
Your needle and thread are more than just tools for filling in patterns. They are instruments for creating texture, depth, and emotion. It’s time to move beyond simply following lines and start thinking like a textile artist, making conscious choices that transform your work from pretty to poignant.
In each idea that follows, I’ll guide you through a specific technique or a shift in perspective. You’ll learn not just what stitch to use, but why—how a change in thread direction can create form, how layering textures can tell a story, and how even the simplest stitch, when used with intention, can make a powerful statement.
Forget the pressure to be perfect. Instead, focus on being thoughtful. These techniques are designed to build your confidence and refine your artistic eye, helping you create pieces that feel uniquely, beautifully, and authentically yours.
1. Build a Meadow with dimensional Stitches
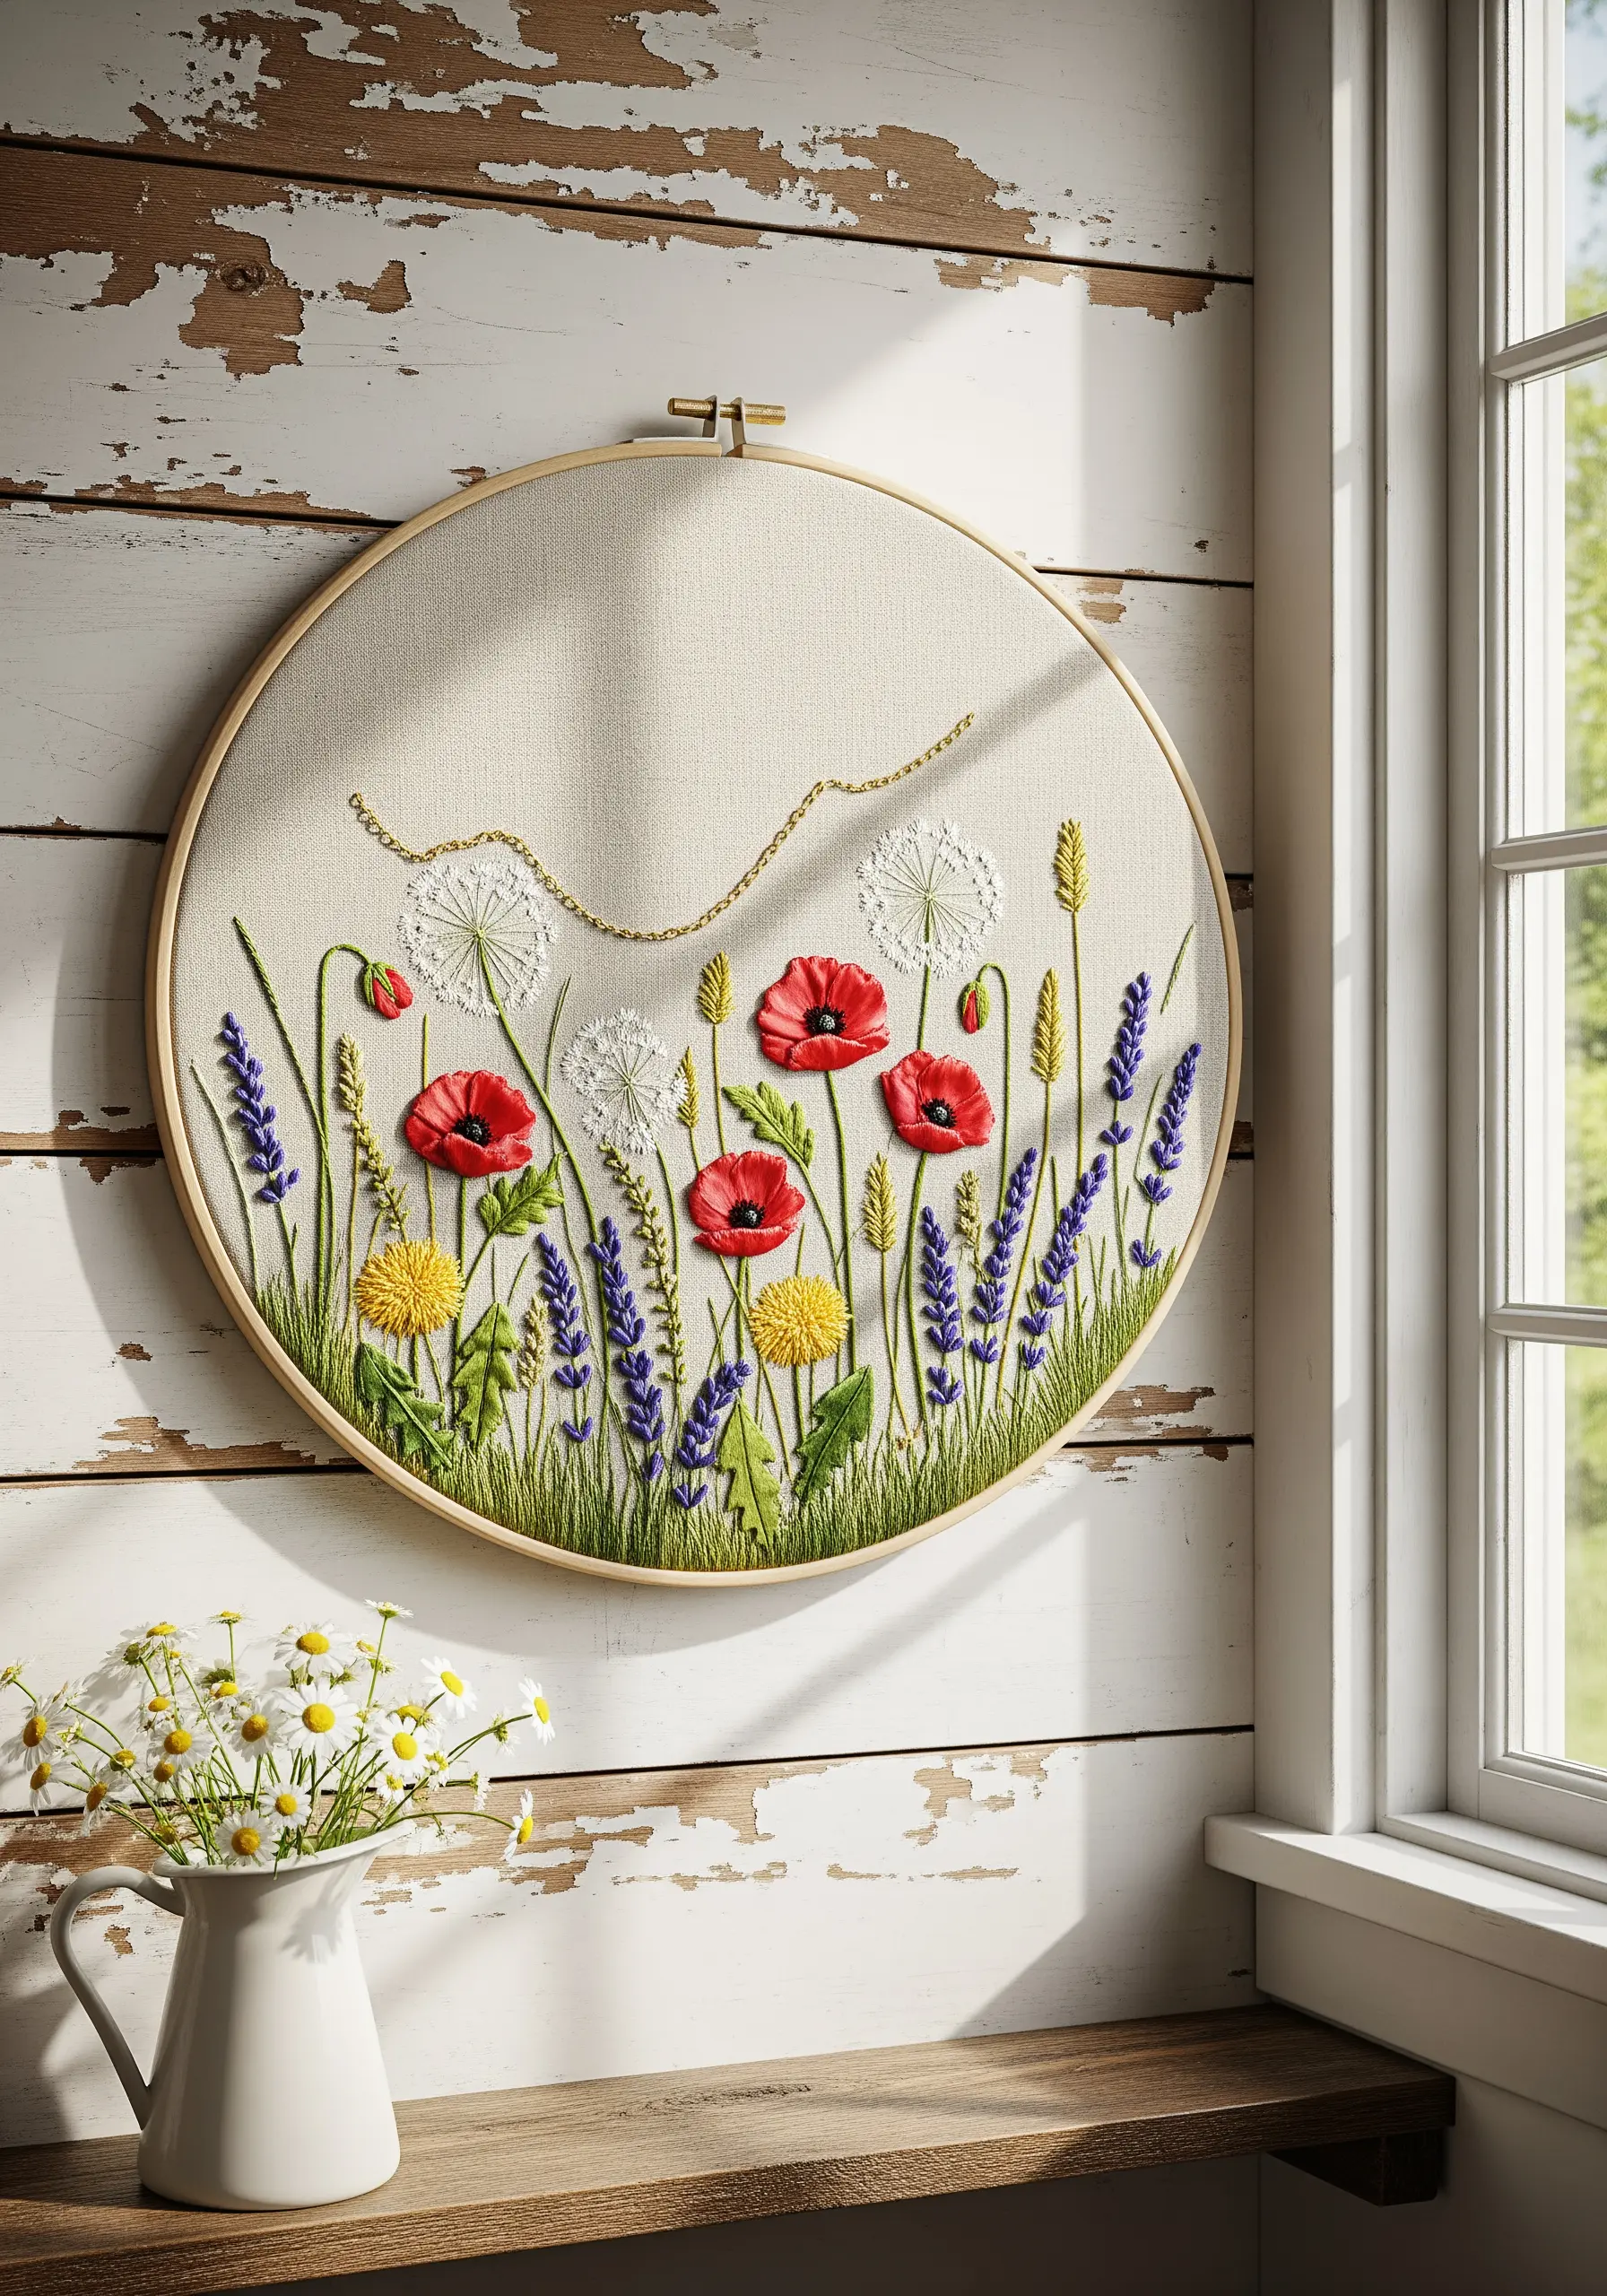
Create a dynamic wildflower scene by combining stitches of varying heights and textures.
Use raised satin stitch pads under your poppies to make them pop, and contrast their smoothness with fluffy, unwound thread for dandelion seed heads.
For the lavender, a series of detached chain stitches (lazy daisies) stacked along a stem gives a realistic, tapered bloom shape.
Incorporate a delicate couched metallic chain to add an unexpected touch of shimmer that catches the light, elevating the entire composition from flat to sculptural.
2. Master Realistic Fur with Thread Painting
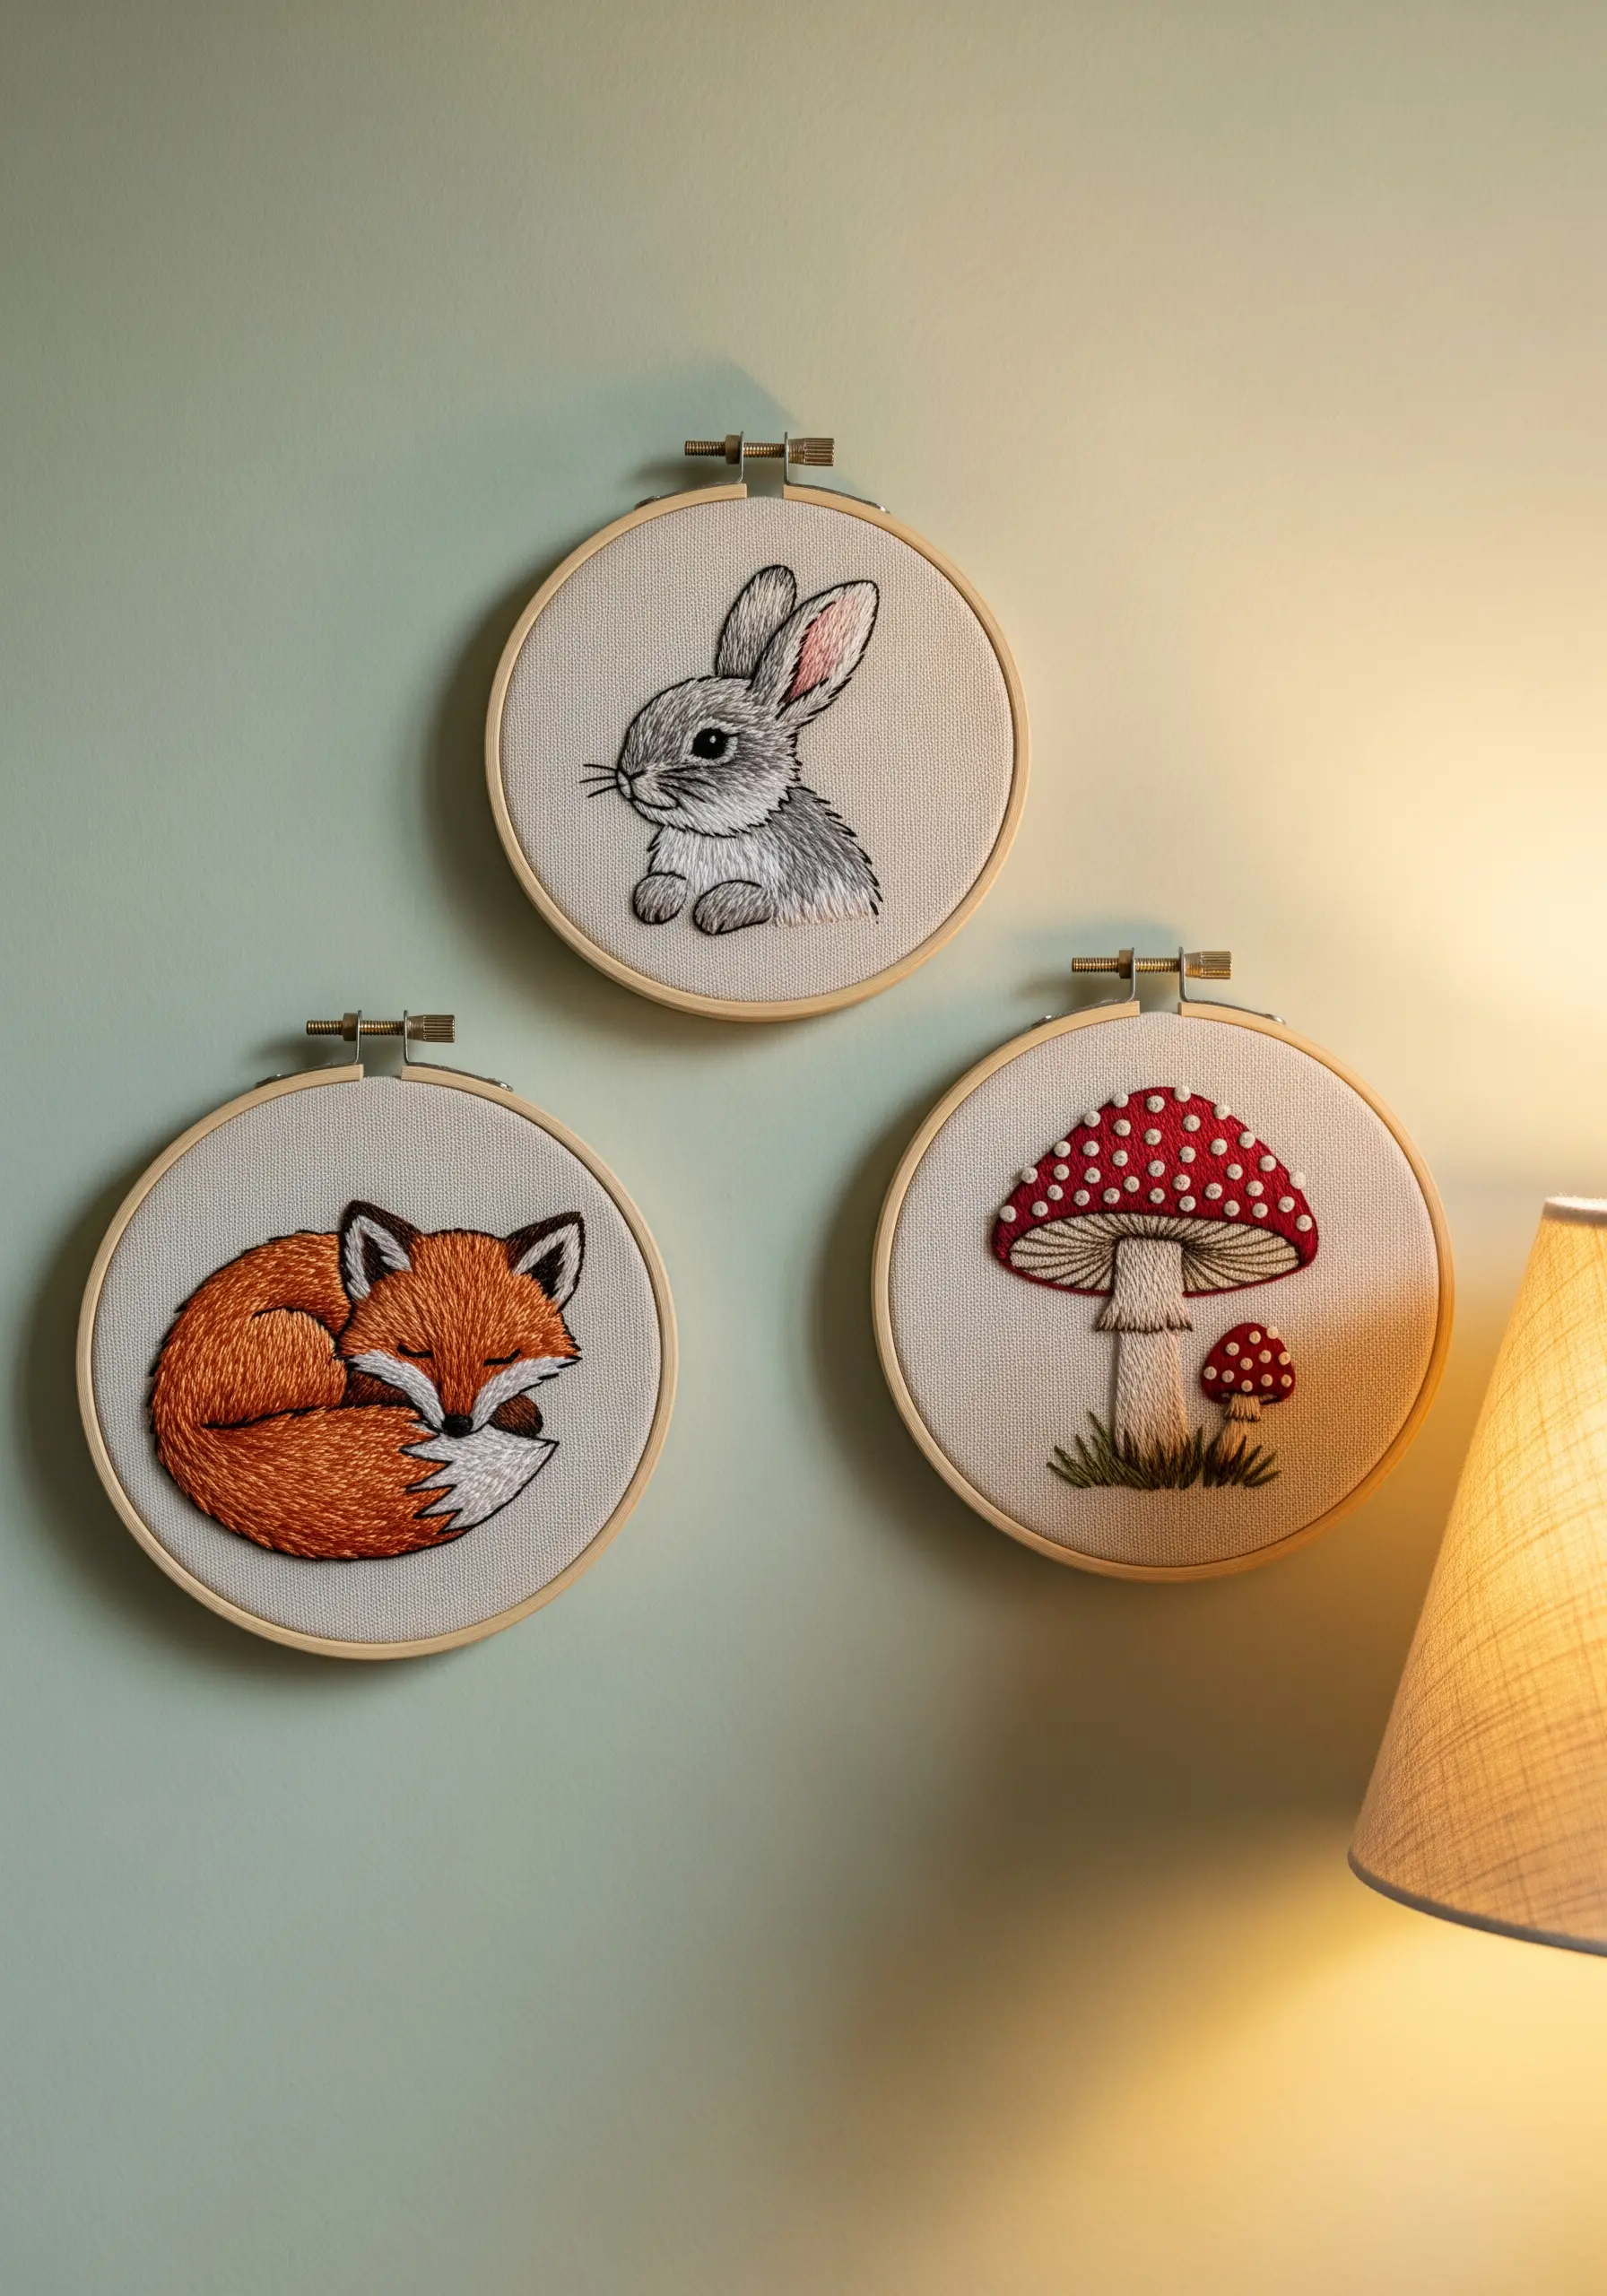
To give woodland creatures a soft, touchable quality, move beyond simple satin stitch and embrace thread painting.
Use a single strand of six-strand floss and the long-and-short stitch technique, blending shades of brown, orange, and white to mimic natural fur direction.
For the rabbit’s fur, use shorter, denser stitches. For the fox’s tail, use longer, sweeping stitches to suggest fluffiness.
This painterly approach transforms simple outlines into lifelike portraits with depth and personality.
3. Capture Garden Realism with Directional Stitching
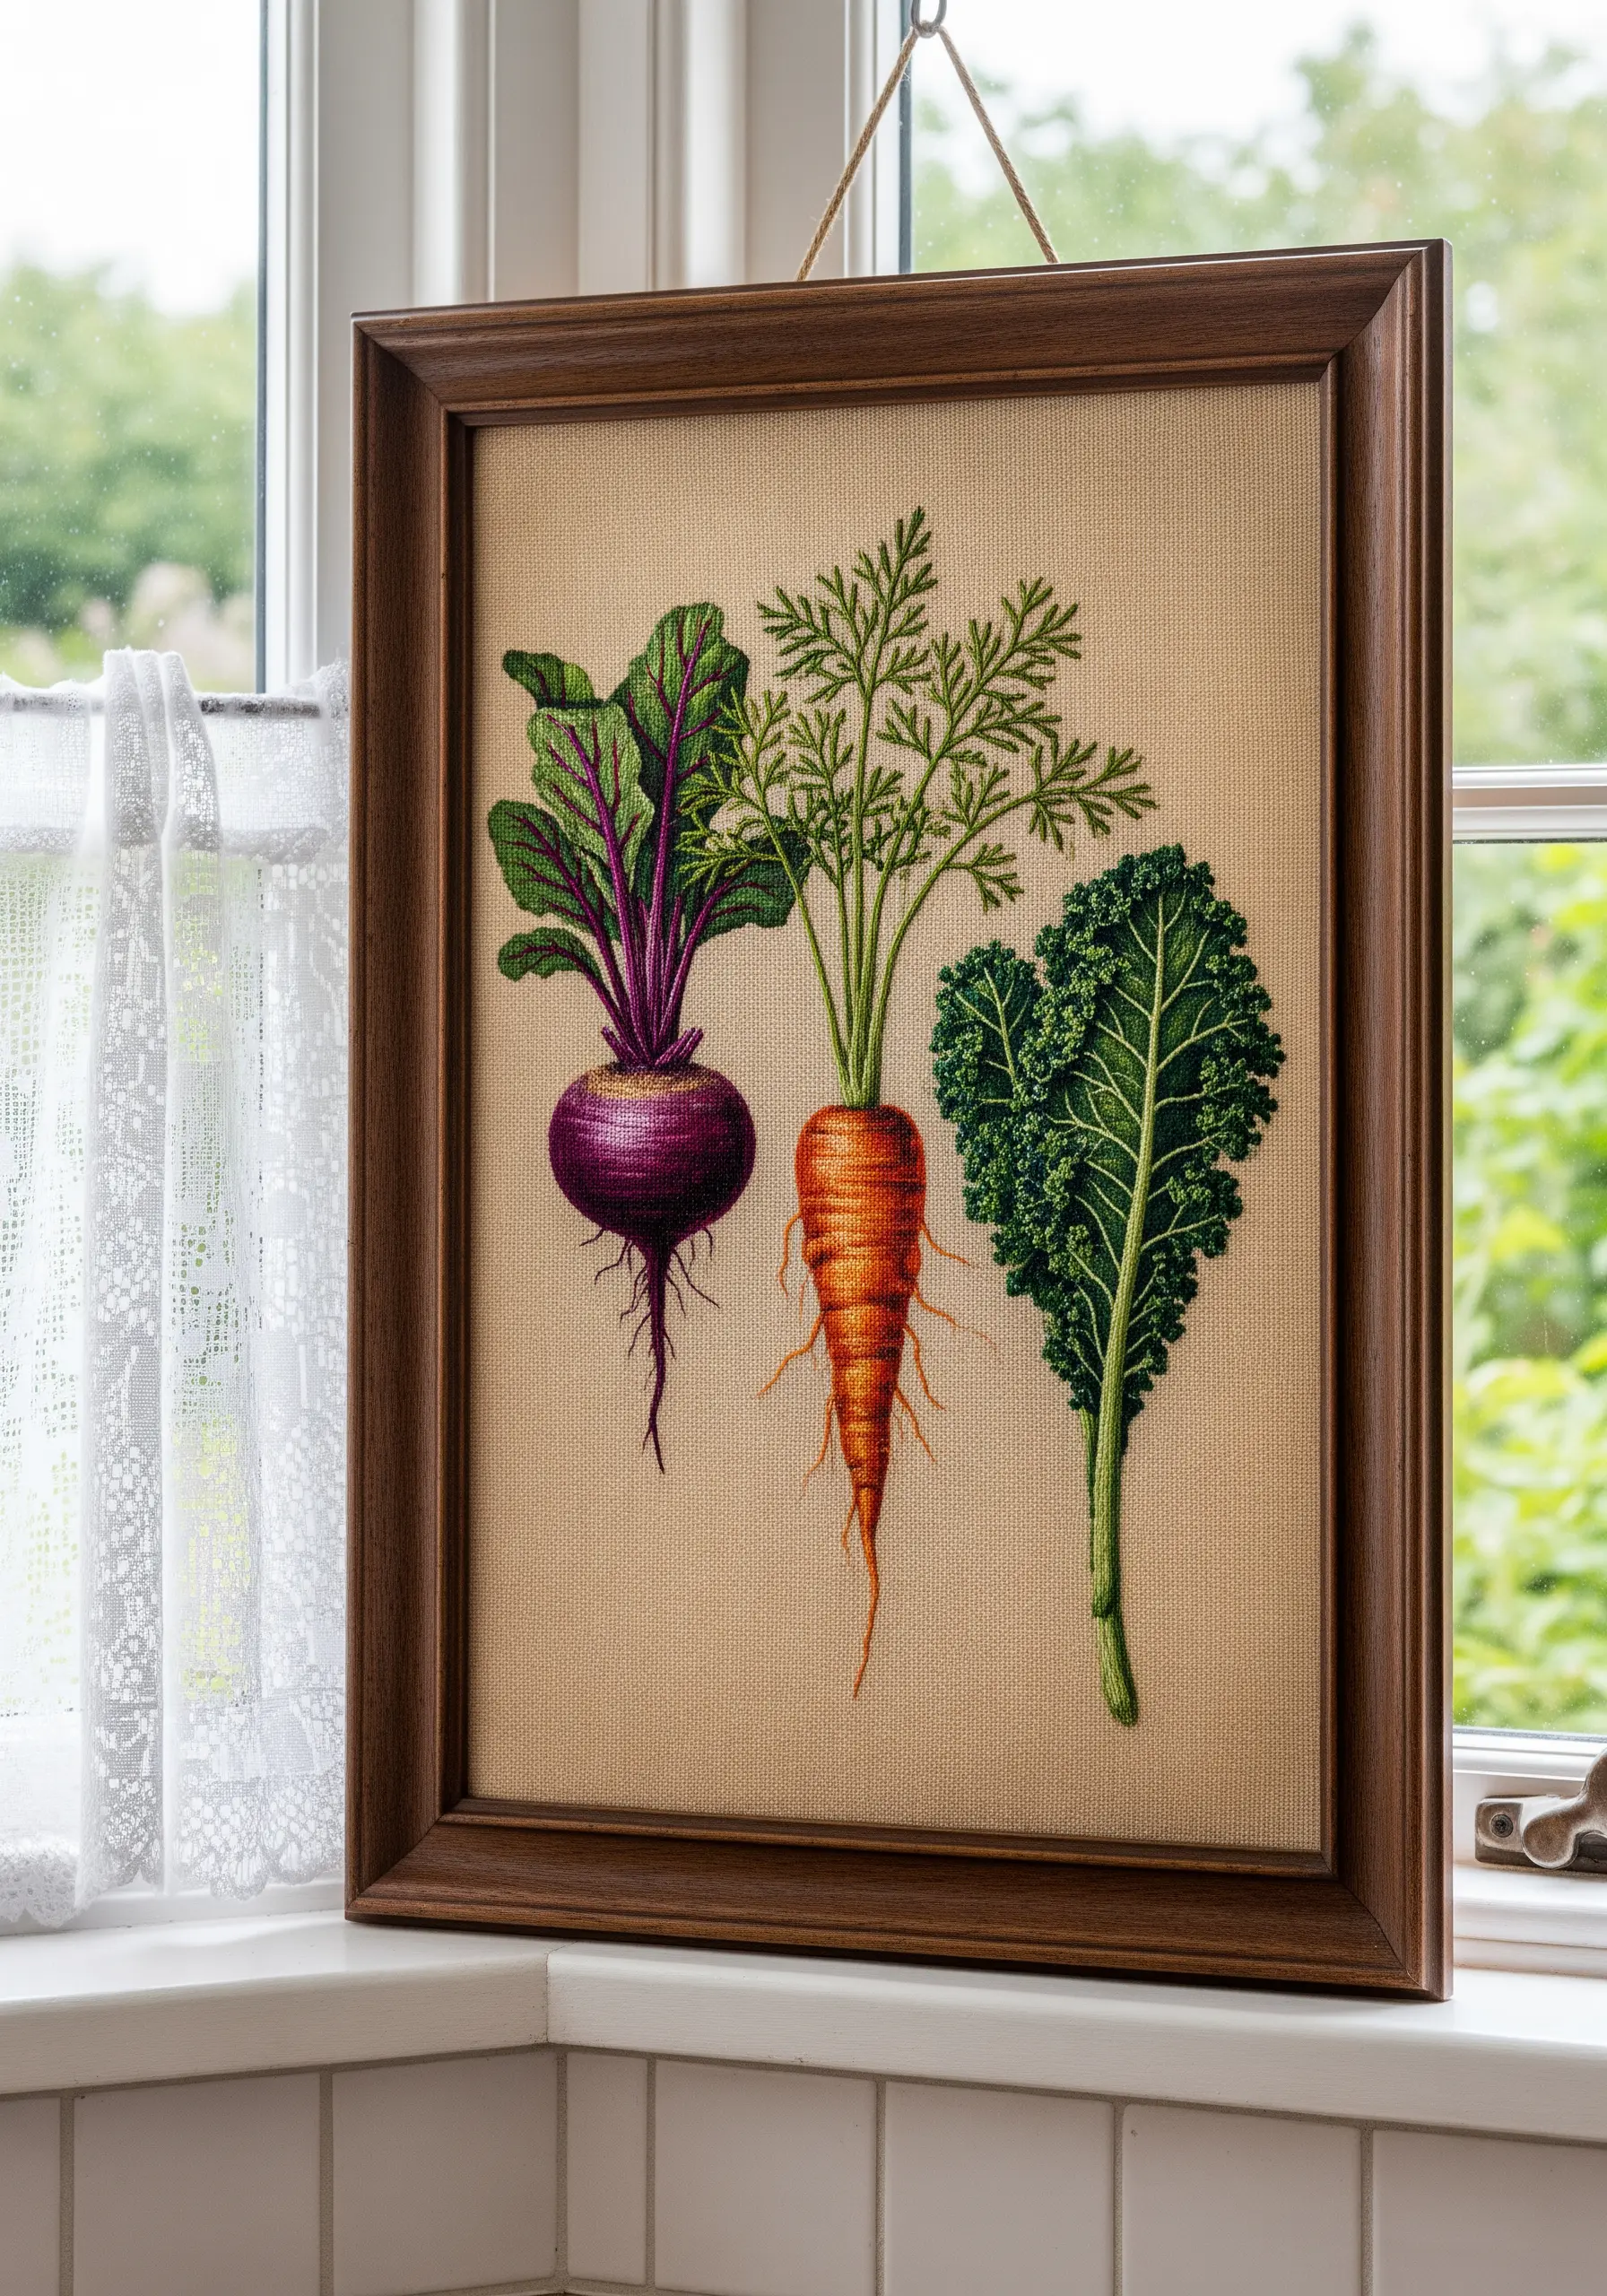
Bring root vegetables to life by ensuring your stitch direction follows the natural form of the subject.
For the carrot, angle your long-and-short stitches slightly inward and downward to mimic its conical shape and subtle growth lines.
On the beet, use curved satin stitches that radiate from the center to emphasize its roundness.
This subtle adjustment creates an illusion of volume and makes your botanical subjects look far more realistic and three-dimensional, even on a flat surface.
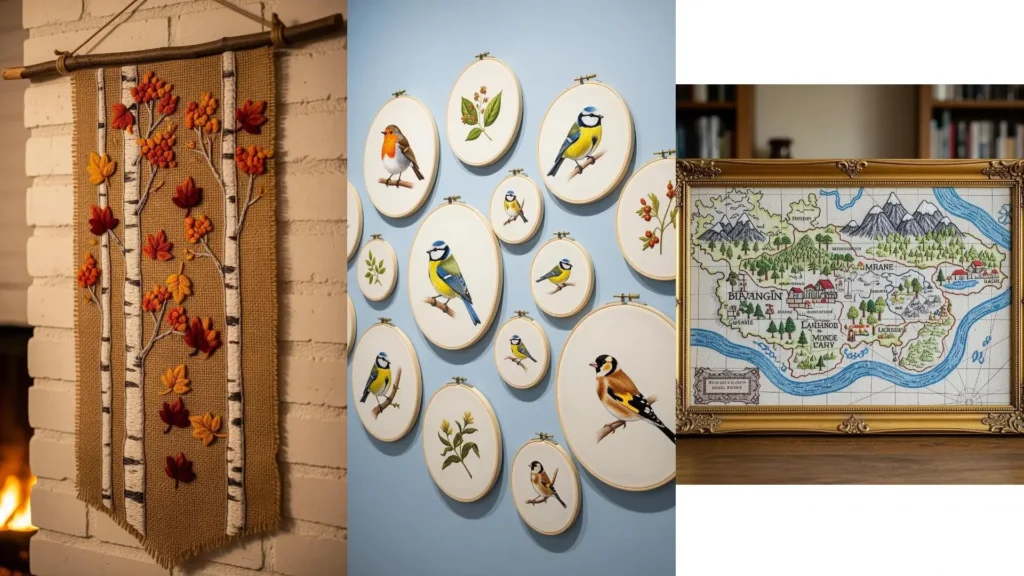
4. Embrace Rustic Texture with Burlap and Appliqué
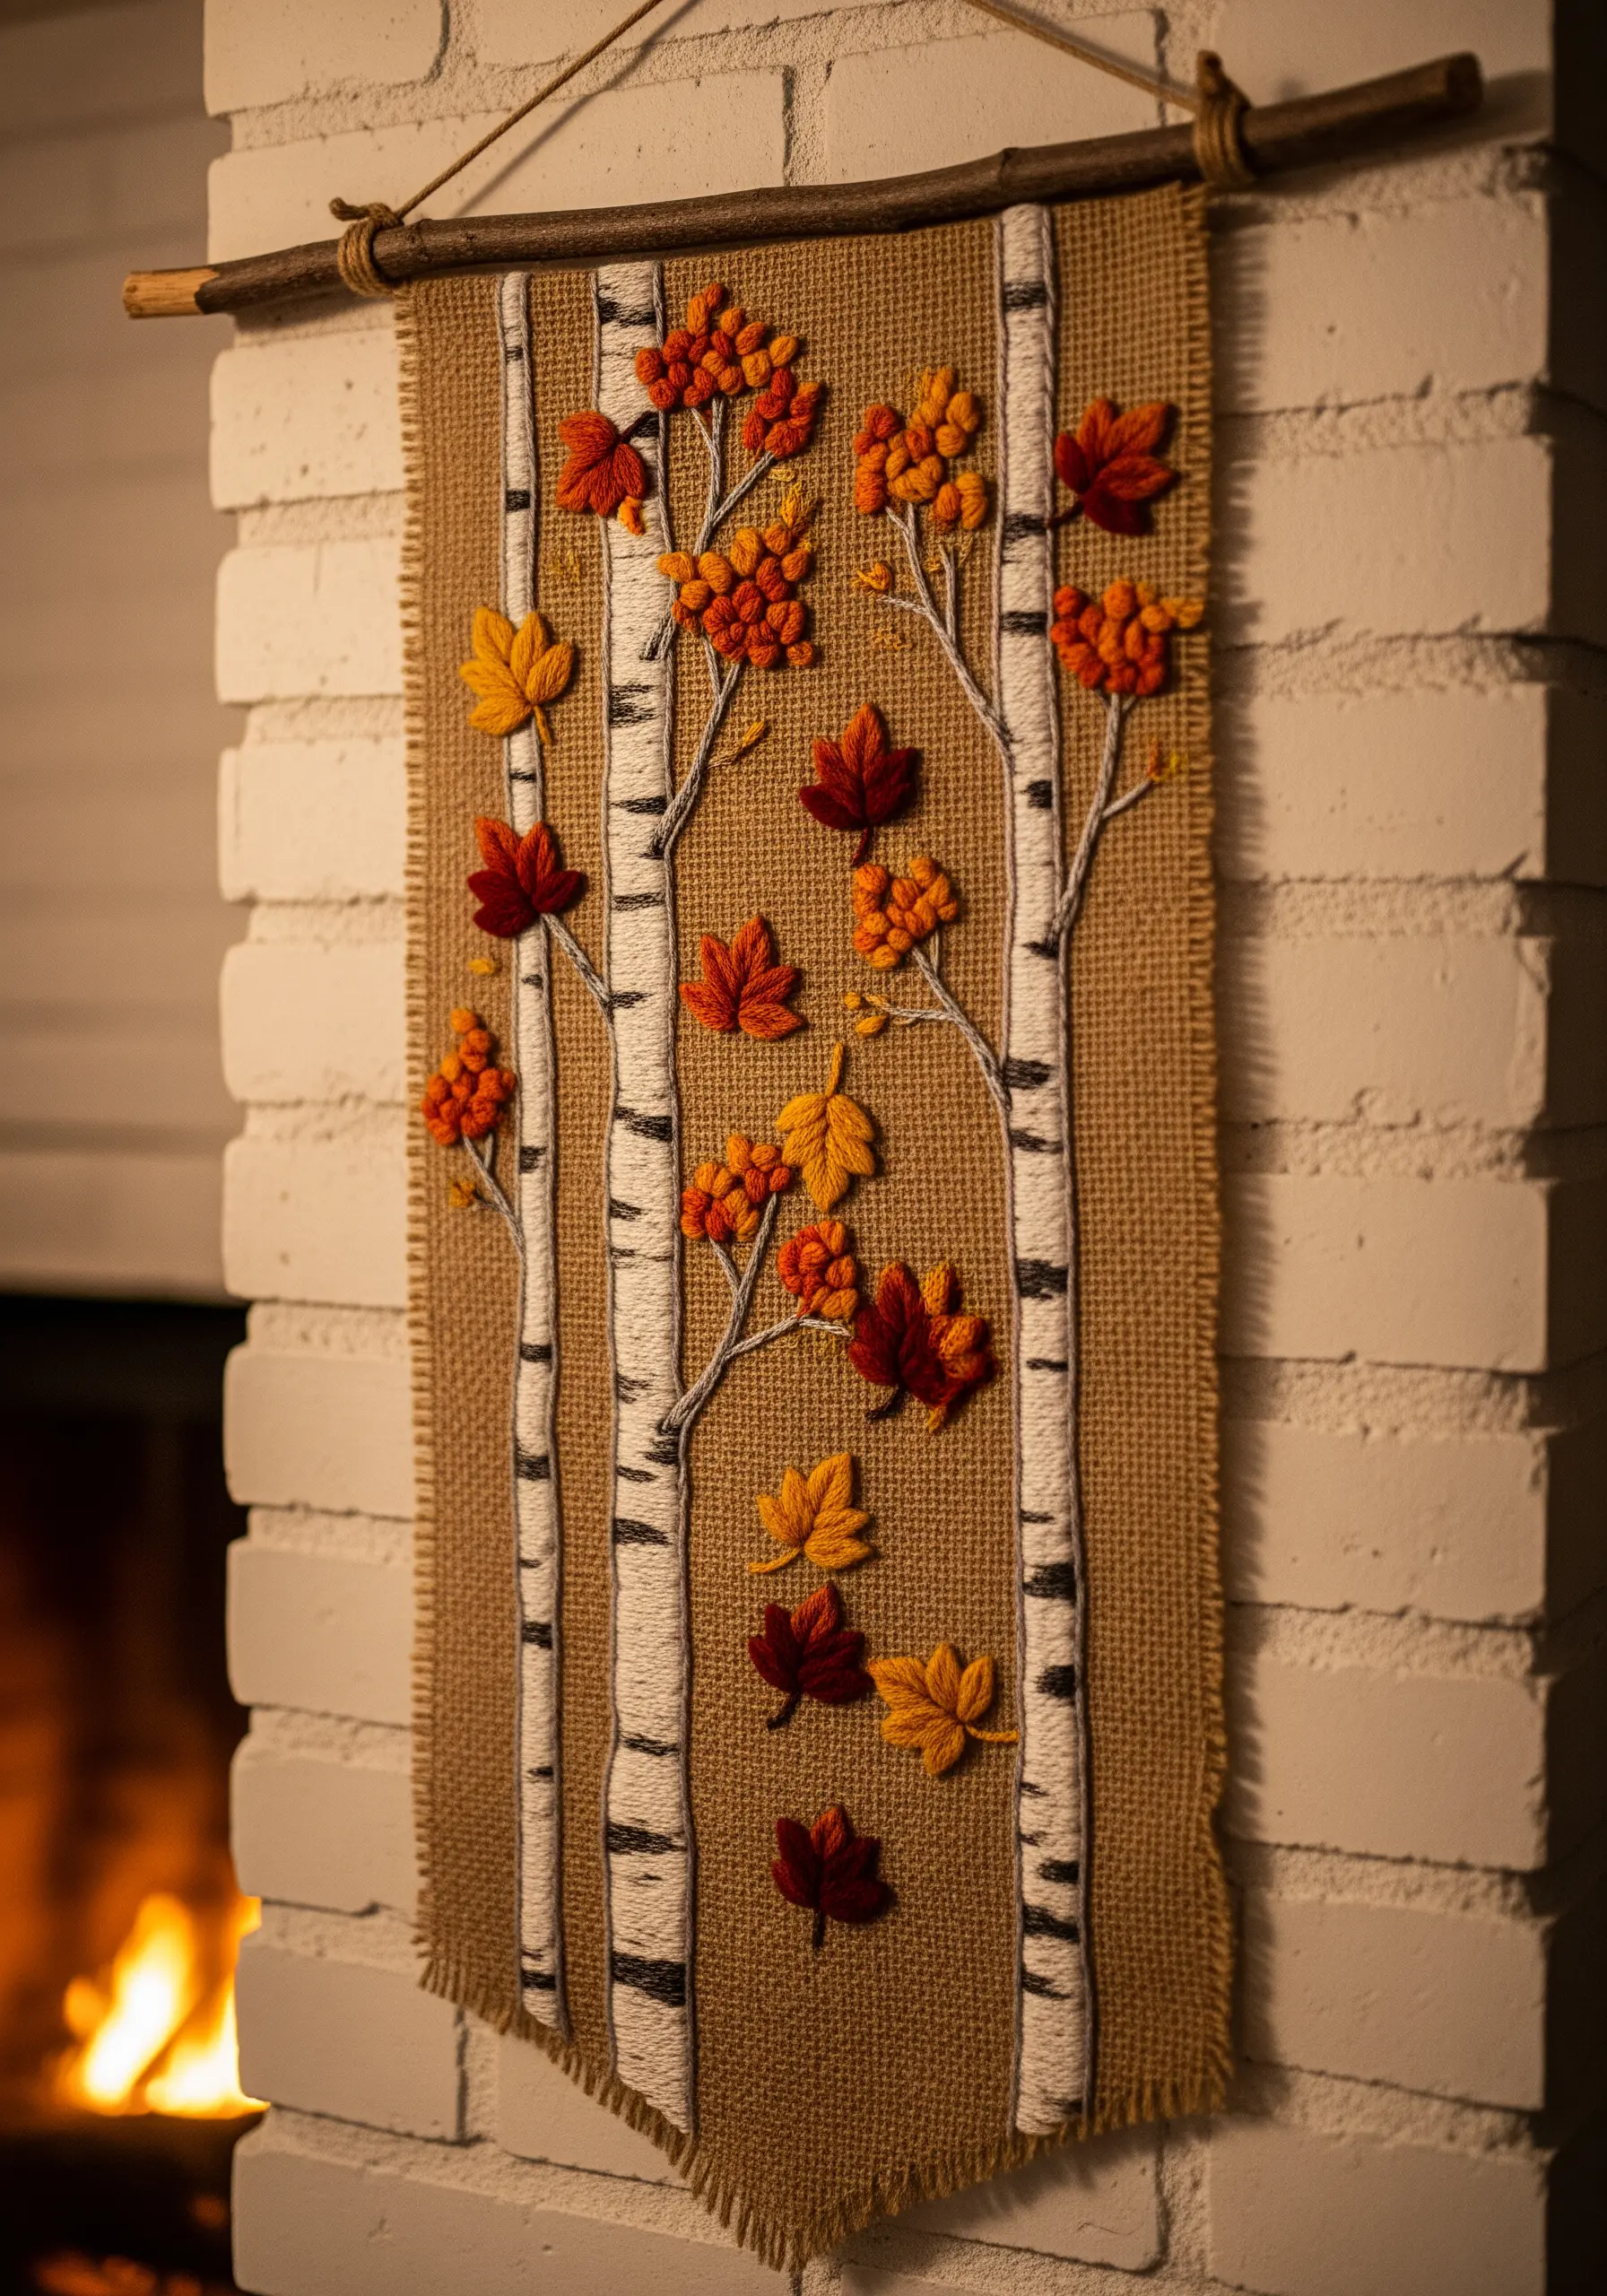
Working on a coarse fabric like burlap requires a different approach. Instead of fine details, focus on bold textures and shapes.
Use a thick thread, like #5 pearl cotton, for the birch tree trunks—its twisted ply stands out against the open weave.
For the foliage, cut leaf shapes from felt and attach them with a single stitch. This mixed-media technique adds instant dimension and color that fine stitching on burlap can’t achieve.
5. Create Delicate Transparency with Organza
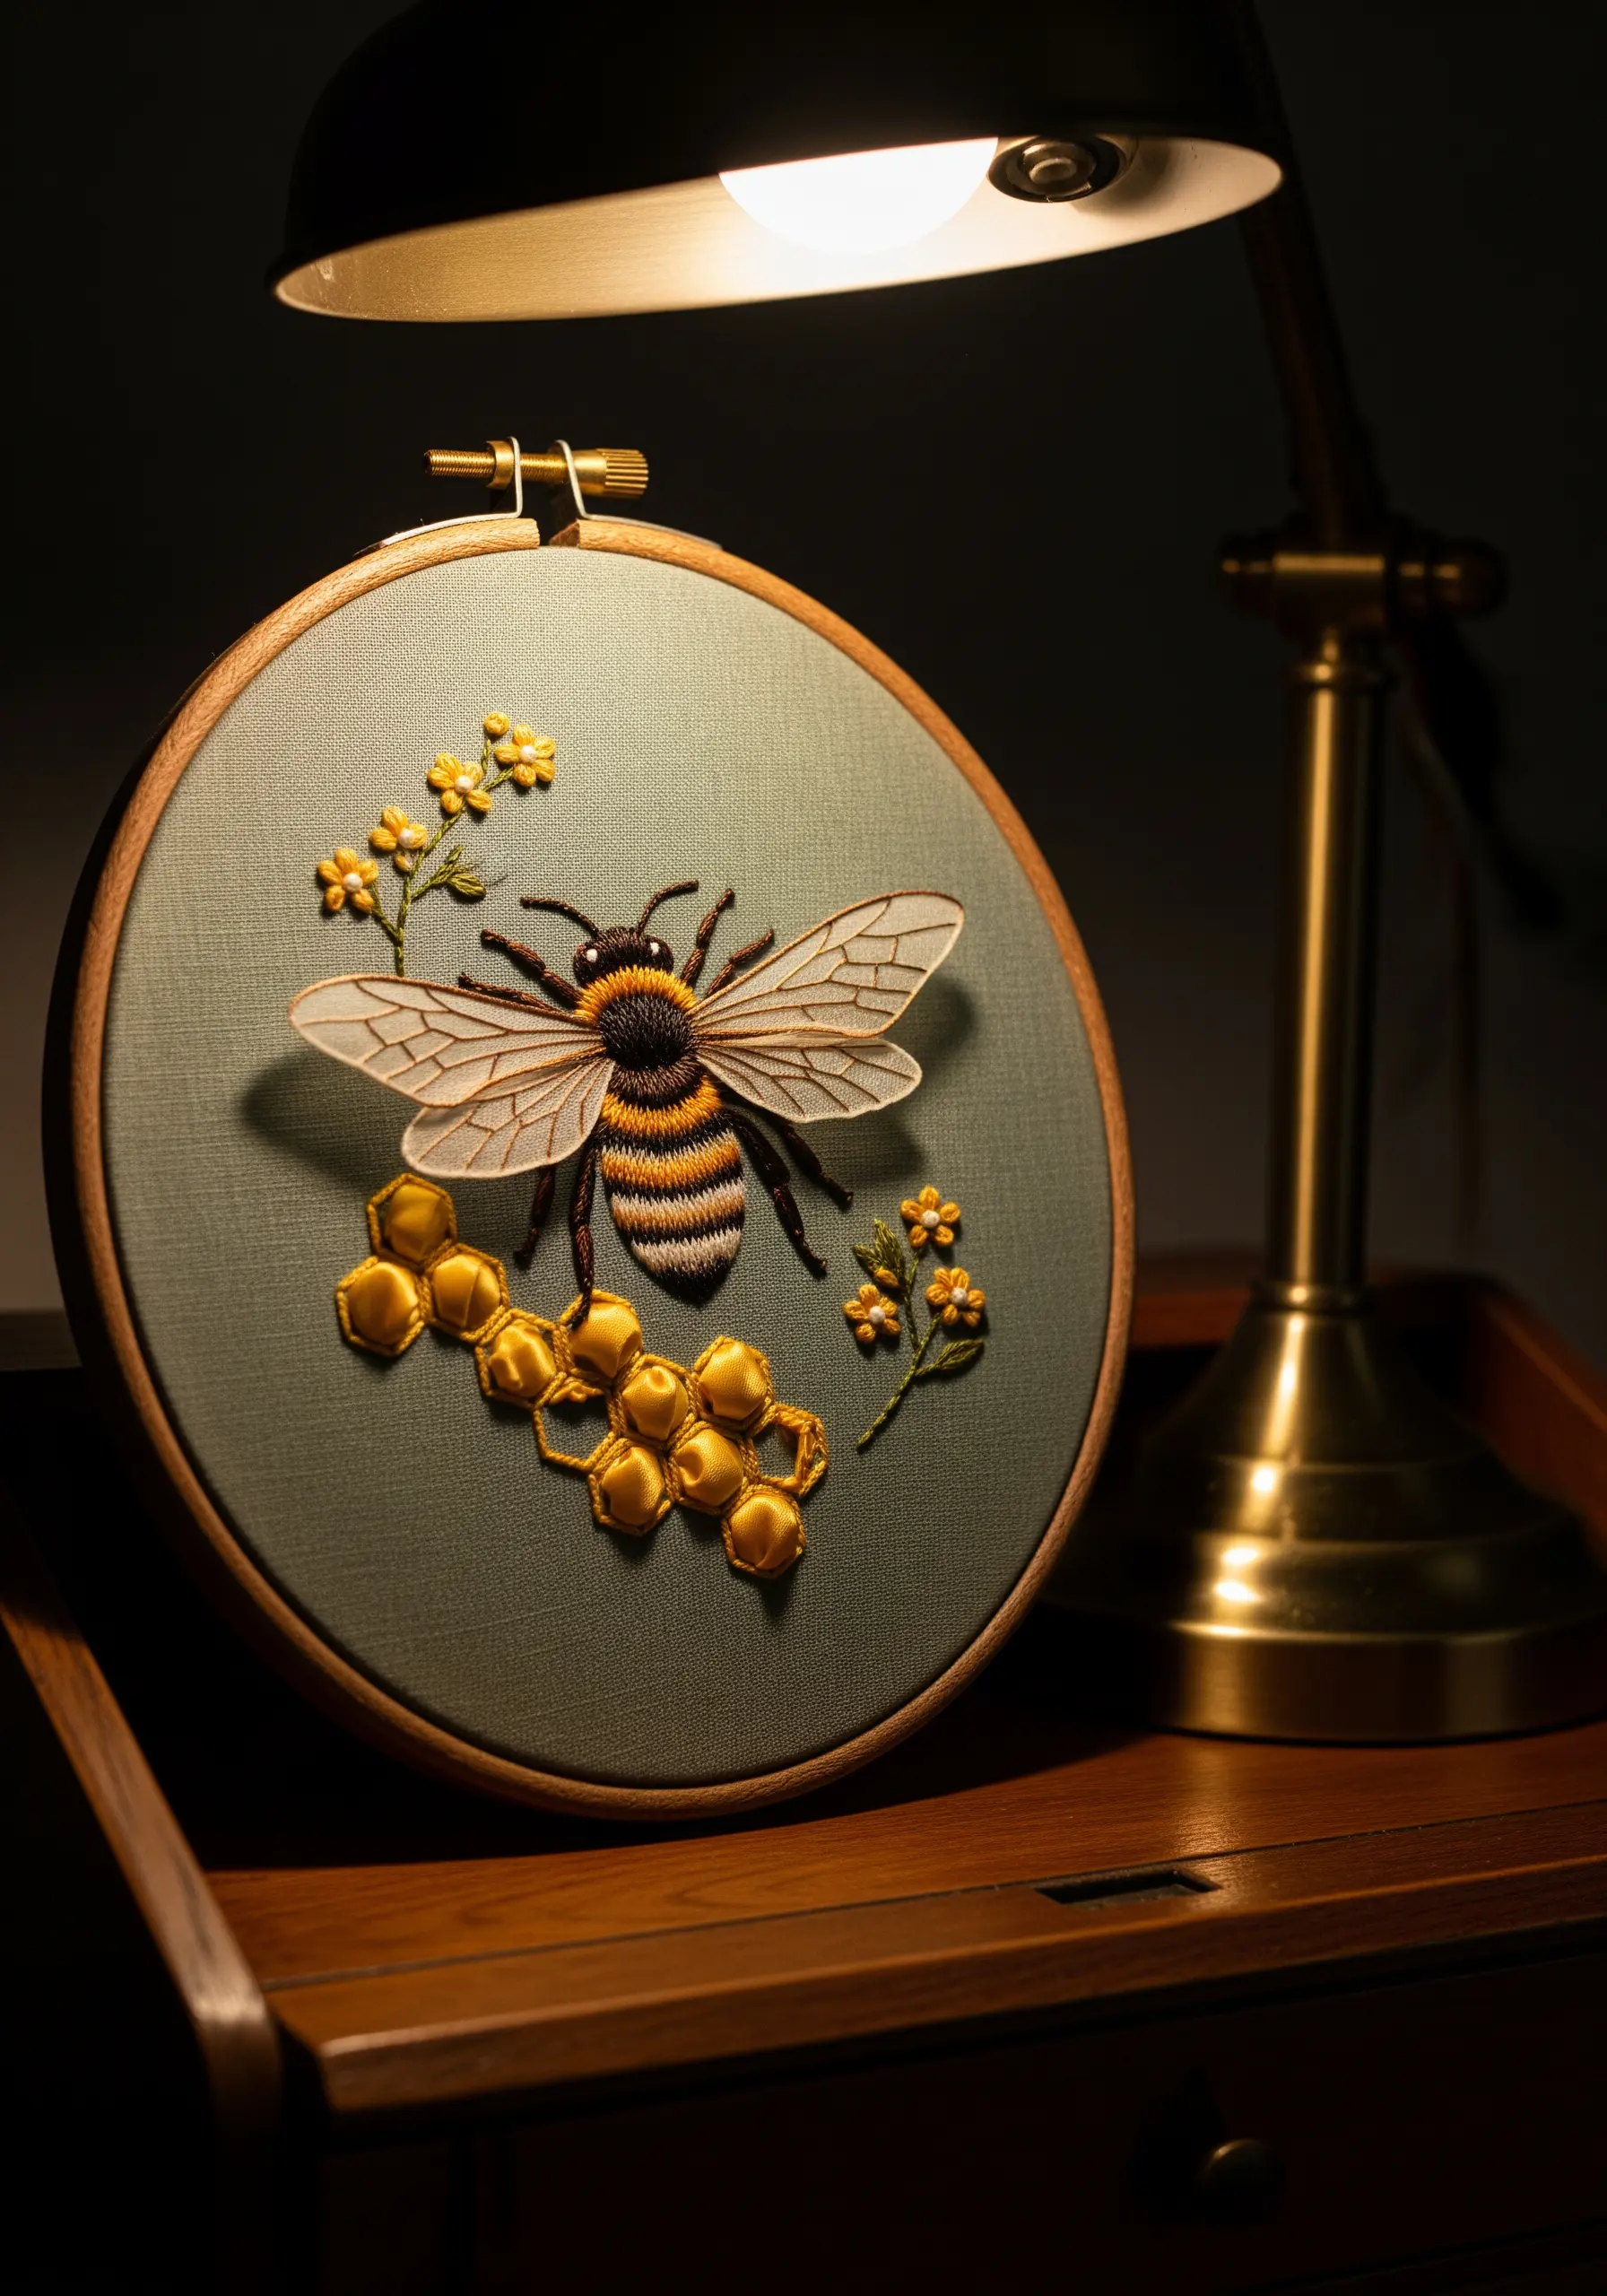
To give insects like bees and dragonflies ethereal, realistic wings, incorporate a layer of sheer organza fabric.
Stitch the body of the bee directly onto your base fabric first.
Then, lay a small piece of organza over the wing area and secure it with tiny stitches along the edge before embroidering the veins on top.
Once finished, carefully trim the excess organza. This technique creates a beautiful illusion of transparency that standard stitches cannot replicate.
6. Design a Statement Piece with Large-Scale Embroidery
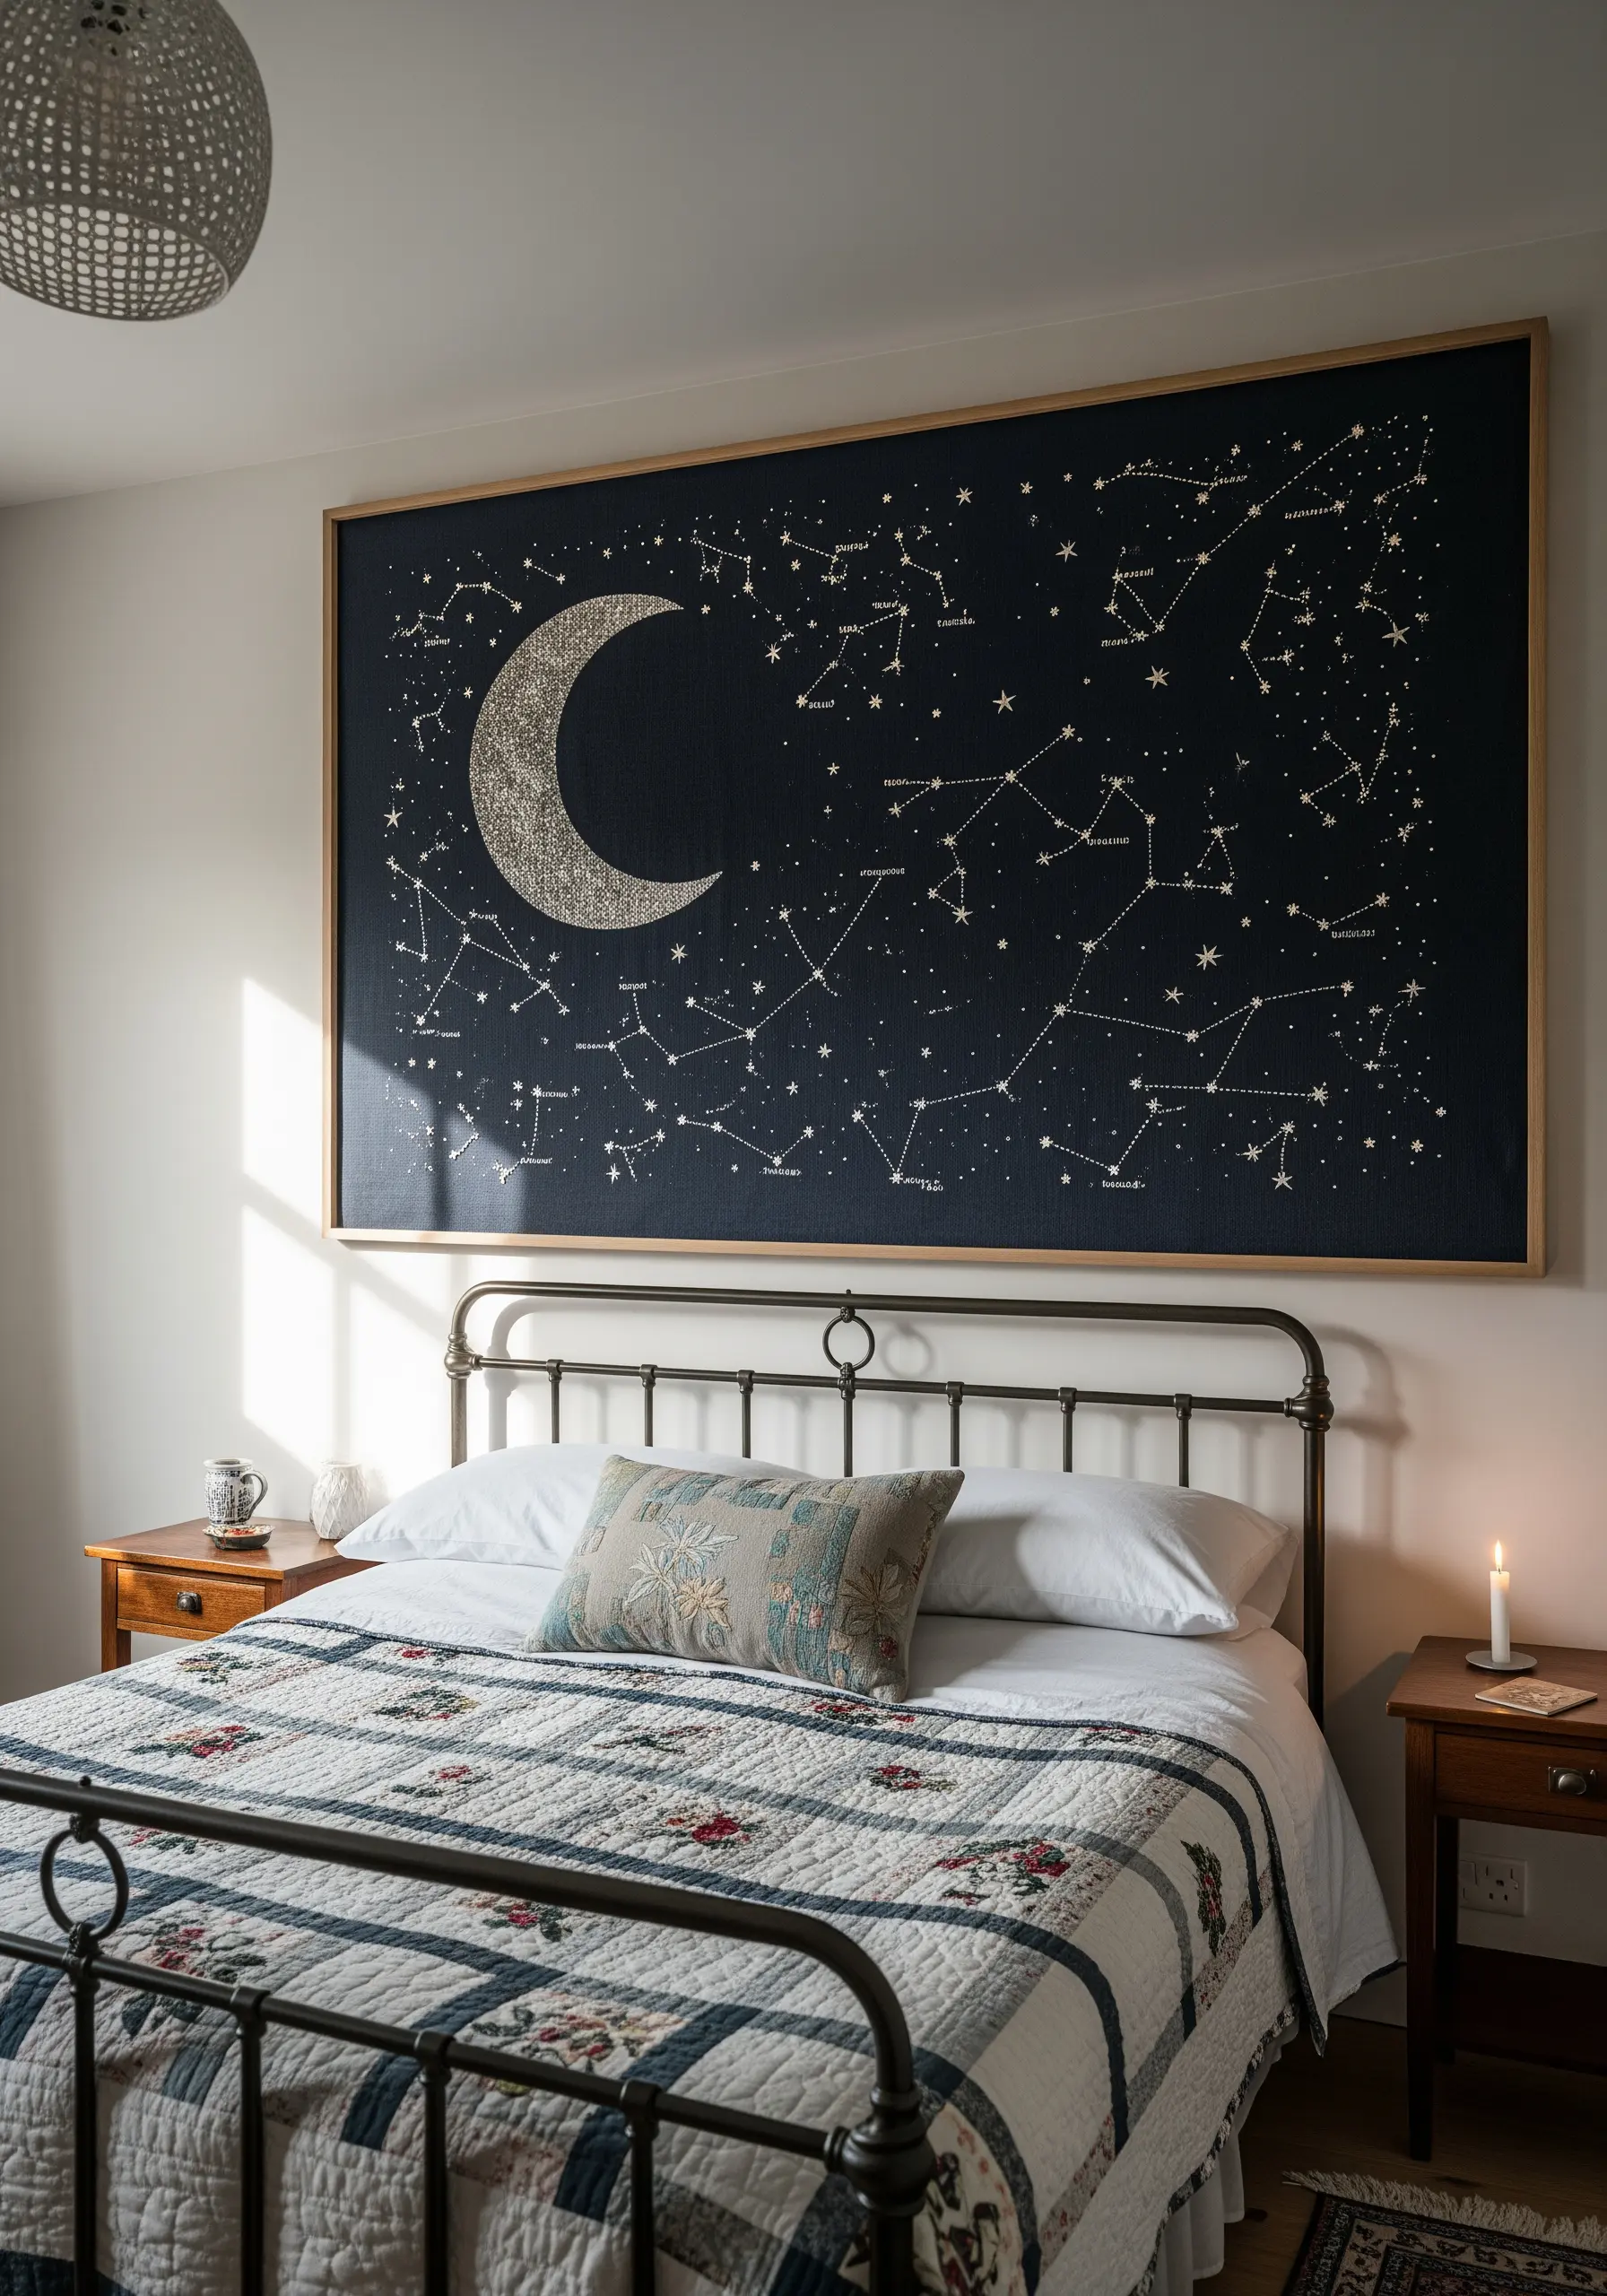
Don’t limit your embroidery to small hoops; think bigger with a statement wall tapestry.
For a large-scale project like a celestial map, transfer your design onto a sturdy fabric like linen or canvas.
Keep the stitches simple—backstitch for constellations and dense seed stitch or French knots for the moon’s texture.
The impact comes from the scale, not the complexity of the stitches, creating a stunning focal point for any room.
7. Combine Lettering and Botanicals on Grid Fabric

For designs that mix text and motifs, like an herb chart, Aida cloth or even-weave linen provides a natural grid for perfect alignment.
Use a simple cross-stitch for the botanicals, which lends a charming, rustic quality.
For the lettering, switch to a crisp backstitch using two strands of floss. This contrast in stitch styles ensures the text is legible and stands apart from the illustrations.
8. Paint a Landscape with Textured Knots
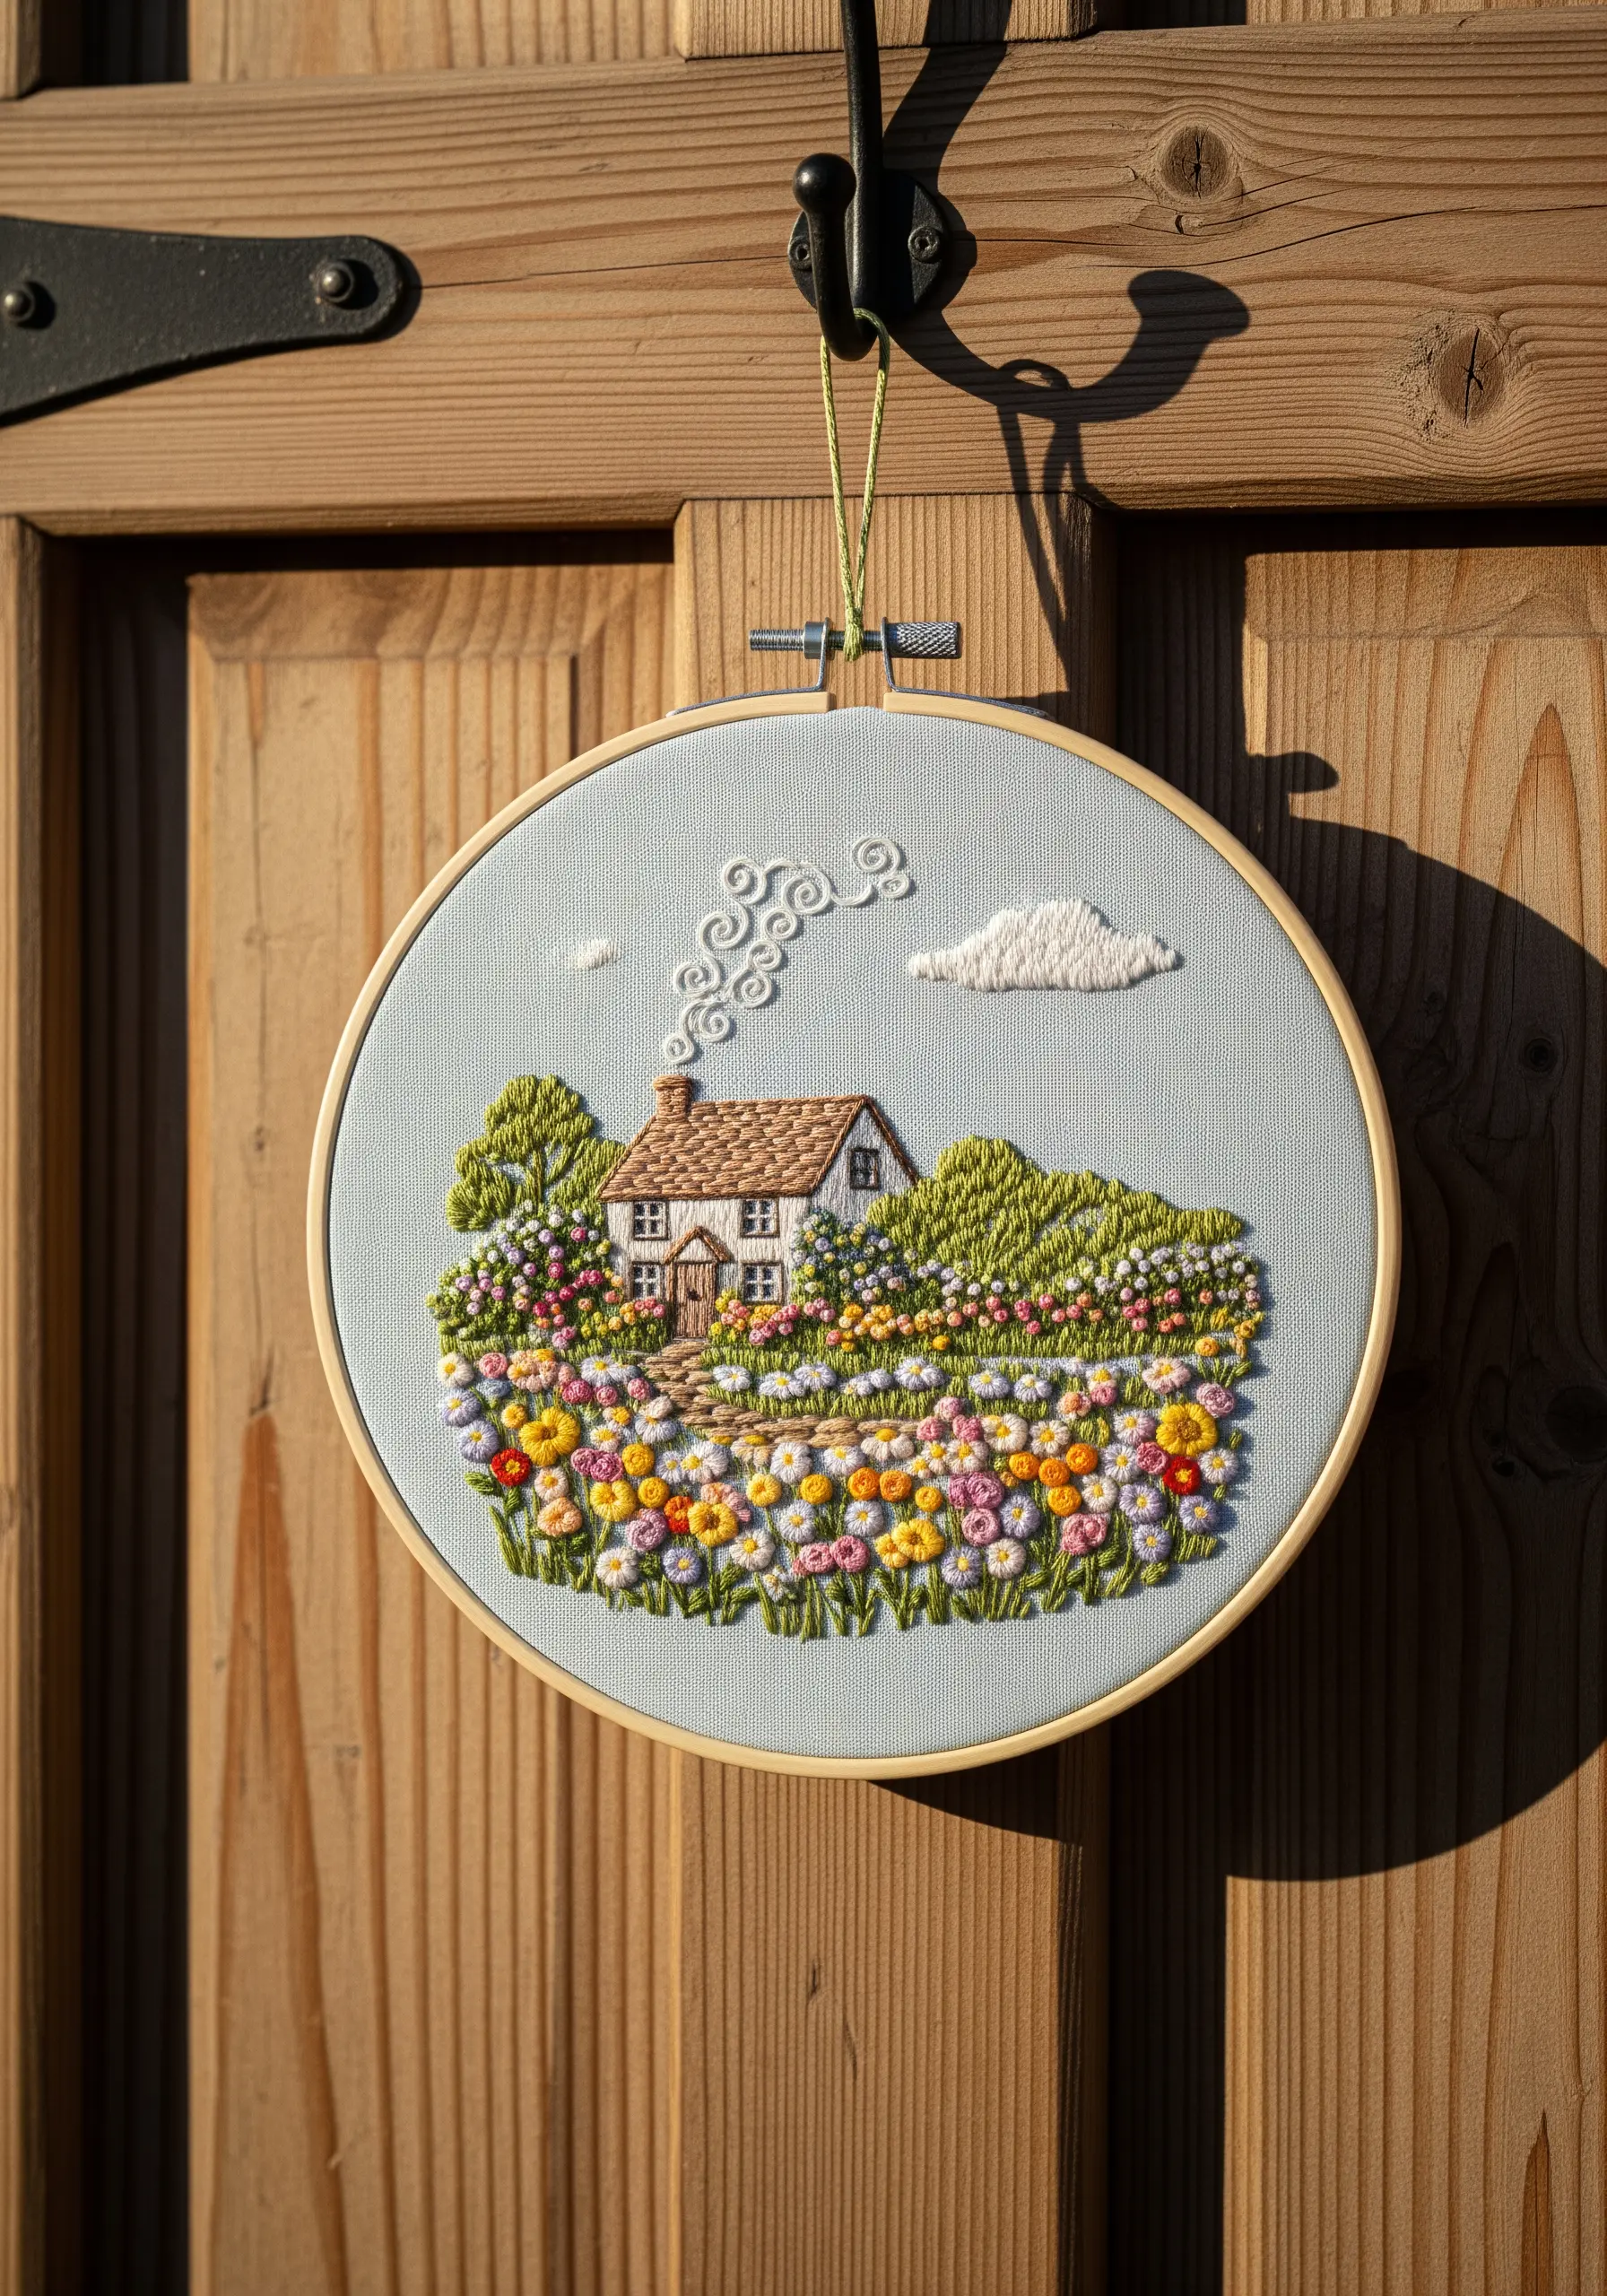
To create a lush, tactile garden scene, rely on the power of knotted stitches.
Use dense clusters of French knots and colonial knots in various colors to form flowerbeds and bushes. Varying the number of wraps will create different-sized knots, adding to the organic feel.
This technique is incredibly forgiving and fills space quickly, resulting in a piece that invites viewers to touch it.
For the cottage itself, use clean satin stitches to contrast with the textured garden.
9. Curate a Cohesive Hoop Art Gallery
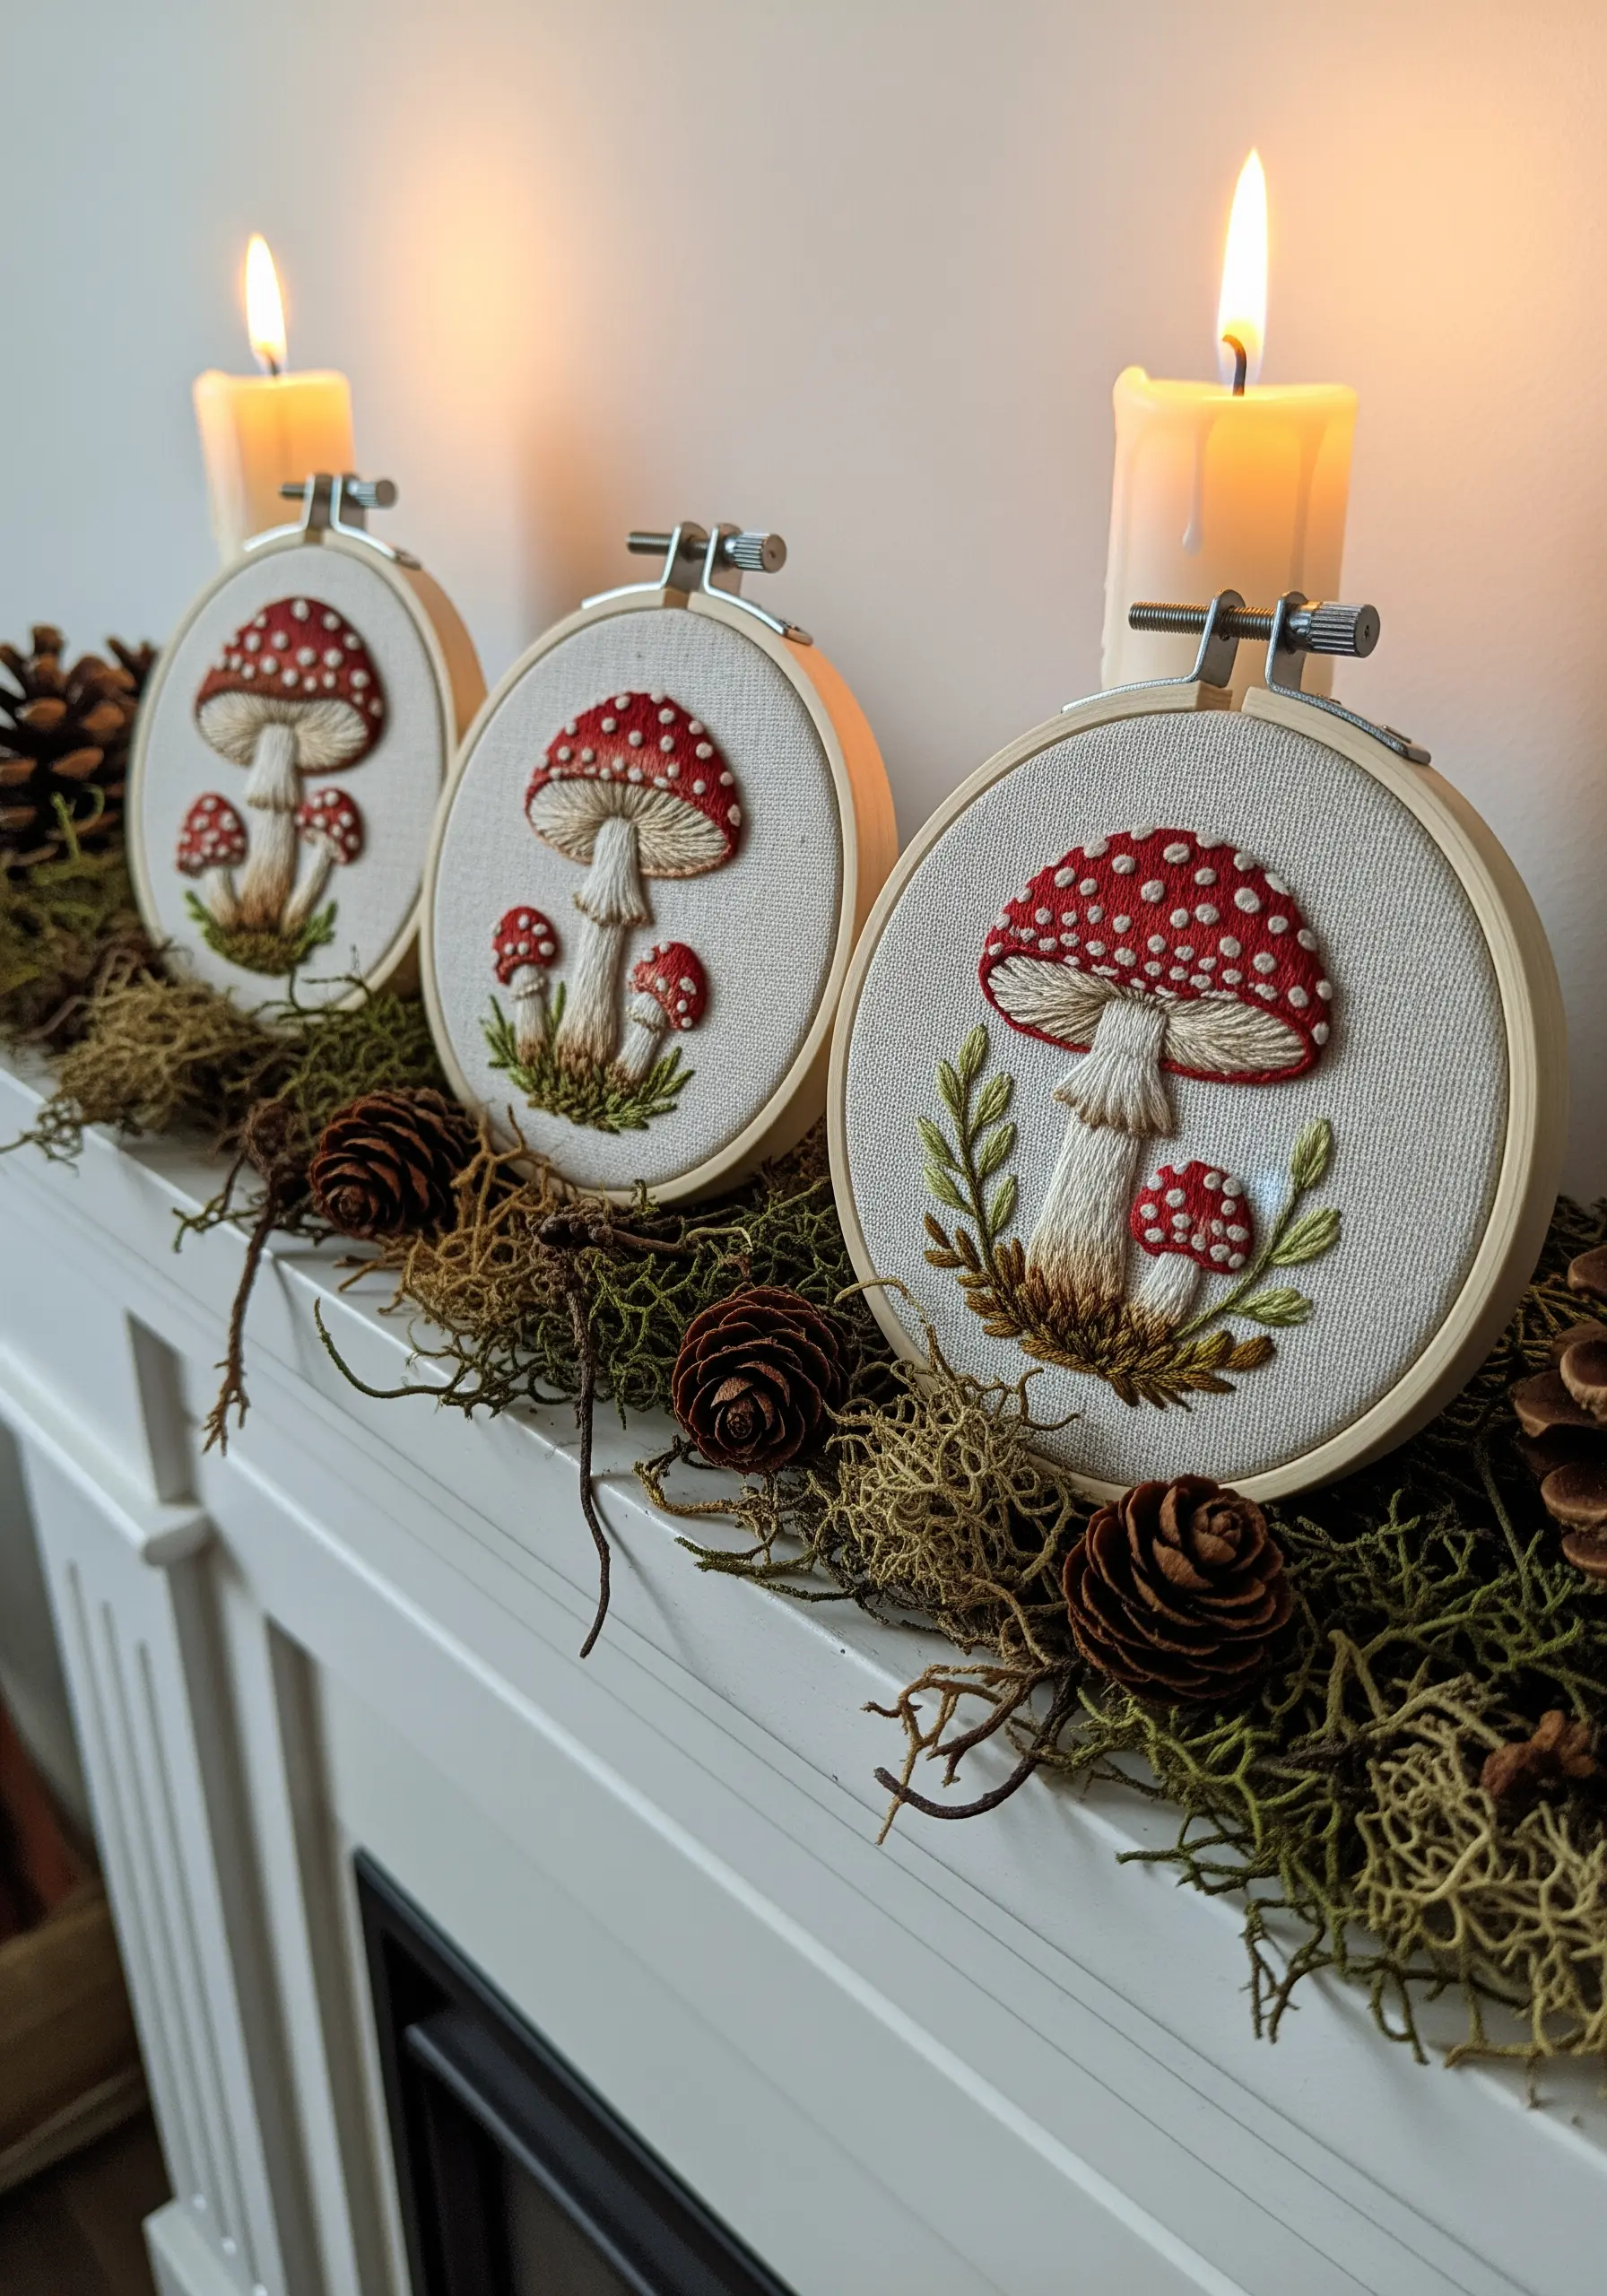
Elevate your wall decor by displaying multiple hoops as a single, curated collection.
To create a unified look, choose a central theme, like woodland motifs, and a consistent color palette.
Stitch your designs on the same background fabric and use matching hoops. Arranging them together on a mantelpiece or wall transforms individual pieces into a cohesive narrative.
10. Add Depth with Subtle Thread Shadowing
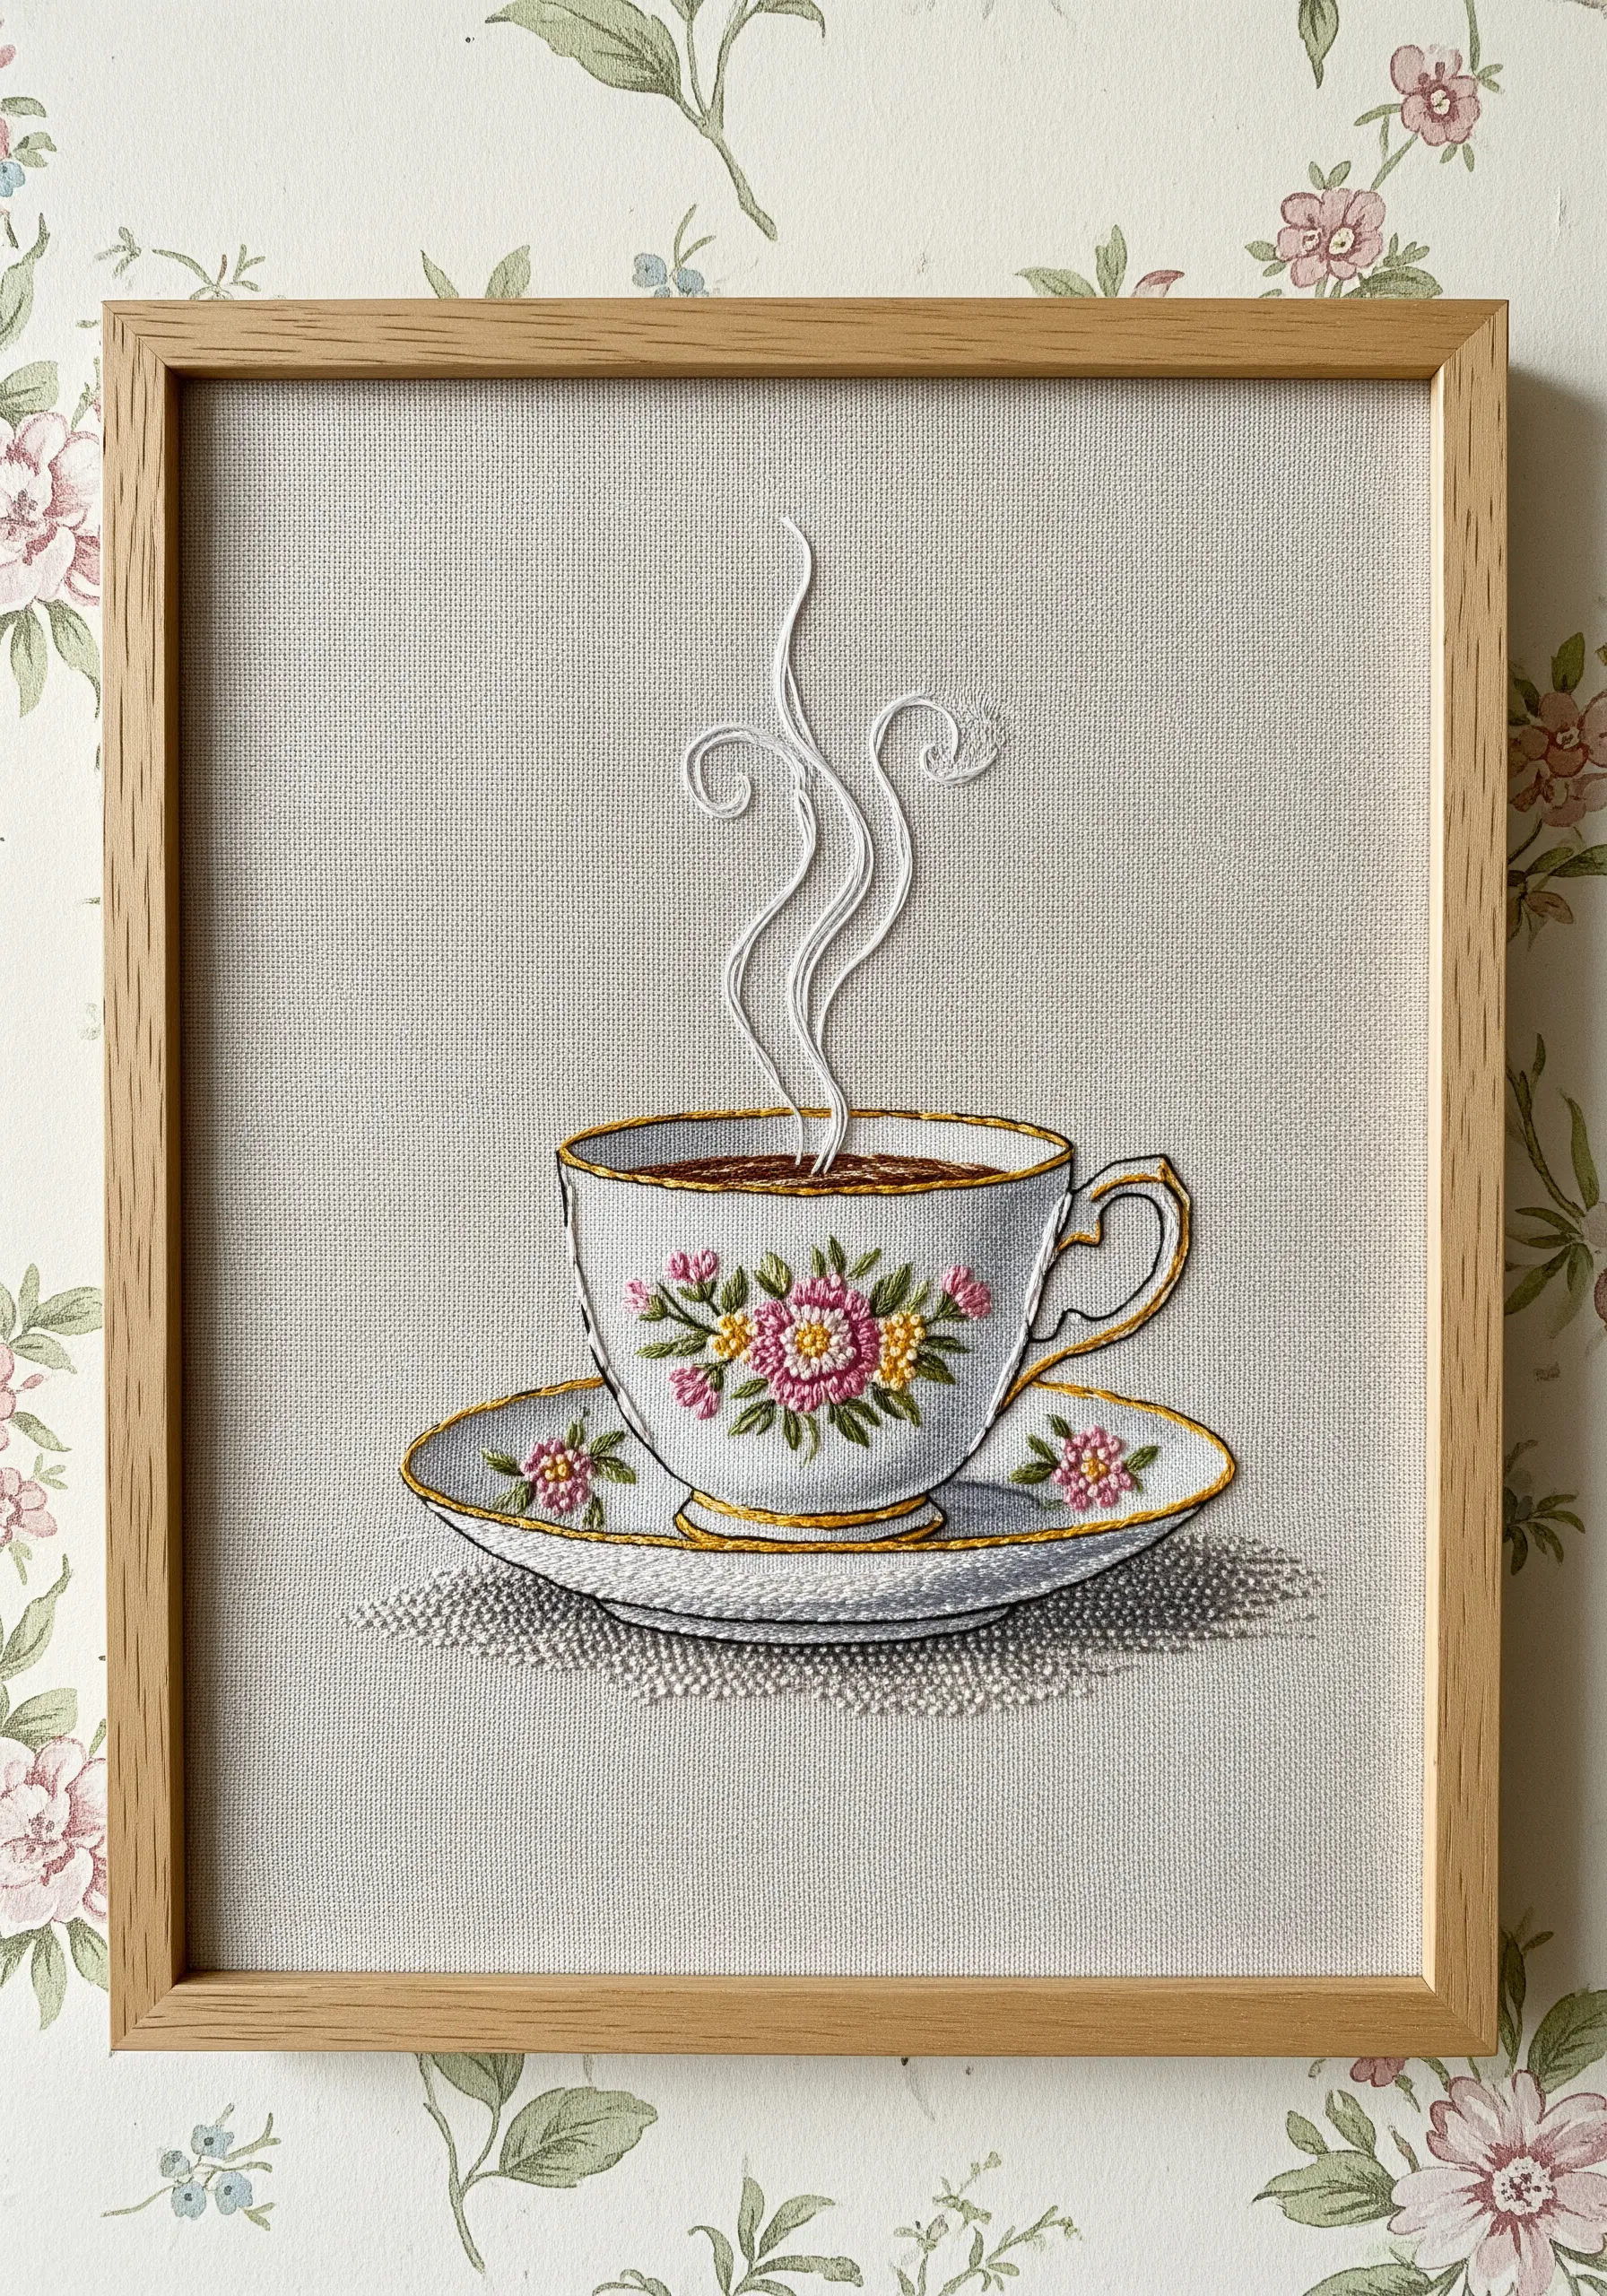
Make flat objects like a teacup appear three-dimensional by adding subtle shadows with thread.
Outline the object first, then use a single strand of a slightly darker color (like a pale grey for a white cup) to stitch a thin line of split stitch along the inner edges and under the rim.
This simple addition tricks the eye into seeing depth and form, giving your work a polished, professional look.
11. Craft 3D Florals with Silk Ribbon

For plush, dimensional flowers that stand out, swap your floss for silk ribbon.
A simple detached chain stitch or a folded ribbon stitch is all you need to create realistic cherry blossoms or rosebuds.
The ribbon’s width naturally fills the space, creating soft, voluminous petals with minimal effort. This technique is perfect for adding a luxurious touch to seasonal banners and decor.
12. Create a Unique Canvas with Fabric Dye
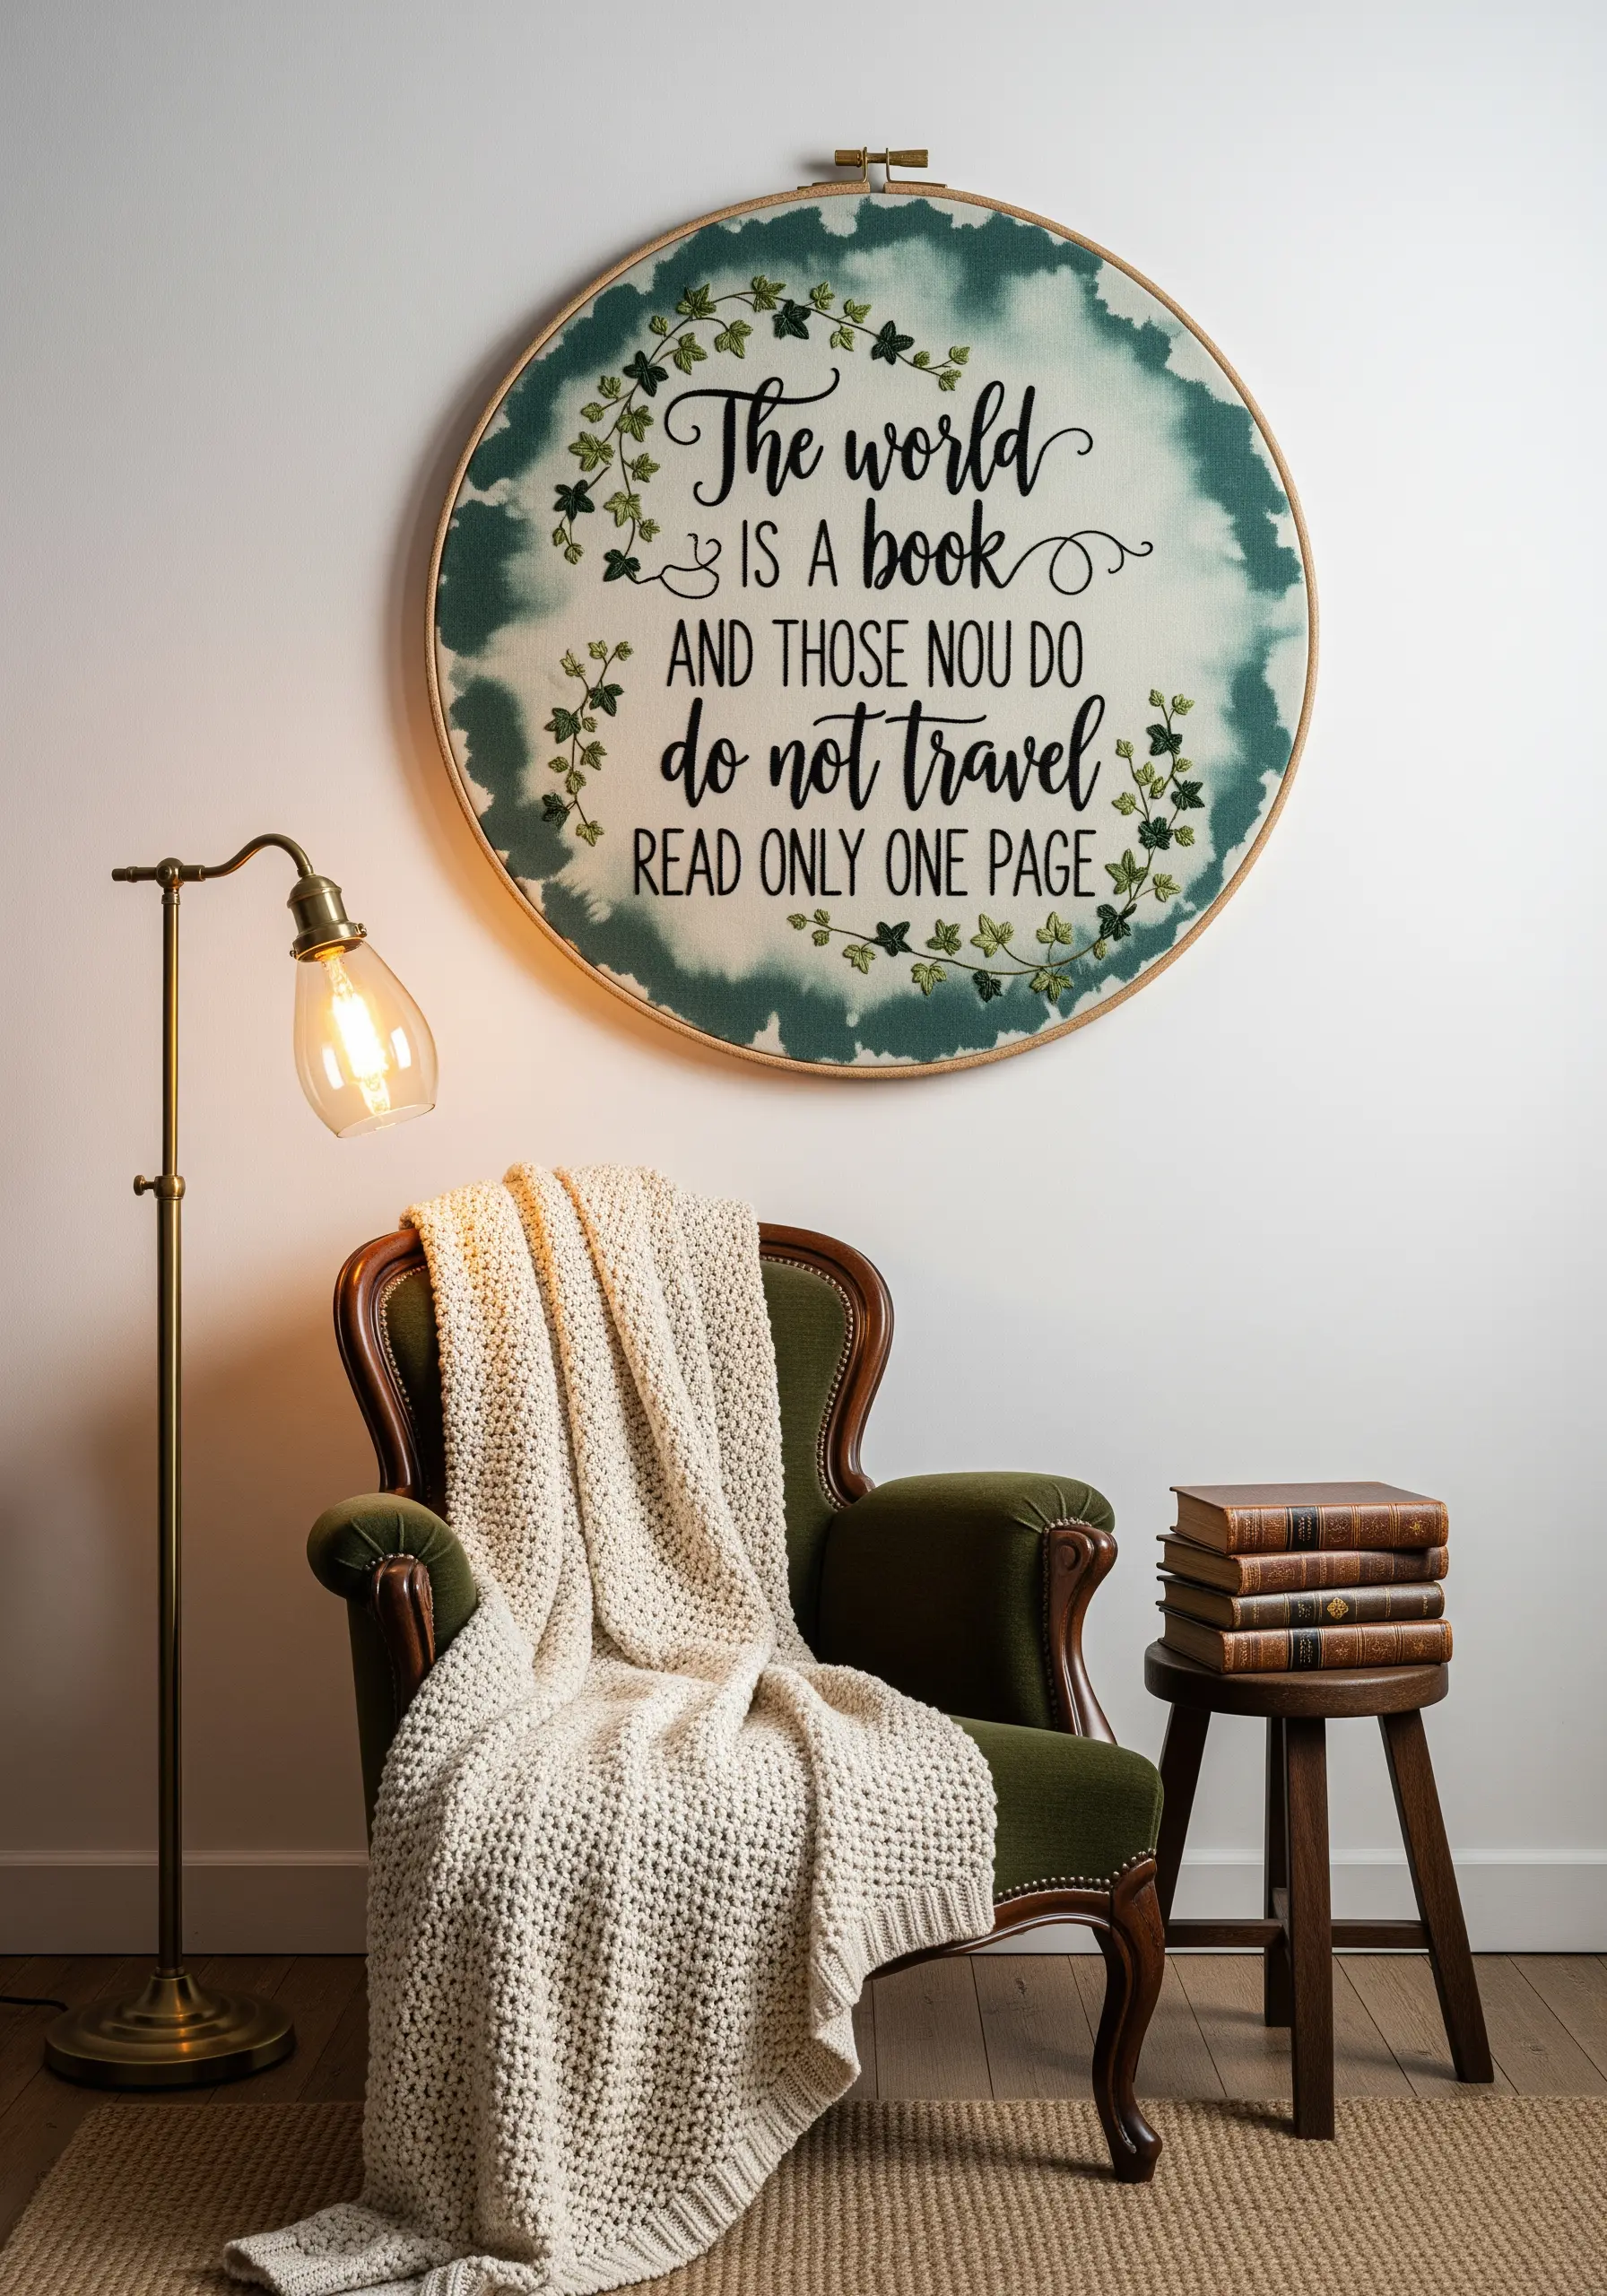
Give your embroidery a custom, artistic background by dyeing your fabric before you begin stitching.
Apply watercolor paint or watered-down fabric dye to your stretched fabric to create a soft, mottled effect.
Let it dry completely before transferring your design. This technique adds a layer of depth and visual interest that makes your lettering and motifs pop.
13. Sculpt a Seascape with Textured Stitches and Embellishments
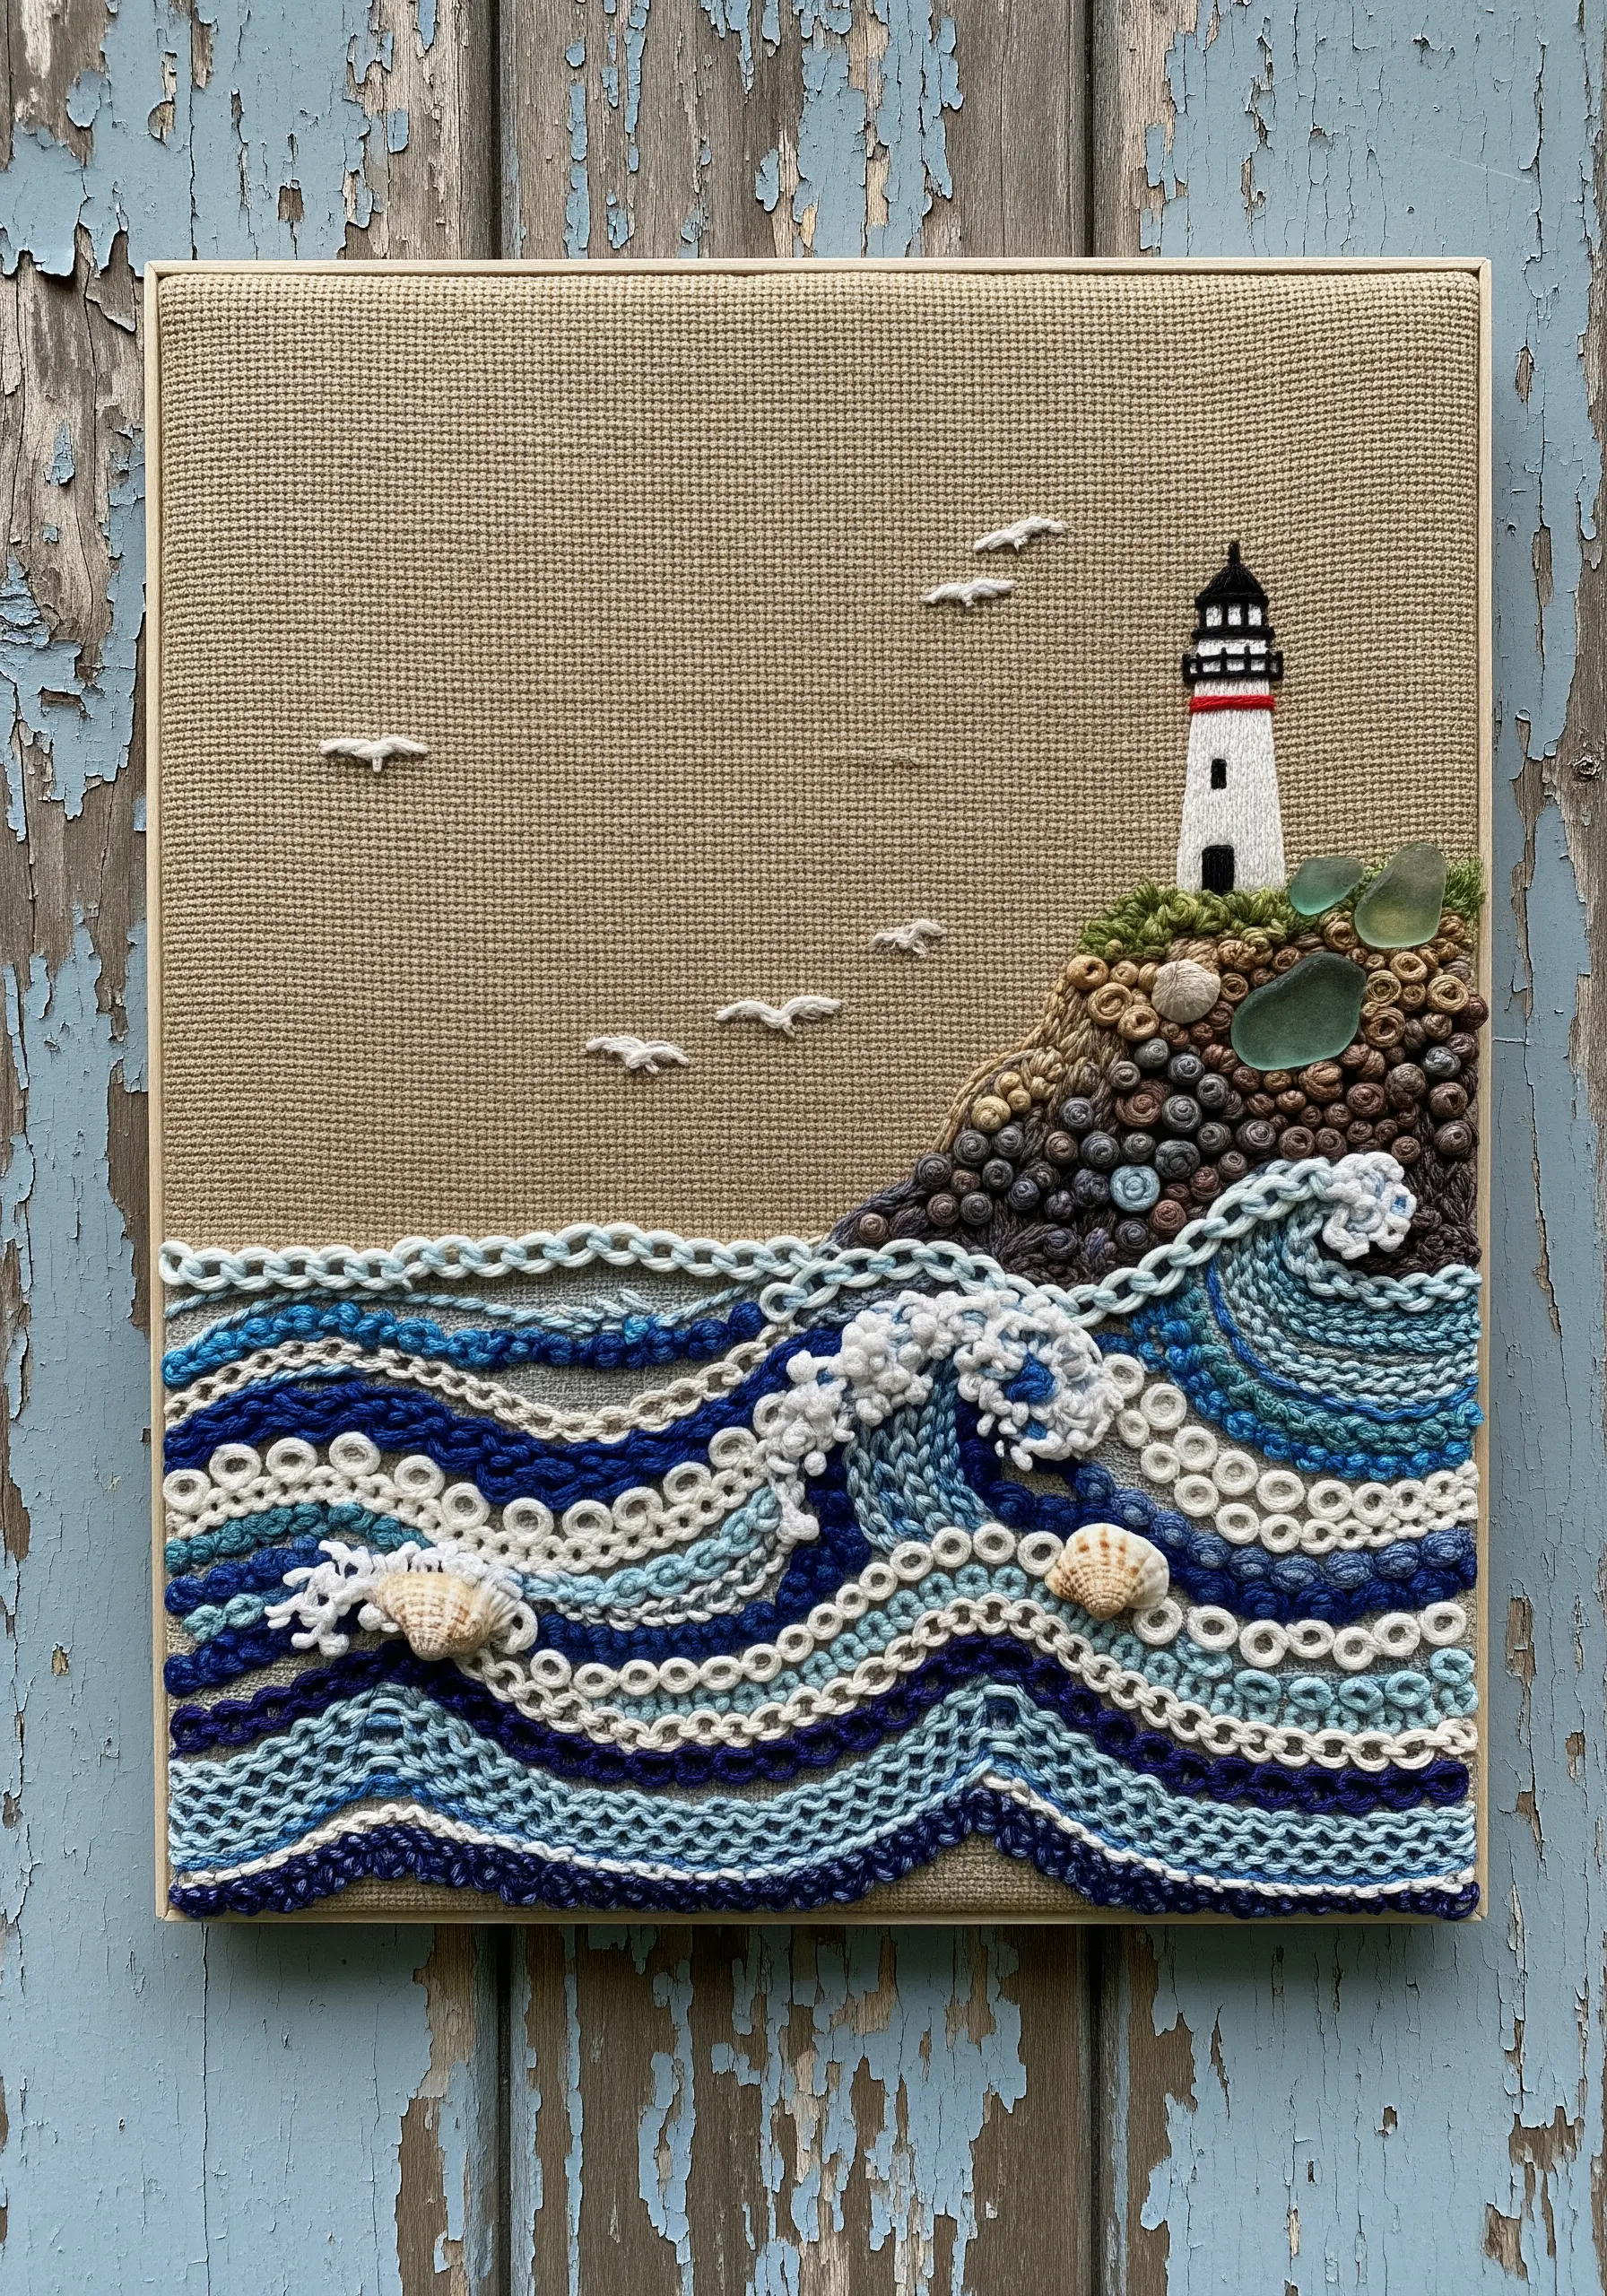
Capture the motion of the ocean by building layers of highly textured stitches.
Use thick yarn couched onto the surface for the base of the waves, and add rows of Pekinese stitch or chain stitch for movement.
For the seafoam, use dense clusters of French knots in white and pale blue. Incorporate found objects like tiny shells or sea glass to complete the immersive, tactile experience.
14. Personalize Decor with an Embroidered Family Tree
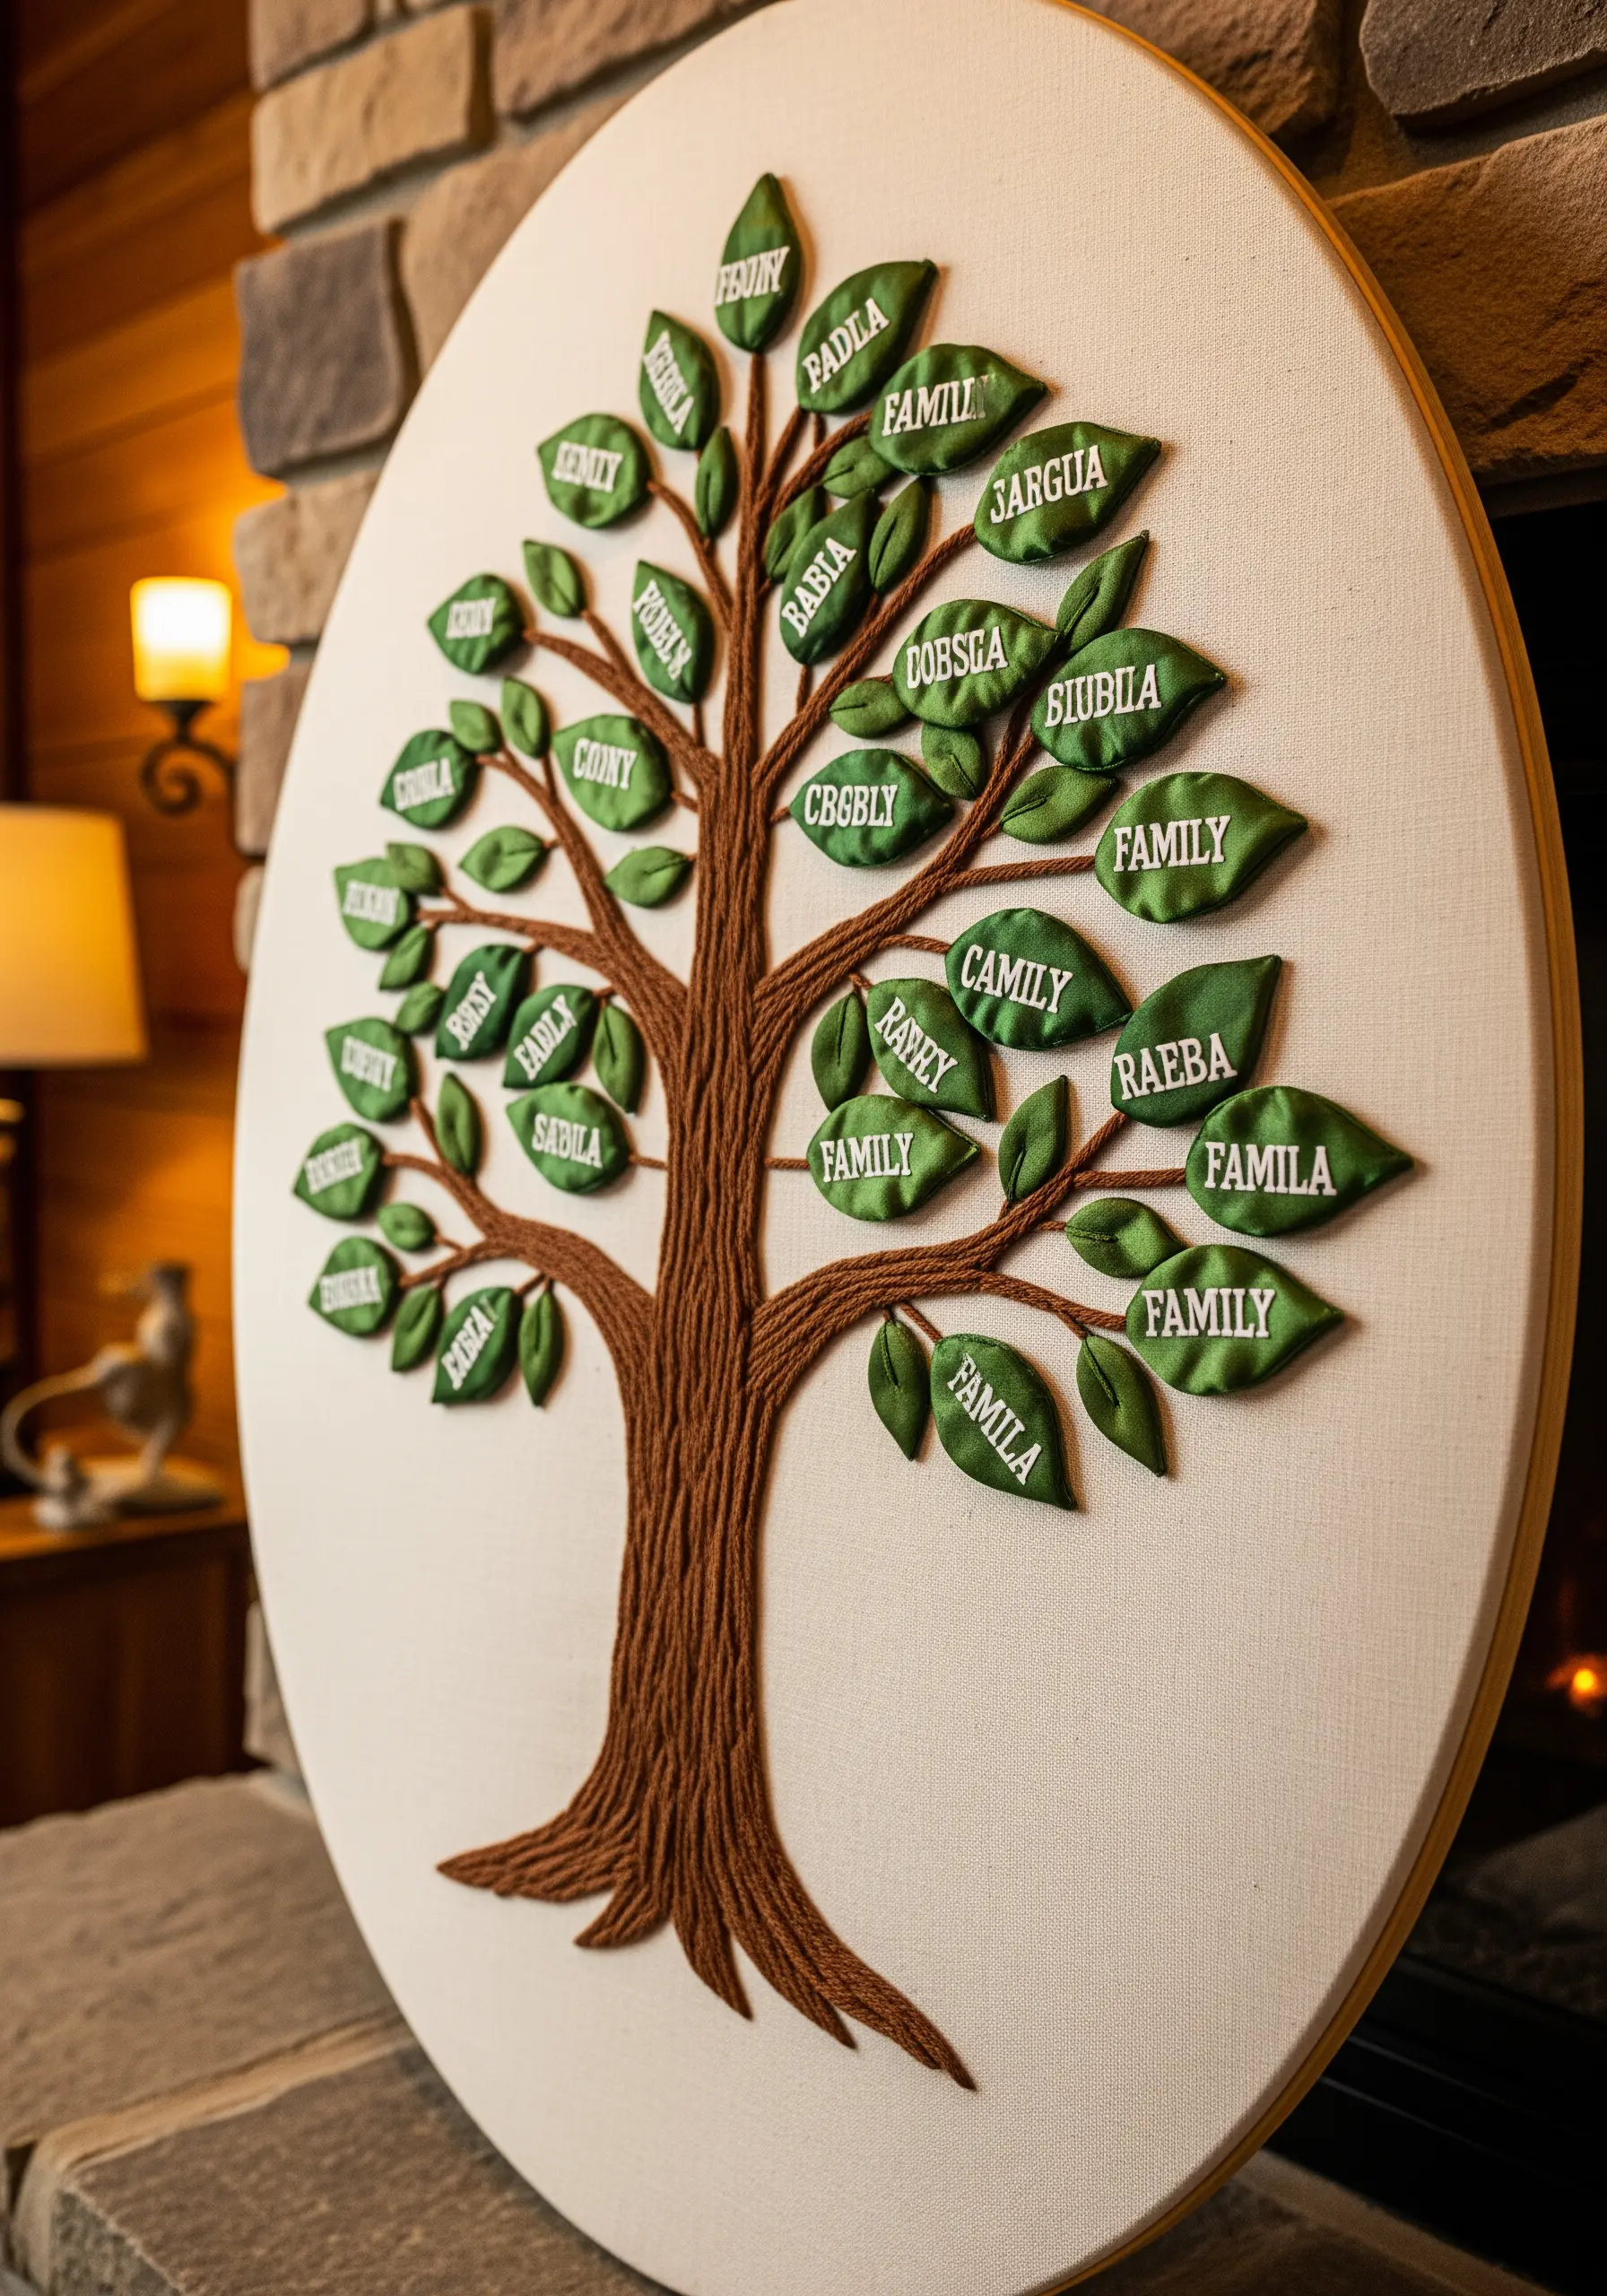
Create a meaningful heirloom by stitching a family tree that combines texture and text.
Couch a thick brown yarn for the trunk and branches to give them a sturdy, raised feel. Use ribbon stitch or a satin-stitched leaf shape for the foliage.
You can add names using a fine-tipped permanent fabric pen for clarity or meticulously stitch them with a single strand of floss for a truly handmade touch. These DIY embroidered presents become treasured keepsakes.
15. Preserve Nature by Stitching over Pressed Flowers
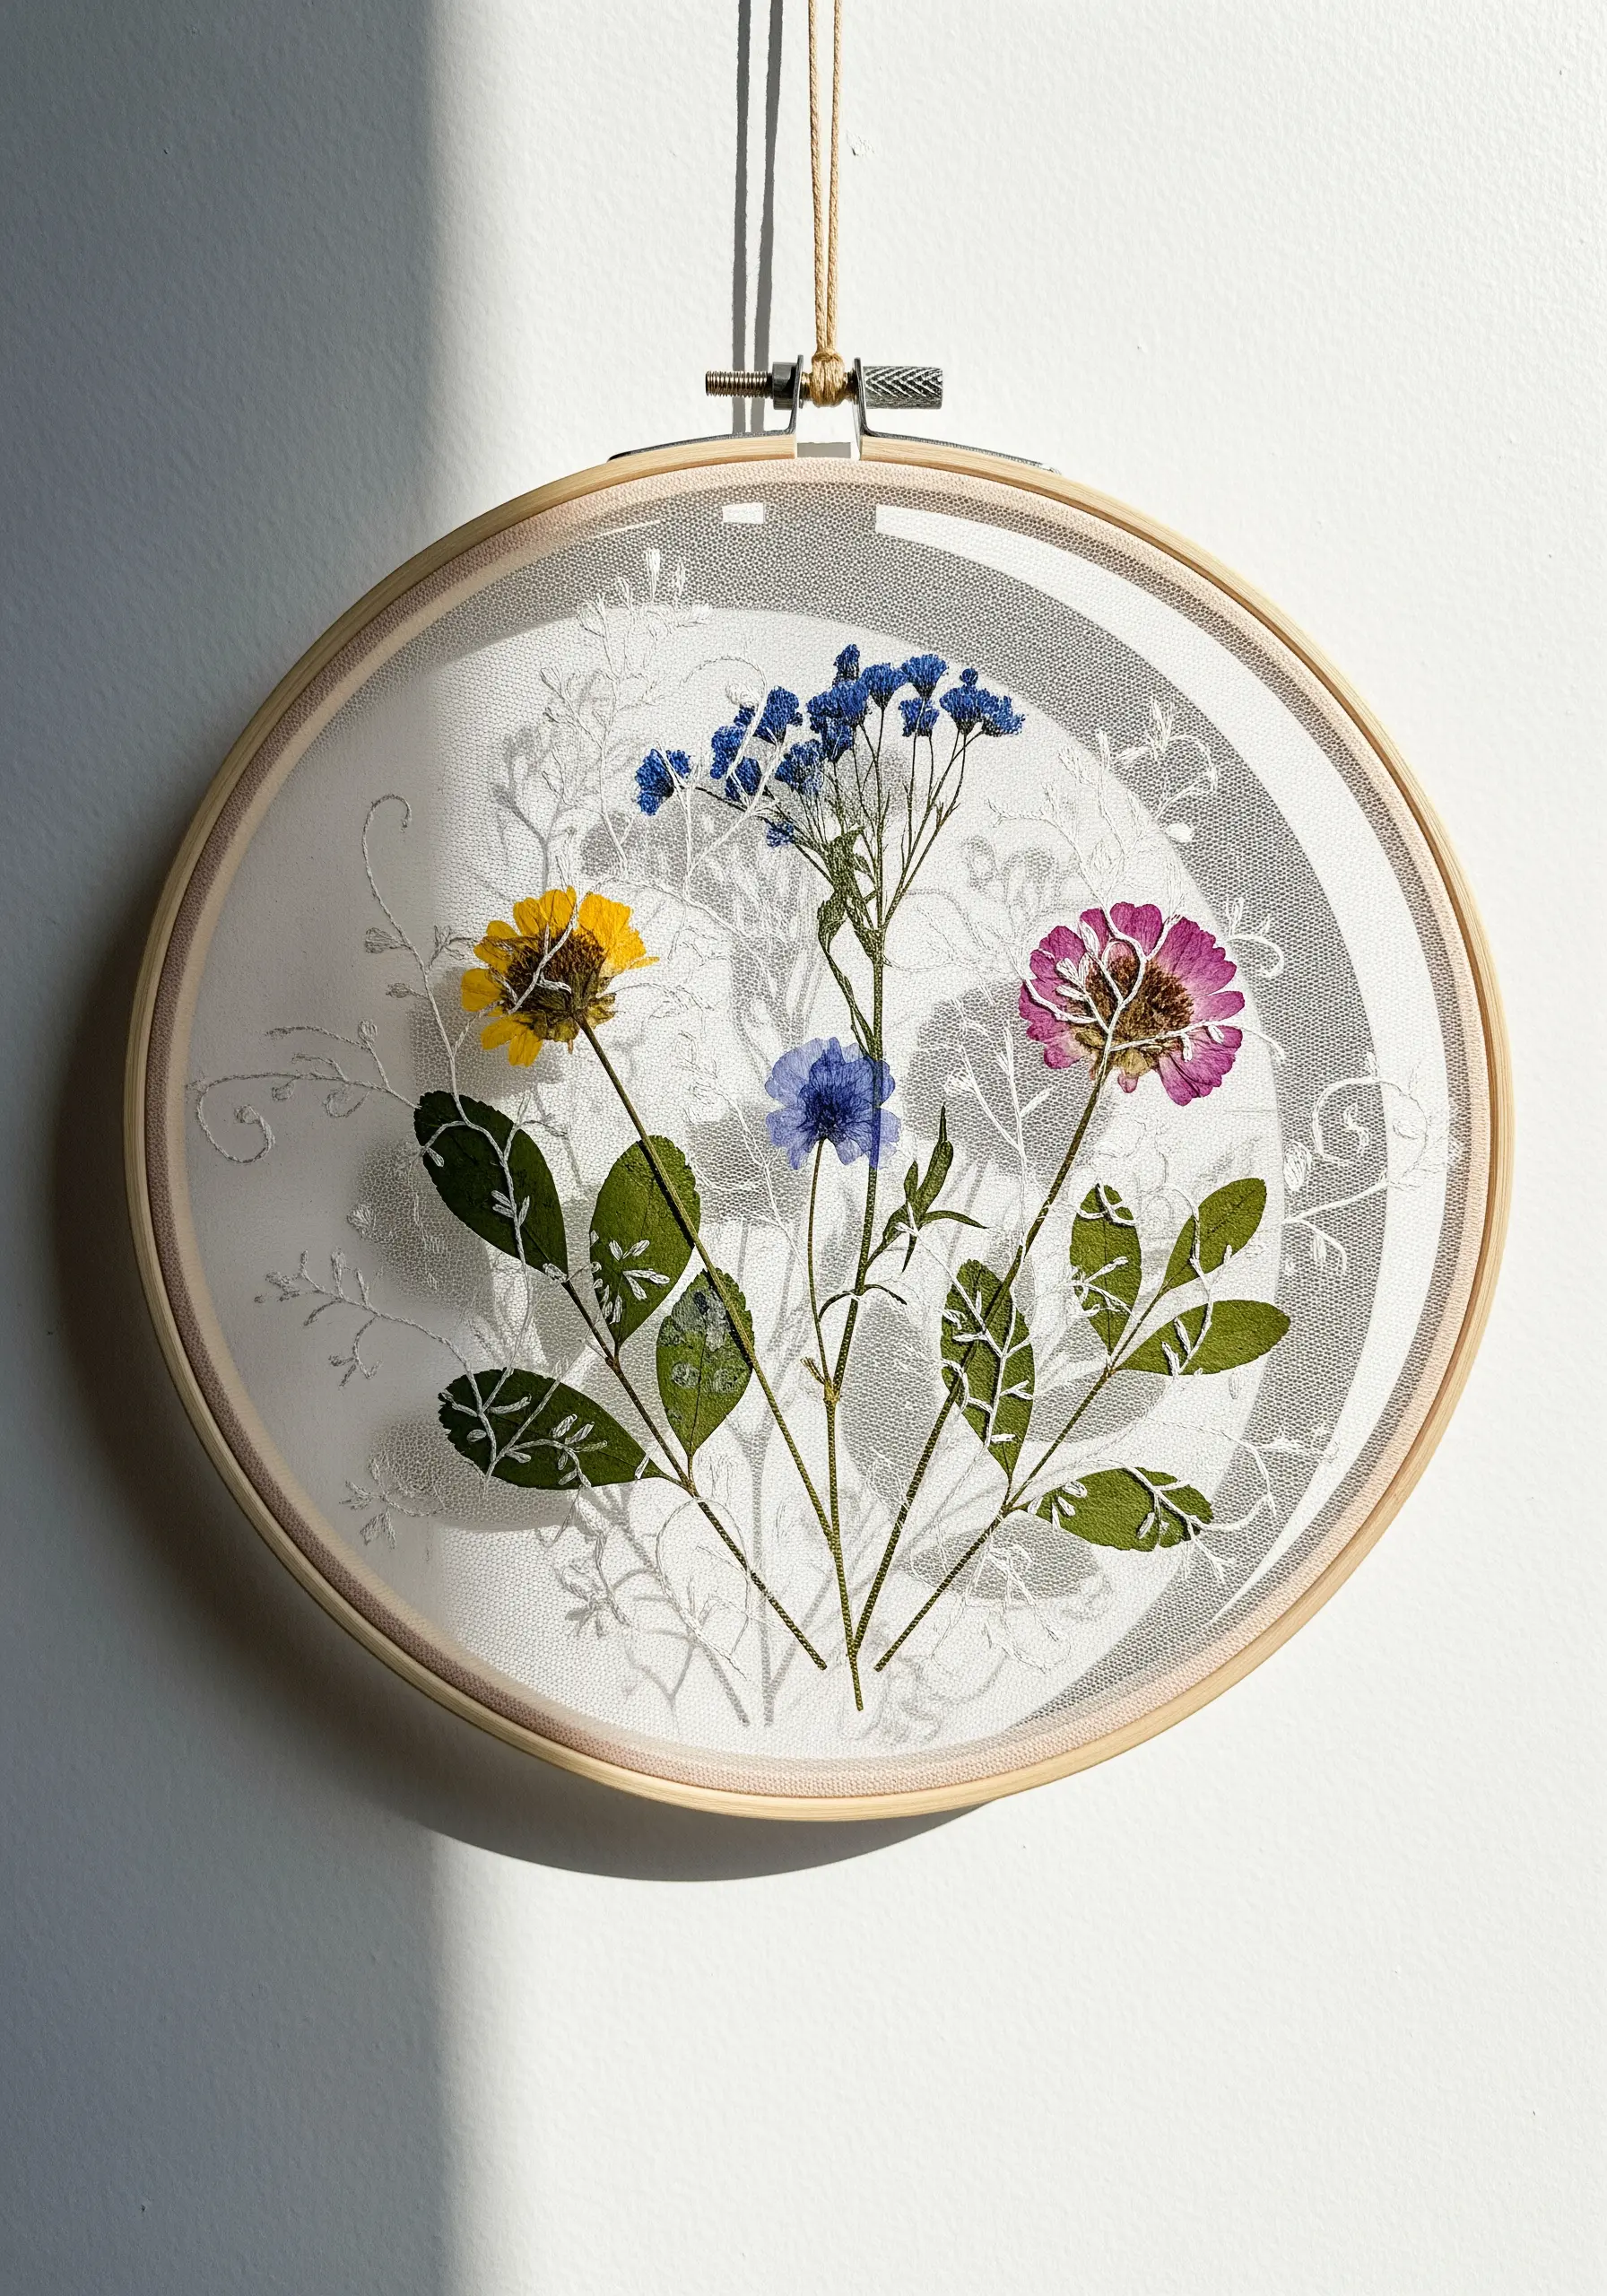
Combine the delicate beauty of real botanicals with embroidery for a truly unique piece of art.
Arrange your carefully dried and pressed flowers on a sheer fabric like tulle or organza, which is stretched in a hoop.
Use a single strand of thread in a matching or contrasting color to secure the flowers with tiny, strategic stitches along the stems and petals. This creates a stunning floating effect.
16. Map Out a Year with Felt Appliqué
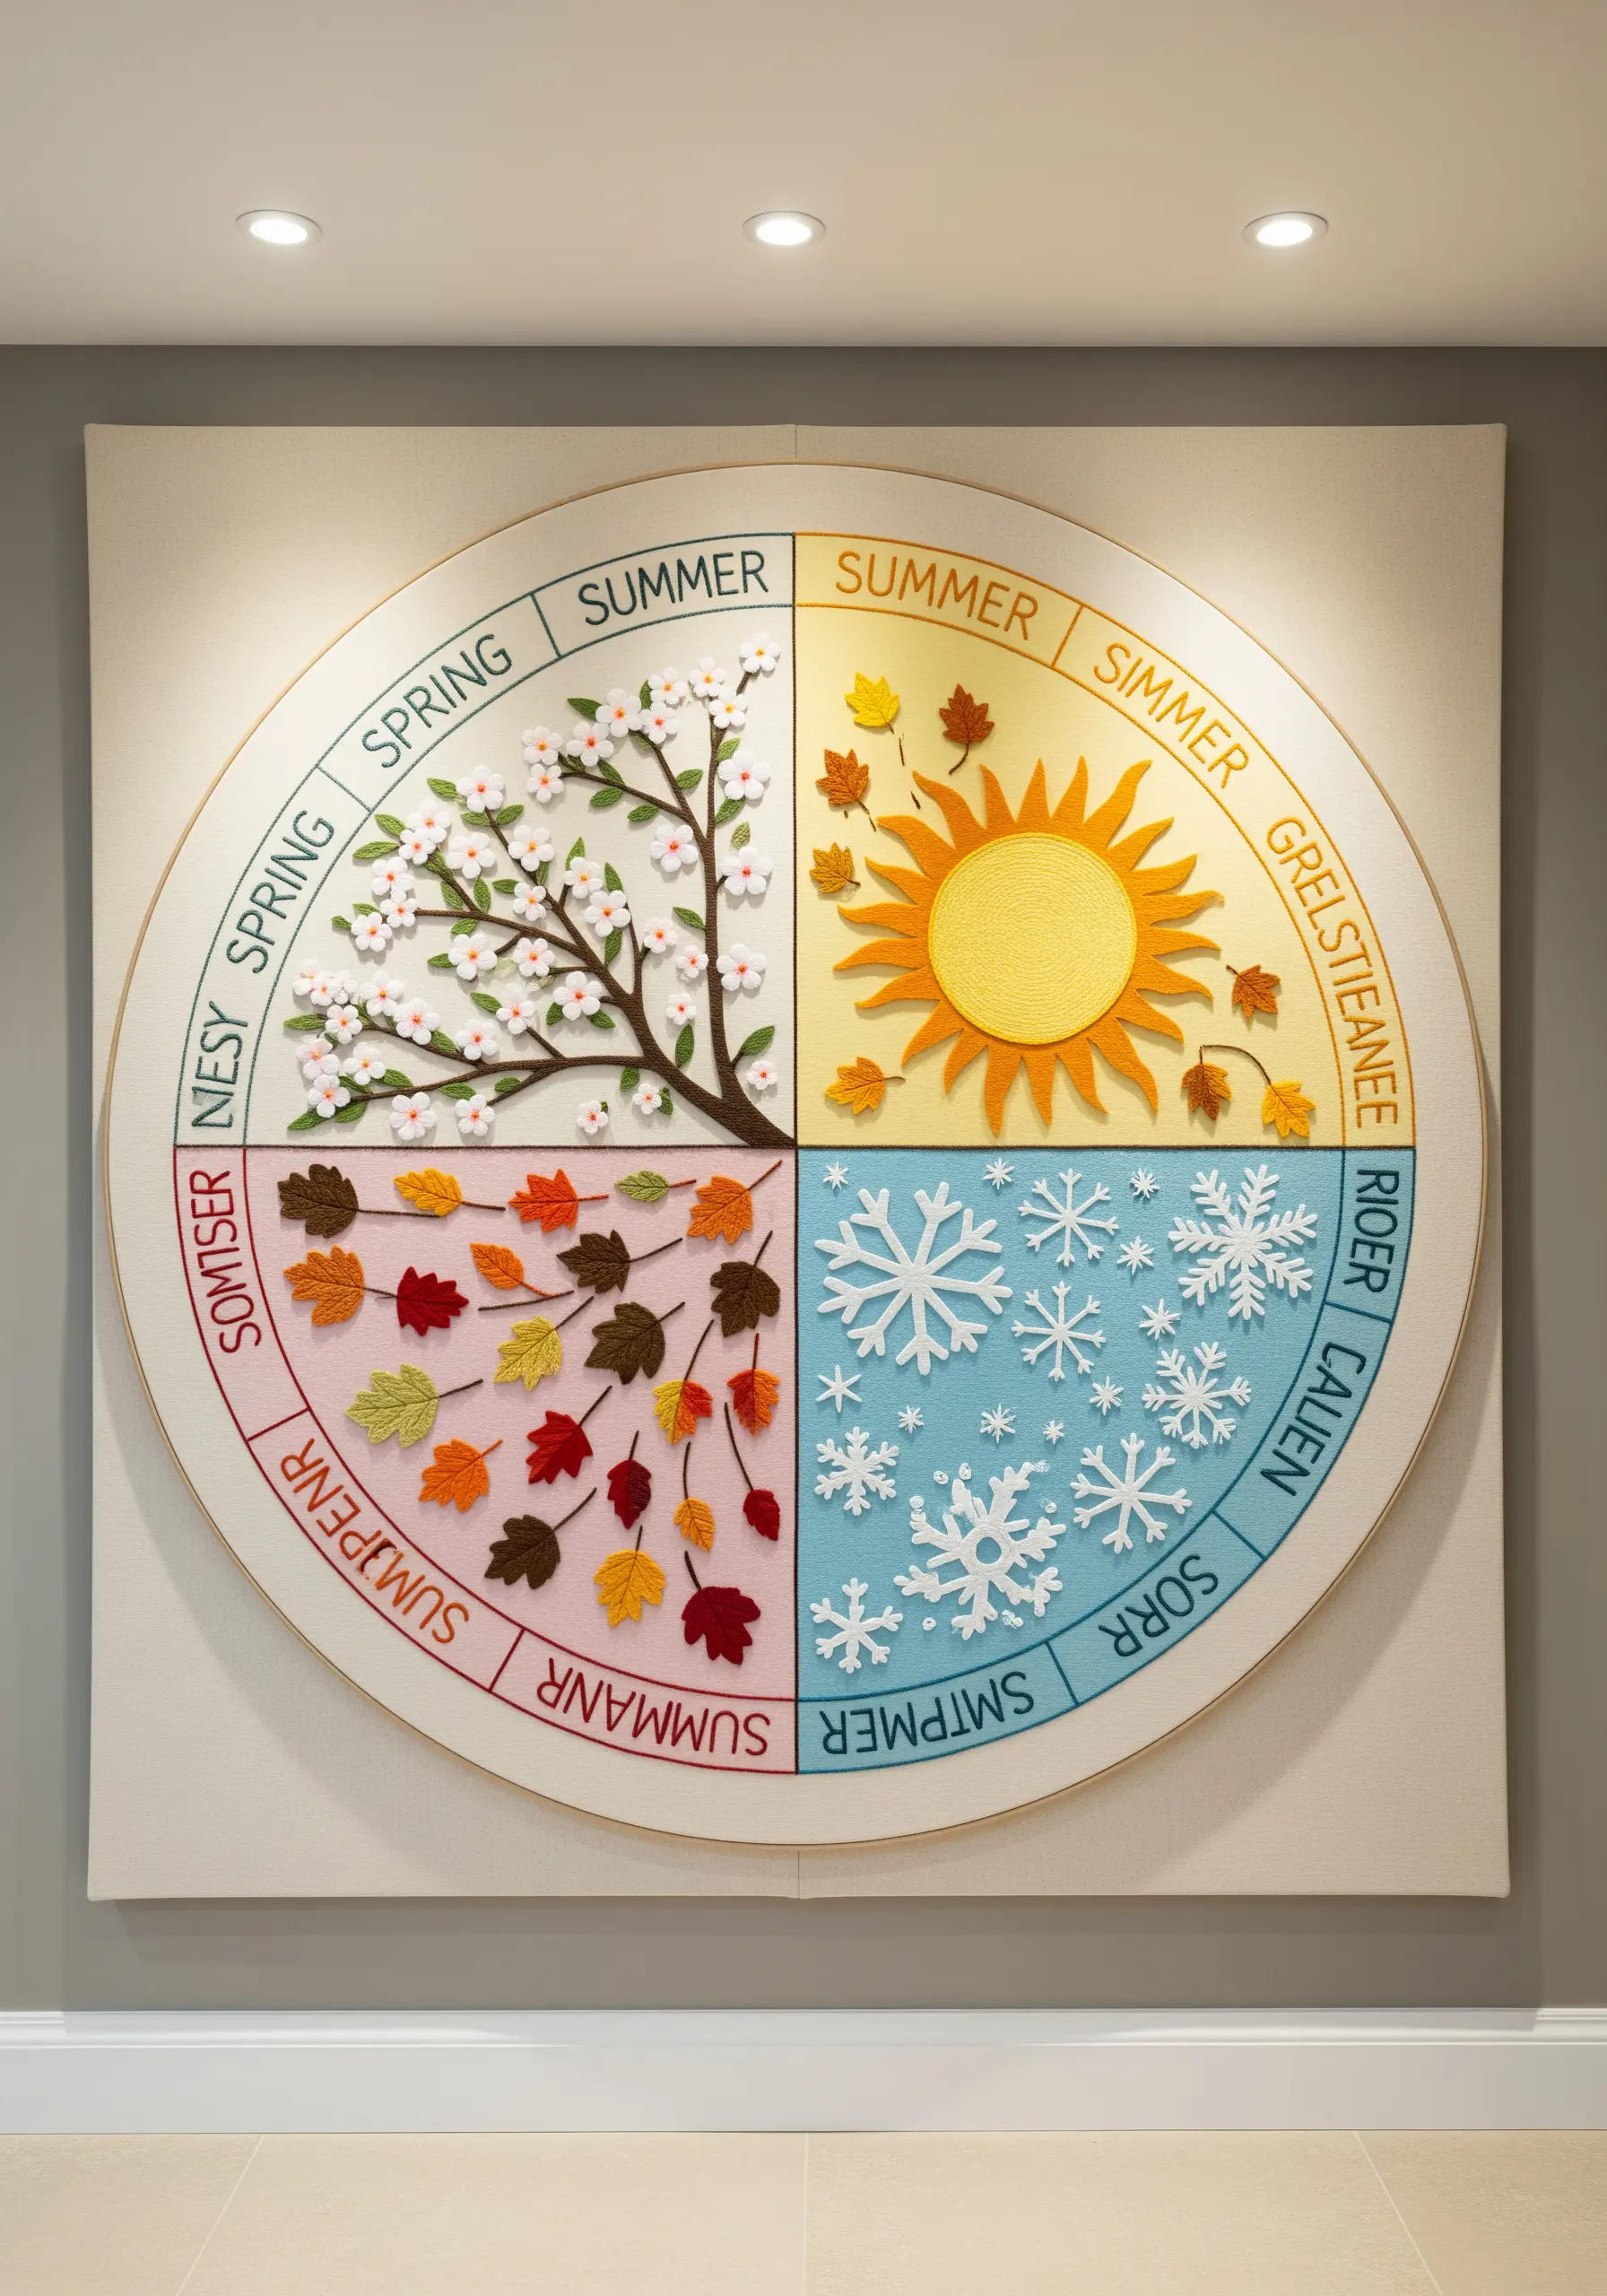
For a large, graphic piece like a seasonal calendar, felt appliqué is your best friend.
Cut out your primary shapes—snowflakes, leaves, sun rays—from colored felt. Arrange them on your background fabric and secure them with a simple whipstitch or running stitch around the edges.
This method allows you to create a bold, clean design with rich color blocking that would be time-consuming to achieve with thread alone.
17. Animate a Scene with Whimsical Stitches
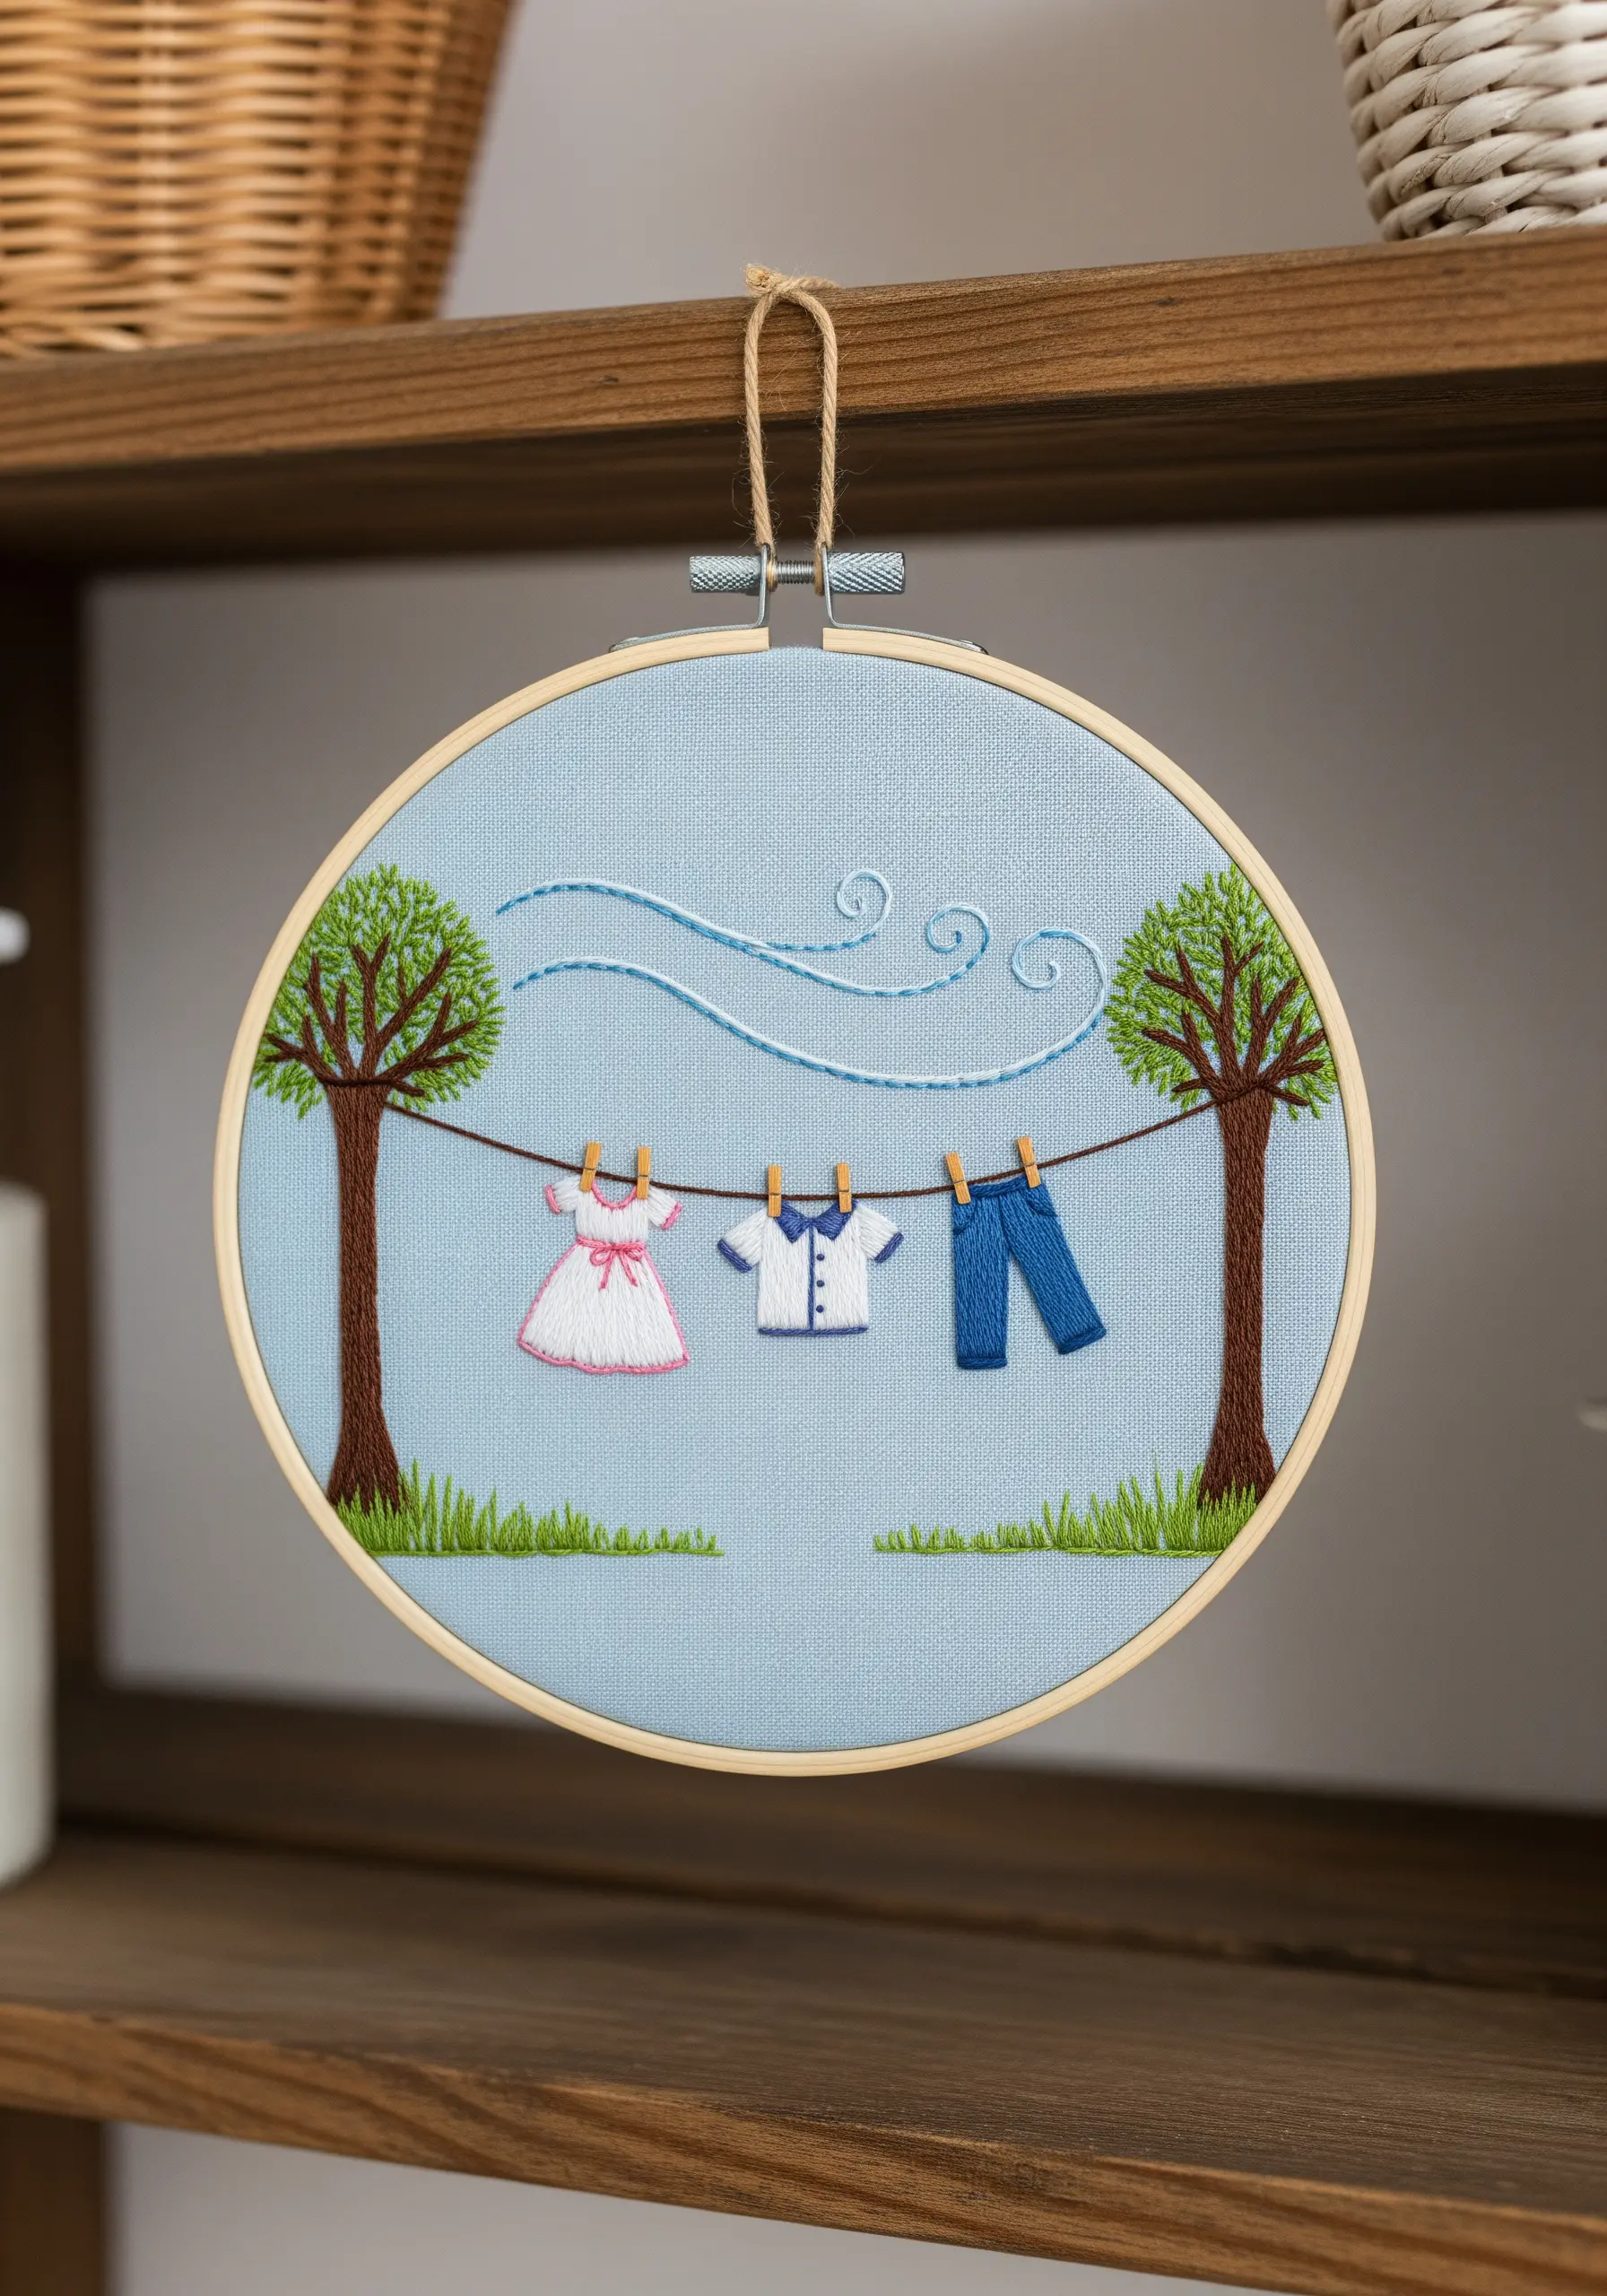
Add a touch of life and movement to your compositions with simple, expressive lines.
To suggest a gentle breeze on a clothesline, use a few flowing lines of stem stitch or whipped backstitch in a light blue thread.
This small detail transforms a static scene into a dynamic one, telling a story and adding a layer of charm without cluttering the design.
18. Create Rolling Hills with Contour Stitching
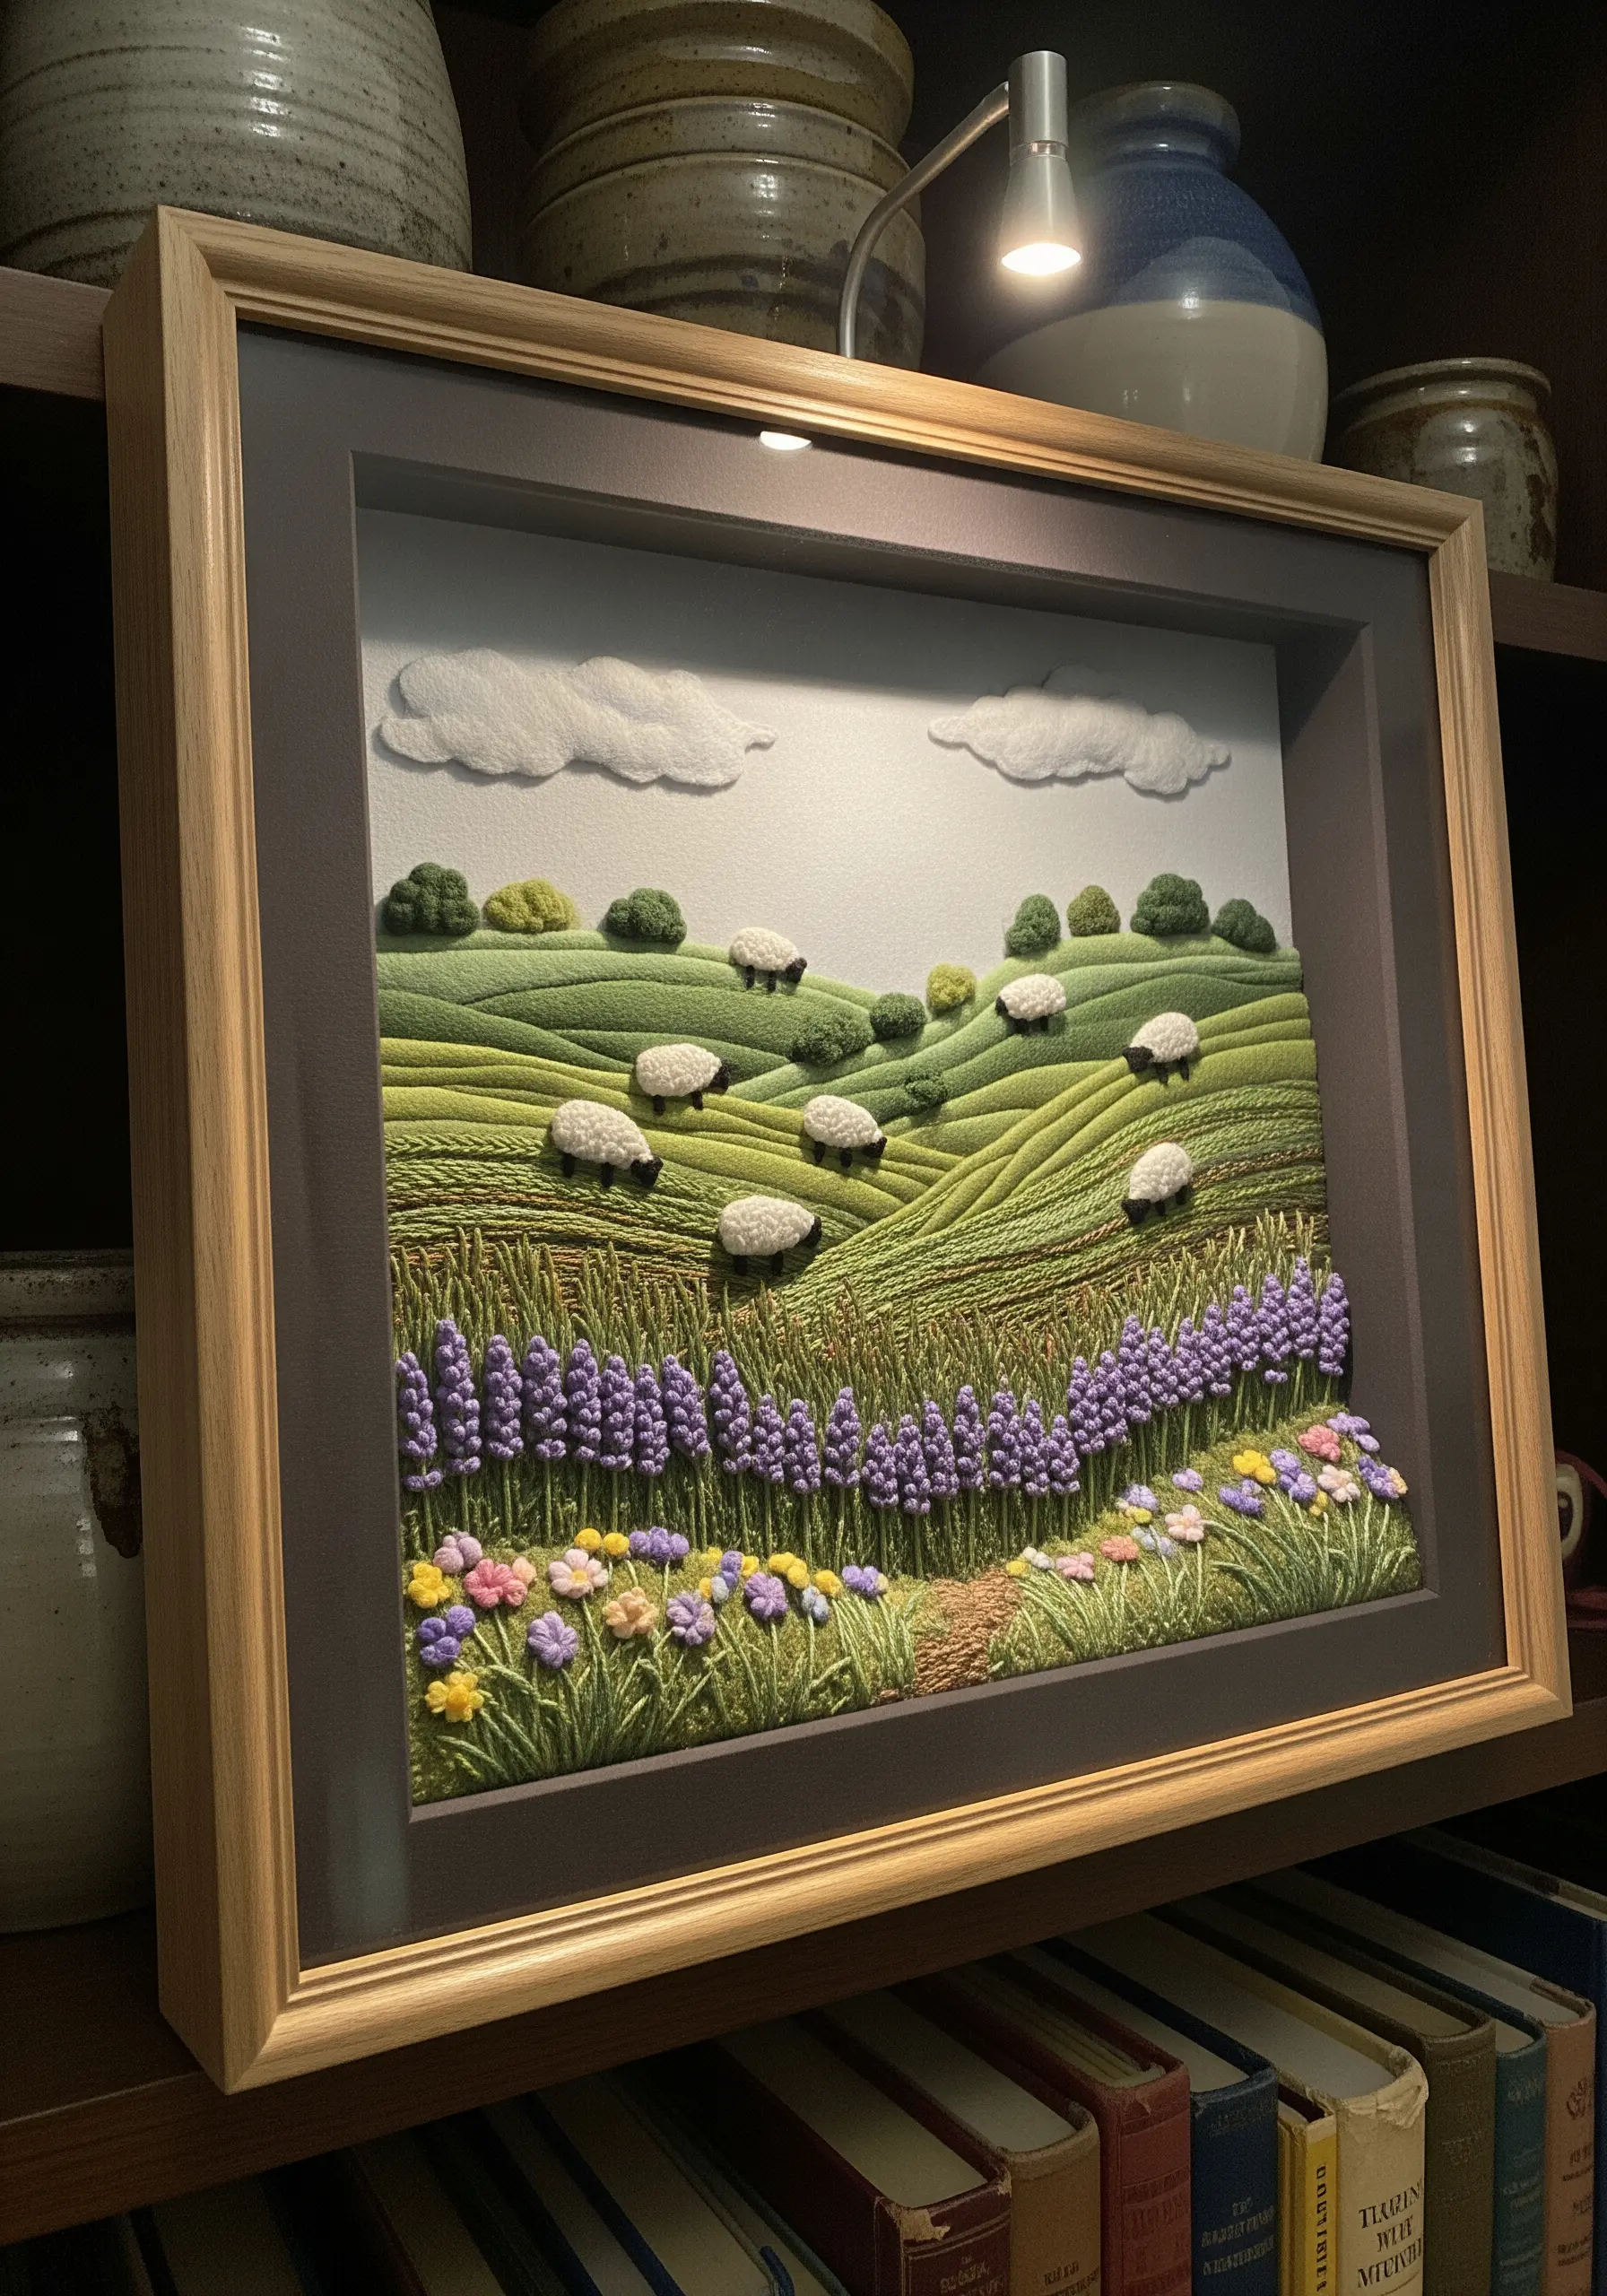
To embroider a landscape with rolling hills, use the direction of your stitches to create contours and depth.
Fill each hill with long-and-short stitch, angling your stitches to follow the curve of the land. Use slightly different shades of green for each hill to suggest distance.
For the sheep, a mass of French knots or bullion knots creates a wonderfully woolly texture that contrasts with the smooth hills.
19. Make a Statement with Minimalist Line Art
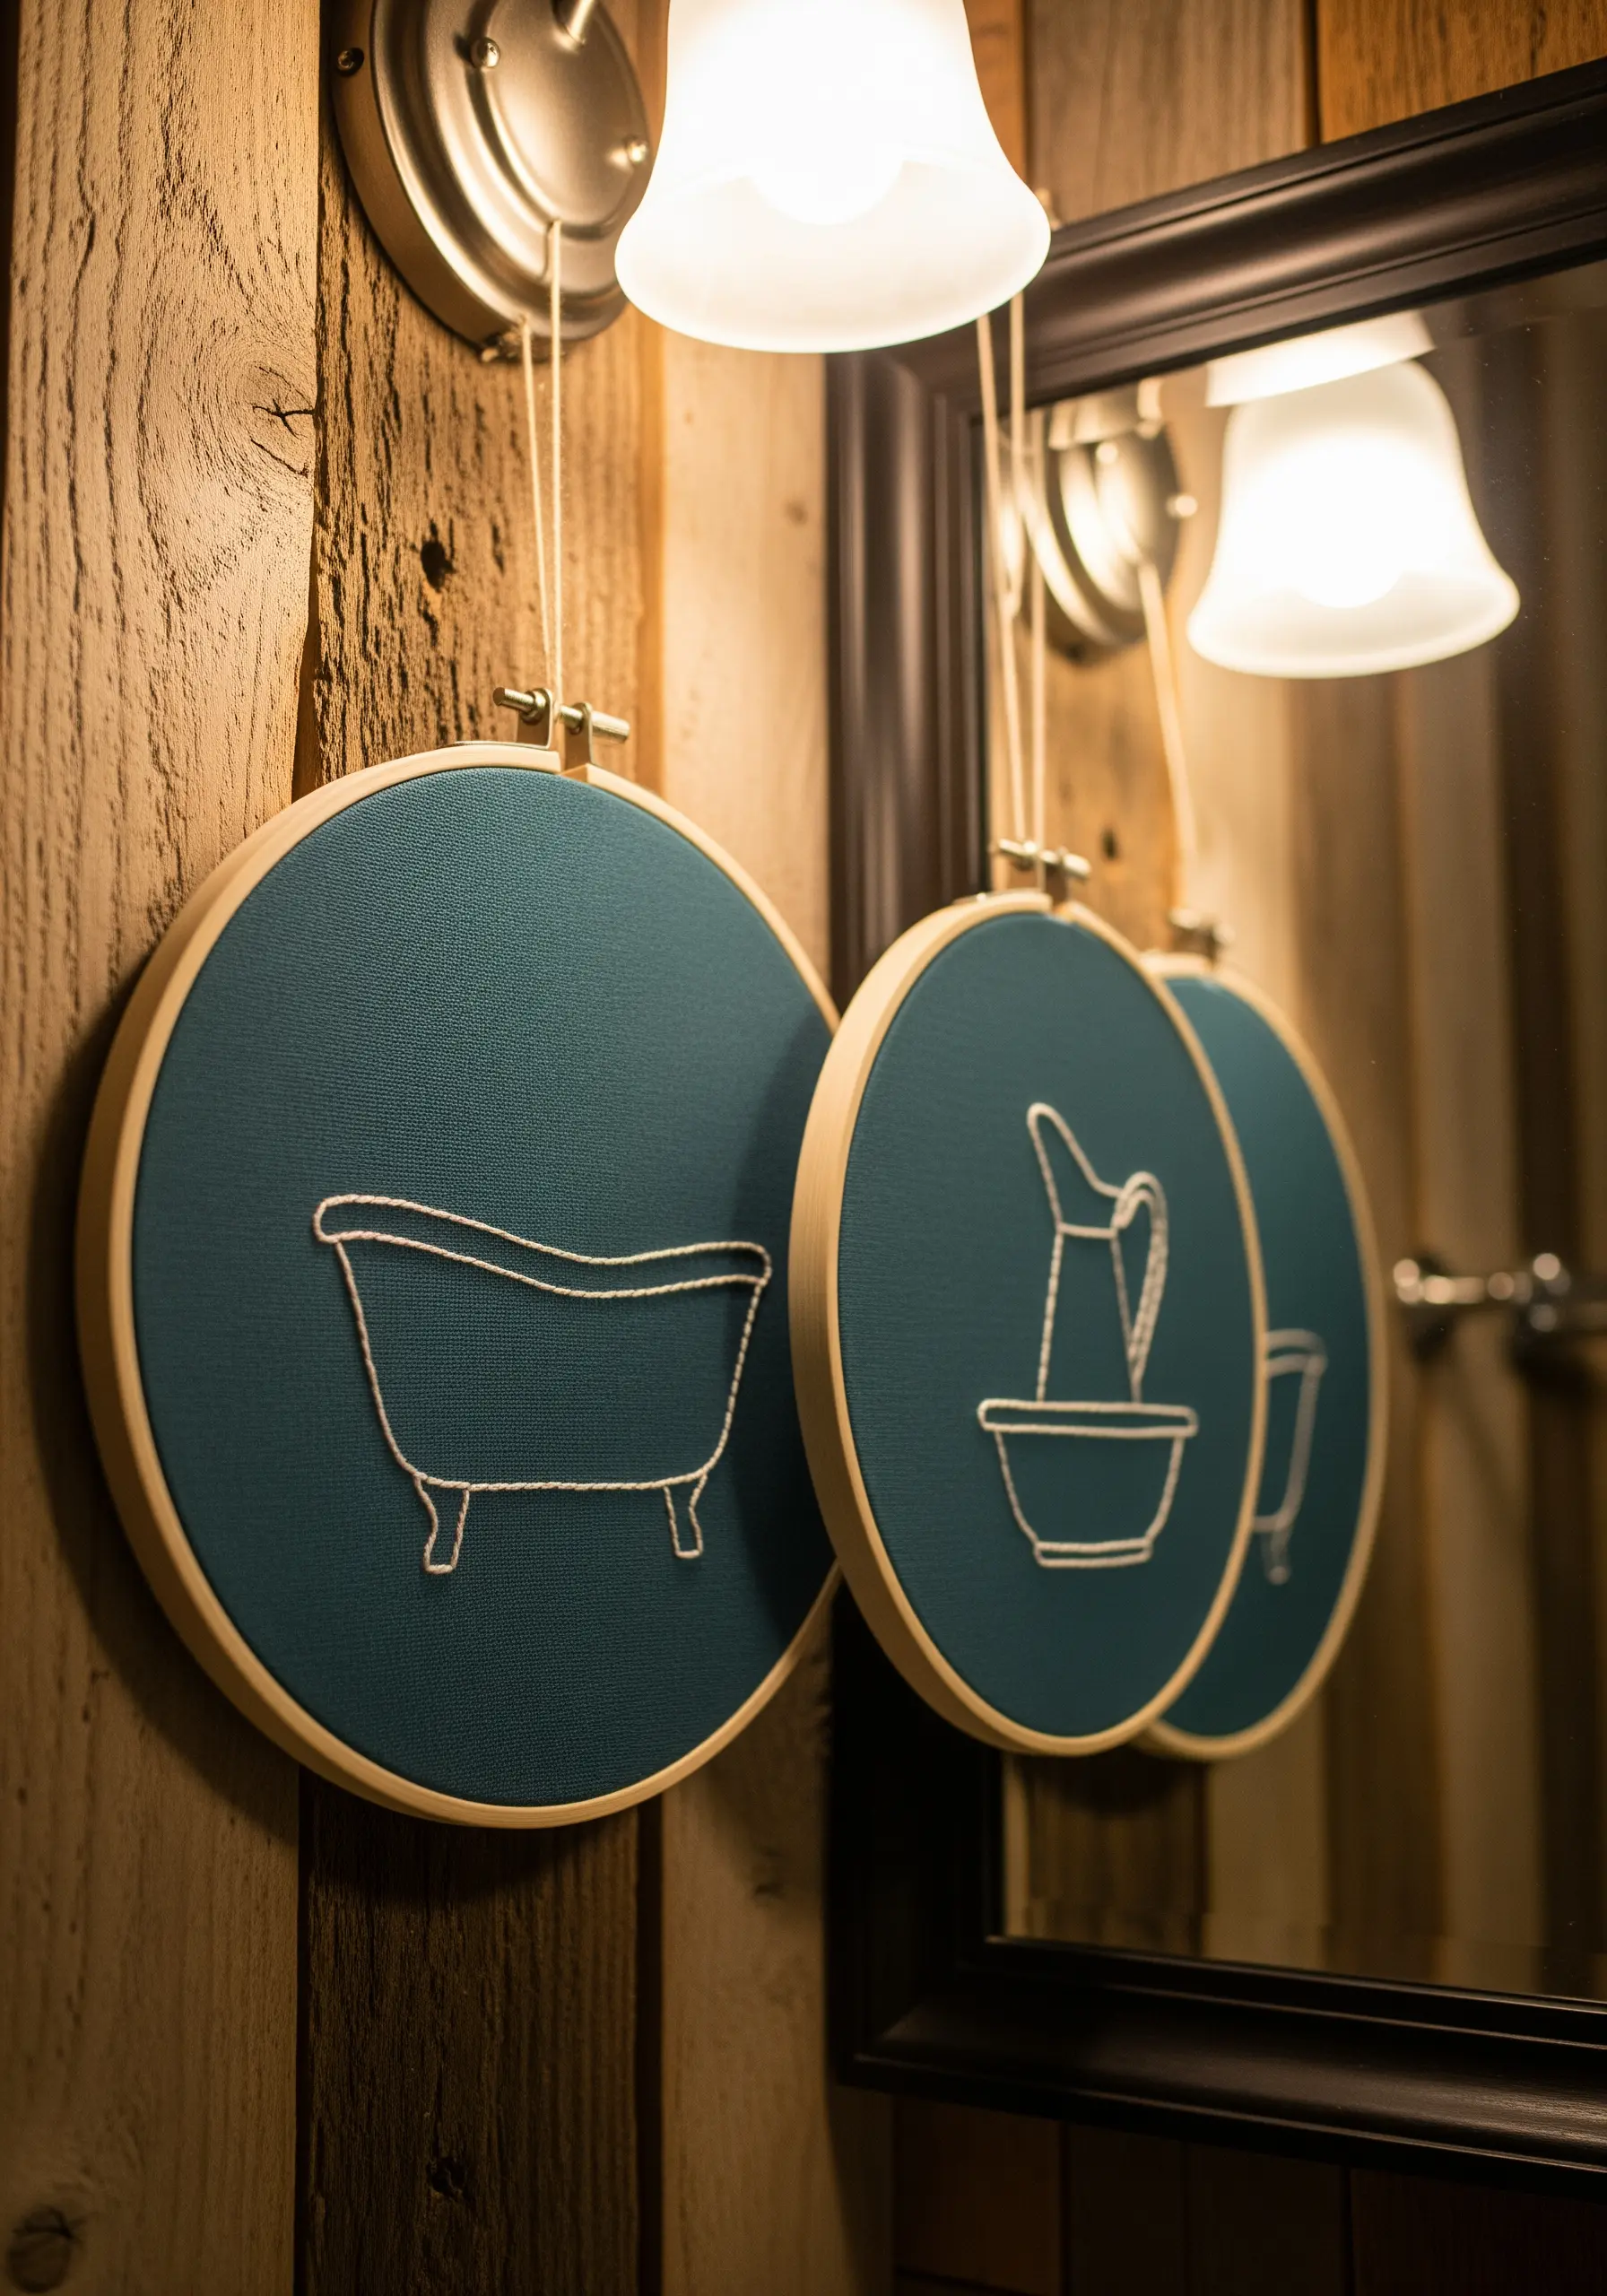
You don’t need complex stitches or dozens of colors to create impactful decor. A simple line drawing can be incredibly elegant.
Choose a high-contrast color combination, like white thread on dark teal fabric. Use a single, clean stitch like a backstitch or split stitch to trace your design.
The beauty of this style lies in its simplicity and the power of negative space. These minimal embroidery wall pieces are perfect for modern, uncluttered homes.
20. Achieve a Graphic Look with Geometric Fills
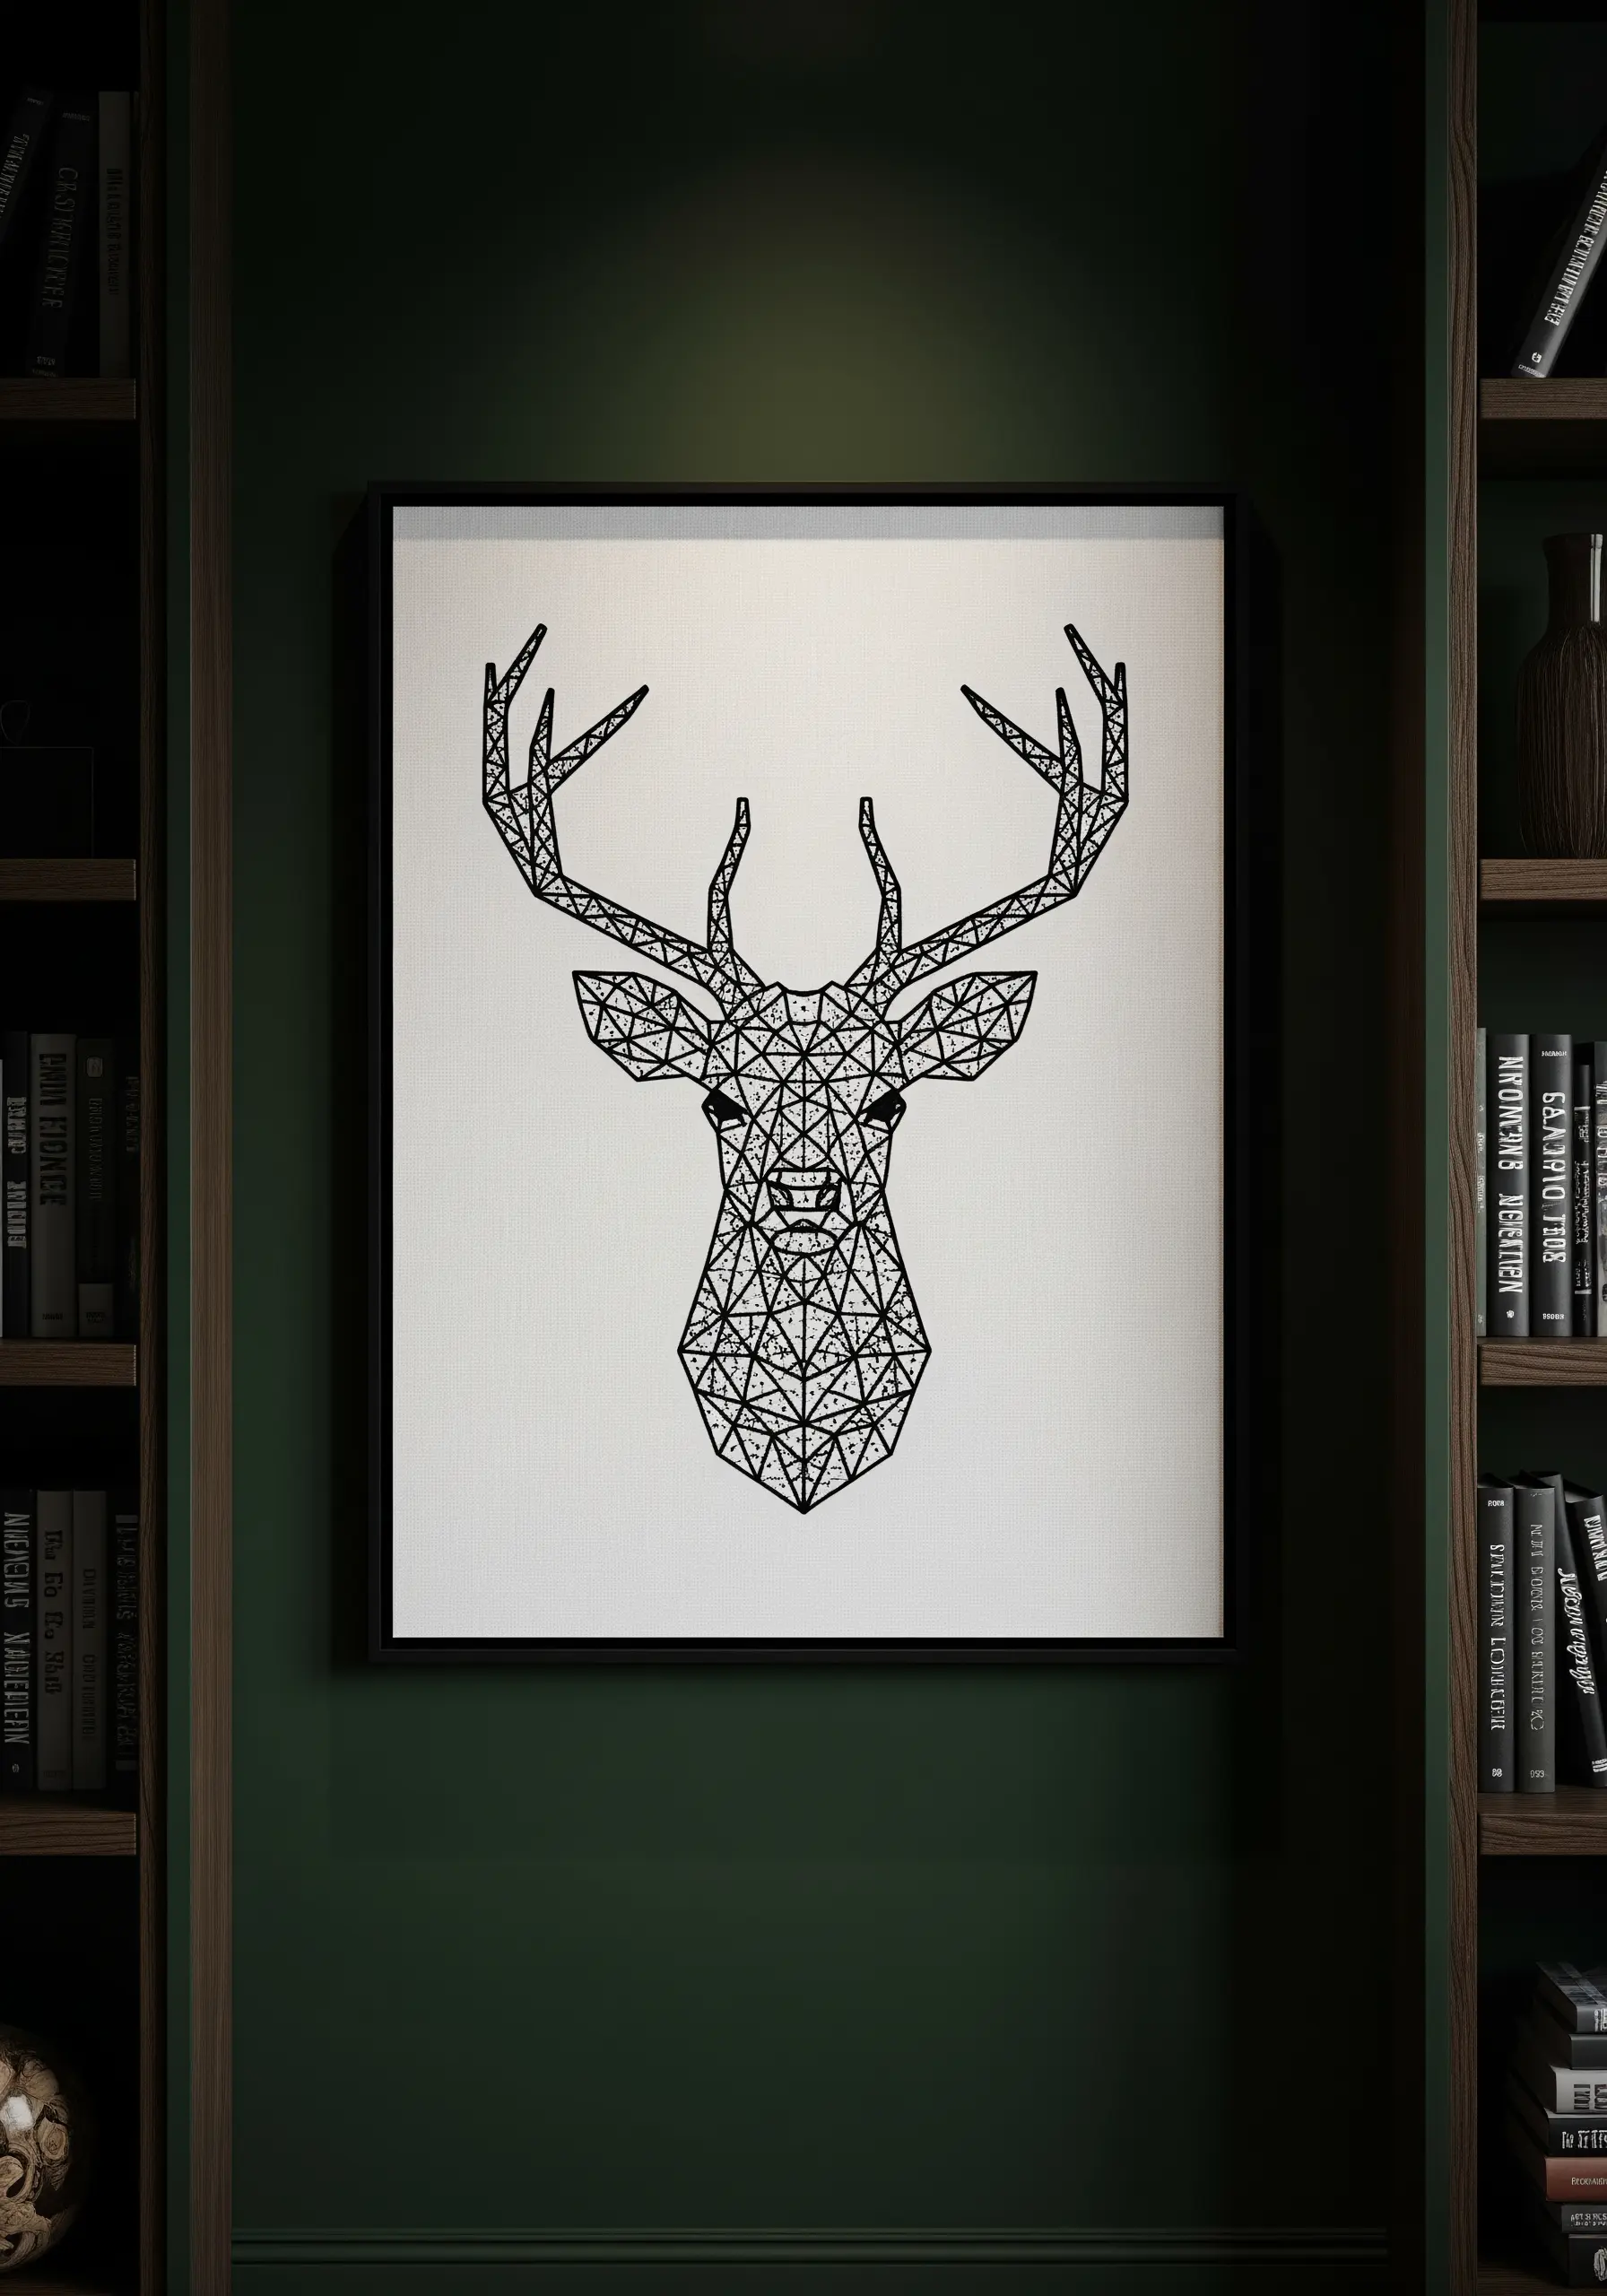
Combine the rustic charm of embroidery with a modern, graphic sensibility by using geometric patterns as fills.
Instead of coloring in a shape with satin stitch, fill it with a grid of intersecting straight stitches, triangles, or other repeating patterns.
This technique adds visual interest and a contemporary edge, transforming a simple animal silhouette into a piece of abstract art.
21. Illustrate a World with Fine-Line Detailing

When creating a detailed piece like a fantasy map, precision is everything.
Switch to a single strand of embroidery floss and a smaller needle (size 9 or 10). This allows you to stitch crisp lettering, sharp mountain peaks, and delicate tree icons.
Use a basic backstitch for all outlines to maintain consistency and clarity. The result is a rich, illustrated world that invites close inspection.
22. Achieve Lifelike Color with Thread Blending
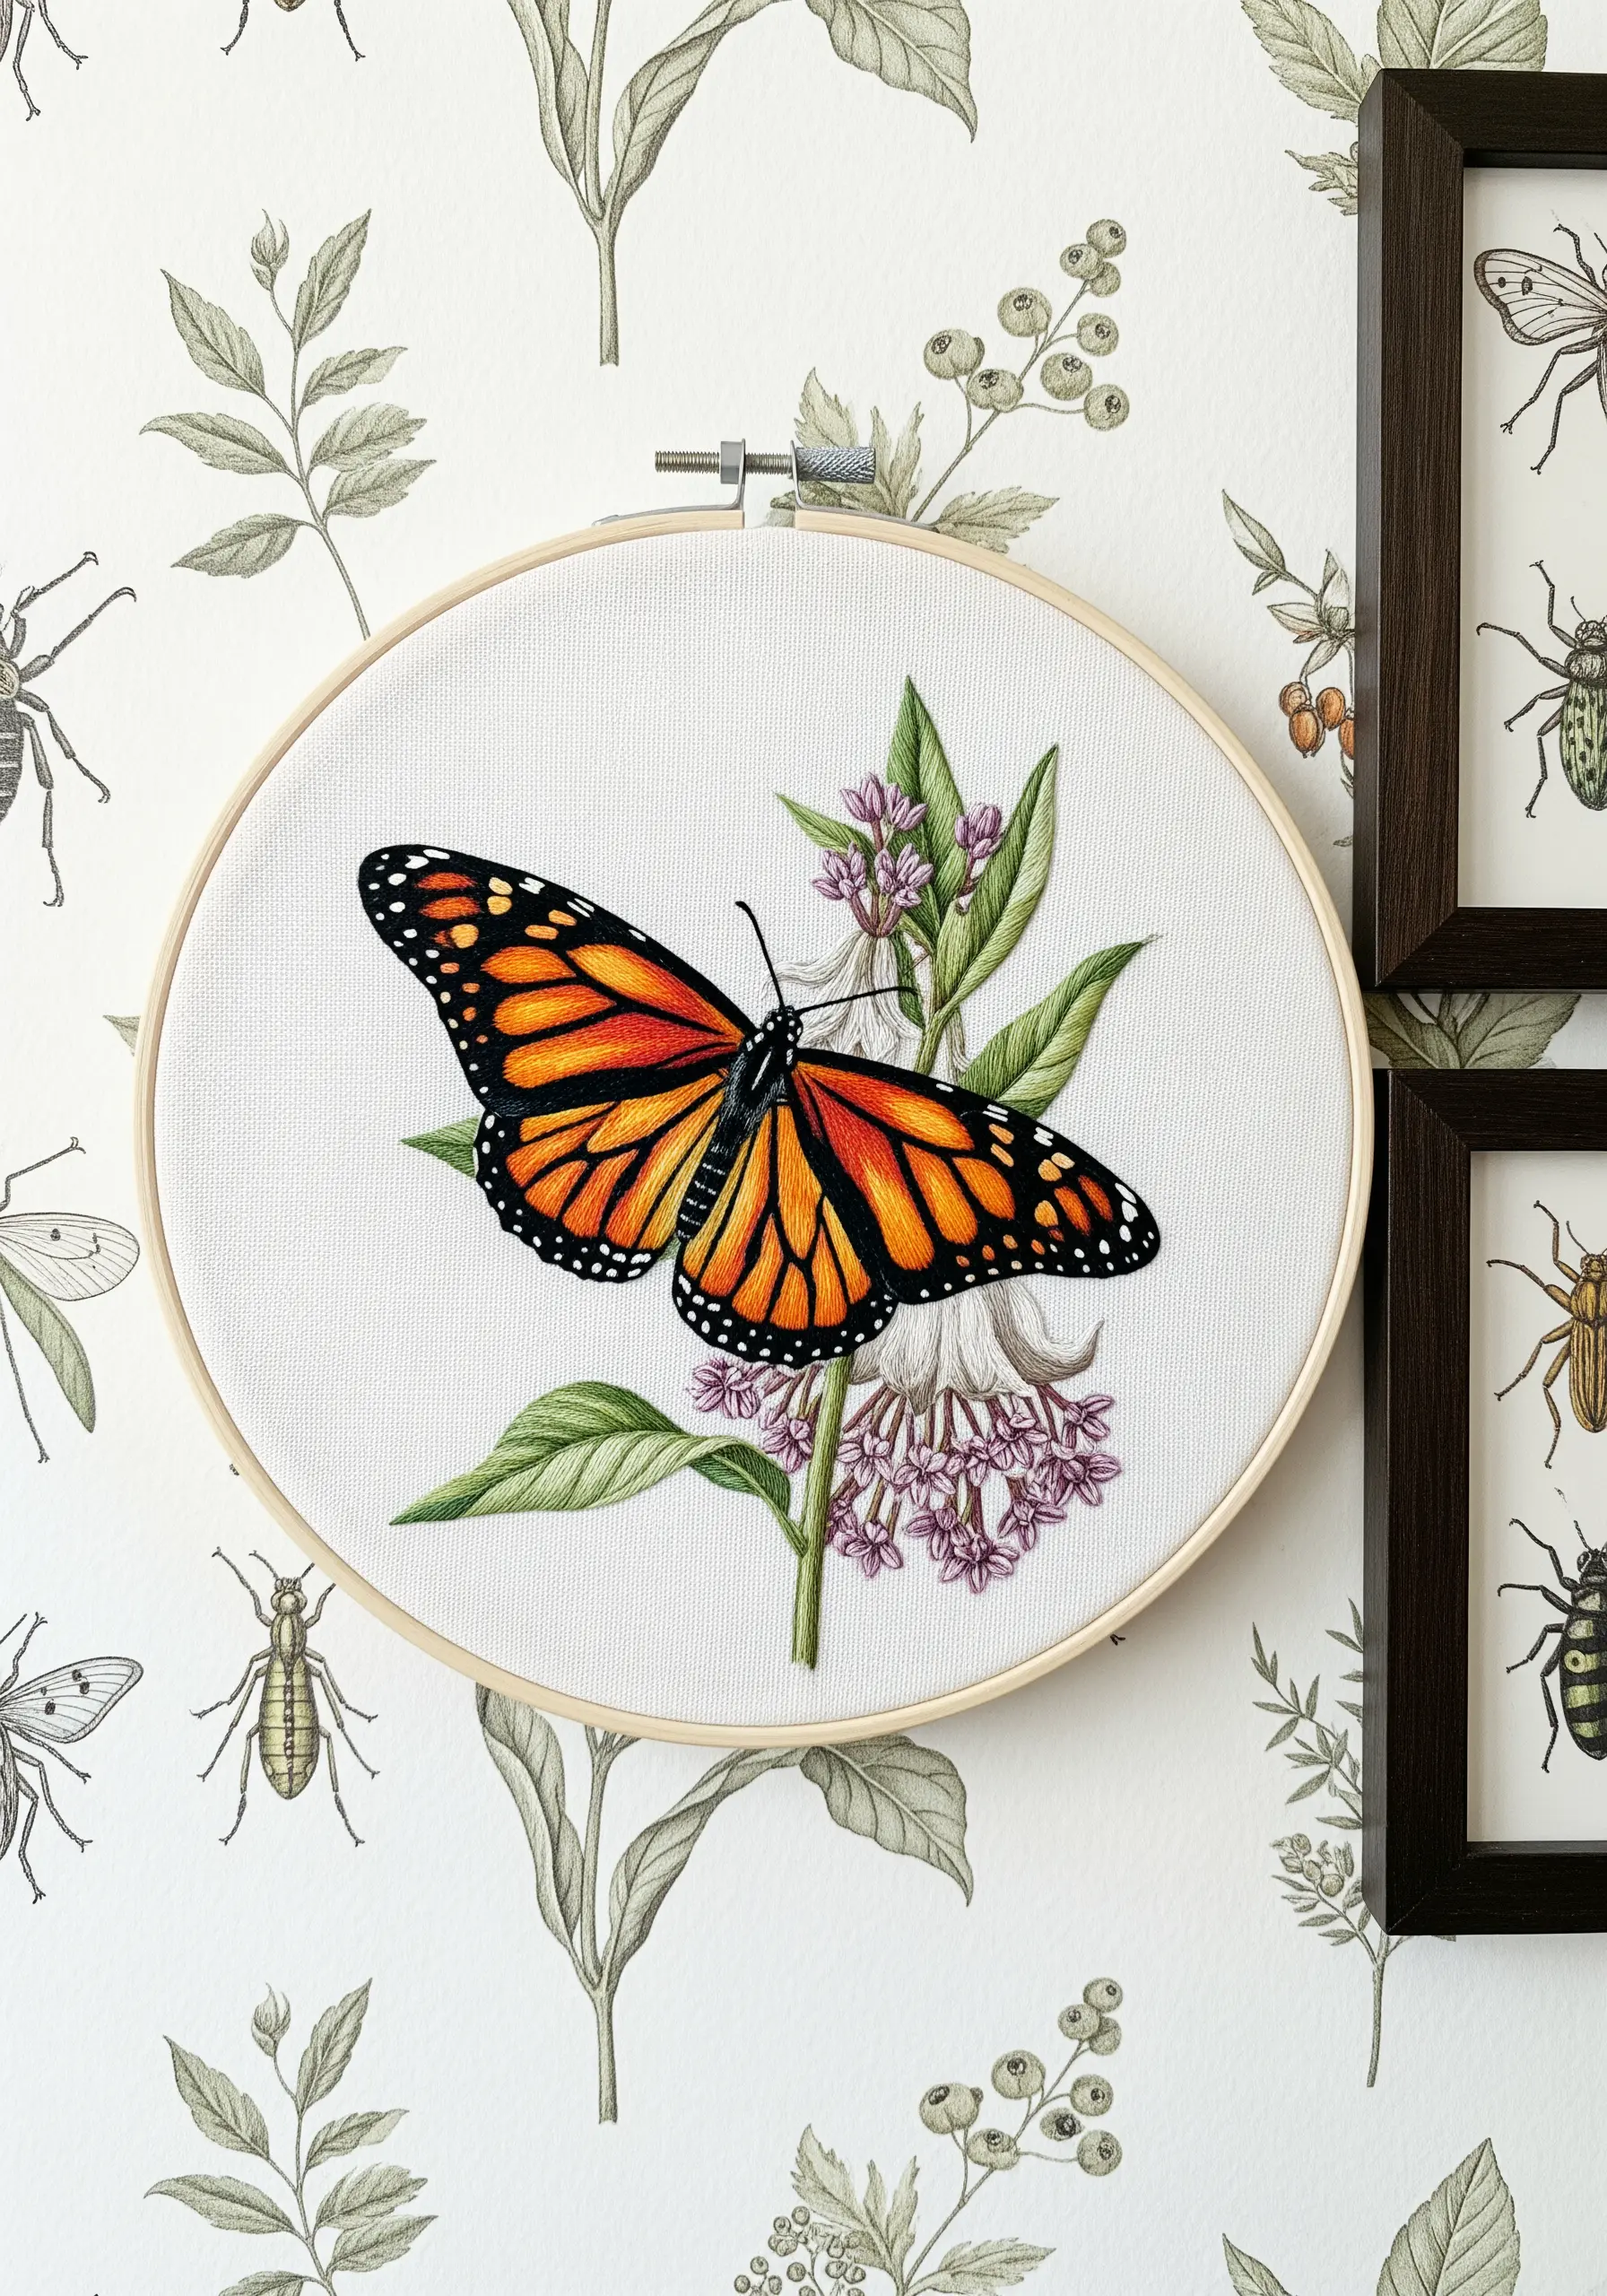
To create the stunning, gradual color shifts seen in a monarch butterfly’s wings, you need to blend your threads.
Instead of switching abruptly from orange to red, thread your needle with one strand of each color and stitch them together.
Use this blended thread in the transitional areas. This long-and-short stitch technique creates a soft, painterly gradient that looks incredibly realistic.
23. Add Elegance with an Embroidered Bell Pull
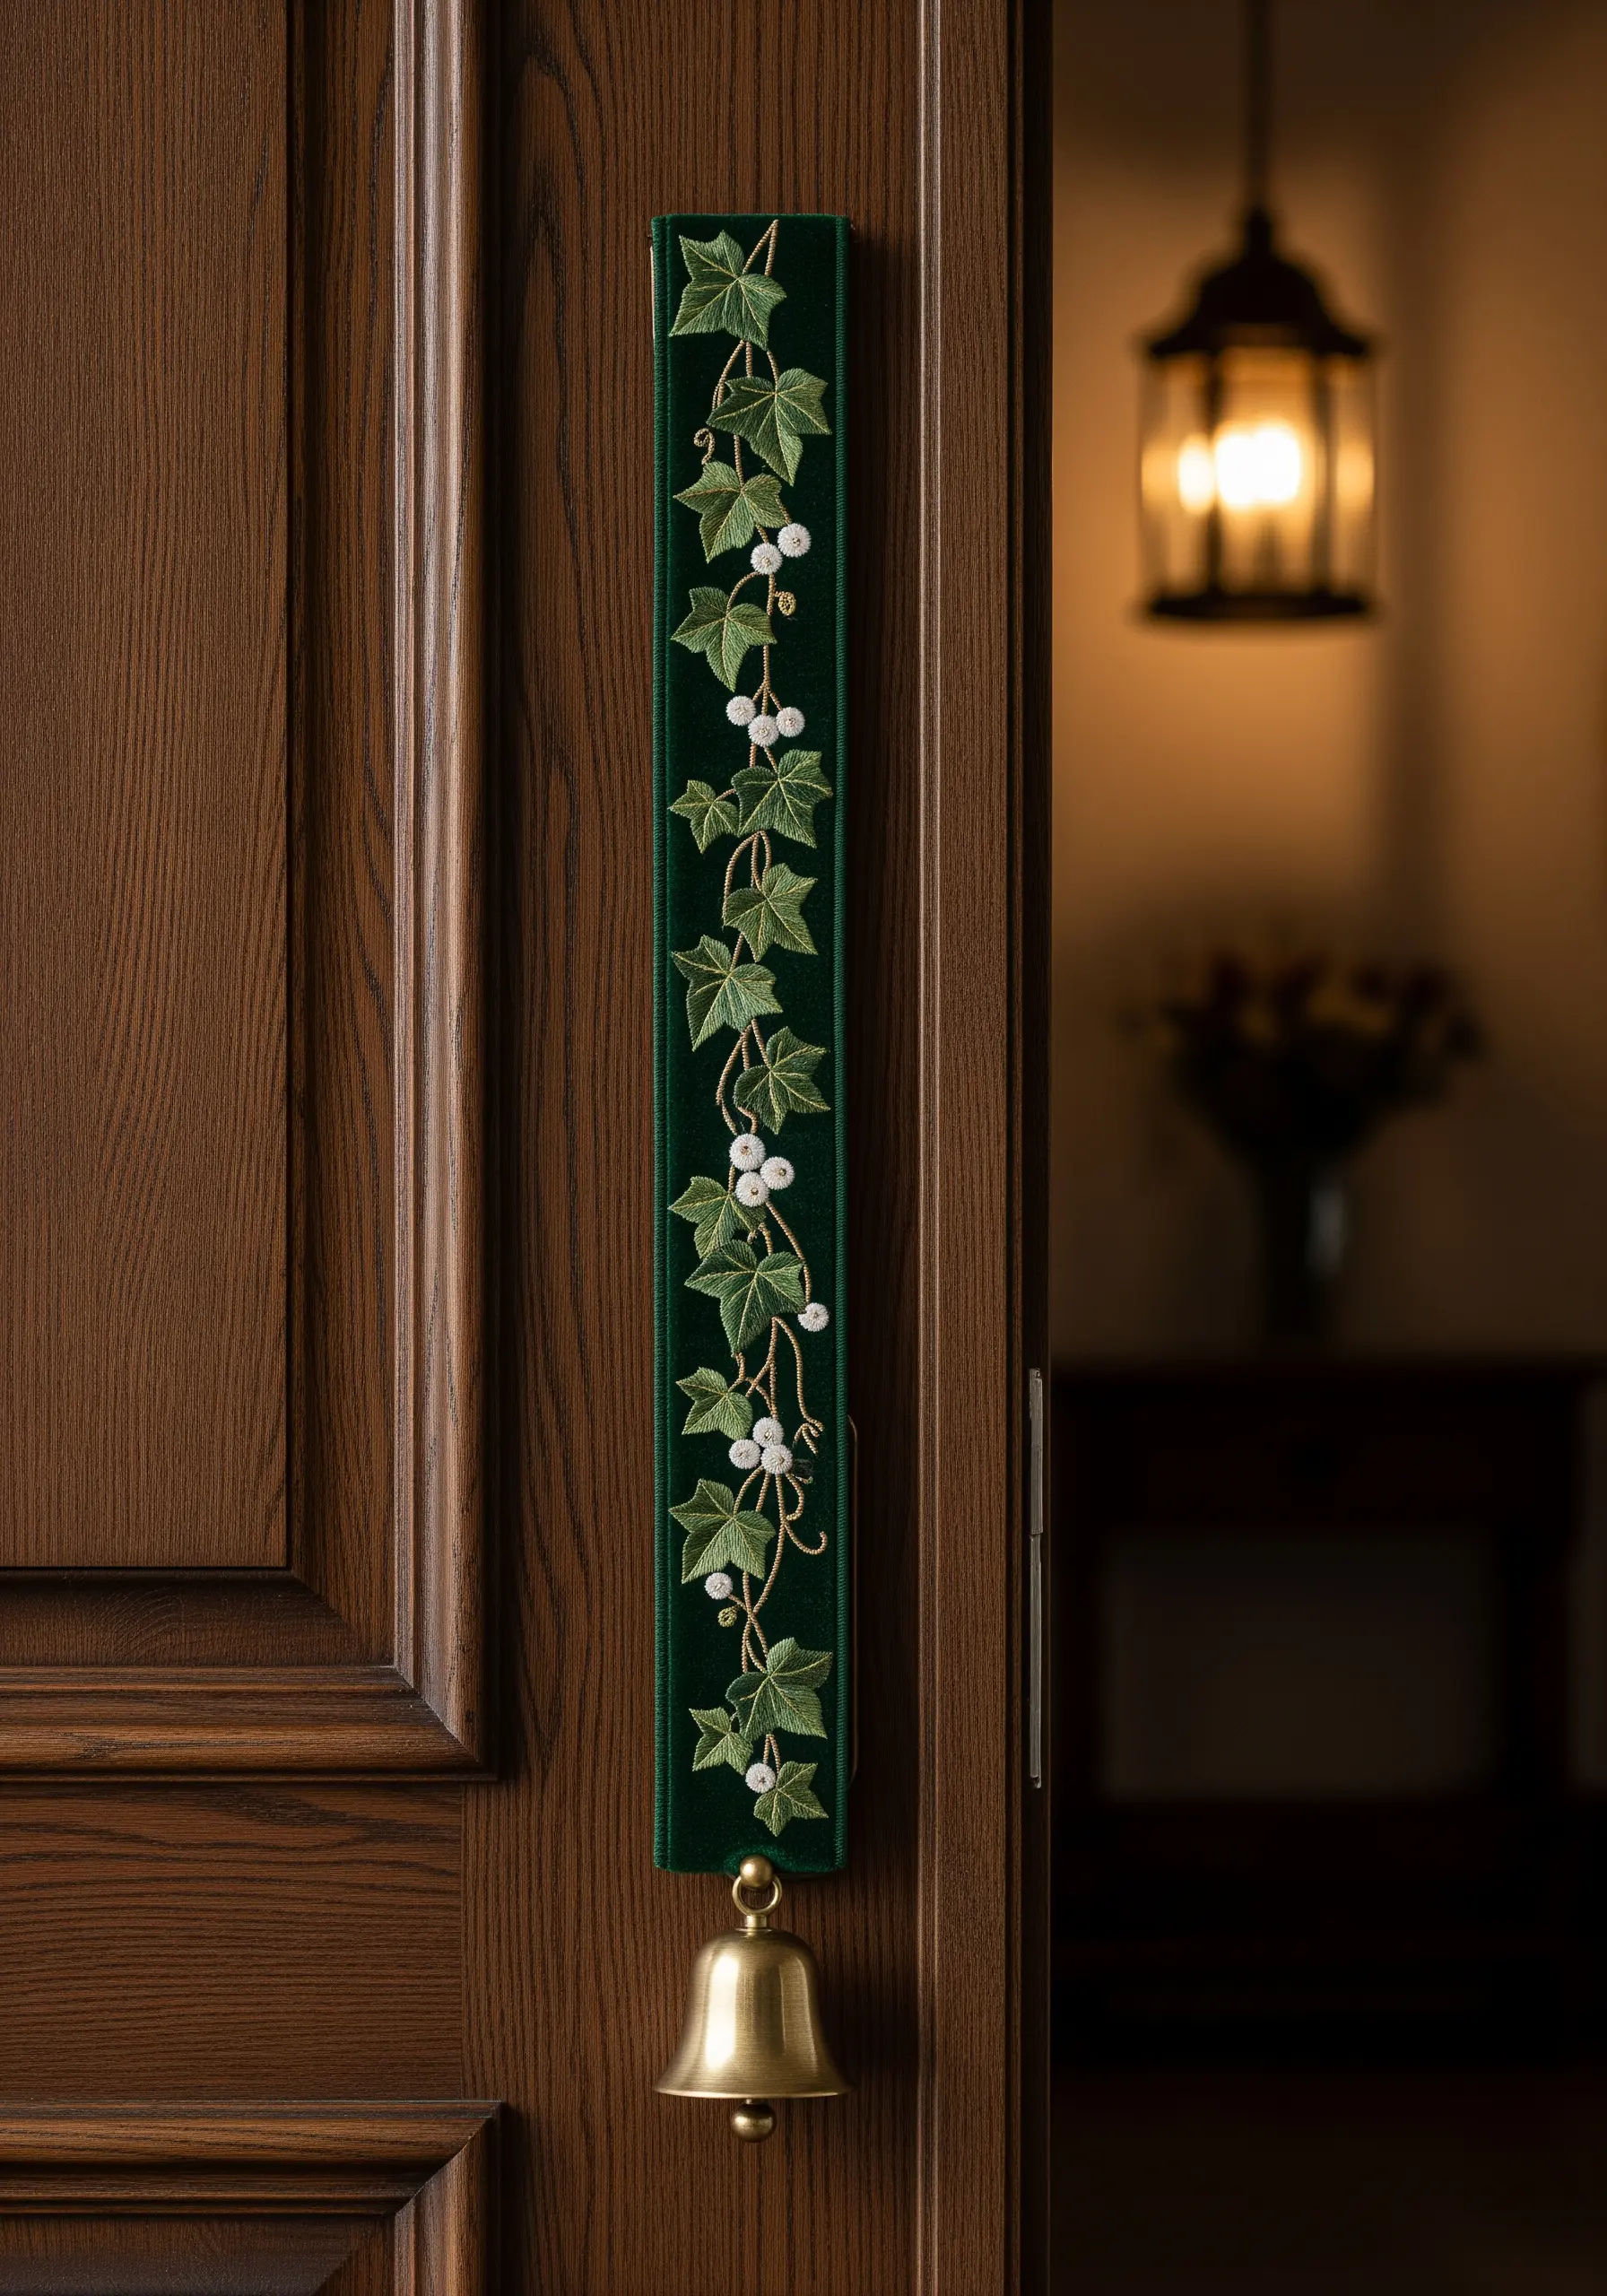
A bell pull is a classic piece of vintage decor that you can easily modernize with embroidery.
Choose a luxurious base fabric like velvet, which provides a rich background for your stitching. A simple, trailing vine motif works beautifully.
Use a stem stitch for the vines and French knots for berries. The raised texture of the knots against the velvet pile creates a sophisticated, tactile piece perfect for hanging on a door.
24. Contrast Smooth Stitches with Rustic Fabric
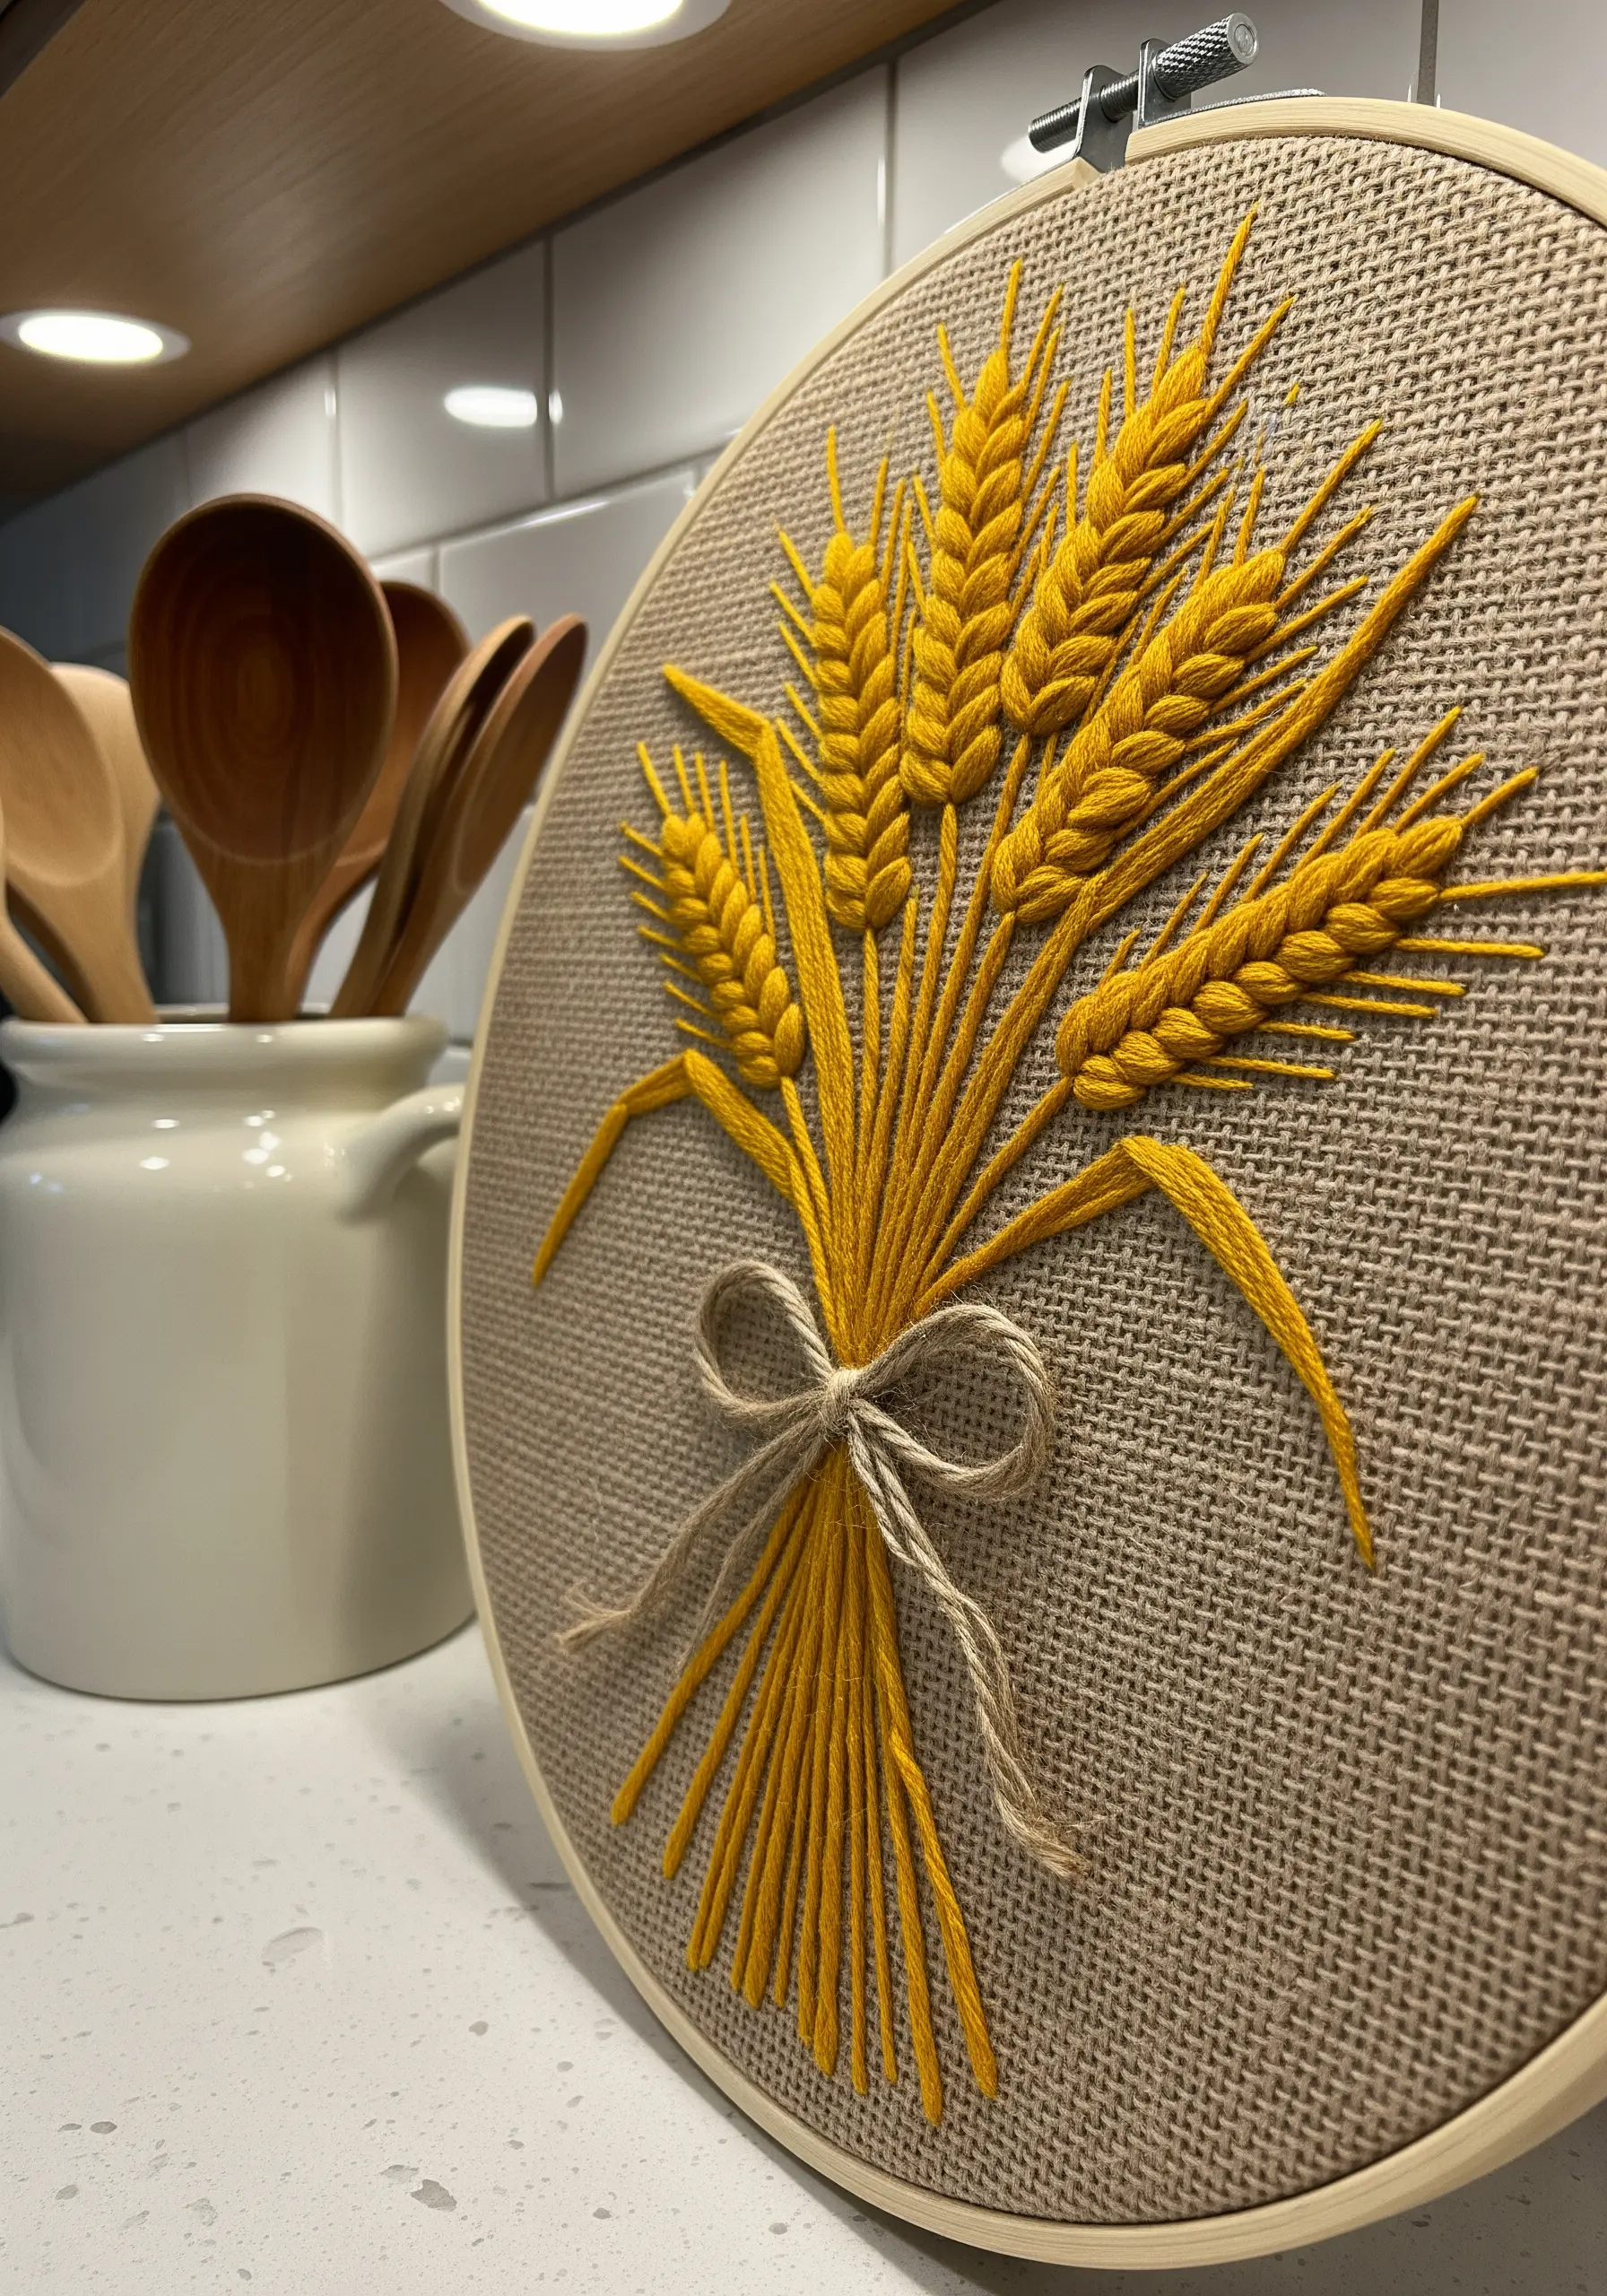
Create a powerful visual contrast by pairing smooth, glossy stitches with a rough, textured fabric.
Stitch a sheaf of wheat using a lustrous rayon or satin floss on a rustic linen or burlap background.
The long, uniform satin stitches will catch the light and appear exceptionally sleek against the matte, open weave of the fabric. This simple pairing makes the design pop.
25. Design a Naturalist’s Gallery Wall
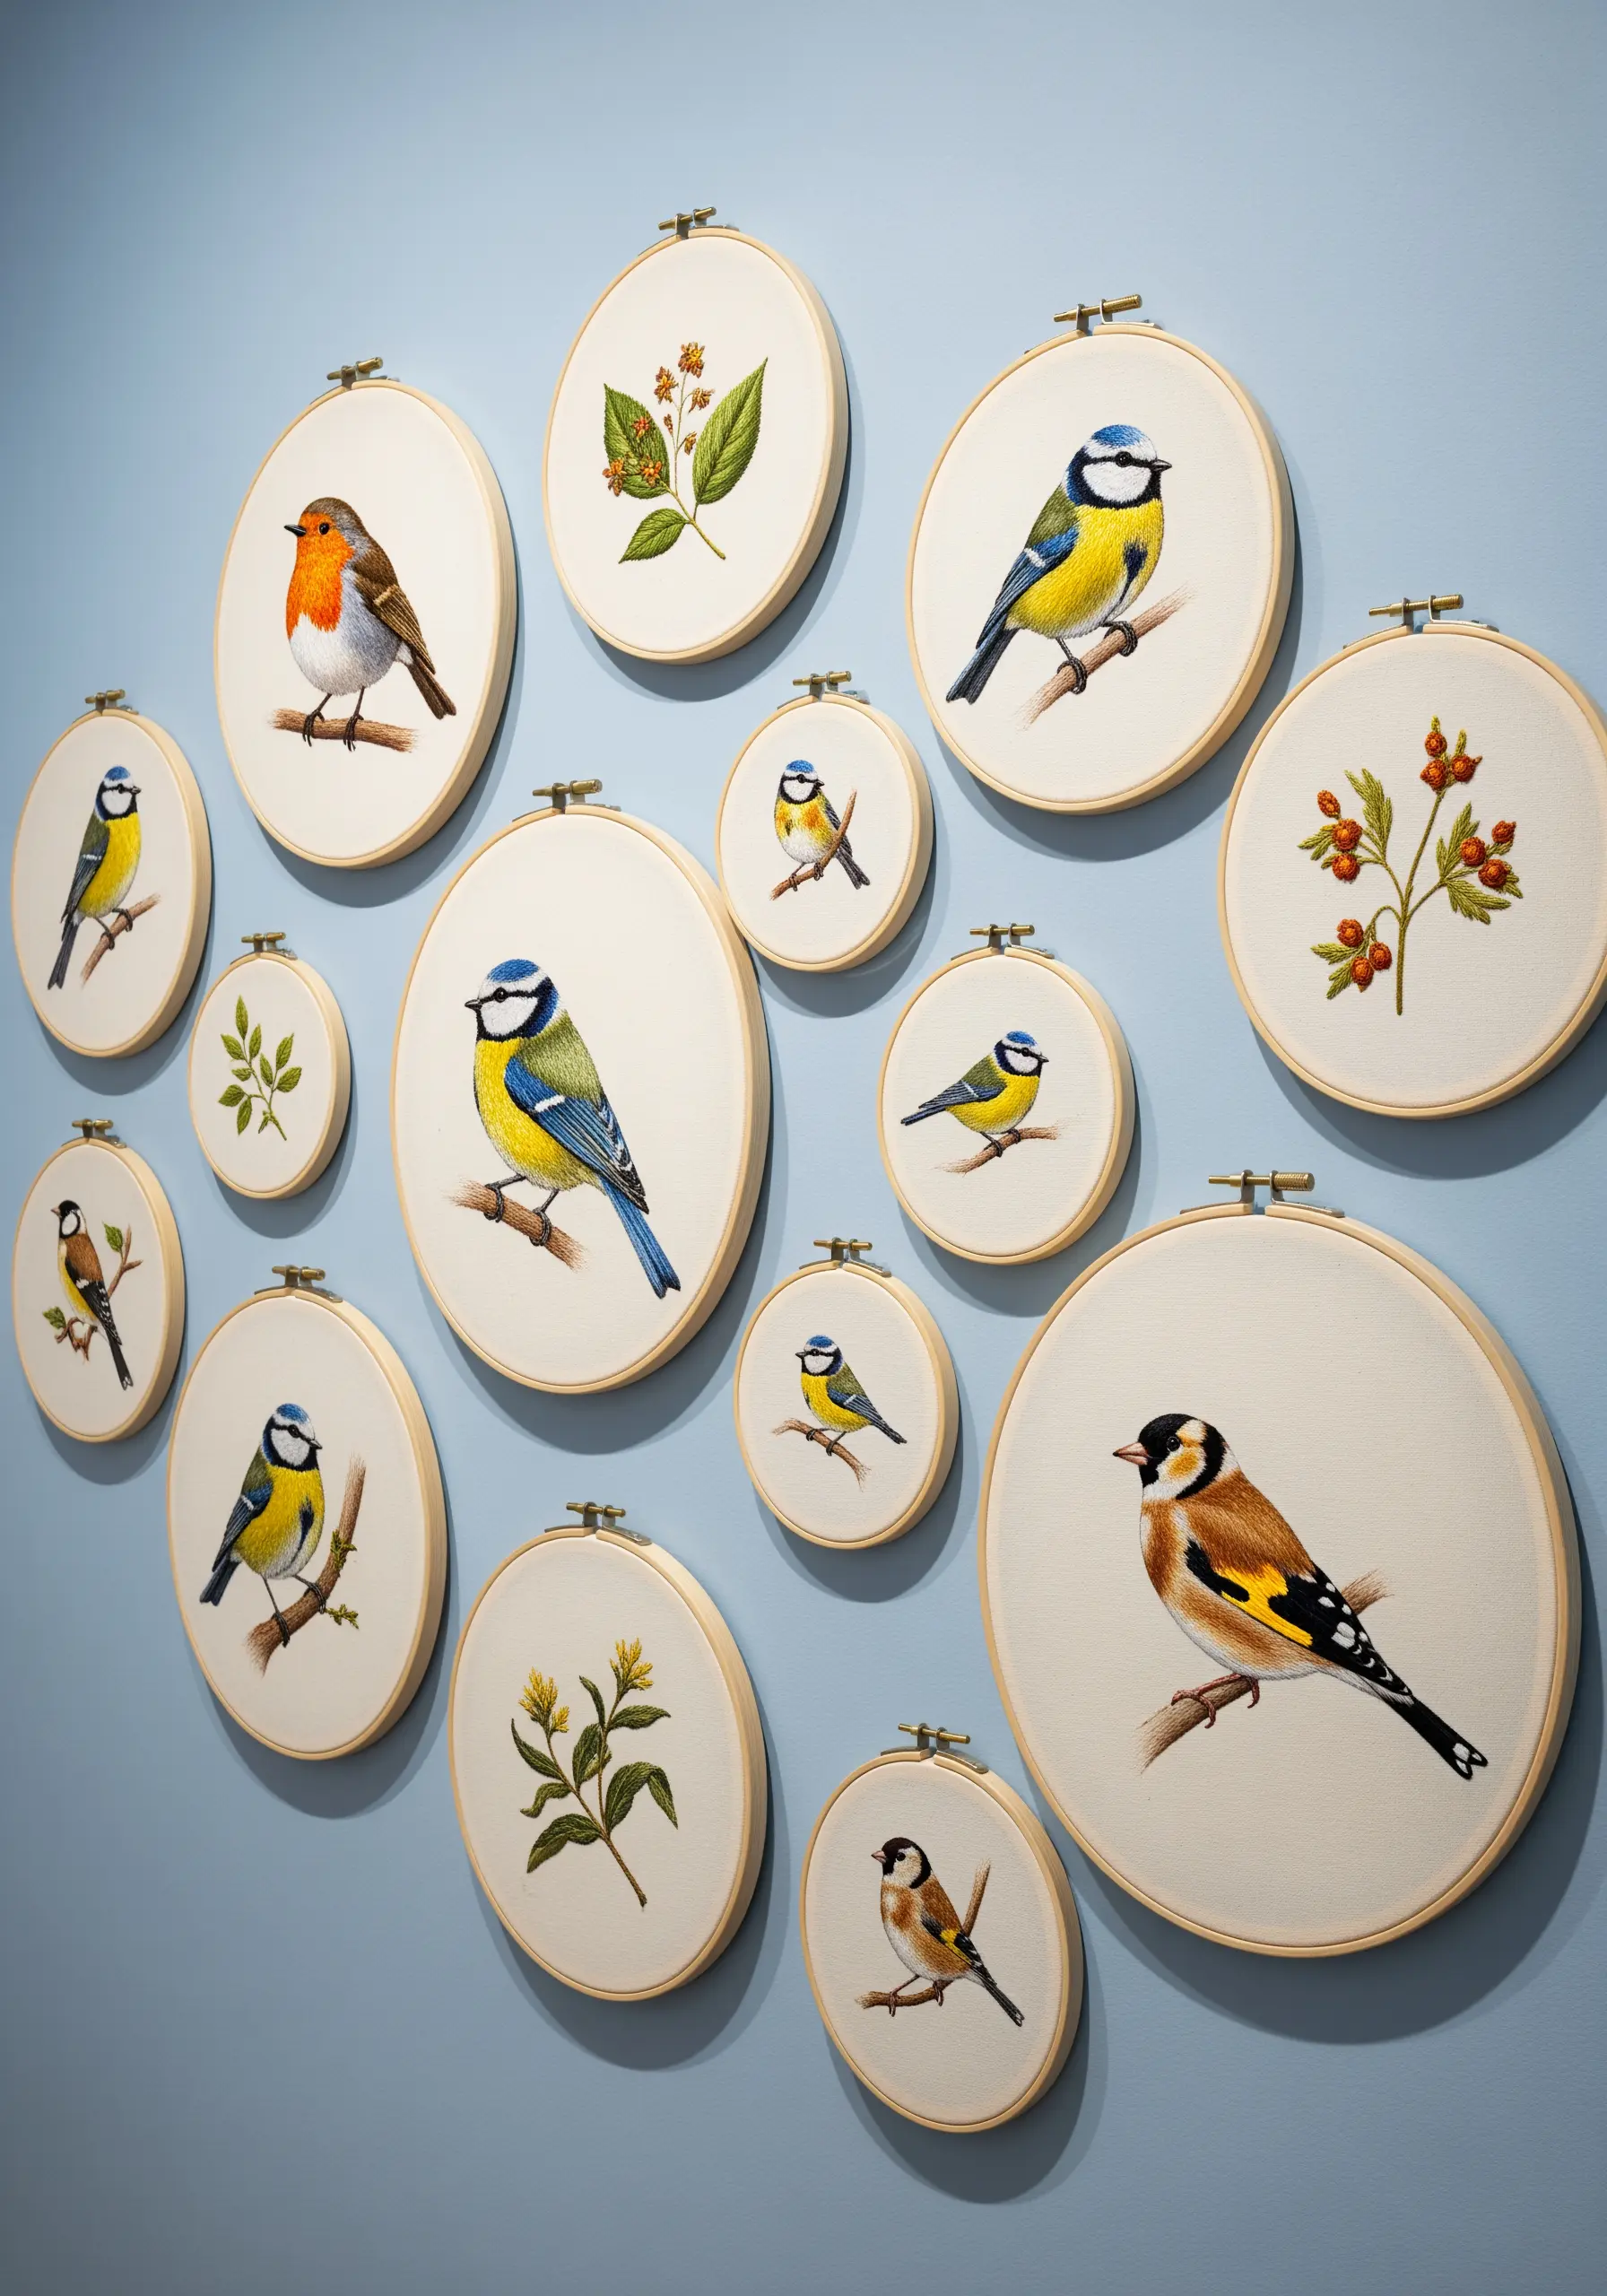
Transform a blank wall into a naturalist’s collection by grouping embroidered studies of flora and fauna.
Stitch individual birds and botanical specimens in various sizes of hoops, keeping the style and background fabric consistent.
Arranging them in a dynamic, salon-style cluster creates the feel of a vintage scientific illustration collection and allows you to build your display over time.
26. Tell a Story with a Triptych Design
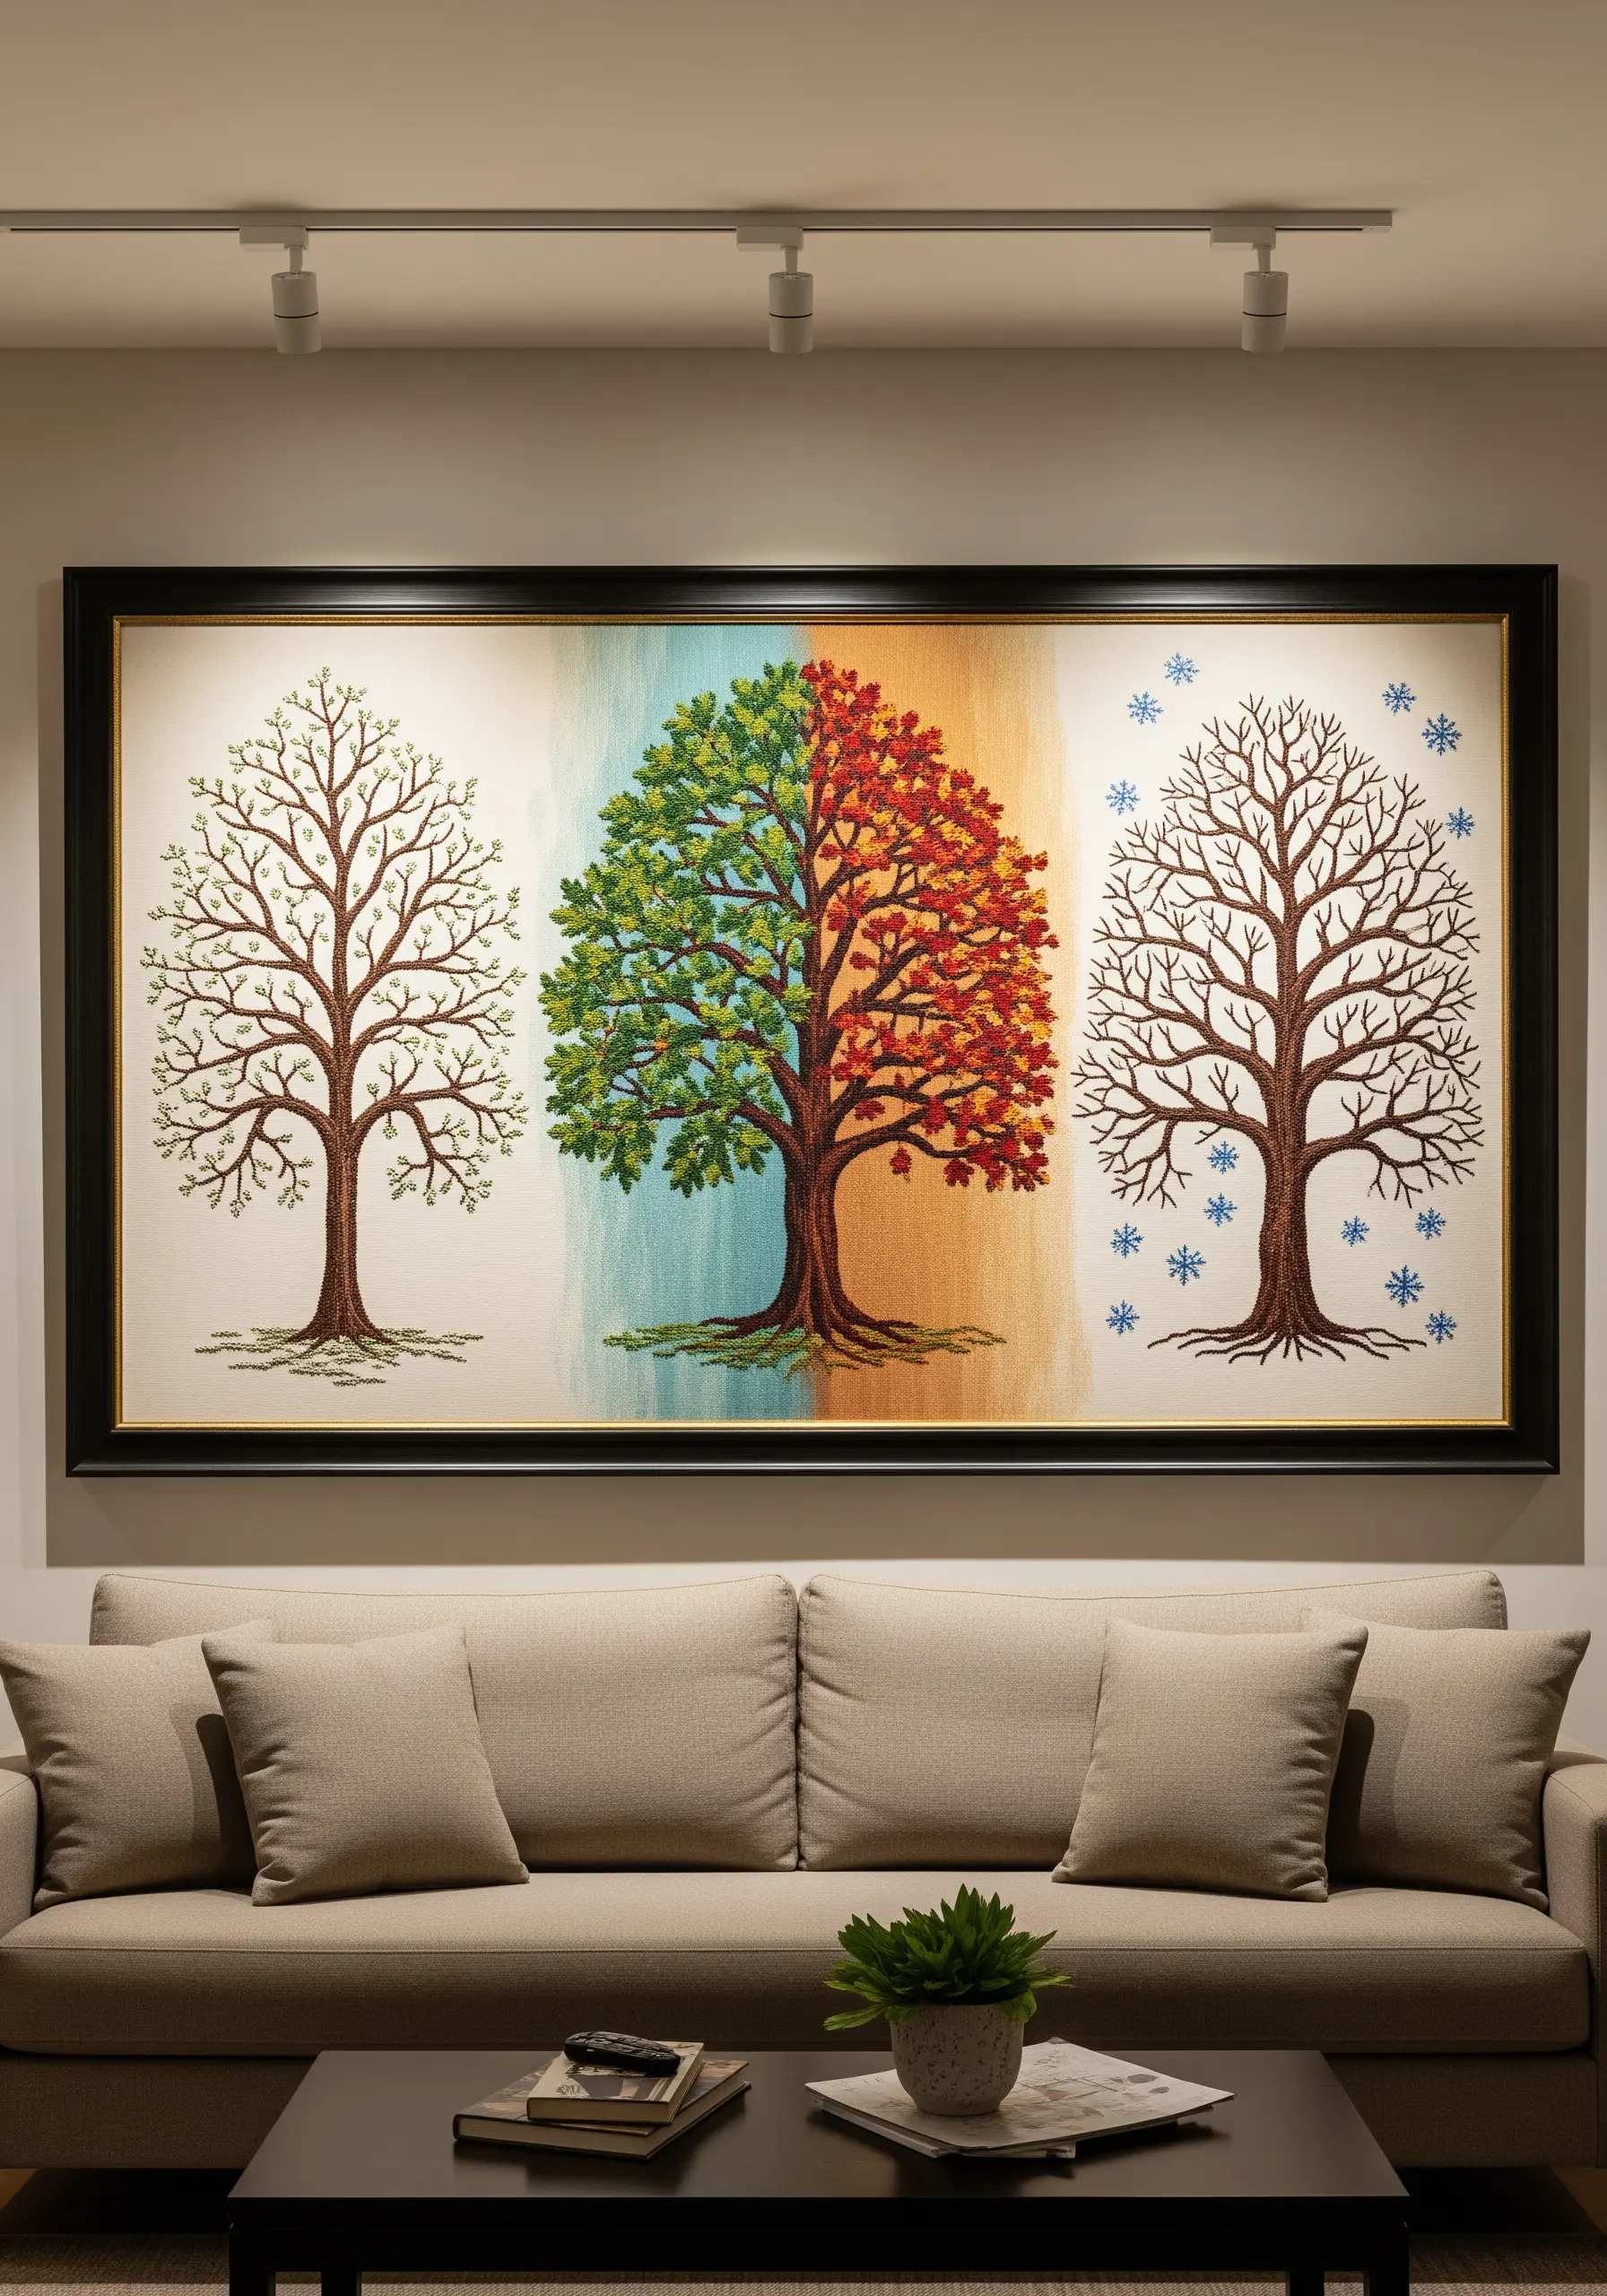
A triptych, or a design in three panels, is a powerful way to show progression or contrast.
Embroider a central motif, like a tree, across three distinct sections, showing its transformation through the seasons.
Use a painted fabric background to define each panel’s color story—from the cool blues of winter to the warm oranges of autumn. This narrative approach makes your art more engaging.
27. Achieve a Screen-Printed Look with Bold Outlines
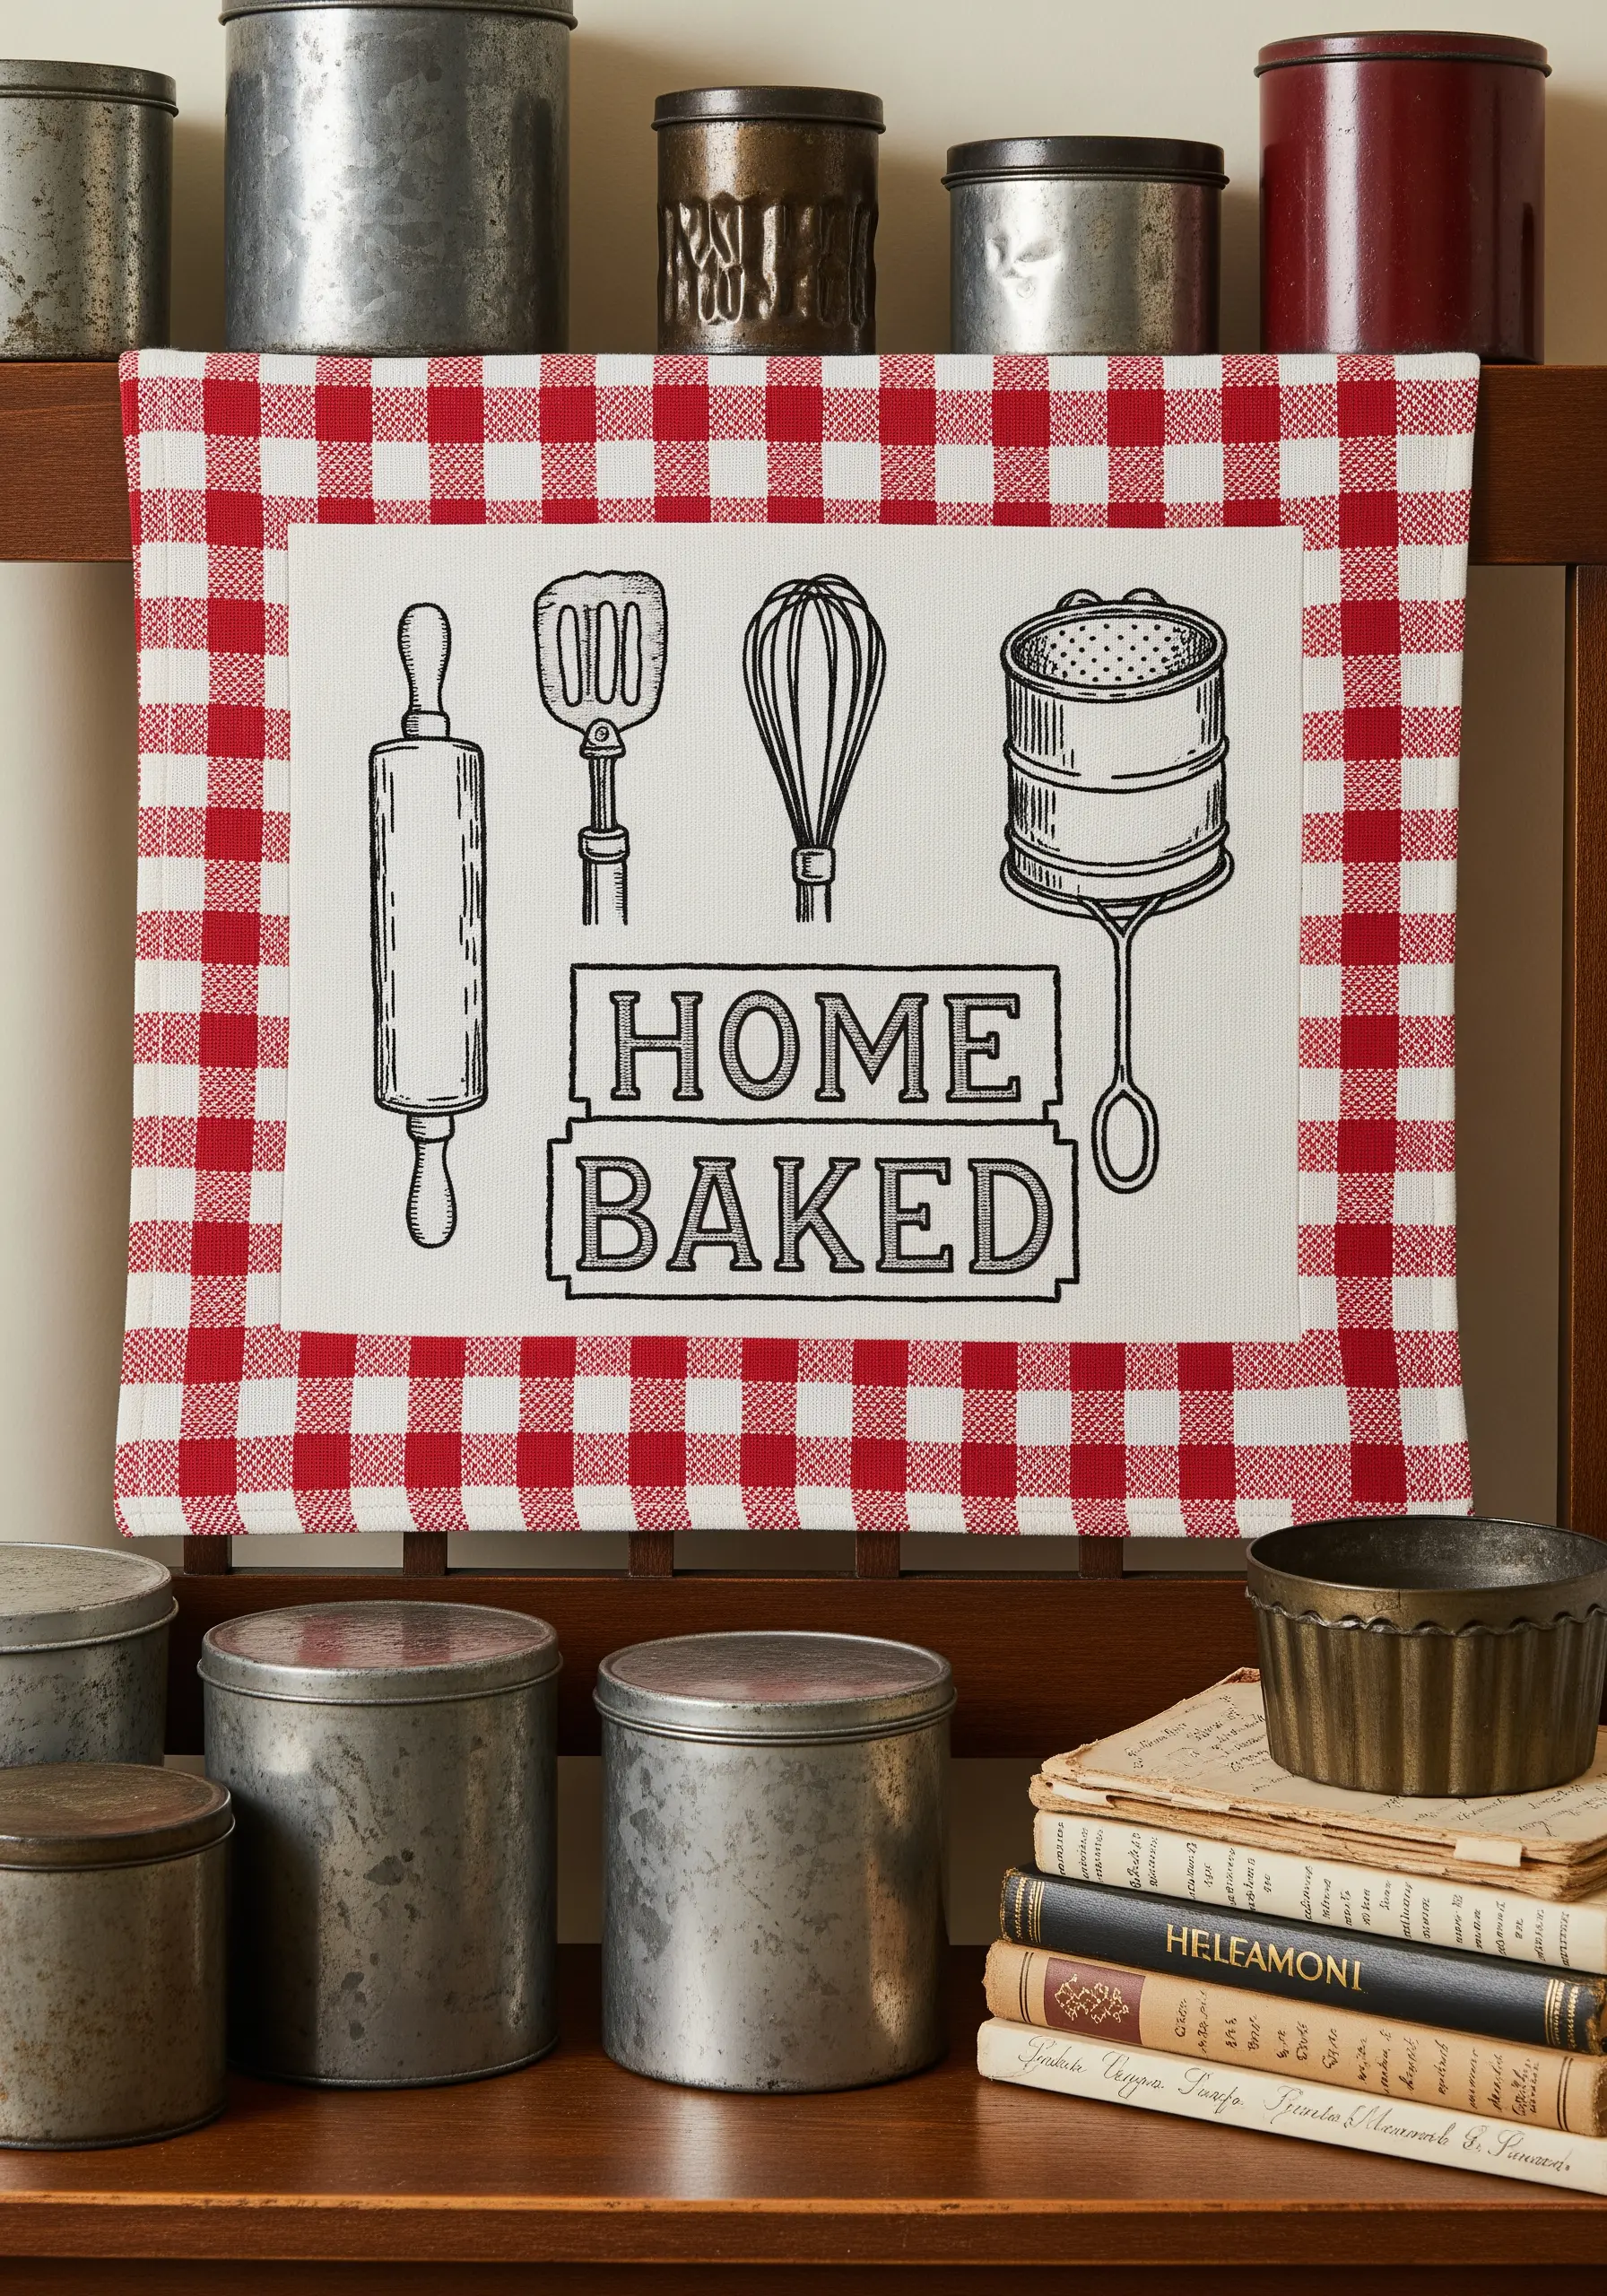
Mimic the graphic, retro style of screen-printing by using a heavy, dark outline for your design.
Use at least four to six strands of black embroidery floss and a thick stitch like a chain stitch or a heavy backstitch.
Keep the interior of the design simple or leave it as negative space. This technique gives your kitchen towels or wall hangings a bold, vintage farmhouse aesthetic.
28. Define Form with Negative Space
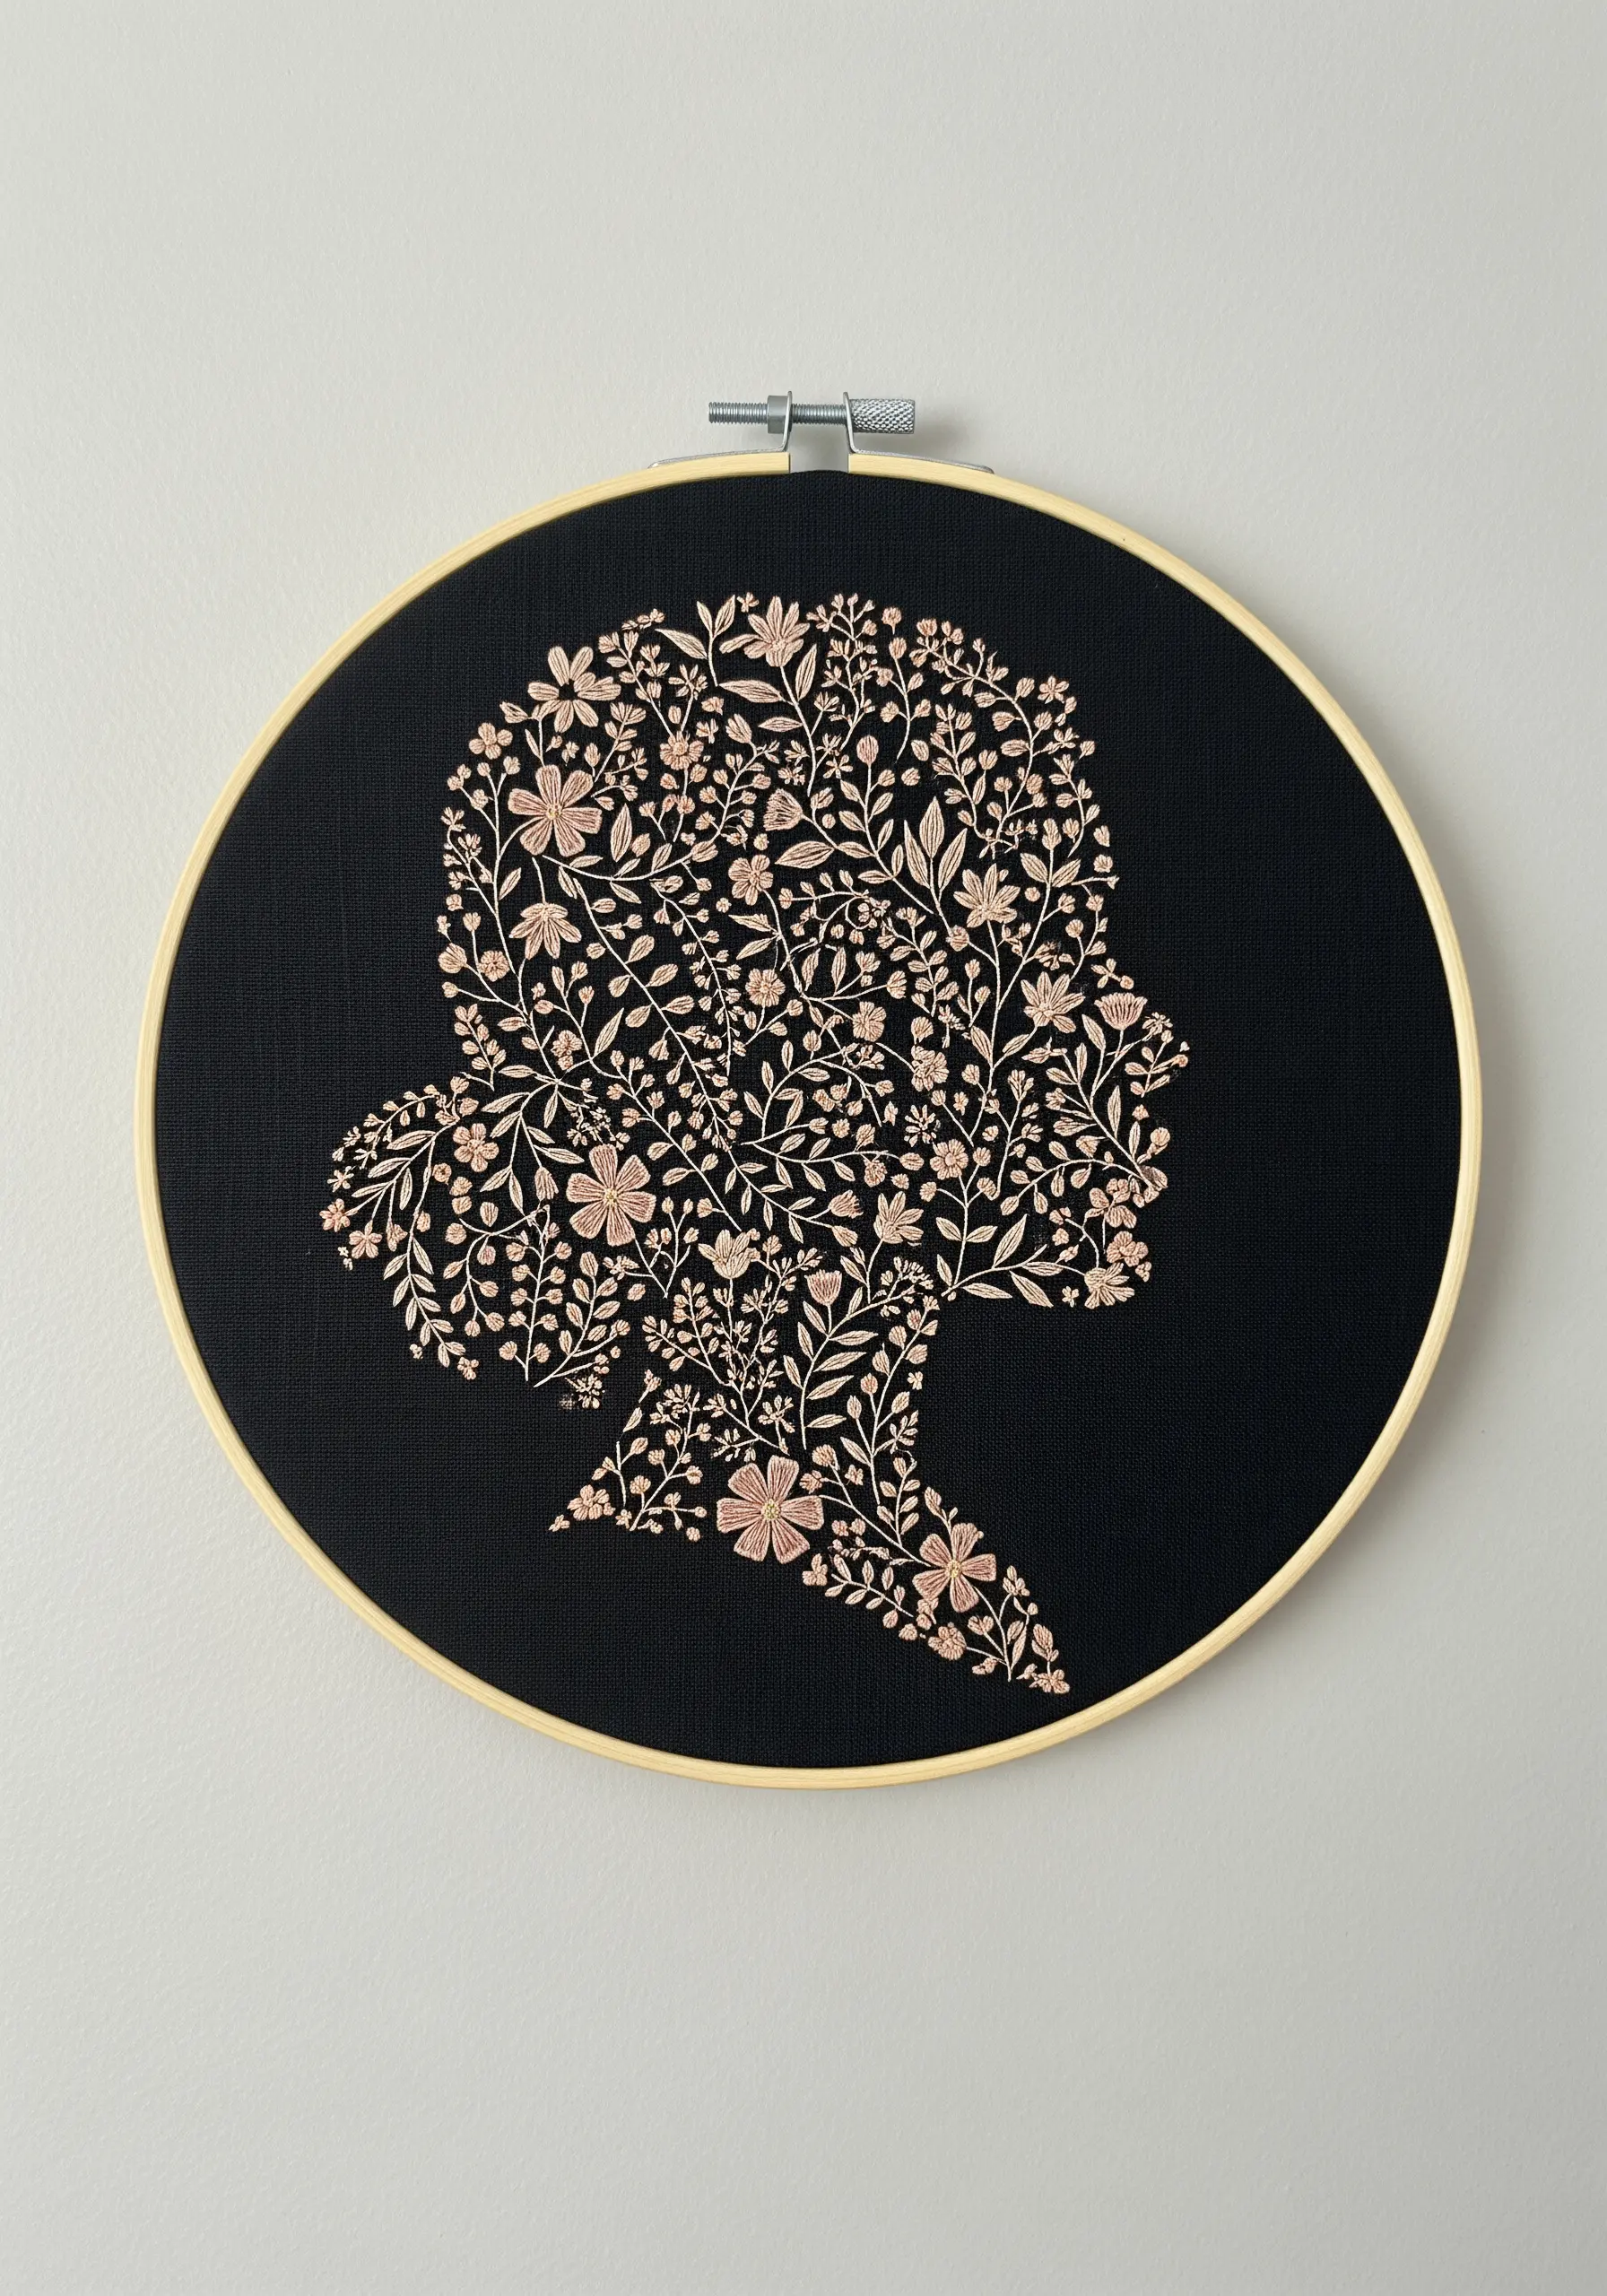
Create a sophisticated and striking piece by letting the fabric do the work.
Instead of filling a shape, trace the outline of a classic silhouette—like a cameo portrait—on dark fabric.
Then, fill the *entire area around* the silhouette with tiny, dense floral motifs using a single, light-colored thread.
The unstitched fabric becomes the focal point, creating a visually stunning effect where the background defines the subject.
29. Weave a Story with Folk Art Tapestry
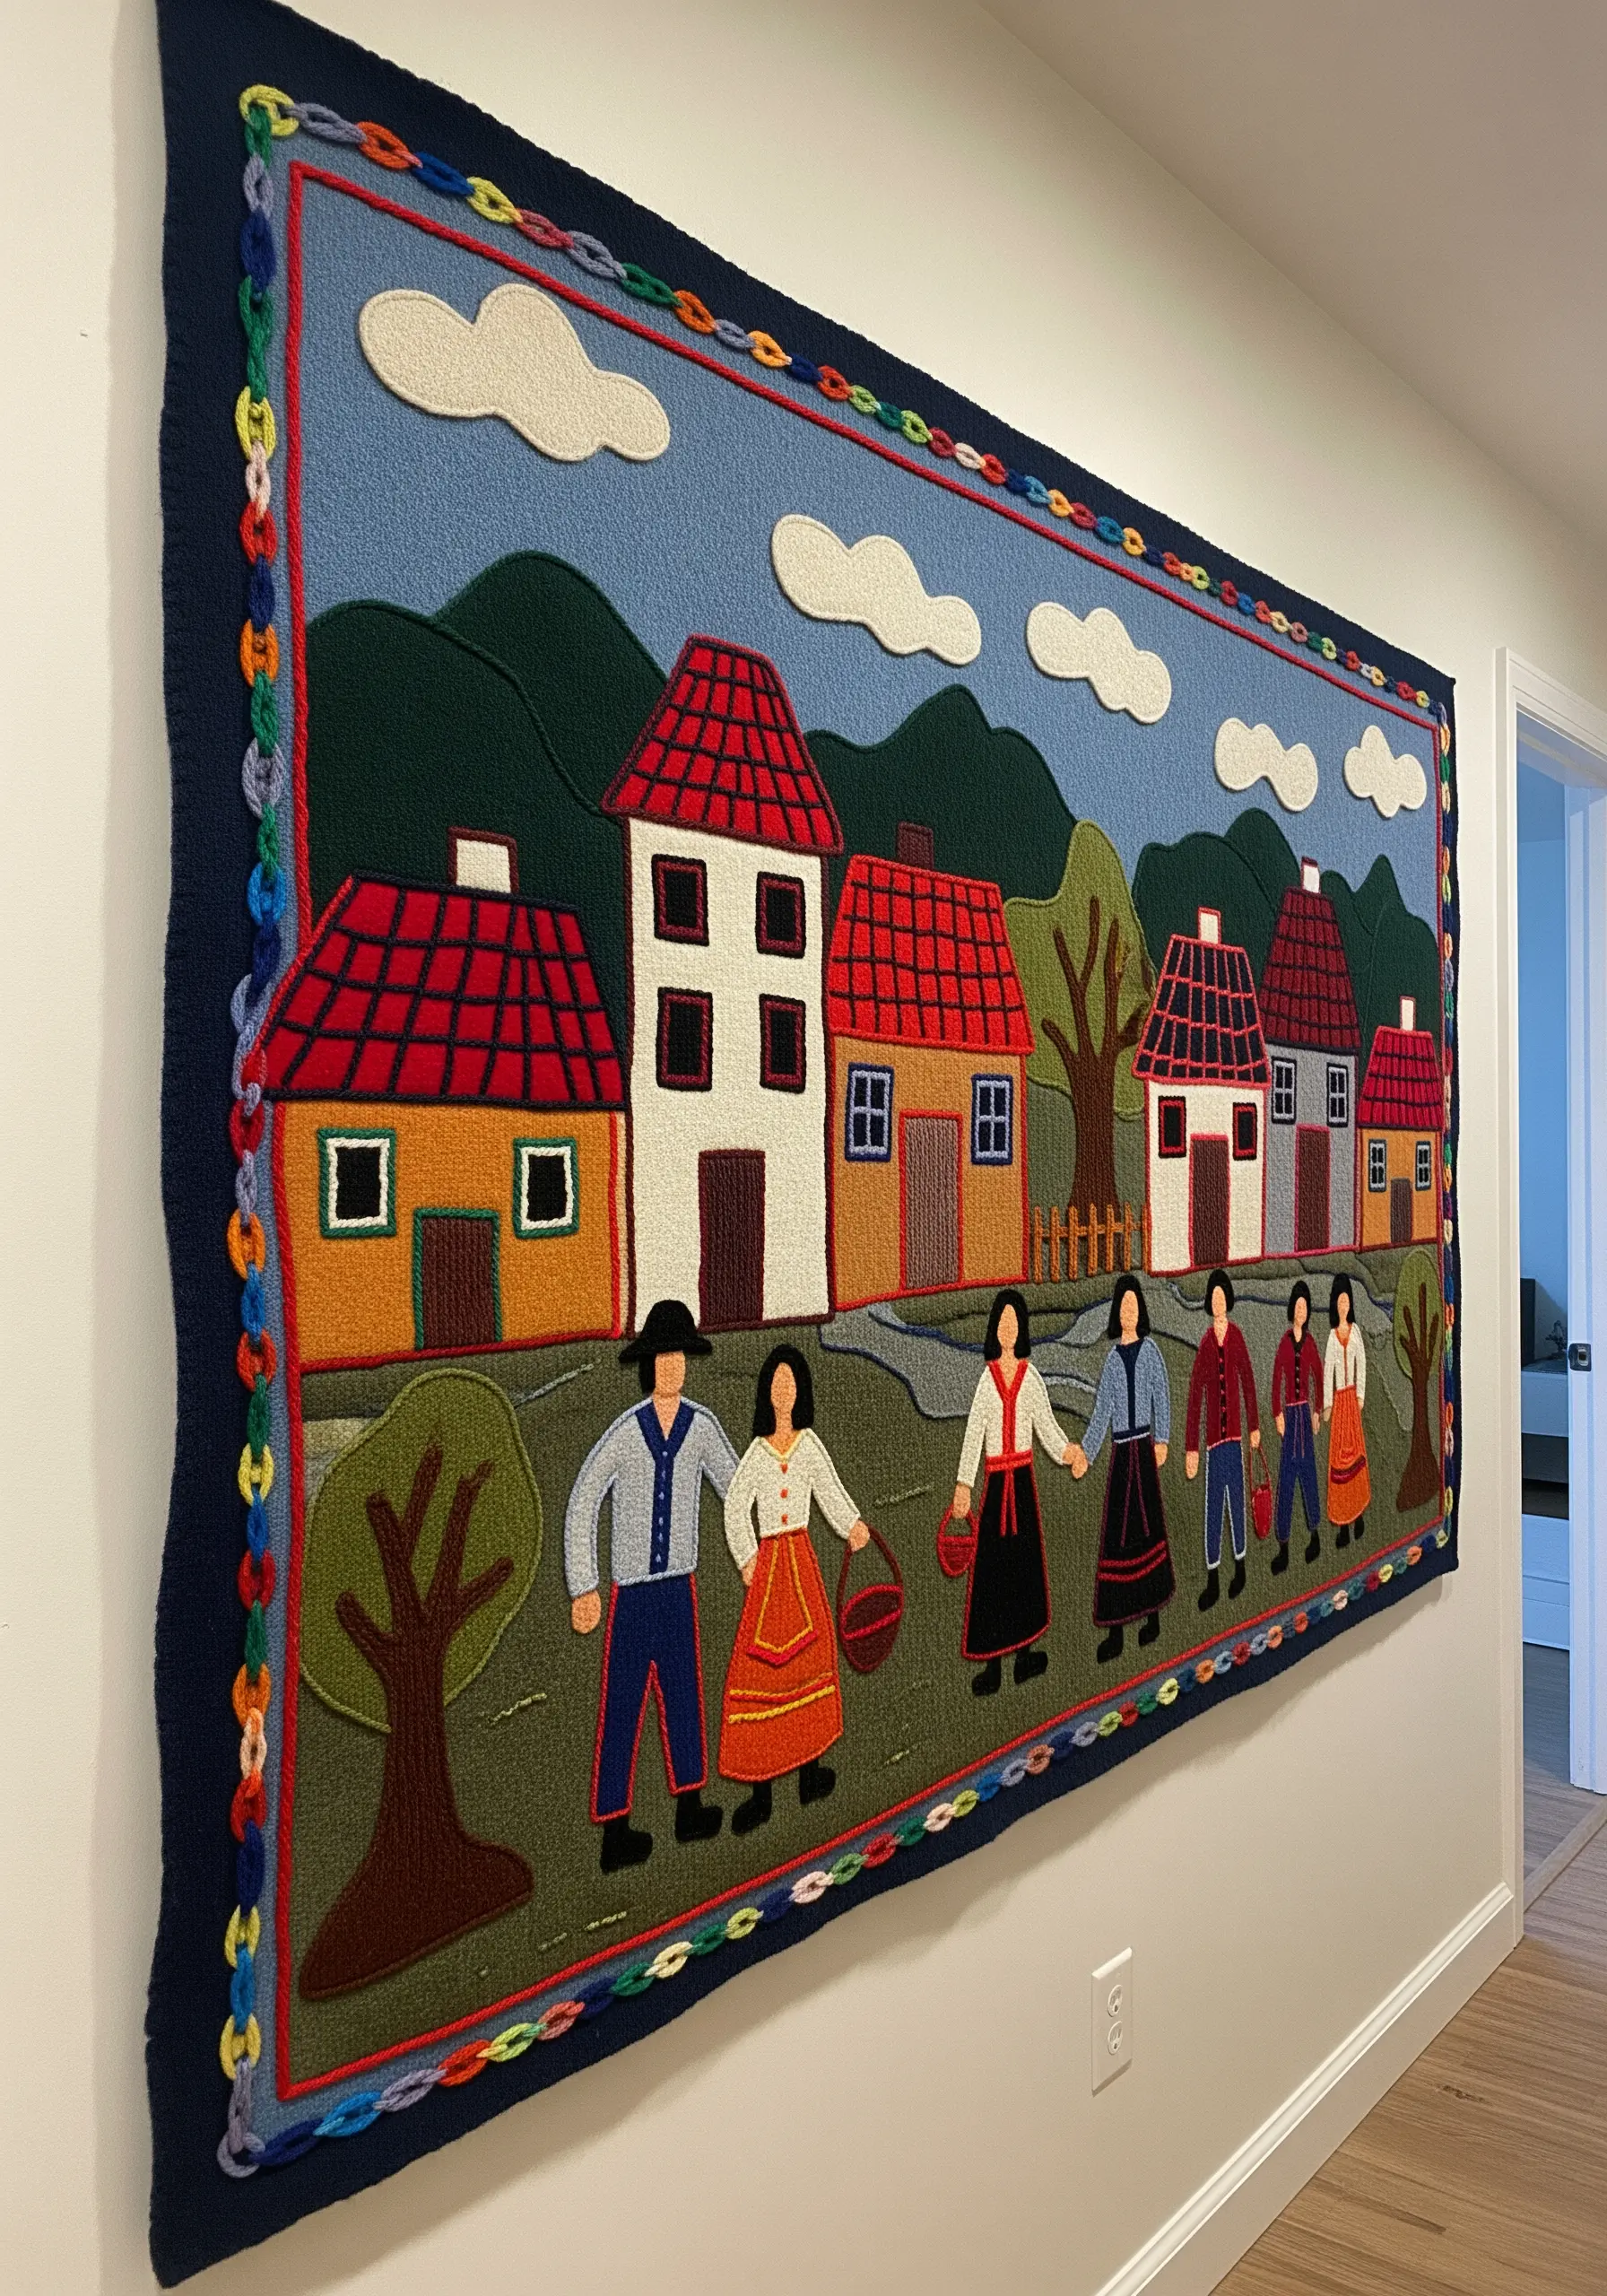
Capture the charm of traditional folk art by using thick yarn instead of floss for a large-scale wall hanging.
Use a punch needle or a large tapestry needle to fill in blocks of color, creating a piece that feels like a blend of embroidery and rug-making.
Simple shapes, bold outlines, and a vibrant color palette are the hallmarks of this style, perfect for adding warmth and handmade character to a room.
30. Elevate Practice into Art with a Stitch Sampler
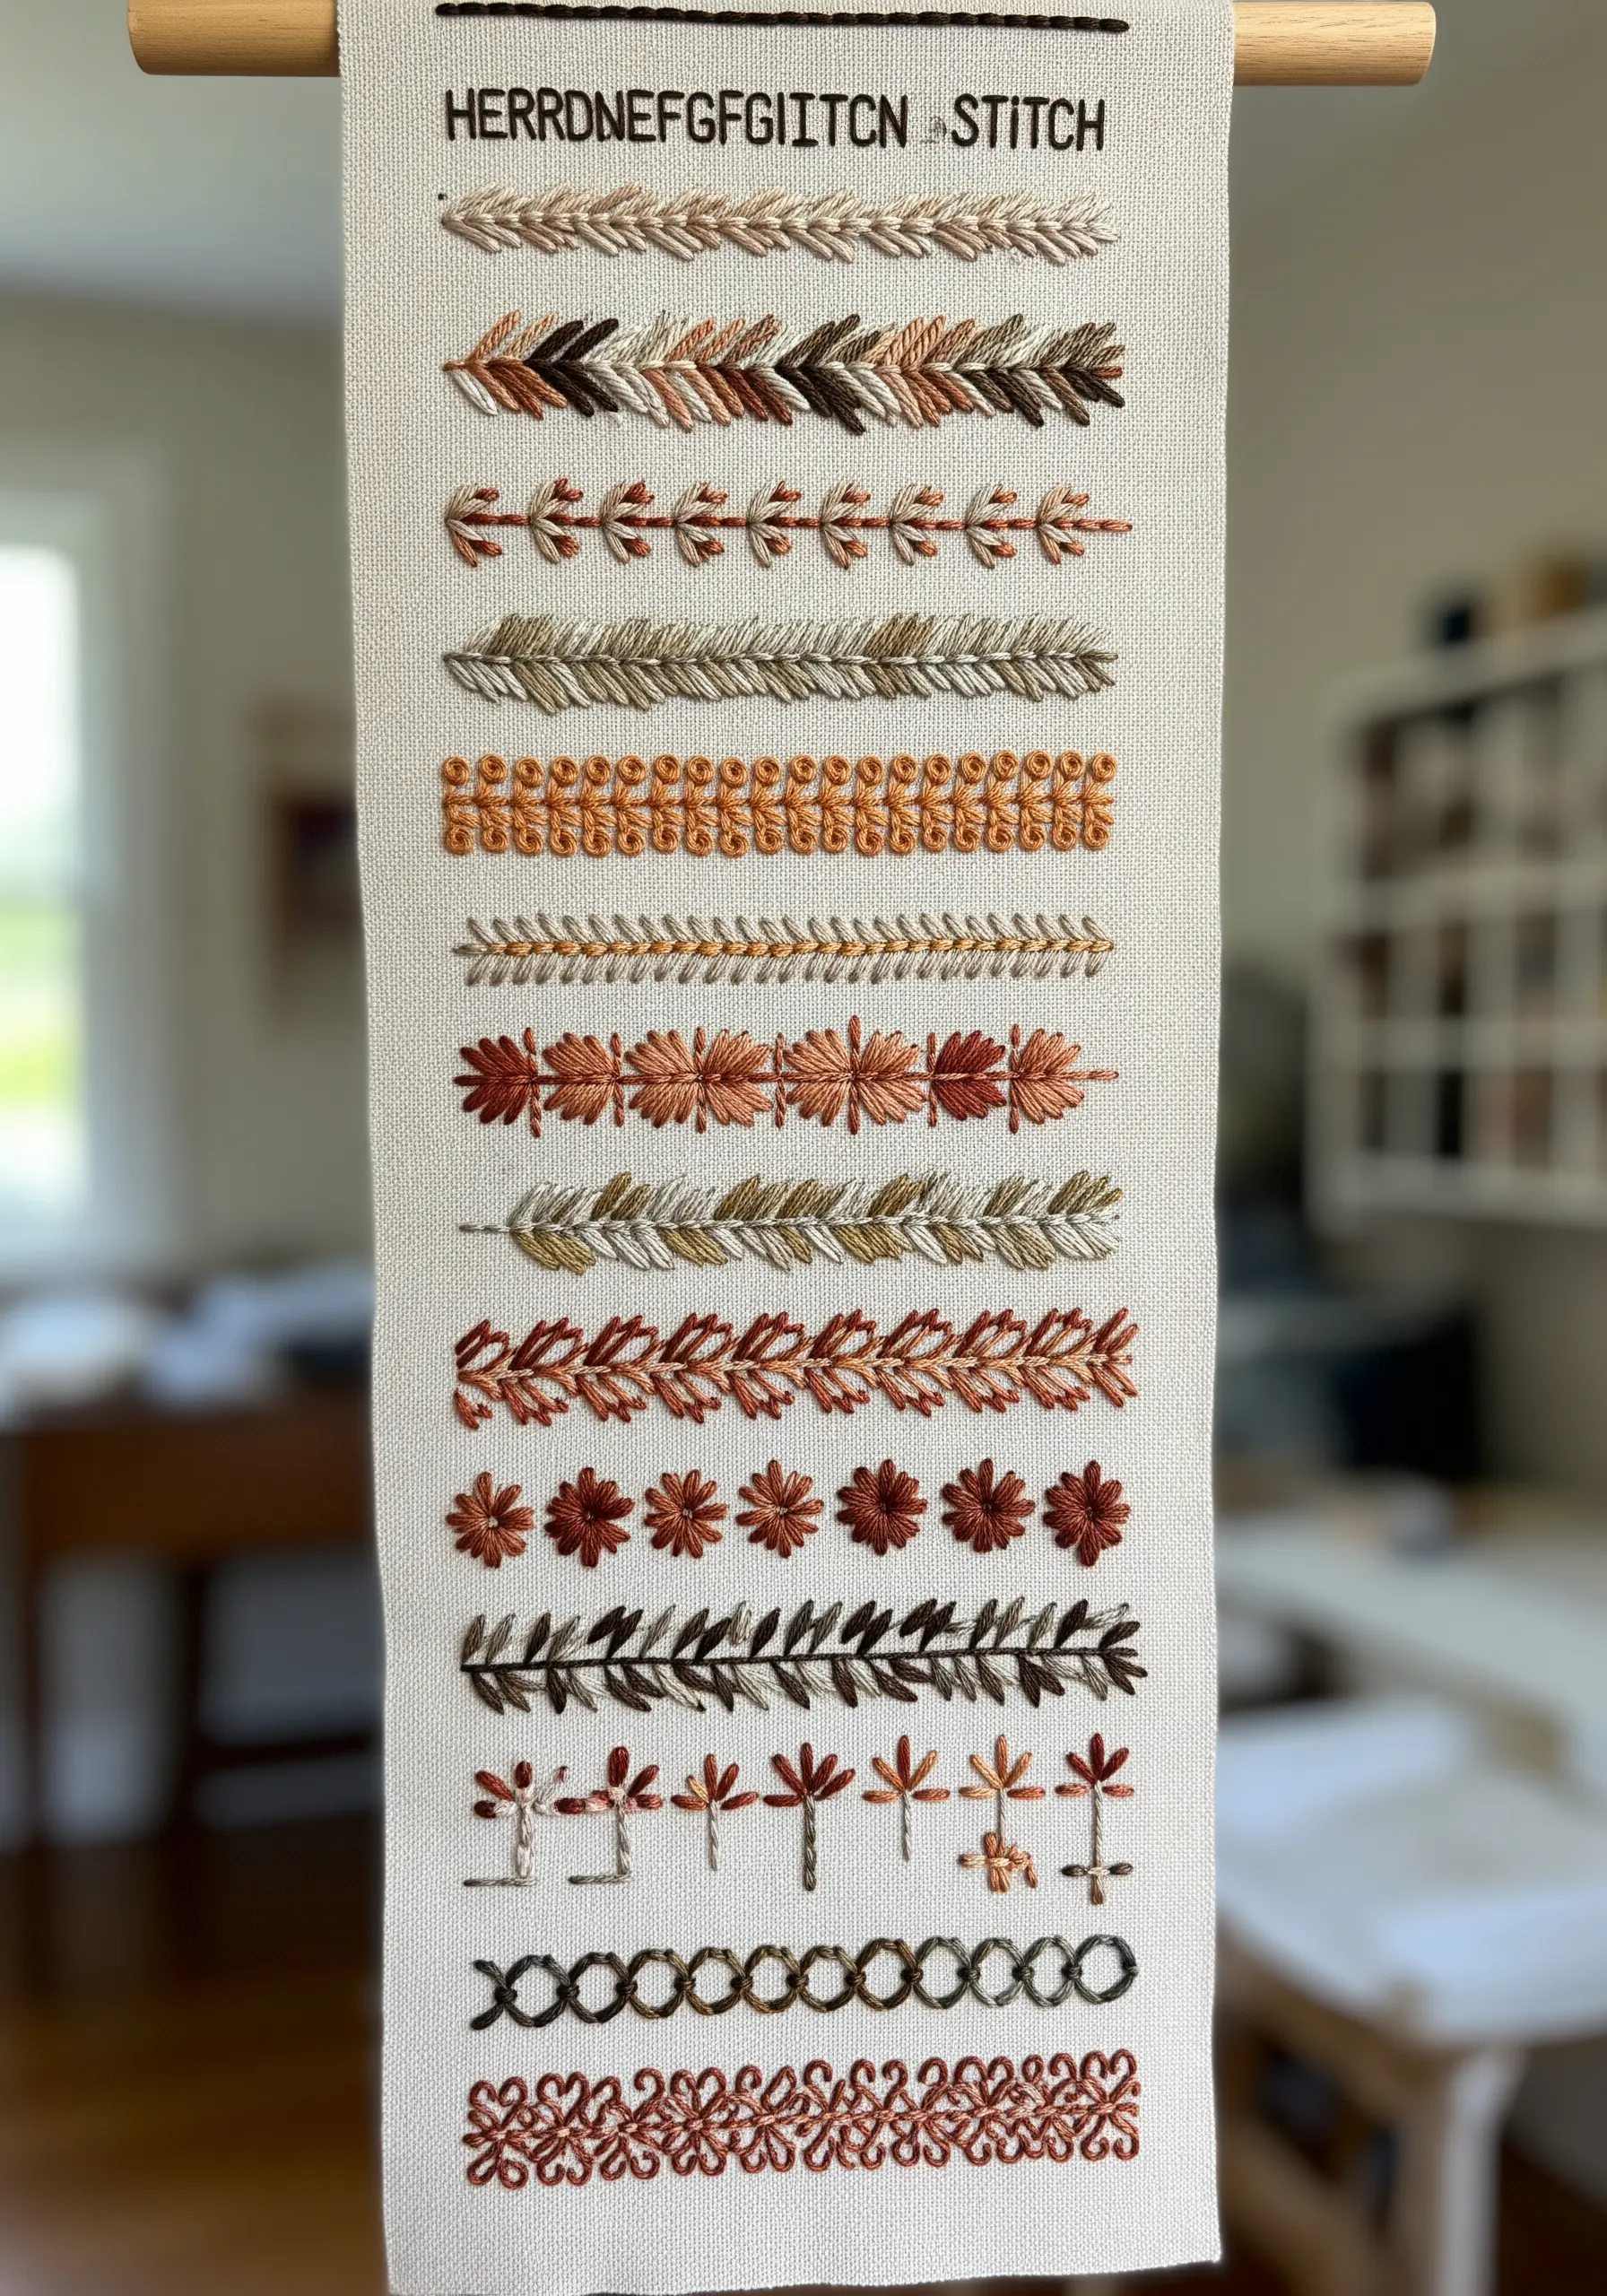
A stitch sampler is more than just a practice sheet; it’s a beautiful record of your skills and creativity.
Choose a cohesive, earthy color palette and dedicate each row to a different decorative stitch: fly stitch, feather stitch, chevron stitch, and more.
By arranging them neatly on a long linen banner, you transform a technical exercise into a sophisticated piece of wall decor that celebrates the craft itself.
31. Draft a Garden with Architectural Embroidery
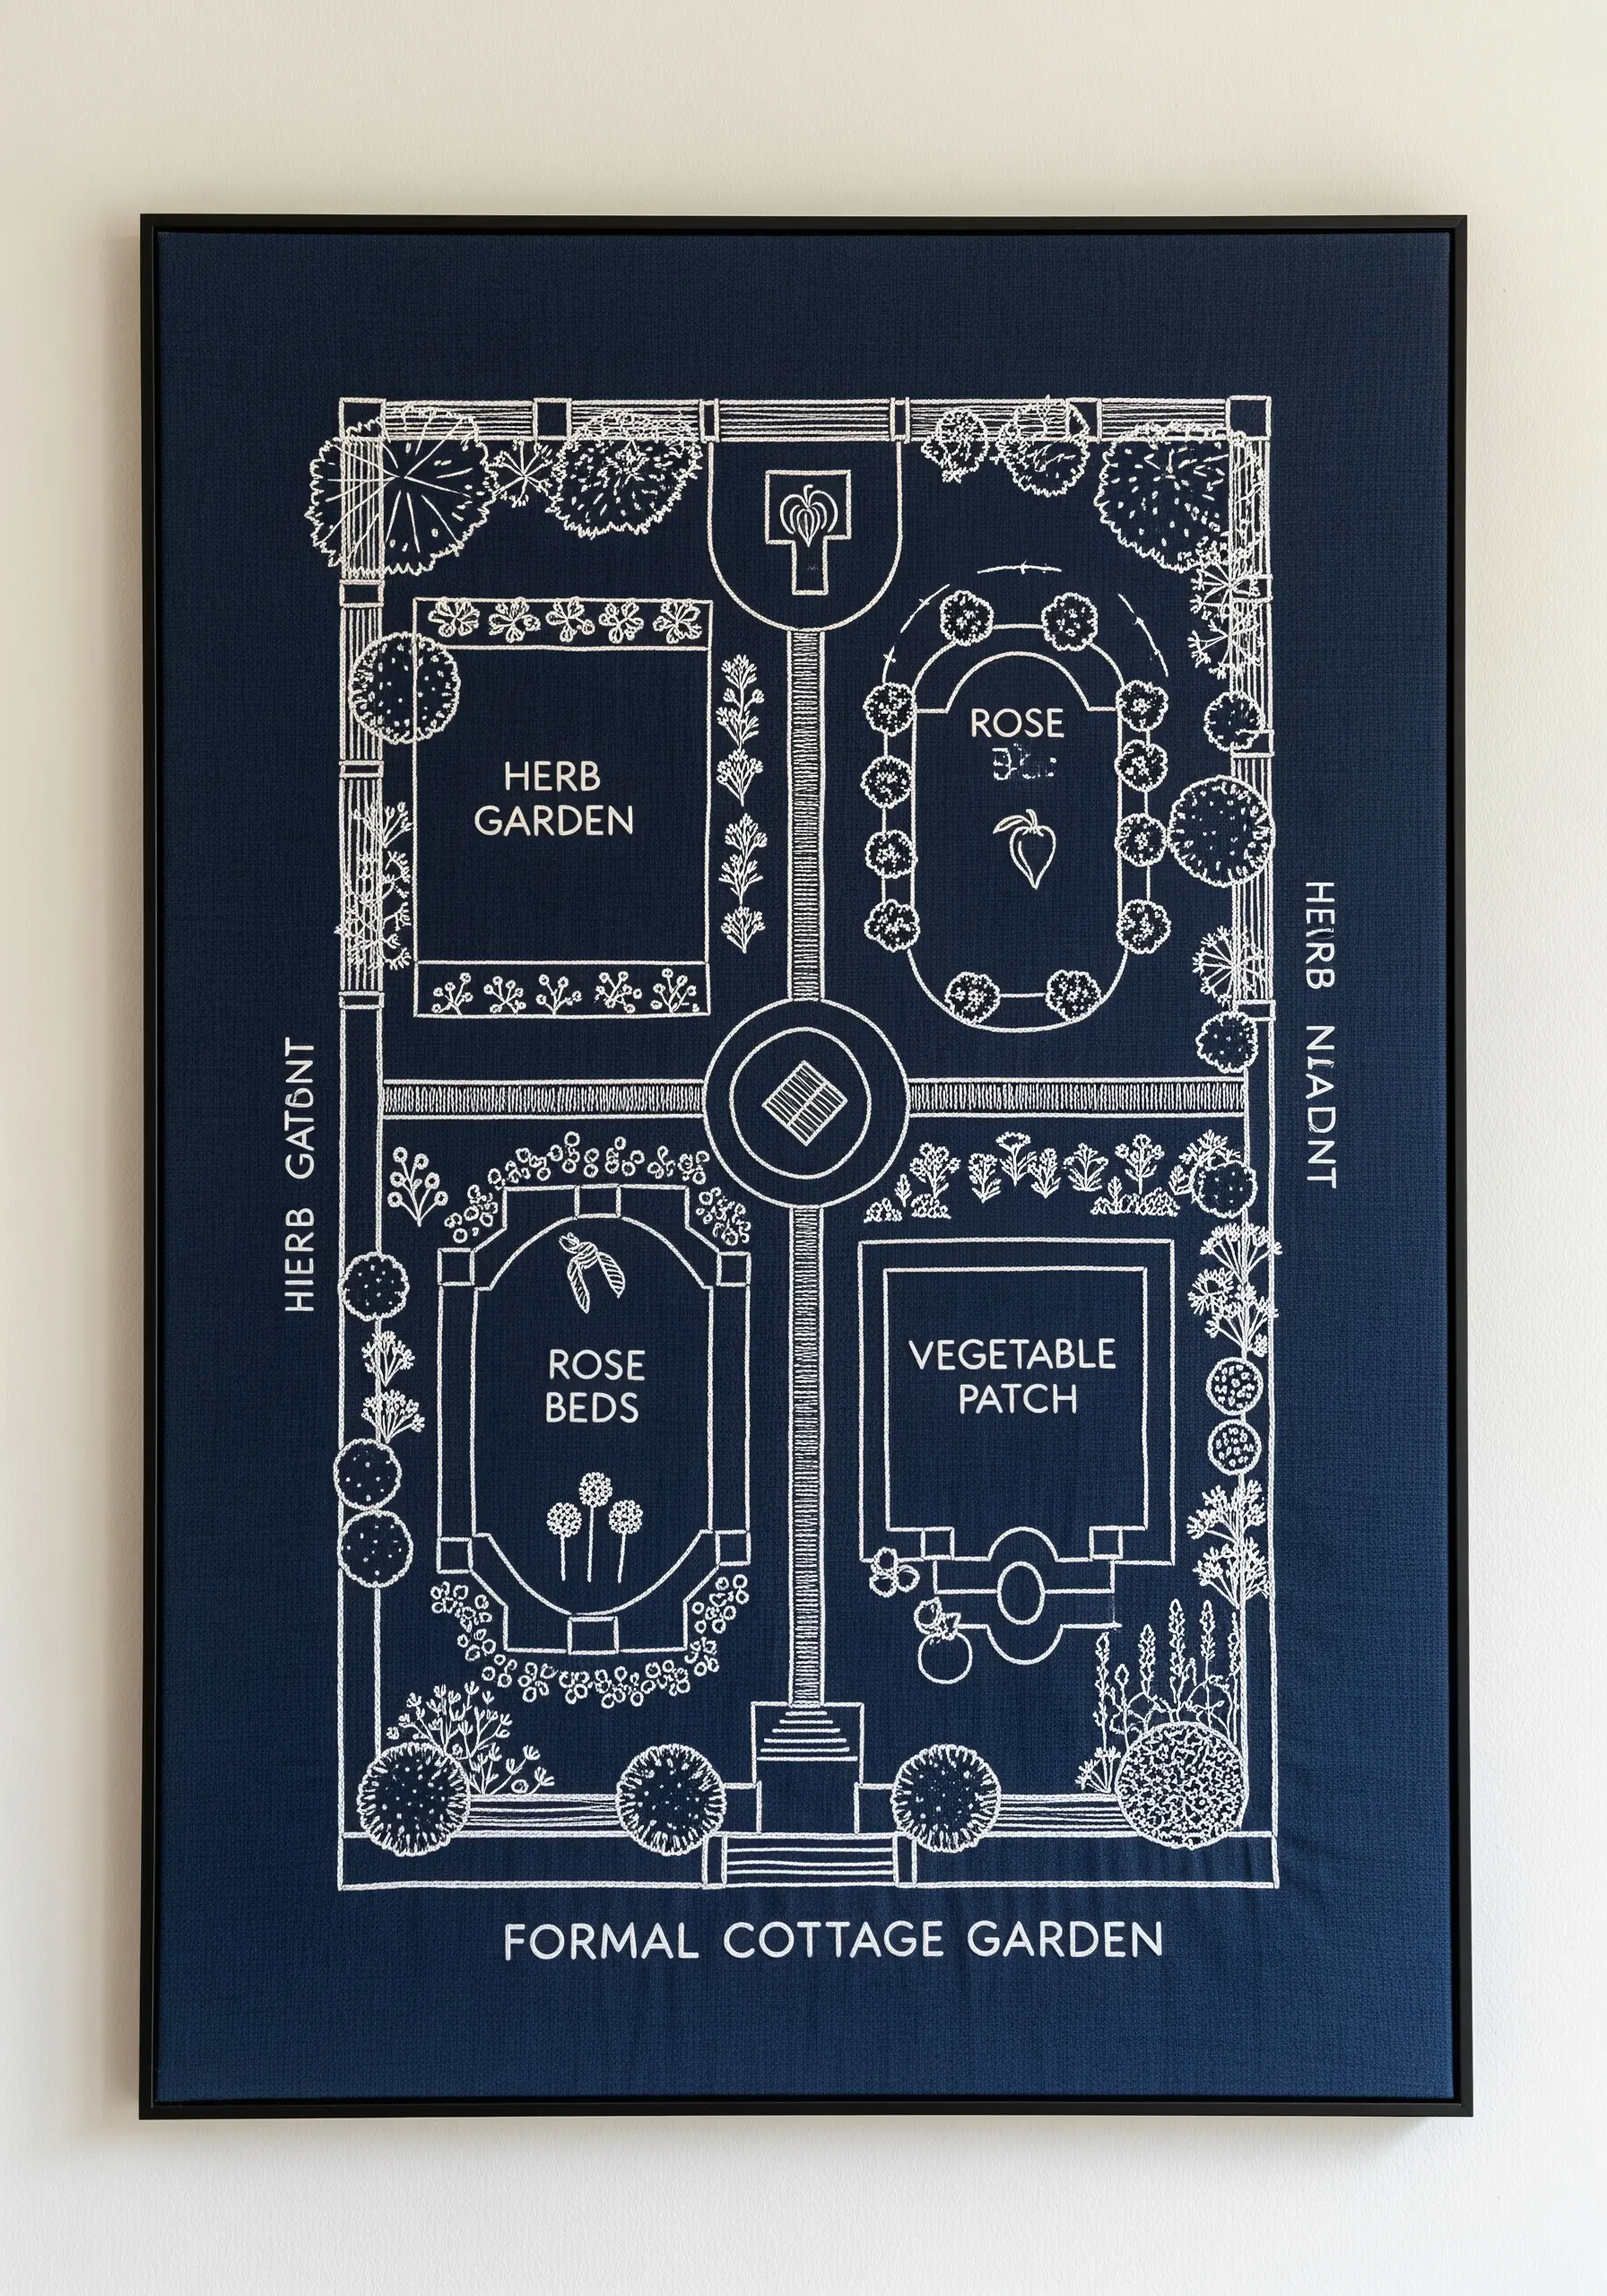
Recreate the elegance of a vintage blueprint by embroidering a formal garden plan.
Use a crisp white thread on a deep navy blue linen to mimic the classic architectural drawing style.
Rely on a precise backstitch for all the structural lines and pathways, and switch to tiny French knots and seed stitches to indicate flowerbeds and shrubs.
This unique concept combines a love for gardening with a clean, graphic aesthetic.
32. Add Festive Sparkle with Metallic Threads

For holiday decor that truly shines, incorporate metallic threads into your work.
To stitch delicate snowflakes, use a silver or gold metallic floss on a rich, dark background like red or green velvet.
A helpful tip: work with shorter lengths of thread (about 12 inches) and use a thread conditioner to minimize tangling and fraying. The result is a piece that glitters beautifully in the candlelight.
33. Fill a Shape with a Medley of Stitches
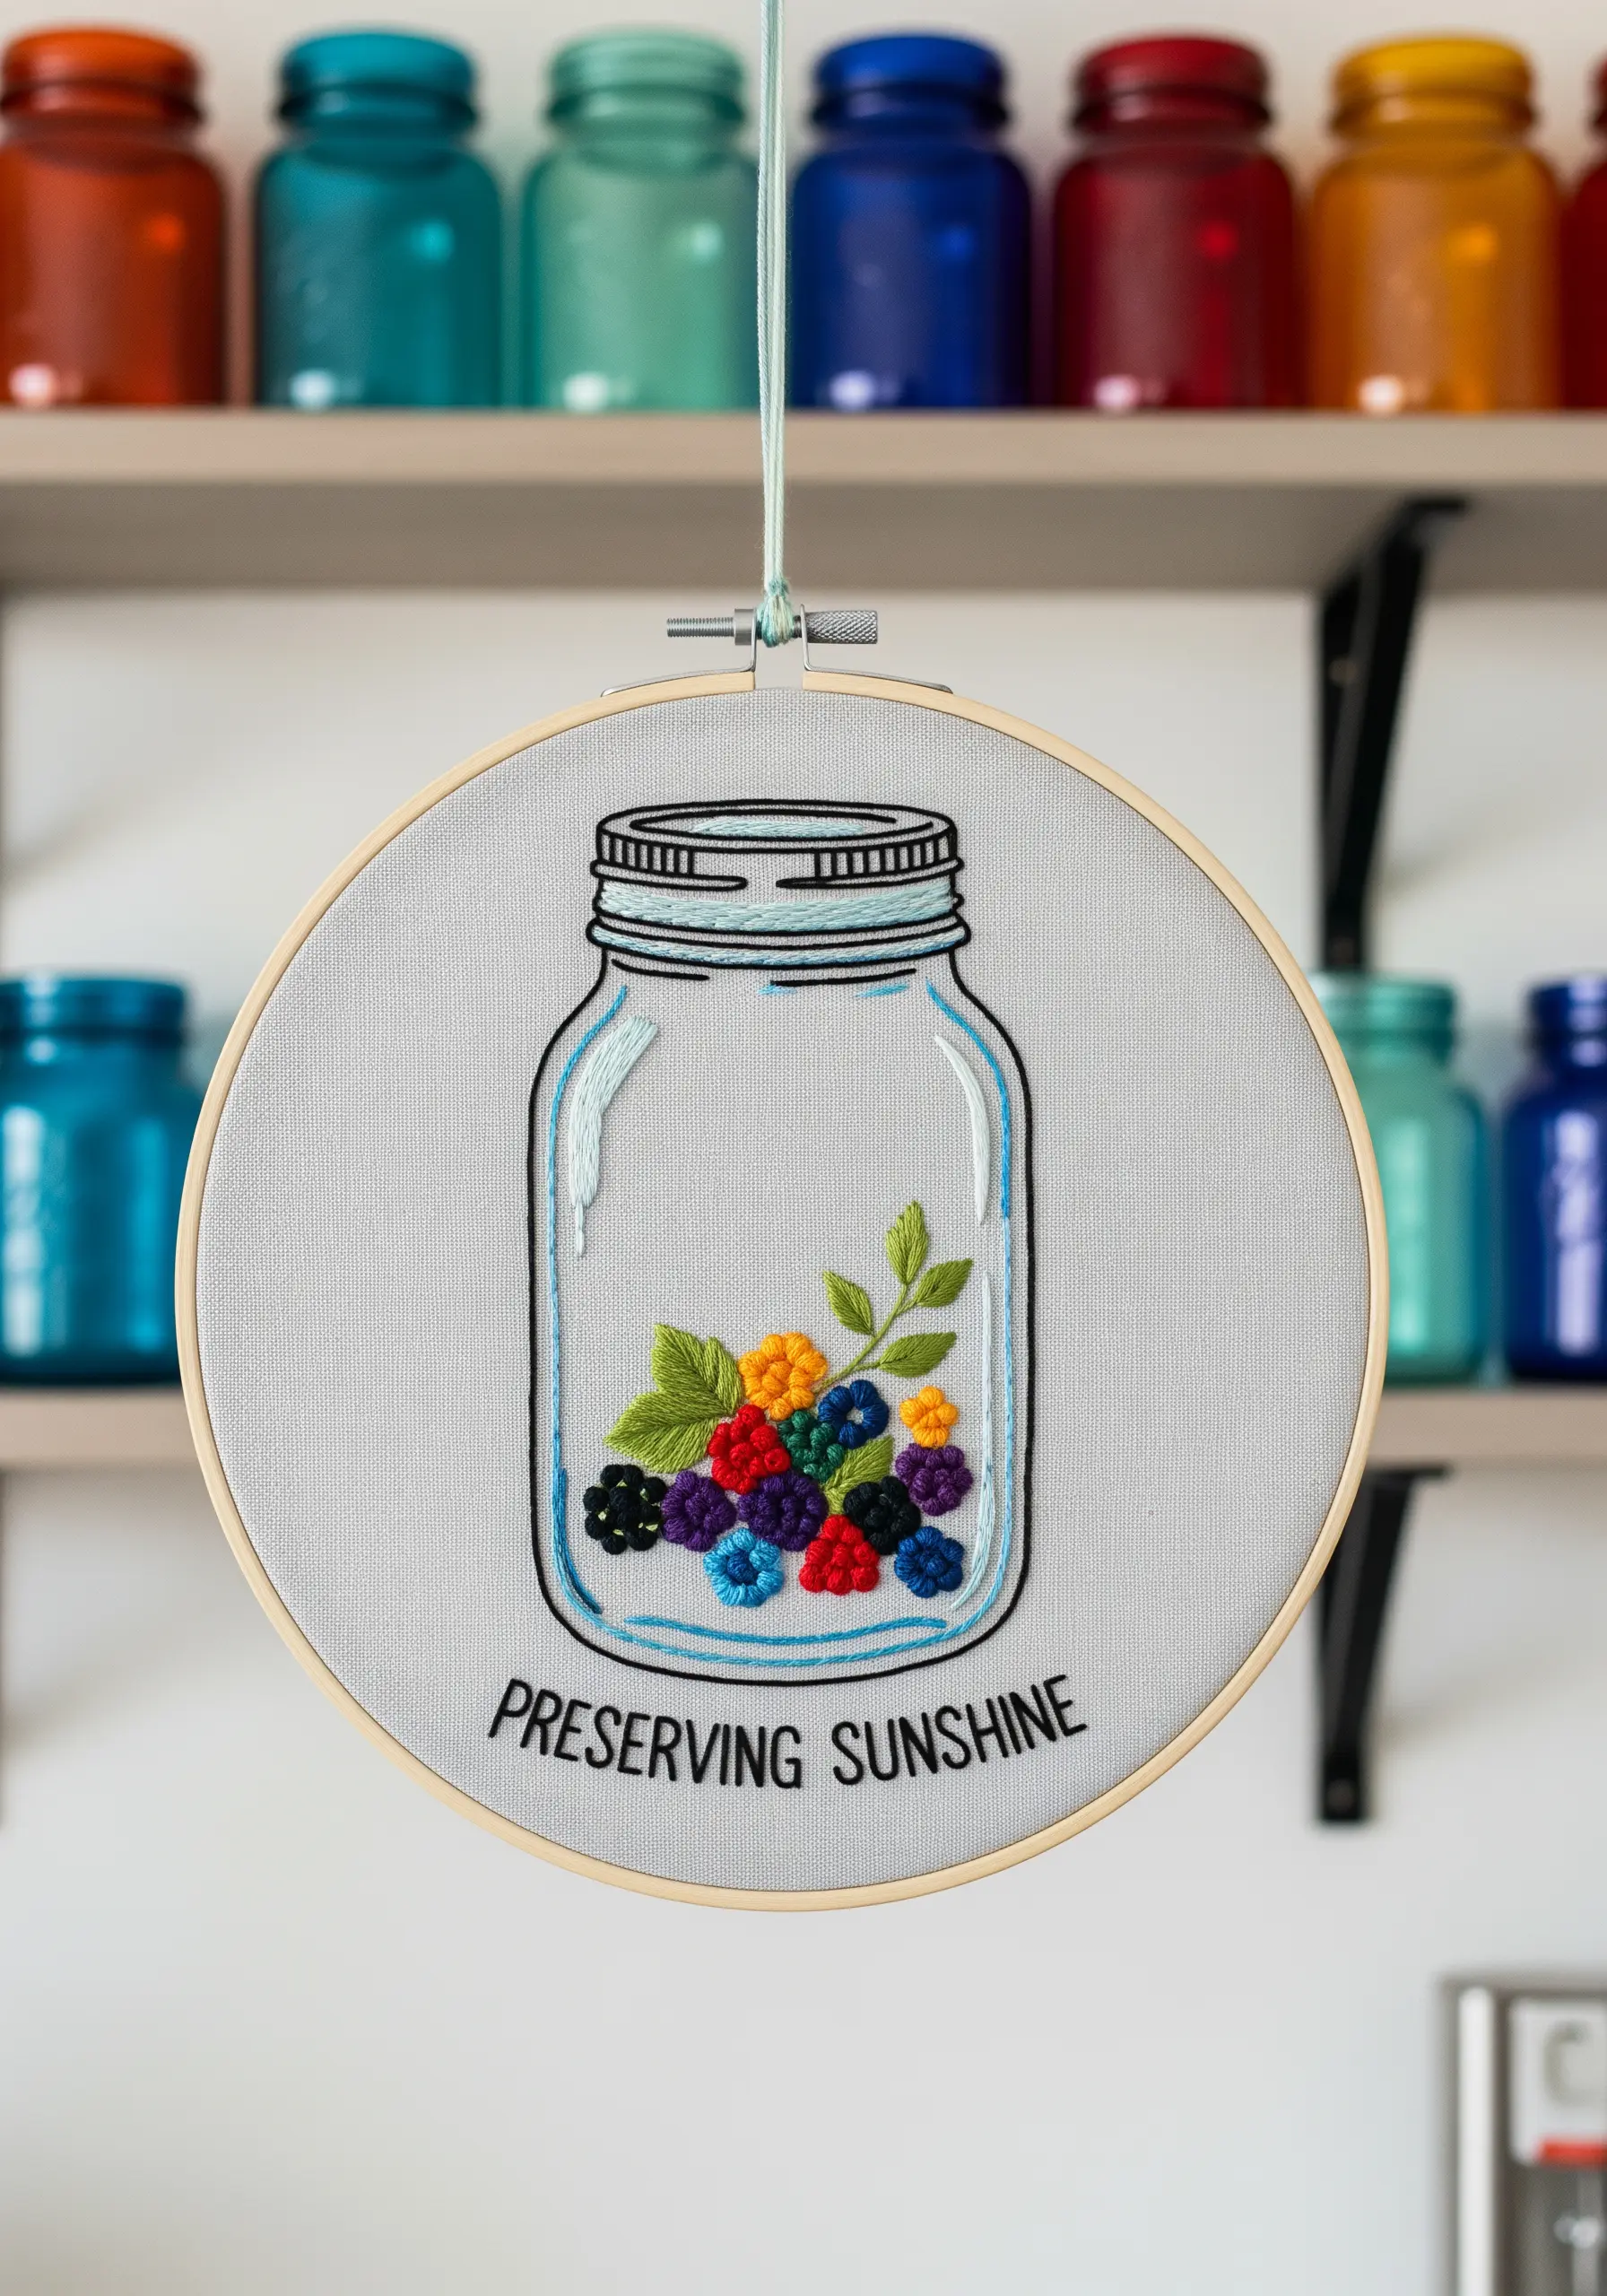
Create a playful, textured look by filling a simple outline with a variety of stitches.
Inside the outline of a mason jar, use tightly packed French knots for blackberries, satin stitch for leaves, and bullion knots for raspberries.
This ‘stitch collage’ approach adds so much visual interest and dimension. It turns a simple concept into a celebration of color and texture.
34. Capture Delicacy by Stitching on Tulle
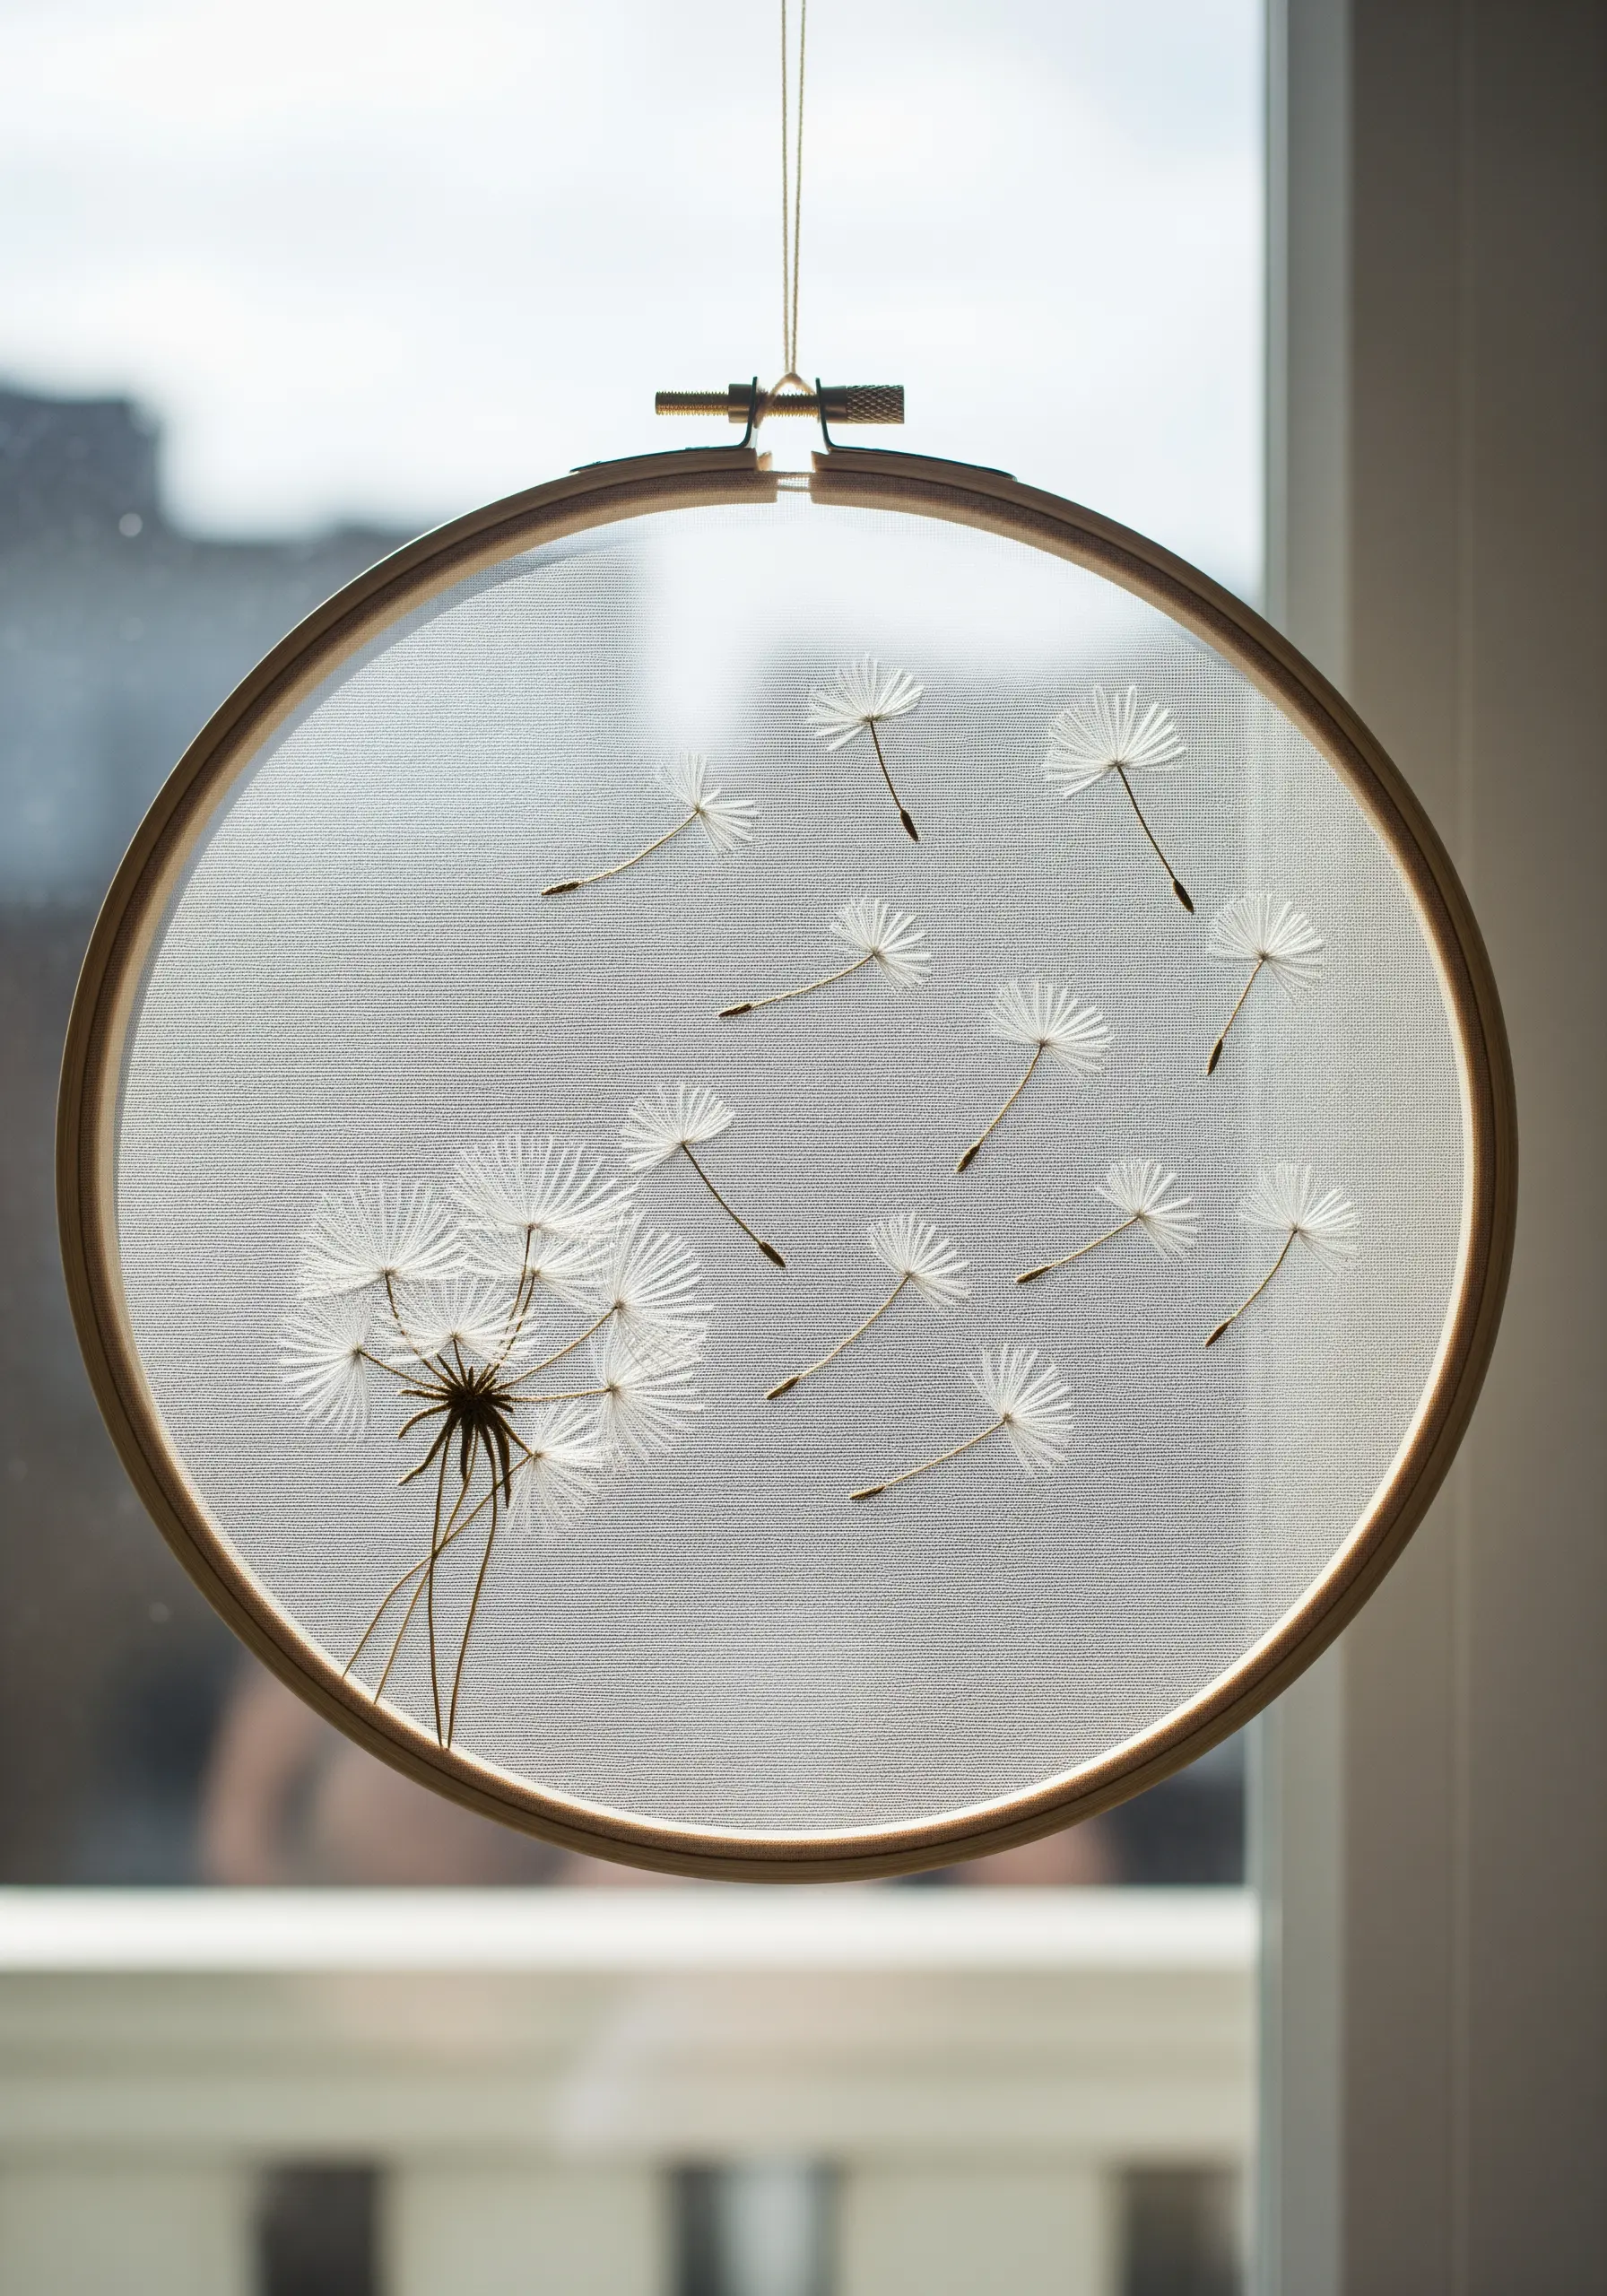
Stitching on a sheer fabric like tulle allows you to create designs that appear to float in mid-air.
This is perfect for ethereal subjects like dandelion seeds drifting in the wind. Use a lightweight thread and delicate stitches, like straight stitches and tiny seed stitches.
When hung in a window, the light shines through the fabric, making the tulle nearly invisible and the embroidery the sole focus.
35. Bring Pet Portraits to Life with Detail
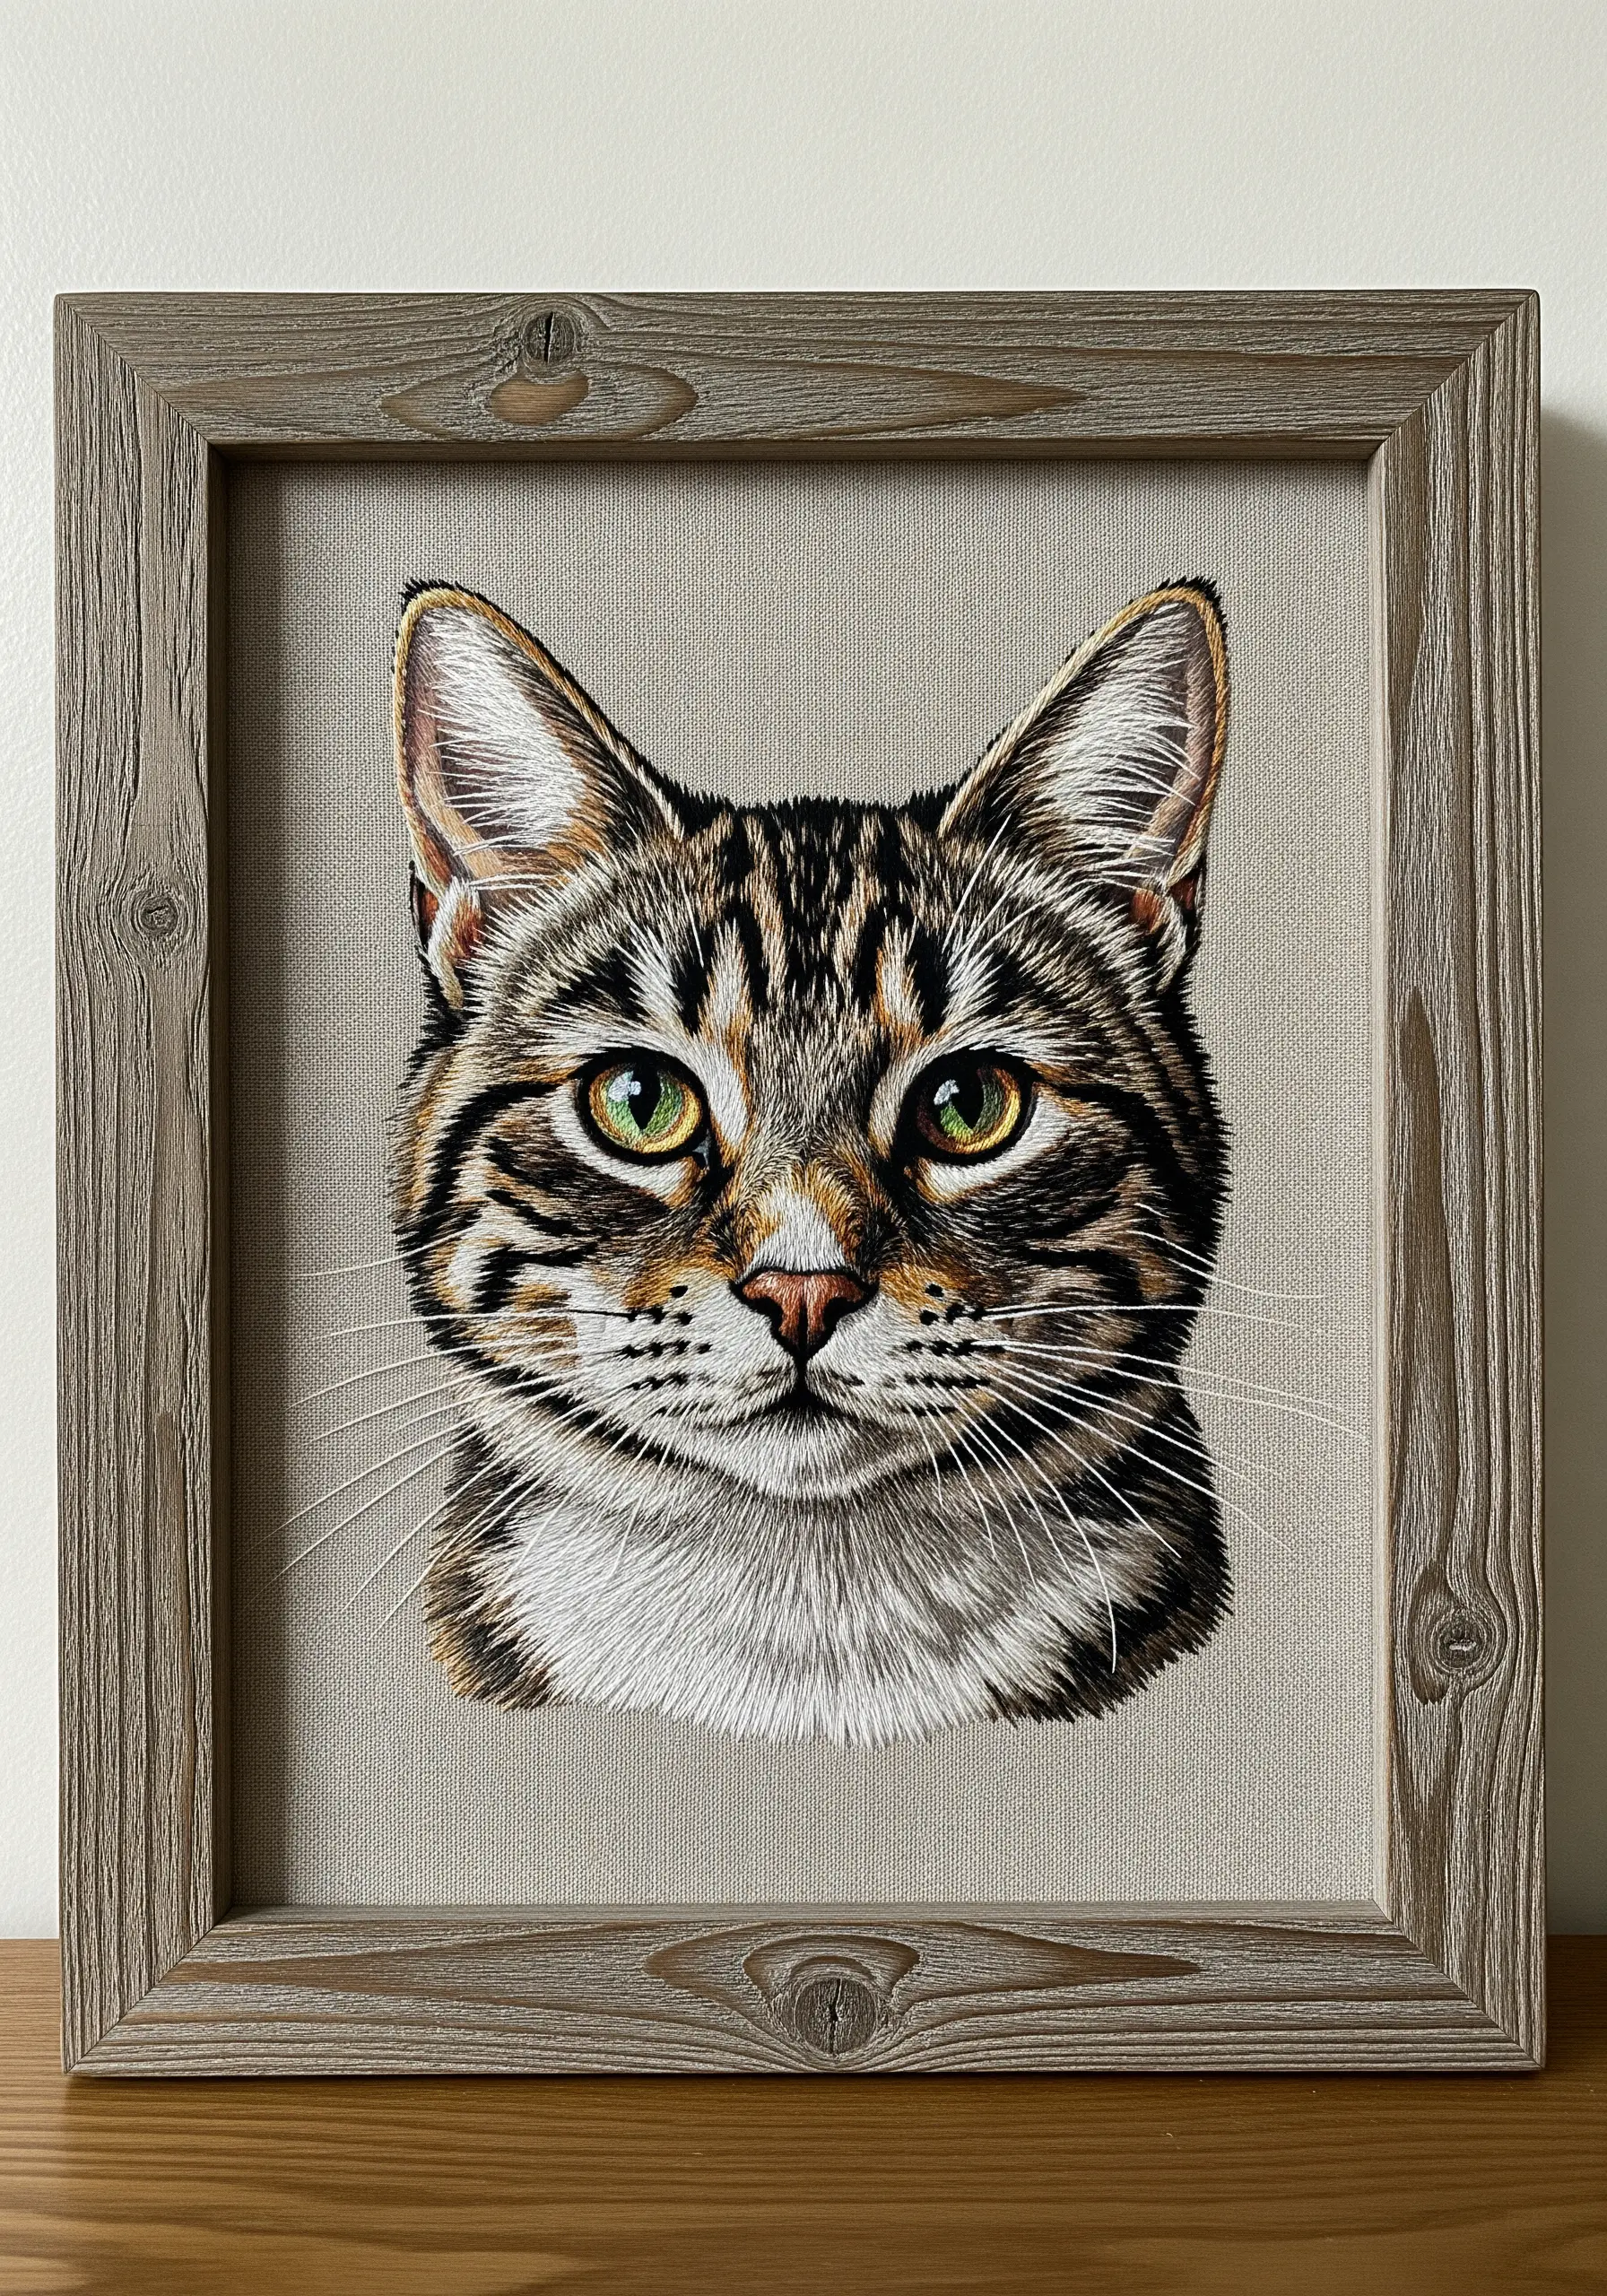
To capture the true essence of an animal in a thread-painted portrait, focus on the details that convey personality.
Use a single strand of floss to painstakingly recreate the stripes of a tabby cat or the texture of its nose. The eyes are crucial—use multiple shades to create depth and add a single white stitch as a catchlight for a spark of life.
These meaningful personalized keepsakes are a testament to patience and love.
36. Recreate Vintage Ephemera on Fabric
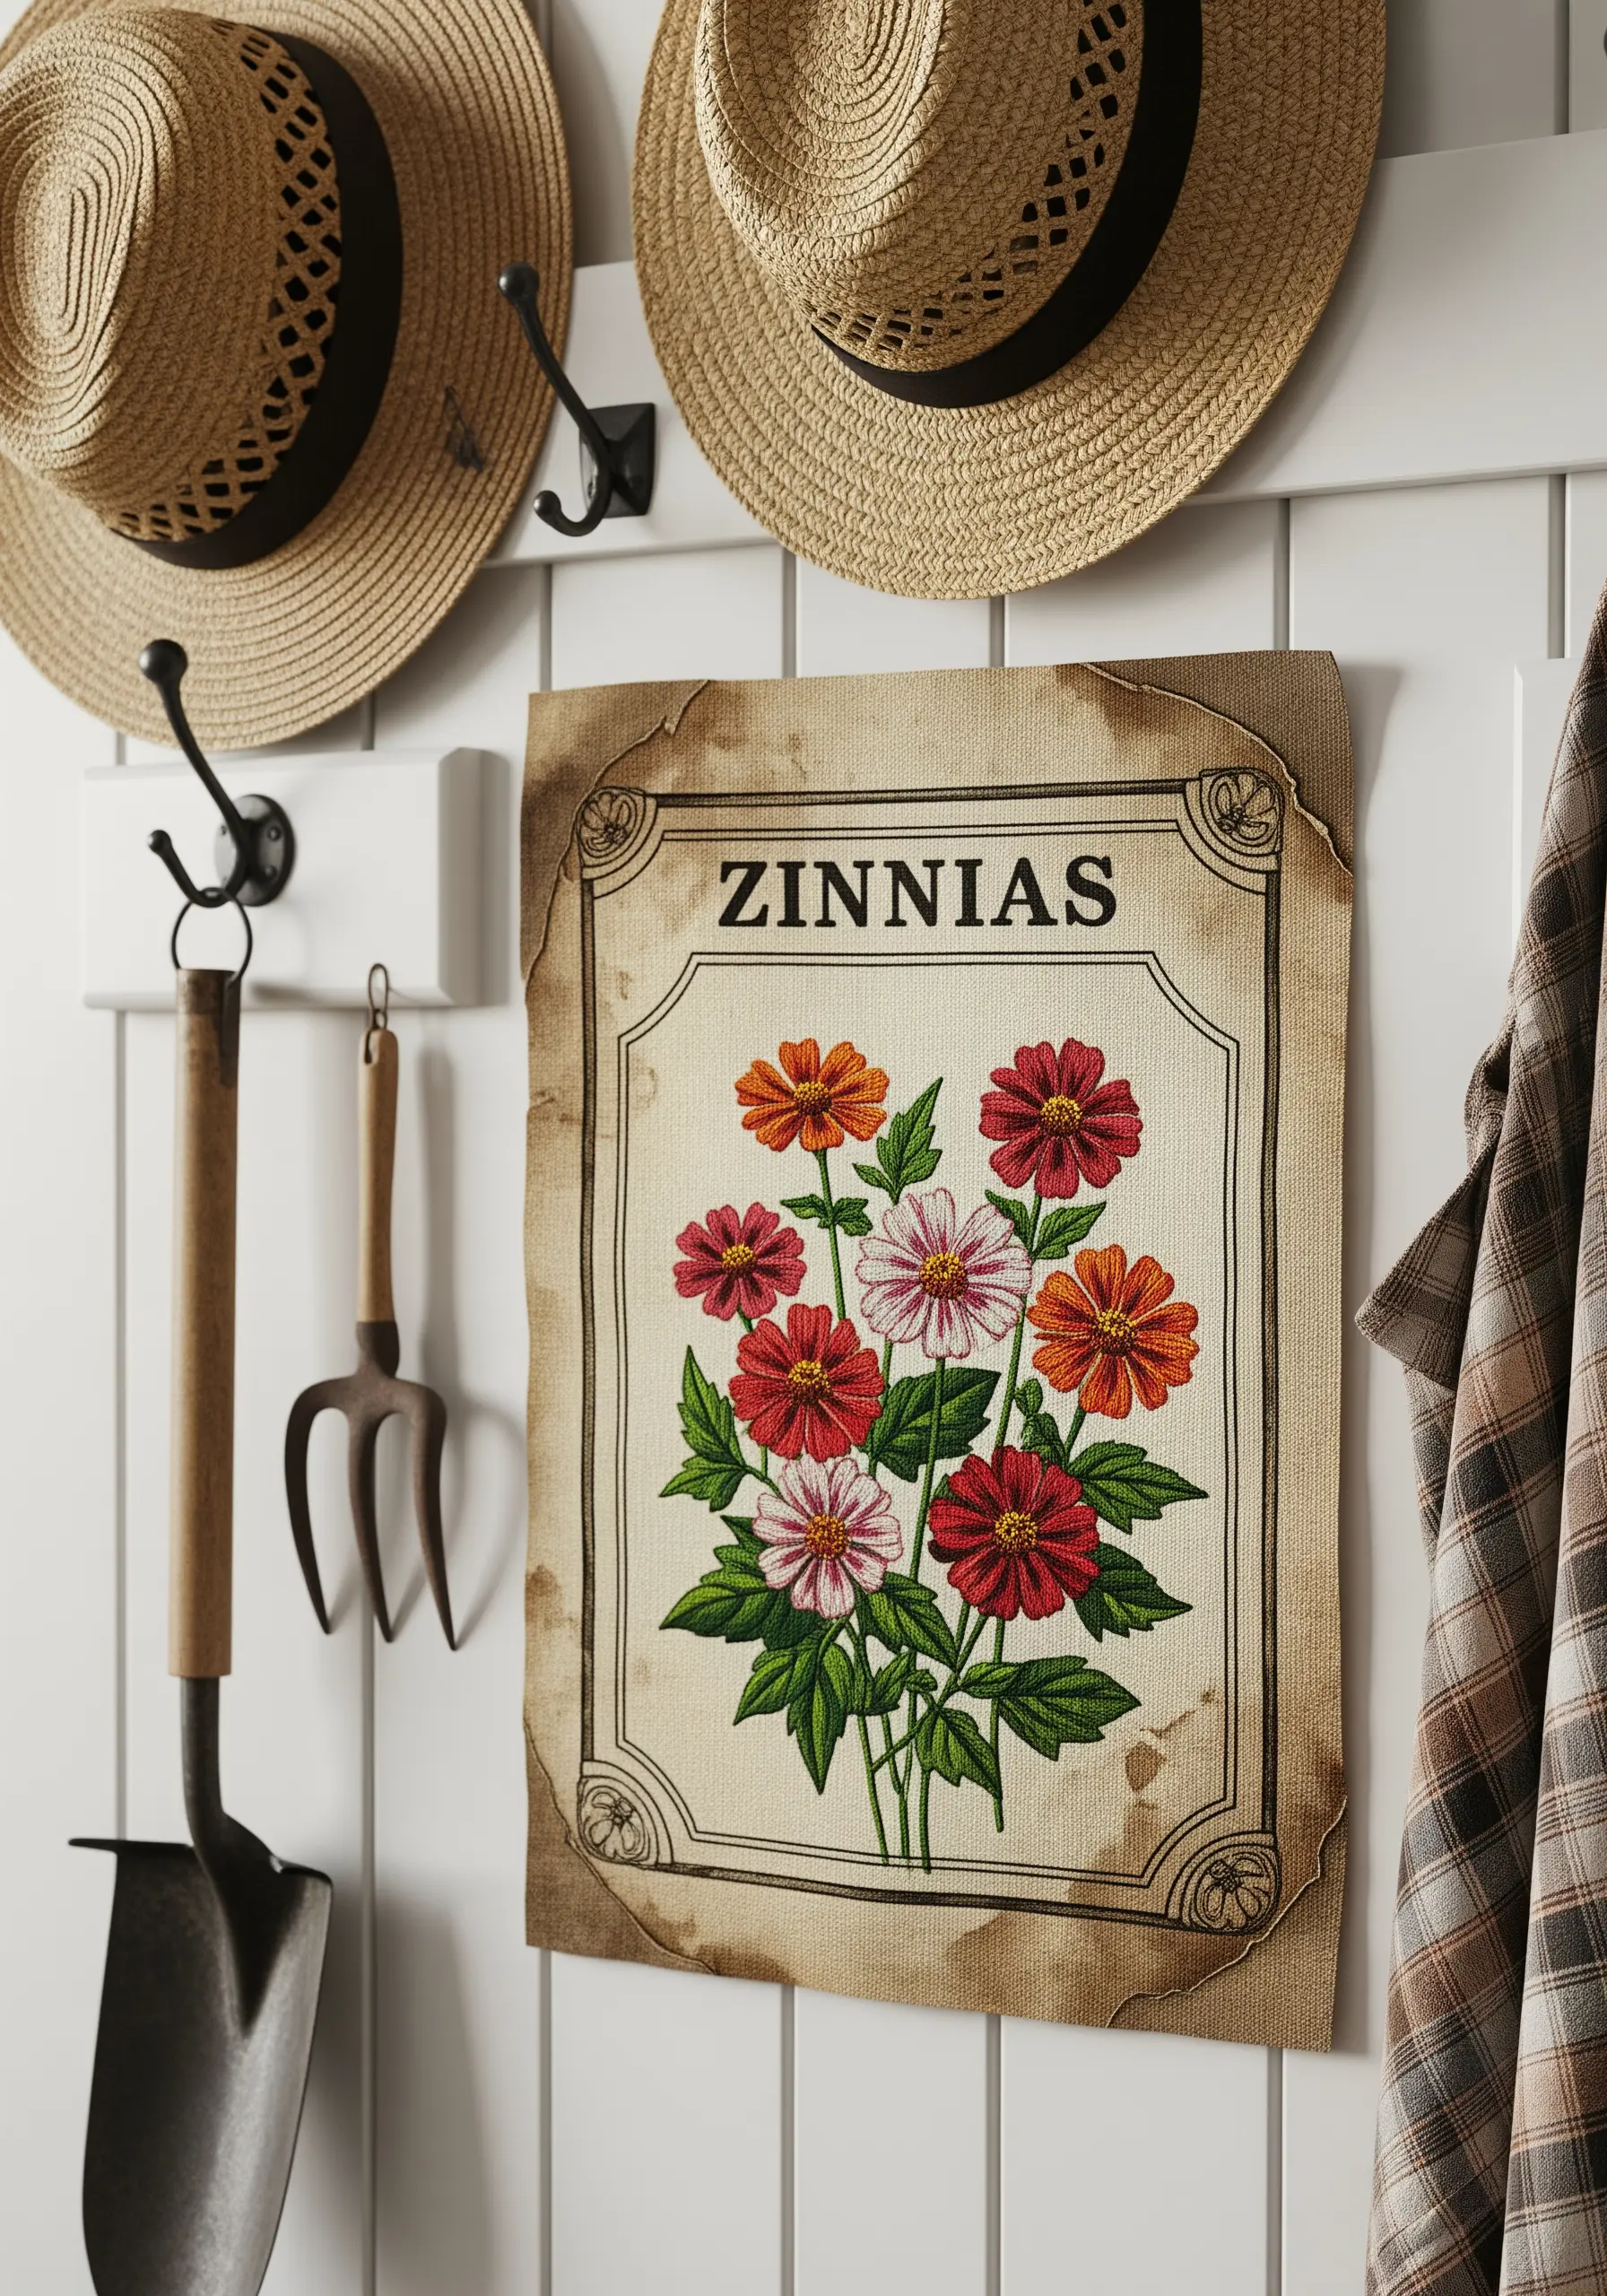
Give your embroidery a nostalgic, antique feel by recreating the look of a vintage seed packet.
Start with a tea-stained or off-white fabric to simulate aged paper. Use a combination of satin stitch for the colorful flowers and a simple backstitch for the typography.
Don’t worry about perfect edges; a slightly rustic finish enhances the vintage charm. This is one of the best cottagecore floral embroidery ideas for a gardener’s home.


