
You have a deep love for embroidery—the quiet rhythm of the needle, the way color blooms from a single thread. But perhaps you feel your work has reached a plateau, and you’re searching for that next step, that element of surprise that will make your stitching feel truly alive.
The answer often lies not in mastering a more complex stitch, but in embracing new materials. Mixing fibers—incorporating wool roving, yarn, felt, ribbons, and even beads—is one of the most accessible ways to add instant depth, texture, and personality to your work. It’s about letting the material do the work for you, creating effects that thread alone cannot achieve.
These ideas are not complex formulas, but invitations to play. They are designed to show you how a touch of soft wool can become ethereal steam, how a chunky yarn can become rugged bark, and how a simple felt cutout can become a sculptural petal. Let these examples give you the confidence to look beyond the floss and transform your embroidery into tactile, whimsical art.
1. Build a Dimensional Forest Floor
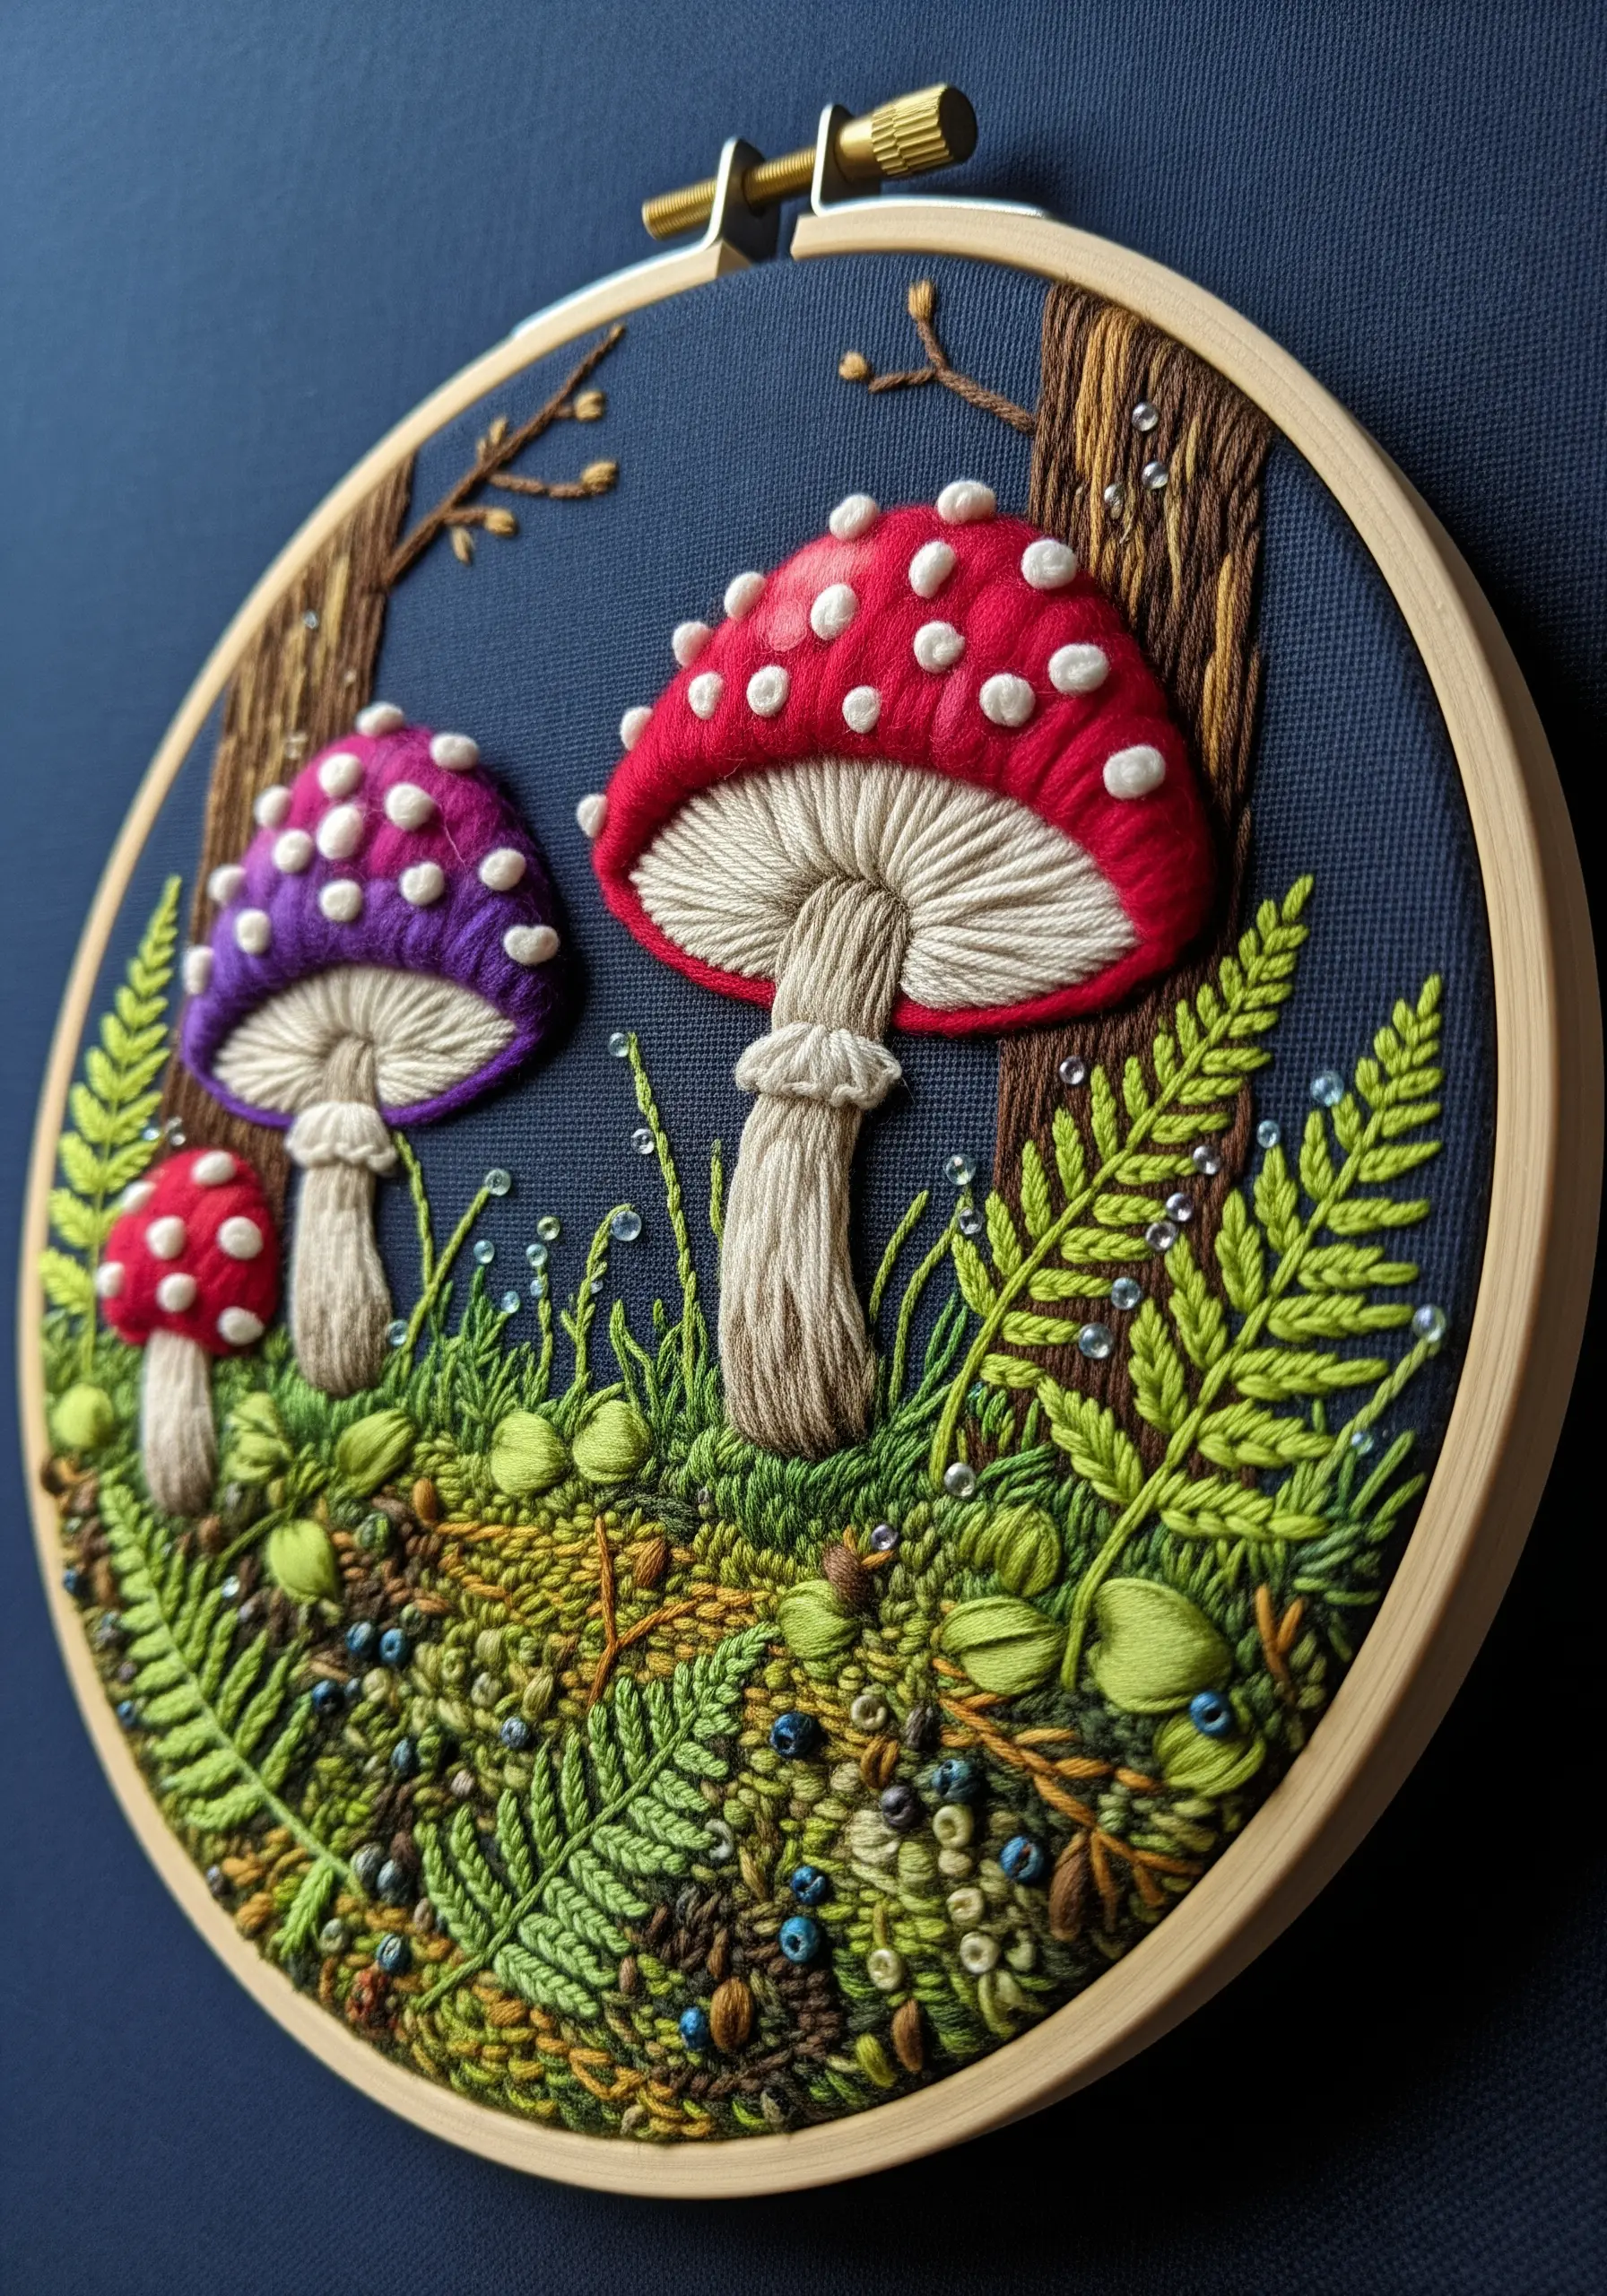
Give your mushroom caps a soft, rounded form by using padded satin stitch as your base before covering them with color.
For the delicate gills underneath, use tightly packed single straight stitches in an off-white or beige thread to create realistic lines and shadow.
The forest floor comes alive when you combine different textures: use French knots of varying sizes for moss, add tiny, clear seed beads for dewdrops, and scatter bullion knots to suggest fallen leaves.
This layering of stitches and materials is what transforms a flat image into a miniature, explorable world.
2. Sculpt a Needle-Felted Celestial Scene
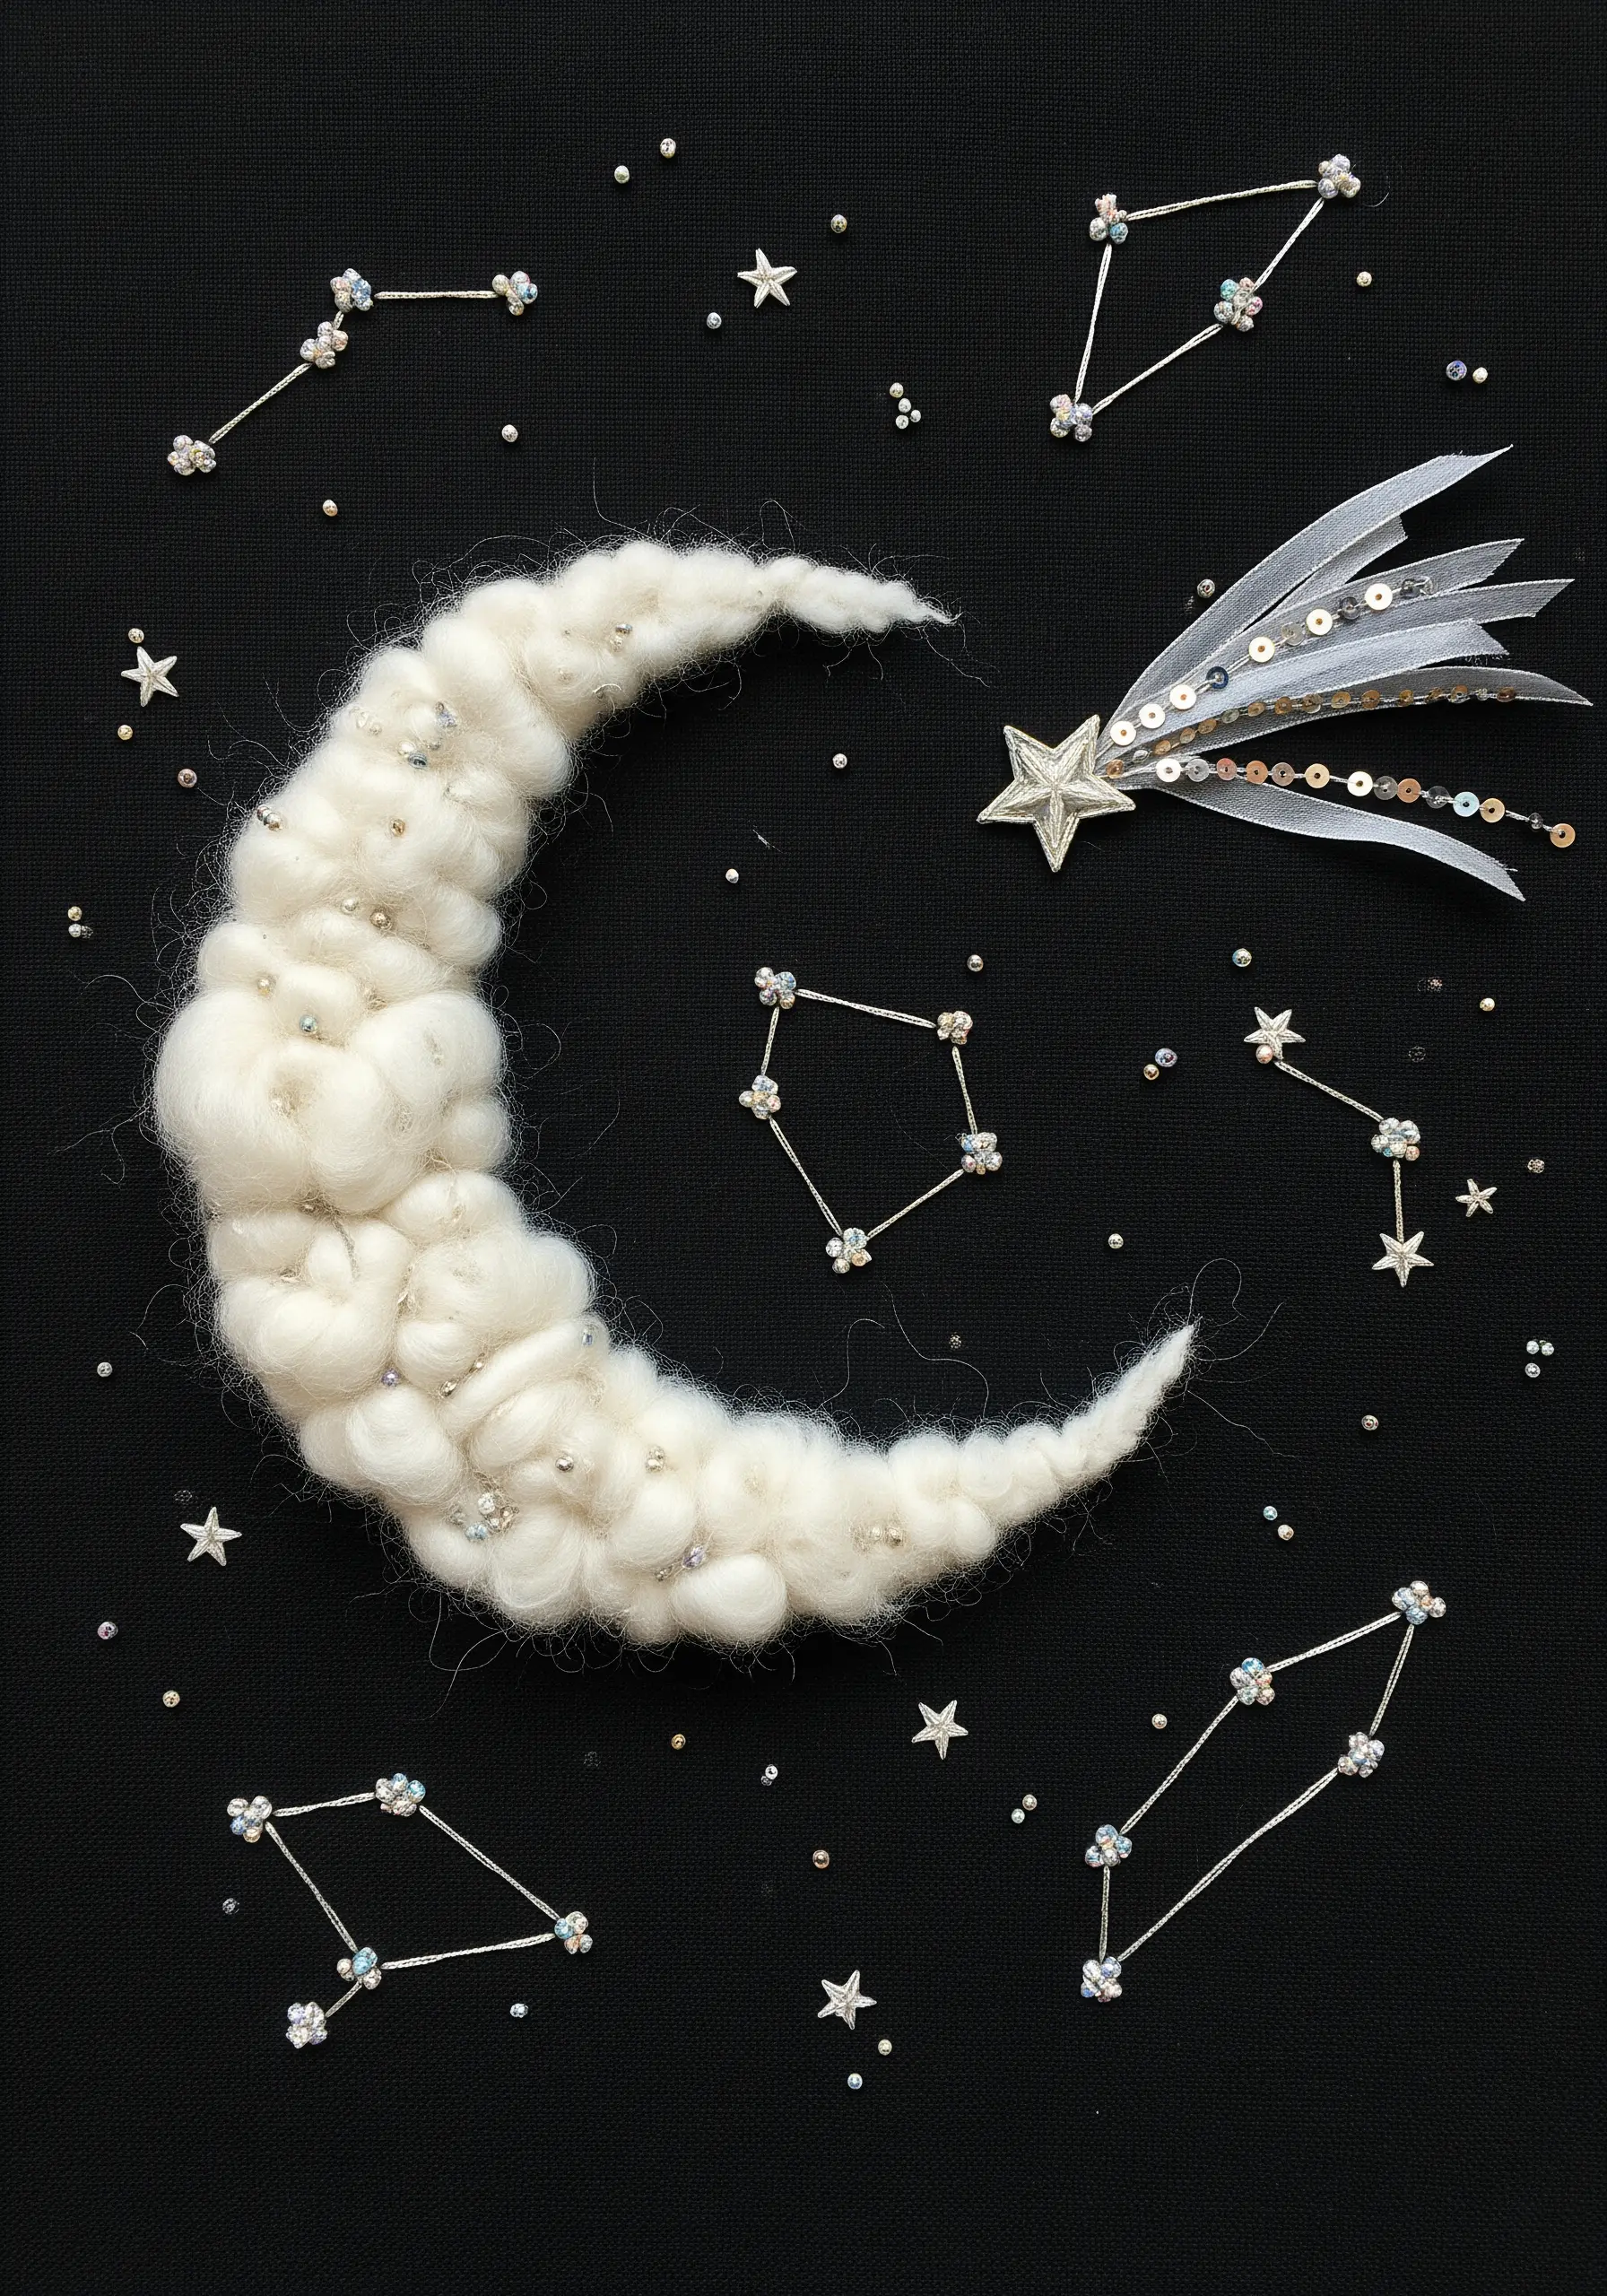
Create a soft, ethereal moon by needle-felting wool roving directly onto a dark fabric background.
This technique adds a gentle, cloud-like volume that traditional embroidery floss simply cannot replicate, providing a beautiful textural contrast.
For the constellations, use a fine, shimmering metallic thread to stitch the connecting lines, keeping them sharp and delicate.
Mark the stars with a mix of tiny silver beads and iridescent sequins to catch the light, making your night sky truly sparkle.
3. Weave a Fantastical Ribbon Mane

Render the fox’s fur with classic long-and-short stitch, which allows you to blend colors smoothly for a soft, realistic effect.
For the dramatic mane, couch down a mix of fibers—try thin silk ribbons, velvet yarn, and strands of metallic cord to create a rich, untamed texture.
Couching is perfect here because it allows you to easily control the placement of thicker, unconventional materials.
For a final, surprising element, integrate a real peacock feather by carefully stitching it into place, blurring the line between embroidery and mixed-media art.
4. Cultivate a High-Relief Coral Garden
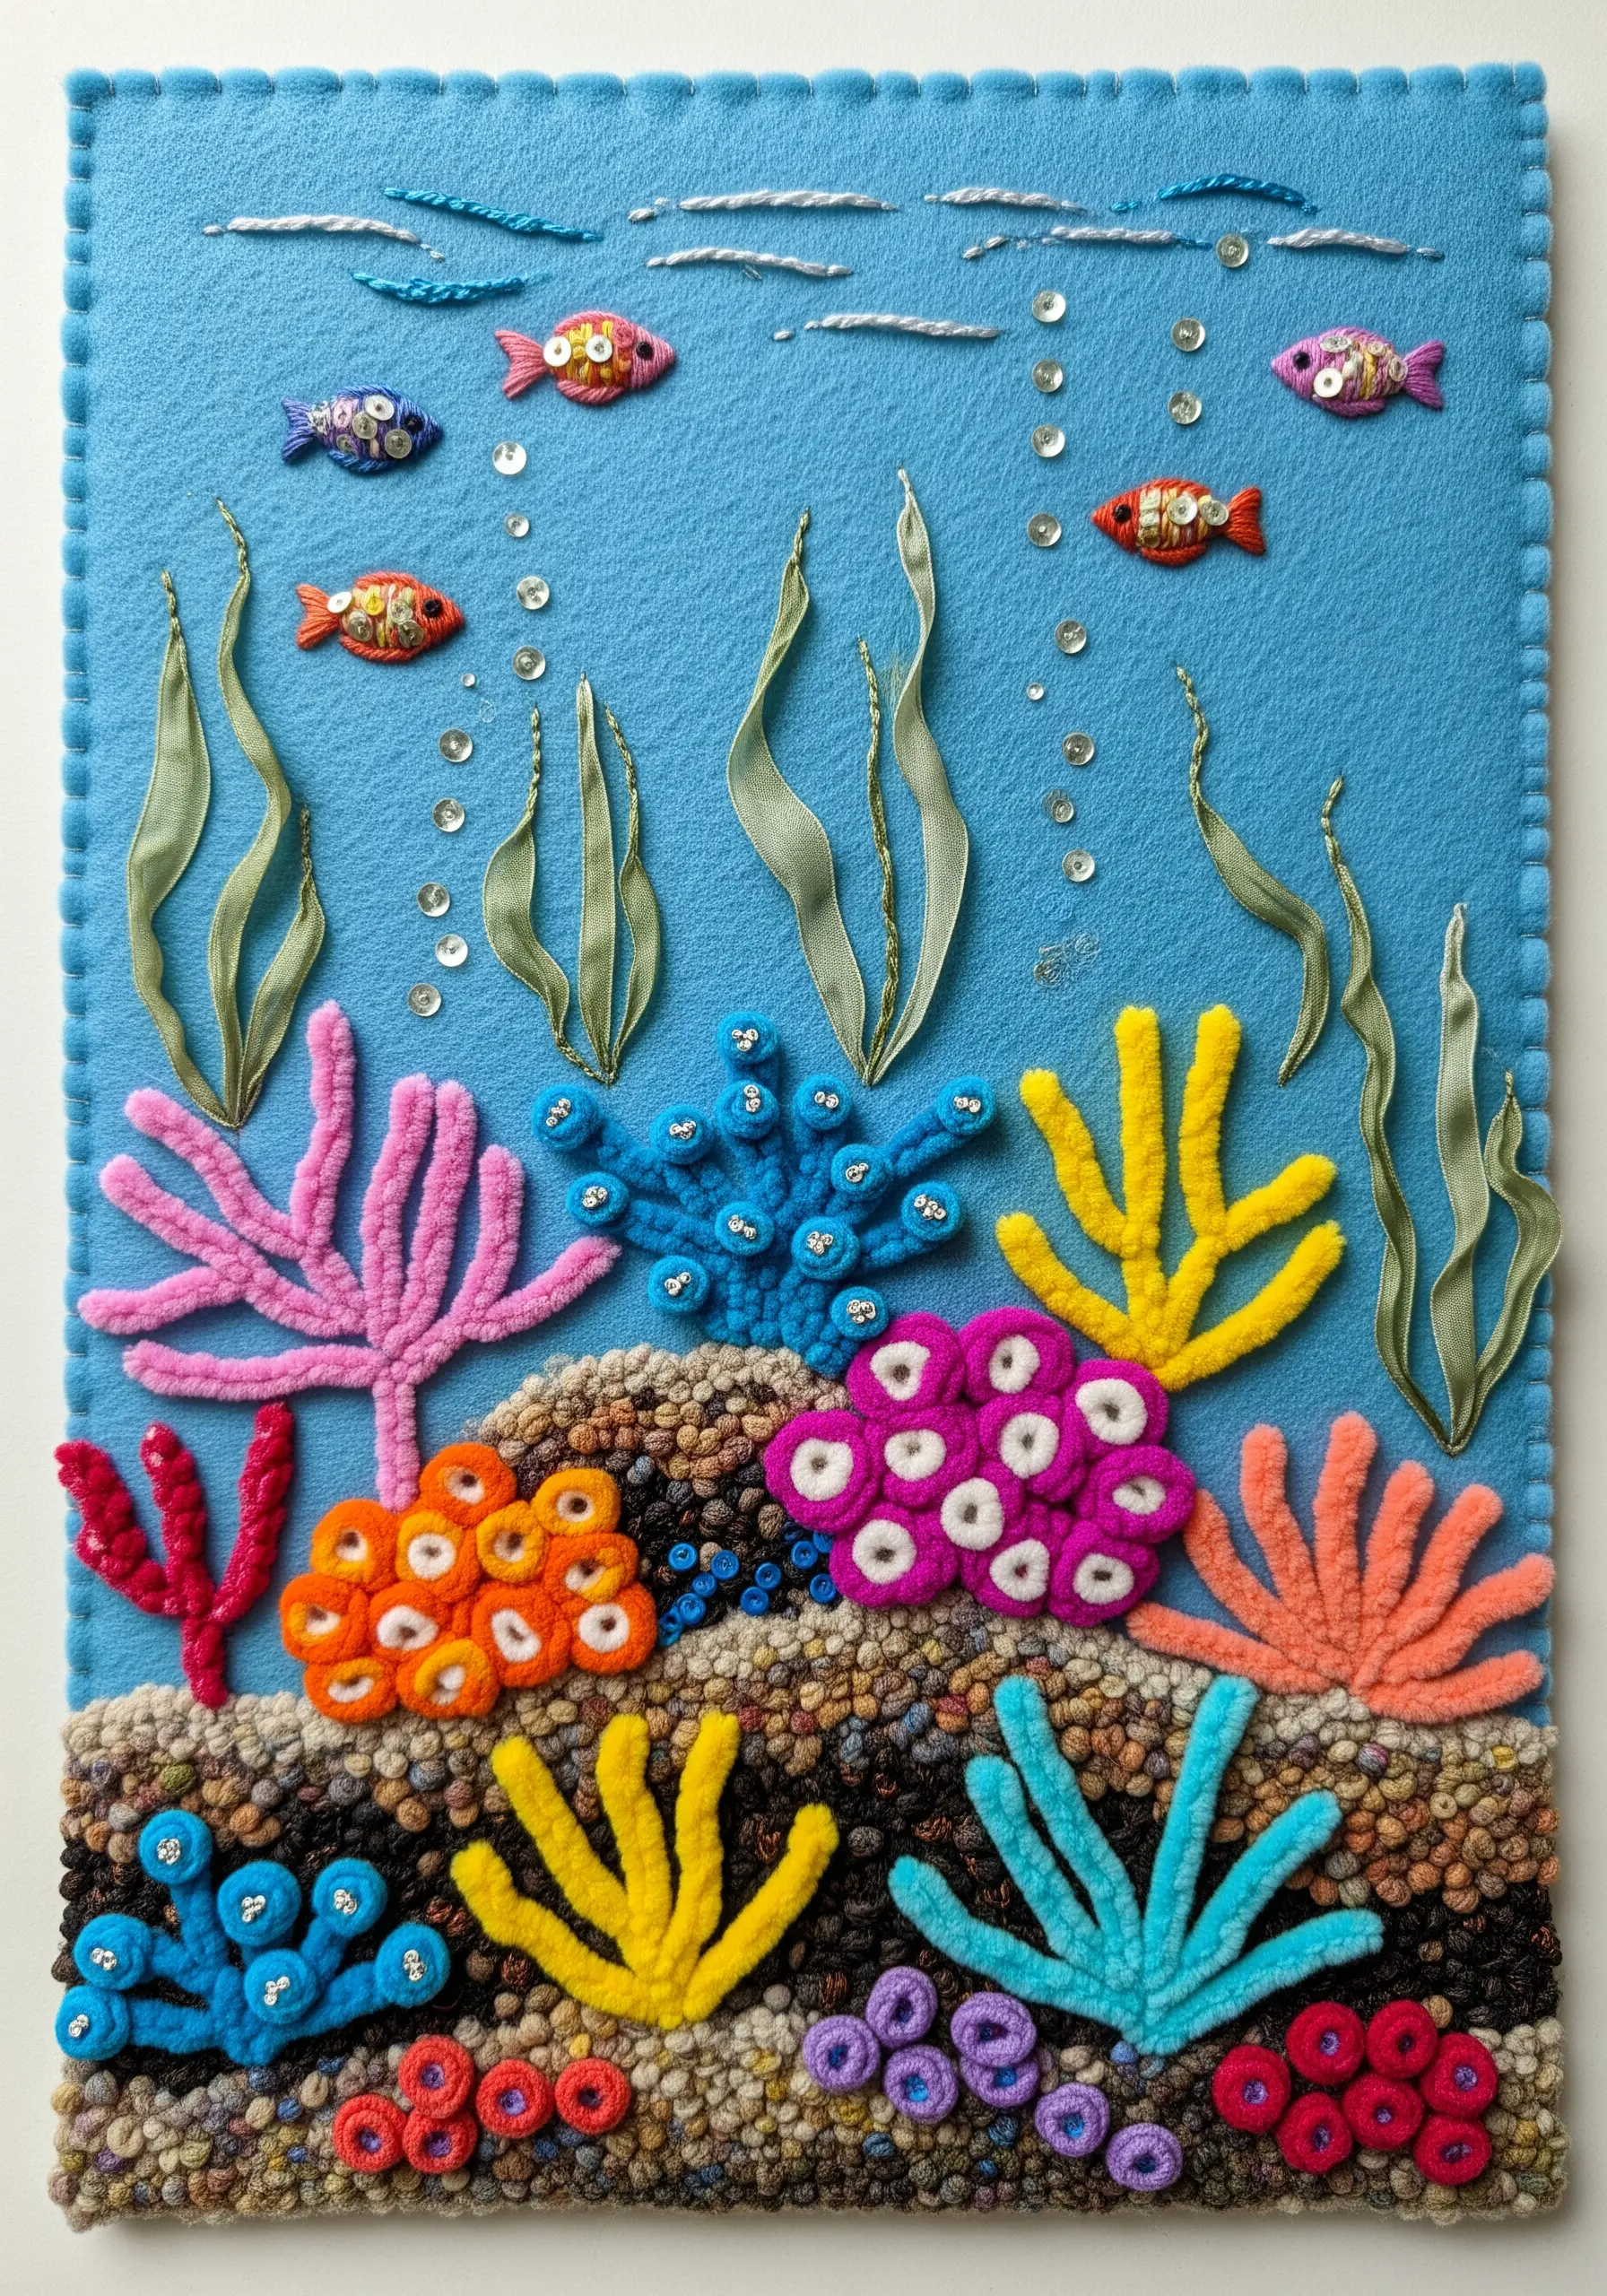
Use a sturdy felt background for this project, as it provides the stability needed to support heavy, dimensional stitching without puckering.
Build your coral structures with chunky yarn, employing stitches like turkey work for shaggy textures and dense French knots for rounded forms.
Incorporate lustrous silk ribbon to create the gentle sway of seaweed, using a single, folded leaf stitch.
Finally, create a pebbled seafloor by stitching a dense mix of seed beads and tiny French knots, adding another layer of intricate texture.
5. Combine Felt Appliqué with Fluffy Clouds

Begin with a felt appliqué base for the balloon, which provides bold, solid blocks of color and clean edges that are easy to work with.
Embellish the felt panels with simple, decorative stitches like running stitch or detached chain stitch to add pattern without overwhelming the design.
For the clouds, needle-felt soft wool roving directly onto the backing fabric. This creates a fluffy, three-dimensional effect that contrasts beautifully with the flat, crisp felt of the balloon.
Use a woven stitch with thick twine for the basket to add a final, realistic texture.
6. Capture Ethereal Steam with Wool Roving

Create a delicate, minimalist design by outlining your teacup with a simple backstitch, keeping the focus on the mixed-media element.
Embellish the cup with a cluster of tiny bullion knot flowers, which add a pop of color and texture at the base.
To form the steam, gently pull apart a few wisps of white wool roving, arrange them into a swirling shape, and secure them with tiny, nearly invisible tacking stitches.
This technique perfectly captures the light, airy quality of steam in a way that thread cannot.
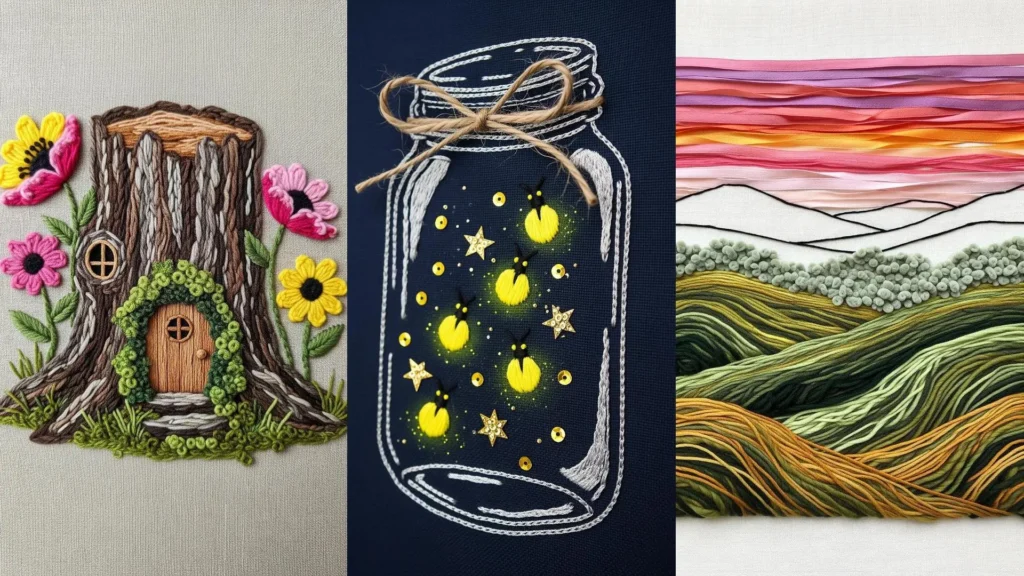
7. Craft a Tree Stump House with Yarn

Mimic the texture of bark by using thick, variegated wool yarn laid down in long vertical stitches, which creates a rustic, wood-grain effect.
Introduce a different material for the door by appliquéing a small piece of faux leather or wood veneer, providing a surprising and realistic focal point.
Create a lush, overgrown wreath around the door with dense green French knots.
For the flowers, use layered detached chain stitches (lazy daisies) to build dimensional petals that stand out from the surface.
8. Sculpt a Felt Flower Bouquet
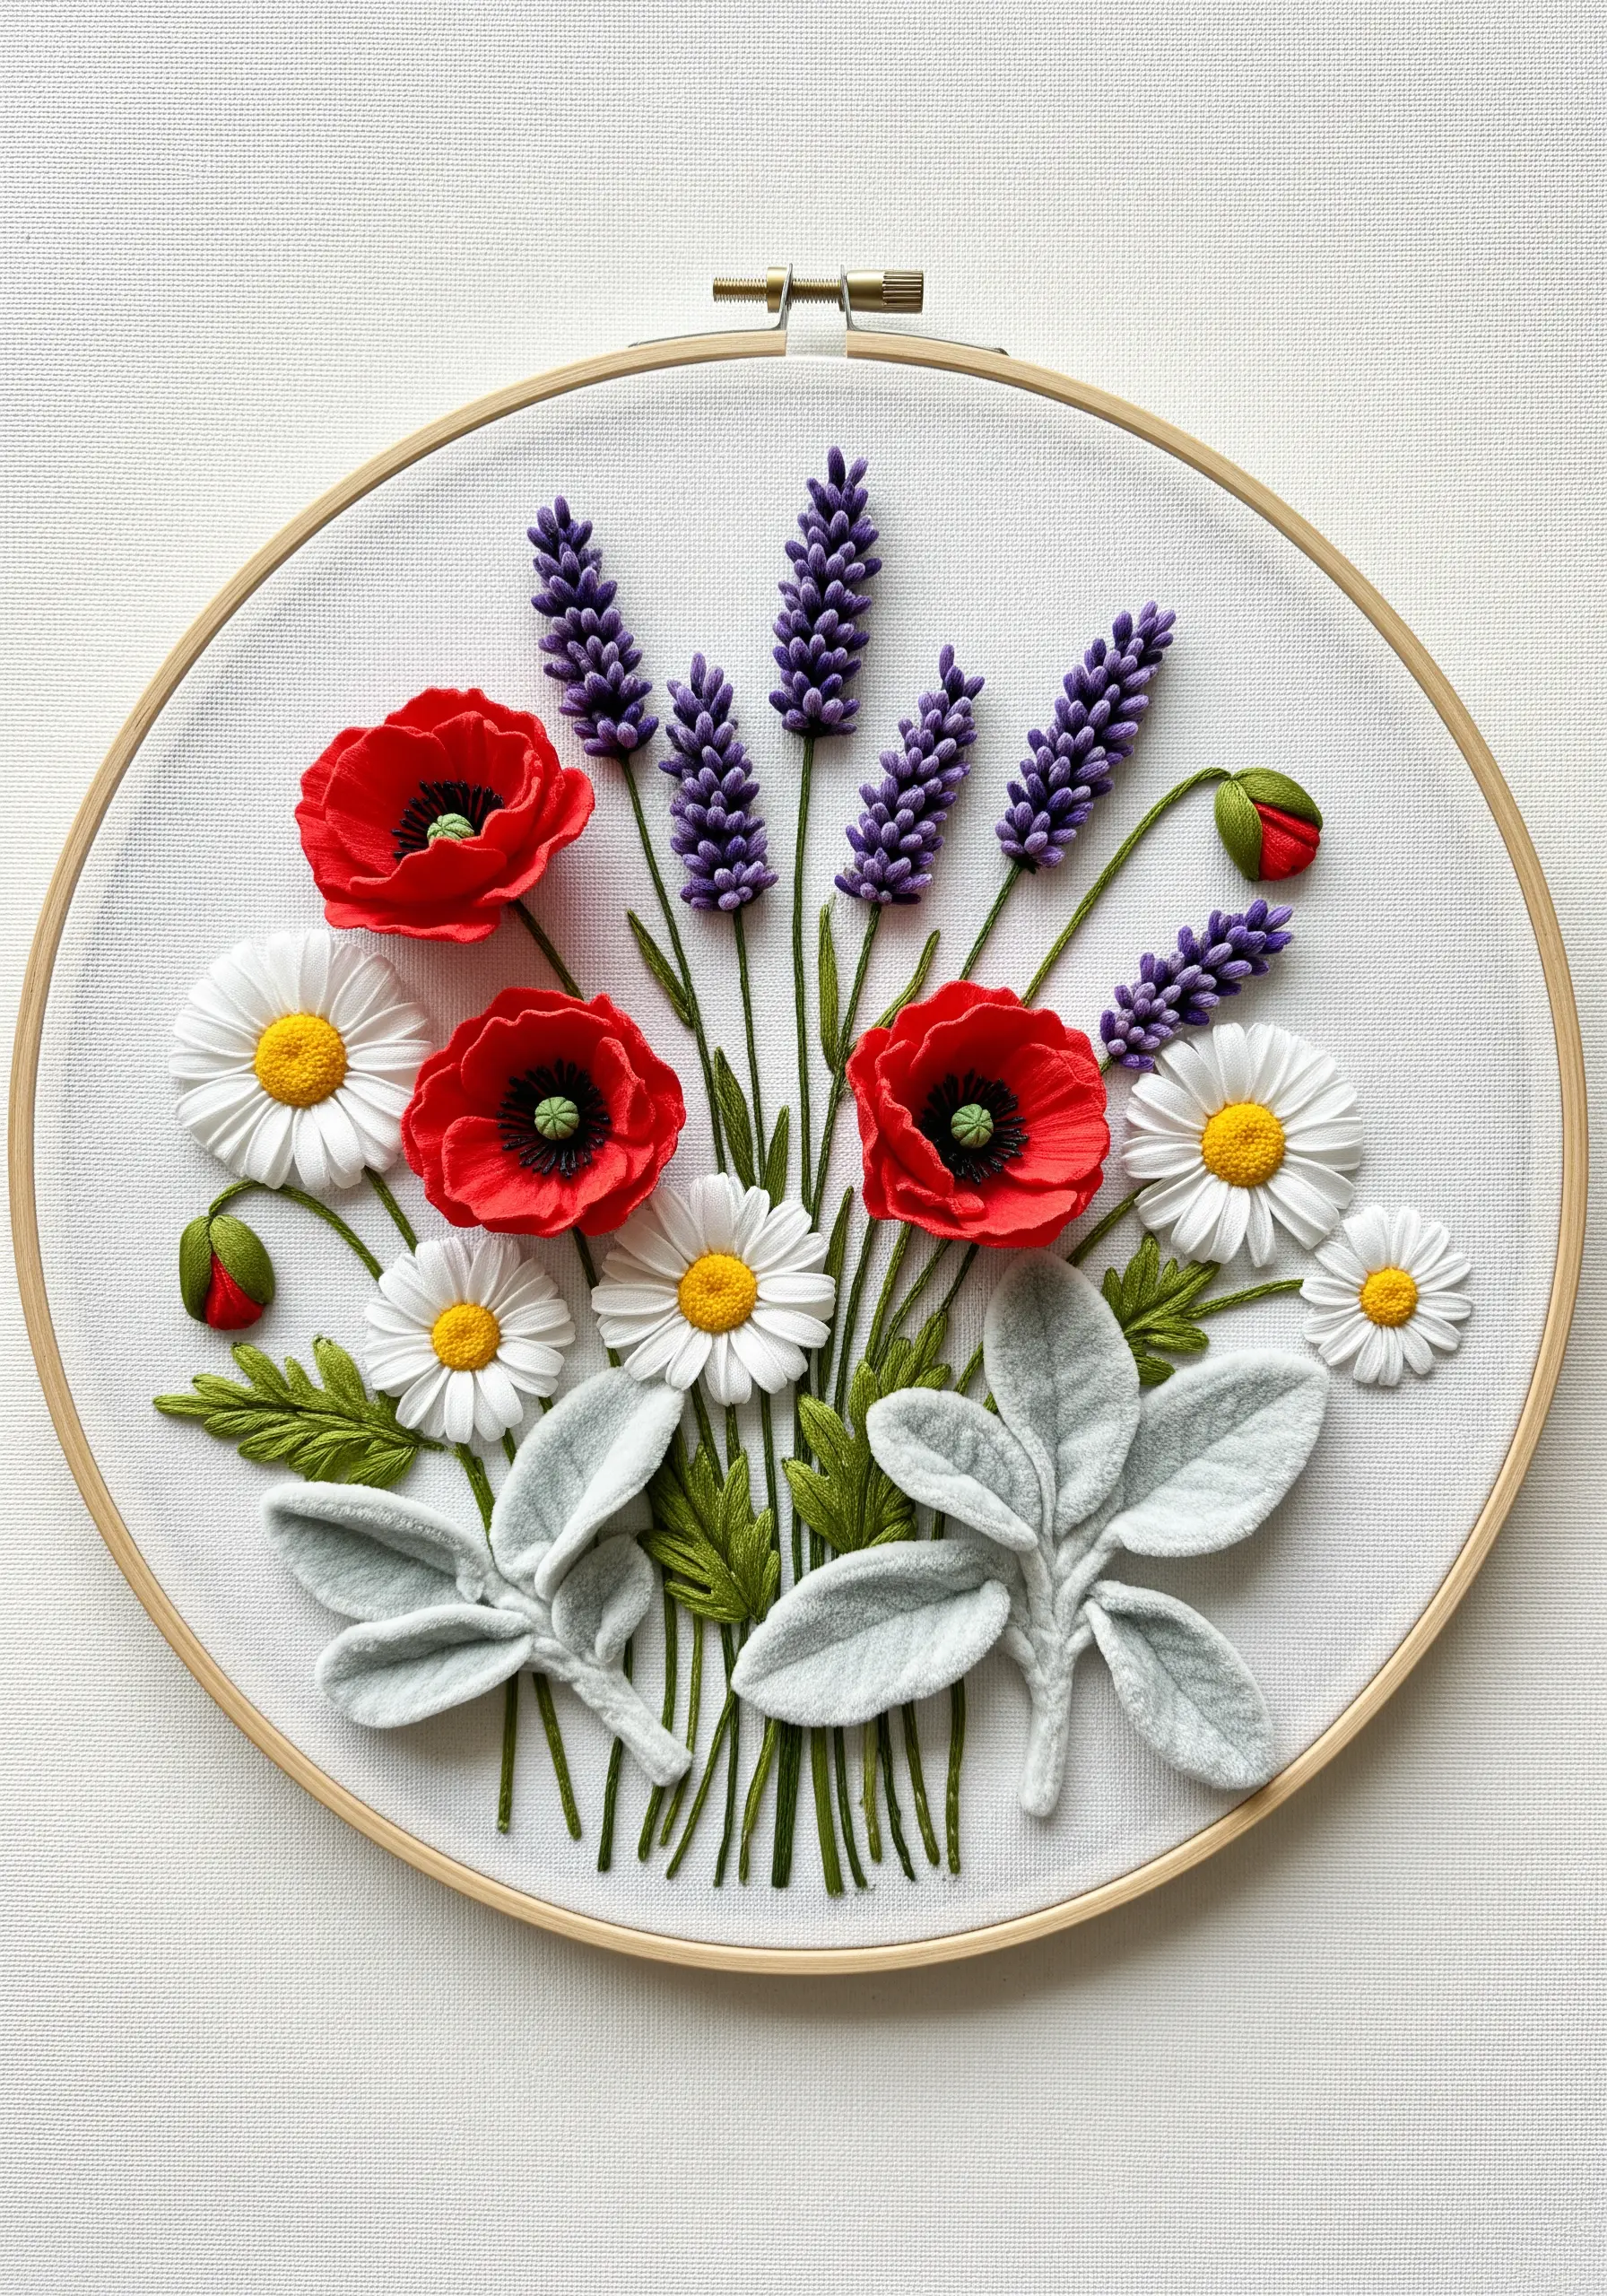
Move beyond flat stitching and into stumpwork by creating your flowers from shaped pieces of felt.
Cut individual petals for the poppies and daisies, then stitch them down only at the base, allowing them to lift away from the fabric for a true 3D effect.
This method allows you to create soft, sculptural forms with clean, defined shapes, giving your bouquet a modern yet handcrafted feel.
Use a padded satin stitch for the flower centers to add even more dimension and realism.
9. Design an Overgrown Doorway
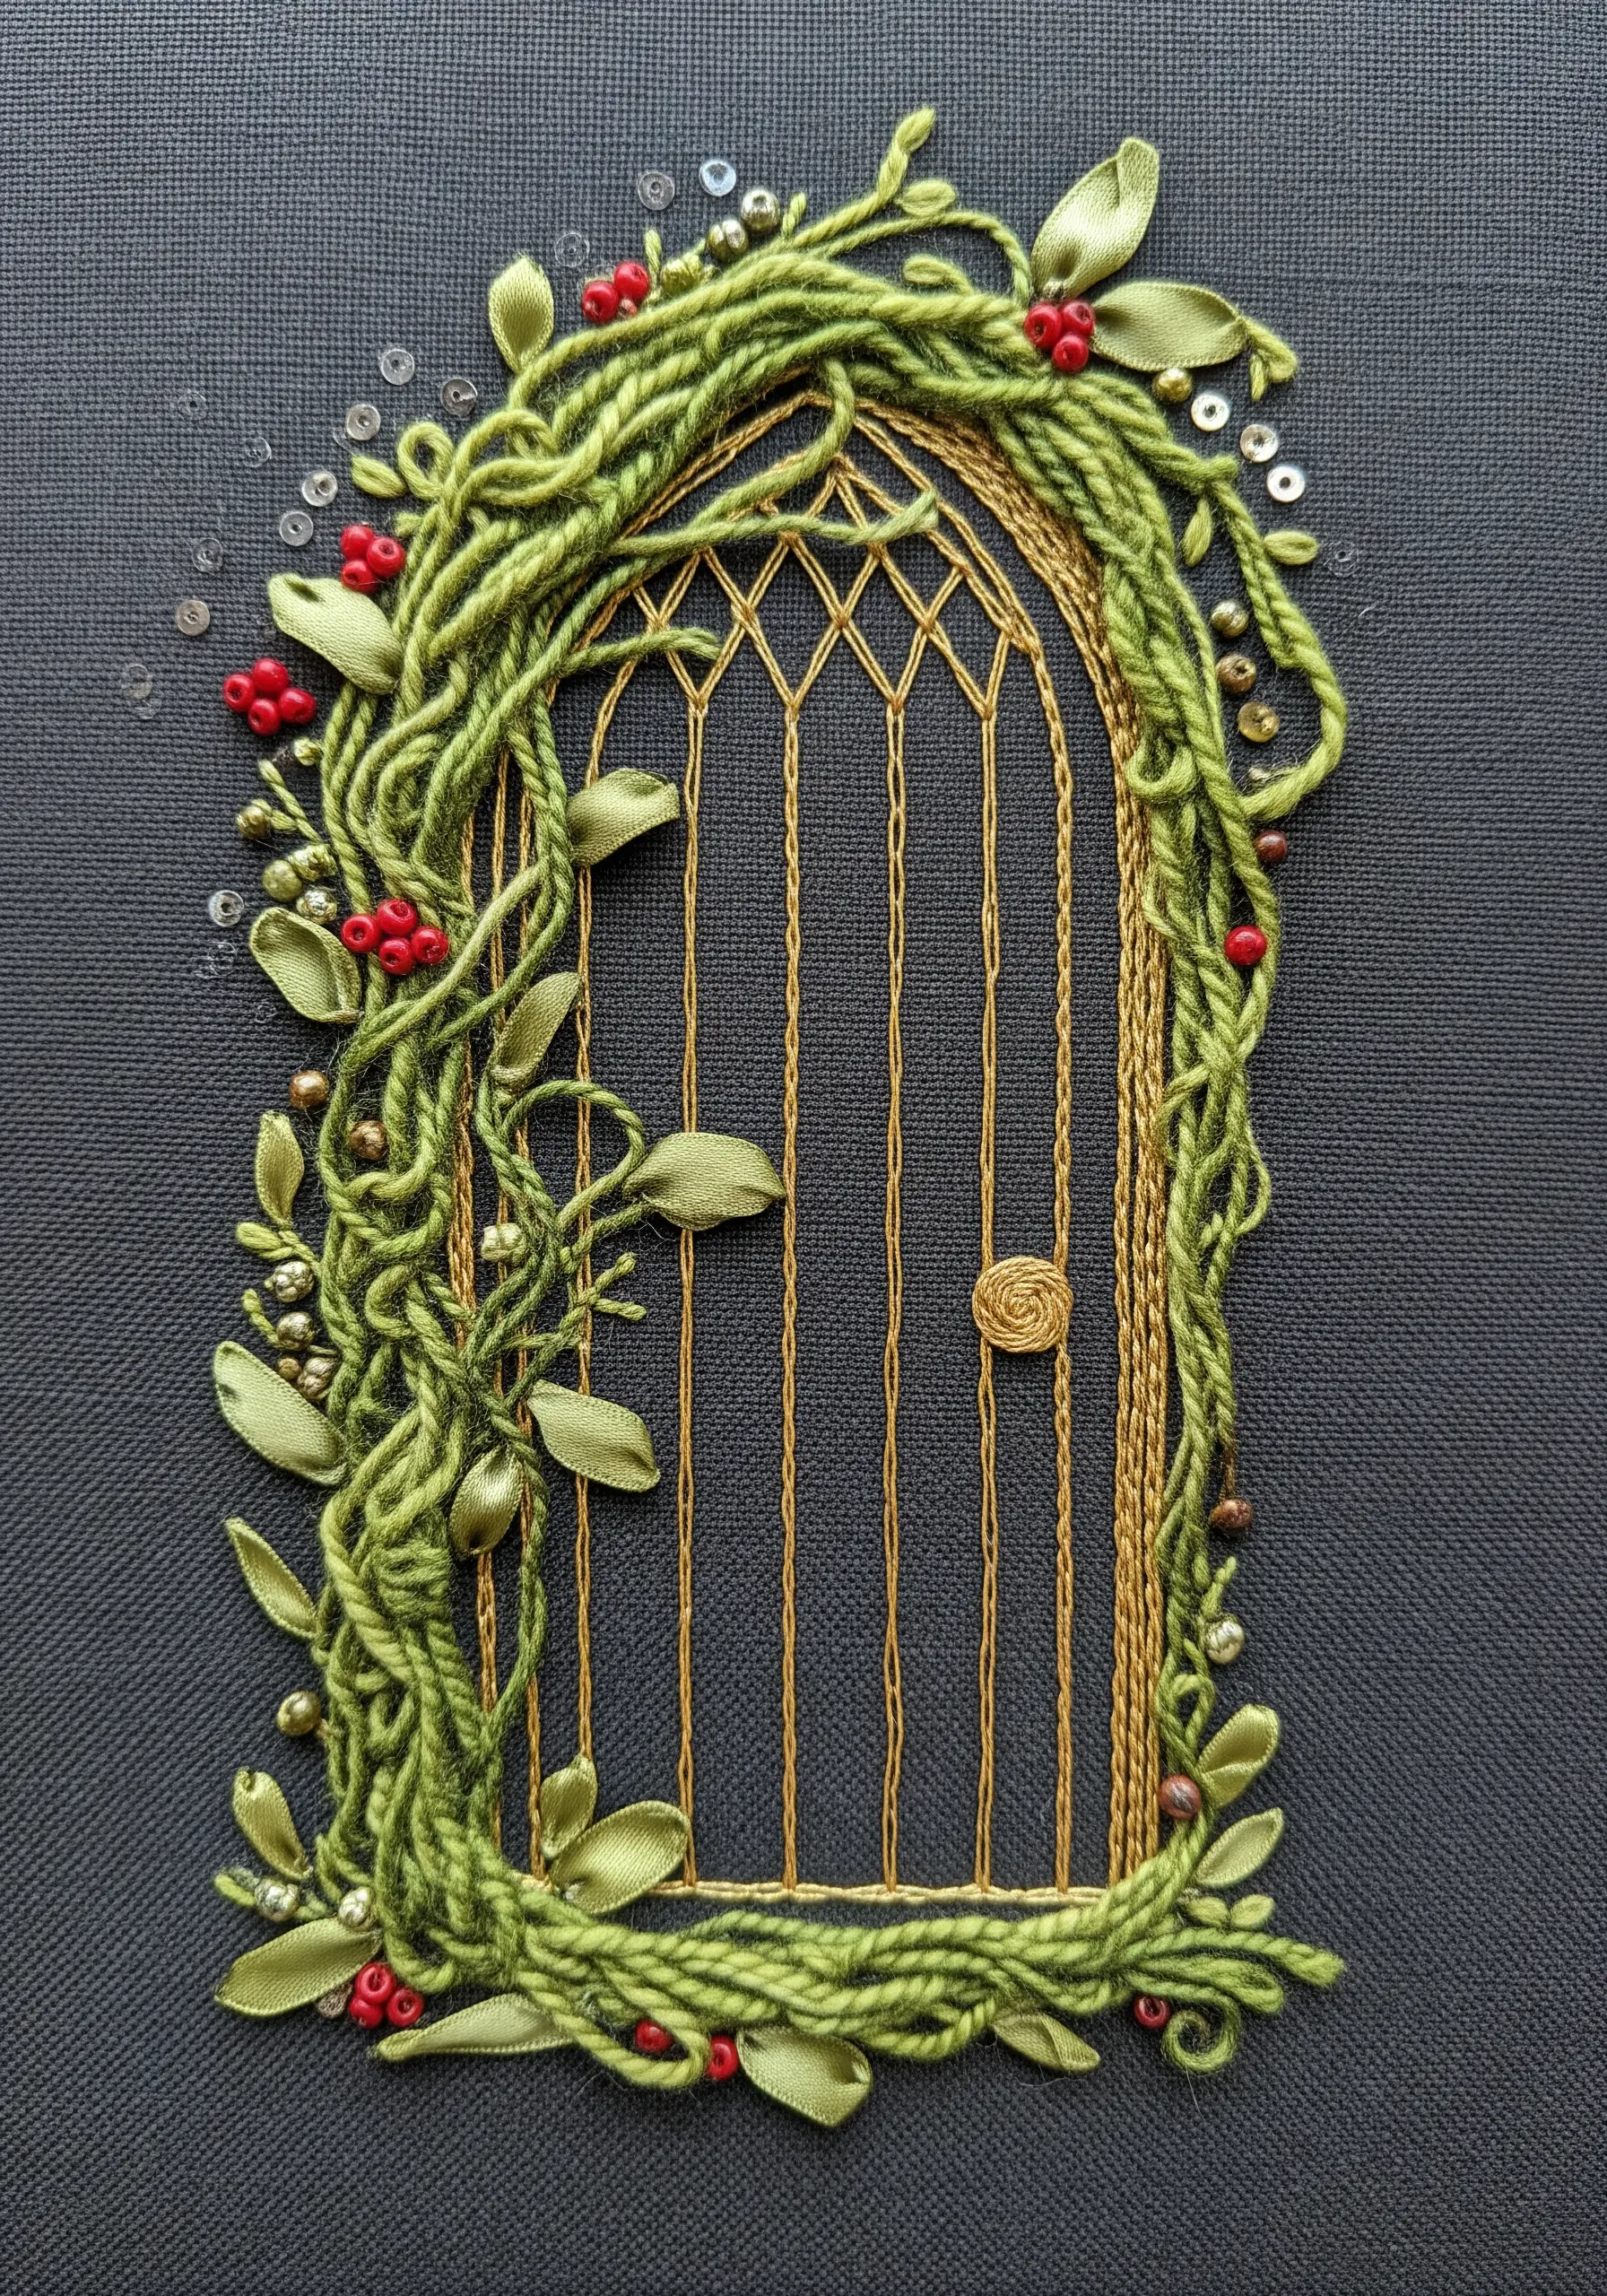
Define the structure of the door with a sharp metallic thread to create a solid, architectural base.
Create the winding, overgrown vines by couching down a thick, textured yarn, which allows you to create fluid, organic curves with ease.
Weave in individual leaves using silk ribbon in a simple leaf stitch—the sheen of the ribbon will contrast beautifully with the matte yarn.
Finally, scatter red glass beads for berries and tiny metallic seed beads for a touch of magical sparkle.
10. Craft a Padded Rainbow Chameleon
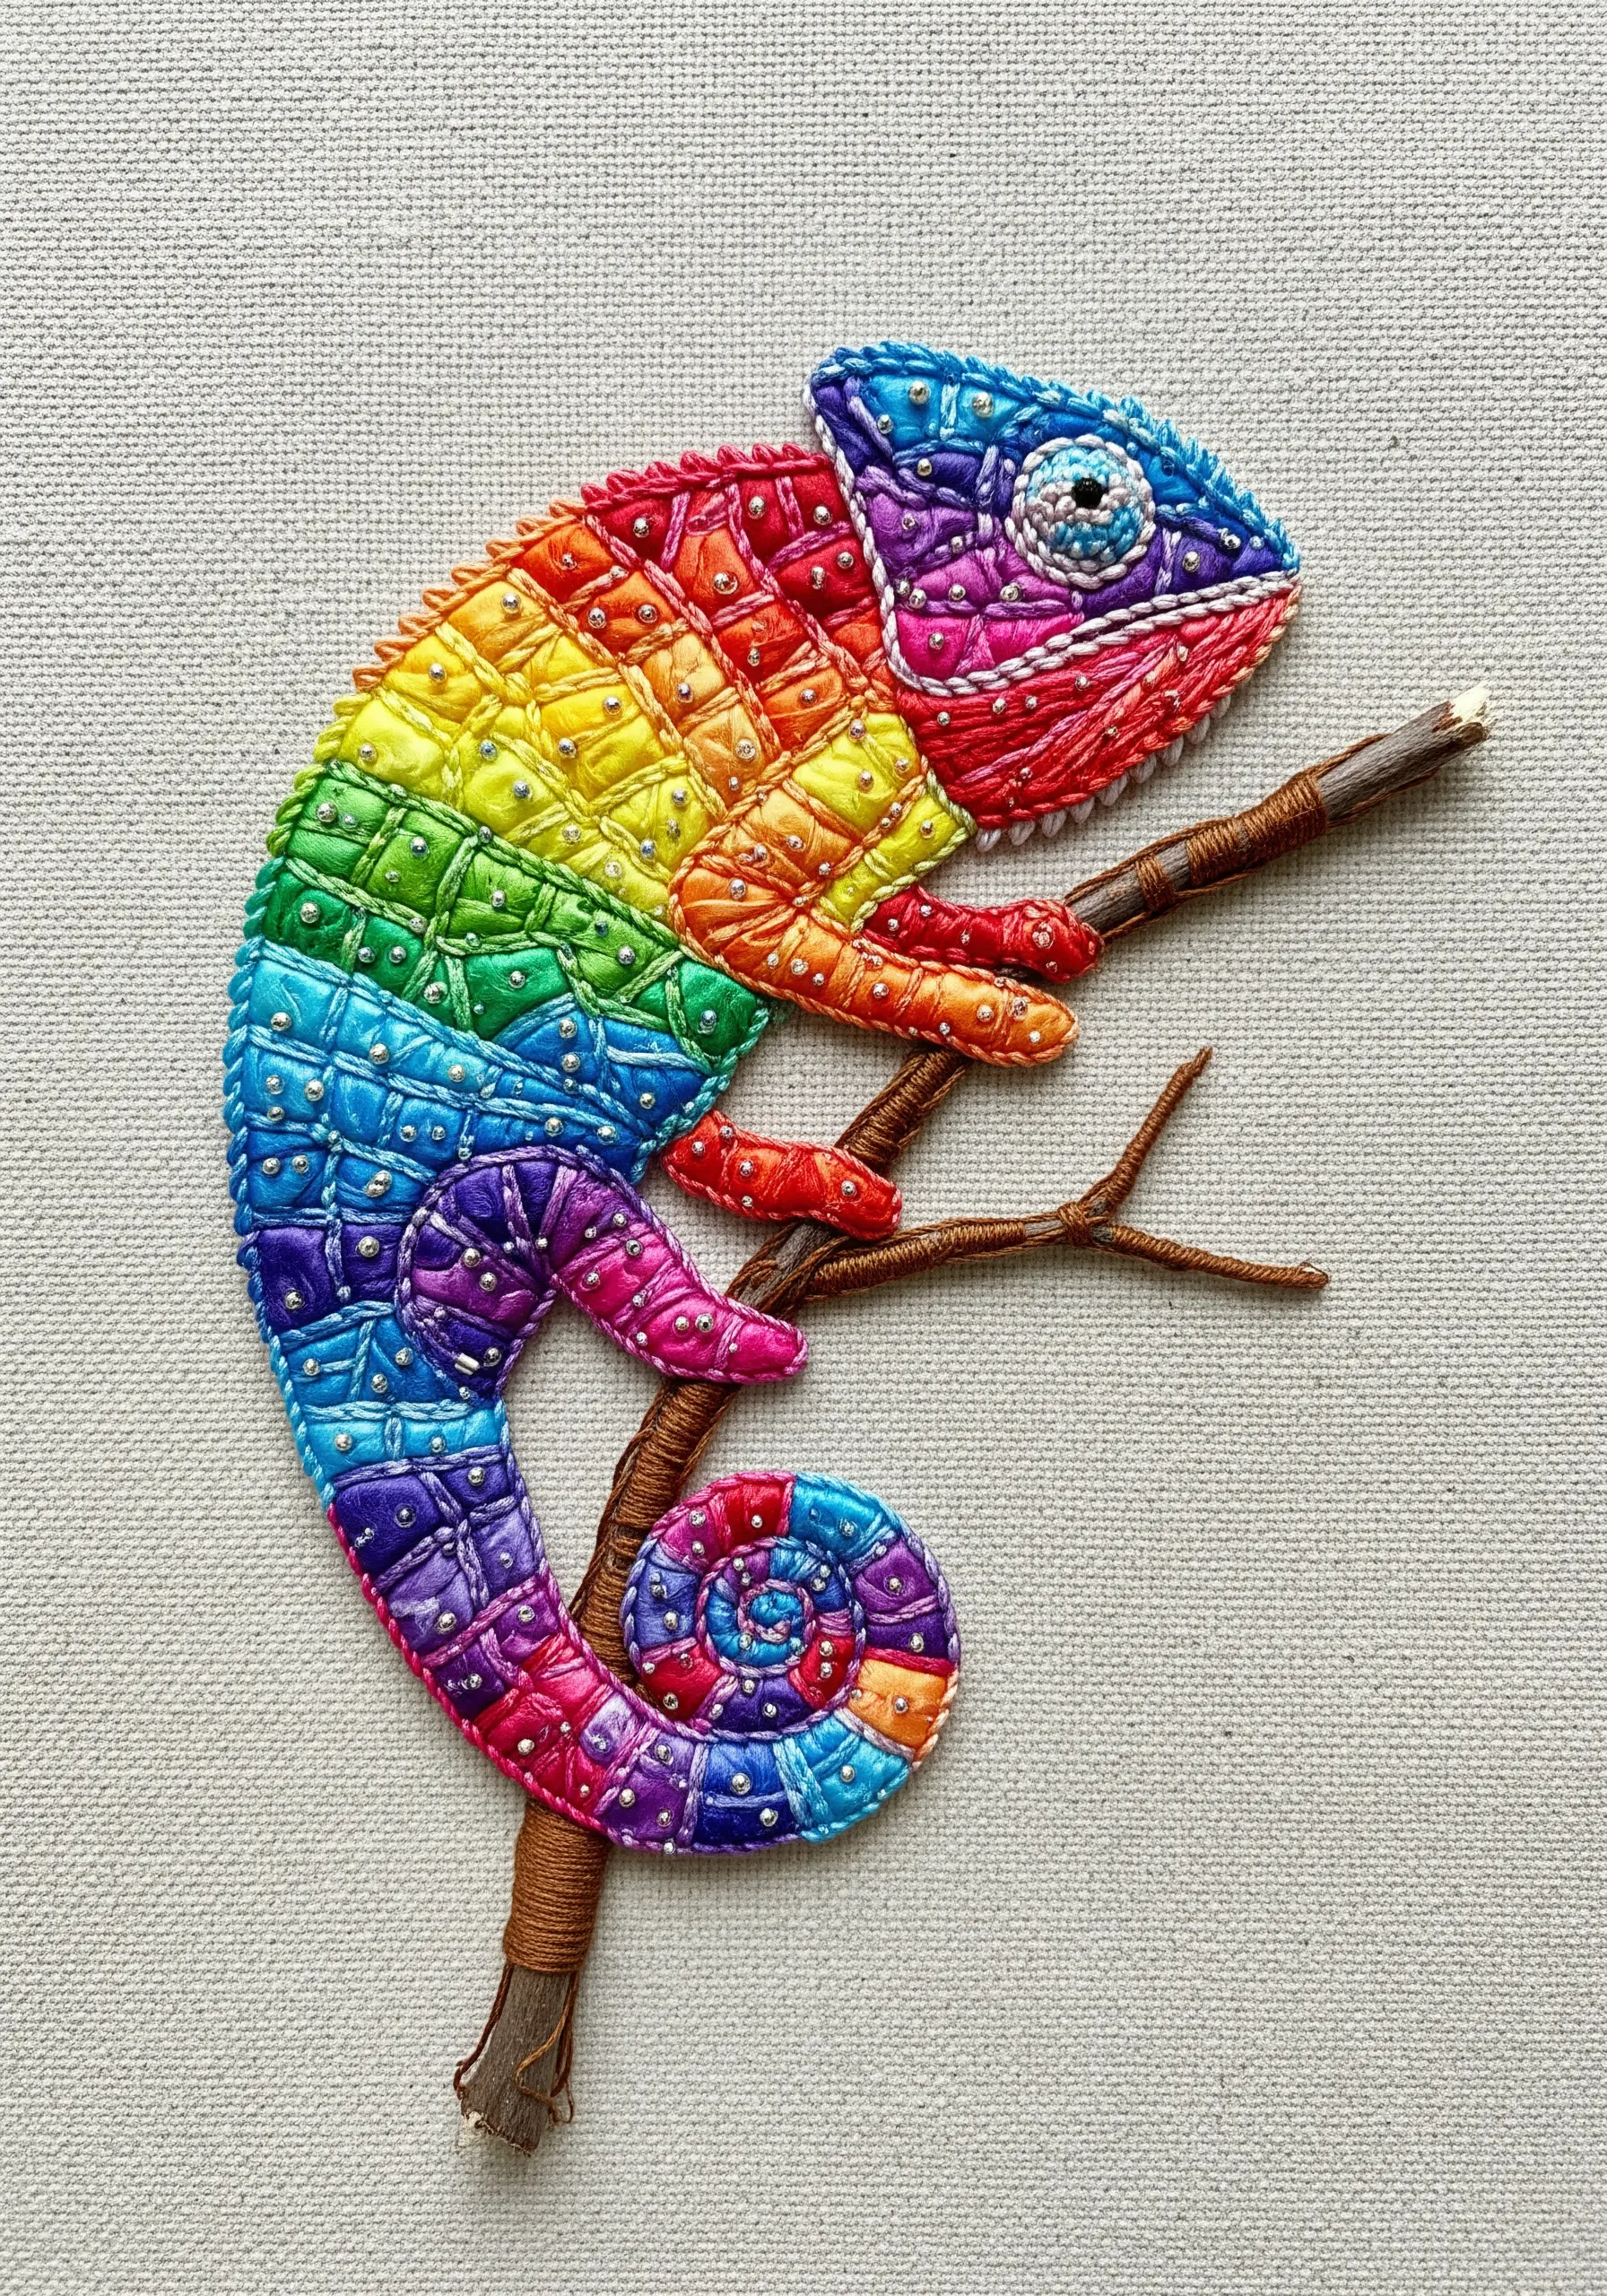
Give your chameleon a high-relief, sculptural form by using padded appliqué for each color segment of its body.
Place a small amount of felt or batting behind each fabric piece before stitching it down to create a puffy, 3D surface.
Define the scales with simple backstitches and add a single, tiny bead to the center of each one to catch the light and add a subtle, reptilian shimmer.
For an ultra-realistic touch, incorporate a real, small twig for the branch it rests on.
11. Stitch a Library of Mixed Textures
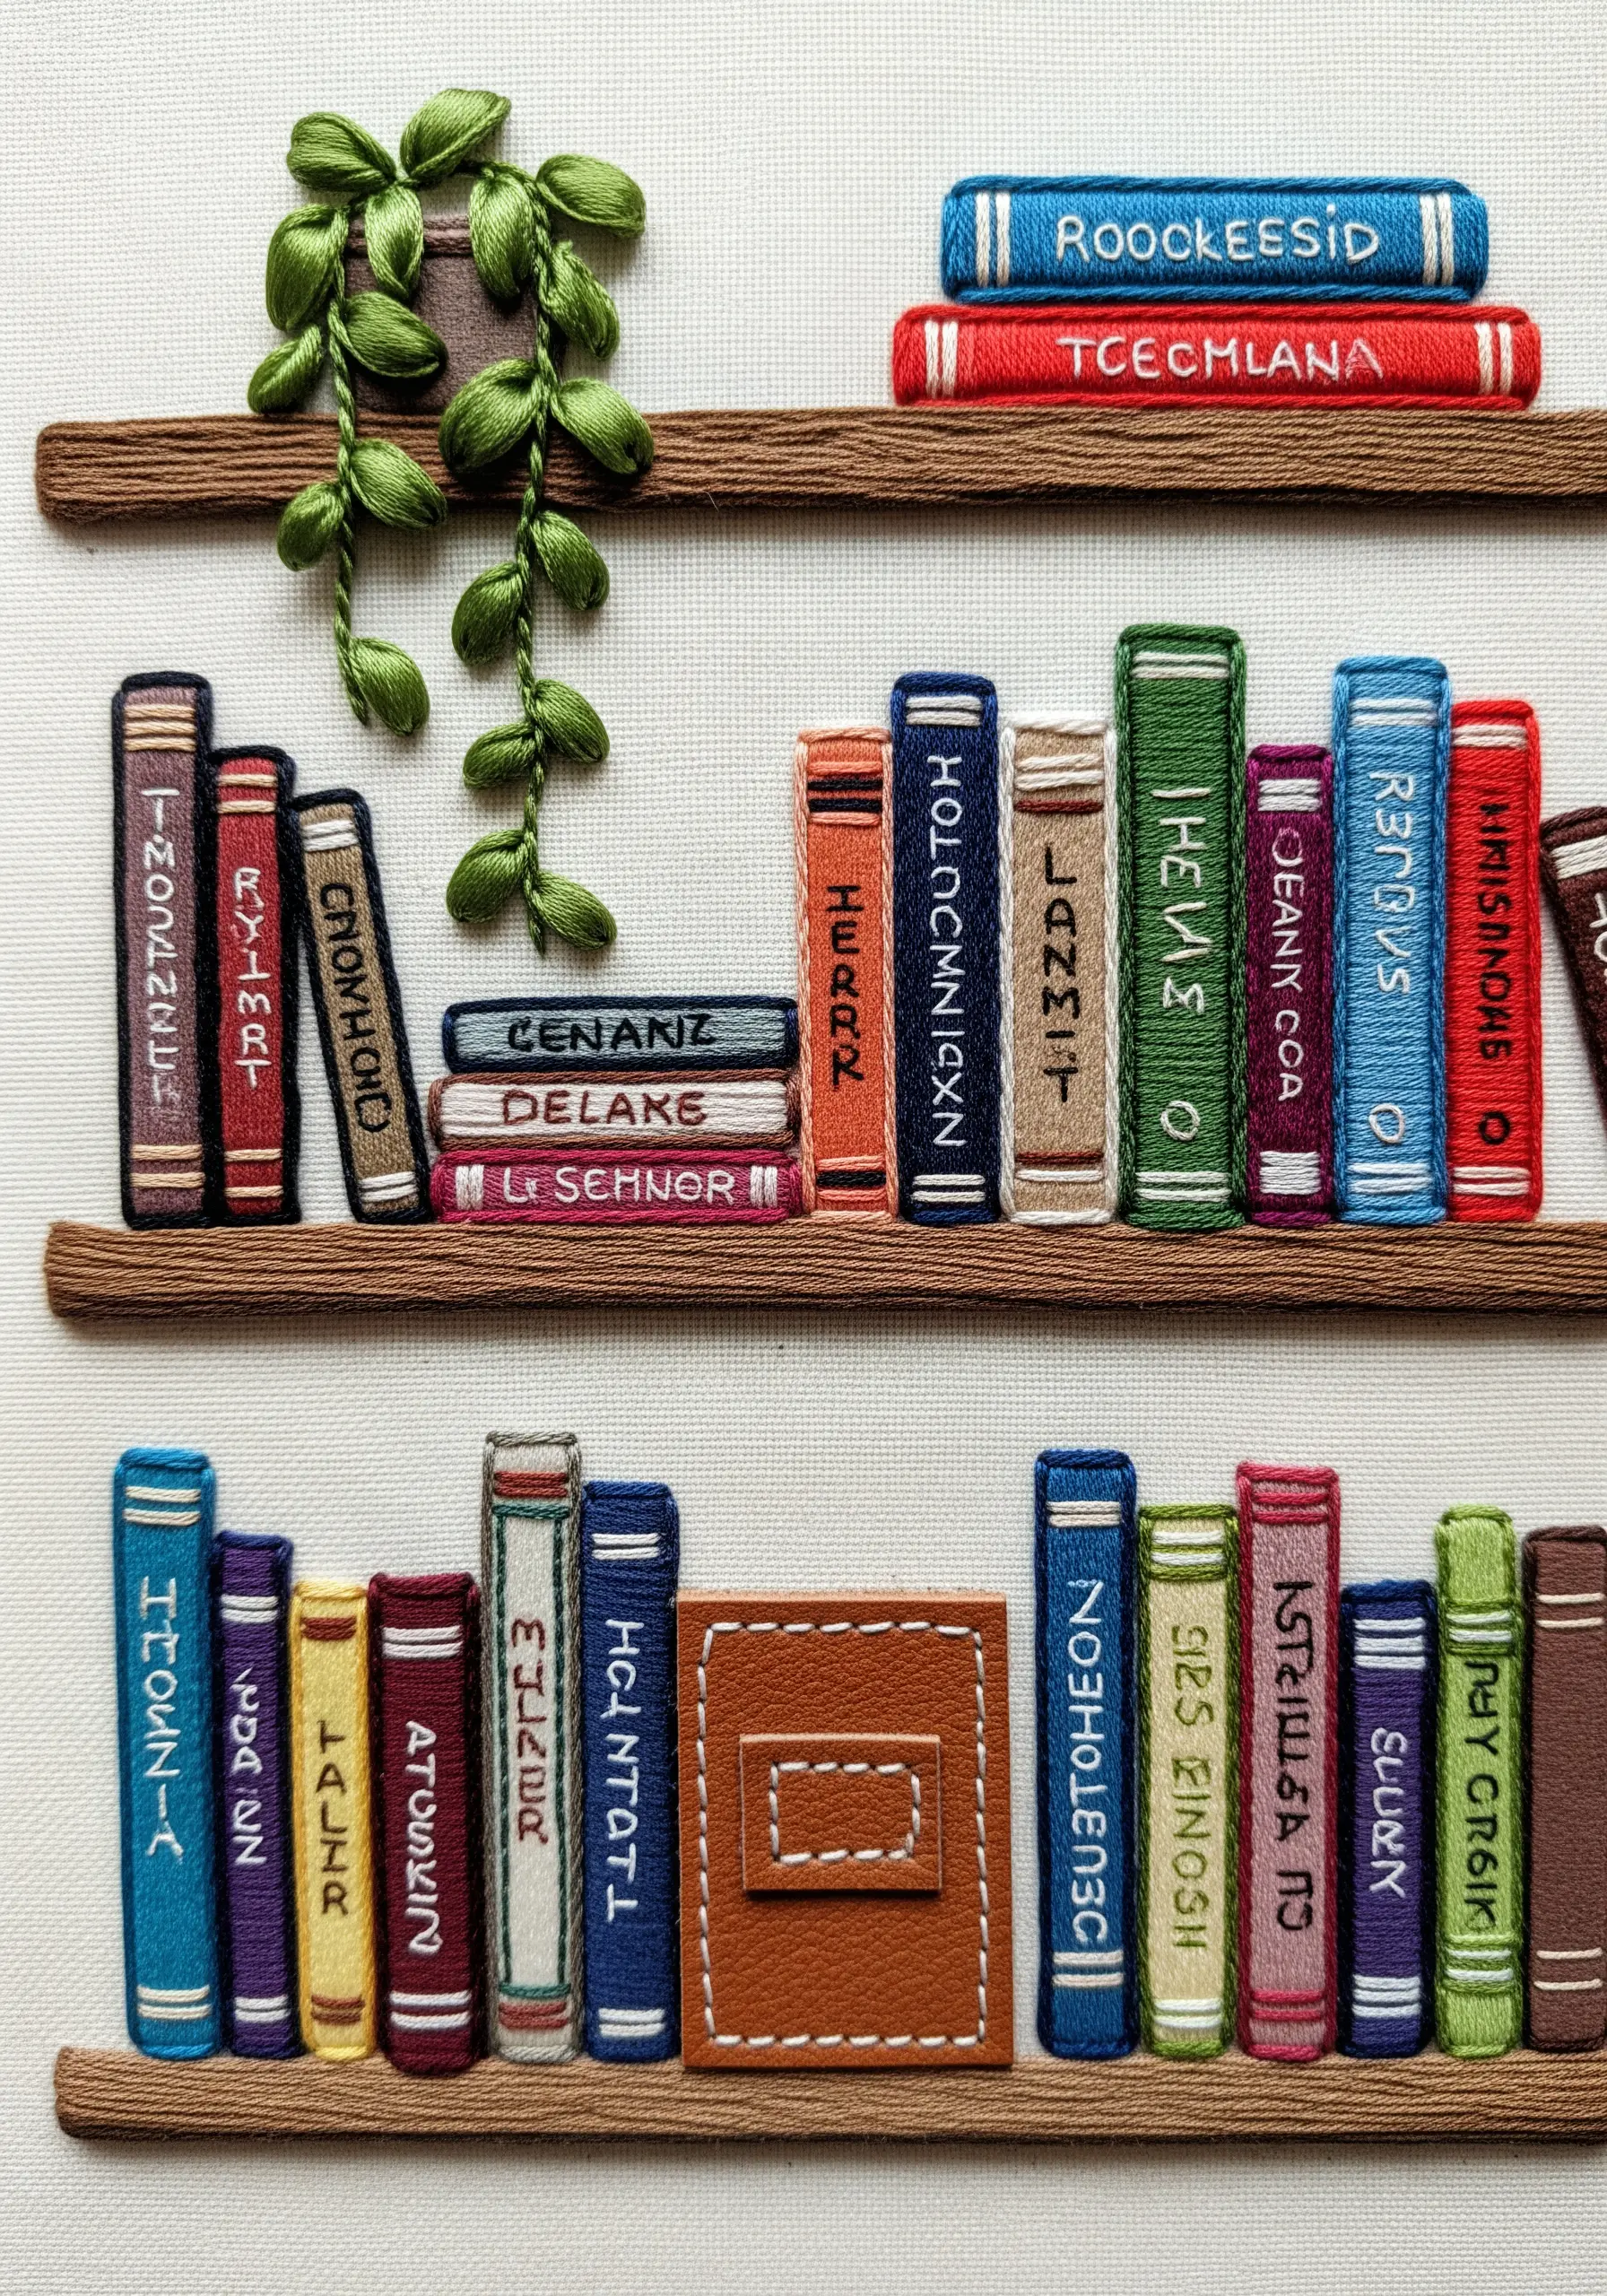
Create your rows of books primarily with dense satin stitch to give them a solid, uniform appearance.
To add visual interest and a tactile surprise, introduce a single book made from a small piece of faux leather or felt appliqué, using a simple running stitch for the binding detail.
This subtle shift in material instantly draws the eye and adds a layer of sophistication.
Add a final touch of life with a small trailing plant stitched with green ribbon embroidery, whose glossy leaves provide yet another texture.
12. Capture Fireflies in a Jar
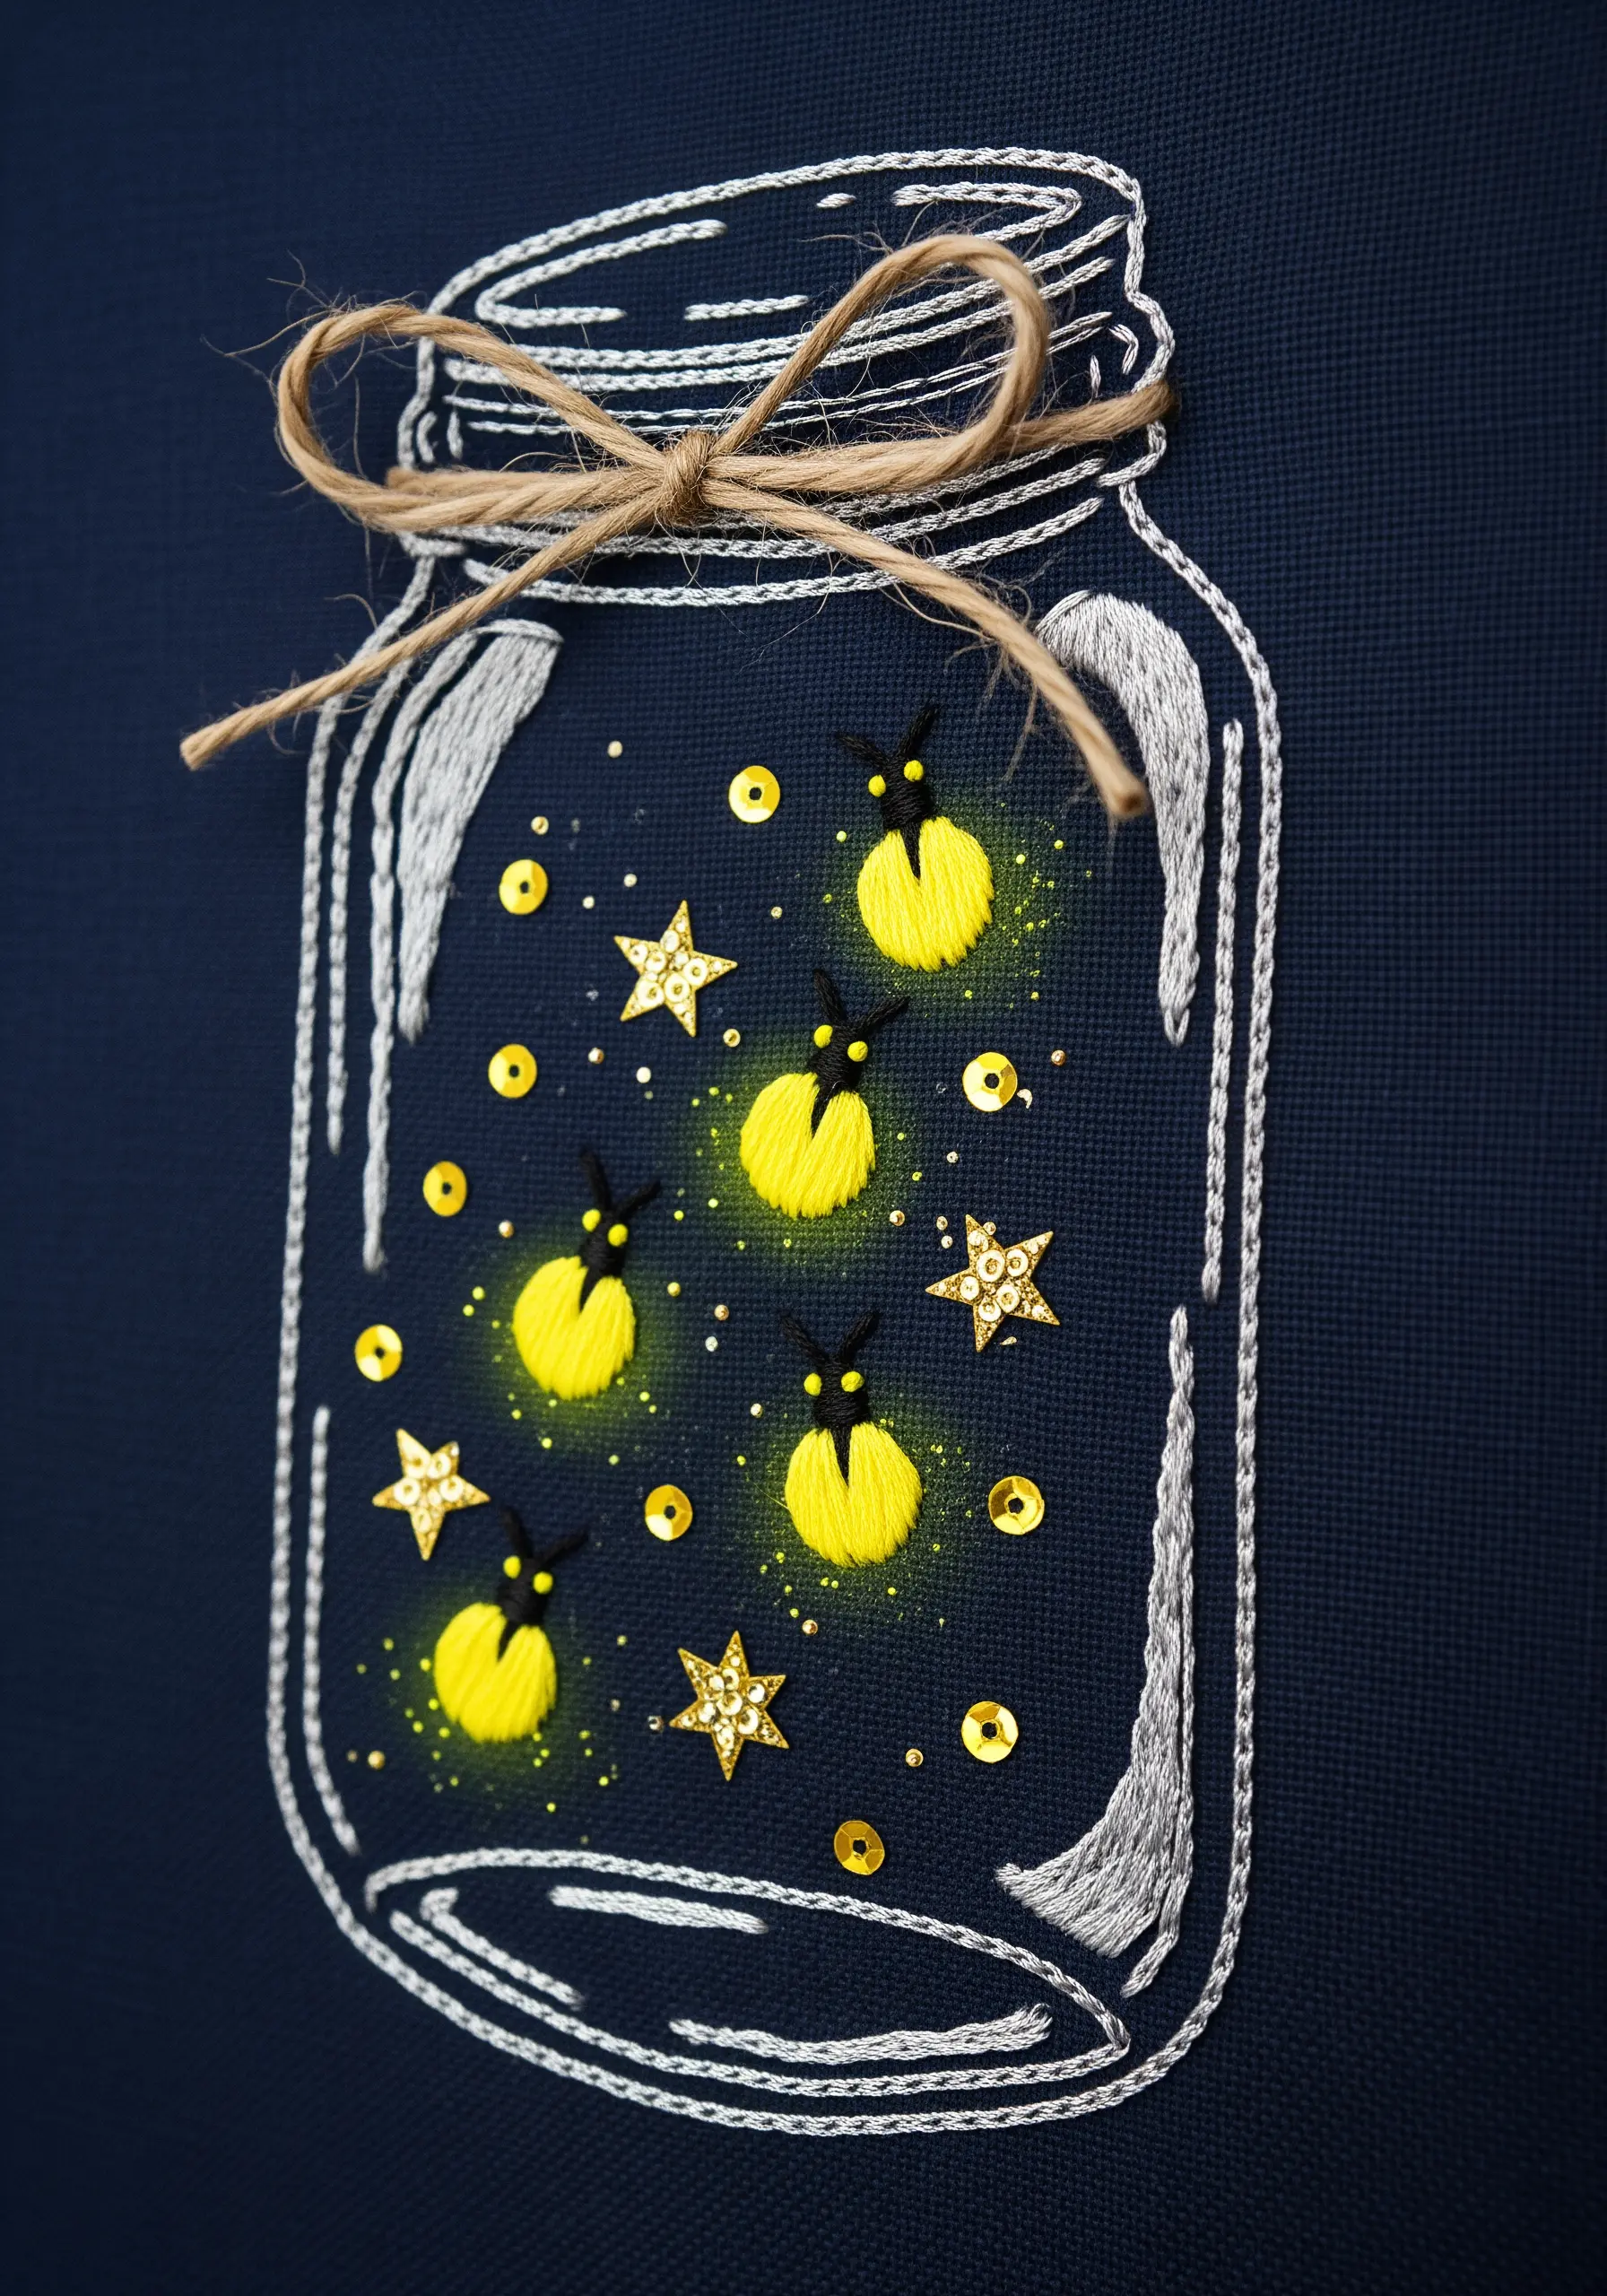
To make the fireflies truly glow, stitch them with a vibrant, almost neon yellow satin stitch on a dark navy or black fabric to maximize the contrast.
Amplify their light by surrounding each one with a few strategically placed gold sequins and tiny seed beads, which will catch and reflect the light.
You can even add a subtle halo effect with a light touch of gold fabric paint applied with a dry brush.
Finish the piece by tying a small piece of real twine around the jar’s lid for a charming, rustic detail.
13. Paint a Landscape with Ribbon and Yarn
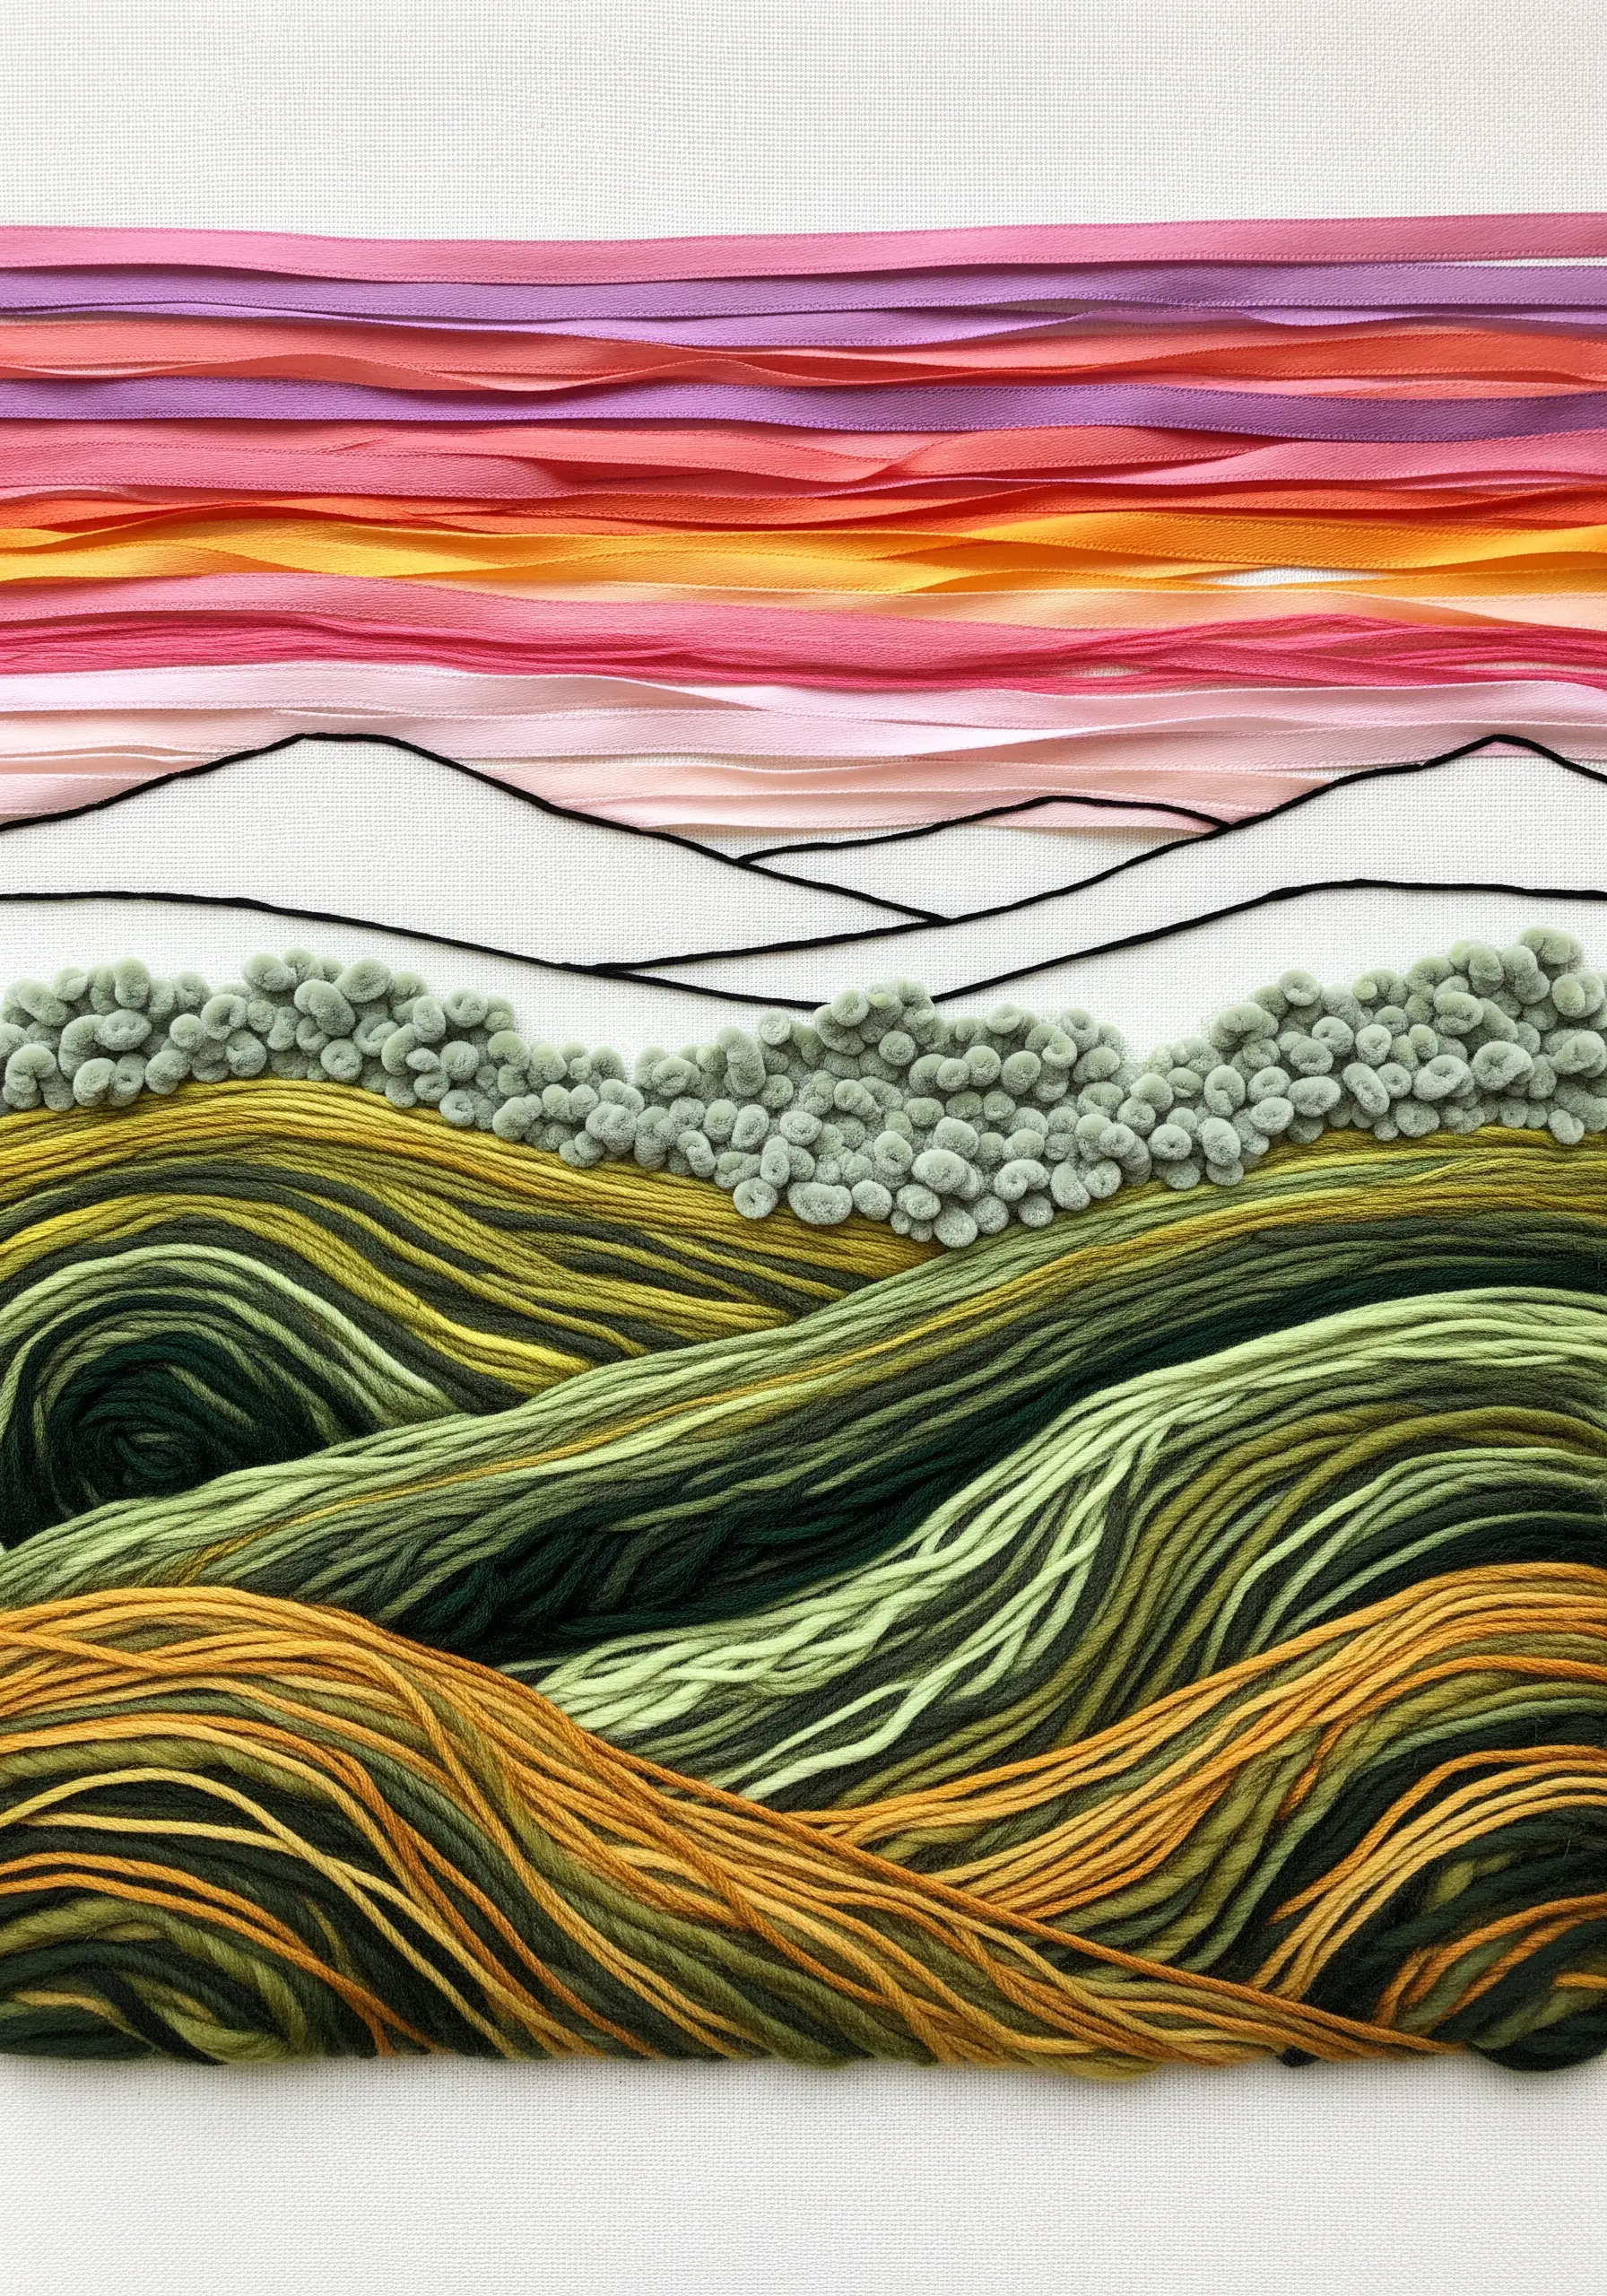
Create dramatic, rolling hills by couching down thick, variegated yarn in long, swirling patterns that follow the contours of the land.
For the texture of distant trees or shrubs, use dense clusters of French knots in muted green tones.
The most innovative element is the sky: create a painterly sunset by laying down overlapping strips of wide organza or silk ribbon.
Secure the ribbons only at the top and bottom, allowing their colors to blend seamlessly in a way that mimics a watercolor wash.
14. Sculpt a Dragon Guarding a Crystal
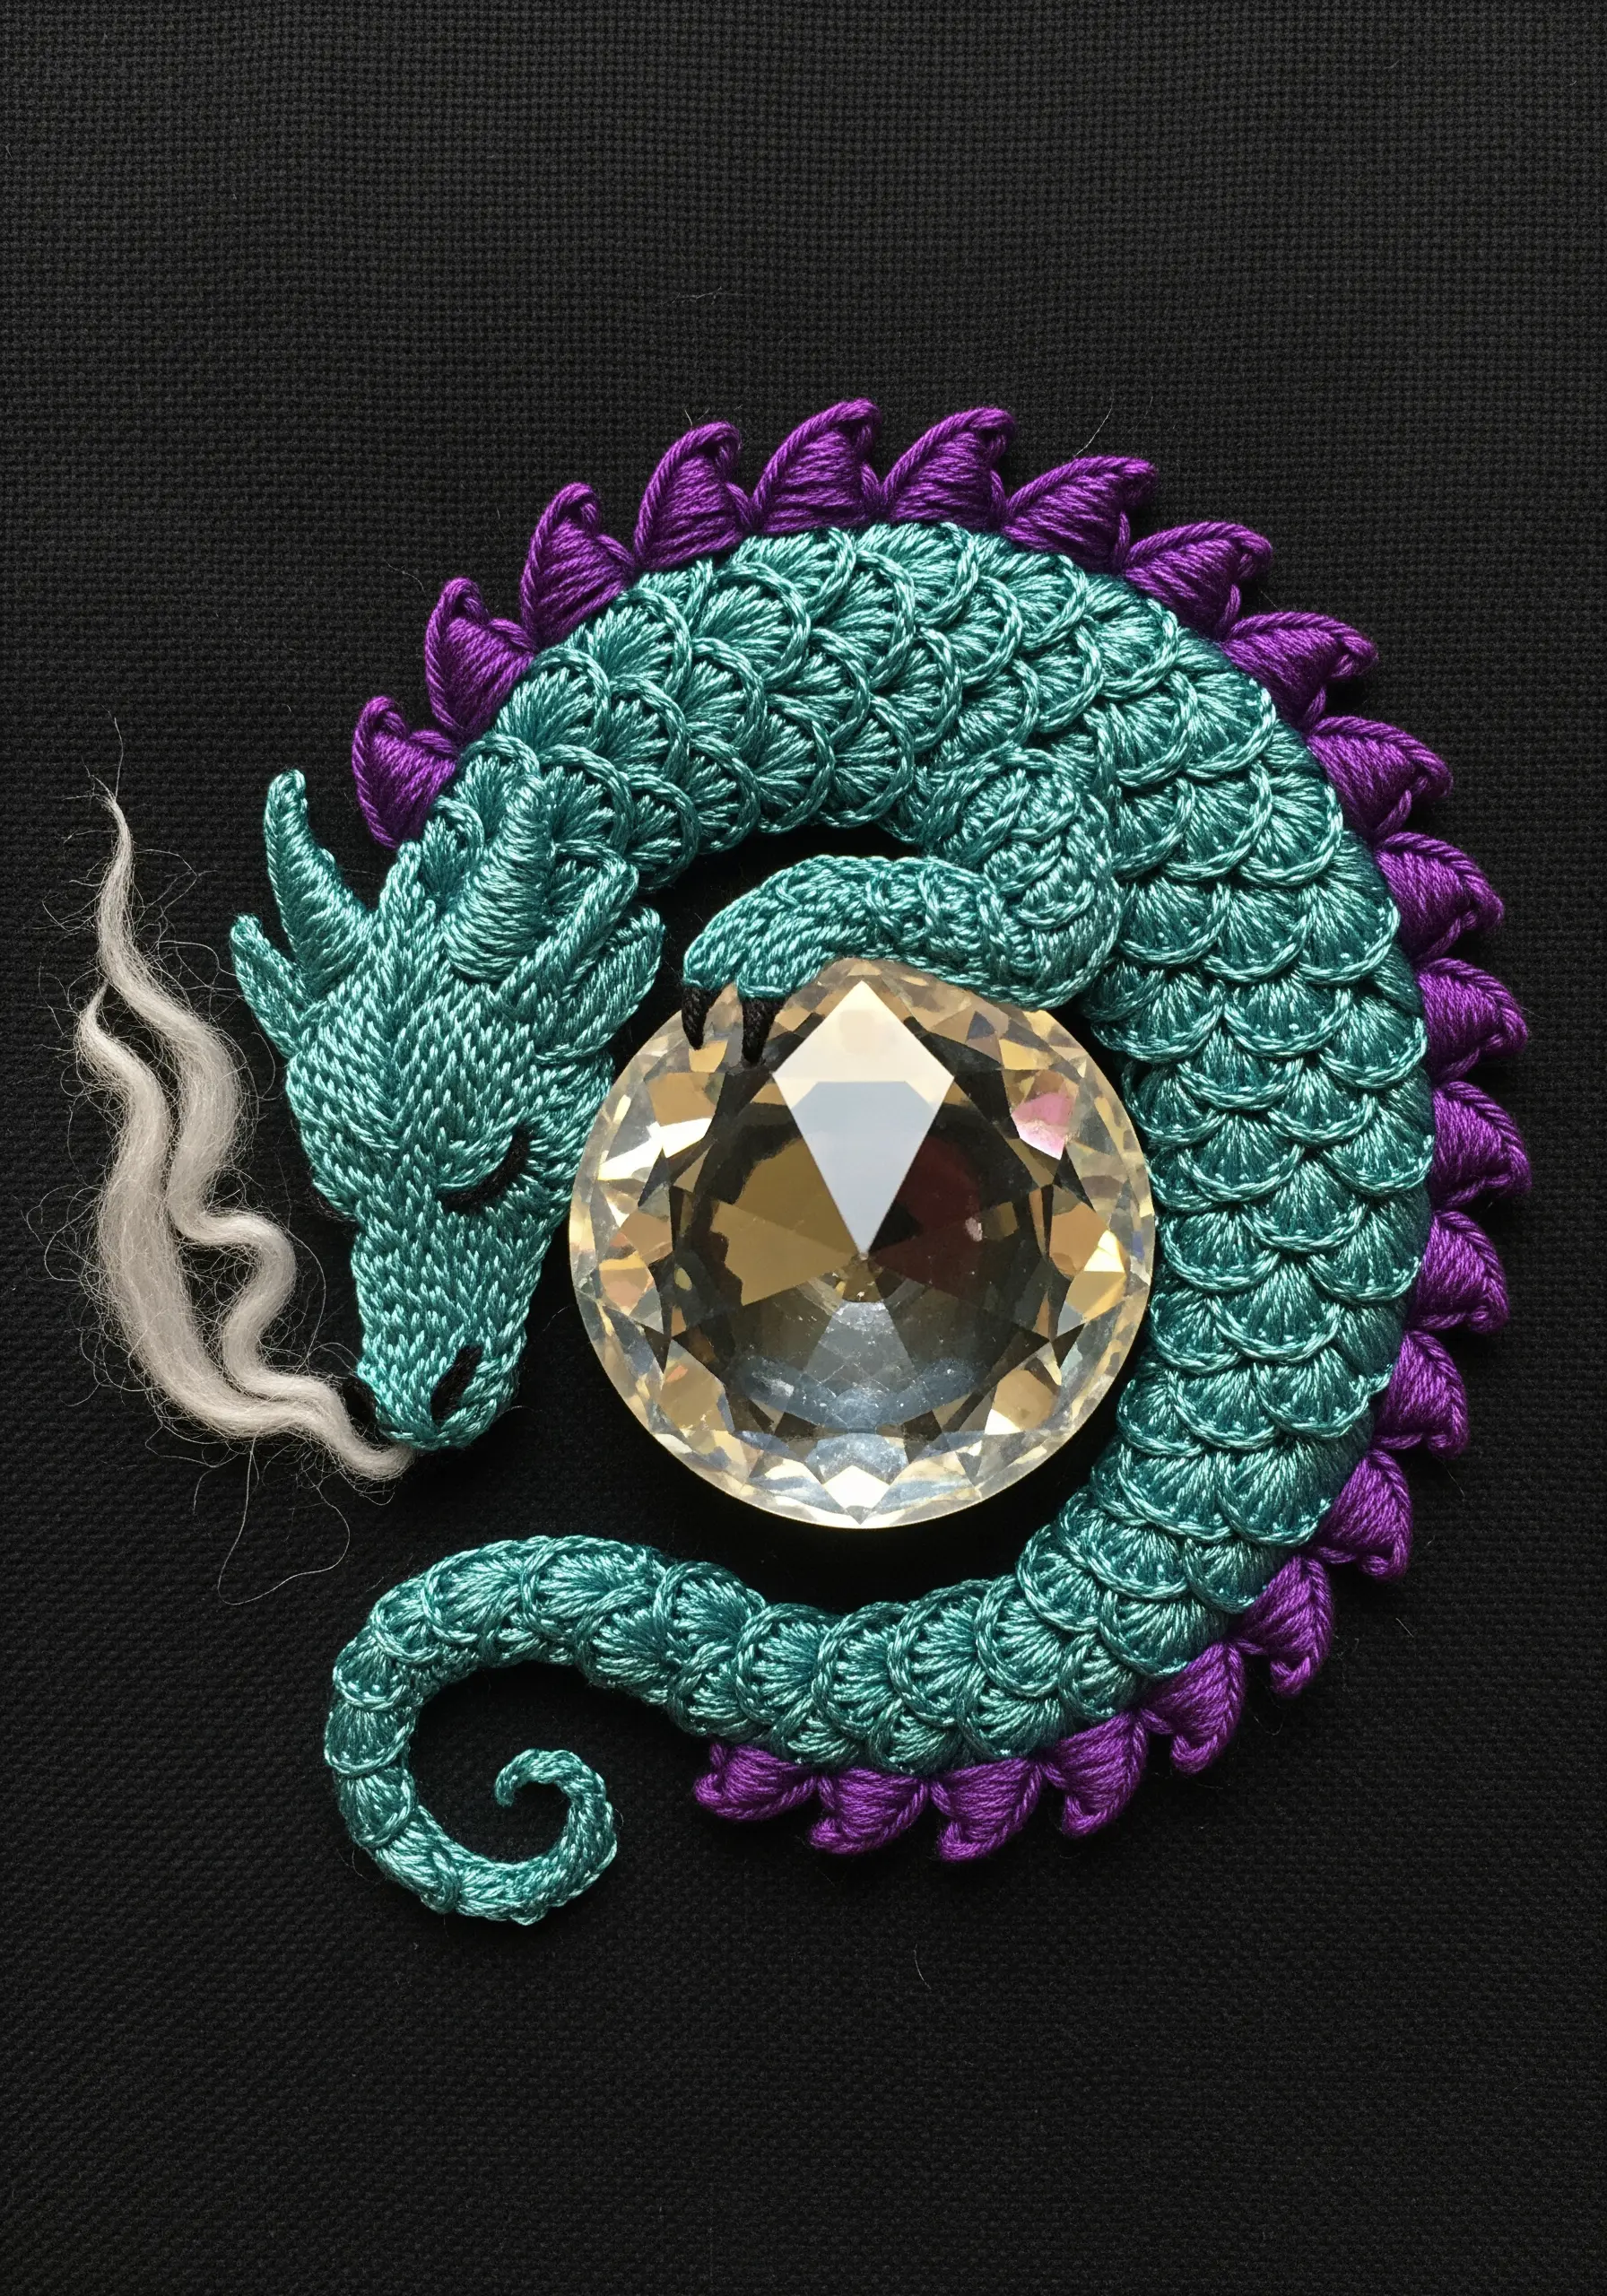
Build the dragon’s body with a highly textured, dimensional stitch like the detached buttonhole stitch, worked in overlapping rows to create a scale-like effect.
This technique creates a sturdy, raised fabric that lifts off the background, giving your creature a powerful presence.
Make a large, faceted crystal bead the central focus of your composition, carefully stitching the dragon’s body to appear as if it’s wrapped protectively around it.
Add a final, delicate touch with a wisp of untwisted wool roving for a puff of smoke.
15. Create a Bird with a Woven Ribbon Tail
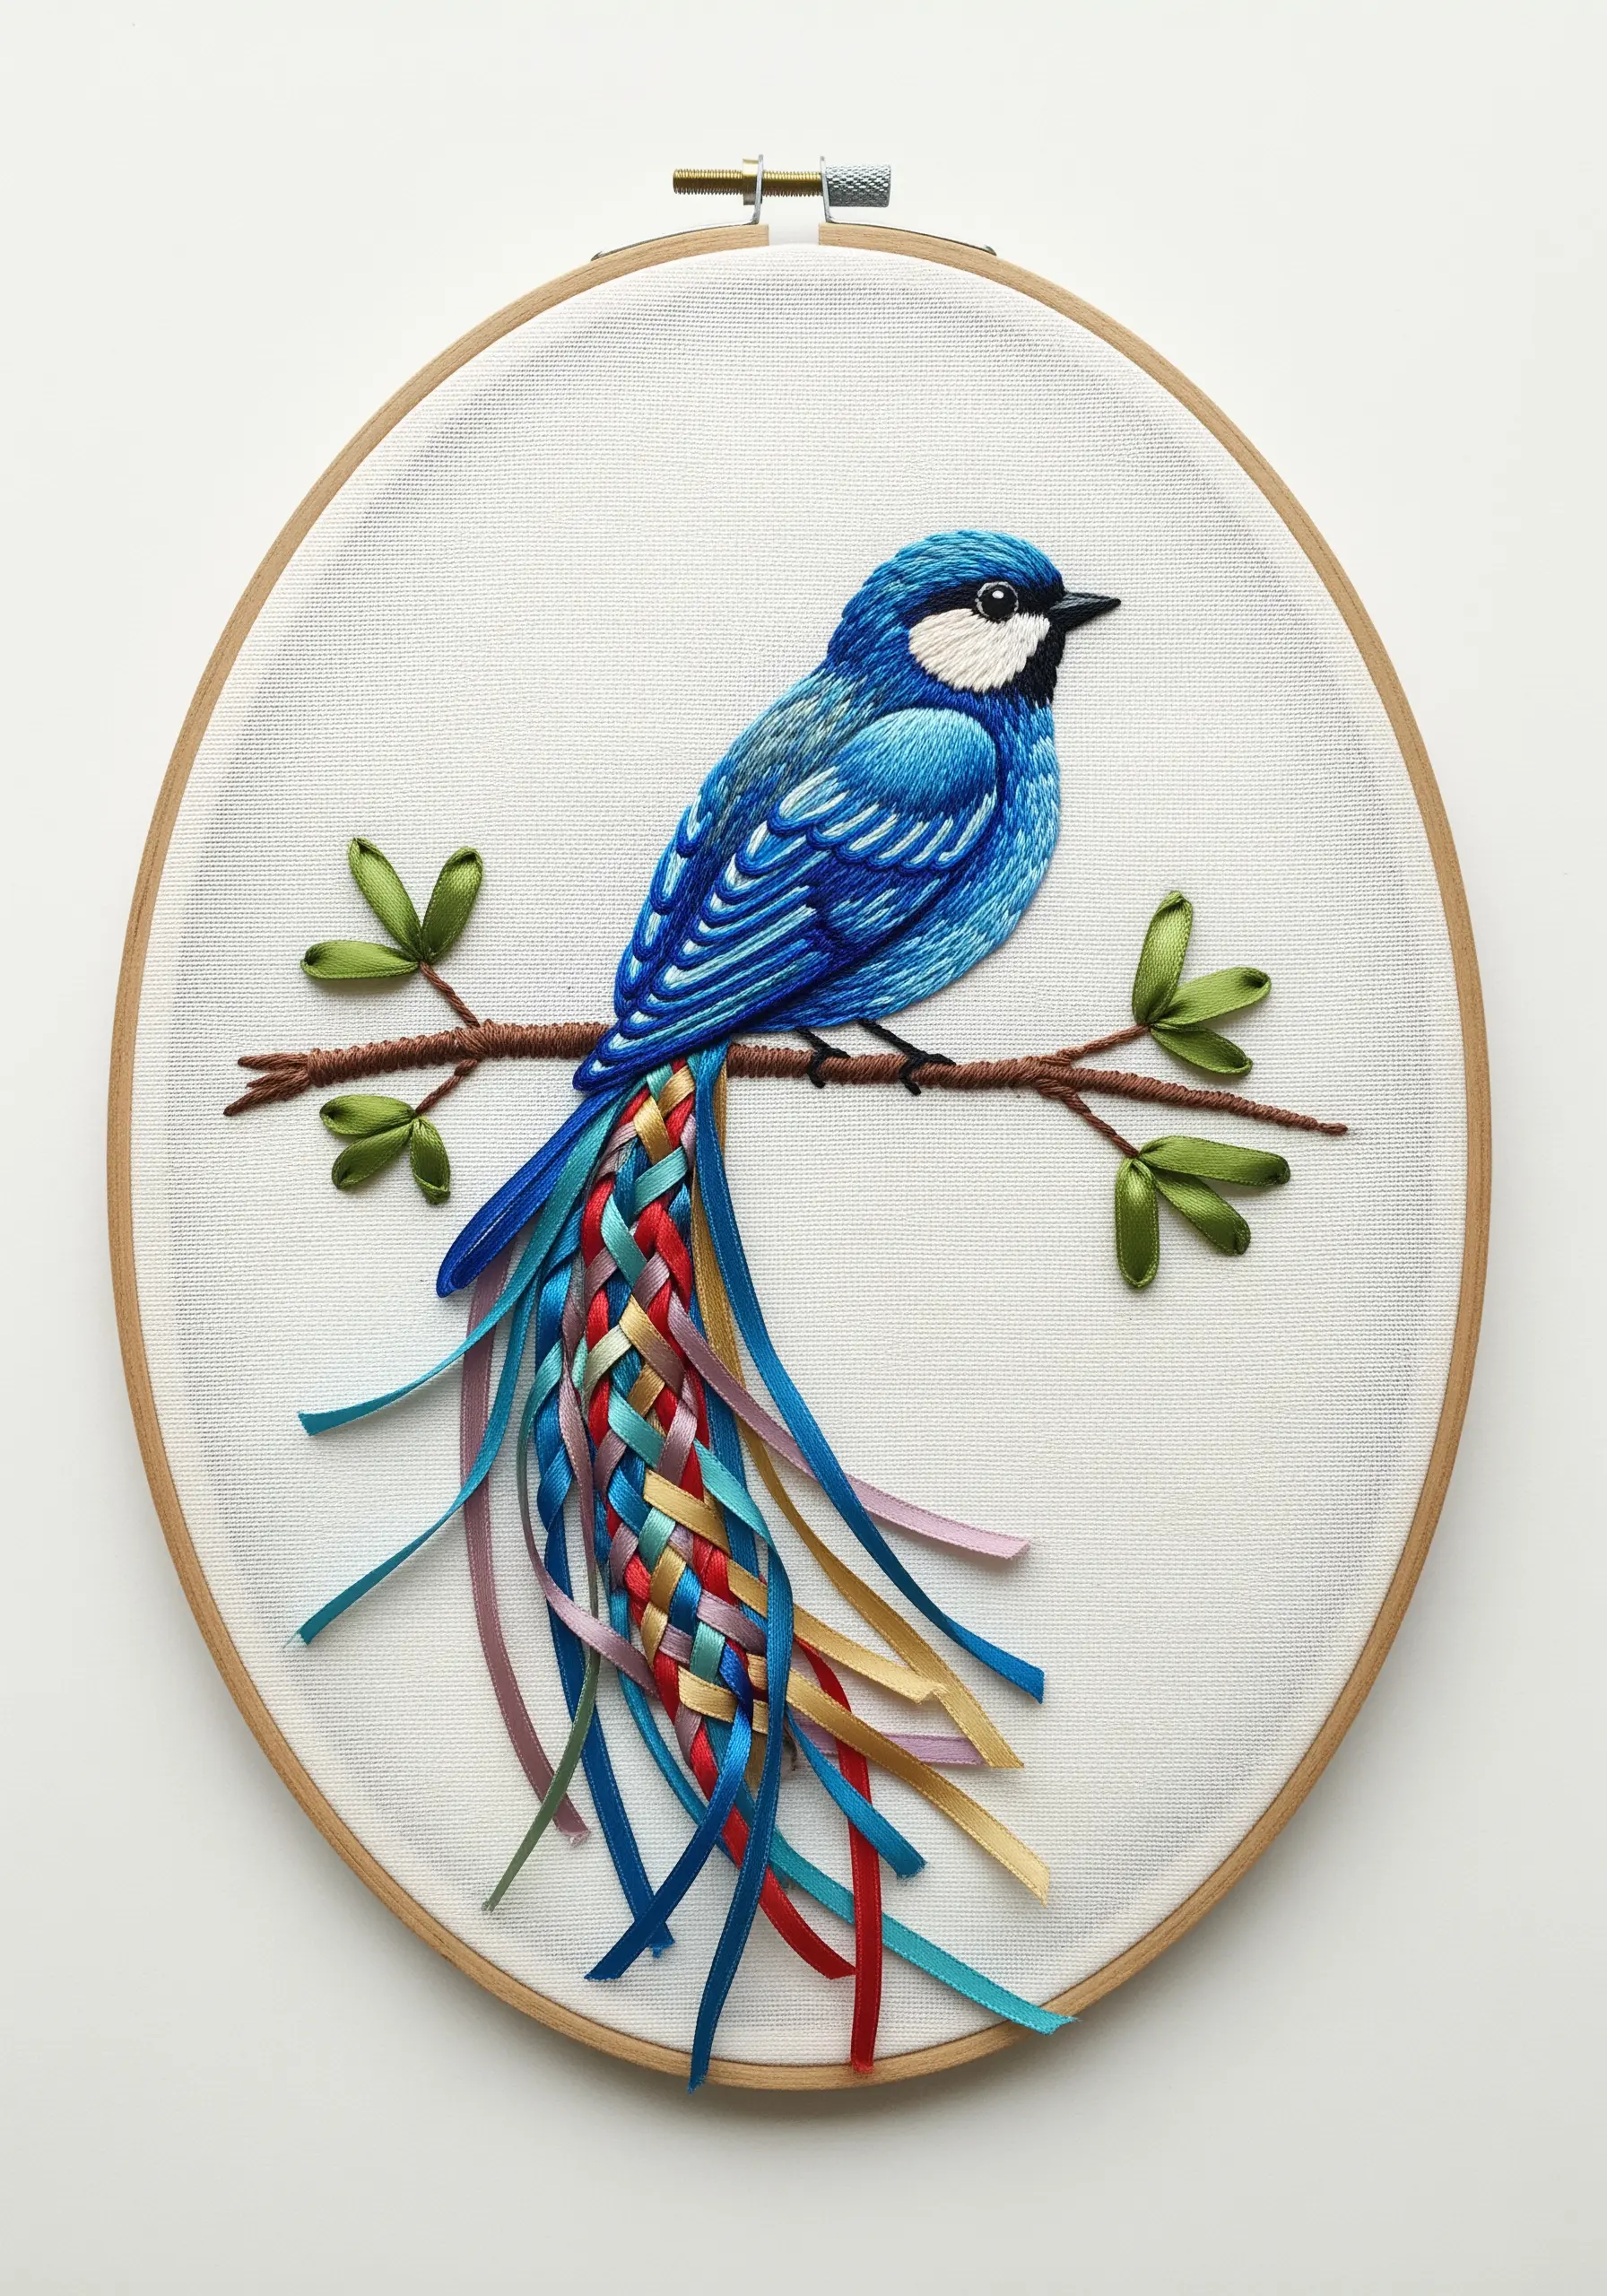
First, render the bird’s body with meticulous long-and-short stitch to create smooth, feathered gradients of color.
For the magnificent tail, leave long strands of ribbon hanging from the bird’s base to act as the ‘warp’ threads.
Then, take shorter ribbons and weave them through the hanging strands, creating a beautiful, colorful lattice that hangs freely.
This technique adds unexpected movement and transforms a simple animal portrait into a fantastical piece of fiber art.
16. Build a Layered Felt Terrarium
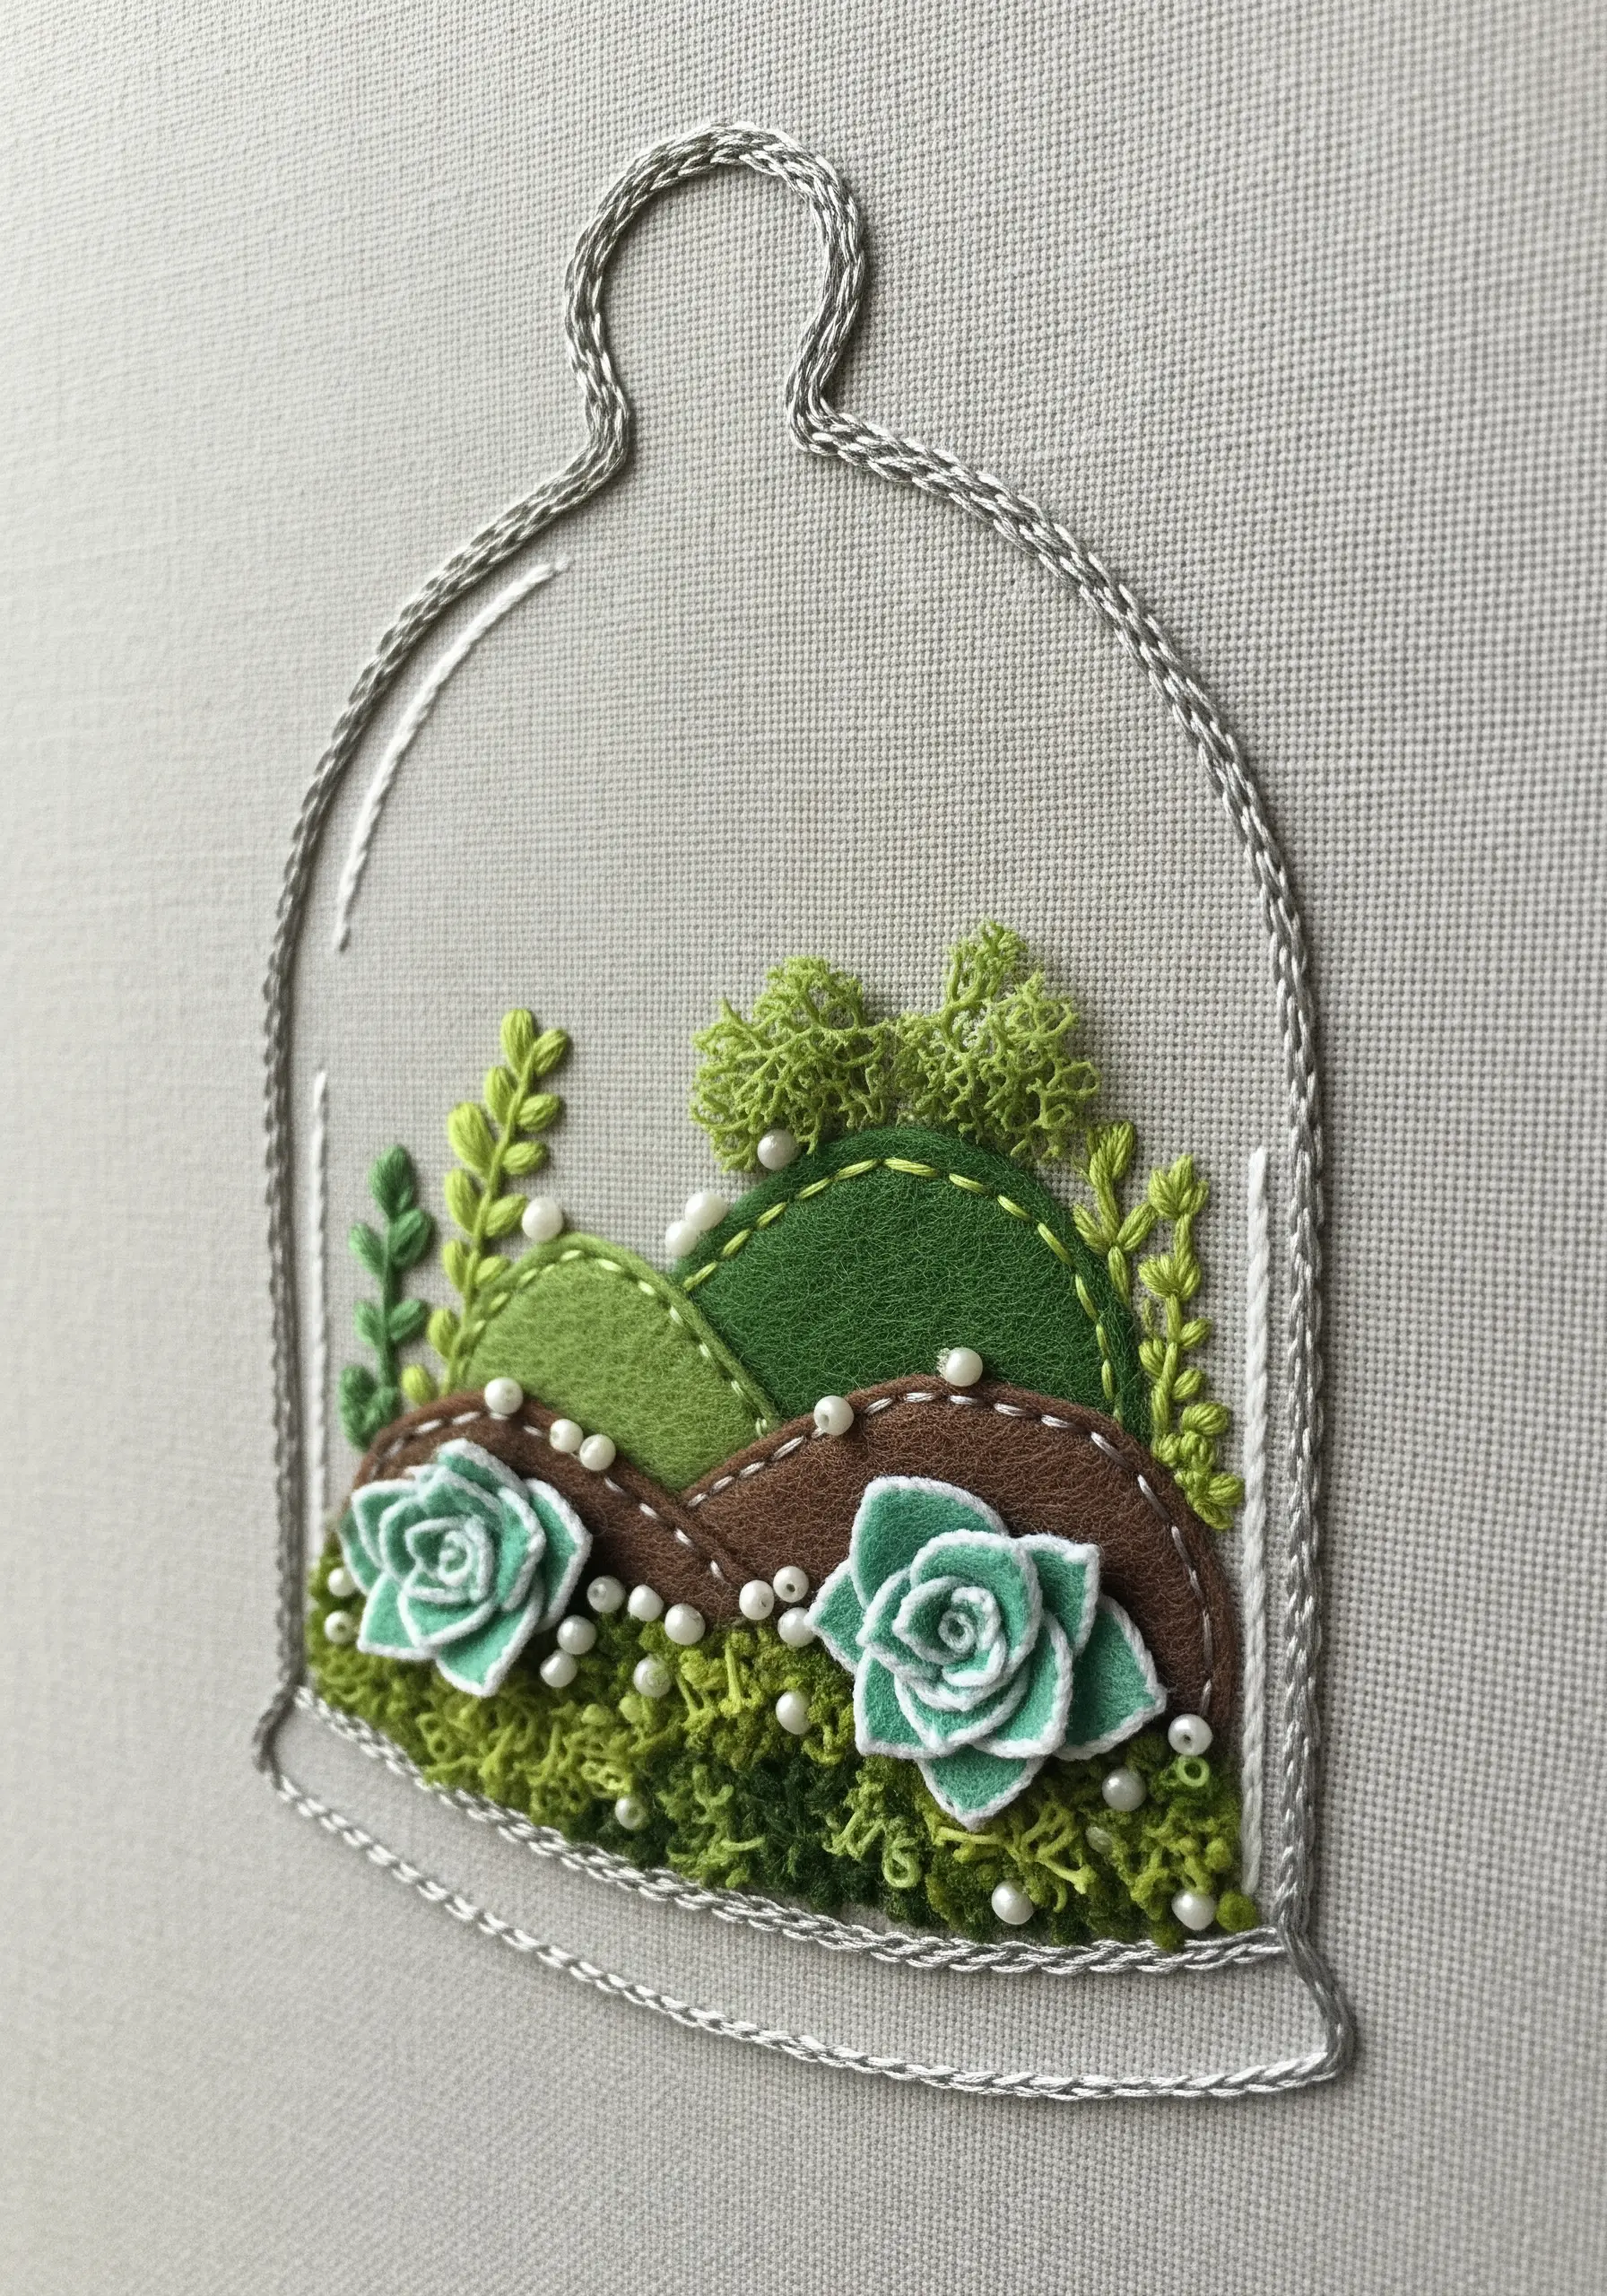
Construct your miniature garden scene by layering cut pieces of felt to represent different strata of soil and moss.
Craft dimensional succulents by cutting a wavy strip of felt, rolling it into a tight spiral, and securing it with a few stitches at the base.
Use a textured chenille yarn or dense clusters of French knots for a mossy ground cover.
Finally, scatter a few tiny white pearl beads throughout the scene to simulate droplets of water, adding a touch of light and realism.
17. Stitch Over a Painted Galaxy
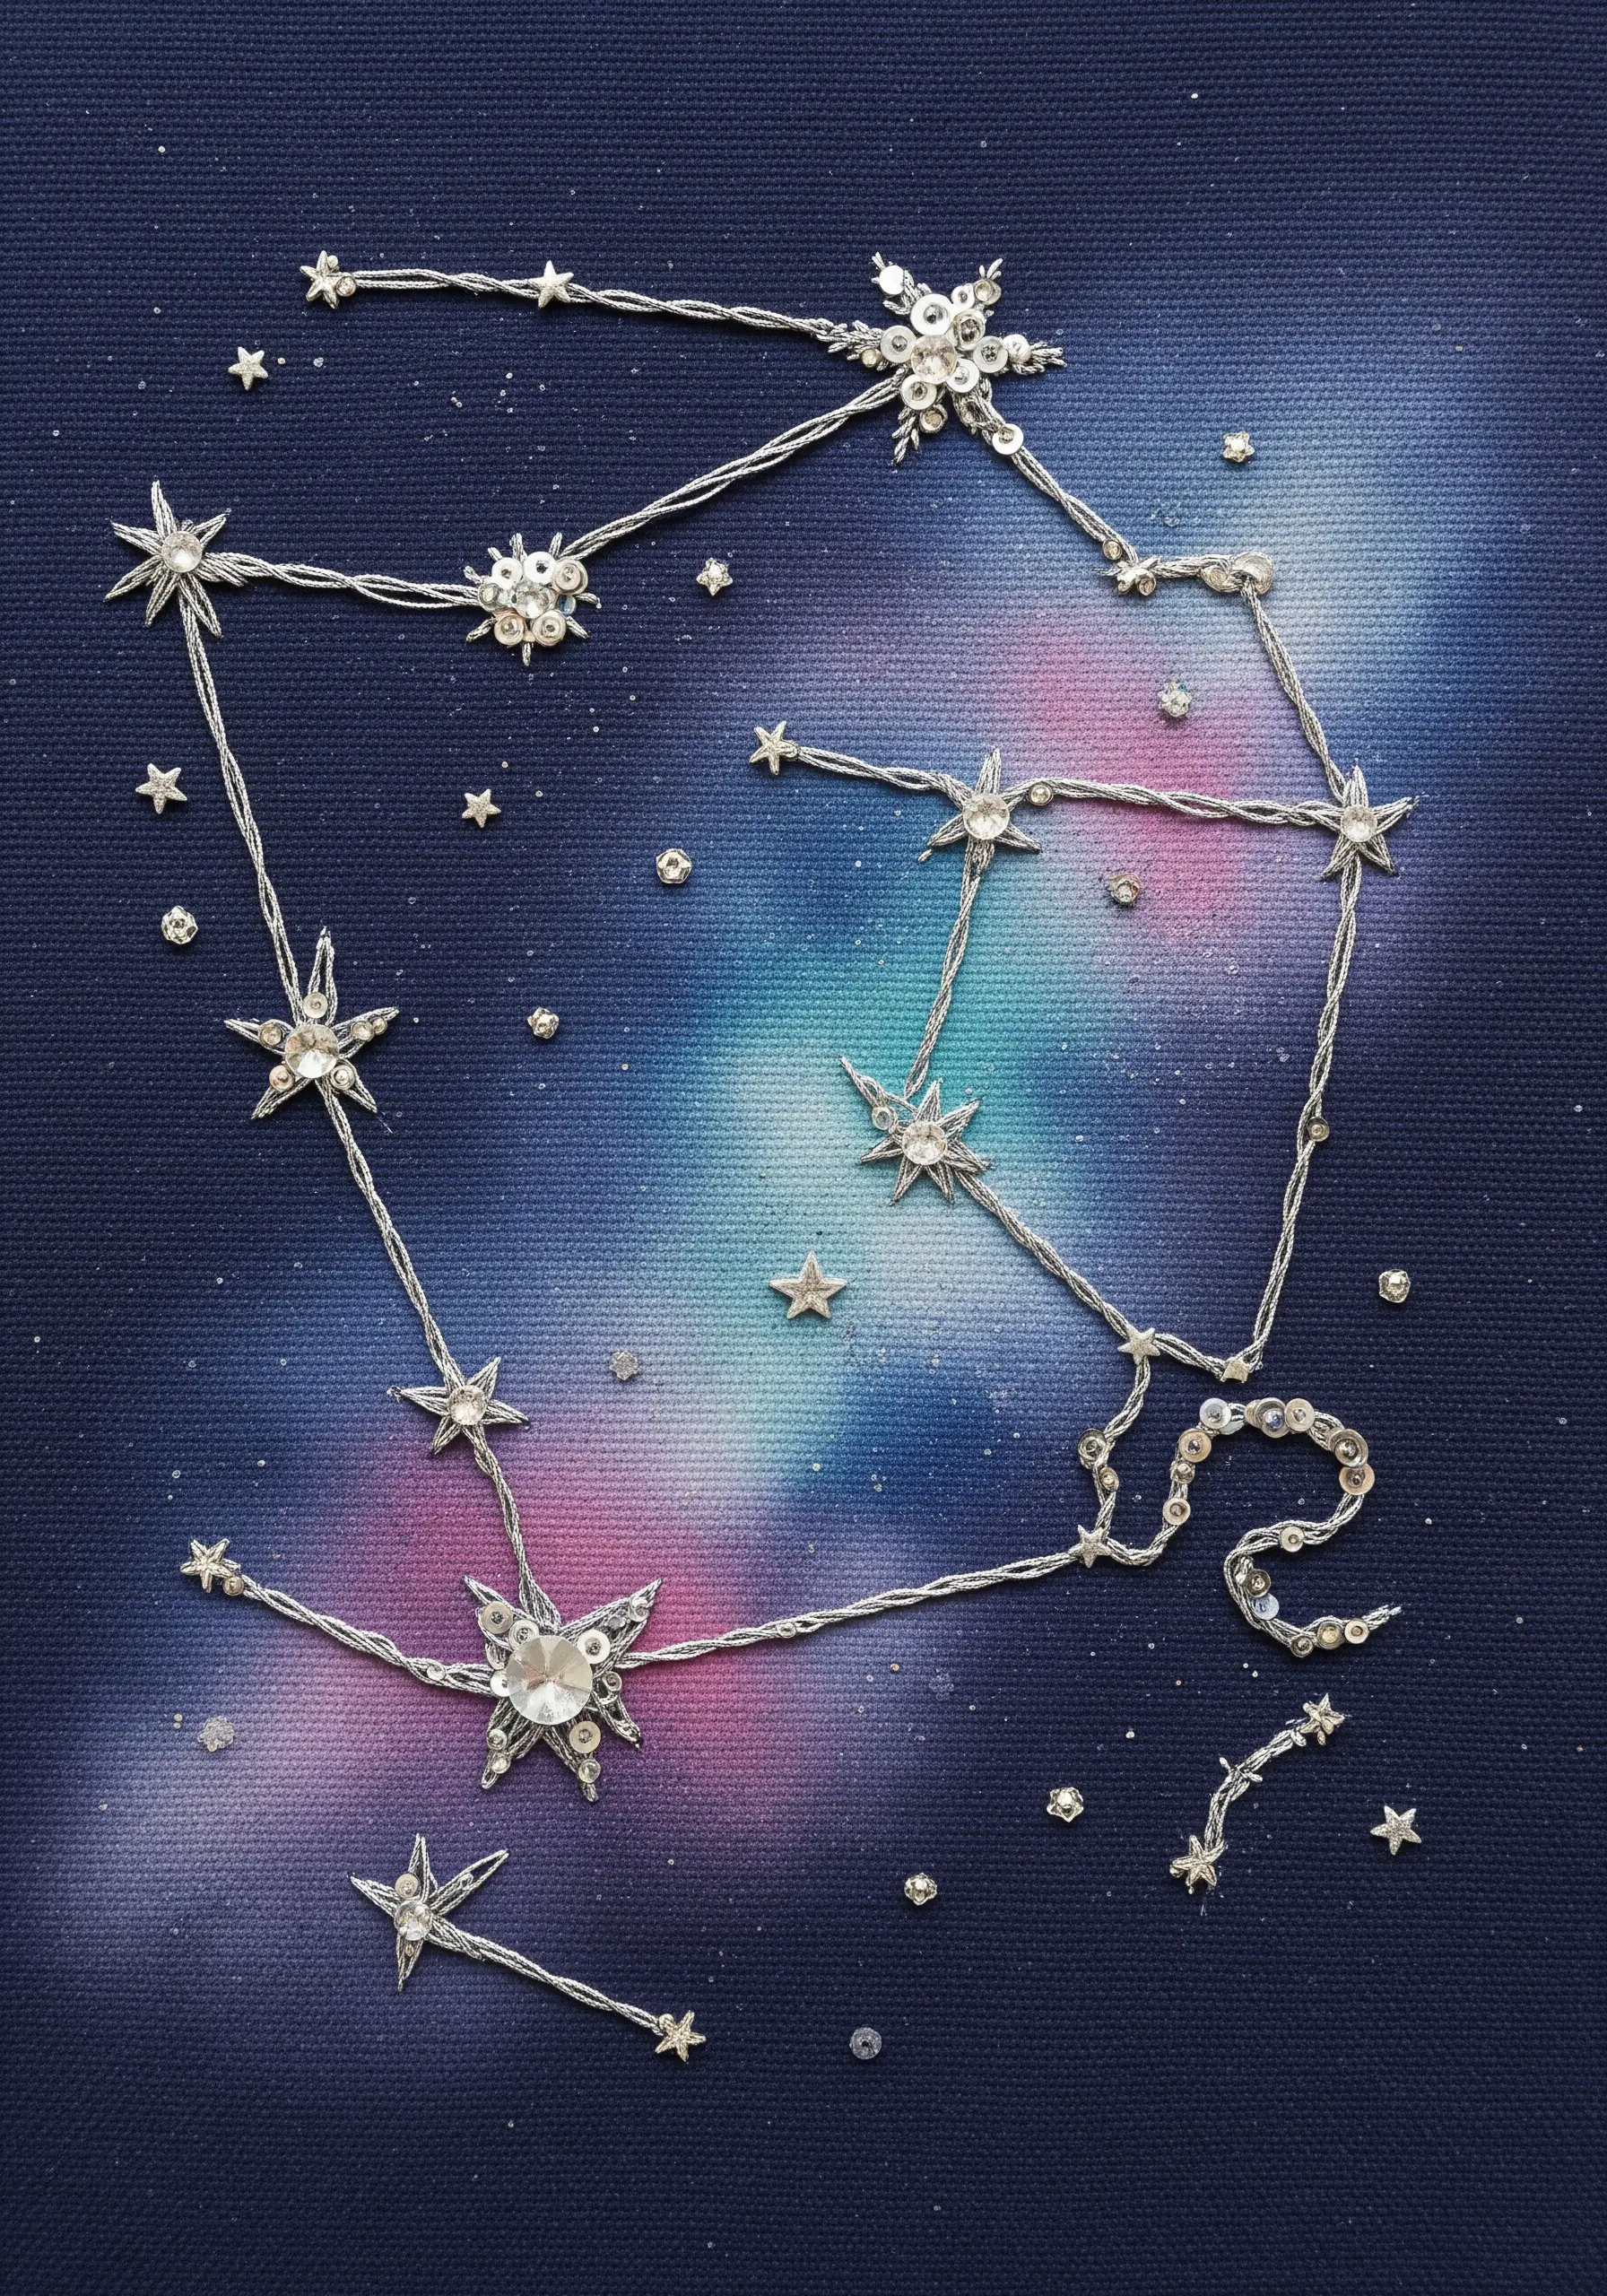
Create a background with incredible depth by painting a galaxy-inspired watercolor wash directly onto your fabric before you begin stitching.
Once the paint is completely dry, stitch your constellation over the top using a bright, high-contrast metallic thread.
Embellish the main stars with a mix of iridescent sequins, seed beads, and a single, larger crystal for the brightest point in the formation.
The painted background provides a swirling nebula effect that thread alone could never achieve.
18. Embellish an Illustration with Fiber
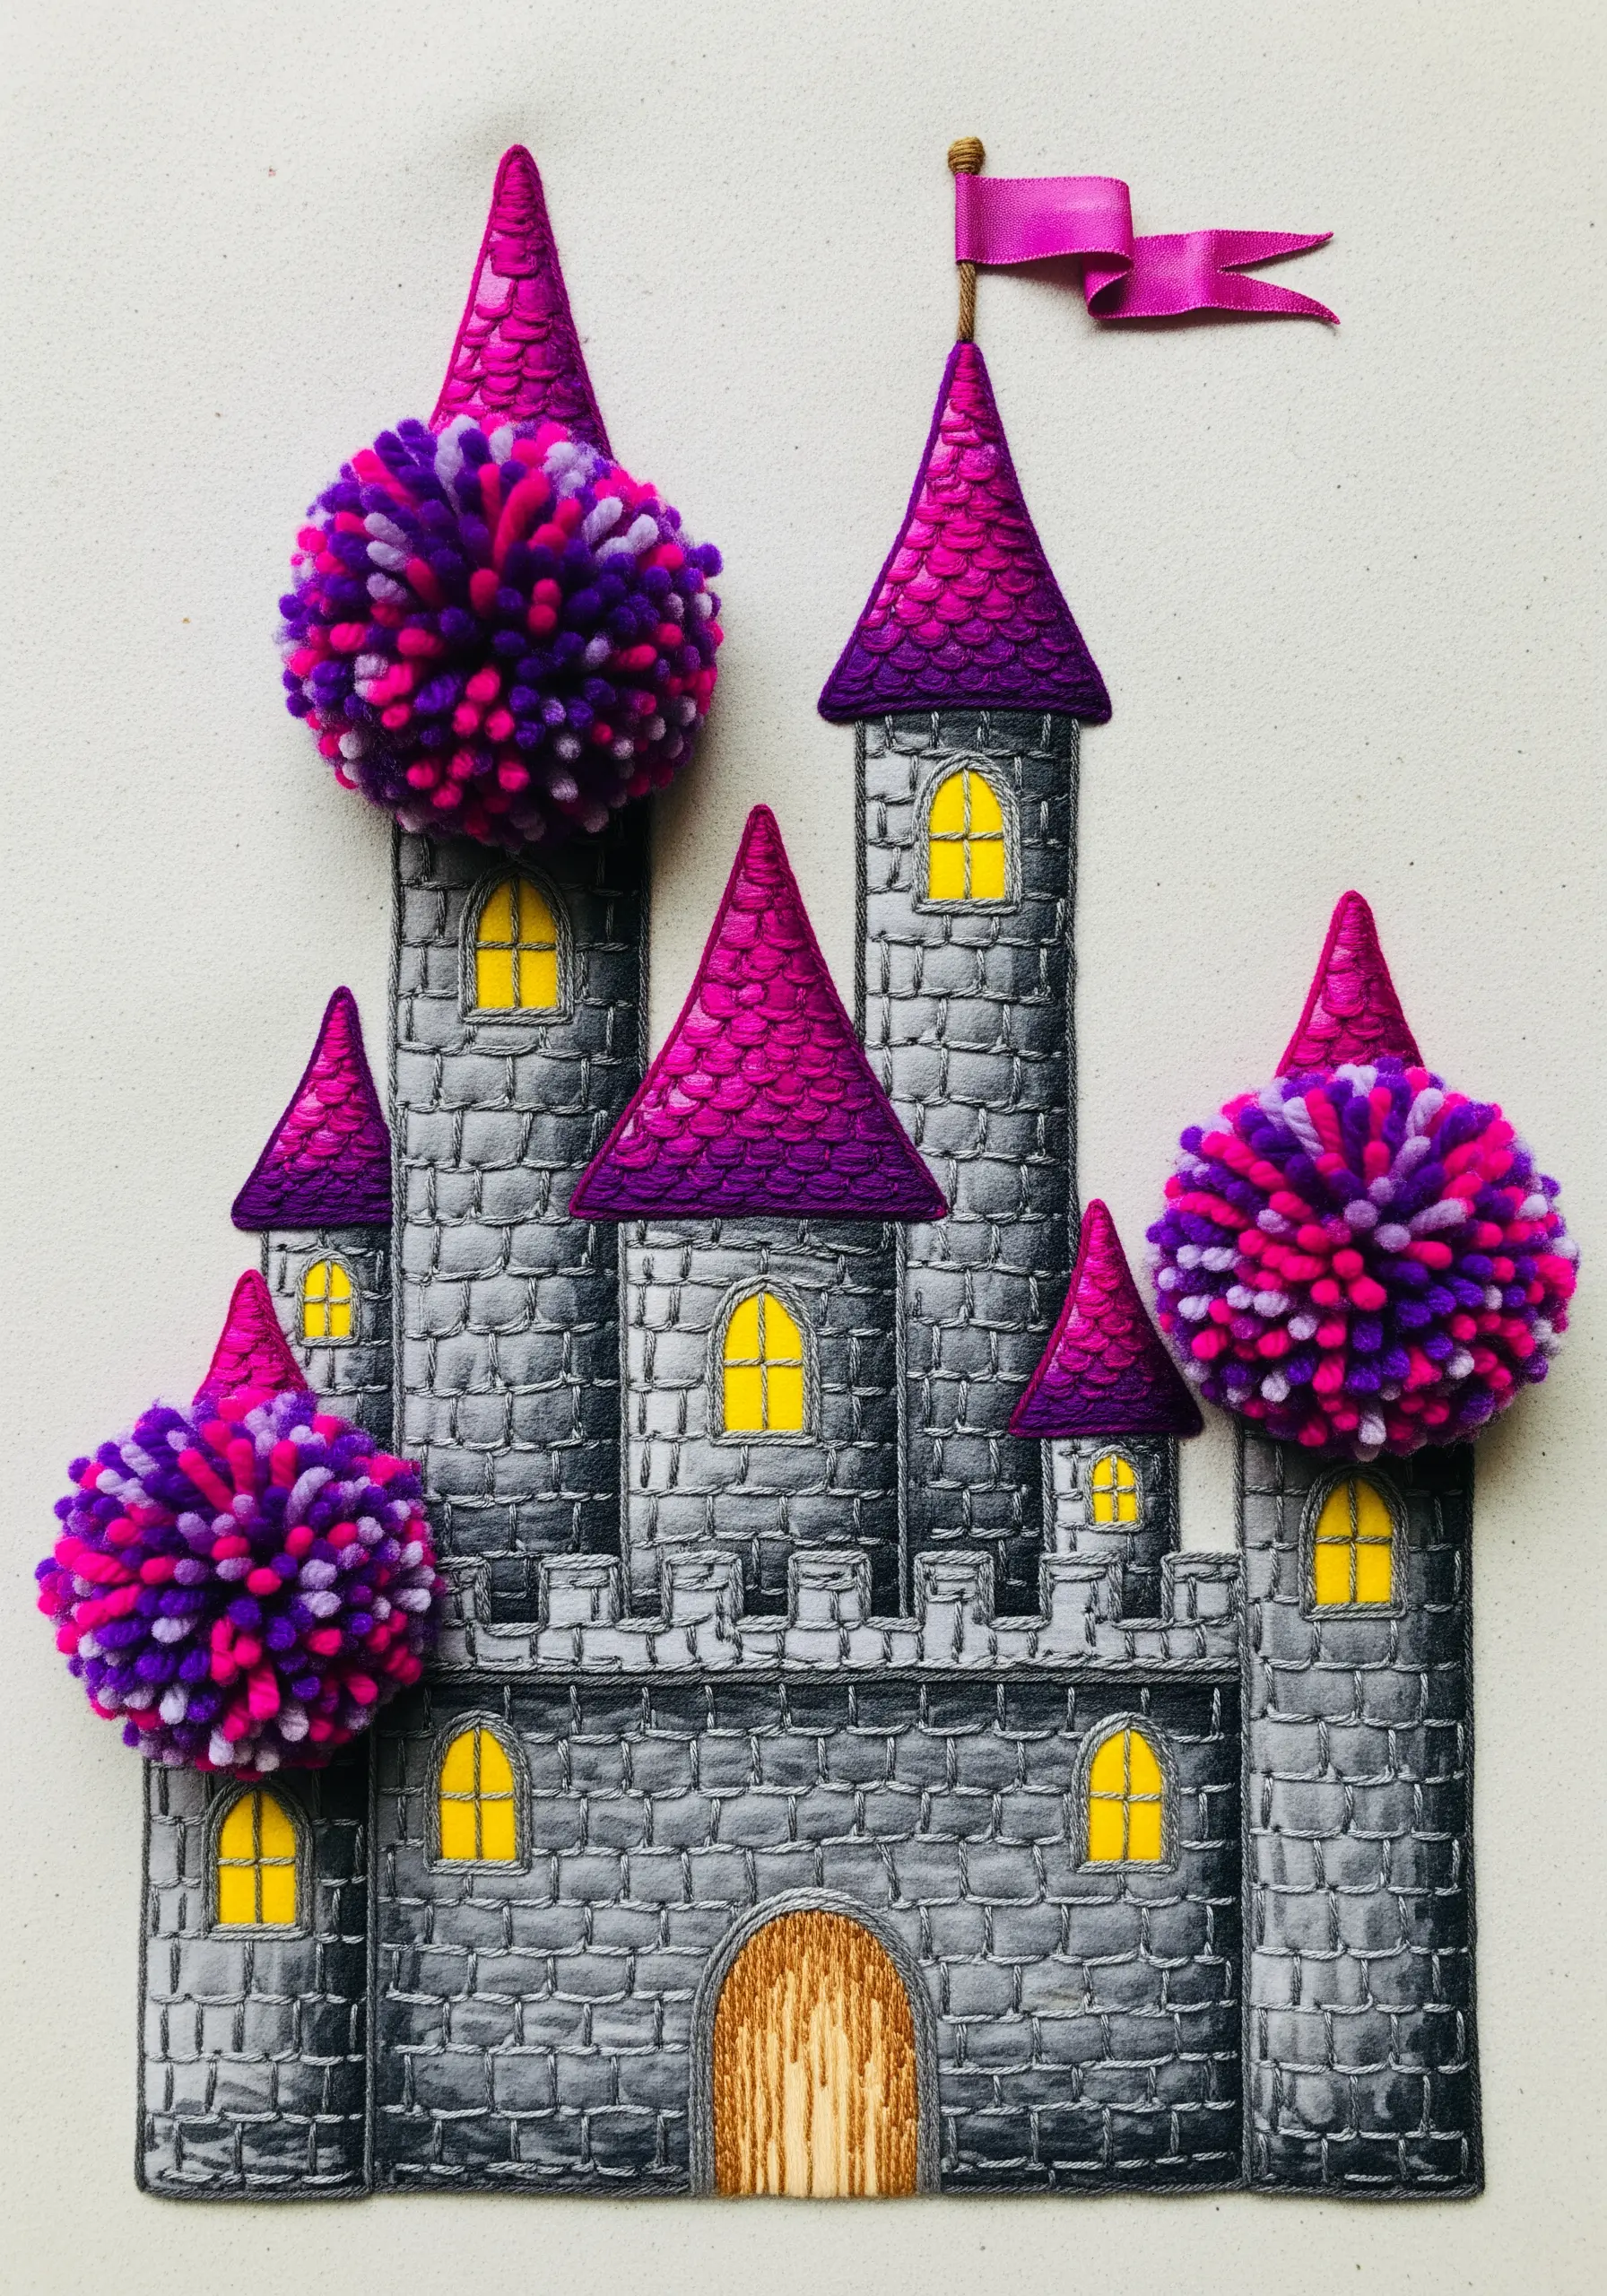
Start with a pre-printed or hand-drawn illustration on your fabric, using embroidery as a way to add texture and dimension rather than create the entire image.
Attach large, fluffy yarn pom-poms to the castle towers to create whimsical, cloud-like treetops.
A simple folded piece of satin ribbon makes a perfect, shimmering flag, while a block of golden satin stitch fills in the doorway with a touch of light.
This method blends illustration with fiber art for a unique, storybook effect that is both quick and charming.
19. Integrate Found Objects into a Garden Scene
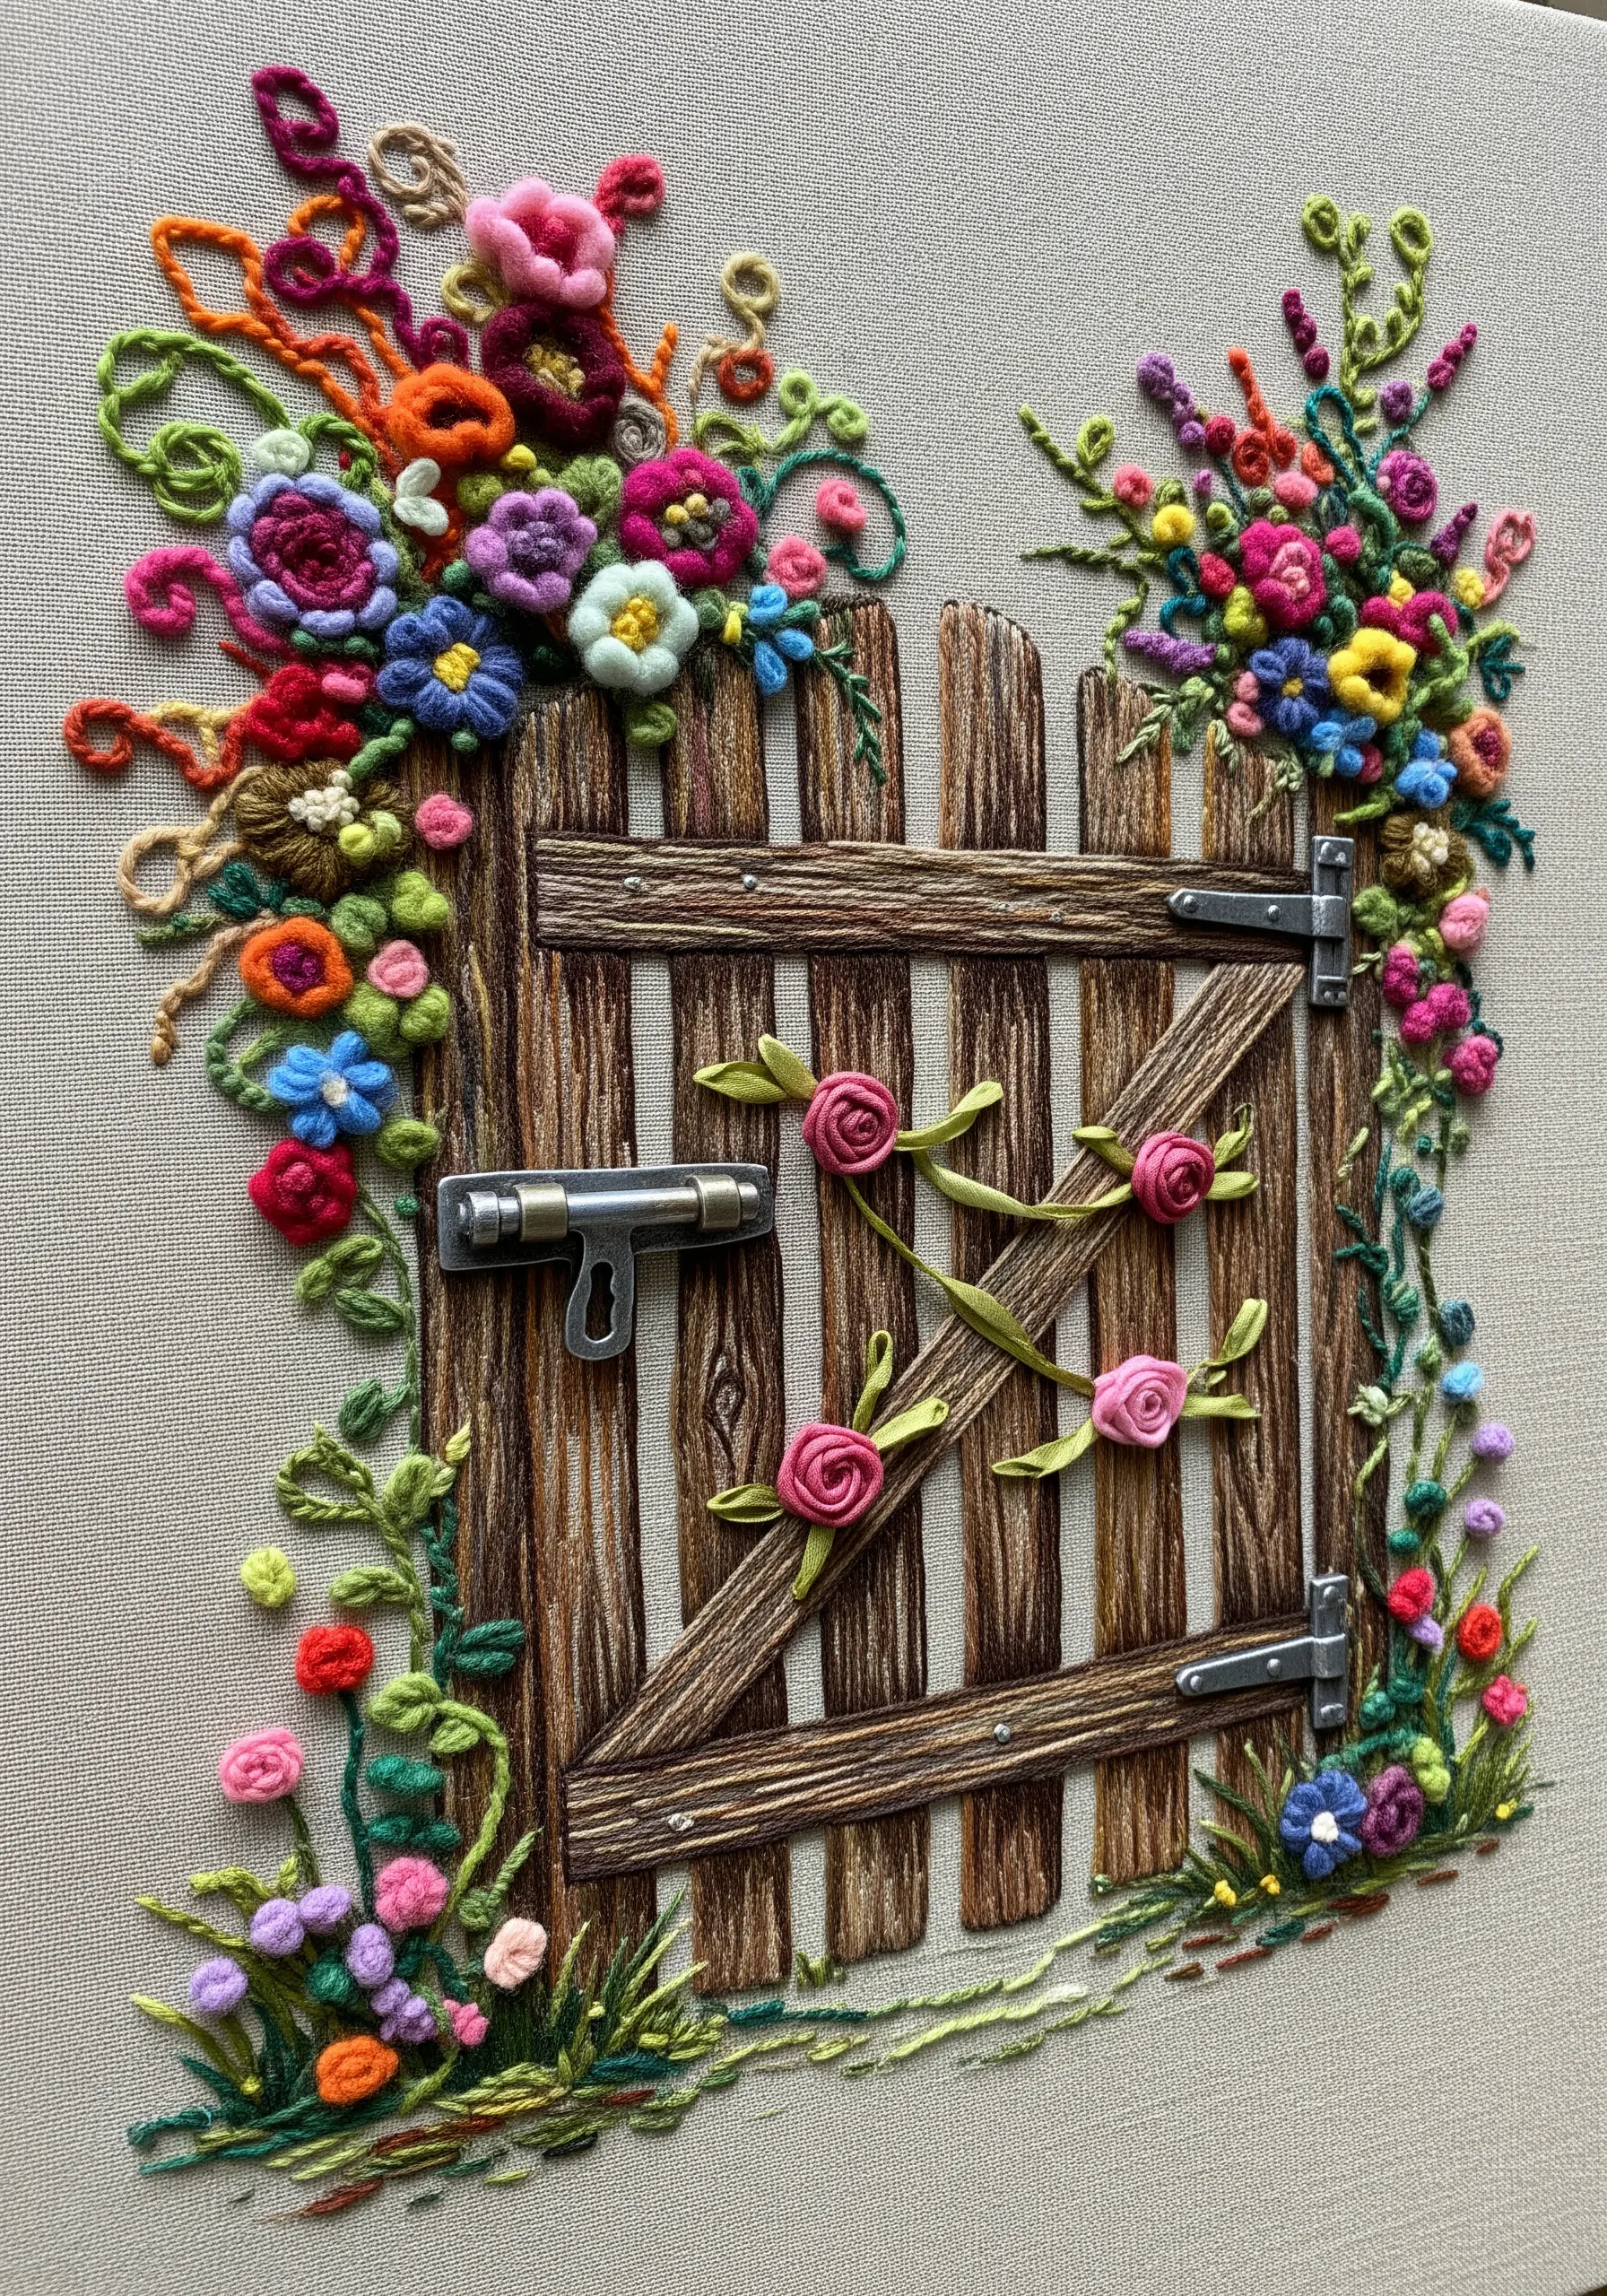
Elevate your embroidery by incorporating a ‘found object,’ such as a miniature metal latch or hinge, onto the garden gate.
Stitch the wooden gate with variegated brown floss using long-and-short stitch to create a realistic wood-grain texture.
Surround the gate with a riot of floral stitches: use bullion knots for lavender, woven wheel roses for larger blooms, and delicate silk ribbon for climbing roses.
This combination of hard metal, soft thread, and lustrous ribbon creates a piece that is rich in both story and texture.


