

Your hallway doesn’t have to be a forgotten space. Think of it as a gallery waiting to happen, a place where a small, thoughtful piece of art can completely shift the energy of your home.
Embroidery, with its texture and quiet presence, is perfect for this. These compact hoop designs are more than just decorative; they are moments of focused creativity that can bring warmth and personality to the narrowest of walls.
Here, you won’t find complex projects that take weeks. Instead, you’ll discover techniques that offer immediate visual reward—a smarter way to use color, a stitch that creates perfect lines, a composition that feels balanced and intentional. Let’s turn that small space into a statement.
1. Create Lunar Texture with Knots and Beads
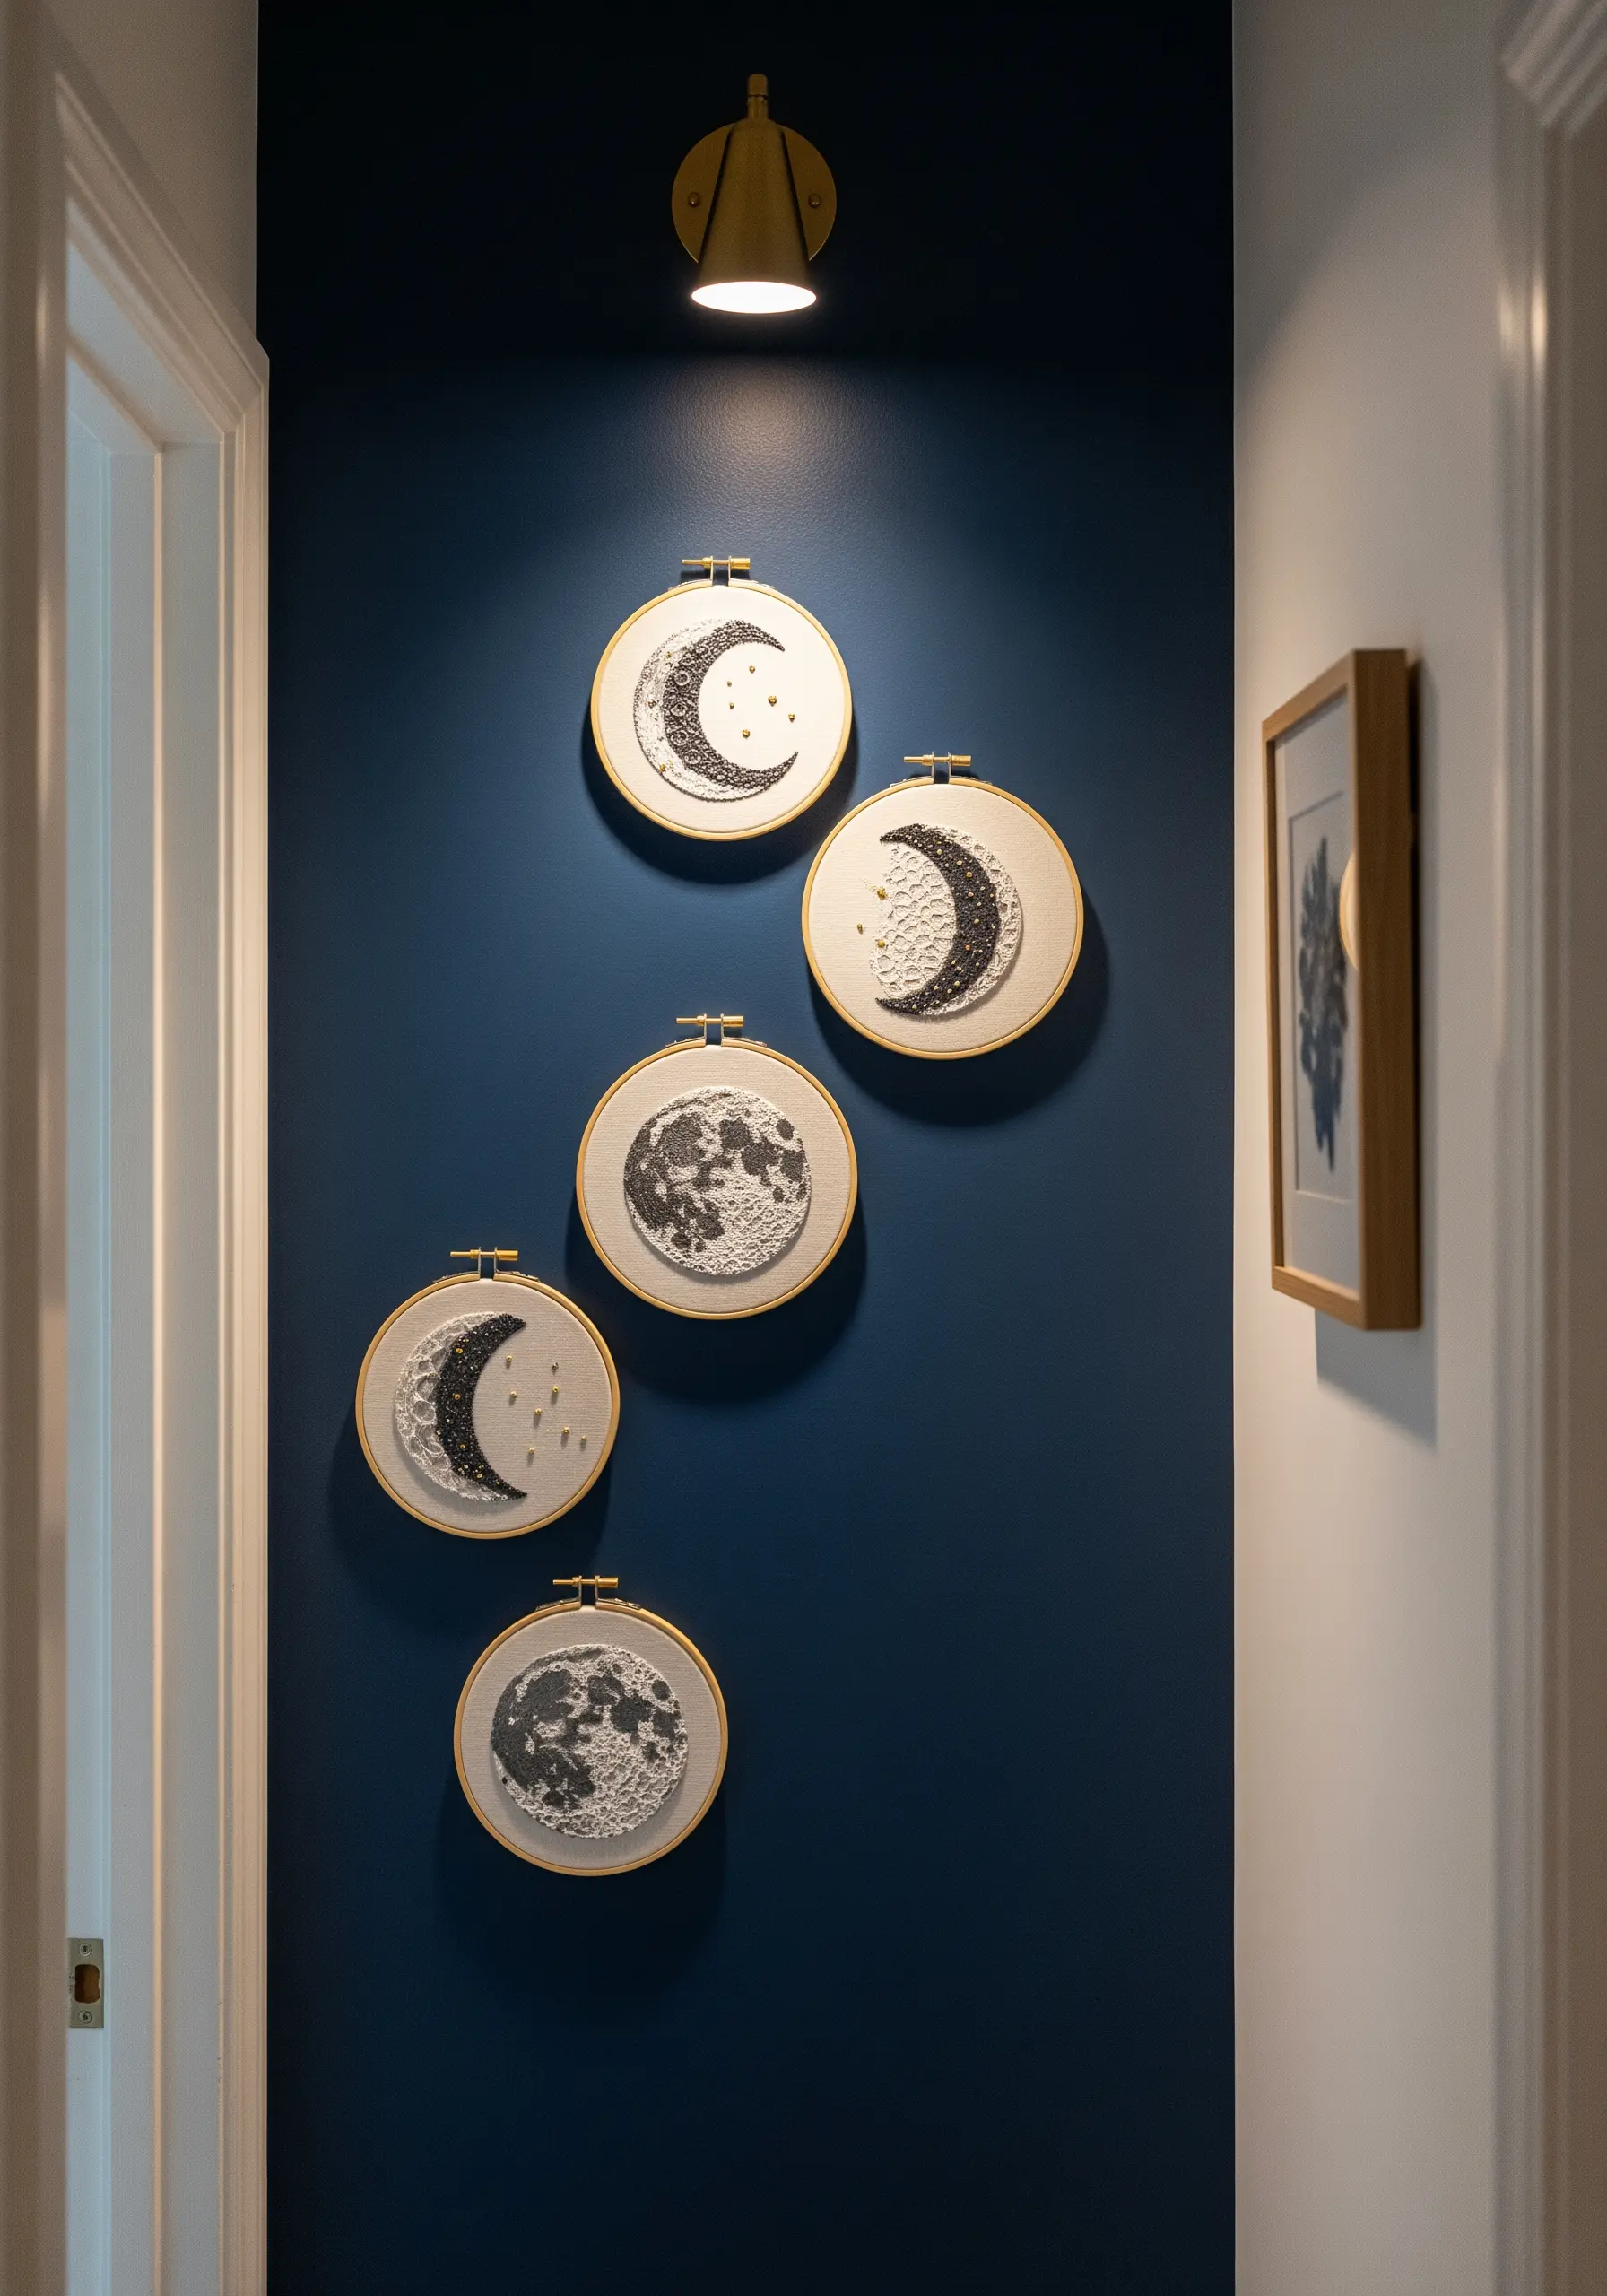
To give your moon phases a tactile, cratered surface, densely pack French knots using a slightly thicker thread, like a pearl cotton size 8.
Vary the size of the knots by wrapping the thread once for small dots and two or three times for larger ones, which mimics the varied texture of the lunar surface.
For a touch of cosmic shimmer, scatter in tiny silver or pearlescent seed beads as stars—they catch the light beautifully against a dark navy or black linen fabric.
This combination of matte knots and reflective beads creates a sophisticated depth that elevates a simple motif into a piece of organic decor.
2. Master Bold Shapes with Graphic Satin Stitch
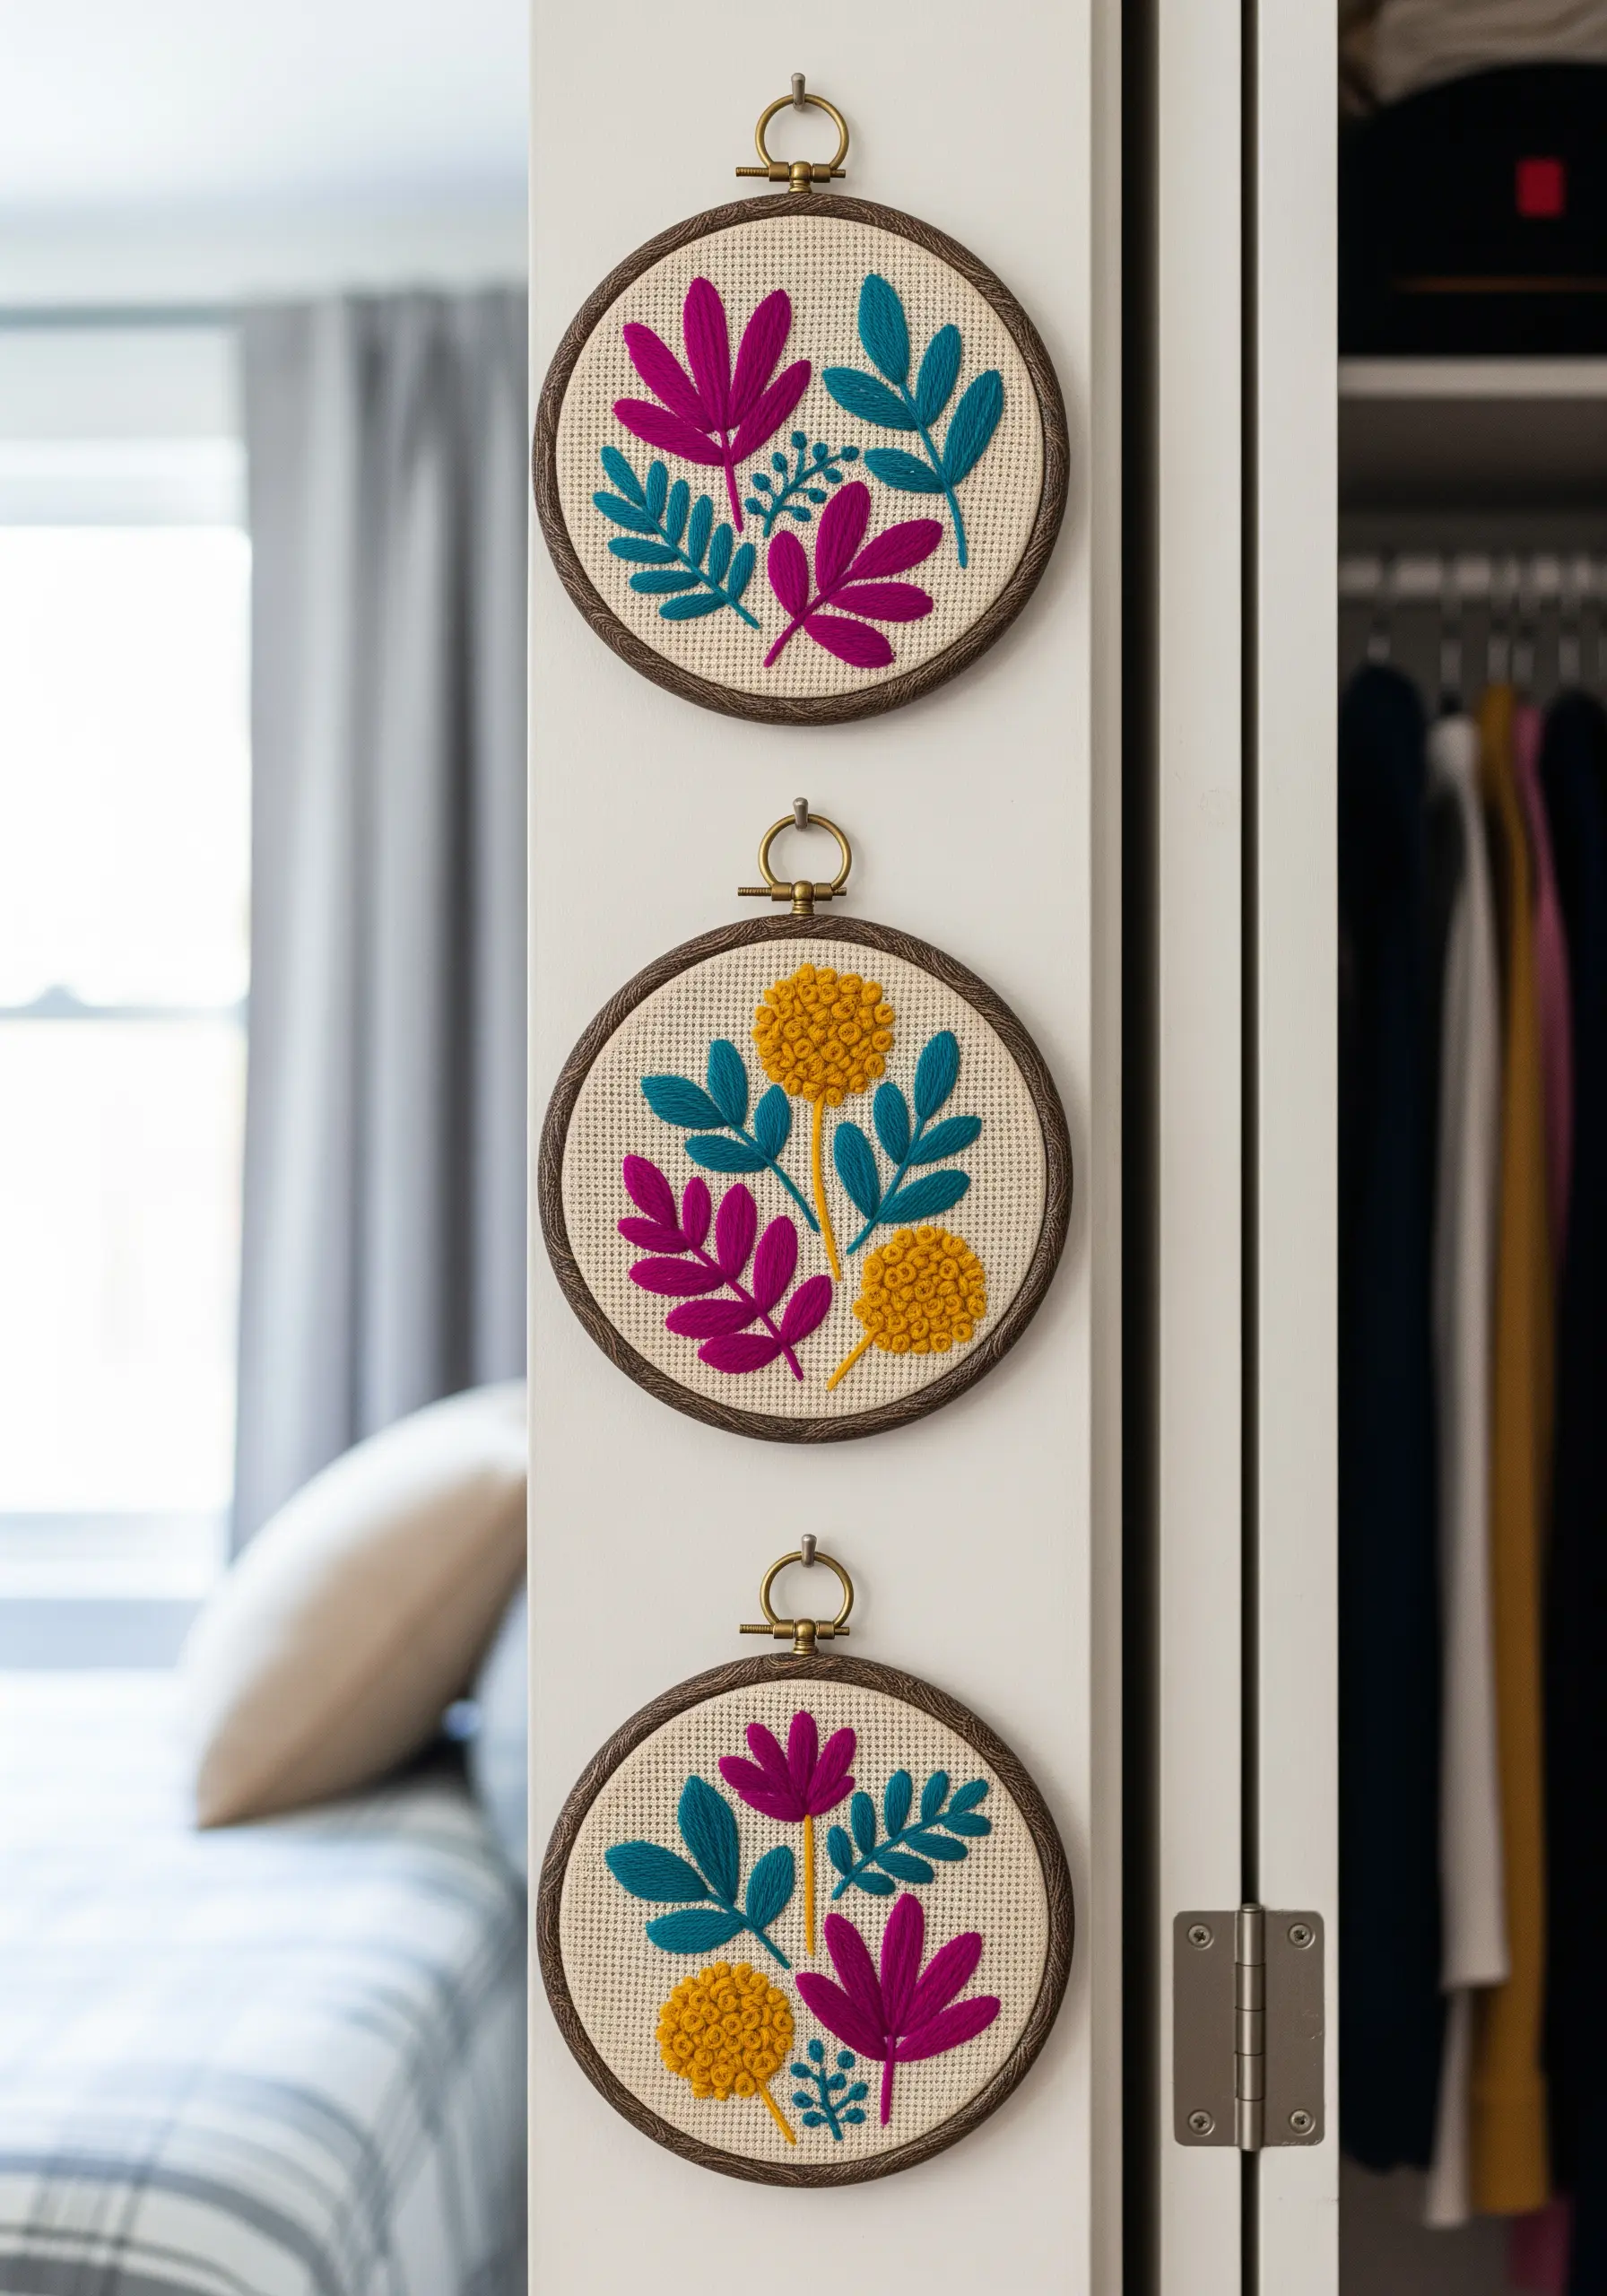
When working with stylized botanicals, use a dense satin stitch to create solid, graphic blocks of color.
The key to a flawless finish is an underlying layer of split stitches along the shape’s border; this simple step raises the edge slightly and gives your satin stitches a clean, sharp line to meet.
Choose aida cloth or an evenweave fabric to help guide your needle, ensuring your stitches lie perfectly parallel for a smooth, almost machine-made appearance.
This technique turns simple shapes into bold bohemian floral embroidery that feels intentional and modern.
3. Unify a Collection with a Strict Color Palette
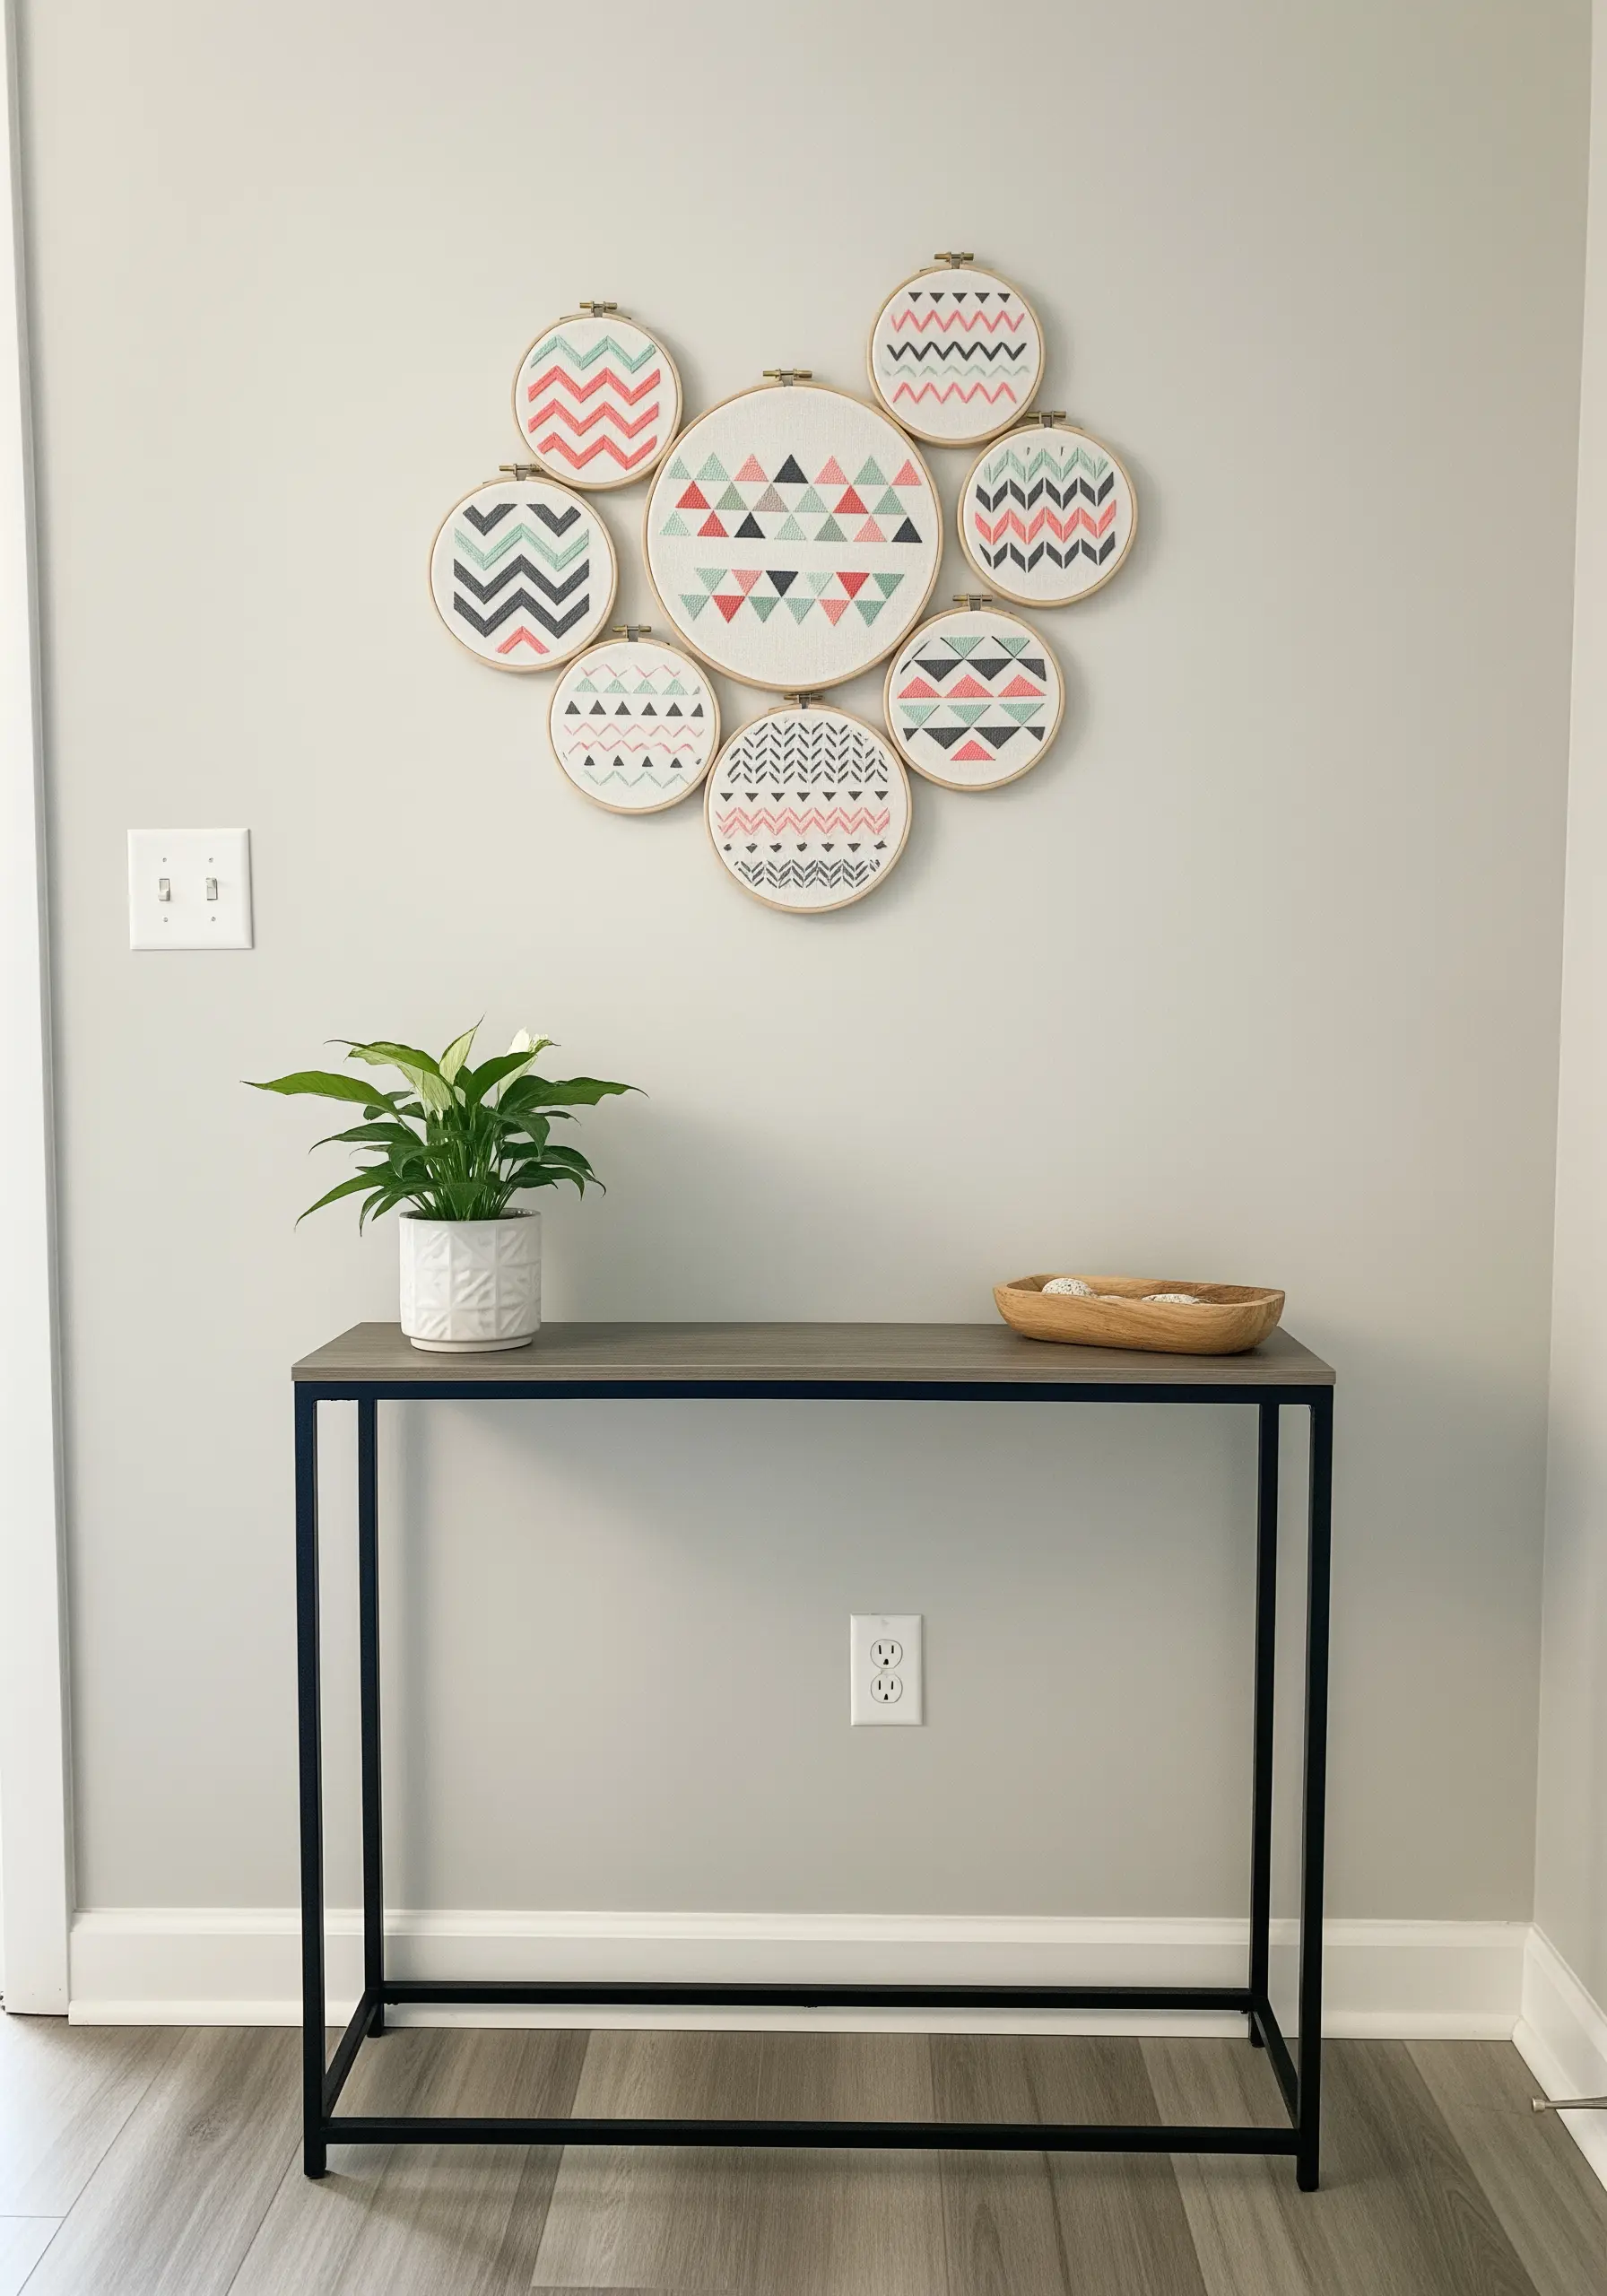
To create a cohesive gallery wall from multiple hoops, the secret is a disciplined color palette, not matching patterns.
Select four or five complementary colors and use them across a variety of geometric designs—chevrons, triangles, and simple lines.
This repetition of color ties the individual pieces together, creating a unified installation that feels curated and impactful.
Consider using pre-printed fabric as your guide; you can simply stitch over the lines for perfect precision, turning it into an easy yet impressive geometric embroidered wall decor piece.
4. Paint a Sunset Sky with Blended Threads
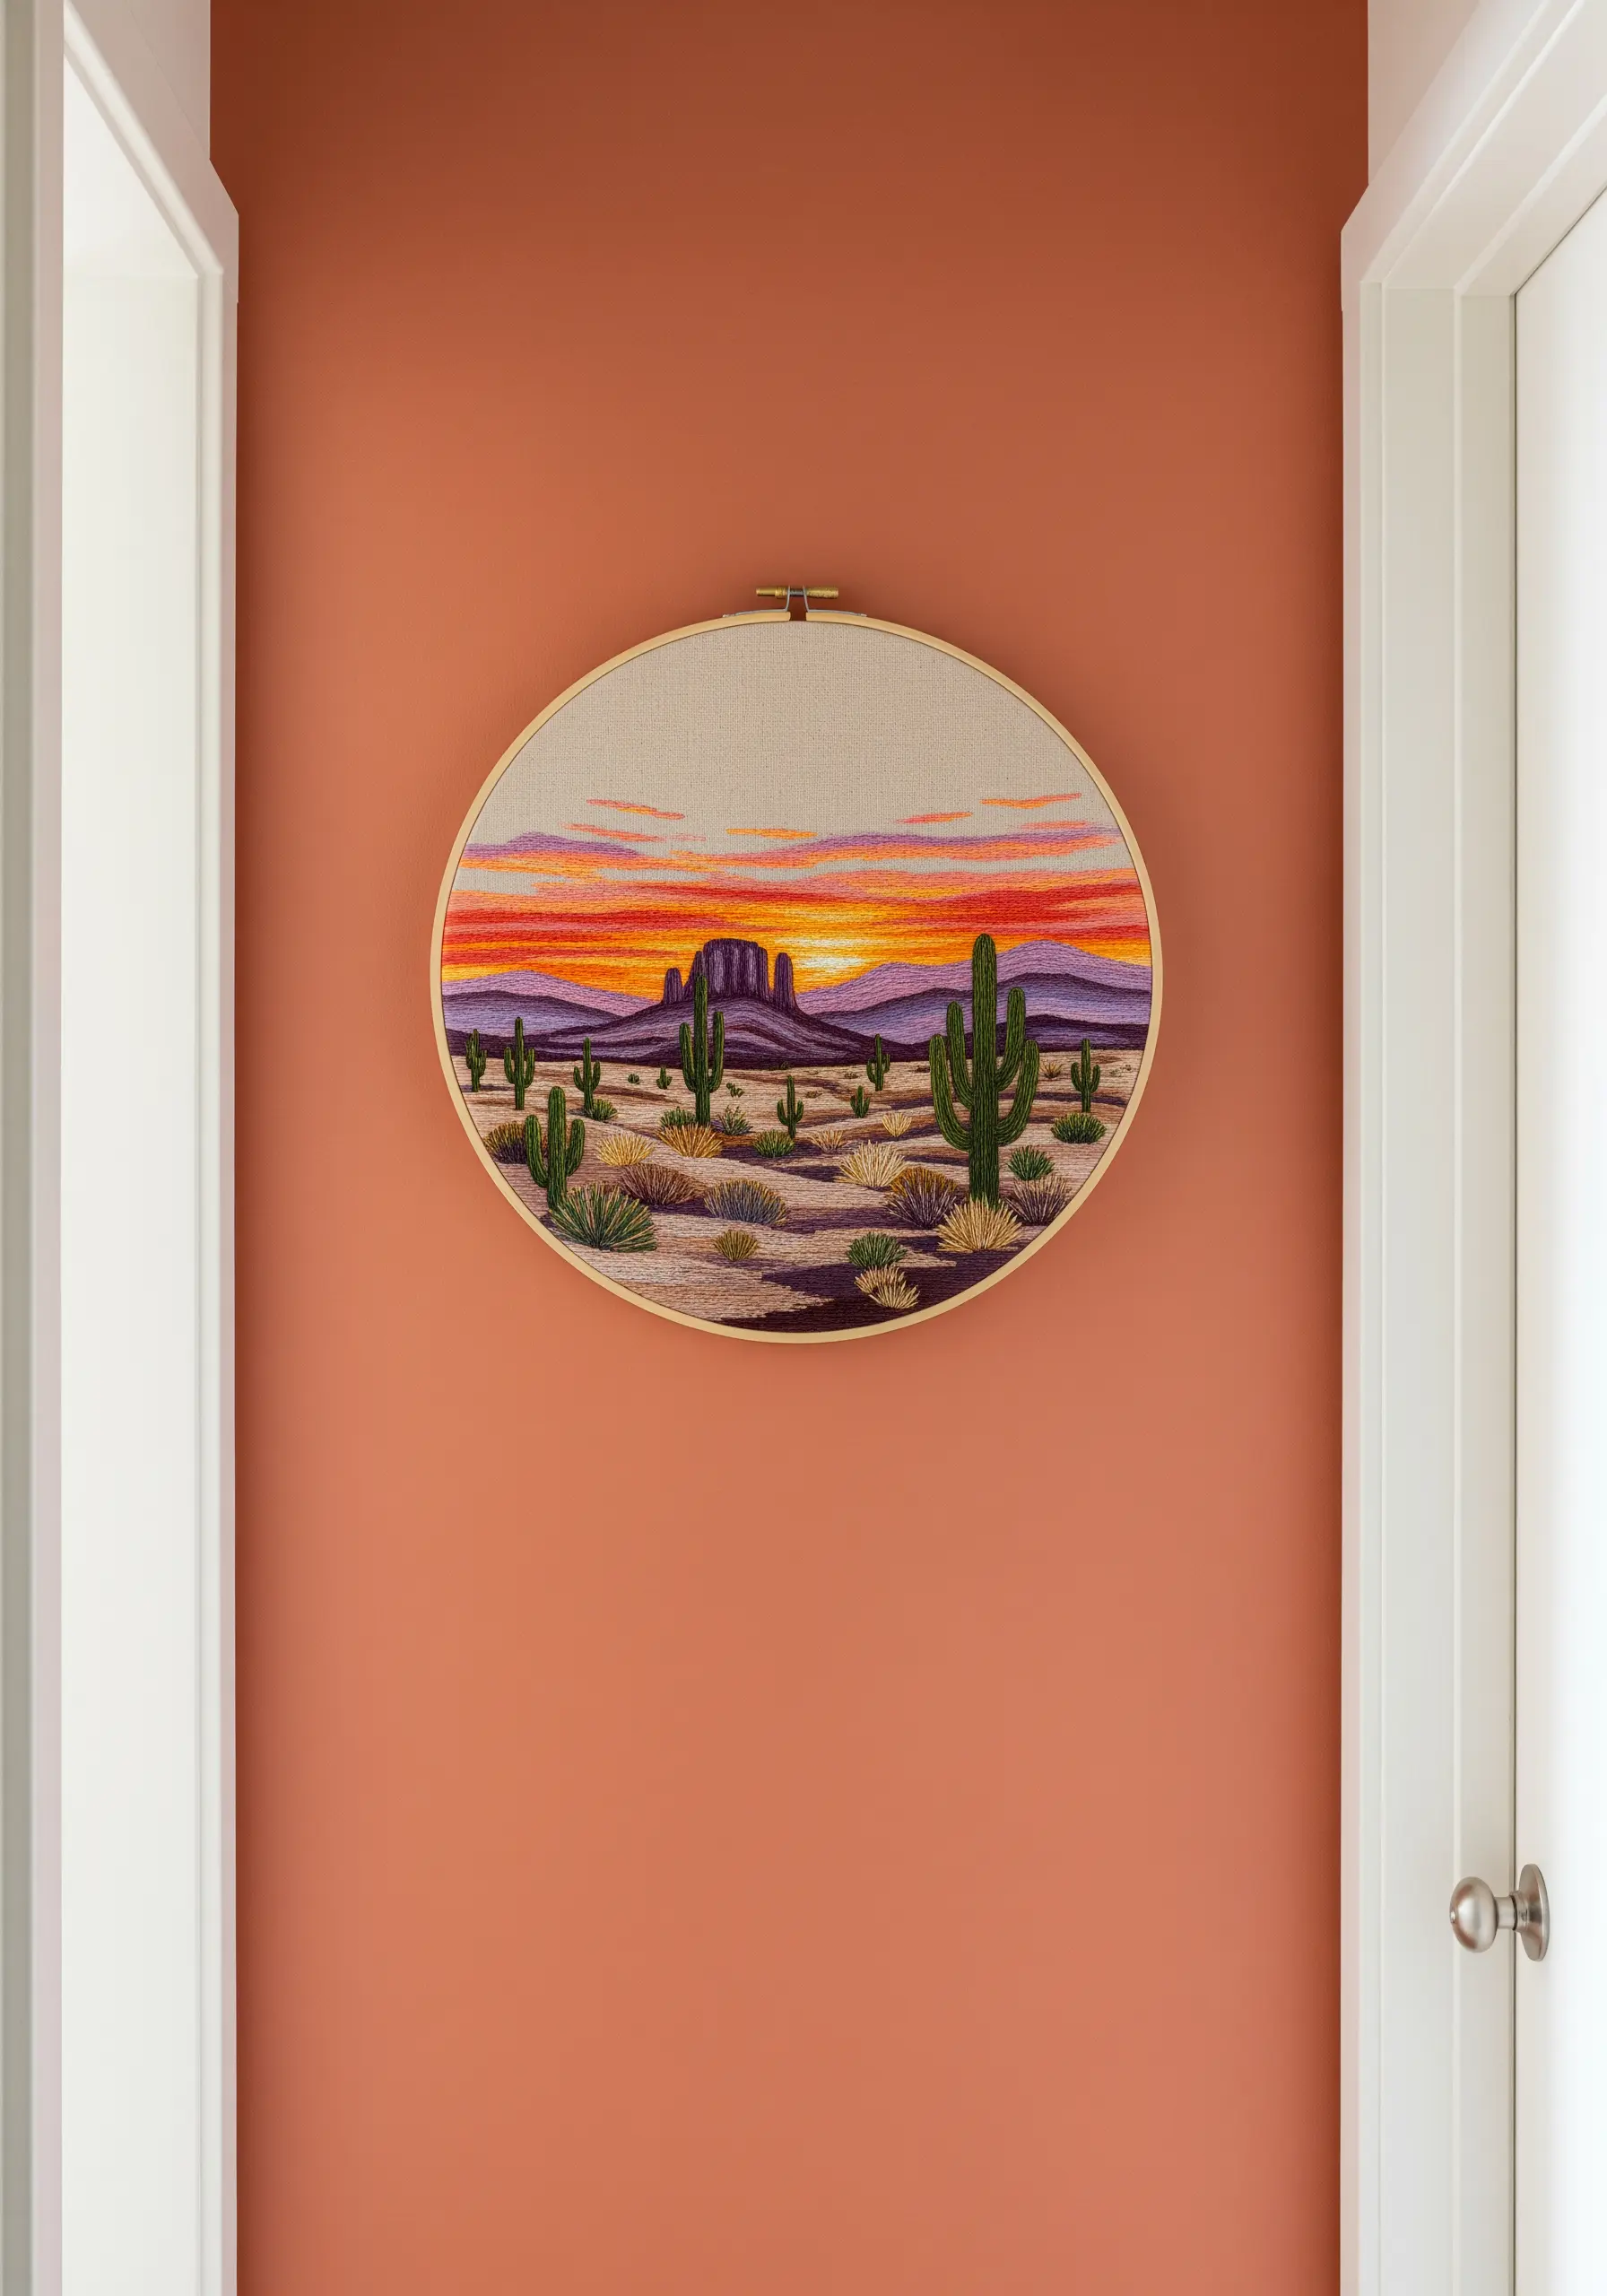
Achieve a painterly sunset effect using the long-and-short stitch, which allows colors to blend seamlessly into one another.
Work in horizontal bands, starting with the lightest color at the horizon and gradually introducing darker threads as you move up the sky.
To create the softest transitions, use a single strand of floss and slightly overlap the stitches from one color band into the next. This mimics the gentle gradations of light in a real sky.
This approach to mountain landscape thread painting adds realism and emotional depth without complex techniques.
5. Define Minimalist Forms with a Perfect Outline
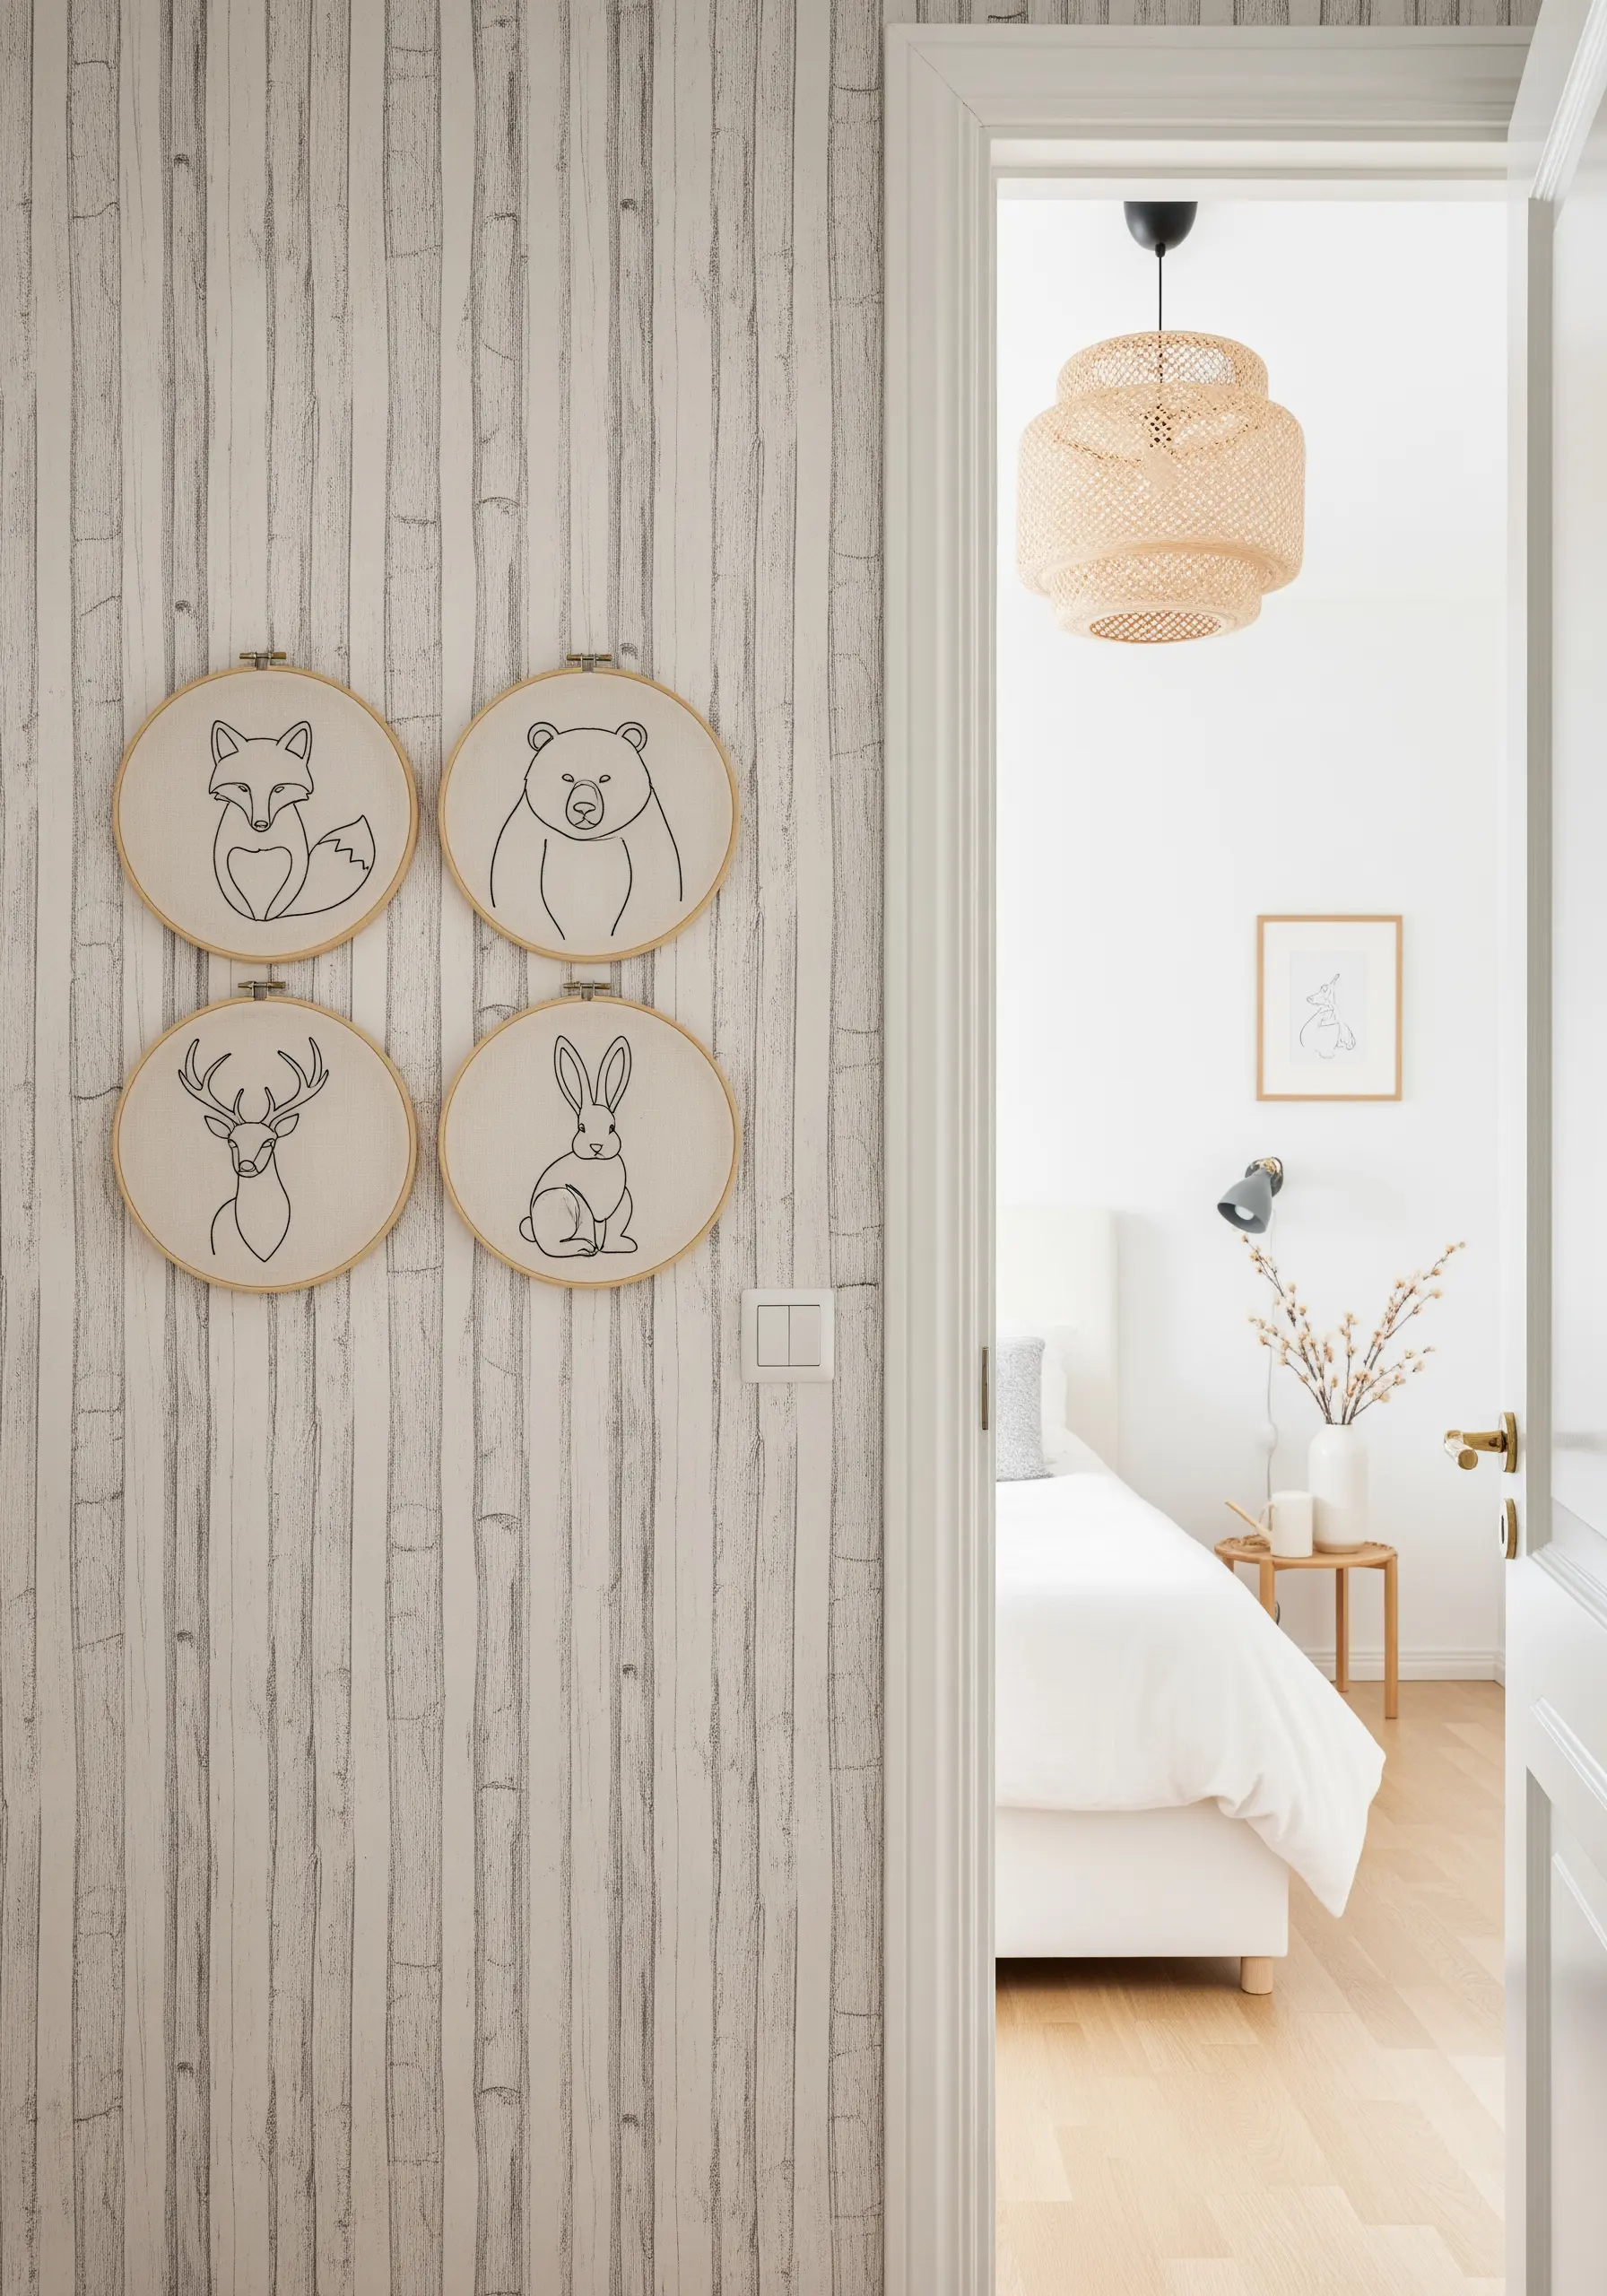
For clean, graphic line art, your outline stitch is everything. A whipped backstitch offers a completely smooth, uninterrupted line that looks incredibly polished.
First, create a standard backstitch outline. Then, using the same thread, slide your needle under each stitch without piercing the fabric, effectively ‘whipping’ the thread around the outline.
Use a single strand of black floss on a neutral linen background to create high-contrast, minimalist line art animal designs that feel both simple and sophisticated.
6. Add Dimension to Botanicals with Shading
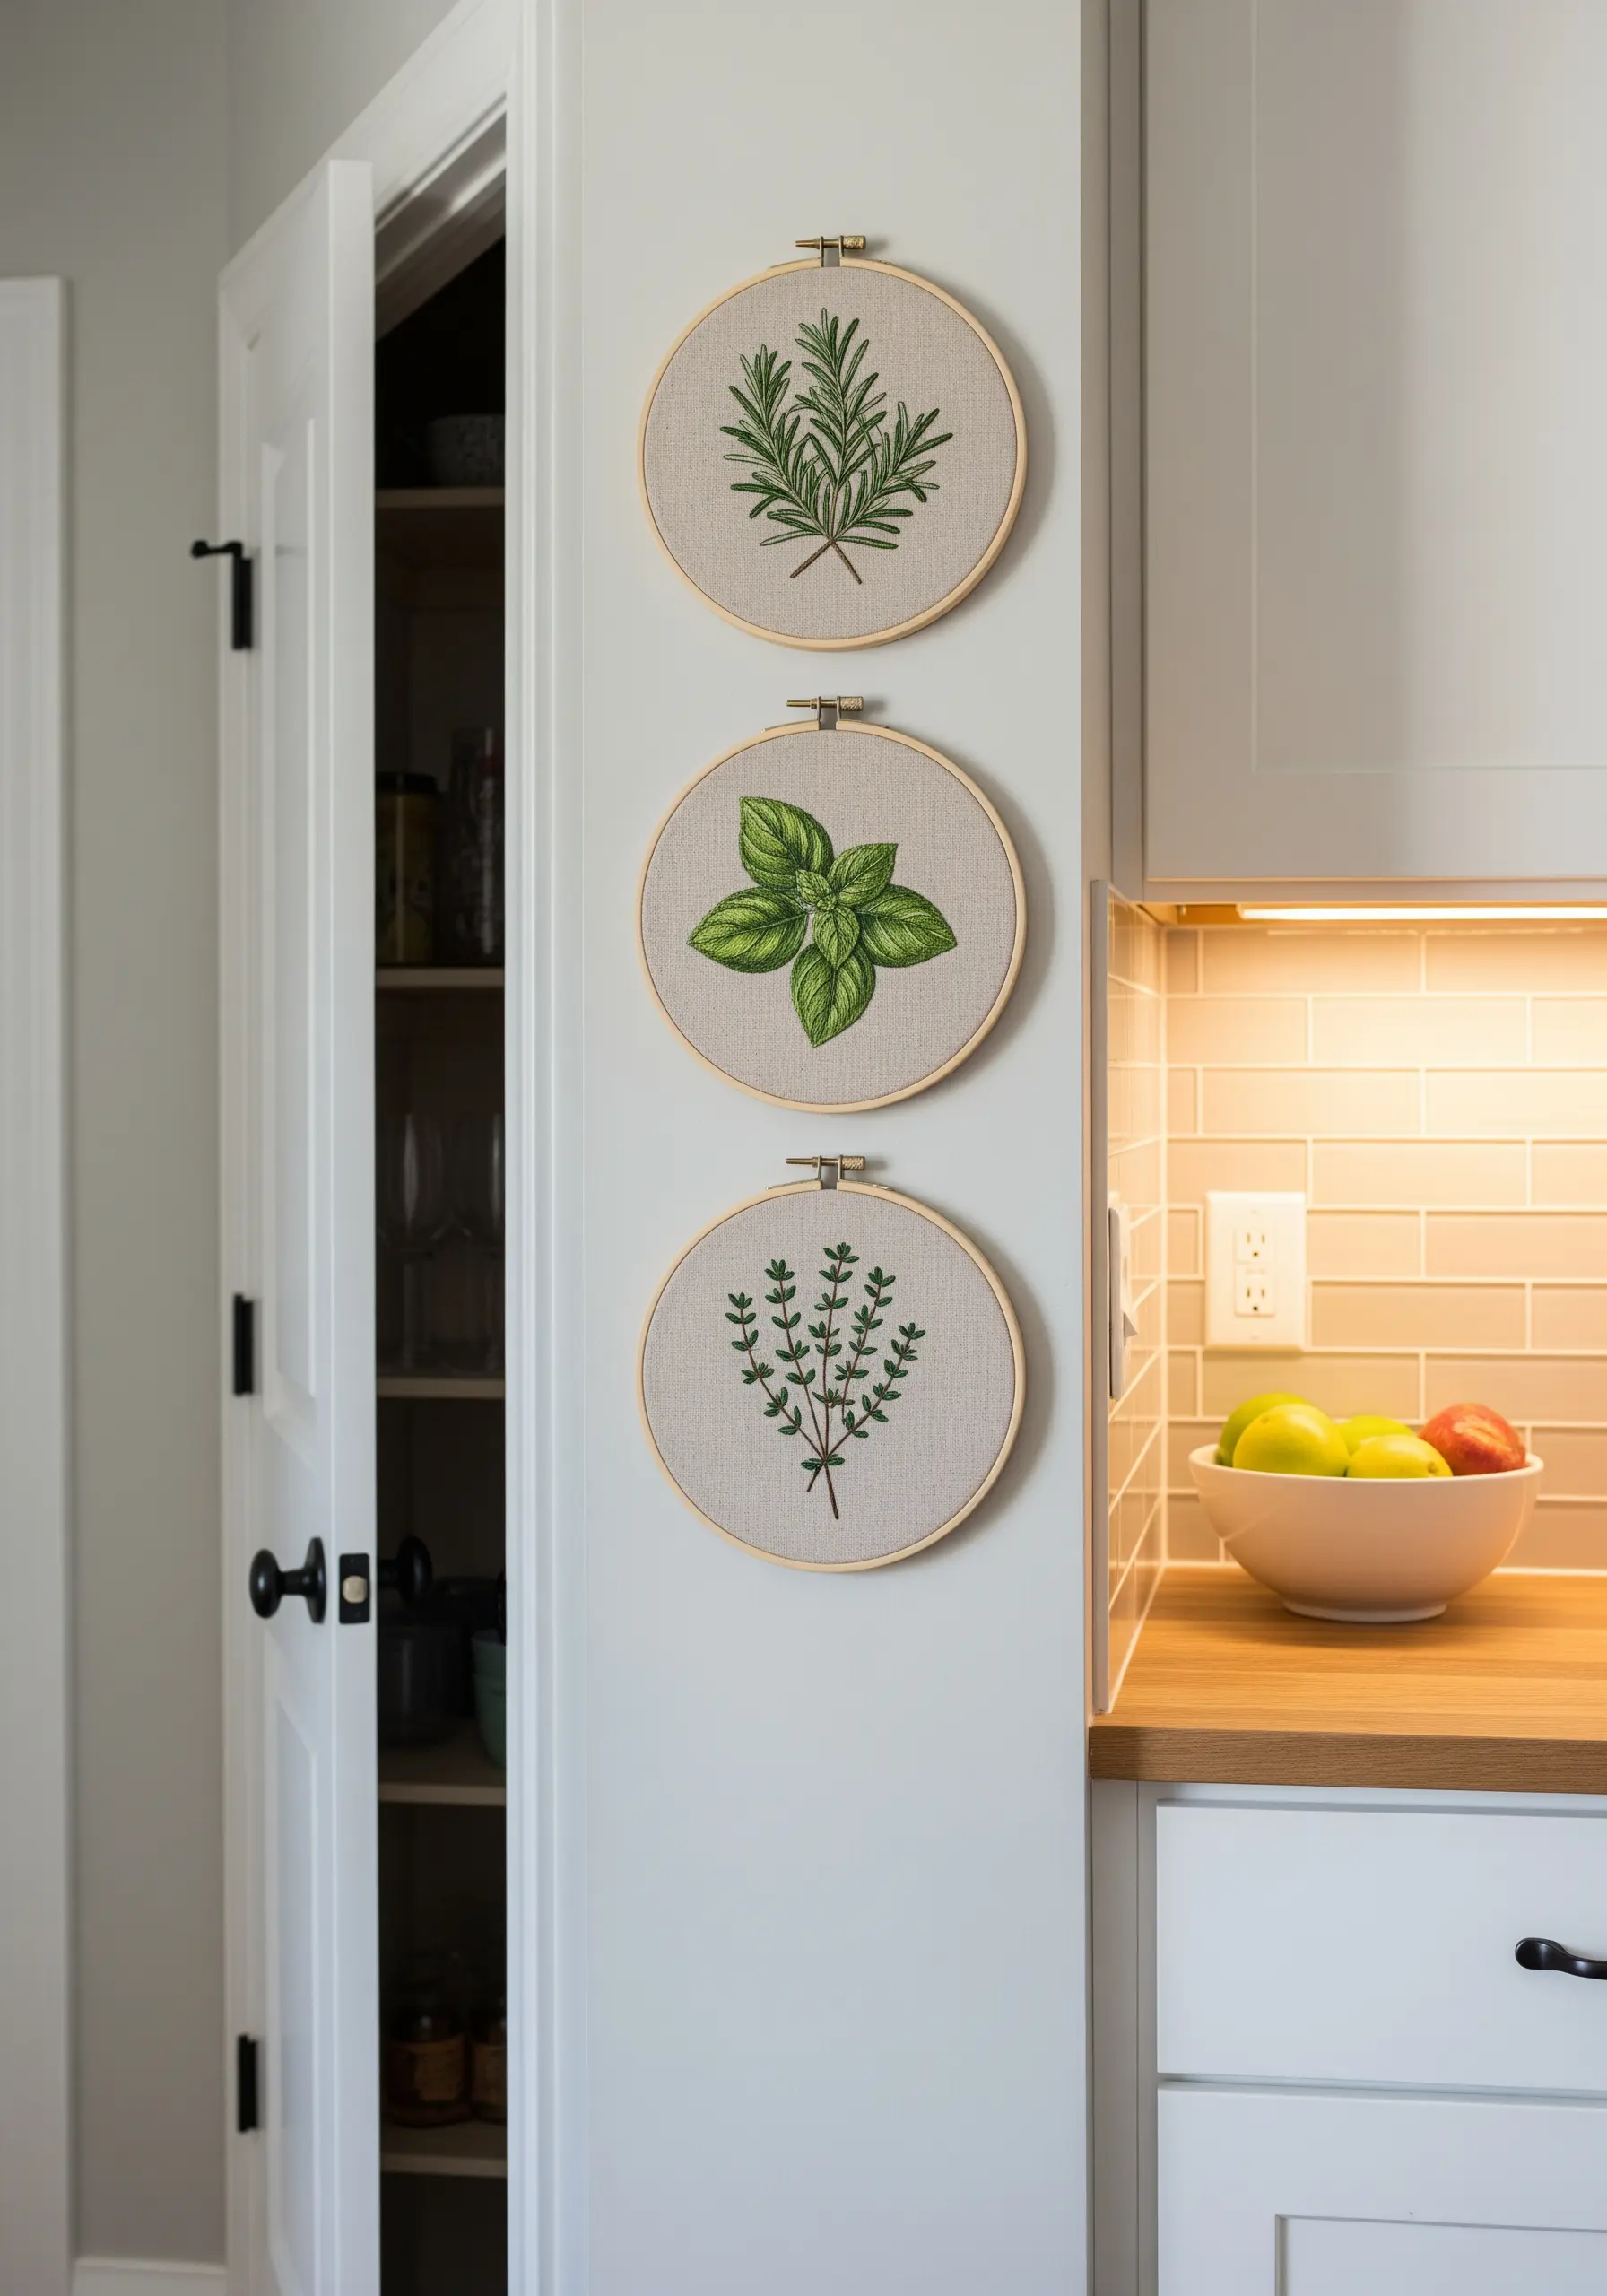
Bring simple herb motifs to life by using two or three shades of the same color within each leaf.
Use a darker green for the central vein and the base of the leaf, then transition to a lighter shade for the outer edges where the light would naturally hit.
Stitch direction is also crucial: angle your satin stitches to follow the natural curve and growth of the leaves. This subtle shading and directional stitching creates a realistic, three-dimensional effect.
These detailed touches transform simple patterns into charming mini fruit & herb embroidery frames.
7. Compose a Playful Gallery with Negative Space
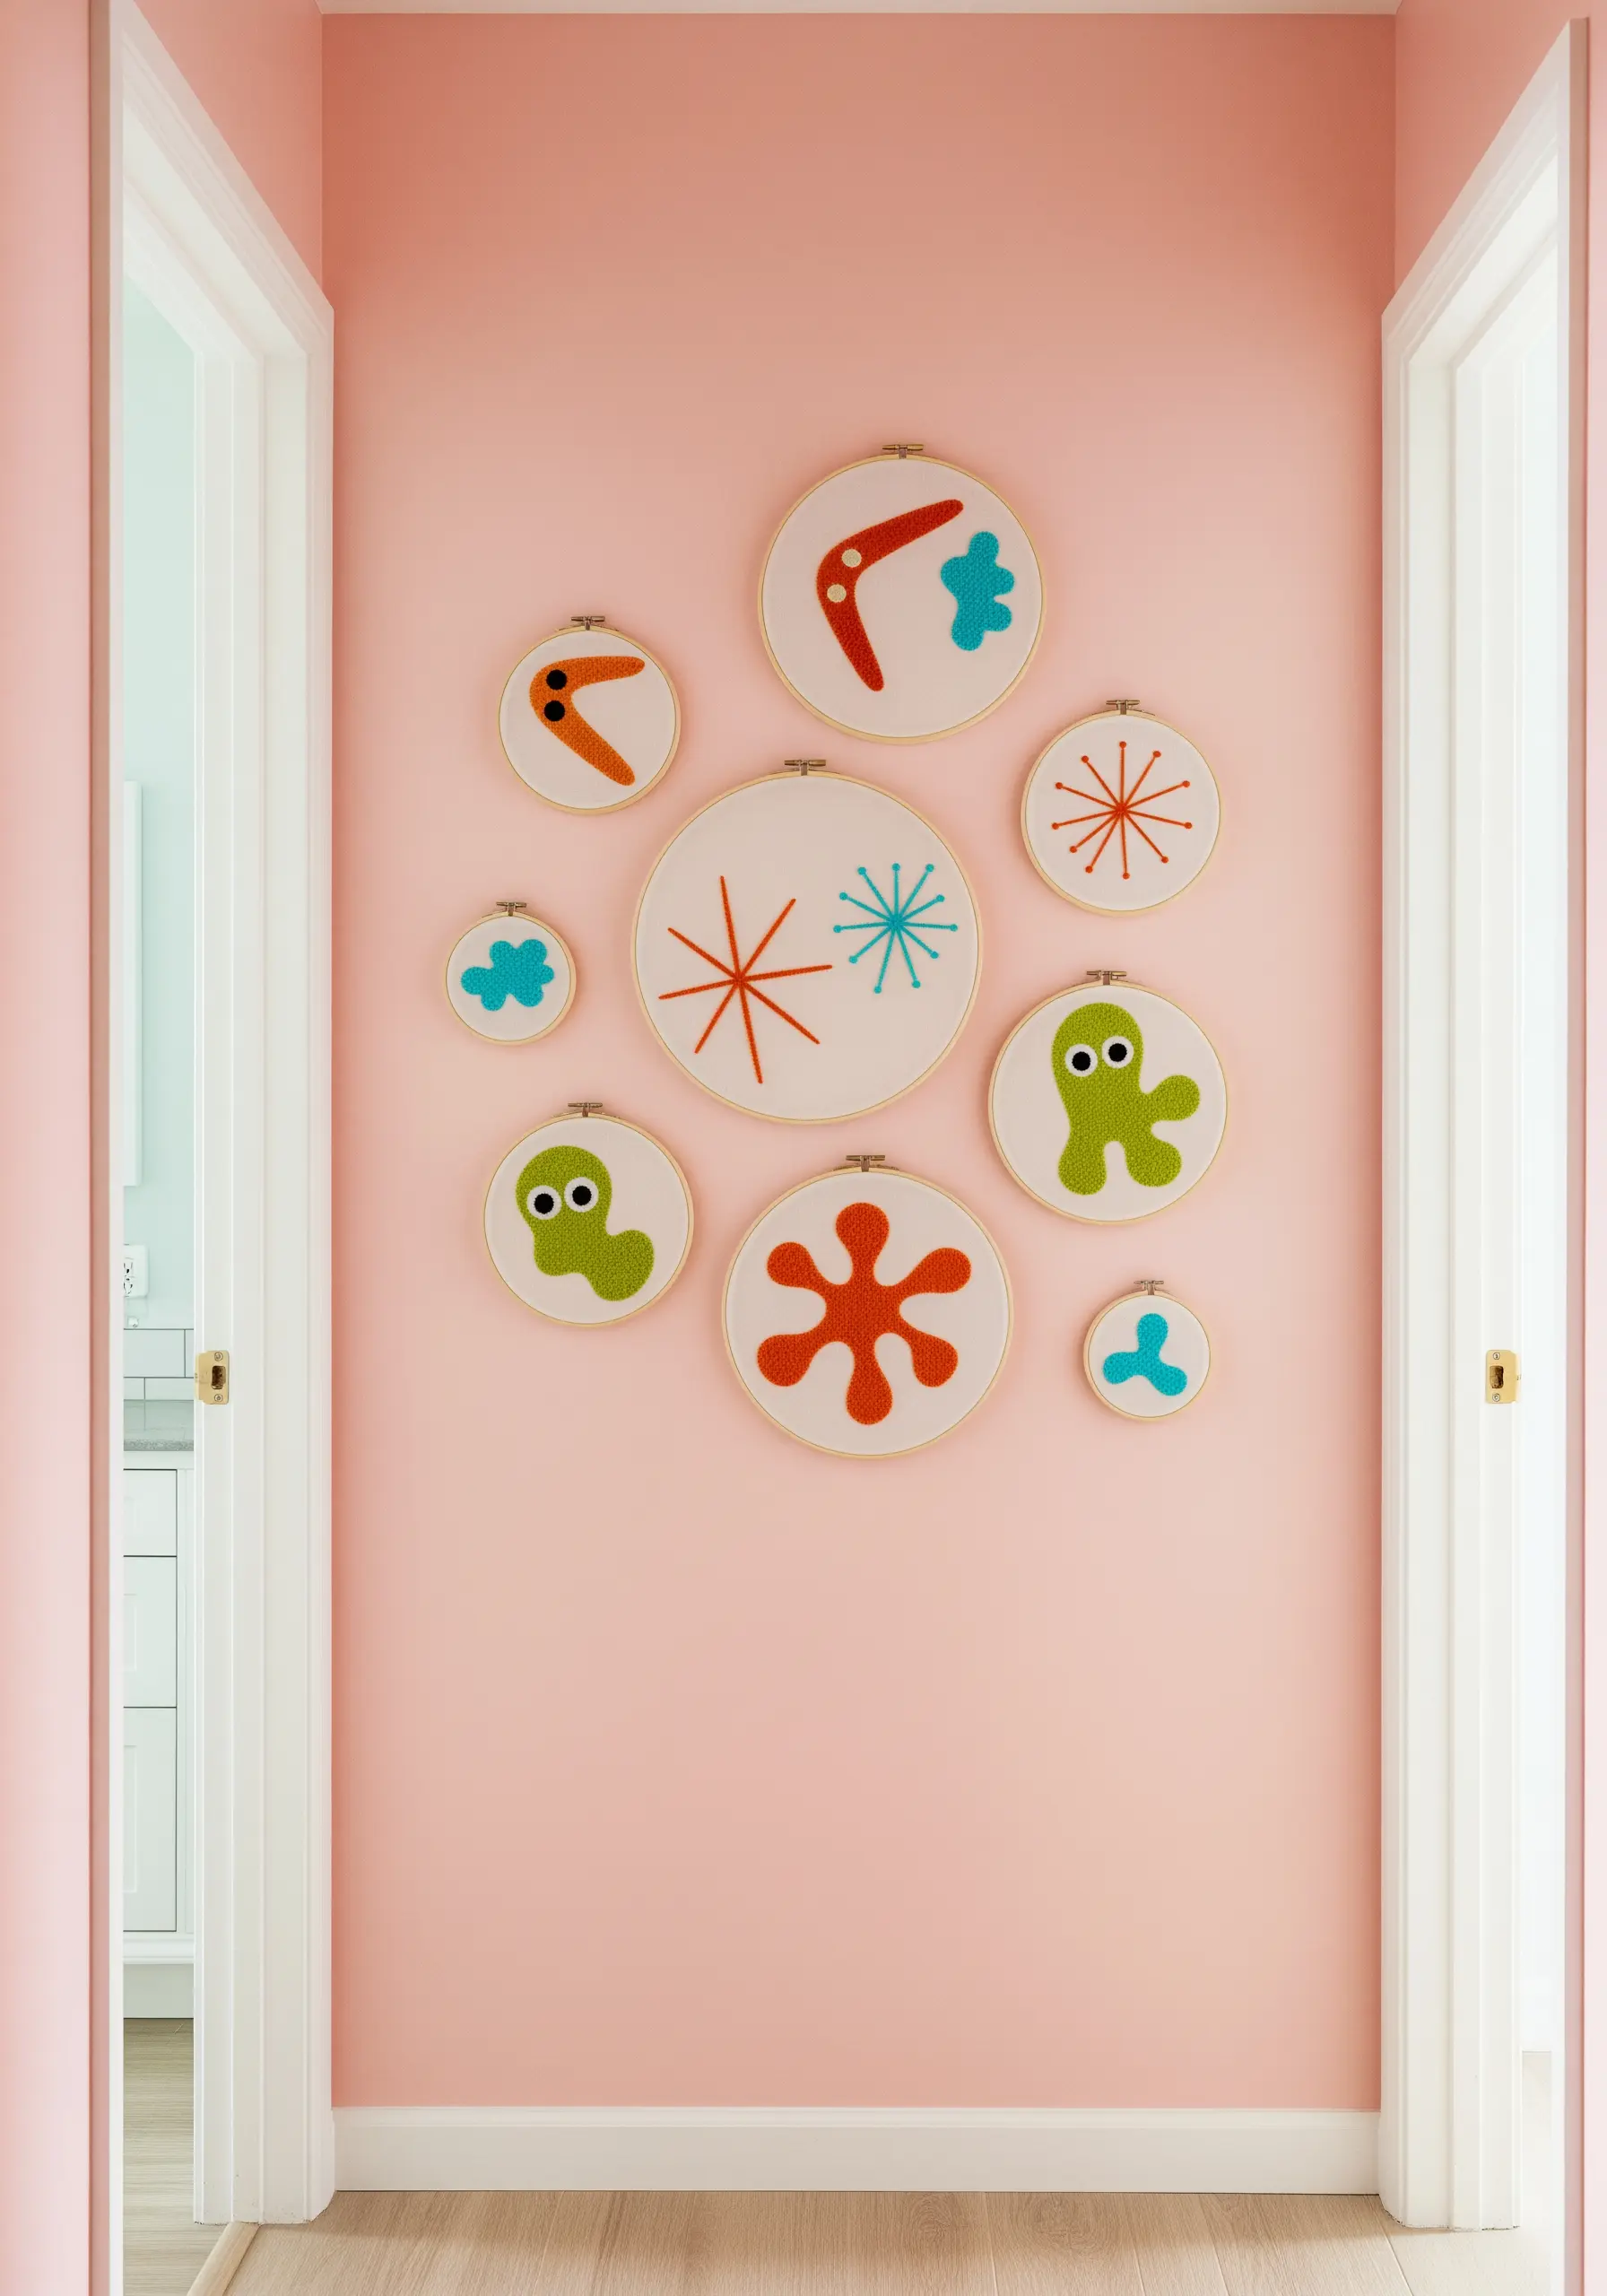
When arranging a collection of abstract hoops, think like a designer and use the wall itself as part of your composition.
Vary the size of your hoops and the space between them to create a sense of rhythm and movement. The blank wall—or negative space—is just as important as the embroidered motifs.
This approach prevents the display from feeling cluttered and allows each piece to breathe, resulting in a dynamic, joyful installation that feels like a single piece of art.
It’s a perfect way to display mini retro-style embroidery frames with personality.
8. Elevate a Series by Mounting on a Fabric Panel
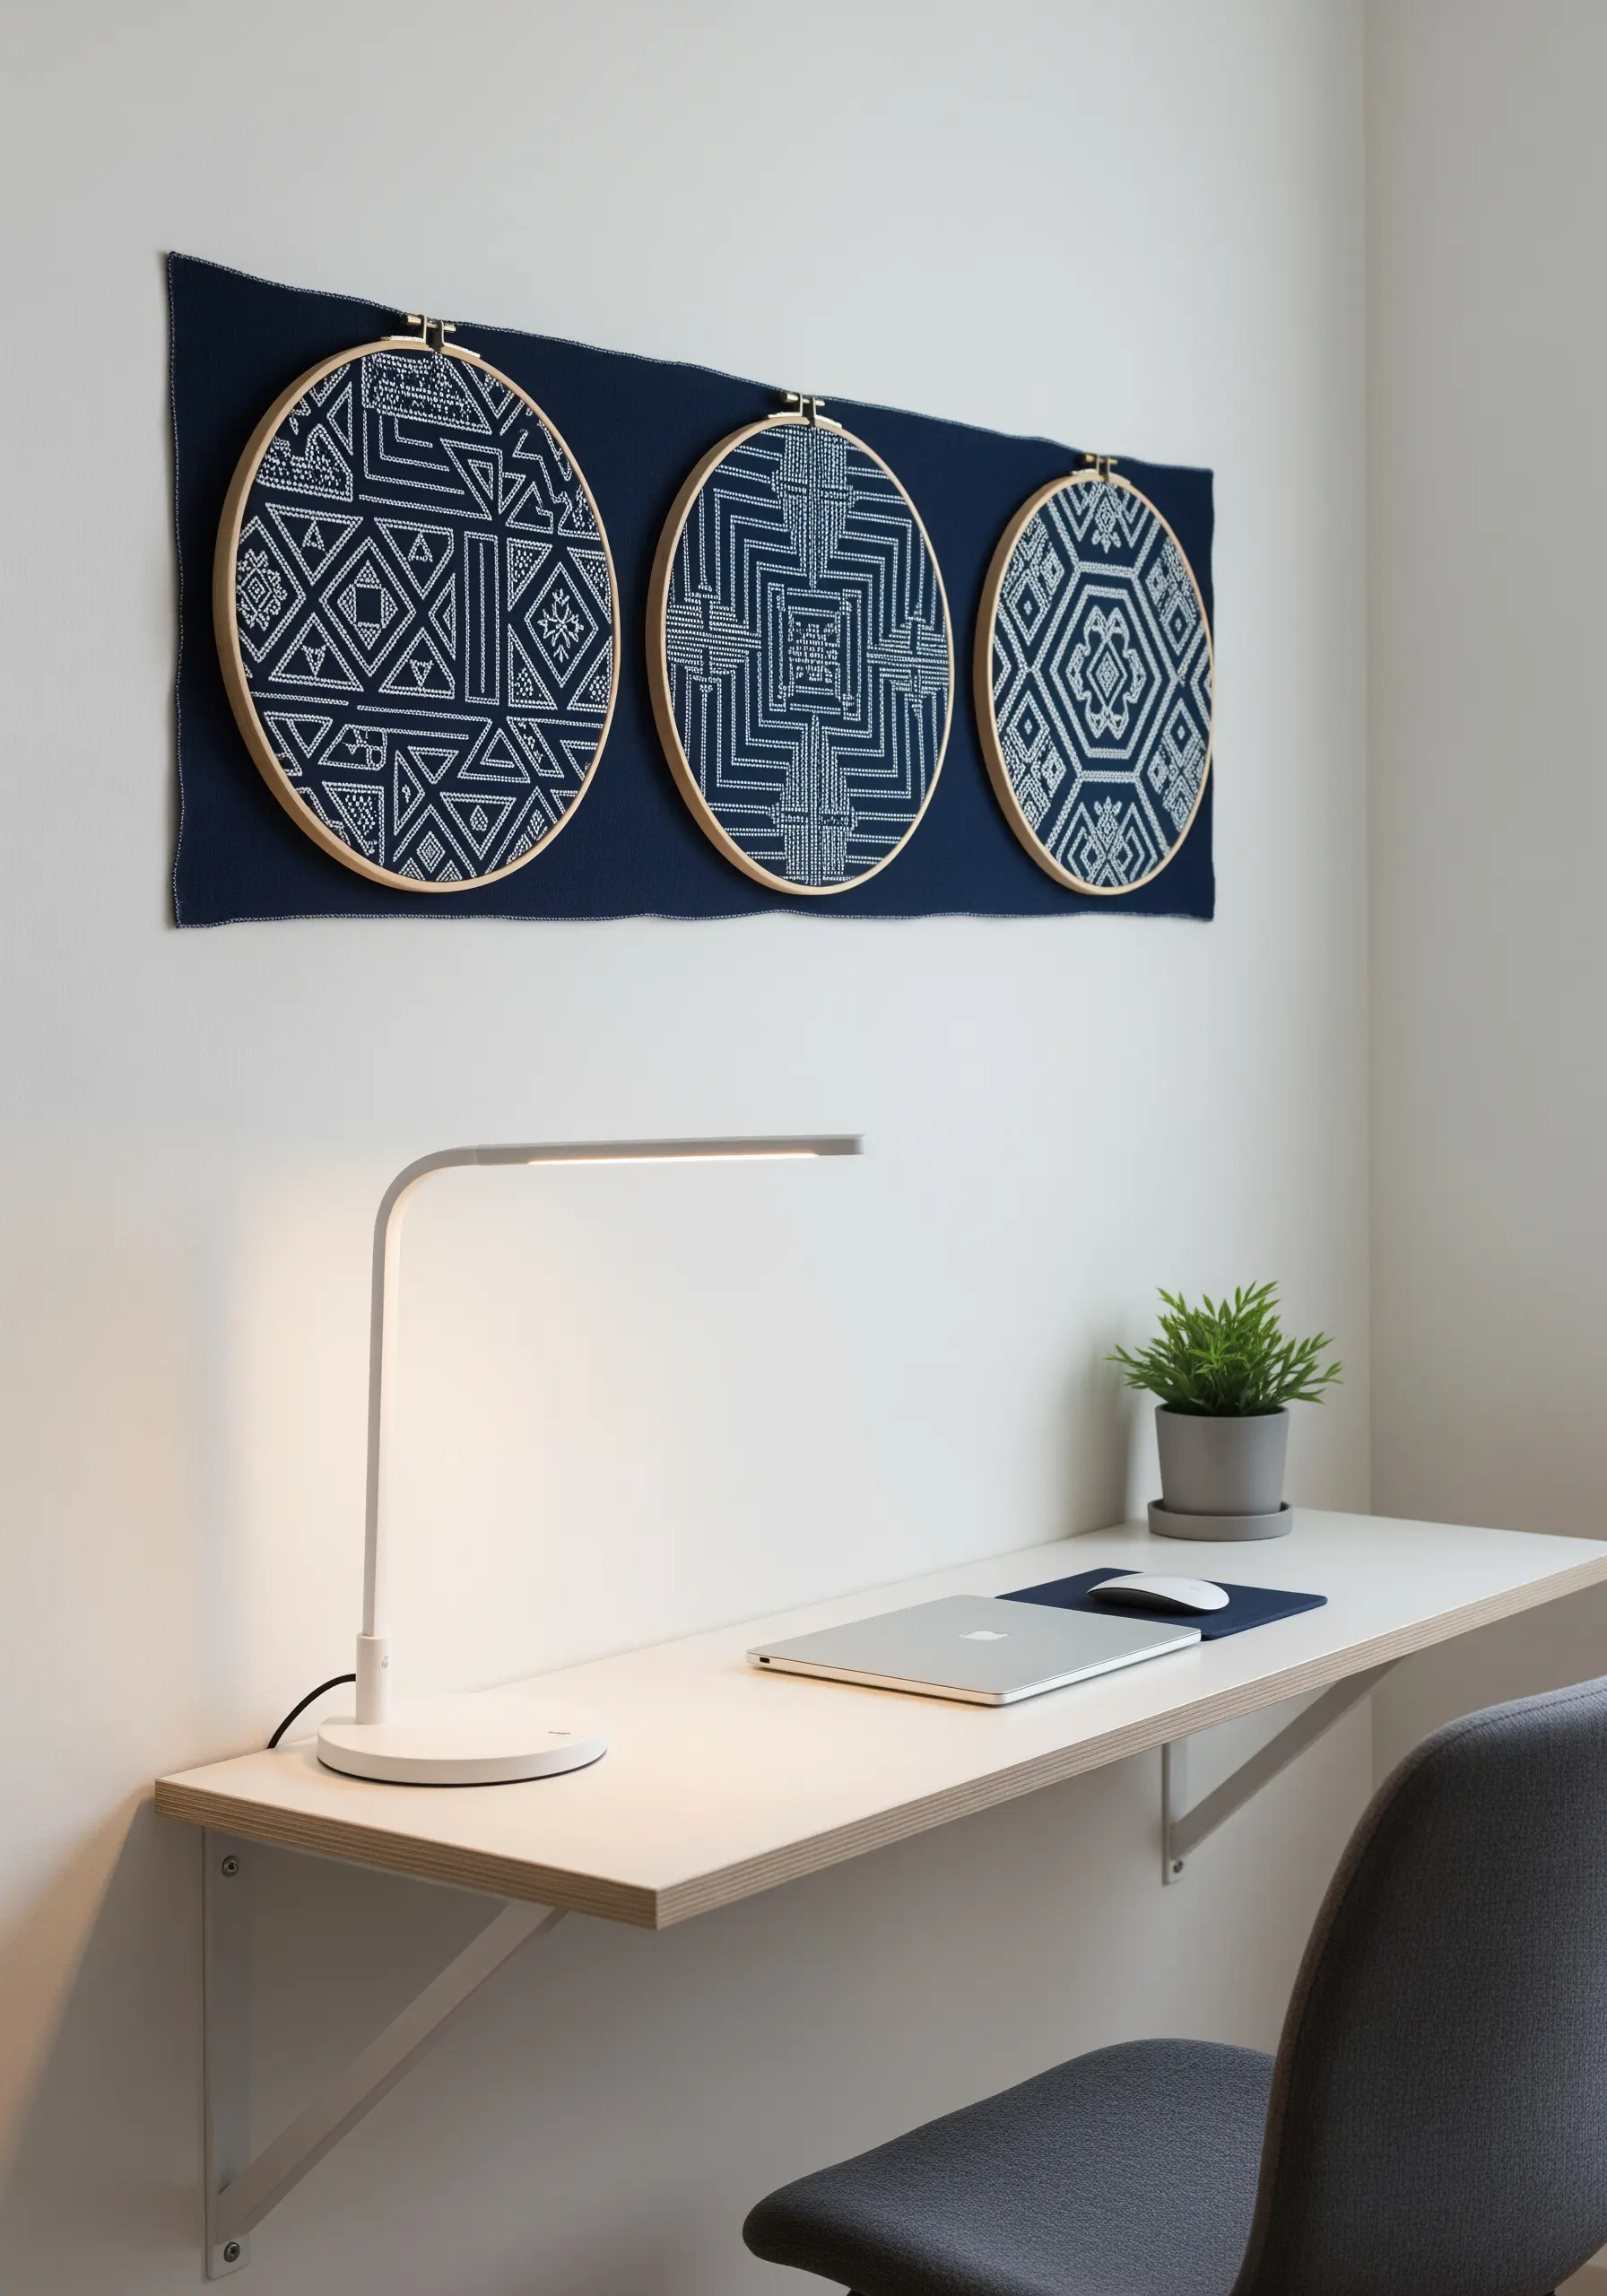
To give a trio of hoops more presence and turn them into a significant focal point, mount them onto a larger piece of contrasting fabric.
Choose a solid, dark textile like navy linen or charcoal felt to make the lighter threads of your embroidery stand out.
This technique frames the collection, unifying the individual hoops into a single, cohesive tapestry that feels more substantial and intentional on a narrow wall.
It’s an excellent way to organize hooped wall collage layouts for maximum impact.
9. Capture Delicate Florals with Varied Textures
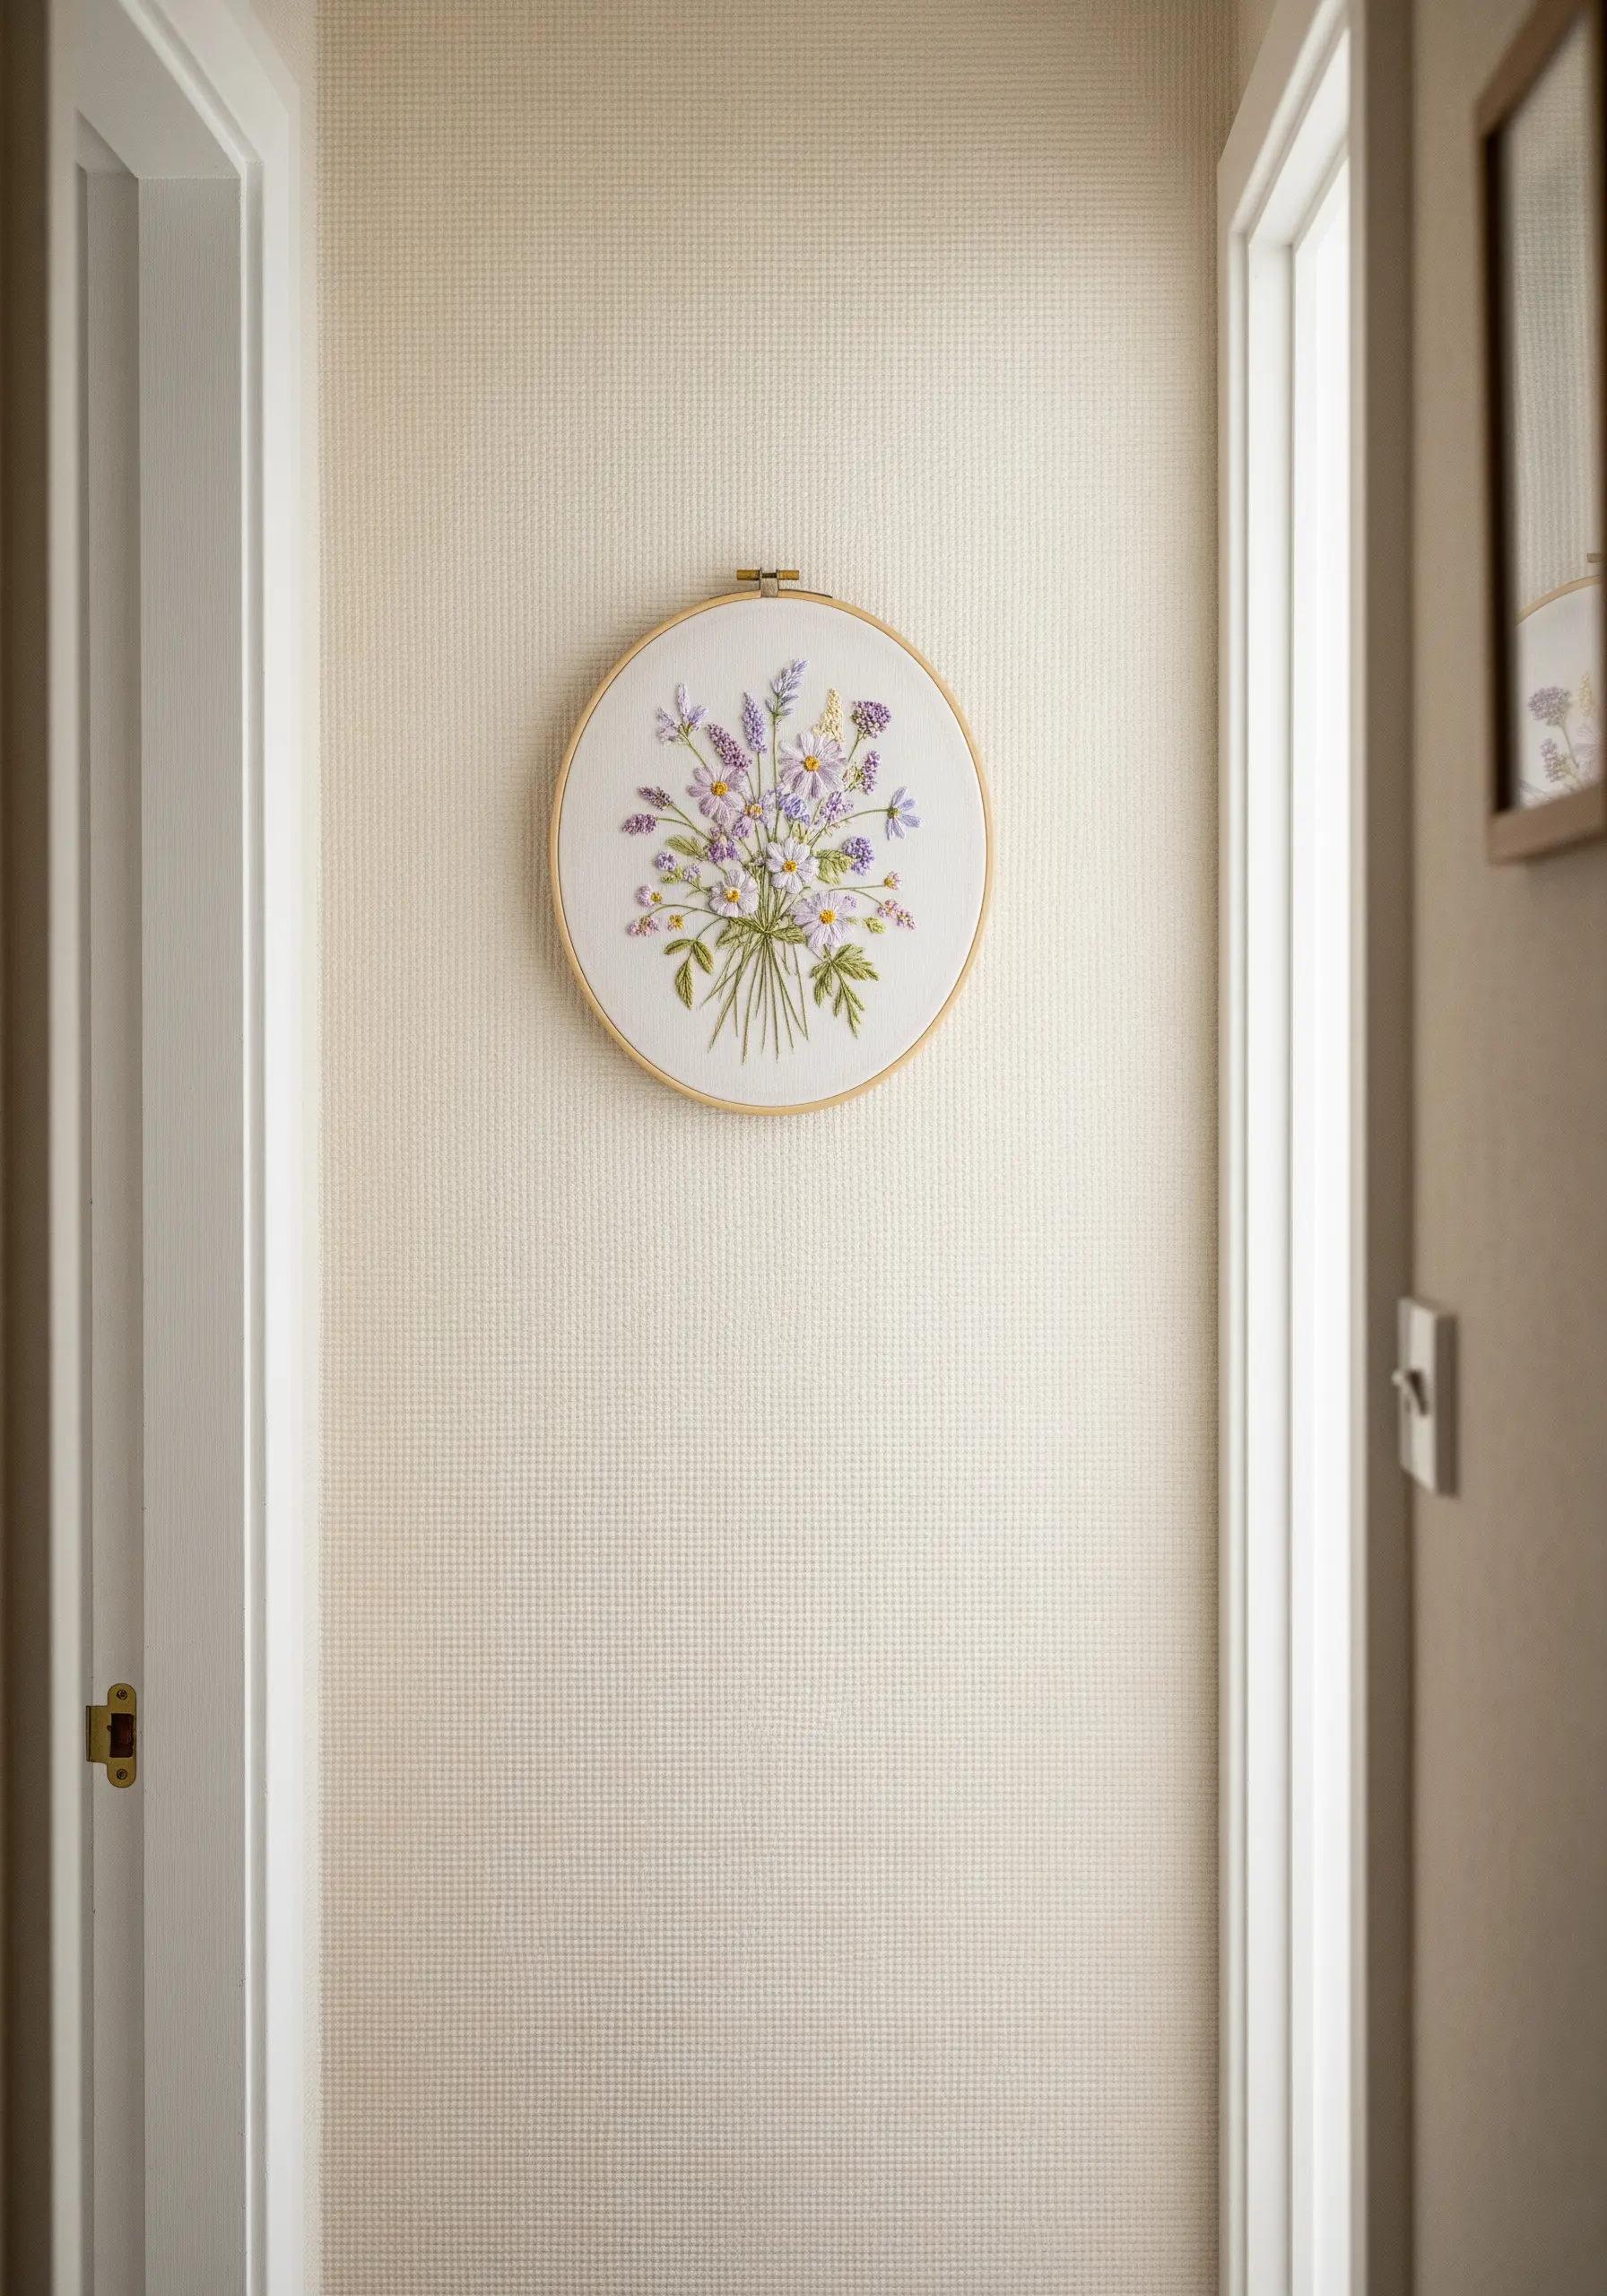
To create a botanical bouquet that feels light and realistic, use a mix of stitches that mimic the natural textures of the flowers.
Use single-strand lazy daisy stitches for tiny petals, small French knots for buds and filler flowers like baby’s breath, and a delicate stem stitch for the stalks.
Combining these different textures in a single composition prevents the design from looking flat and adds a professional touch to even the simplest floral arrangements, perfect for lavender-inspired embroidery designs.
10. Maximize Impact with High-Contrast Fabric
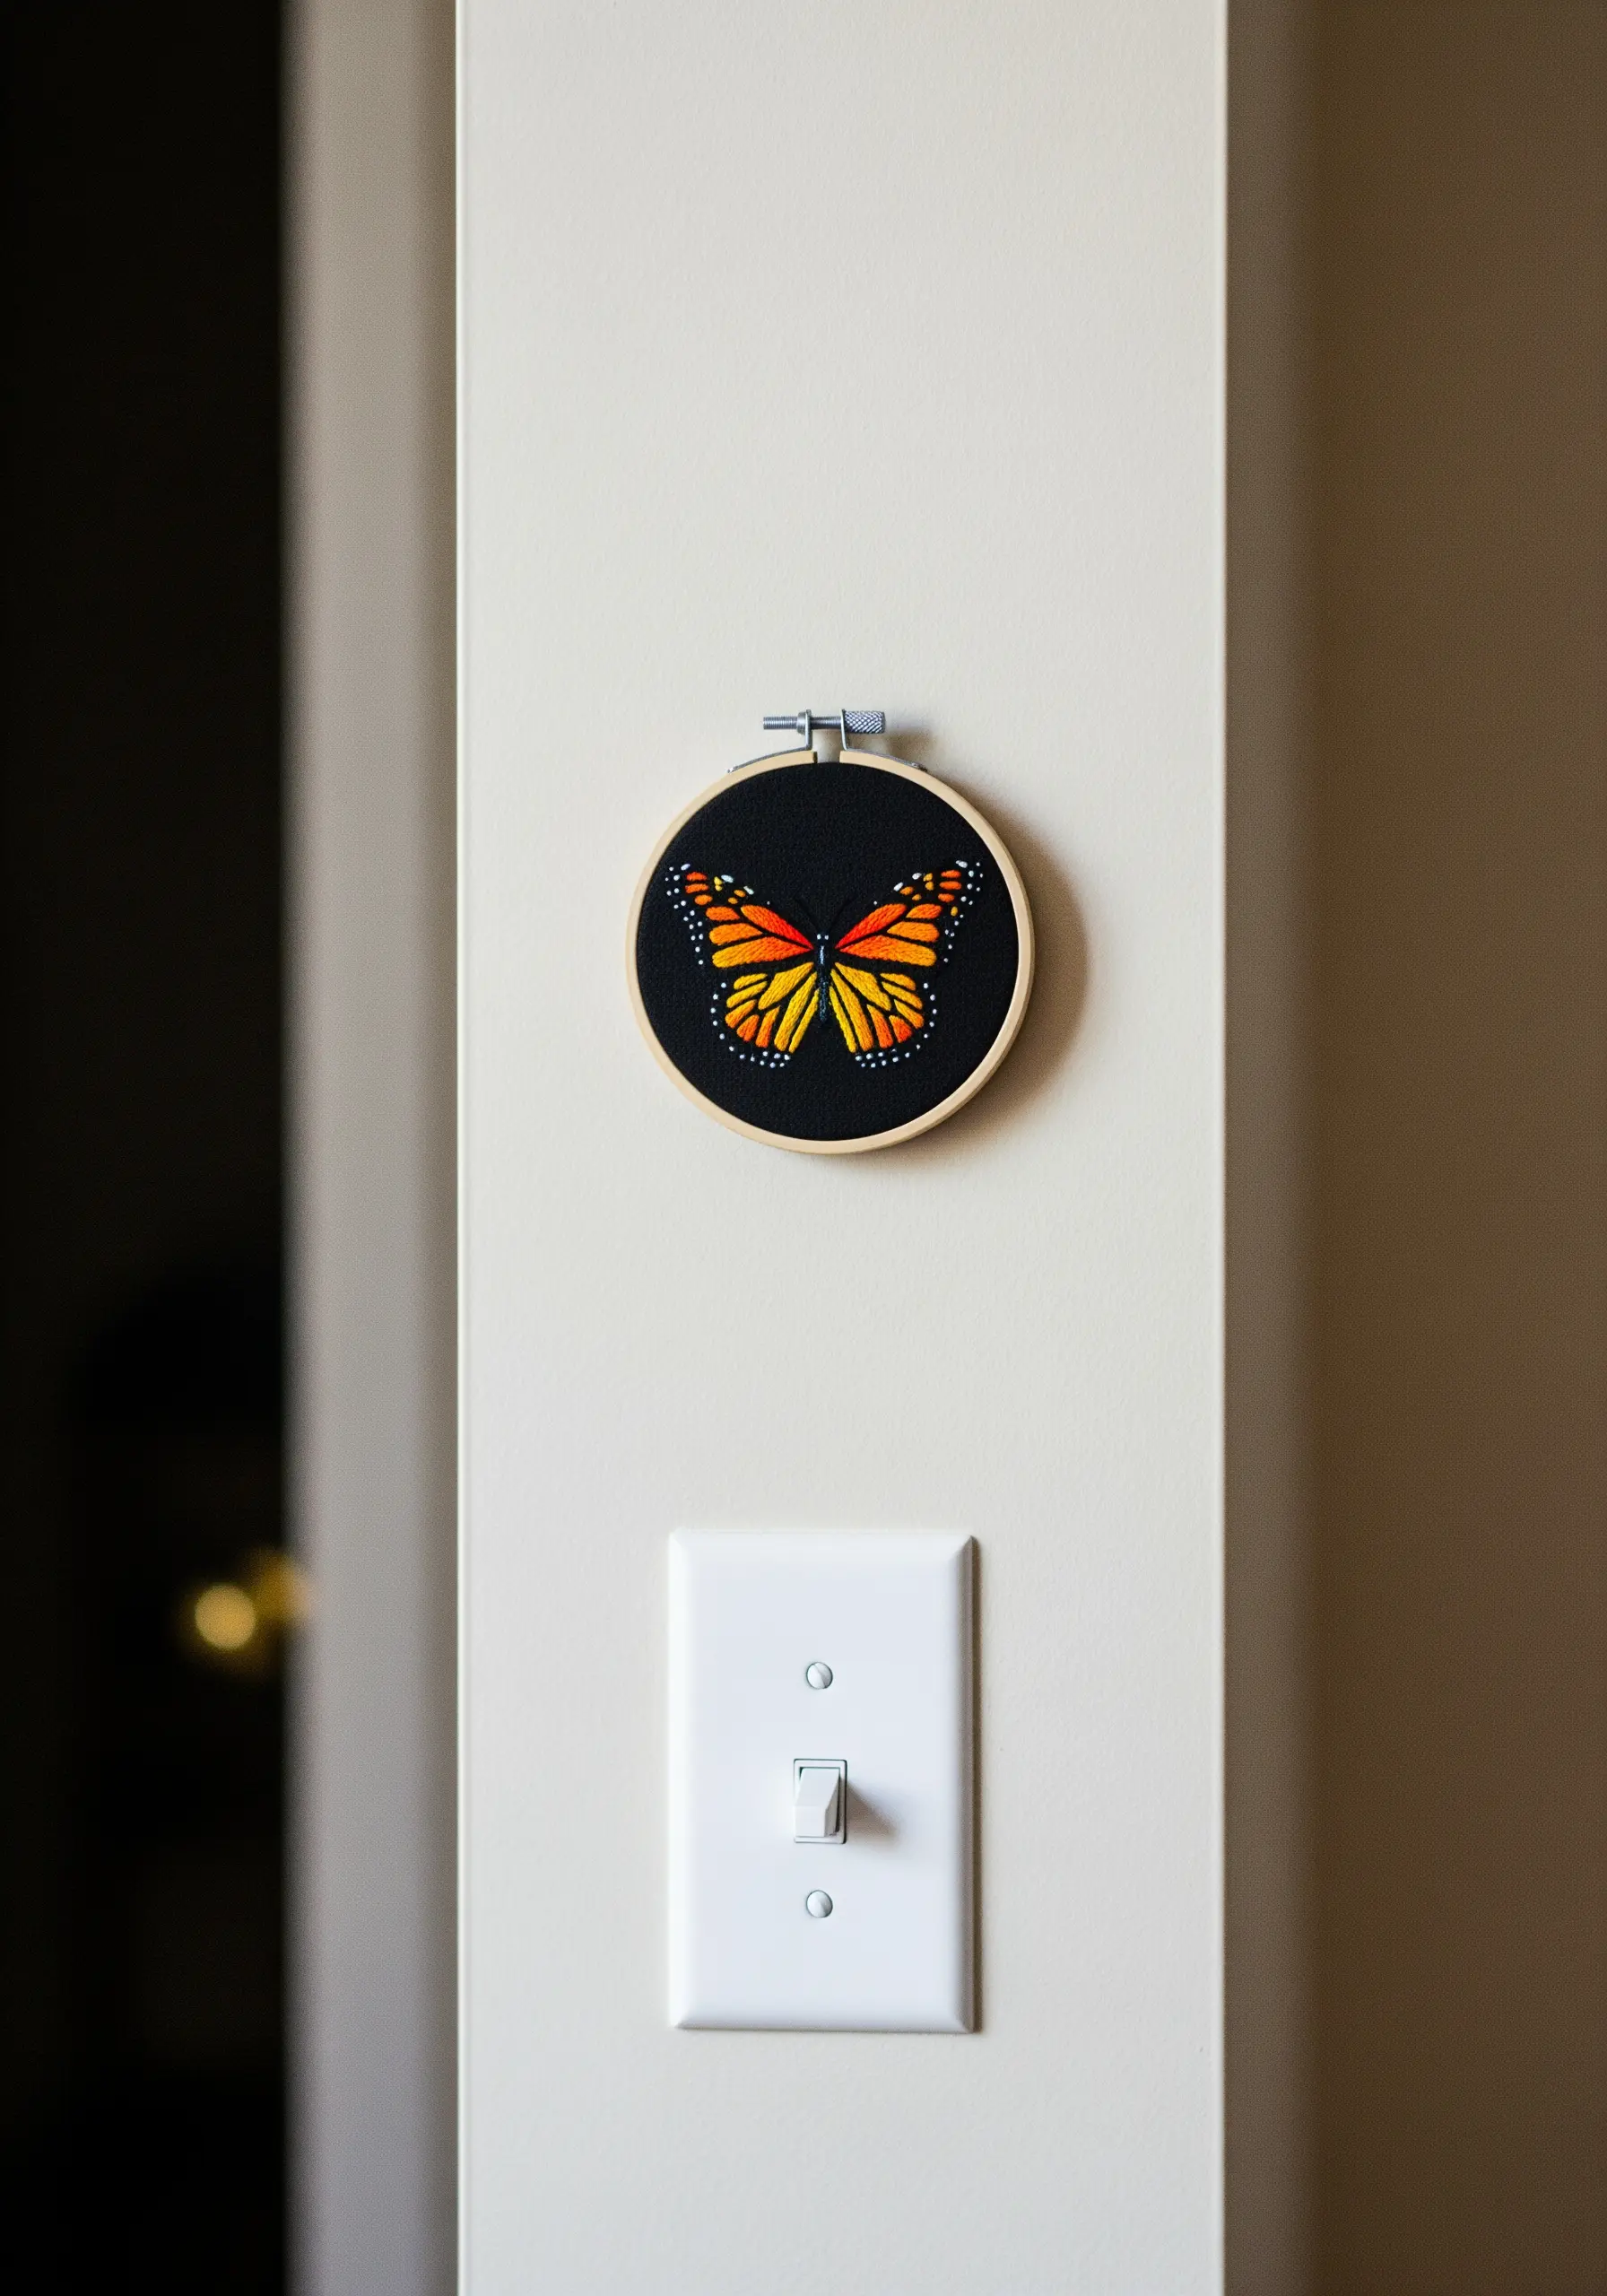
Make a small design command attention by stitching it on a fabric that creates dramatic contrast.
A deep black or charcoal cotton allows vibrant colors like orange, yellow, and red to appear intensely saturated and luminous.
Use two strands of floss for your fill stitches to ensure full, opaque coverage against the dark background. This technique is especially effective for single motifs, making them feel like glowing jewels on the wall.
It’s a simple trick for creating tiny embroidery ideas that feel powerful and focused.
11. Stitch Architectural Lines with Graphic Precision
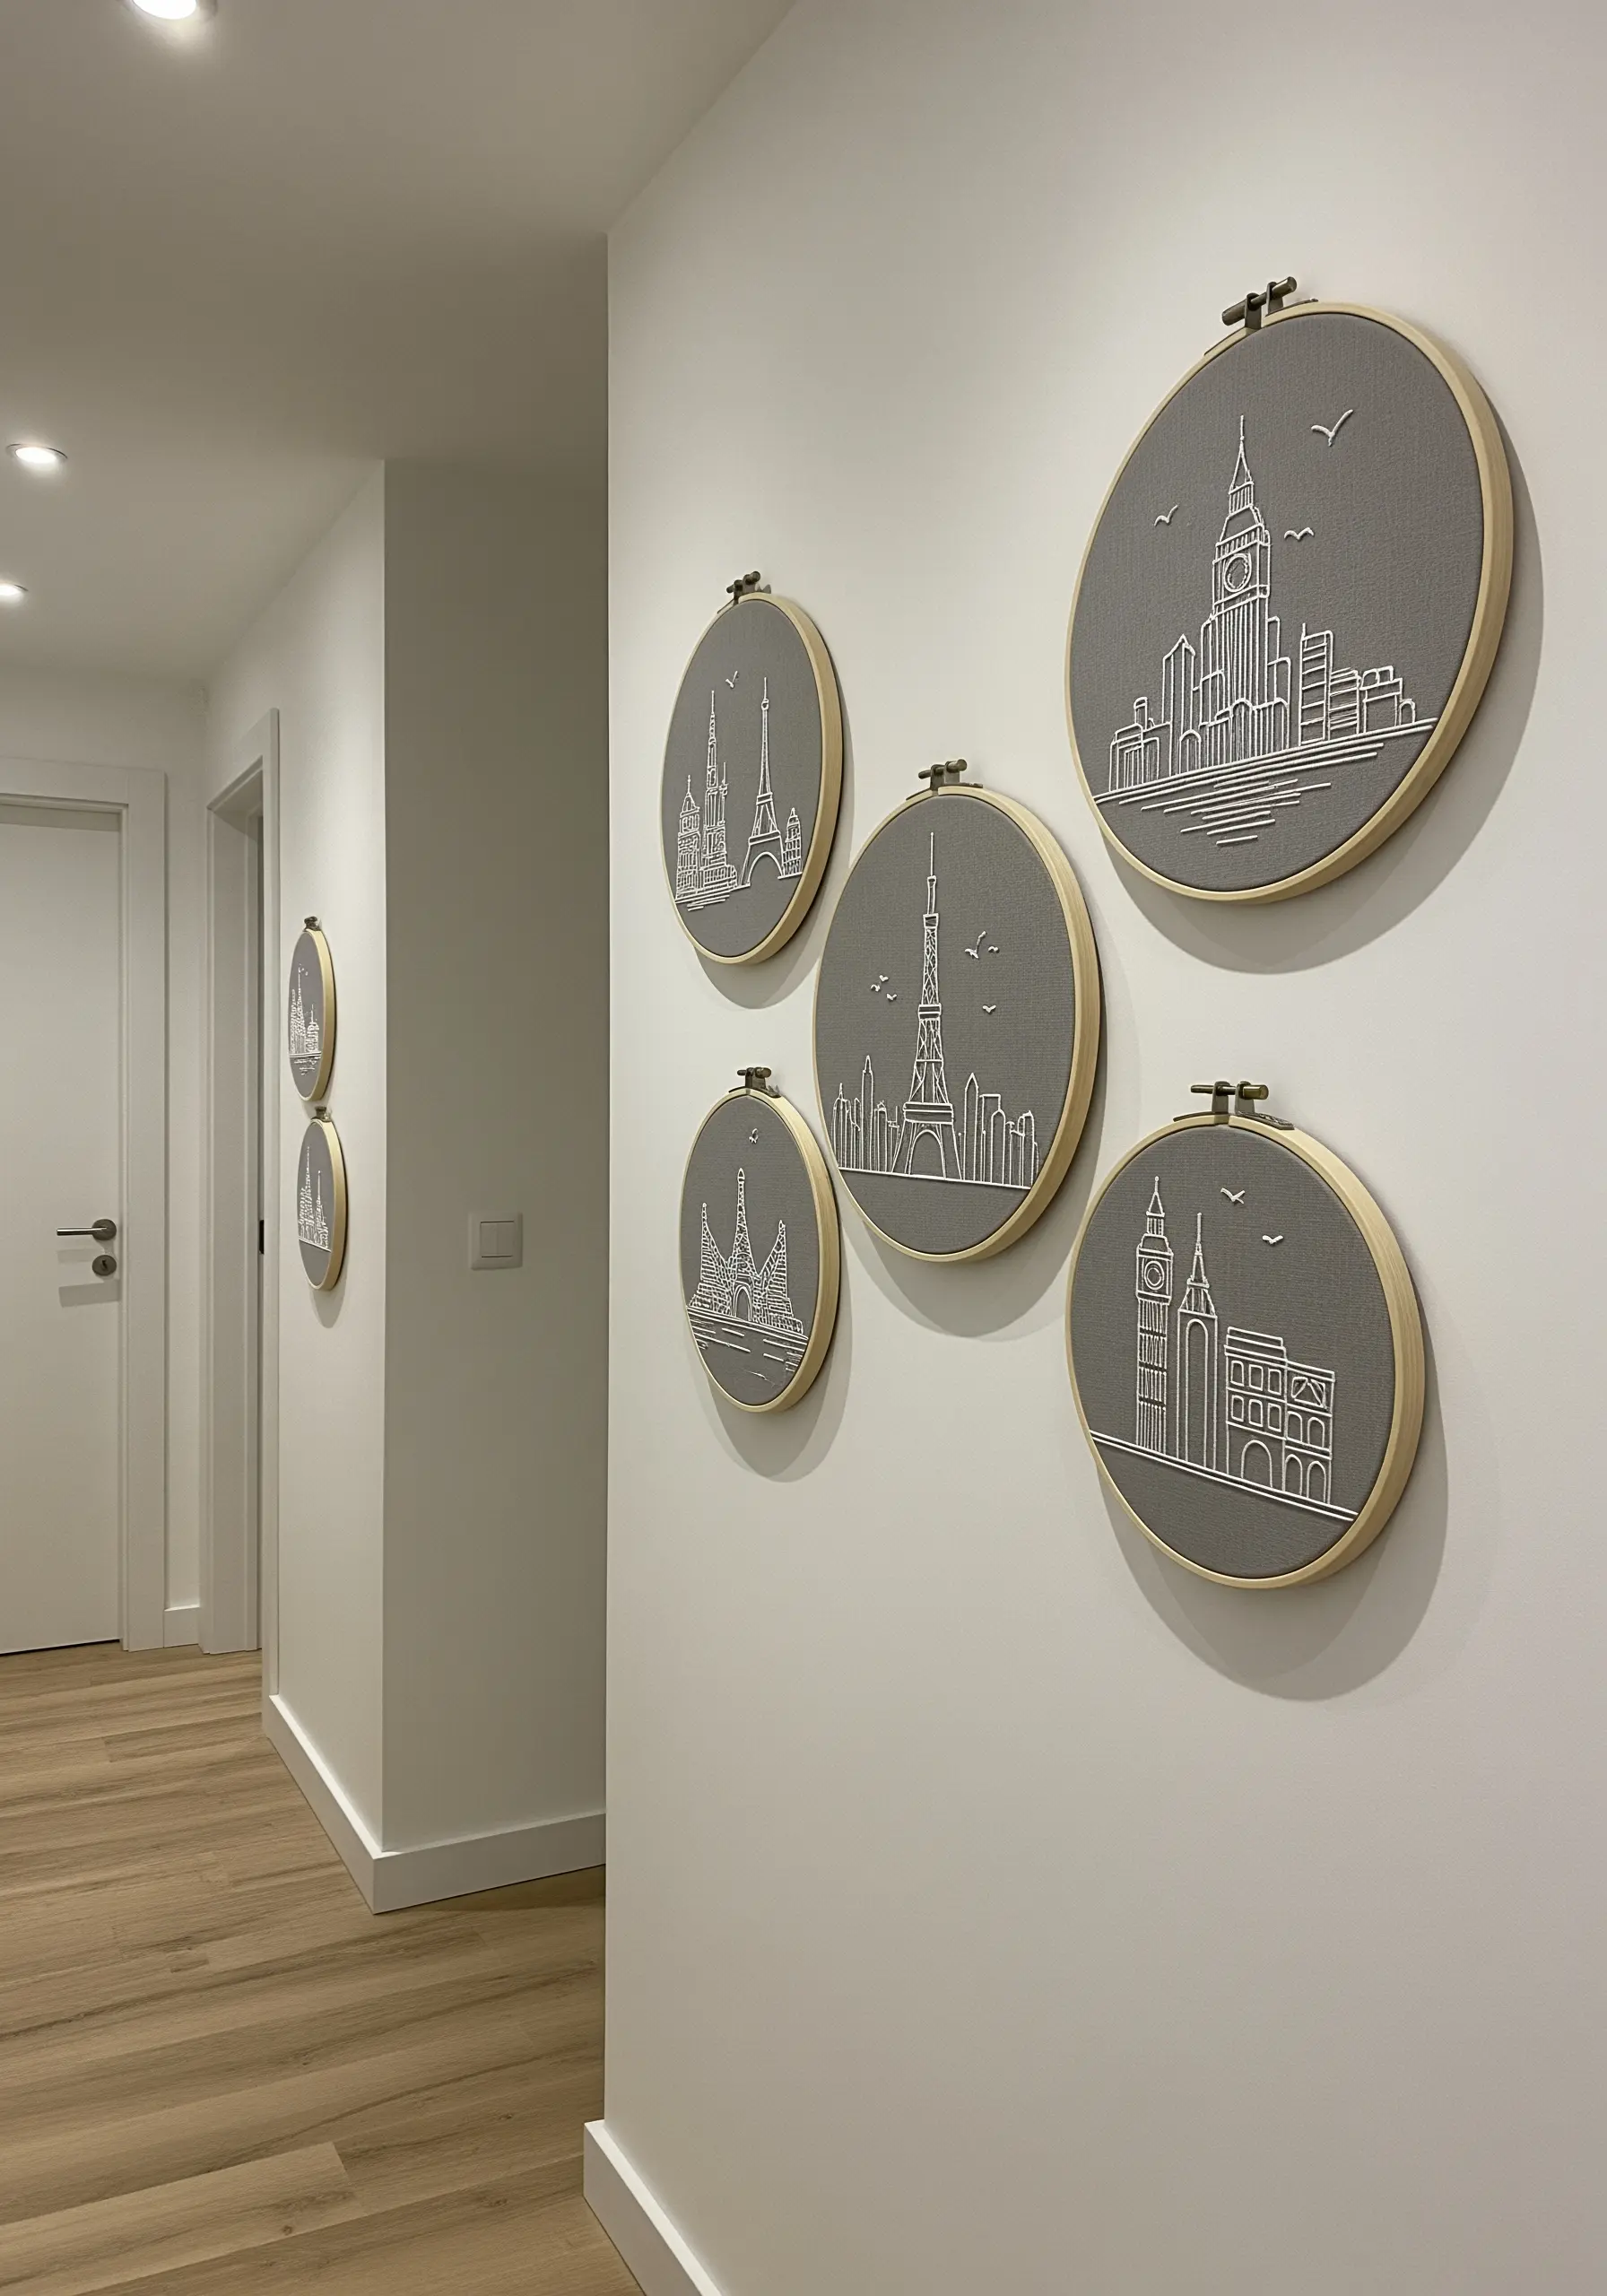
To capture the essence of city skylines, focus on clean, precise lines rather than dense detail.
Use a simple backstitch with two strands of white floss on a medium-gray fabric for a sophisticated, architectural feel.
The contrast is strong enough to be clear but soft enough to avoid harshness. This monochromatic approach feels modern and is surprisingly quick to execute.
Plan your stitch path to minimize thread jumps on the back, ensuring a tidy finish for your one-line embroidery wall arts.
12. Build Tactile Surfaces with Directional Stitching
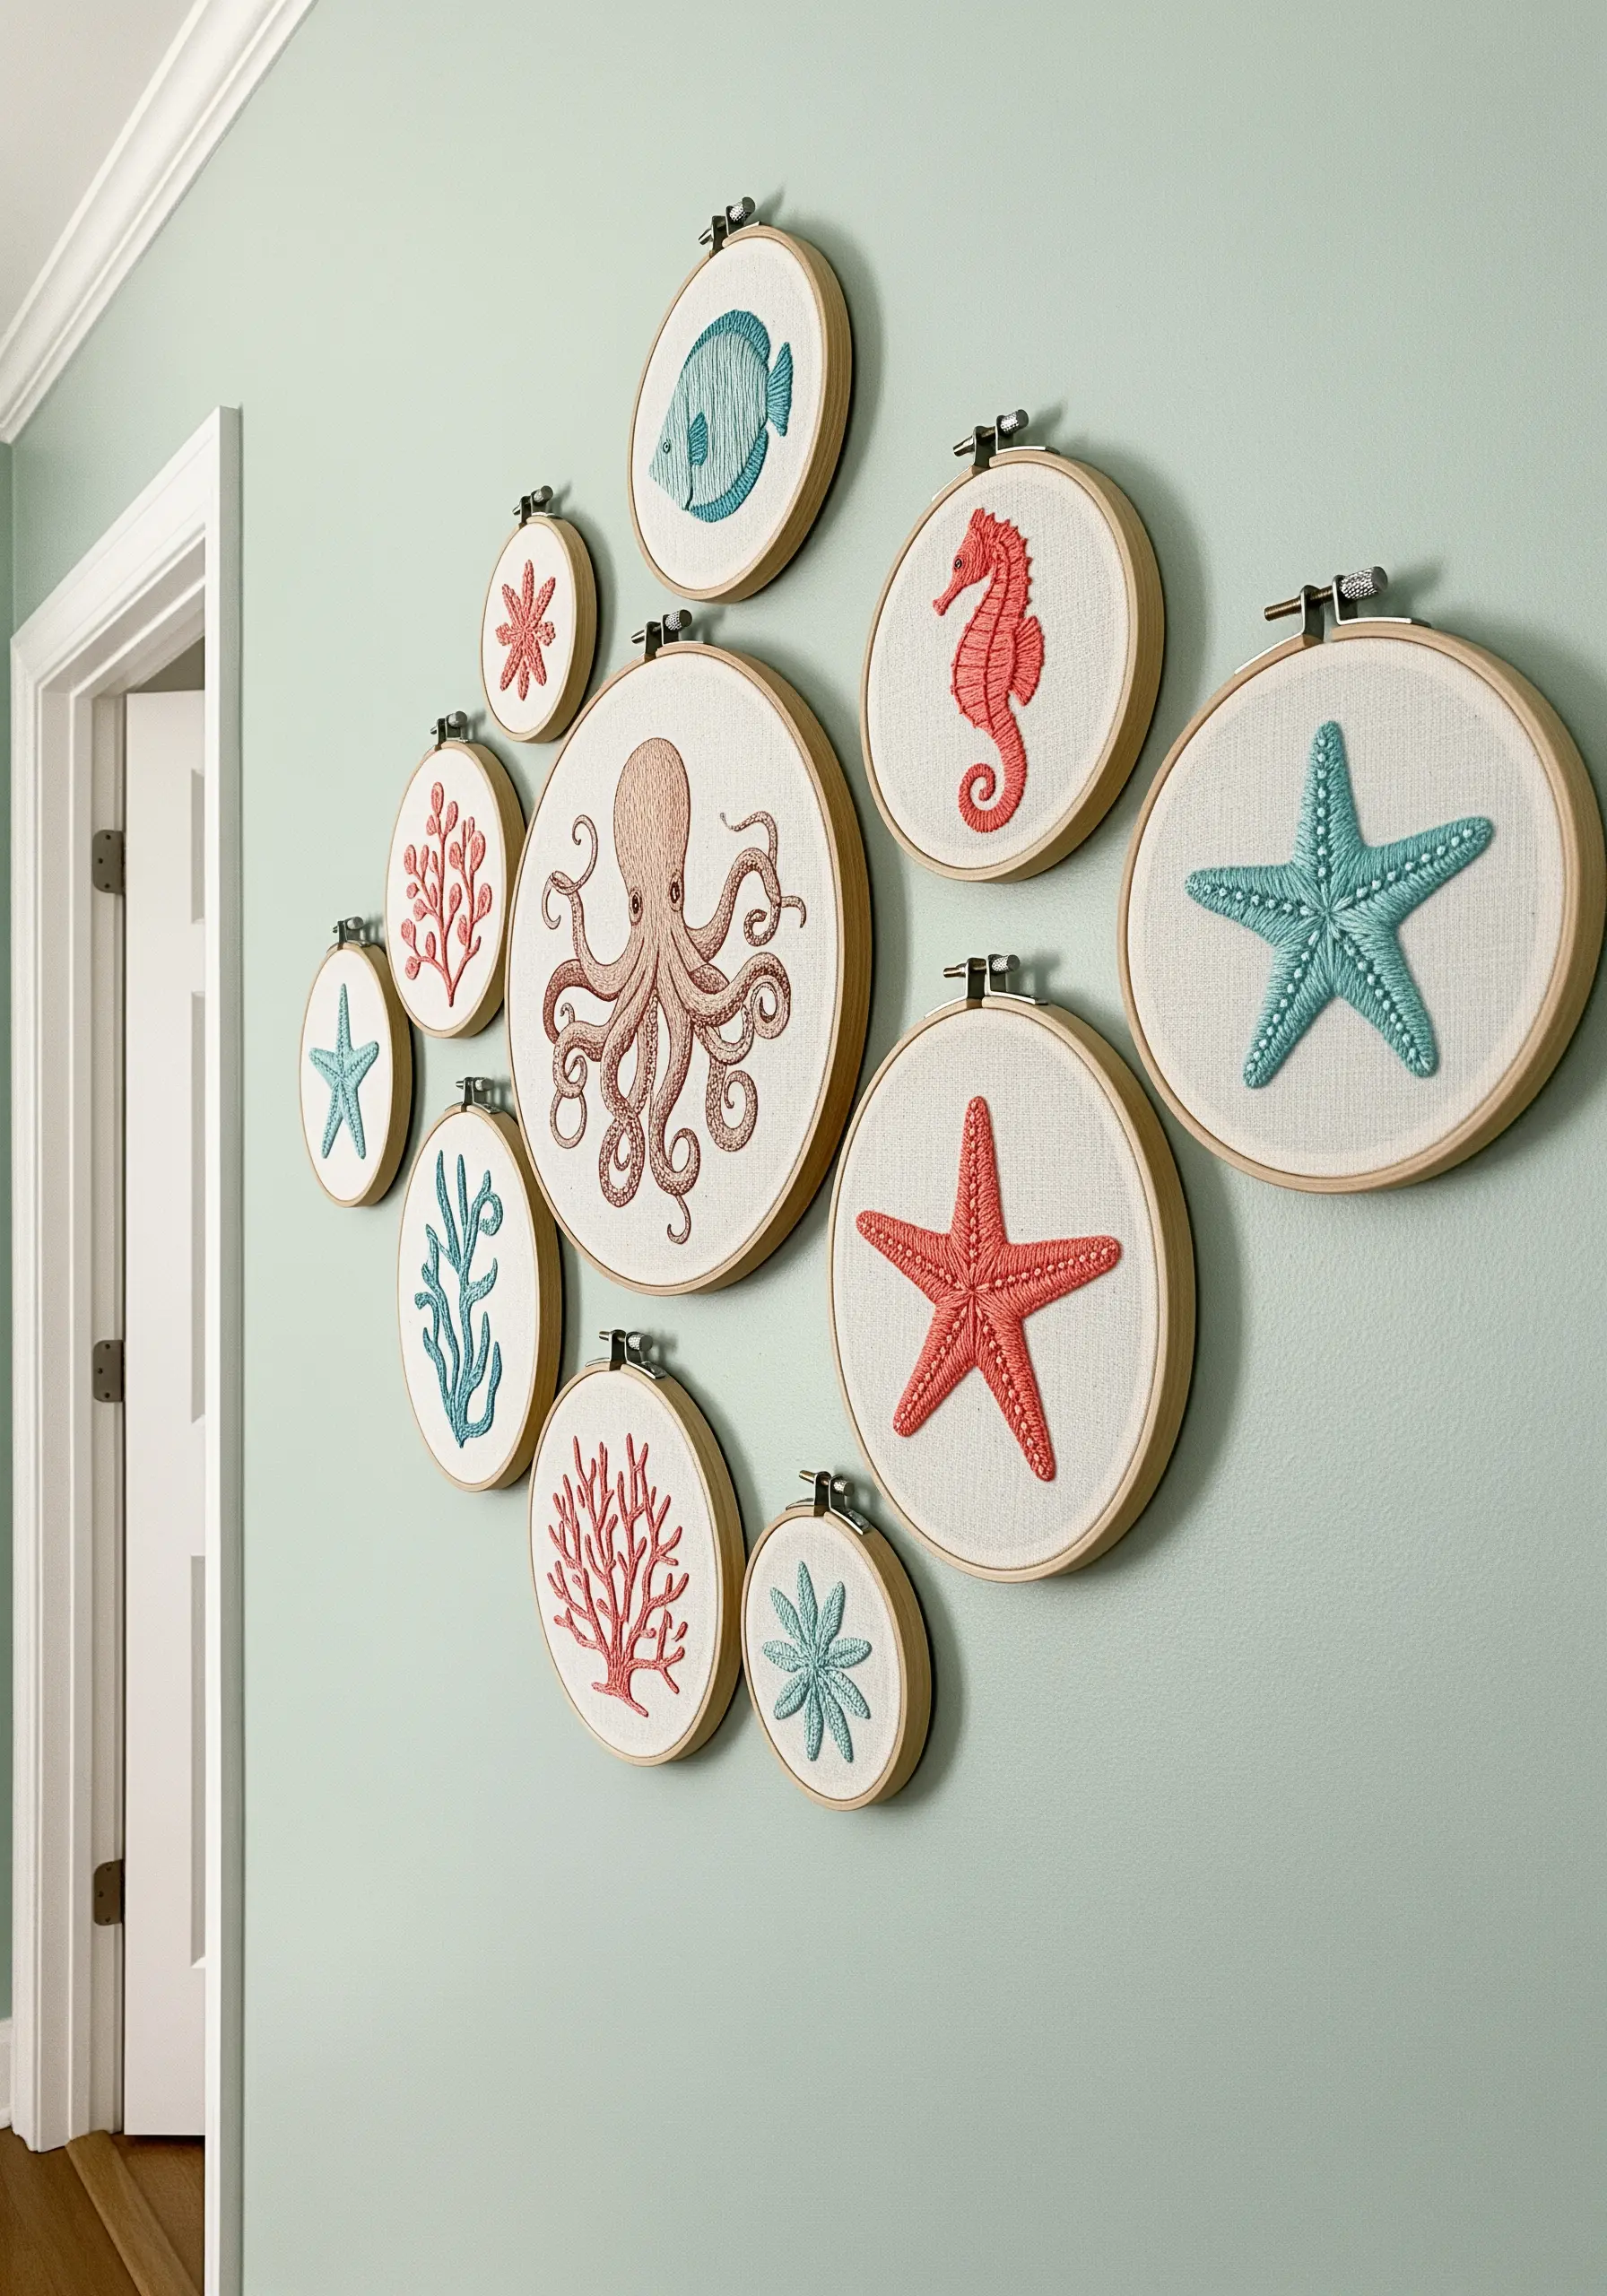
Give sea creatures a lifelike texture by varying your stitch choices and directions.
Fill a starfish with a dense satin stitch, angling the threads from the center of each arm outward to create a subtle raised effect.
For an octopus, use a smooth outline stitch for the body and fill the tentacles with rows of French knots to suggest suction cups.
This thoughtful use of texture makes the embroidery compelling to touch as well as to see, ideal for coastal ocean-inspired string art.
13. Achieve Art Deco Glamour with Metallic Thread
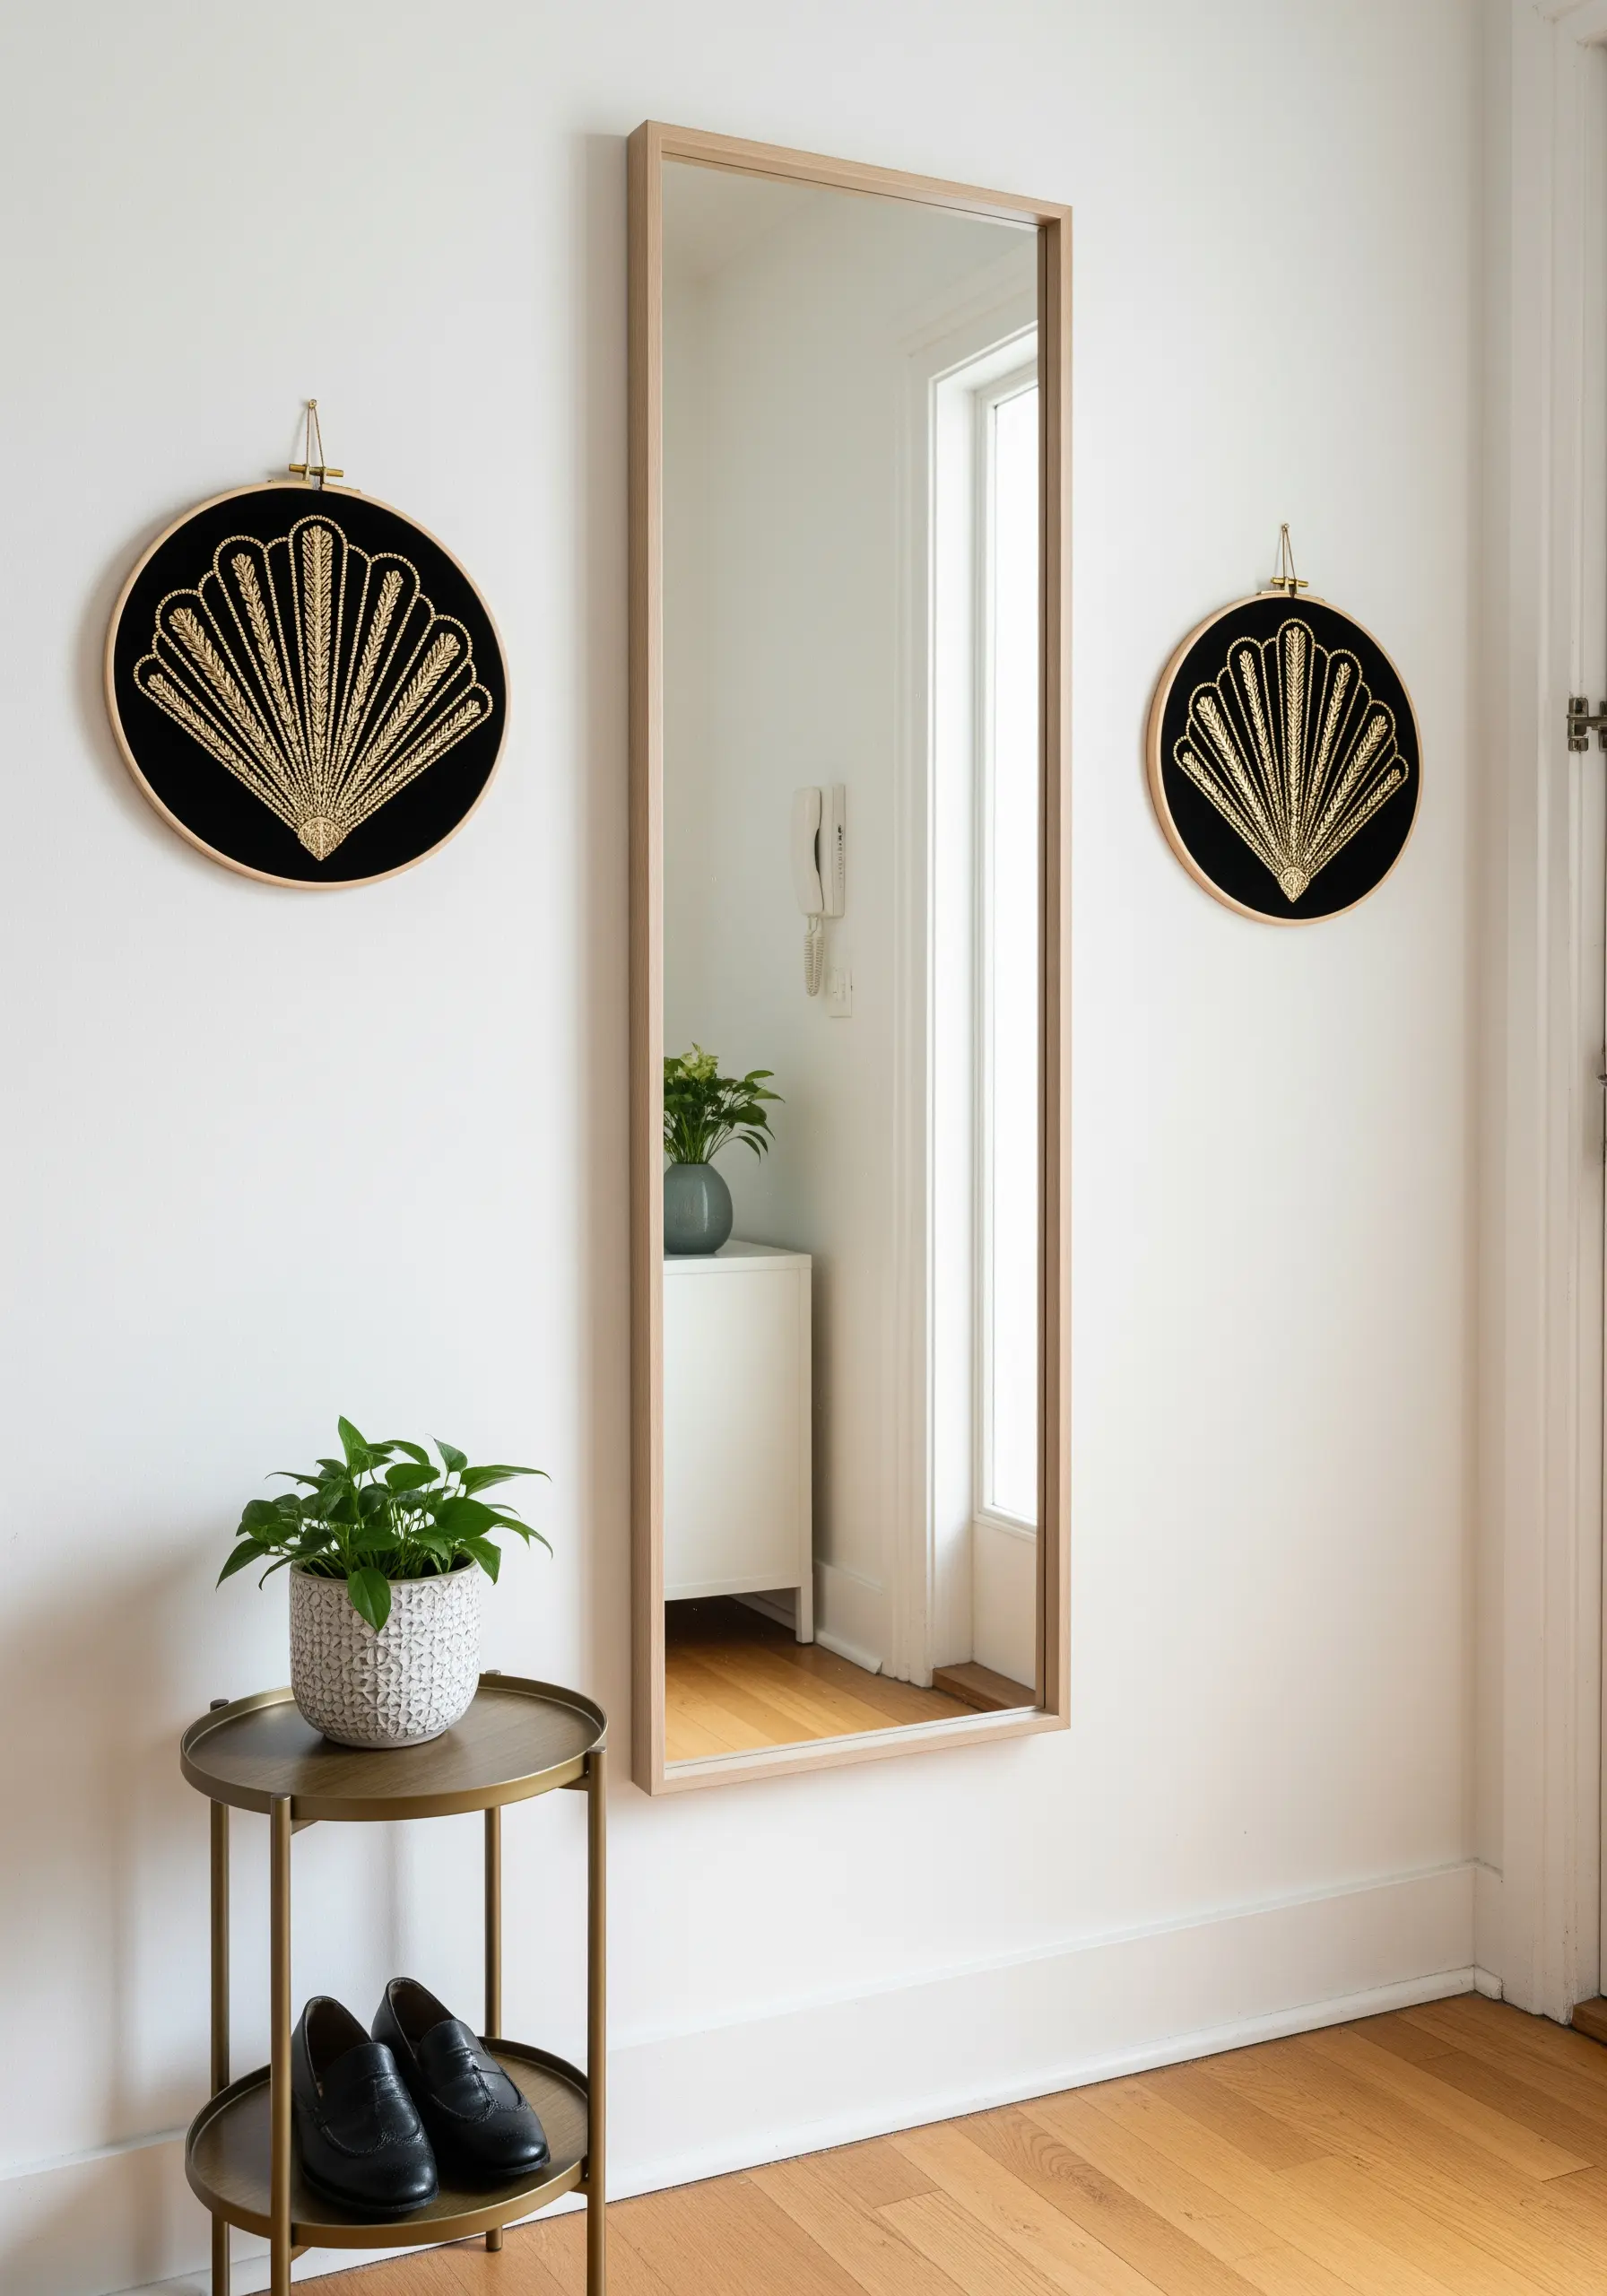
Capture the opulence of the Art Deco era by using gold metallic thread on a stark black fabric.
To manage metallic floss, which can be prone to tangling and fraying, use shorter lengths of thread (about 12 inches) and a thread conditioner like beeswax.
Stitch slowly and ensure your satin stitches lie flat and parallel to maximize their light-reflecting quality. The symmetry of Art Deco motifs makes them perfect for creating balanced, high-end statement pieces.
This is how you use modern thread art ideas using only black and gold to achieve a luxe finish.
14. Embrace Meditative Stitching with Mandalas
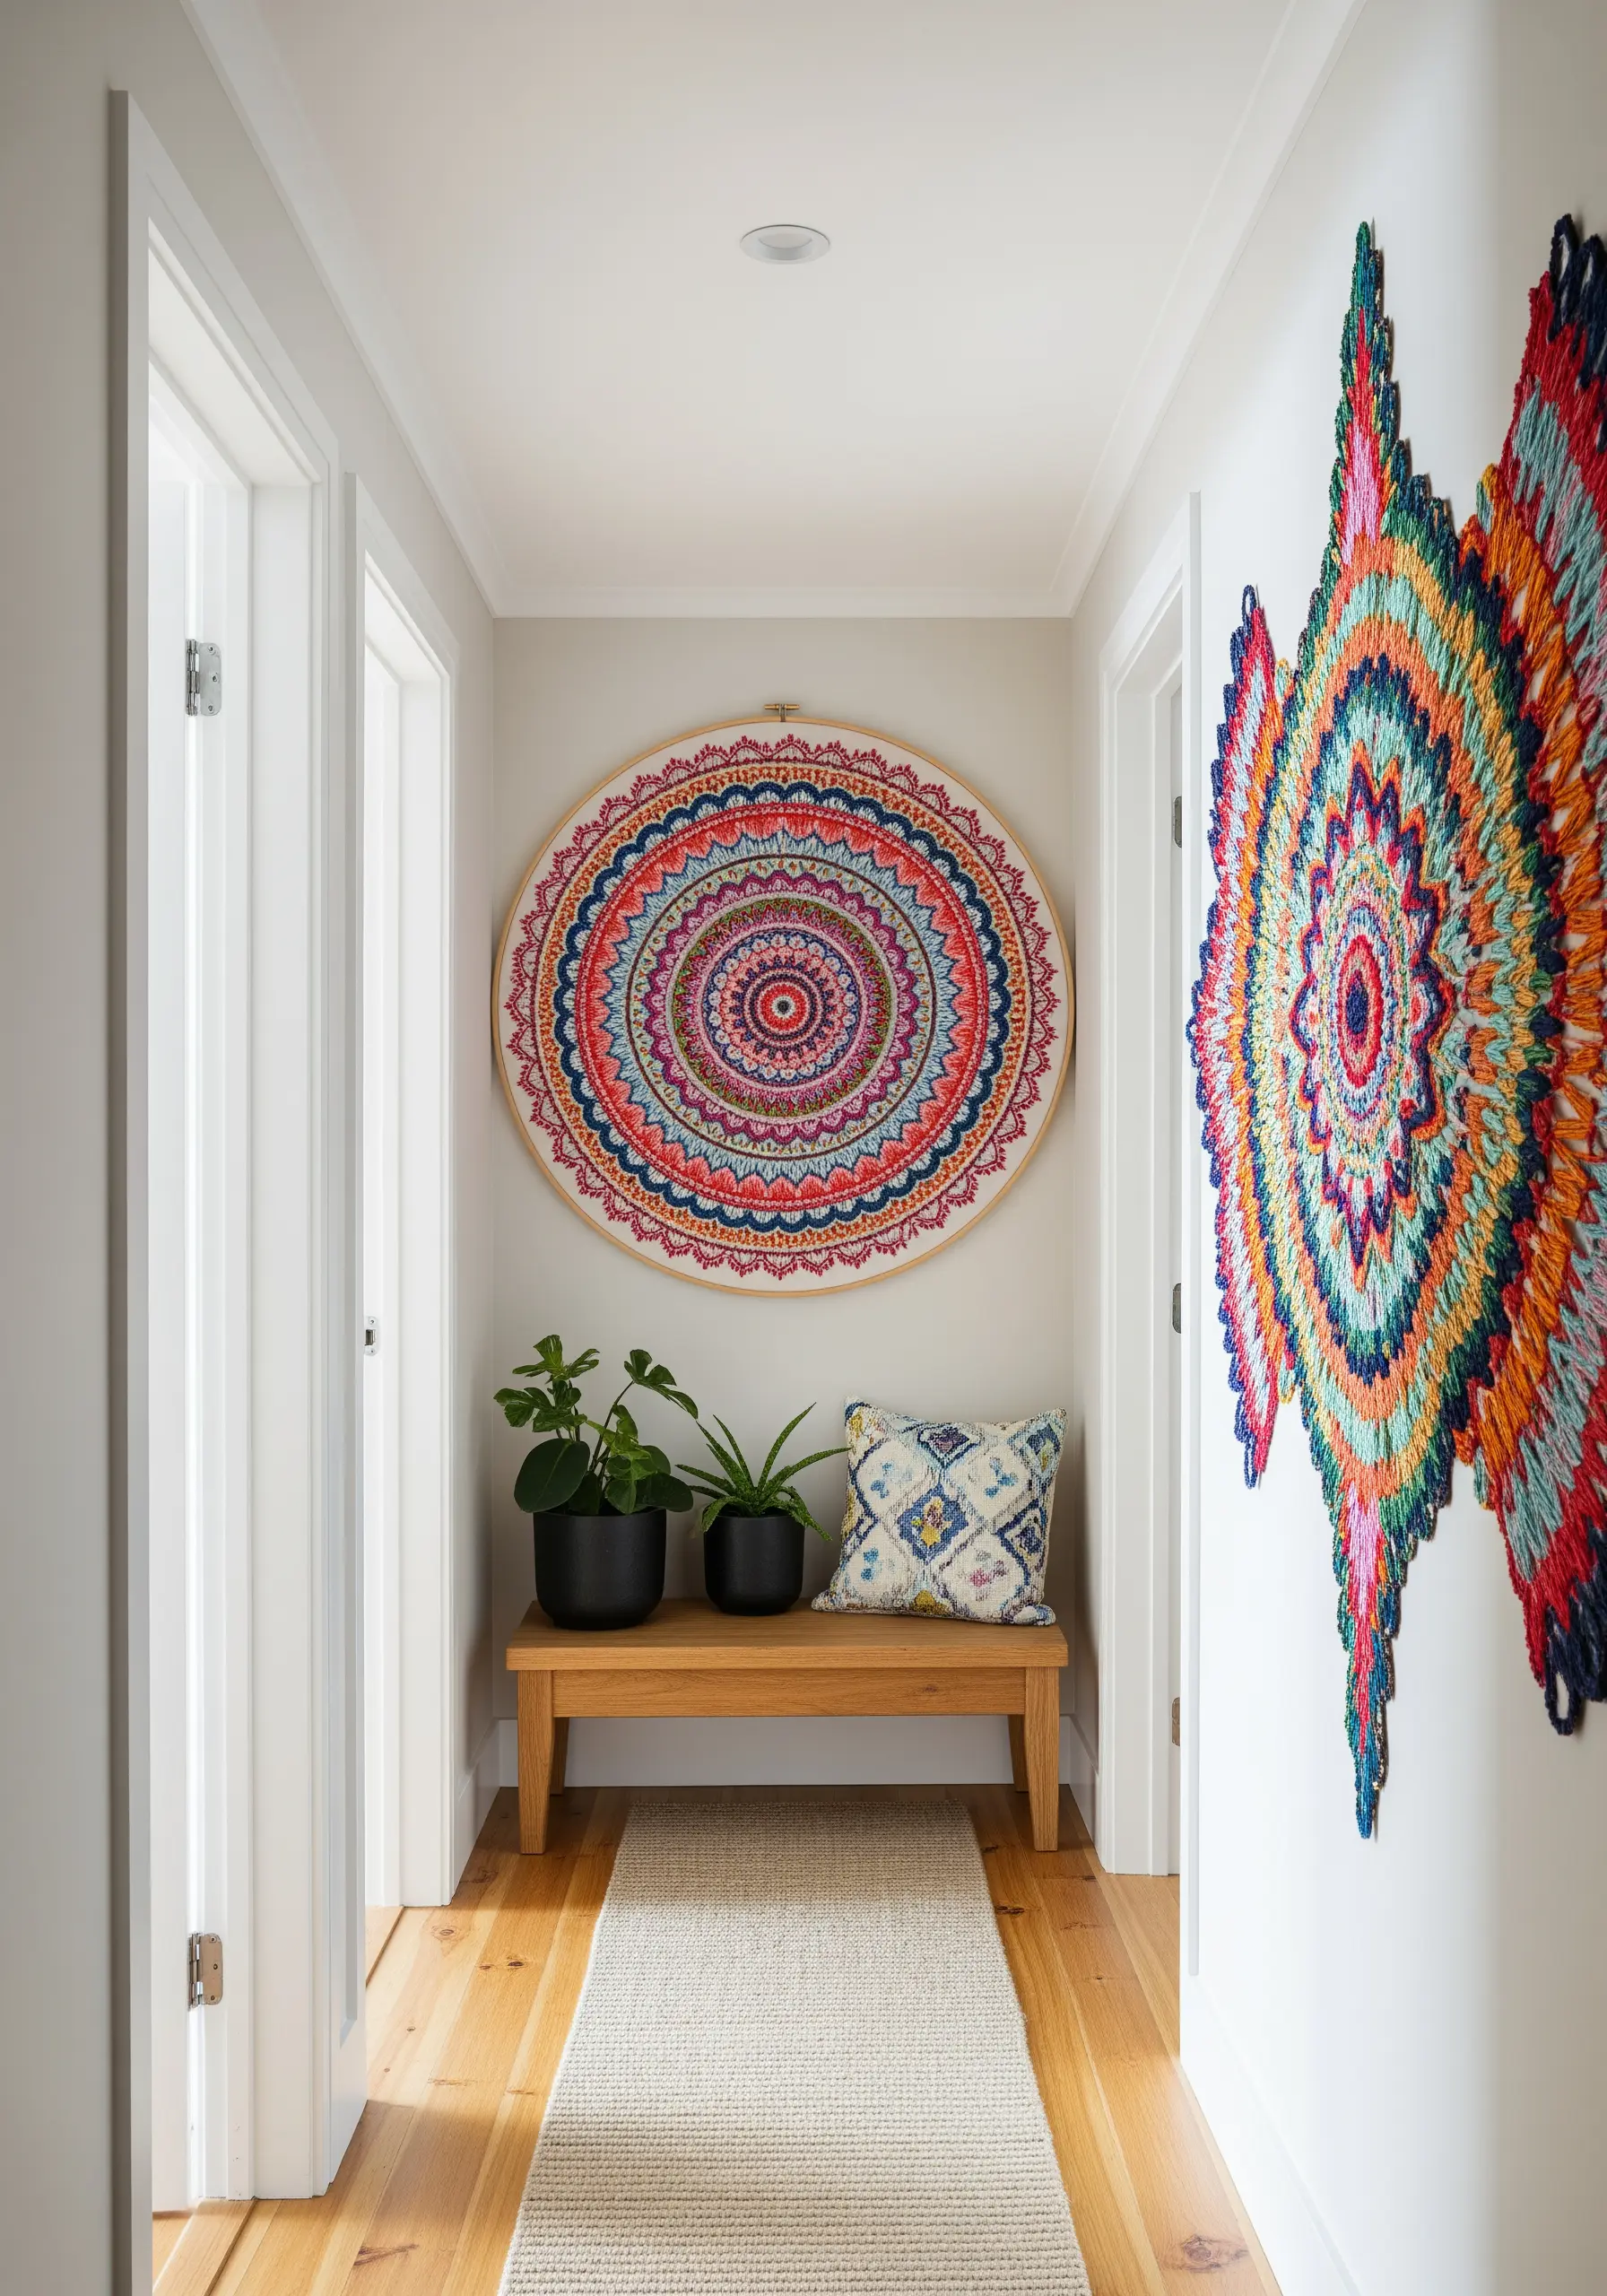
A large-scale mandala is the perfect project for finding a state of creative flow. The repetitive nature of the stitches and patterns can be incredibly calming.
To keep the design from feeling chaotic, plan your color progression in advance. Work from the center out, or assign specific colors to repeating shapes to create a sense of rhythm and harmony.
The result is not just a beautiful piece of decor, but a record of your mindful stitching practice, creating beautiful modern thread mandala ideas.
15. Design a Vertical Cascade for Narrow Spaces
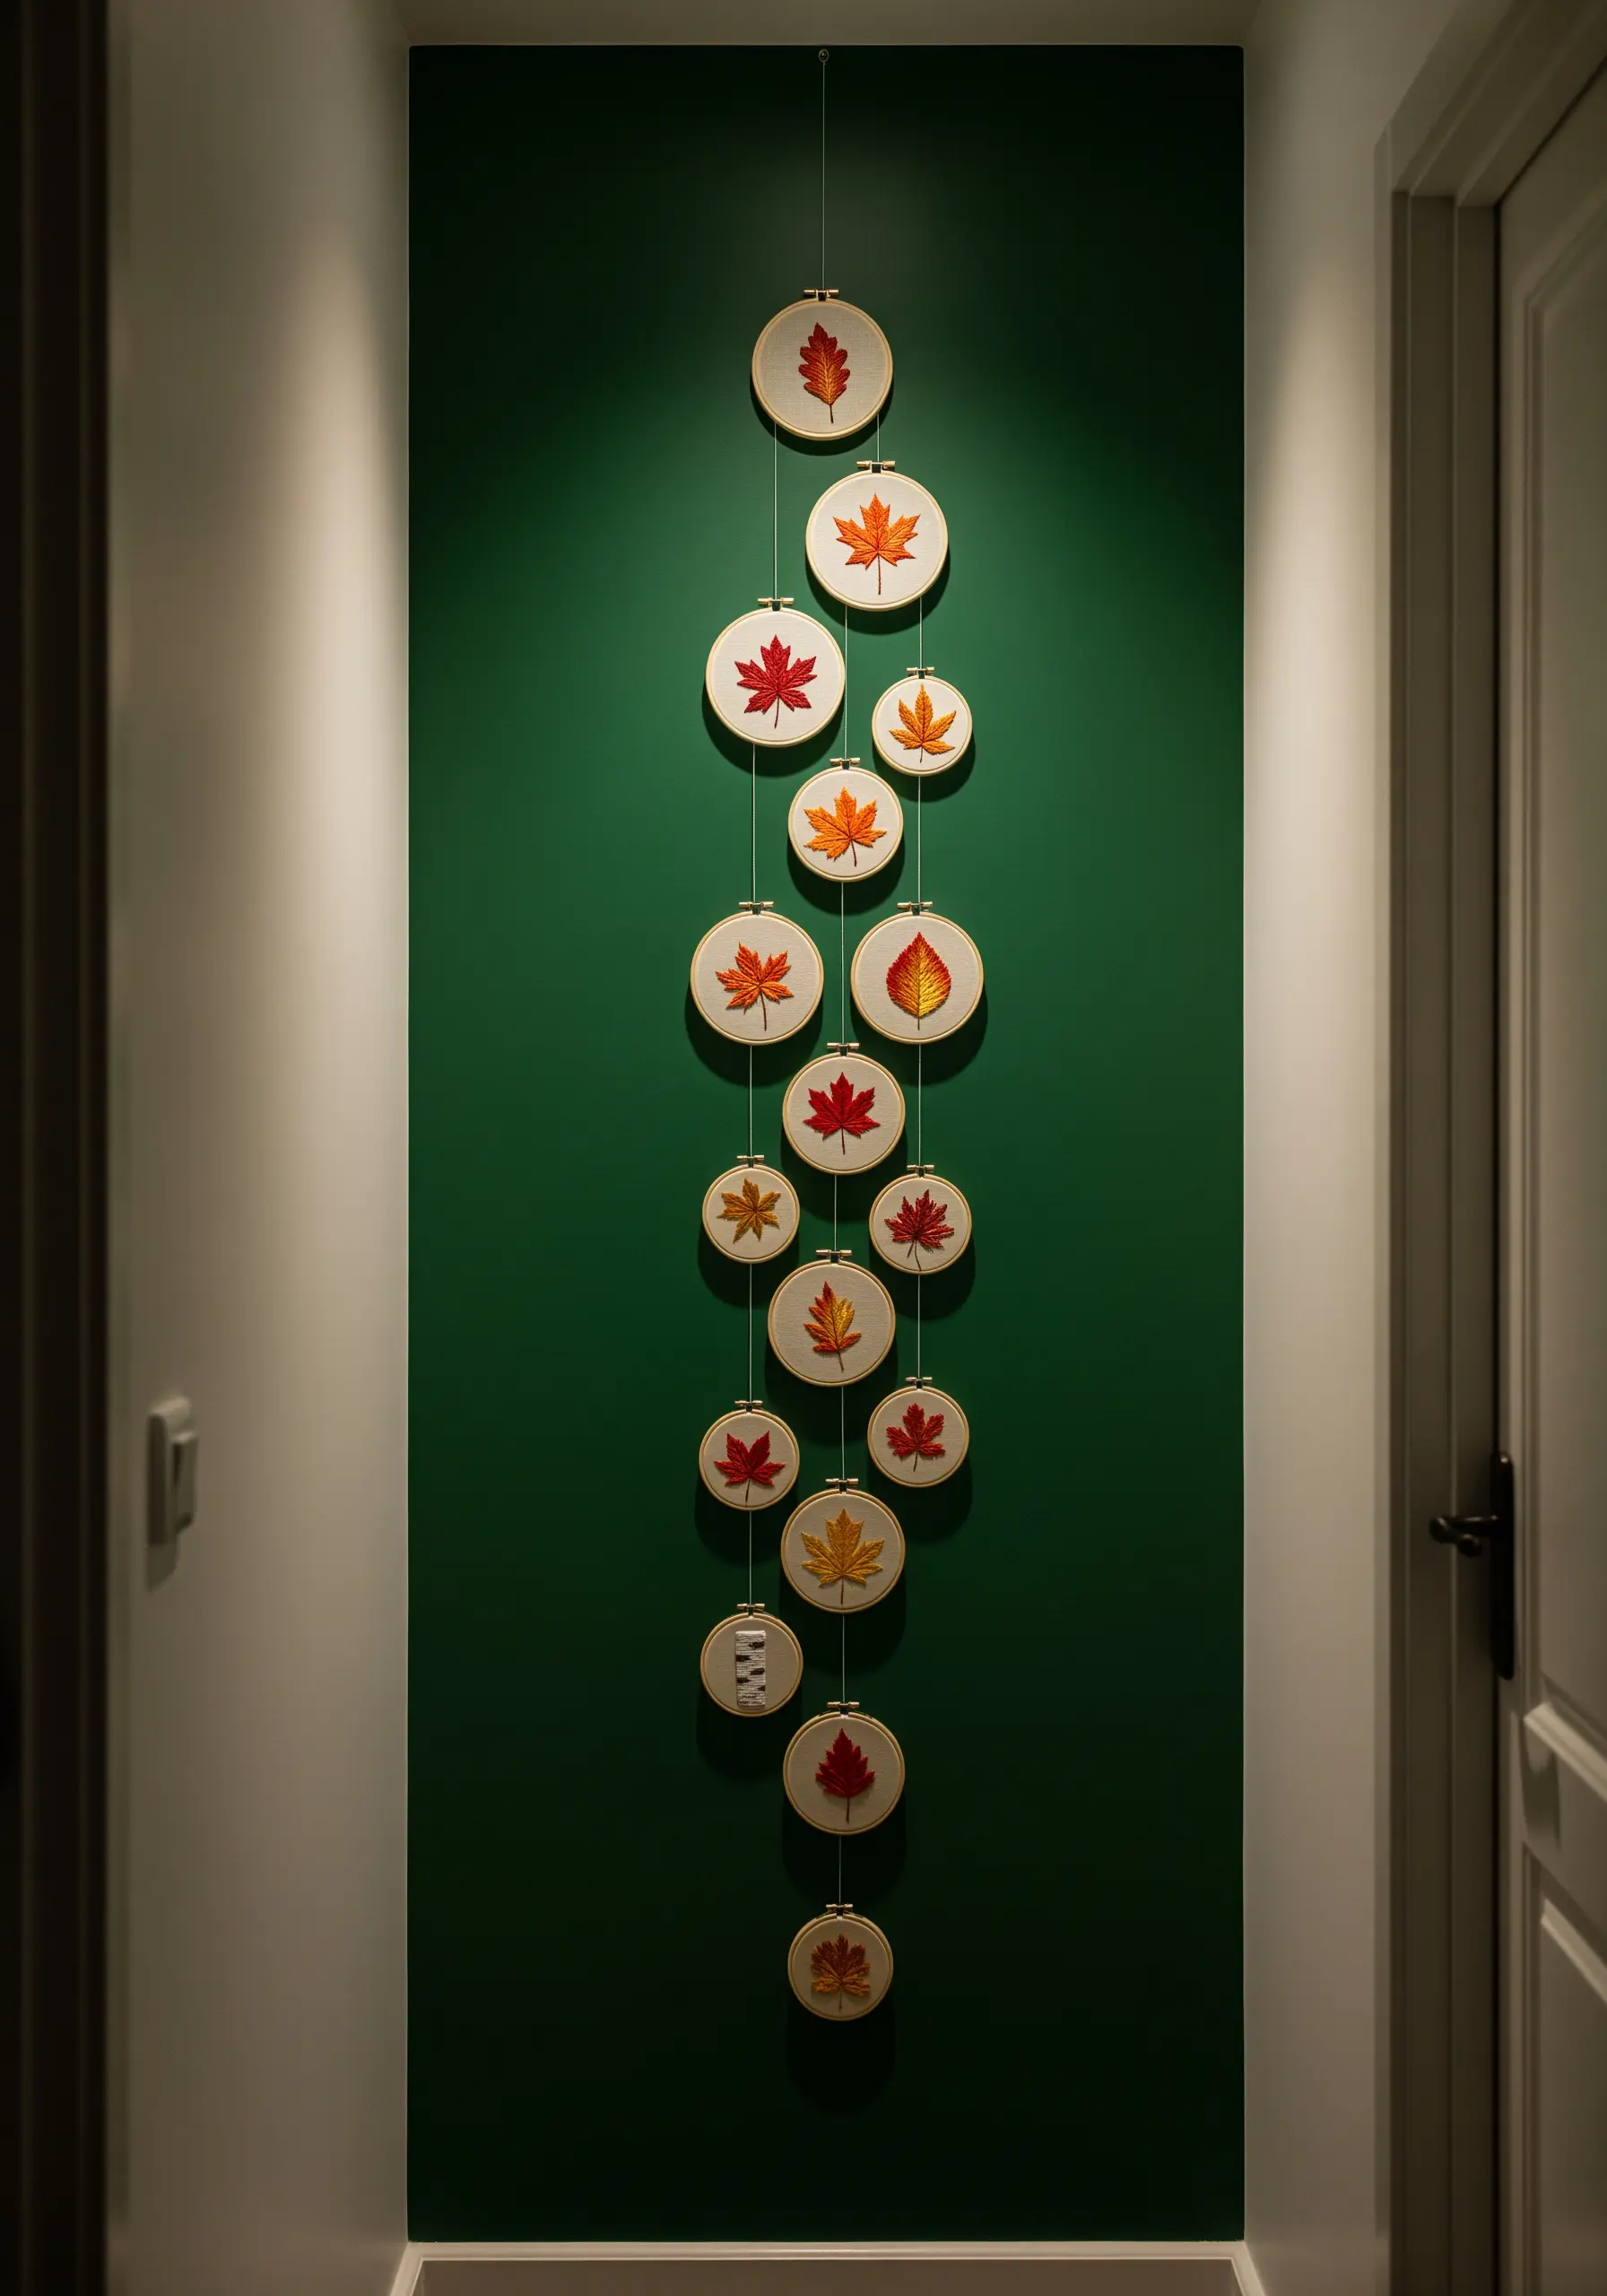
For a tall, narrow wall where a traditional gallery layout won’t fit, create a vertical installation.
Stitch individual motifs—like these autumn leaves—in various small hoops, then connect them using a strong, clear fishing line or a fine, coordinating cord.
Vary the spacing between the hoops to create a sense of natural, gentle movement, as if the leaves are falling. This format draws the eye up and down, making the most of vertical space.
It is a creative way to display seasonal embroidery wall decor in a compact home.
16. Explore Graphic Abstraction with Straight Stitches
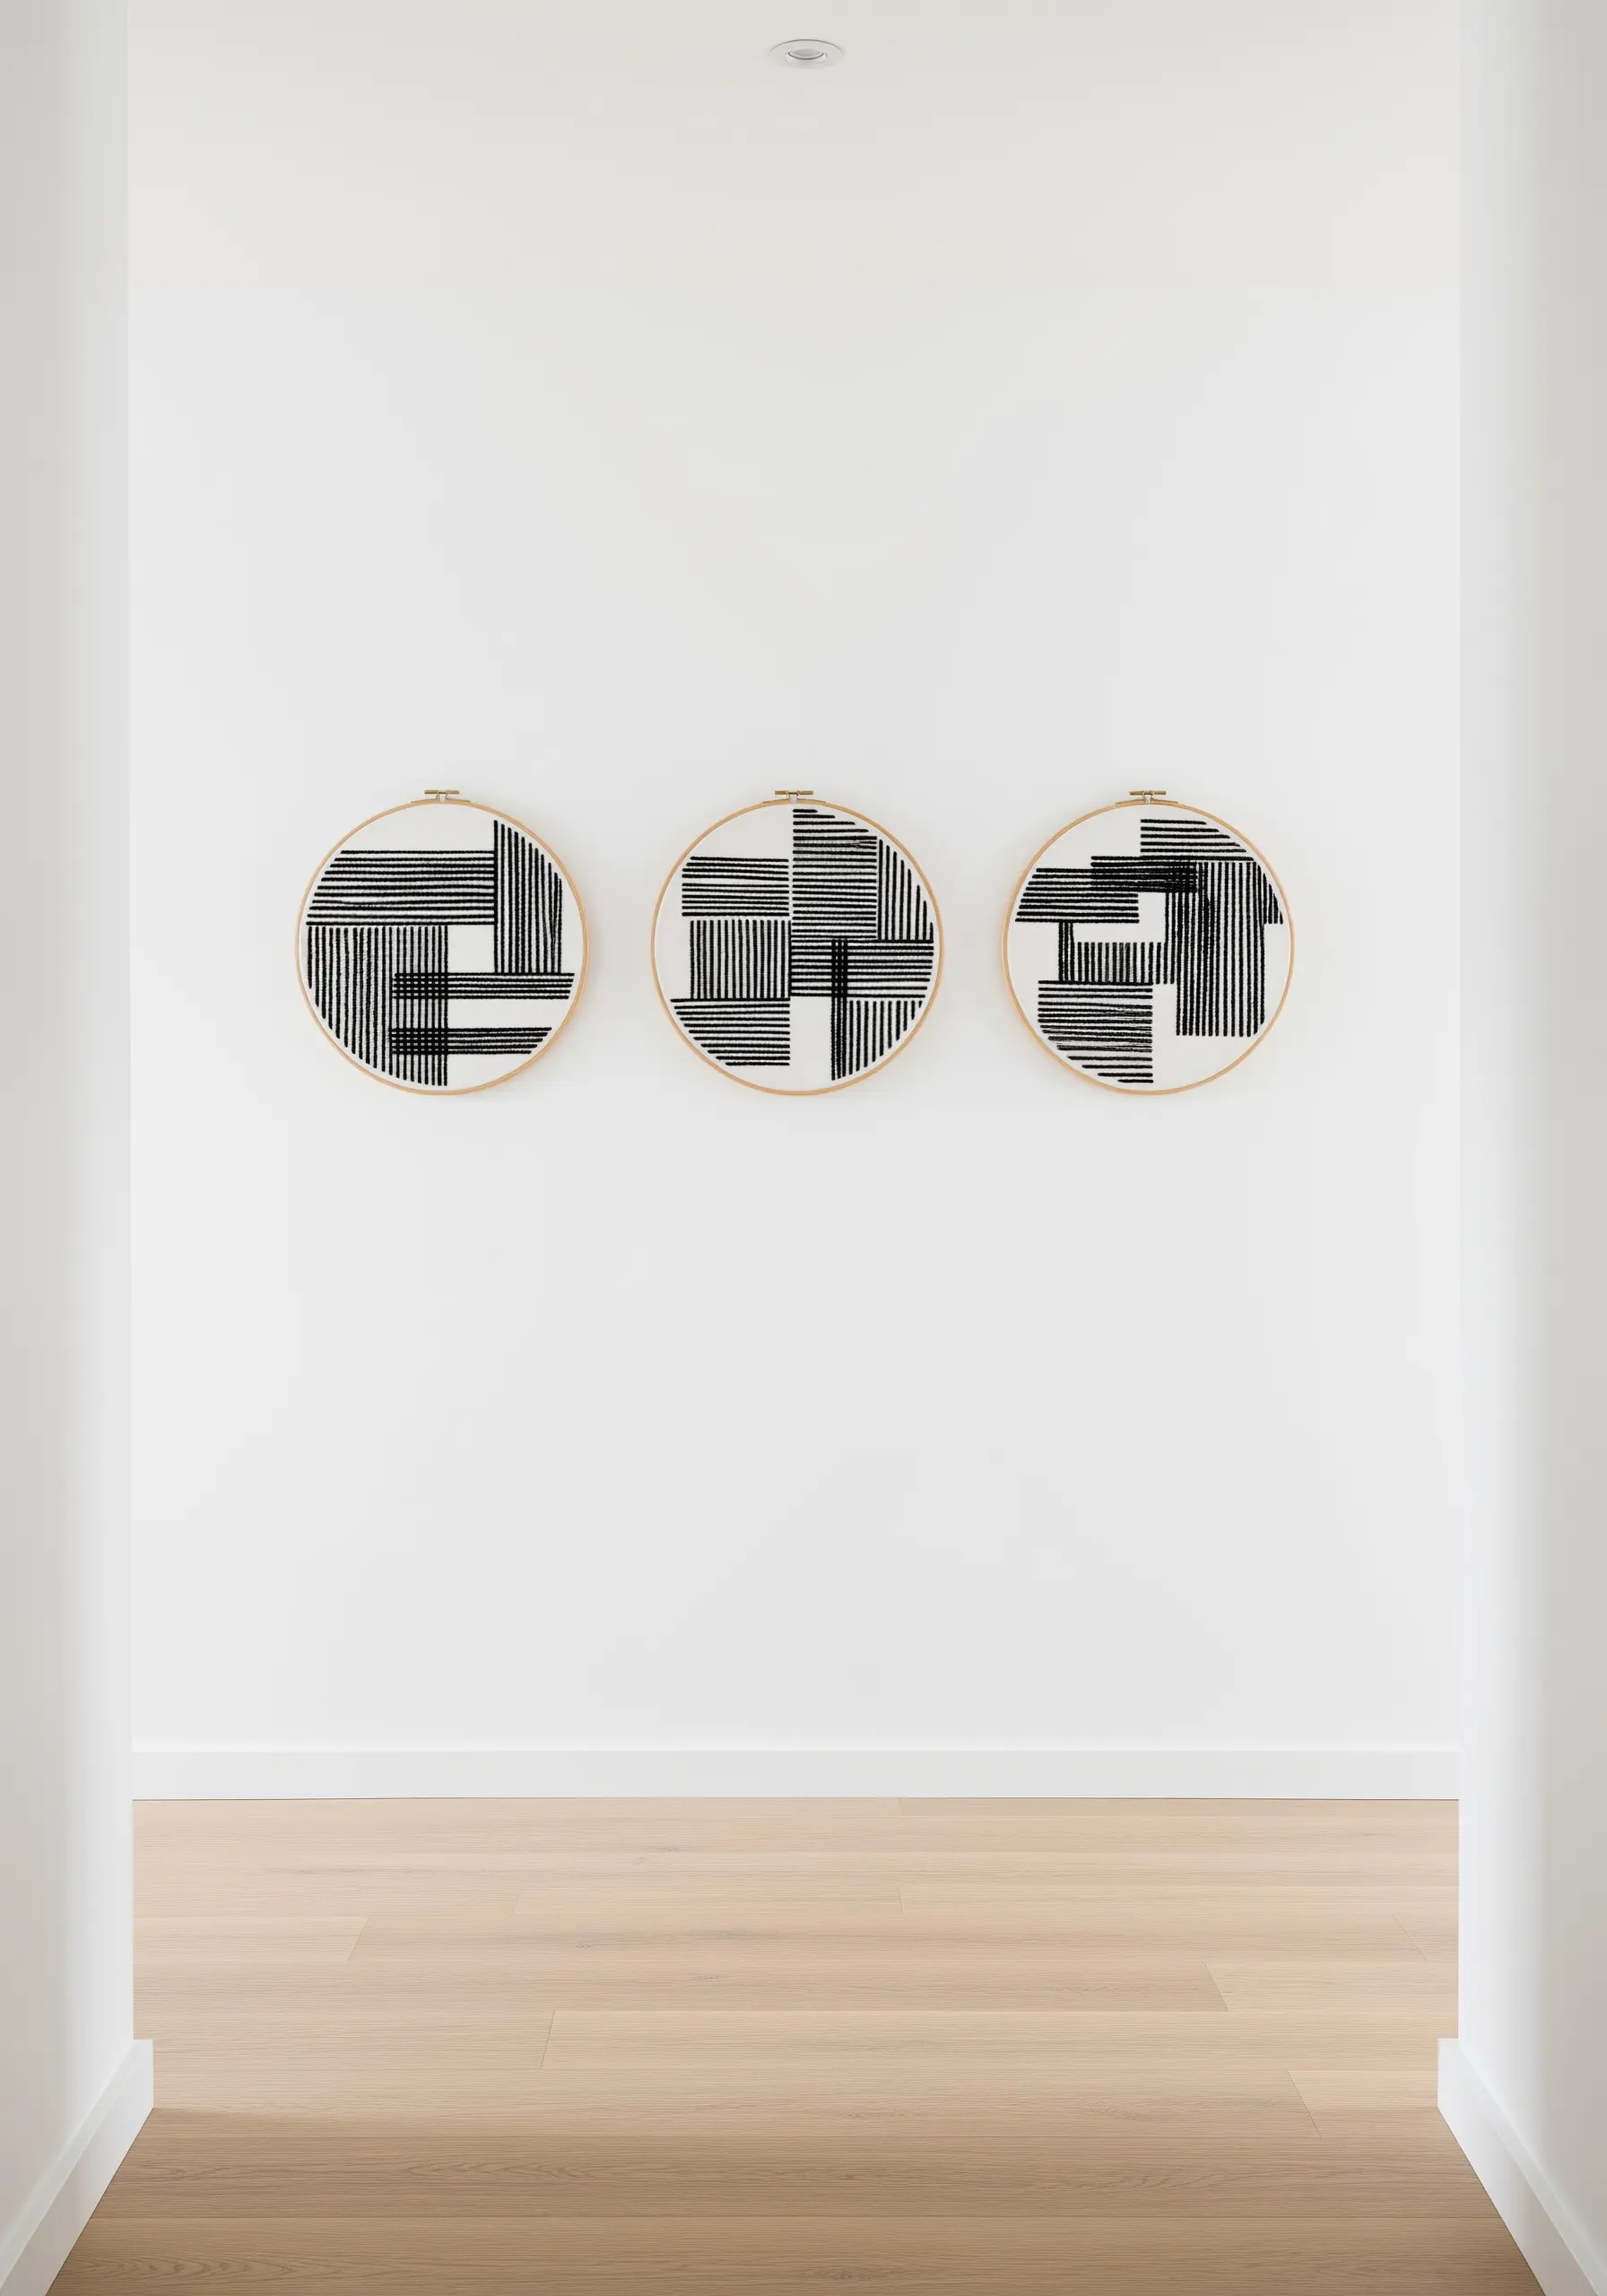
You don’t need complex stitches to create visually interesting abstract art. This design relies entirely on the straight stitch.
Achieve this woven, block-like effect by filling shapes with parallel straight stitches, then layering another set of stitches in a perpendicular direction on top.
Using a high-contrast palette like black on white enhances the graphic quality. The key is maintaining consistent tension and spacing to create a clean, modern texture.
These abstract minimal embroidery pieces prove that simplicity can be incredibly powerful.
17. Tell a Story Across Multiple Hoops
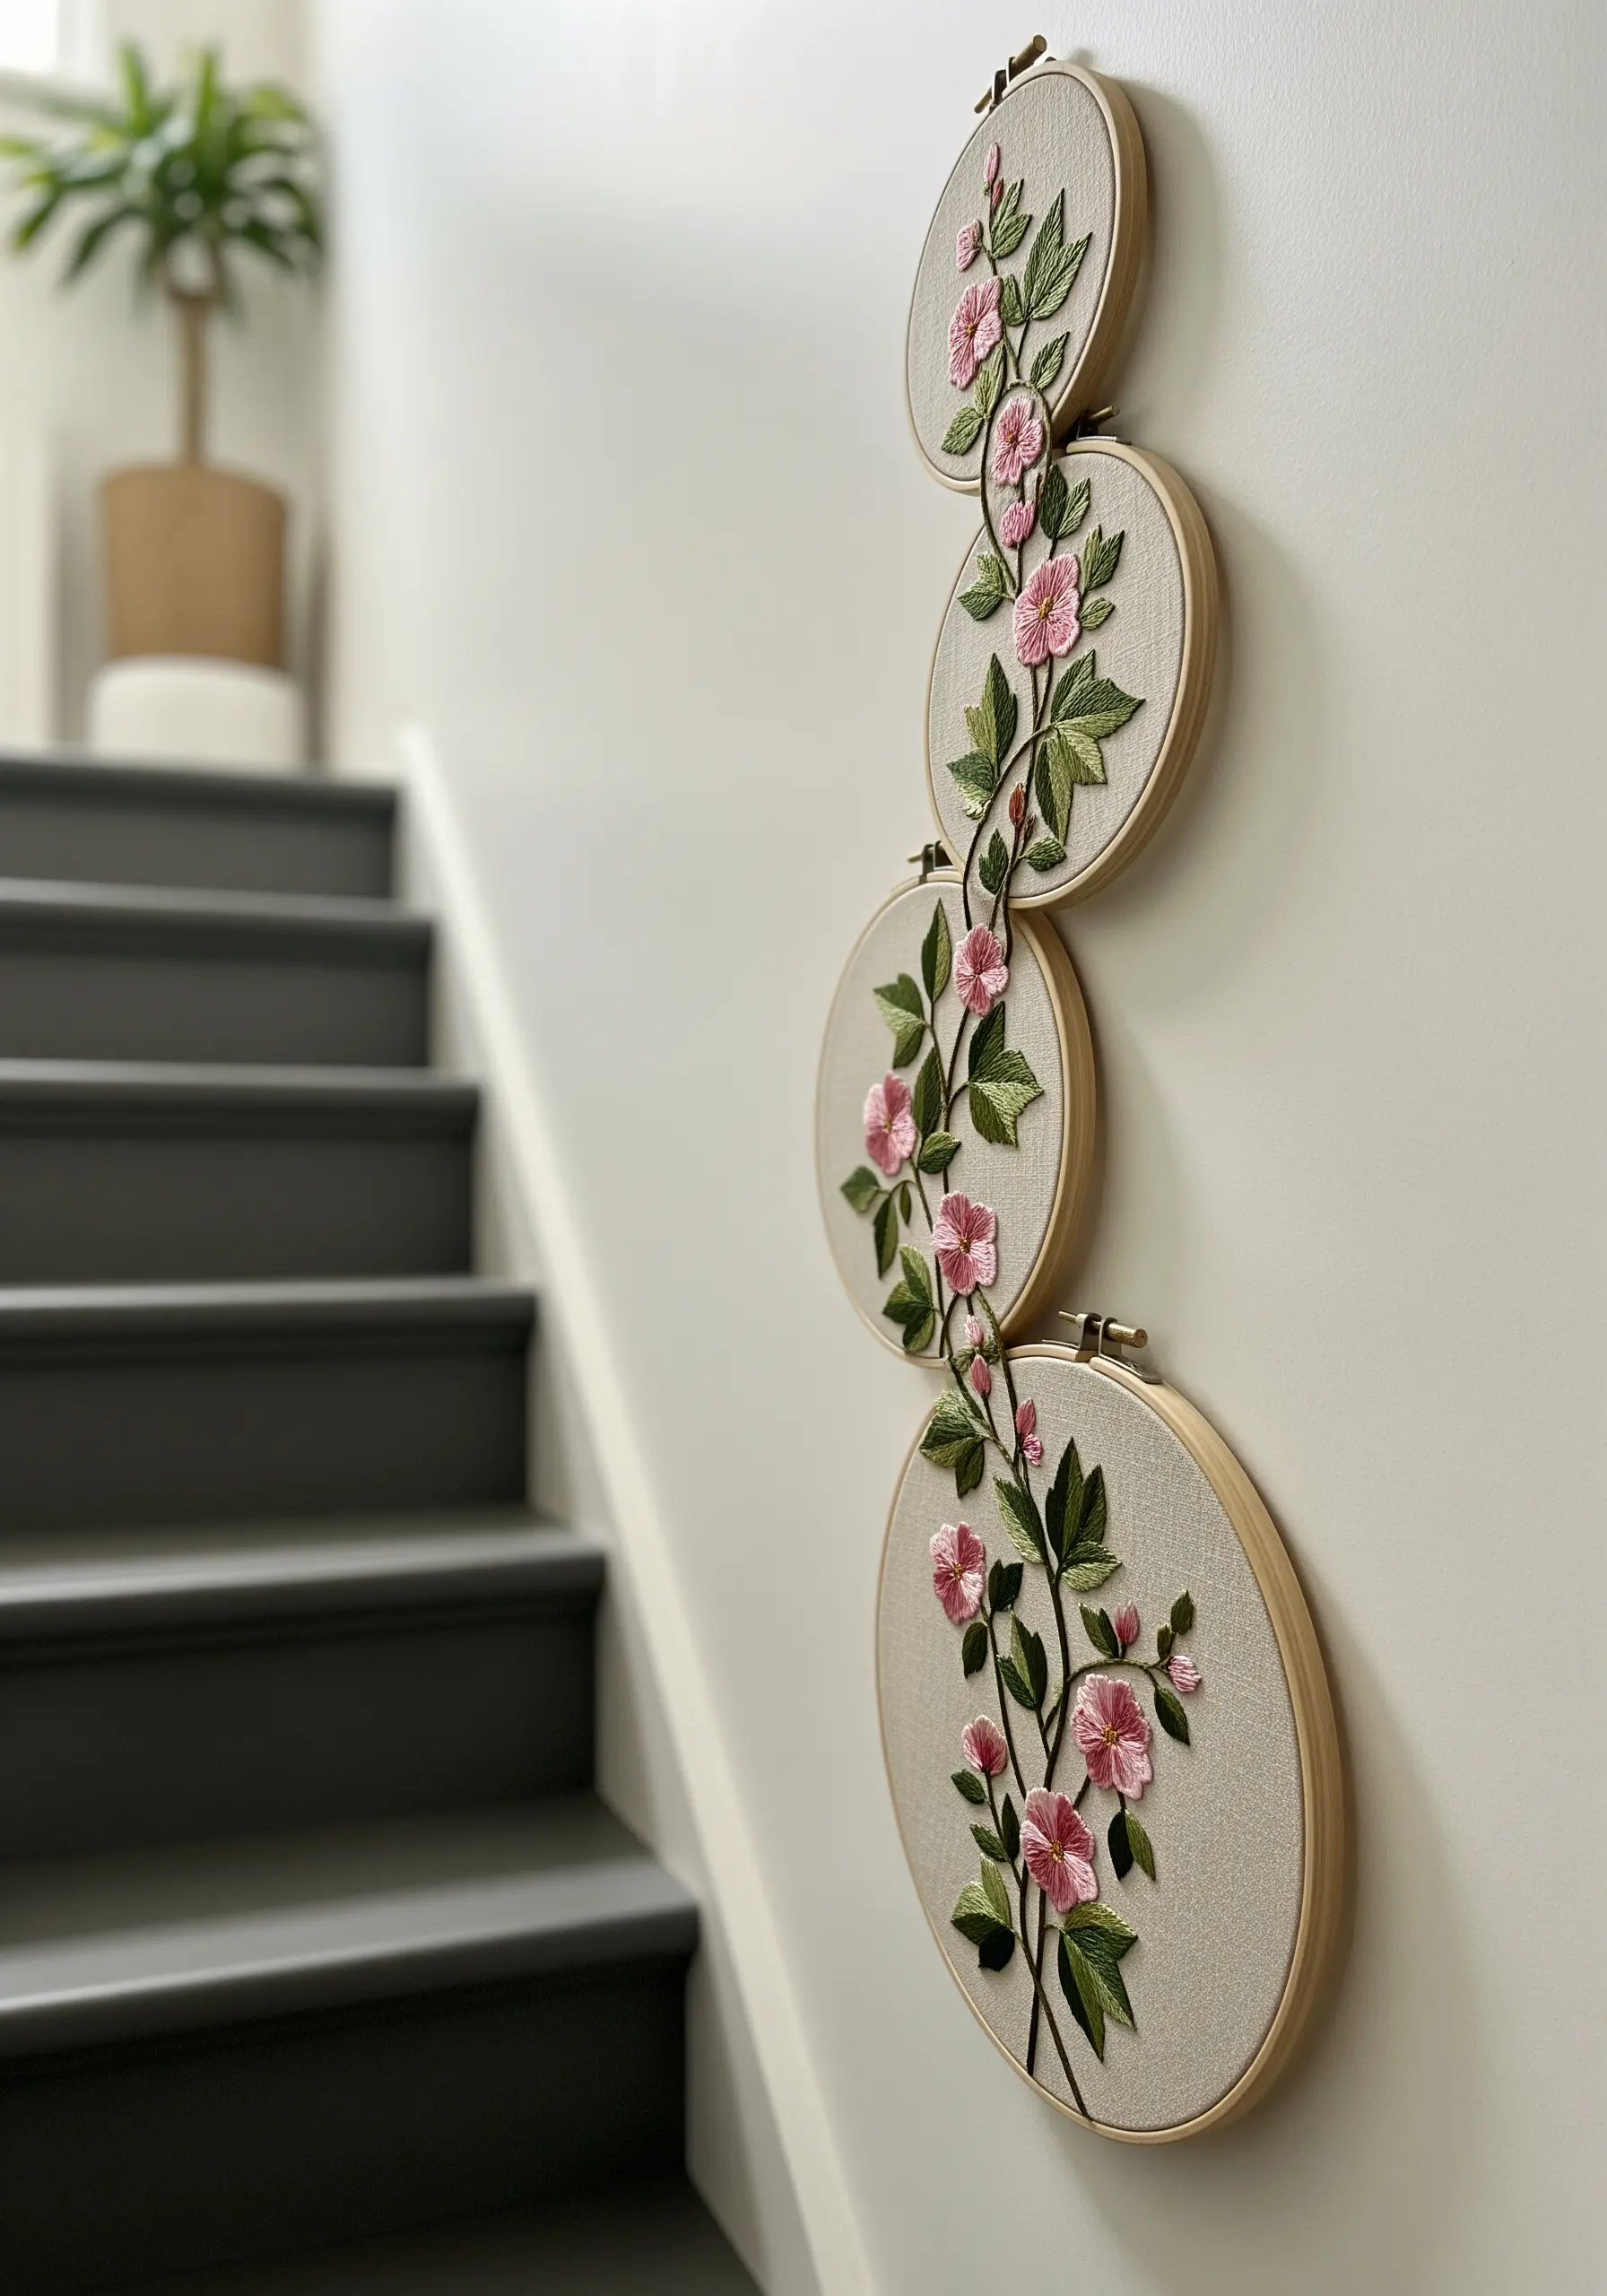
Create a single, flowing design that travels across several hoops for a unique vertical narrative.
To execute this, lightly trace your entire design onto a single piece of fabric first. Then, carefully place and tighten each hoop along the path of the branch or vine before you begin stitching.
Once stitched, you can cut the fabric around each hoop, leaving a small border to fold and secure at the back. This ensures the design aligns perfectly when hung.
It’s an elegant way to display subtle floral embroidery motifs.
18. Perfect Your Lettering with a Smooth Stitch
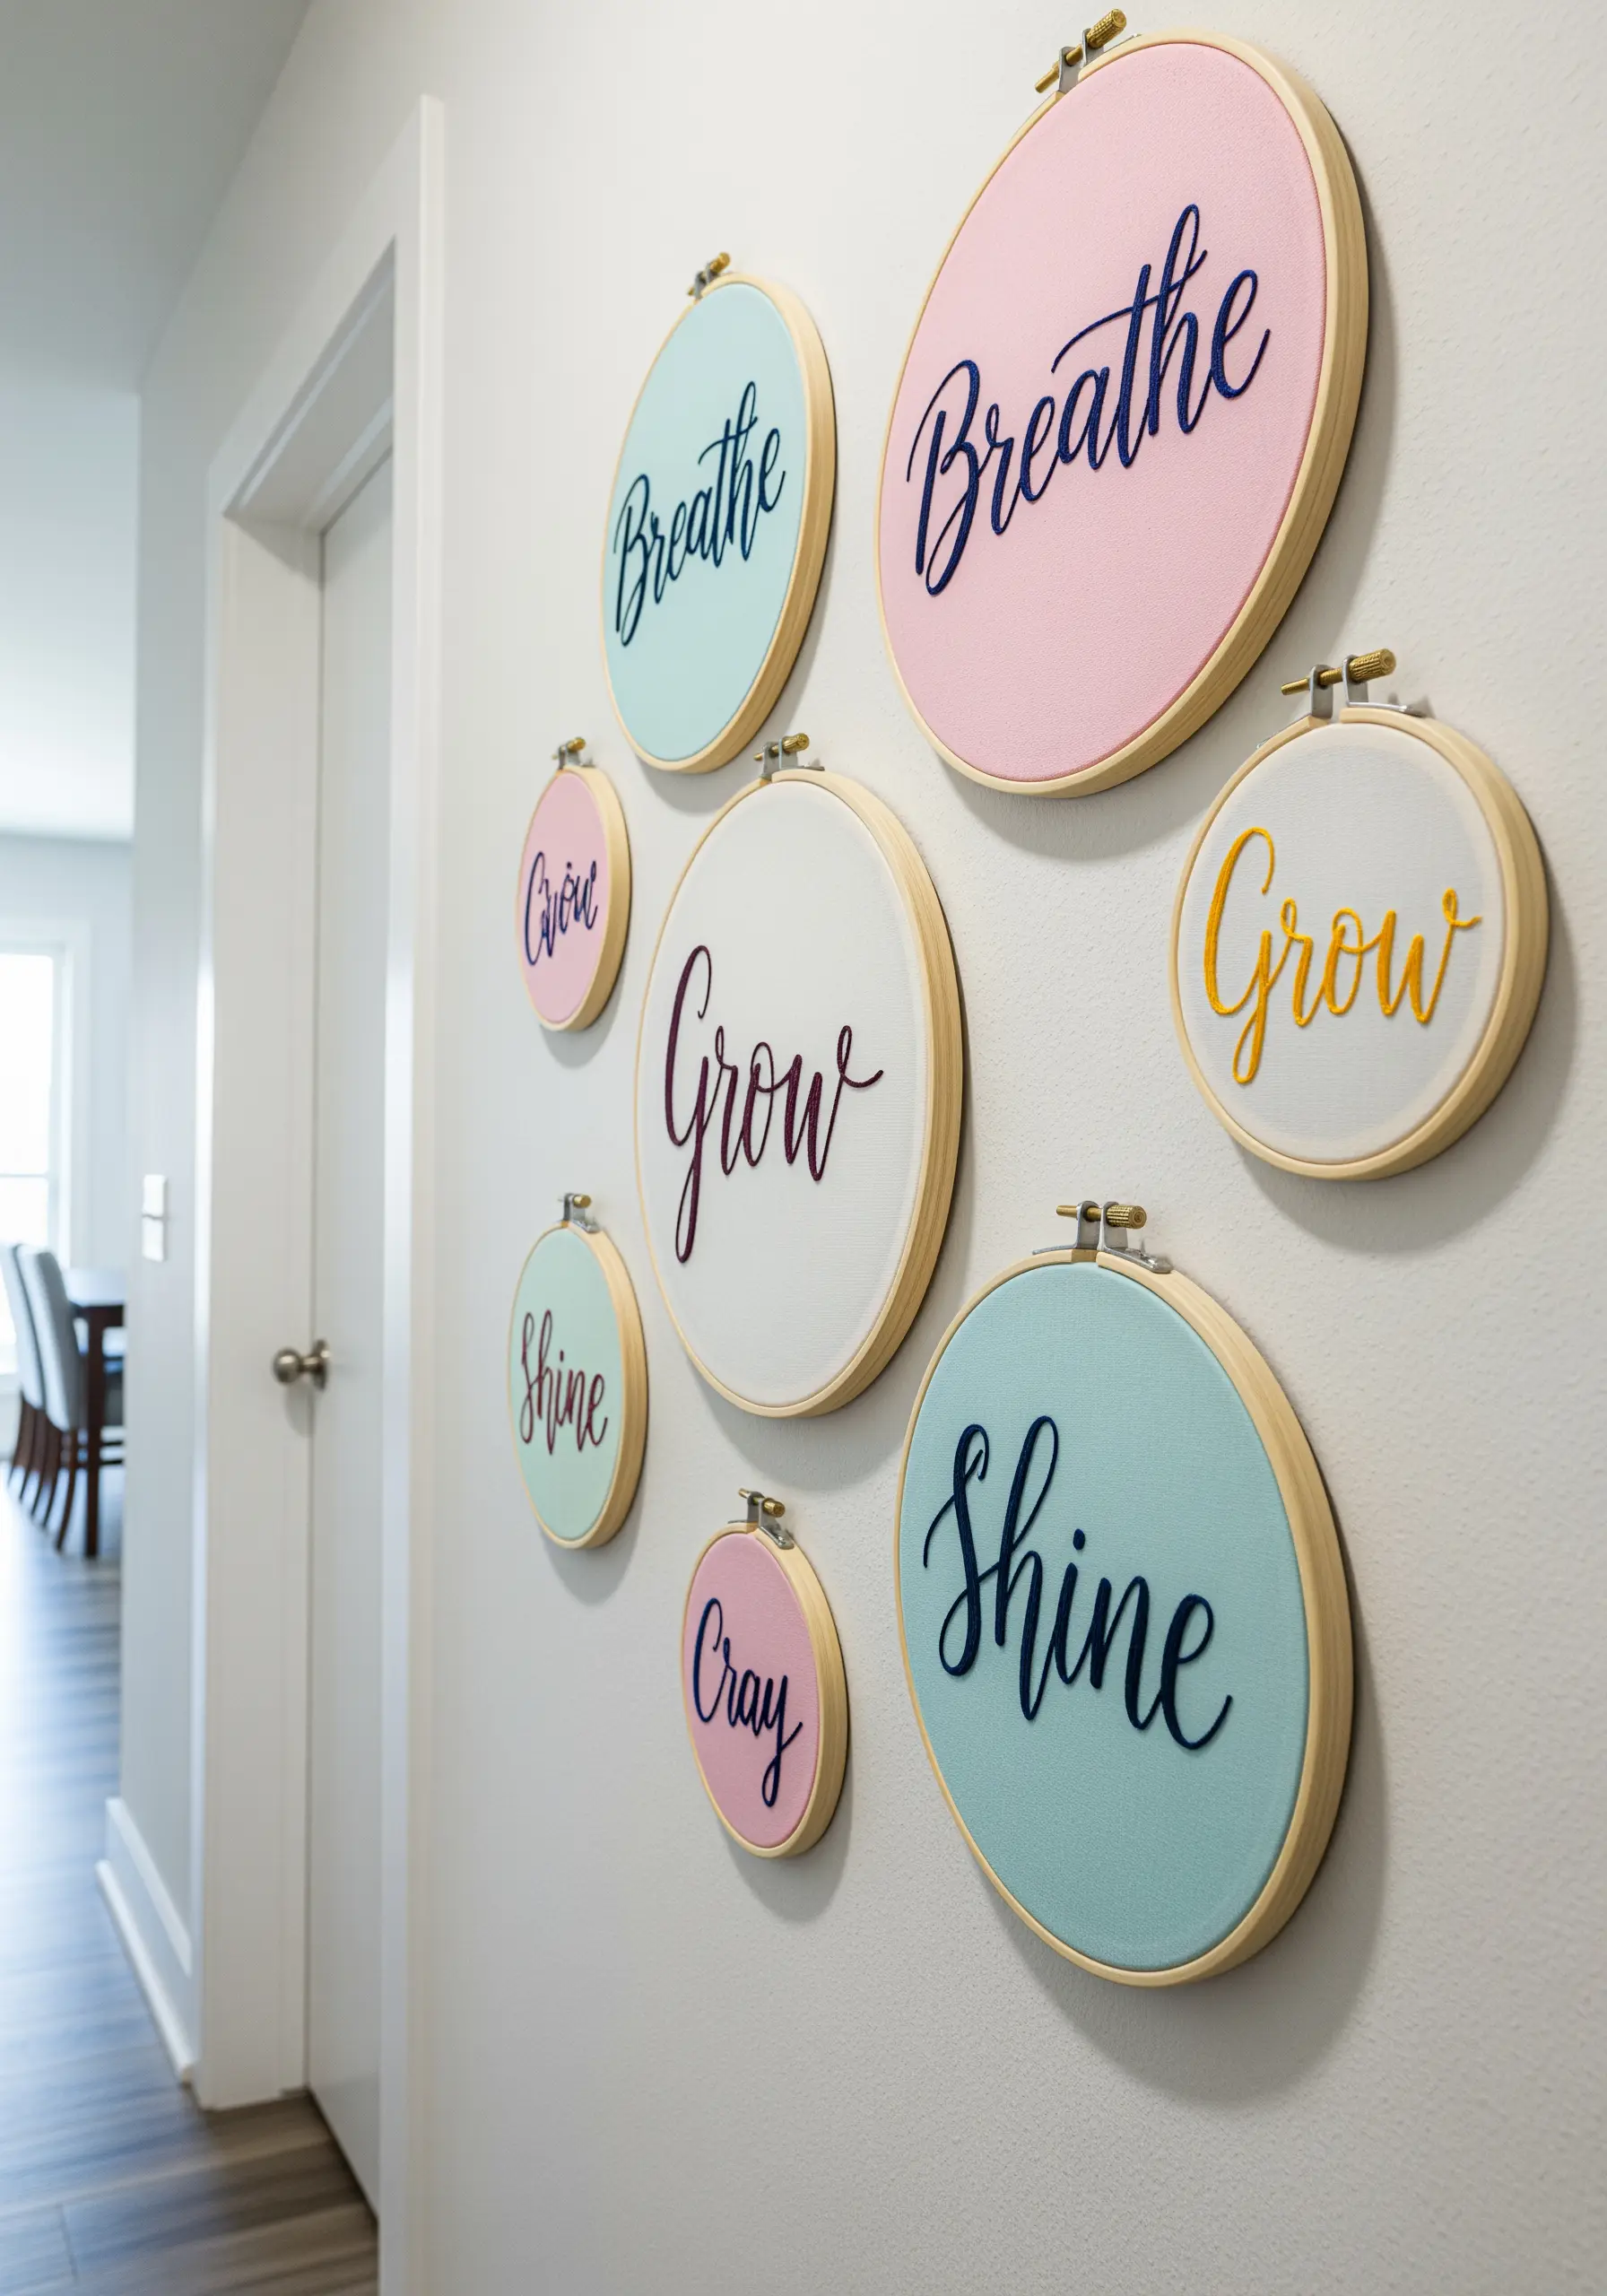
For elegant, script-style lettering, a standard backstitch can look disjointed. Instead, use a stem stitch or a whipped backstitch.
Both stitches create a smooth, rope-like line that flows beautifully around curves, making your text look fluid and professional.
Use a heat-erasable pen to trace your chosen word onto the fabric, ensuring perfect placement and scale before you commit to a single stitch.
This focus on clean lines is essential for minimal typography embroidery patterns that feel polished.
19. Create Atmospheric Depth with Layered Tones
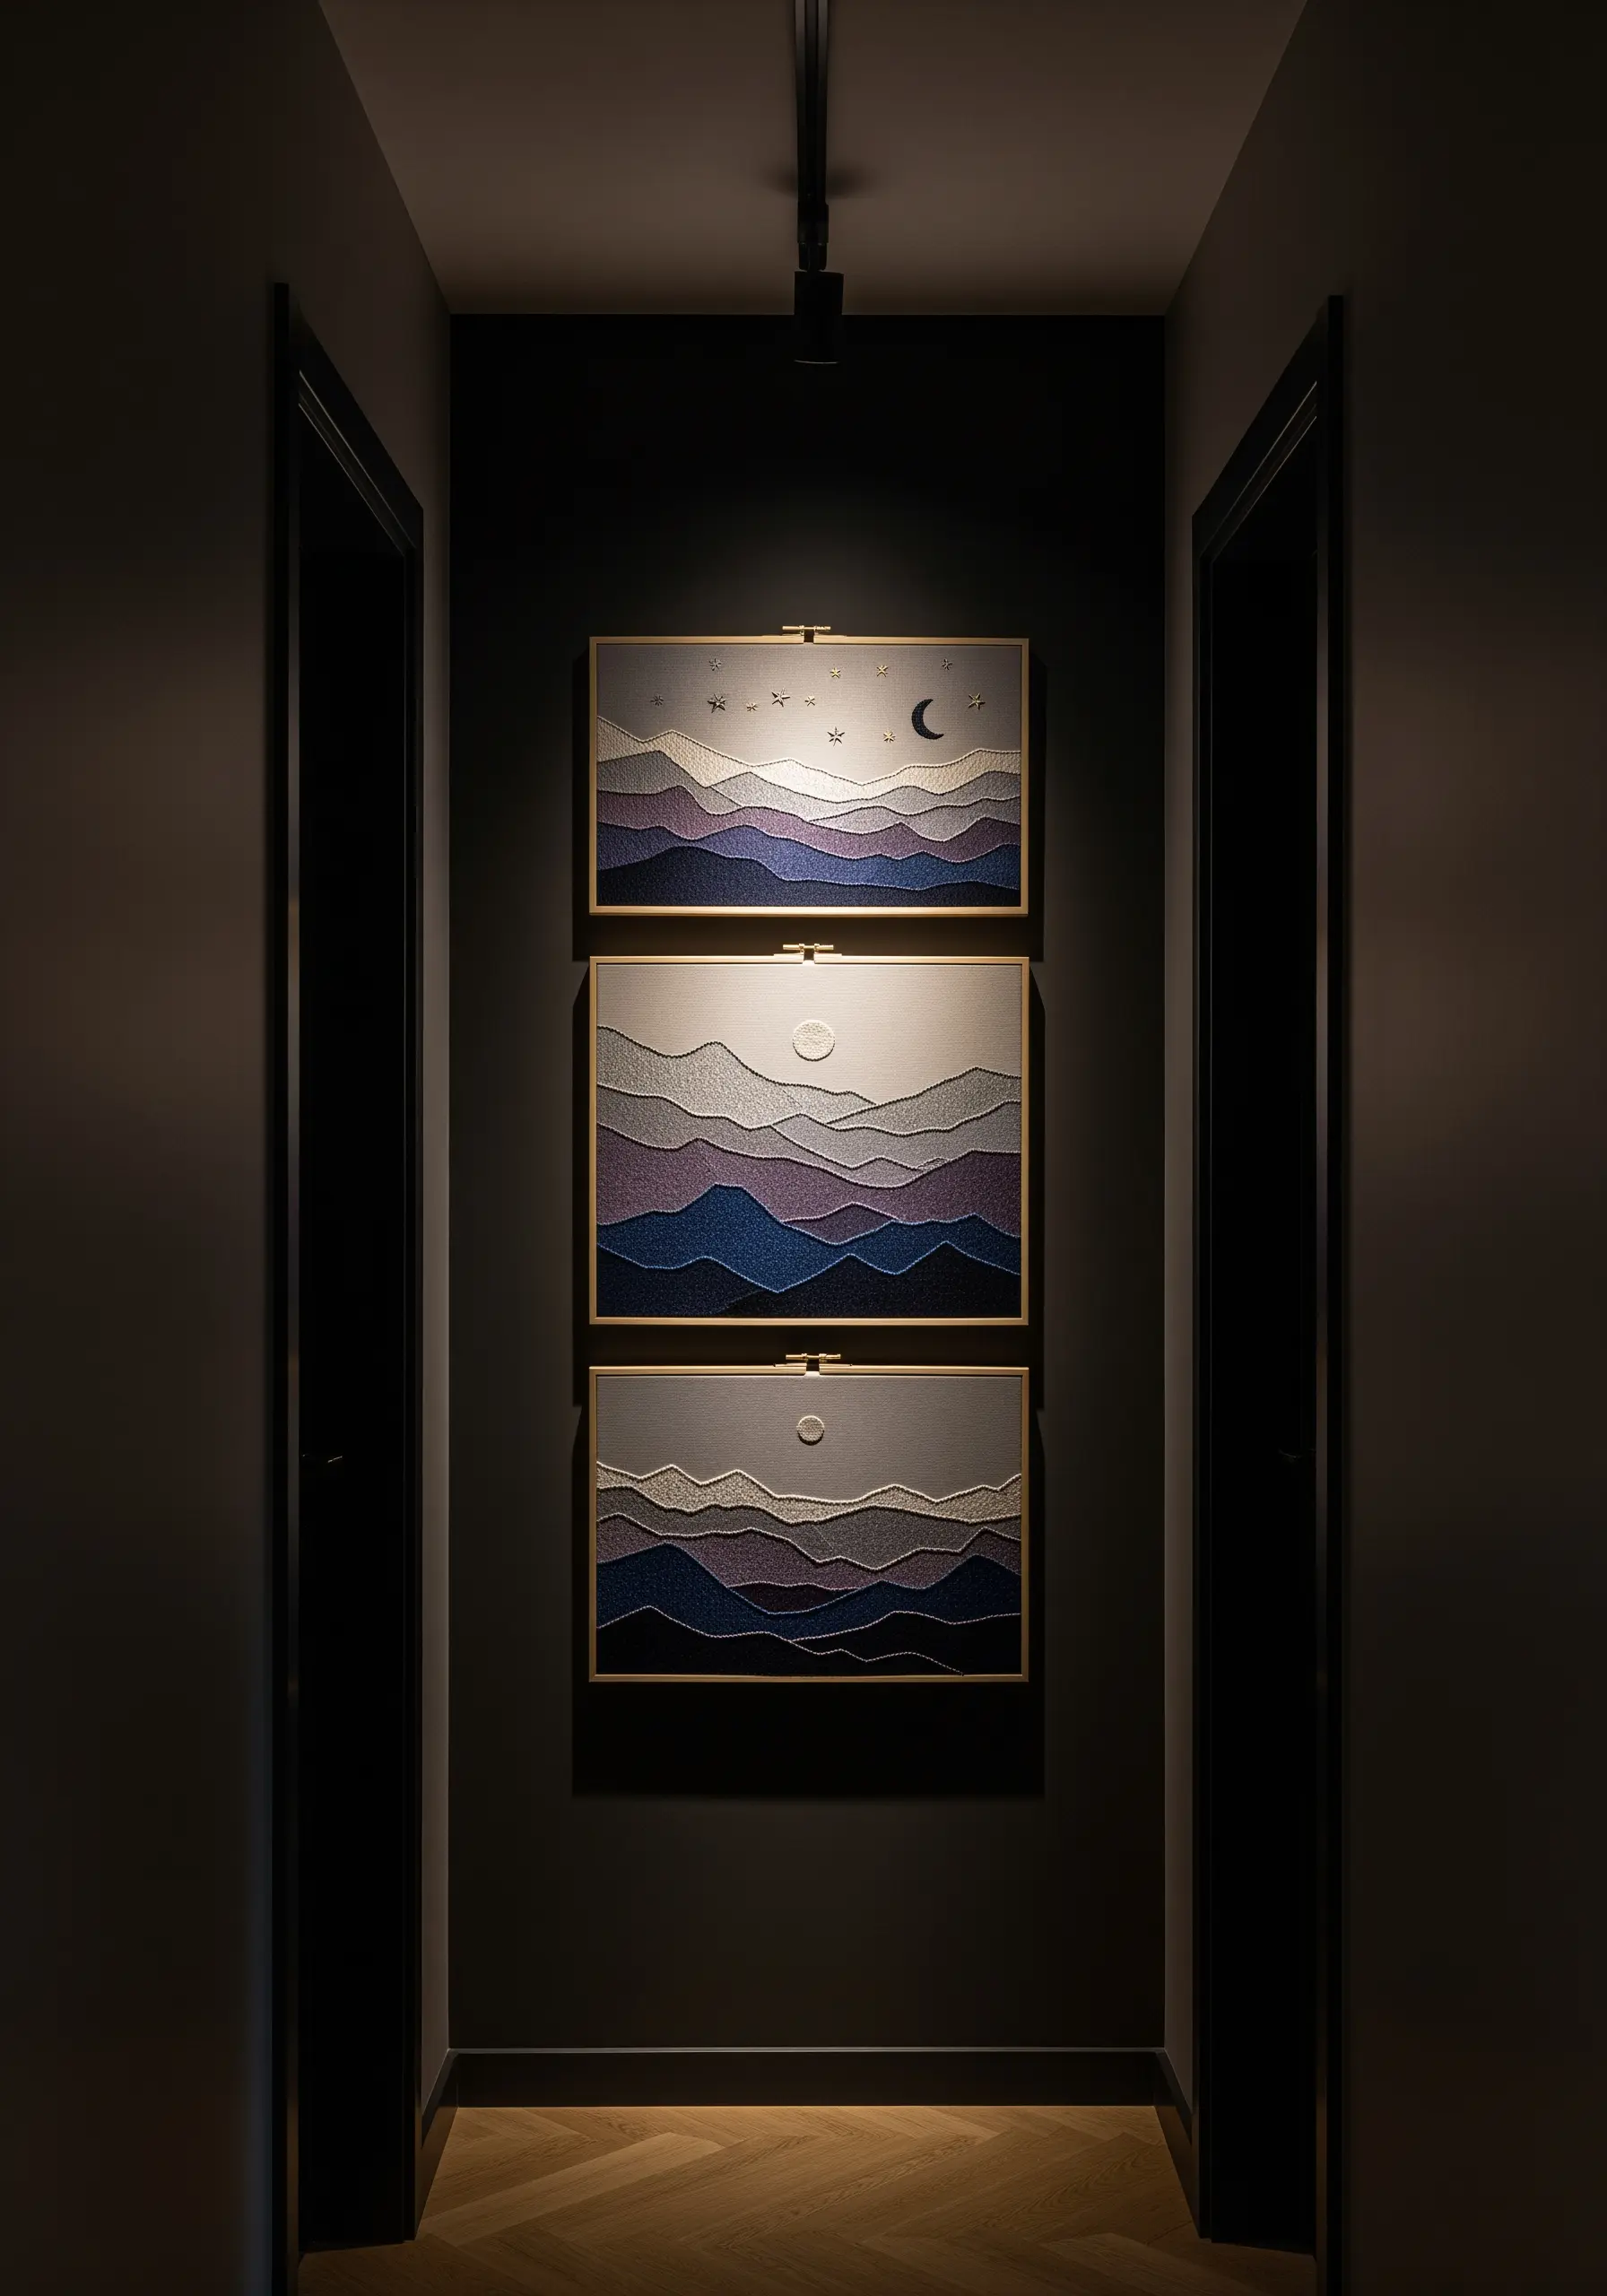
To suggest distance in a landscape, use the principles of atmospheric perspective: objects in the foreground should be darker and more detailed, while those in the background are lighter and simpler.
Embroider each mountain range in a different shade, moving from dark purple or navy in the front to pale lavender or grey in the back.
Using a simple running stitch or seed stitch for the texture adds to the minimalist feel, creating dreamy nature-inspired embroidery designs with a sense of immense space and calm.


