

If you feel your embroidery has hit a plateau, the solution may not be a new stitch, but a new surface. A fabric collage base is more than just a background; it’s an active, textural layer that infuses your work with depth, narrative, and a captivating 3D quality from the very first step.
Think of your fabric scraps not as leftovers, but as a painter’s palette. By layering torn canvas, piecing together velvets, or weaving strips of linen, you build a foundation that already has a story. Your embroidery then becomes the final, defining detail that completes the picture, rather than creating it from scratch.
Here, you’ll discover how to use simple collage techniques to transform a flat hoop into a dynamic piece of textile art. These ideas require no special equipment—just a new way of seeing the materials you already have. Prepare to create embroidery that doesn’t just sit on the fabric, but emerges from it.
1. Weave a Landscape with Textured Fabric Strips

Create a stratified, rustic background by layering horizontal strips of torn or cut fabric directly in your hoop.
Combine materials like burlap, raw linen, felted wool, and even faux moss fabric to build instant environmental texture.
This technique establishes a sense of place before you even begin stitching your main motif.
The raised texture of the background provides a physical and visual anchor for a dimensional element, like this punch-needle fox, making it feel fully integrated into its surroundings.
2. Sculpt an Oceanic Scene with Layered Ribbons
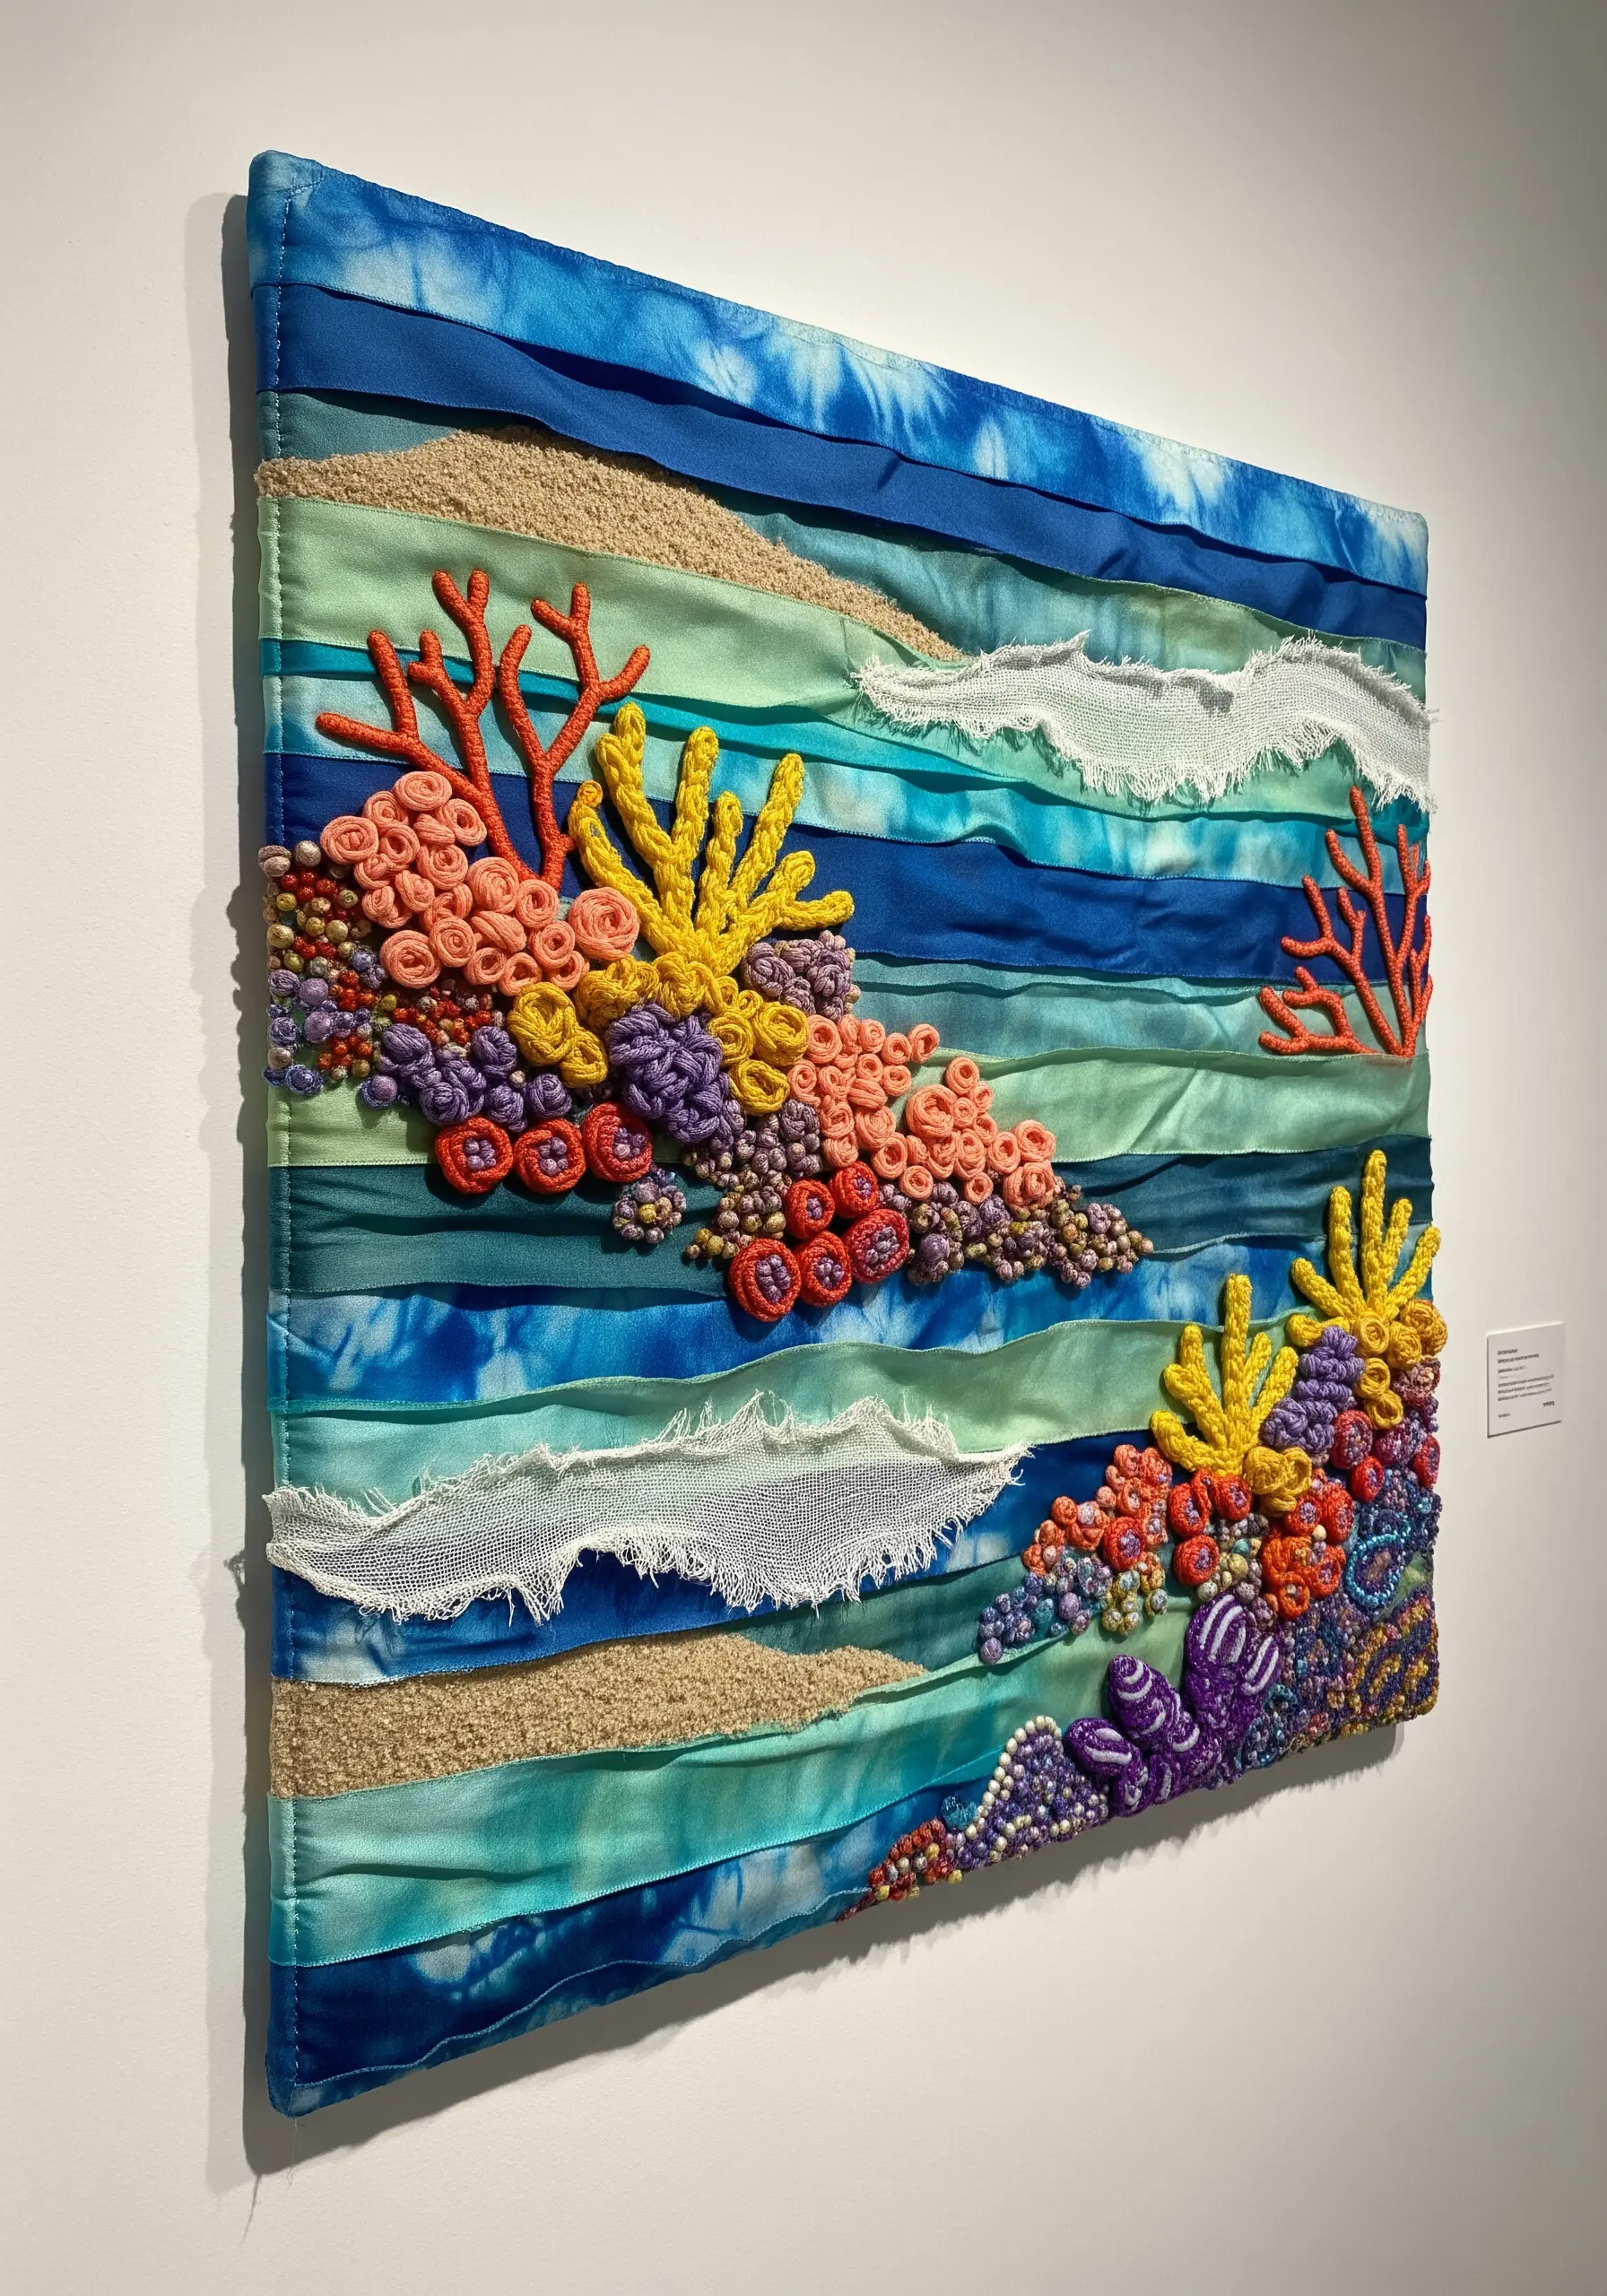
Mimic the fluid movement of ocean currents by layering various ribbons—satin, organza, and tie-dyed—horizontally across your base fabric.
The varying sheens and opacities create immediate visual depth and light play, suggesting sunlight filtering through water.
Incorporate frayed gauze or delicate mesh to represent seafoam and add another layer of texture.
Stitching dense clusters of French knots and bullion stitches for coral over this fluid base creates a stunning contrast that makes the embroidery pop.
3. Quilt a Celestial Grid for Deep-Space Embroidery

Construct a patchwork grid using fabrics in deep cosmic tones like navy, black, and charcoal.
Introduce shimmer and depth by mixing textures: soft velvet for the void of space, metallic lamé for distant nebulae, and simple cotton for stability.
This structured, quilted base provides the perfect canvas for delicate constellations embroidered with metallic threads and scattered beads.
Stitch planets using a padded satin stitch or long-and-short stitch to give them a rounded, three-dimensional form against the flat fabric panels.
4. Construct an Urban Landscape with Denim Patchwork

Deconstruct old jeans to create a powerful patchwork base that tells a story of its own.
Arrange pieces of varying washes—from dark indigo to faded stone-wash—to create visual contrast and texture.
Allowing the edges to fray adds a gritty, industrial feel that perfectly complements an urban theme.
Your embroidery becomes the architectural lines defining the cityscape, with the bold thread color creating a striking contrast against the rugged denim.
5. Layer Paper and Lace for a Vintage Botanical Base

Combine antique book pages, delicate paper doilies, and fragments of vintage lace to build a nostalgic, multi-layered collage.
This method works beautifully to frame a central motif, adding historical and emotional context.
Secure the paper and lace elements with a light fabric glue or nearly invisible tacking stitches before adding your main design.
By integrating embroidery, you physically and visually unify the disparate materials, creating cohesive mixed-media collage techniques that feel intentional and elegant.
6. Build a Dense Jungle with Layered Fabric Leaves
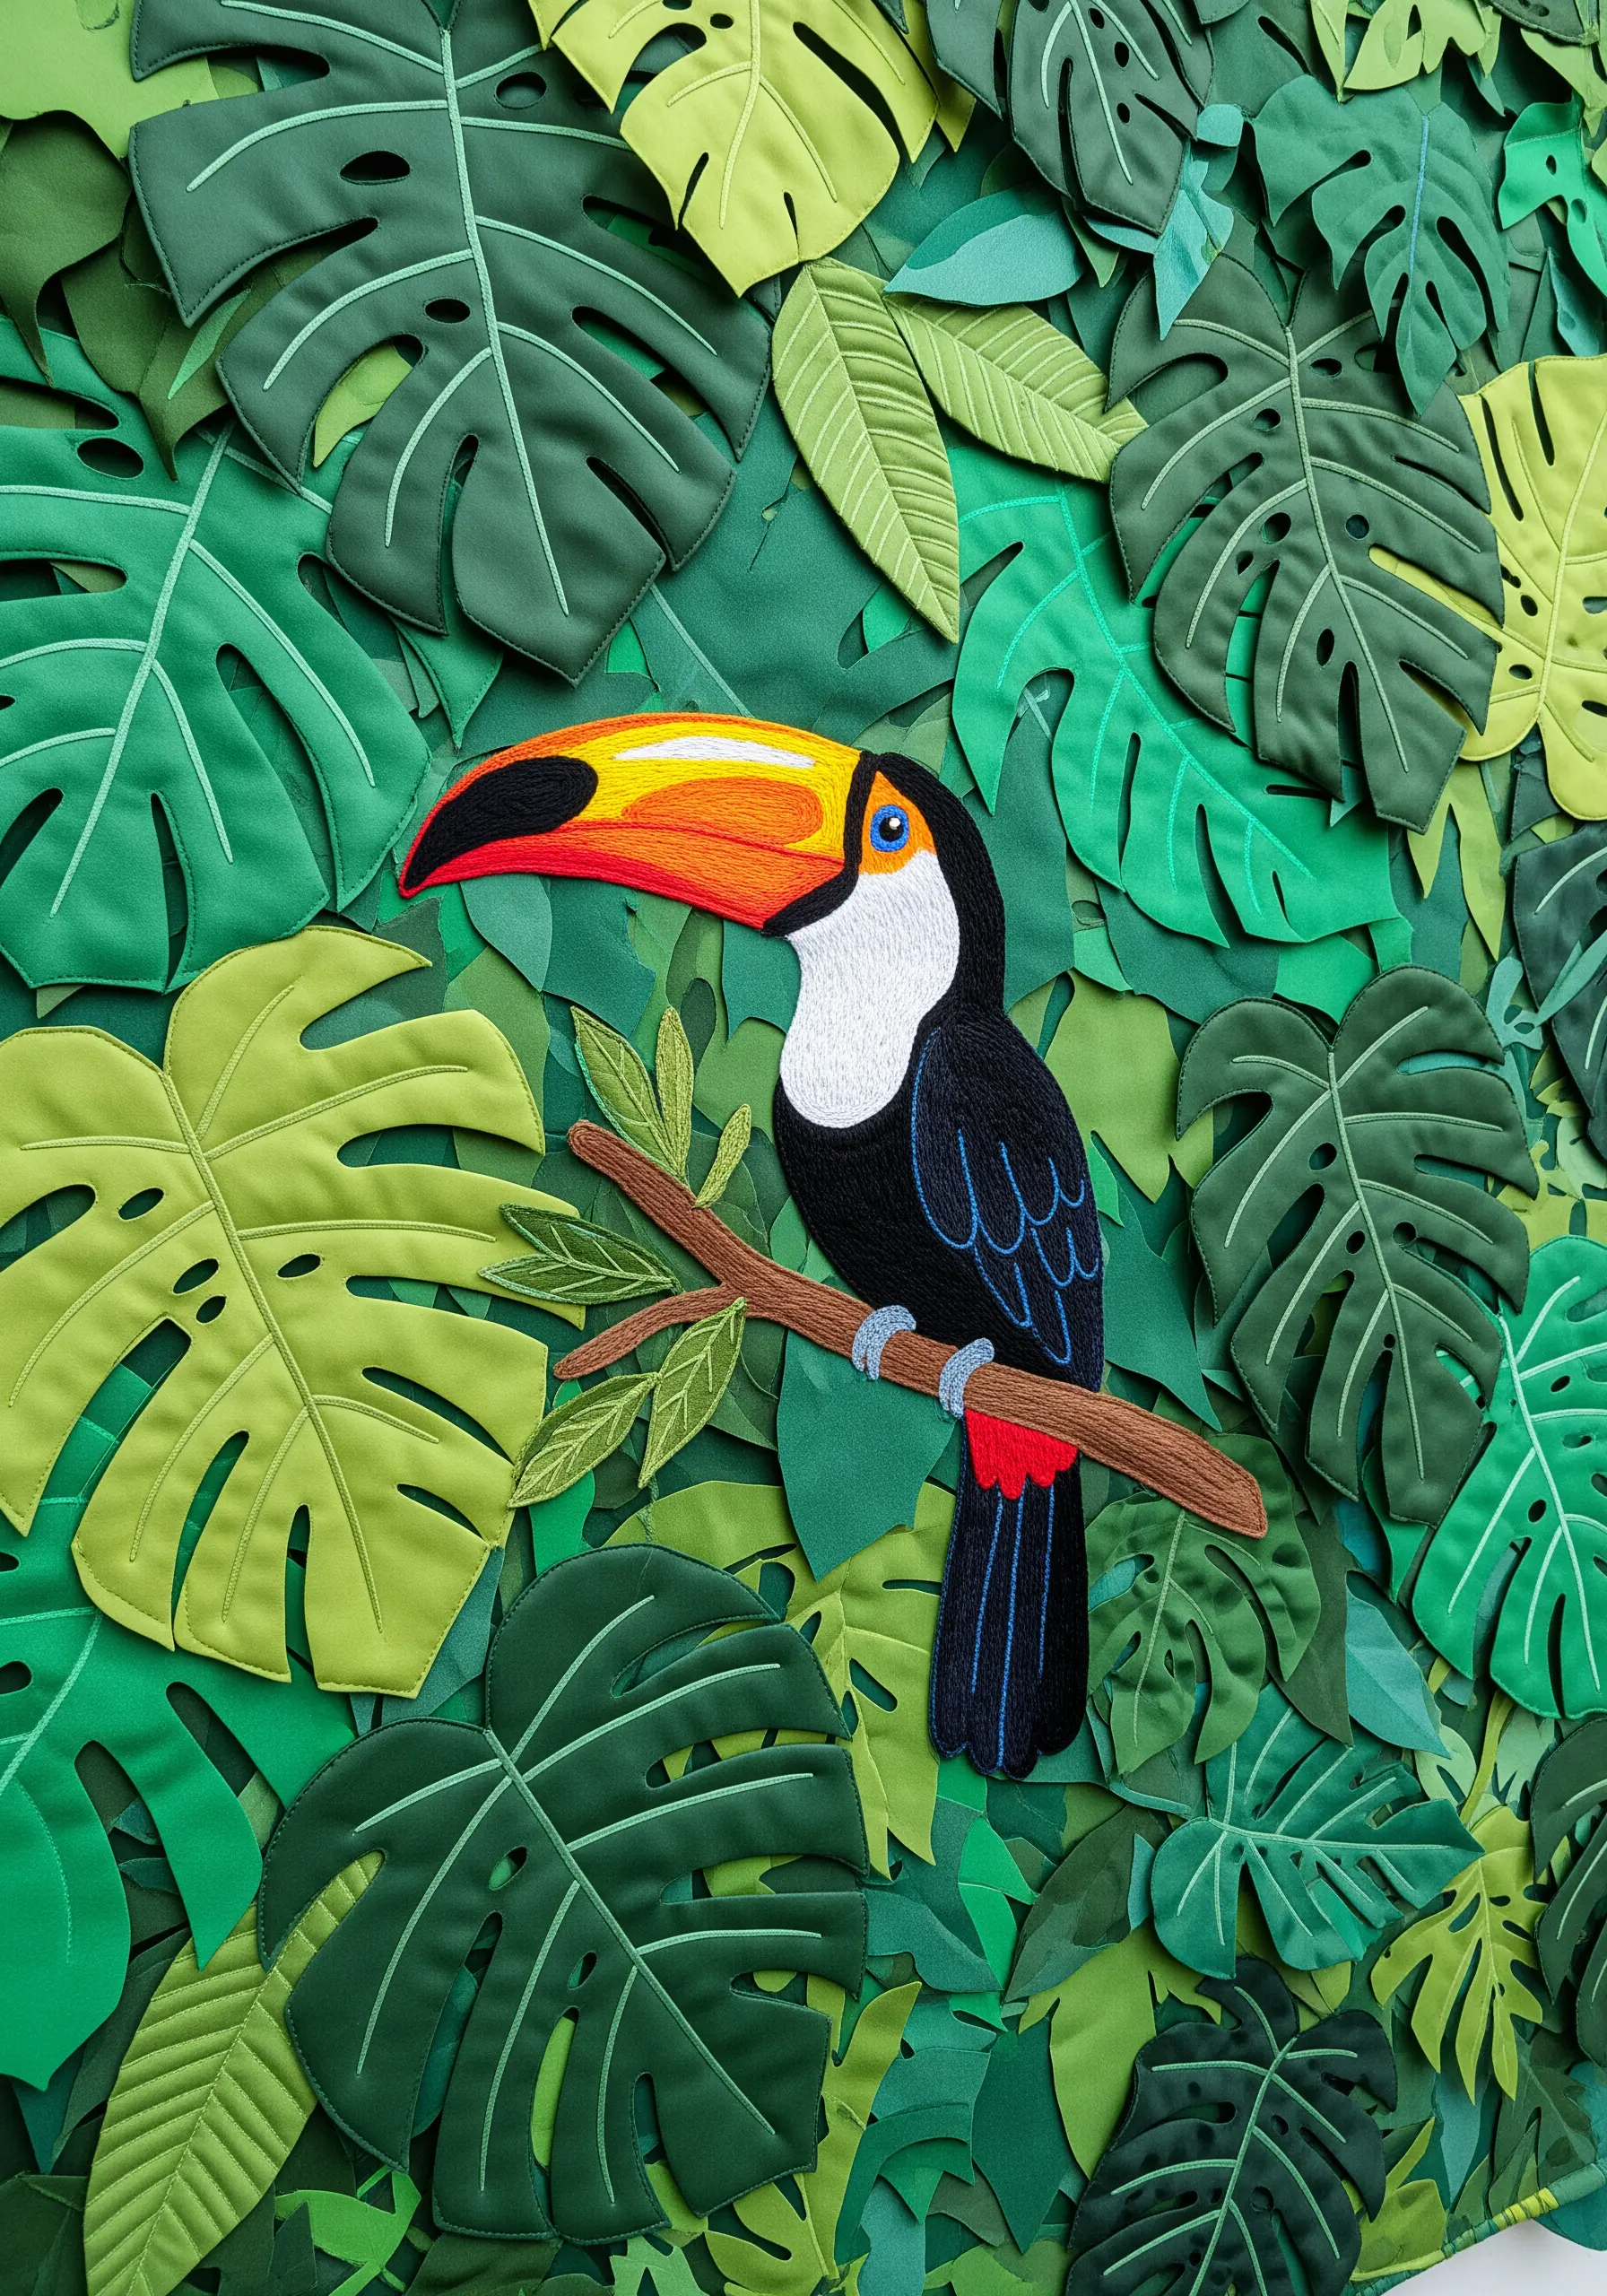
Create a lush, overlapping jungle canopy by cutting leaf shapes from various shades and types of green fabric.
Use felt, cotton, and even neoprene for different levels of stiffness and texture, mimicking the diversity of a real rainforest.
Secure each leaf with just a few stitches at its base, allowing the tips to lift away from the background for natural shadow and dimension.
Your embroidered motif will appear nestled within this foliage, creating a far more immersive scene than stitching on a flat surface.
7. Create Graphic Tension with Color-Blocked Felt
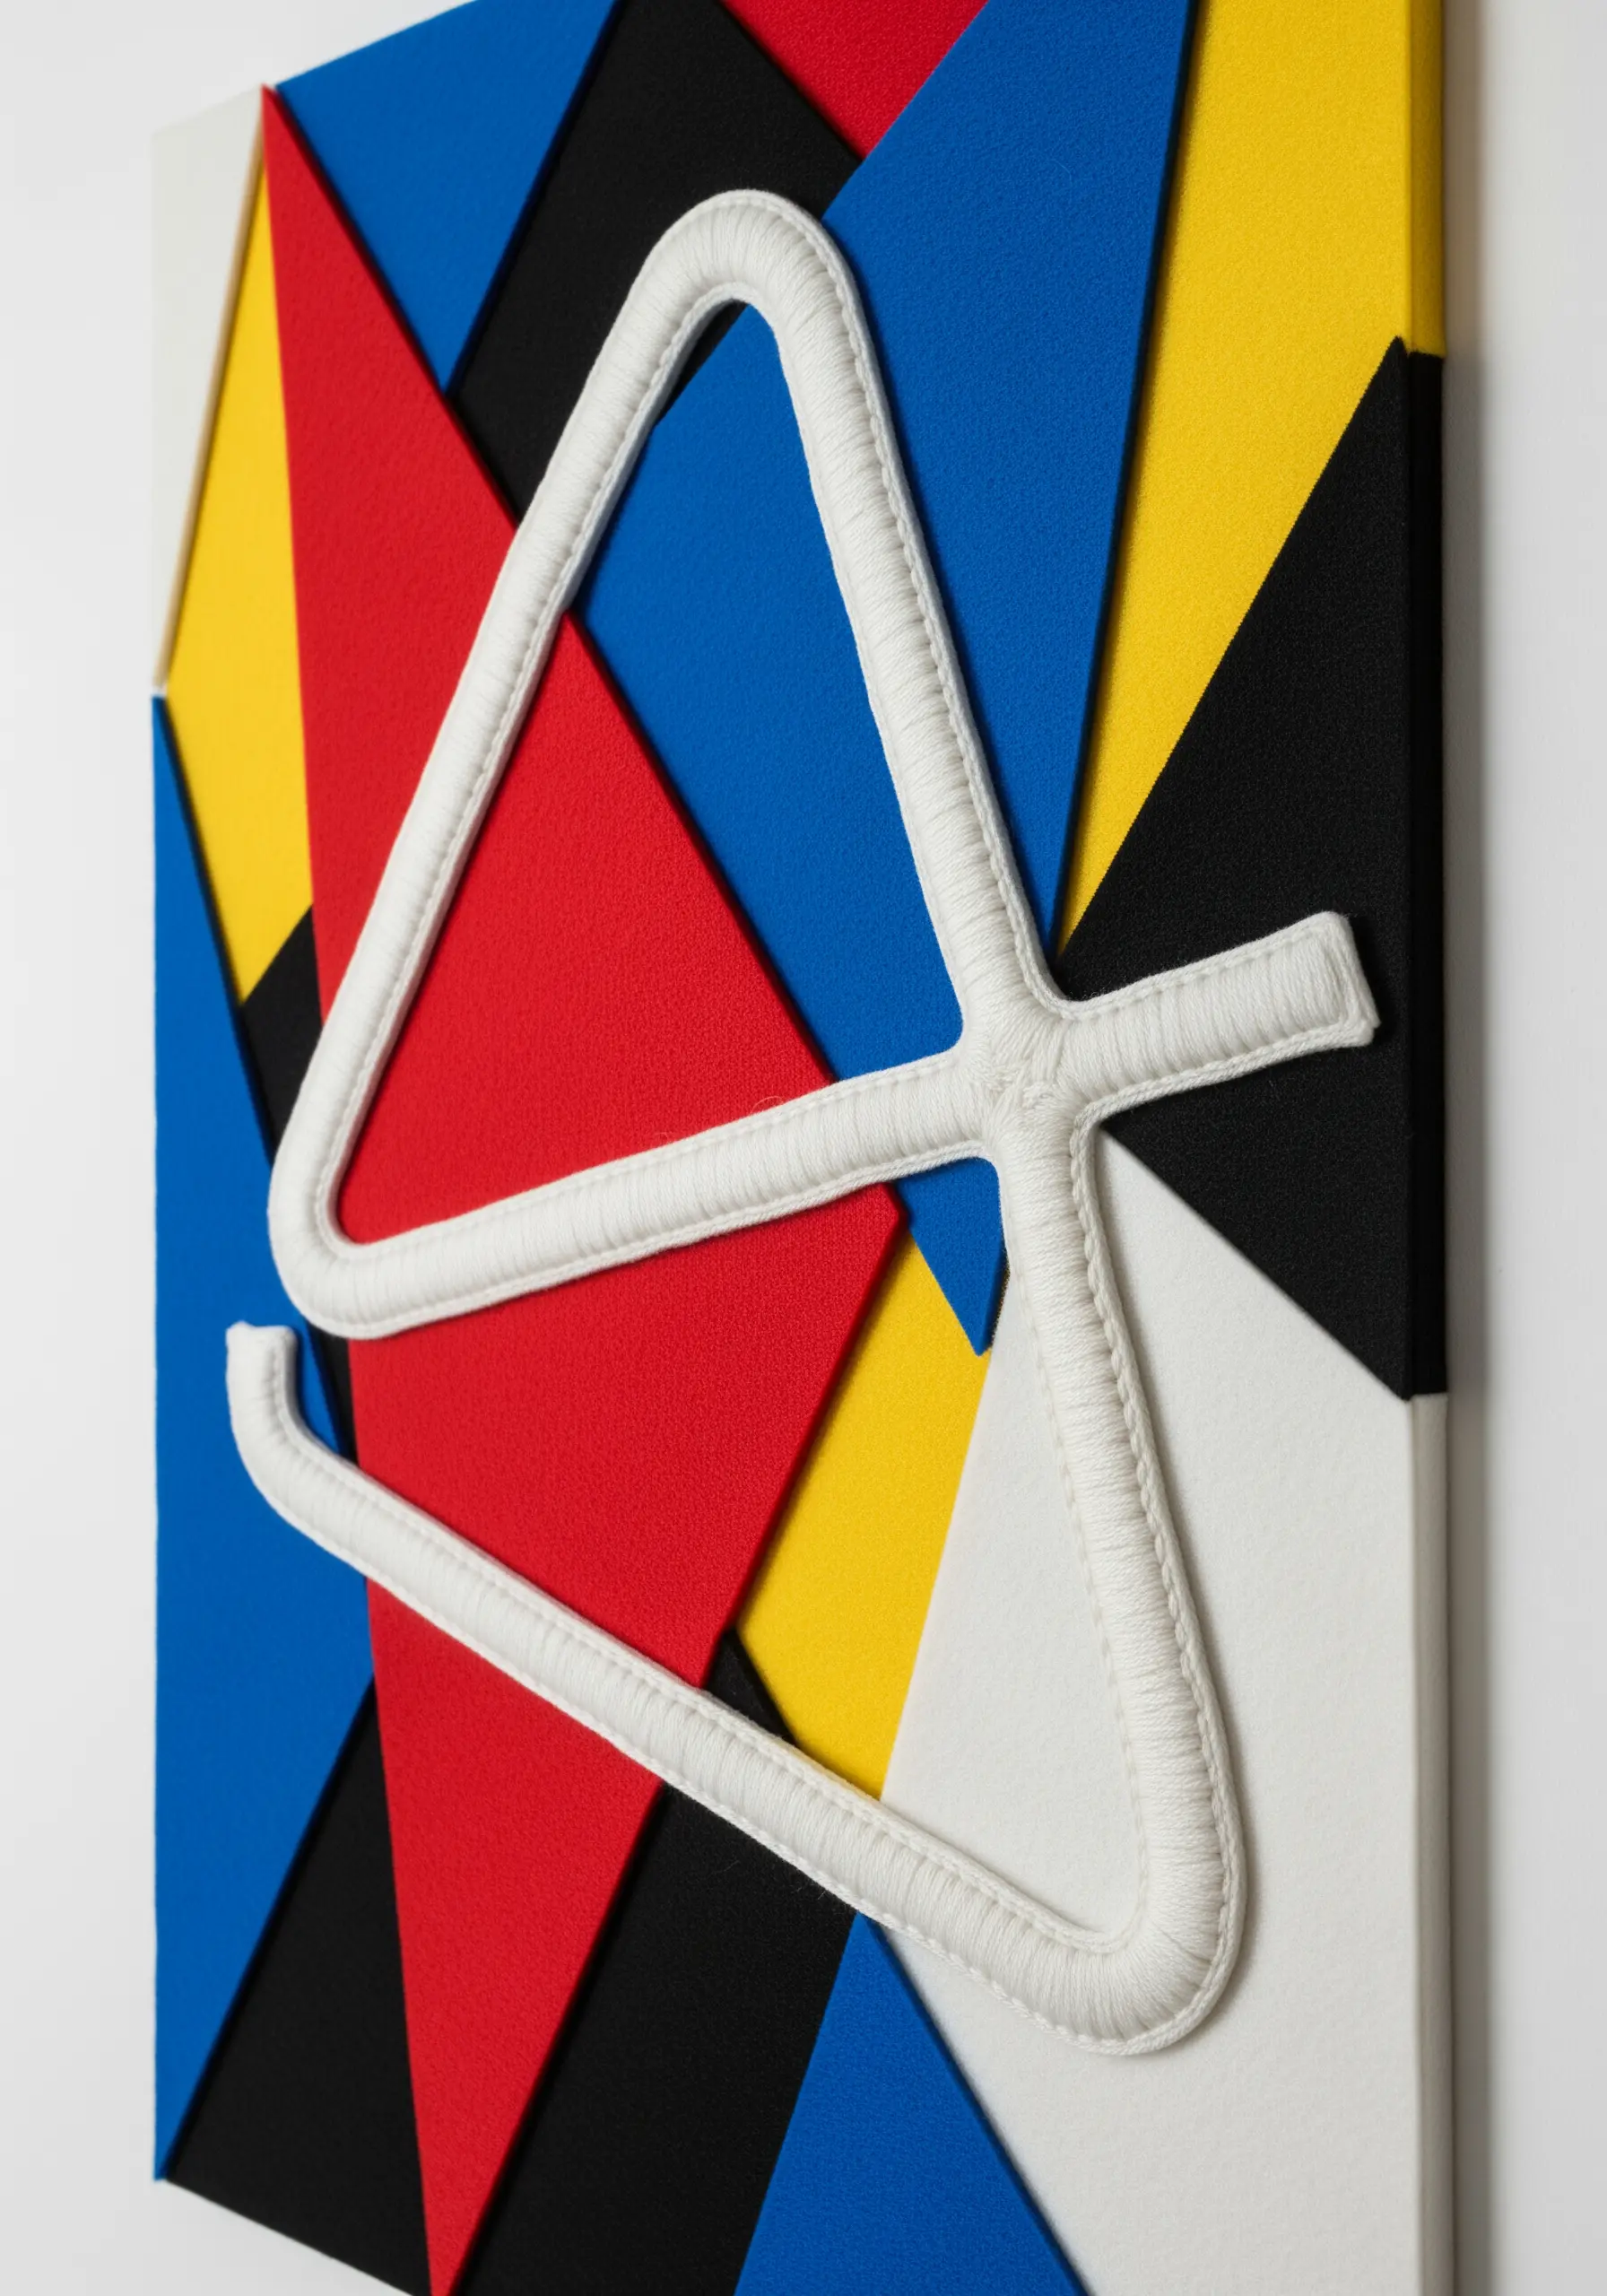
Use precisely cut pieces of felt in bold primary colors to design a hard-edged, geometric background inspired by modern art.
Felt is ideal for this technique because its edges won’t fray, ensuring your lines remain crisp and clean.
Appliqué the shapes onto a sturdy canvas, then introduce a single, contrasting embroidered element.
A sculptural form stitched in a neutral color, like the white cord here, creates a powerful focal point against the vibrant, flat background.
8. Evoke Earthen Textures with Woven Fabric Strips

Weave strips of highly textured, earth-toned fabrics like canvas, linen, and bouclé to form a rich, tactile base.
A muted palette of terracotta, sand, and cream instantly evokes the feeling of a desert landscape or arid soil.
This foundation makes raised, dimensional stitches like stumpwork or padded satin stitch feel grounded and organic.
Your embroidered succulents will appear as if they are growing directly from this woven earth, creating a cohesive and natural composition.
9. Explore Subtle Depth with a Monochrome Fabric Collage
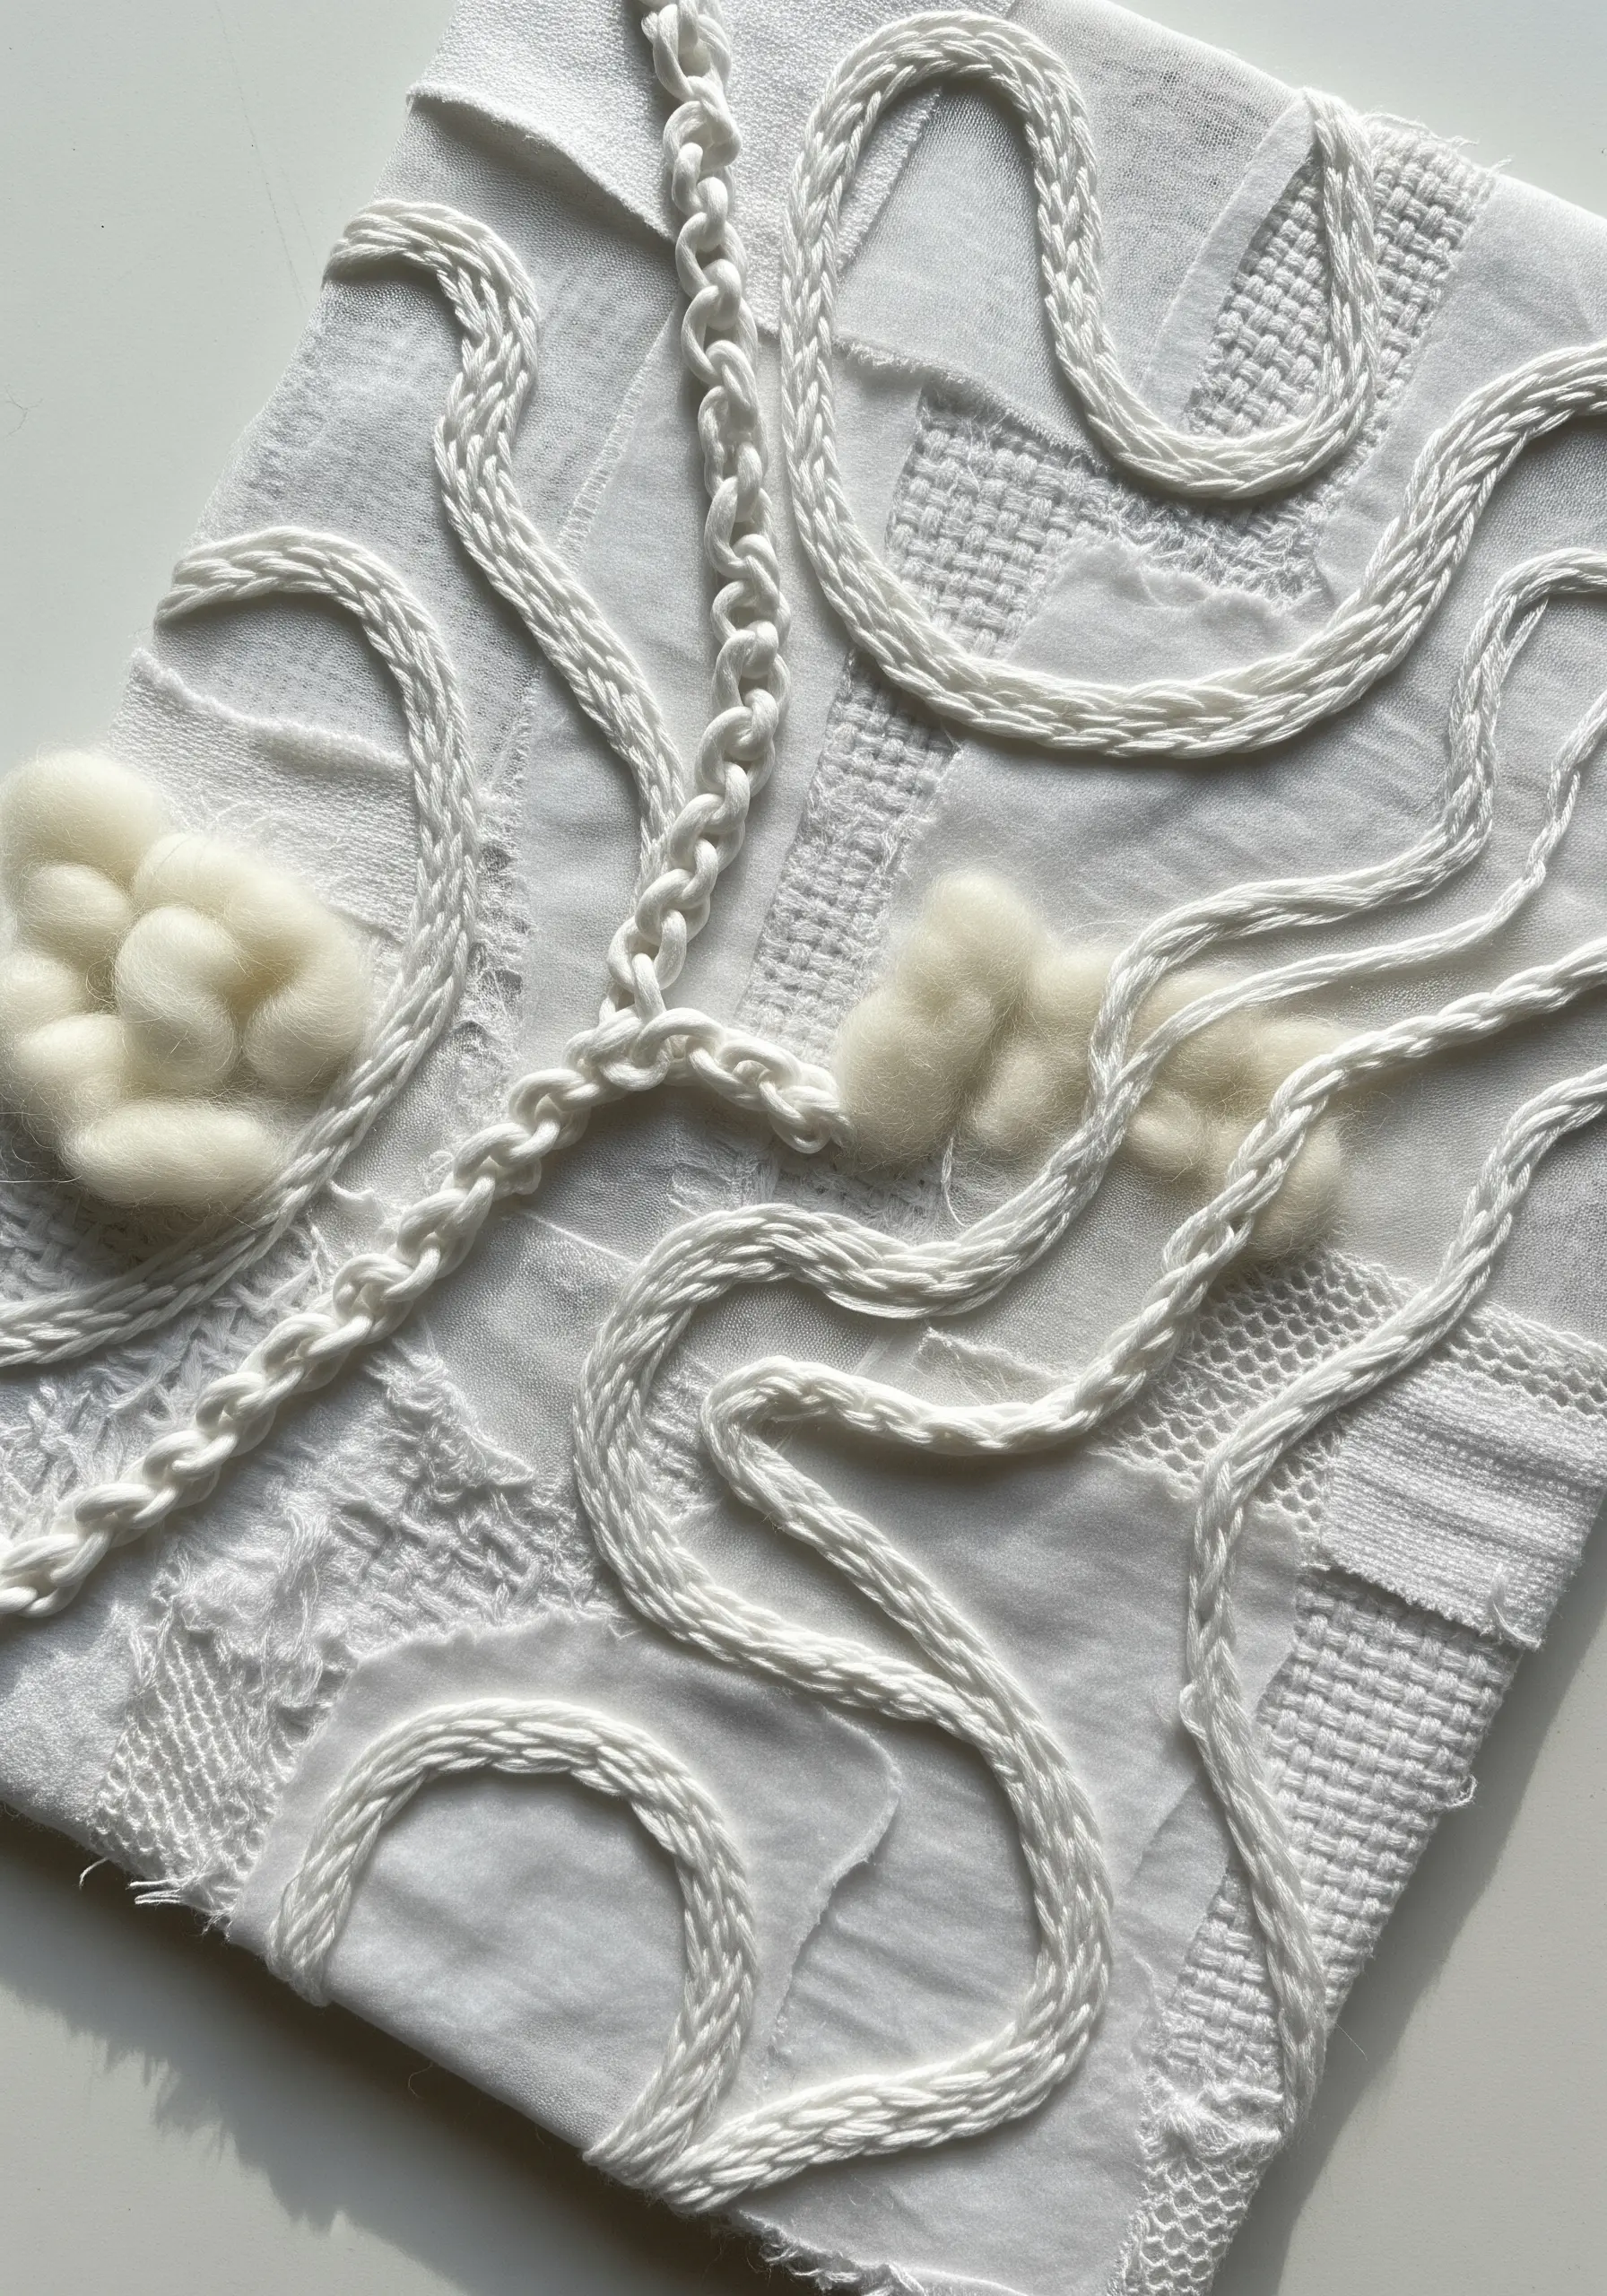
Build a composition rich in texture, not color, by layering scraps of white and off-white fabrics like cotton, gauze, muslin, and lace.
The focus shifts entirely to how light and shadow play across the different weaves, frayed edges, and fabric weights.
Add thick, sculptural stitches like a couched cord or heavy chain stitch in a matching thread to create lines that unify the composition.
This sophisticated approach results in stunning textured neutral embroidery samplers that feel like woven art.
10. Integrate Natural Elements for an Autumnal Forest Floor

Create a mottled, earthy background using felted wool or hand-dyed fabric to mimic fallen leaves and rich soil.
Then, incorporate real, preserved skeleton leaves directly into your collage by stitching them down with delicate, nearly invisible couching stitches.
This technique masterfully blurs the line between textile art and the natural world.
It gives your embroidered subjects, like these amanita mushrooms, a magically realistic context, as if you’ve captured a true moment from the forest floor.
11. Use Cheerful Patchwork for a Cottagecore Feel

Stitch together small squares of gingham, tiny floral prints, and coordinating solid colors to create a classic quilt-style background.
The playful and slightly irregular mix of patterns provides a vibrant, handmade energy that feels warm and inviting.
To ensure your embroidered motif remains the focal point, choose a subject with a strong, clean silhouette.
Using sheer organza appliqué for delicate elements, like the dragonfly wings, allows the charming patchwork pattern to peek through.
12. Imply Architecture with Patterned Fabric Panels
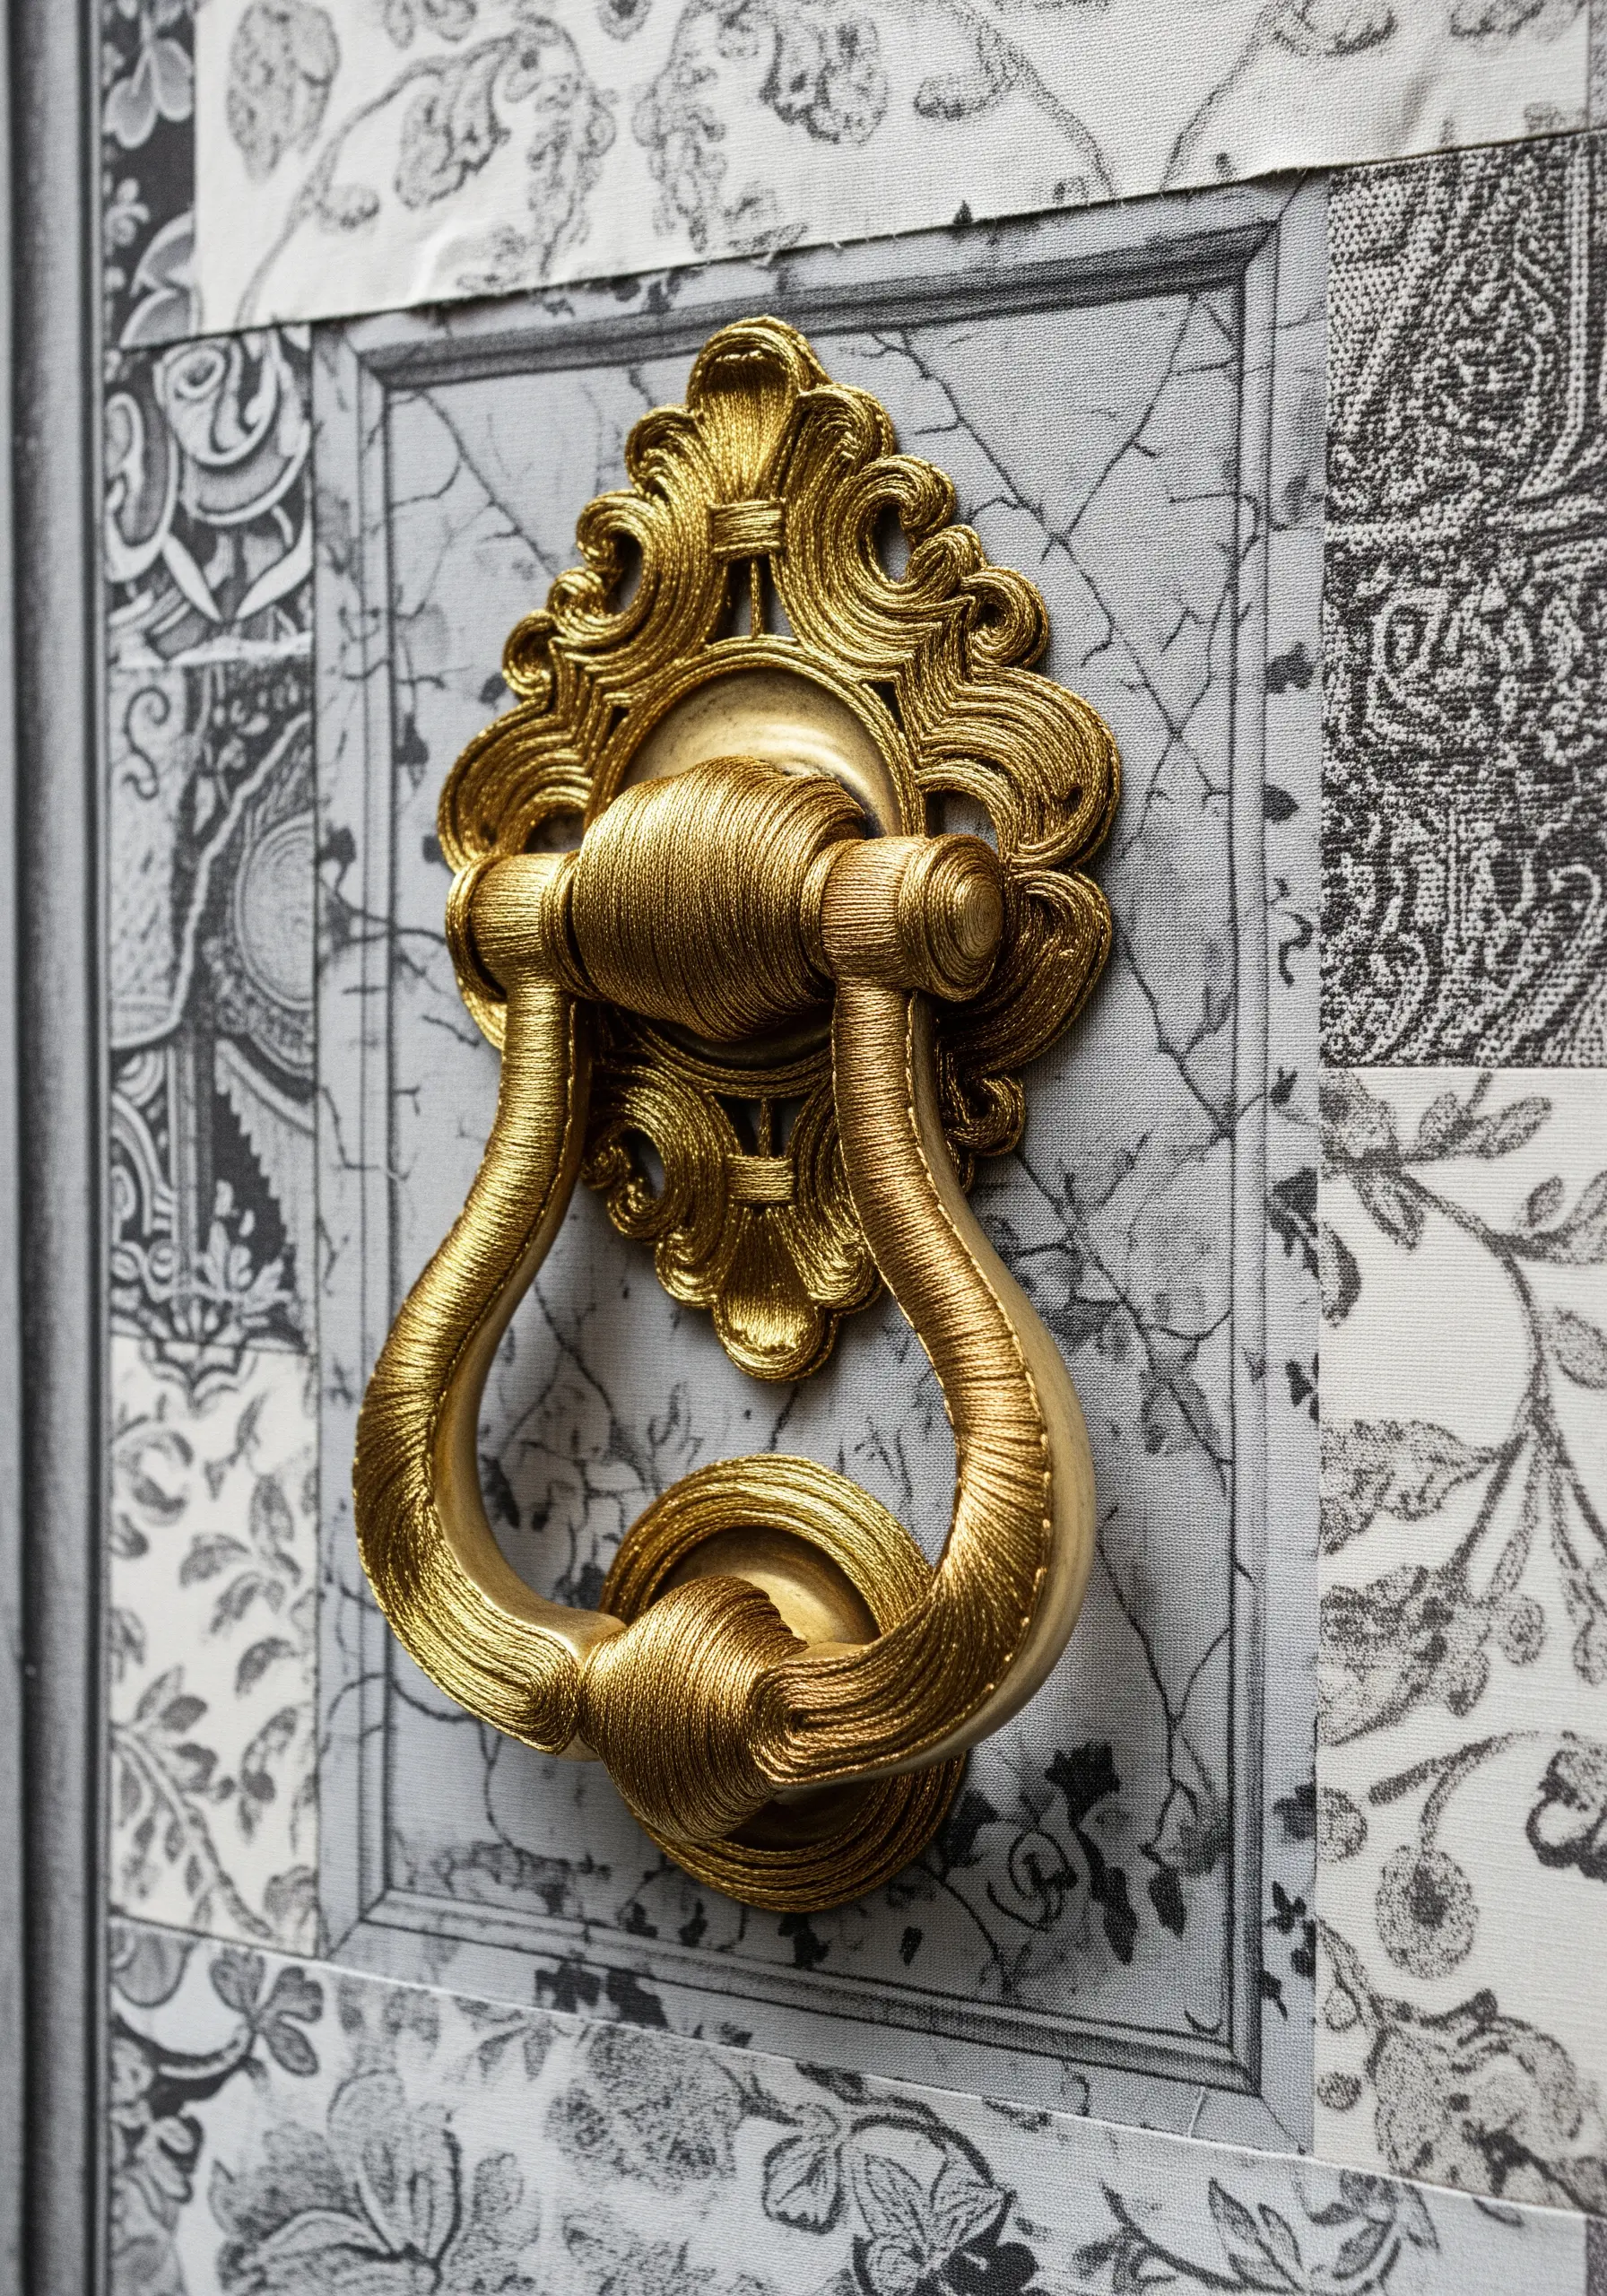
Arrange fabric pieces with architectural or damask prints to create the illusion of paneled doors, ornate wallpaper, or carved stone.
This clever technique provides a sophisticated context for your subject without requiring you to stitch an entire background scene.
A central, heavily embroidered motif in a contrasting color, like this metallic gold knocker, becomes the undeniable focal point.
It gains a sense of weight and importance from its elegant, collaged surroundings.
13. Stitch on a Gradient Fabric for Effortless Color

Start with a pre-dyed gradient or watercolor-style fabric to achieve a smooth, professional-looking color transition that would be very time-consuming to embroider.
This allows the background itself to become a key design element, doing most of the visual work for you.
You can then add simple, graphic embroidery—like these sun rays in metallic thread—that acts as a refined detail rather than a dense filling.
Tiny seed beads add a touch of sparkle that catches the light and enhances the vibrant colors.
14. Tell a Story with Thematic Printed Fabrics

Select a fabric printed with imagery that directly supports your embroidery’s theme, such as a map, vintage script, or botanical illustrations.
Cut and collage pieces of the printed fabric to create a meaningful frame or background for your central design.
This method adds a layer of narrative and intellectual depth to your work.
It transforms a beautifully stitched compass from a simple object into a powerful symbol of travel, history, and exploration.
15. Juxtapose Jewel-Toned Velvets for a Luxe Base

Create an abstract, flowing background by layering irregularly shaped pieces of crushed velvet in rich, saturated jewel tones.
The fabric’s plush pile catches and reflects light differently from every angle, adding a dynamic shimmer and dimension that flat cotton cannot achieve.
This opulent, tactile base is the perfect stage for an equally luxurious motif, like a majestic peacock embroidery stitched with fine, shimmering threads.
16. Combine Rustic Textures for a Farmhouse Aesthetic

Pair humble, natural fabrics like burlap and gingham to create a clean, rustic foundation with immediate character.
The textural contrast between the coarse, plain-woven burlap and the crisp, patterned gingham adds visual interest without overwhelming the composition.
This simple yet effective paneling is perfect for highlighting delicate botanical embroidery.
It lends your work a charming, kitchen-garden feel that is both timeless and comforting.
17. Echo Natural Forms with Frayed, Layered Canvas
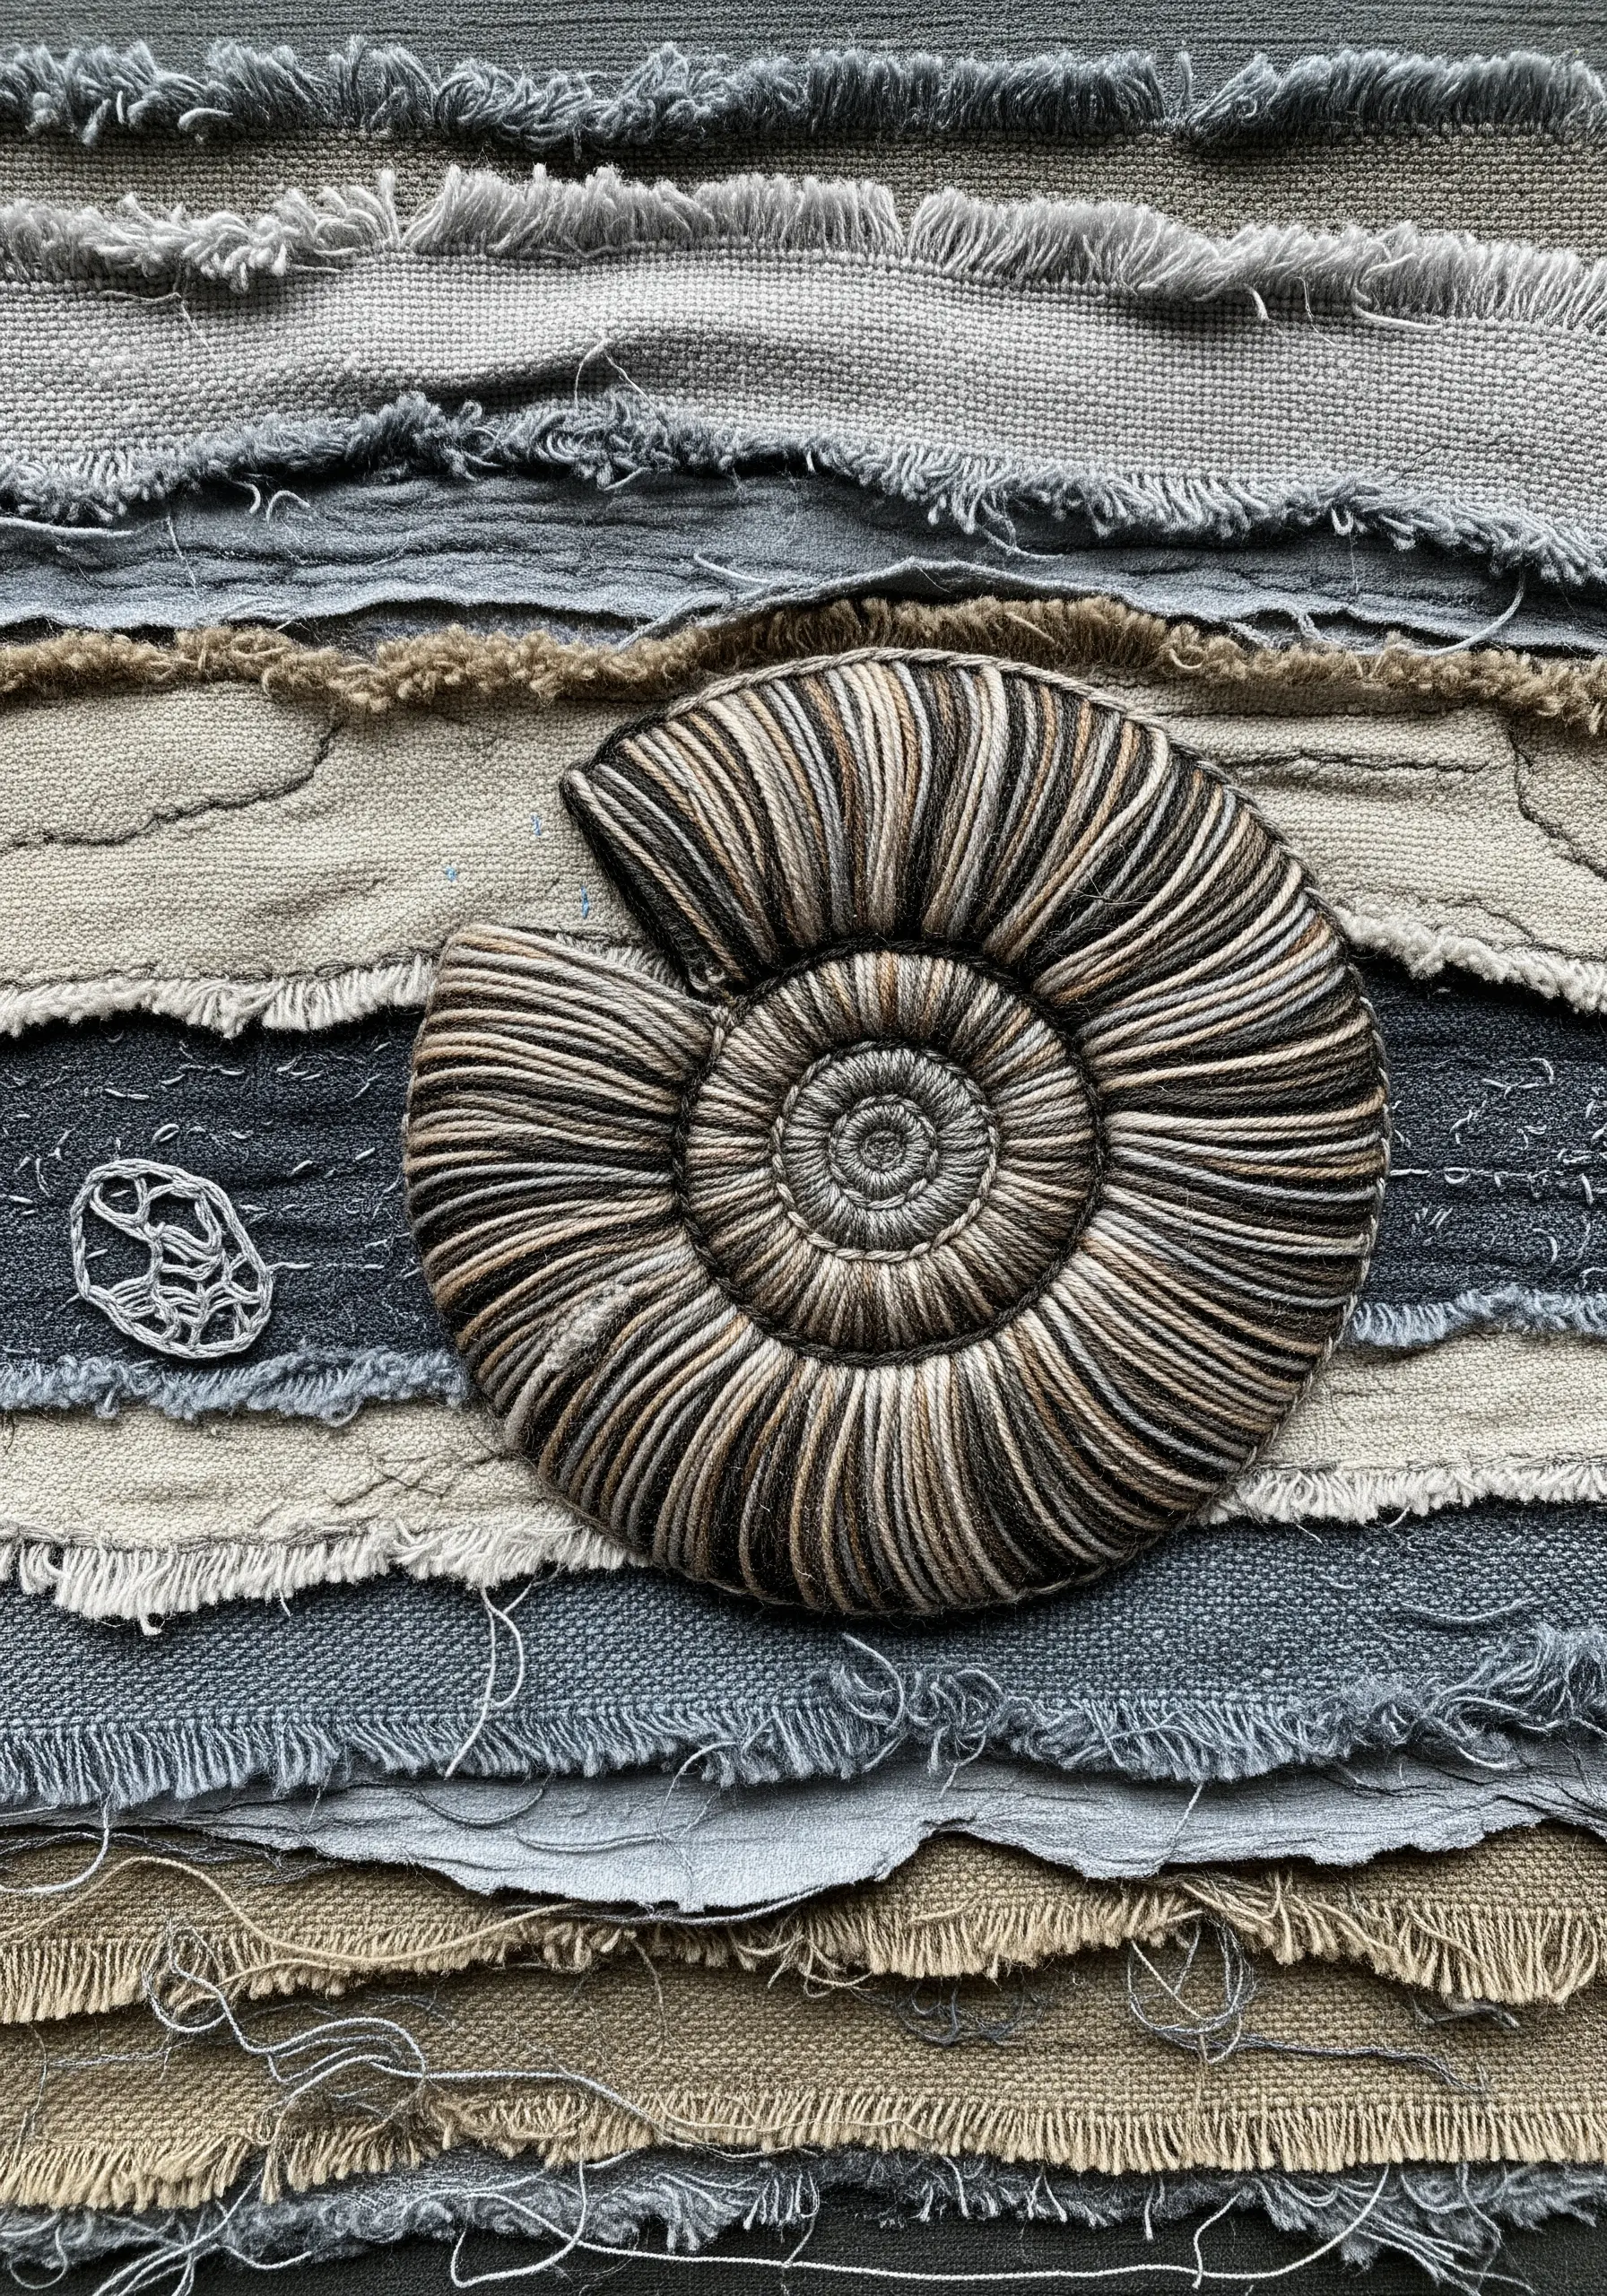
Mimic the appearance of sedimentary rock or a weathered coastline by layering torn strips of canvas and linen in neutral, earthy tones.
Allowing the raw, frayed edges to remain visible is key, as they contribute essential texture and a sense of organic decay.
This rugged base makes a meticulously stitched central motif feel like a genuine archaeological discovery.
Your embroidered ammonite appears not just placed on top, but truly unearthed from within the fabric layers, creating a powerful narrative.
18. Create a Stained Glass Effect with Sheer Fabrics
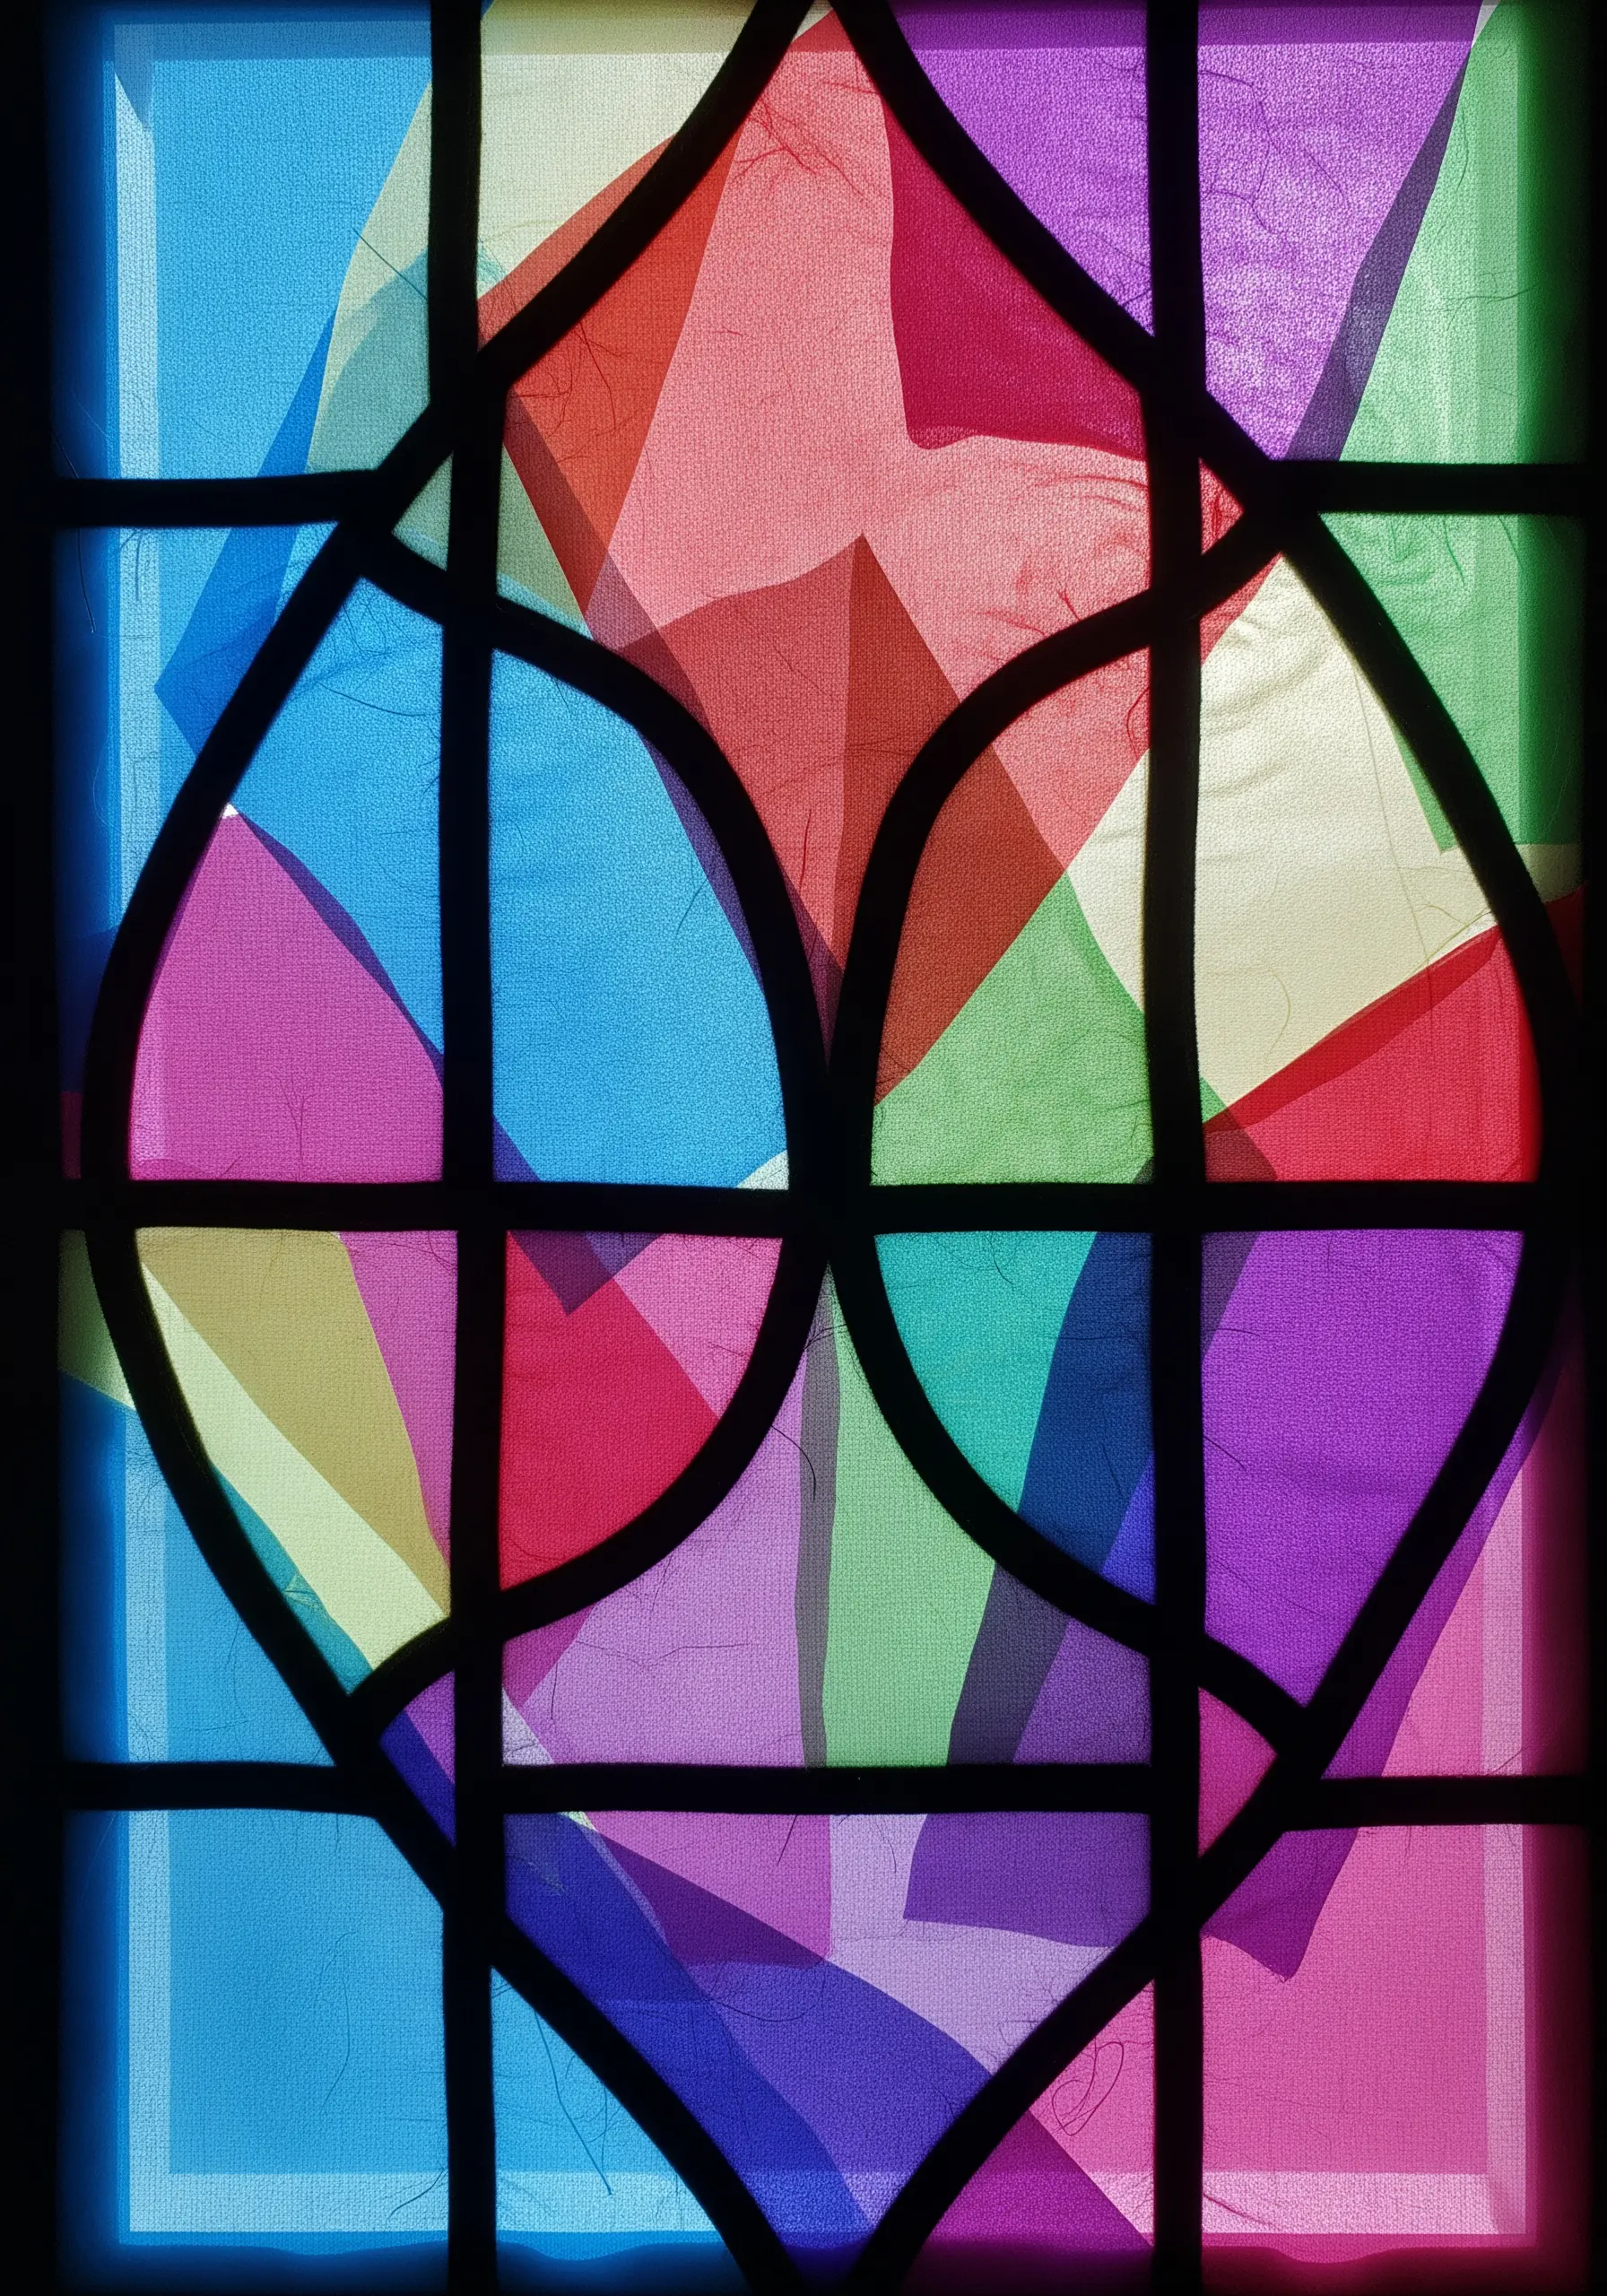
Use wide black ribbon or strips of felt to create the rigid “leading” lines of a window frame on your base fabric.
Fill the negative spaces with layered pieces of colorful, sheer fabrics like organza, chiffon, or tulle.
As the translucent fabrics overlap, they will blend to create new shades, beautifully mimicking the luminous quality of stained glass.
This is a stunning no-stitch collage technique that provides a vibrant, light-filled background for minimal or no additional embroidery.


