
That collection of leftover materials you have—the fabric scraps, the half-used skeins of thread, the lone buttons—isn’t clutter. Think of it as your personal library of textures and colors, a quiet archive of every creative project you’ve poured your heart into.
The challenge isn’t just to ‘use up’ these supplies, but to see them with fresh eyes. Instead of remnants, you have ingredients. The goal is to move beyond simple utility and toward intentional artistry, combining these disparate pieces into something that feels whole, considered, and uniquely yours.
Take a moment to simply look at what you have. Notice the way a floral cotton feels next to a rough piece of linen, or how a single strand of metallic thread can illuminate a neutral yarn. This is where the real work begins: not in the stitching, but in the seeing. You have everything you need to make something beautiful right now.
1. Composed Textile Mosaic Wall Art
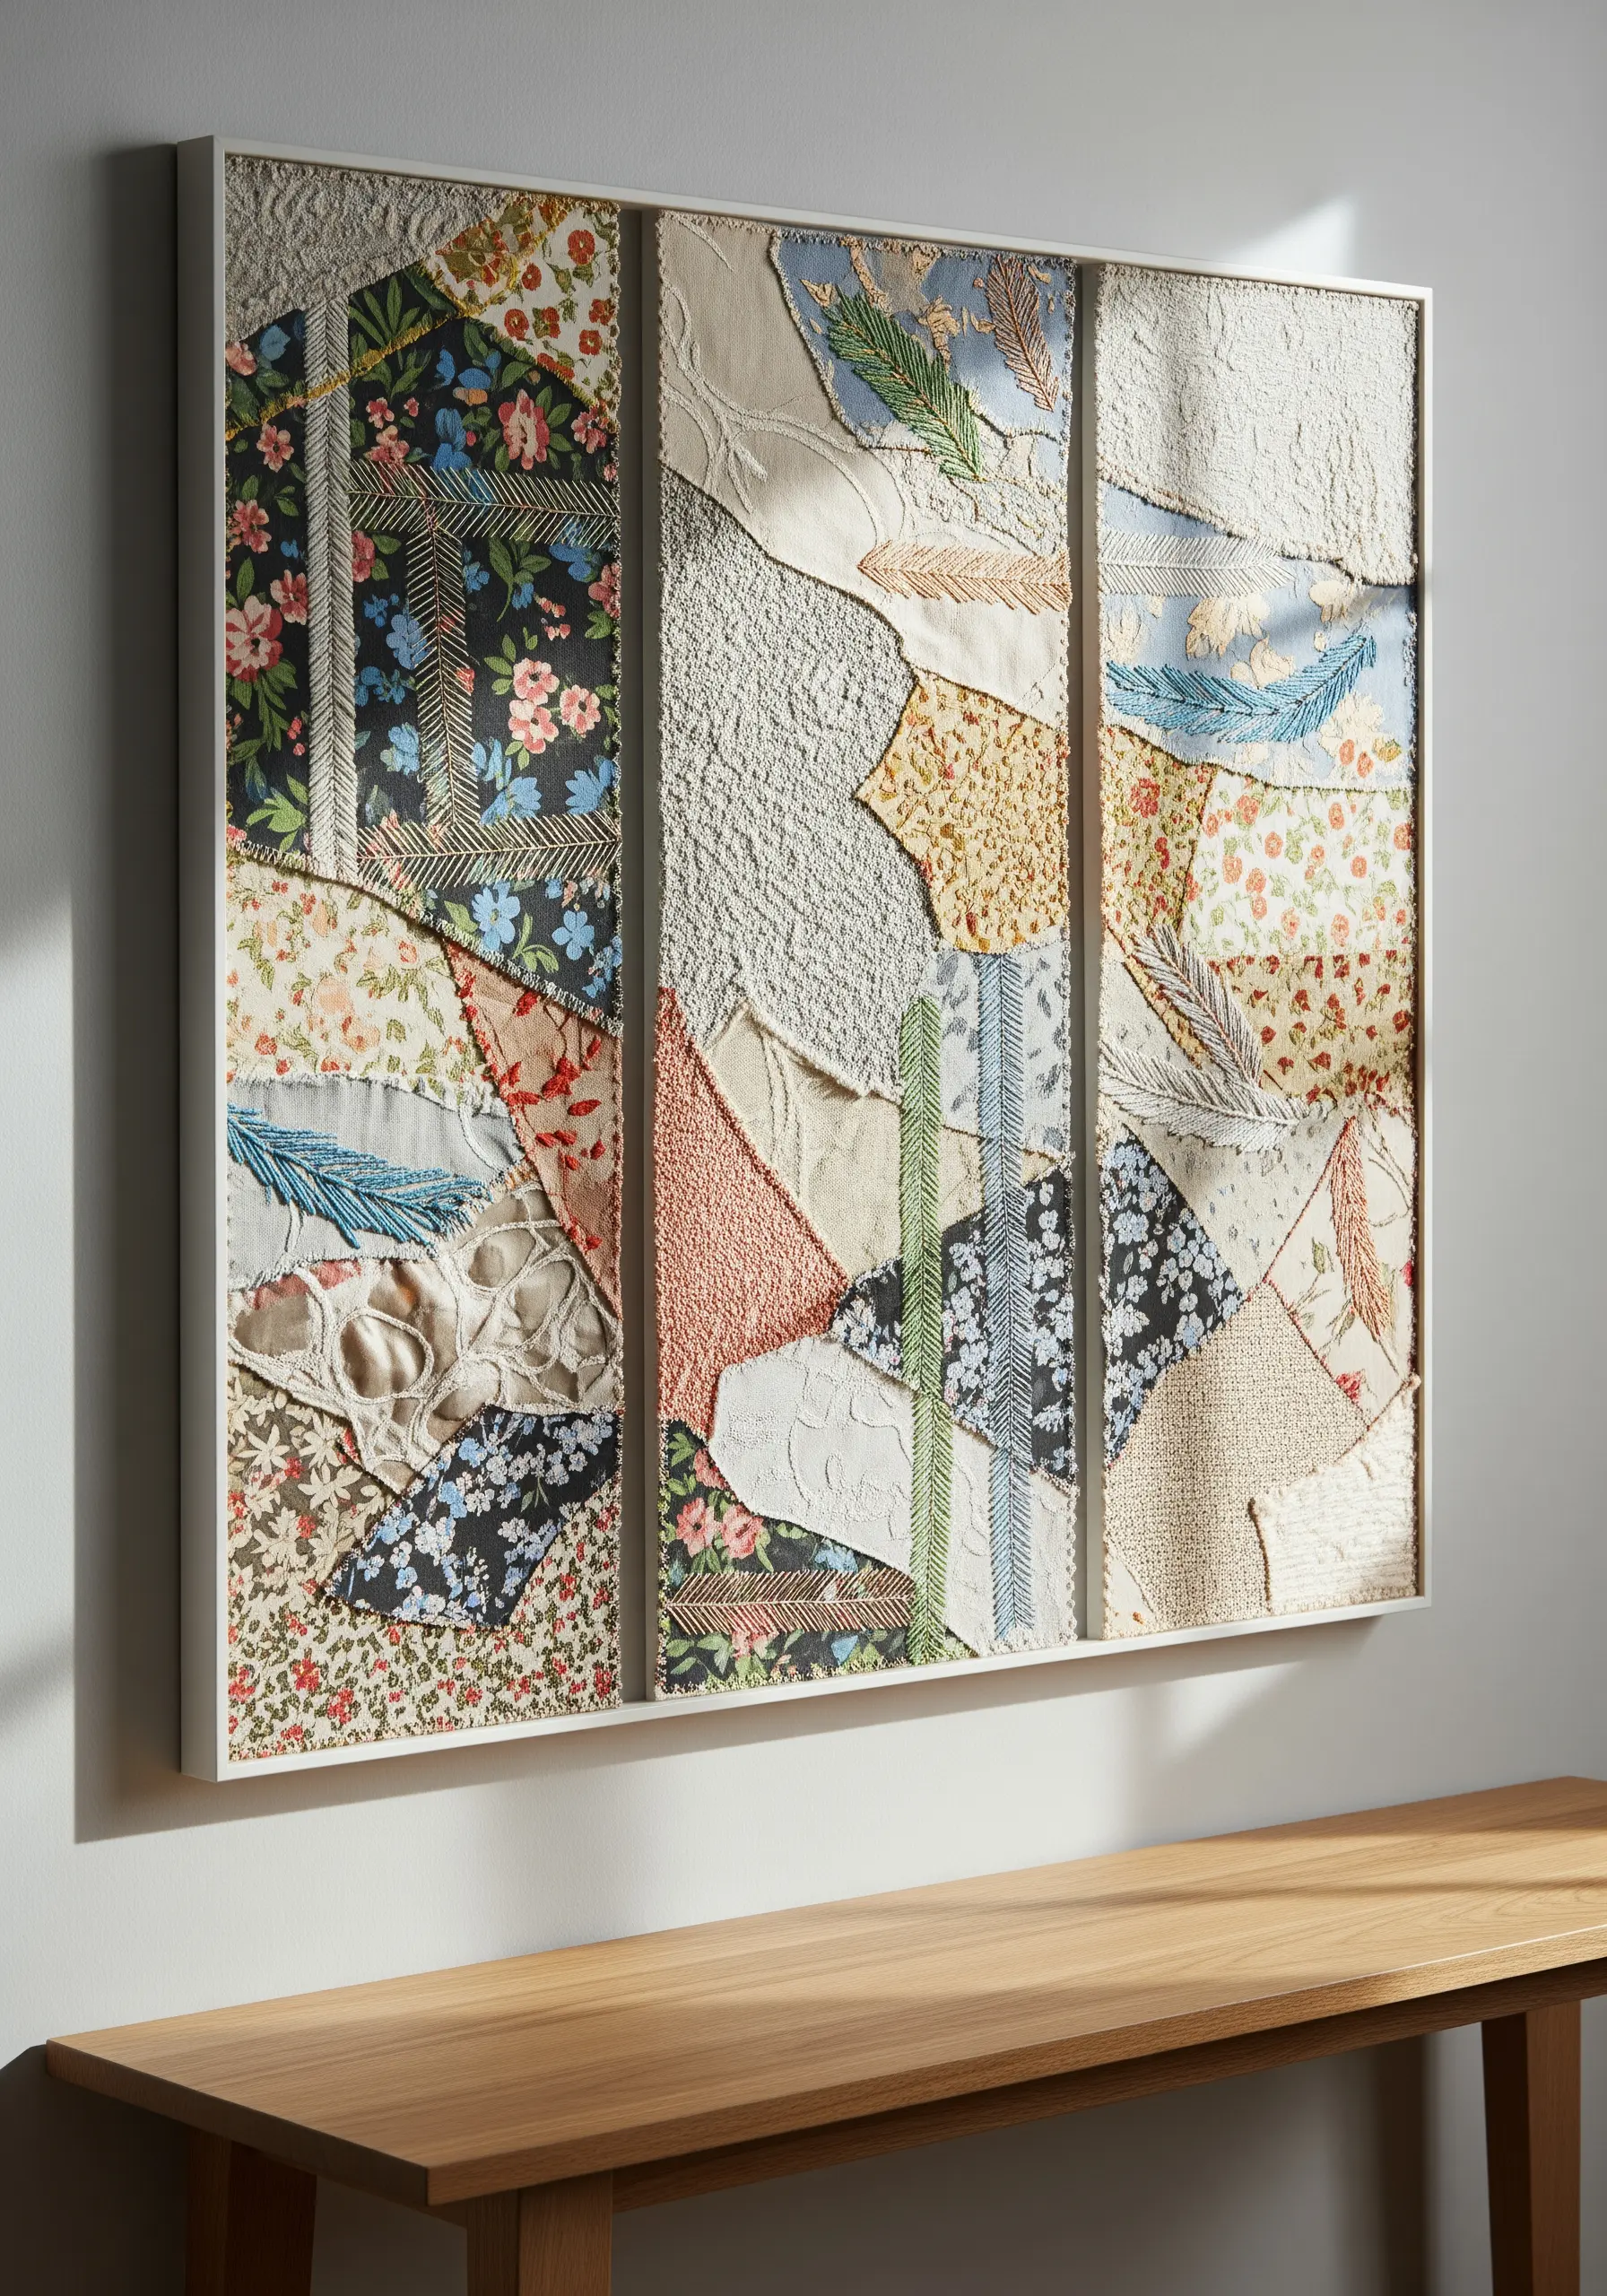
Transform fabric remnants into a cohesive triptych by focusing on composition and textural balance.
Begin by arranging your scraps on a backing fabric, playing with the flow of color and pattern across the three panels.
Contrast busy florals with solid, textured pieces like the densely stitched cream fabric, which you can recreate using masses of French knots or seed stitches.
This creates areas of visual rest, preventing the final piece from feeling chaotic.
Finally, unify the disparate elements by adding subtle, hand-stitched lines—like a simple running stitch—that cross over the patchwork seams, tying the entire composition together.
The goal is to create a visual conversation between materials, not just a collection of scraps.
2. Sculptural Yarn-Wrapped Vessels
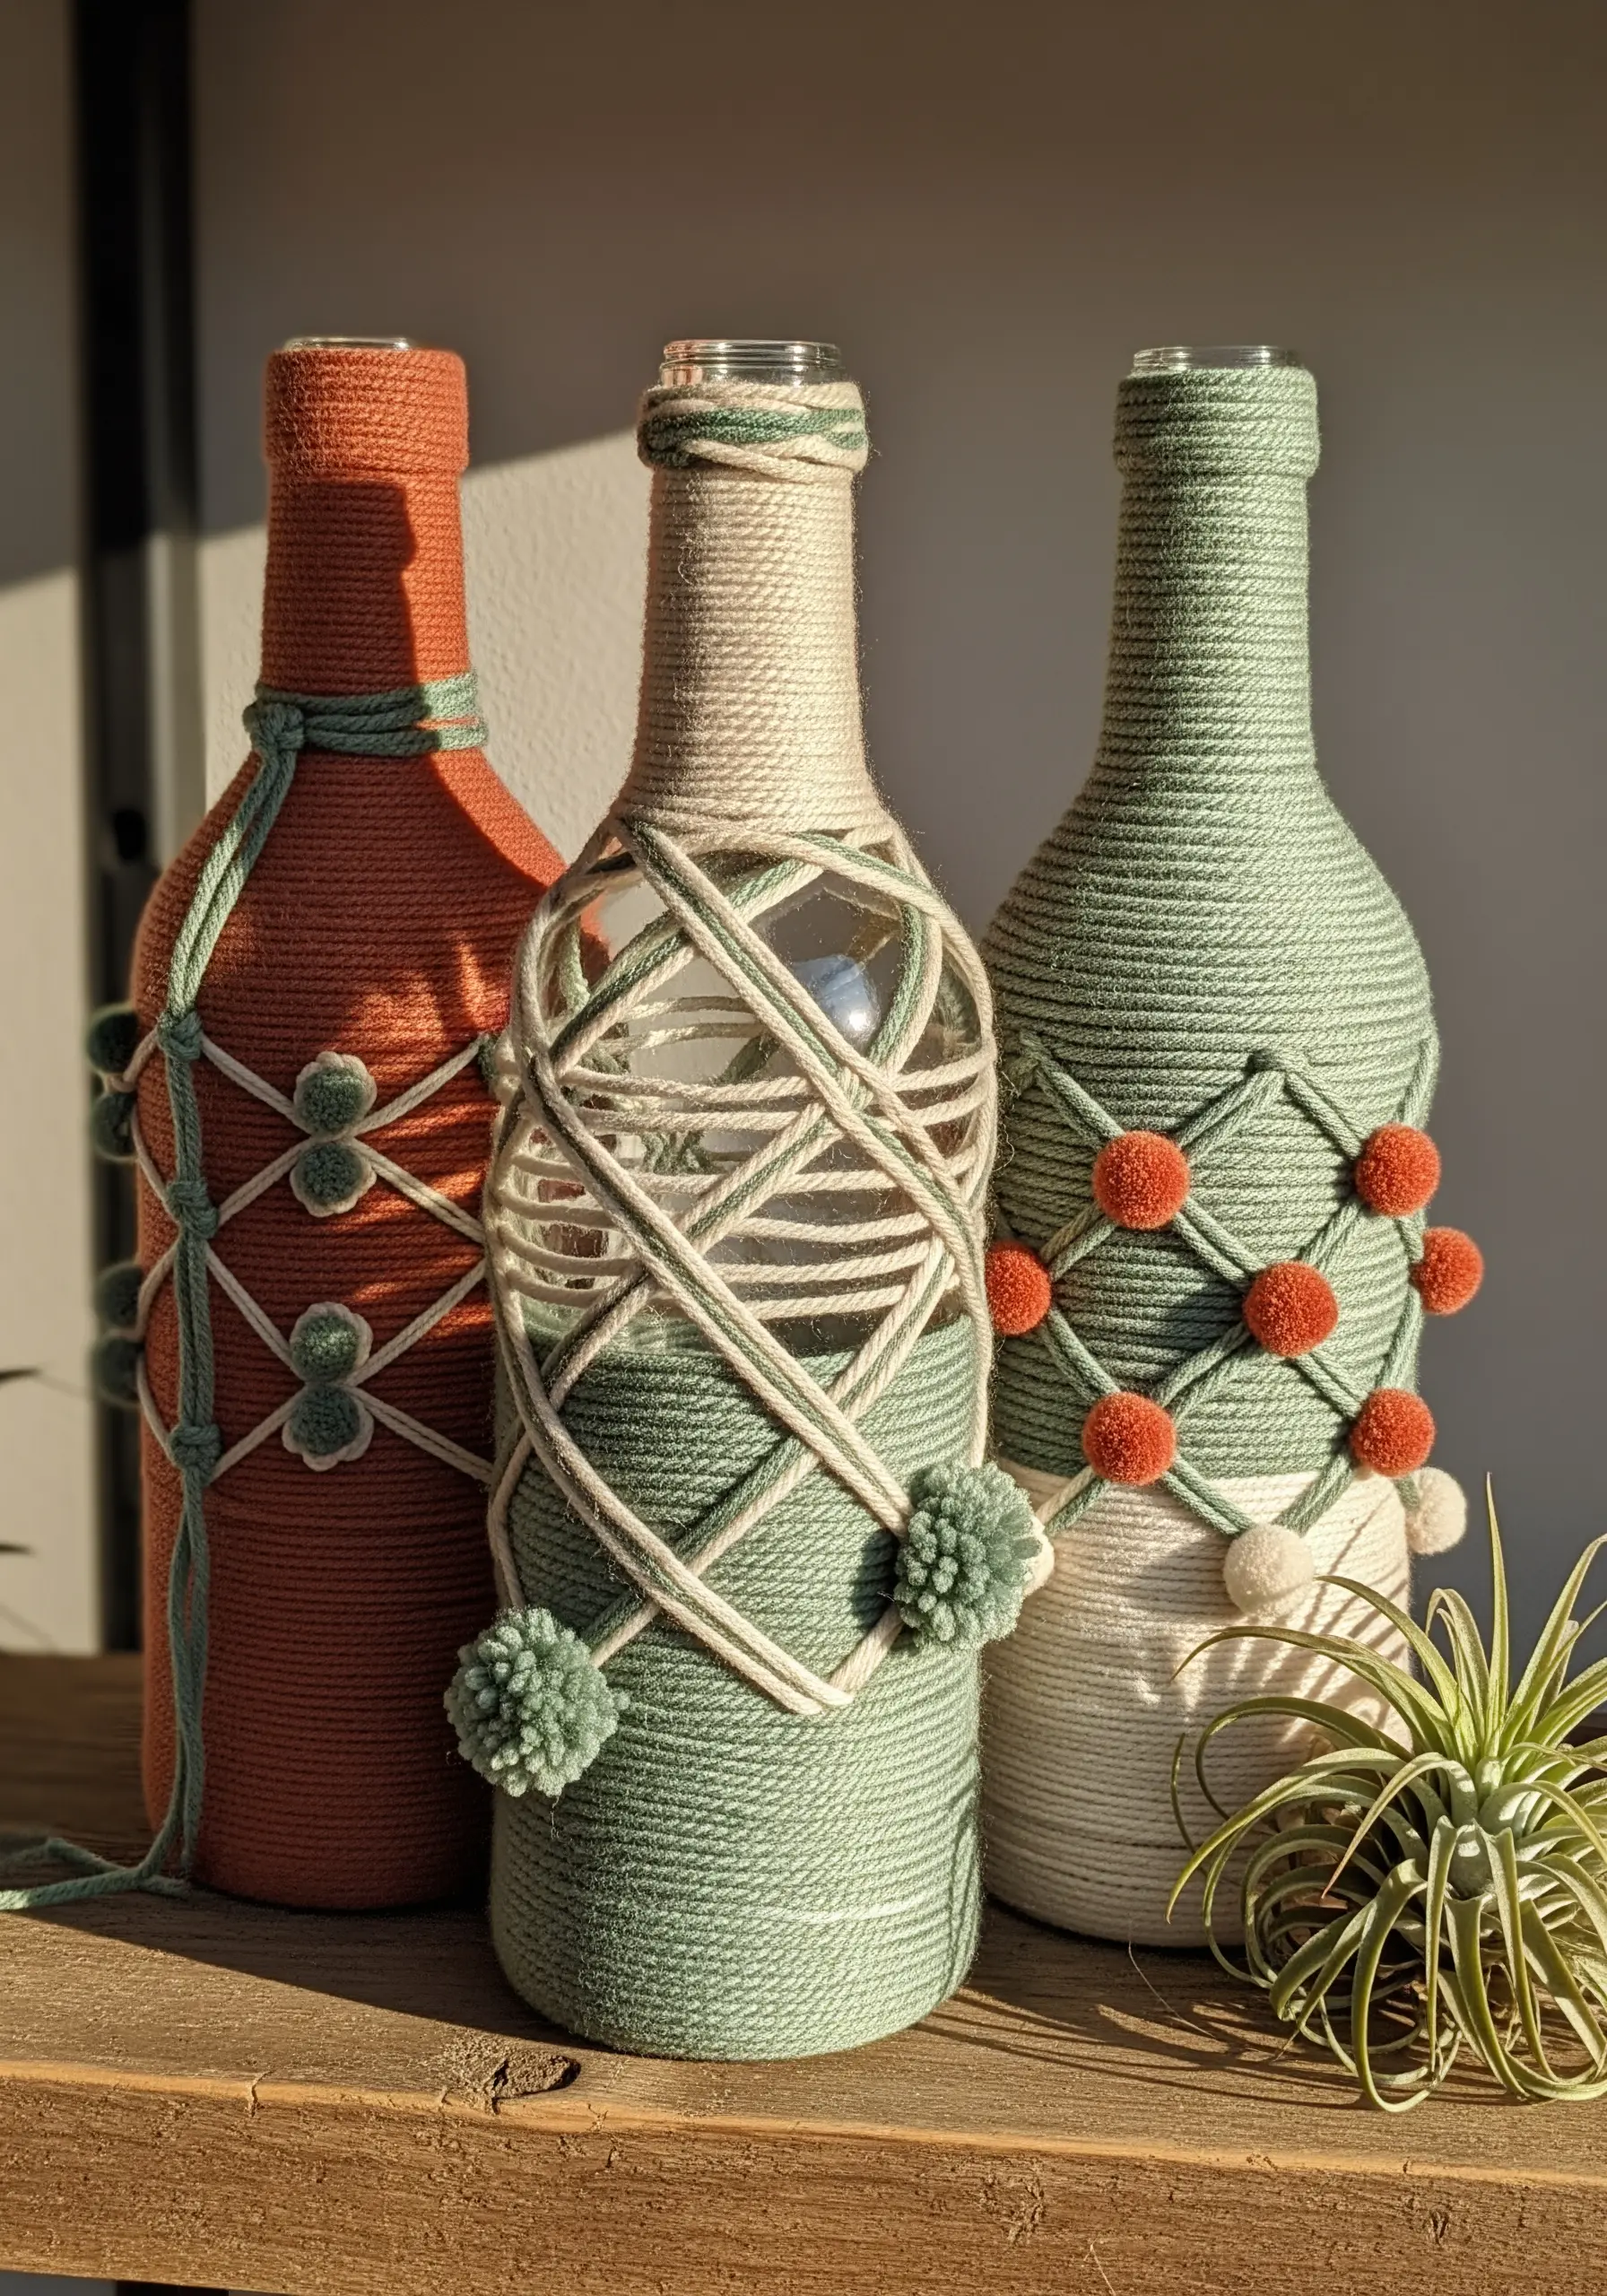
Elevate empty bottles from simple decor to sculptural art by using yarn to create form and texture.
Wrap the bottle tightly with a base color, ensuring each strand sits flush against the last for a seamless surface.
Use a contrasting yarn to create a graphic overlay, experimenting with macrame-inspired diamond patterns or simple diagonal lines.
This technique is not just decorative; it’s one of the foundational yarn wall art techniques adapted for a three-dimensional object.
Anchor your knots with a dab of fabric glue on the underside for a clean finish, and add small, handmade pom-poms for a playful, textural punctuation.
3. Embellished Button & Bead Mosaic
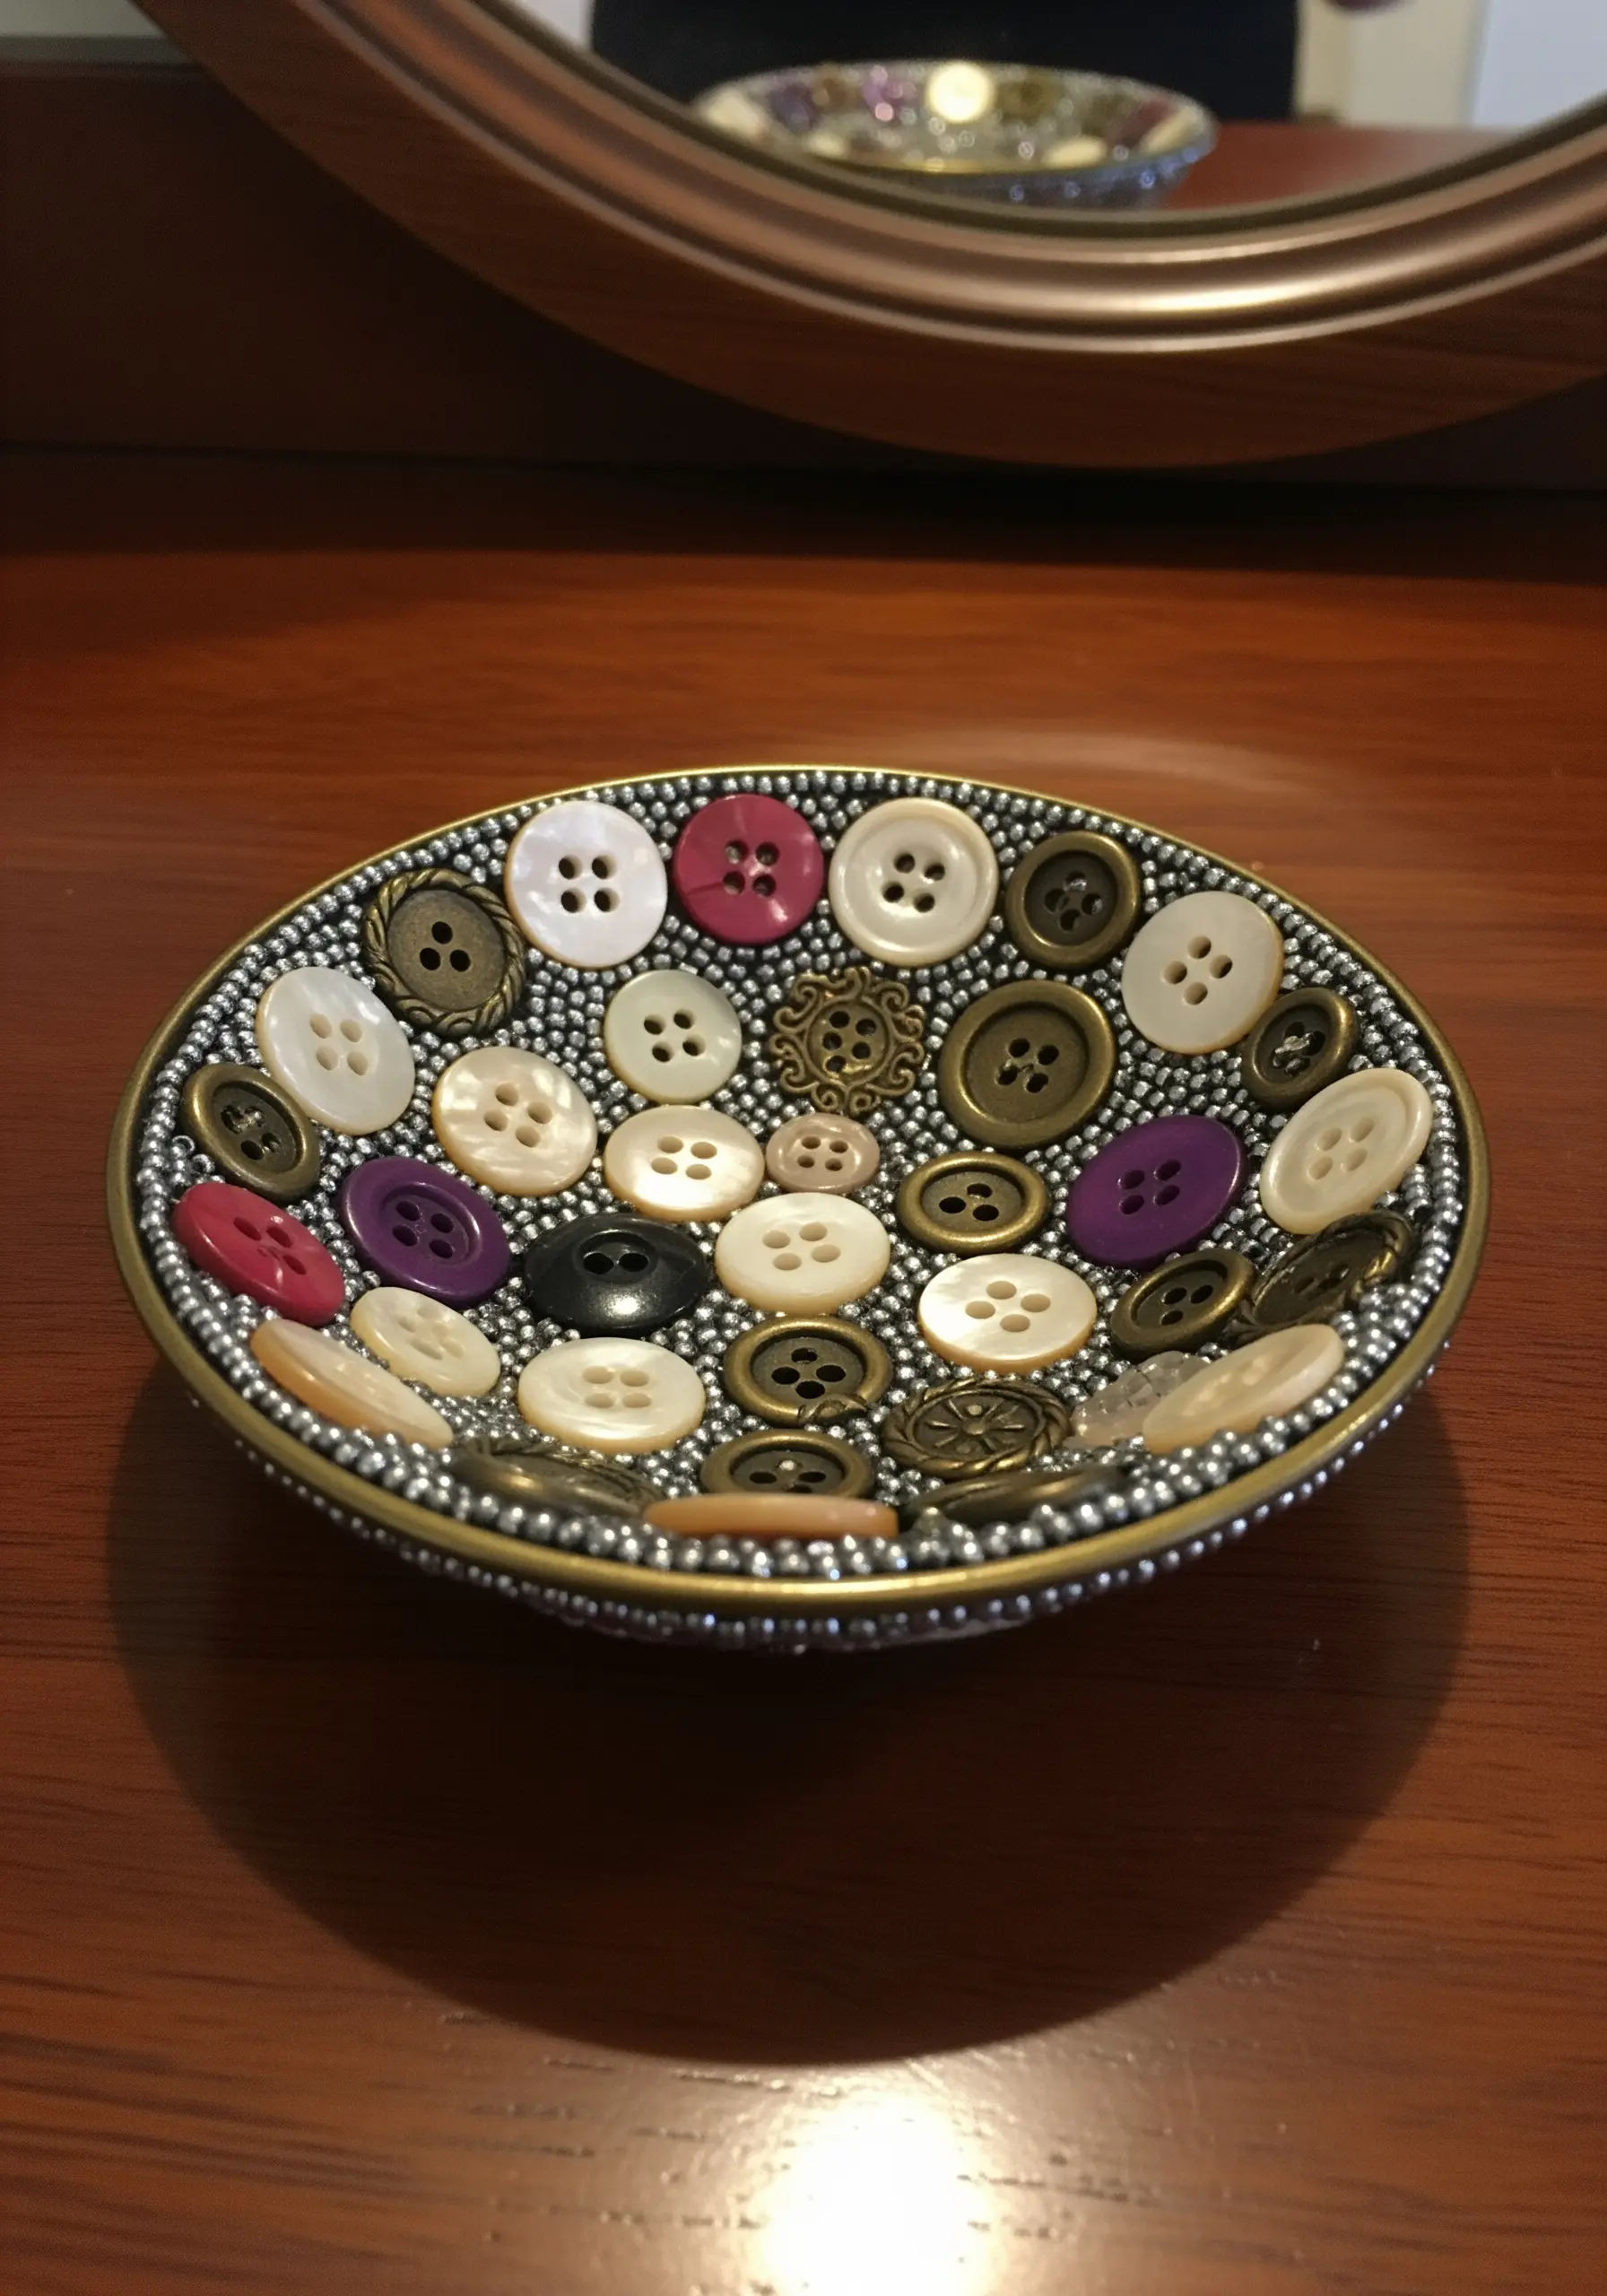
Create a durable and intricate mosaic dish by treating buttons and beads as you would tiles.
Start by arranging your largest buttons to establish the main design, then fill the larger gaps with medium-sized buttons, creating a sense of rhythm.
Use a strong, clear-drying adhesive suitable for non-porous surfaces.
The real artistry comes from filling the remaining tiny spaces with seed beads; this technique, borrowed from beading embroidery, gives the piece a professional, filled-in look and a satisfying texture.
It transforms a simple collection of fasteners into one of many creative handmade trinkets that everyone will notice.
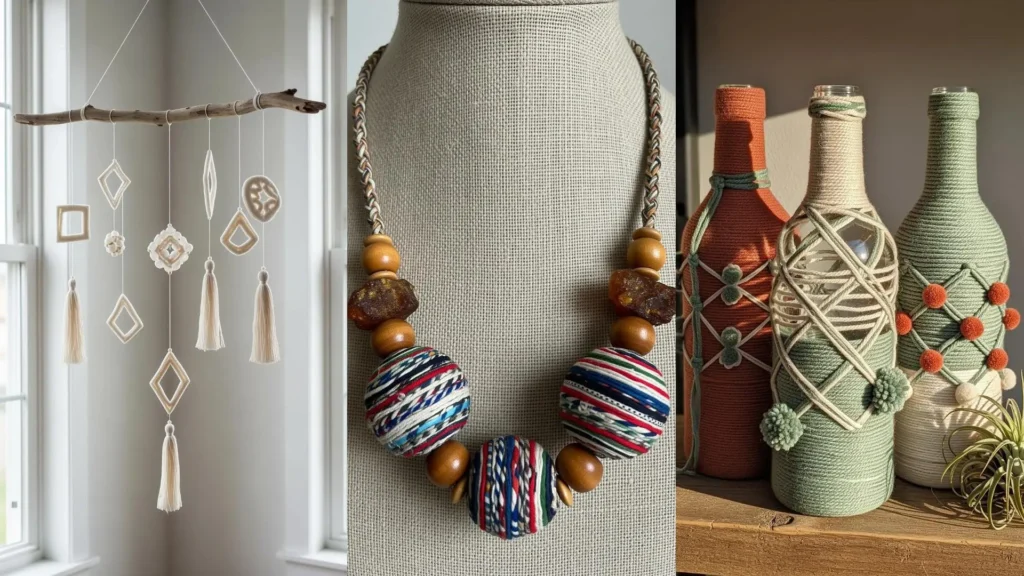
4. Balanced Geometric Fiber Mobile
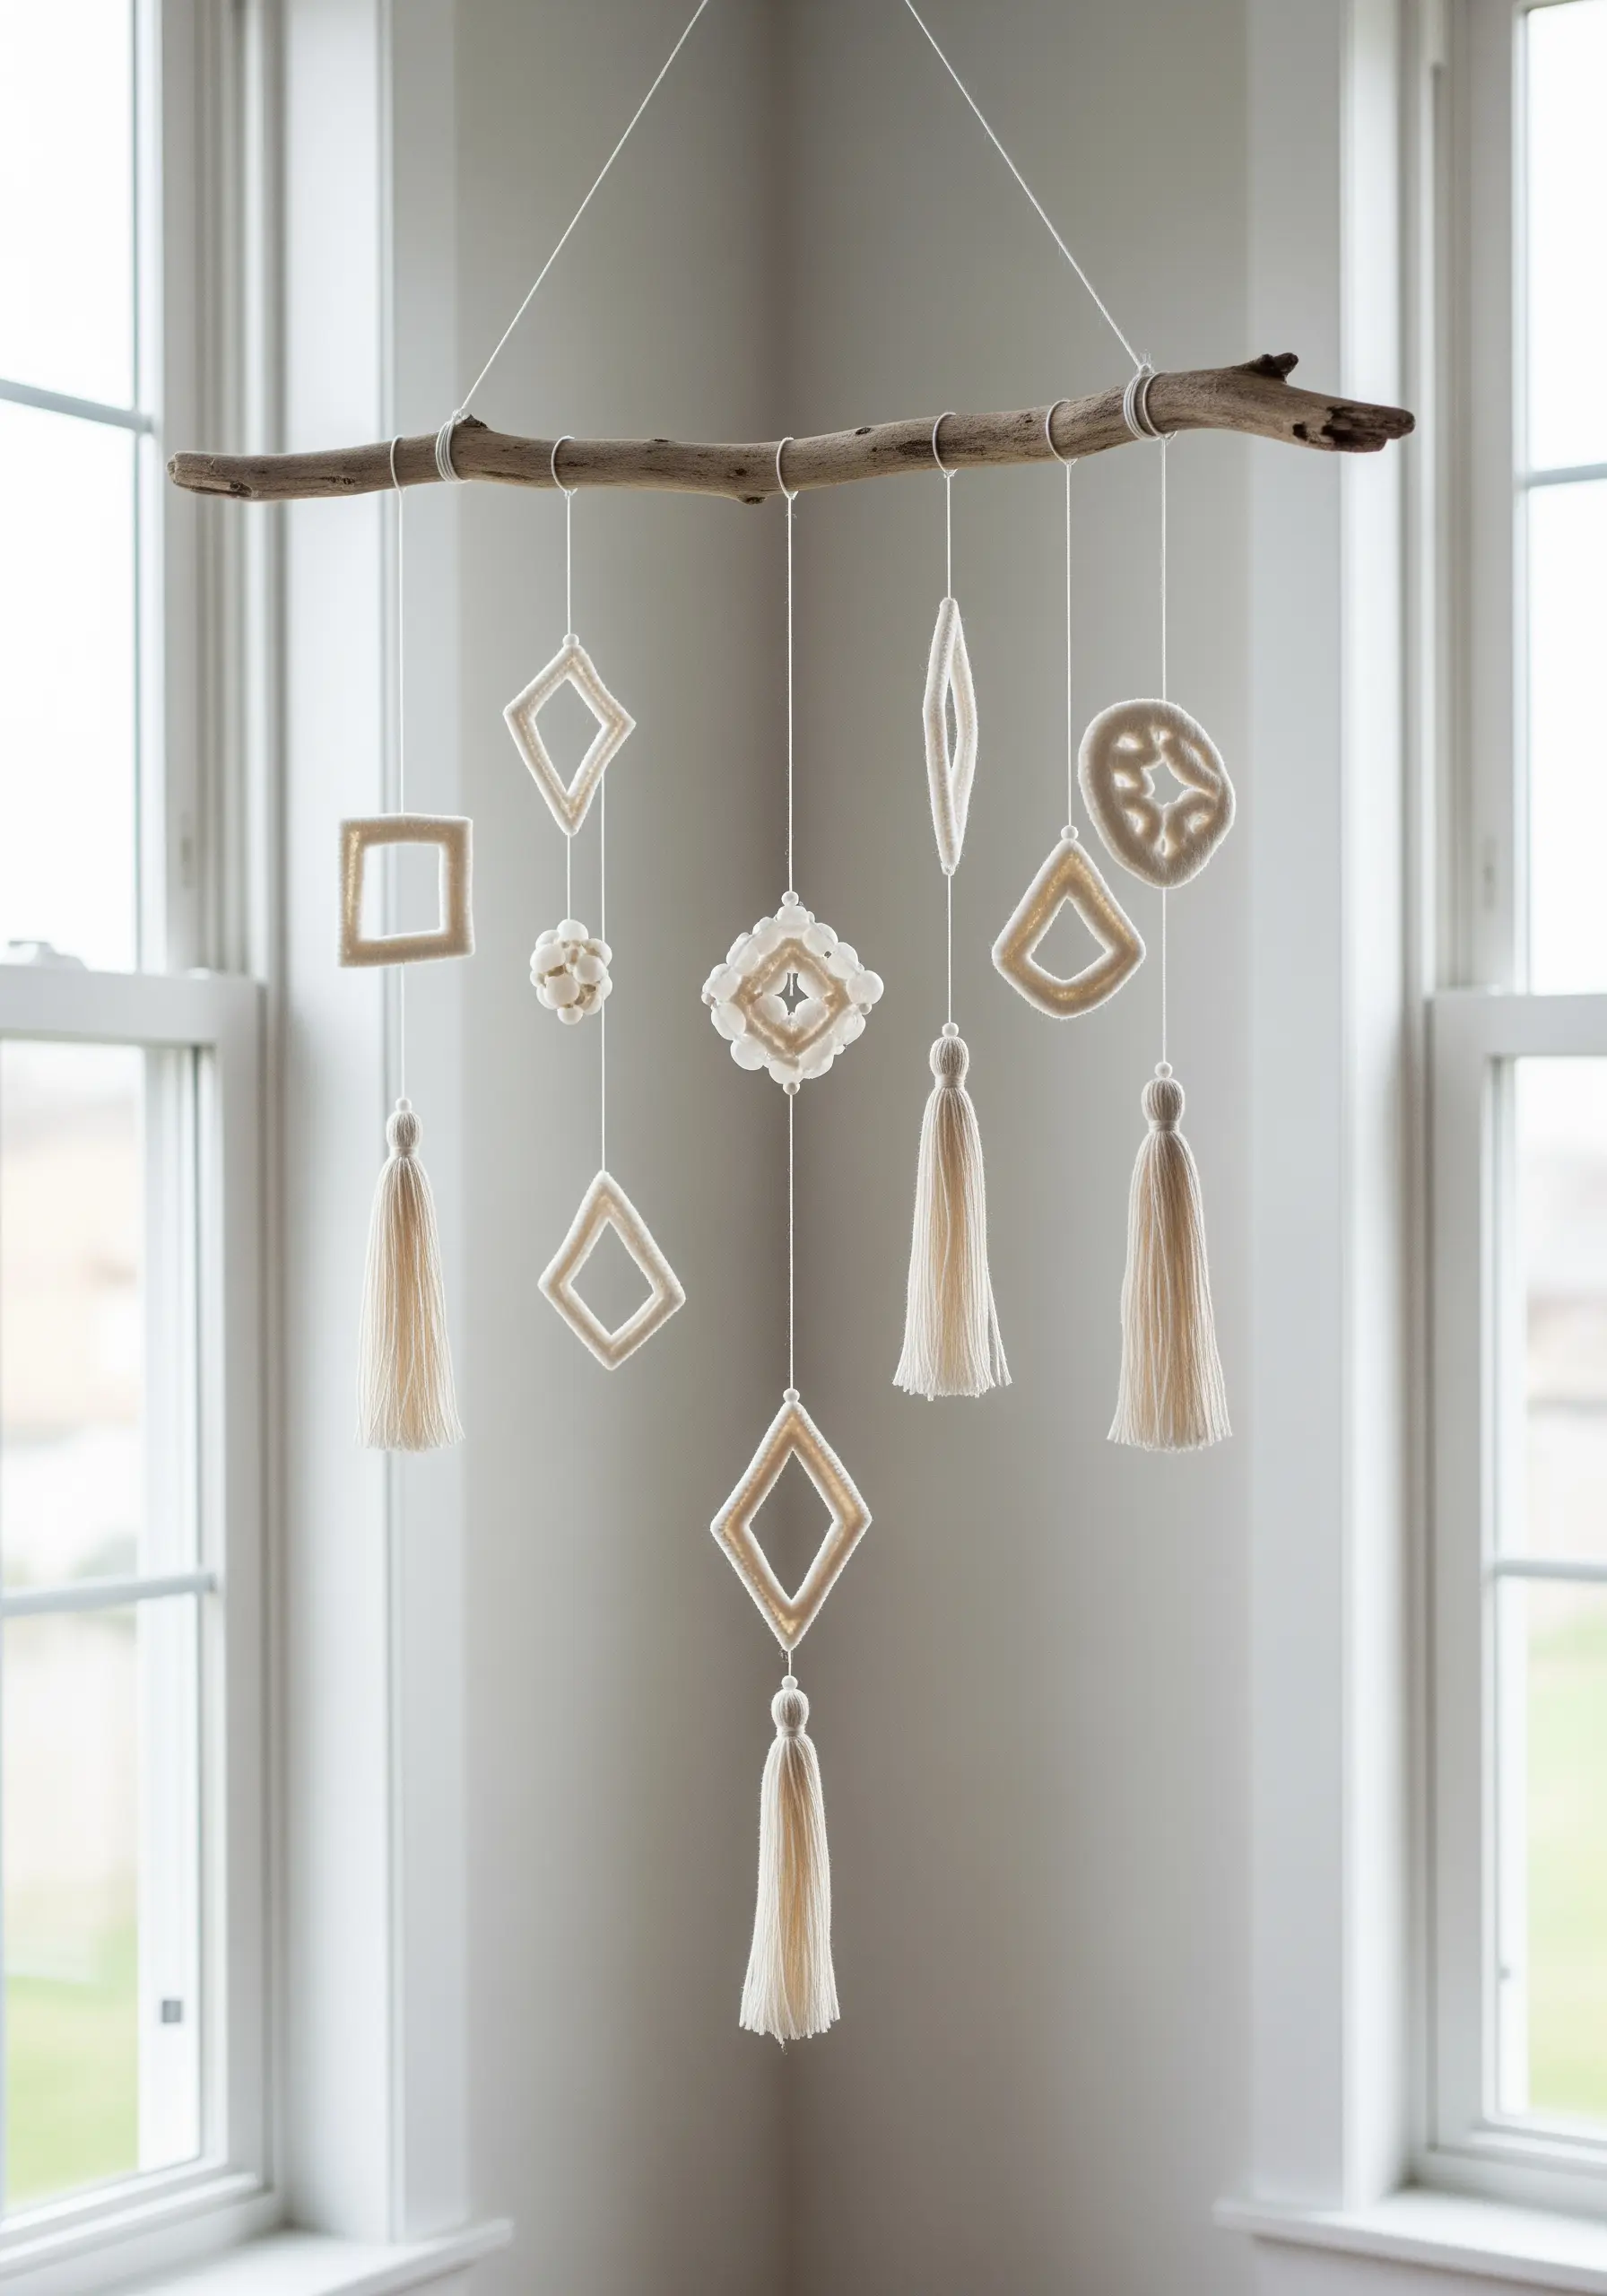
Construct a serene and modern mobile by focusing on balance, repetition, and the simplicity of wrapped forms.
Create your geometric shapes from lightweight wire or even sturdy cardstock, then wrap them meticulously with a neutral-colored yarn or floss.
The key to an elegant result is consistency in wrapping tension.
Assemble the mobile on a natural element like a piece of driftwood, hanging each piece with a single, strong thread.
Incorporate tassels to add vertical weight and gentle movement, ensuring the entire piece hangs in equilibrium.
These soft, neutral tone embroidery ideas translate beautifully into three-dimensional art.
5. Appliquéd Lace & Fabric Lampshade
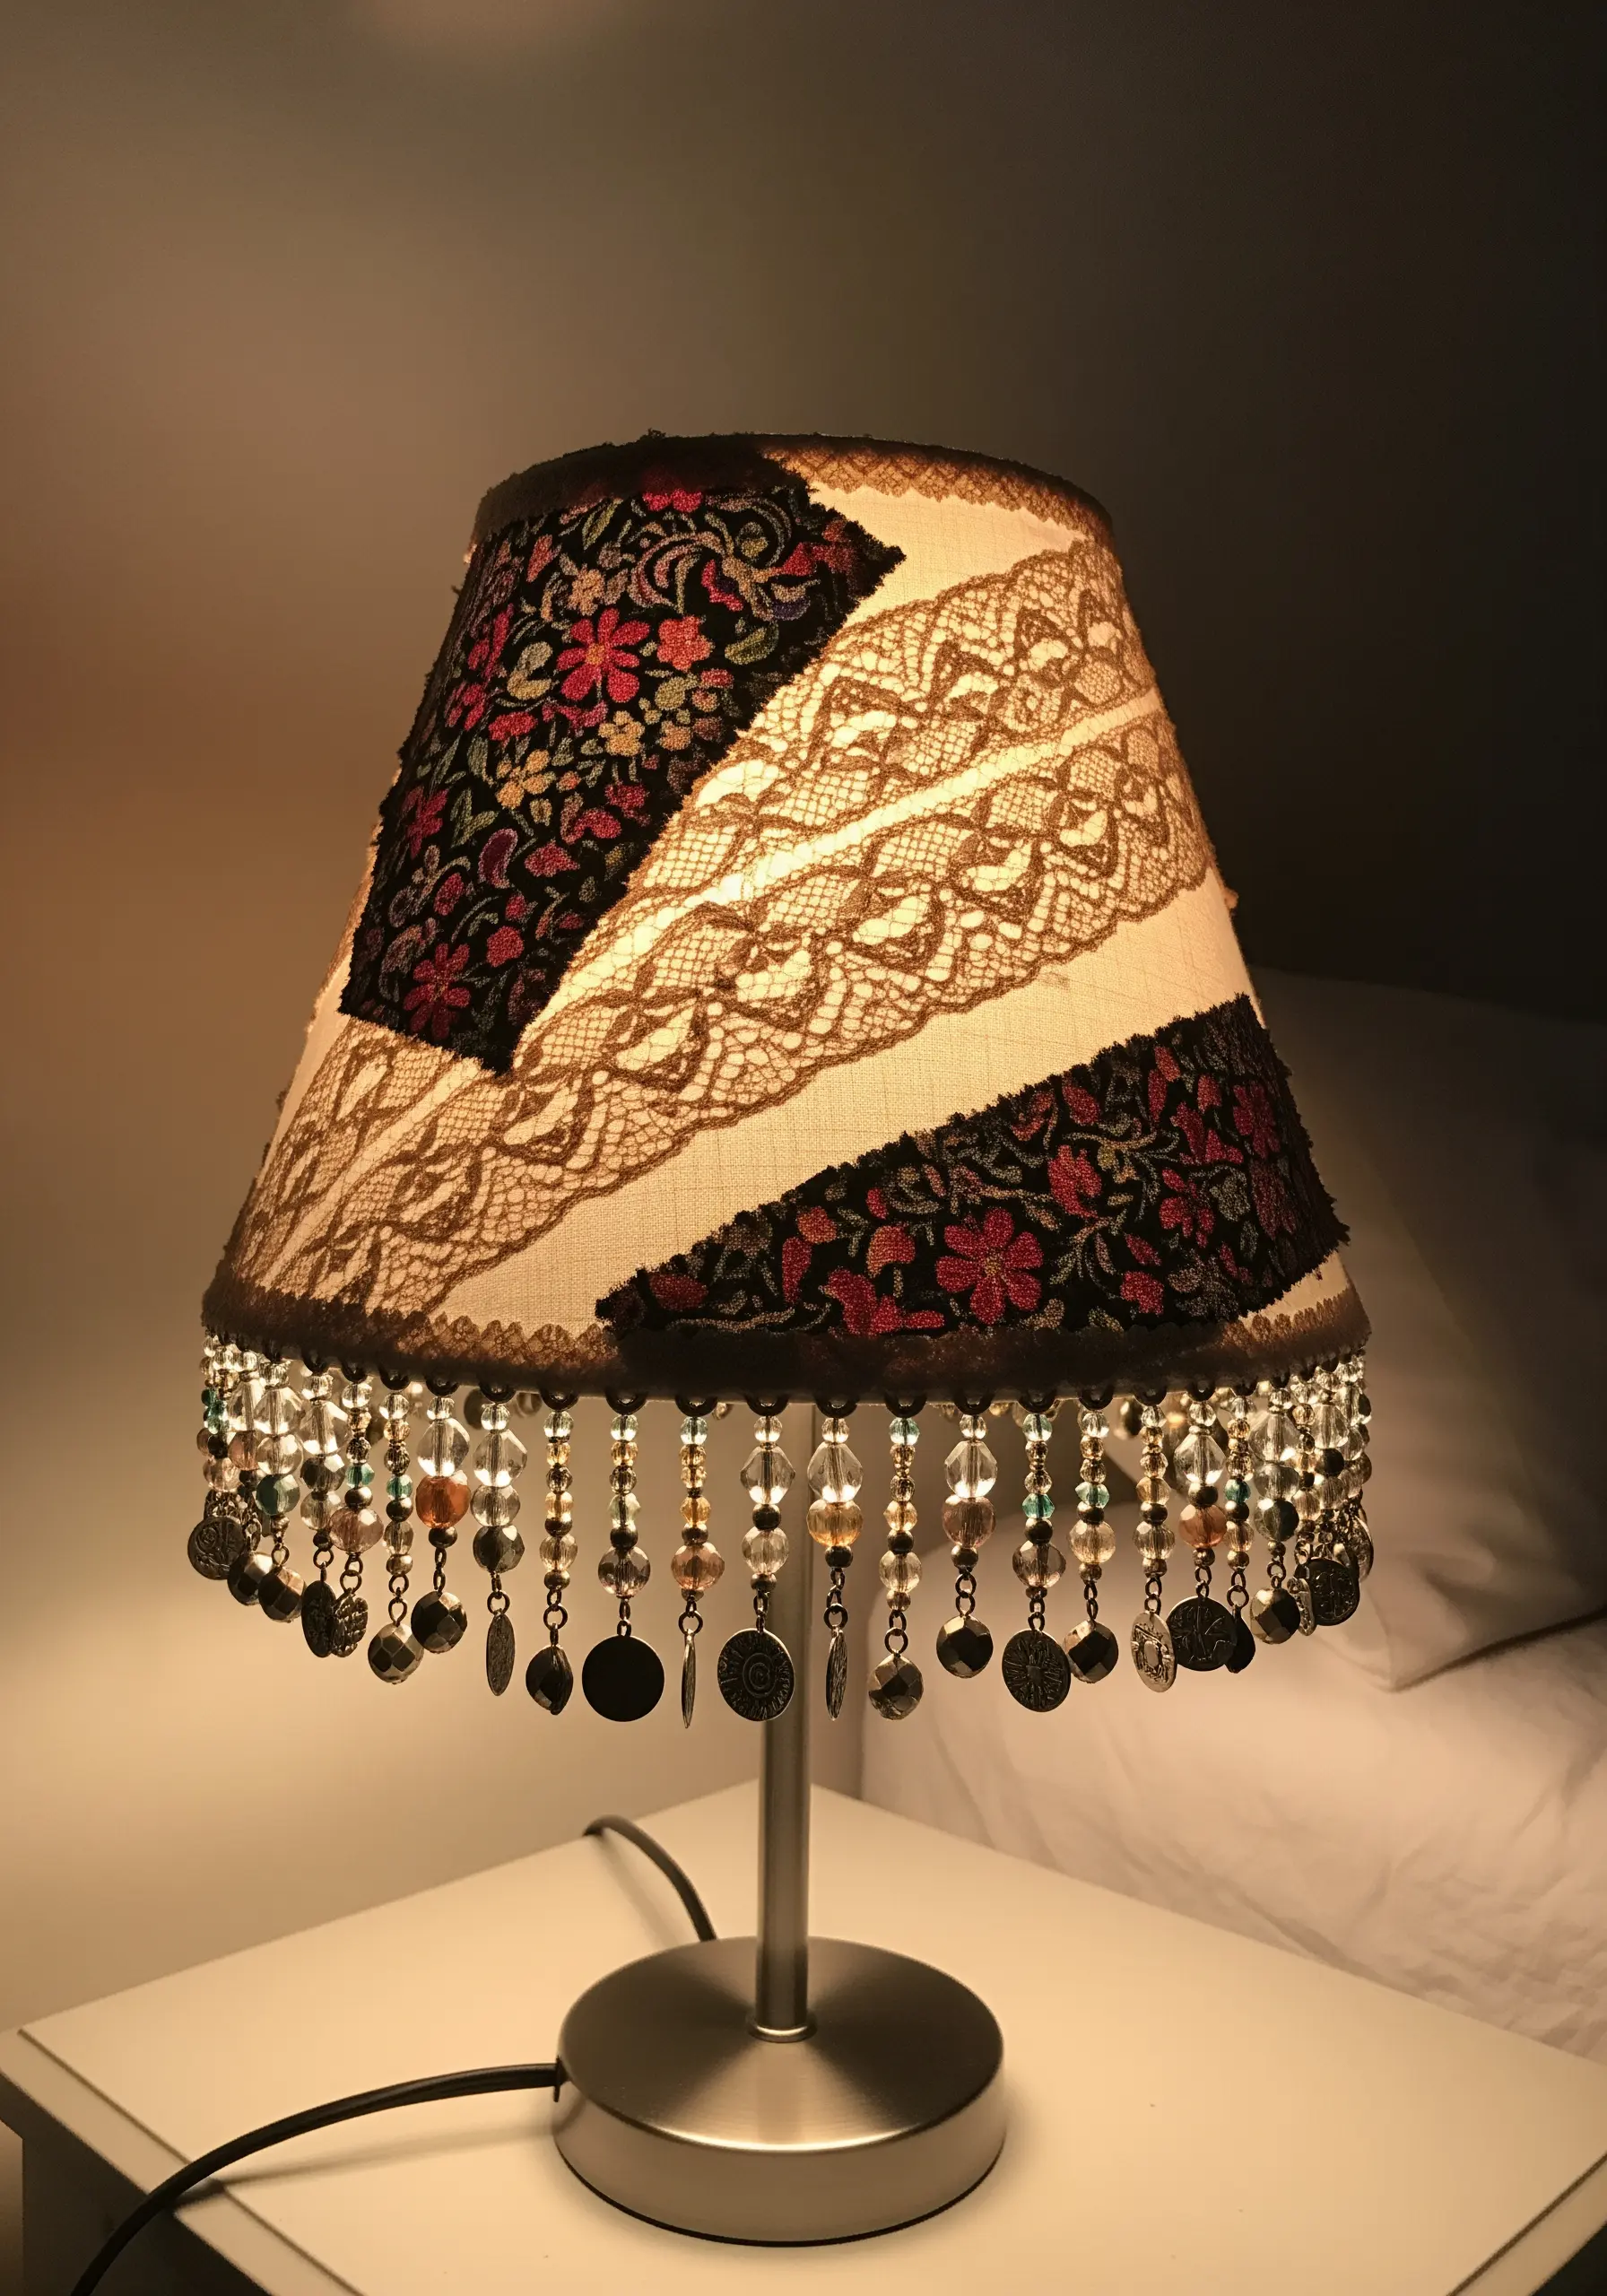
Transform a plain lampshade into a bohemian light source by layering fabric scraps and vintage lace.
To apply fabric to a curved surface, first press your fabric scraps and cut them into clean shapes.
Use a spray adhesive or a thin layer of fabric-safe decoupage glue to position them.
Layer delicate lace over the opaque fabrics to create a beautiful interplay of light and shadow when the lamp is on.
For a final touch of polish, secure the edges of the fabric pieces with a small, discreet whipstitch and add a fringe of leftover beads and charms for weight and sparkle.
6. Expressive Patchwork Journal Cover
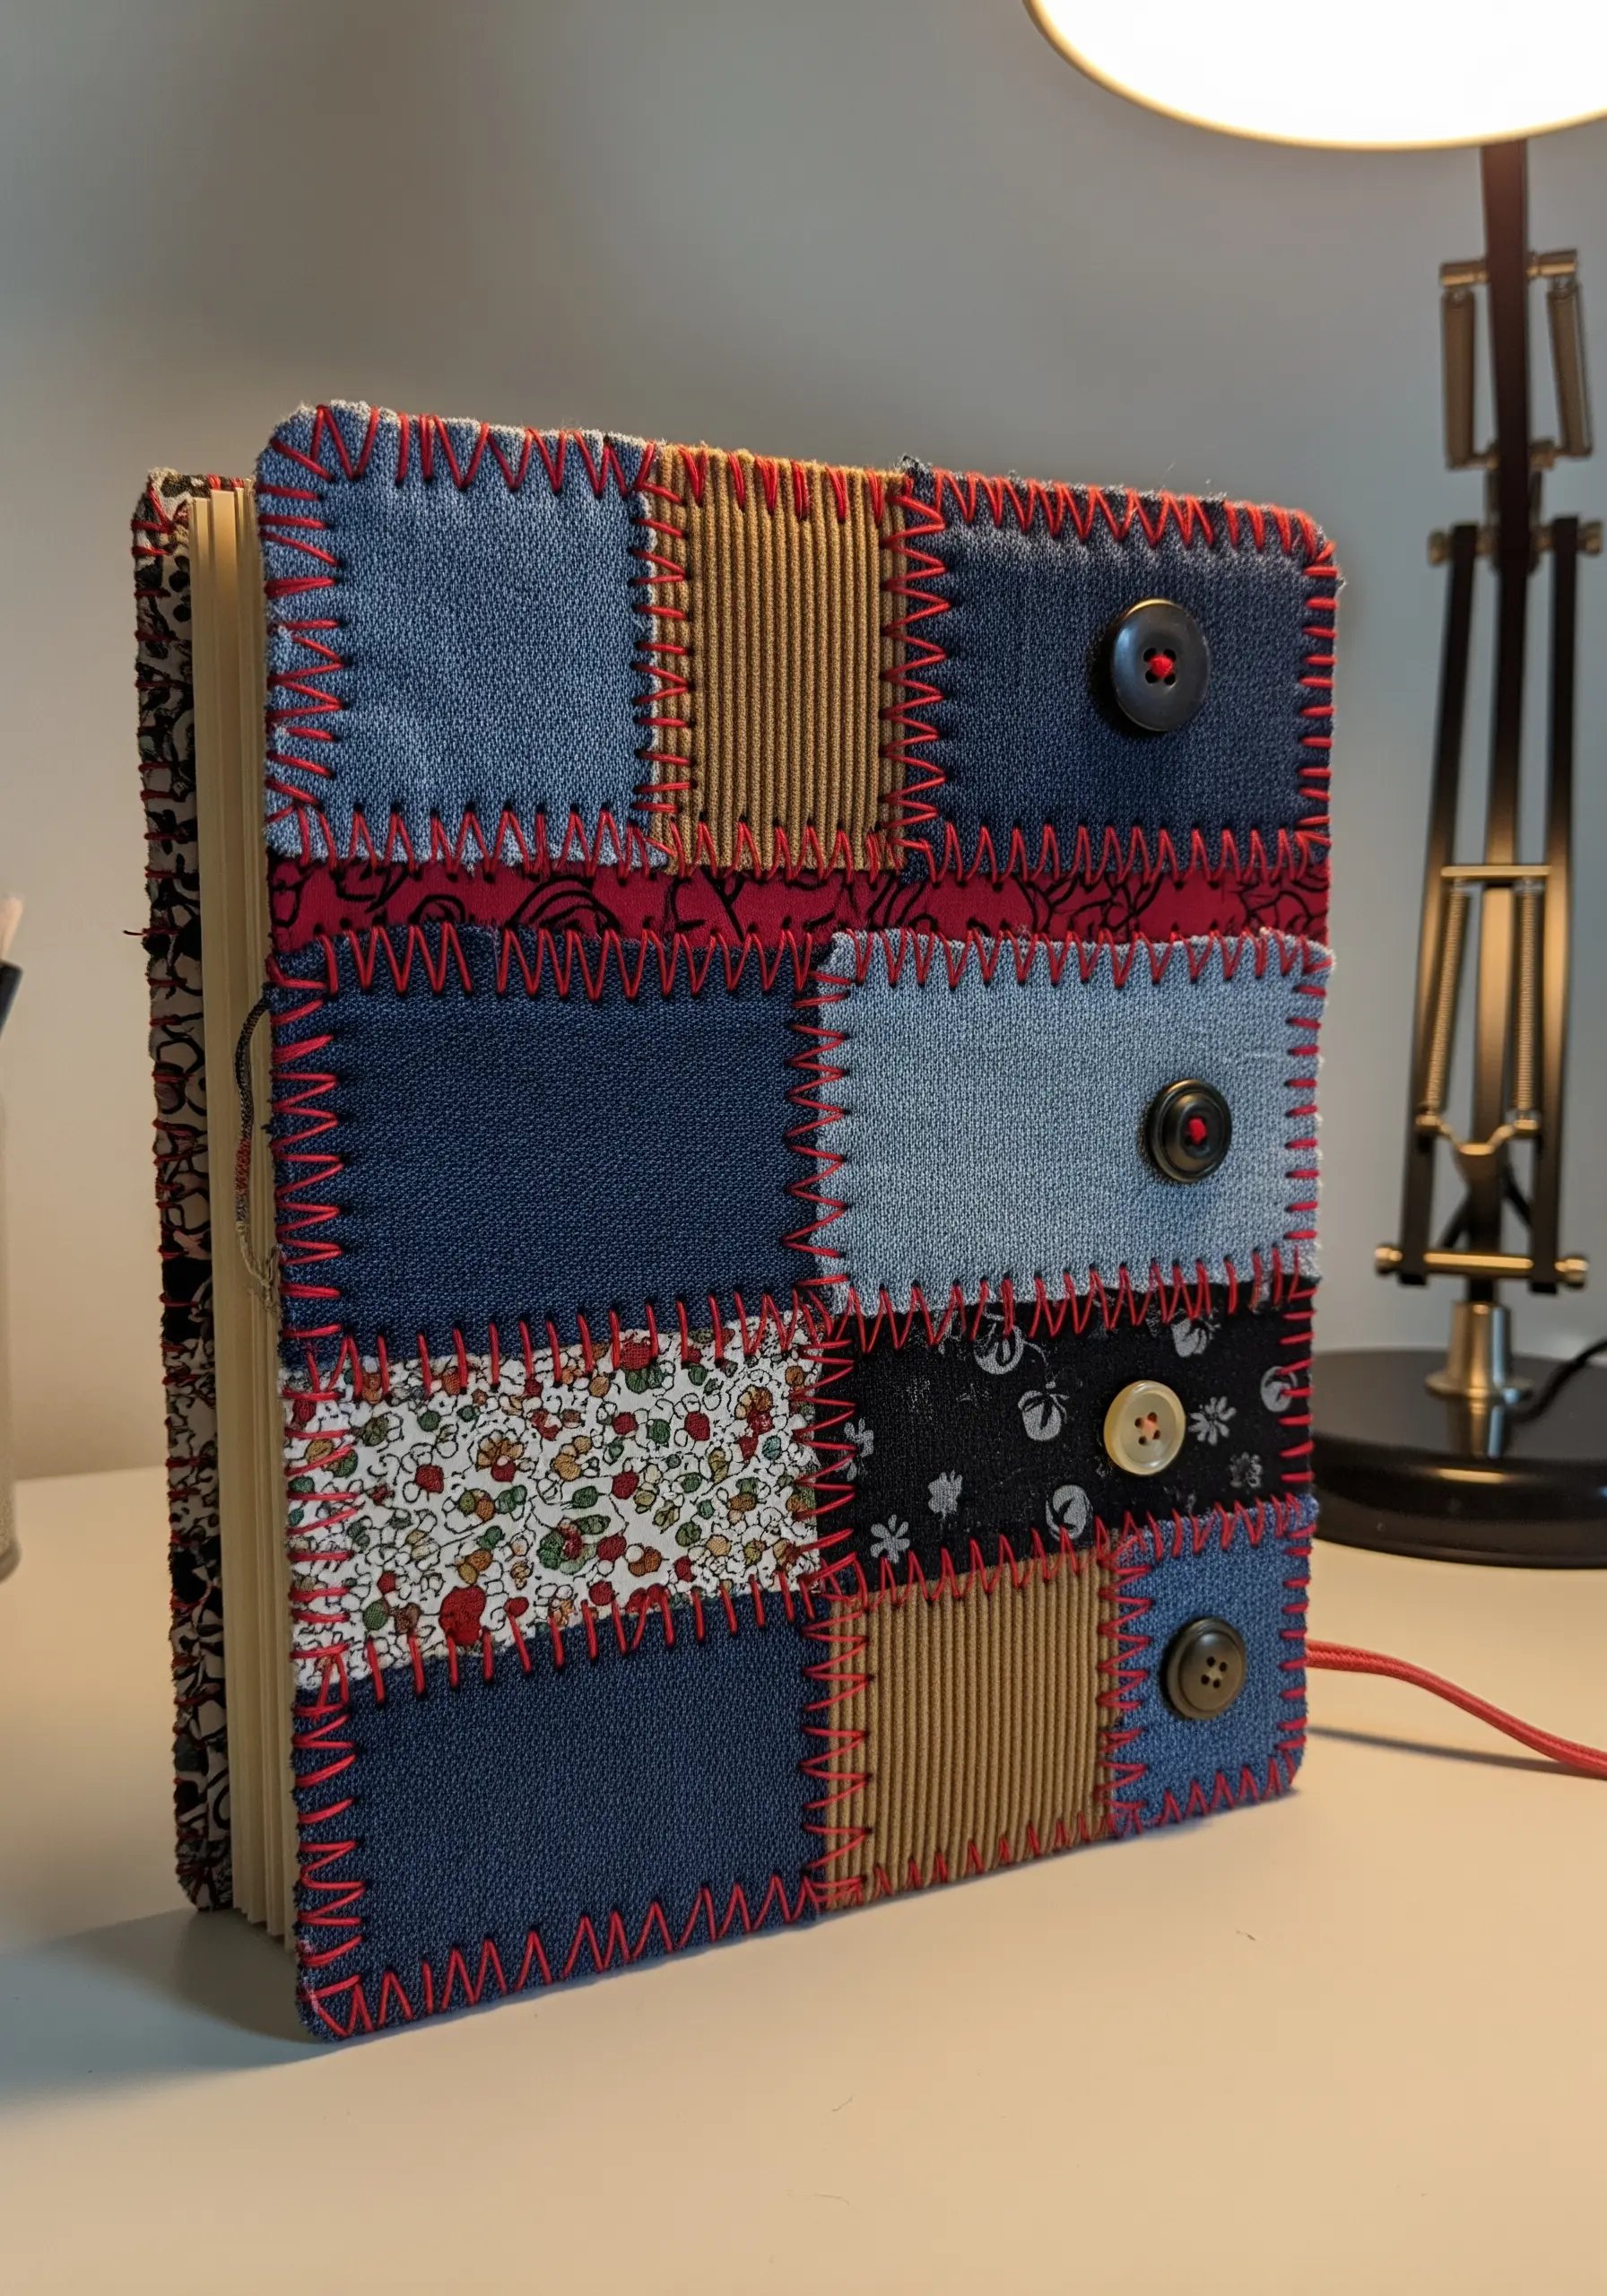
Turn a simple journal into a tactile object by creating a cover that celebrates the stitch.
Arrange your fabric scraps—denim, corduroy, and cotton provide excellent textural contrast—onto a sturdy backing fabric.
Instead of hiding your stitches, make them the focal point by using a thick, contrasting thread like a pearl cotton or sashiko thread.
Use a deliberately oversized blanket stitch; its graphic quality not only secures the patches but also adds a rustic, handmade rhythm to the design.
These bold, visible stitches are wonderful quick stitch inspirations that elevate simple patchwork.
7. Hand-Quilted Topographical Pillow
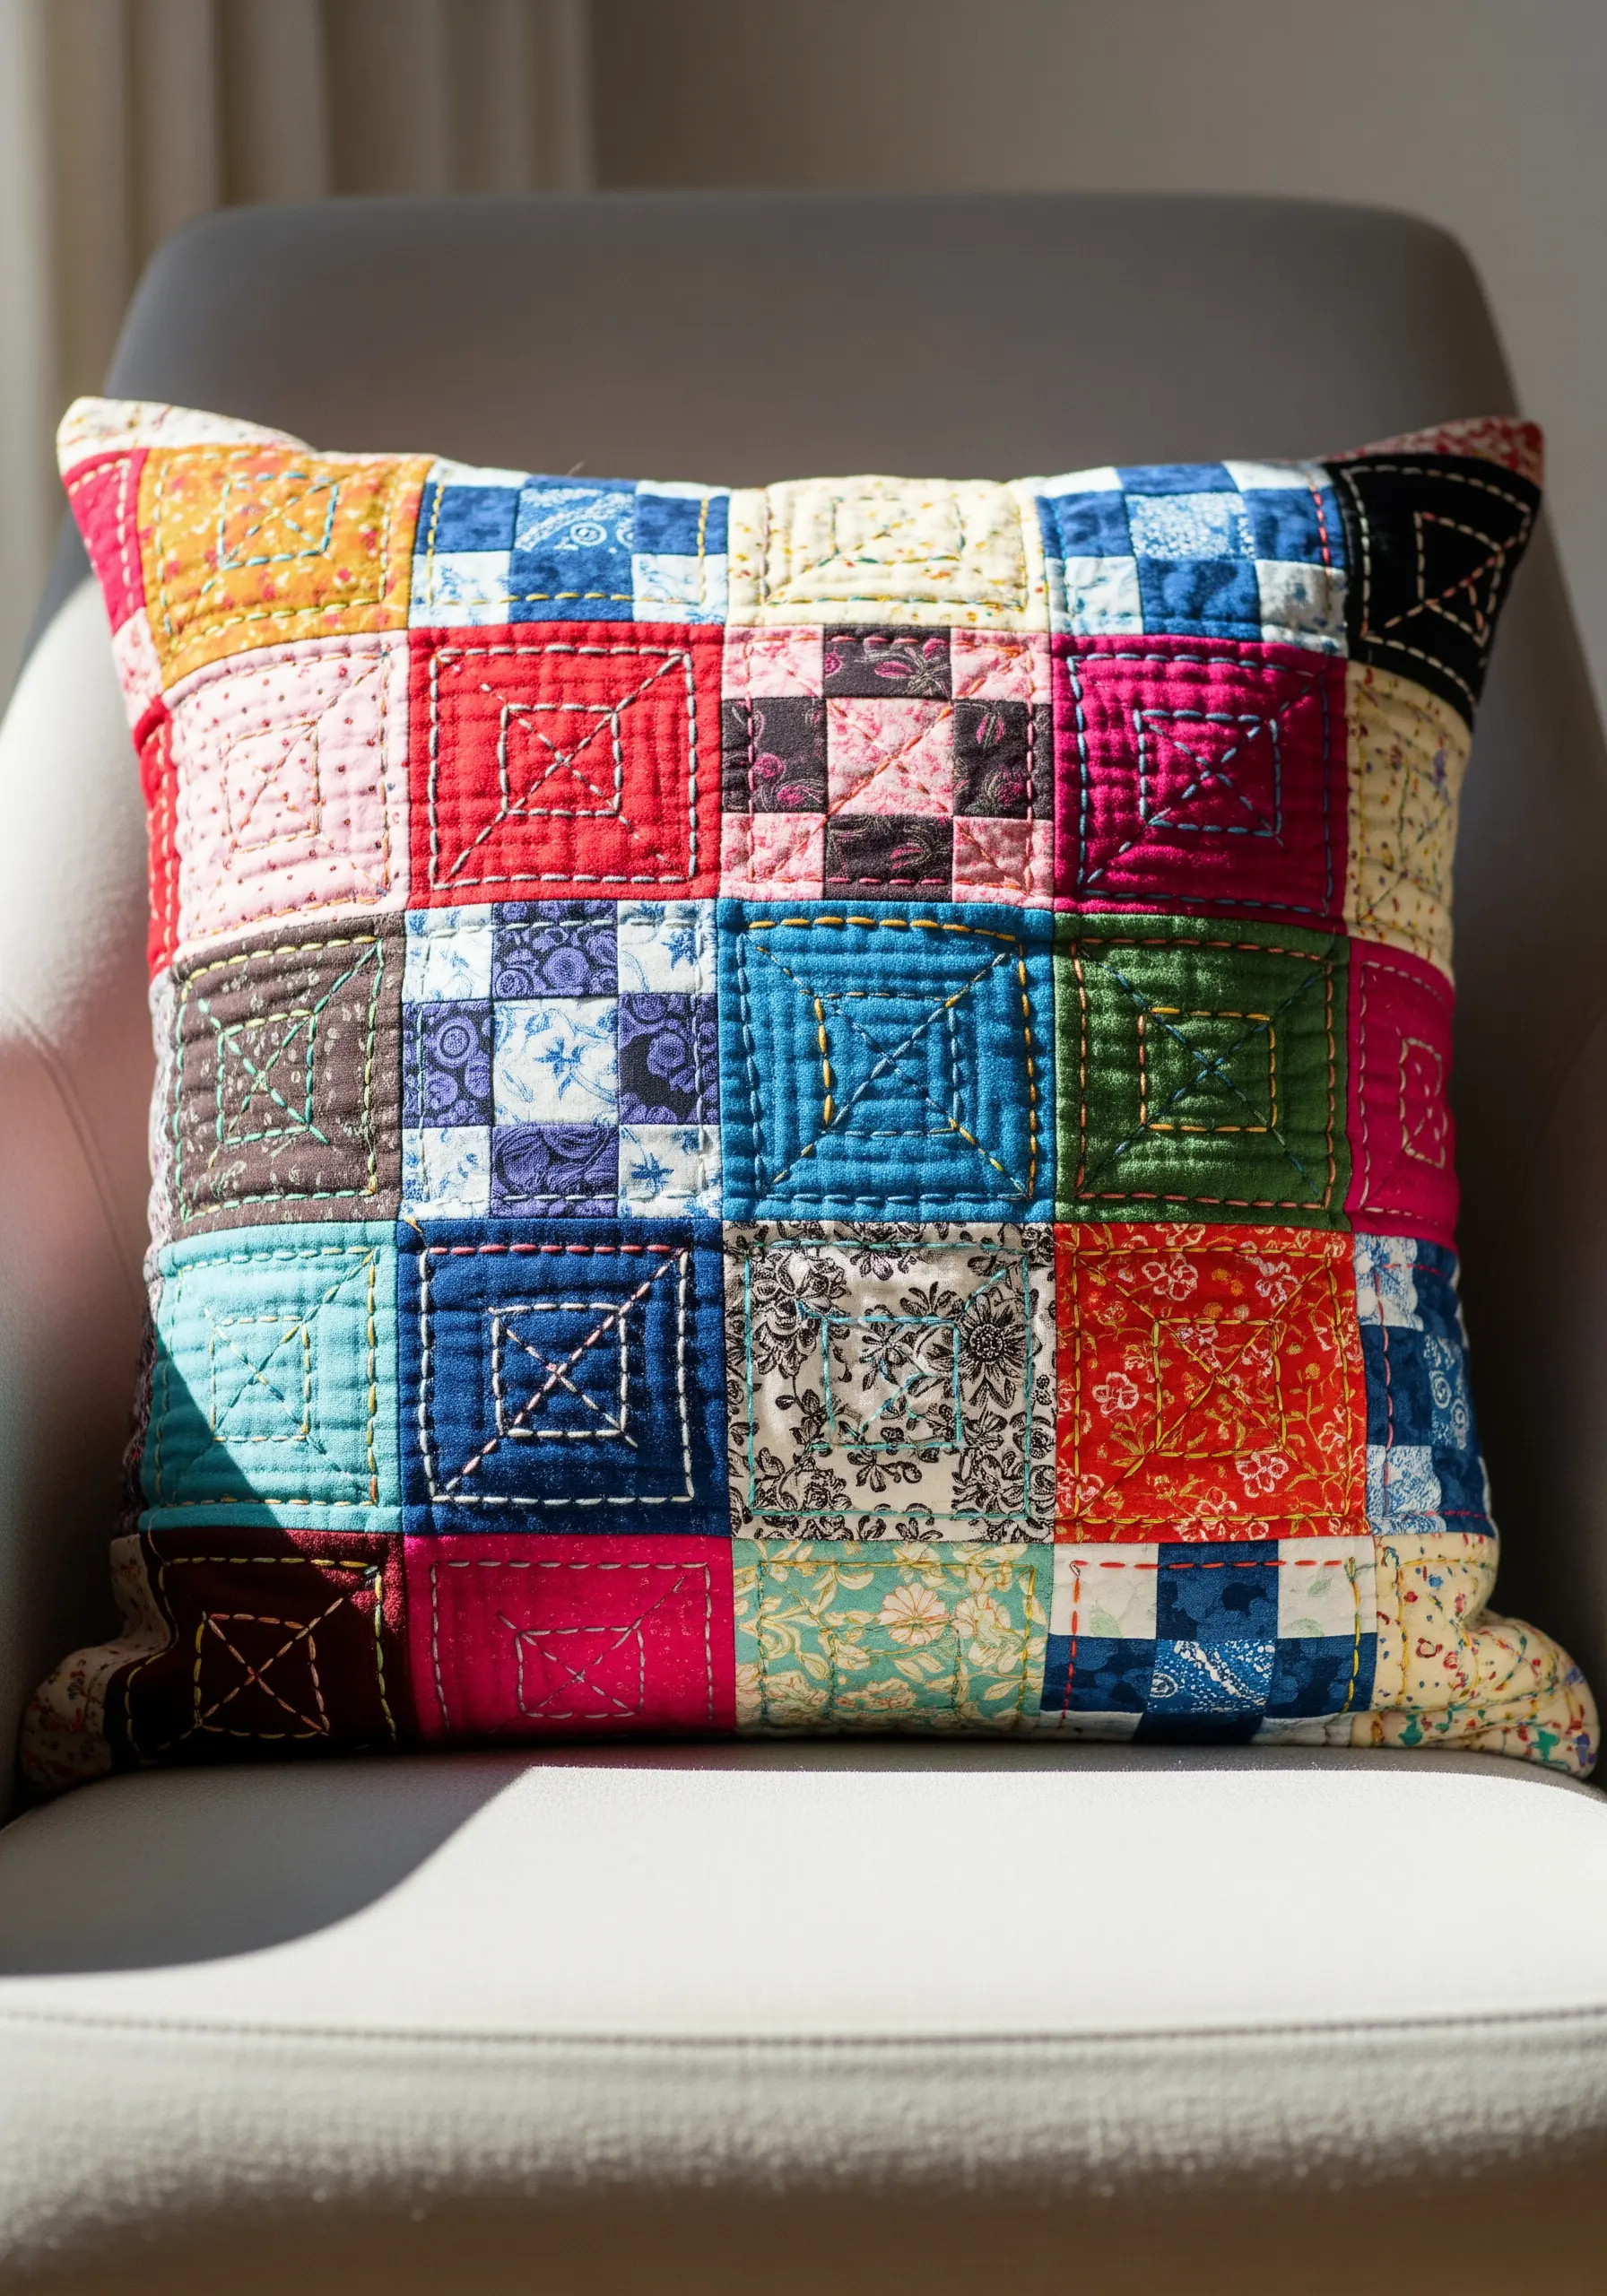
Add a layer of artistry to a patchwork pillow with intentional hand-quilting.
After piecing your fabric squares, layer it with batting and a backing fabric.
Instead of just stitching in the ditch (along the seams), use a simple running stitch to create secondary patterns on top of the patchwork.
You can stitch concentric squares, diagonals, or spirals, turning each fabric square into a mini composition.
Use a contrasting thread color to make your stitches stand out as a linear, graphic element, adding both texture and a thoughtful design layer to your embroidery cushion pillow ideas.
8. Mixed-Media Sculptural Vessel
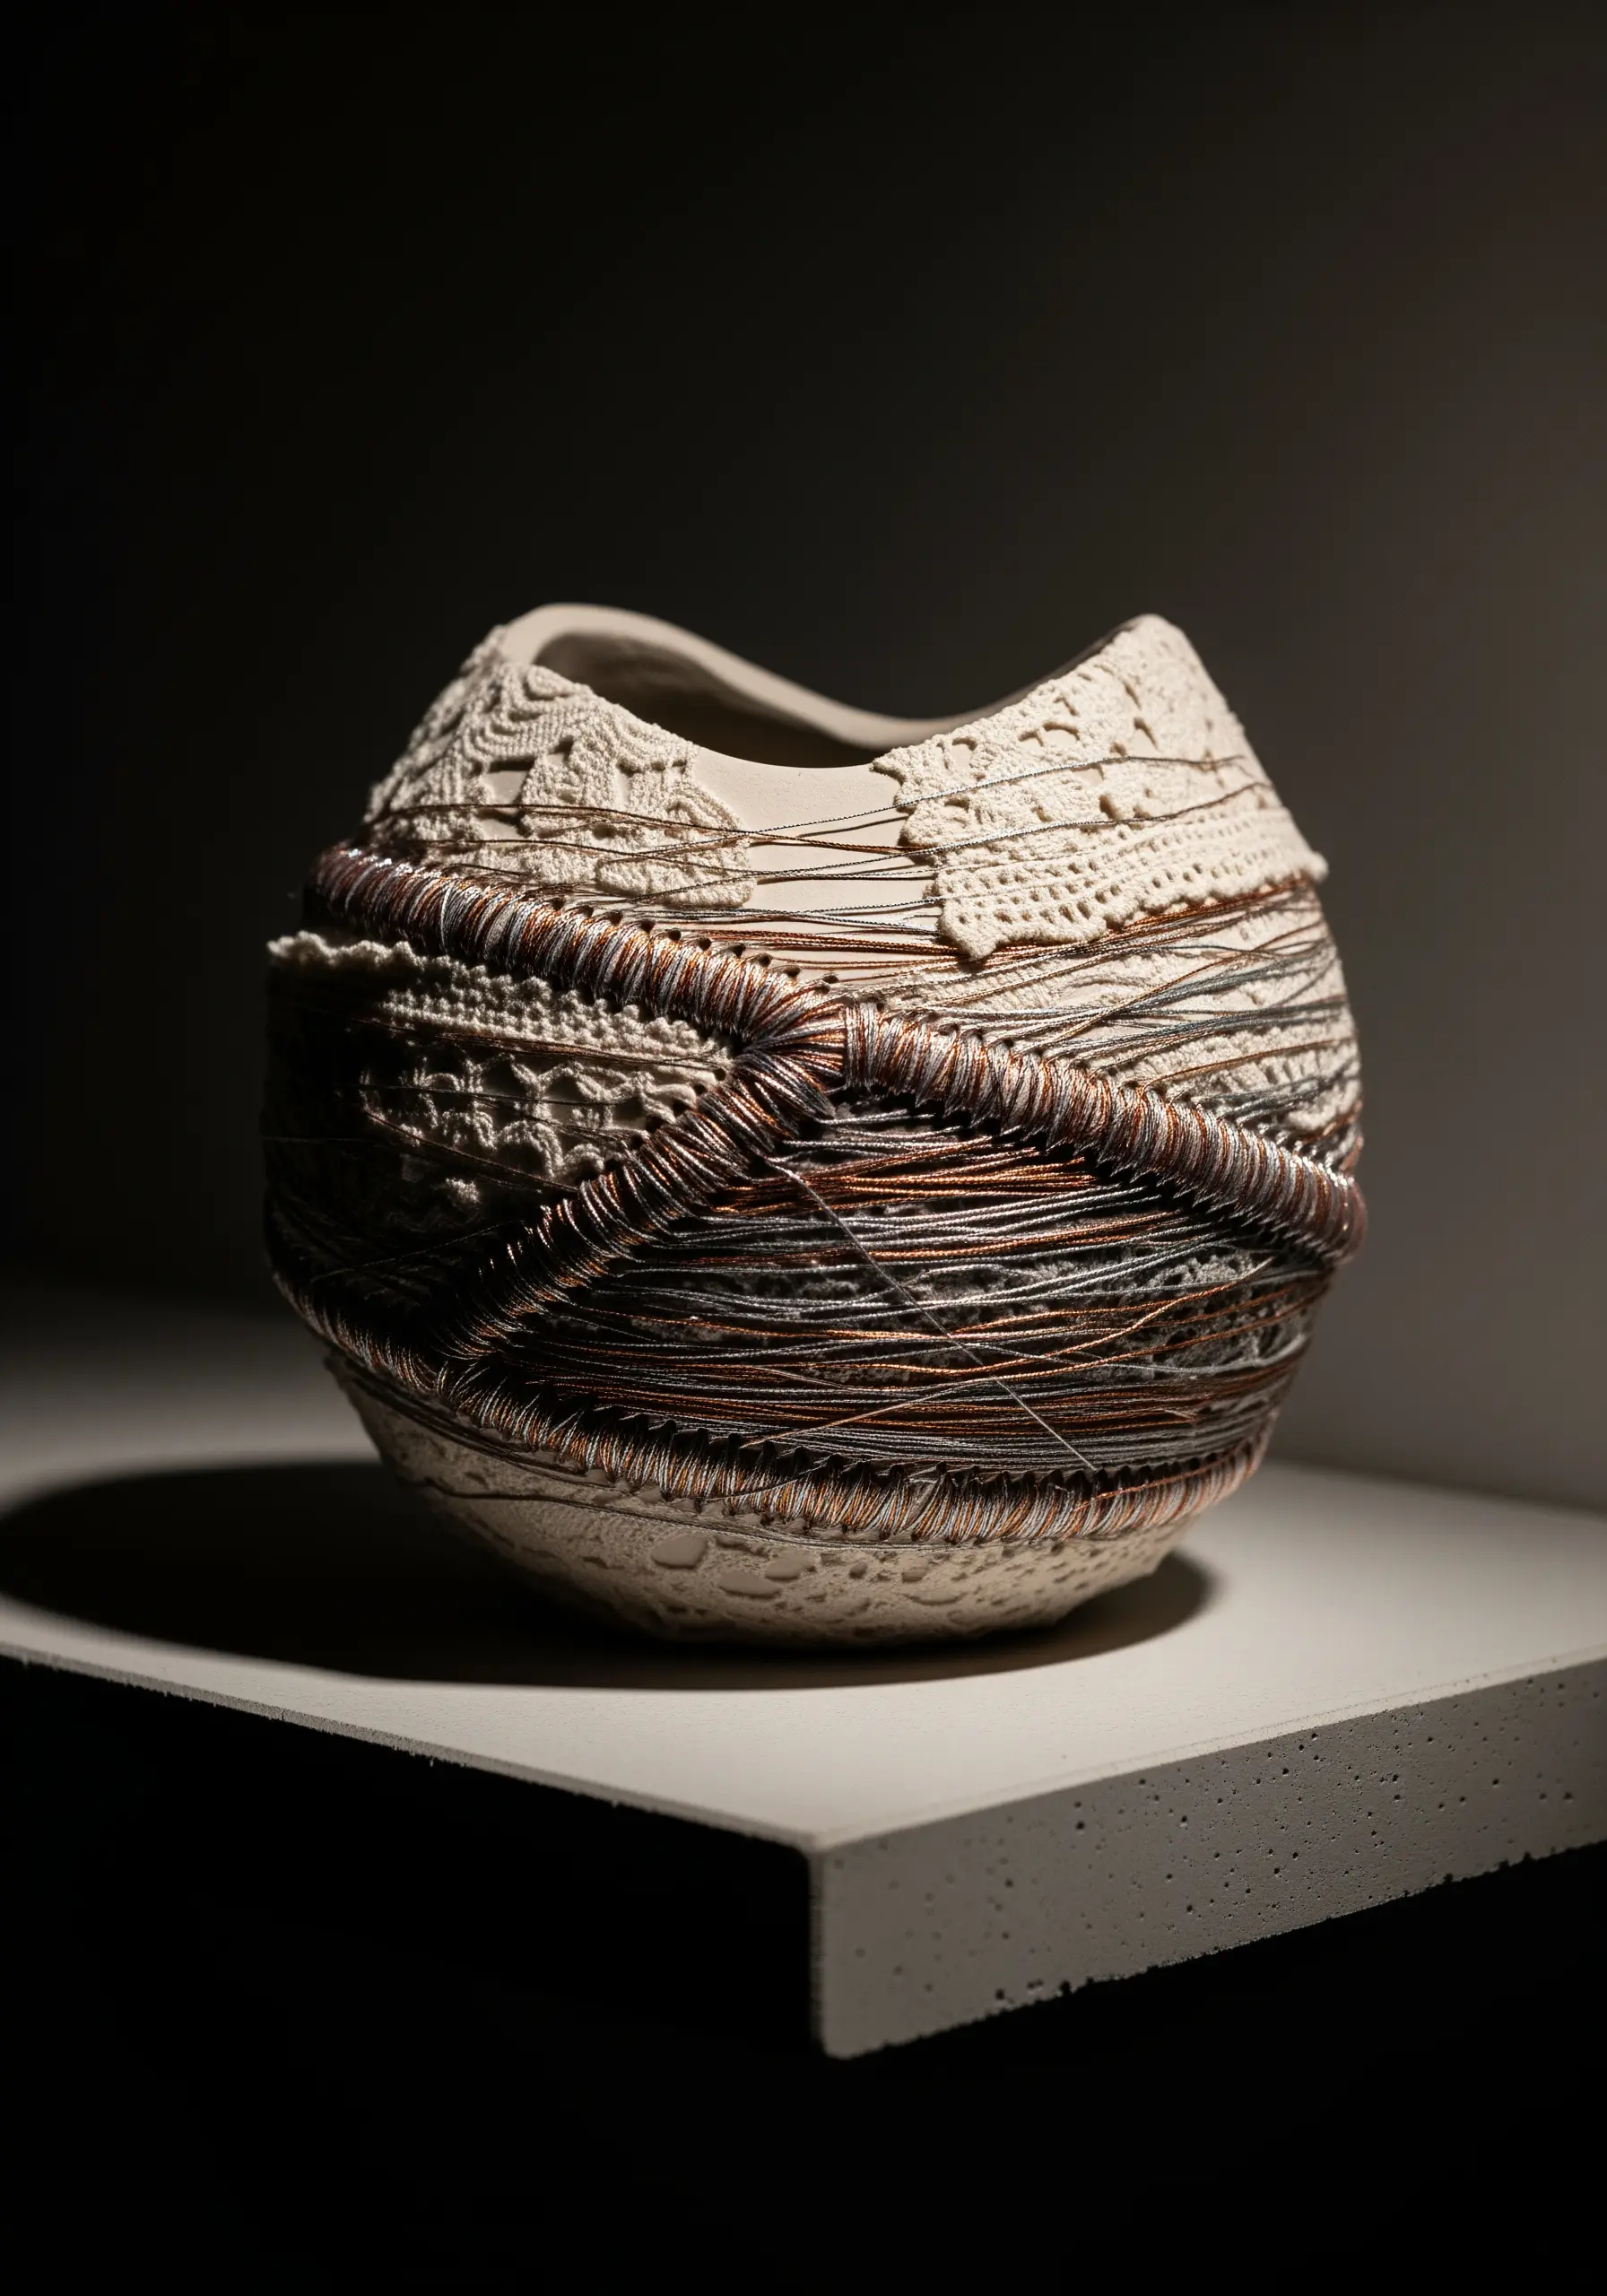
Combine the textures of fabric and thread with a solid form like clay or plaster to create compelling handmade sculptures that look like they belong in a museum.
Before your air-dry clay has fully hardened, gently press a piece of lace or a textured scrap fabric onto its surface to create a permanent impression.
Once dry, use the imprinted texture as a guide for wrapping.
Coil metallic thread, fine wire, or even waxed linen cord around the vessel, allowing the wrapping to highlight the object’s curves and complement the delicate fabric imprint.
This technique creates a sophisticated dialogue between soft and hard materials.
9. Coiled Fabric & Stitch Coasters
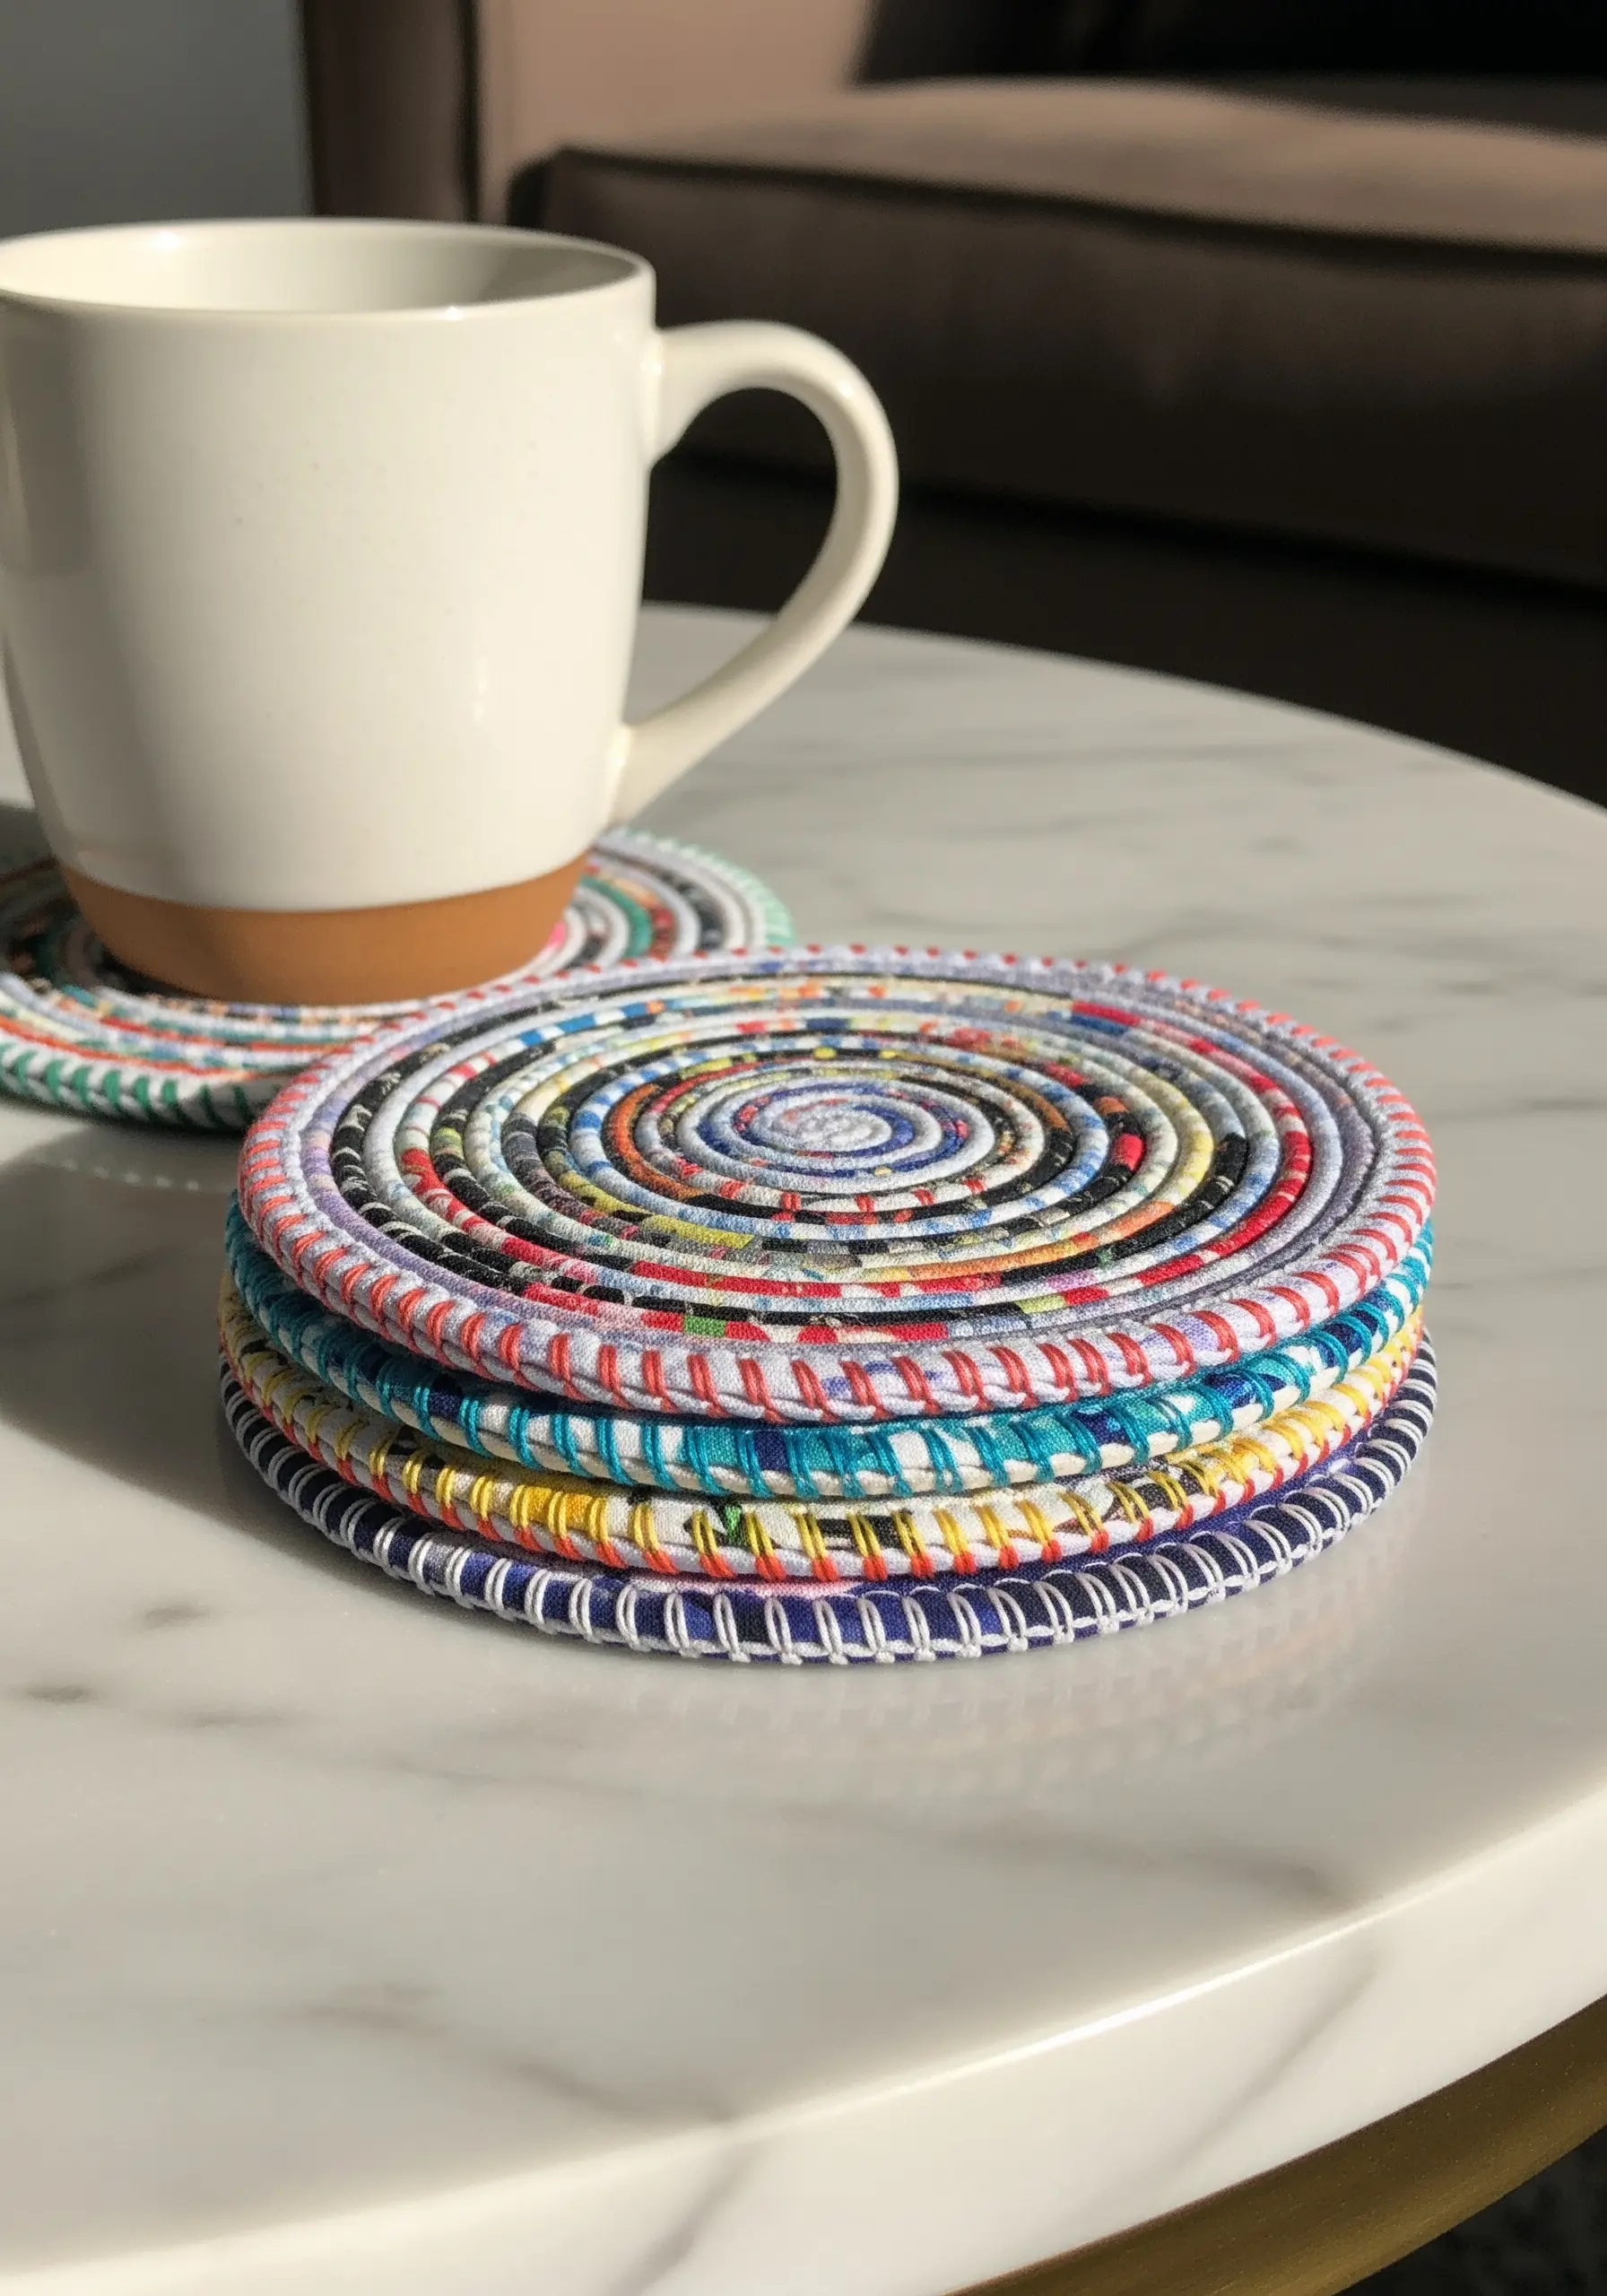
Use up the thinnest strips of fabric by creating coiled coasters, held together with a decorative stitch.
Take a long, narrow strip of fabric and wrap it tightly around a length of cotton clothesline rope.
As you wrap, begin coiling the rope into a flat spiral, using a needle and a strong, colorful thread to stitch the coils together as you go.
A simple whip stitch or blanket stitch works perfectly.
The visibility of the stitch is part of the design, adding a handmade detail that elevates these functional fabric projects that are perfect for crafting with kids.
10. Minimalist Felt & Fiber Garland
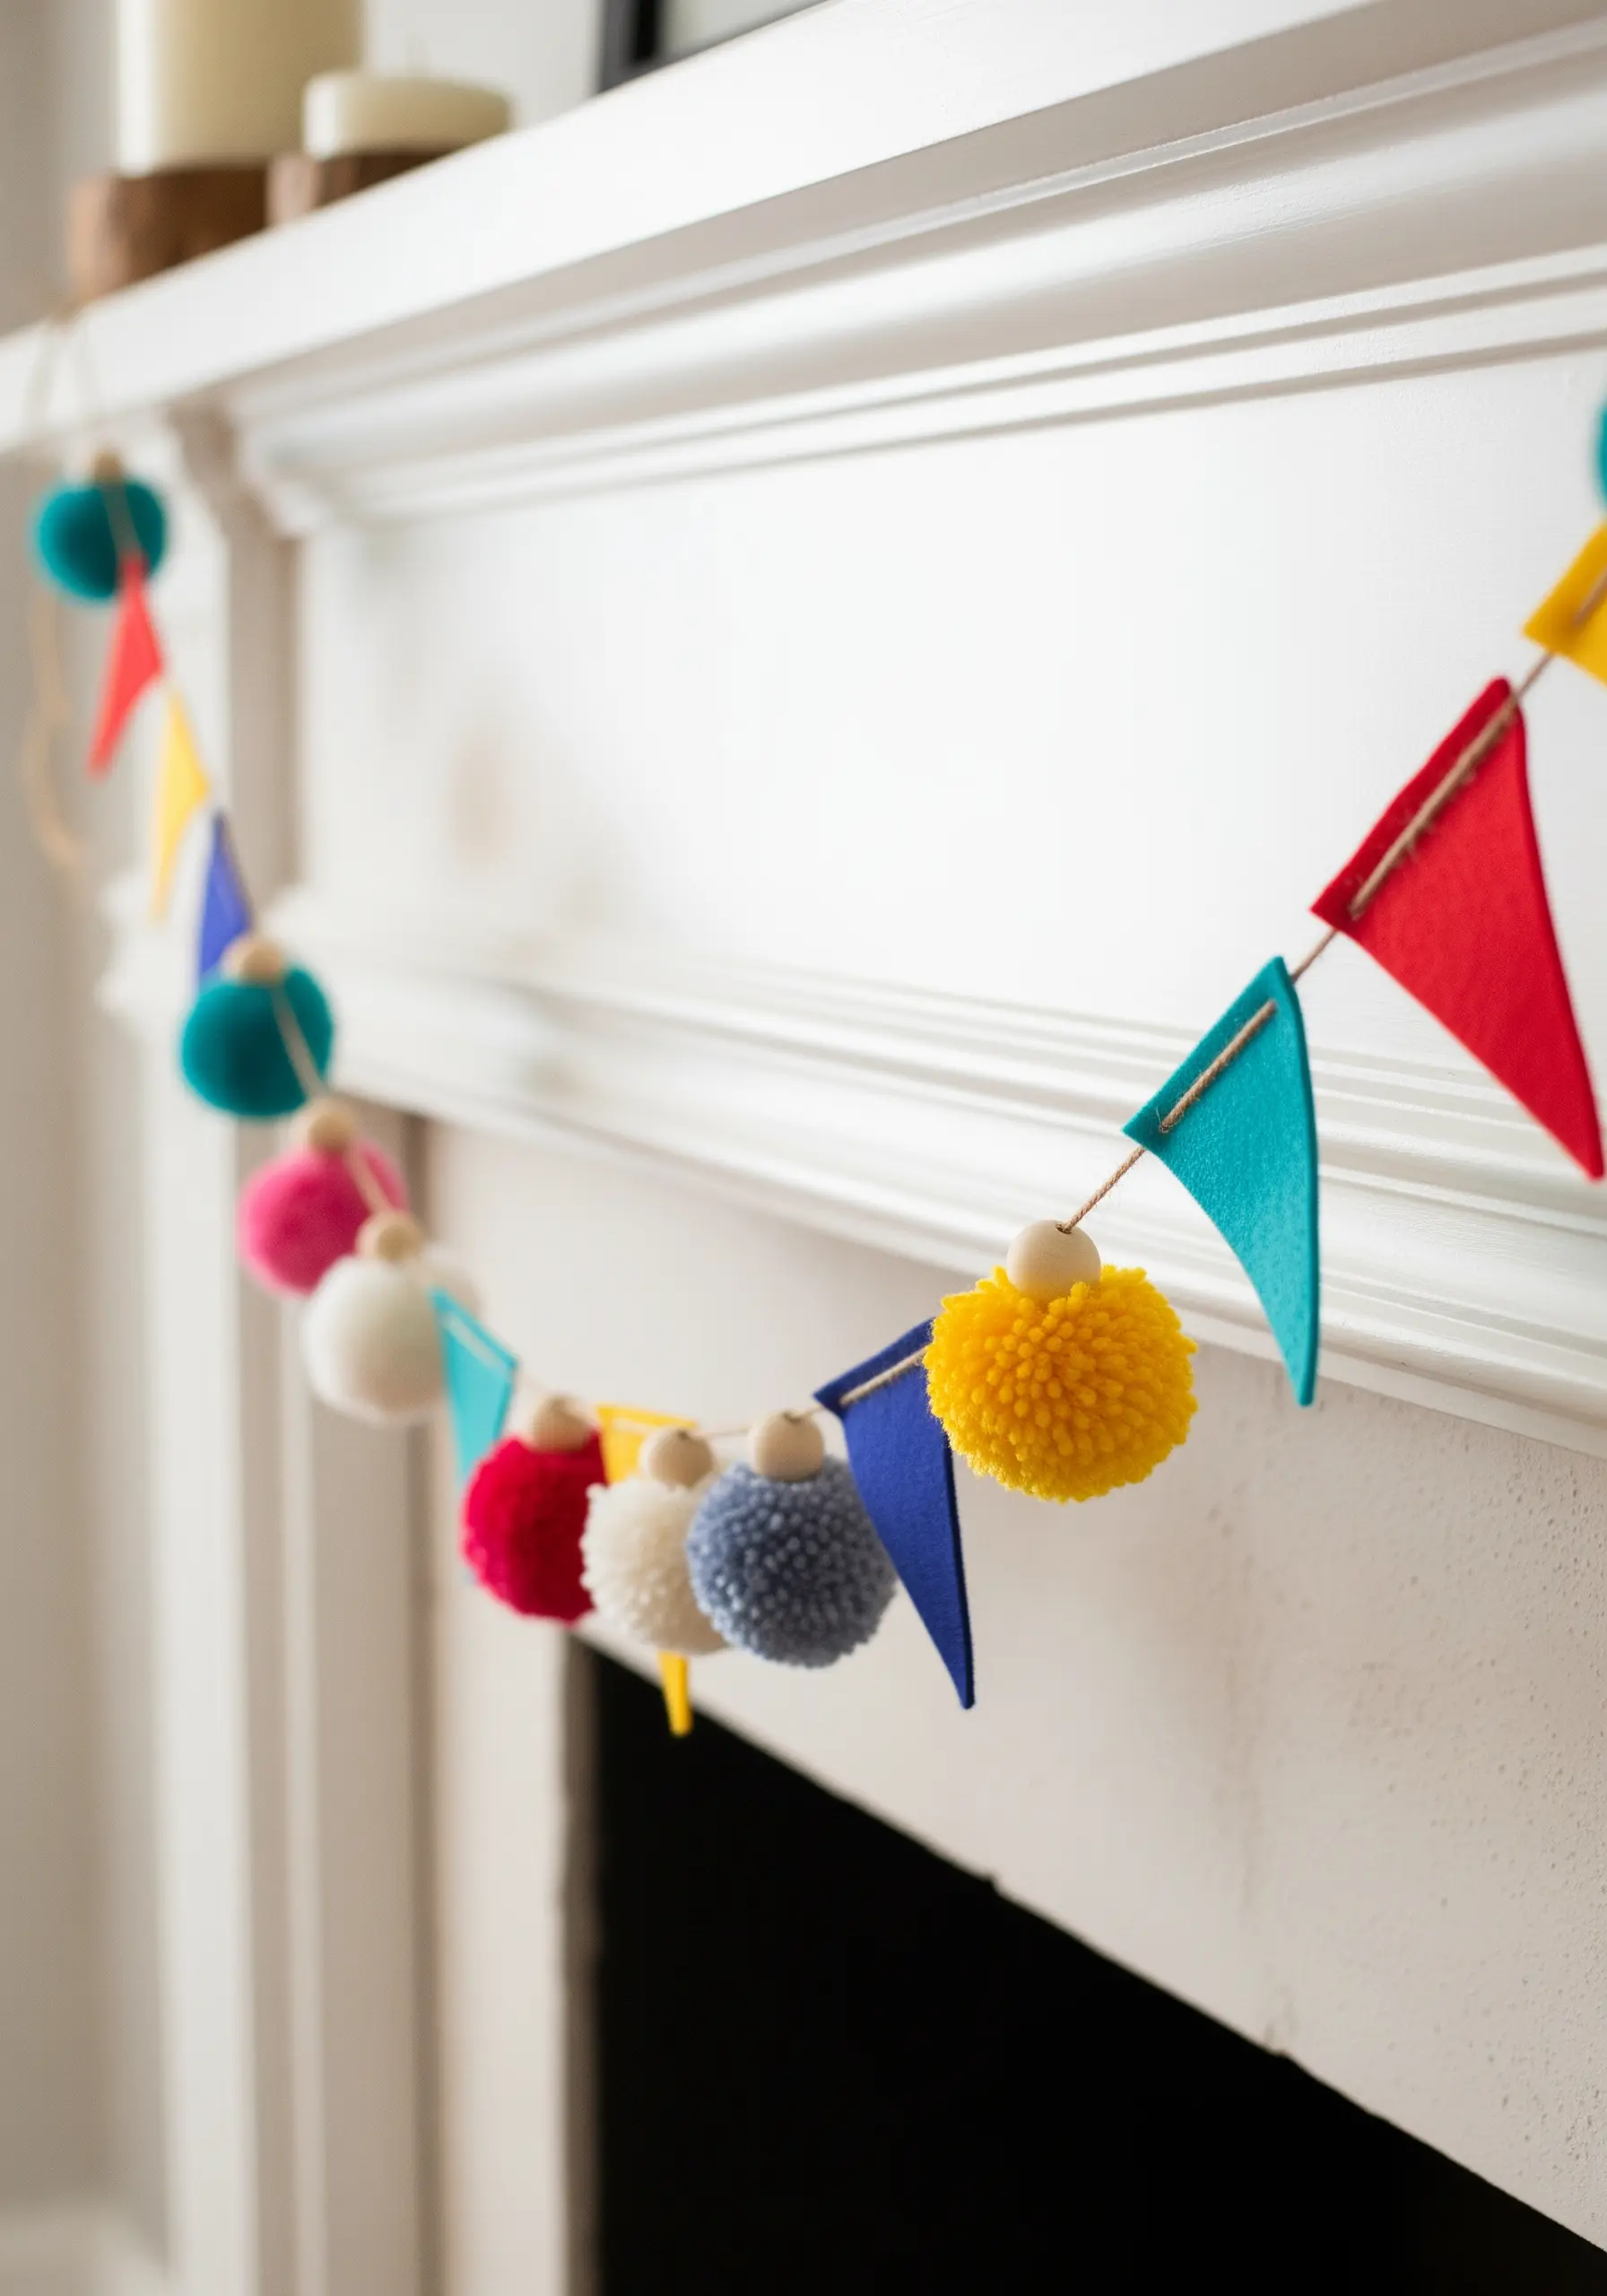
Construct a modern, reusable garland that feels both playful and polished.
Cut simple pennant shapes from leftover felt scraps—the material’s clean, no-fray edge is perfect for this.
Create your own dense, fluffy pom-poms by wrapping yarn around your hand or a piece of cardboard, tying it off, and trimming it into a neat sphere.
String the elements onto a piece of twine or ribbon, using a needle to thread through the felt and the center of the pom-poms.
Small wooden beads act as elegant spacers, giving the garland a sophisticated, rhythmic structure.
11. Dimensional Landscape with French Knots
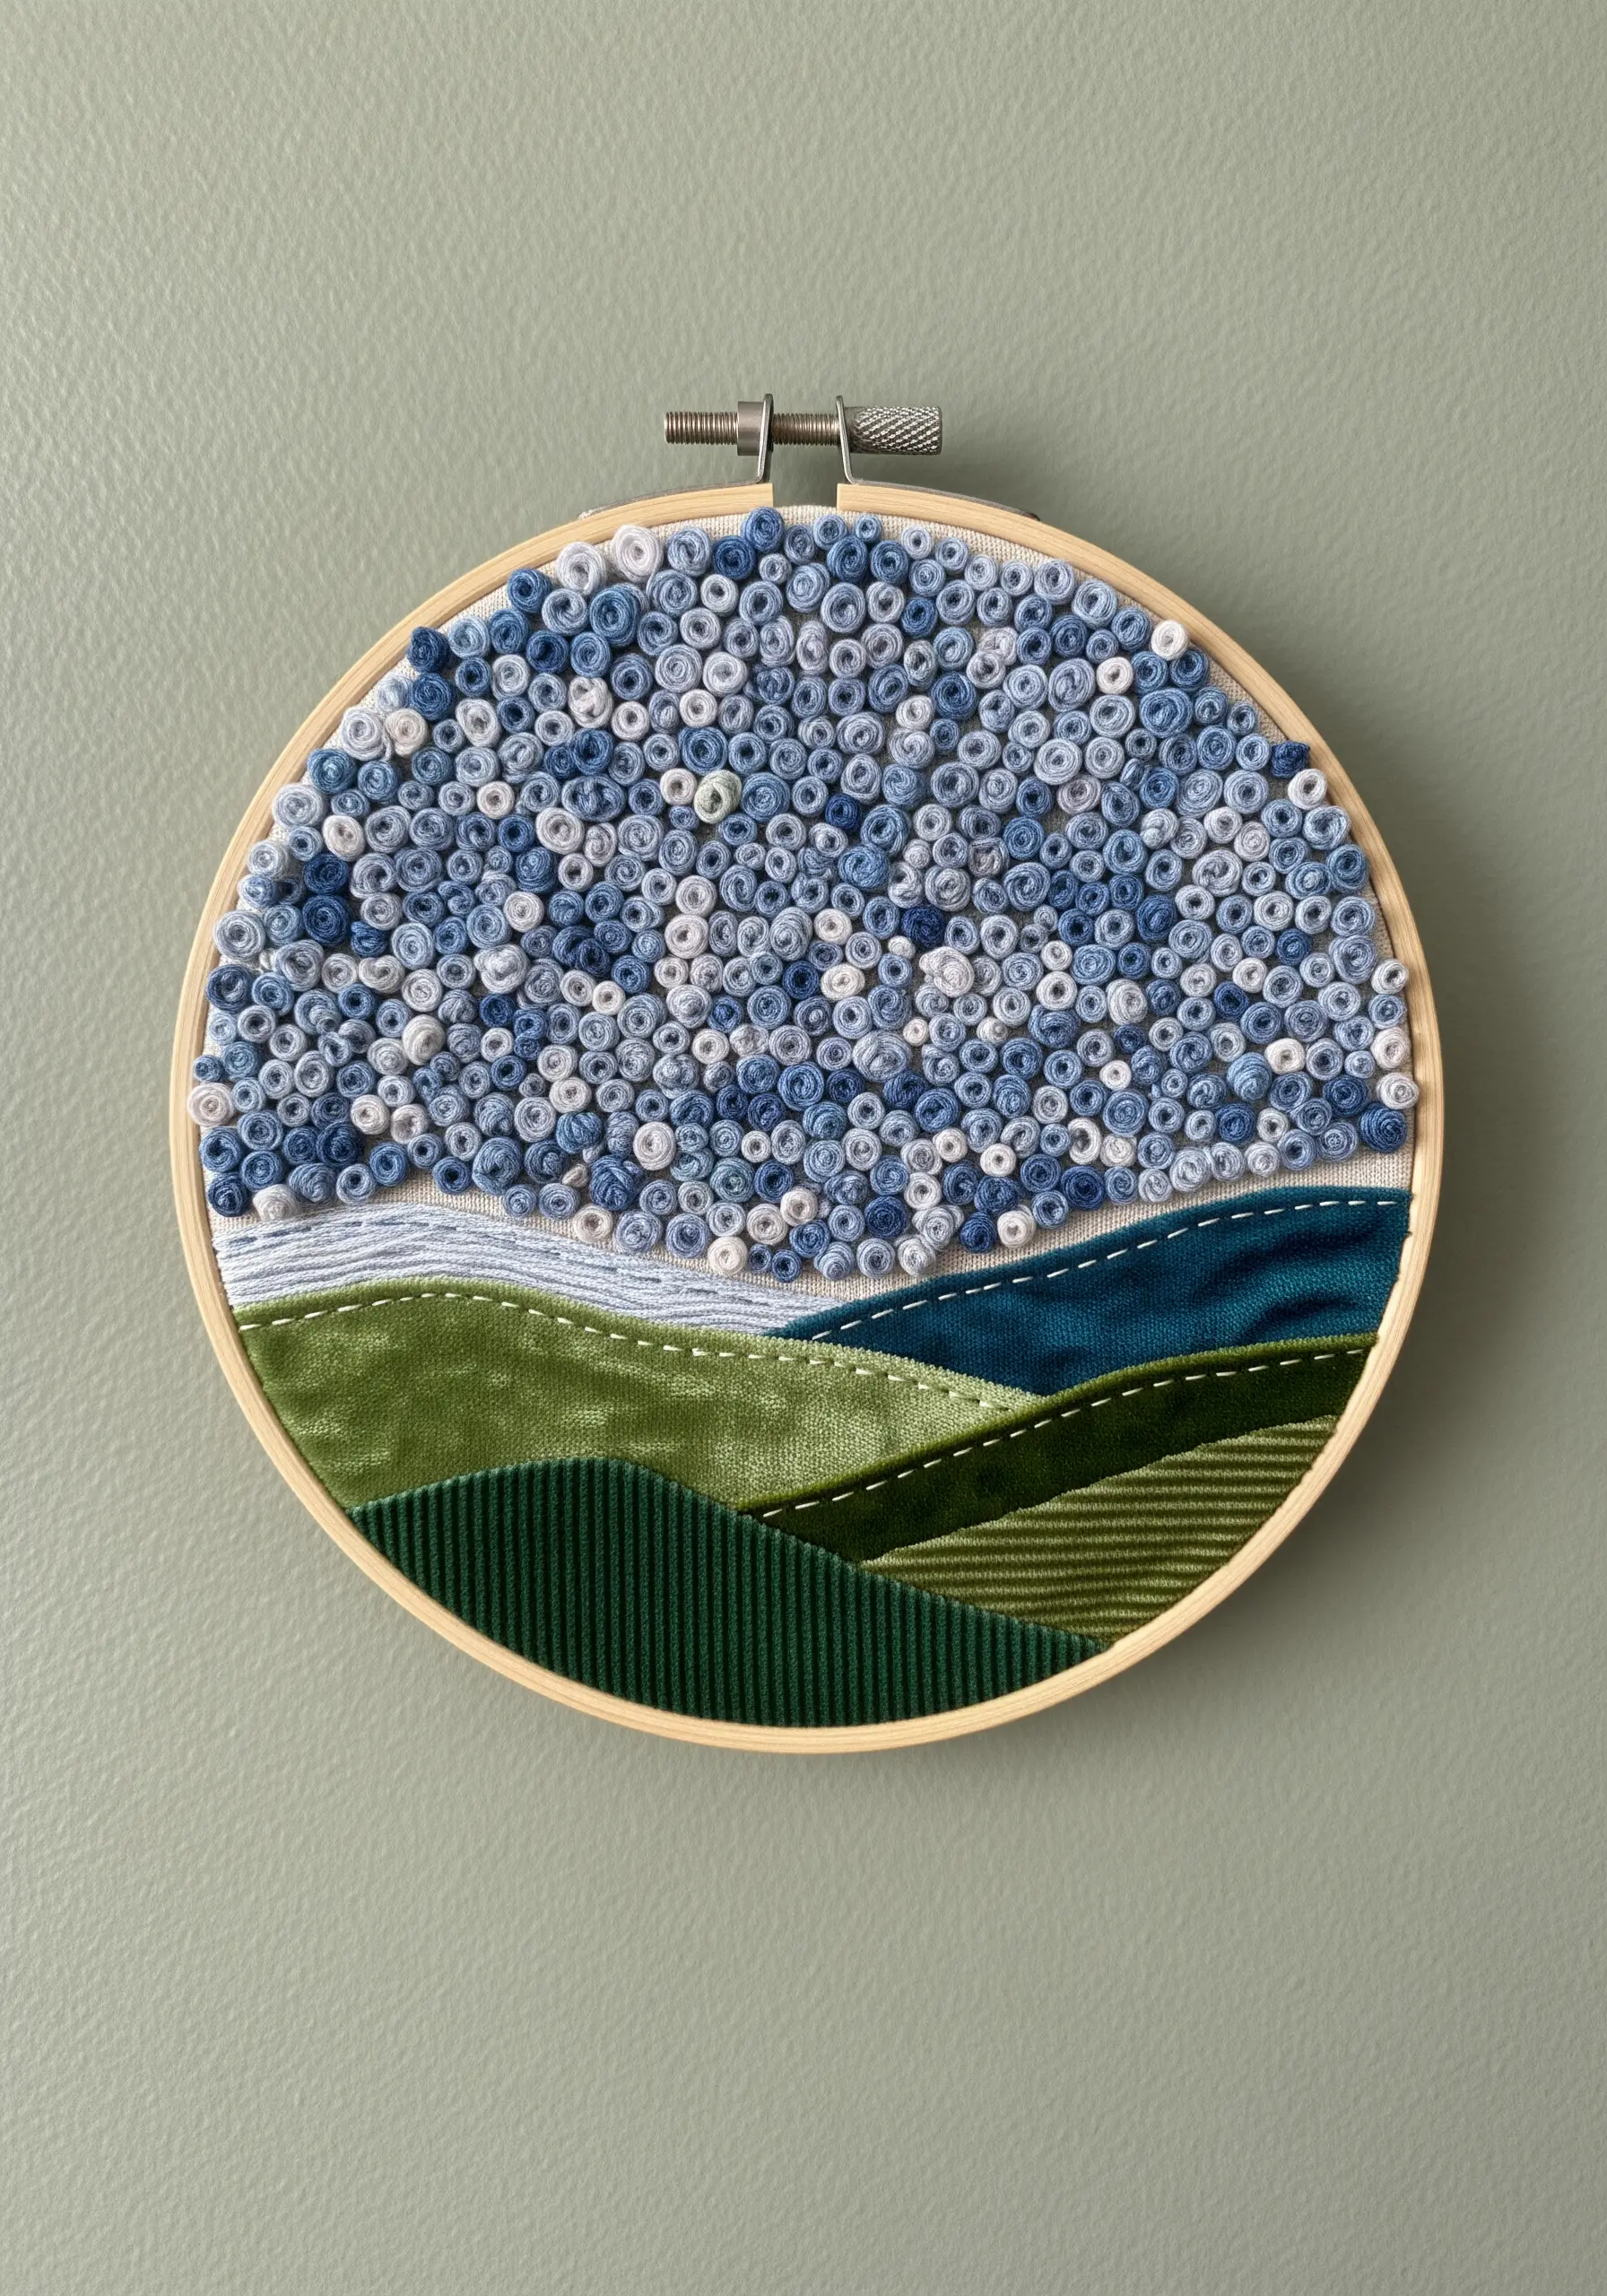
Create a powerfully textured landscape by combining fabric appliqué with a single, repeated stitch.
First, layer scraps of velvet, corduroy, or linen to form the rolling hills, securing them with a simple backstitch along the top edge.
For the sky, use varying shades of blue and white thread to create a dense canopy of French knots.
To achieve this painterly, cloud-like effect, vary the number of times you wrap the thread around the needle (once for small knots, two or three times for larger ones).
This focus on texture is a key component in advanced mountain landscape thread painting techniques.
12. Opulent Mixed-Fiber Tassels
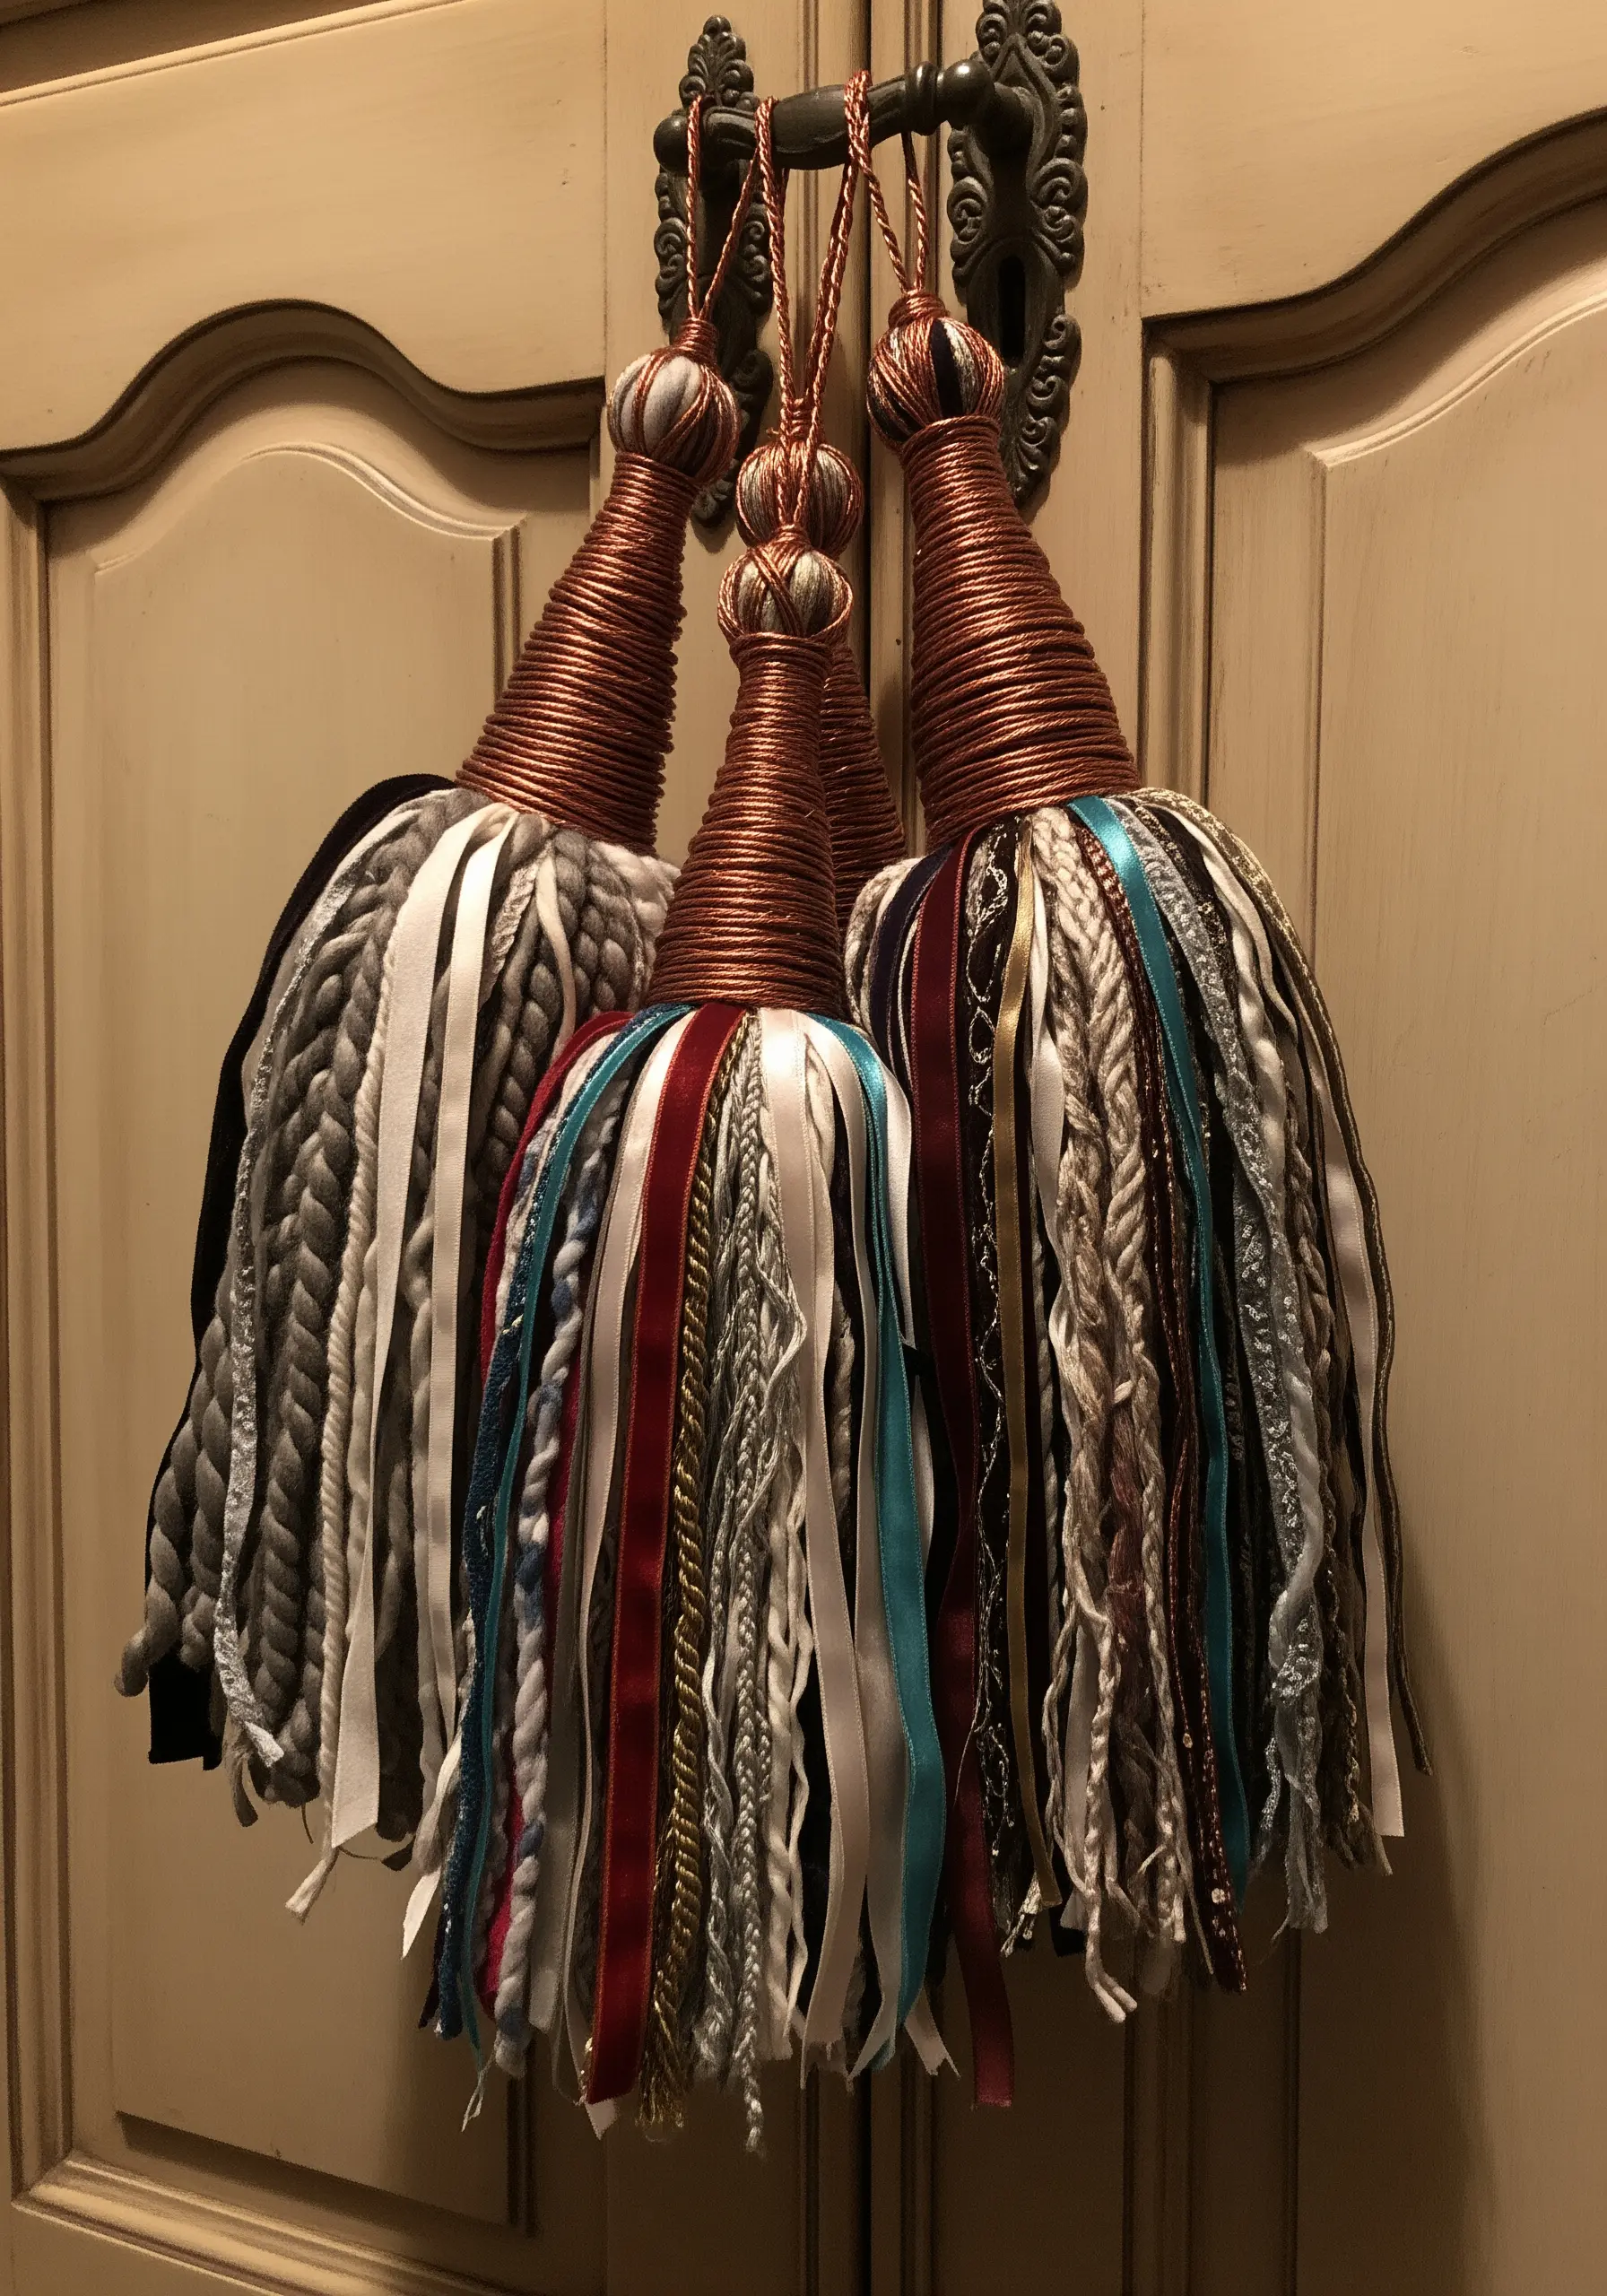
Go beyond simple yarn tassels by blending a rich variety of leftover materials to create decorative, statement pieces.
Gather an assortment of textures: chunky wool, silky ribbons, metallic embroidery floss, and even thin strips of velvet or lace.
Cut them to your desired length and fold them over, securing the bundle tightly near the top.
The final touch is to wrap the ‘neck’ of the tassel with a contrasting material, like a fine copper wire or a tightly wound silk ribbon, to give it a polished, professional finish.
These can be used as standalone decor or incorporated into larger mixed fiber wall hangings.
13. Folded Fabric Kanzashi Wreath
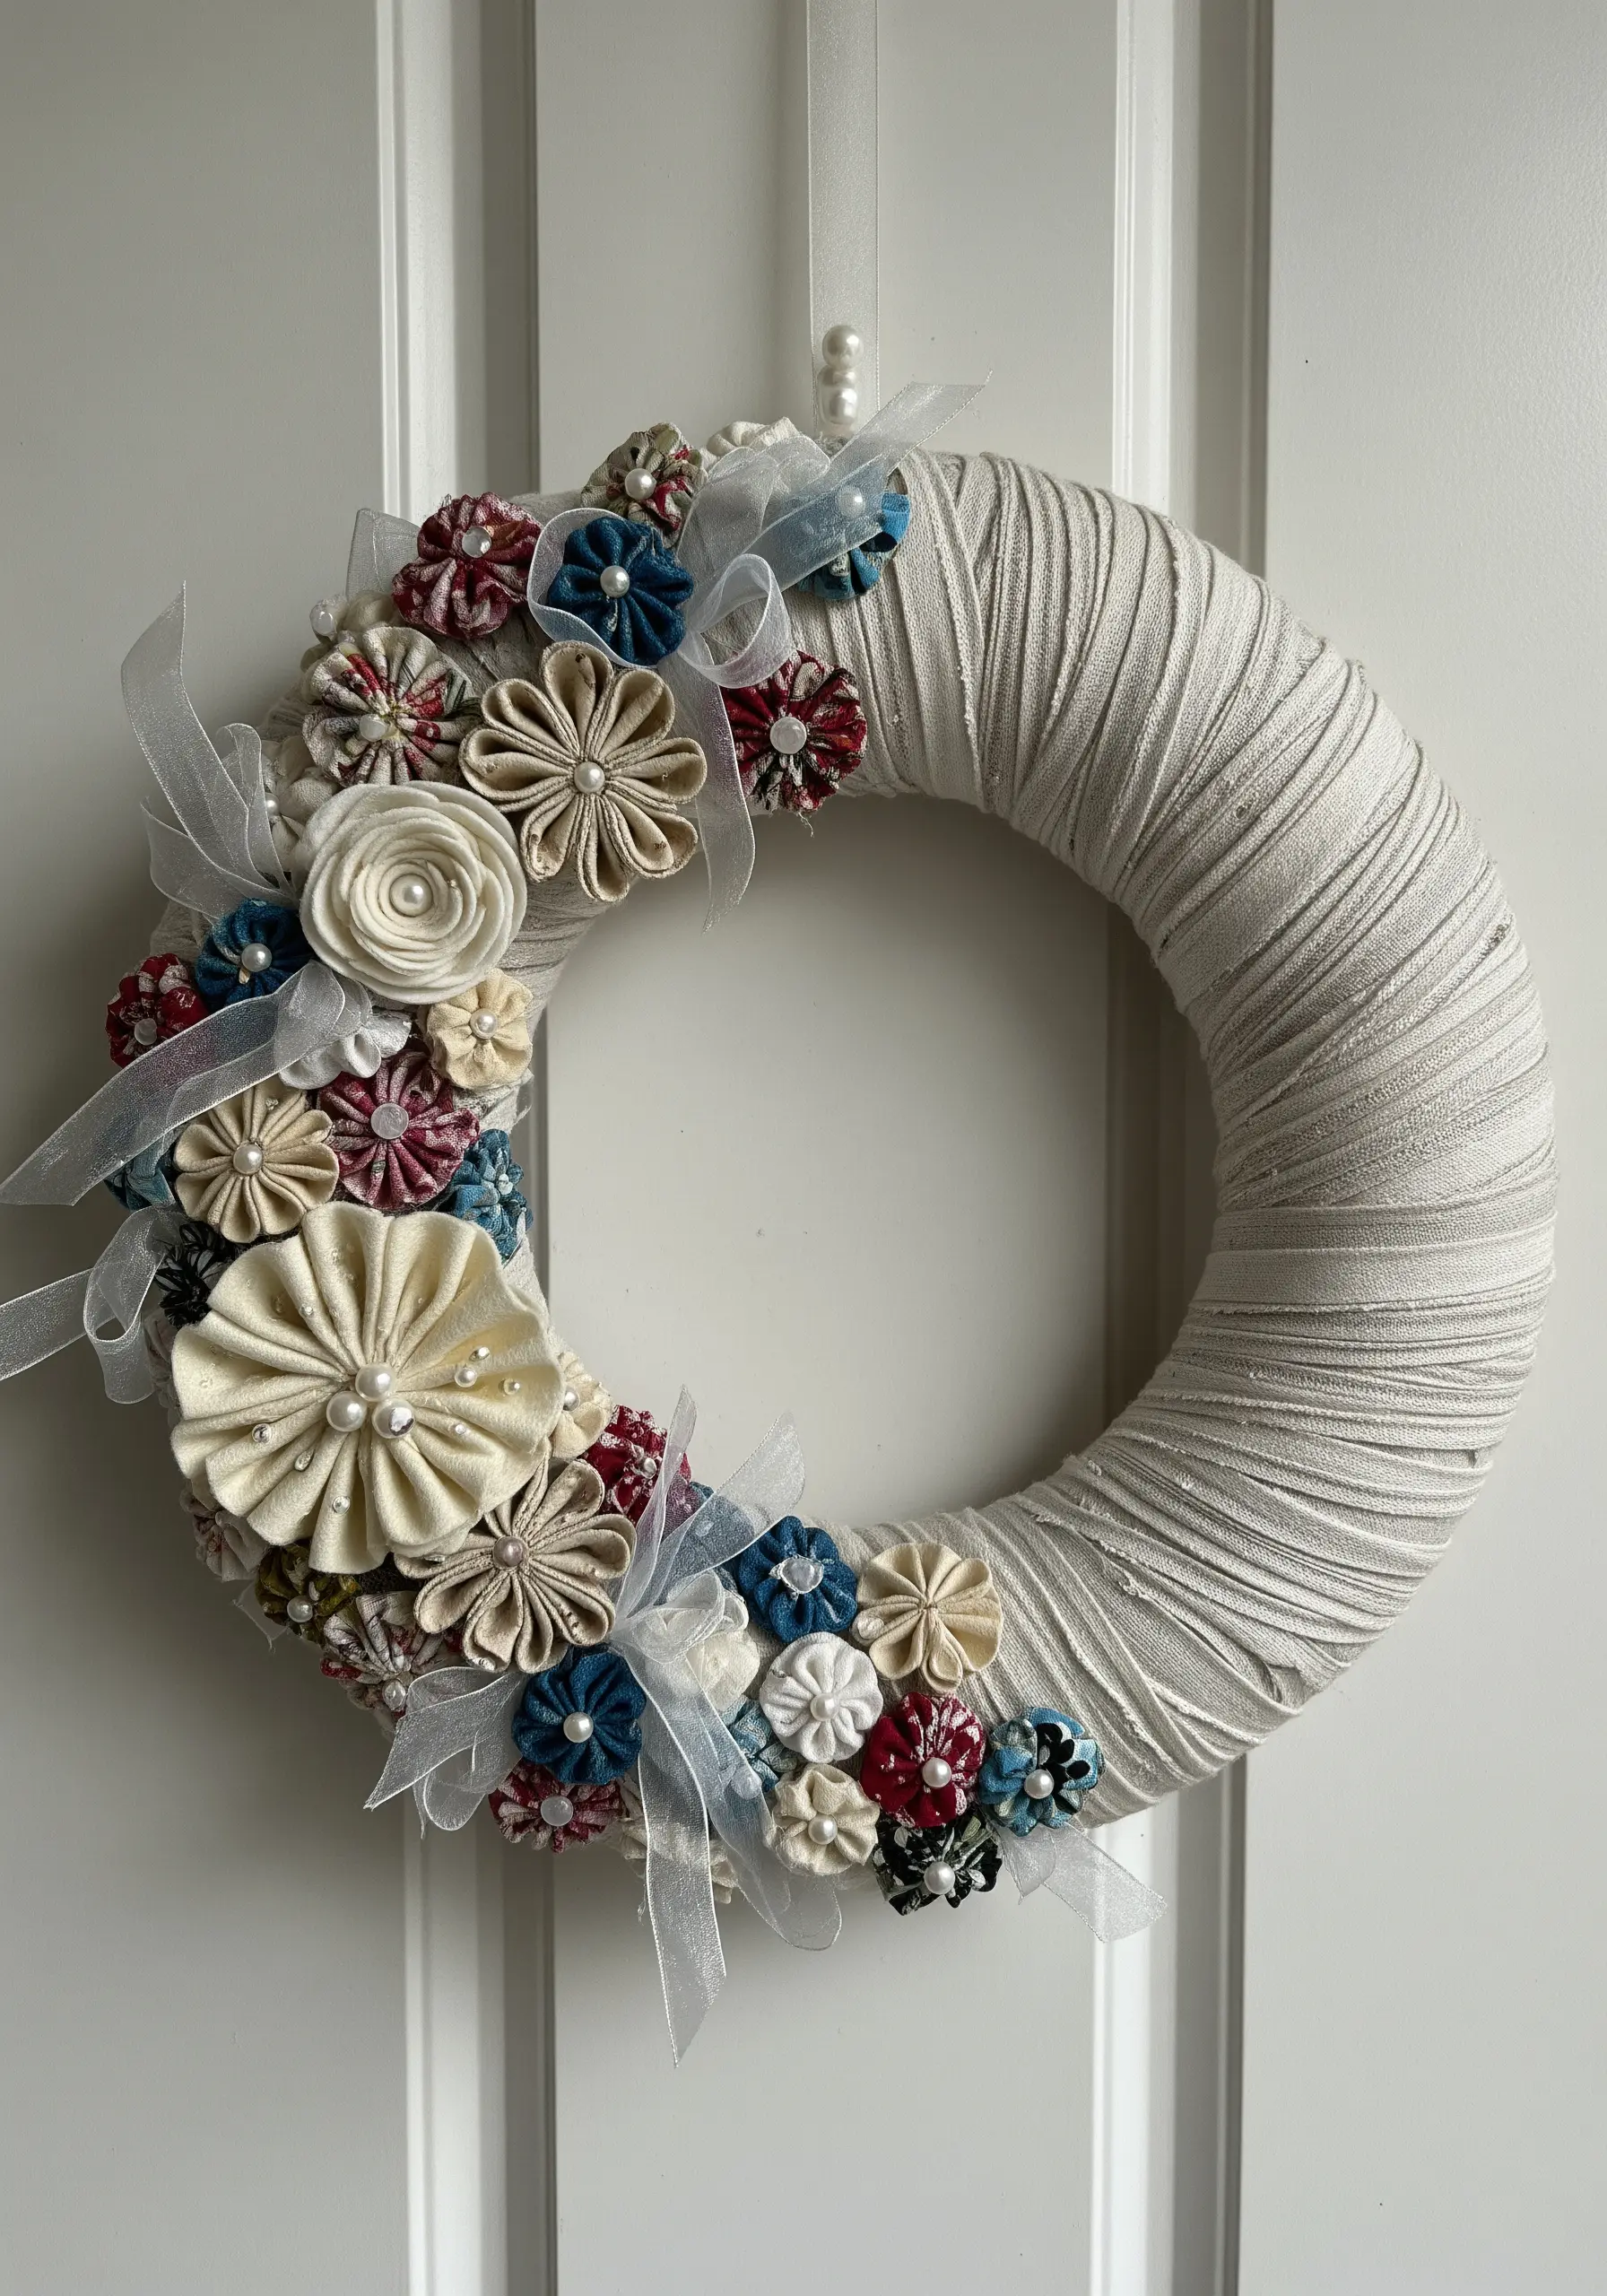
Give fabric scraps an elegant, sculptural form by crafting a wreath with Kanzashi-inspired flowers.
This traditional Japanese technique involves folding small squares of fabric into petal shapes.
Stitch five or six petals together at their base to form a flower, securing a pearl bead or vintage button in the center to hide the join.
Create flowers of varying sizes and colors for visual interest.
Arrange your finished blooms on a wreath form that you’ve wrapped with neutral-toned fabric strips, securing them with a hot glue gun or by stitching them directly to the fabric base.
14. Fabric-Covered Canister Organizers
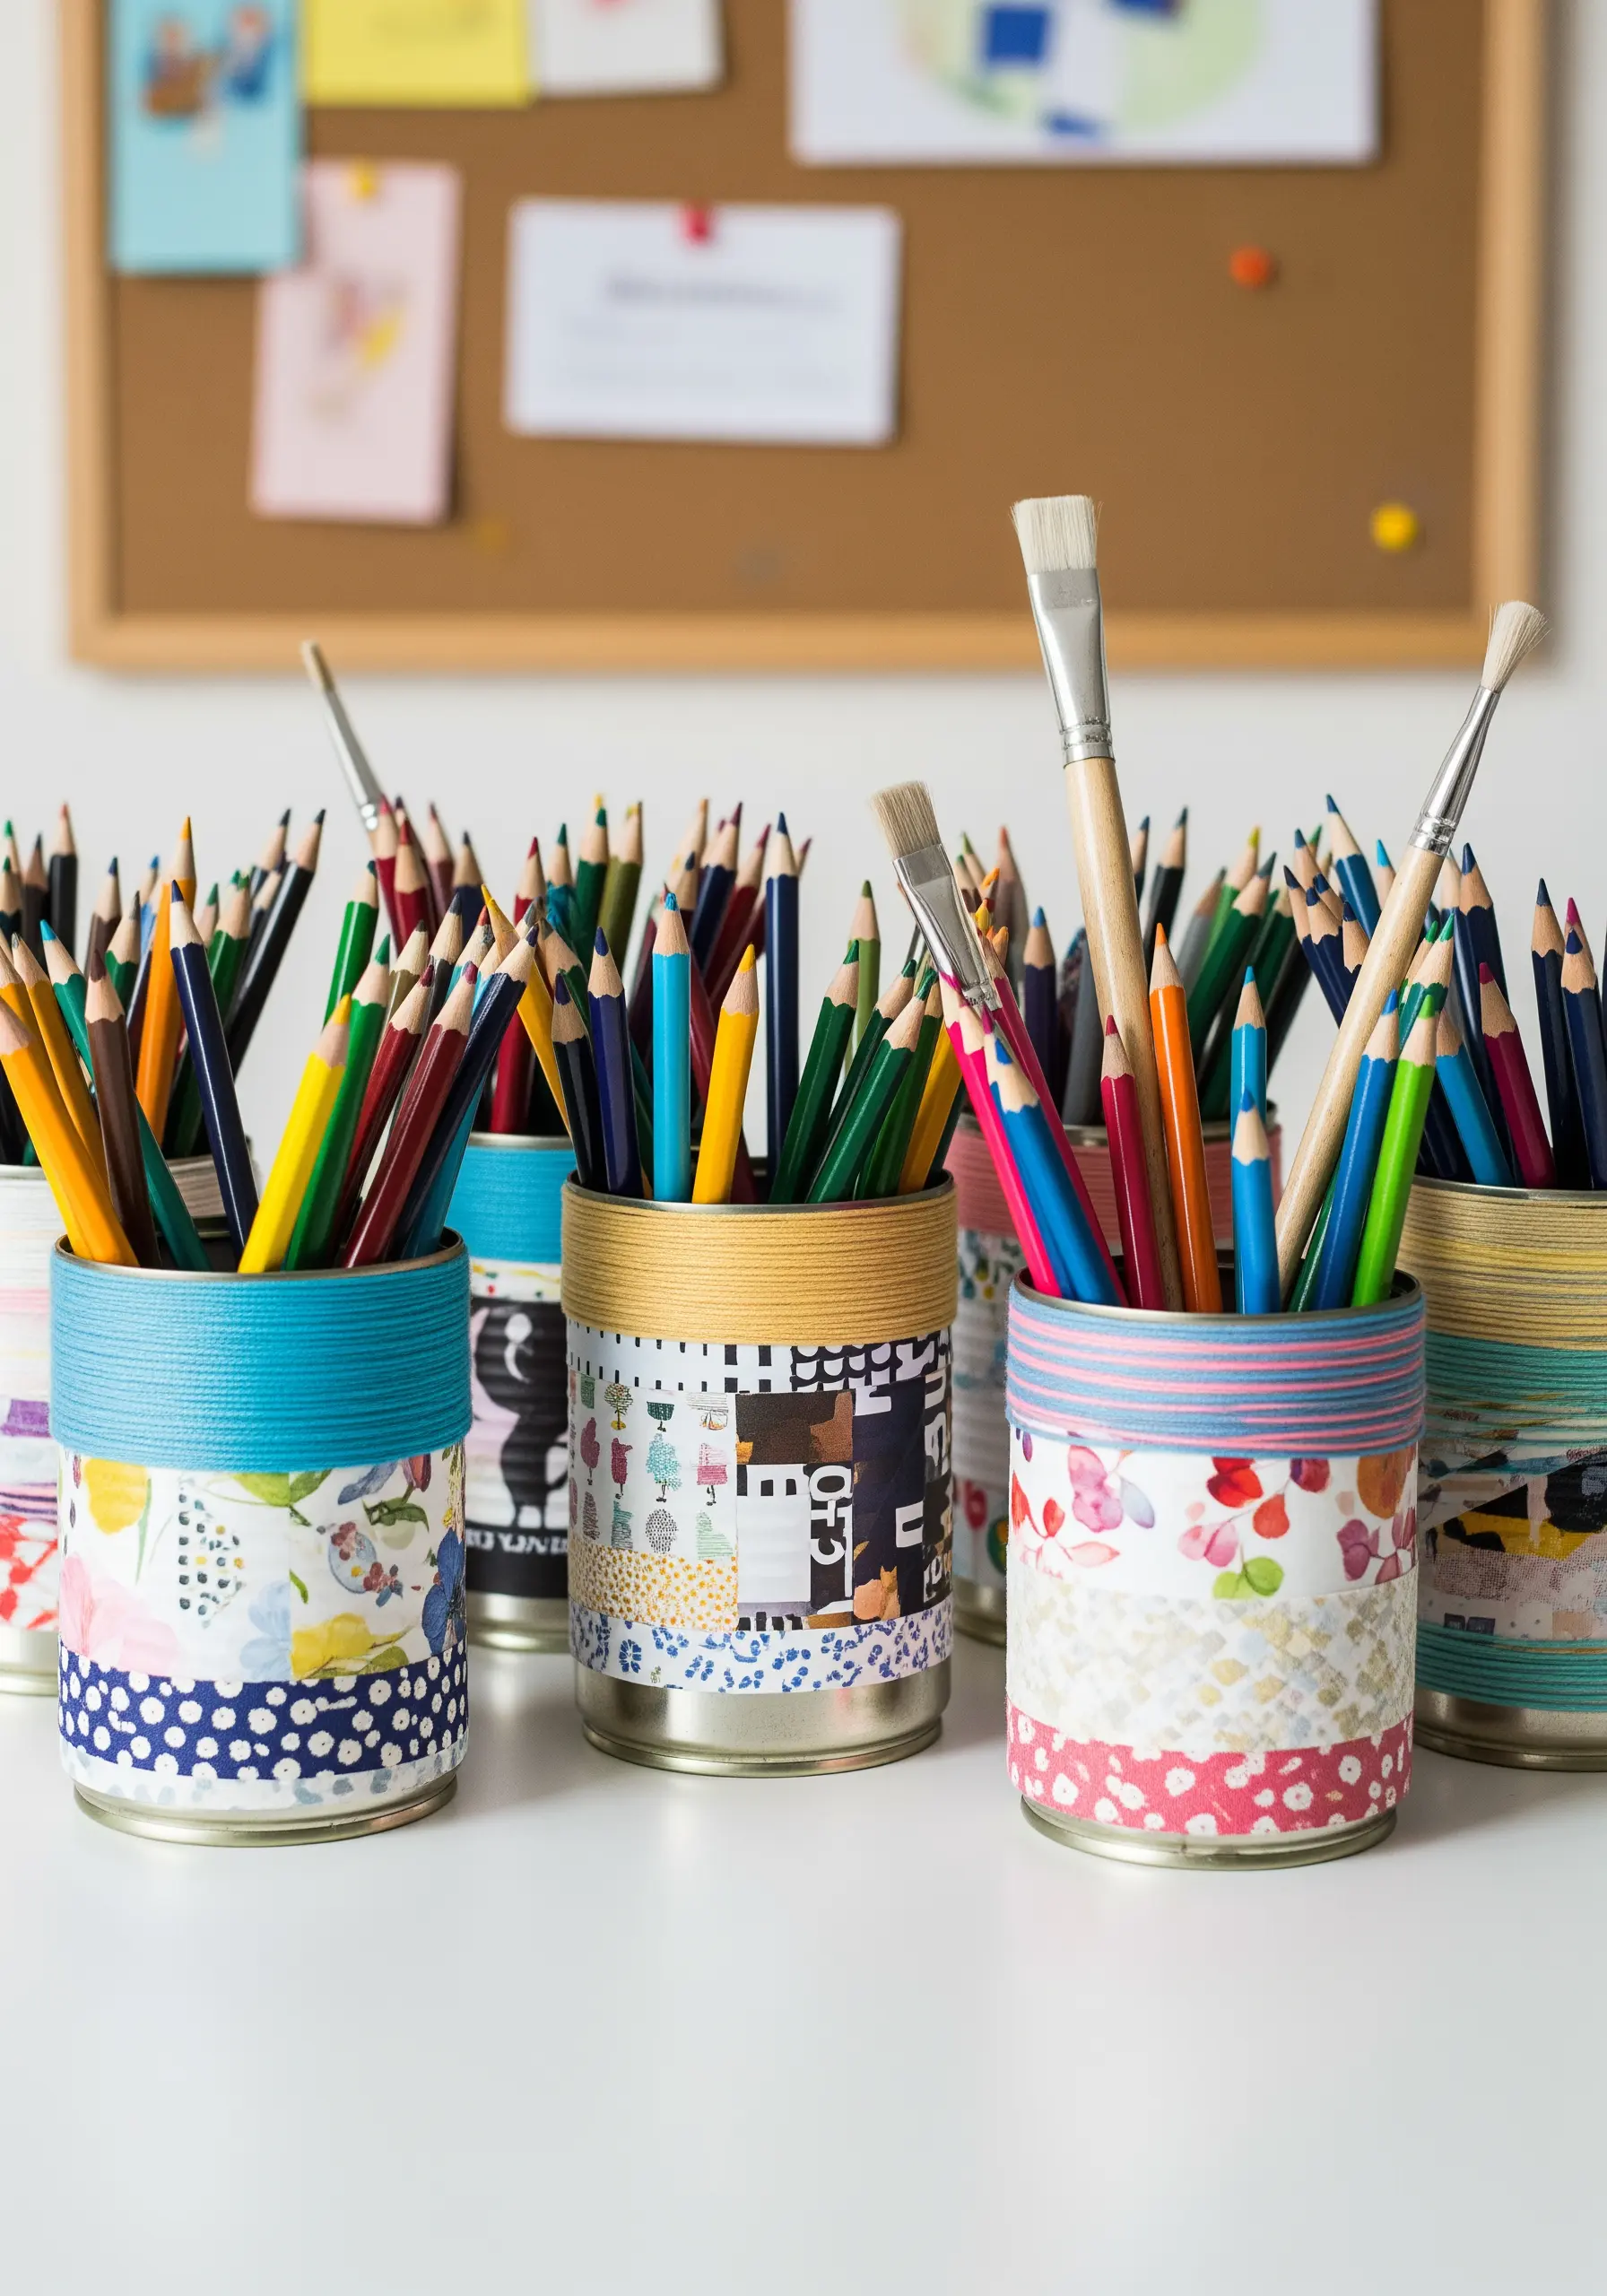
Elevate simple tin cans into bespoke desk storage with a clean, fabric-wrapped finish.
Cut a piece of fabric to the exact height and circumference of your can, plus a small overlap.
Apply a thin, even coat of Mod Podge or fabric glue to the can and smoothly roll the fabric onto it, pressing out any air bubbles.
For a refined edge, tuck the raw fabric edge under before gluing down the final seam.
You can further embellish them by wrapping the top rim with a complementary shade of embroidery floss, creating a crisp, colorful border for your tiny apartment office decor ideas.
15. Appliquéd Seascape Bookmark
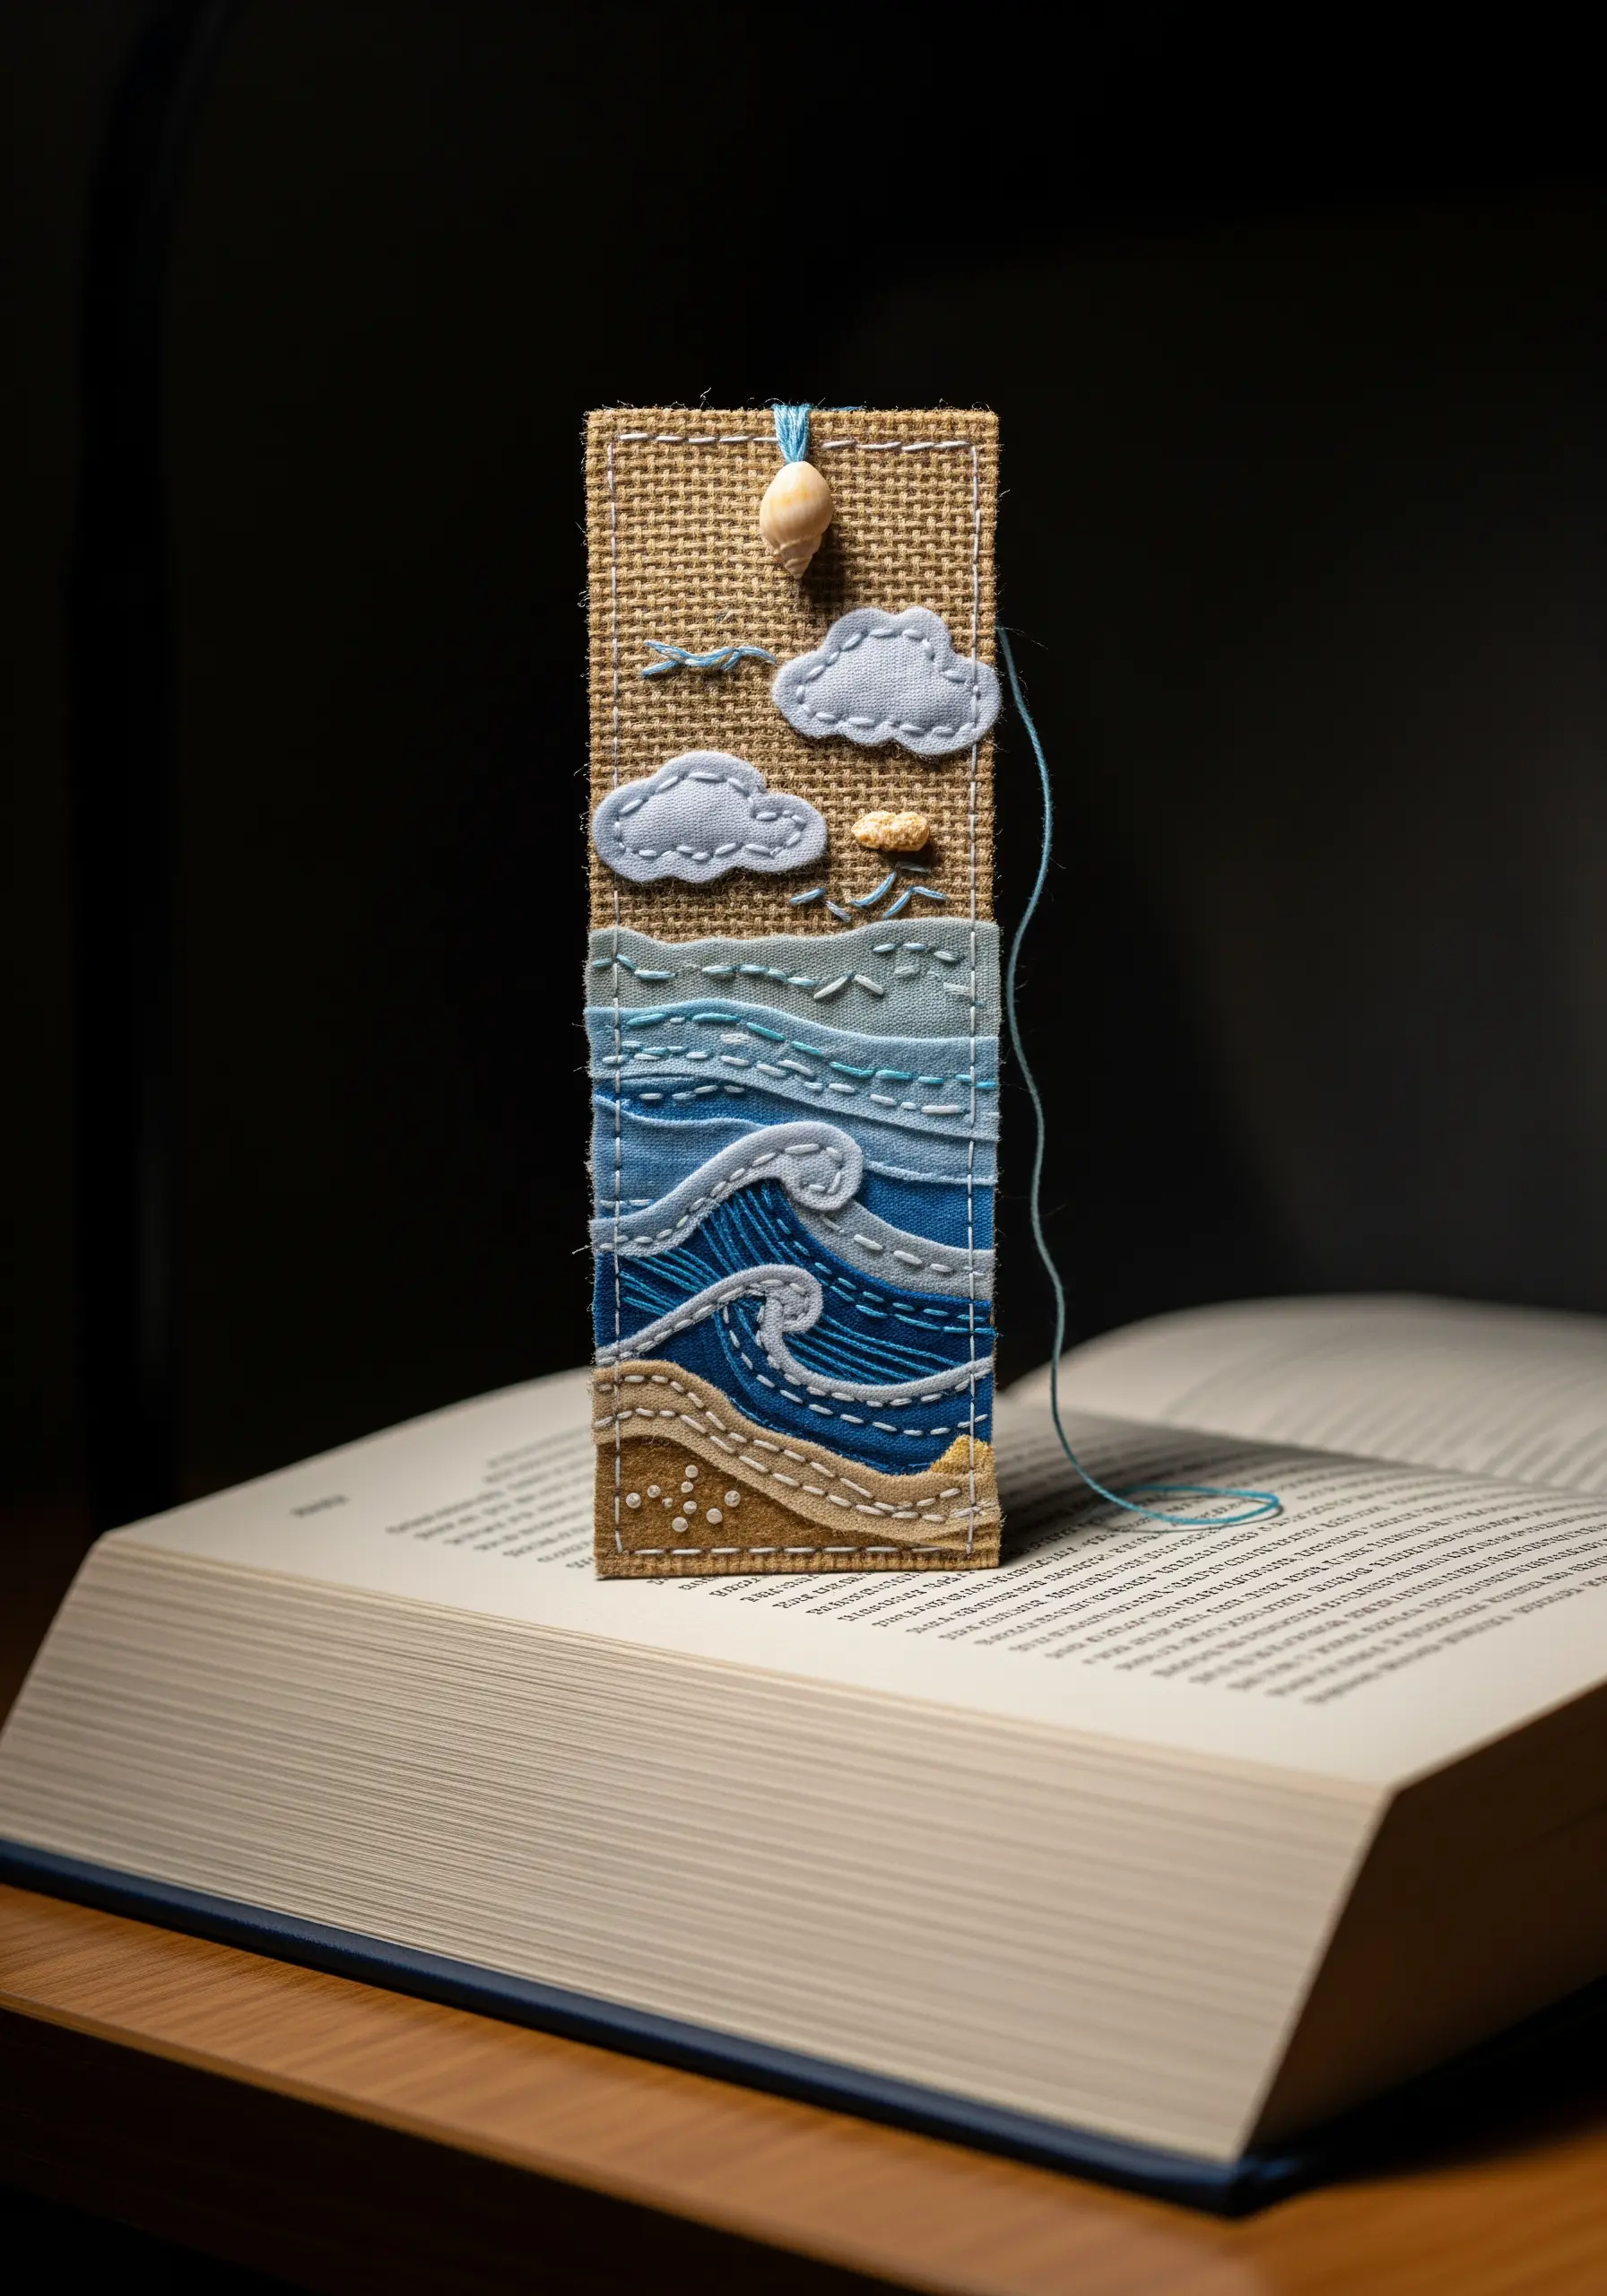
Stitch a miniature textile collage that captures the movement of the sea.
Use a sturdy base fabric like burlap or felt for your bookmark.
Snip and layer small pieces of blue and sandy-toned fabrics to create the ocean and shore, letting the raw edges show for organic texture.
Secure the layers with simple running stitches that mimic the flow of water.
Use contrasting white or ecru thread to add fine details like the crest of a wave with backstitches or seafoam with scattered seed stitches.
These tiny sea-inspired embroidery ideas make for wonderfully personal and functional art.
16. Textile-Wrapped Bead Jewelry
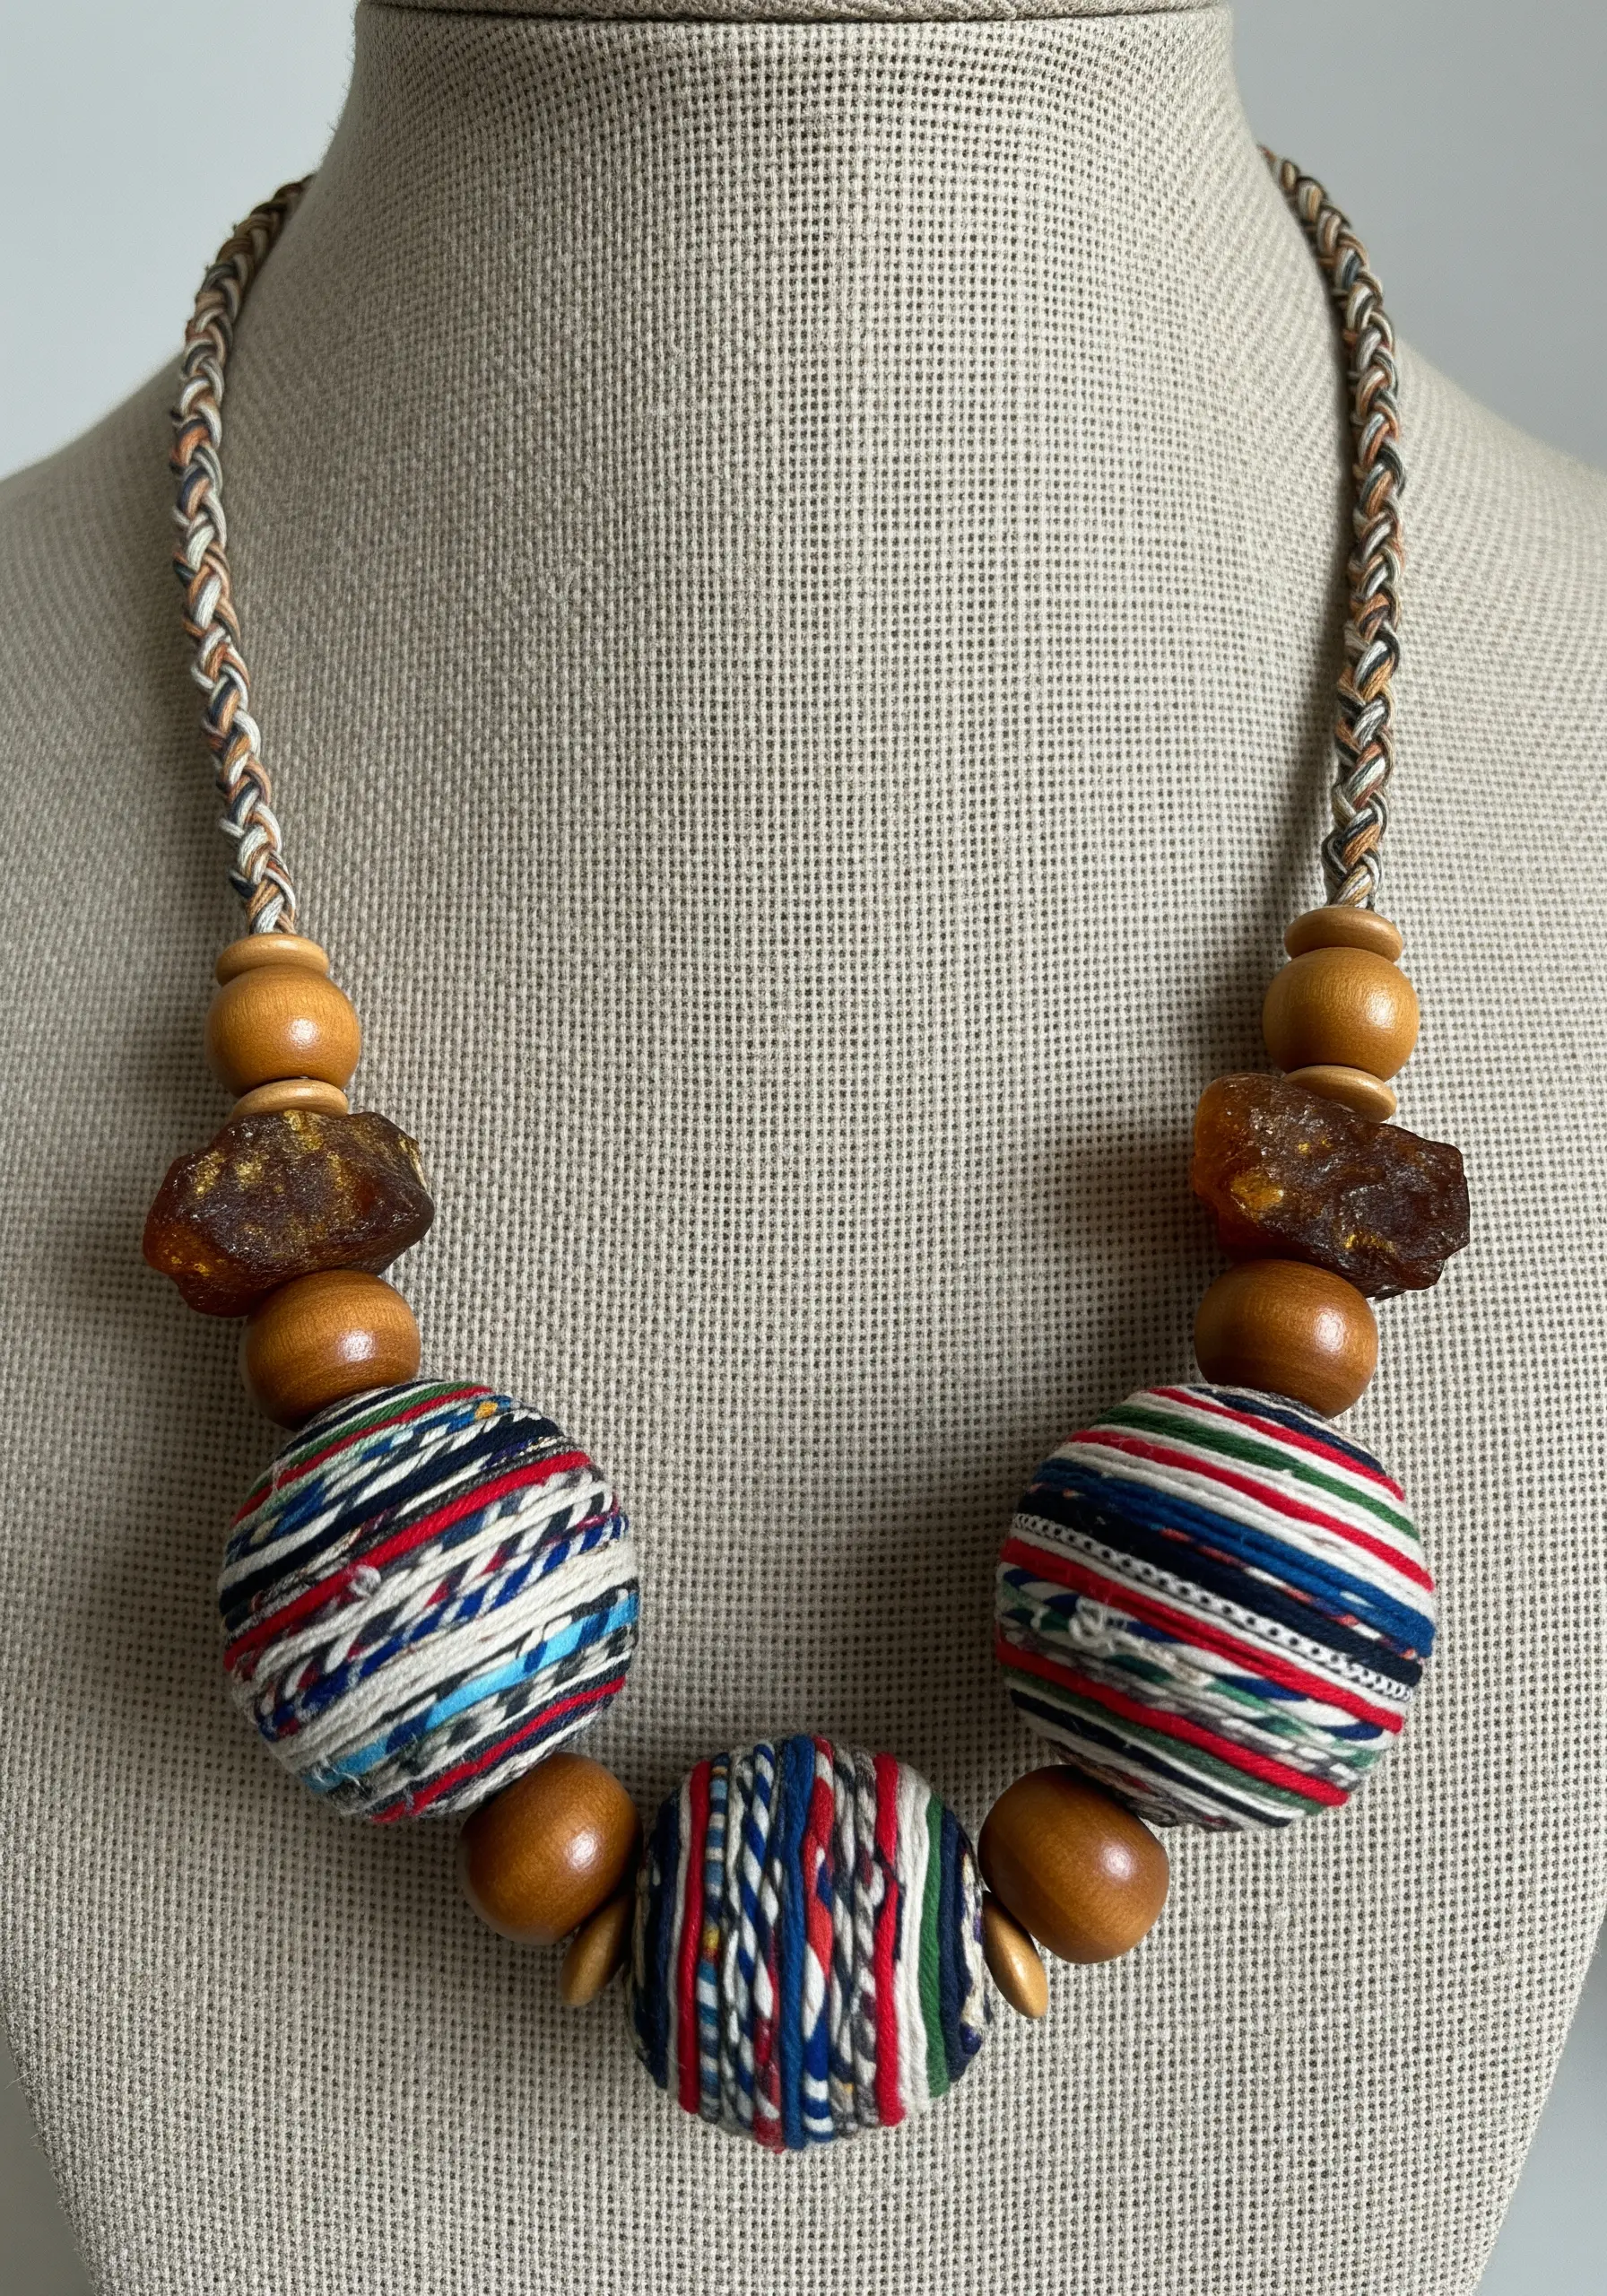
Create bold, lightweight statement jewelry by transforming plain wooden beads with fabric or thread scraps.
For a smooth finish, cut your fabric into a thin, continuous bias strip—this allows it to wrap around a sphere without puckering.
Secure the starting end with a dot of glue, then wrap tightly, overlapping each layer slightly.
Tuck the final end under the last wrap with another dot of glue.
For a more textured look, wrap the beads with variegated embroidery floss or fine yarn, creating a colorful, homespun feel for your handmade embroidered jewelry and accessories.
17. Decoupaged Fabric Storage Boxes
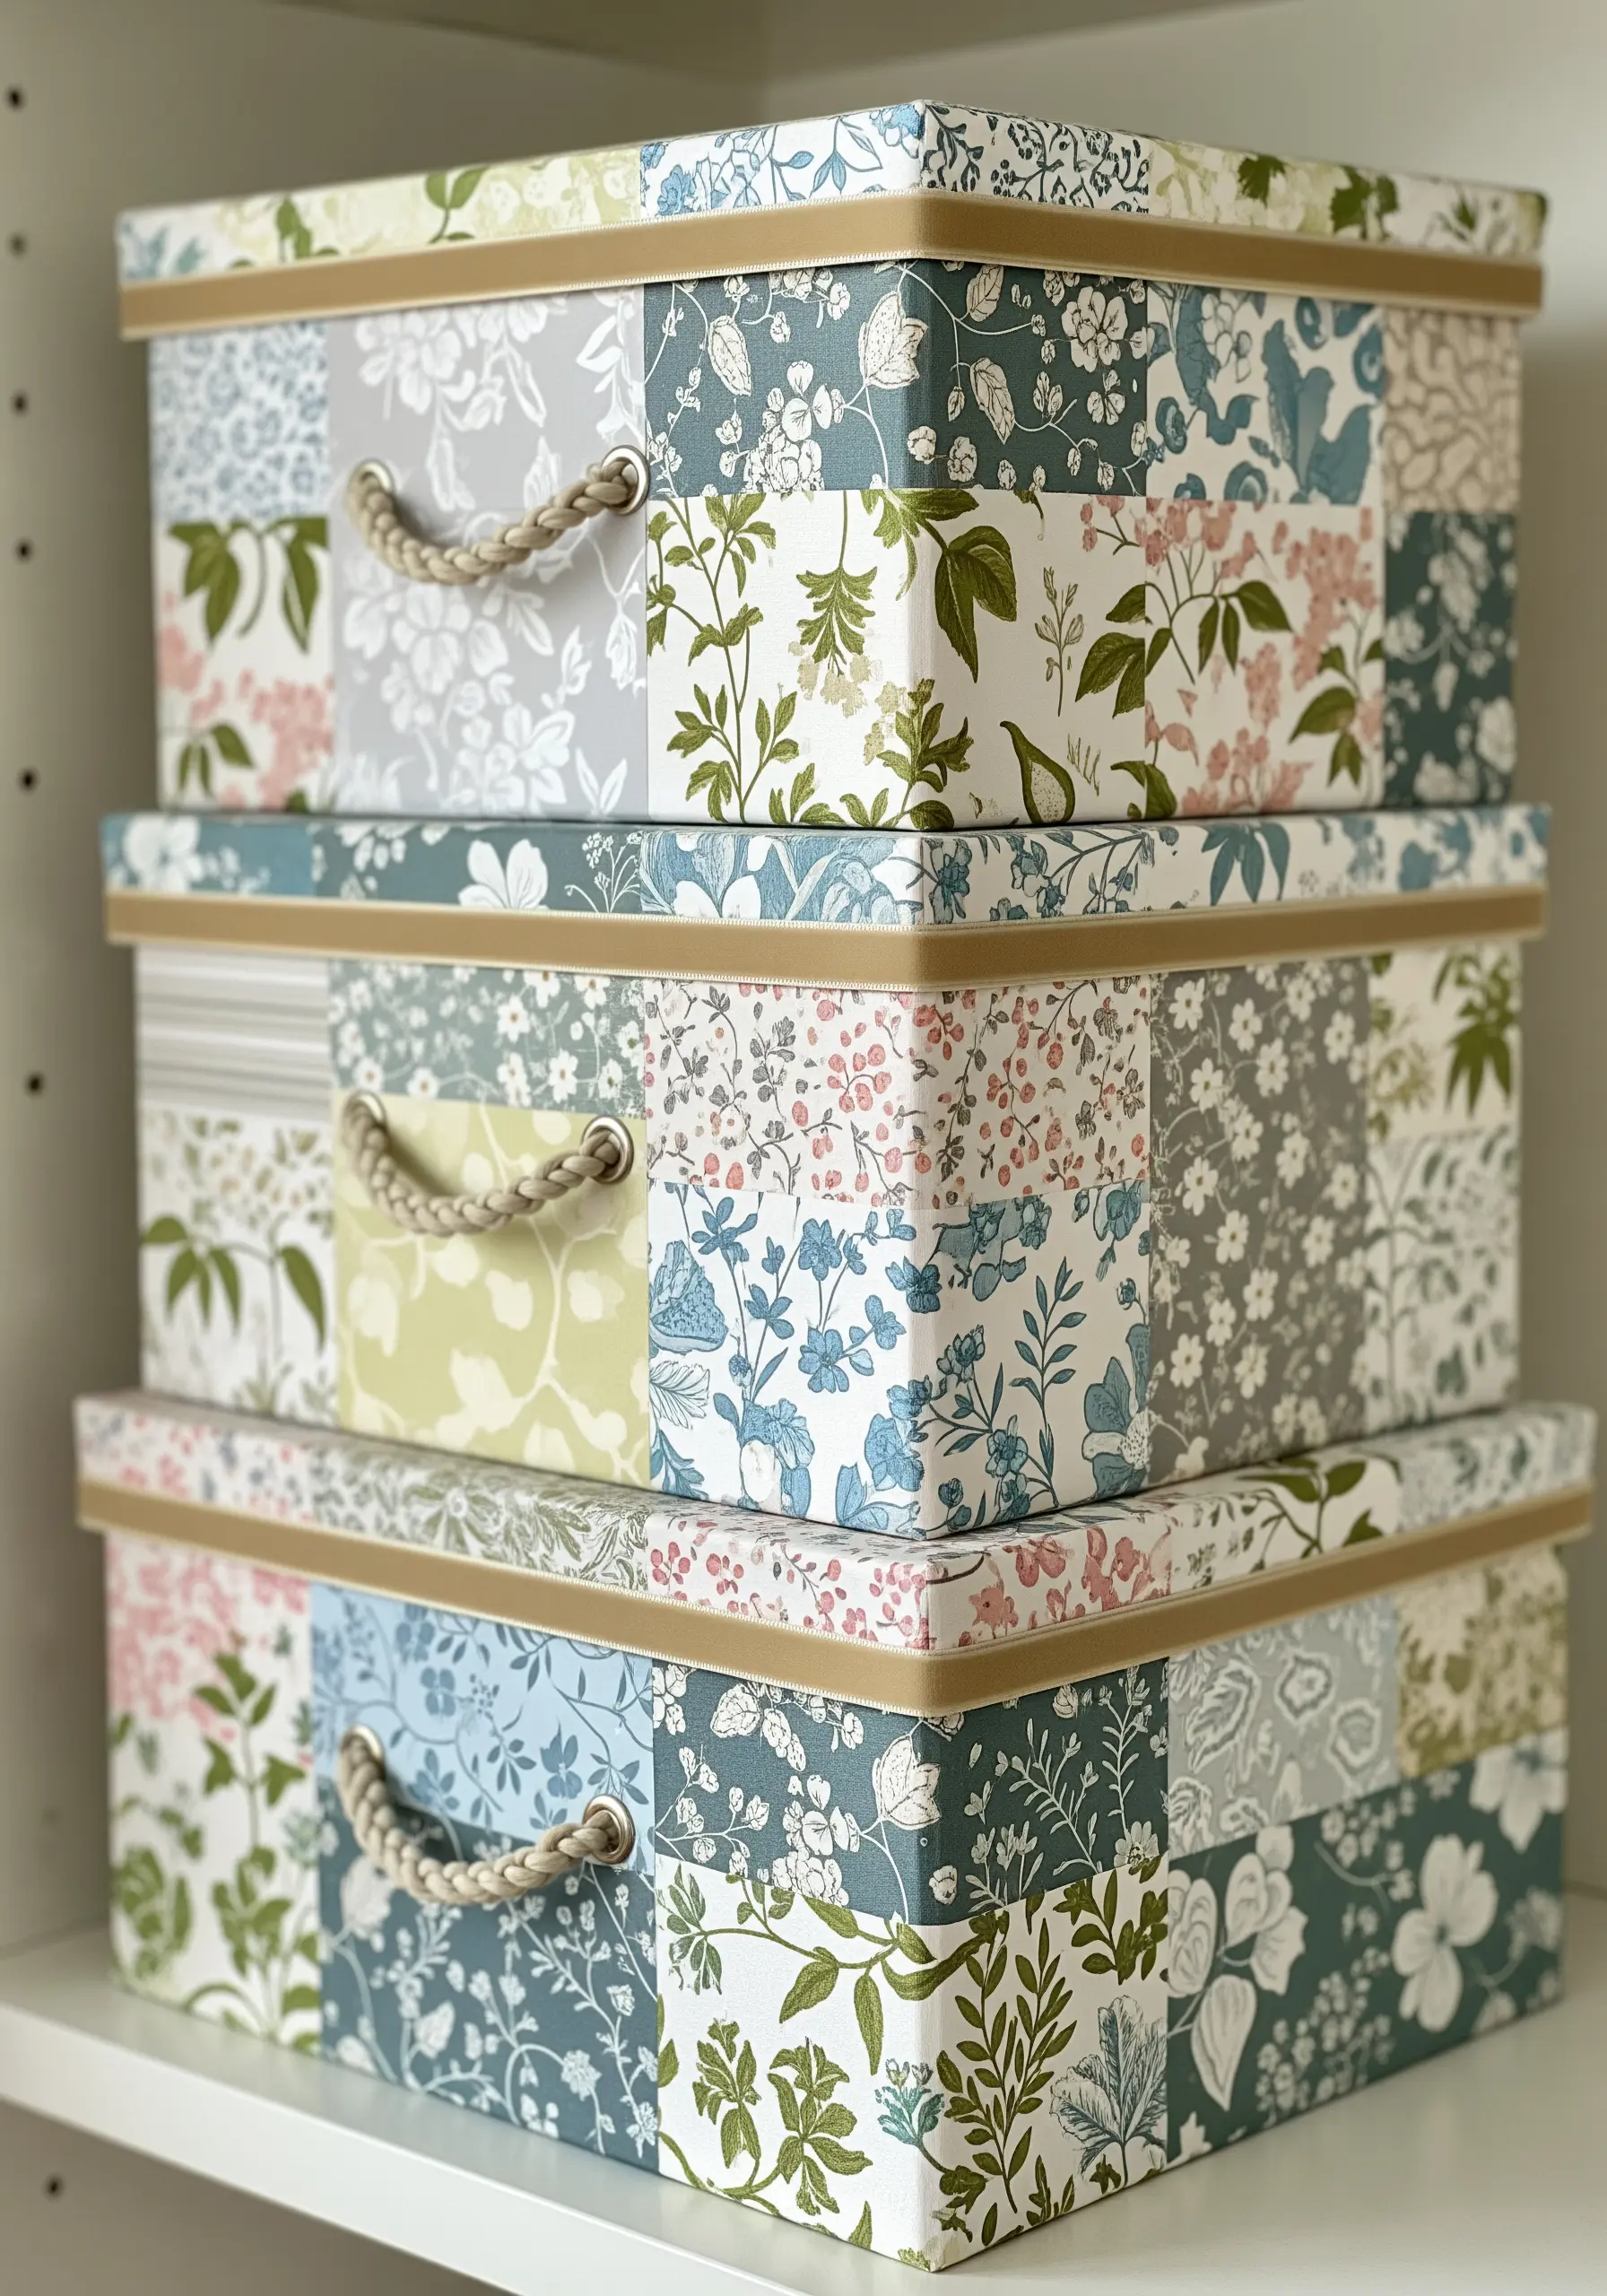
Unify mismatched storage boxes and give them a durable, custom finish using fabric decoupage.
Select a cohesive palette of fabric scraps and cut them into geometric shapes.
Working in small sections, apply a thin layer of fabric-safe Mod Podge to the box, press a fabric piece down firmly, and then apply another thin layer of Mod Podge on top to seal it.
Overlap your pieces slightly to ensure full coverage.
This technique not only beautifies the boxes but also reinforces them, creating stylish and smart embroidery storage ideas for tiny apartments.


