

A simple tote bag is the perfect canvas, but it’s easy to feel stuck when deciding what to stitch. You want something that feels modern, looks intentional, and reflects your personal style—not just another generic floral motif.
This is where geometric embroidery shines. It’s a language of shape, line, and texture that can be as minimalist or as complex as you wish. By focusing on precision, color theory, and the right stitch for the job, you can transform a basic bag into a piece of wearable art that looks polished, cohesive, and uniquely you.
Forget feeling overwhelmed. Here, you’ll discover techniques that offer immediate visual impact, from creating 3D illusions with thread direction to adding sculptural texture with yarn. These are not just patterns; they are exercises in thoughtful design that will build your confidence and refine your artistic eye, one stitch at a time.
1. Create Dimensional Depth with Directional Satin Stitch
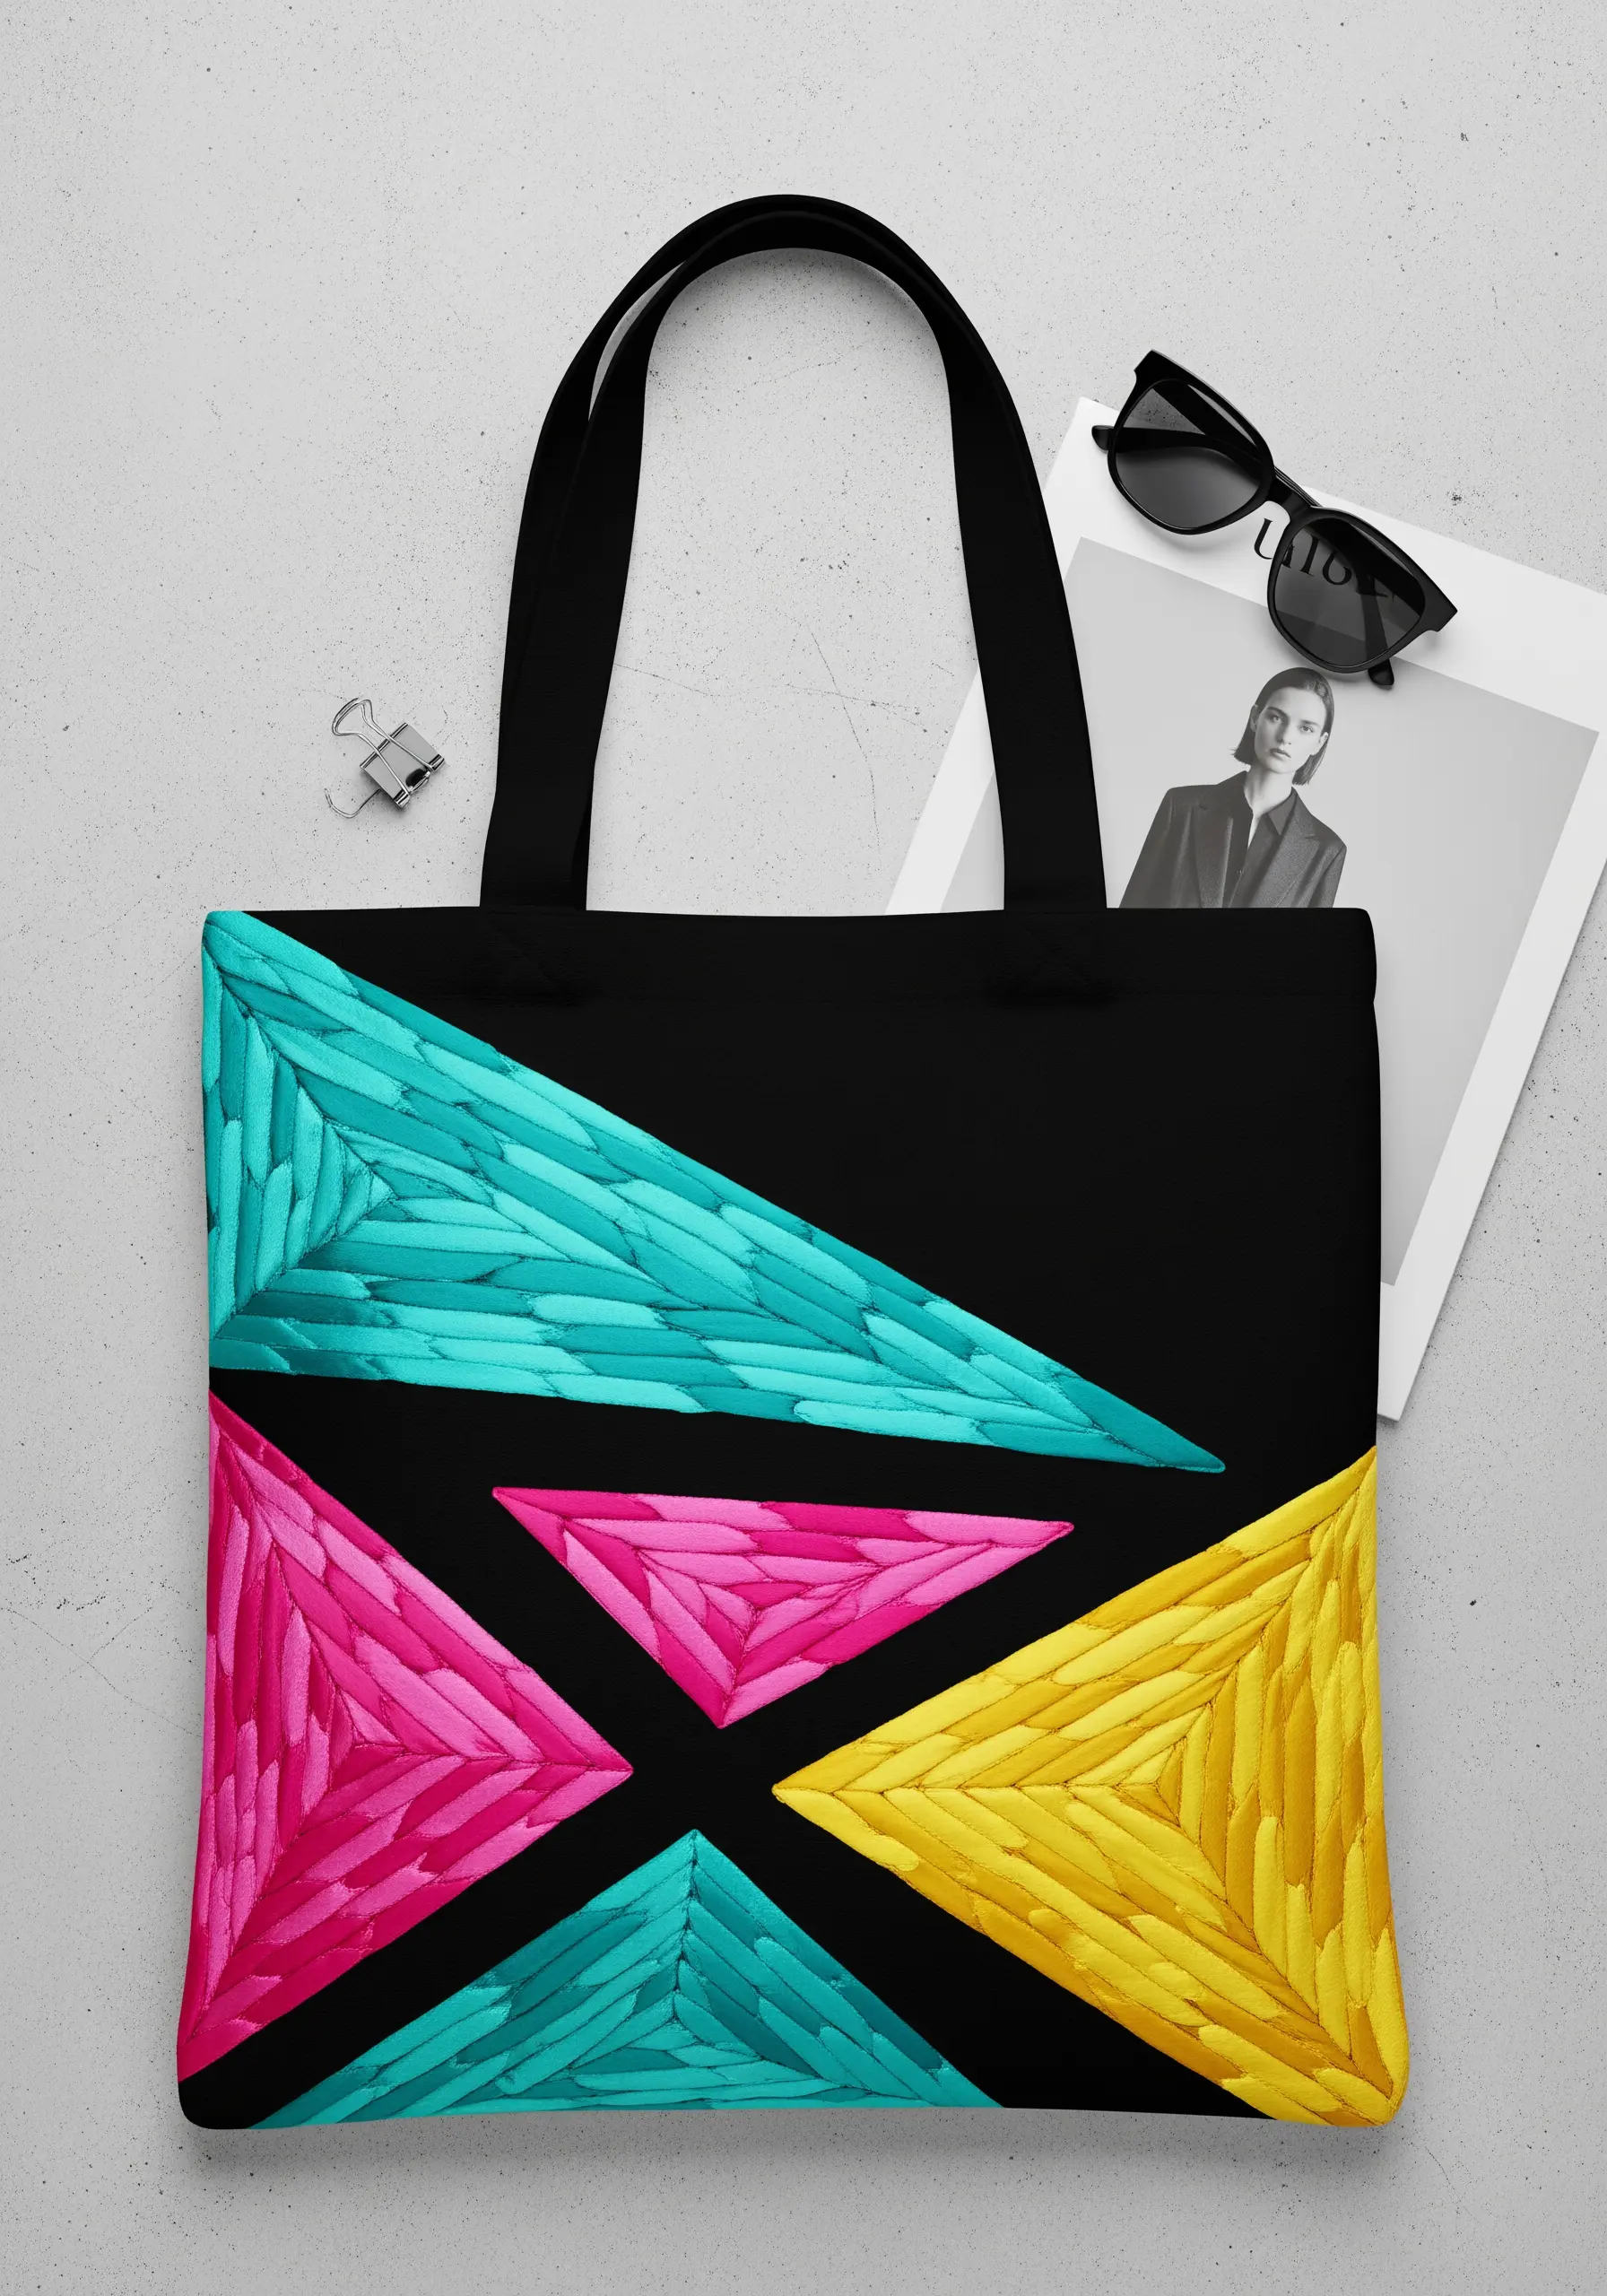
Transform flat triangles into dynamic, 3D-like shapes by controlling the direction of your satin stitches.
Instead of filling each shape uniformly, angle your stitches to converge at a central point or flow from one edge to another.
This technique tricks the eye into seeing light and shadow, giving the geometric forms a faceted, almost crystalline appearance.
Use a high-sheen six-strand floss and don’t split the threads; the thickness enhances the texture and makes the vibrant colors pop against the dark canvas.
2. Combine Outline and Texture for Understated Elegance
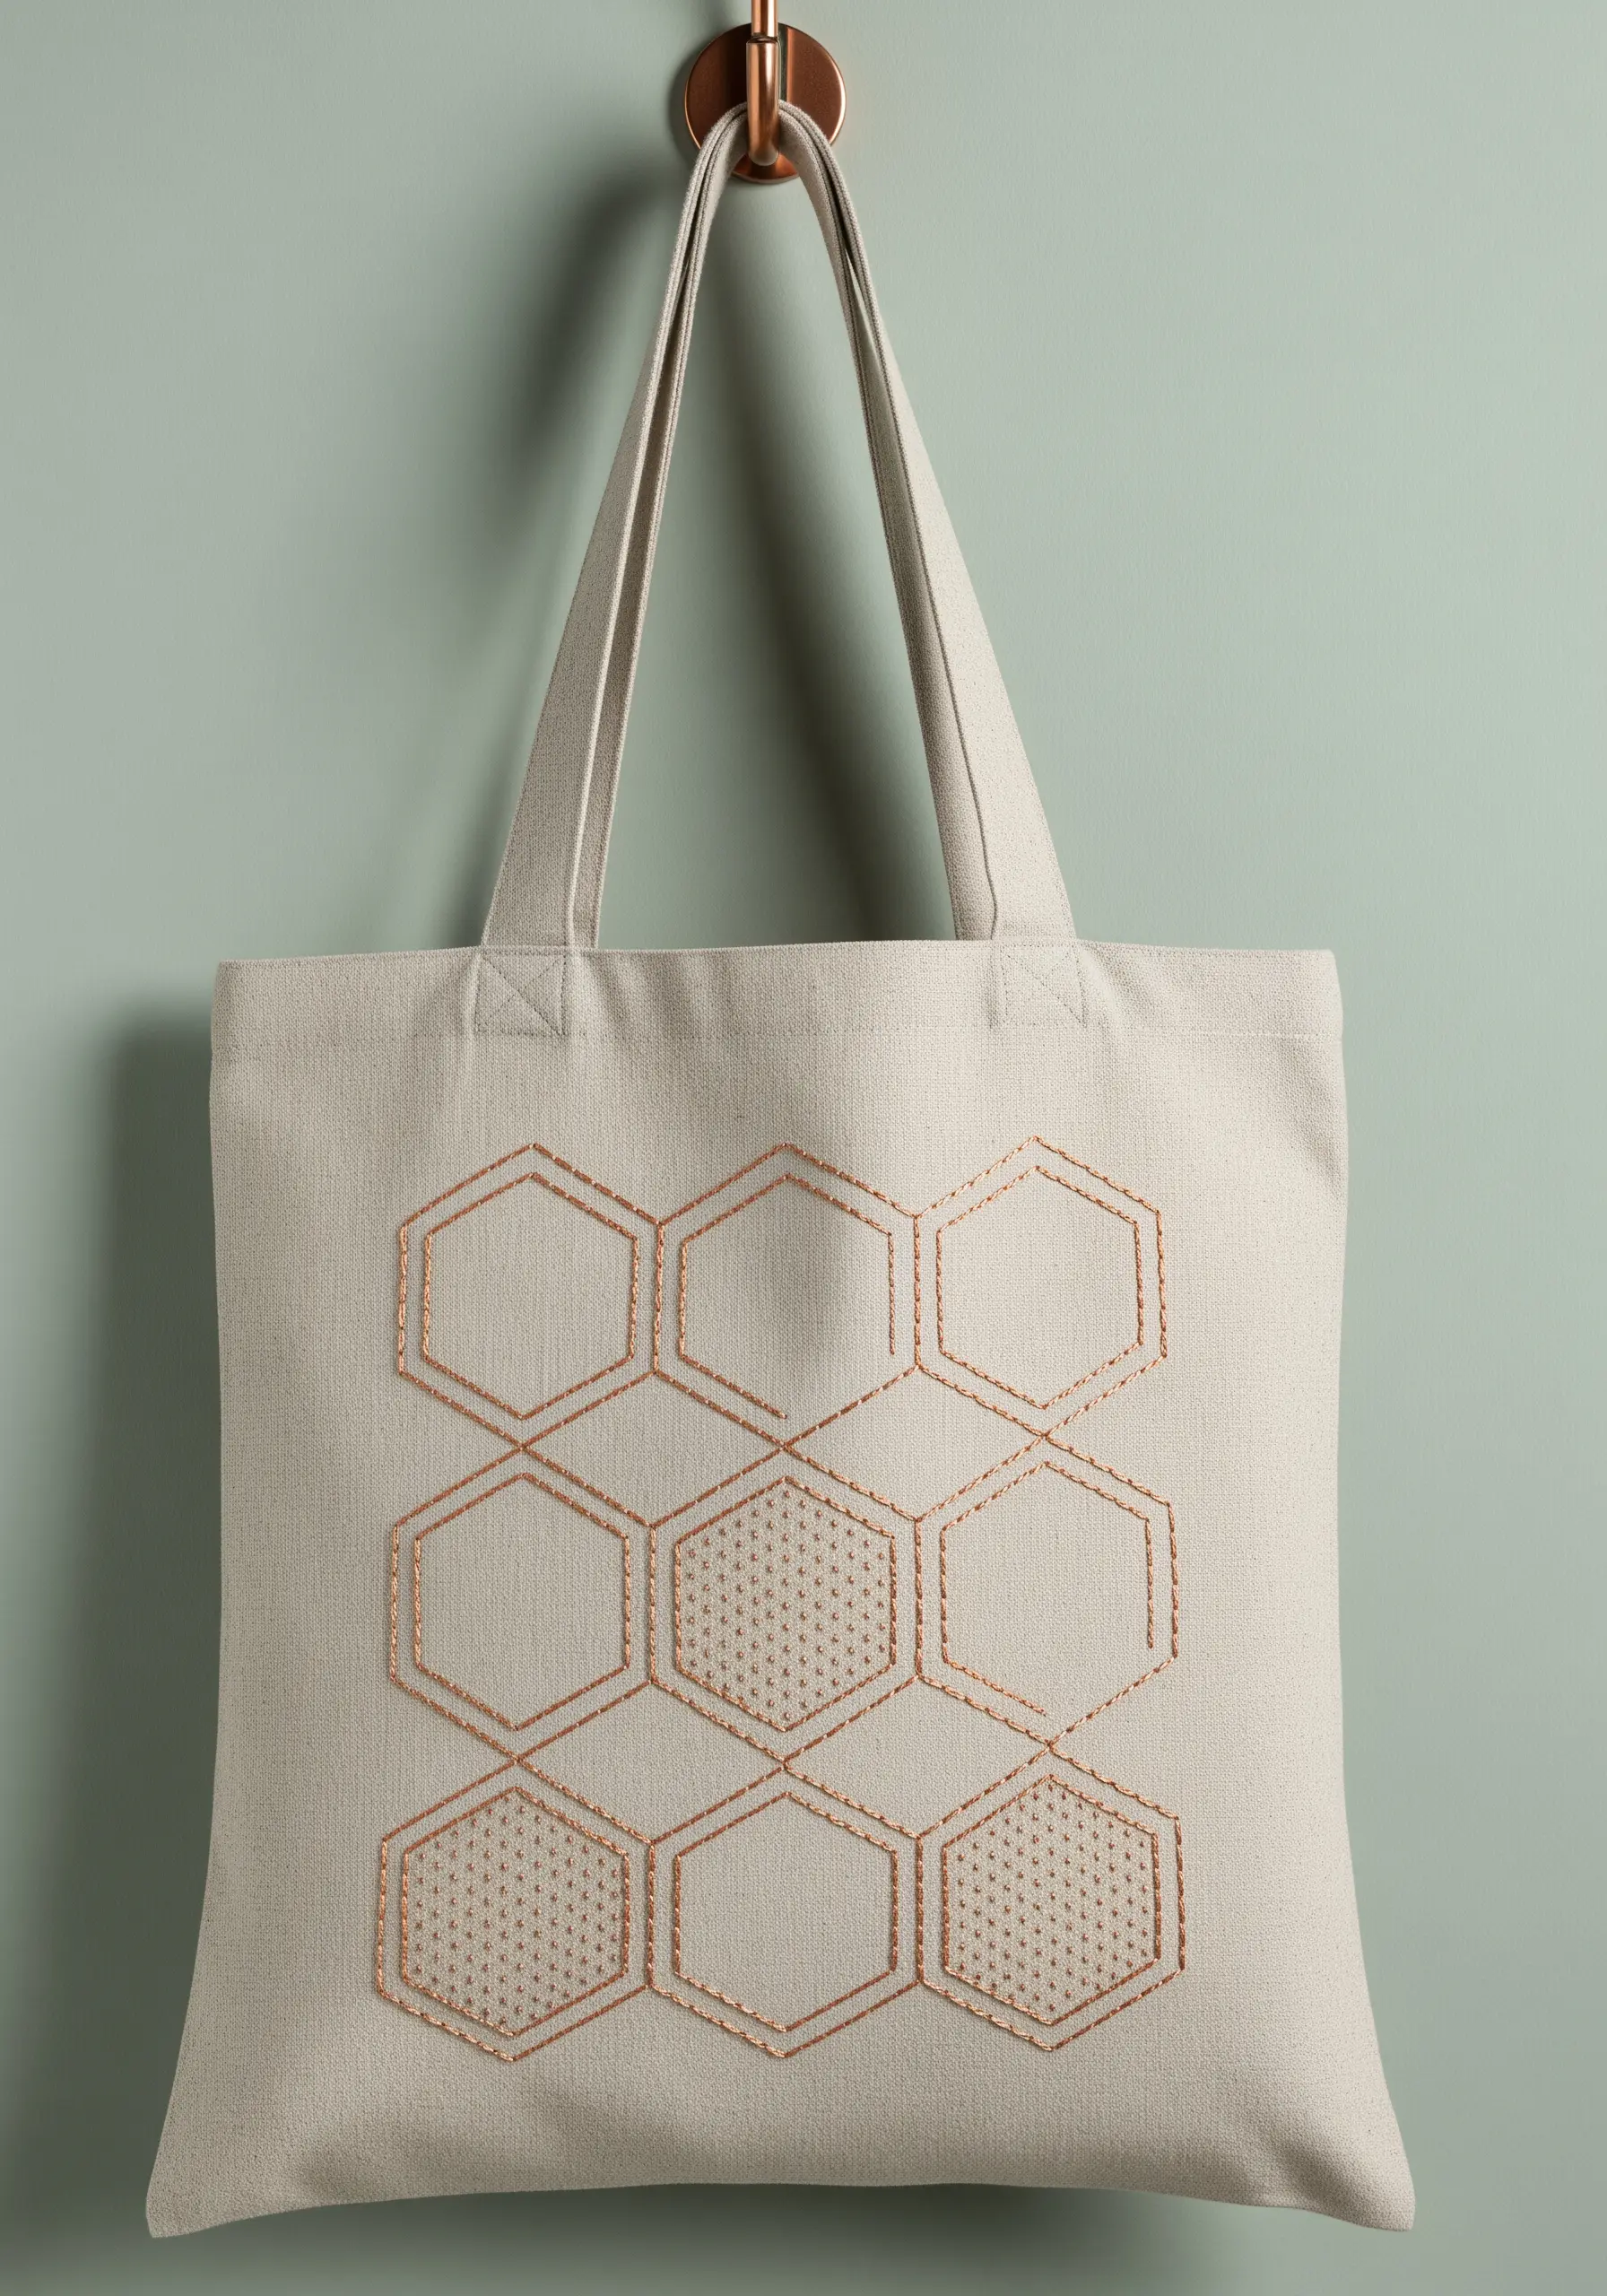
Elevate a simple honeycomb pattern by focusing on the interplay between lines and texture.
Use a fine backstitch or stem stitch for the hexagonal outlines—a metallic copper or bronze thread adds warmth and sophistication to neutral canvas.
Fill select hexagons with tiny, scattered seed stitches. This creates a subtle textural contrast that draws the eye without overwhelming the design.
The beauty here lies in restraint; the empty shapes are just as important as the filled ones, creating a balanced and airy composition.
3. Master the Art Deco Sunburst with Couching

Capture the glamour of Art Deco by layering different types of thread to create a dramatic sunburst.
For the thicker, prominent rays, use a multi-strand metallic floss or a fine metallic yarn. Instead of stitching through the heavy fabric repeatedly, lay it on the surface and secure it with small, evenly spaced couching stitches in a matching, thinner thread.
Intersperse these bold rays with delicate lines of single-strand backstitch using contrasting metallic threads, like silver and gold.
This method not only saves thread but also creates a cleaner, more defined look with varied line weights, which is key to the Deco aesthetic.
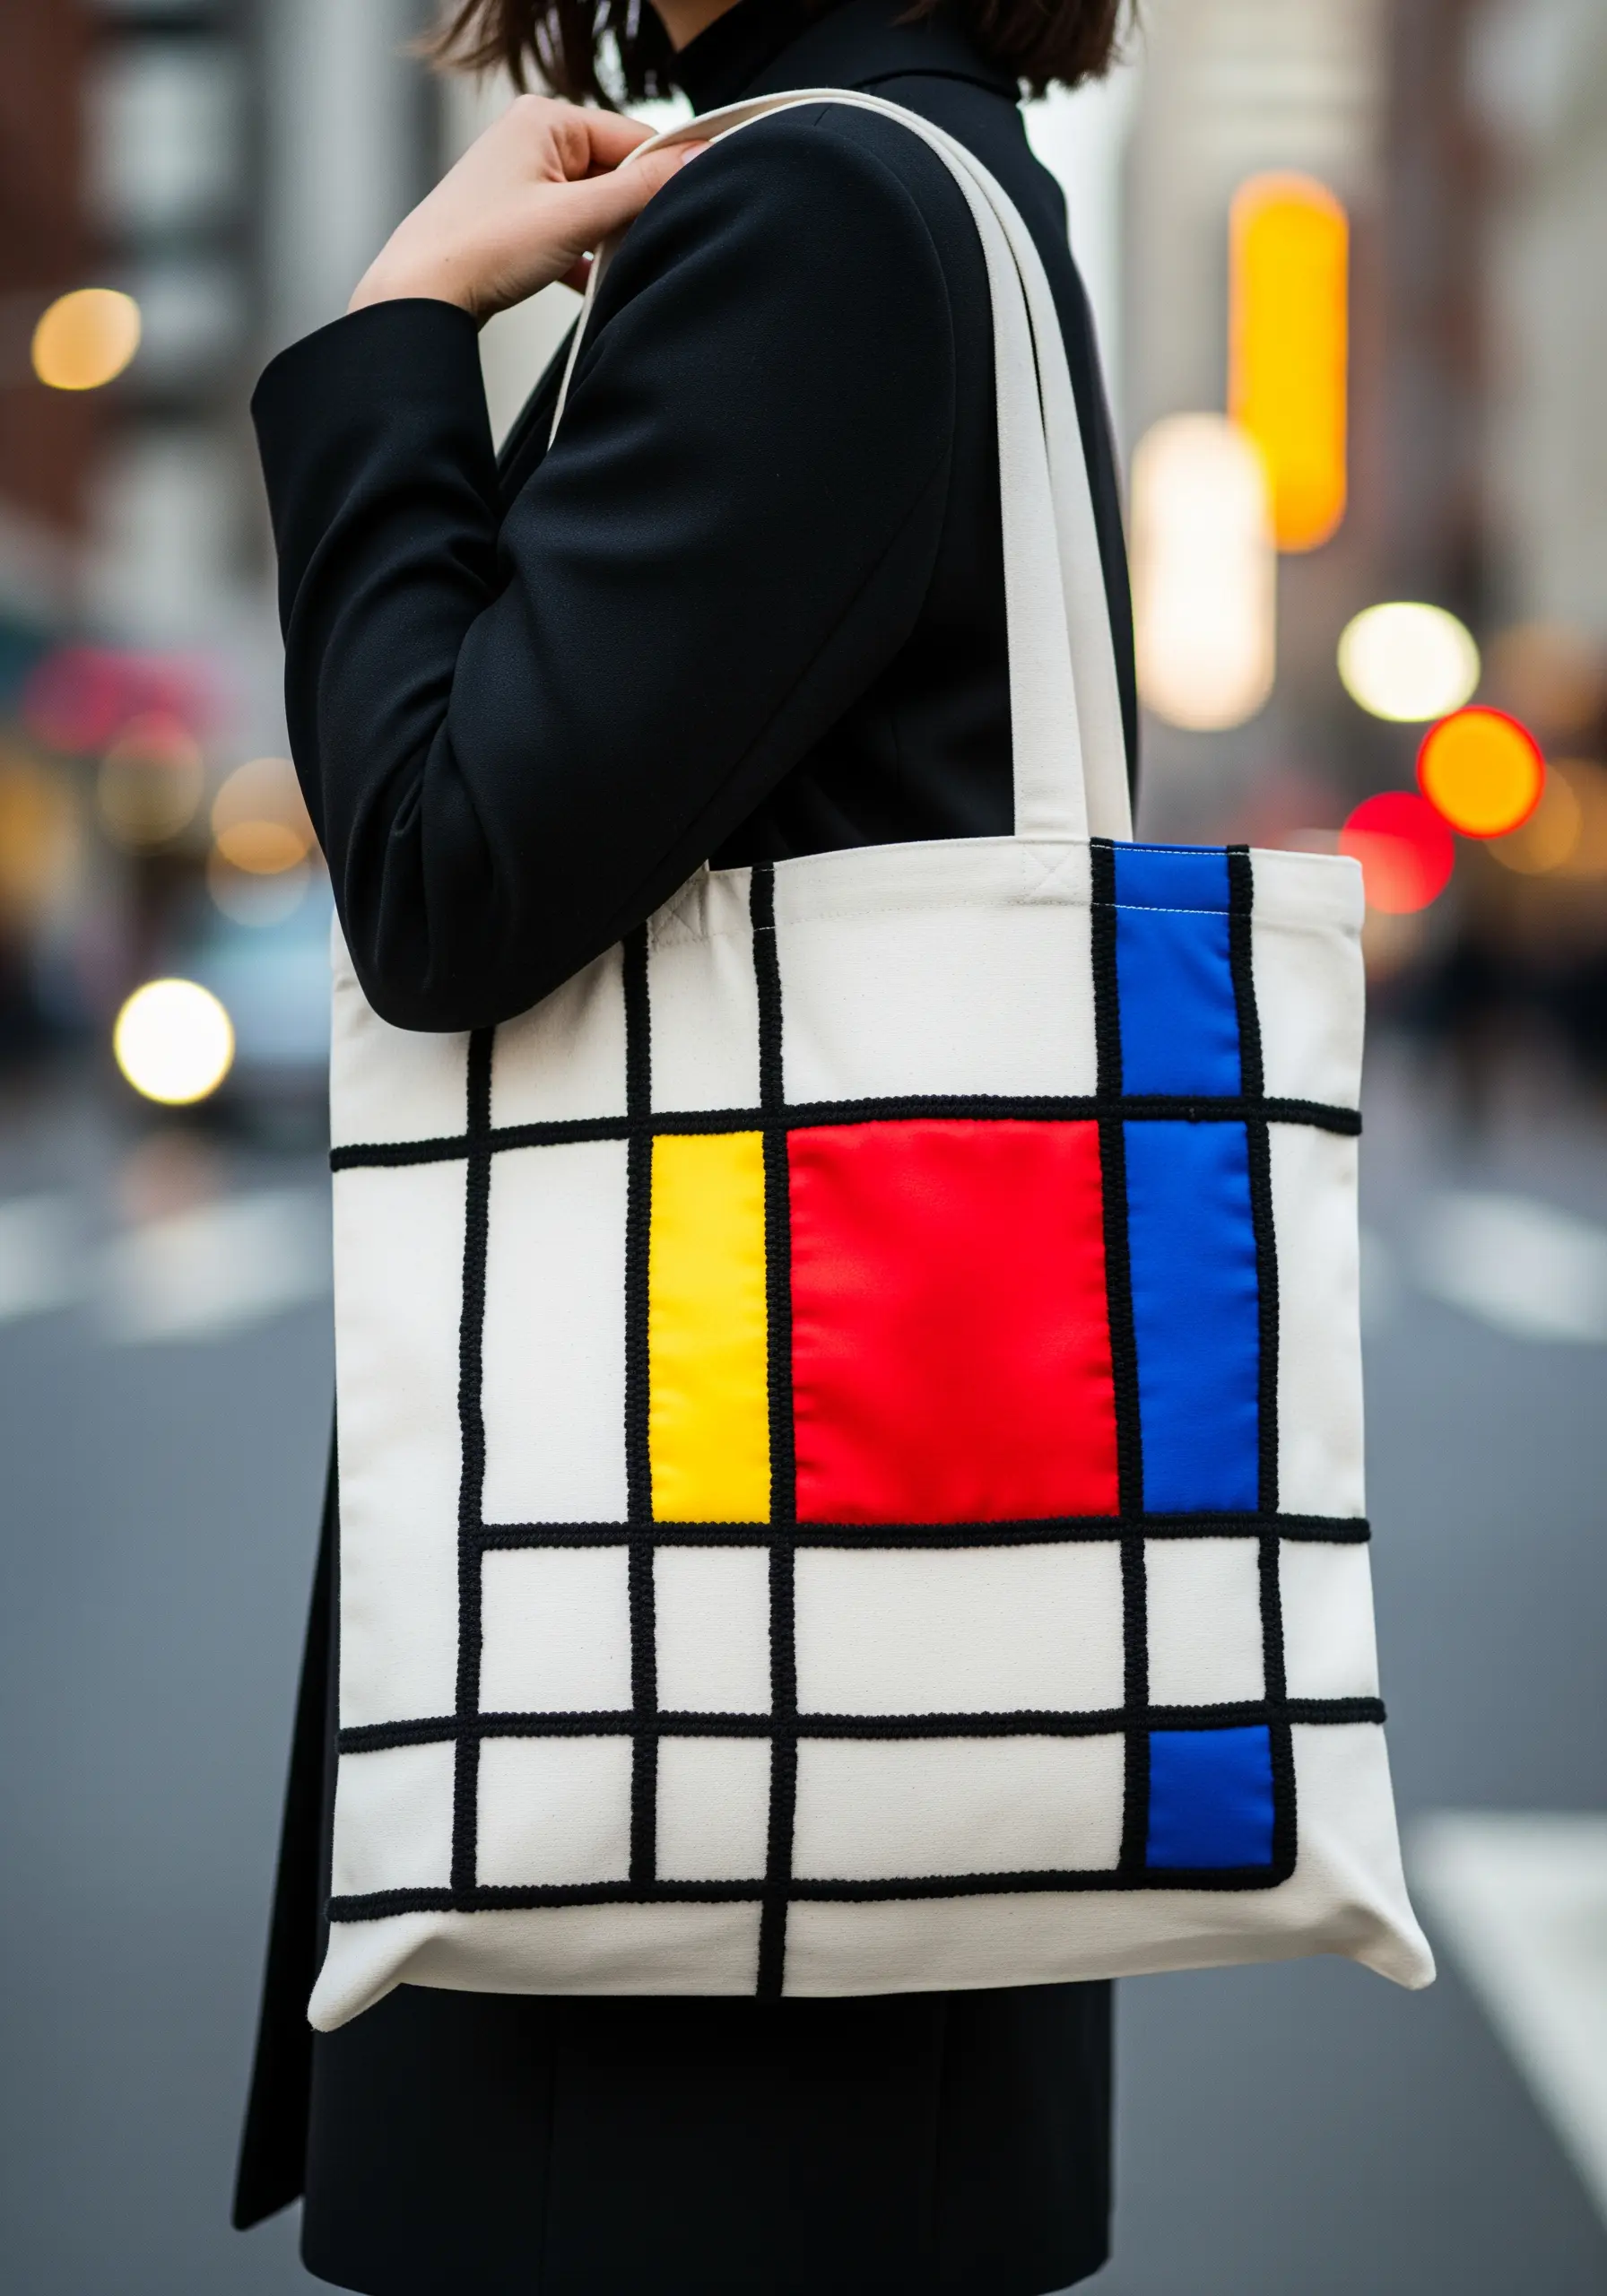
4. Achieve Bold Color Fields with Couched Yarn
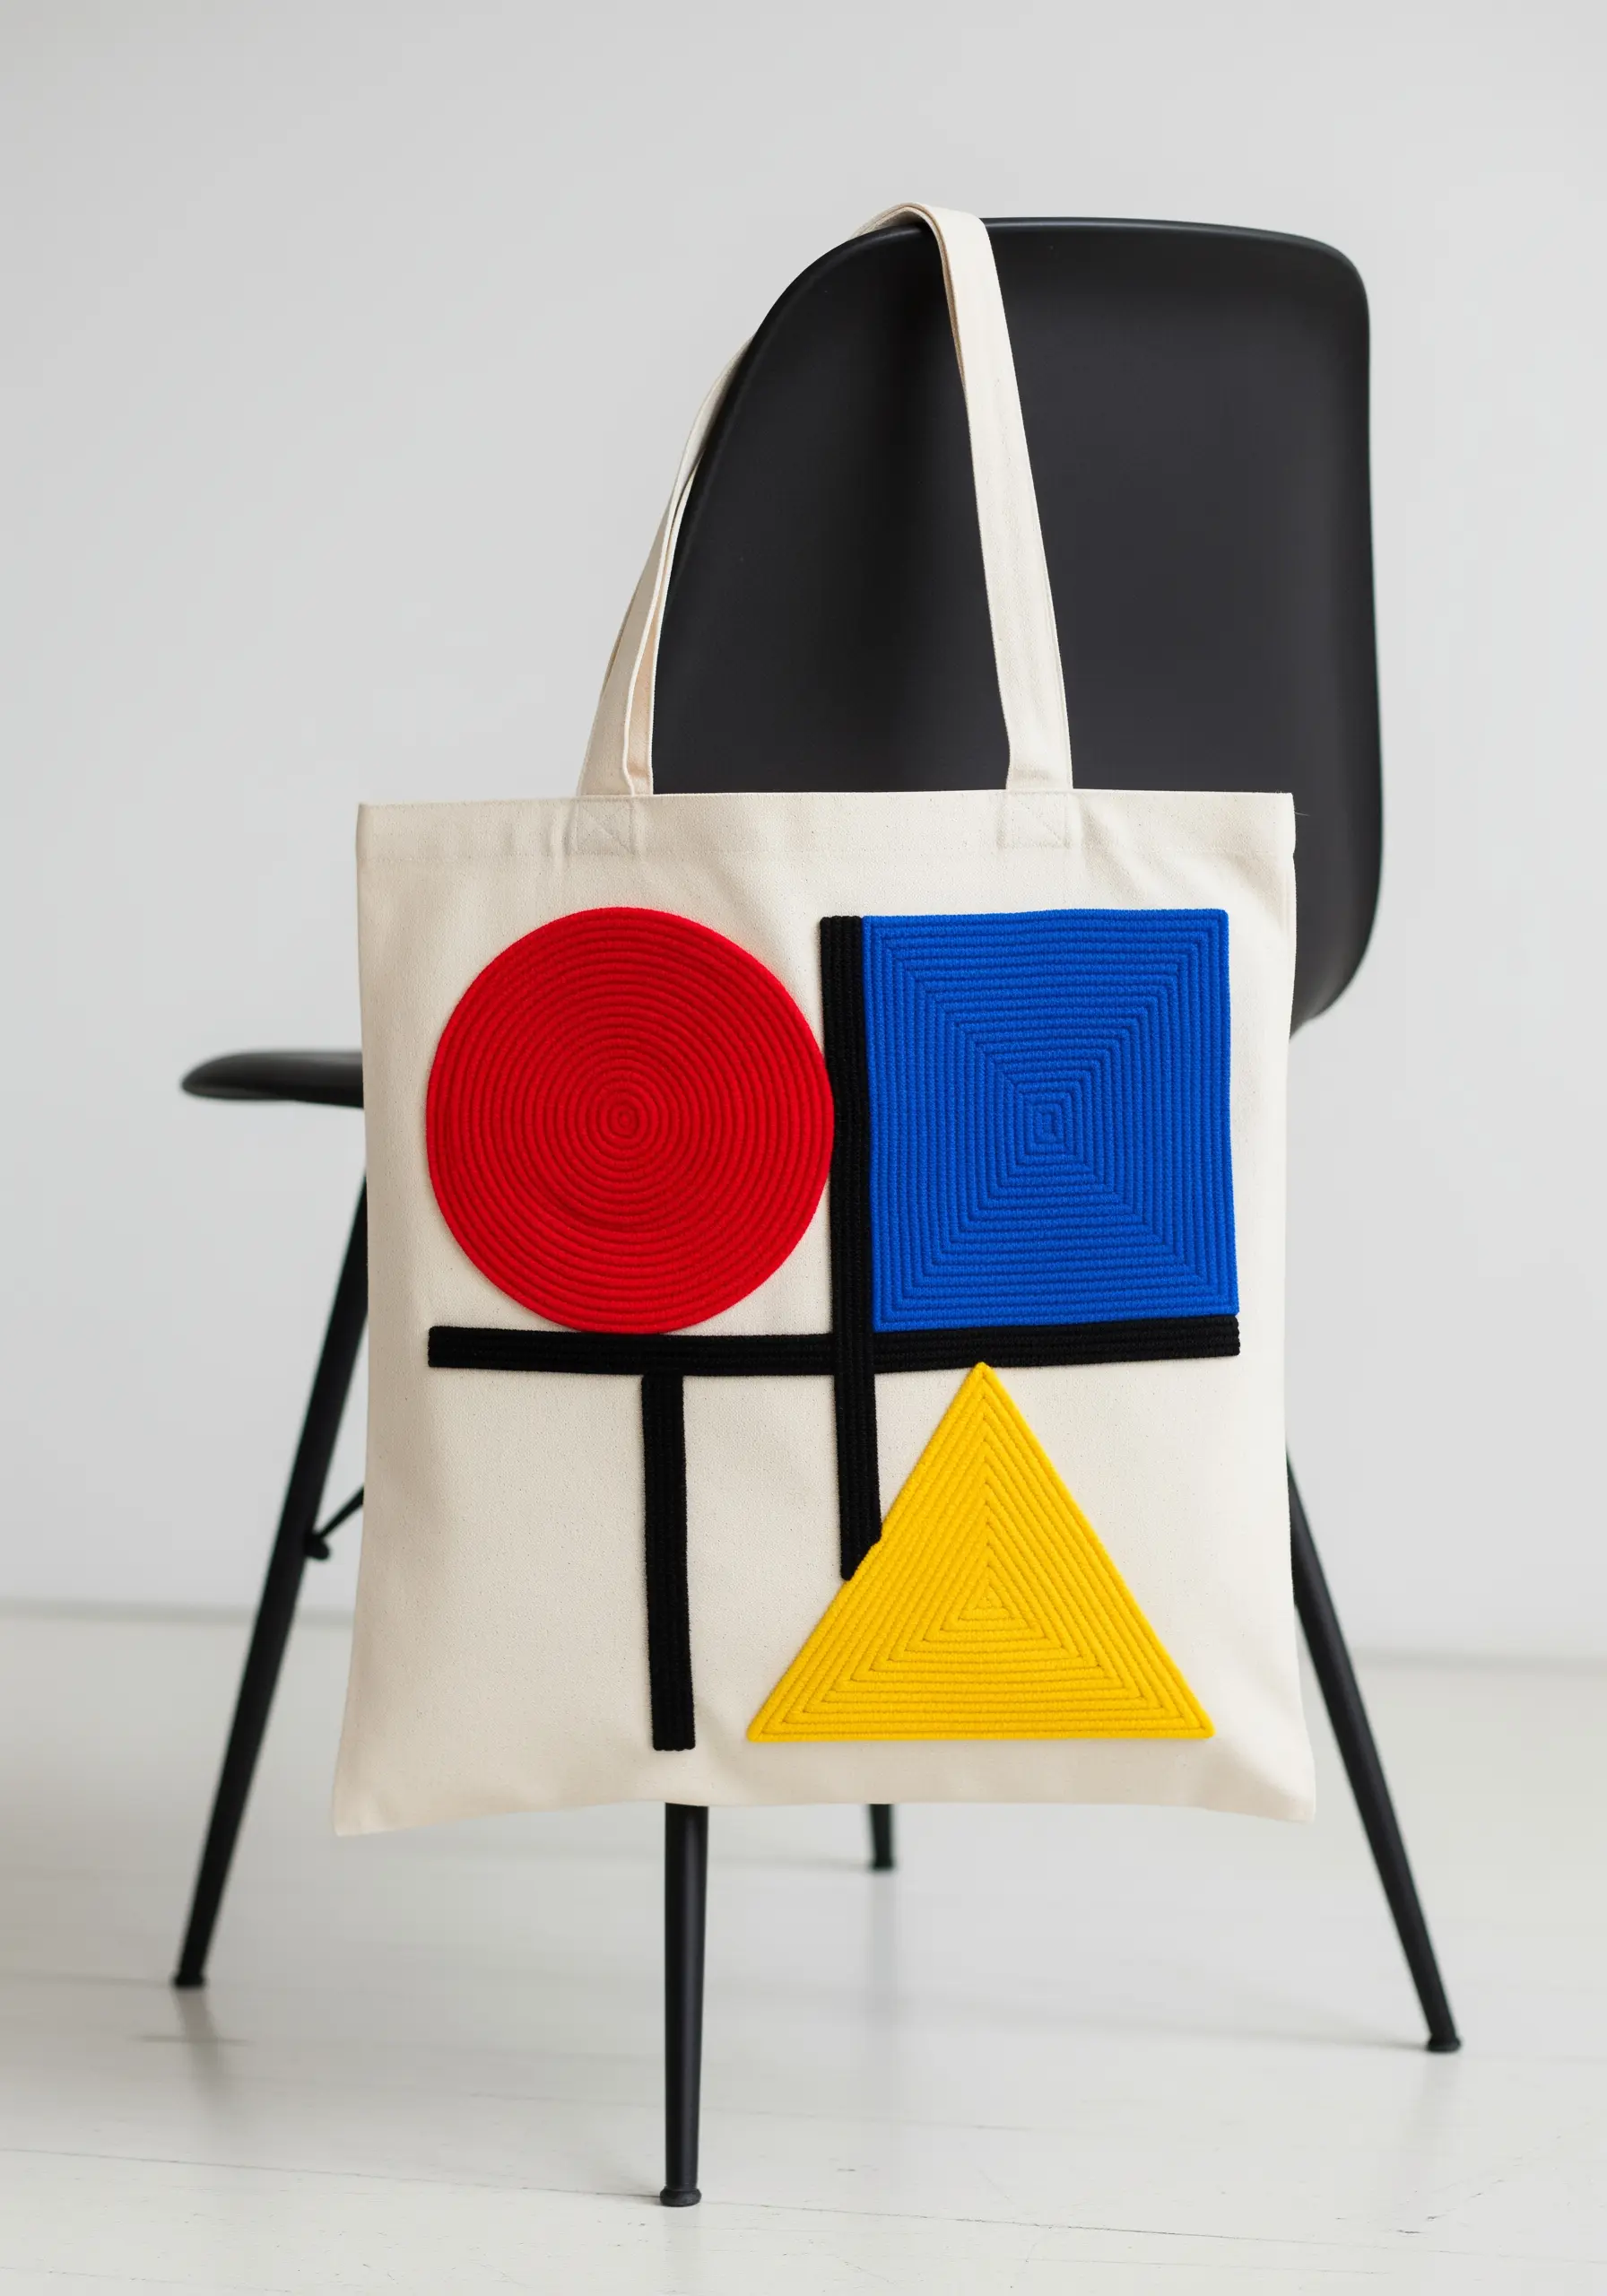
For a design inspired by Mondrian, use thick yarn to create perfectly flat, opaque blocks of color with incredible texture.
Outline your desired shape and then lay down strands of yarn back and forth, filling the area completely.
Using a standard embroidery needle and matching floss, tack down the yarn with tiny, almost invisible couching stitches. This ensures the yarn stays flat and the edges remain crisp.
This technique provides the impact of bold color fields with a sculptural quality that simple satin stitch cannot replicate on this scale.
5. Add Dramatic Chevron Texture with Surface Crochet
Take your chevron pattern to the next level by working directly on the fabric surface with a crochet hook and chunky yarn.
Mark your zigzag lines on the tote bag. Then, holding the yarn behind the fabric, use the hook to pull up loops and create a chain stitch that sits on top of the canvas.
To build even more dimension, work a row of single crochet directly into that initial chain stitch base. This creates an extreme texture that is both visual and tactile, turning your tote into a true statement piece.
6. Make Neon Pop with Precision and Contrast
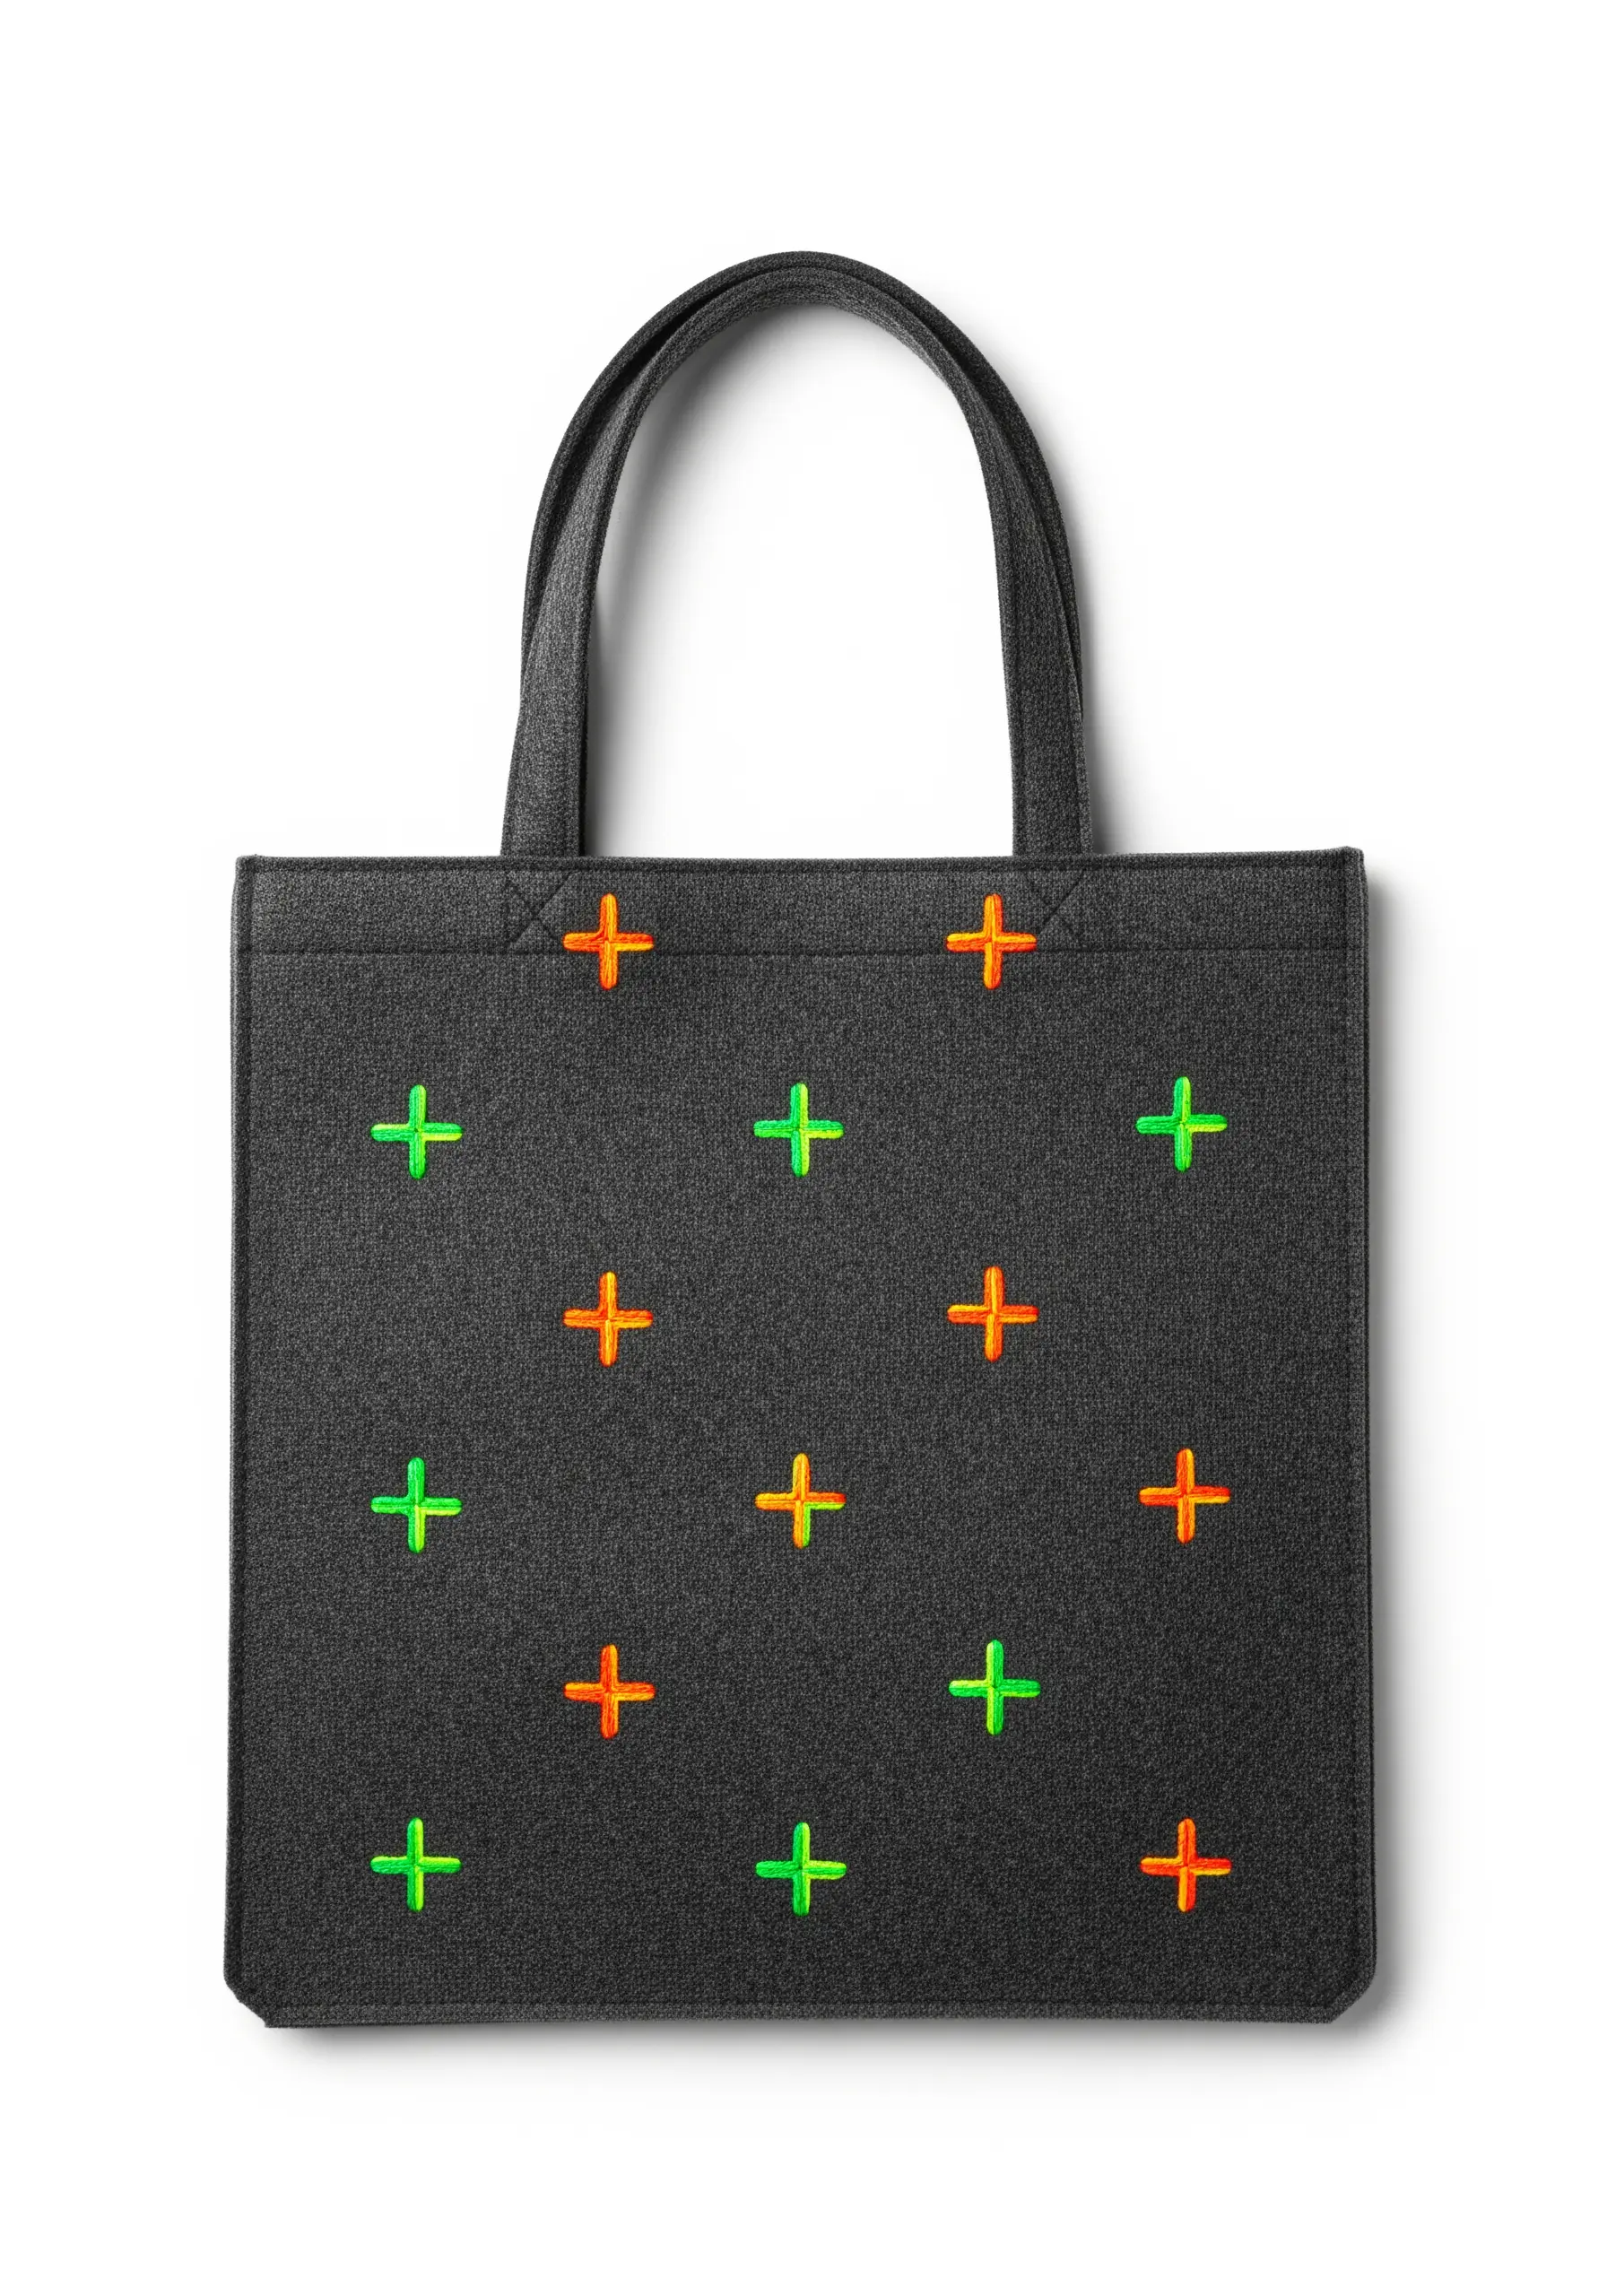
The success of a minimalist grid pattern lies in perfect execution and smart color choices.
Use a dark, dense fabric like felted wool or heavy canvas to provide a non-reflective background that absorbs light.
Choose intensely saturated neon floss for your stitches. The high contrast is what creates the visual vibration and makes the simple shapes feel electric.
Each plus sign is just two intersecting satin stitches. Use a sharp needle and a ruler to ensure every stitch is perfectly straight and evenly spaced for a clean, graphic impact.
7. Create a Hypnotic Effect with Concentric Lines
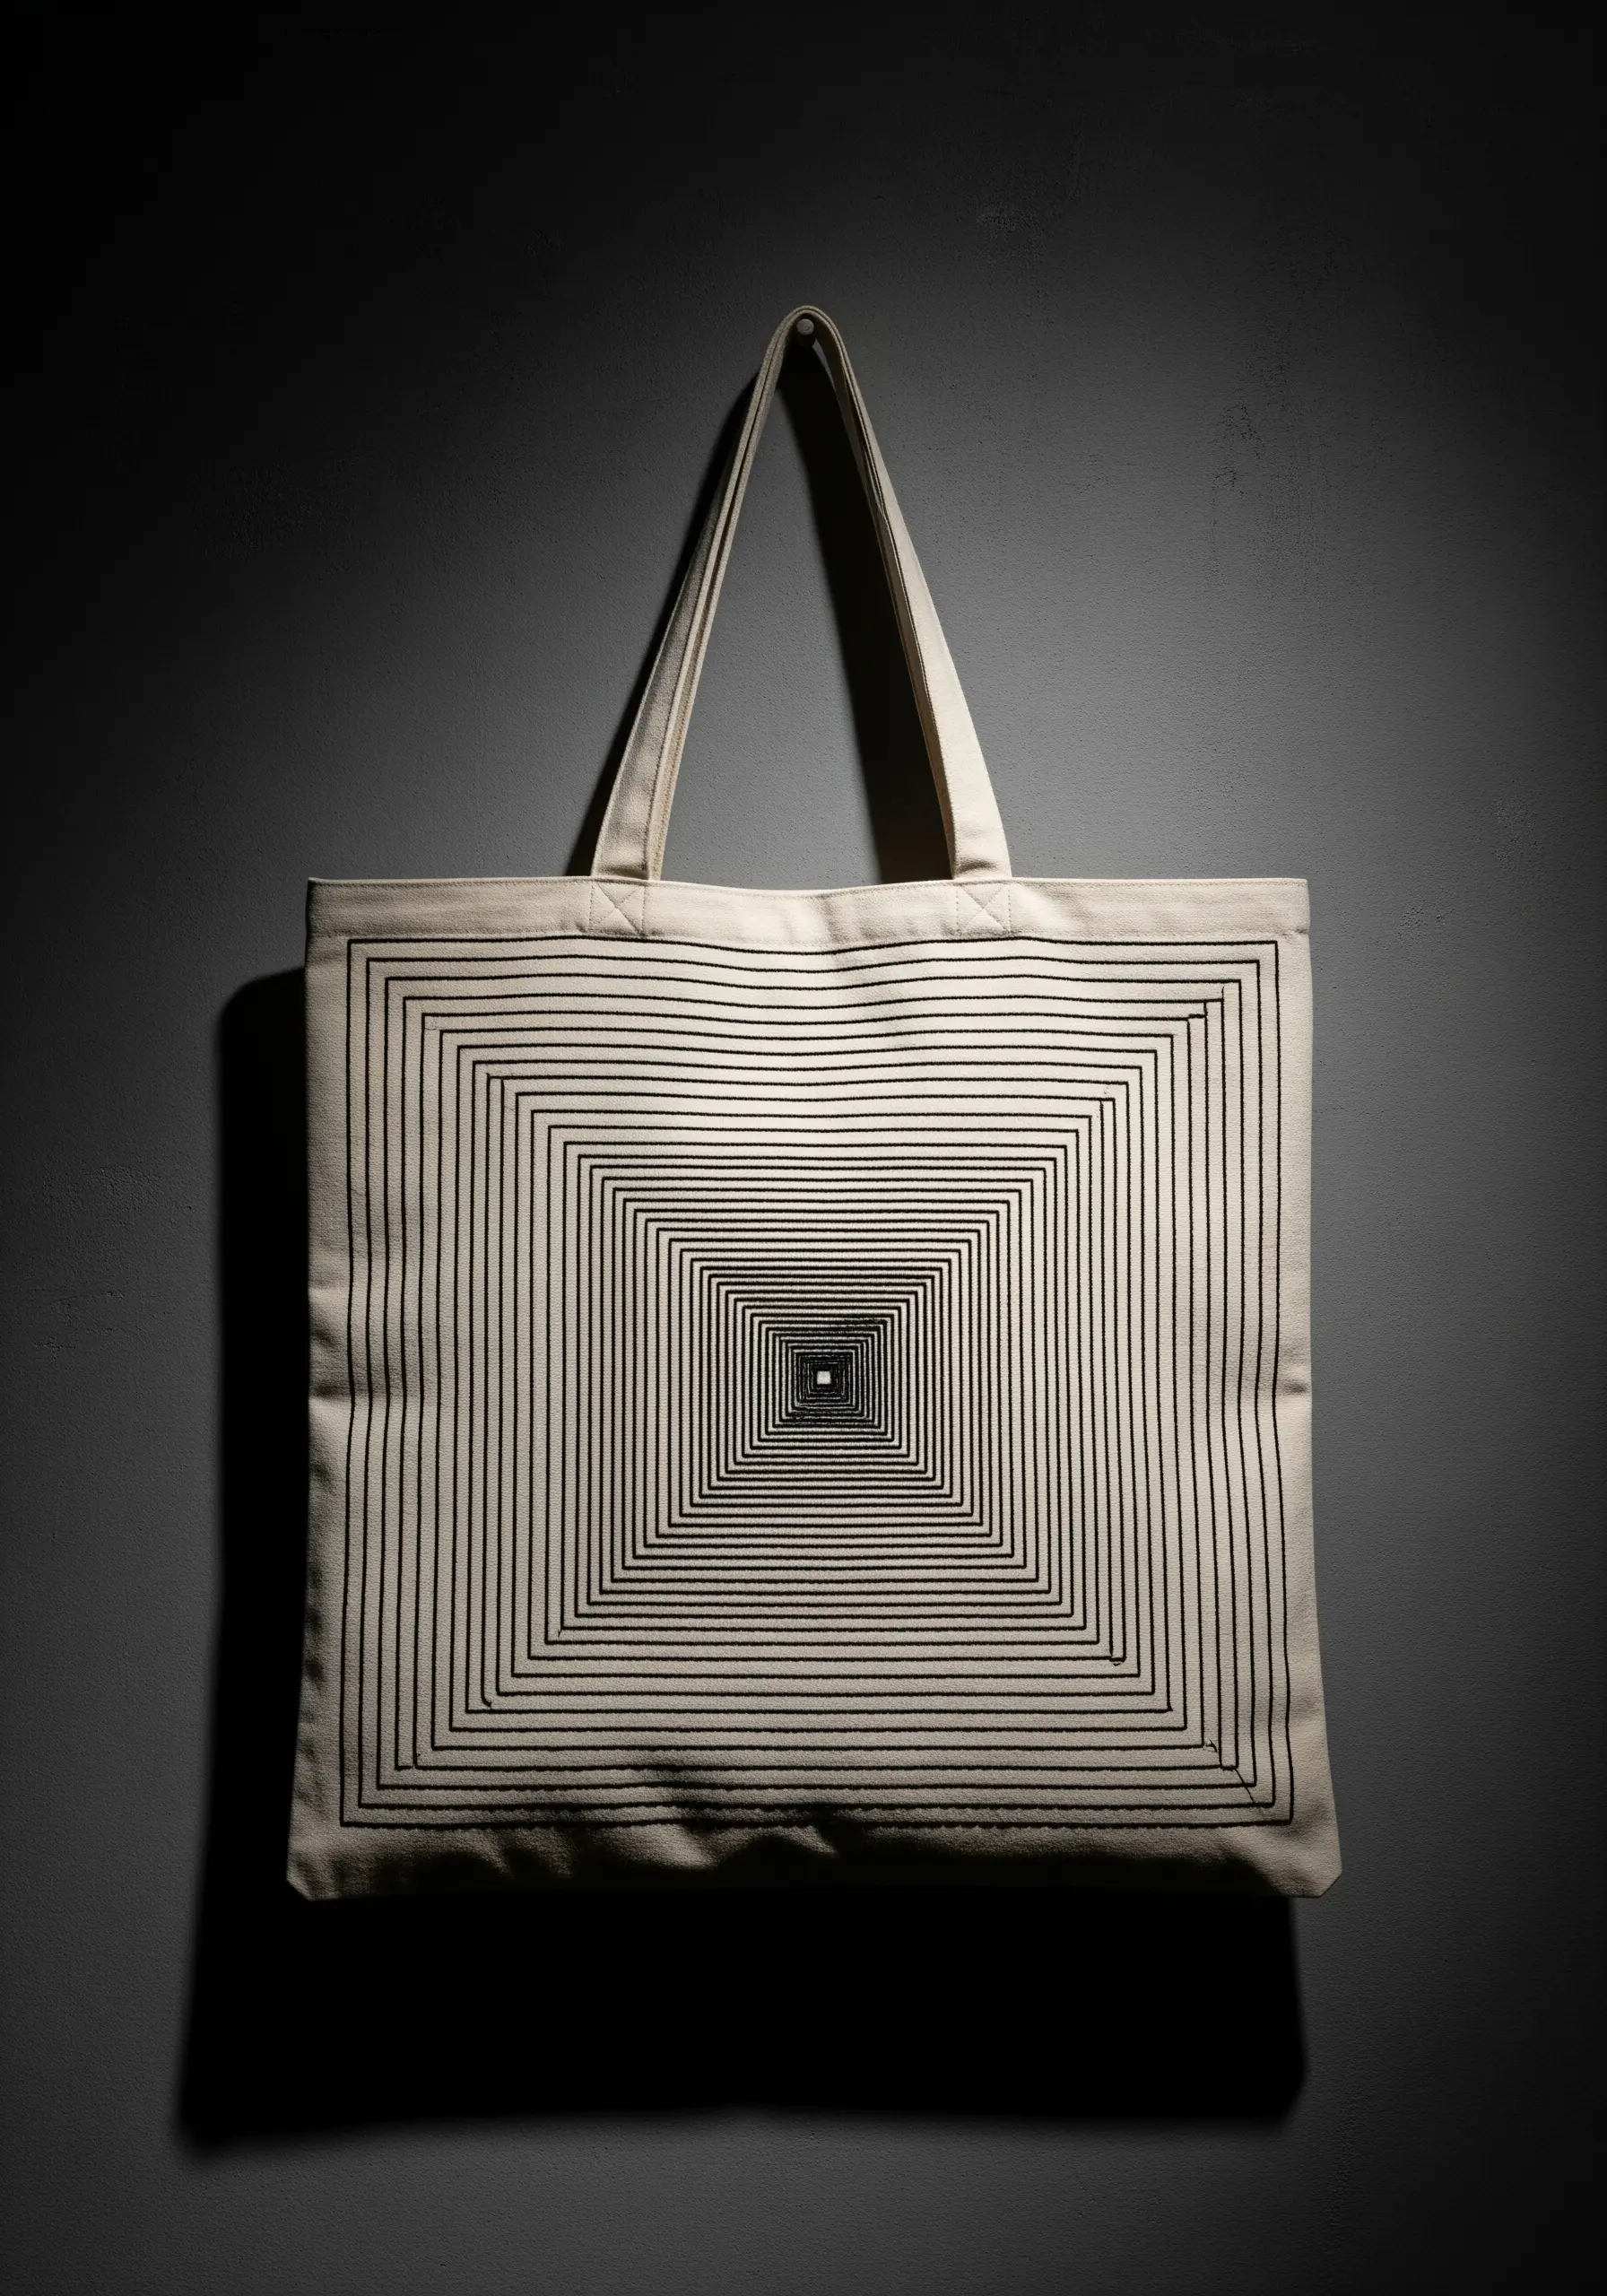
This powerful design is achieved with the simplest of stitches: the backstitch or stem stitch. Its strength comes from precision and repetition.
Start with the smallest square in the center and work your way outwards, keeping the distance between each line perfectly consistent.
Using a ruler and a water-soluble marker is non-negotiable here; any inconsistency will break the optical illusion.
Choose a fine thread (two or three strands) to keep the lines crisp and prevent them from looking bulky, which maintains the hypnotic, tunneling effect.
8. Define Shapes with a Satin Stitch Grid
Recreate a classic abstract composition by treating each colored block as its own miniature satin stitch project.
To achieve those perfectly crisp edges where colors meet, first outline each rectangle with a split stitch. This raised edge acts as a barrier, giving your satin stitches a firm line to press against.
Fill each block with satin stitches, keeping them parallel to the shortest side of the rectangle. This ensures the smoothest finish and best light reflection, making each color field look solid and vibrant.
9. Stitch a Terrazzo Mosaic with French Knots
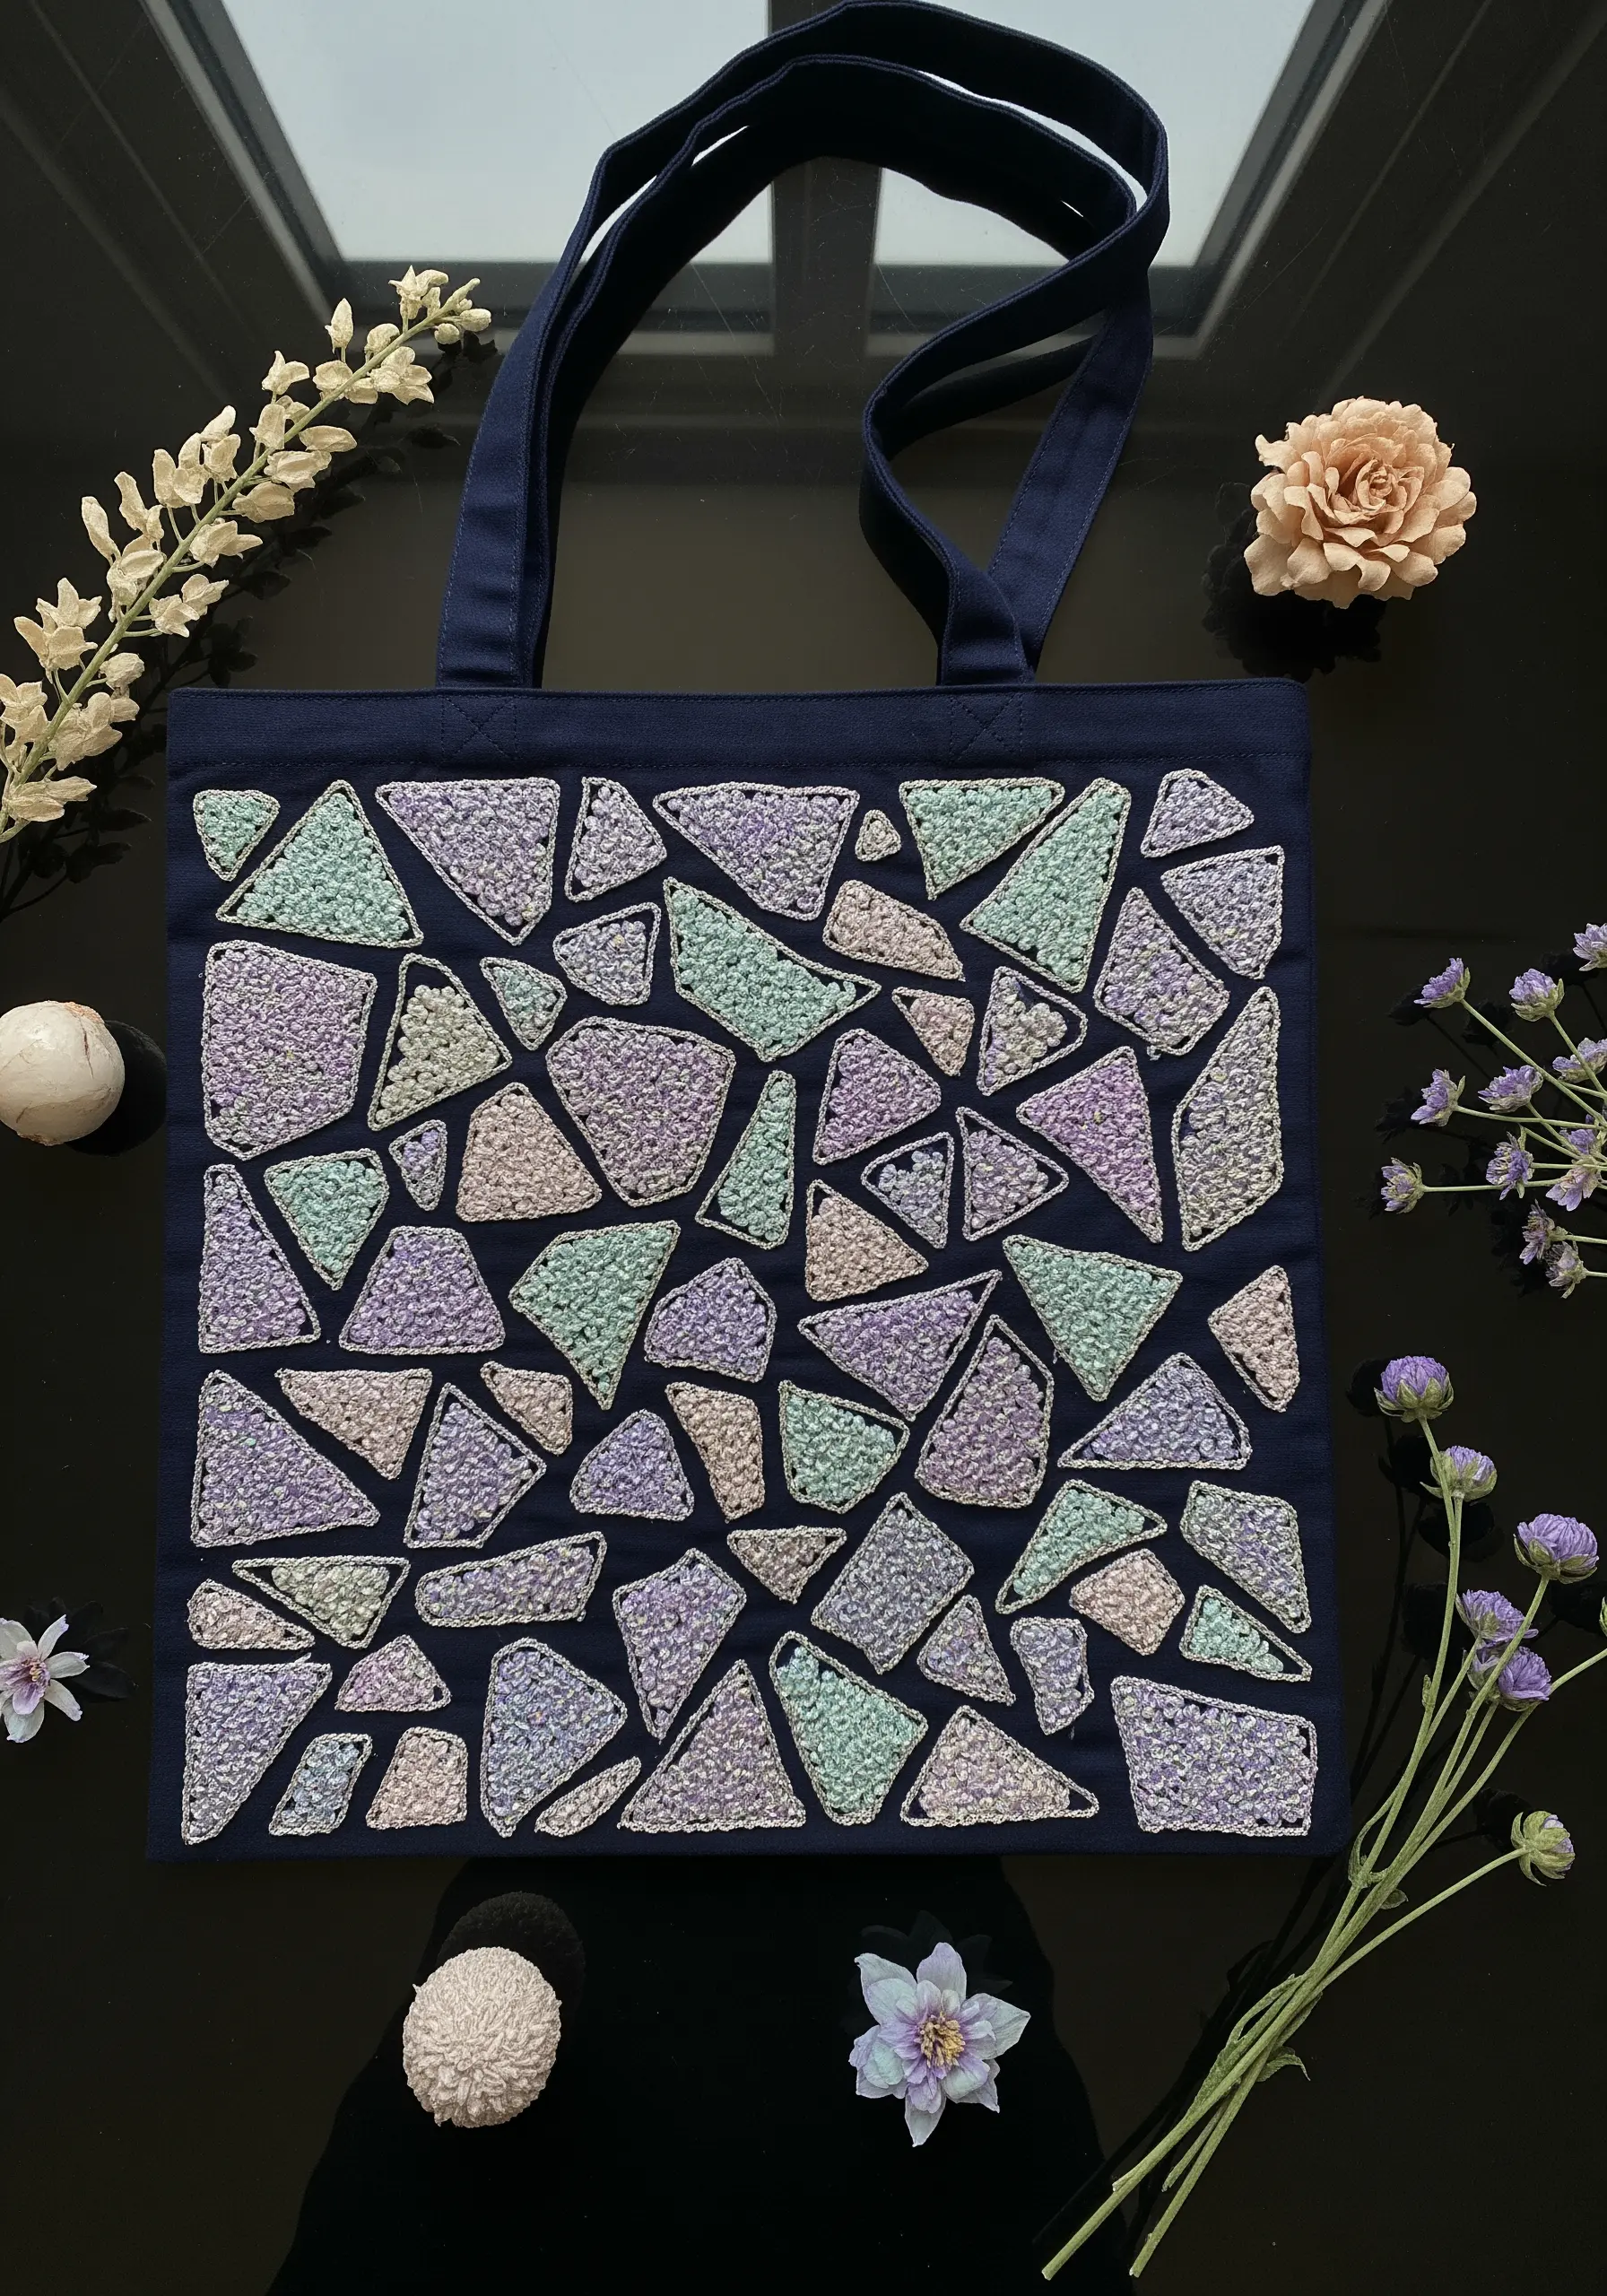
Mimic the look of terrazzo or mosaic tiles by filling irregular shapes with dense clusters of French knots.
First, outline your shapes with a simple backstitch in a contrasting color to act as ‘grout’.
Then, fill each segment with French knots using a soft, tonal palette. Vary the number of wraps around your needle (one, two, or three) to create knots of different sizes, adding to the organic, textured feel.
Using a variegated thread within a single shape can also add subtle color shifts, enhancing the stone-like effect.
10. Craft a Scandi-Folk Border with Simple Stitches
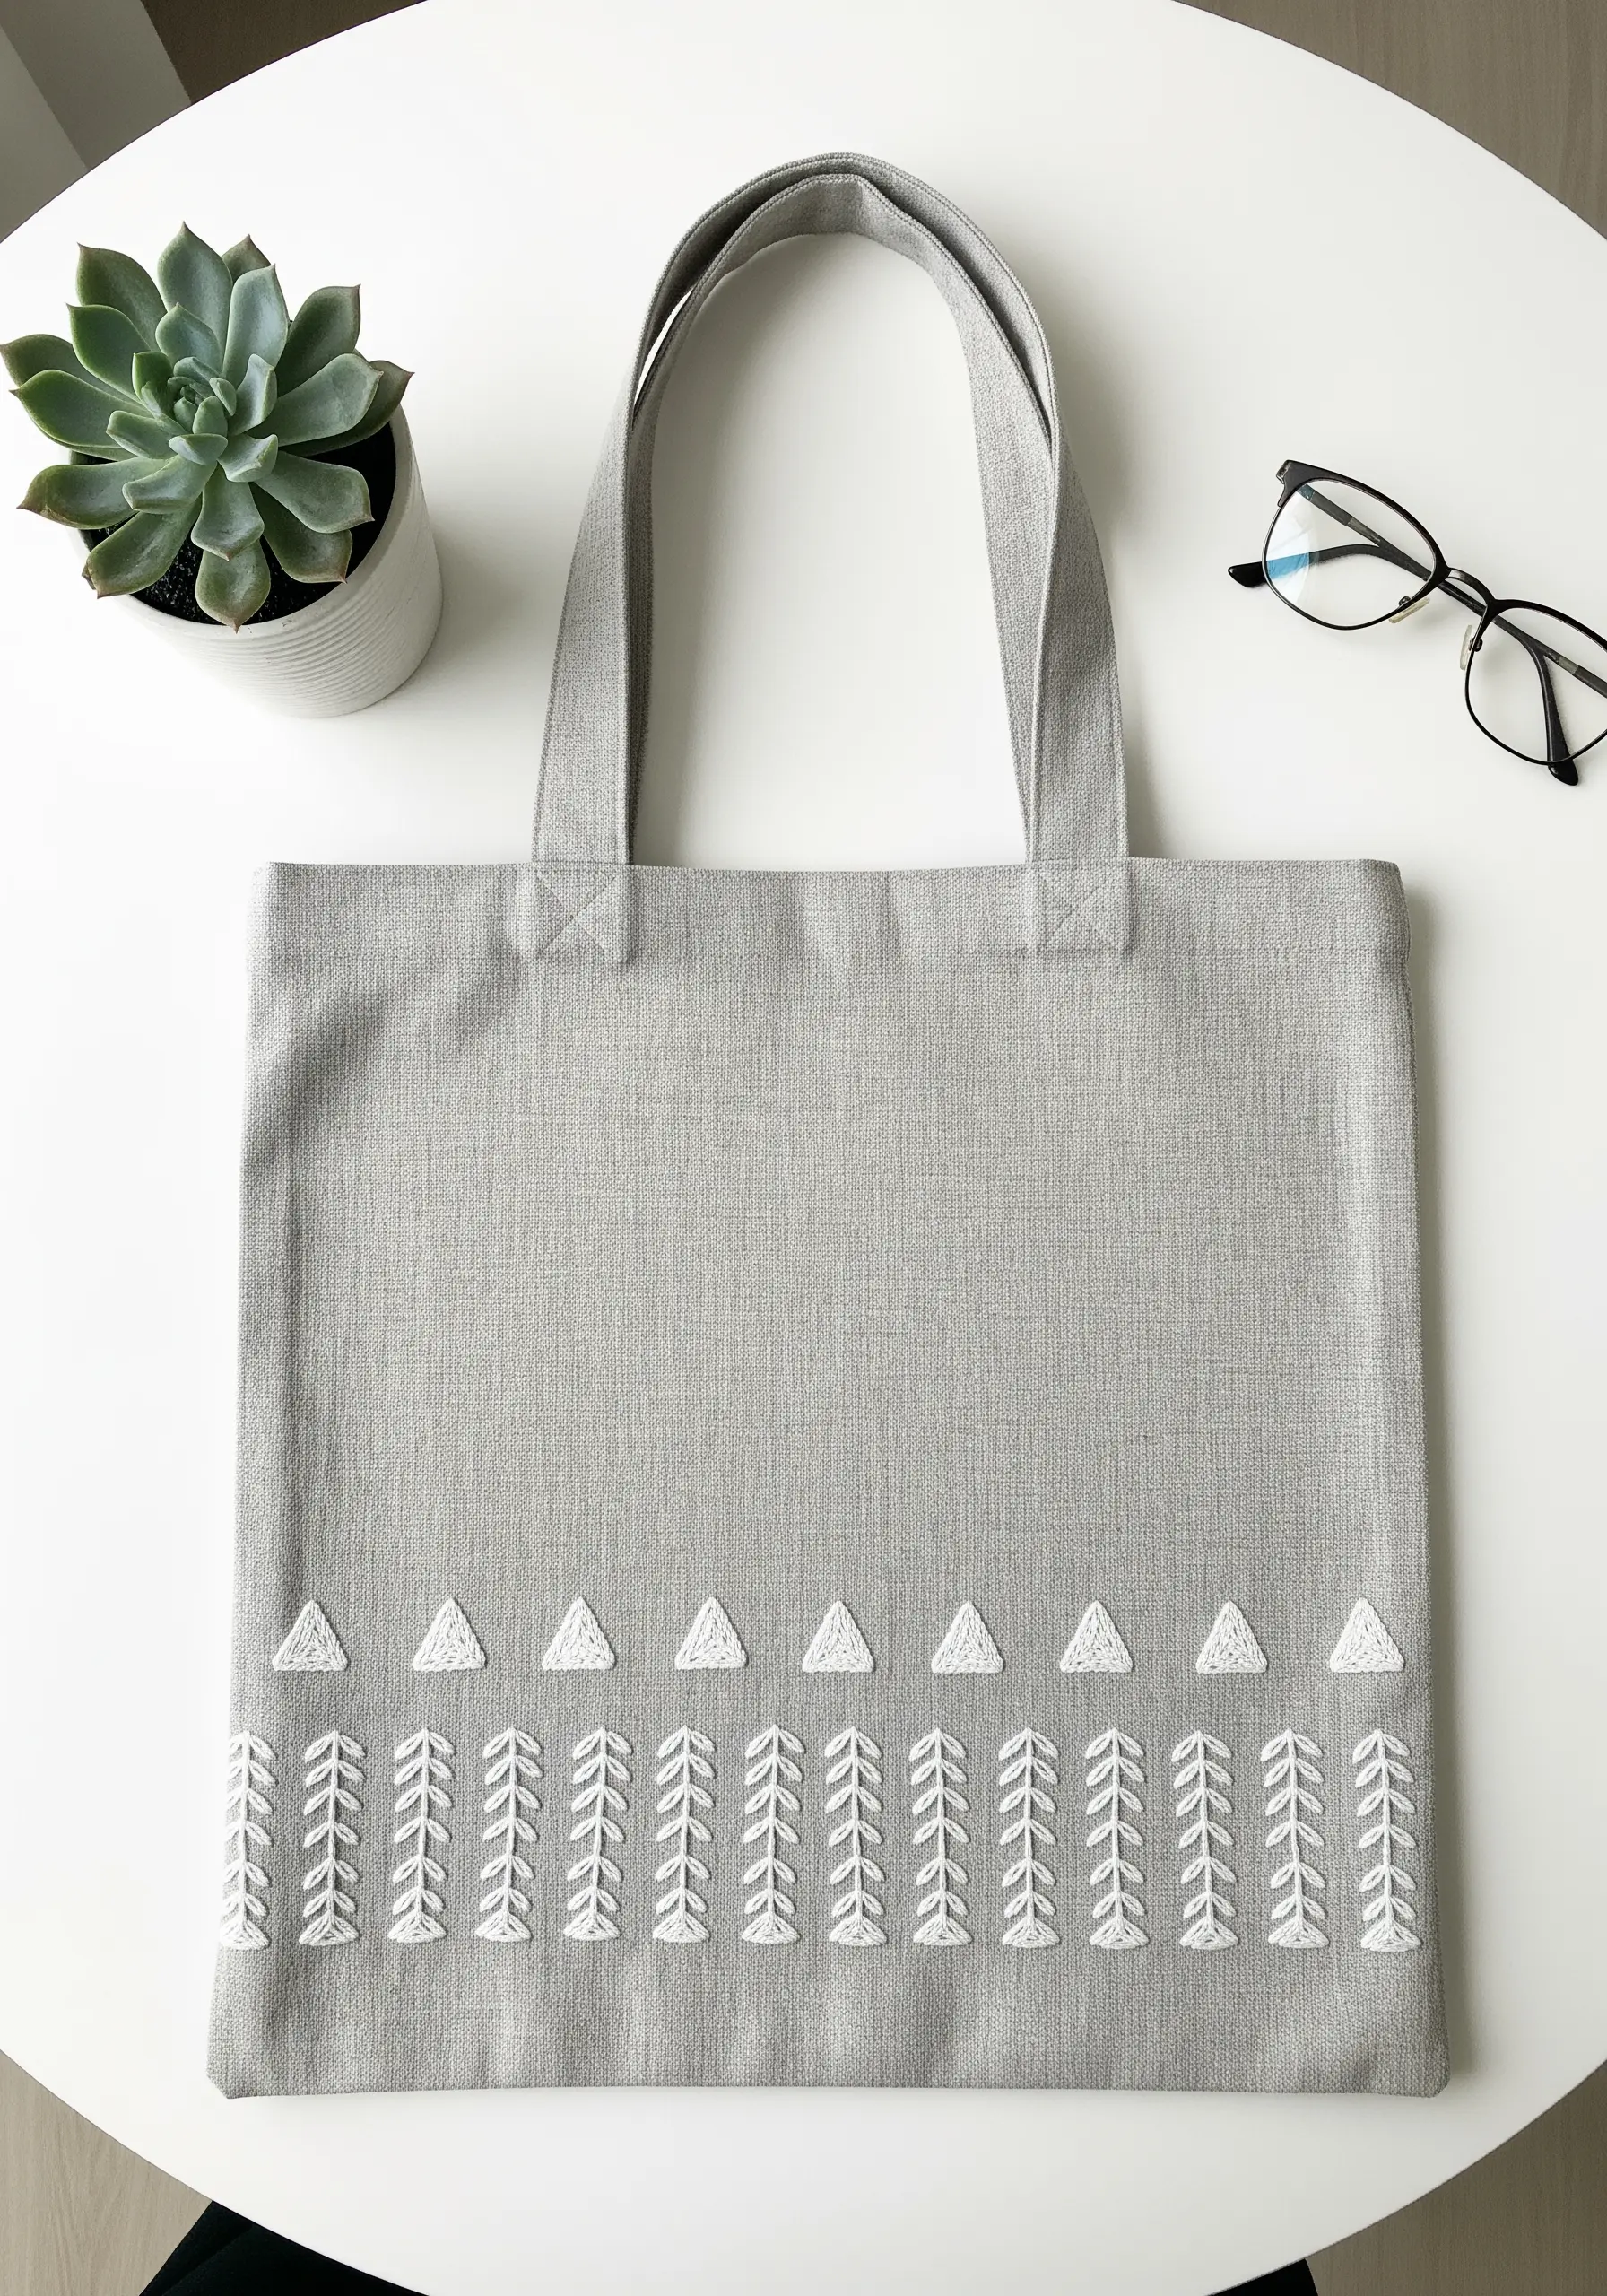
This clean, rhythmic pattern relies on the clarity of just two simple stitches: the satin stitch and the fly stitch.
Create the top row of triangles using a basic satin stitch, ensuring each stitch is laid smoothly next to the last for a solid fill.
For the ‘leafy’ branches below, use a detached chain stitch or fly stitch for each V-shape, anchored by a tiny straight stitch.
The combination of solid shapes and delicate openwork creates a beautiful rhythm. Using a crisp white thread on a neutral grey linen tote enhances the minimalist, Scandinavian feel.
11. Build a Geodesic Sphere with Fabric Appliqué

For a large-scale geometric design, combine the speed of appliqué with the polish of embroidery.
Cut your triangles from various shades of grey and white cotton fabric. Arrange them on your tote to form the sphere and secure them with an iron-on adhesive like Heat’n Bond.
To finish the edges and add a clean, graphic look, outline each triangle with a tight, narrow satin stitch or a precise backstitch in a contrasting thread.
This fabric collage approach is much faster than filling the entire shape with thread and results in a perfectly smooth, professional finish.
12. Weave Intricate Textures with a Darning Stitch Fill
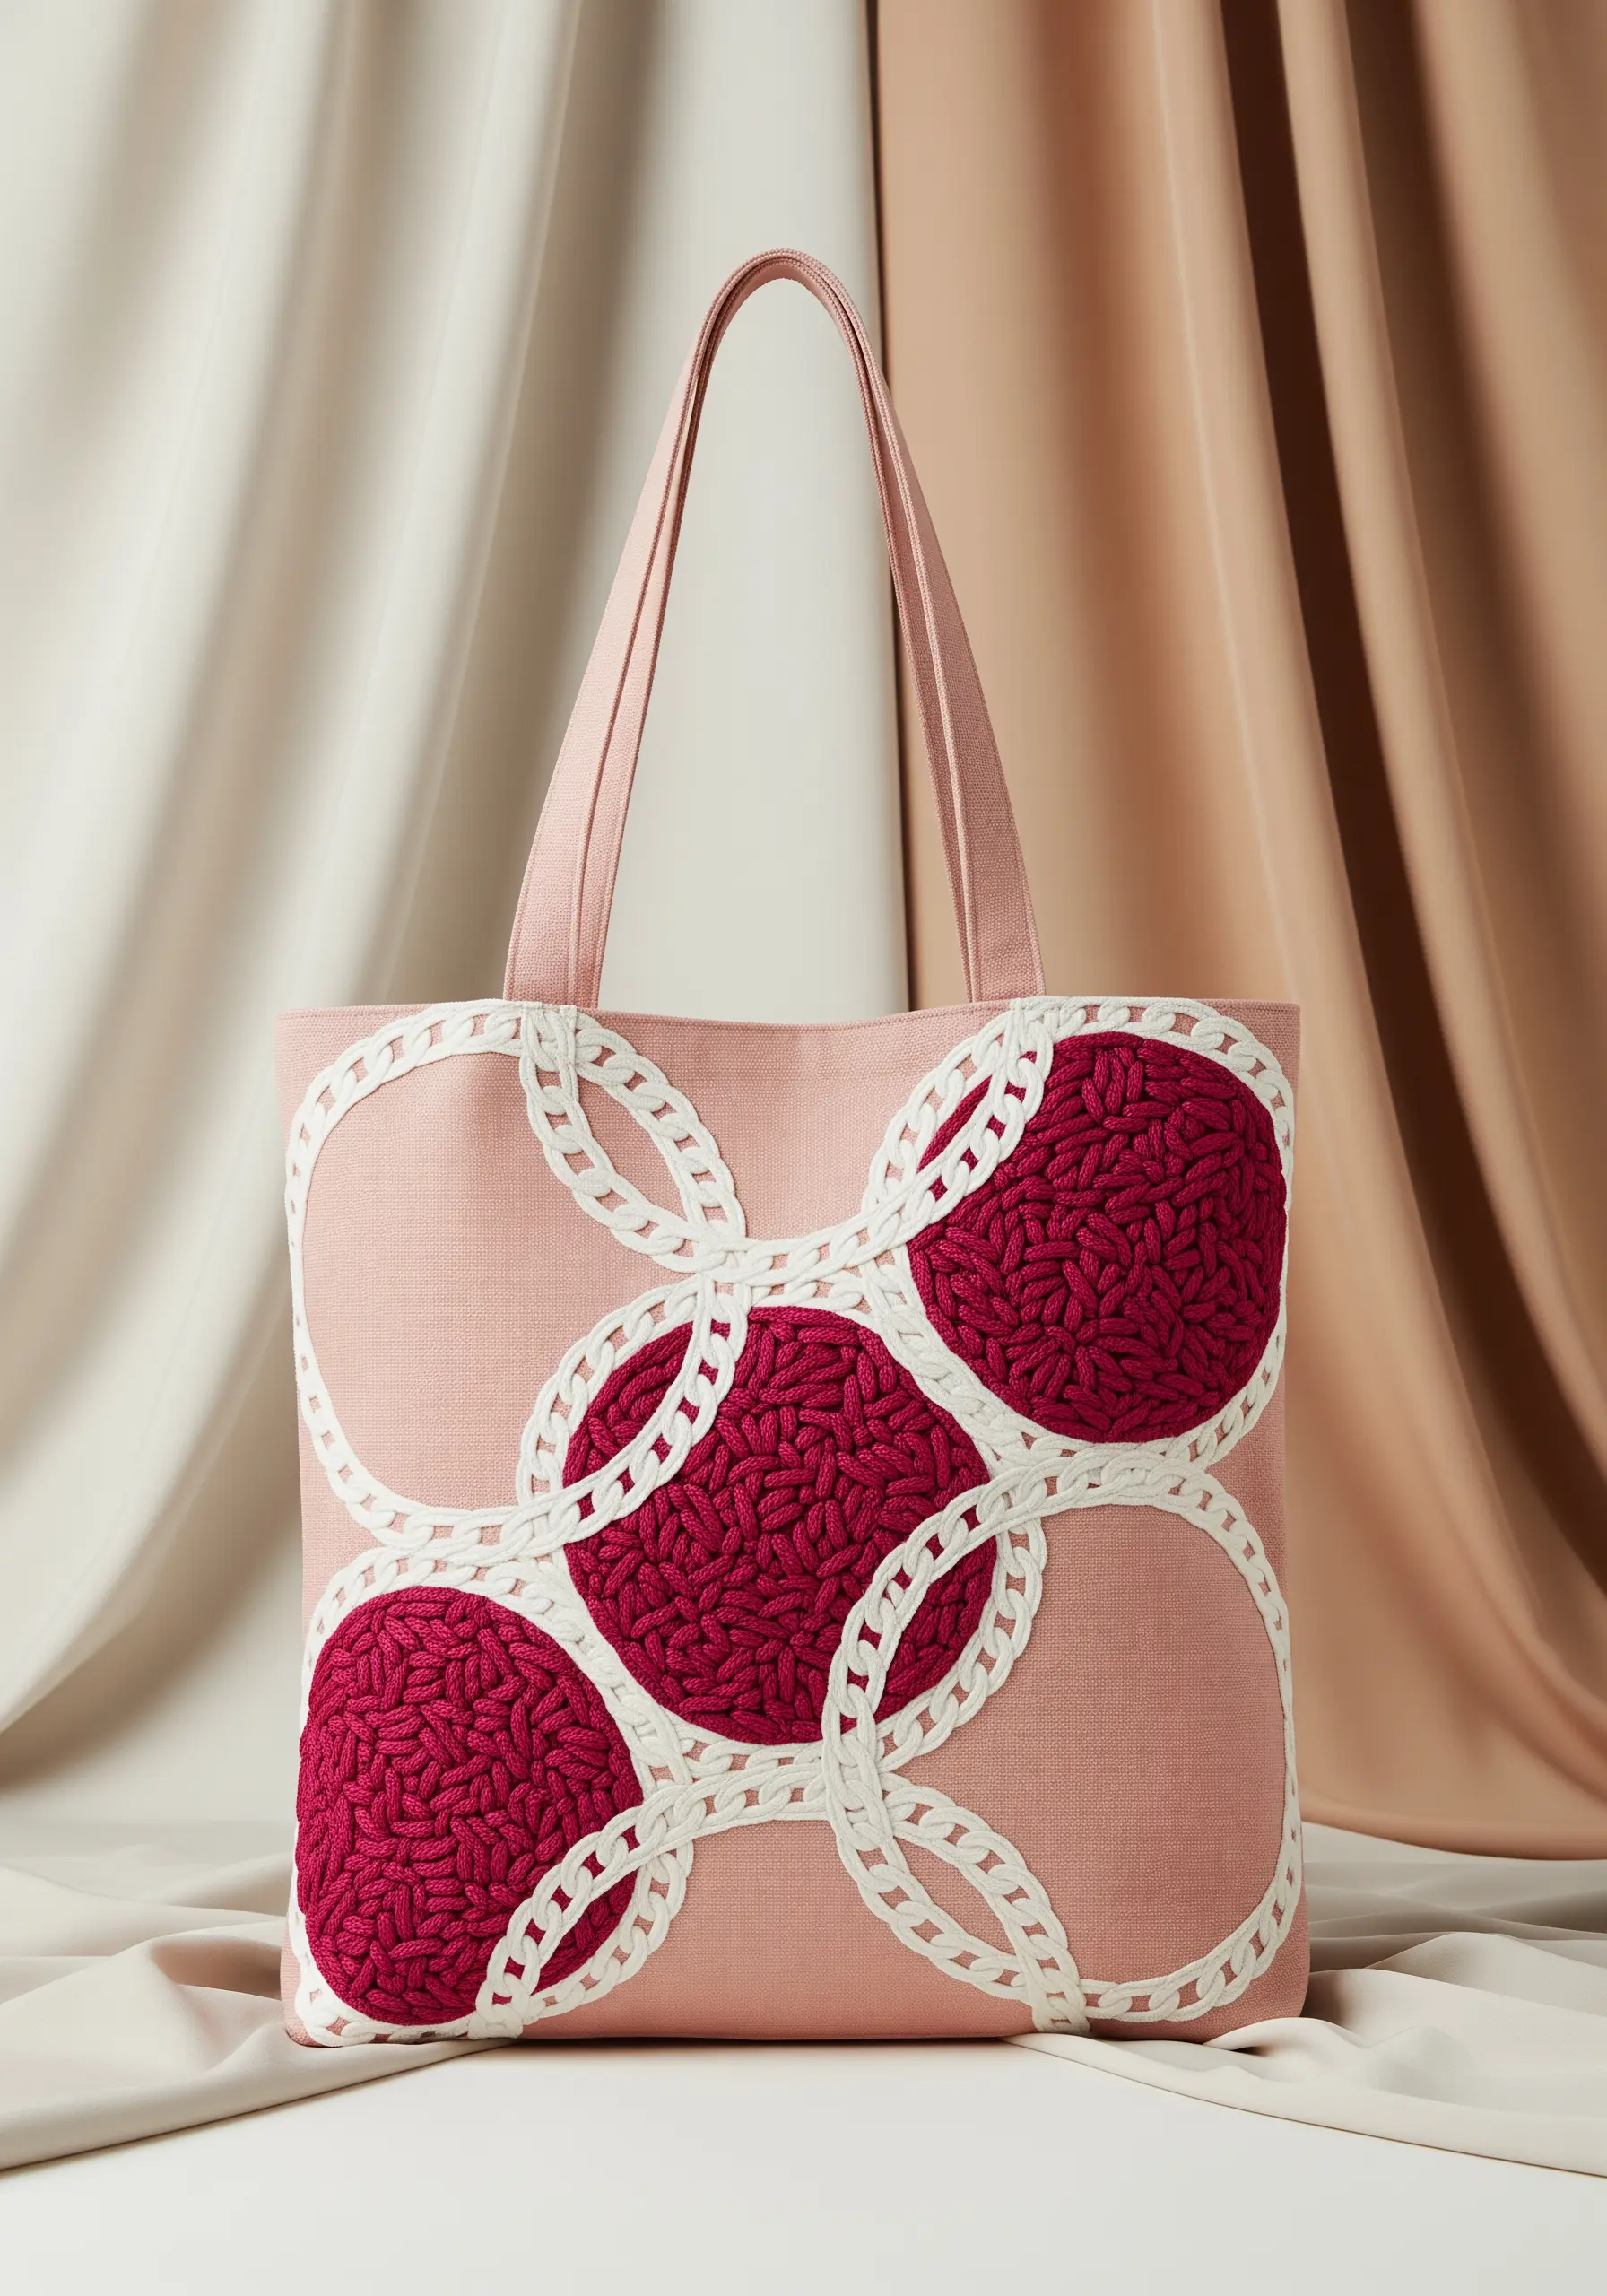
Achieve a rich, woven texture by filling shapes with needle weaving instead of traditional stitches.
First, create a grid of long, parallel straight stitches across your shape (the warp). Then, use your needle to weave a second thread (the weft) over and under these stitches, packing them tightly together.
For the interlocking rings, use a couched chain stitch or a heavy whipped backstitch to create raised, defined borders that contain the woven fill.
This technique turns a simple circle into a complex, tactile element that begs to be touched.
13. Define a Shape with Negative Space
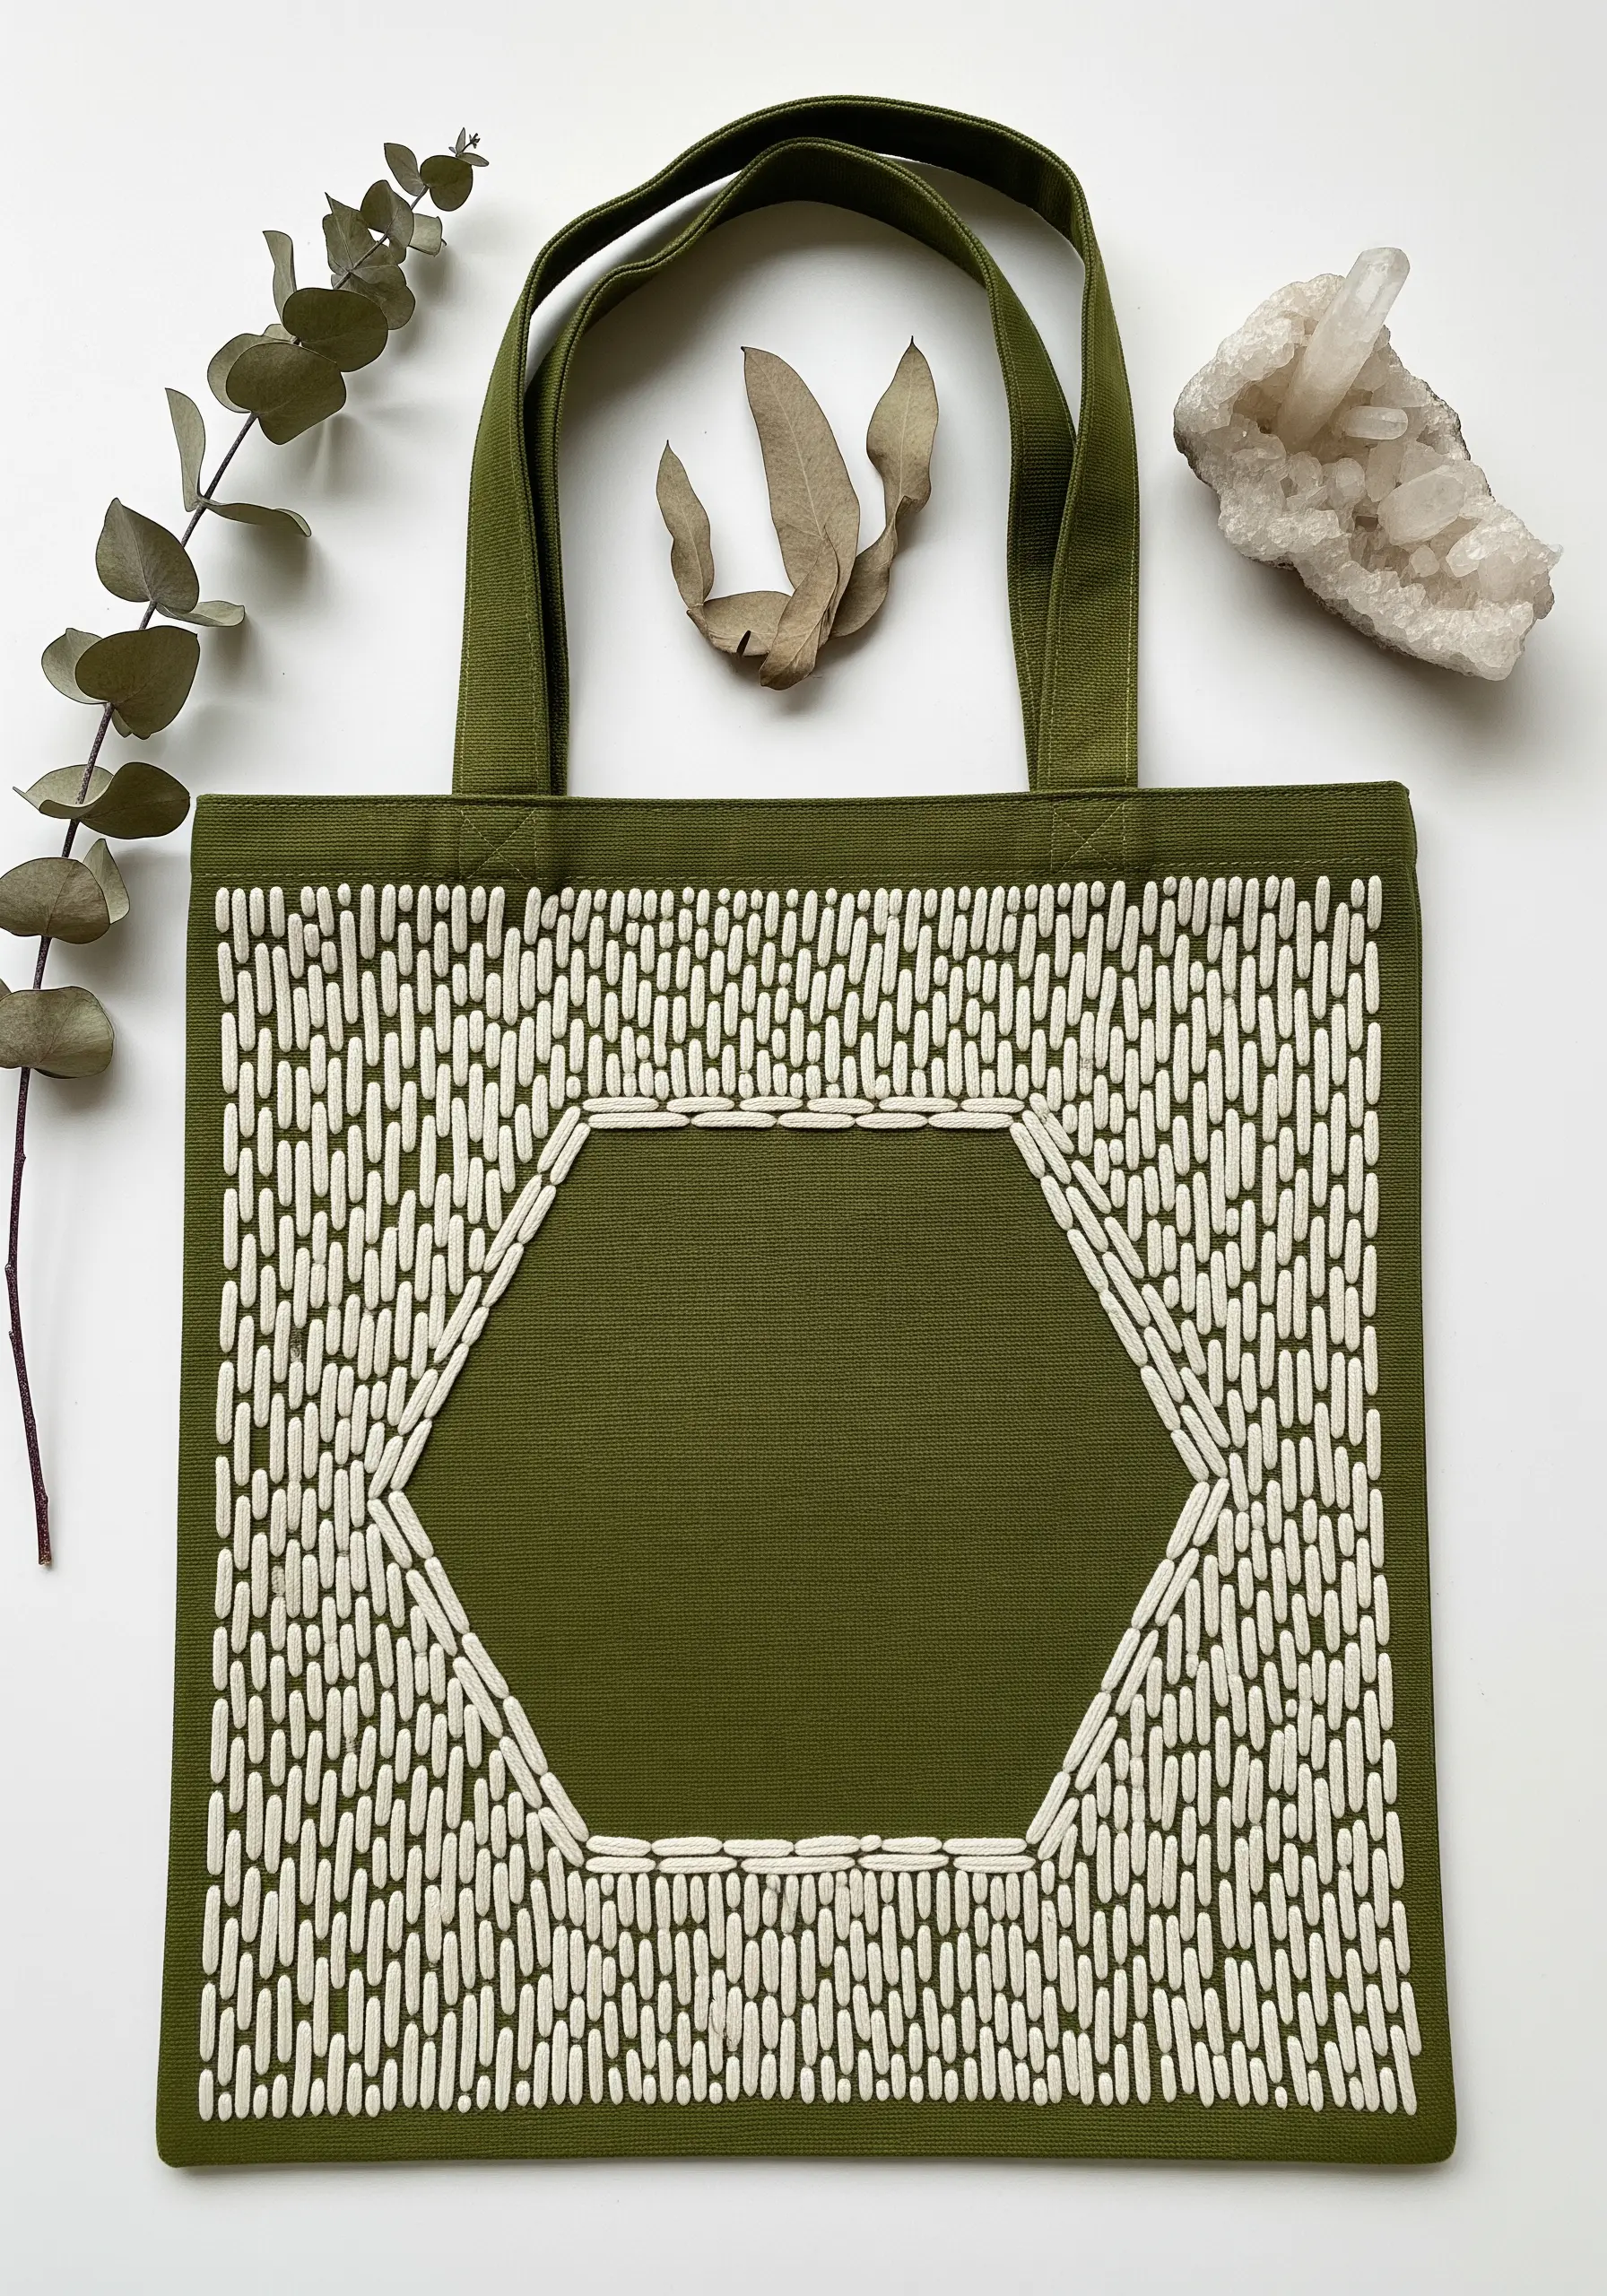
Make the unstitched part of your design the focal point. This technique is all about the power of what you *don’t* embroider.
Outline your central shape—in this case, a hexagon—with a simple backstitch. This line creates the boundary for your design.
Then, fill the *entire area around it* with evenly spaced, vertical straight stitches or seed stitches. The density of the surrounding texture makes the empty hexagon pop, turning it into the primary subject.
This clever reversal of focus is a hallmark of modern design, proving that using negative space is a powerful compositional tool.
14. Stitch a Luxe Quilted Grid with Whipped Backstitch

Create the look of a classic quilted pattern with a single, elegant stitch that adds texture and dimension.
First, stitch a simple grid of backstitches across the surface of your tote bag. Use a slightly longer stitch length for a cleaner look.
Next, take a second thread (you can use the same color for a subtle look, or a contrasting one for more definition) and whip it around each backstitch without piercing the fabric.
This technique transforms a flat grid into a raised, rope-like pattern, giving your tote a sophisticated, high-end finish that feels far more complex than it is to create this luxe grid.
15. Blend Appliqué and Linework for a Stylized Landscape
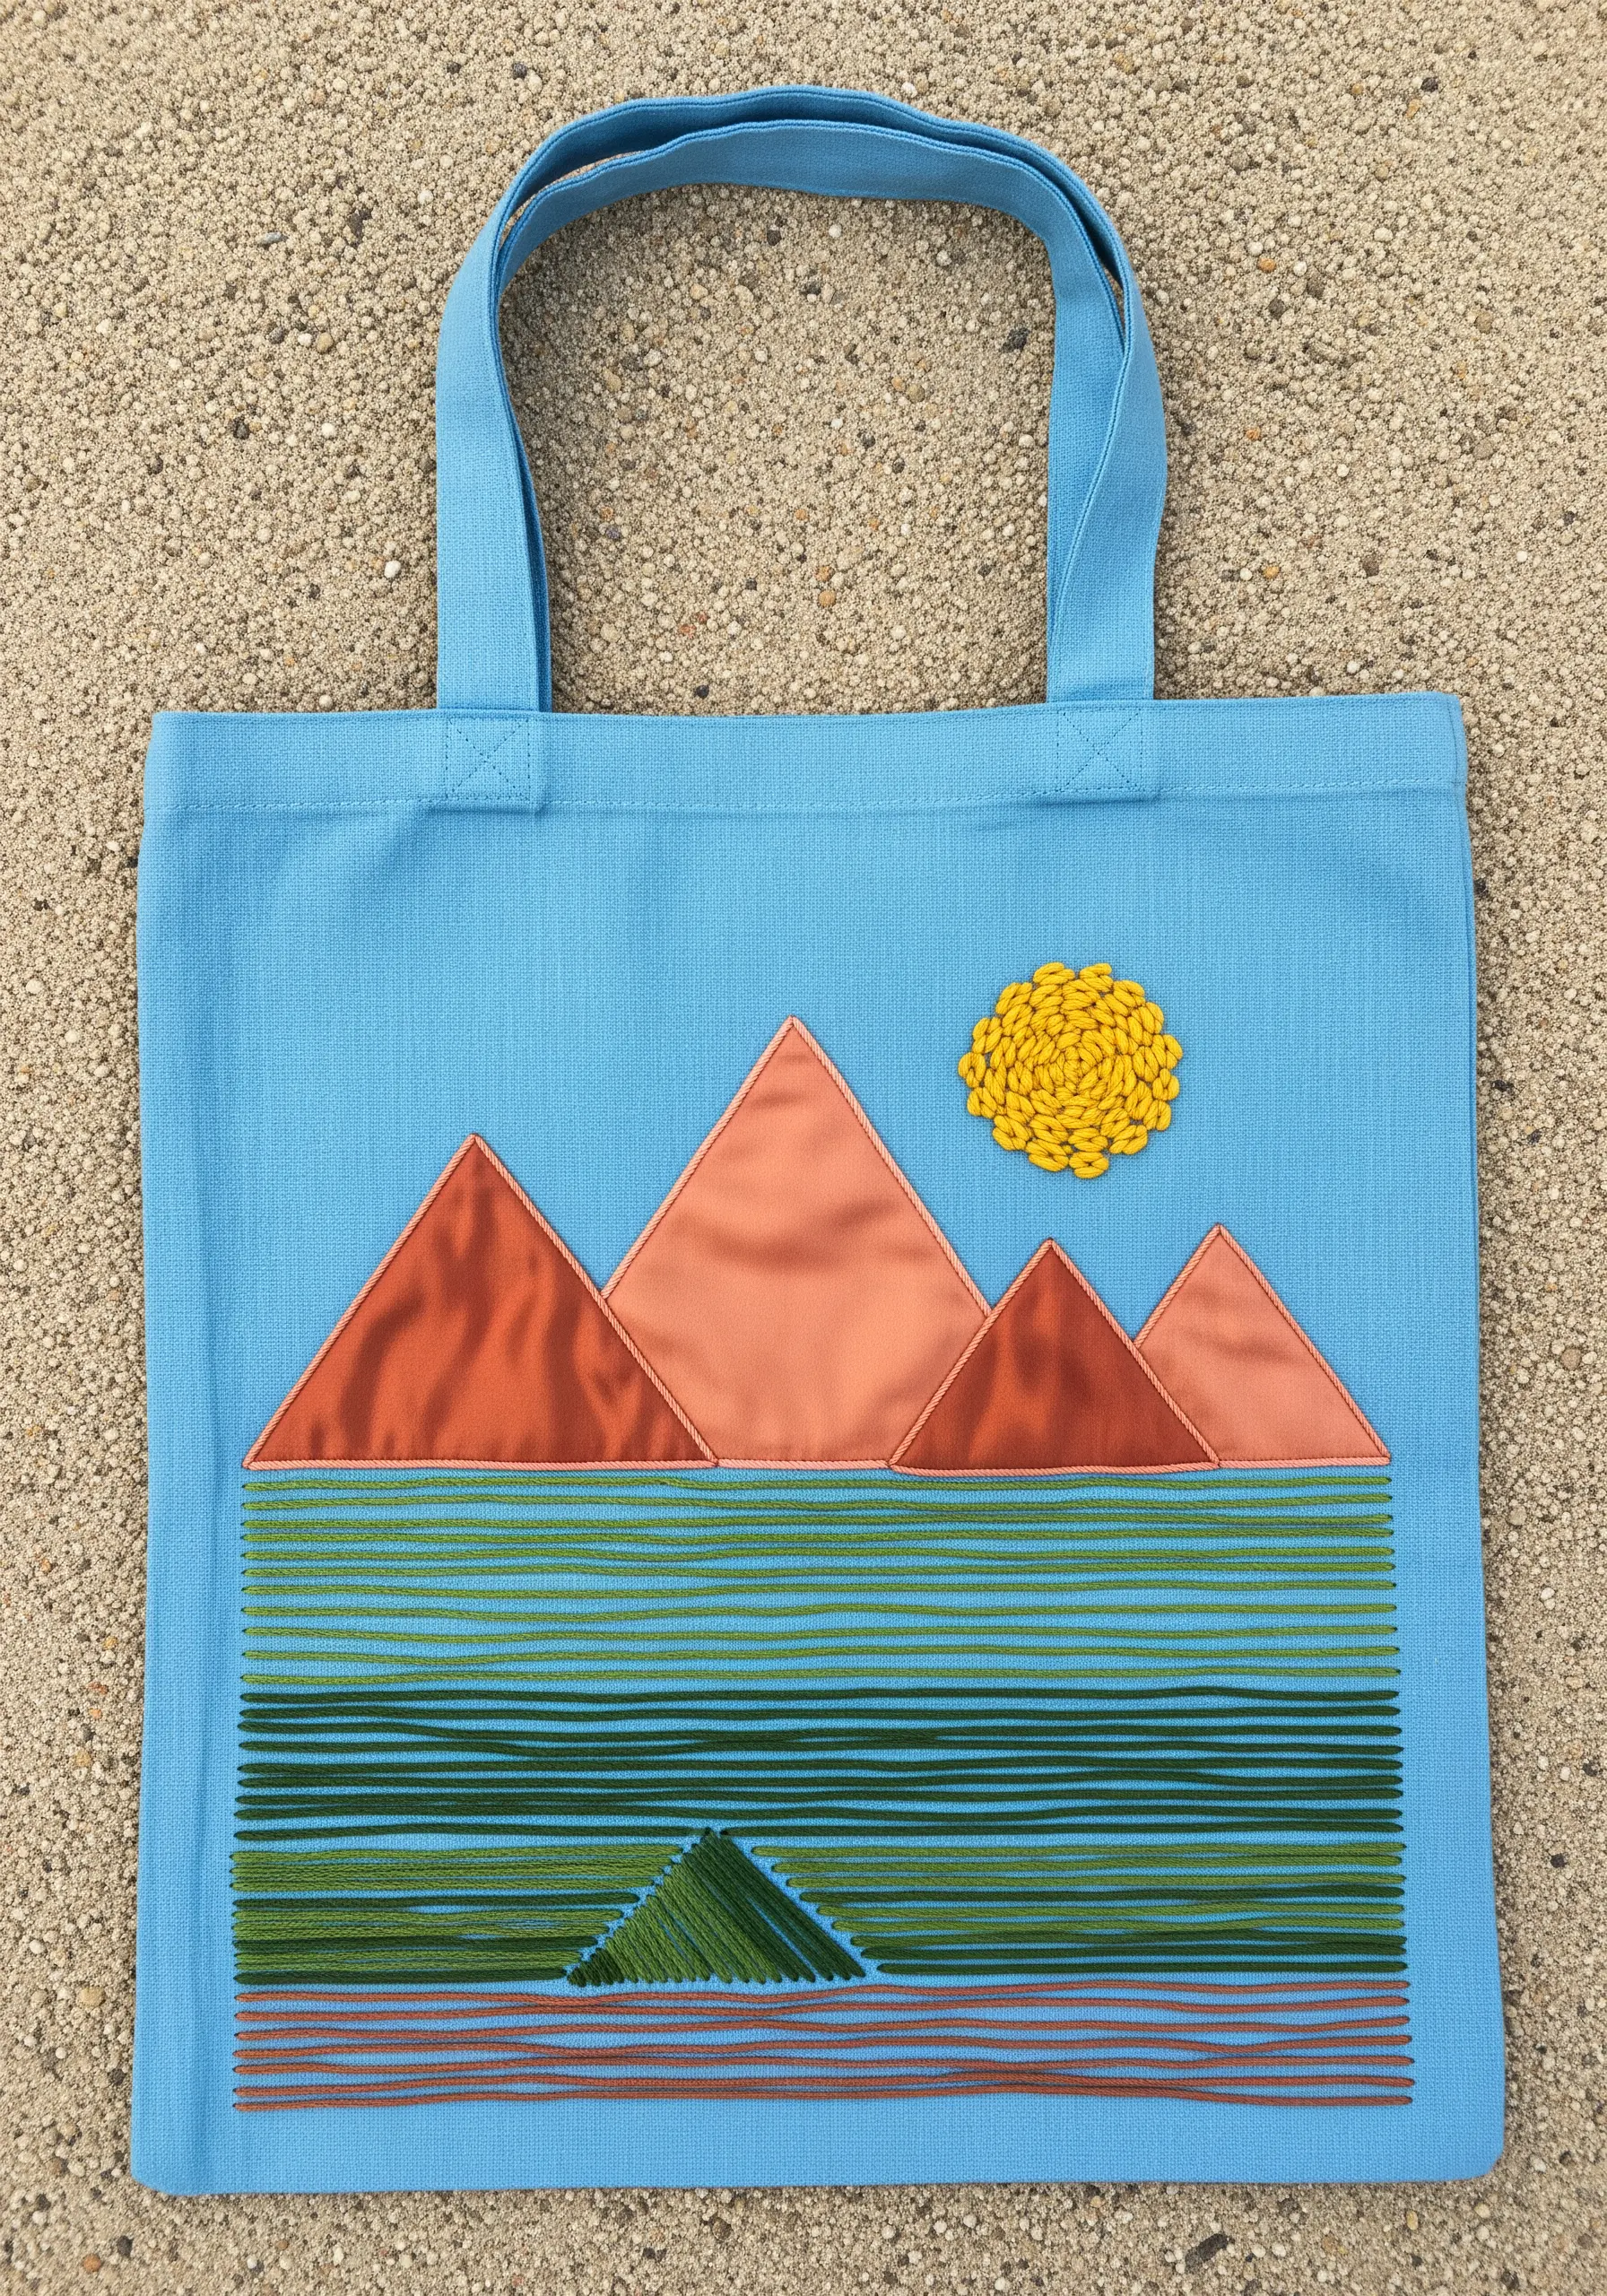
Create a graphic landscape by combining different textile techniques for each natural element.
For the mountains, use fabric appliqué with a slight sheen, like silk or satin, to catch the light and create a smooth, solid shape. Secure the edges with a neat backstitch outline.
Represent the water with dense, horizontal straight stitches in varying shades of blue and green to suggest depth and movement.
Finally, render the sun with a cluster of tightly packed French knots or a woven circle (like a wagon wheel stitch) for a pop of concentrated texture.
16. Embrace Rhythmic Repetition with Sashiko Stitching
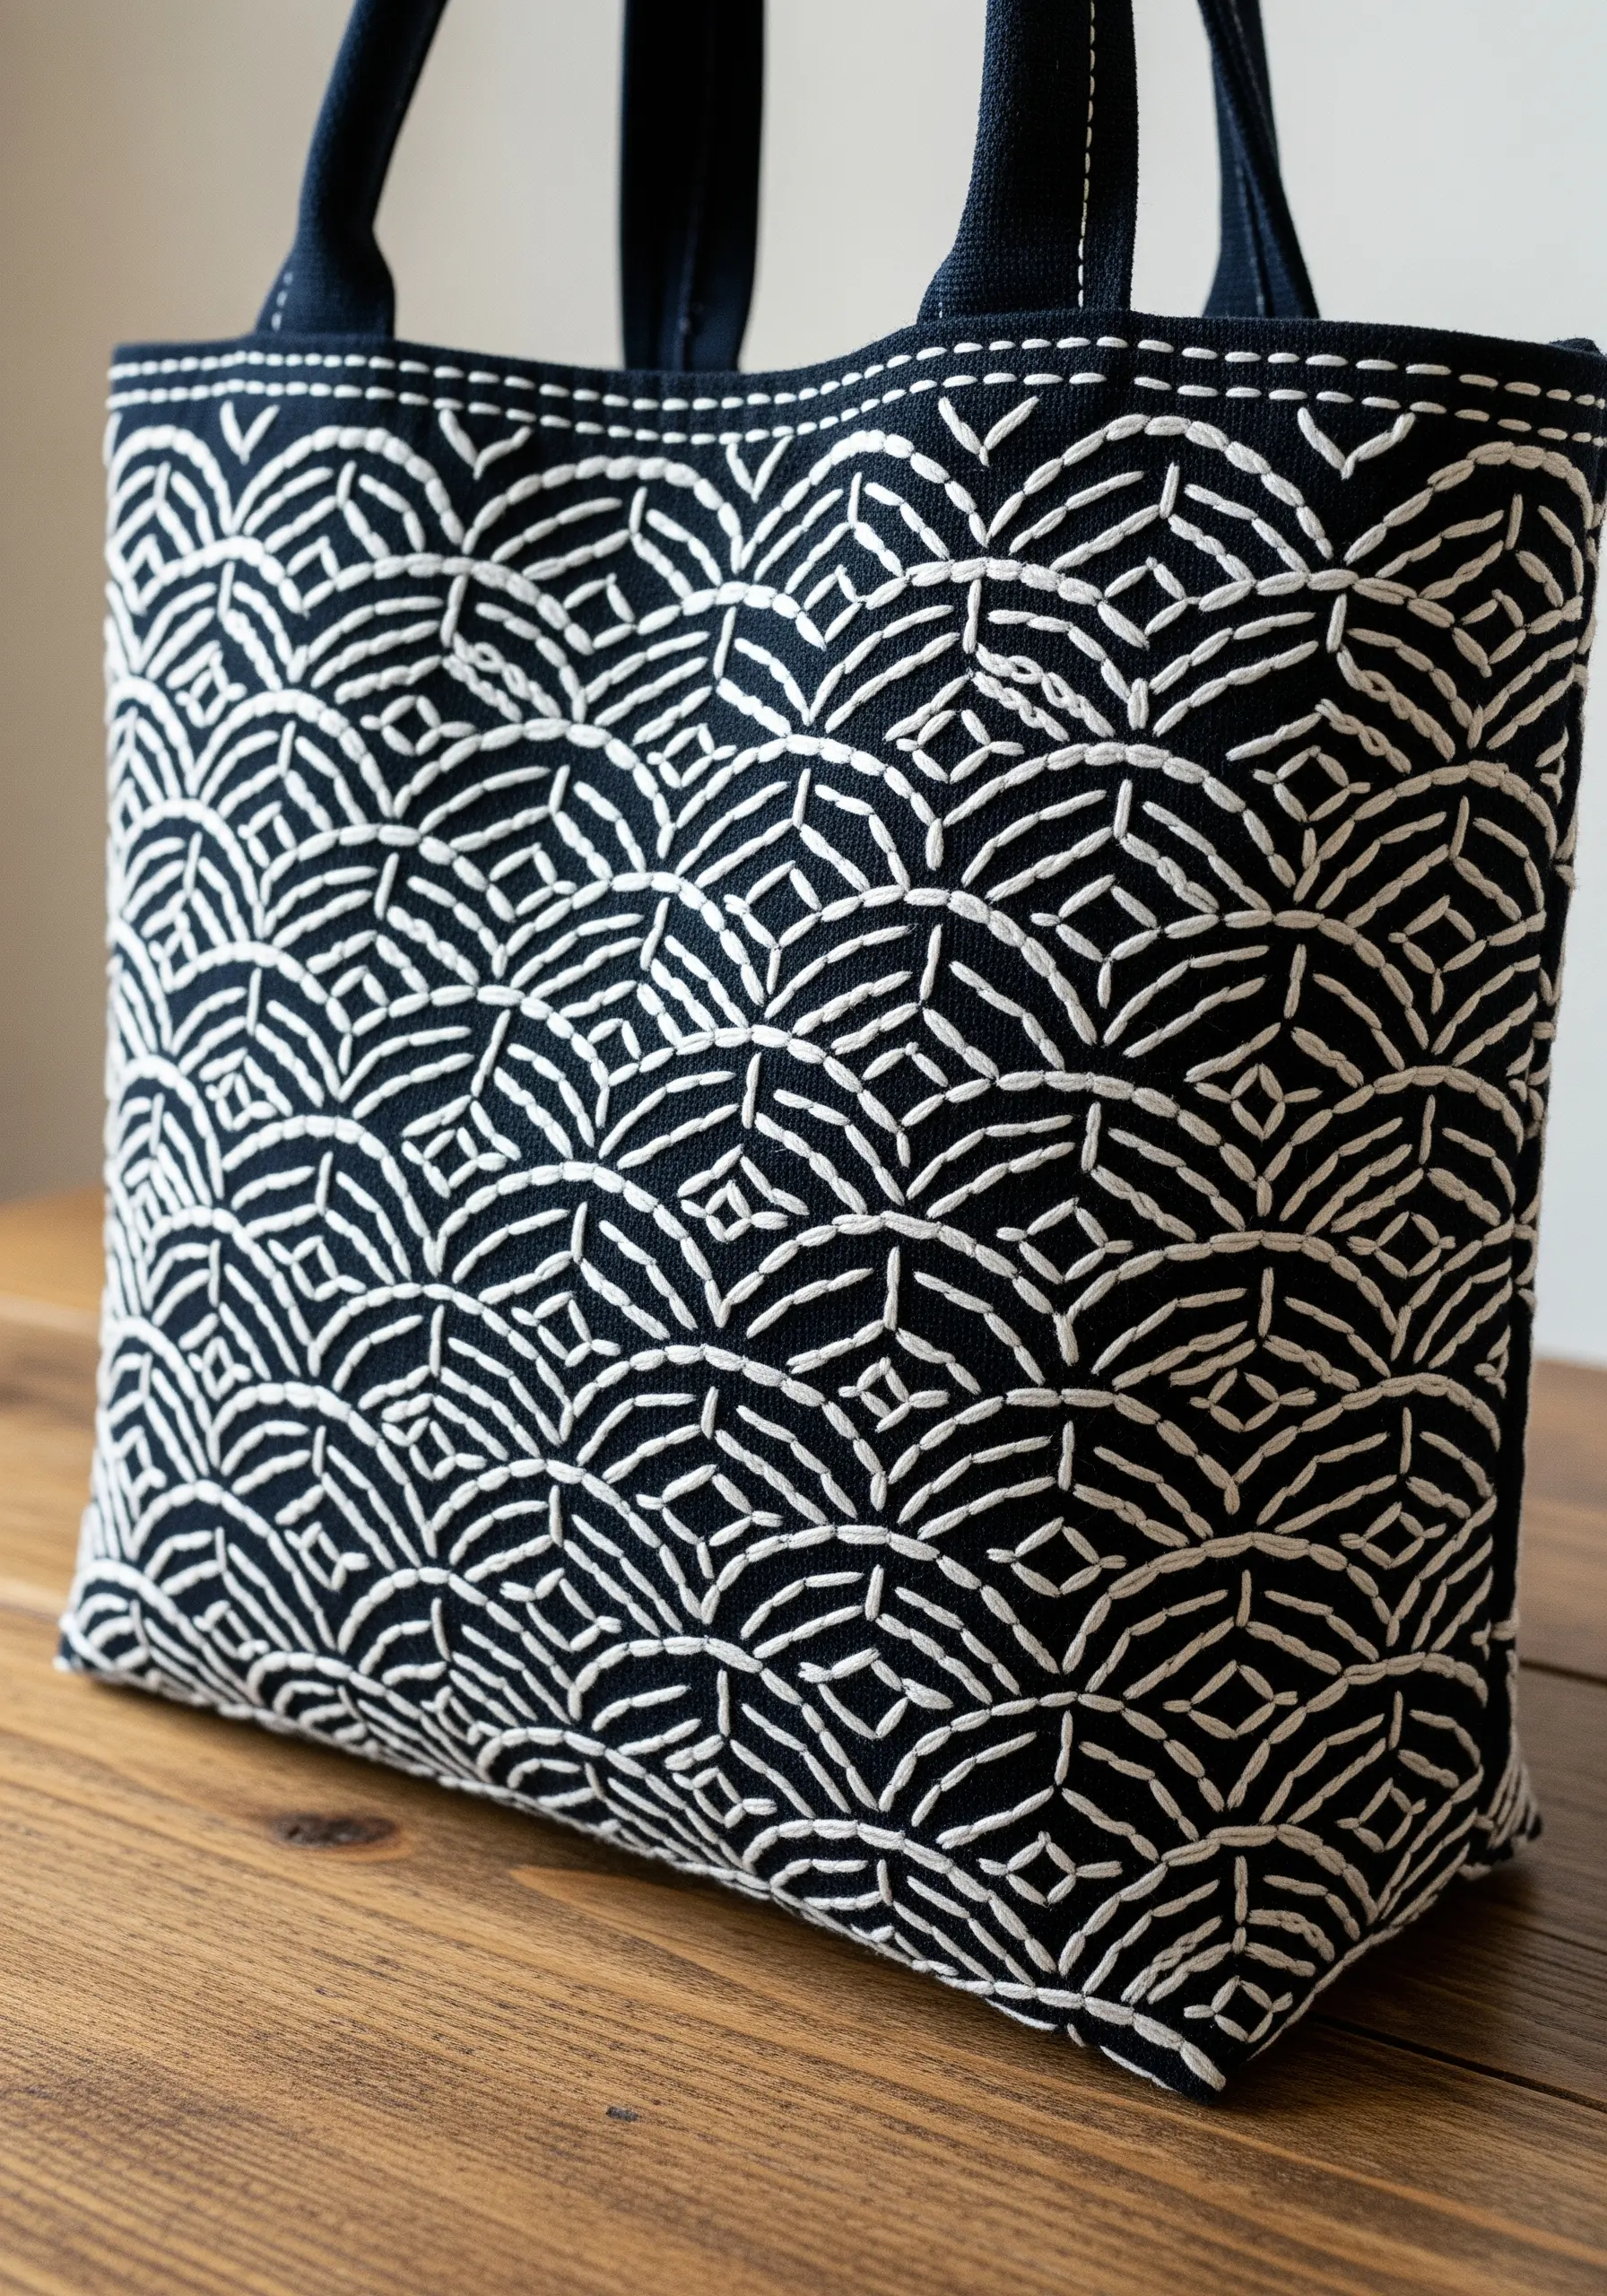
Explore the meditative art of Sashiko to create stunning, durable patterns with a simple running stitch.
This traditional Japanese Sashiko pattern, called Seigaiha (blue ocean waves), is made entirely of overlapping circles.
Use a thick, high-contrast thread, like a white Sashiko or perle cotton thread, against a dark navy or indigo fabric. The key to an authentic look is consistency: keep your stitch length and the space between stitches uniform.
The beauty of Sashiko is in its rhythmic precision, which creates a pattern that is both visually complex and deeply calming to stitch.
17. Channel 80s Cool with a Memphis Design Collage

Capture the playful energy of the Memphis Group by combining bold shapes, squiggles, and patterns.
This is a perfect opportunity for mixed media. Cut your geometric shapes from brightly colored felt or cotton fabric and appliqué them onto the tote.
Embroider the finer details, like the black and white stripes and the energetic squiggles, directly onto the fabric using a simple backstitch or a smooth satin stitch.
The key is to embrace asymmetry and a clashing color palette—it’s this deliberate, joyful chaos that defines the iconic 80s aesthetic.
18. Create a Glitch Effect with Interrupted Satin Stitch
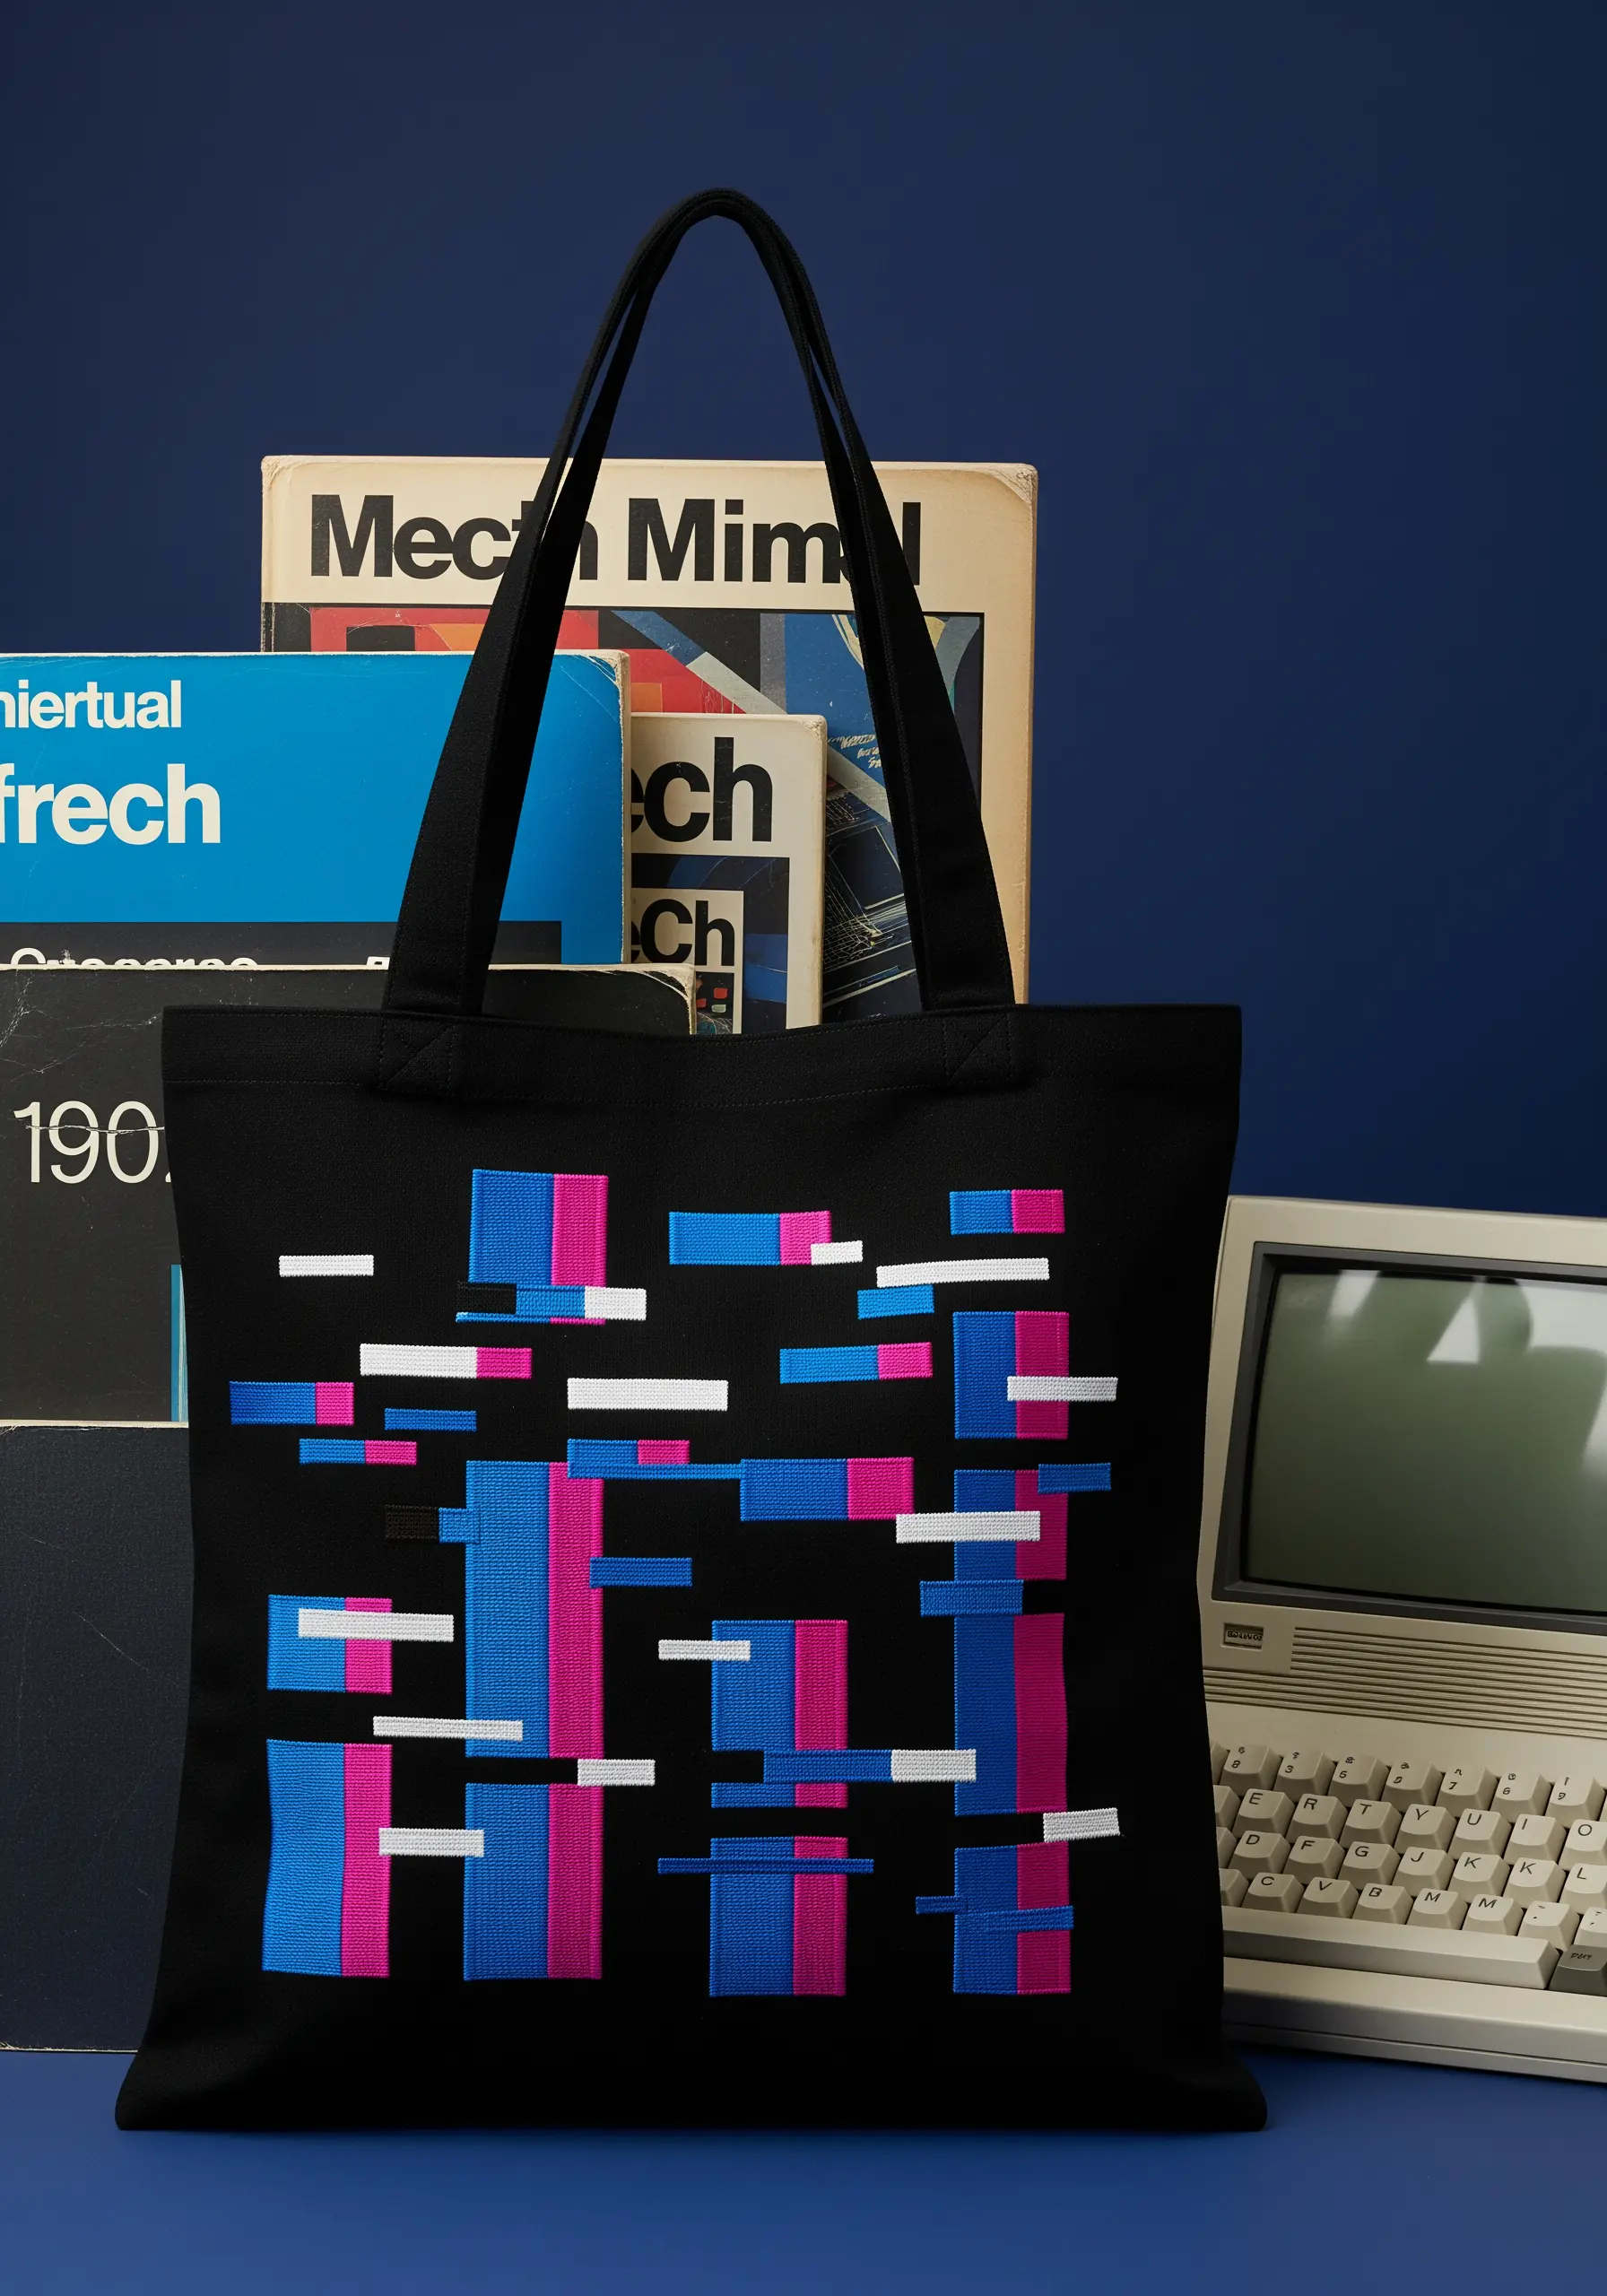
Translate the aesthetic of digital distortion into thread by strategically breaking up your satin stitches.
Lay down solid blocks of vertical satin stitch in bold, digital-inspired colors like magenta and cyan.
Then, create the ‘glitch’ by interrupting these blocks with horizontal bars of a contrasting color, like white or black. These bars should look like they are displacing or overwriting the original signal.
This technique relies on clean lines and dense stitching to sell the effect of a corrupted digital image, turning a simple tote into a piece of wearable tech-art.
19. Design a Patchwork Monogram with Varied Fill Stitches
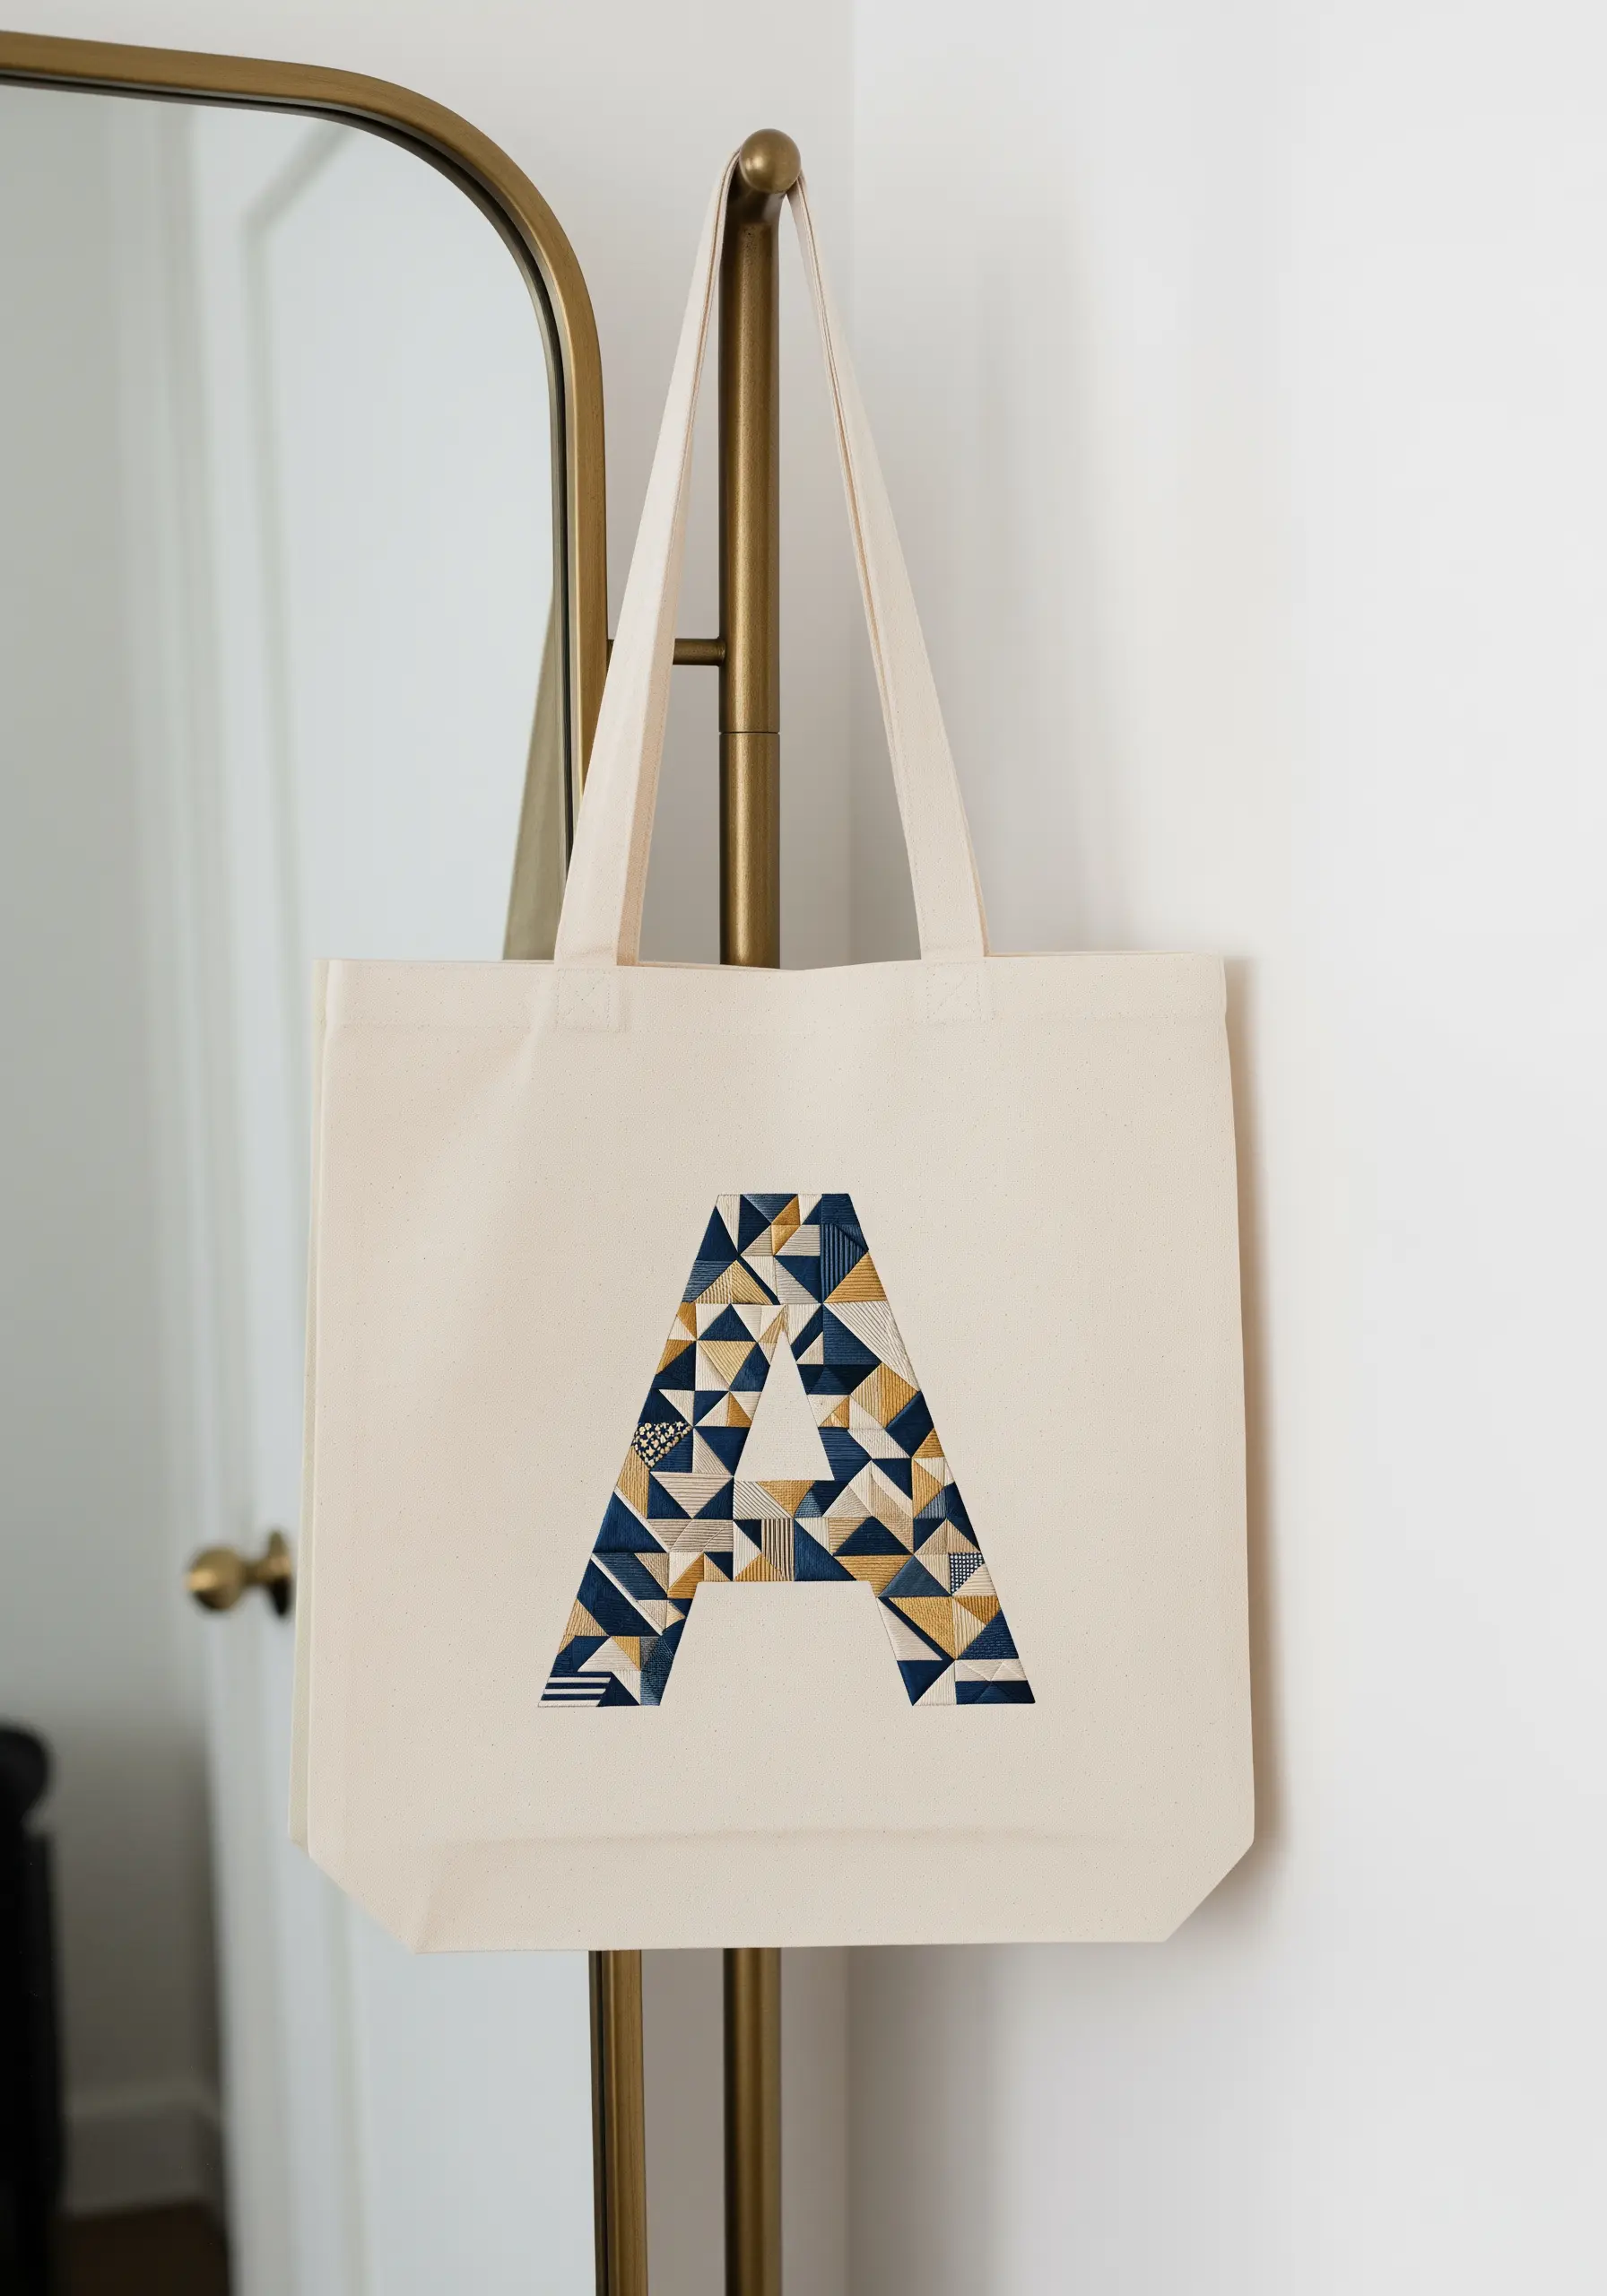
Turn a simple initial into a sampler of geometric patterns by dividing the letter into a patchwork of smaller shapes.
Draw your Monogram, then subdivide it into triangles, squares, and rectangles.
Fill each small section with a different textural stitch: try checkerboard patterns, diagonal satin stitches, dense seed stitches, or straight-line grids (blackwork).
By sticking to a cohesive color palette (like blues, golds, and creams), the variety of patterns will feel intentional and sophisticated rather than chaotic, resulting in a personalized and intricate design.
20. Map the Stars with Straight Stitches and Metallics

Stitch a celestial masterpiece by combining simple lines with sparkling accents.
Use a single strand of gold or silver metallic thread to create the constellation lines with a basic backstitch. This gives the design a delicate, map-like quality.
For the stars, use a contrasting white or silver thread. Create starbursts with layered straight stitches of varying lengths (an asterisk stitch) or use French knots for smaller, more distant stars.
Sprinkling tiny seed stitches or adding sequins randomly across the dark navy fabric will mimic a field of distant galaxies, adding depth and magic to your composition.
21. Add a Woven Patch for Unmatched Dimensionality
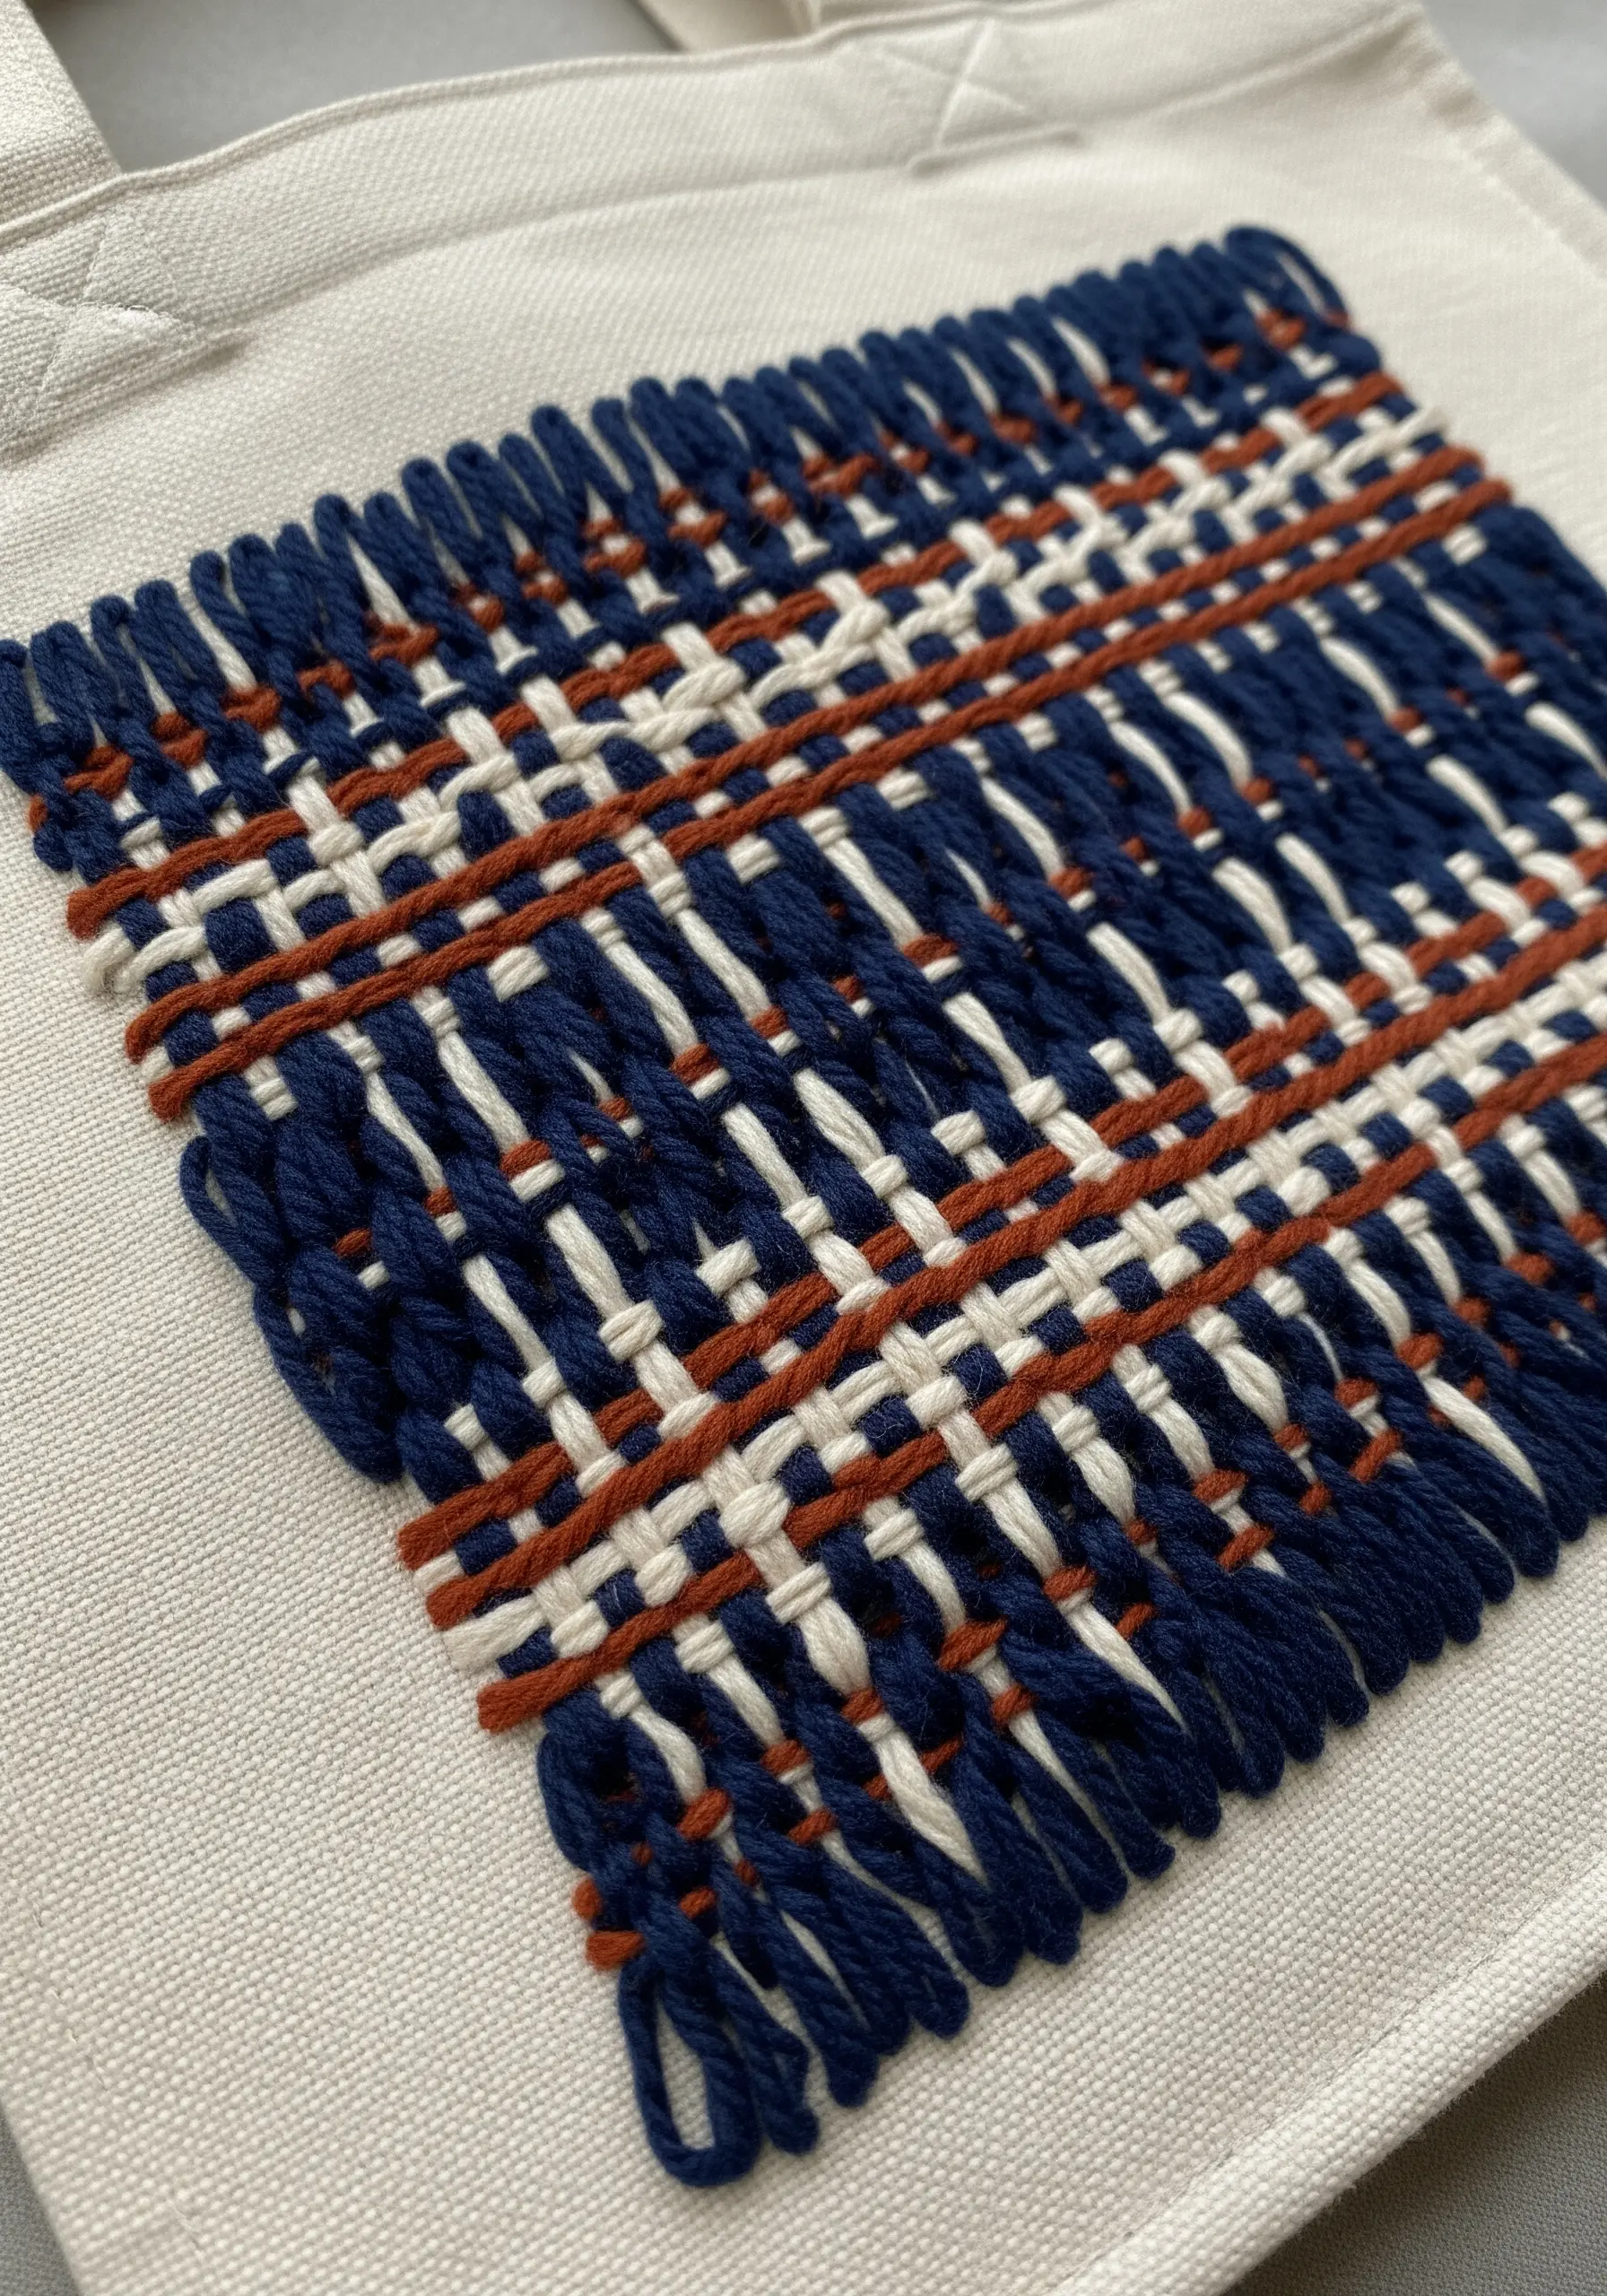
Create a truly sculptural element on your tote by weaving directly onto the fabric.
Lay down a series of long, vertical straight stitches in a tight grouping to act as your warp threads. Use a thick, chunky yarn for this to build volume quickly.
Then, using a tapestry needle, weave contrasting colors of yarn horizontally through your warp threads. Experiment with different weaving patterns—plain weave (over-one, under-one) or twill—for different effects.
This Woven patch technique adds a level of dimensionality and texture that traditional embroidery stitches can’t match, creating a focal point that is both rustic and modern.
22. Capture a Mid-Century Vibe with Clean Lines and Color Pops
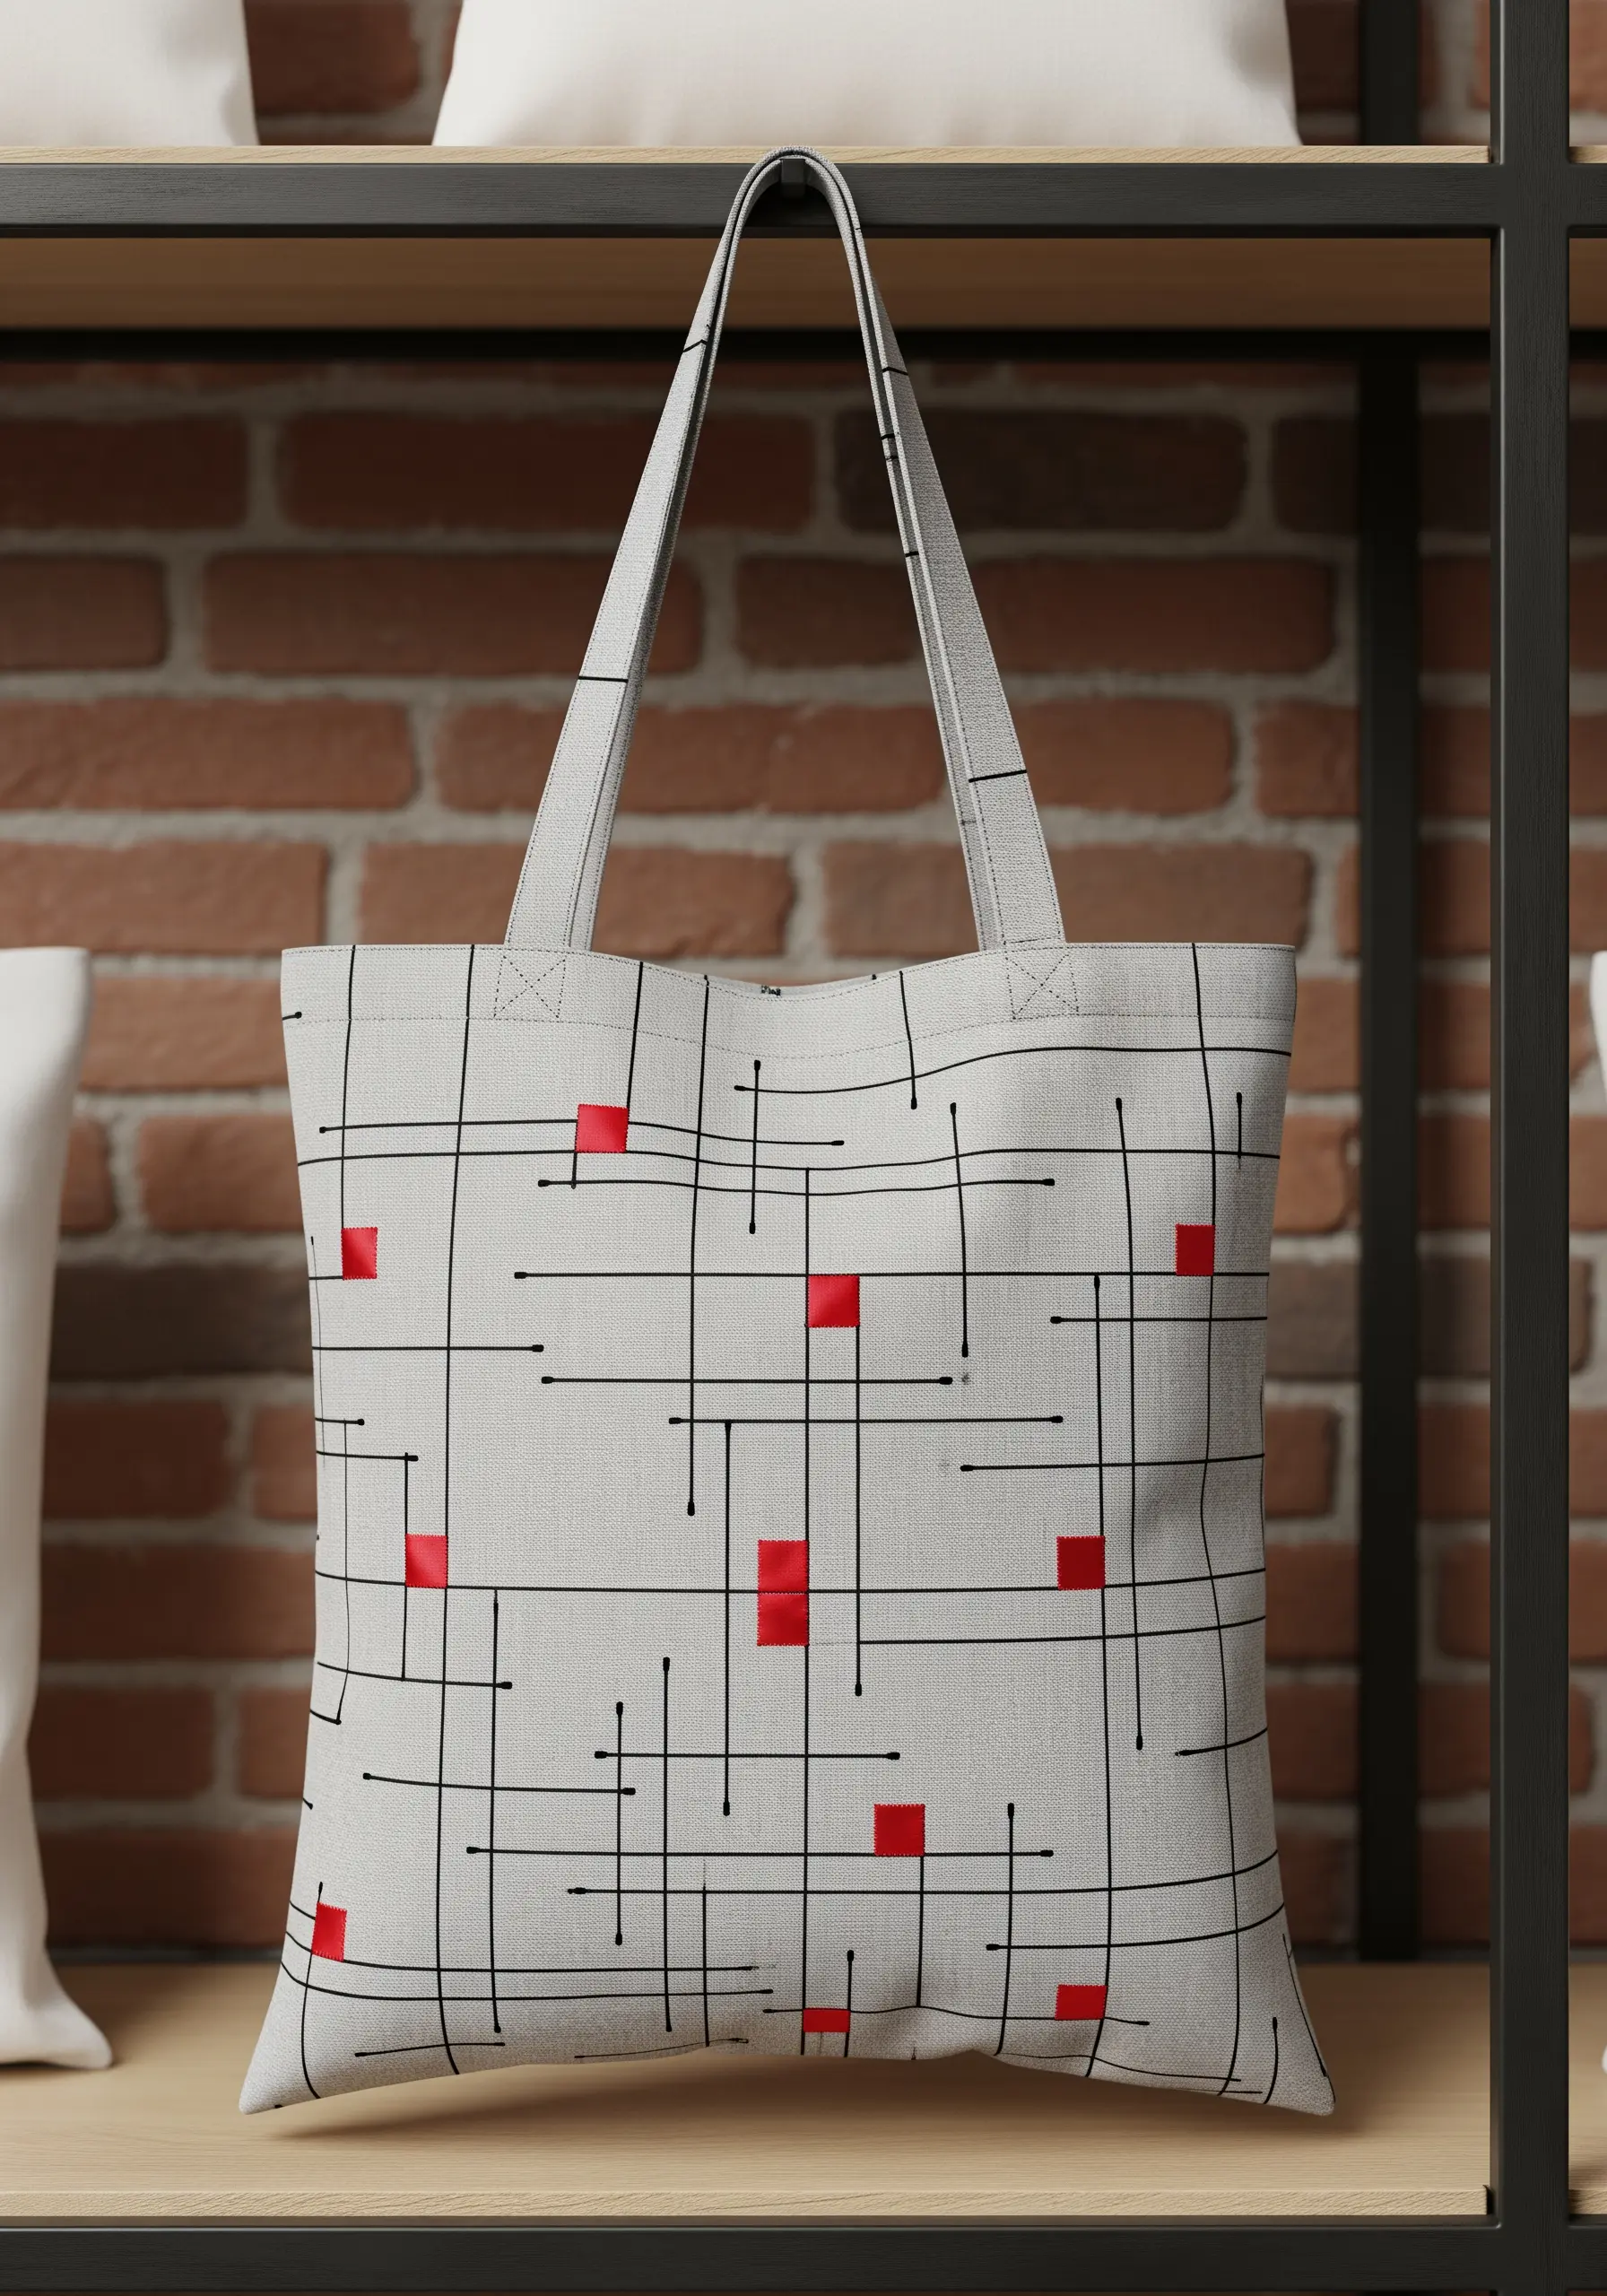
Evoke the spirit of mid-century modern design by focusing on minimalist lines and carefully placed accents of color.
Use a crisp, fine backstitch in a dark, contrasting color to create the intersecting grid. Precision is key—the lines should feel deliberate and controlled.
Fill in small, select shapes with bold, solid color. You can use satin stitch for a traditional embroidered feel or, for a flatter and more graphic look, use fabric appliqué with felt or cotton.
This Mid-century modern line art style is defined by its balance of negative space, linear structure, and sparing use of primary colors.
23. Layer Stitches for a Bold, Graphic Tribal Pattern
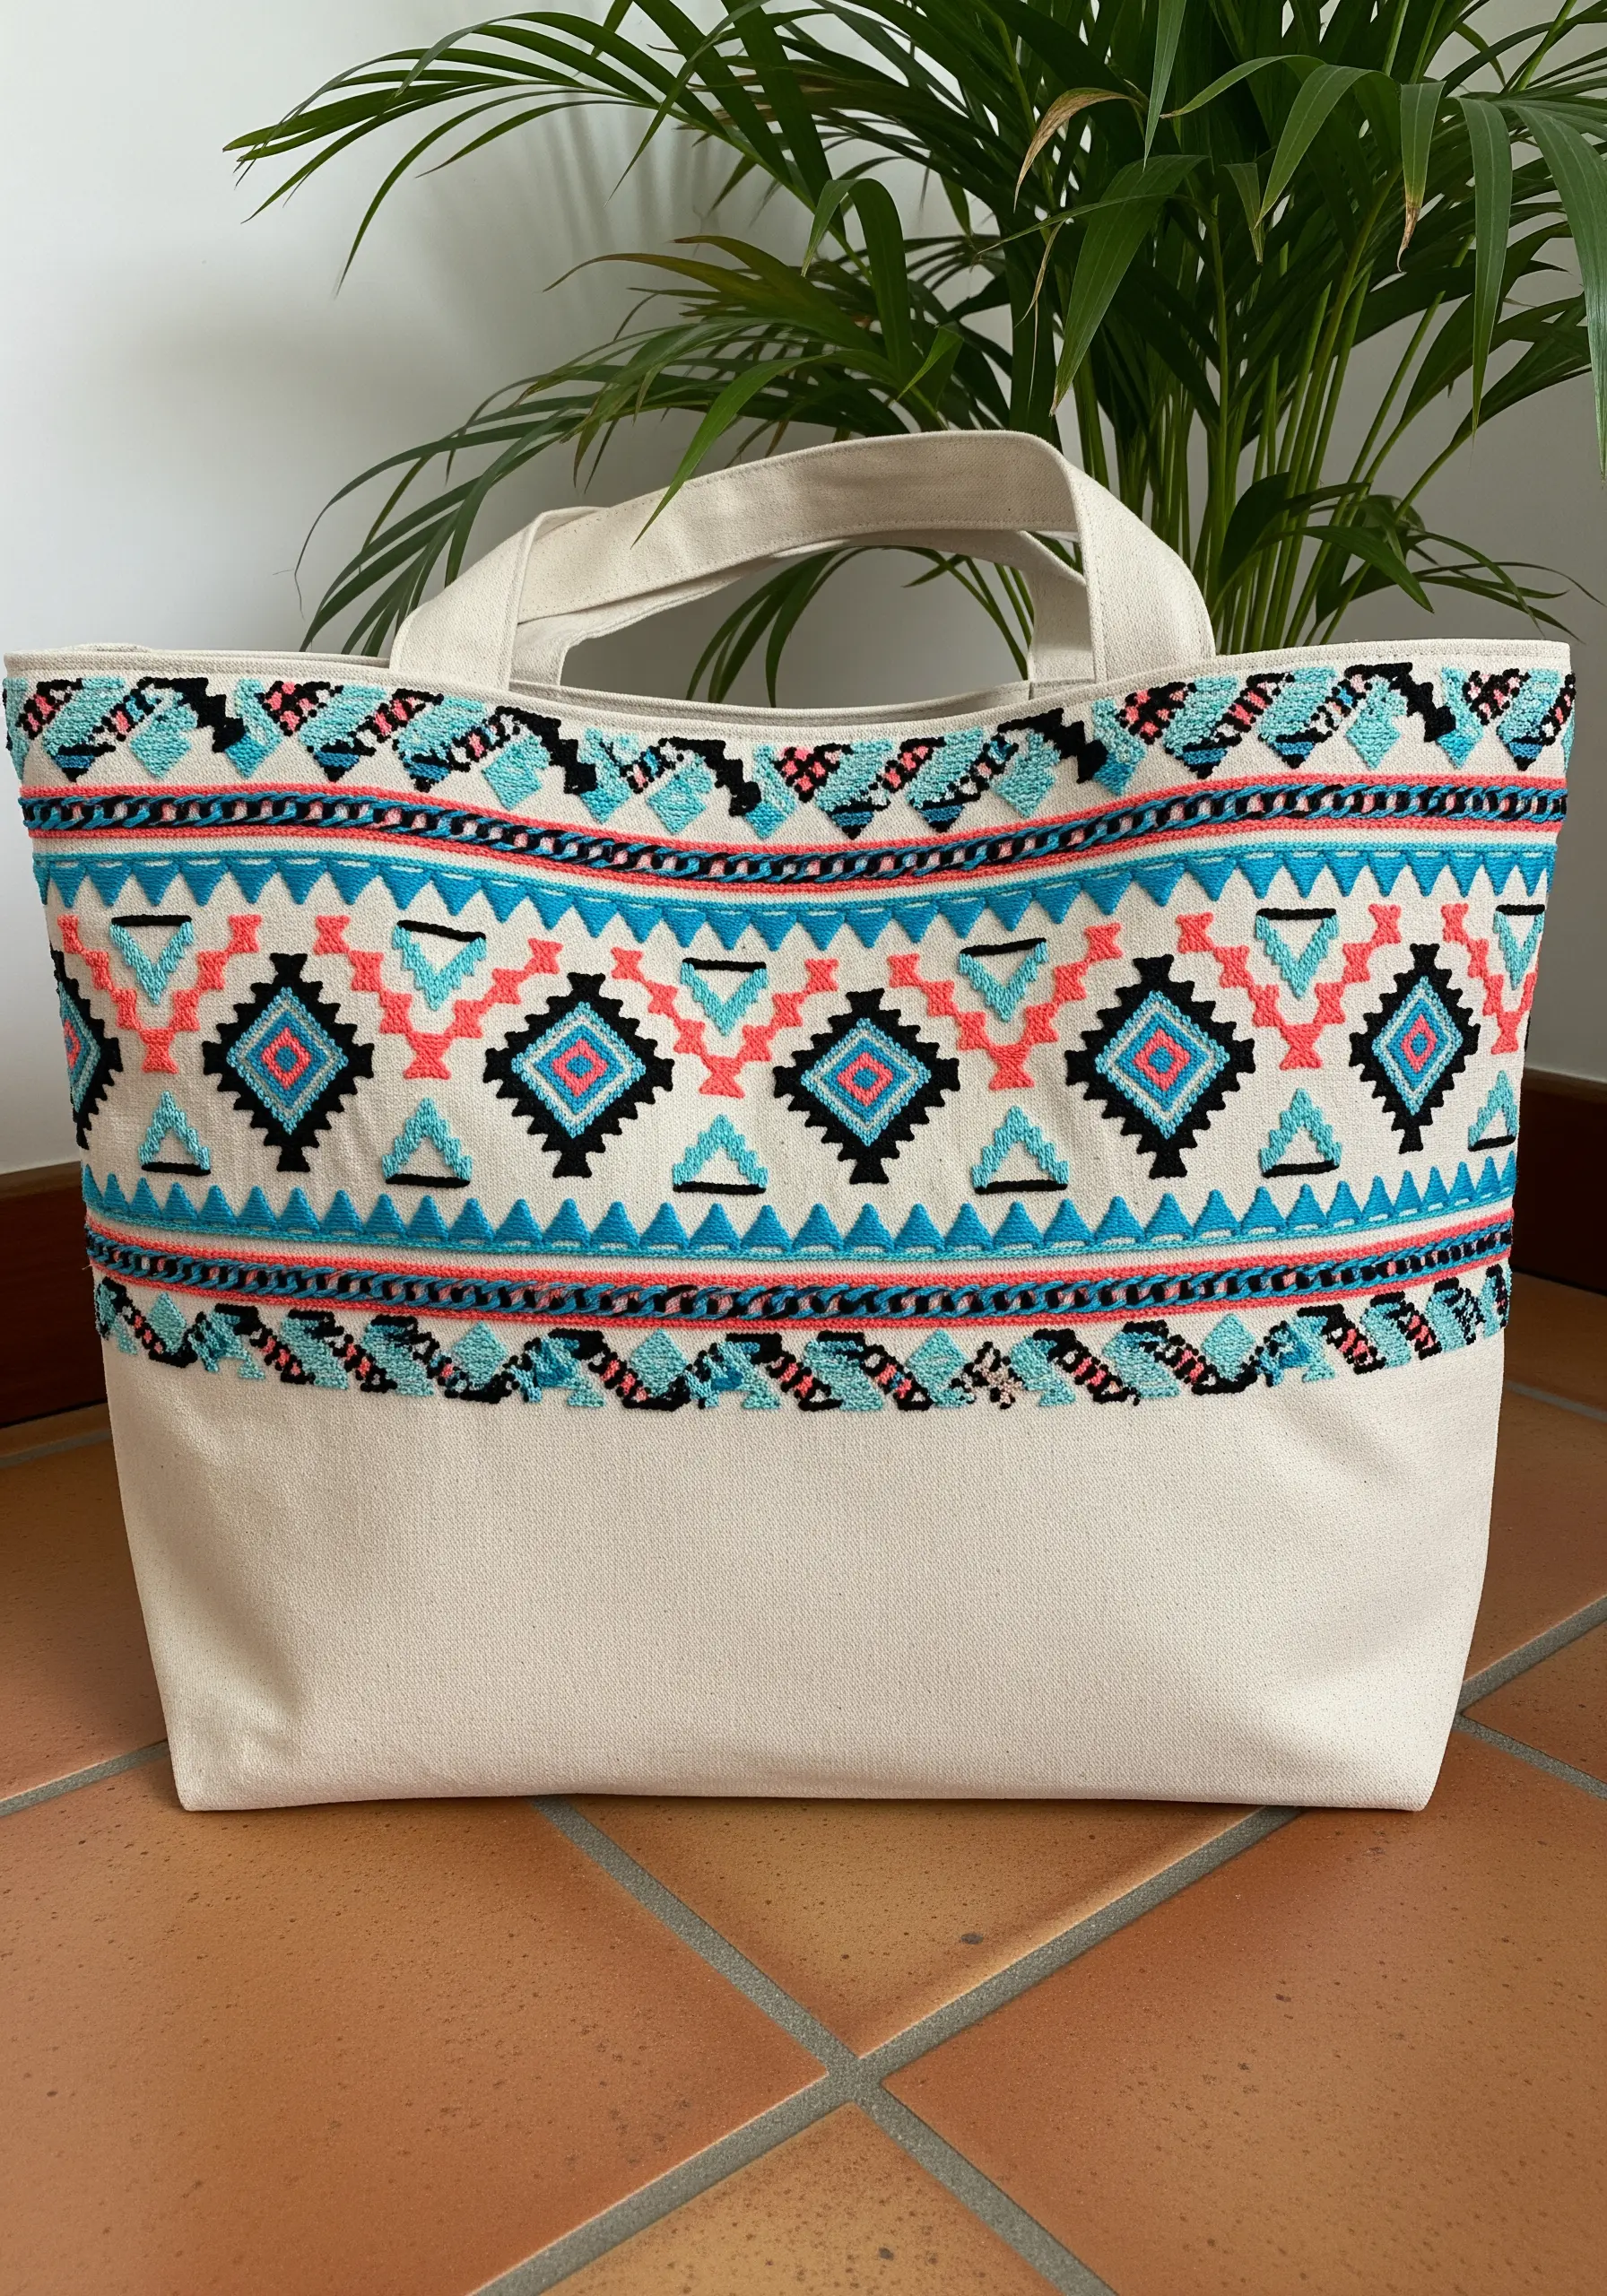
Build a vibrant, textural pattern by layering different stitches to create distinct bands of color and shape.
Start with the main geometric shapes—the diamonds and triangles—and fill them with a smooth satin stitch. Use bold, high-contrast colors like coral, turquoise, and black to make the design pop.
Next, add definition by outlining these shapes with a crisp backstitch in a contrasting color. This creates separation and makes the pattern feel more intricate.
Finally, add textural details like rows of seed stitch or small straight stitches to fill in the background areas, adding another layer of complexity to the design.
24. Create a Liquid Metal Effect with High-Sheen Thread
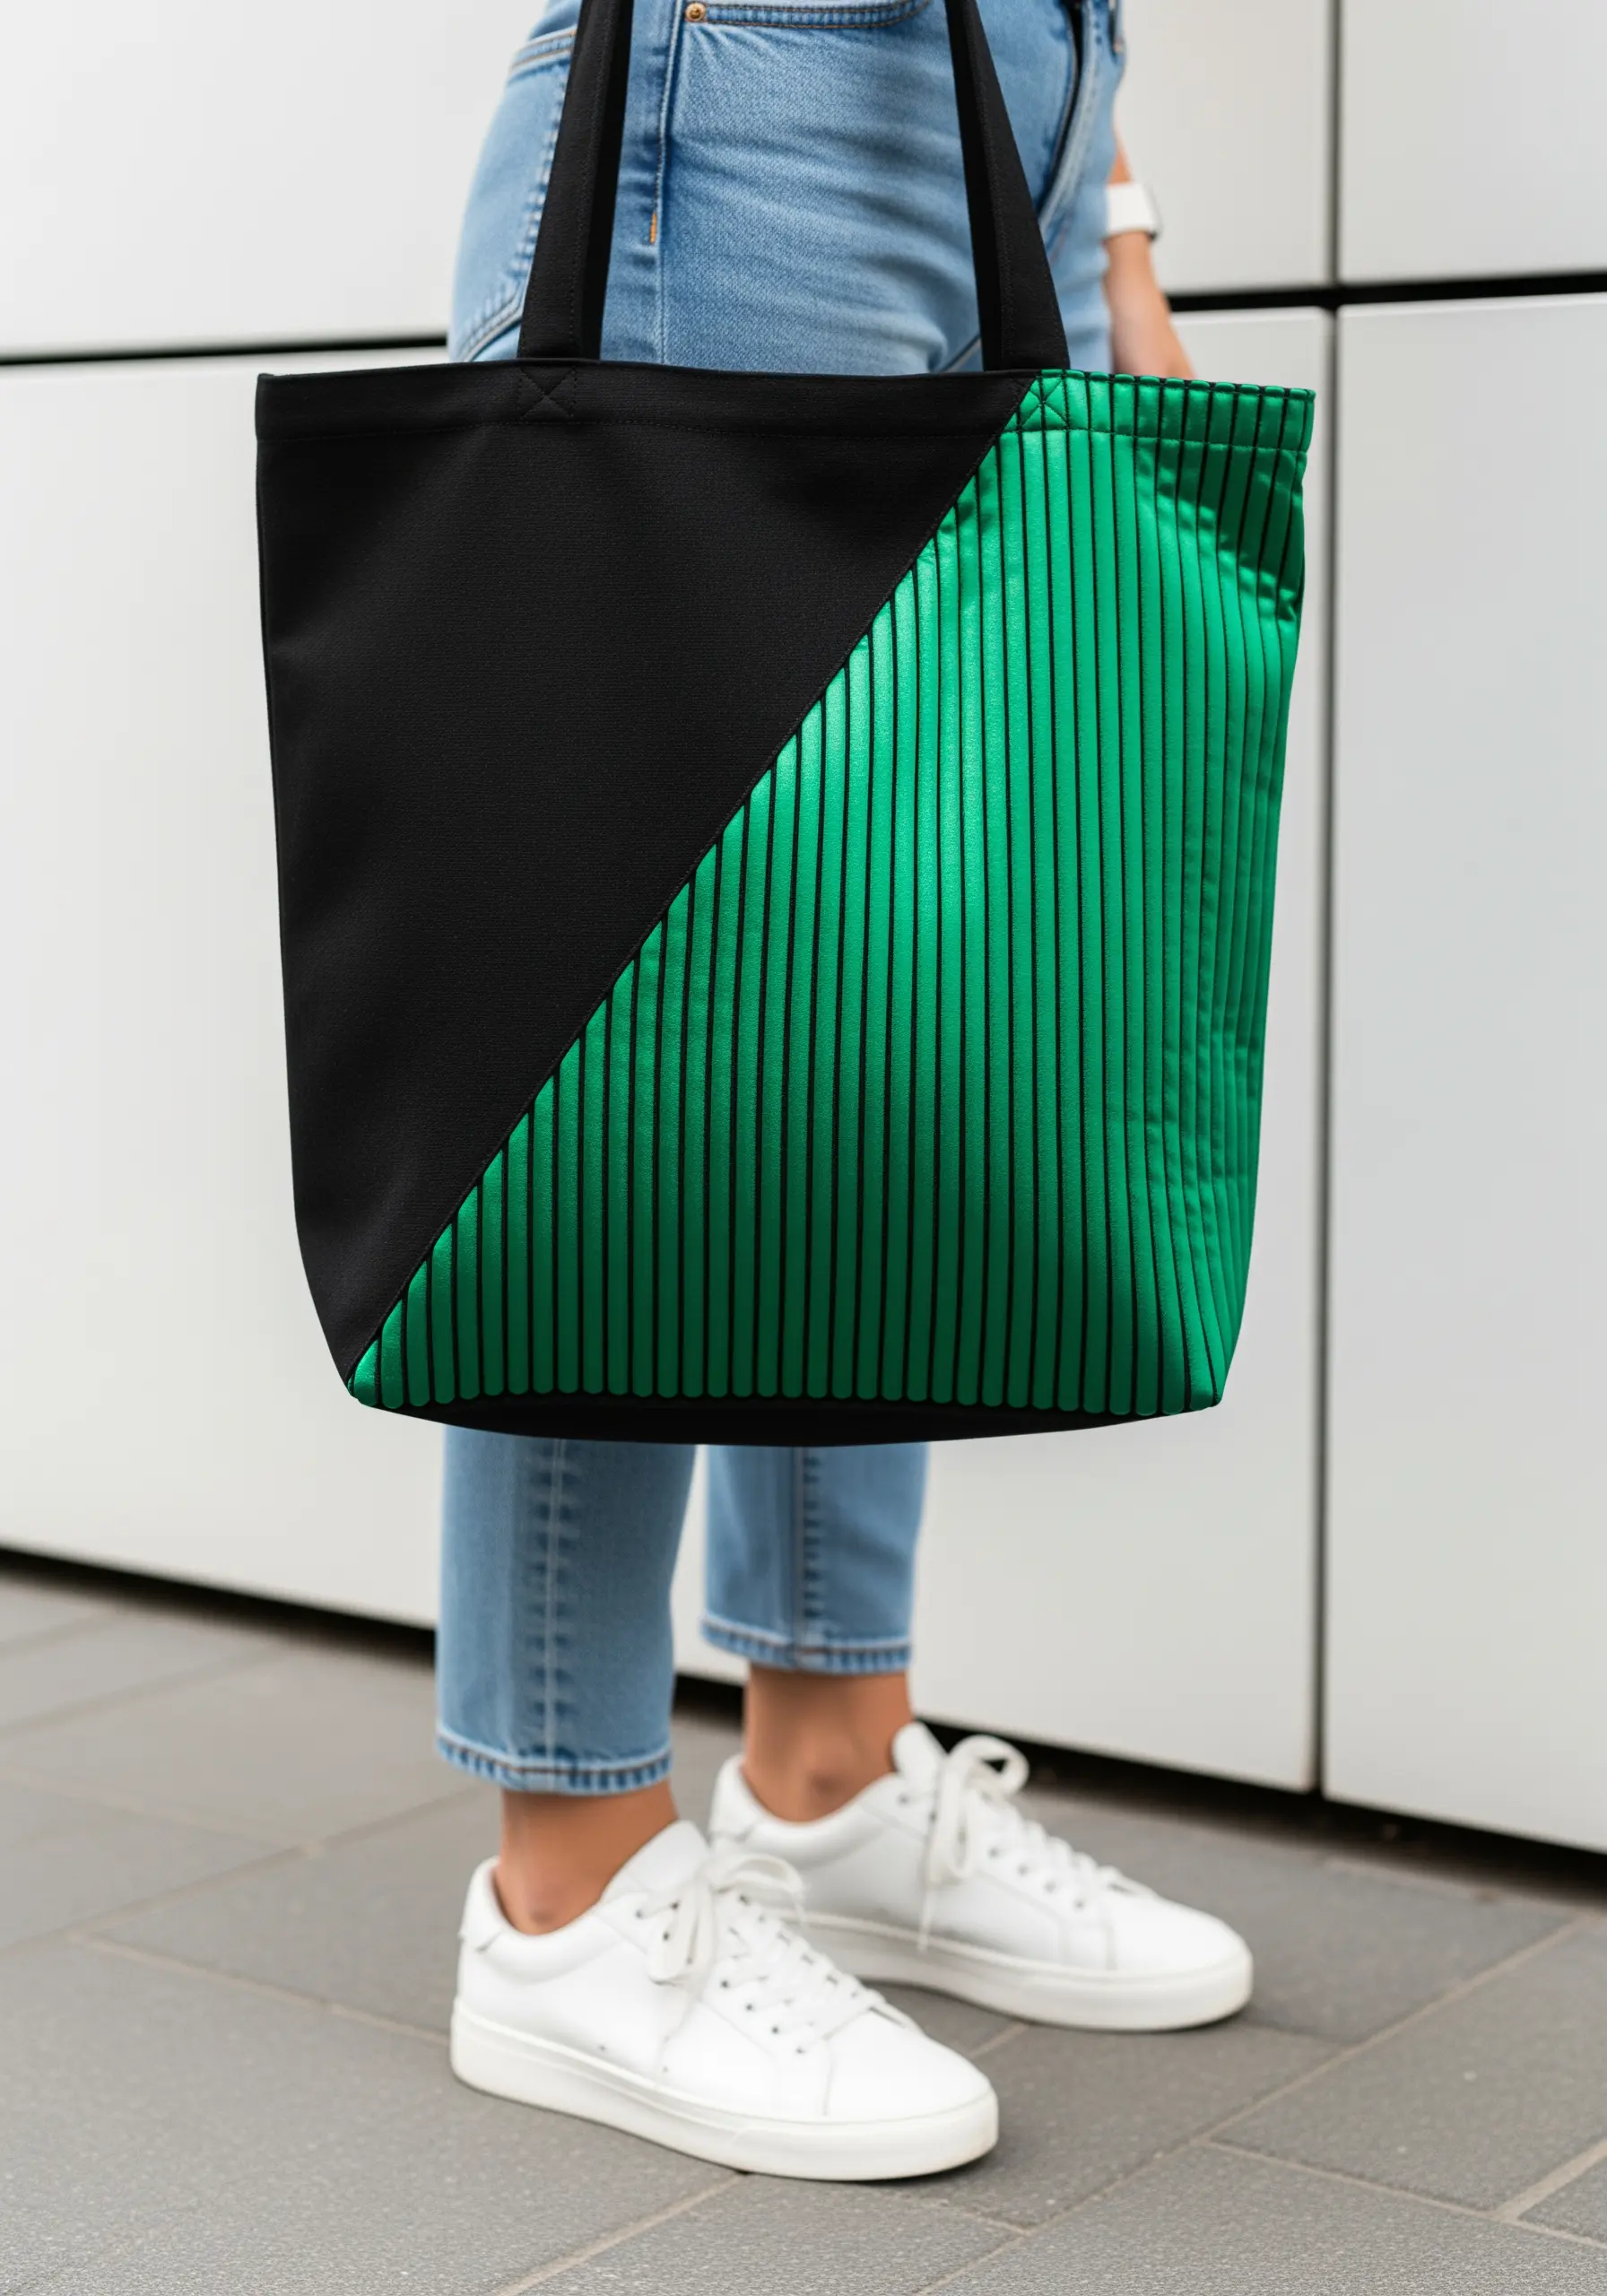
The key to this futuristic, almost liquid look is the perfect alignment of stitches combined with the right thread.
Use a rayon or silk floss, which has a much higher sheen than standard cotton. A metallic thread would also work, but can be trickier to handle.
Work your vertical satin stitches with extreme precision, ensuring they are perfectly parallel and packed tightly together with no gaps. Using a laying tool or the shaft of your needle to smooth each stitch before you pull it tight will maximize the luster.
The uninterrupted reflection of light across the smooth surface of the high-sheen thread is what creates this stunning, wet-look finish.
25. Achieve a Sculptural Spiral with Braid Stitch
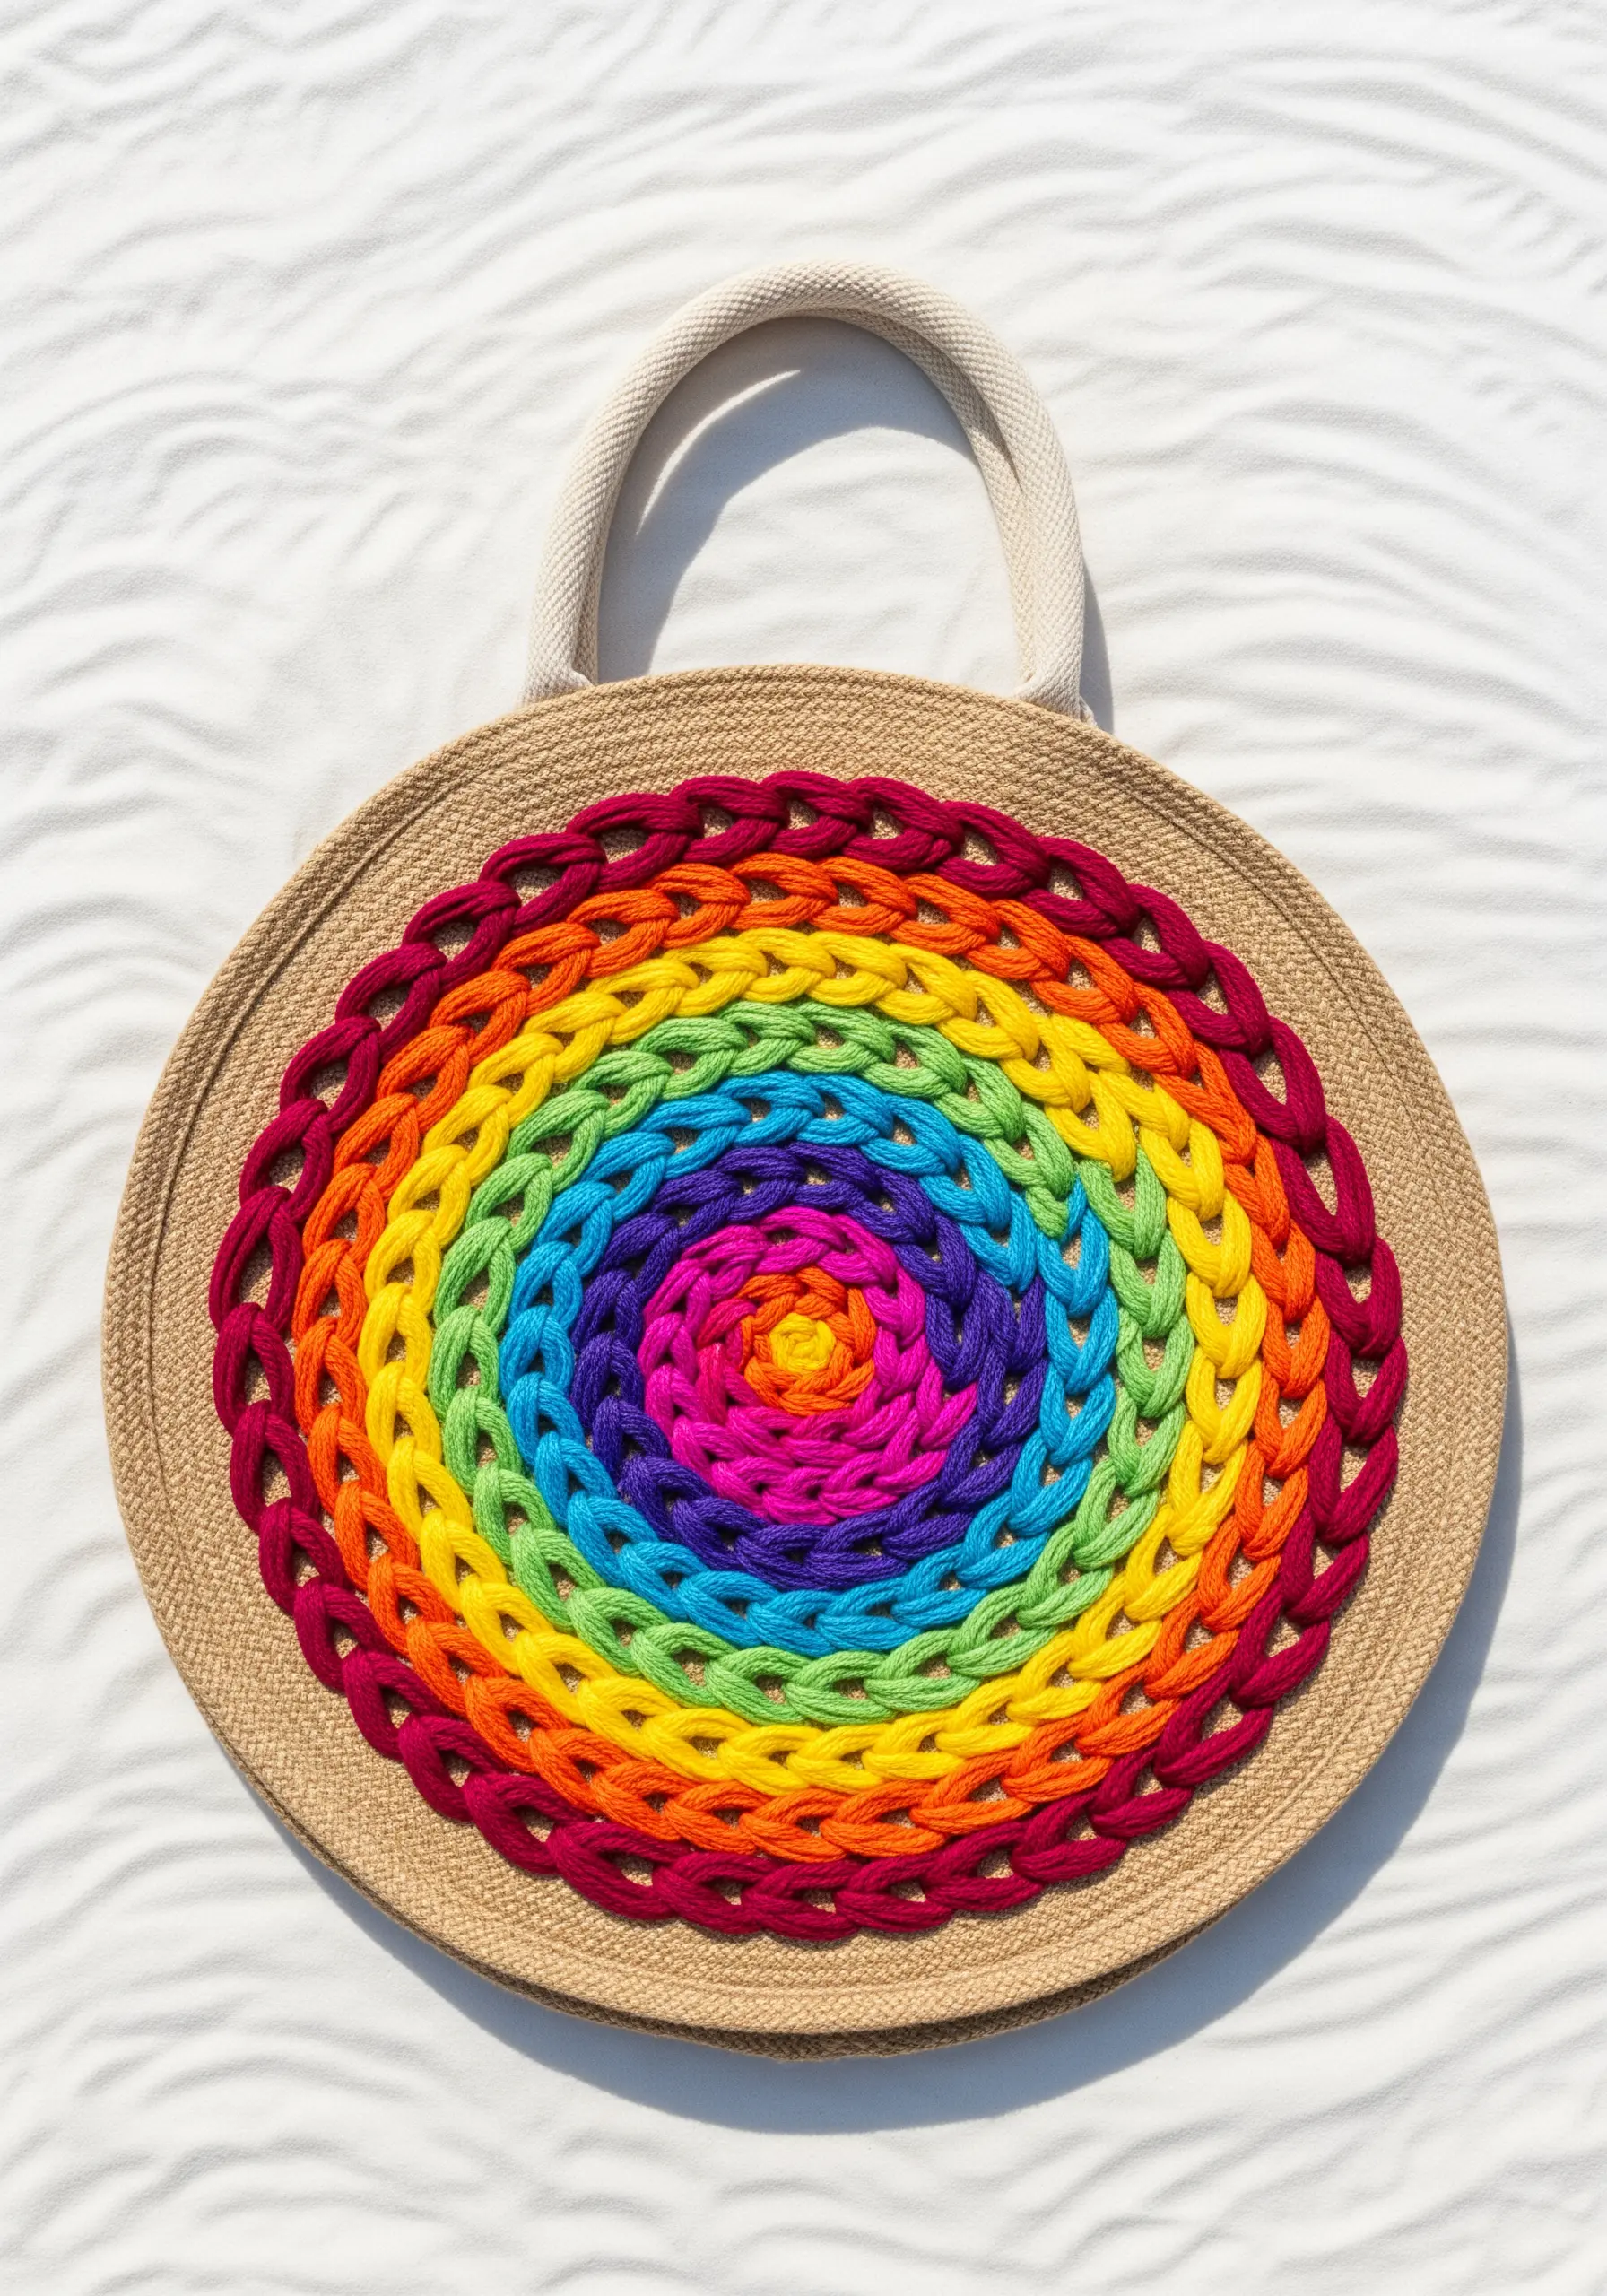
For a design that truly stands off the fabric, use a highly dimensional stitch like the braid stitch or a couched thick cord.
The braid stitch is worked by creating a series of interconnected loops that form a raised, plaited line. It’s perfect for creating thick, textural outlines.
To achieve the rainbow spiral, simply switch your thread color as you work your way around. Use a thick thread like perle cotton or even multiple strands of embroidery floss to maximize the three-dimensional effect.
This technique is surprisingly fast and turns a simple spiral into a tactile, joyful centerpiece.
26. Design a Dynamic Starburst with Radiating Lines
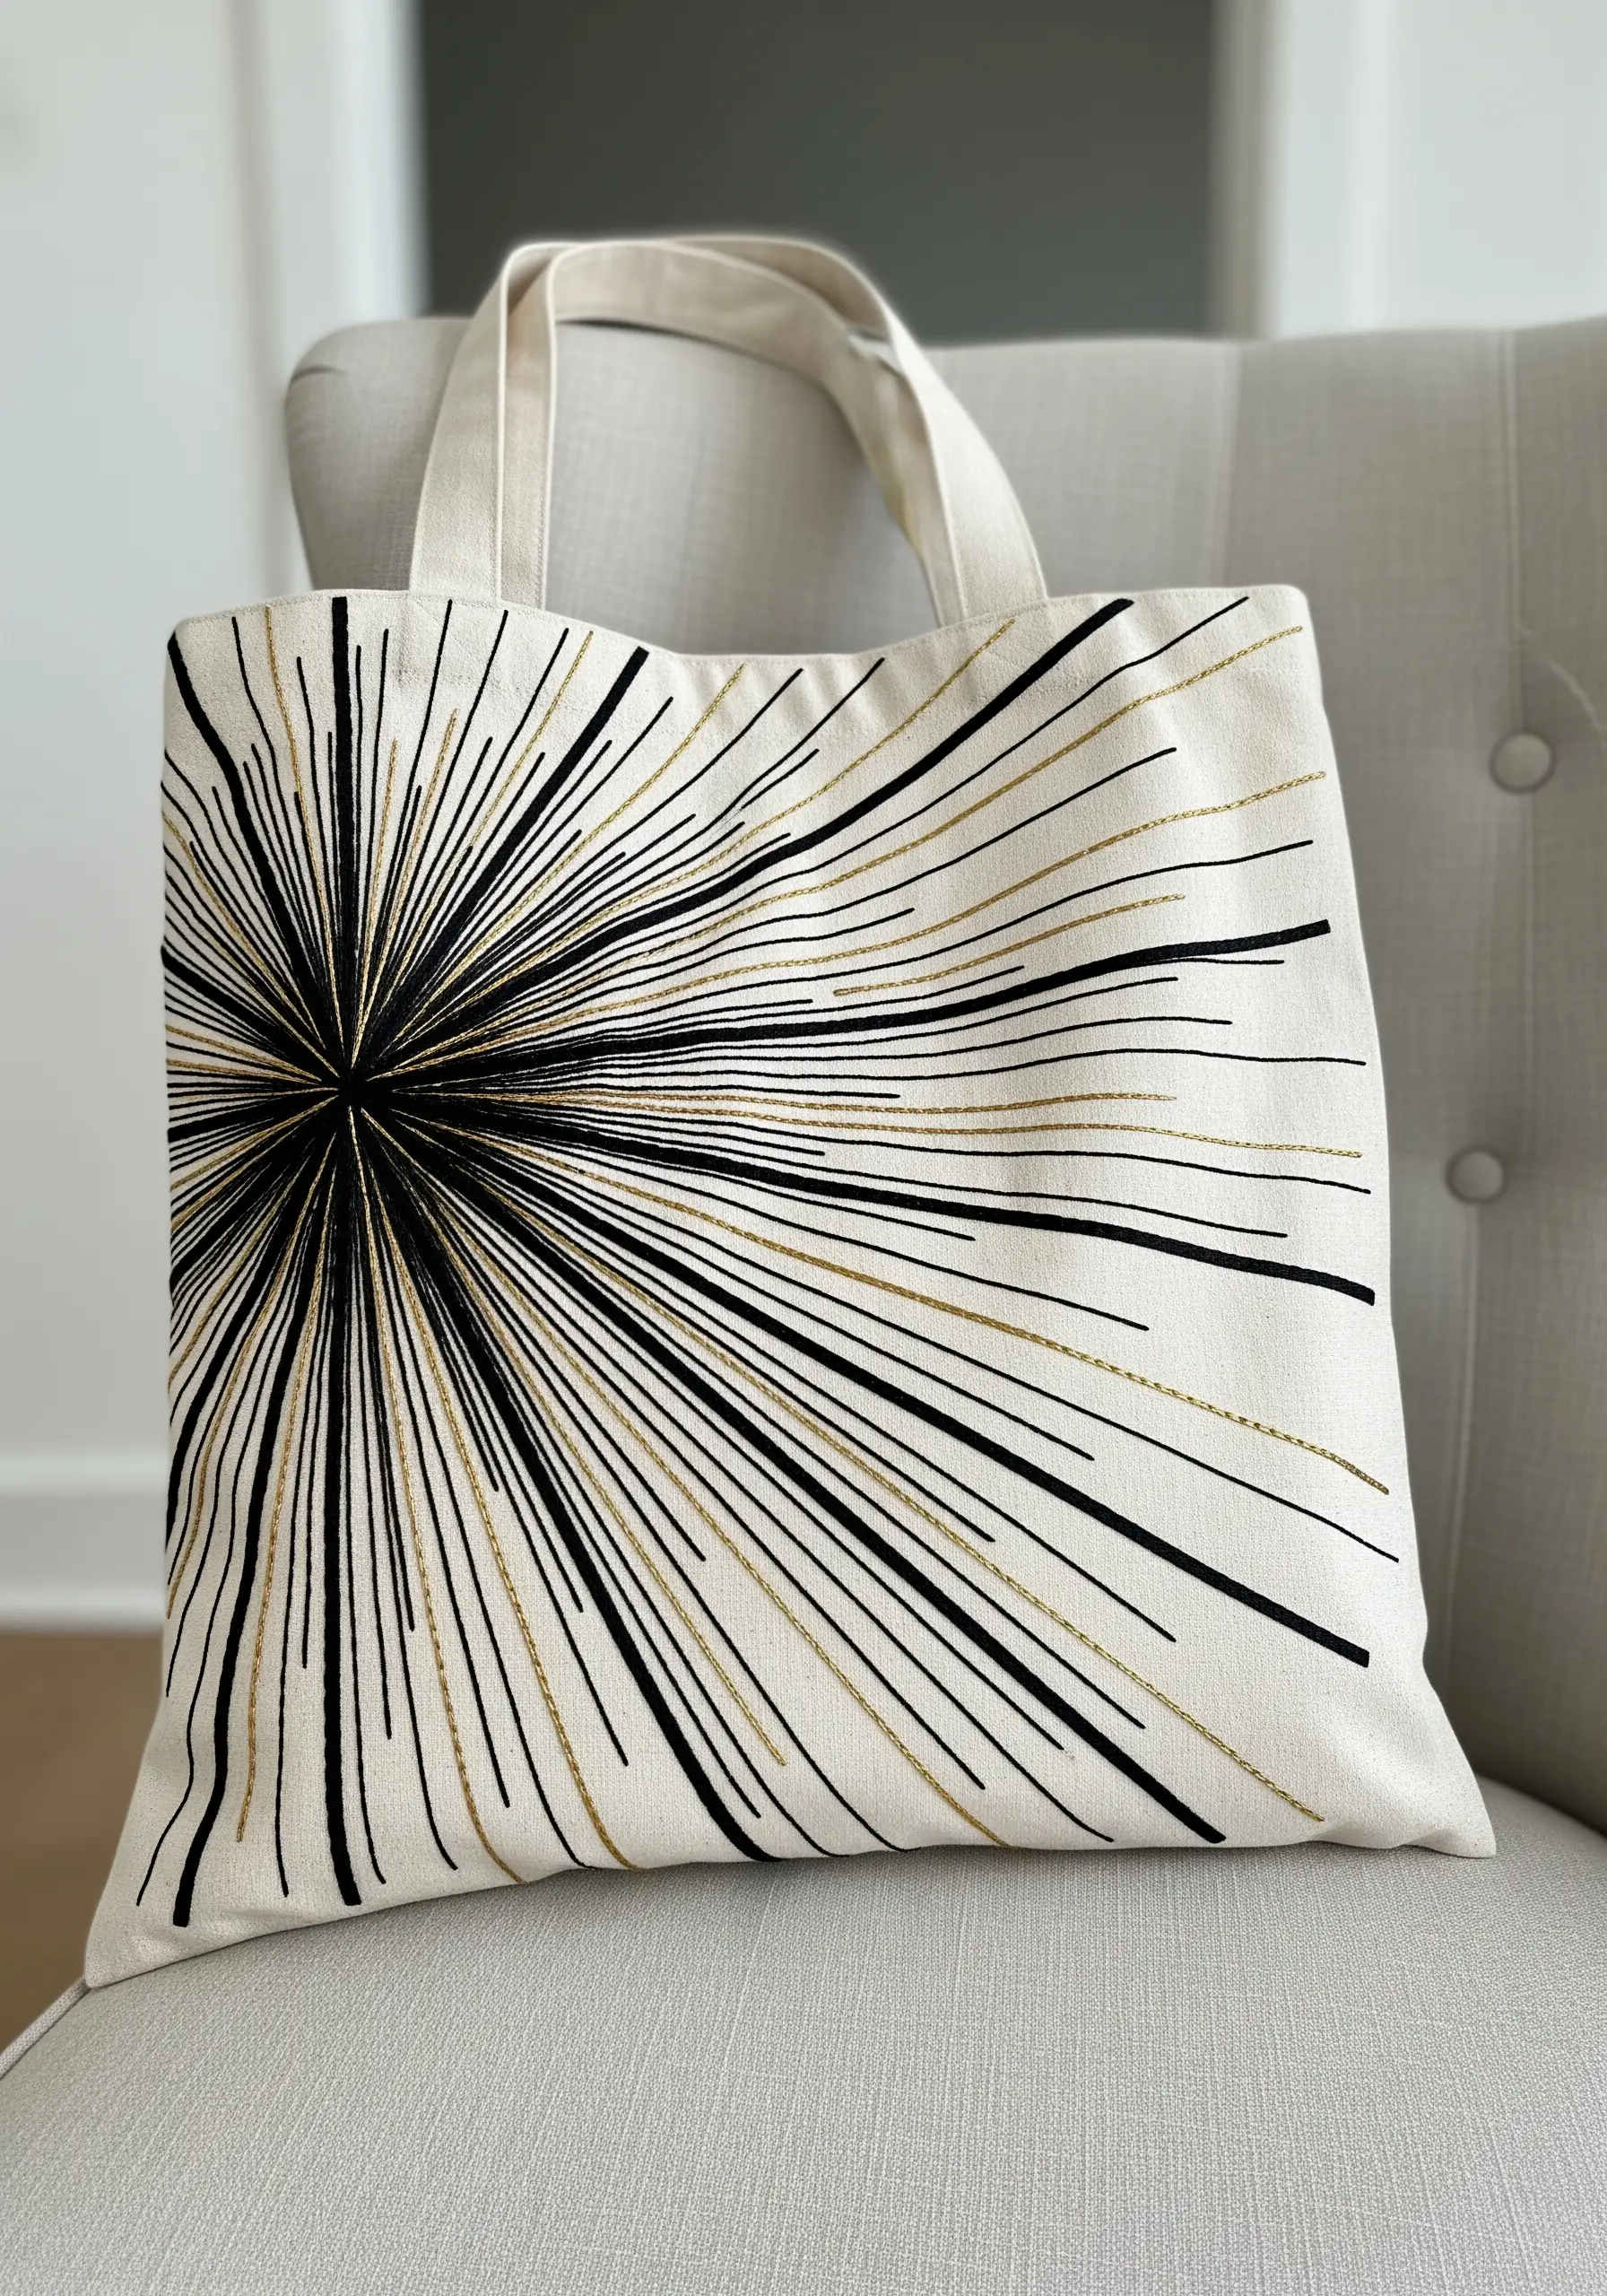
Create a powerful sense of movement and energy with a starburst pattern that explodes from a central point.
Use a combination of black and metallic thread to create visual interest and depth. Vary the length of your straight stitches, making them shorter near the center and longer as they radiate outward.
Don’t keep the lines perfectly uniform. A little bit of randomness in the length and spacing makes the design feel more organic and energetic.
The contrast between the matte black and the reflective metallic and black thread catches the light beautifully, enhancing the feeling of a brilliant burst.
27. Construct 3D Cubes with Color and Light
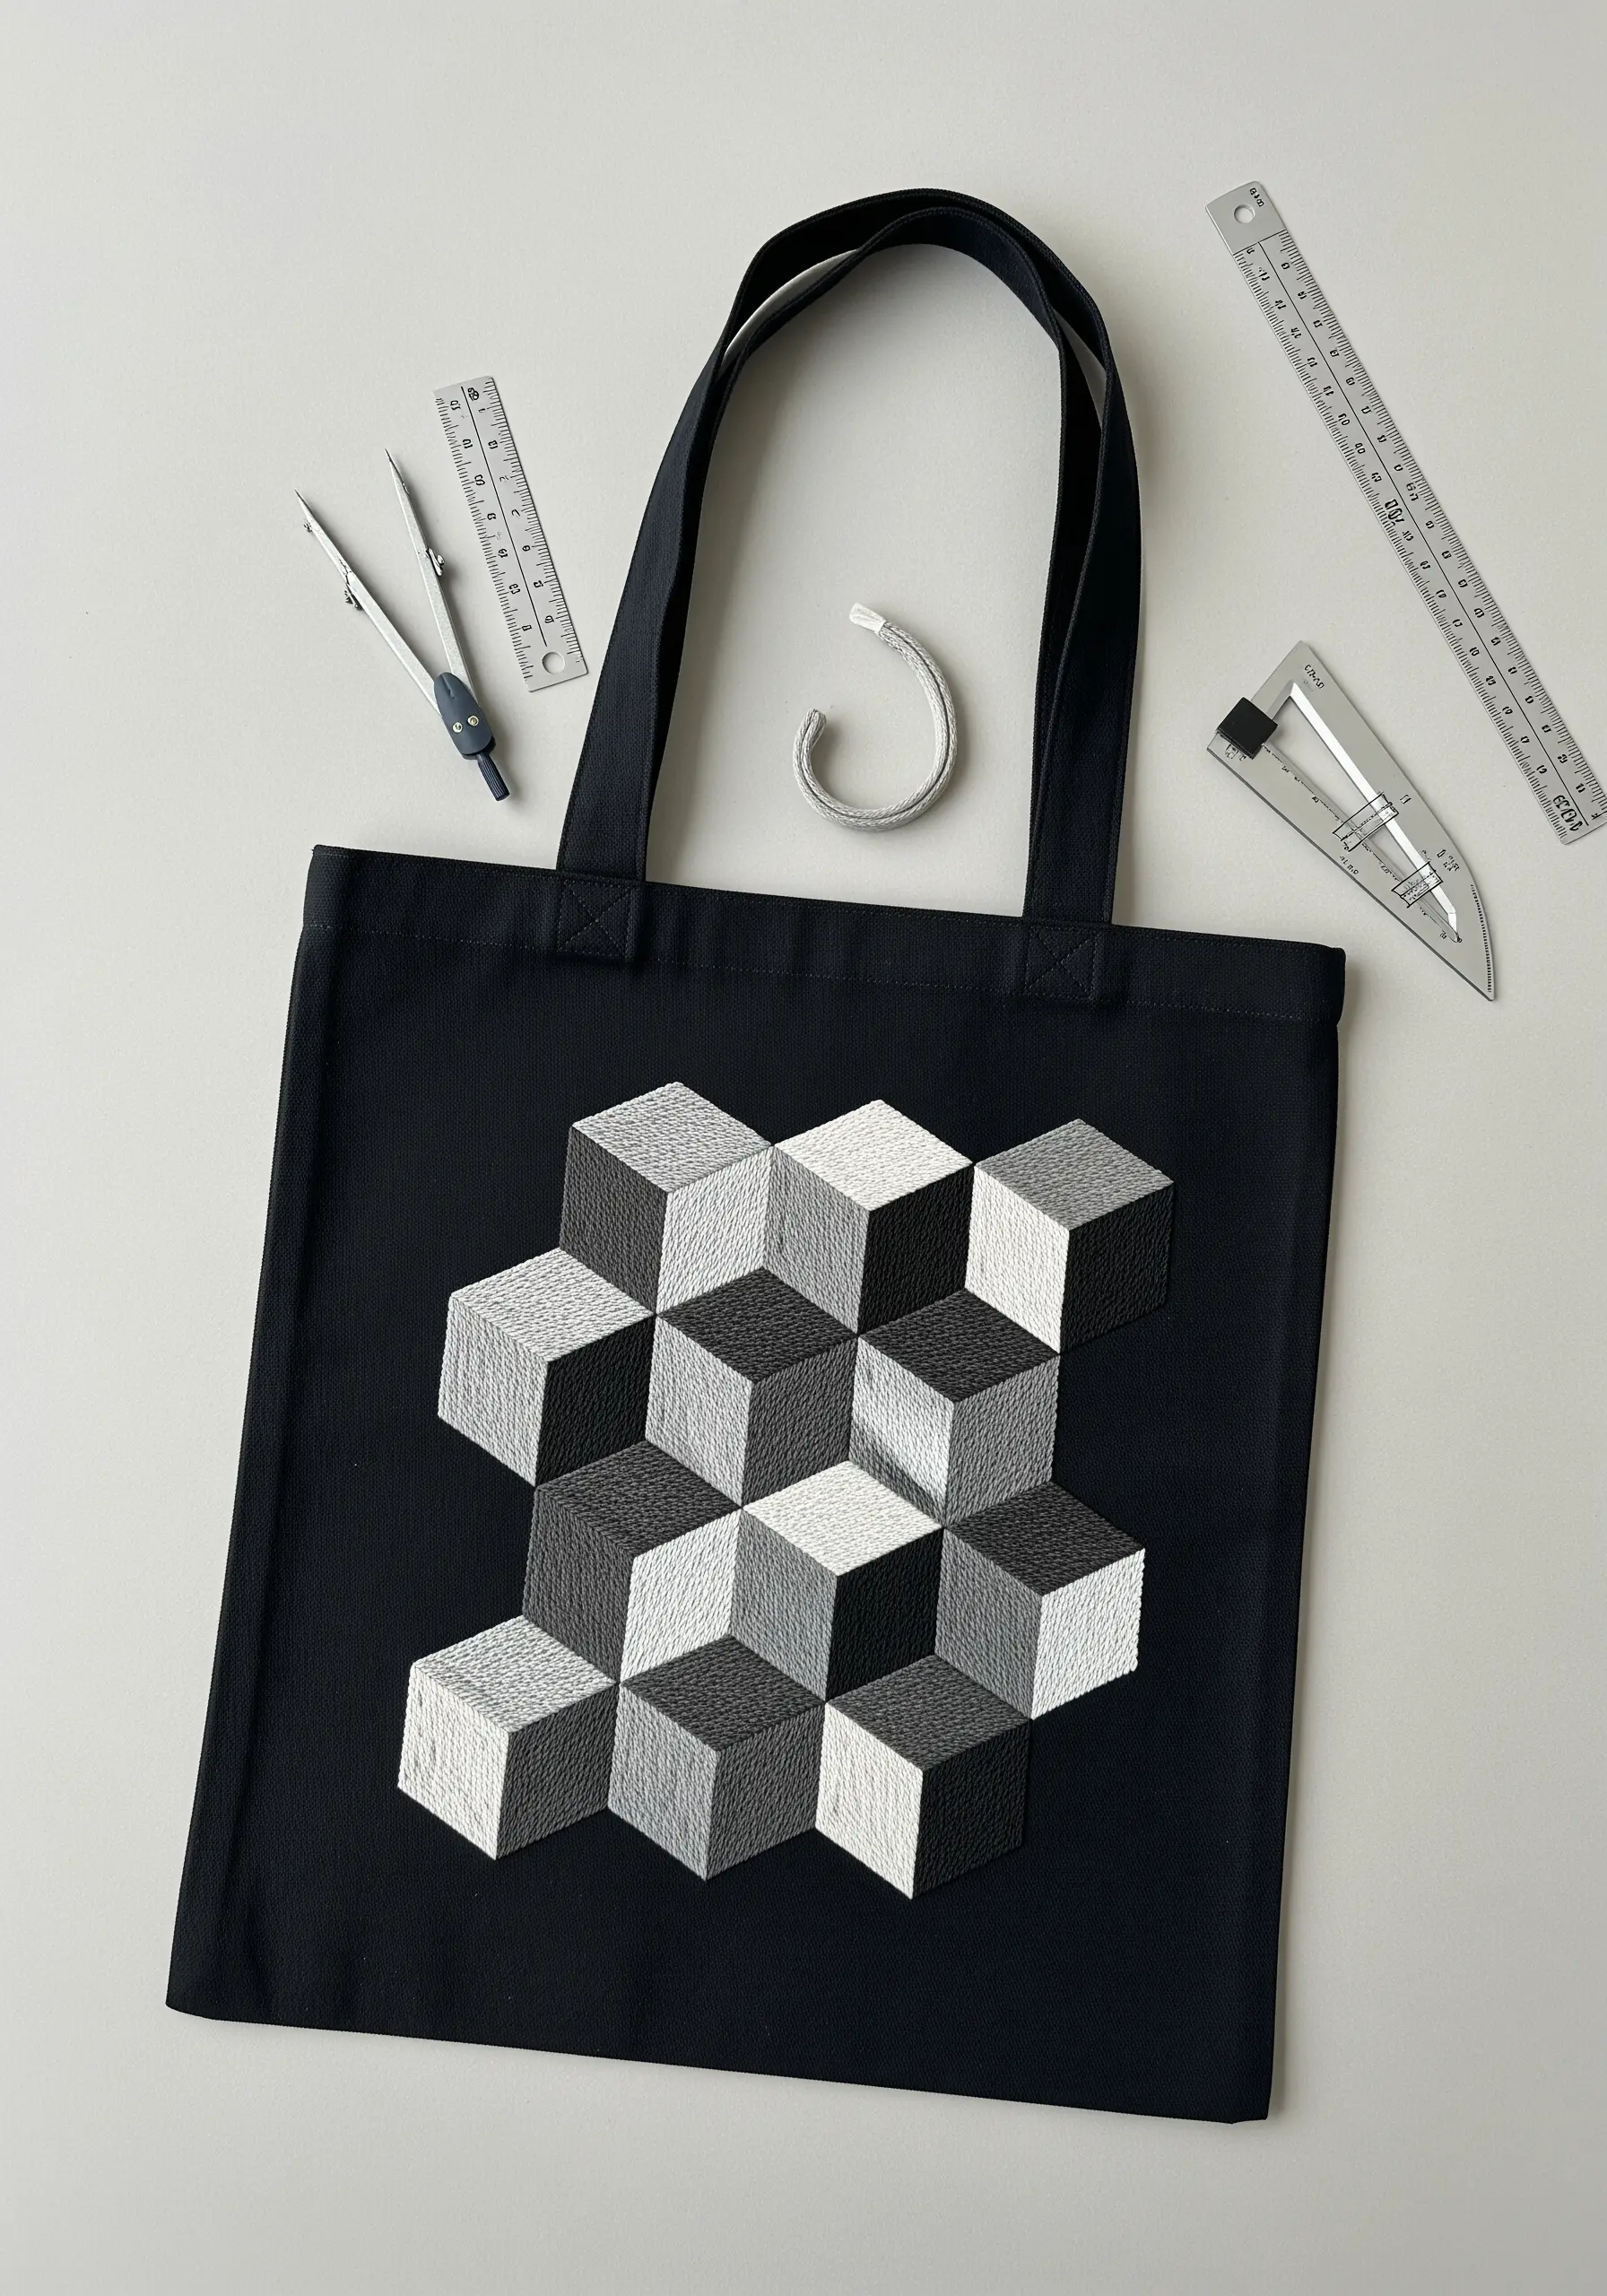
This entire design is an exercise in creating the illusion of light and shadow using only three shades of thread: light, medium, and dark.
For each cube, assign your lightest color to the top face (where the light would hit), the medium shade to one side, and the darkest shade to the other.
The magic is in the direction of your satin stitches. Stitch the top face with horizontal stitches, one side with diagonal stitches leaning one way, and the other side with diagonal stitches leaning the opposite way.
This careful control of color and stitch direction is what convinces the eye it’s seeing a three-dimensional object on a flat surface.
28. Create a Modern Sampler with Blackwork Fills
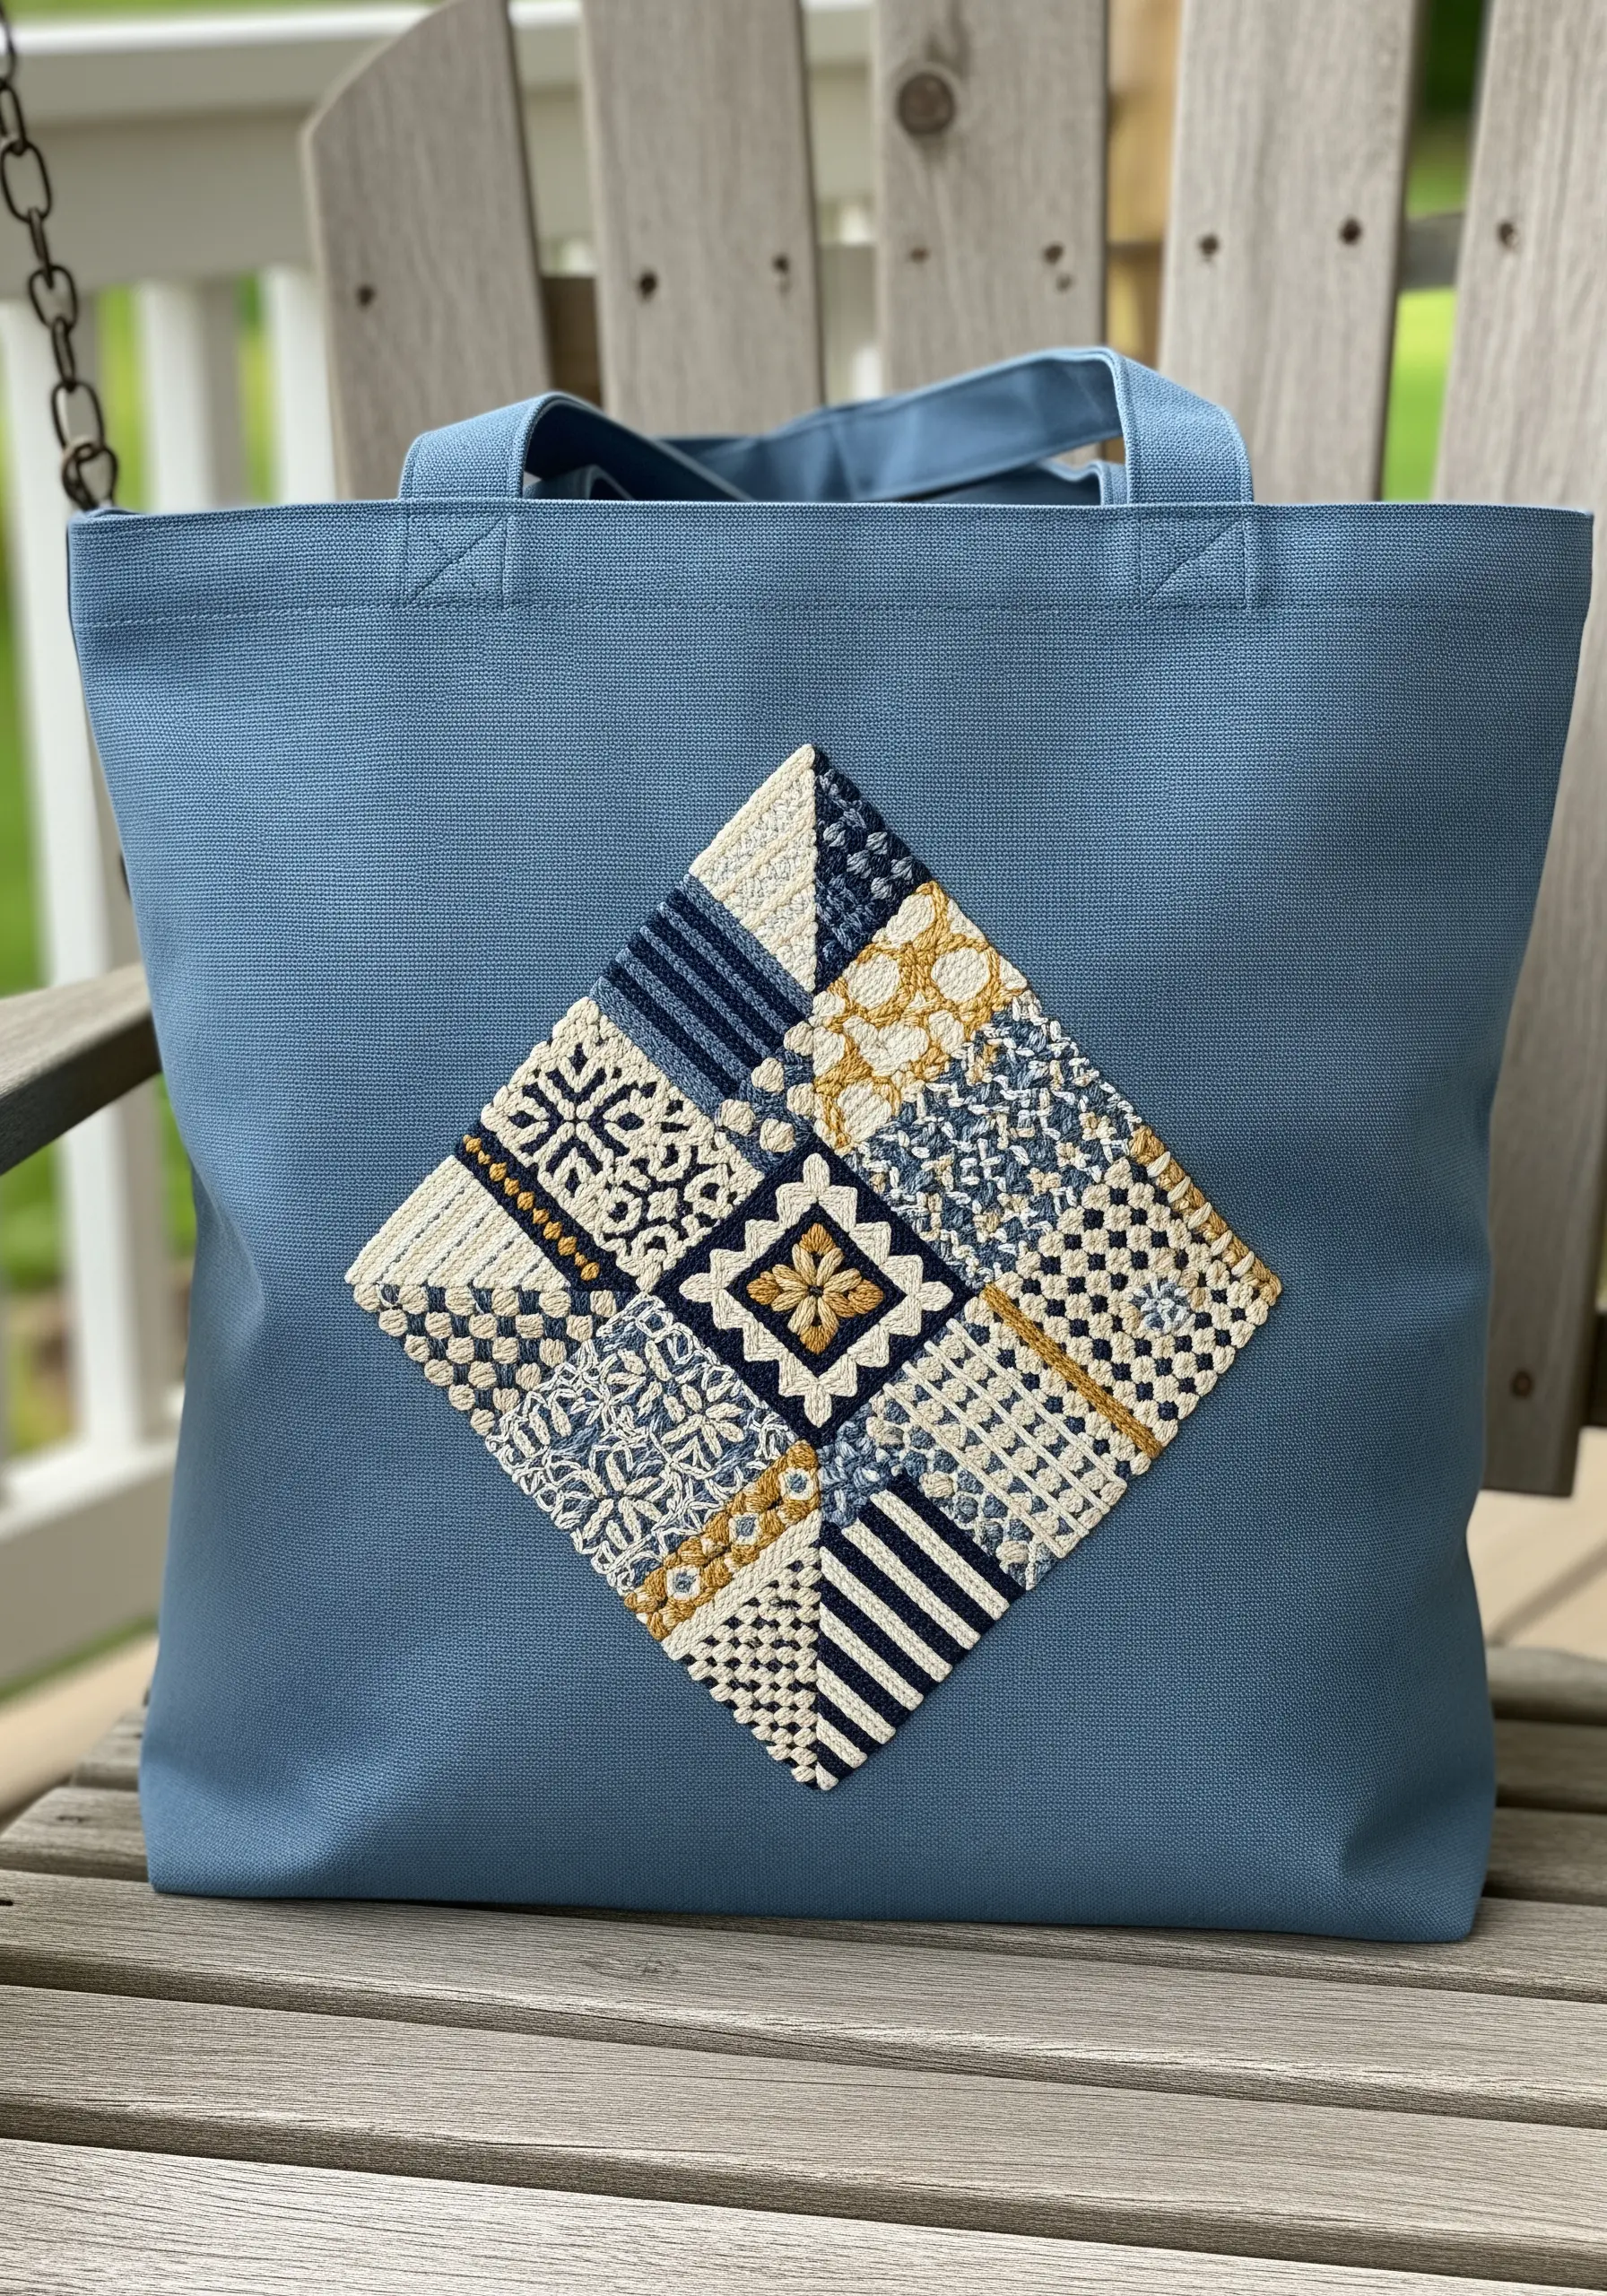
Elevate a simple diamond shape by treating it as a canvas for a collection of intricate fill patterns.
This technique, often used in Blackwork embroidery, involves creating geometric patterns with simple running or back stitches. Divide your main shape into a grid of smaller squares or triangles.
Fill each segment with a different repeating pattern: try diagonal lines, crosses, squares, or lattices. You can find hundreds of traditional Blackwork fill patterns online to inspire you.
By containing these complex patterns within a simple shape and a unified color scheme, you create a piece that is both incredibly detailed and harmoniously balanced.
29. Add Oversized Texture with Applied Knitting
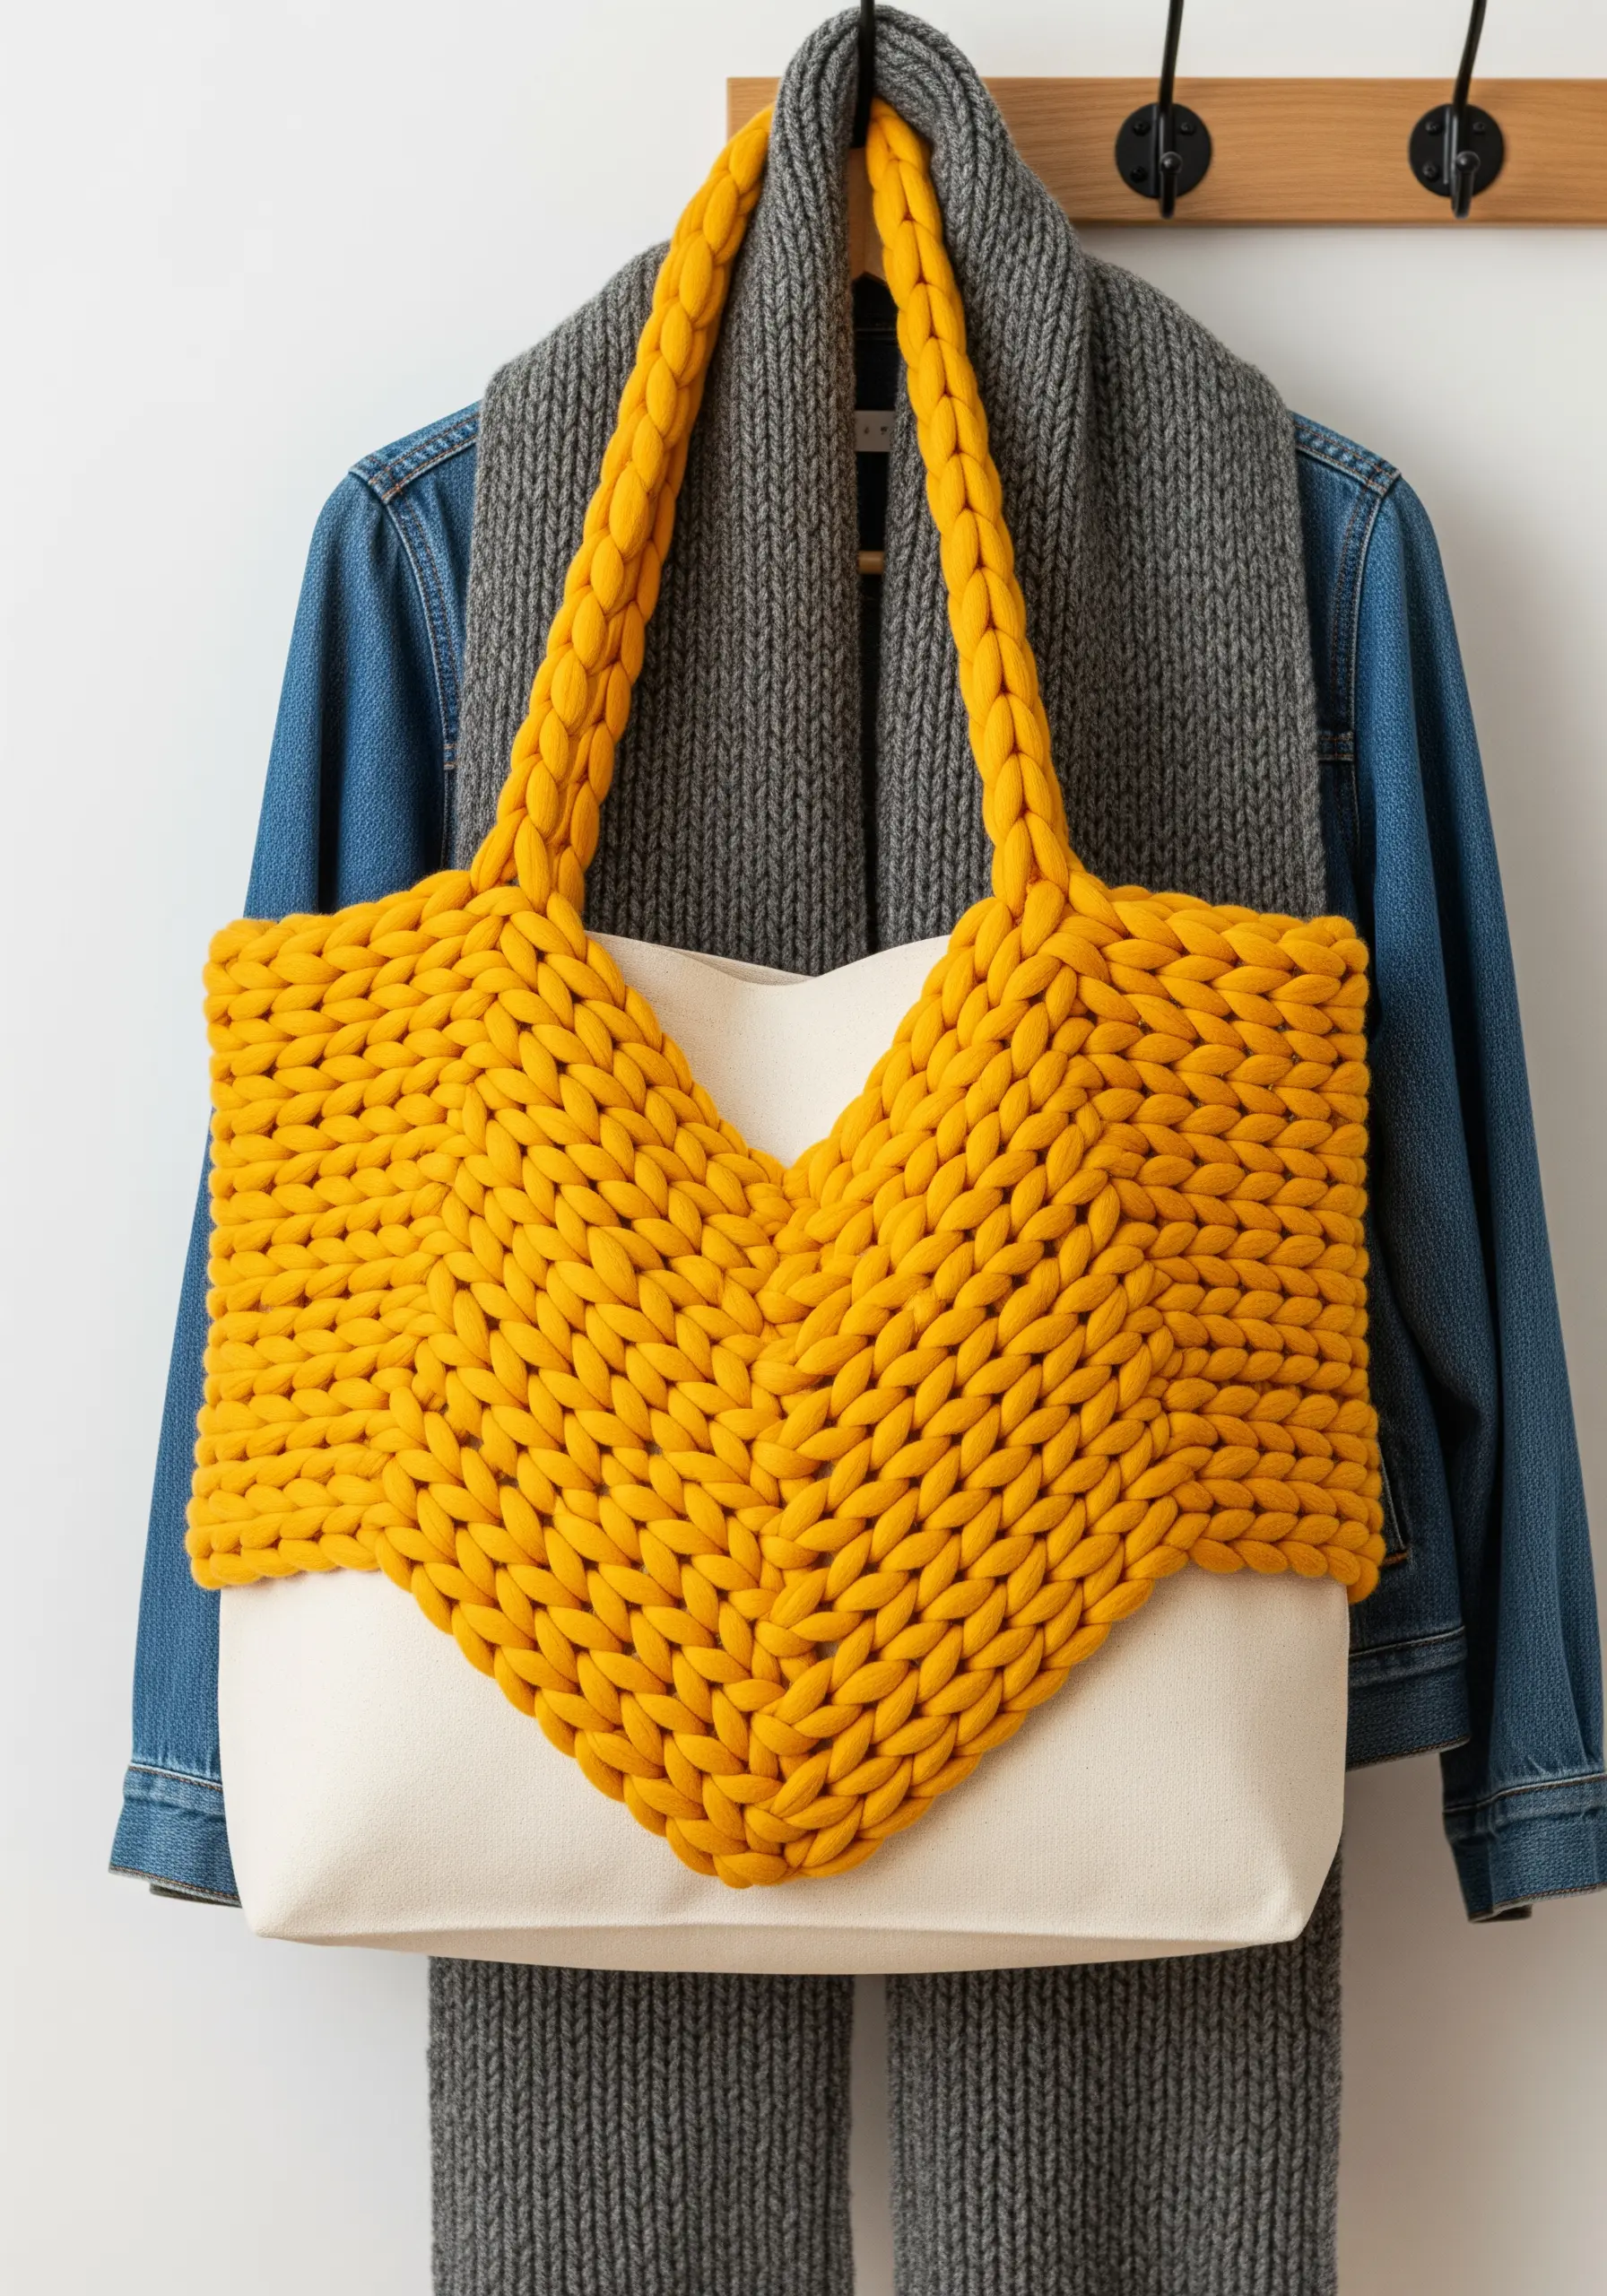
Integrate the soft, sculptural quality of knitting by attaching a pre-knitted panel directly onto your tote.
Use jumbo yarn and large needles (or even your arms) to knit a simple garter stitch panel in the desired shape, like this V-formation.
Once complete, carefully hand-sew the knitted piece onto the surface of the canvas tote bag using a strong, matching thread. Stitch discreetly along the edges and at key points in the center to ensure it’s secure.
This method allows you to incorporate the cozy texture of Chunky yarn without needing specialized tools to work through heavy canvas.
30. Visualize Sound with a Satin Stitch Soundwave
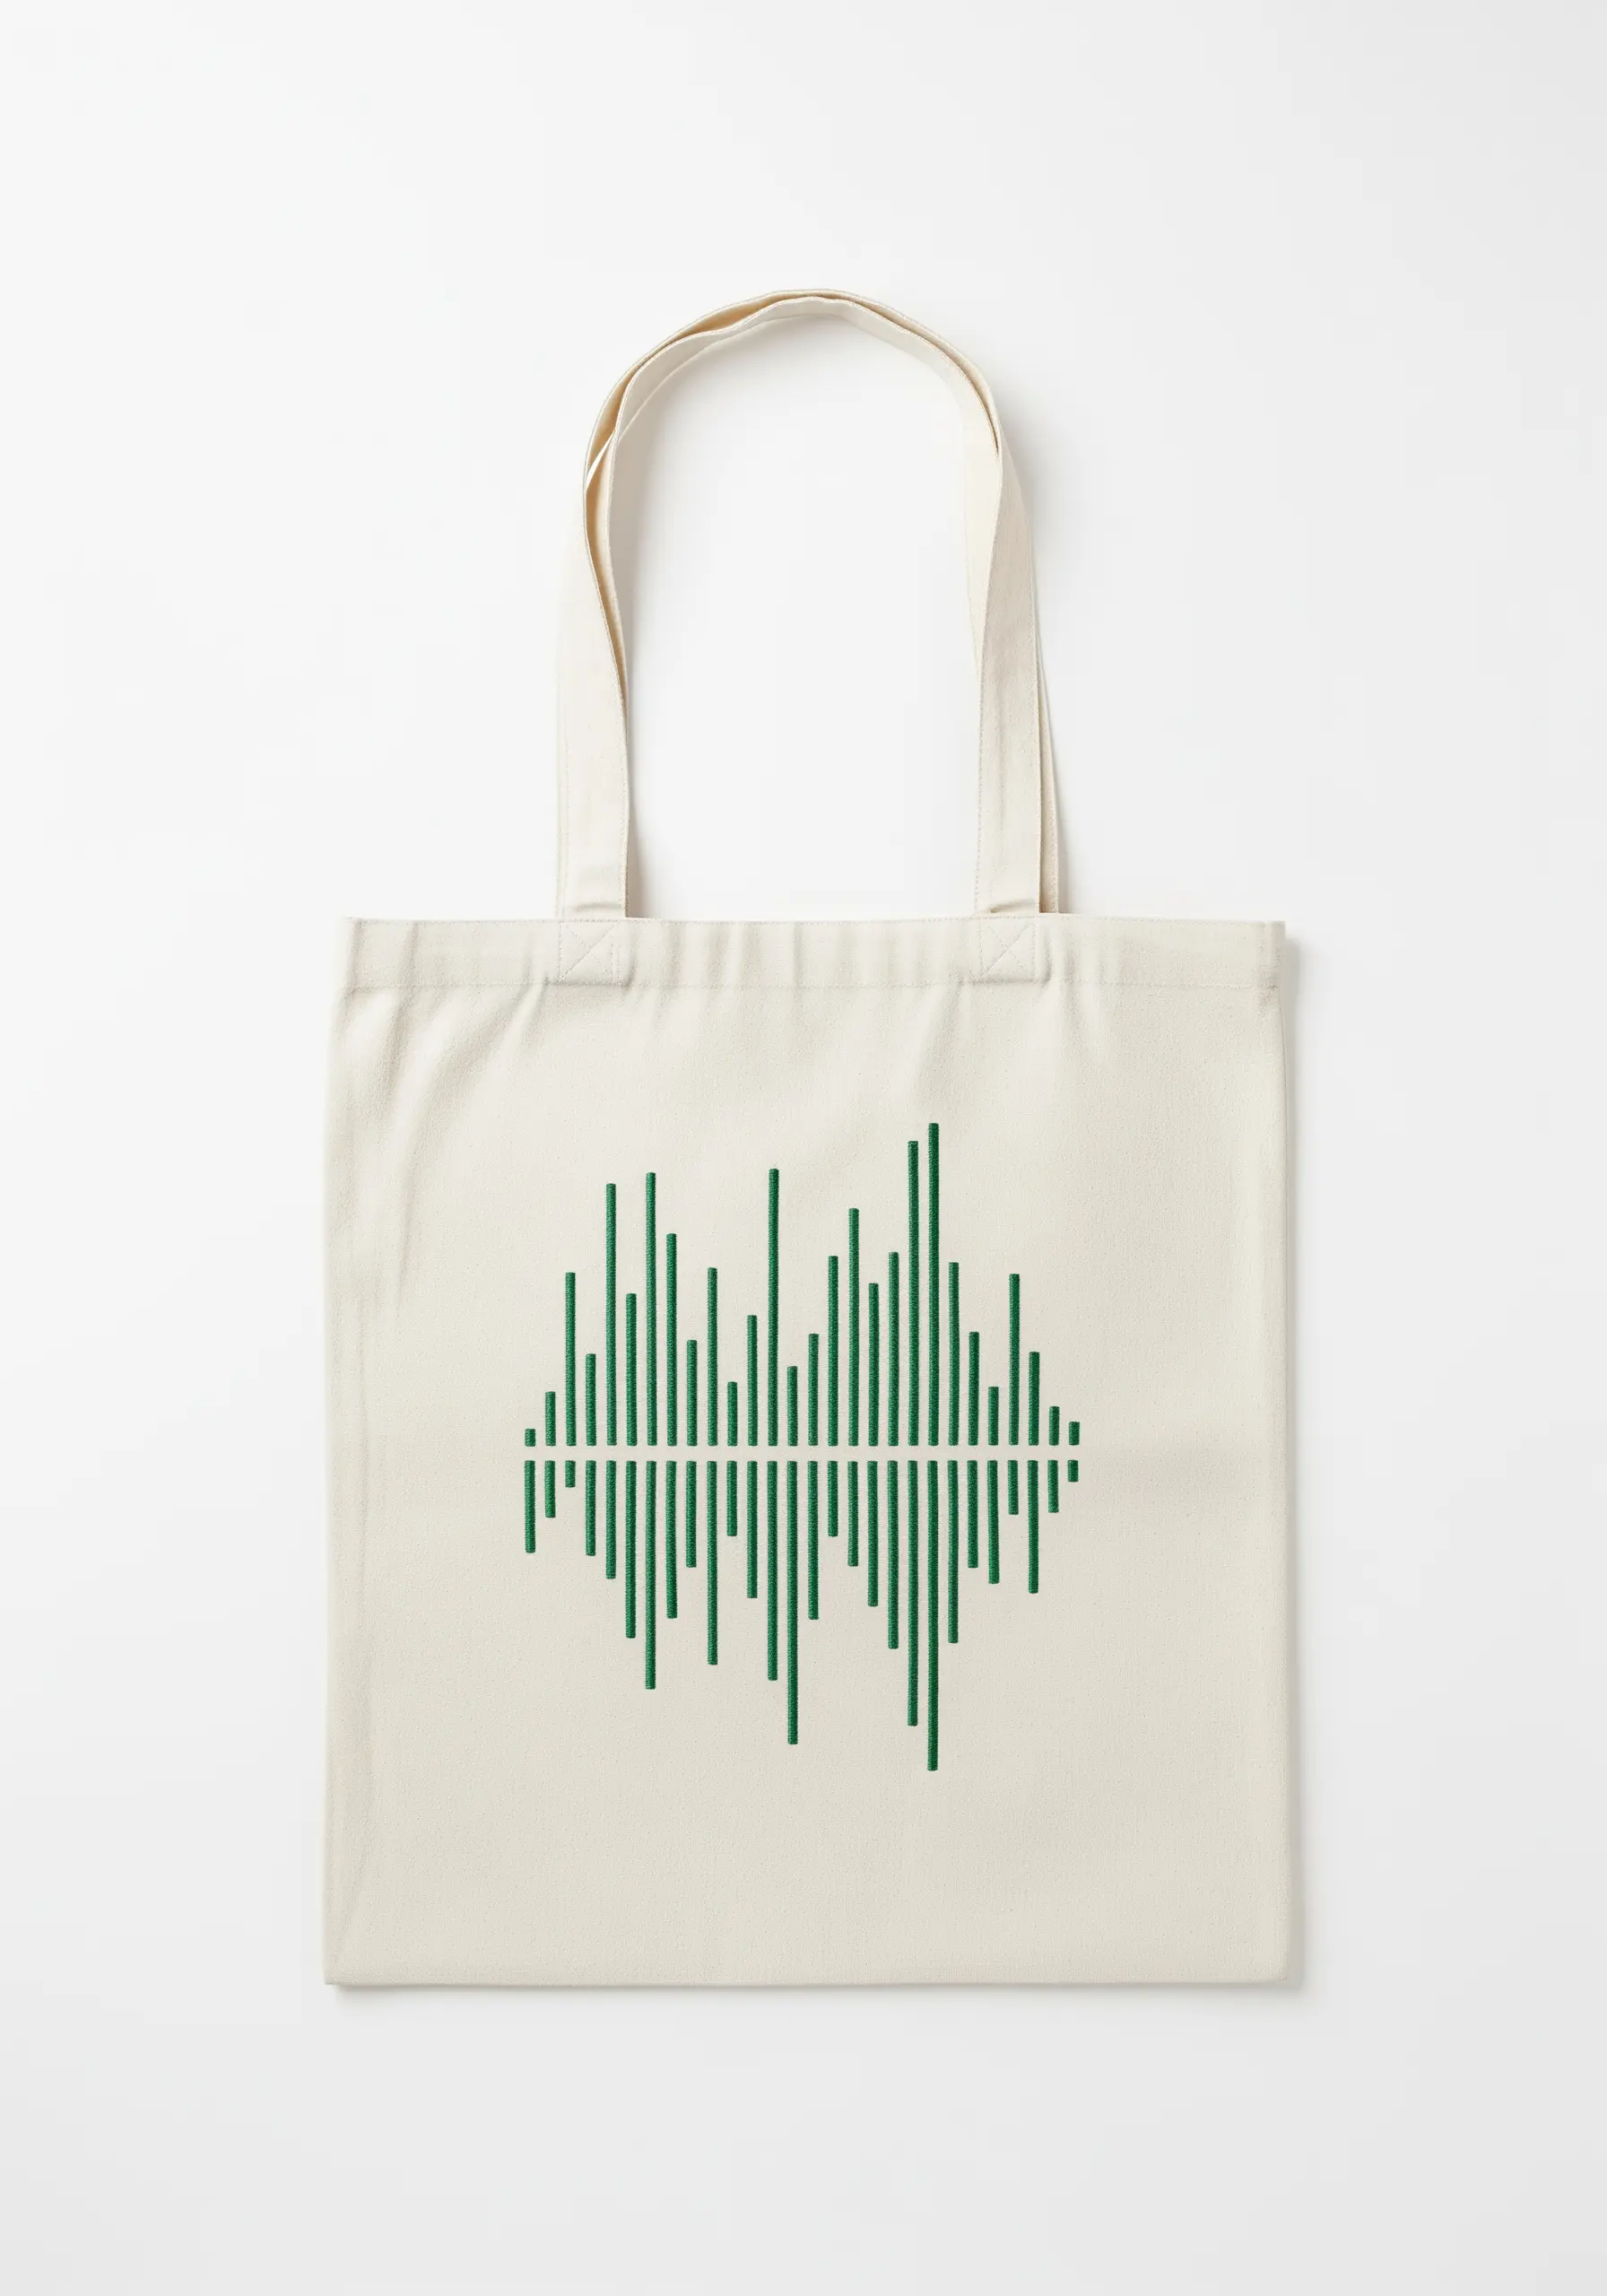
Turn a meaningful clip of audio—a favorite song, a loved one’s voice—into a unique piece of wearable art.
Use a free online tool to generate a visual representation of your audio file. Print this Soundwave pattern and transfer it to your fabric.
Each vertical bar is a simple satin stitch. The key is to keep your stitches perfectly vertical and uniform in width, varying only the height to match the pattern.
This is a deeply personal way to embed meaning into a geometric design, creating a piece that is both aesthetically cool and emotionally resonant.
31. Create Visual Tension with a Split Composition
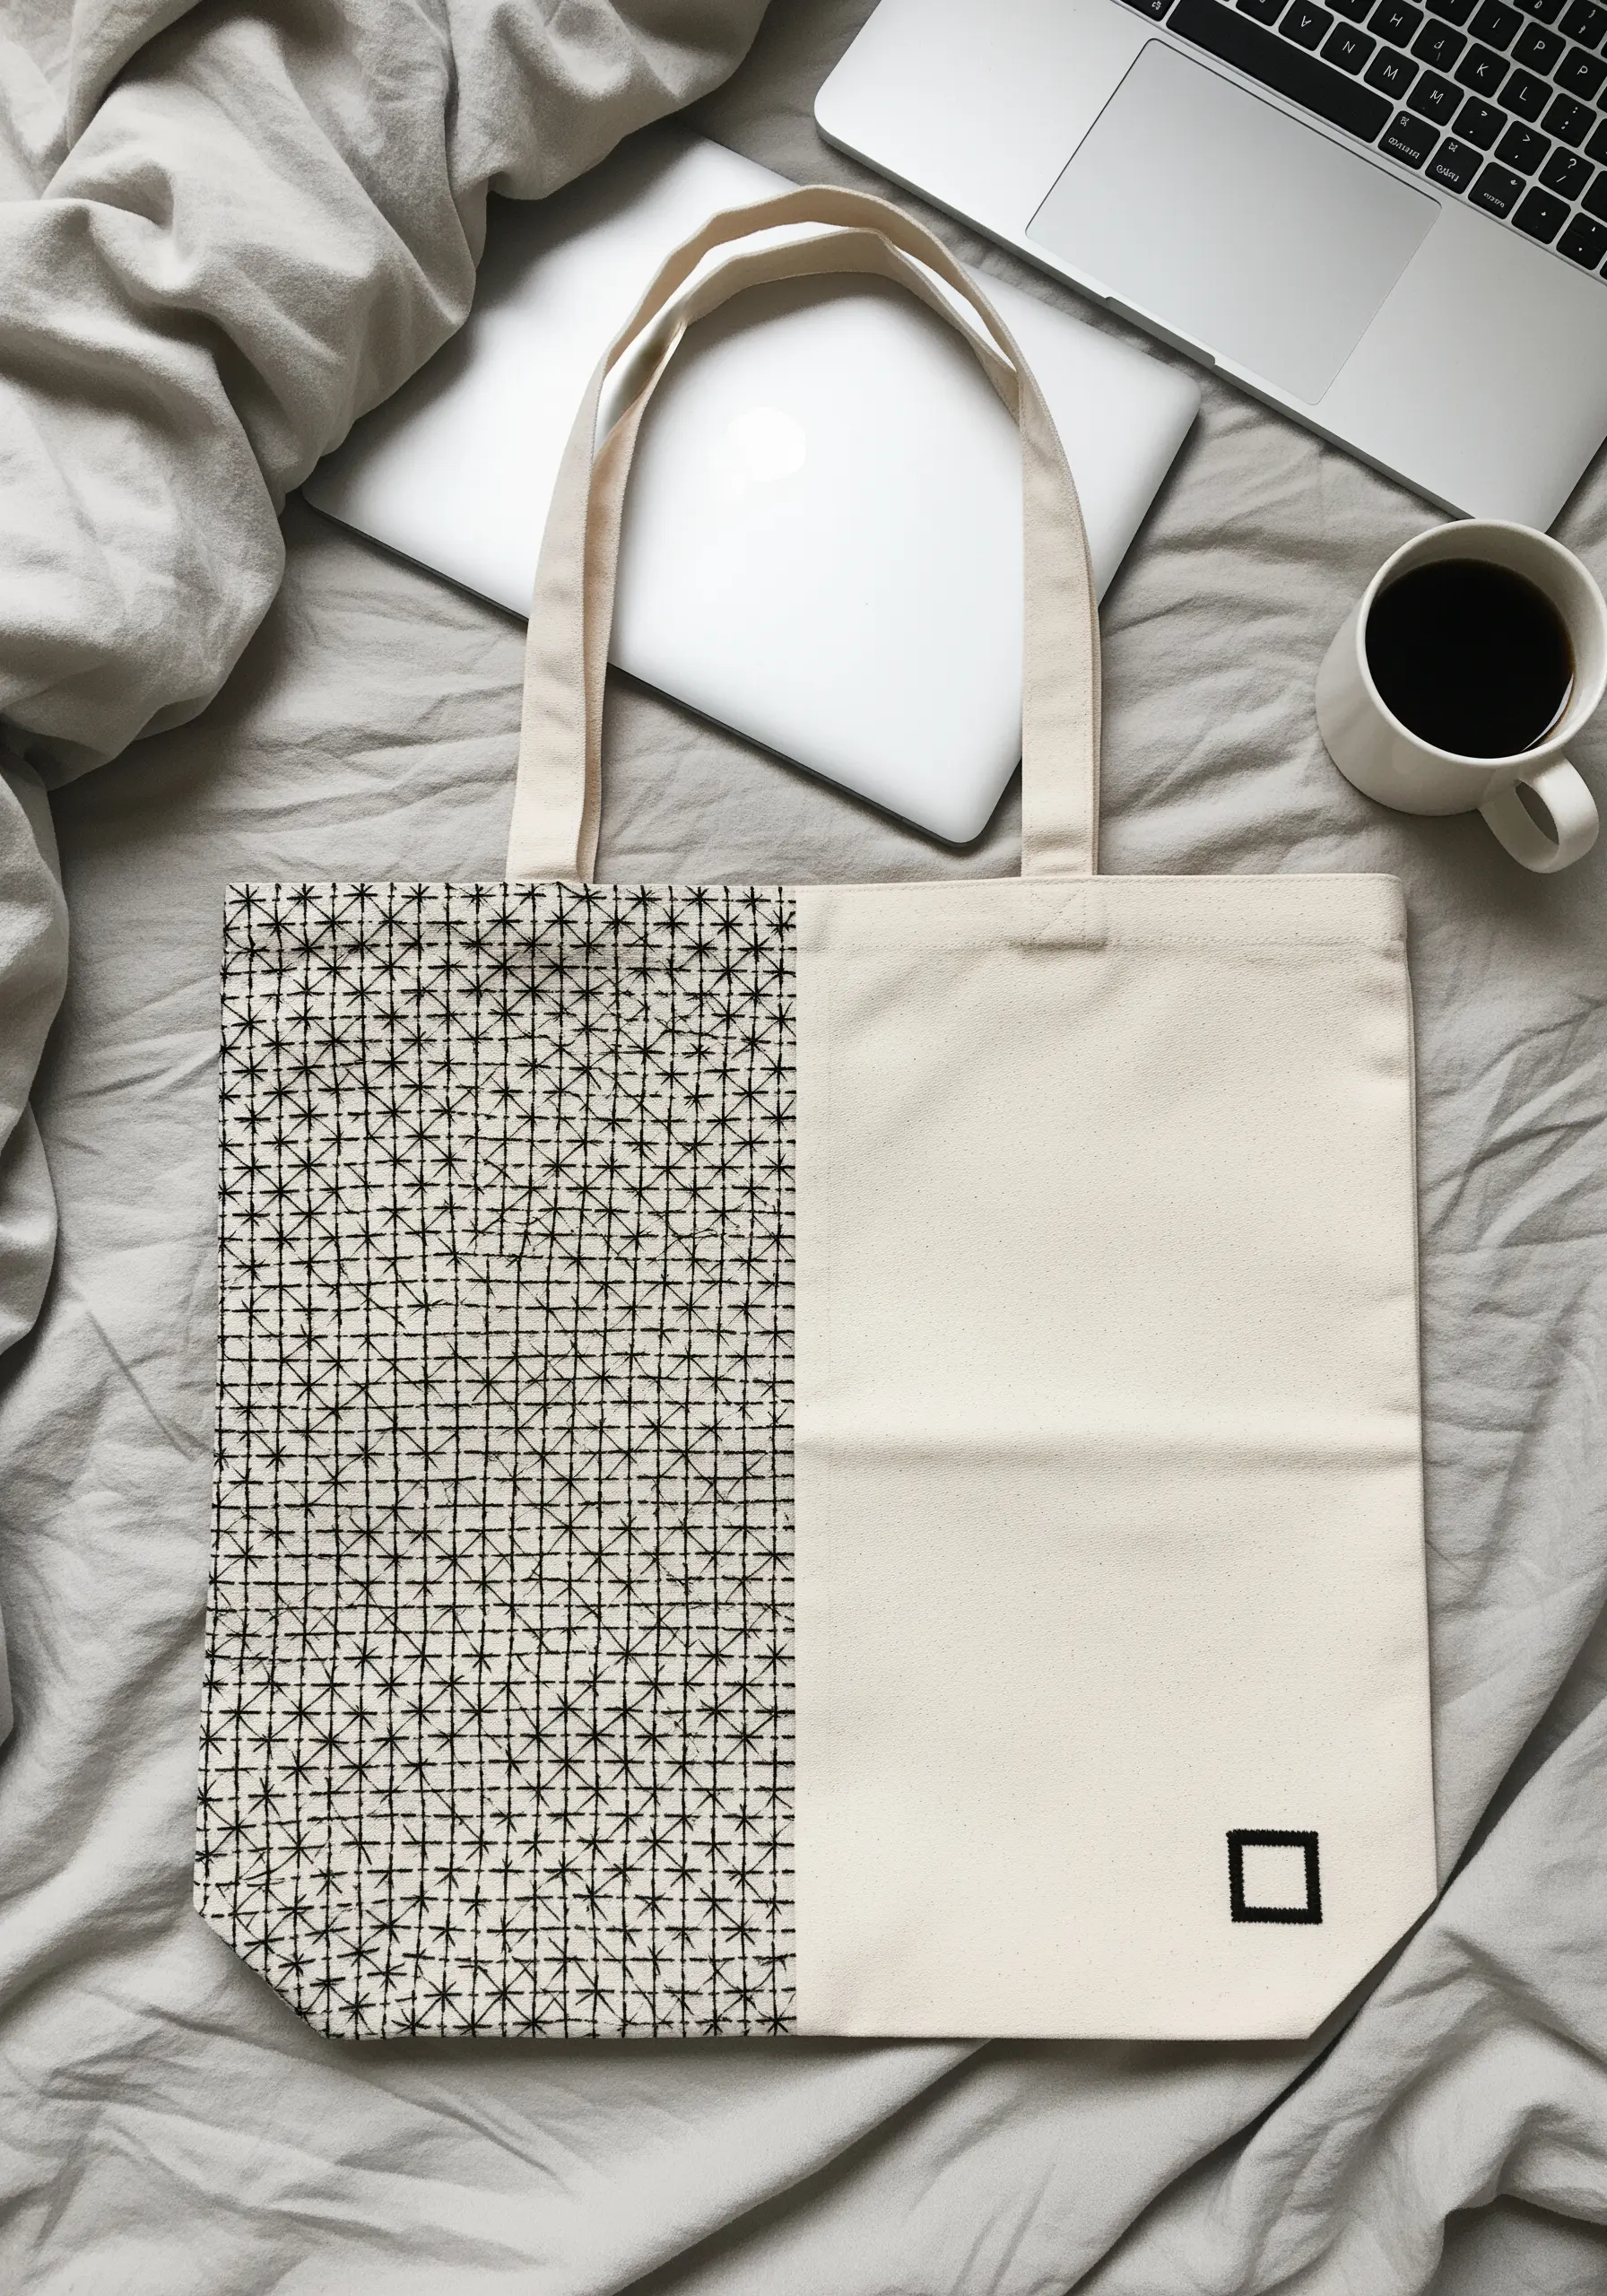
Make a powerful design statement by confining a dense, intricate pattern to just one half of your tote bag.
Fill one side with a repeating geometric pattern, like these Sashiko-inspired star stitches. The repetition creates a strong, textured field.
Leave the other half almost entirely blank, adding only a single, small embroidered element to create balance and a point of focus.
This dramatic contrast between dense pattern and open space is a sophisticated design choice that feels intentional and modern, drawing the eye and inviting closer inspection.
32. Craft an Interlocking Pattern with Outline and Fill
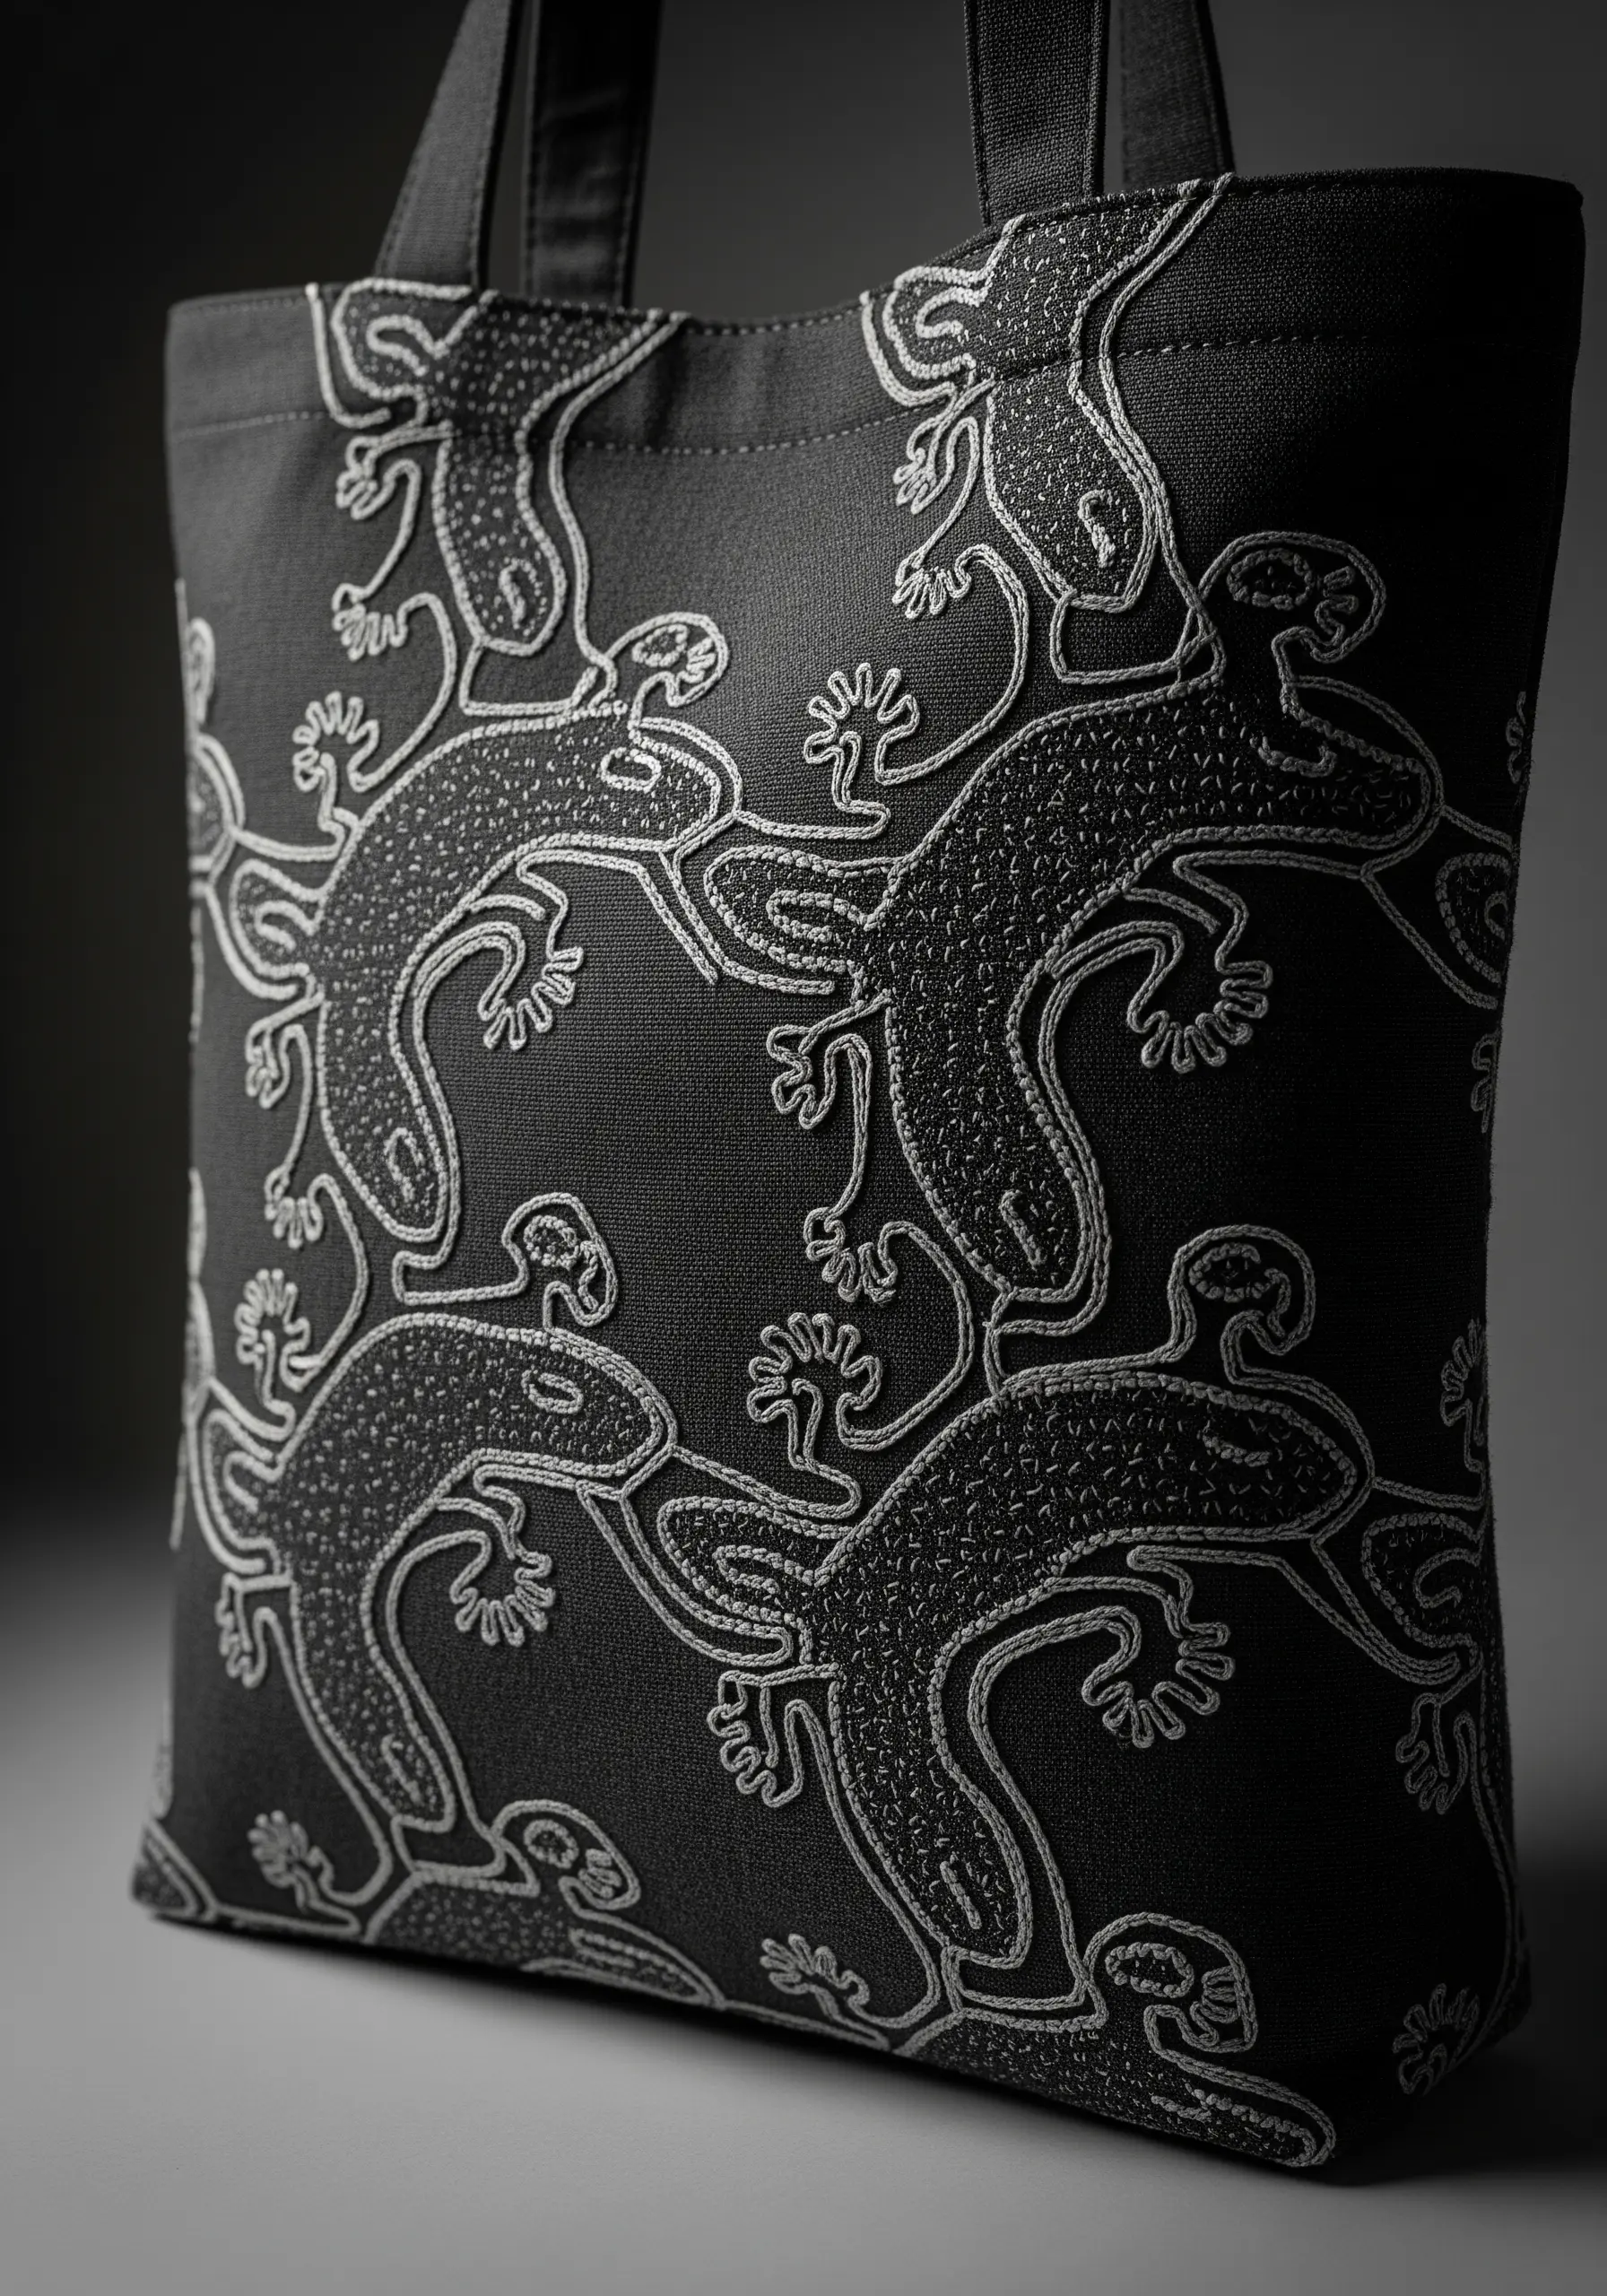
For a complex, tessellated design, a two-step approach of outlining and filling gives you the most control and the cleanest result.
First, stitch the complete outline of the Tessellated lizard pattern using a smooth, solid line like a stem stitch or split stitch. This defines the shapes and creates the interlocking structure.
Next, come back and fill the bodies of the lizards with a textural stitch, like seed stitch or even tiny French knots.
This separation of tasks ensures your outlines are crisp and your fill is contained, preventing the intricate design from becoming messy or muddled.
33. Construct a Graphic Animal with Fabric Appliqué
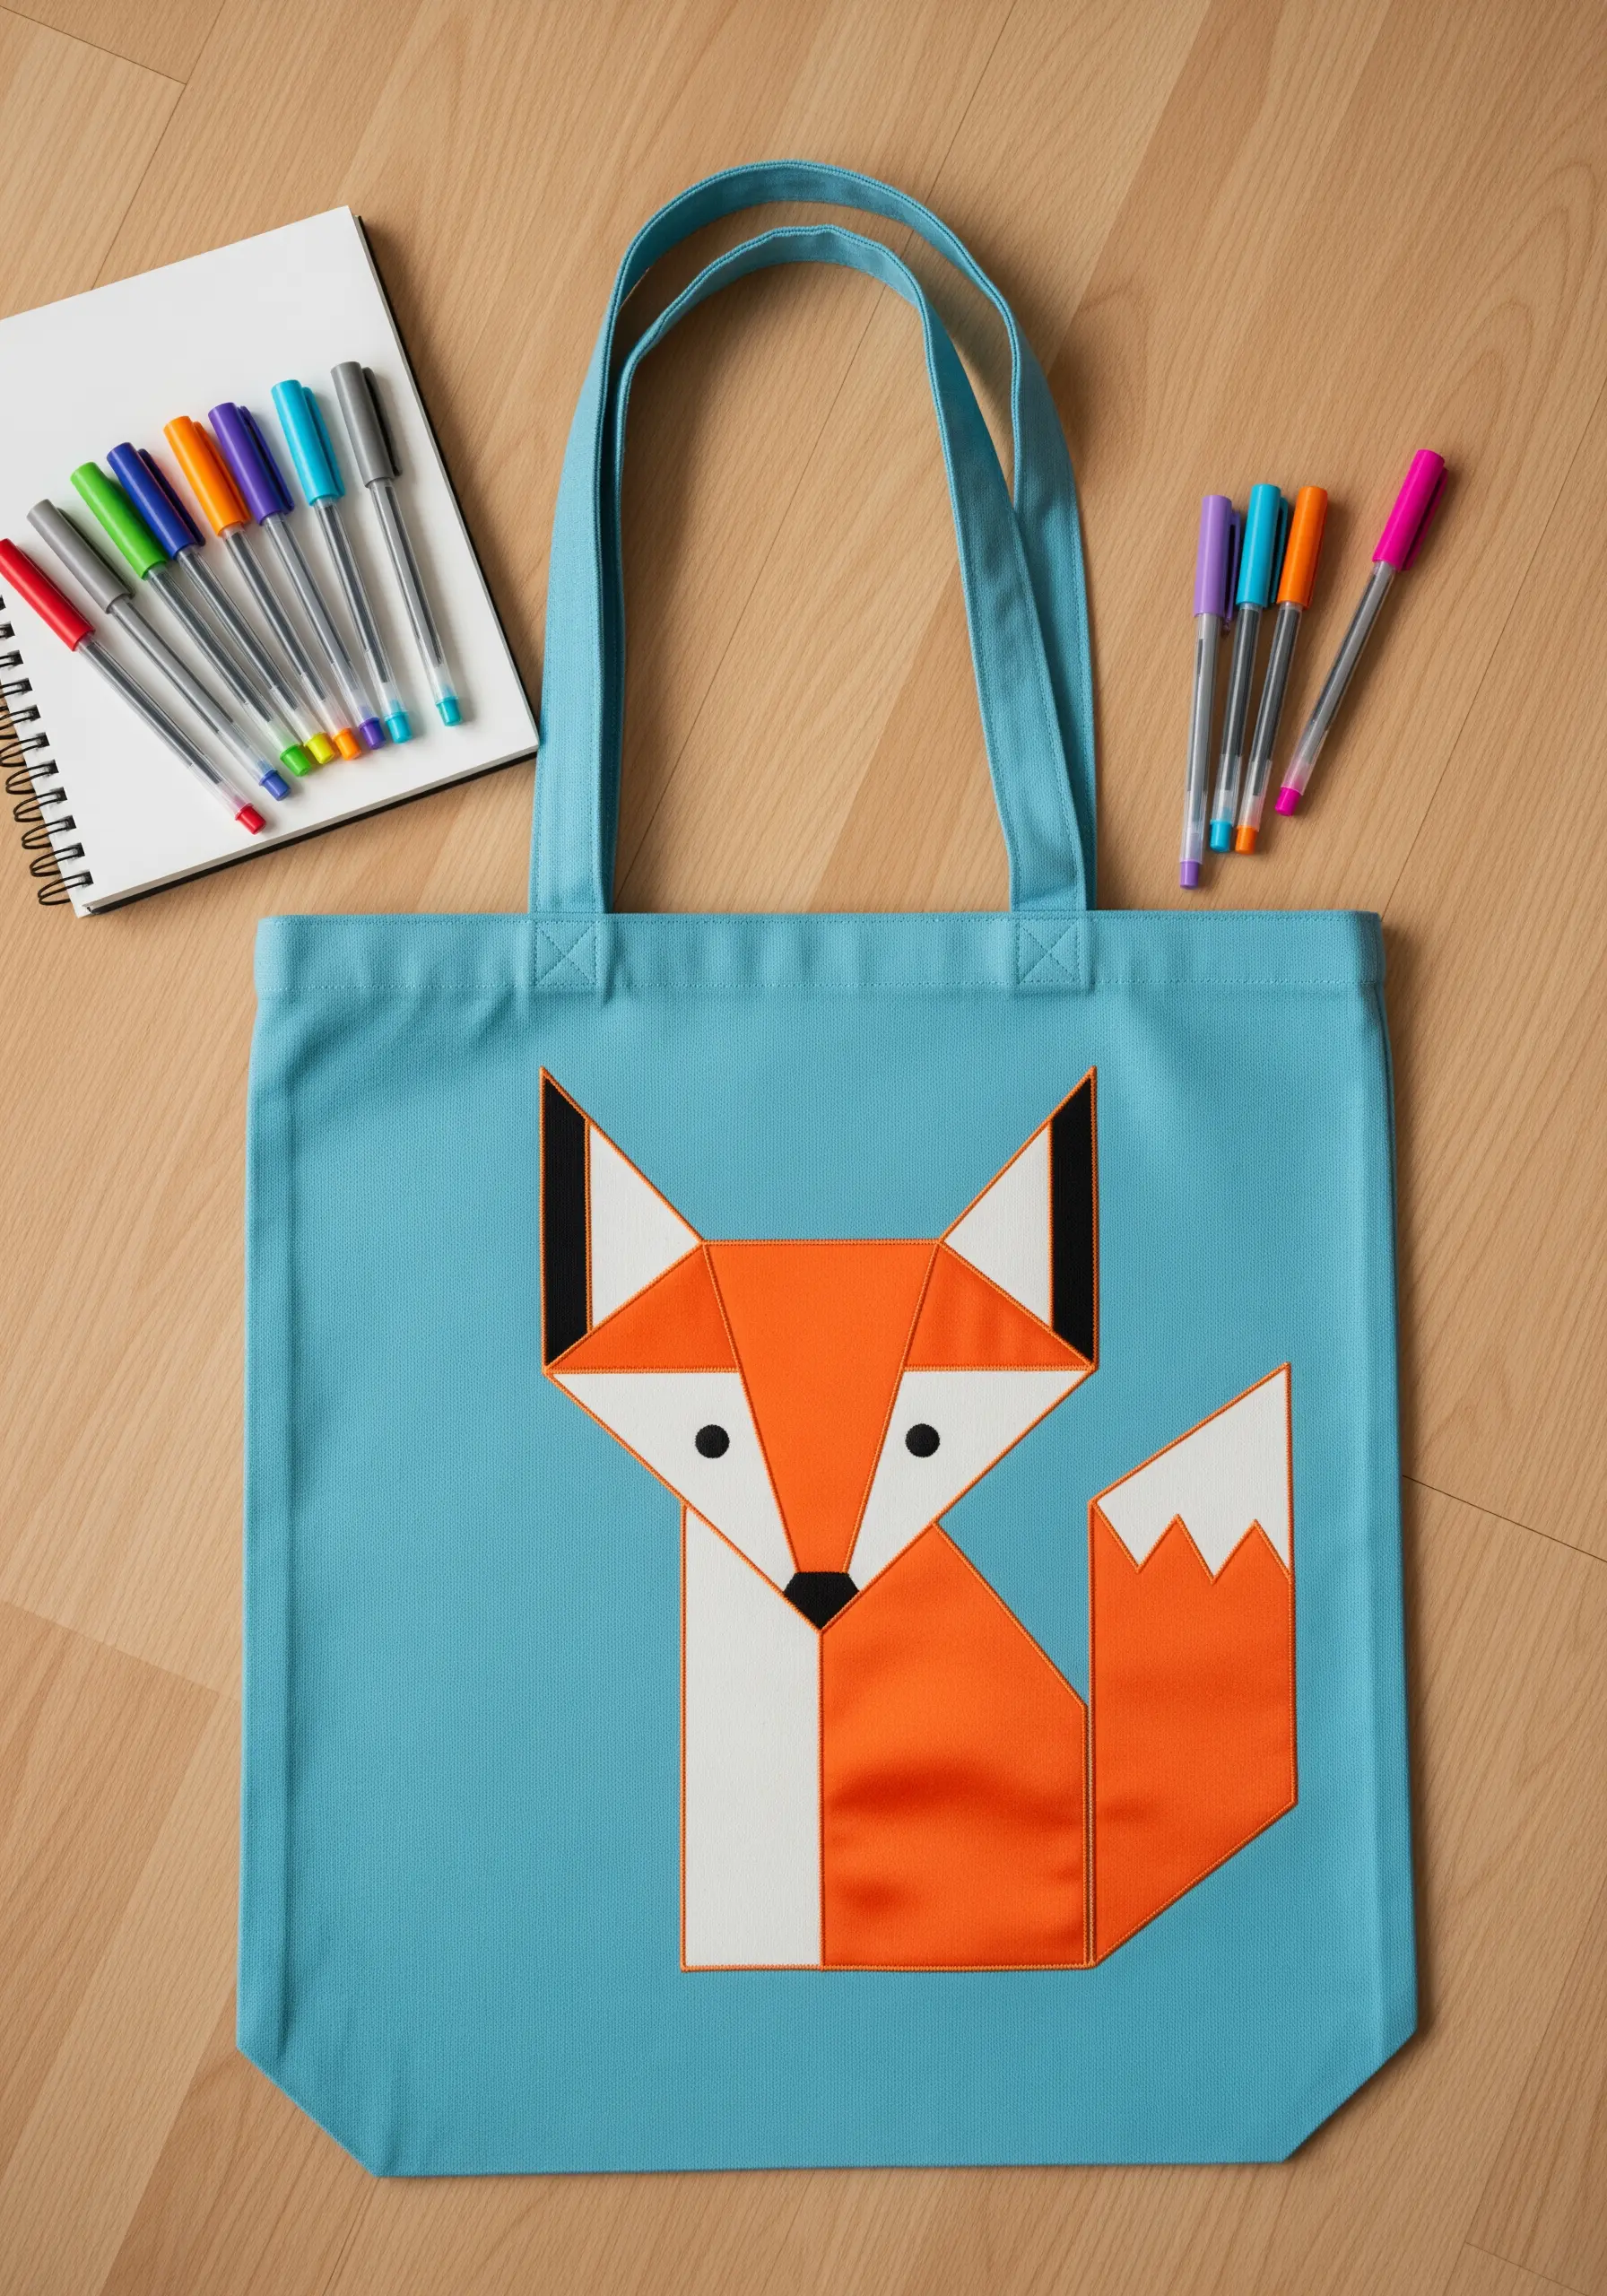
Build a stylized, geometric animal using crisp shapes of fabric for a look that’s sharp and modern.
Cut your shapes from different colors of fabric—a satin or sateen with a slight sheen works beautifully to catch the light. Iron them onto the tote using a fusible web for perfect placement and no shifting.
The key to the polished finish is the outline. Use a single strand of black floss to stitch a fine, precise backstitch around every edge. This defines each geometric plane and gives the illustration a clean, graphic novel feel.
34. Perfect the Classic Argyle with Satin and Straight Stitch
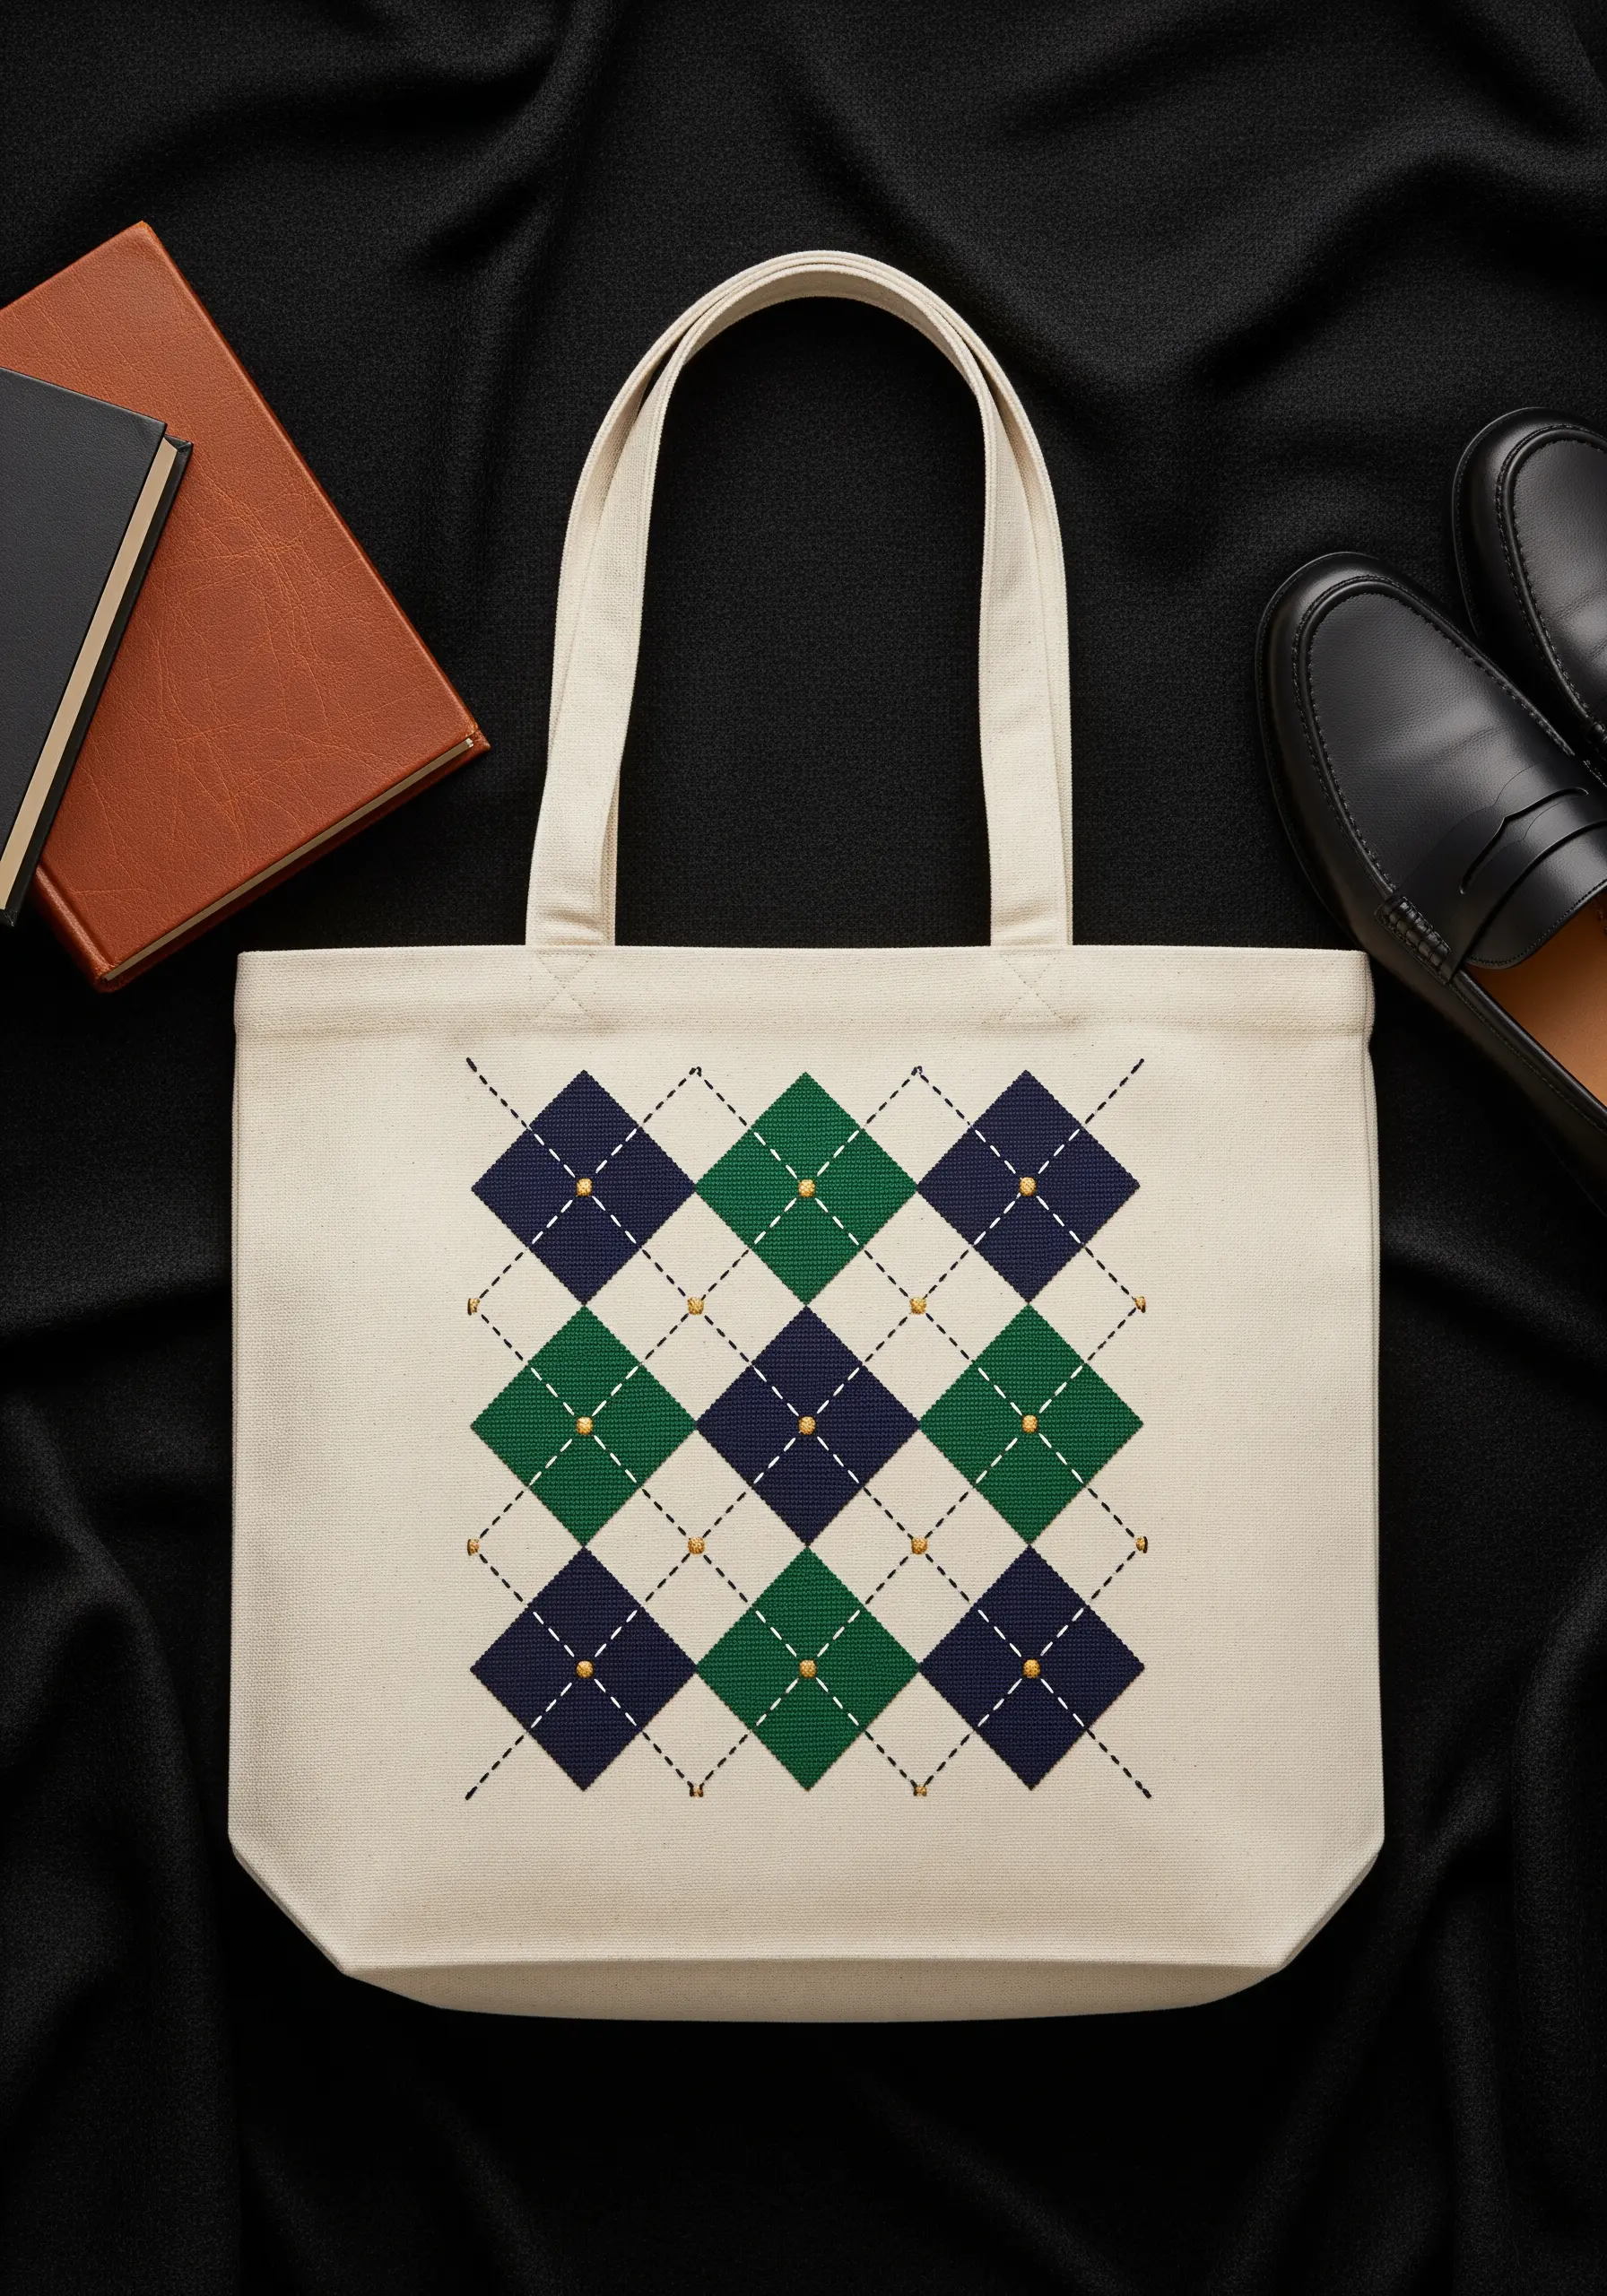
Achieve a flawless argyle pattern by breaking it down into its three core components: diamonds, lines, and dots.
First, fill the solid diamonds with satin stitch. To keep them perfectly neat, outline each diamond with a split stitch first to create a raised edge for your satin stitches to tuck against.
Next, use a simple backstitch or a single long straight stitch for the thin intersecting lines. Using a ruler and a fabric marker will ensure they are perfectly straight.
Finally, add the small details—a single French knot or a tiny cross-stitch—where the lines intersect, giving the pattern its classic, polished look.


