
Have you ever found yourself with beautiful scraps of fabric, delicate paper, and a desire to create something more than just another hoop? You have the stitching skills, but you want your work to tell a deeper story, to feel less like a pattern and more like a piece of art.
The secret isn’t necessarily learning a dozen complex new stitches. Instead, it’s about learning to see paper and fabric not just as surfaces, but as materials you can layer, cut, and collage. By blending these elements, you introduce texture, depth, and narrative into your work before you even make the first stitch.
Think of thread as the final, unifying element—the line that connects disparate pieces, the texture that brings a flat image to life. These projects will show you how to confidently combine materials, turning simple stitches and scraps into expressive, personal artworks that feel truly and completely your own.
1. Layer Paper Ephemera with High-Texture Stitches
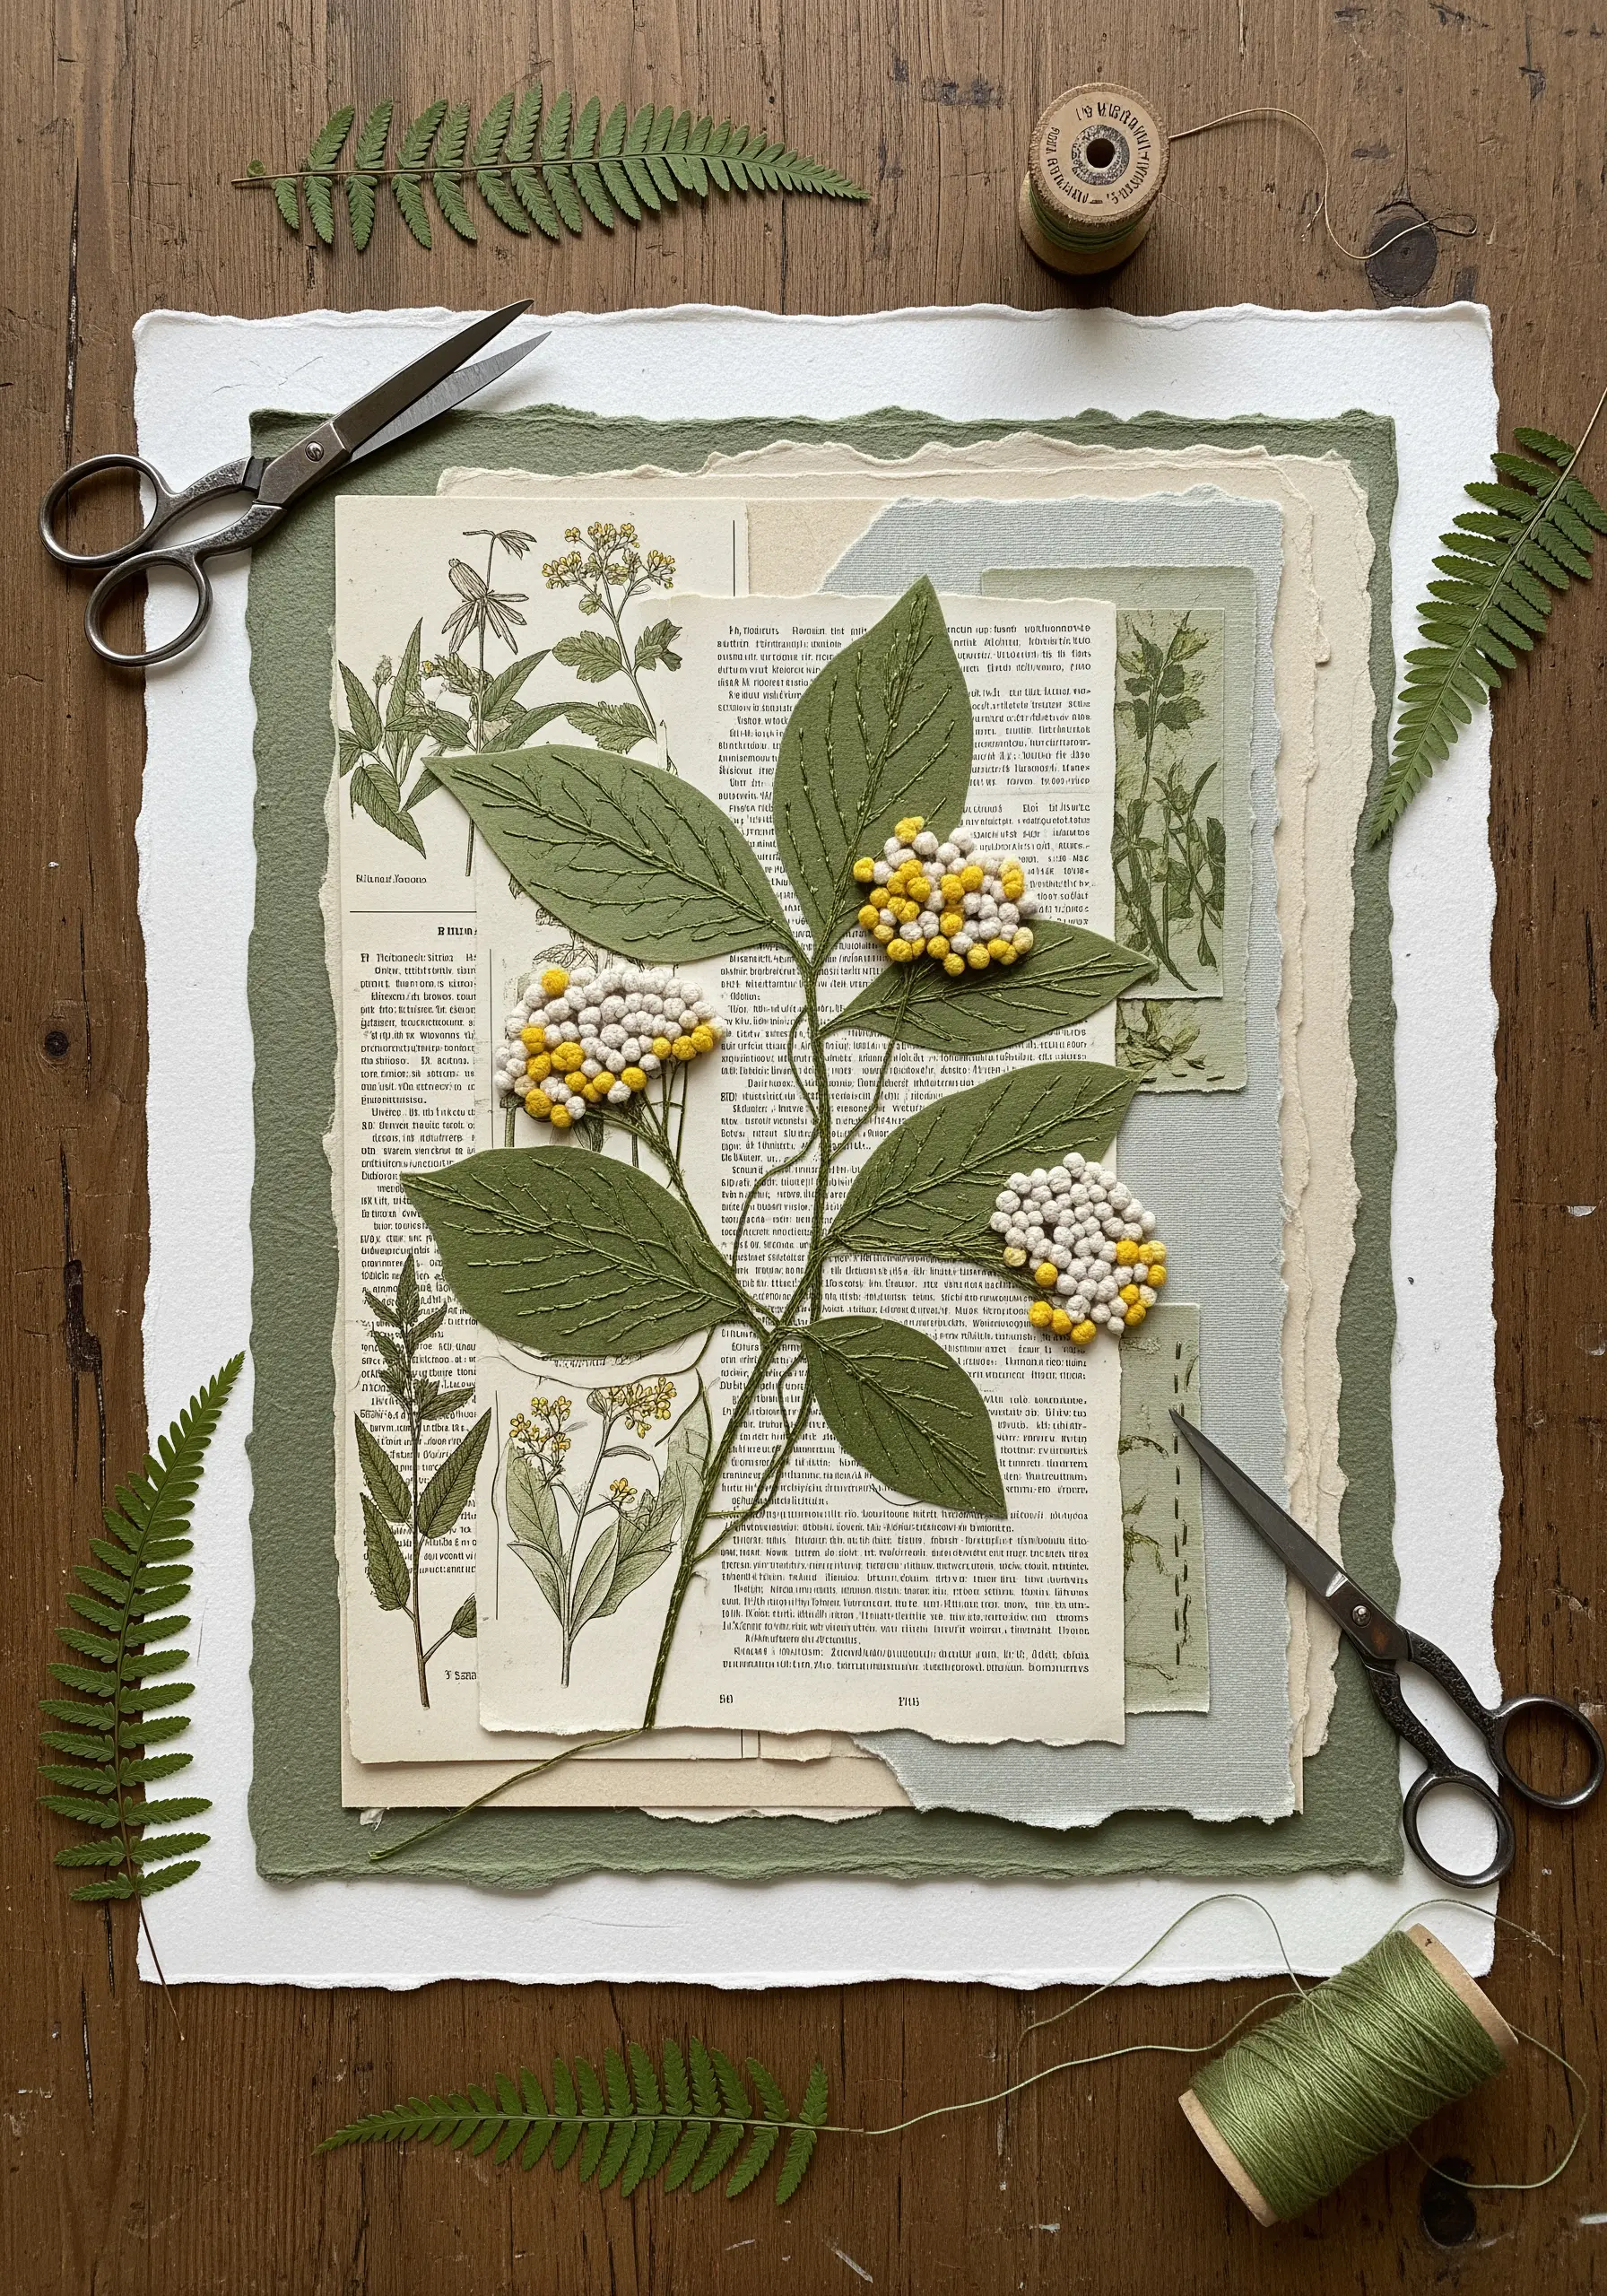
Build your composition by layering handmade paper and vintage botanical illustrations as your base.
Create contrast by stitching directly onto a cutout fabric leaf, using dense clusters of French knots for the flower heads. This technique adds a sculptural, 3D quality that makes the botanical element lift off the page.
Use a fine, sharp needle (a size 10 milliner’s needle is perfect) to pierce the paper and fabric layers cleanly without tearing.
This approach transforms flat paper into a tactile experience, blending illustration with tangible texture for elegant pressed flower embroidery designs.
2. Create Padded Appliqué for Celestial Depth
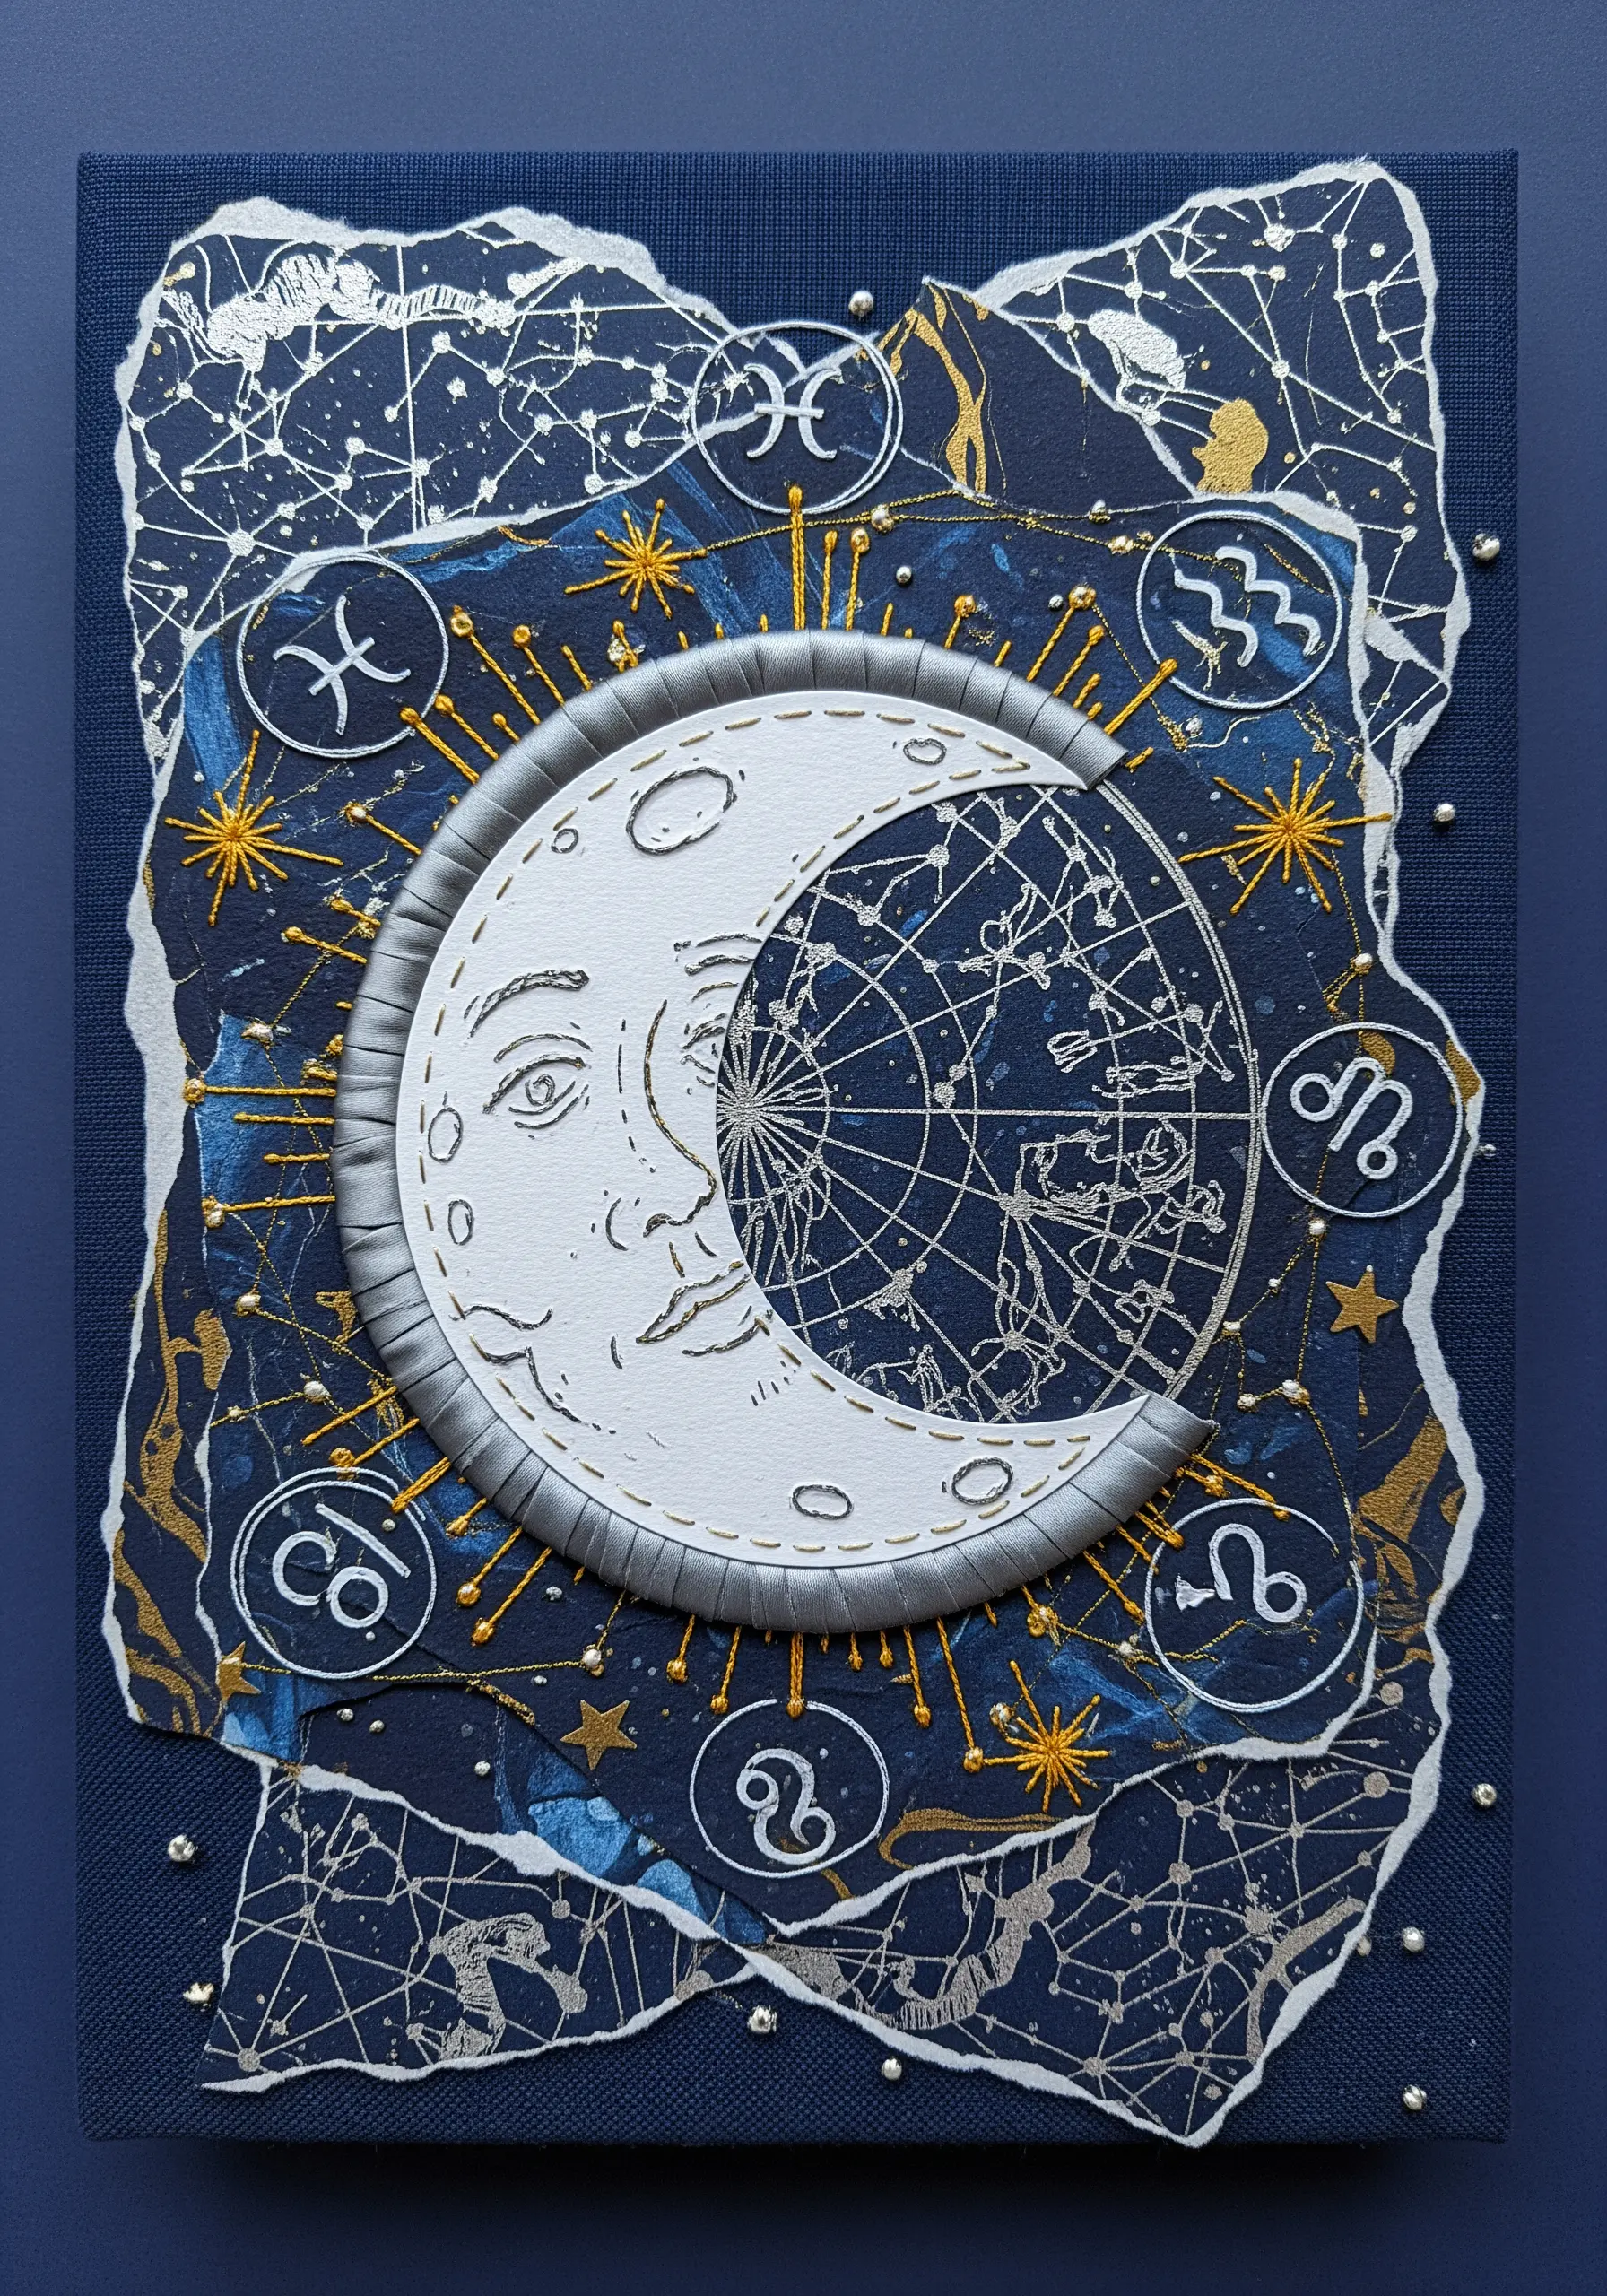
To give your central motif a raised, three-dimensional effect, use padded satin stitch.
Cut your moon shape from felt, stitch it to the background fabric, and then cover it with a layer of paper or fine fabric, wrapping the edges tightly.
Outline this padded shape with a smooth, wide satin stitch using a high-sheen ribbon or metallic floss. This technique physically lifts the element, creating dramatic shadows and a professional finish.
Surround it with delicate seed stitches and gold thread accents to mimic a starry sky, turning your piece into one of those minimal sky moon designs with surprising depth.
3. Define Collage Horizons with a Blanket Stitch Edge
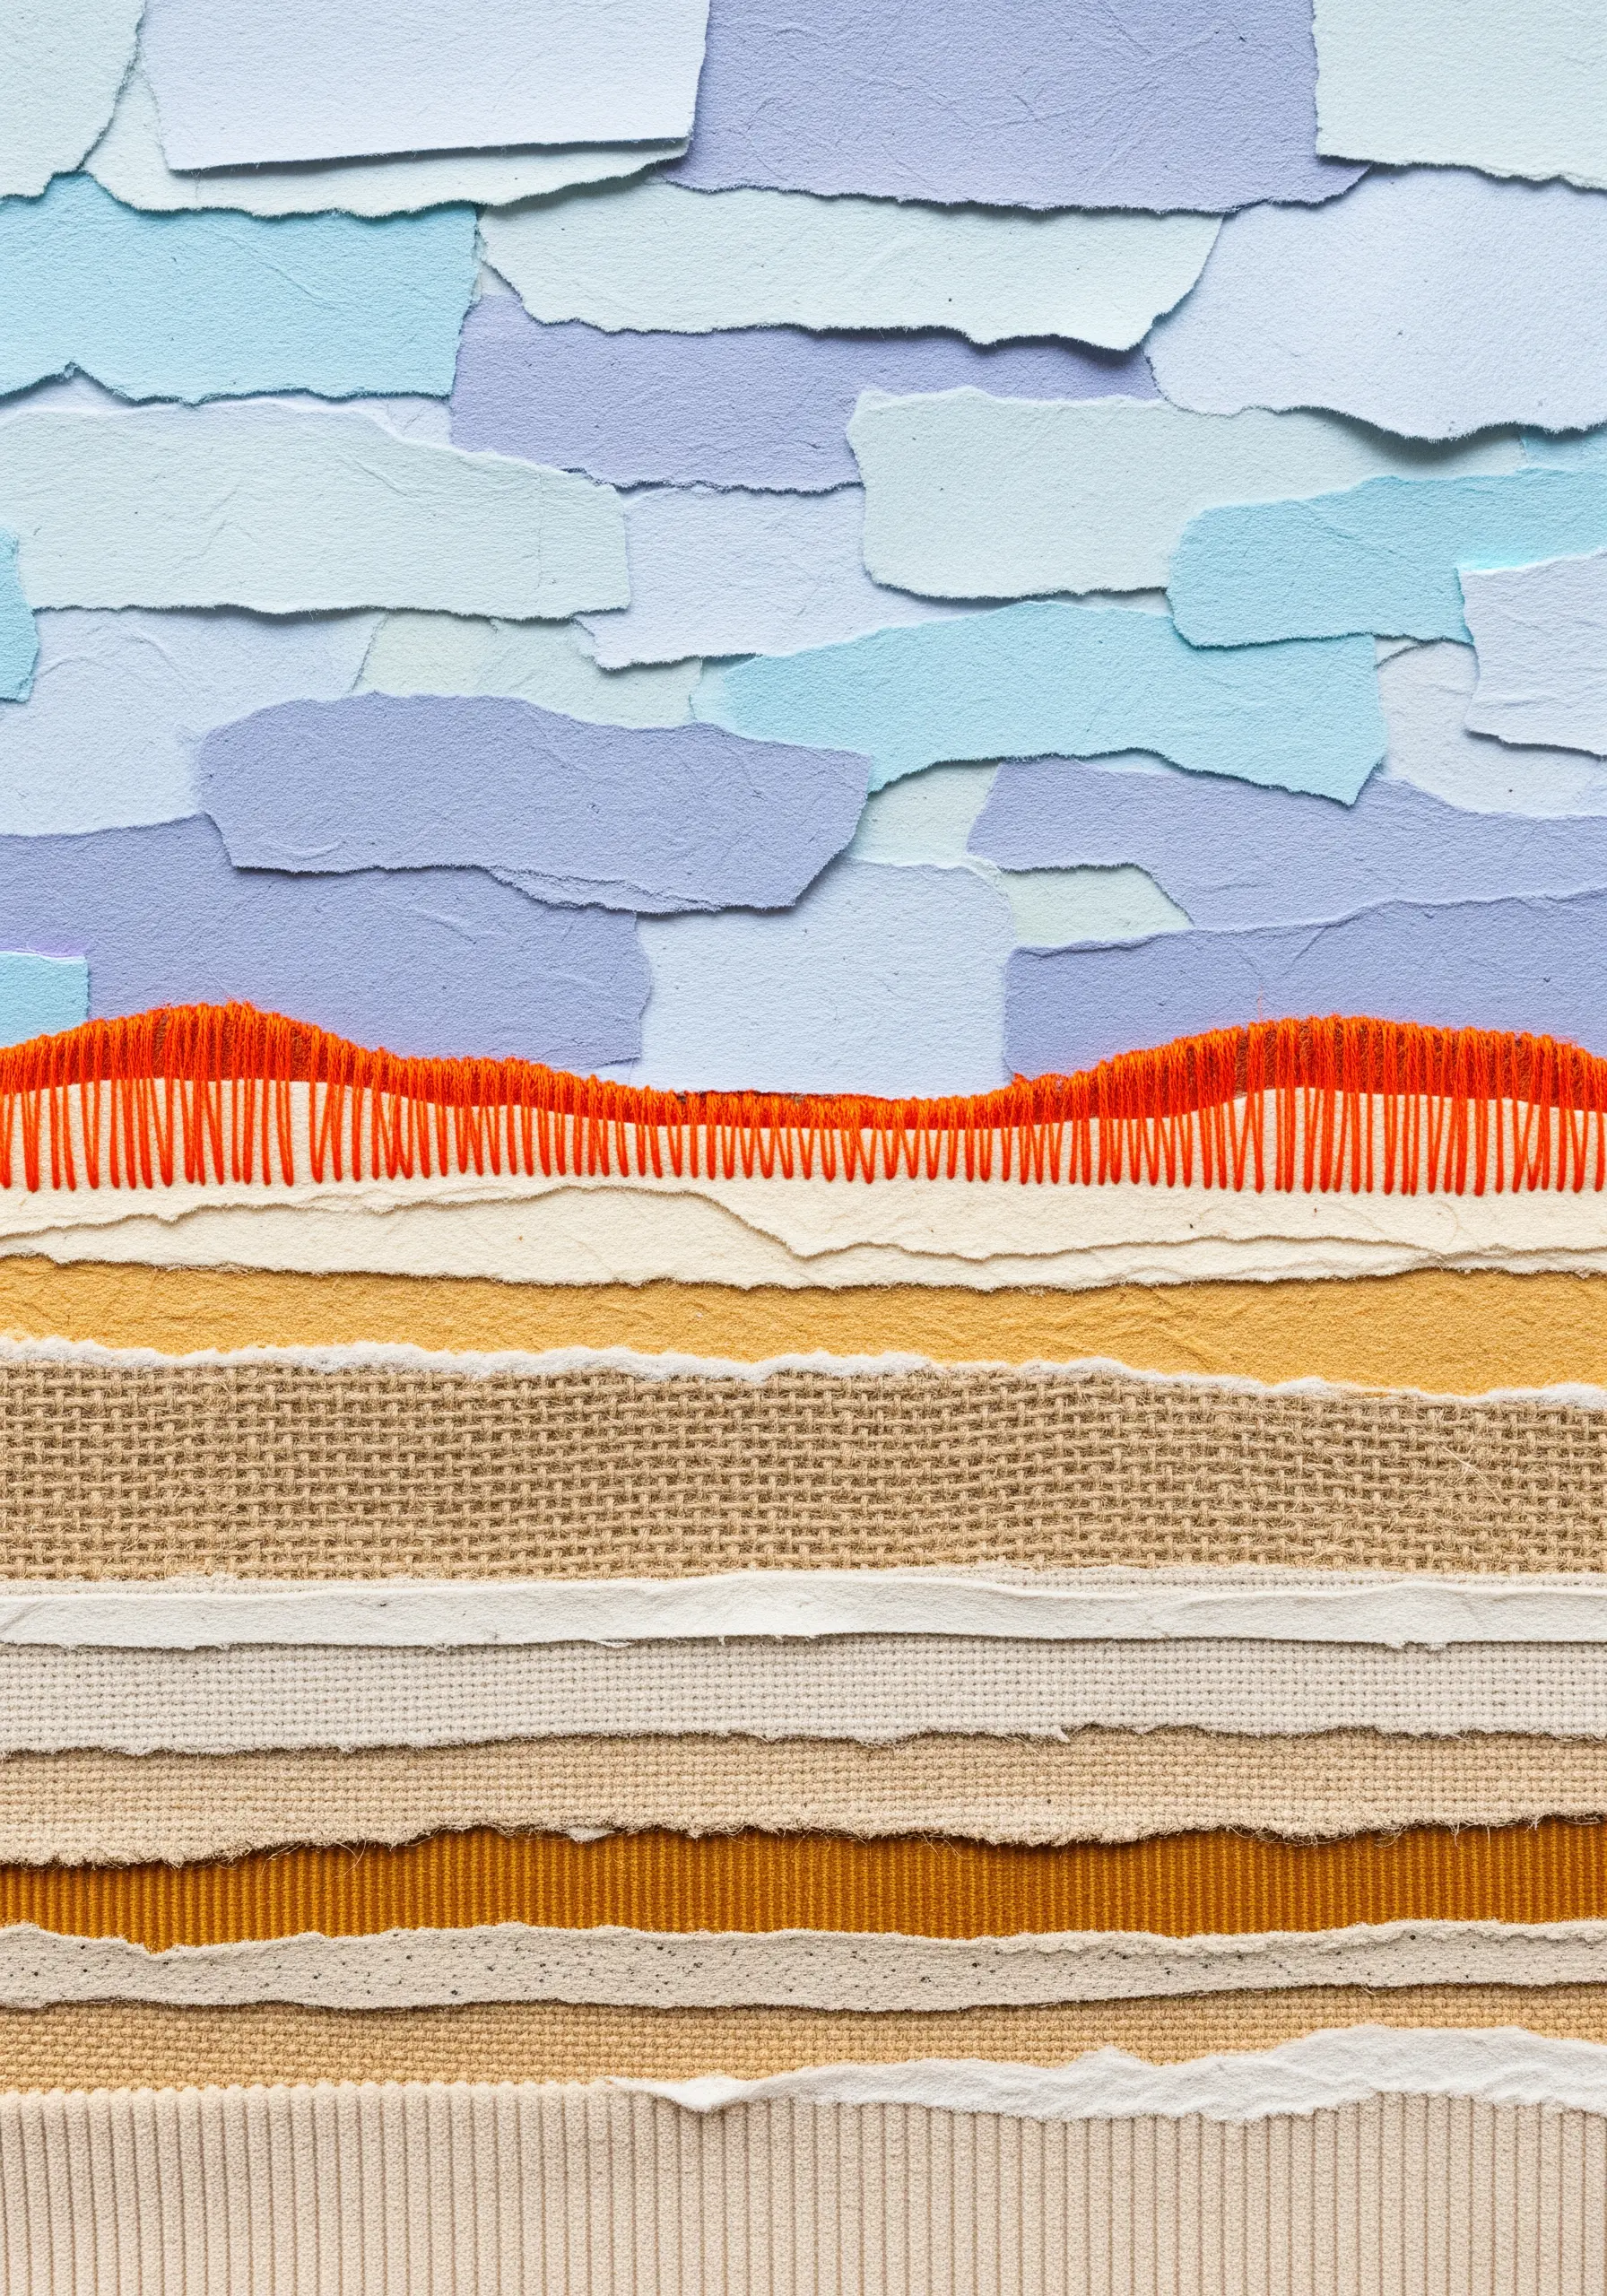
When collaging landscapes with torn paper and fabric strips, use embroidery to create a sharp, intentional horizon line.
Secure your fabric and paper layers with a light adhesive, then work a dense, even blanket stitch along the defining edge of your landscape.
This stitch not only secures the materials but also introduces a clean, graphic line that separates sky from land, adding structure to an otherwise abstract composition.
It’s a simple way to elevate your fabric collage embroidery compositions from random scraps to a cohesive, artistic statement.
4. Stitch a Garden into a Fabric Façade
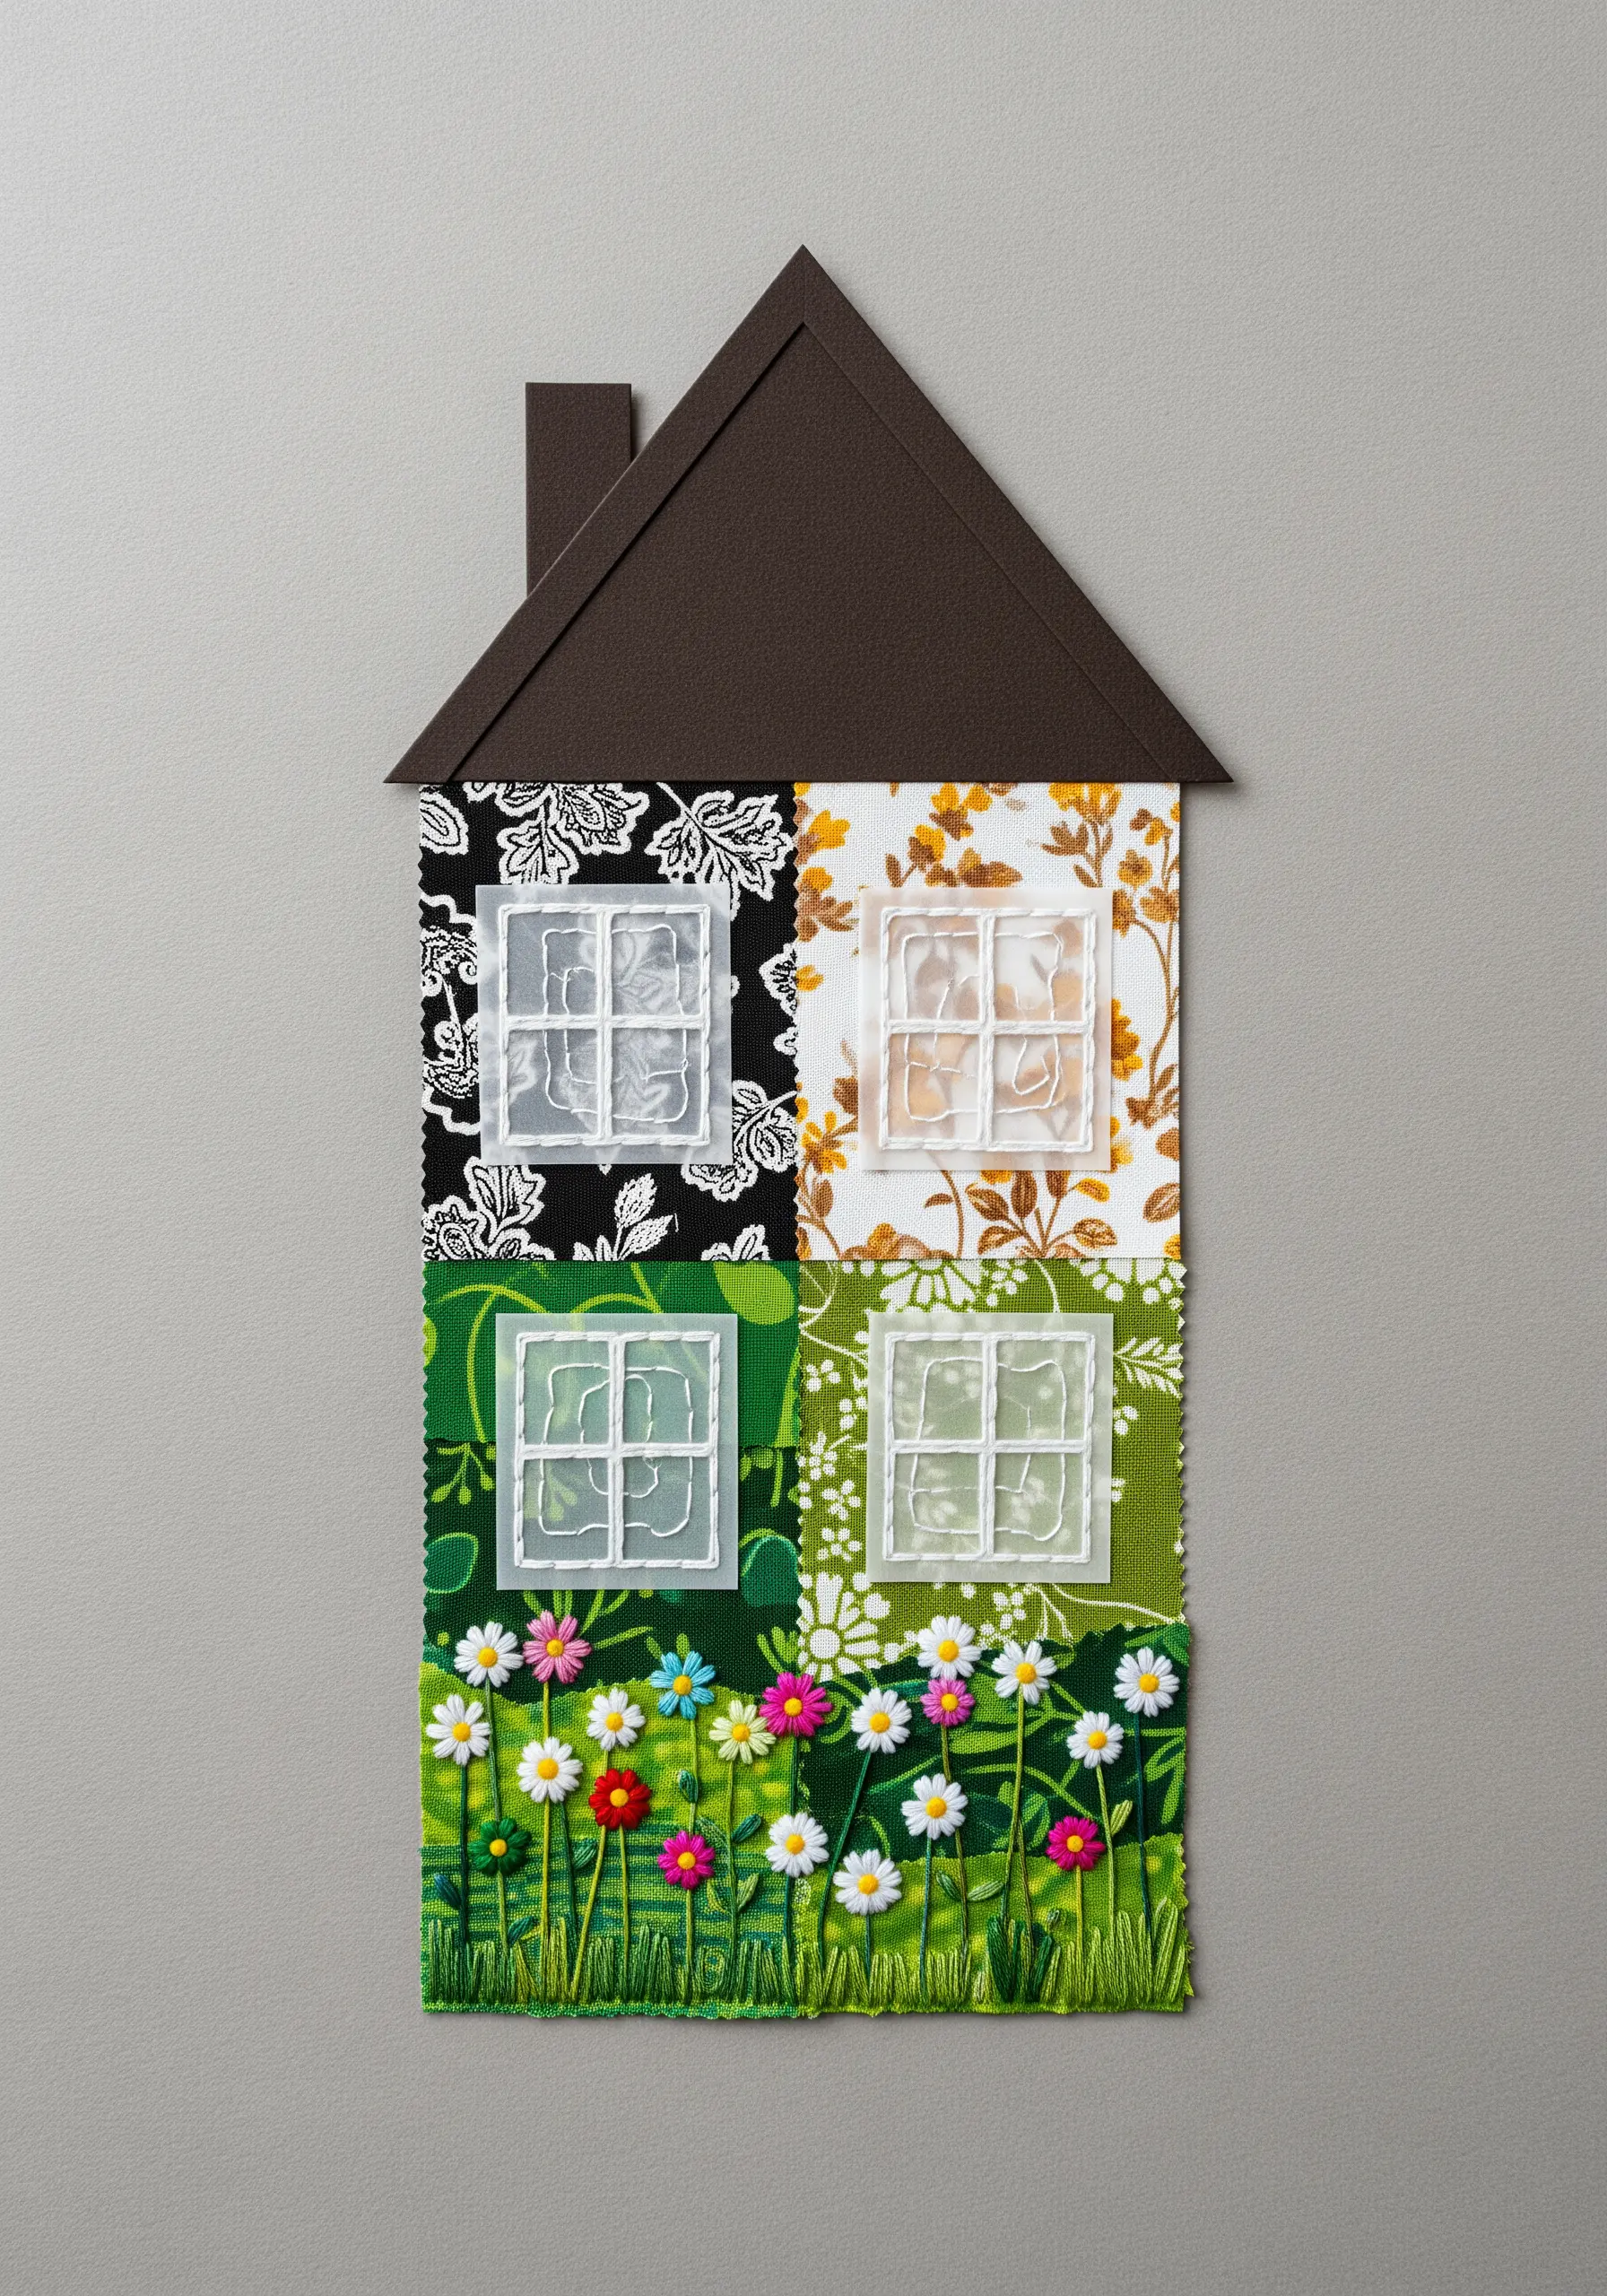
Use patterned fabric scraps to build the structure of a house, letting the prints suggest wallpaper or exterior textures.
Then, ground the composition by stitching a dimensional flower garden along the base. Use detached chain stitches (lazy daisies) for petals and French knots for flower centers.
Vary the height of your straight stitches to create blades of grass, which gives the illusion of a foreground and adds depth.
This transforms a simple appliqué into a narrative piece, showcasing how 3D floral embroidery techniques can bring a static image to life.
5. Sculpt Waves with Ruched Fabric Ribbons

Instead of stitching waves, create them with layered, manipulated fabric.
Cut thin strips of lightweight cotton or organza, then gather and tack them onto your background fabric in undulating lines. This ruching technique creates instant volume and movement that thread alone cannot replicate.
Secure the fabric waves with tiny, hidden anchoring stitches. Add fine sand and seed beads along the shoreline for a granular texture.
This mixed-media method is perfect for capturing the dynamic energy of the ocean in your coastal theme tiny embroidery art.
6. Frame Vintage Photos with Stitched Details
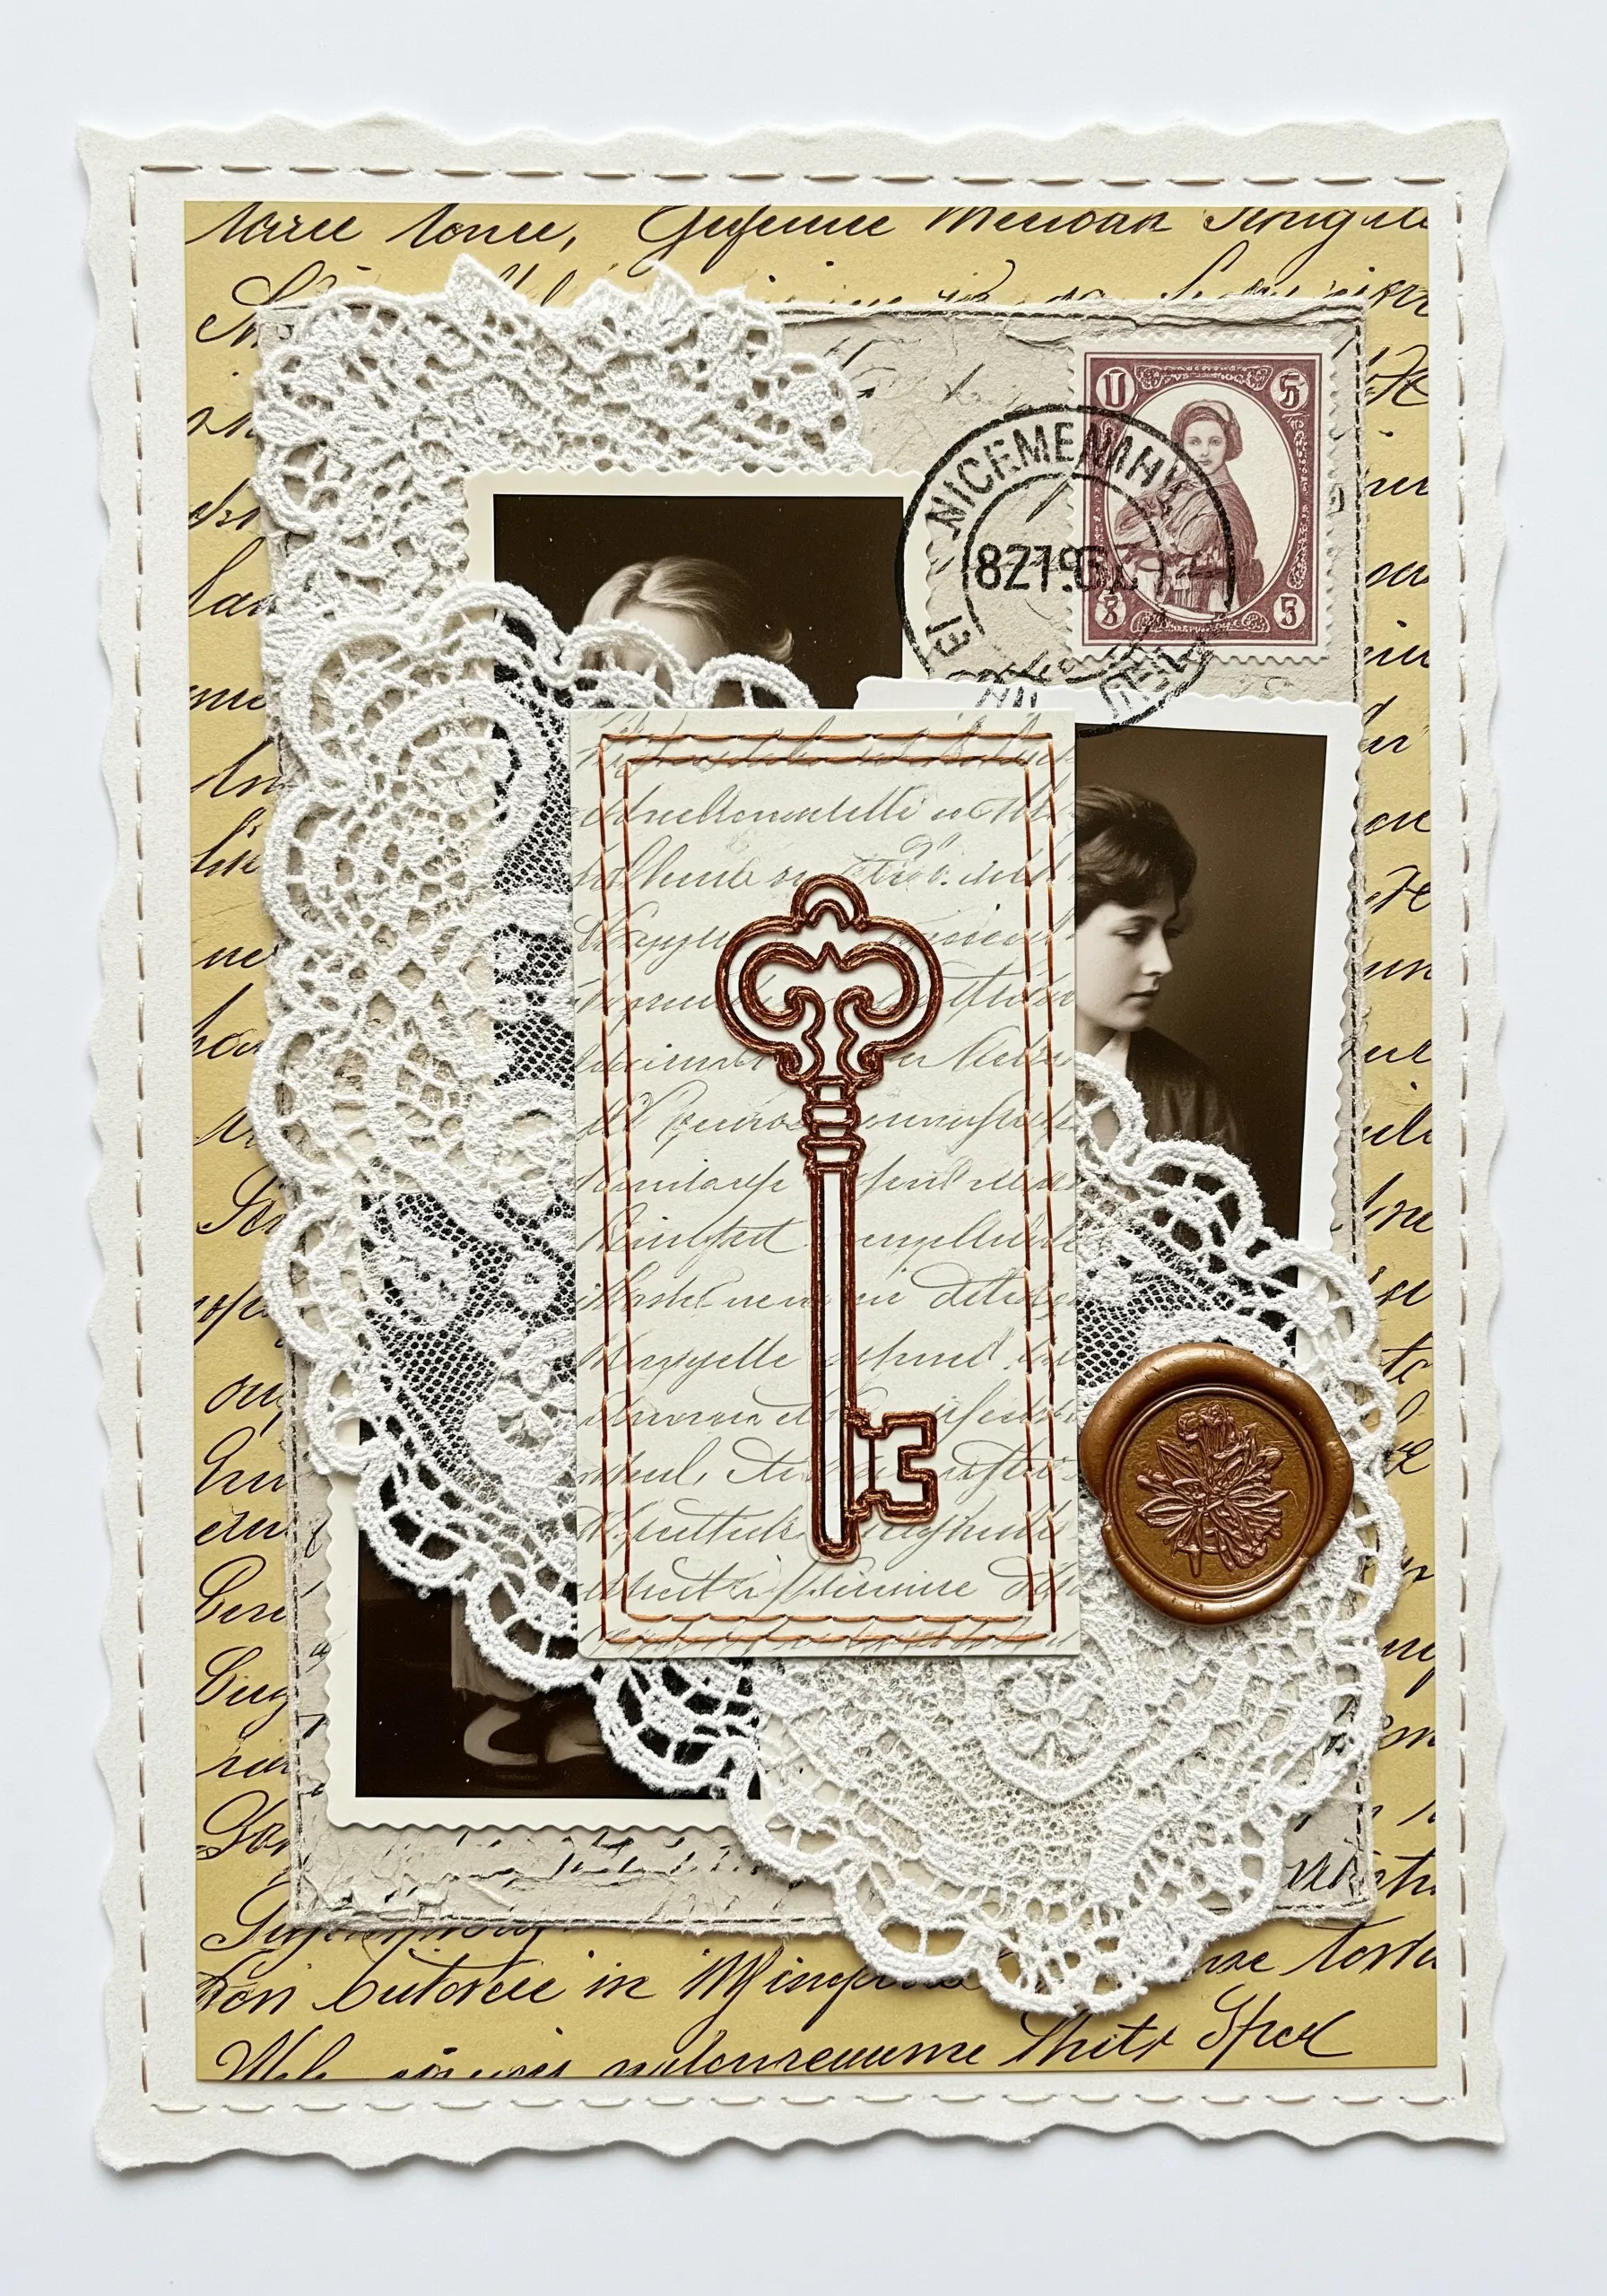
Elevate a paper collage by using thread to frame and highlight key elements.
Mount a vintage photograph or ephemera onto a card, then stitch a simple running stitch or backstitch around its border. This creates a subtle, handcrafted frame that integrates the paper element into the textile background.
You can also use embroidery to outline a specific motif within the collage, like the key, drawing the viewer’s eye and adding a layer of texture.
It’s one of the most effective embroidered mixed-media ideas for unifying disparate elements.
7. Transition from Collage to Thread Across Seasons
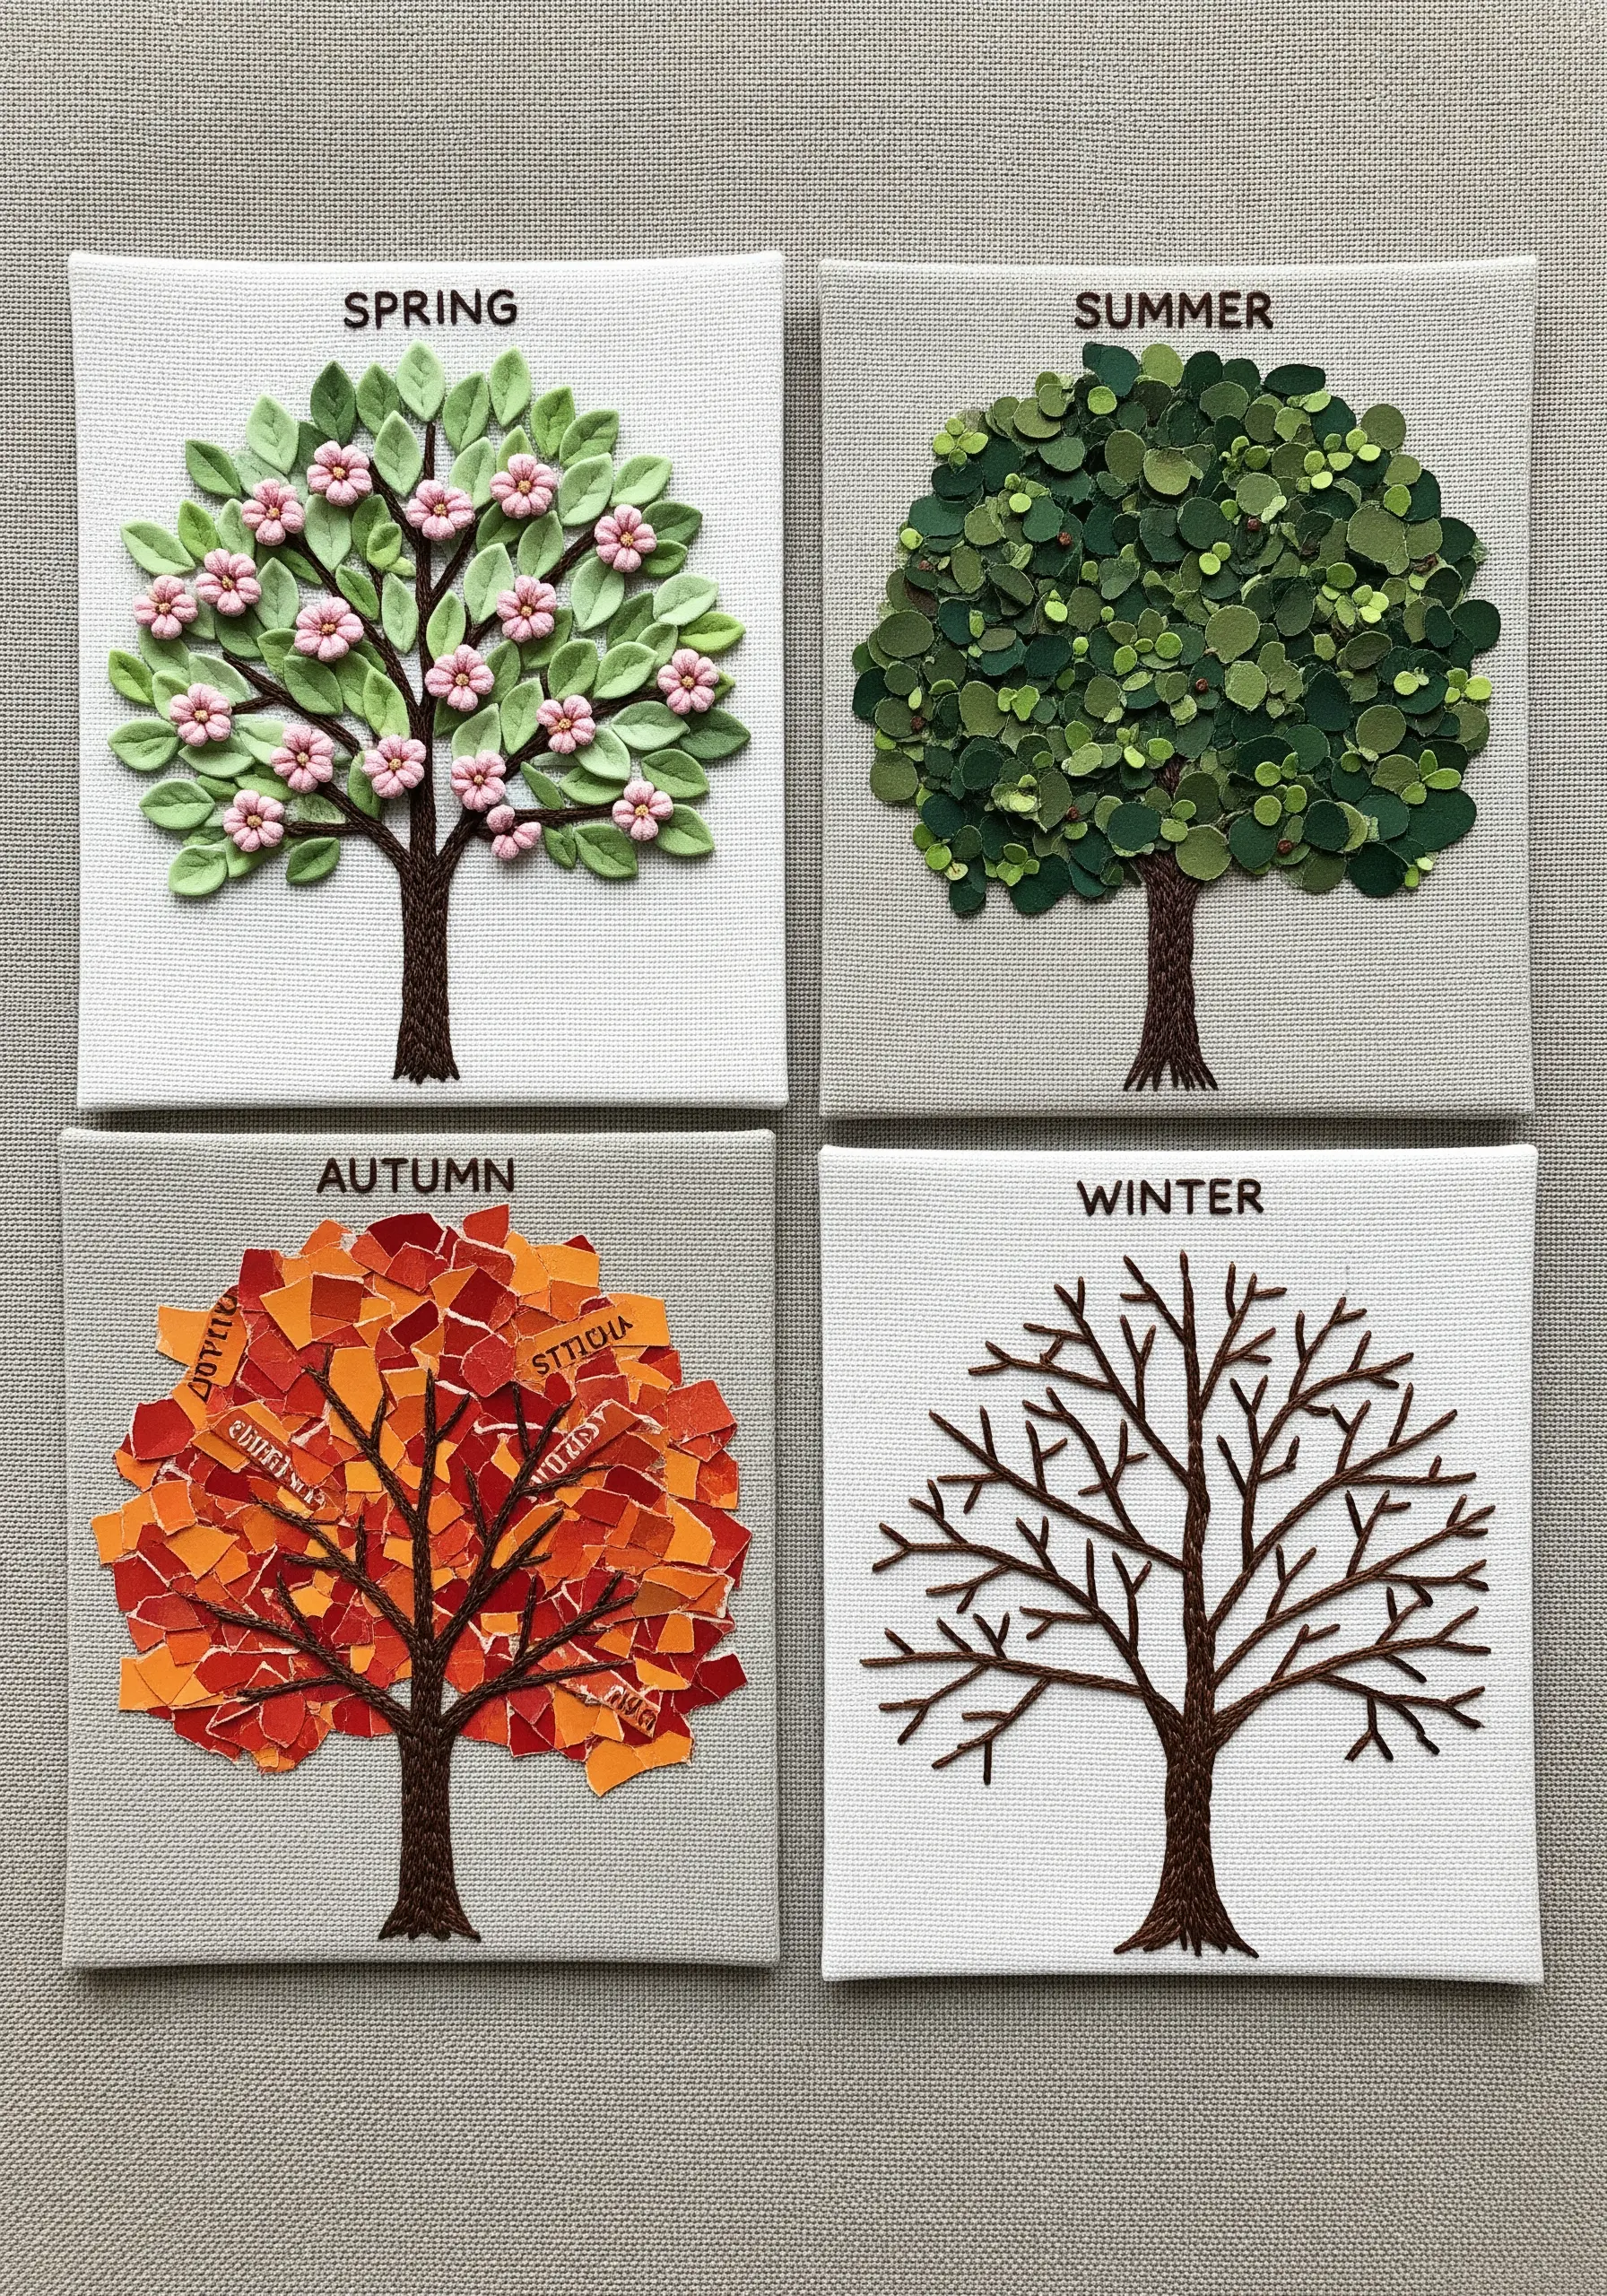
Tell a story through four panels by gradually shifting from collage to pure embroidery.
Start with dimensional fabric and paper for the lushness of spring and summer, using appliqué and tiny paper cutouts for leaves and blossoms.
For autumn, switch to torn paper scraps to represent the texture of falling leaves. Anchor them with minimal stitches.
Finally, render winter’s bareness with only thread, using split stitch or stem stitch for the intricate branches. This progression showcases the expressive power of different materials, and is one of the best creative embroidery ideas inspired by tree bark and leaves.
8. Unite Patchwork with a Consistent Stitched Edge
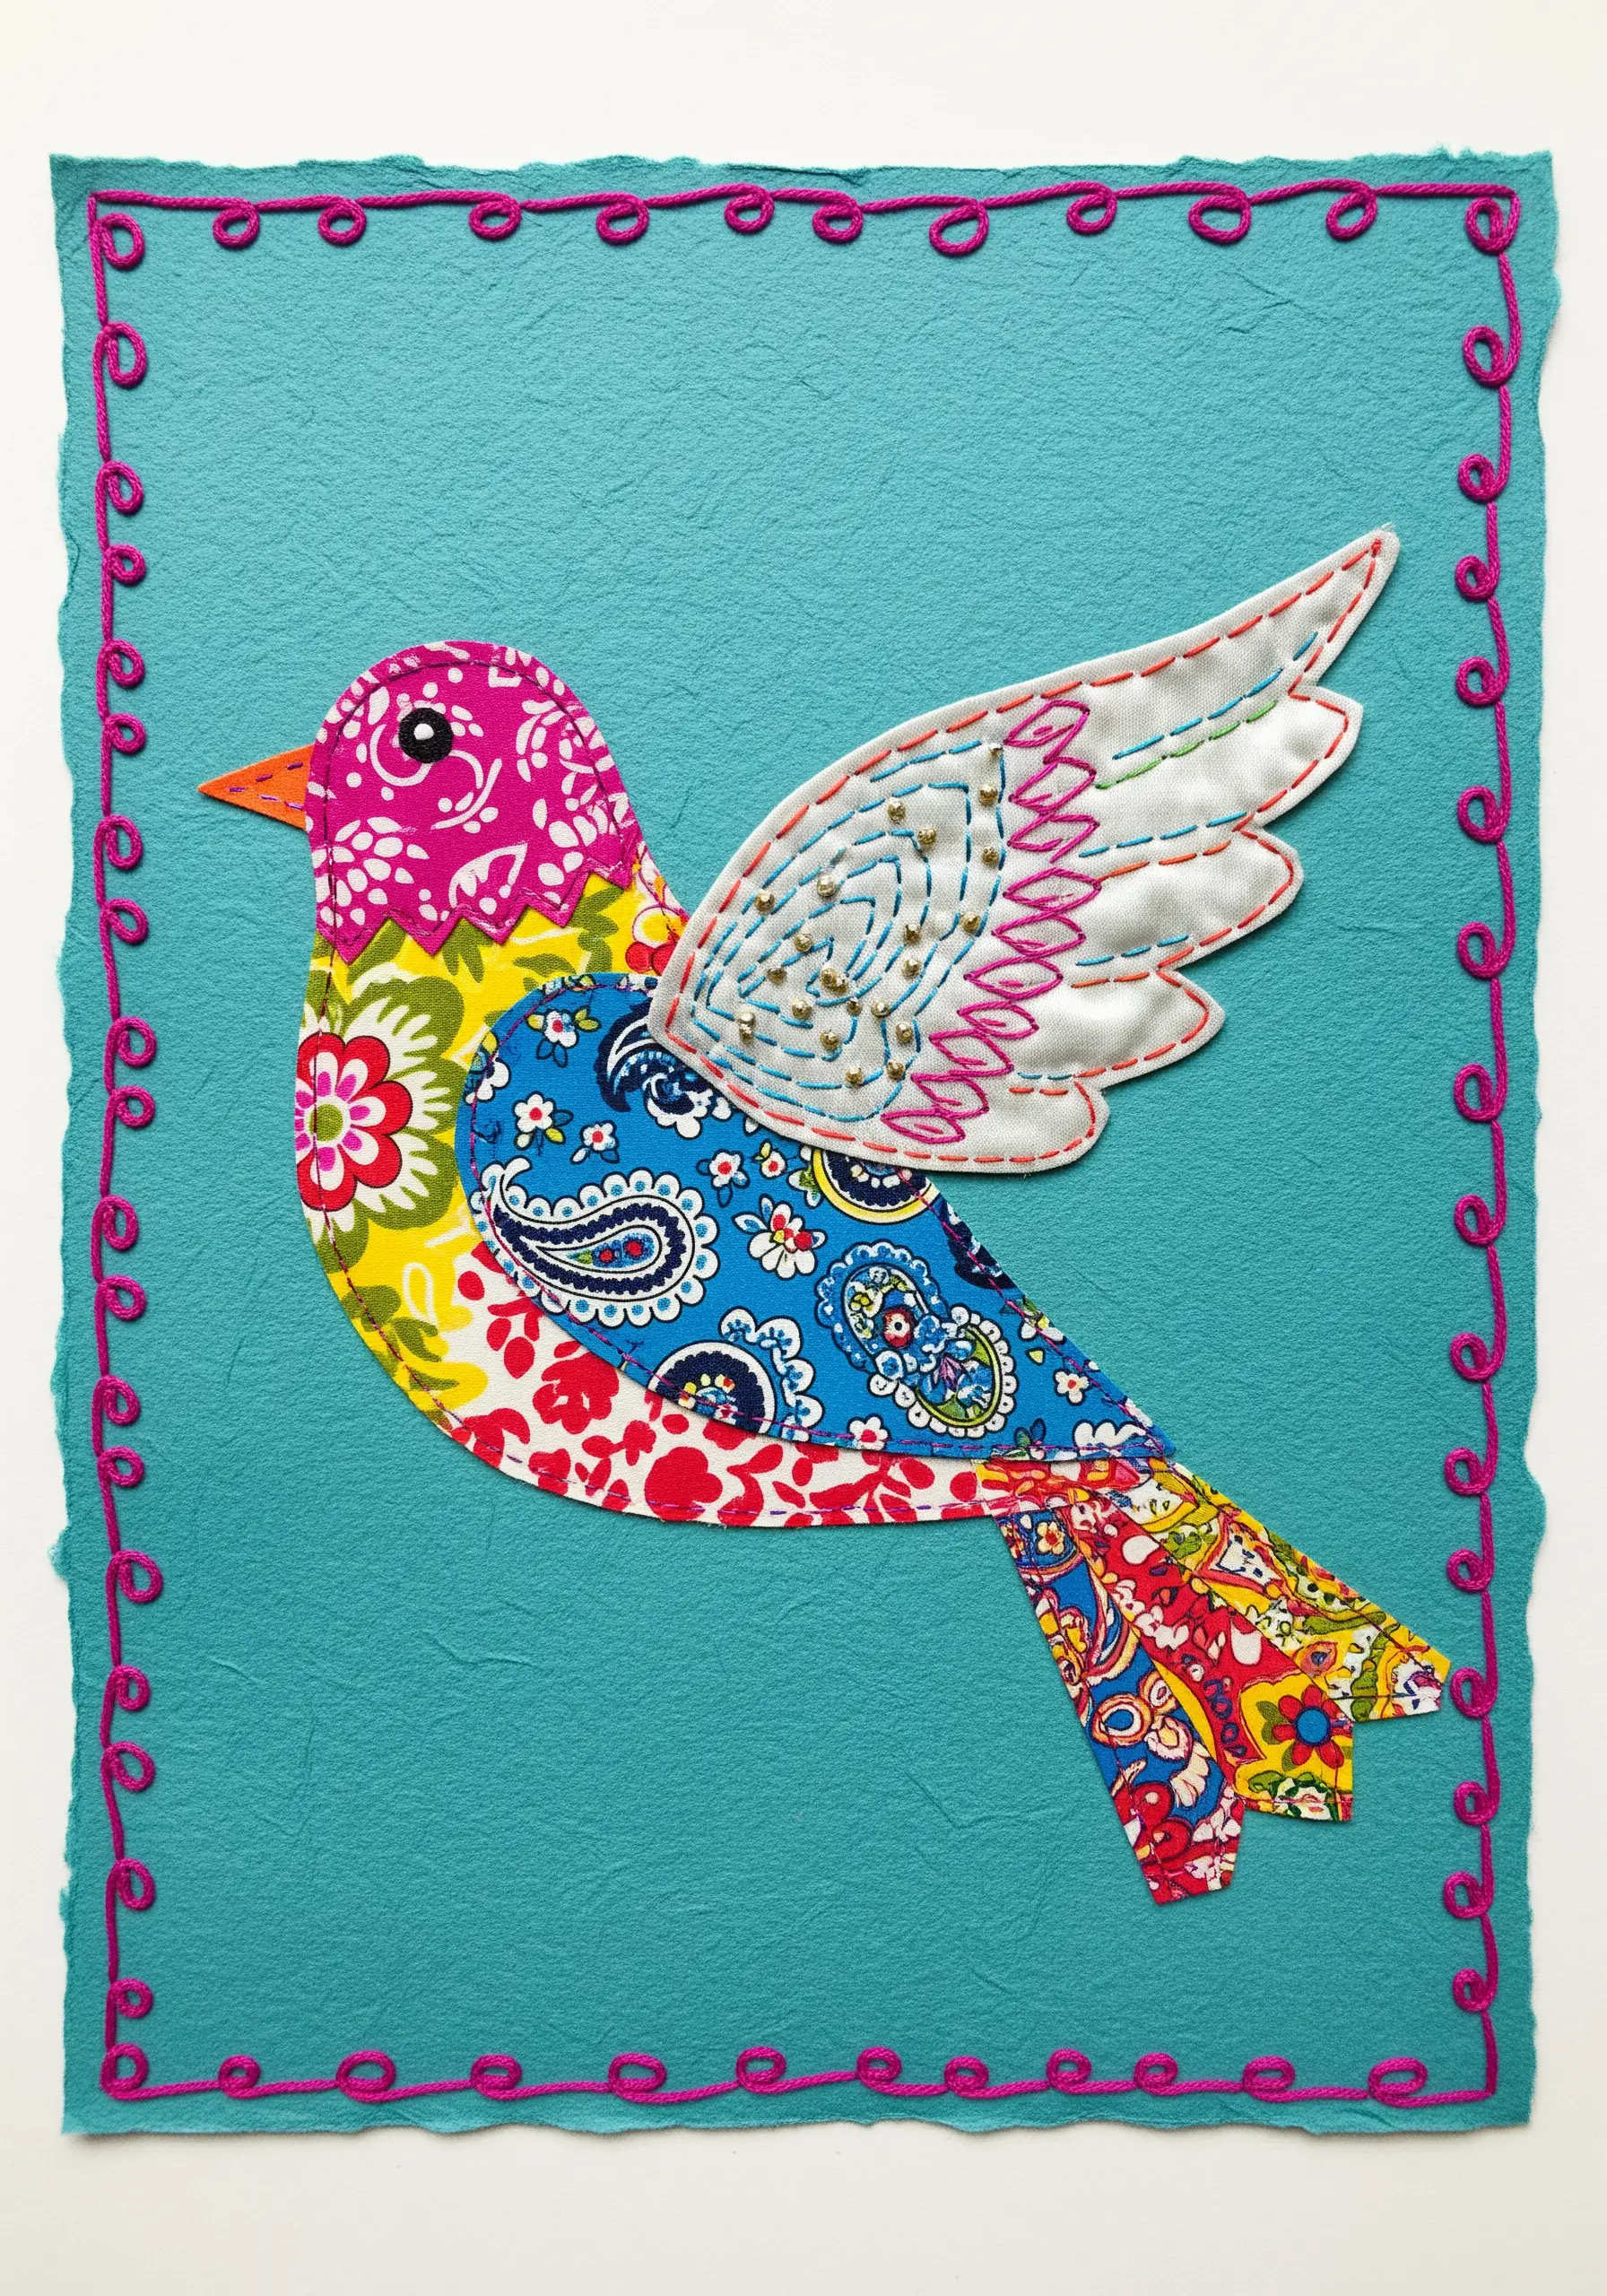
When creating a figure from multiple patterned fabrics, use a single, unifying stitch to define its silhouette.
Cut your bird shape from various scraps and secure them with a fusible bonding web. Then, outline the entire shape and the wing detail with a bold, consistent backstitch or split stitch.
This technique prevents the patchwork from looking chaotic and instead frames it as an intentional design choice.
It is a fundamental principle in fabric collage embroidery artworks that use color in beautiful and deliberate ways.
9. Anchor Geometric Shapes with Minimalist Running Stitches
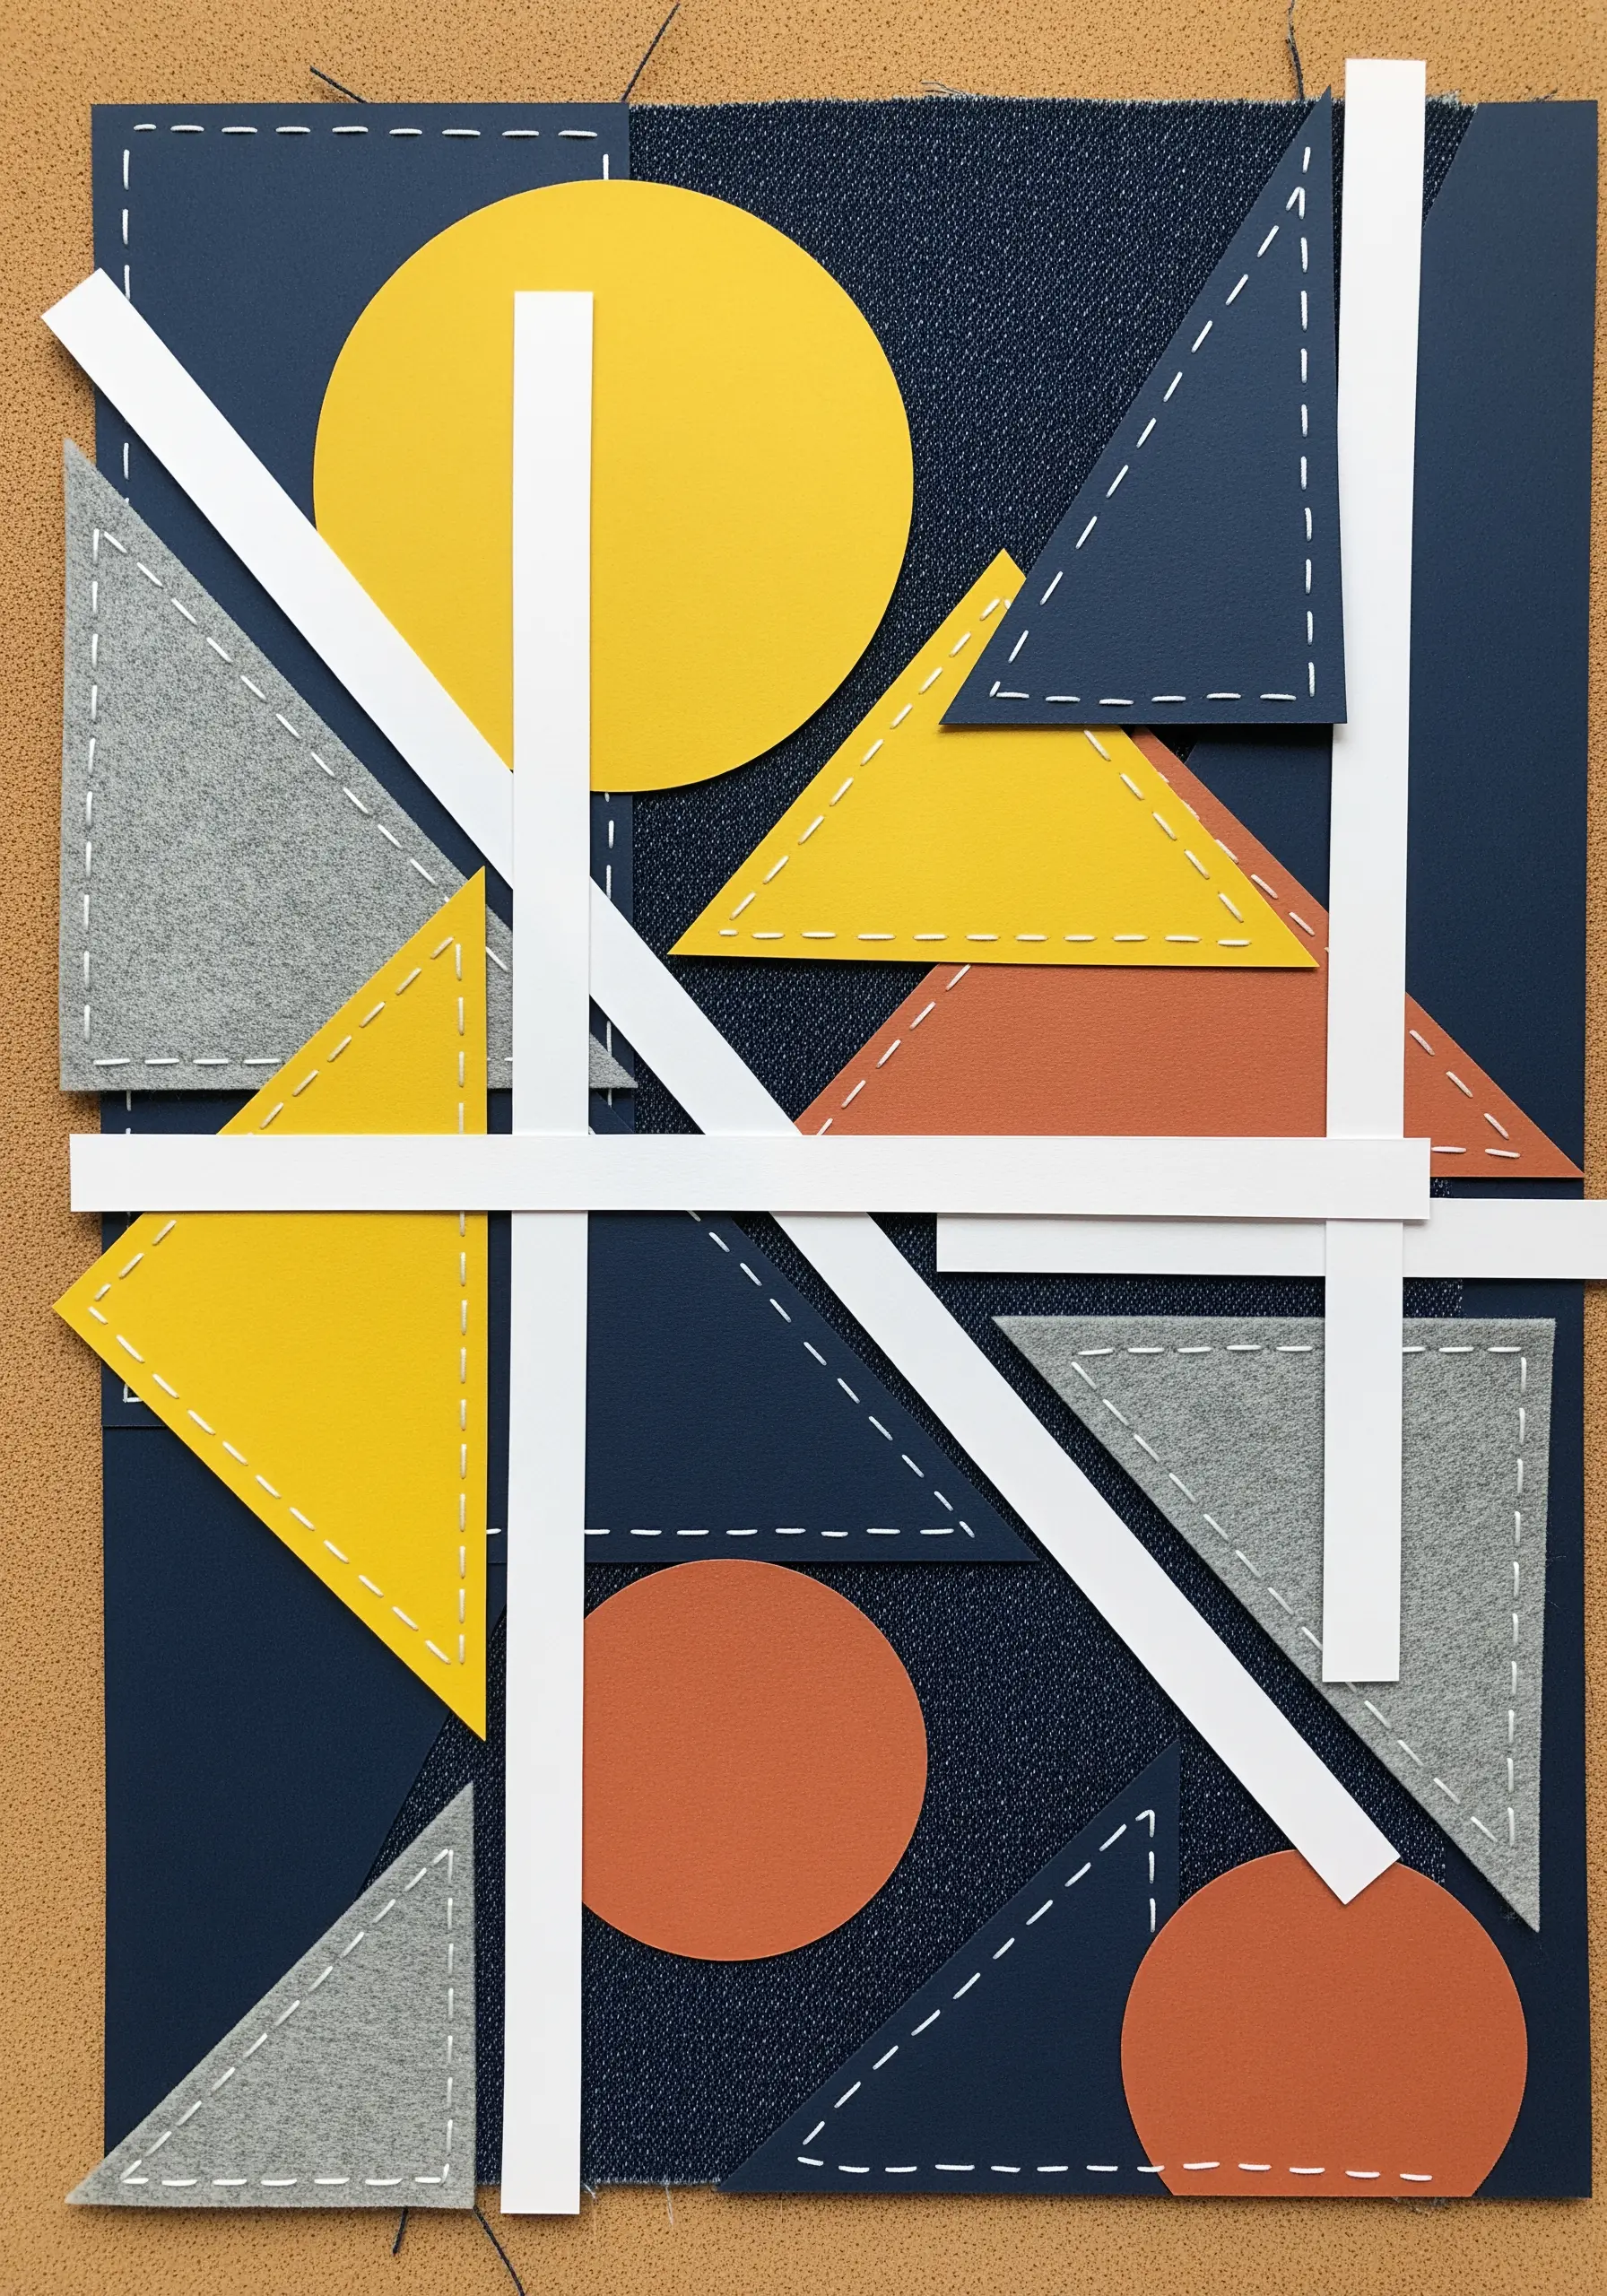
Create a modern, architectural look by securing paper or felt shapes with a clean, functional running stitch.
Instead of hiding your stitches, make them a visible part of the design. Use a contrasting thread color and maintain perfectly even stitch lengths to create a crisp, graphic effect.
This method draws attention to the construction of the artwork itself, celebrating the intersection of materials.
This approach works especially well for abstract framed embroidery patterns where line and form are the main focus.
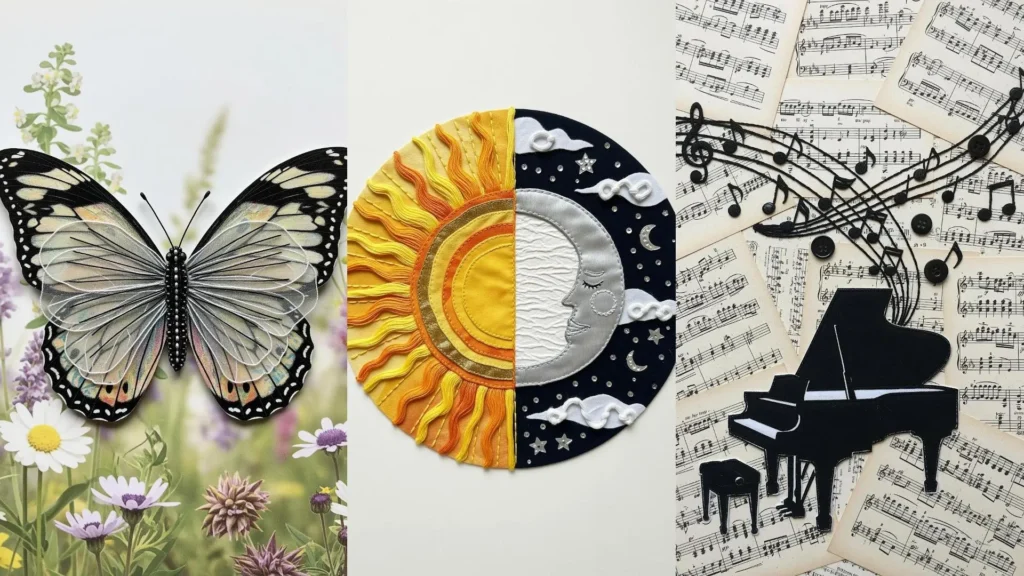
10. Add Dimensionality with Layered Vellum Wings
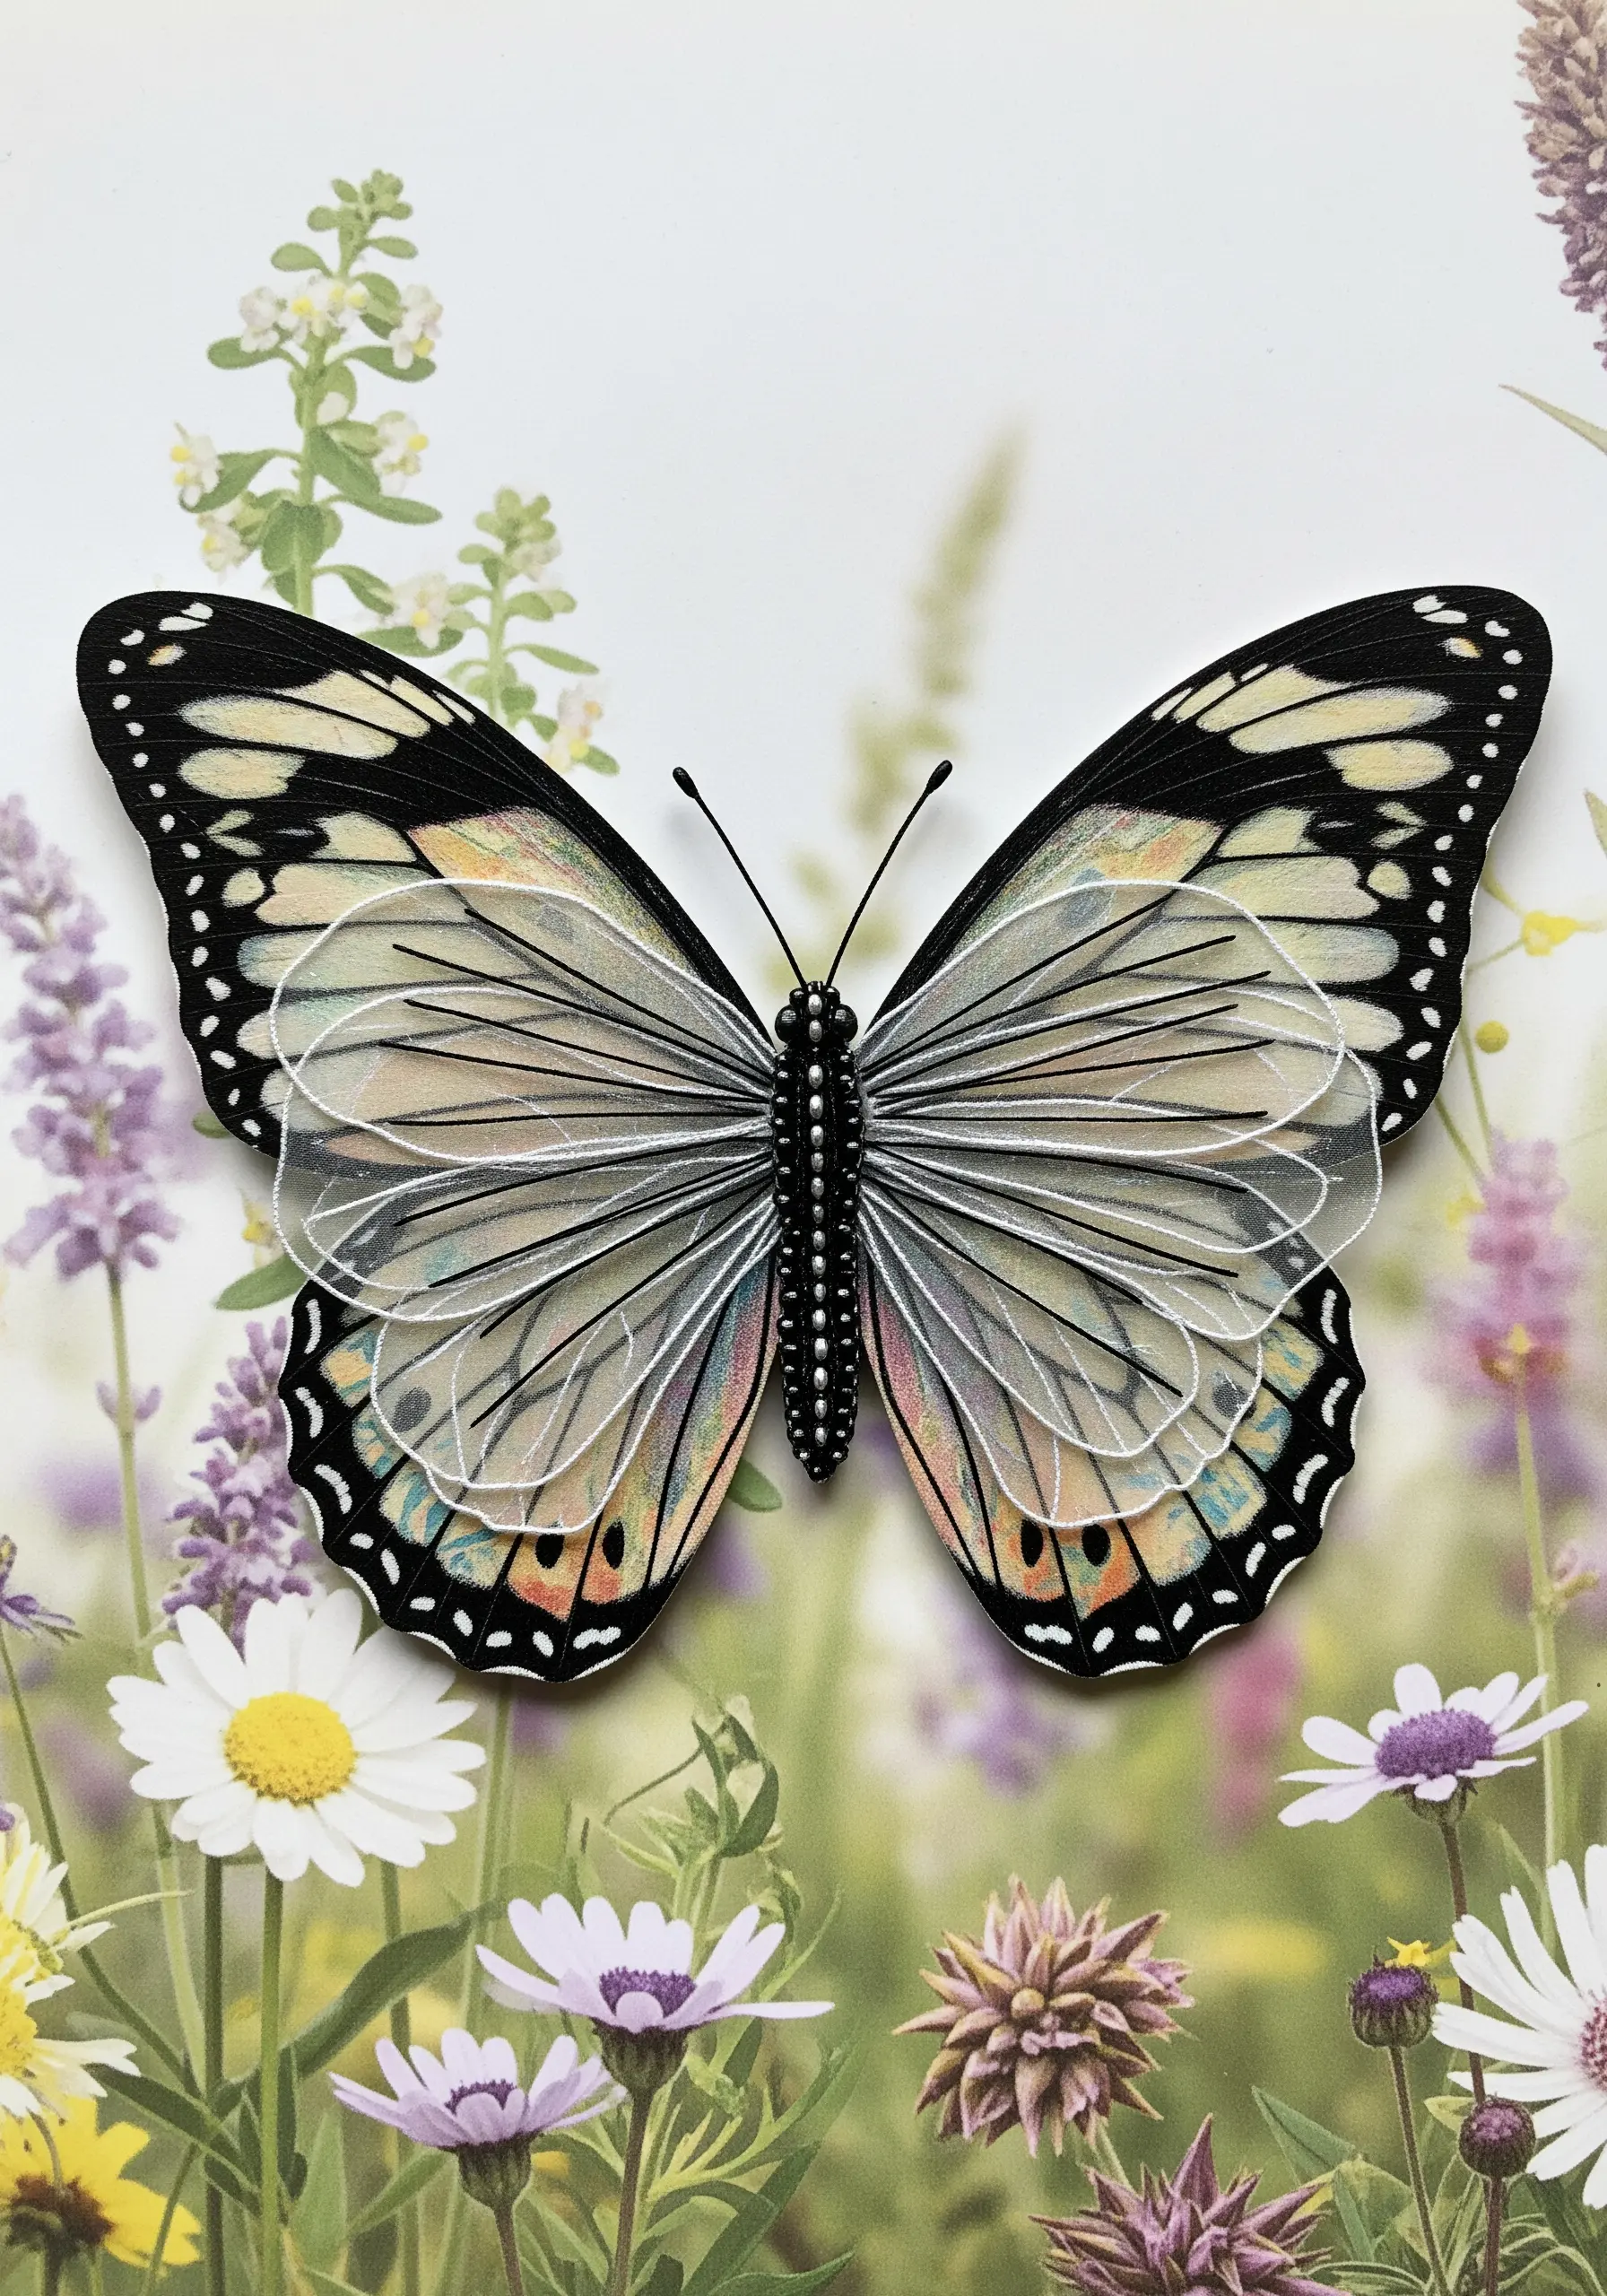
Give your embroidered insects a delicate, ethereal quality by adding wings made from printed vellum or organza.
Embroider the body of the butterfly directly onto your background fabric. Then, carefully cut out the vellum wings and attach them only along the center, next to the body.
This allows the wings to lift slightly from the surface, creating natural shadows and a sense of lightness and movement.
It’s a beautiful technique for butterfly garden embroidery ideas that feel incredibly lifelike.
11. Integrate Text by Stitching Directly onto Paper

Transform a simple paper cutout into a meaningful focal point by embroidering a quote directly onto it.
Choose a sturdy, high-quality cardstock that can handle perforation. Use a single strand of thread and a sharp, fine needle to carefully backstitch your lettering.
Pre-piercing the holes with your needle before threading can prevent accidental tearing and ensure cleaner stitches.
This method turns your words into a tactile element, perfect for inspirational quote embroidery hoops that blend paper craft and fiber art.
12. Combine Appliqué and Satin Stitch for a Dynamic Finish
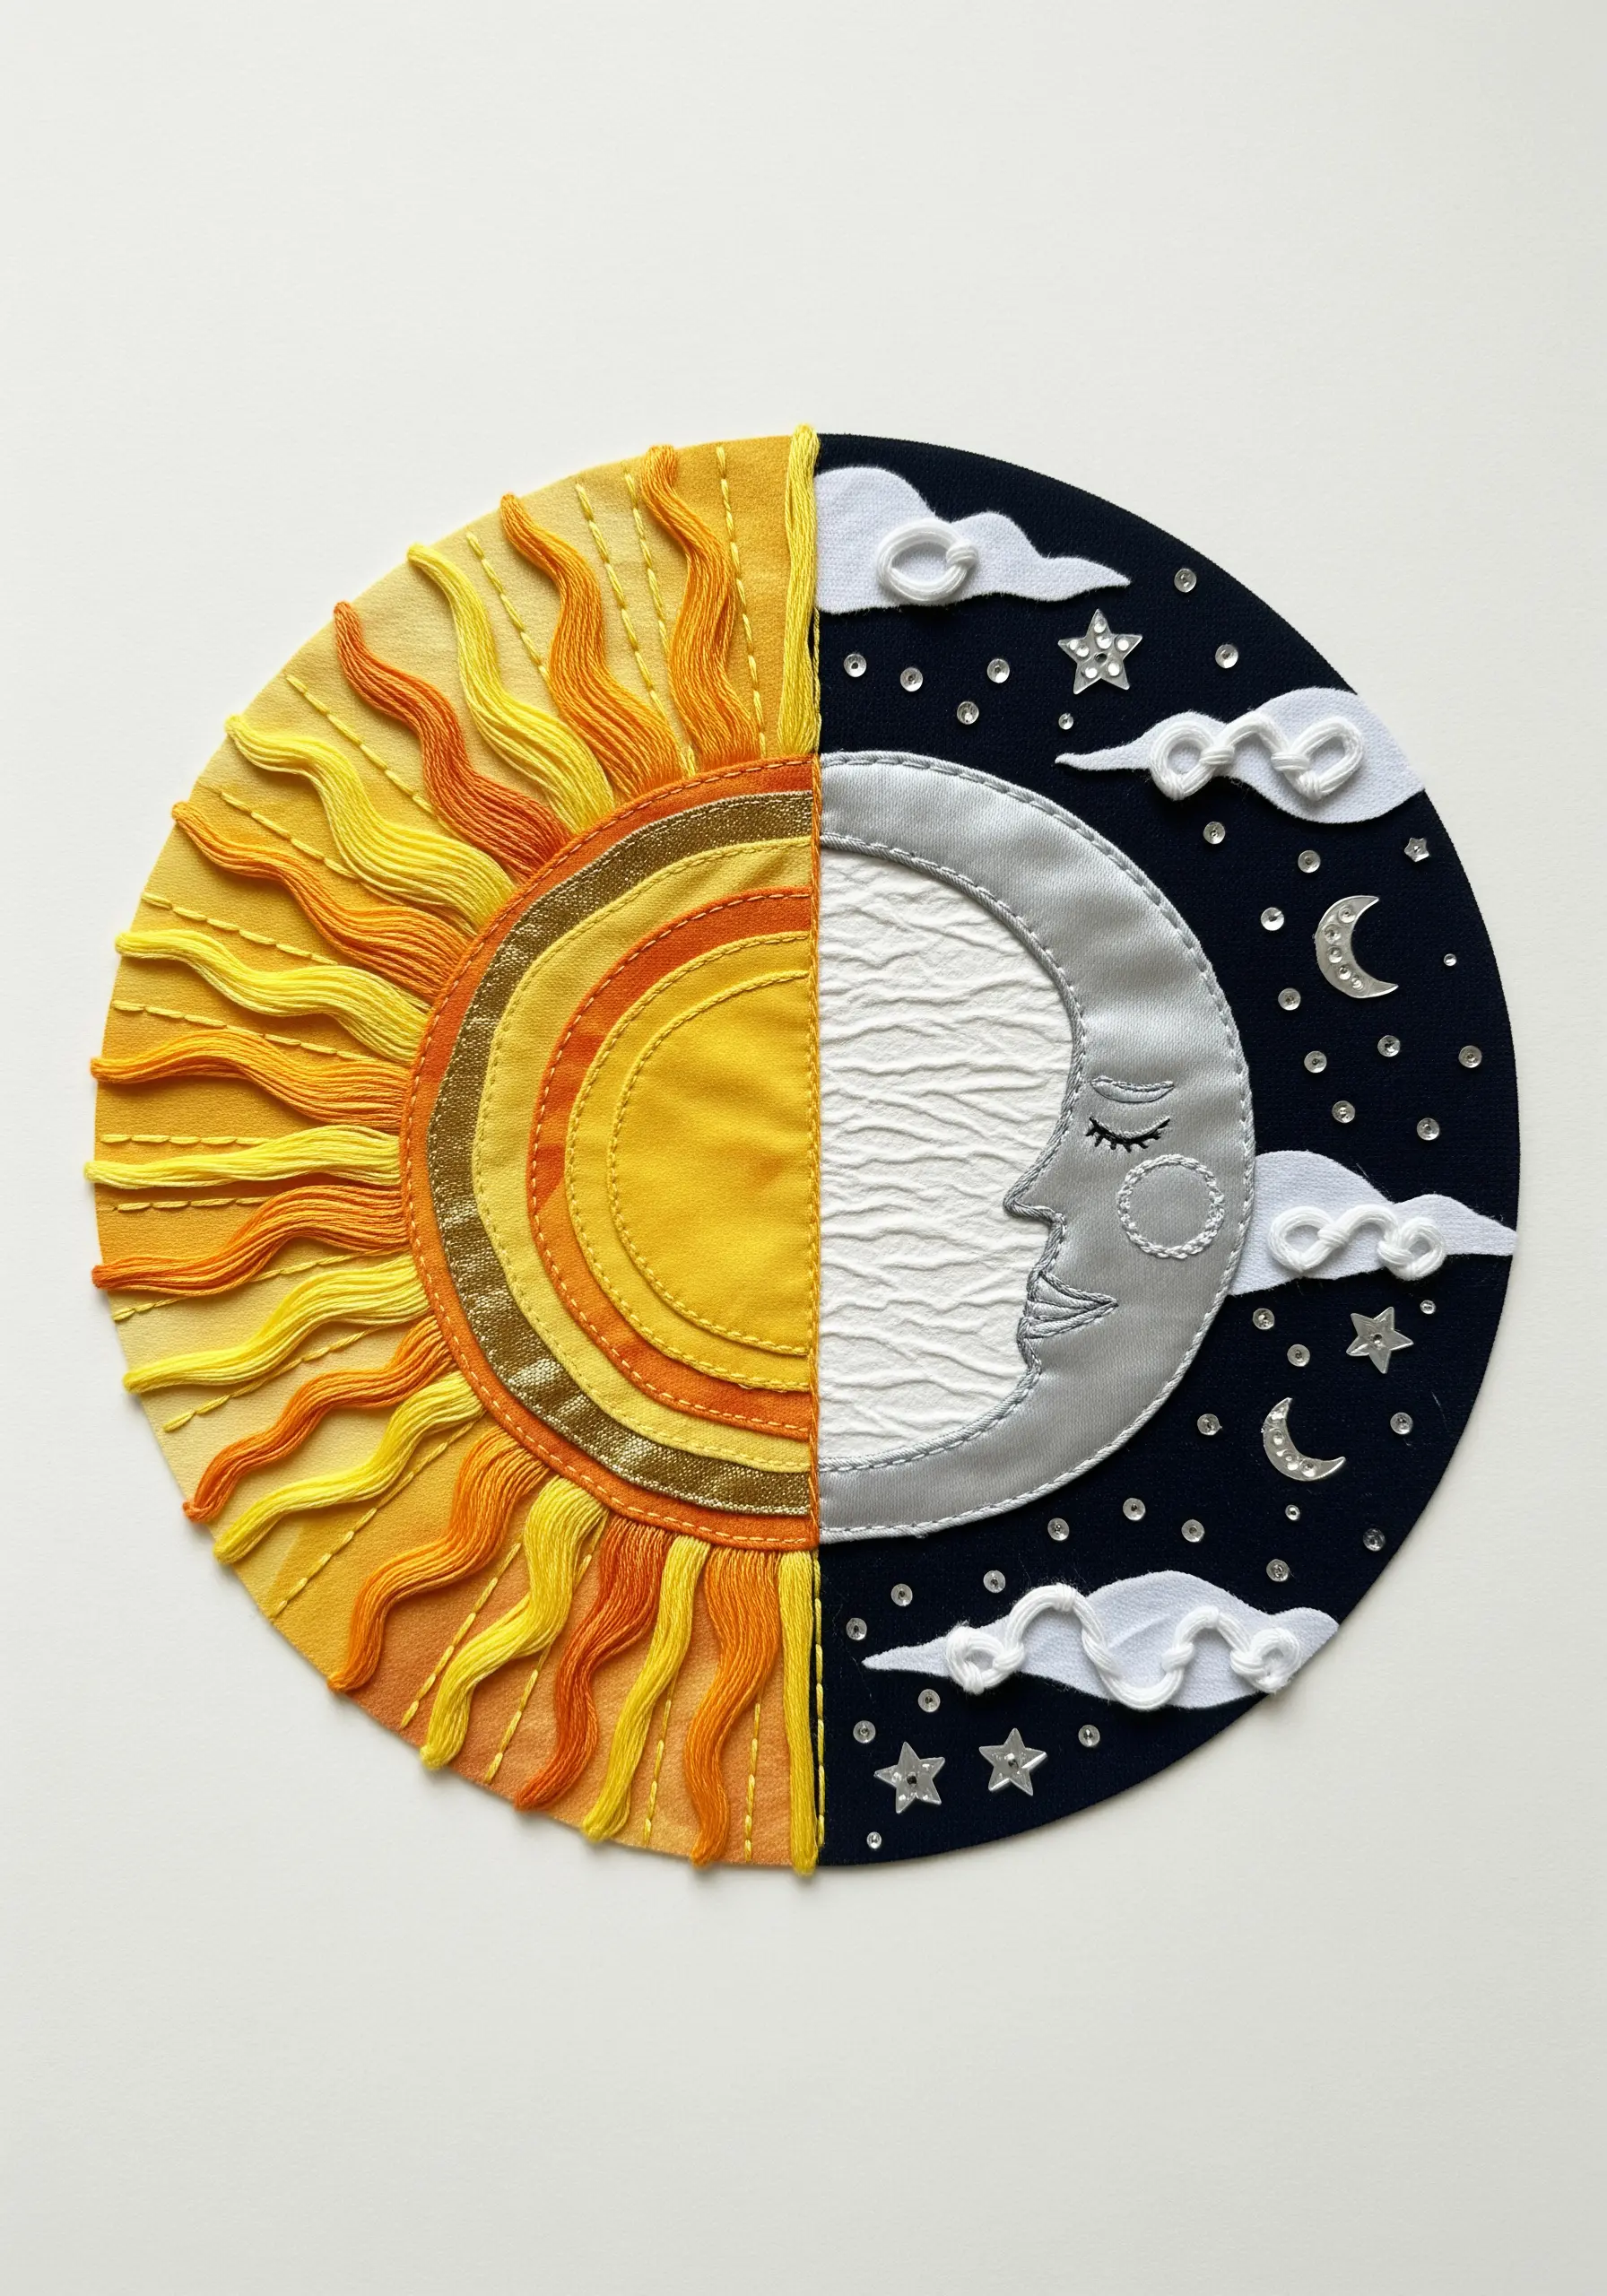
Create a striking celestial design by blending the flatness of appliqué with the texture of dense stitchwork.
Use fabric appliqué for the sun’s core and the moon’s face to achieve clean shapes and smooth surfaces. For the sun’s rays, use a mix of long-and-short stitch and satin stitch with variegated thread to create a fiery, energetic texture.
This contrast between the smooth fabric and the raised, vibrant threads adds visual energy and sophistication.
It’s a perfect technique to explore when making celestial micro-embroidery ideas that balance bold shapes with intricate details.
13. Use Thread as a Sketching Tool for Architectural Details
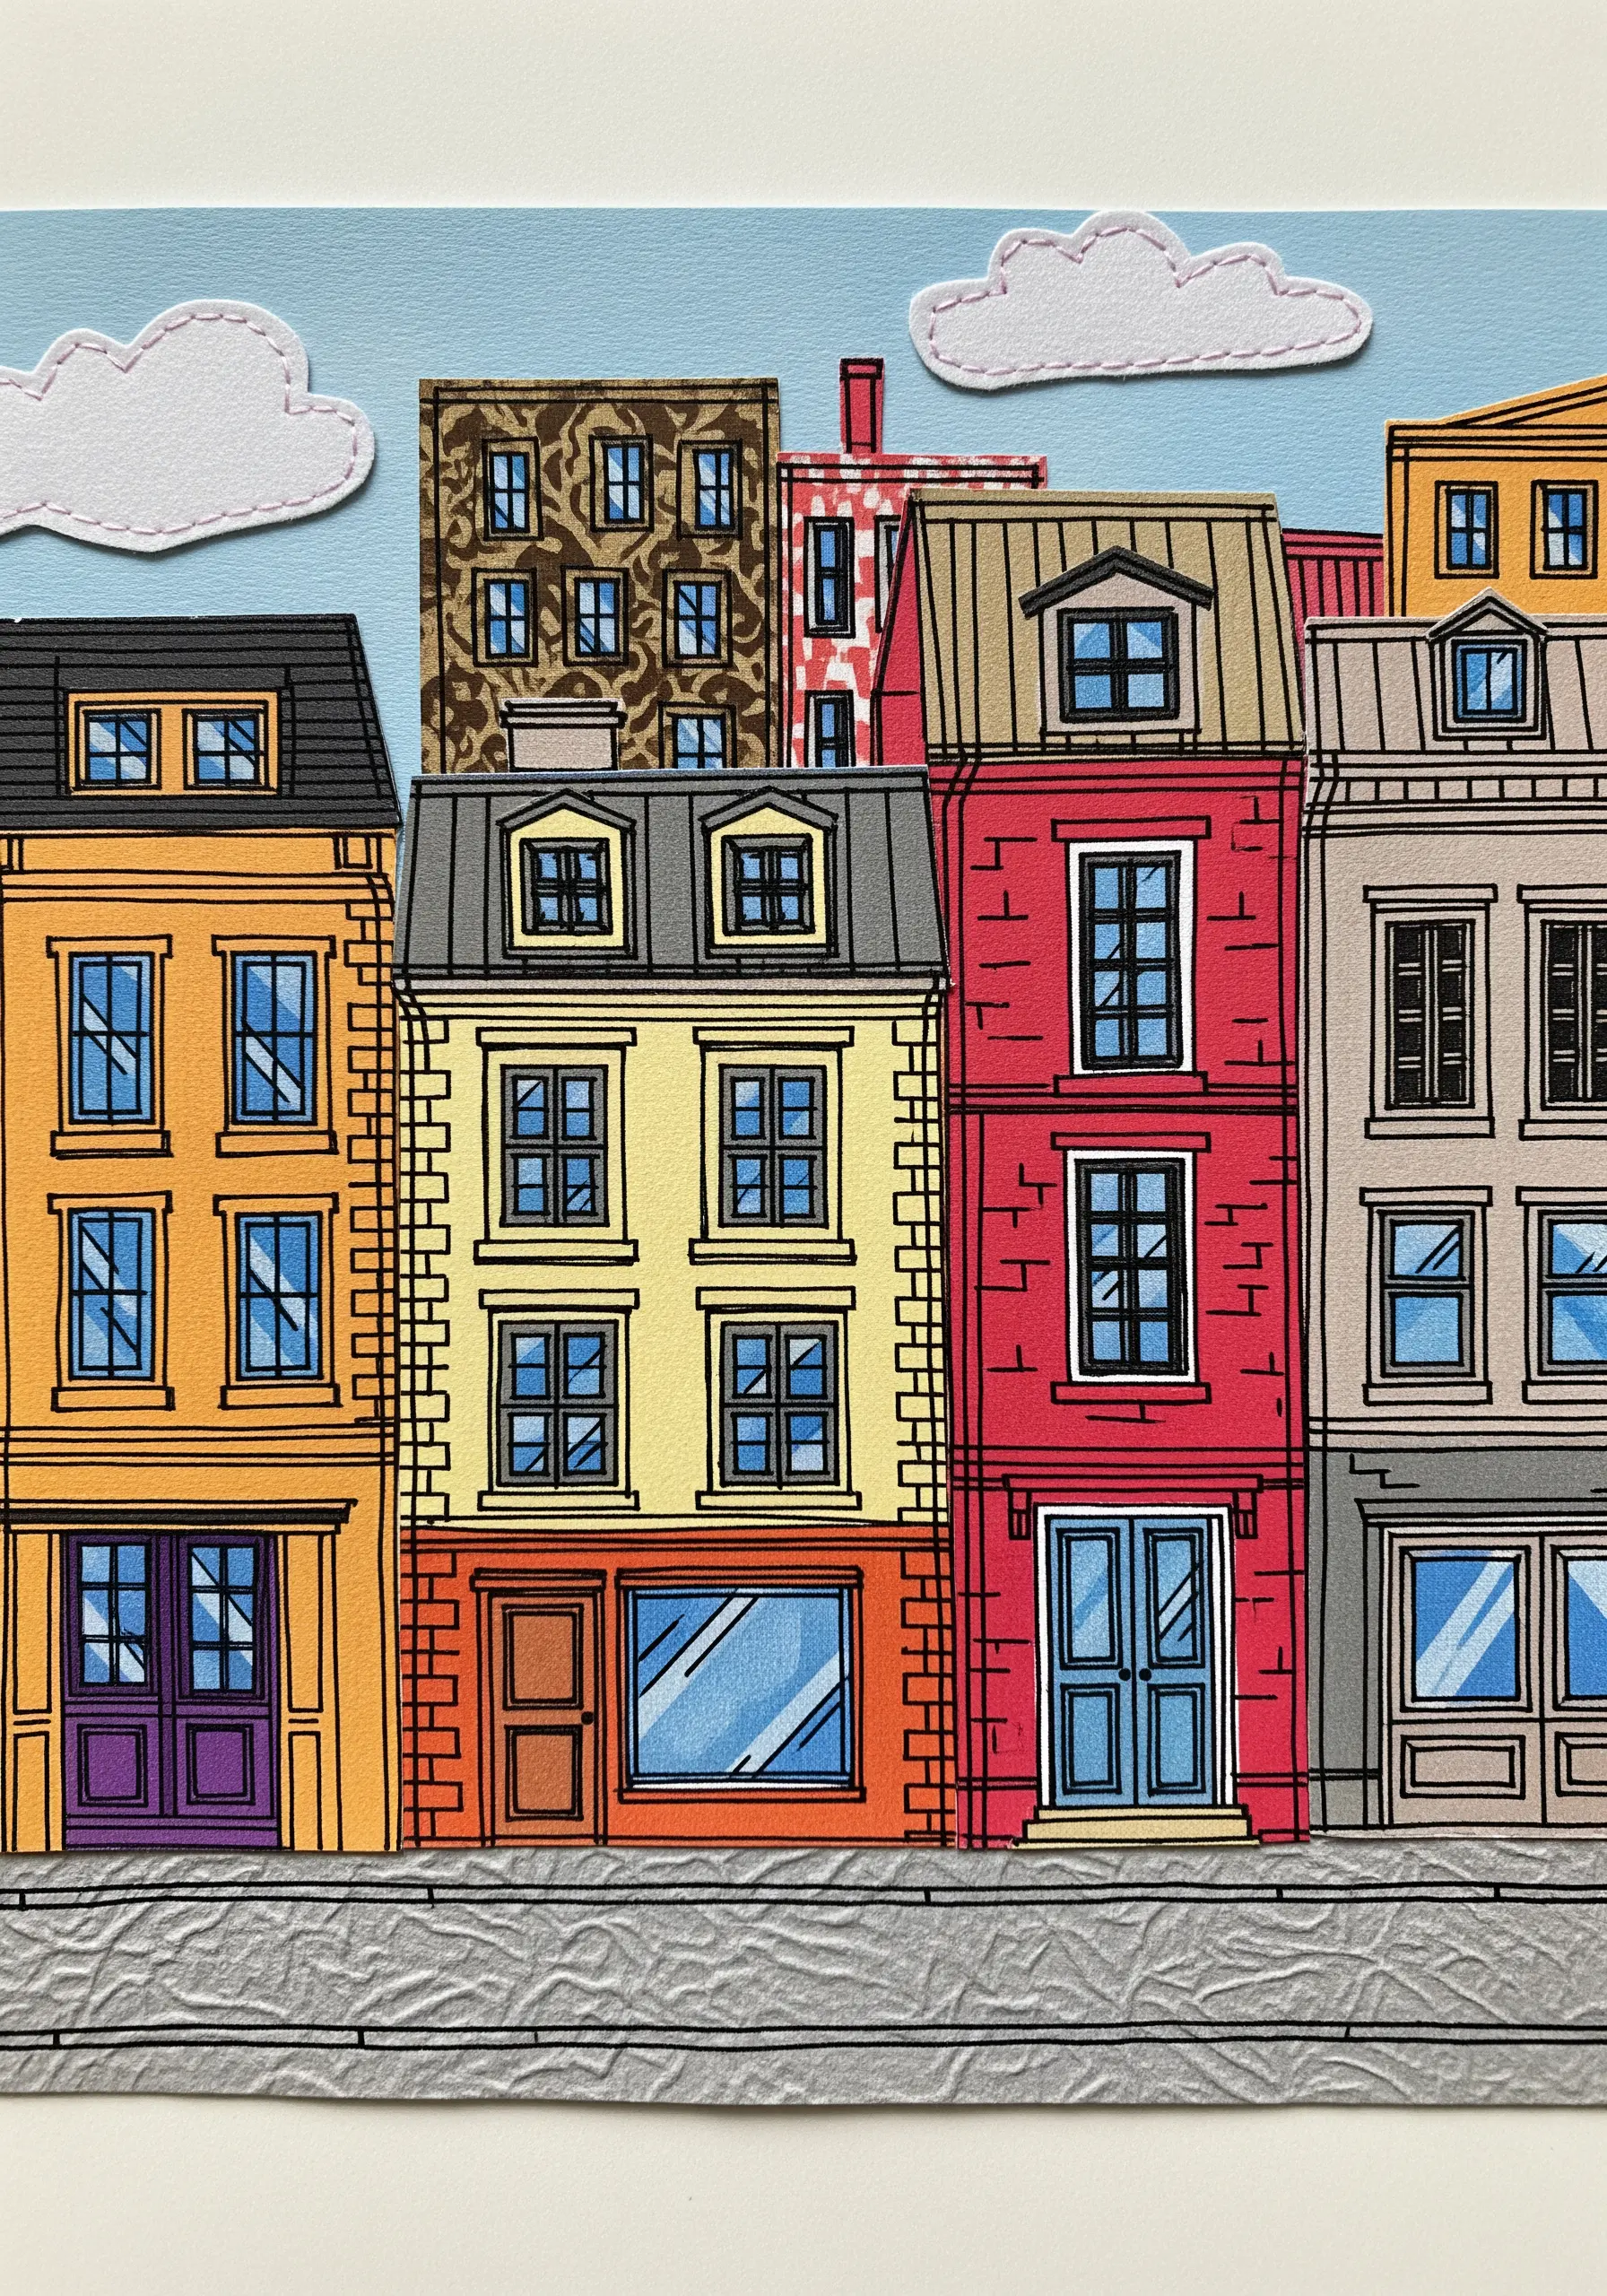
Instead of aiming for perfect, filled-in shapes, use a simple backstitch to create architectural outlines over your paper or fabric collage.
Think of your needle and thread as a fine-tipped pen. Use a loose, expressive backstitch to trace the lines of windows, doors, and rooflines, allowing the lines to feel fluid and hand-drawn.
This technique adds a charming, illustrative quality and unifies the different collaged pieces with a single, cohesive style.
It allows you to capture the magic of imperfection, turning a simple cityscape into a work of art.
14. Build a 3D Meadow with Embellishments and Stitches

Create a truly immersive landscape by combining fabric collage with buttons, beads, and dimensional stitches.
Use torn fabric strips for rolling hills, then populate your meadow with flowers made from buttons, French knots, and woven wheel stitches. Secure tiny fabric or felt flowers with a bead in the center for added dimension.
Introduce moss or textured yarn for grassy patches to create a rich, tactile scene that invites touch.
These are the kinds of high-texture fabric collage embroidery projects that become stunning, multi-layered shadowbox art.
15. Create an Underwater Scene with Tulle and Netting
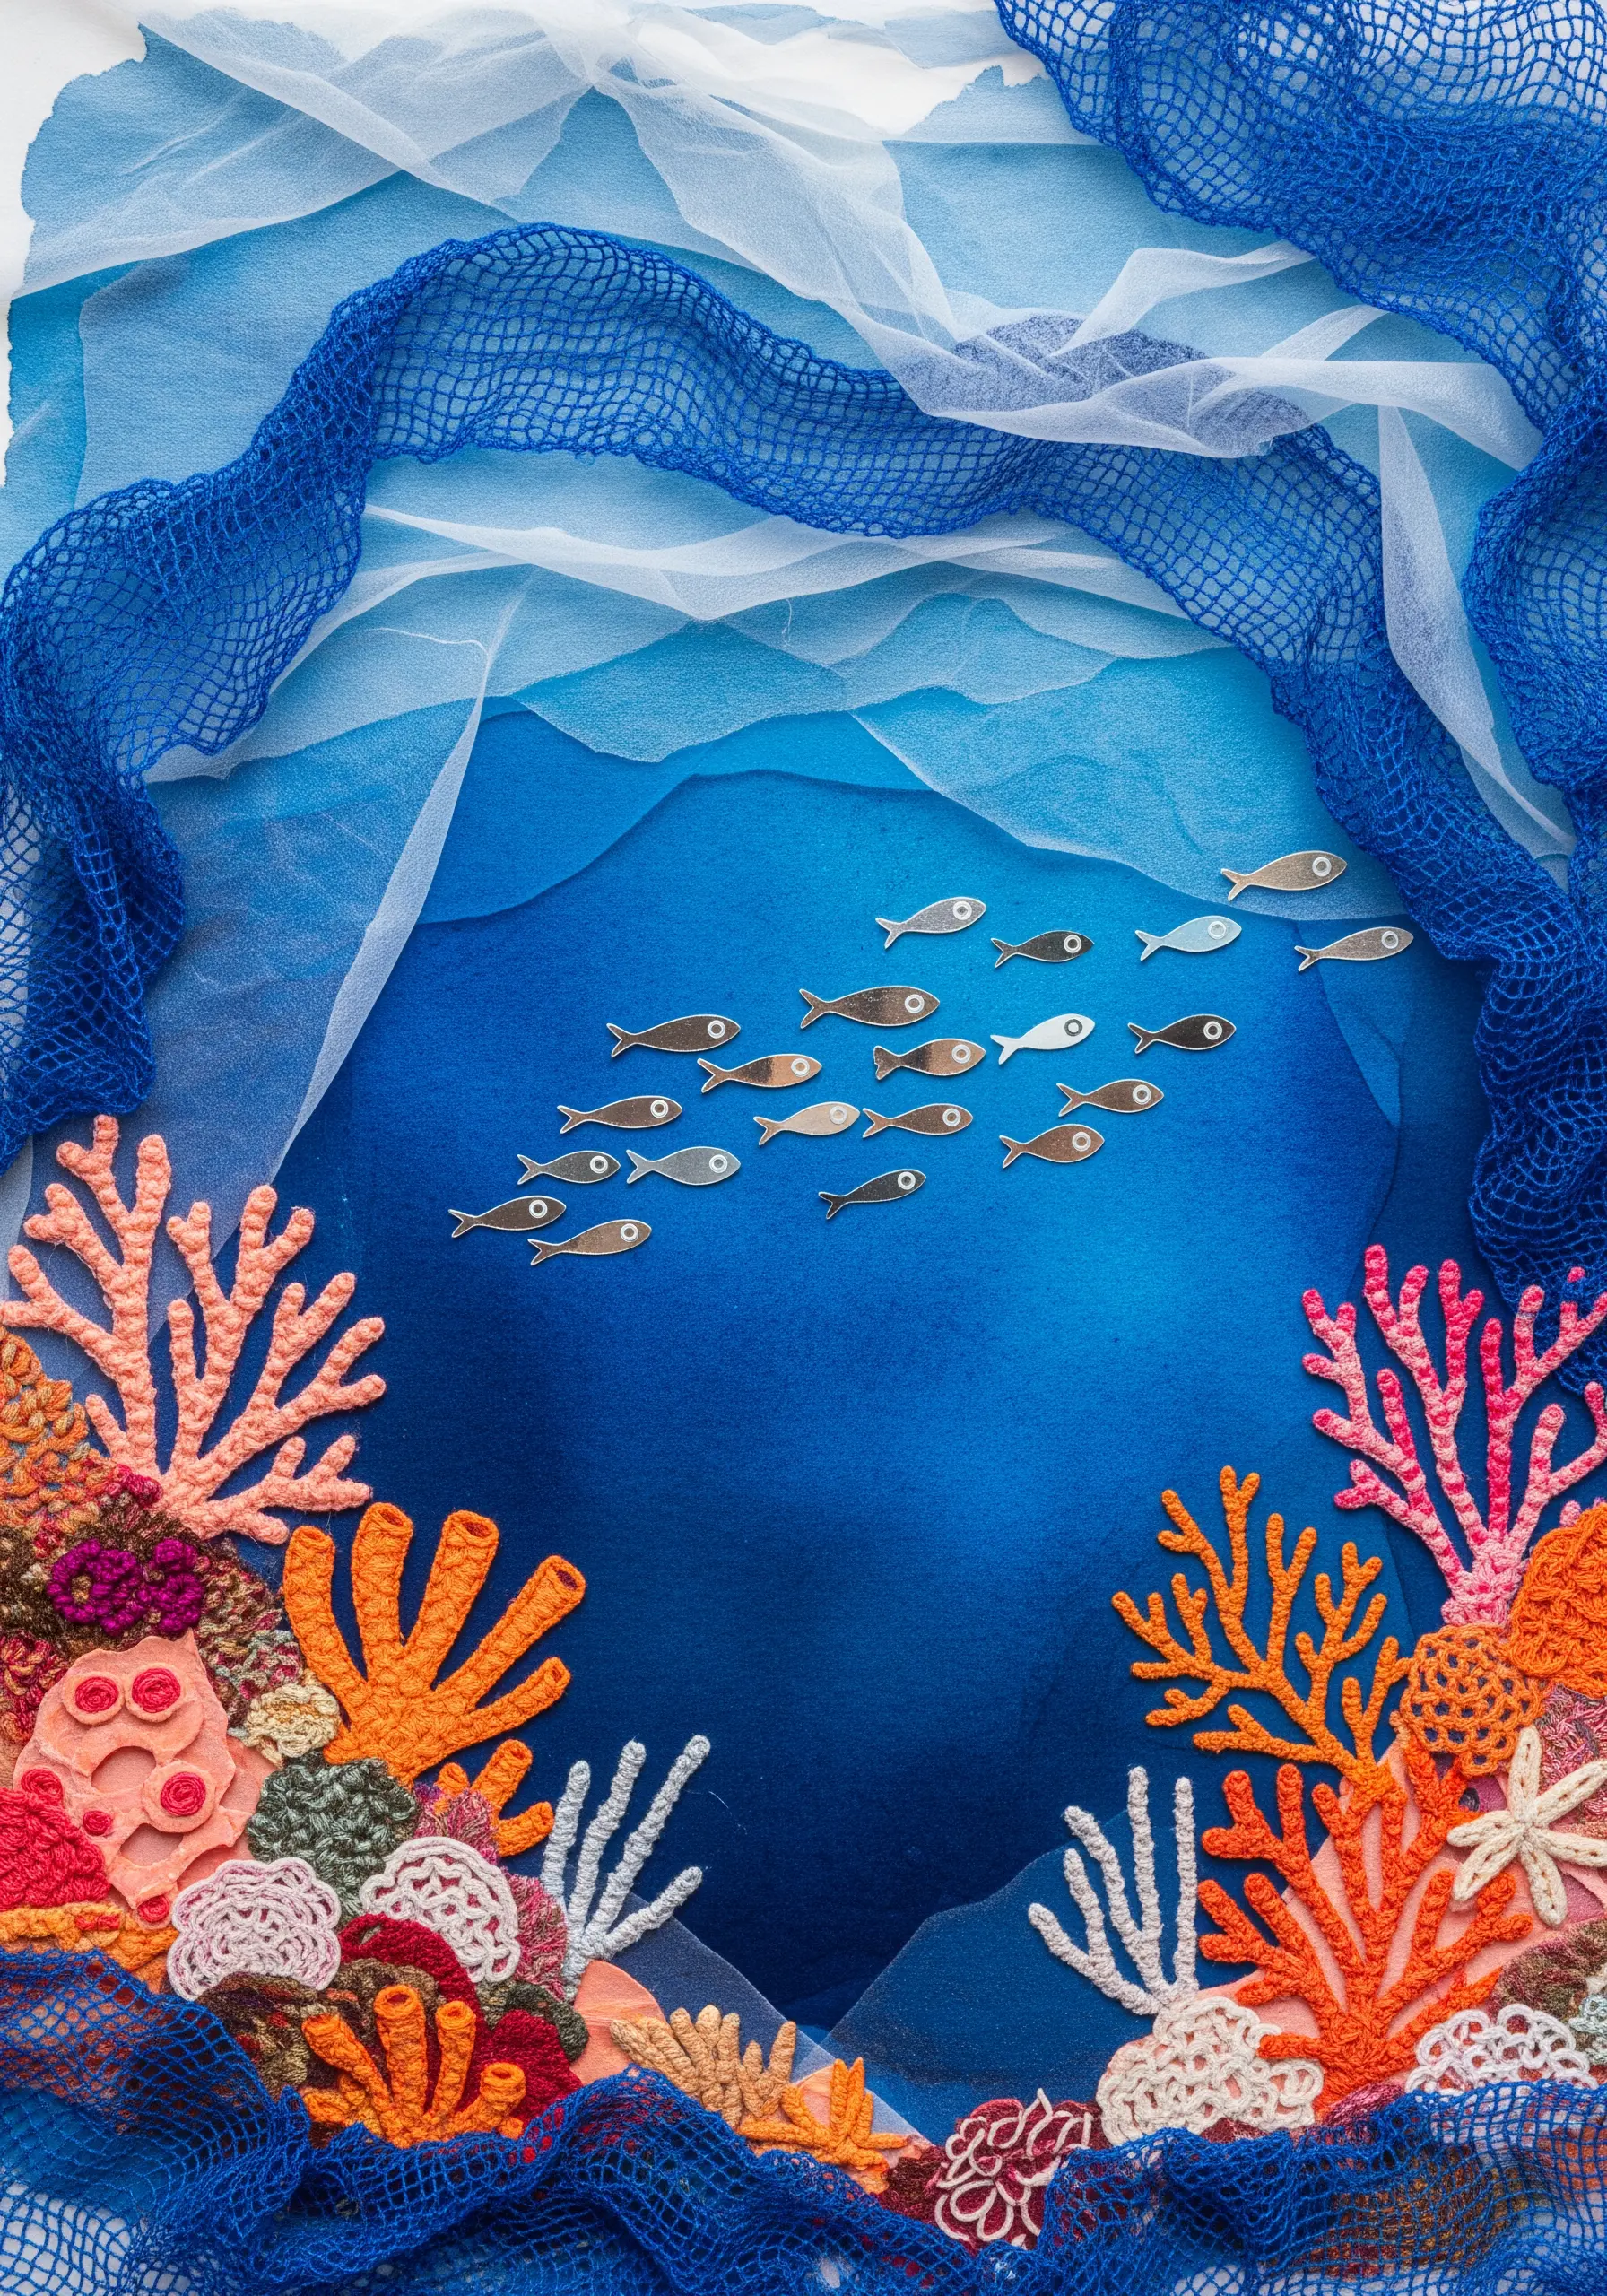
Suggest the ethereal quality of water by layering sheer fabrics like tulle and netting over your background.
Drape and secure the fabrics to mimic the movement of currents. This creates a soft, diffused effect that instantly reads as aquatic.
For the coral reef, use a combination of crochet elements, turkey work, and French knots to build up a highly textured foreground.
This play between sheer layers and dense texture makes for incredibly effective stunning embroidered wall hangings with a sense of deep-sea mystery.
16. Anchor Natural Elements with a Single Line of Thread
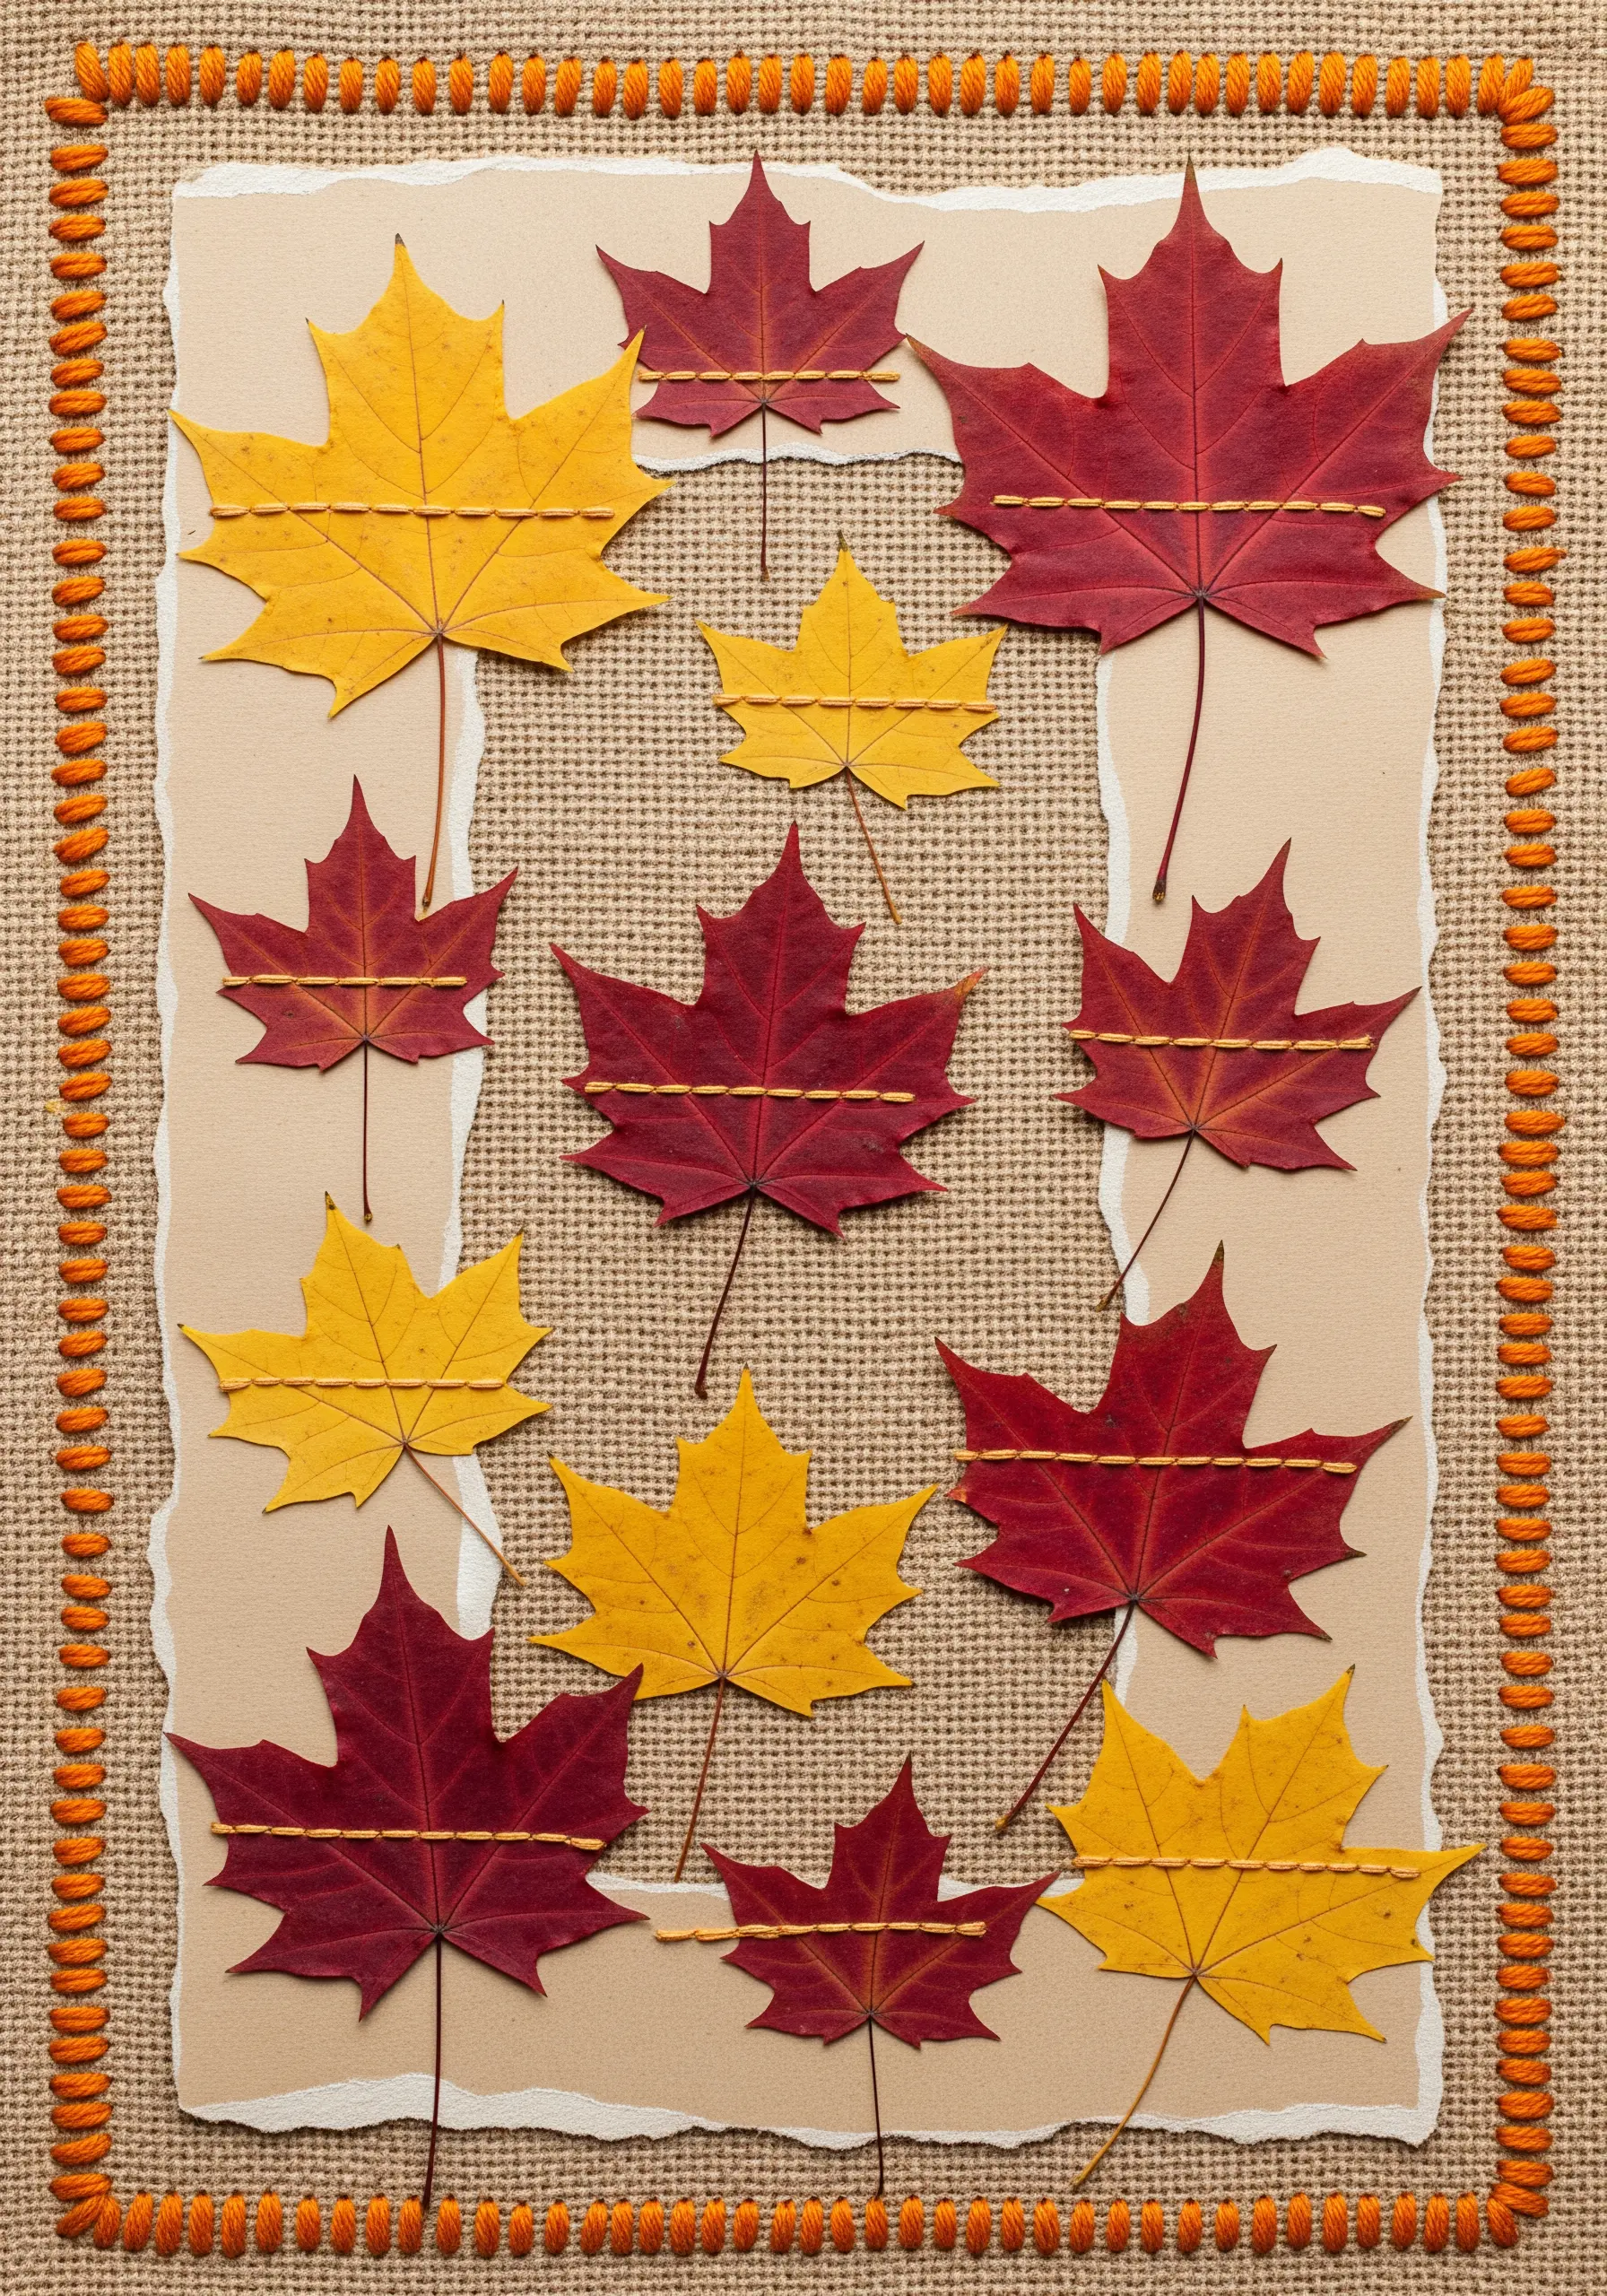
Incorporate delicate natural objects like pressed leaves directly into your work by stitching over them.
Arrange your leaves on a paper or fabric background and use a single, bold line of running stitch or backstitch down the center of each leaf to secure it.
Choose a thread color that either contrasts or complements the leaves to make the stitch an intentional design element.
This simple technique is a beautiful way to create embroidery projects that use pressed leaves as stencil guides or as the final piece itself.
17. Embellish Paper Mandalas with Thread and Sequins
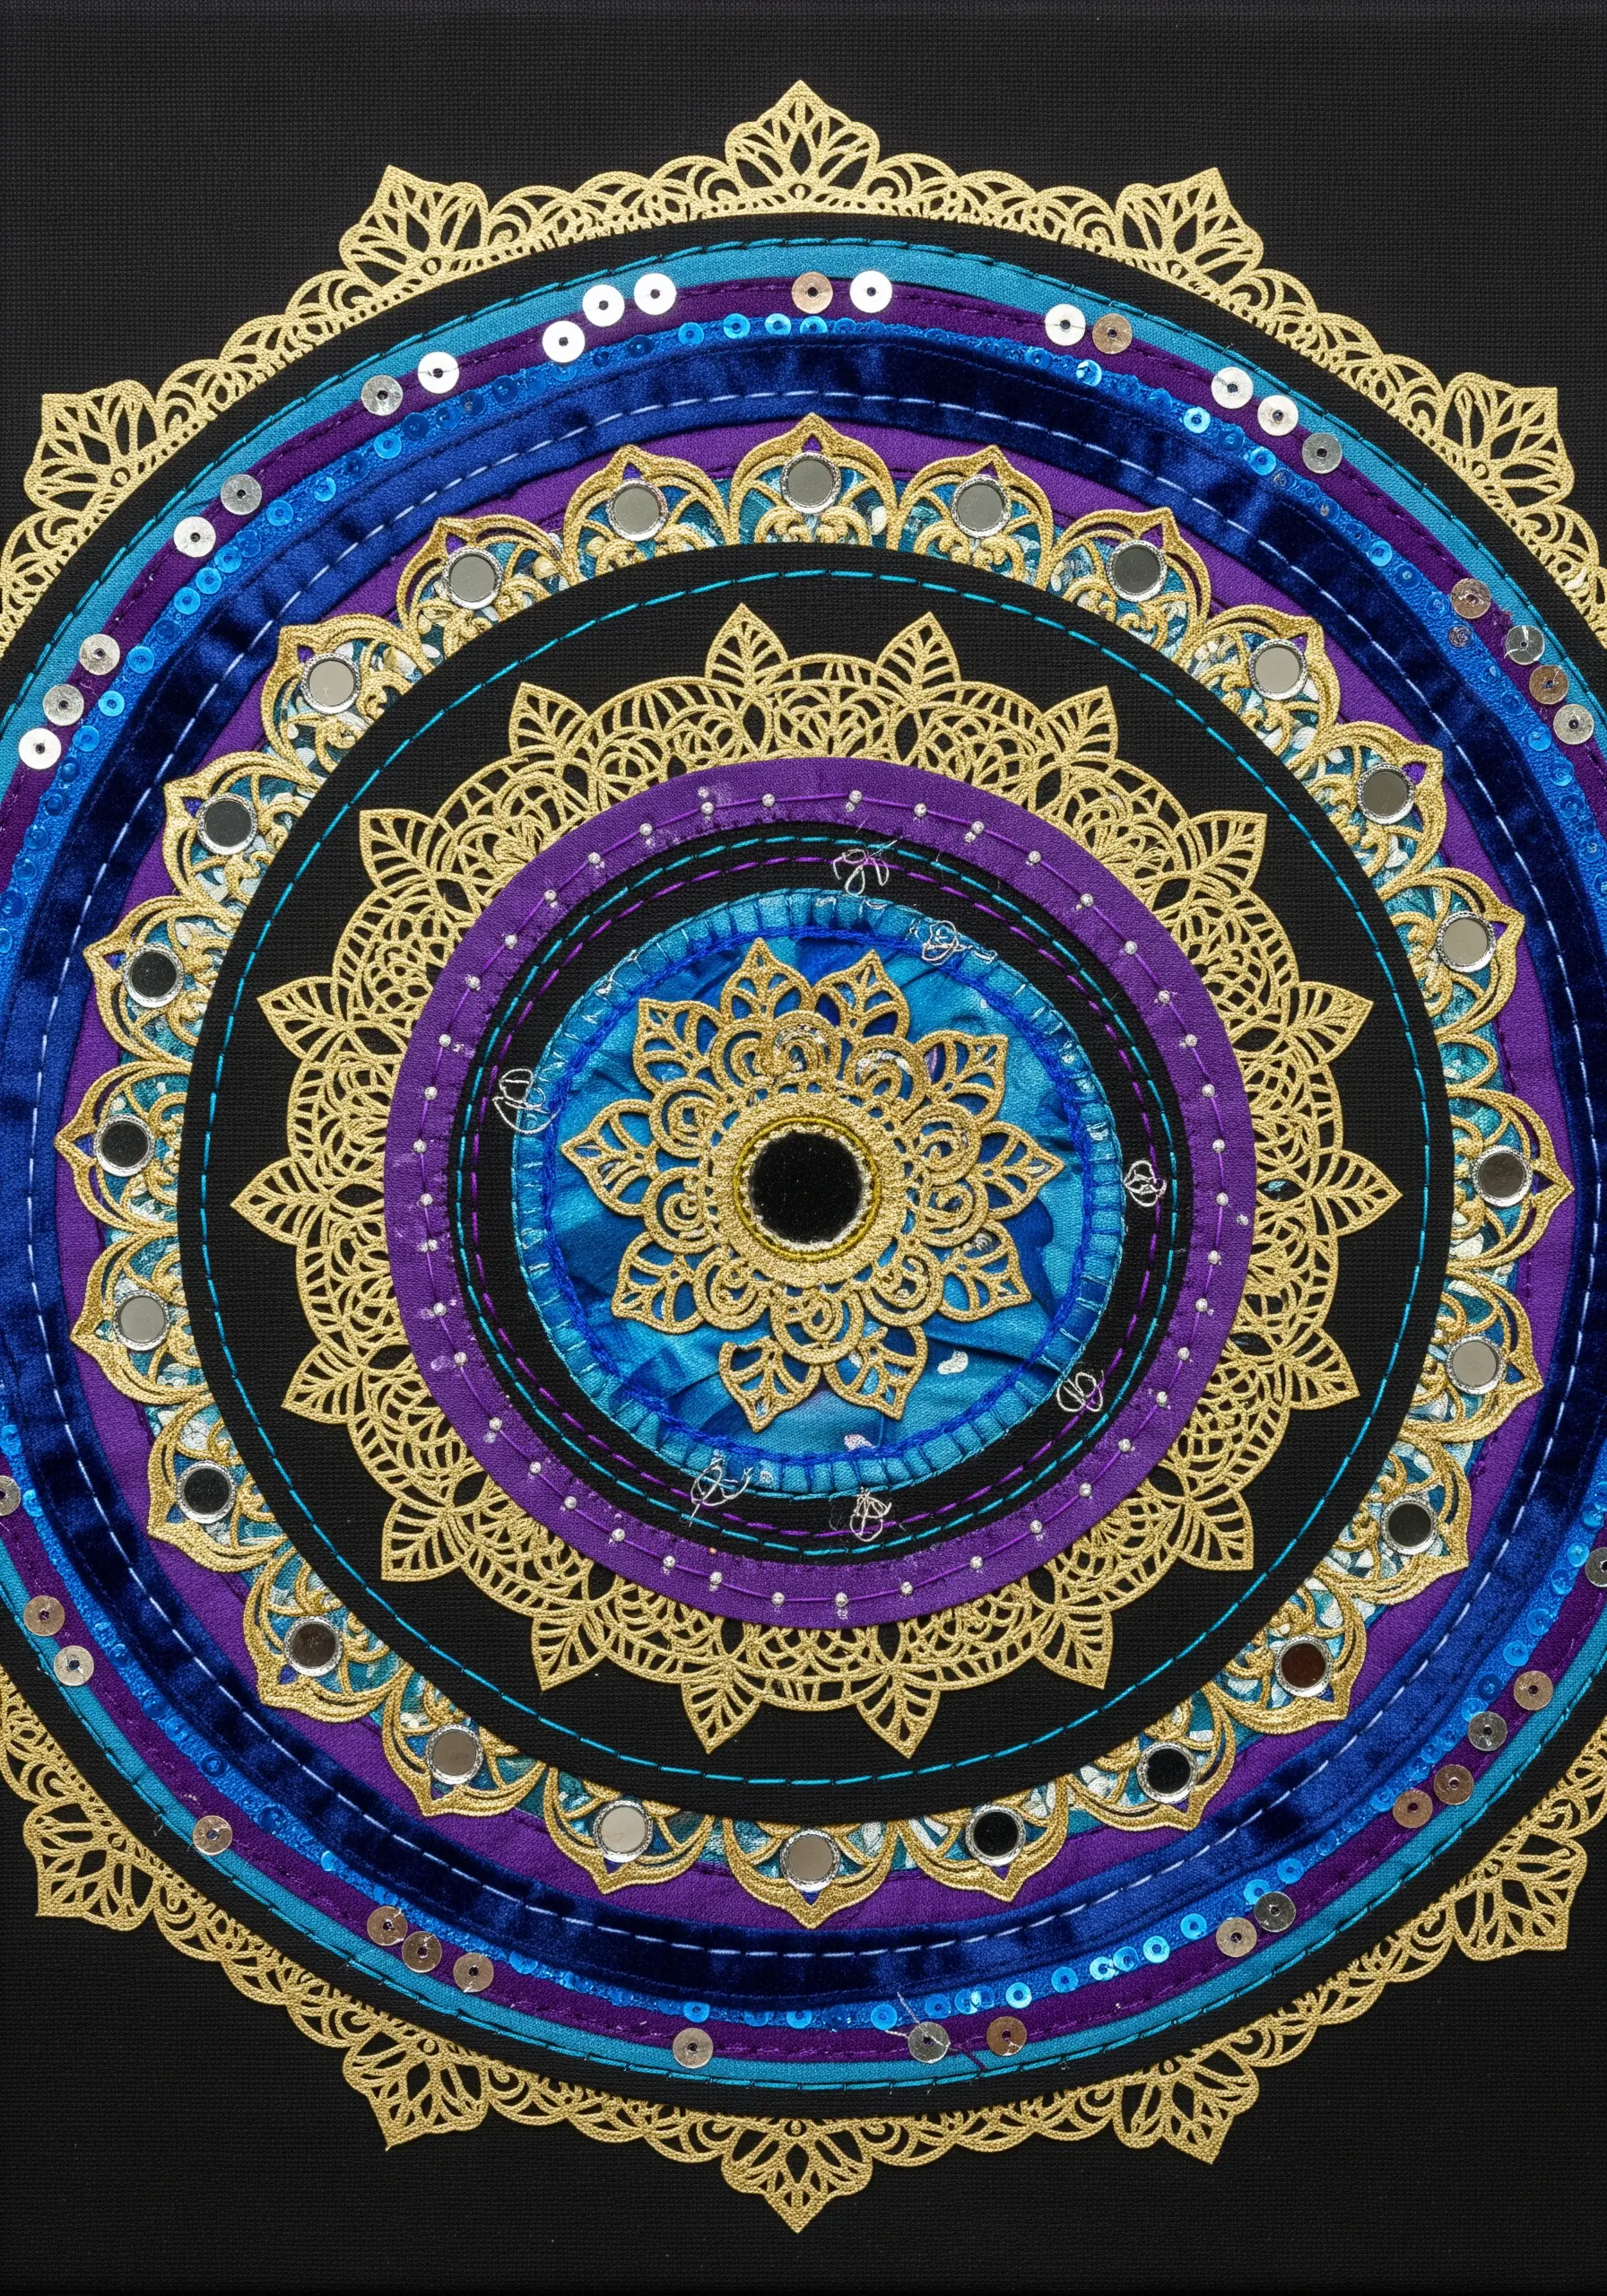
Combine the precision of a laser-cut paper mandala with the tactile richness of fabric and embellishments.
Layer strips of velvet, silk, and cotton behind the paper cutouts to add color and texture. Then, use fine metallic thread to anchor the paper to the fabric, adding sequins or small mirrors (shisha) for a touch of sparkle.
This transforms a flat paper design into a multi-layered, opulent piece.
This technique is perfect for creating embroidered mandala wall art designs that feel both intricate and luxurious.
18. Add a Homespun Touch with Stitched Borders
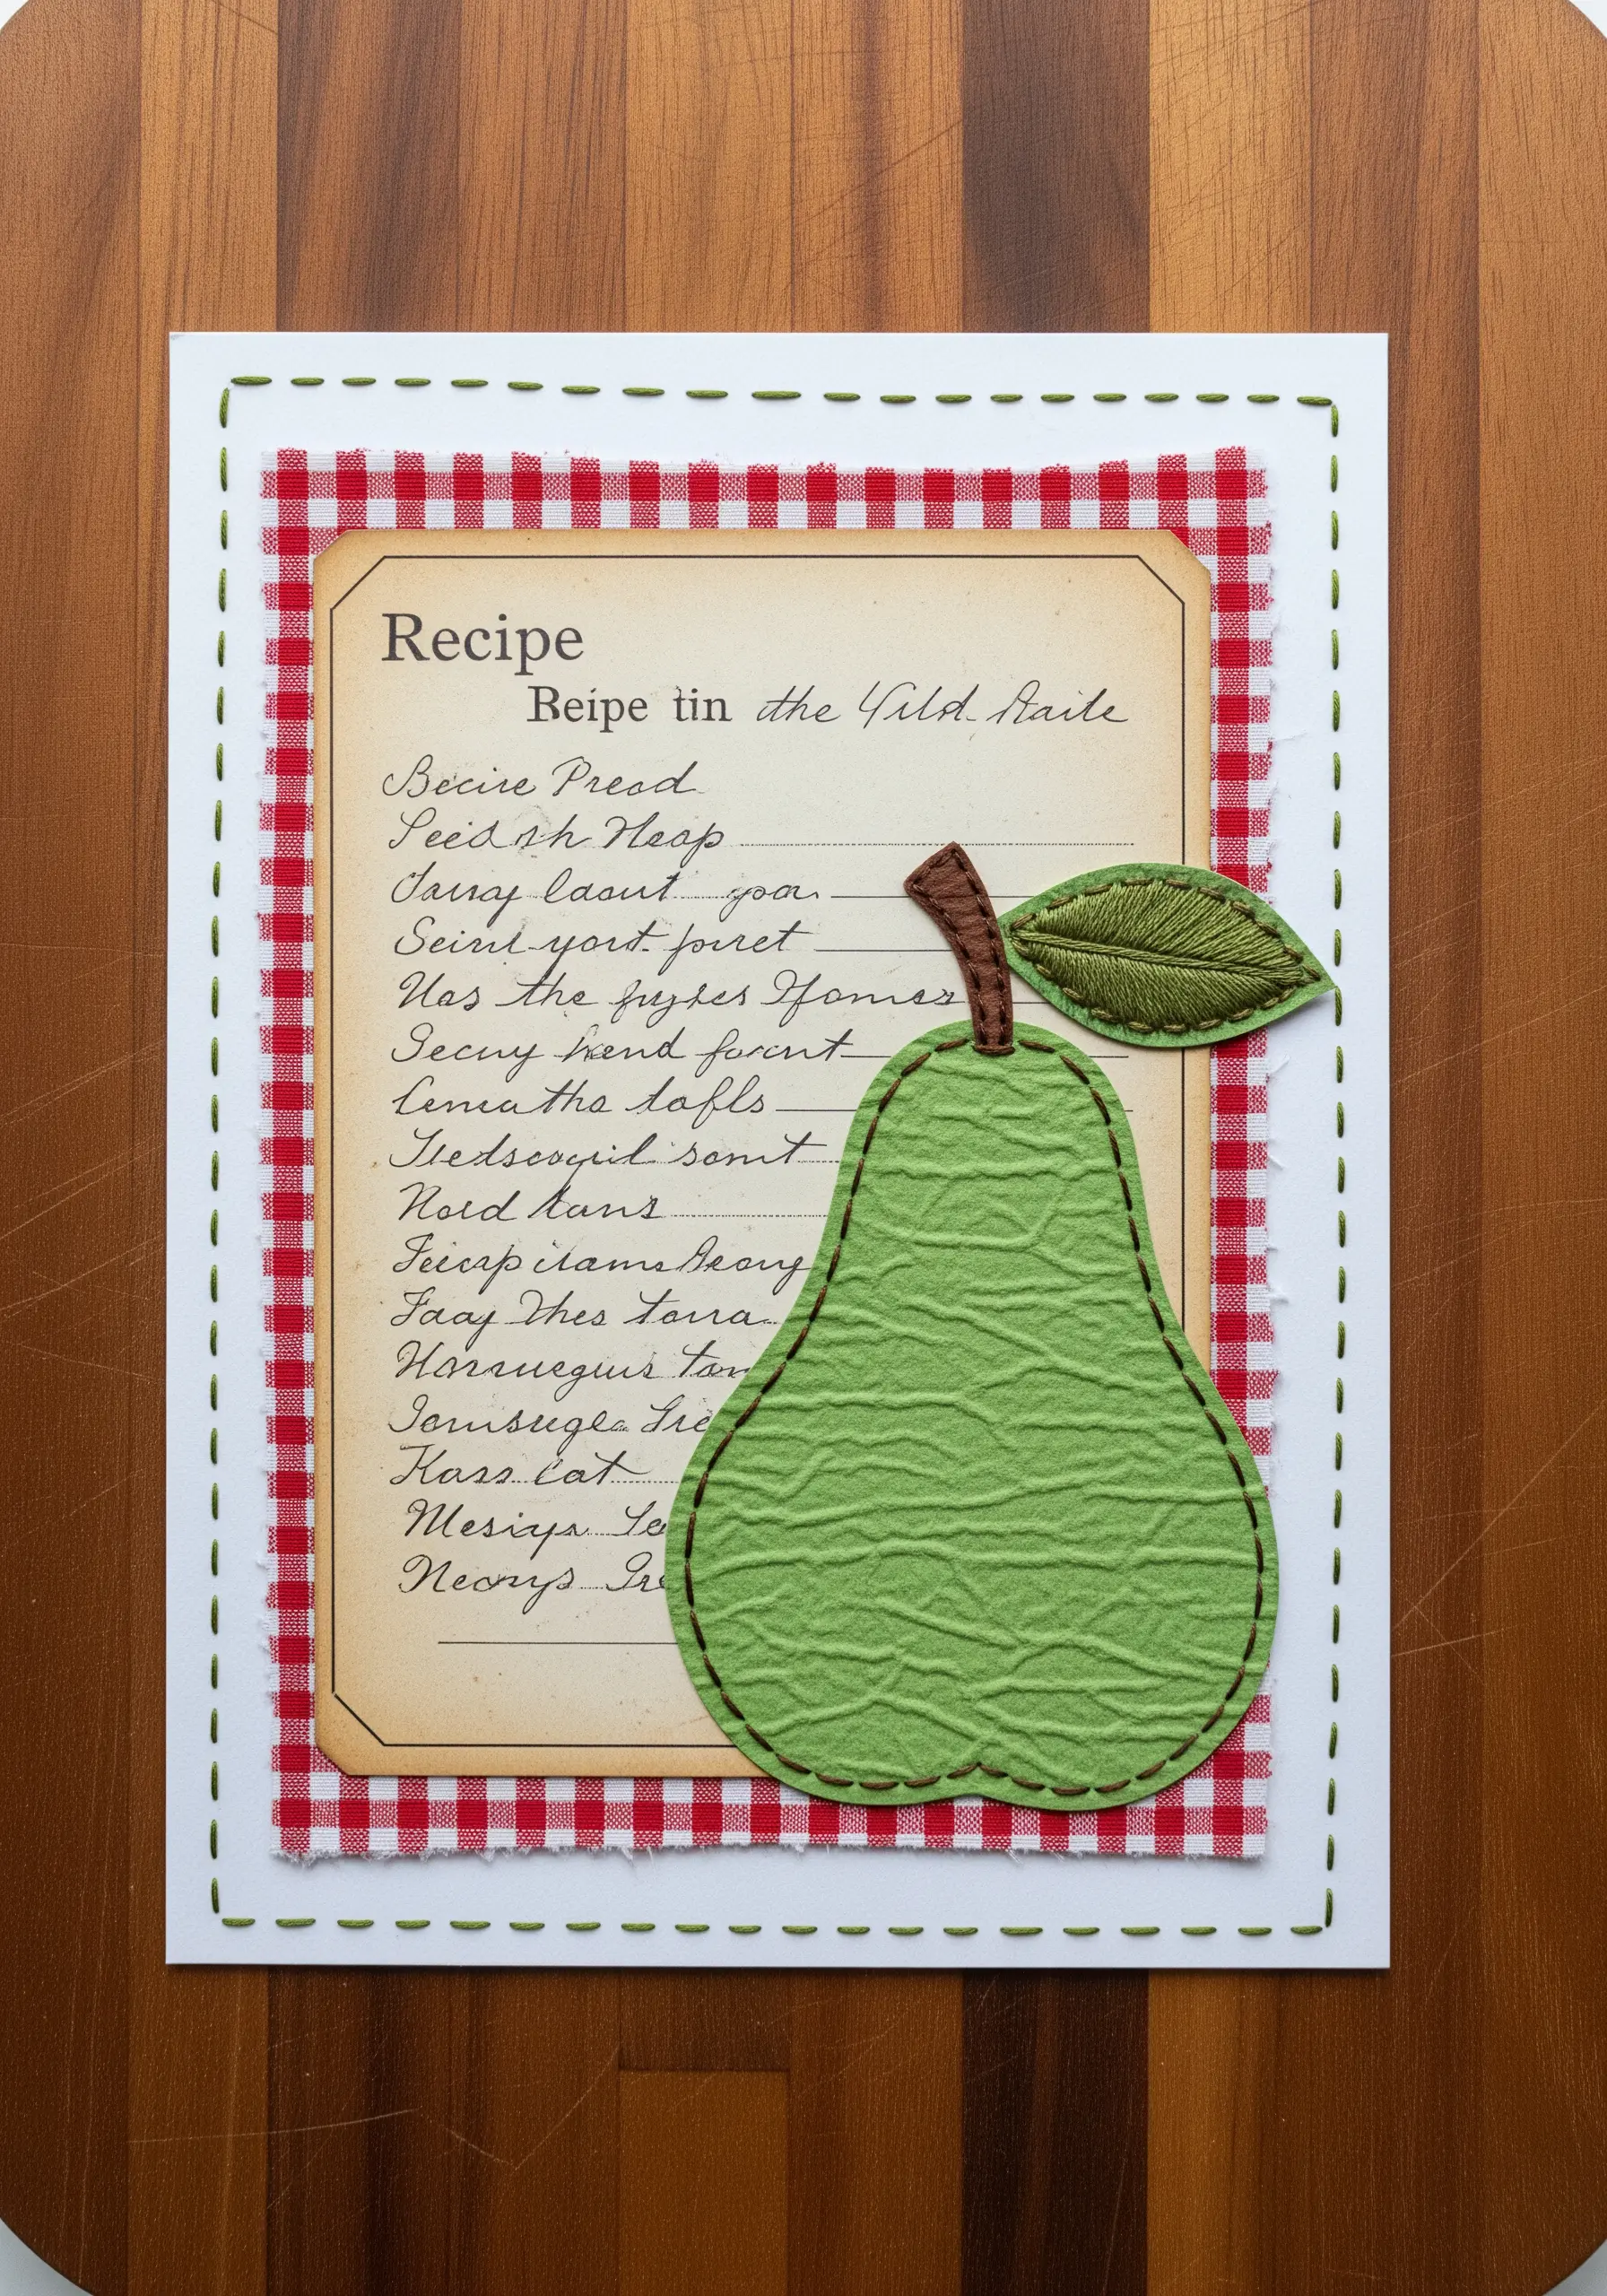
Give your paper crafts a warm, handmade feel by adding a simple stitched border.
Layer your central element, like a recipe card, over a patterned fabric like gingham. Then, use a basic running stitch around the edge of both the paper and the fabric background.
This small detail visually connects the different materials and softens the hard edges of the paper, creating a charming, cohesive look.
It’s a simple way to elevate cute dessert tea theme table linen embroidery motifs into finished art pieces.
19. Etch Texture onto Paper with Directional Stitches
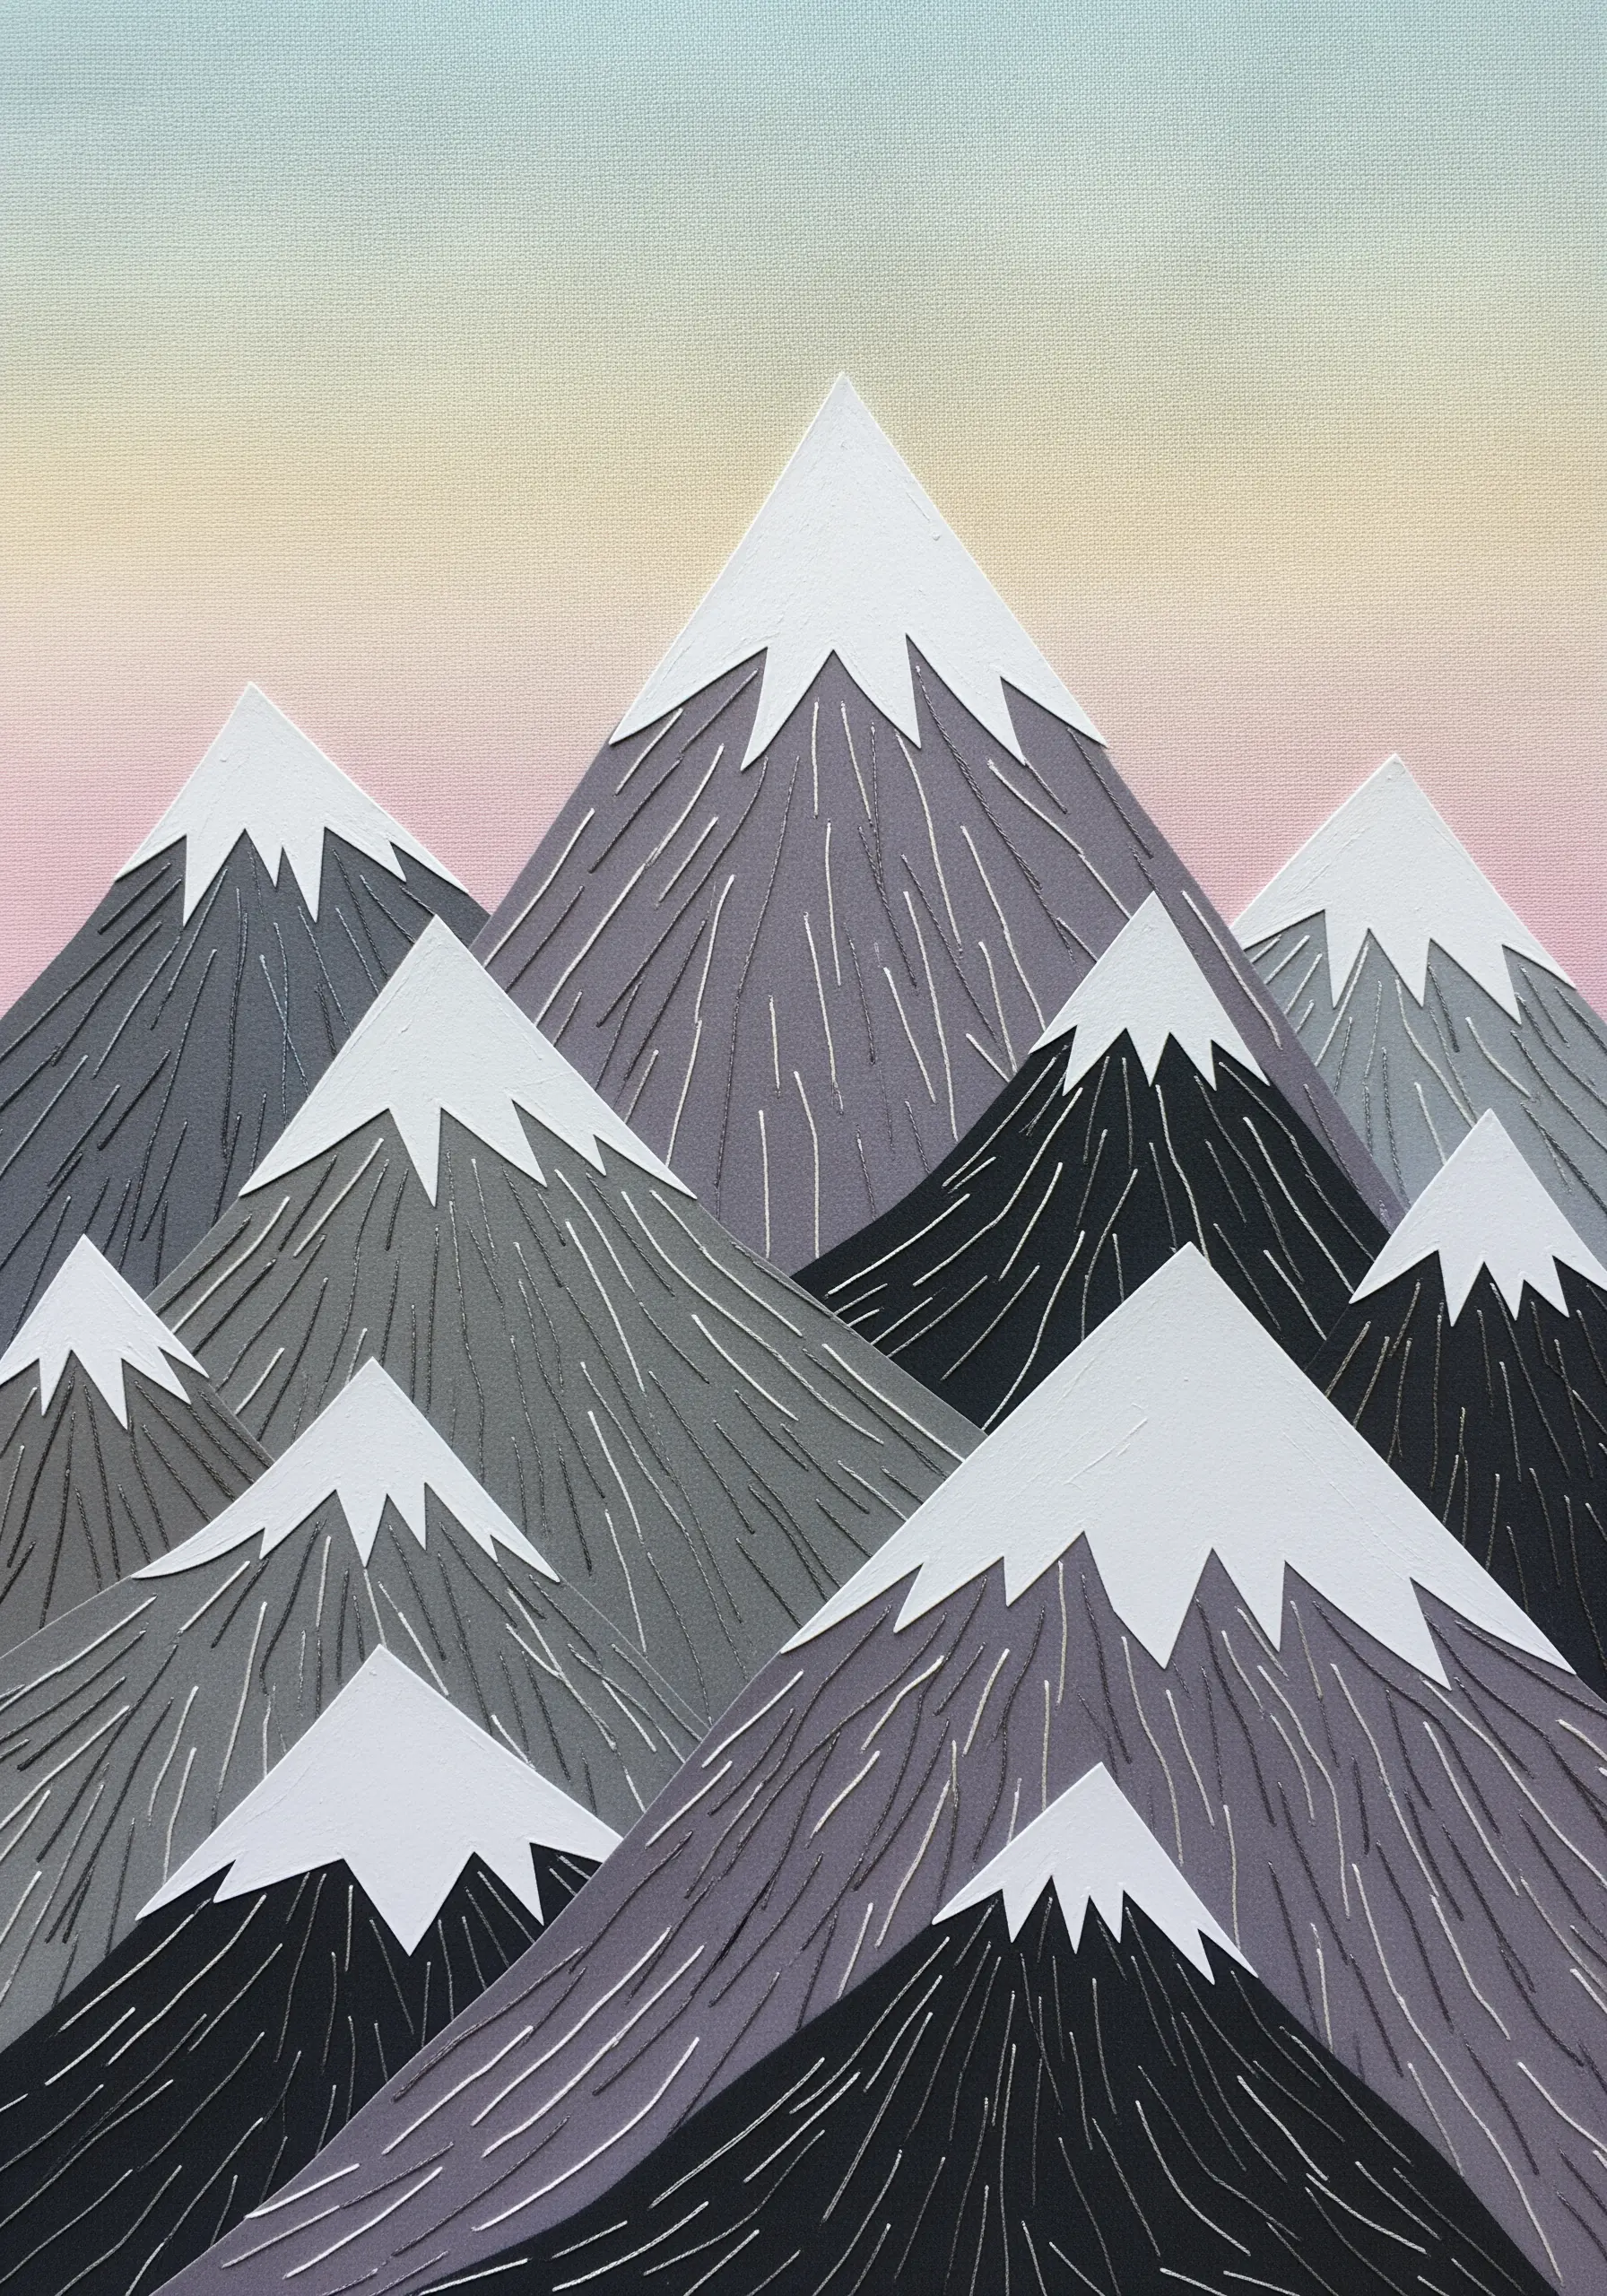
Use thread not just to decorate, but to create the illusion of texture and shadow on paper.
On a paper mountain collage, use straight stitches in varying lengths and angles to suggest rocky crevices and slopes. Don’t stitch randomly; follow the imagined contours of the mountain.
On darker paper, use lighter thread to create highlights, and on lighter paper, use darker thread to create shadows. This technique is akin to hatching in a drawing.
It’s an advanced yet accessible way to learn ways to capture nature’s textures in your next embroidery project.
20. Create a Dreamscape with Draped Fabric and Embellishments
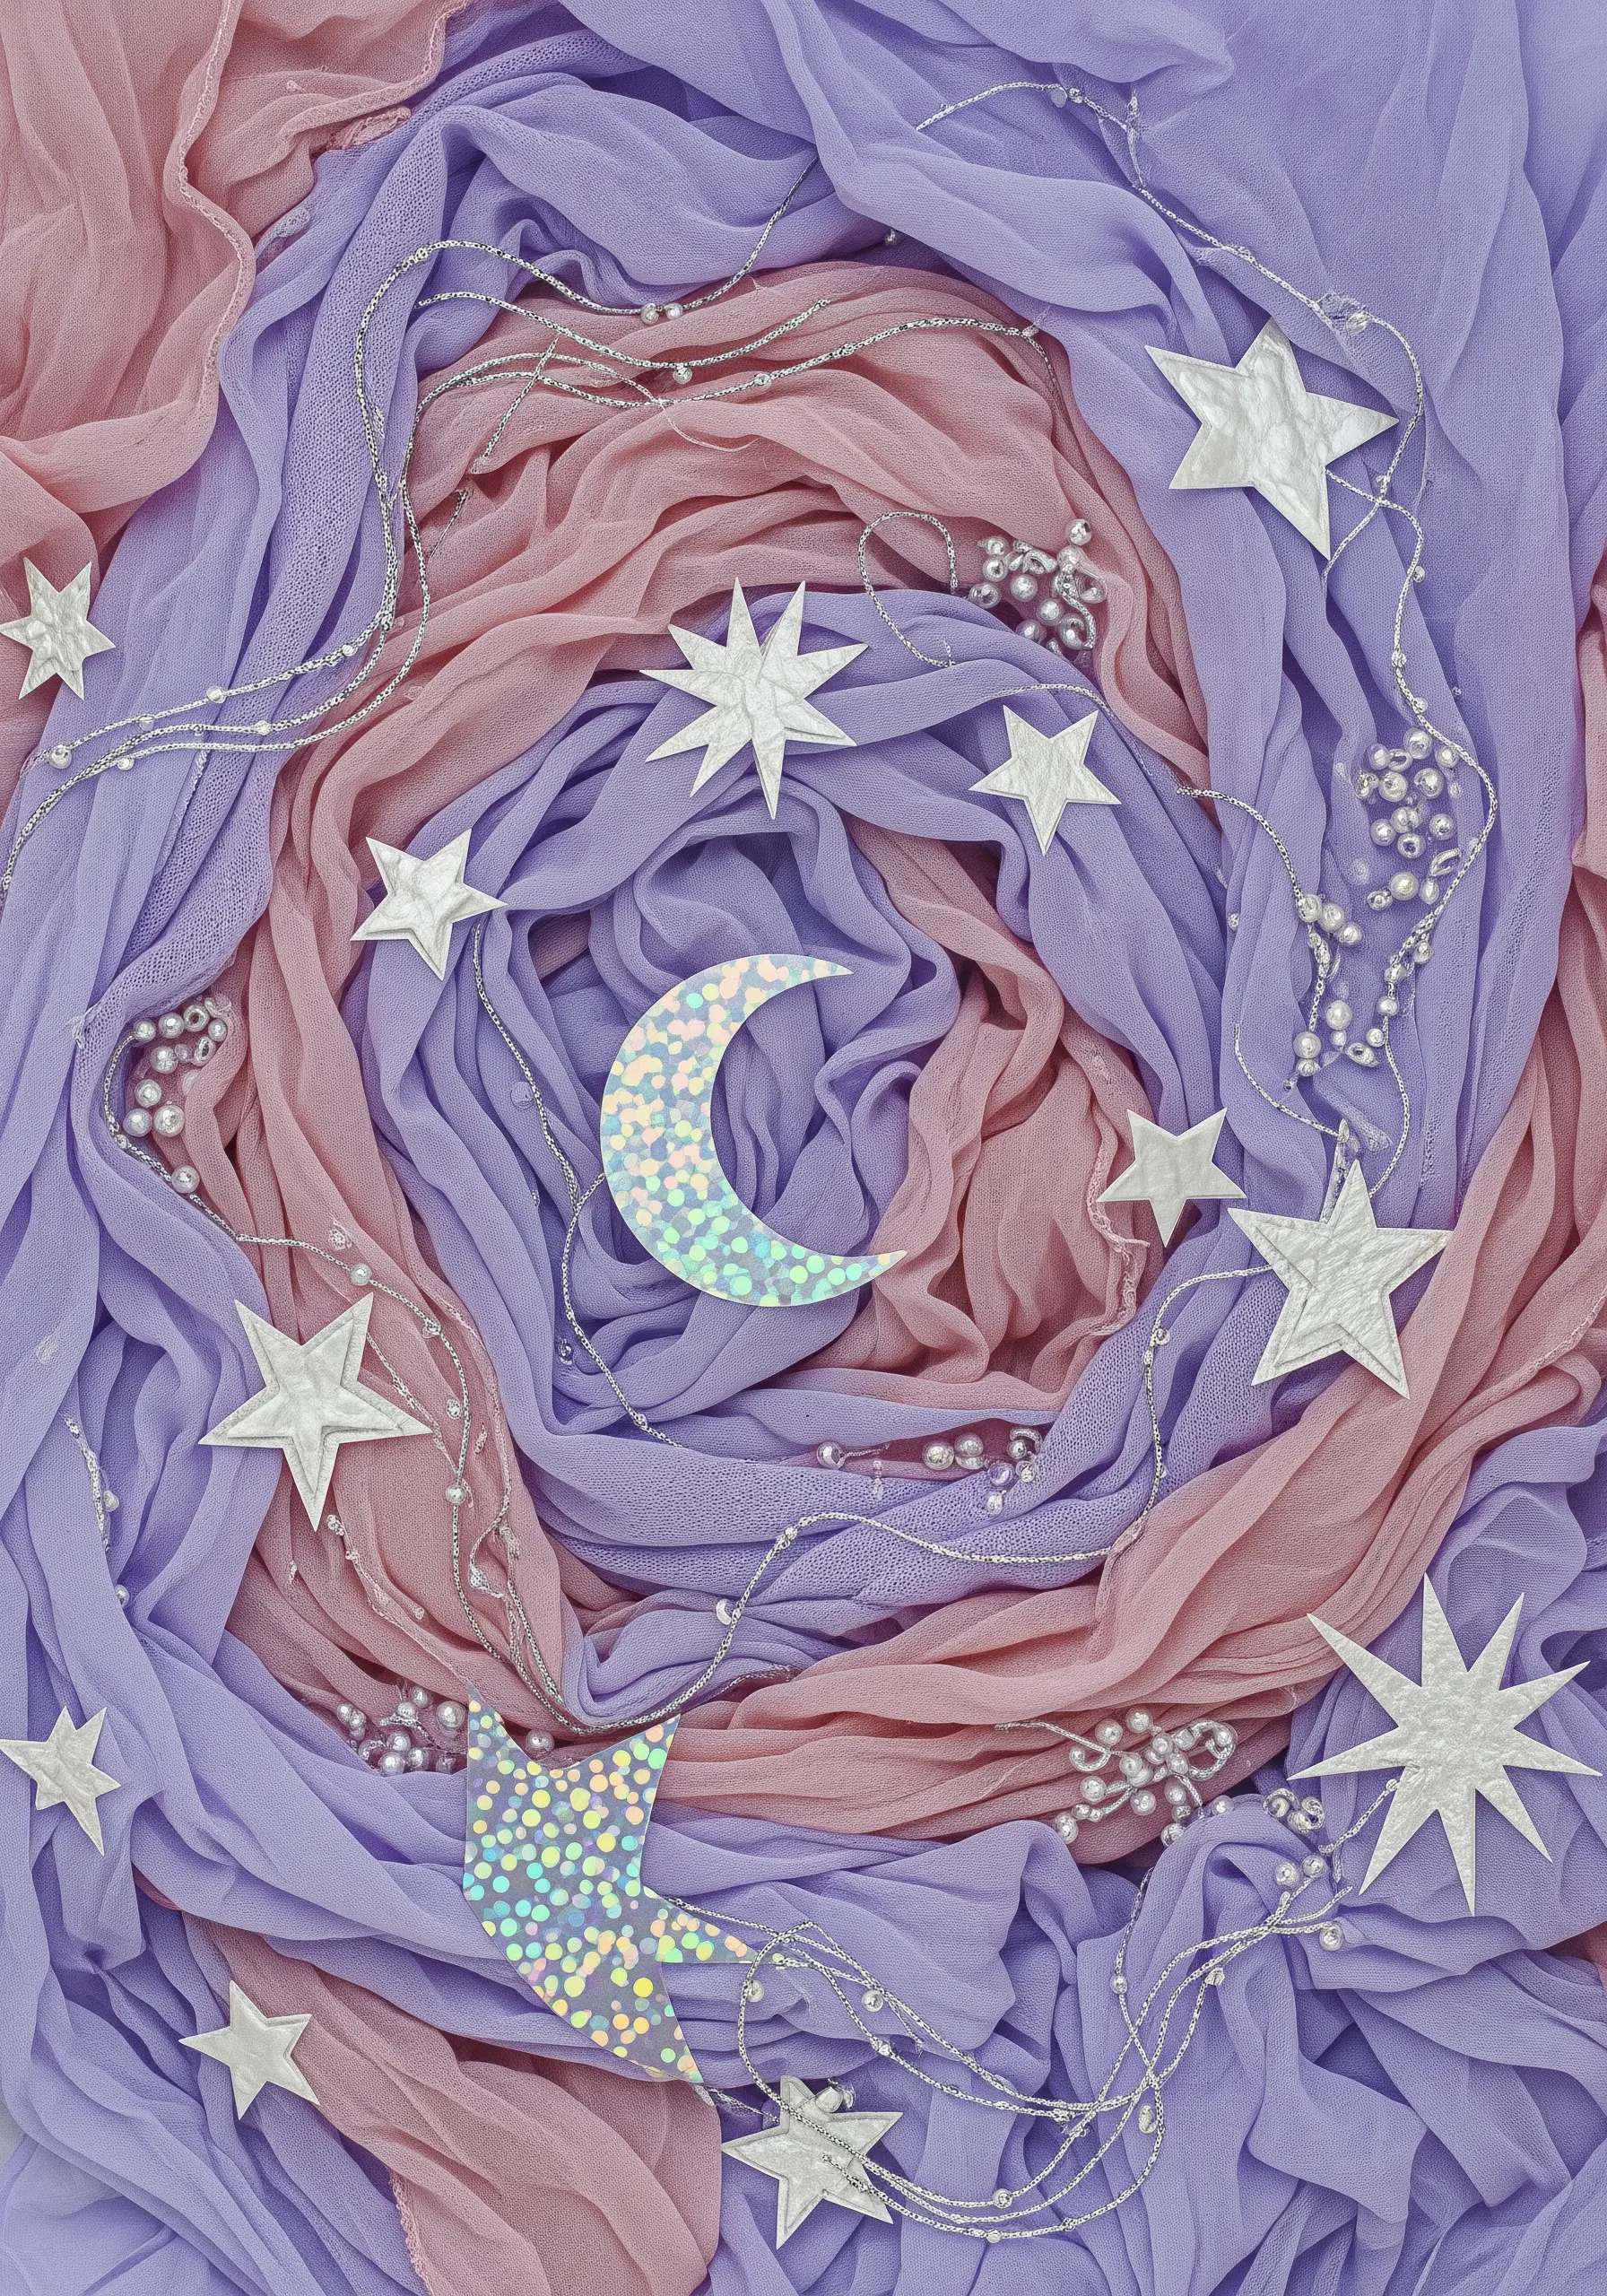
Build an abstract background by draping and layering soft, flowing fabrics like chiffon or organza.
Instead of stitching a defined scene, let the fabric folds create the composition. Secure the draped fabric with scattered stitches, then embellish it with beads, sequins, and iridescent paper cutouts.
Use fine, sparkly threads to couch down delicate trims, adding lines of light that meander through the fabric.
This process-driven approach is perfect for creating abstract mixed-media embroidery ideas that feel ethereal and dreamlike.
21. Edge Printed Paper with a Dimensional Blanket Stitch
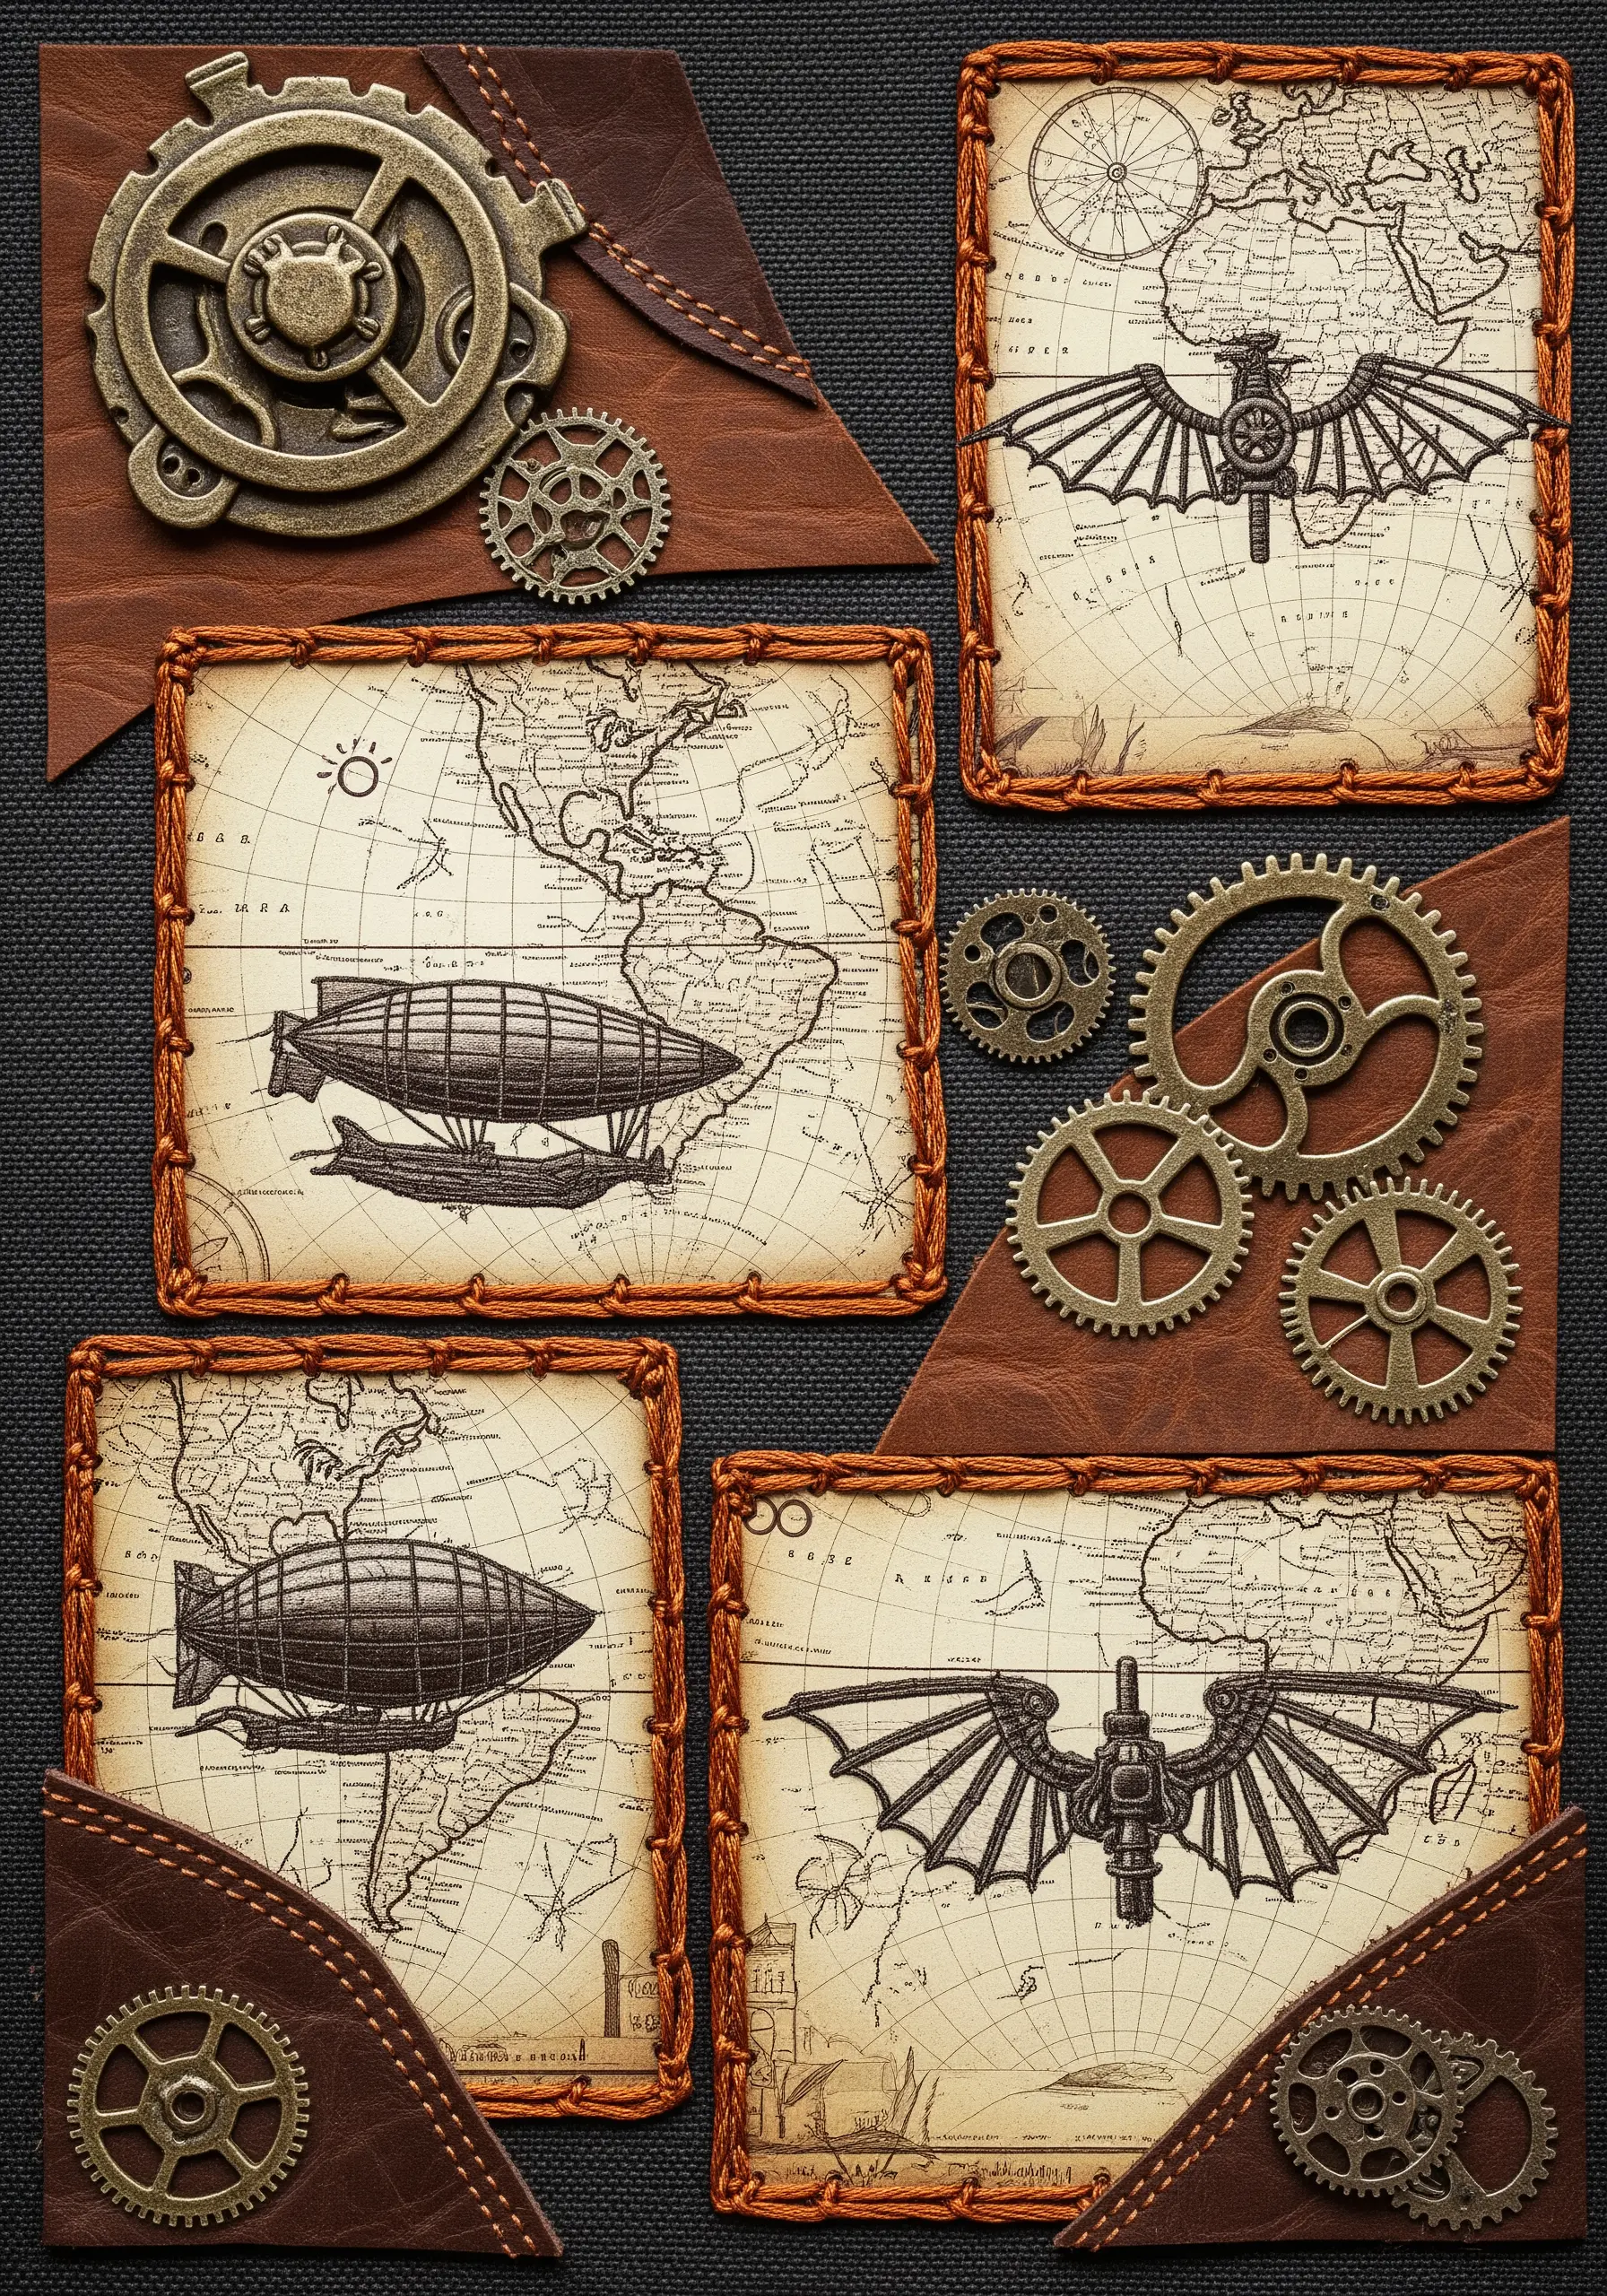
Give printed paper elements a finished, textile quality by edging them with a dense blanket stitch or whipped backstitch.
Carefully pierce the edges of your paper illustrations before you begin stitching. Use a thick thread, like pearl cotton or all six strands of floss, to create a substantial, corded edge.
This technique frames the paper, integrates it seamlessly with a fabric or leather background, and adds a satisfying tactile border.
It’s one of the most clever ways to combine fabric and thread for stunning art, elevating simple prints into unique artifacts.
22. Animate a Silhouette with Flowing Thread

Bring a static paper or felt silhouette to life by using thread to create a sense of movement.
Embroider flowing lines of music extending from the piano, using a combination of stem stitch and backstitch. Use a single, continuous thread for as long as possible to maintain a smooth, calligraphic line.
Varying the number of strands you use—from one to three—can create a sense of perspective, with thicker lines appearing closer.
This approach transforms a simple cutout into a dynamic scene, perfect for playful, cartoon-style embroidery ideas.
23. Map Your World with Fabric Appliqué and Dotted Lines
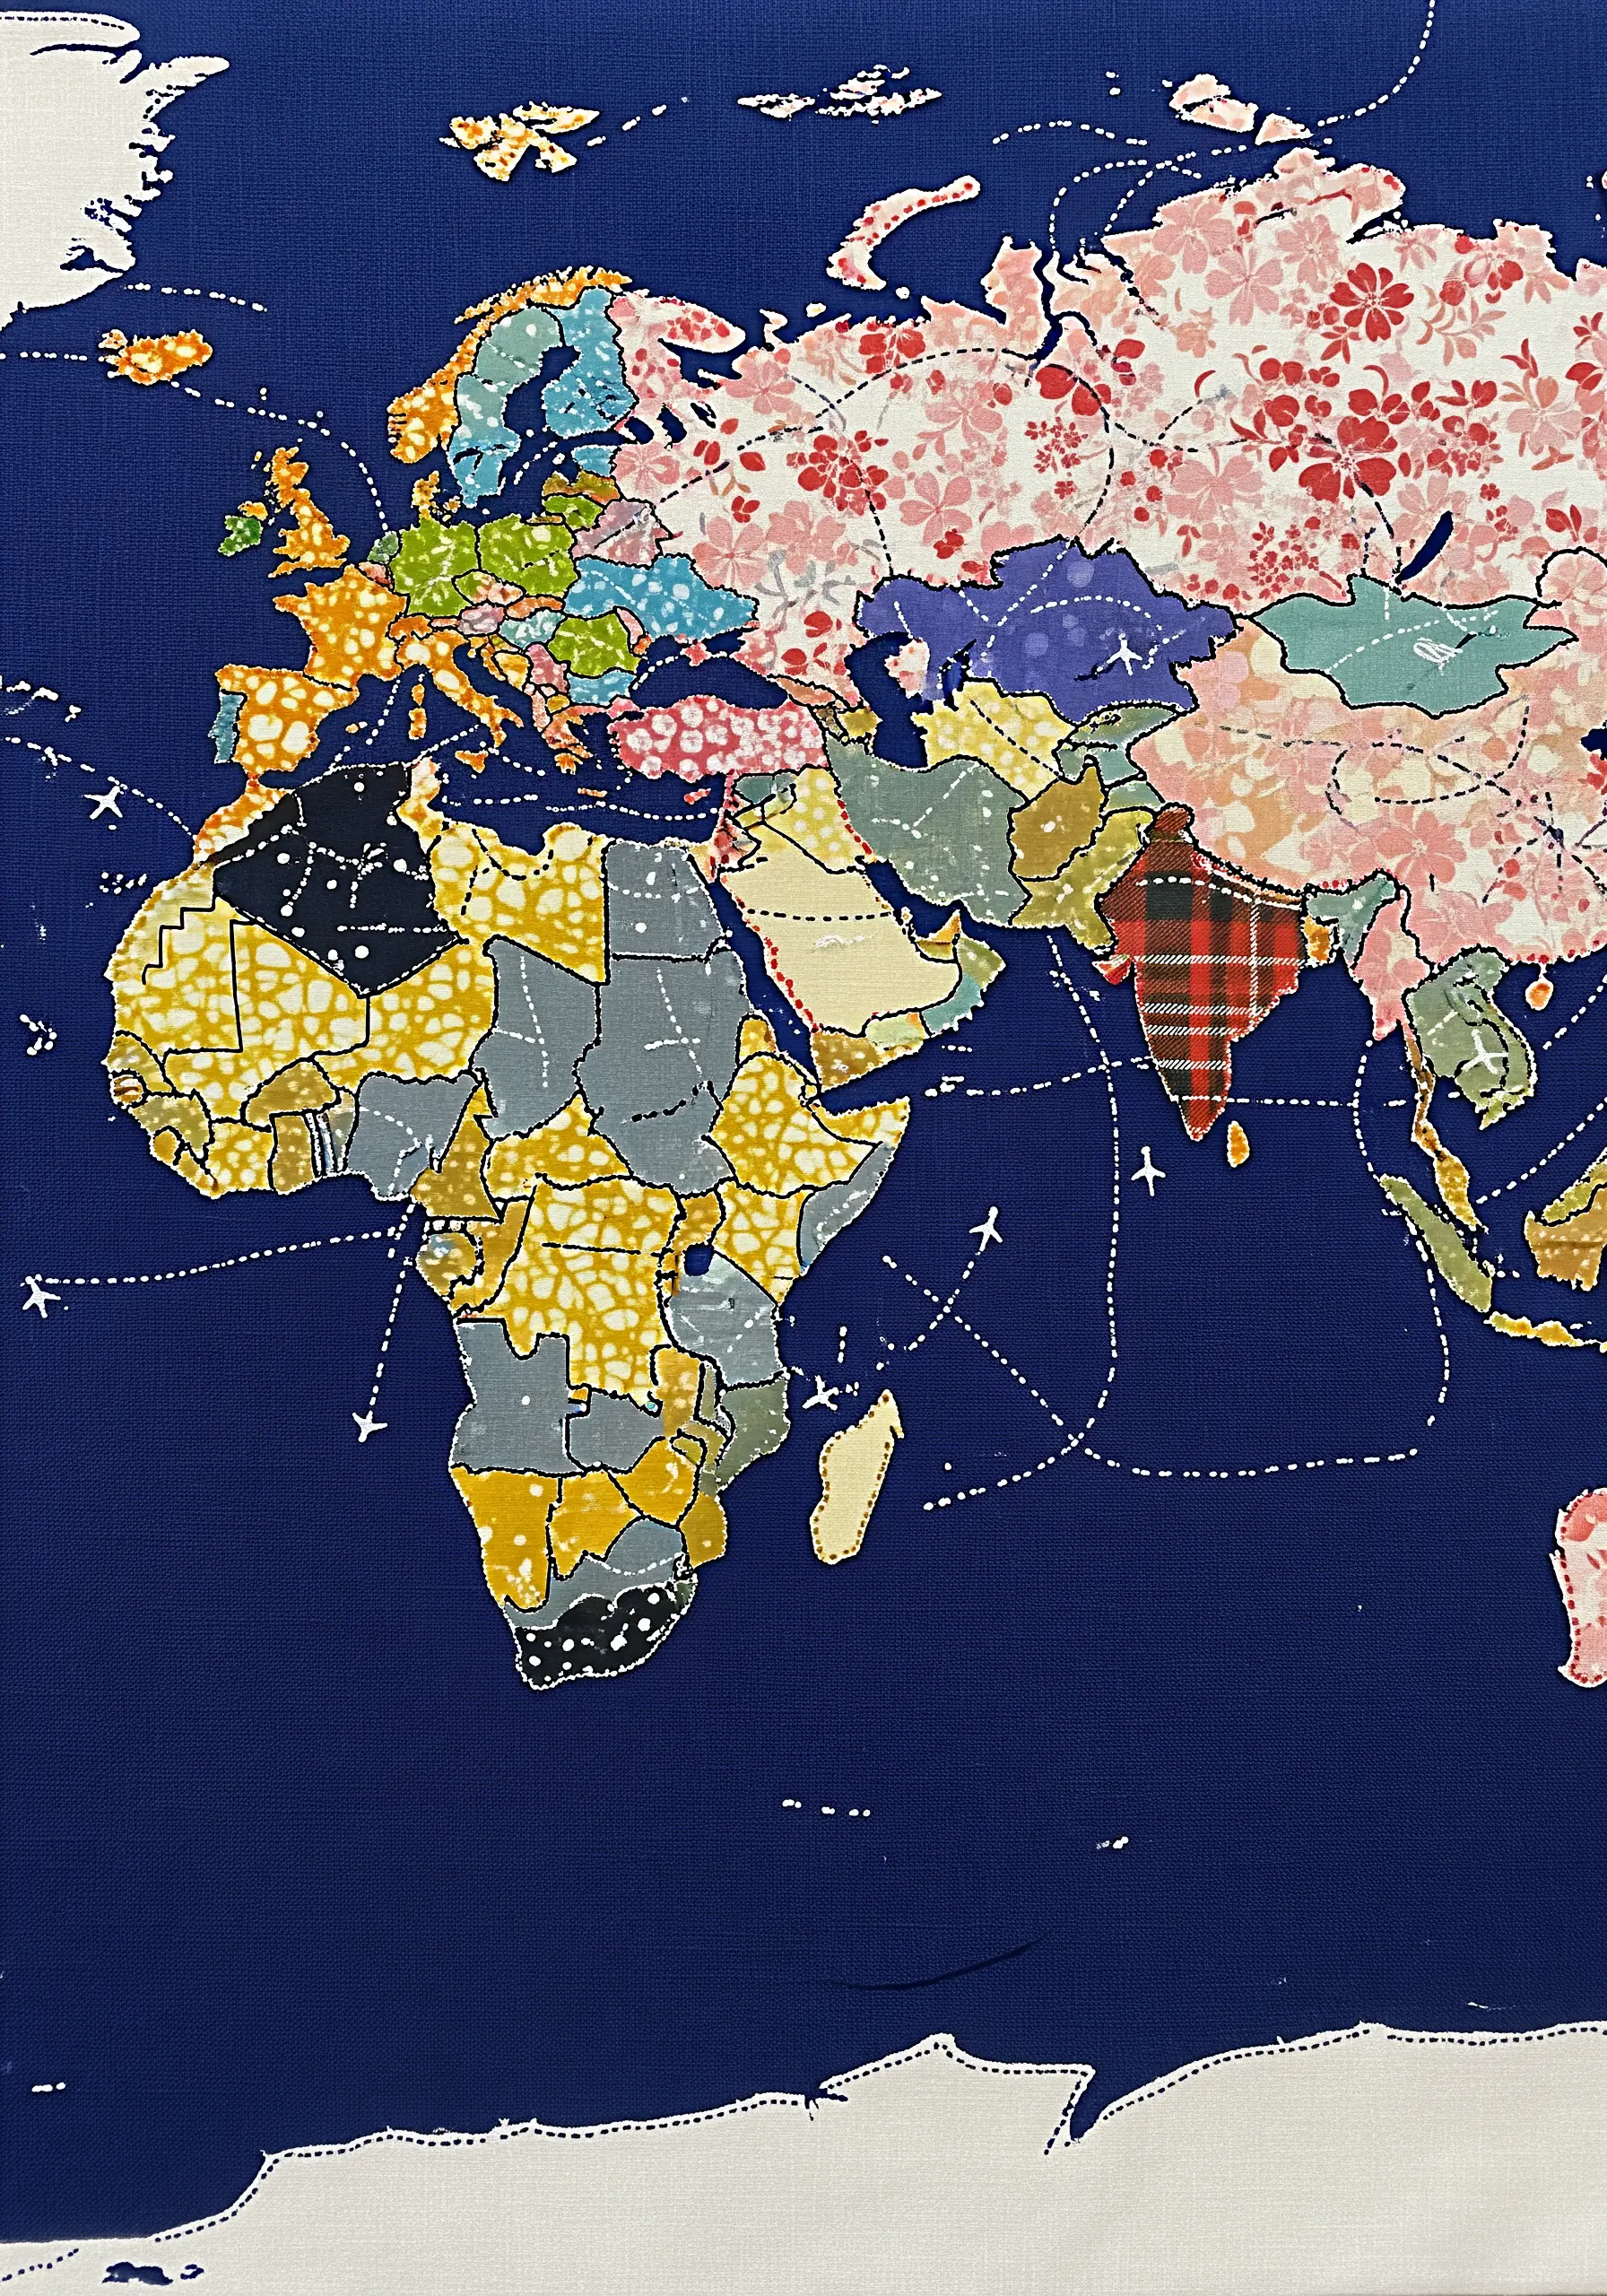
Create a personalized world map using fabric scraps that hold meaning for you—a piece of a childhood dress, a scrap of a favorite shirt.
Use the technique of raw-edge appliqué, cutting each country’s shape and securing it with a simple running stitch just inside the border. This gives it a charming, slightly rustic look.
Connect significant places with a delicate, dashed line of running stitch to represent travel routes or personal connections.
This is one of the most personal fabric art ideas perfect for adding color to your home and telling your own story.
24. Add Subtle Texture with Seed Stitch and Fern Stitch
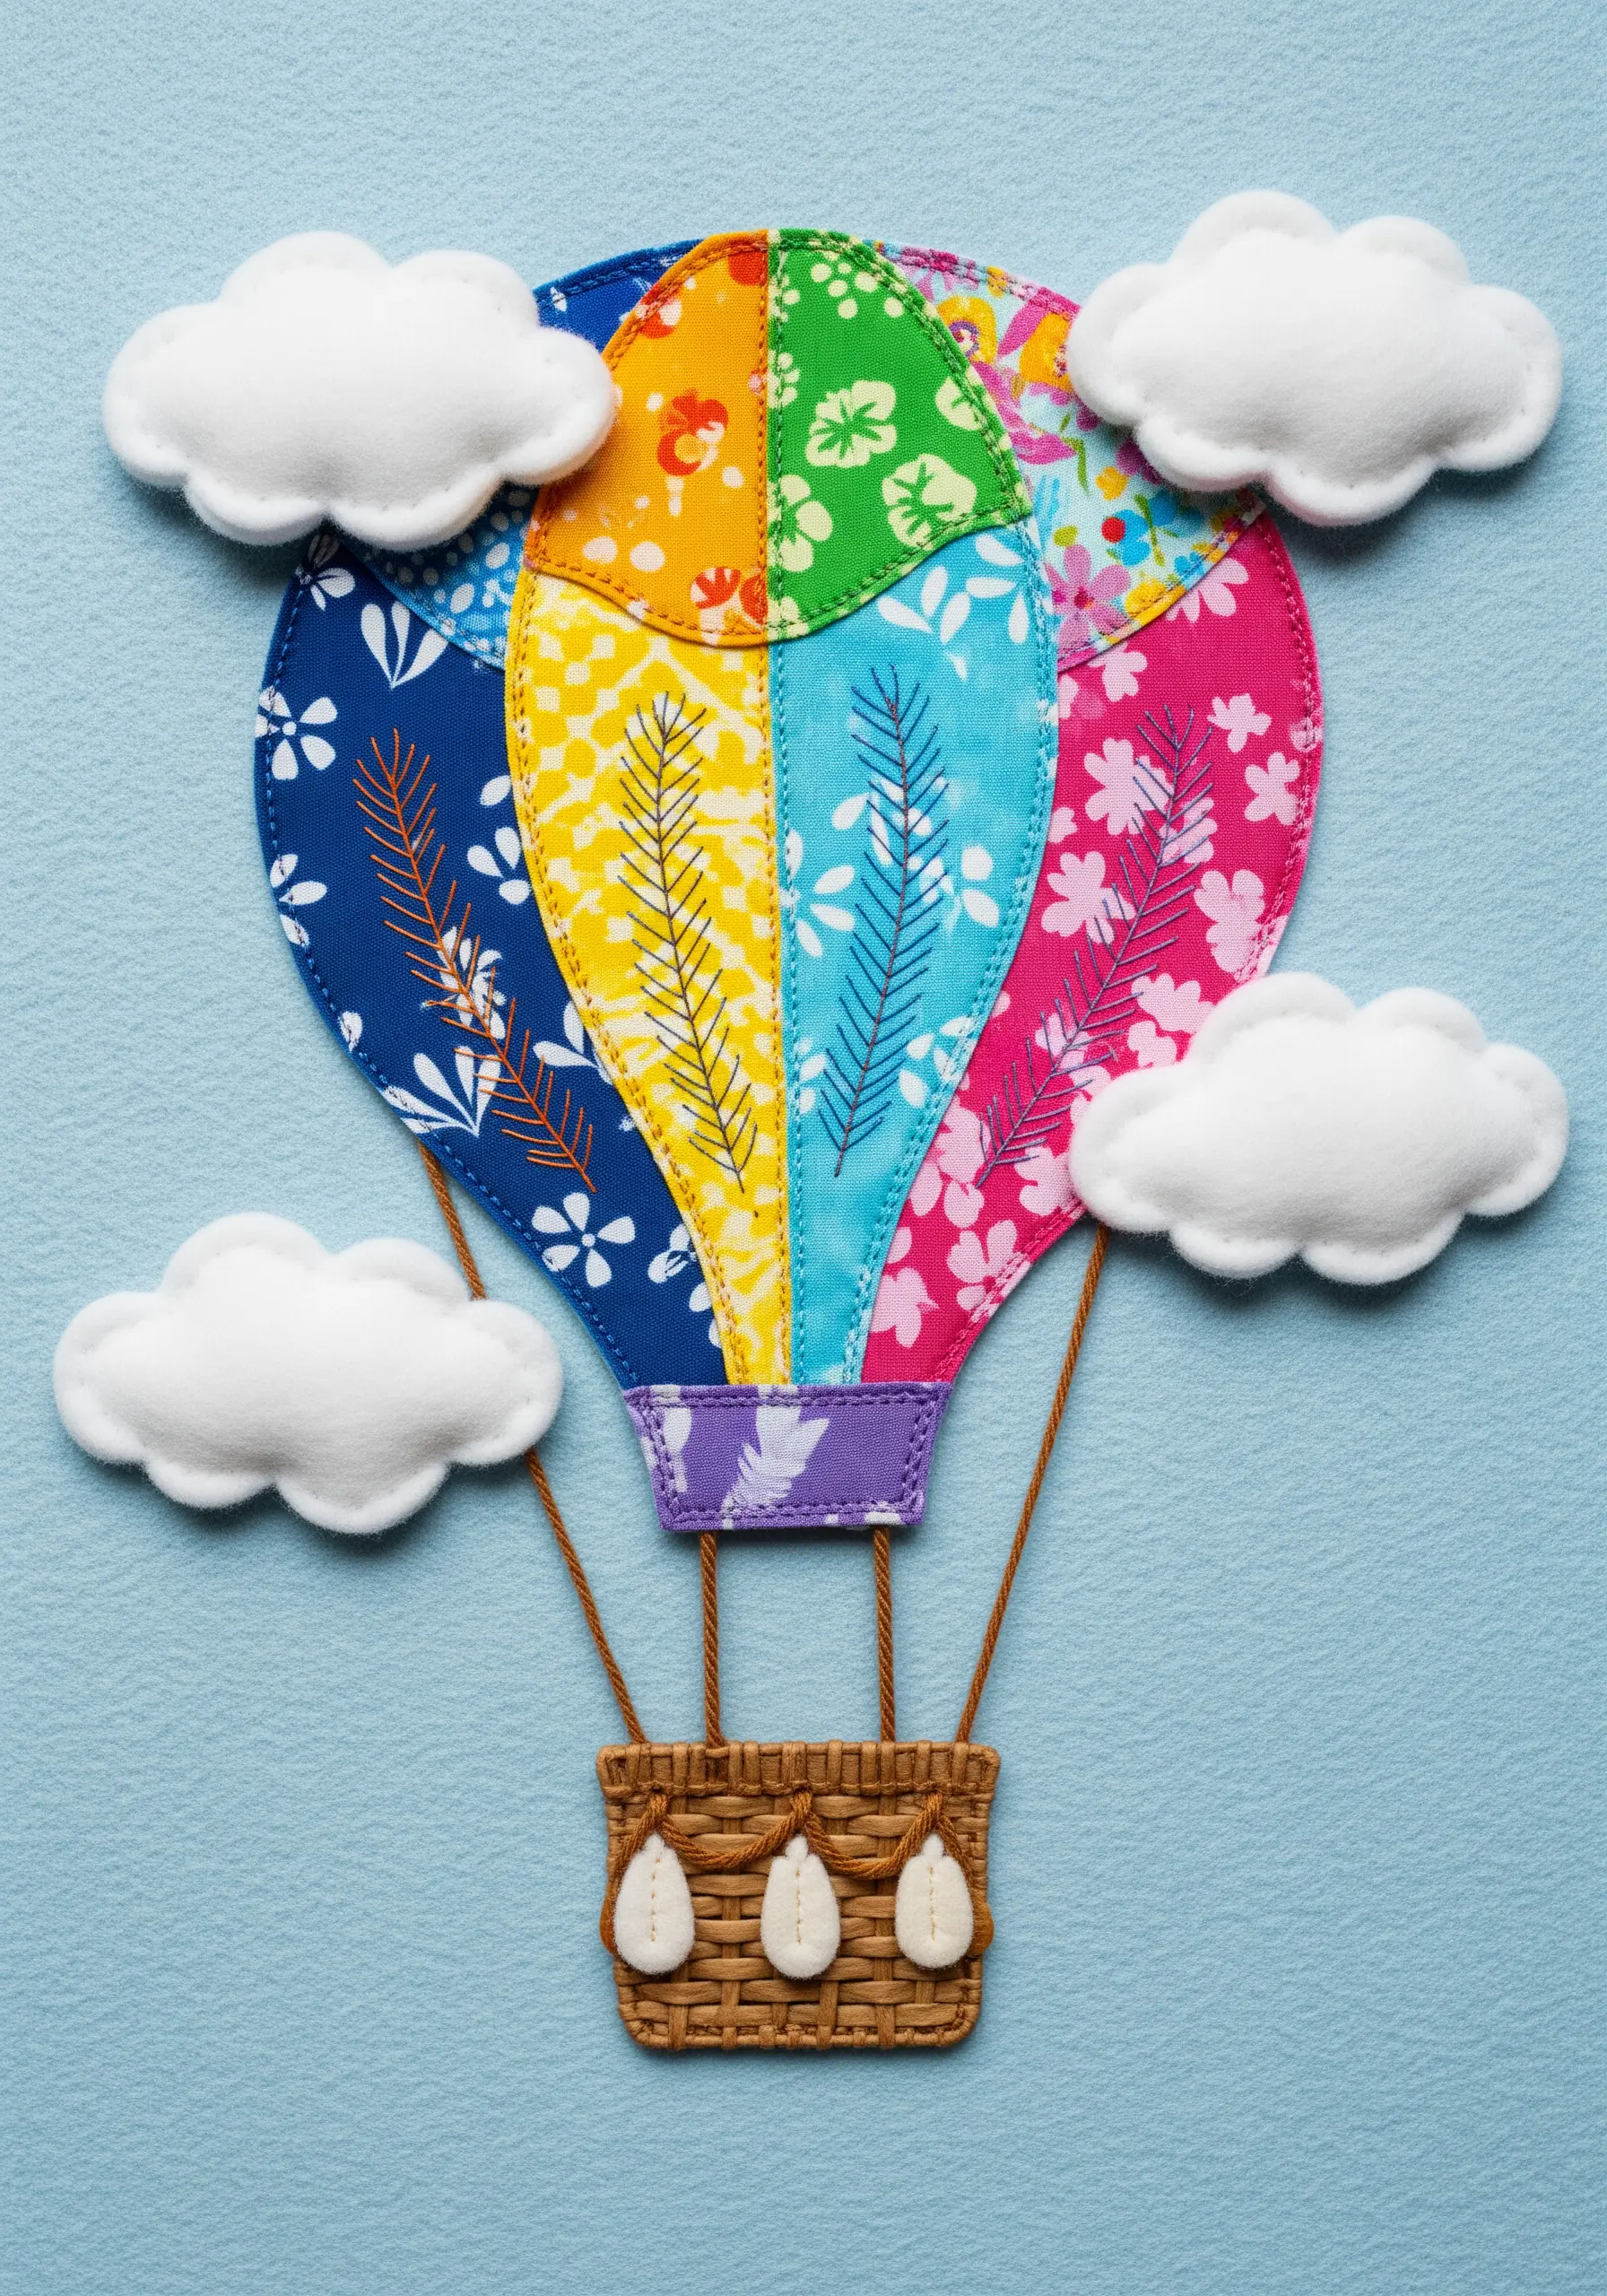
Even on bold, colorful fabric appliqué, small stitched details can add a layer of sophistication.
On a patchwork hot air balloon, instead of leaving the fabric plain, add decorative stitches that complement the pattern. Use fern stitch to create botanical details or scattered seed stitches to add a subtle, all-over texture.
This shows attention to detail and integrates the appliqué more fully into the embroidered piece.
It’s a gentle technique perfect for nursery-friendly string art balloon cloud designs where softness is key.
25. Sculpt with Thread for a Whimsical 3D Effect
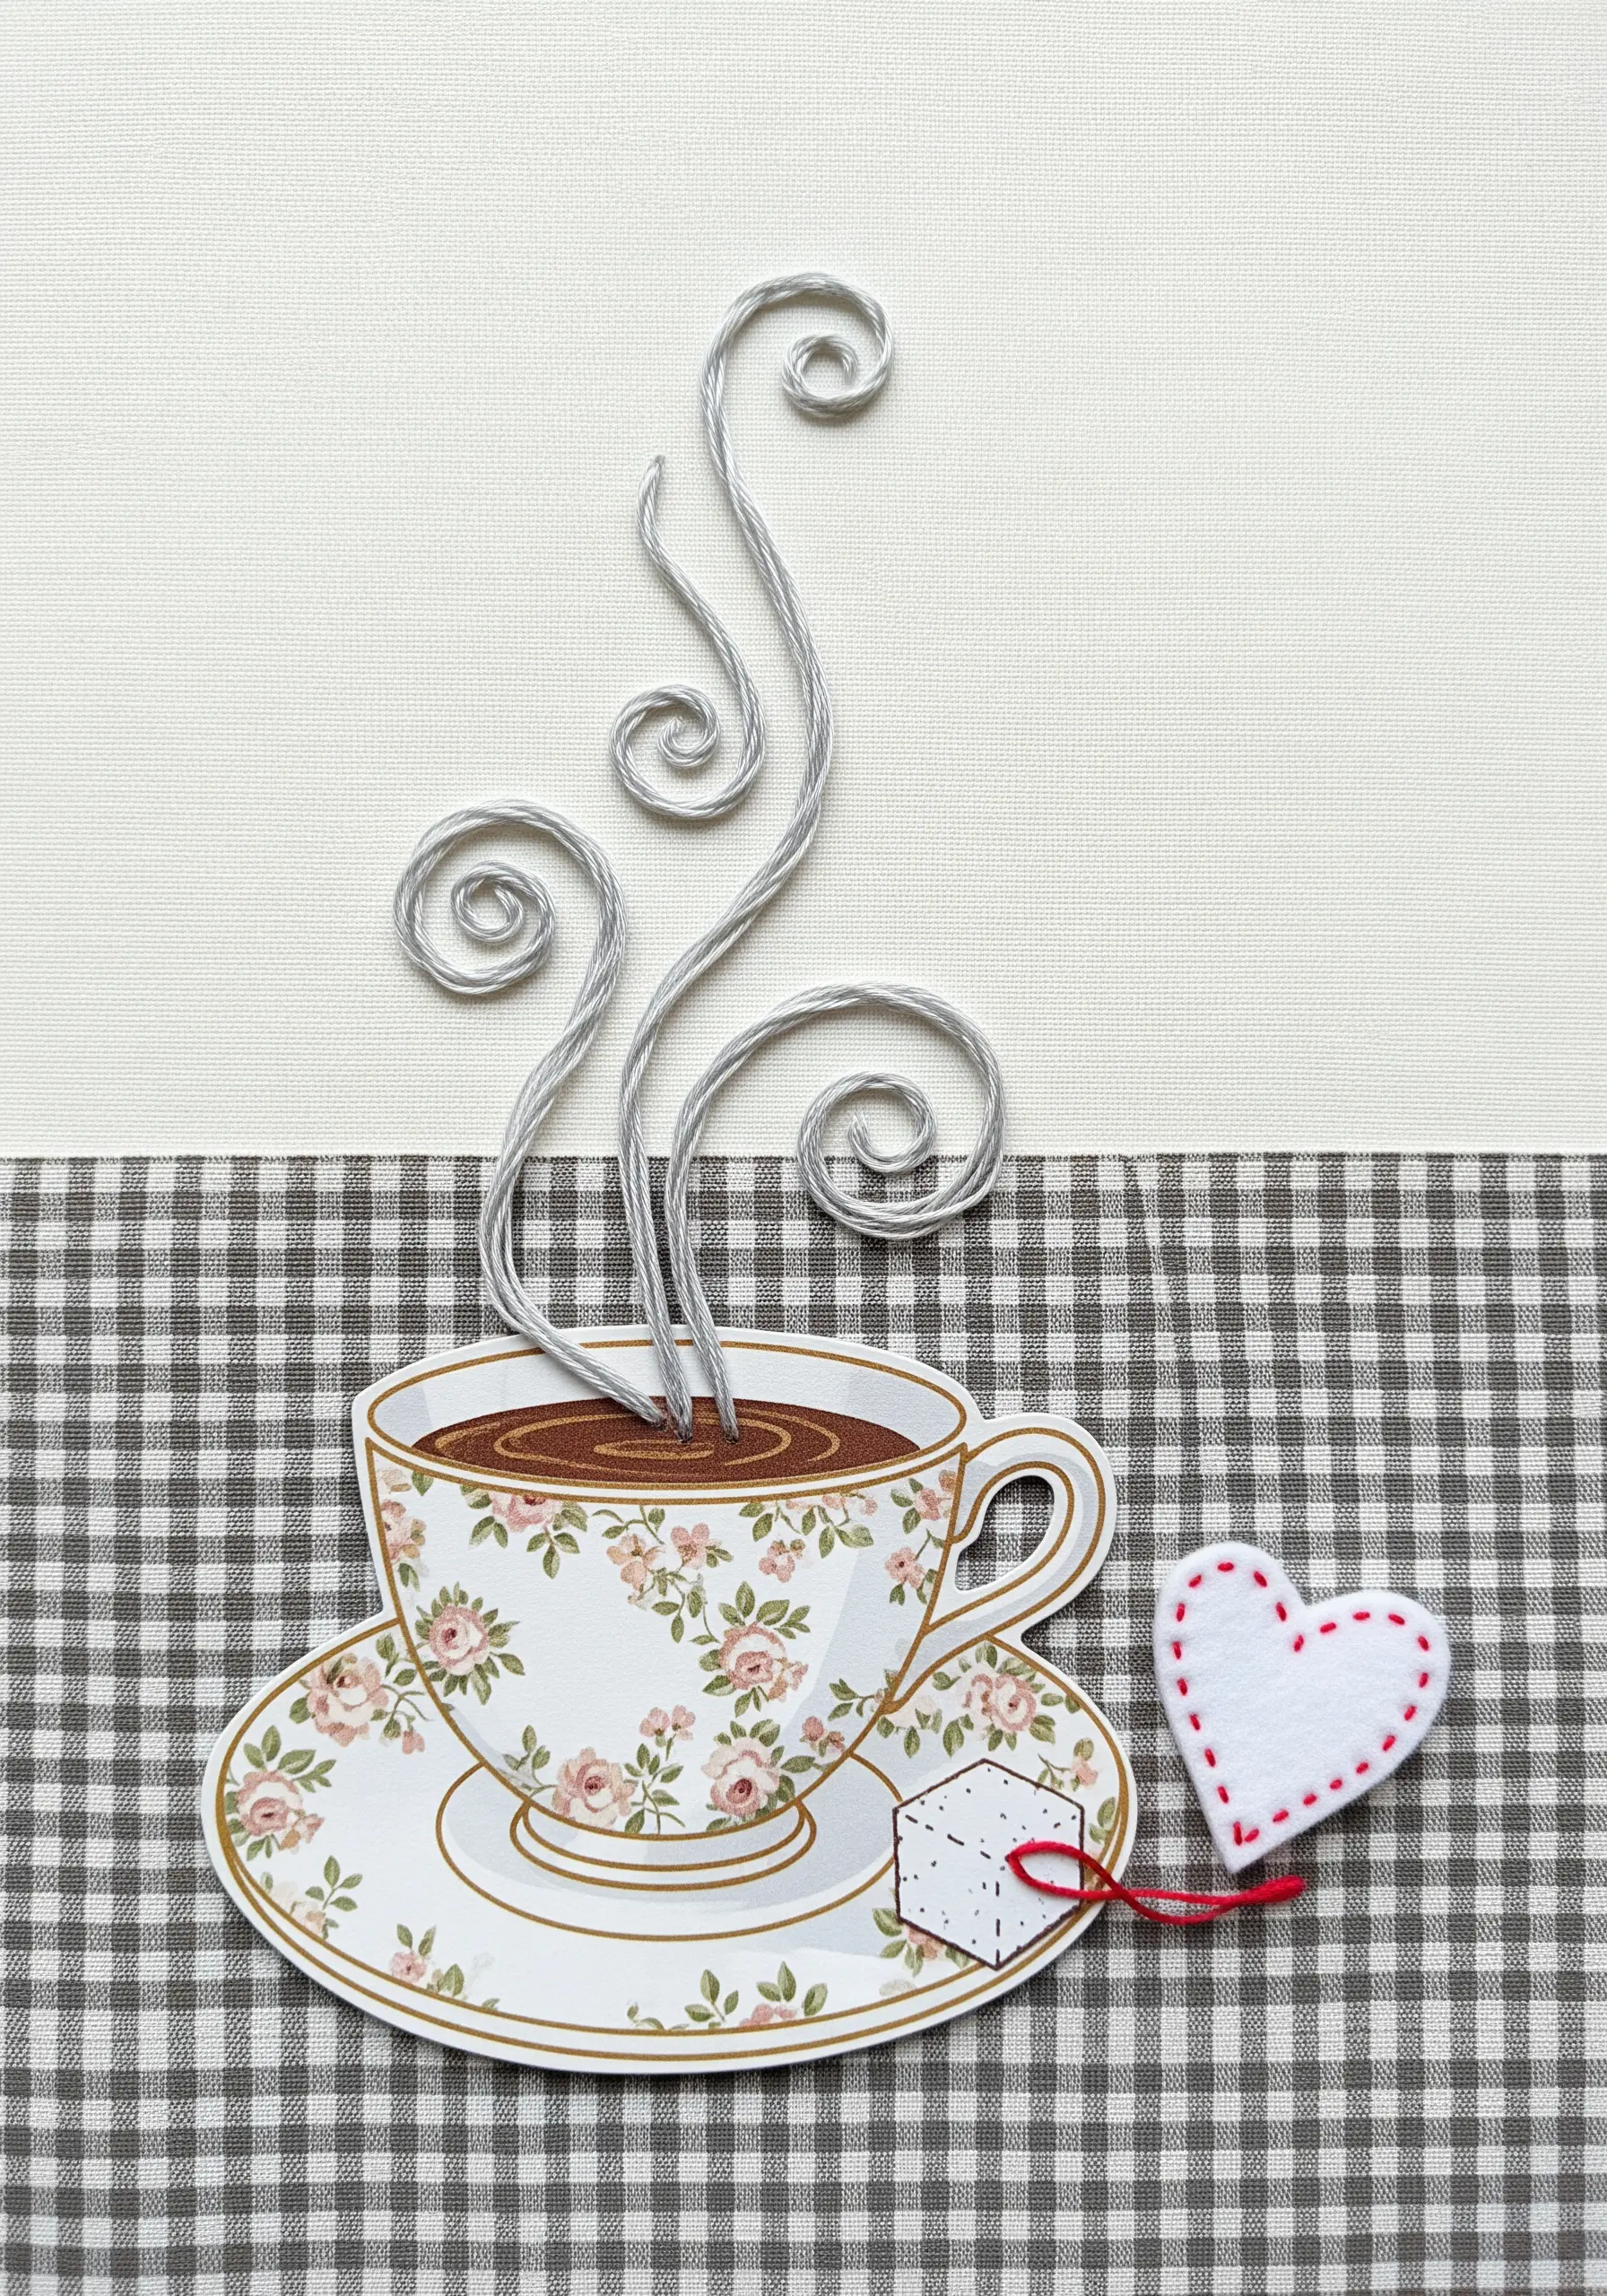
Create playful, three-dimensional elements using wire-wrapped thread.
Carefully bend a piece of fine, pliable craft wire into your desired shape, like steam rising from a teacup. Then, use a single strand of embroidery floss to wrap the wire tightly and completely, securing the ends with a tiny dab of glue or a few hidden stitches.
Attach the sculpted thread to your collage. This technique allows you to create lines that float above the surface, adding a touch of magic.
Use it for minimal food coffee motifs to bring them to life with whimsical, sculptural details.
26. Combine Felt Appliqué with Simple Outline Stitches
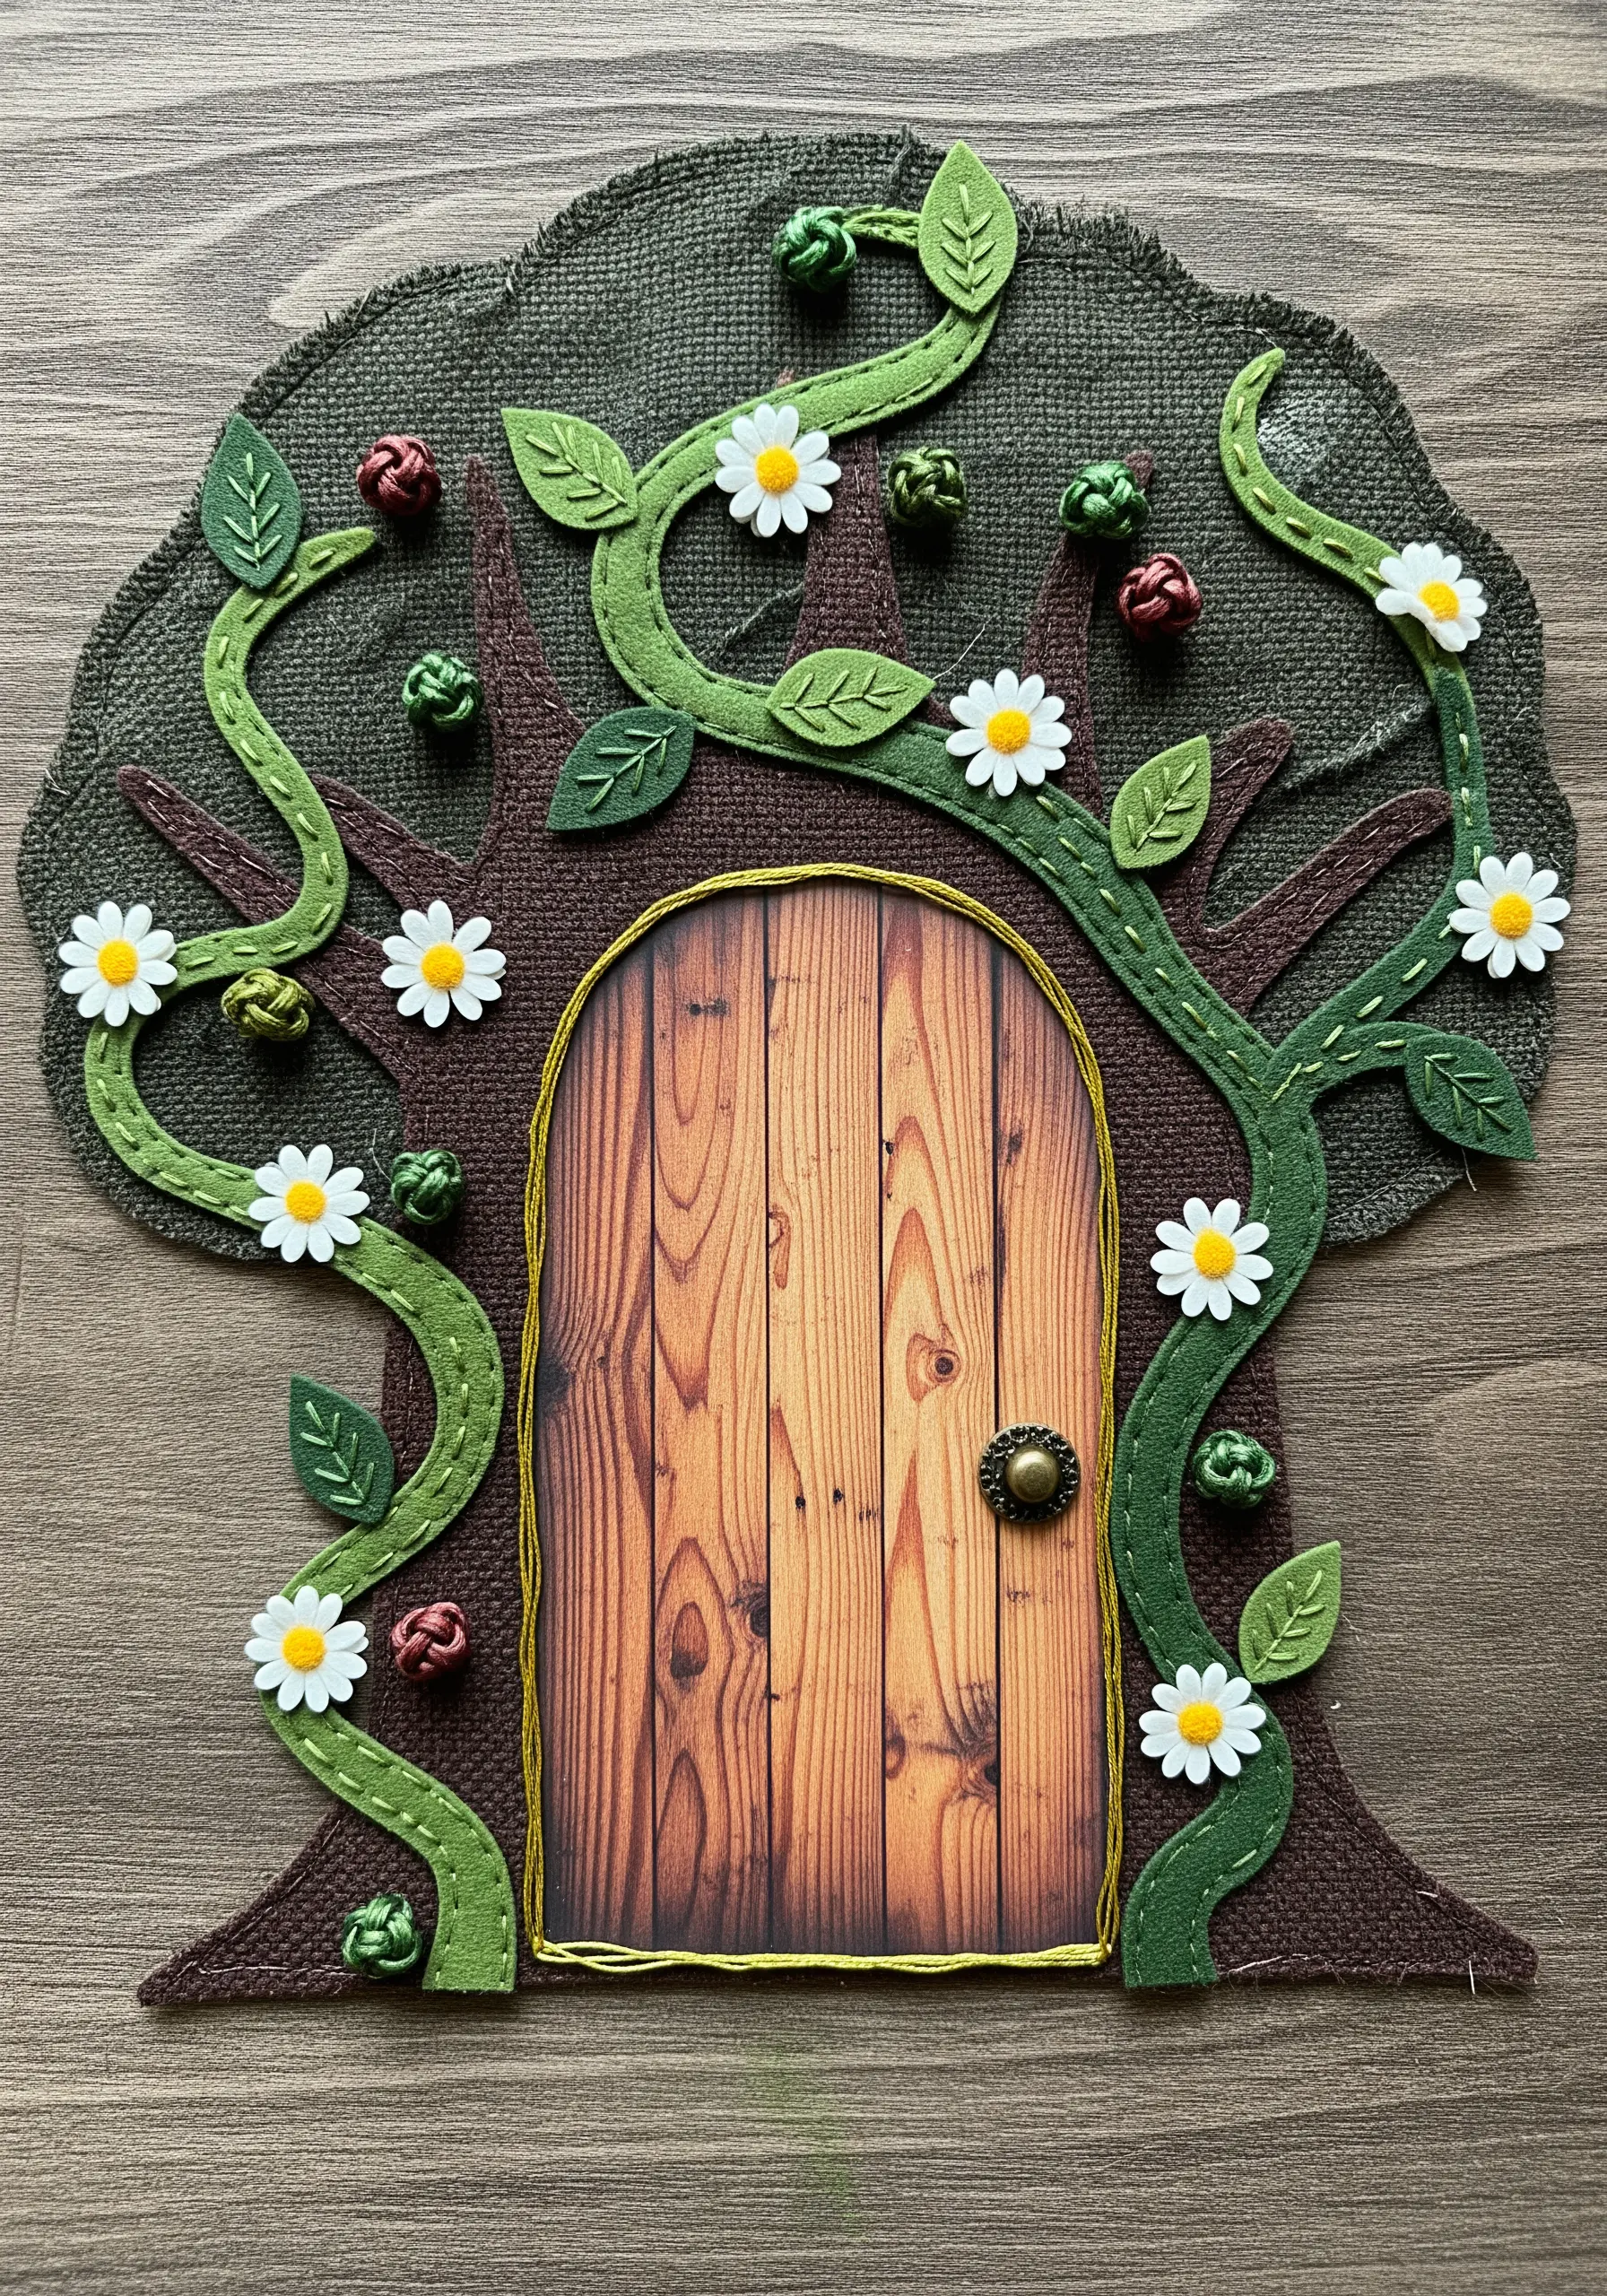
Use felt for your main appliqué shapes; its thickness provides a natural, soft dimension, and the edges won’t fray.
Layer felt pieces to build up your design, like the vines and leaves on a tree. Then, use a simple running stitch or backstitch just inside the edge of each piece to secure it and add a charming, hand-stitched detail.
This combination of soft felt and simple stitching creates a look that is both playful and polished.
These are perfect for creating diy calm cozy wall hangings with a storybook feel.
27. Replicate Spines and Thorns with Straight Stitches
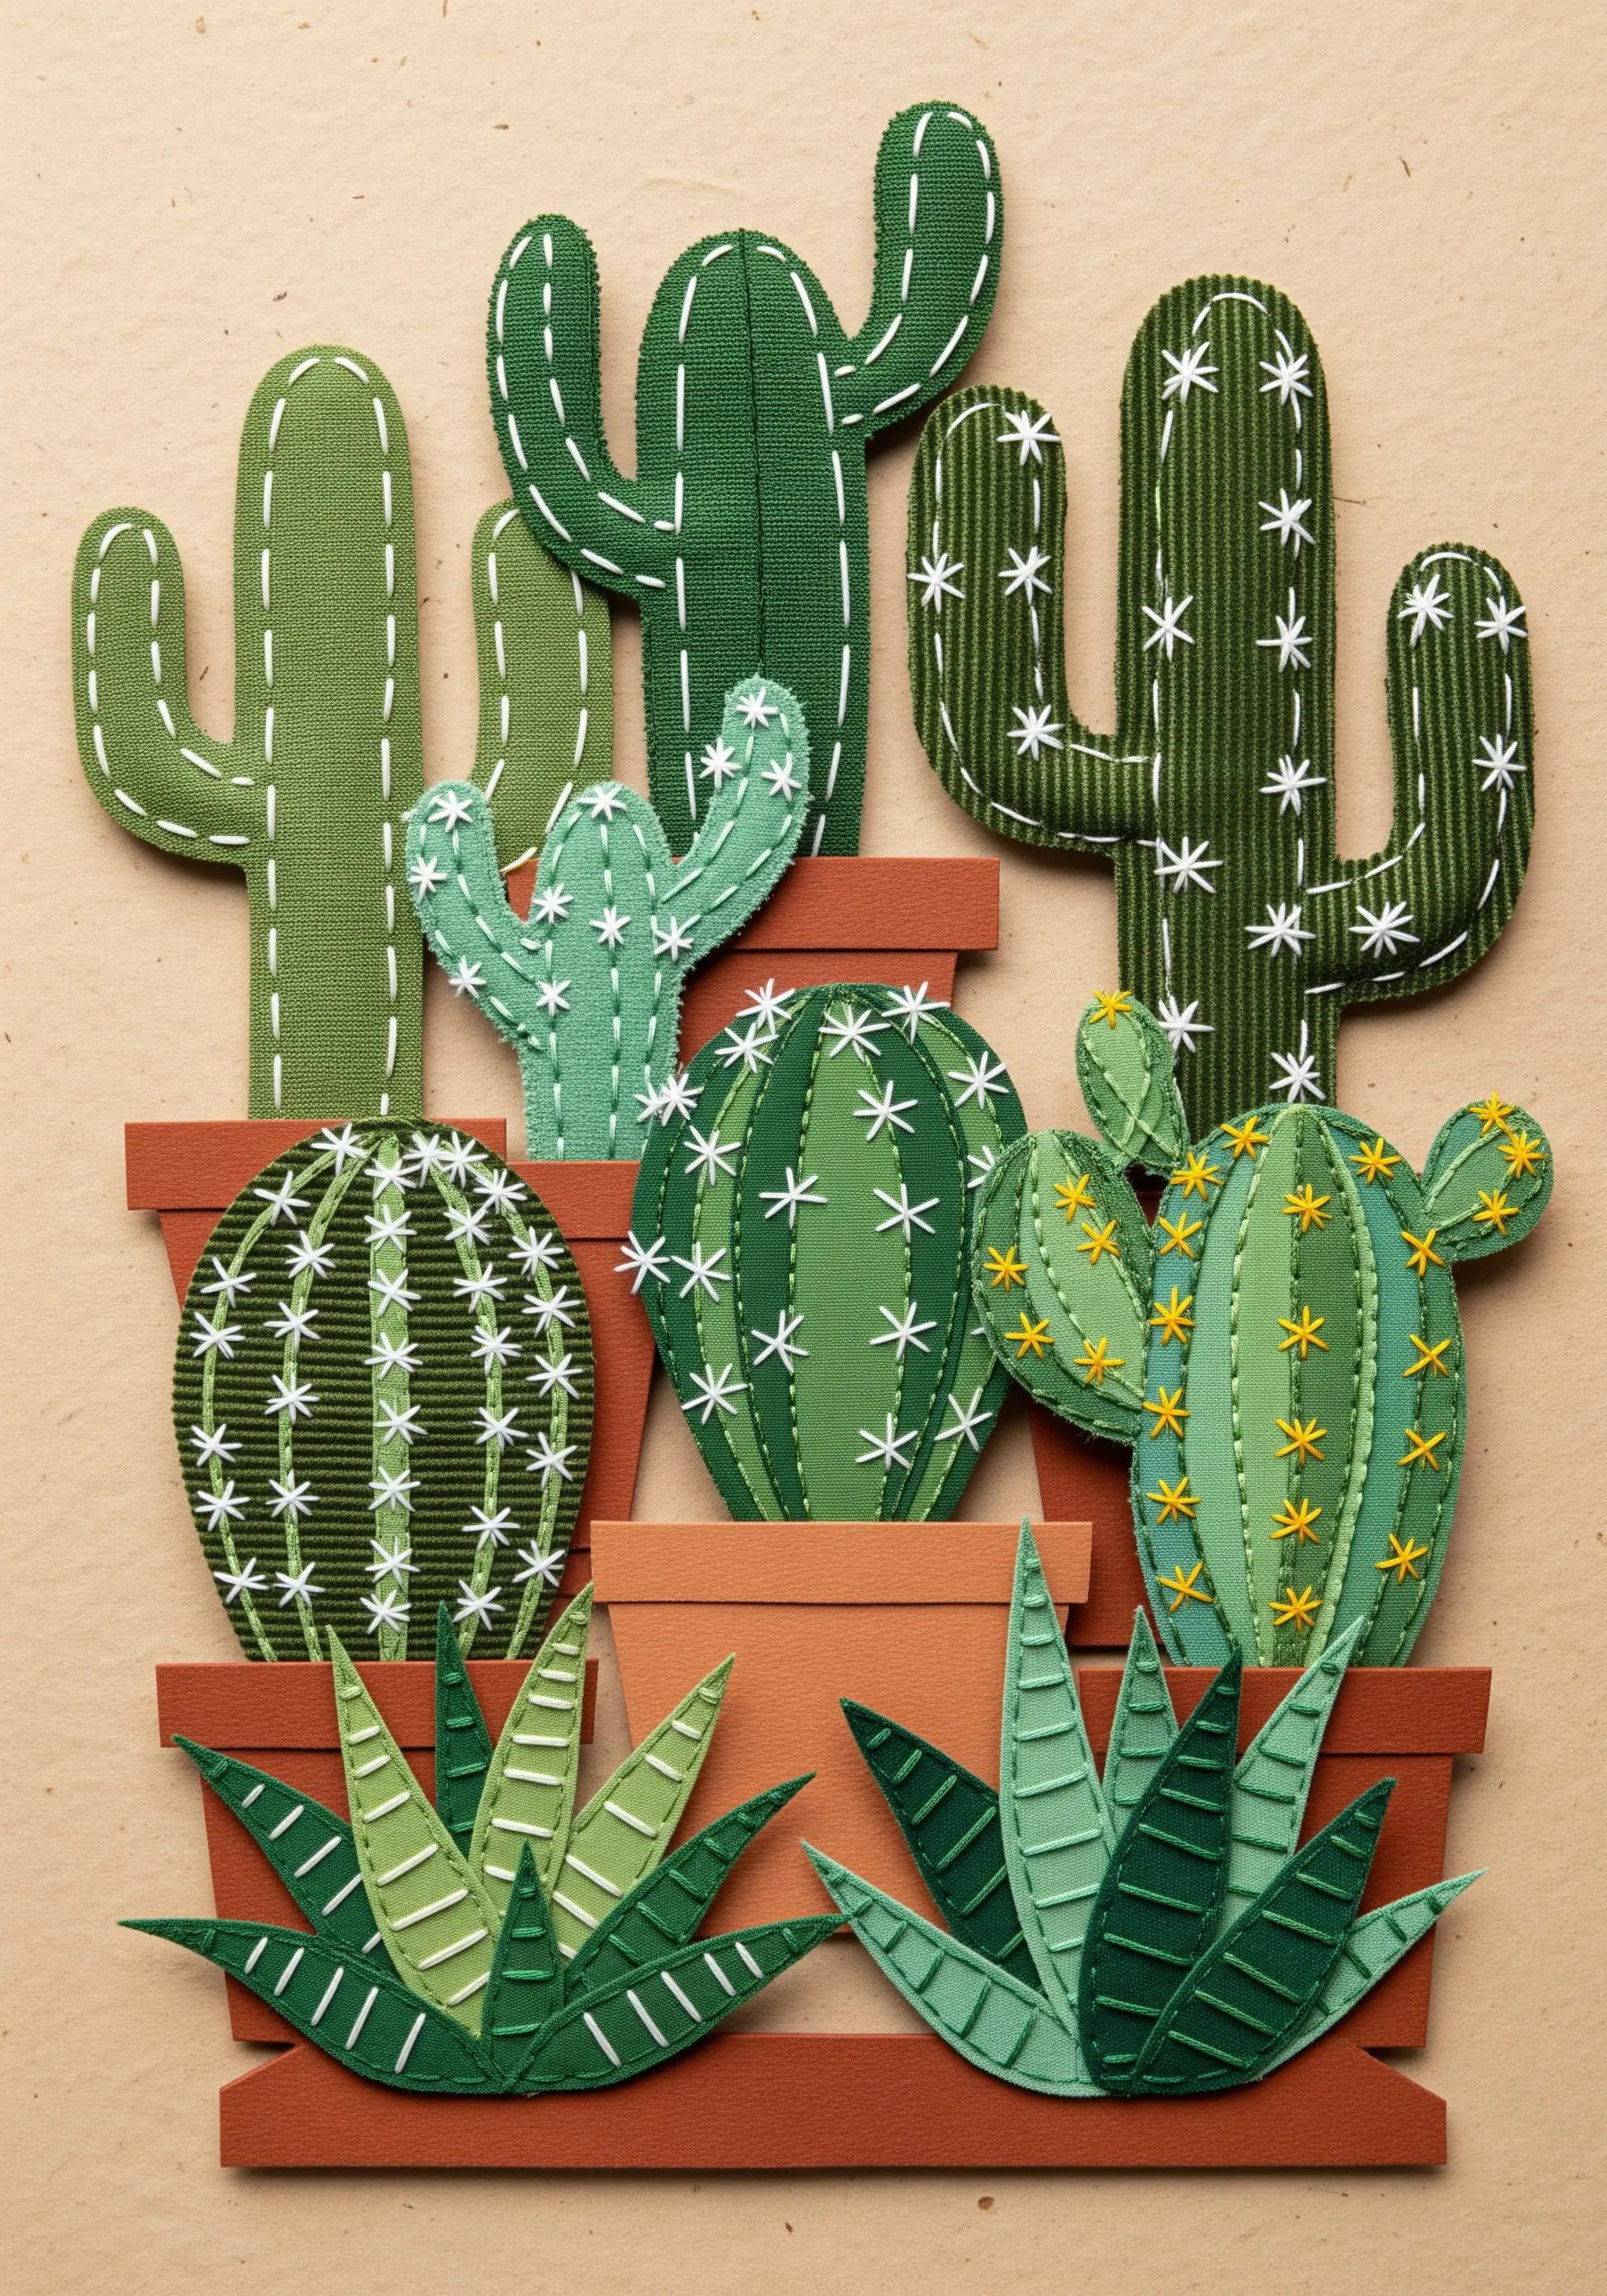
Give paper or fabric cacti a realistic texture by using simple straight stitches to represent their spines.
Vary the length and arrangement of your stitches to match the type of cactus. For some, use radiating star-like stitches; for others, use parallel vertical lines or scattered individual stitches.
Use a contrasting thread color, like white or yellow on green, to make the details pop.
This is a perfect example of how the most basic stitch can create incredible texture and detail, turning flat shapes into believable forms. These are some of the most satisfying minimalist stitch designs that fit in the palm of your hand.
28. Use a Sewing Machine to Craft with Paper
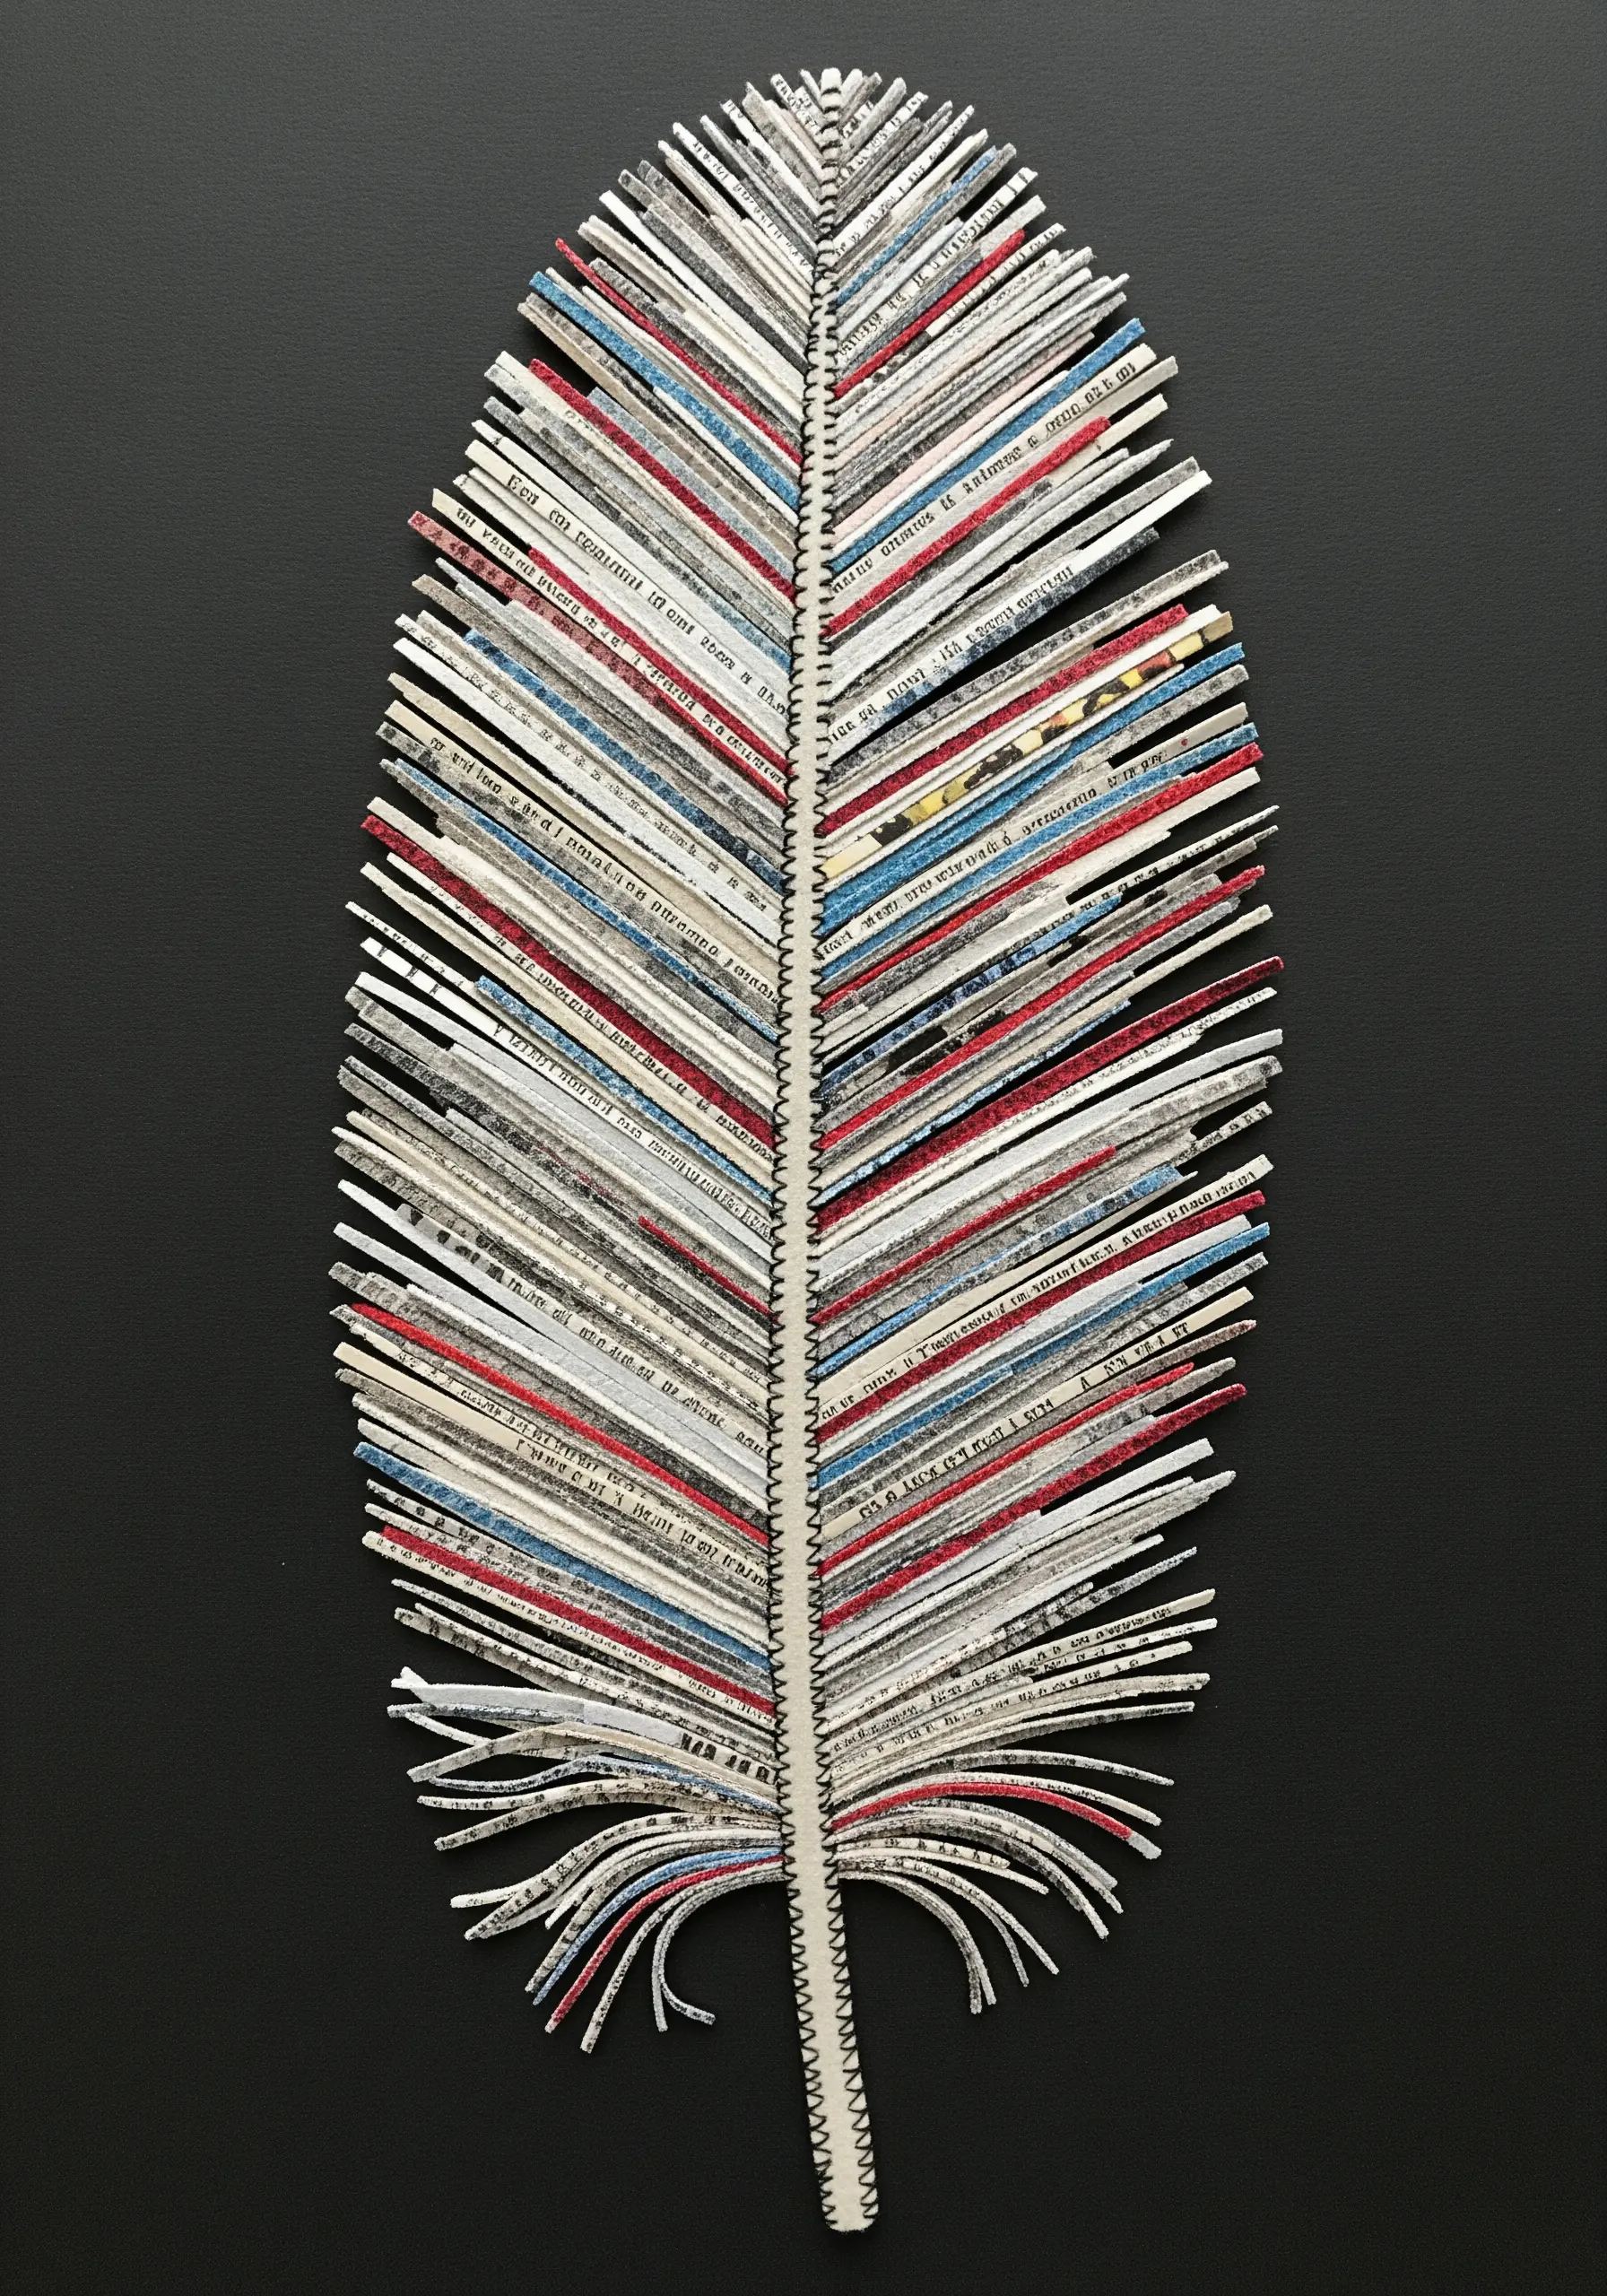
You don’t need to stitch by hand to combine paper and thread. A sewing machine can create beautifully precise lines.
For this technique, use a longer stitch length (3.0 or 3.5) to prevent the paper from perforating too much and tearing. A sharp microtex needle creates clean holes rather than punching through the fibers.
Use a simple zigzag stitch down the center of a paper feather to create a dimensional spine.
This is one of the most effective paper art designs that pair beautifully with nature-inspired embroidery, blending craft disciplines for a modern result.


