

A simple napkin can become a meaningful keepsake with just a few well-placed stitches. The secret to embroidery that feels both handmade and luxurious isn’t about complex patterns; it’s about thoughtful technique.
Forget perfection and focus on intention. Think about how the direction of a single satin stitch can mimic the way a leaf catches the light, or how choosing a matte cotton over a shiny rayon thread can create a soft, earthy feel.
These small, deliberate choices are what transform a simple leaf border into a personal, elegant detail. Let’s explore how you can elevate your stitching, one napkin at a time, to create something truly special for a day you’ll always remember.
1. Classic Olive Branch Corner
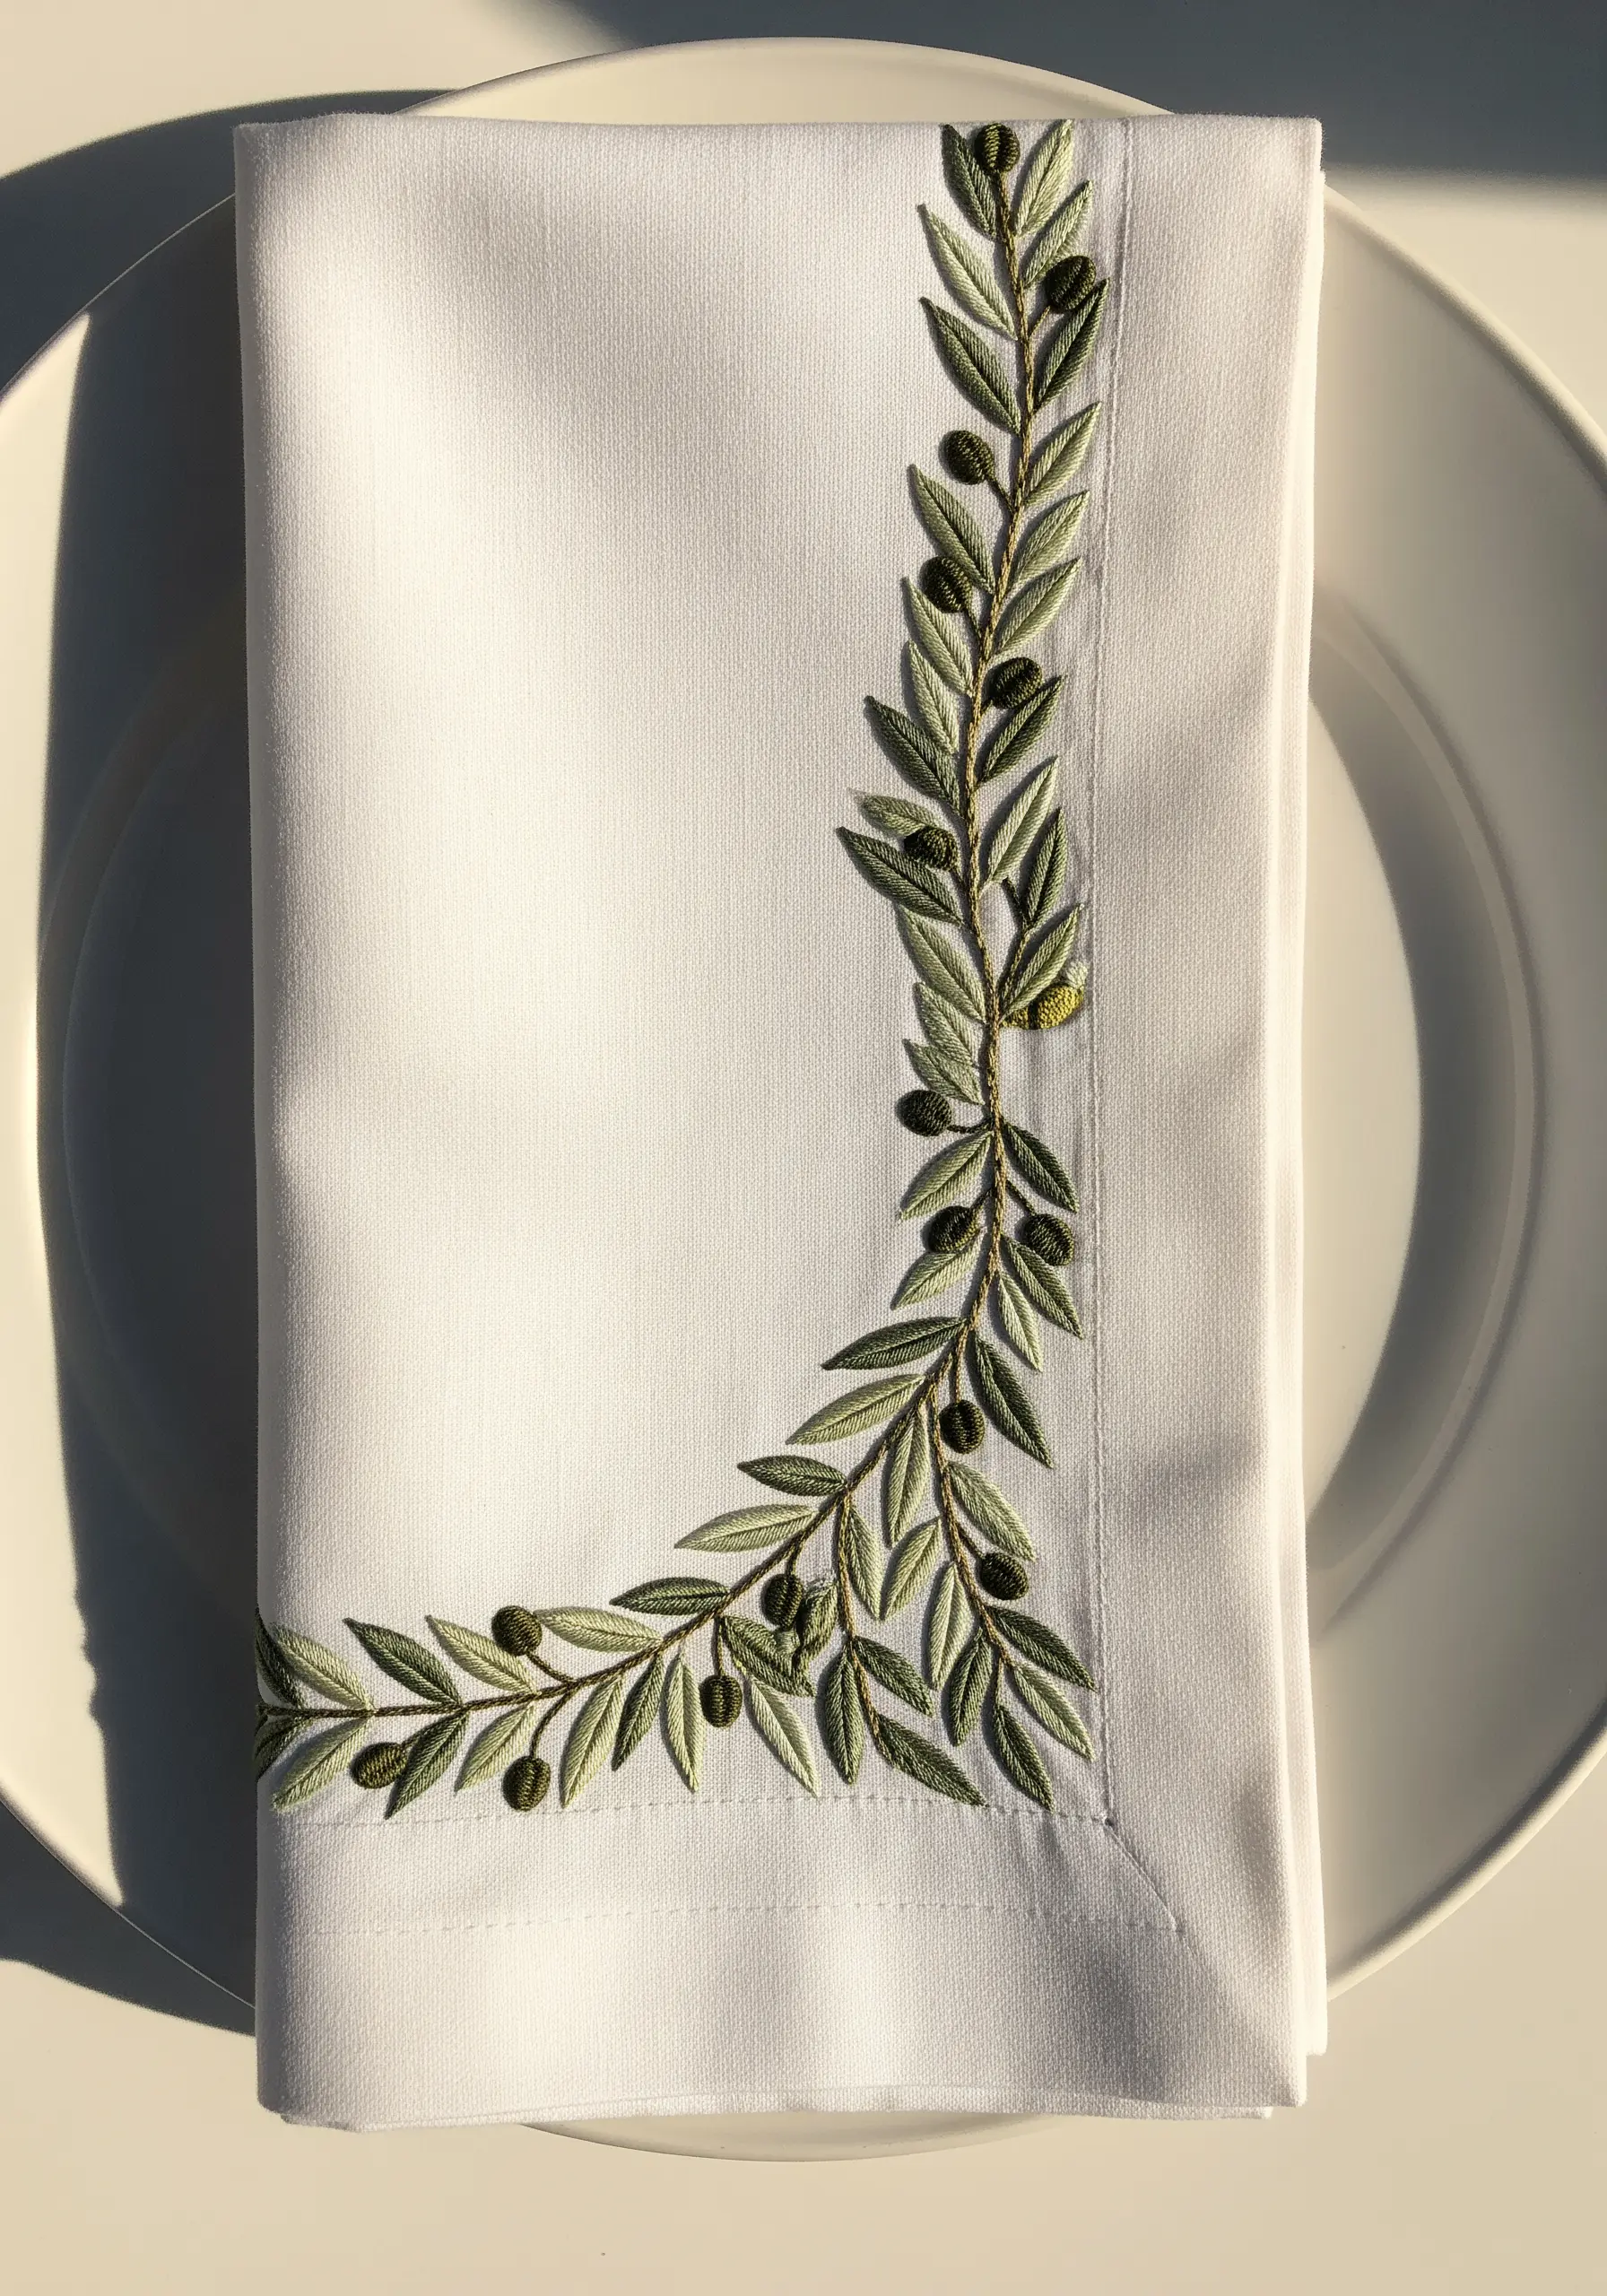
To give your olive leaves a subtle, realistic curve, angle your satin stitches slightly away from the central stem rather than keeping them perfectly perpendicular.
Use three distinct shades of green—a mid-tone for the main leaf, a lighter shade for a highlight on one edge, and a darker one for the underside of overlapping leaves.
This layering creates depth and prevents the design from looking flat.
For the olives, use tightly packed French knots in a deep olive-green or black, pulling each knot taut to create a firm, round shape that contrasts beautifully with the smooth leaves.
2. Soft-Focus Eucalyptus Border
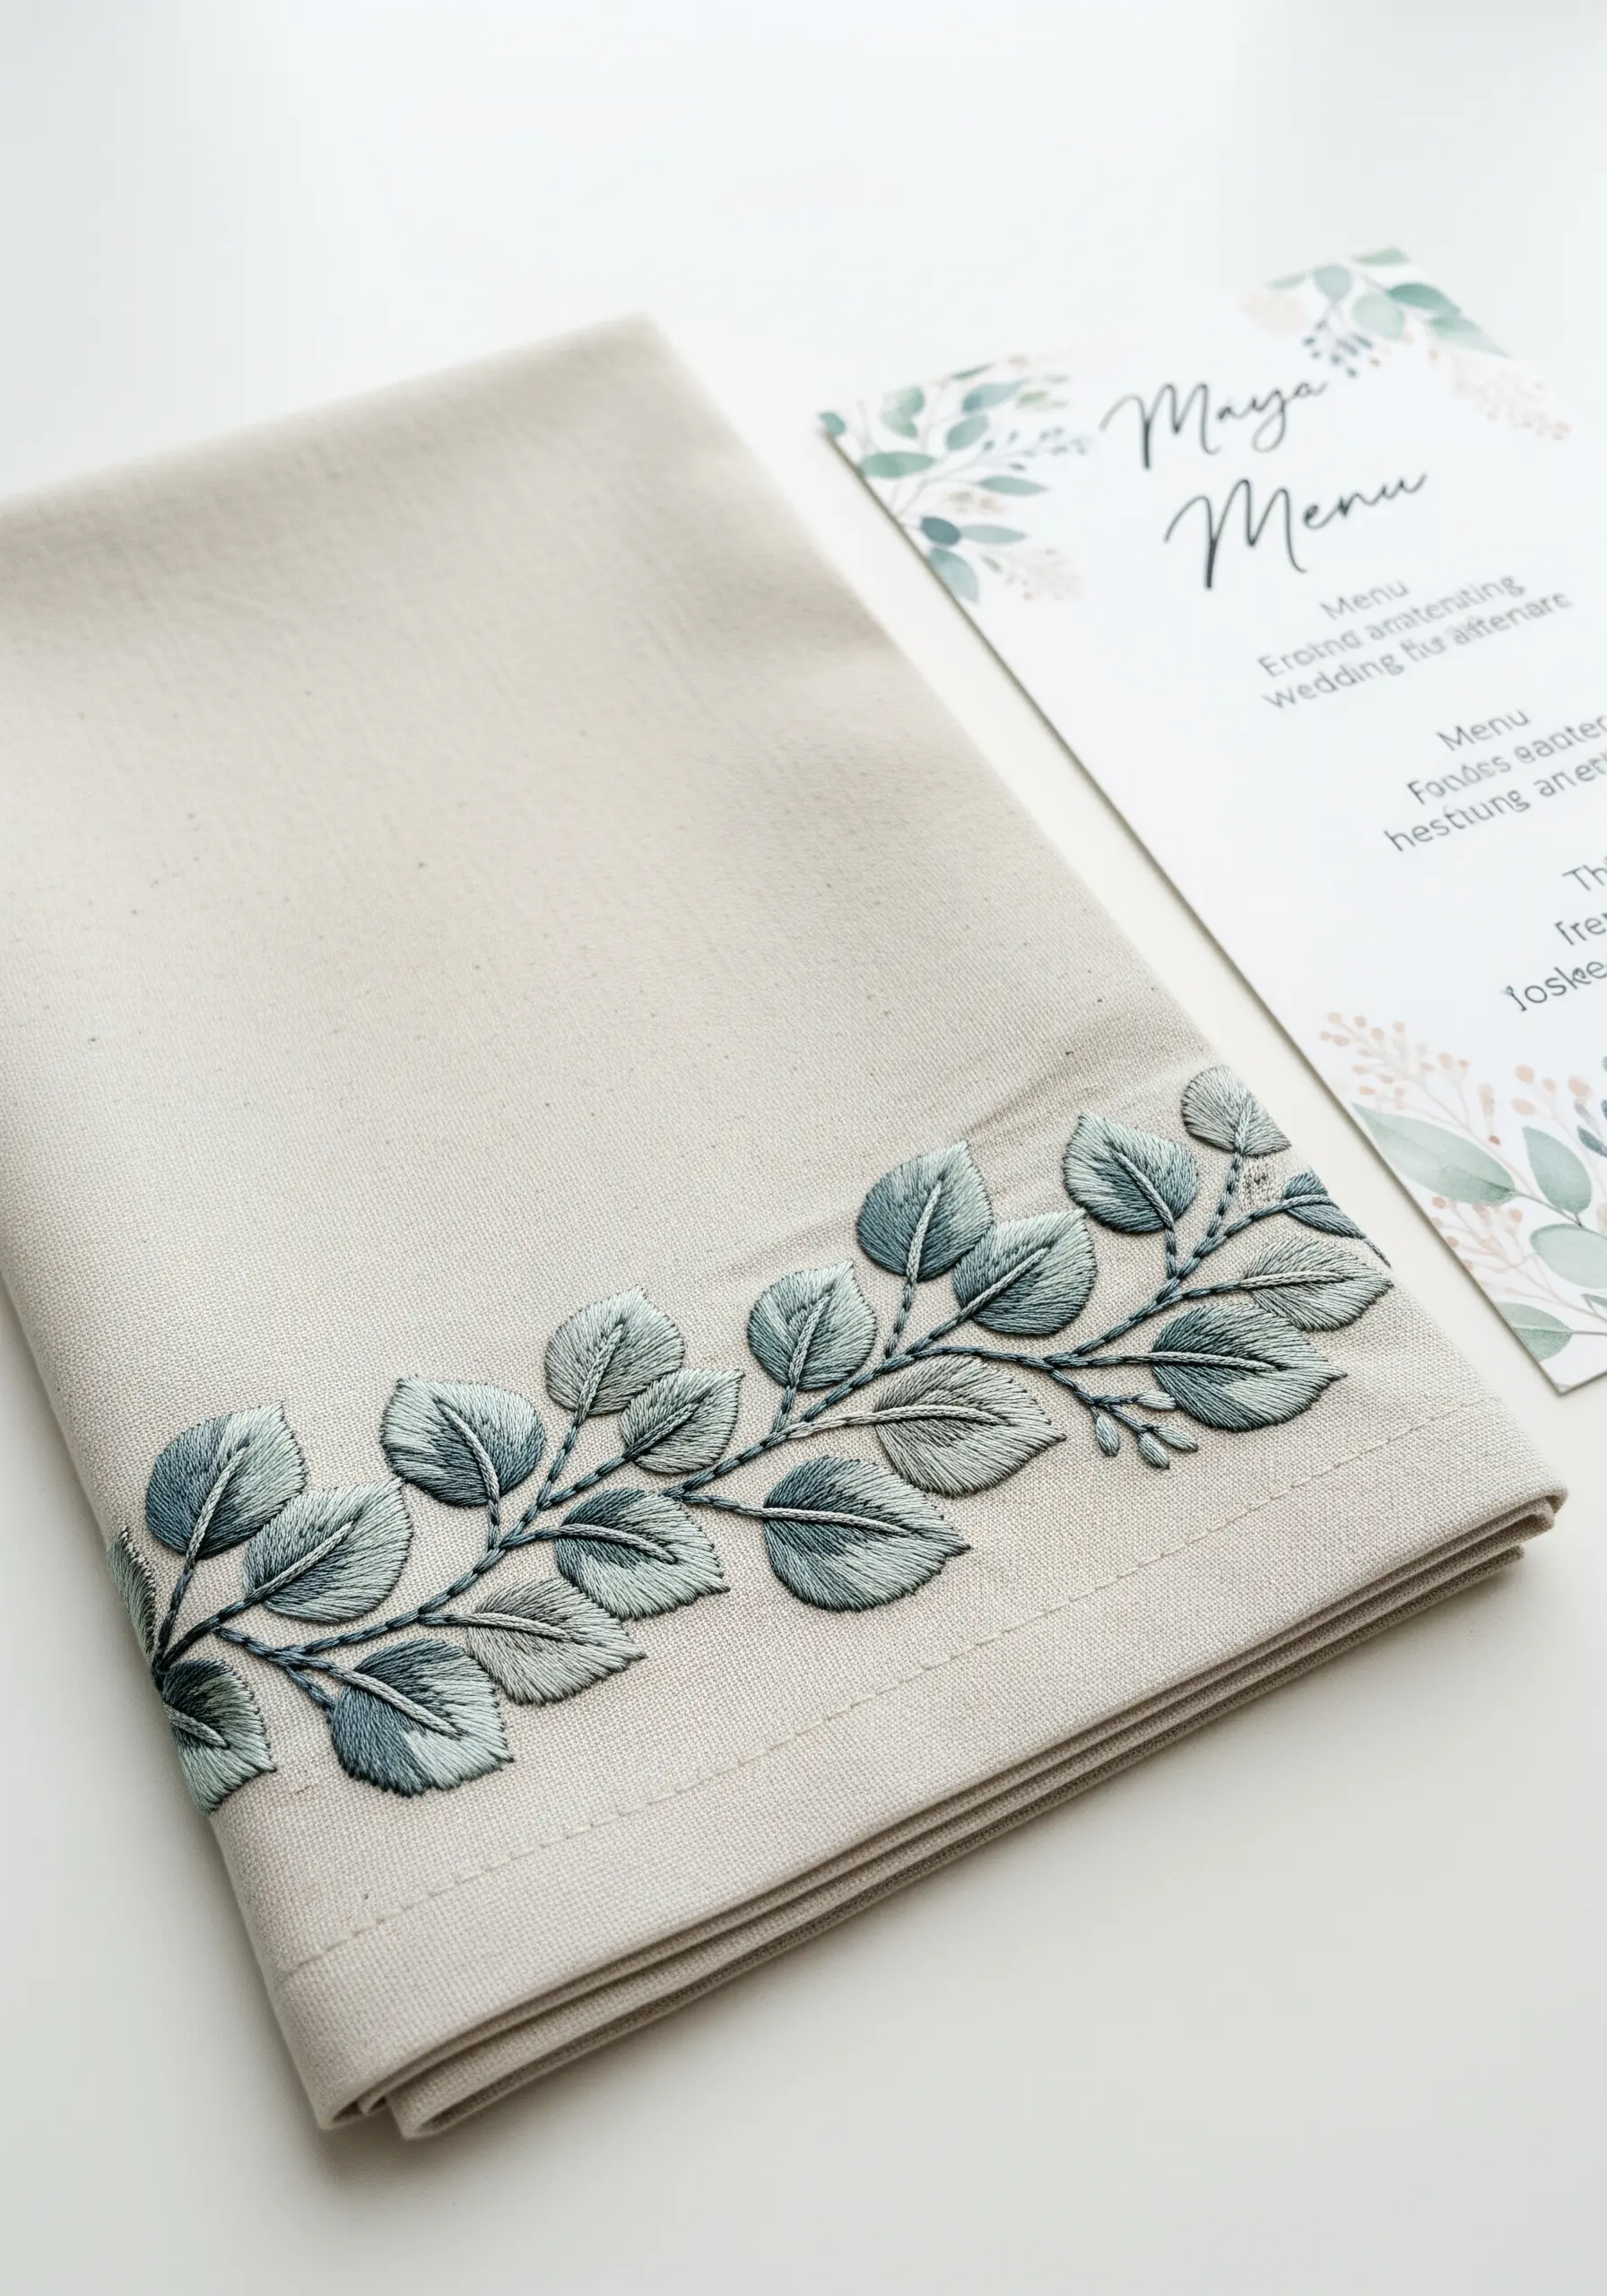
Achieve this painterly, soft-focus effect using long-and-short stitch, which allows you to blend colors seamlessly without harsh lines.
Work with a single strand of thread for the most delicate gradient, using a dusty blue-green and a muted silver-gray.
Outline each leaf with a fine split stitch in a slightly darker shade before filling it in; this creates a crisp edge that contains your fill stitches and gives the design structure.
This technique elevates a simple botanical into a piece of framed embroidery art on fabric.
3. Gilded Ginkgo Silhouette
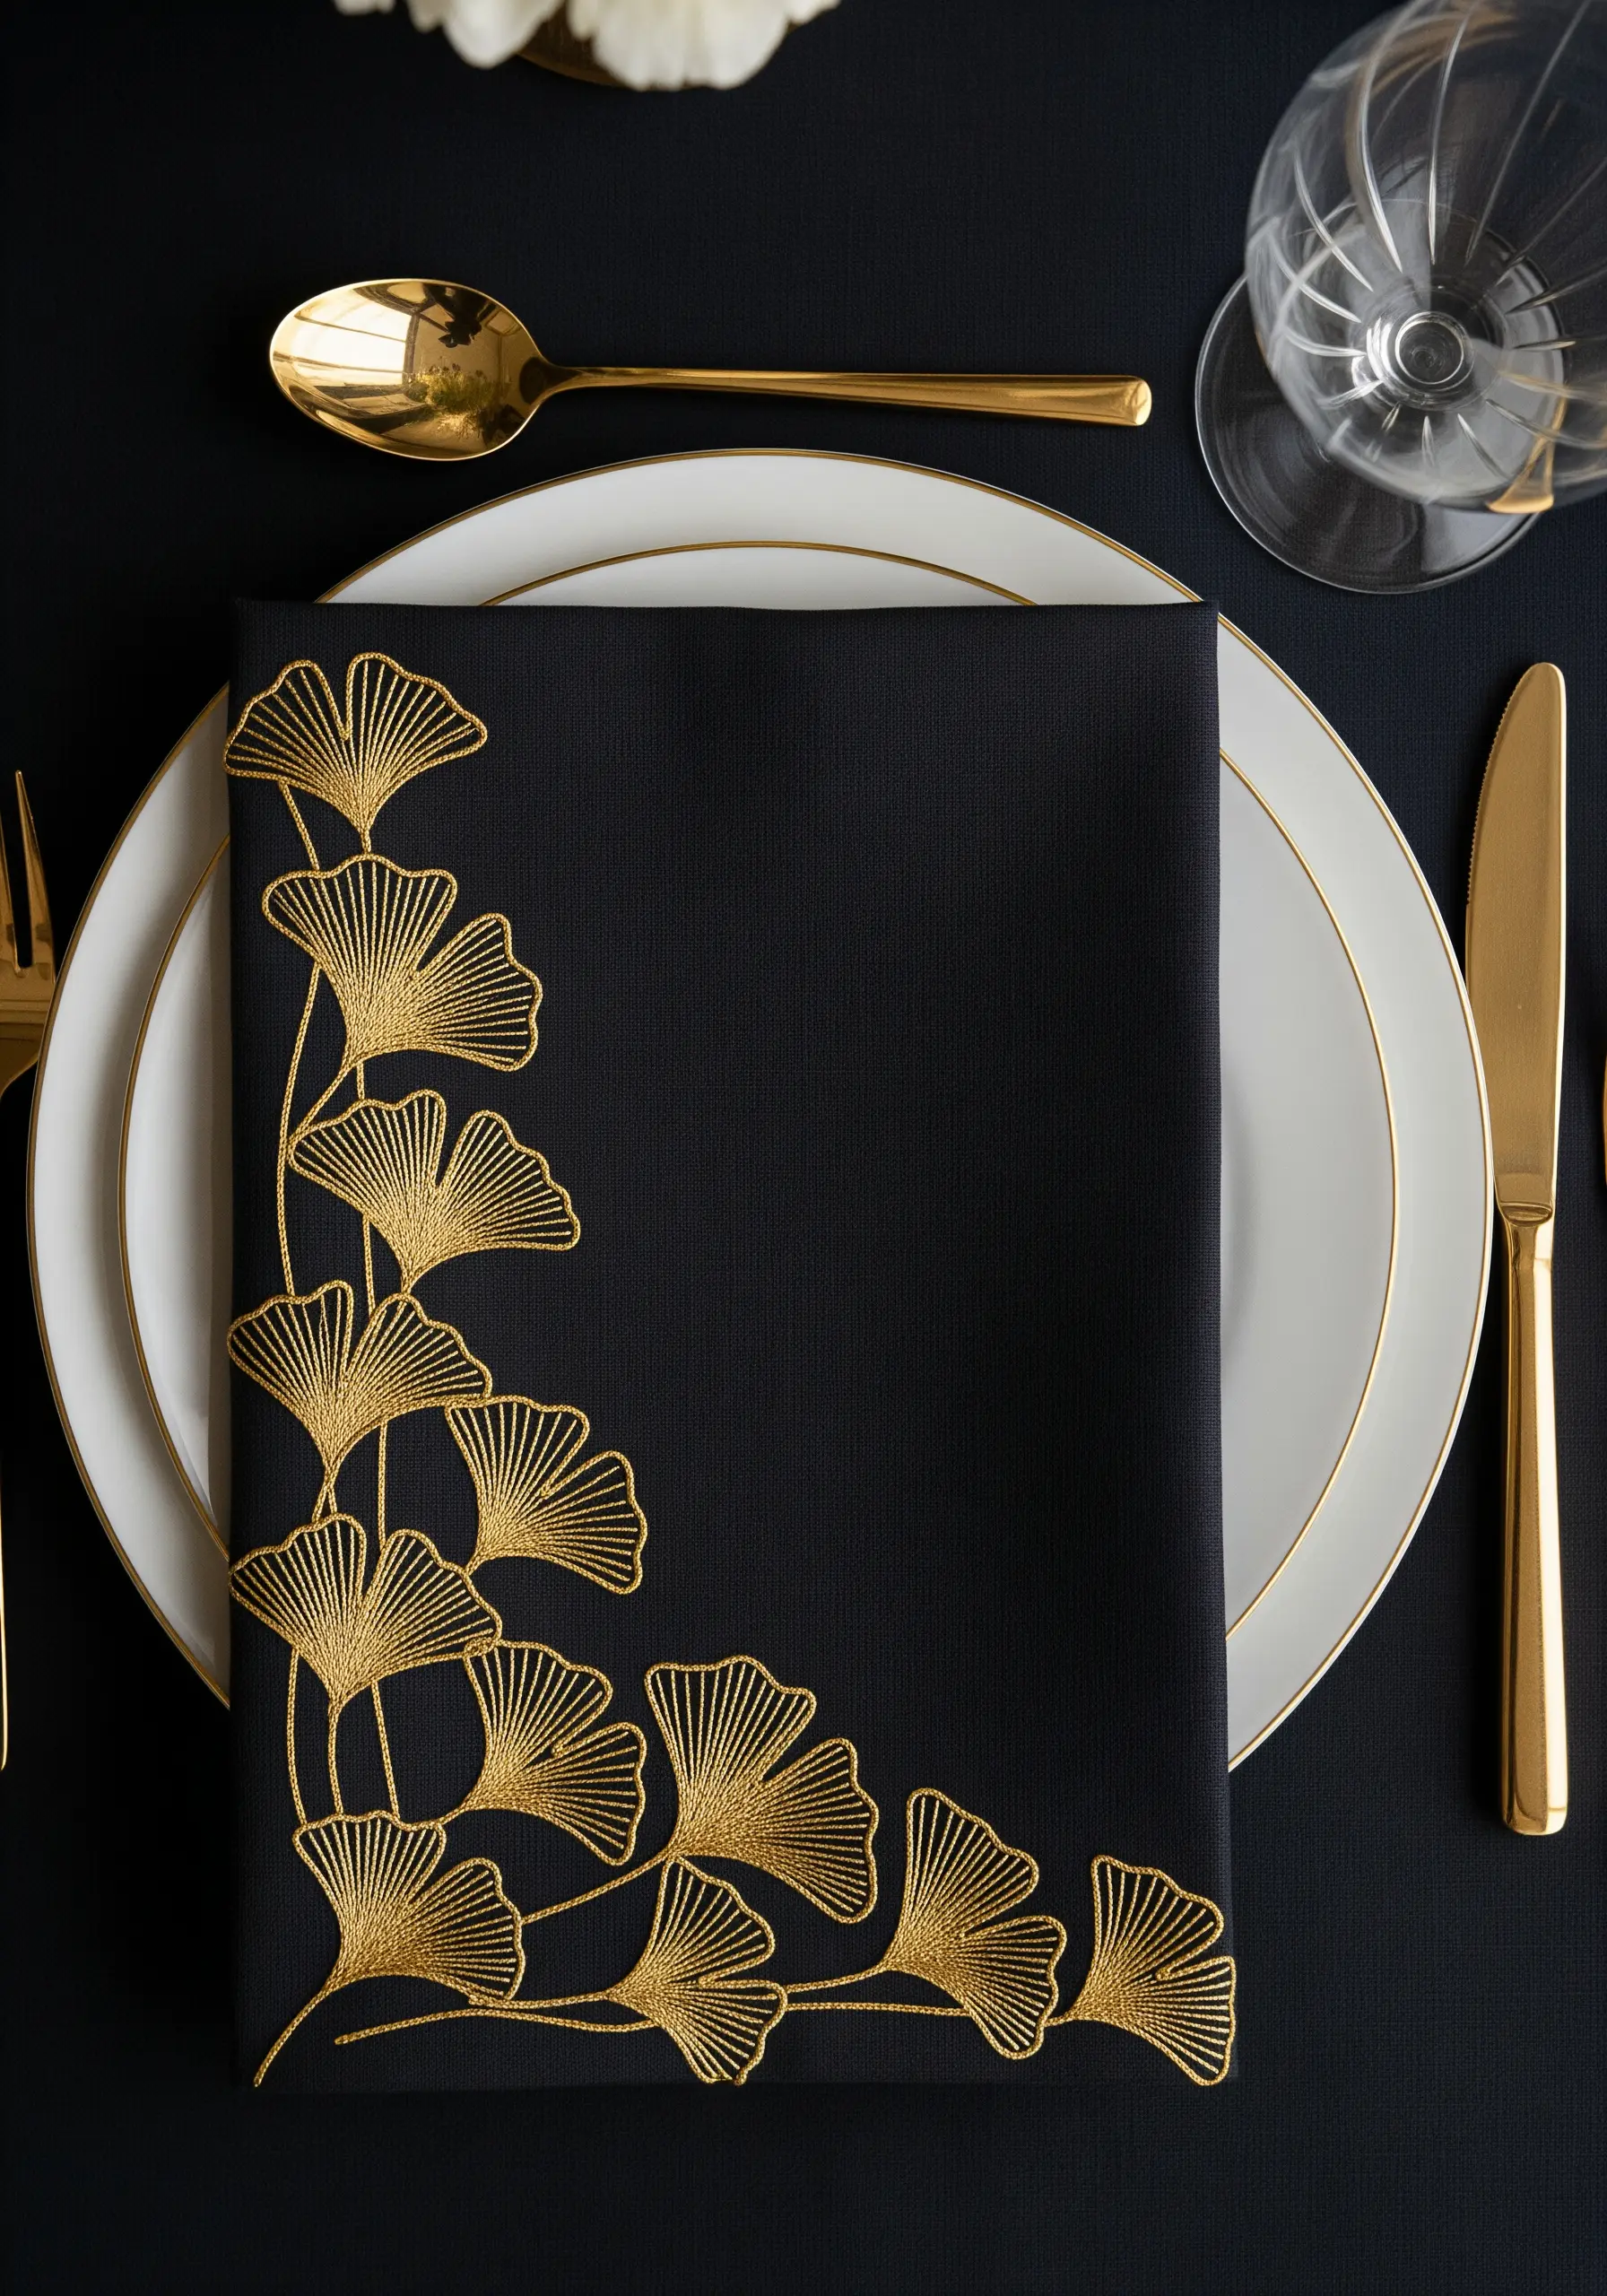
When working with metallic thread on a dark fabric, the key is tension and light.
Use a high-quality gold metallic floss and a needle with a larger eye to prevent shredding.
Keep your satin stitches short and uniform to maximize light reflection, giving the ginkgo leaves their signature shimmer.
For the delicate stems, a single, sharp line of couching or a fine backstitch will provide structure without adding bulk, ensuring the focus remains on the elegant fan-shaped leaves.
4. Two-Tone Fern Frond Frame

Create this modern gradient effect by dividing each fern leaflet into two sections.
Fill the outer half with a light mint green satin stitch, and the inner half with a darker olive green.
Ensure all your stitches flow in the same direction, away from the central stem, to create a cohesive, polished look.
This simple color-blocking technique transforms a traditional fern into a clean, contemporary design that feels both fresh and sophisticated.
5. Laurel Wreath Monogram
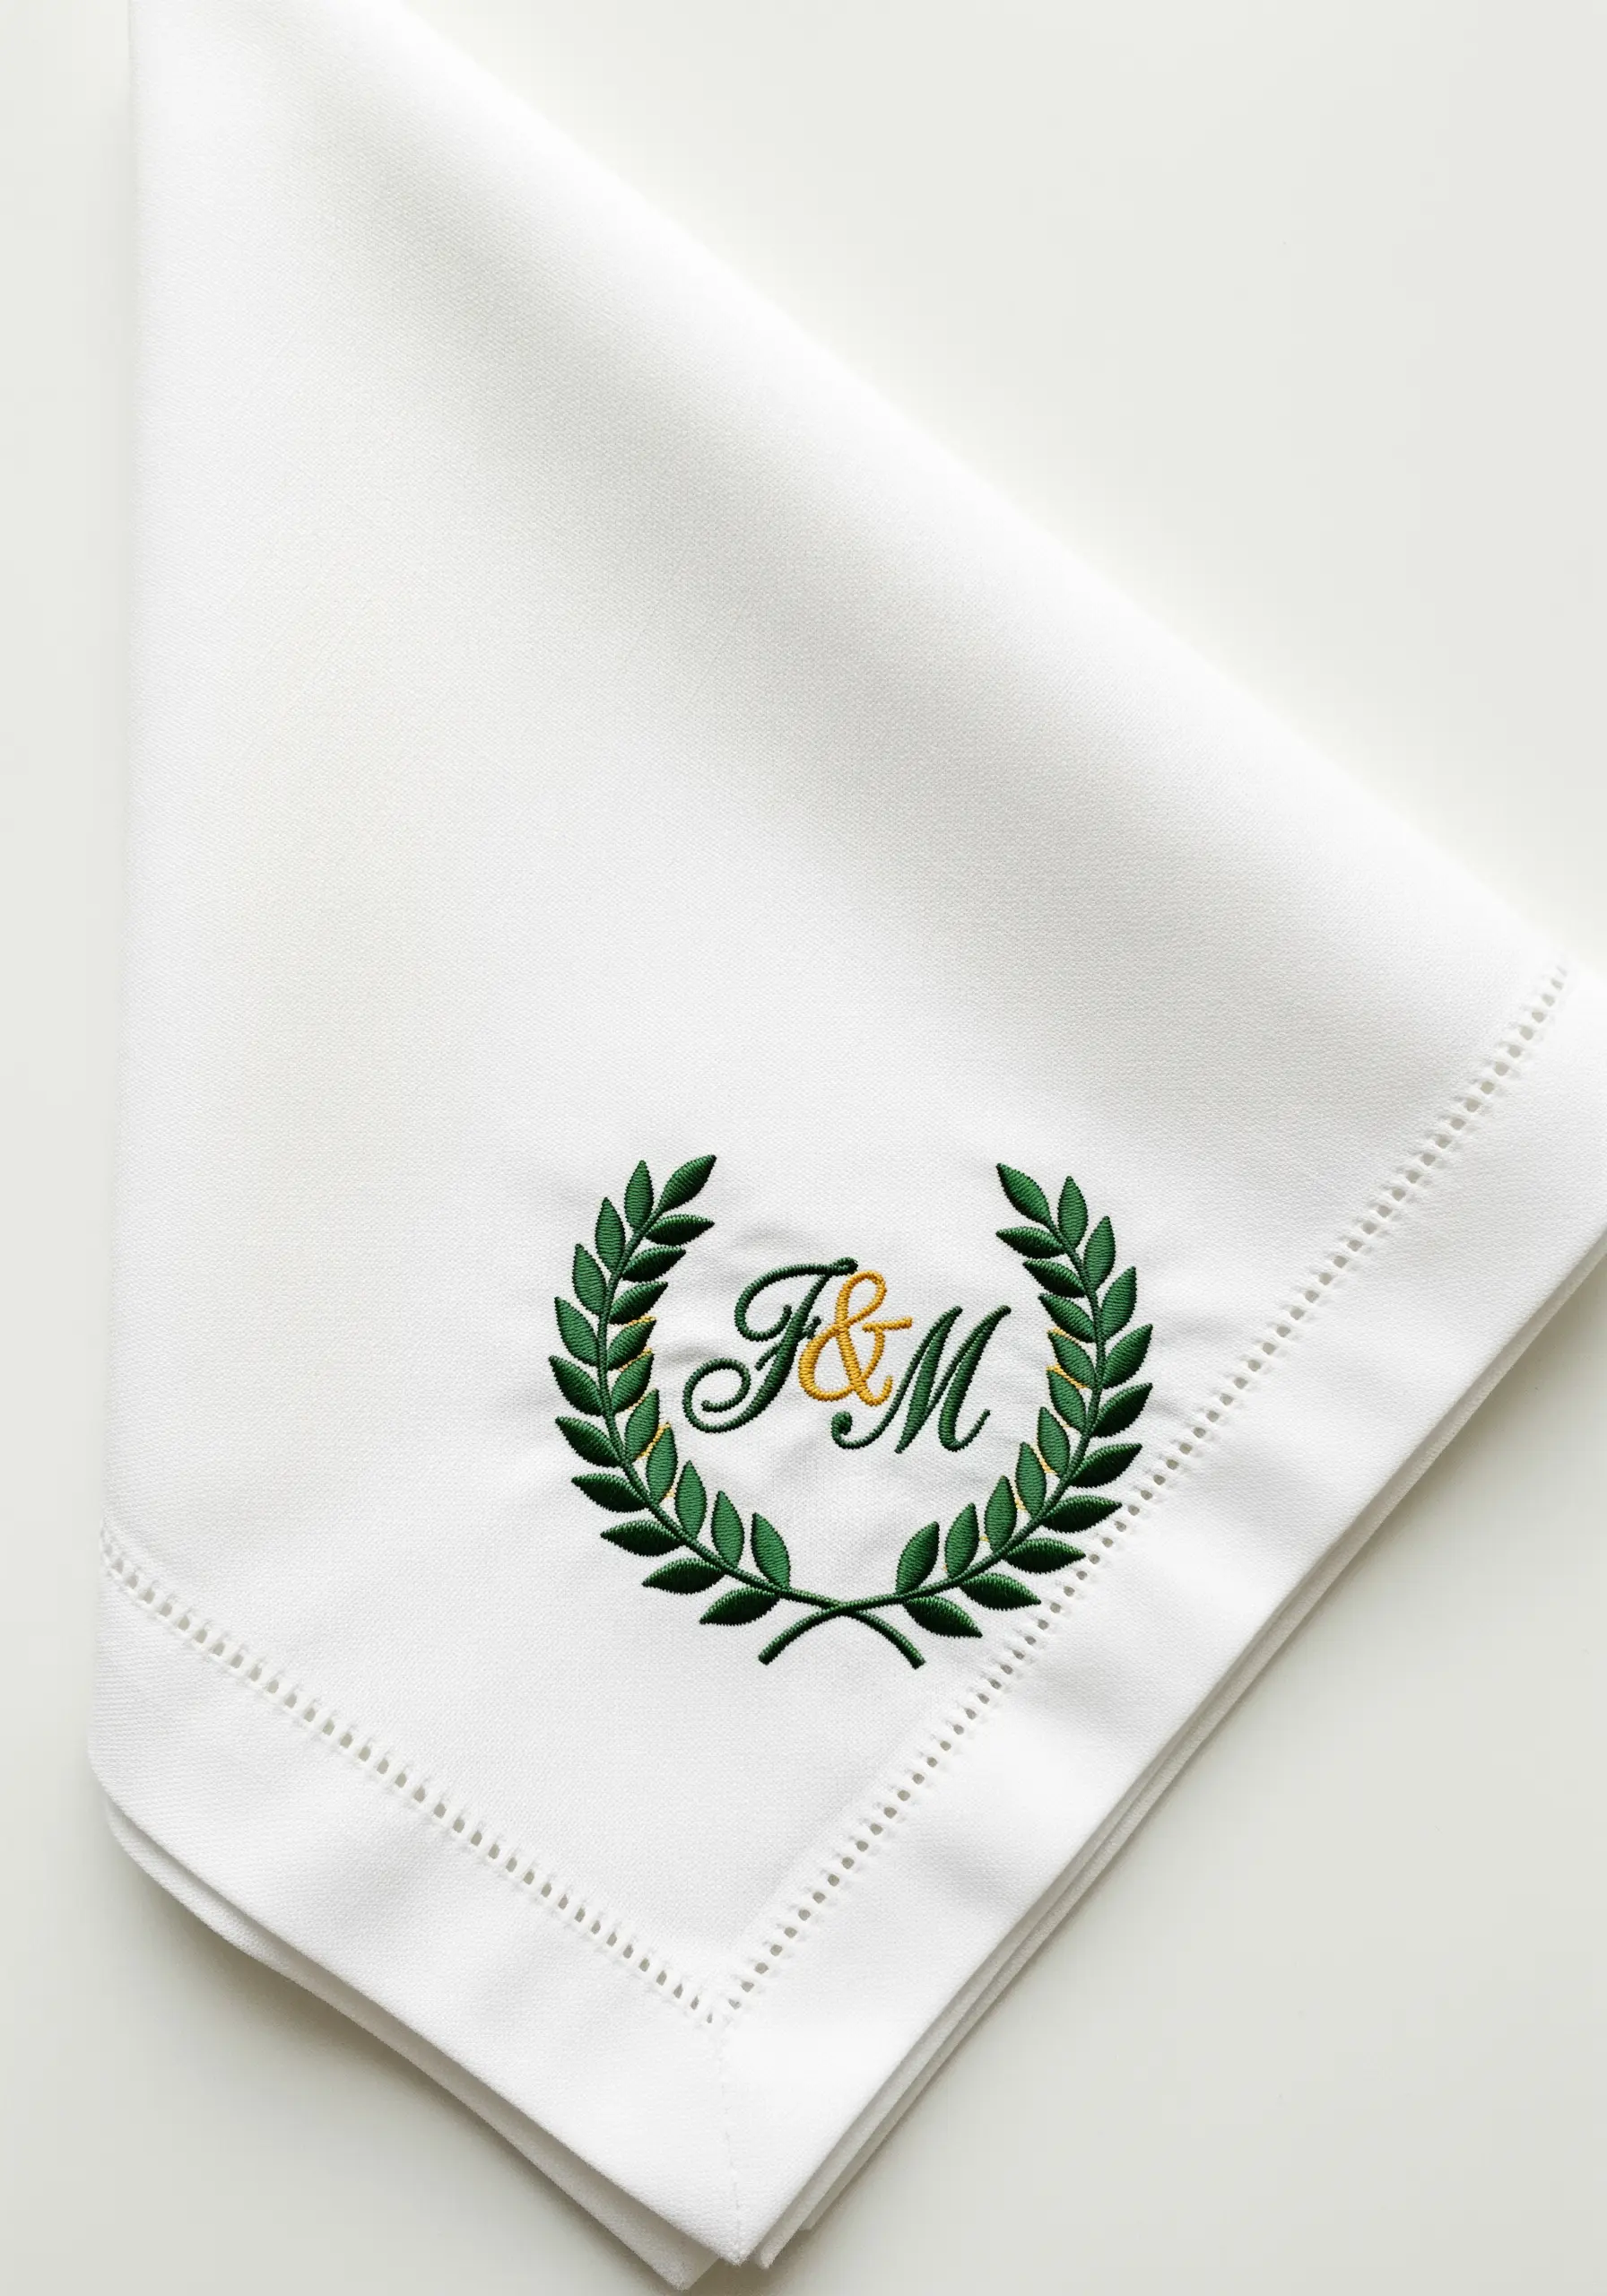
For a perfectly symmetrical laurel wreath, use fishbone stitch for the leaves.
This stitch creates a beautiful raised center line that mimics a natural leaf vein, adding texture and dimension automatically.
Work the leaves in a deep, classic green to frame the initials.
For the monogram itself, choose a contrasting color like gold or silver and use a padded satin stitch to make the letters stand out, giving them a raised, embossed quality.
6. Autumnal Maple Leaf Cascade
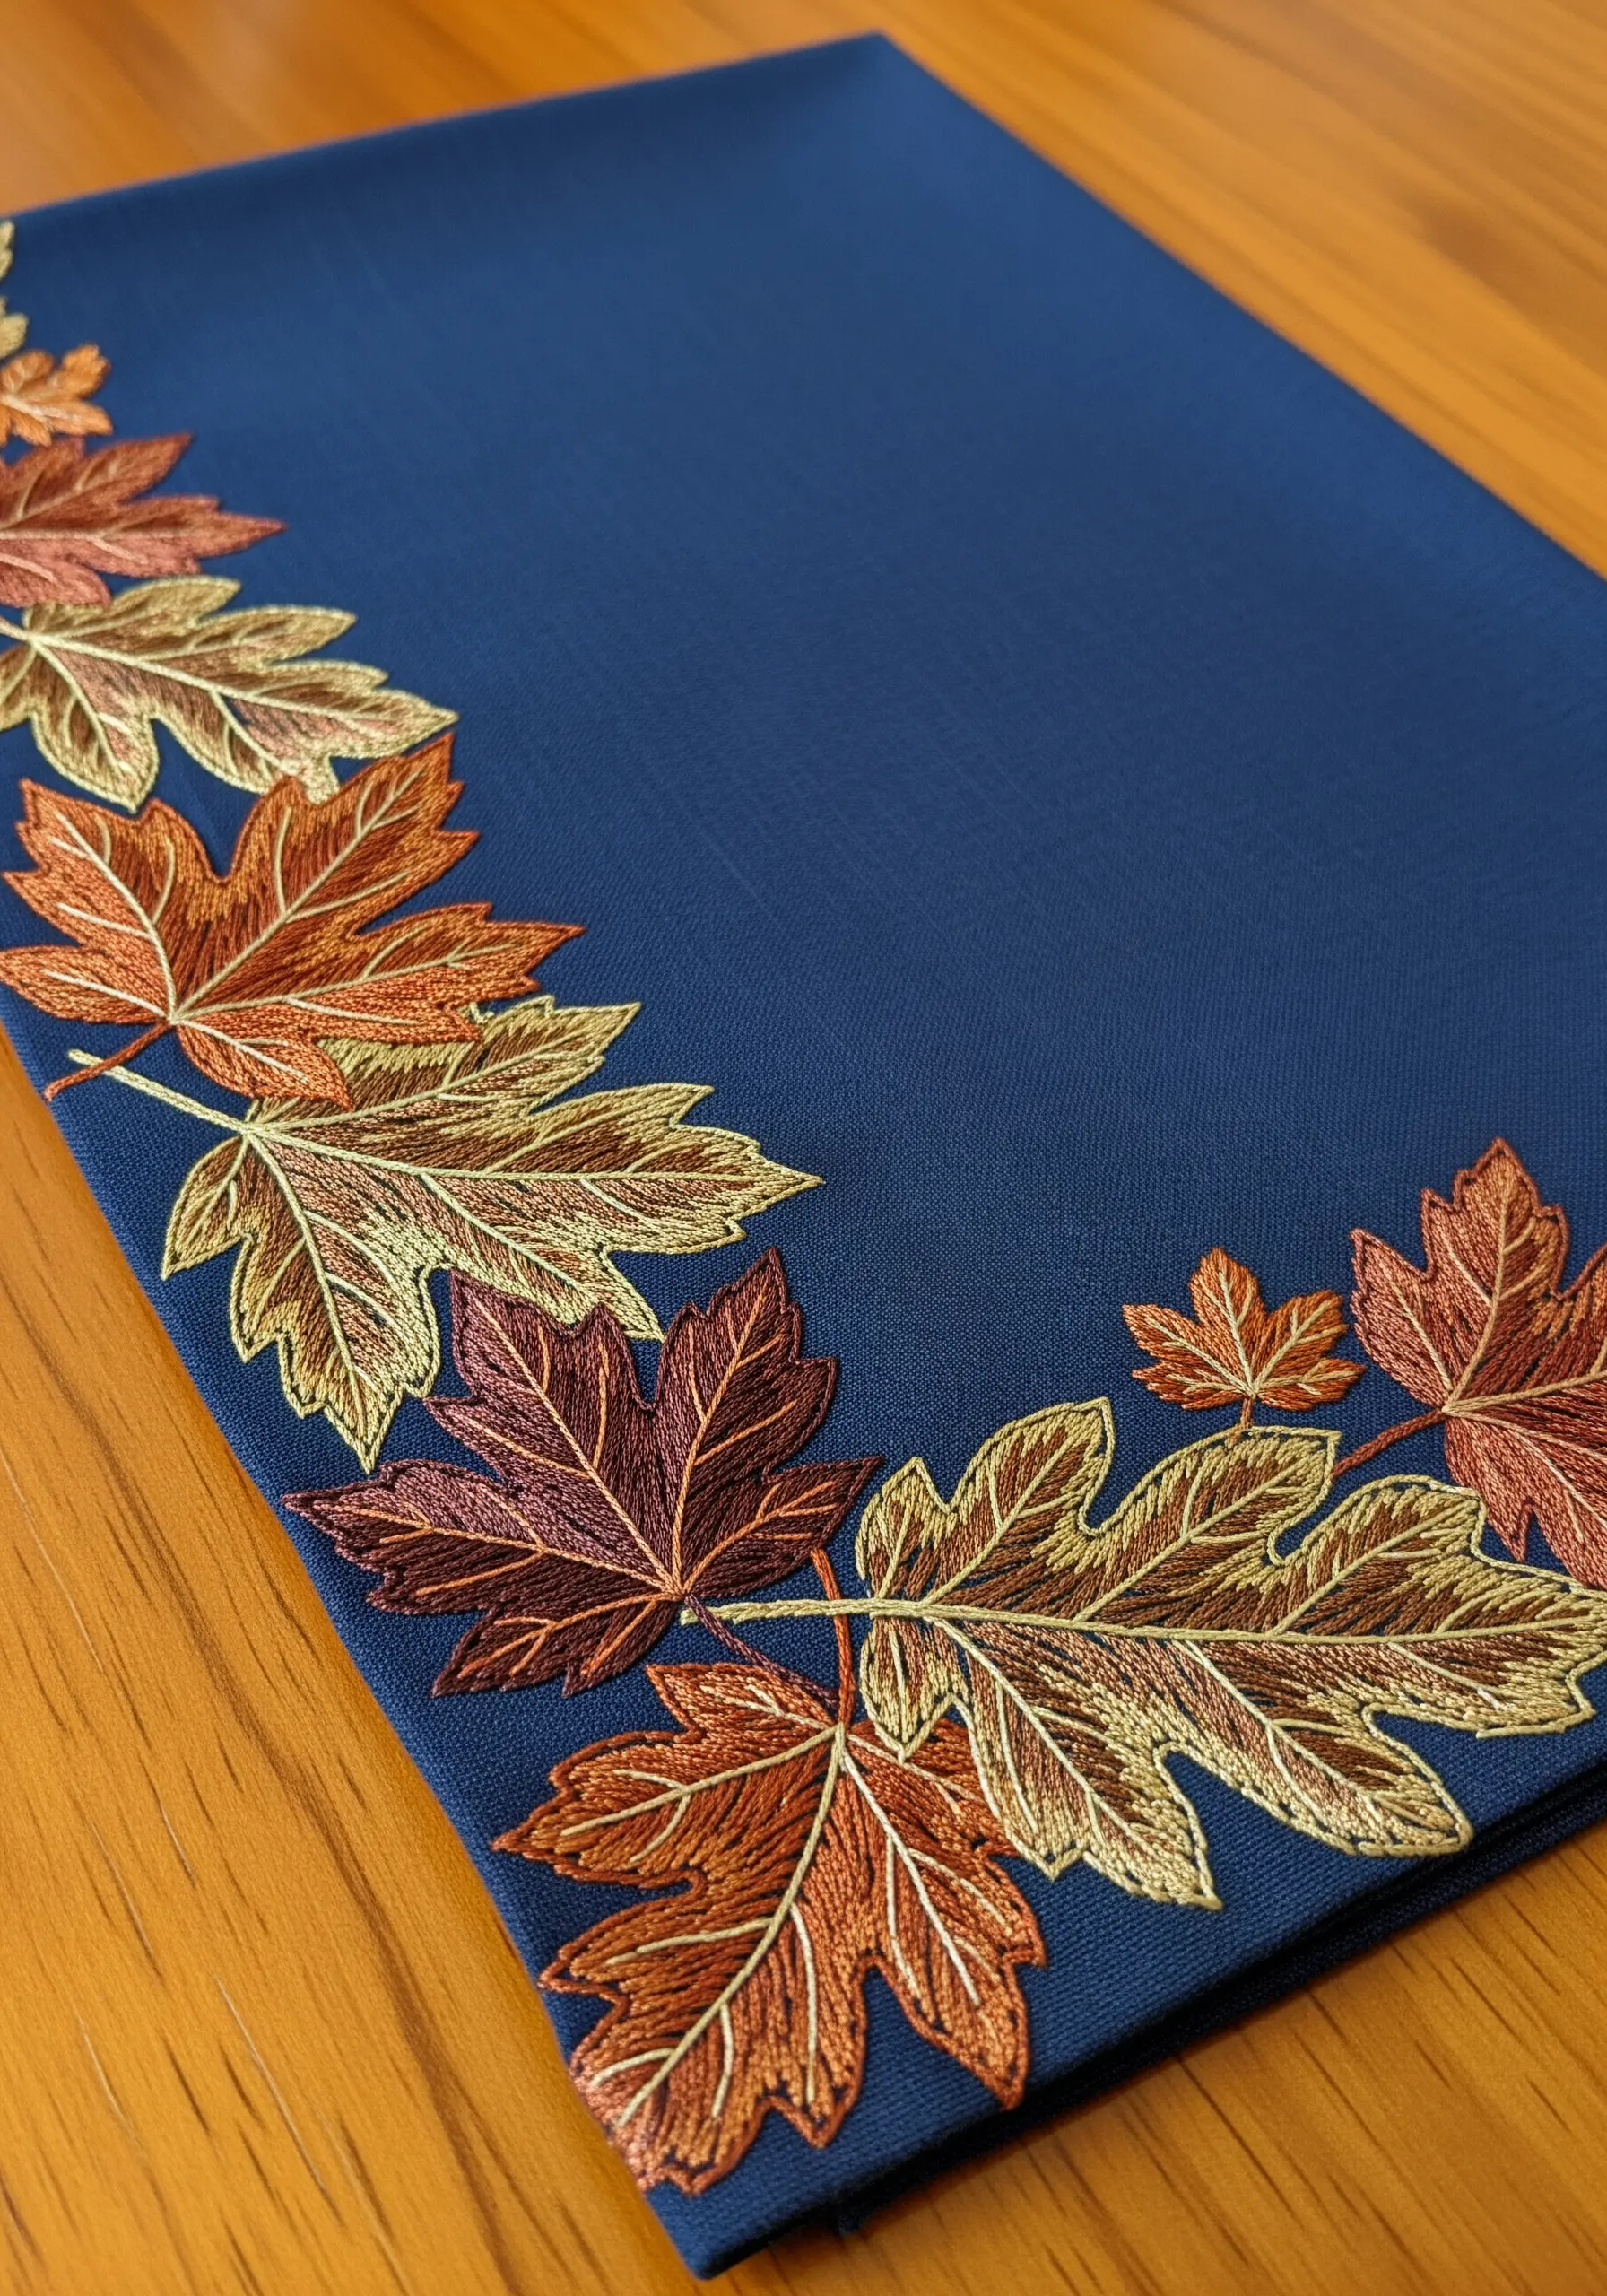
Capture the rich, warm tones of autumn by using thread color blending within each leaf.
Using long-and-short stitch, load your needle with two or three complementary shades—like rust, gold, and copper—to create a variegated, organic look.
Outline the leaves with a dark brown or burgundy backstitch to define their iconic shape against the deep blue fabric.
This technique adds incredible depth and makes each leaf feel like a unique work of art.
7. Modern Appliqué with a Stitched Edge

For a bold, graphic look, turn to appliqué instead of fill stitching.
Cut your leaf shapes from high-quality cotton or felt in shades of teal, mint, and white.
Iron on a fusible backing to prevent fraying and to hold them in place while you stitch.
Secure each piece with a tight, clean machine satin stitch or a dense, hand-stitched buttonhole stitch around the edge.
This technique is fast, impactful, and perfect for a contemporary wedding aesthetic.
8. Whispering Willow Branch
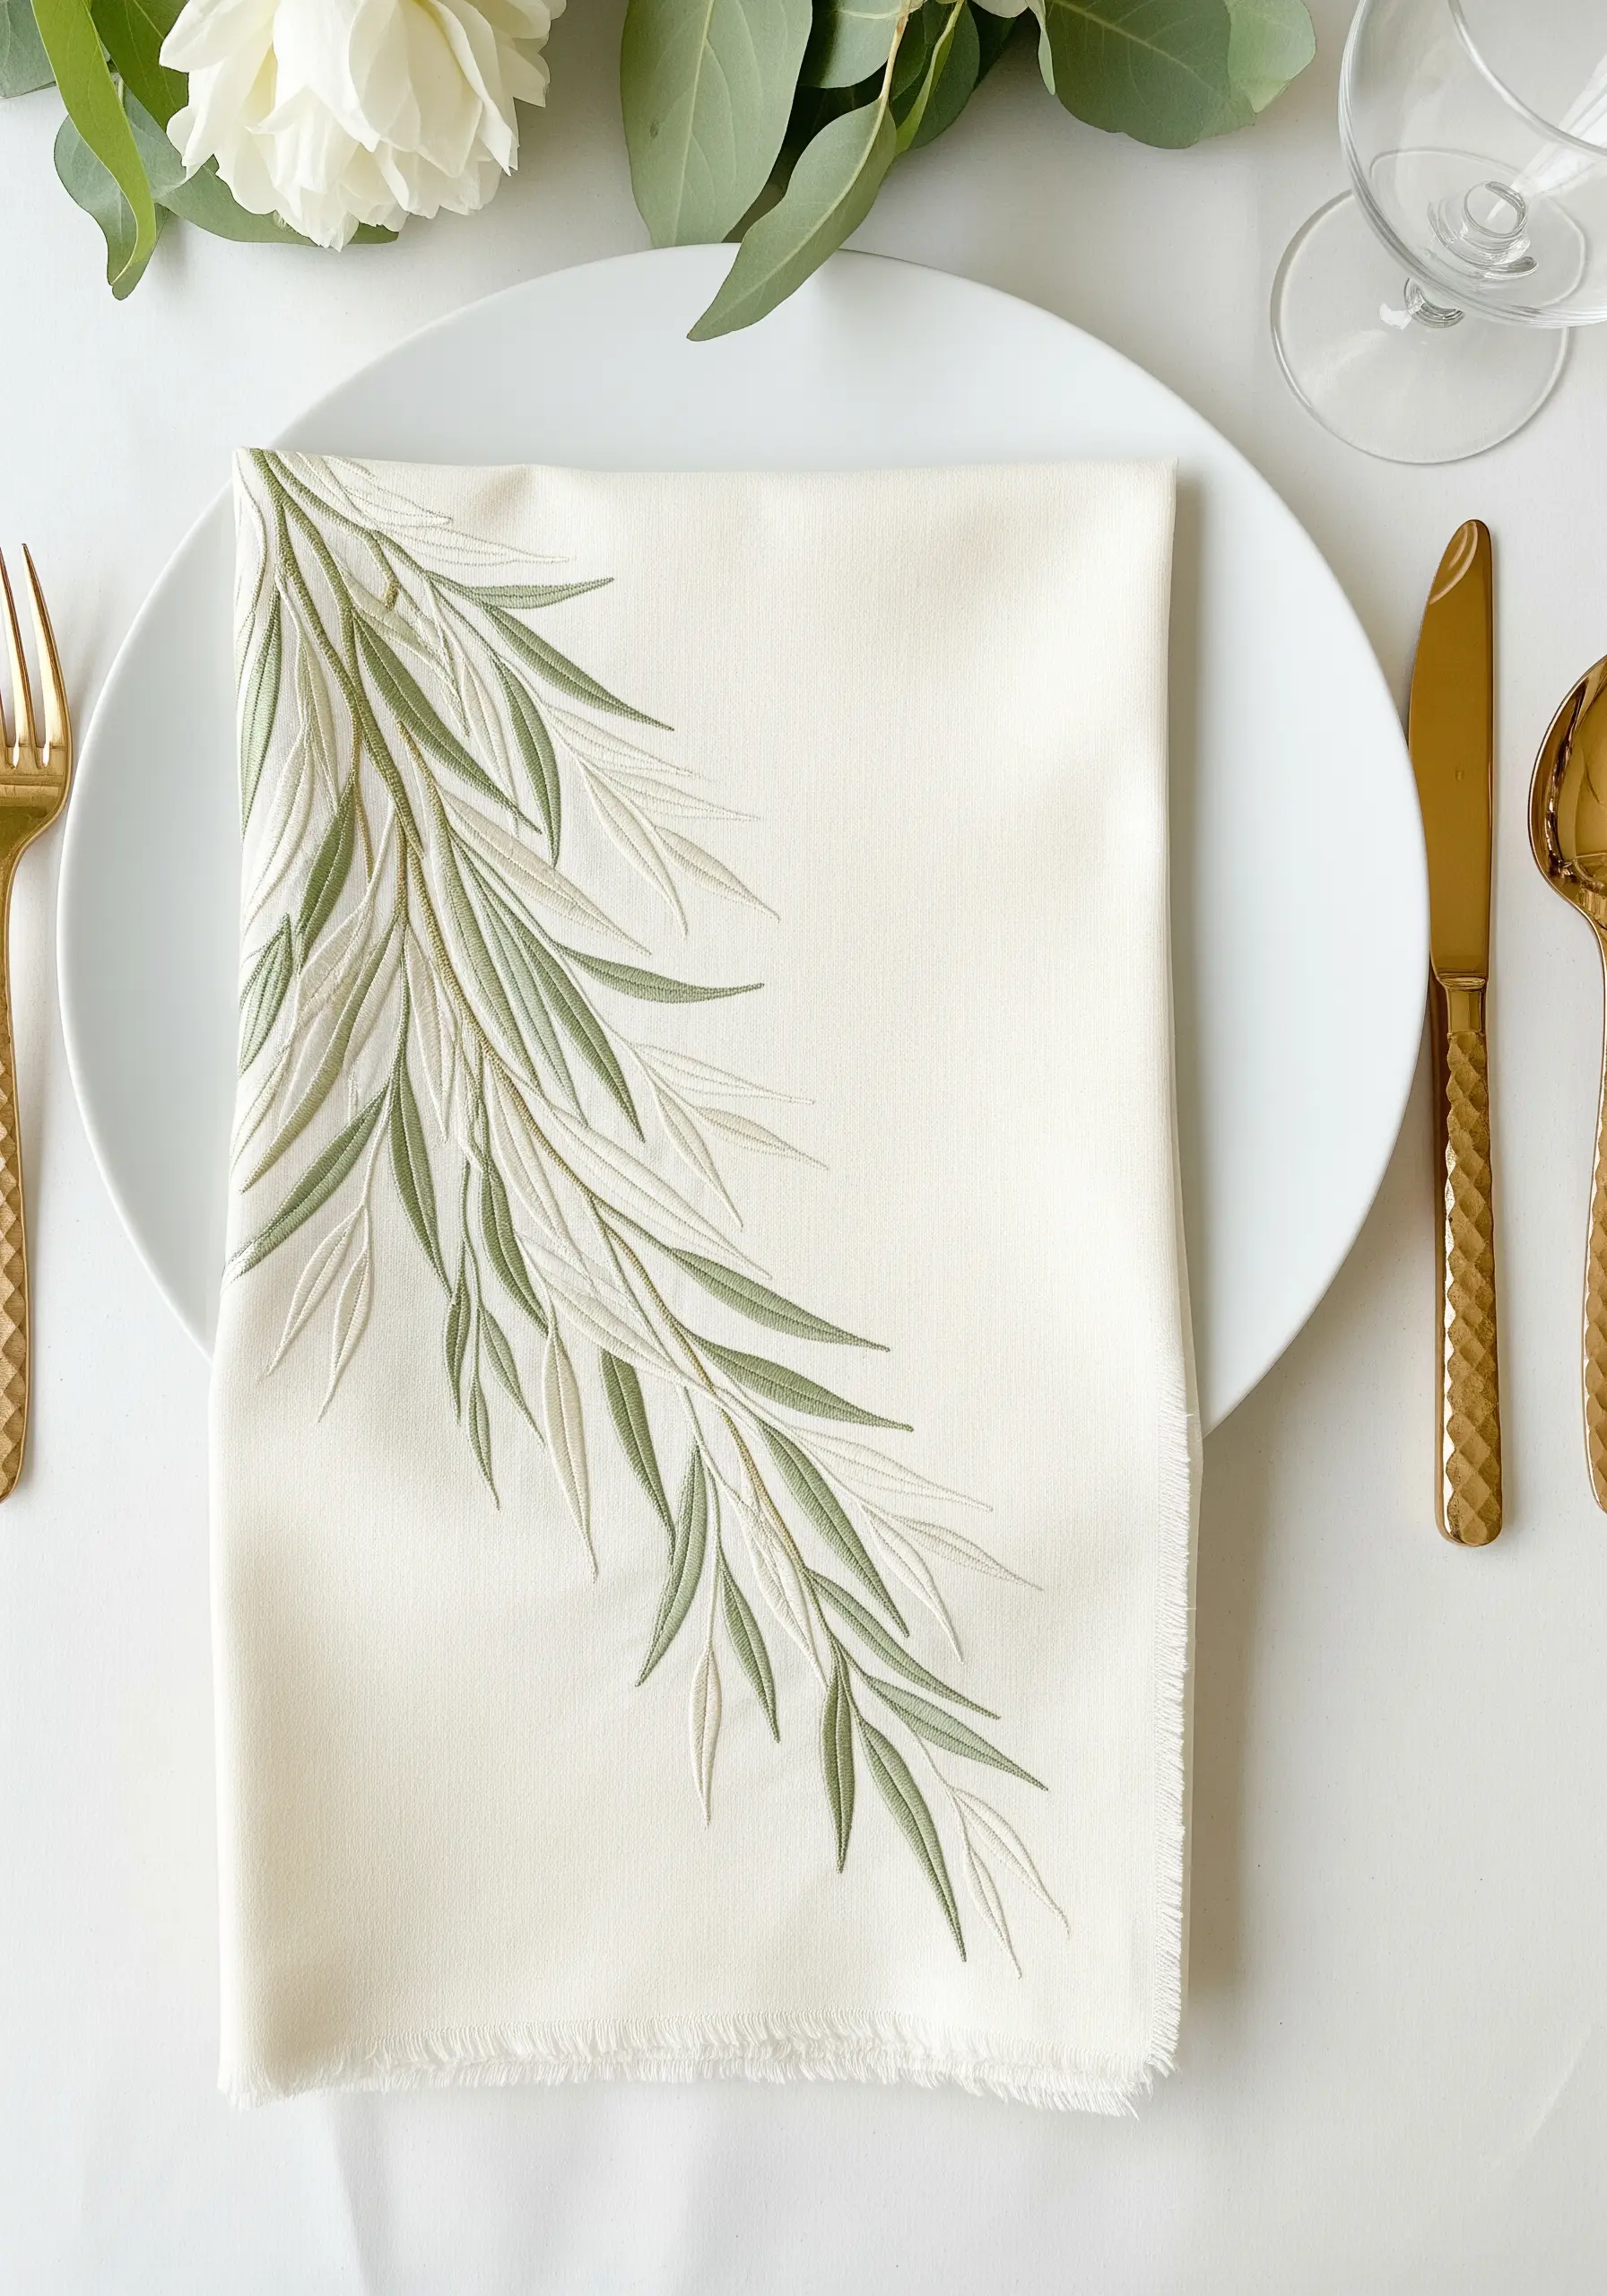
This design is an exercise in elegant restraint.
Create the delicate, drooping willow leaves using a simple straight stitch or a single, elongated lazy daisy stitch.
Use just one or two strands of floss in muted greens and off-whites to maintain a light, airy feel.
Vary the length and angle of the stitches to mimic the natural, gentle movement of willow branches in the wind.
The beauty here lies in the negative space and the simplicity of the lines.
9. Tone-on-Tone Ivy Border
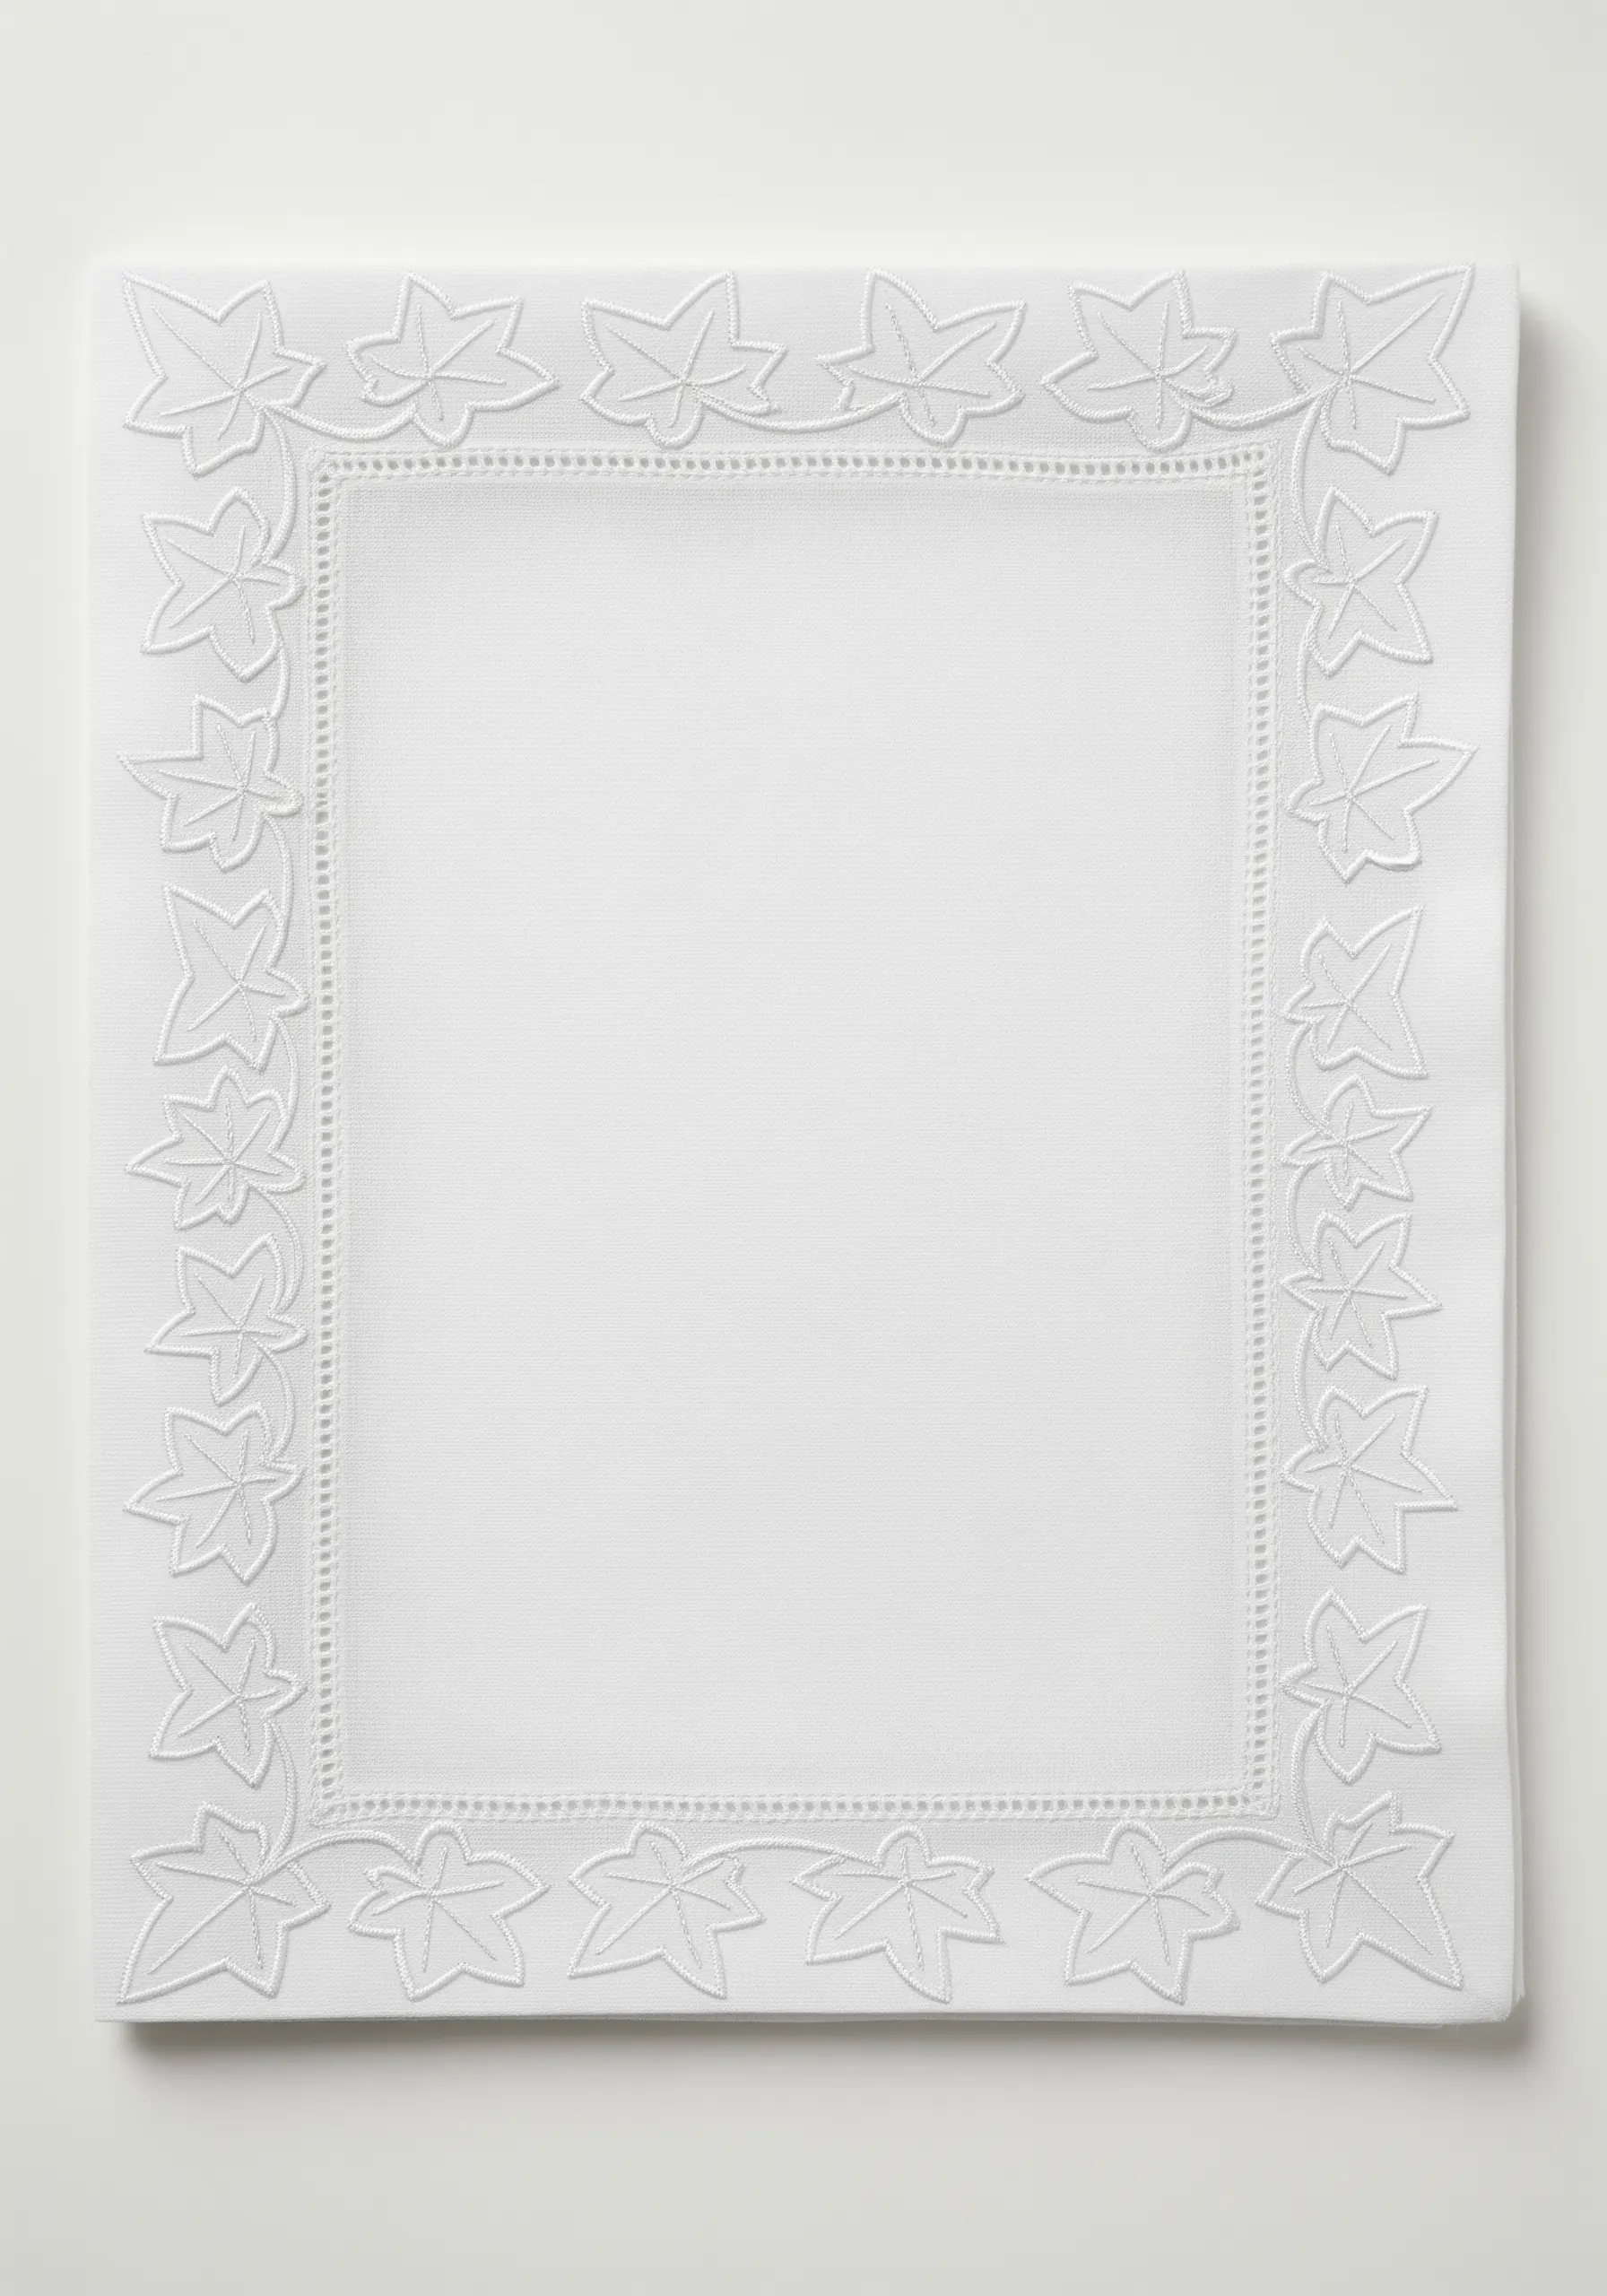
When working white-on-white, texture is everything.
Make this ivy border stand out by using a padded satin stitch.
First, create a foundation of small running stitches within your leaf outline, then cover it with satin stitches worked in the opposite direction.
This simple step raises the embroidery from the fabric surface, allowing it to catch the light and create subtle shadows.
The result is an incredibly understated embroidery project that looks expensive and refined.
10. Scattered Herb Garden Motif
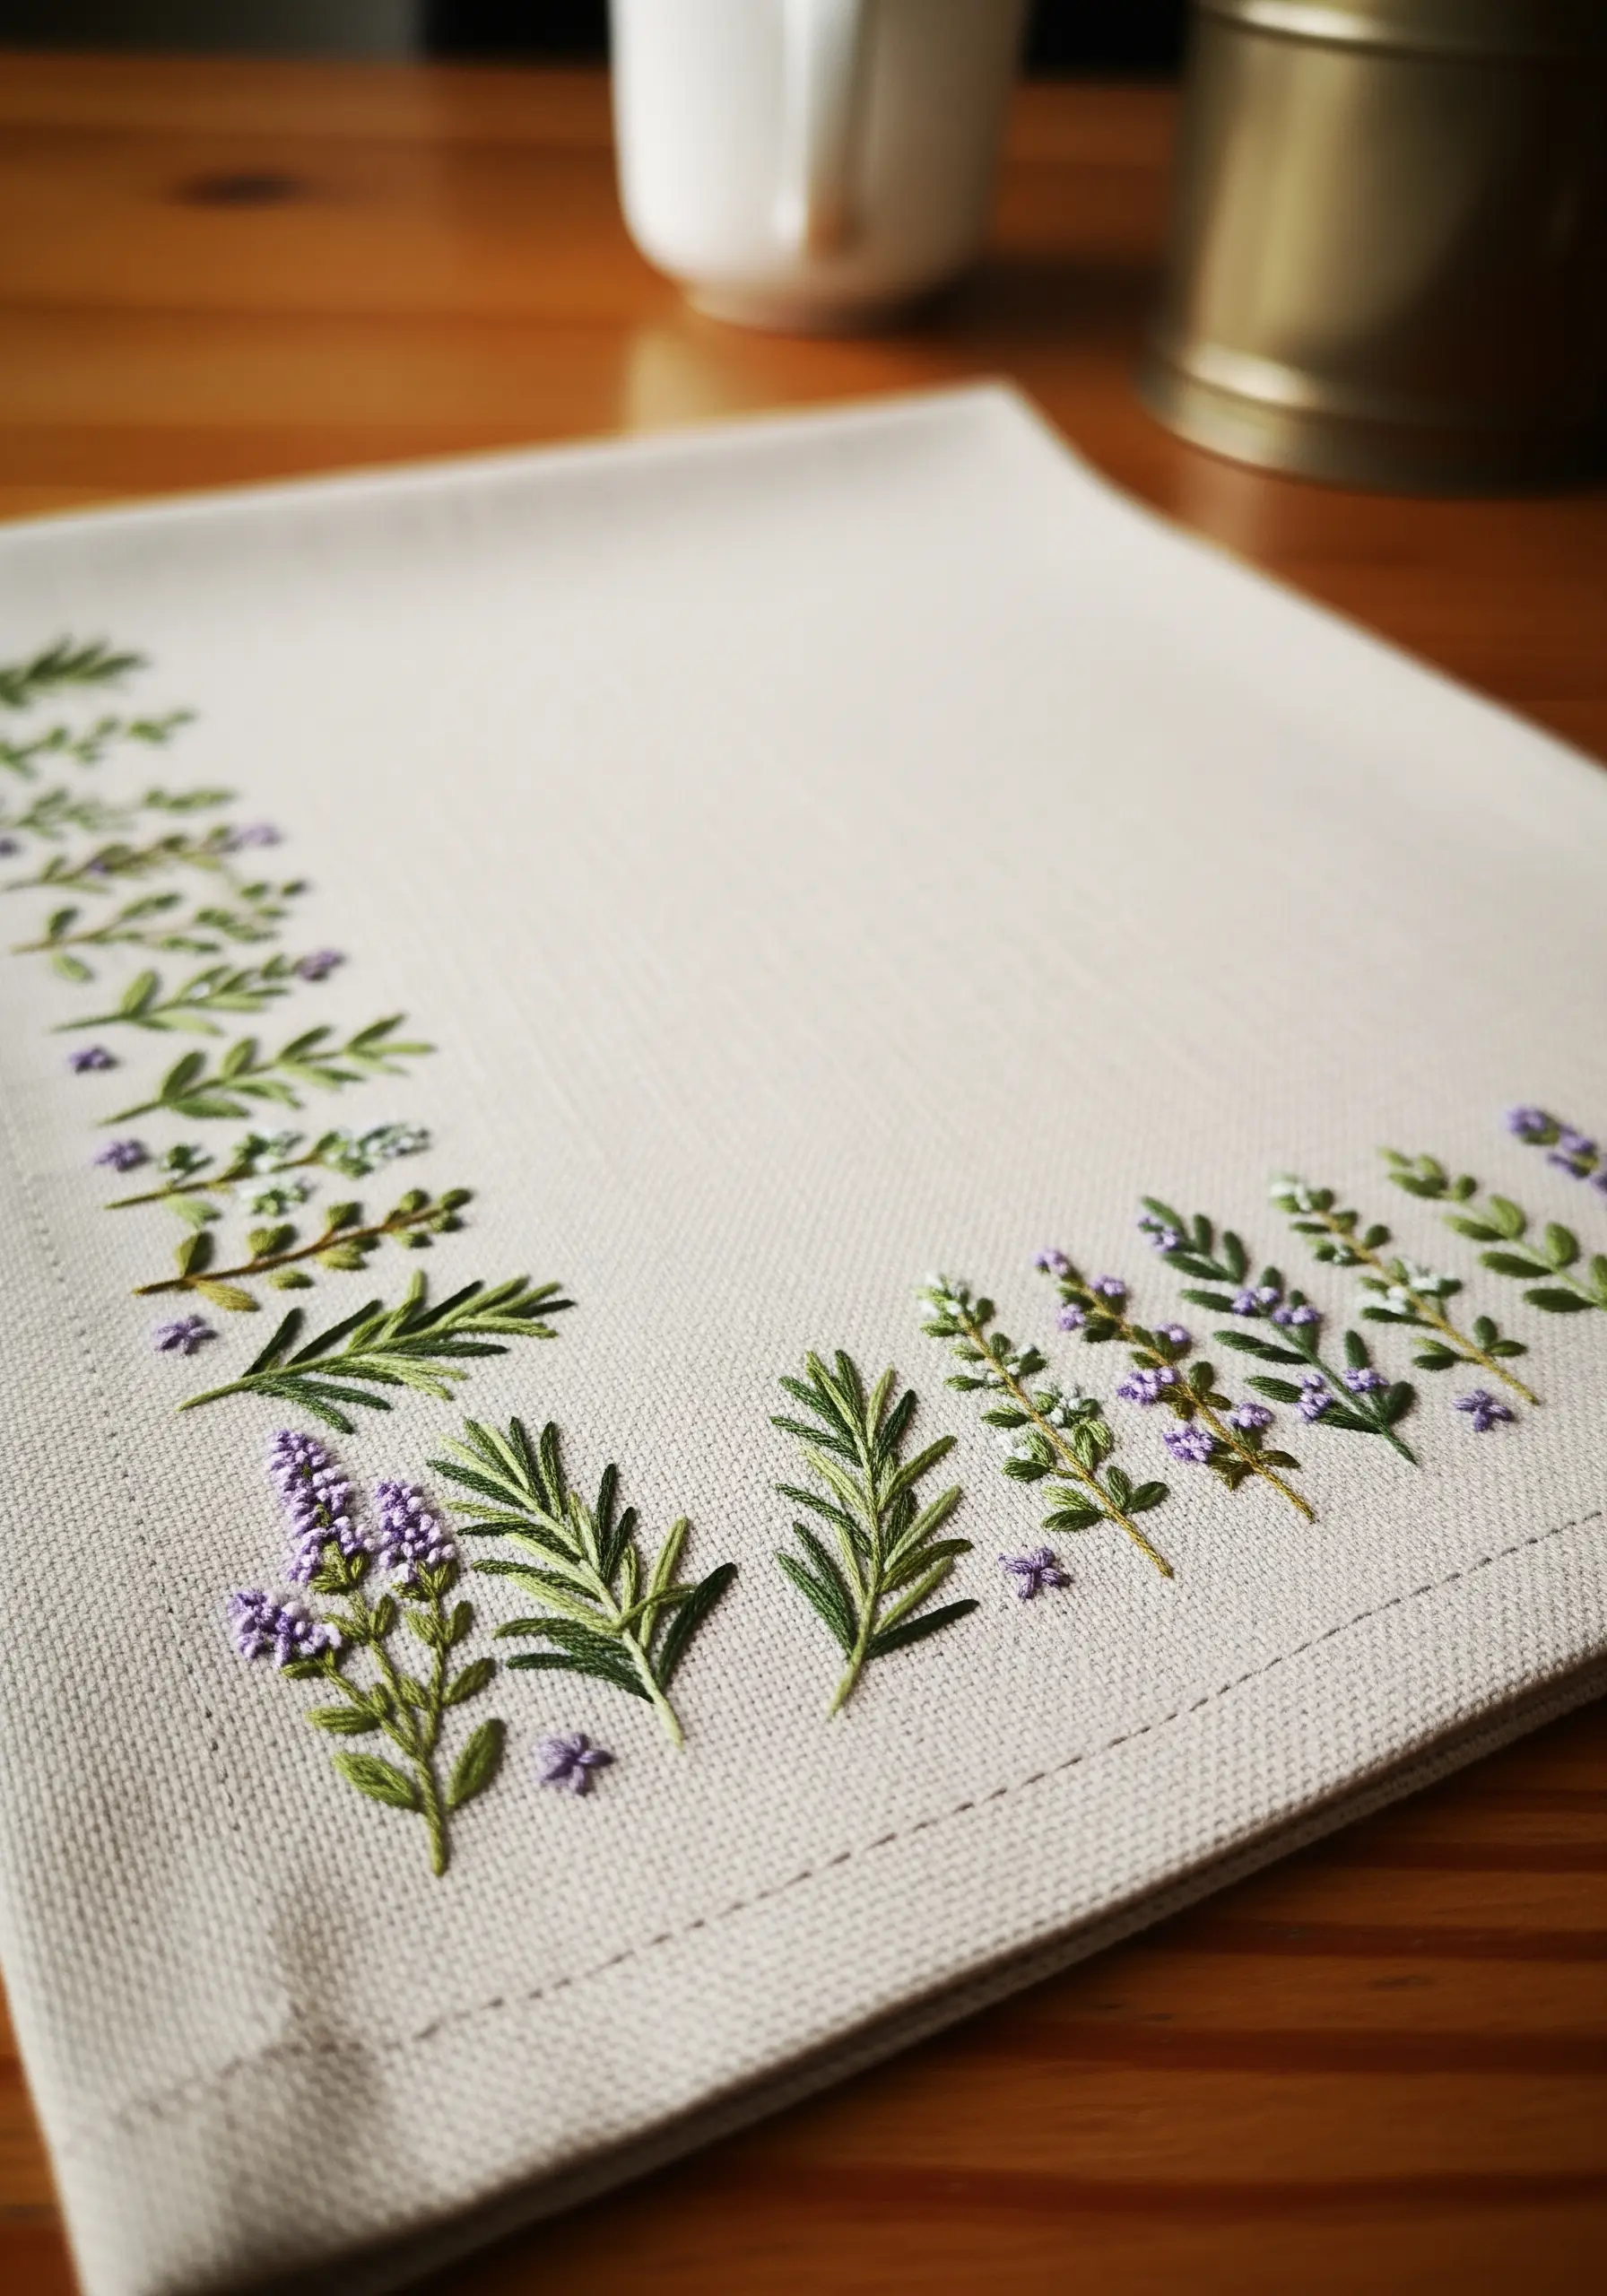
To create a natural, ‘just-gathered’ look, vary your stitch techniques for each herb.
Use straight stitches for the needle-like rosemary leaves, tiny French knots for the lavender blossoms, and small lazy daisy stitches for the thyme leaves.
This mix of textures adds visual interest and authenticity.
Arrange the sprigs organically along the napkin edge rather than in a rigid line, leaving small gaps to suggest a freshly picked bouquet.
These herbal plant embroidery motifs are perfect for a garden-themed wedding.
11. Gilded Tropical Leaf Centerpiece
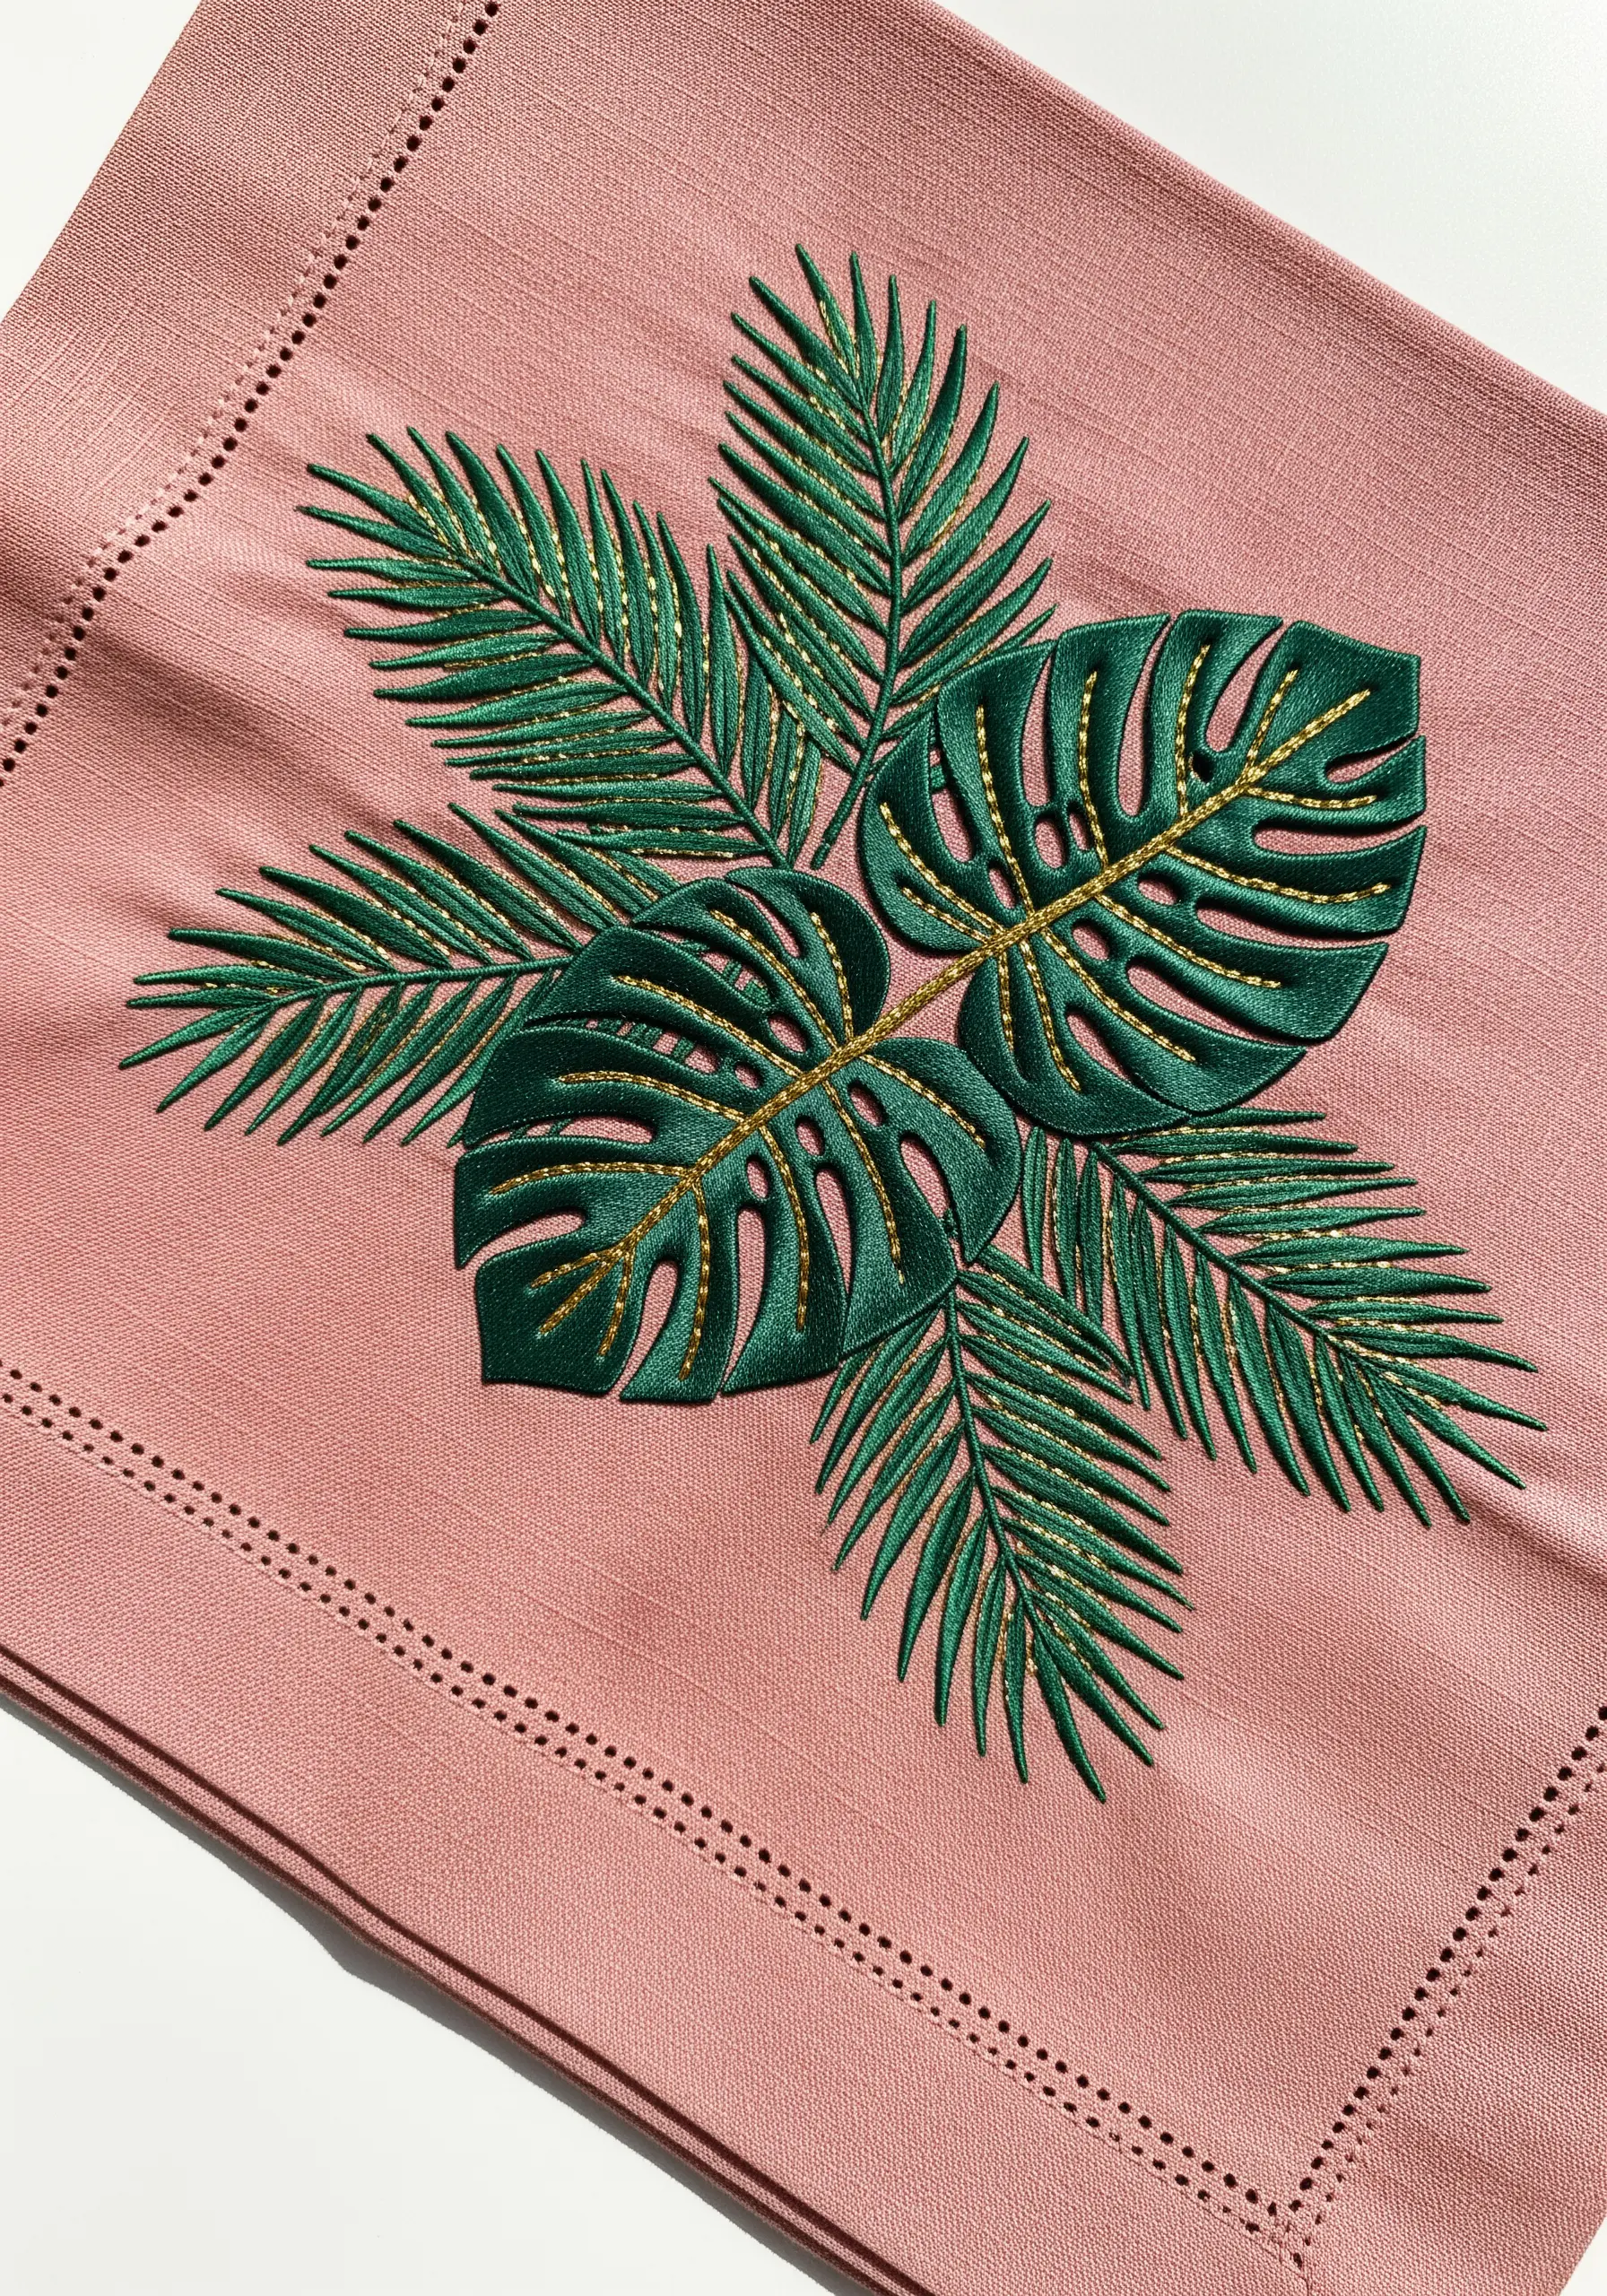
Make this tropical design luxurious by layering a fine gold metallic thread over the top of your green satin stitch.
After filling the monstera leaves with a rich, deep green, use the gold thread to stitch the central vein and add delicate highlights along the cutouts.
This detail catches the light beautifully and adds a touch of glamour without overpowering the botanical form.
It’s a perfect way to elevate tropical botanical embroidery patterns for a formal event.
12. Delicate Forget-Me-Not Vine
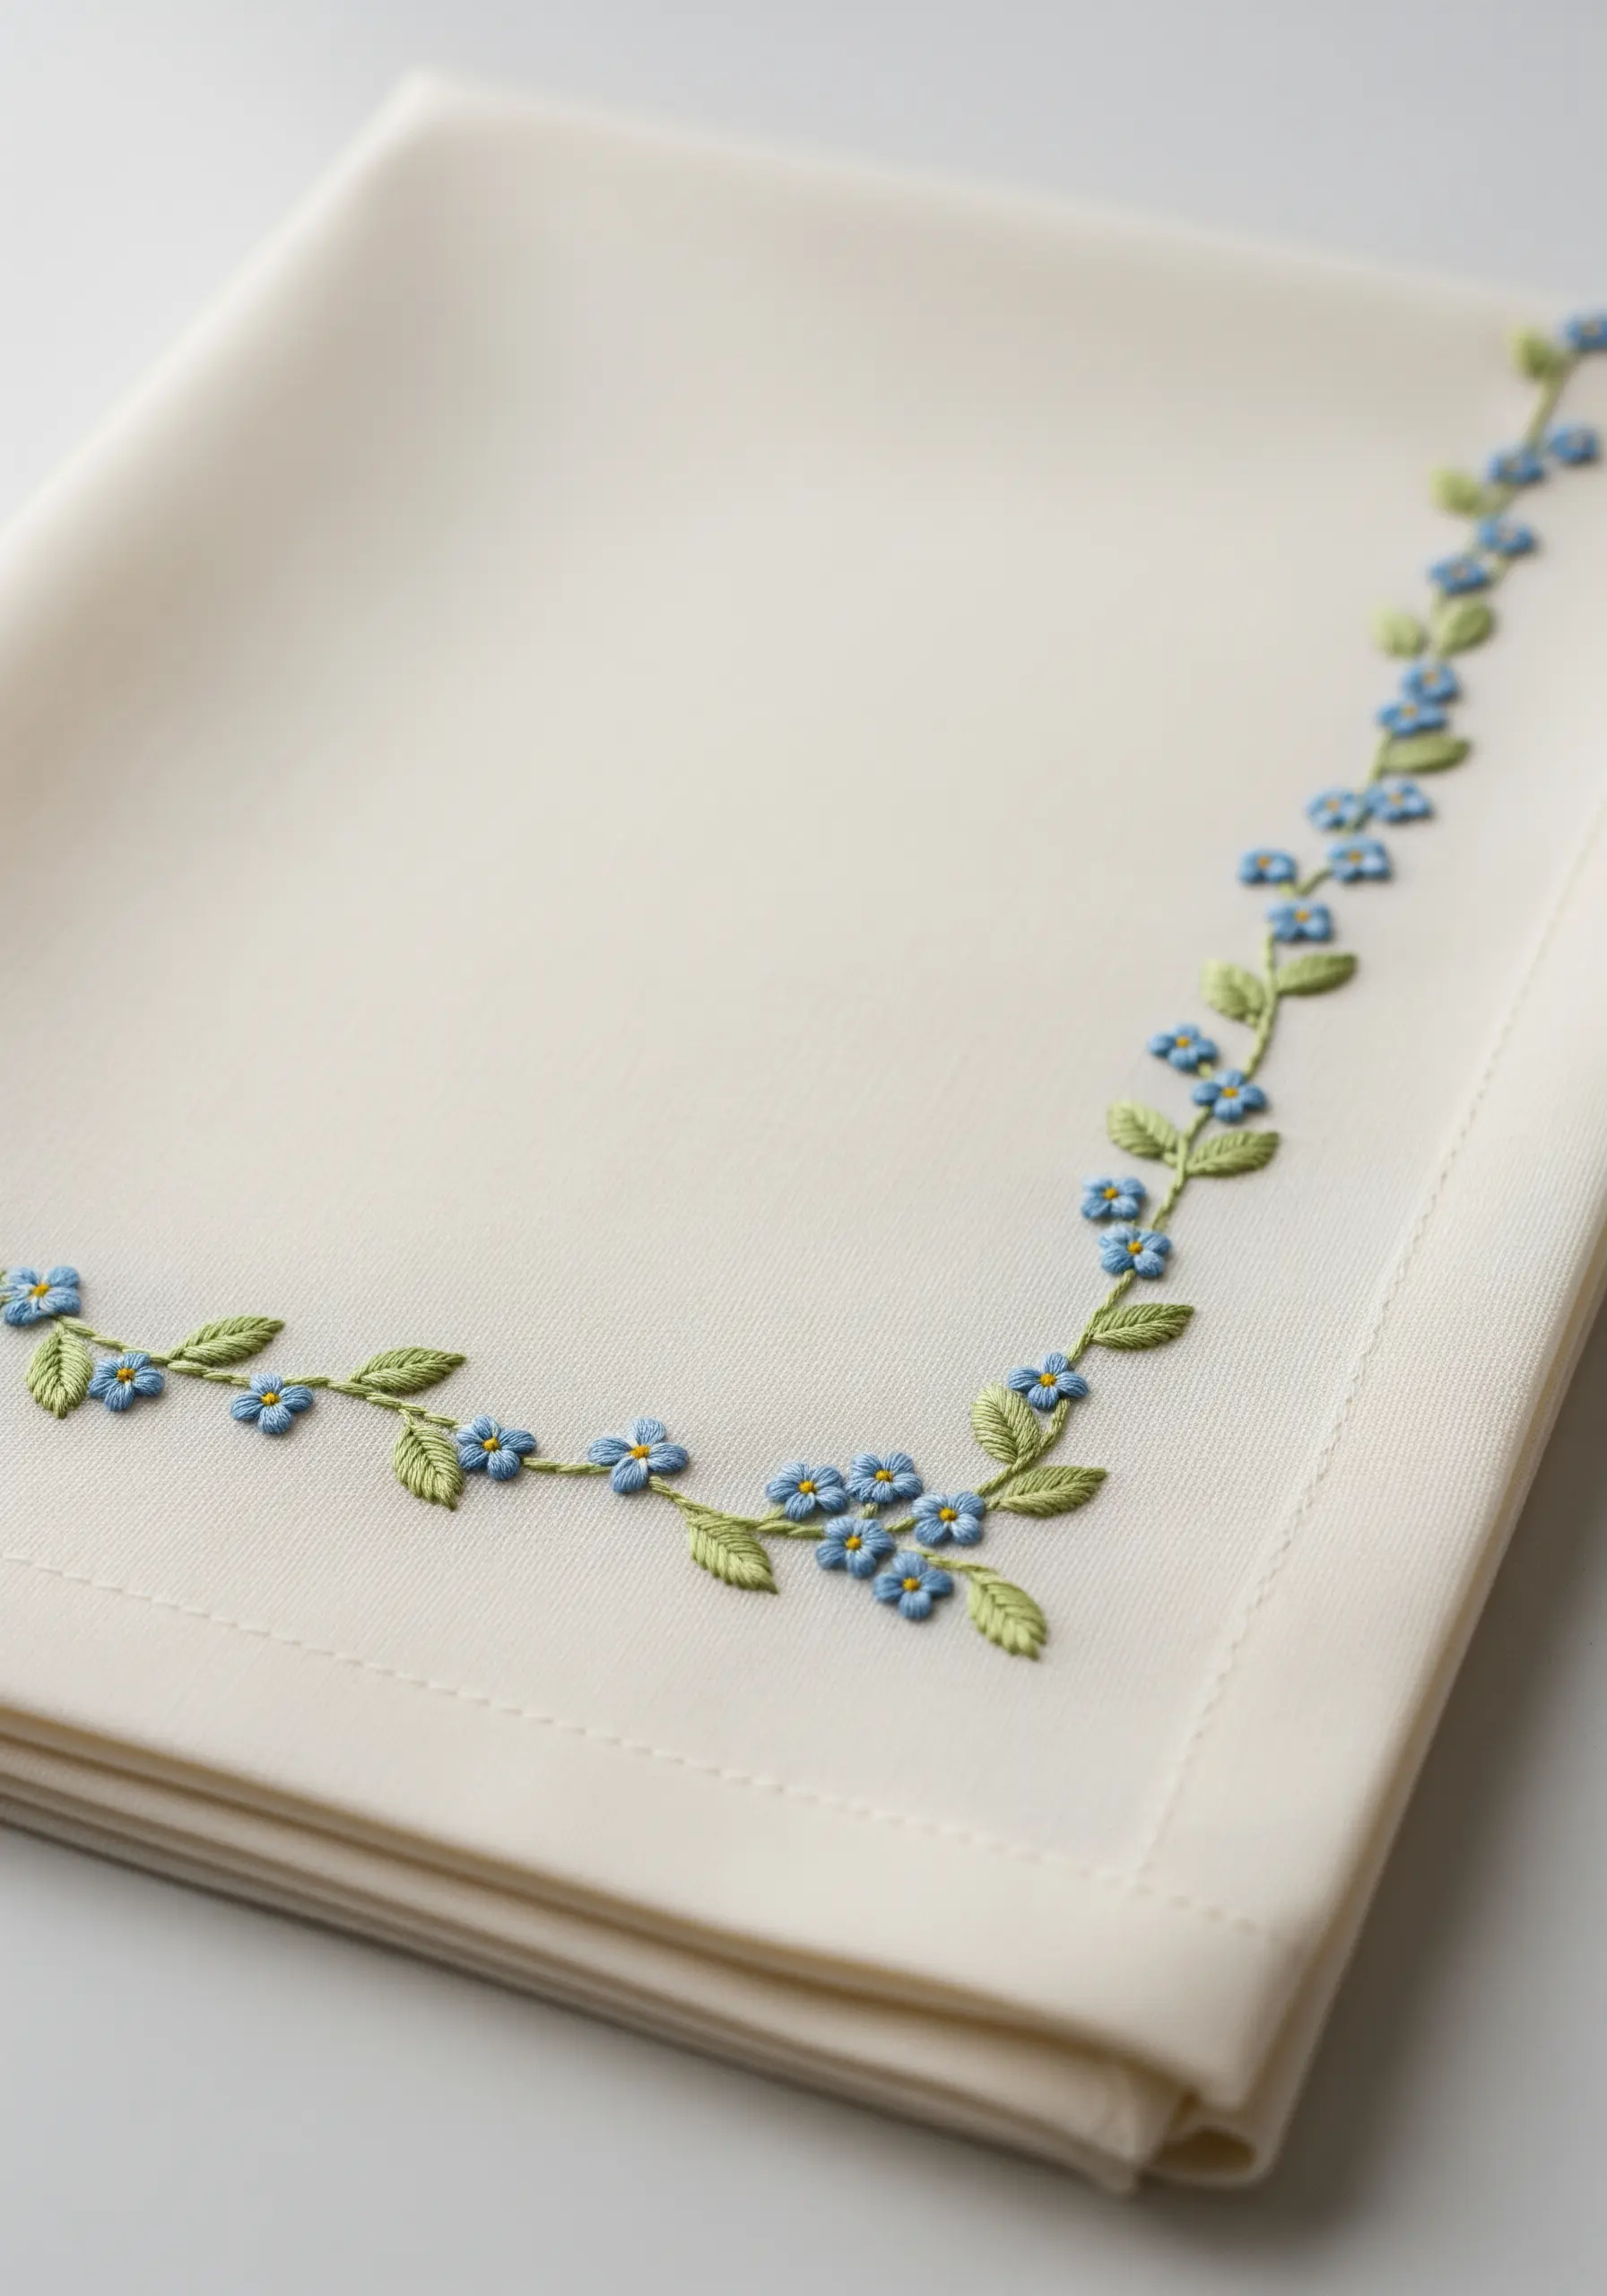
The key to this design’s charm is its delicate scale.
Use a single strand of floss for the entire piece.
Create the tiny blue blossoms with a cluster of five lazy daisy stitches around a central yellow French knot.
For the leaves, a single lazy daisy stitch in soft green is all you need.
Connect everything with a gracefully curving stem stitch. This fine work creates a look of timeless, romantic elegance.
13. Silver Laurel on Slate Blue
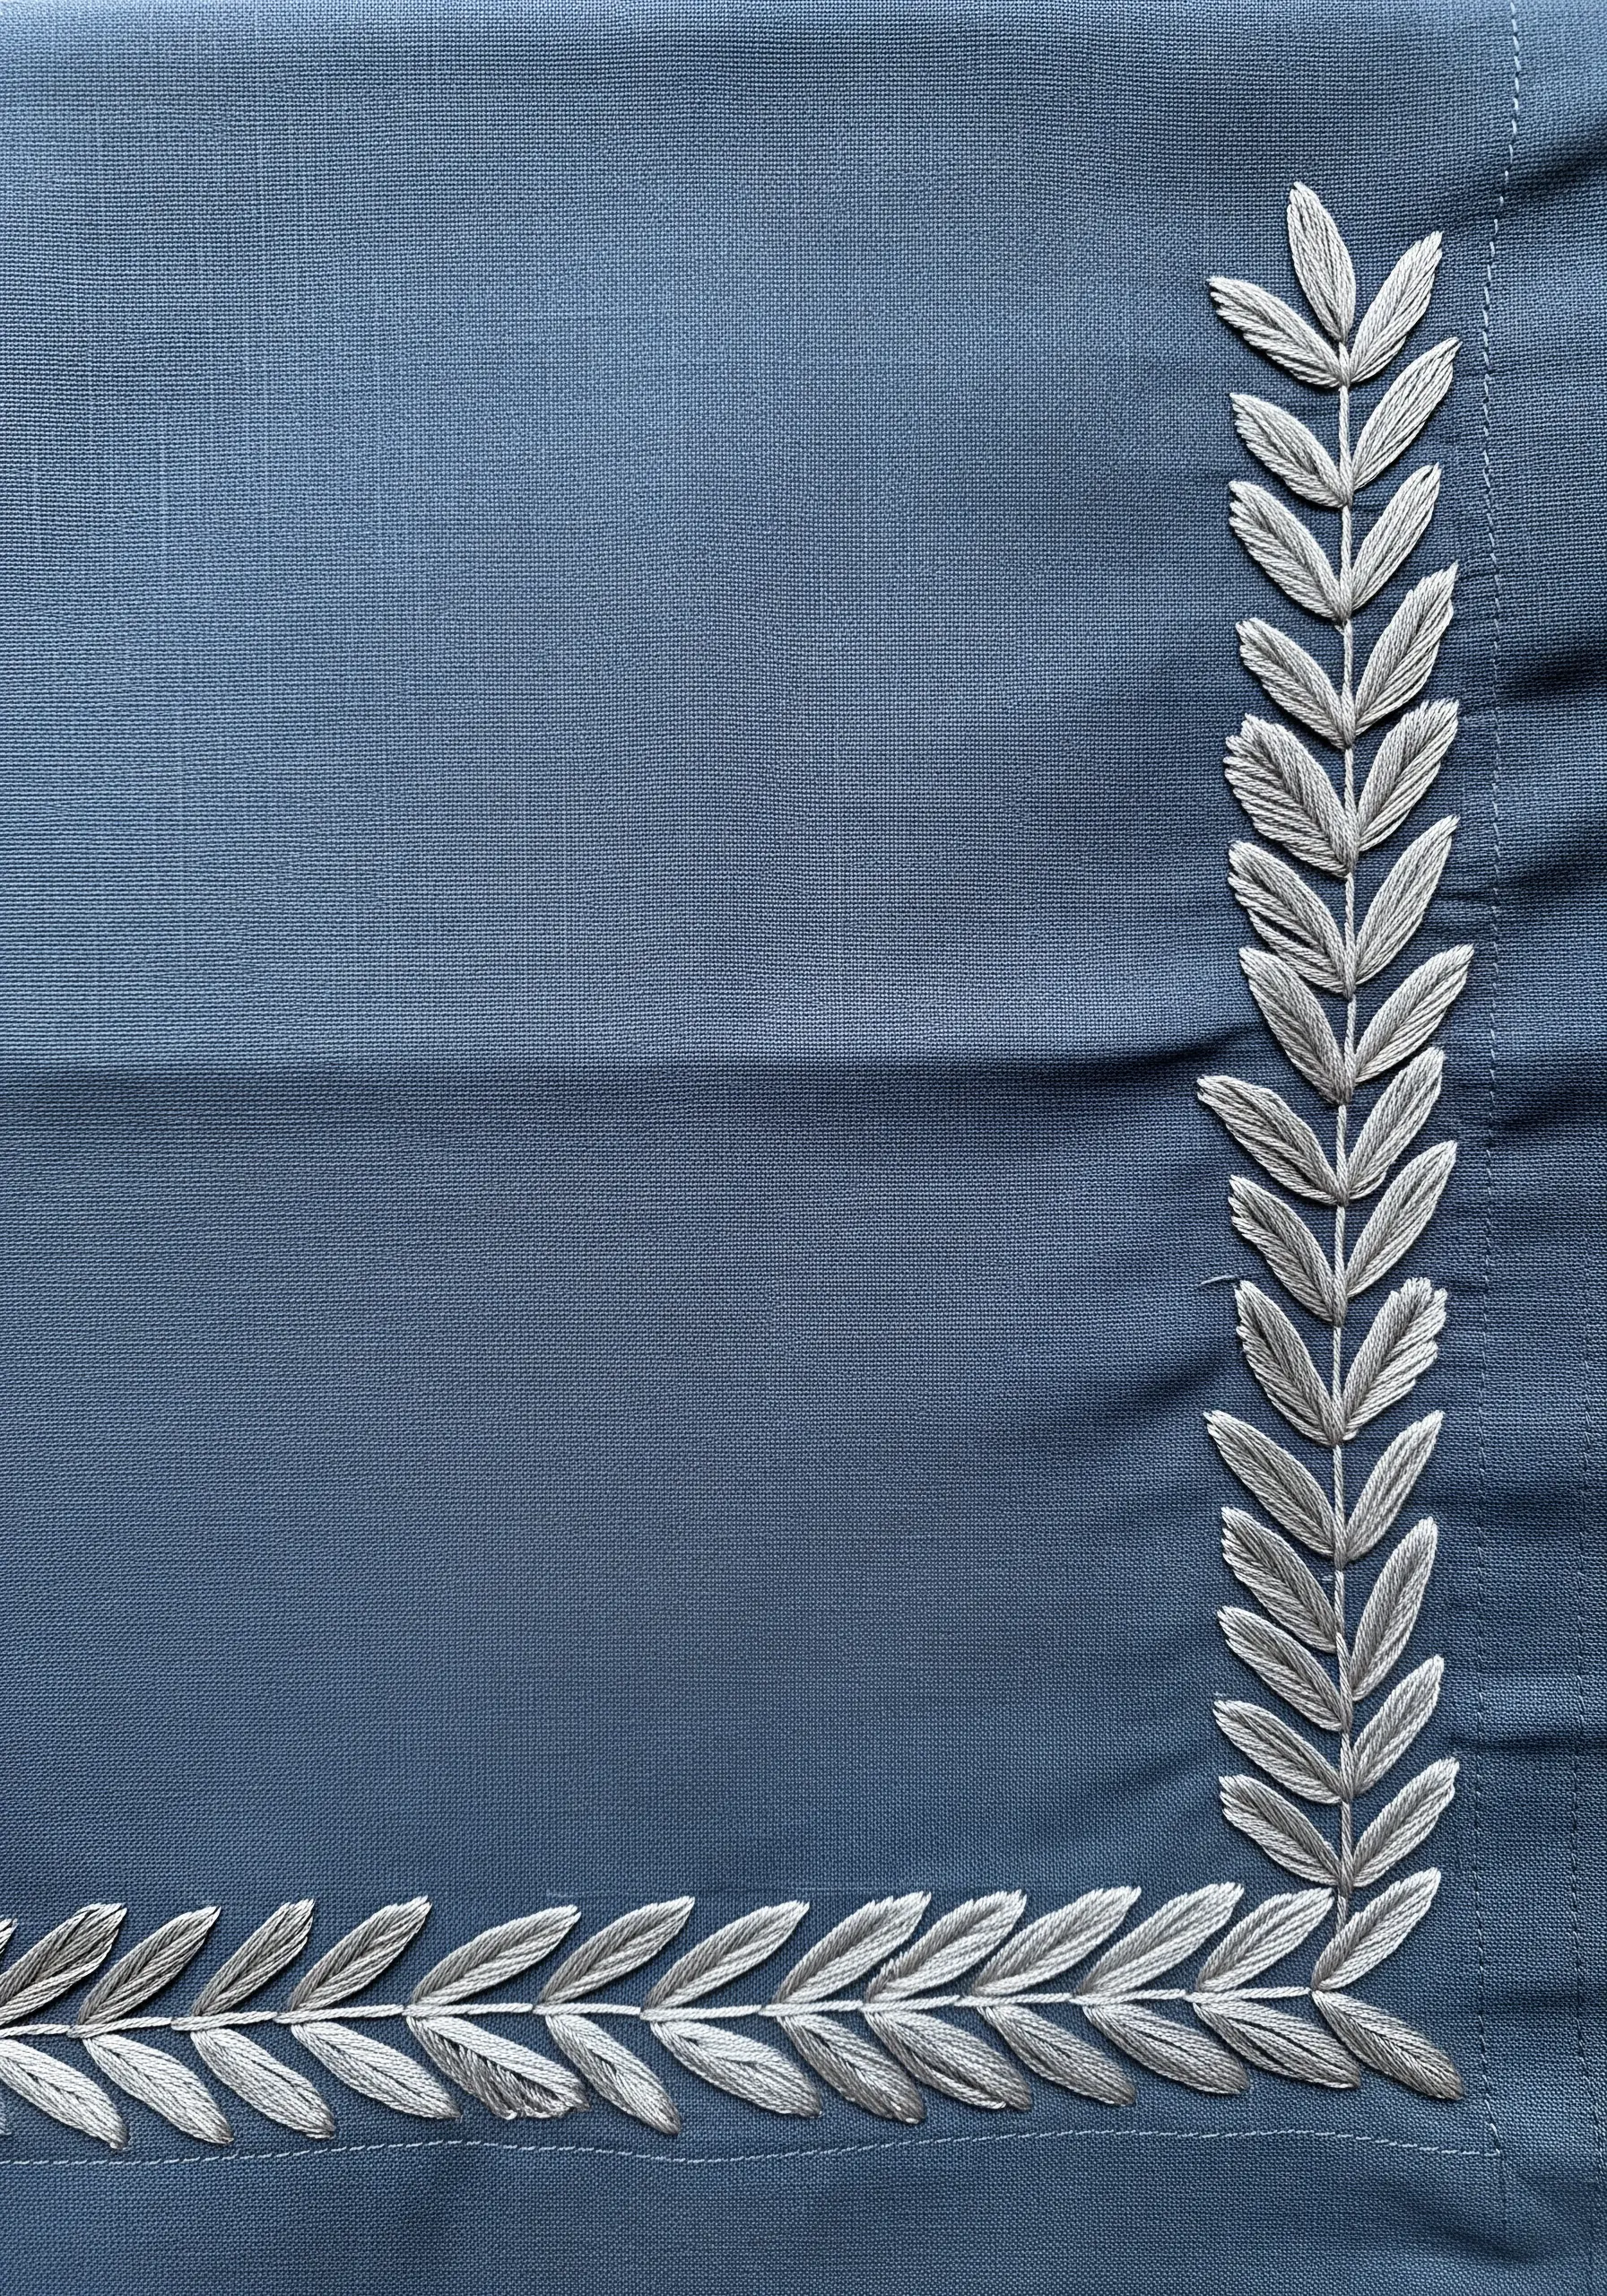
For a cool, contemporary take on a classic laurel, switch from green to silver.
Use a high-sheen rayon or silk thread in a pale silver or light gray to achieve a liquid-metal effect against the muted blue fabric.
The fishbone stitch is ideal here, as its central spine adds dimension and catches the light, enhancing the thread’s natural luster.
This color palette feels modern, sophisticated, and unexpectedly fresh.
14. Holly and Berry Velvet Corner

Stitching on velvet requires a light touch and the right tools.
Always use a stabilizer on the back to prevent the fabric from stretching, and a sharp needle to pierce the pile cleanly.
For the holly berries, consider using small red beads instead of French knots for a perfect, uniform 3D effect.
The contrast between the plush velvet, the smooth satin stitch leaves, and the glossy beads creates a rich, tactile experience perfect for a winter wedding.
15. Textured Pussy Willow Corner
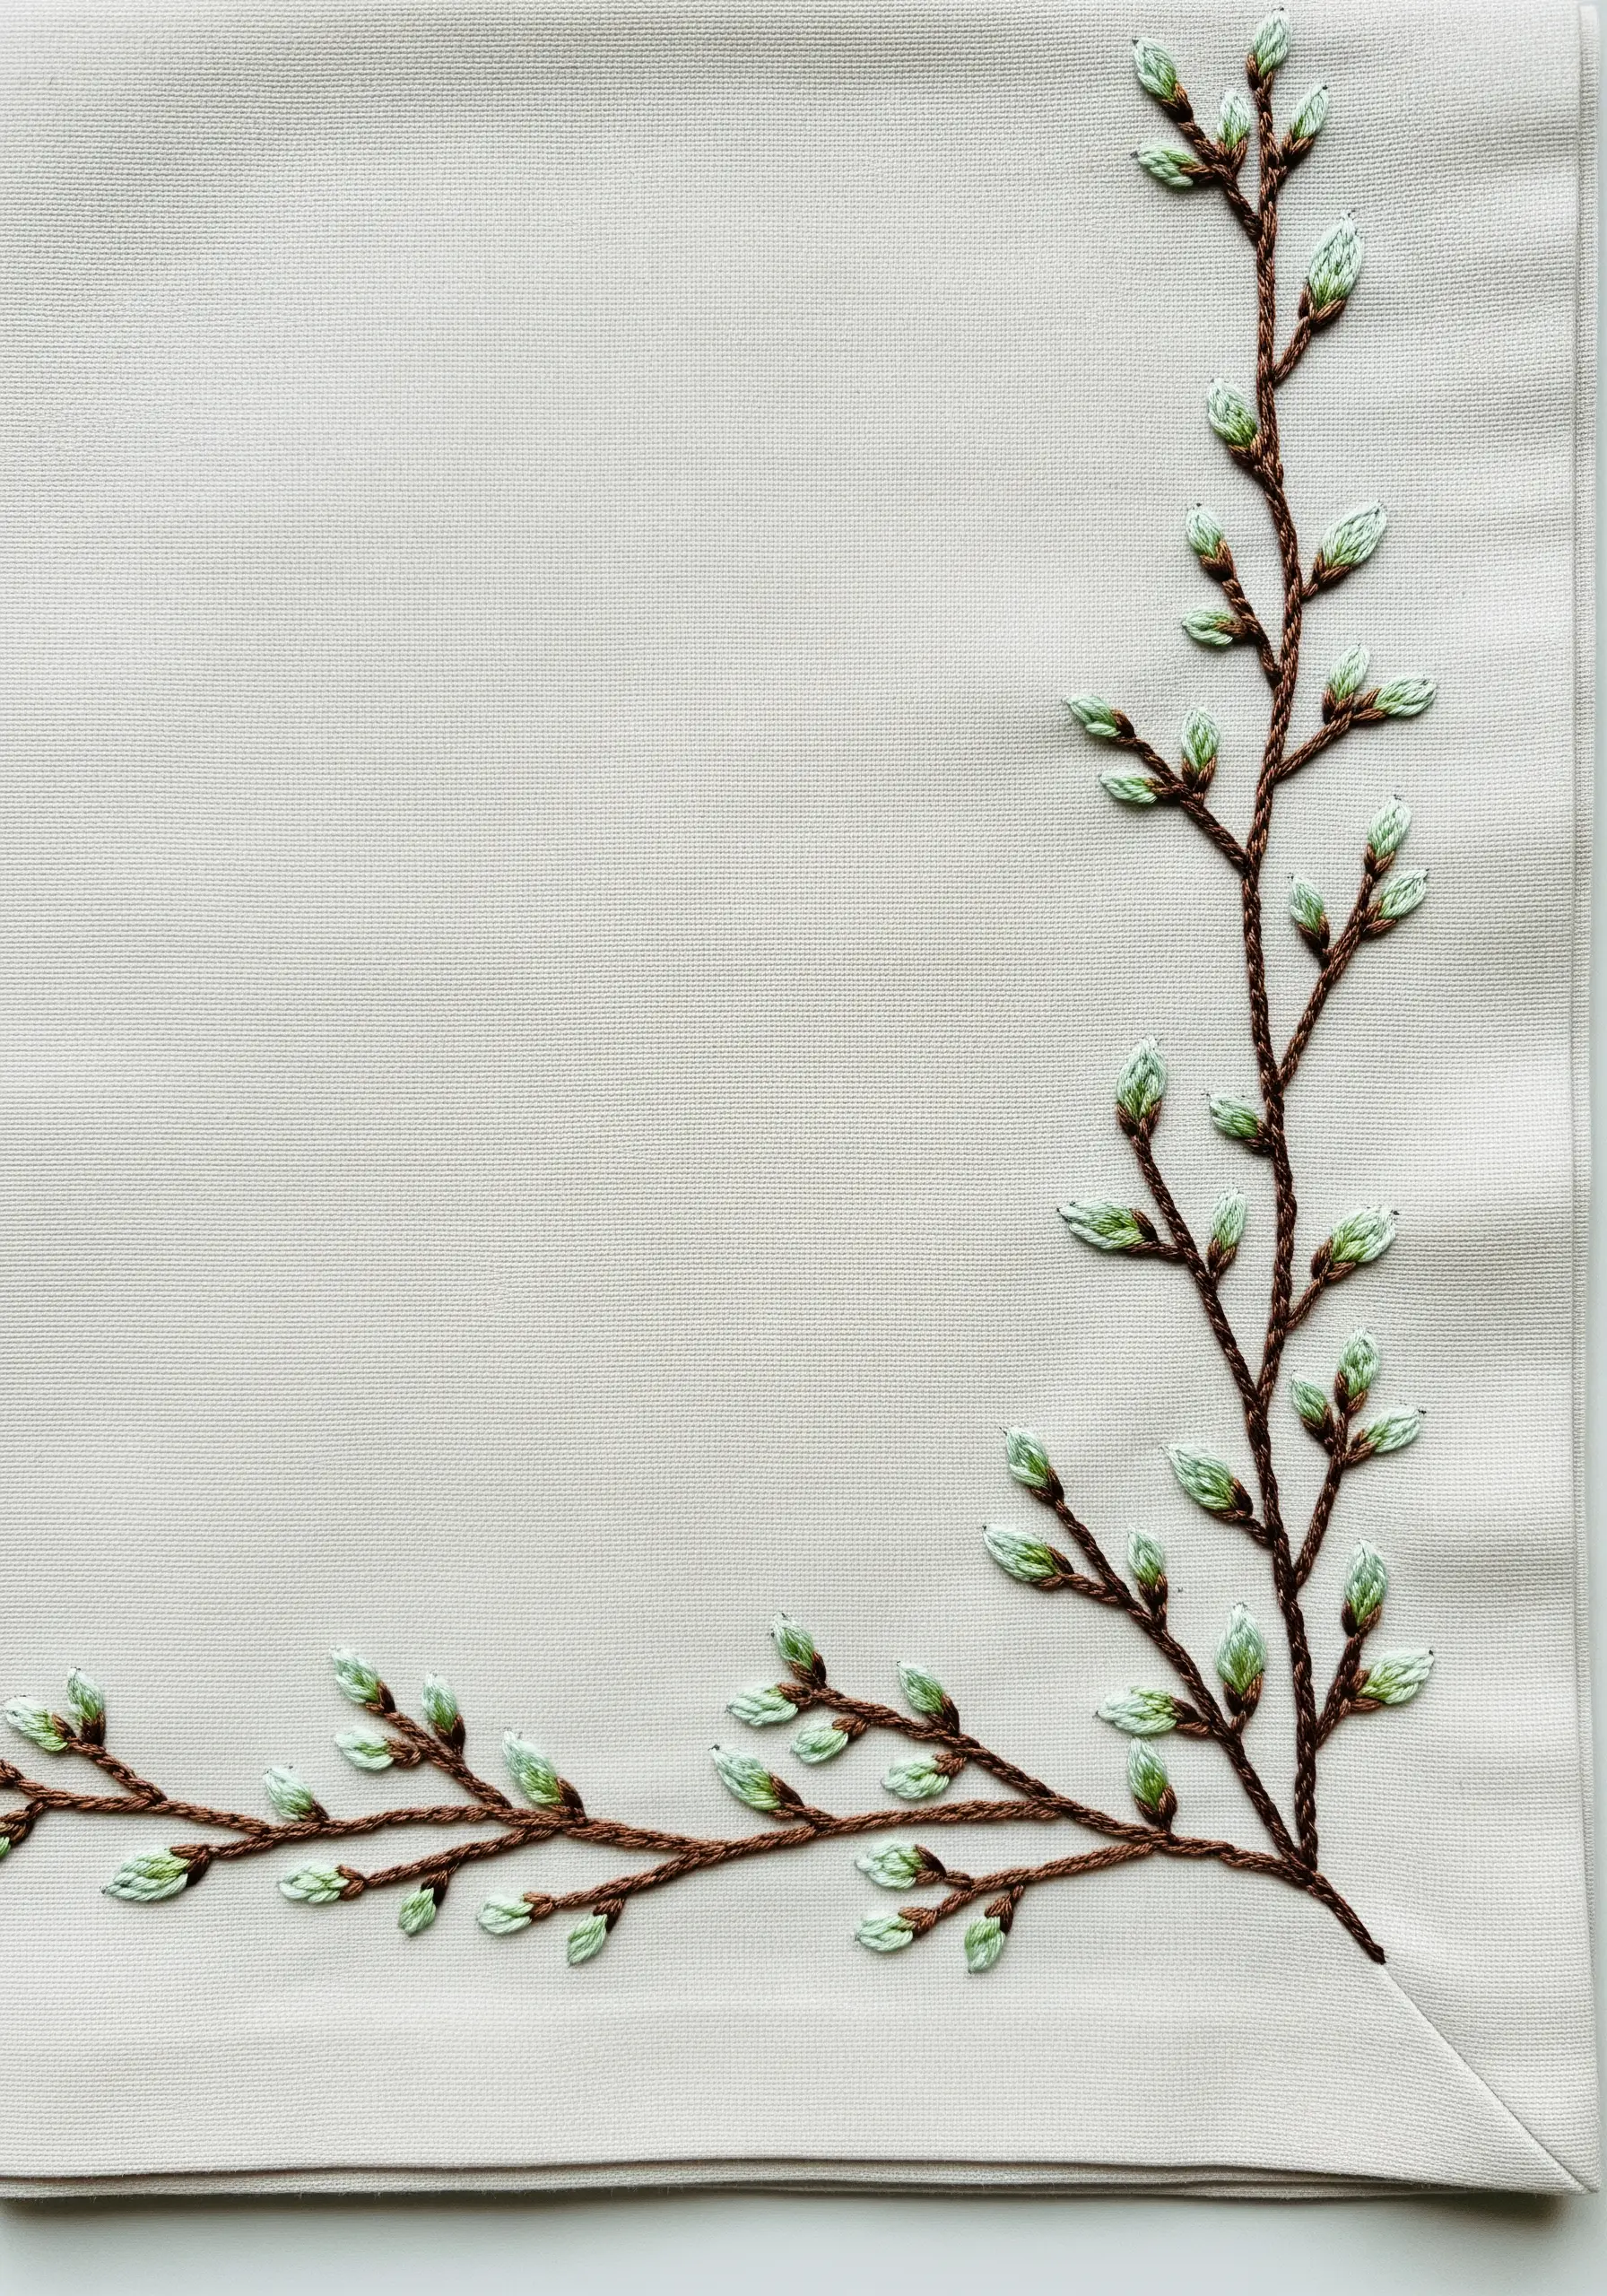
To capture the soft, fuzzy texture of pussy willow buds, use a padded satin stitch with a twist.
First, create a small oval of padding stitches, then cover them with satin stitches using a slightly fuzzy thread, like a fine wool-blend or a matte cotton.
For the branches, use a whipped backstitch in a variegated brown thread; the whipping adds roundness and dimension, making the branches look more realistic and less like a simple line.
These organic texture embroidery designs bring a touch of early spring indoors.
16. Shaded Magnolia Leaf Cluster
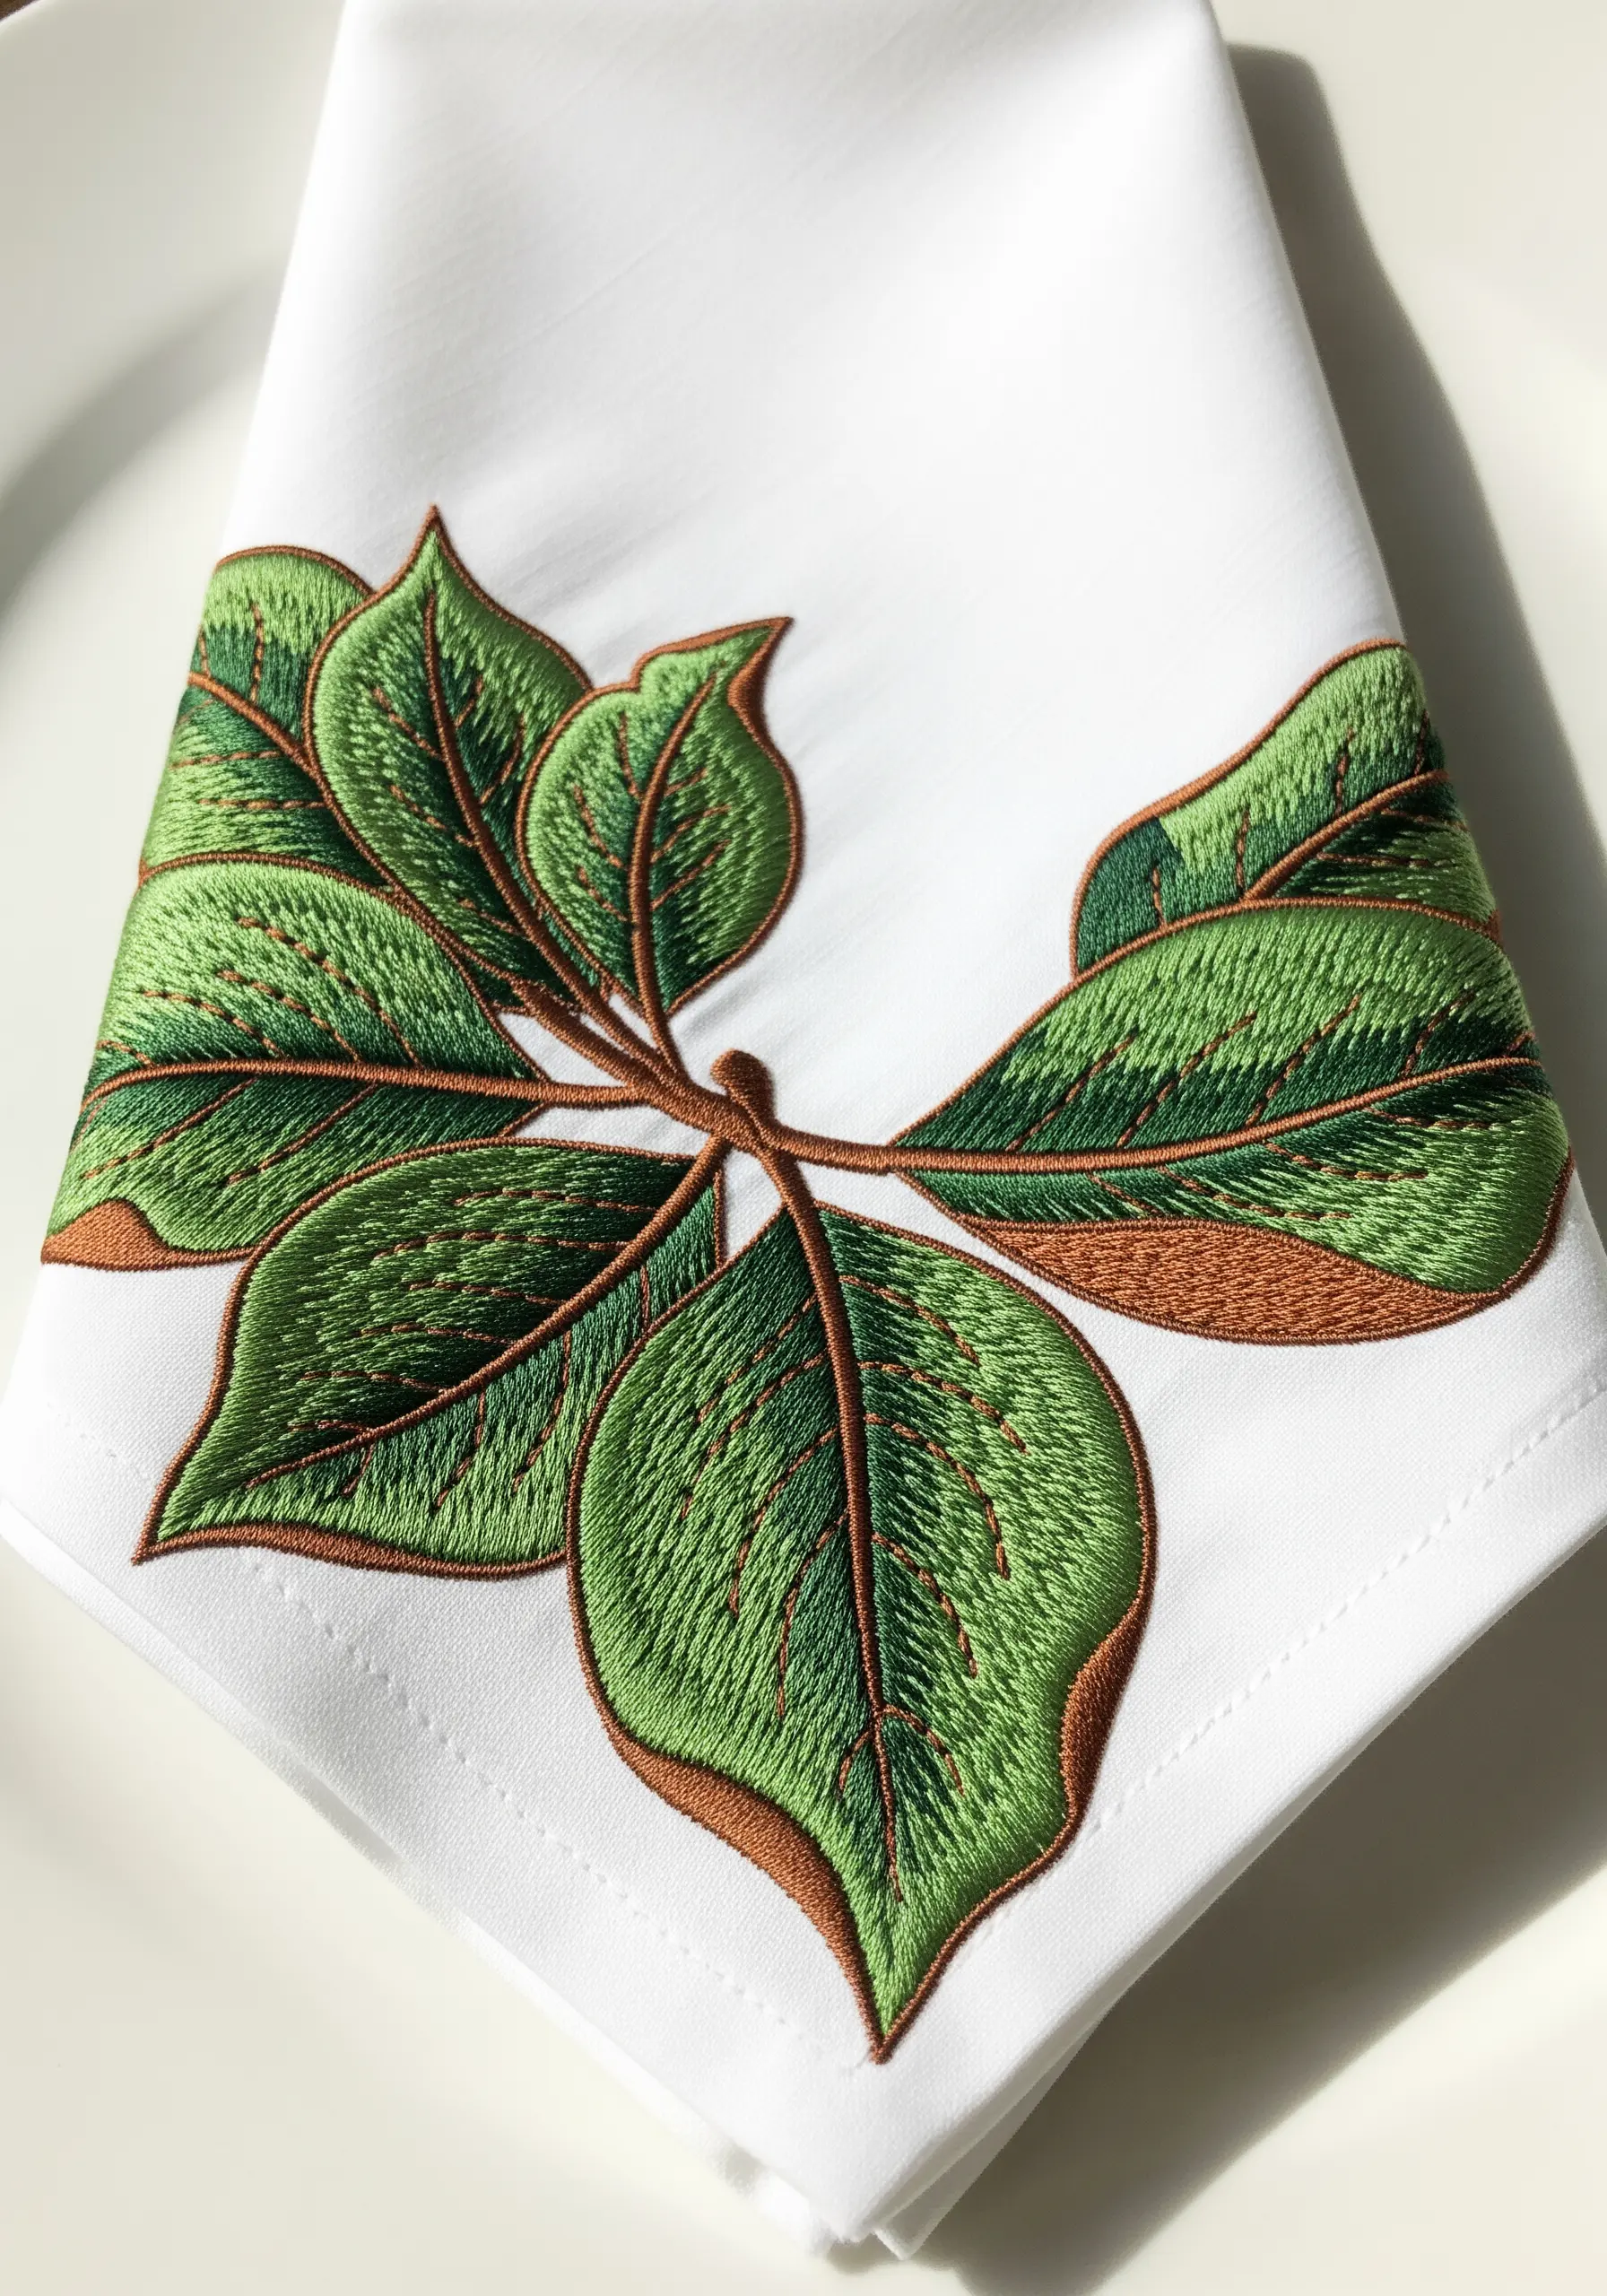
The realism in these magnolia leaves comes from subtle detailing.
Fill the leaves with a bright green satin stitch, then add texture with sparsely placed seed stitches (tiny straight stitches) in a slightly darker green.
This mimics the natural texture of a leaf surface.
Define the entire shape with a clean, sharp backstitch outline in brown, which not only grounds the design but also suggests the warm, velvety underside of a magnolia leaf.
17. Laurel Border with Couched Cord
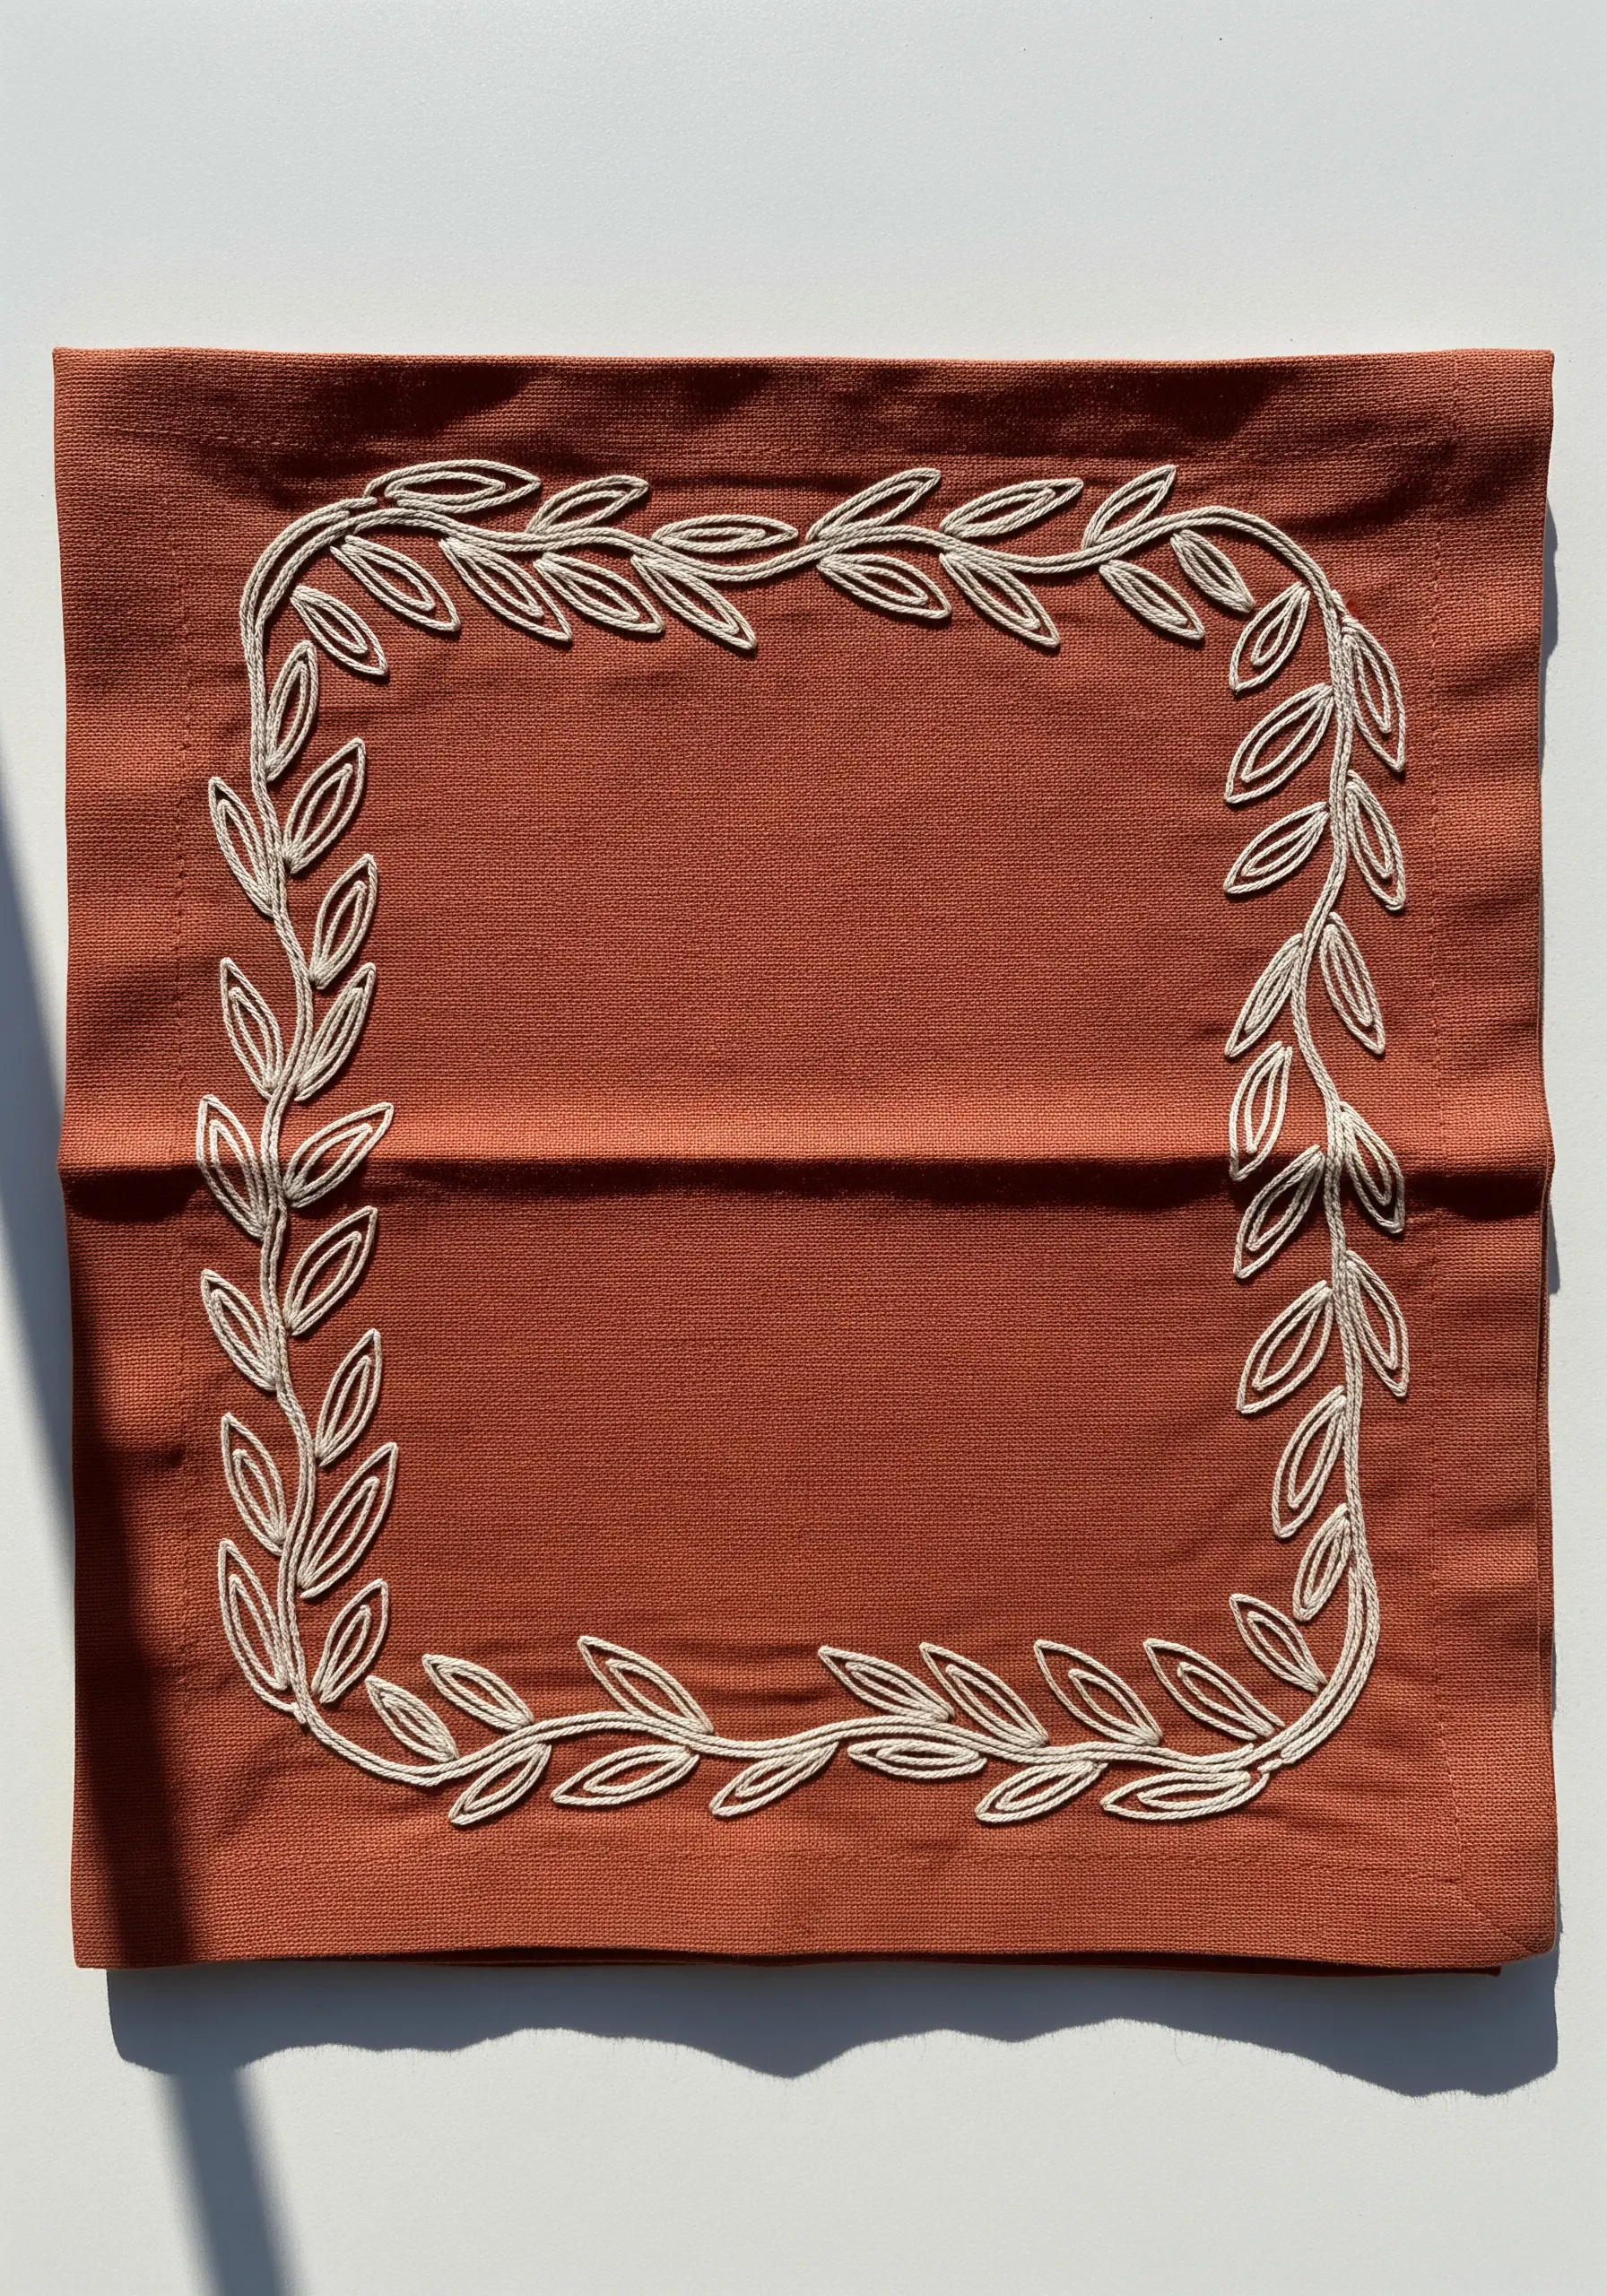
Create a clean, raised, and perfectly uniform outline by using the couching technique.
Lay down a thicker cord or gimp thread along your design line, and then tack it in place with small, perpendicular stitches using a finer matching thread.
This method is faster than a satin stitch outline and produces a flawless, sculptural line that looks incredibly professional.
It’s an ideal way to frame a napkin with texture instead of color.
18. Minimalist Ash Branch Spray
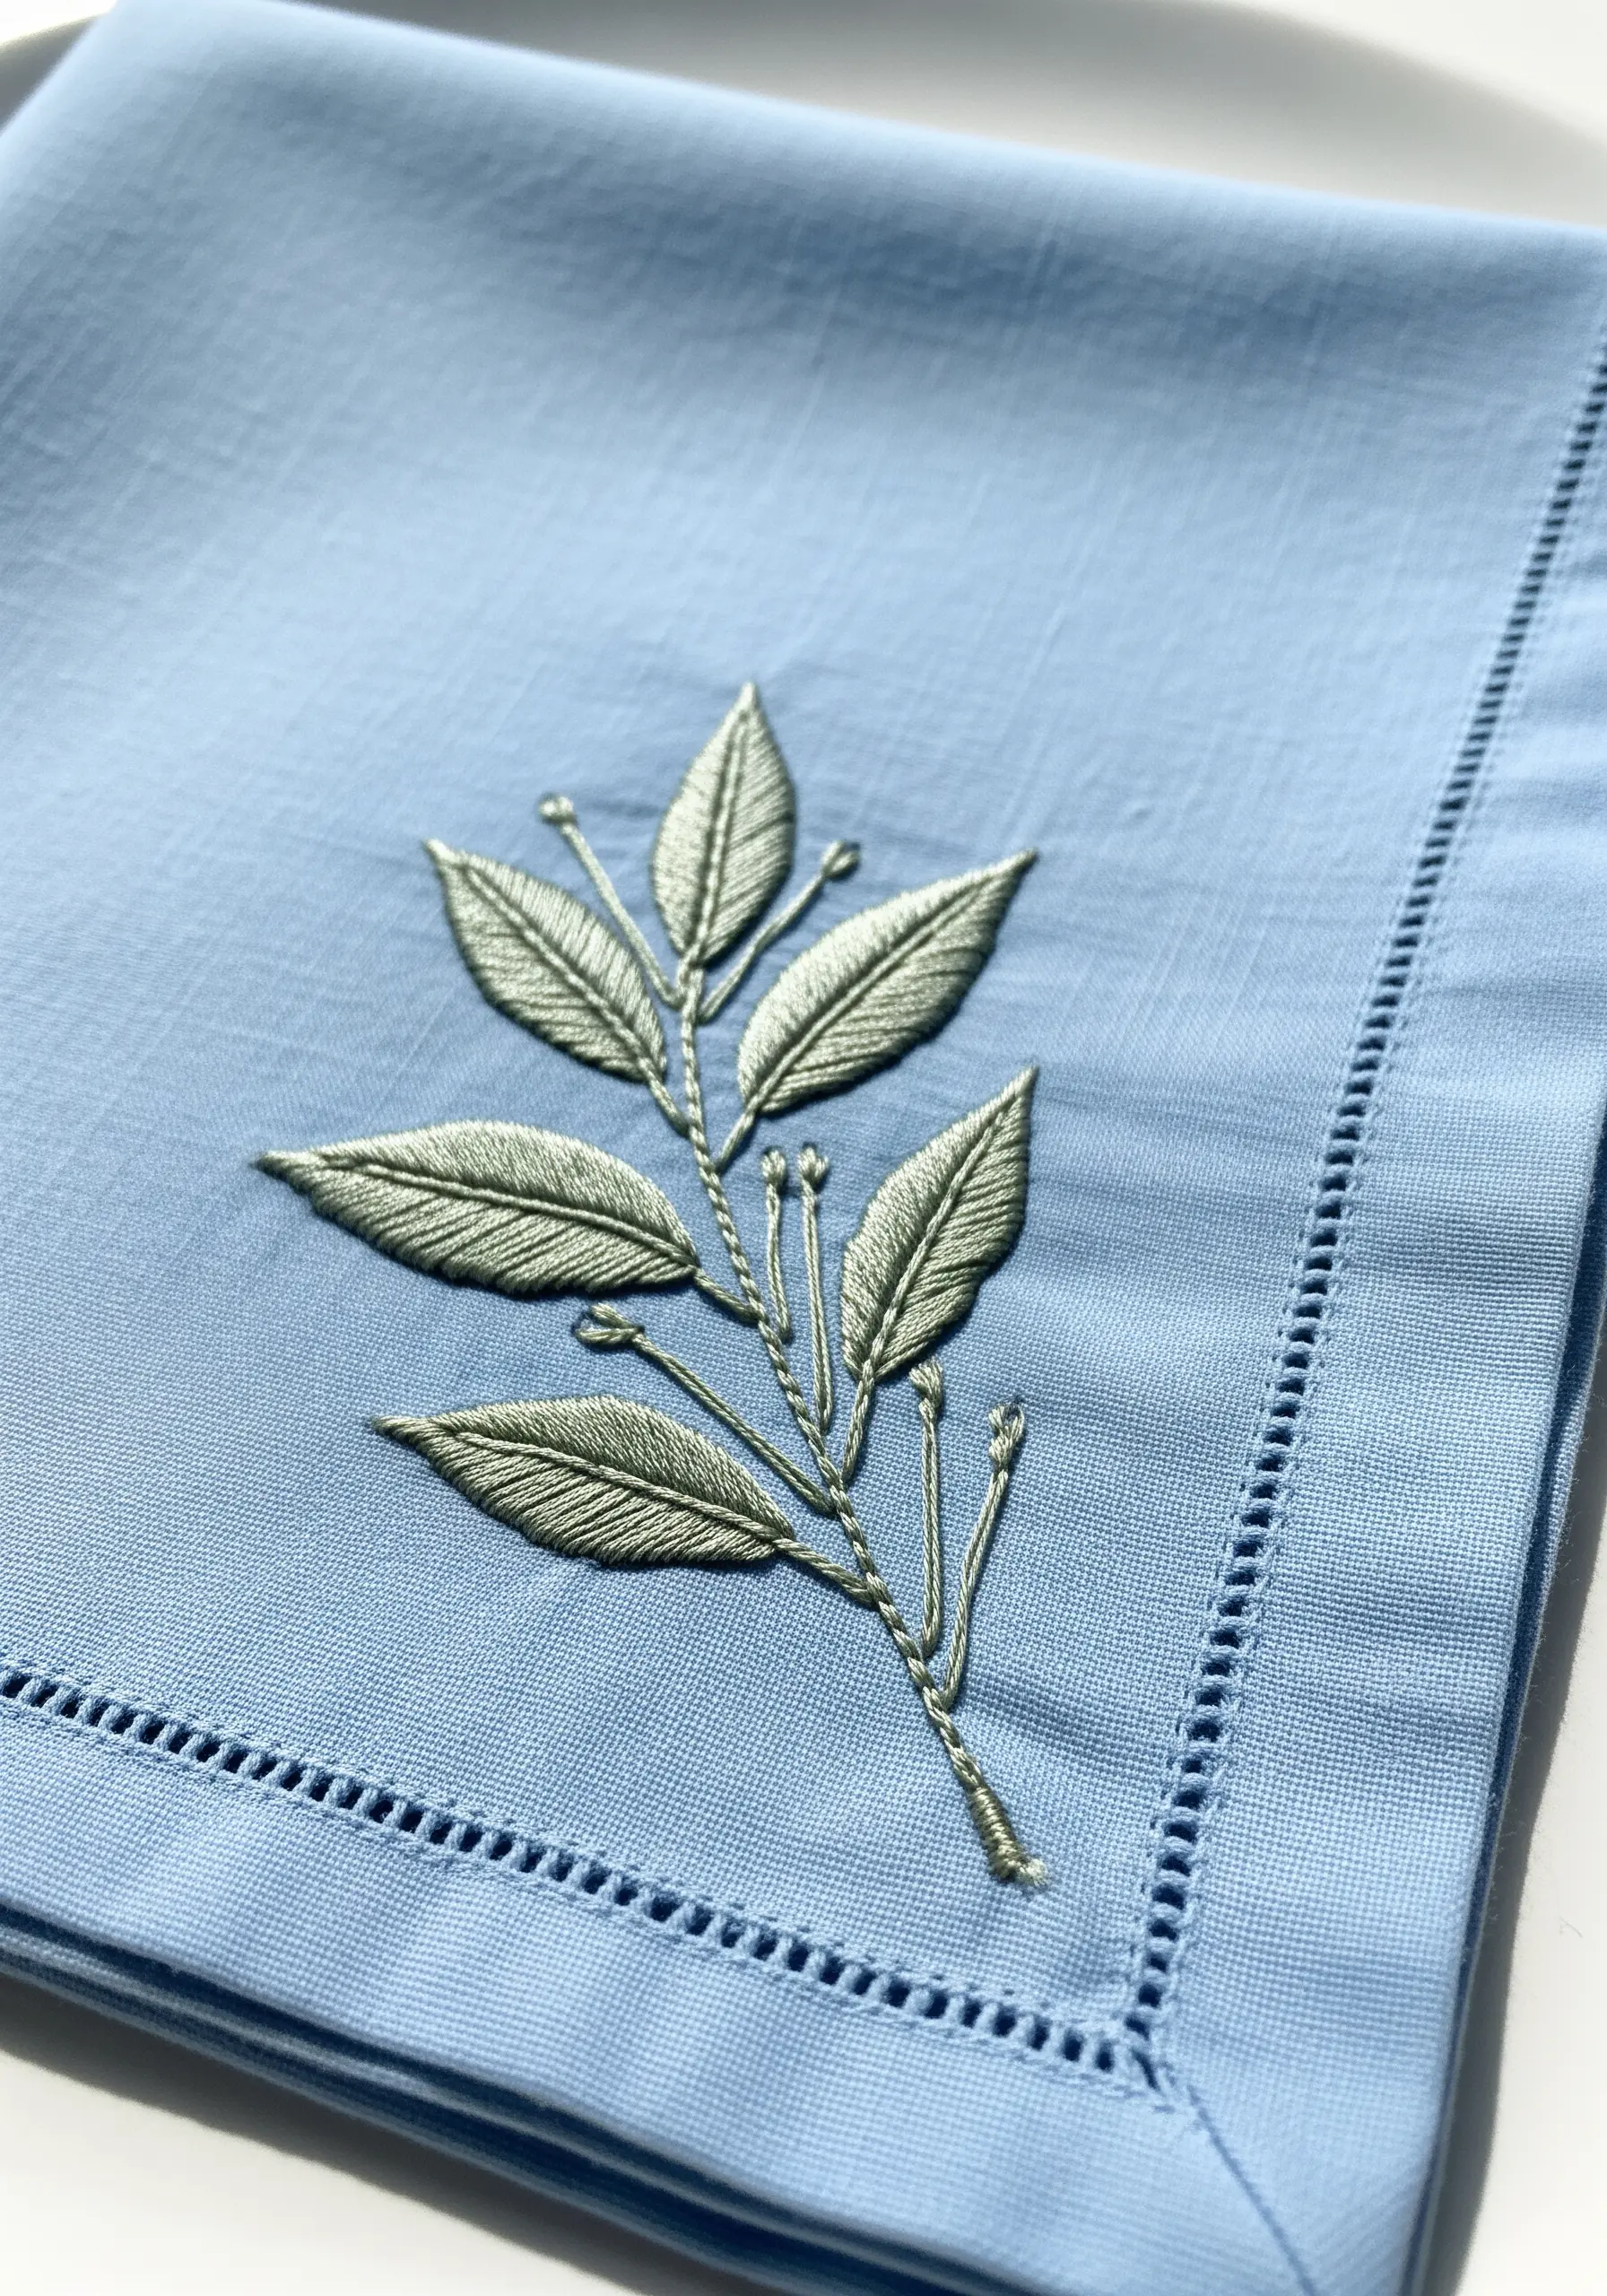
This design proves that simplicity is the ultimate sophistication.
Use a delicate fishbone stitch for the leaves, which creates a natural center vein with no extra effort.
For the stems, a simple backstitch provides a clean line.
Finish with tiny French knots at the tips of the stems to suggest buds.
Using a single color of thread—a silvery green—unifies the design and gives it a serene, elegant quality that works beautifully on fine linen.
19. Dramatic Blackberry Bramble Frame
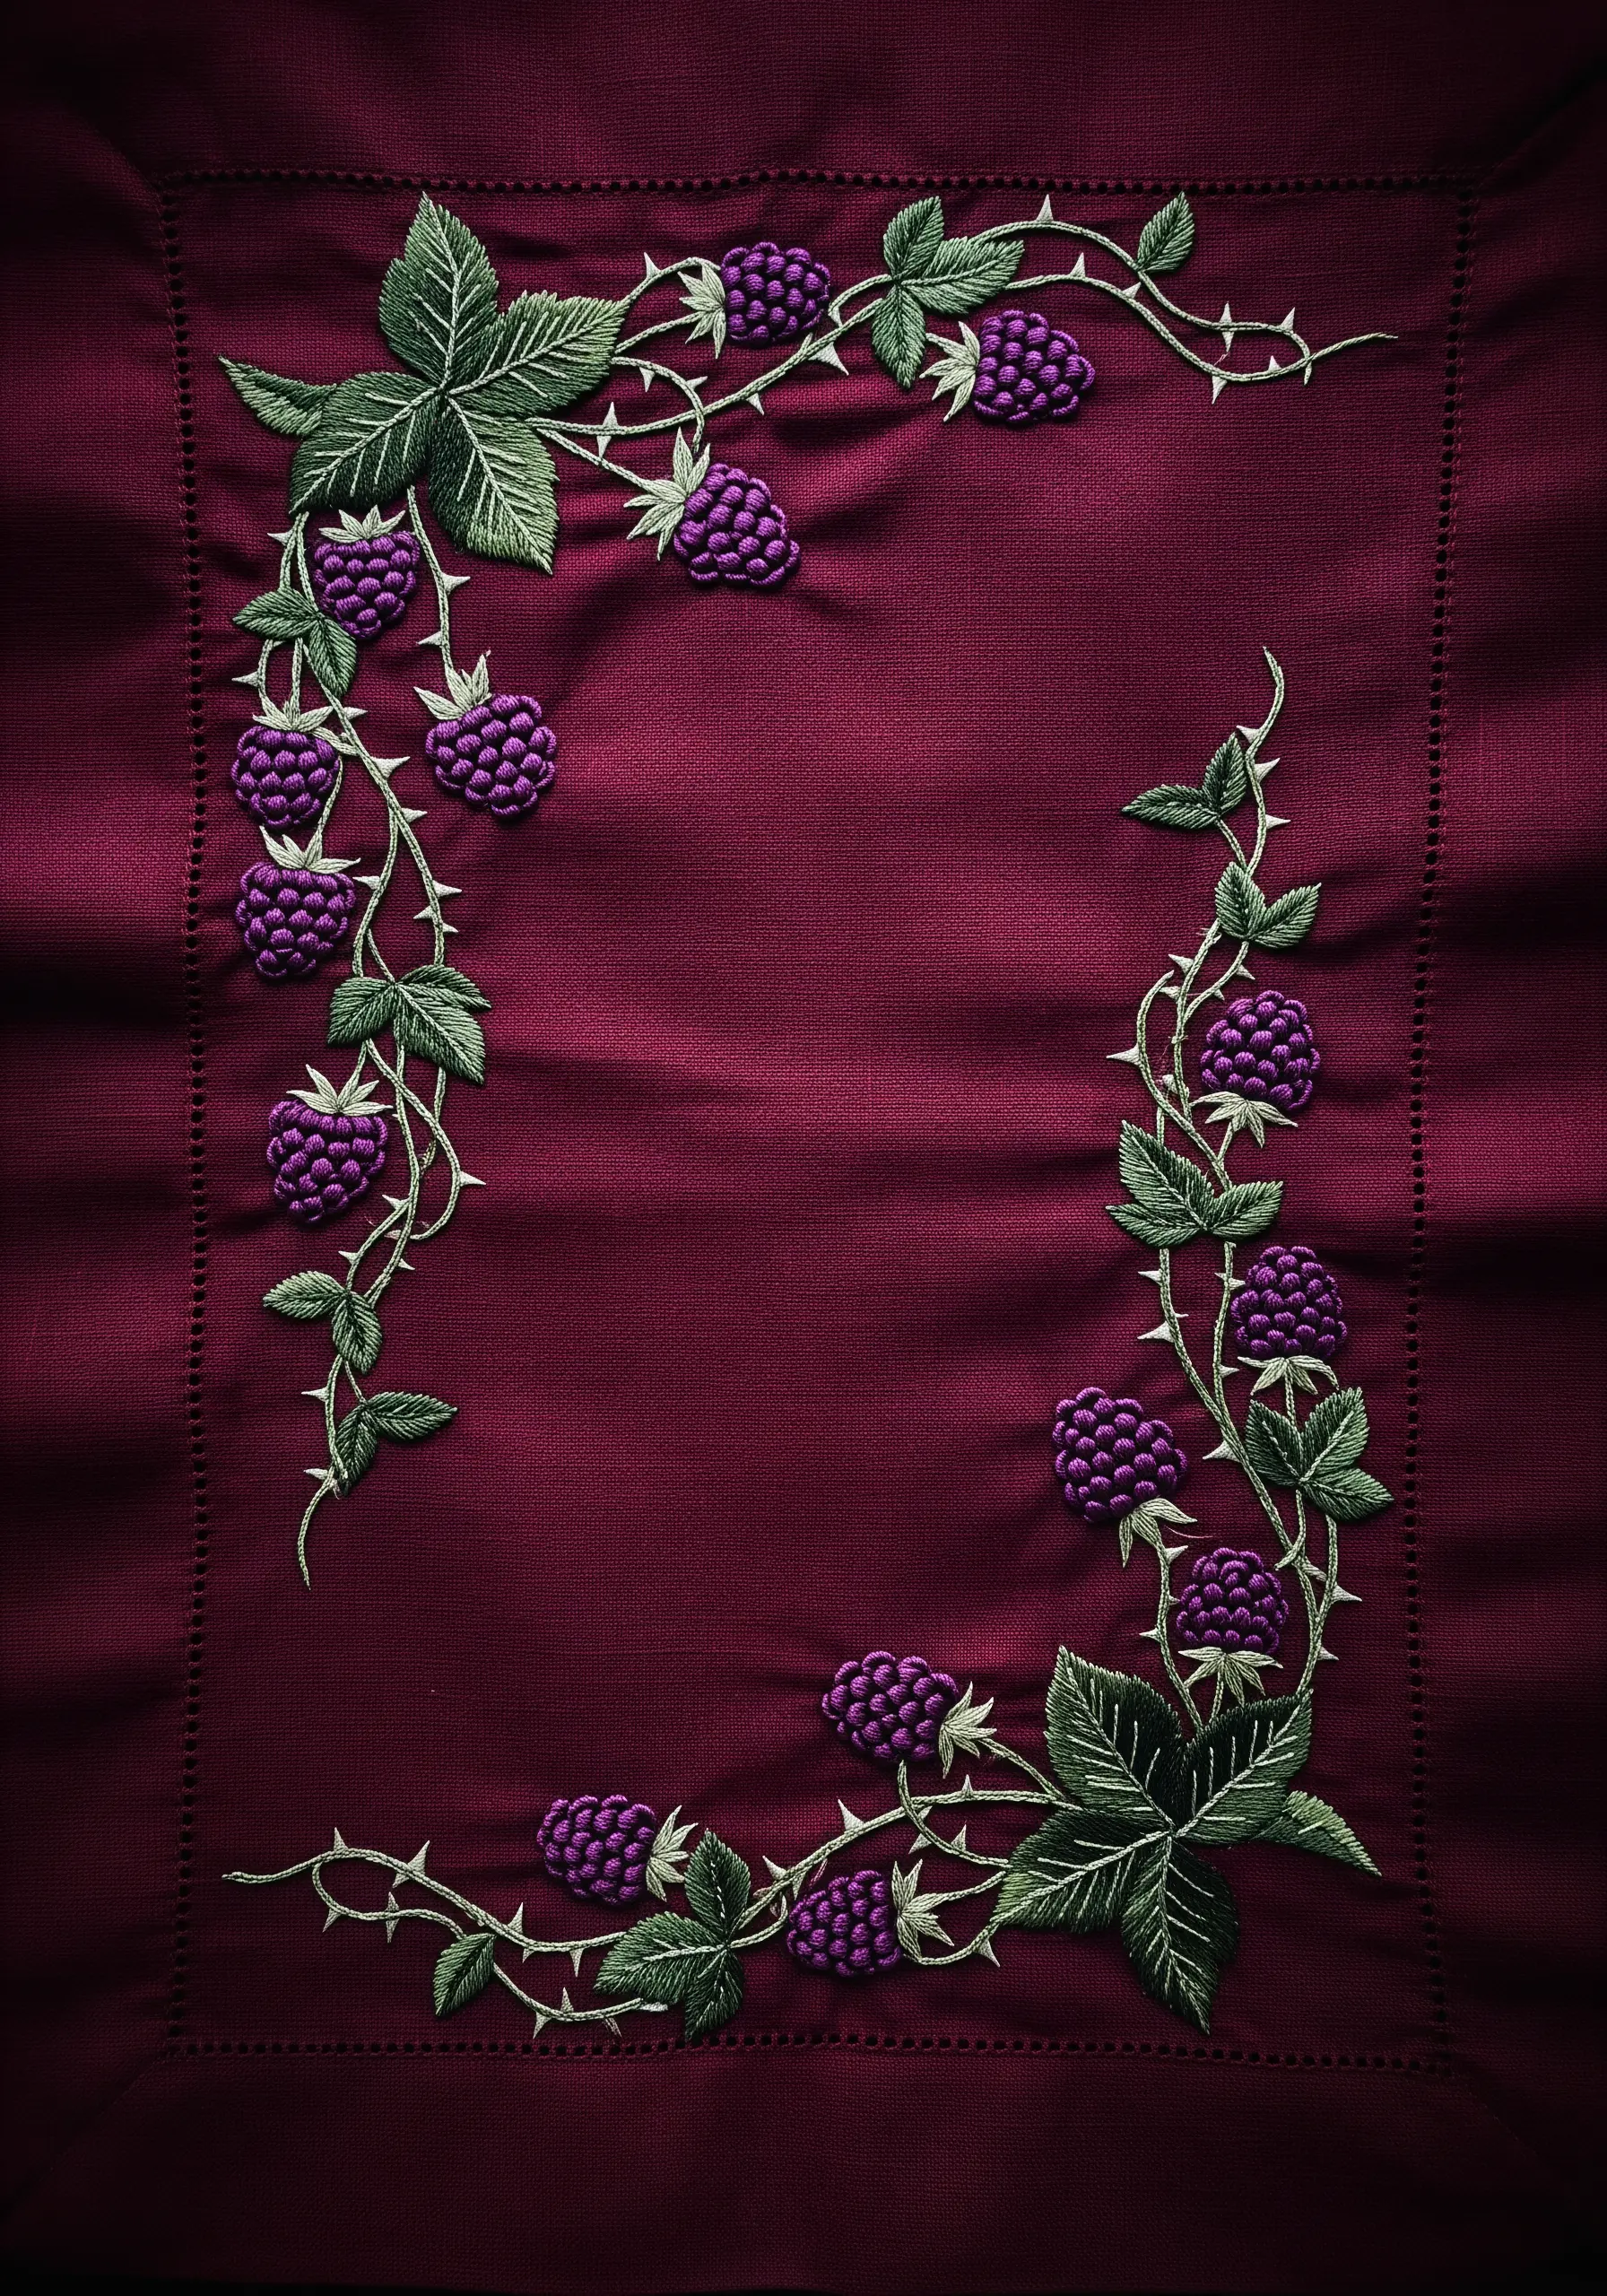
To build the dimensional texture of the blackberries, use bullion knots or a dense cluster of French knots for each drupelet.
Stitch them closely together in a rich purple, adding a single highlight stitch in a lighter lavender to one side to create a sense of light and roundness.
For the thorny stems, use a jagged backstitch in a contrasting light green, ensuring the ‘thorns’ are sharp and defined against the dark, moody fabric.
The result is a design with incredible depth and a touch of wild romance.
20. Delicate Climbing Ivy Border
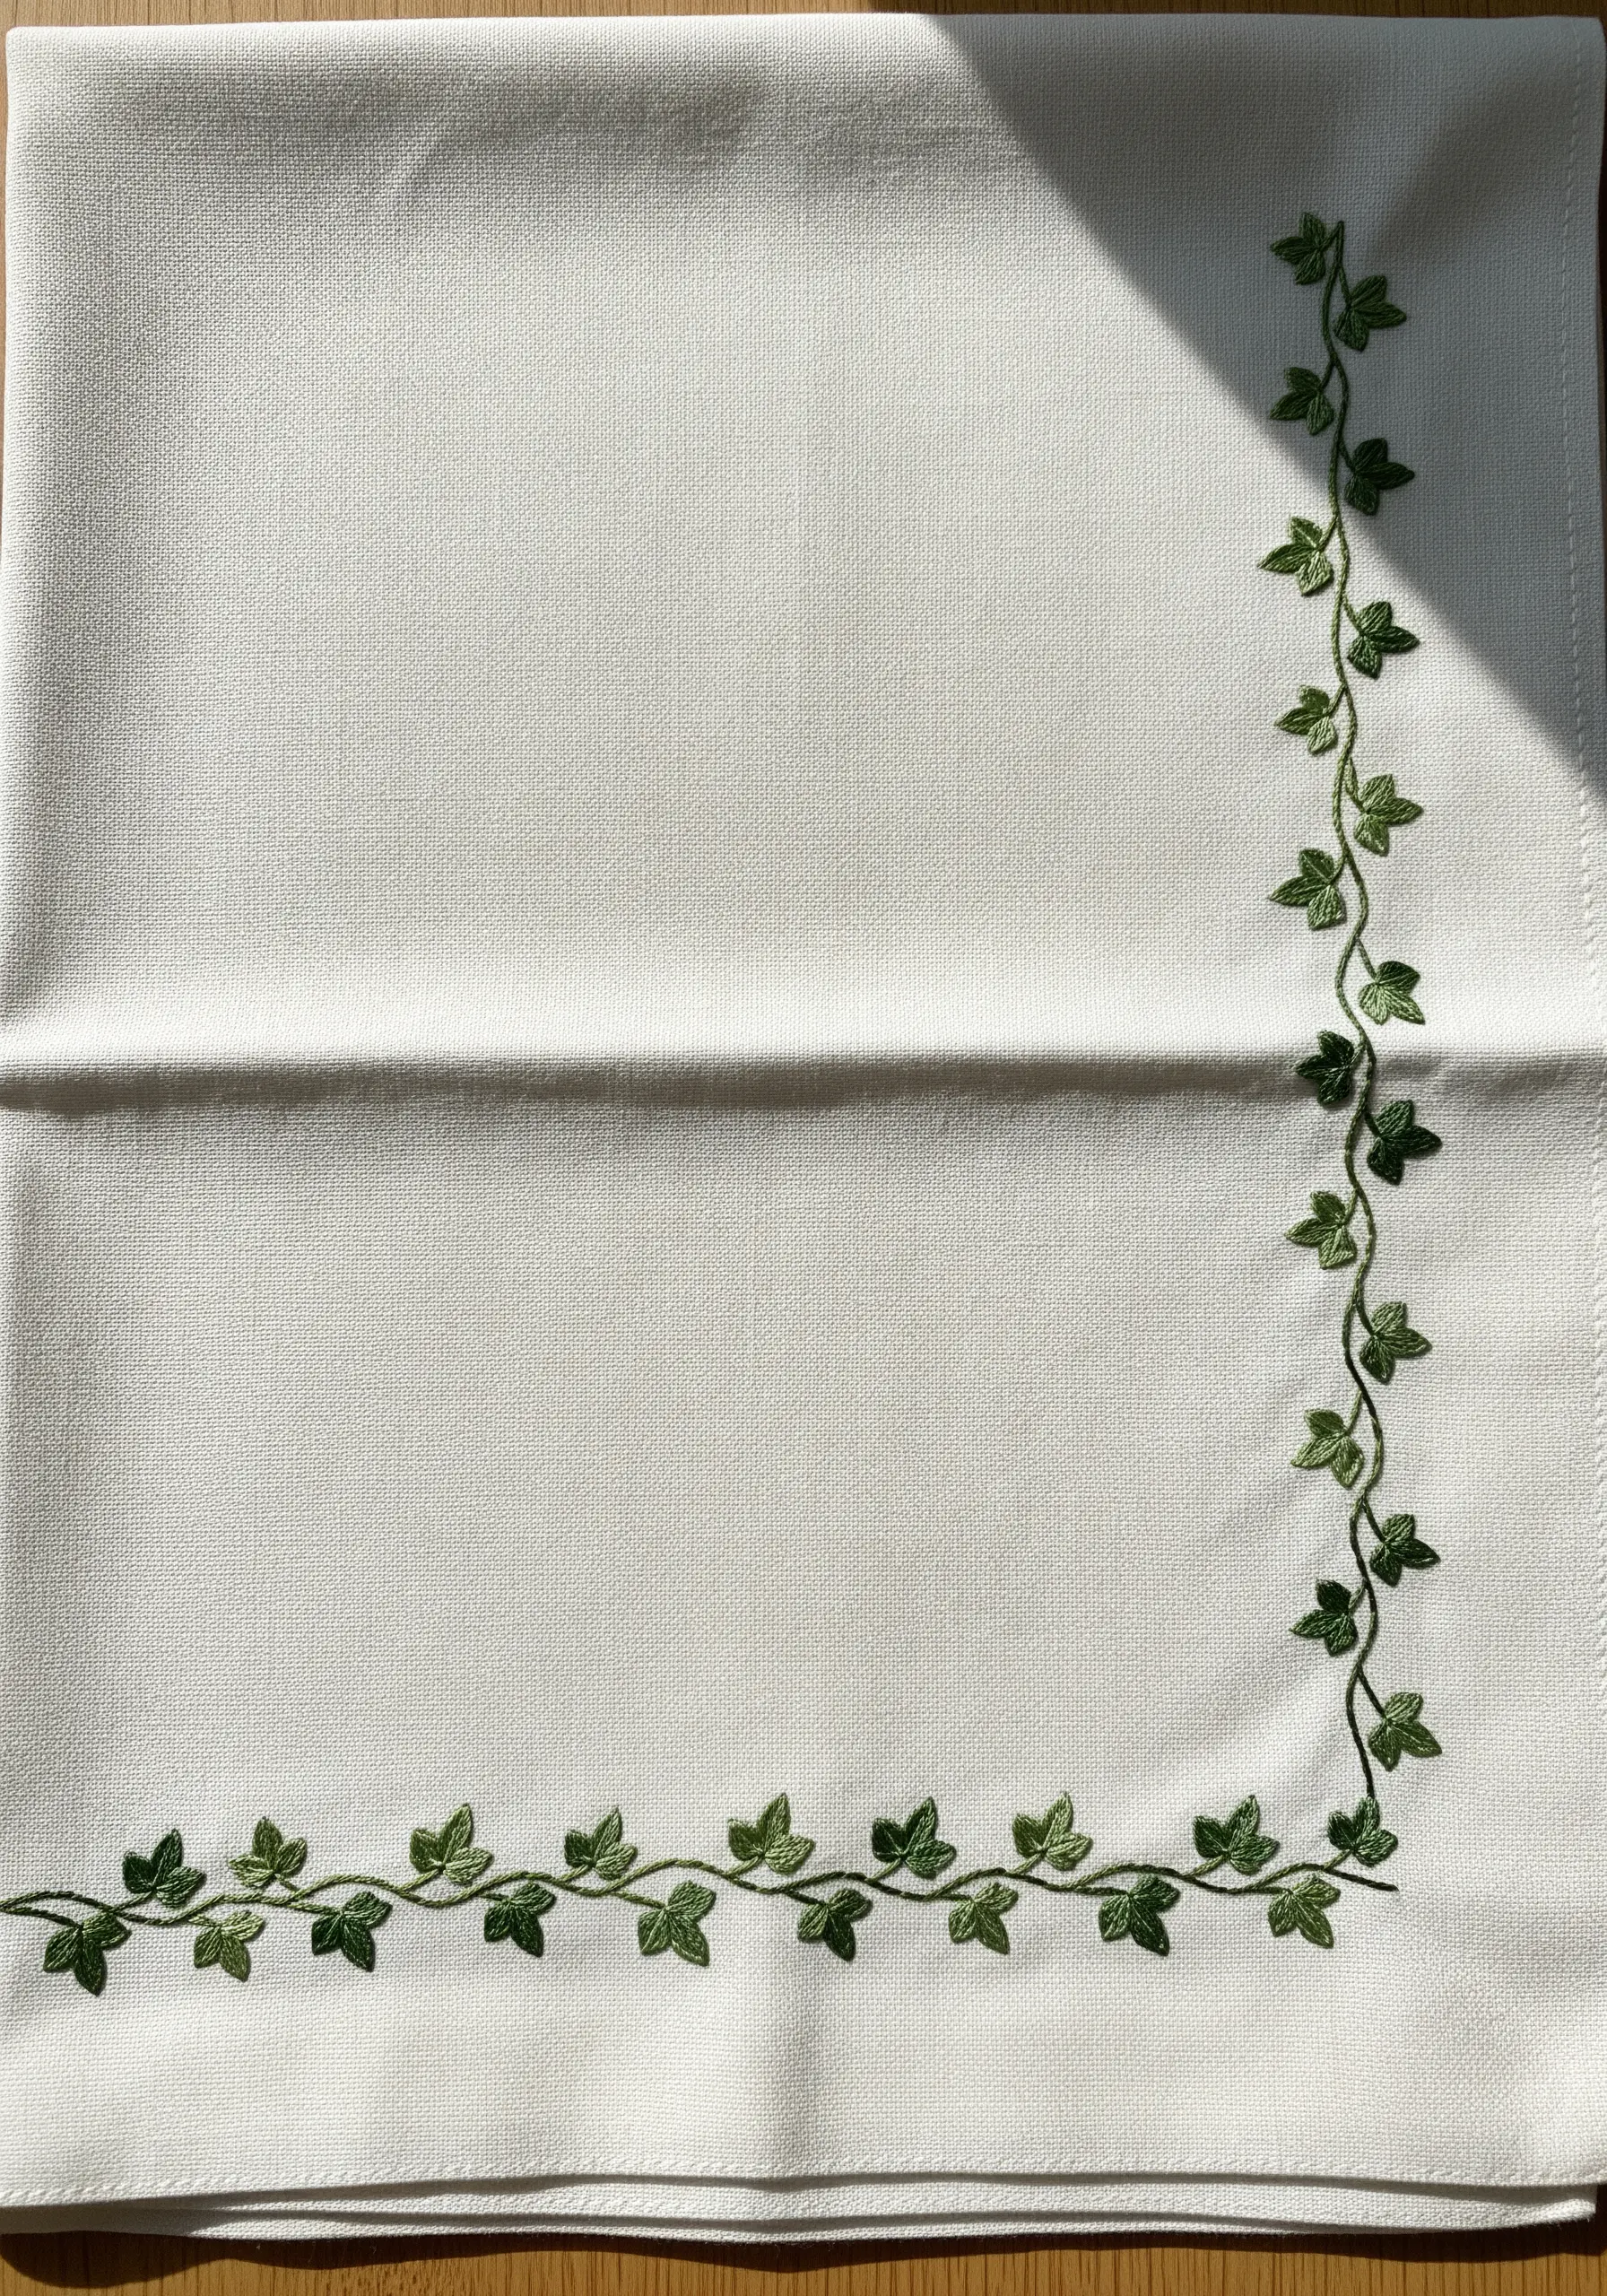
For an understated and classic border, consistency is your goal.
First, stitch the winding vine using a smooth, even stem stitch.
Then, add the leaves at regular intervals using a simple lazy daisy stitch or two small, angled straight stitches to form each leaf shape.
Using just two or three strands of a single green floss will keep the design light and prevent it from feeling heavy, making it a perfect, timeless accent for a wedding napkin.


