

Your phone is with you all day—why not make it a small canvas for your creativity? A touch of embroidery can transform this everyday object into something personal, tactile, and intentionally beautiful.
It’s not about stitching complex, time-consuming masterpieces. Instead, think of it as an opportunity to focus on a single, perfect detail. A clean line, a satisfying texture, or a thoughtful combination of colors is all it takes to make a statement.
These mini designs are perfect for exploring a new stitch or color palette without the commitment of a large project. Each one is a small victory, a quiet moment of artistry you can carry in your pocket.
1. The Textured Arch Rainbow
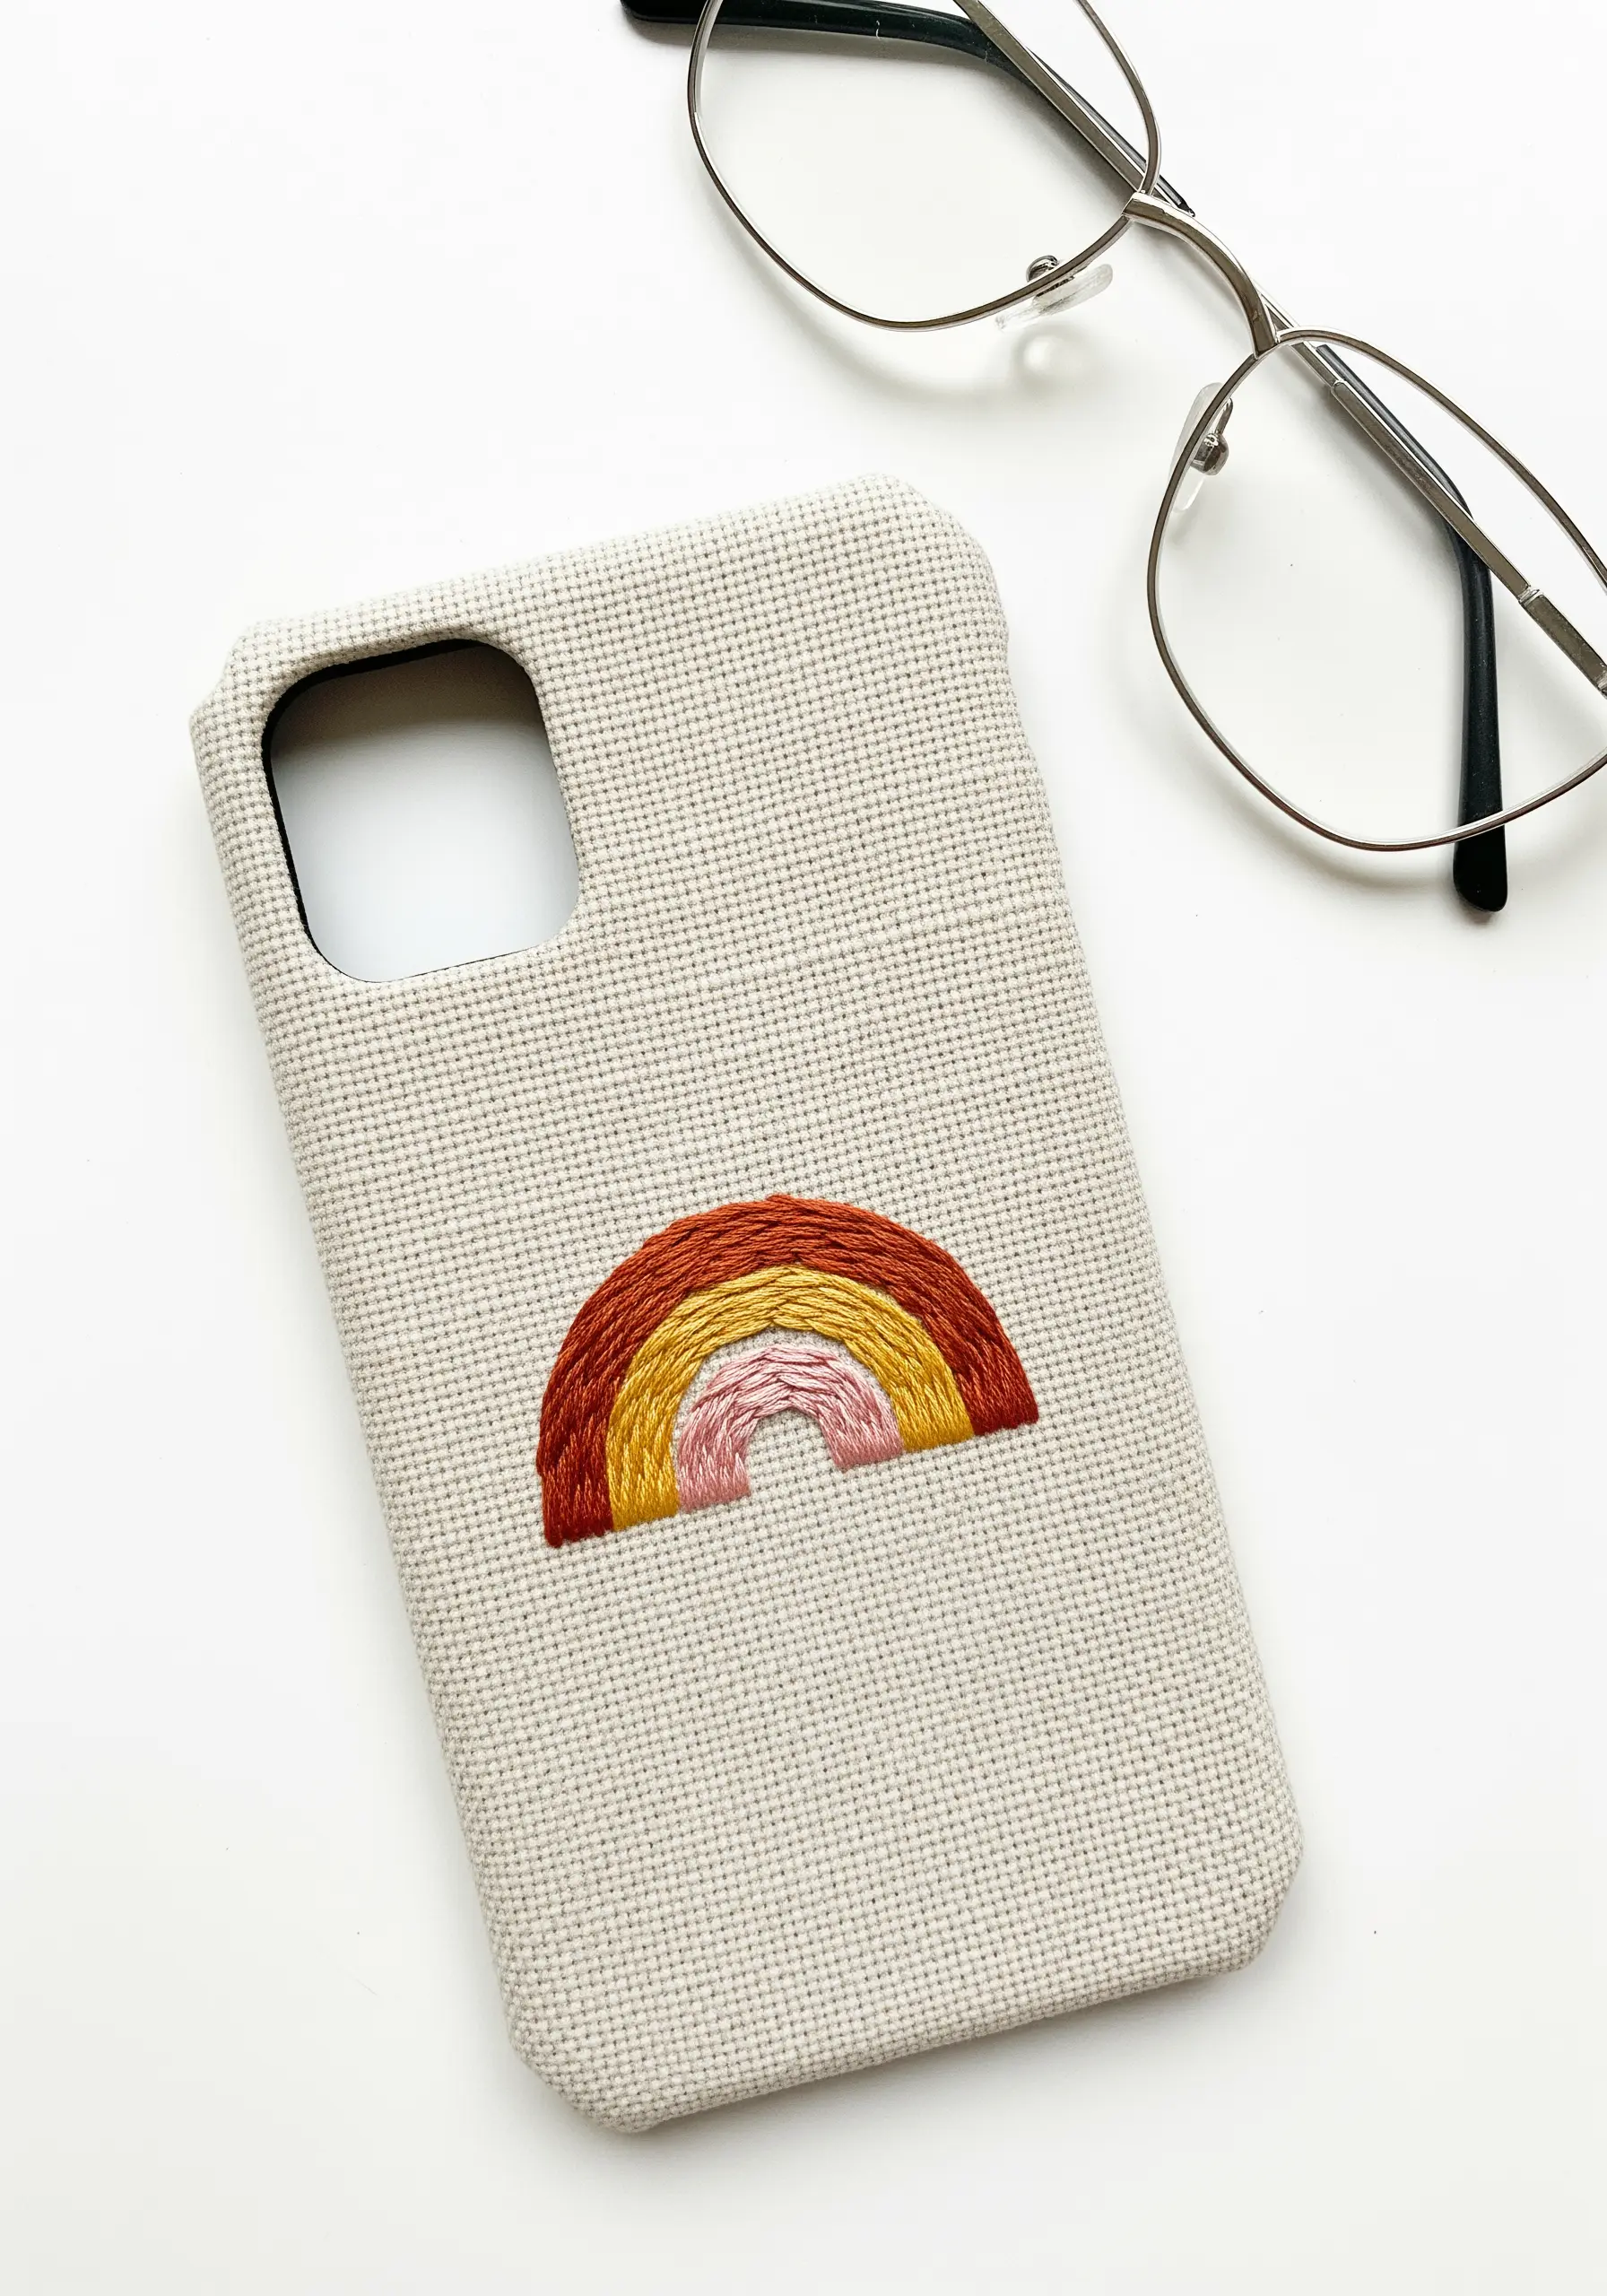
Instead of a flat satin stitch, build each arc of your rainbow using a whipped backstitch or chain stitch.
This technique creates a raised, rope-like texture that gives the simple shape a tactile, three-dimensional quality.
For a modern look, swap traditional primary colors for an earthy, tonal palette of rust, ochre, and muted pink.
This thoughtful color choice feels sophisticated and turns a playful motif into a refined accent.
2. The Minimalist Monstera Outline
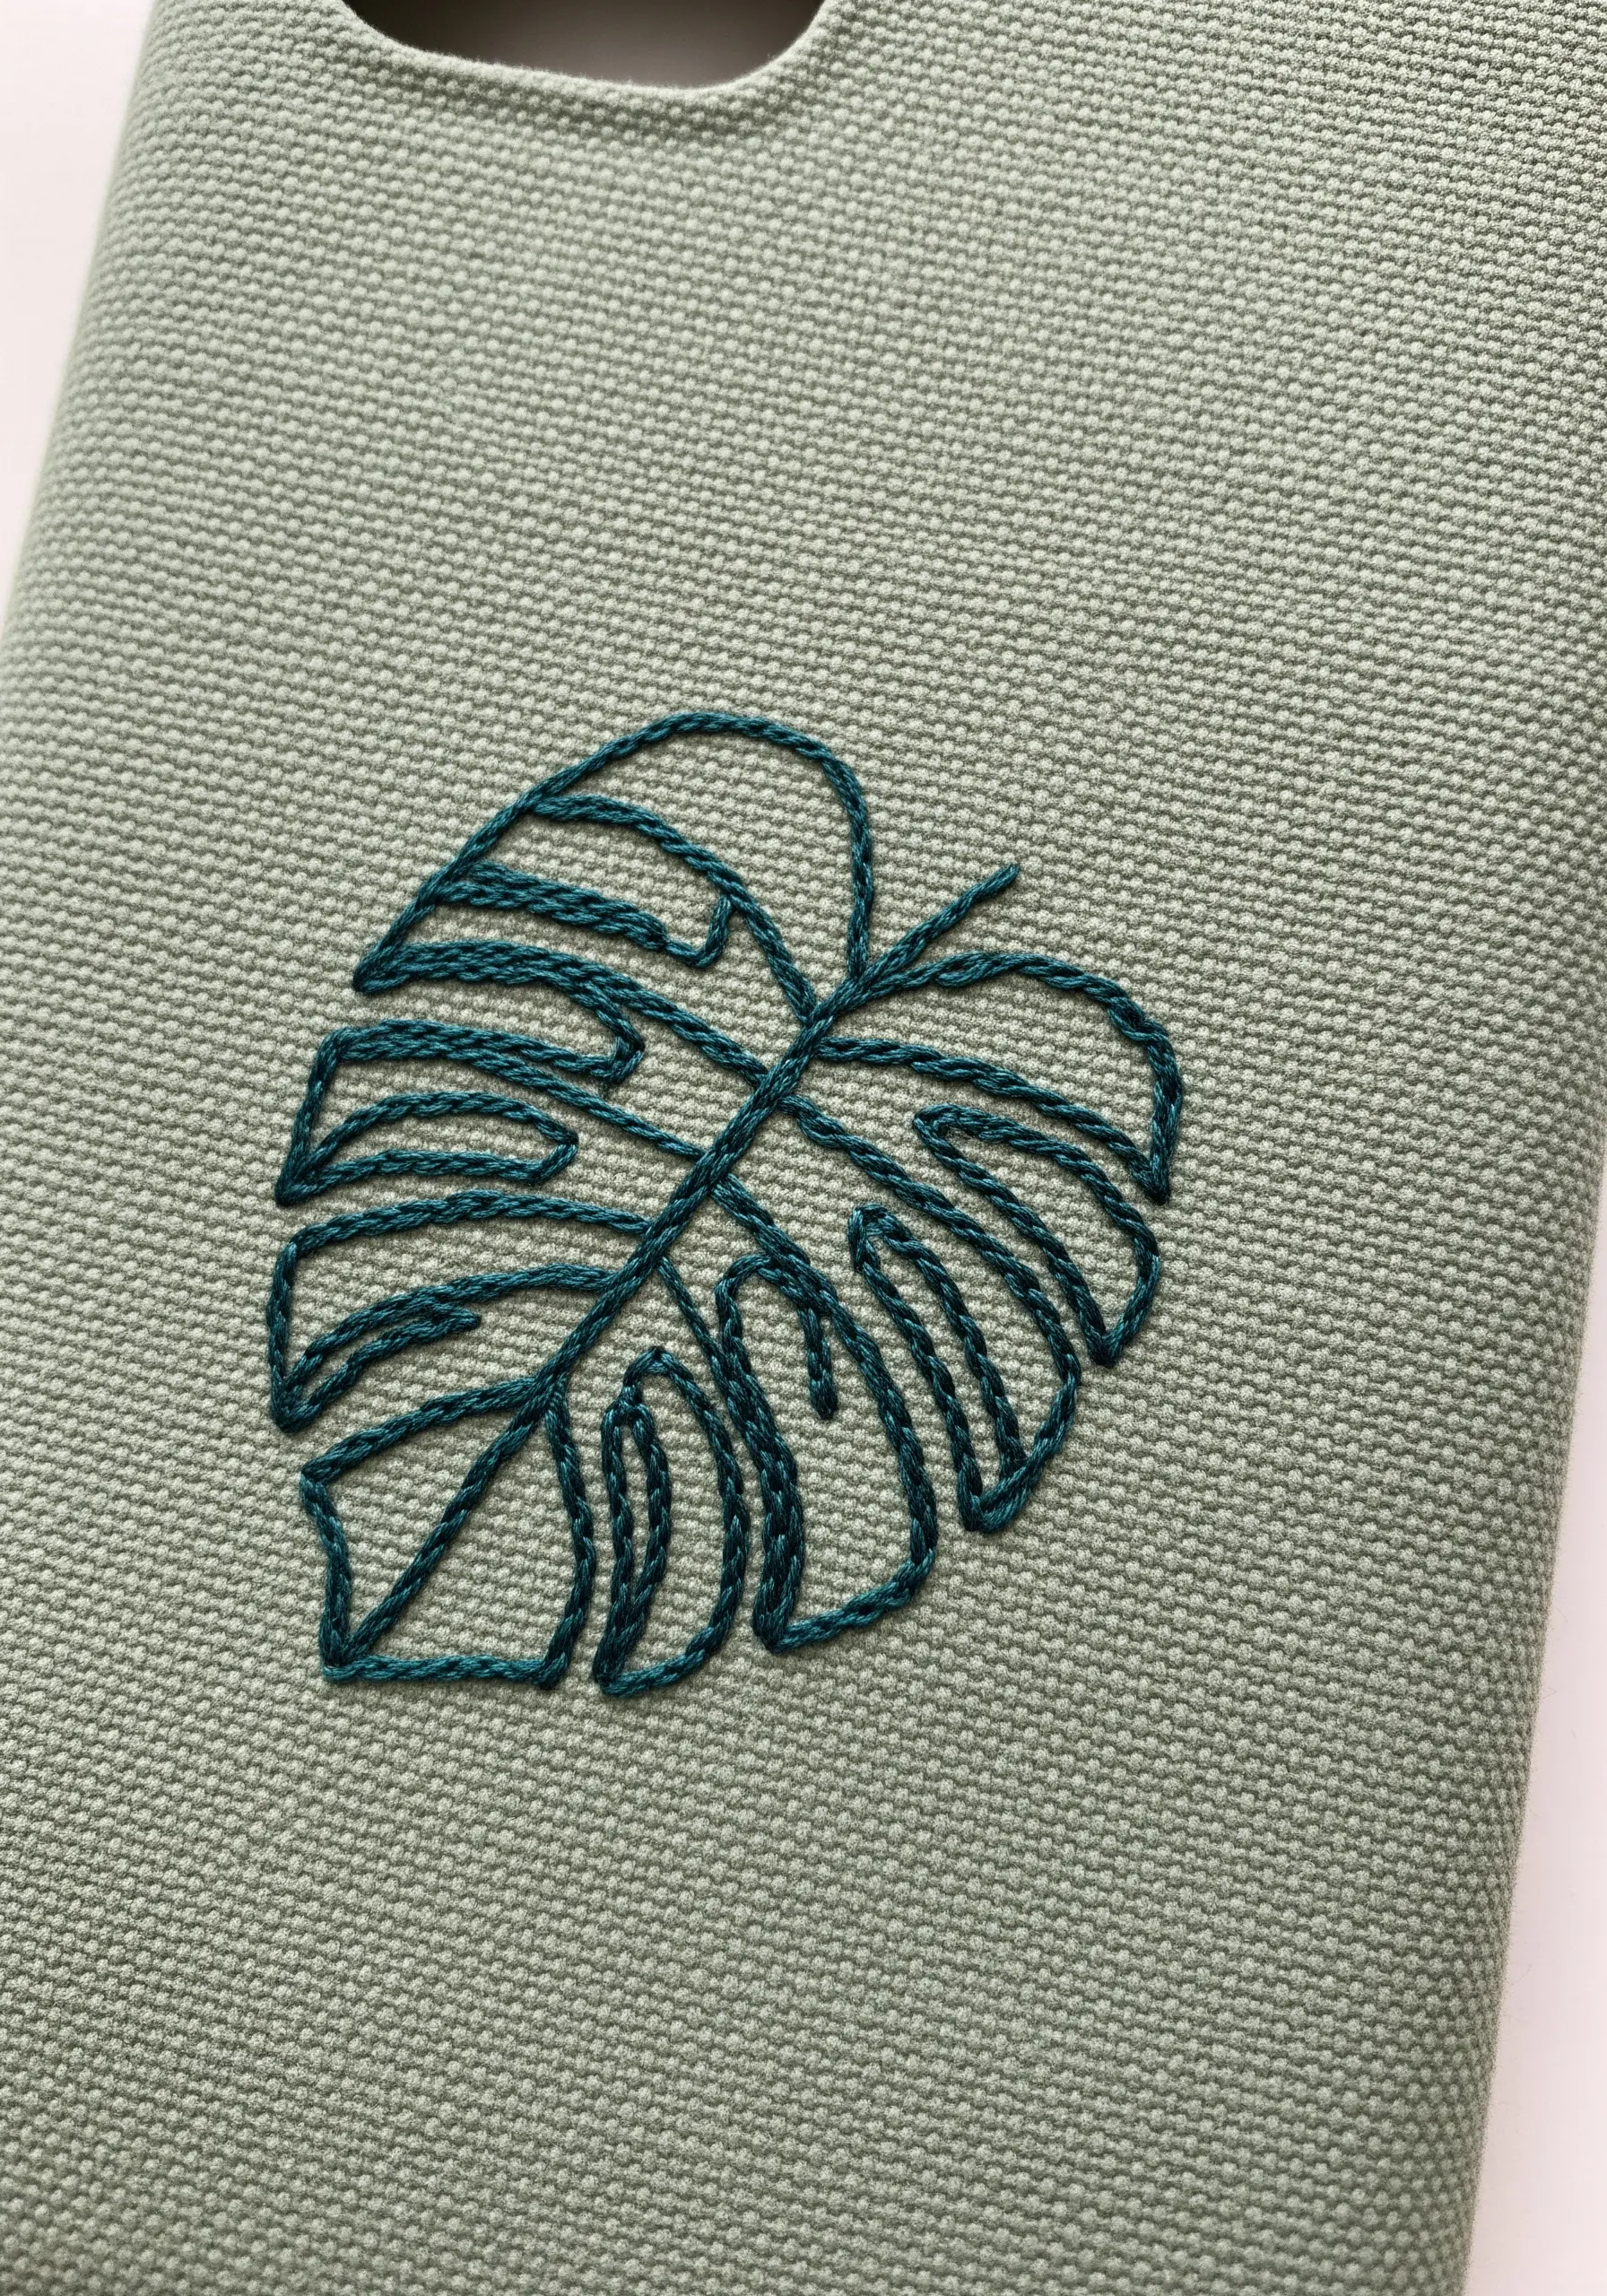
For clean botanical line art, the consistency of your stitch is everything.
Use a stem stitch or a two-strand backstitch, focusing on keeping each stitch the exact same length, especially around the curves of the leaf.
To prevent puckering on the tight corners, shorten your stitches slightly as you navigate sharp turns.
This maintains tension and ensures the outline remains crisp and fluid, never jagged.
3. The Celestial Nightscape

Combine metallic and matte threads to create a dynamic celestial scene that truly shines.
For the crescent moon, fill the shape with a dense fishbone stitch using silver metallic floss for a light-catching texture.
Stitch the stars with a simple gold thread, using four intersecting straight stitches to form tiny, sharp starbursts.
Working with metallic thread can be tricky; use shorter lengths (about 12 inches) to minimize tangling and fraying.
4. The Layered Abstract Composition
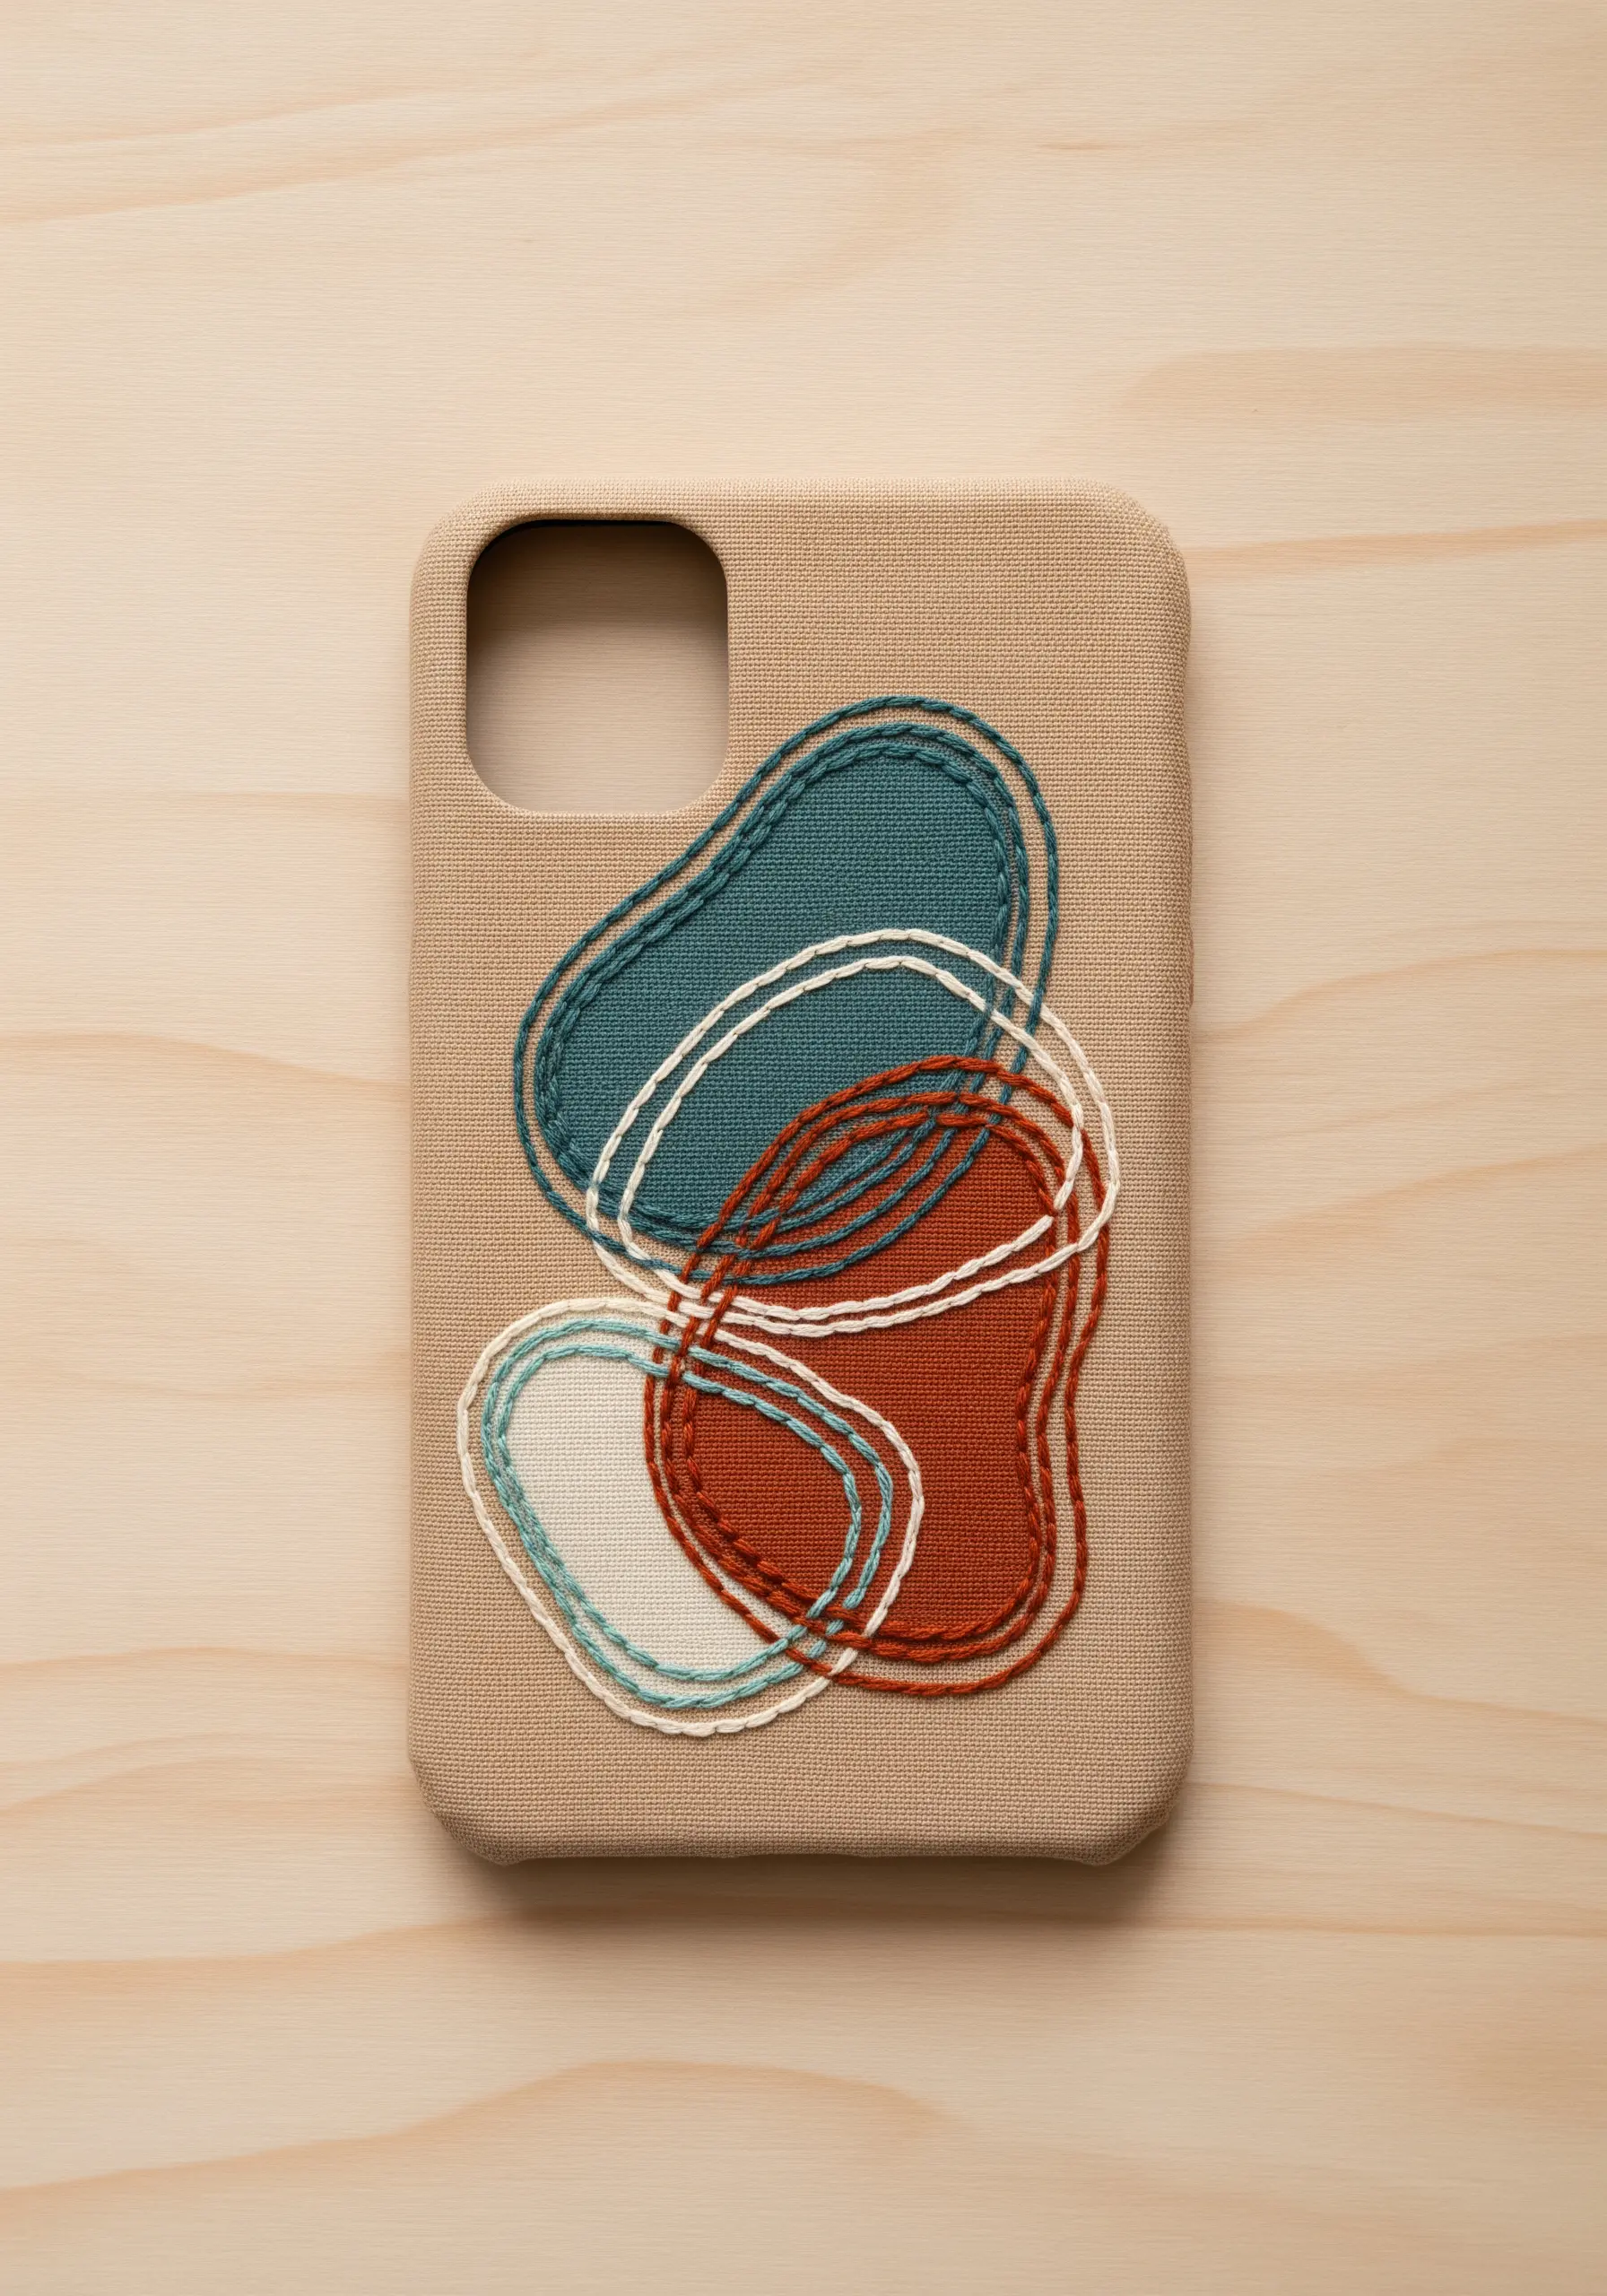
Create a dynamic abstract design by layering organic shapes filled with satin stitch.
To ensure your satin stitches have a perfectly clean edge, first outline each shape with a tiny split stitch using a single strand of matching thread.
This raised border acts as a guide and a barrier, allowing you to tuck your satin stitches underneath for an exceptionally smooth, professional finish.
Use a cohesive color palette—like rust, teal, and cream—to ensure the overlapping forms feel harmonious, not chaotic.
5. The Sculptural Wordmark
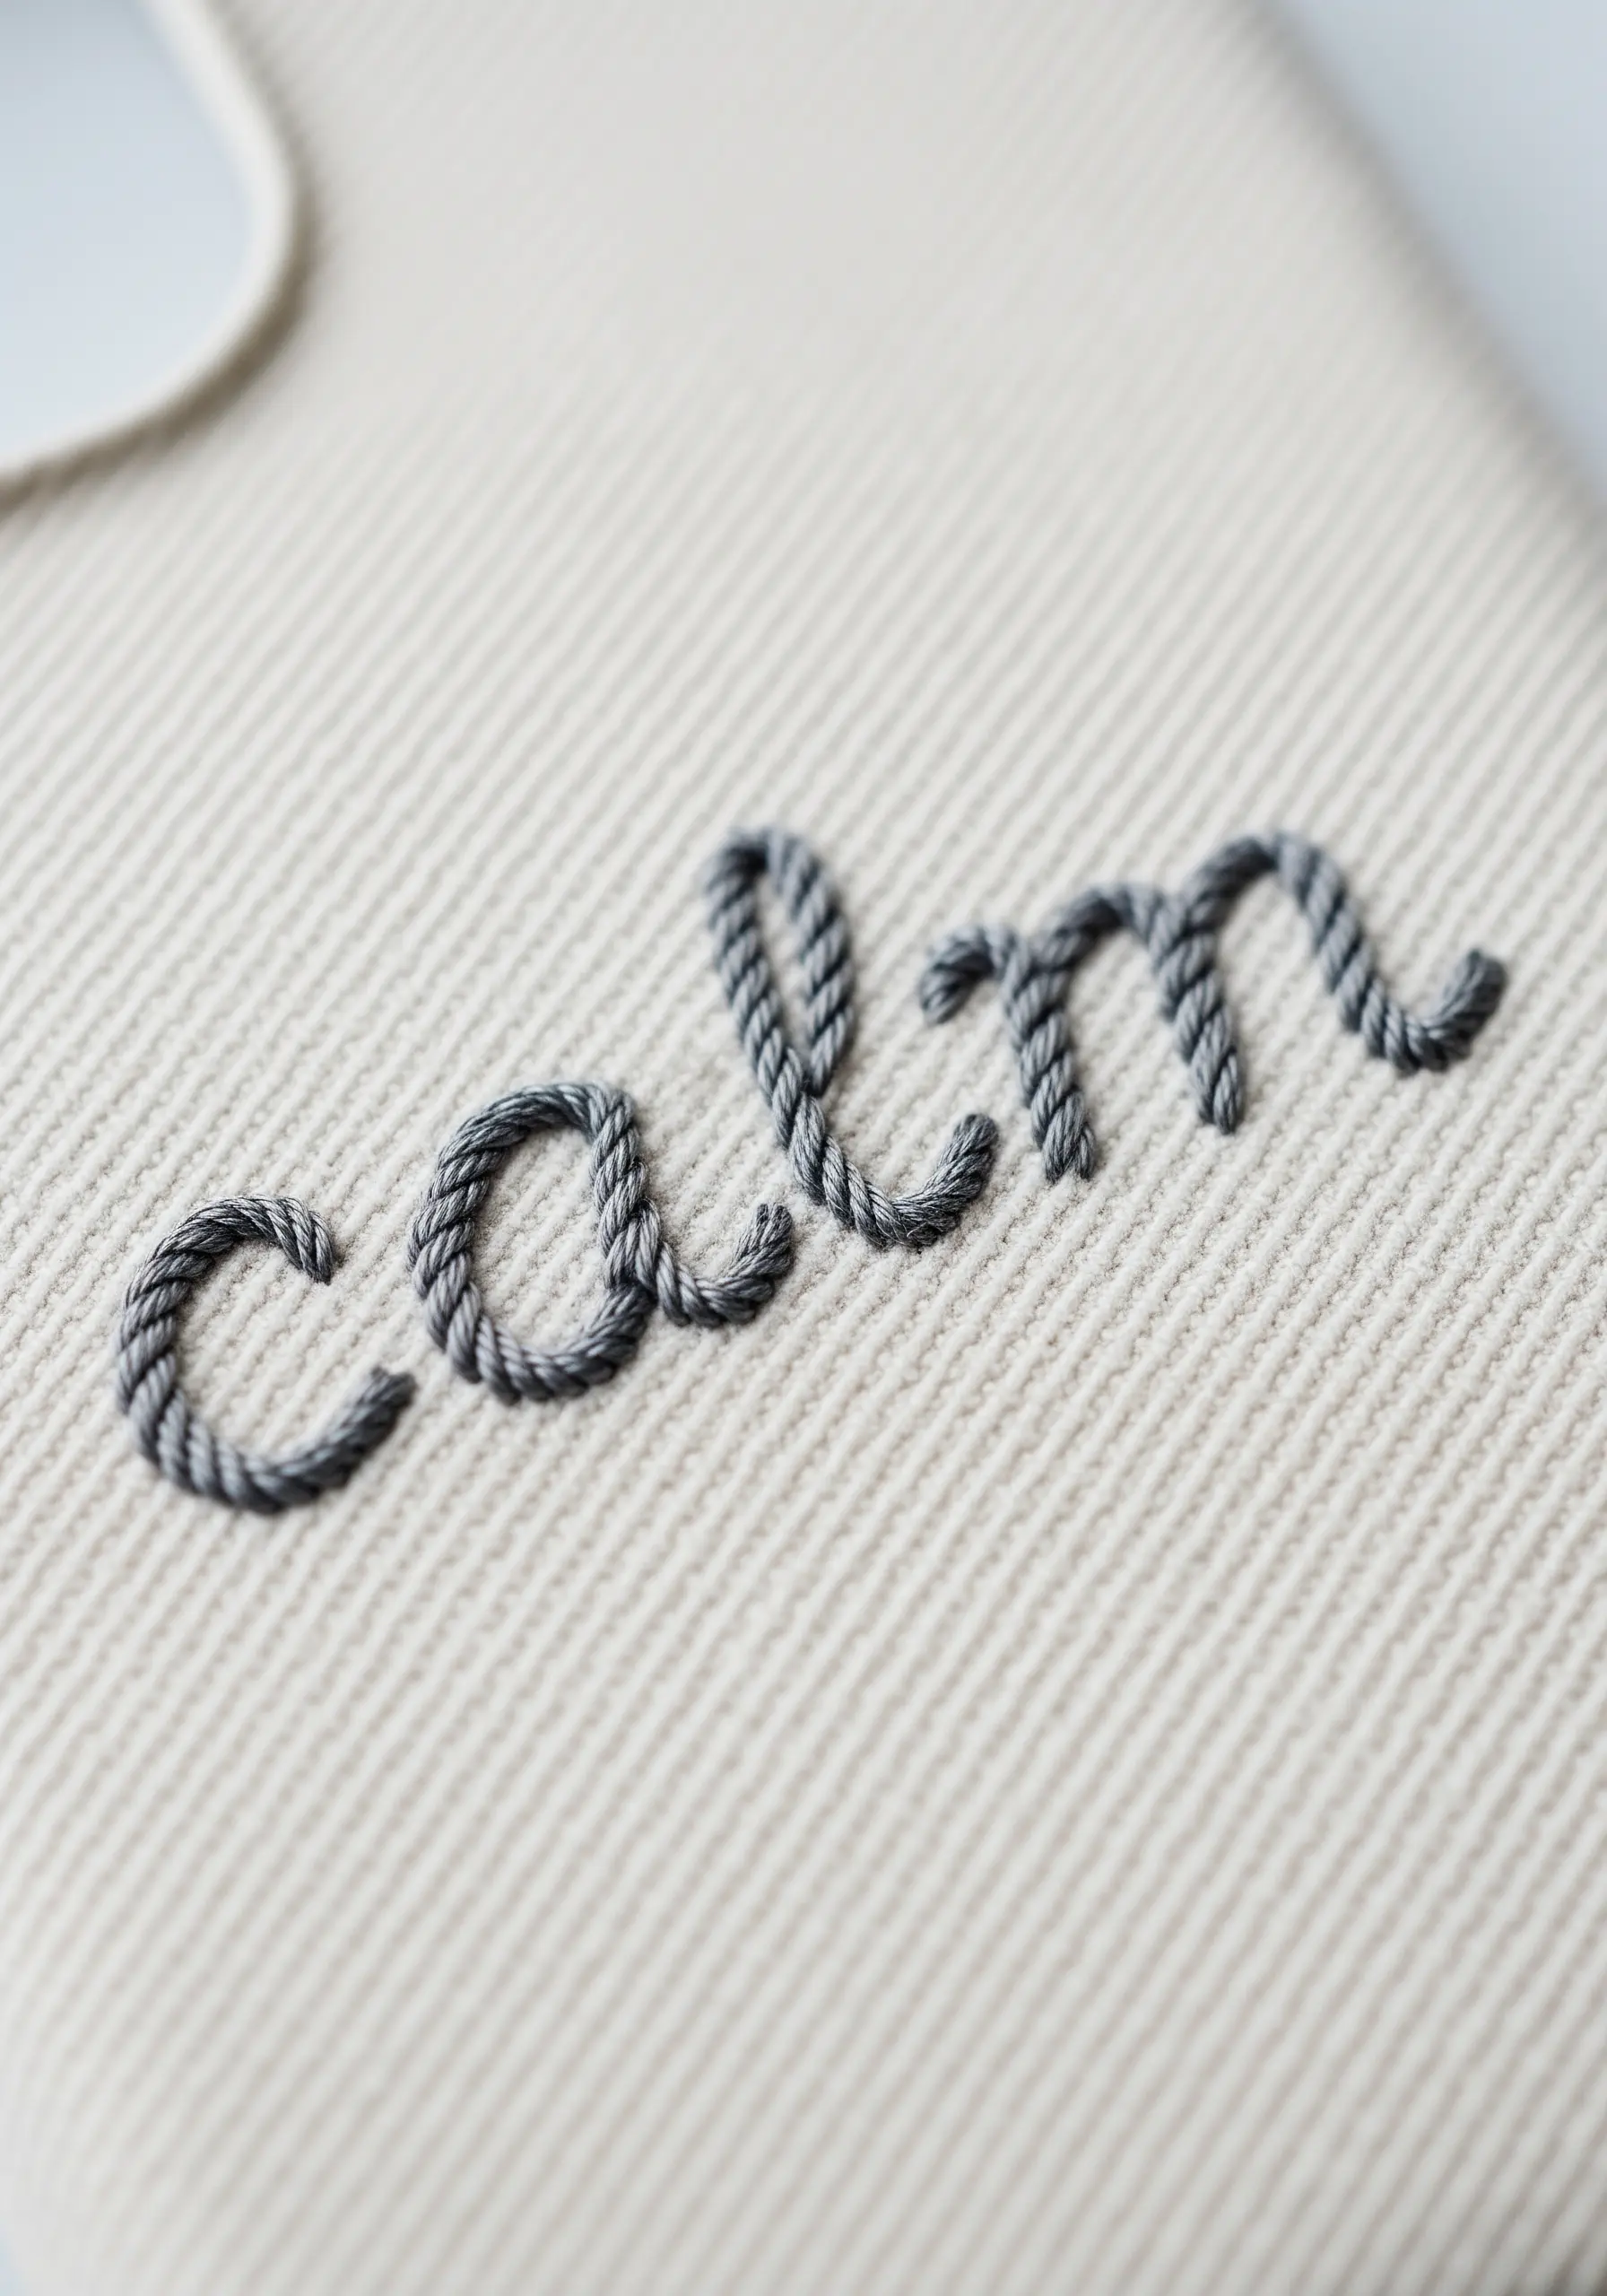
Elevate simple text by using a stitch that adds physical dimension, turning a word into a small sculpture.
A raised chain stitch band is perfect for this, creating a bold, rounded line that stands out from the fabric surface.
Work with all six strands of your floss to achieve that chunky, rope-like effect.
This technique gives minimal typography a satisfying texture you can actually feel, making the message more impactful.
6. The Delicate Lavender Sprig
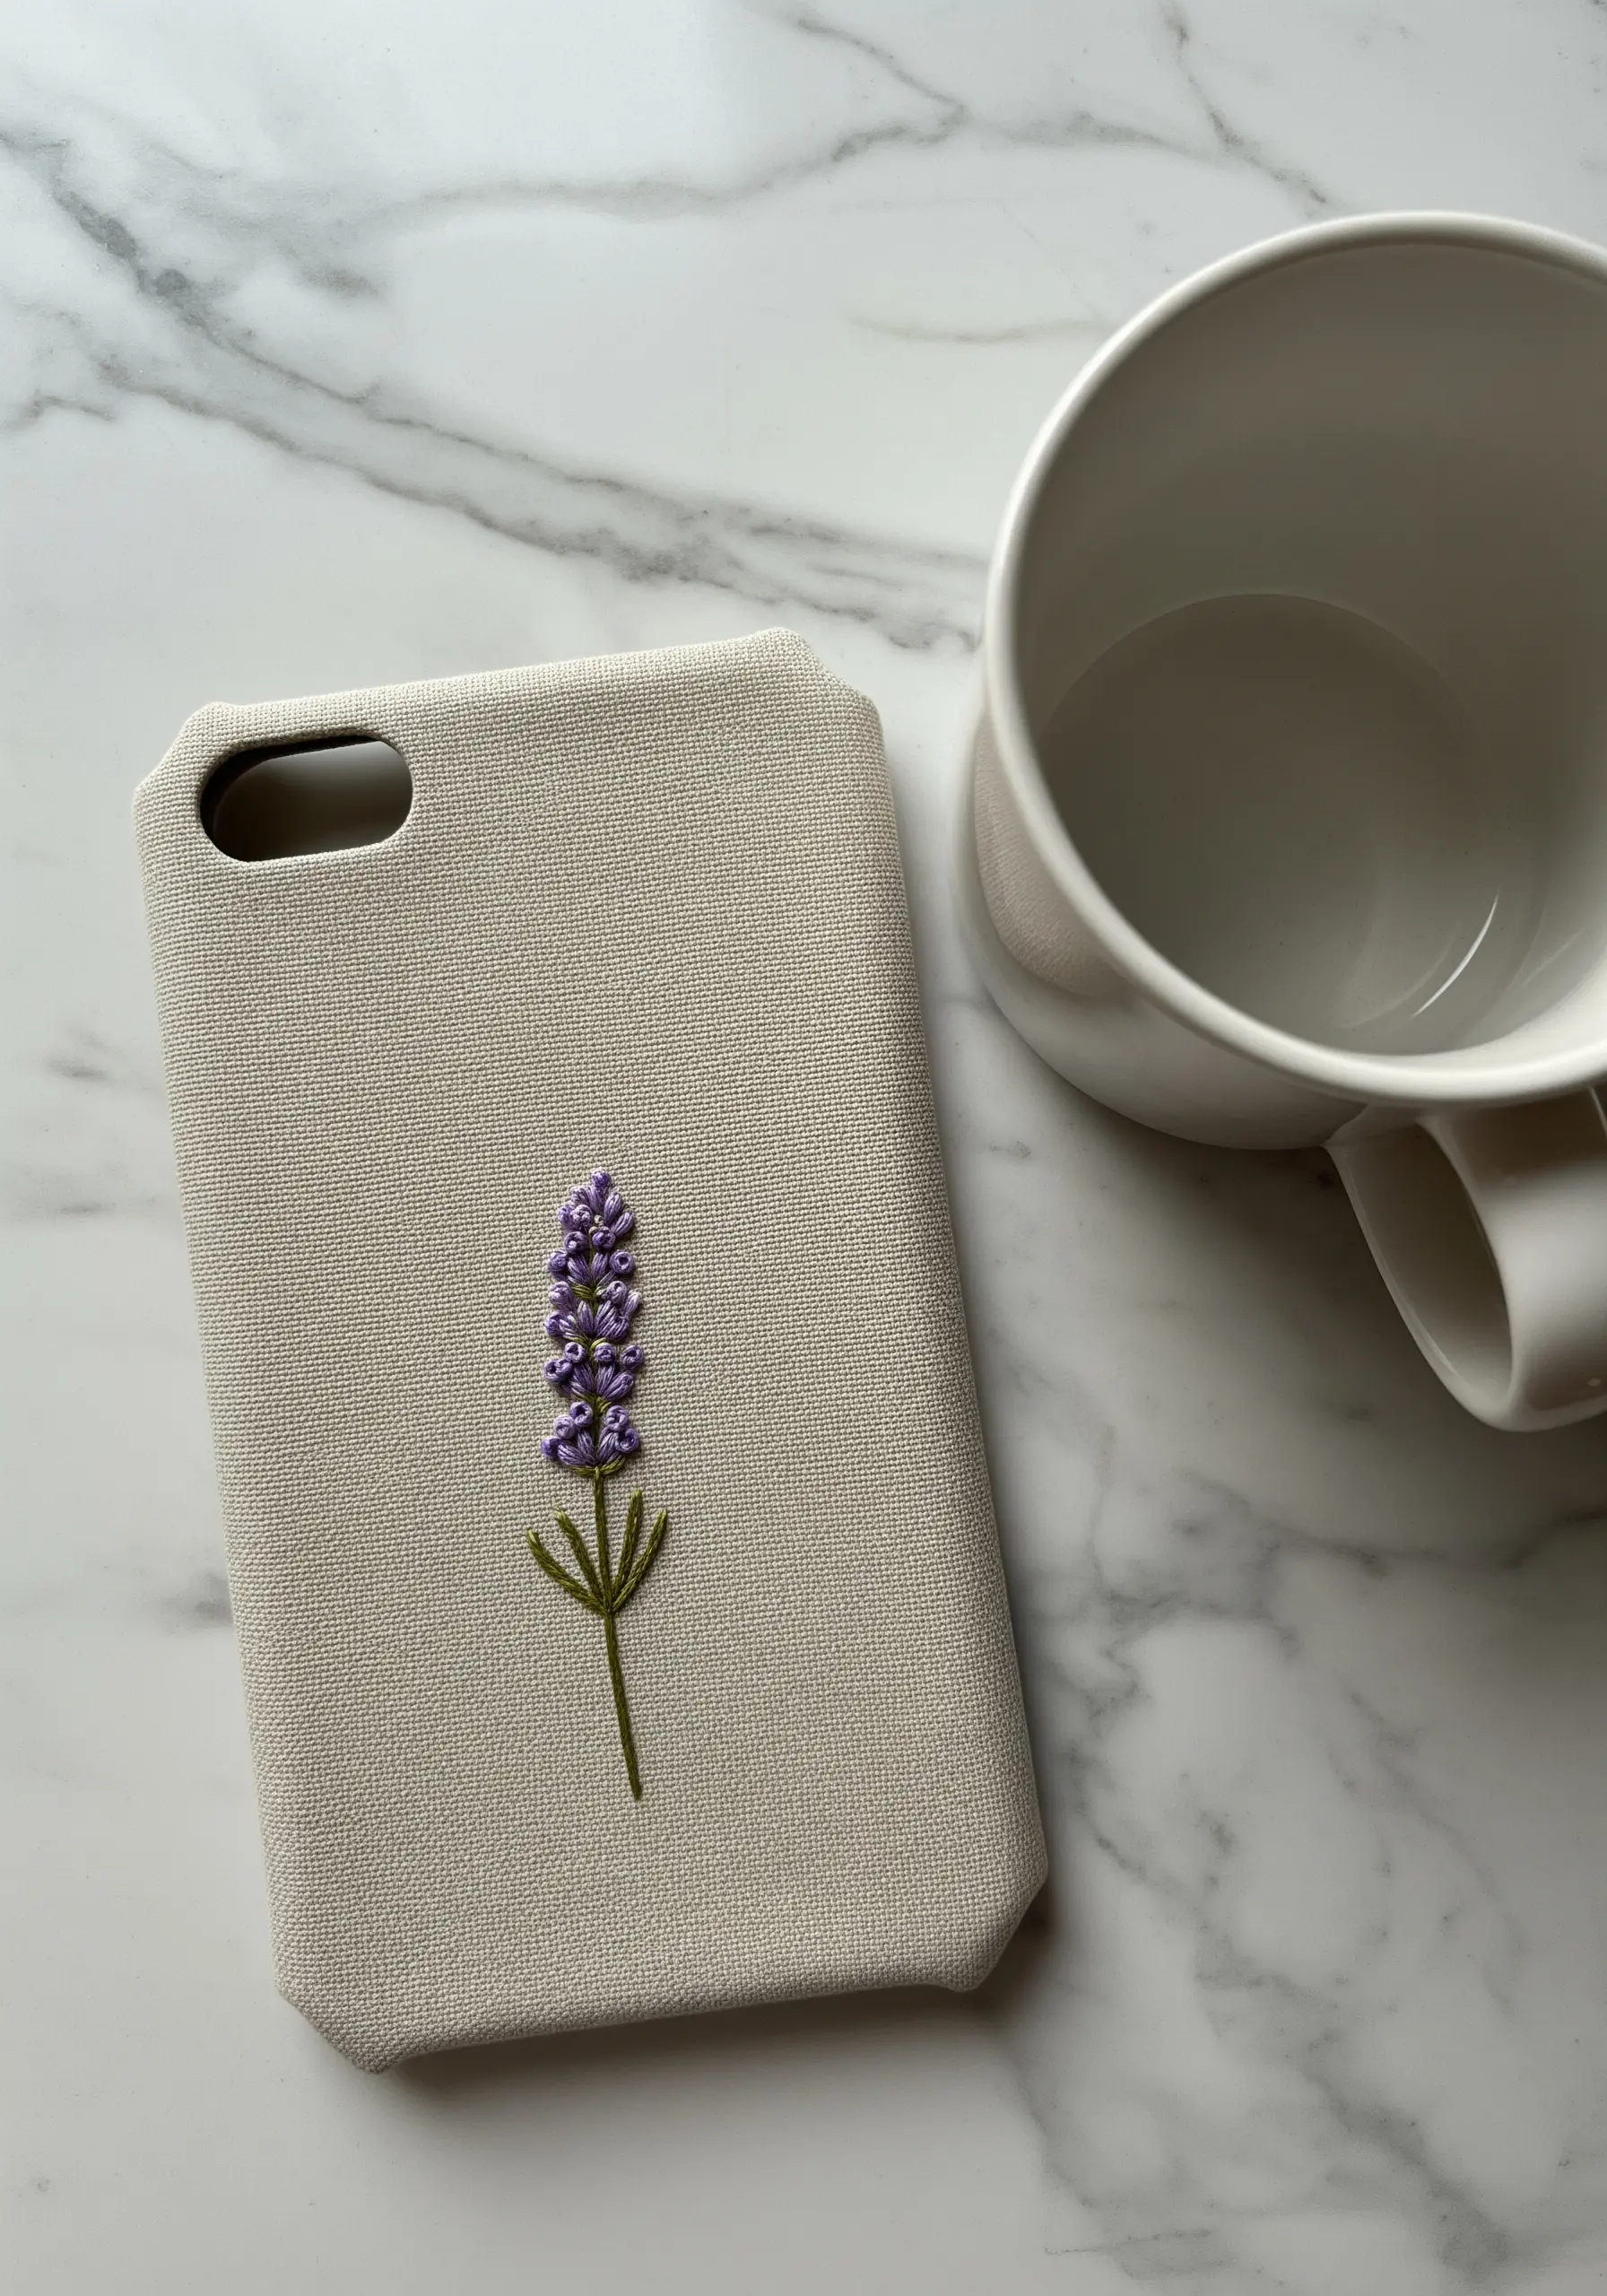
Capture the texture of a lavender sprig by using French knots for the blossoms.
Vary the placement and tightness of each knot, clustering them densely at the bottom and spacing them out toward the top to mimic natural growth.
Use two shades of purple—a medium and a light lavender—and alternate them randomly to create subtle dimension and realism.
A single, delicate stem stitch in green is all you need to ground the florals without overpowering them.
7. The High-Contrast Line Art Cat

When working with a simple outline on a dark background, the crispness of your line is paramount.
Use a bright white thread and a whipped backstitch to create a solid, smooth line that pops against the black fabric.
The whipping motion wraps the initial backstitch, eliminating gaps and creating a continuous, cord-like effect.
This technique ensures your modern line art looks bold and intentional, not faint or broken.
8. The Thread-Painted Mountain Range
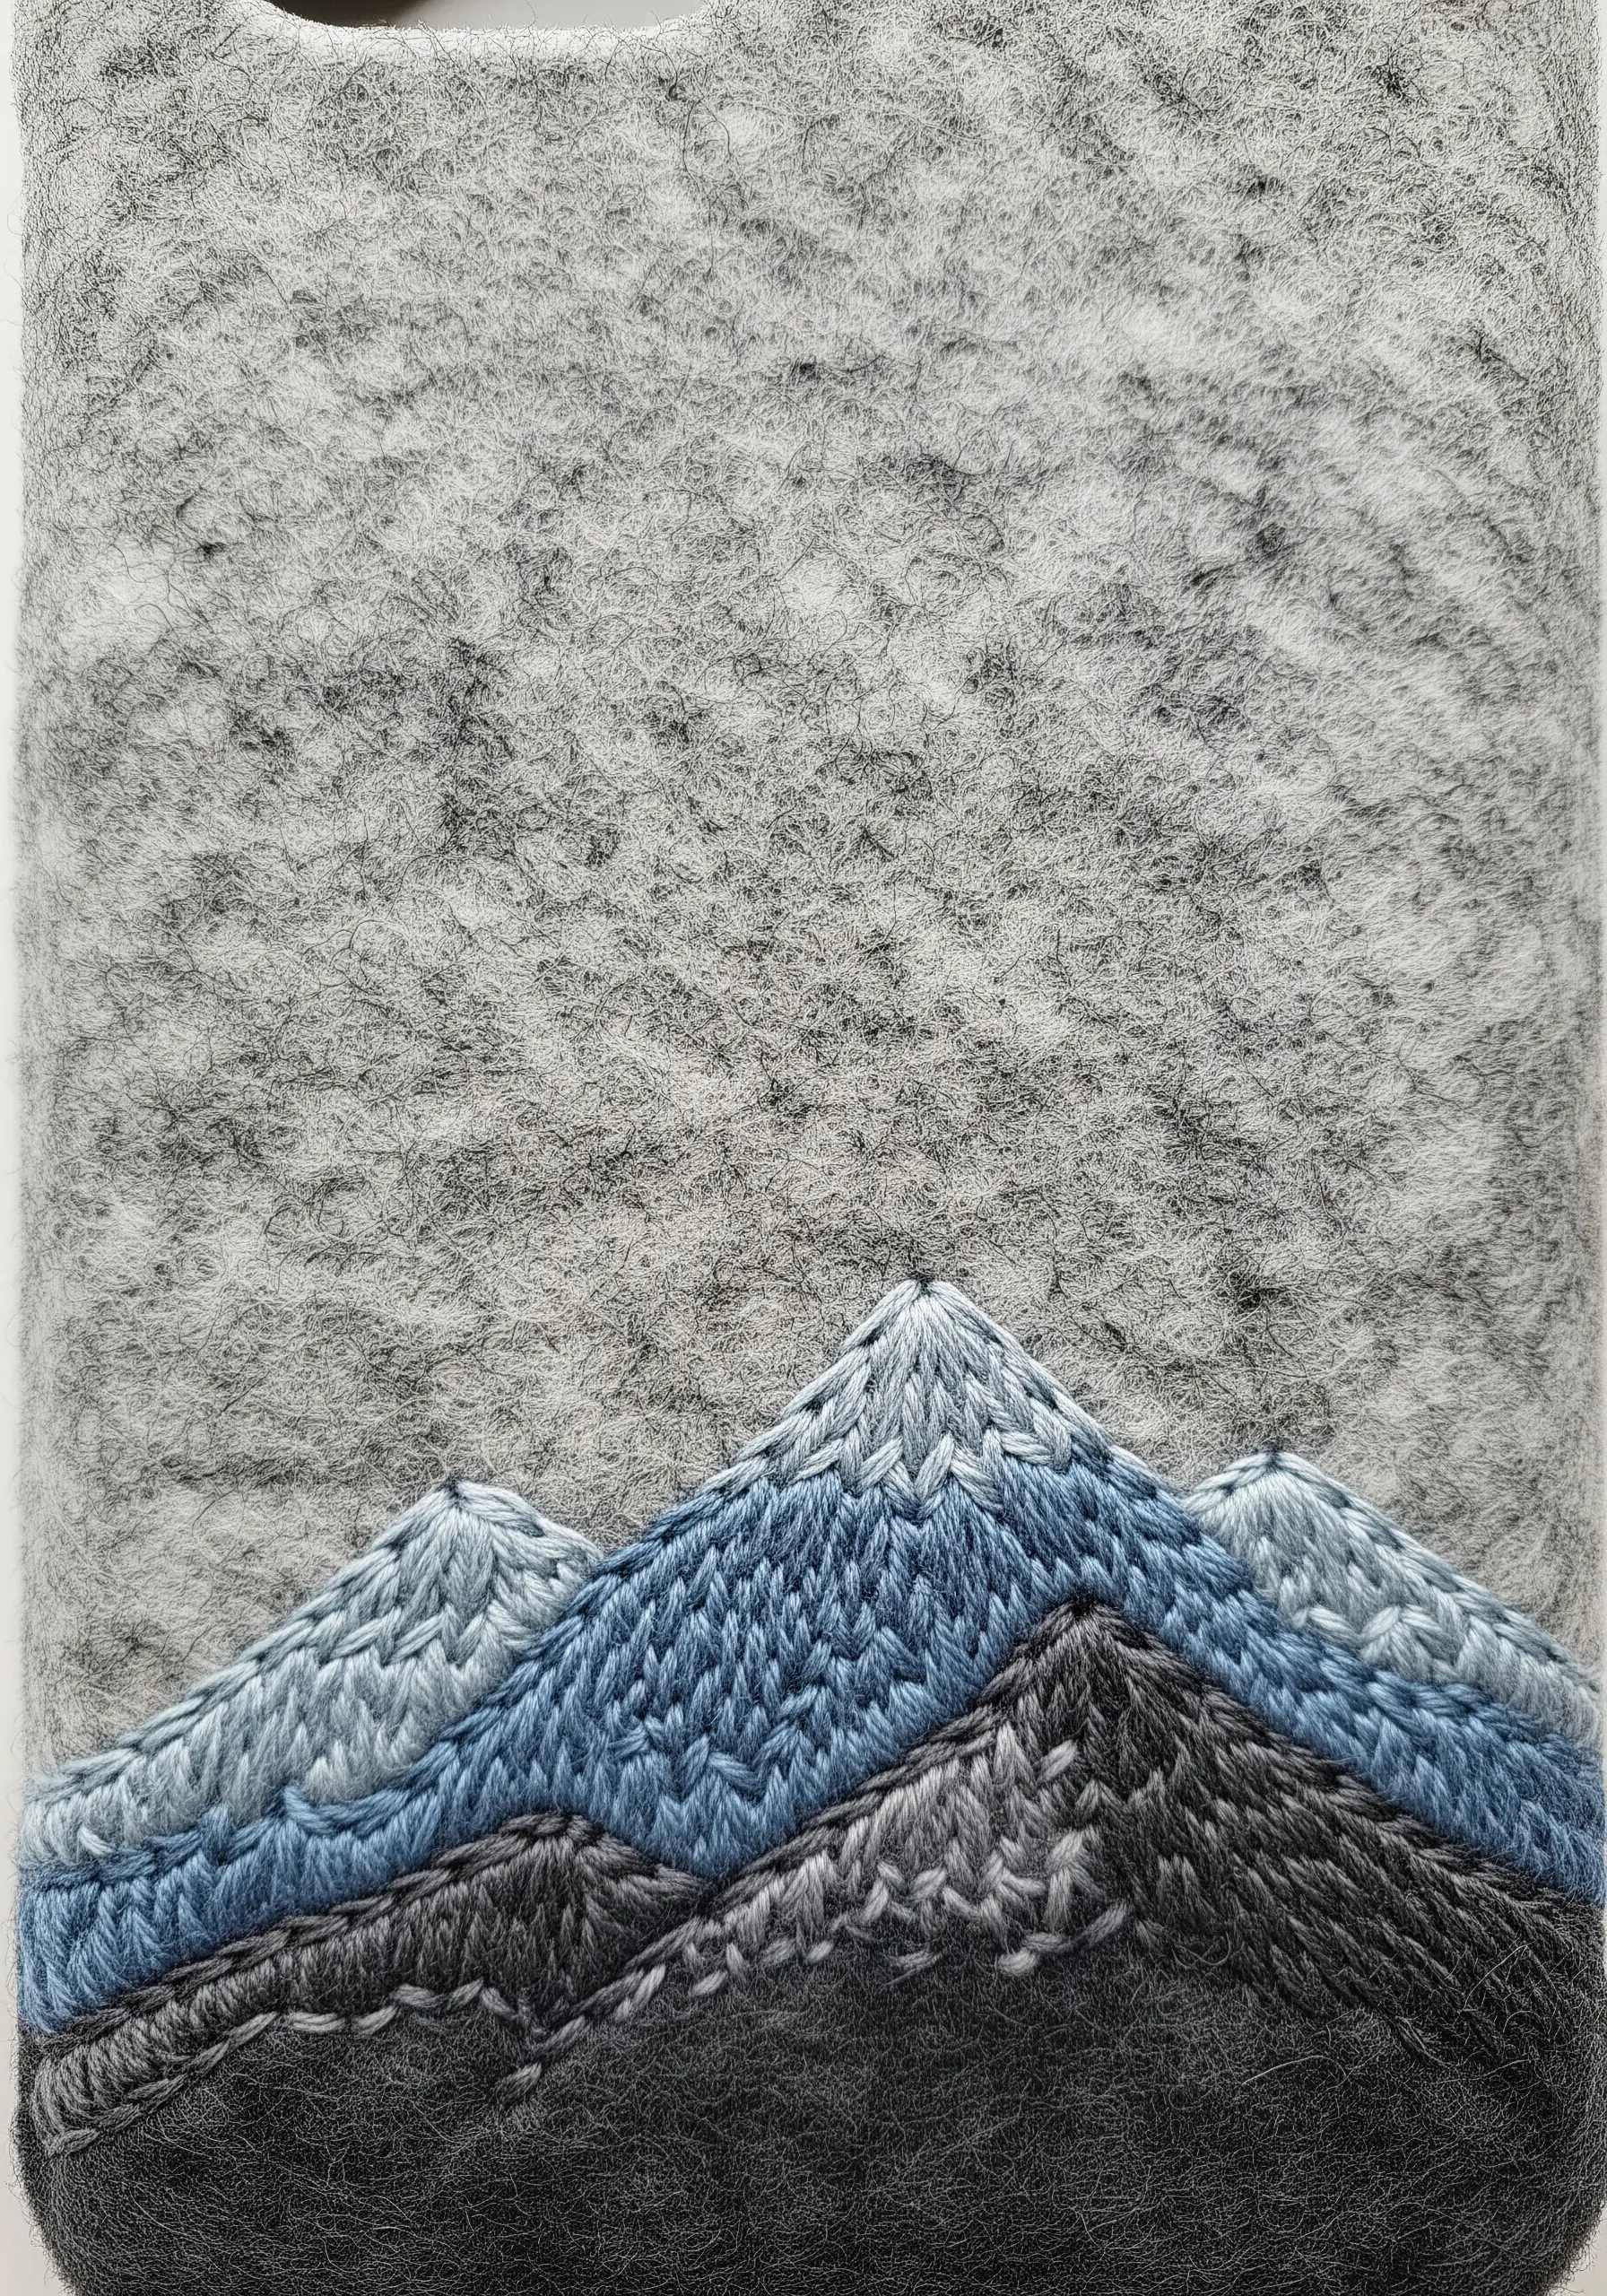
Create an atmospheric mountainscape using the long and short stitch technique to blend colors seamlessly.
Work in sections, starting with the lightest blue at the peaks and gradually introducing darker shades as you move down.
Vary the direction of your stitches to follow the natural angles of the mountain slopes; this simple shift creates a sense of form and shadow.
Adding a few rows of chain stitch or seed stitch between the color blocks introduces a rugged texture that enhances the landscape’s depth.
9. The Modern Geometric Plus Pattern

For a clean, repeating geometric pattern, use the fabric’s weave as a natural grid.
Each plus sign can be made with two intersecting straight stitches of equal length—for example, each stitch crossing over four threads of the fabric.
Maintaining this count across the entire surface ensures every symbol is identical, resulting in a polished, uniform pattern.
This precision transforms a simple motif into sophisticated, minimalist decor.
10. The Charming Saguaro Cactus
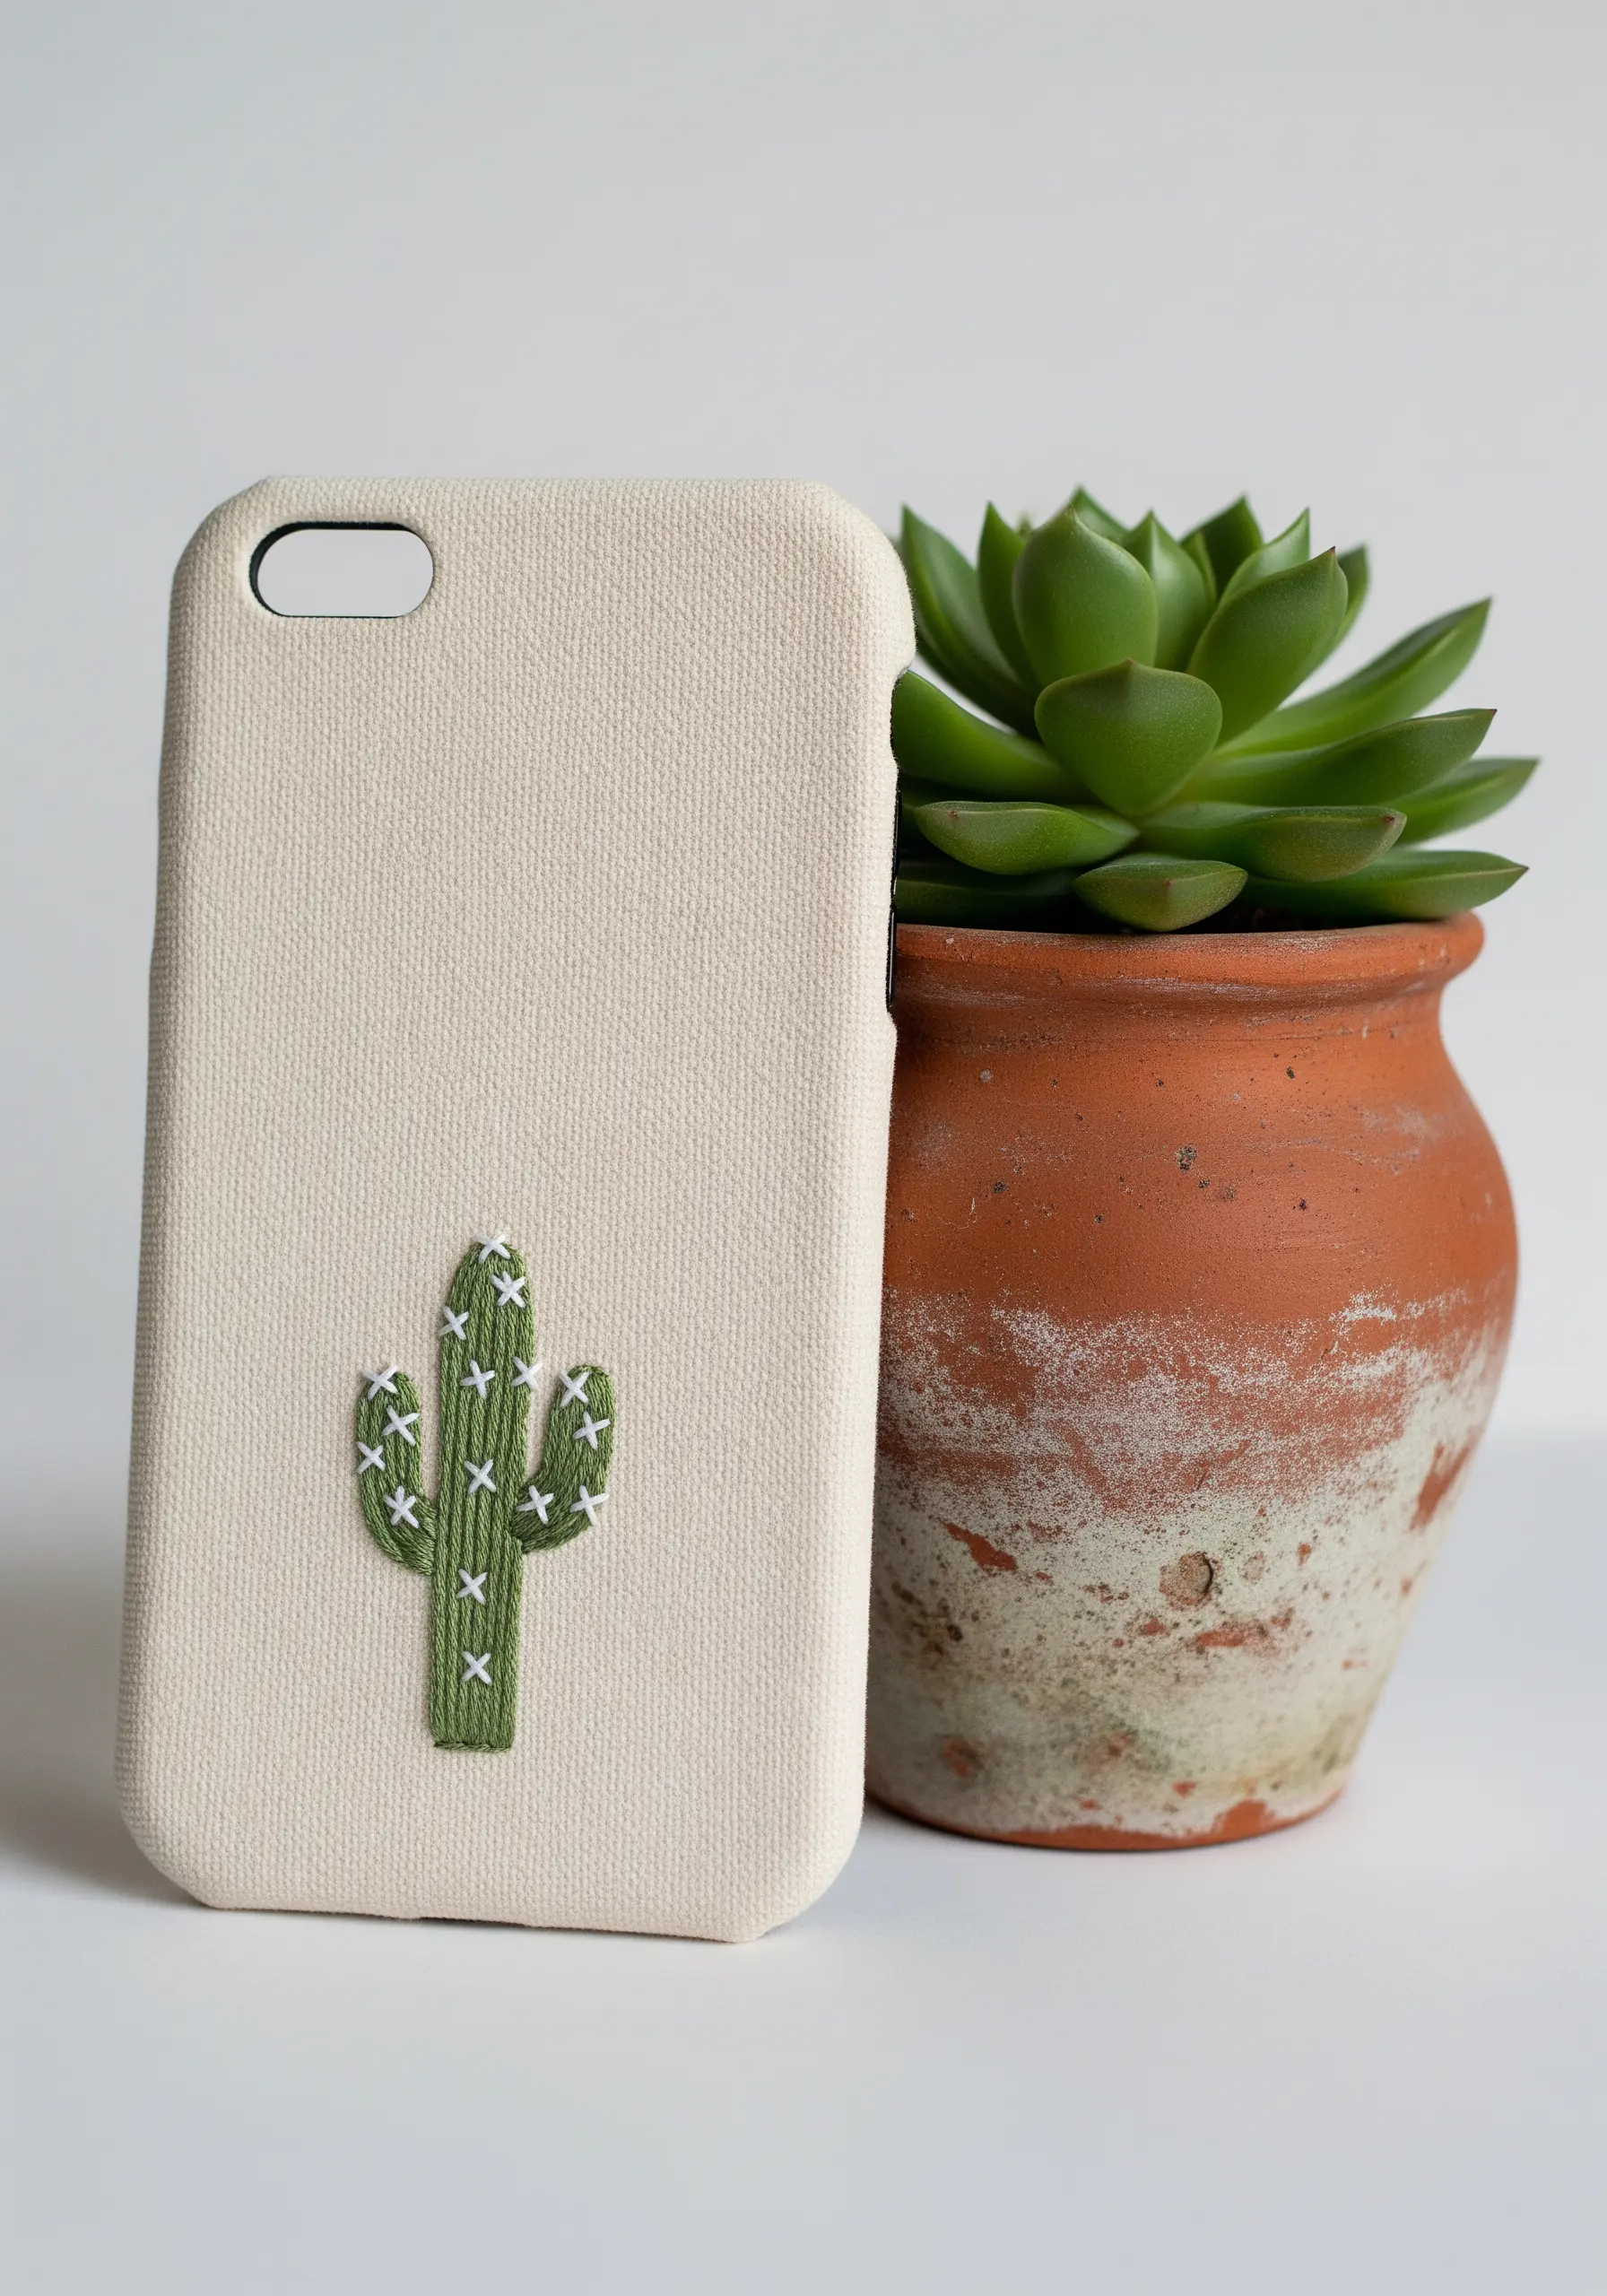
Bring a simple cactus to life by focusing on clean fill stitches and subtle details.
Fill the body with a vertical satin stitch, but first, outline the shape with a split stitch. This creates a slightly raised edge that keeps your satin stitches neat and contained.
For the spines, use a contrasting white thread to add tiny ‘V’ shapes or single straight stitches.
This small detail adds just enough texture and personality to make the simple houseplant motif feel complete.
11. The Delicate Star Constellation
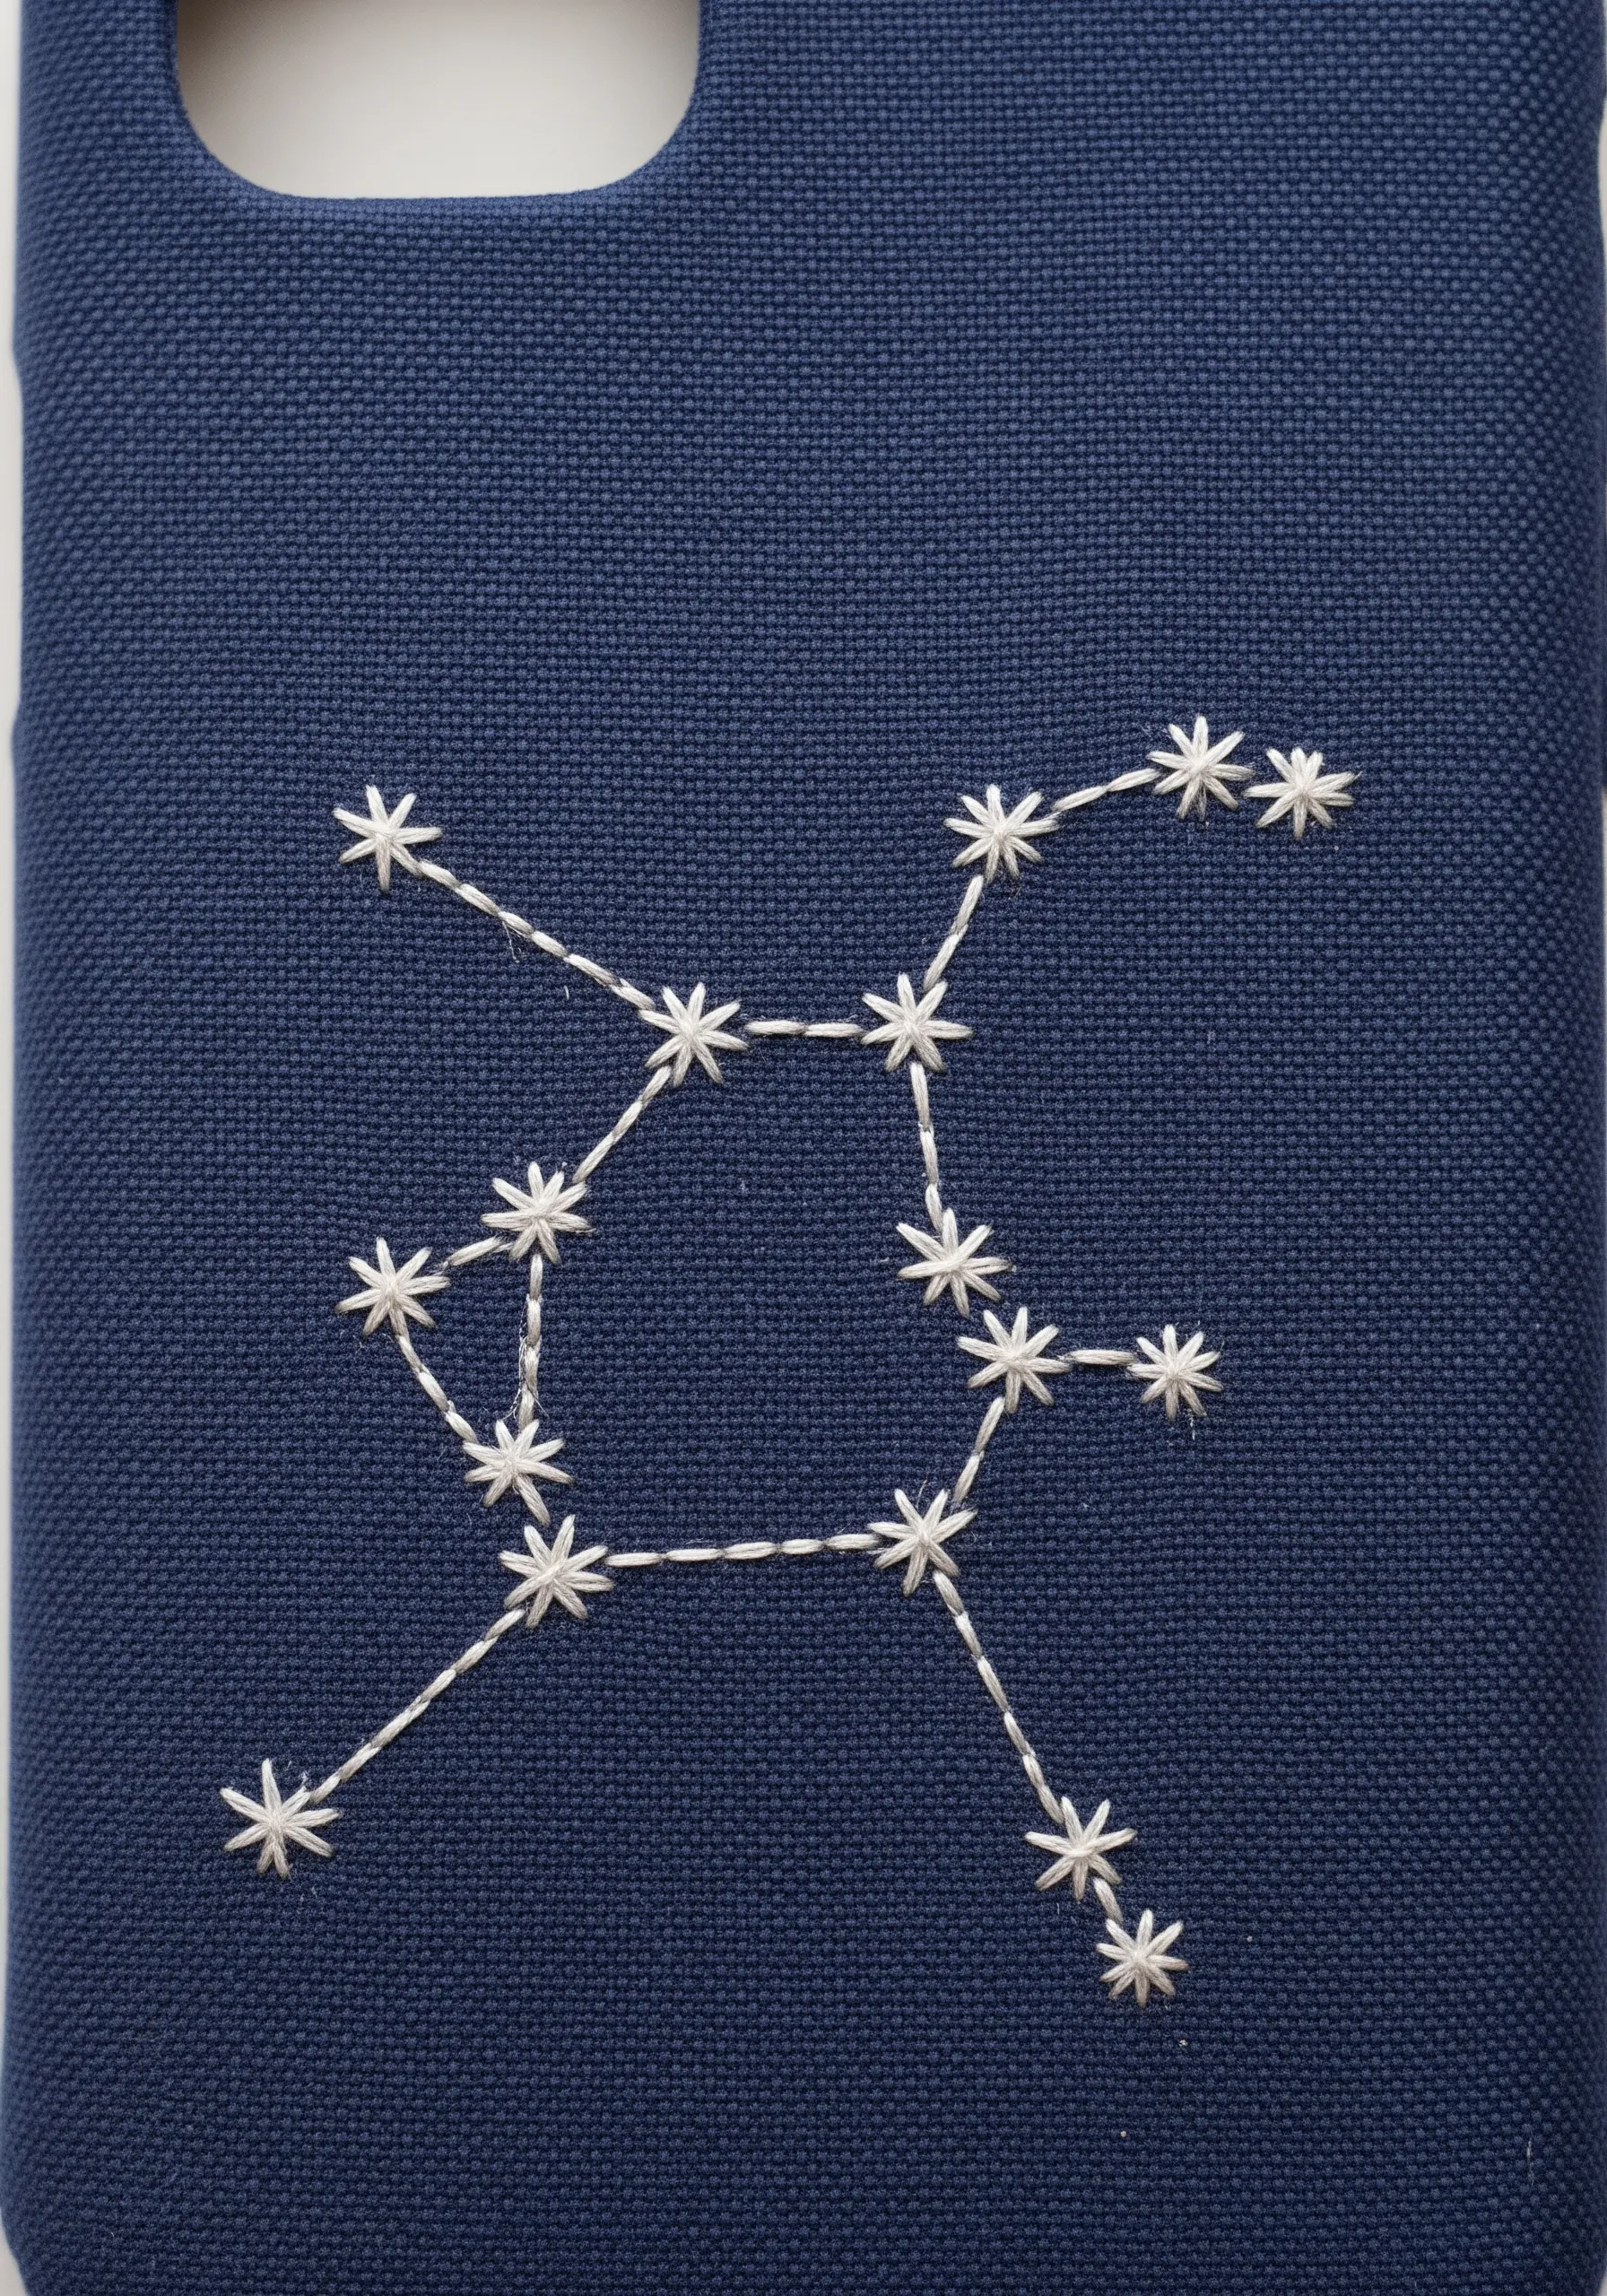
To embroider a constellation, focus on creating delicate, well-defined stars connected by subtle lines.
For each star, use a series of five to six straight stitches radiating from a central point, forming a tiny, crisp asterisk.
Connect them with a single-strand backstitch, keeping the lines taut but not so tight that they pucker the fabric.
The contrast between the sharp starbursts and the fine connecting lines is what gives the design its astronomical elegance.
12. The Continuous Line Portrait
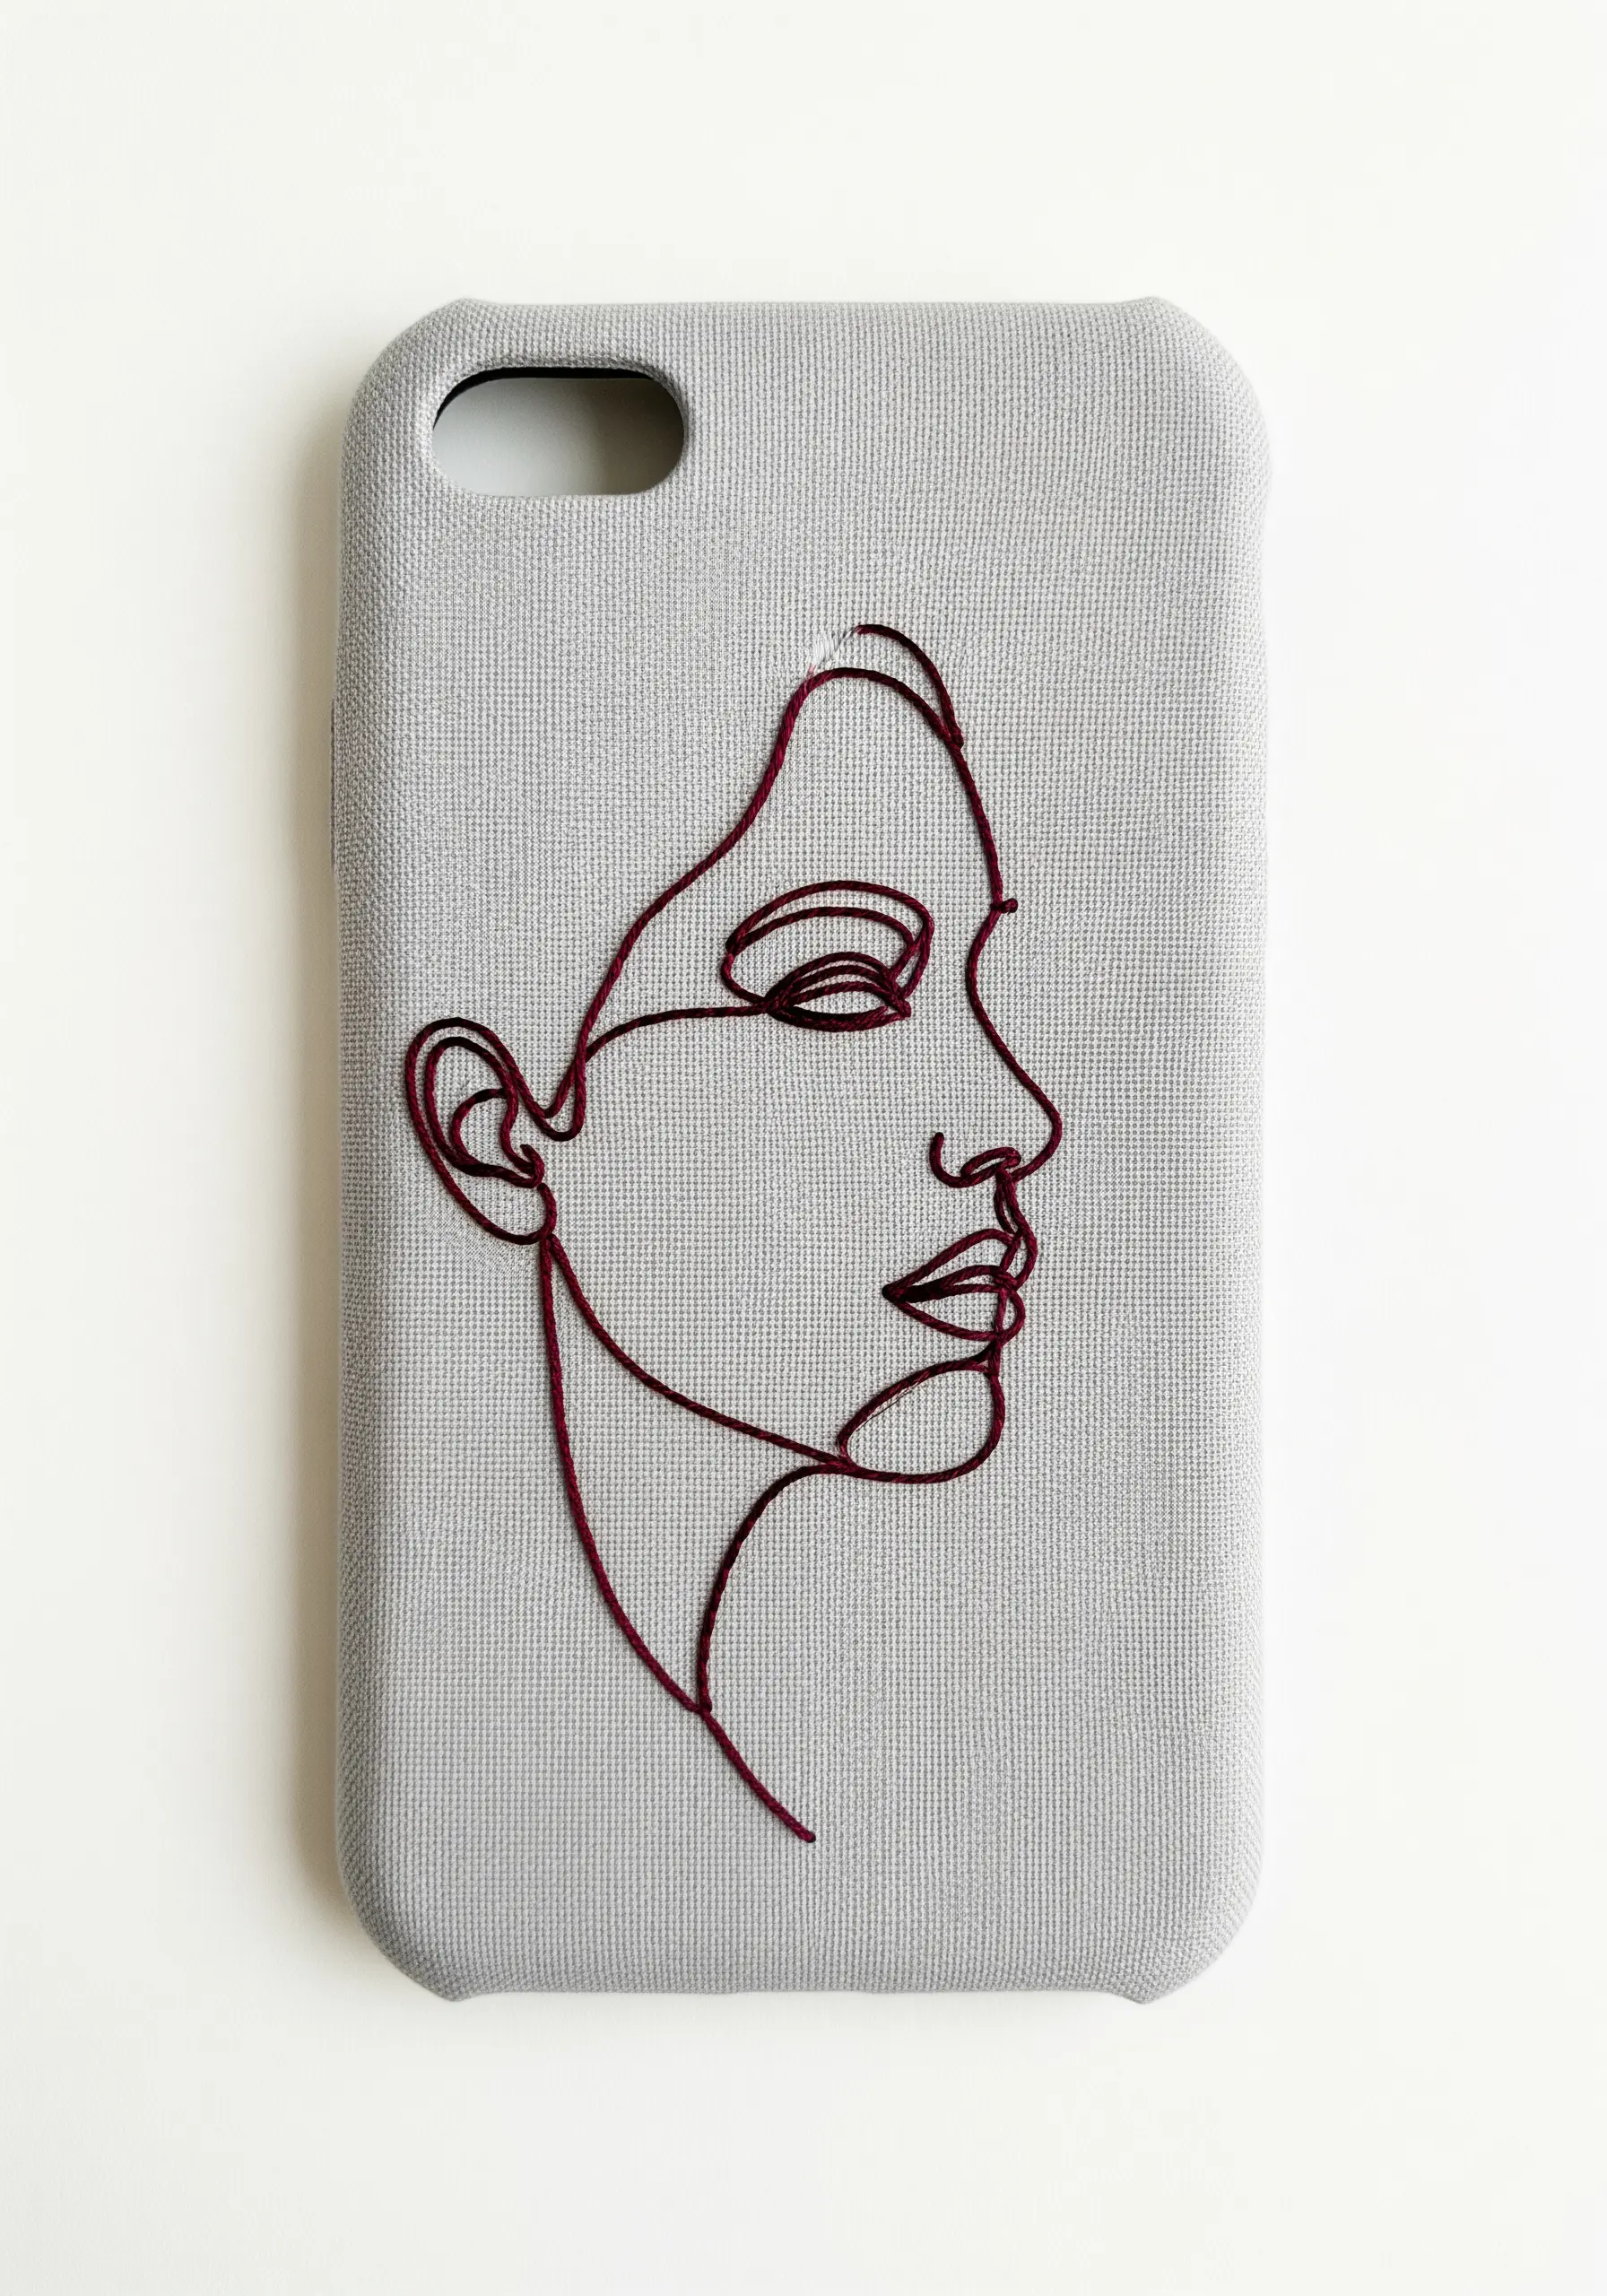
The key to a successful one-line portrait is creating a single, fluid stroke that never breaks.
Use a stem stitch with a single strand of thread; its twisting motion produces a smooth, rope-like line that is perfect for capturing the gestural quality of the drawing.
Before you start stitching, trace the entire design with your needle (without thread) to commit the path to muscle memory.
This practice run helps you navigate the curves and overlaps with confidence, resulting in a more graceful and continuous line.
13. The Iconic Great Wave
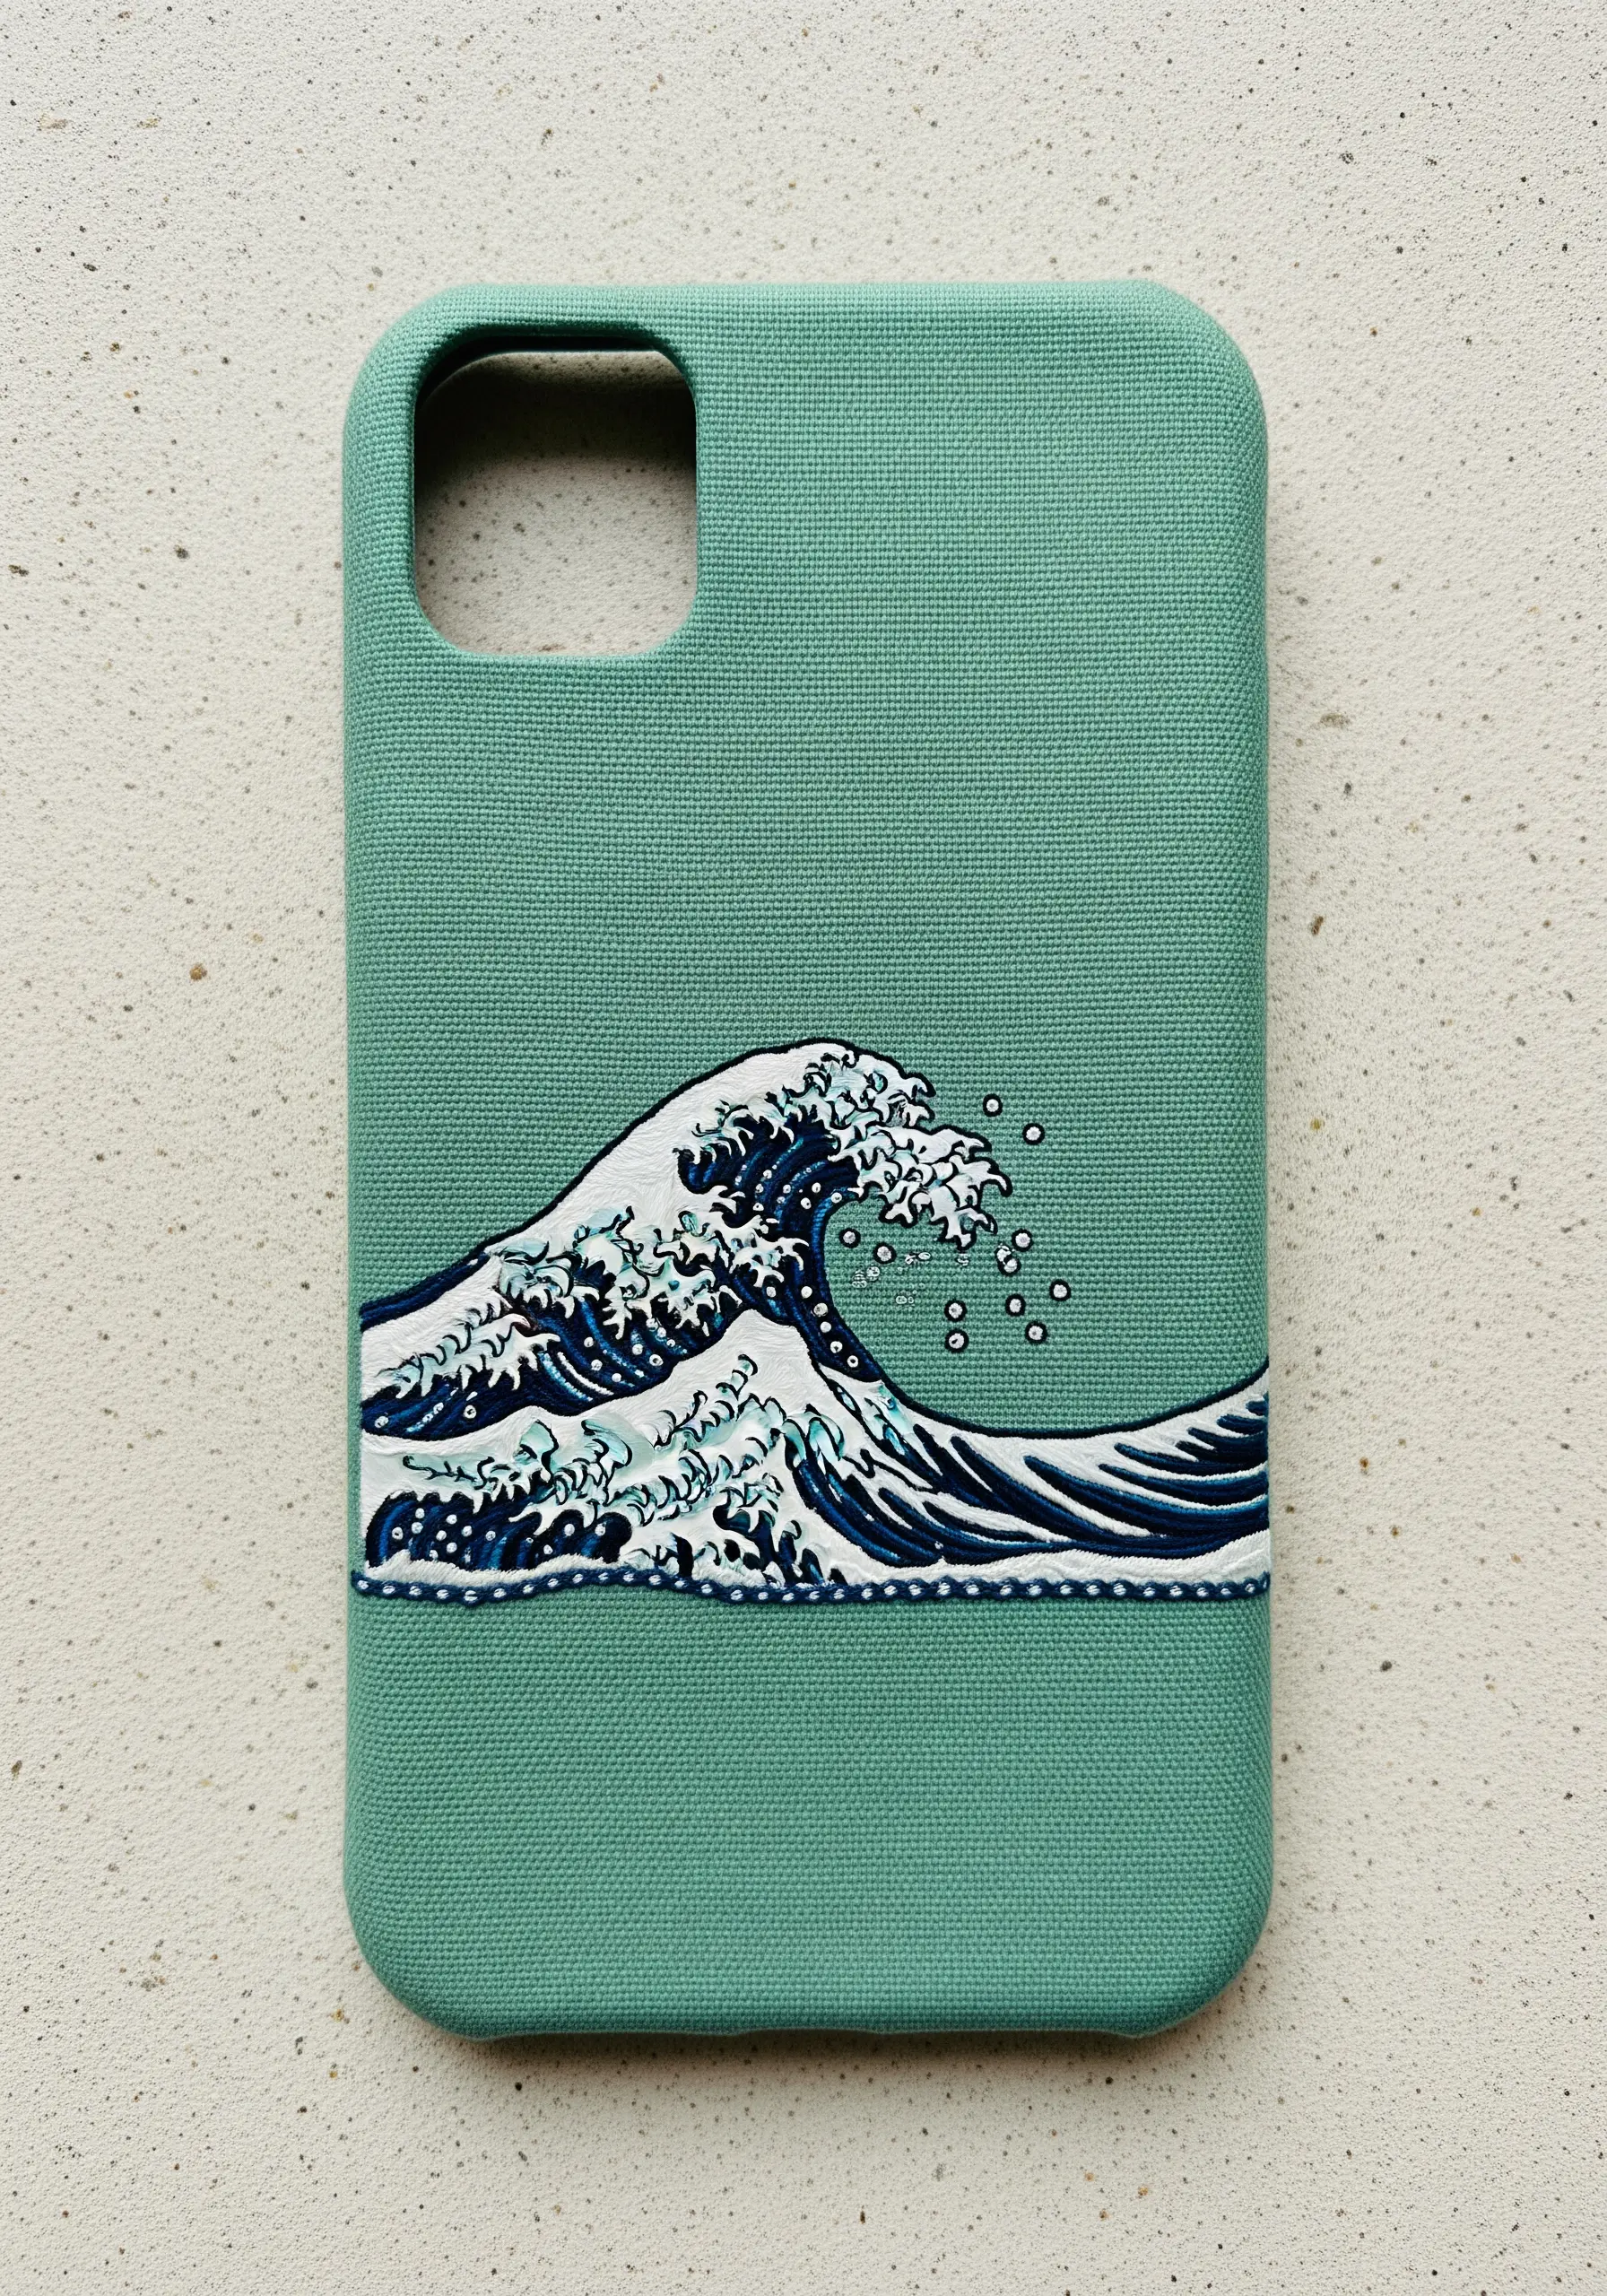
To capture the energy of Hokusai’s wave, use directional stitching to mimic the flow of water.
Fill the large sections of the wave with short, slightly curved satin stitches, angling them to follow the crest’s movement.
For the delicate seafoam and spray, switch to tiny, scattered seed stitches and French knots using a bright white thread.
This contrast in stitch style and density is what creates the dynamic tension between the powerful wave and the light, airy foam.
14. The Minimalist Honeycomb

For this precise honeycomb pattern, outline each hexagon with a satin stitch border rather than filling it completely.
This technique emphasizes the clean lines and negative space, creating a light, airy design.
To achieve perfectly sharp corners, pivot your needle at a 90-degree angle at each point of the hexagon.
Using just two strands of floss gives you enough coverage for a solid line without adding unnecessary bulk to this delicate geometric pattern.
15. The Botanical Monogram
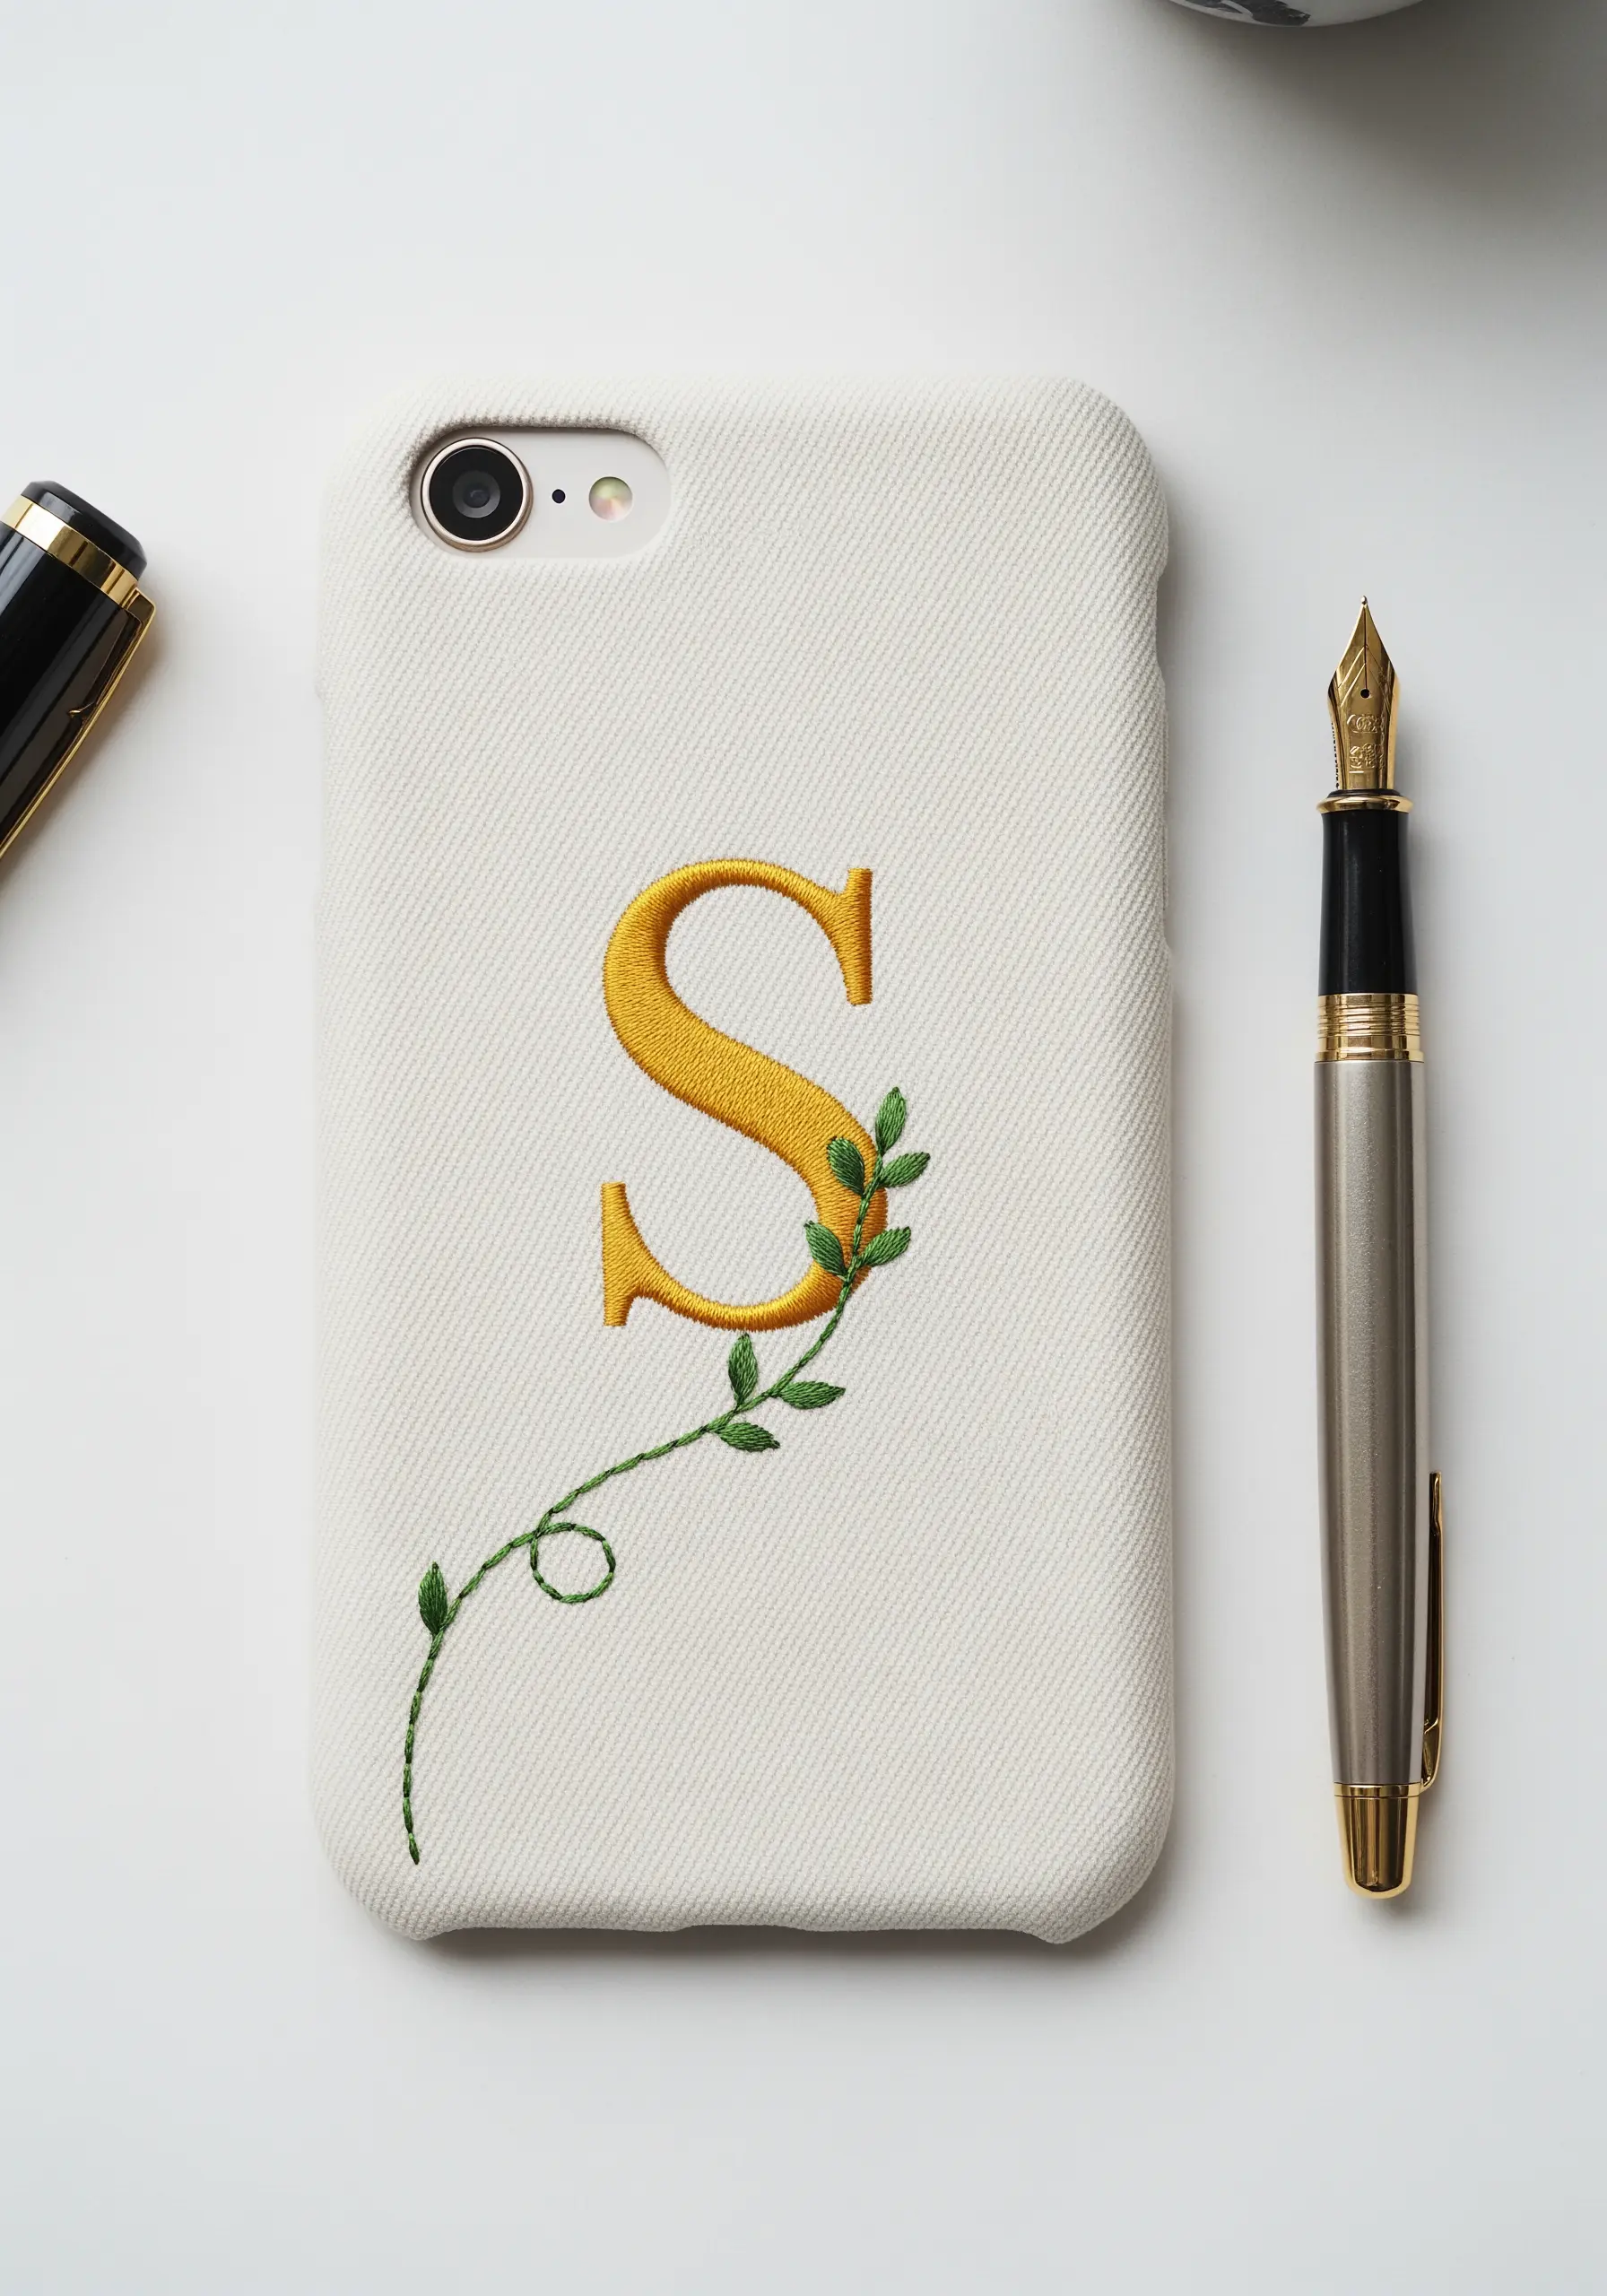
Combine the boldness of a classic monogram with the delicacy of botanical embroidery for a balanced design.
Fill the letter with a perfectly smooth satin stitch—first outlining it with split stitch to get those crisp, defined edges.
For the climbing vine, use a lighter touch: a single-strand stem stitch for the vine and tiny detached chain stitches (lazy daisies) for the leaves.
This contrast between the solid, confident letter and the fine, organic vine is what makes the monogram feel both personal and timeless.
16. The Dimensional Avocado
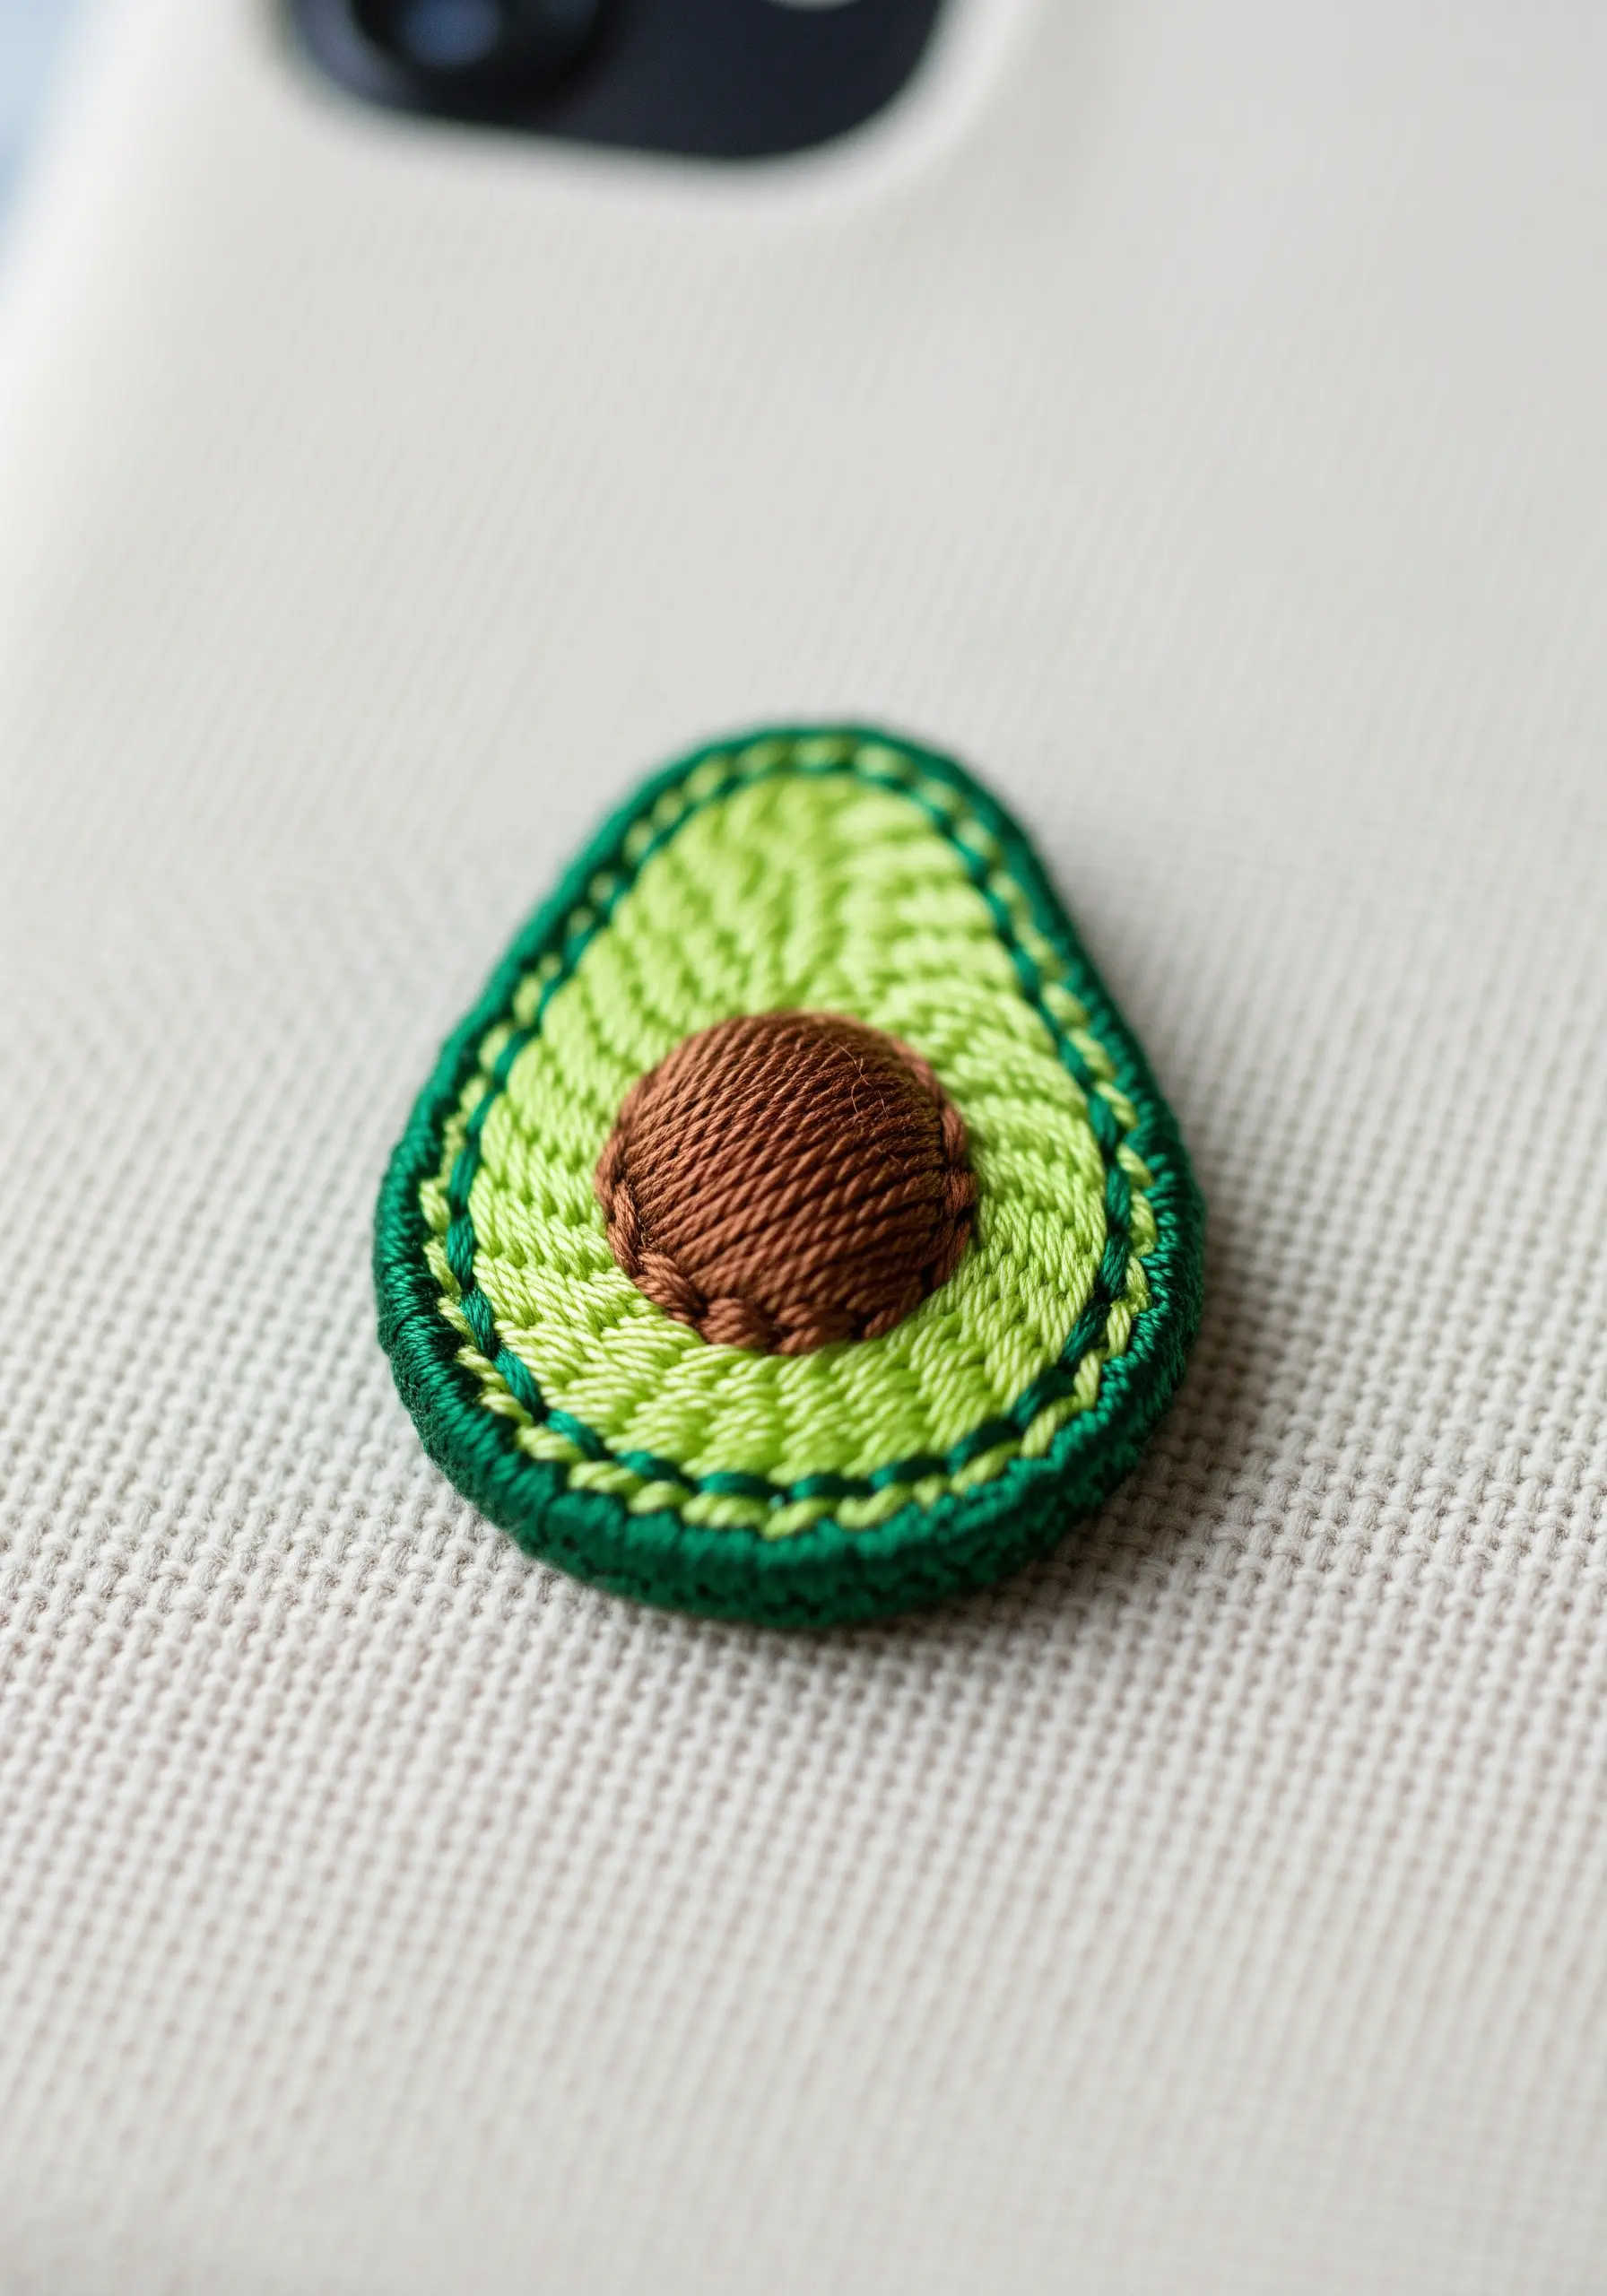
Create a realistic avocado by using stitch direction to suggest form and texture.
Fill the light green flesh with angled satin stitches that radiate outwards from the center, mimicking the fruit’s natural lines.
For the pit, use a circular brick stitch in brown to create a smooth, rounded shape that appears to sit inside the avocado.
Finally, enclose the entire design with a raised, whipped backstitch border in dark green to give it a clean, patch-like finish that pops.
17. The Whimsical Paper Plane
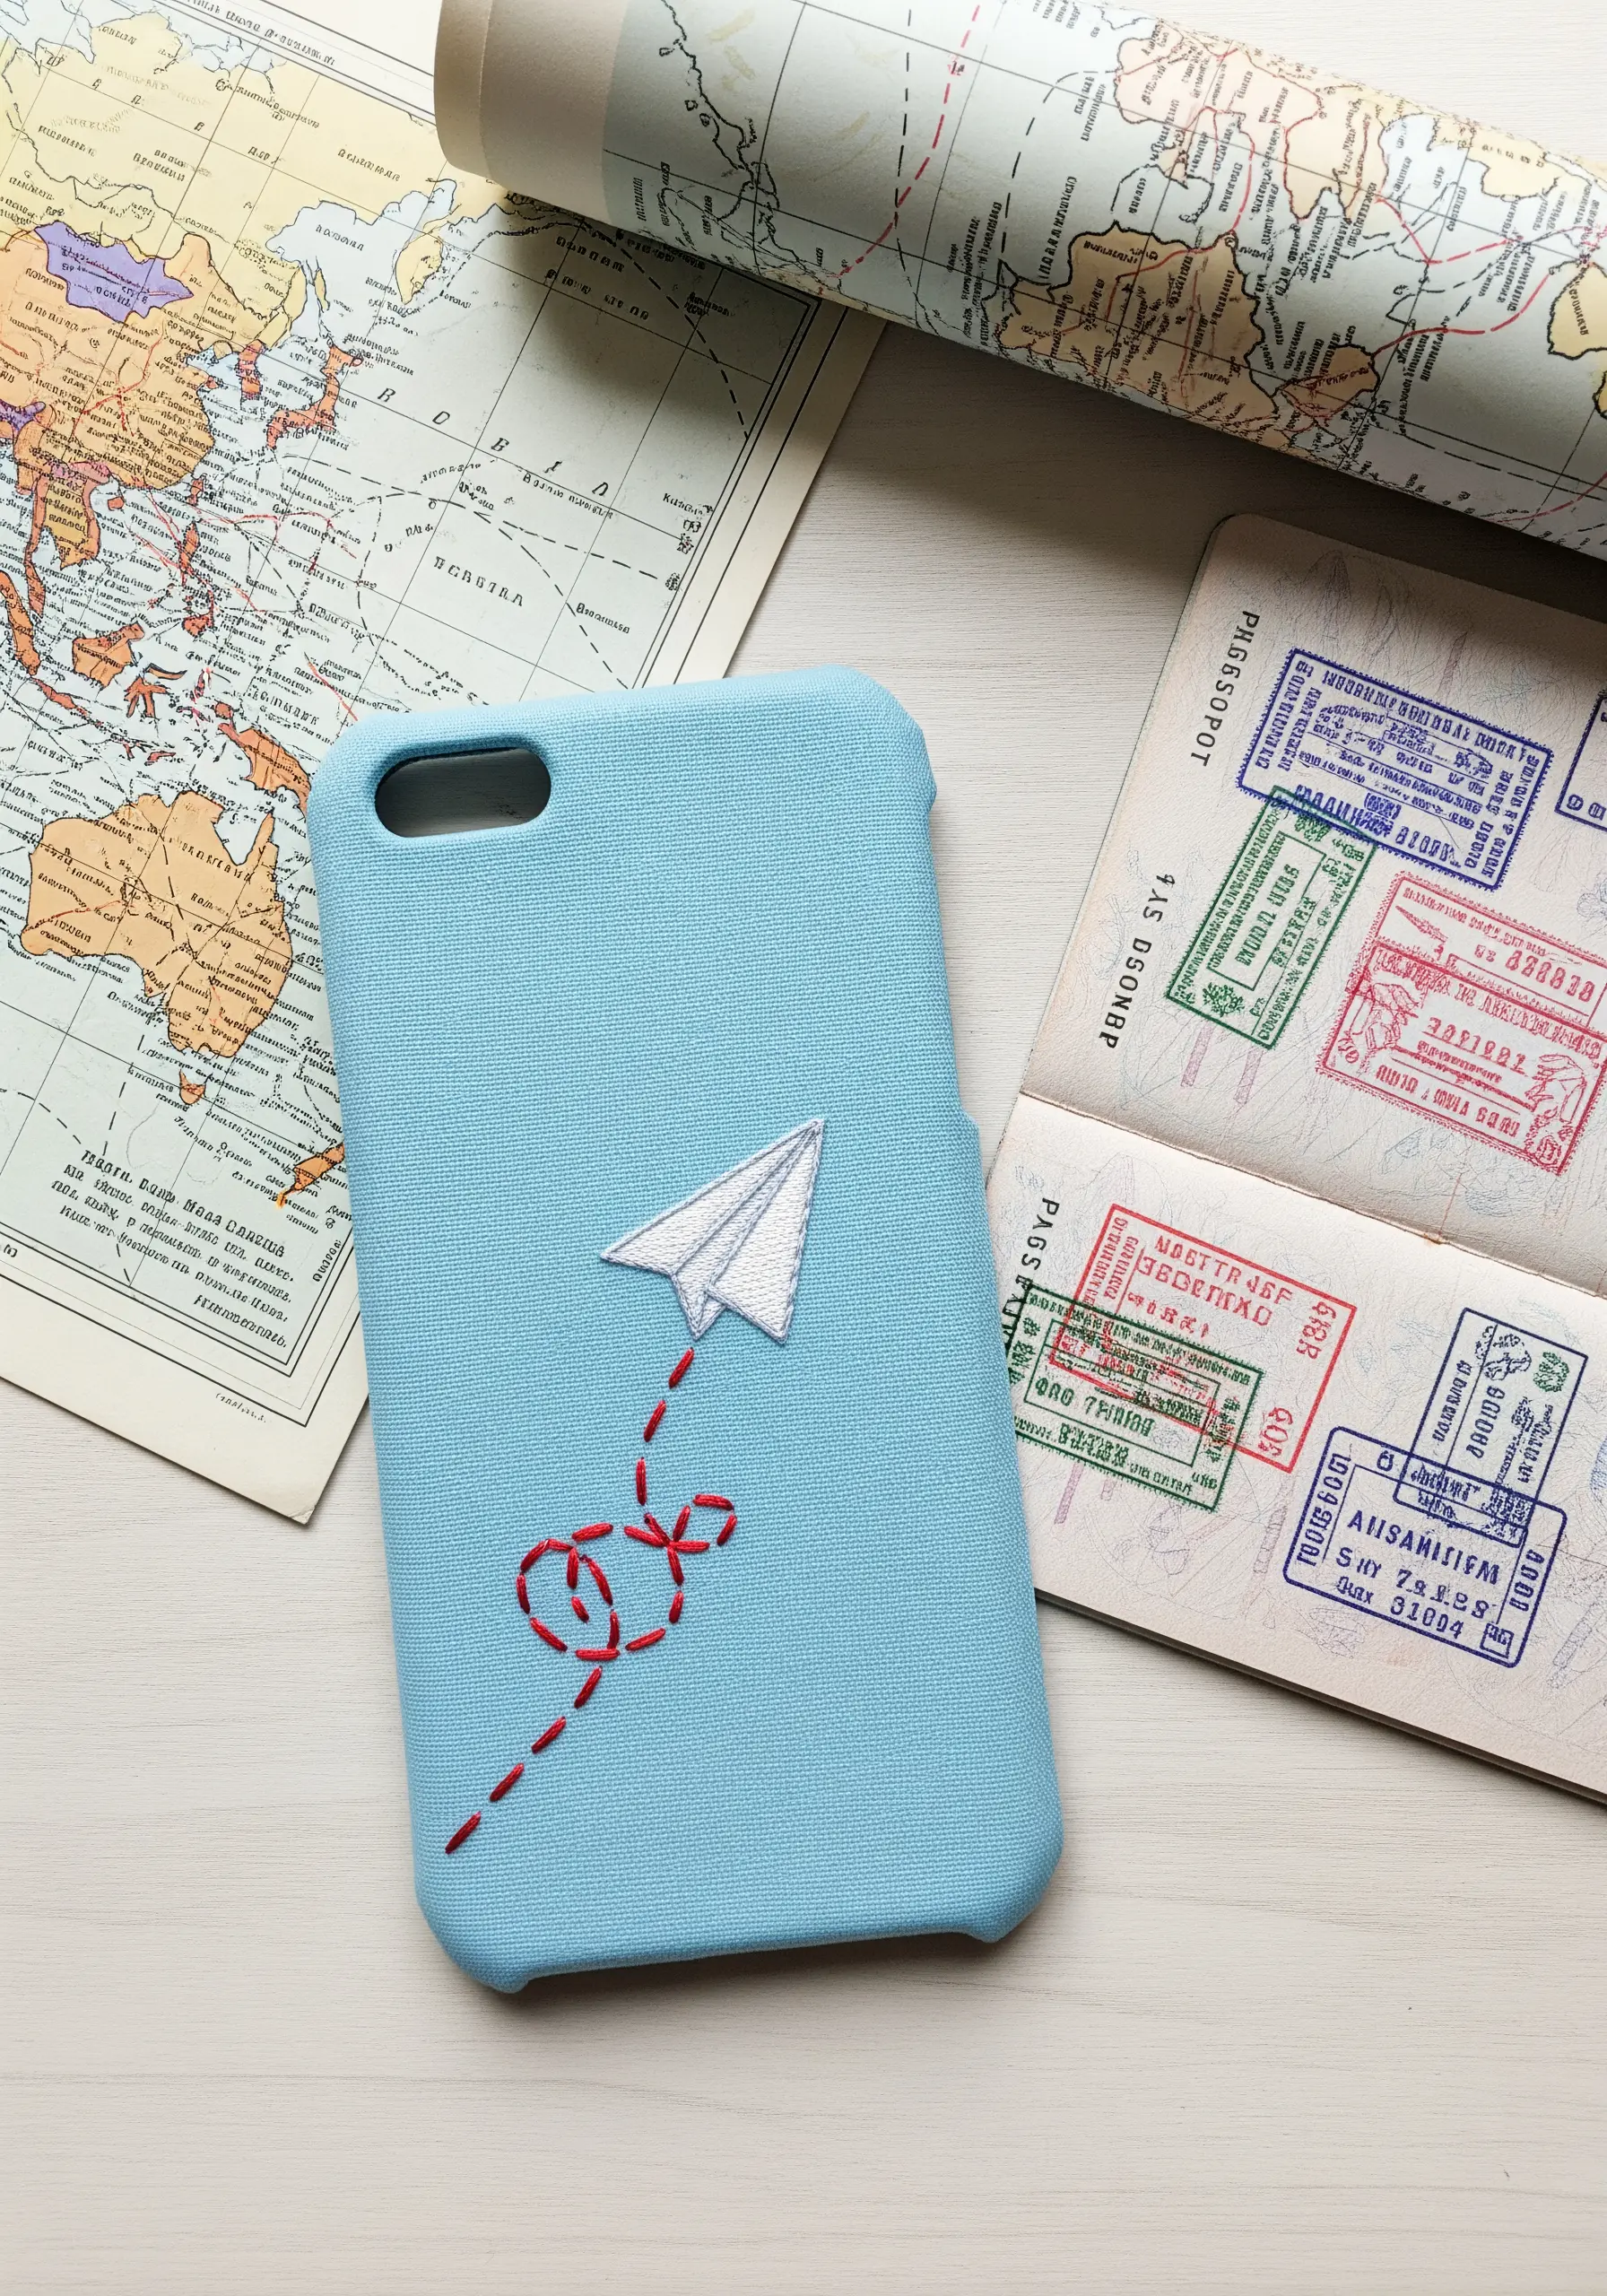
Give a simple paper airplane a sense of motion and playfulness with a contrasting flight path.
Fill the plane itself with a neat, dense satin stitch in white or off-white thread for a solid, paper-like finish.
For the dotted trail, use a vibrant red thread and a simple running stitch, leaving small, even gaps between each stitch to create a dashed line.
This simple combination tells a story, making it a perfect motif for travel-inspired pieces.
18. The Woodland Mushroom Trio
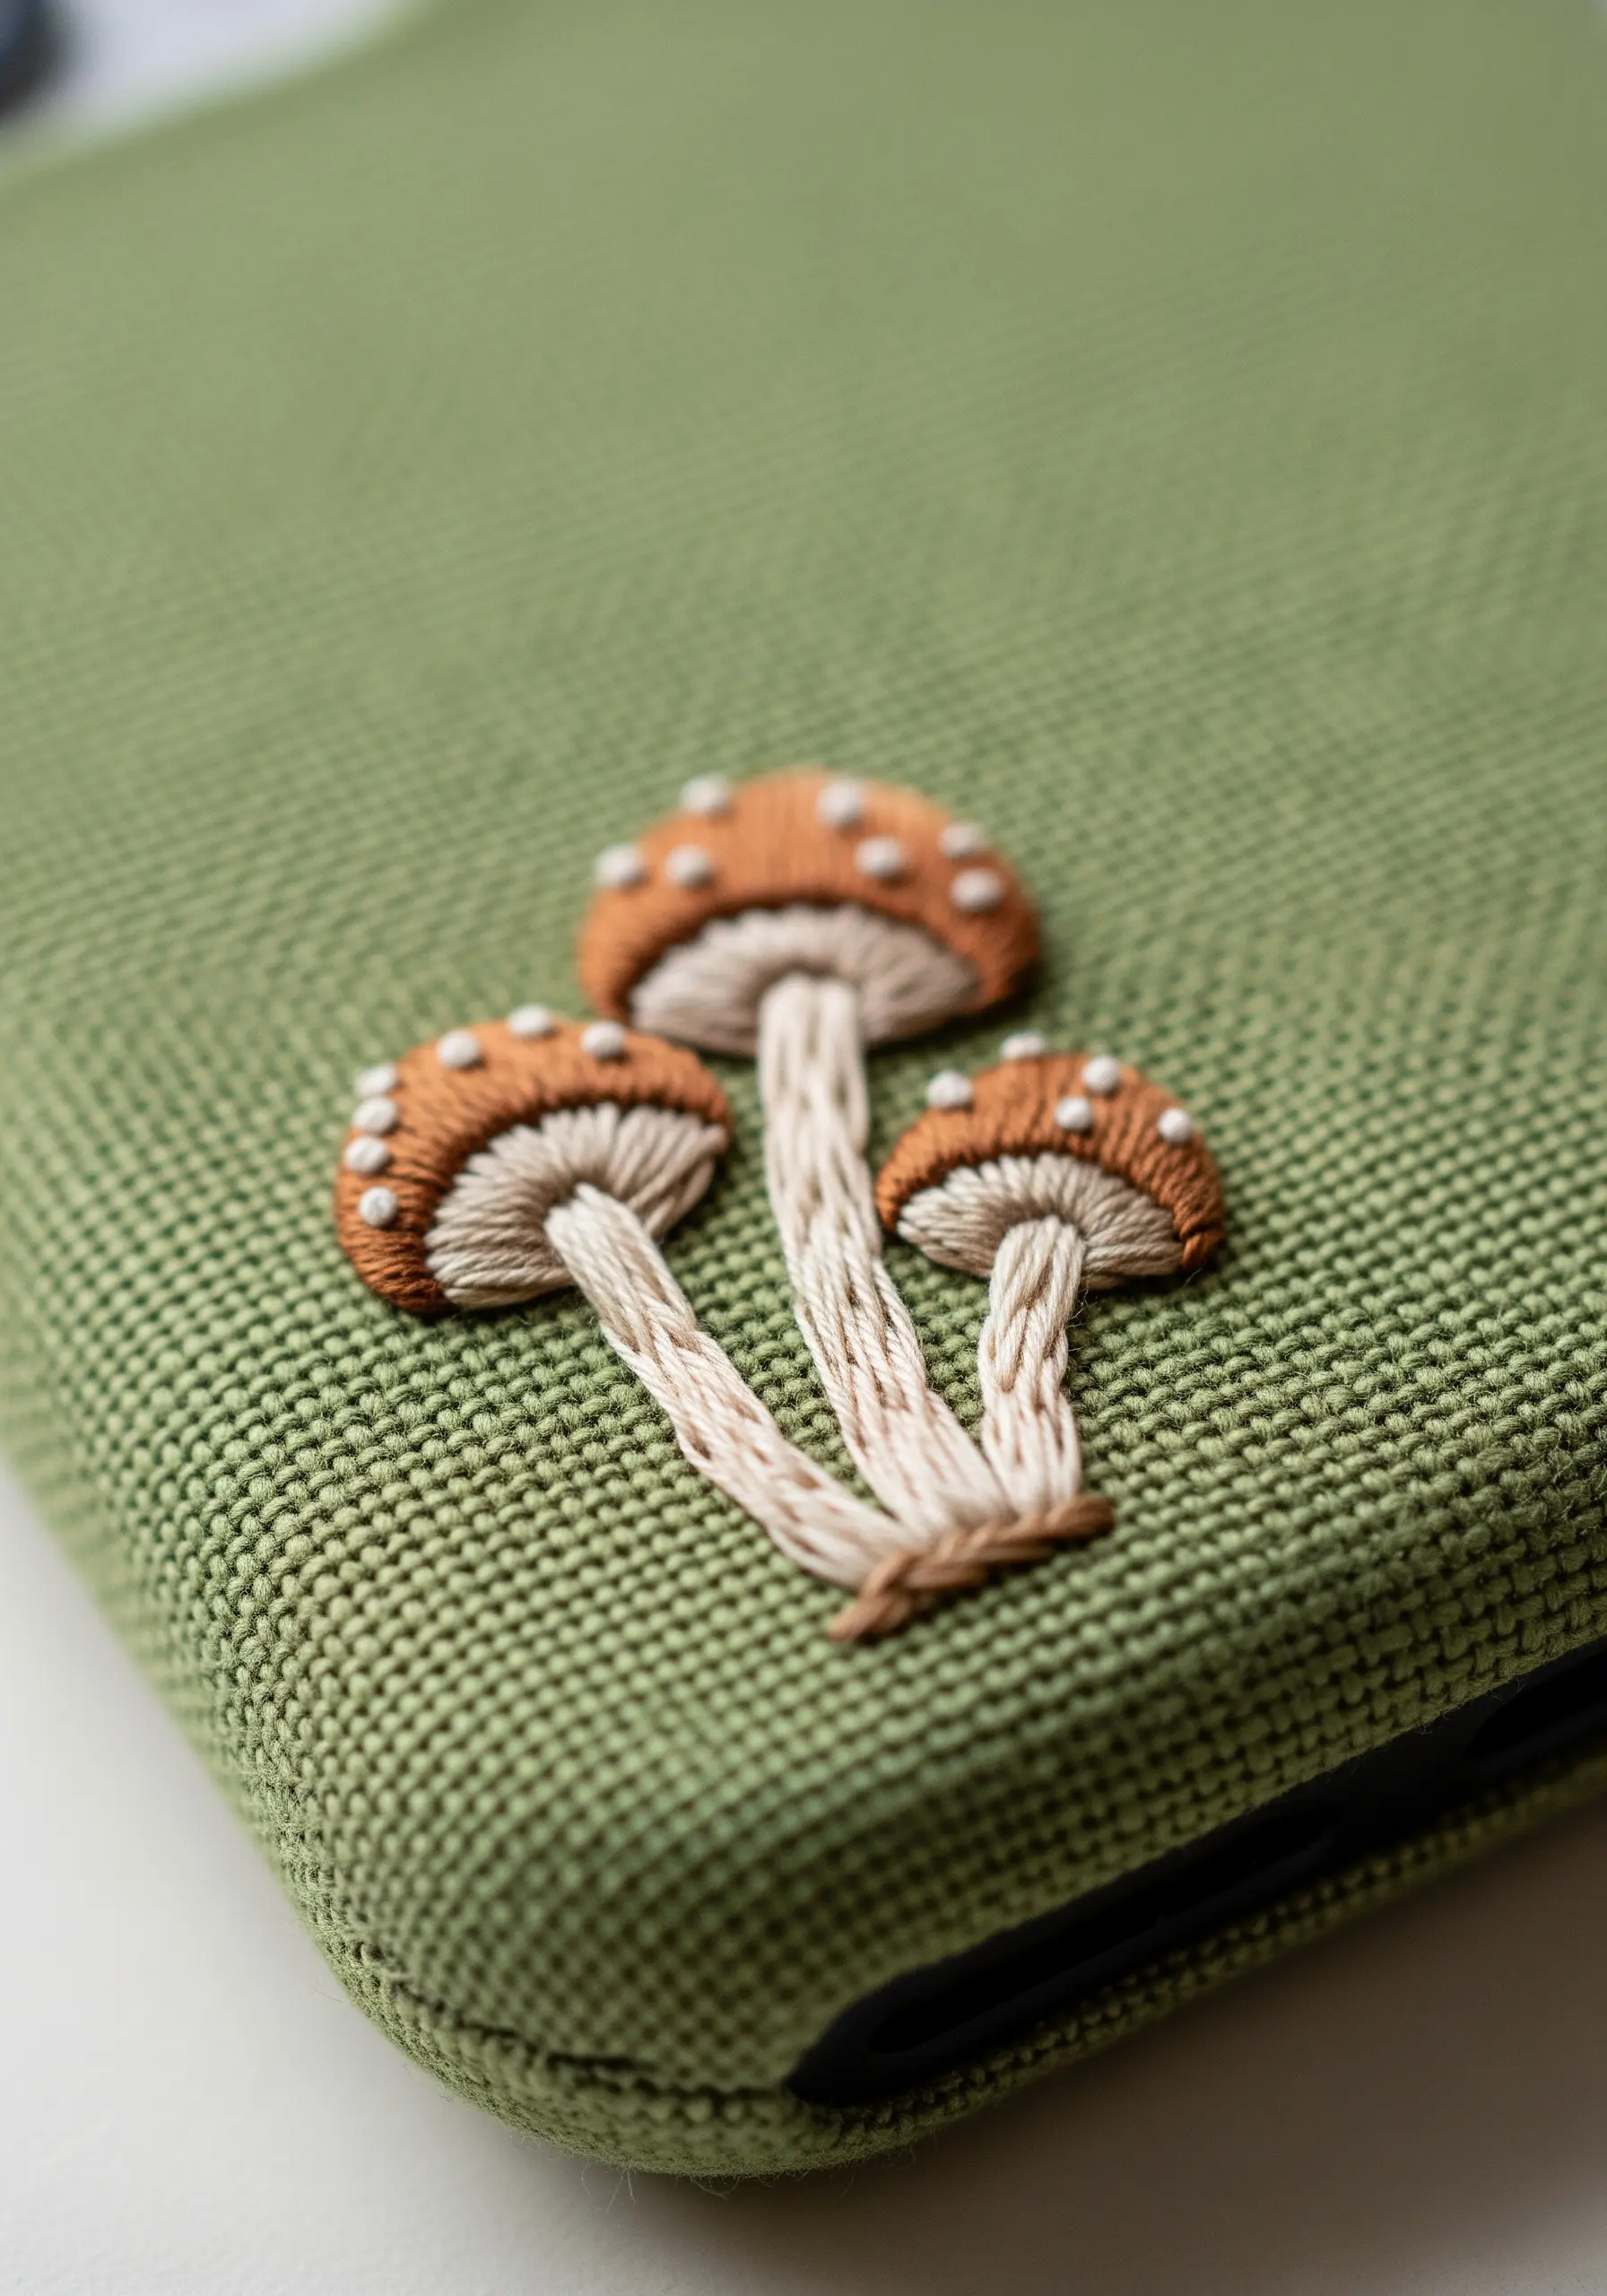
Build a charming cluster of mushrooms by combining three simple stitches for texture and detail.
Use a padded satin stitch for the caps to give them a rounded, dimensional shape. Simply add a layer of straight stitches underneath before covering with your final satin stitch.
Add a few scattered French knots on top for the signature spots, and use a twisted chain stitch for the stems to suggest gills and texture.
These forest-floor botanical stitch ideas create a tactile, realistic effect.
19. The Modern Color-Blocked Patch
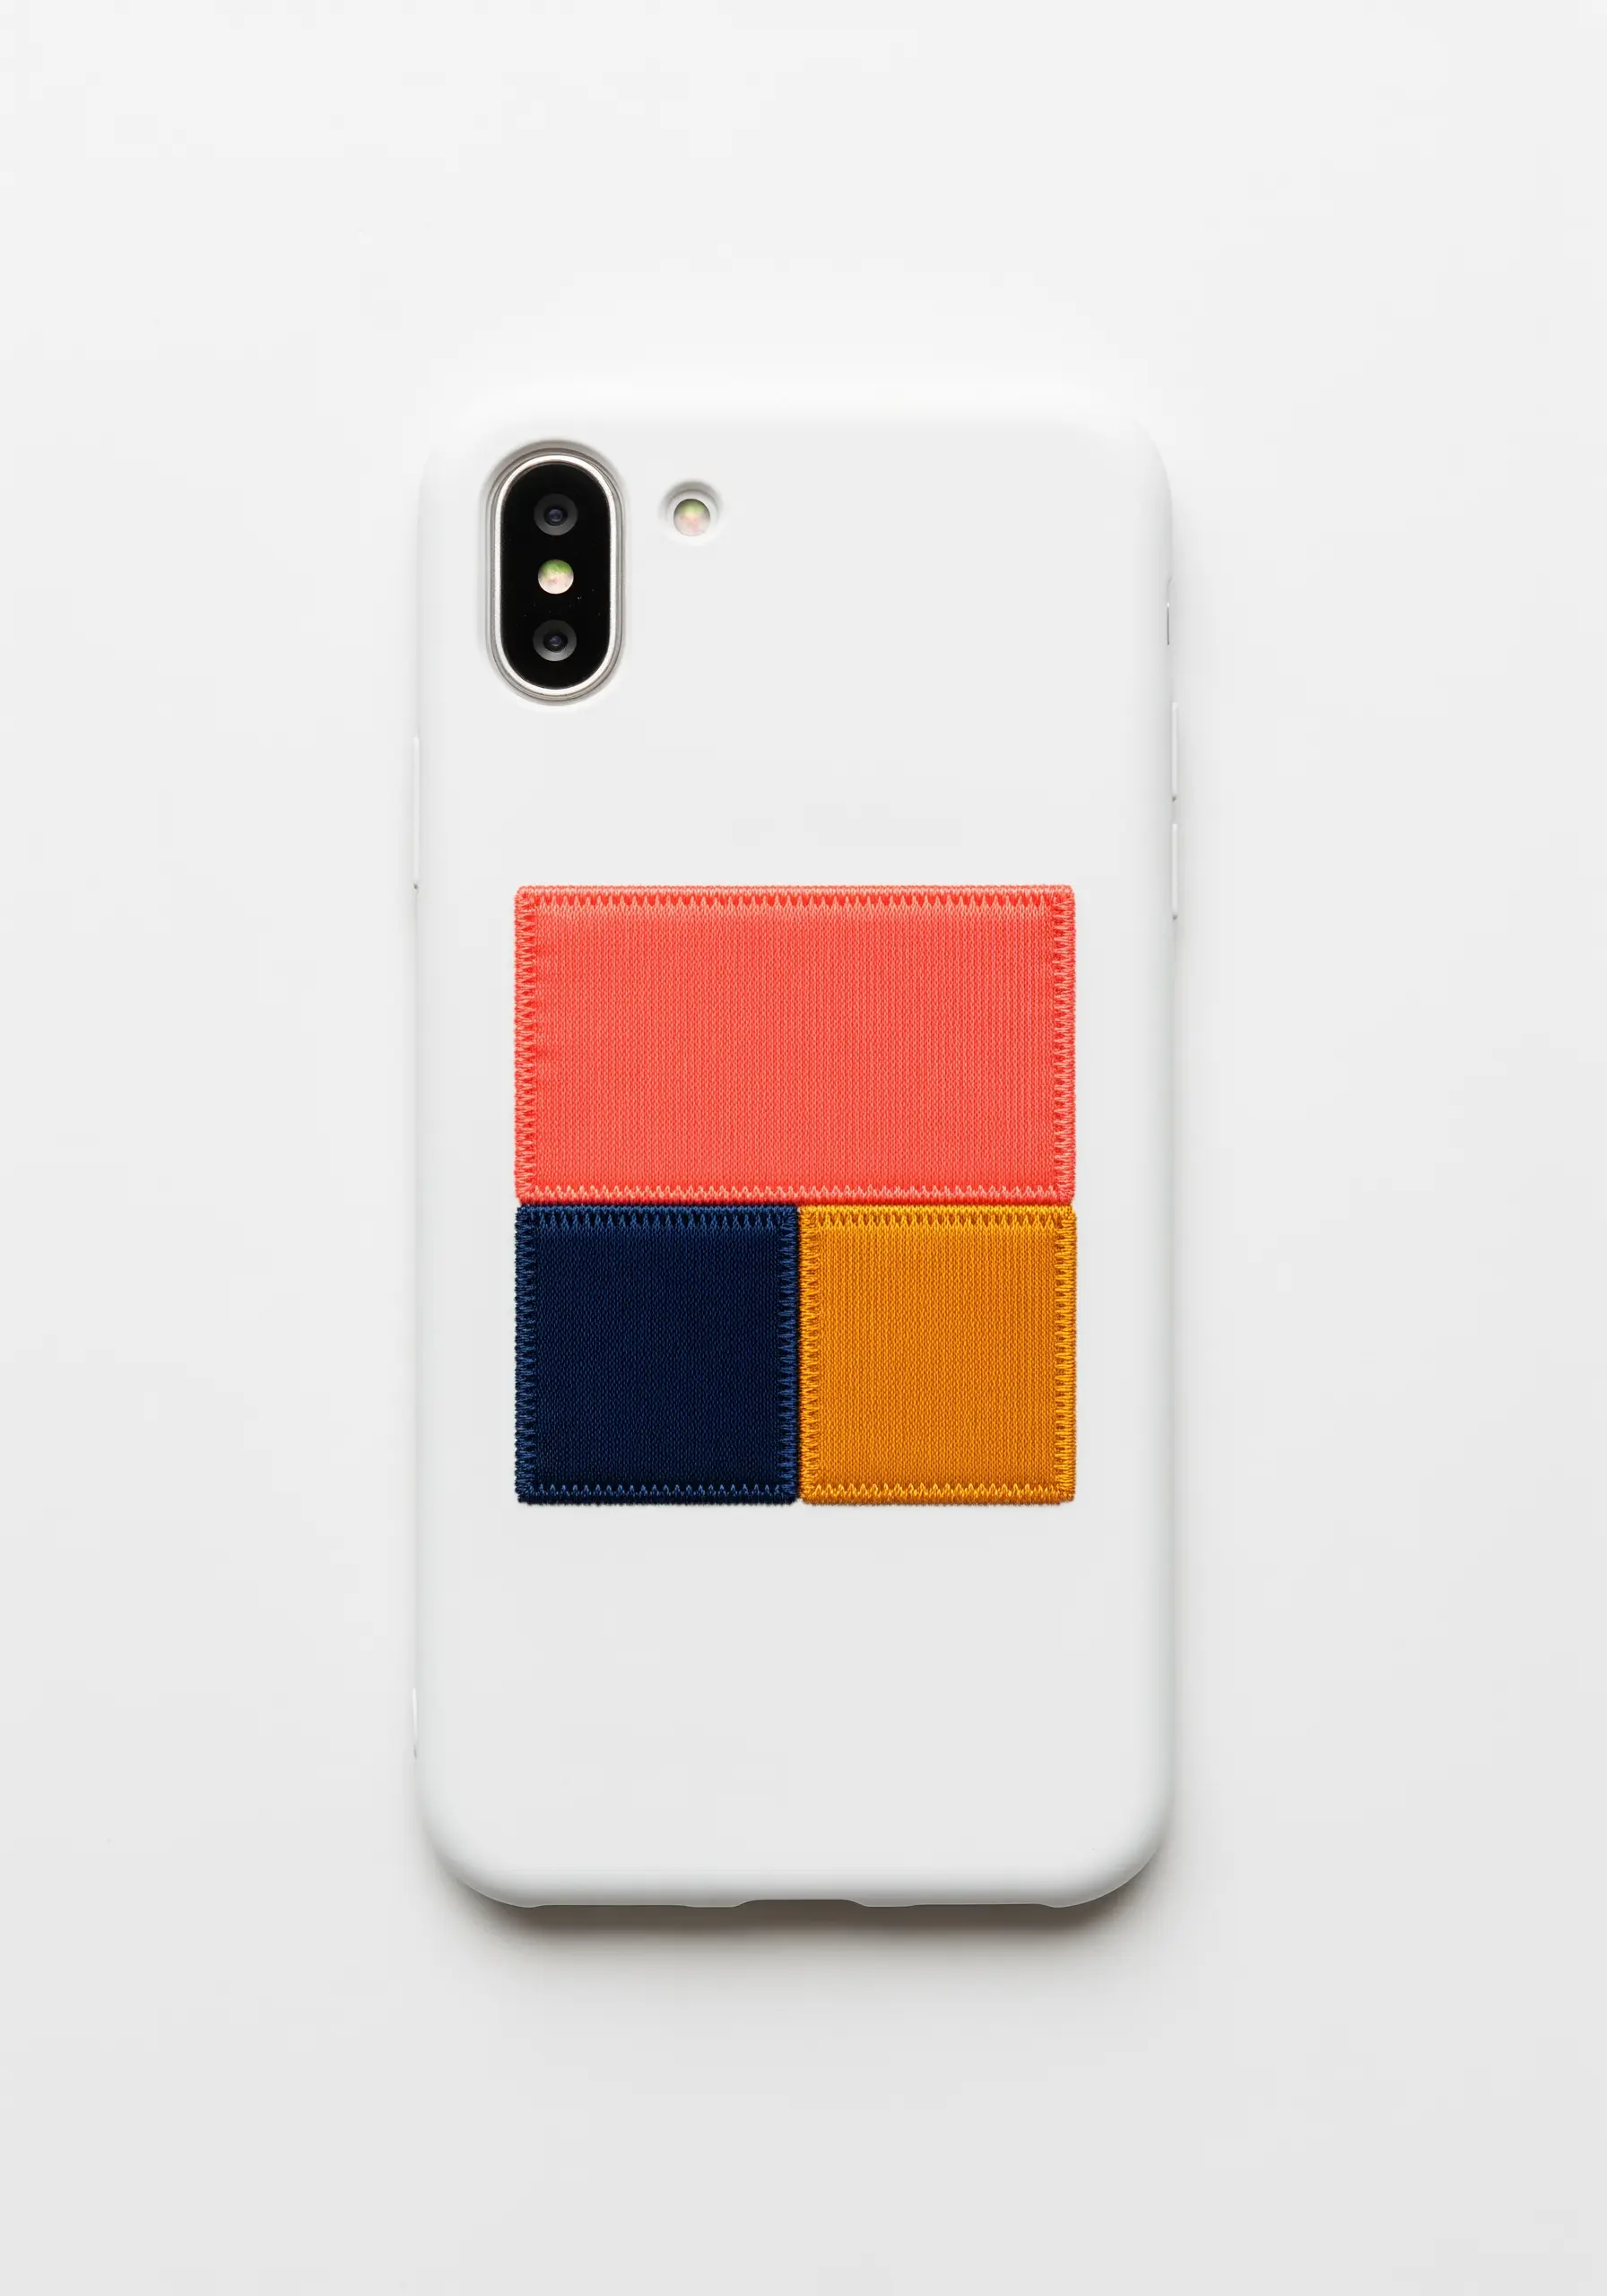
Achieve this ultra-modern, woven look by creating a dense darning stitch patch directly onto your case.
Work in blocks of color, laying down a series of parallel vertical stitches, then weaving your thread horizontally over and under them to create a solid fill.
The key to a clean finish is impeccable tension and perfectly straight edges.
Define the borders of each color block with a neat backstitch before you begin weaving; this creates a sharp boundary and prevents the edges from looking frayed.
20. The Elegant Eucalyptus Branch
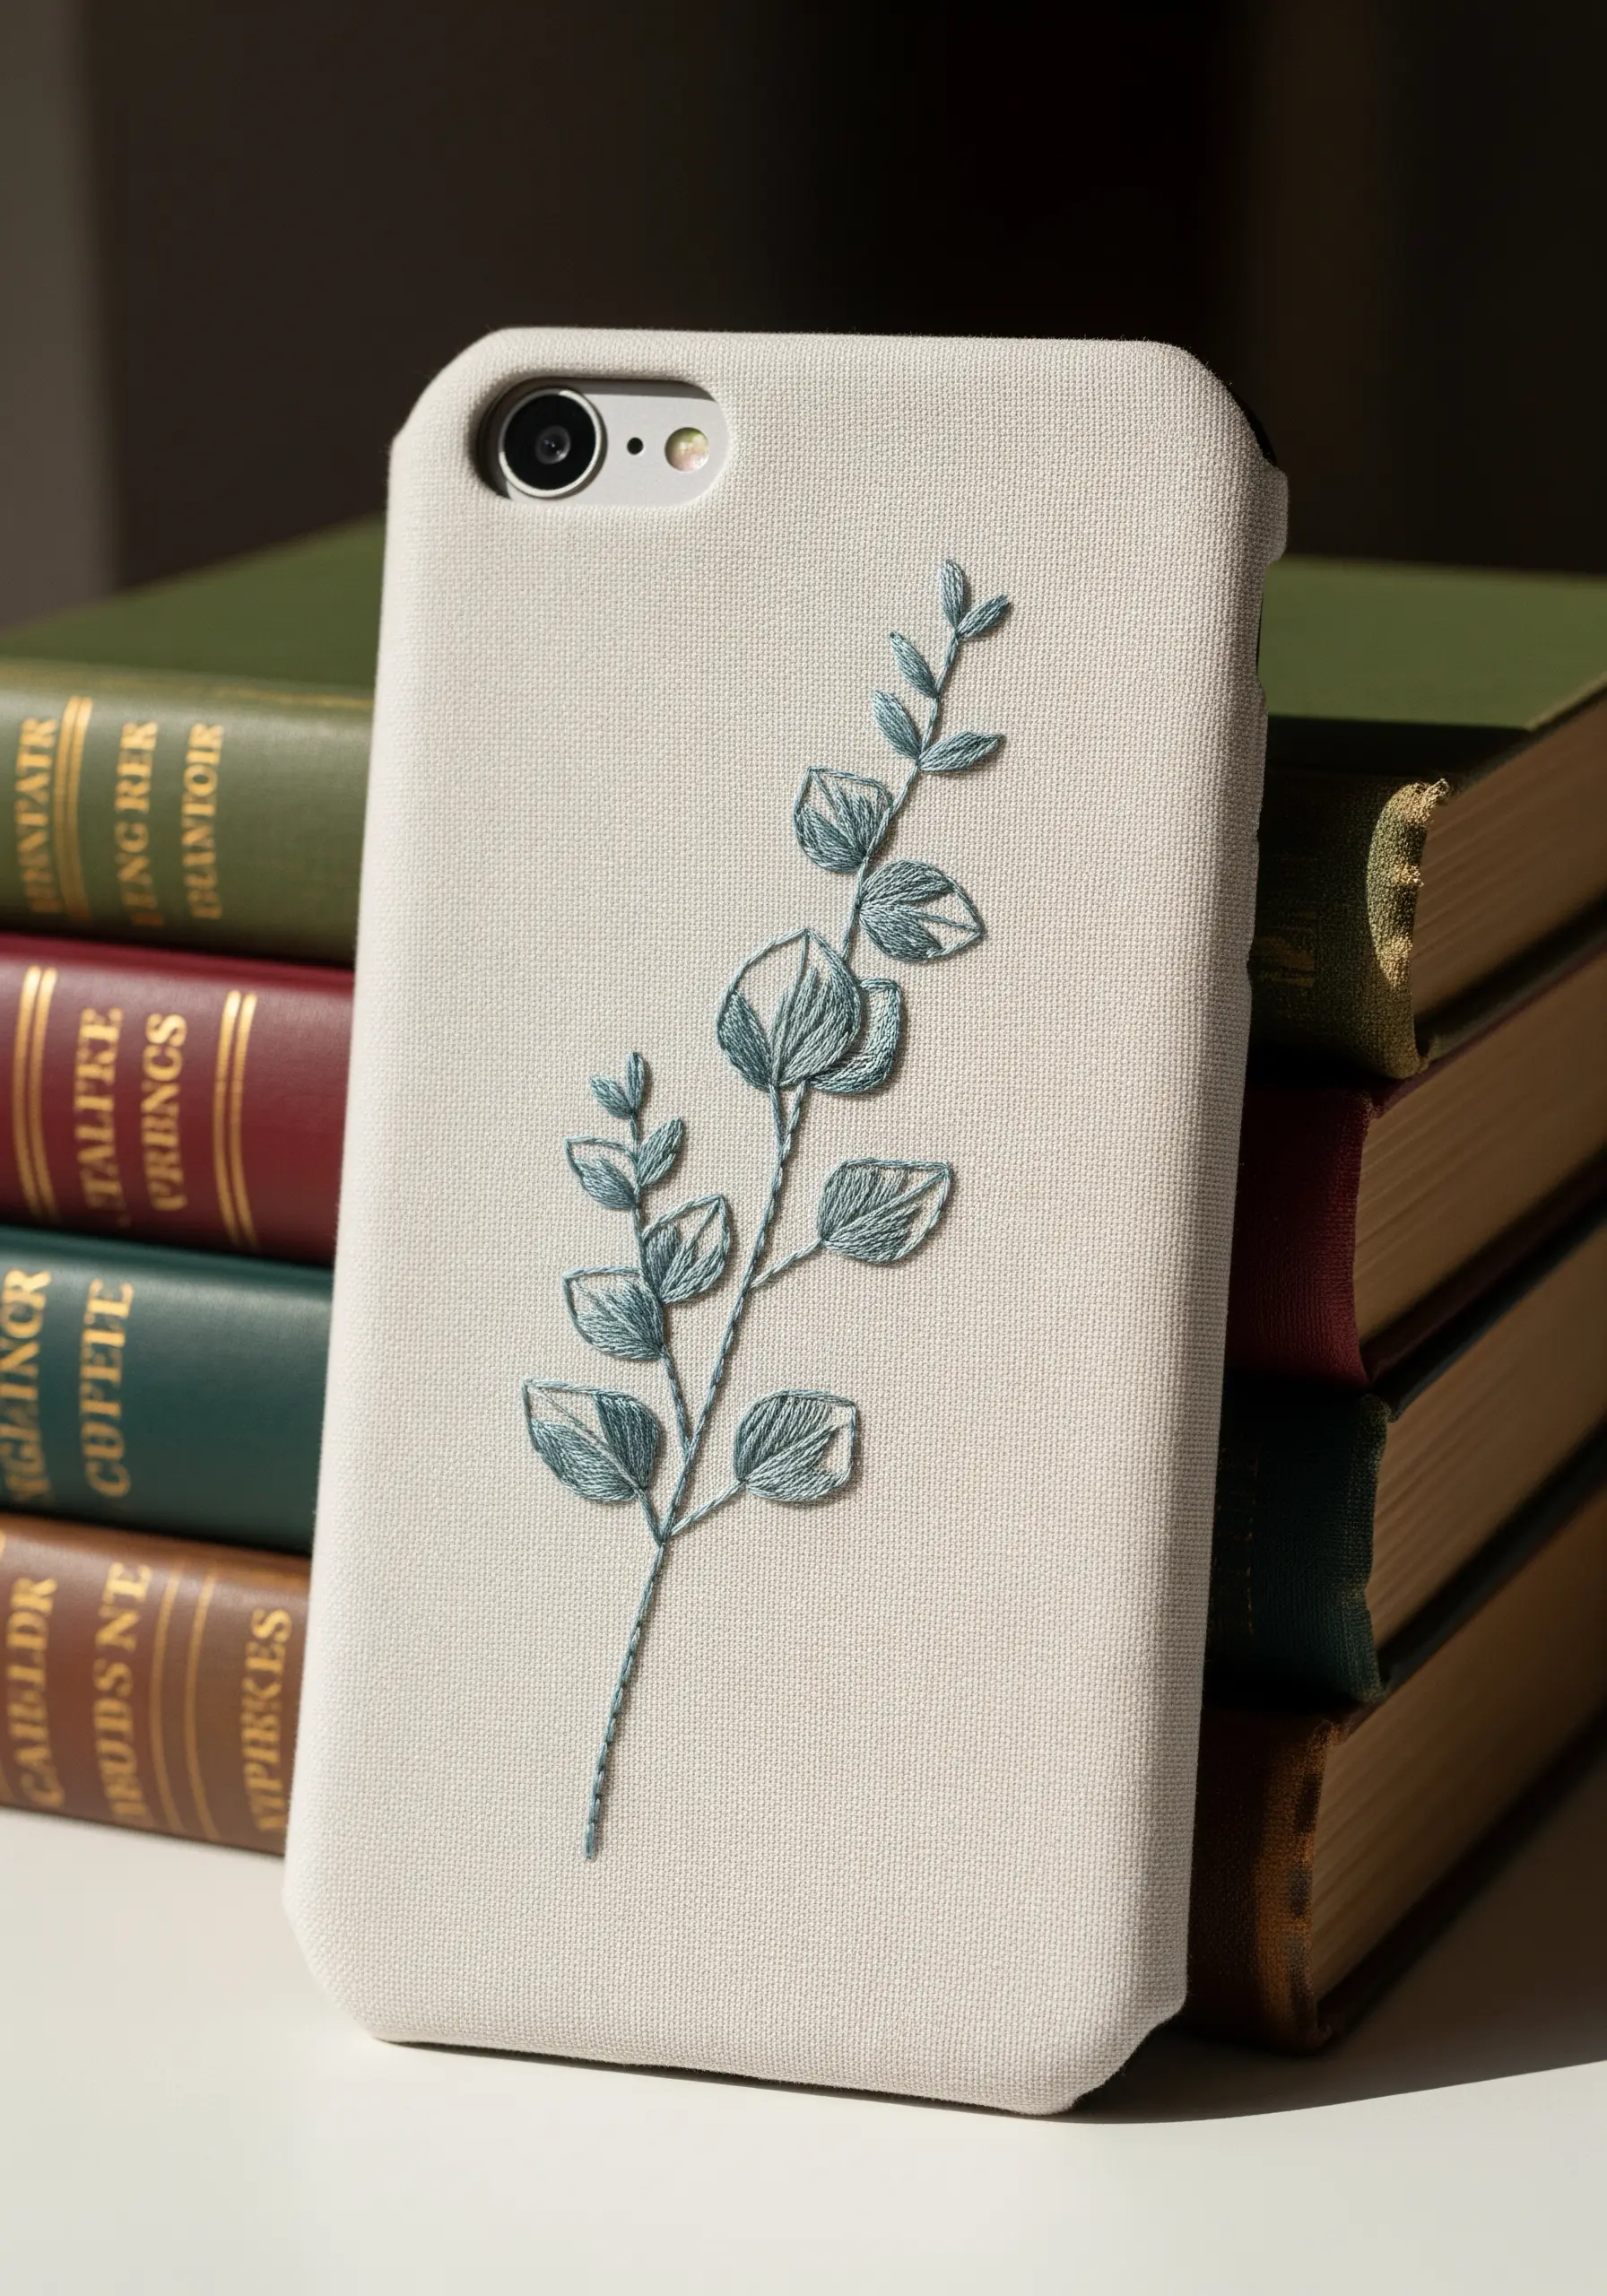
The fishbone stitch is the ideal choice for creating realistic leaves like these, as it forms the central vein and fills the leaf in a single motion.
Start each stitch at the top center of the leaf, alternating sides as you work your way down. This naturally creates the angled look of a eucalyptus leaf.
To give the branch an organic feel, slightly vary the size and angle of each leaf.
This delicate leaf stitch technique is both efficient and beautiful, adding instant botanical elegance to any project.
21. The Fluffy Woven-Wheel Cloud
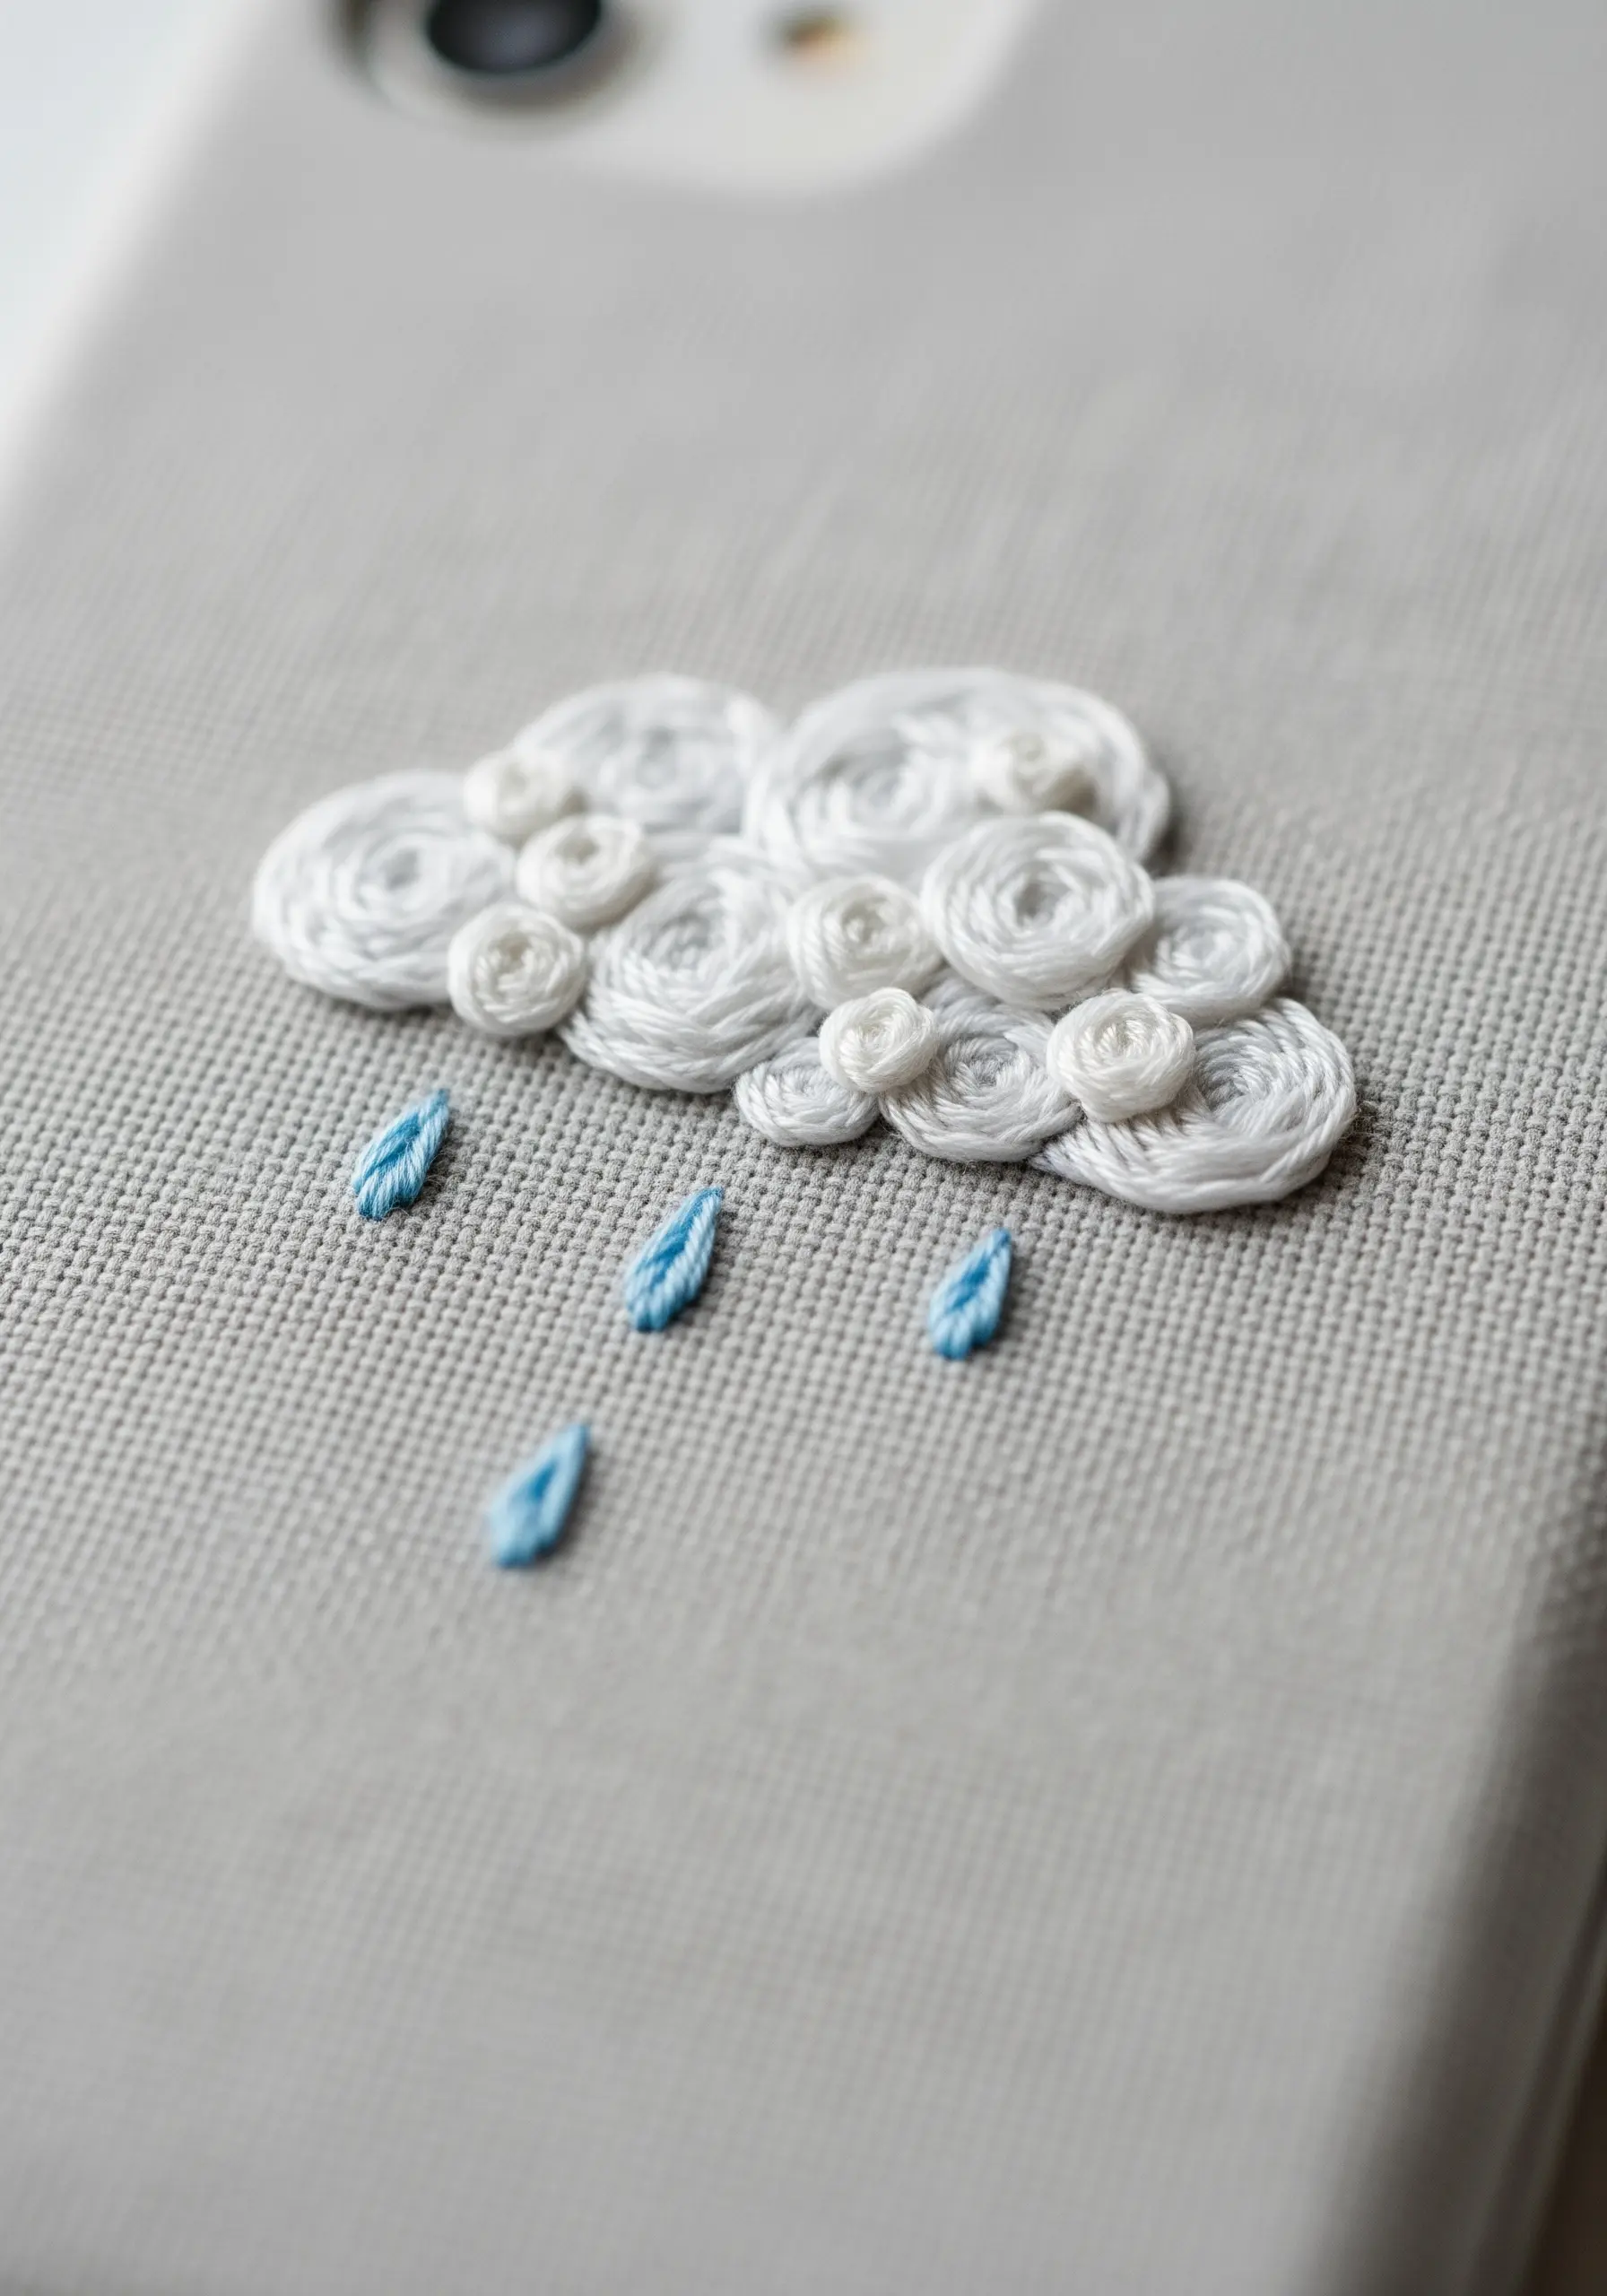
Create a stunningly textured cloud by clustering woven wheel stitches (also known as rose stitches) of different sizes.
Start by making a small asterisk of five straight stitches as a base, then weave your thread over and under these spokes until the circle is filled.
Overlap several of these woven wheels in shades of white and light grey to build a fluffy, dimensional cloud formation.
For the raindrops, a single detached chain stitch in a contrasting blue provides the perfect finishing touch.
22. The Minimalist Open Book
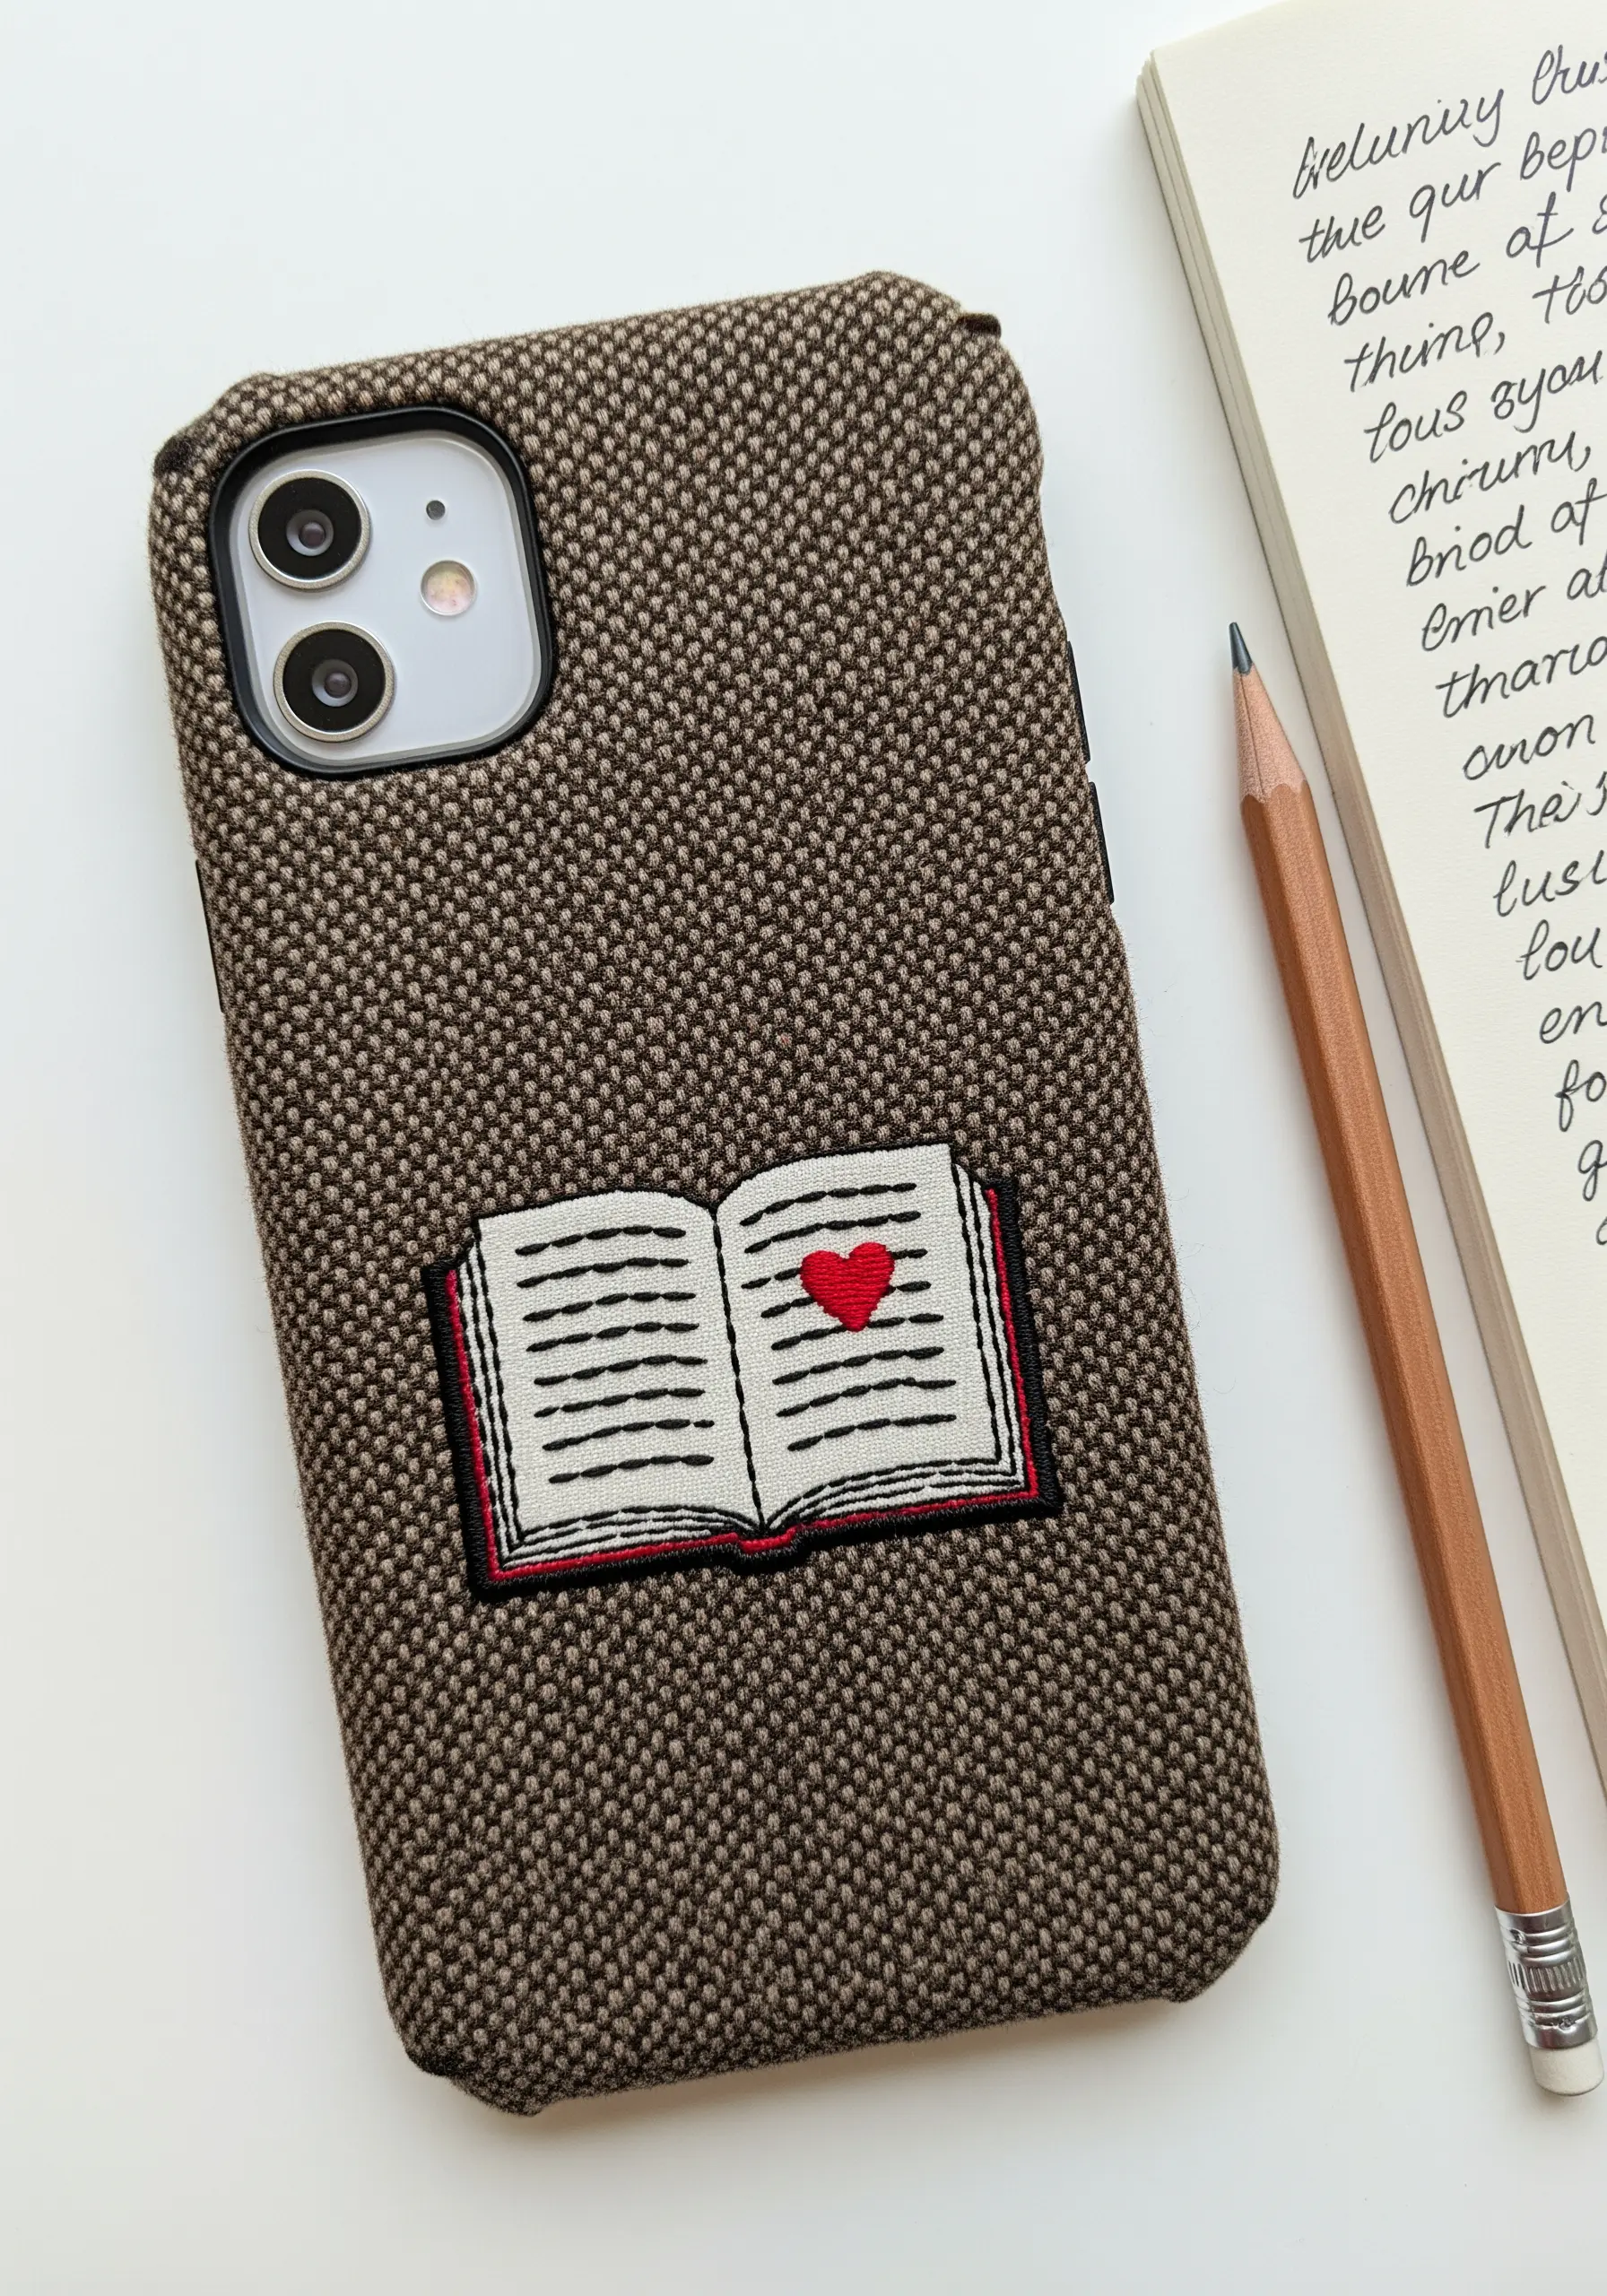
Capture the essence of a book with a few strategic stitches that suggest detail without being overly complex.
Use long, parallel straight stitches in an off-white to represent the pages, keeping them perfectly aligned for a neat look.
Outline the book’s cover with a bold backstitch in black or red, and fill the tiny heart with two or three satin stitches.
This simple combination of stitches creates an instantly recognizable and charming motif for any book lover.


