

Minimalist embroidery isn’t about doing less; it’s about making every single stitch count. It’s a quiet practice in finding the beauty in a single line, a carefully placed knot, or the elegant space you leave empty.
Forget overwhelming patterns and a hundred colors. Here, you’ll discover how to use simple techniques to create work that feels intentional, modern, and deeply personal. Each project is an invitation to slow down, focus on the needle and thread, and see how powerful simplicity can be.
Let’s move beyond just following a pattern and start making deliberate choices—about texture, composition, and form. You have the ability to create something clean, polished, and full of quiet confidence. Let’s begin.
1. Master Geometric Landscapes with Satin Stitch
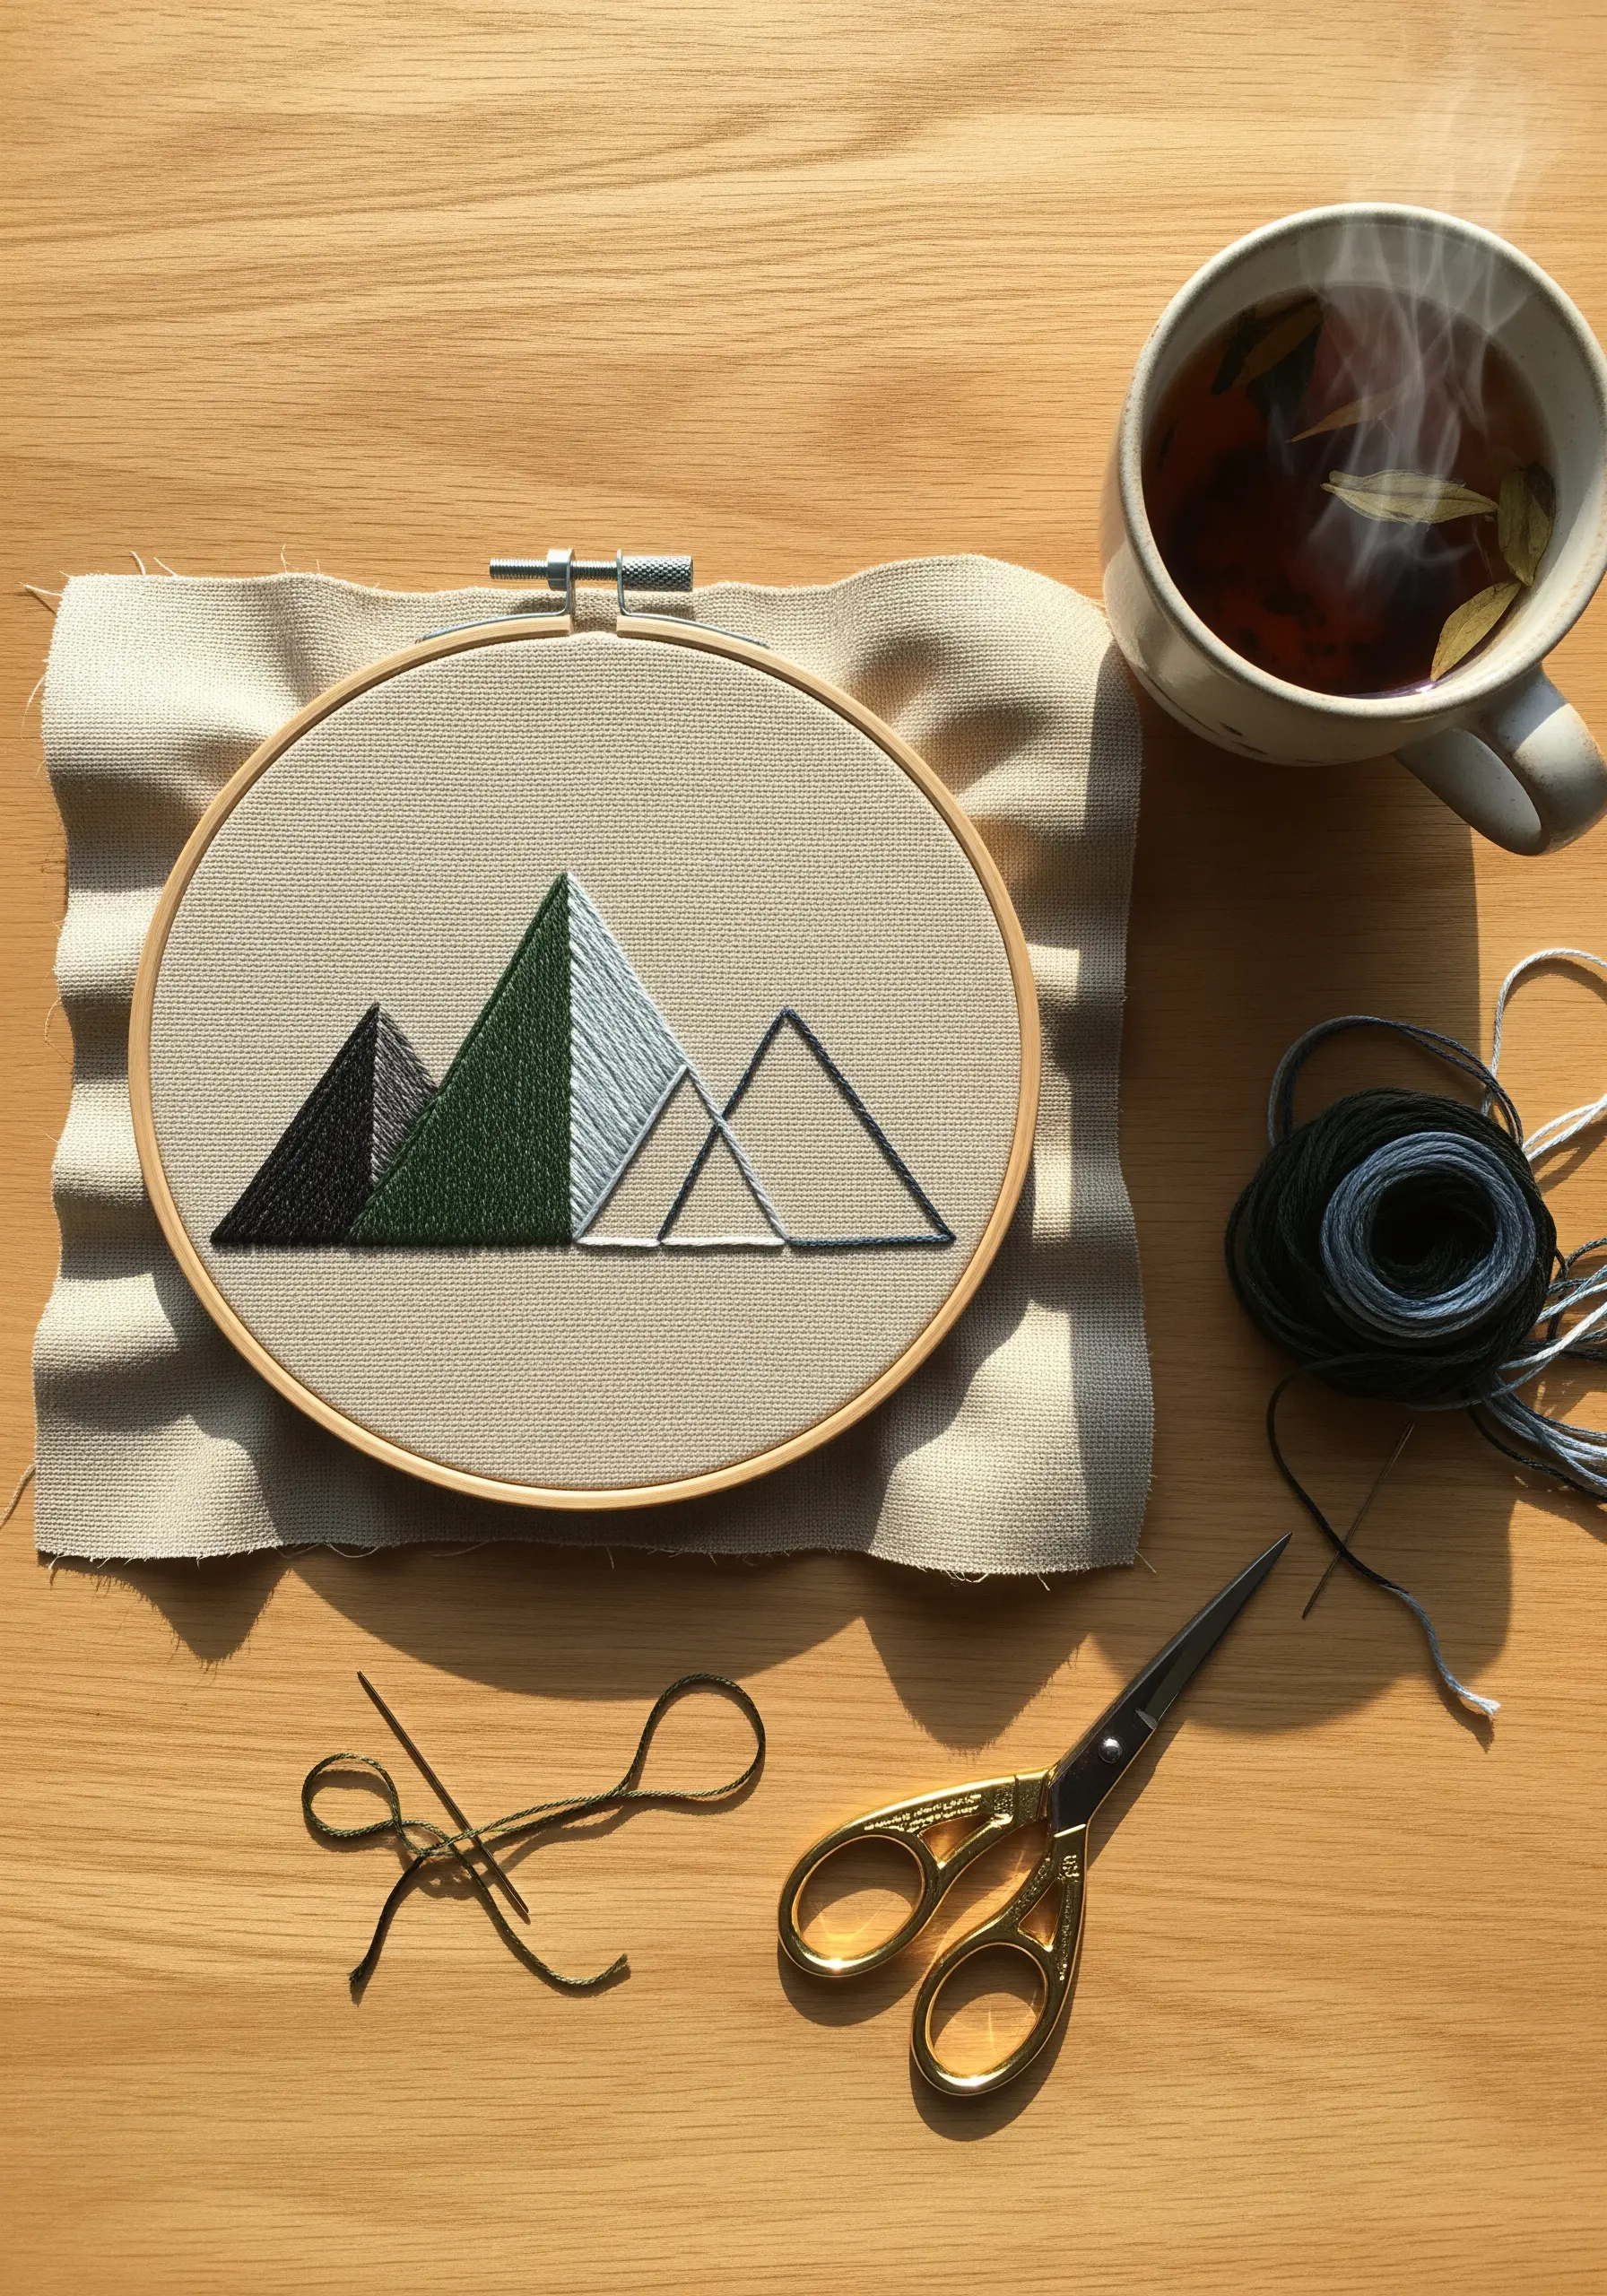
Create a sharp, graphic mountain range by combining filled shapes with clean outlines.
Use a dense satin stitch for the filled triangles, ensuring your stitches lie perfectly parallel for a smooth, fabric-like sheen.
Contrast the solid forms with delicate, two-strand backstitch outlines for the secondary peaks—this creates an immediate sense of depth and perspective.
Stitching on a high-count linen or evenweave cotton provides a stable grid, making it easier to achieve precise geometric shapes.
This technique elevates simple triangles into sophisticated geometric hoop art designs that feel both modern and serene.
2. Achieve Delicate Botanicals with a Single Line
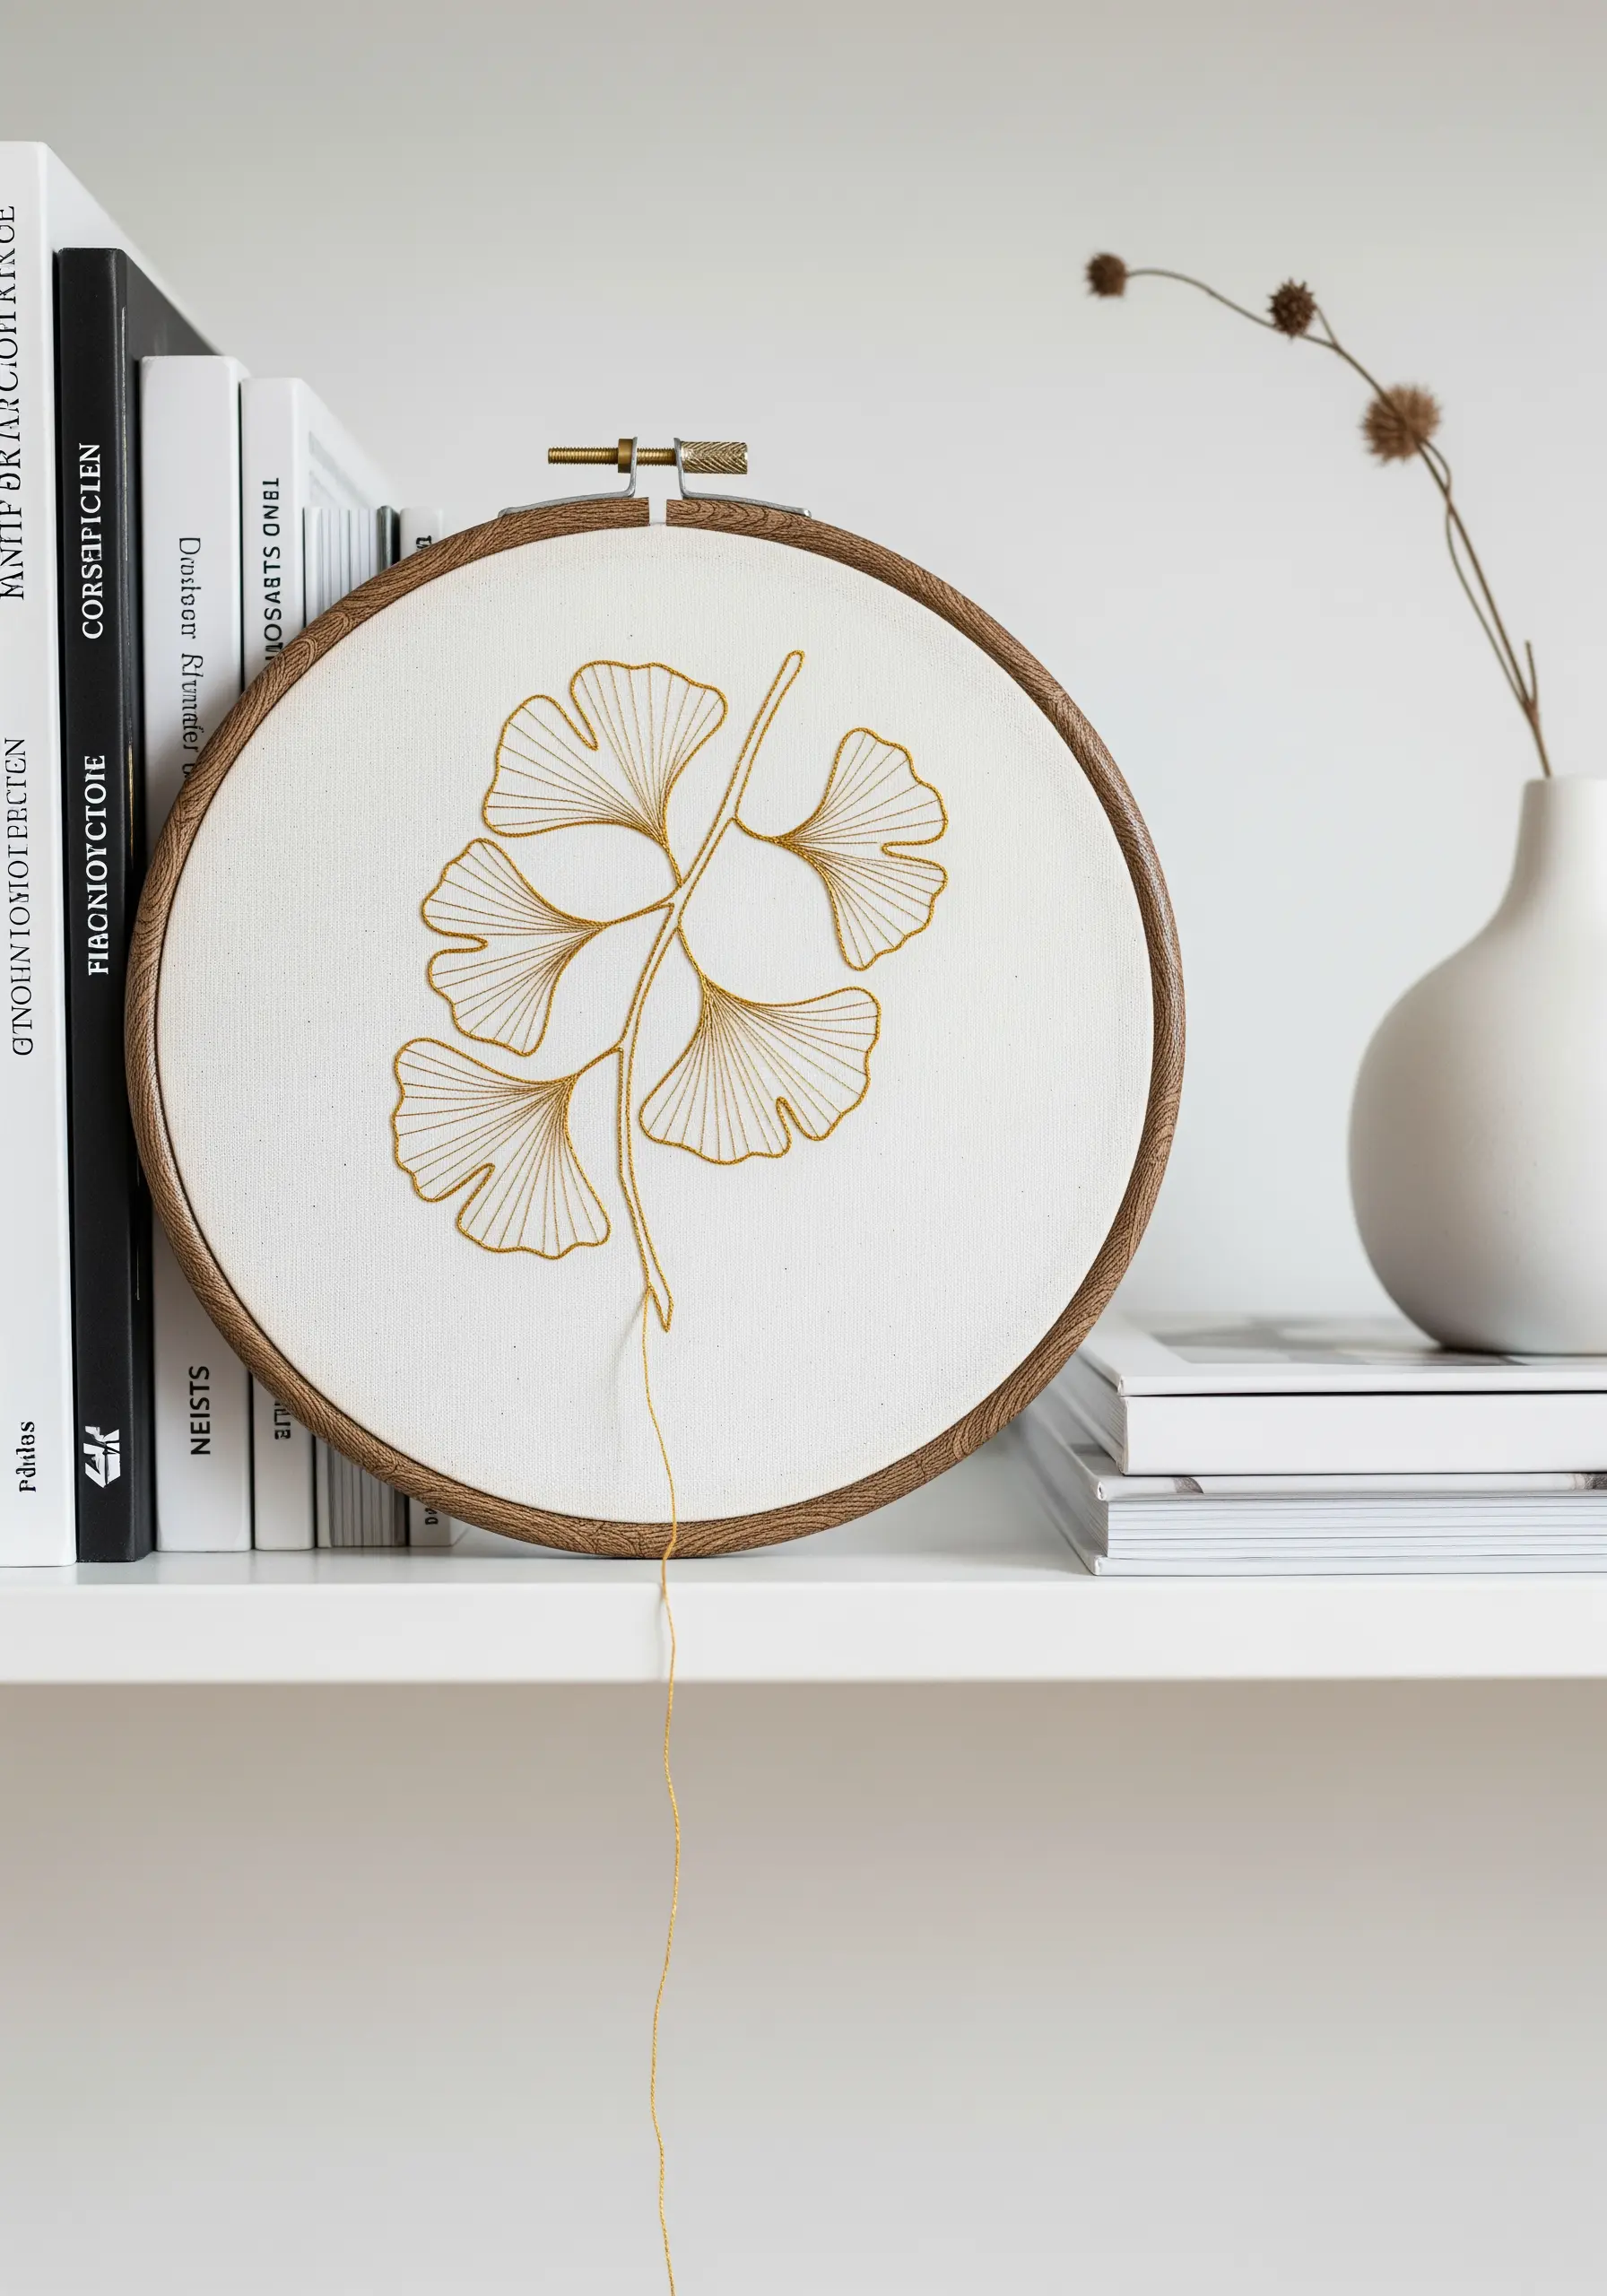
Capture the airy elegance of ginkgo leaves using a single, continuous line.
Trace the pattern and use a two-strand split stitch or whipped backstitch to create a raised, cord-like line that feels intentional and smooth.
The key to this design’s success is stitch consistency—focus on making each stitch the same length to produce a flawless, unbroken flow.
Choosing a high-sheen thread, like a gold rayon or silk floss, on a simple off-white cotton or linen canvas allows the linework itself to be the centerpiece.
These one-line floral embroidery motifs transform simple outlines into refined art.
3. Embrace the Art of the Imperfect Outline
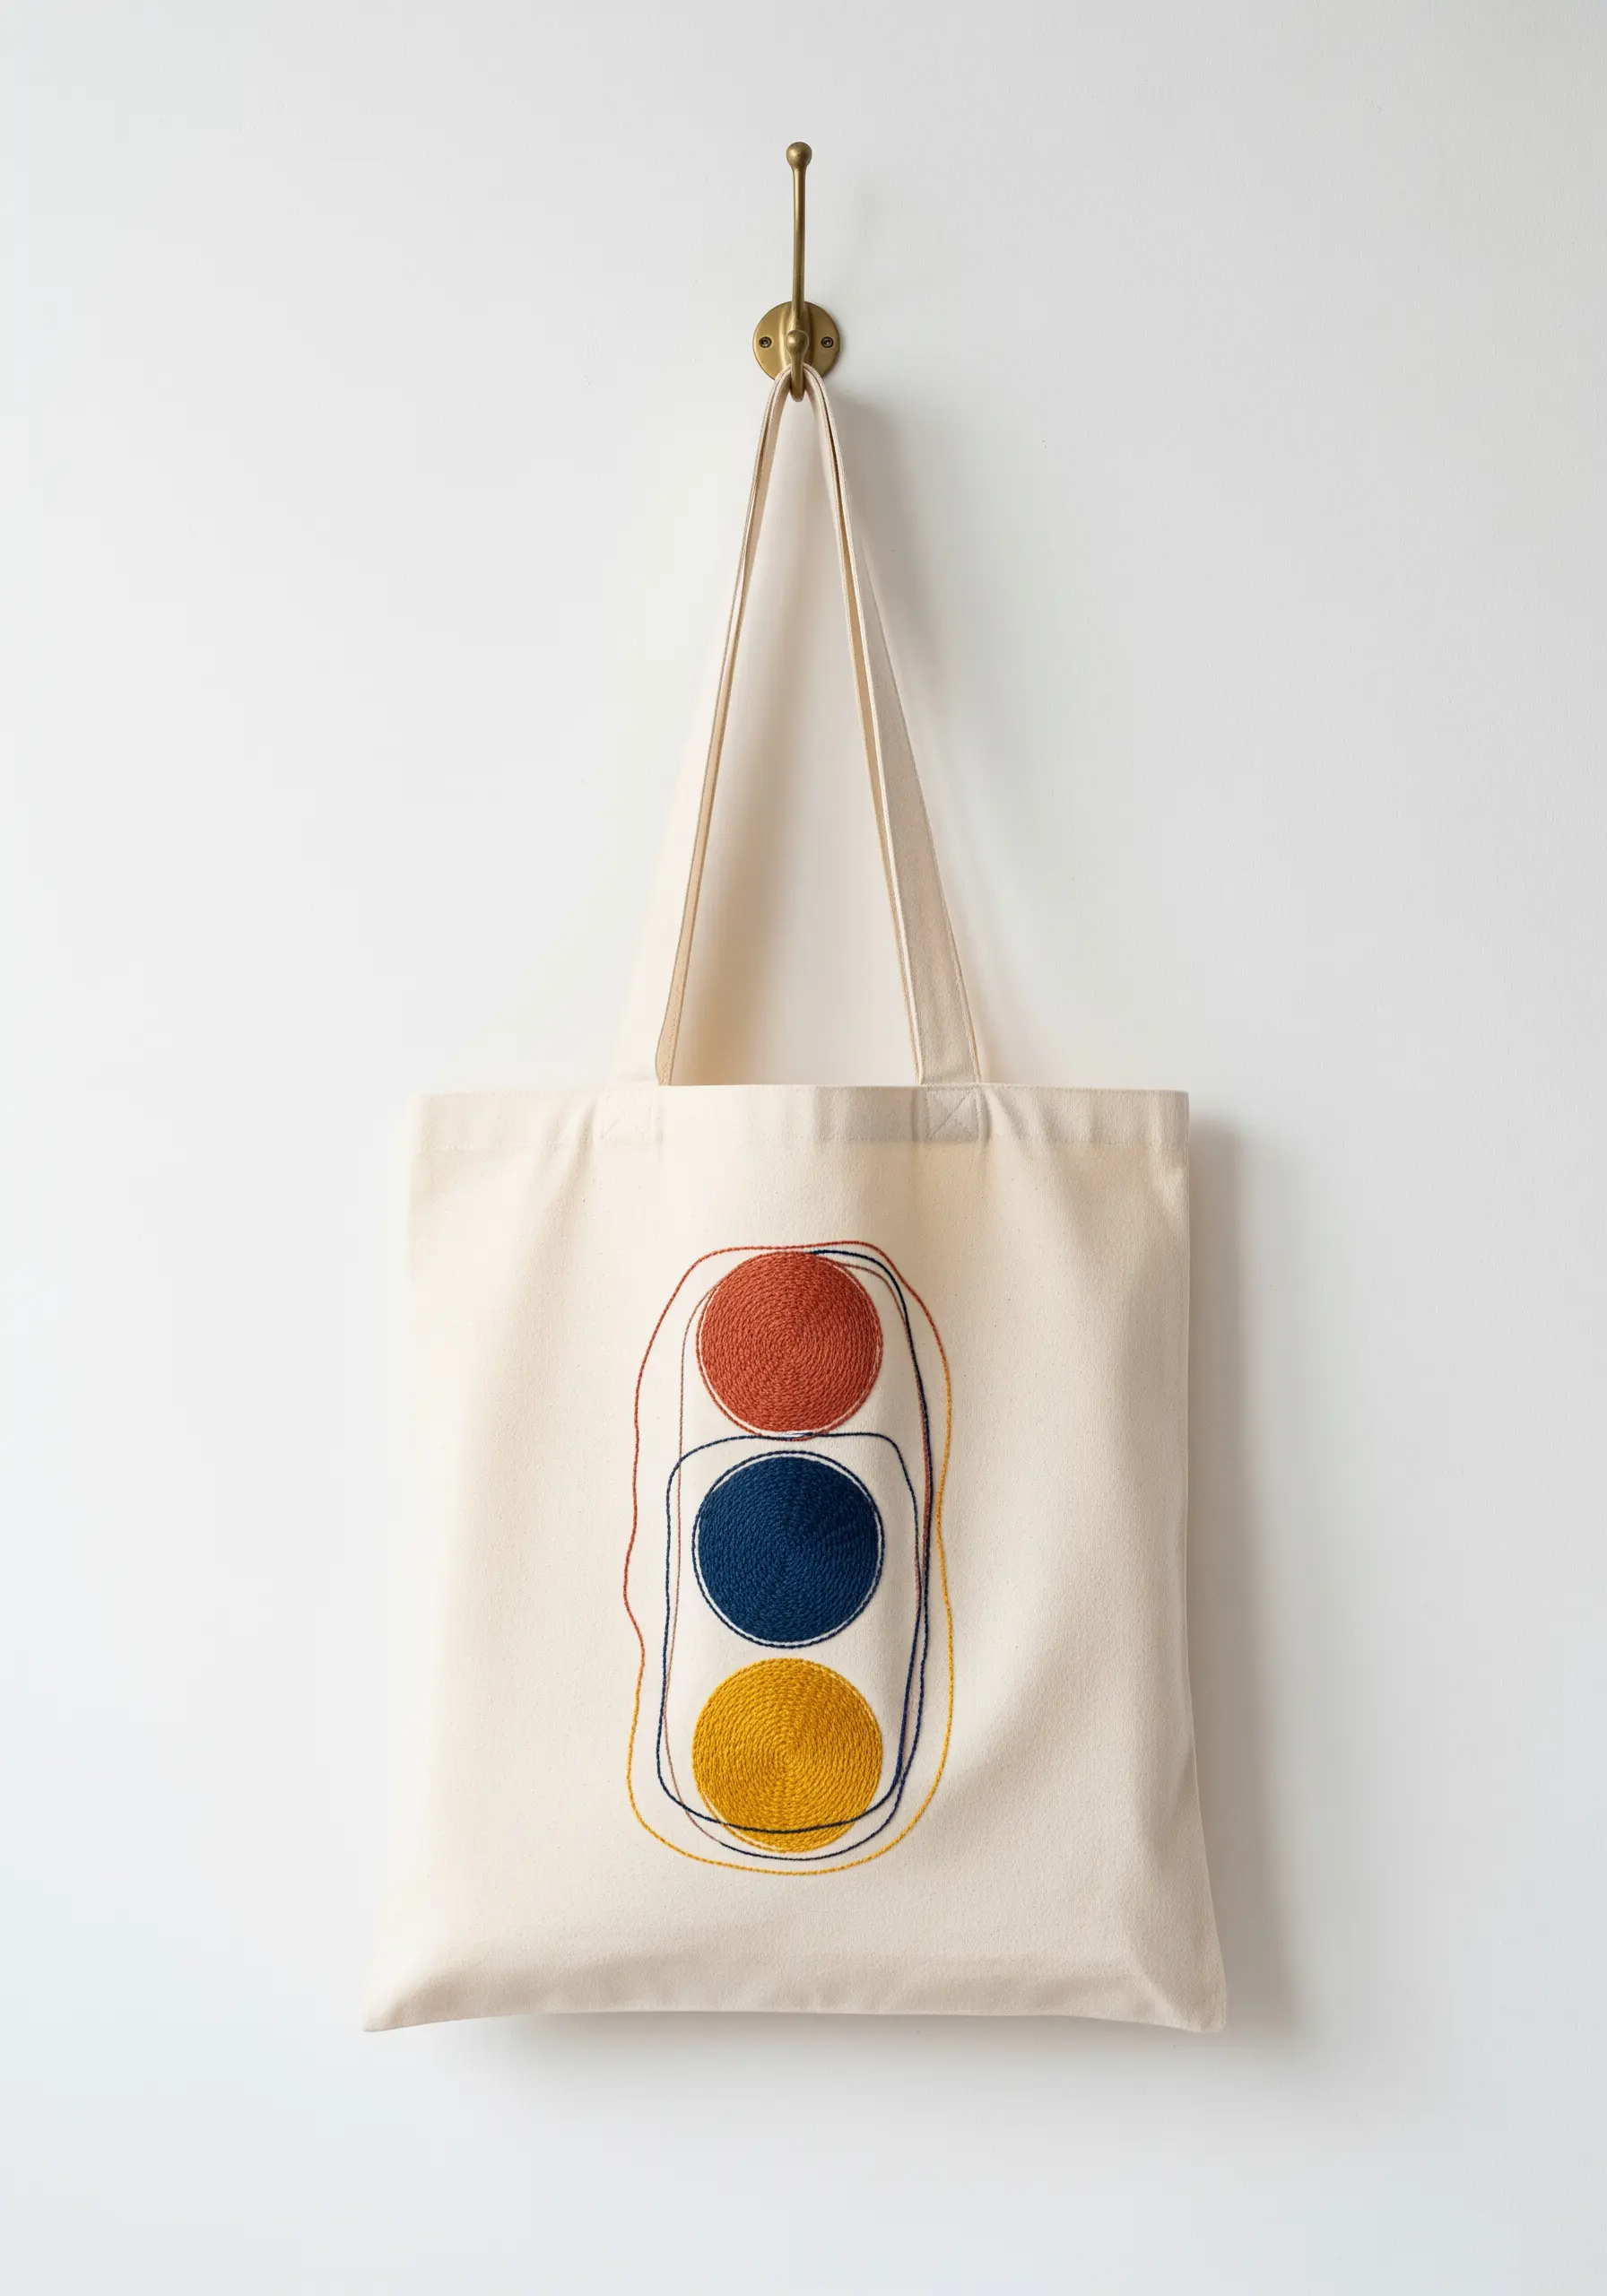
Give a simple motif personality by pairing solid fills with loose, expressive outlines.
First, fill the circles with a classic satin stitch, using a single color for each to create bold, flat shapes.
Then, use a contrasting backstitch to create wobbly, overlapping outlines that look sketched or drawn—this adds movement and a playful, artistic energy.
These are excellent tote bag embroidery techniques because the graphic style is highly visible and durable for everyday use.
4. Elevate Table Linens with Herbal Motifs
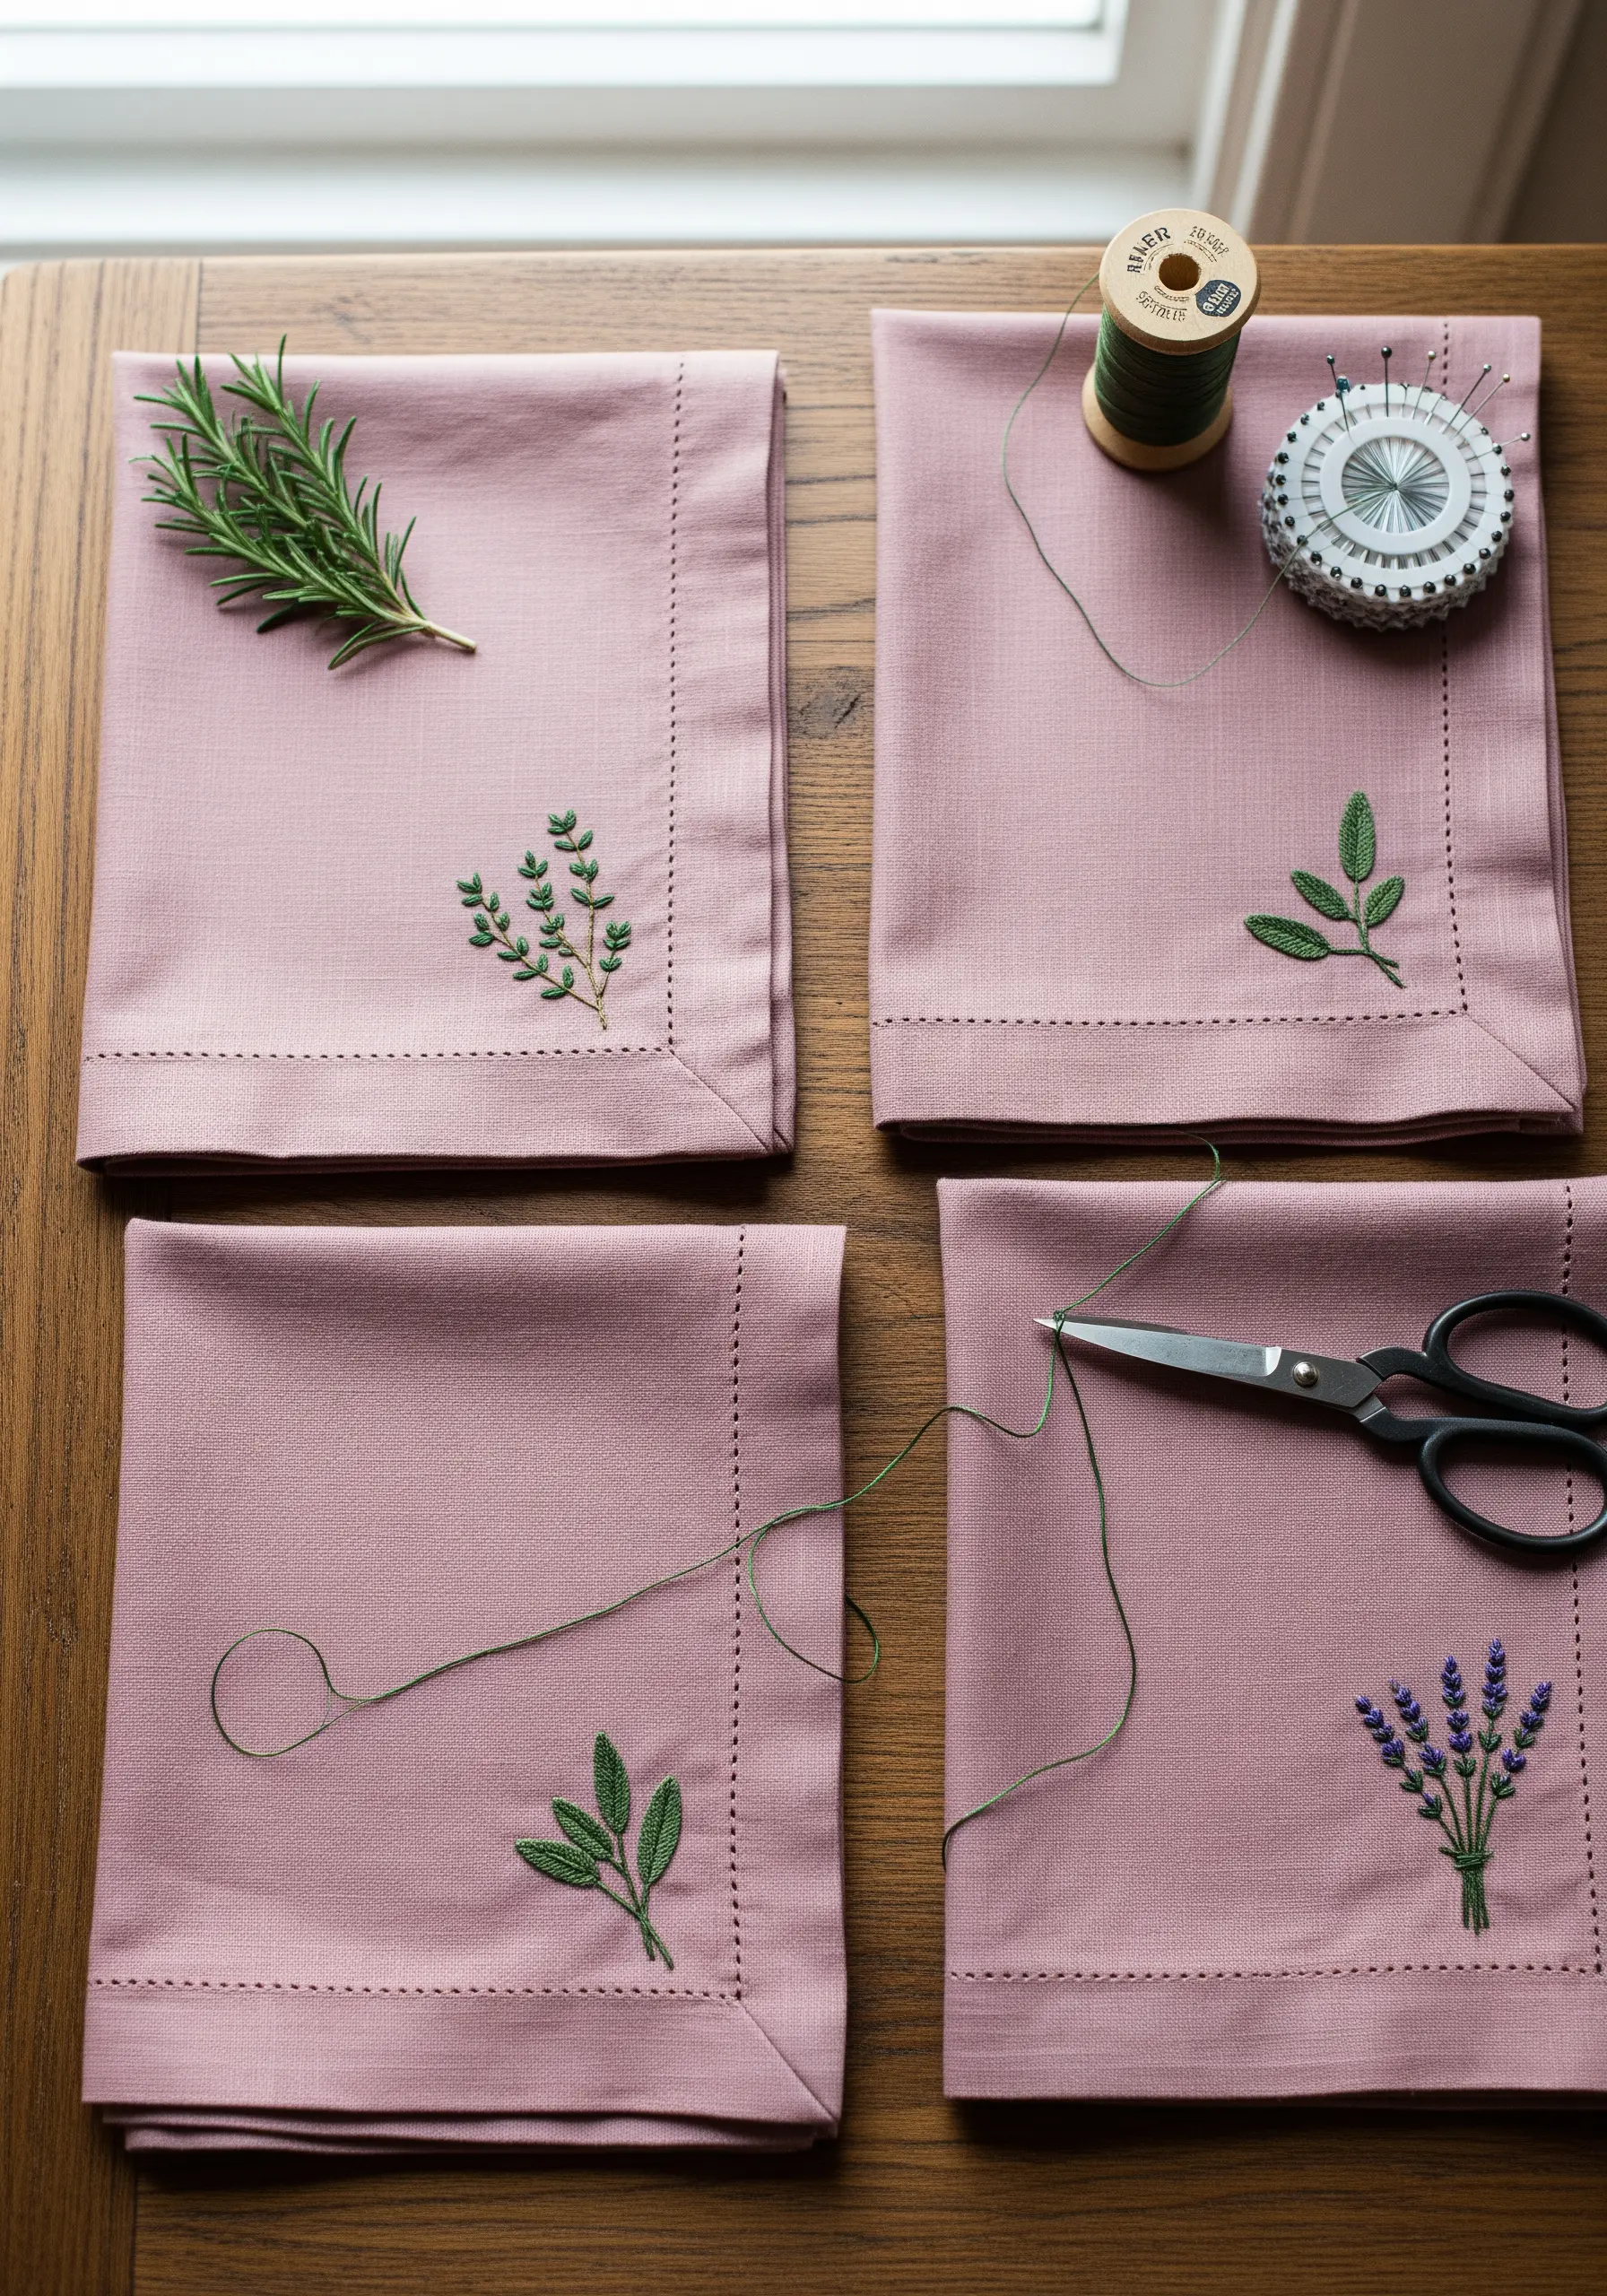
Transform simple napkins into elegant, personalized tableware with delicate botanical touches.
Assign a specific stitch to each herb’s texture: use tiny French knots for lavender buds, a smooth satin stitch for sage leaves, and a split stitch for rosemary’s fine needles.
This approach not only looks professional but also makes the stitching process a mindful exercise in observation.
Work with just two or three strands of floss to keep the details crisp and avoid overpowering the delicate fabric of the linen.
These thoughtful herbal plant embroidery motifs add a touch of handmade luxury to any dining experience.
5. Add a Polished Pop to Casual Apparel
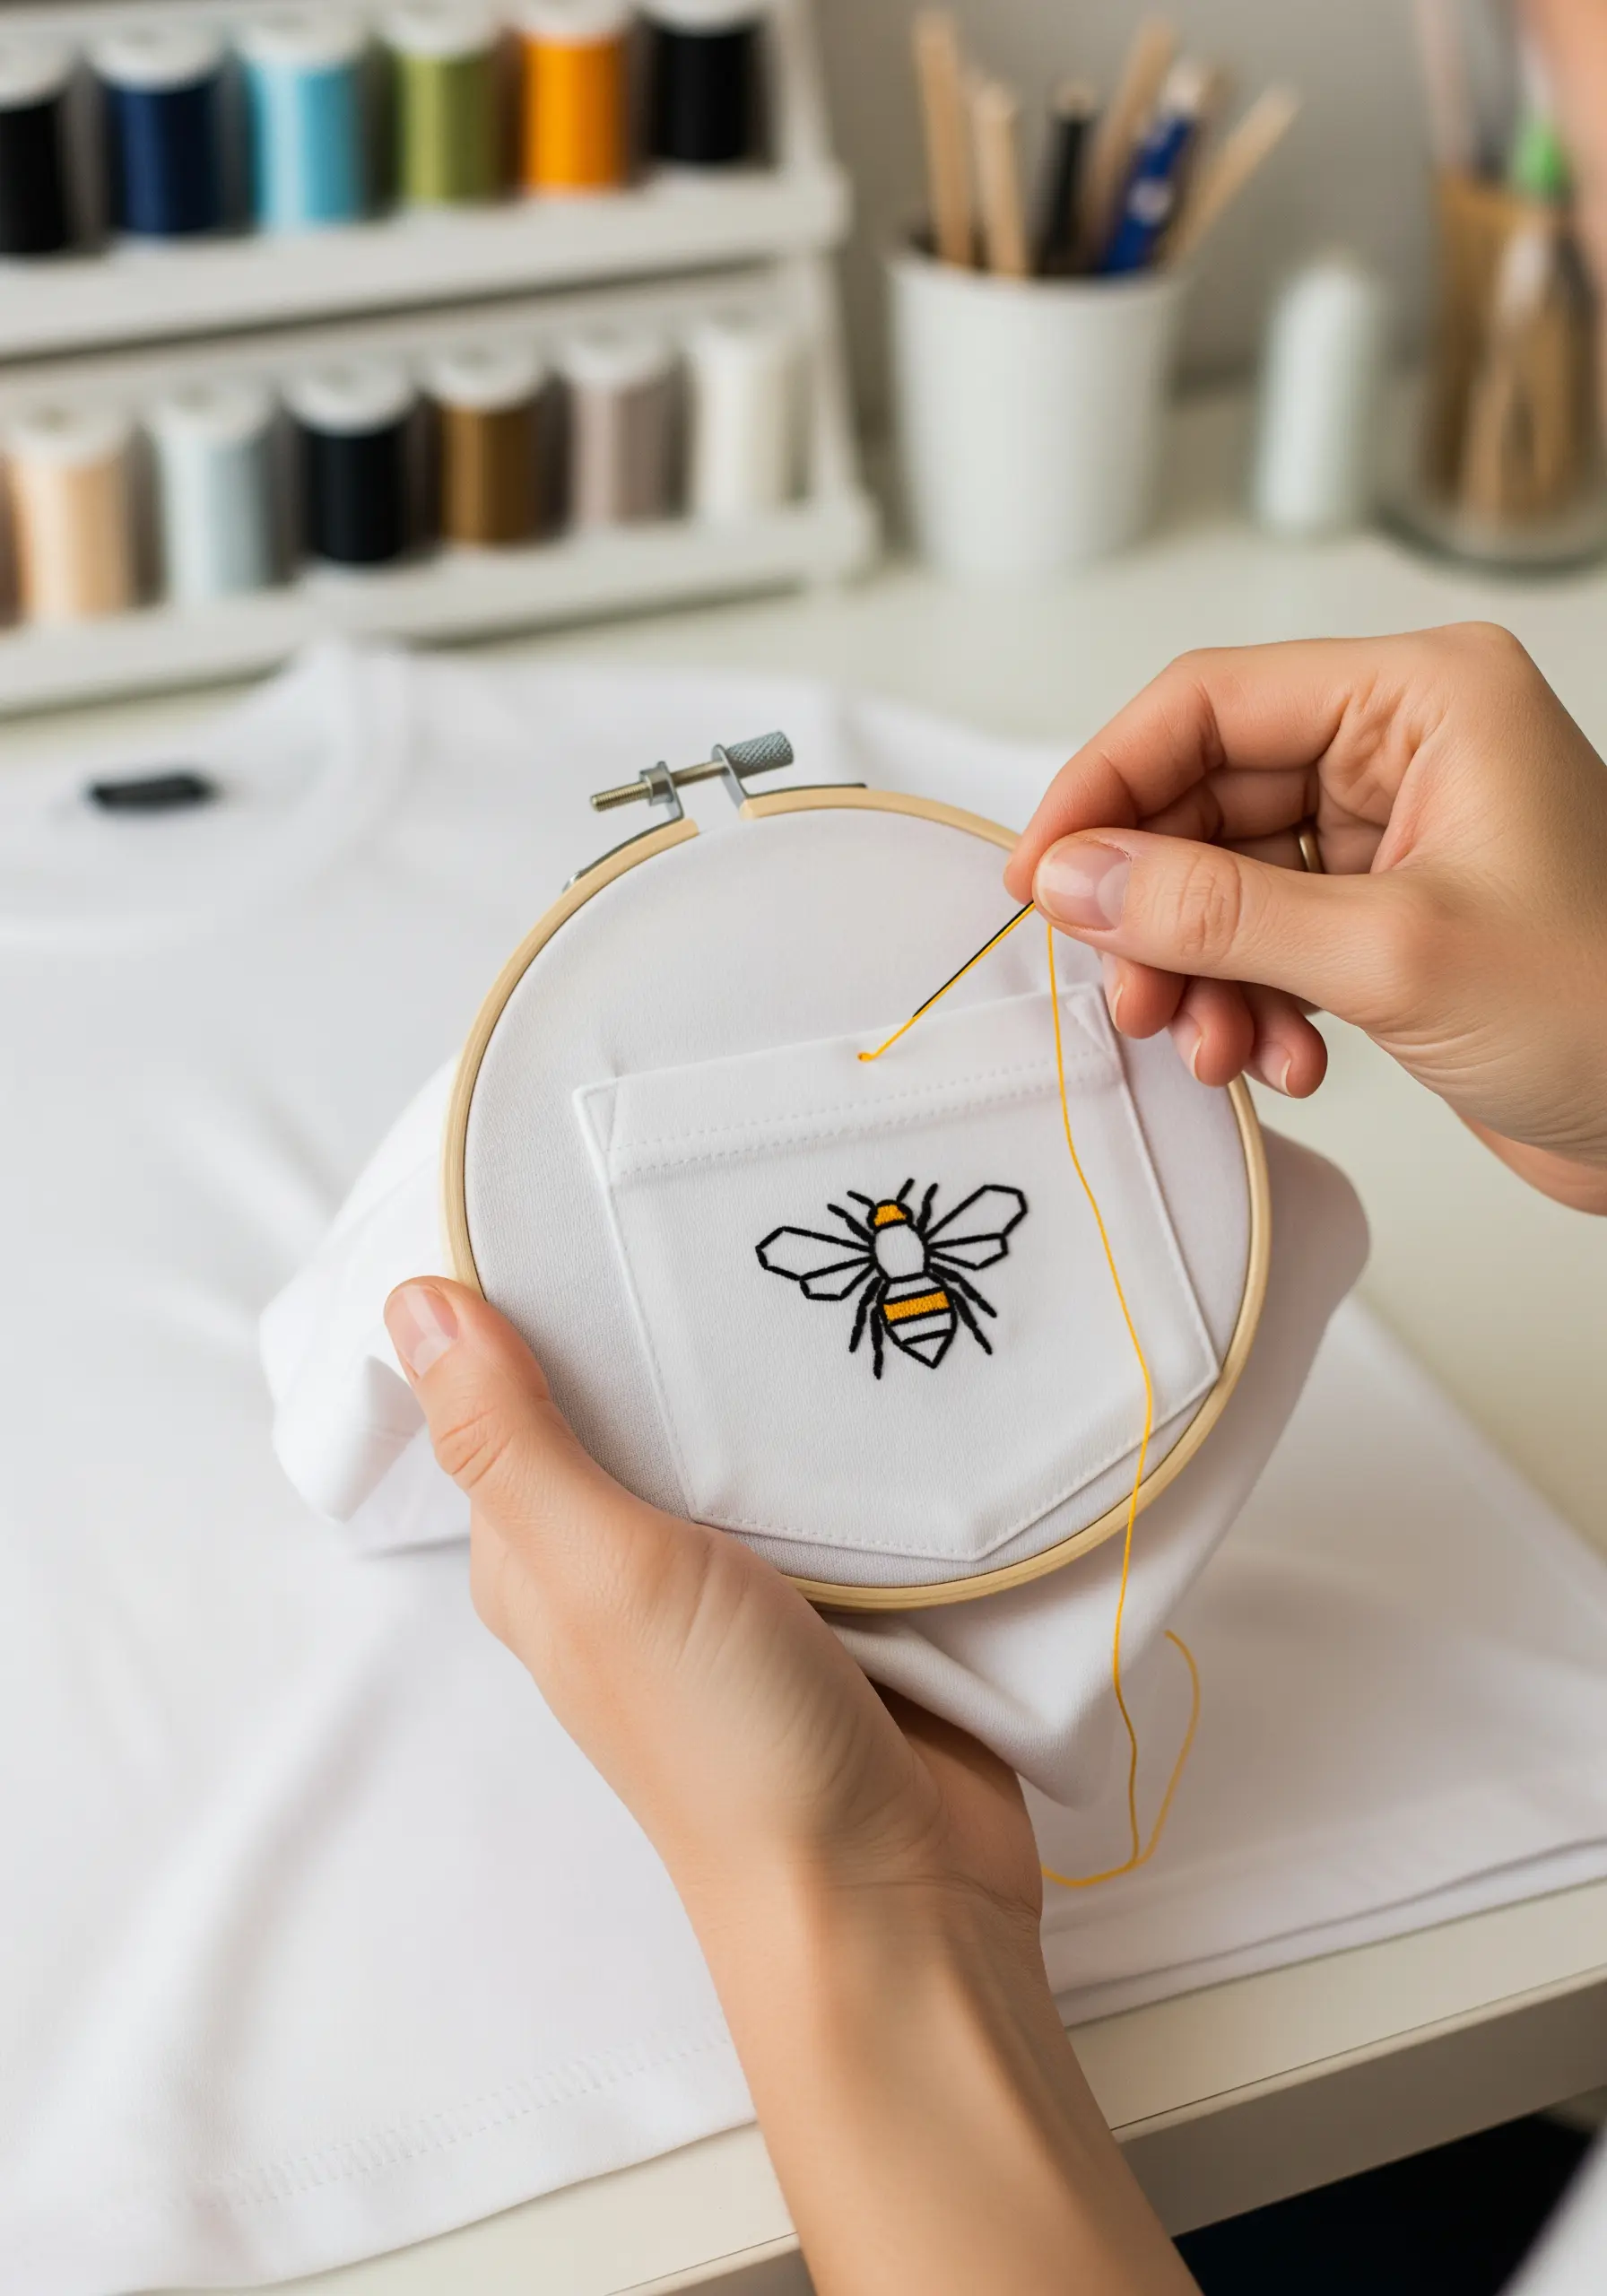
Stitching on knit fabric like a t-shirt requires one crucial step: stabilization.
Iron a cut-away or stick-on stabilizer to the inside of the shirt before hooping—this prevents the fabric from stretching and your stitches from warping.
Use a simple backstitch with three strands of floss for a bold, clean outline that stands out without feeling heavy.
For the filled stripes, a satin stitch works perfectly, but keep the stitches short to minimize pulling.
These carefully placed minimal stitch motifs turn a basic garment into a custom piece.
6. Create Sculptural Text with a Whipped Stitch
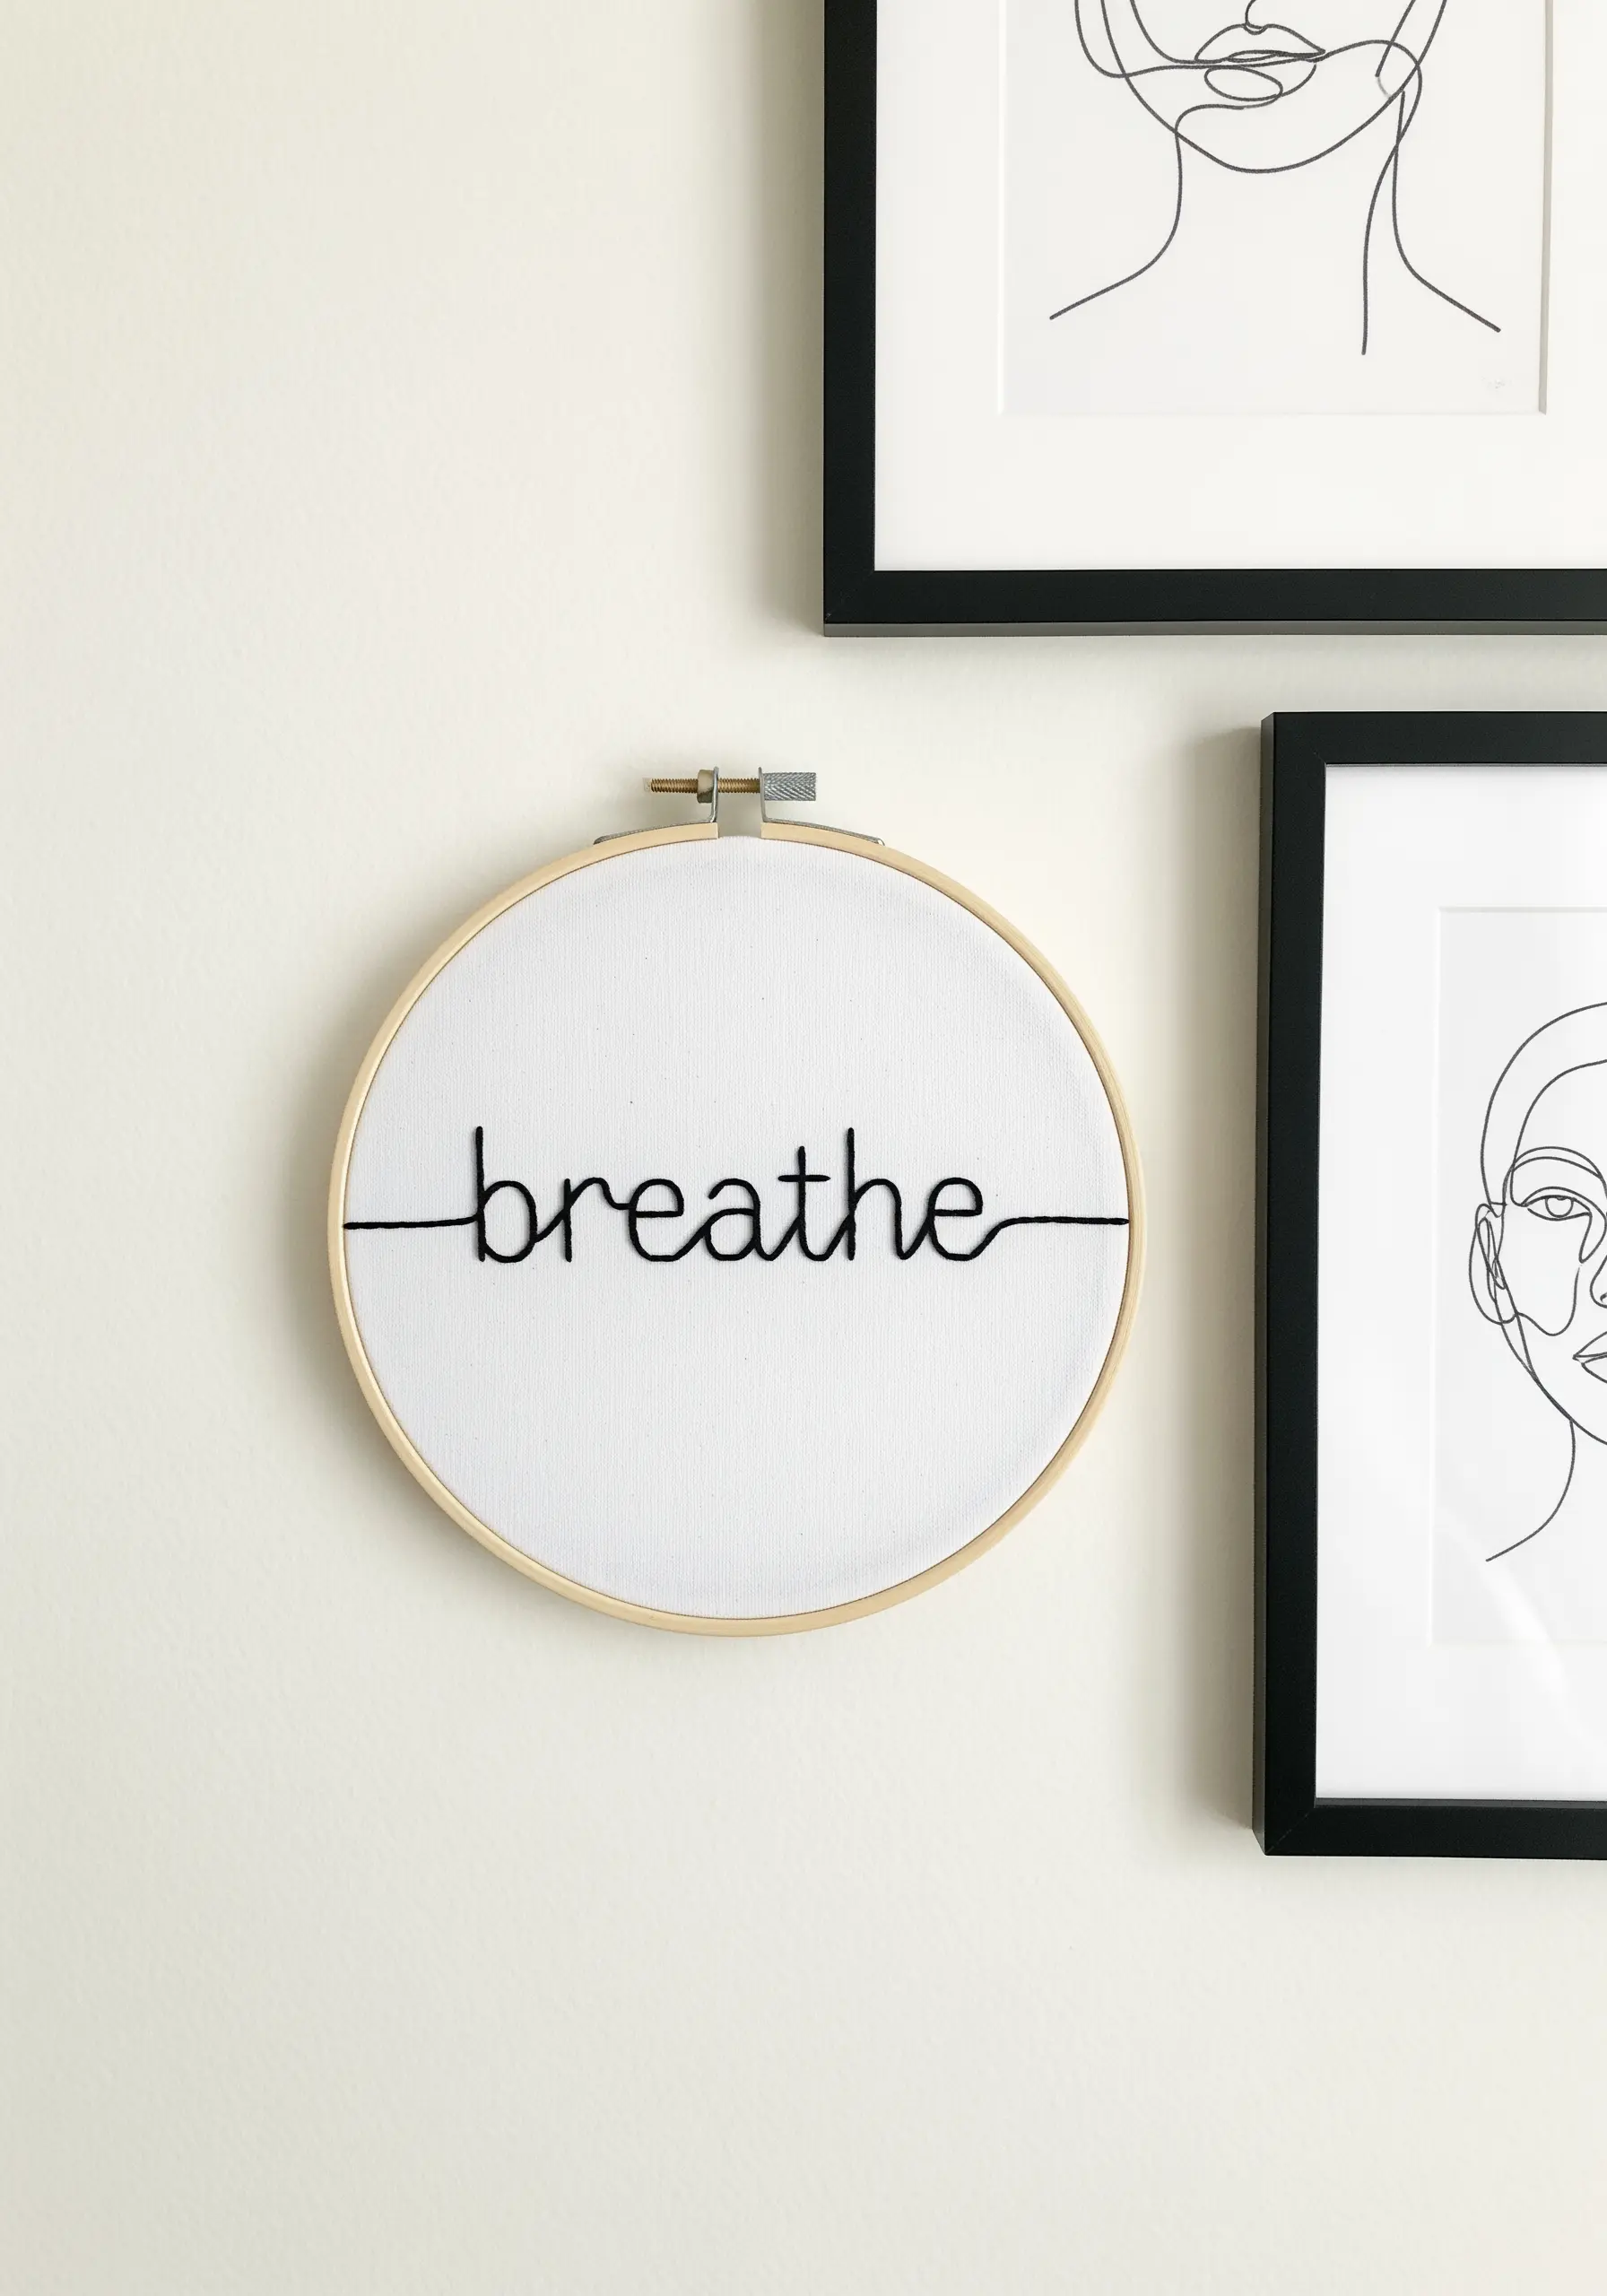
Give simple lettering a bold, three-dimensional quality using a whipped backstitch.
First, stitch your word using a standard backstitch with a thick thread, like all six strands of floss or even a fine yarn.
Next, take a second thread (either matching or contrasting) and wrap it around each backstitch without piercing the fabric, creating a smooth, rope-like effect.
This technique turns a flat line into a sculptural element, making your message stand out with clean, modern precision.
It’s one of the best thread-based typography ideas for creating impactful word art.
7. Paint with Texture Using French Knots
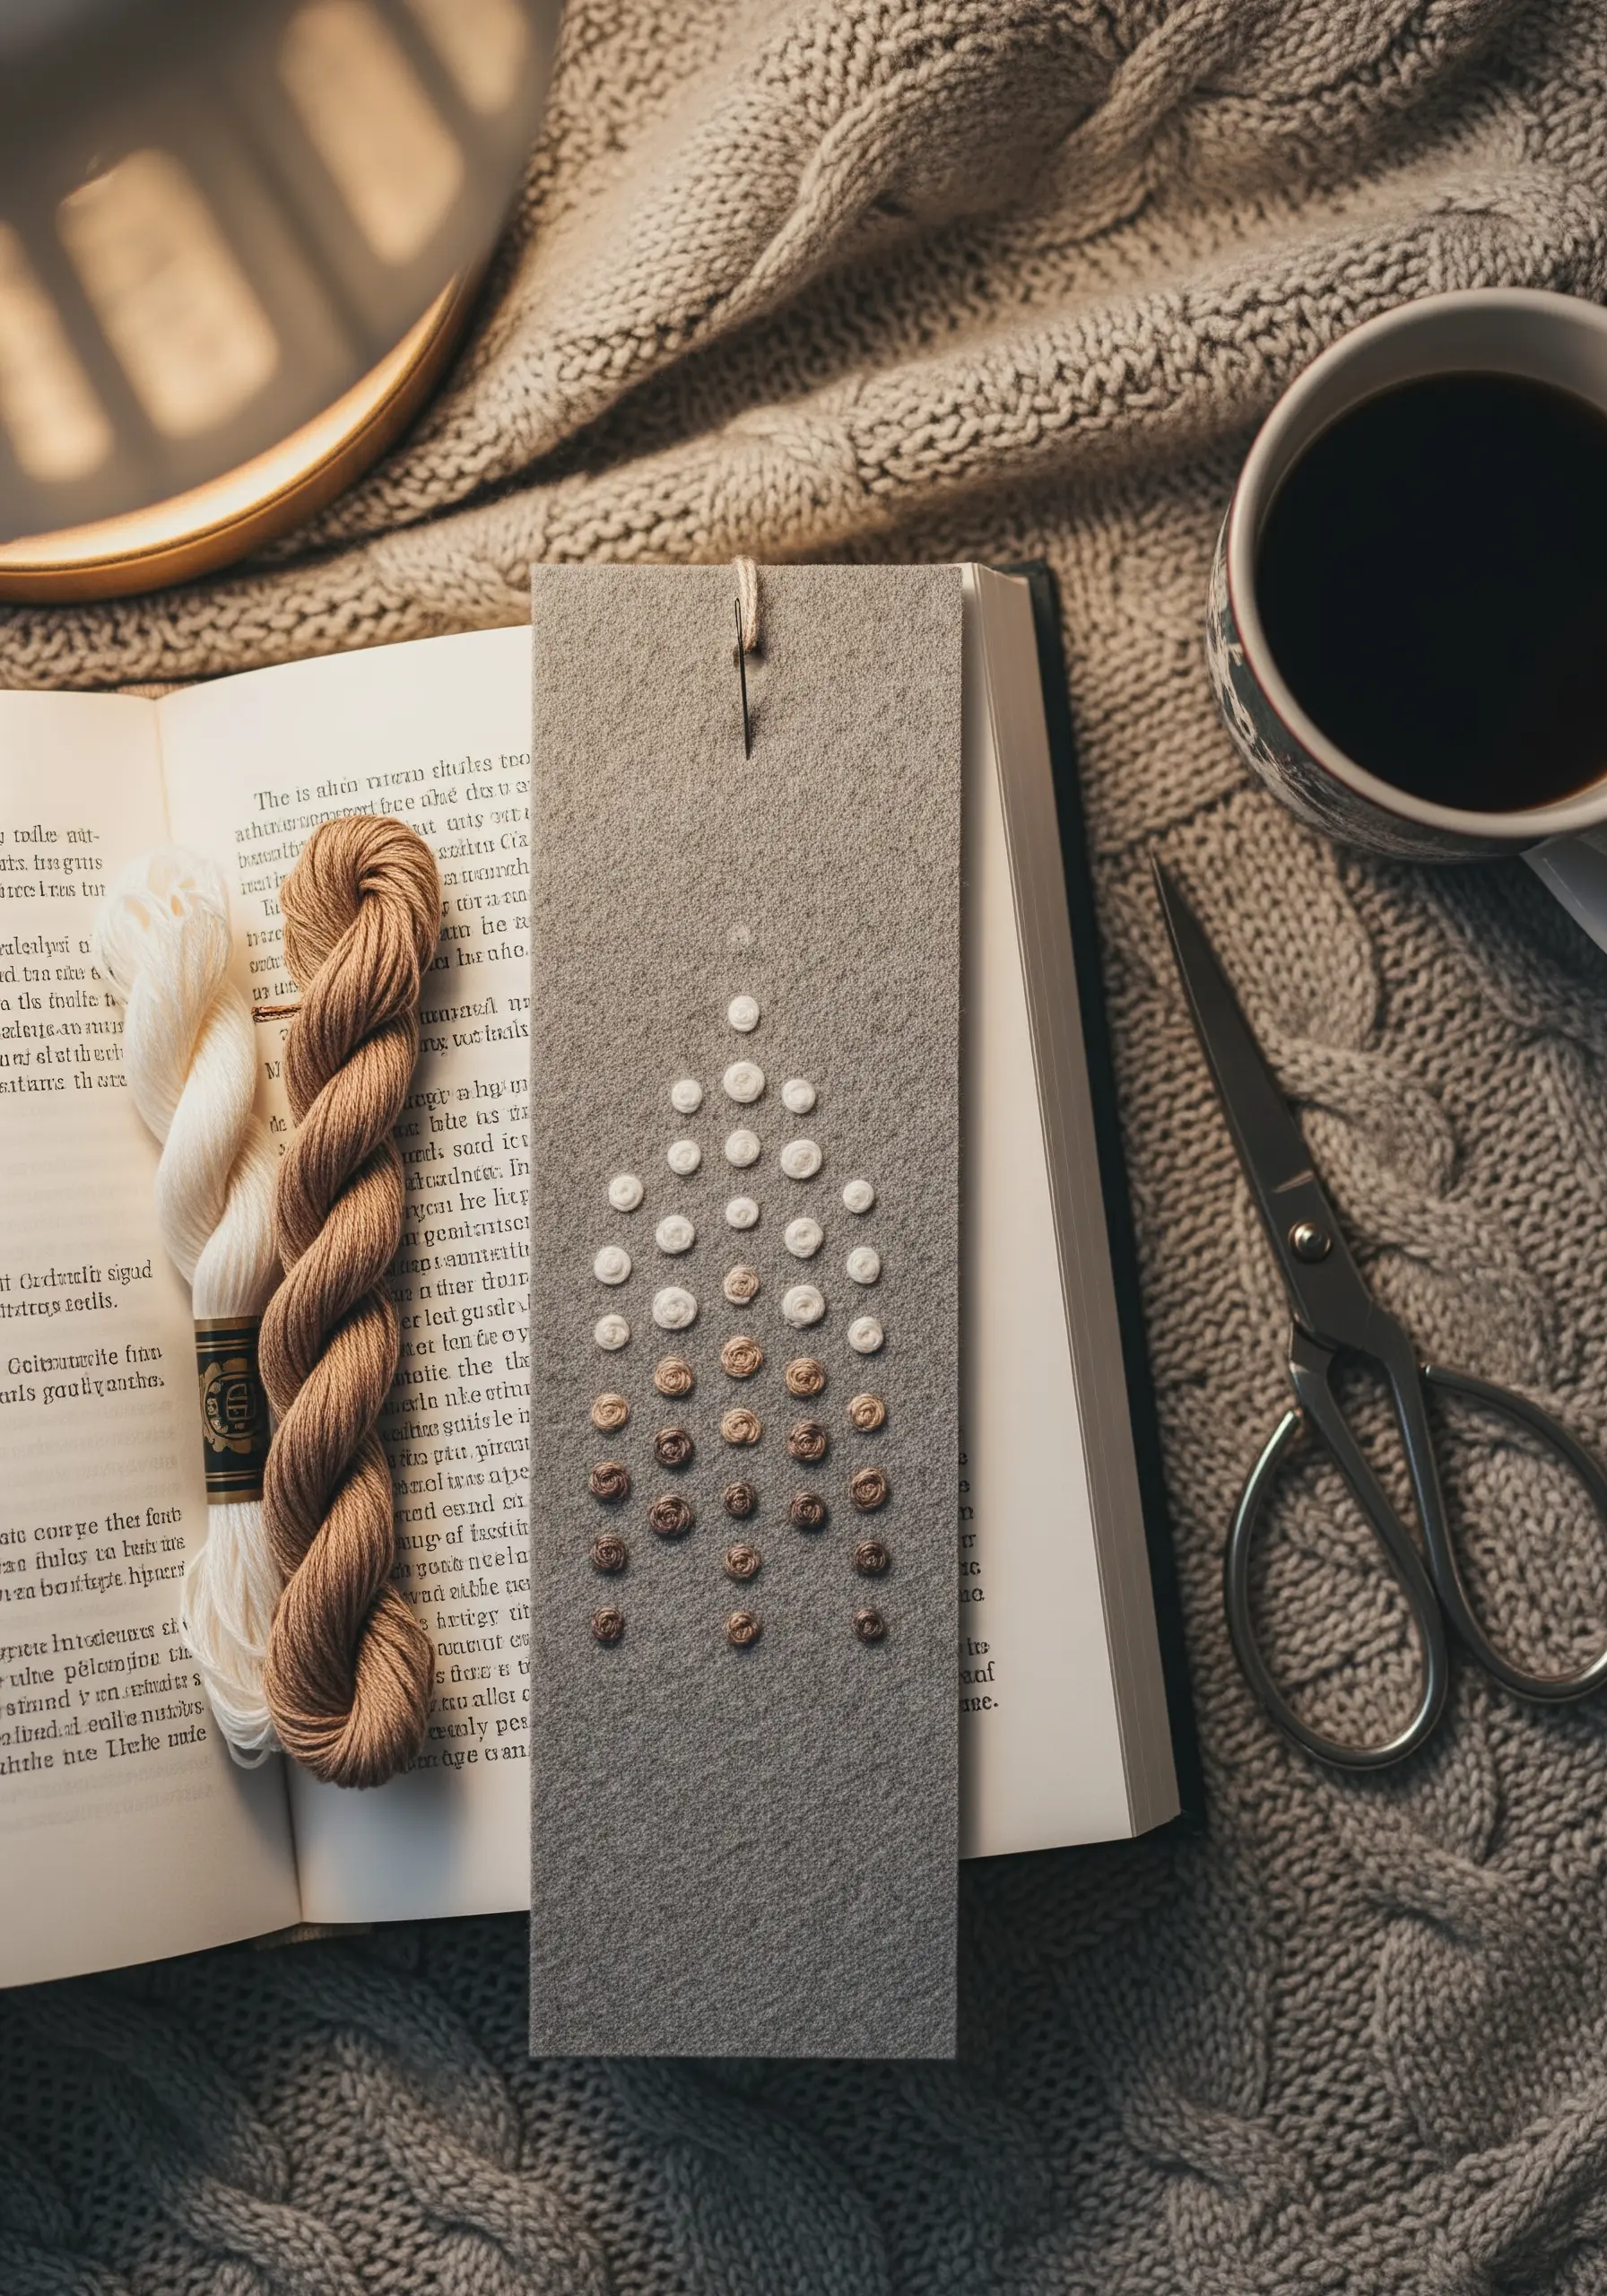
Move beyond lines and fills by creating a design composed entirely of French knots.
Create a subtle color gradient by arranging knots in rows, shifting from light to dark tones.
You can control the size of each knot by changing the number of thread strands or the number of times you wrap the thread around the needle (once for small, twice for larger).
Stitching on a sturdy material like felt provides a firm foundation, allowing the knots to sit securely without pulling the fabric.
This is one of those small embroidery projects that offers immense textural satisfaction.
8. Design Modern Home Décor with Parallel Lines

Create sophisticated, high-end-looking cushions with the simple power of repeating lines.
Use a water-soluble marker and a ruler to draw your guidelines directly onto the fabric, ensuring every line is perfectly spaced and parallel.
A backstitch or stem stitch executed with 4-6 strands of cotton floss will create a bold, graphic line that feels both handmade and intentional.
Choosing a high-contrast color palette, like navy on cream or rust on linen, enhances the minimalist, geometric aesthetic.
This approach turns basic cushions into cohesive abstract shapes for pillow covers.
9. Weave an Abstract Sunset with Straight Stitches
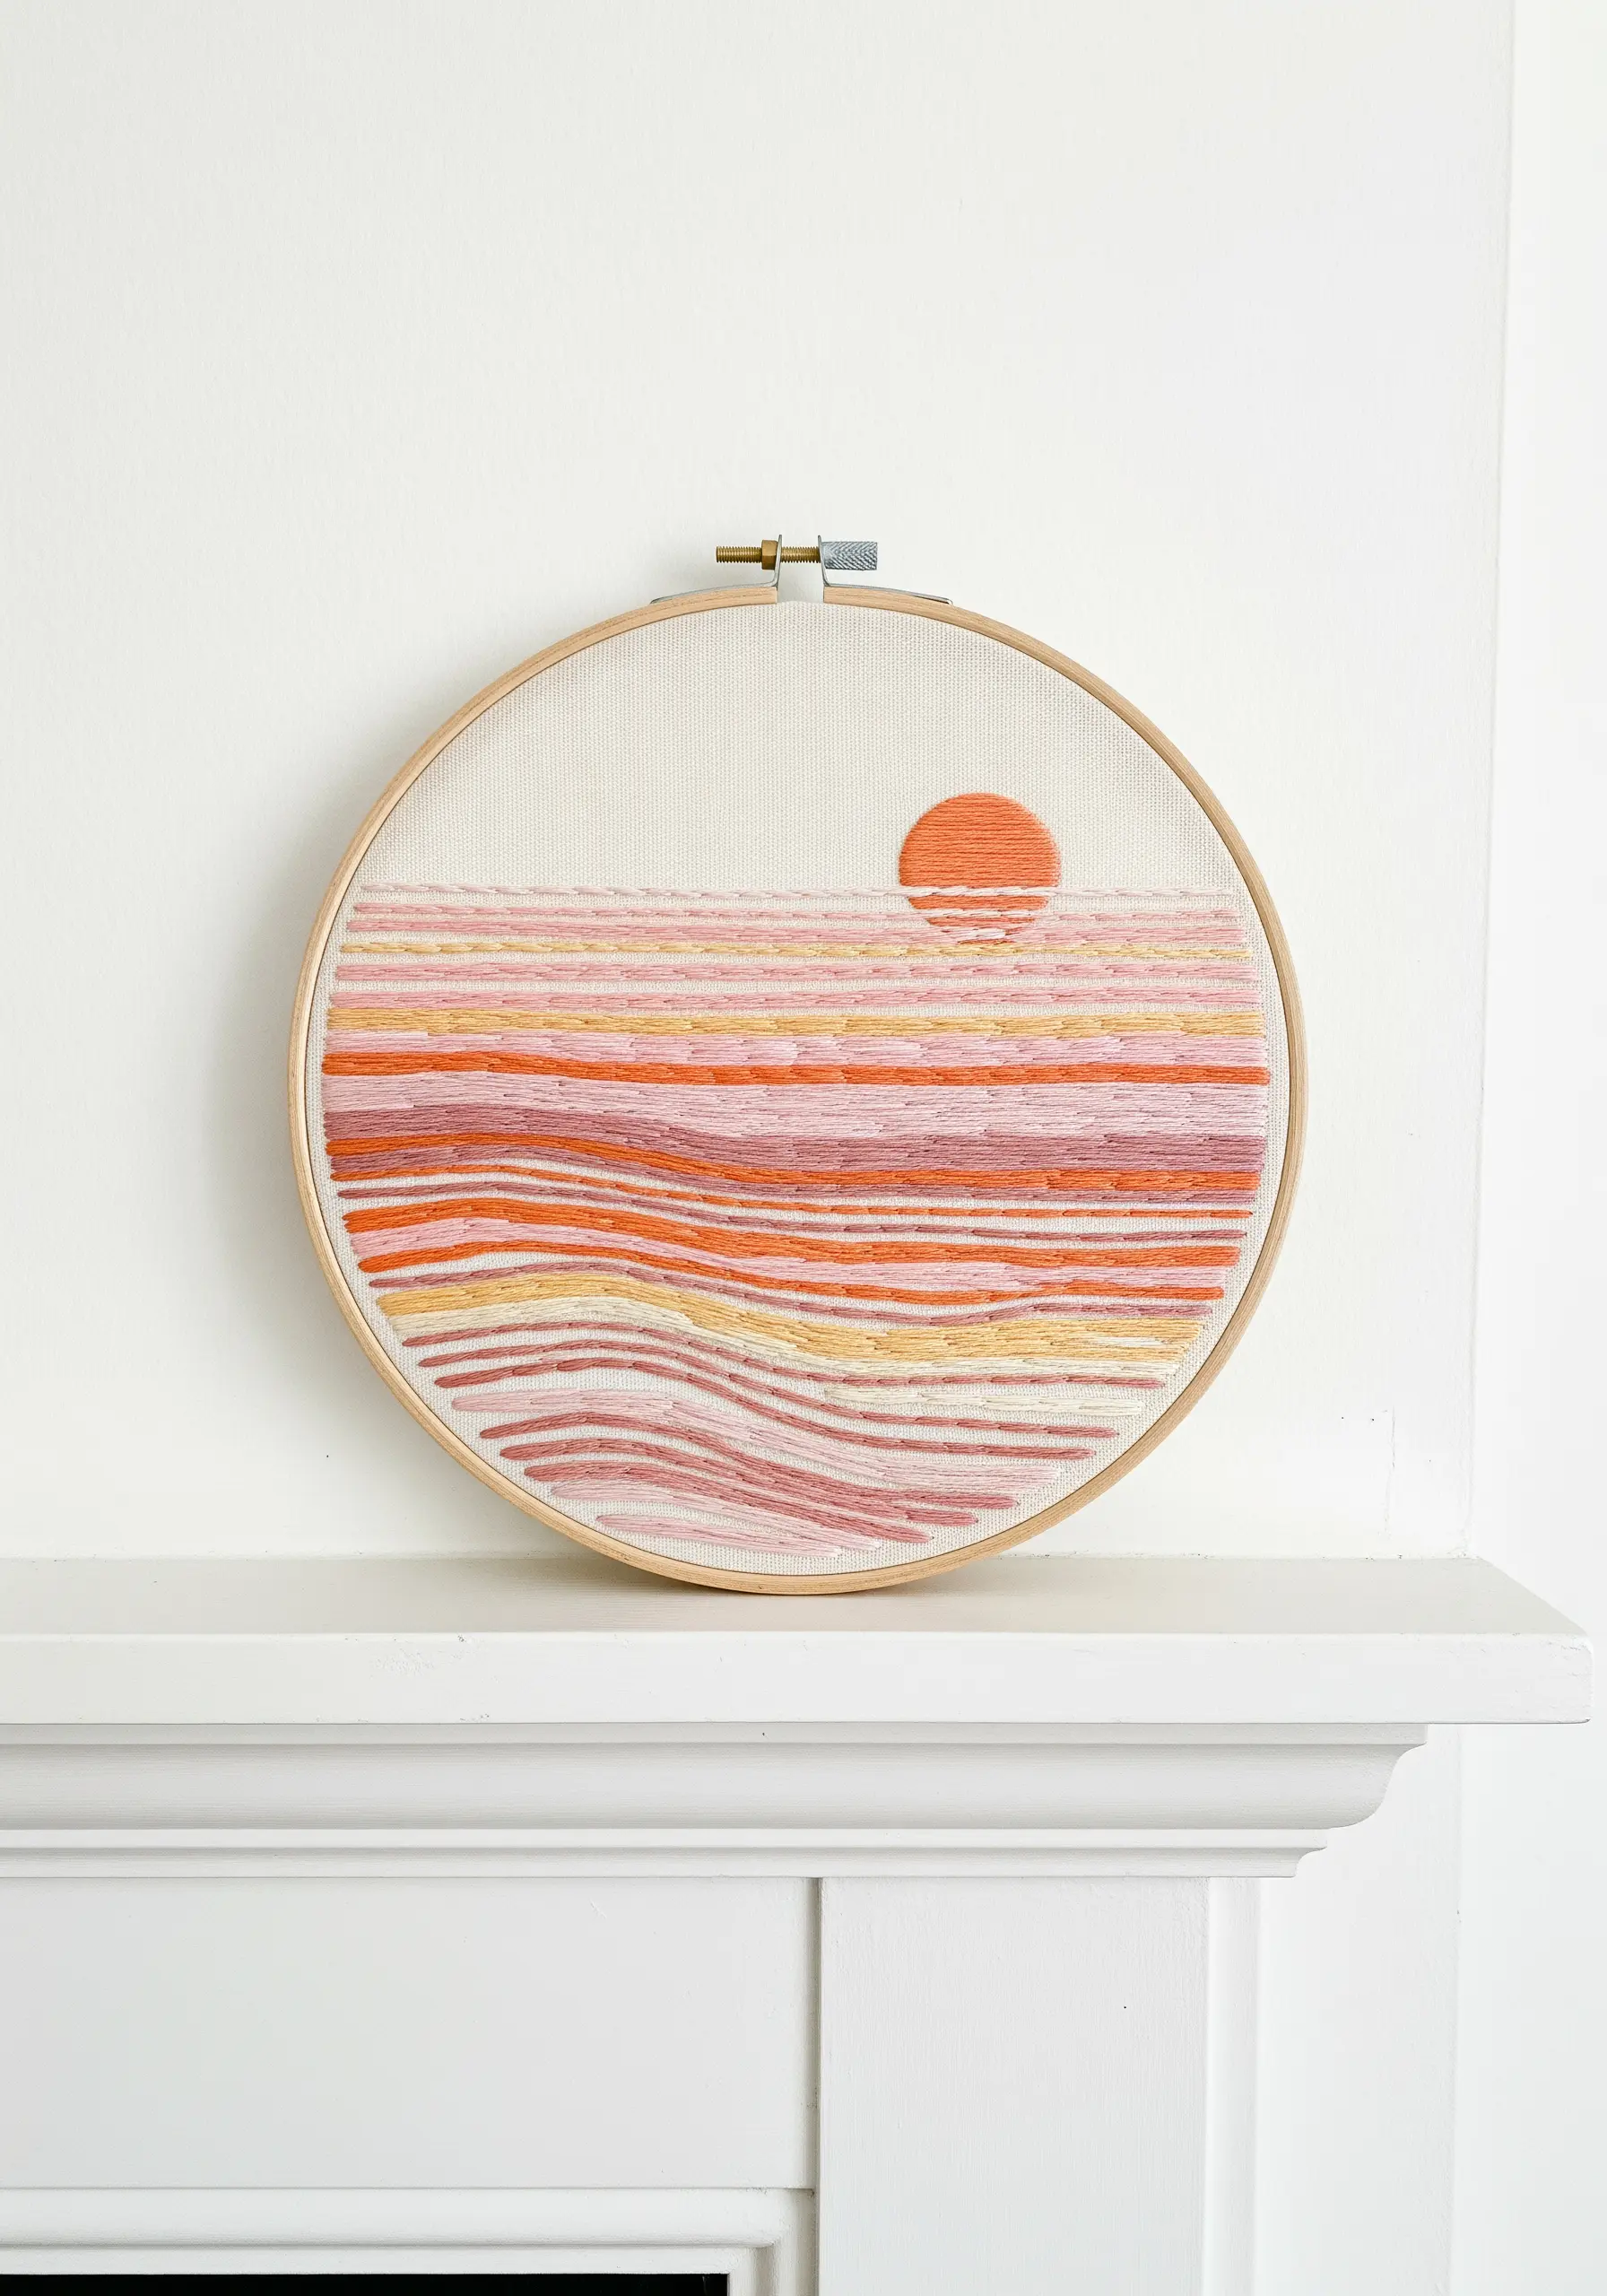
Create a painterly landscape using long, layered stitches instead of traditional outlines.
Work with a variety of floss colors—pinks, oranges, yellows—and use two or three different colored strands in your needle at once for a heathered, blended effect.
Fill the space with long, straight stitches, varying their length and density to create organic, wavy bands of color that mimic a sunset over water.
This technique is wonderfully forgiving and allows for creative freedom, making it perfect for relaxing nature-scene embroidery hoops.
A simple satin-stitched circle for the sun provides a clean focal point against the textured sky.
10. Add a Personal Touch by Stitching on Paper
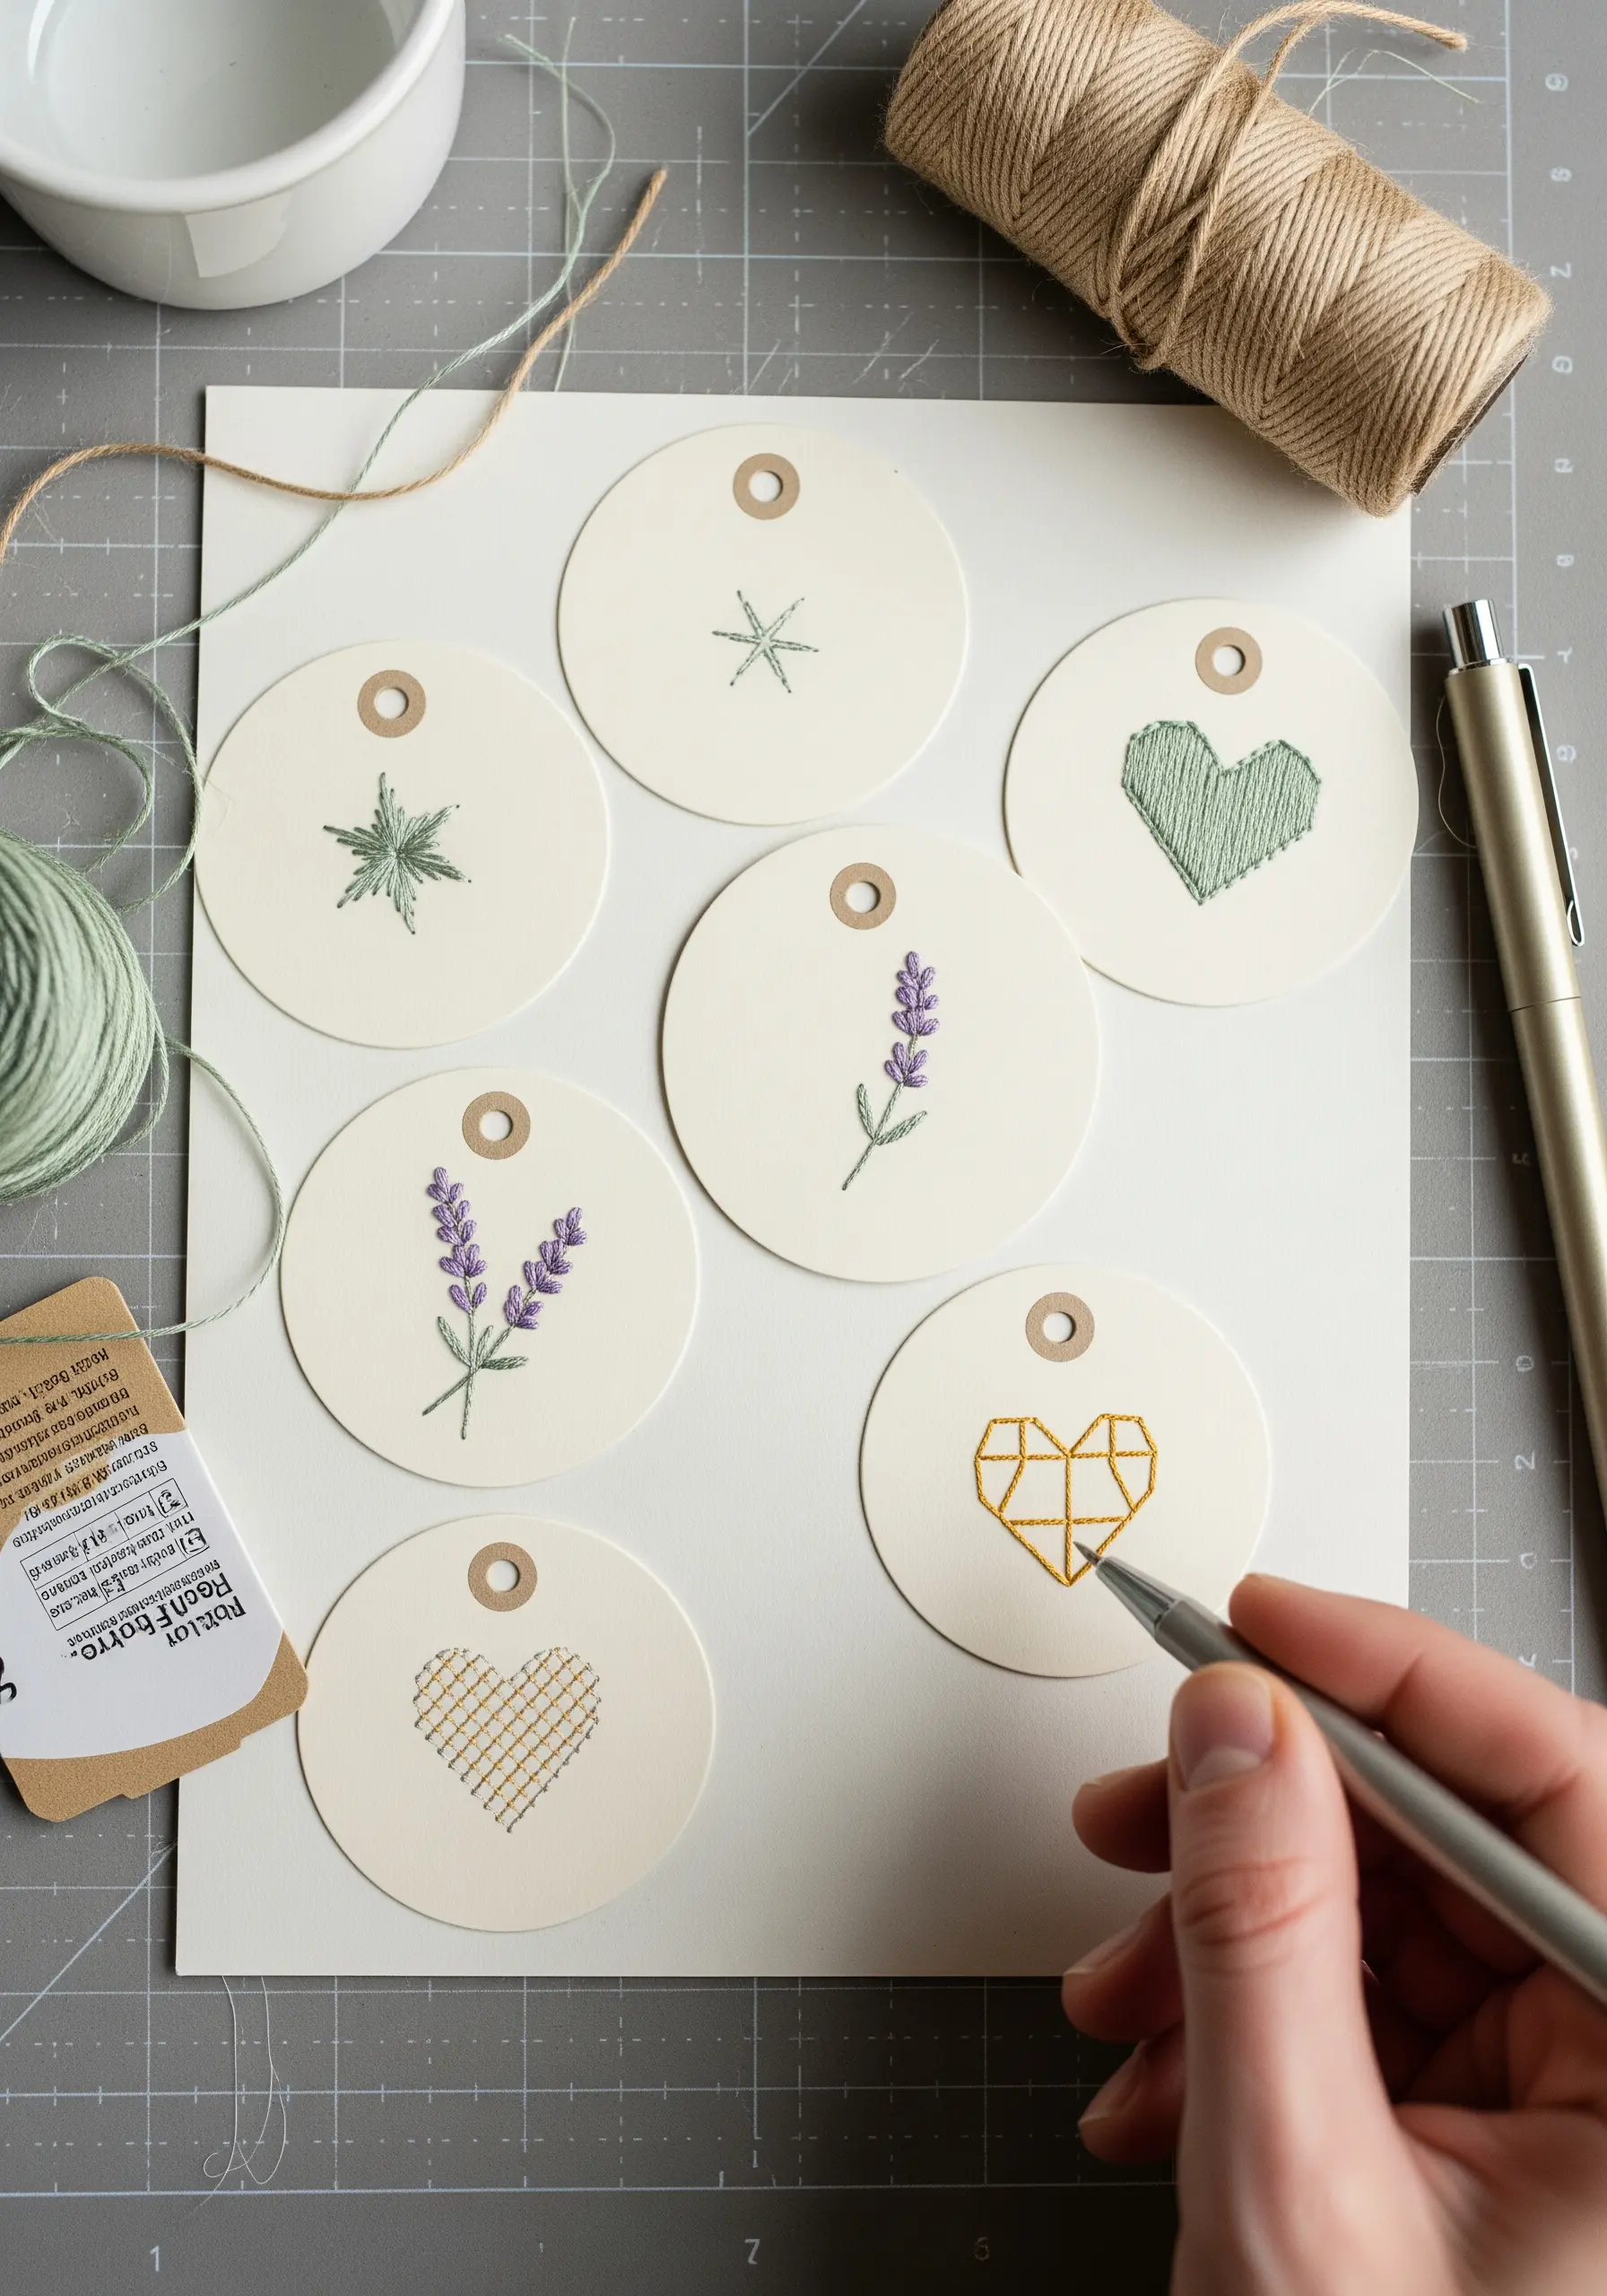
Elevate gift tags, cards, or bookmarks by adding delicate embroidered details.
The secret to stitching on paper without tearing it is to pre-punch your holes along the pattern lines with a needle before you begin stitching.
Use simple, low-tension stitches like the straight stitch, backstitch, or lazy daisy, as complex or tight stitches can damage the paper.
Just two strands of floss provide enough color and definition without overwhelming the small scale of the project.
You can create beautiful DIY embroidered cards and mini gifts that feel thoughtful and unique.
11. Embellish Denim with a Hidden Detail

The most impactful embroidery is often the most unexpected.
Place a tiny, personal motif on an unusual spot, like the underside of a collar, the edge of a cuff, or along a pocket seam.
Use a high-contrast thread—like bright white on dark denim—to make the design pop.
A simple backstitch for the solid lines and a seed or running stitch for the dotted trail creates a dynamic, playful story in just a few stitches.
These small embroidery ideas that turn ordinary clothes into art give garments a secret, meaningful touch.
12. Scale Up Your Art with Yarn Couching
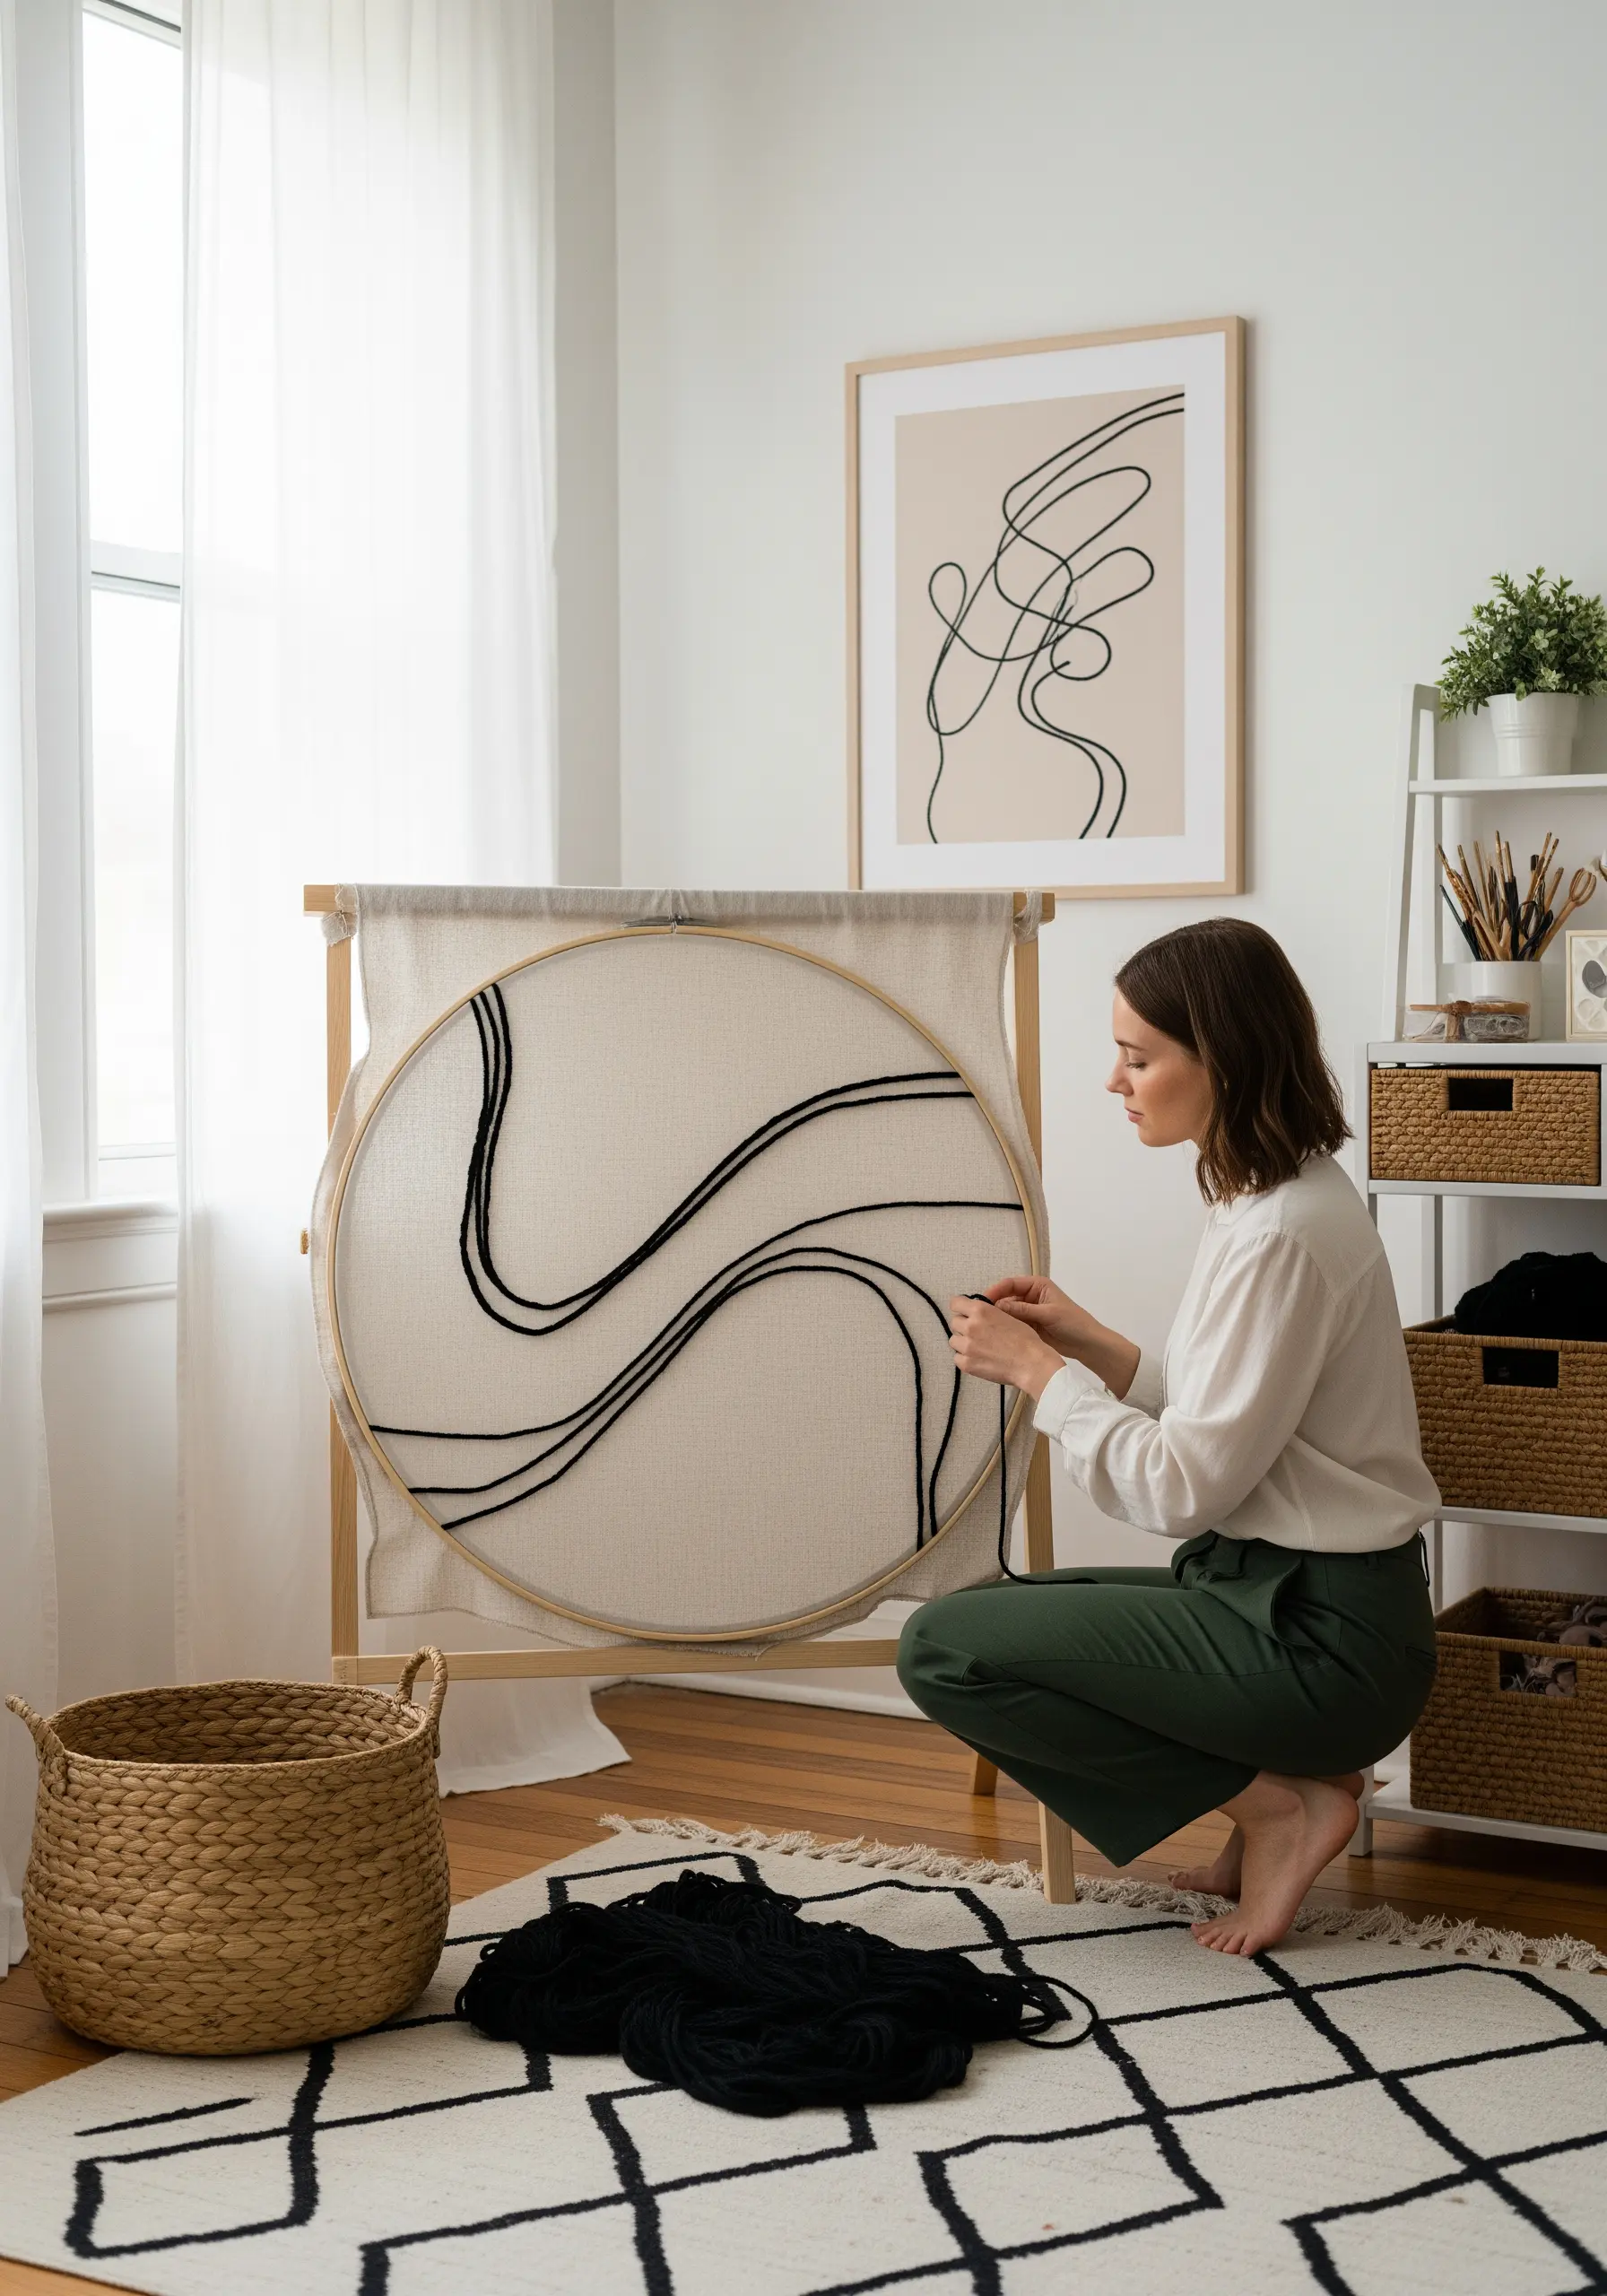
Create large-scale, dramatic wall art by trading floss for yarn.
Instead of pulling a thick fiber through the fabric, use the couching technique: lay the yarn on the surface of your fabric and use a thinner, matching sewing thread to tack it down with small, evenly spaced stitches.
This method allows you to create bold, flowing lines that would be impossible with traditional embroidery, preserving the yarn’s loft and texture.
It’s a fantastic way to produce large yarn wall art designs with minimal time and effort.
13. Combine Function and Beauty with a Ring Holder
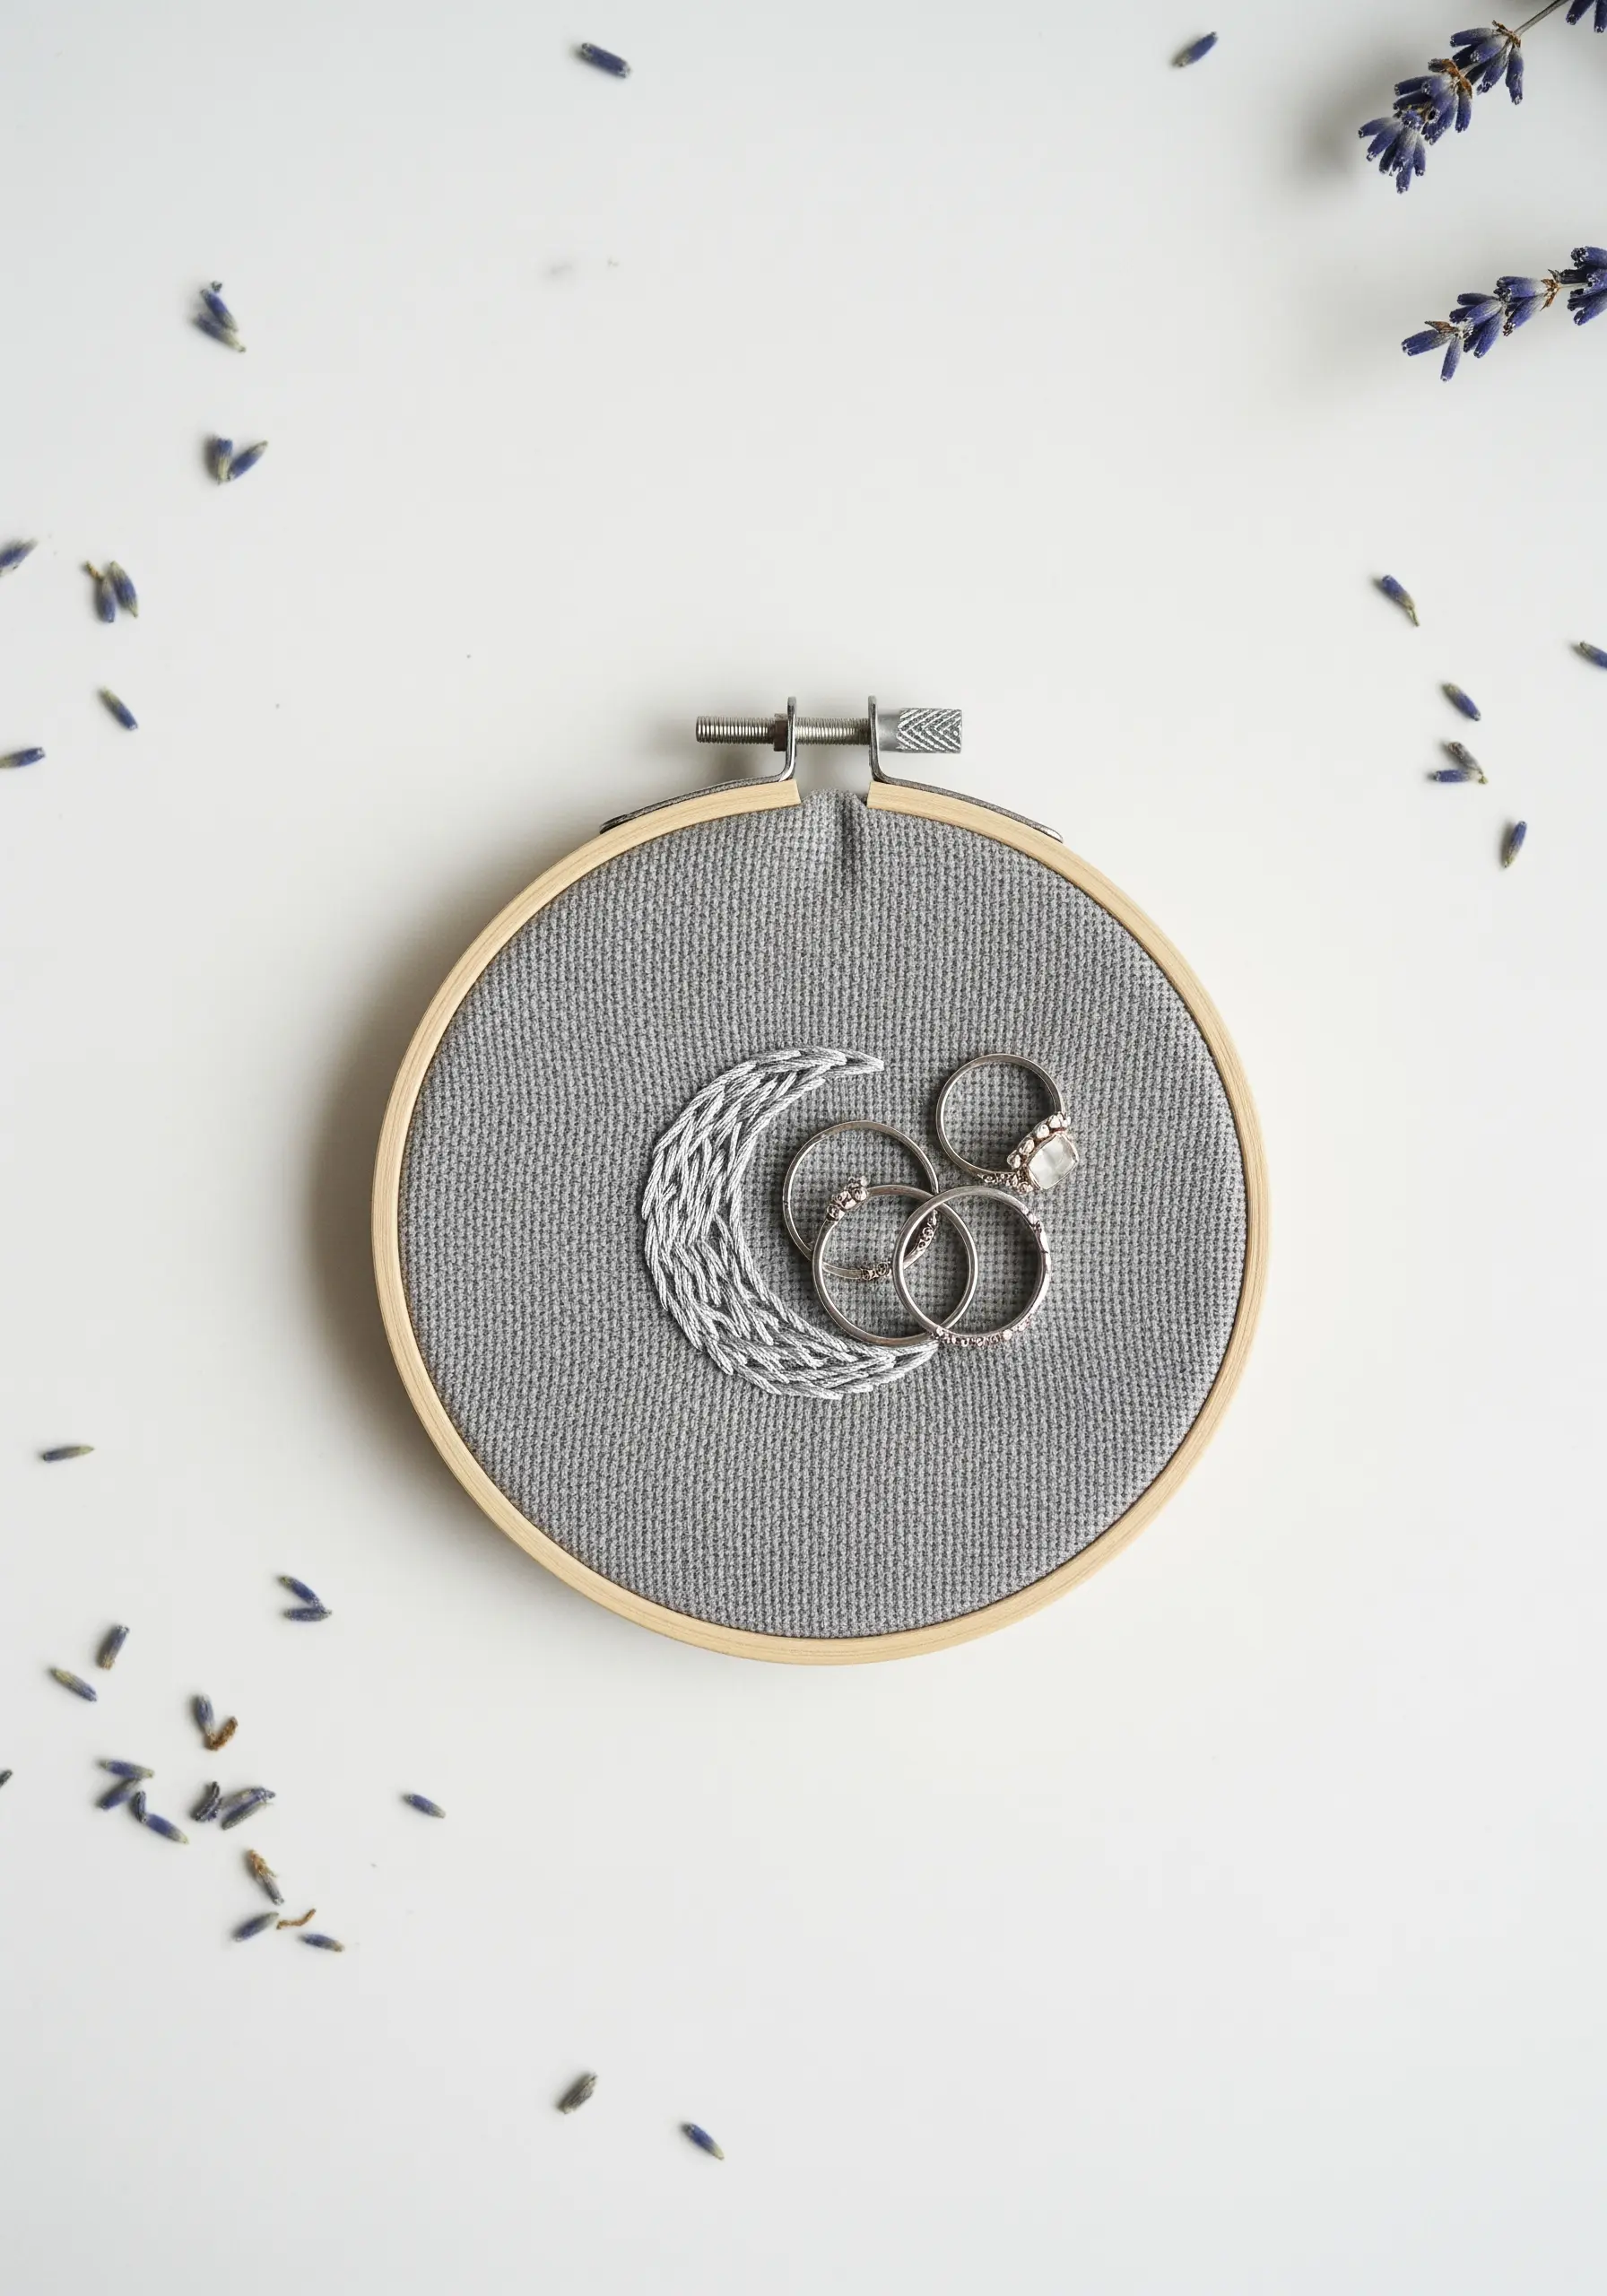
Turn a small embroidery hoop into a beautiful and practical piece of décor.
Create texture within the crescent moon shape by varying the direction of your satin stitches—this catches the light differently and adds subtle dimension.
Using a silver metallic or silky light gray thread gives the moon a natural luminosity against a darker, textured fabric like gray linen.
The finished piece serves as a lovely holder for rings and small jewelry, making it one of those personalized embroidery wall pieces that is also wonderfully functional.
14. Conquer Textured Fabrics Like a Pro
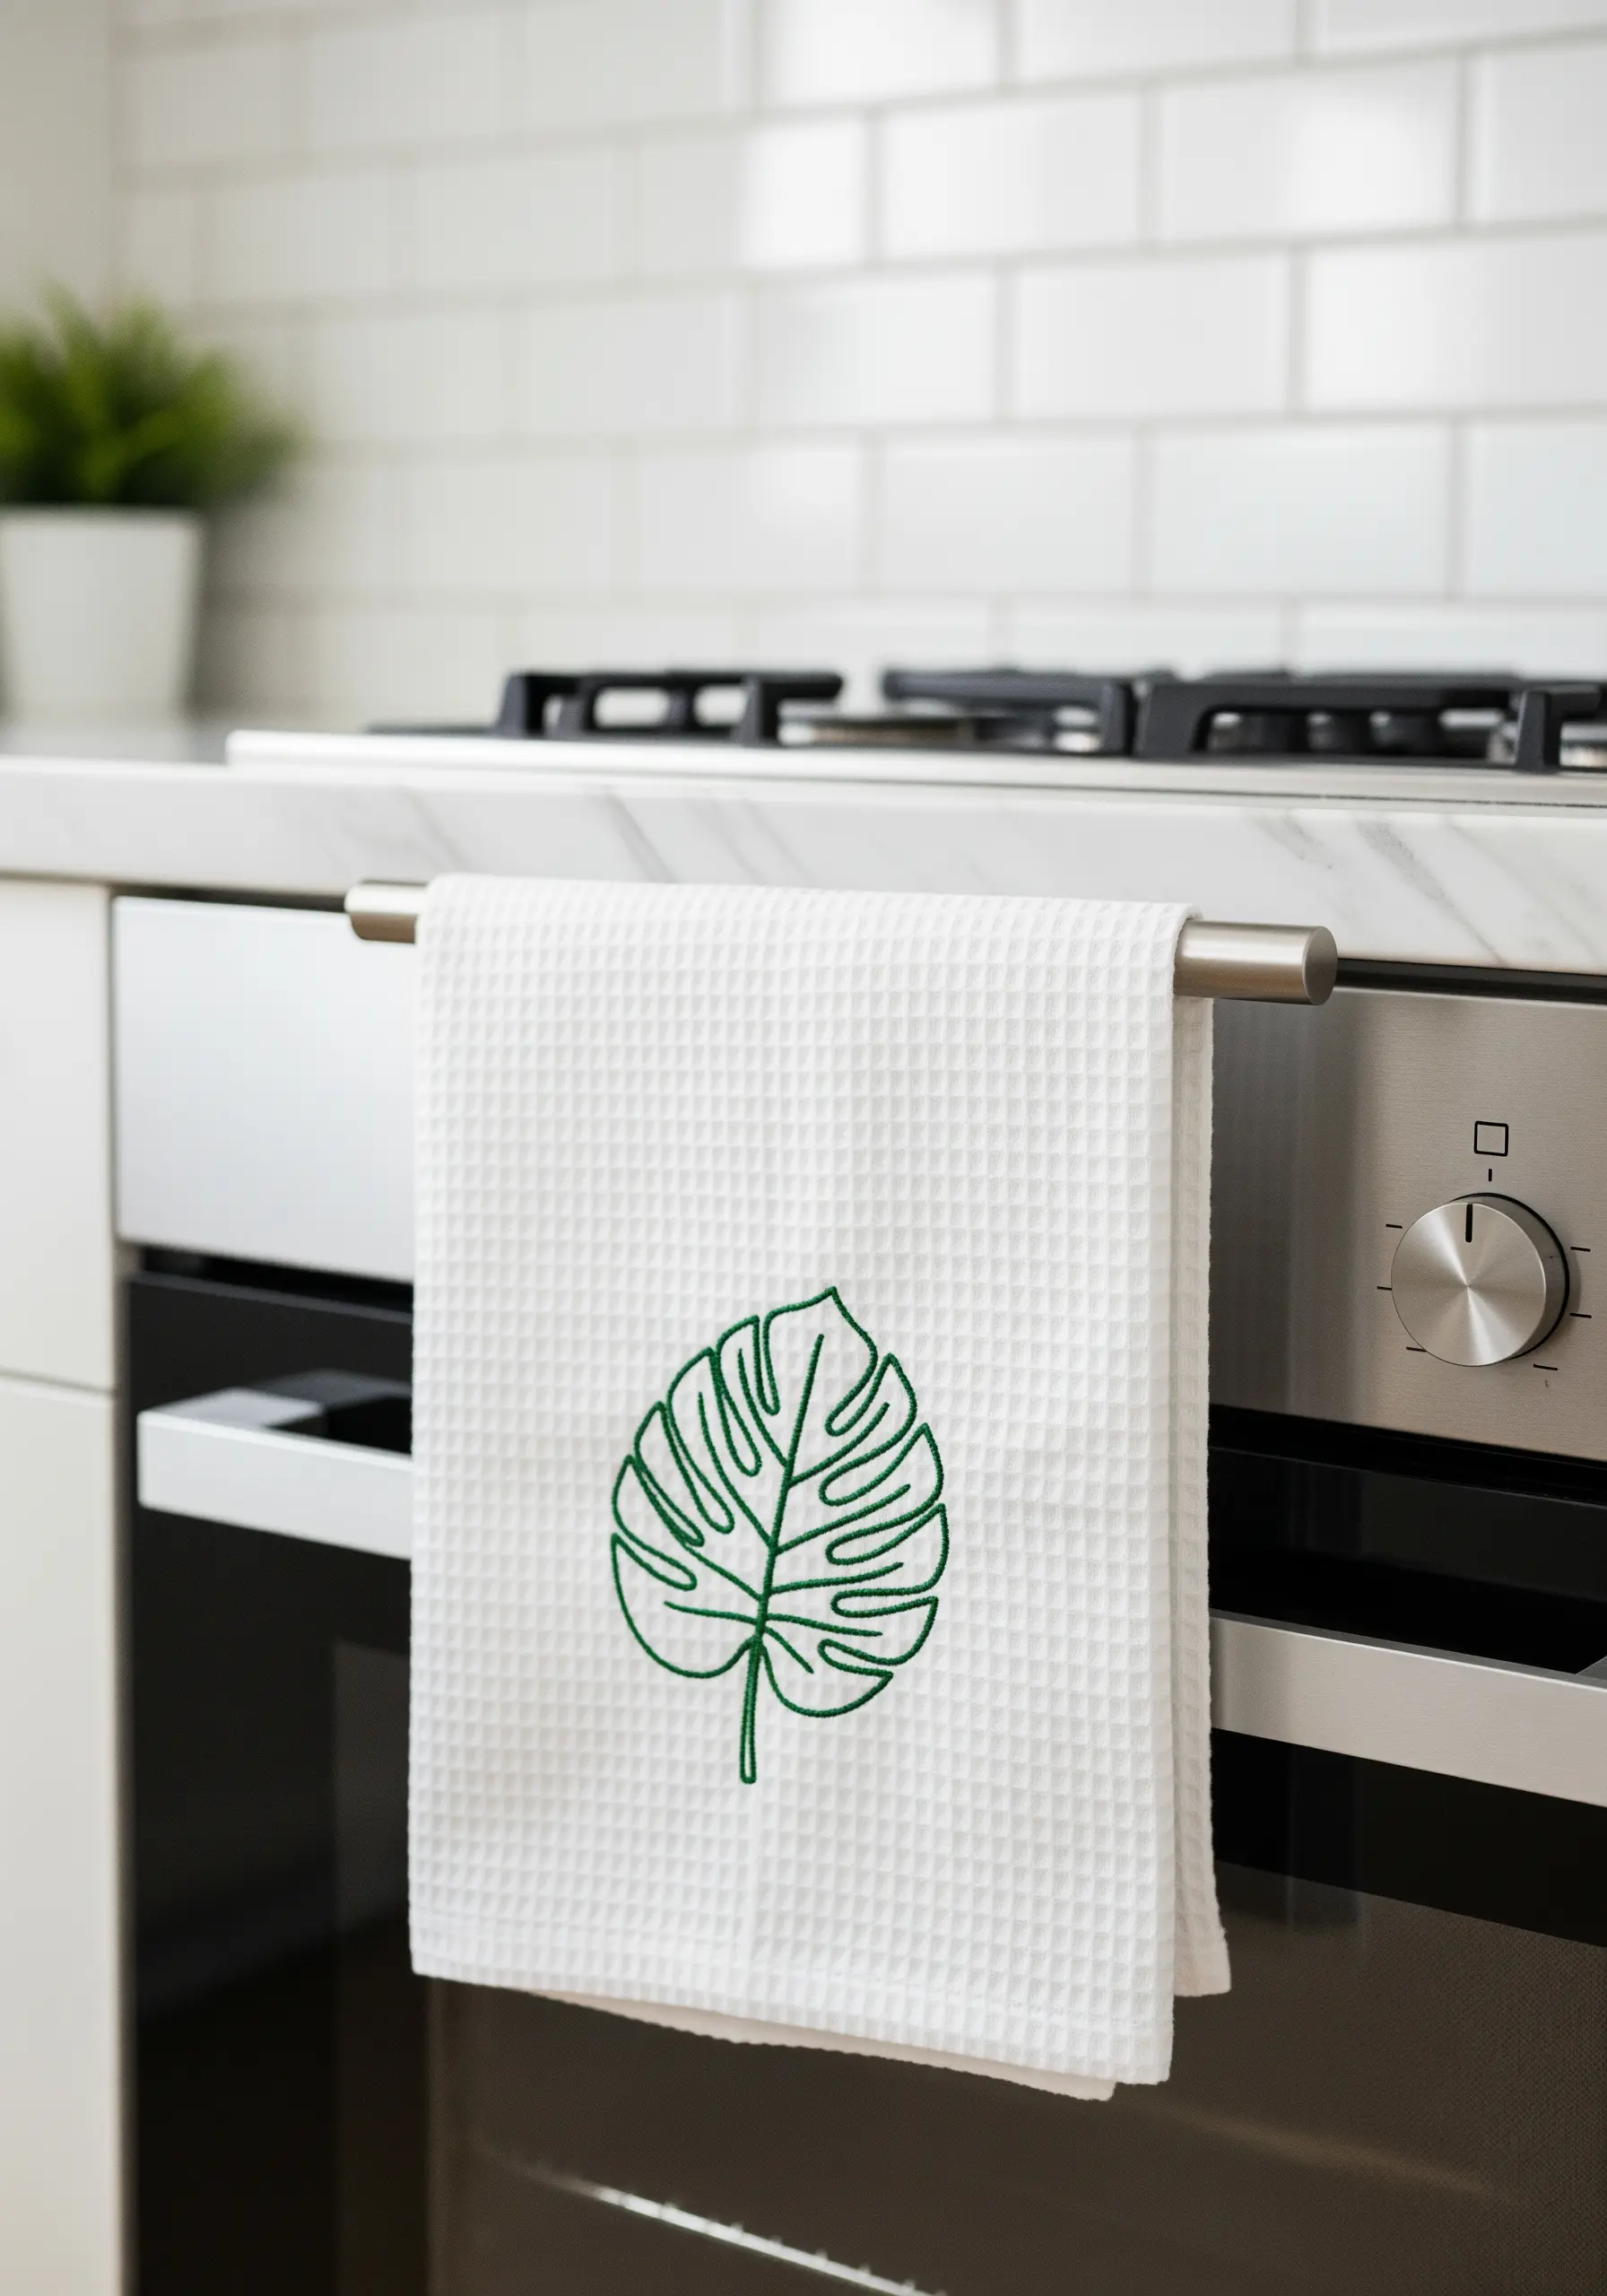
Don’t be intimidated by textured fabrics like waffle-weave towels.
To ensure your stitches don’t sink and disappear into the fabric’s grid, increase your thread count to 4-6 strands of floss.
A stem stitch or split stitch is your best choice here, as they create a solid, raised line that sits on top of the fabric’s texture rather than getting lost in it.
This approach is perfect for adding clean, graphic plant-inspired embroidery patterns to kitchen towels, bathrobes, or throw blankets.
15. Craft Your Own Professional-Looking Patches
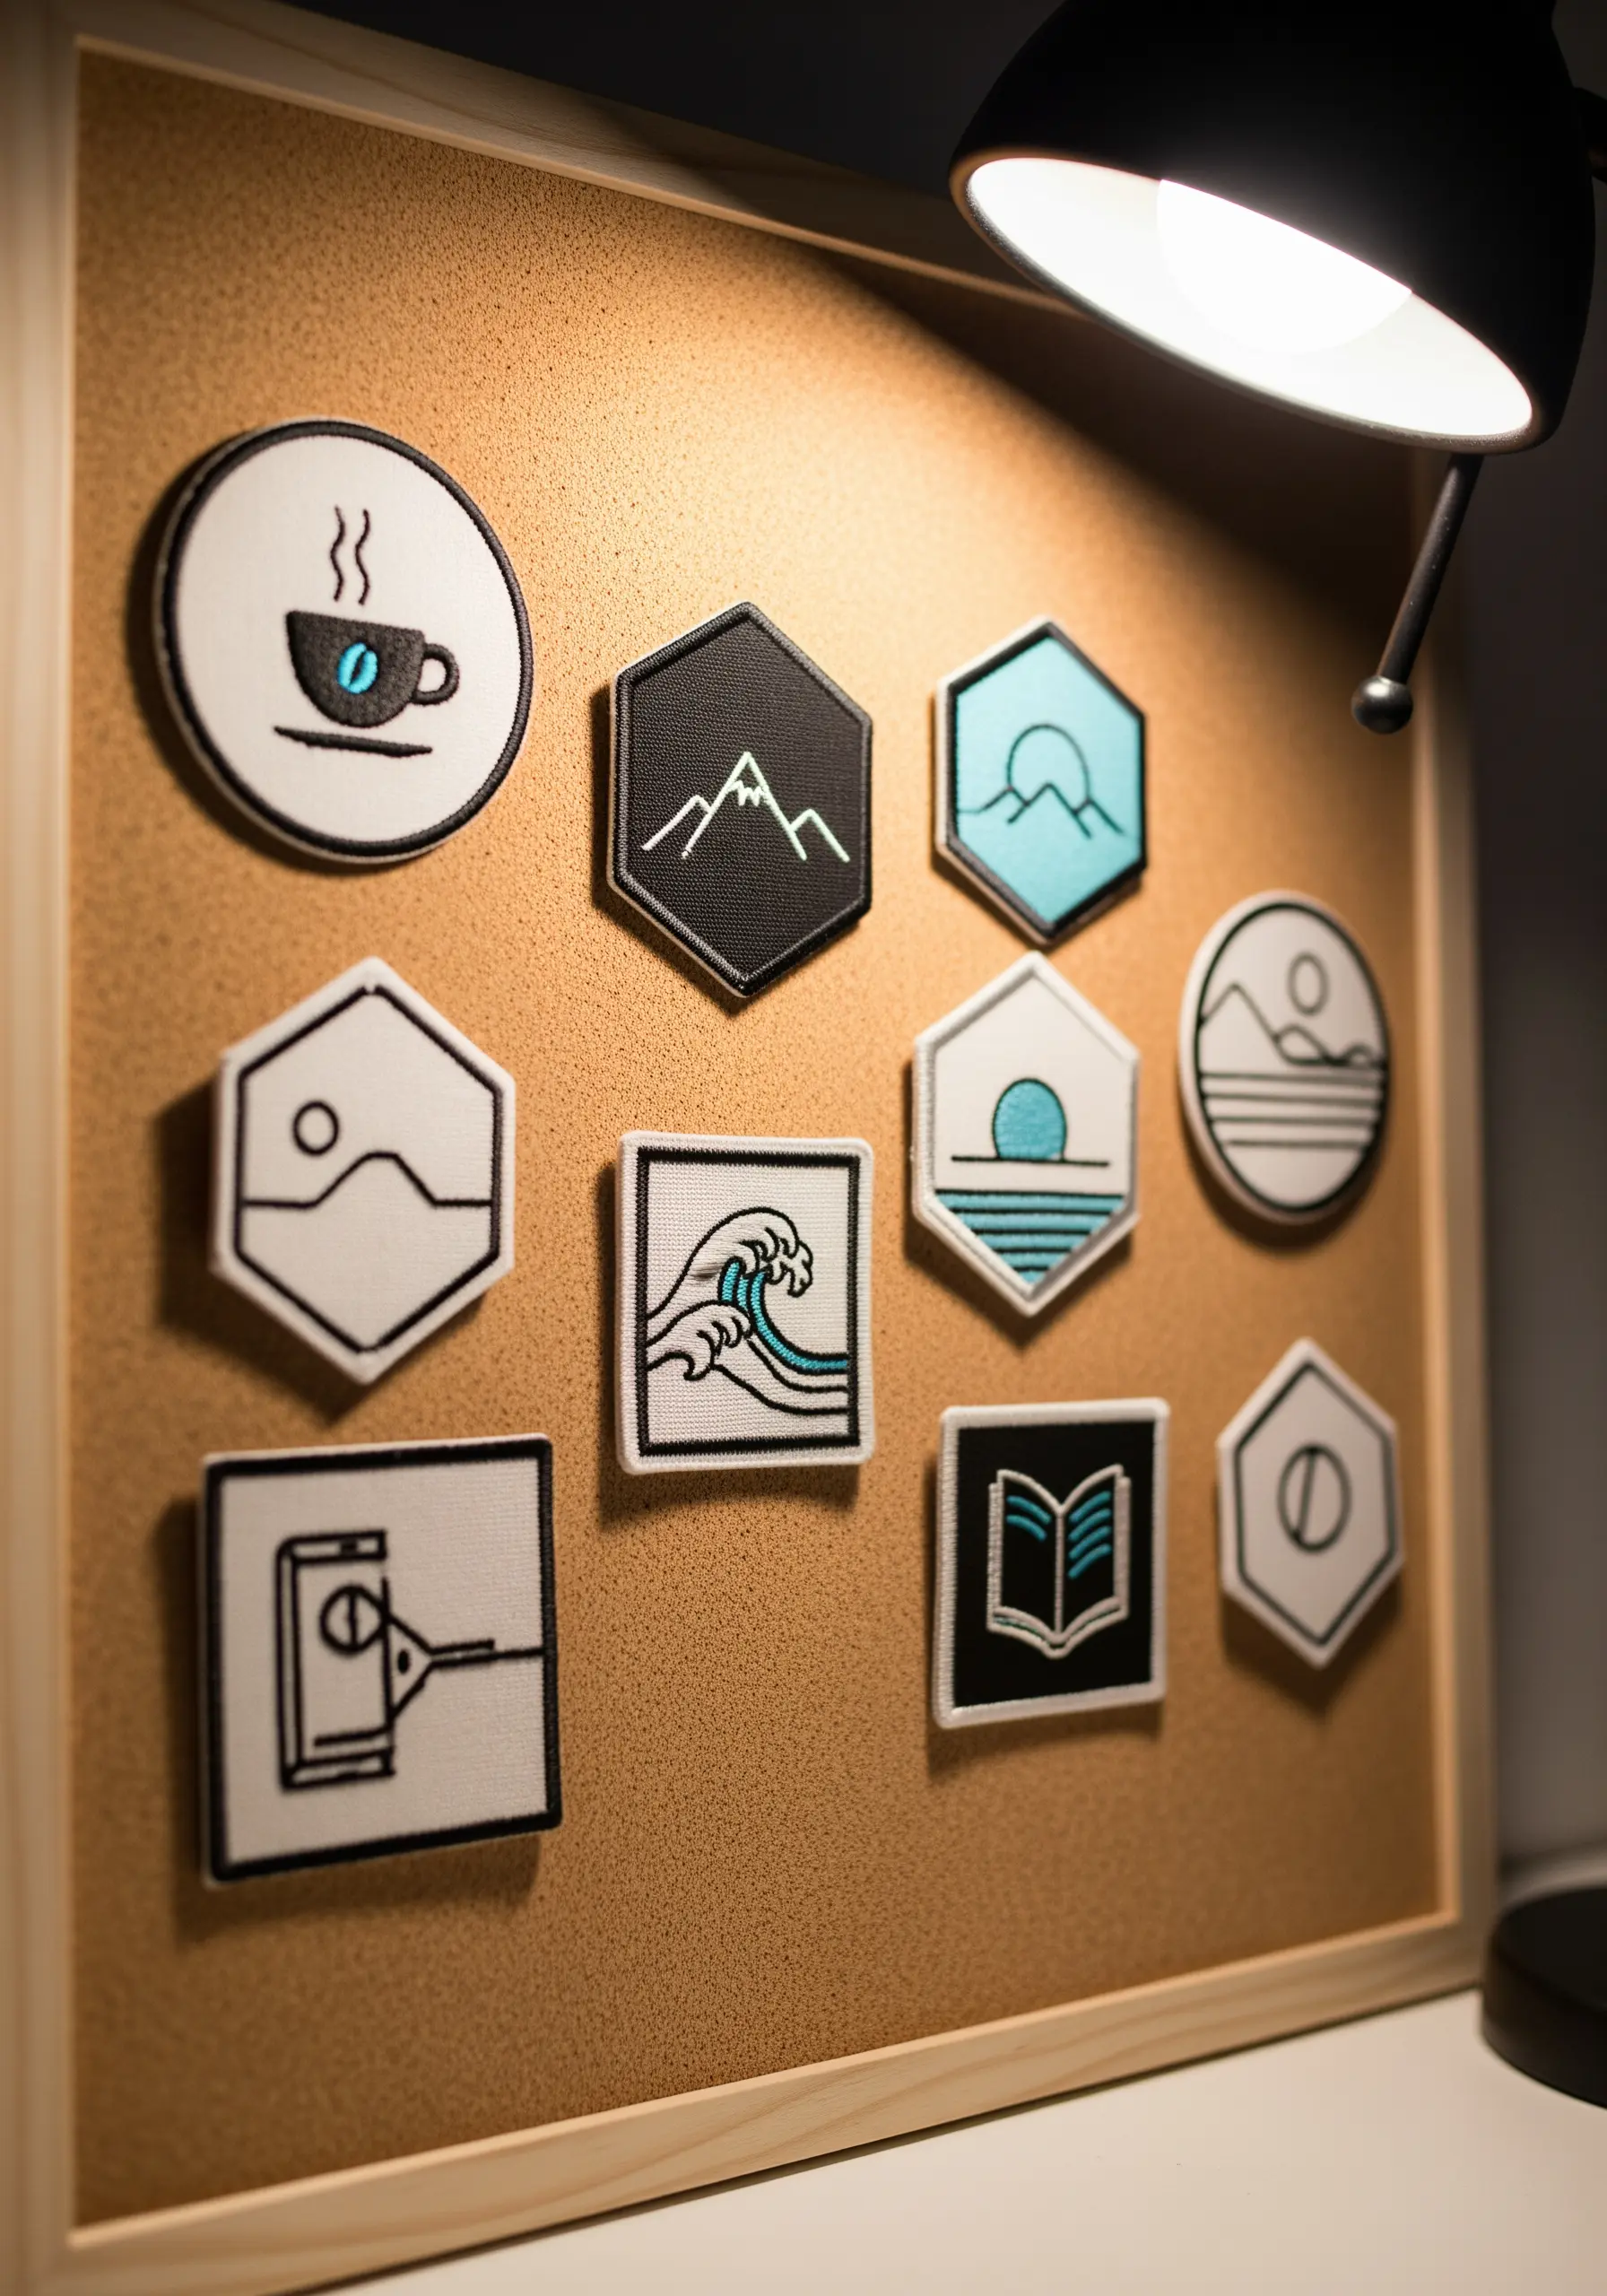
Create durable, custom patches with a clean, professional finish.
Stitch your design onto a piece of stiff felt or two layers of canvas with interfacing ironed between them.
To create the defined border, use a satin stitch all the way around the edge of your patch, making sure your stitches are tight and uniform.
Once complete, carefully trim the excess fabric from behind the satin stitch edge.
You can then apply an iron-on adhesive backing or simply sew your tiny hoop patch-style embroidery onto jackets, bags, or hats.
16. Capture Emotion with Continuous Line Art
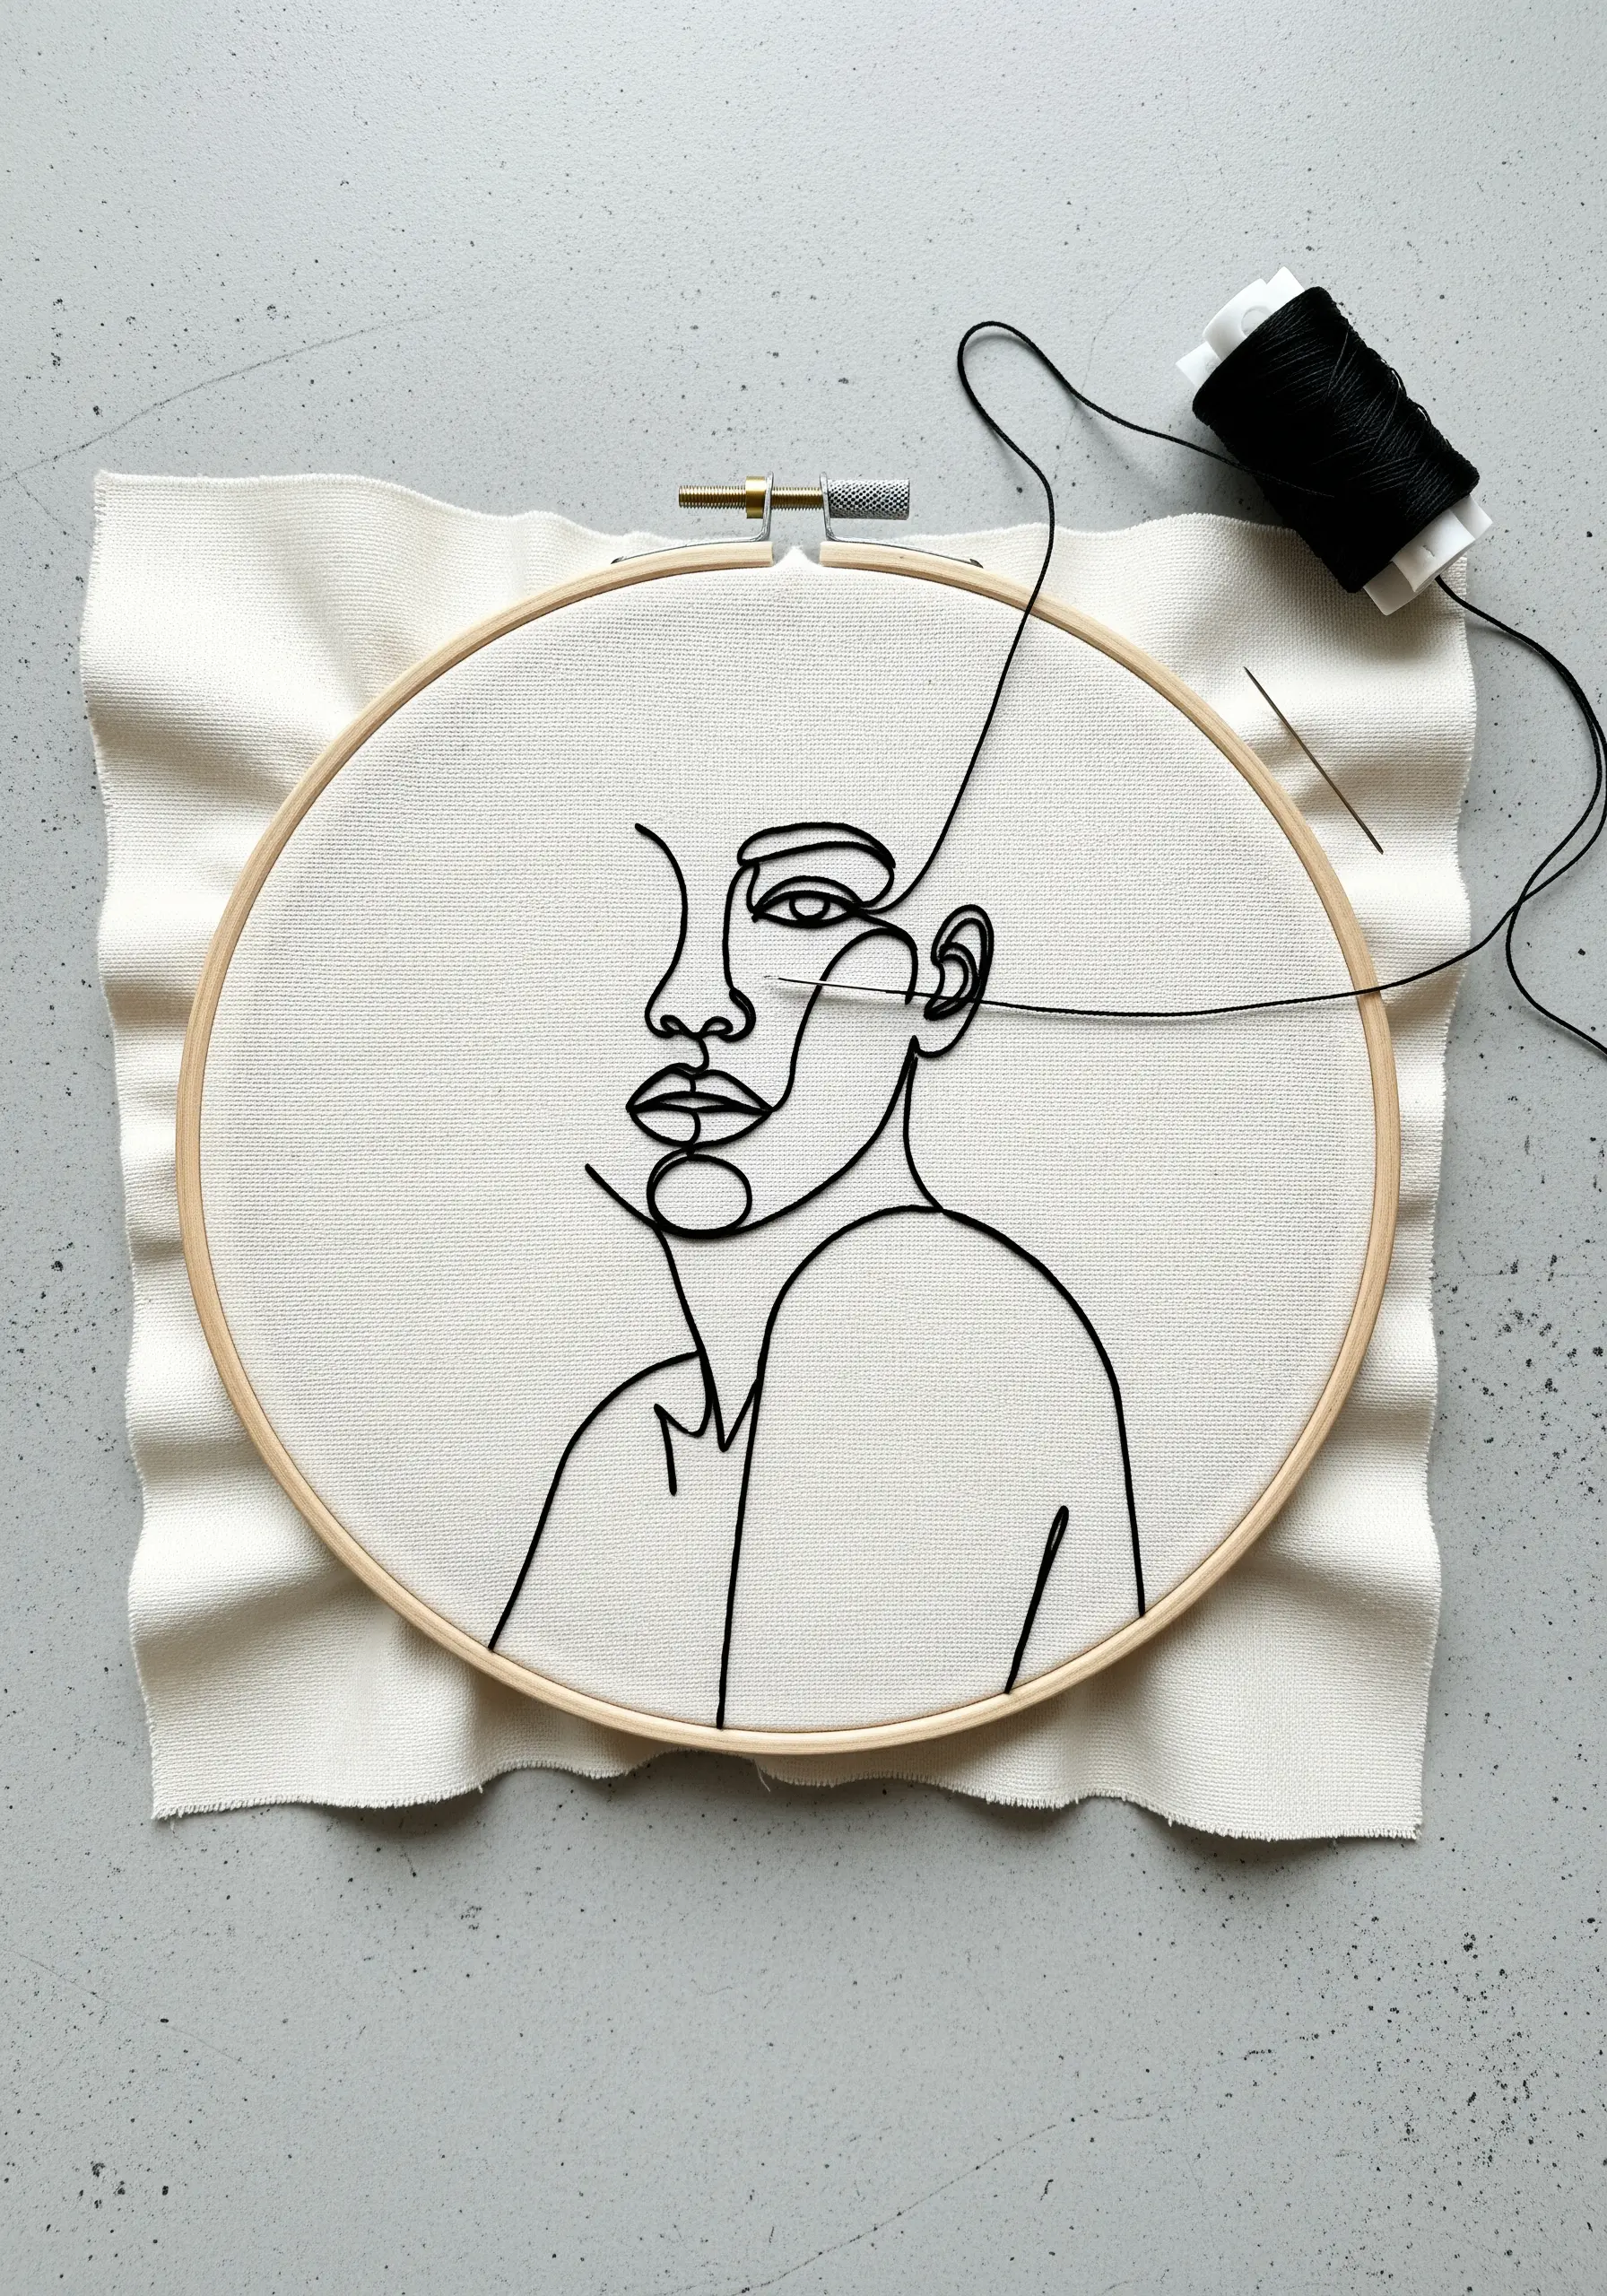
The beauty of a one-line portrait lies in its fluid, unbroken feel.
To achieve this, use a stem stitch or a whipped backstitch, which creates a smooth, rope-like line that is ideal for curves and flowing shapes.
Use a single piece of thread for as long as possible to minimize the need to start and stop, which can disrupt the continuous look.
This technique is perfect for stitching modern line art faces, transforming a simple sketch into an elegant and expressive piece of fiber art.
17. Customize Home Accents with a Simple Pattern
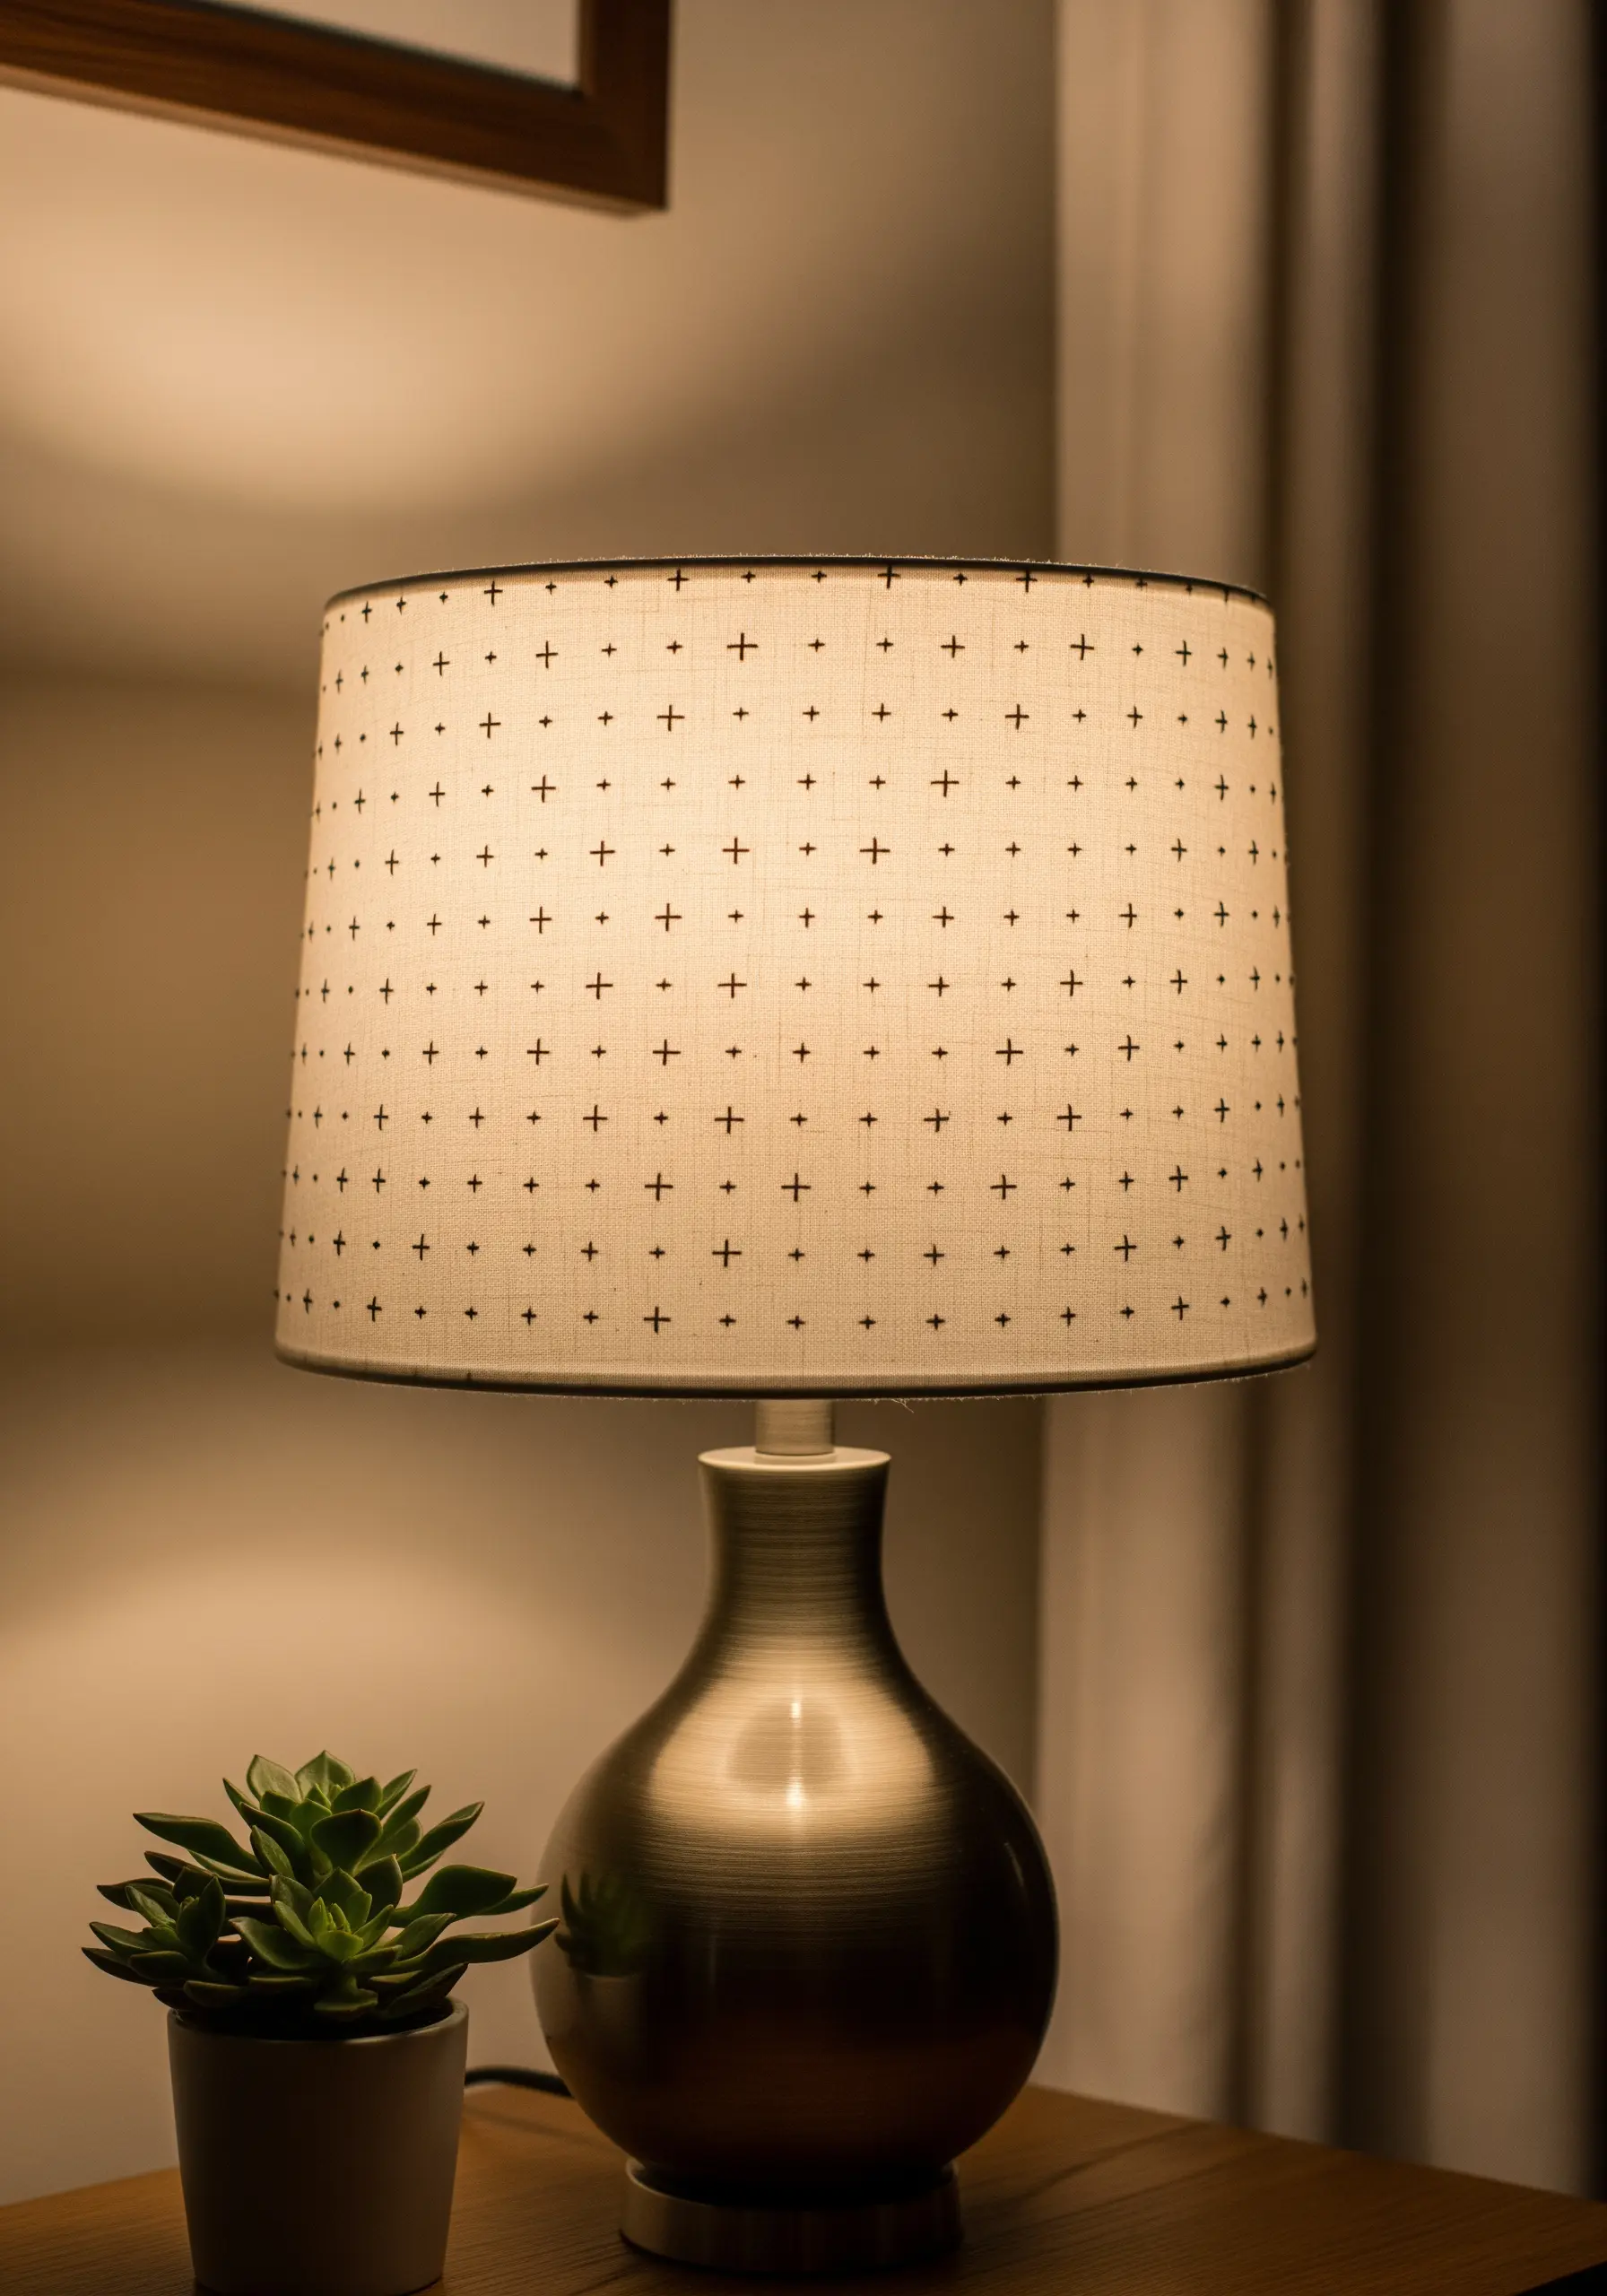
Turn a plain lampshade into a bespoke piece of decor with a subtle, repeating pattern.
Create a simple grid using a pencil and ruler, then stitch a small motif, like a plus sign or a single cross-stitch, at each intersection.
Using just two strands of a dark thread on a light-colored linen shade creates a pattern that is visible and intentional without being overwhelming.
This is one of those creative embroidery projects that transform ordinary fabric—or in this case, a lampshade—into something truly special.
18. Create Ethereal Art on Sheer Fabric
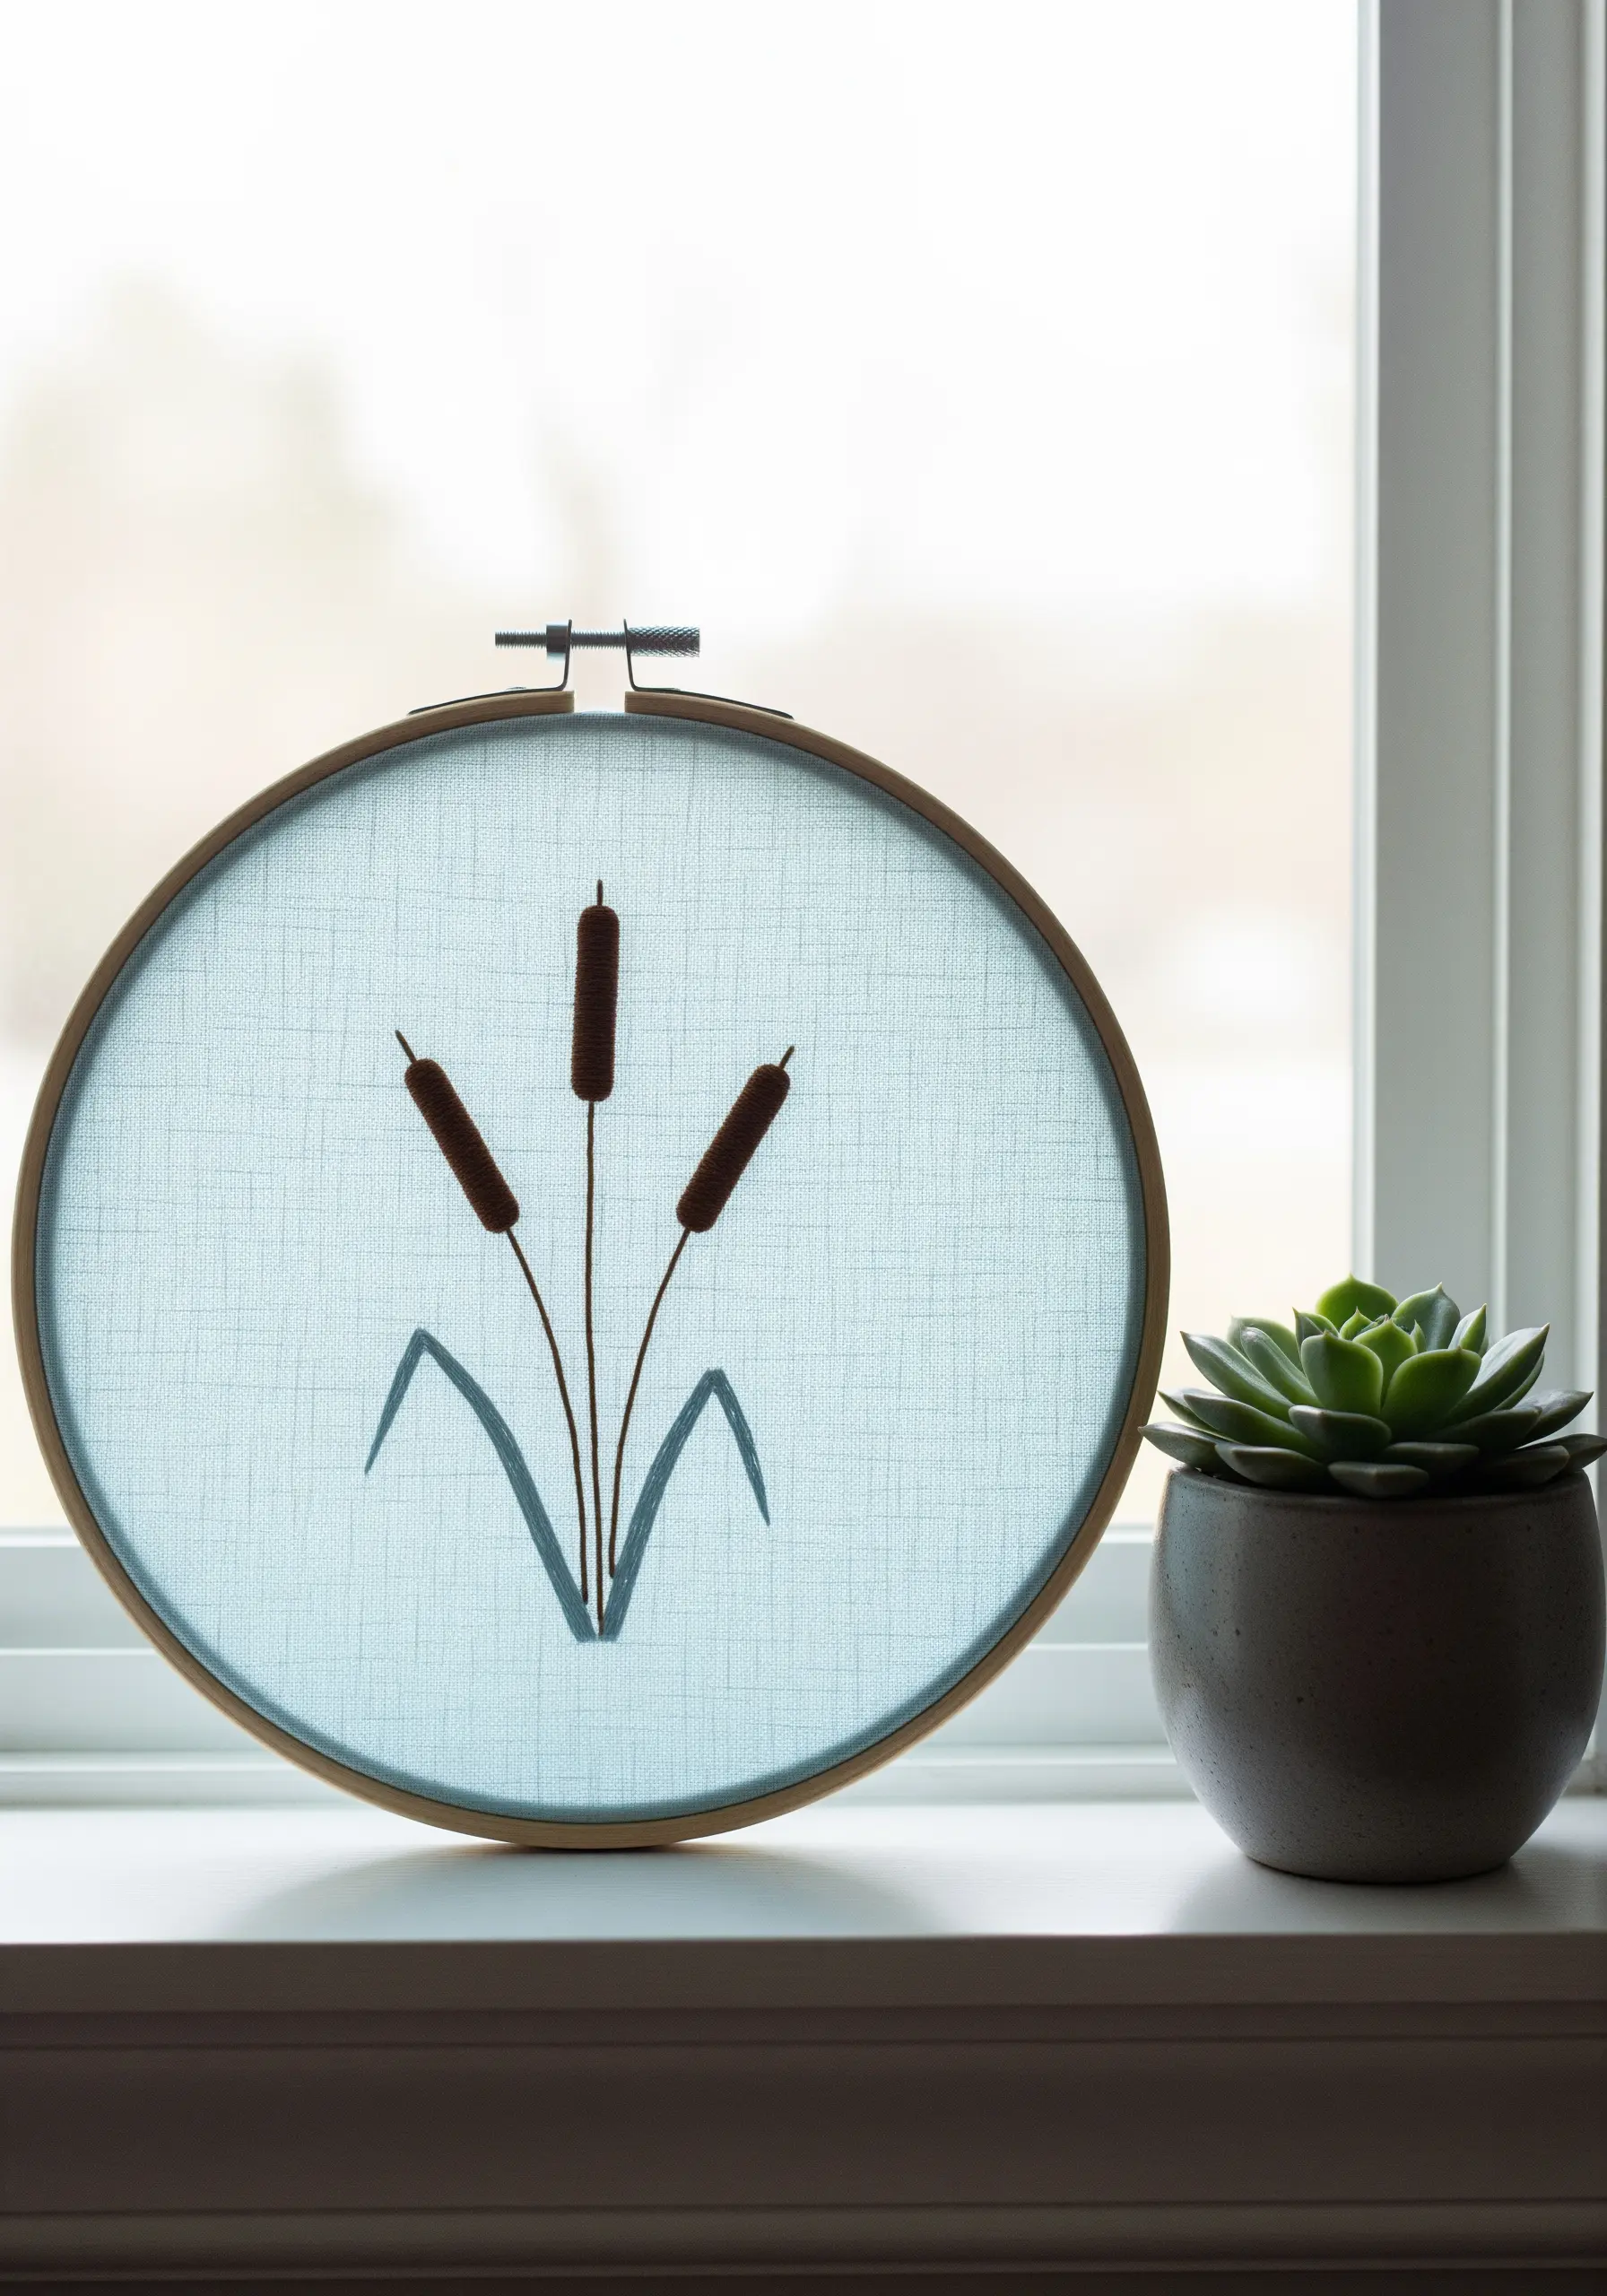
Stitching on a translucent fabric like organza or voile creates a beautiful, floating effect.
To prevent puckering, always use a hoop and back your sheer fabric with a water-soluble or heat-away stabilizer, which provides support during stitching and disappears completely afterward.
Use solid satin stitches for the cattail heads and a simple backstitch for the stems, allowing the light to pass through the empty space around your motif.
These negative space embroidery techniques are perfect for creating delicate, window-hung art pieces.
19. Stitch the Stars with High-Contrast Details

Capture the night sky by using the stark contrast of white thread on black fabric.
Use a white transfer pencil or chalk to mark your constellation pattern; it will show up clearly and brush away easily once you’re finished.
Create the stars with tiny, bright French knots, and connect them with crisp, single-strand backstitches for the constellation lines.
This is one of the most classic moon and stars embroidery ideas, turning a simple hoop into a piece of cosmic art.


