

Before you pick up your next project, take a moment. That feeling of wanting to create something truly beautiful—something polished and intentional—is the foundation of all great embroidery. But often, the gap between the vision in your mind and the piece in your hoop feels vast.
The secret isn’t in mastering hundreds of complex stitches or buying every color of floss. It’s in the subtle shifts: changing your stitch direction to mimic a leaf’s vein, adding a layer of padding to make a petal pop, or choosing a thread that contrasts boldly with your fabric.
Here, you’ll find not just patterns, but techniques. Each idea is designed to give you a specific tool to elevate your work, moving it from a simple hobby to a form of personal artistry. Let’s start transforming your stitches into stories, one thoughtful detail at a time.
1. Master Variegation with Thread Painting
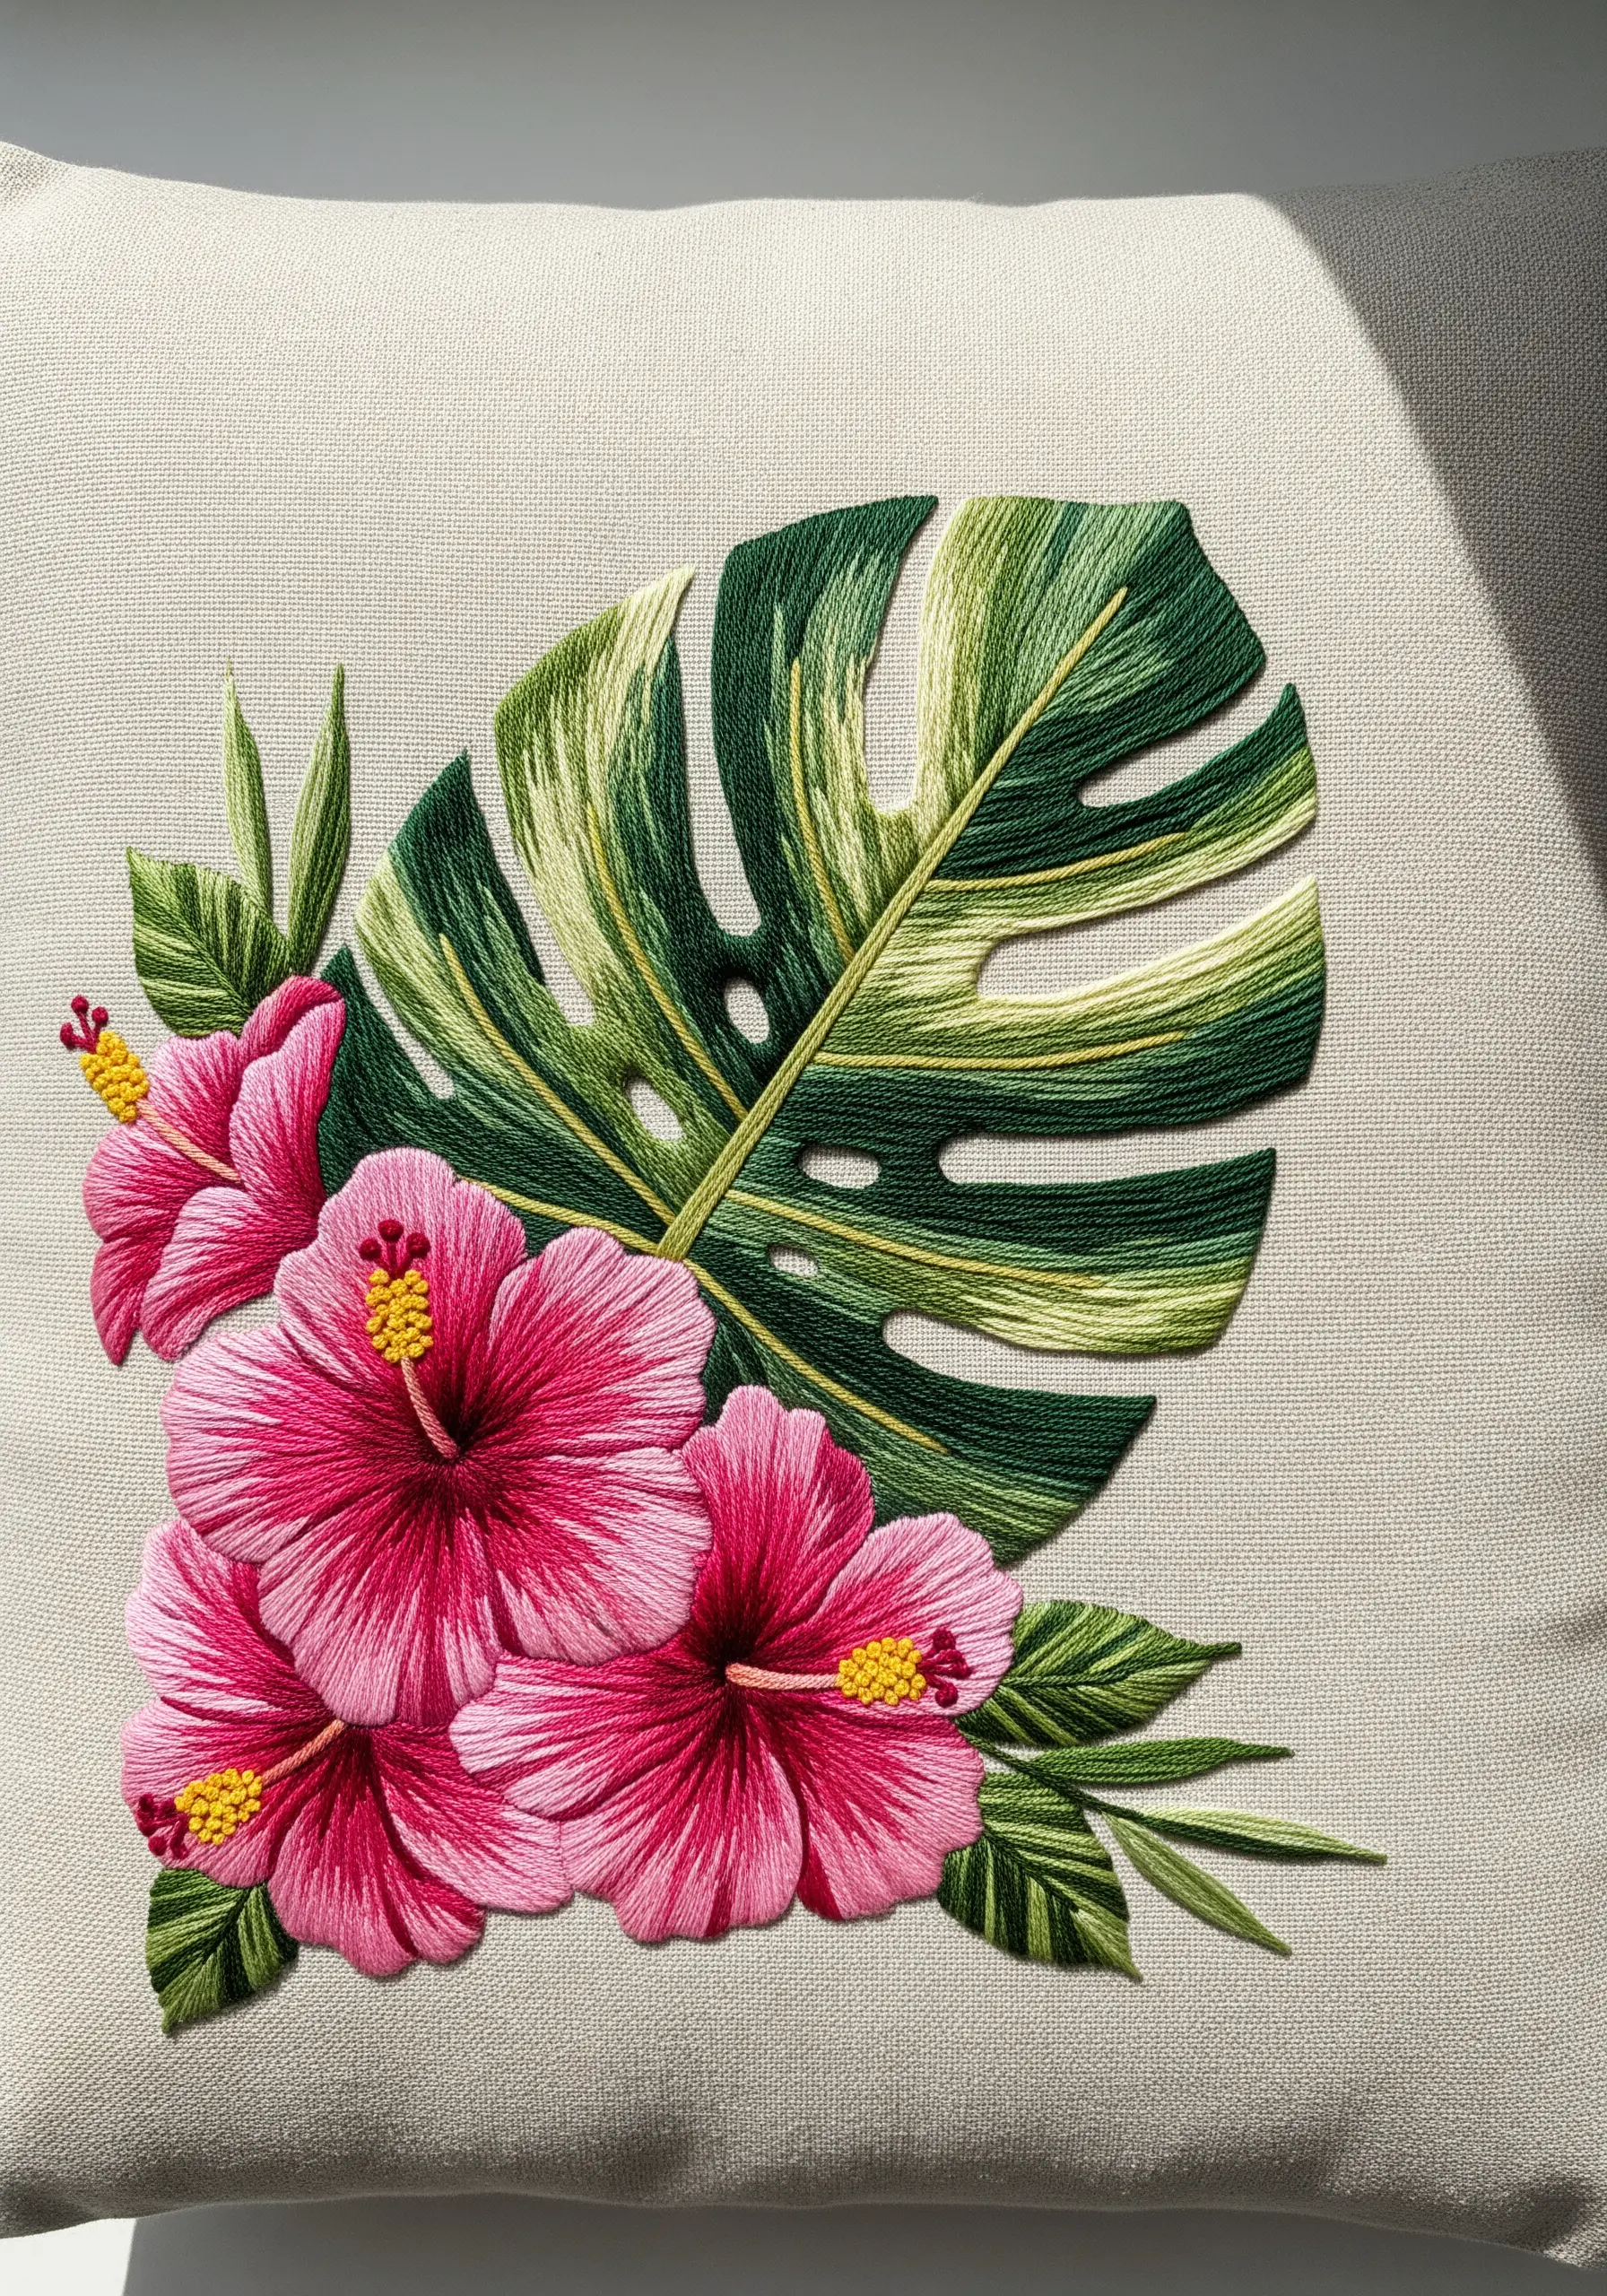
Create a realistic variegated Monstera leaf by mastering the long-and-short stitch, also known as thread painting.
Lay your initial stitches in the direction of the leaf’s natural growth, following the veins from the center outwards.
Blend shades of green, cream, and chartreuse using a single strand of floss for a smooth, paint-like gradient.
This technique turns a simple leaf into a focal point, adding depth and photorealism to your pillow stitching ideas.
Contrast the detailed leaf with bold, satin-stitched hibiscus flowers to balance the composition.
2. Create a Statement Back Piece on Denim
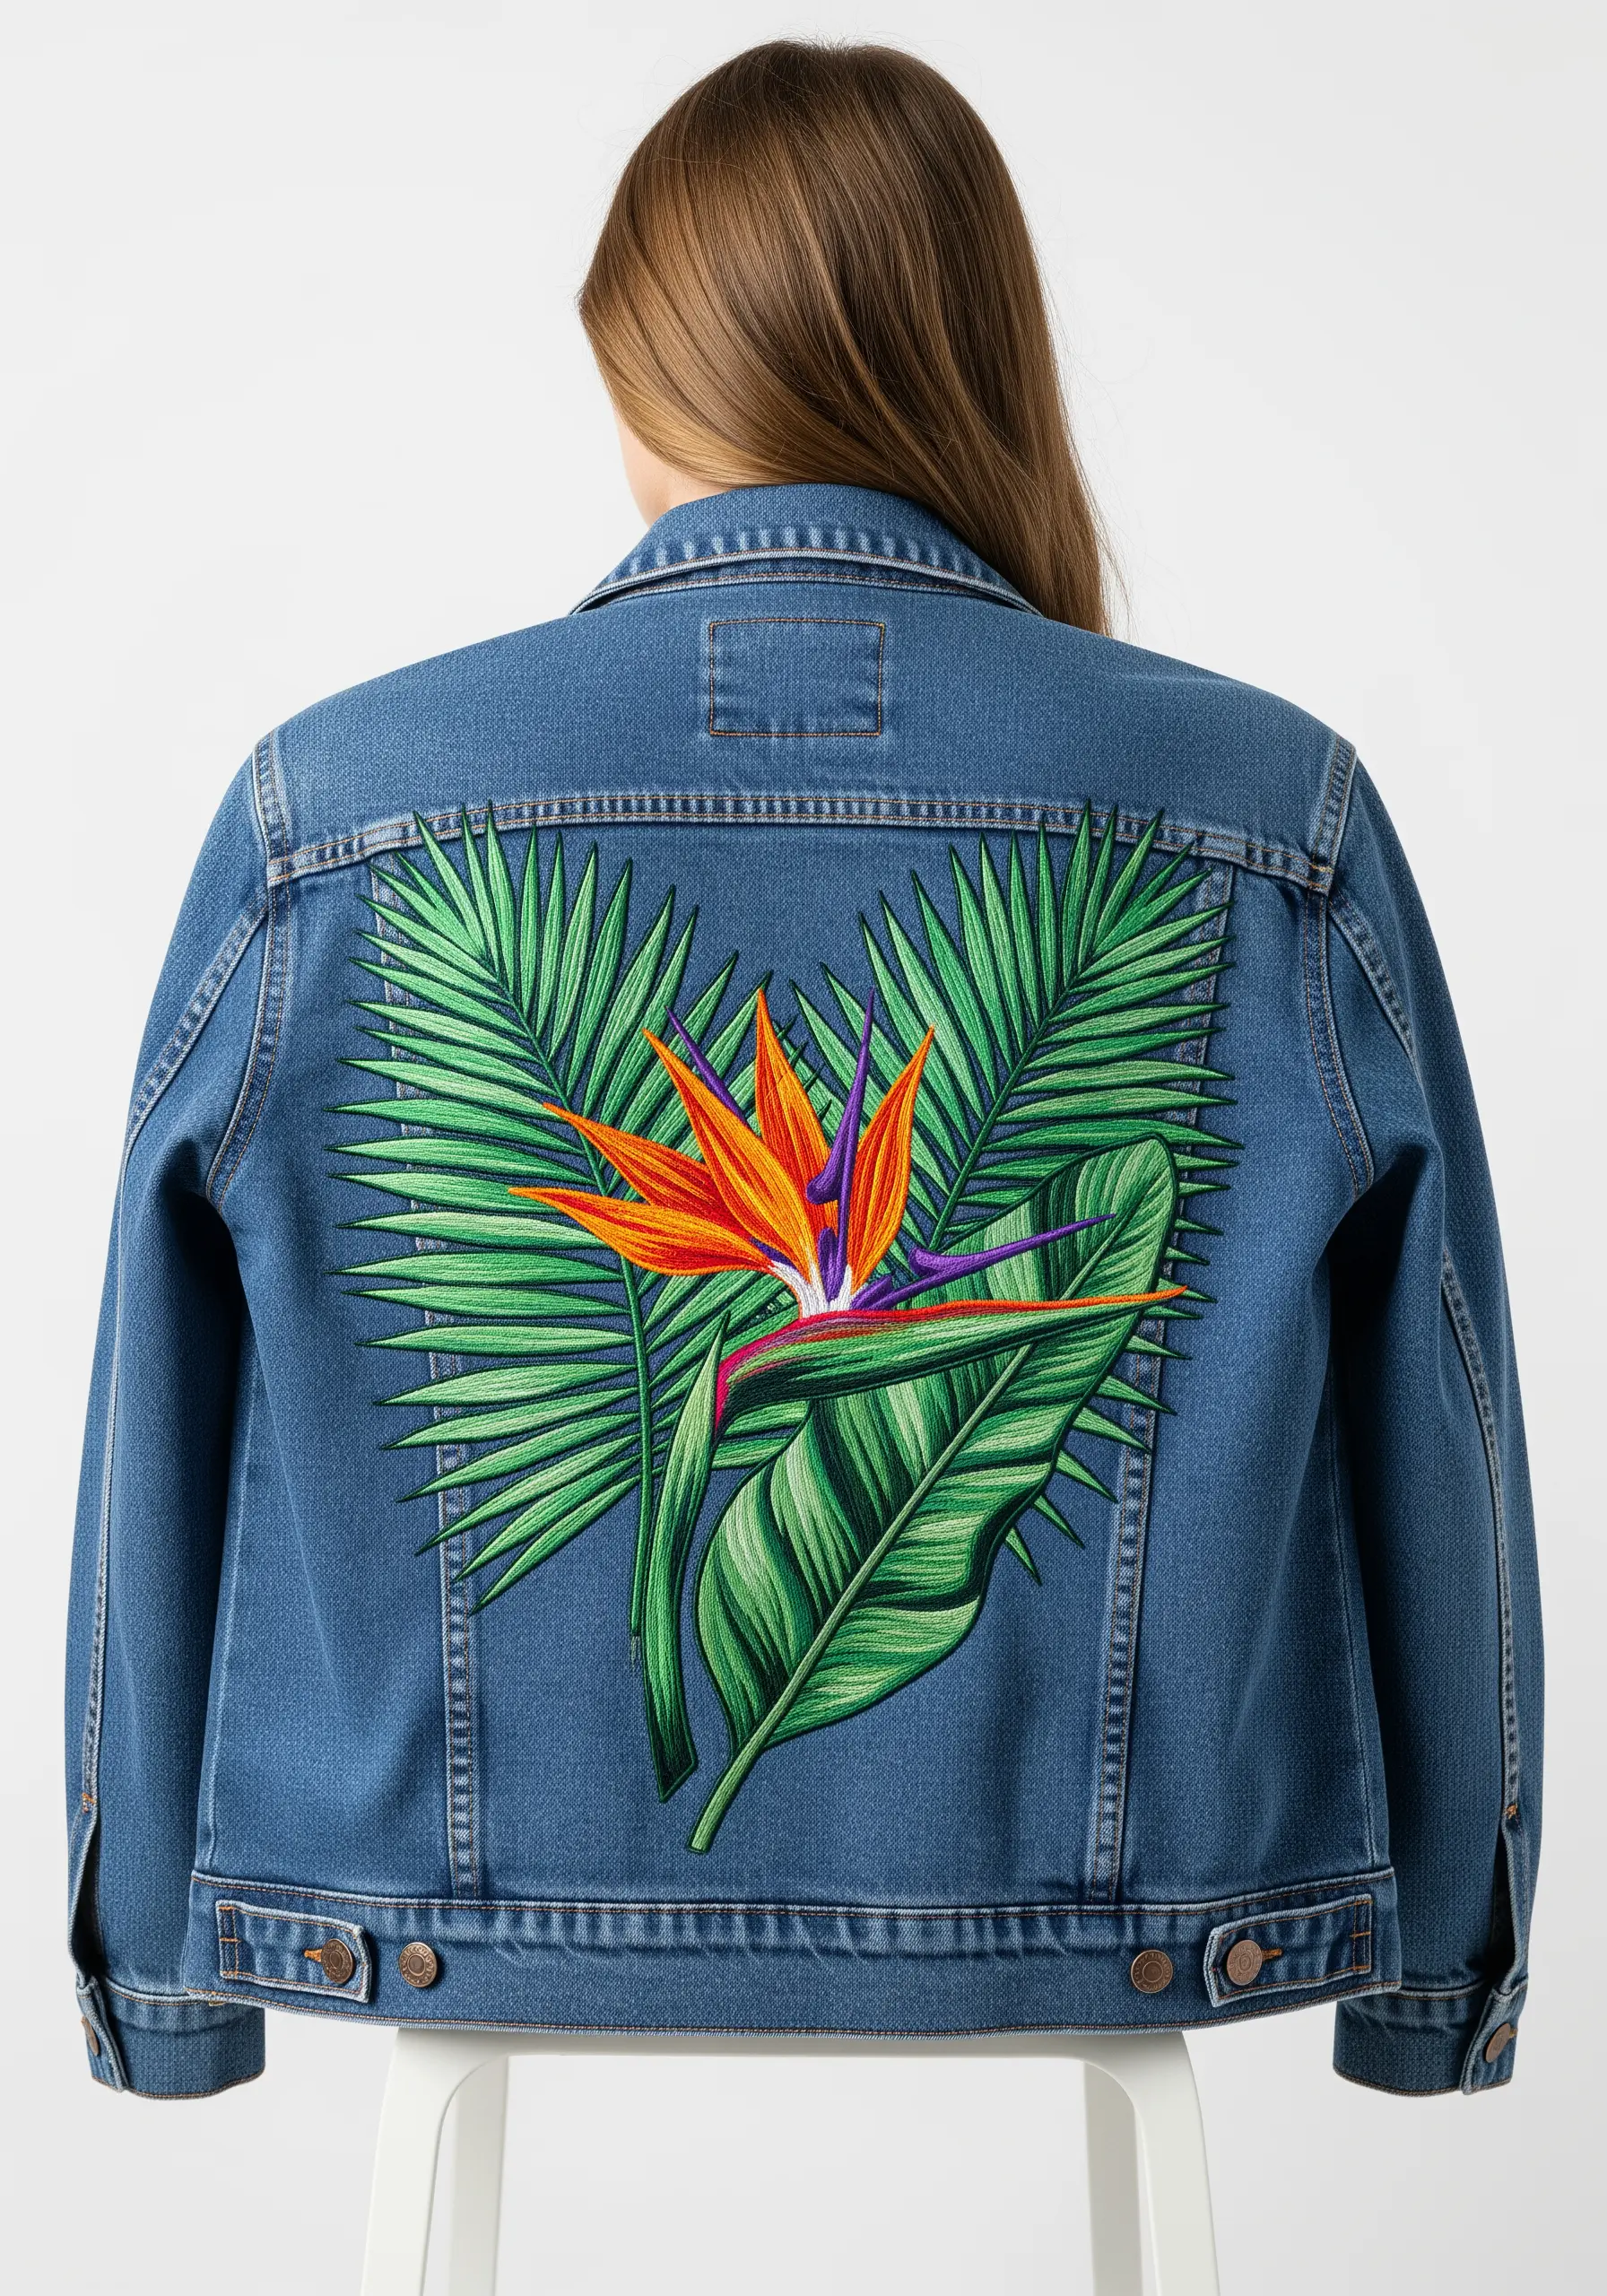
Transform a denim jacket by using the back panel as a canvas for a large, vibrant composition.
Always use a medium-weight cut-away stabilizer on the inside of the jacket to prevent the heavy denim from warping your stitches.
Frame a central flower, like the Bird of Paradise, with overlapping palm and banana leaves to create a sense of lush depth.
Use high-contrast, saturated threads—oranges, purples, and bright greens pop dramatically against the blue denim, creating art you can wear.
3. Add Dimension with Padded Satin Stitch

Elevate simple flowers by giving them physical dimension using padded satin stitch.
Before stitching your plumeria petals, fill the shape with a base layer of small, straight stitches or tiny pieces of felt.
Then, cover this padding with smooth satin stitches, working from the outer edge toward the center.
This technique makes the flowers pop from the fabric, casting subtle shadows and creating a dynamic interplay with the flat-stitched leaves.
Arrange your composition in a gentle curve to create movement, making for elegant hoop art that feels alive.
4. Design for Large-Scale Wall Art

Move beyond the hoop by stitching on a large, stretched canvas for a piece of statement fiber art.
Choose a sophisticated color palette, like deep purple orchids and muted green ferns against a cool gray background, for a modern, gallery-worthy feel.
Combine bold, satin-stitched orchid petals with delicate, feathery fern fronds made using fly stitch or fern stitch.
This contrast in texture and form is what gives large-scale embroidery its captivating visual interest.
5. Frame Botanicals with Geometric Lines

Create a striking visual contrast by framing soft, organic Anthurium flowers and leaves within a crisp geometric border.
Use a single, thin line of backstitch or stem stitch to draw the frame, allowing it to intersect and weave behind the leaves.
This technique contains the composition, giving it a structured, contemporary look that feels intentional and designed.
Ensure your satin stitch on the leaves and flowers has clean, sharp edges to complement the precision of the linear frame.
This approach works beautifully for elevating simple linens like napkins or tea towels.
6. Master Detail in Miniature Pocket Embroidery

Turn a simple t-shirt pocket into a focal point with a small, highly detailed botanical motif.
When stitching on jersey or knit fabric, always use an iron-on stabilizer on the inside to prevent stretching and puckering.
For intricate flowers like the passion flower, use just one or two strands of floss to capture the delicate filaments and petal details.
Combining a complex flower with a simple, satin-stitched leaf creates balance in these tiny embroidery patterns, preventing the design from looking too busy.
7. Replicate Leaf Patterns with Precision

Capture the stunning stripes of a Calathea leaf by using contrasting colors and precise stitch placement.
First, fill the main leaf shape with long-and-short stitch in the base green color.
Then, add the distinctive pink or cream stripes on top using a simple backstitch or split stitch, following the natural pattern of the leaf.
This layering technique adds texture and realism. Placing such a detailed botanical on a patterned fabric, like the stripes here, creates a rich, maximalist aesthetic perfect for customizing journal covers.
8. Create Symmetrical Placemat Designs

Elevate your table settings by creating balanced, symmetrical designs on placemats.
To ensure perfect symmetry, lightly trace your design on both sides using a water-soluble marker before you begin stitching.
Use simple, repeating motifs like these palm fronds and Heliconia flowers to form an elegant wreath or border.
This approach makes a set of placemats feel cohesive and professionally finished, turning everyday meals into special occasions.
It’s one of the most effective DIY embroidery tricks to transform plain fabric.
9. Embroider on Straw with Bold Textures
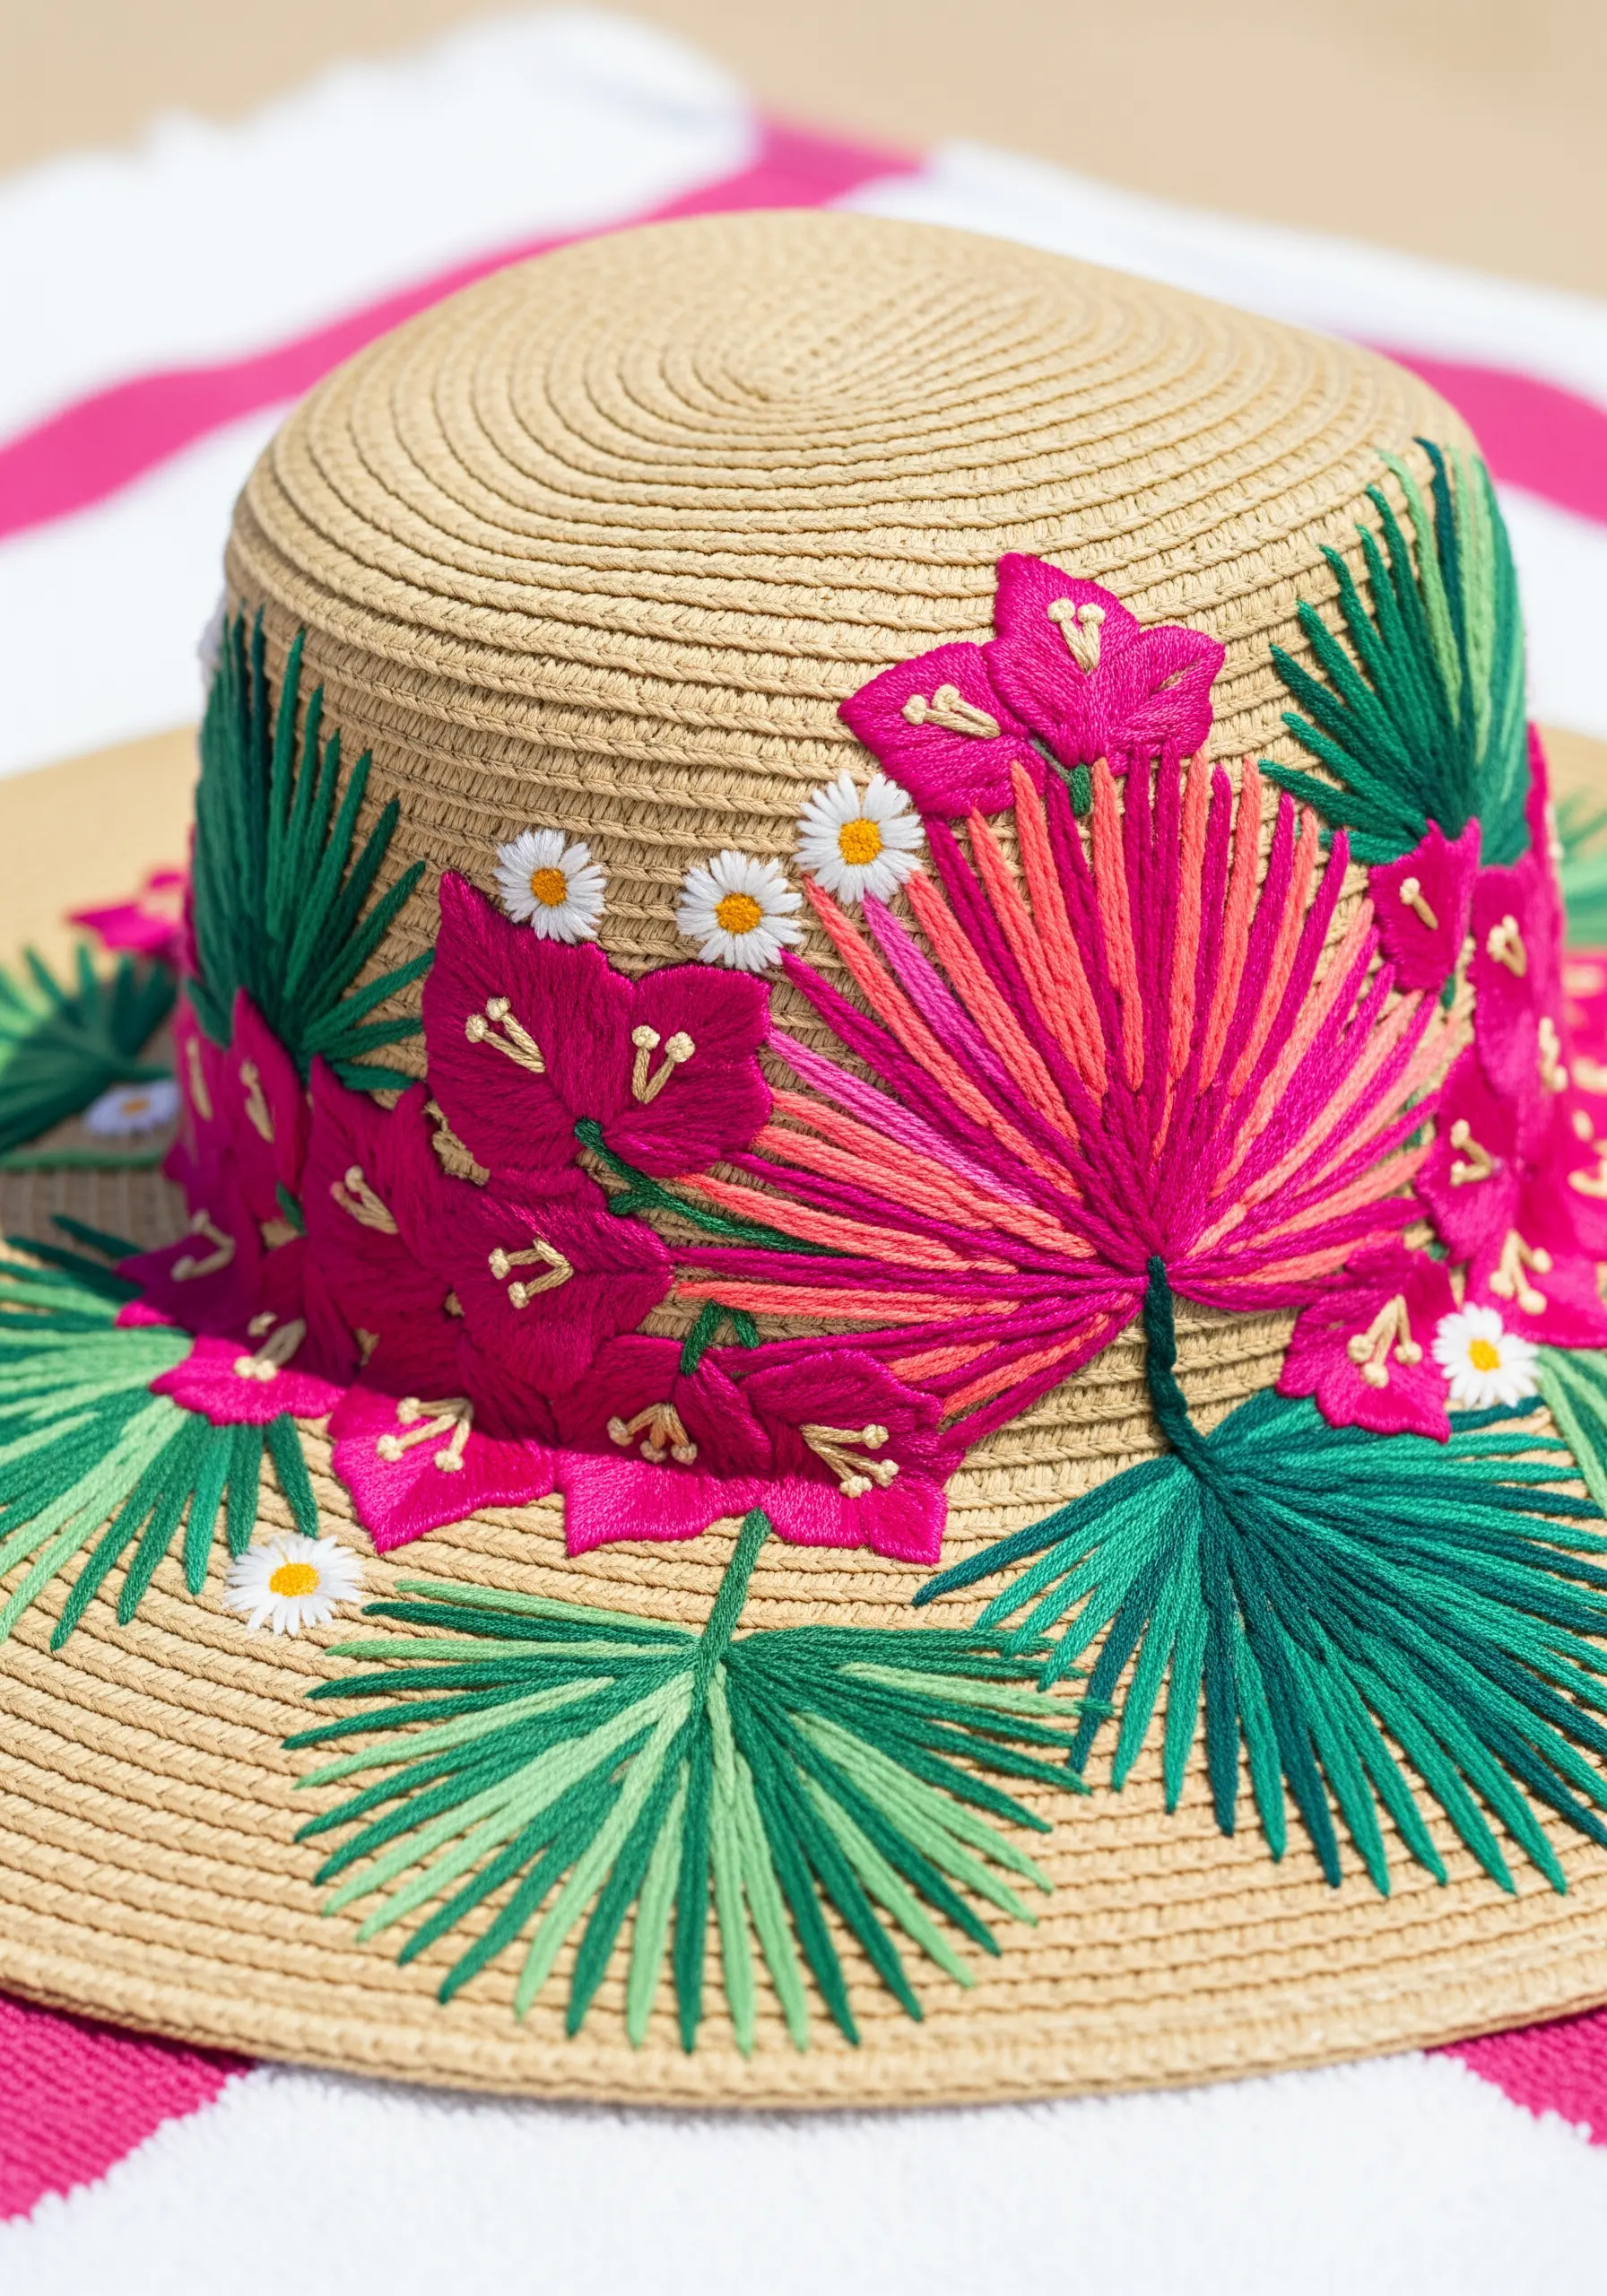
Take your embroidery beyond fabric by stitching directly onto a textured surface like a straw hat.
Switch from standard floss to thicker threads like tapestry wool or #5 pearl cotton for stitches that won’t get lost in the straw’s weave.
Use bold, simple stitches like satin stitch, lazy daisy, and straight stitches rather than delicate, detailed ones.
The goal here isn’t fine detail but vibrant color and playful texture, making it a perfect application for projects using yarn.
10. Add Delicate Motifs to Sheer Curtains
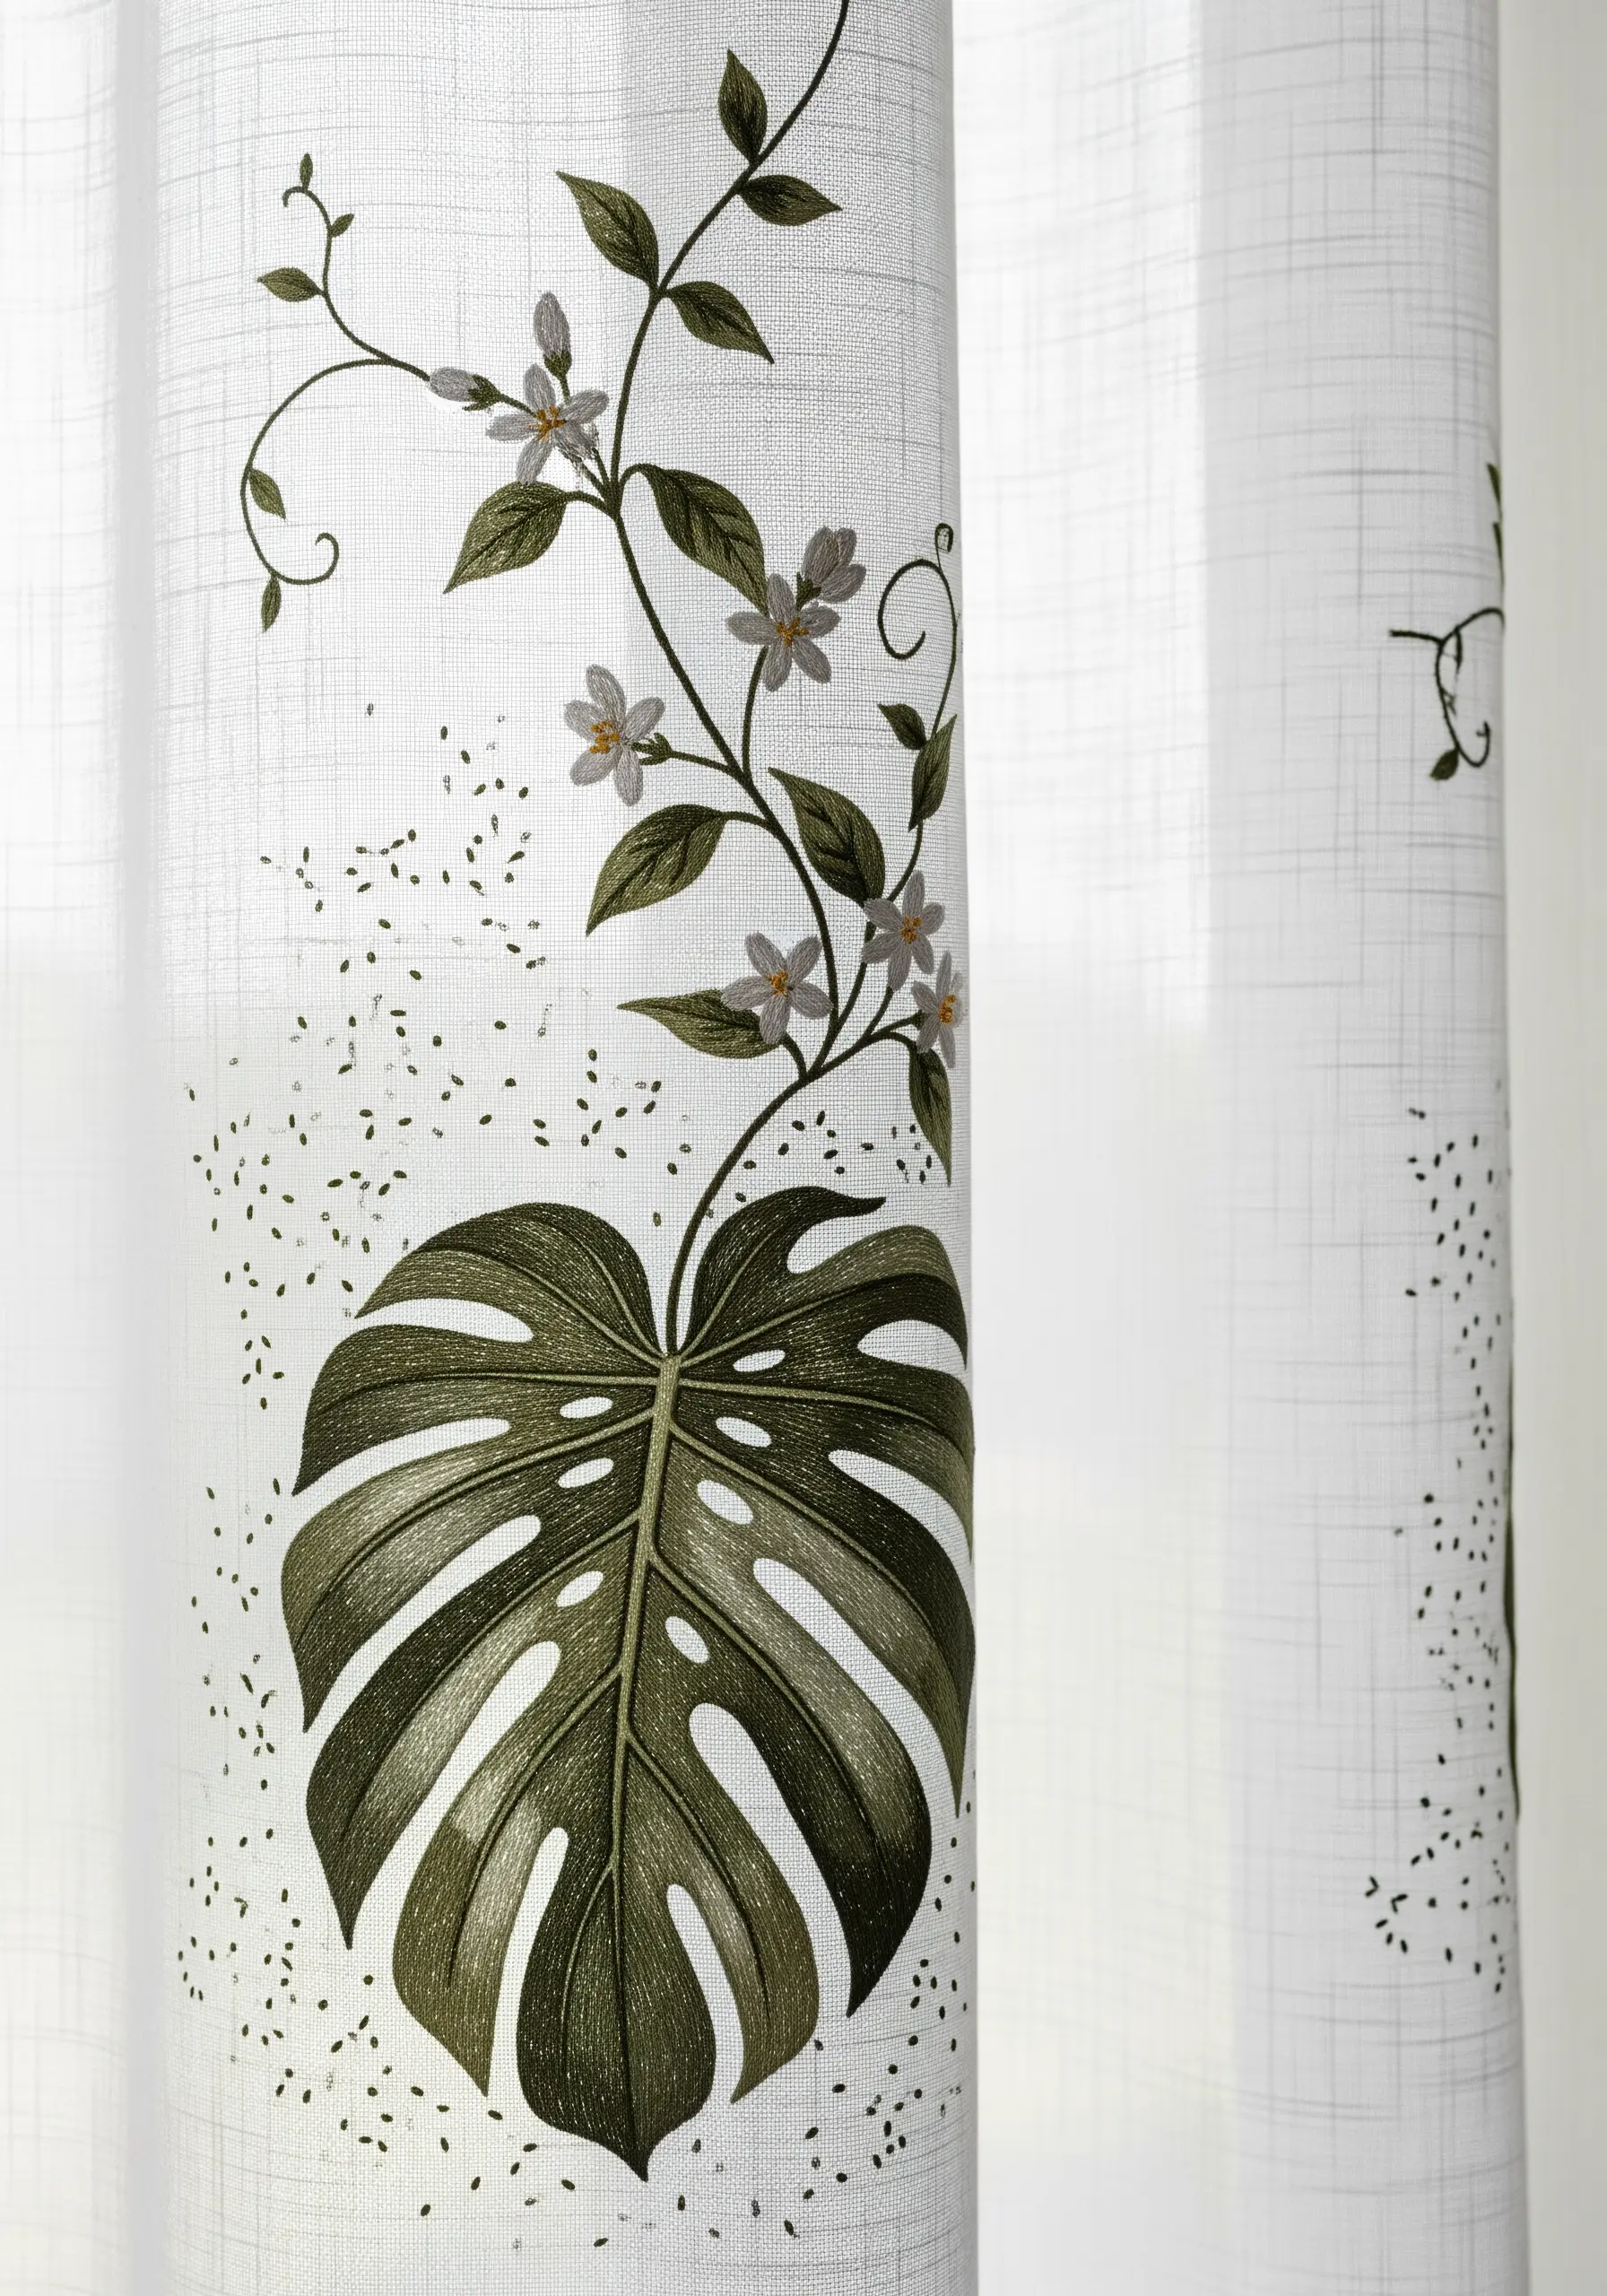
Embroidering on sheer or semi-sheer fabric creates an ethereal, light-filled effect.
Always use a lightweight, wash-away stabilizer to support your stitches and prevent the delicate fabric from tearing.
Keep your designs light and airy—a climbing vine or scattered leaves allow light to filter through, preserving the curtain’s function.
The back of your work will be visible, so ensure your knots and carried threads are neat and minimal for a polished look from every angle.
This approach is perfect for handmade touches that make a room feel natural.
11. Center Your Design with a Medallion Motif
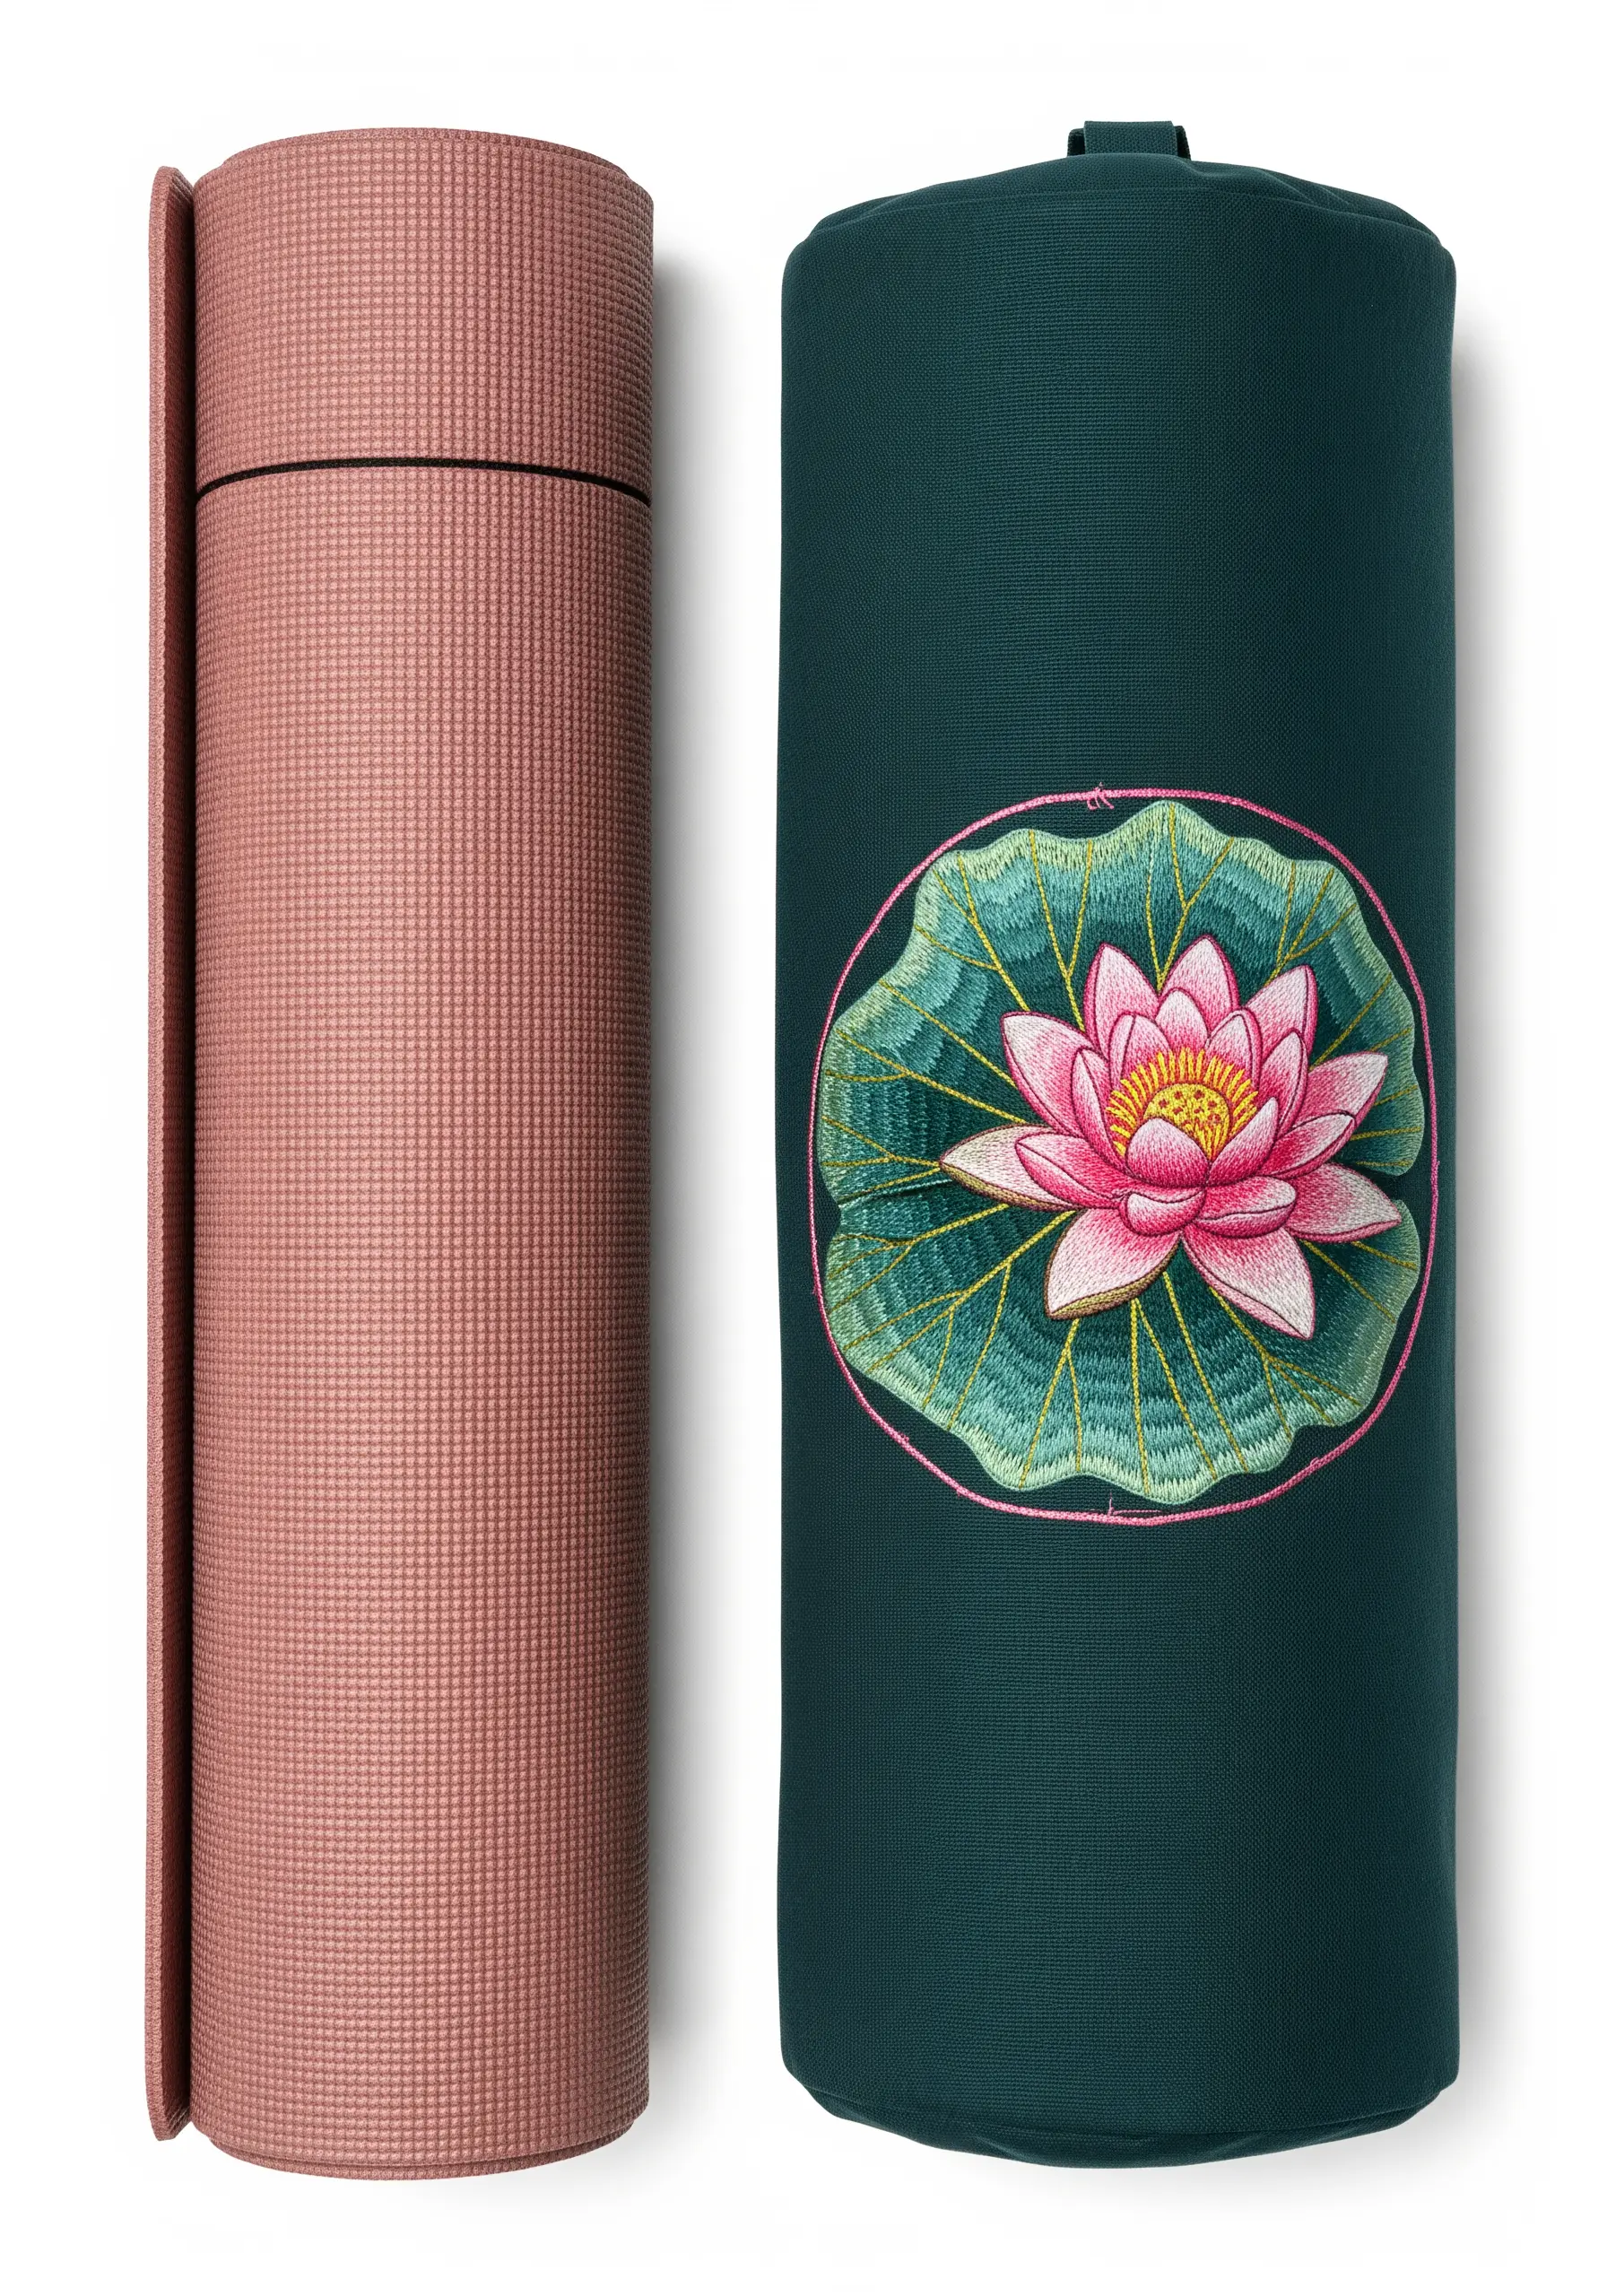
Create a strong focal point on items like bags or cushions with a circular medallion design.
Use directional long-and-short stitch on the water lily pad, with stitches radiating from the center to mimic its natural veins and create a sense of form.
Enclose the entire composition within a simple backstitched circle to give it a clean, contained, and emblem-like finish.
This framing technique elevates a simple botanical into a polished, intentional piece of art.
12. Design a Pattern for a 3D Object
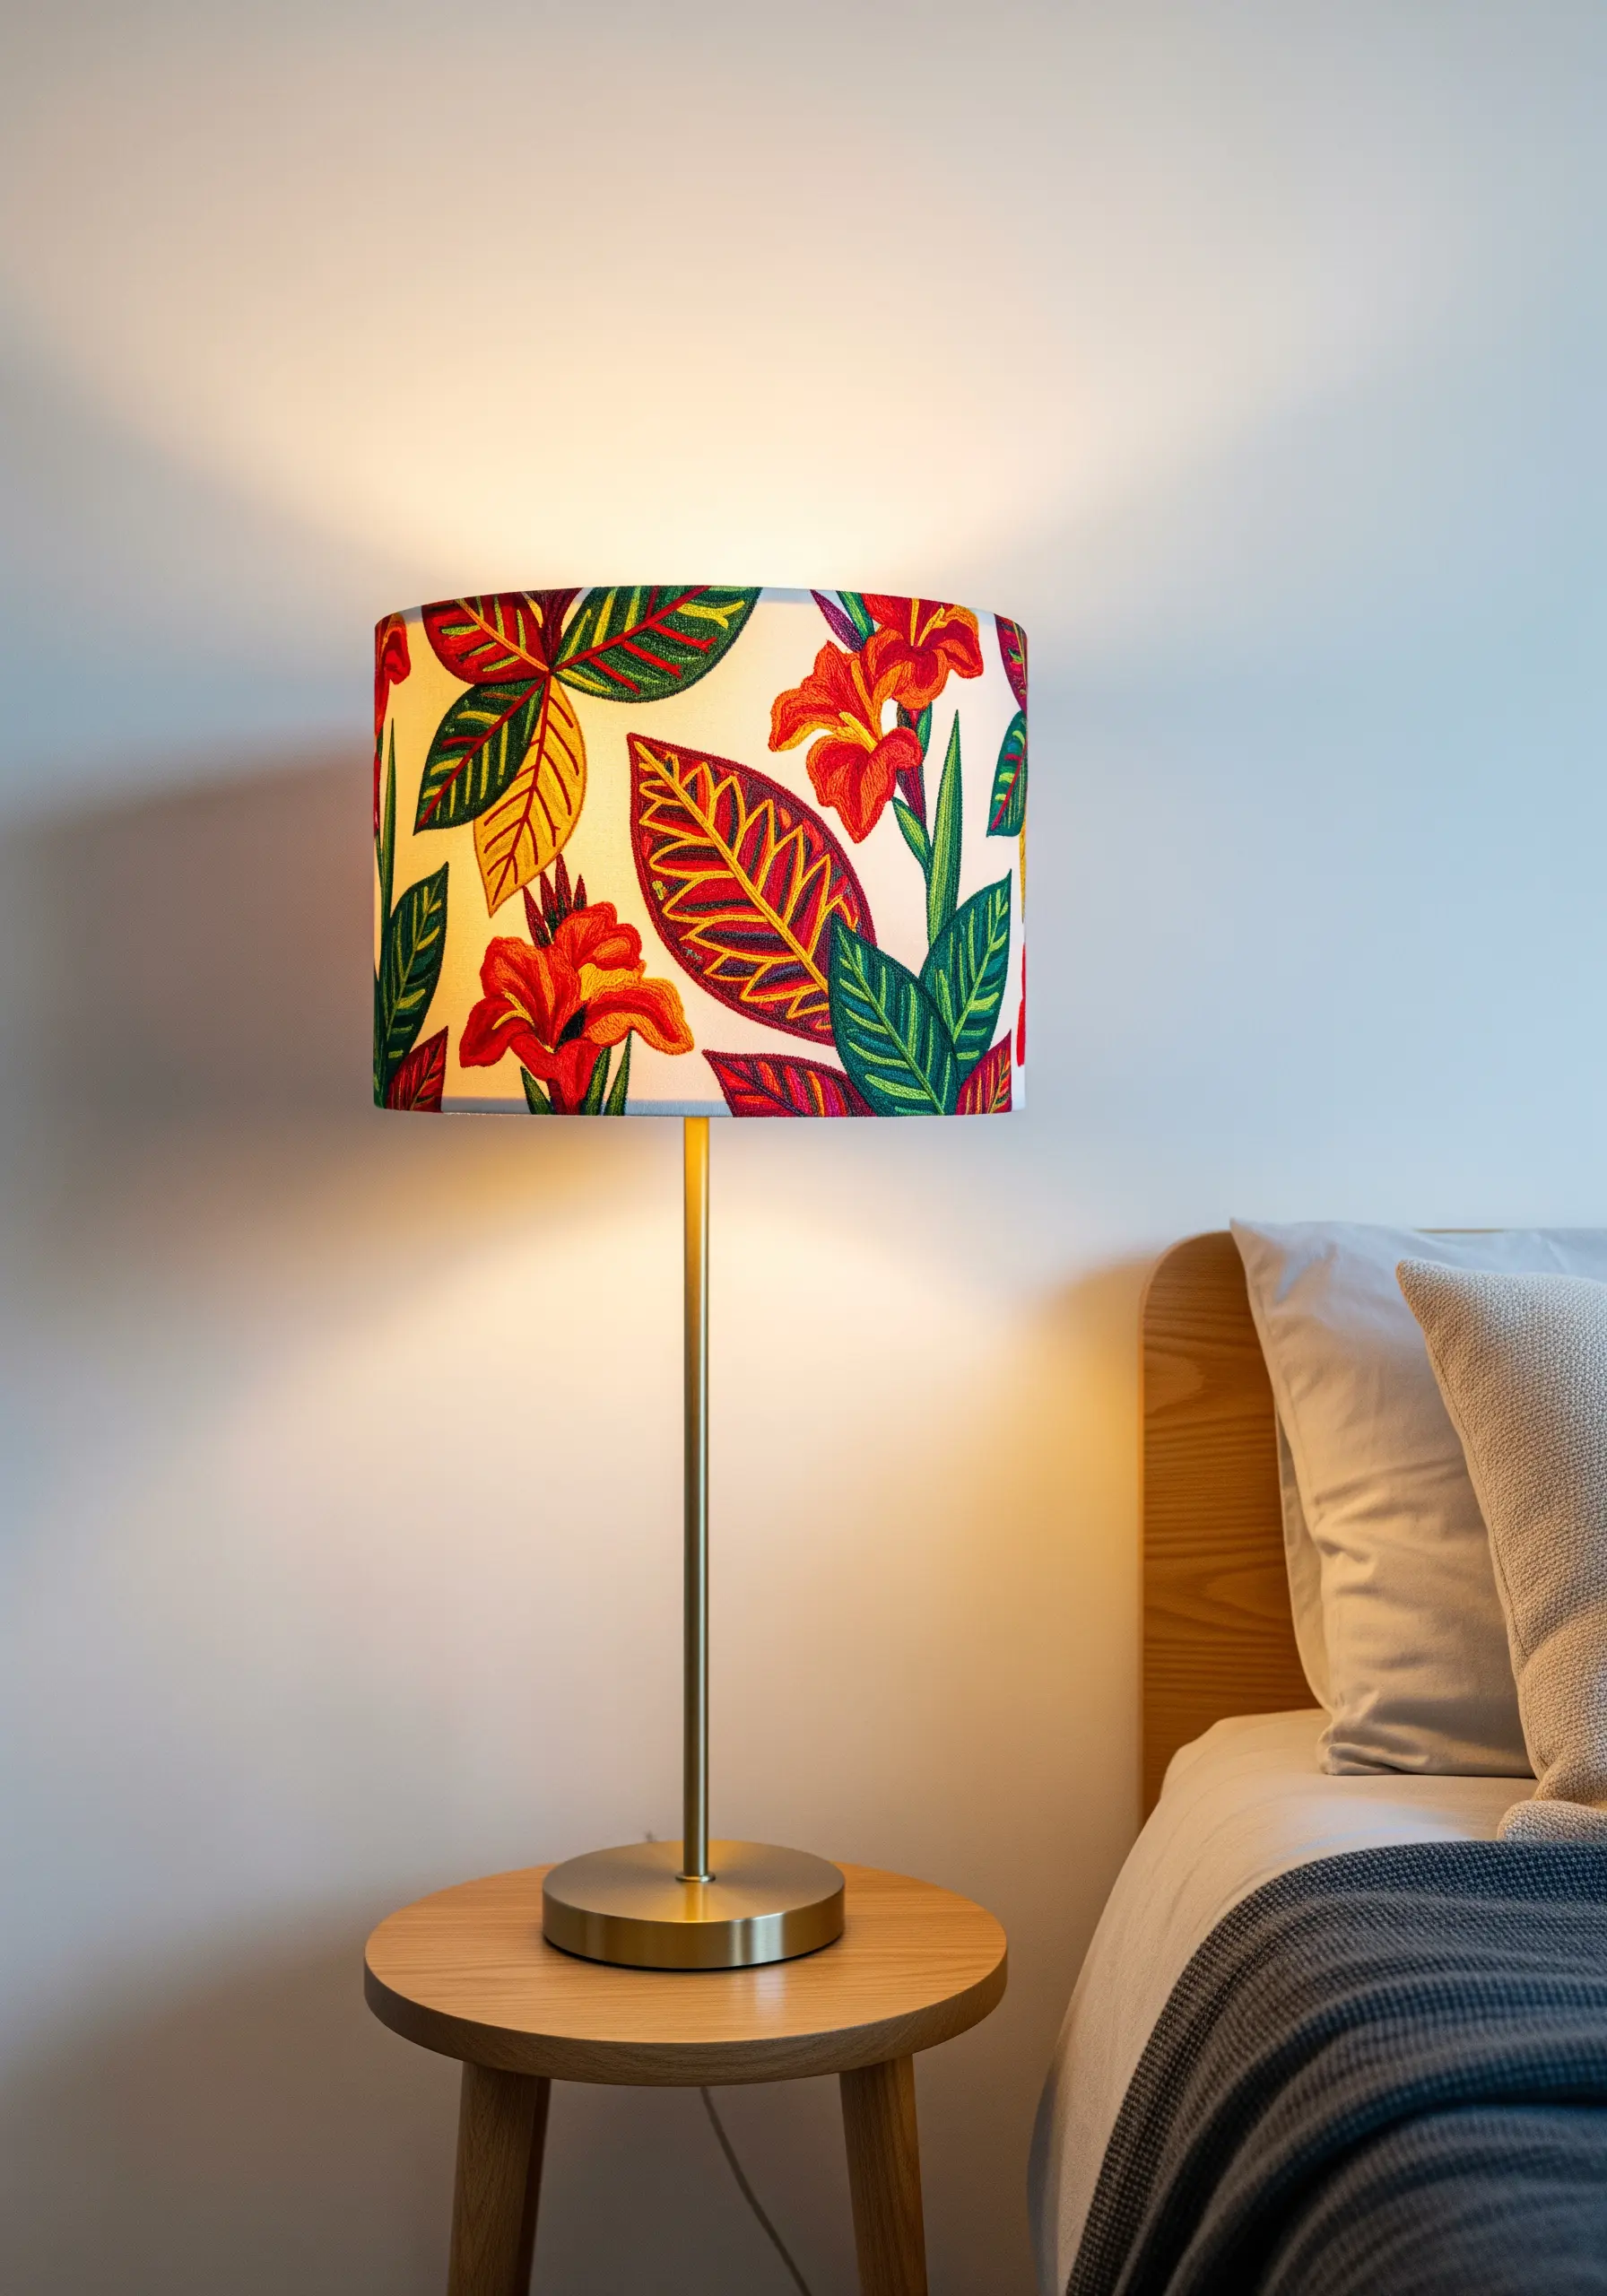
When embroidering fabric for a 3D object like a lampshade, plan a repeating or continuous pattern that looks good from all angles.
Use bold, graphic shapes and a vibrant, high-contrast color palette to ensure the design remains clear and impactful when illuminated from within.
Choose a tightly woven, light-colored fabric like cotton or linen that provides a stable base for stitching and diffuses light beautifully.
This project is one of many tiny embroidered accents that can make your home look designer-crafted.
13. Create Cohesion with Small, Repeating Sprigs
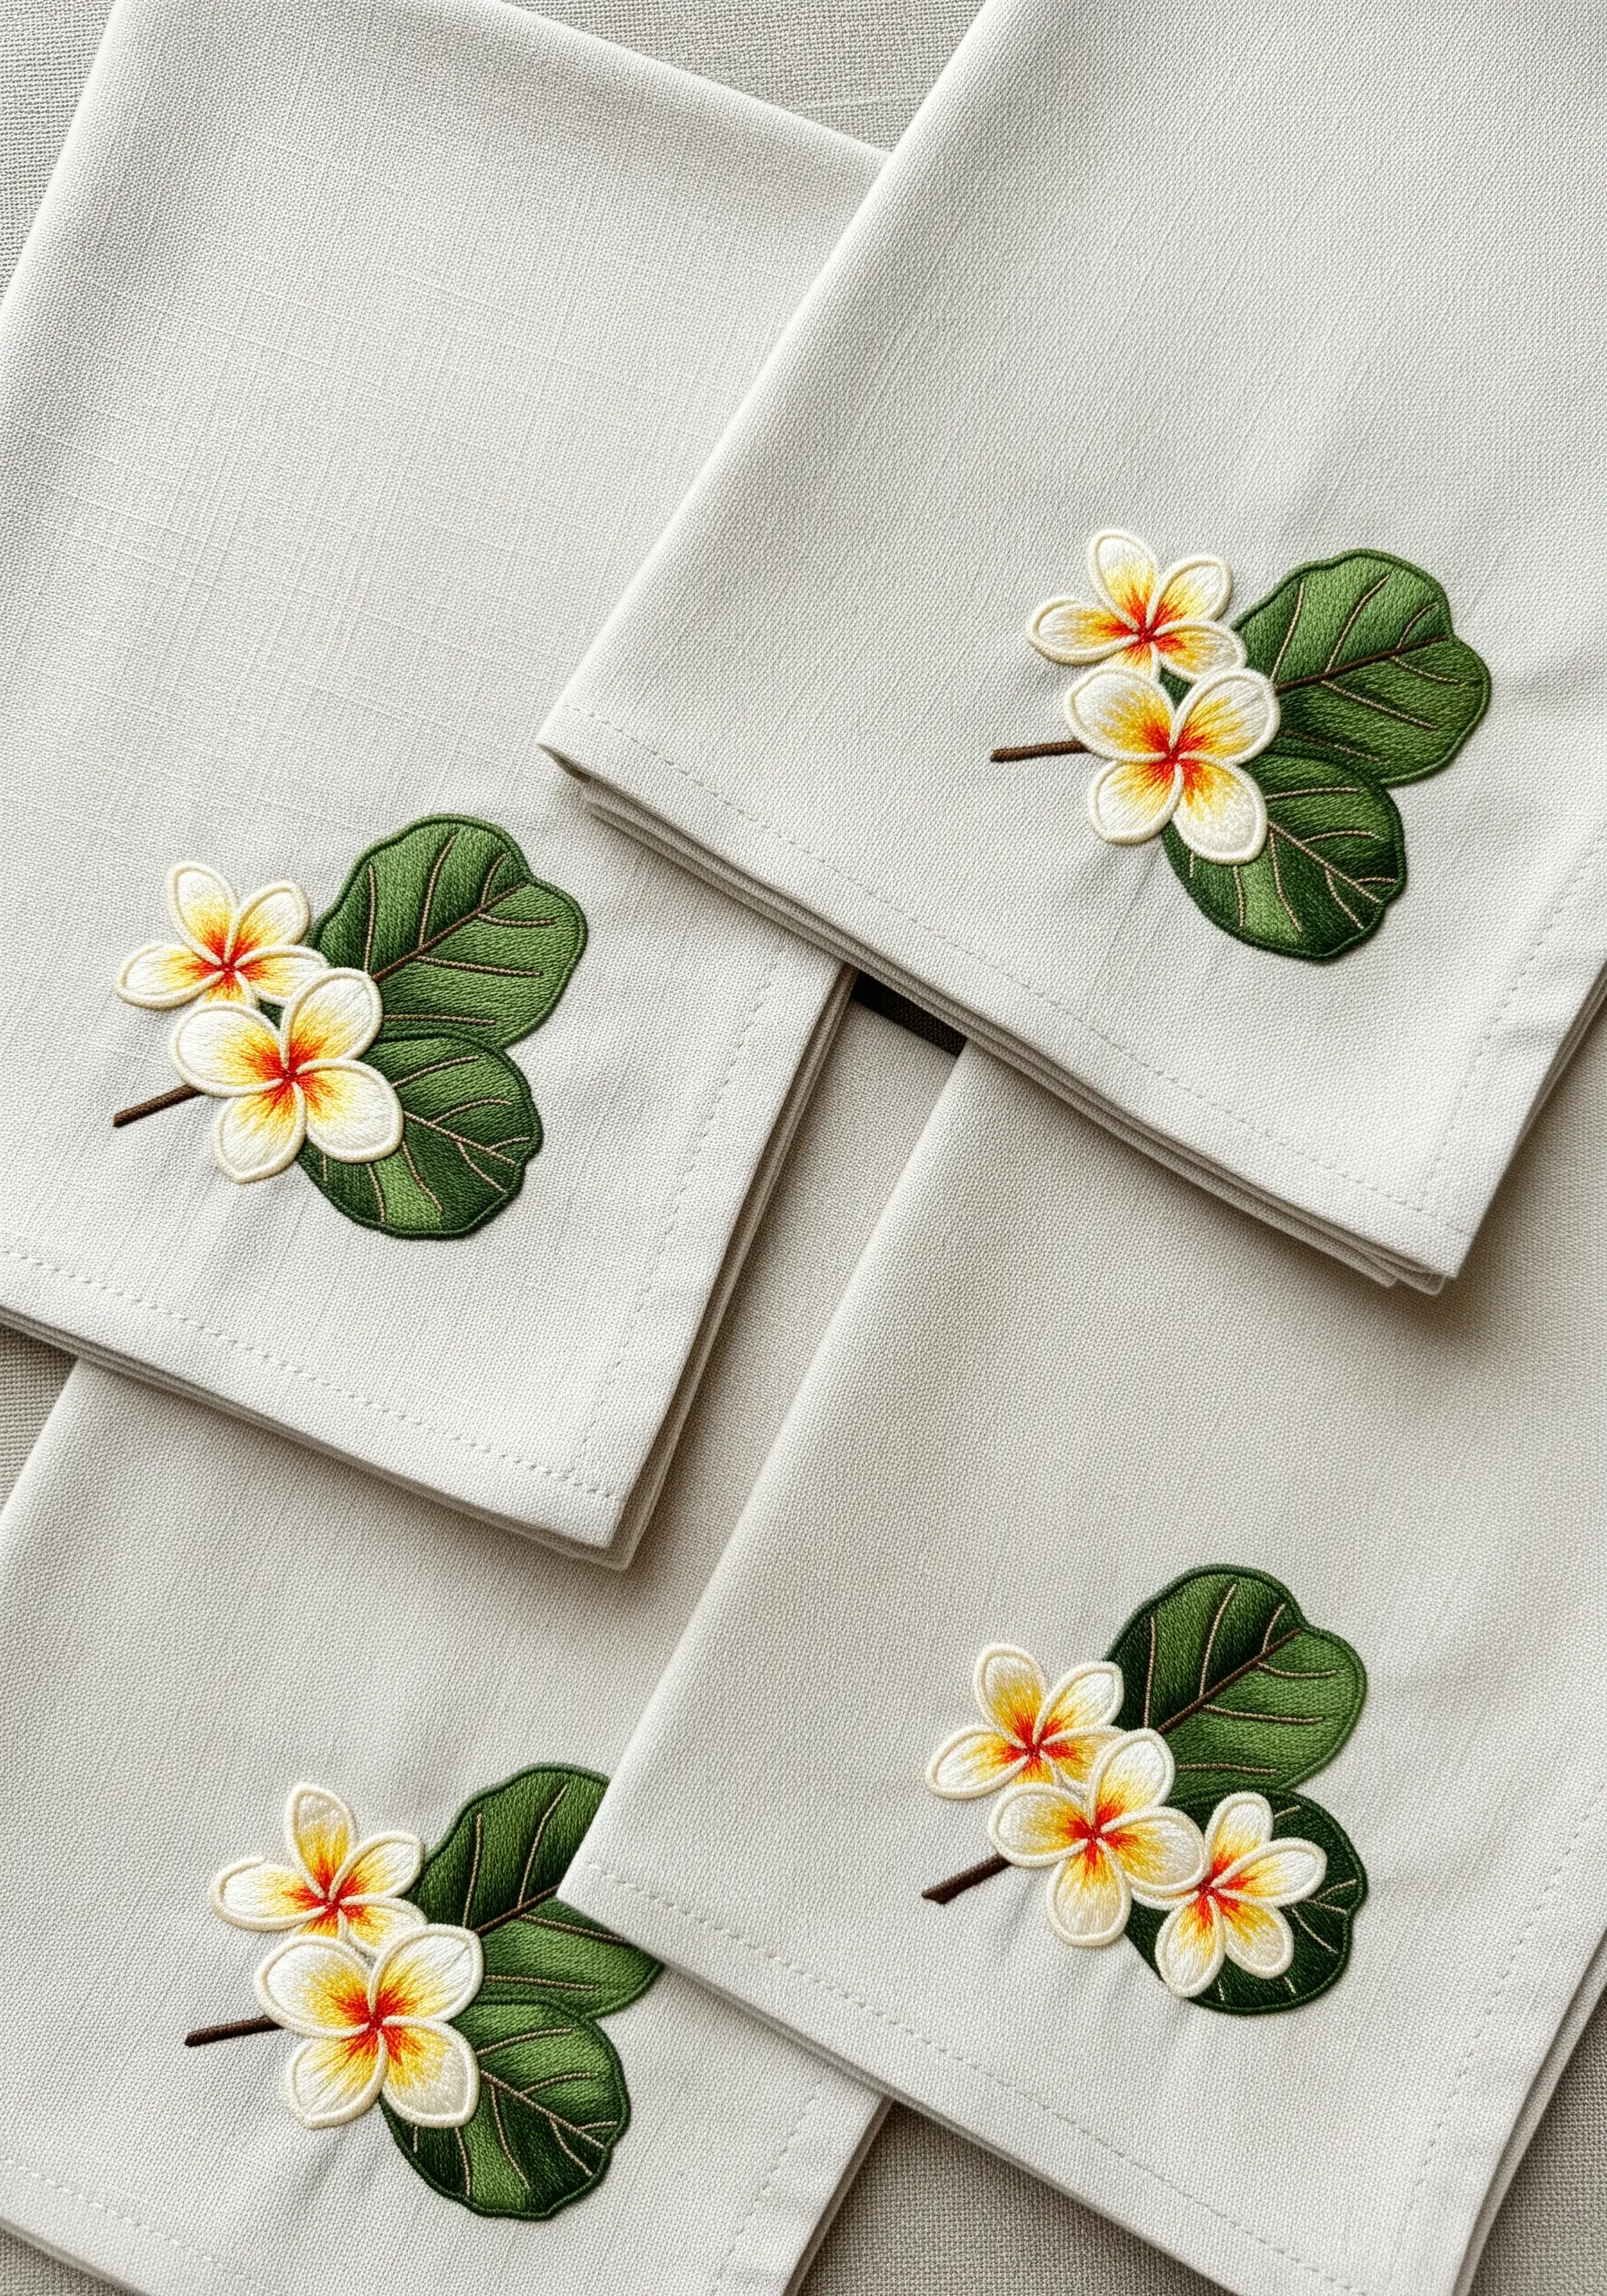
For a set of napkins or coasters, achieve an elegant, cohesive look with small, identical botanical sprigs.
Place the motif consistently in the same spot on each item, such as the bottom right corner, for a professional finish.
Use thread painting to give the small leaf dimension, and blend yellow, white, and orange in the plumeria flowers for a touch of realism.
These easy small embroidery patterns are quick to complete but add a significant touch of handmade luxury.
14. Achieve a Bold, Graphic Look with Outlines

Make your tropical botanicals pop with a clean, graphic style by emphasizing strong outlines.
Use a thick, raised stitch like a whipped backstitch or a chain stitch for the outlines to give them prominence.
Fill the shapes with dense, smooth satin stitch in flat, vibrant colors. This combination of bold lines and solid color blocks creates a modern, almost cartoon-like effect.
Stitching on a dark fabric like this black apron makes the bright colors appear even more intense and striking.
15. Use Stitch Direction to Create a Fan Effect
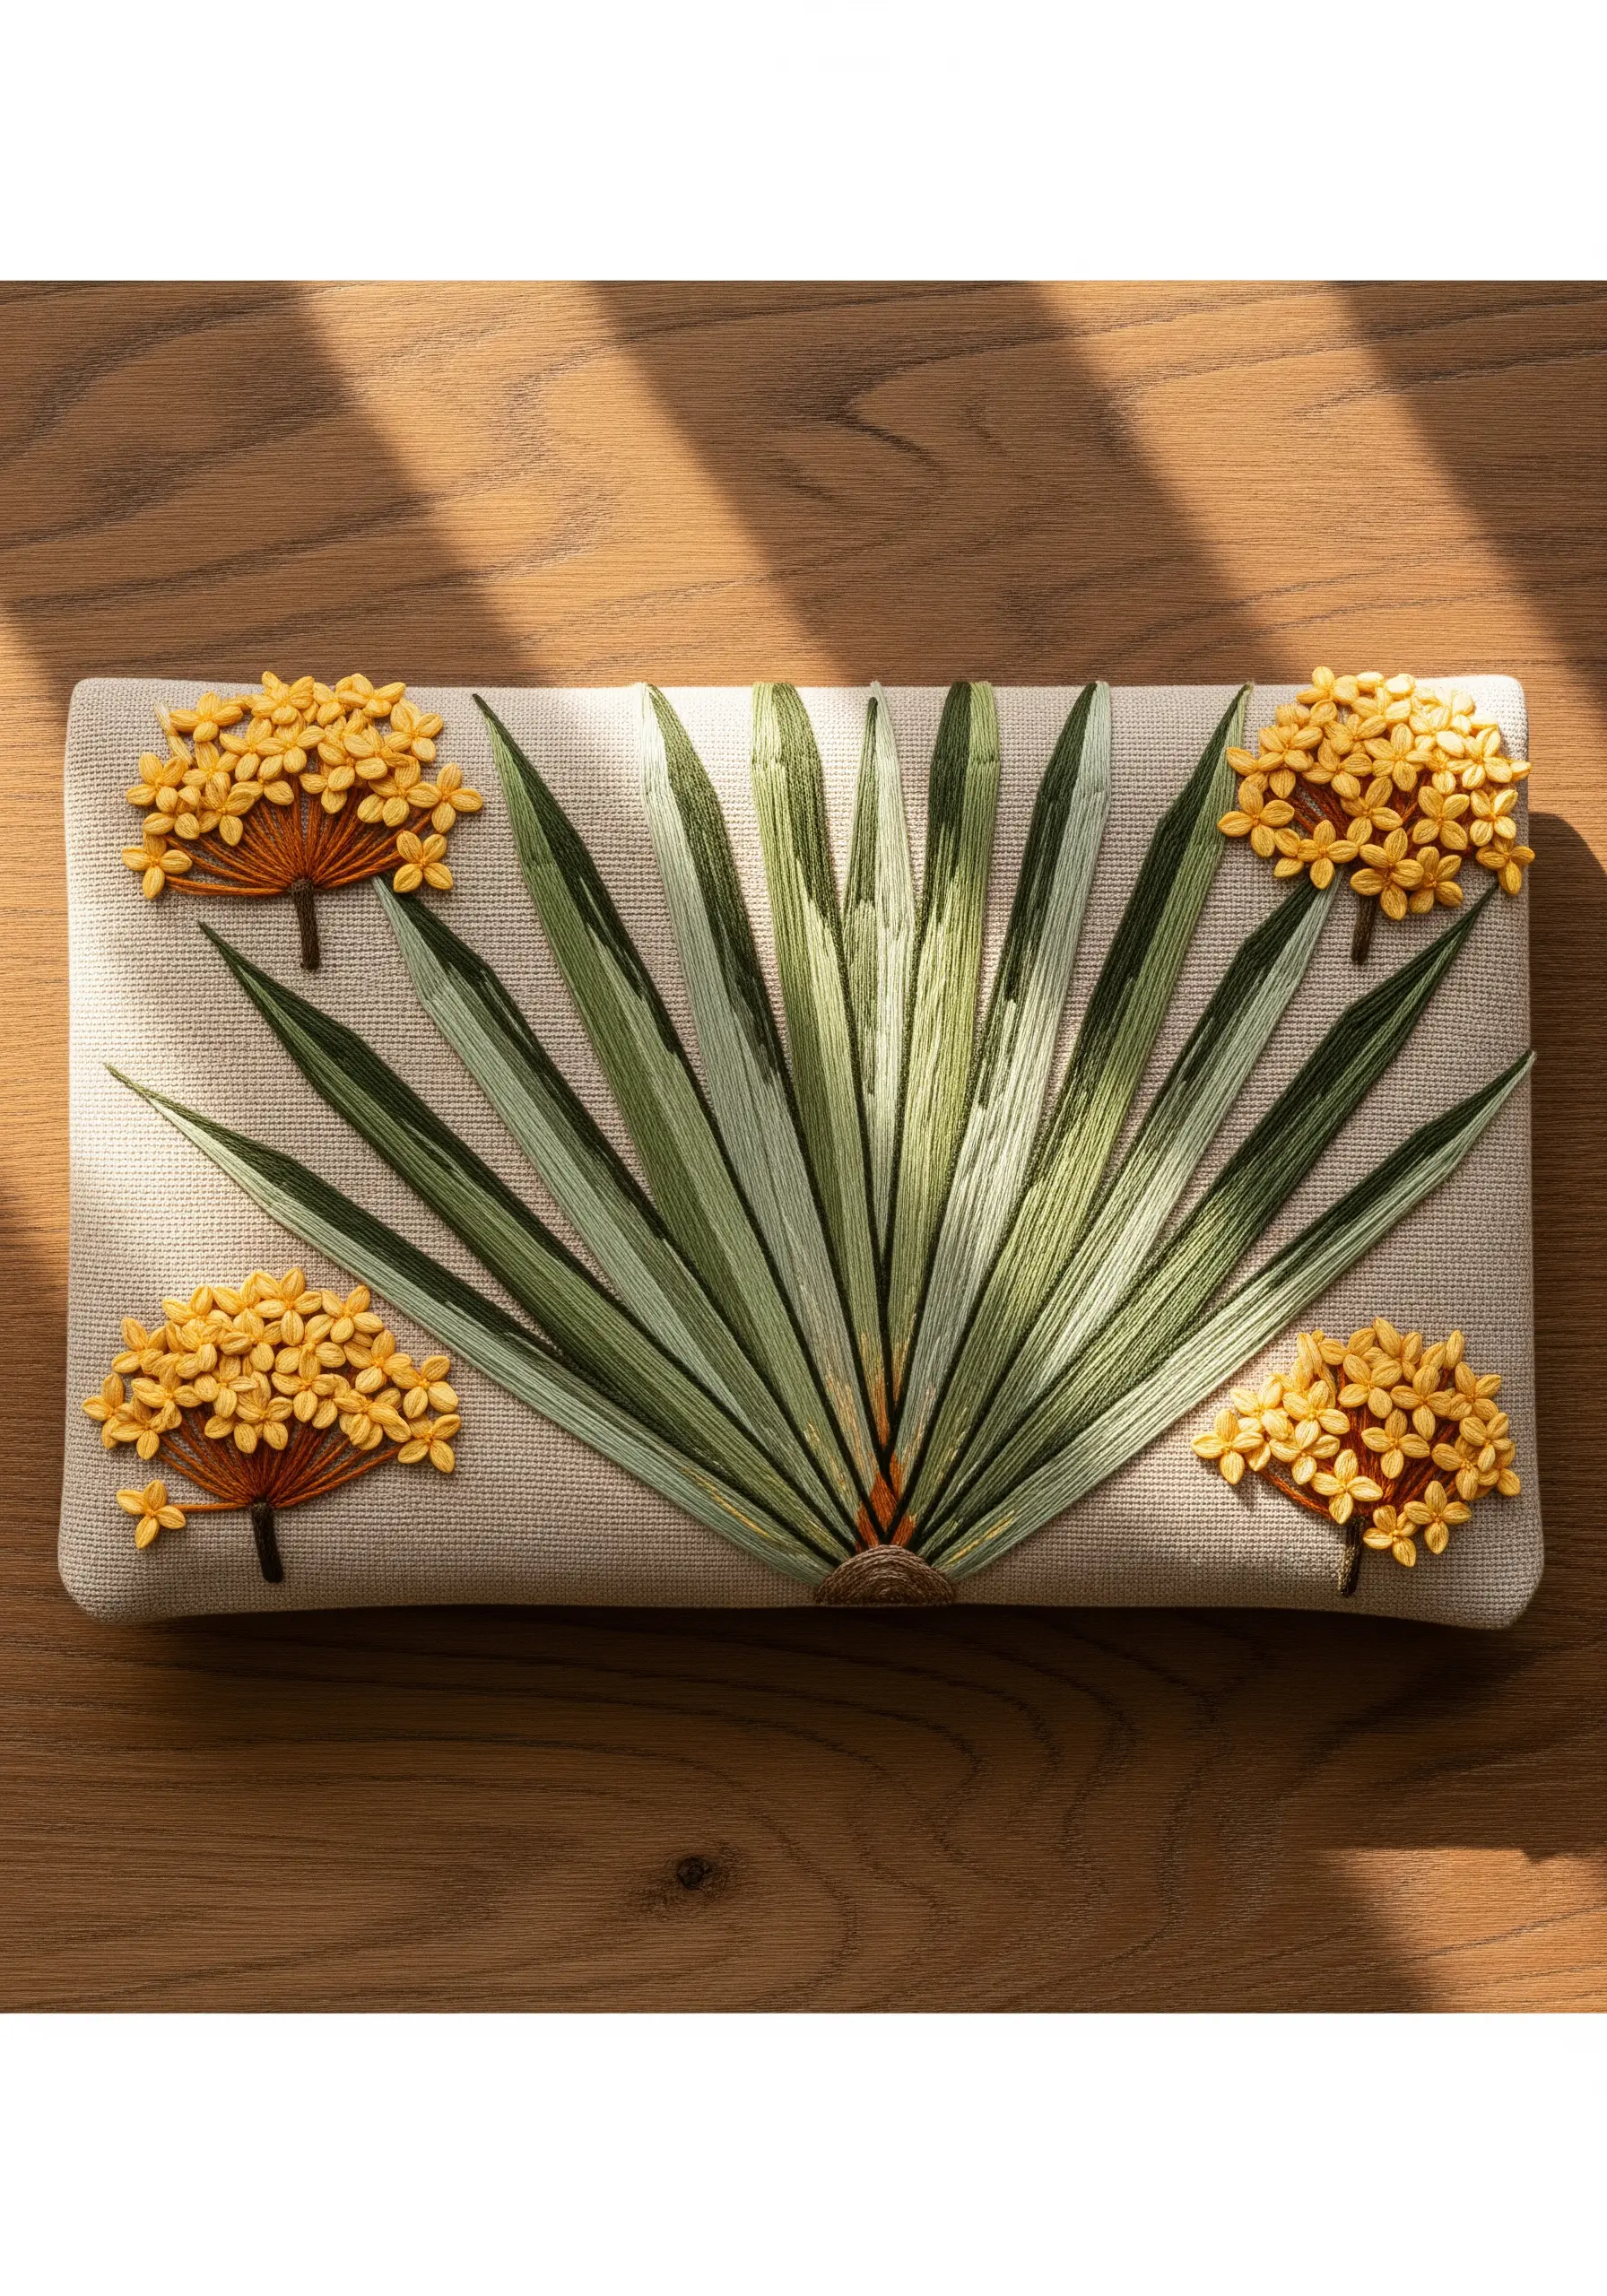
Create a sense of movement and form in long leaves by using carefully directed straight stitches.
For these fan-like leaves, run single, long stitches from the base to the tip, radiating outwards like rays of light.
Use a variegated green thread or blend two similar green tones to add subtle color dimension without complex shading.
Contrast the smooth, sleek leaves with textured clusters of French knots for the yellow flowers, creating a pleasing tactile and visual balance.
This composition demonstrates powerful natural texture embroidery.
16. Translate Botanical Illustrations to Fabric

Turn a favorite botanical illustration into a stunning piece of textile art for your wall.
For a complex flower like a Protea, break it down into smaller, manageable sections.
Use long-and-short stitch to blend colors on the petals, creating a soft gradient from base to tip.
For the fuzzy center, a dense application of French knots or turkey work will replicate the unique texture perfectly.
Hanging it as a fabric tapestry is a modern alternative to traditional framing for these DIY framed embroidery art projects.
17. Add an Embroidered Border to Terry Cloth

Embellish a plush towel by adding a contrasting embroidered border to the flat-woven band.
Because towels are washed frequently, secure your thread ends meticulously by weaving them under existing stitches on the back.
Use a dense satin stitch for the flowers and leaves; the smooth, raised texture provides a beautiful contrast against the looped terry cloth pile.
A symmetrical, repeating pattern of flowers and leaves creates a classic, luxurious finish.
18. Master Silk Shading on Lustrous Fabric
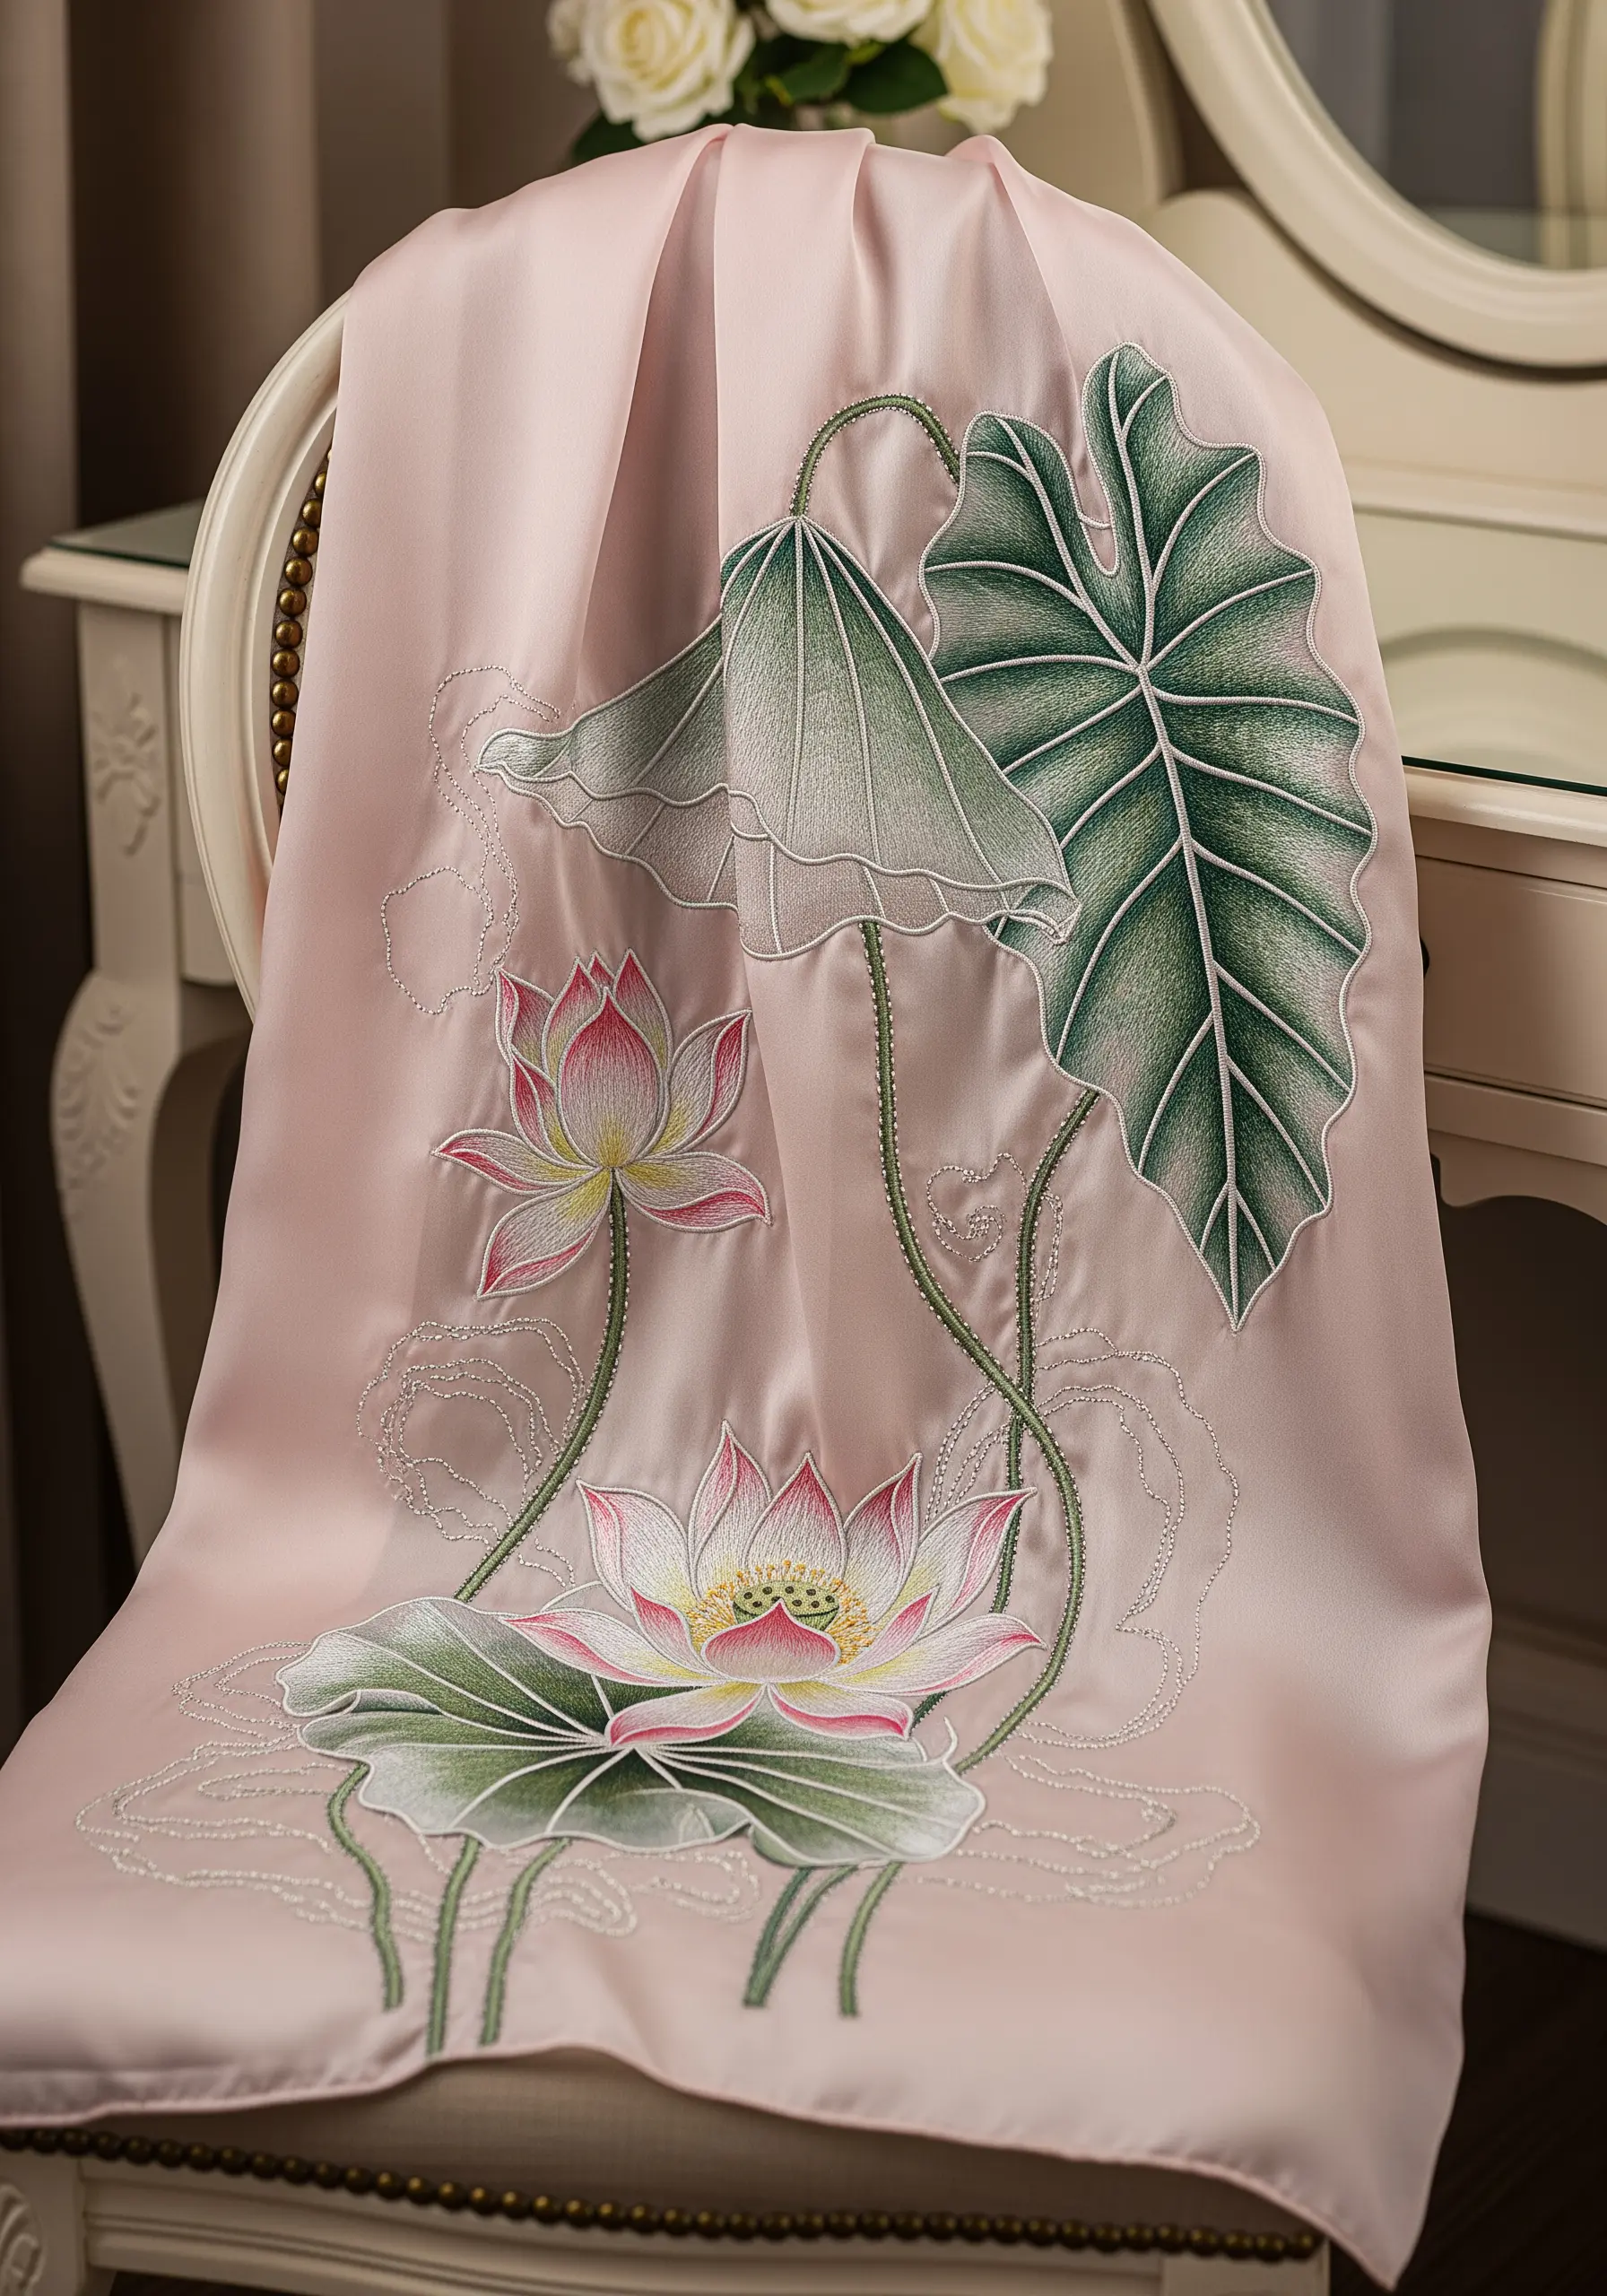
Achieve a delicate, watercolor-like effect on satin or silk fabric using the silk shading technique.
Use a single strand of cotton or silk floss and a very fine needle to avoid creating large holes or puckering the fabric.
Blend your colors meticulously with long-and-short stitch, ensuring your stitches are angled to follow the curves of the lotus petals and leaves.
The natural sheen of the fabric will enhance the subtle color transitions, creating a truly elegant and ethereal piece.
19. Design Coordinated Pillowcase Sets
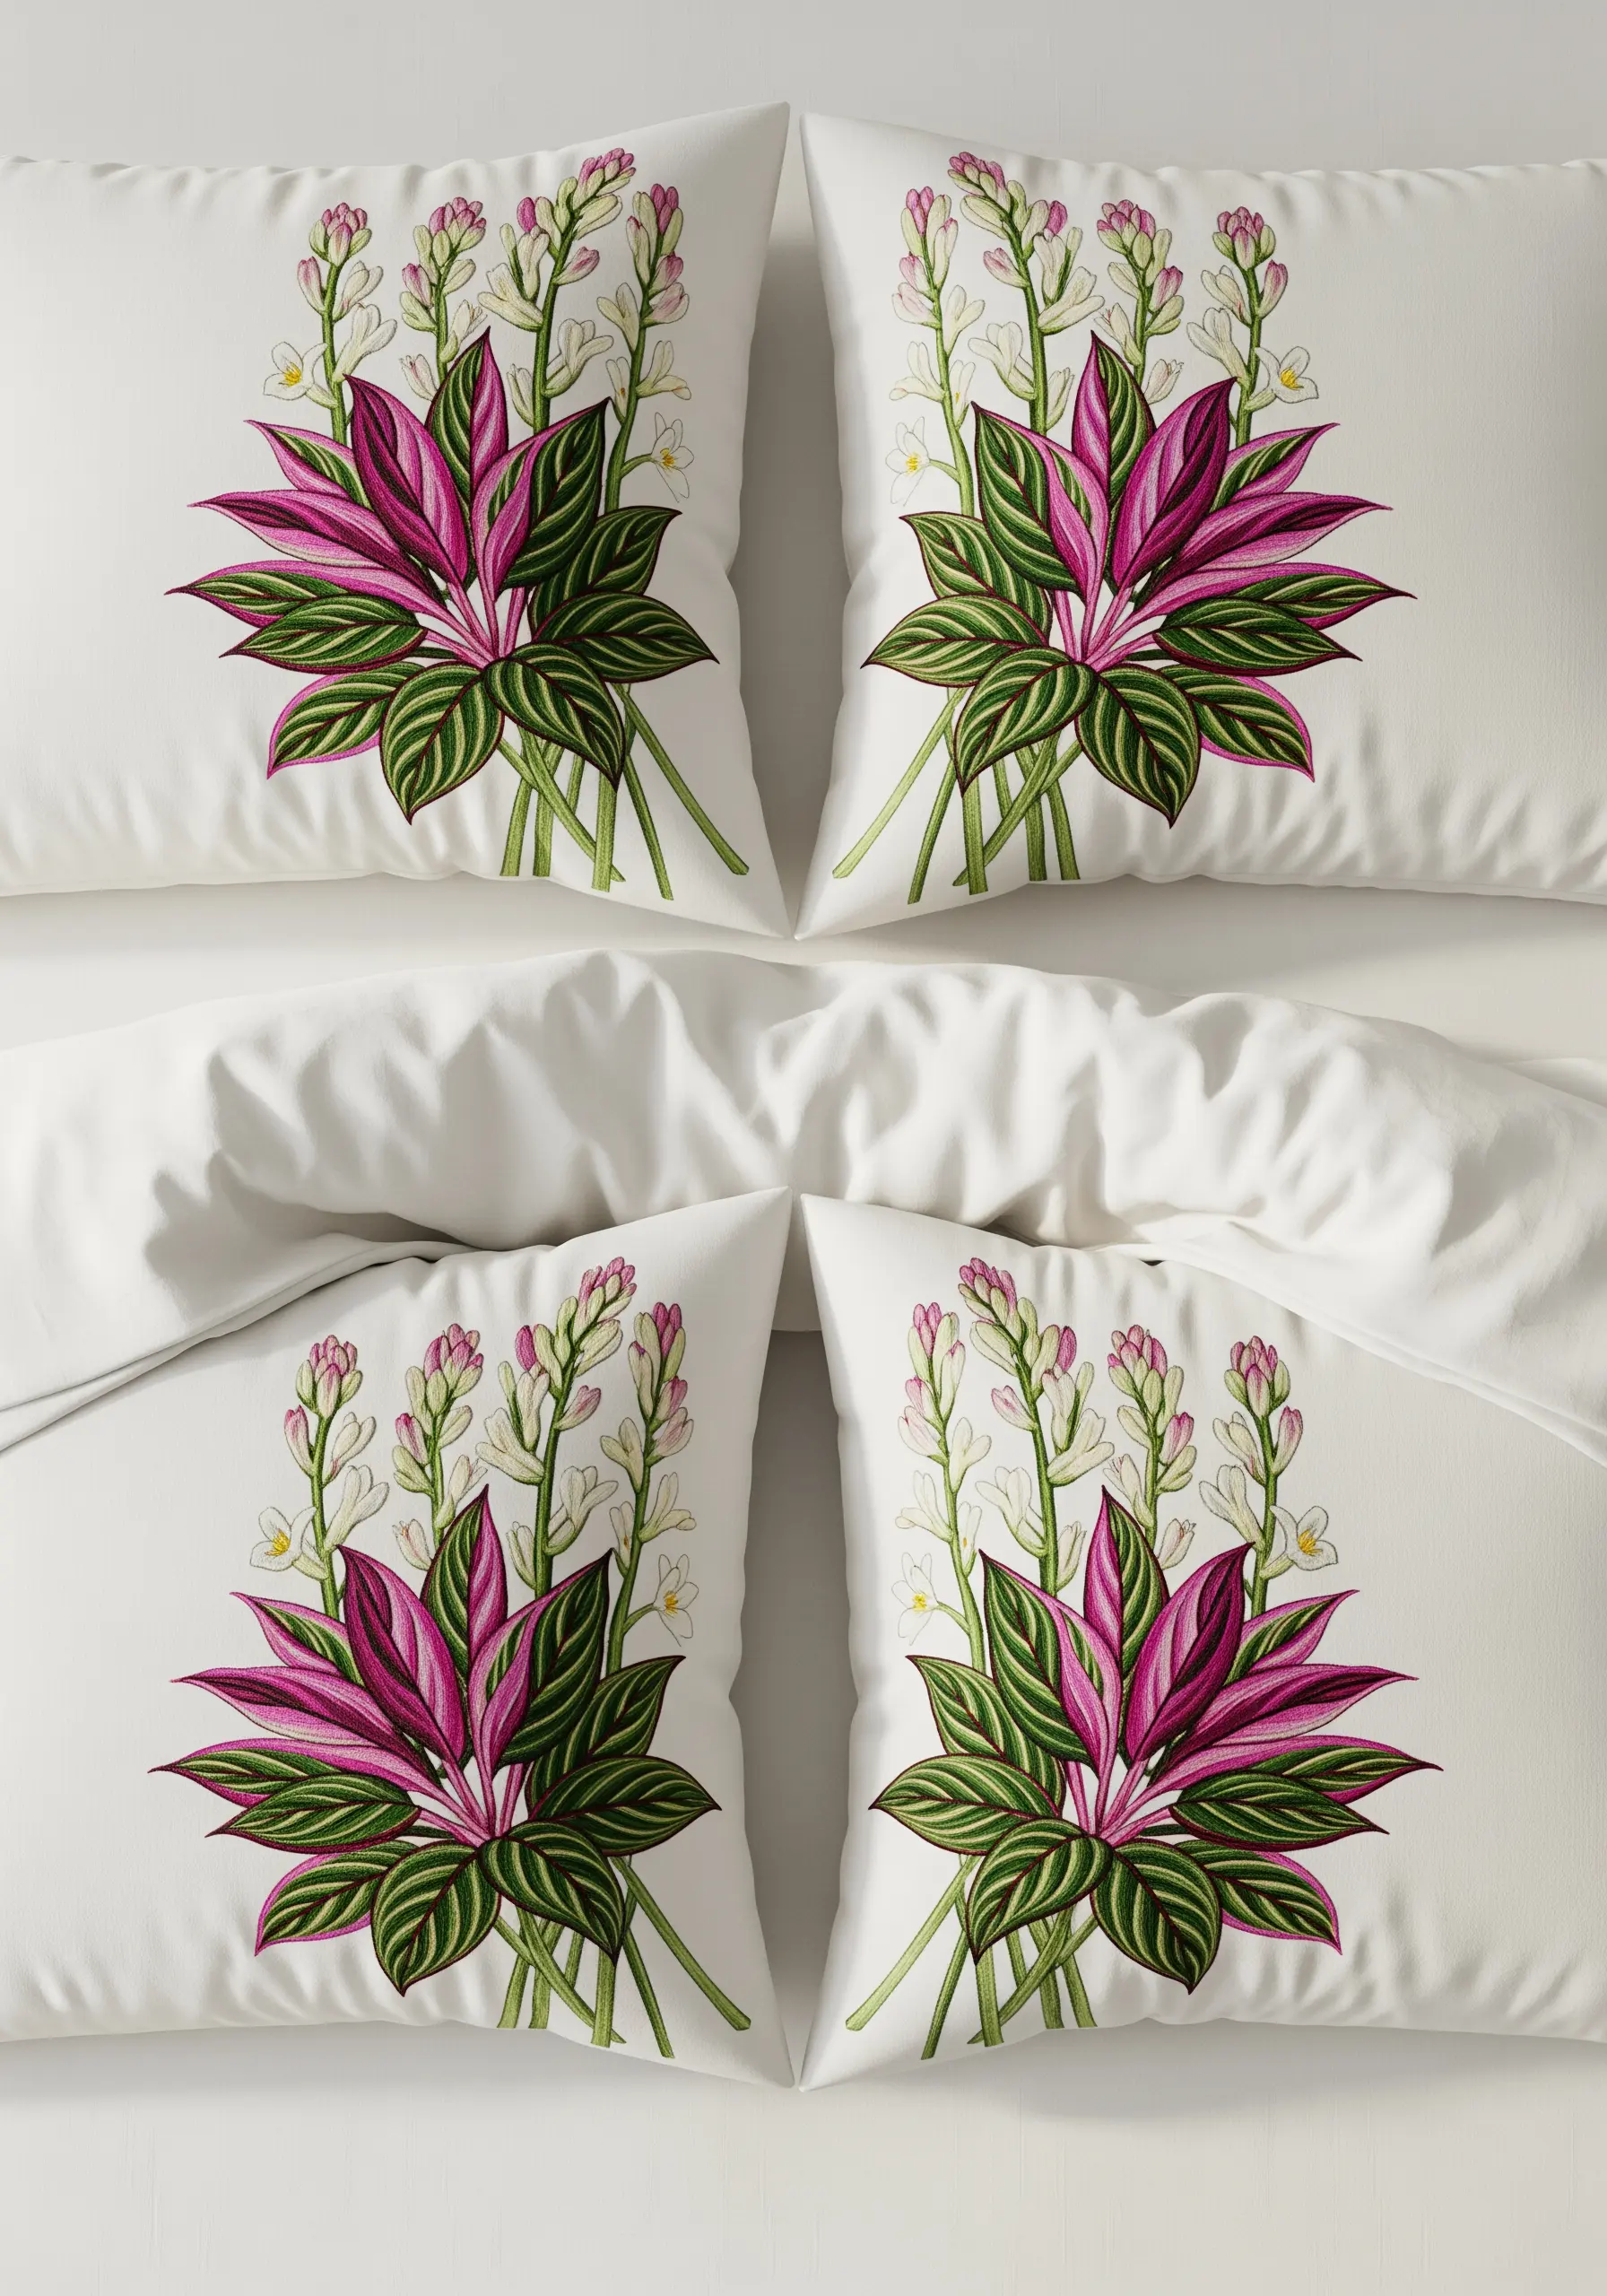
Create a beautifully coordinated bed by stitching complementary botanical designs on a set of pillowcases.
Choose a plant with interesting foliage, like the Stromanthe Triostar, to practice blending multiple colors within a single leaf.
Use a simple backstitch for the outlines and a directional satin stitch or long-and-short stitch for the fill to capture the leaf’s variegation.
Pairing the bold leaves with more delicate, wispy white flowers adds balance and sophistication to these personalized embroidery ideas.
20. Incorporate Unexpected Graphic Elements
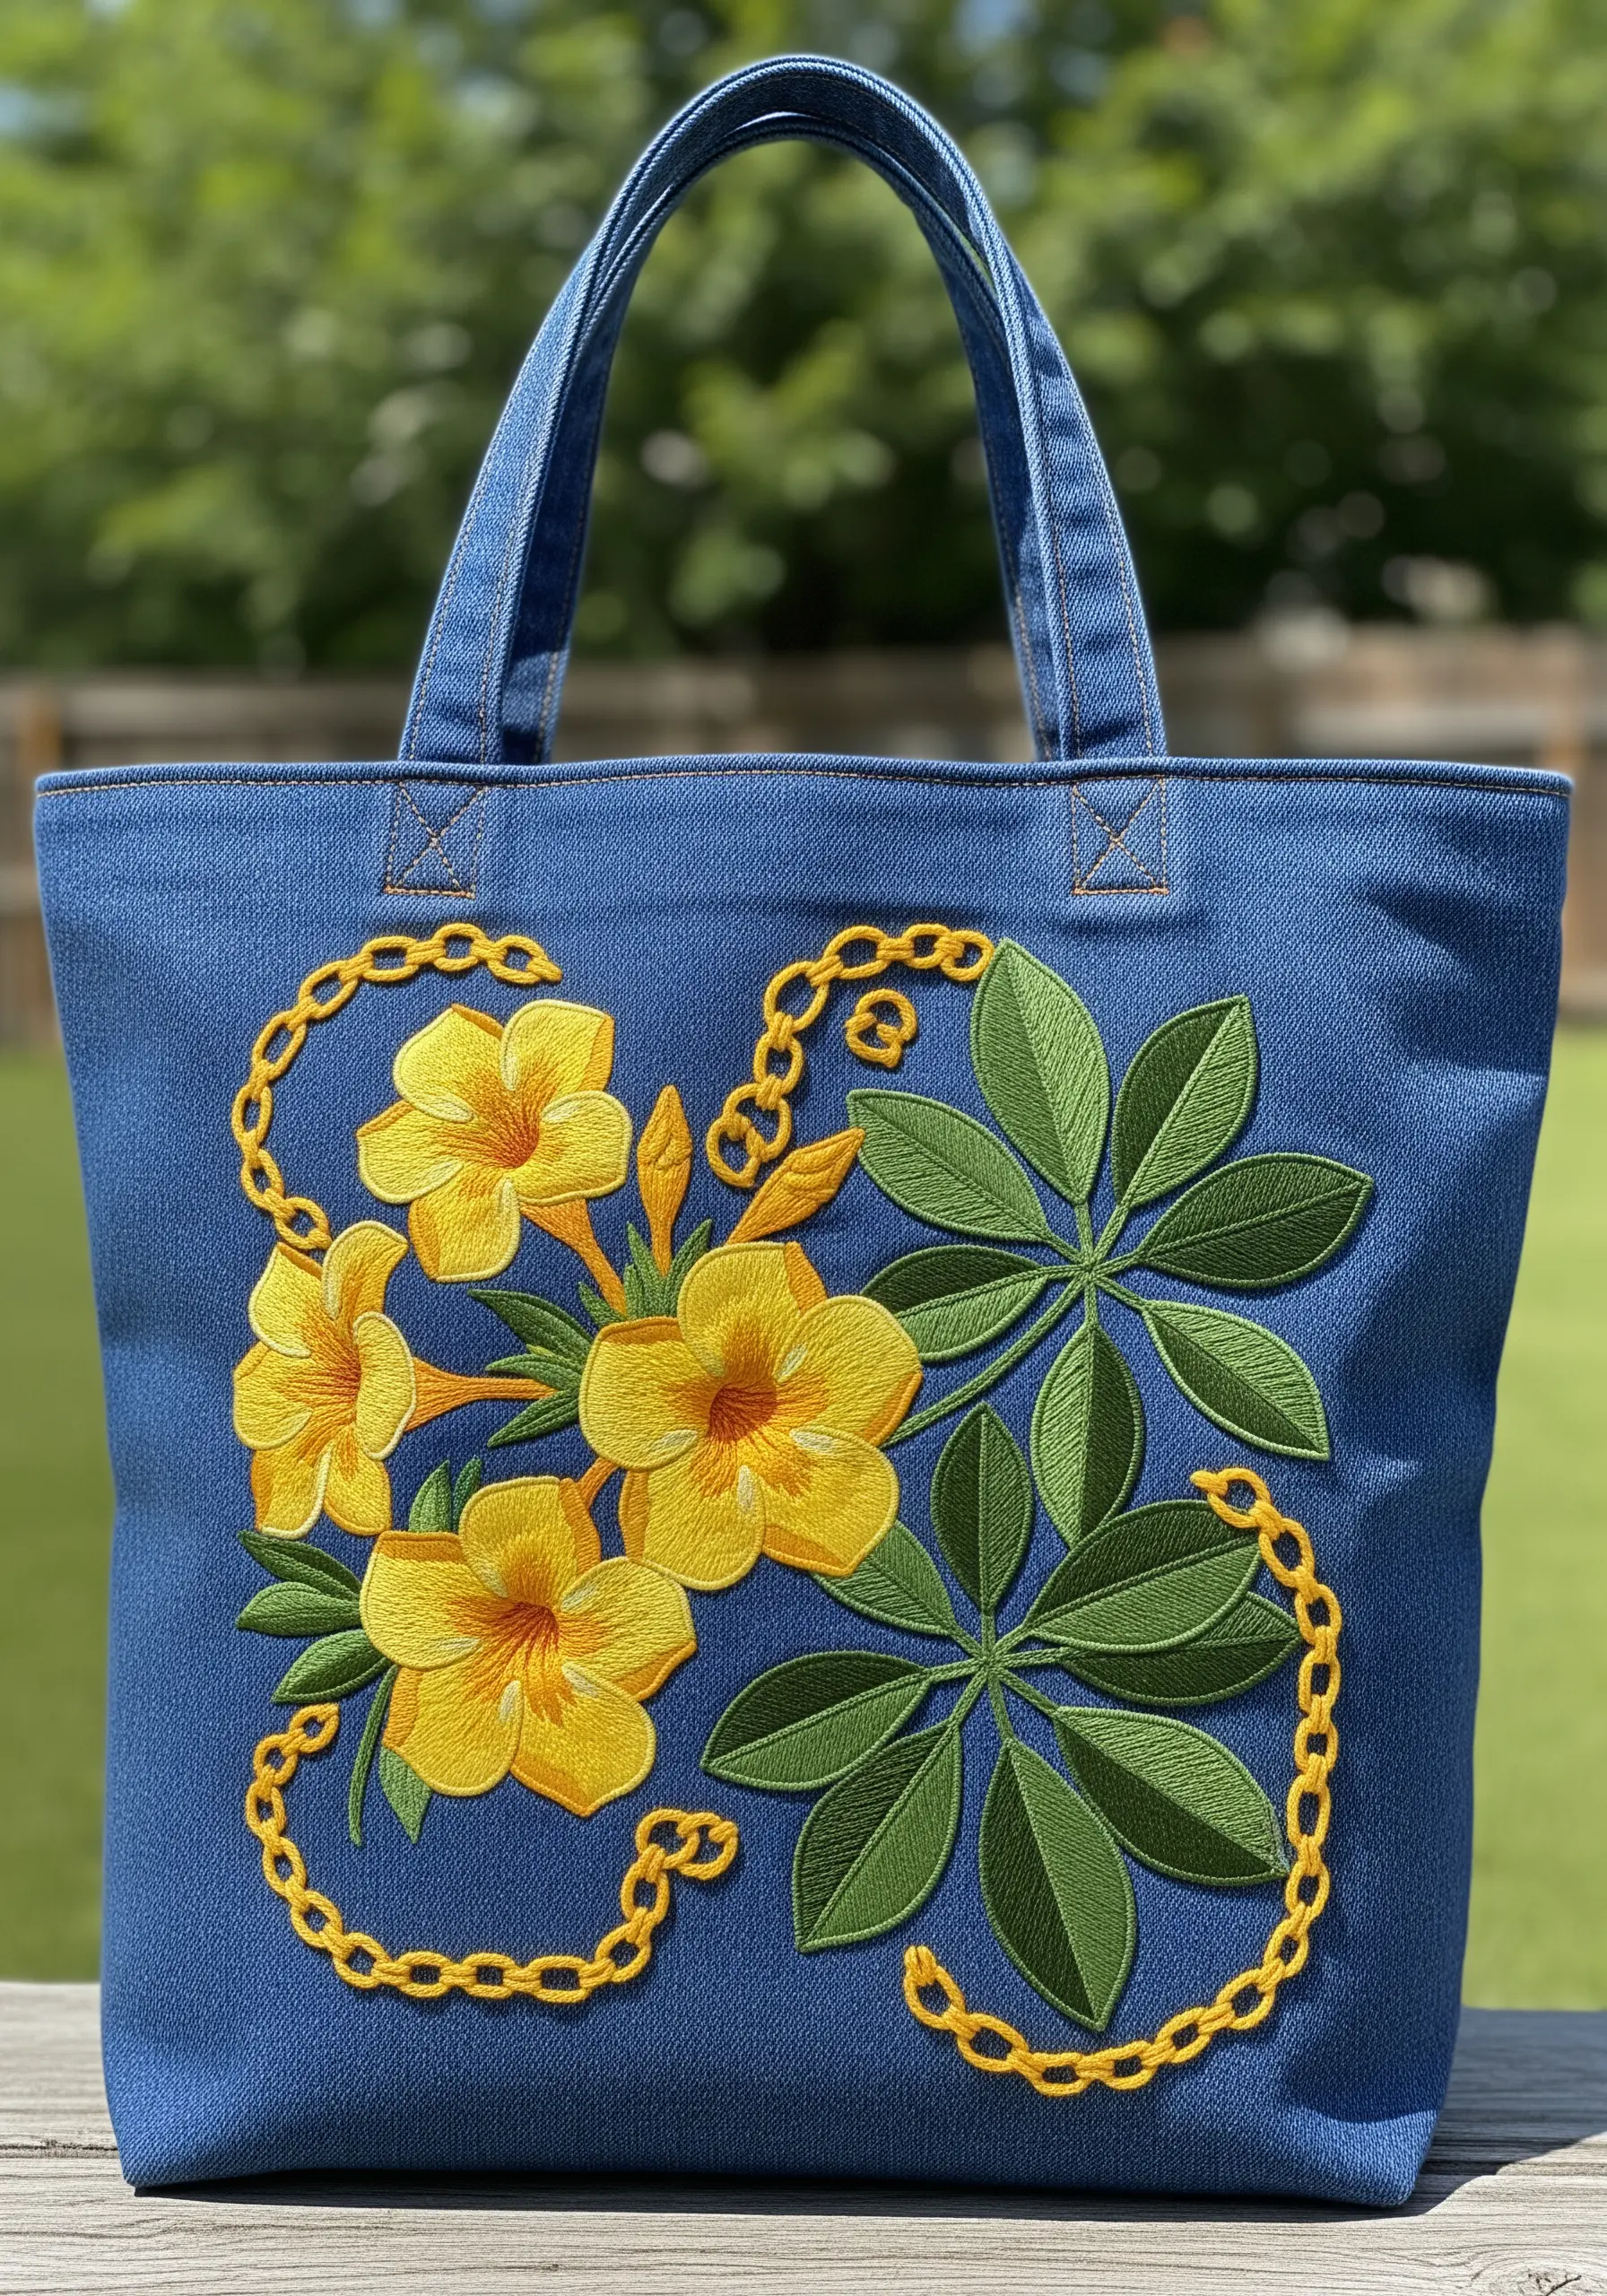
Add a modern twist to a classic floral design by incorporating a non-botanical, graphic element like a chain.
Use a heavy chain stitch with a contrasting color, like this bold gold, to make the element stand out.
Weave the chain behind and in front of the leaves and flowers to create a sense of depth and interaction between the elements.
This technique elevates a simple tote bag from a standard floral project into a unique piece of wearable art, perfect for turning plain tote bags into mini gardens.
21. Create an Illustrated Look with Line Art
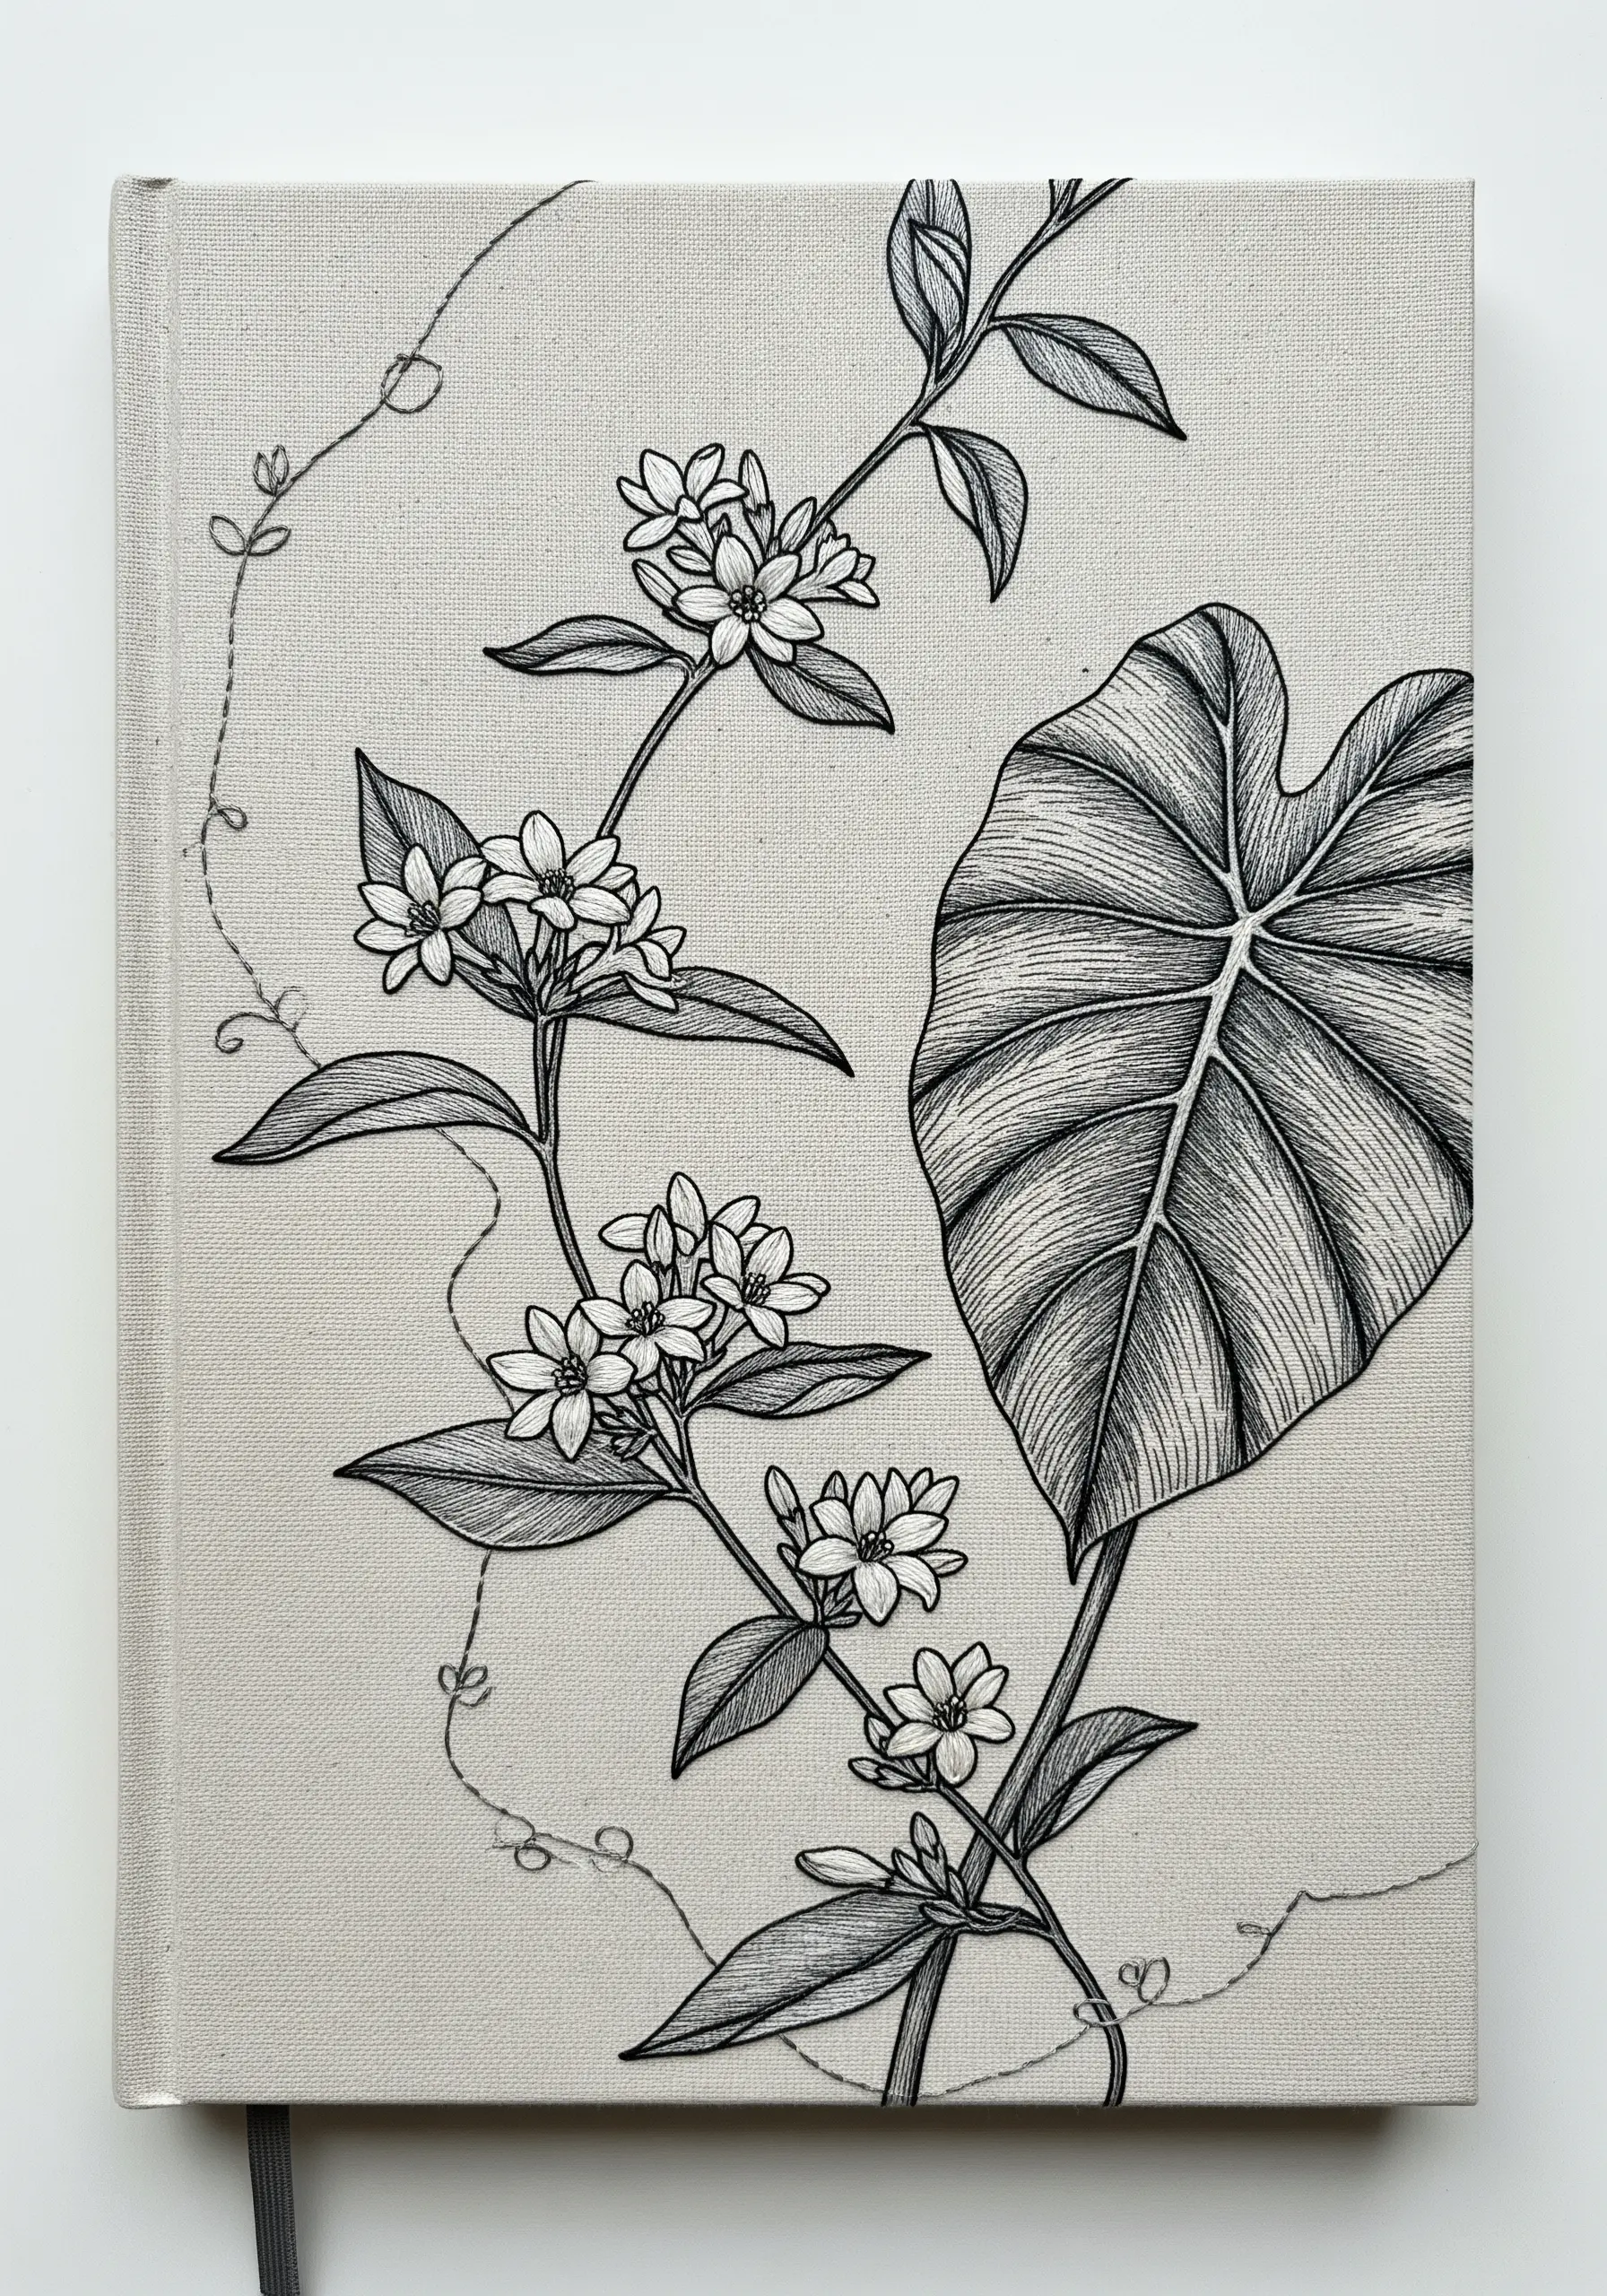
Achieve a sophisticated, hand-drawn aesthetic using only black thread and line-based stitches.
Use a neat backstitch or stem stitch for the main outlines of the leaves and flowers.
Create shading and texture with parallel lines (hatching) and crossed lines (cross-hatching), just as you would with a pen on paper.
This minimalist approach focuses on form and texture rather than color, resulting in elegant delicate line art embroidery that looks stunning on journal covers or framed as art.
22. Construct a Lavish Embroidered Table Runner
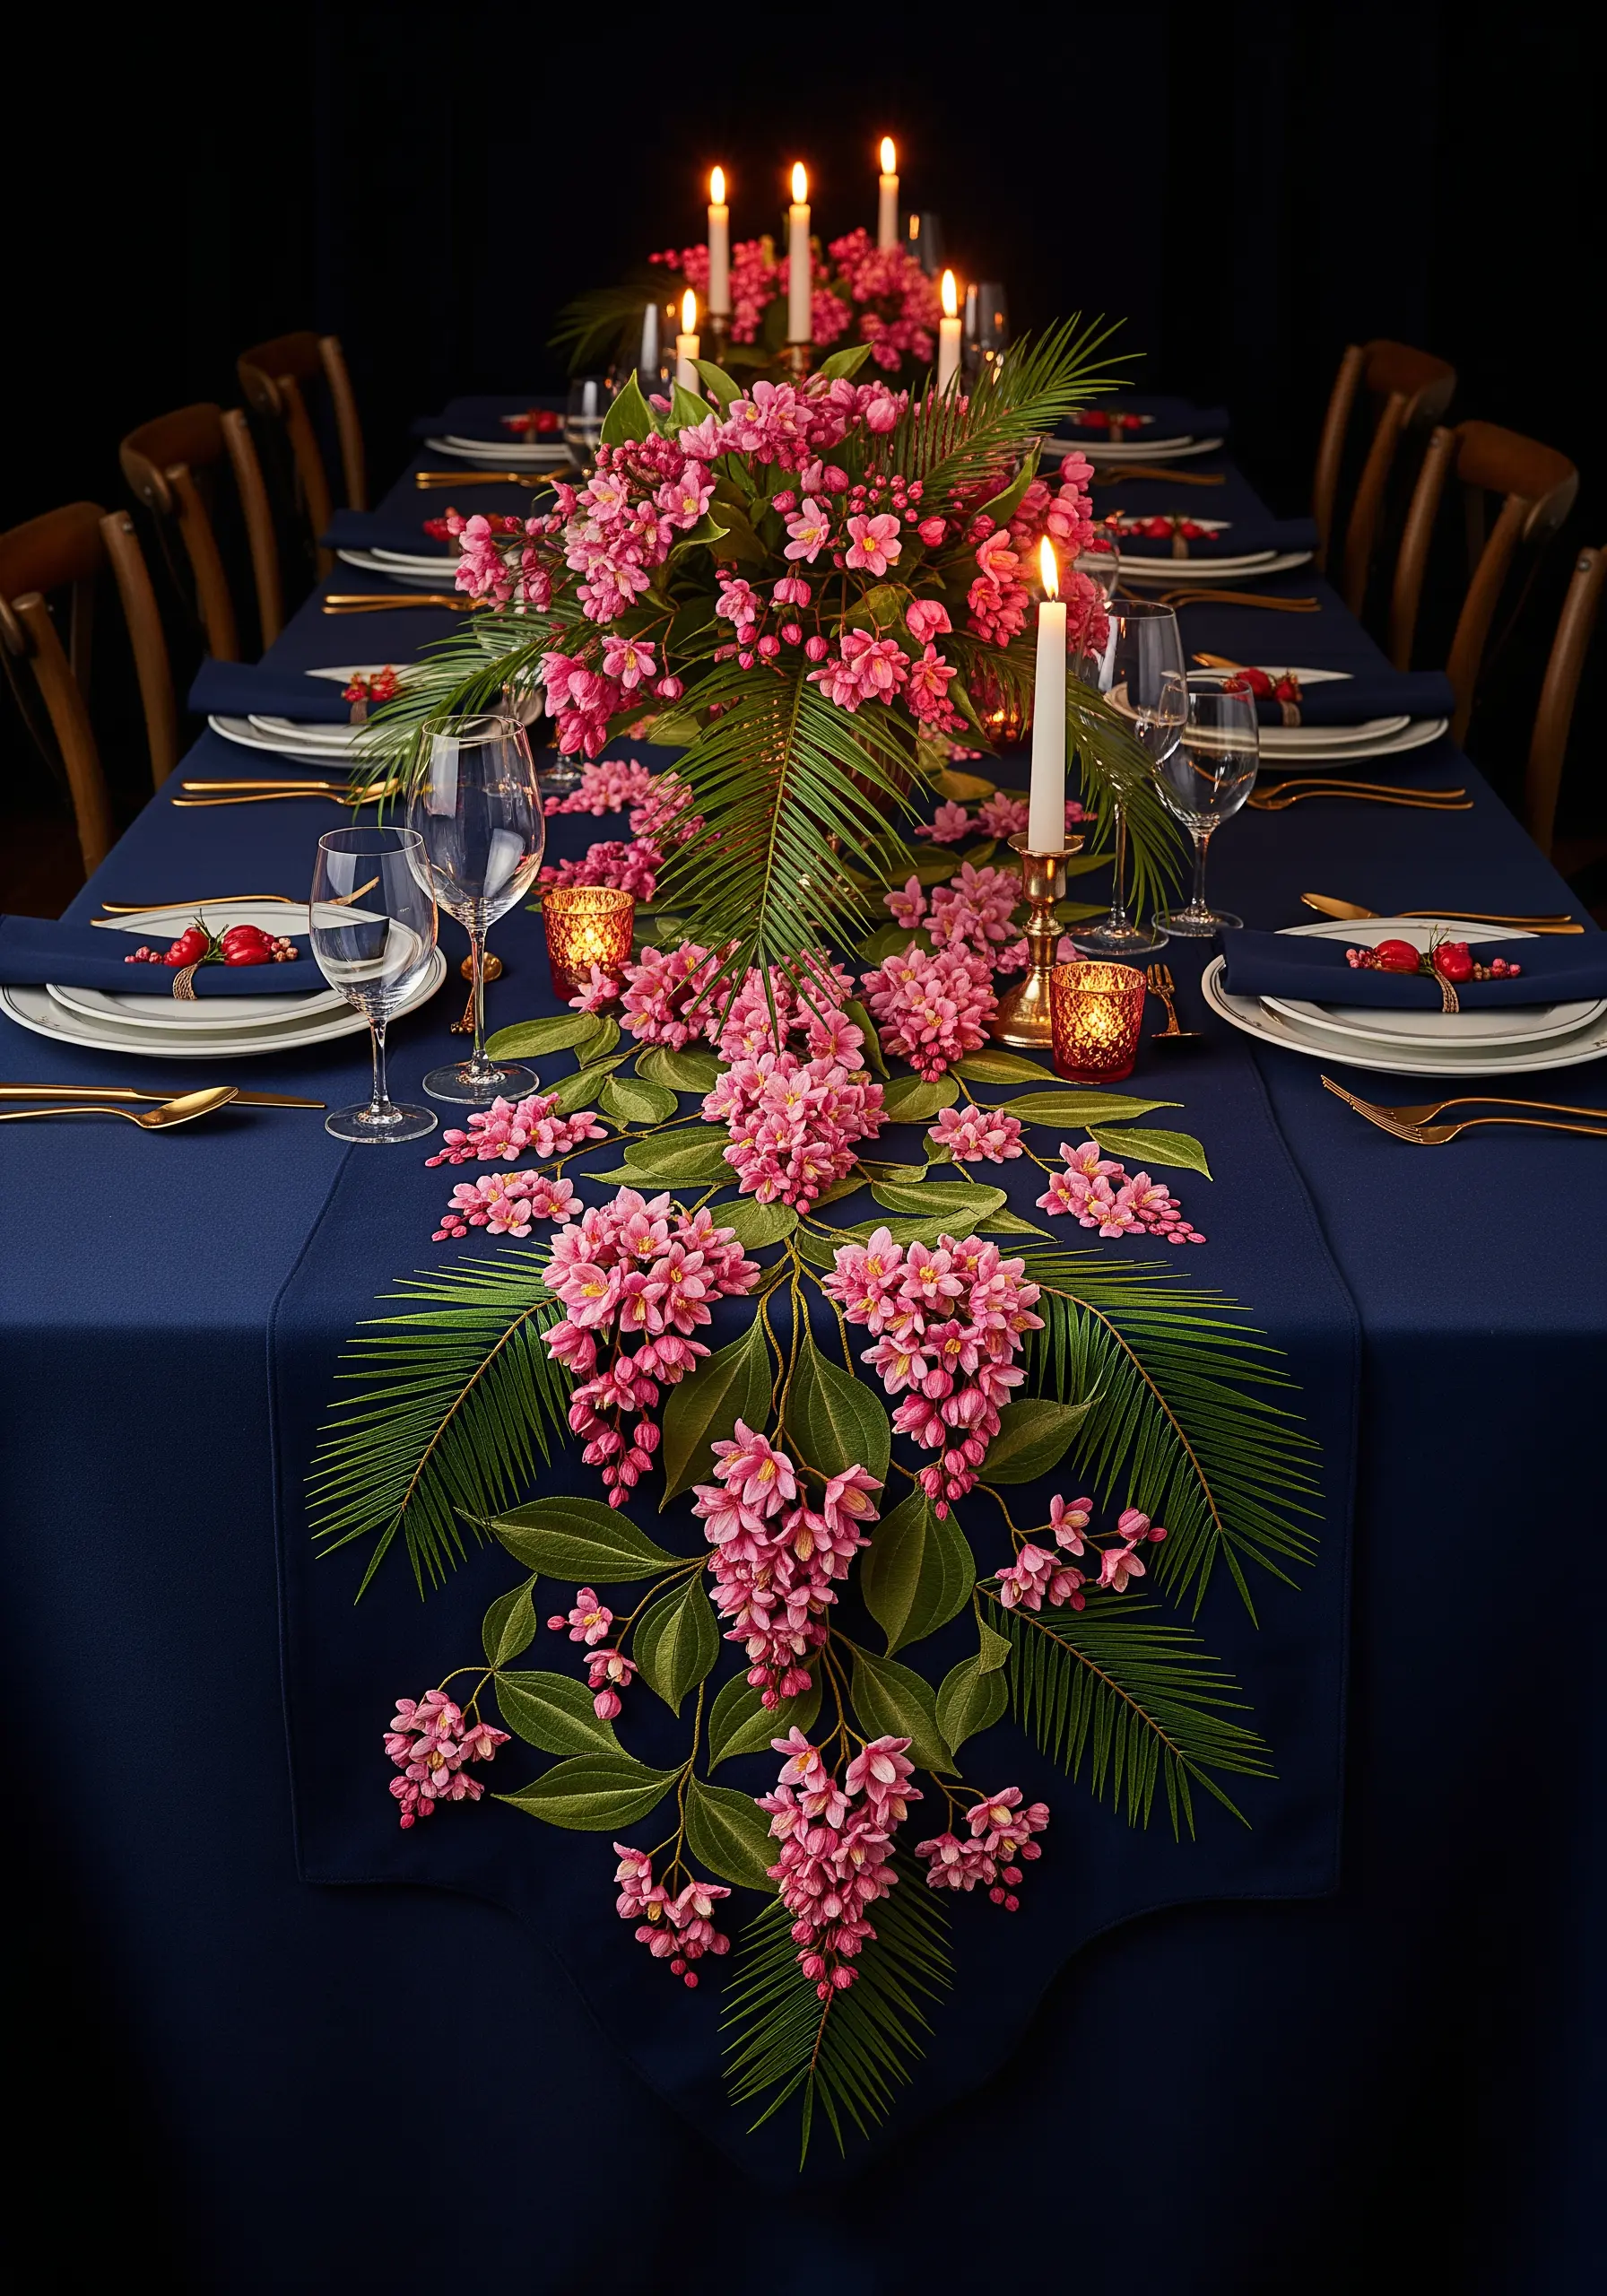
Design an opulent, cascading centerpiece by embroidering a table runner from end to end.
Work in layers: stitch the background elements like the palm fronds first, then add the mid-ground leaves, and finally the foreground flowers.
Create texture and density in the floral clusters by using French knots, bullion knots, or cast-on stitches for the individual blossoms.
This large-scale project transforms a plain tablecloth into a dramatic, unforgettable element of your tablescape.
23. Add Modern Texture with Seed Stitching

Incorporate modern, abstract textures into your botanical designs with simple seed stitches.
Use clusters of small, scattered straight stitches in a contrasting color to create a stippled or dotted effect.
This technique adds visual interest and a contemporary feel to the negative space around your main subject.
Framing the central bouquet with two elegantly arched fern fronds provides a sense of symmetry and grace to the overall composition.
24. Embellish a Collar with Symmetrical Motifs
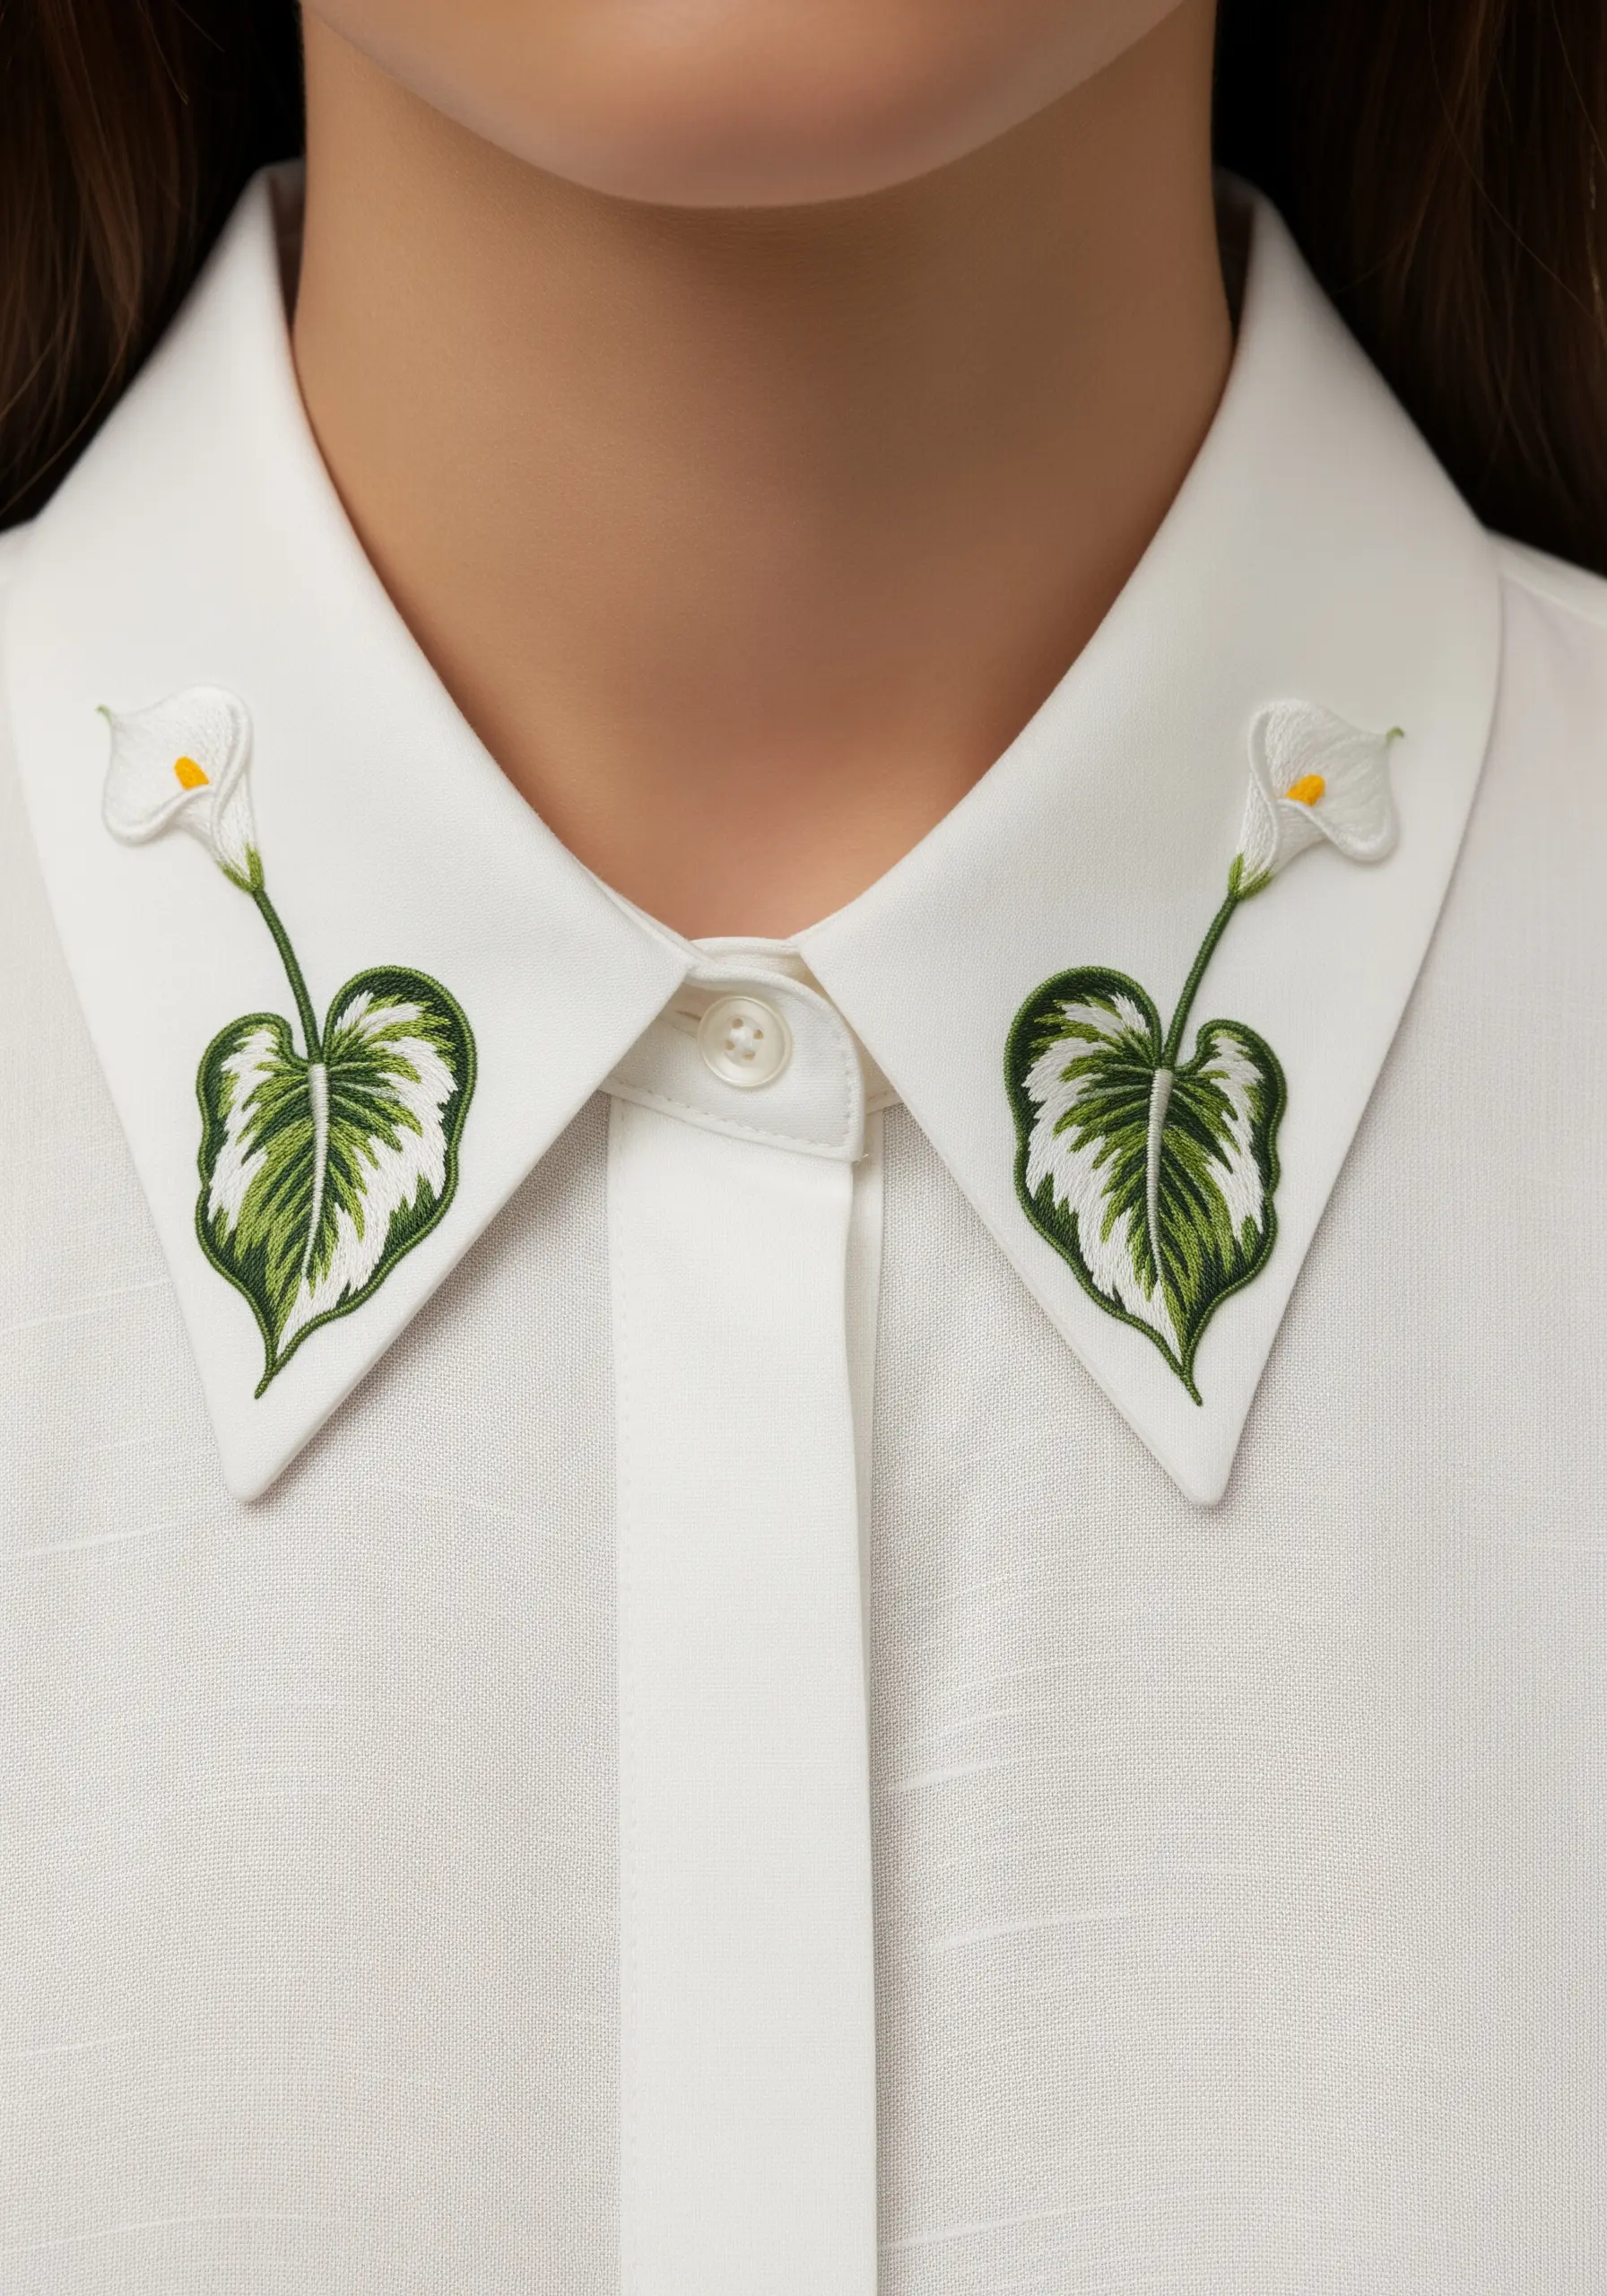
Add a bespoke touch to a plain shirt by embroidering perfectly symmetrical motifs on the collar points.
To ensure perfect placement, use a water-soluble transfer paper or a lightbox to trace the mirror-image designs onto each collar point before stitching.
Keep the motifs small and elegant, like these Calla Lilies with variegated leaves, to complement the garment rather than overwhelm it.
This is a subtle yet powerful way to customize your wardrobe with a touch of handmade artistry.
25. Adapt Surface Embroidery for Aida Cloth
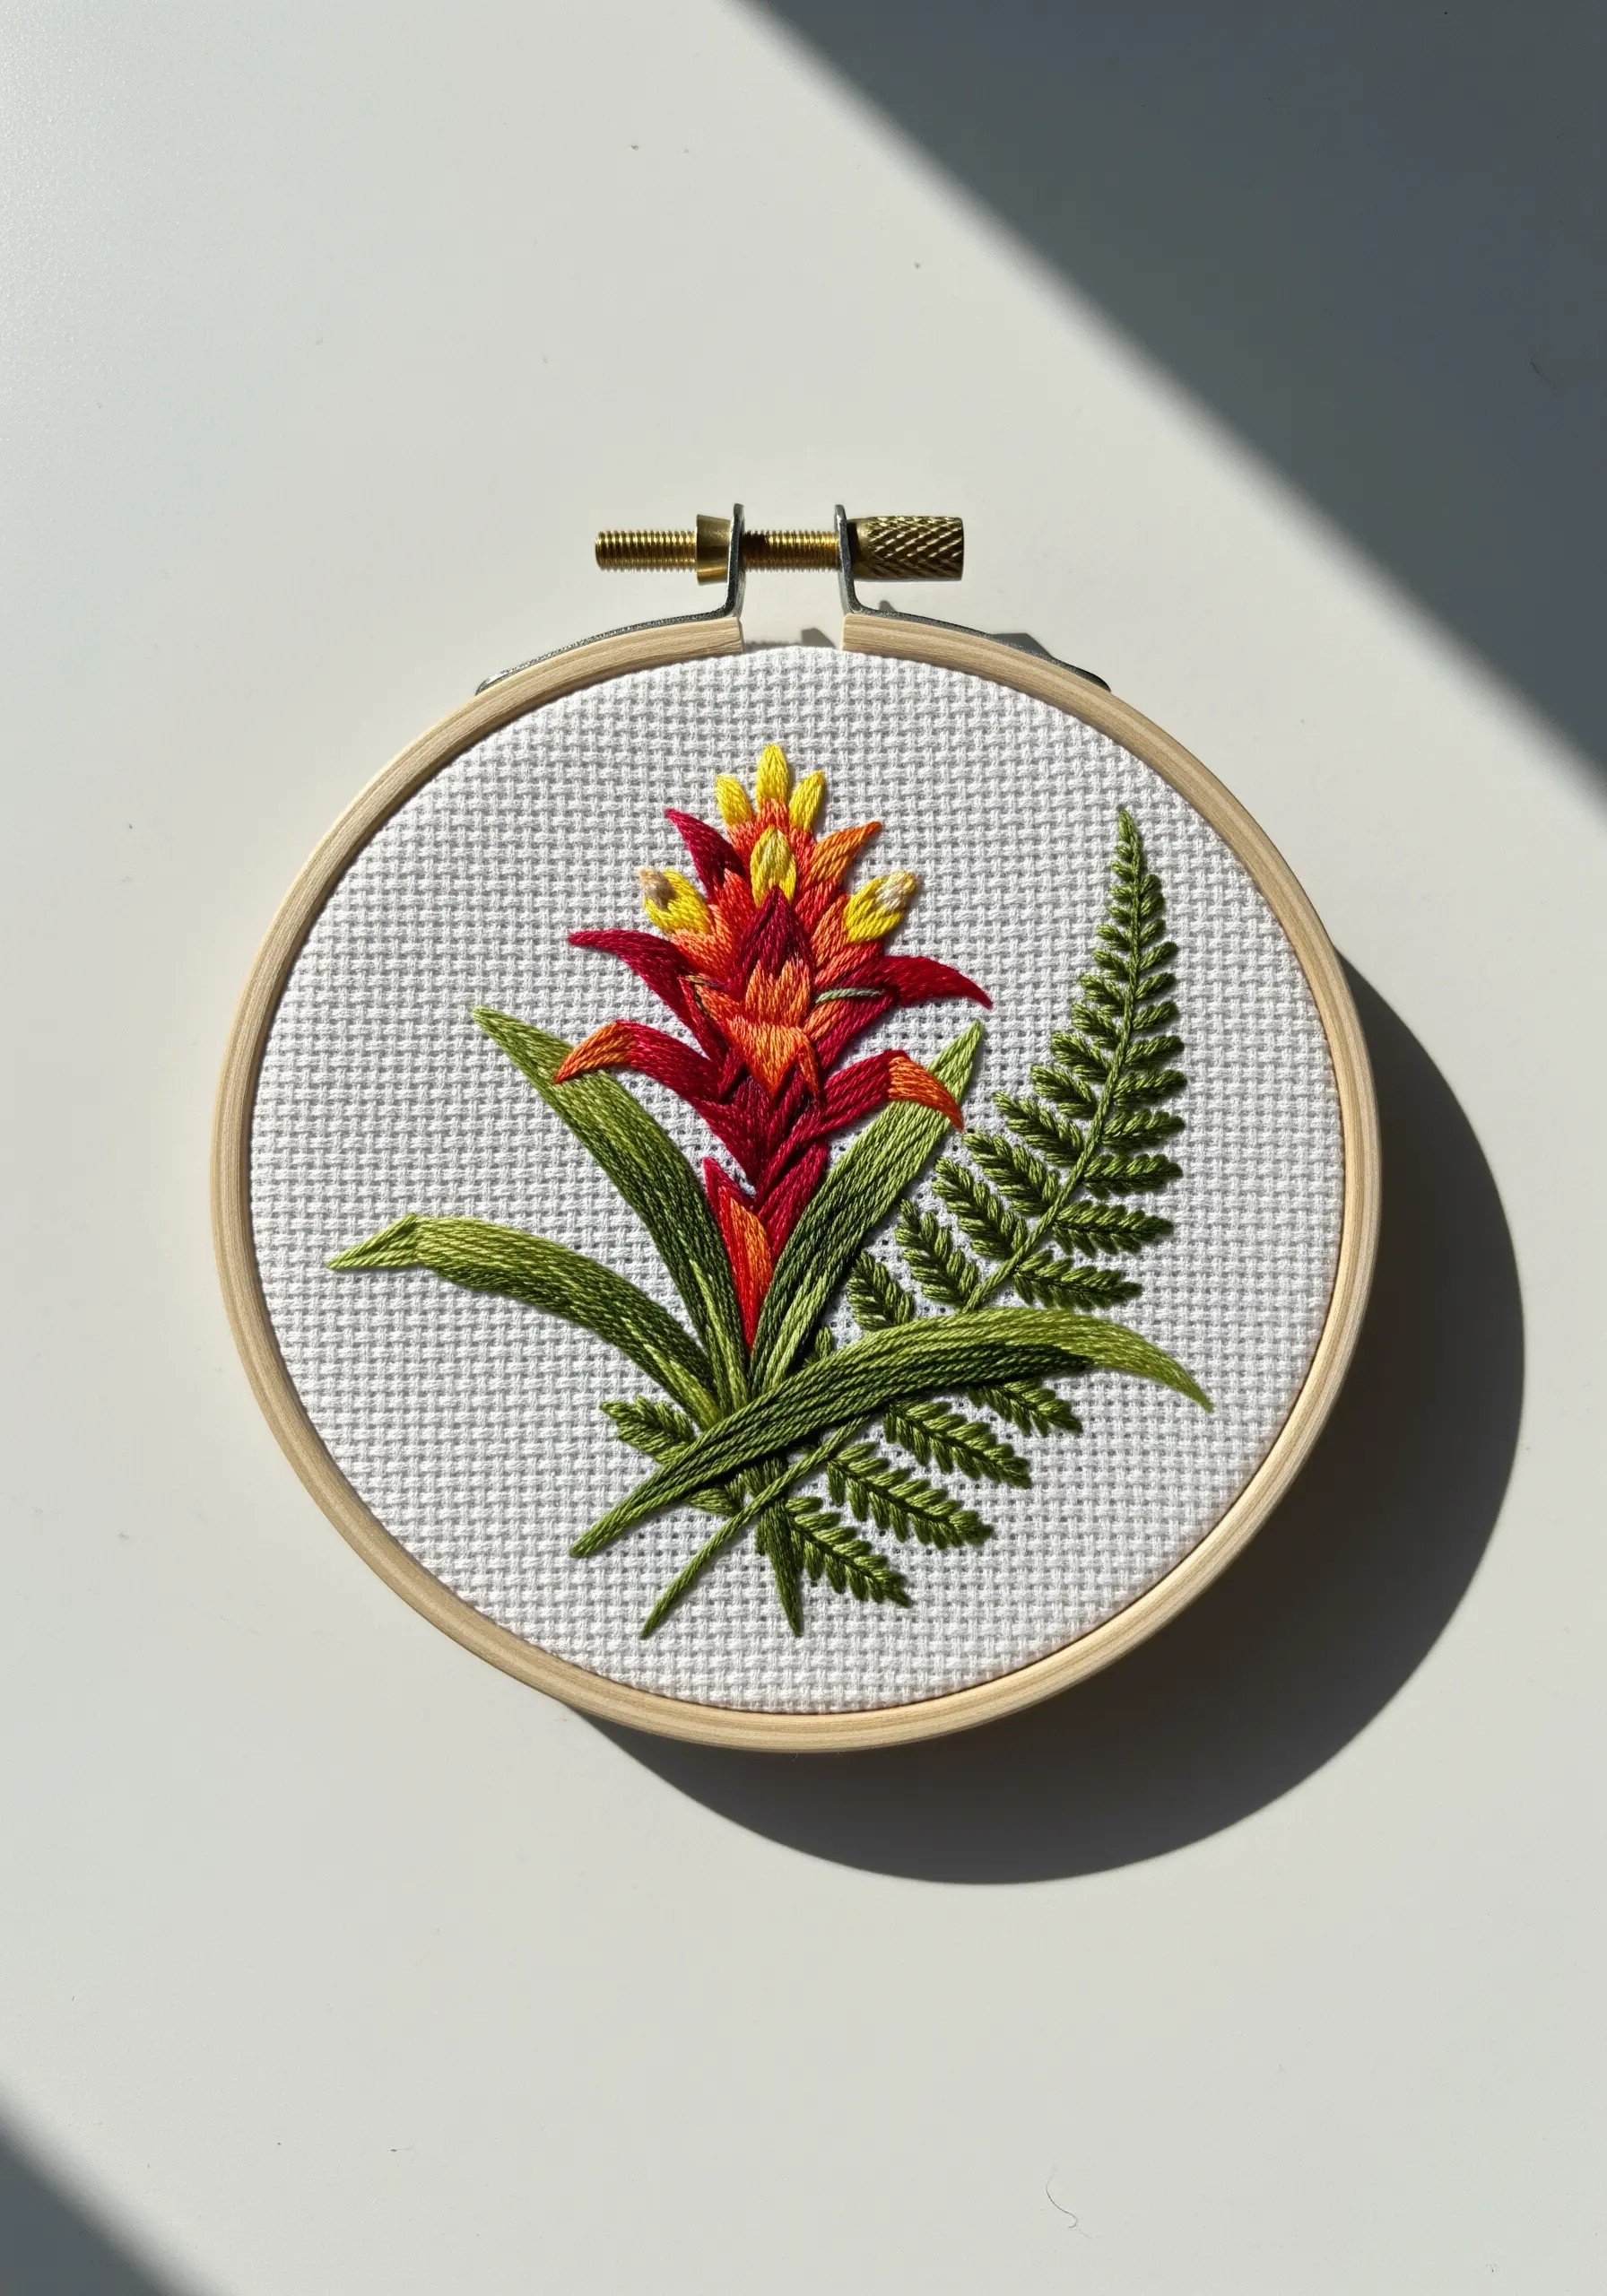
While typically used for cross-stitch, Aida cloth can be a great base for surface embroidery, offering a built-in grid for stitch consistency.
Use the fabric’s holes as a guide for creating perfectly even stitches like the fly stitches that form this fern frond.
For thread-painted elements like the Bromeliad, you can ignore the grid and work freely across the surface.
This combination of structured and freeform stitching on a gridded fabric creates a unique textural result.
26. Create Energy with a Dynamic Background
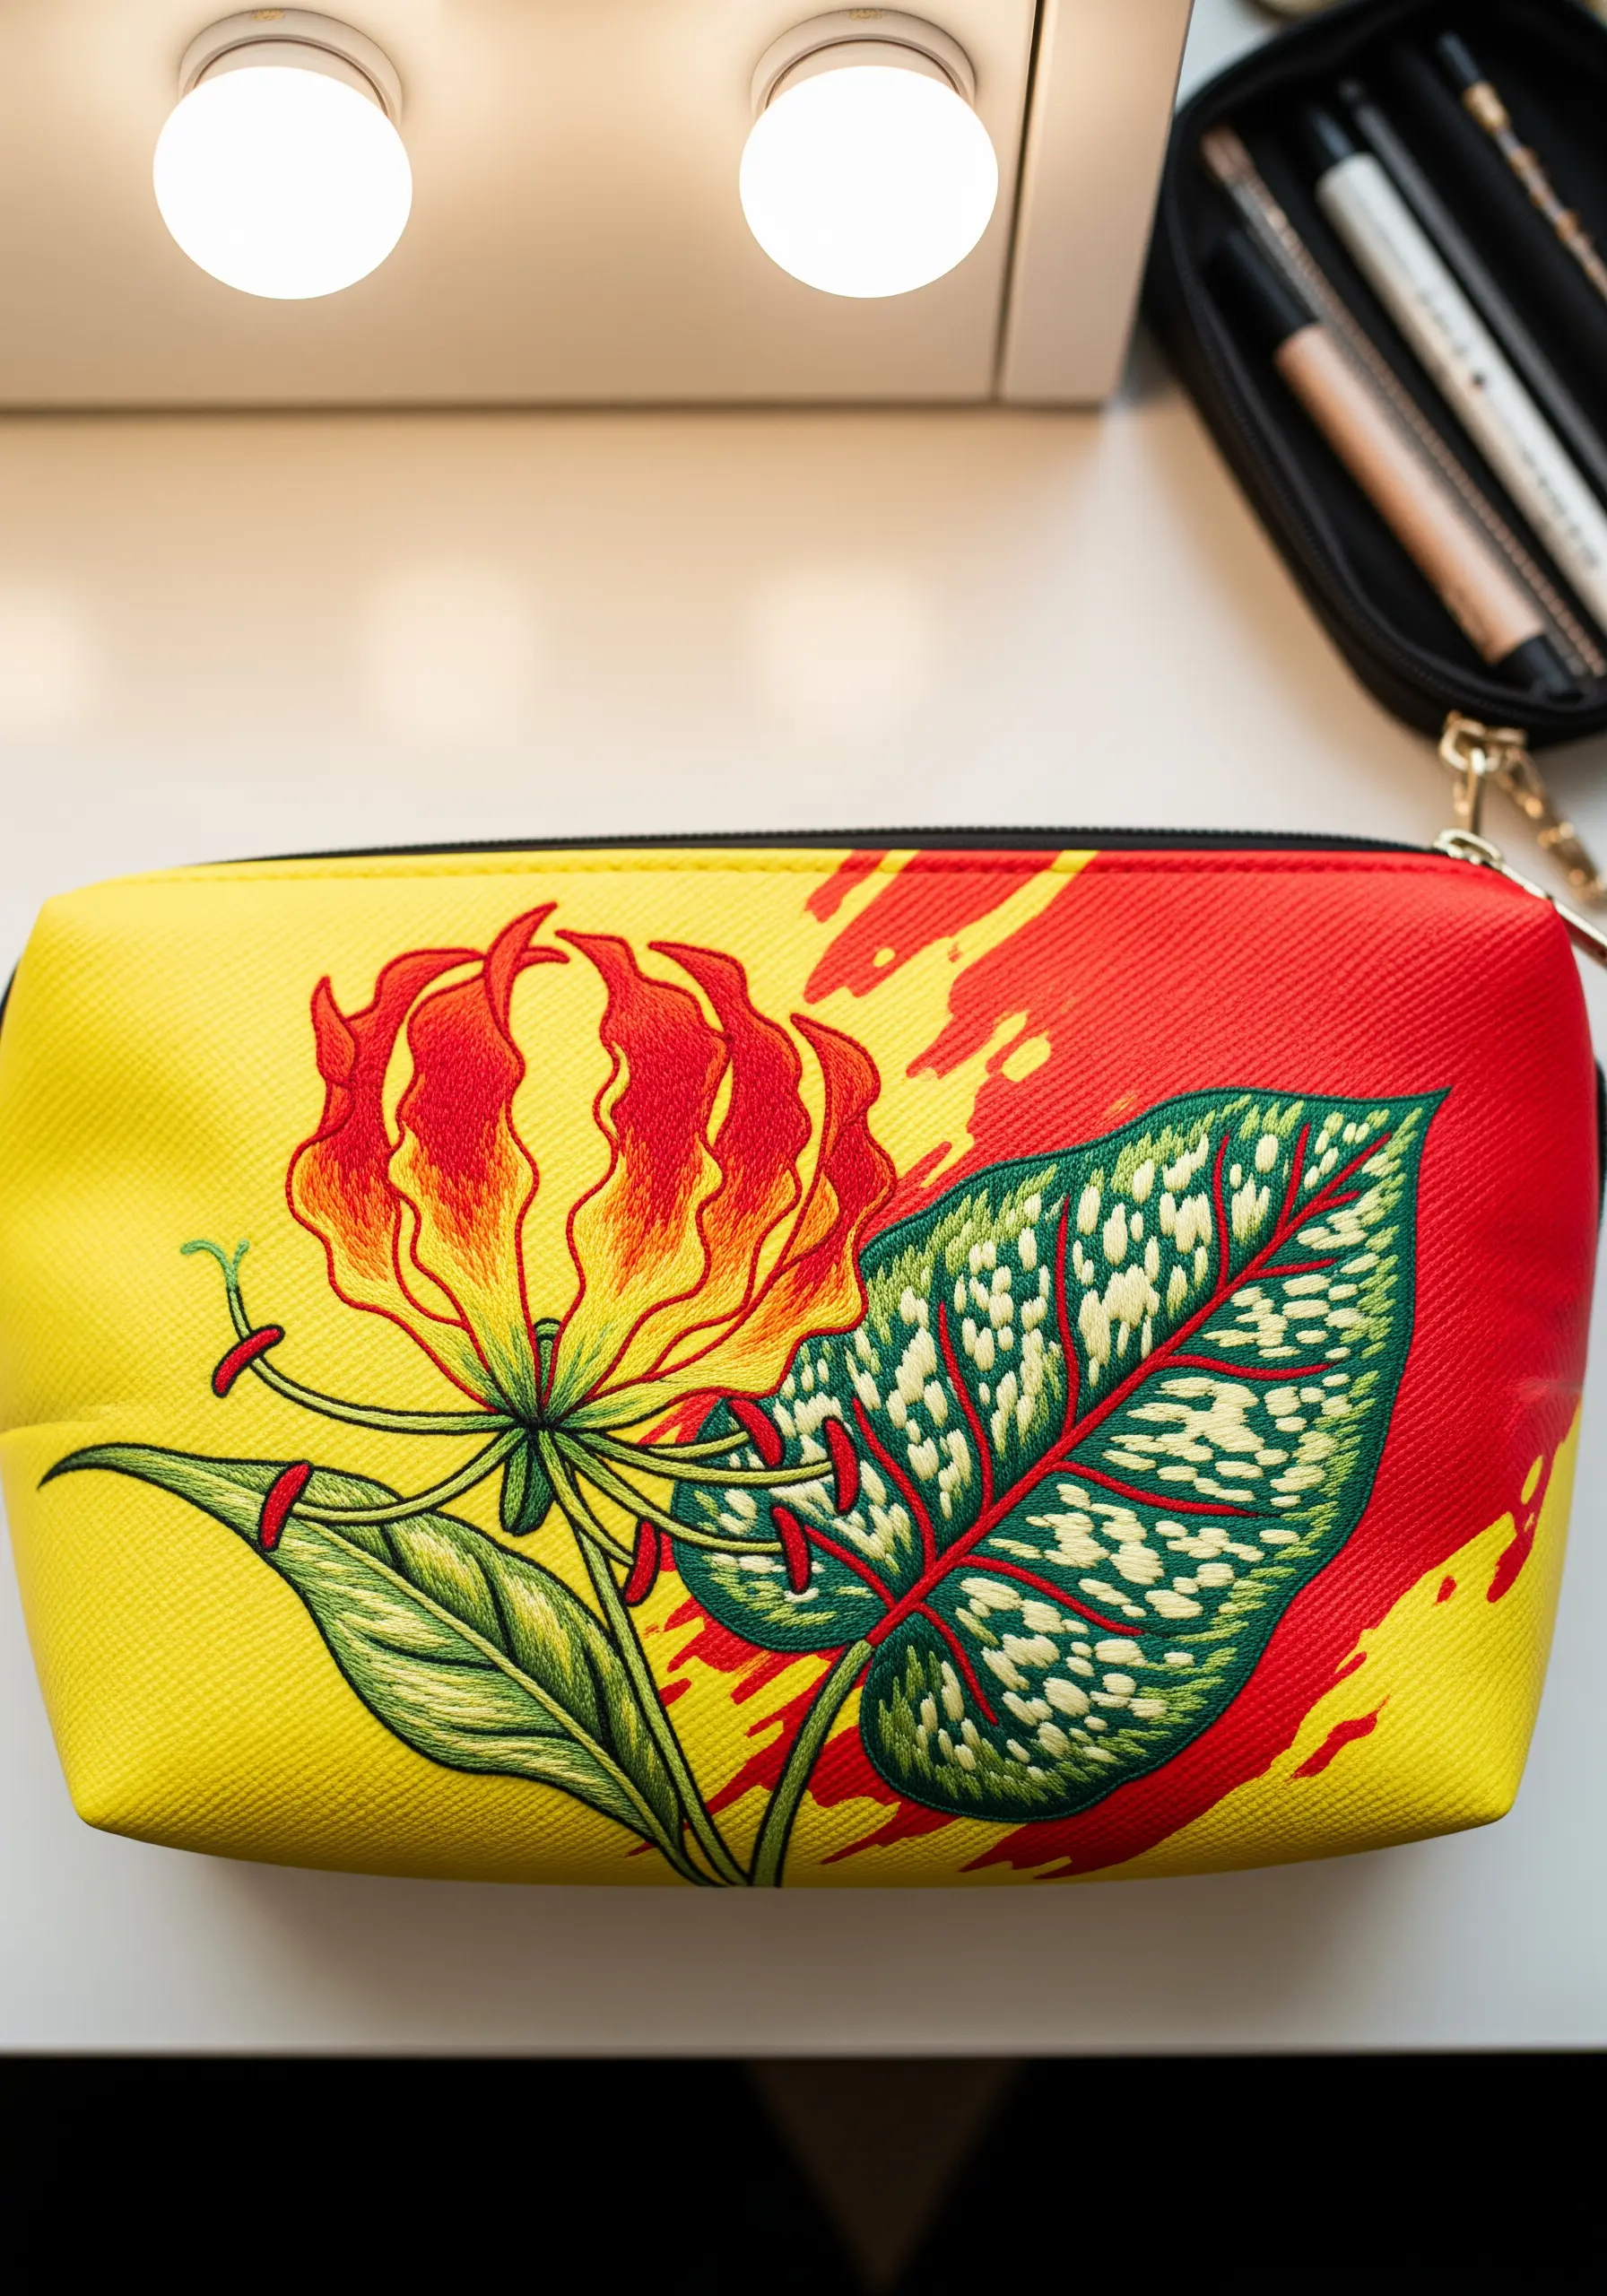
Instead of stitching on a plain surface, create a dynamic, color-blocked background for your botanical motif.
Use dense satin stitch or long-and-short stitch to fill large areas with color, creating a diagonal split for visual energy.
Choose colors that contrast well with your main subject; here, the yellow and red background makes the red flower and green leaf stand out.
Adding veins to the leaf in a contrasting color is another simple way to introduce more detail and vibrancy.
27. Embellish Three-Dimensional Home Decor

Bring a touch of handcrafted charm to functional items like a macrame plant hanger by embroidering the fabric pot holder.
Choose simple, cheerful stitches that are quick to execute, such as lazy daisy stitch for the flower petals and stem stitch for the vines.
Use a limited, harmonious color palette to ensure the design feels cohesive and complements the natural tones of the macrame and plant.
This is a wonderful way to add a thoughtful handmade touch to everyday objects.
28. Plan a Repeating Pattern for Straps and Borders
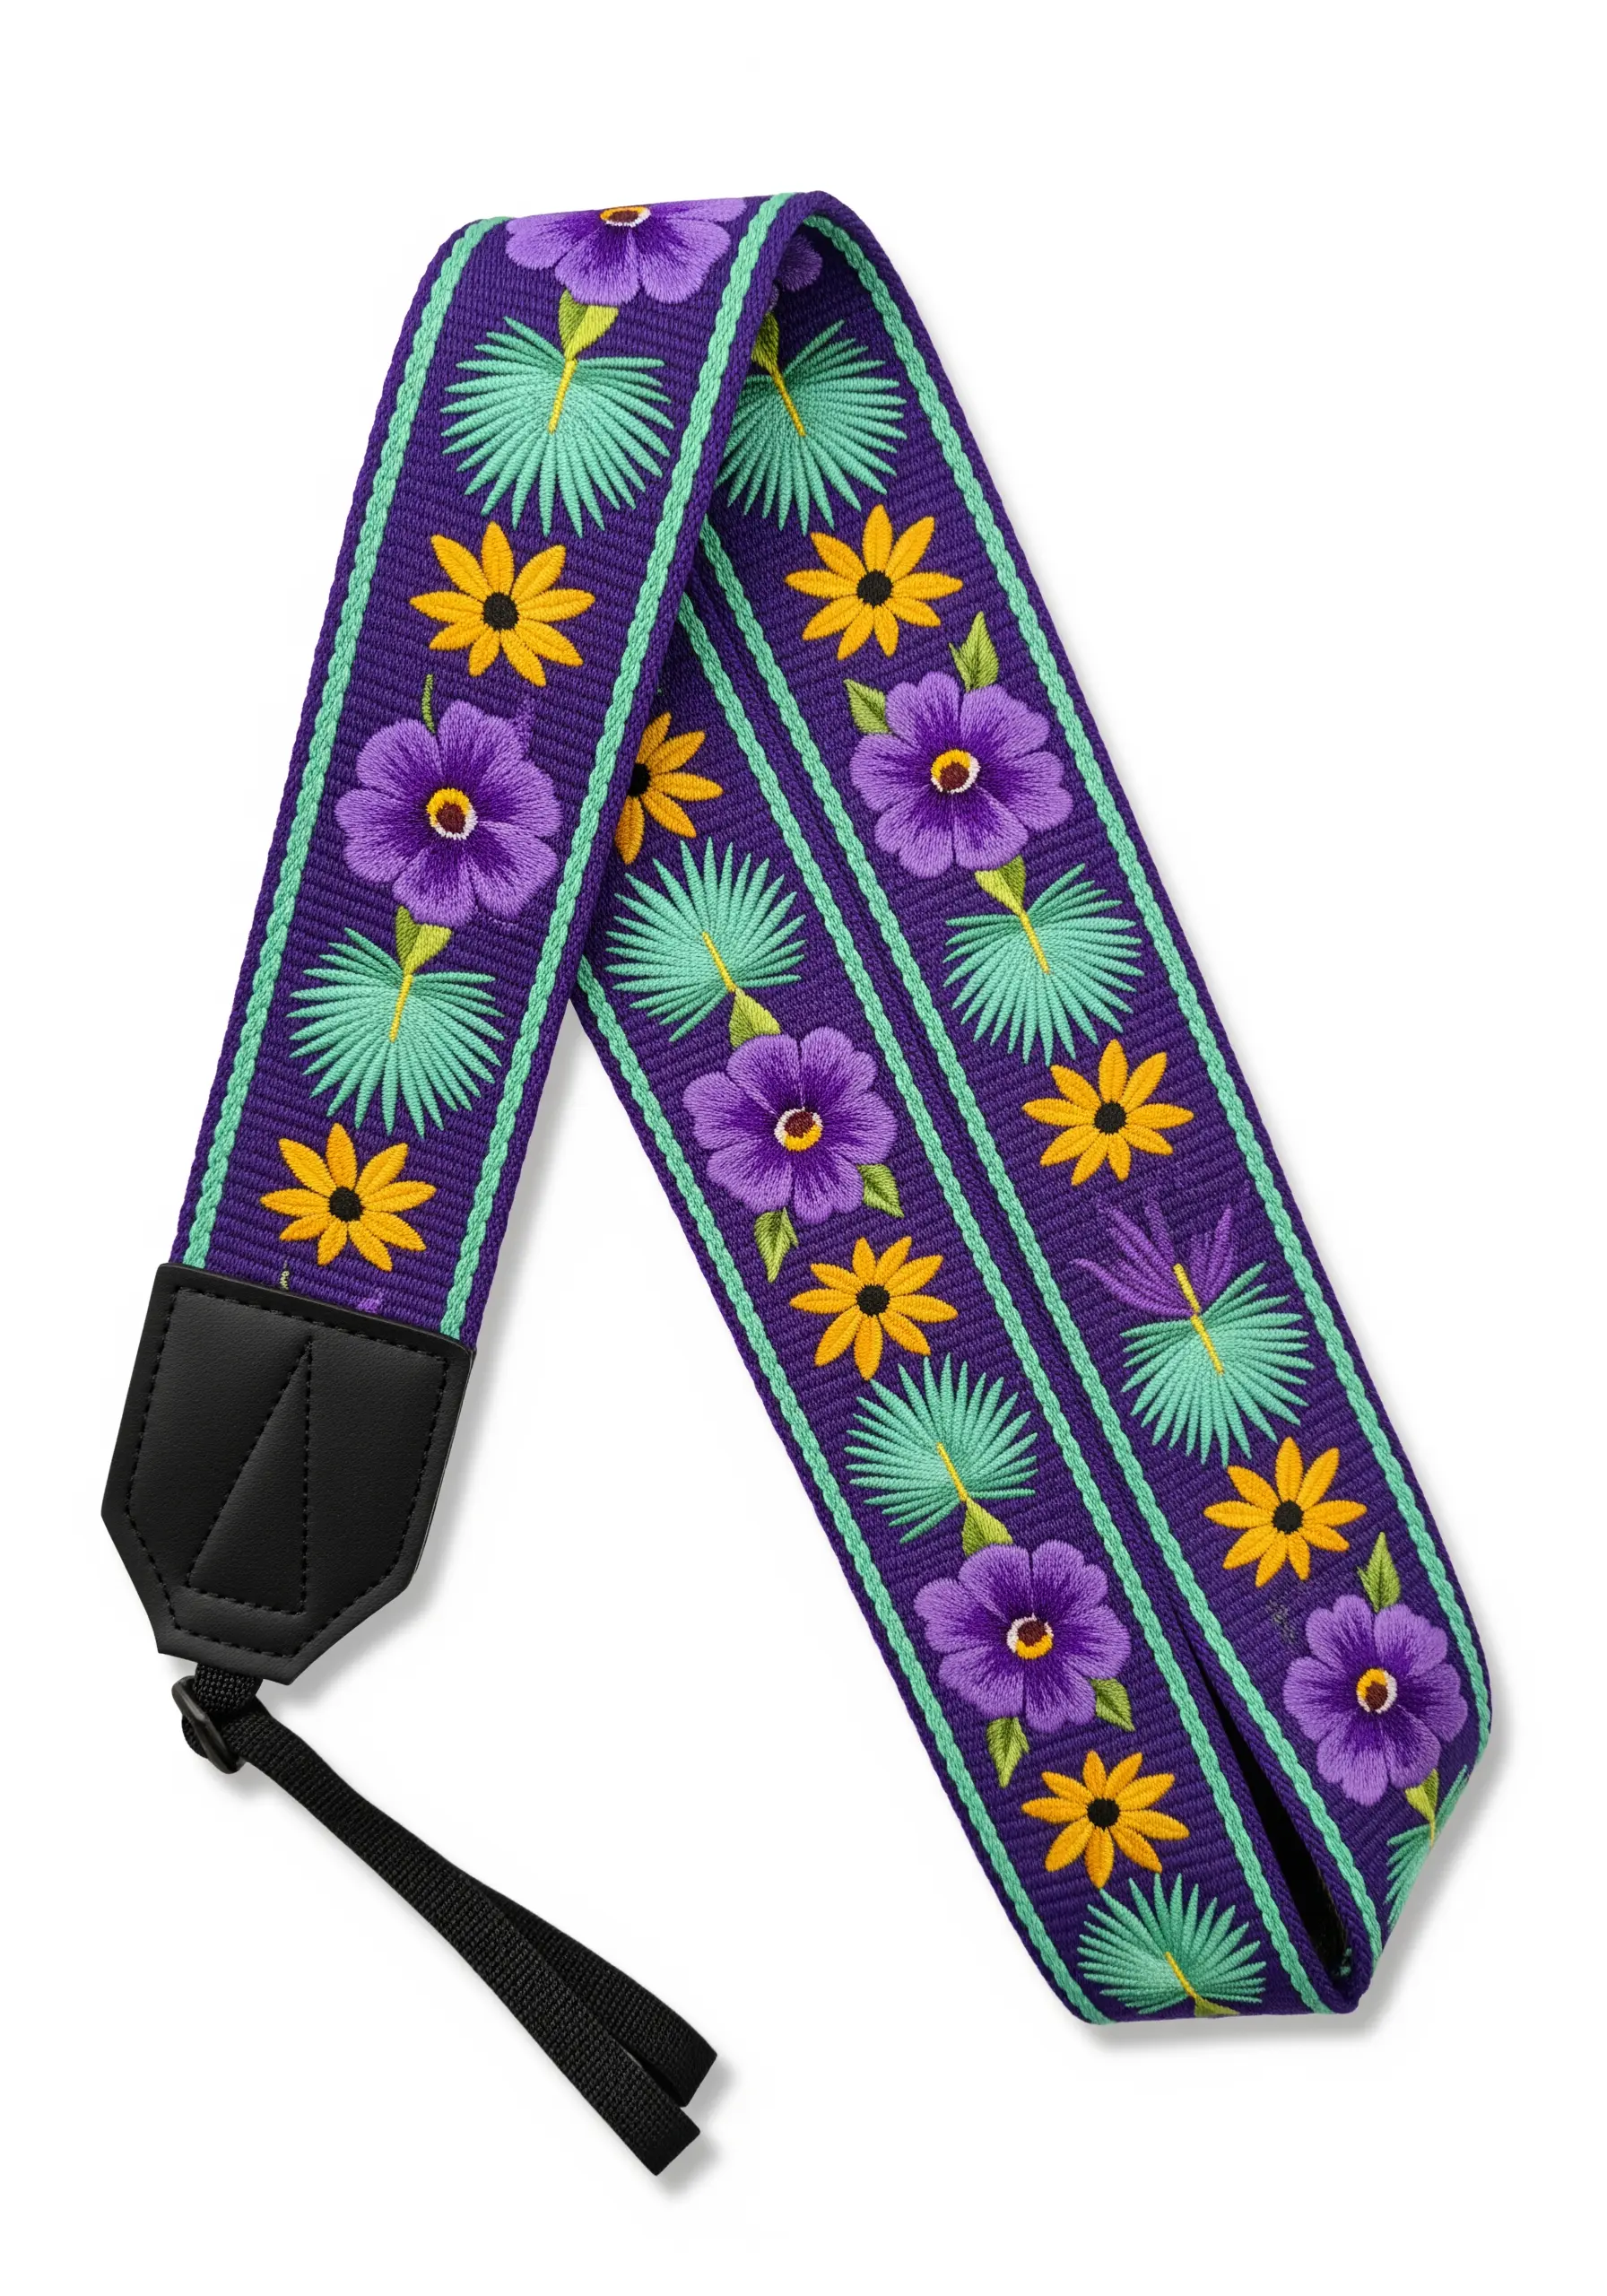
Create a seamless, professional-looking design for a long, narrow item like a camera strap or belt by planning a repeating pattern.
First, design a single unit of the pattern that can be mirrored or repeated end-to-end.
Use a ruler and a disappearing ink pen to mark out the placement of each unit, ensuring even spacing along the entire length.
A simple, geometric arrangement of stylized flowers and leaves works particularly well for this type of application.
29. Combine Felt Appliqué with Embroidery

Create bold, textural designs by combining felt appliqué with decorative embroidery stitches.
First, cut your main shapes—the Monstera leaves and the ginger flower petals—from felt and secure them to your base fabric with a few small stitches or fabric glue.
Then, use embroidery to add details, like the veins on the leaves and the texture on the flower, while simultaneously securing the edges of the felt pieces.
This mixed-media approach is perfect for creating durable, high-impact designs on items like laptop sleeves or bags and is one of many abstract mixed media embroidery ideas.


