

When you look at your embroidery, I want you to feel more than just pride in a finished project. I want you to see intention, artistry, and a quiet confidence in every single stitch.
Let’s move past just following patterns and start making thoughtful choices. We’ll explore how changing a single stitch can add lifelike texture to a leaf, how choosing the right fabric can make your colors sing, and how a simple frame can turn your hoop into a polished piece of home decor.
This isn’t about complex techniques or expensive supplies. It’s about learning to see your thread and needle as tools for expression, allowing you to create small, meaningful works of art that make your home feel uniquely and beautifully yours.
1. Master Expressive Fur with Directional Stitching
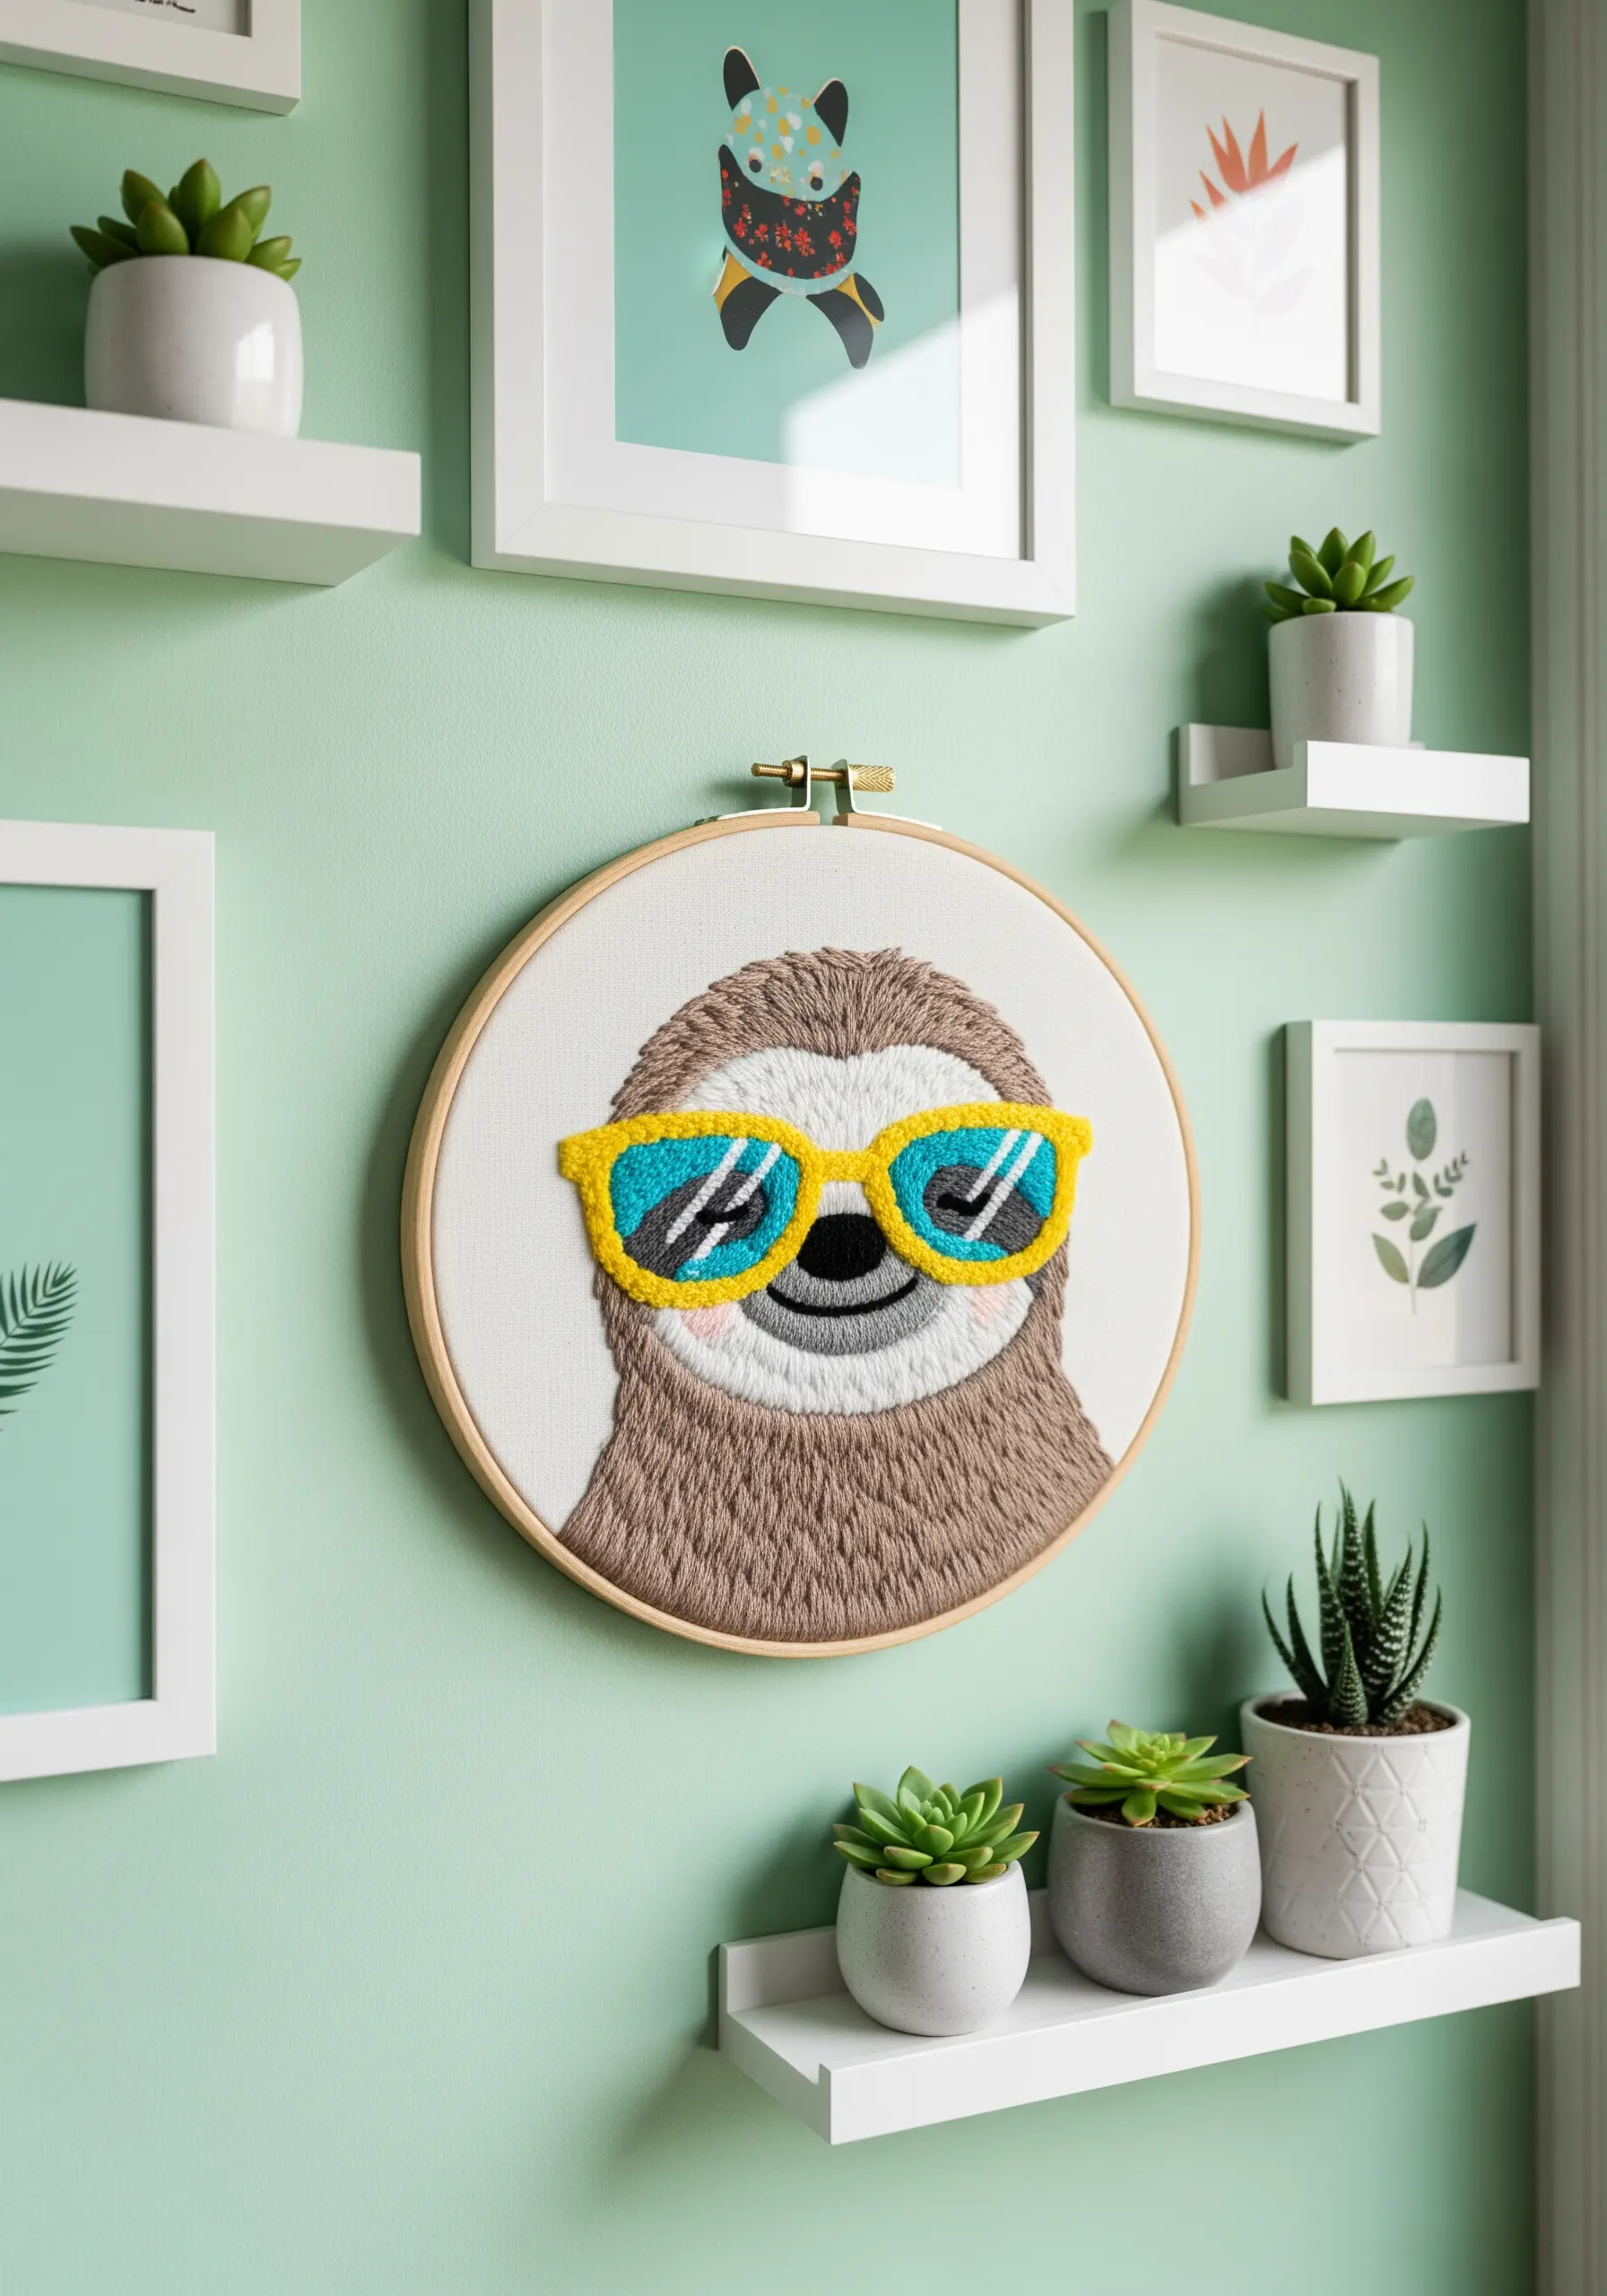
To give your embroidered animals a soft, pettable texture, focus on the direction of your stitches.
Use a single strand of floss and the long-and-short stitch, angling your needle to follow the natural growth of fur.
For the fluffy sunglasses, switch to turkey work (Ghiordes knot) and trim the loops to create a plush, 3D effect that contrasts beautifully with the flat fur.
This directional technique adds realism and movement, making your character feel alive rather than static.
2. Create Celestial Drama on Dark Fabric
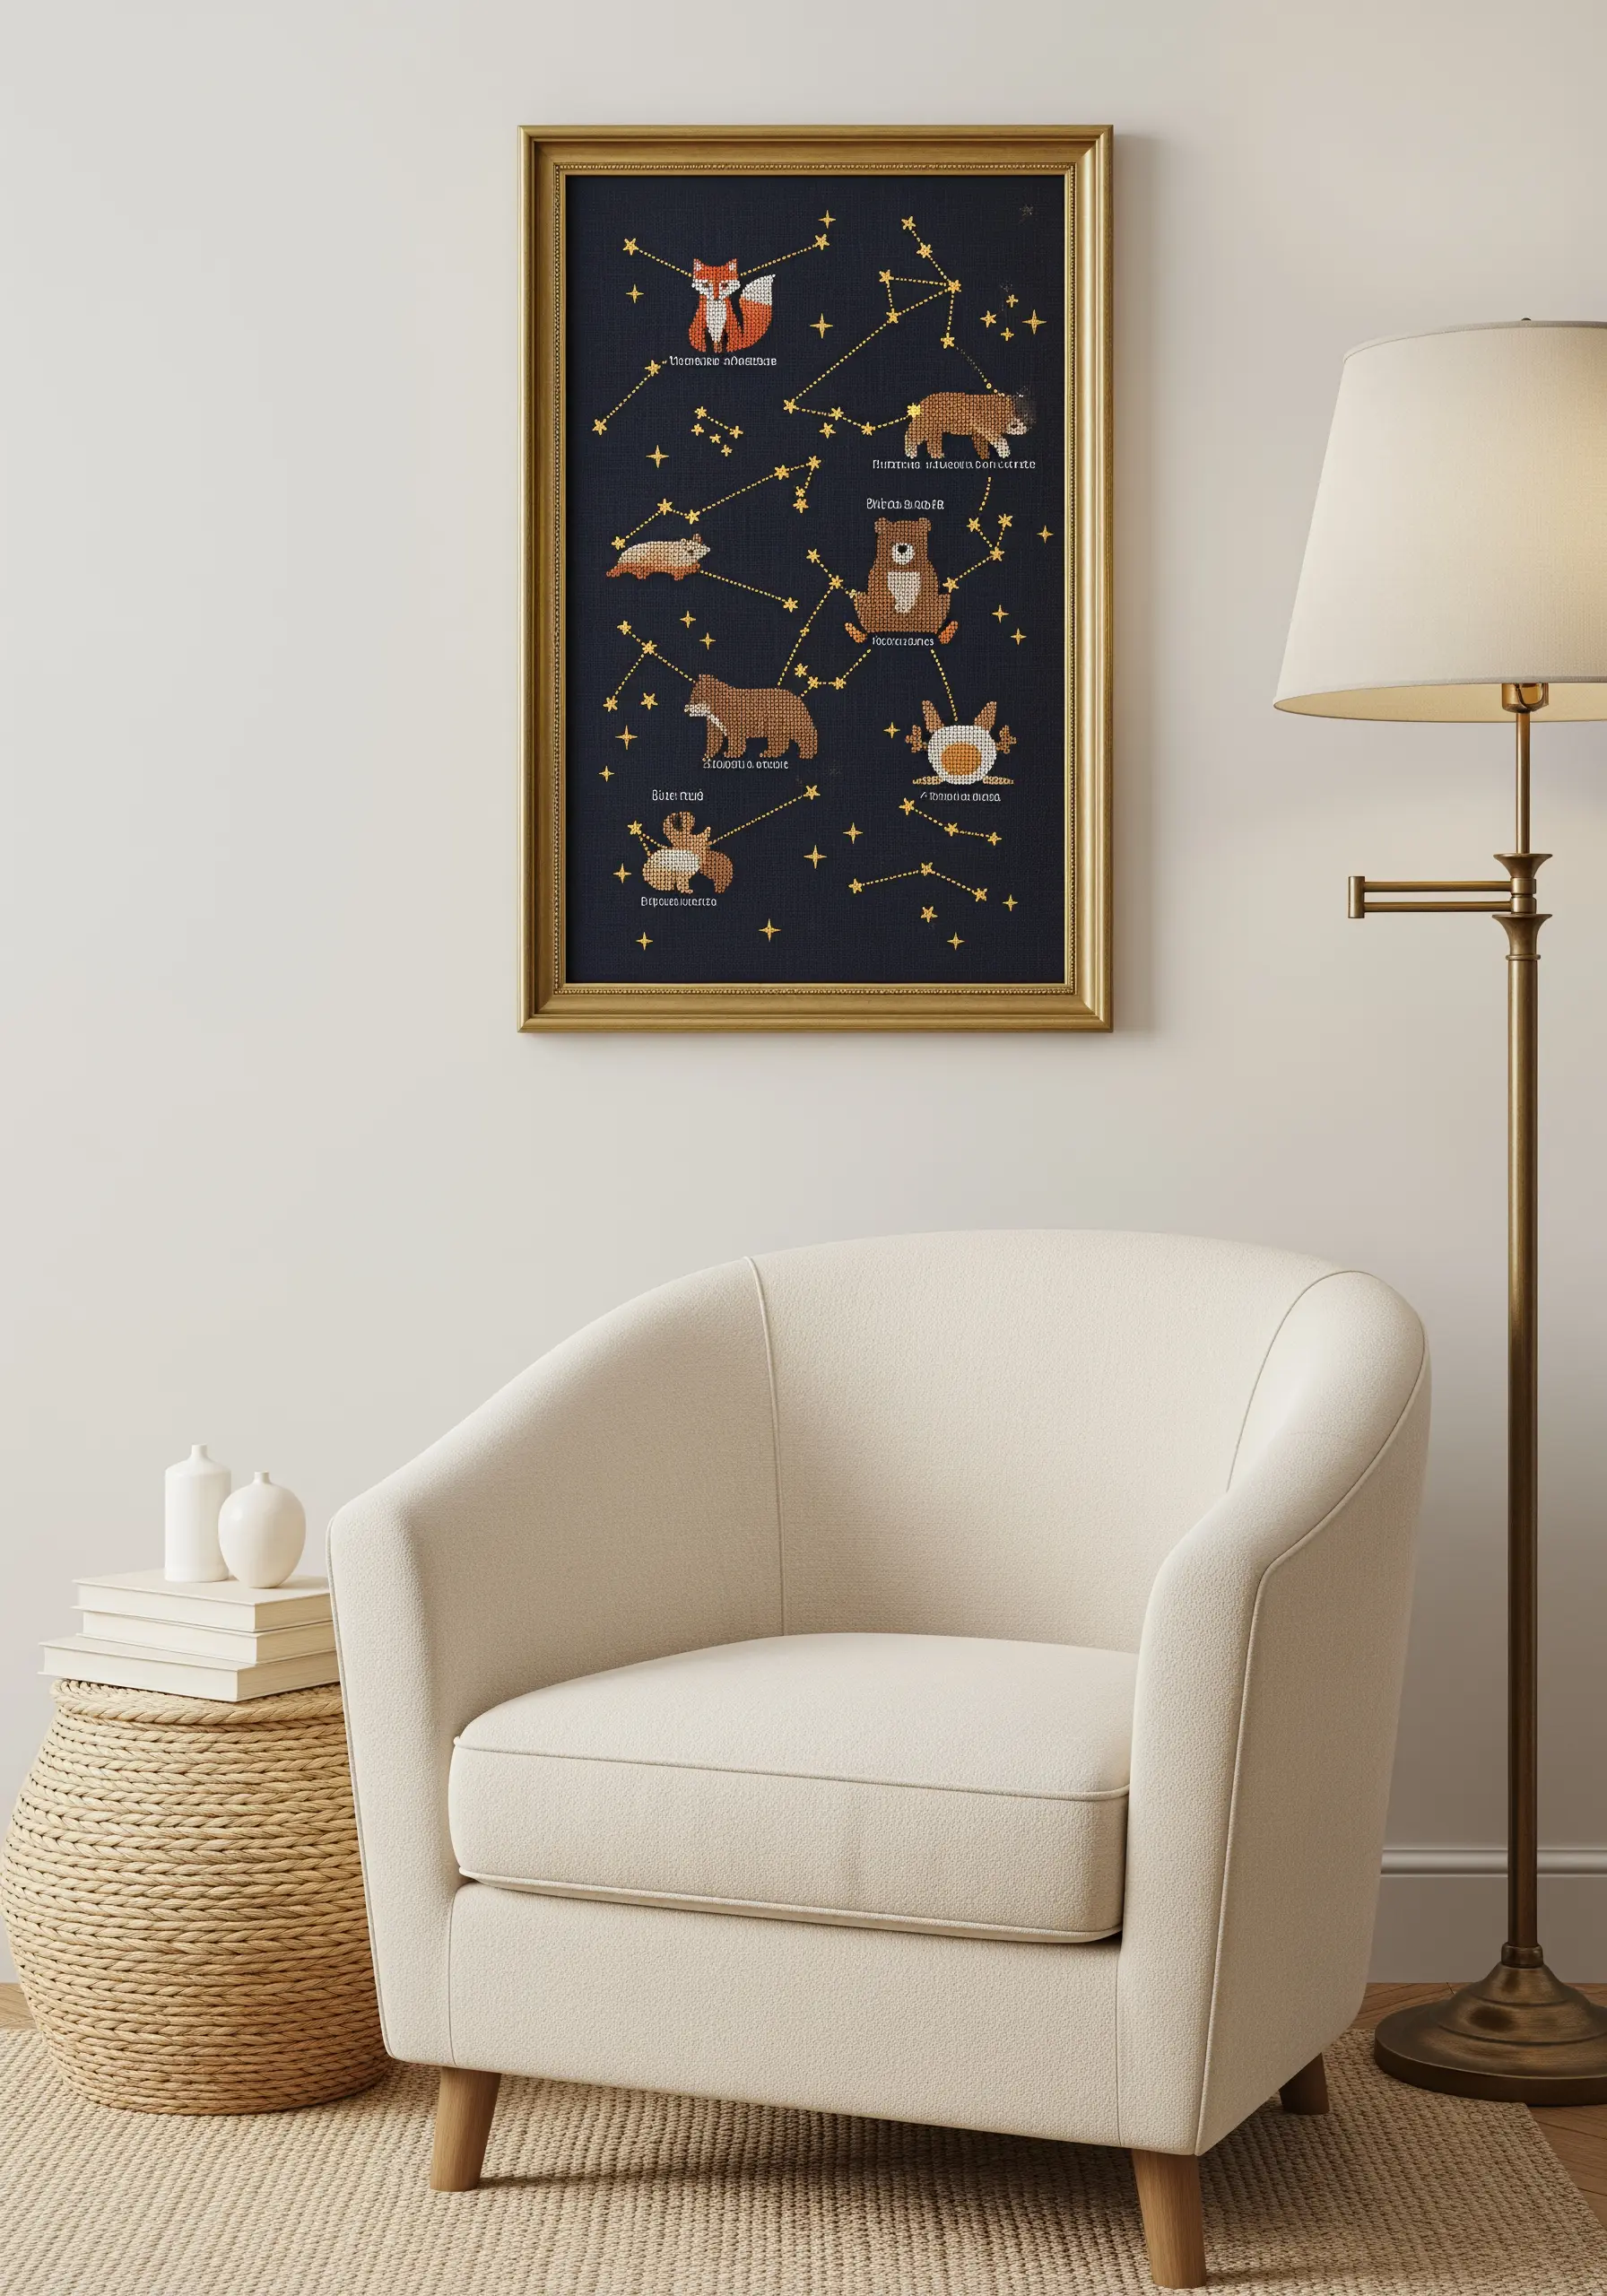
Make your cosmic designs pop by choosing a dark, tightly woven fabric like navy linen or black cotton twill.
Use a single strand of a bright metallic or high-sheen white thread for the star lines and constellations.
This high contrast creates a dramatic, night-sky effect that feels both magical and sophisticated.
Keep the animal motifs simple with minimal fill stitches, ensuring the constellations remain the focal point of your artwork, perfect for dreamy baby clothing embroidery ideas.
3. Elevate Simple Shapes with Clean Outlines
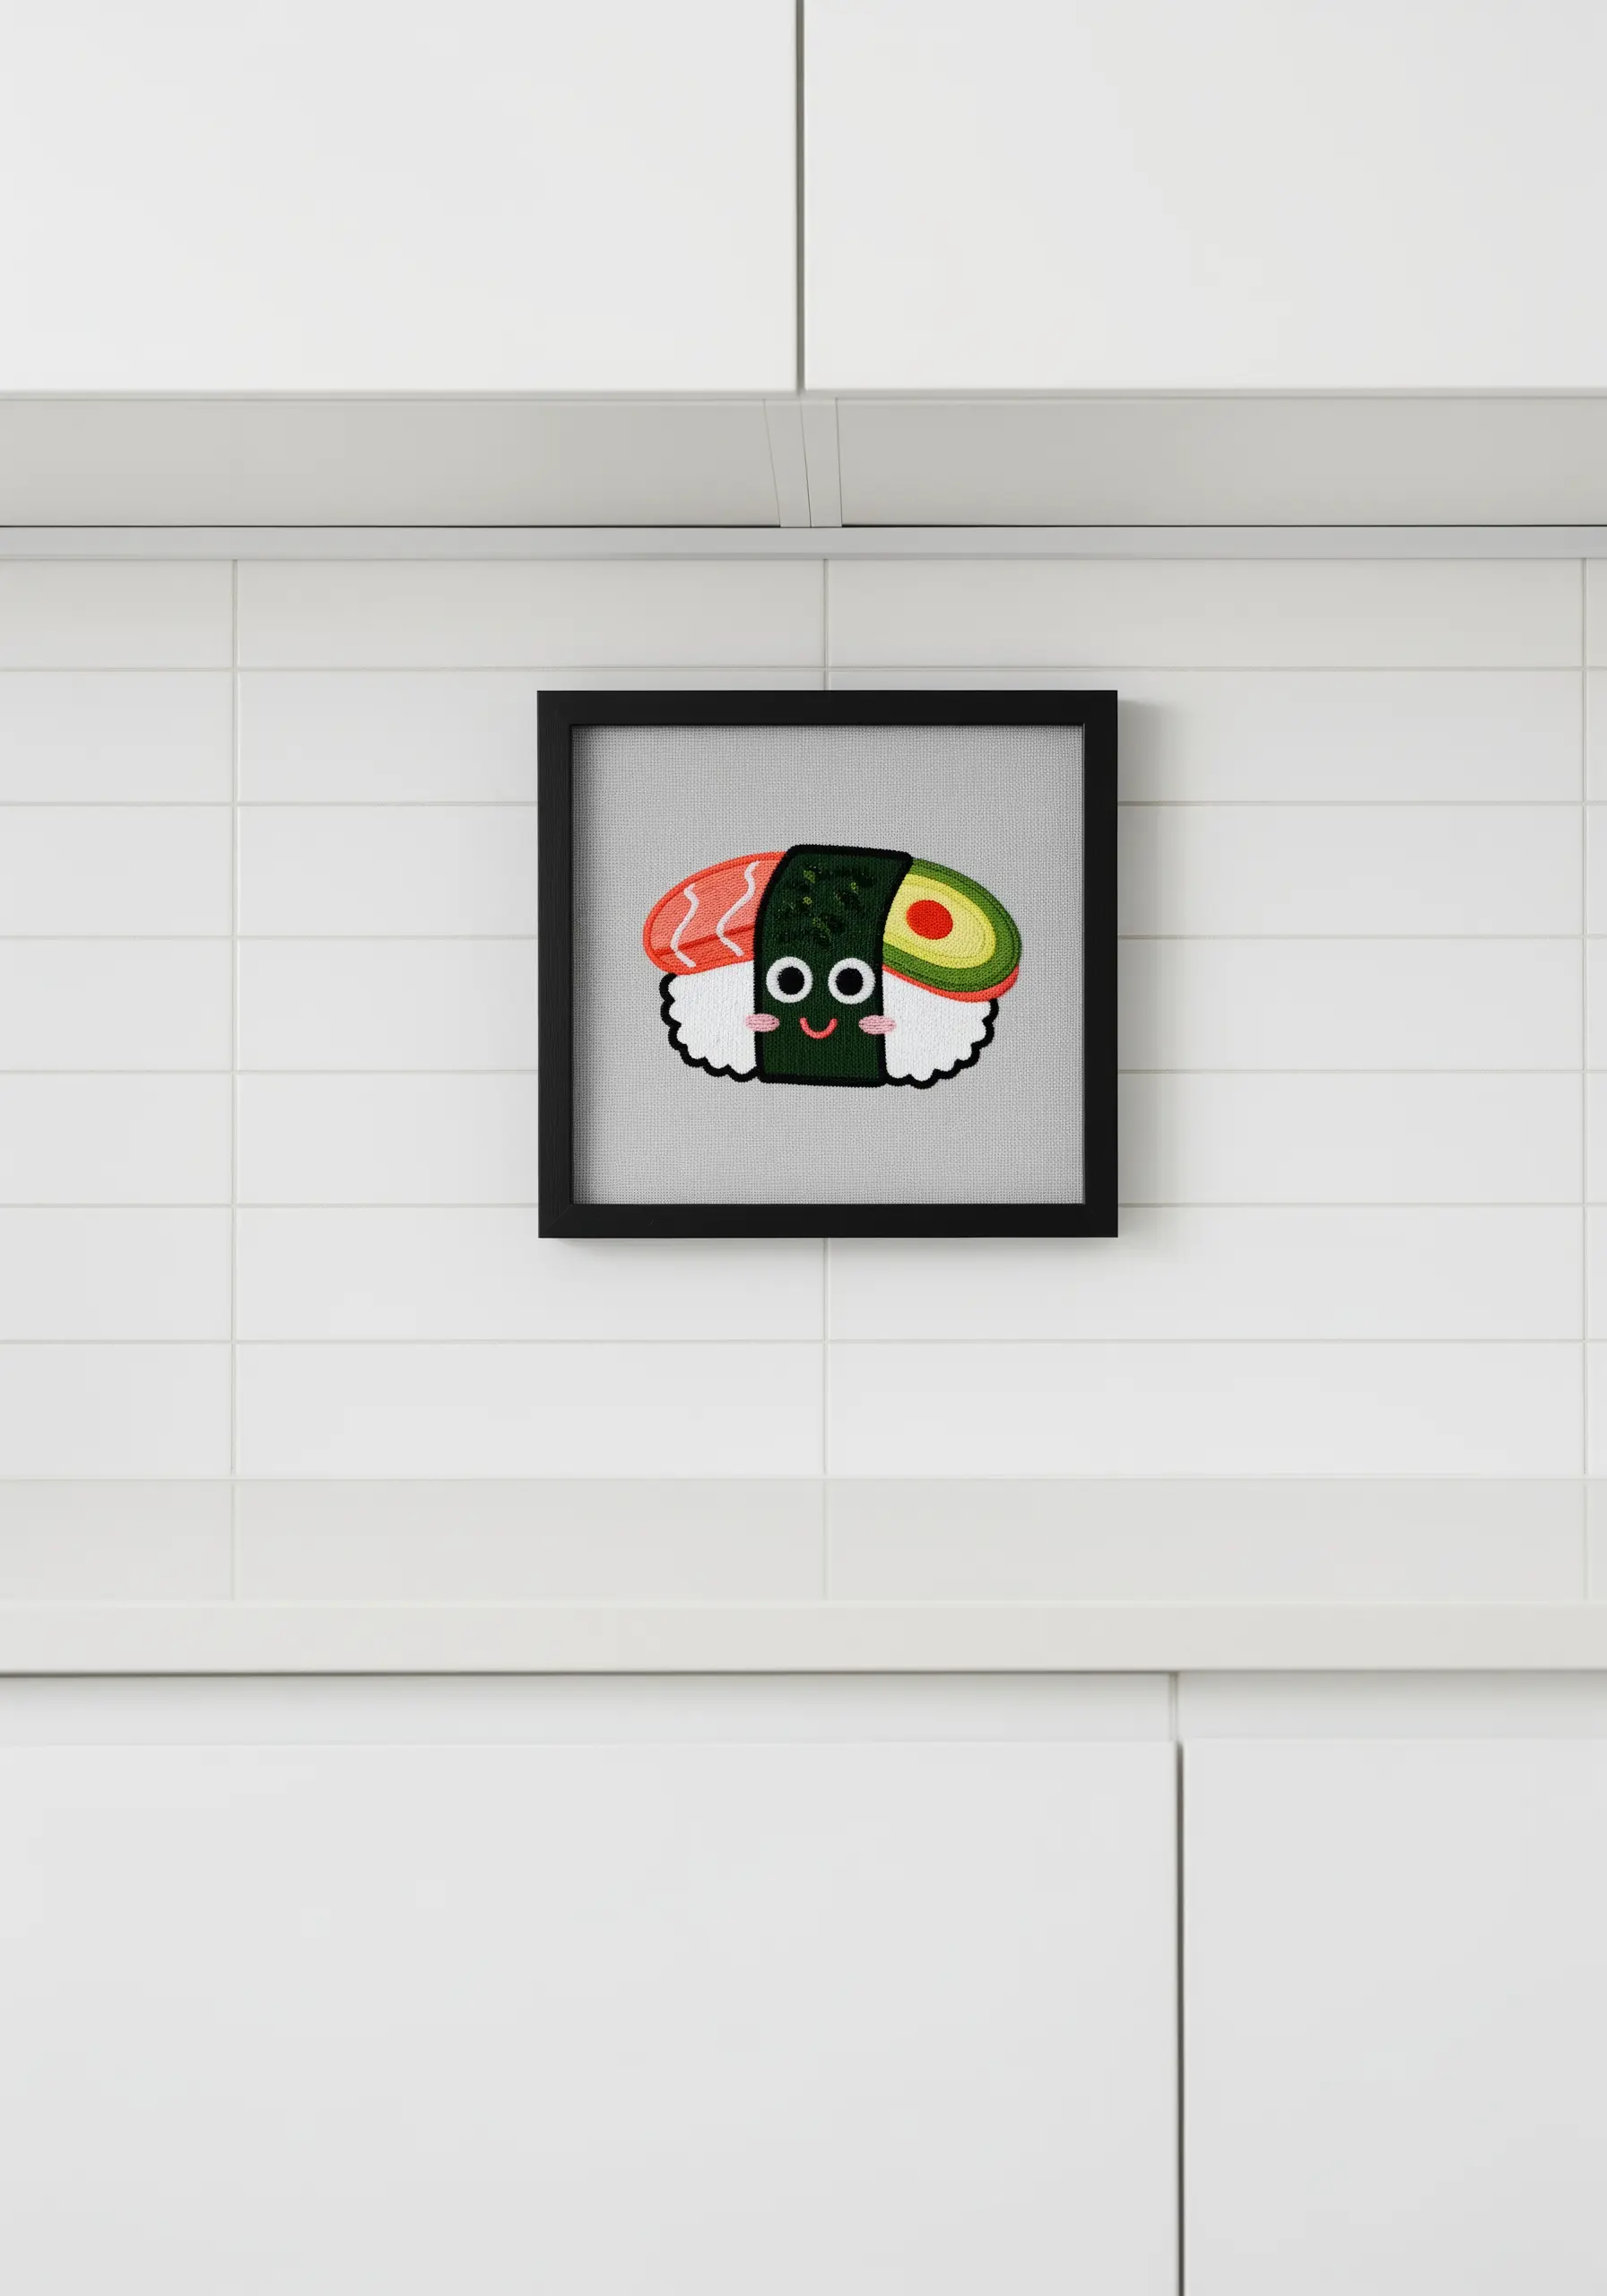
For charming, cartoon-style motifs, a perfect outline is everything.
Before you begin your satin stitch fill, create a sharp boundary using a split stitch or backstitch with two strands of floss.
Then, fill the shape with a single strand of floss, tucking your needle just outside the outline to create a smooth, raised edge.
This simple preparation step prevents colors from bleeding into one another and gives your work a polished, professional finish, even for small embroidery ideas that look complex.
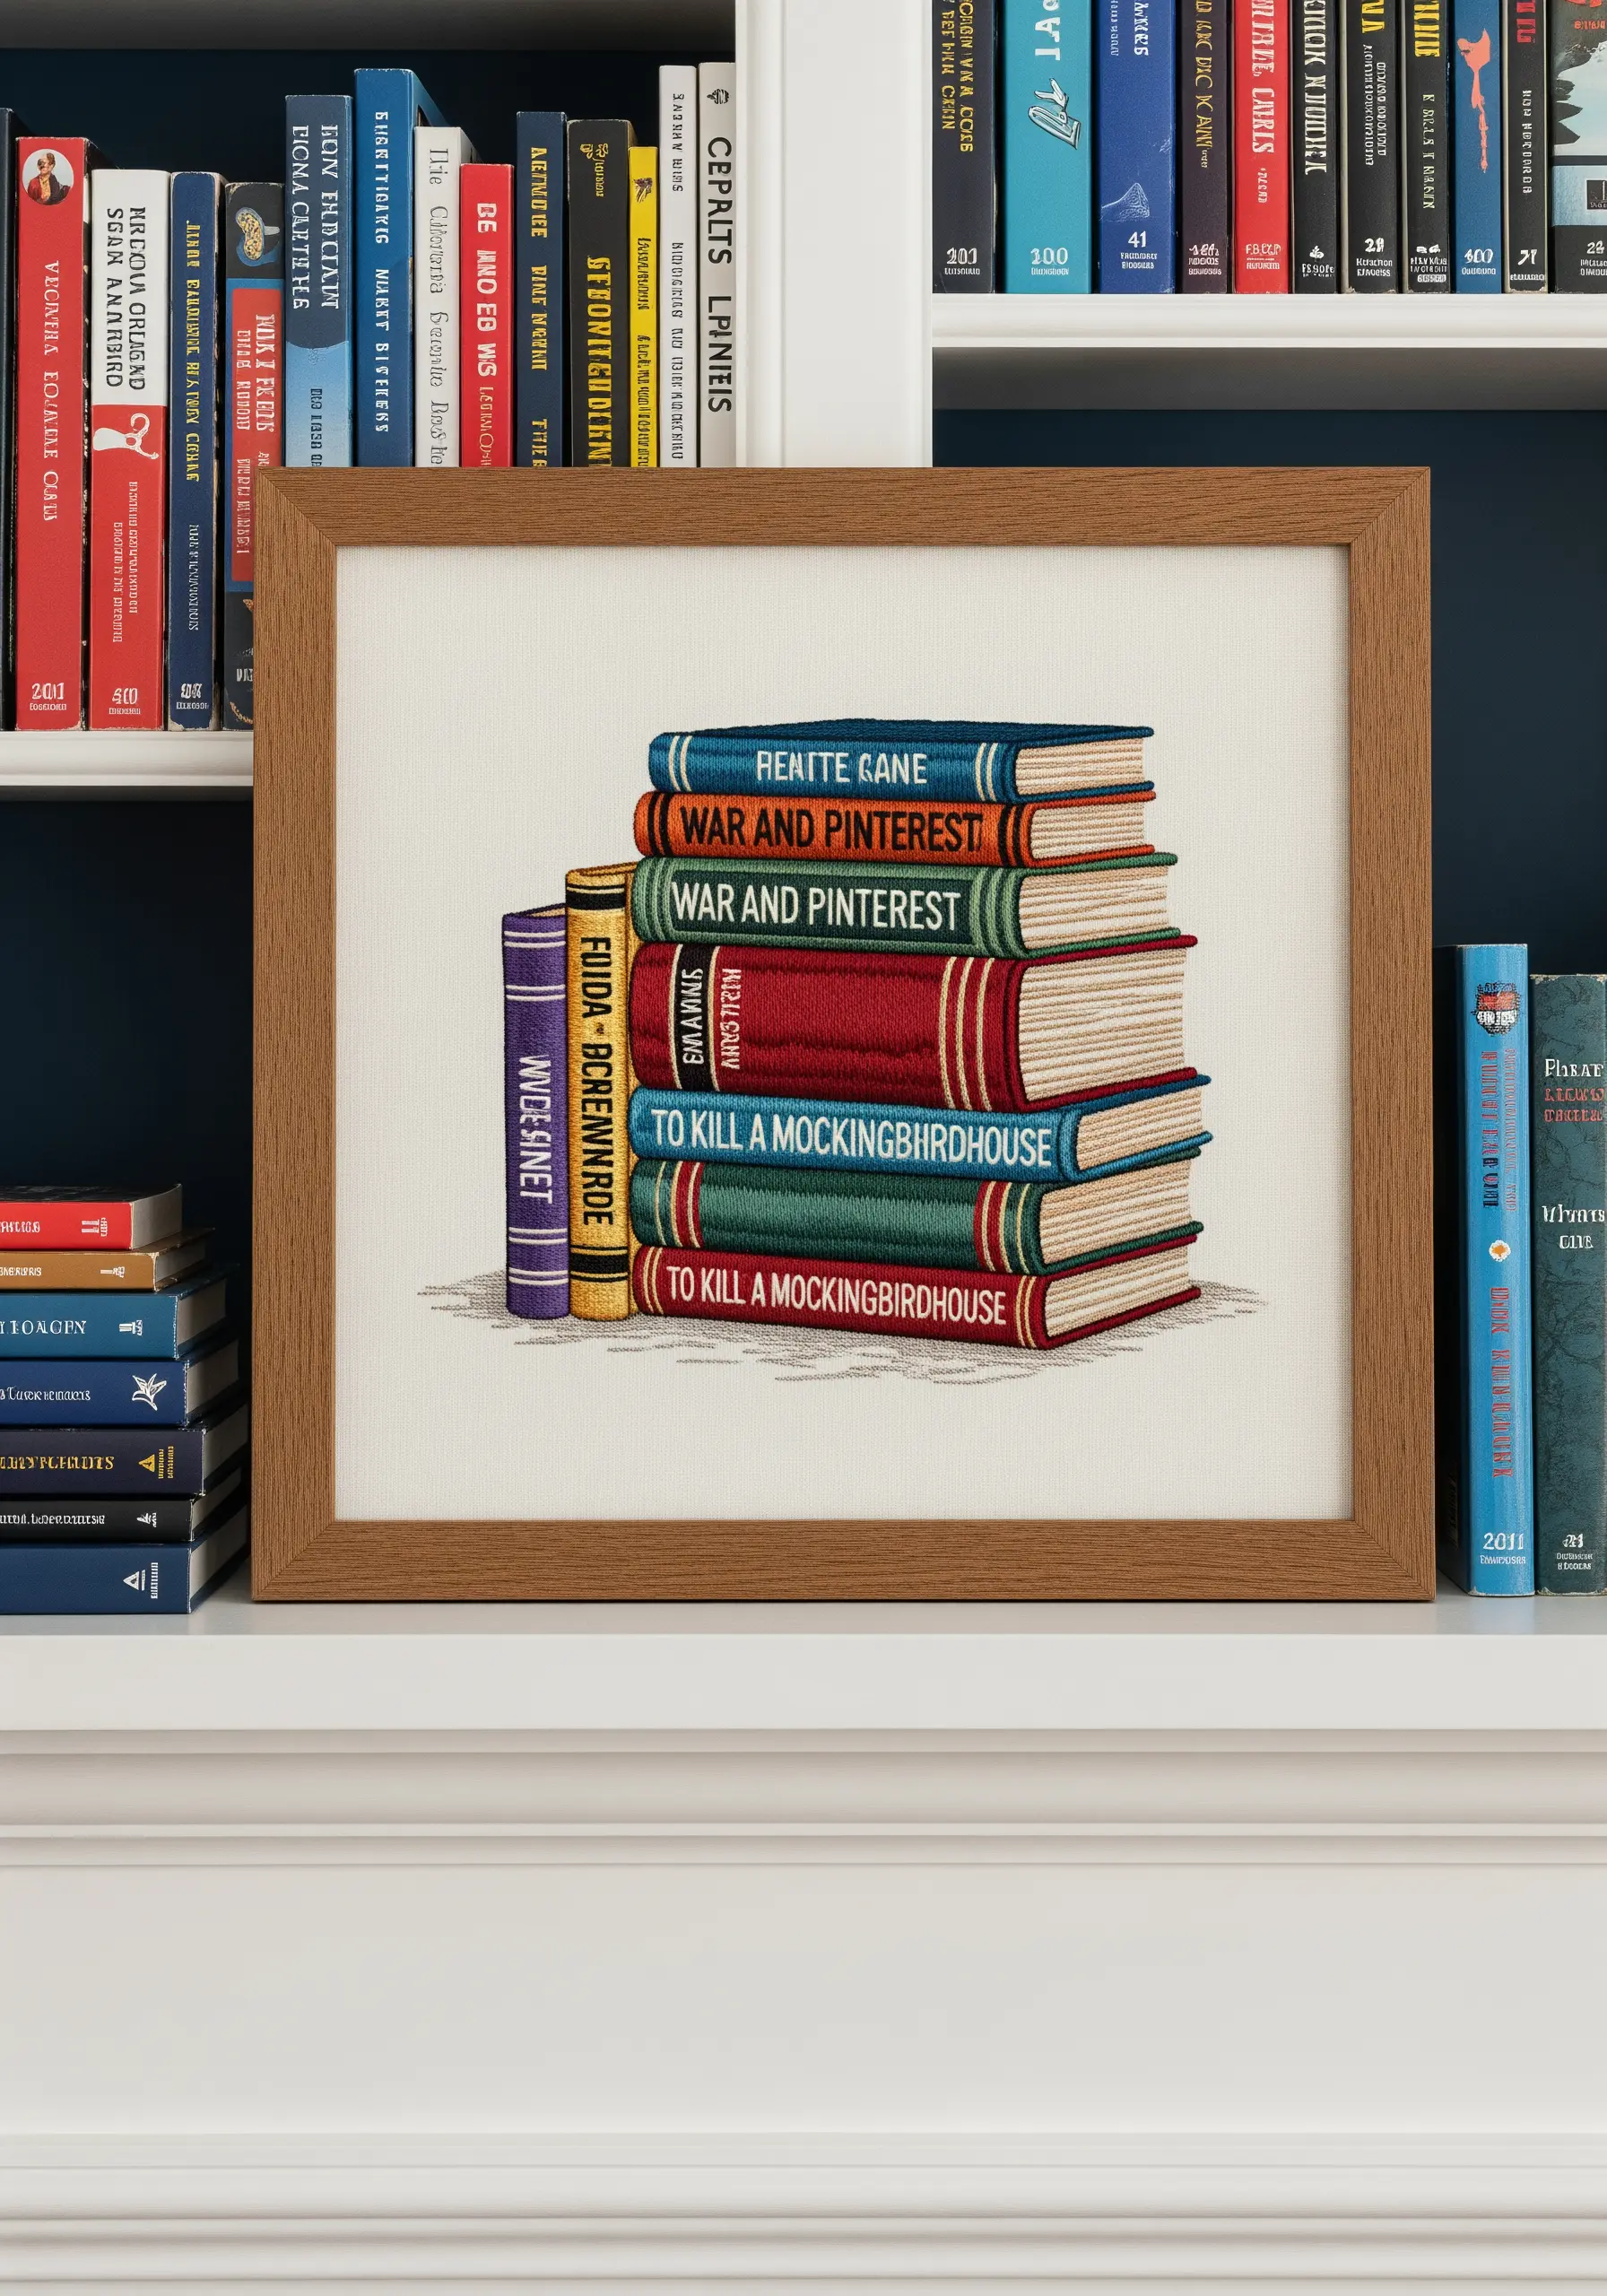
4. Stitch Bold Lettering with Padded Satin Stitch
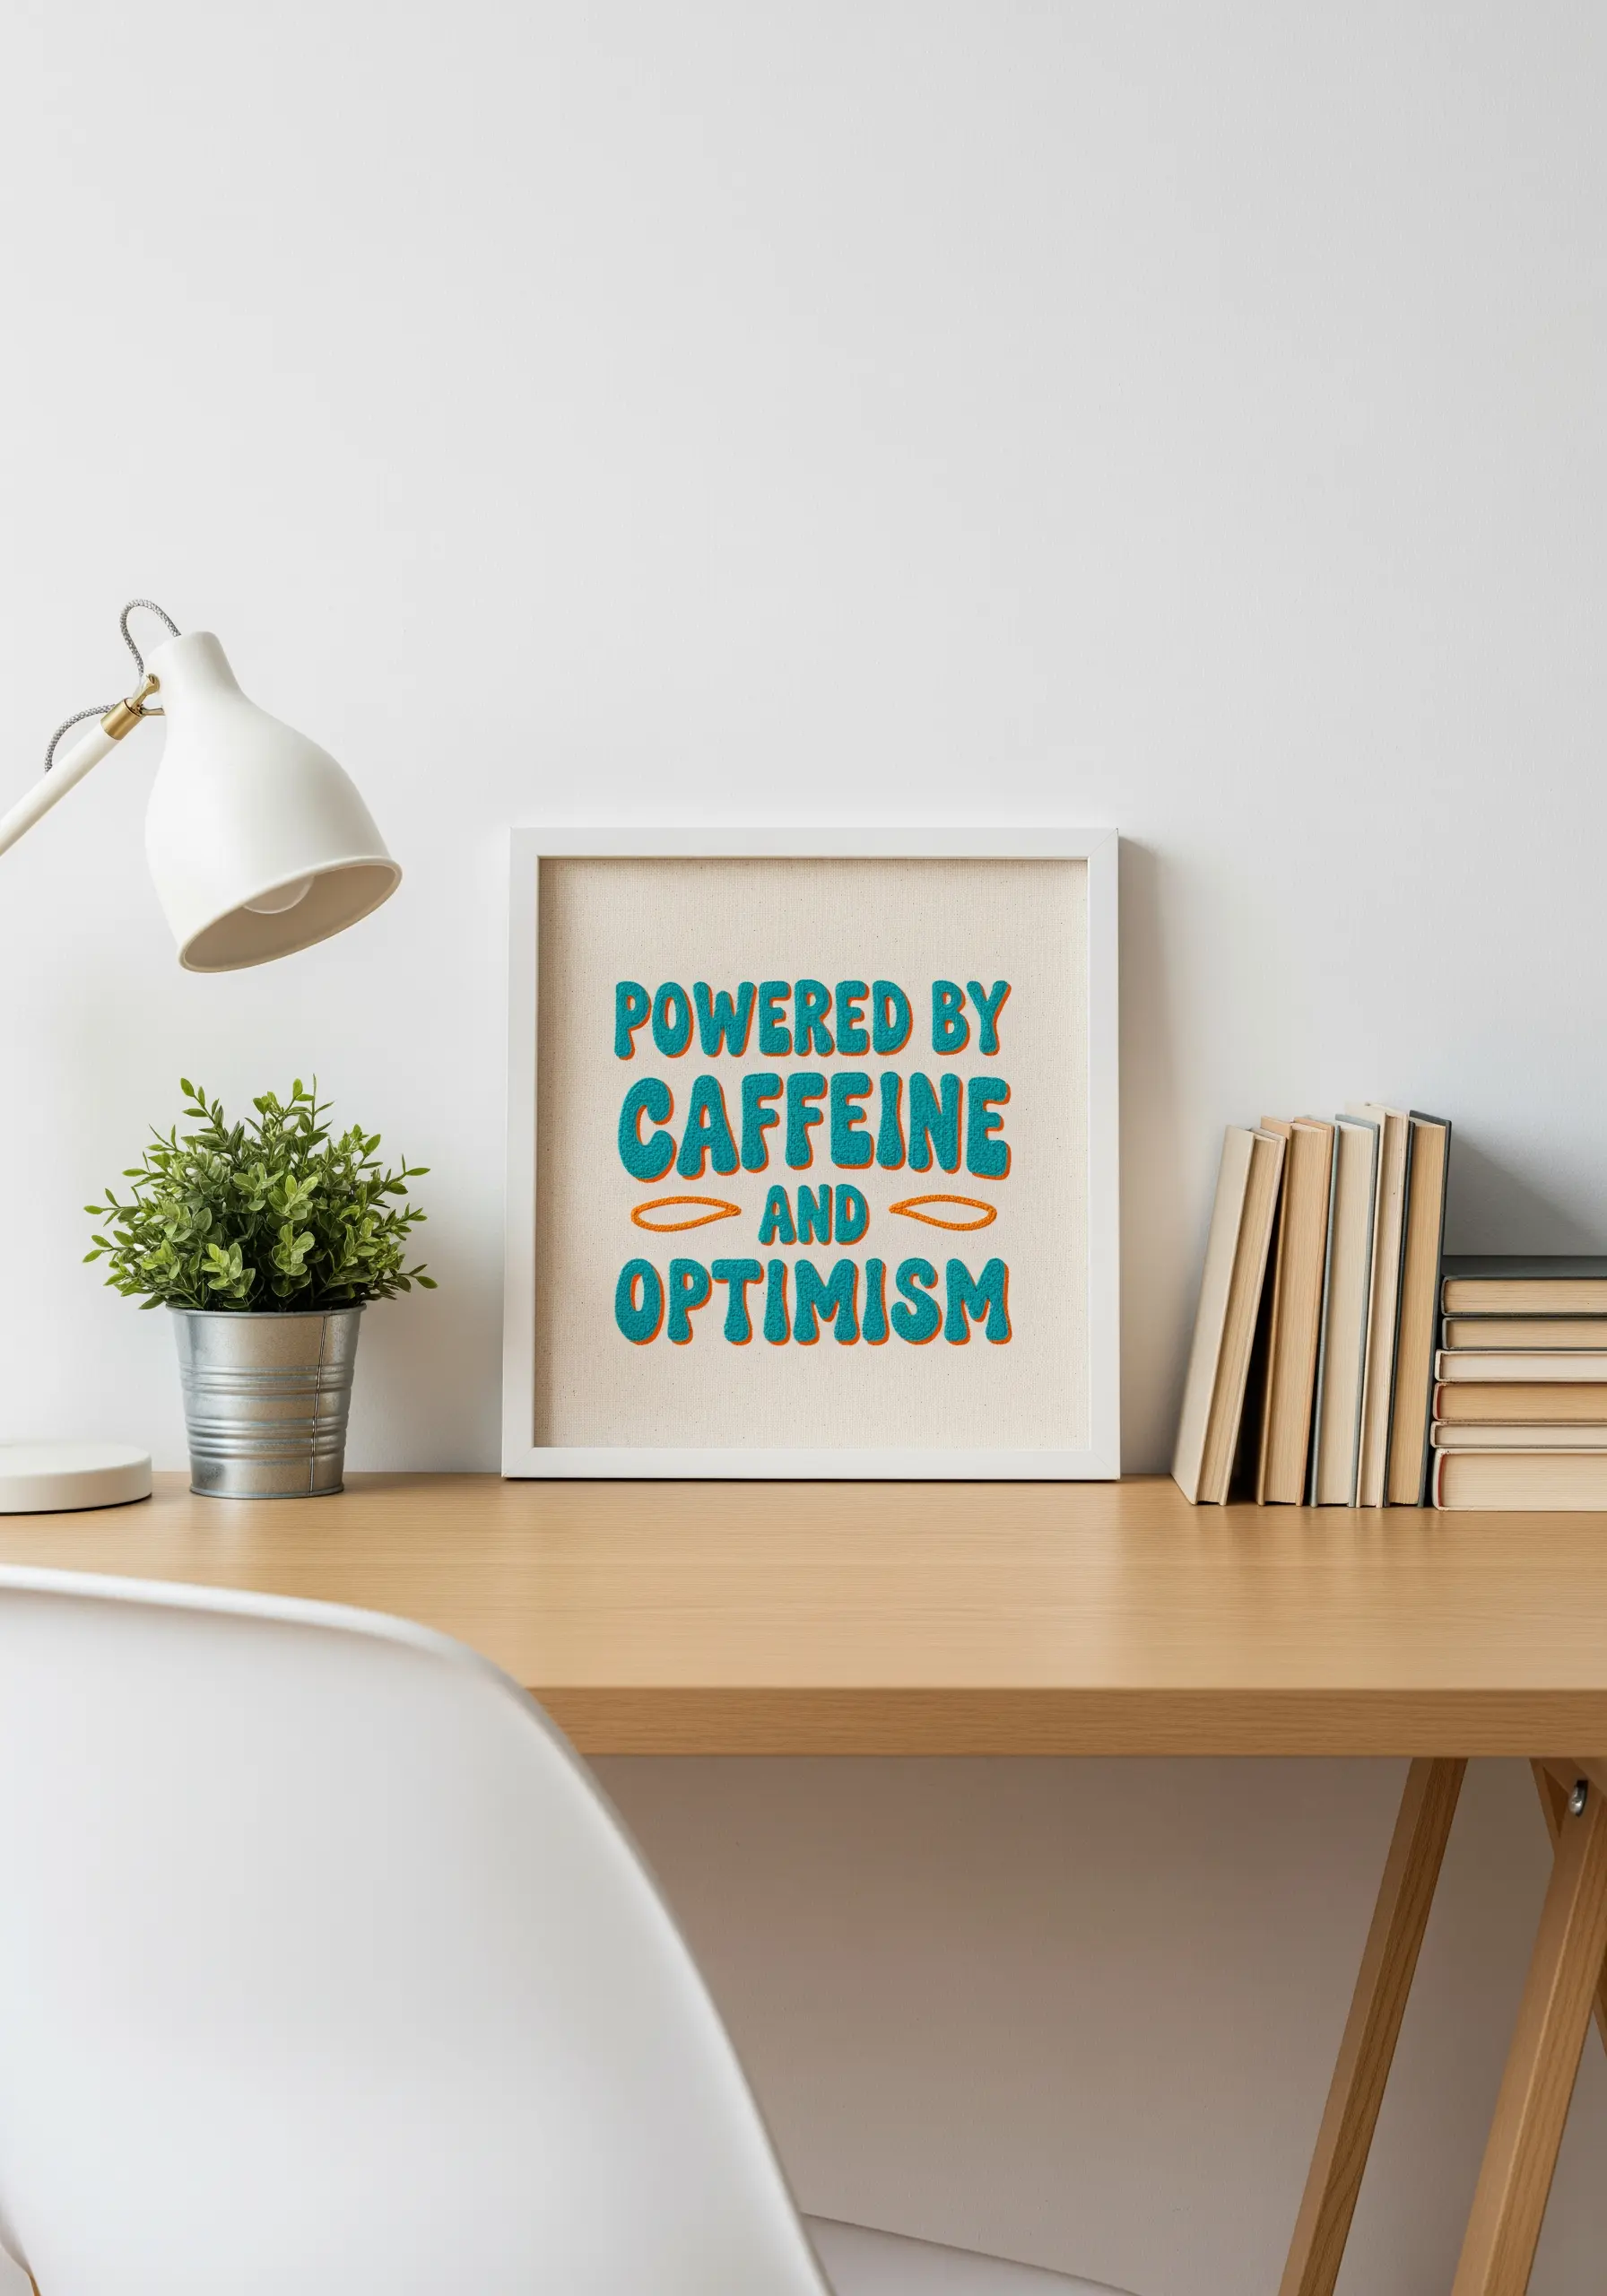
To make embroidered text stand out with a satisfying, tactile quality, use a padded satin stitch.
First, fill the letter shapes with small, underlying seed stitches or a simple running stitch.
Then, cover this padding with your final satin stitches, working perpendicular to the foundation stitches.
This technique raises the letters from the fabric surface, giving them dimension, shadow, and a bold graphic impact you can’t achieve with flat stitches alone.
5. Build Dimension with Layered Stitches
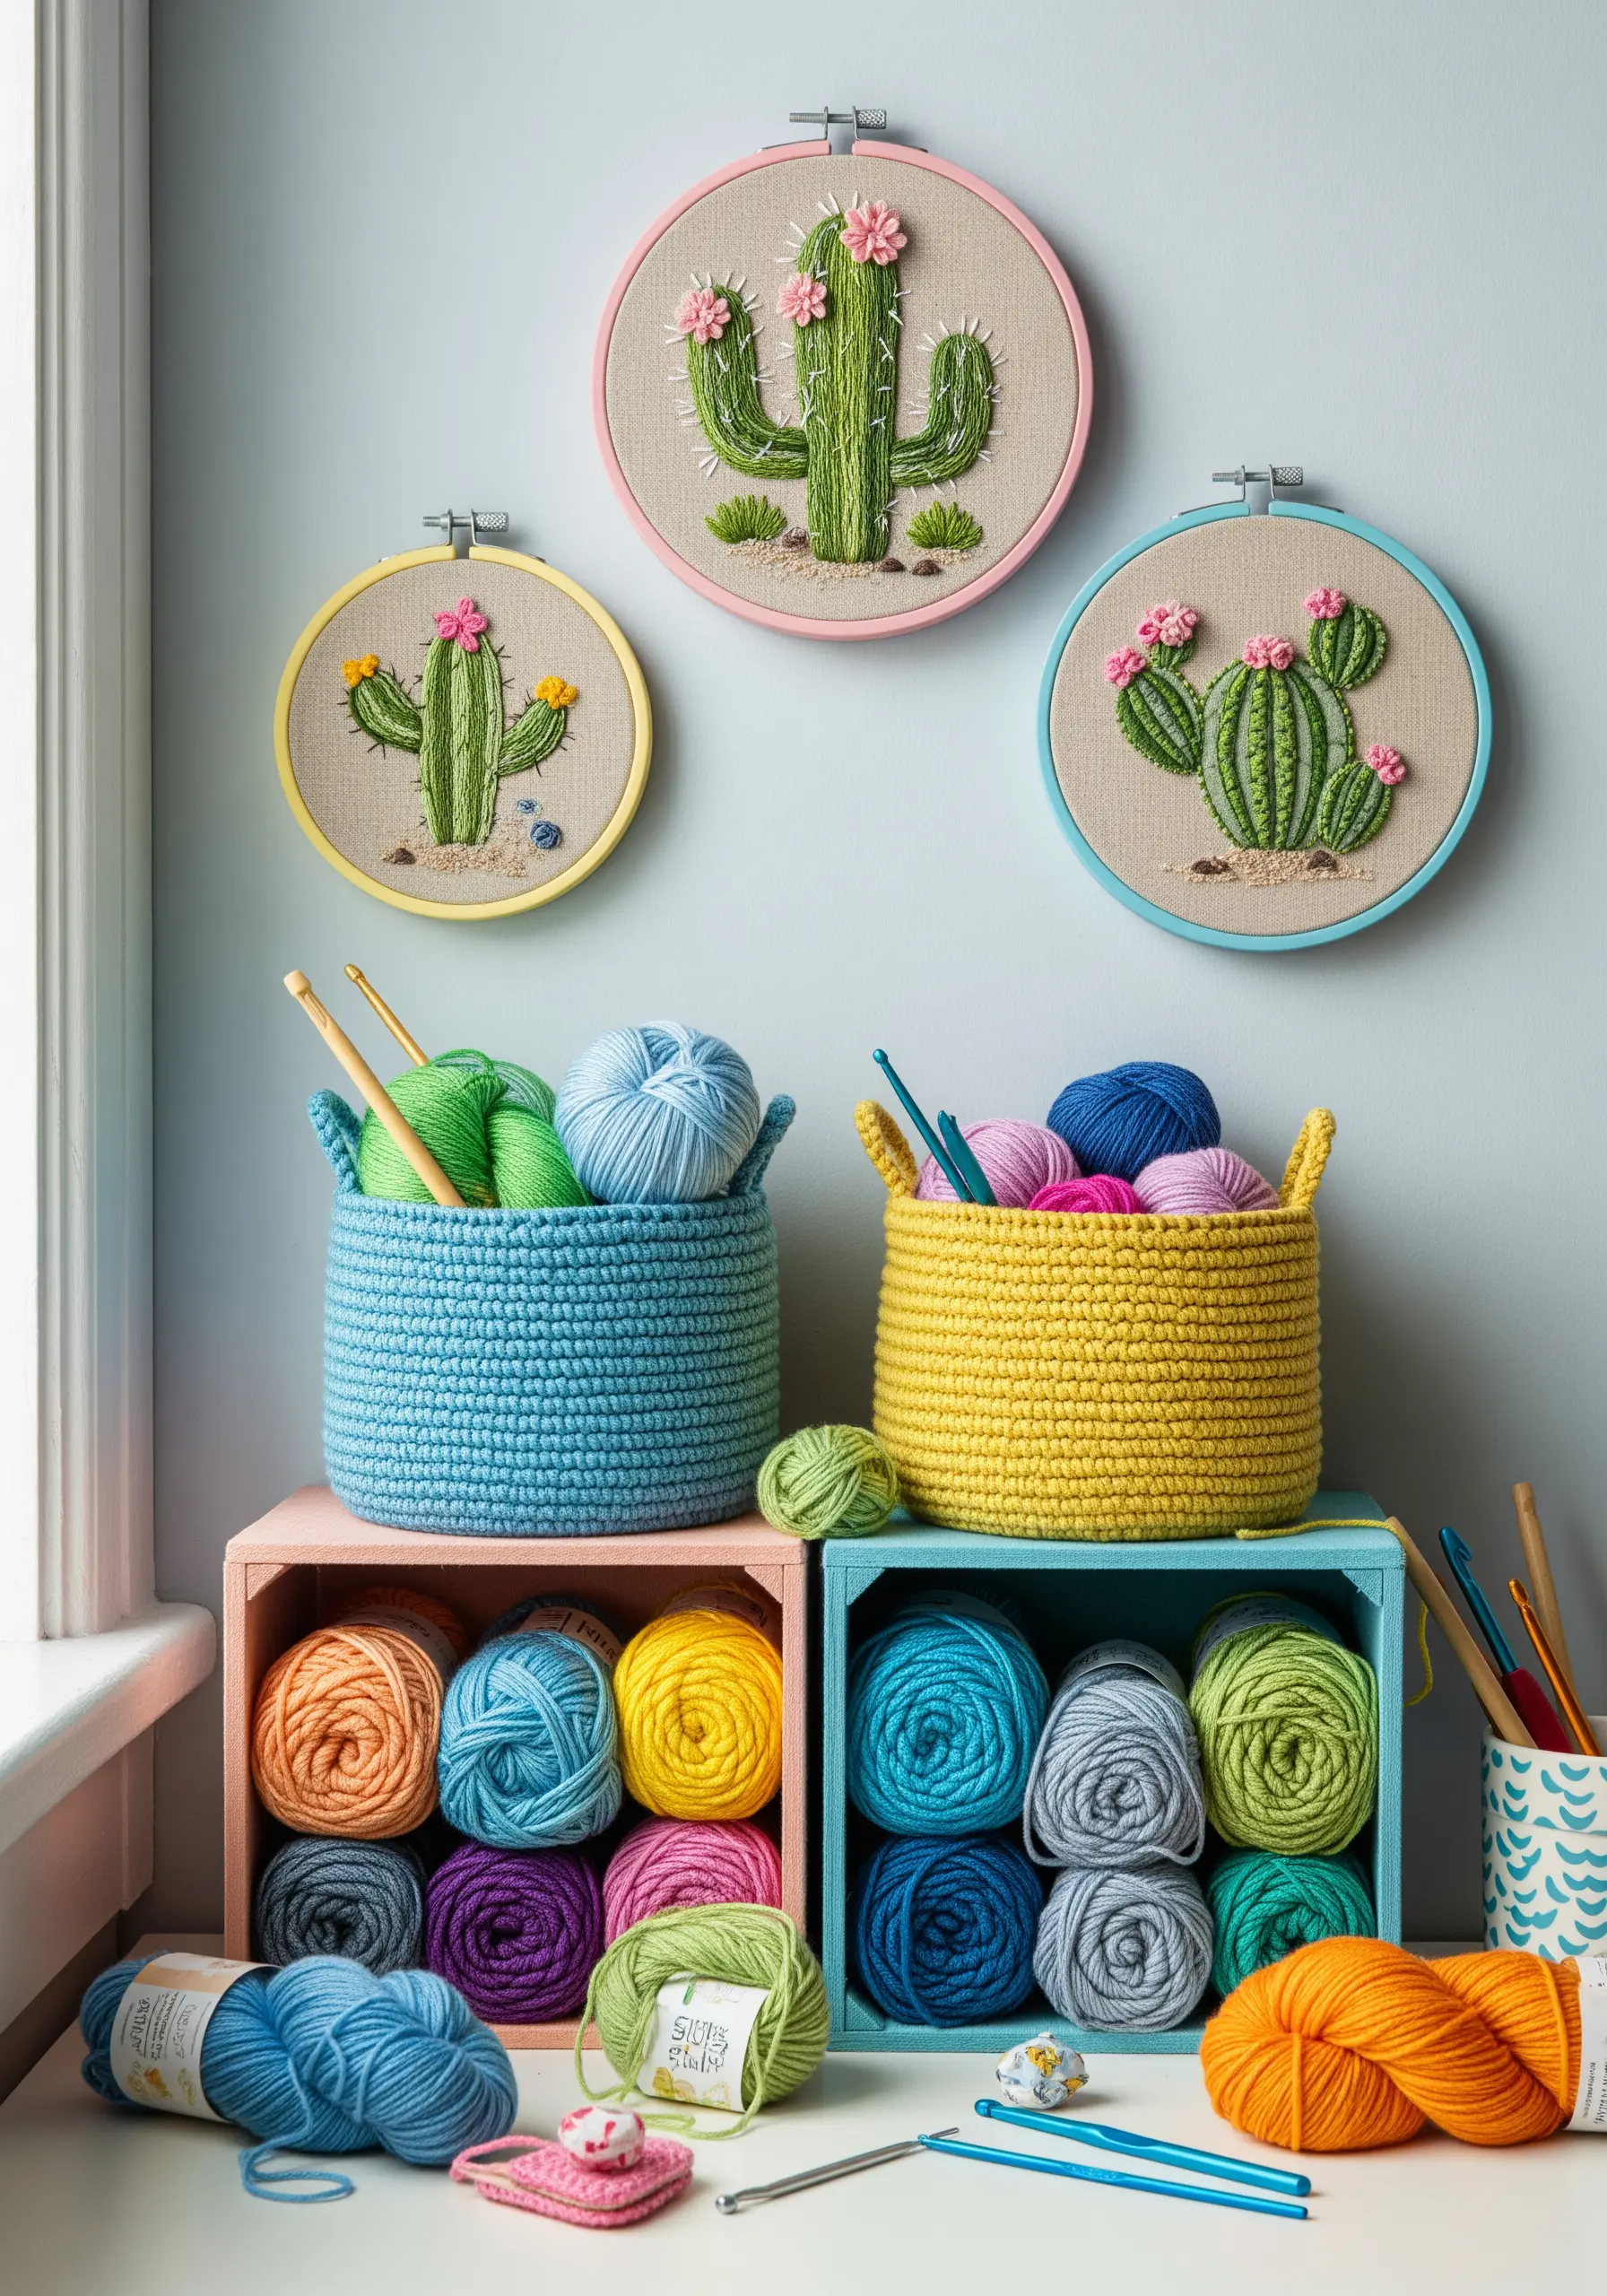
Instead of filling your cactus motifs with a flat satin stitch, build realistic dimension by layering simpler stitches.
Use a series of detached chain stitches (lazy daisies) or French knots for the flowers to give them a delicate, clustered appearance.
For the cactus body, use vertical satin stitches and add fine backstitched lines in a lighter green to suggest ribs and texture.
This combination transforms a simple shape into one of the most gorgeous floral embroidery ideas for a fresh, botanical feel.
6. Refine Your Art with Minimalist Line Work
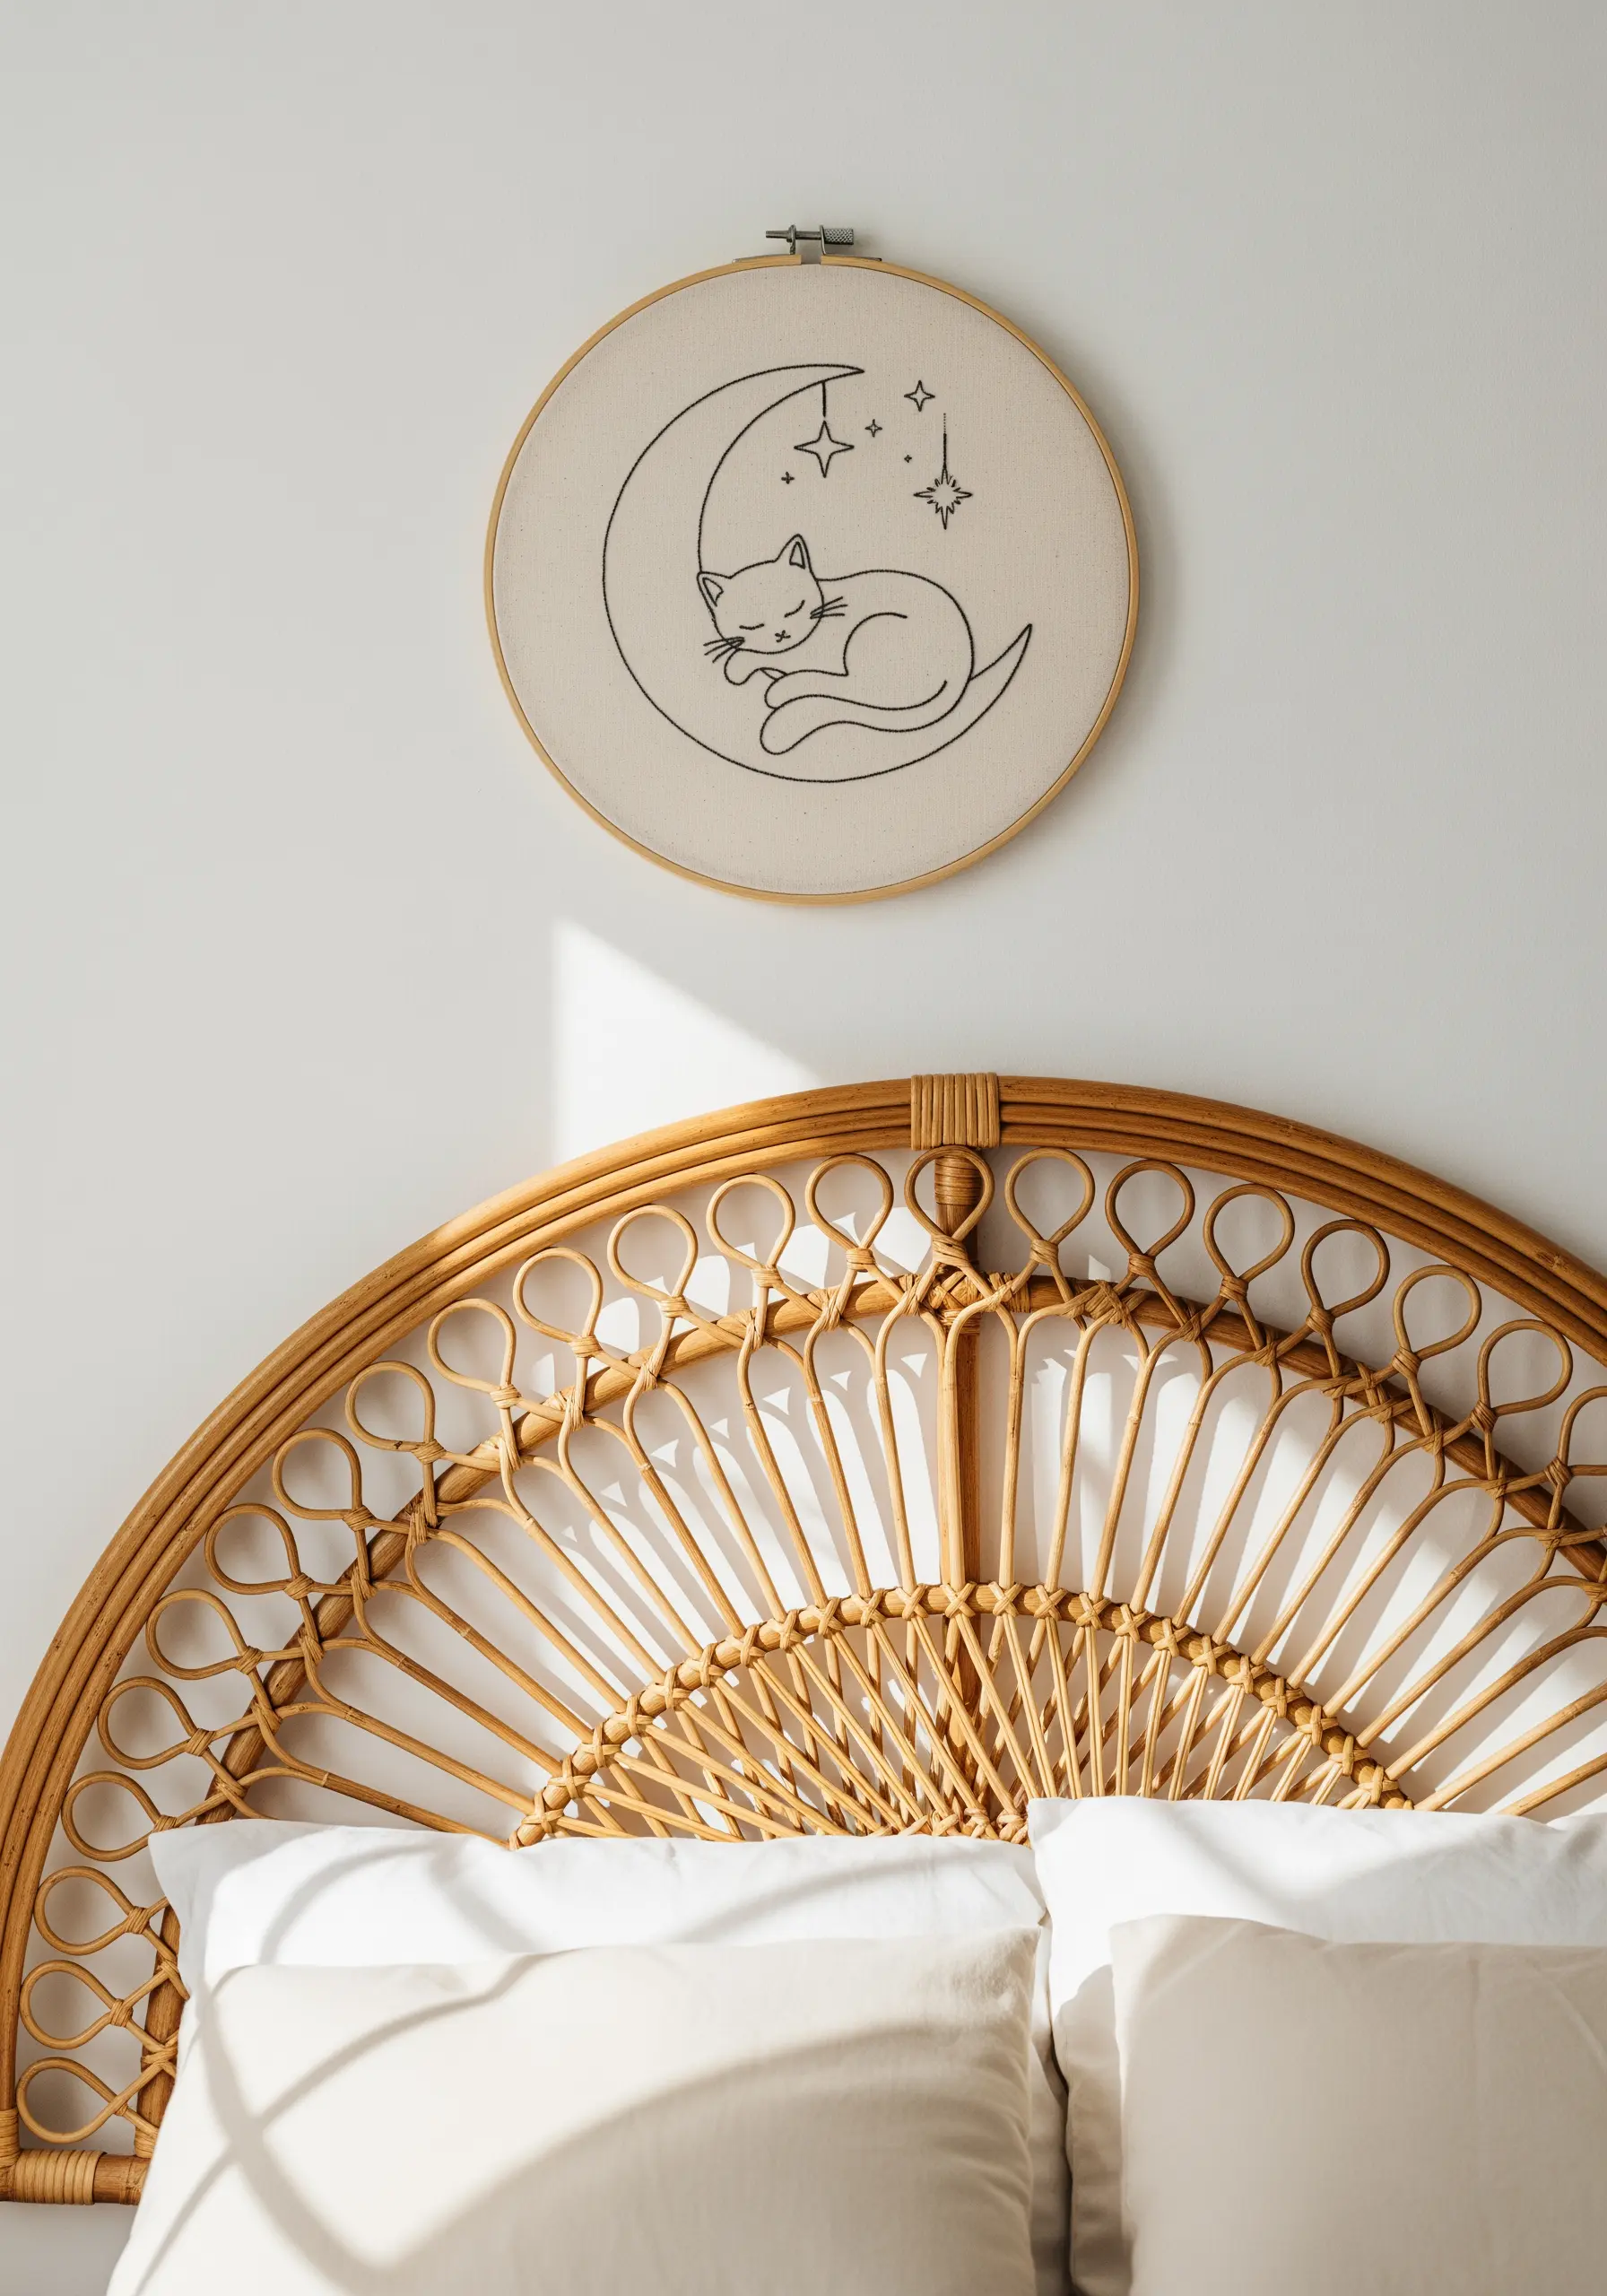
Sometimes, the most impactful designs are the most restrained.
To achieve this clean, illustrative look, focus on perfecting your backstitch or stem stitch.
Use a single strand of high-contrast thread, like black on natural linen, and concentrate on keeping your stitch length perfectly consistent.
A stabilizer on the back of your fabric will prevent puckering and ensure your lines remain crisp and elegant, ideal for minimalist line art animal designs.
7. Create a Glossy Finish with Thread Choice

To give embroidered food a delicious, liquid sheen—like syrup or glaze—your choice of thread is crucial.
Opt for a rayon or silk floss instead of standard cotton; their natural luster catches the light beautifully.
Use a directional satin stitch, following the drips and curves of the liquid to enhance the illusion of movement and reflection.
A few strategically placed single stitches in a lighter shade will act as highlights, completing the glossy effect.
8. Stitch Realistic Insects on Velvet
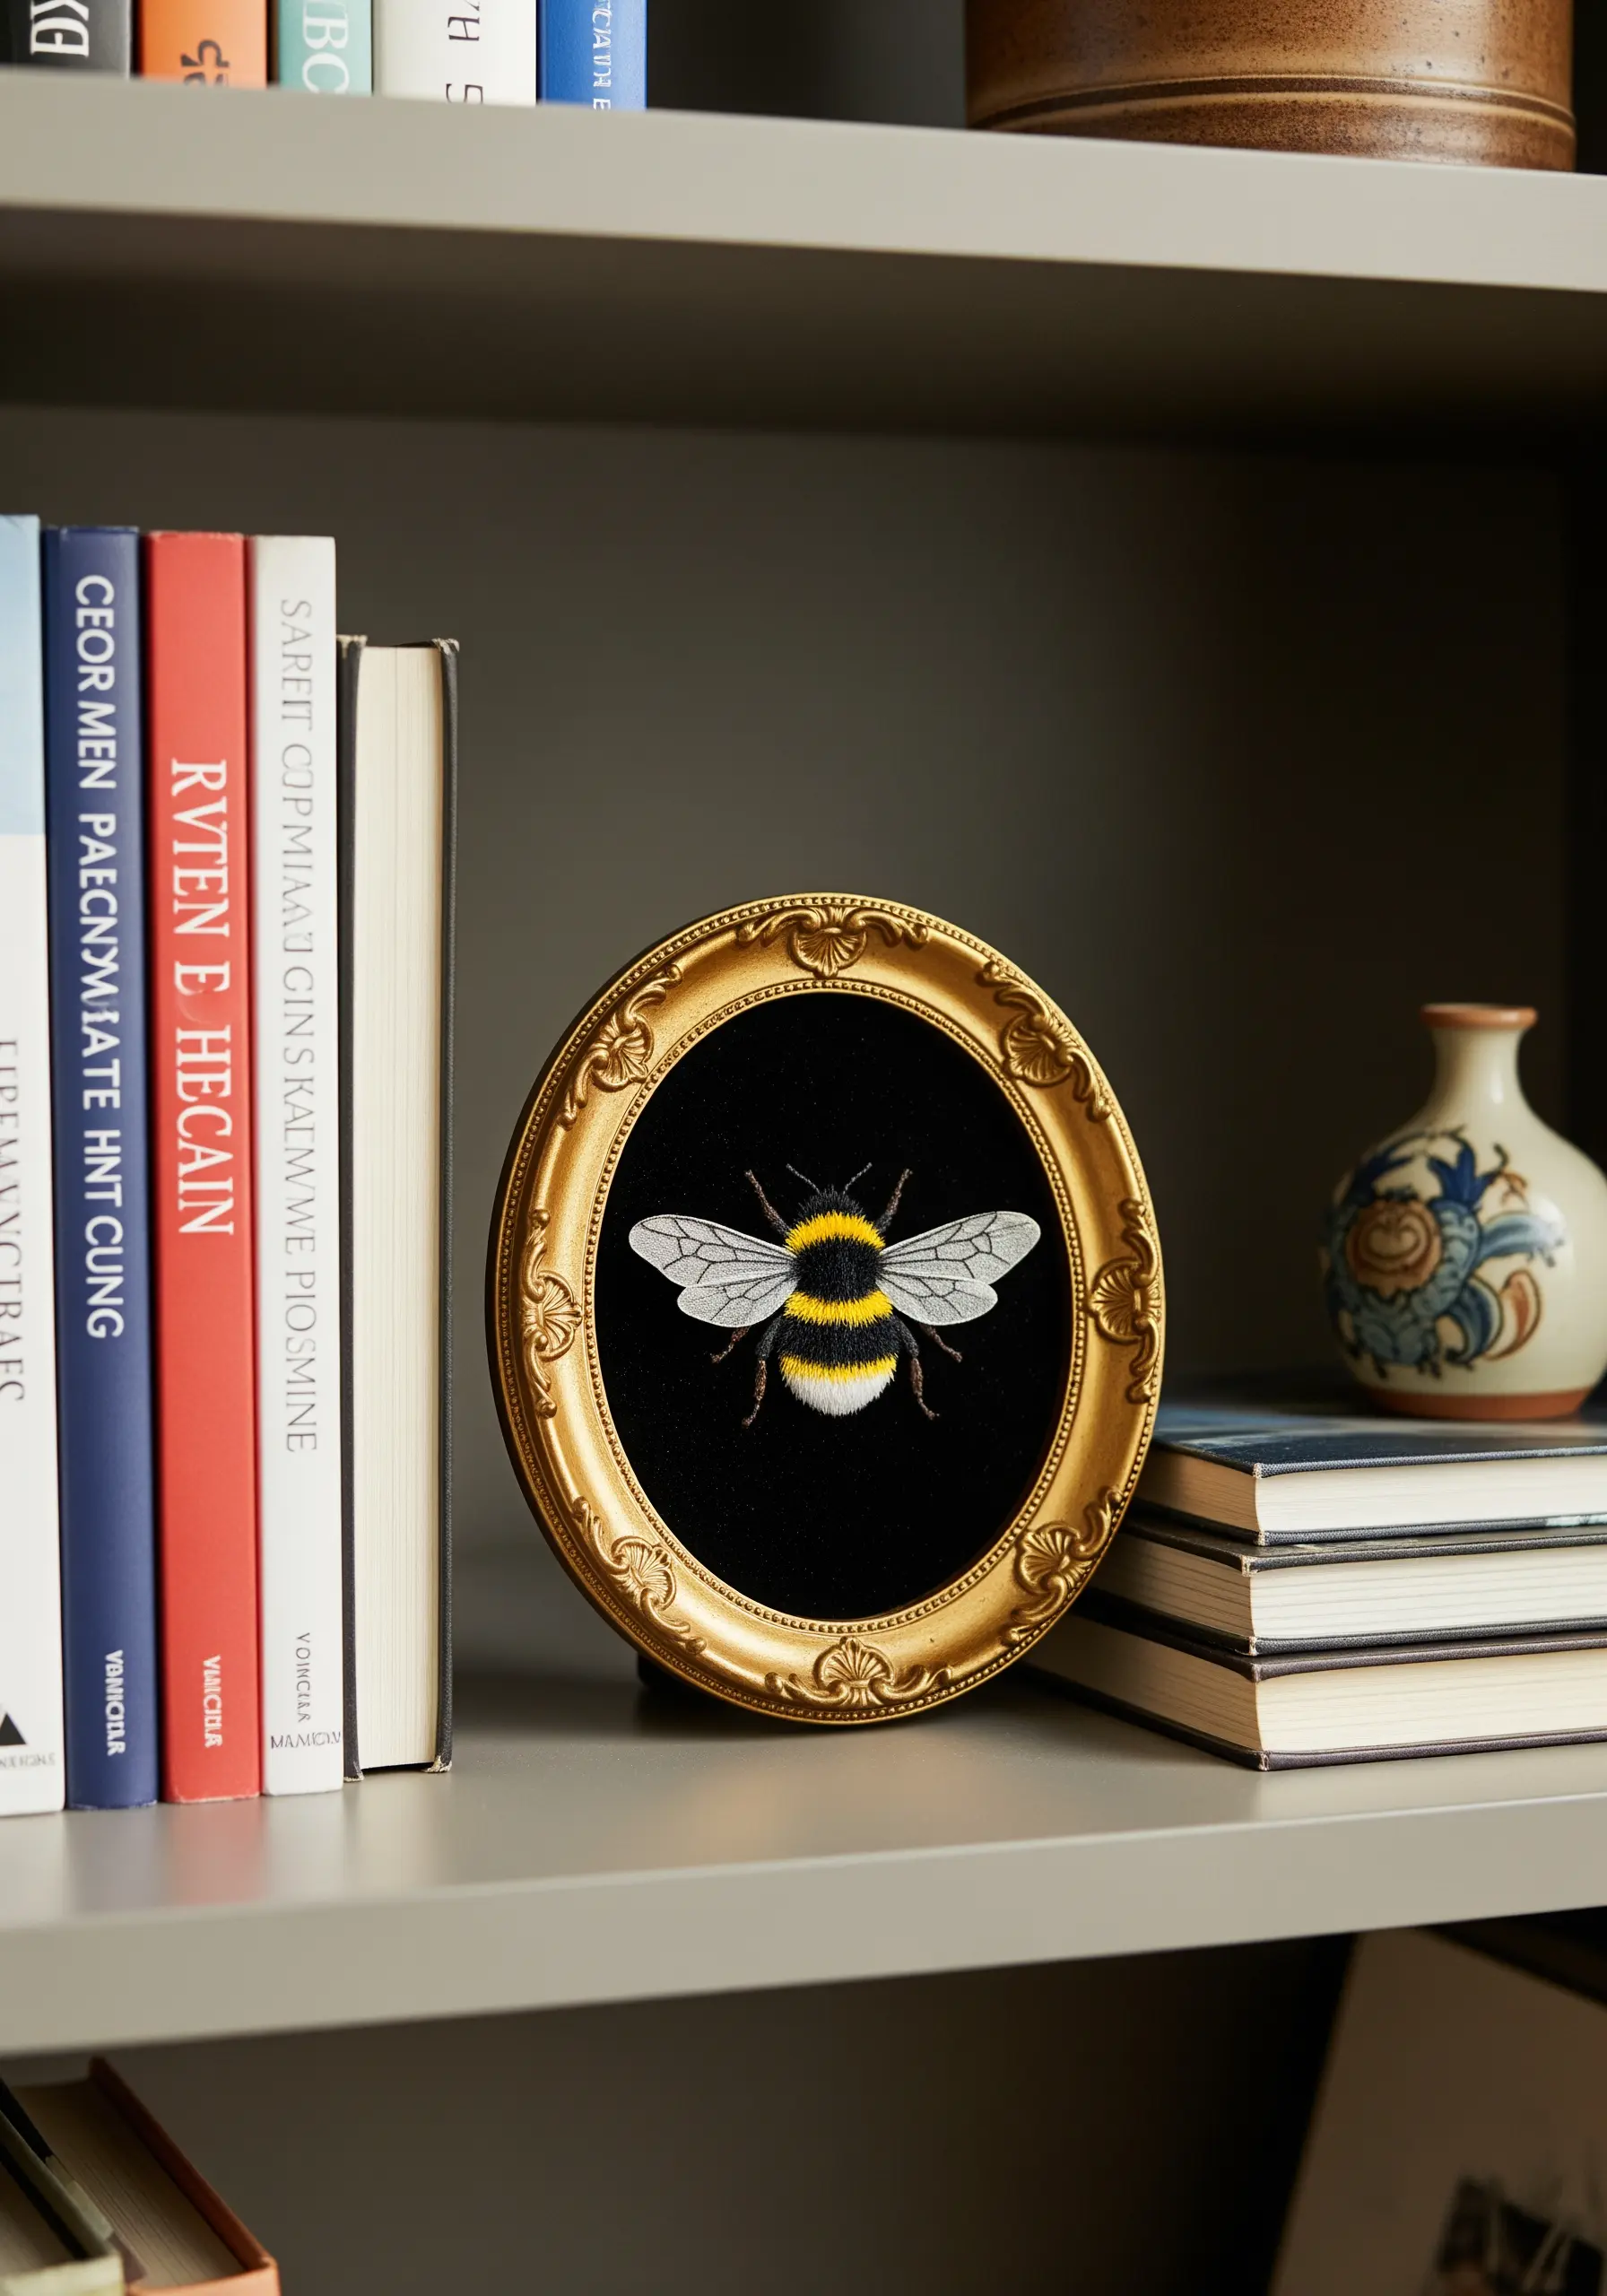
For a striking, museum-quality display, embroider your subject on a piece of black velvet.
The deep, matte pile of the velvet absorbs light, making your thread colors appear exceptionally vibrant and detailed.
Use long-and-short stitch with fine, single-strand floss to blend colors for the fuzzy body, and use a delicate couching stitch with a silvery metallic thread for the wing veins.
This combination of texture and technique makes bird & butterfly embroidery patterns feel incredibly lifelike.
9. Achieve a Chunky, Tactile Look with Yarn
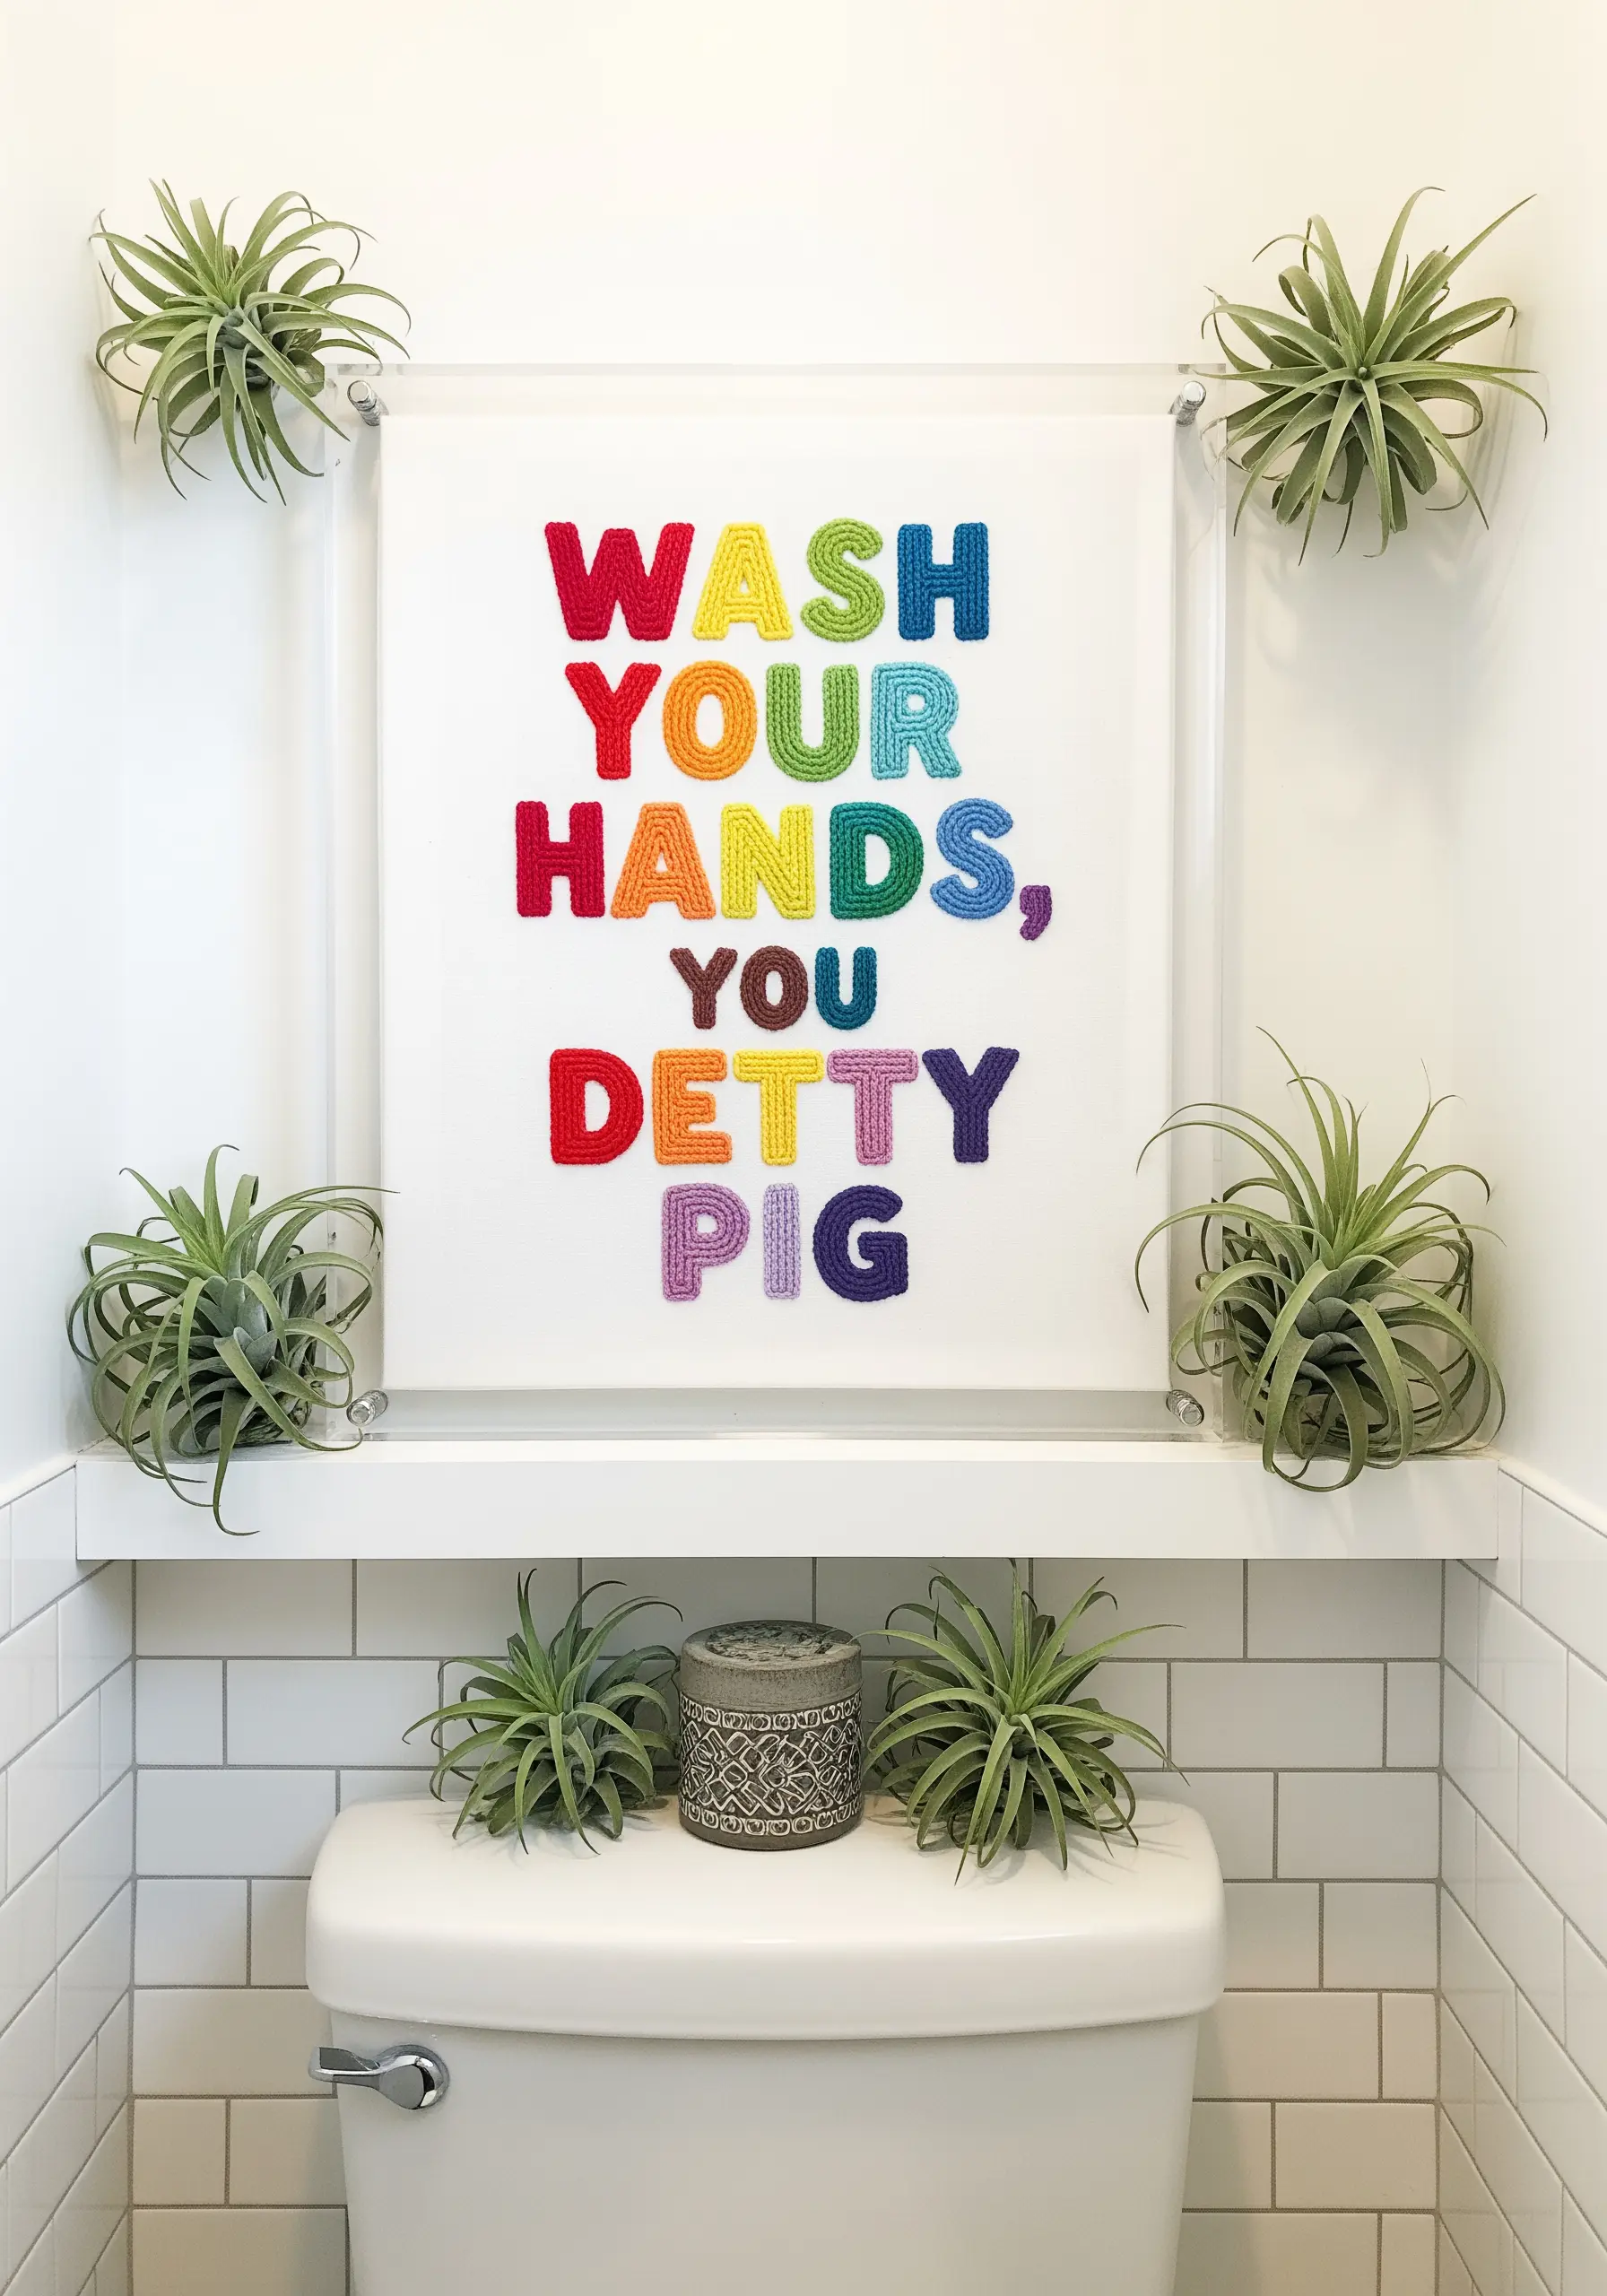
For playful, graphic pieces, swap your embroidery floss for fine-gauge yarn.
Use a large-eyed chenille needle and a sturdy fabric like canvas or denim to support the thicker fibers.
A simple chain stitch or stem stitch will create bold, dimensional lines that are perfect for typography and color-blocked shapes.
This technique is fast, fun, and results in wonderfully tactile DIY yarn wall art patterns that invite touch.
10. Combine Cross-Stitch with Delicate Textures
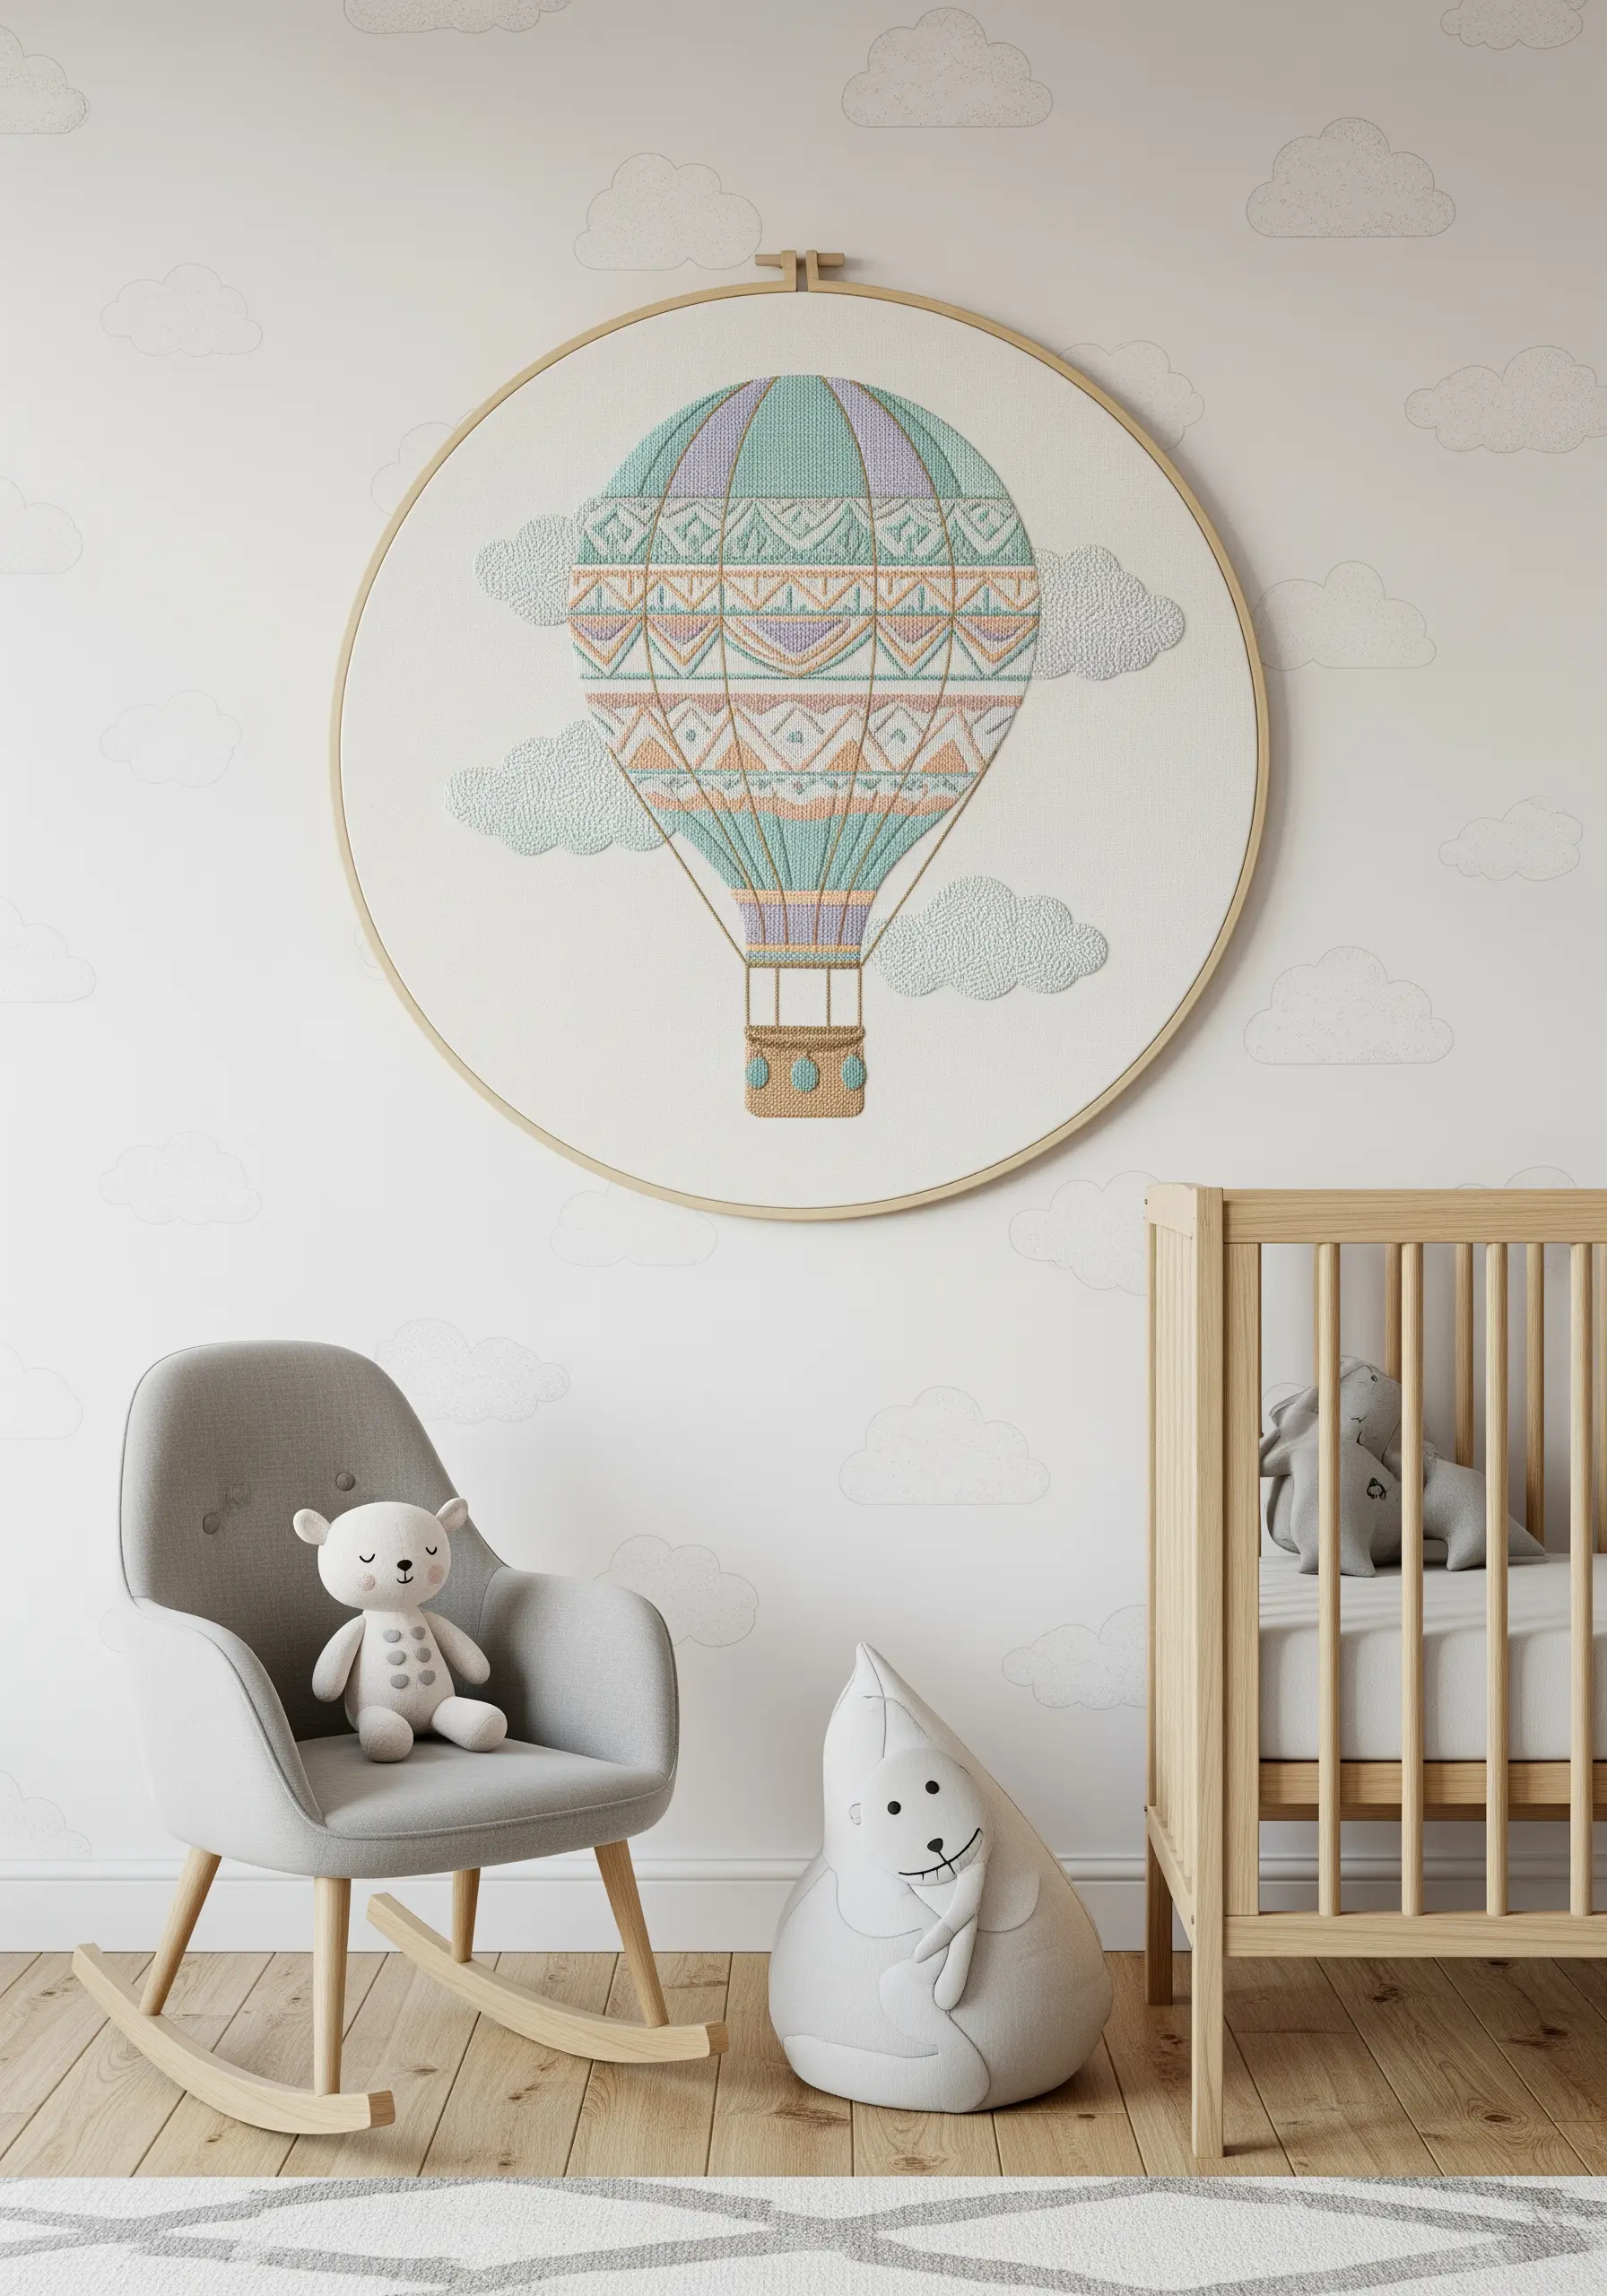
Elevate a traditional cross-stitch design by incorporating other textural stitches.
While the main body of the balloon can be classic cross-stitch, use French knots or seed stitches for the clouds.
This adds a soft, puffy texture that contrasts with the structured grid of the cross-stitch, creating visual interest and depth.
It’s a simple way to add a modern, mixed-media feel to otherwise traditional geometric abstract thread patterns.
11. Suggest Transparency with Open Fill Stitches
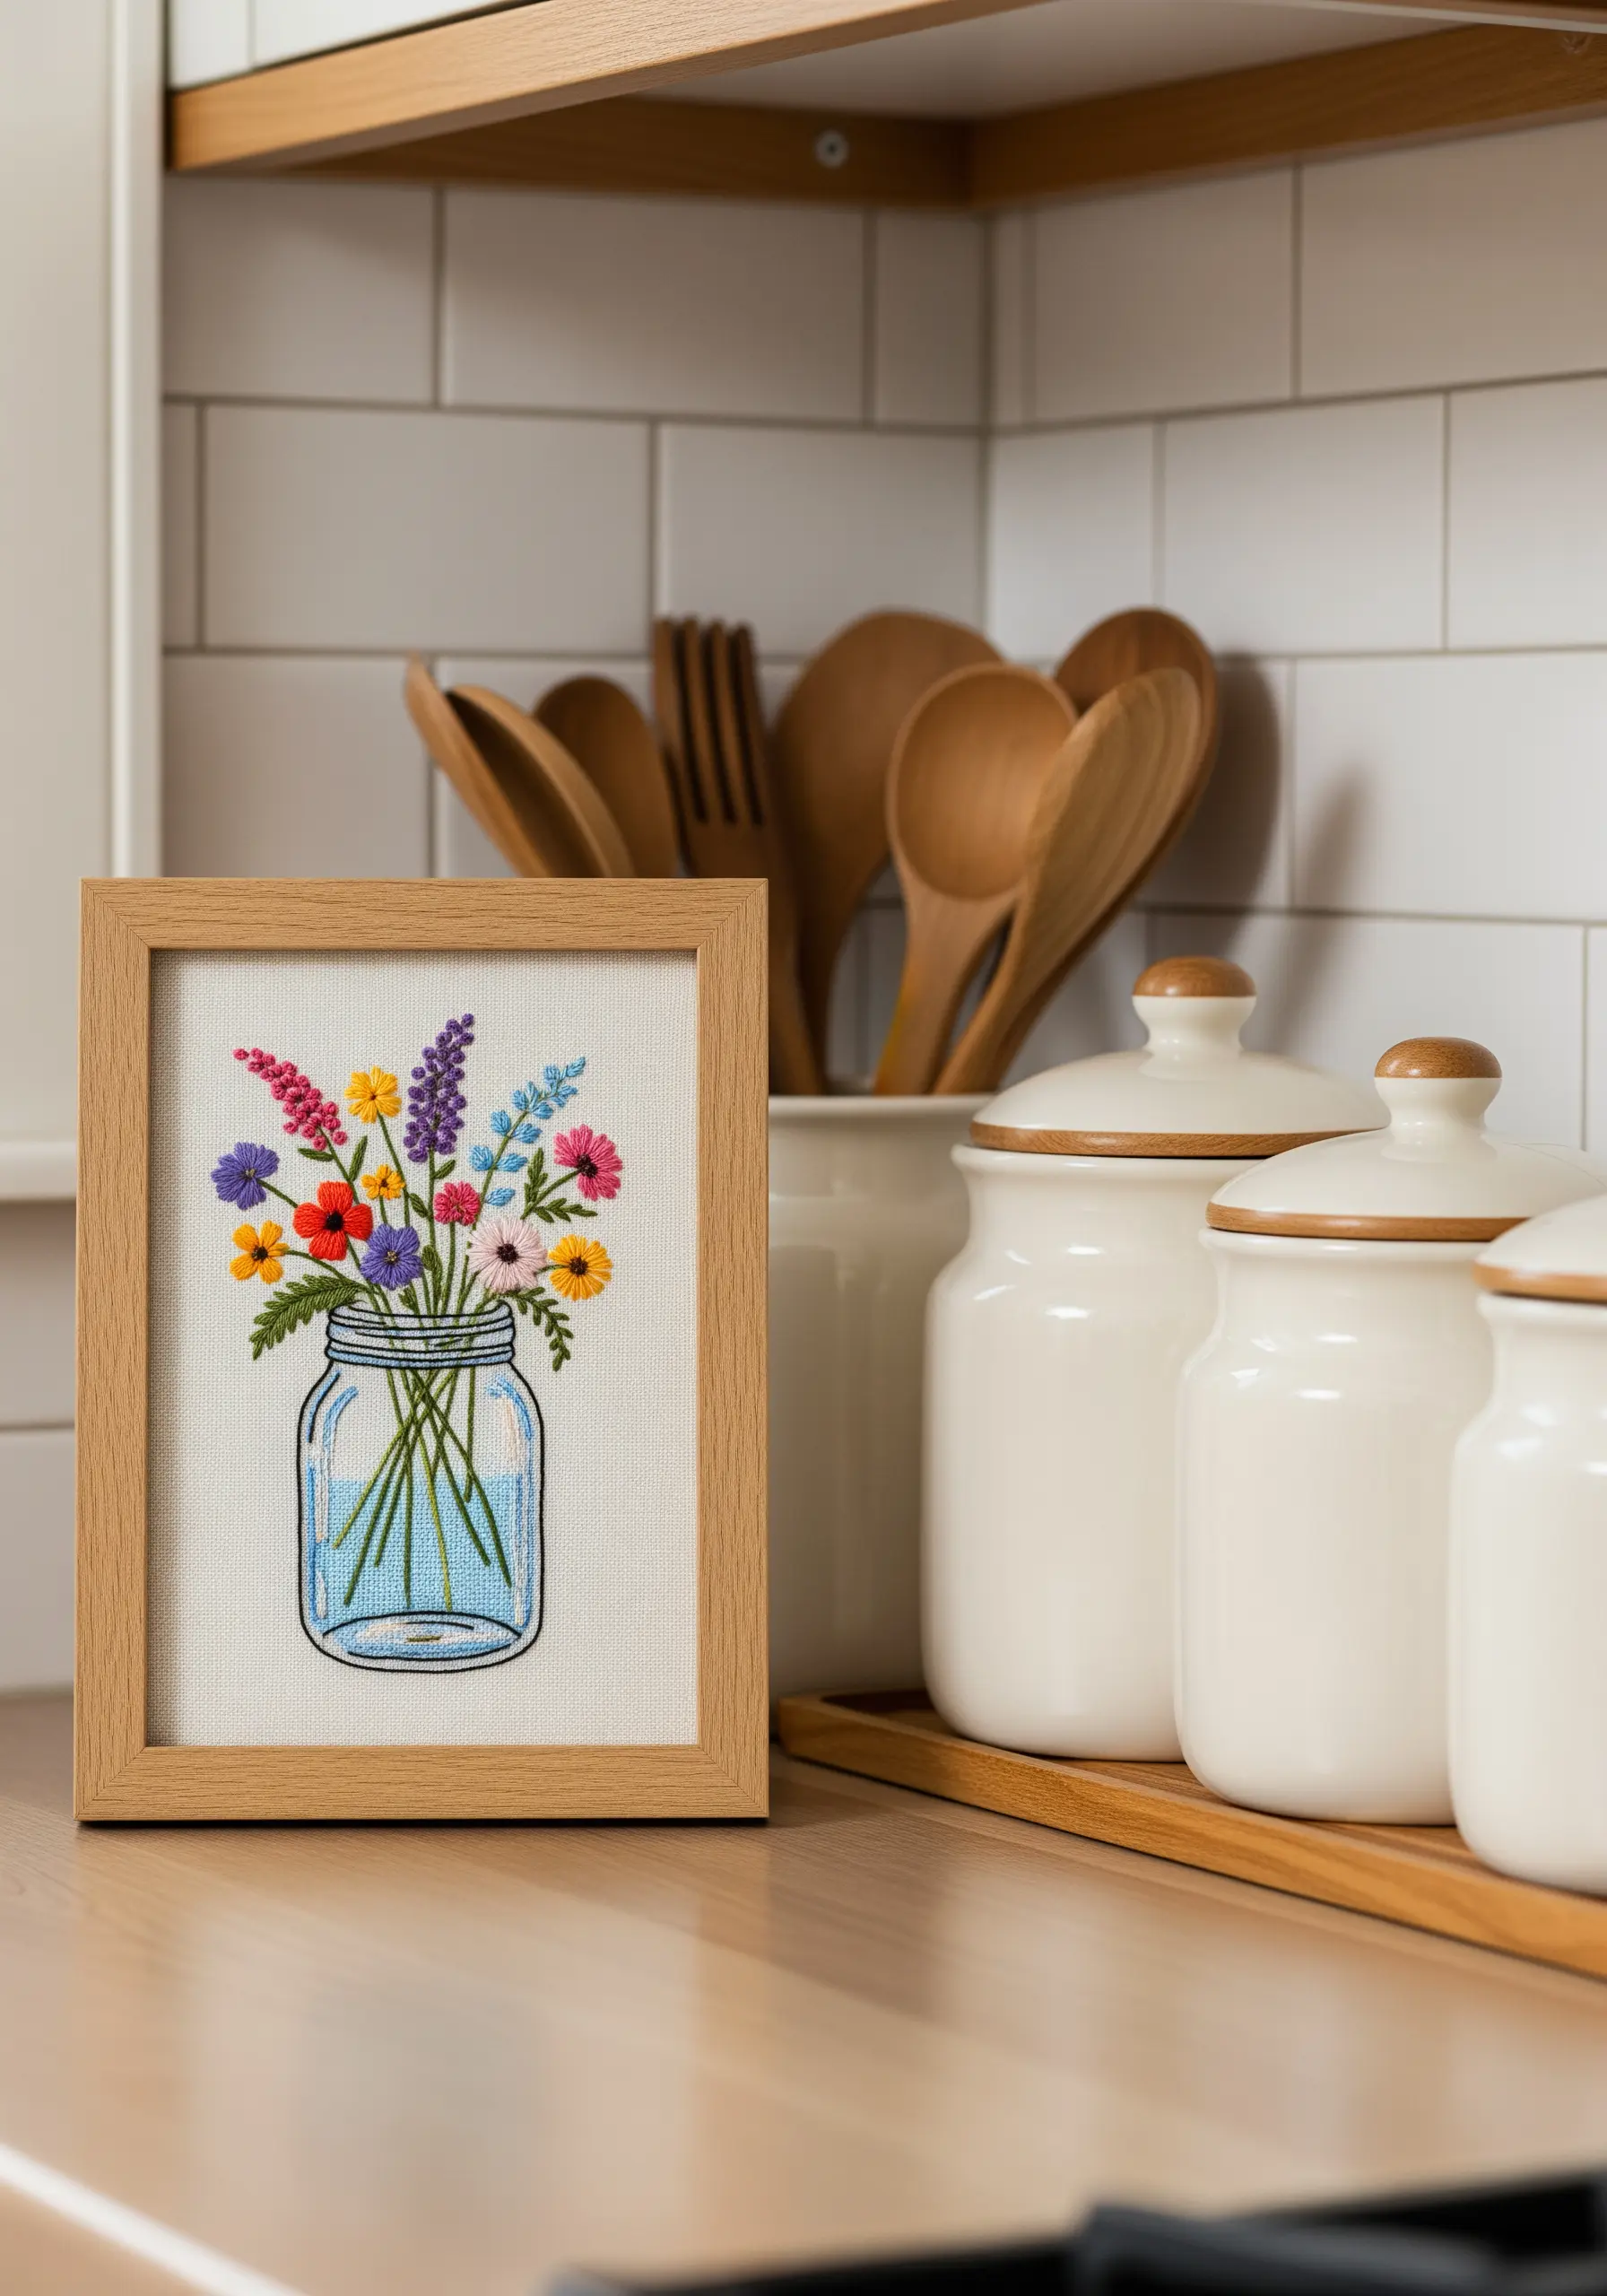
To create the illusion of glass, avoid solidly filling the shape.
Instead, use an open fill technique like a fishbone stitch or spaced-out satin stitches in a light blue or grey thread.
Outline the jar with a darker, sharp backstitch to define its form.
This contrast between the solid flower stems and the airy stitches of the jar tricks the eye into seeing transparency, making it one of the most clever watercolor style floral threads techniques.
12. Create a Soft 3D Effect with Felt Appliqué
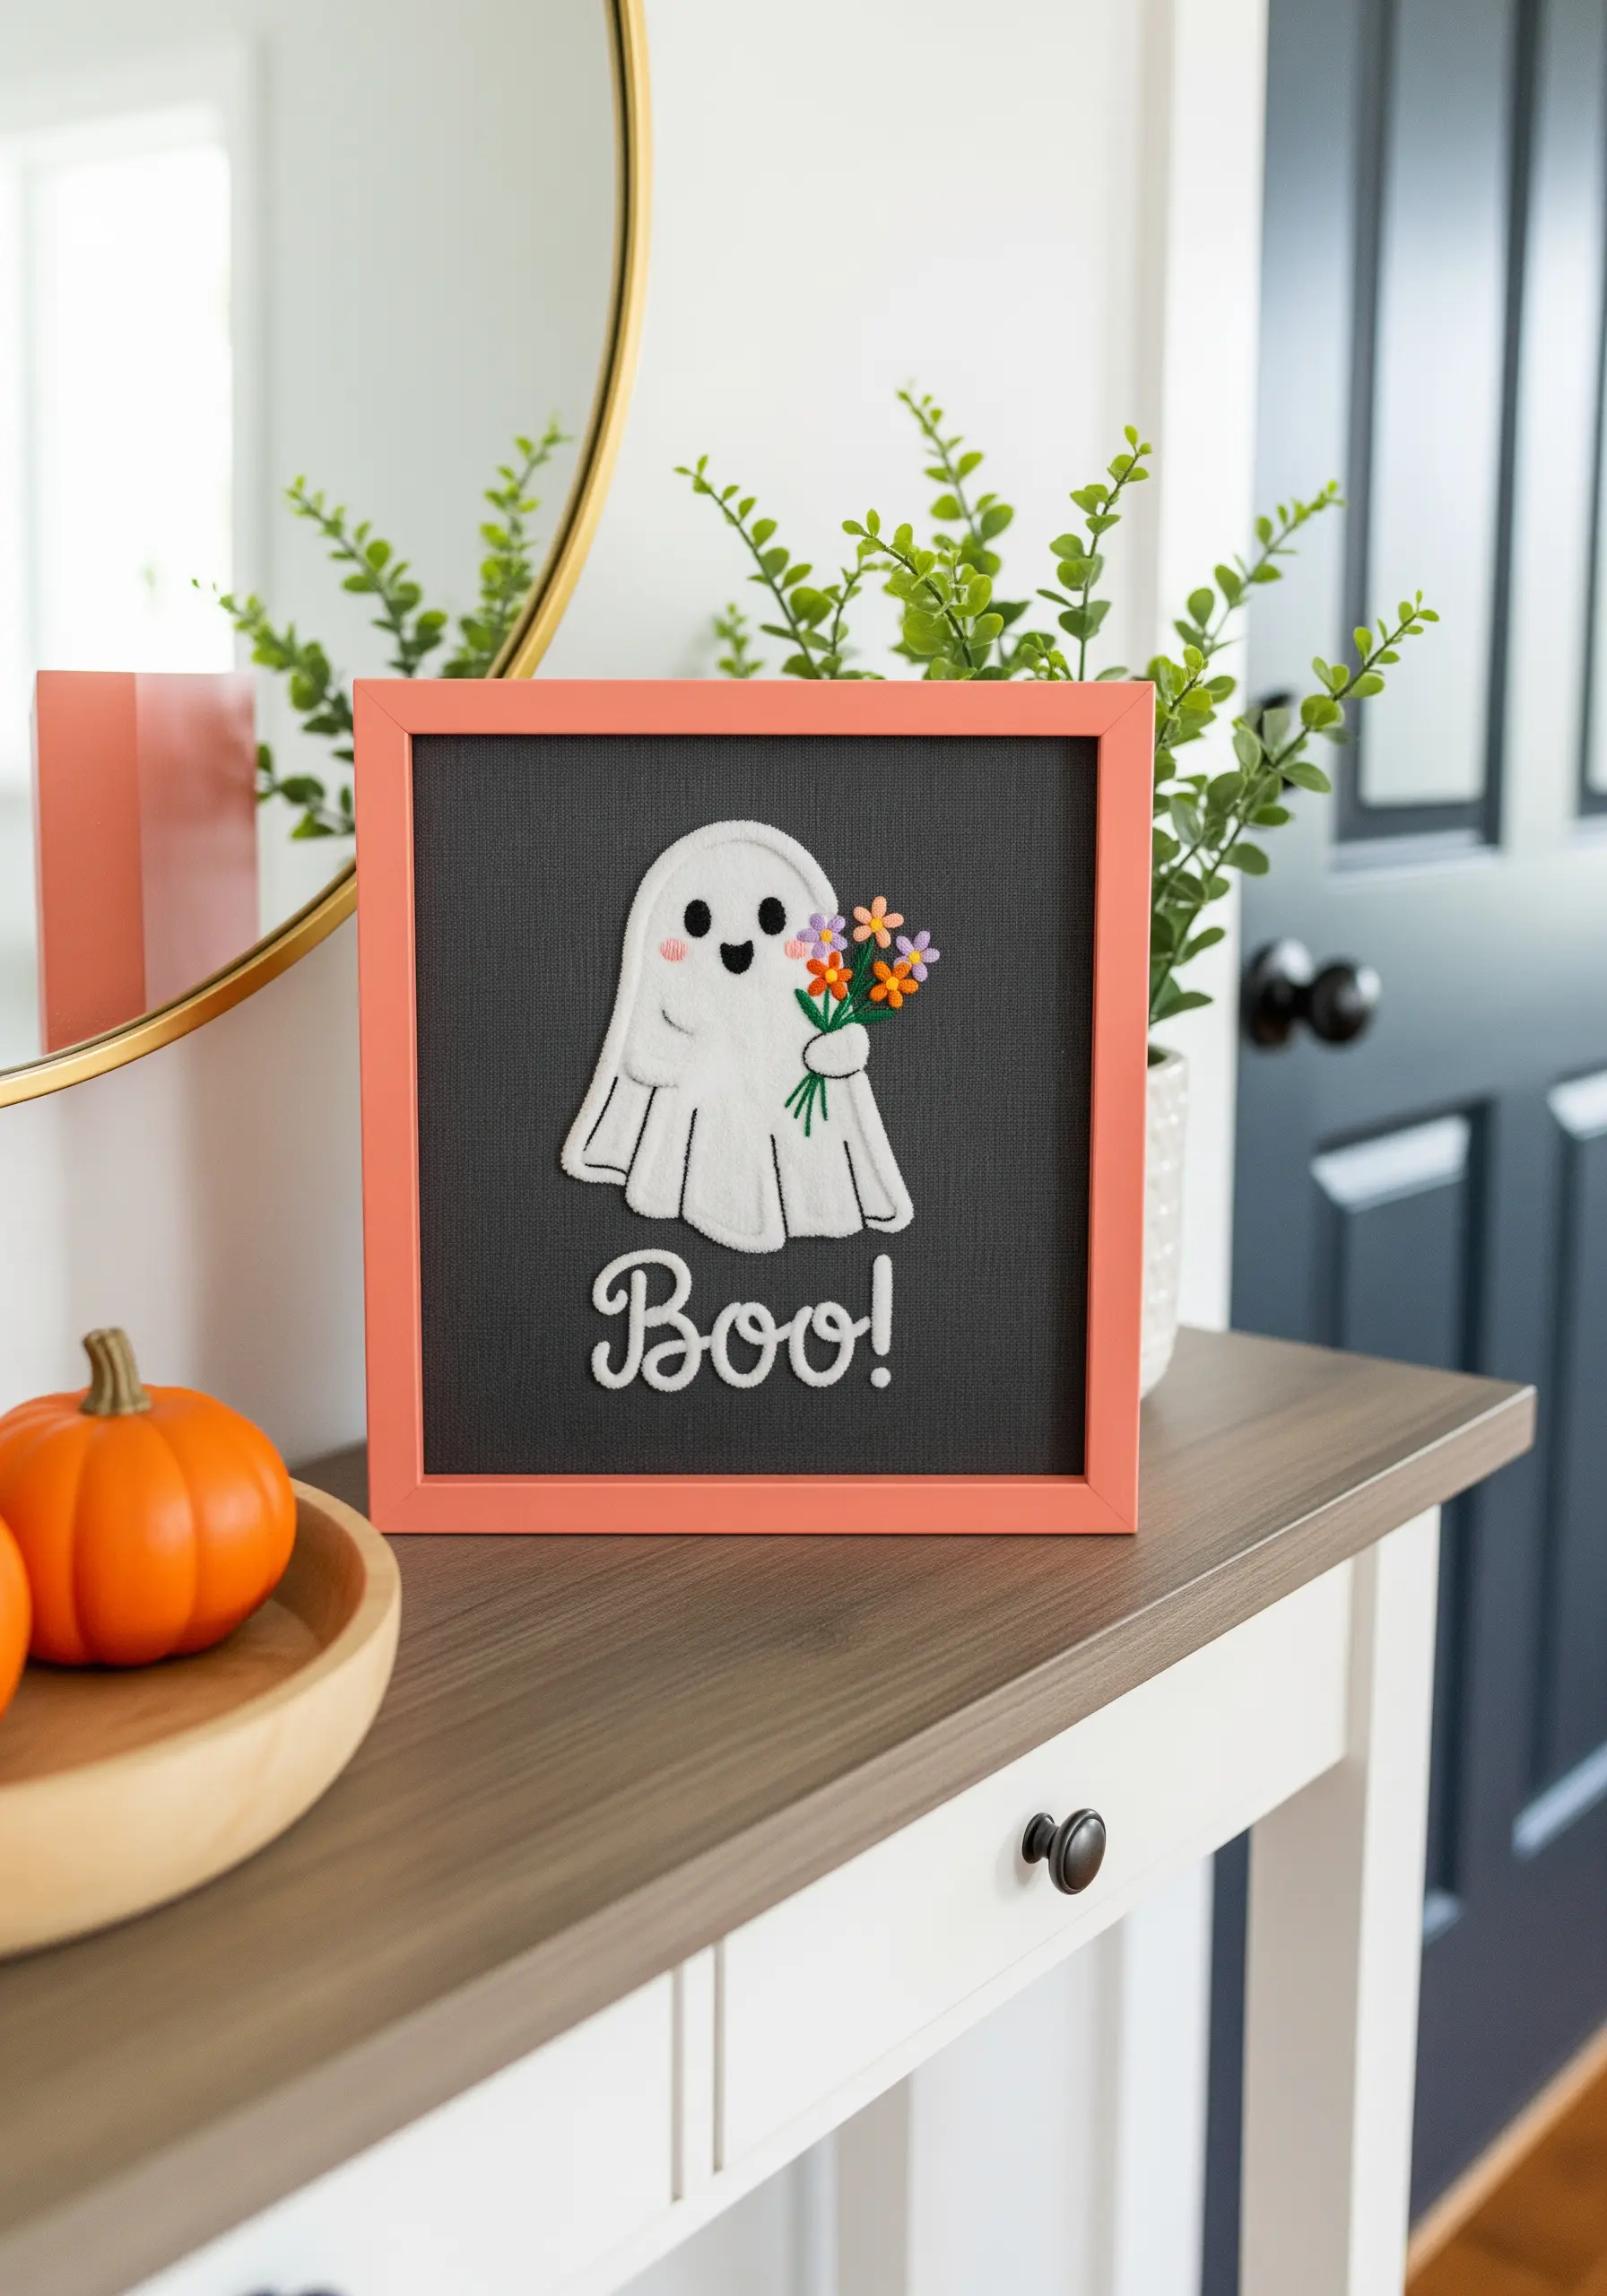
For a quick and playful design with a raised surface, combine embroidery with felt appliqué.
Cut your main shape from a piece of white felt and secure it to your background fabric with a few hidden stitches.
Then, use a blanket stitch or satin stitch around the edge to secure it permanently and give it a clean border.
Add embroidered details on top of the felt to complete the design; it’s a perfect trick for fun seasonal embroidery decor ideas.
13. Add Personality with Negative Space
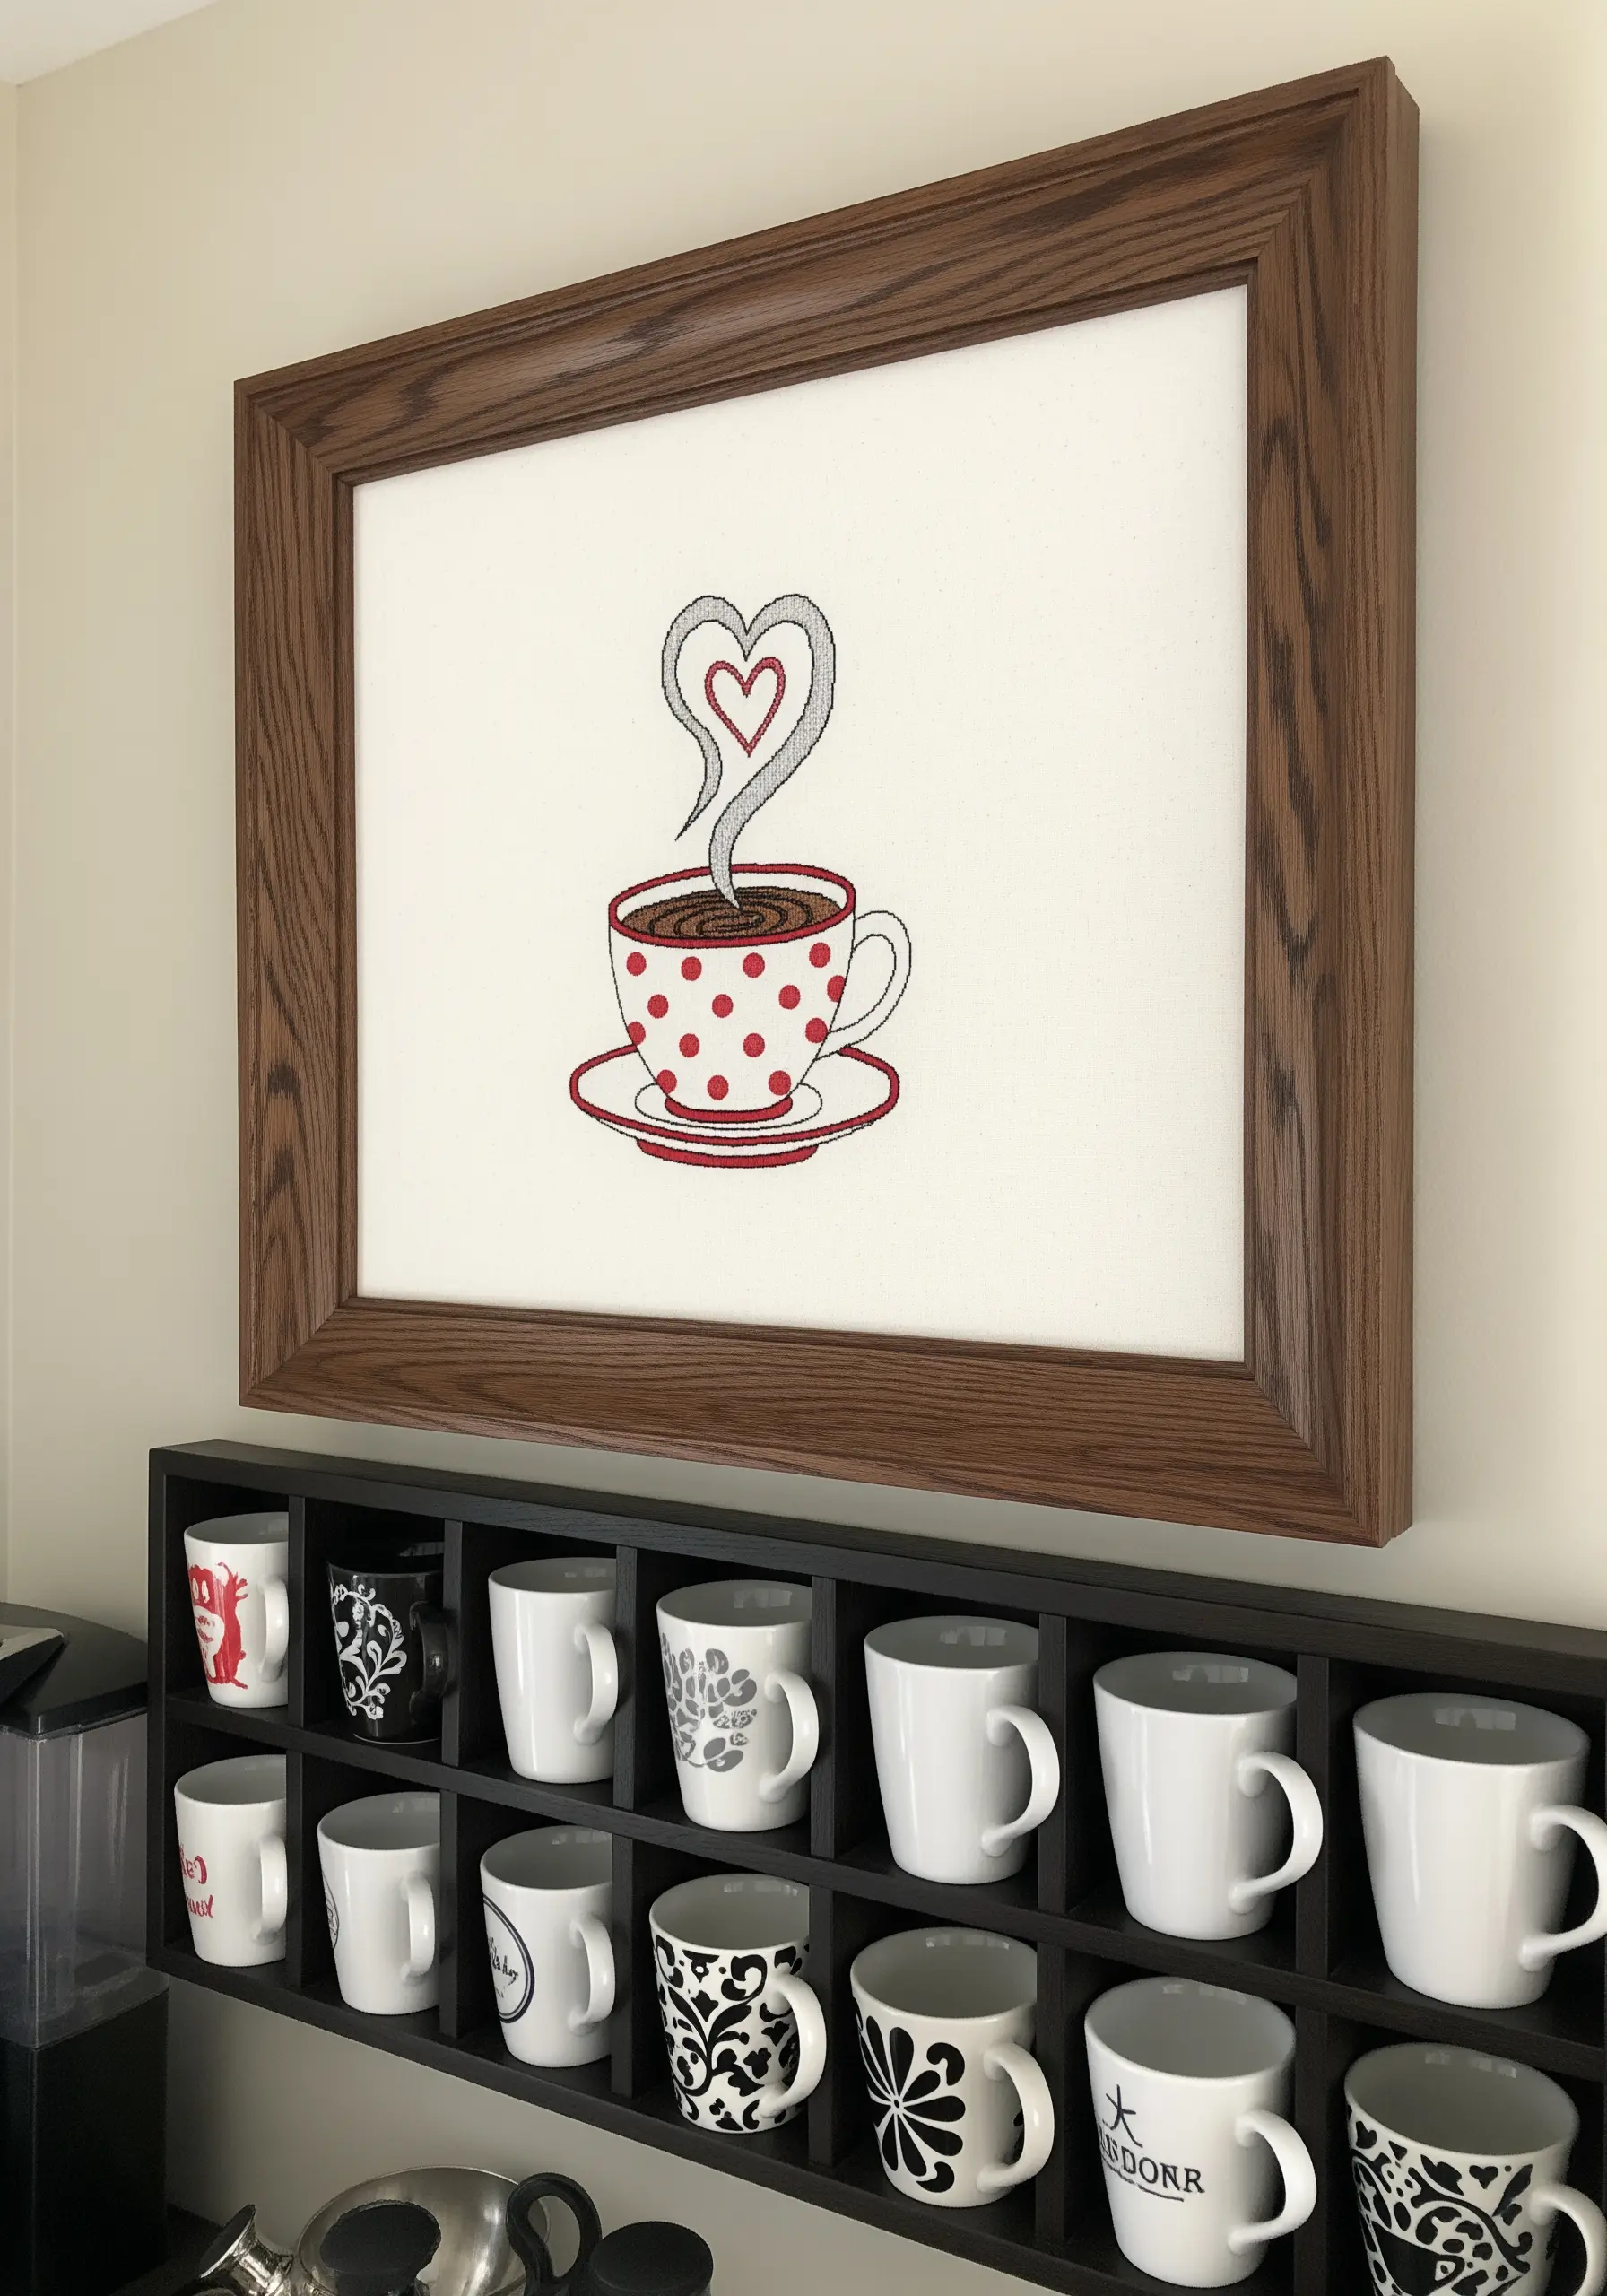
You don’t need to fill every shape with thread to make an impact.
In this coffee cup design, the polka dots are created by the absence of stitching, allowing the white background fabric to show through.
This technique, known as using negative space, adds pattern and visual interest without adding more work.
It’s a smart and efficient design choice for simple mini embroidery patterns that feel thoughtfully composed.
14. Achieve Realistic Shading with Thread Painting
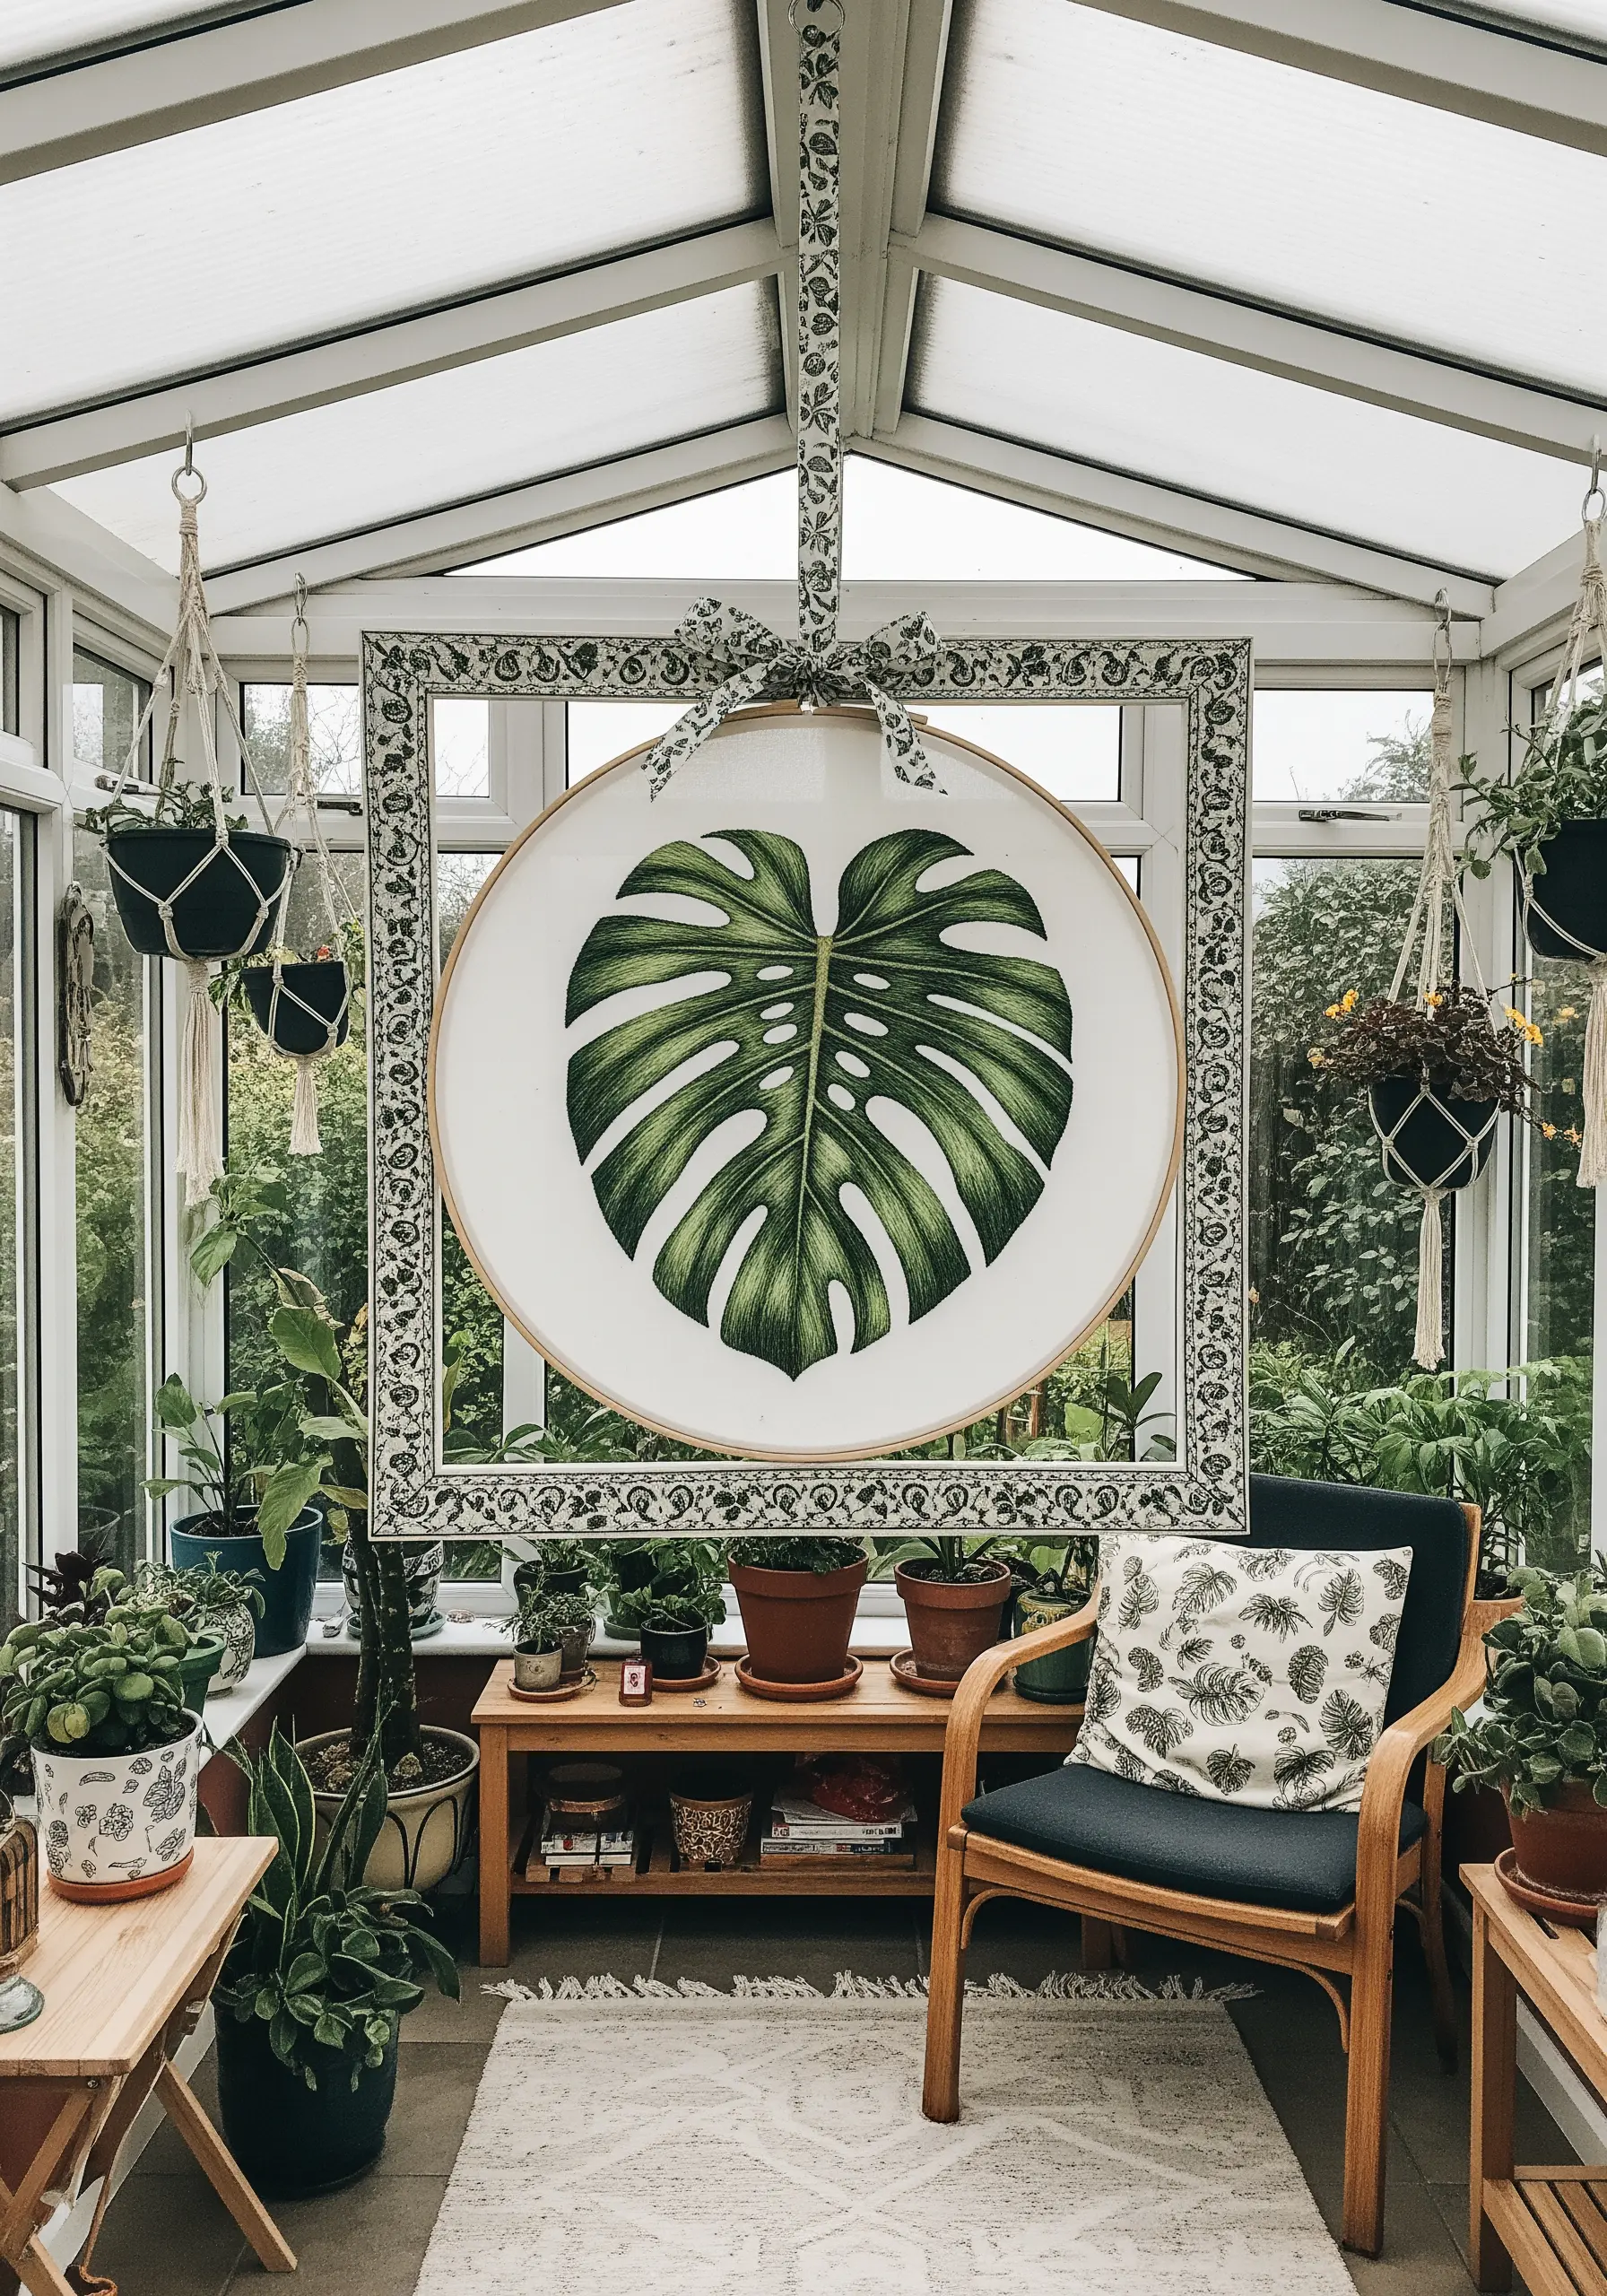
To create the lifelike variegation of a monstera leaf, you’ll need the thread painting technique, also known as long-and-short stitch.
Work with a single strand of floss and use at least three to four shades of green, from light to dark.
Start by creating a row of alternating long and short stitches, then blend the next color into that row, staggering your stitches to avoid harsh lines.
This meticulous blending is key to mastering realistic leaf vein stitch methods.
15. Incorporate Mixed-Media Elements for Playful Texture
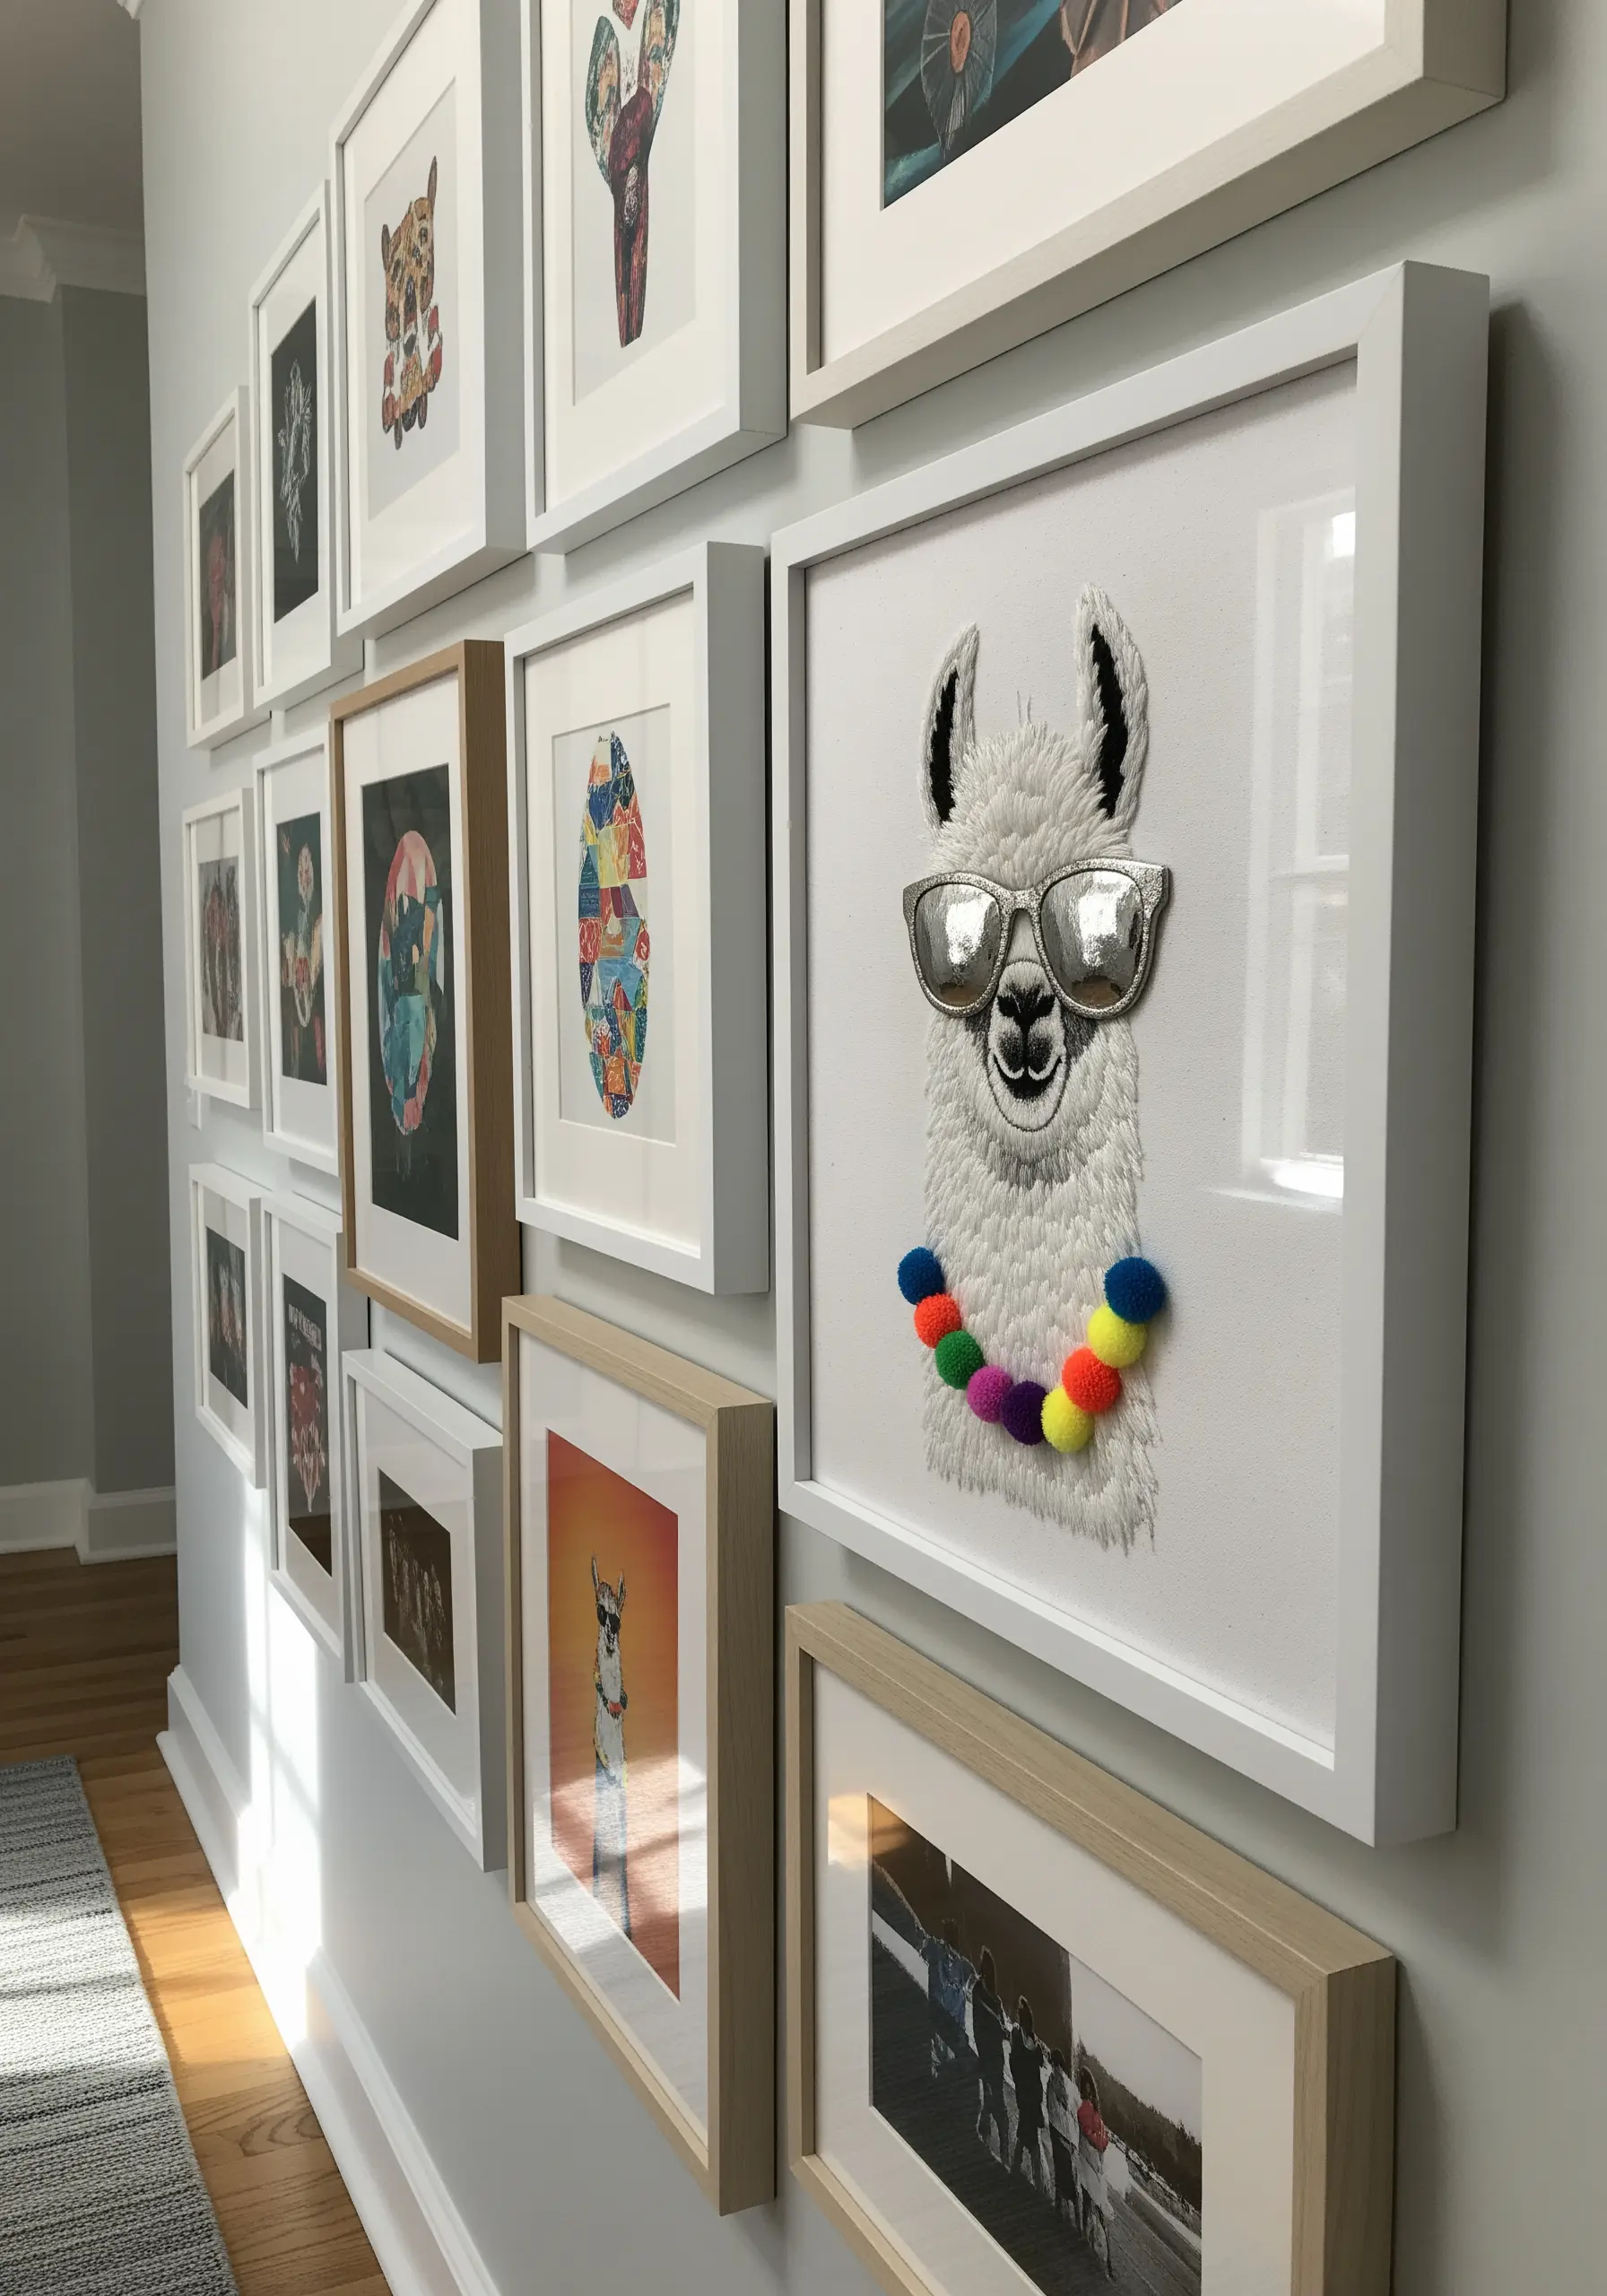
Don’t be afraid to add non-thread elements to your embroidery for a surprising and delightful touch.
Here, tiny, colorful pom-poms are stitched on to create the llama’s necklace, adding a burst of 3D texture and fun.
You can also use beads, sequins, or even small pieces of metallic leather for elements like sunglasses.
These playful mixed-fiber art projects make your work uniquely expressive and memorable.
16. Use Variegated Thread for Effortless Gradients
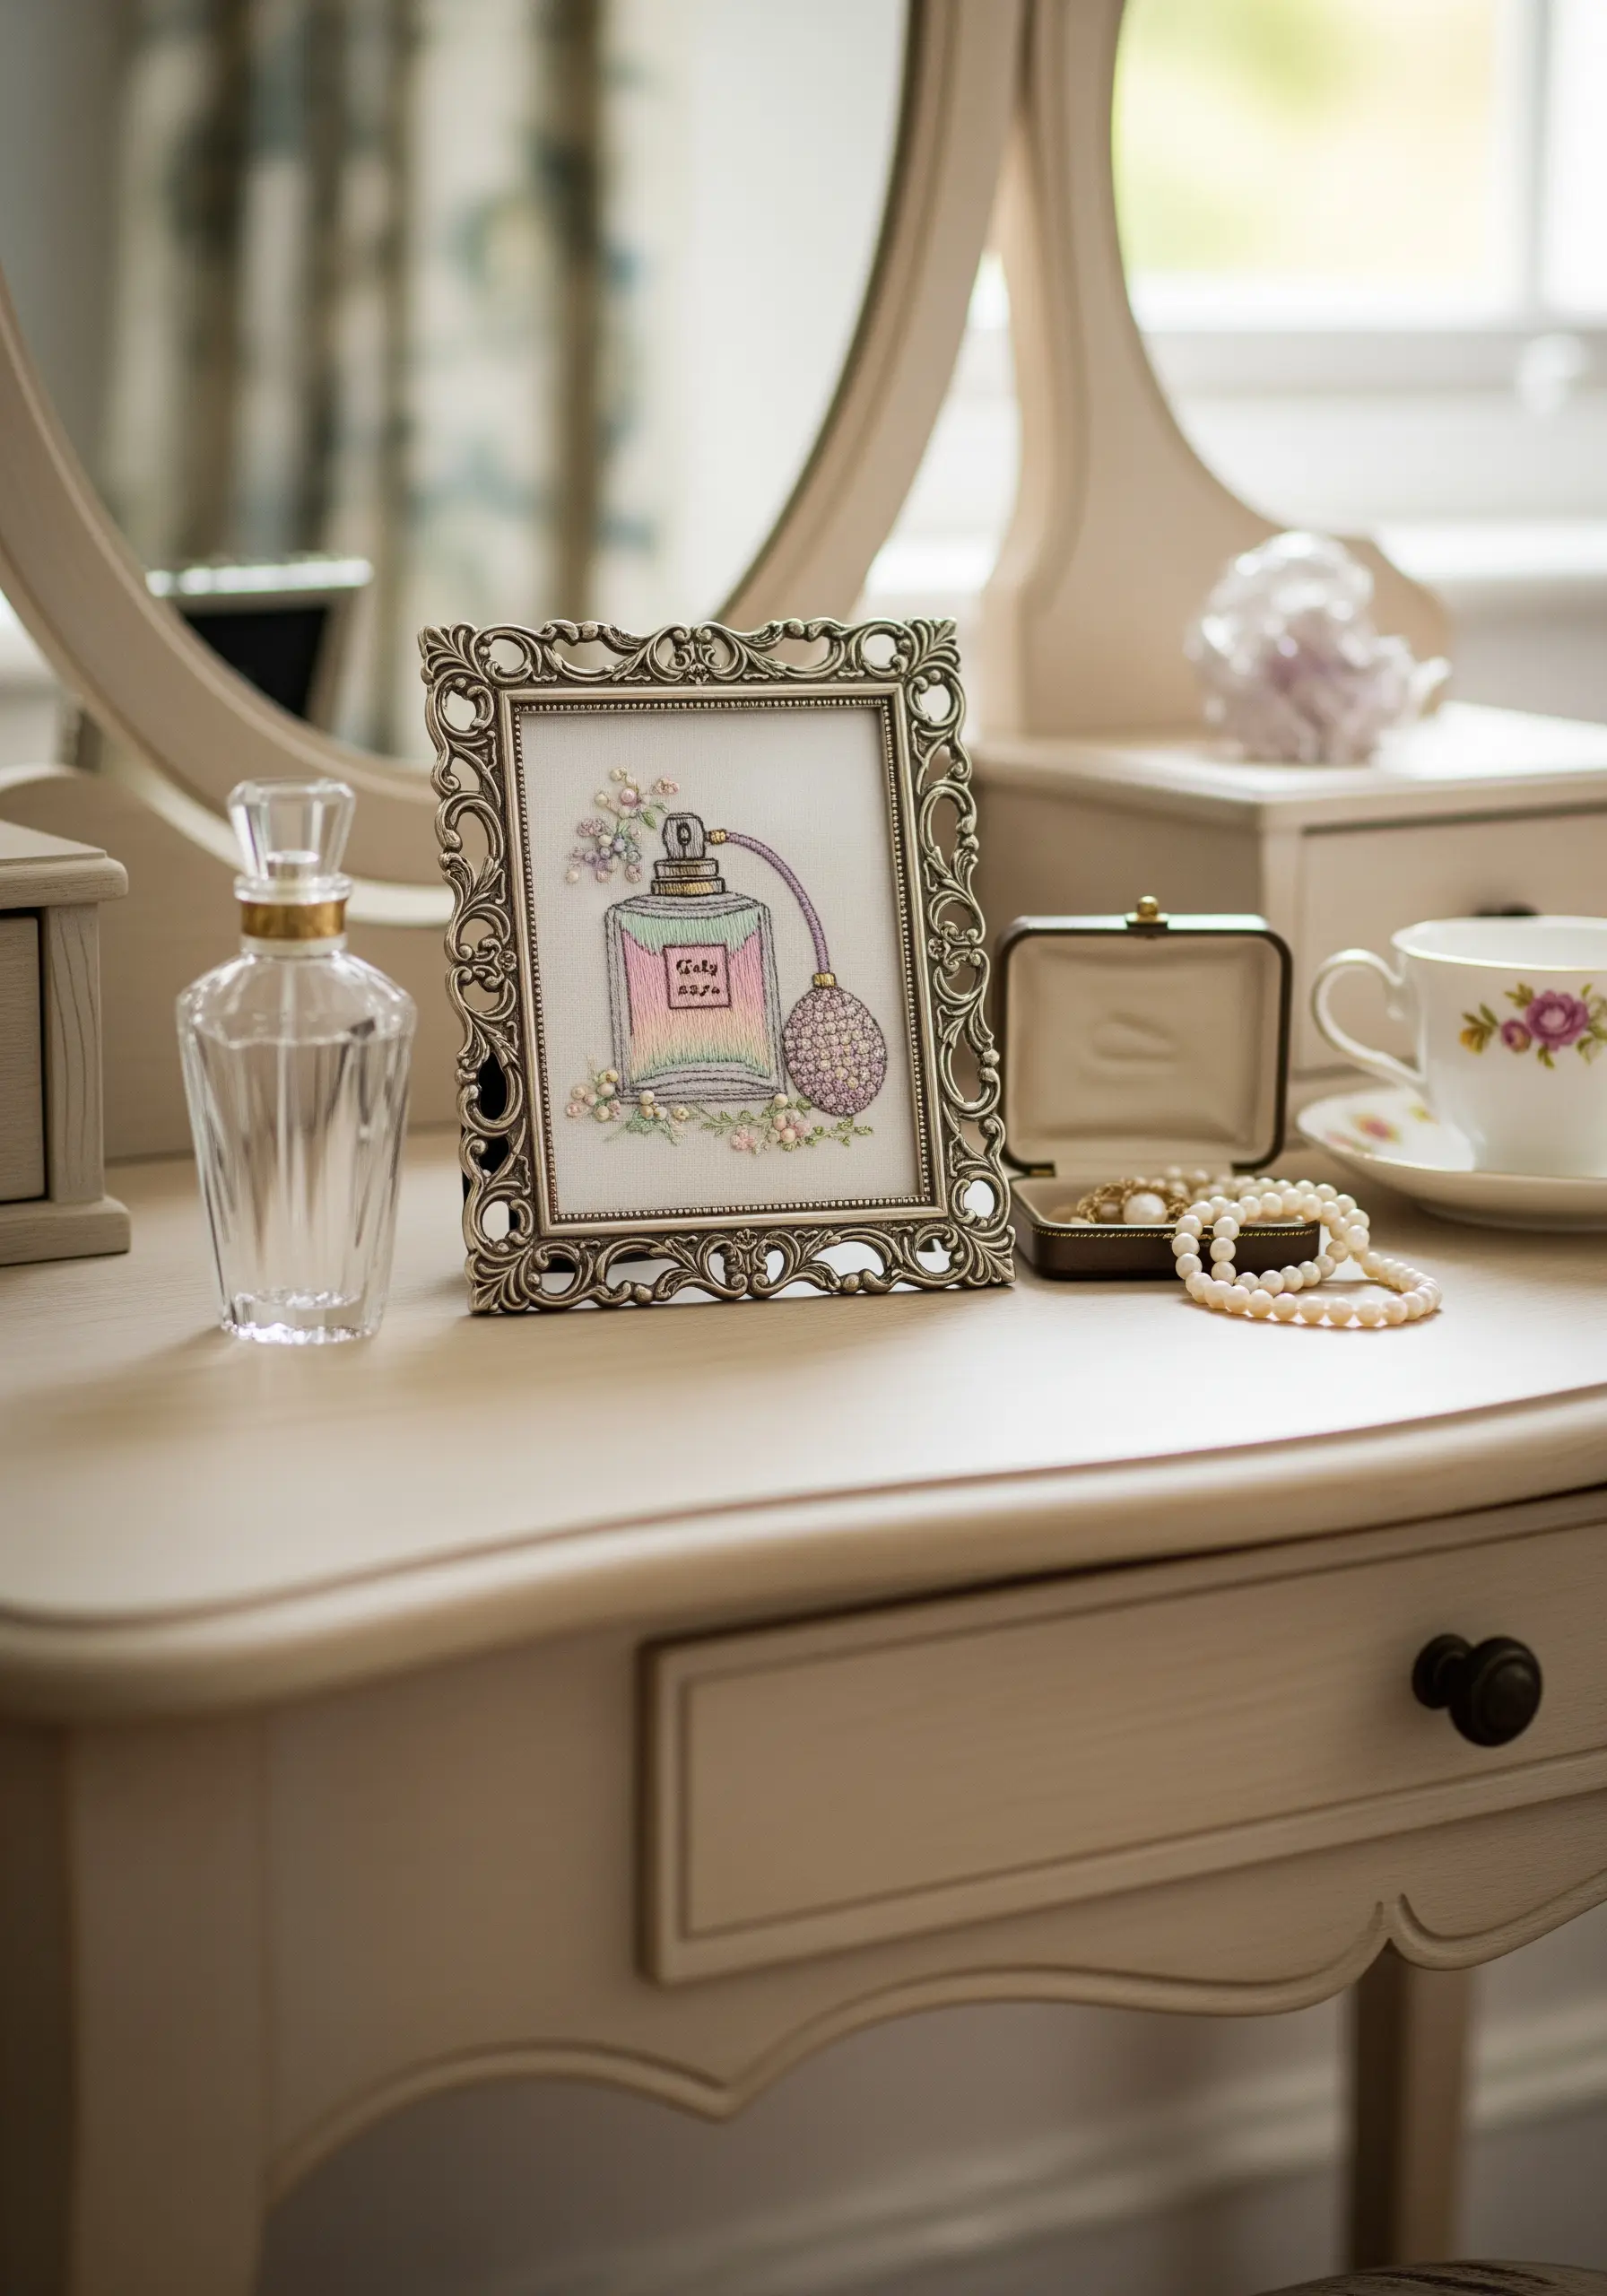
To achieve a soft, watercolor-like color transition without constantly changing your thread, use a variegated floss.
This type of thread is dyed with multiple colors along its length, creating gentle shifts in hue as you stitch.
It’s particularly effective for filling shapes like the perfume bottle, where it adds subtle dimension and a touch of iridescent magic.
This is a wonderful shortcut for creating beautiful, vintage-inspired framed embroidery ideas.
17. Achieve Graphic Impact with Color Blocking
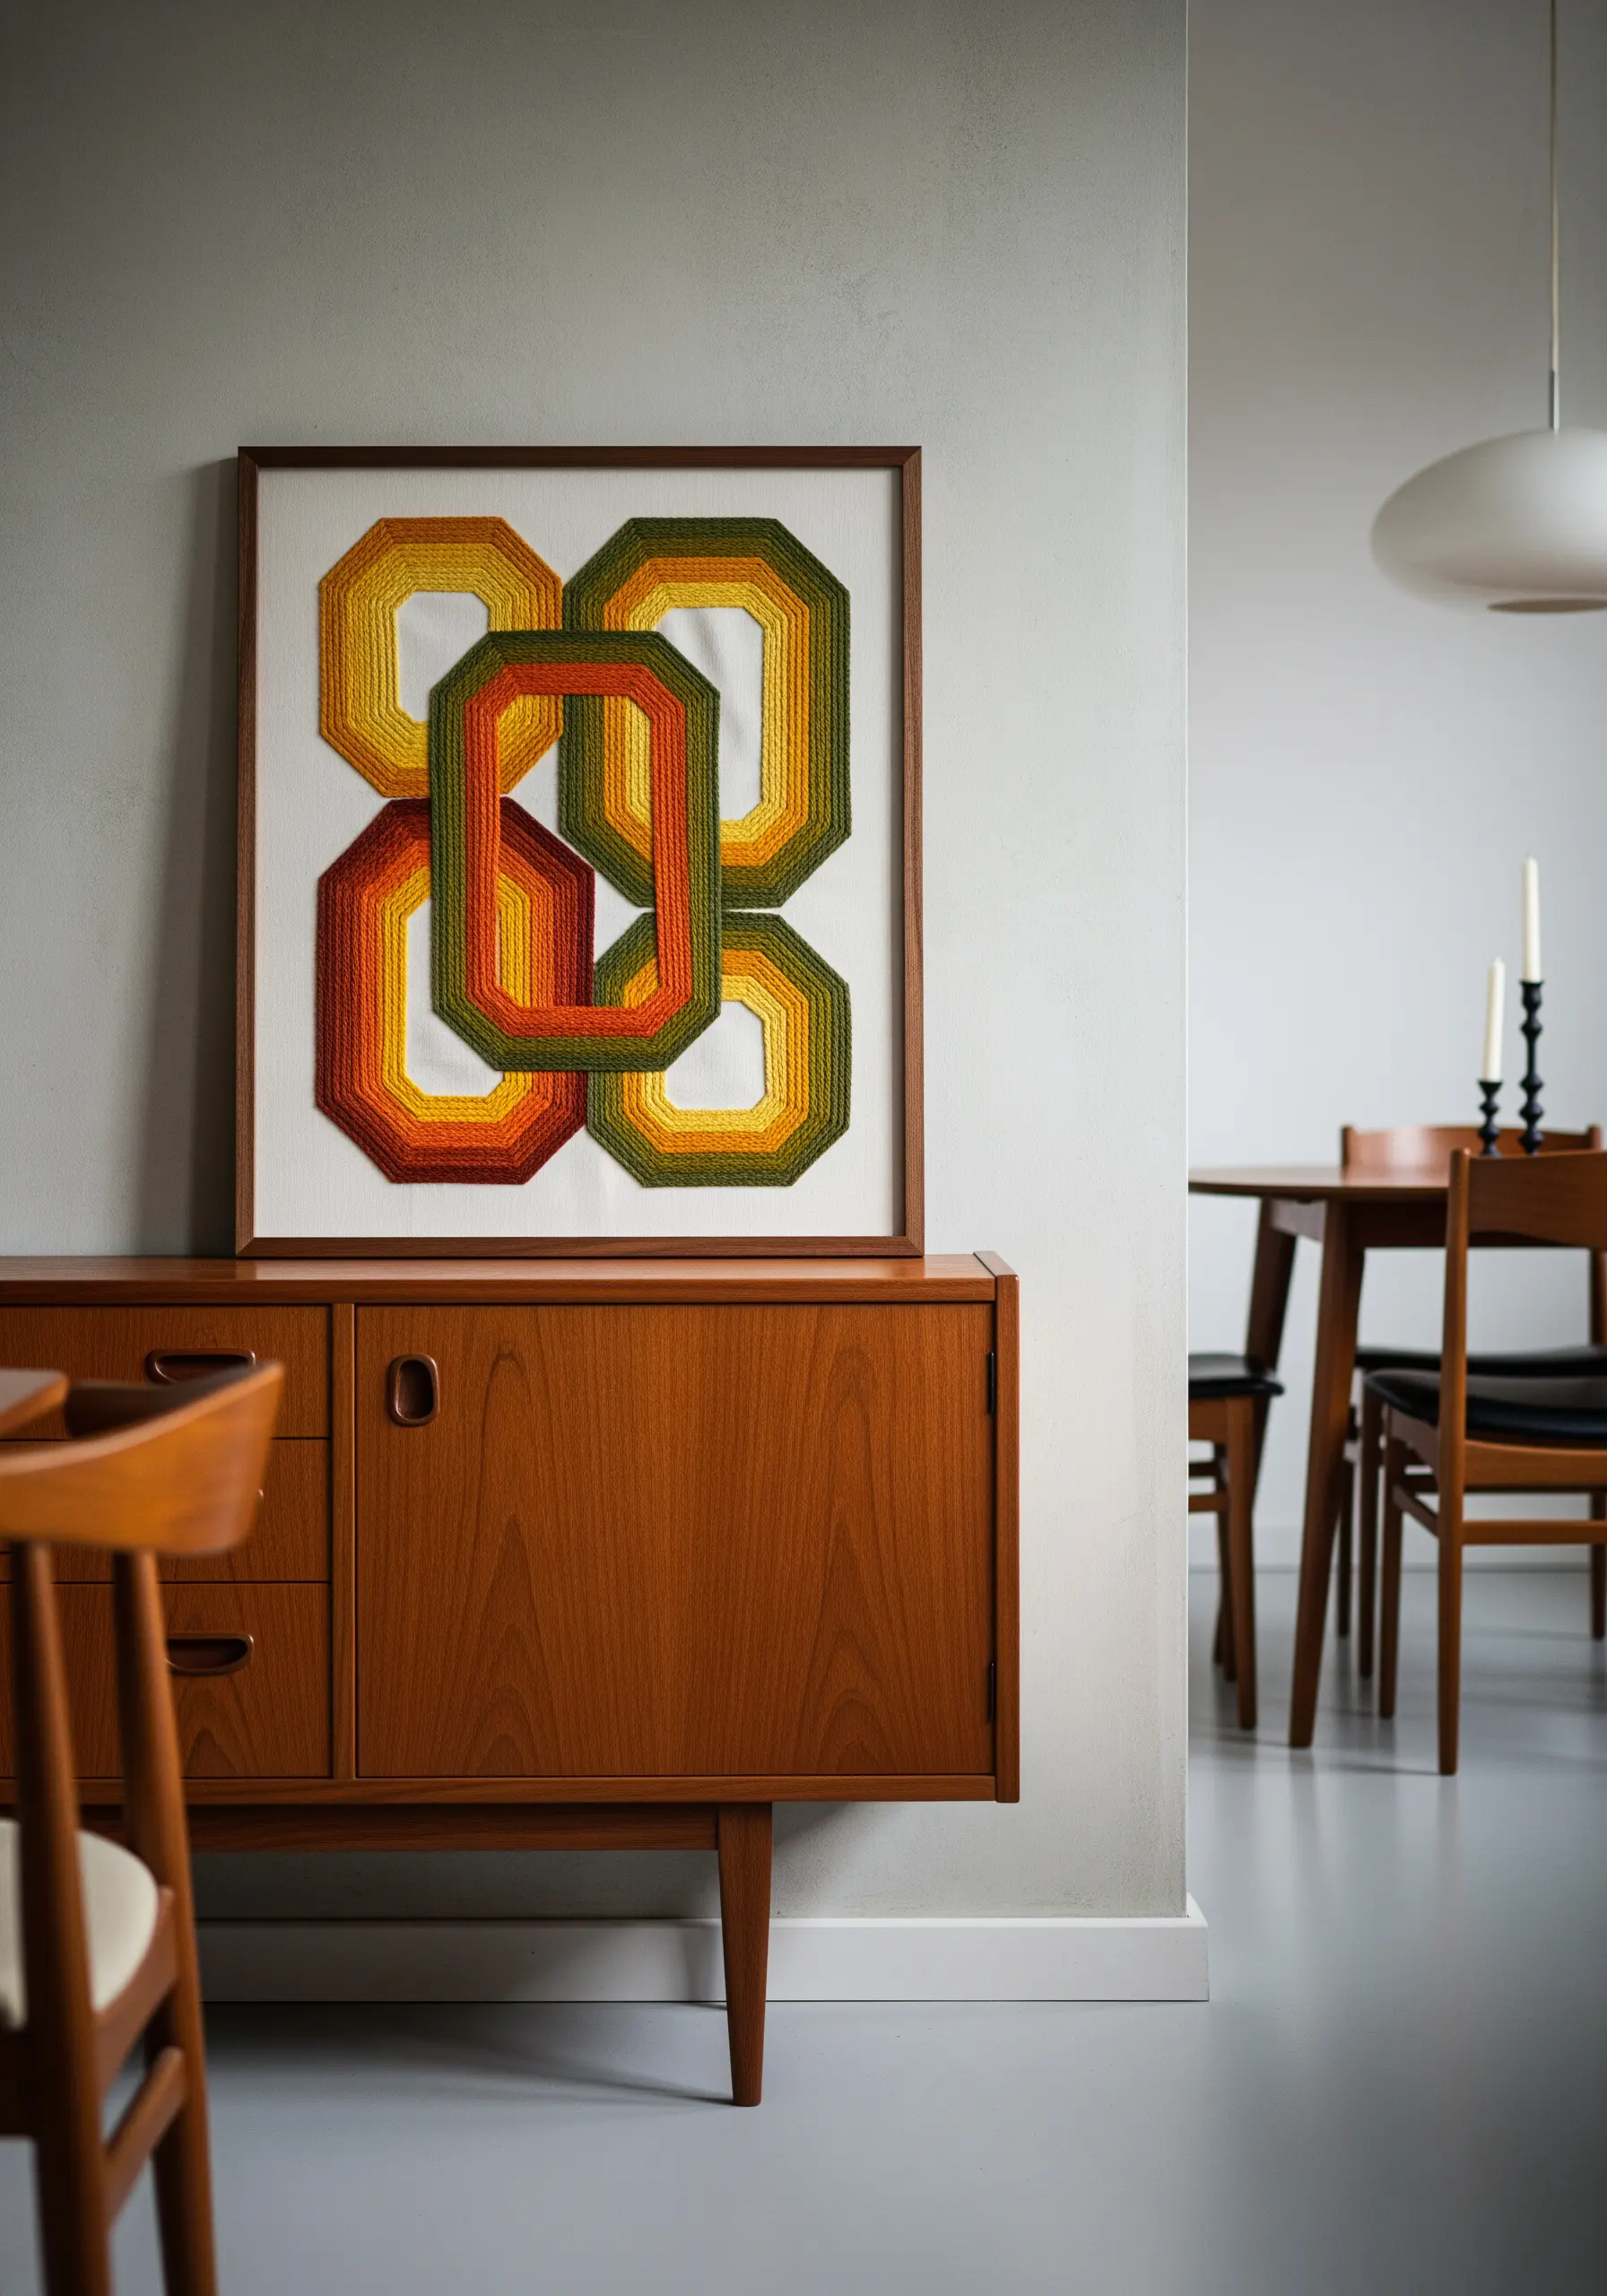
For a bold, mid-century modern aesthetic, focus on crisp color blocking.
Use a dense, perfectly smooth satin stitch to fill each geometric shape, ensuring your stitches lie flat and parallel.
To keep your edges razor-sharp, outline each section with a split stitch before filling.
Choosing a limited, high-contrast color palette of three or four shades enhances the clean, graphic feel of these color blocking embroidery patterns.
18. Embellish Your Hoops for a Cohesive Finish
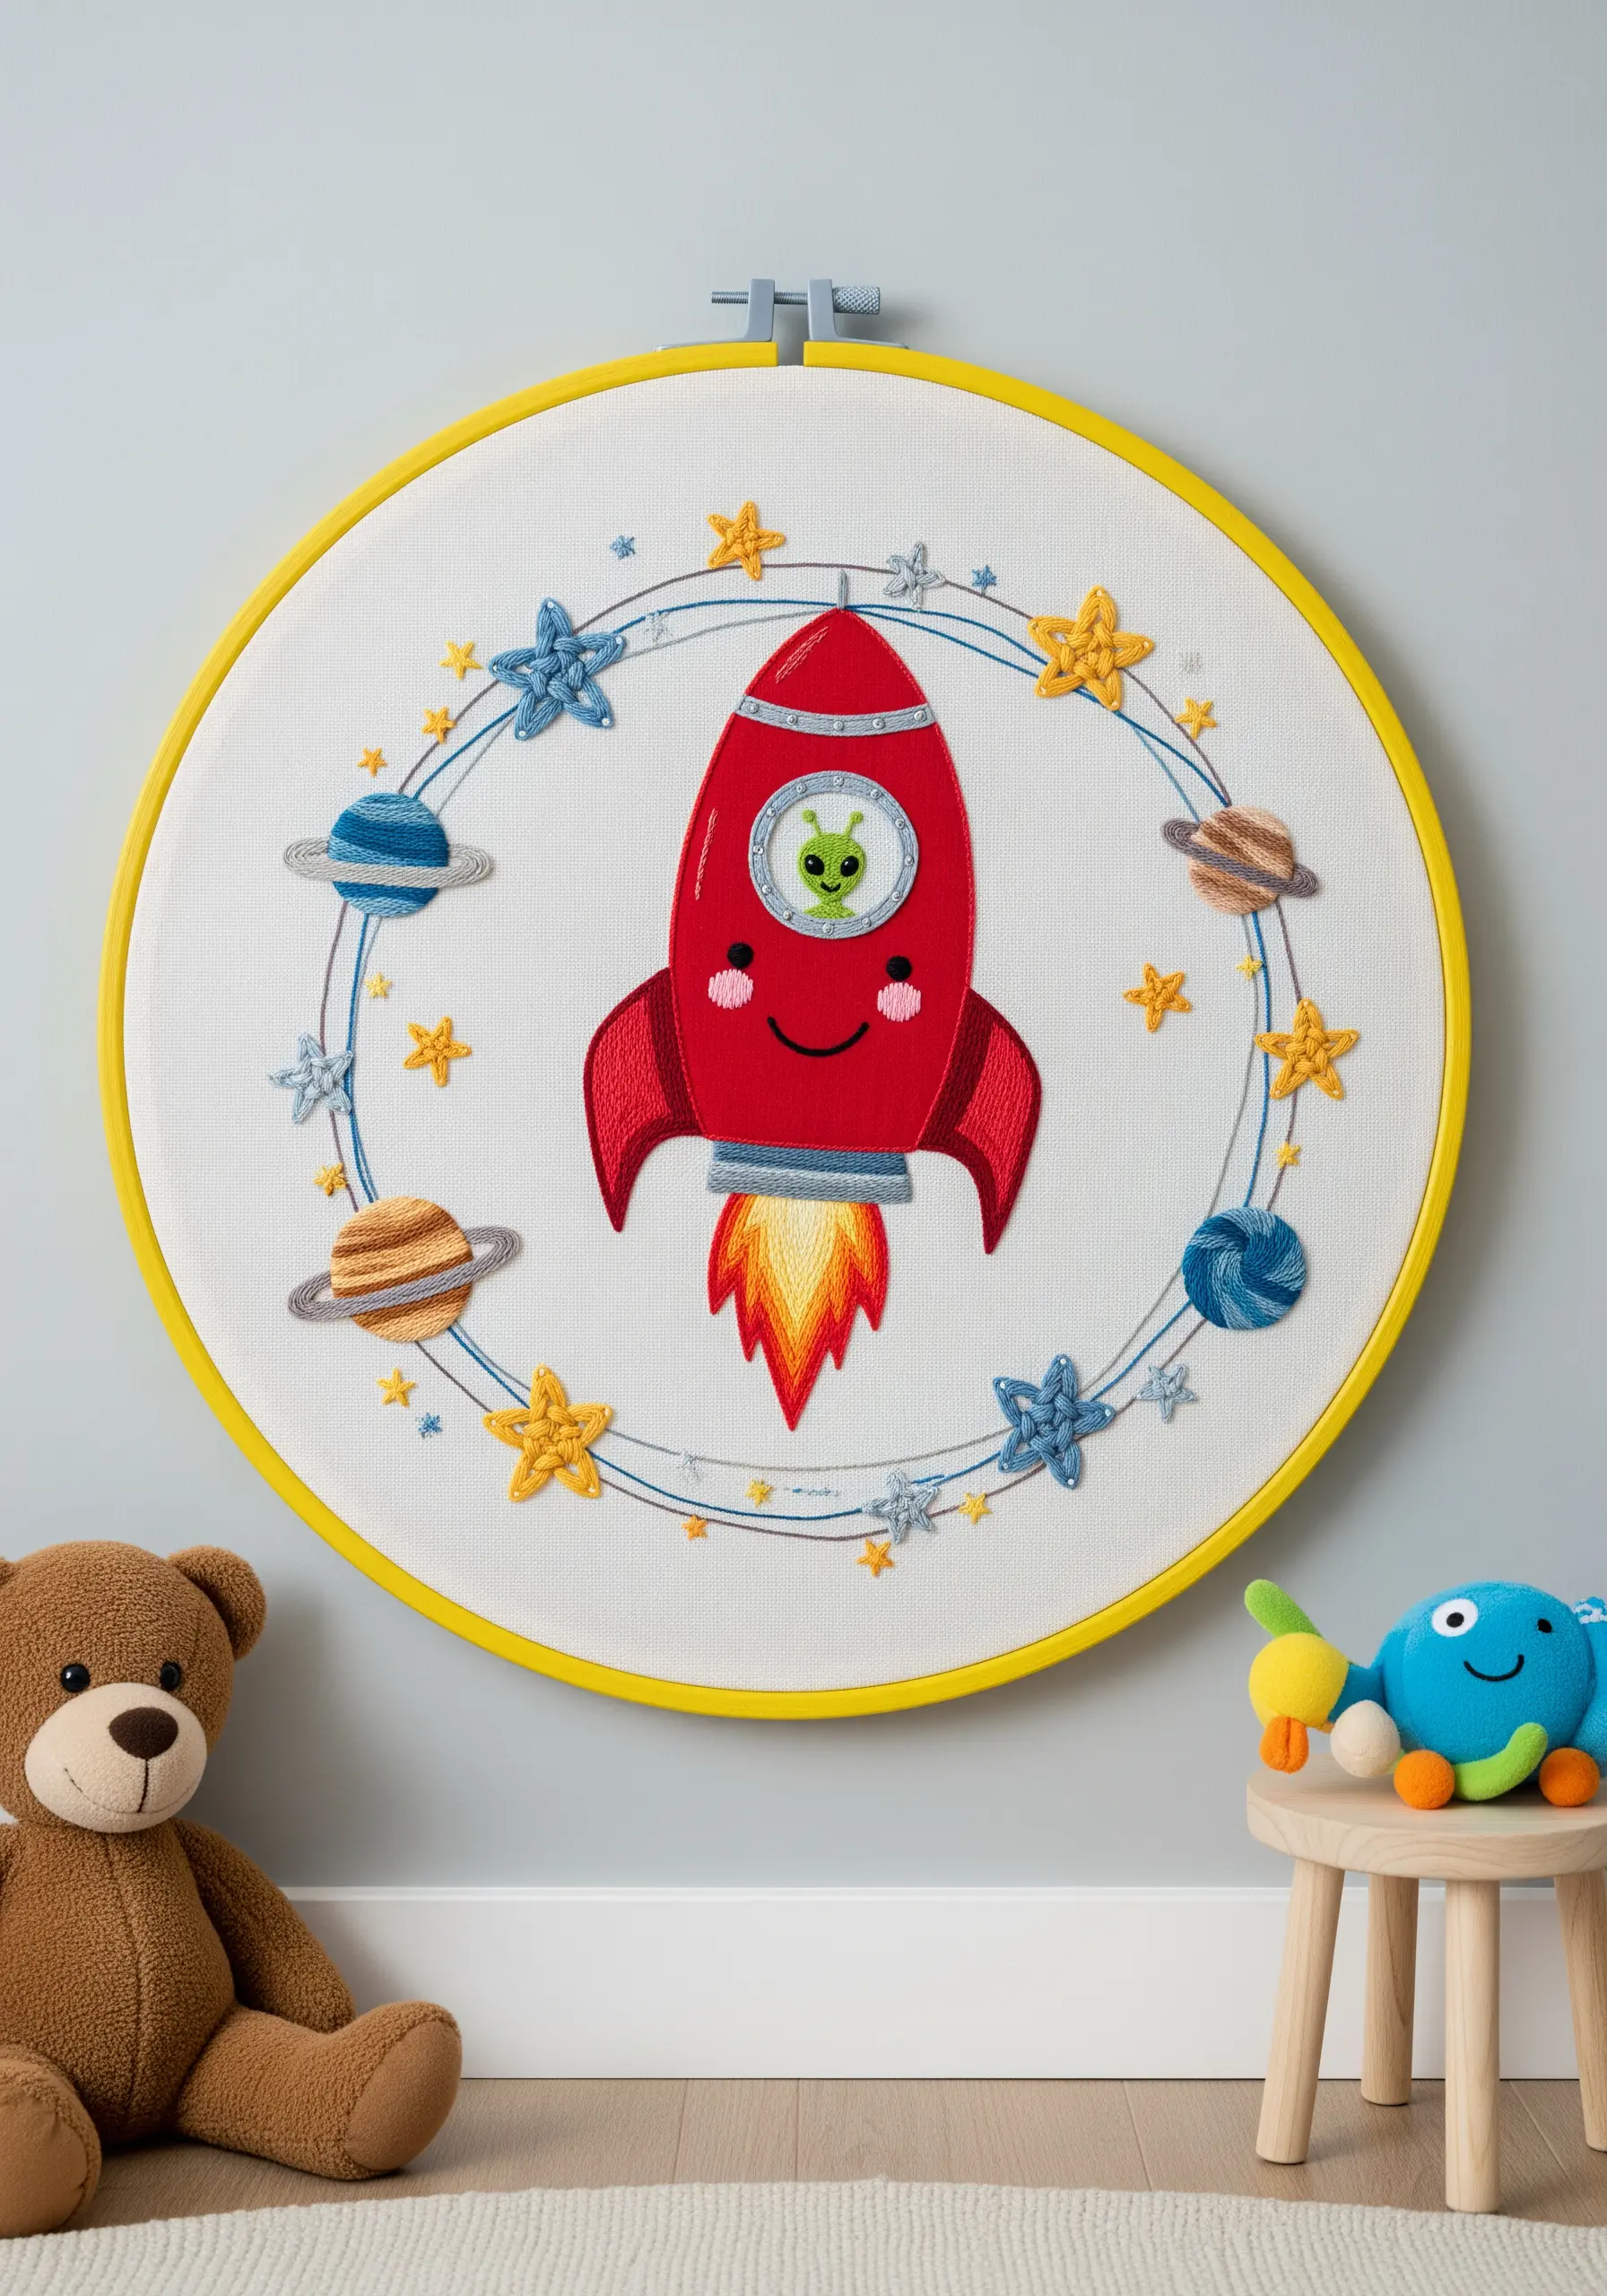
Elevate your finished piece by treating the hoop as part of the artwork.
Instead of leaving the wood plain, you can paint it a solid color that coordinates with your thread palette, or wrap it tightly with ribbon or fabric strips.
This simple finishing touch makes the entire piece feel more intentional and cohesive, turning a simple craft project into a polished piece of decor for a child’s room or any space needing adorable forest animal embroidery ideas.
19. Master Tiny Lettering with a Single Thread
To stitch crisp, legible text on a small scale, the key is simplicity.
Use a single strand of floss and a tiny backstitch or whipped backstitch for smooth curves.
Before you start, trace your letters onto the fabric with a fine, heat-erasable pen to ensure perfect spacing and alignment.
This precision is essential for detailed work and quick stitch inspirations that look professional.
20. Create a Thematic Diptych for a Balanced Display
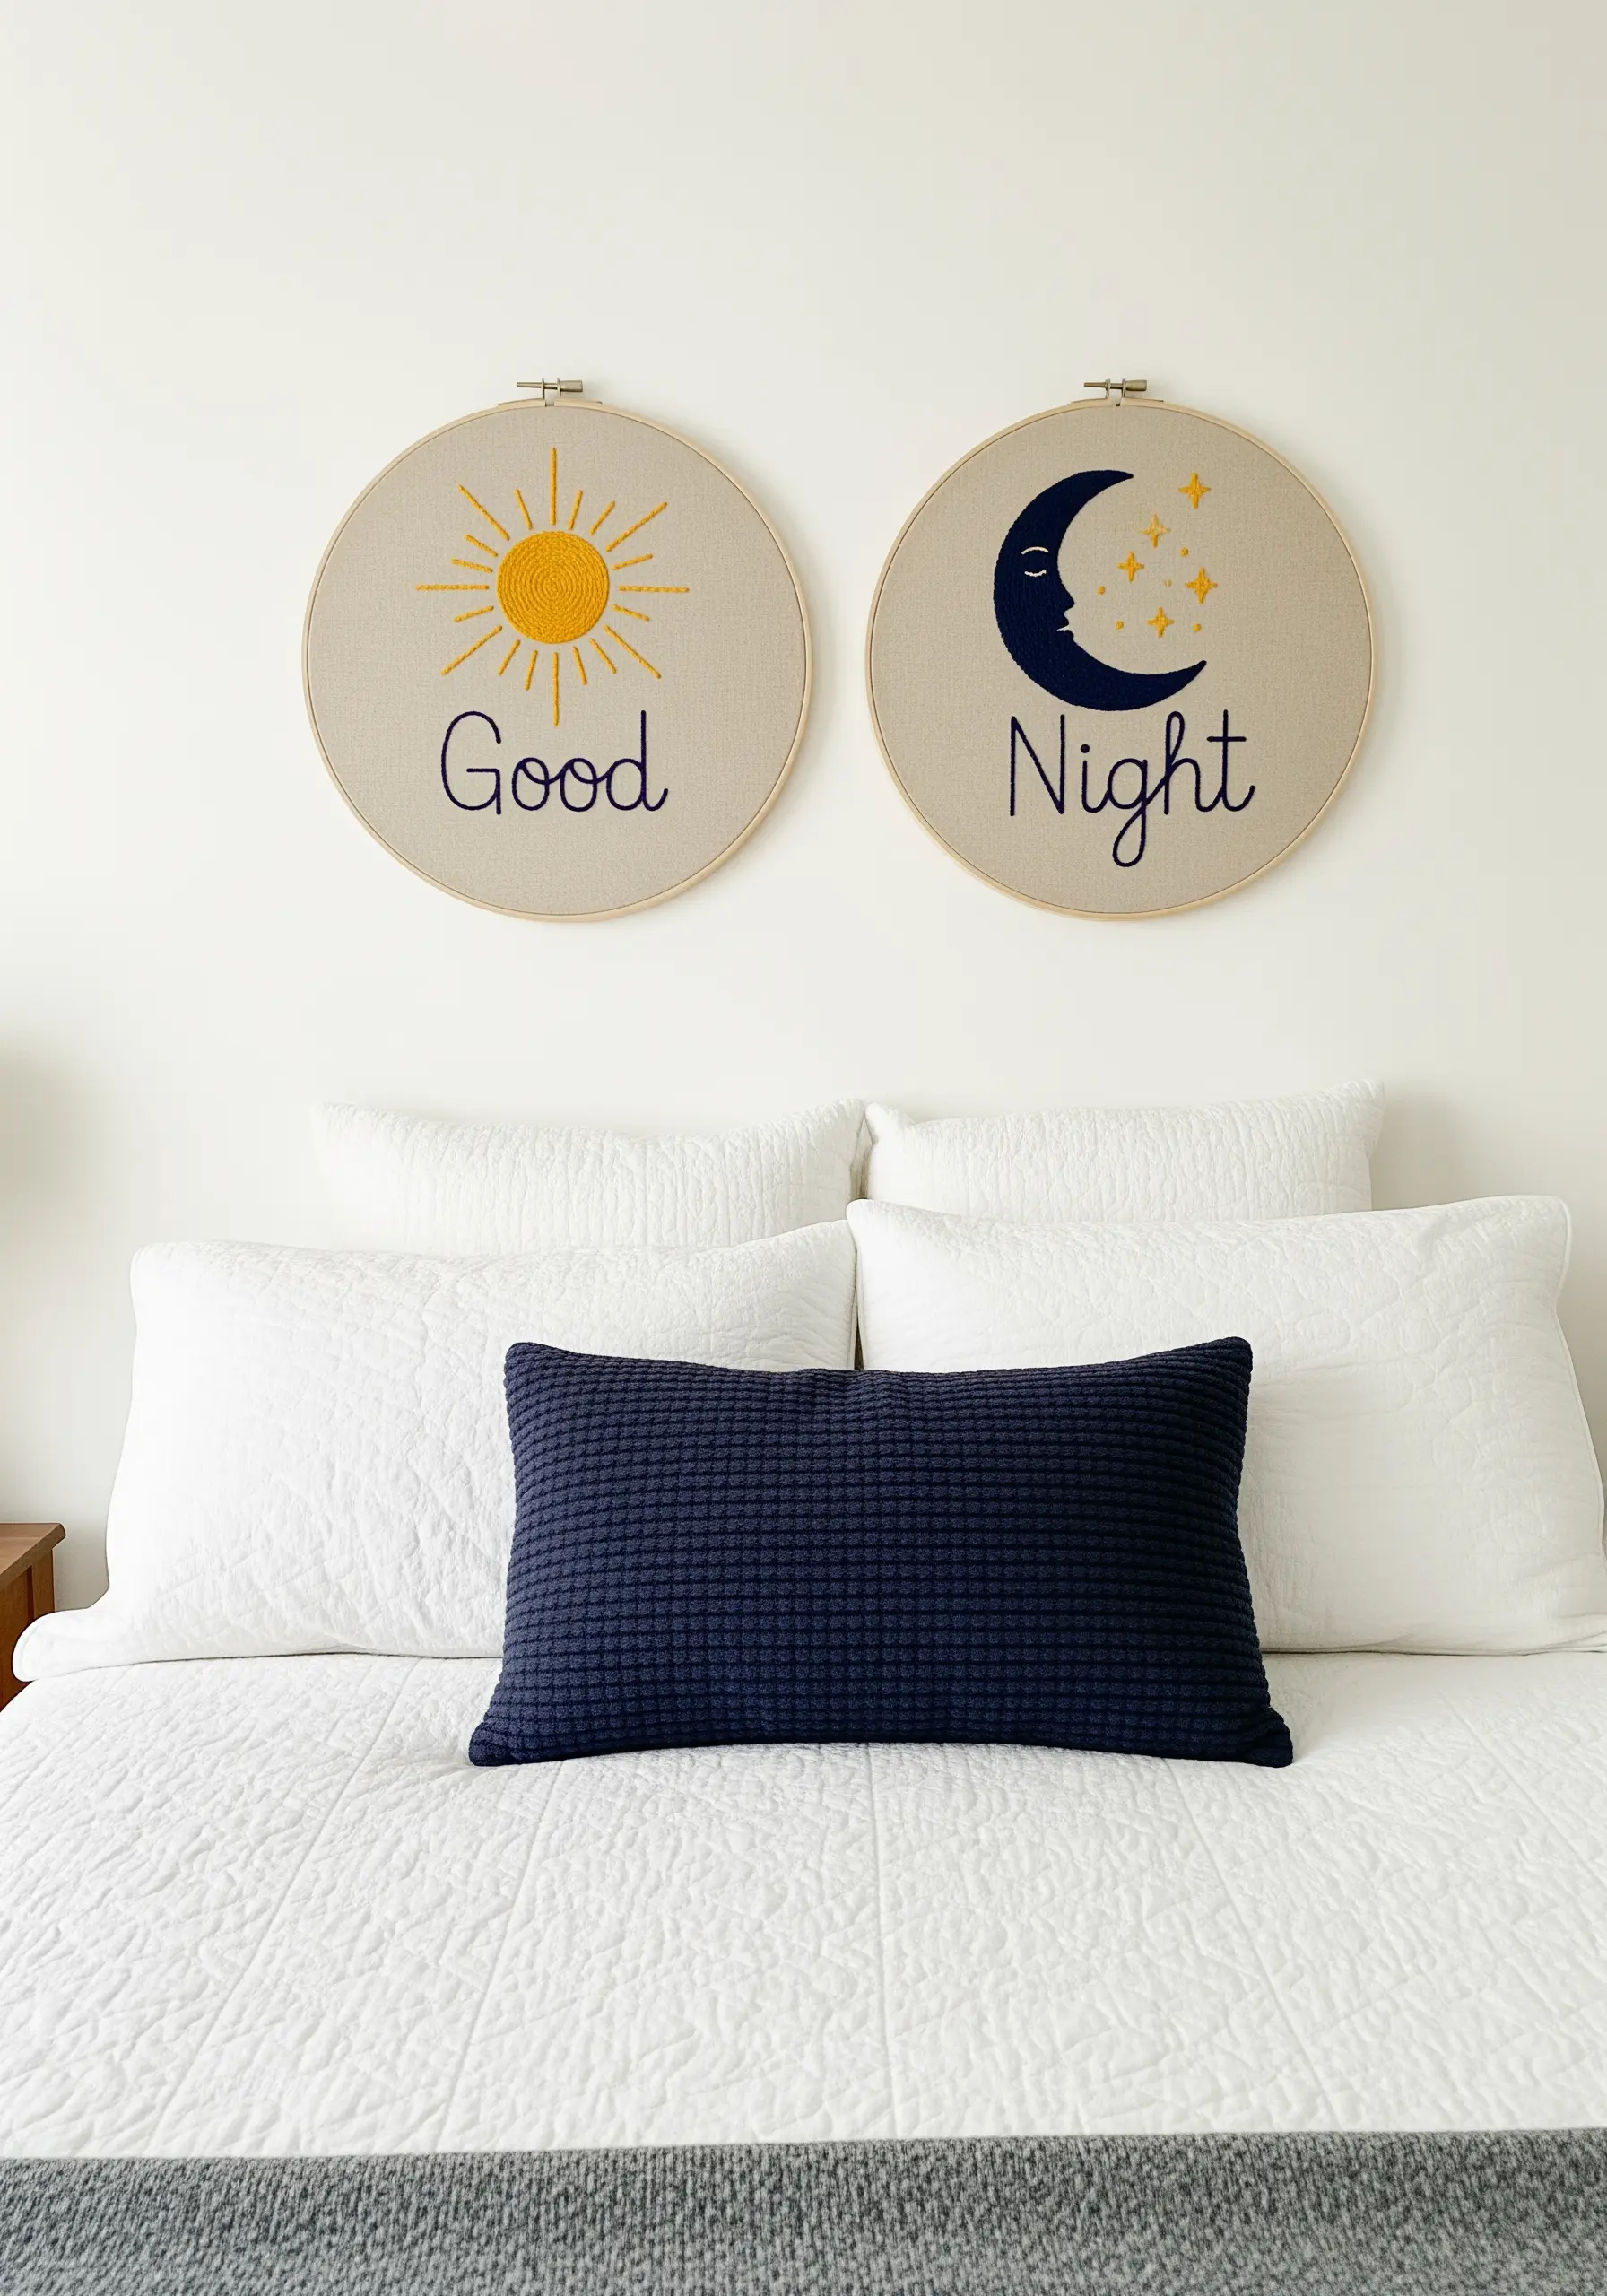
When creating a pair of hoops, design them as a cohesive set for maximum visual impact.
Use the same fabric, hoop size, and a complementary color palette to tie the two pieces together.
Balancing the composition—for example, by having one element (the sun) and another (the moon)—creates a satisfying visual narrative.
This approach elevates bedroom wall embroidery ideas from individual crafts to a curated art installation.
21. Experiment with Unconventional Framing
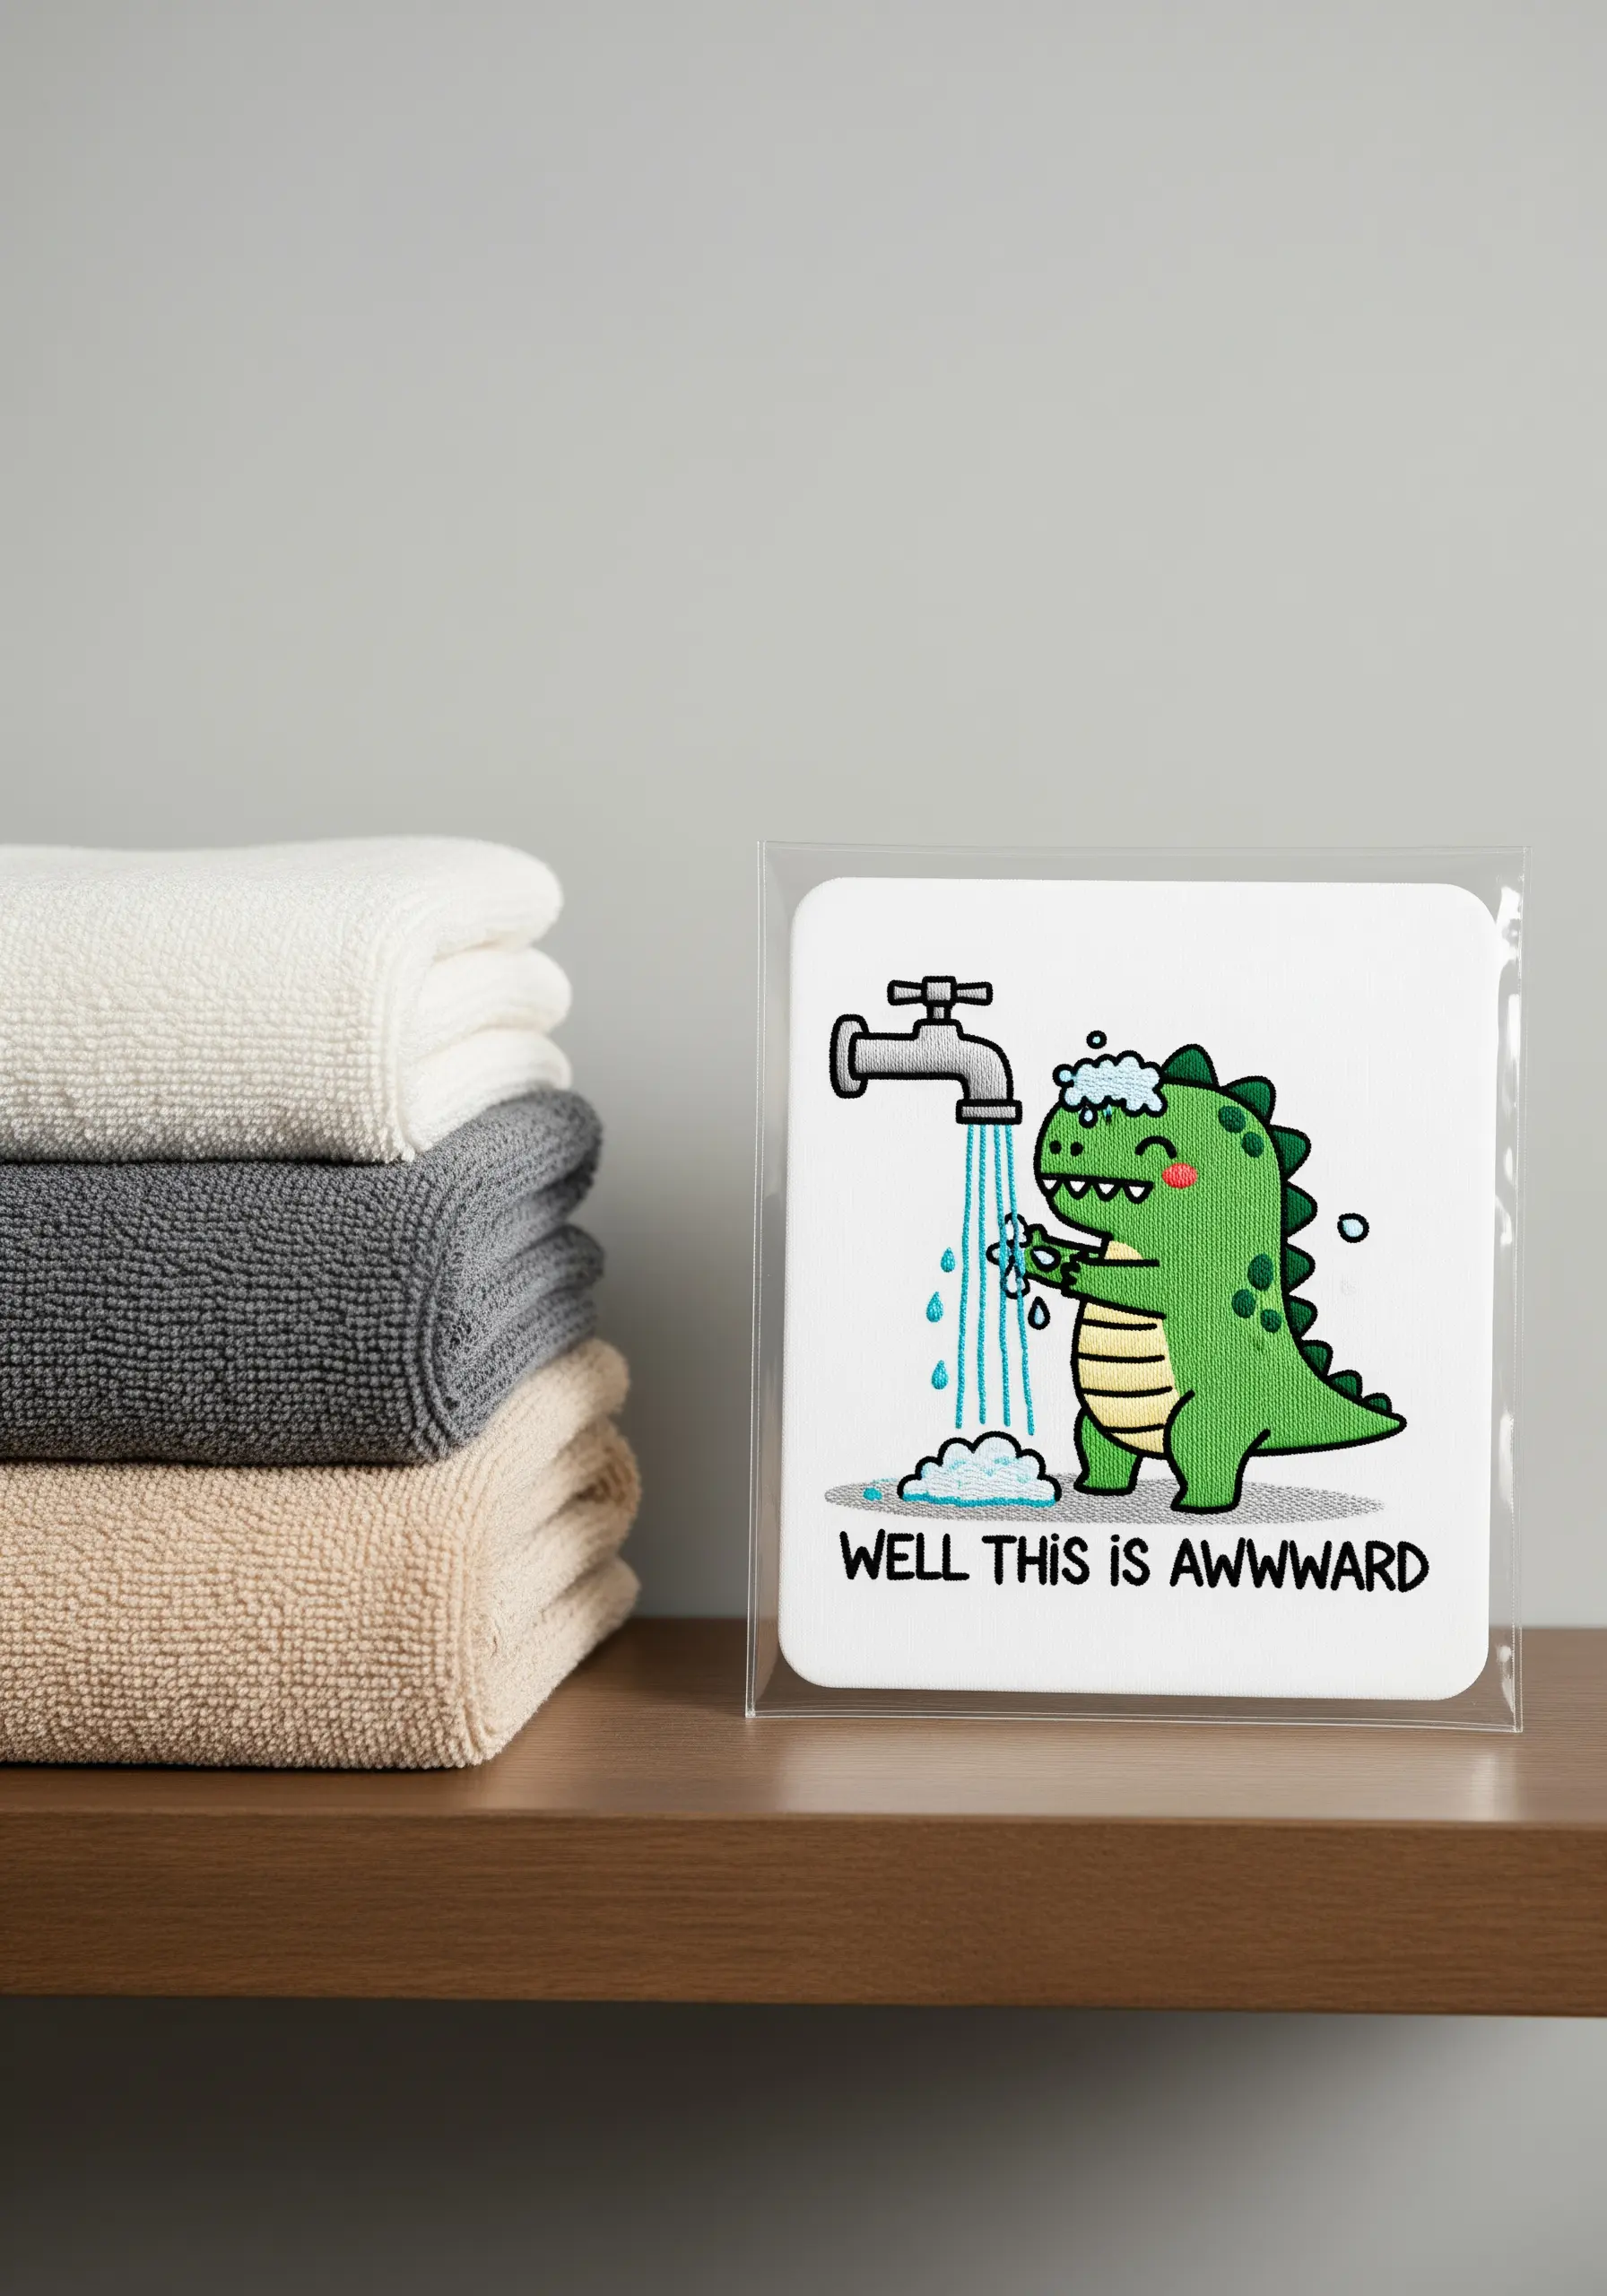
Move beyond the traditional wooden hoop or frame and consider modern alternatives like clear acrylic block frames.
To prepare your embroidery, mount it on a sturdy piece of acid-free mat board cut to size.
This minimalist framing style allows the embroidery itself to take center stage, giving it a clean, contemporary feel that works well with humorous or graphic designs.
It’s a great way to display your favorite tiny animal embroidery designs in a modern home.
22. Replicate Textures with Strategic Stitching
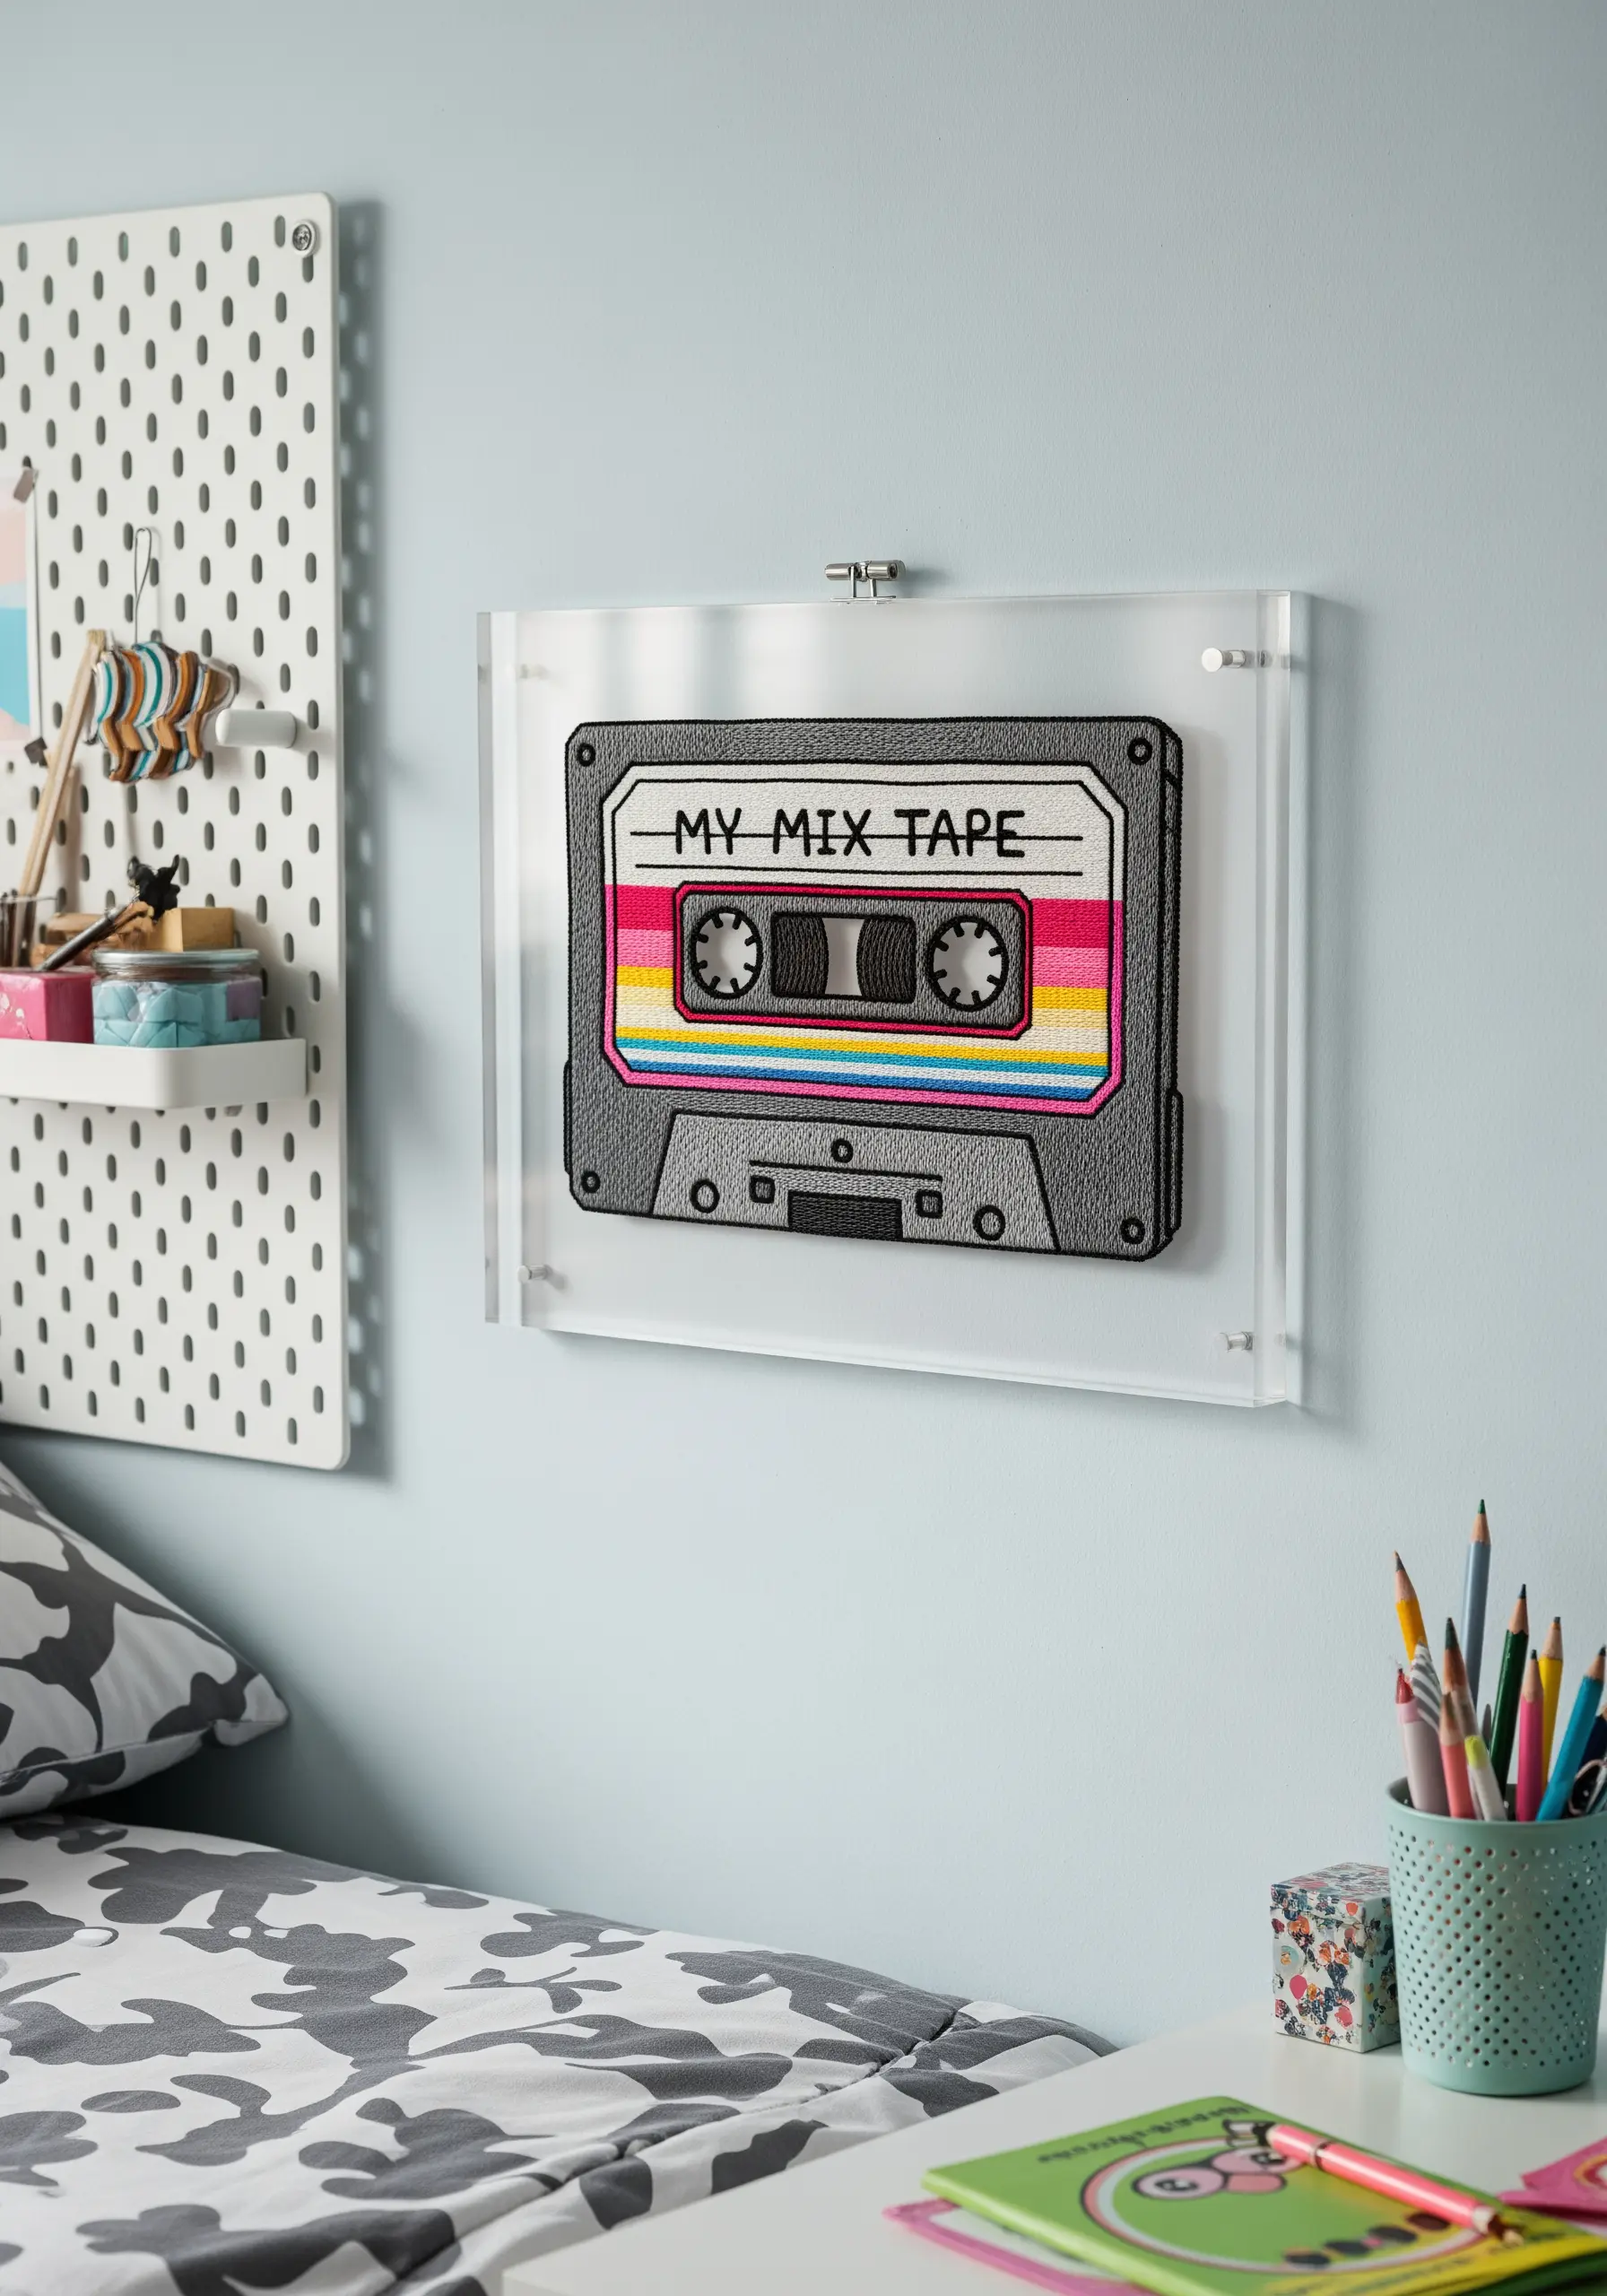
To mimic the slightly grainy texture of a plastic cassette tape, use a fill stitch that isn’t perfectly smooth.
Instead of satin stitch, try a dense seed stitch or a brick stitch, where small, straight stitches are laid down in an offset pattern.
This creates a subtle, matte texture that adds a layer of realism to everyday objects and brings mini retro-style embroidery frames to life.
23. Turn Everyday Reminders into Art
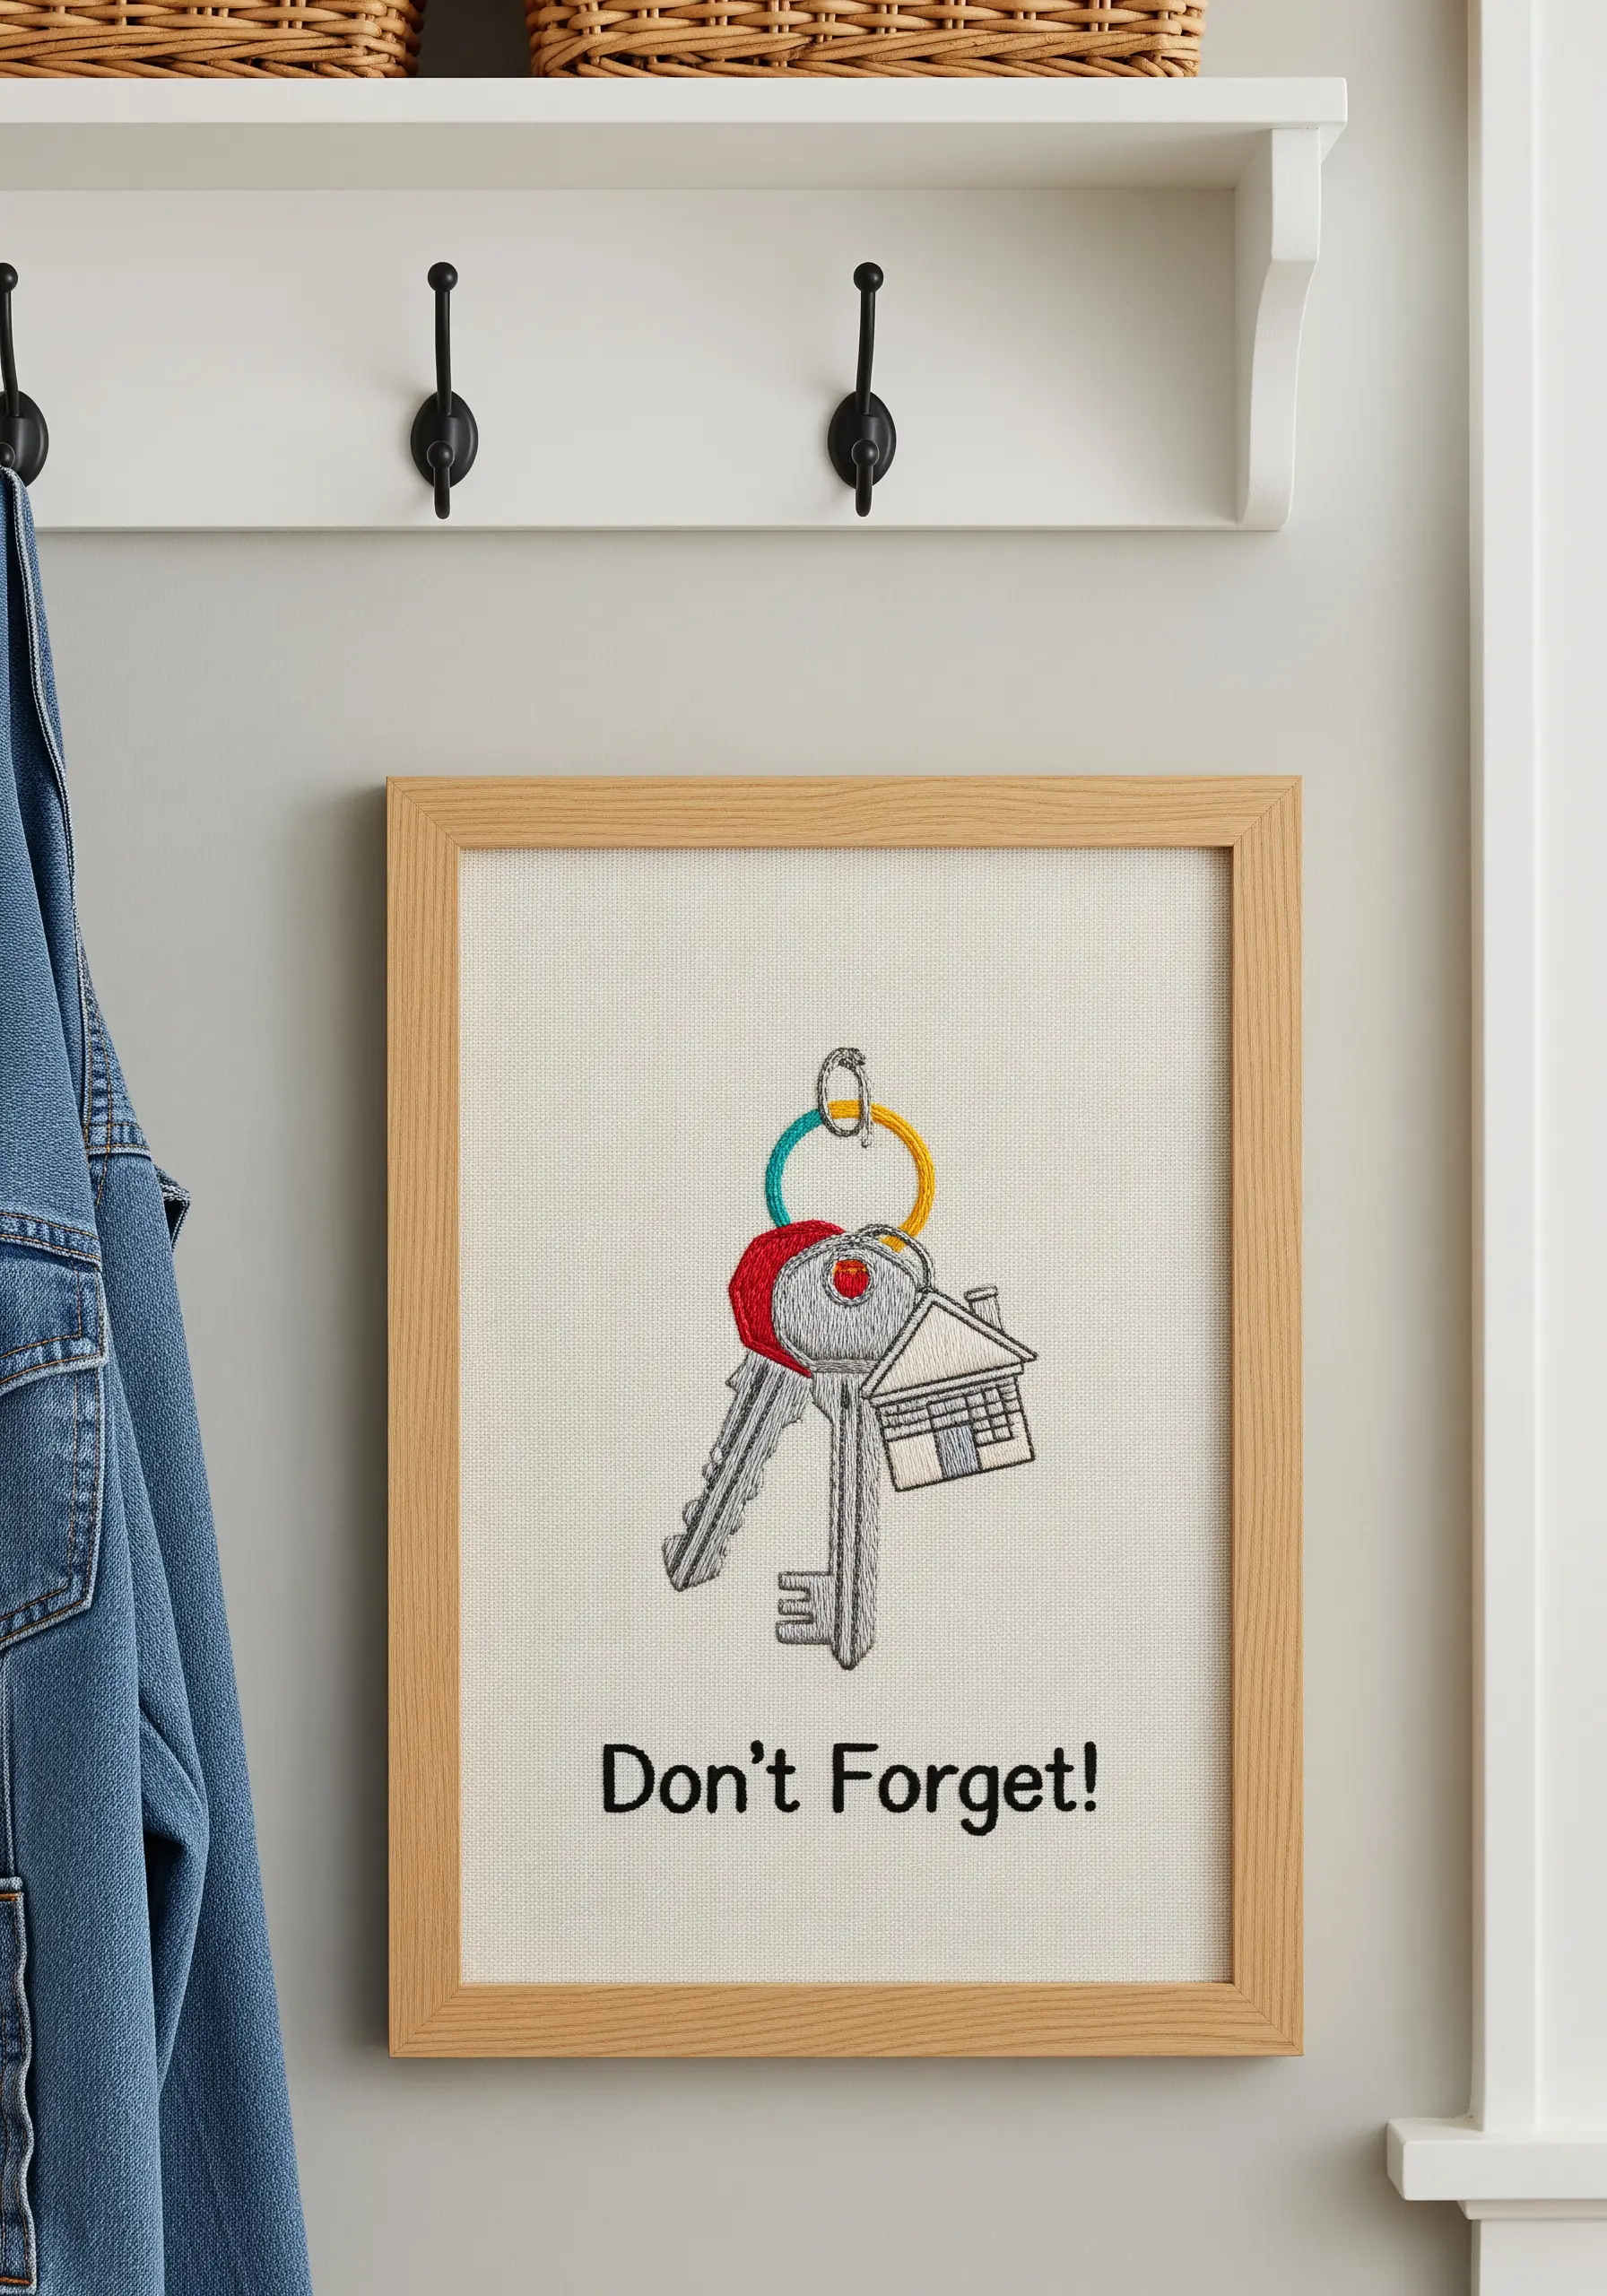
Transform a practical reminder into a charming piece of entryway art by focusing on clean execution.
Use a crisp backstitch for the typography to ensure it’s easily readable.
For the metallic keys, a satin stitch with a silvery-grey thread provides a subtle sheen, while a single strand of red defines the keychain for a pop of color.
These are the kinds of small, simple stitches that turn everyday items into handmade treasures.
24. Add Personalized Details with Micro-Stitches
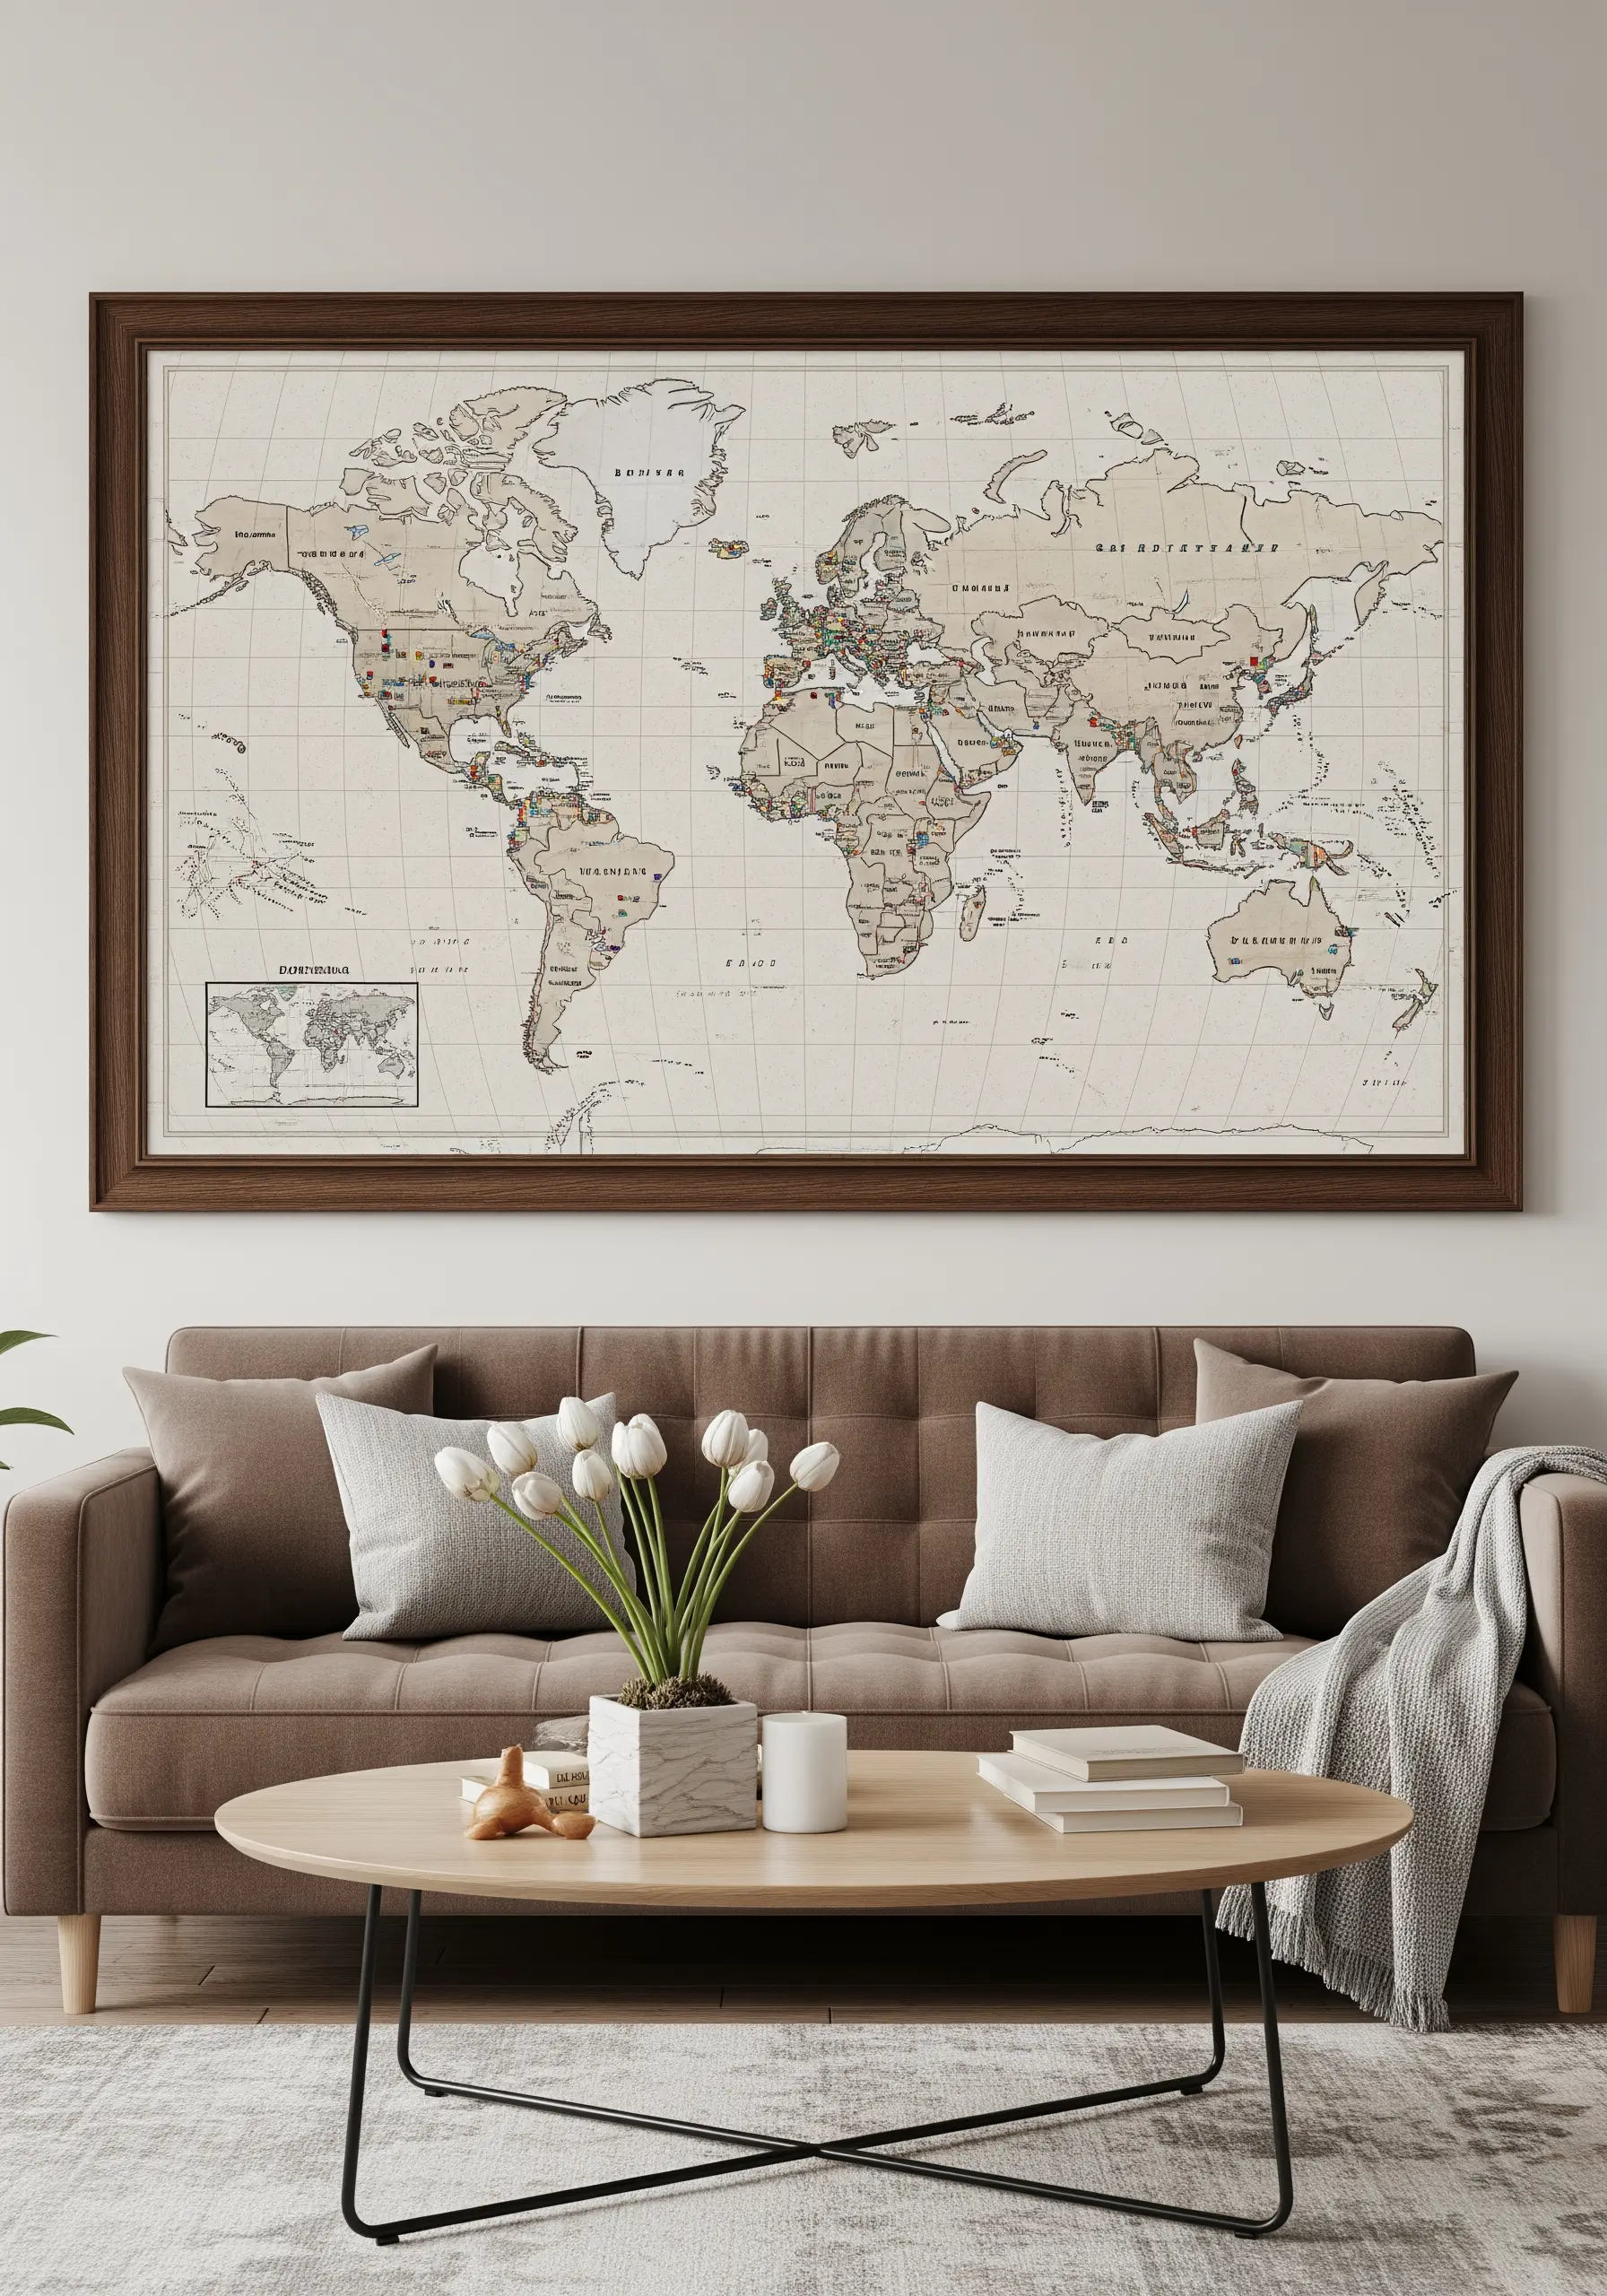
For a large, detailed piece like a world map, the magic is in the tiny personal touches.
Use single-strand French knots or tiny cross-stitches to mark places you’ve been or dream of visiting.
Vary the colors for different trips or family members to create a visual travel diary.
This turns a decorative piece into a meaningful, evolving story, a perfect project for those who love minimal travel-themed embroidery ideas.
25. Blend Thread Colors for Realistic Fur
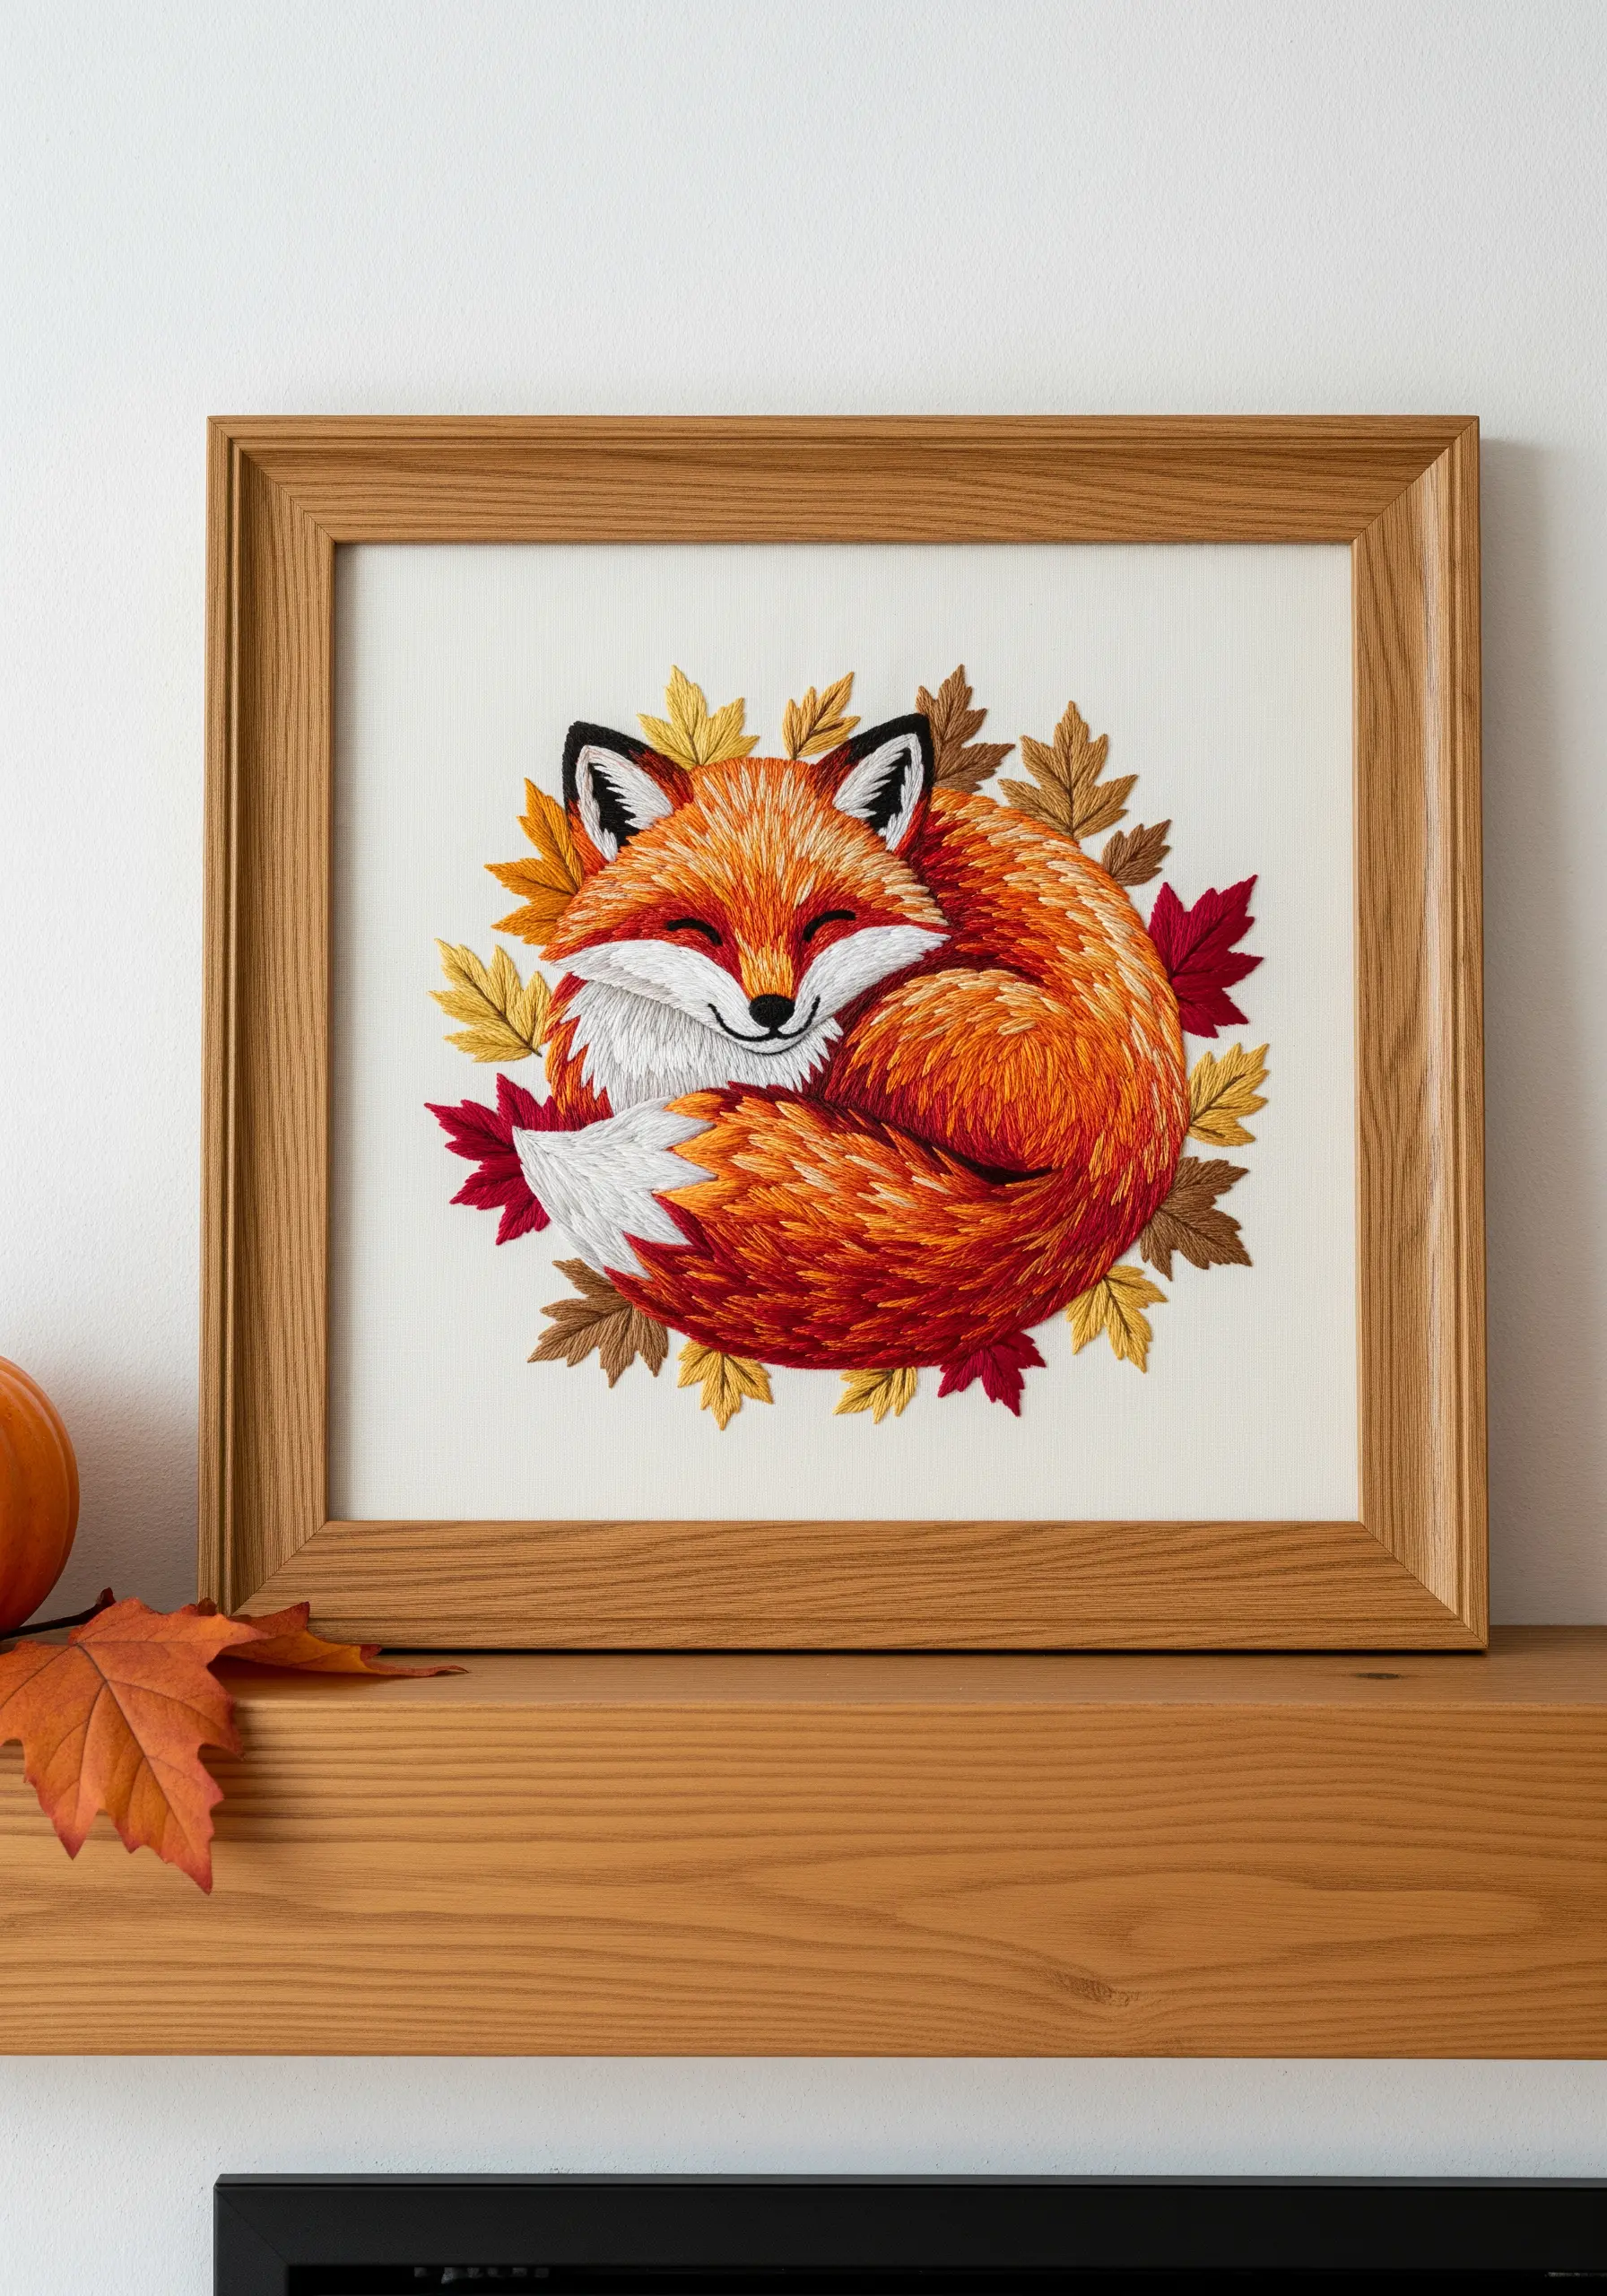
To create the soft, multi-tonal fur of an animal like a fox, work with several shades of your main color simultaneously.
Instead of finishing one color section before starting the next, use the long-and-short stitch to blend them together organically.
Keep your stitches angled in the direction of fur growth for added realism.
This technique is how nature-inspired embroidery ideas truly come to life.
26. Combine Text and Motifs for Punny Art
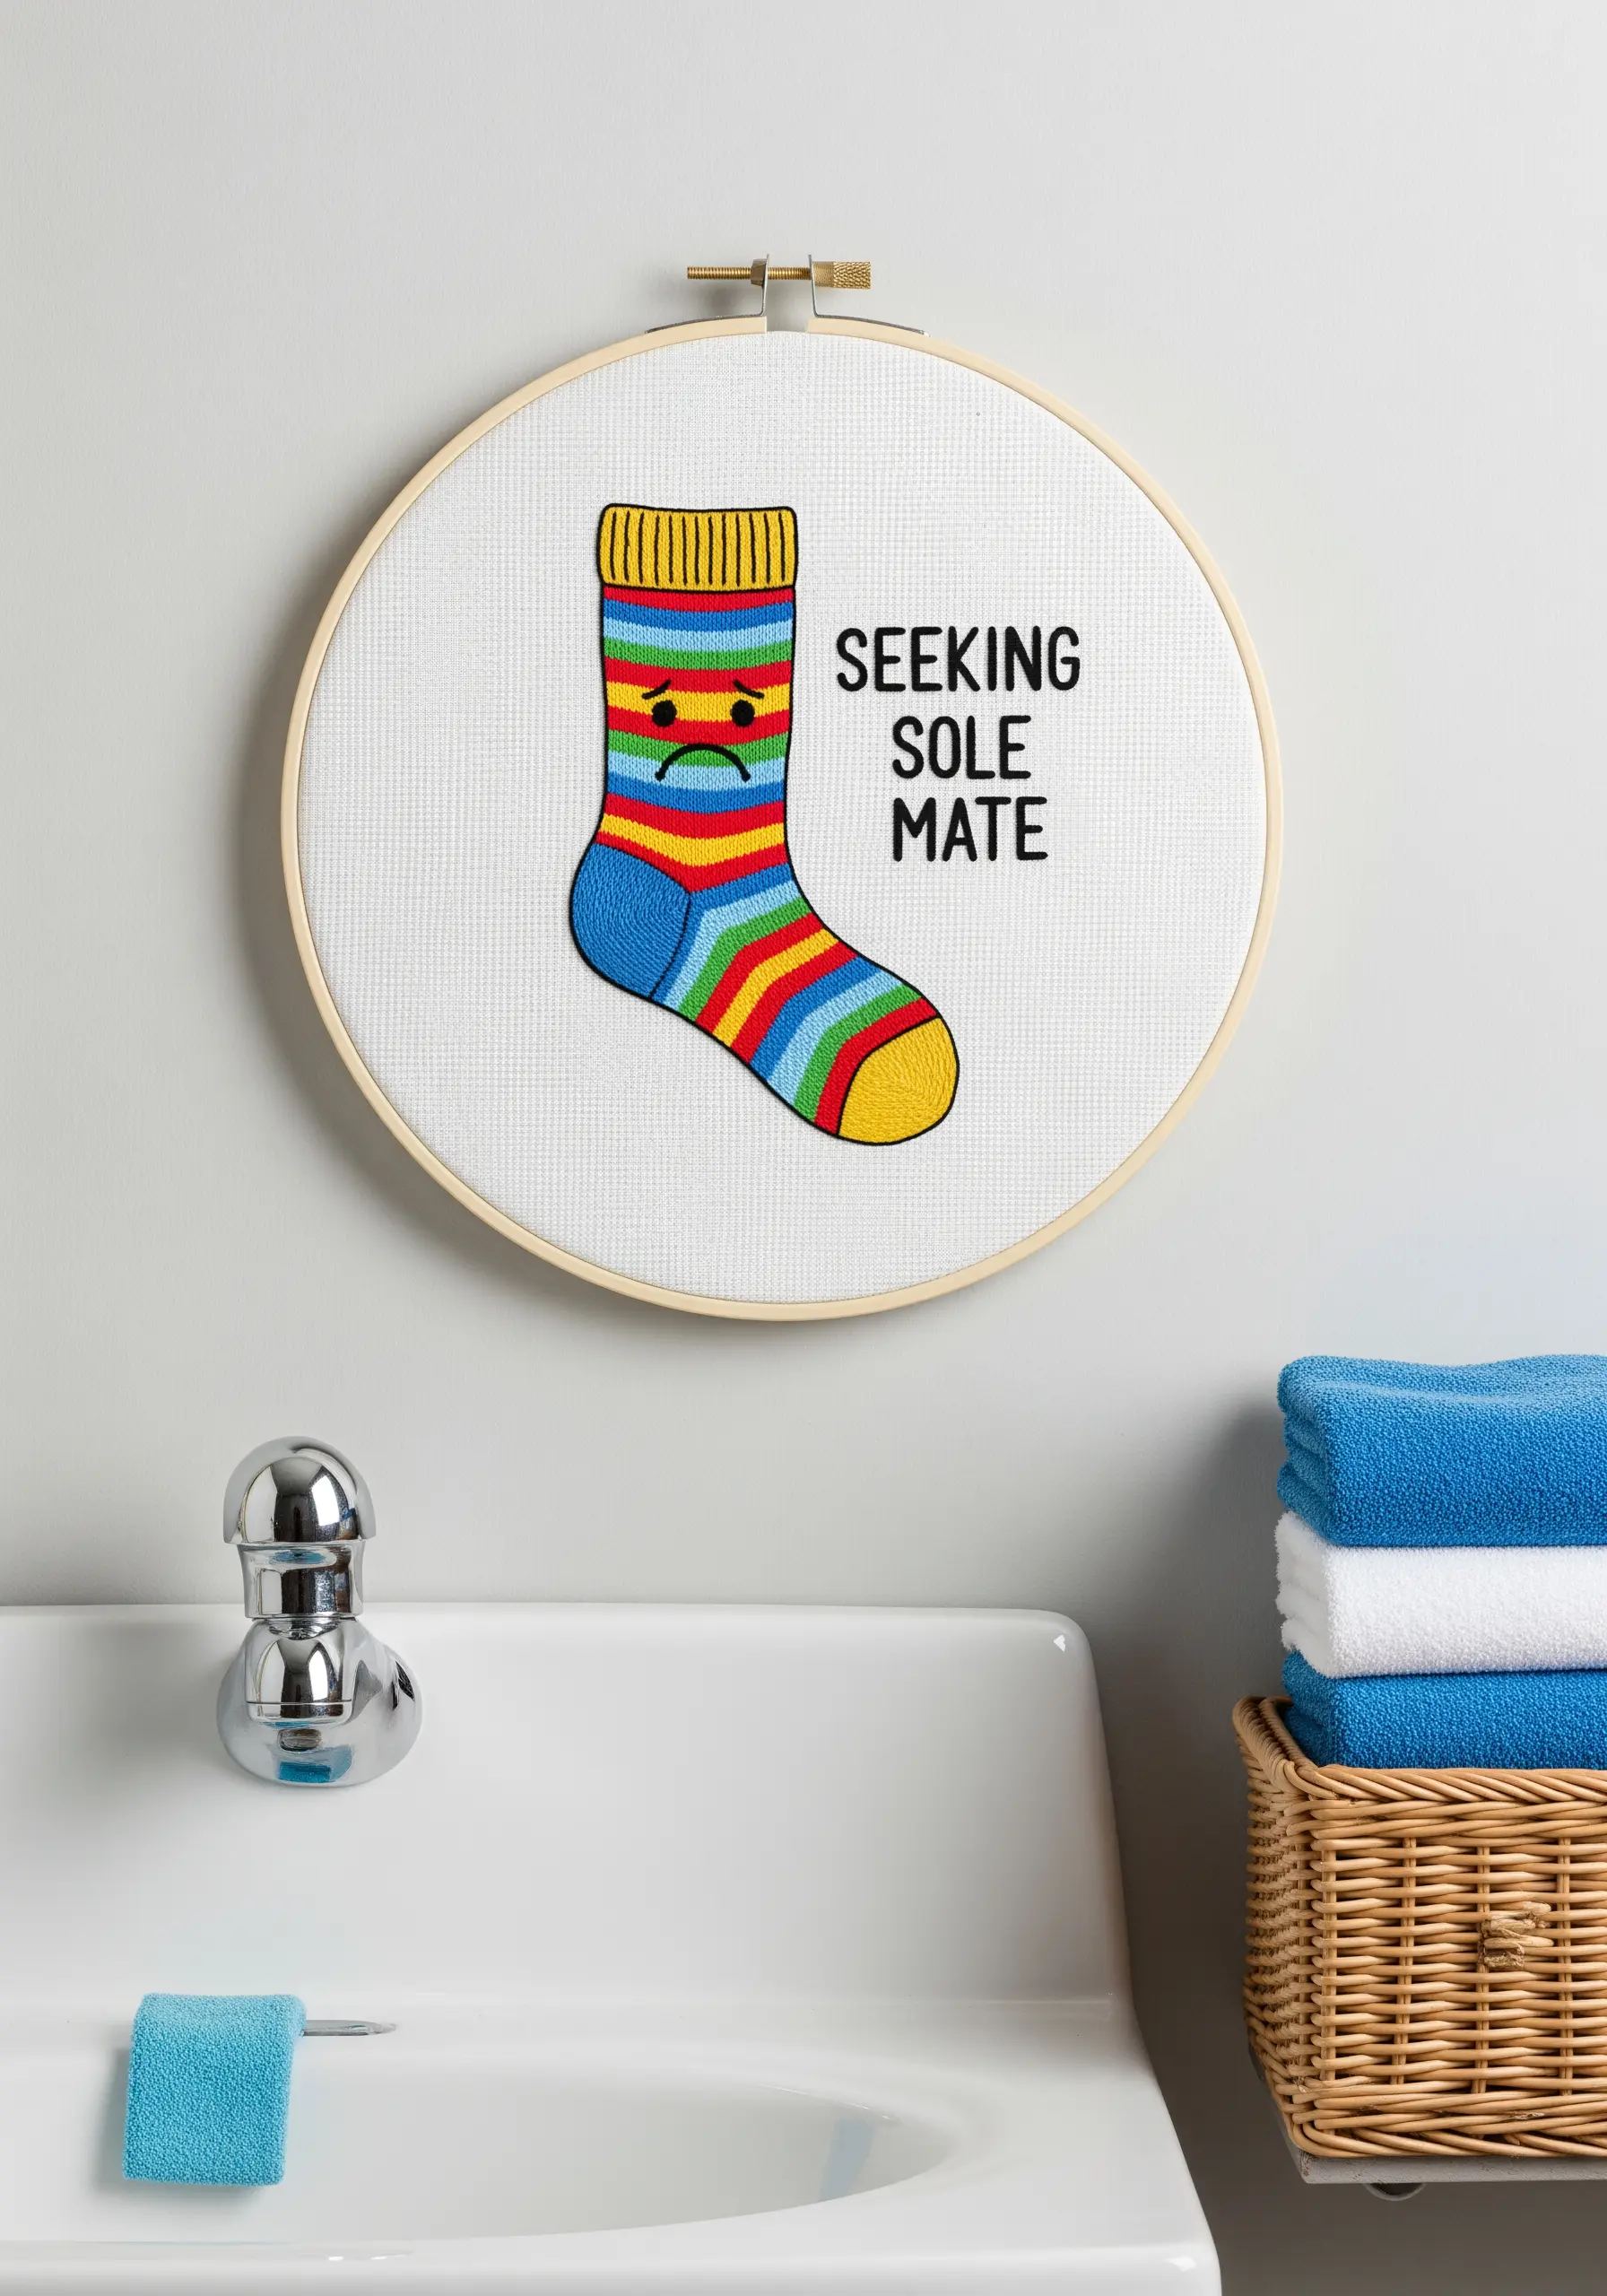
When creating a piece with a clever pun, ensure both the text and the image are balanced and clear.
Use a simple, highly legible font for the text, stitched in a clean backstitch. This allows the joke to land instantly.
Make the accompanying motif colorful and expressive to add personality, but don’t over-embellish it to the point where it distracts from the text.
It’s the perfect formula for fun and funky mixed fiber projects that make people smile.
27. Create Elegant Botanical Sets
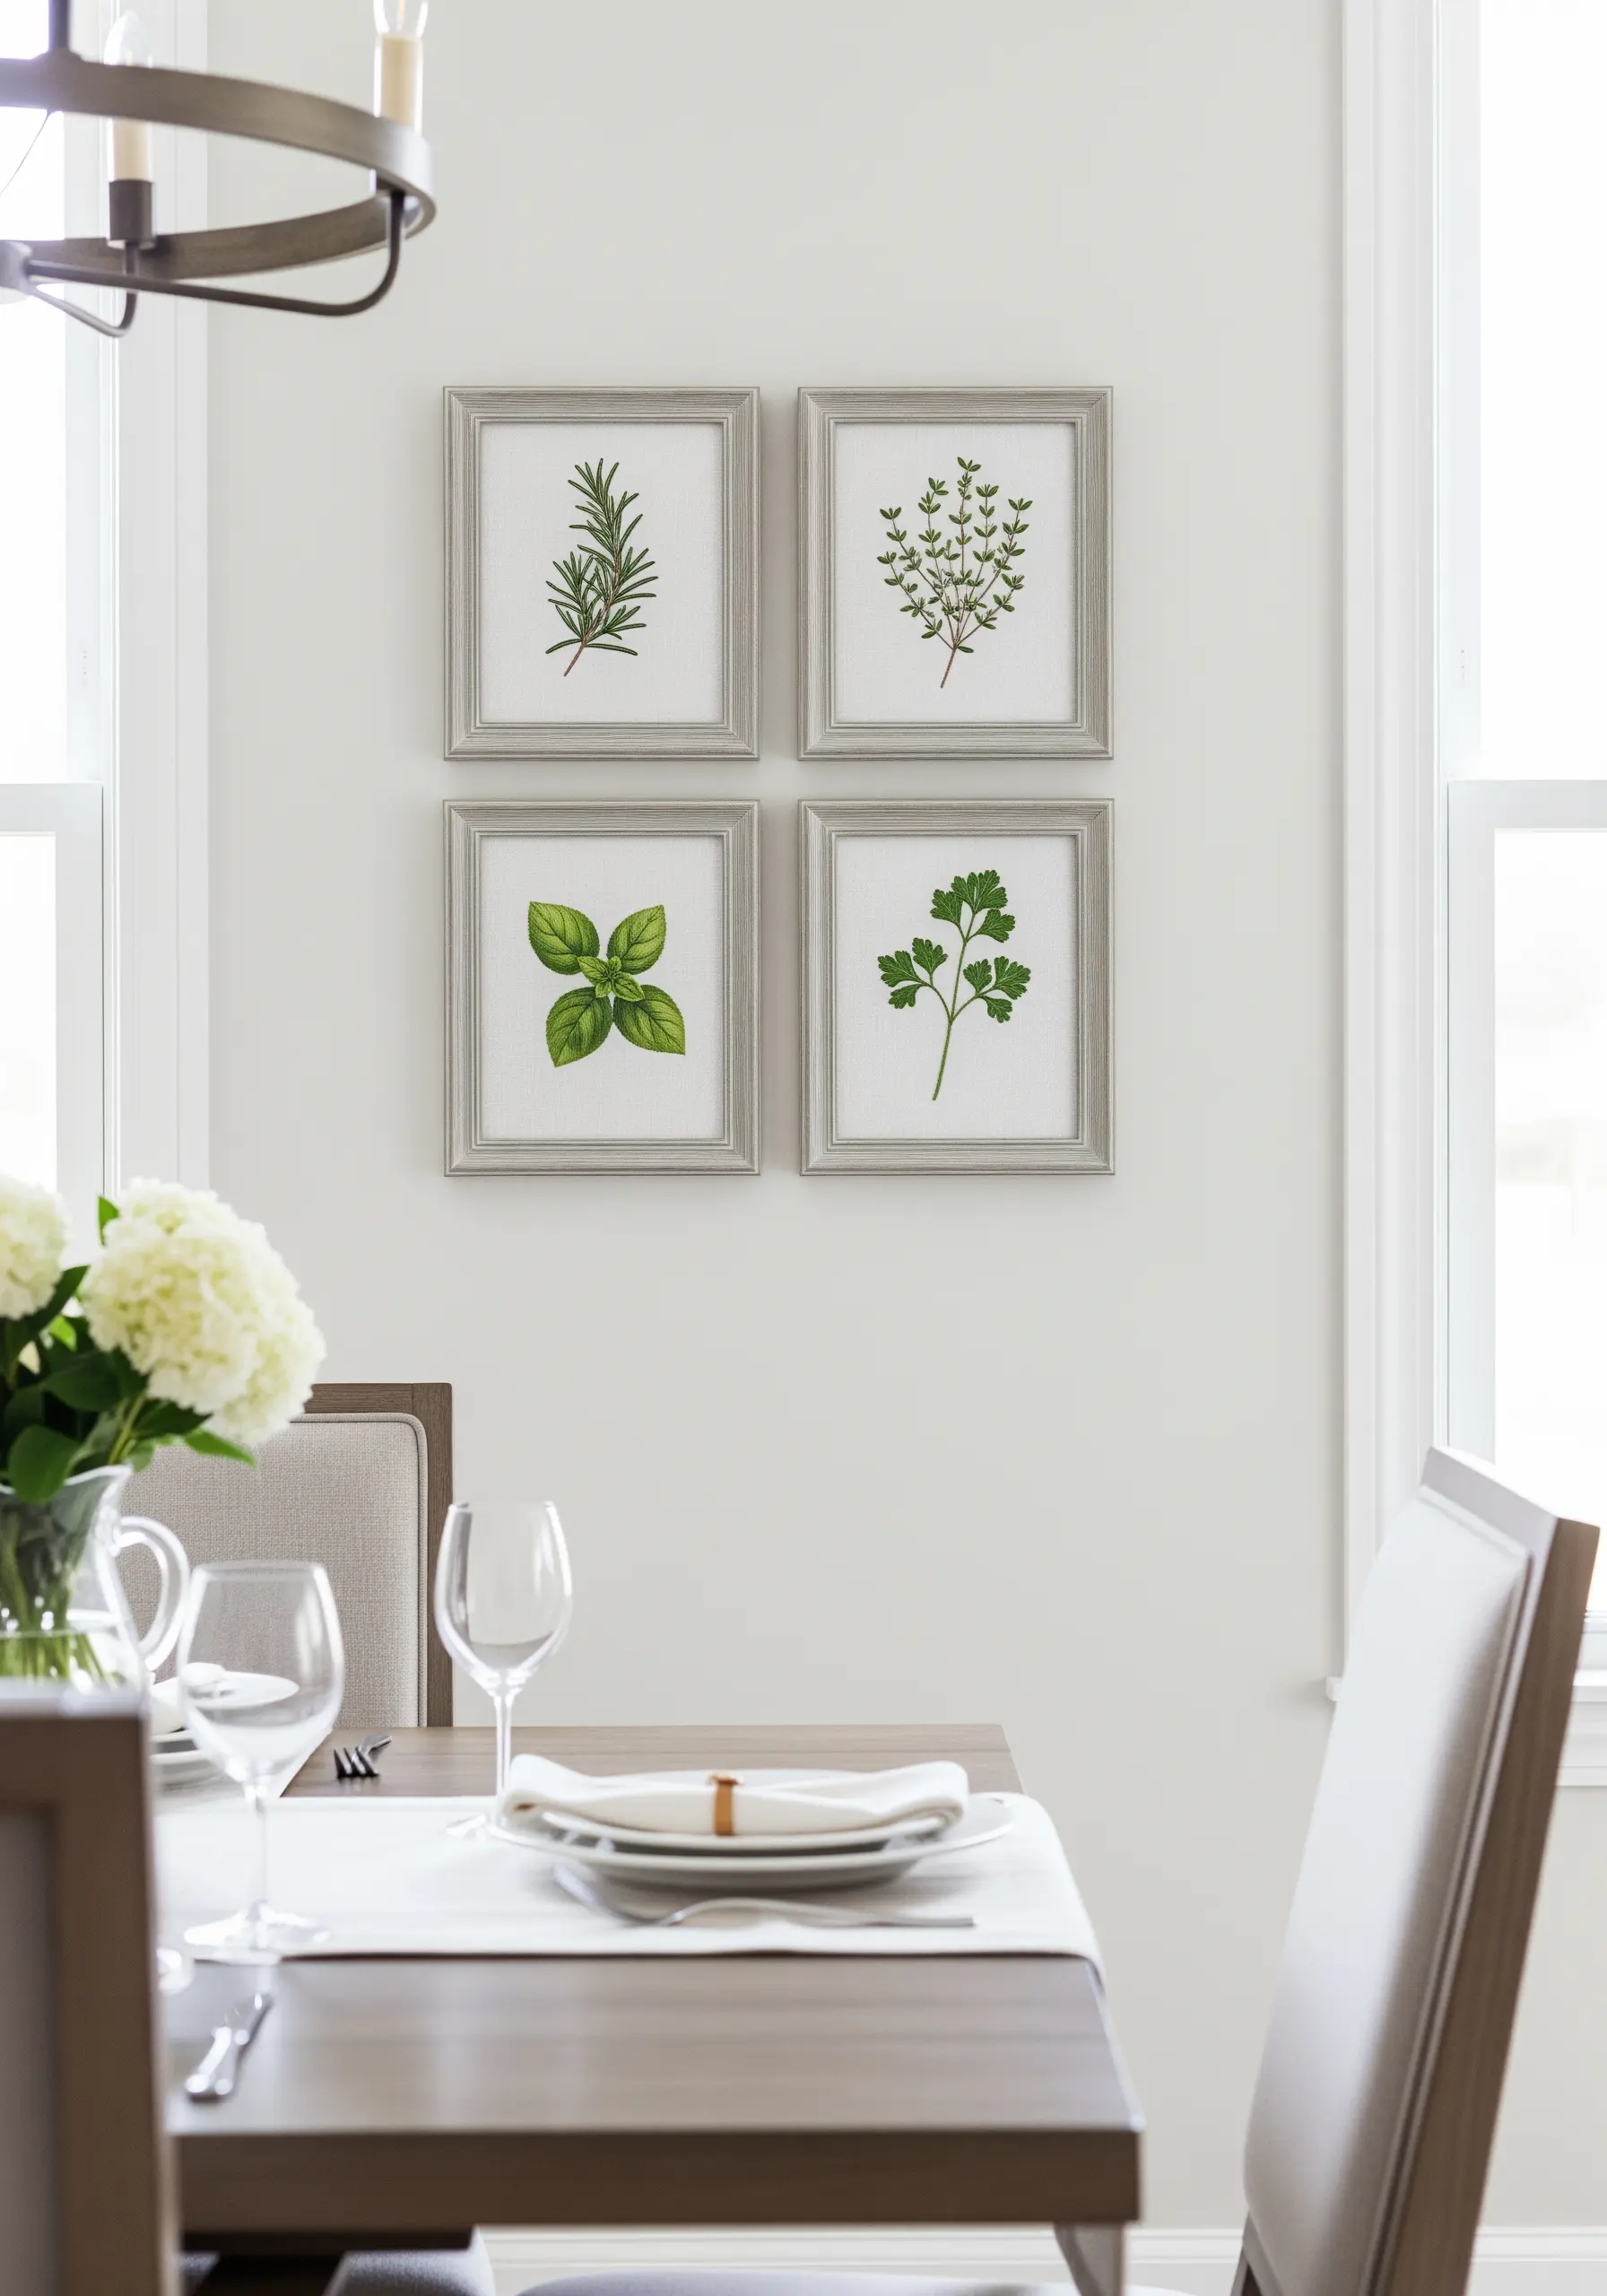
To create a sophisticated gallery wall, stitch a series of related motifs, like different culinary herbs.
Keep the background fabric, frame style, and overall size consistent across all pieces to create a sense of unity.
Focus on capturing the unique texture of each plant—use French knots for rosemary’s texture and delicate fishbone stitch for the flat leaves of basil.
These delicate leaf stitch techniques create a beautiful and cohesive collection.
28. Build Up Texture with Clustered Knots
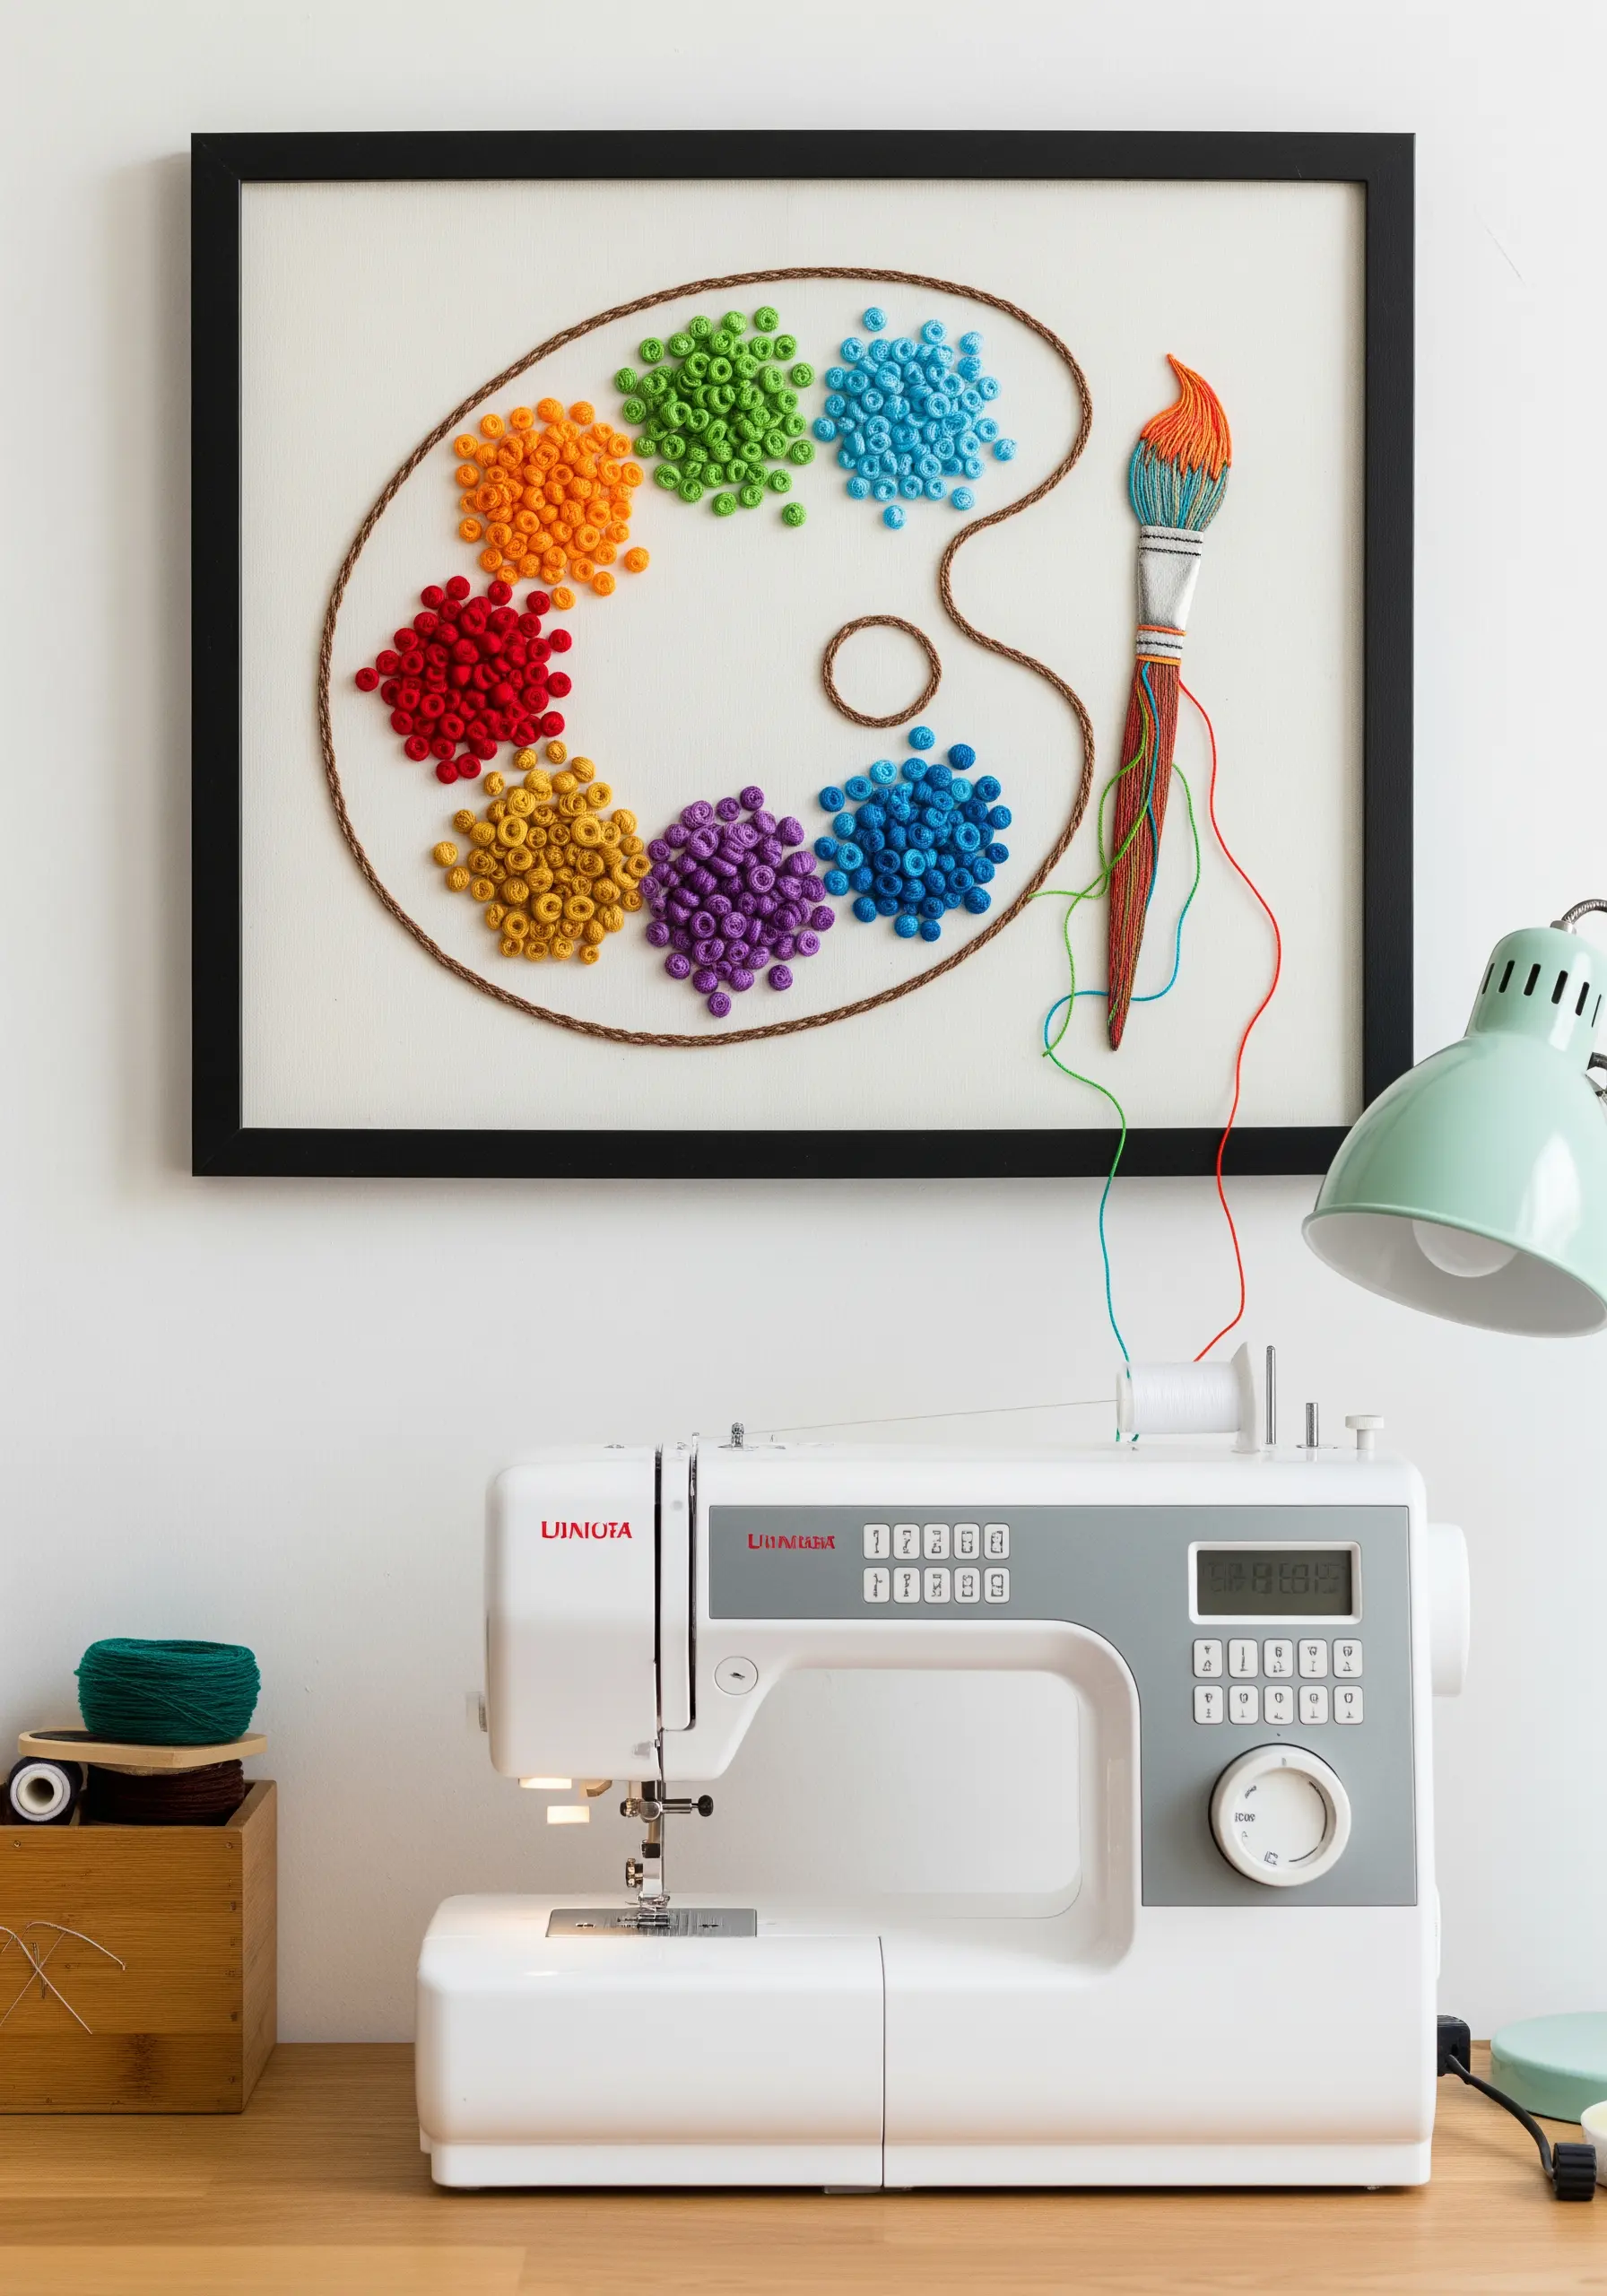
For a highly textured, almost sculptural effect, fill shapes with dense clusters of French knots or colonial knots.
Use a thicker thread, like all six strands of floss or even perle cotton, to create plump, substantial knots.
Pack them closely together so no fabric shows through, creating a rich, bumpy surface that mimics dabs of paint.
This is a fantastic technique for abstract color-blend stitch ideas that are all about texture.


