

Look in your closet. I’m willing to bet there’s a denim jacket you’ve outgrown stylistically, a flannel shirt that feels plain, or a sturdy utility coat just waiting for a second life. These aren’t just old clothes; they are perfectly prepared canvases.
The back panel of a shirt or jacket offers a broad, uninterrupted space—a rare opportunity in garment embroidery. It invites a bold statement, a detailed scene, or a powerful symbol that can completely redefine the piece, turning it from a simple item of clothing into wearable art that tells a story.
Don’t mistake ‘bold’ for ‘complicated.’ The designs that follow are powerful not because of their difficulty, but because of their intelligent use of color, texture, and composition. Let’s explore how you can use your needle and thread to give your wardrobe a new, deeply personal, and unapologetically stylish voice.
1. Celestial Moth with Gradient Wings

To achieve the moth’s luminous, gradient wings, use a long-and-short stitch, blending two or three shades of thread in your needle at once.
For the delicate, feathery antennae, switch to a single strand of white or silver thread and use a simple backstitch or stem stitch for ultimate precision.
The moth’s fuzzy body is the perfect place to build texture; use tightly packed French knots or a turkey stitch that you can later trim for a plush, three-dimensional effect.
A dark denim jacket provides the ideal high-contrast canvas, making the cool blues and vibrant teals of your design appear to glow.
The surrounding starbursts are simple straight stitches—proof that you don’t need complex work to create a balanced and magical composition.
2. High-Vibrancy Mandala with Metallic Accents
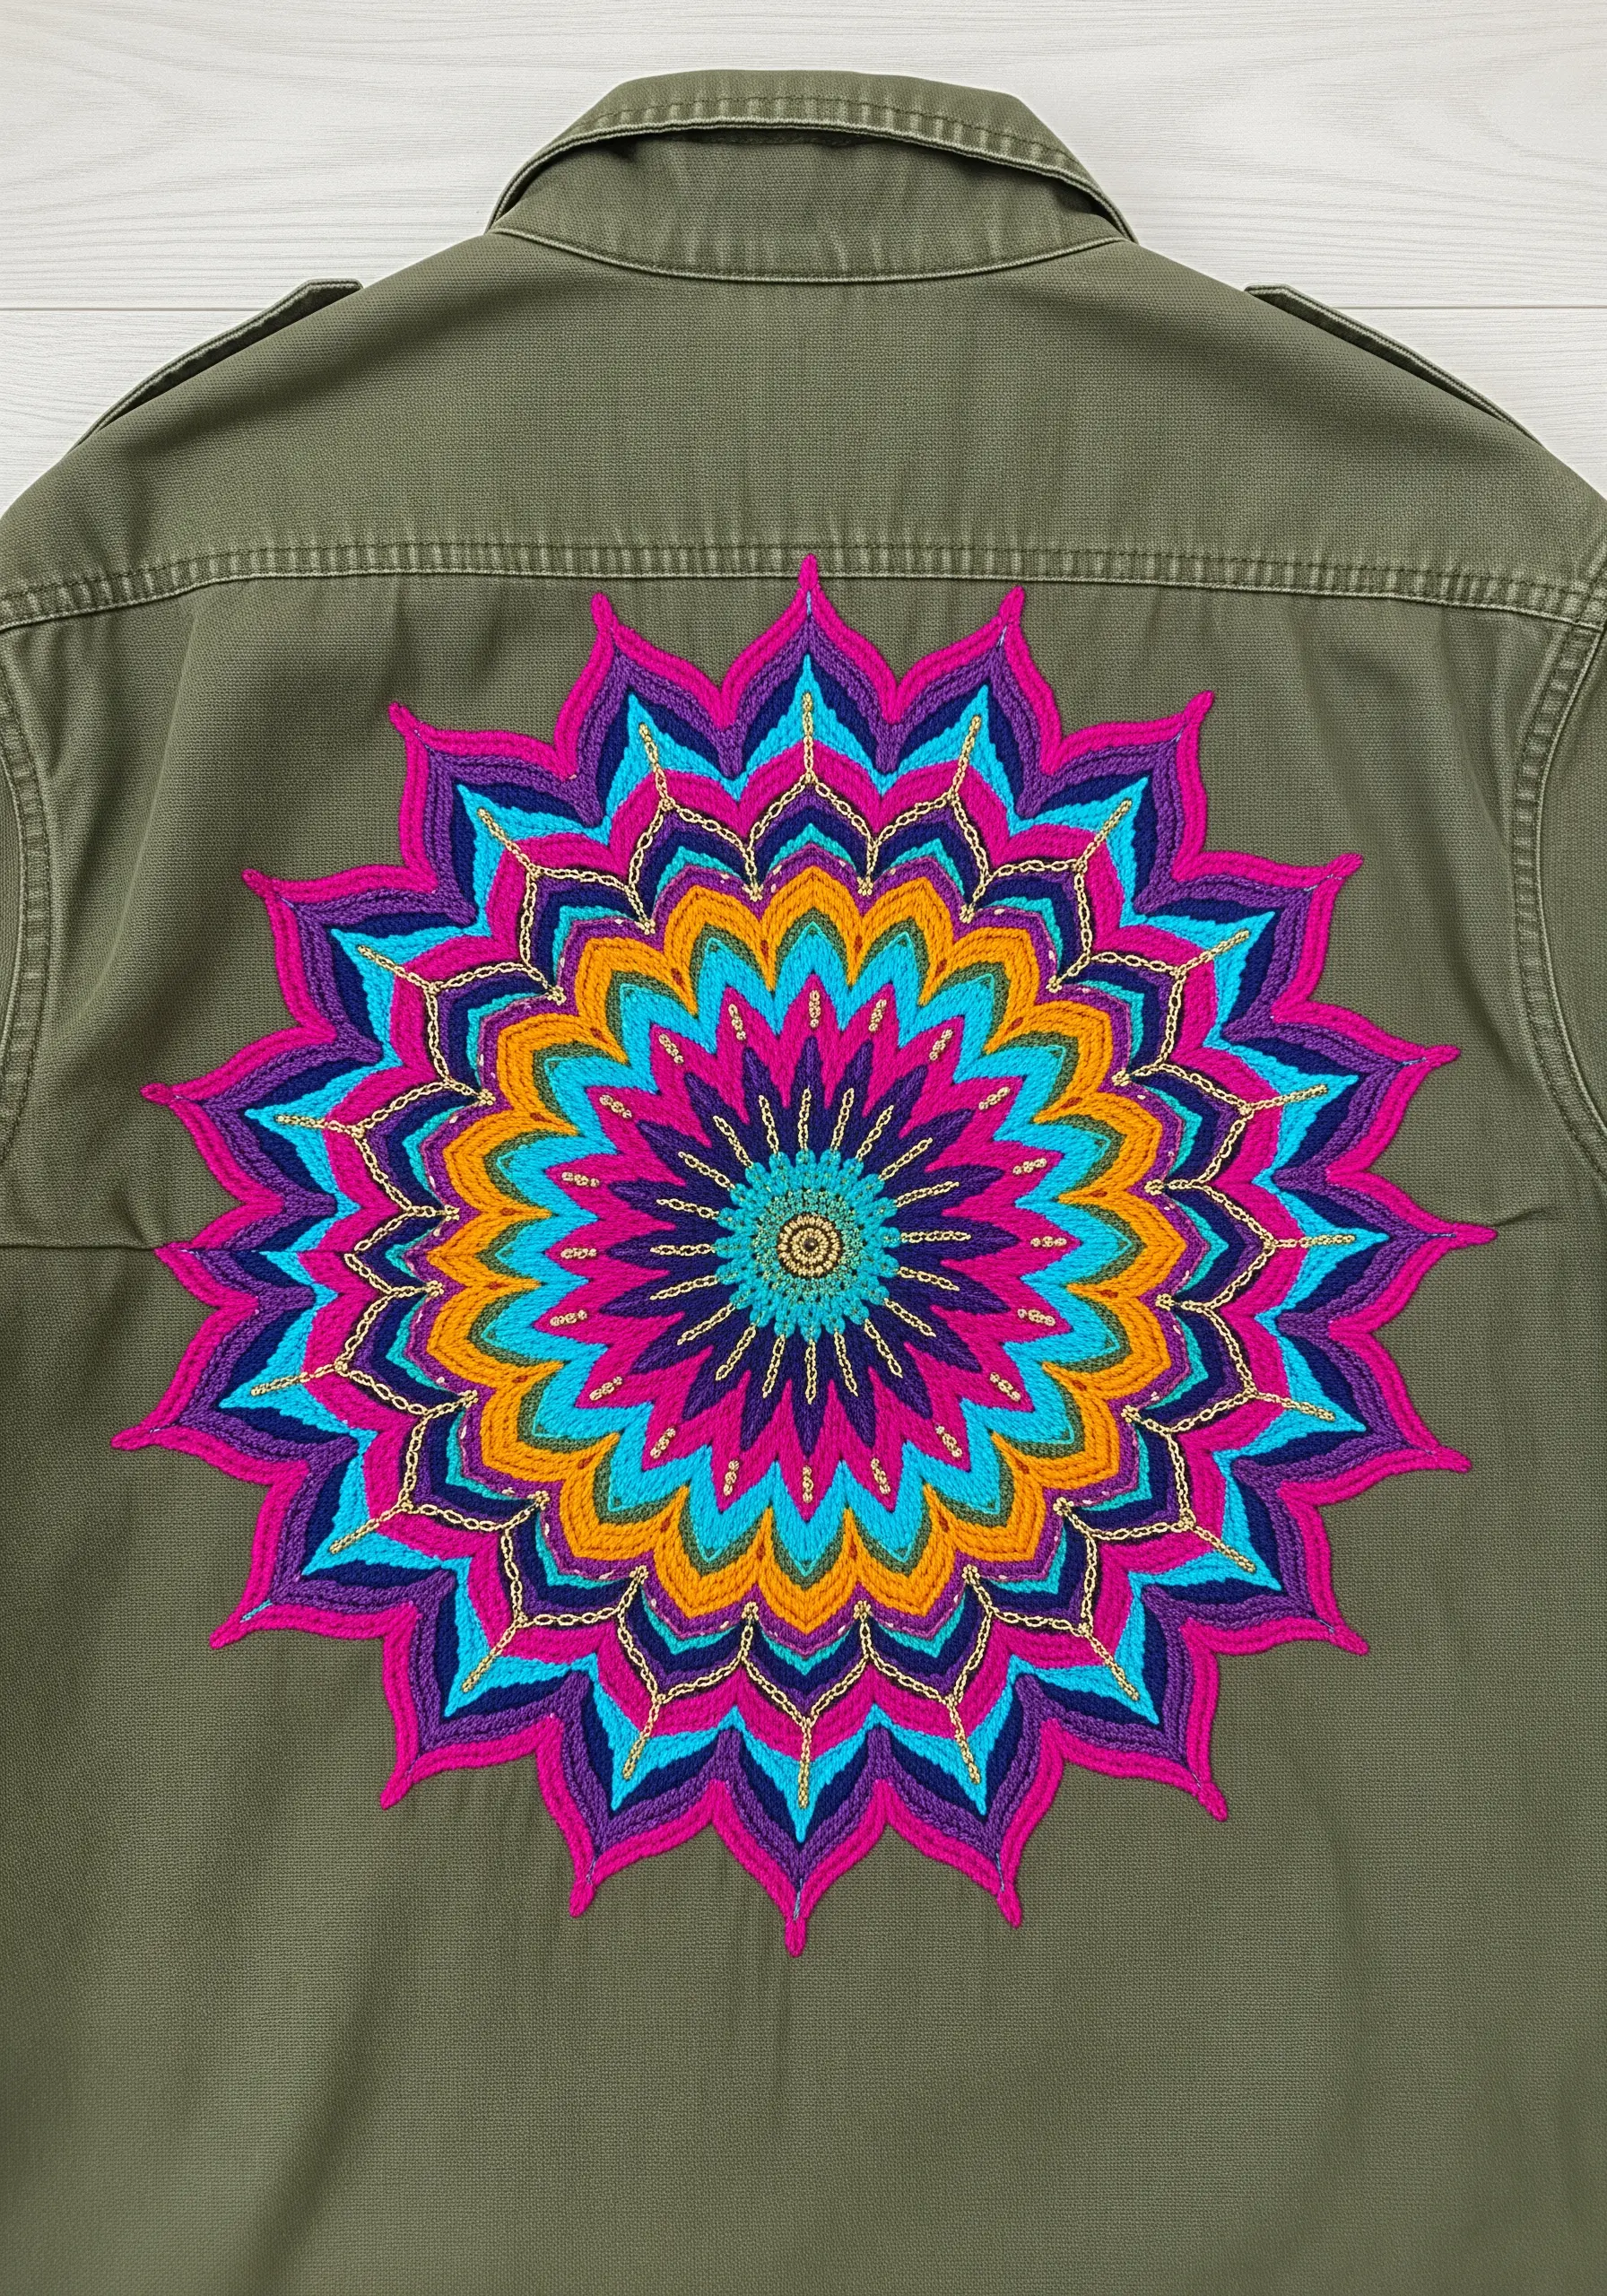
This design’s power comes from dense, impeccable satin stitch, which creates bold fields of flat color.
To ensure your concentric circles remain perfectly round and crisp, first outline each colored ring with a foundational split stitch.
Integrating a fine gold metallic thread between the colors does more than add sparkle—it creates a visual barrier that makes each hue more vibrant and defined.
This is one of the most effective ways to manage color transitions in complex geometric patterns, preventing them from looking muddy.
Remember to use a heavy-duty stabilizer on the back of the fabric to support the density of the stitching and prevent any puckering.
3. Anatomical Heart and Wildflower Contrast
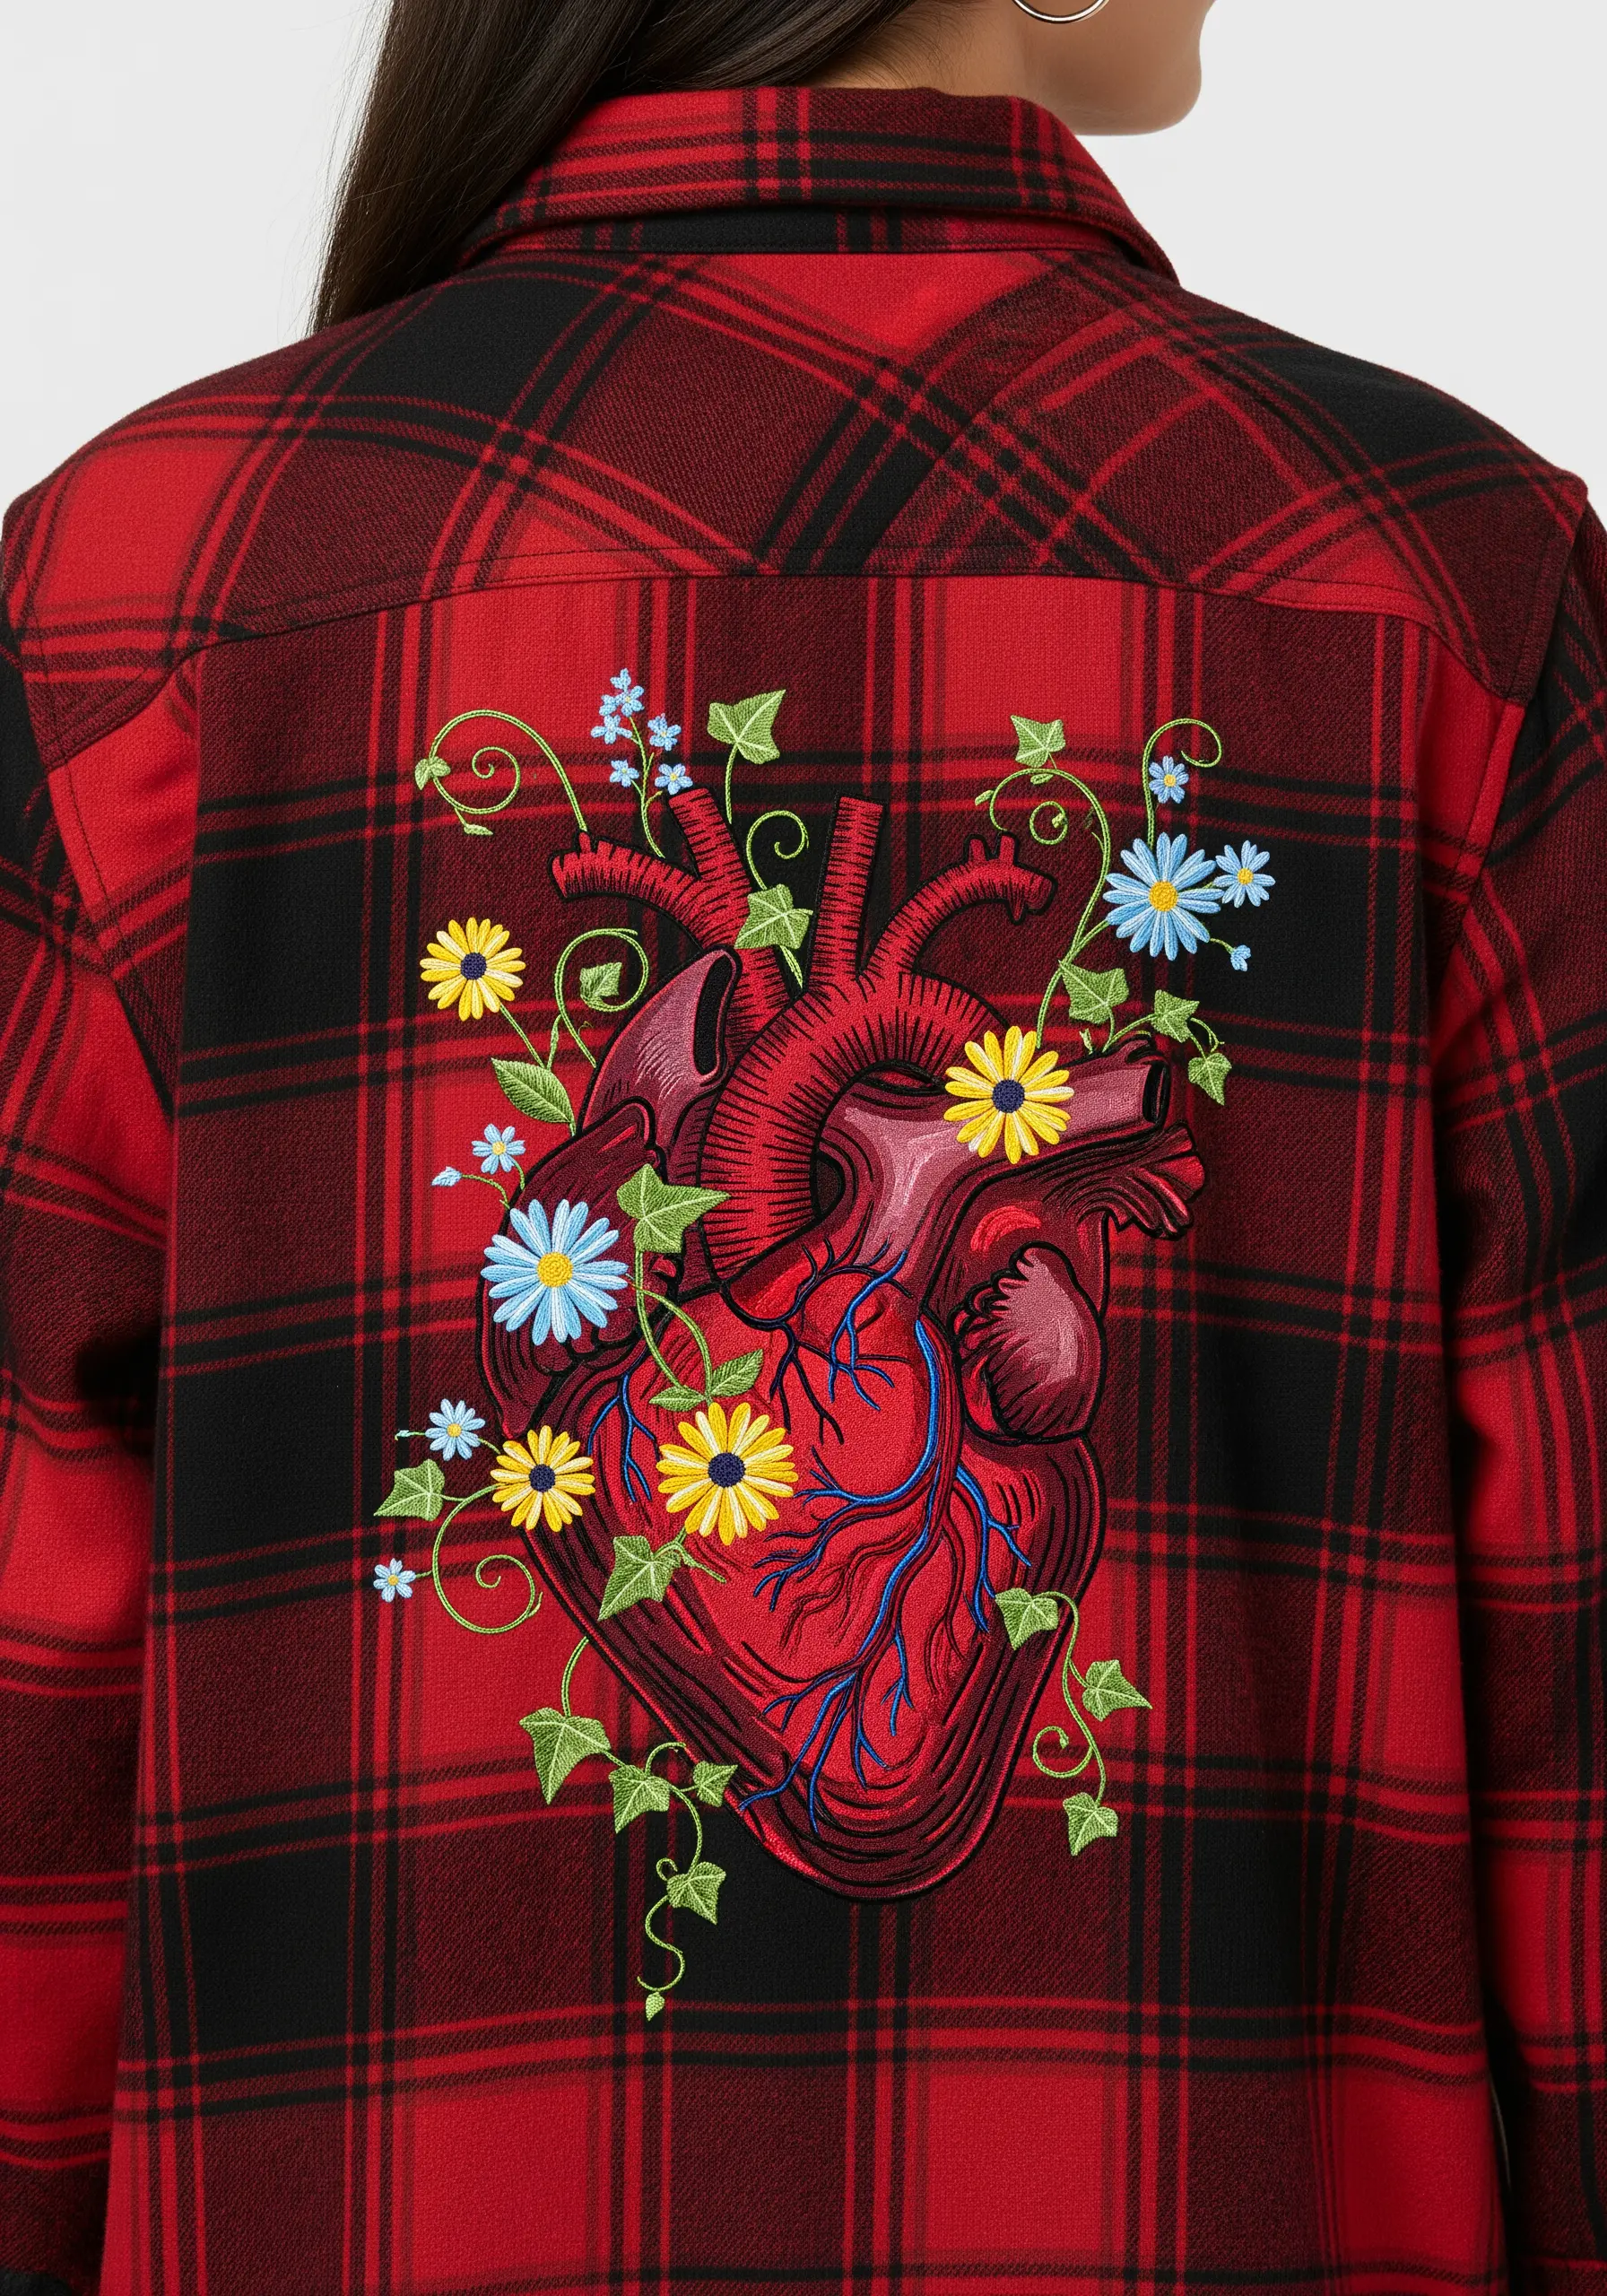
The beauty of this piece lies in the striking contrast between precise, scientific detail and the wild, organic forms of nature.
For the intricate veins of the heart, use a single strand of thread and a fine backstitch to maintain clarity against the busy plaid pattern of the shirt.
Introduce textural variety by using different stitches for the soft, organic wildflowers: satin stitch for smooth petals and French knots for fluffy flower centers.
Most importantly, add a bold white split-stitch outline around the entire composition to visually lift the design from the patterned background, ensuring it commands attention.
4. Dynamic Koi Pond Composition
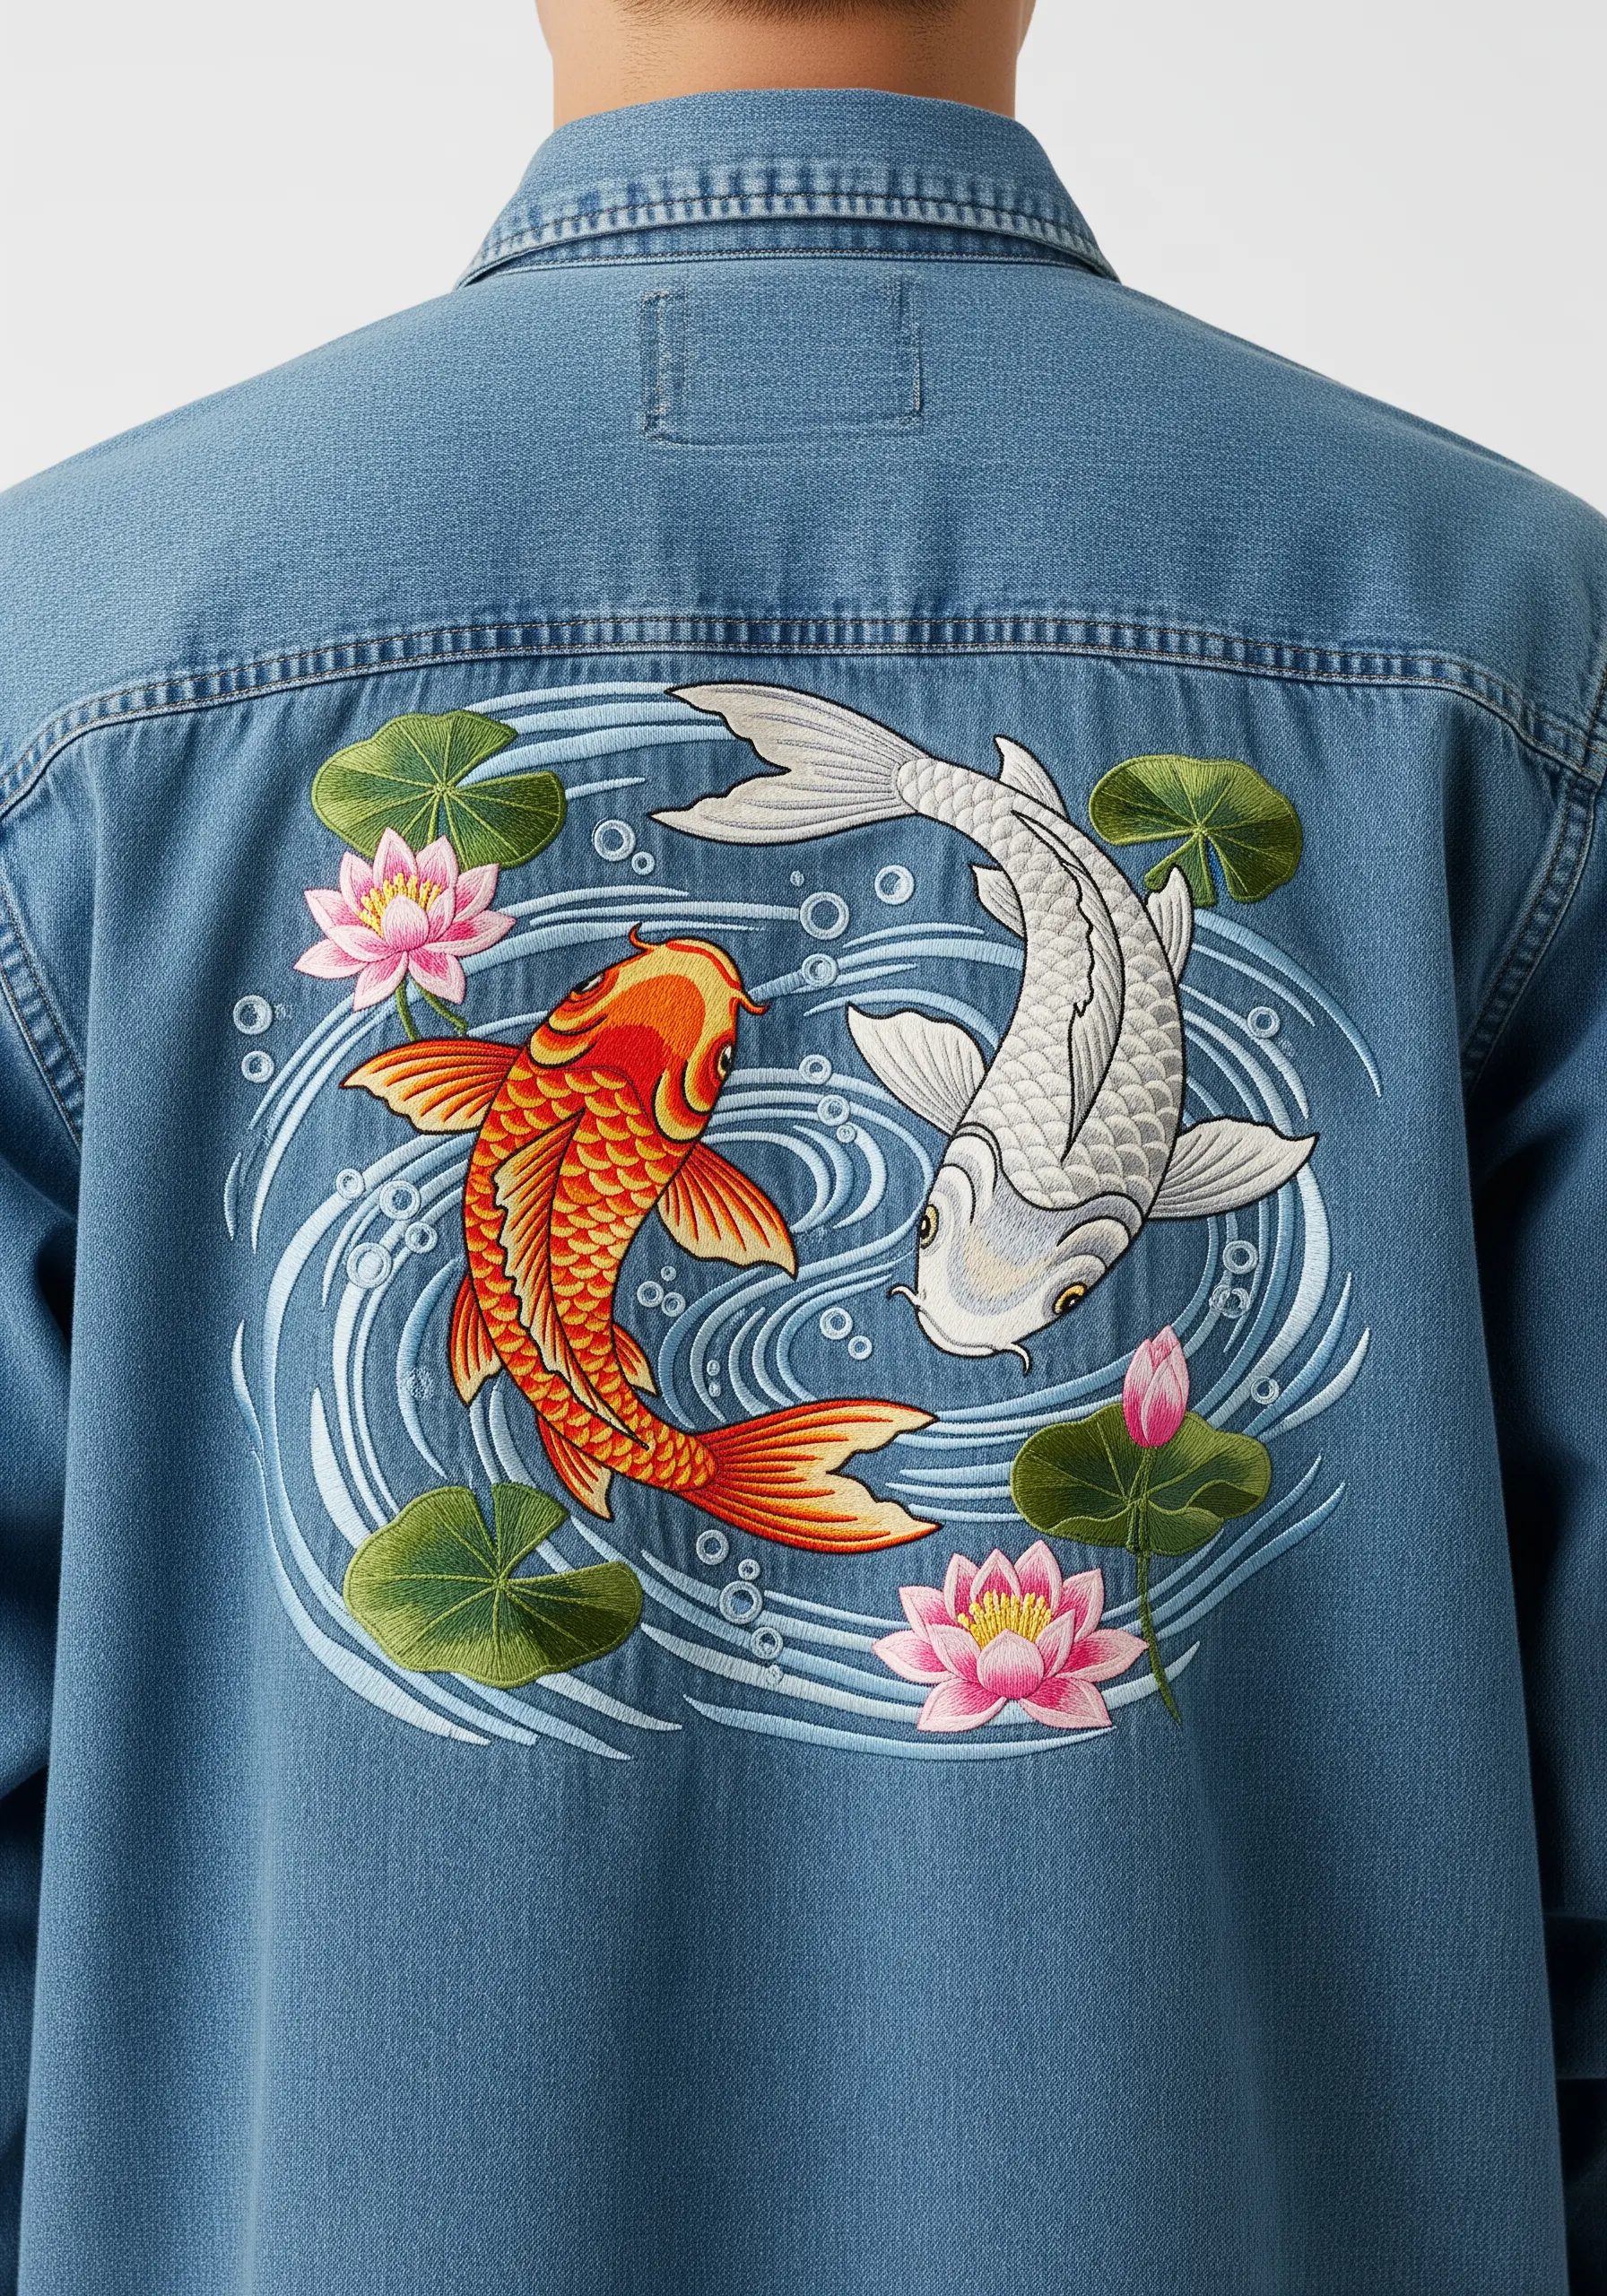
You can create the illusion of movement in the water by using long, sweeping stem stitches in several shades of blue, grey, and white.
For the koi scales, employ a small, overlapping fishbone stitch or scallop stitch to build a realistic, textured surface that catches the light.
Placing a warm-colored fish against a cool-colored one creates an immediate and harmonious focal point, drawing the eye directly to the center.
Reserve your finest single-strand floss for the most delicate details, such as the lily pad veins and tiny air bubbles, to achieve a refined finish.
5. Fierce Tiger with Thread-Painted Fur

This Fierce Tiger is a masterclass in thread painting, which you can achieve using a long-and-short stitch with a single strand of floss.
The key to realism is ensuring your stitches follow the natural direction of the animal’s fur growth, blending oranges, whites, and blacks seamlessly.
To make the eyes truly captivating, choose a high-sheen rayon or silk thread that will catch the light and create a lifelike glint.
The bold, graphic lettering below offers a perfect counterpoint; fill it with a dense, flat satin stitch to contrast with the deep texture of the tiger’s fur.
6. Art Deco Sunburst with Metallic Appliqué

This design achieves its dramatic, graphic impact by combining embroidery with fabric appliqué.
To begin, cut your black and metallic gold fabrics into precise shapes and secure them with a lightweight, iron-on fusible web.
Frame each fabric piece with a clean, tight satin stitch border. This not only secures the appliqué but also gives the design a polished, high-end finish.
This method allows you to cover a large area with bold color and shimmer without the immense time and thread required for a fully embroidered piece.
The contrast between the matte corduroy and the shimmering appliqué is what gives this jacket its luxurious, retro feel.
7. Mythical Phoenix in Flames
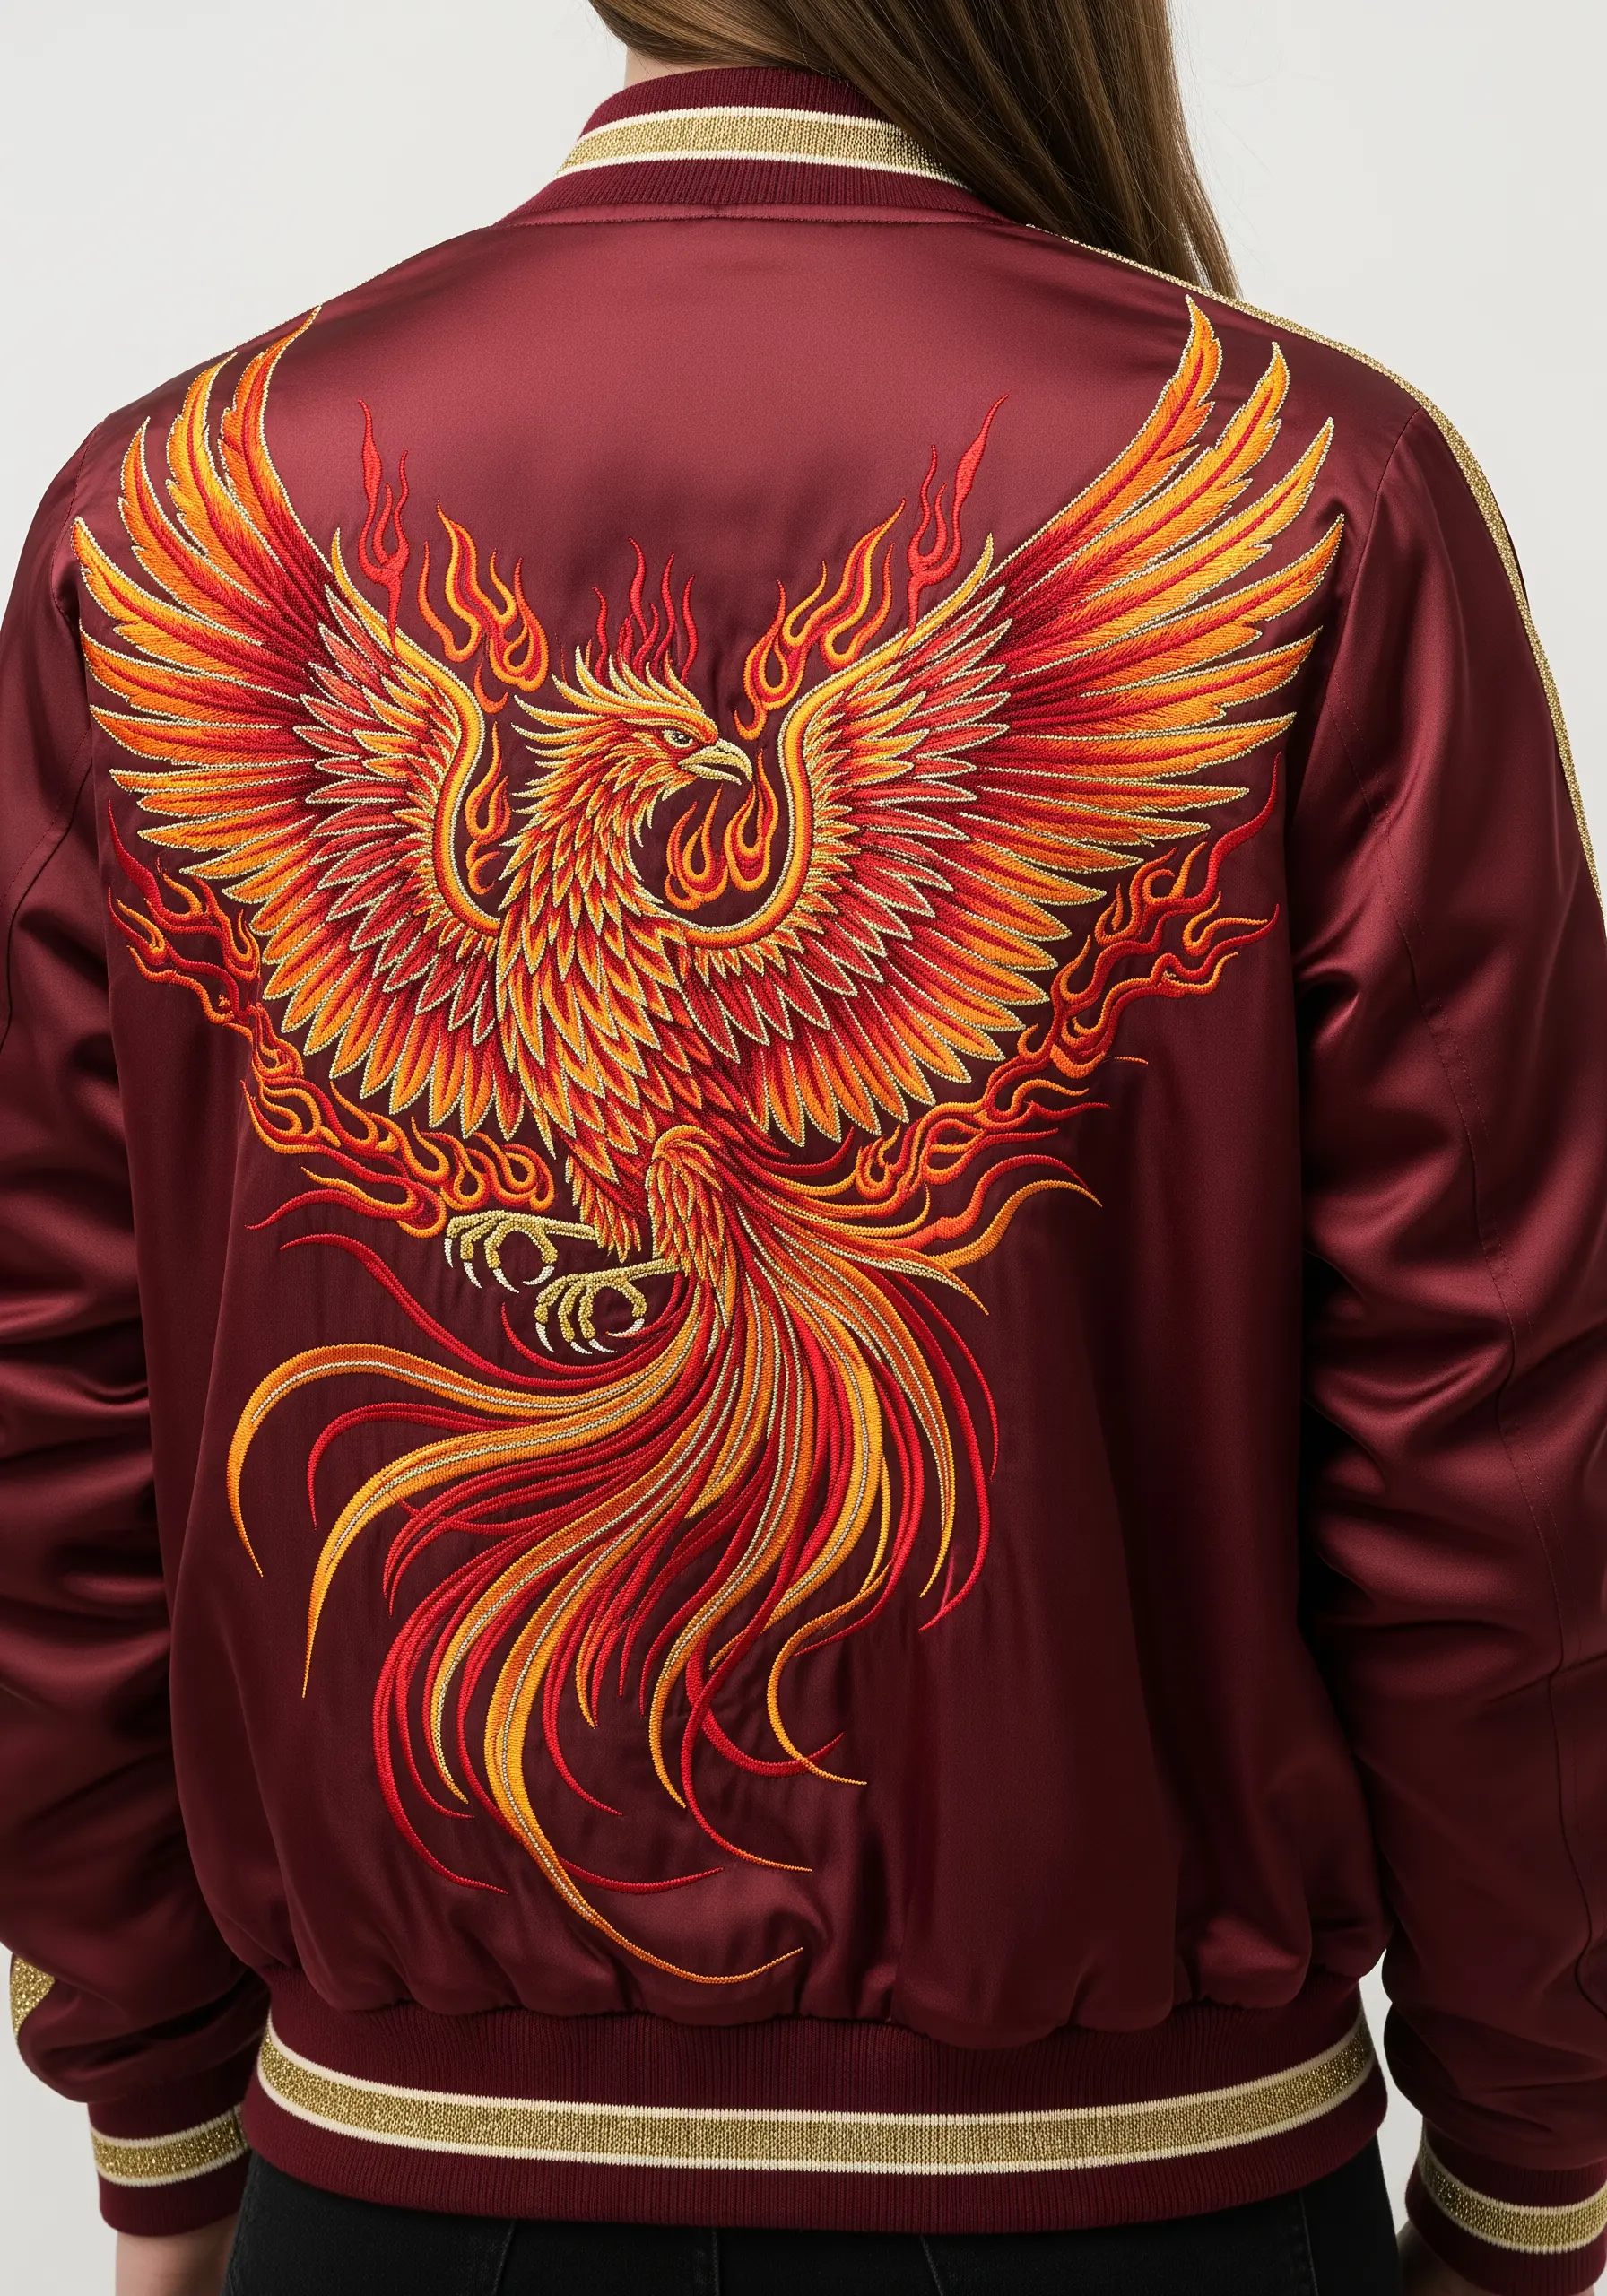
The brilliance of this design is its fiery color gradient, which mimics fire, moving from deep red to vibrant orange and bright yellow.
Achieve this seamless blend by using a long-and-short stitch, allowing the colors to interlock naturally.
To give the flames a sense of movement, vary the length and direction of your stitches, especially at the tips of the wings and tail.
Using a high-sheen rayon thread on a satin jacket is a strategic choice; the fabric’s natural luster amplifies the thread’s glow, making the phoenix look like it’s truly burning bright.
8. Primary Color Geometric Appliqué
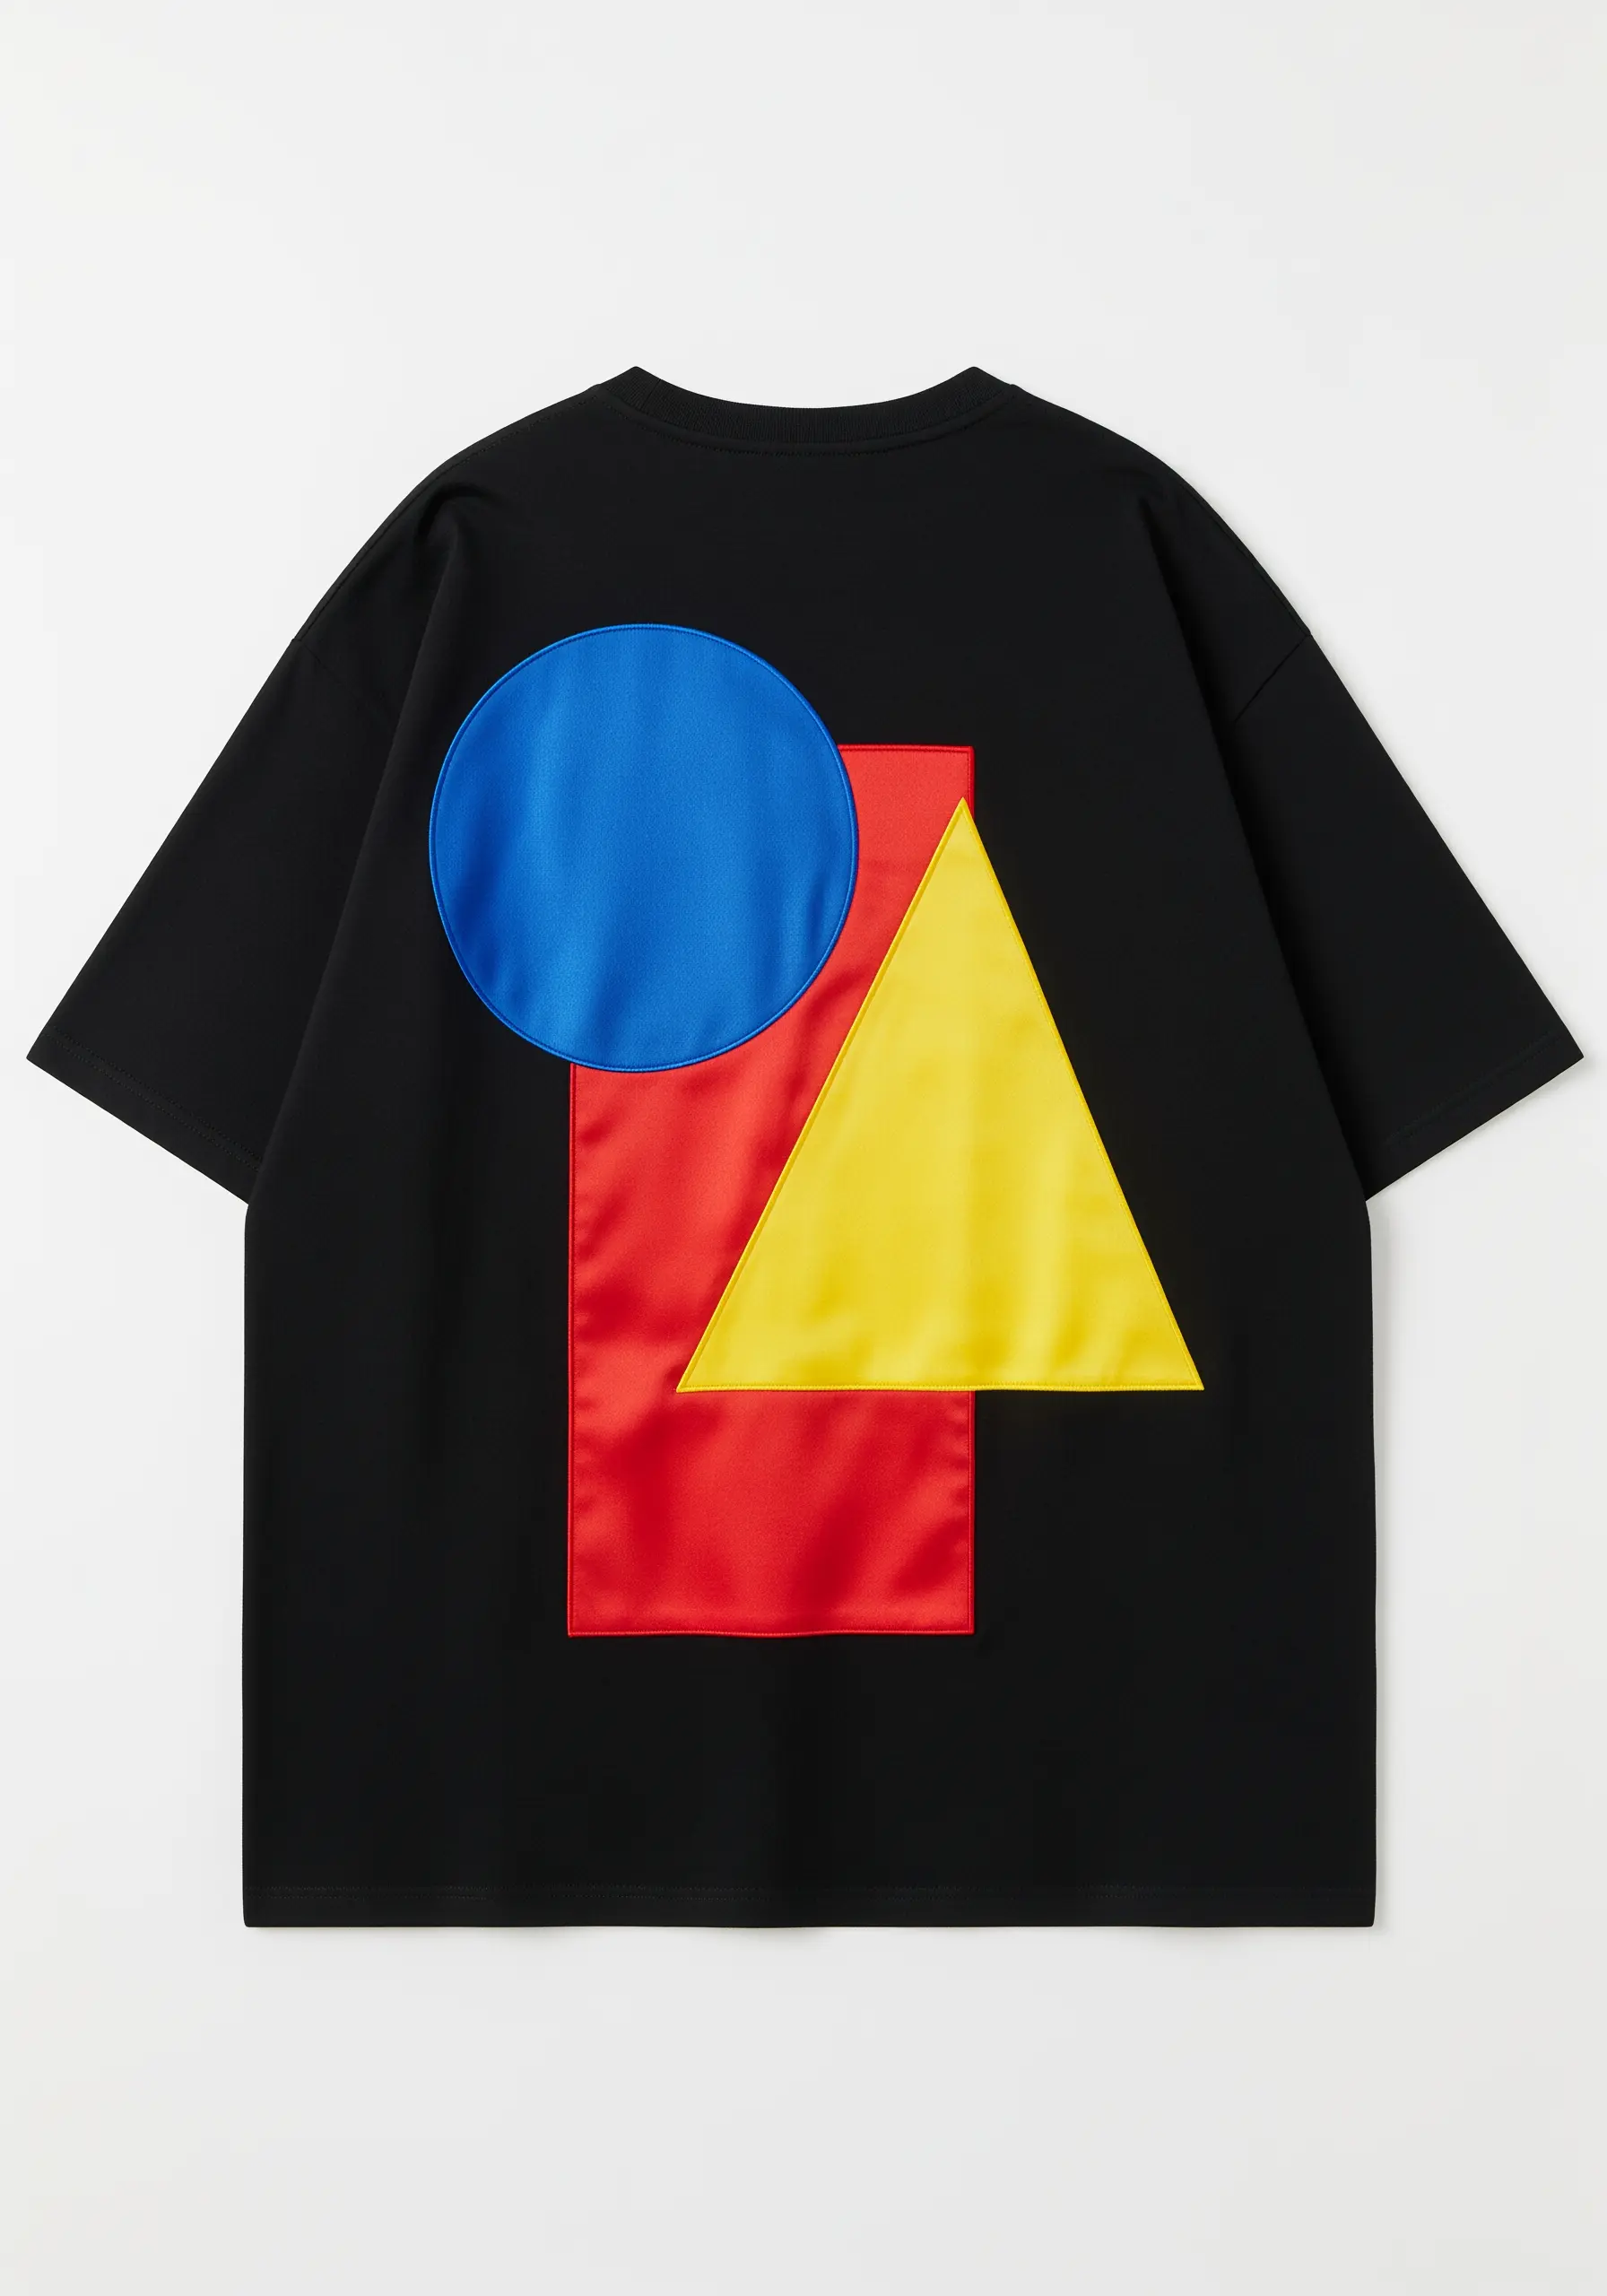
This is a perfect project for exploring bold, modern appliqué on a comfortable garment.
Choose a satin or sateen fabric for your geometric shapes; its subtle sheen will stand out beautifully against the matte cotton of a t-shirt.
First, apply a lightweight fusible web to the back of your colored fabrics, cut out your shapes, and iron them into place.
Secure the edges with a clean, tight machine zigzag stitch or a meticulous hand-stitched blanket stitch for a handcrafted feel.
This Geometric Appliqué technique provides dramatic color blocking while remaining soft and flexible, moving with the knit fabric instead of stiffening it.
9. Gothic Cathedral Window with Metallic Outlines
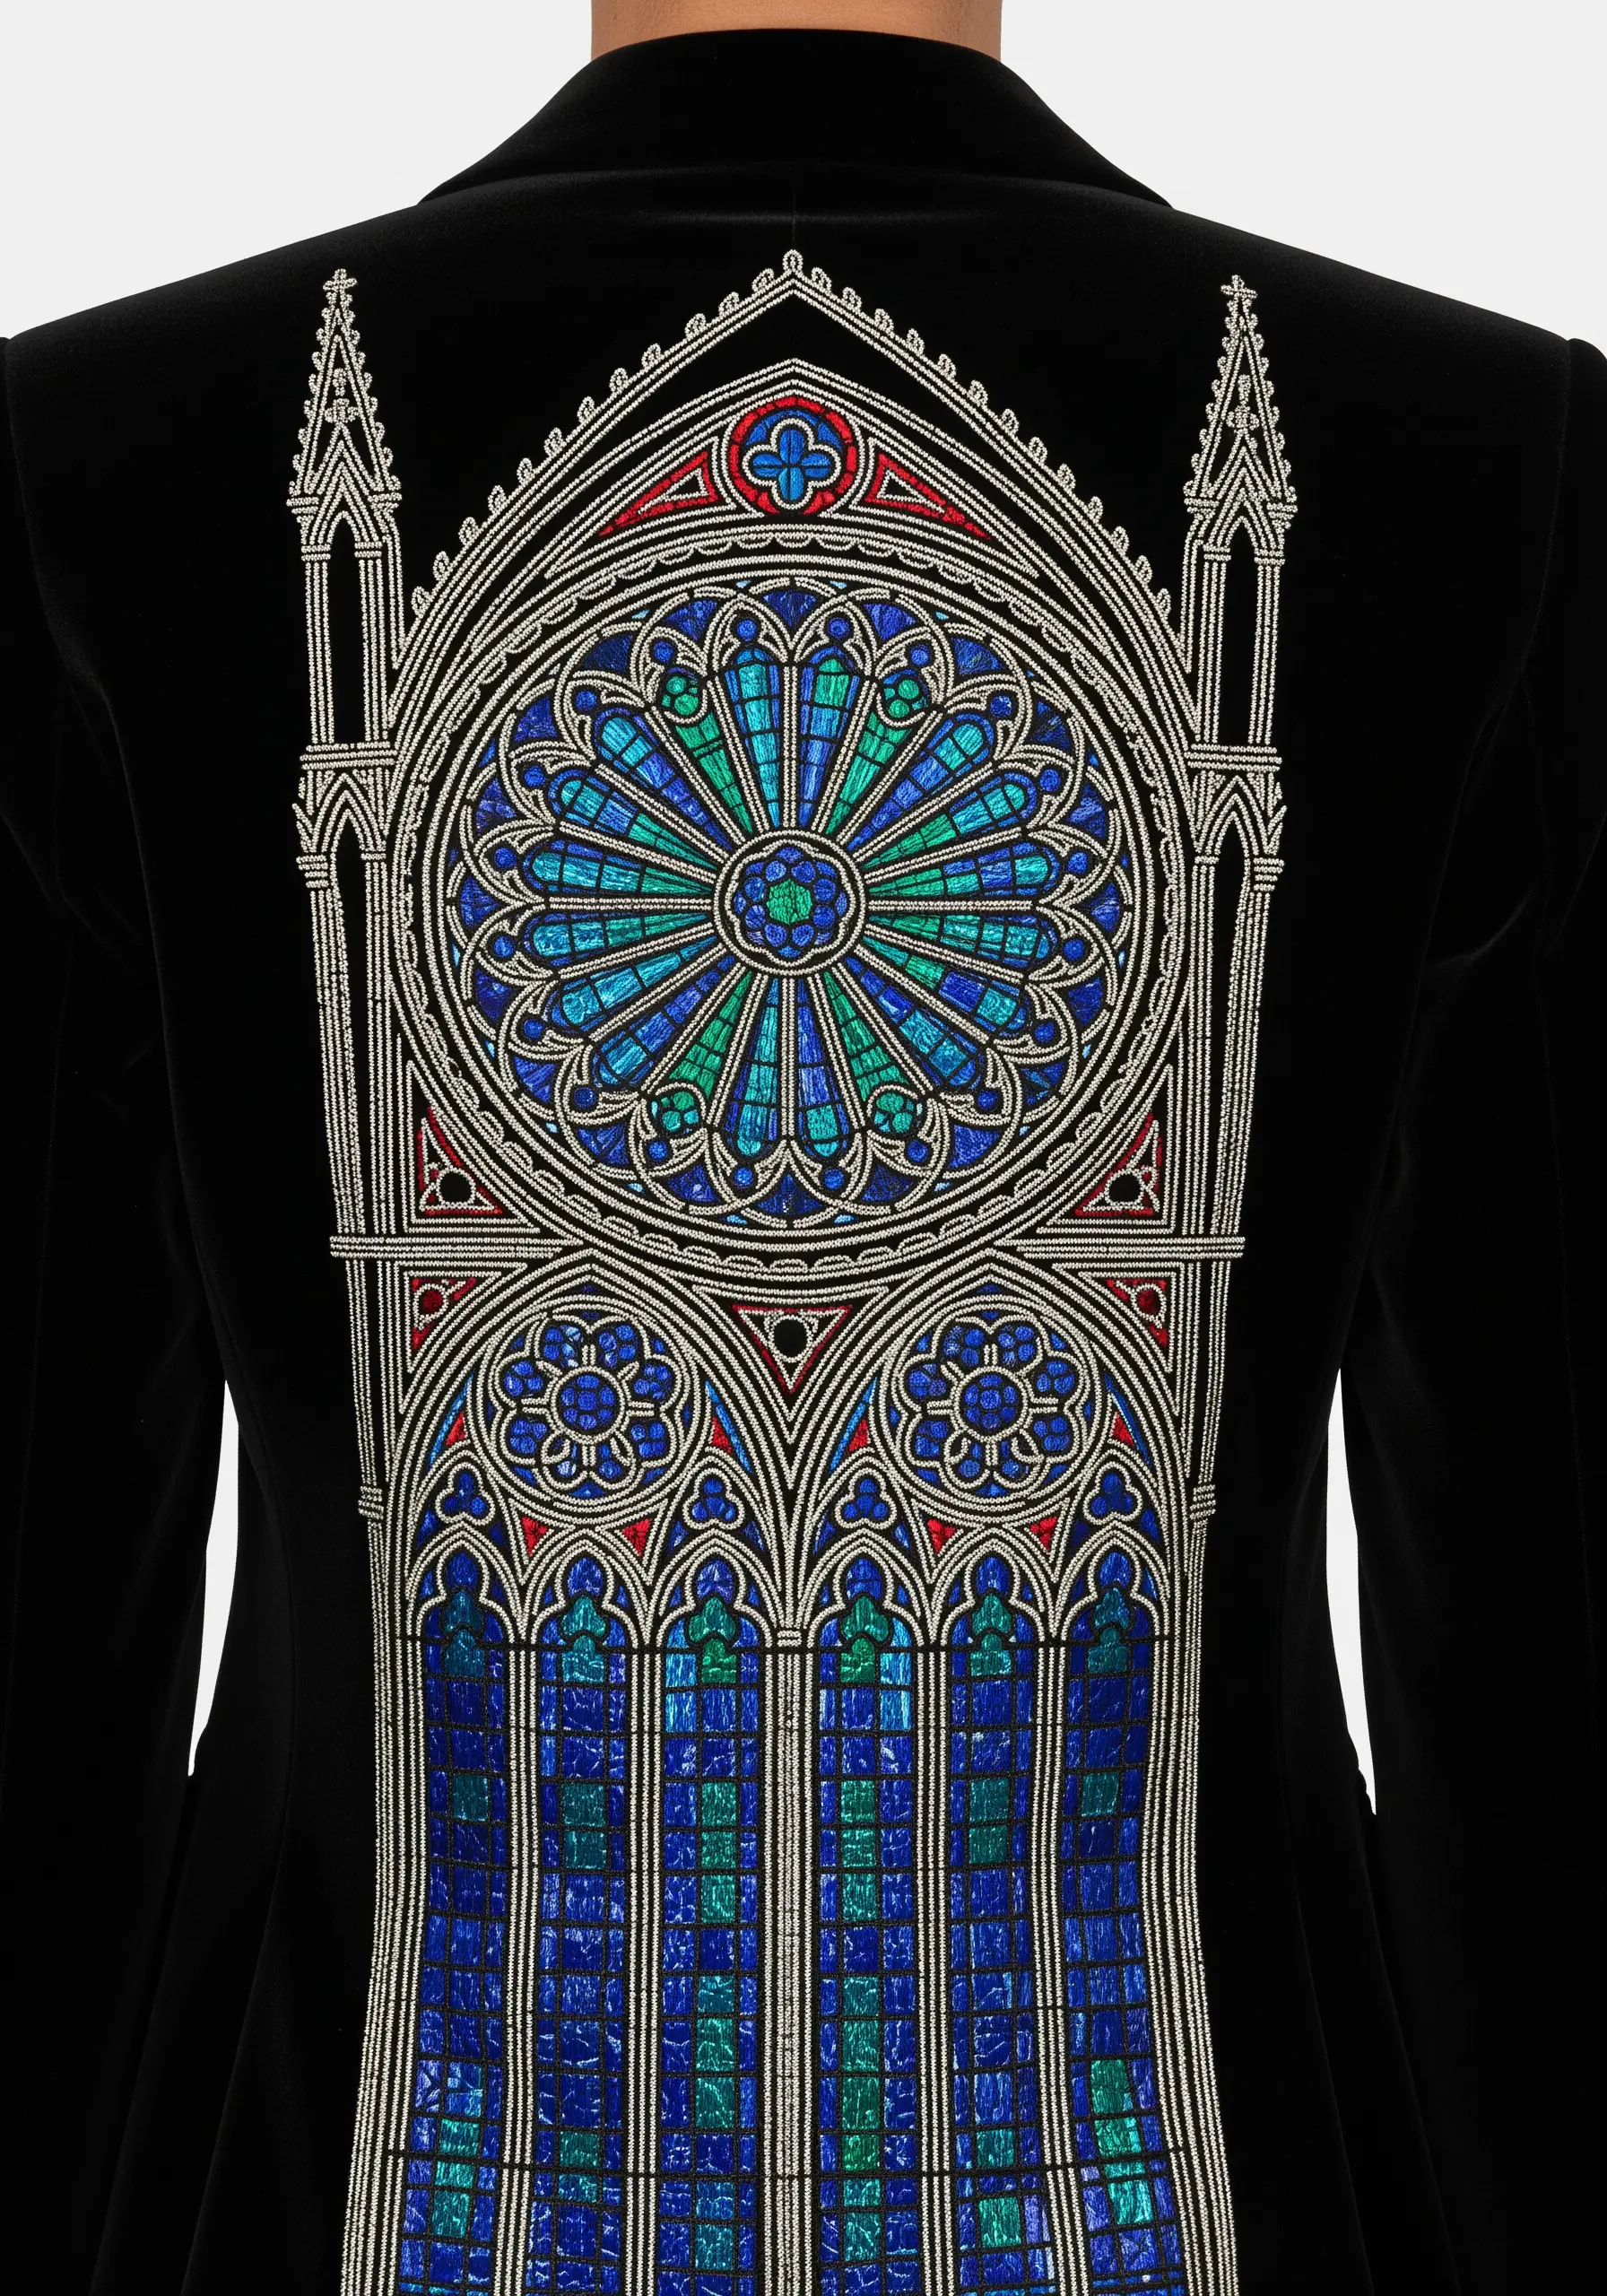
To replicate the look of stained glass, use a silver or pewter metallic thread for the architectural outlines, which mimic leading.
Instead of stitching directly with the stiff metallic thread, use a couching technique: lay the metallic thread on the surface and tack it down with a finer, matching grey thread for perfectly smooth curves.
Fill each colored section with dense, vertical satin stitches to emulate panes of lustrous glass.
On a plush fabric like velvet, the combination of gleaming metallic lines and rich, matte floss creates a breathtaking textural contrast that feels both historic and luxurious.
10. Neon Graffiti Lettering
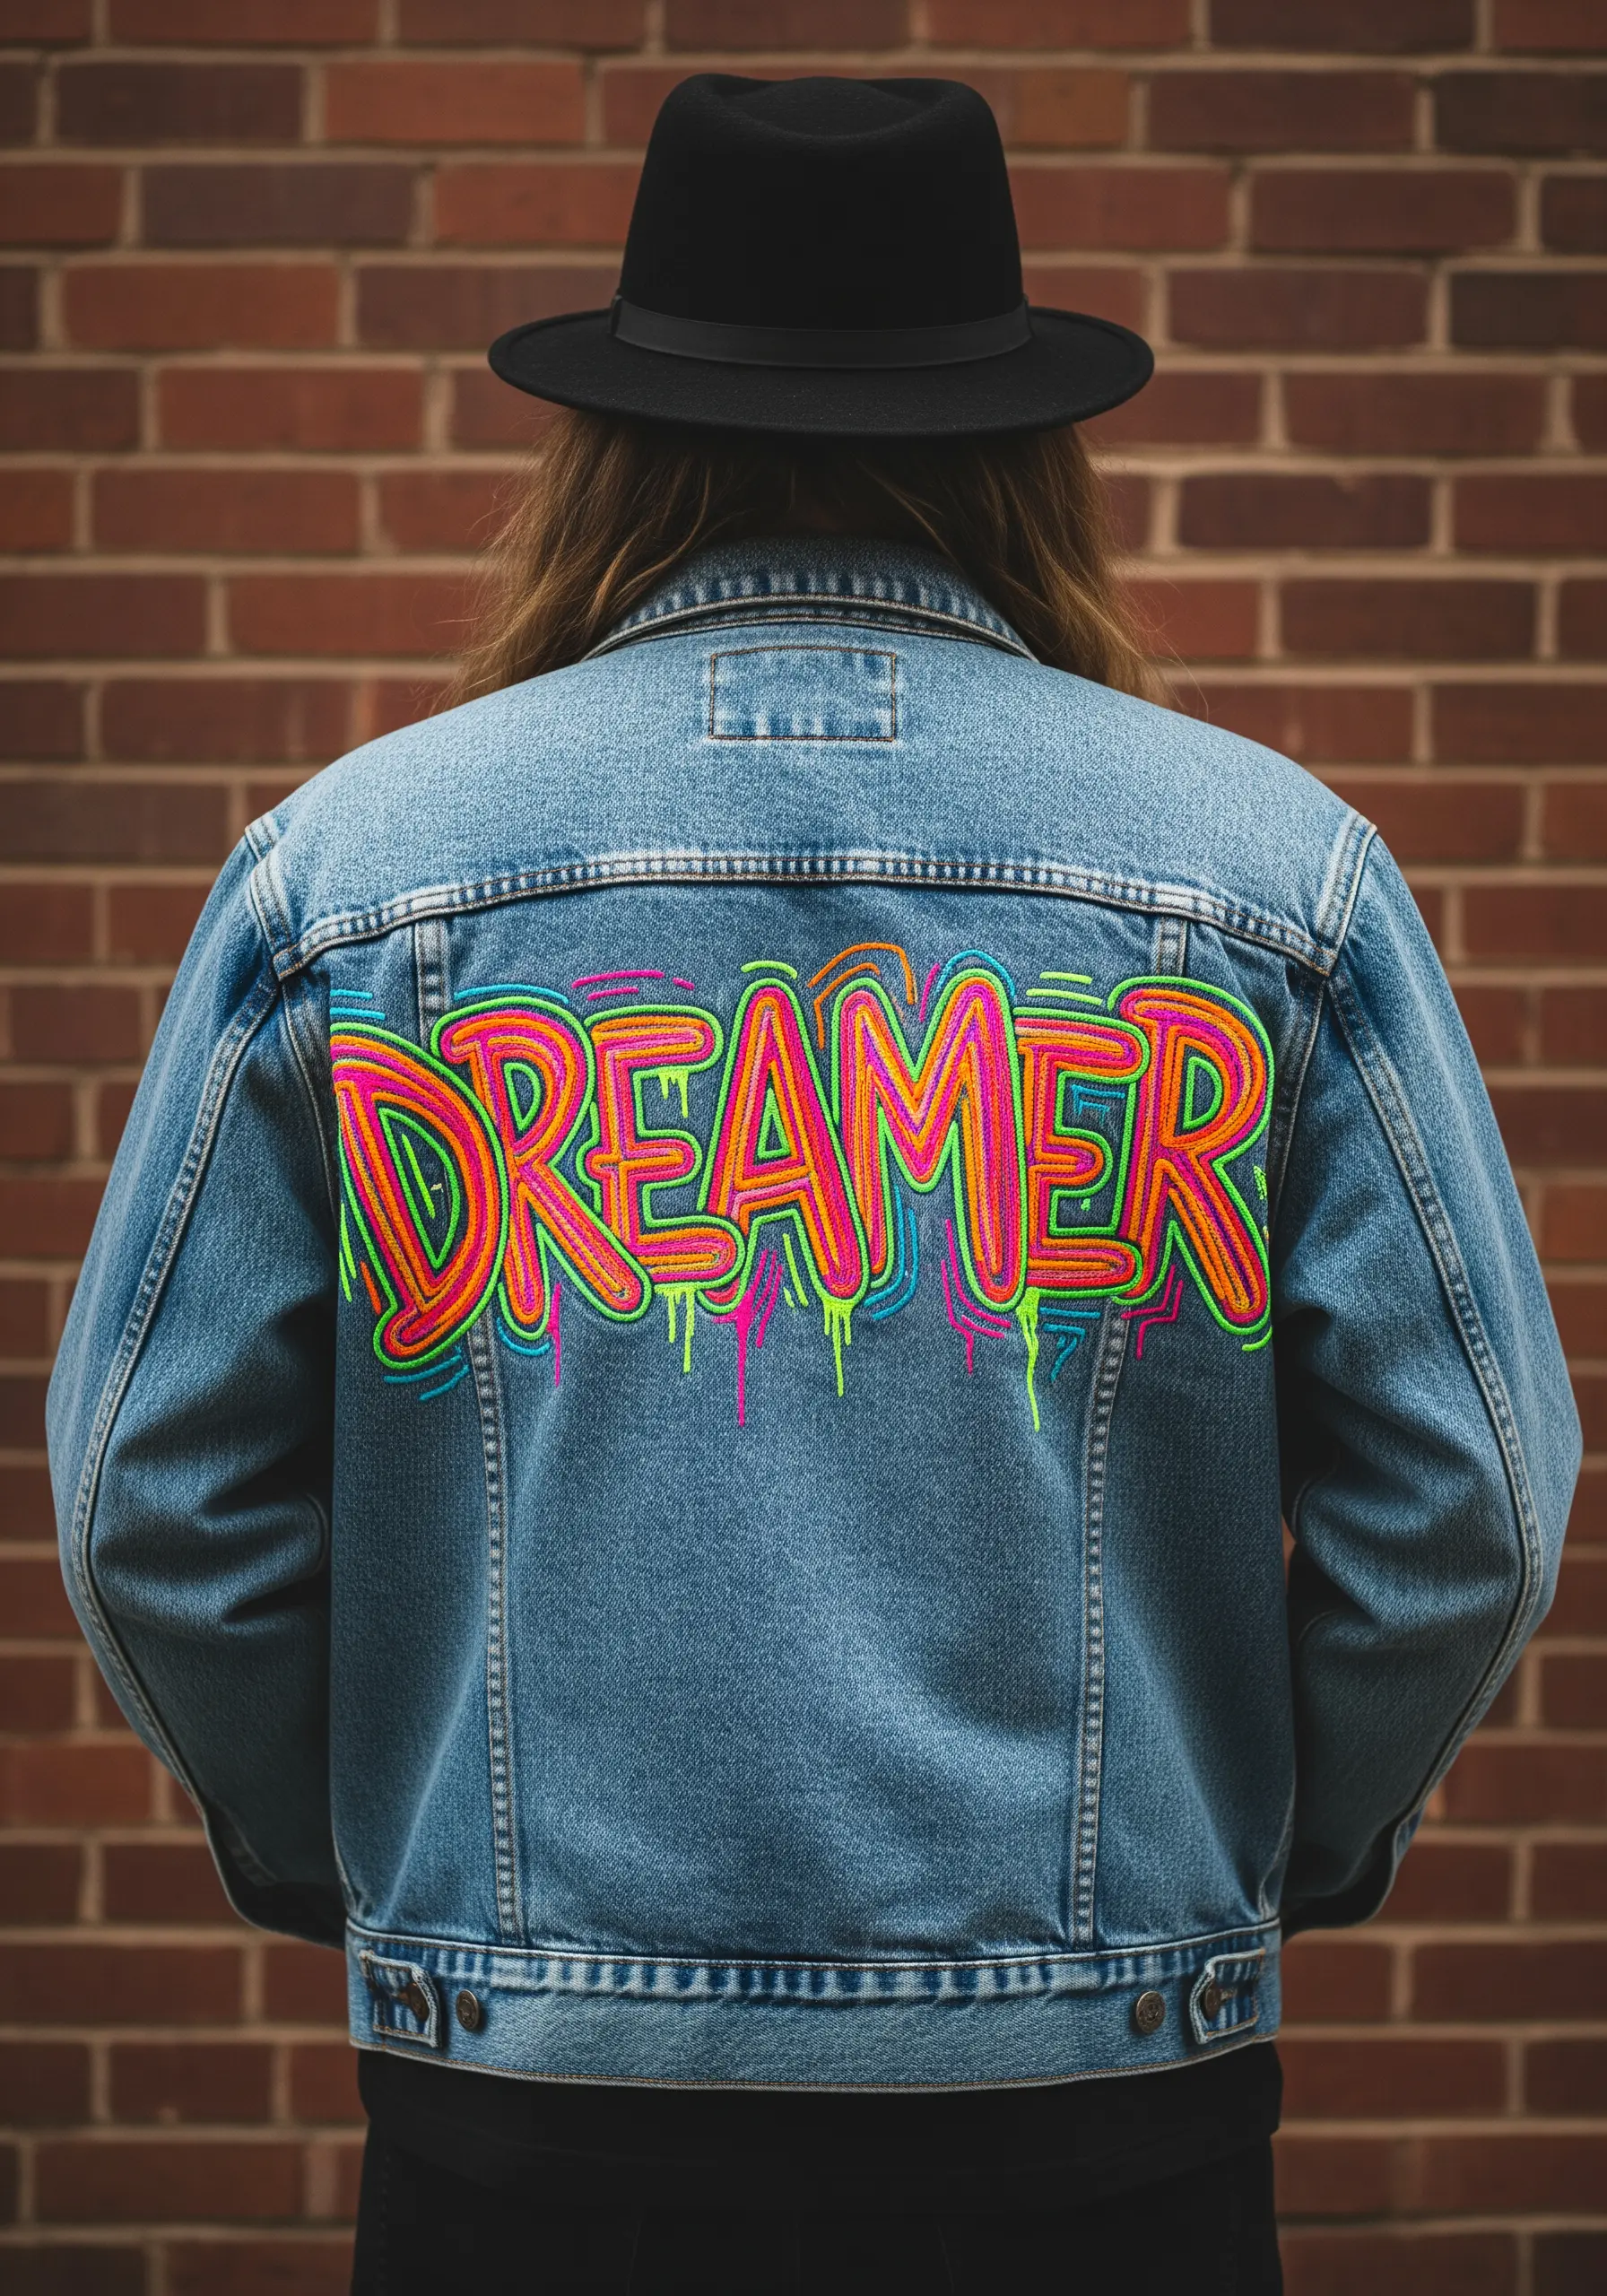
Achieve that authentic, spray-painted effect by choosing the most vibrant neon threads you can find.
Start by outlining your Graffiti Lettering with a crisp split stitch to create a defined edge, just like a graffiti artist would.
Fill the letters with a chaotic long-and-short stitch, intentionally blending and layering bright colors to create an energetic, uneven gradient.
The dripping paint effect is surprisingly simple: use single, long satin stitches that extend down from the base of the letters.
This layered approach is what gives the design its depth and rebellious, street-art vibe.
11. Thread-Painted Mountain Sunset
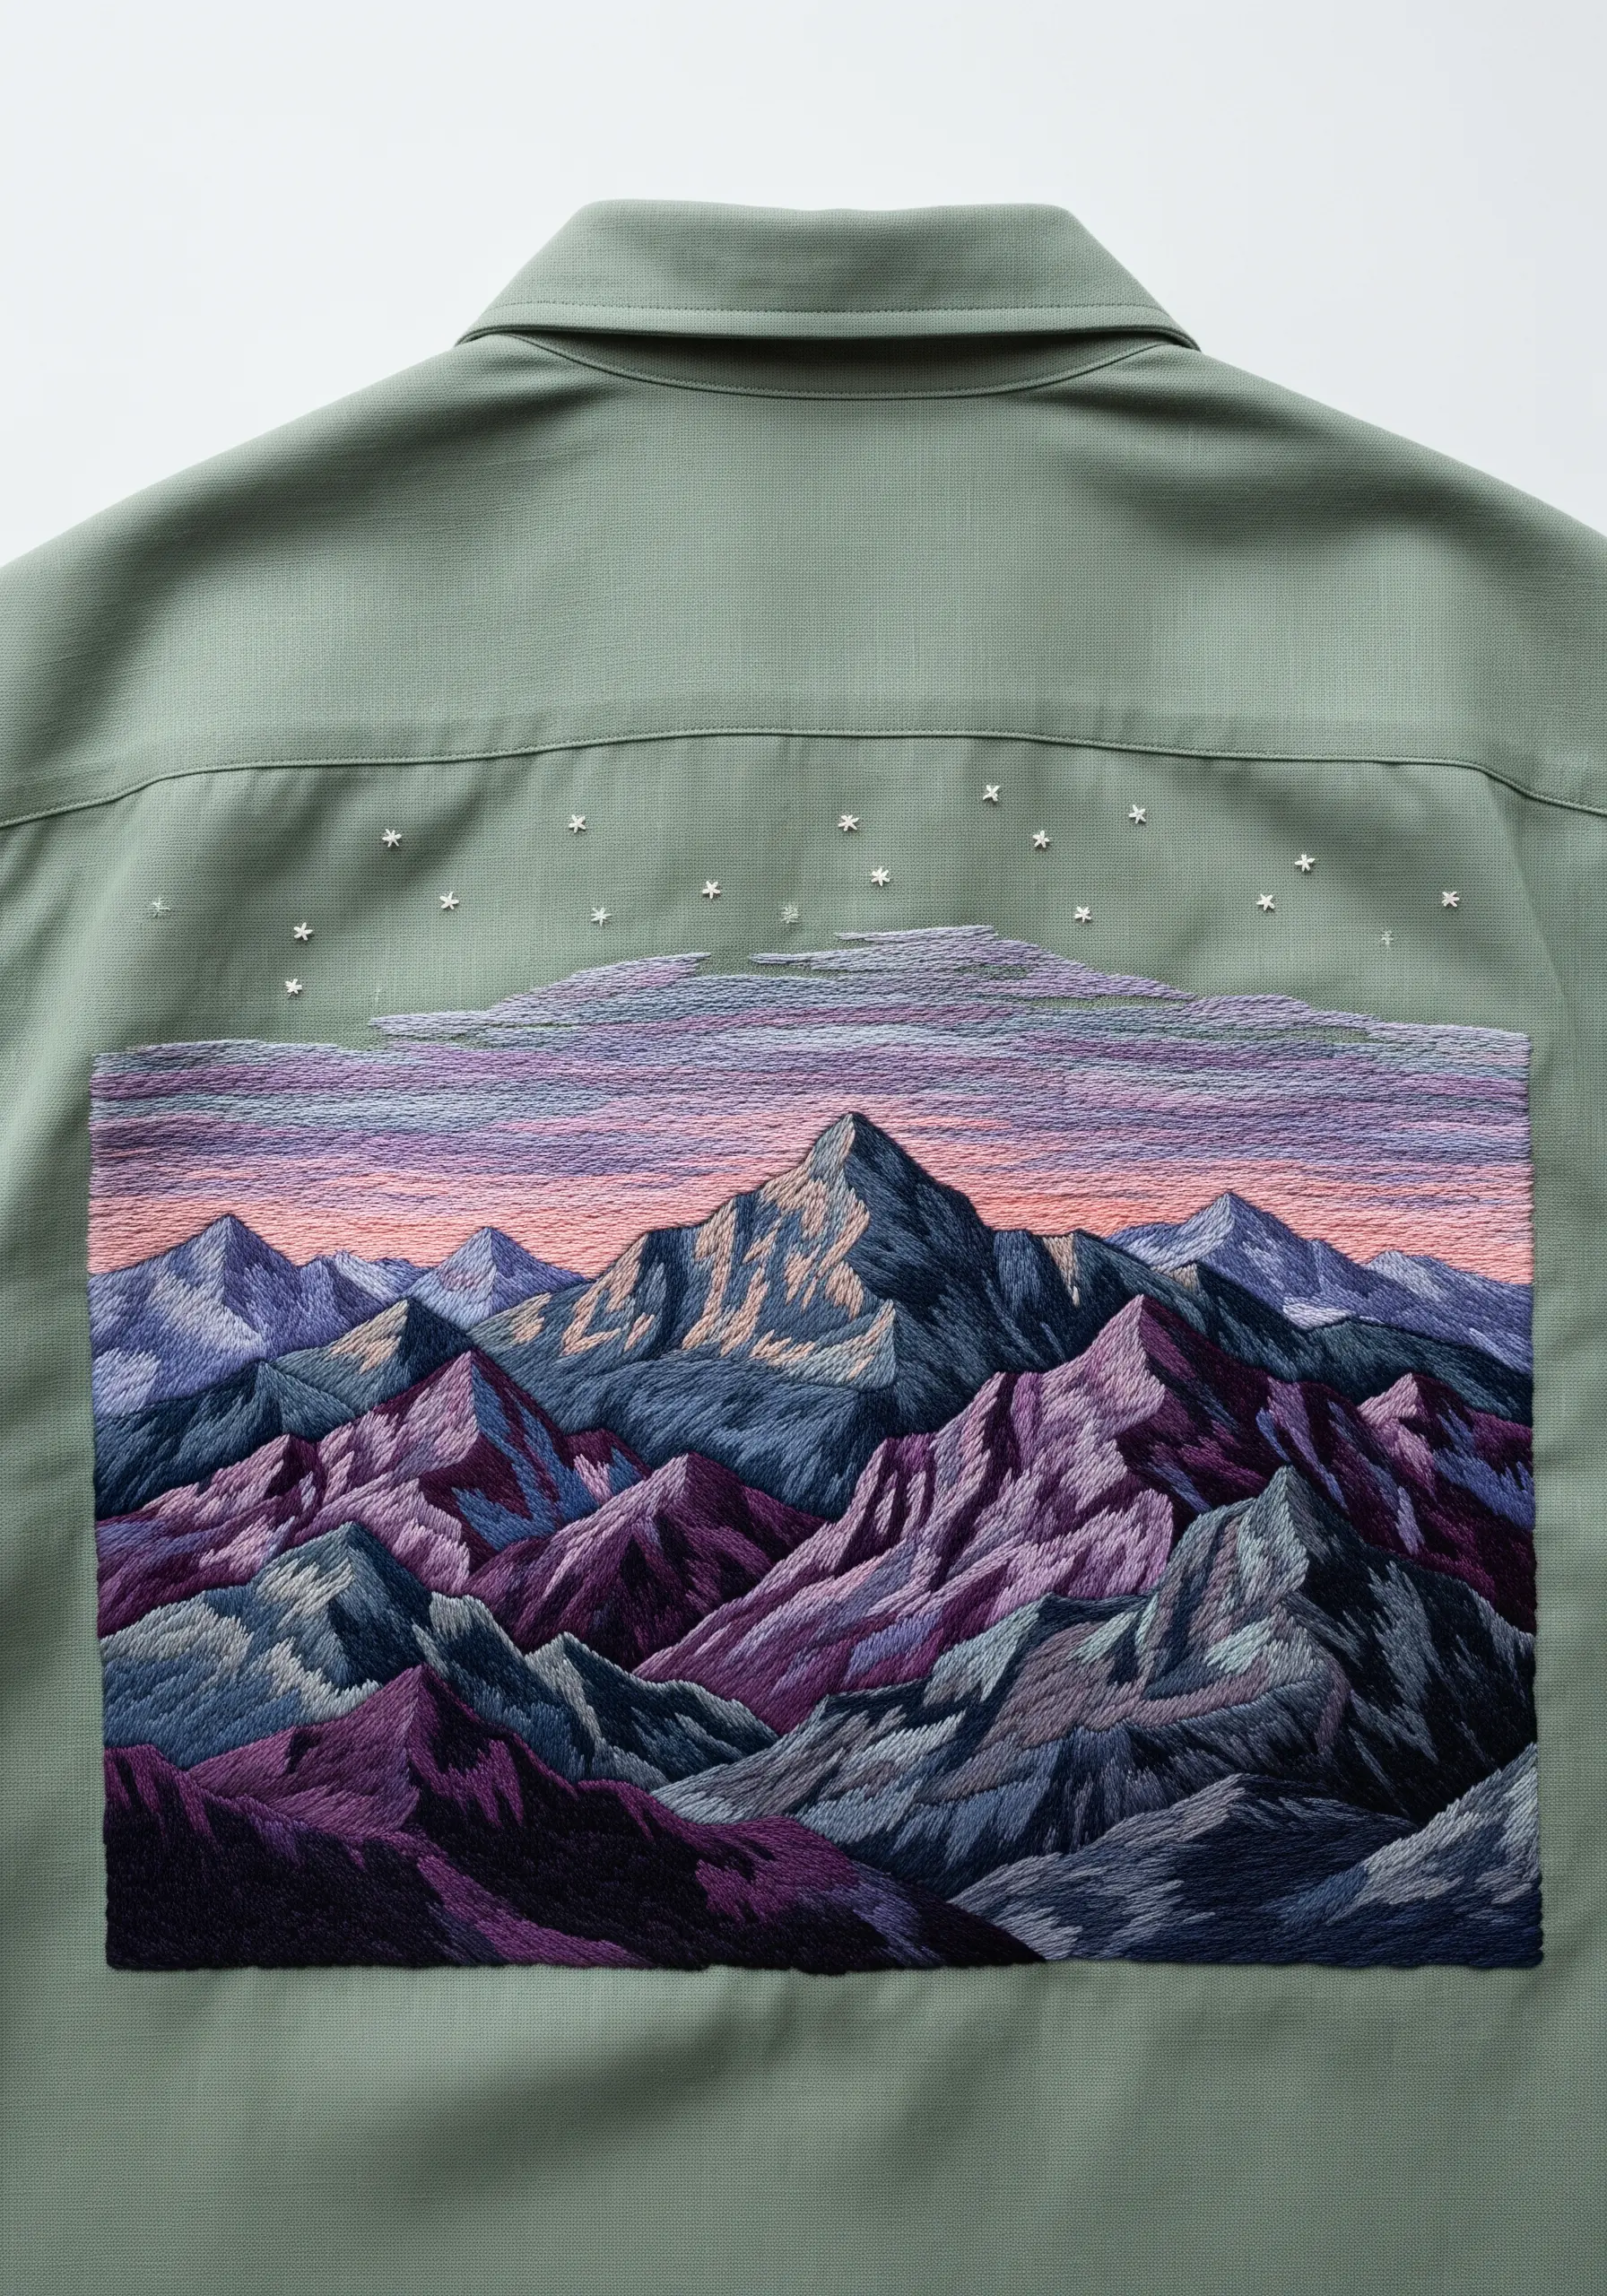
This painterly Thread-Painted Mountain Sunset is all about using your needle to follow the natural forms of the landscape.
Use a long-and-short stitch, varying the direction of your stitches to match the angles and shadows of the mountain peaks.
Create realistic depth by using darker threads for shadowed crevices and lighter shades for the sun-kissed ridges.
For the soft, blended sky, use single strands of floss in your needle and allow the pastel colors to mix organically.
A few tiny, scattered French knots or single straight stitches in white make for perfect, subtle stars.
12. Luminous Scarab Beetle with Gold Accents
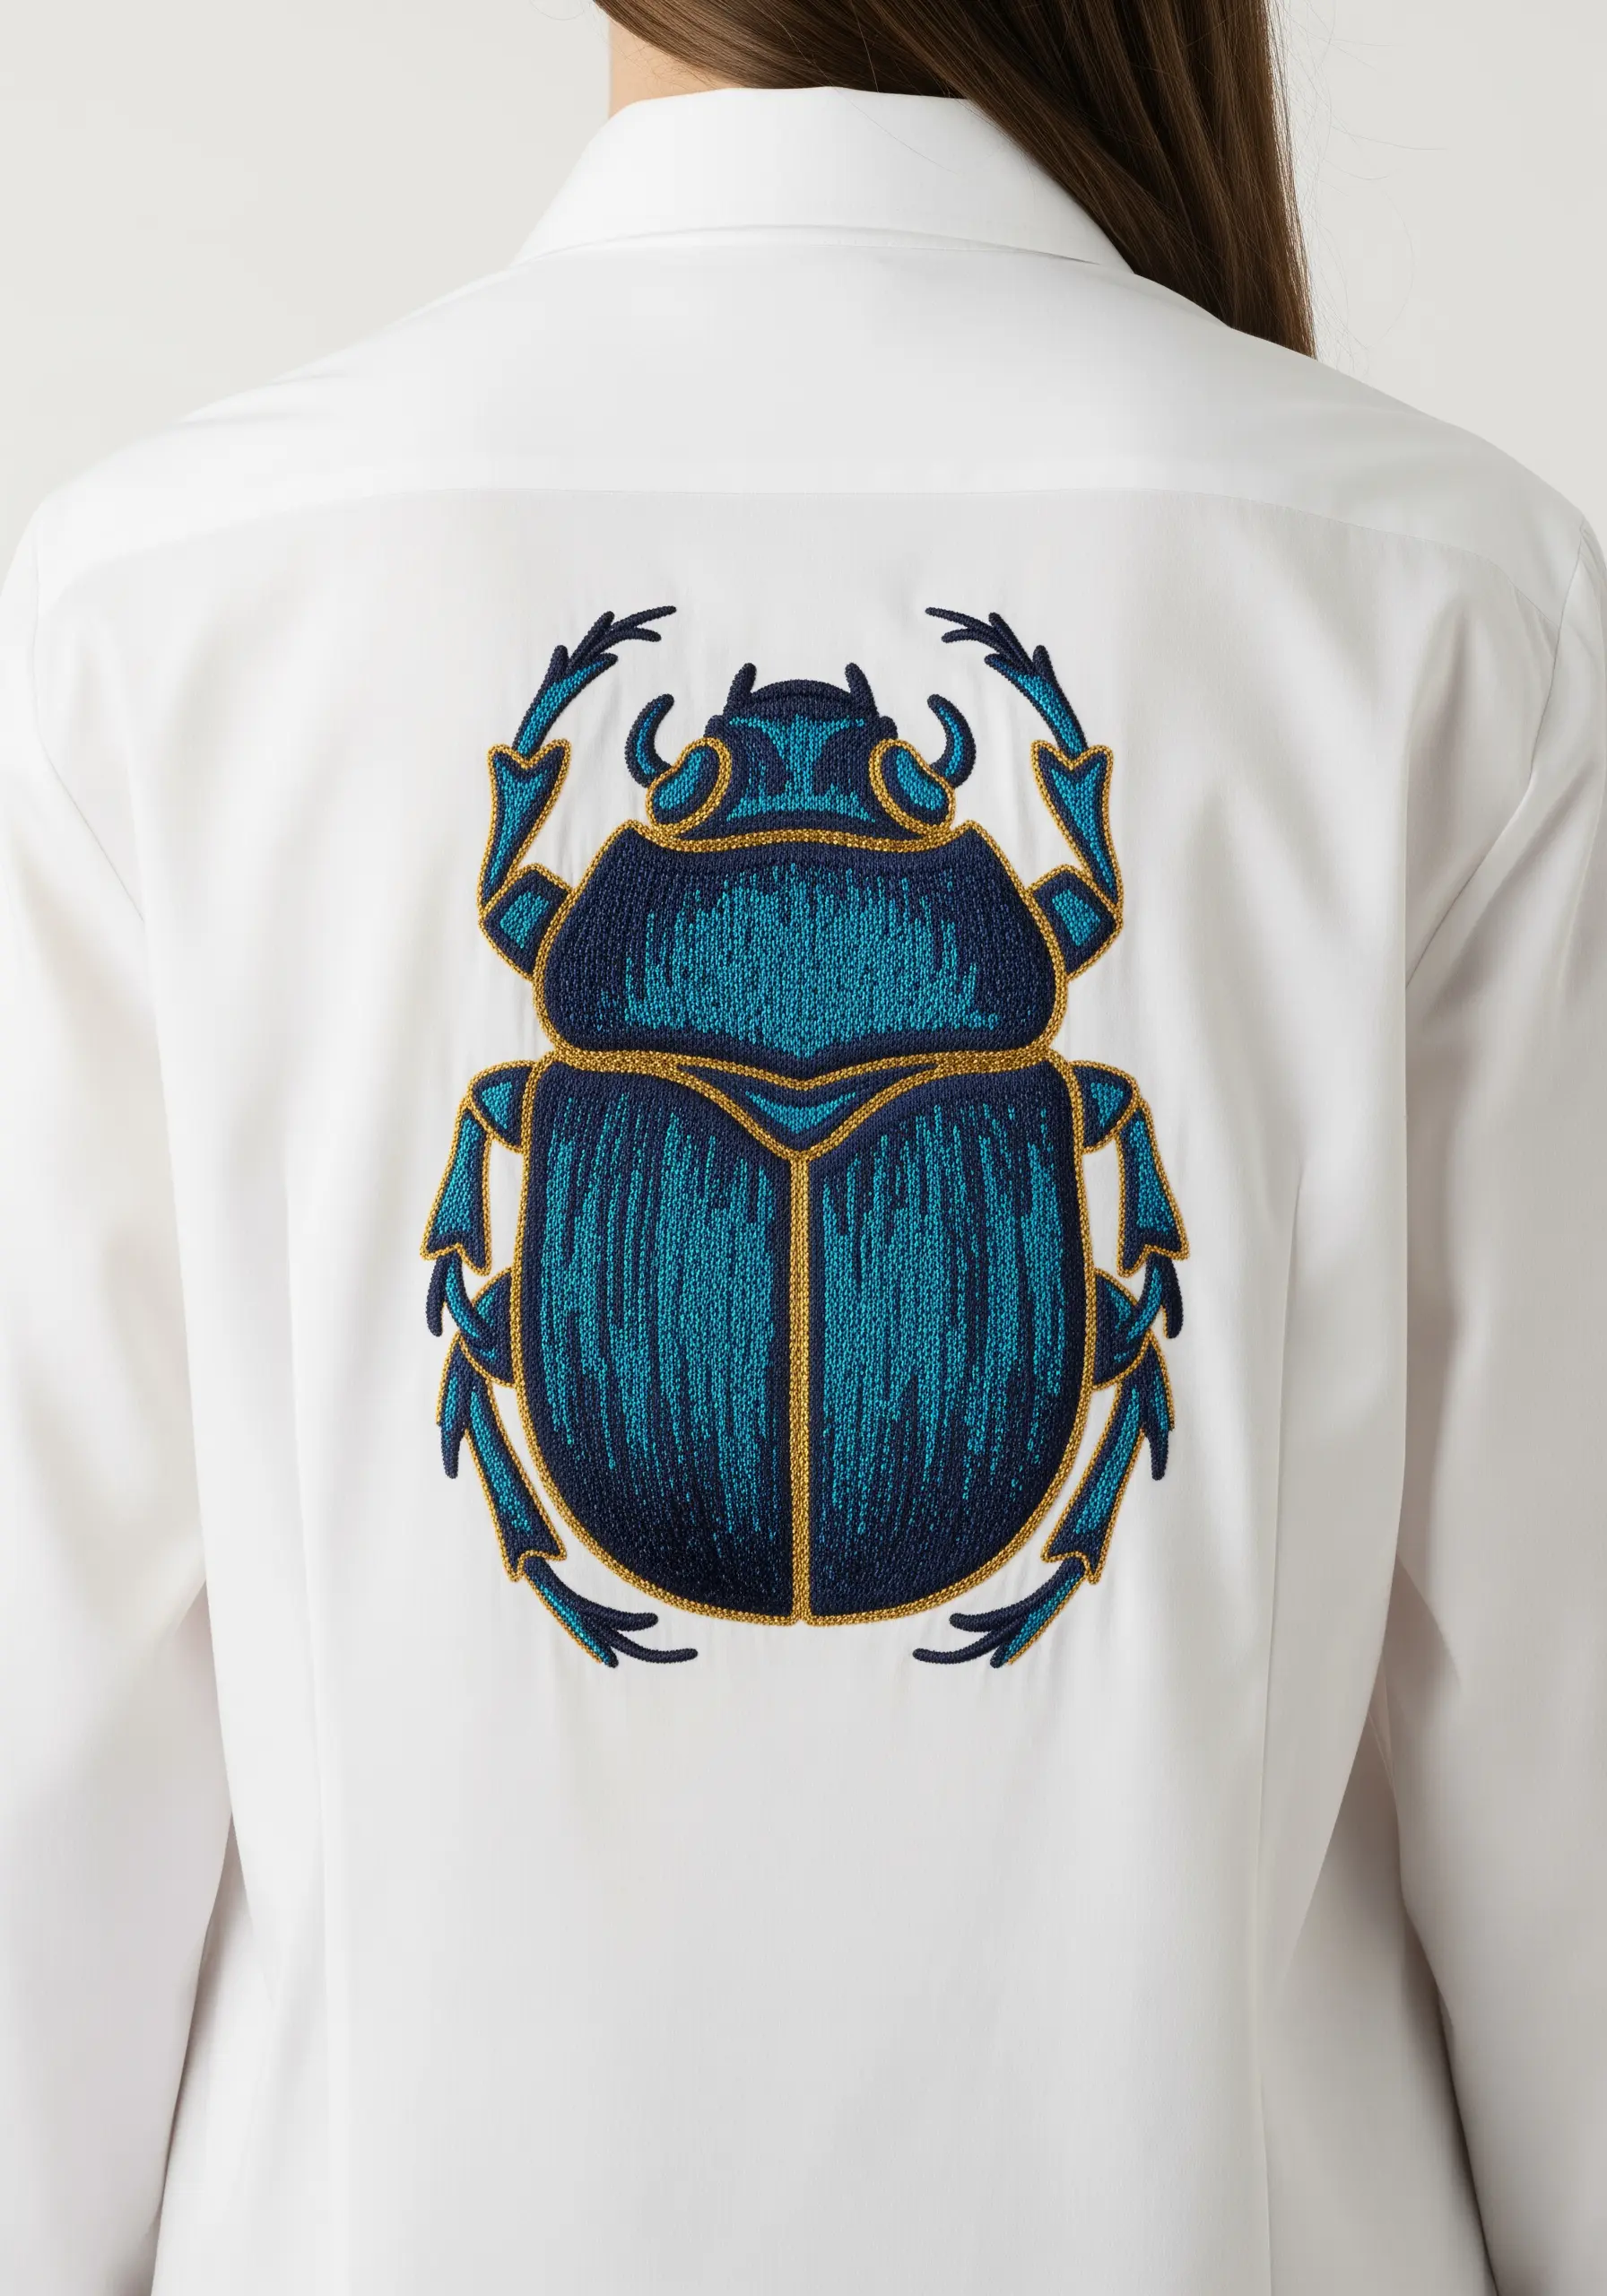
To create the beetle’s iridescent shell, choose a high-sheen rayon or silk thread in rich jewel tones like teal, sapphire, and emerald.
Fill the large sections of the shell with perfectly aligned vertical satin stitches; their smooth, reflective surface will mimic the glossy exoskeleton of a real beetle.
The sharp, clean outline is best achieved by couching a gold metallic thread, which gives you precise control over curves and angles.
This combination of lustrous color and sharp Gold Accents transforms the design into a precious artifact against the crisp white fabric.
13. Panther in a Tropical Jungle
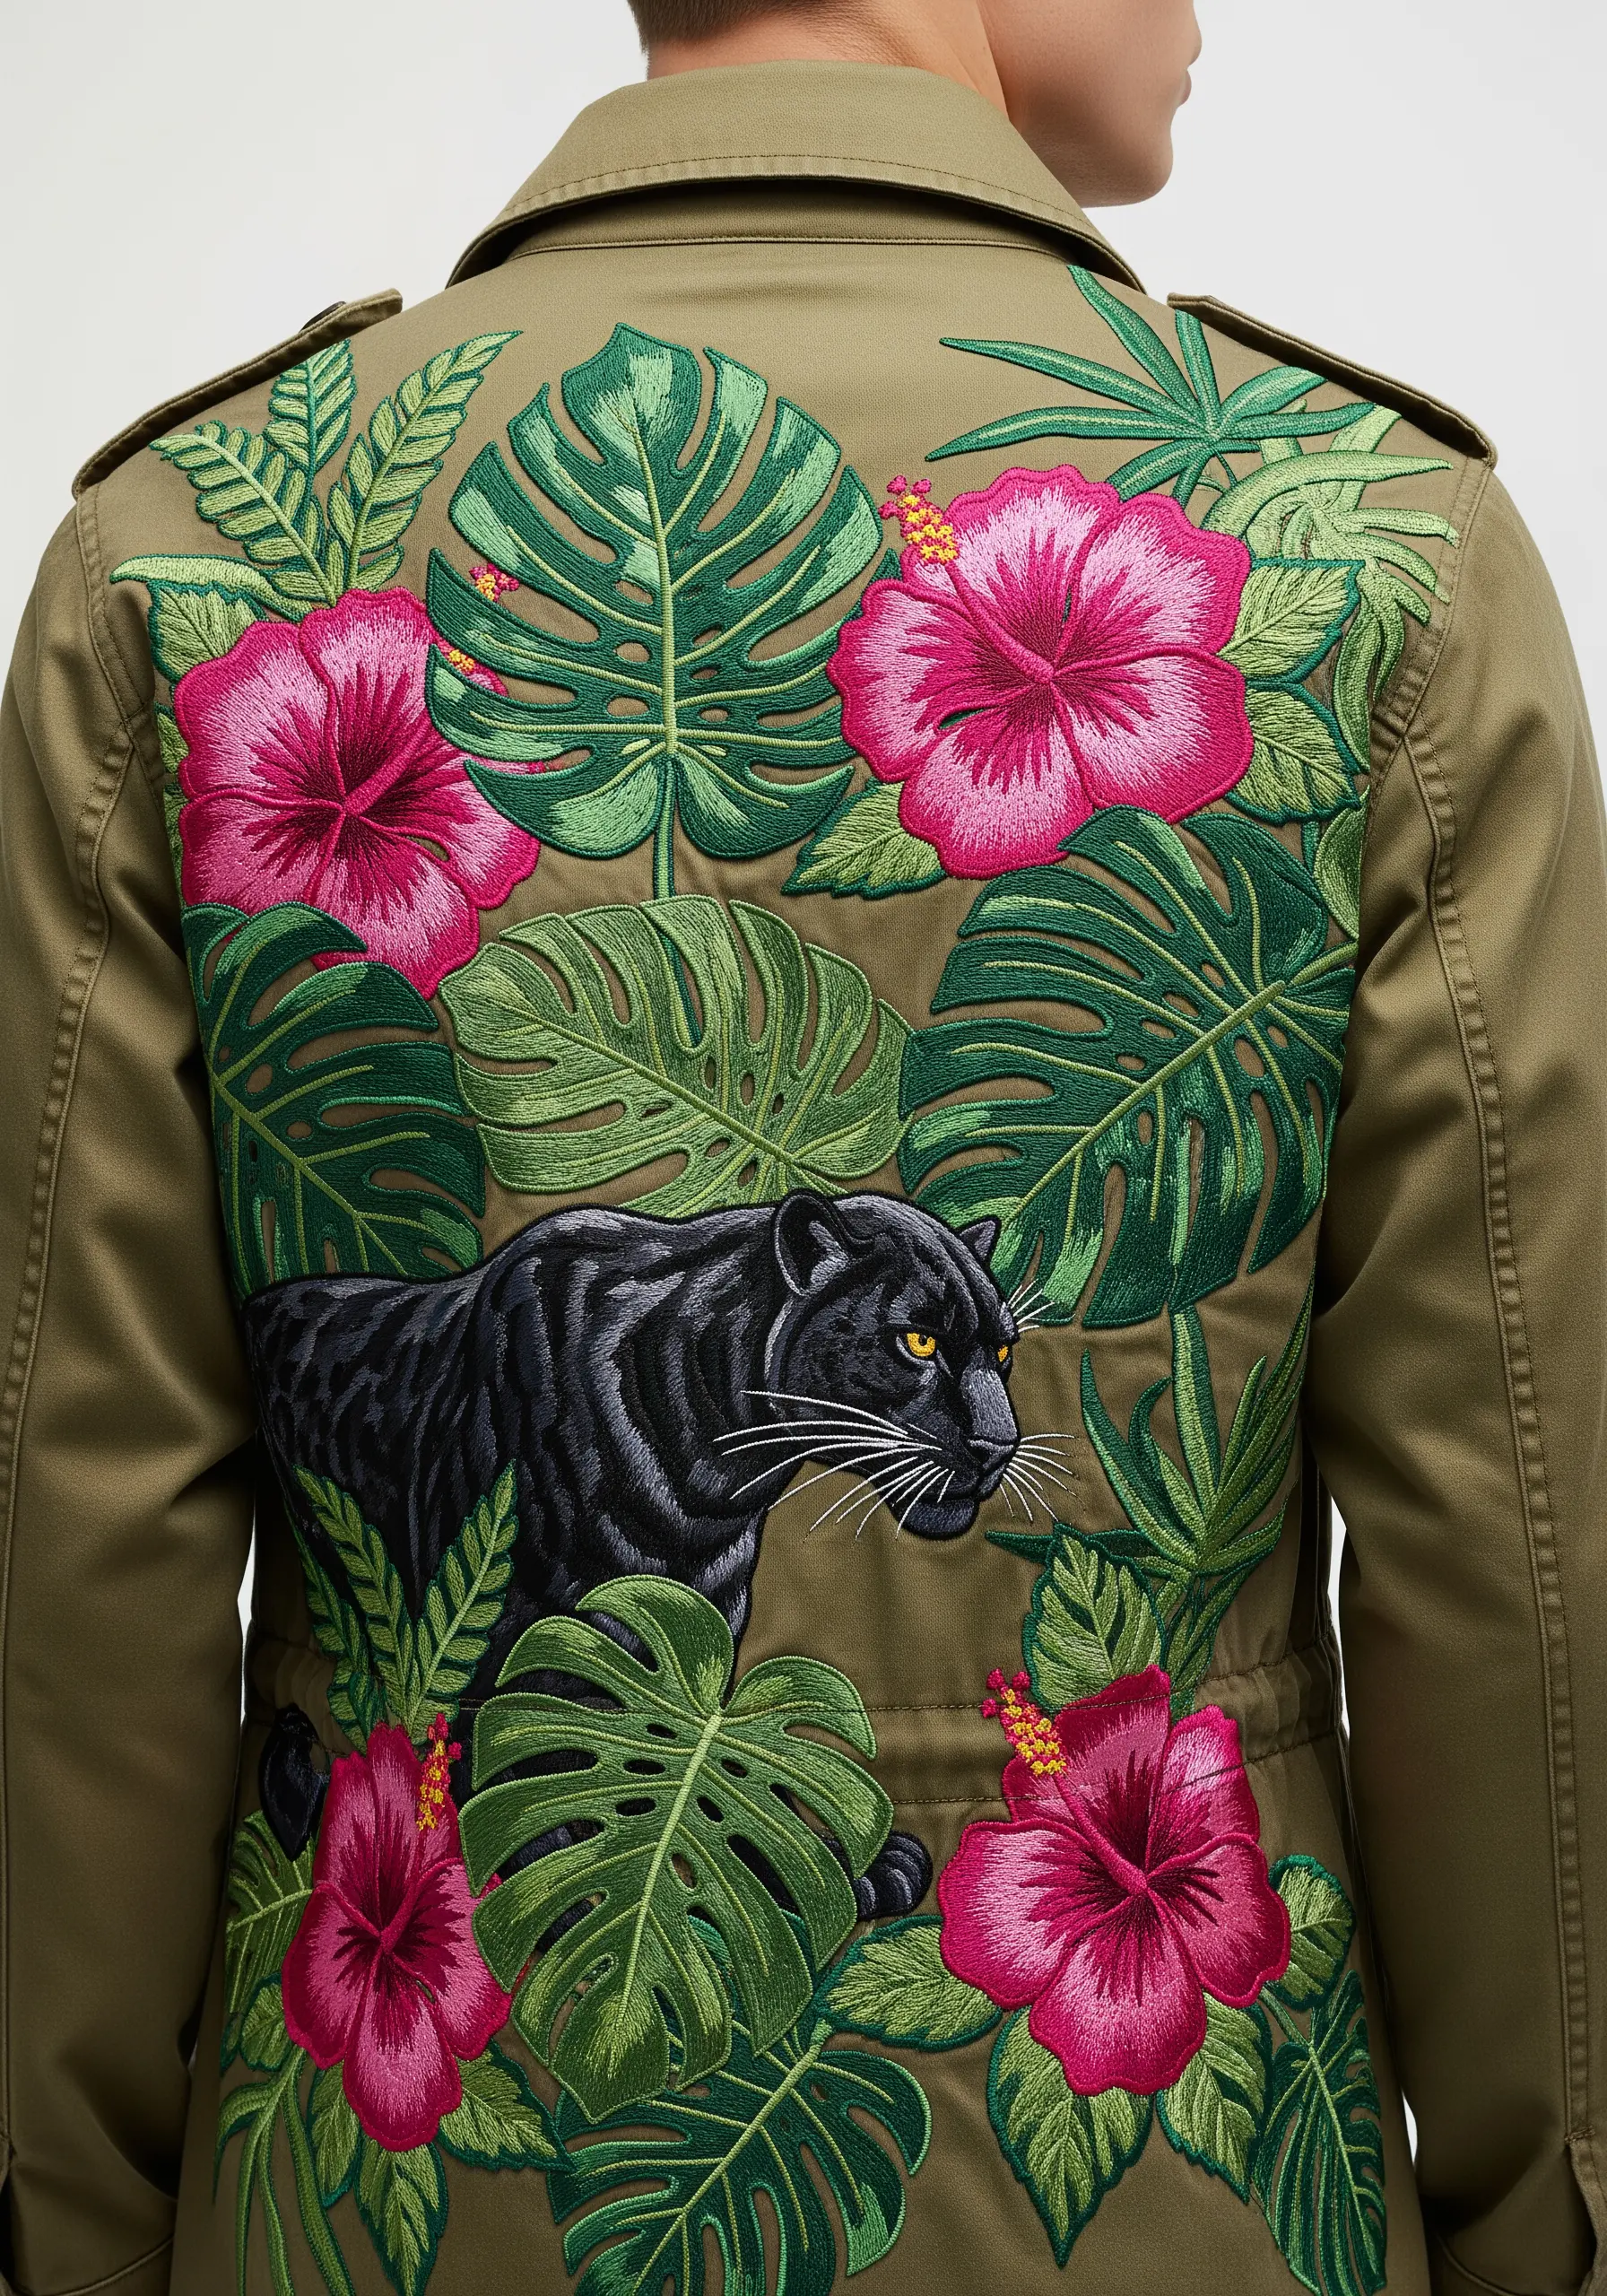
The key to a lush, dense-looking jungle is layering. Always stitch the elements in the background first, like distant leaves, before adding the foreground botanicals.
Use a fishbone stitch for the Monstera leaves to create their characteristic central vein and texture in one go.
For the panther, vary the direction of your black and grey satin stitches to simulate the way light hits its muscular form, creating a subtle sheen.
This strategic layering transforms a flat surface into a deep, immersive Tropical Jungle scene.
14. Minimalist Solar System with Textural Planets
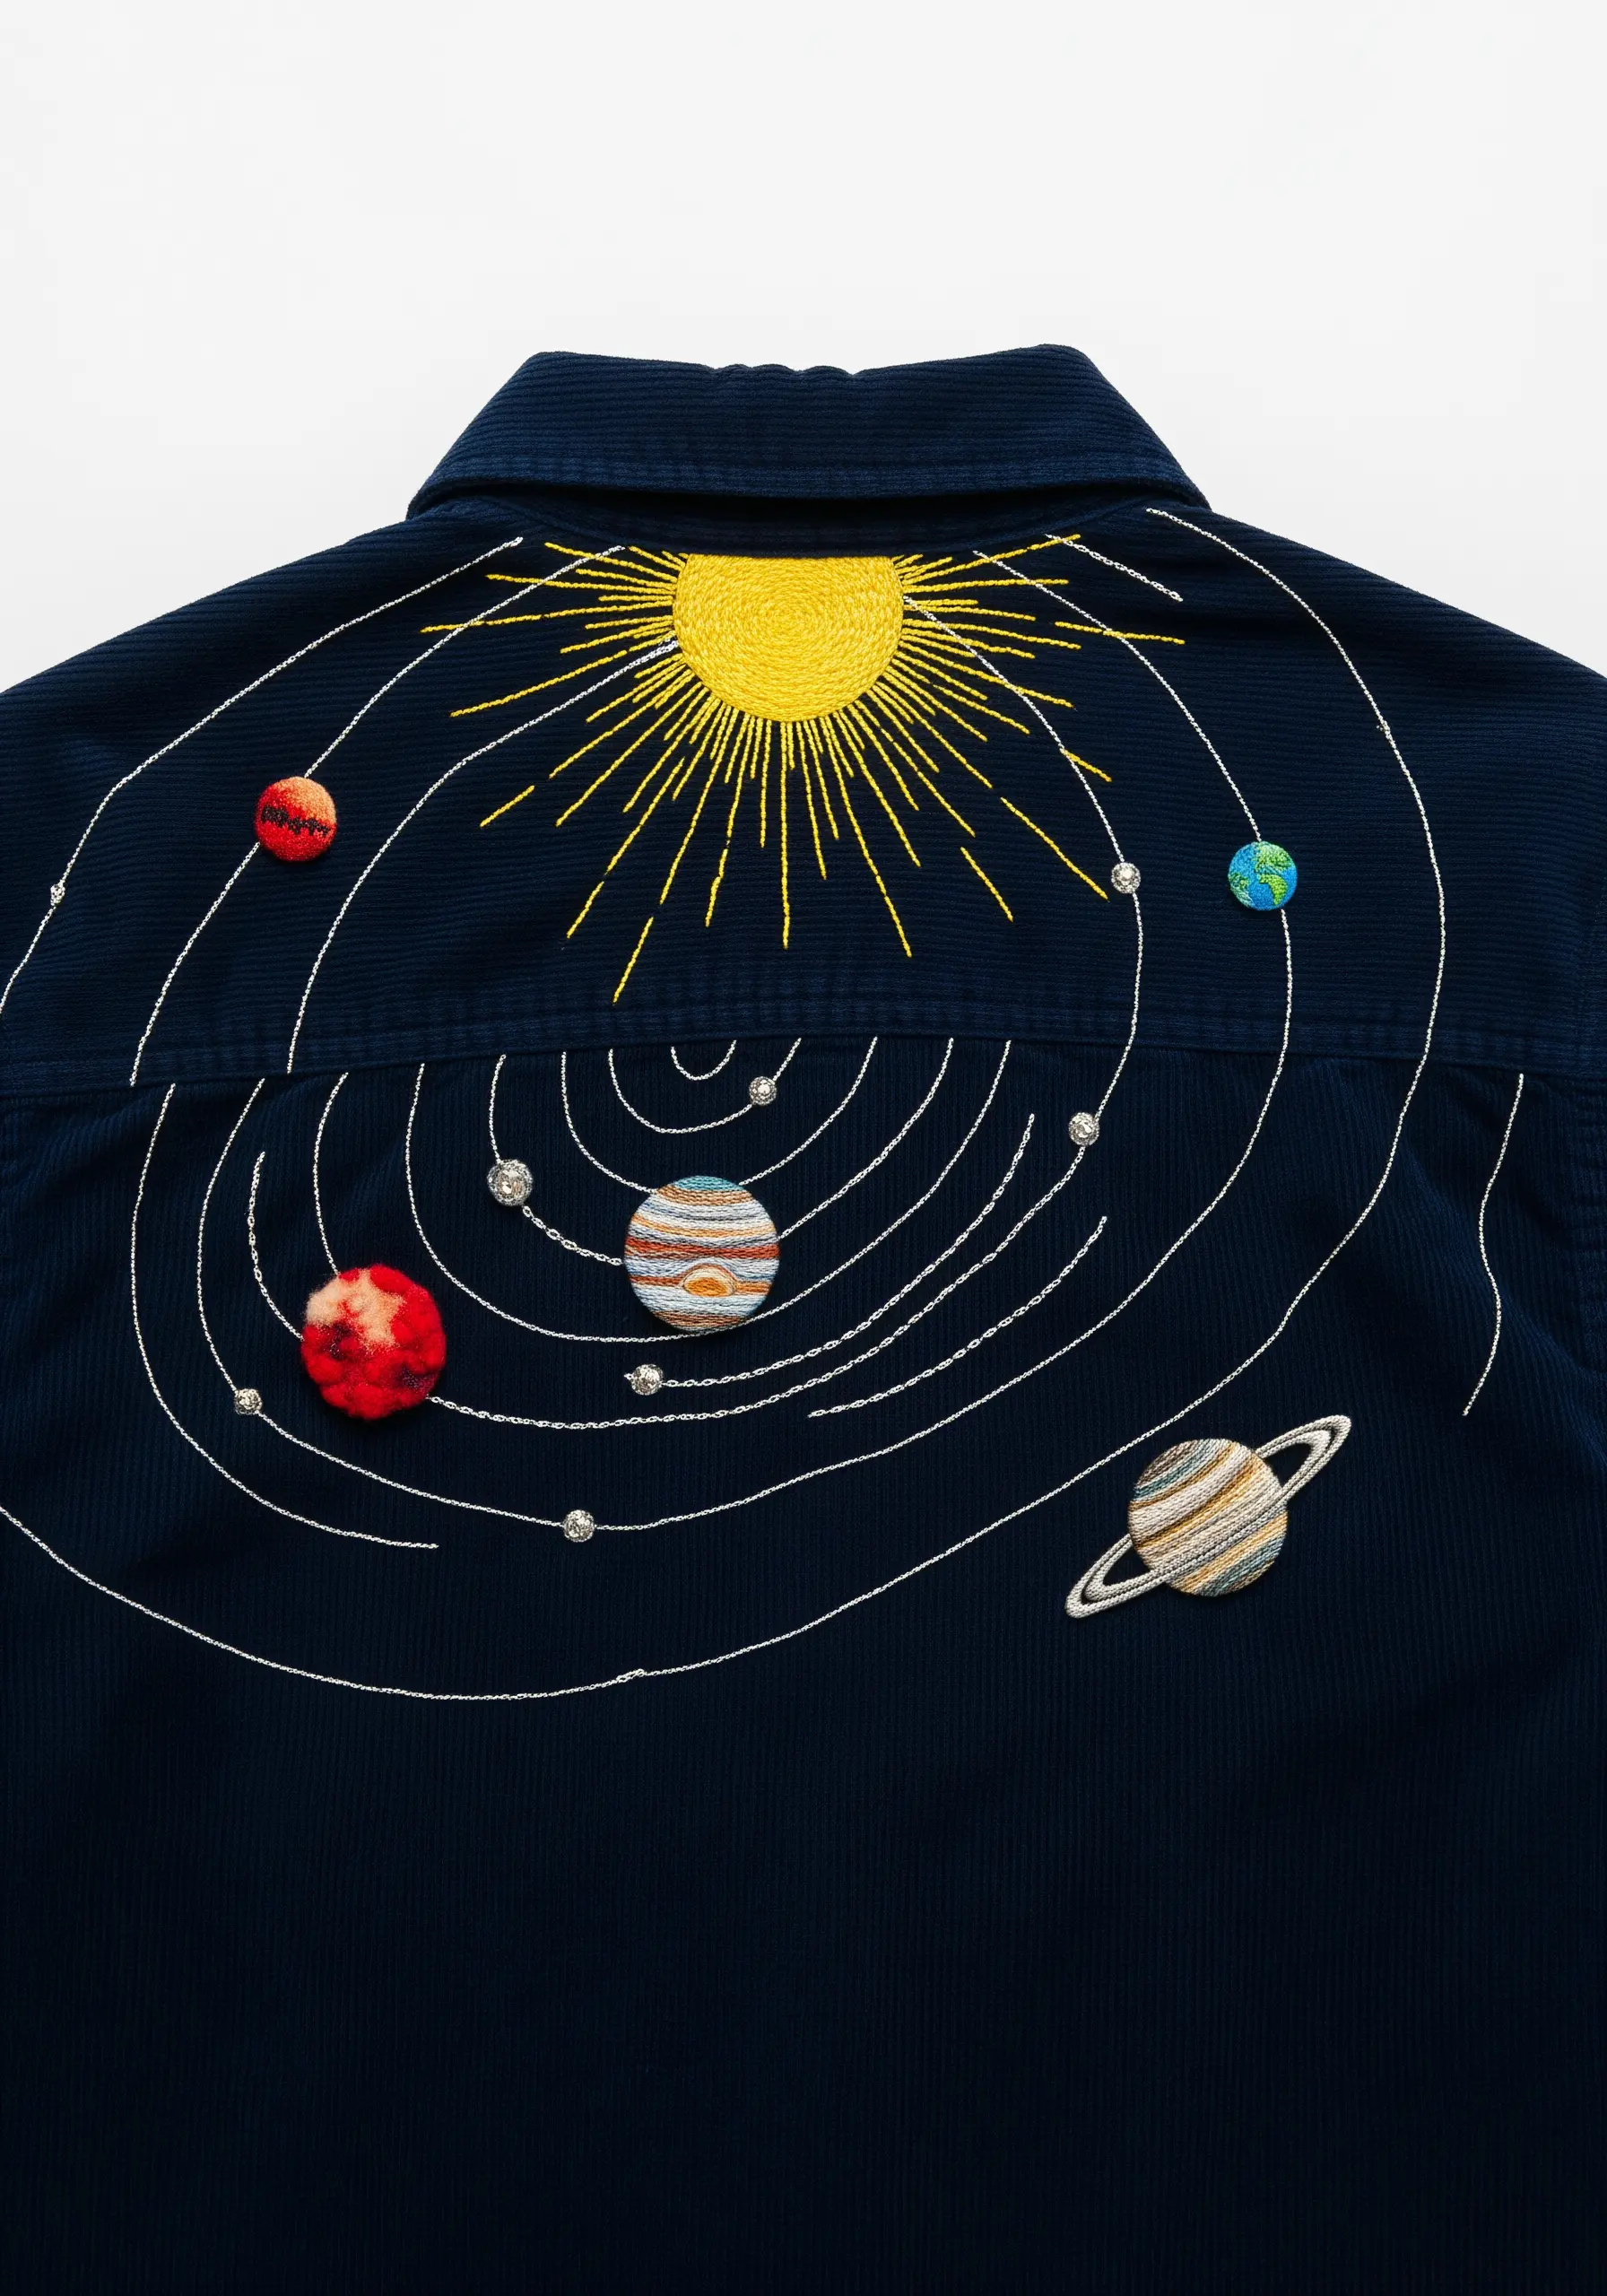
This design is a beautiful exercise in balancing clean lines with rich texture.
Use a simple, neat backstitch for the planetary orbits to keep the lines smooth and graphic against the dark corduroy.
Give each planet a unique personality by using a different stitch: dense French knots for a cratered texture, a woven wheel for a swirled gas giant, or smooth satin stitch for a solid look.
A few strategically placed metallic threads or tiny seed beads within the orbits will add a subtle sparkle, representing asteroid belts or distant stars.
This Minimalist Solar System proves that thoughtful stitch choice is more impactful than complex color palettes.
15. One-Line Portrait with a Pop of Color
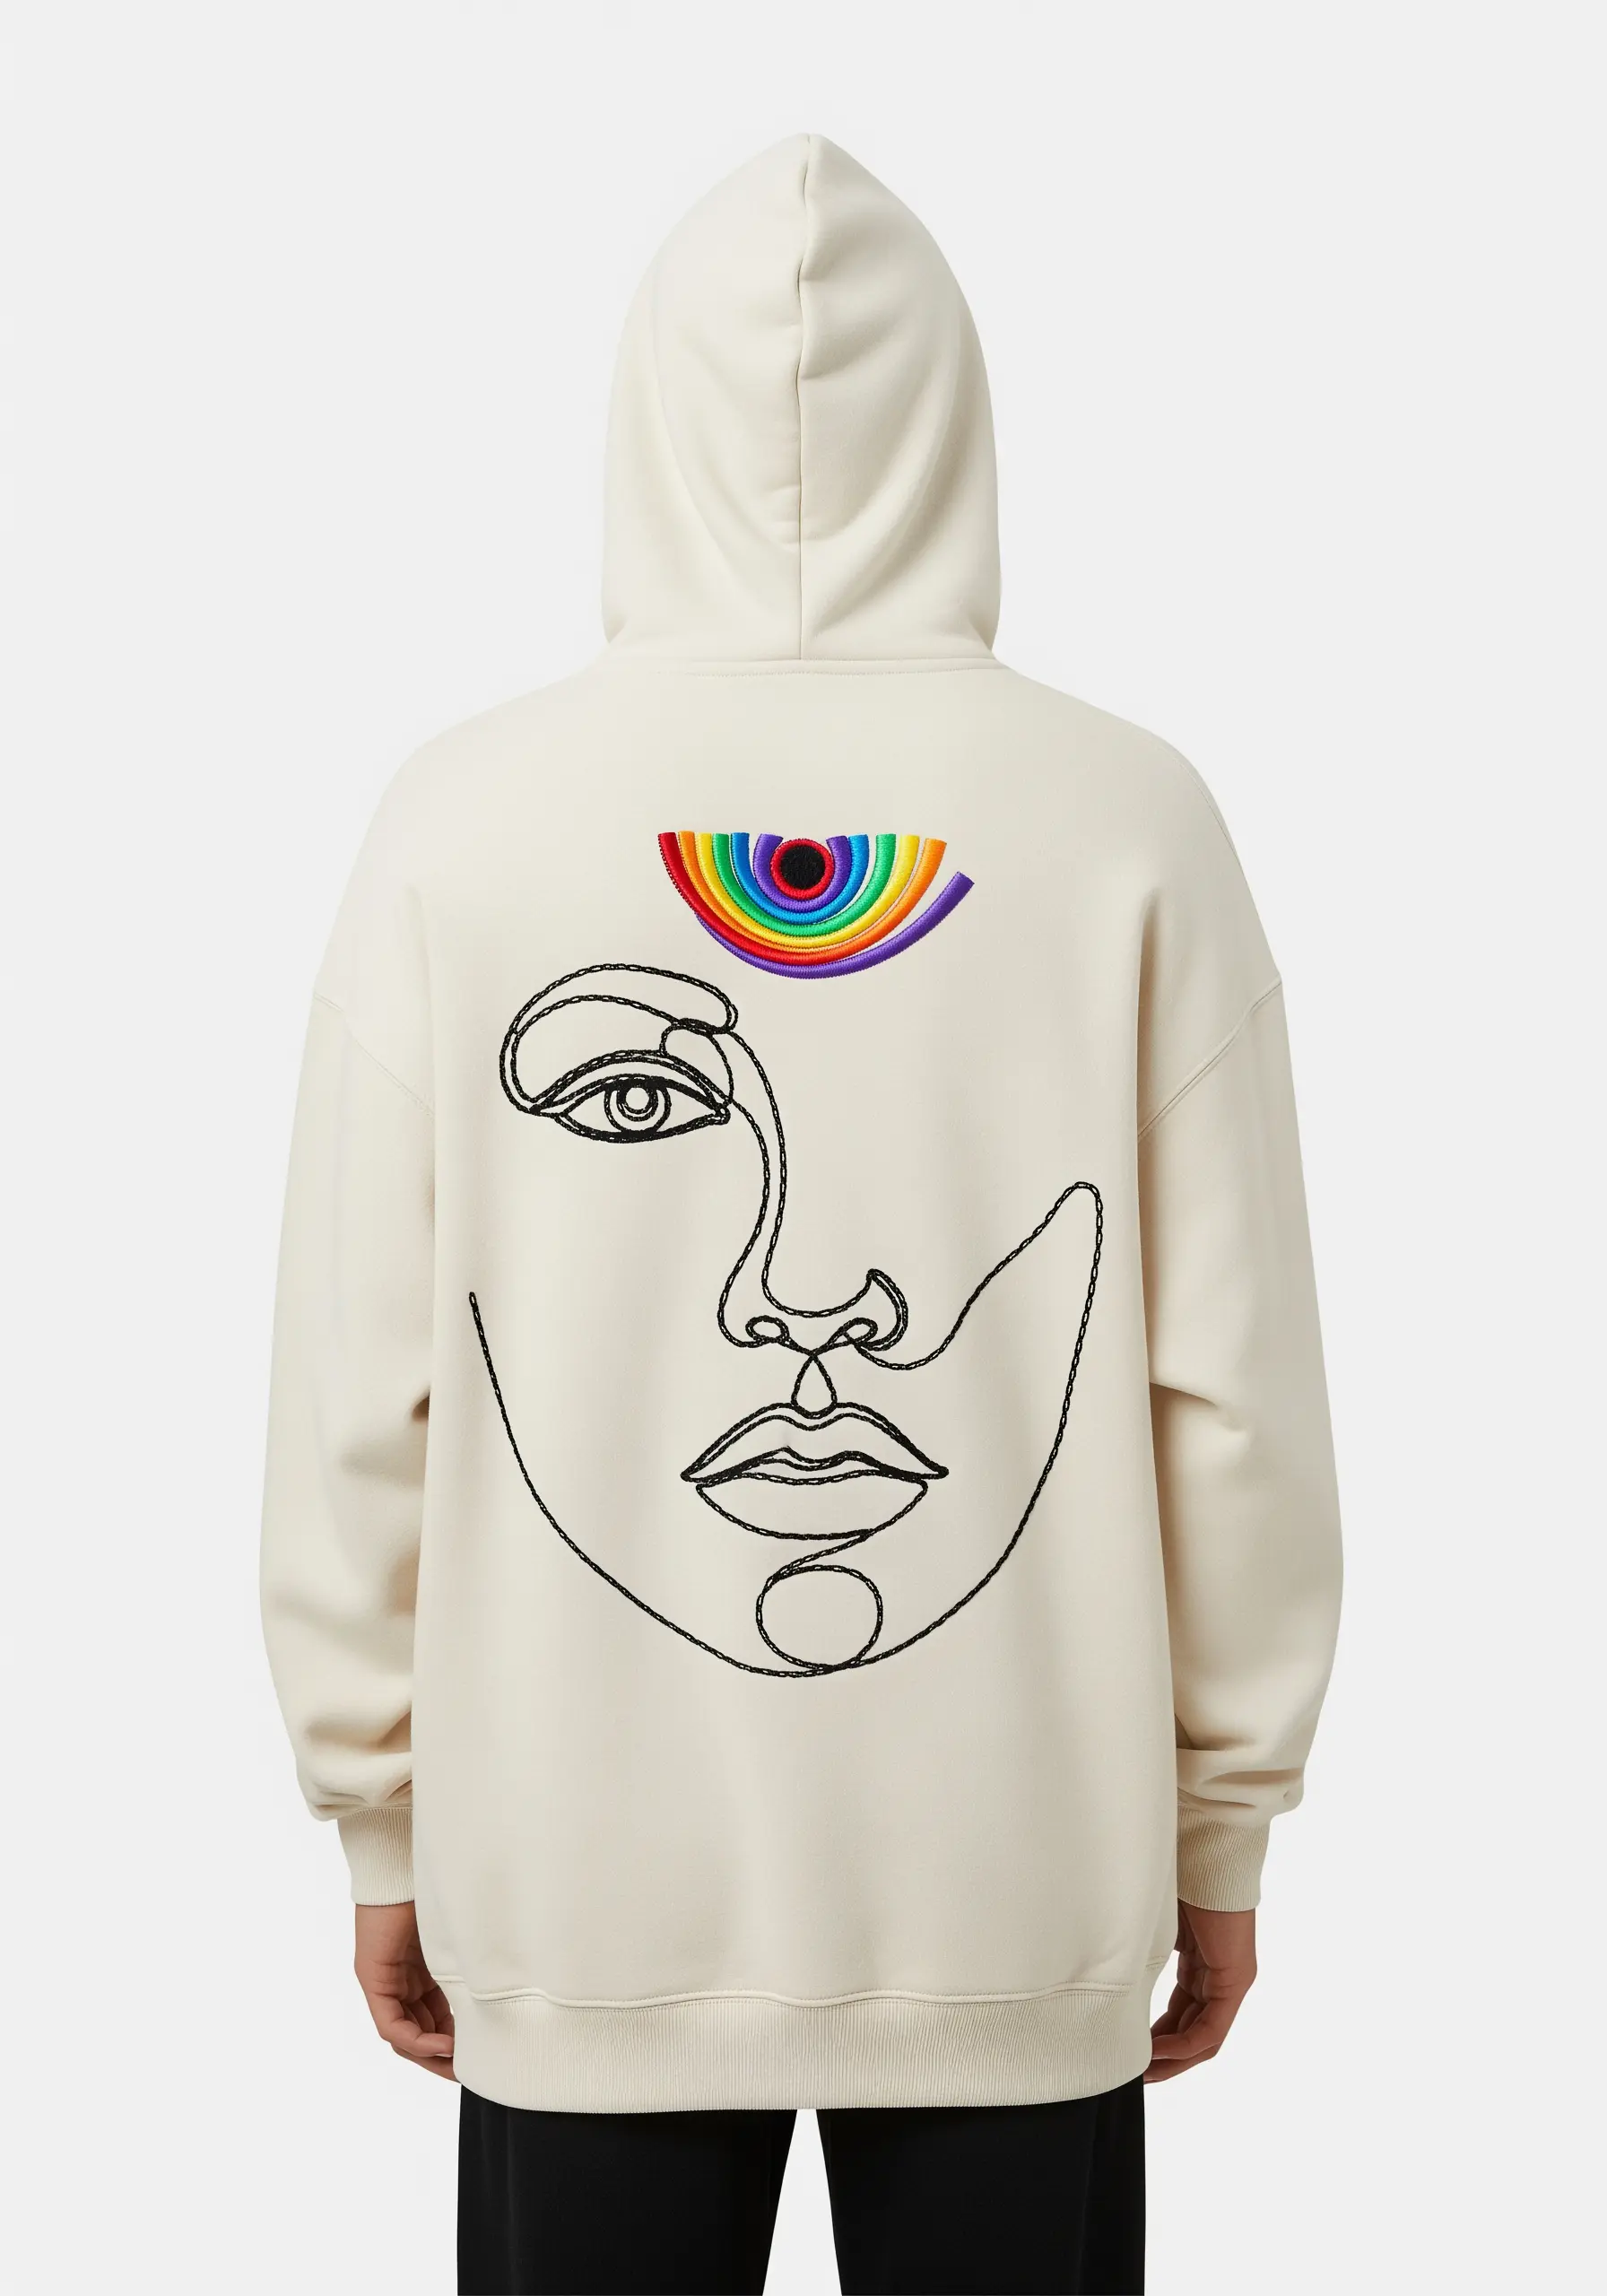
The sophistication of this design comes from its restraint. Execute the One-Line Portrait using a stem stitch with a 3 or 4-strand black floss to achieve a consistent, ink-like quality.
Maintaining even tension is critical on knit fabrics like hoodies to prevent any puckering or distortion of the design.
The rainbow third eye is your focal point. Fill this small, contained shape with a dense and perfectly smooth satin stitch, using single strands of vibrant thread for each color.
This intentional contrast between minimalist line work and a concentrated burst of color creates a modern and visually arresting statement.
16. Iridescent Peacock Feather
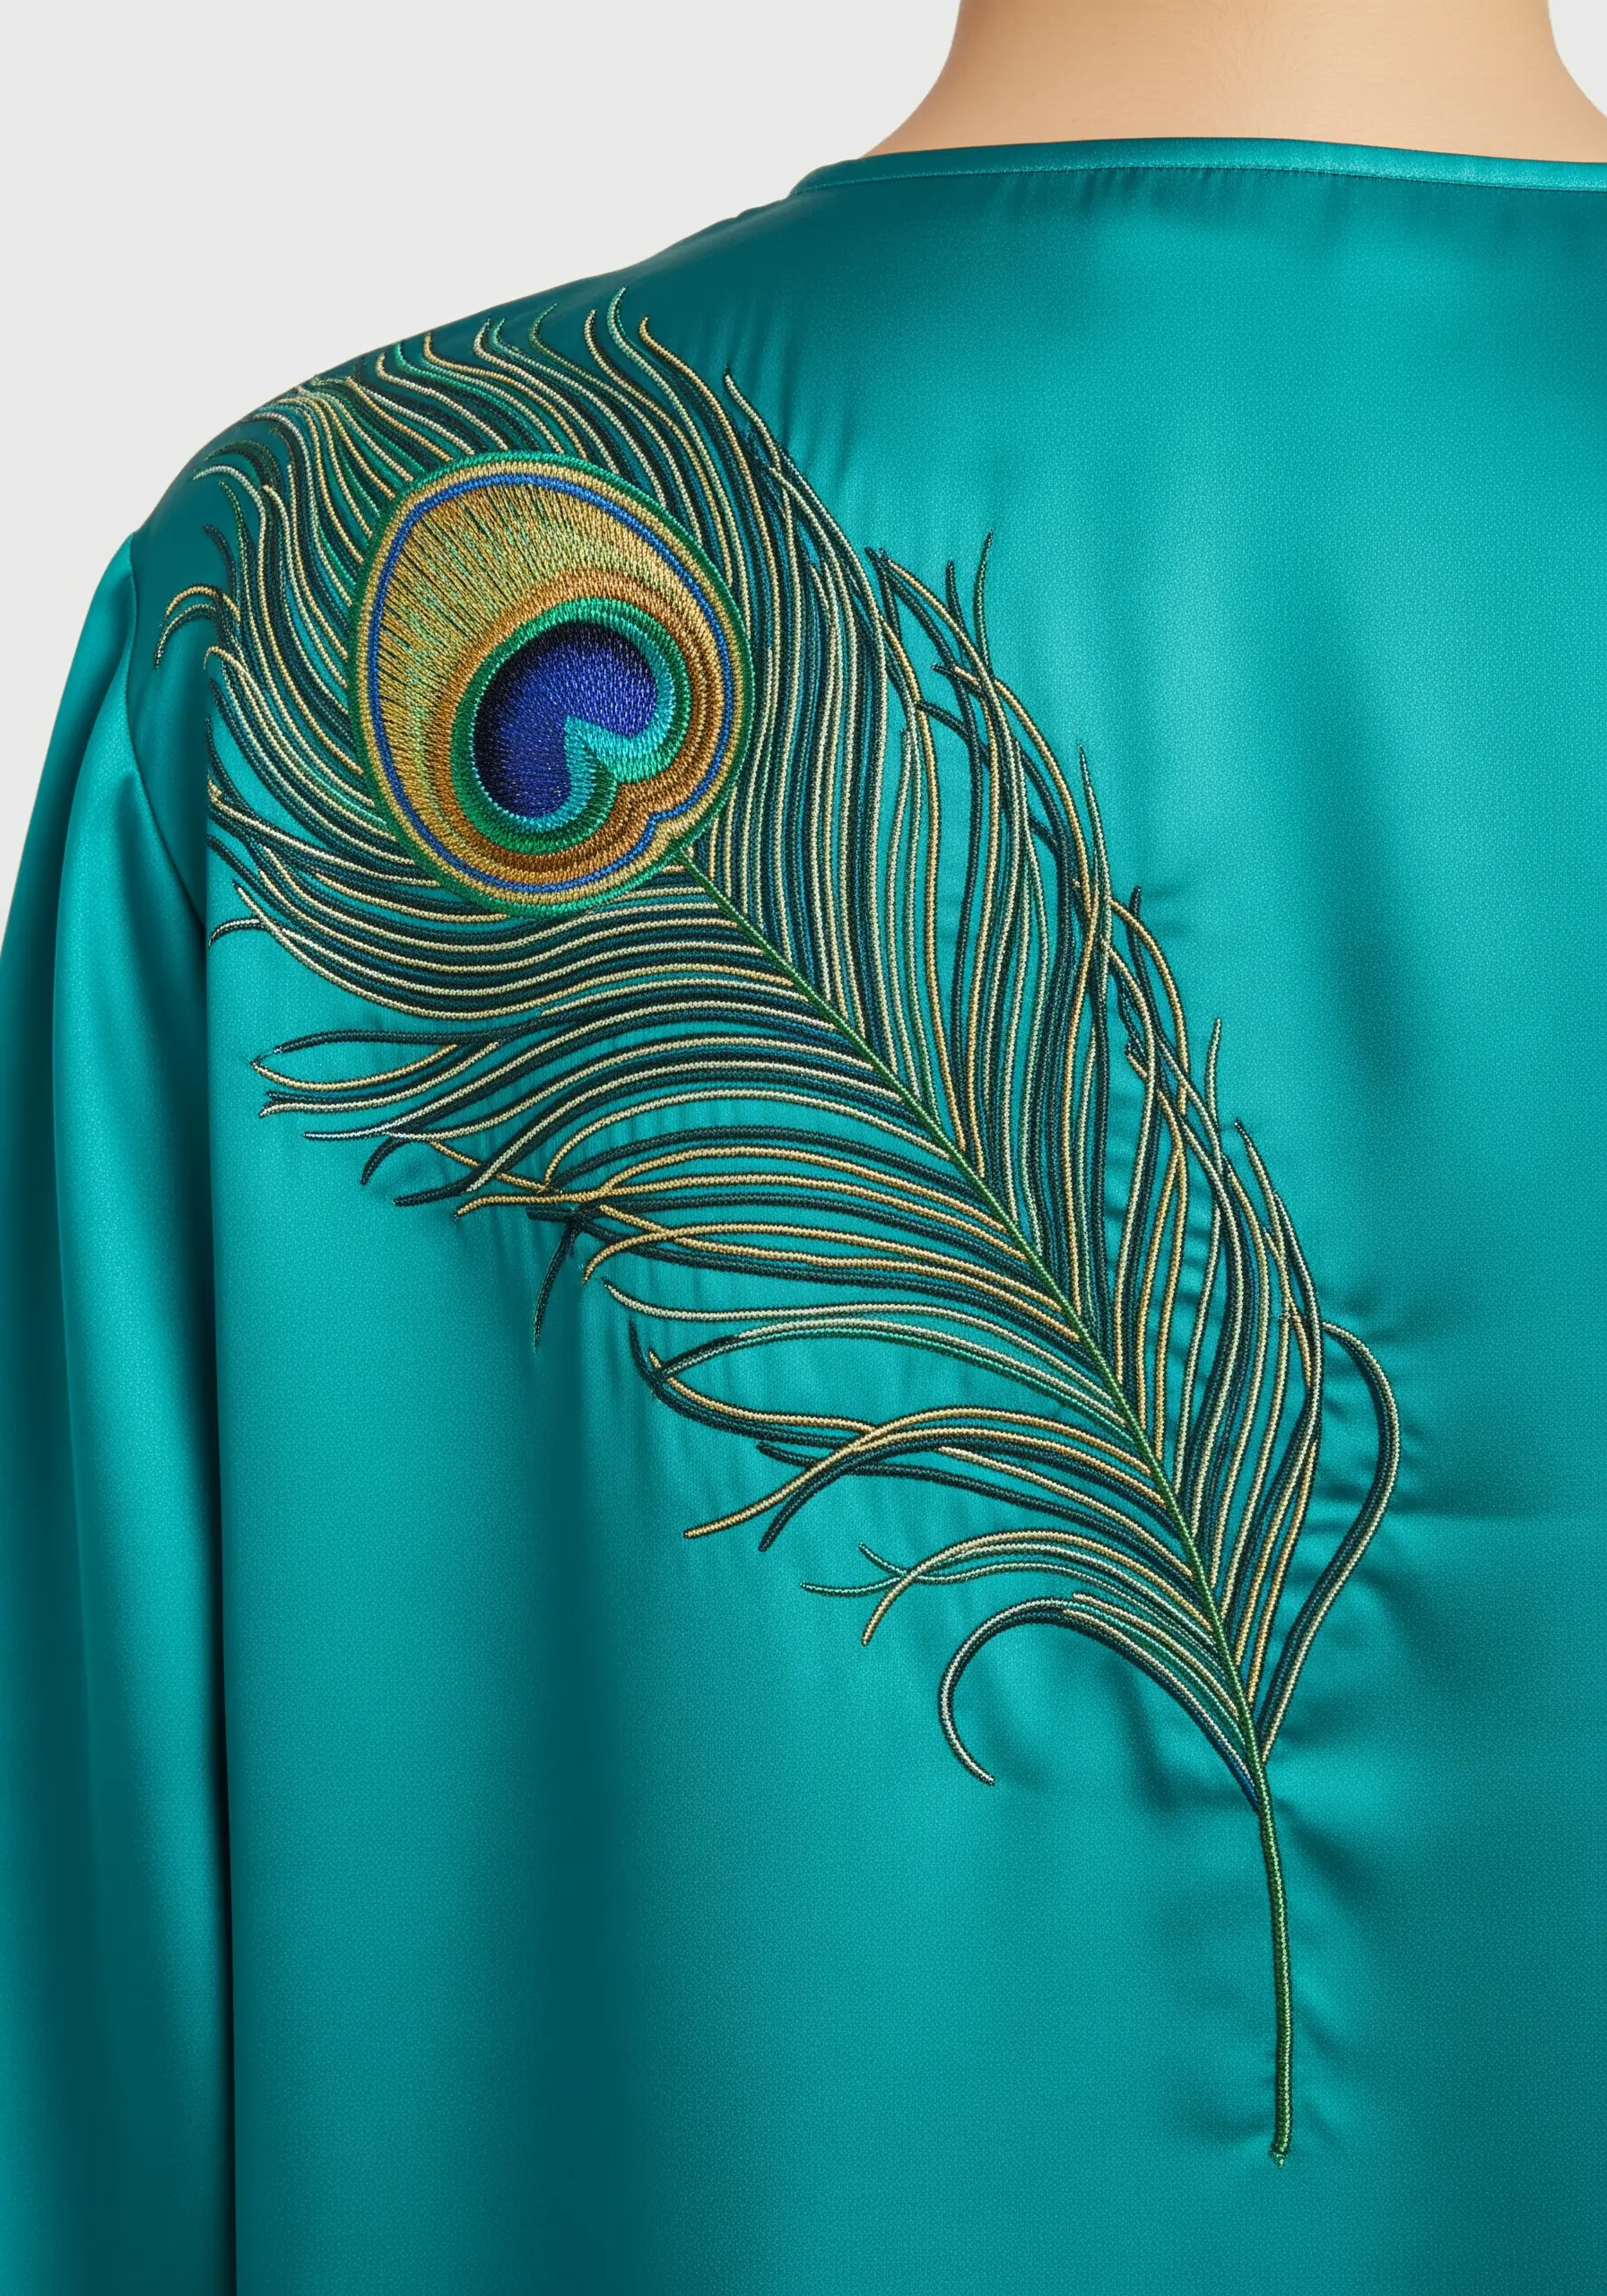
Capturing the shimmer of a Peacock Feather is an exercise in thread selection and directional stitching.
Opt for high-sheen rayon or silk threads in jewel tones—emerald, sapphire, gold, and teal—to replicate the feather’s natural iridescence.
For the long, delicate barbs, use single straight stitches angled outward from the central stem, allowing them to feel light and airy.
In the vibrant ‘eye’ of the feather, use concentric ovals of satin stitch to build the layers of color from the inside out.
The satin fabric of the blouse is a perfect partner, enhancing the thread’s luster and making the design come alive.
17. Punk-Inspired Skull with Appliqué Details
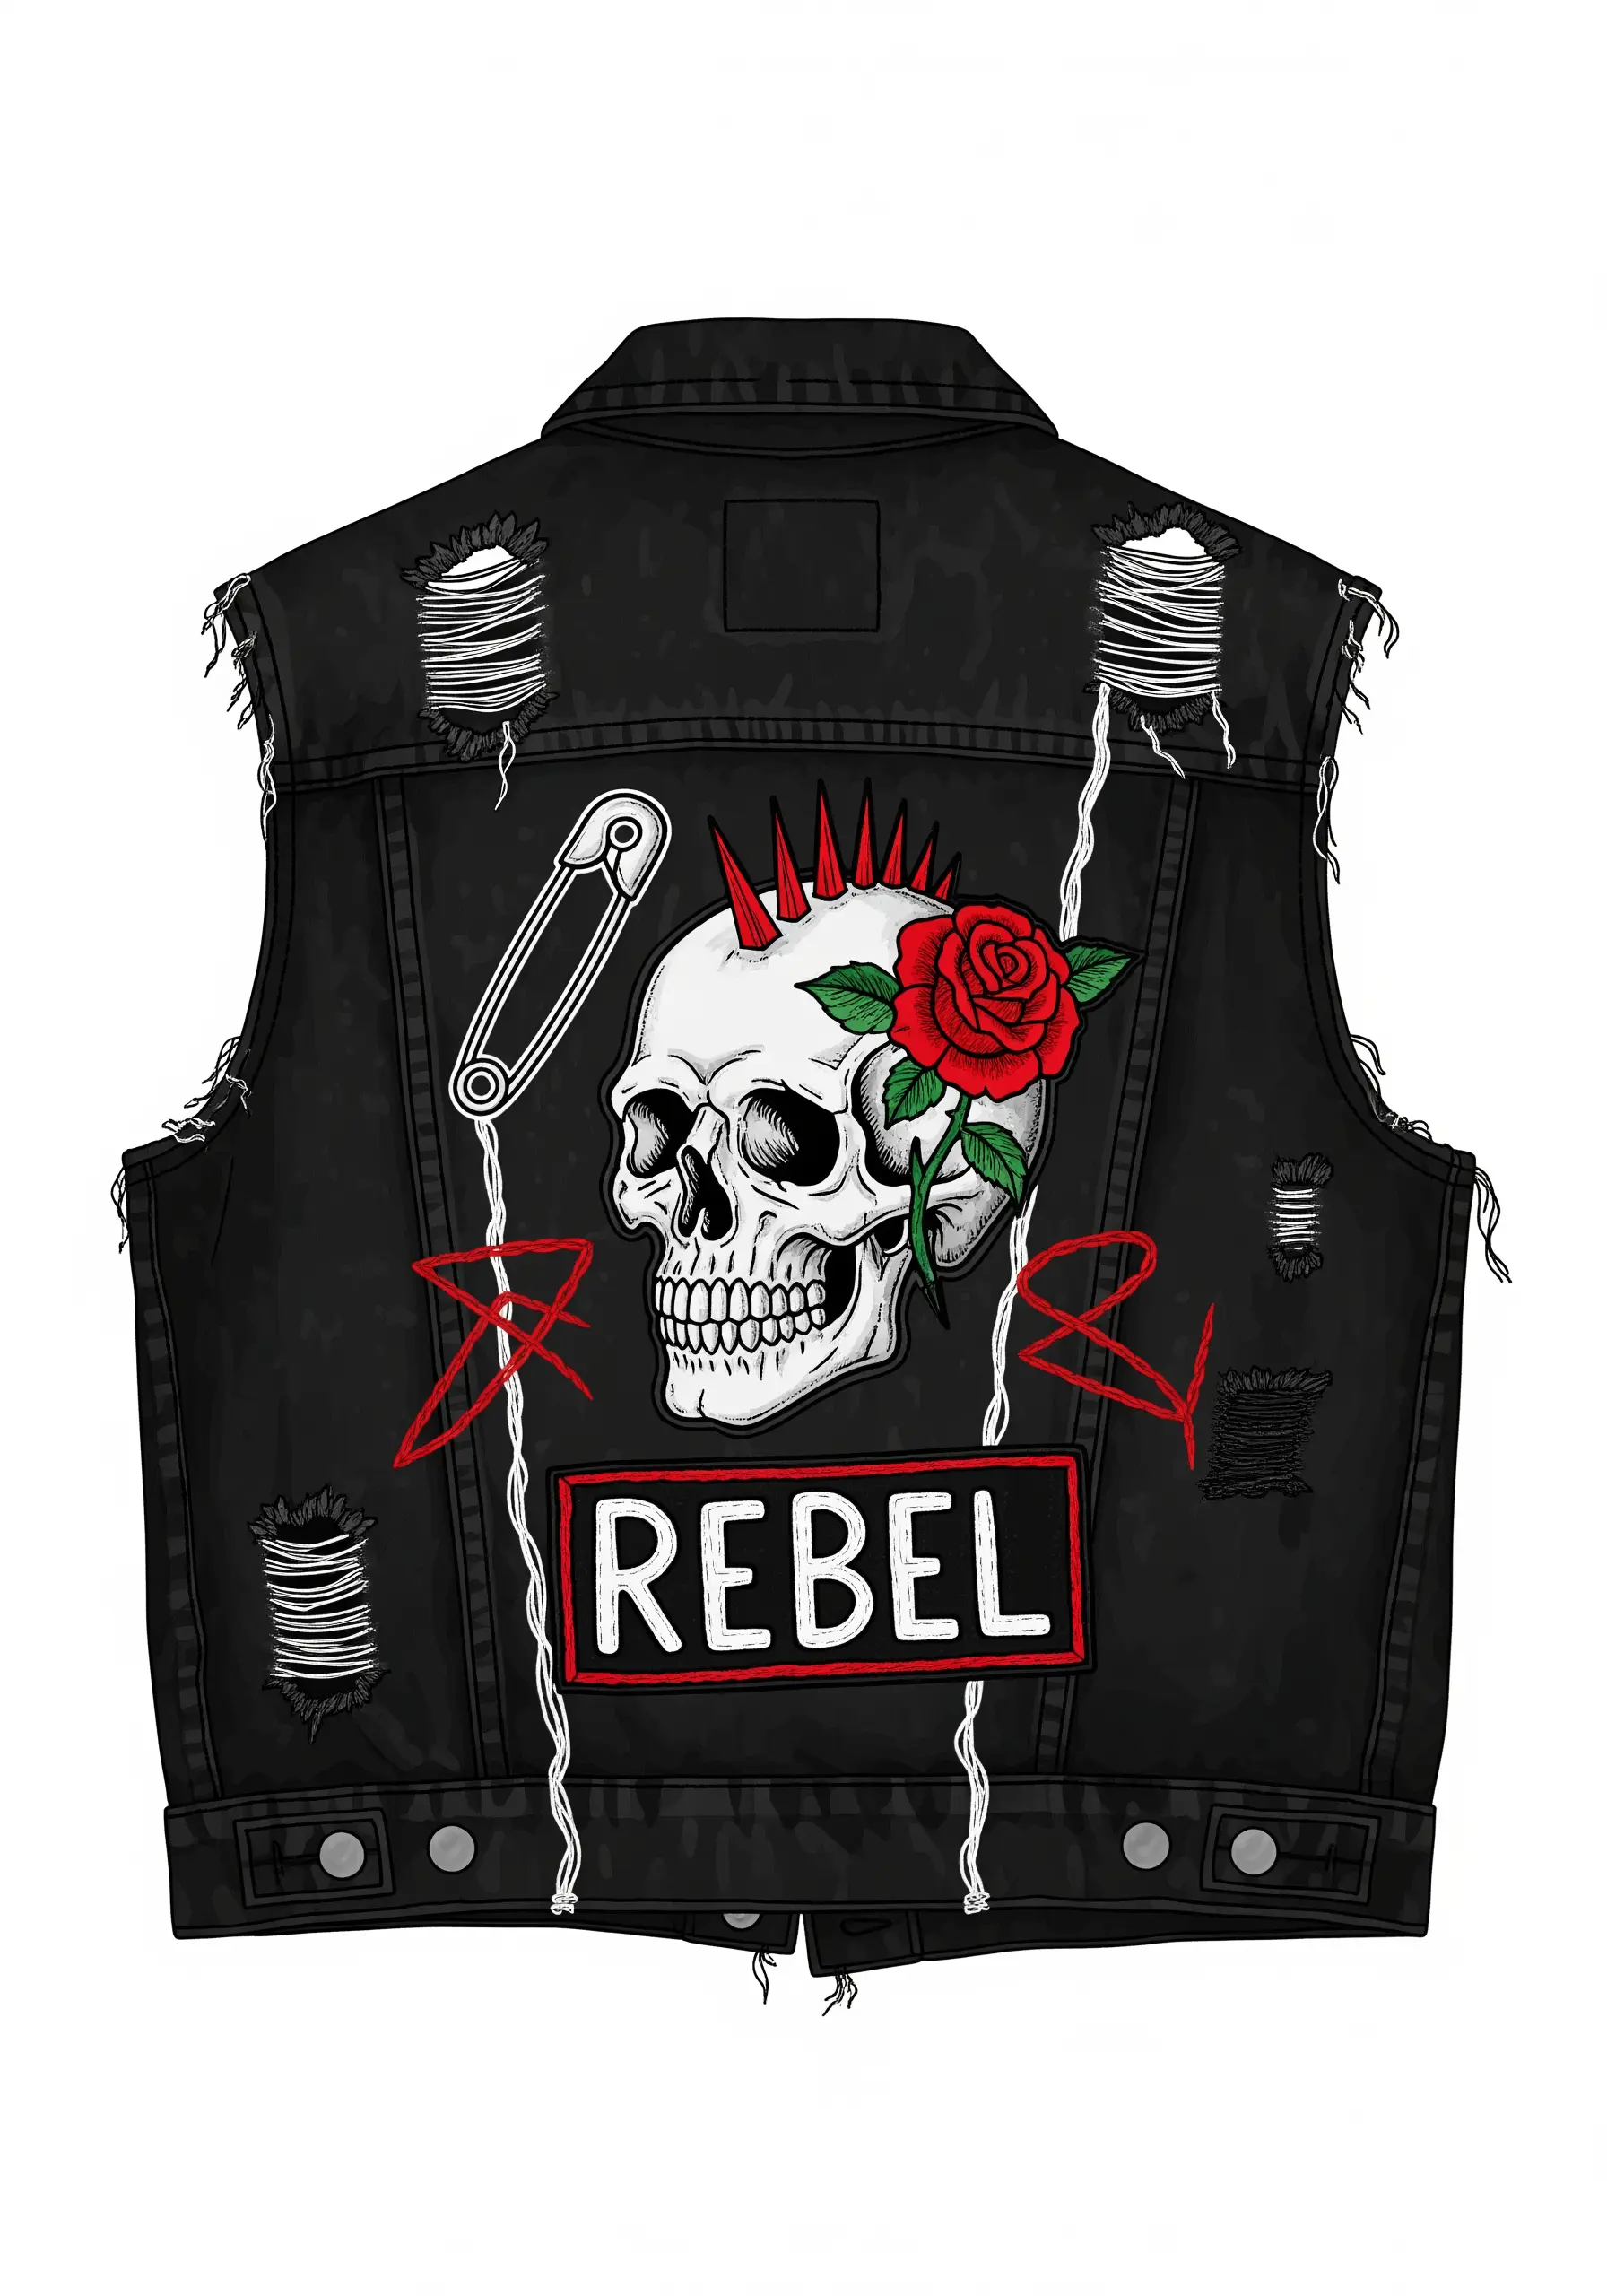
This design achieves its rebellious edge by mixing illustration-style stitching with bold, tactile elements.
Use a simple backstitch for the skull’s outlines and a light seed stitch fill for subtle shading, keeping it graphic and clean.
Give the rose a three-dimensional quality by using a woven wheel stitch, which raises it from the surface.
The ‘REBEL’ patch is a classic appliqué; create it on a separate piece of fabric, then attach it with a thick satin stitch border to mimic a real embroidered patch.
Using a silver metallic thread for the safety pin adds a final, realistic touch to this Punk-Inspired Skull design.
18. Ornate Hamsa with a Beaded Eye
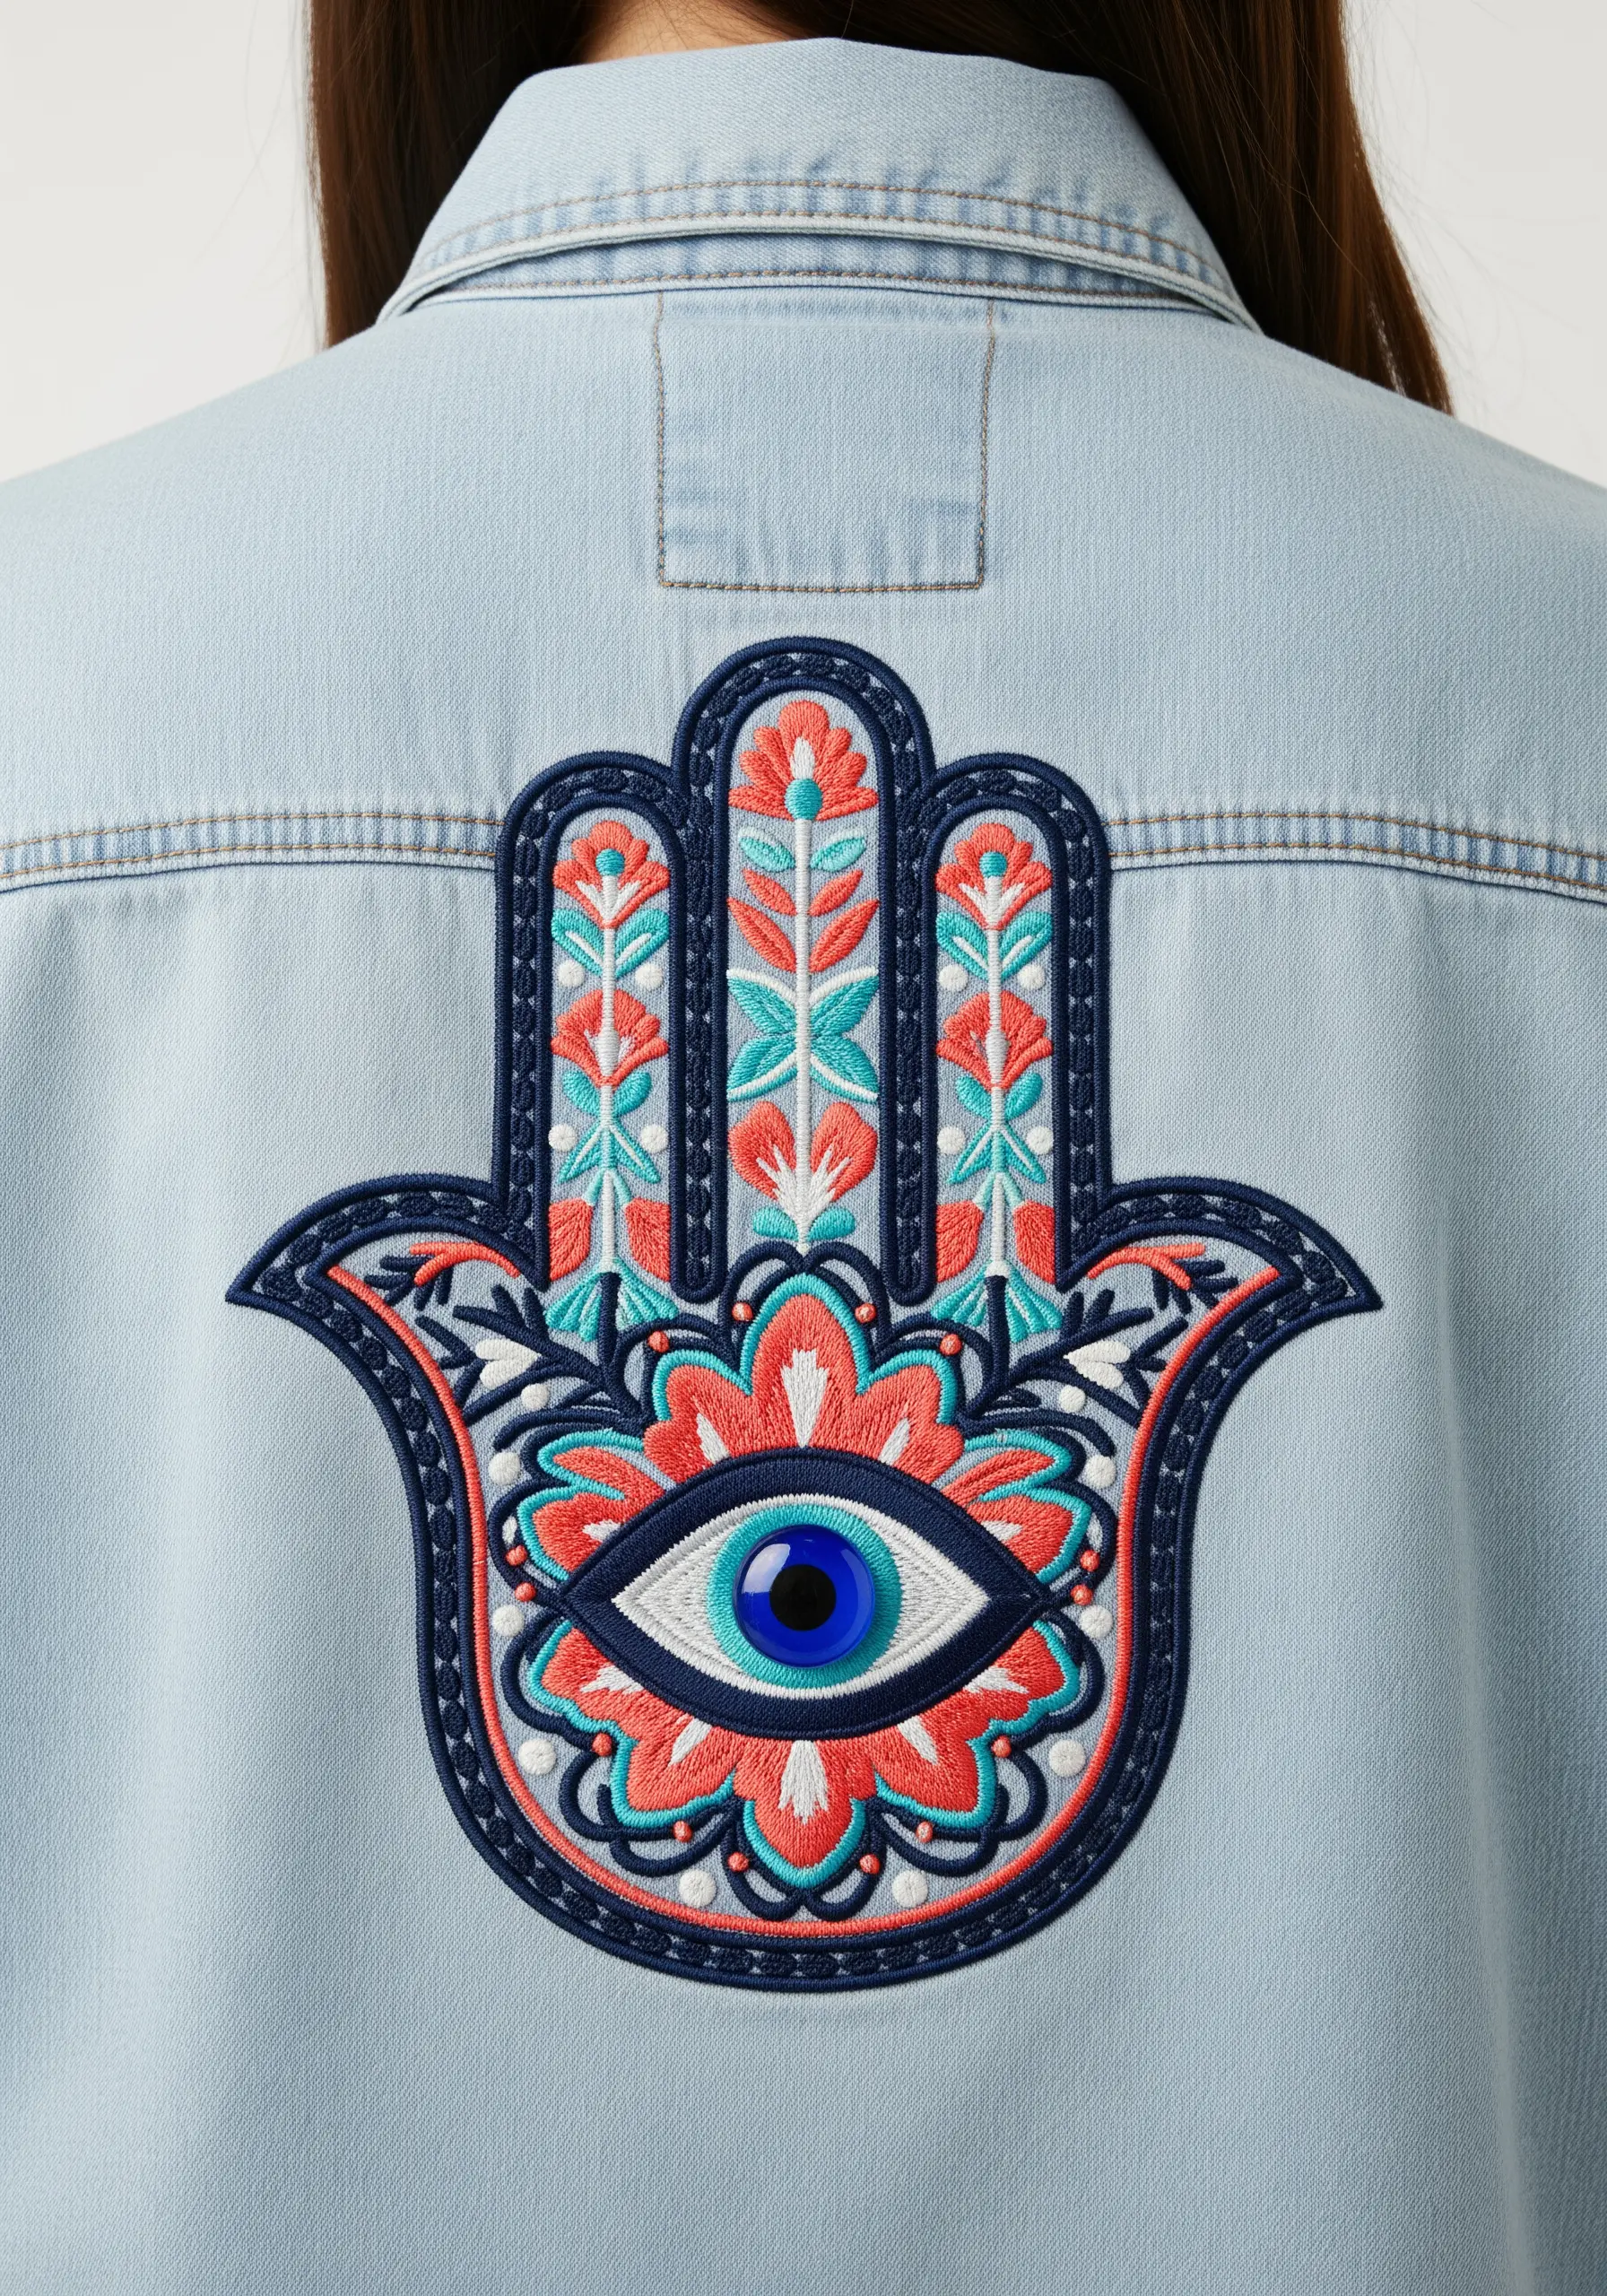
To create a powerful and balanced Hamsa, focus on symmetry and a rich variety of textures.
Establish a strong foundation by outlining the entire hand with a thick split stitch or chain stitch.
Fill the intricate interior patterns with a mix of satin stitch for smooth blocks of color, chain stitch for decorative lines, and French knots for dotted texture.
For the central eye, stitch a single, captivating blue bead into the very center.
This Beaded Eye not only draws focus but also adds a sophisticated, three-dimensional element to the design.
19. Imperial Dragon with Textured Scales
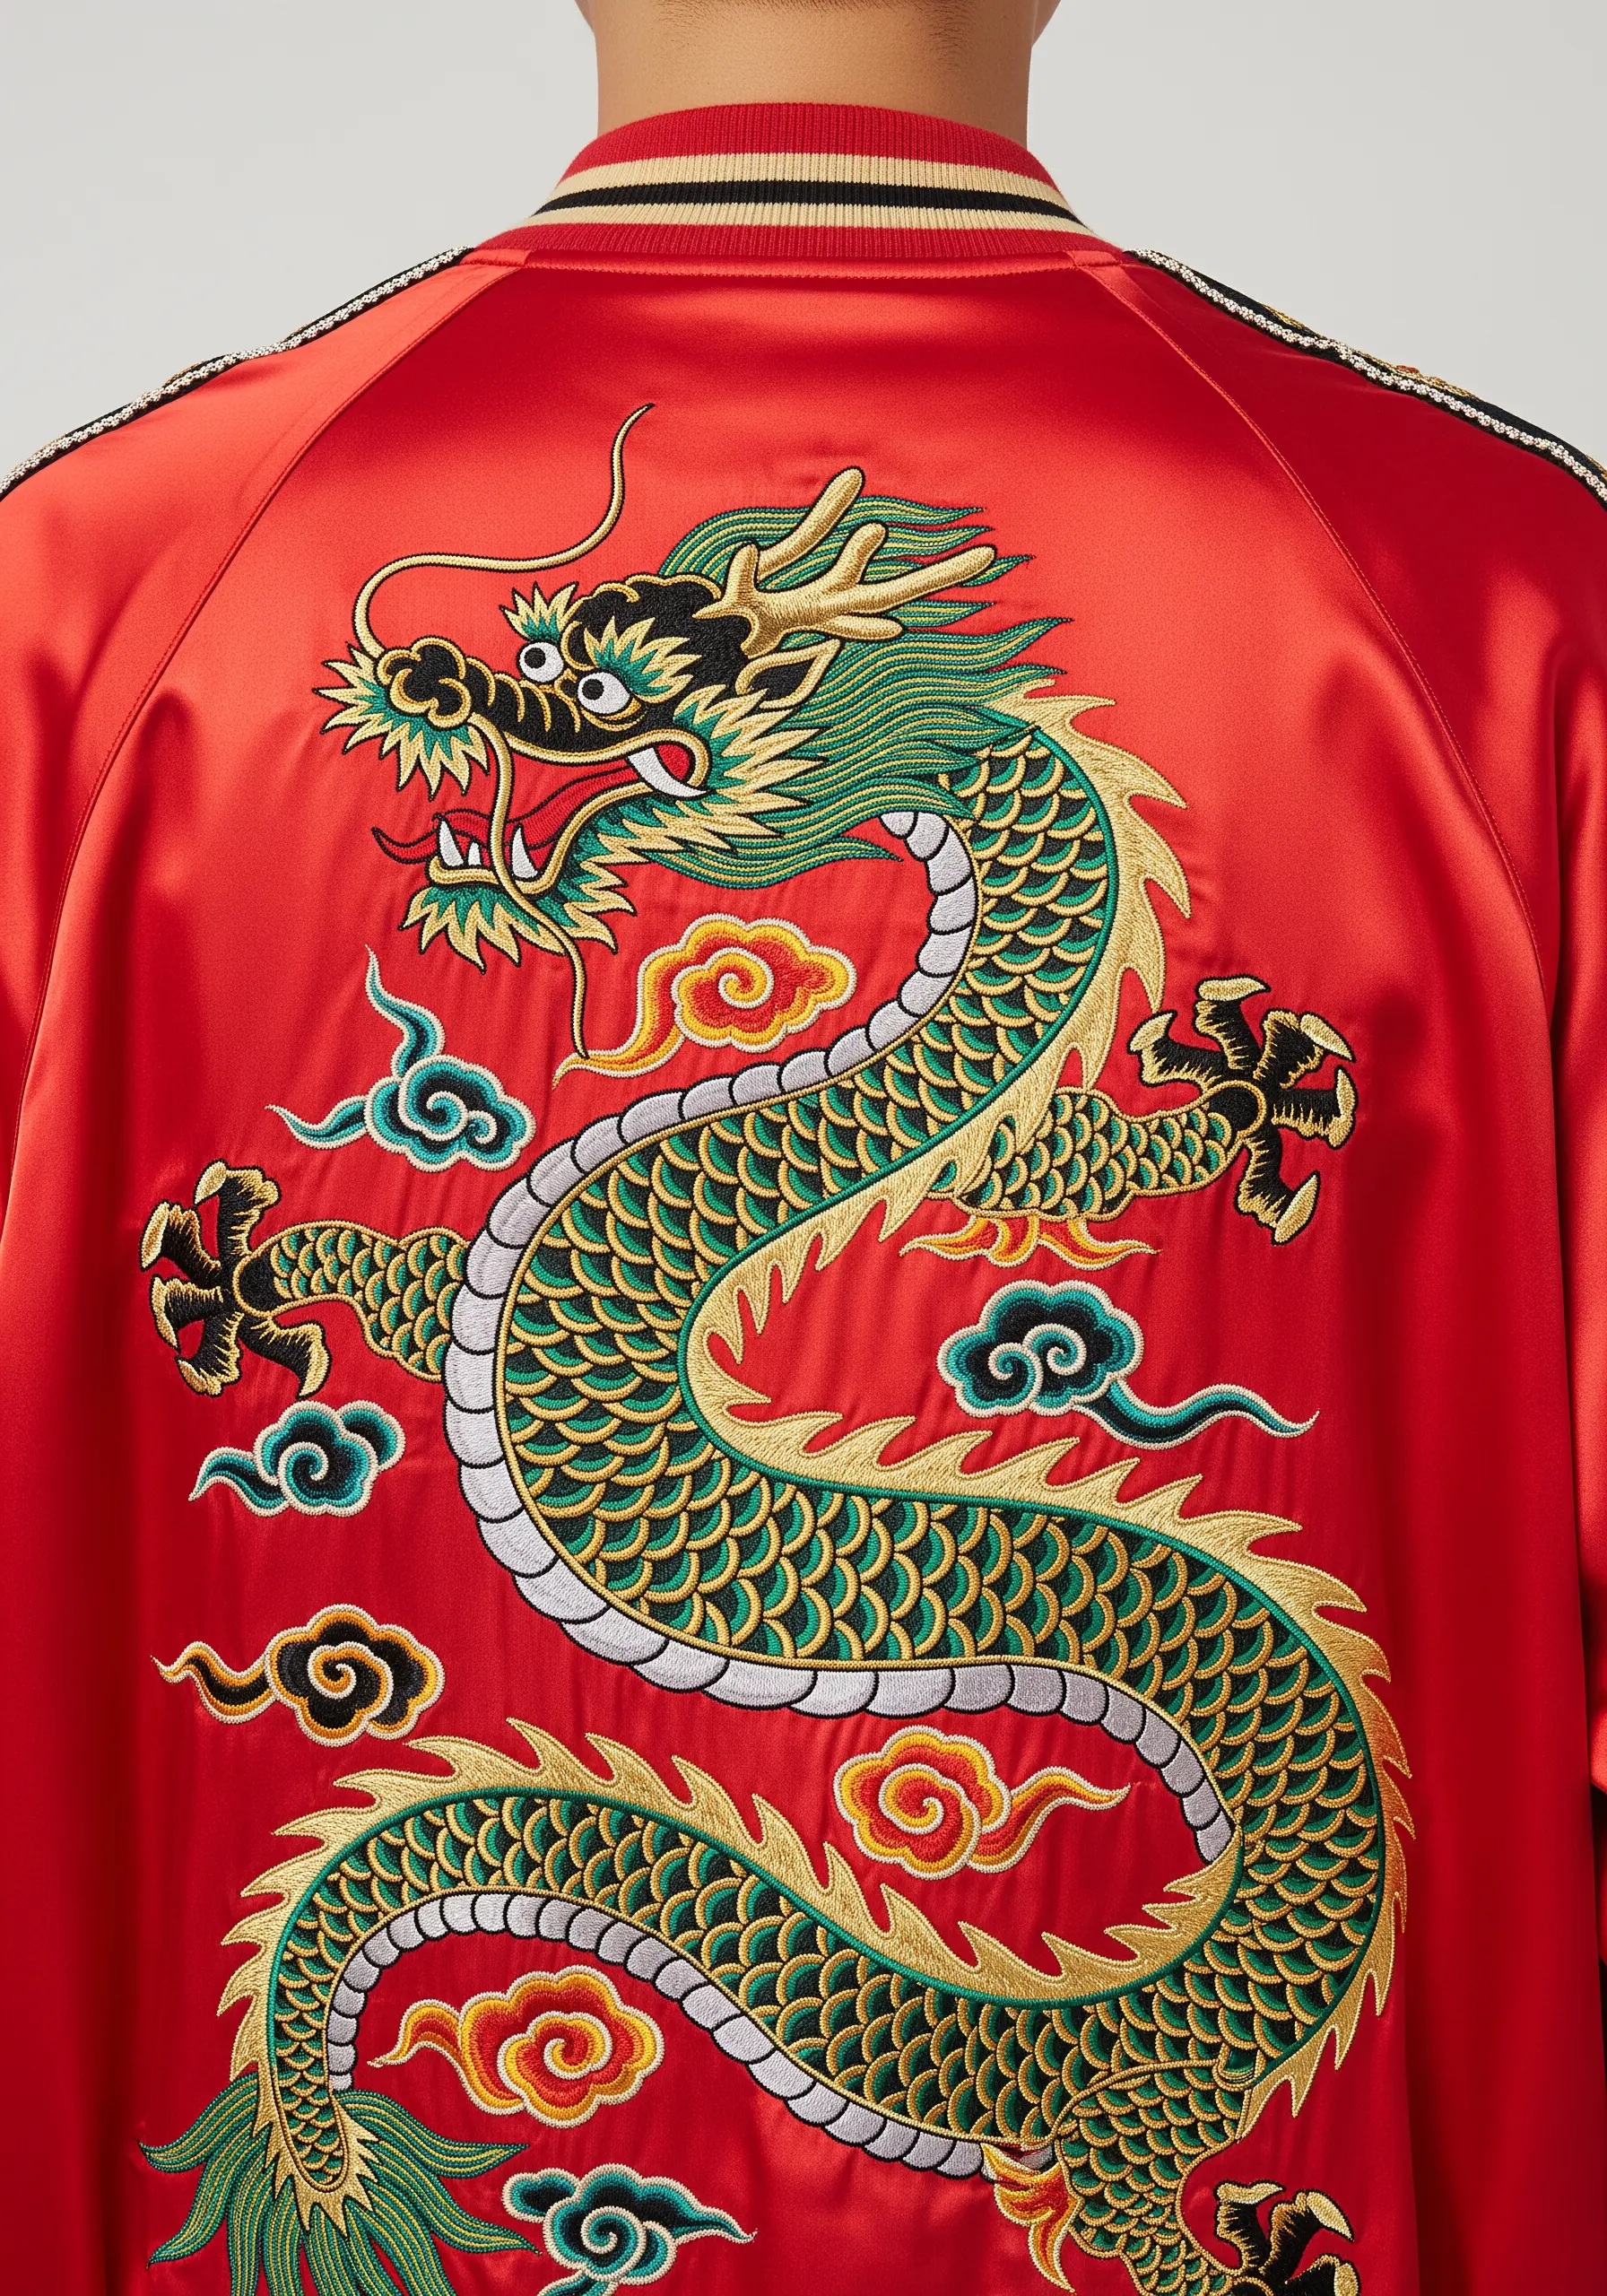
The secret to a dynamic and lifelike dragon is the texture of its scales. Create this effect by using an overlapping pattern of small fishbone stitches or detached chain stitches (lazy daisies).
Use a couched gold metallic thread for the dragon’s outline, whiskers, and claws. This technique provides sharp, regal definition that stands out against the rich red satin.
For the swirling clouds, use a light and airy stem stitch to create a sense of ethereal movement around the powerful form of the dragon.
On a high-sheen fabric, this combination of rich texture and metallic shine creates a truly luxurious and mythical Imperial Dragon.
20. Monochromatic Viking Compass
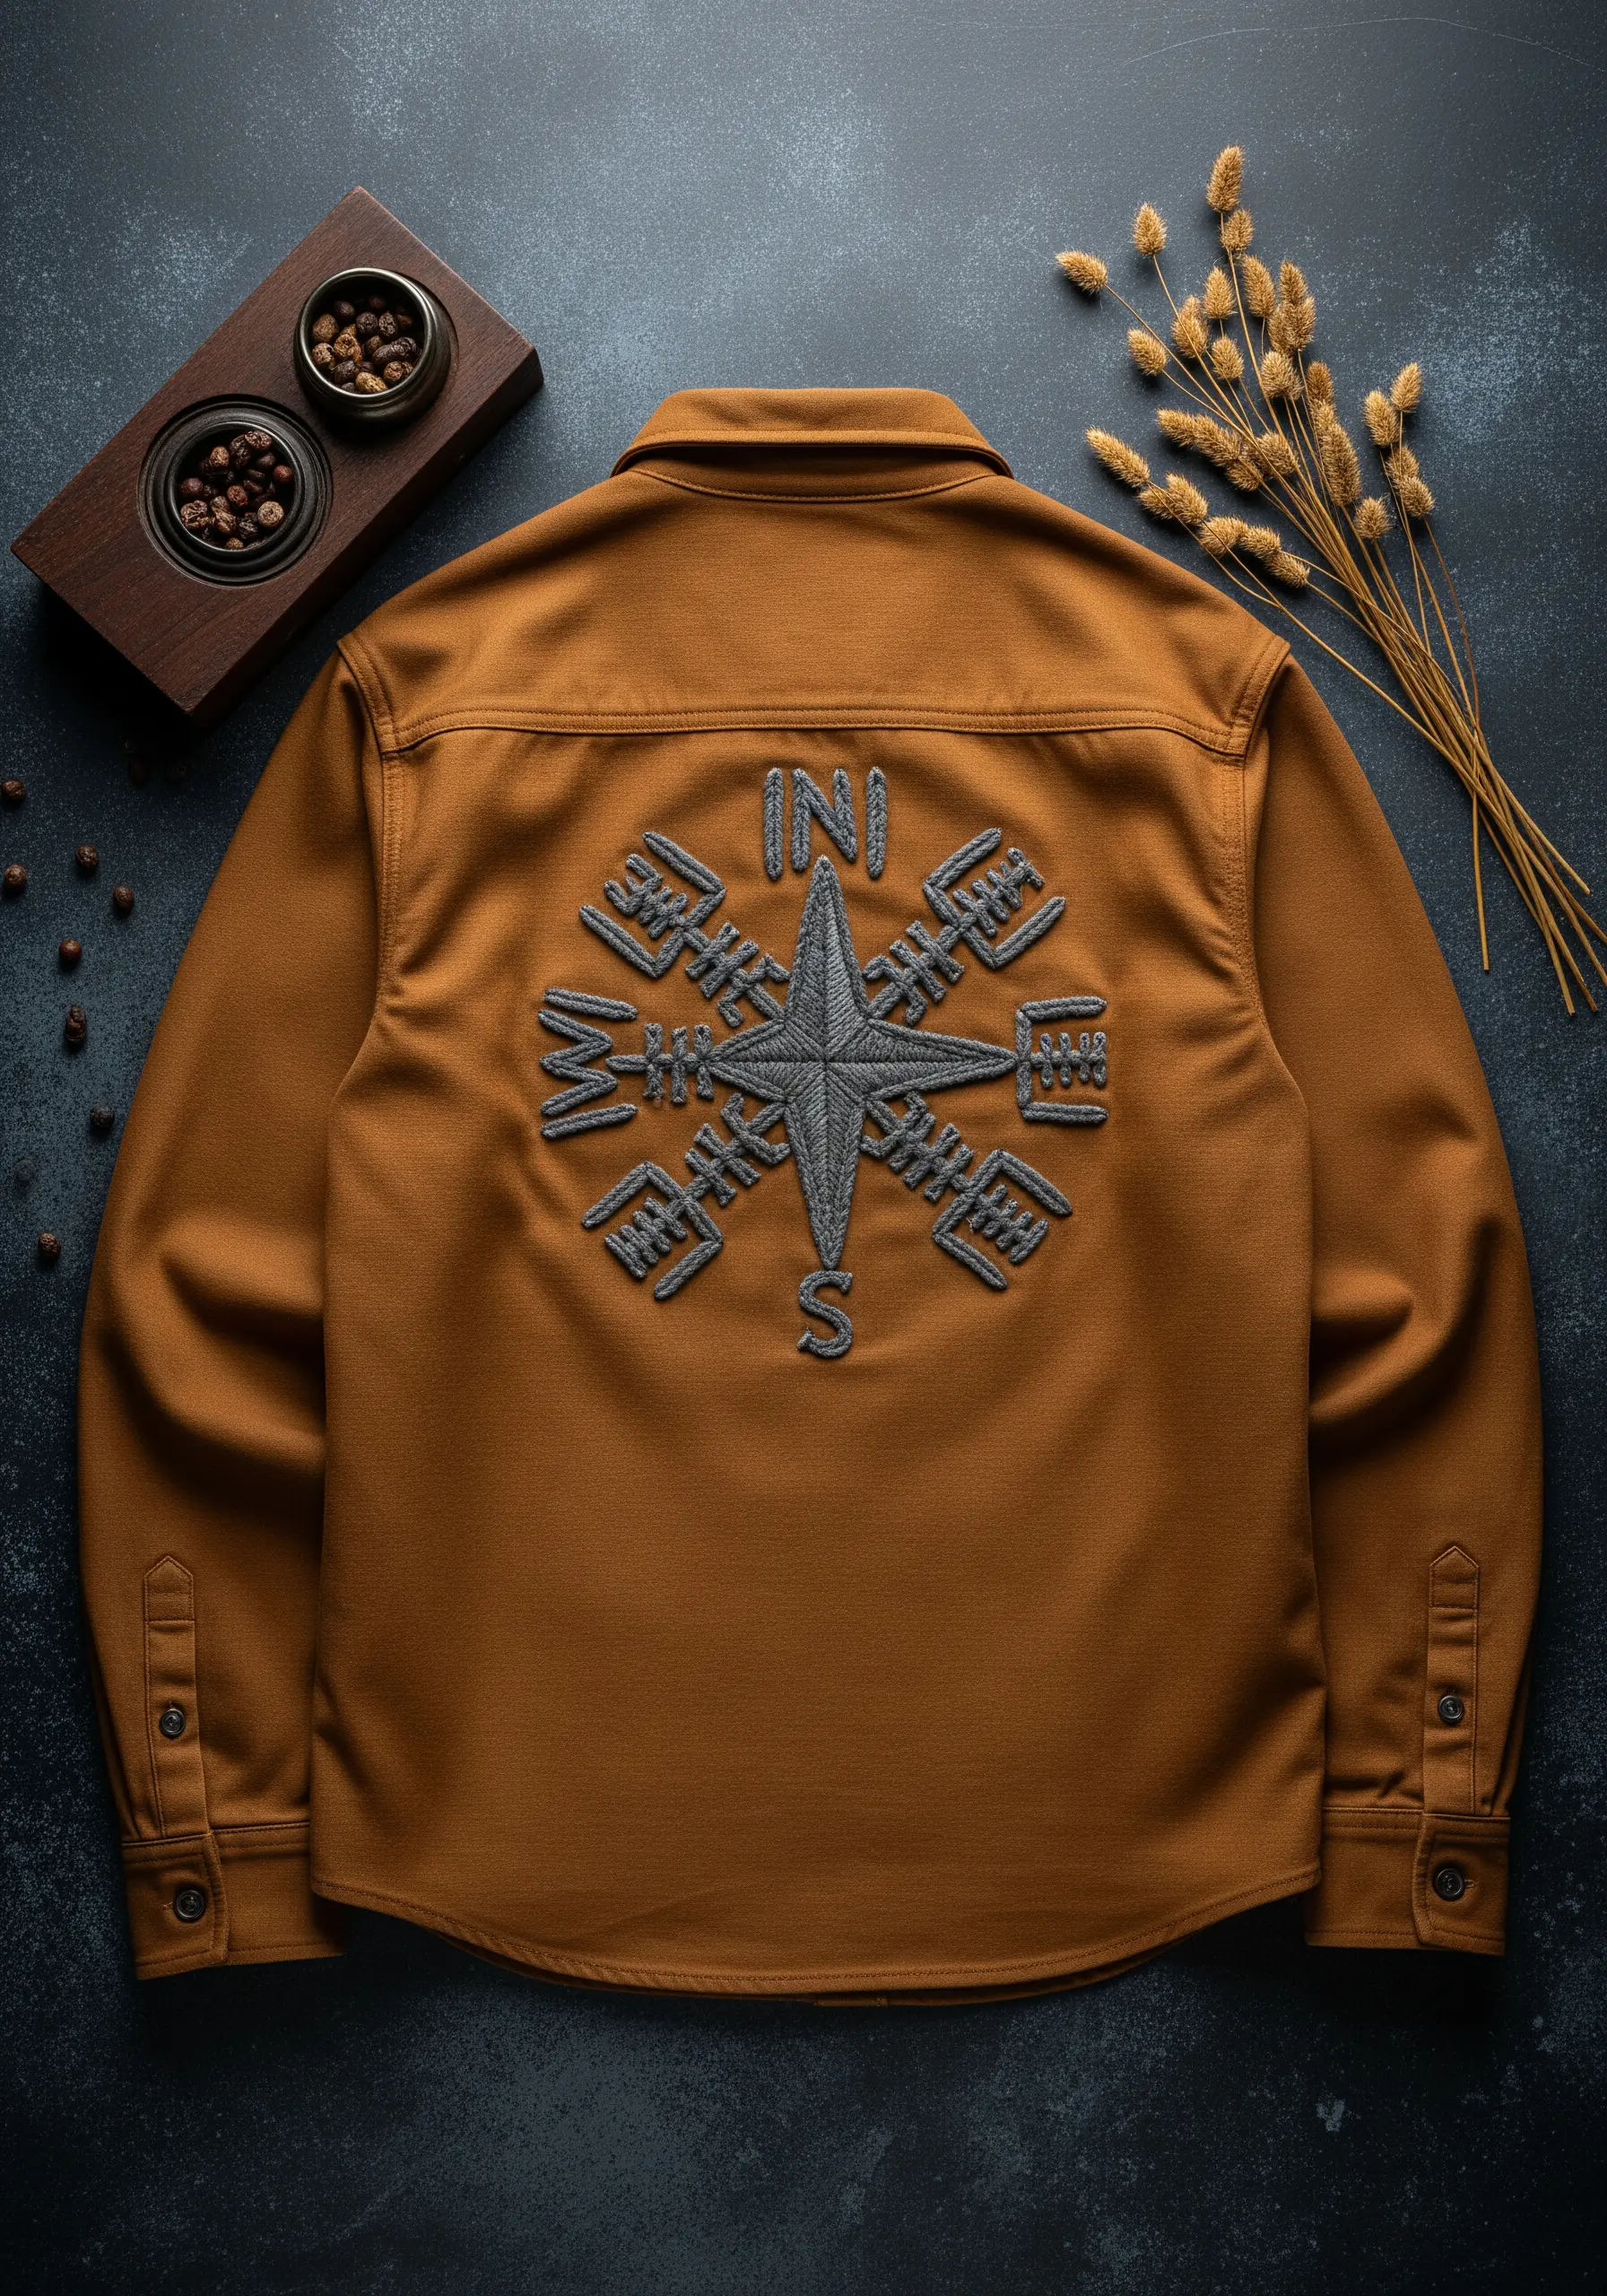
This design is a perfect example of how texture can be more impactful than color.
To make the central compass arms stand out, use a padded satin stitch: first, create a base of small straight stitches, then cover them with your final satin stitch. This gives the element a raised, 3D effect.
For the intricate rune-like details, switch to a finer thread and a simple backstitch to maintain legibility and crispness.
Sticking to a single color family, like these cool greys, on a solid background creates a sophisticated, carved-in-stone look for your Monochromatic Viking Compass.
21. Retro Roller Skate with Motion Lines
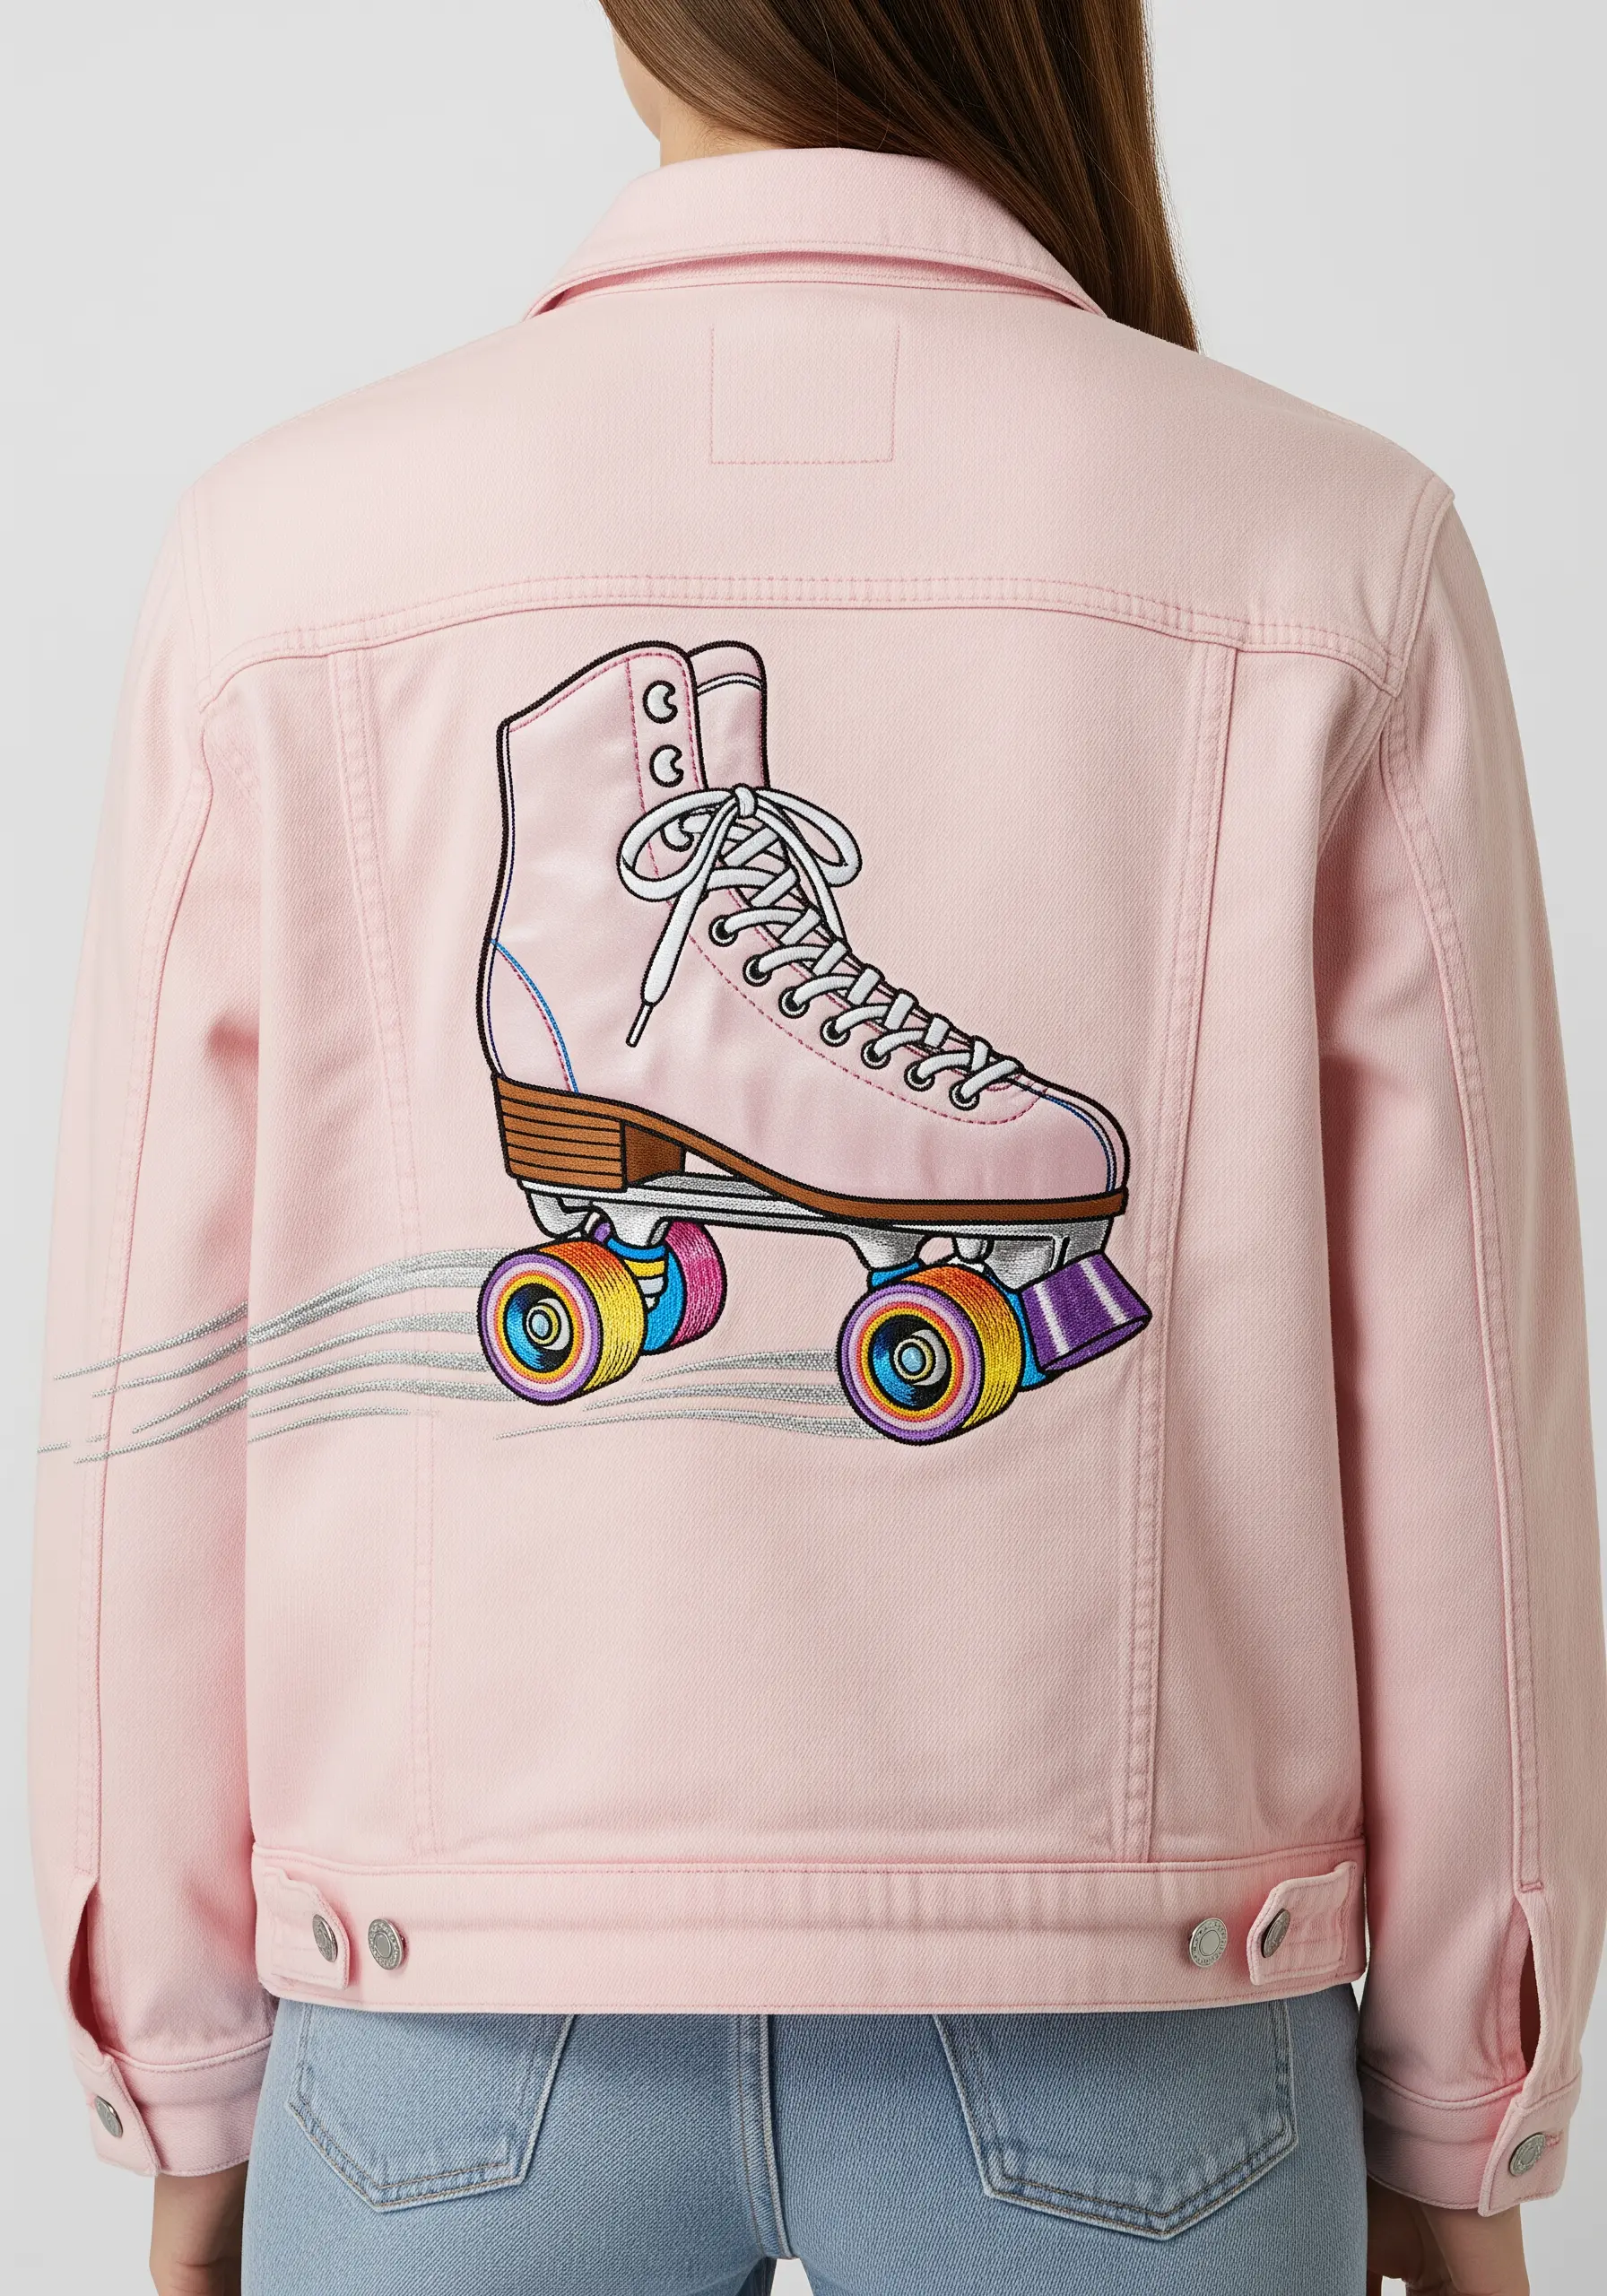
Capture a fun, nostalgic vibe with a clean, graphic approach to your stitching.
Use a tight, uni-directional satin stitch to fill the large color blocks of the skate, which will give it a smooth, almost vinyl-like finish.
Define the smaller details, like the laces and seams, with a crisp backstitch in a contrasting color to make them pop.
The secret to adding energy is the illusion of speed: use a few long, loose straight stitches in a silver or grey thread trailing behind the wheels. This simple trick instantly makes the design feel dynamic.
22. Botanical Acrostic Poem
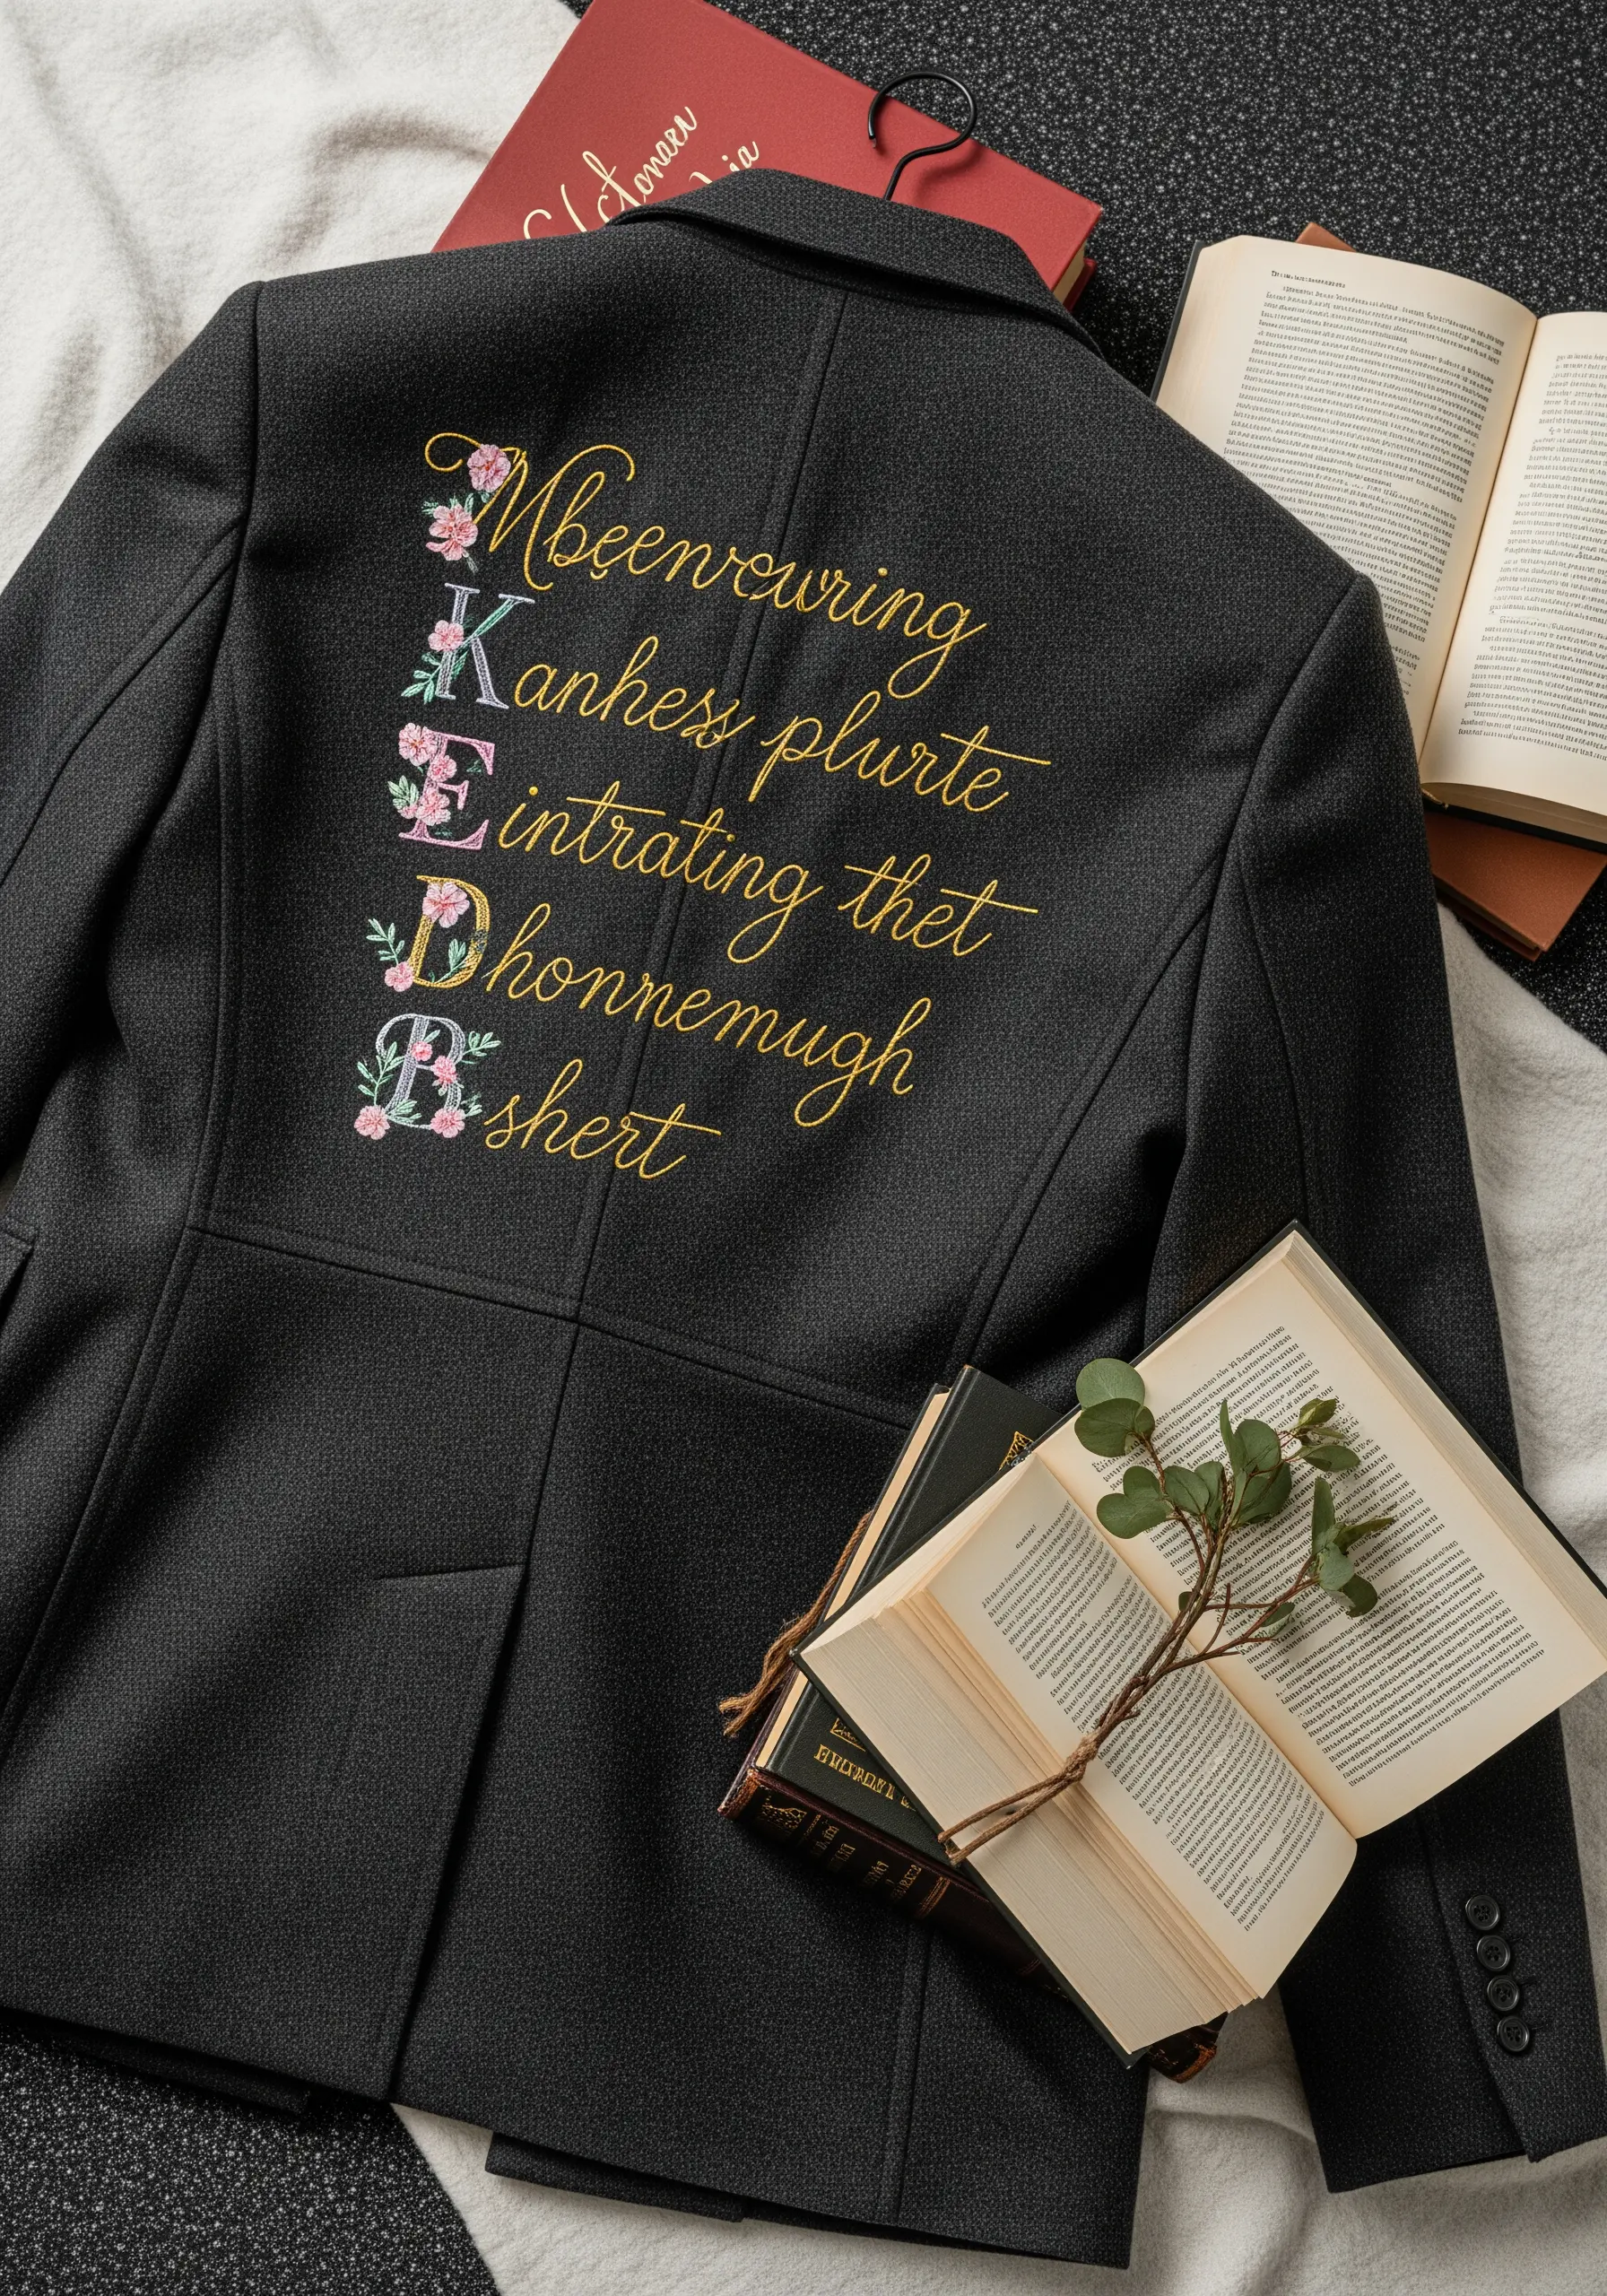
This design beautifully merges the elegance of typography with delicate botanical illustration.
For the letters, use a fine stem stitch or a whipped backstitch to create a smooth, raised line that mimics ink.
Weave tiny floral elements around the script using detached chain stitches for leaves and French knots or miniature satin stitches for blossoms. This gives the piece a personal, illuminated manuscript feel.
Emphasize the acrostic by stitching the first letter of each line in a distinct color, like the gold and pink seen here, to guide the eye and reveal the hidden word.
This Botanical Acrostic Poem is a truly personal way to wear your words.
23. Whimsical Forest Spirits

The charm of these Cute Ghosts in a Forest comes from bold, clean lines and simple, effective fills.
Use a thick chain stitch or a 4-strand split stitch for the outlines of the ghosts and trees; this gives them a solid, cartoonish presence that stands out.
Fill the ghosts’ bodies with a smooth vertical satin stitch. The slight sheen of the thread will help them pop against the matte fabric of the shirt.
To create the tree bark texture, simply alternate vertical straight stitches in two different shades of brown. It’s an easy technique that adds visual interest without complexity.
24. Geometric Honeycomb with Appliqué
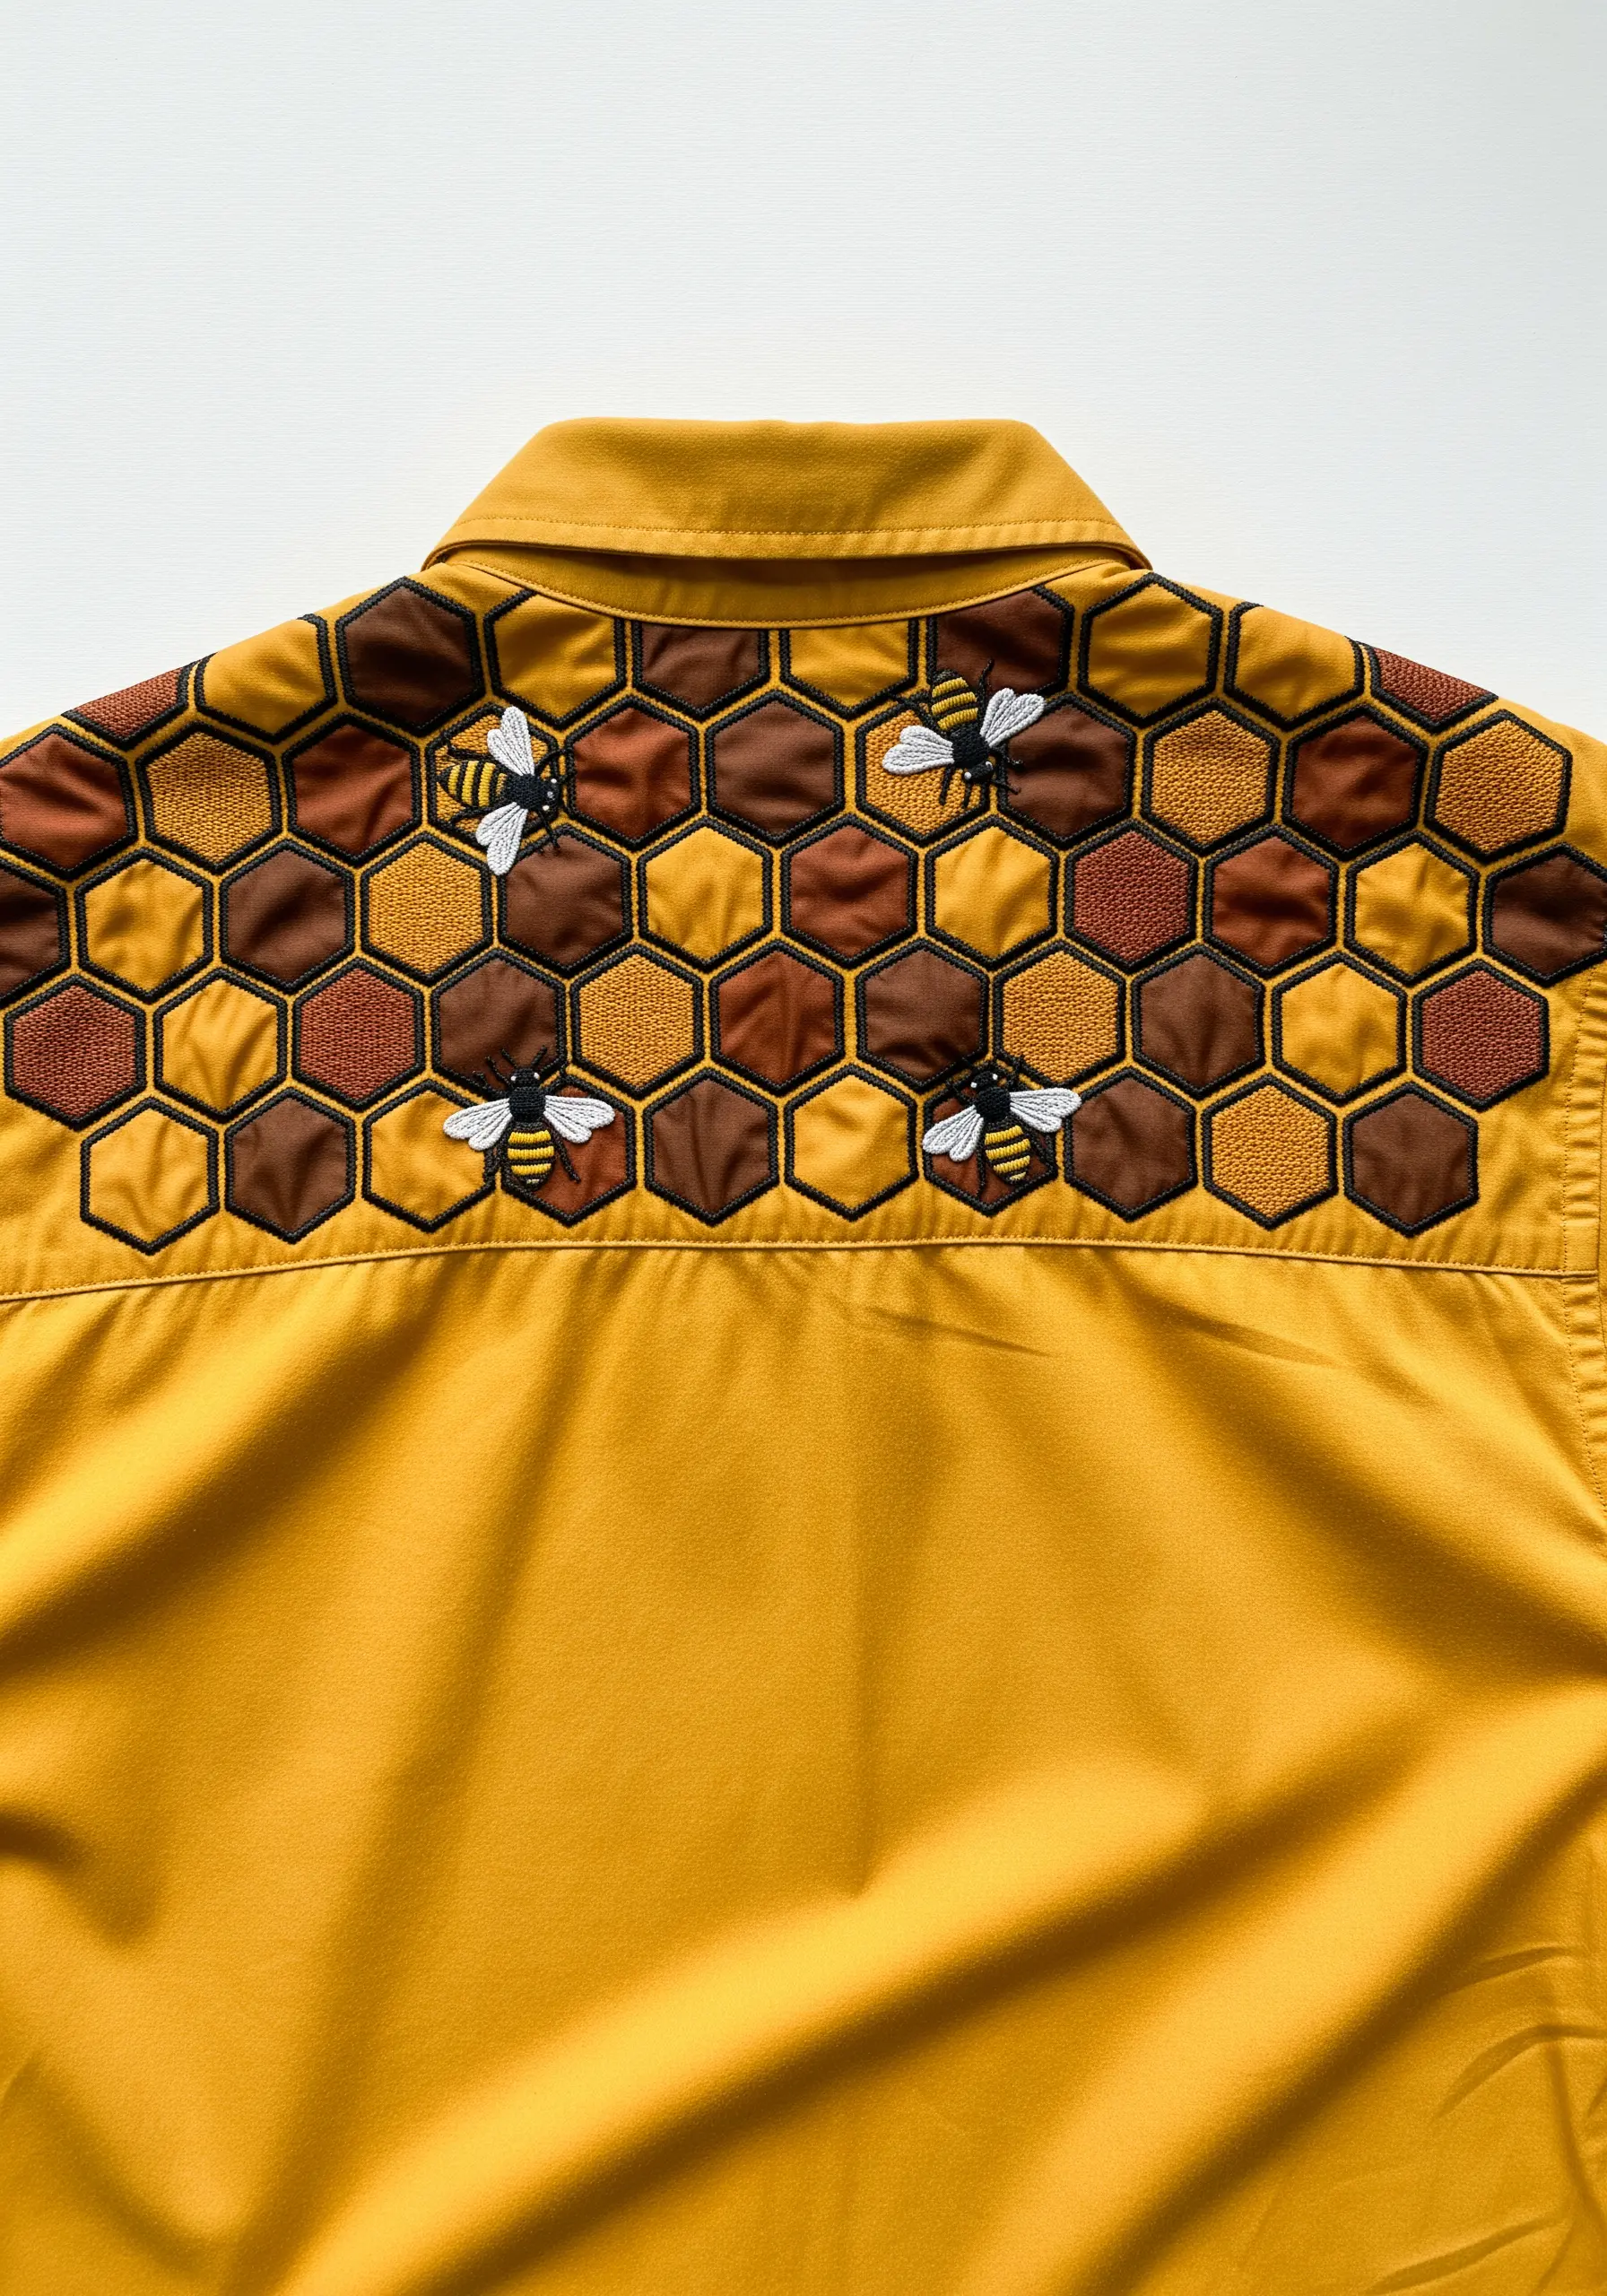
This design is a smart and efficient use of appliqué to create a complex-looking pattern.
Create your geometric honeycomb by cutting hexagons from various shades of brown and gold fabric. Adhere them with a fusible web before securing the edges with a neat backstitch outline.
This technique gives you perfectly crisp shapes and saves an enormous amount of time compared to filling each hexagon with satin stitch.
The bees can then be embroidered directly over the top, using satin stitch for their bodies and delicate, single straight stitches for their translucent wings.
25. The Great Wave in Thread
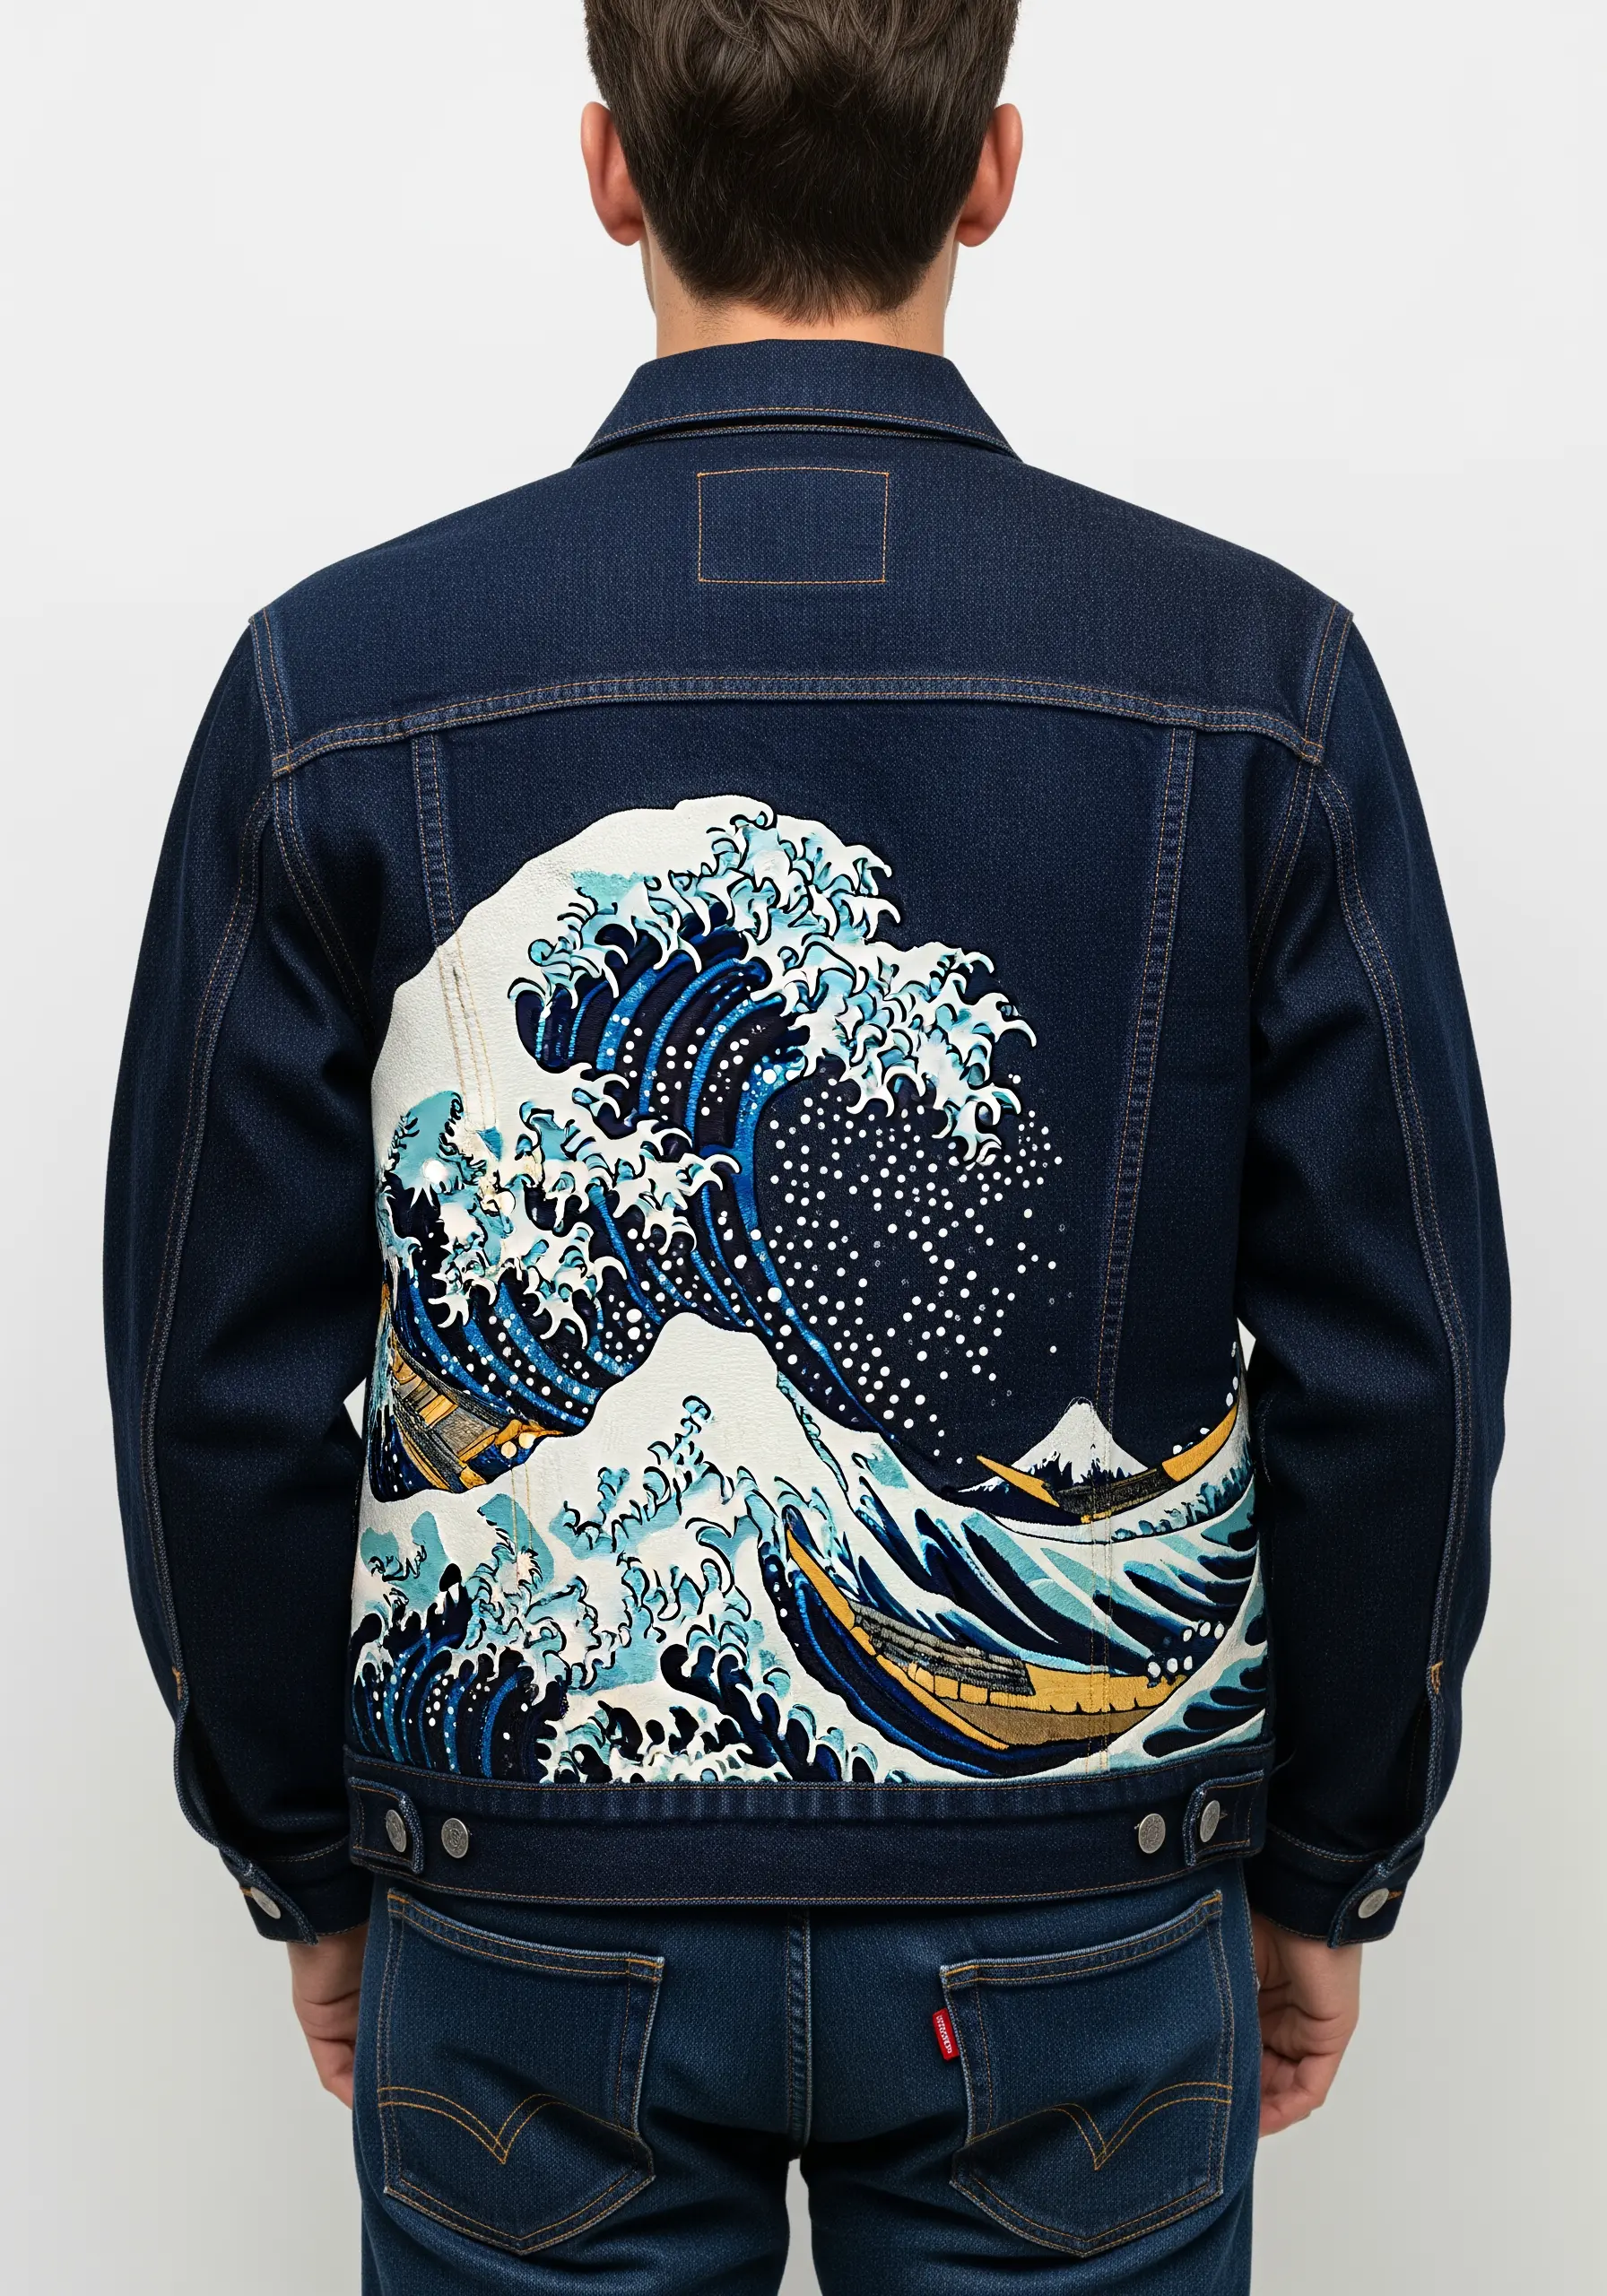
Recreating this iconic masterpiece is all about capturing movement and texture with your stitches.
Use a directional satin stitch for the body of the waves, making sure your stitches follow the powerful curves of the water.
The secret to the crashing sea foam is a dense cloud of French knots in white and light blue. This creates a wonderfully frothy, three-dimensional effect.
It is the contrast between the smooth, flowing stitches of the water and the clustered, tactile knots of the foam that truly brings this piece to life on fabric.
26. Cosmic Astronaut with a Galaxy Visor
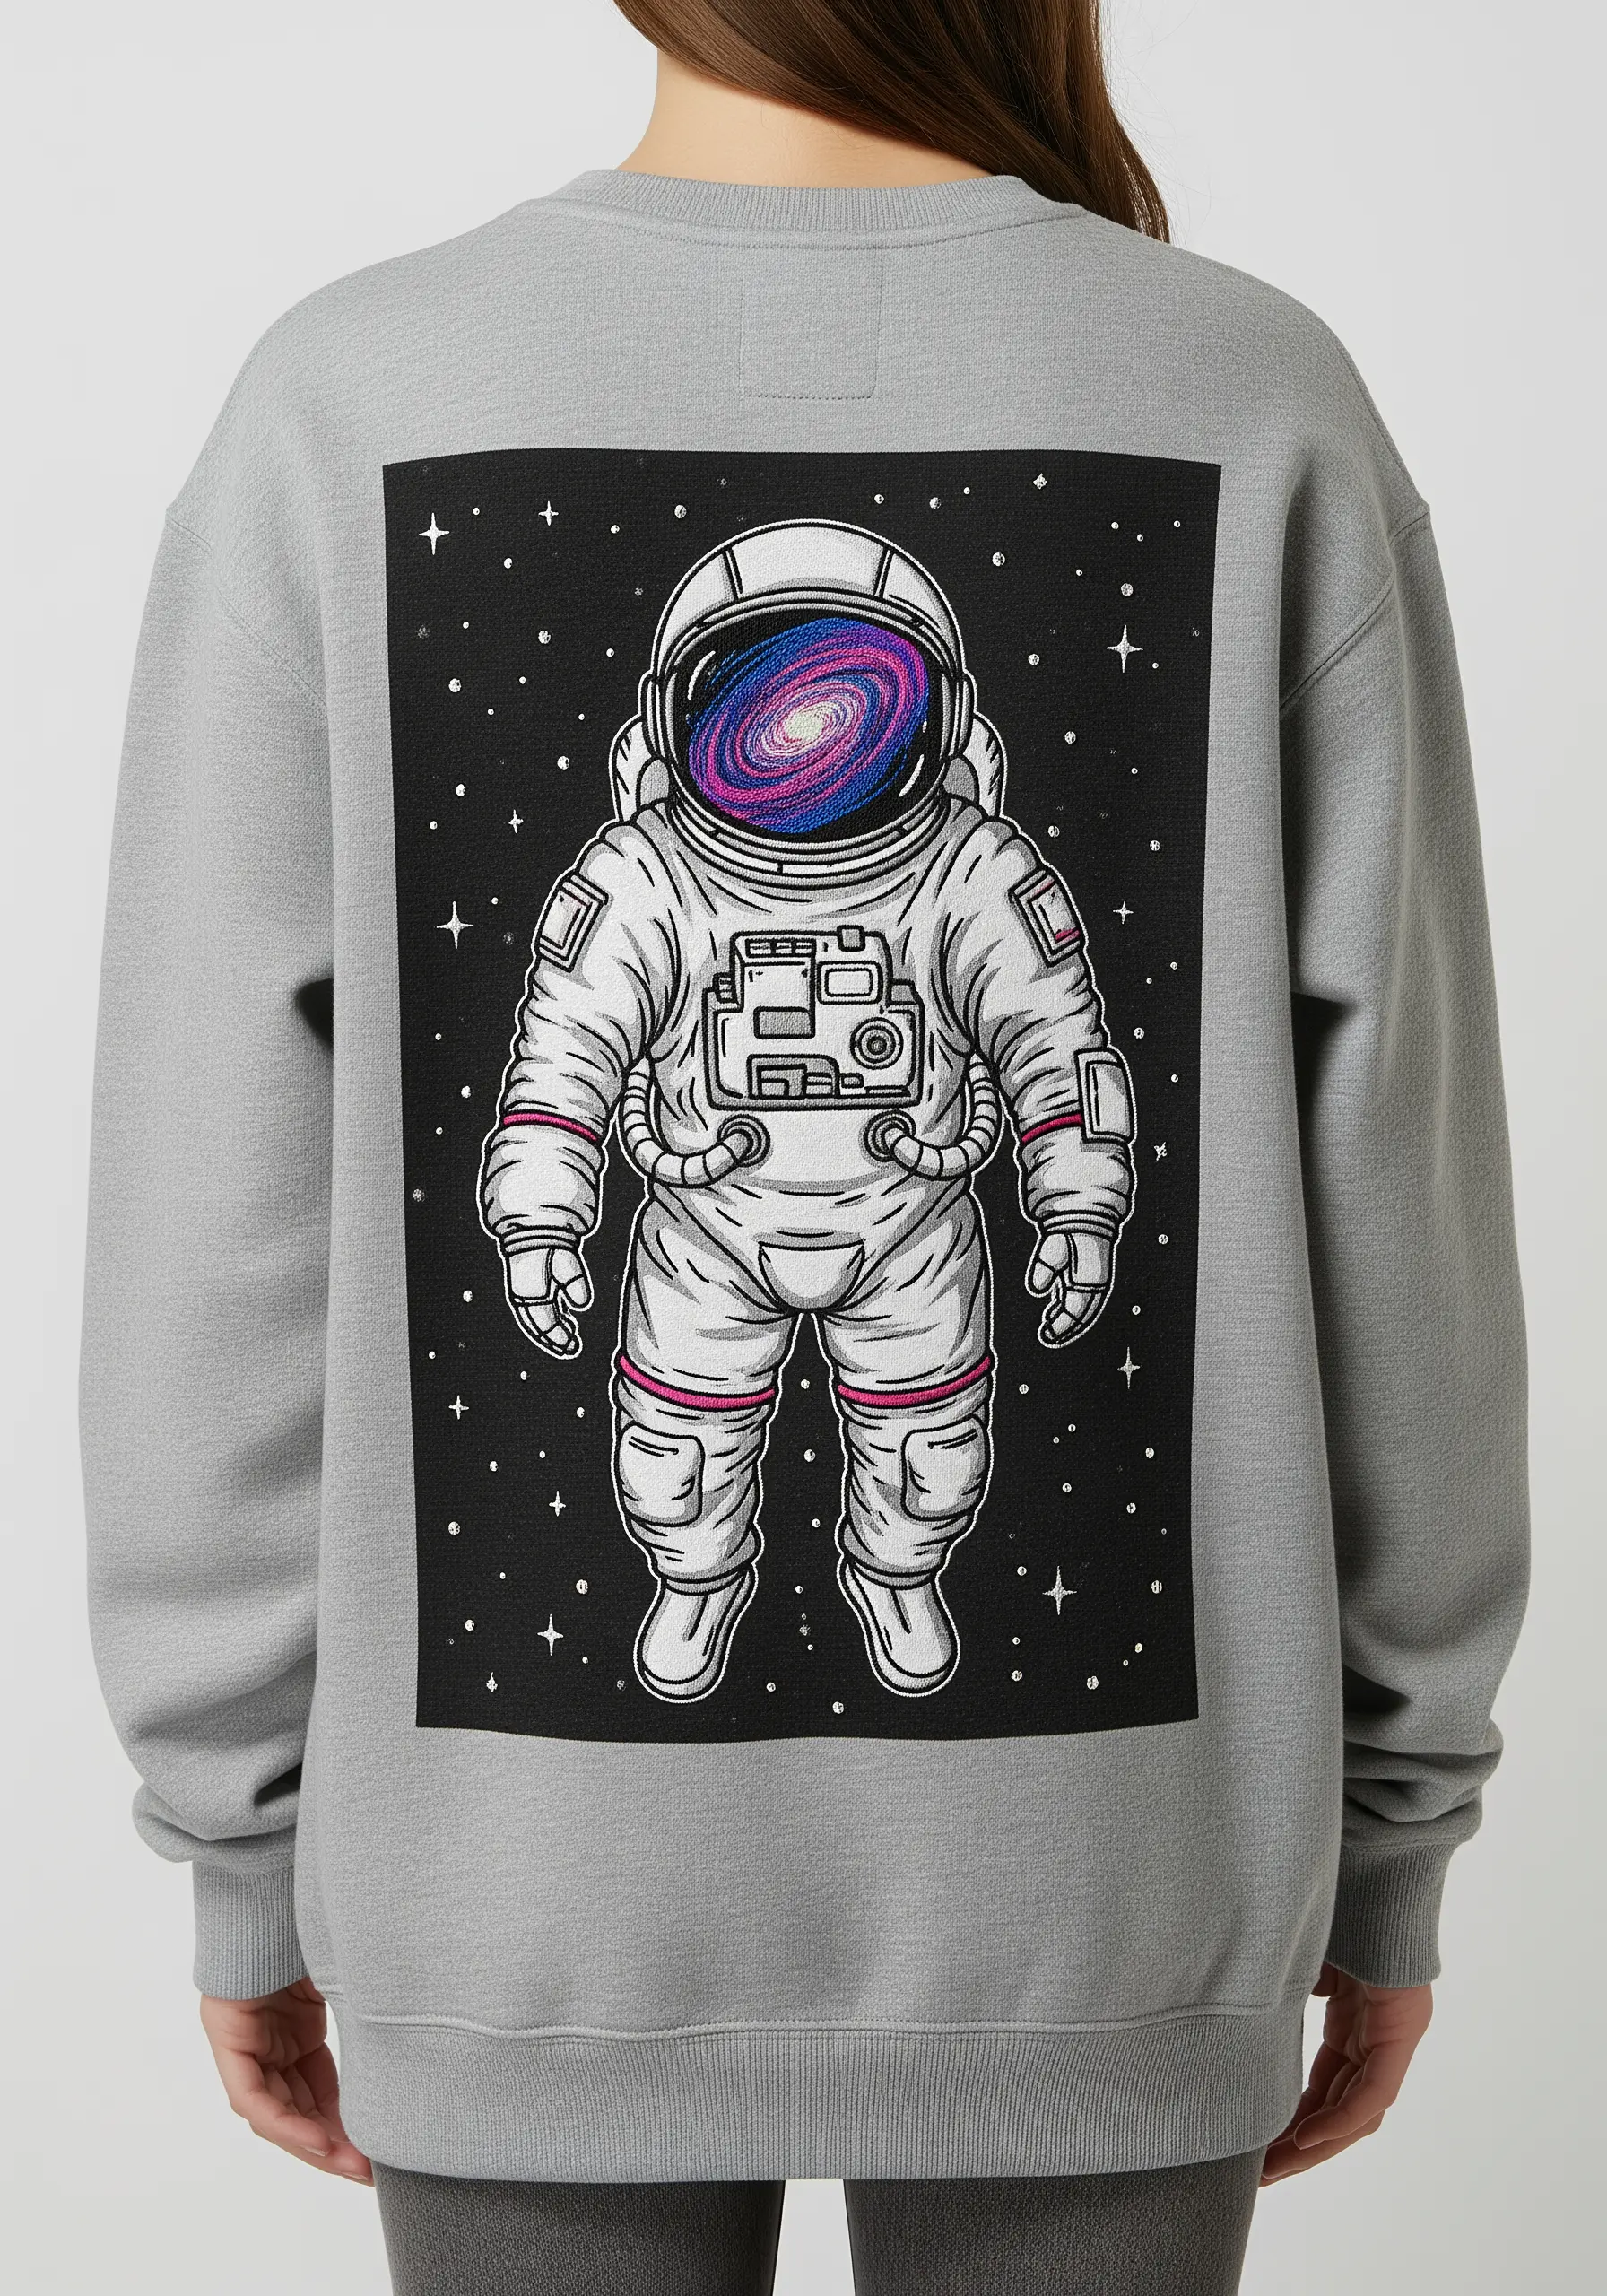
The entire story of this piece is told within the astronaut’s visor. This is where you should focus your most detailed work.
Create the swirling Galaxy Visor using a thread painting technique, blending shades of purple, pink, and blue with a long-and-short stitch.
Add a few scattered French knots in white or metallic silver thread to represent distant stars and nebulae.
For the rest of the astronaut’s suit, use a simple, clean backstitch for the outlines. This stark simplicity makes the cosmic detail of the visor the undeniable and breathtaking focal point.


