

There is a unique stillness in a pressed flower—a captured piece of sunlight, a memory of a garden. Embroidery, too, is an art of stillness, a practice of turning time into texture. When you bring them together, something truly special happens.
This isn’t about creating complex, photo-realistic work. It’s about letting these two gentle arts meet. Your thread can become a stem for a real blossom, a shadow beneath a leaf, or a simple line that gives a floating petal a place to land. It’s a partnership between what you’ve gathered from nature and what you create with your own hands.
So, look at your collection of pressed flowers and your palette of threads not as separate materials, but as a shared language. Start simply. Add a few stitches to anchor a stem. Outline a single petal. You’ll find that your embroidery doesn’t just decorate the flower; it gives it a new story, a new life, right there on the fabric.
1. Add 3D Texture with Embroidered Accents

Integrate your pressed flowers by first securing them with nearly invisible couching stitches—use a single strand of thread that matches your fabric.
Then, add textural contrast with embroidery.
Use yellow or golden French knots to mimic pollen or tiny buds, placing them near the real flower centers or scattered like seeds.
This technique draws the viewer in, blending the flat, delicate nature of the petals with the raised, tactile quality of the threadwork.
2. Frame Printed Florals with Thread Painting

Instead of using real pressed flowers on functional items like pillows, start with a floral-printed fabric appliqué.
Carefully cut out the flower shape, secure it to your cushion cover, and then use thread to bring it to life.
Outline the petals with a neat split stitch to create a clean, defined edge.
Fill the center with a dense cluster of French knots and use long-and-short stitch on the leaves to create realistic shading and depth.
This method gives you the beauty of botanicals with the durability needed for home decor.
3. Fill an Embroidered Outline with Tiny Flowers

Define a simple shape on your surface—like a journal cover or a piece of cardstock—using a clean backstitch.
A single strand of metallic thread works beautifully for celestial themes like moons and stars, giving the outline a subtle shimmer.
Carefully arrange and adhere tiny pressed flowers, like baby’s breath or alyssum, within the stitched boundary.
The embroidered line acts as a perfect container, turning a loose sprinkle of flowers into a deliberate, graphic design. It’s an elegant approach for mixed-media crafts with embroidery.
4. Create a Botanical Tapestry with Stitched Connectors

Transform a collection of pressed leaves into a large-scale wall hanging by focusing on connection.
Arrange your leaves on a linen or canvas panel in a cascading, organic pattern.
Instead of letting them float, link them with embroidered lines.
Use a textured stitch like a chain stitch or a decorative whipped backstitch to create vines and stems that guide the eye through the composition, unifying the individual elements into a single, flowing piece of art.
5. Layer Botanicals on Sheer Fabric for a Floating Effect

Stitch on organza or tulle to make your pressed flowers appear suspended in air.
Stretch one or two layers of sheer fabric in your hoop, then arrange your lavender sprigs and forget-me-nots on top.
Secure them with a few tiny, discreet stitches, or couch them with a single strand of fine thread.
You can then add a whimsical, whisper-light running stitch in a complementary color to suggest movement or a gentle breeze, enhancing the ethereal quality of the design.
6. Translate Natural Forms into Wearable Stitches

While you can’t wear real pressed ferns, you can translate their delicate structure into durable embroidery for a denim jacket.
Start by tracing the fern’s shape onto your fabric.
Use a central stem stitch for the main stalk and then work the fronds using fishbone stitch or separated fly stitches.
This approach captures the intricate, natural pattern of the fern in thread, creating a design that is both organic and permanent.
7. Design Functional Art with Herbaceous Coasters
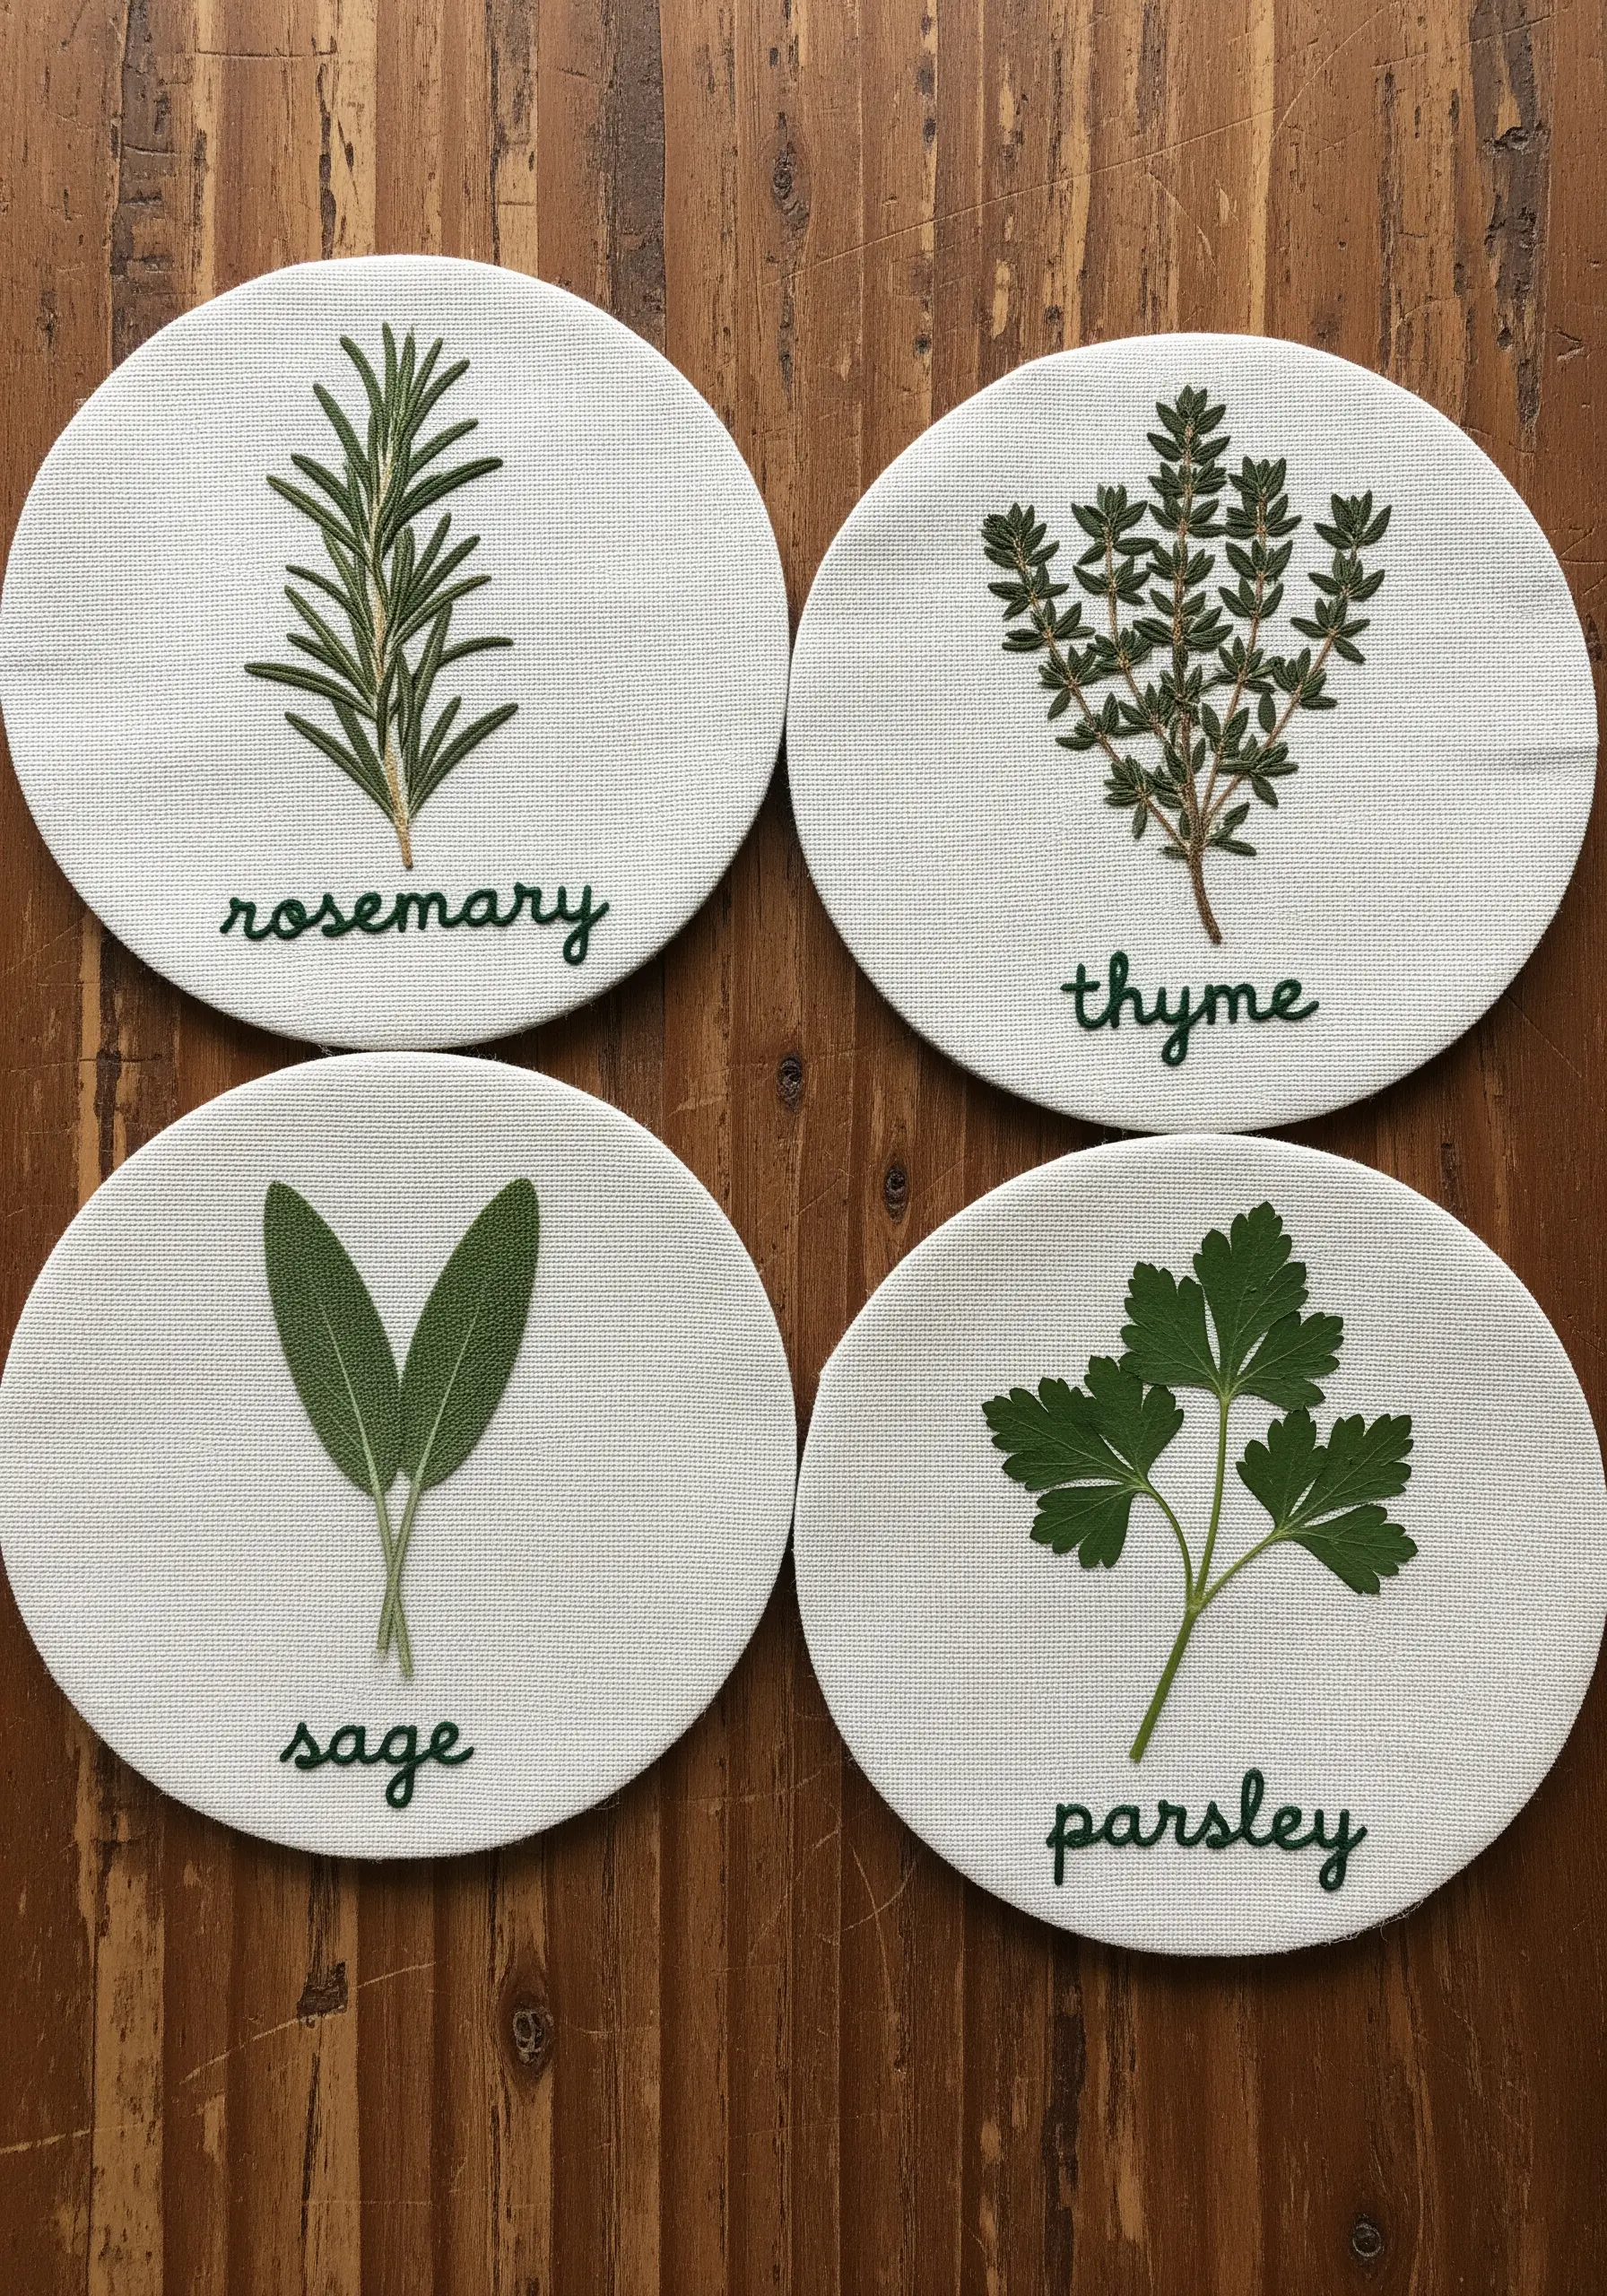
Elevate simple home goods by combining pressed herbs with clean, modern lettering.
Secure a pressed sprig of rosemary or thyme onto a heavy cotton or linen circle using a clear-drying adhesive.
To add a polished, handmade touch, embroider the herb’s name below it.
Use a simple, legible backstitch with three strands of floss for clarity. This transforms a practical item into a piece of personalized, garden-herb embroidery art.
8. Frame a Single Stem as a Botanical Specimen
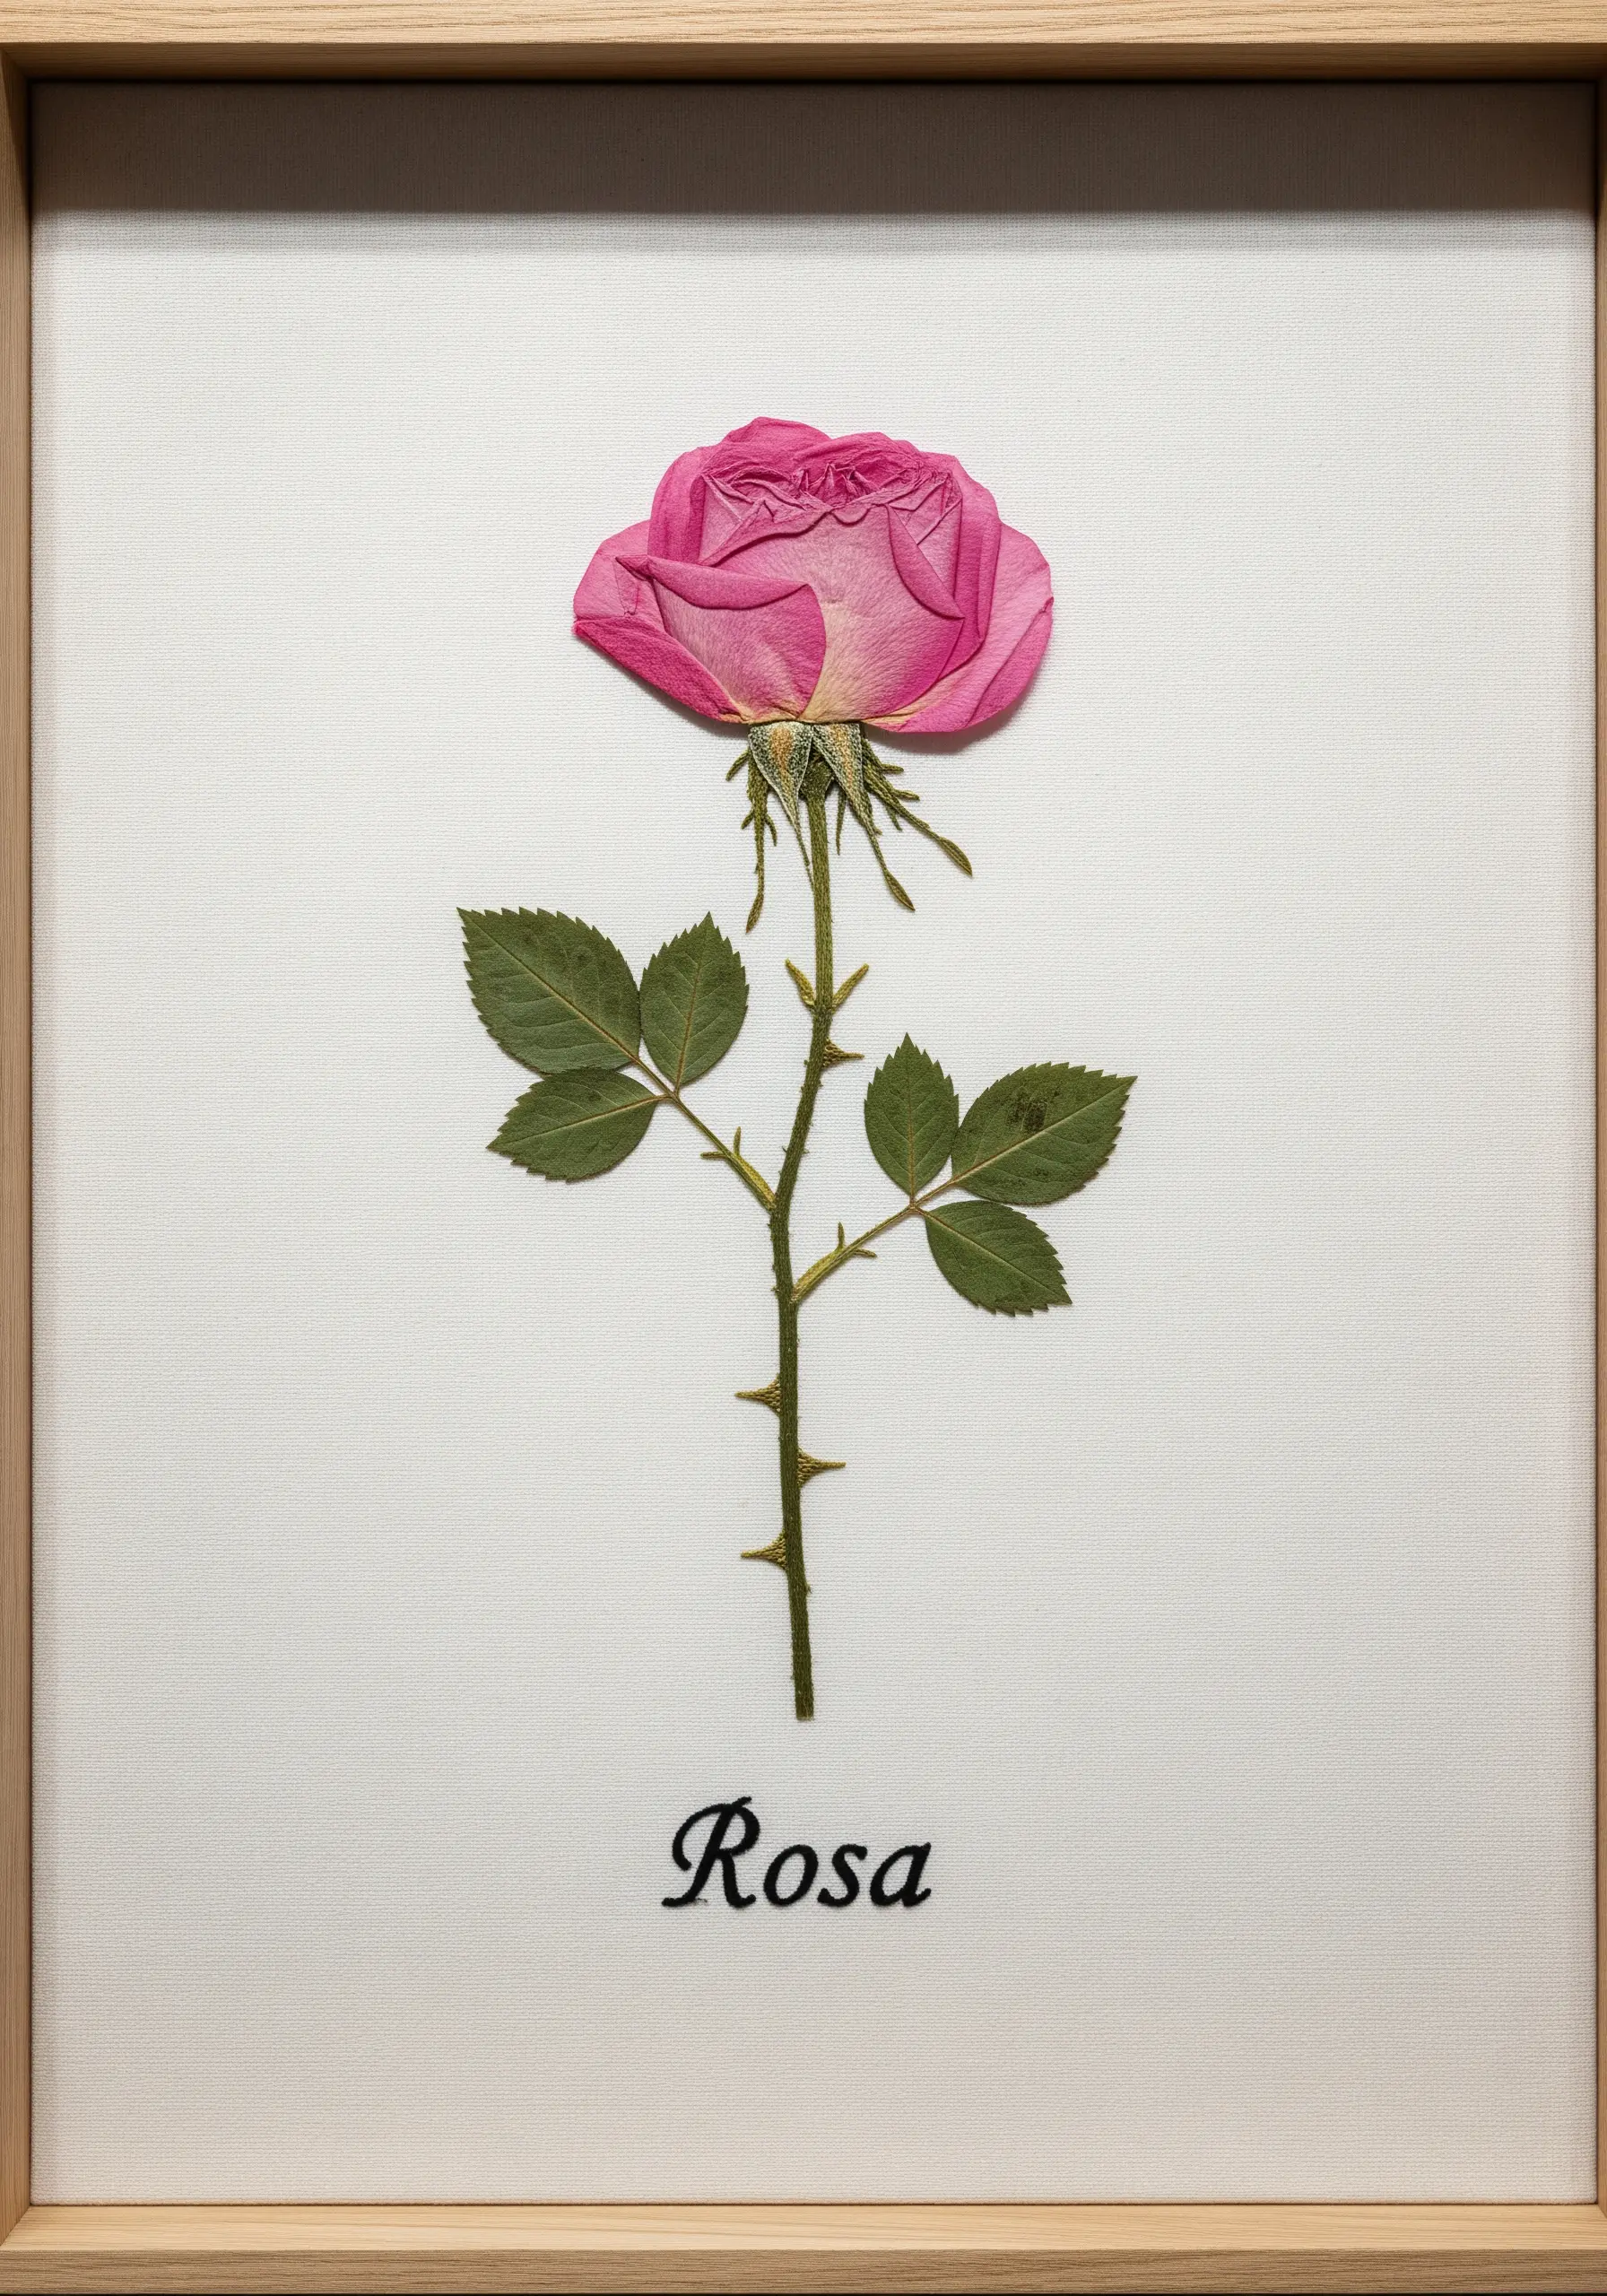
Celebrate the simple beauty of a single flower by presenting it in the style of a classic botanical illustration.
Carefully mount a perfectly pressed rose onto a clean, high-quality linen background.
Below, add its name in an elegant, cursive script using a single strand of black or dark grey thread in a tiny split stitch.
The minimalist composition and refined lettering draw all attention to the flower’s form, color, and texture, turning it into a sophisticated piece of nature-inspired framed embroidery.
9. Frame a Bold Flower with a Textural Border
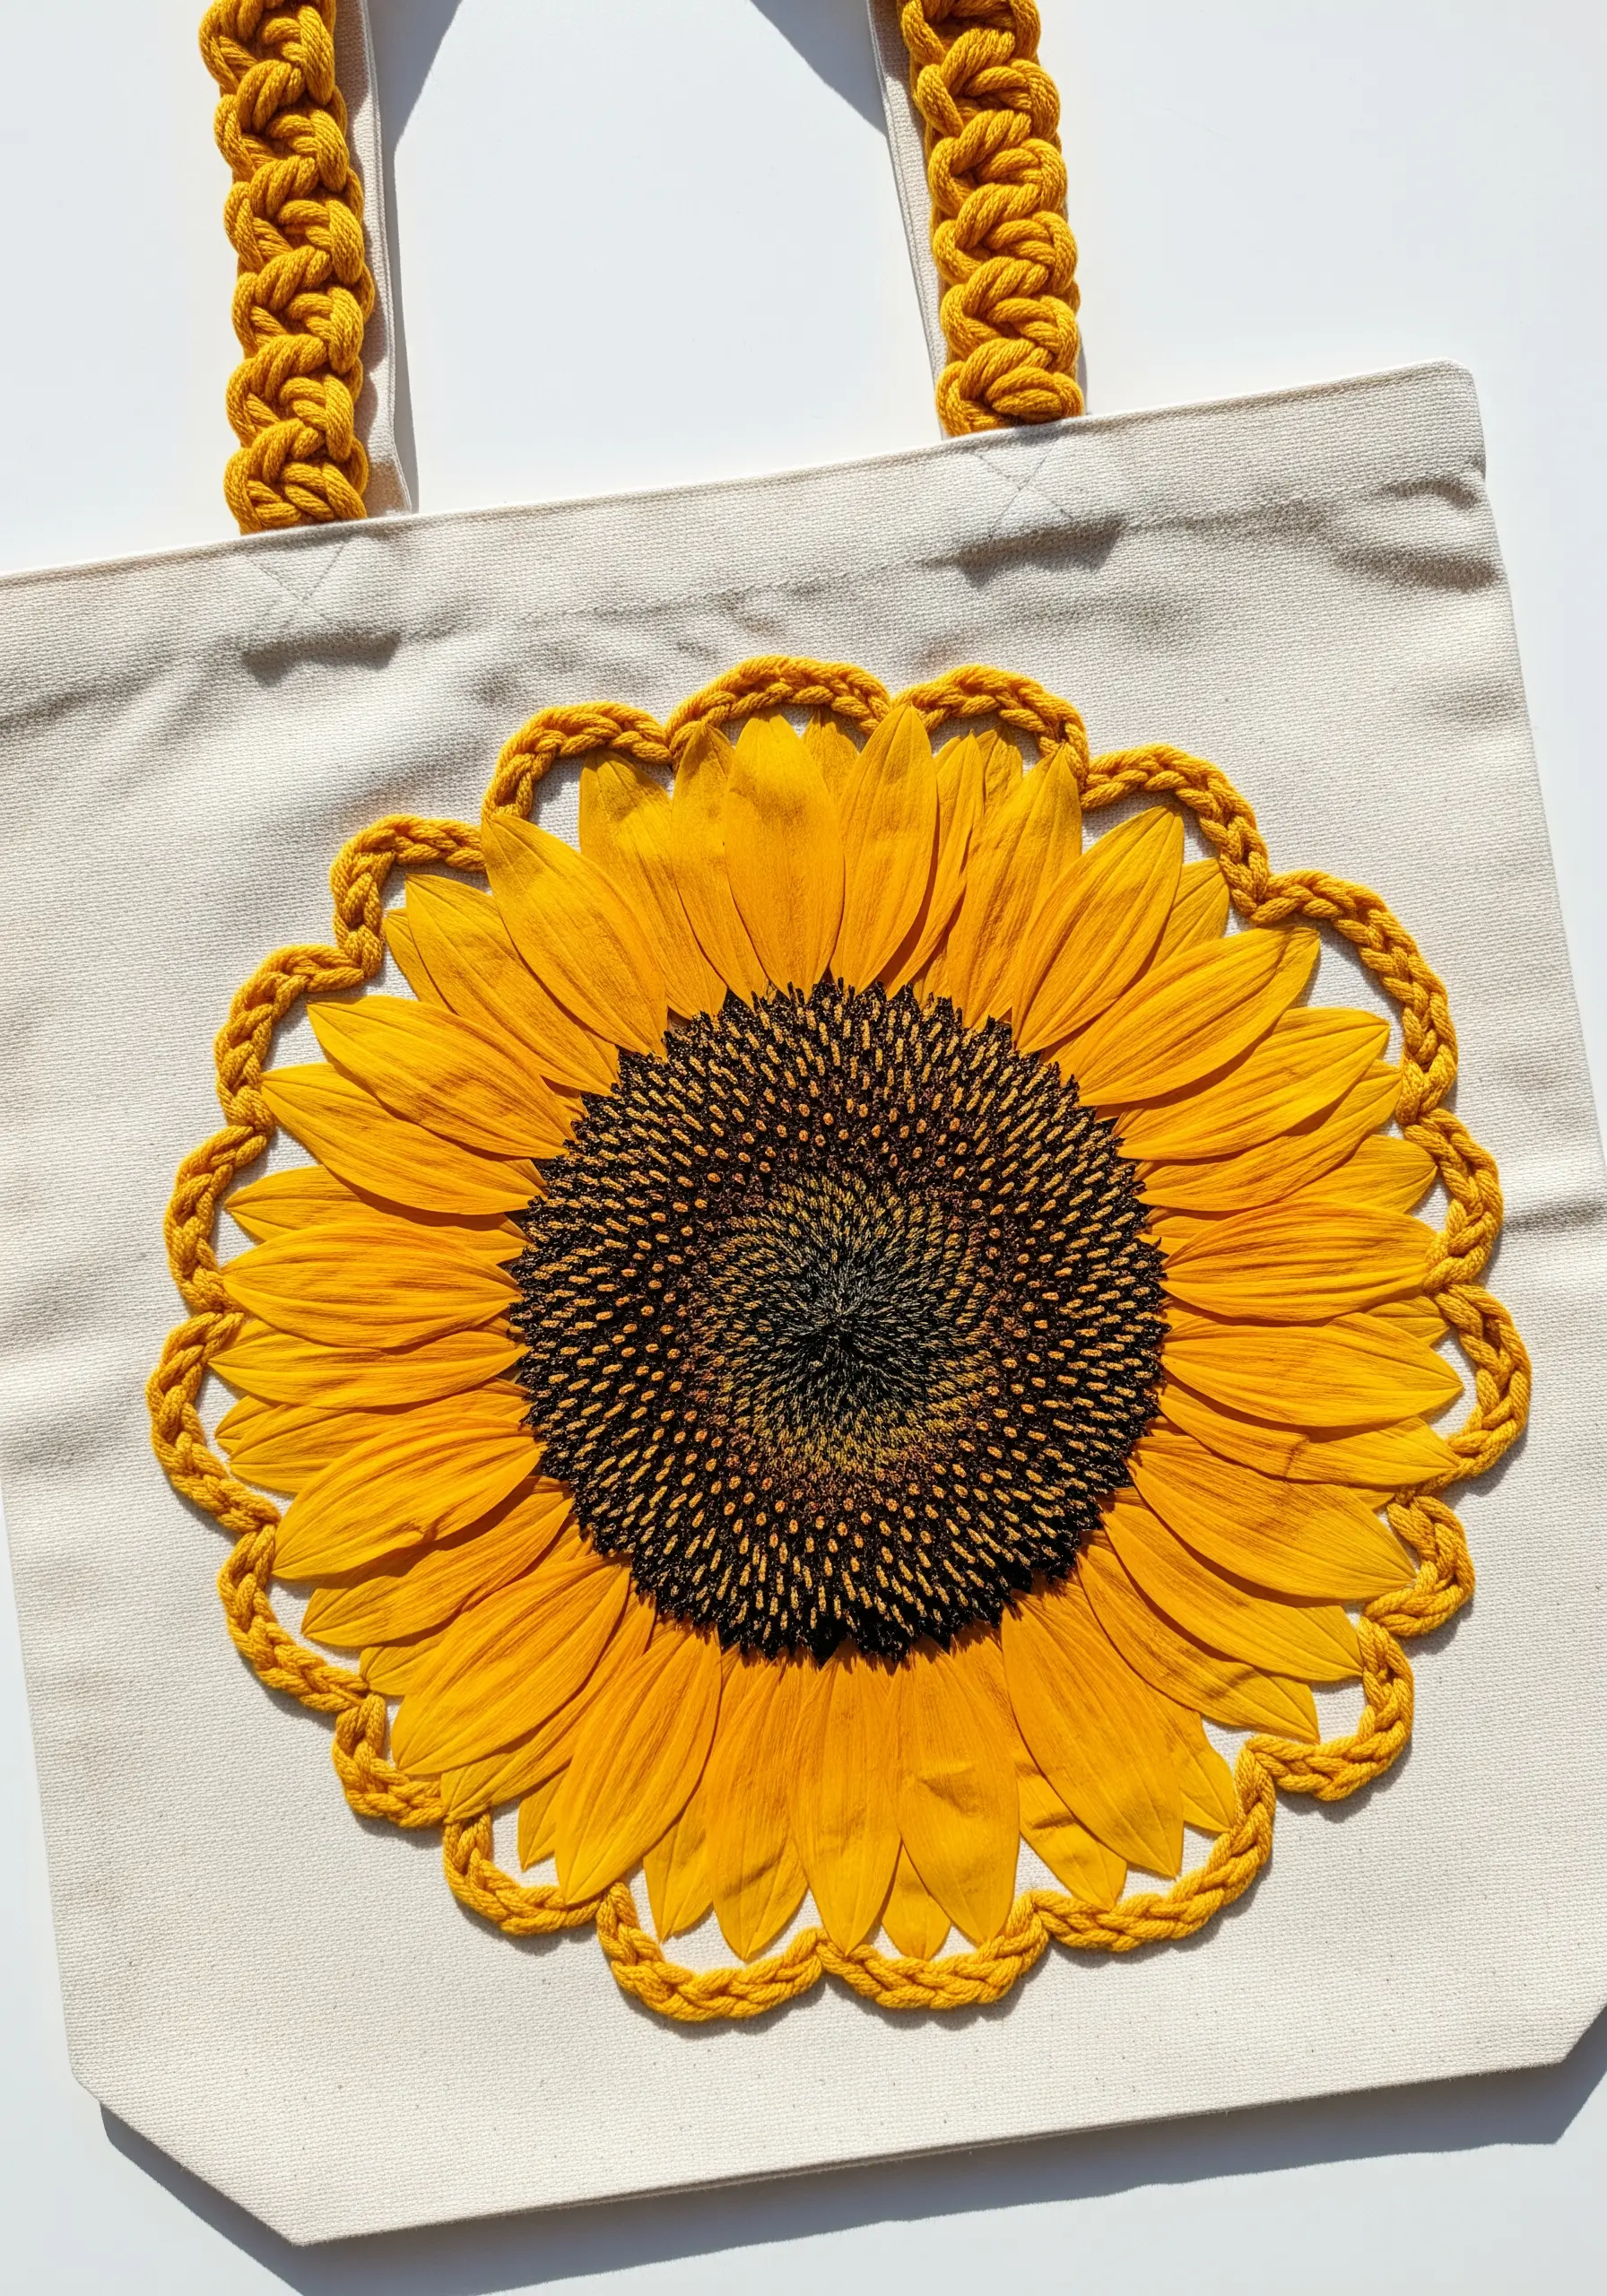
When working with a large, dramatic pressed flower like a sunflower, give it a frame that matches its scale.
After securing the flower to a canvas tote bag, create a bold, dimensional border around it.
Instead of a simple backstitch, use a chunky chain stitch, a plaited braid stitch, or couch a thick yarn around the edge.
This technique adds a satisfying tactile quality and a modern, boho finish, turning plain tote bags into garden-inspired masterpieces.
10. Create Hybrid Bouquets on Delicate Linens
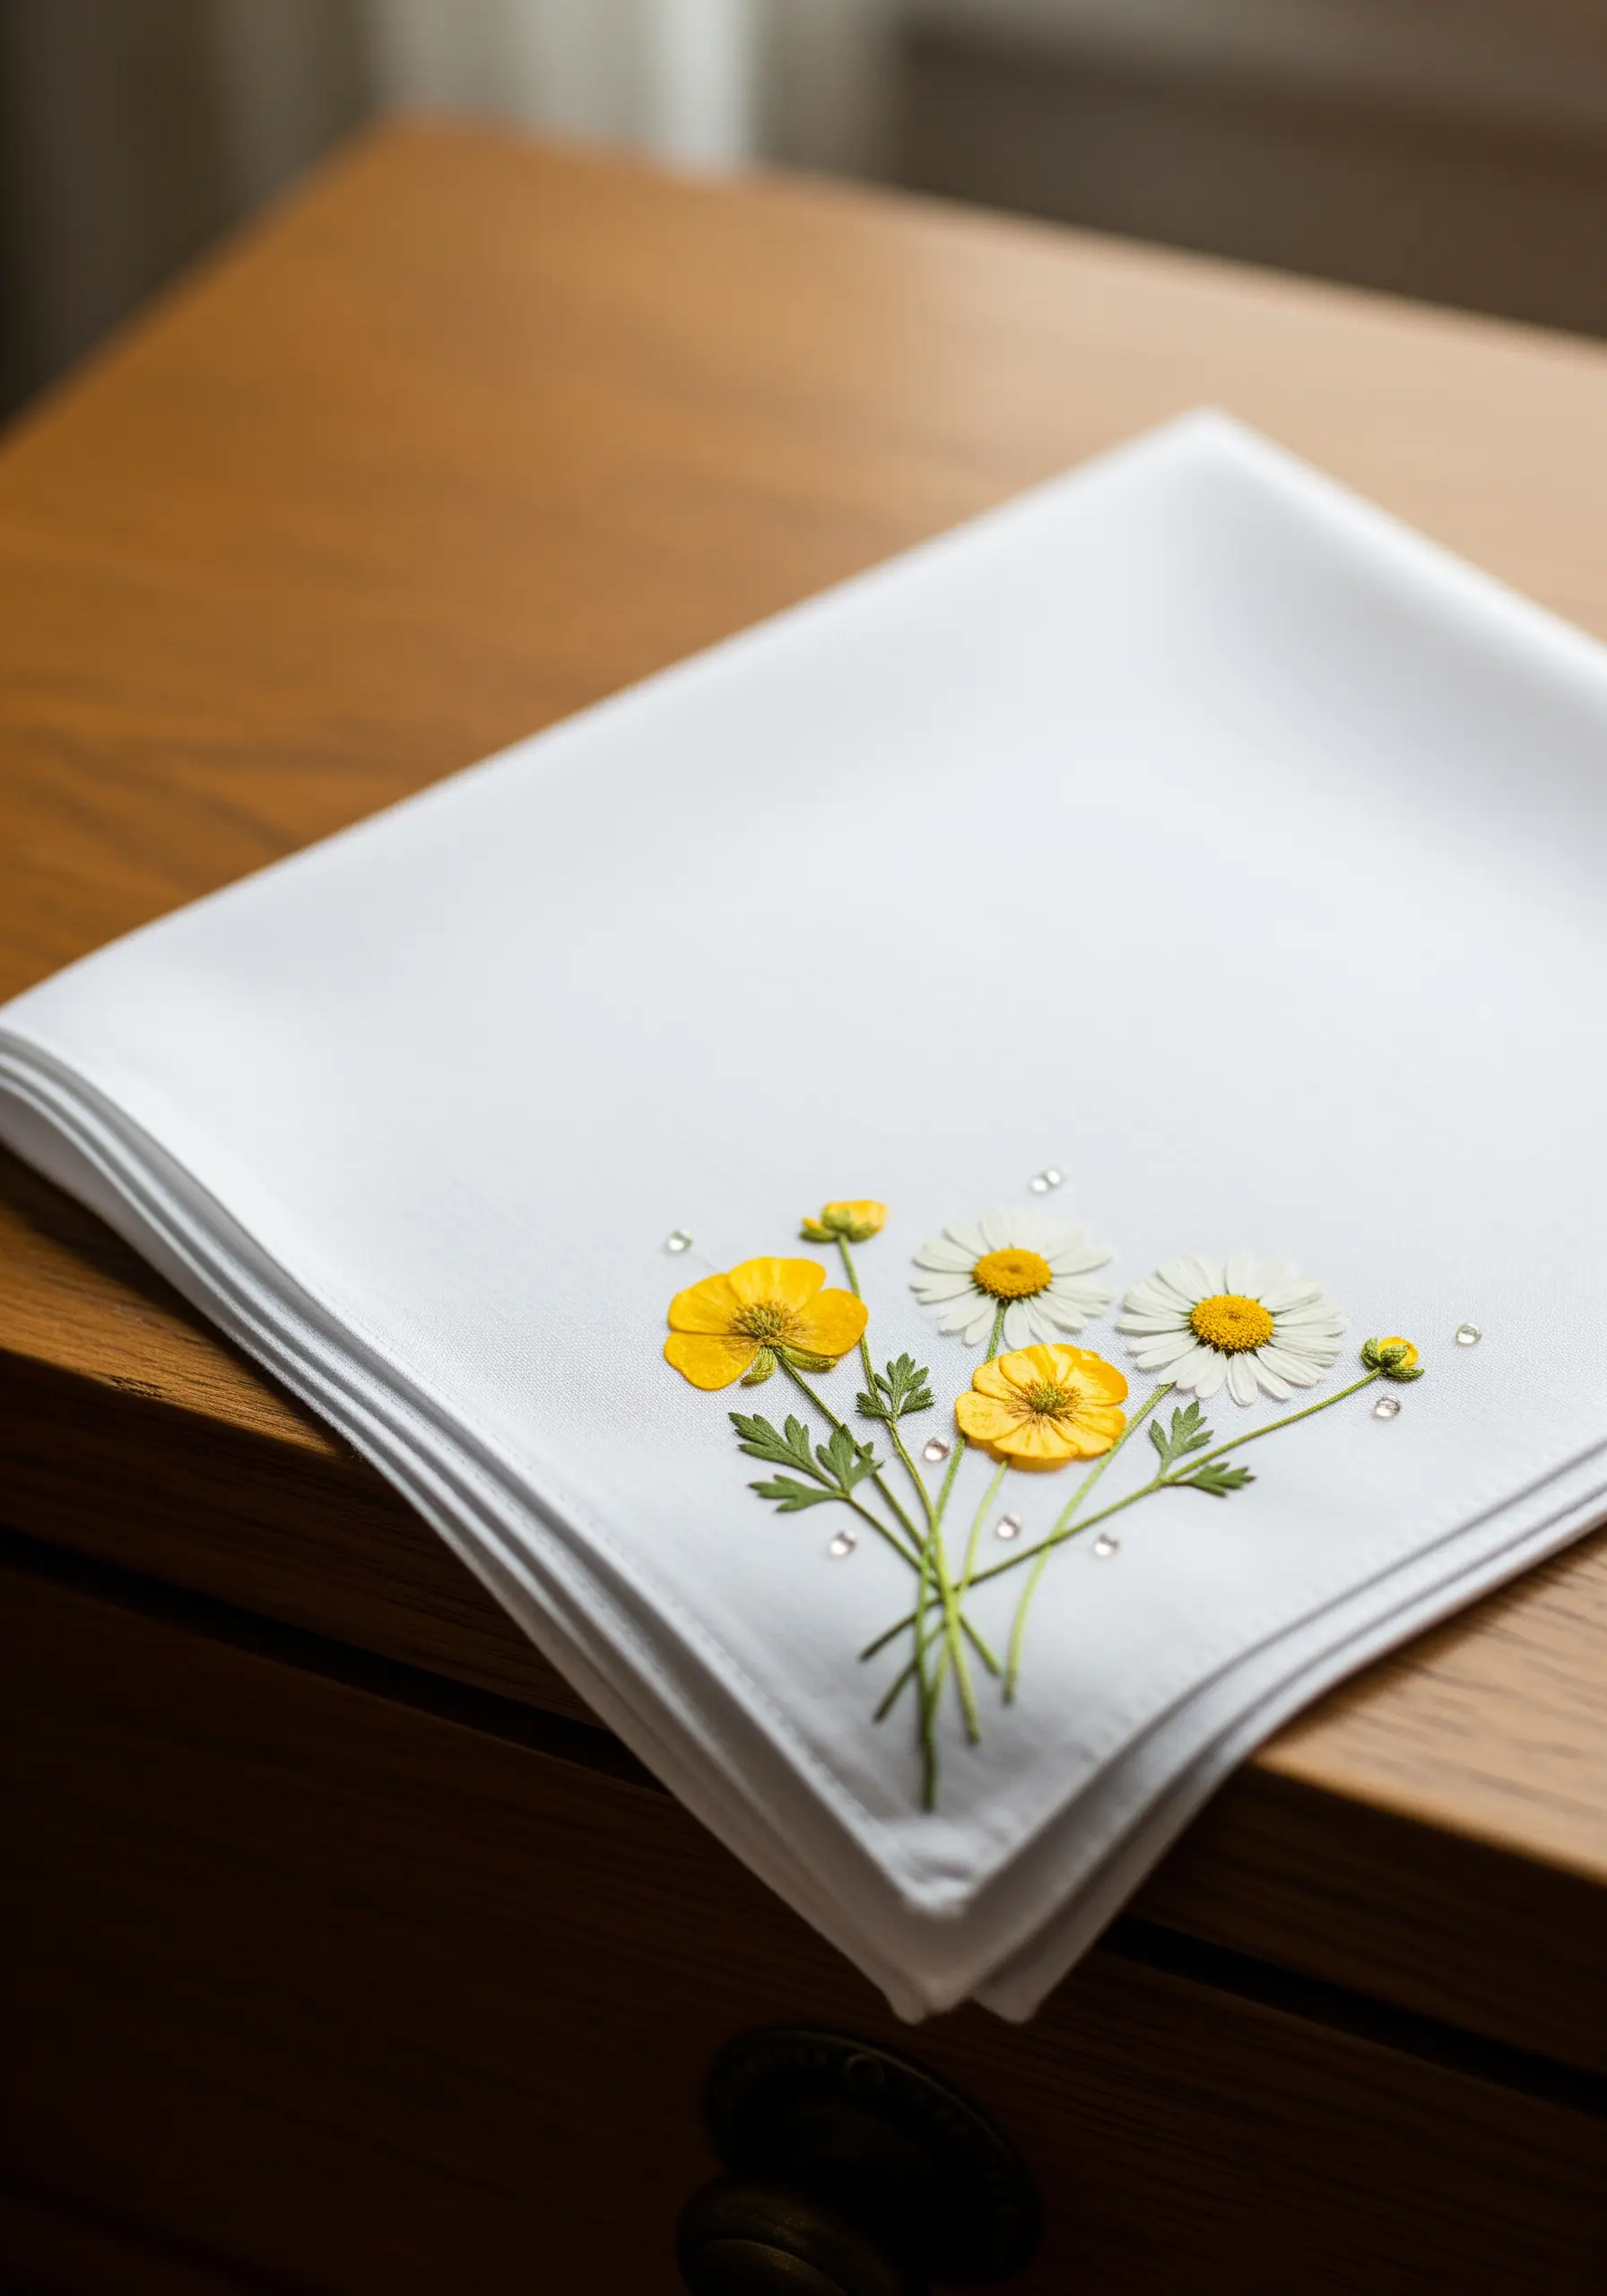
Seamlessly blend pressed flower heads with embroidered stems for a delicate, integrated design.
Arrange small pressed blossoms, like daisies or buttercups, in the corner of a fine cotton handkerchief.
Then, use a single strand of green floss to stitch the stems, bringing them together at the base as if they were a real bouquet.
A fine stem stitch or a whipped backstitch works perfectly. This technique anchors the real flowers to the fabric, making them look as if they grew there.
11. Paint a Landscape with Botanical Layers
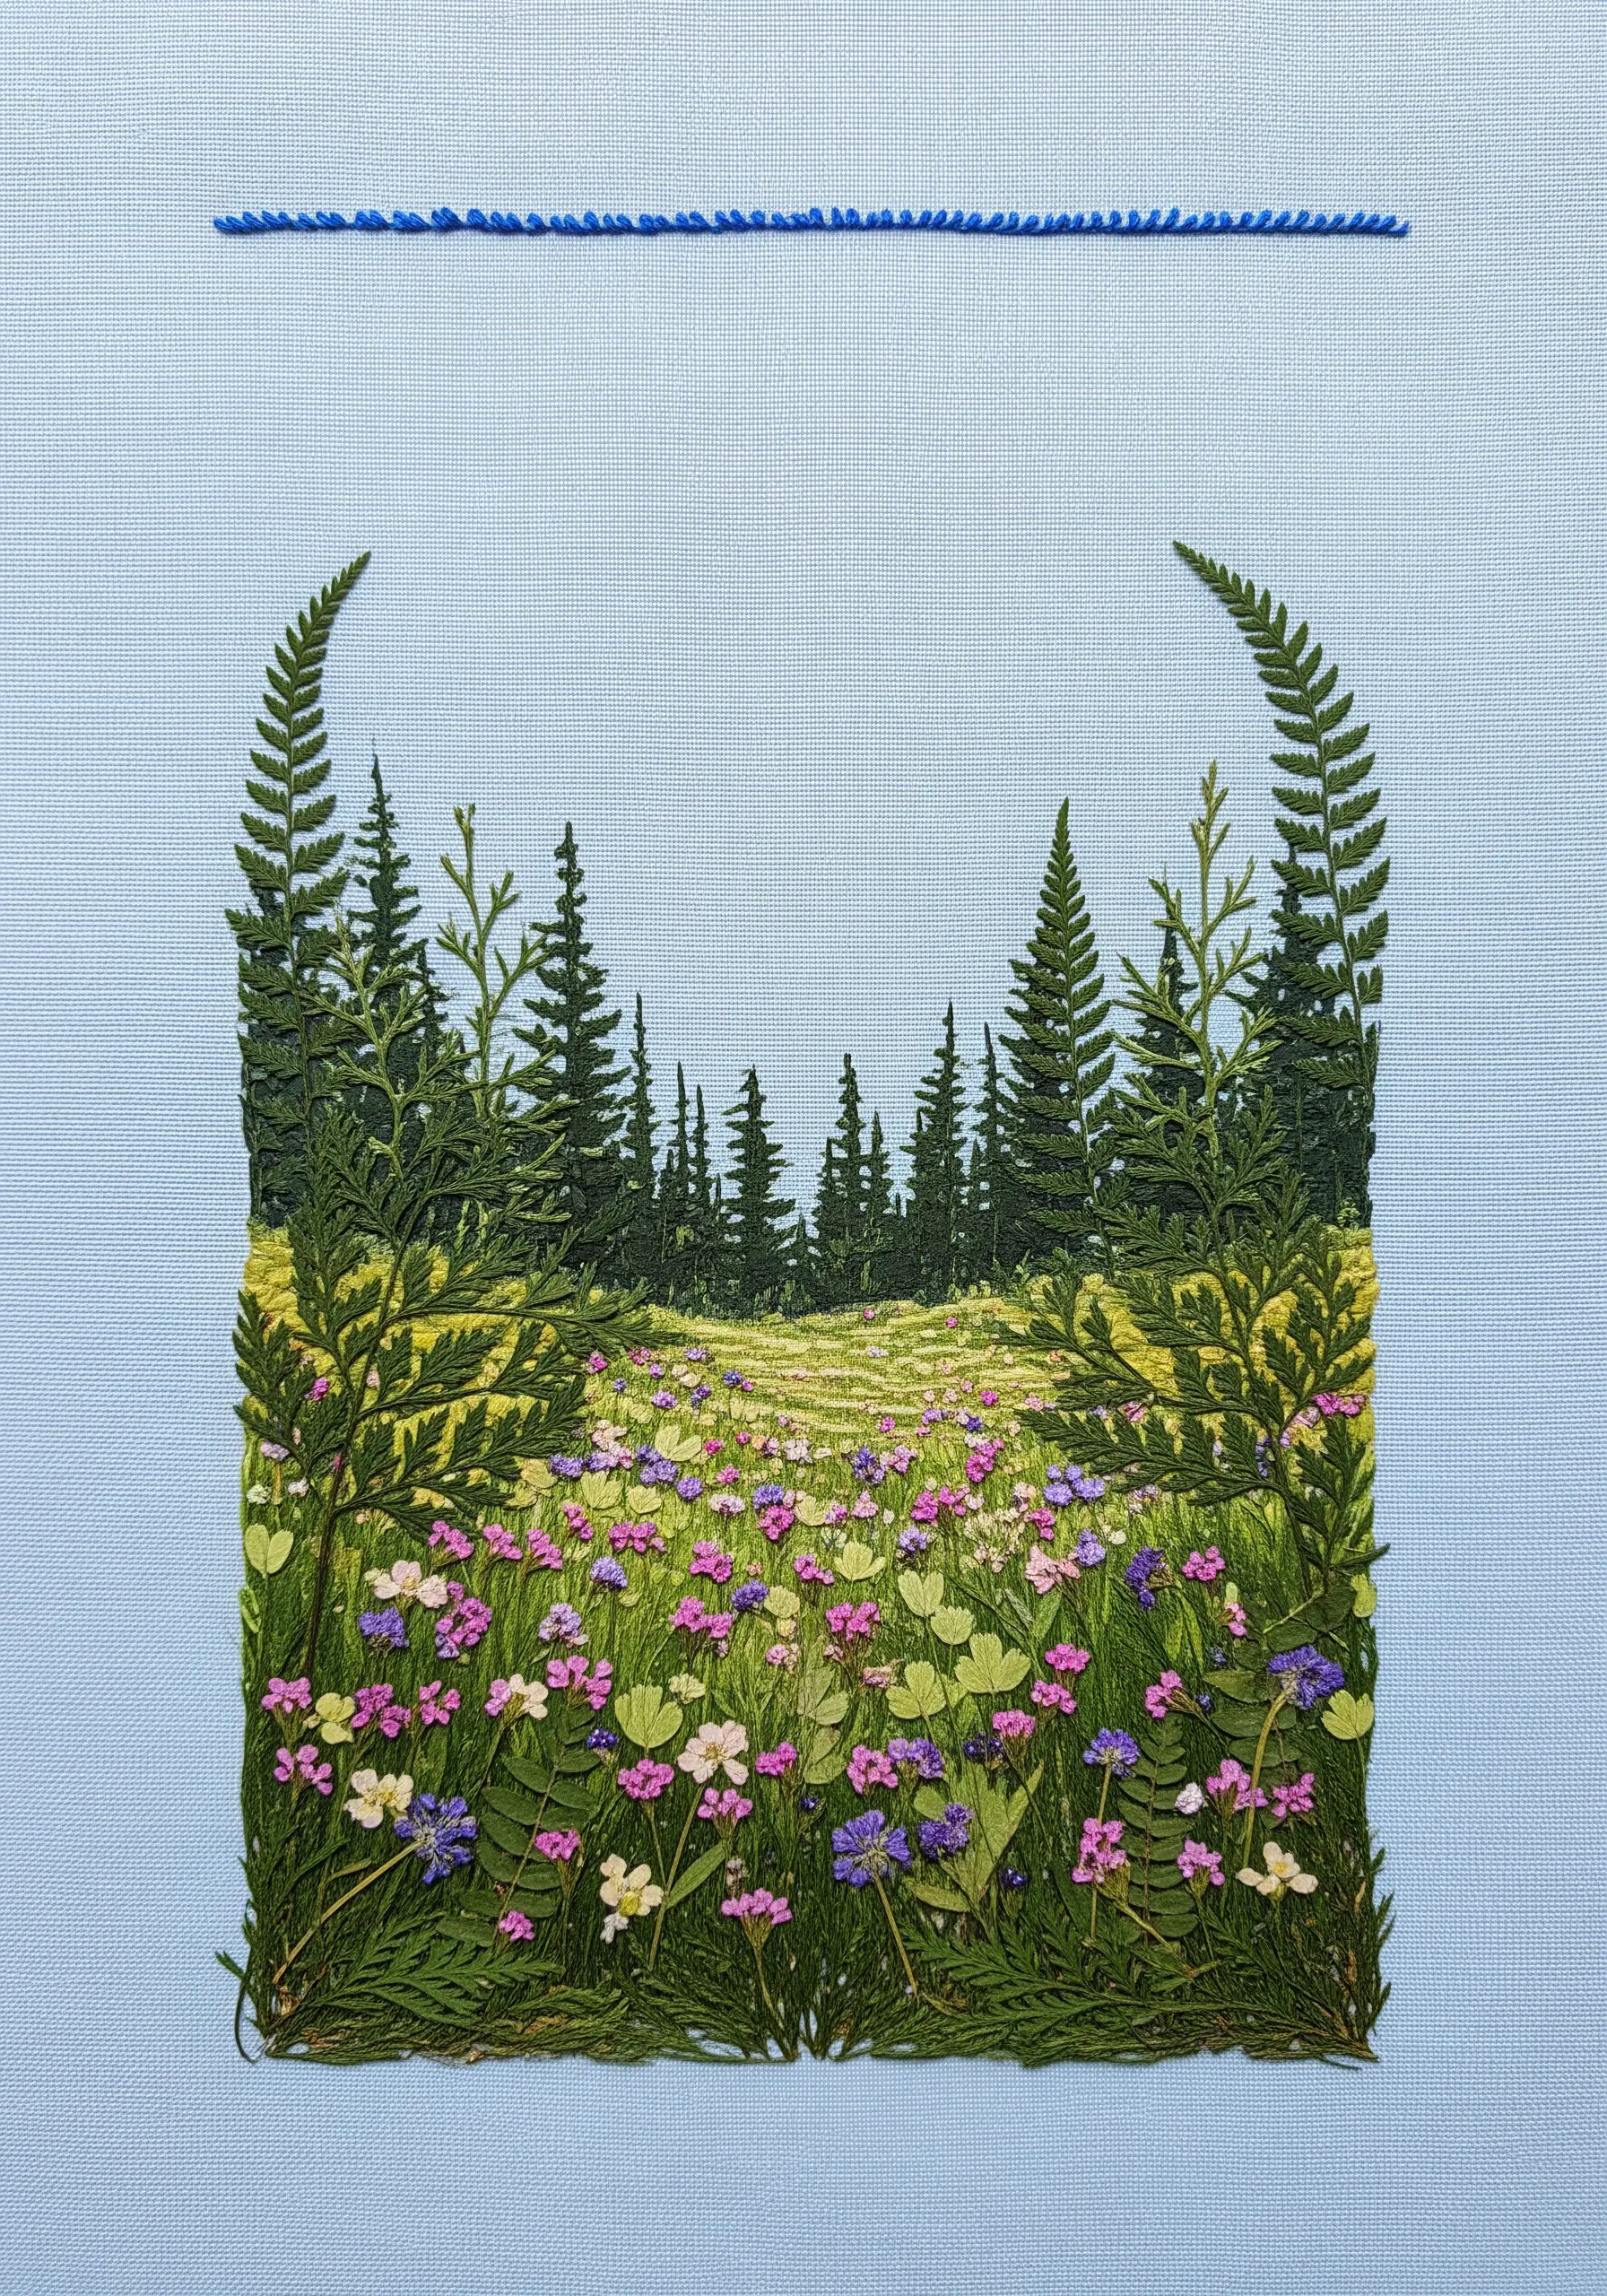
Move beyond single flowers and use a variety of pressed botanicals to construct an entire scene.
Think of your leaves and petals as a painter’s palette.
Use different textures and colors of foliage to create fields, forests, and meadows, layering them for depth.
Secure the elements with a suitable adhesive, and then add a single, clean line of backstitch at the top or bottom to formally frame your botanical painting.
The artistry here is in the composition and layering, creating a true modern thread landscape from natural materials.
12. Illuminate Botanicals on a Lampshade
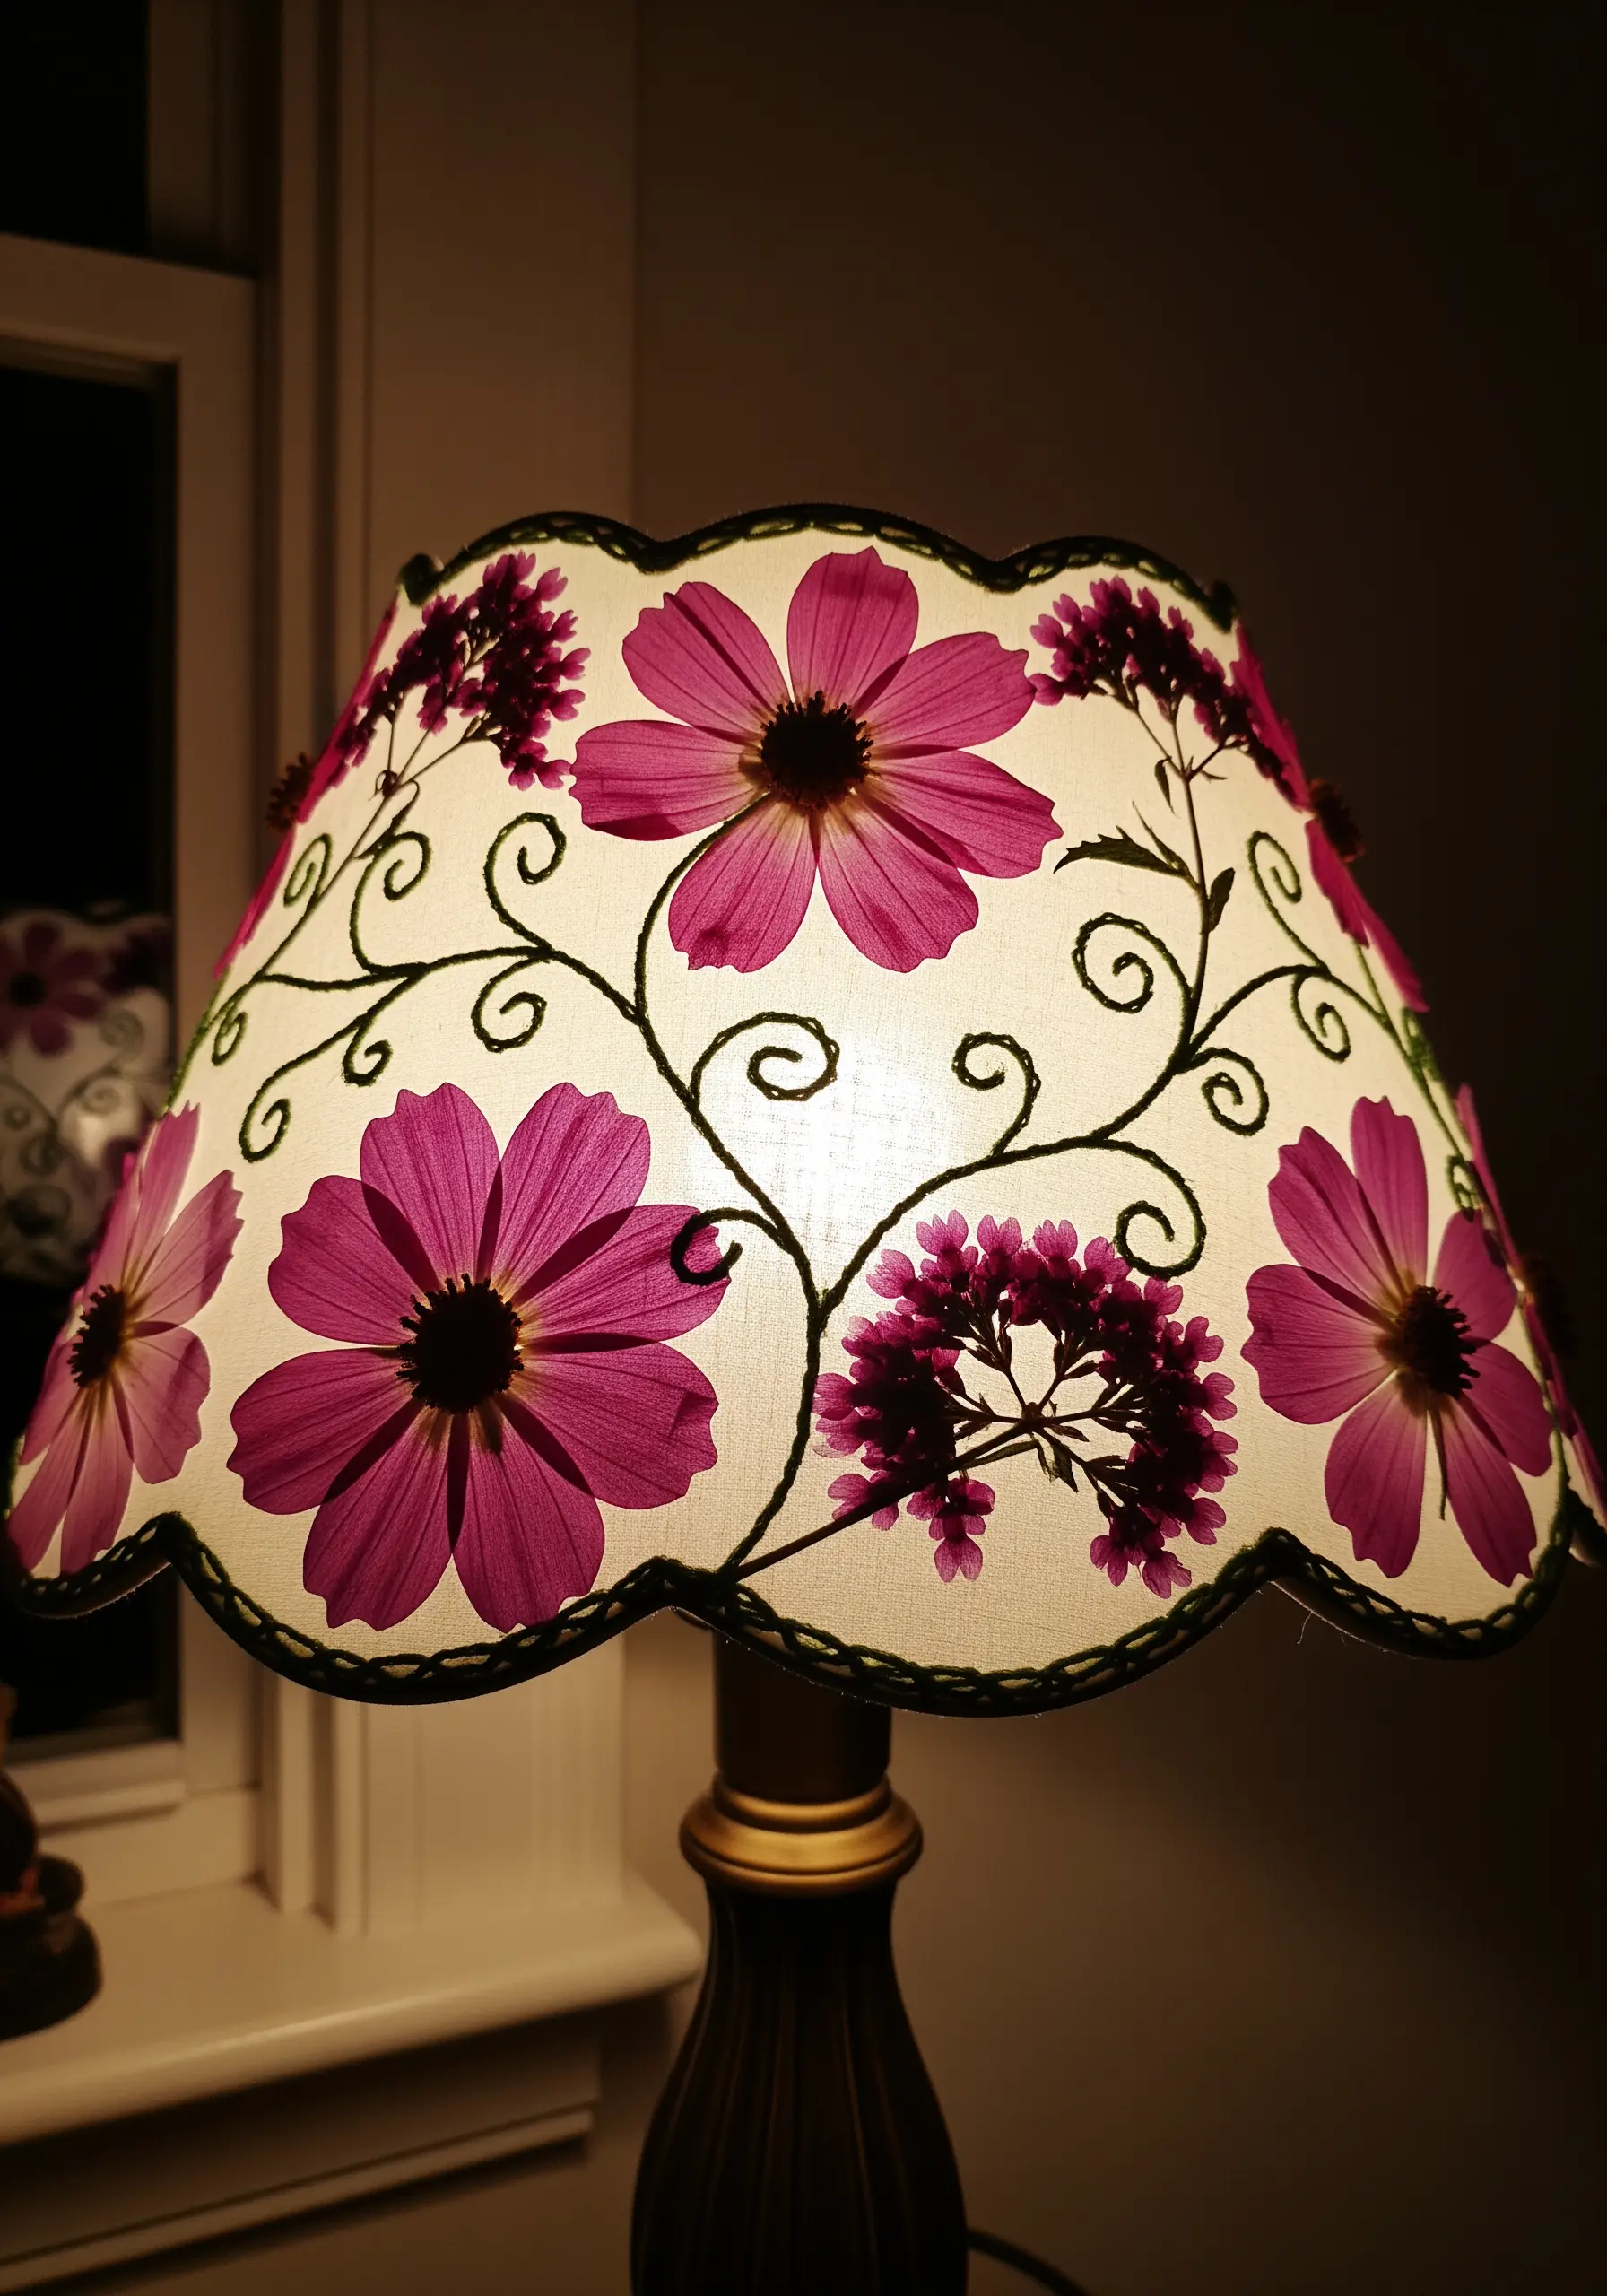
Create a design that transforms when lit by applying pressed flowers to a fabric lampshade.
Adhere your flowers to the shade, then connect them with an elegant, swirling vine motif stitched in a dark thread using stem stitch or chain stitch.
During the day, it’s a lovely botanical design.
When you turn on the light, the petals and leaves become glowing silhouettes, creating a warm, magical ambiance in your room.
13. Design a Contemporary Botanical Sampler
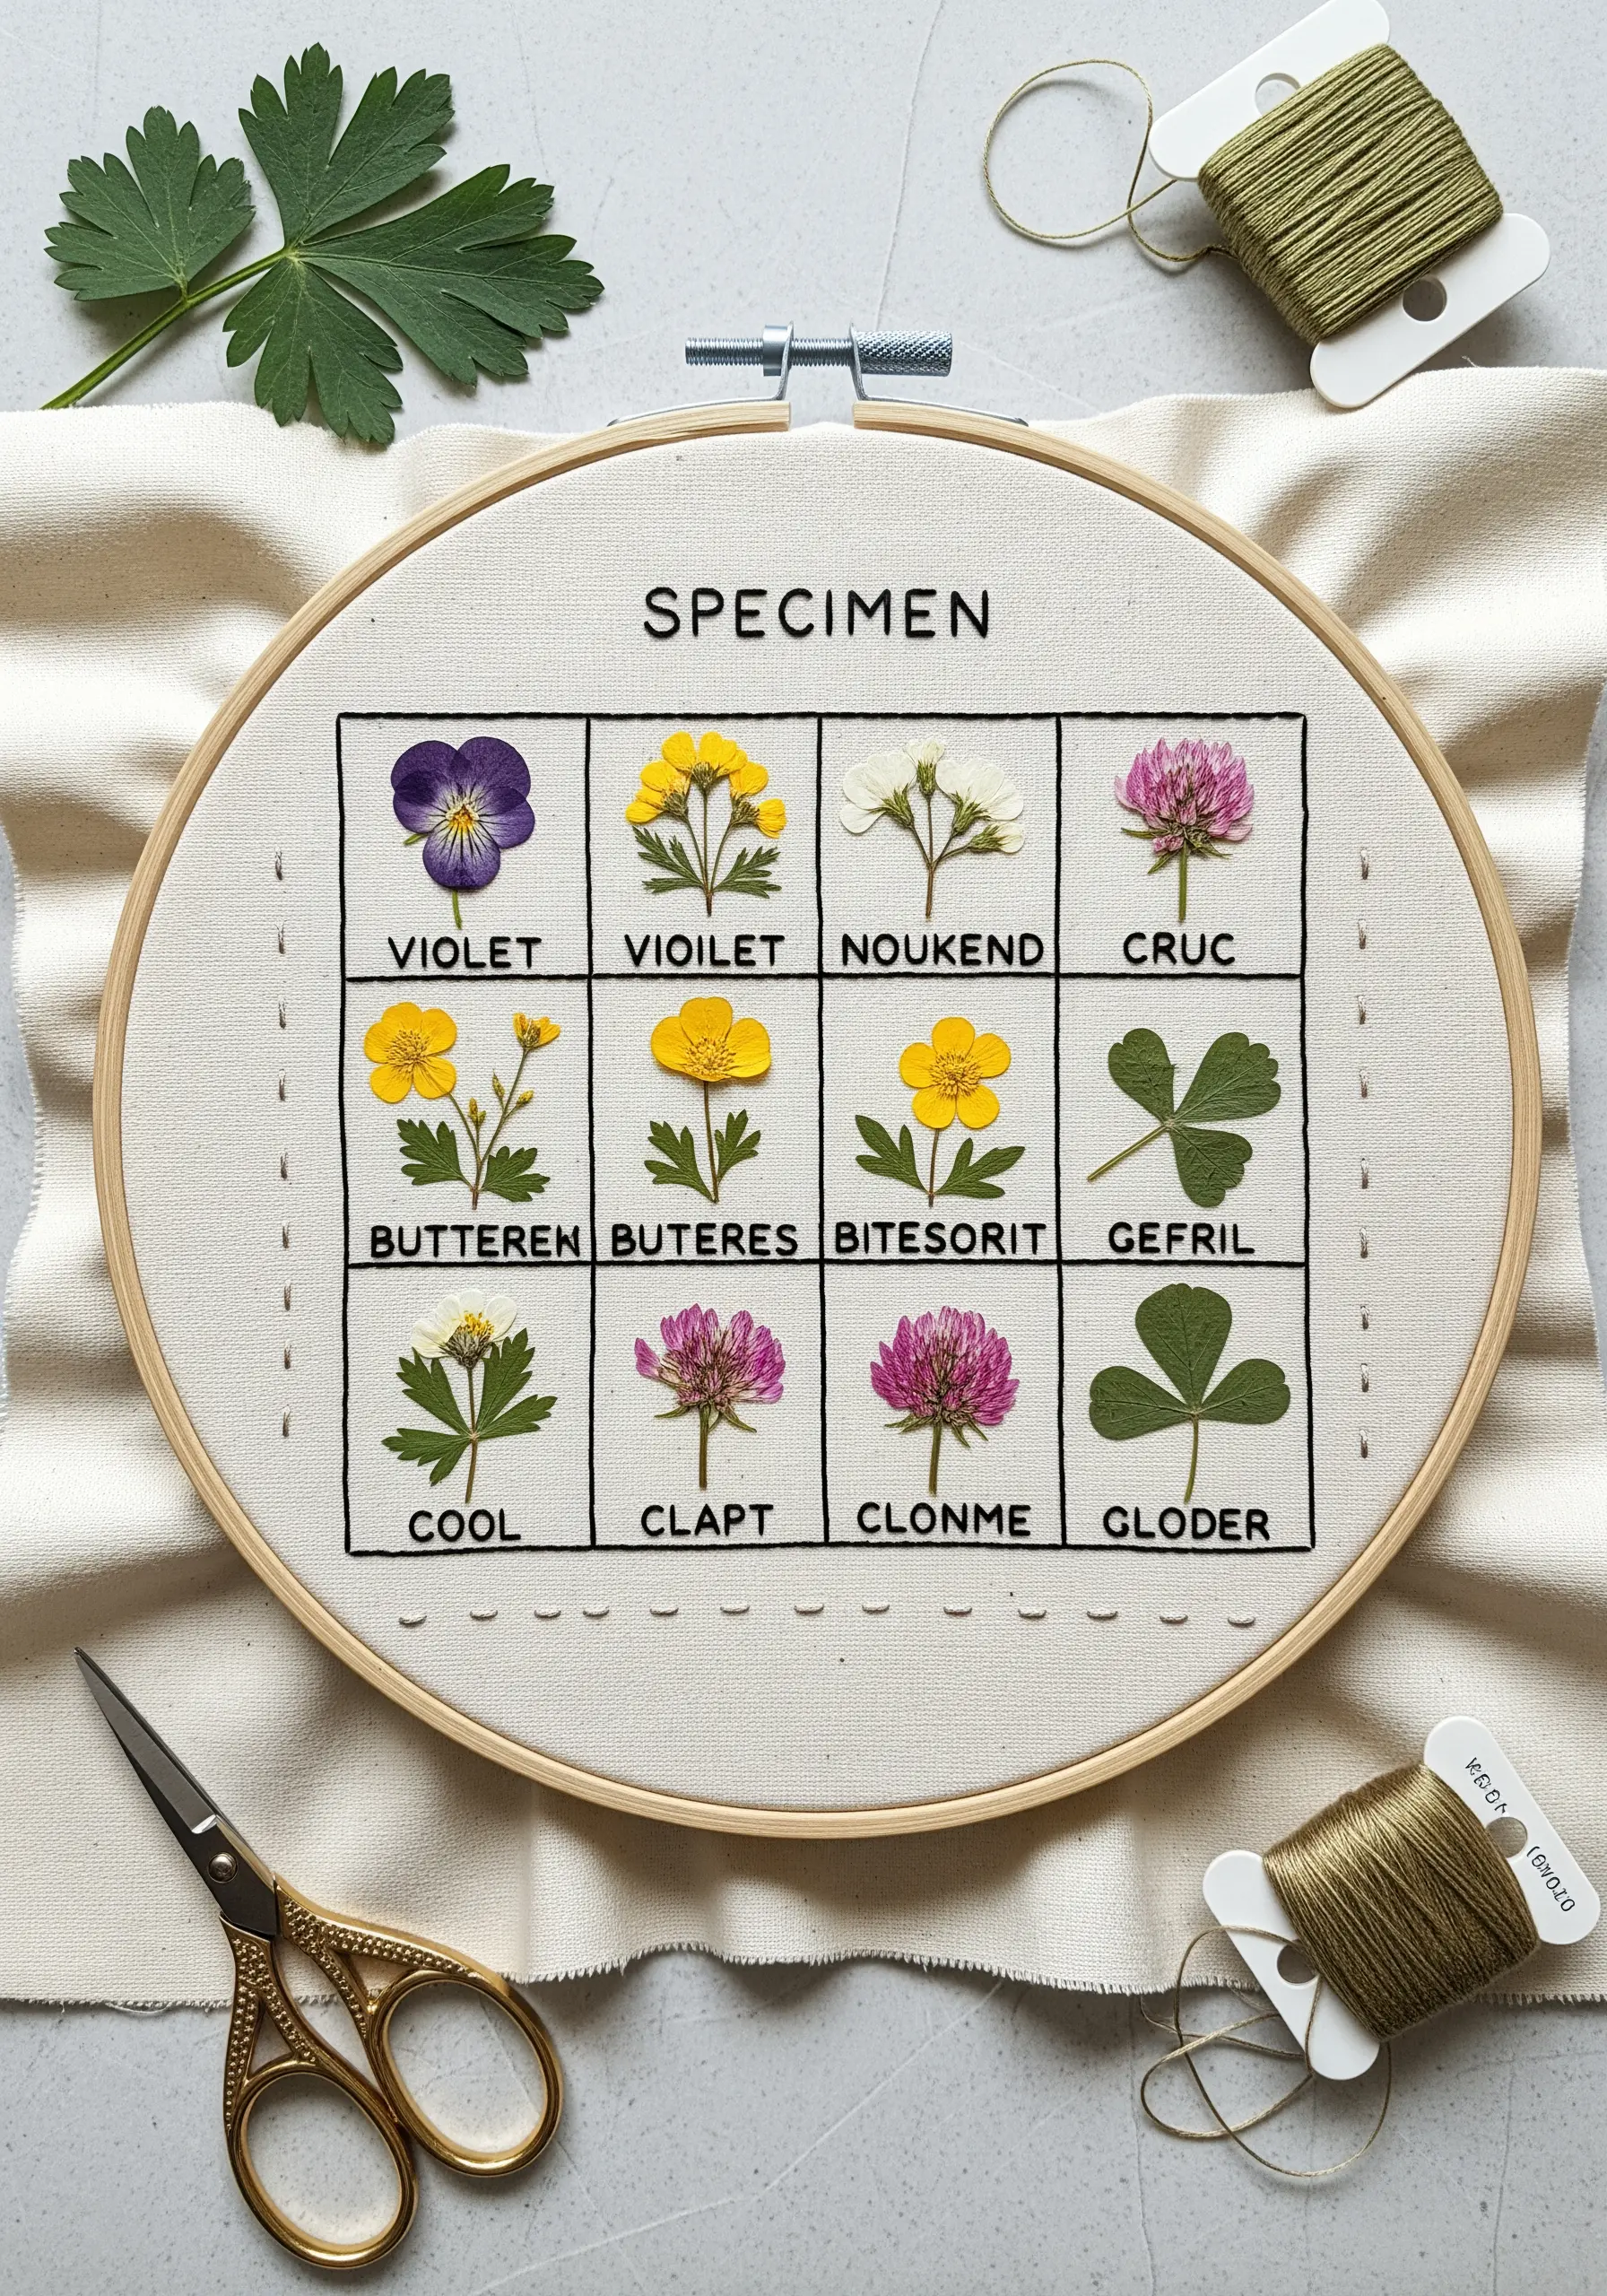
Give the traditional sampler a modern, scientific twist by creating a botanical specimen chart.
Use a simple backstitch in a dark thread to create a clean grid on your fabric.
In each box, secure a different pressed flower or leaf.
Stitch labels beneath each one using a clean, sans-serif font to give it a contemporary, museum-like feel.
This structured layout turns your flower collection into a sophisticated piece of hooped wall collage art.
14. Embellish a Collar with Floral Motifs
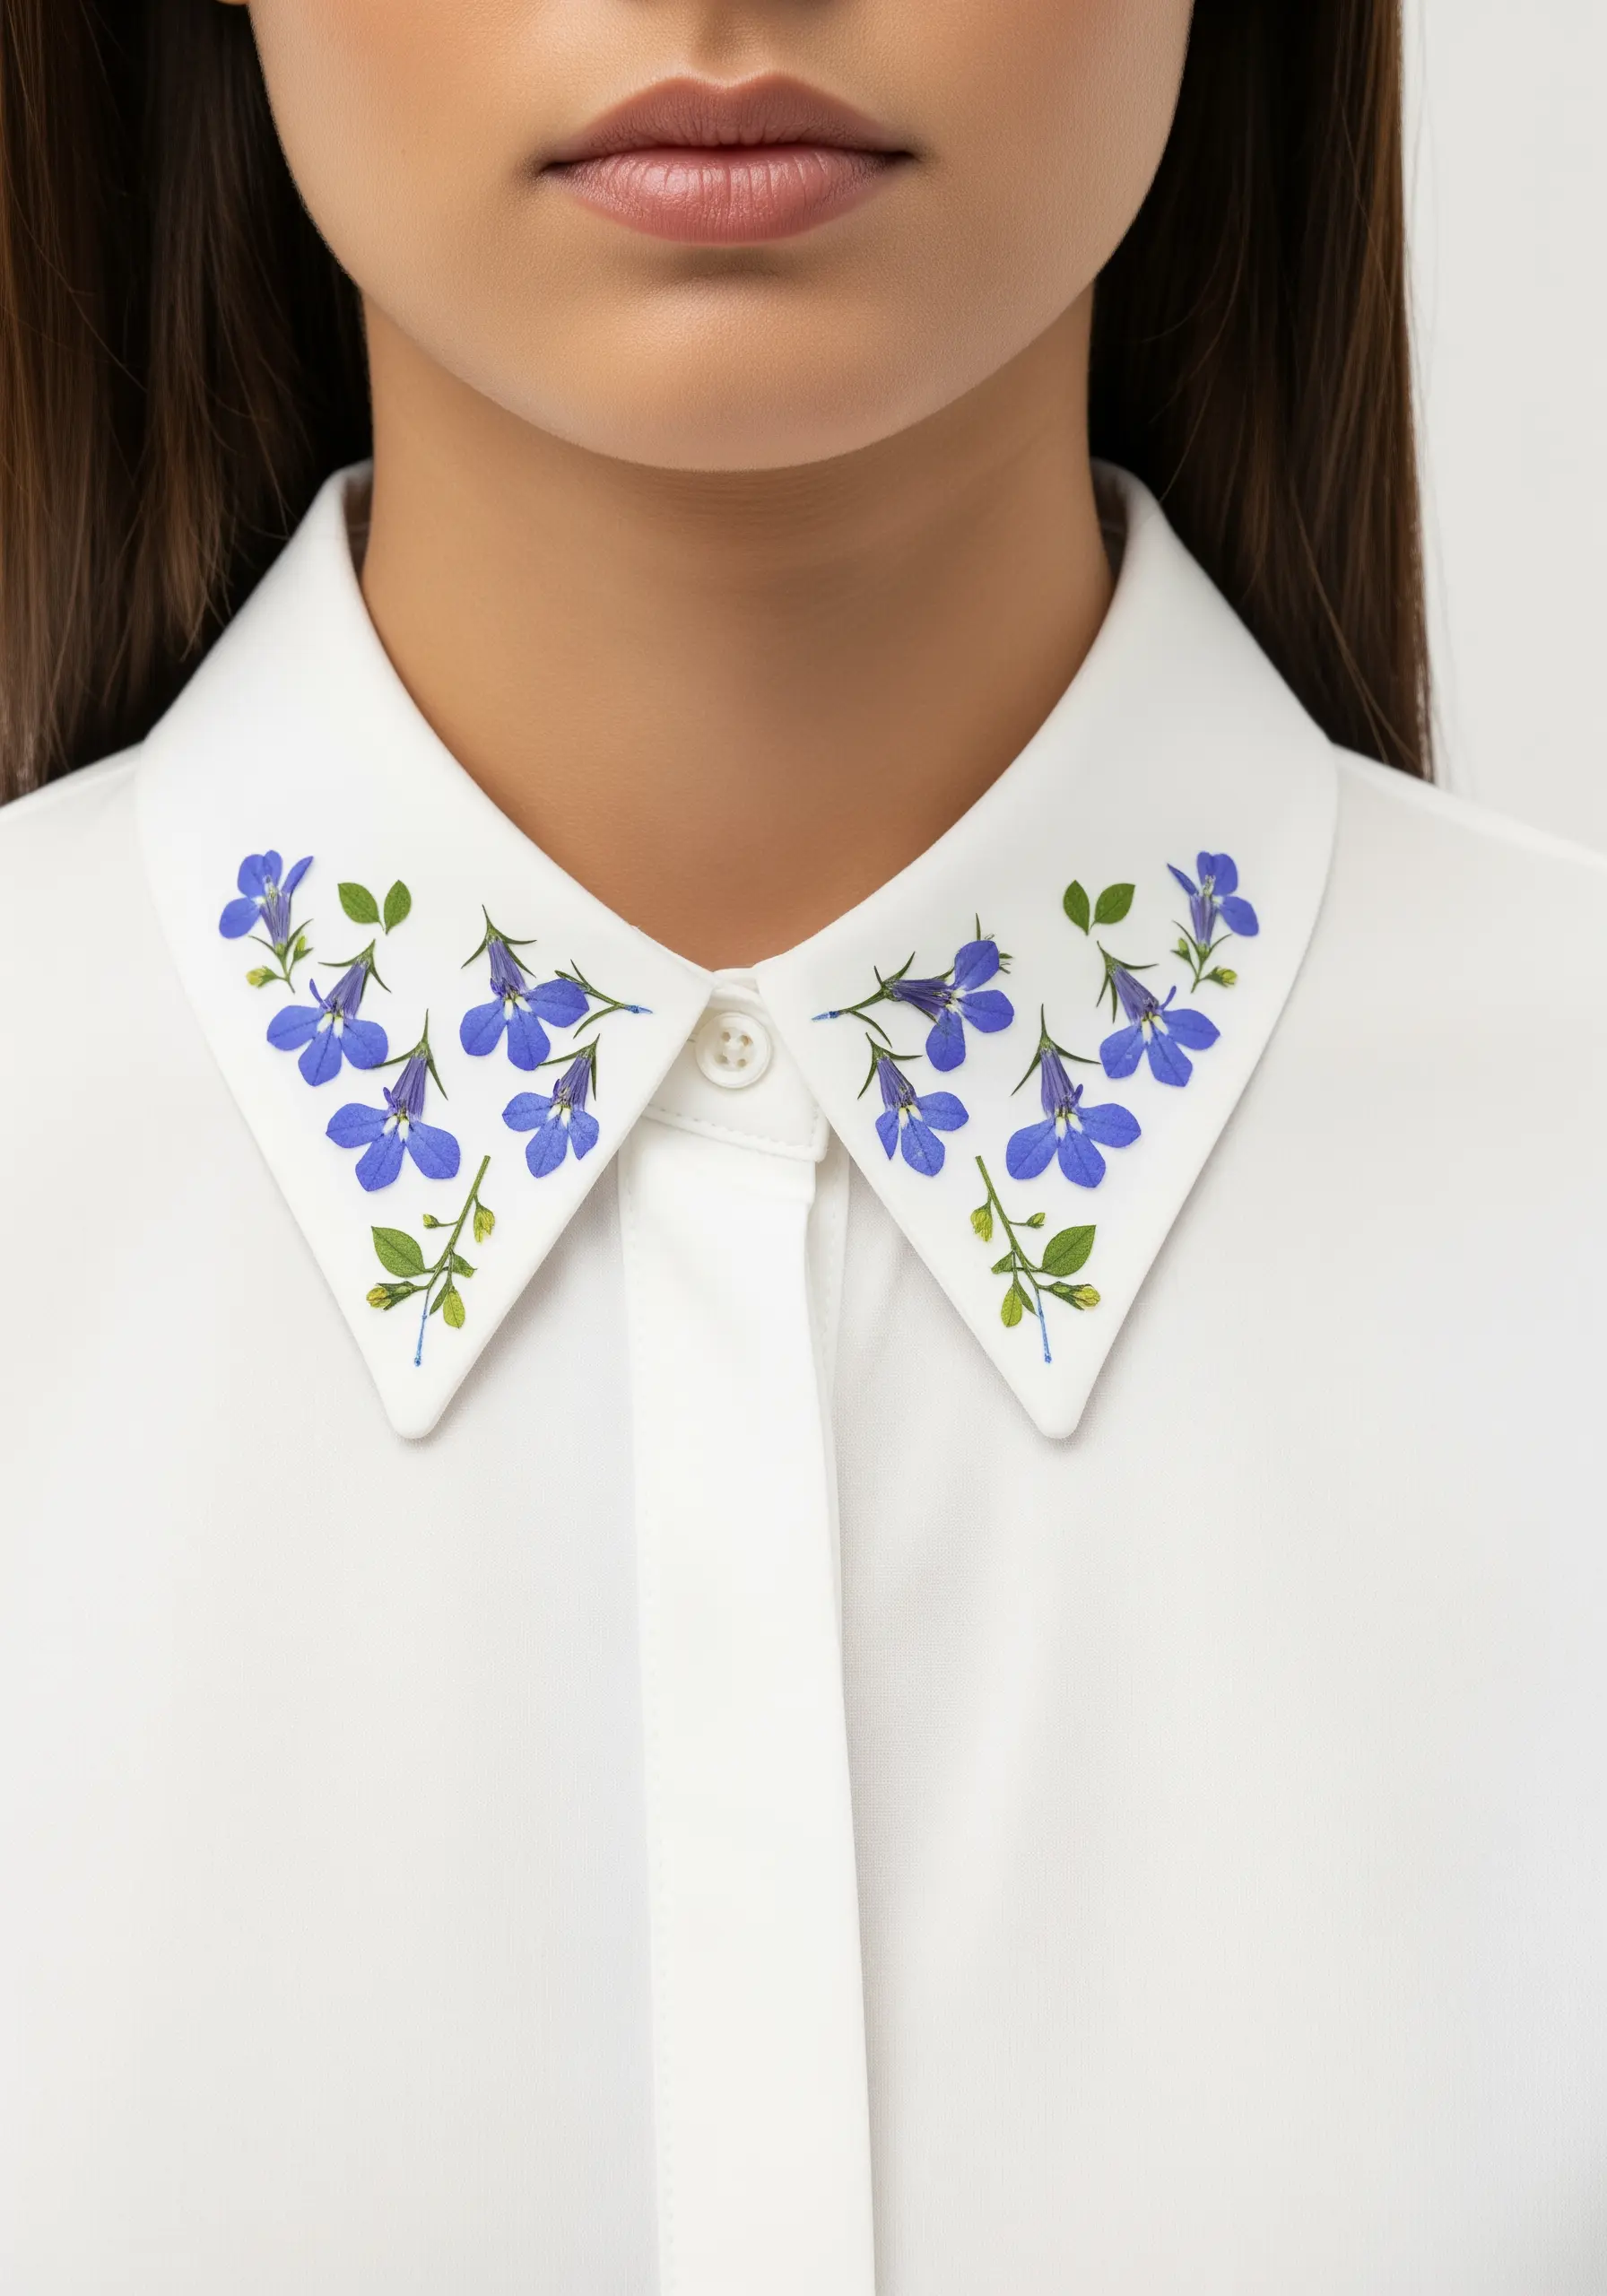
To achieve this delicate look with permanence, translate the shapes of pressed flowers into embroidery.
Trace a symmetrical design of small flowers and leaves onto the points of a crisp shirt collar.
Use a delicate satin stitch or long-and-short stitch for the petals in a vibrant blue, and a simple stem stitch for the foliage.
This technique gives you the aesthetic of scattered petals but with the durability to withstand washing, creating an elegant, custom garment.
15. Embrace Minimalism with a Single Specimen
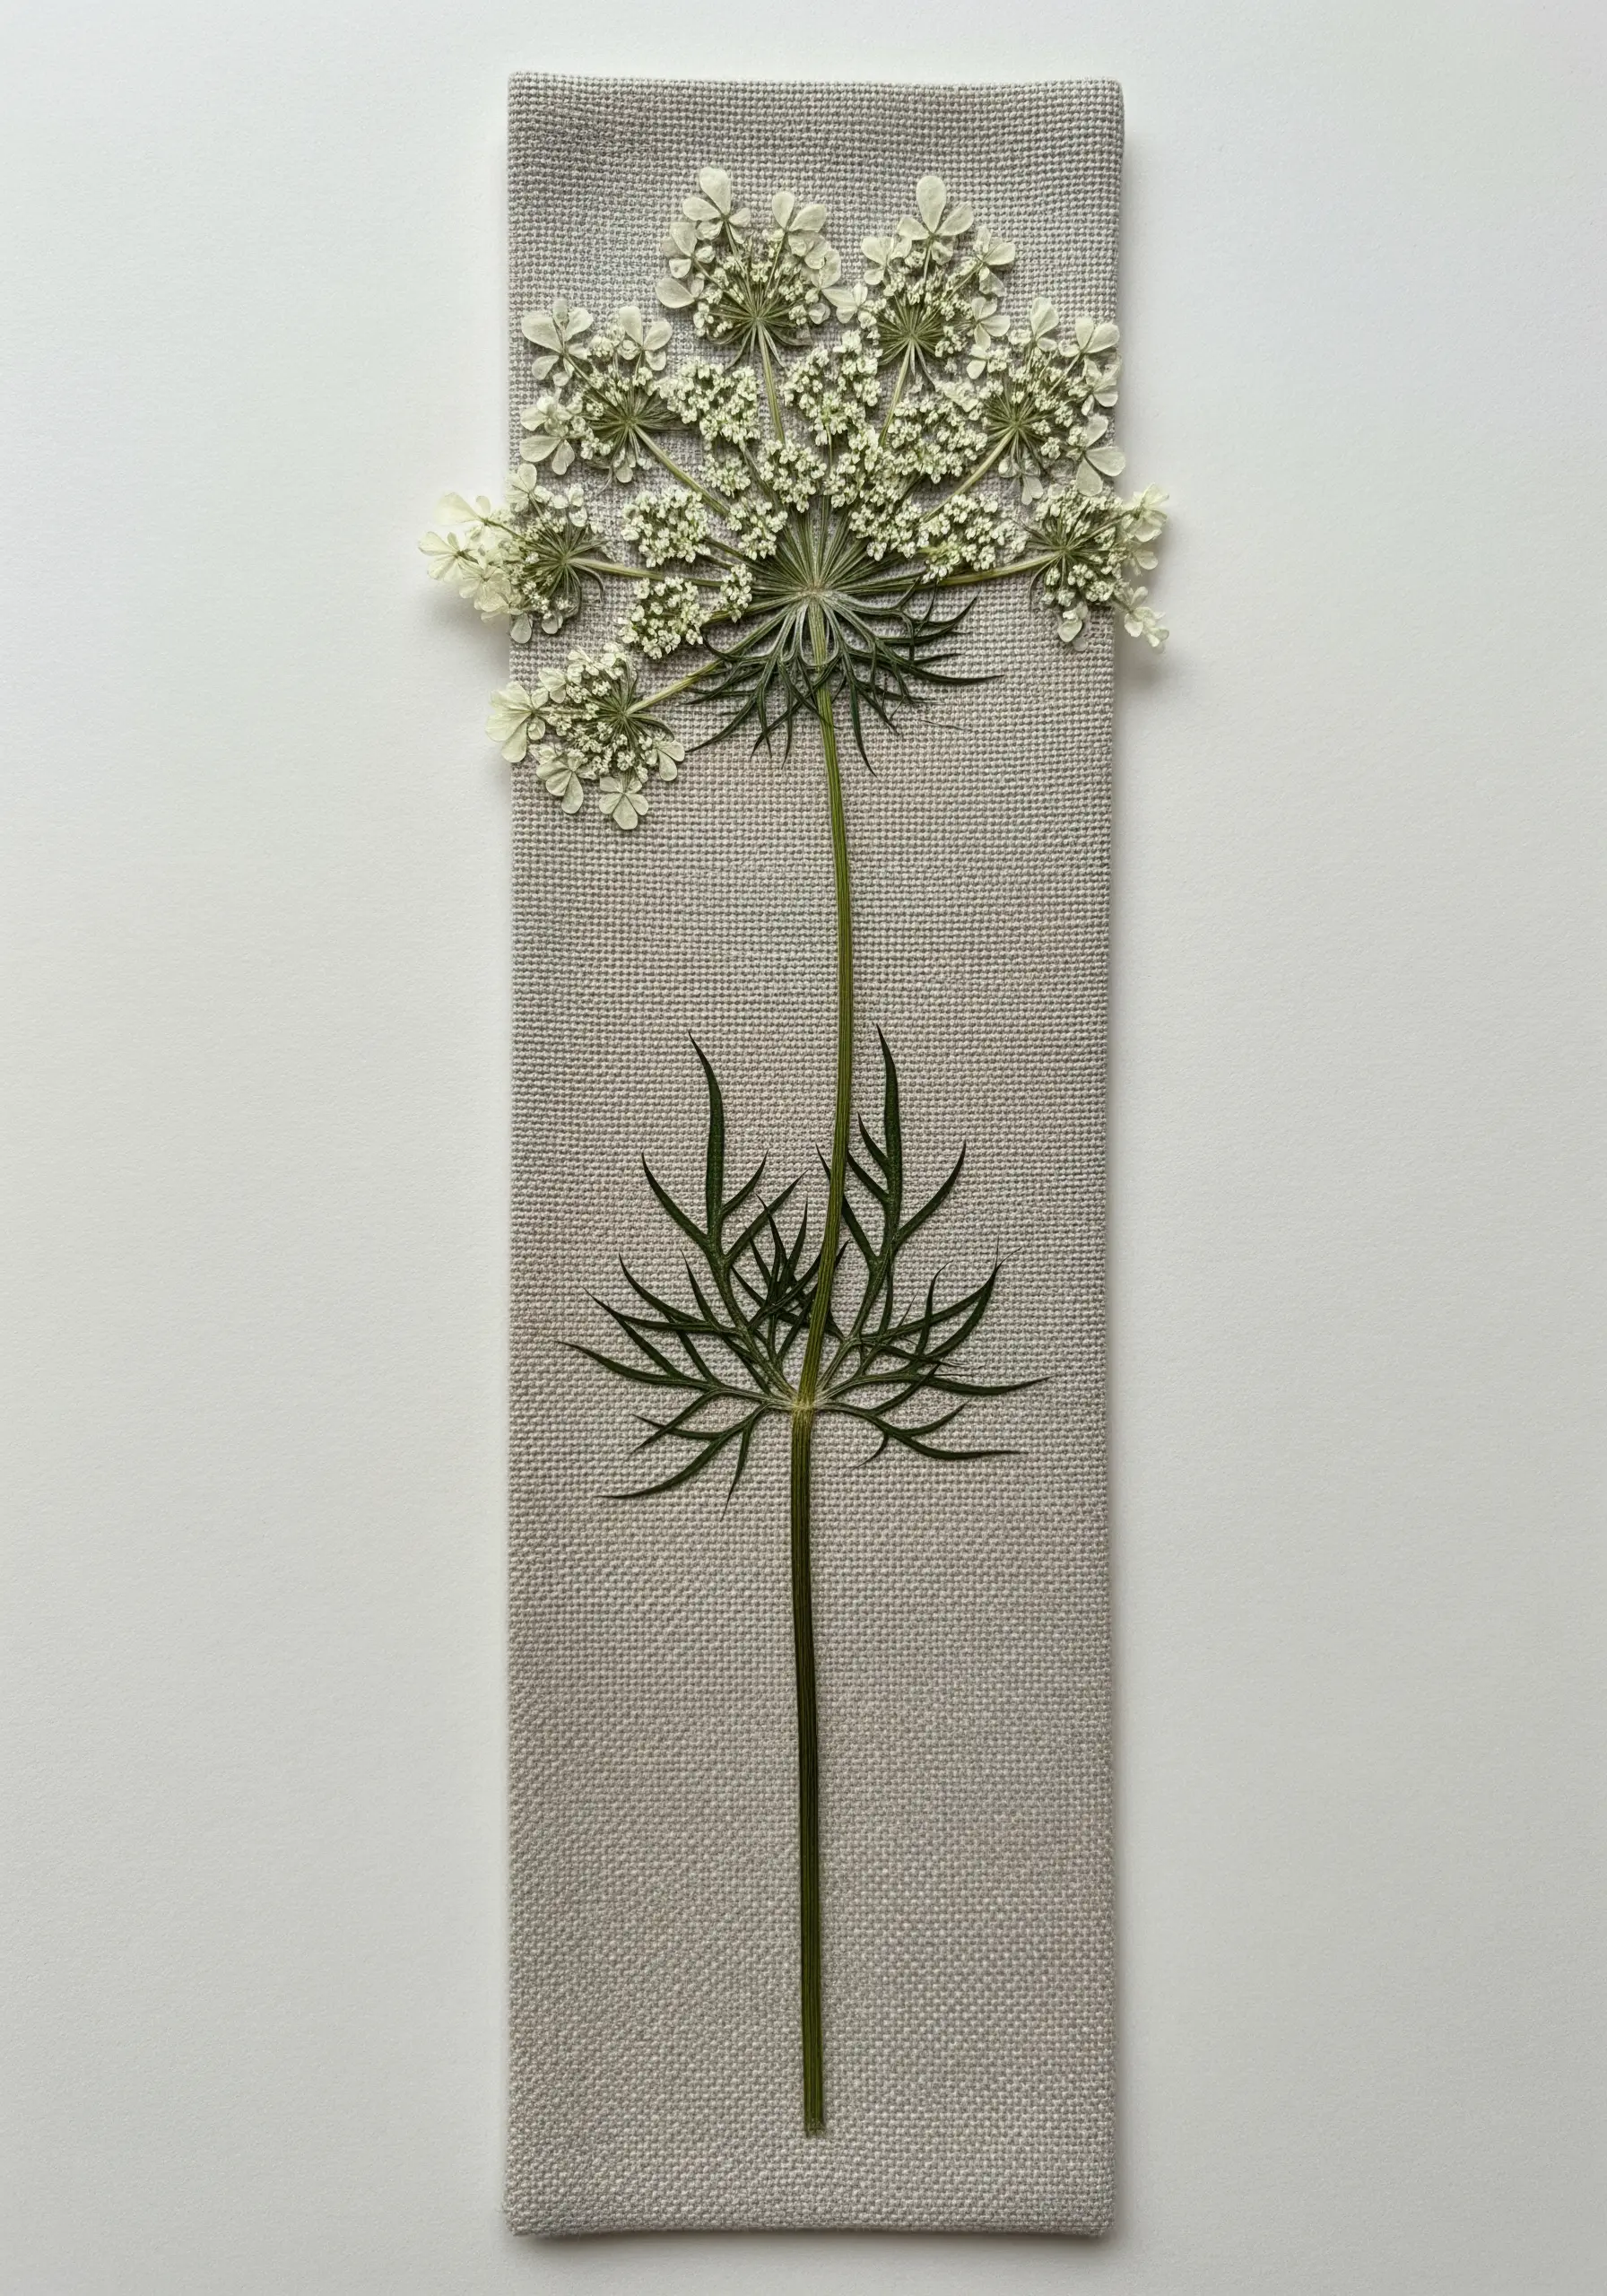
Sometimes, the most powerful statement is the most simple.
This technique is an exercise in restraint, focusing on the beauty of a single, perfectly preserved botanical.
Select a plant with an interesting form, like Queen Anne’s Lace, and mount it on a narrow panel of high-quality, textured linen.
No stitching is required. The art lies in the careful selection and placement, allowing the fabric’s texture and the plant’s natural elegance to speak for themselves.
16. Craft a Floating Botanical Mobile

Create a kinetic piece of art that catches light and movement by designing a botanical mobile.
Use several small embroidery hoops and stretch two layers of organza or tulle in each one, sandwiching small, colorful pressed flowers between them.
This secures the flowers and enhances the floating illusion.
Hang the mini hoops at different lengths from a larger, ribbon-wrapped hoop to create a gentle, drifting display perfect for a nursery or a quiet corner.
17. Build a Dense Floral Wreath with Thread Accents
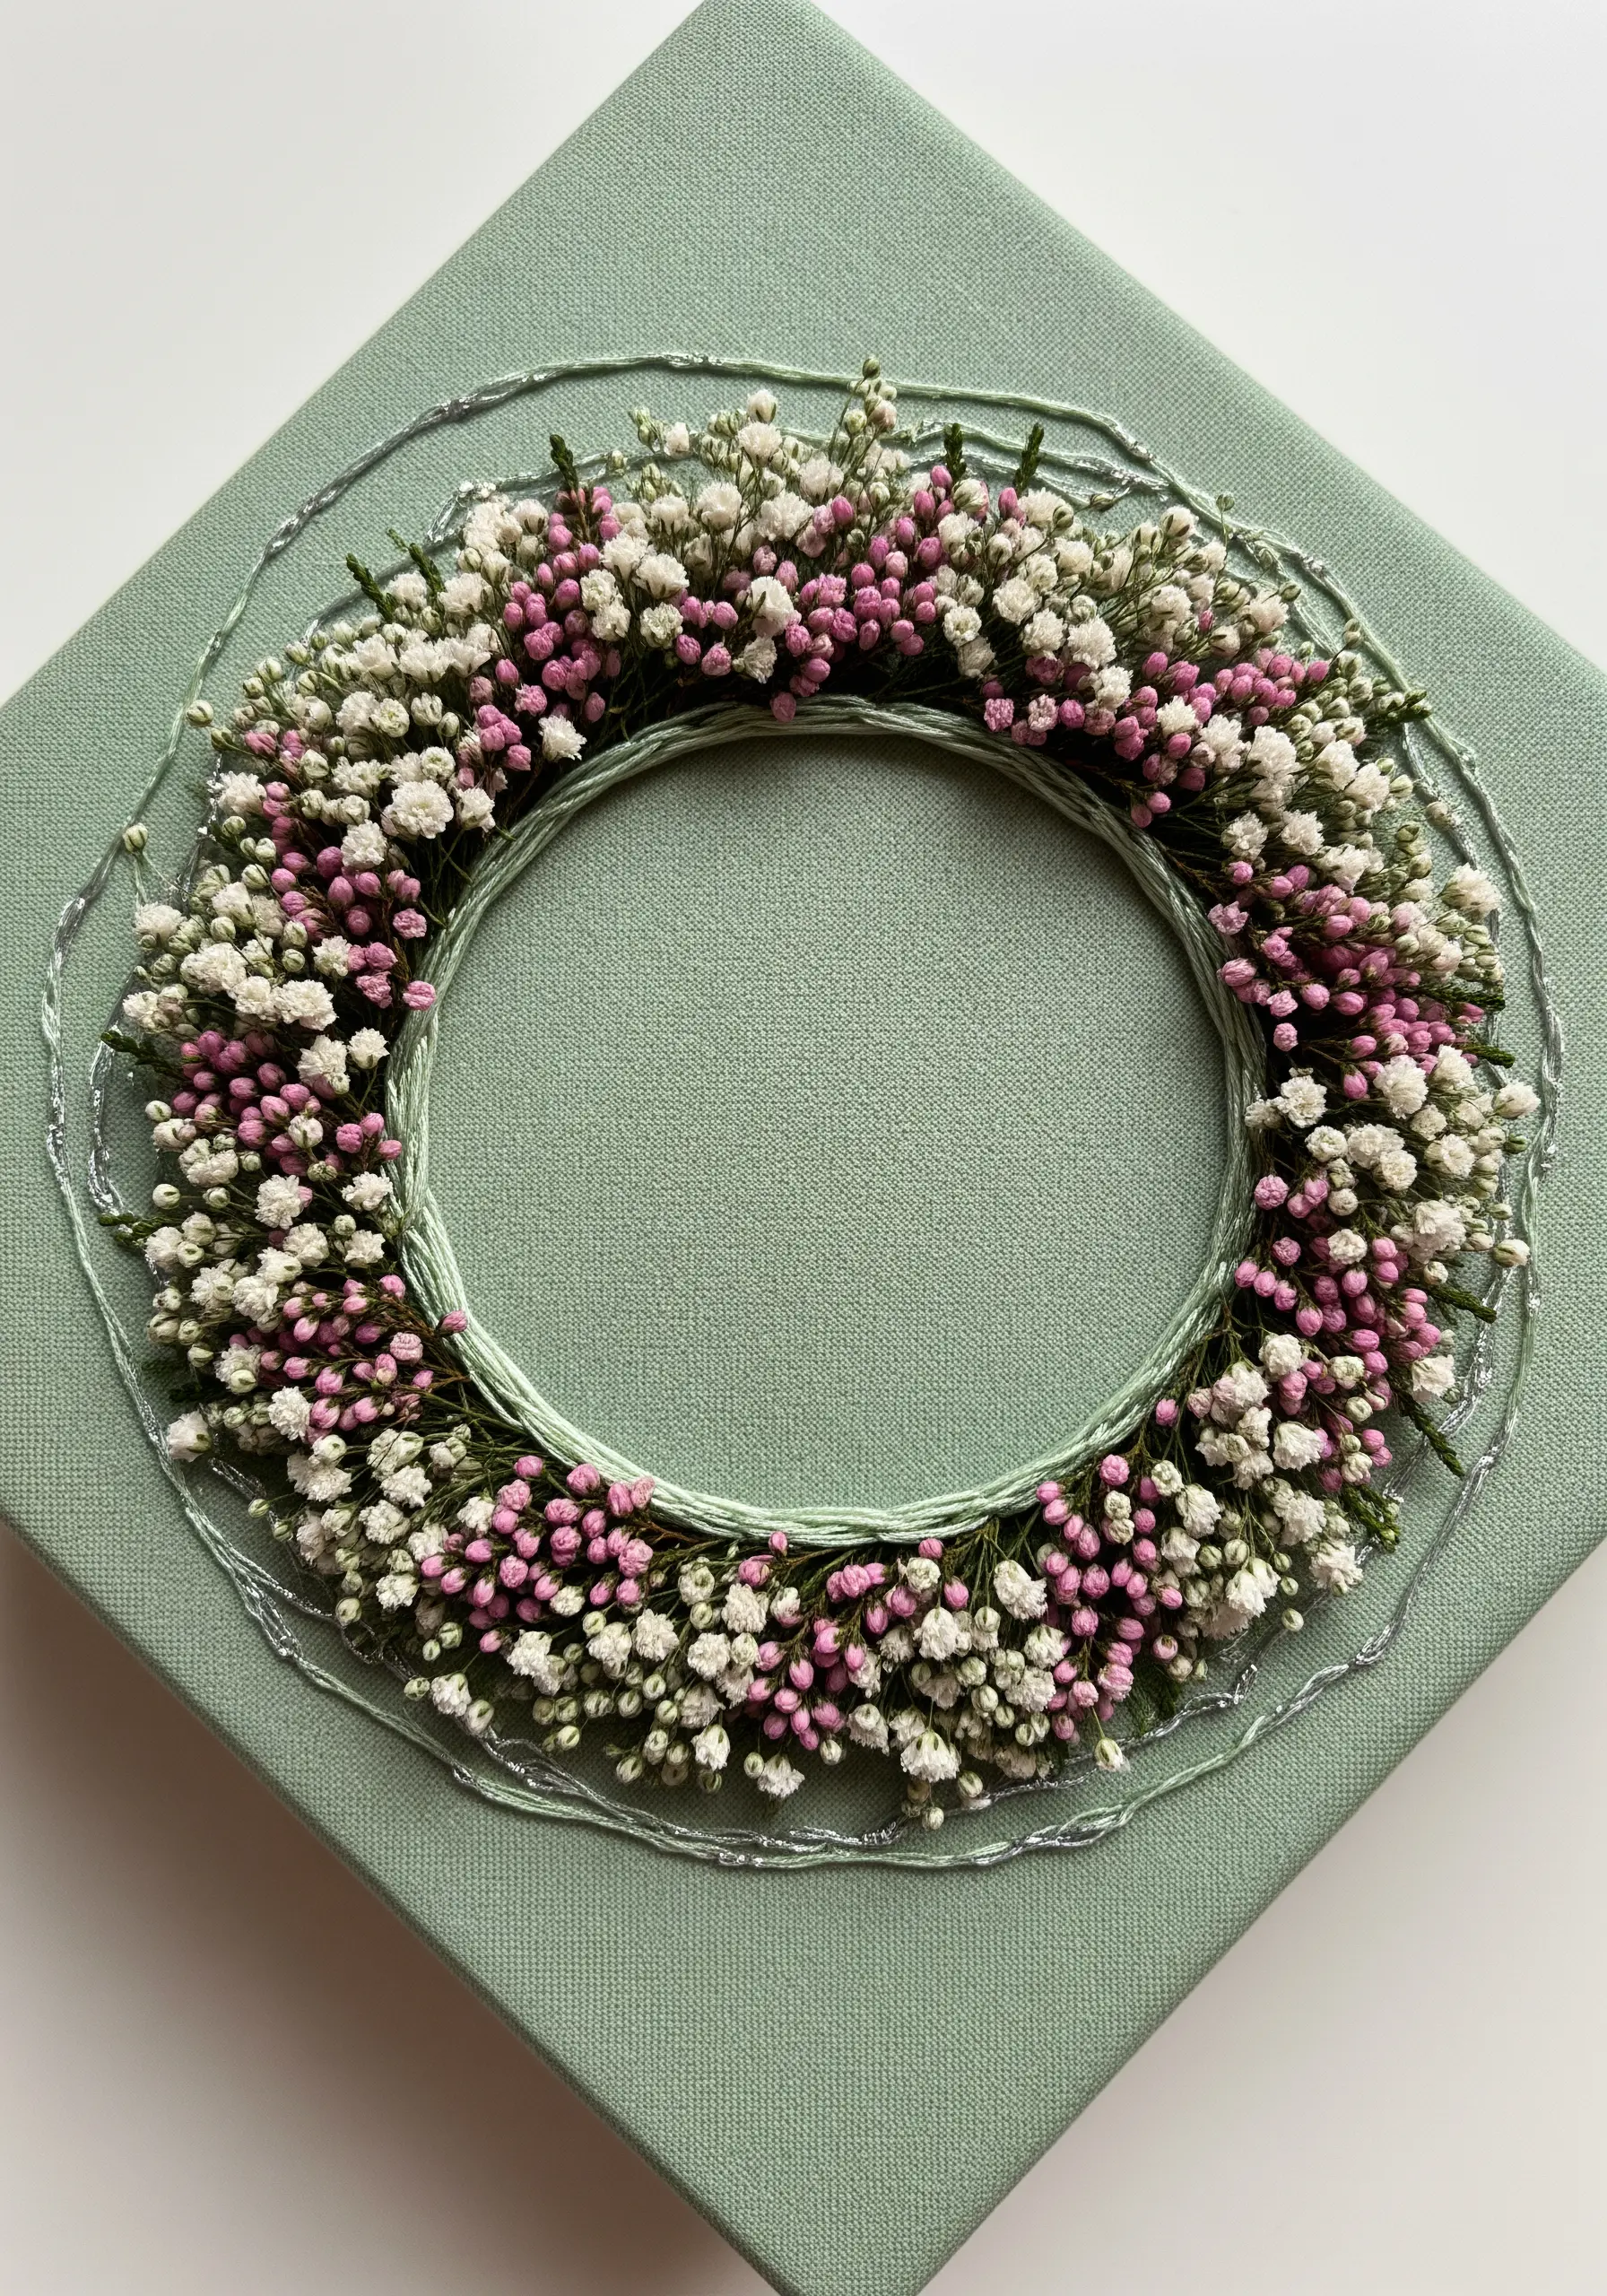
Create a lush, dimensional wreath by layering small, delicate flowers and adding subtle embroidered details.
Start by stitching a simple circle on your canvas to act as a guide.
Carefully glue dense clusters of tiny flowers, like heather or baby’s breath, along this line, building up layers for a full, textured effect.
Finally, weave a single strand of metallic silver or gold thread in and out of the wreath to catch the light and add a touch of unexpected sparkle.


