

The humble daisy chain is more than just a simple motif; it’s a perfect canvas for refining your technique. Whether you’re embellishing a phone case or transforming a plain canvas bag, the goal is always to move beyond just stitching a shape and toward creating texture, depth, and intention.
Here, you won’t find vague suggestions. Instead, you’ll discover specific adjustments you can make right now—from choosing the right stitch for a 3D effect to using color and value to create dimension. These ideas are designed to elevate your work, giving it a polished, thoughtful quality that feels both modern and timeless.
Let this be an invitation to slow down, to consider the weight of your thread, the direction of your stitches, and the story you want to tell. Your hands already know what to do; this is about giving them new ways to speak.
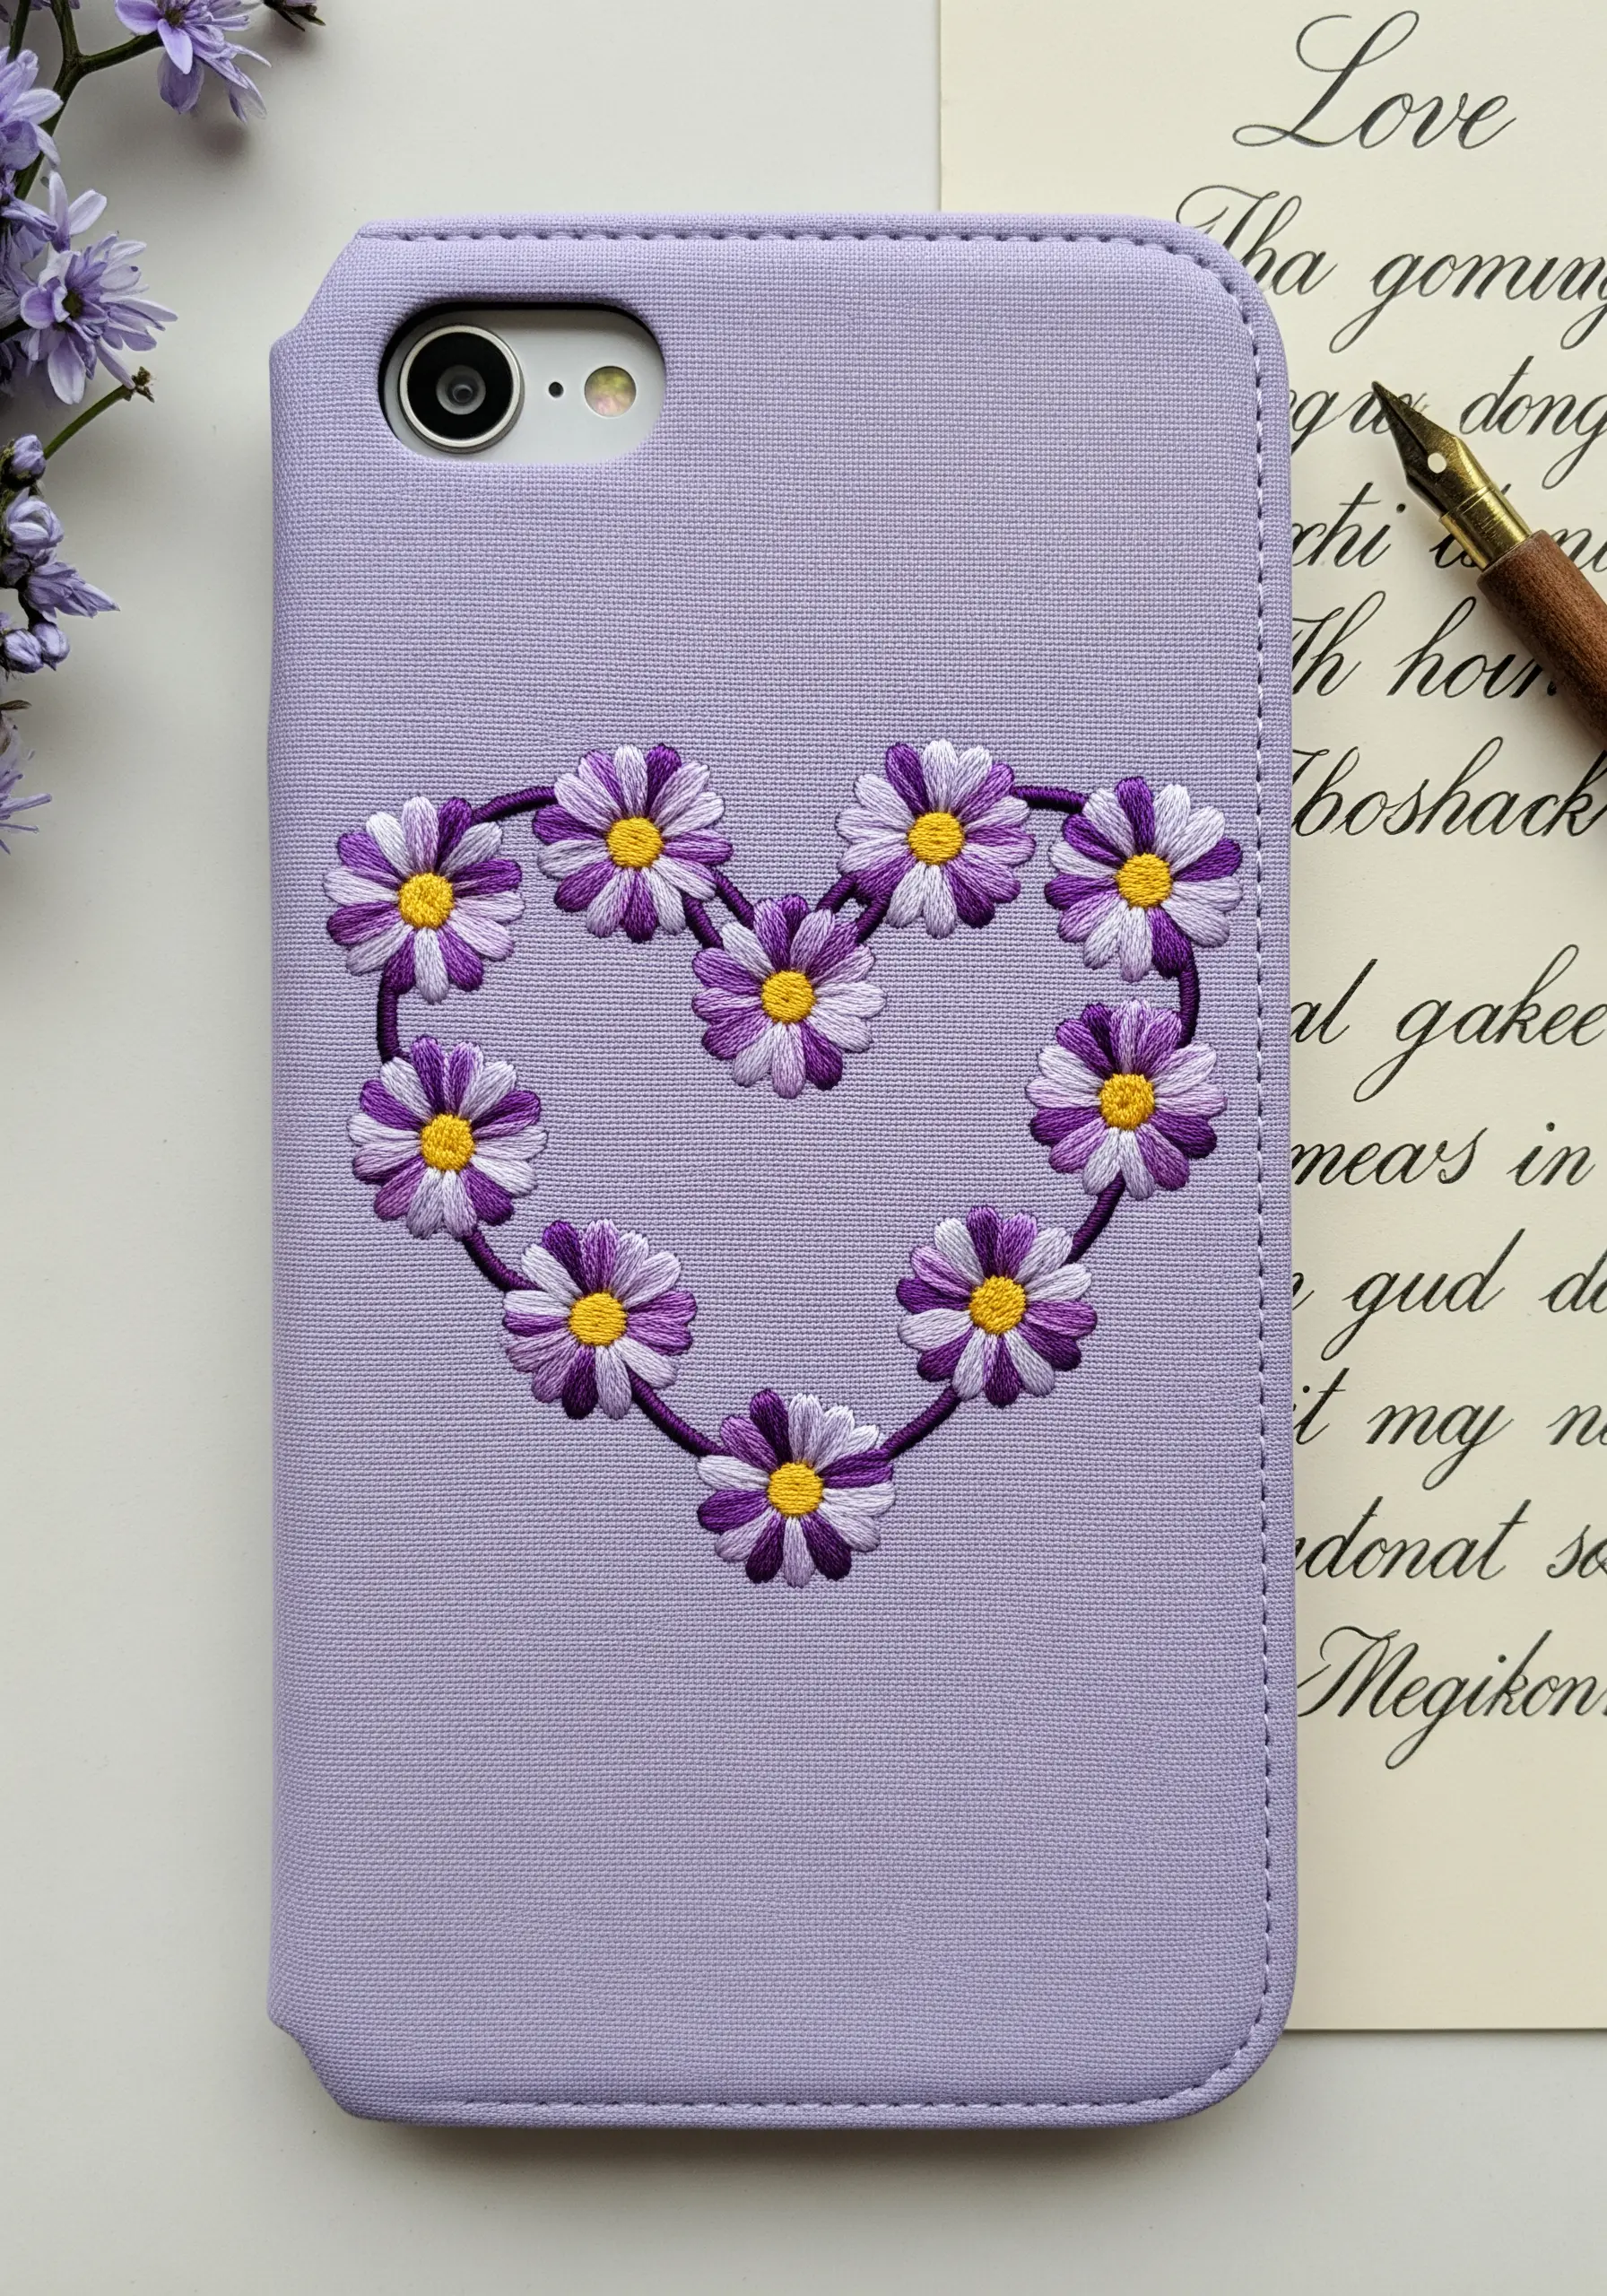
1. Create a Raised Diagonal Vine

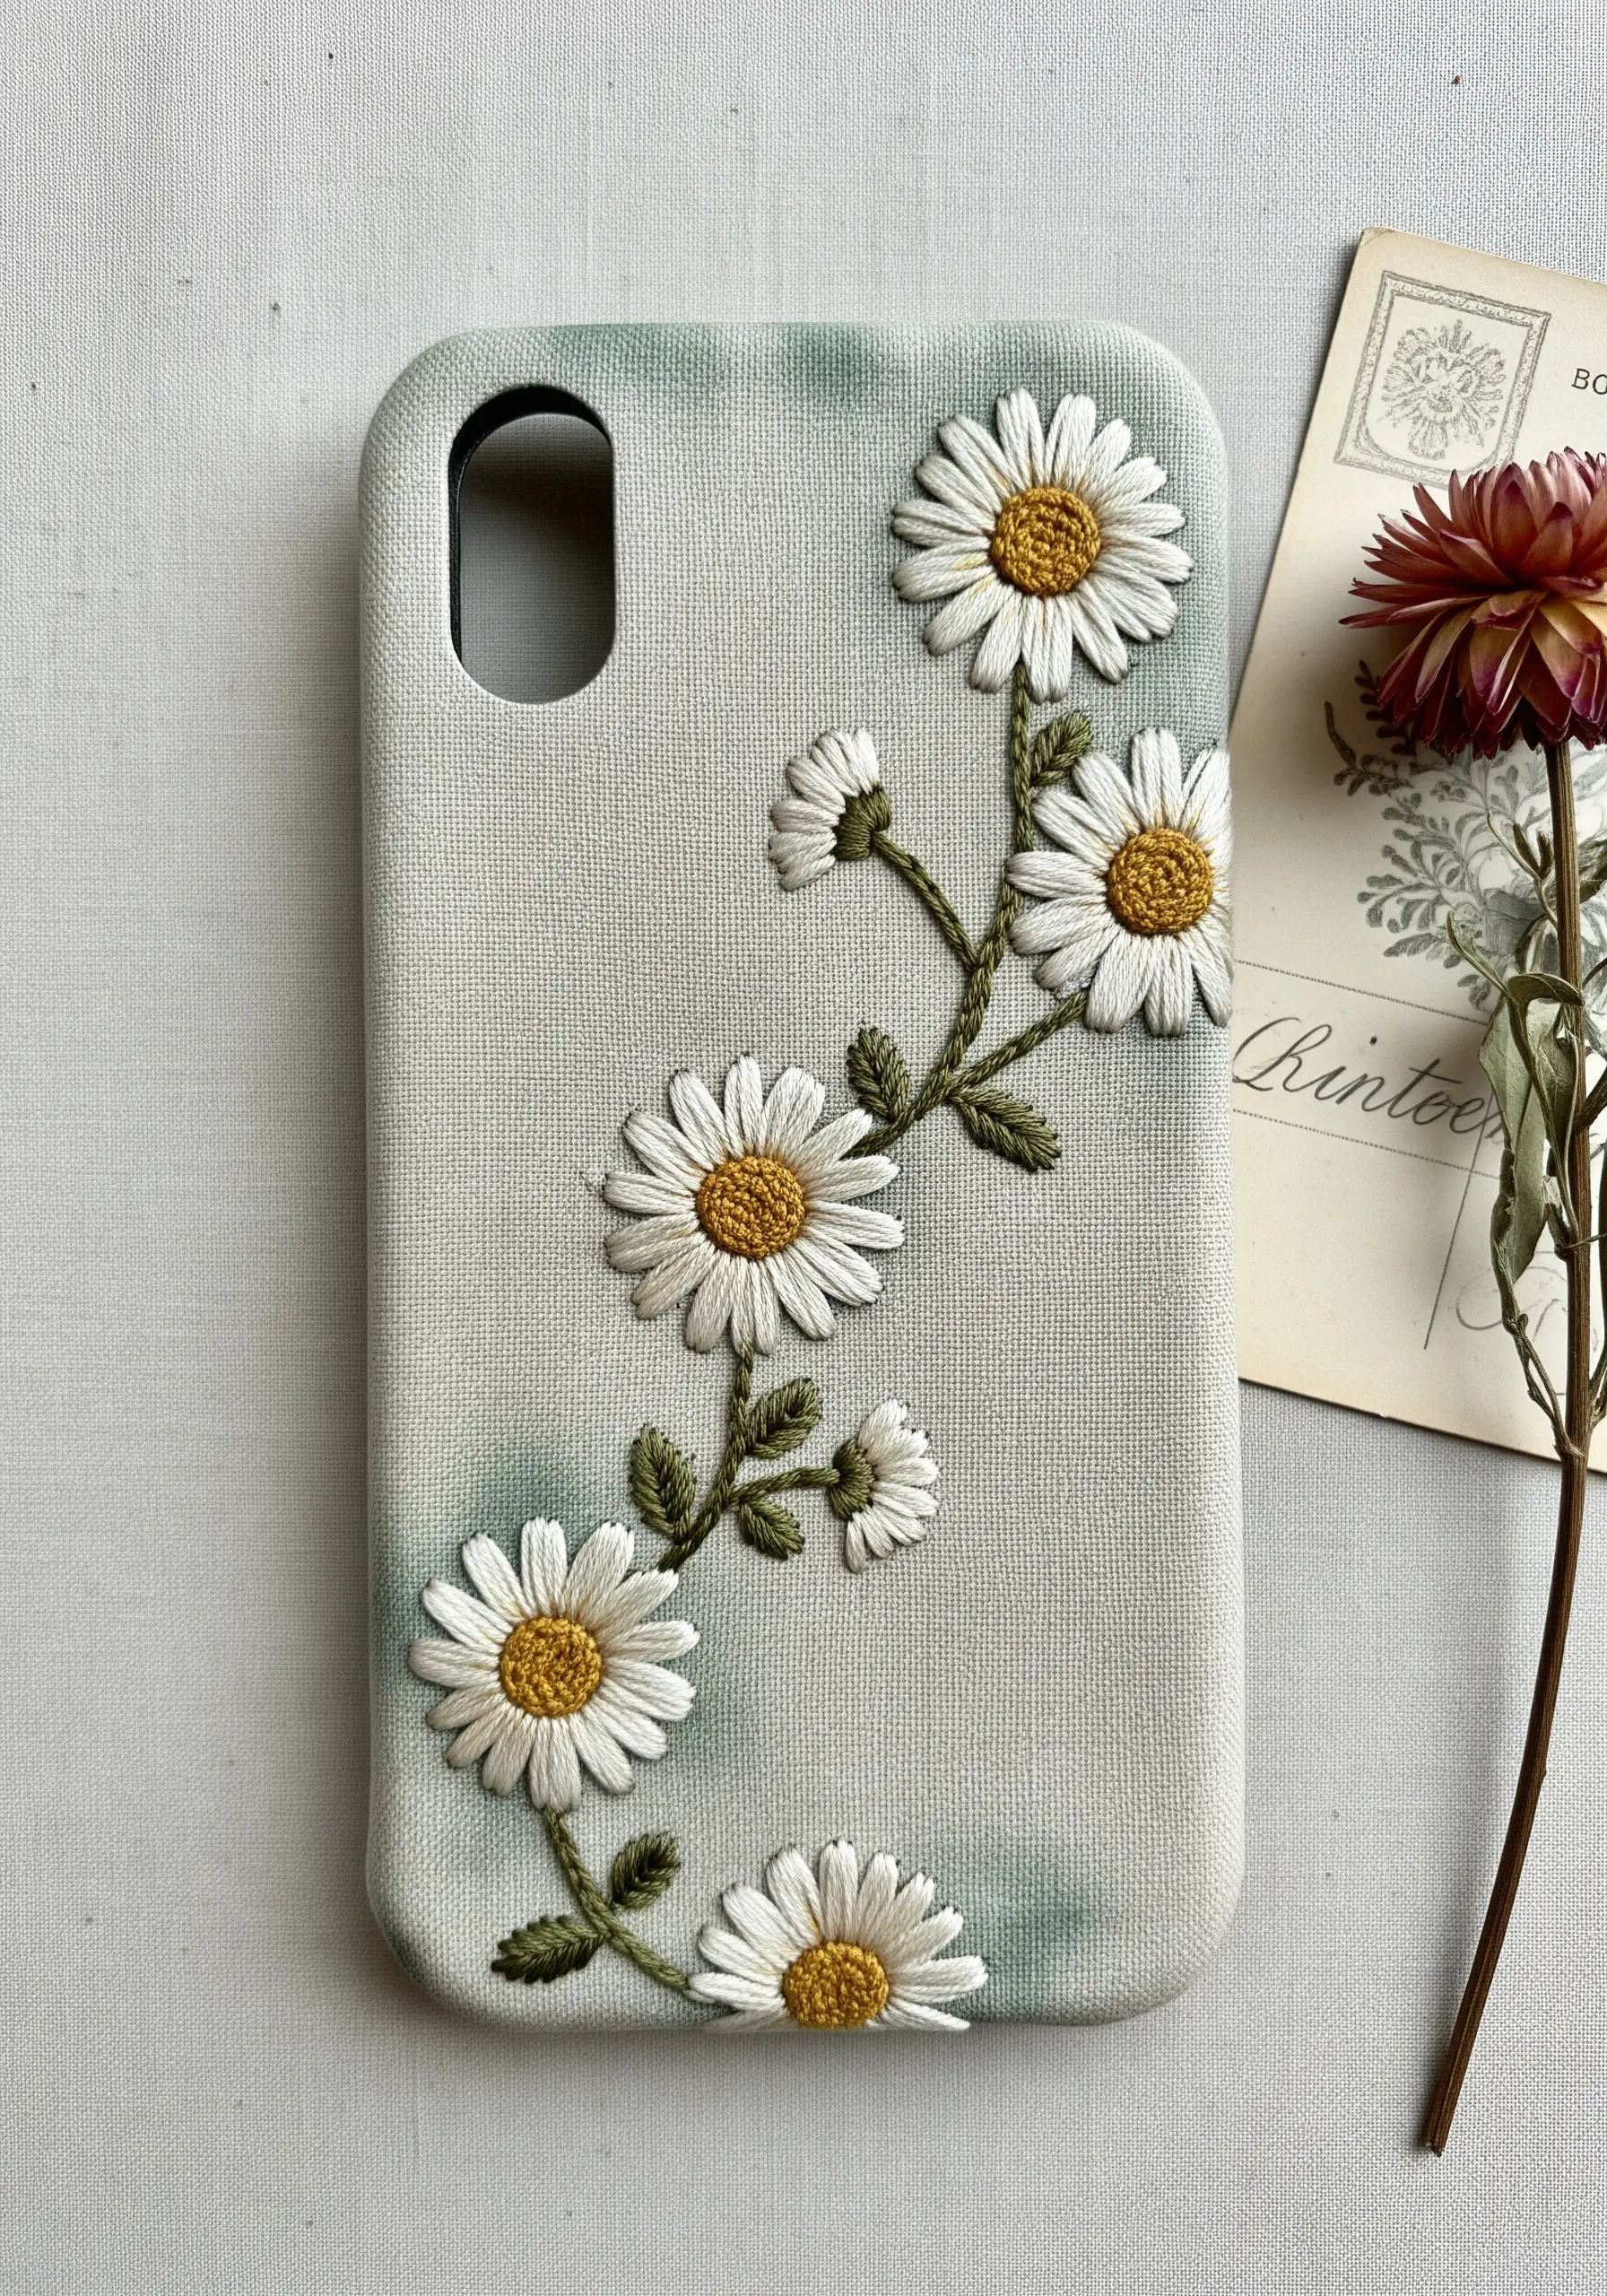
To give your daisy petals a three-dimensional feel, use a padded satin stitch.
First, lay down a few small, straight stitches in the center of each petal shape as a foundation.
Then, work your satin stitch over this padding, using four strands of floss instead of the usual two.
This simple technique lifts the petals from the surface, creating subtle shadows that make the entire design pop, especially on a textured fabric phone case.
For the stem, a whipped backstitch in a contrasting green will give you a perfectly smooth, rope-like line.
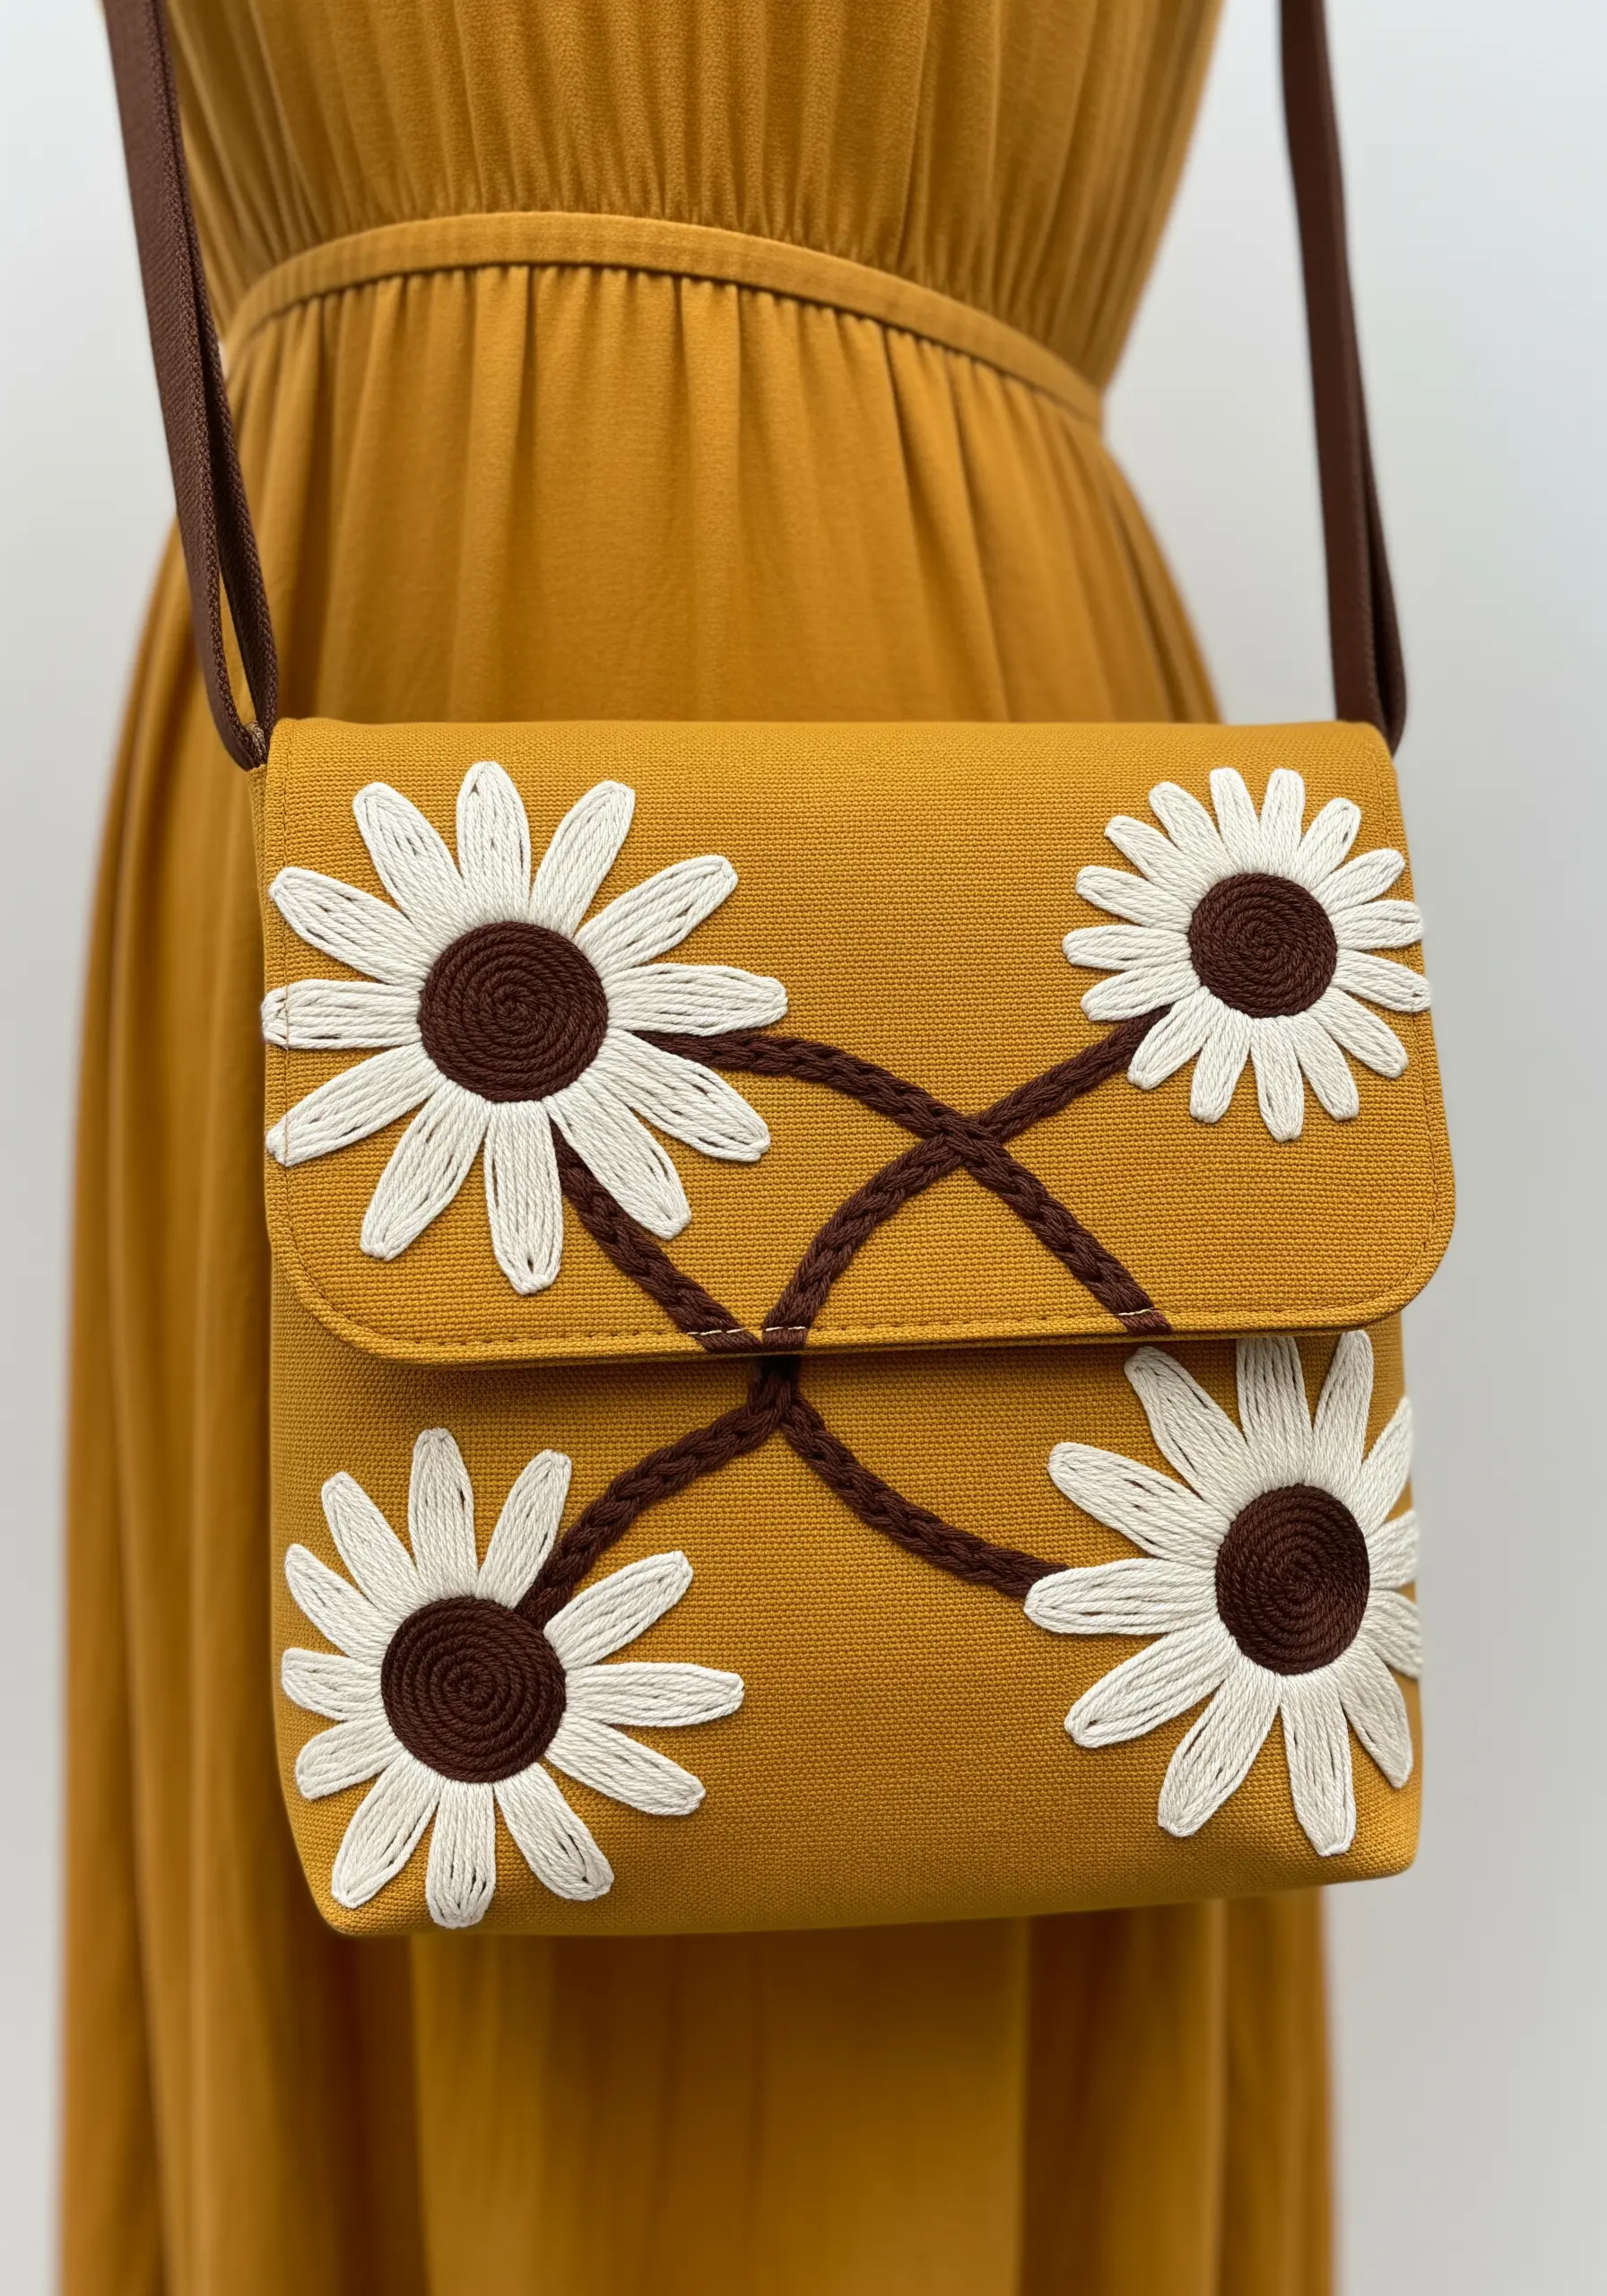
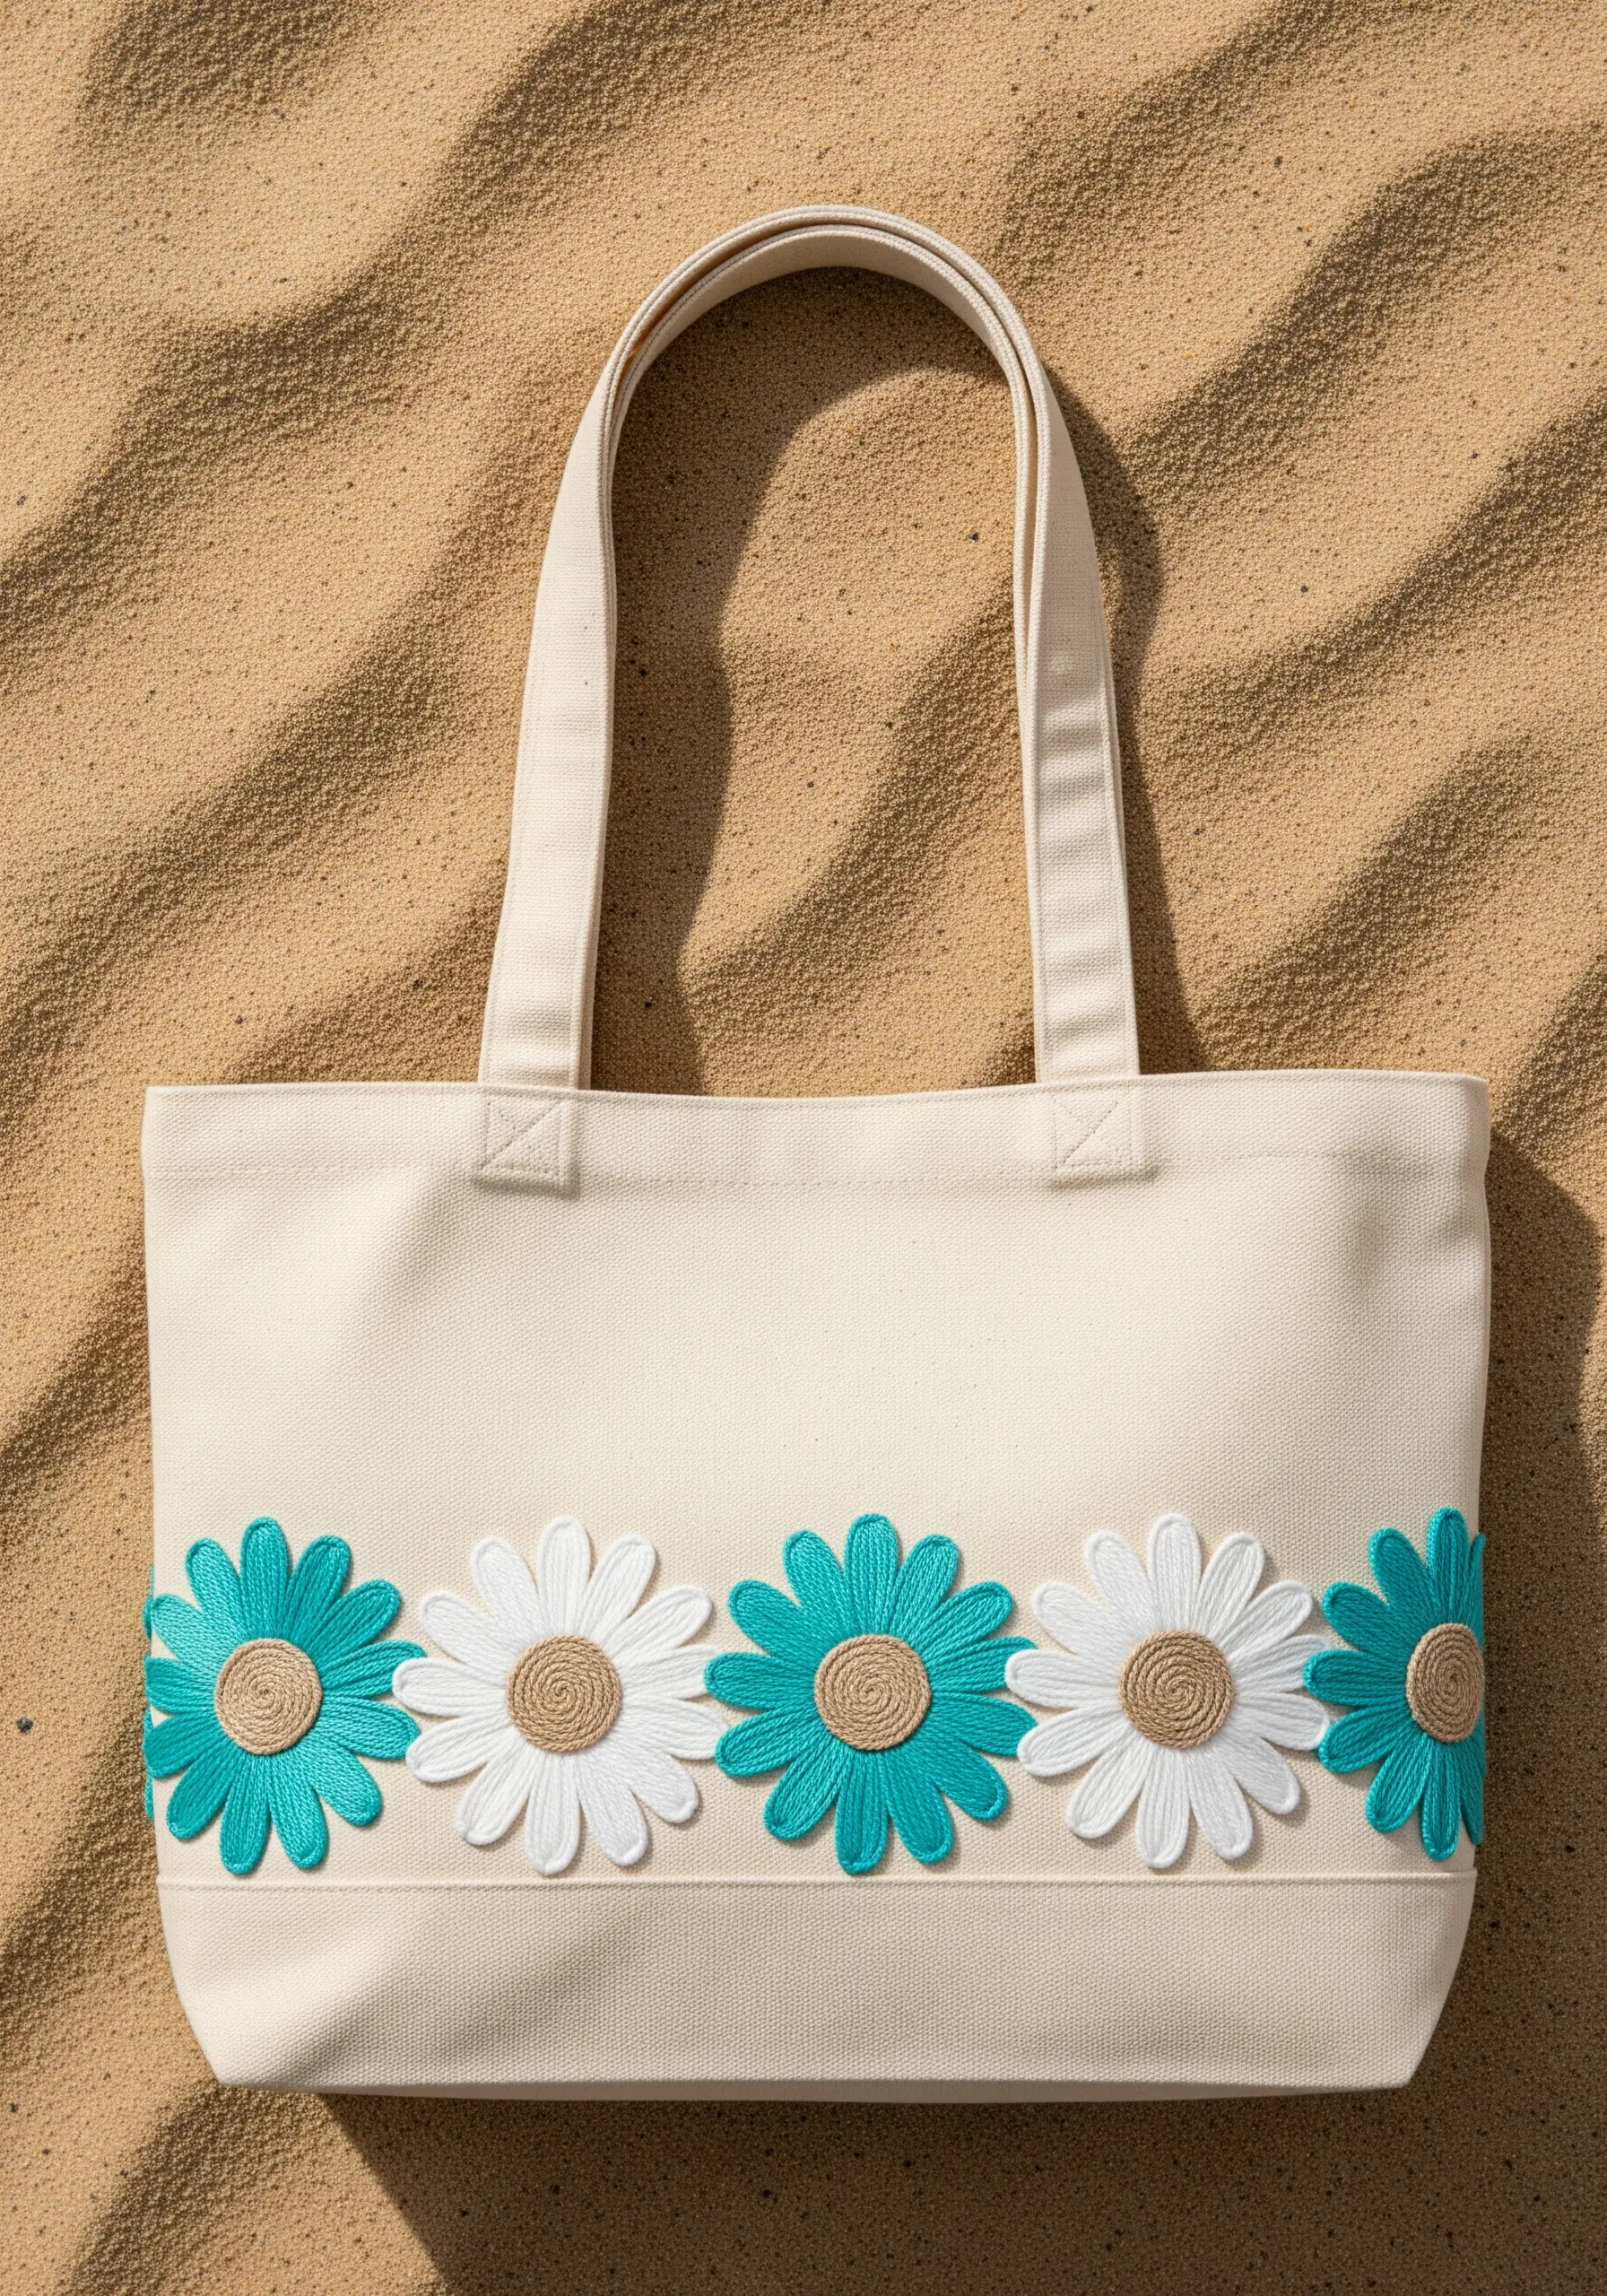
2. Engineer a Statement Garland with Stumpwork
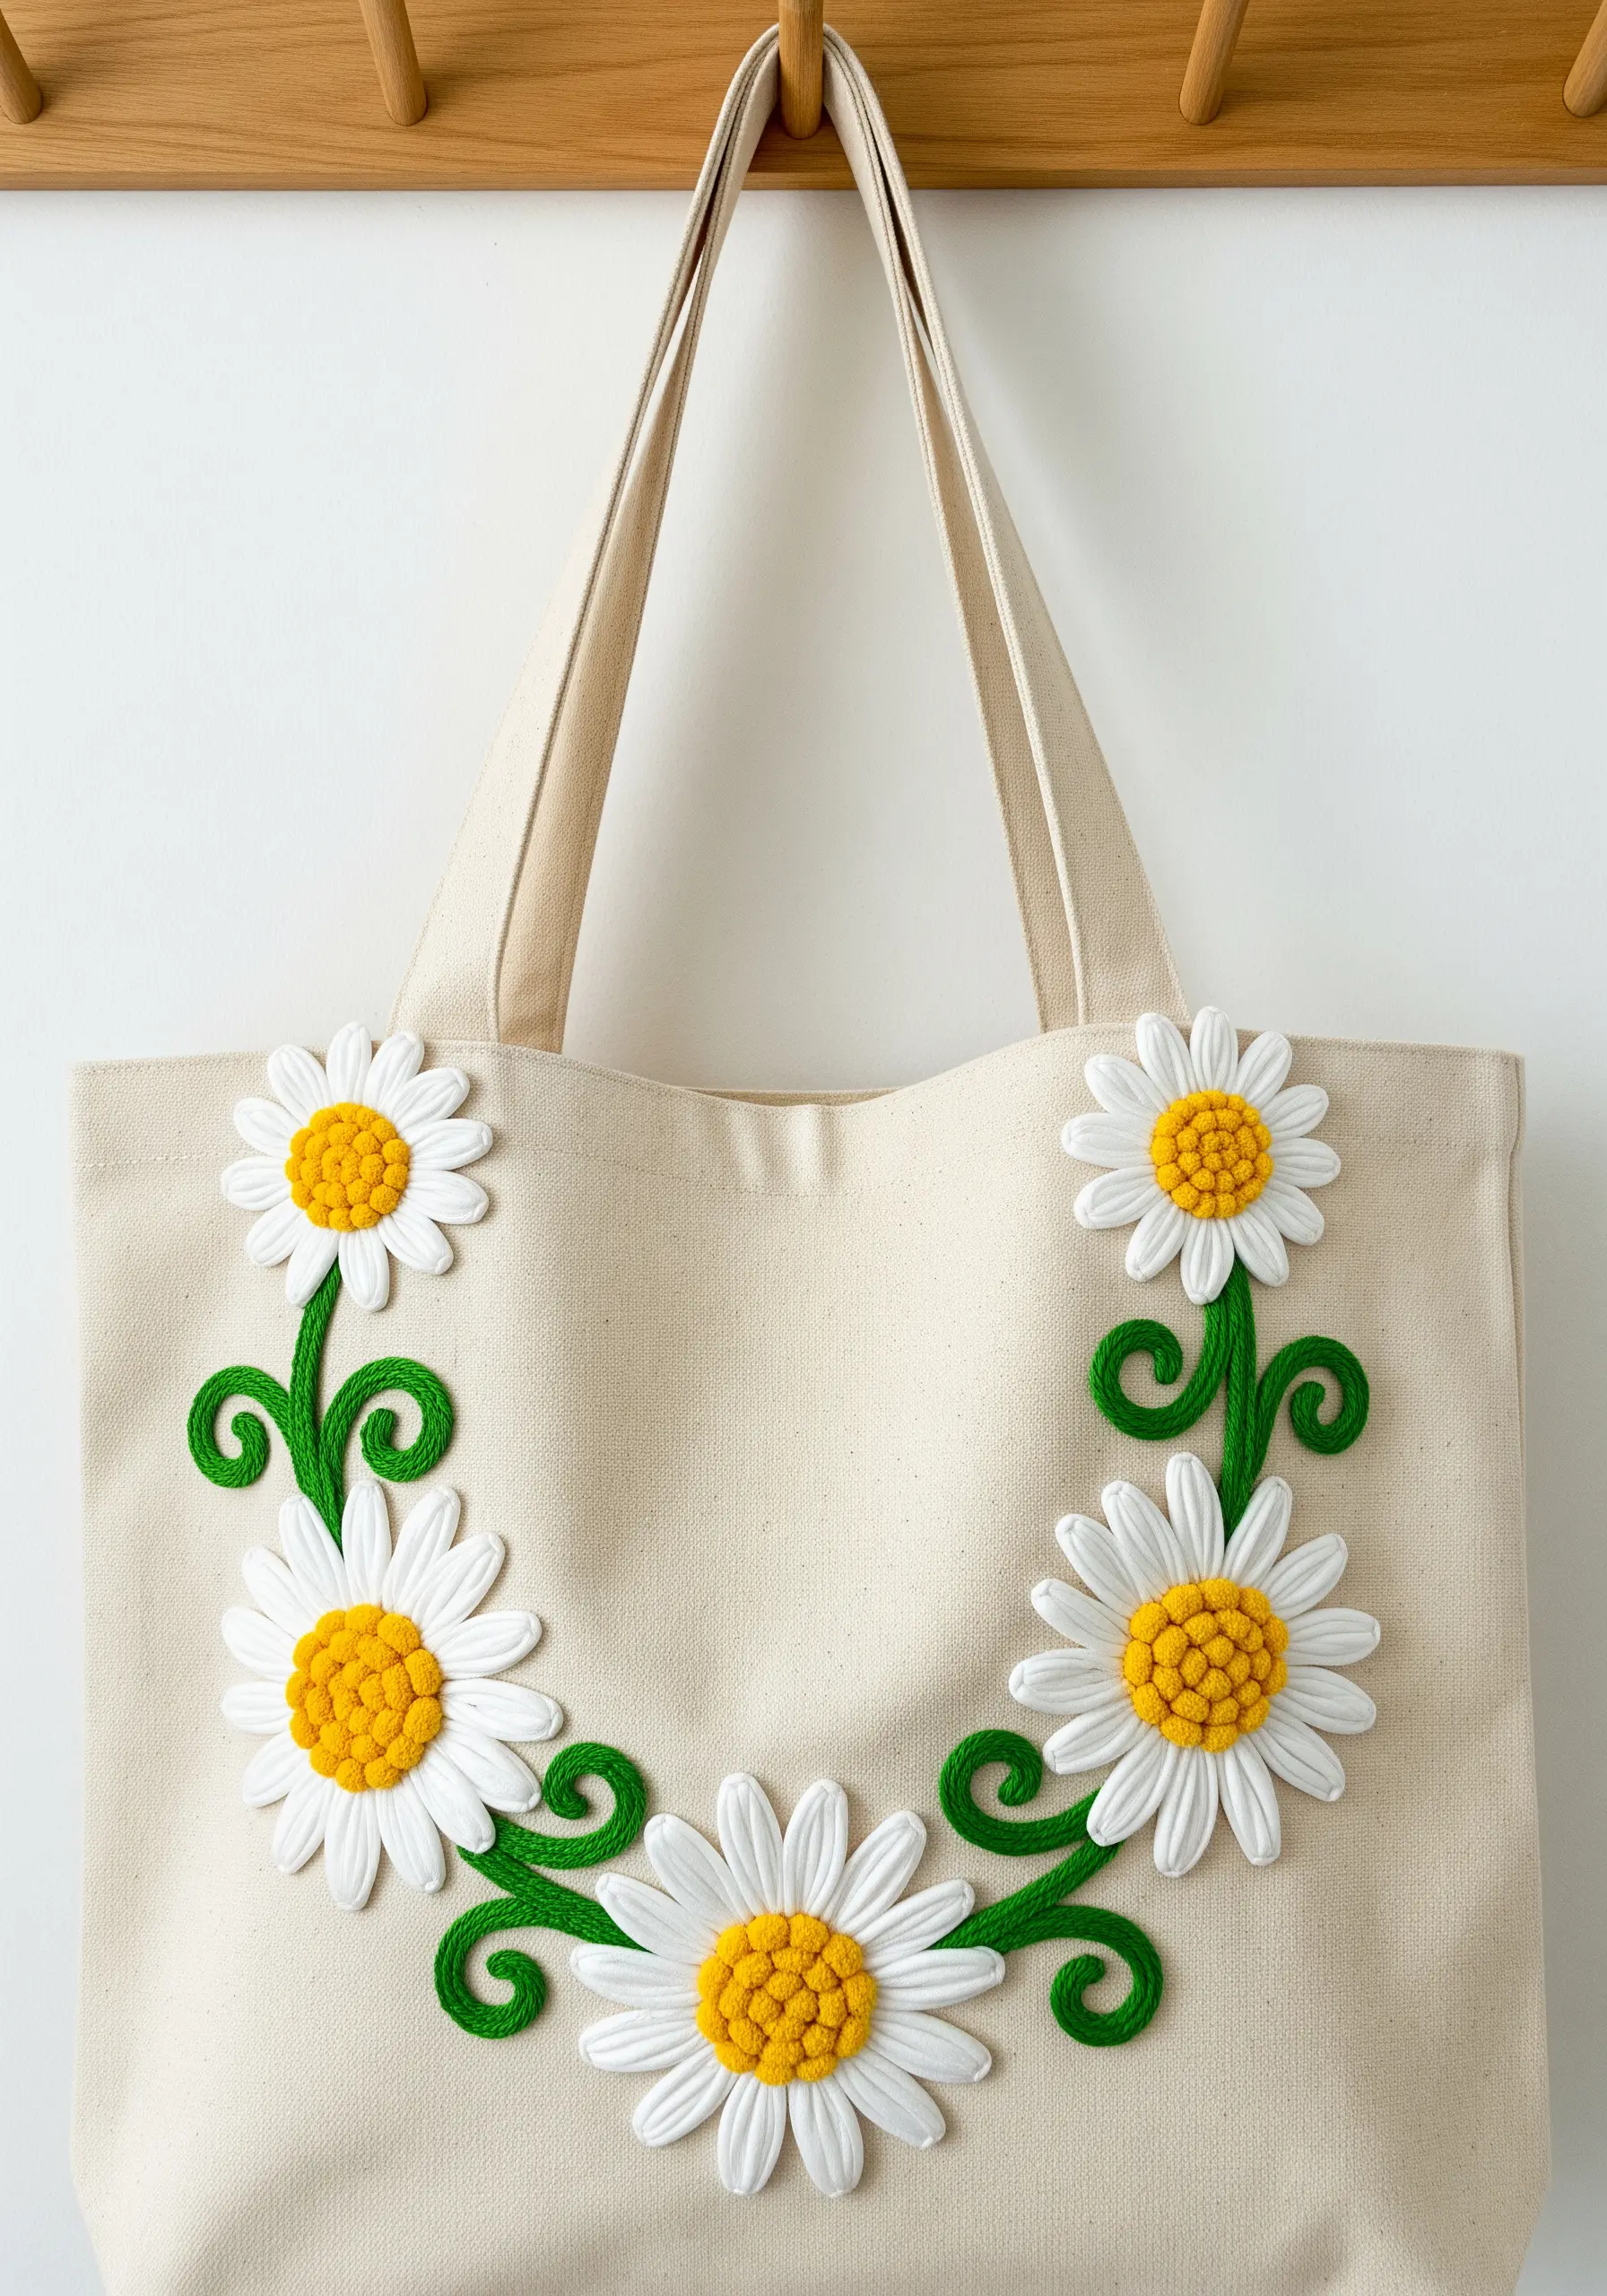
For a bold, almost sculptural effect on a sturdy canvas tote, don’t stitch directly onto the bag.
Instead, create the daisies using stumpwork techniques on a separate piece of fabric stabilized in a hoop.
Work each petal over a wire frame or use heavy padding, then cut it out and carefully apply it to the bag.
This method prevents the heavy stitching from puckering the canvas and allows the flowers to stand out dramatically, turning a simple bag into a piece of wearable art.
3. Achieve Precision with a Symmetrical Column
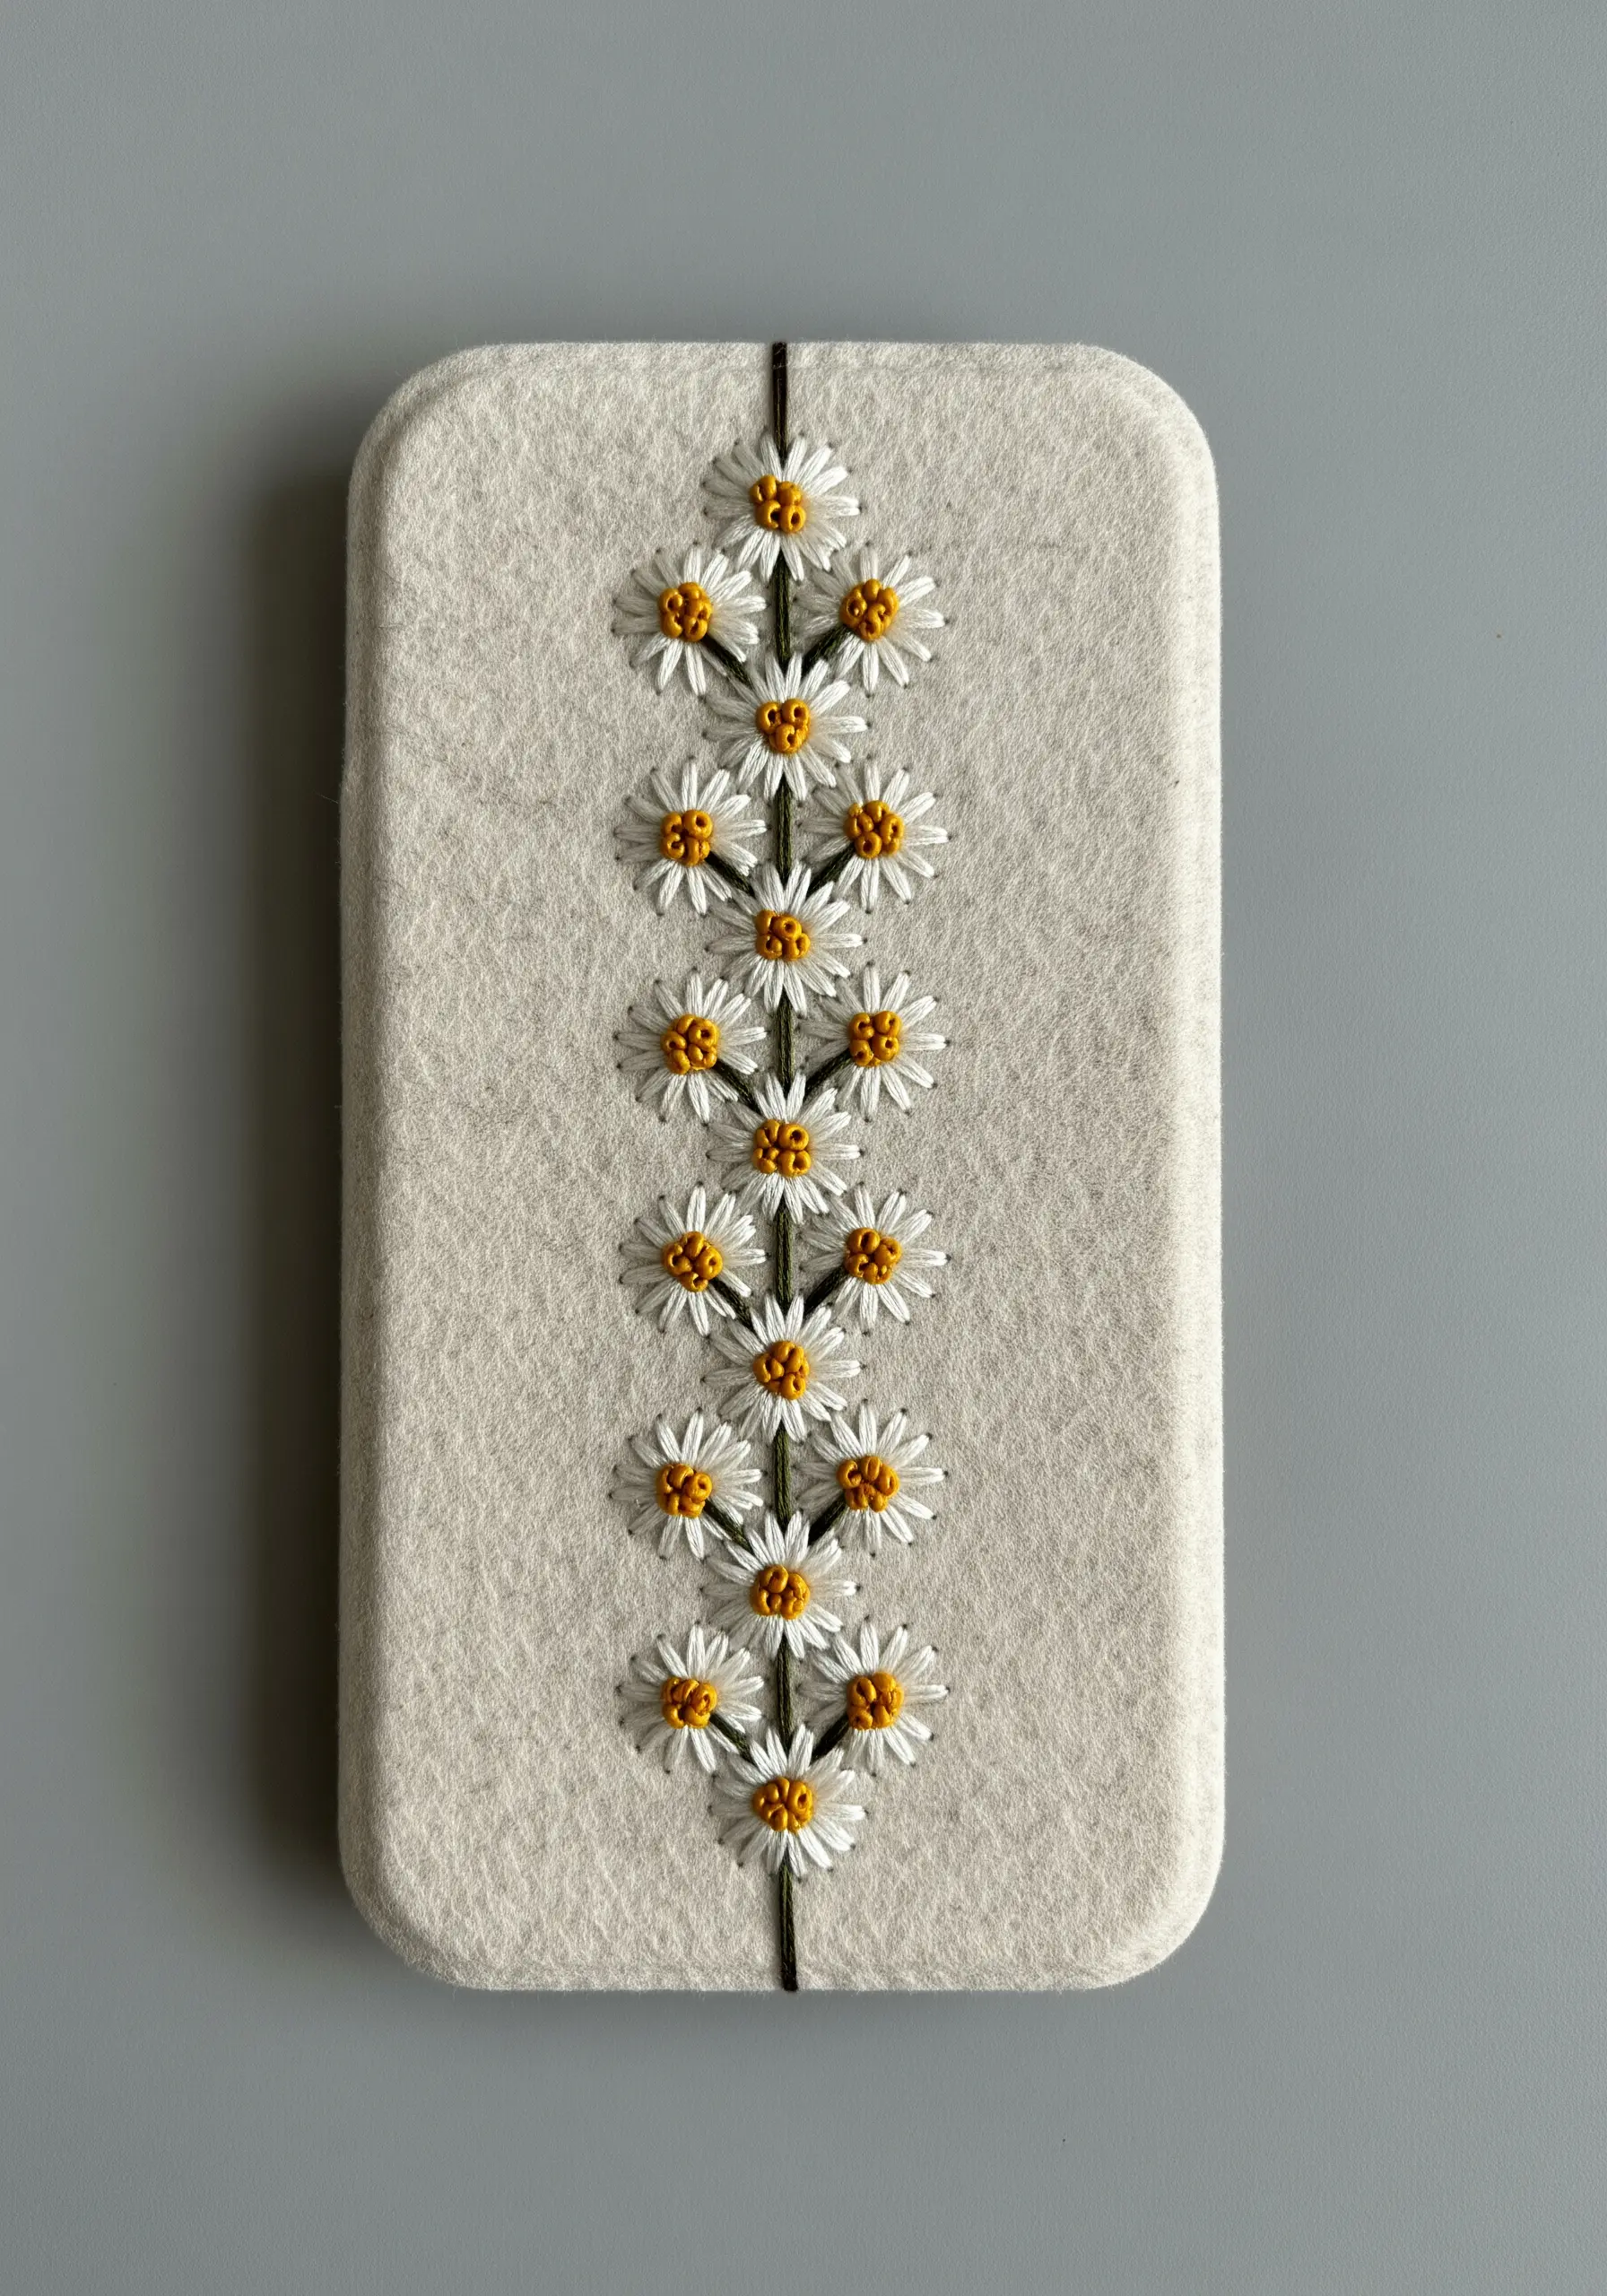
When executing a symmetrical pattern, your setup is everything.
Use a water-soluble or heat-erasable pen to draw a perfect vertical guideline down the center of your phone case.
Mark the precise location for each daisy center along this line to ensure flawless spacing.
Use a detached chain stitch (or lazy daisy stitch) for the petals, as its teardrop shape is naturally uniform and easy to replicate.
This meticulous approach guarantees a clean, geometric result that feels both delicate and intentional.
4. Master Bold Color on Denim
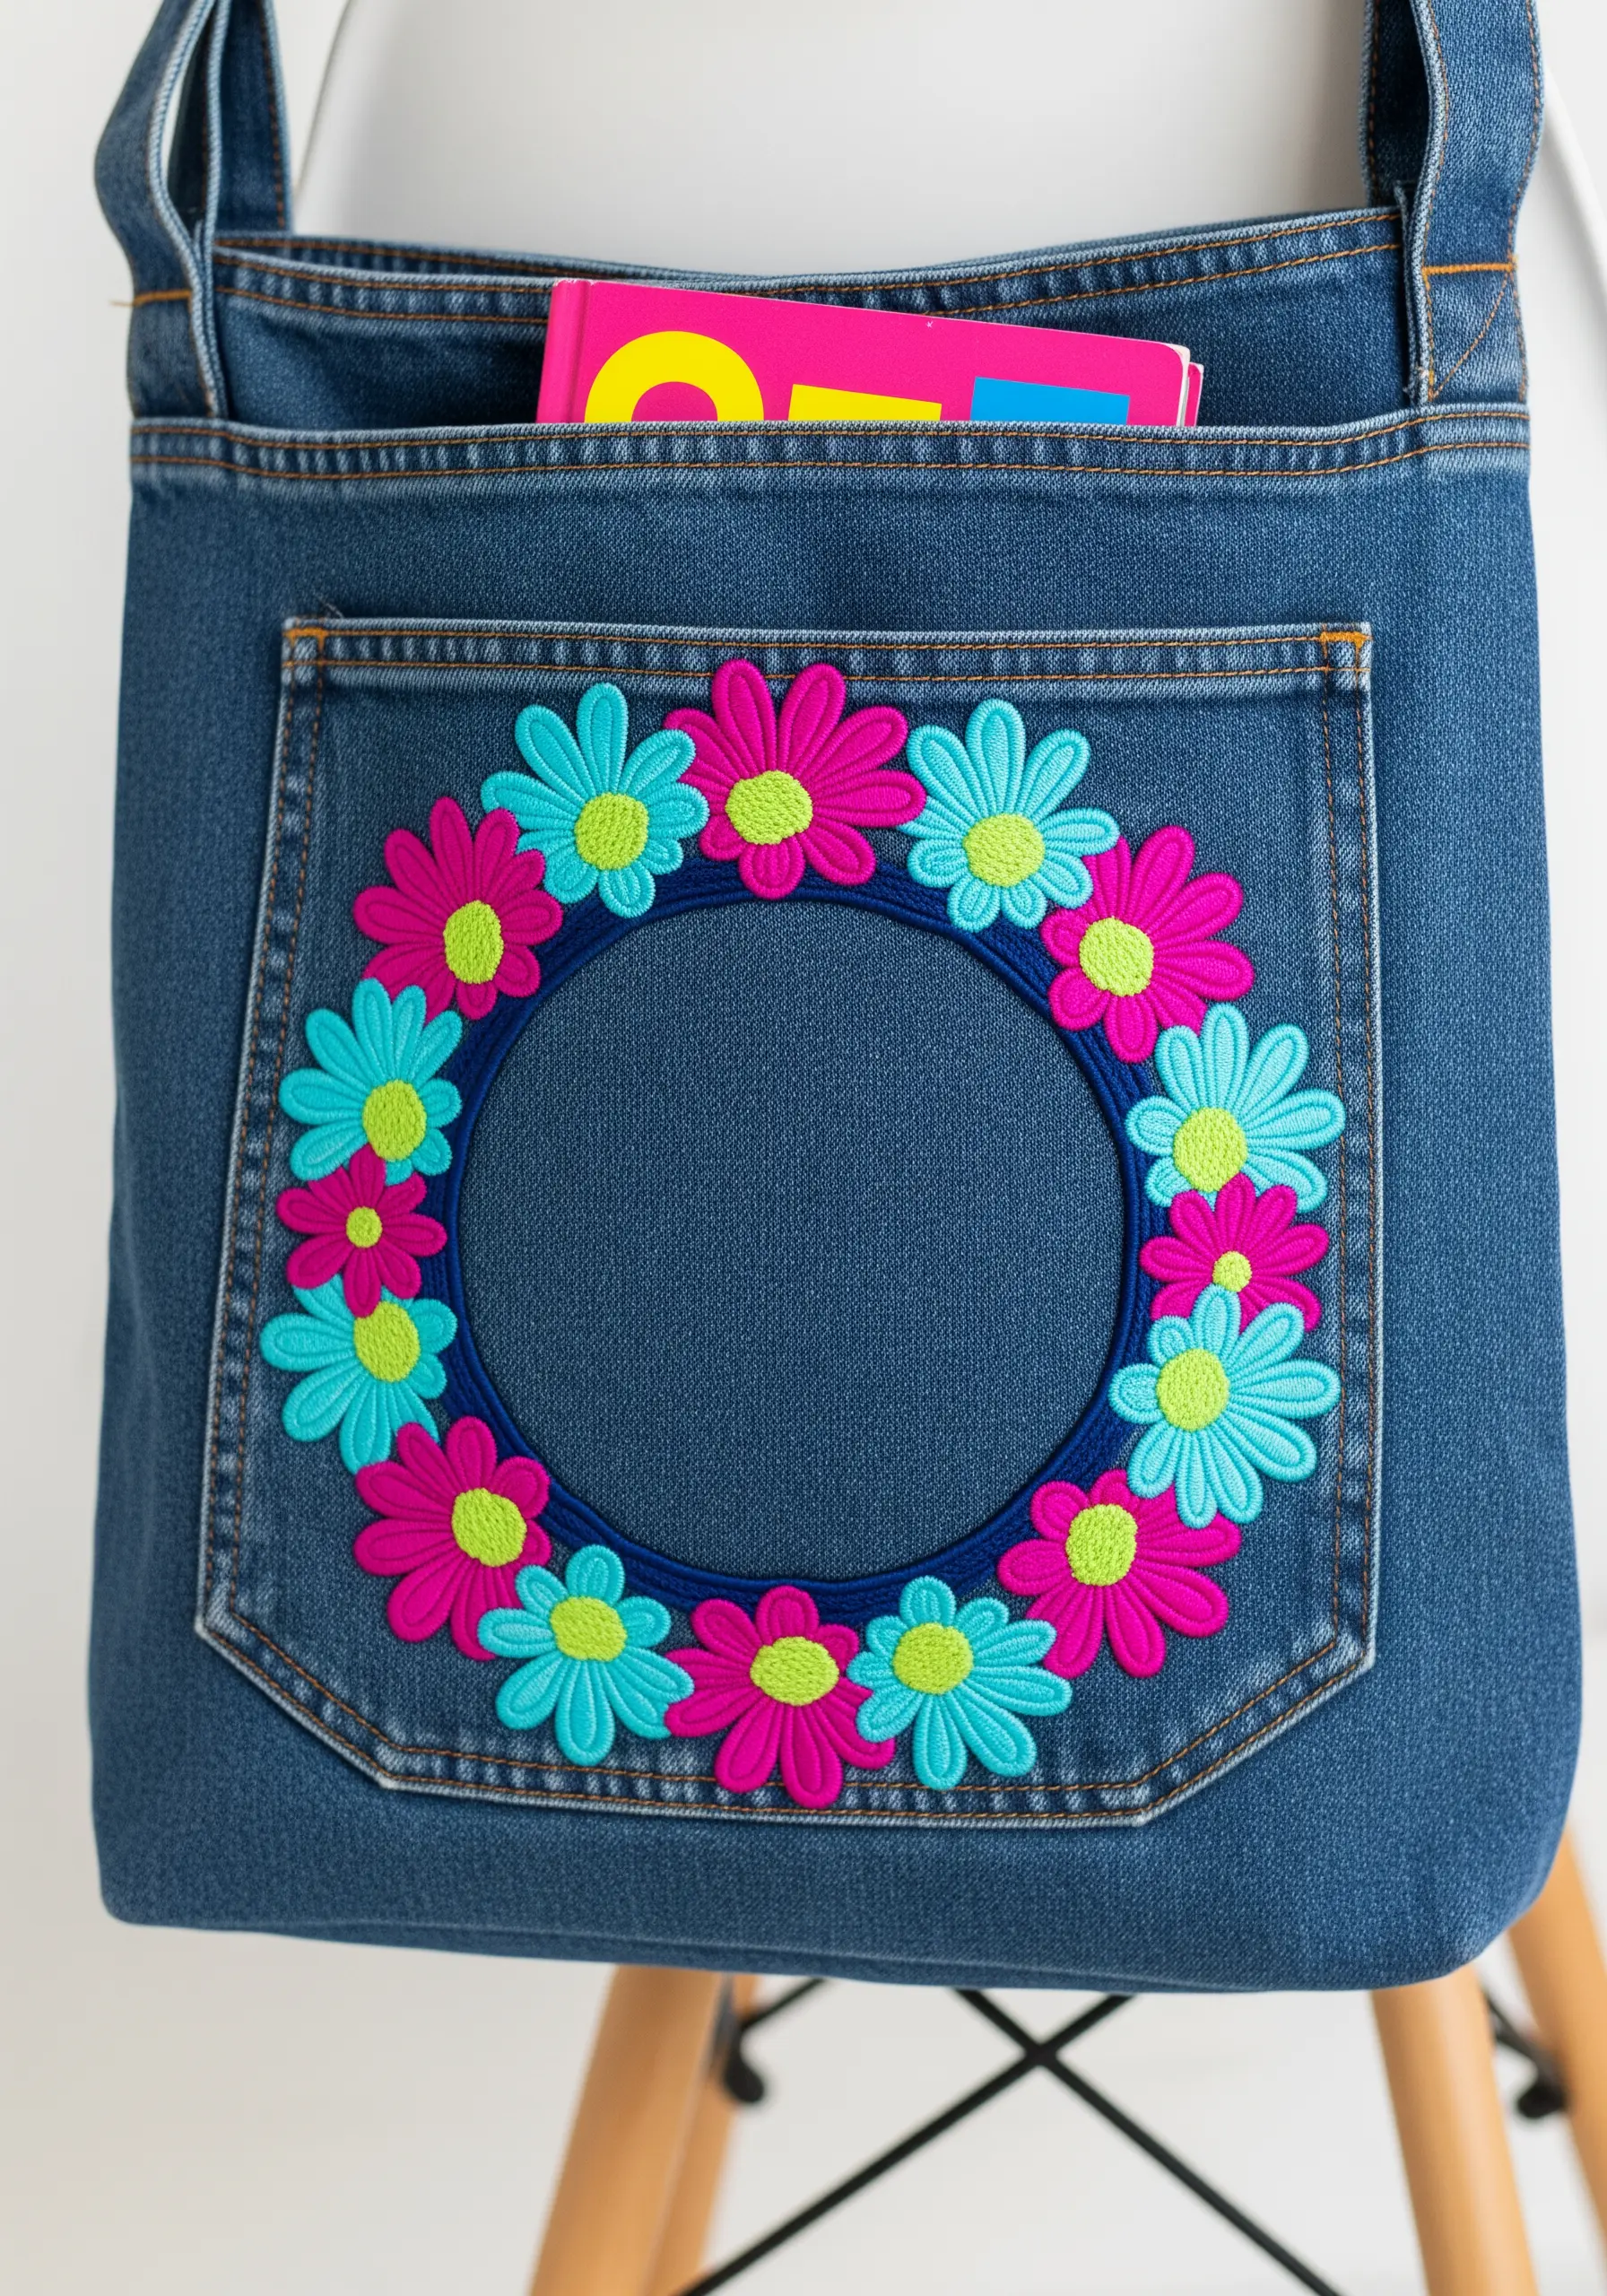
To make bright, vibrant colors pop on dark denim, you need to prime the fabric first.
Before stitching your petals in neon pink or turquoise, lay down a base layer in the same shape using a single strand of white floss.
Think of it as a primer for your thread—it neutralizes the dark indigo underneath, allowing the true vibrancy of your colored thread to shine through.
Combine this with a sharp denim needle to pierce the thick fabric cleanly, ensuring your stitches are smooth, not forced.
5. Integrate Beads for a Touch of Light

Elevate simple satin-stitched daisies by adding a single, well-placed bead to each center.
After stitching your yellow flower centers, bring your needle up through the middle and thread on a metallic or pearlescent seed bead.
Secure it with a tiny tacking stitch that sinks back into the same hole.
This detail adds a point of reflected light and a hint of texture, transforming a sweet design into something more refined and eye-catching.
6. Wrap Designs Around Corners with Control
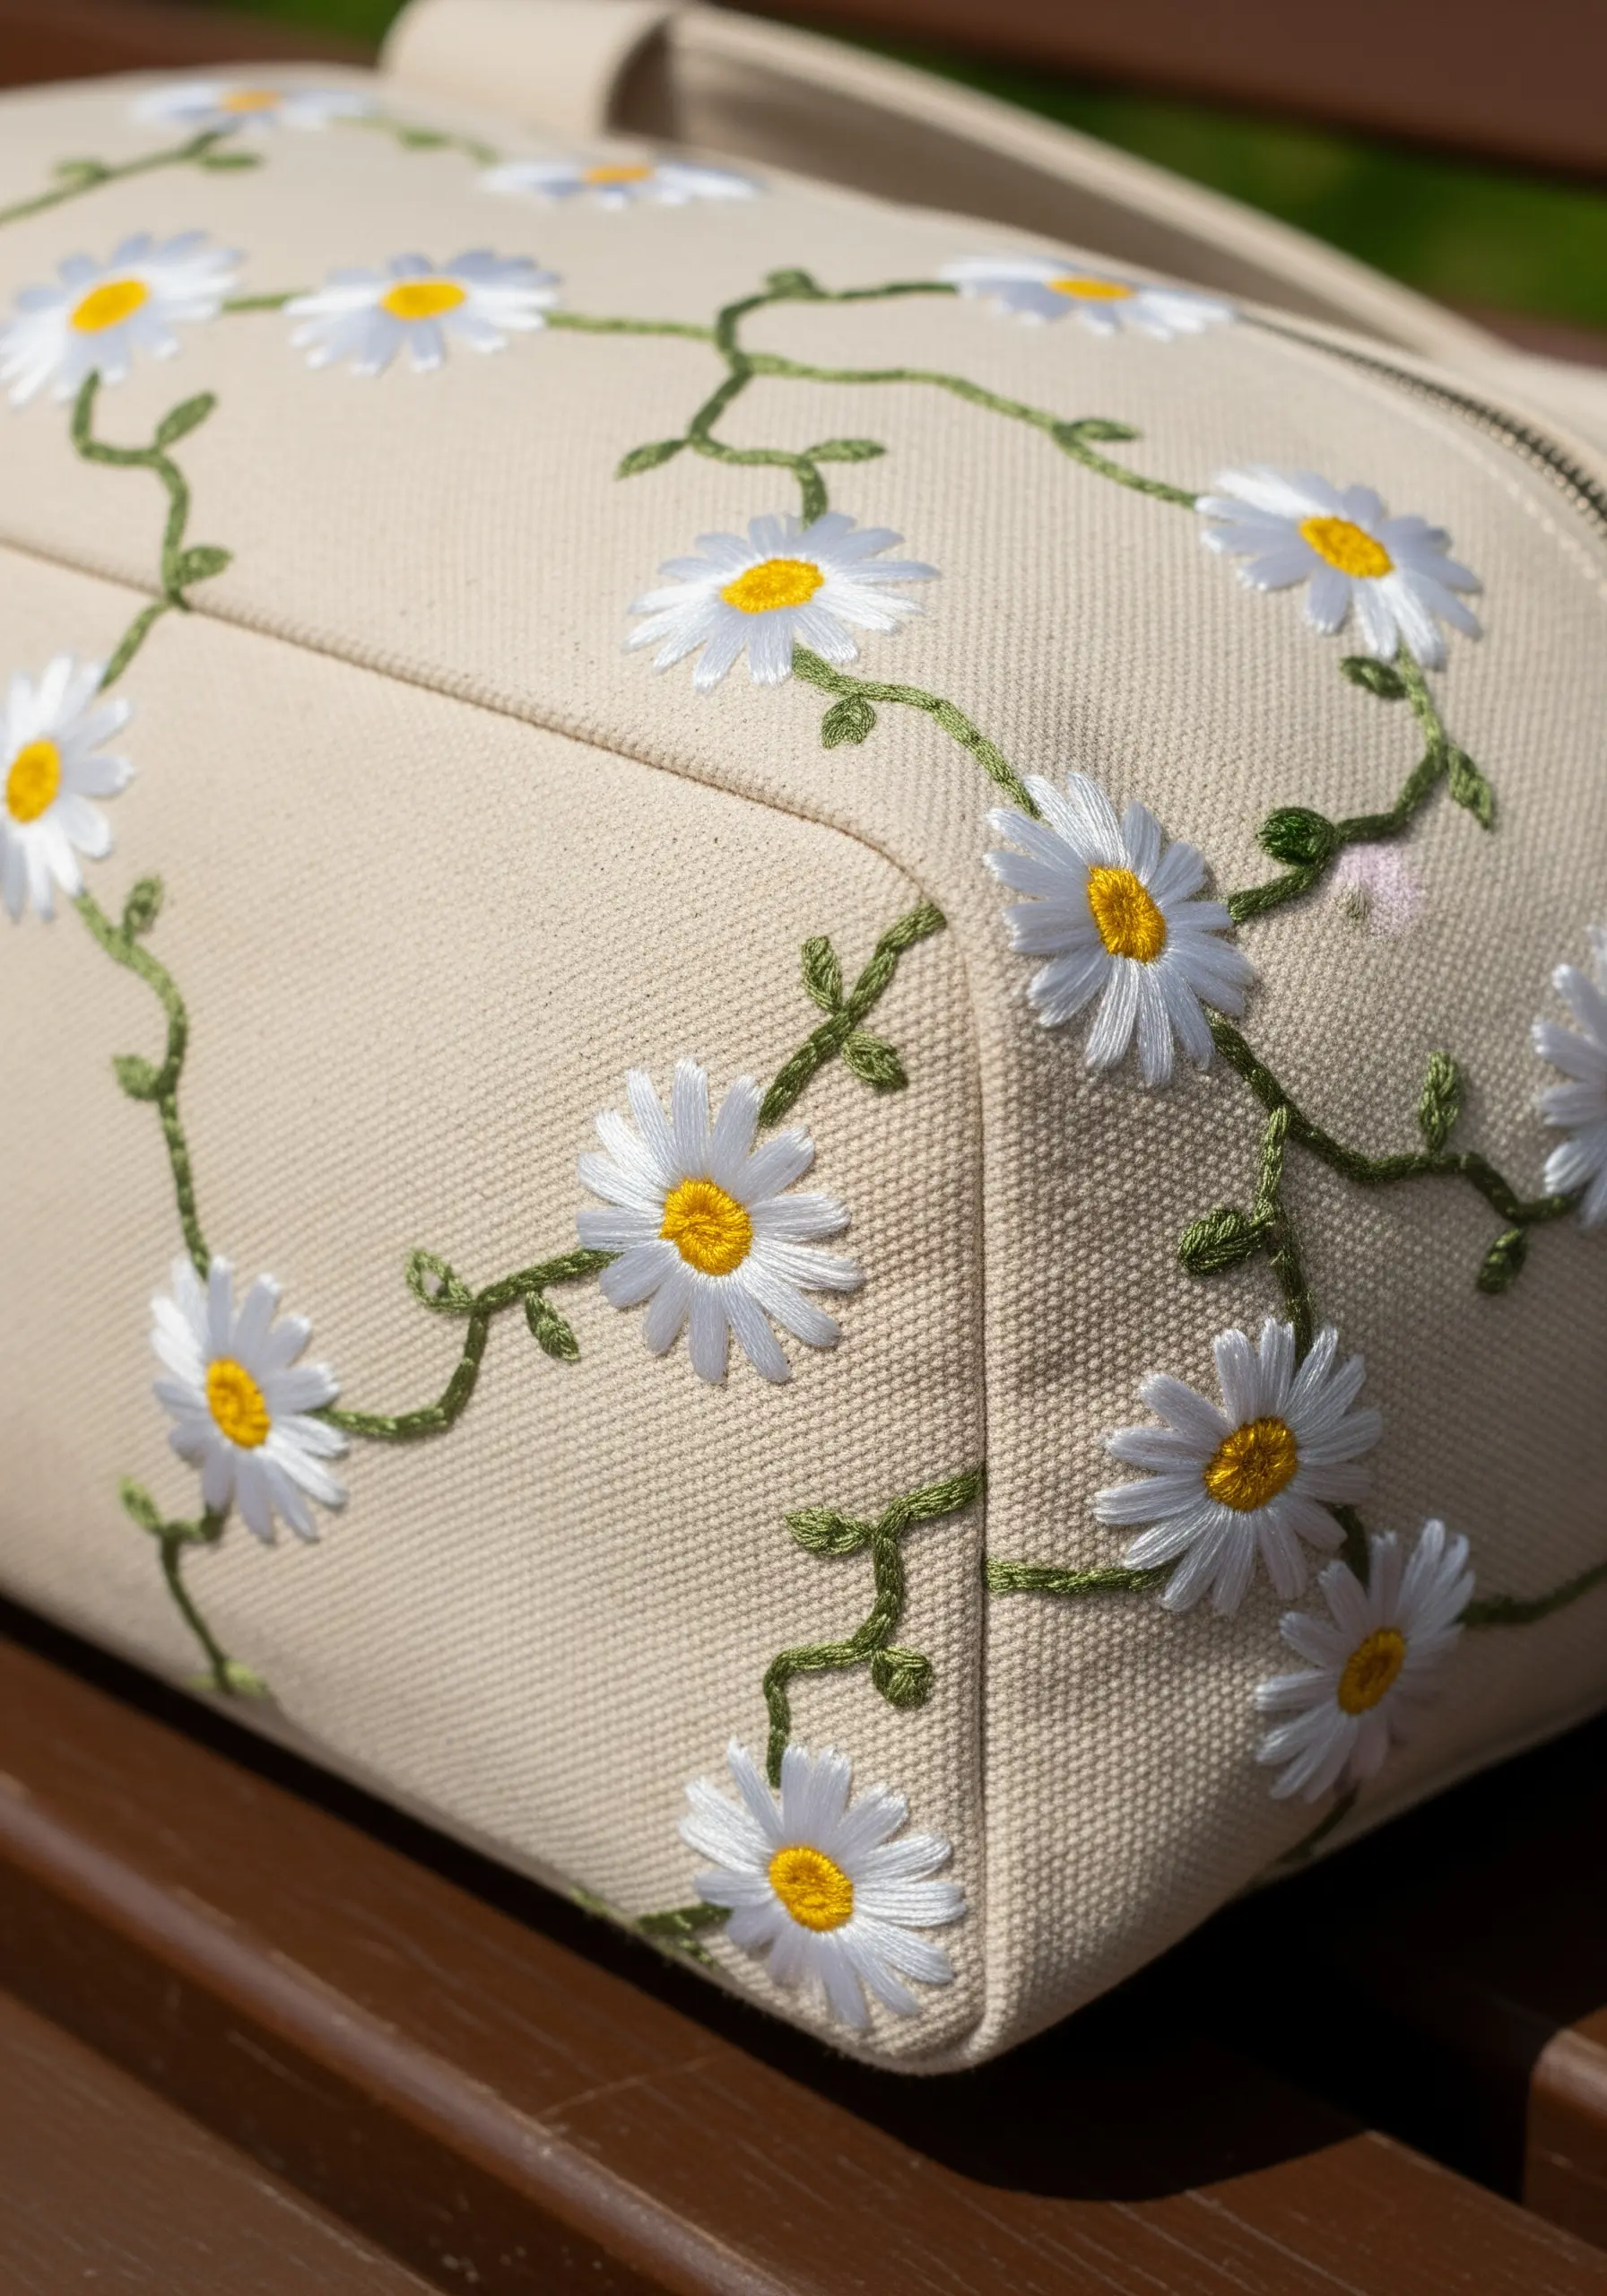
Embroidering on a pre-constructed object like a cosmetic bag requires stitching without a hoop in tight spots.
To maintain control and prevent distortion as your design wraps around a corner, trace your pattern first and plan your stitch direction.
Use a stable stitch like a split stitch or stem stitch for the vines, as they are less likely to warp or loosen with the bag’s movement.
Anchor your thread securely on the inside to ensure the stitches withstand daily use.
7. Explore Monochrome Shading for Depth
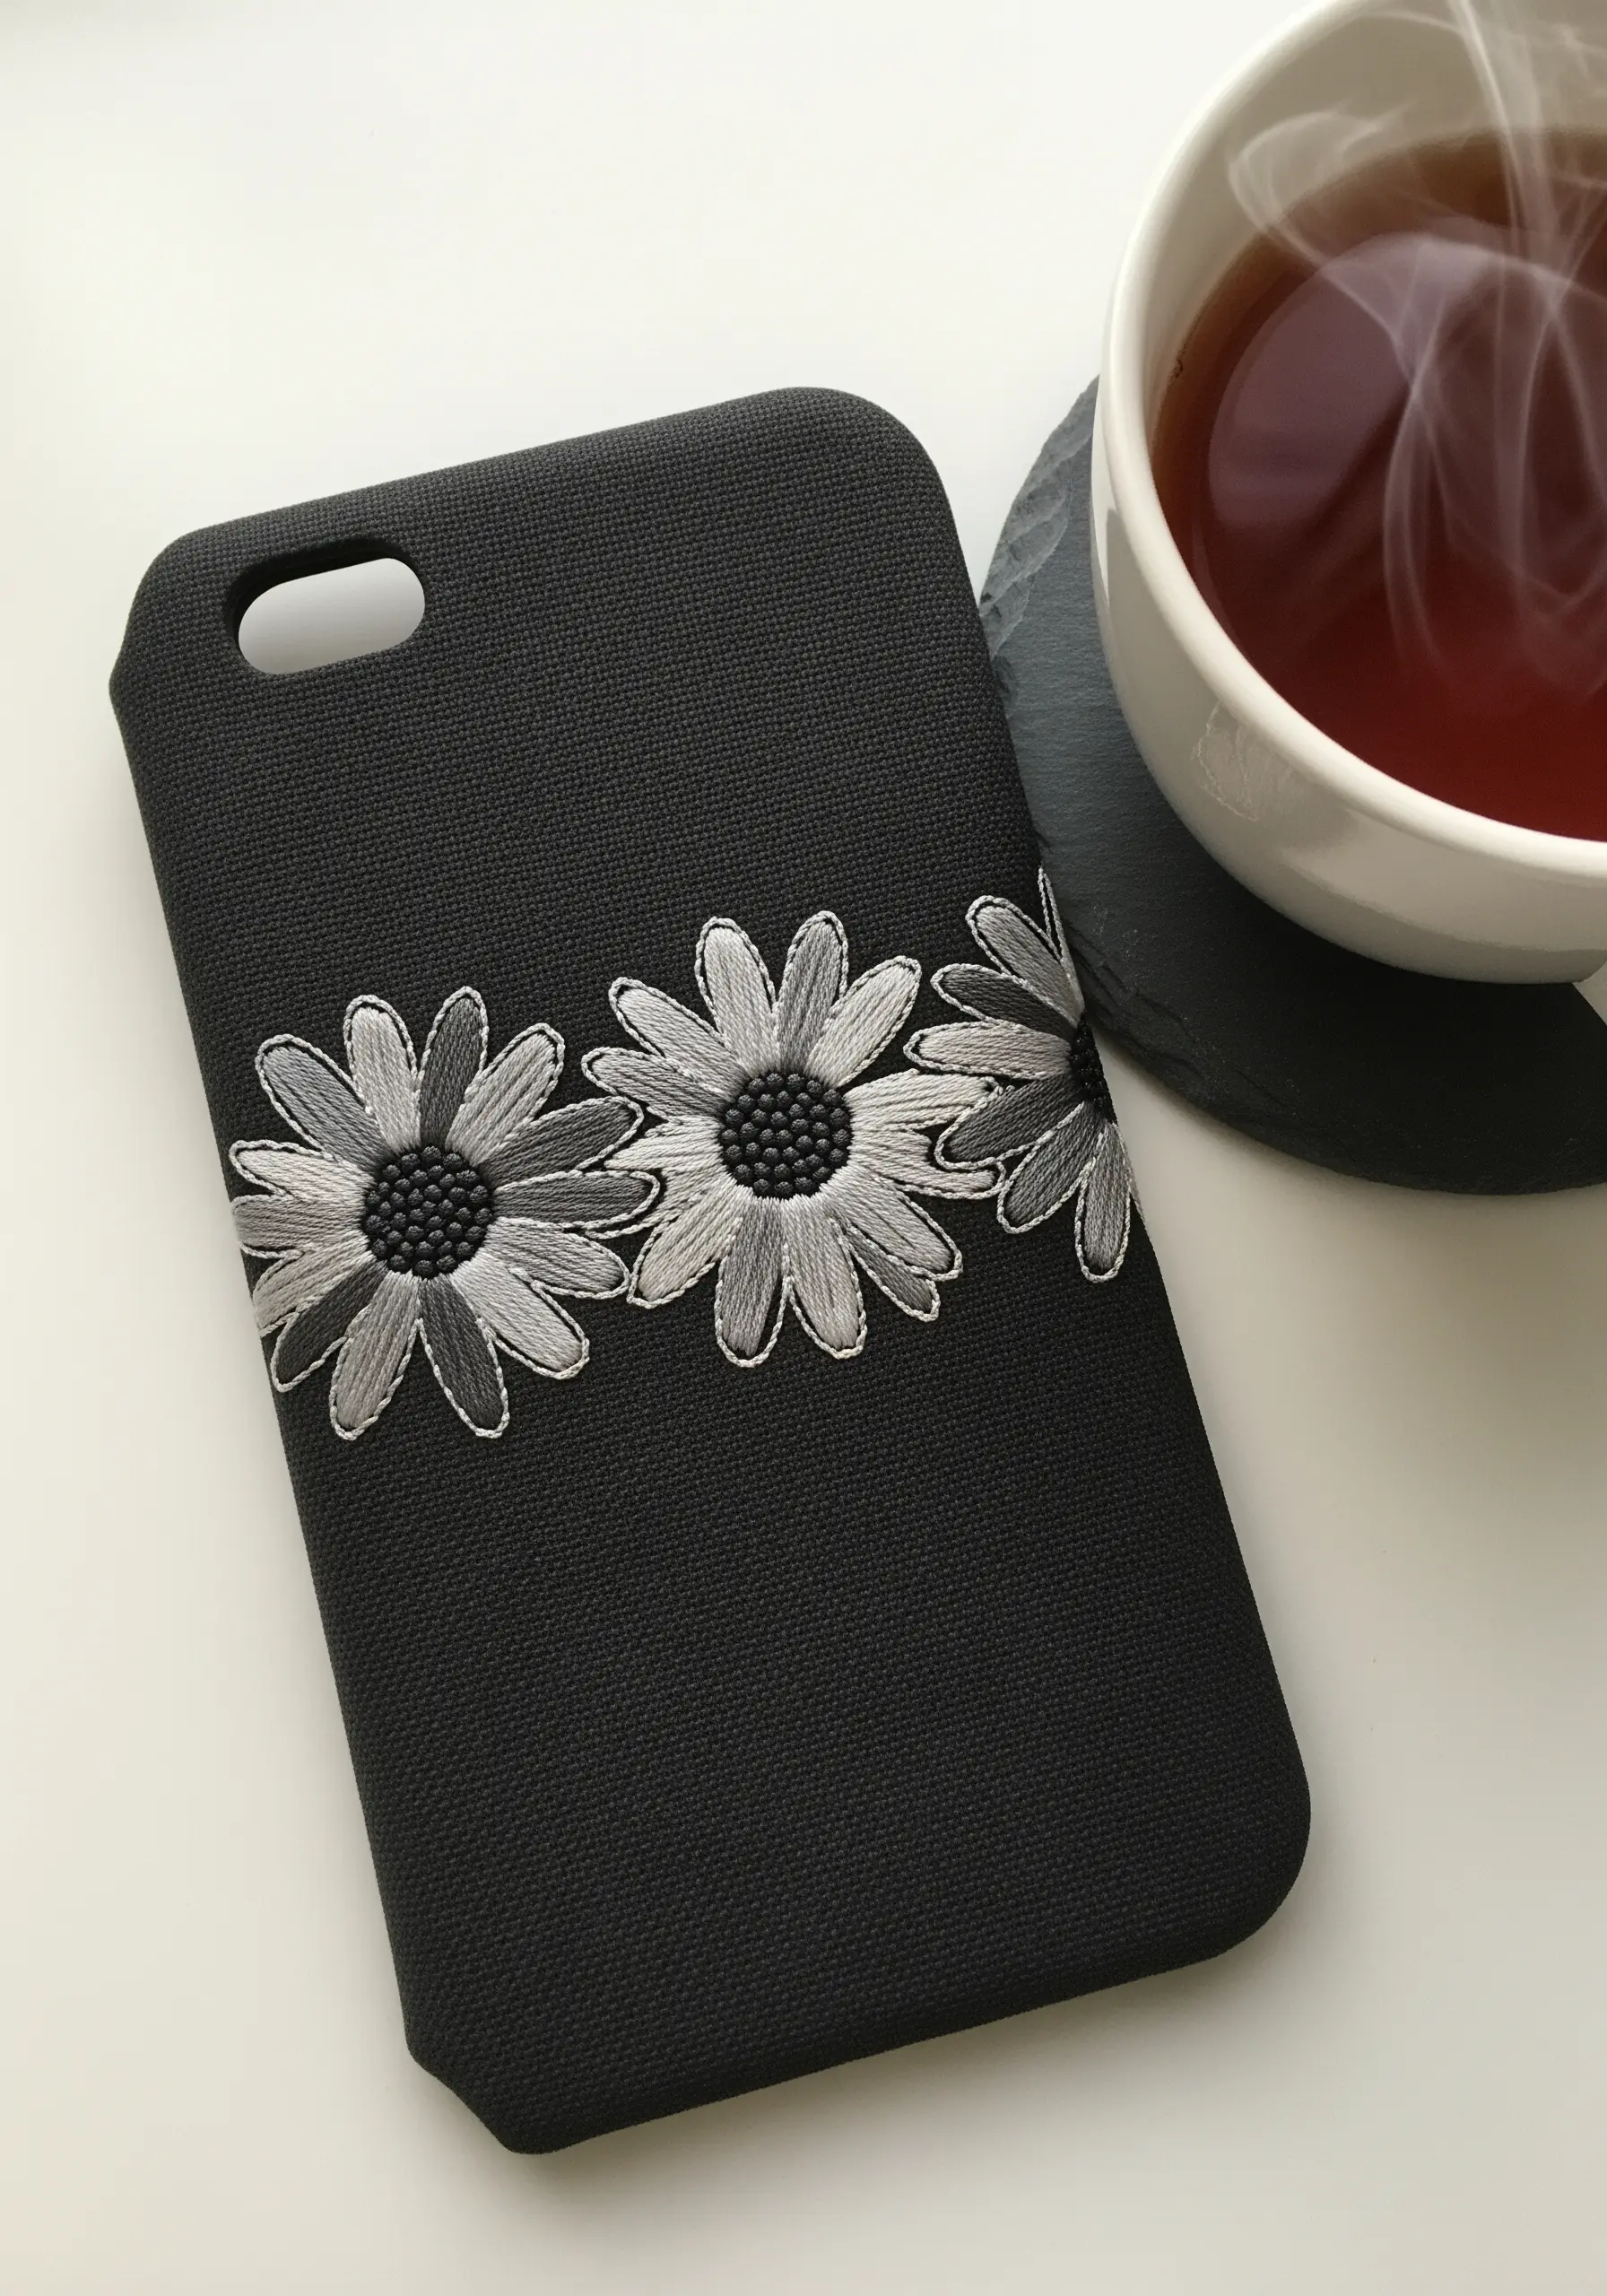
Create a sophisticated, high-contrast design on a black surface by using value instead of color.
Select three or four shades of gray floss, from pale silver to dark charcoal.
Use the long-and-short stitch to fill each petal, placing the darkest shade at the base where the petal meets the center, and blending out to the lightest shade at the tip.
This technique mimics how light falls on a real flower, giving your monochrome textile wall art a surprising level of realism and depth.
8. Perfect the Uniform Border
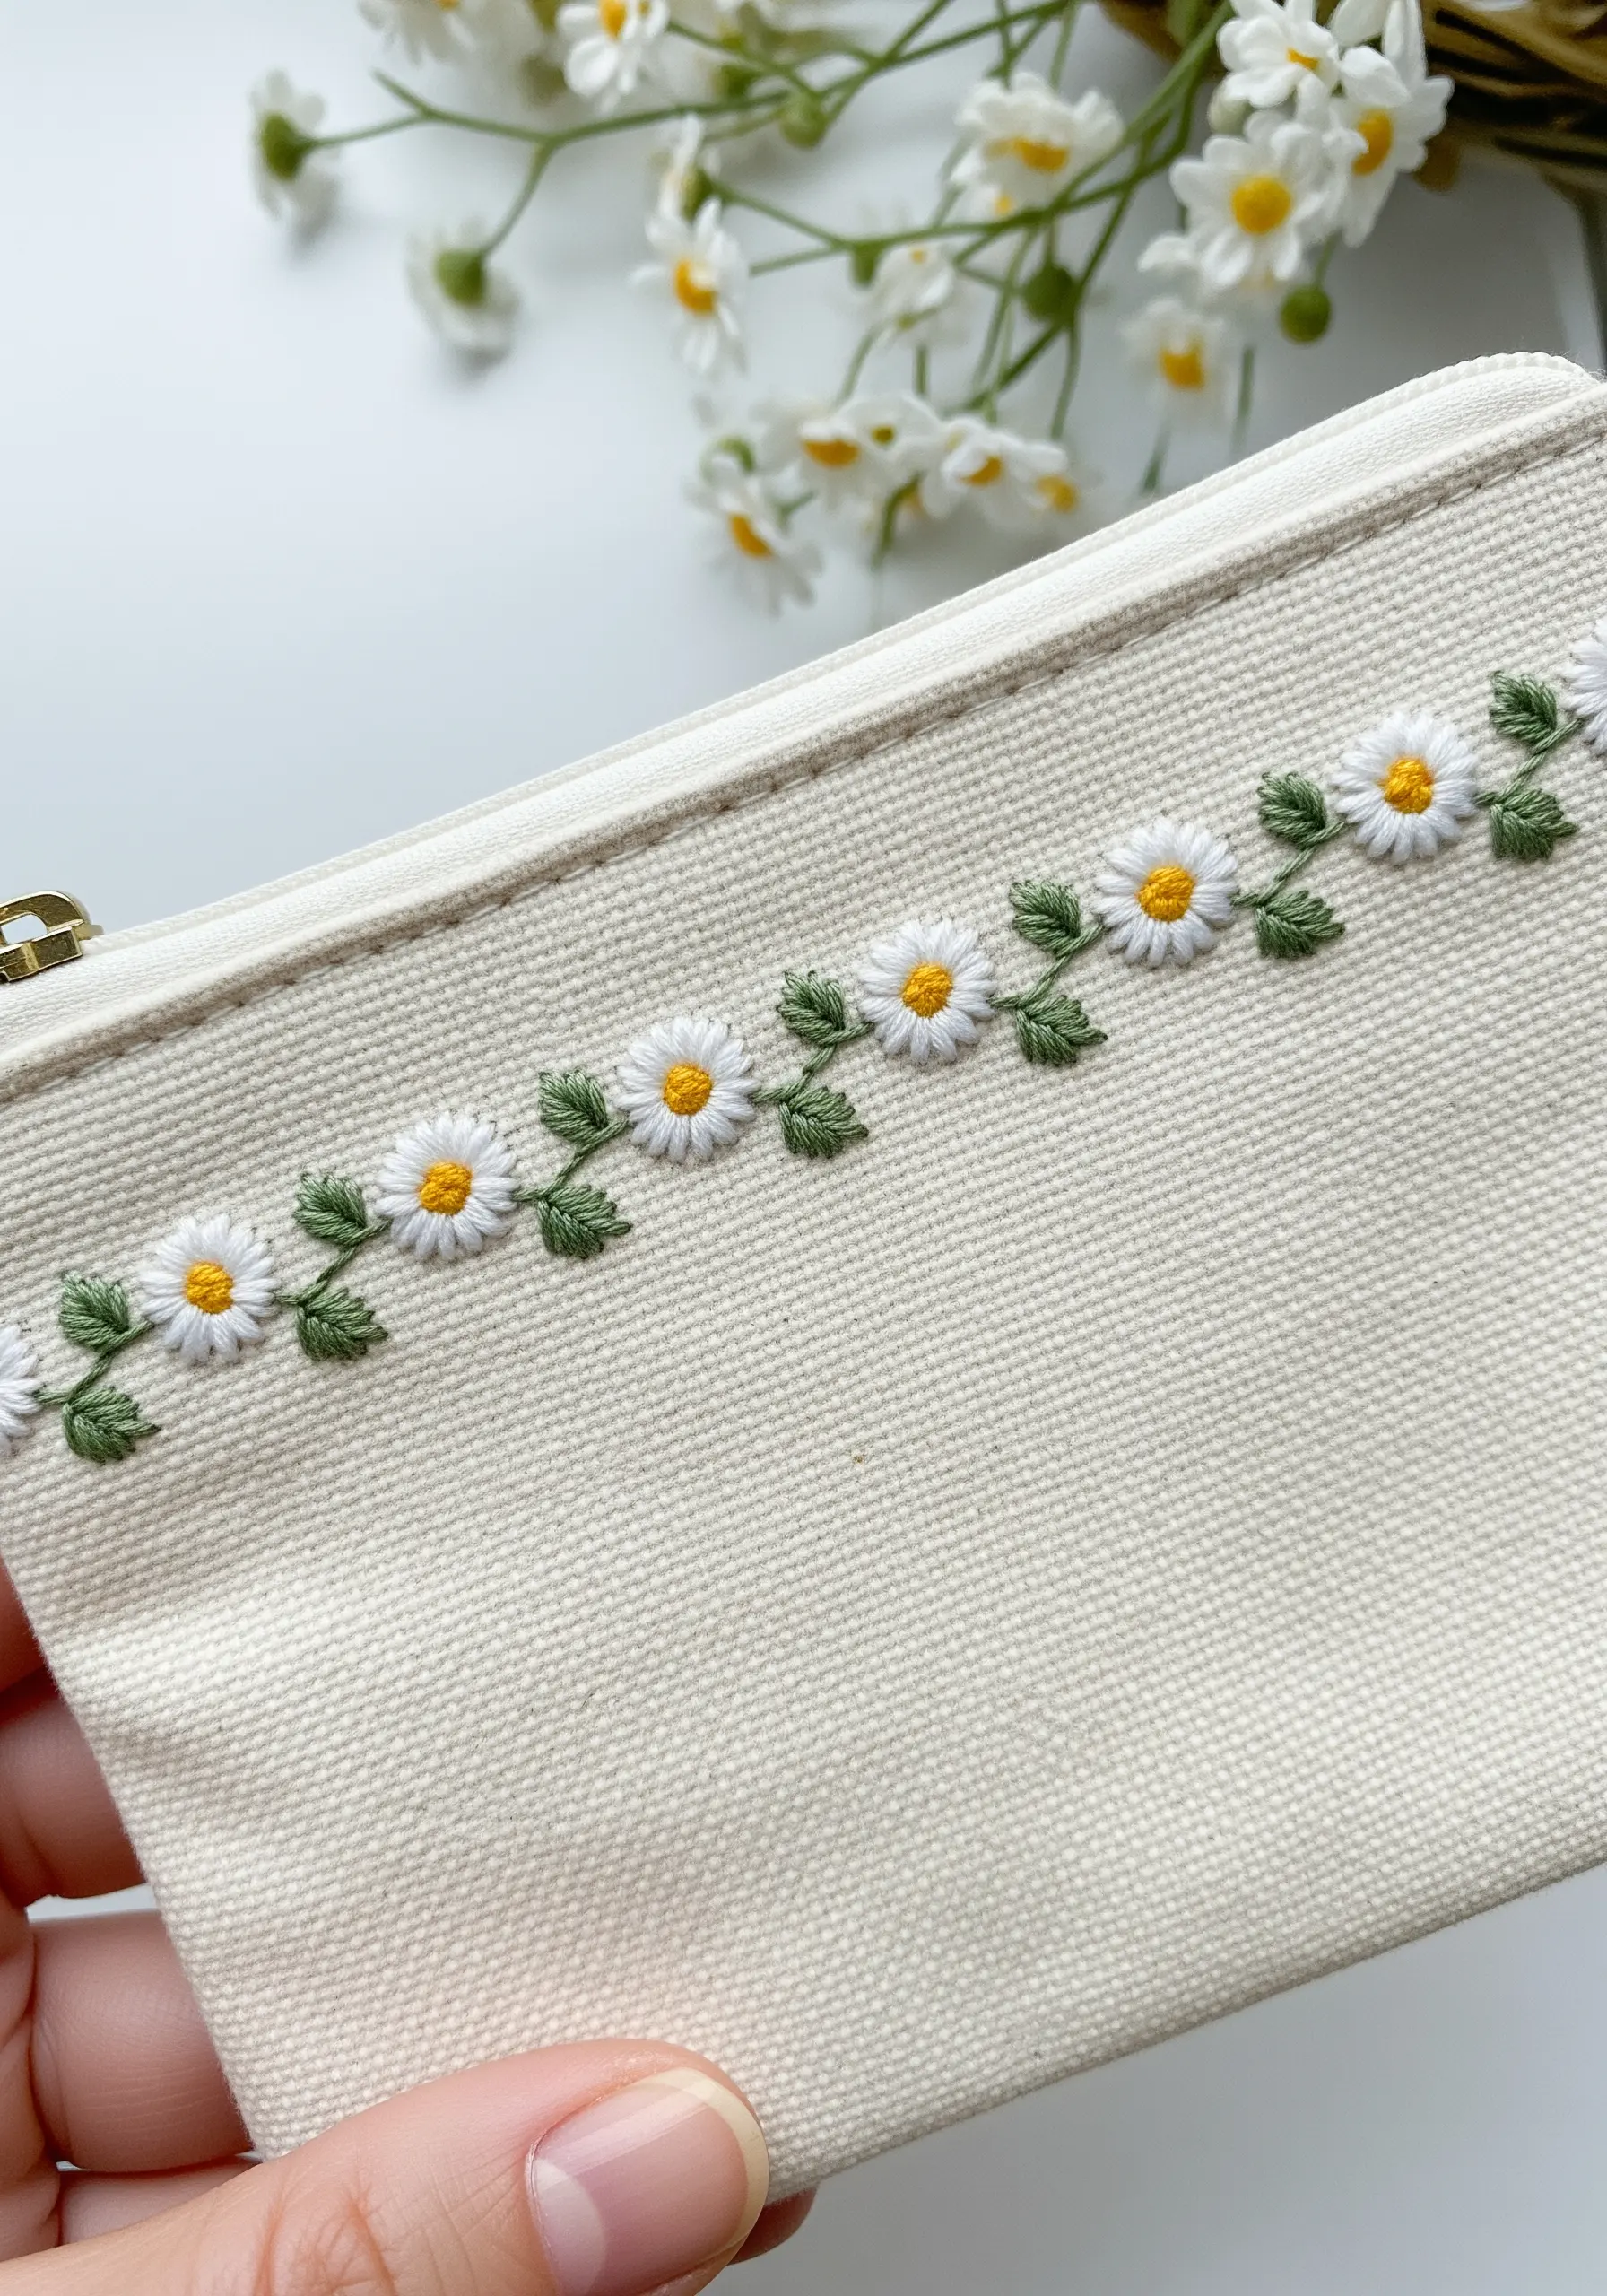
A clean, repeating border relies on consistency in every stitch.
To achieve this on a small pouch, create a simple template of one daisy-and-leaf unit on tracing paper.
Use this template to transfer the design at exact intervals along your stitch line.
For each flower, use the exact same number of detached chain stitches for the petals and the same number of wraps for the central French knot.
This disciplined approach results in a polished, professional-looking finish.
9. Paint with Thread for a Realistic Effect
To give your daisies a soft, painterly quality, move beyond simple satin stitch and explore thread painting.
Use a single strand of floss and the long-and-short stitch to fill the petals, blending two or three shades of off-white and pale gray to create highlights and shadows.
For the stems, twist two different shades of green floss together before threading your needle.
This creates a naturally variegated thread that adds instant organic texture and realism to your wildflower thread painting.
10. Build a Dense, Textured Daisy Wreath
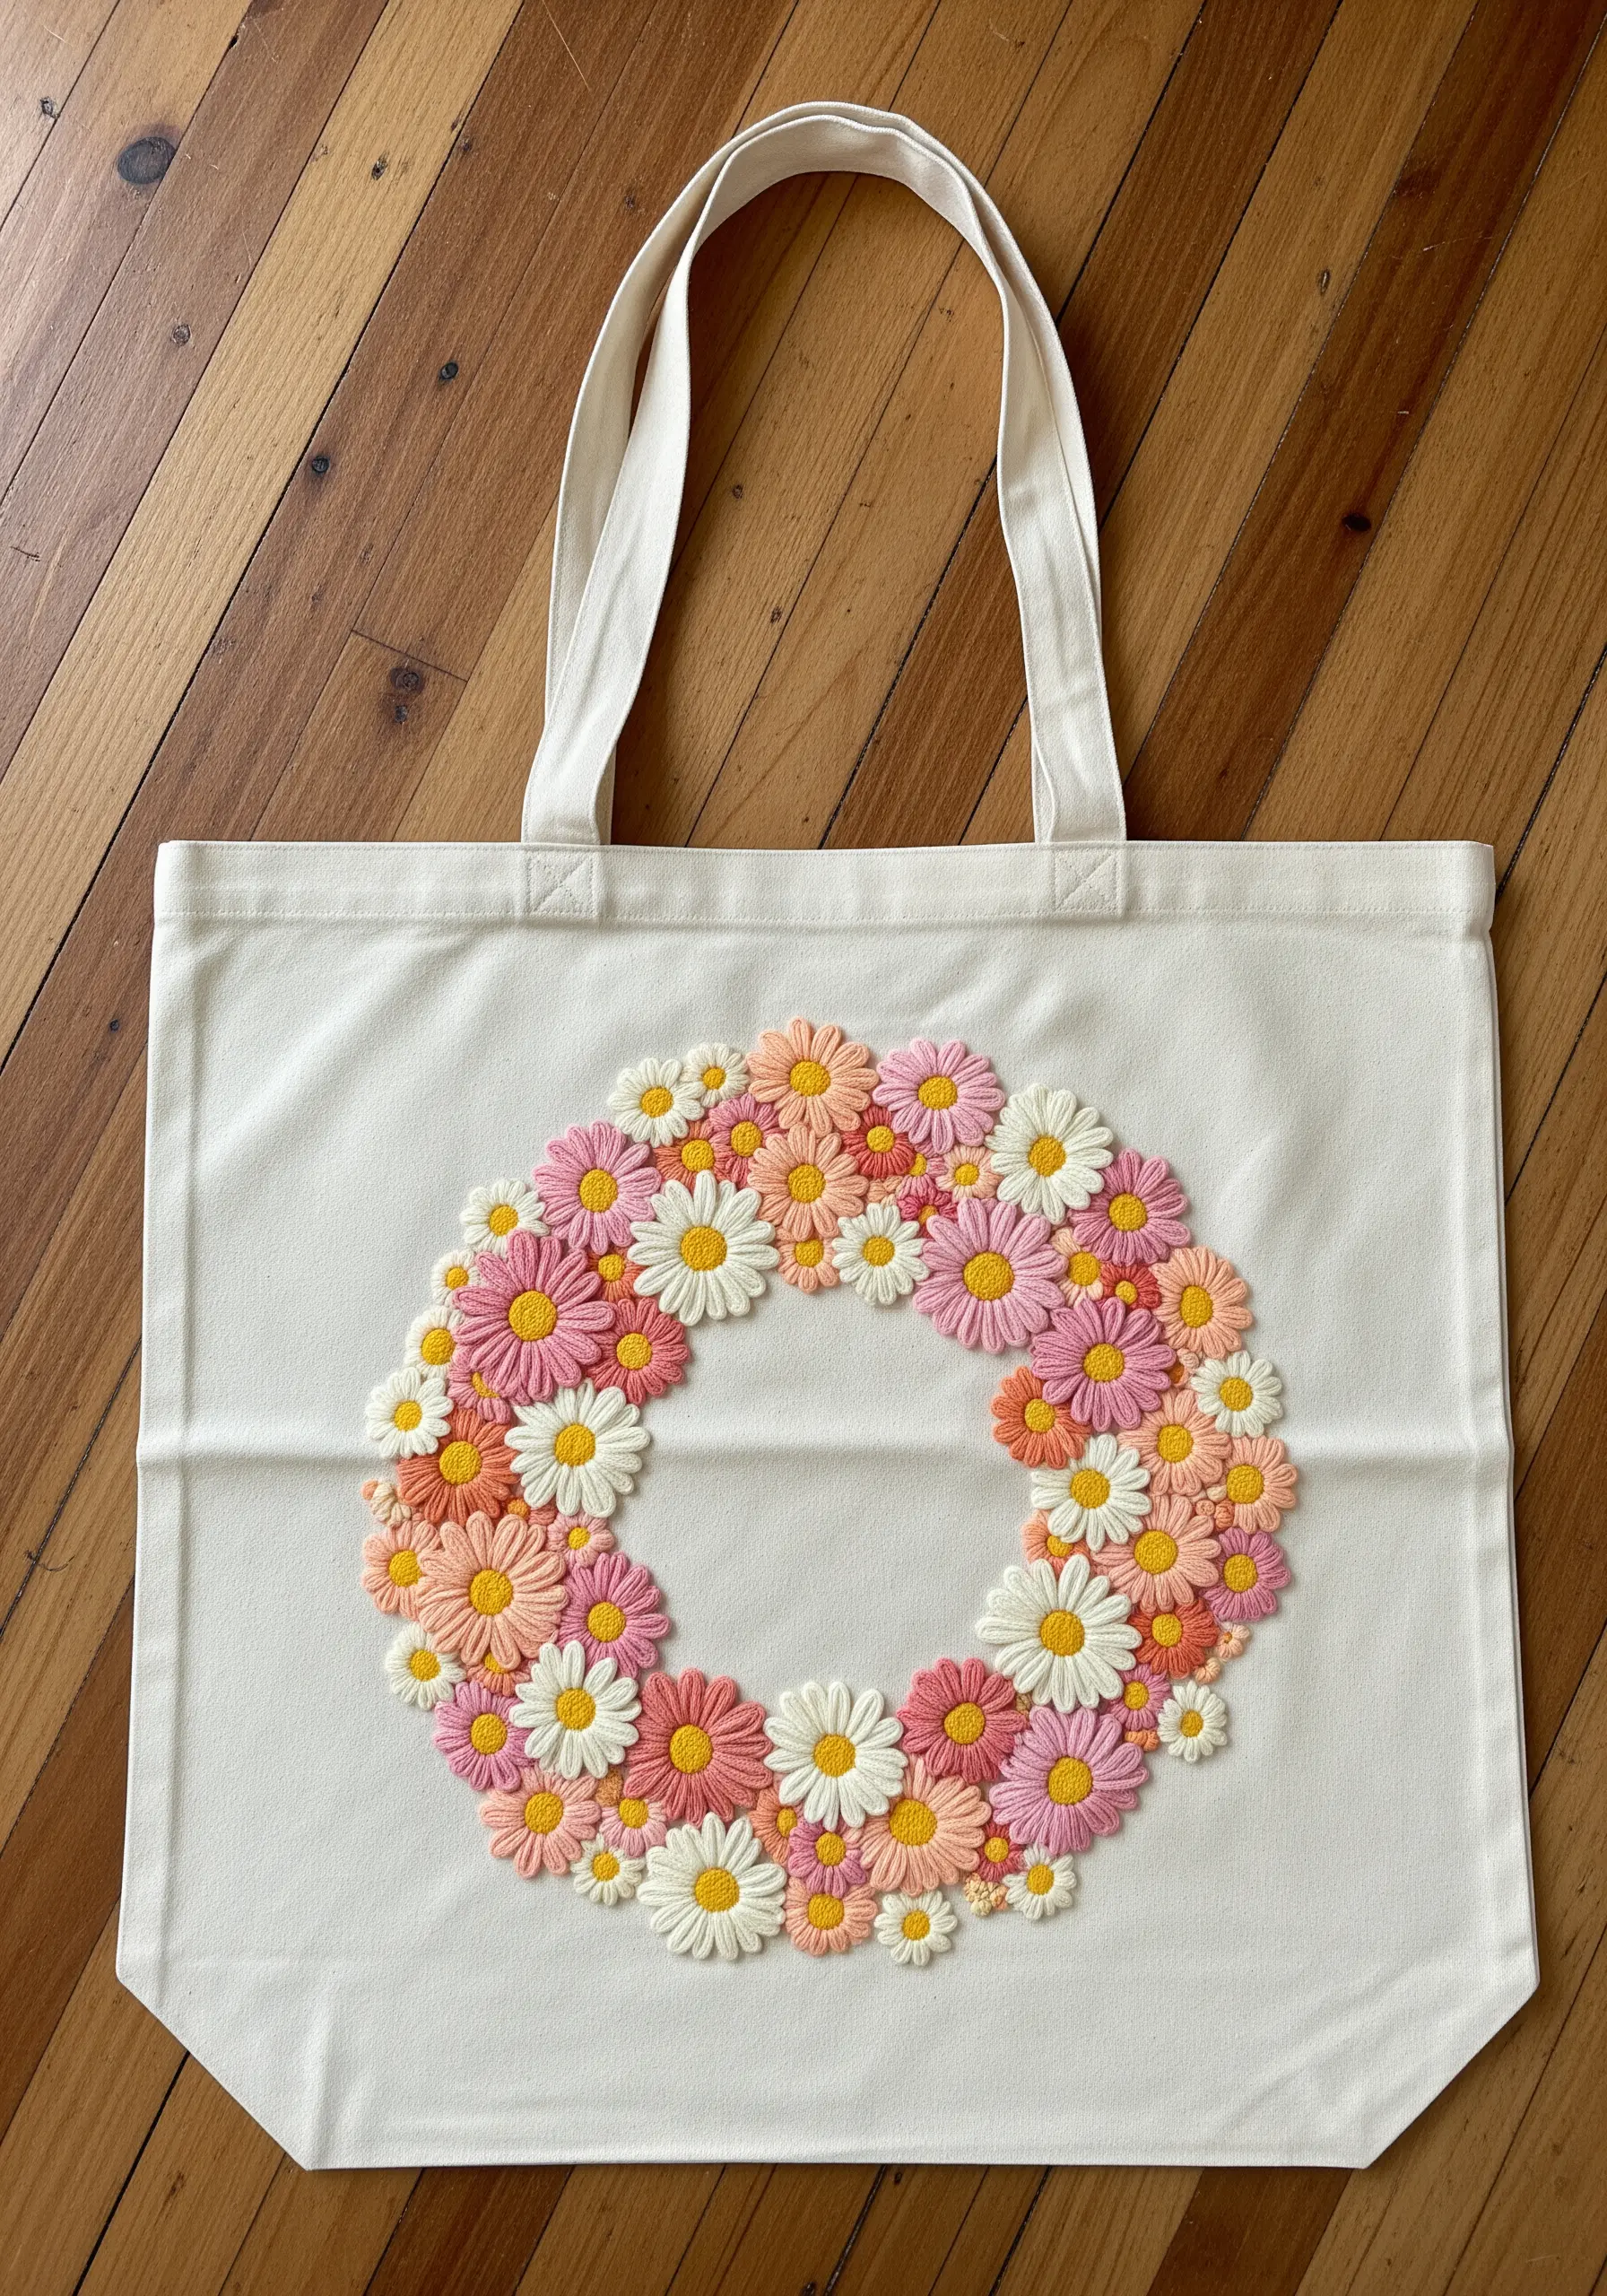
Create a lush, abundant look by layering your stitches and varying their scale.
Begin by stitching the daisies that will appear in the background, then stitch the foreground flowers directly on top of their edges to create overlap.
Use a mix of flower sizes—some with long petals, some small and button-like.
Vary the size of the French knot centers, some with two wraps and some with three, to enhance the sense of depth and texture within the clustered wreath.
11. Design a Celestial Daisy Constellation
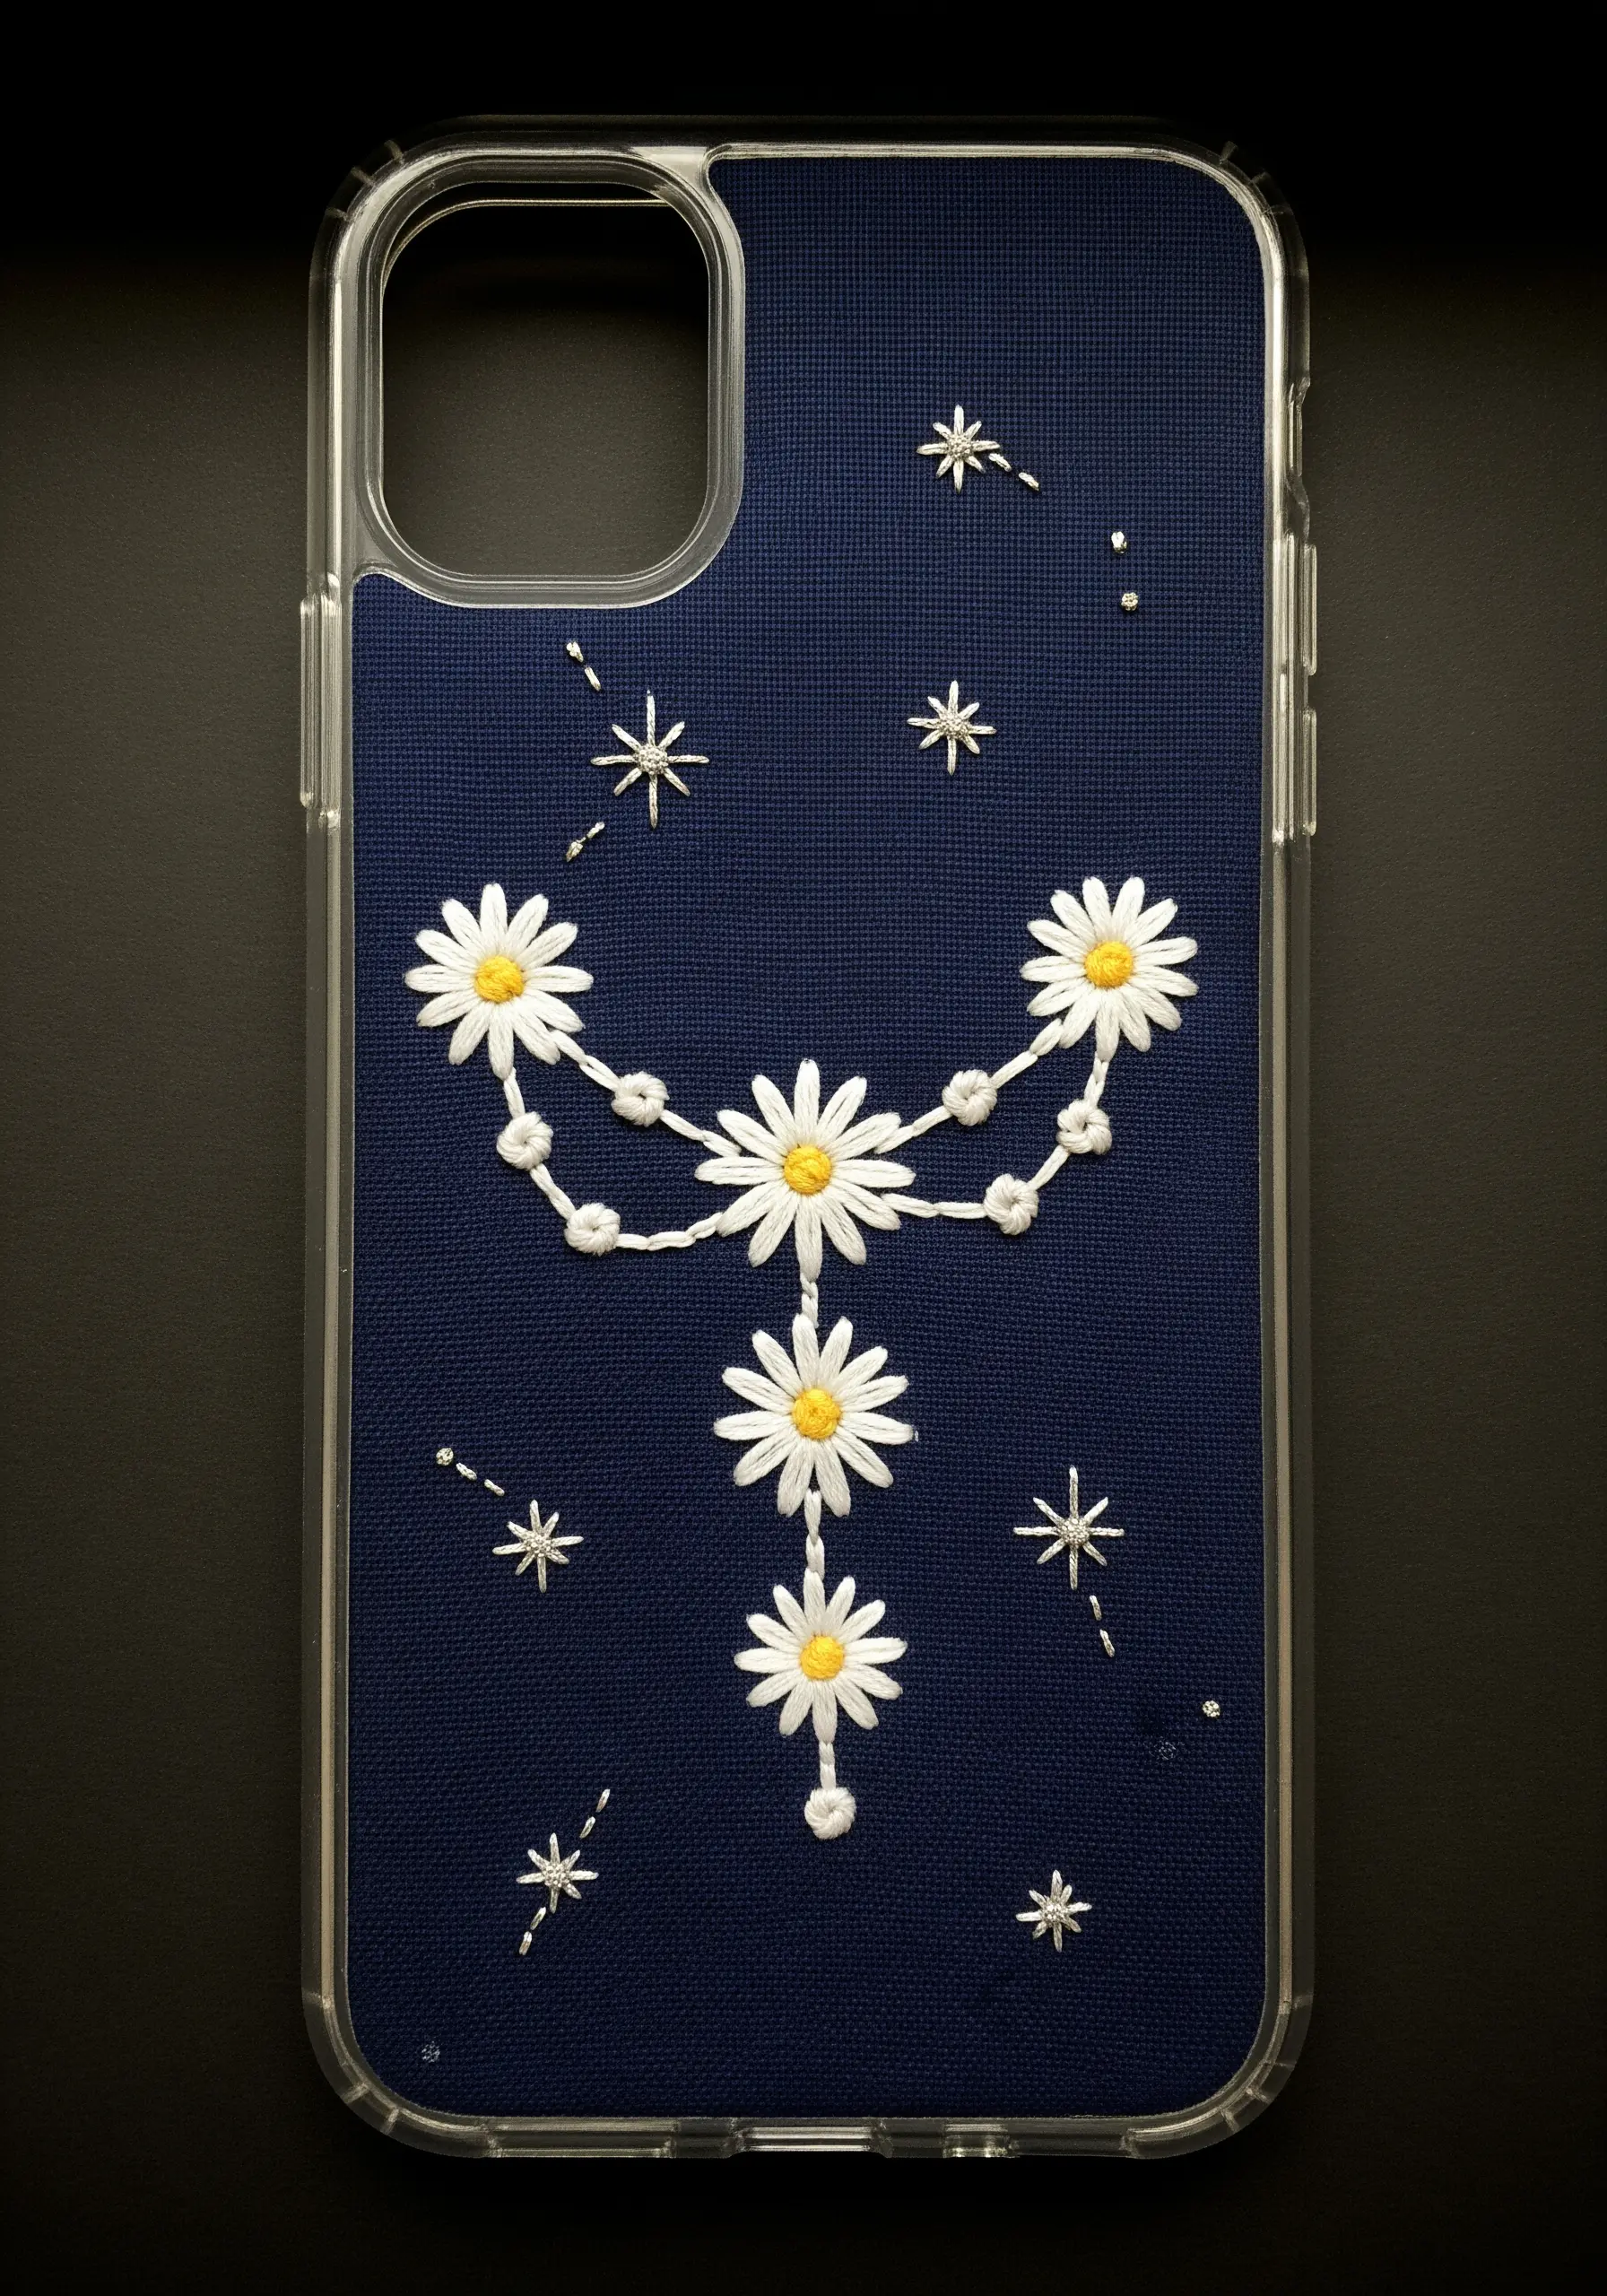
Combine floral motifs with celestial elements for a delicate, modern design.
Use a fine metallic silver thread to stitch tiny stars using simple straight stitches or star stitches, scattering them across the dark navy fabric.
Connect your primary daisy motifs with a fine, whipped backstitch in a contrasting white to suggest the lines of a constellation.
This minimalist approach creates a narrative and leverages negative space, proving that a few well-placed stitches can have a major impact.
12. Embrace Bold, Graphic Outlines
For a retro, graphic style, the outline is just as important as the fill.
Use a full six strands of embroidery floss or a thick perle cotton to create high-impact shapes.
Outline each petal and the flower’s center with a heavy chain stitch or stem stitch before filling them.
This technique creates a clean, cartoon-like definition that emphasizes shape and color, making the design feel bold, confident, and playful.
13. Stitch on Textured Corduroy

When embroidering on a textured fabric like corduroy, your main goal is to prevent the stitches from sinking into the channels (wales).
Apply a lightweight, iron-on stabilizer to the back of the area you plan to stitch.
This provides a smooth, stable surface for your needle and thread, ensuring your stitches sit neatly on top of the fabric’s ridges.
The contrast between the soft, fuzzy corduroy and the crisp, bright stitches creates a beautiful textural play.
14. Construct an Appliqué Book Band

Instead of stitching directly onto a finished object, create a detachable, embellished band.
Embroider your daisy chain onto a separate strip of heavy cotton or felt.
This allows you to work comfortably in a hoop and perfect every stitch without wrestling with the bulk of a bag or cover.
Once finished, you can neatly sew the band onto your project, giving it a clean, raised, and professional-looking appliqué finish.
These are perfect DIY embroidery gift ideas you can prepare in batches.
15. Tell a Story with Stitched Roots
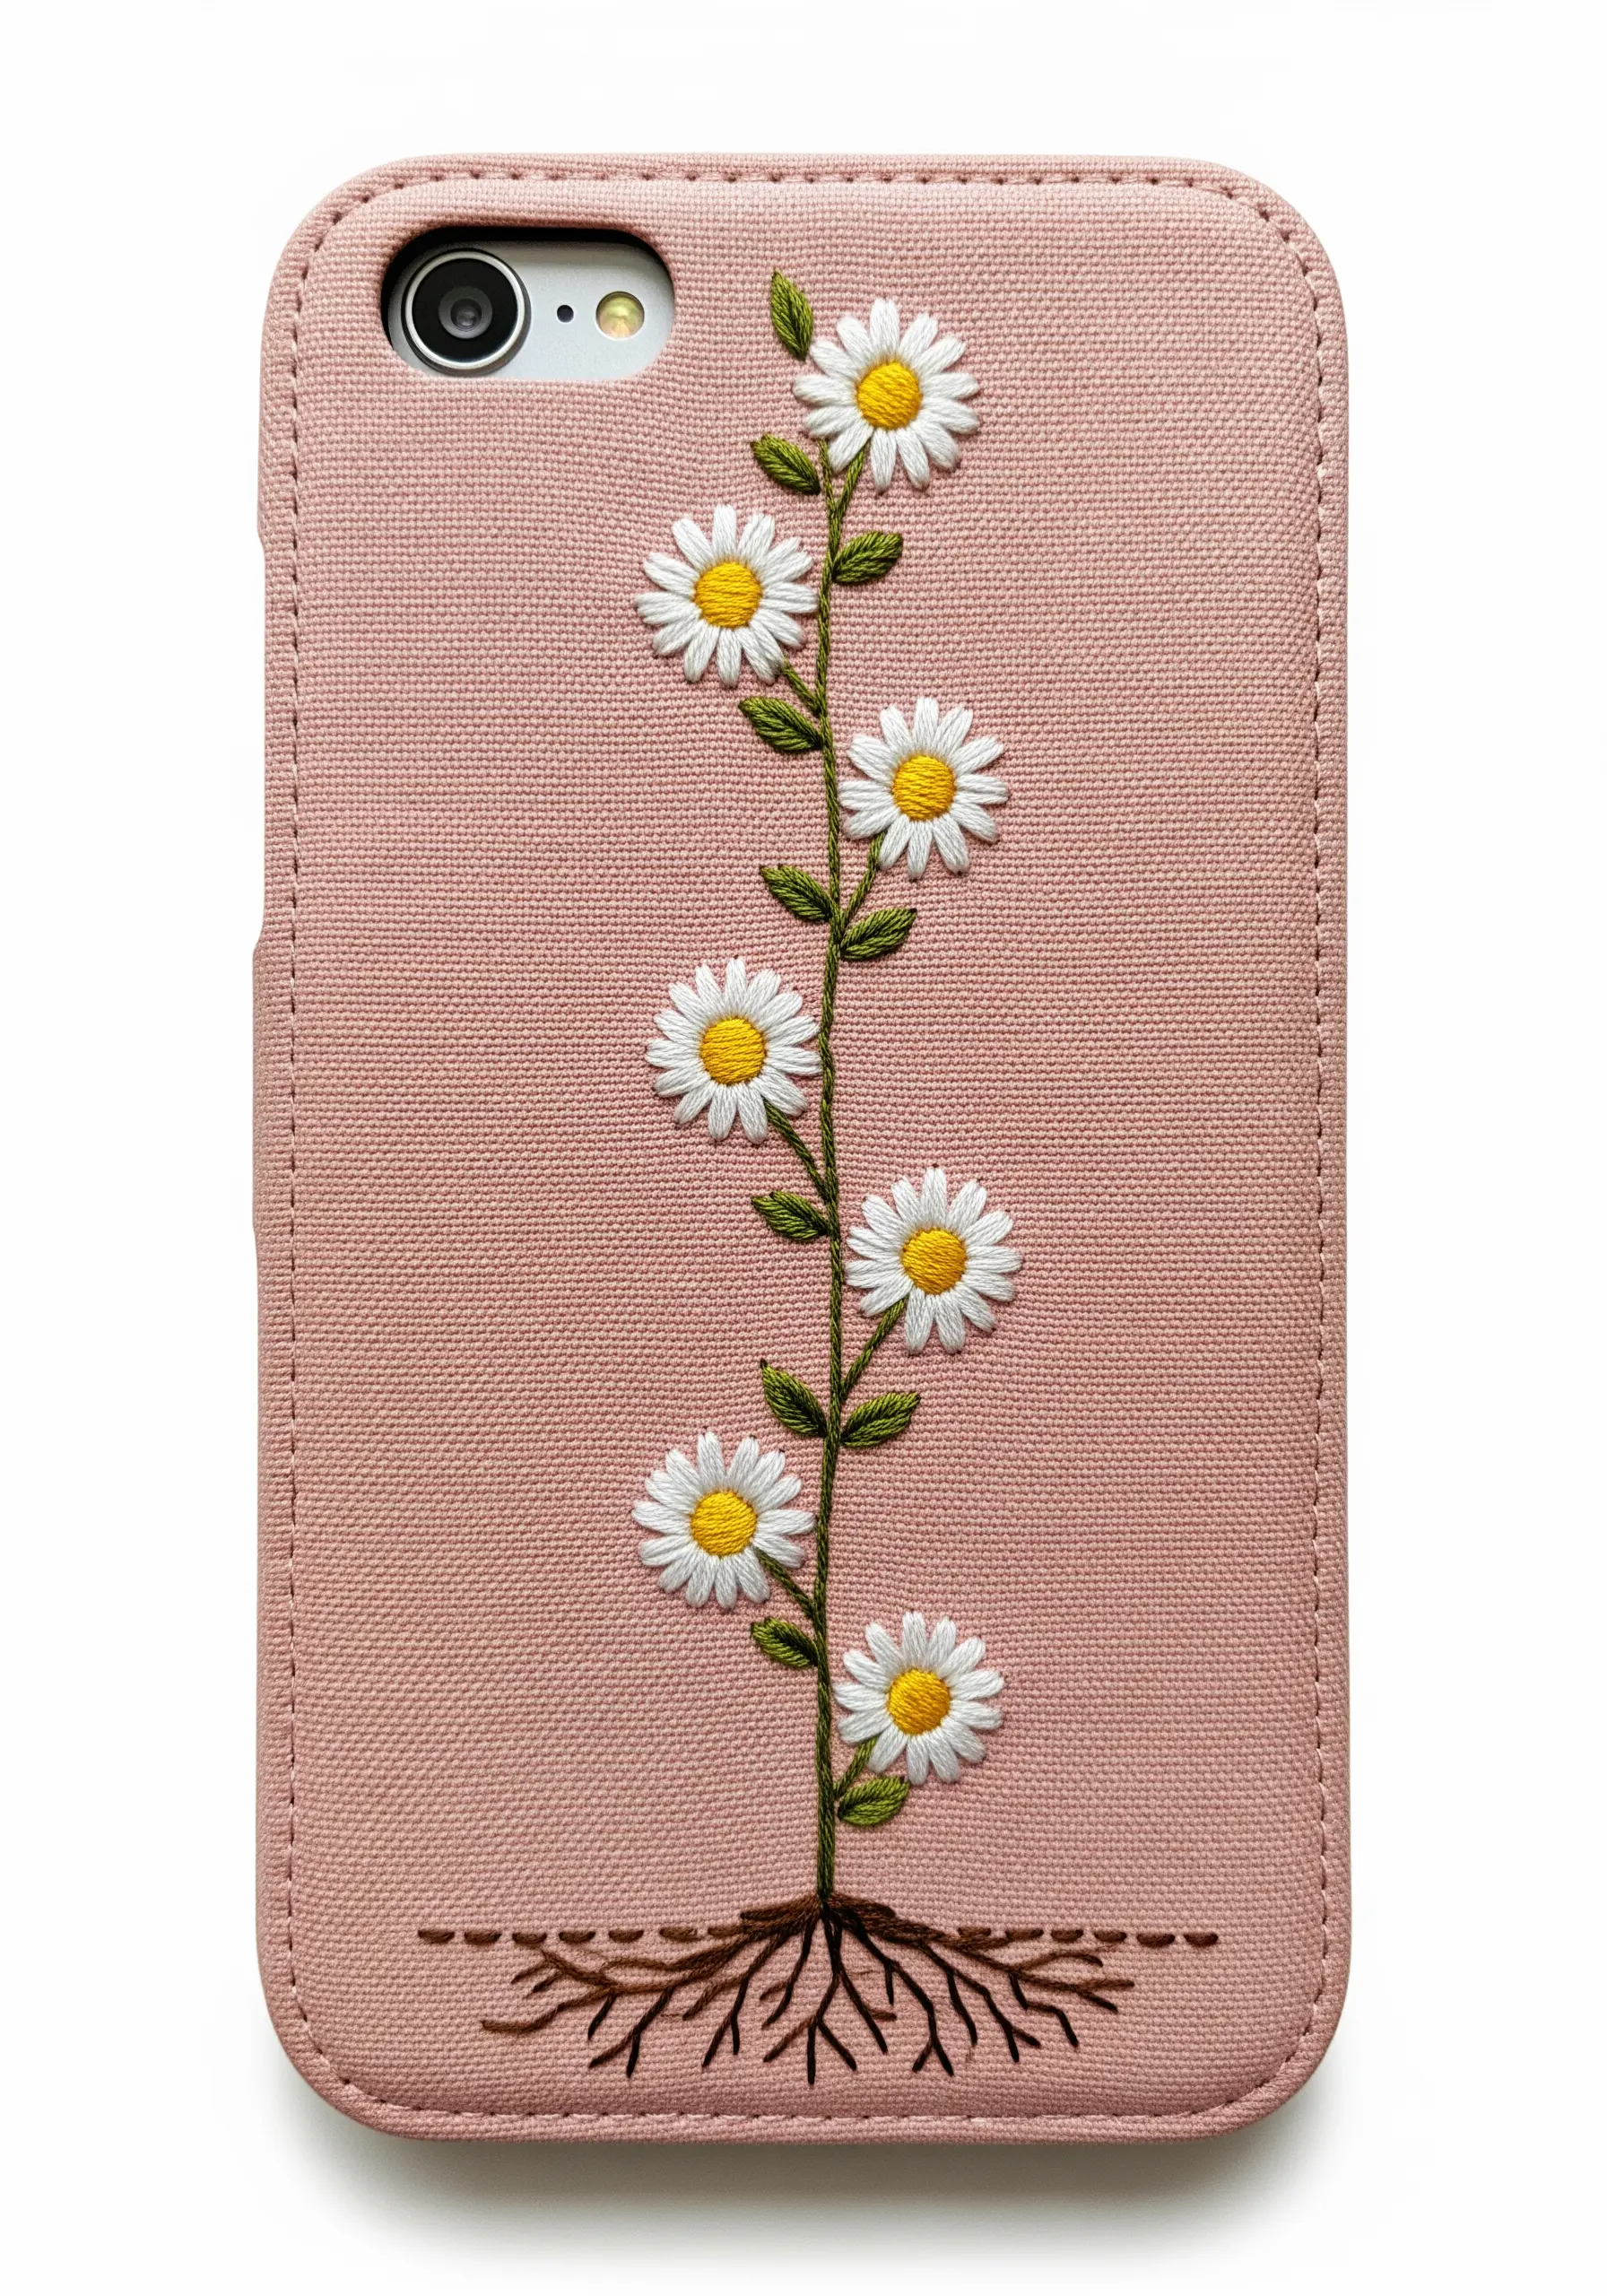
Add a layer of narrative and visual interest by extending your design below the surface.
To create a delicate root system, use a single strand of brown floss in a few different shades.
Work a series of wandering split stitches and single straight stitches, varying their length and direction to mimic the organic chaos of real roots.
This unexpected detail transforms a simple flower stem into a small, illustrative story.
16. Create a Custom Chain-Link Fabric

Turn a plain piece of fabric into a custom textile with a repeating, all-over pattern.
To form the links, use a simple chain stitch in a gentle, curving line to connect your scattered daisies.
Keep your tension light and consistent to give the chains a soft, natural drape.
For a more delicate look, use only two strands of floss. This technique is perfect for creating fabric to be sewn into pouches, notebook covers, or other tiny embroidery projects.
17. Play with Scale for Dramatic Focus
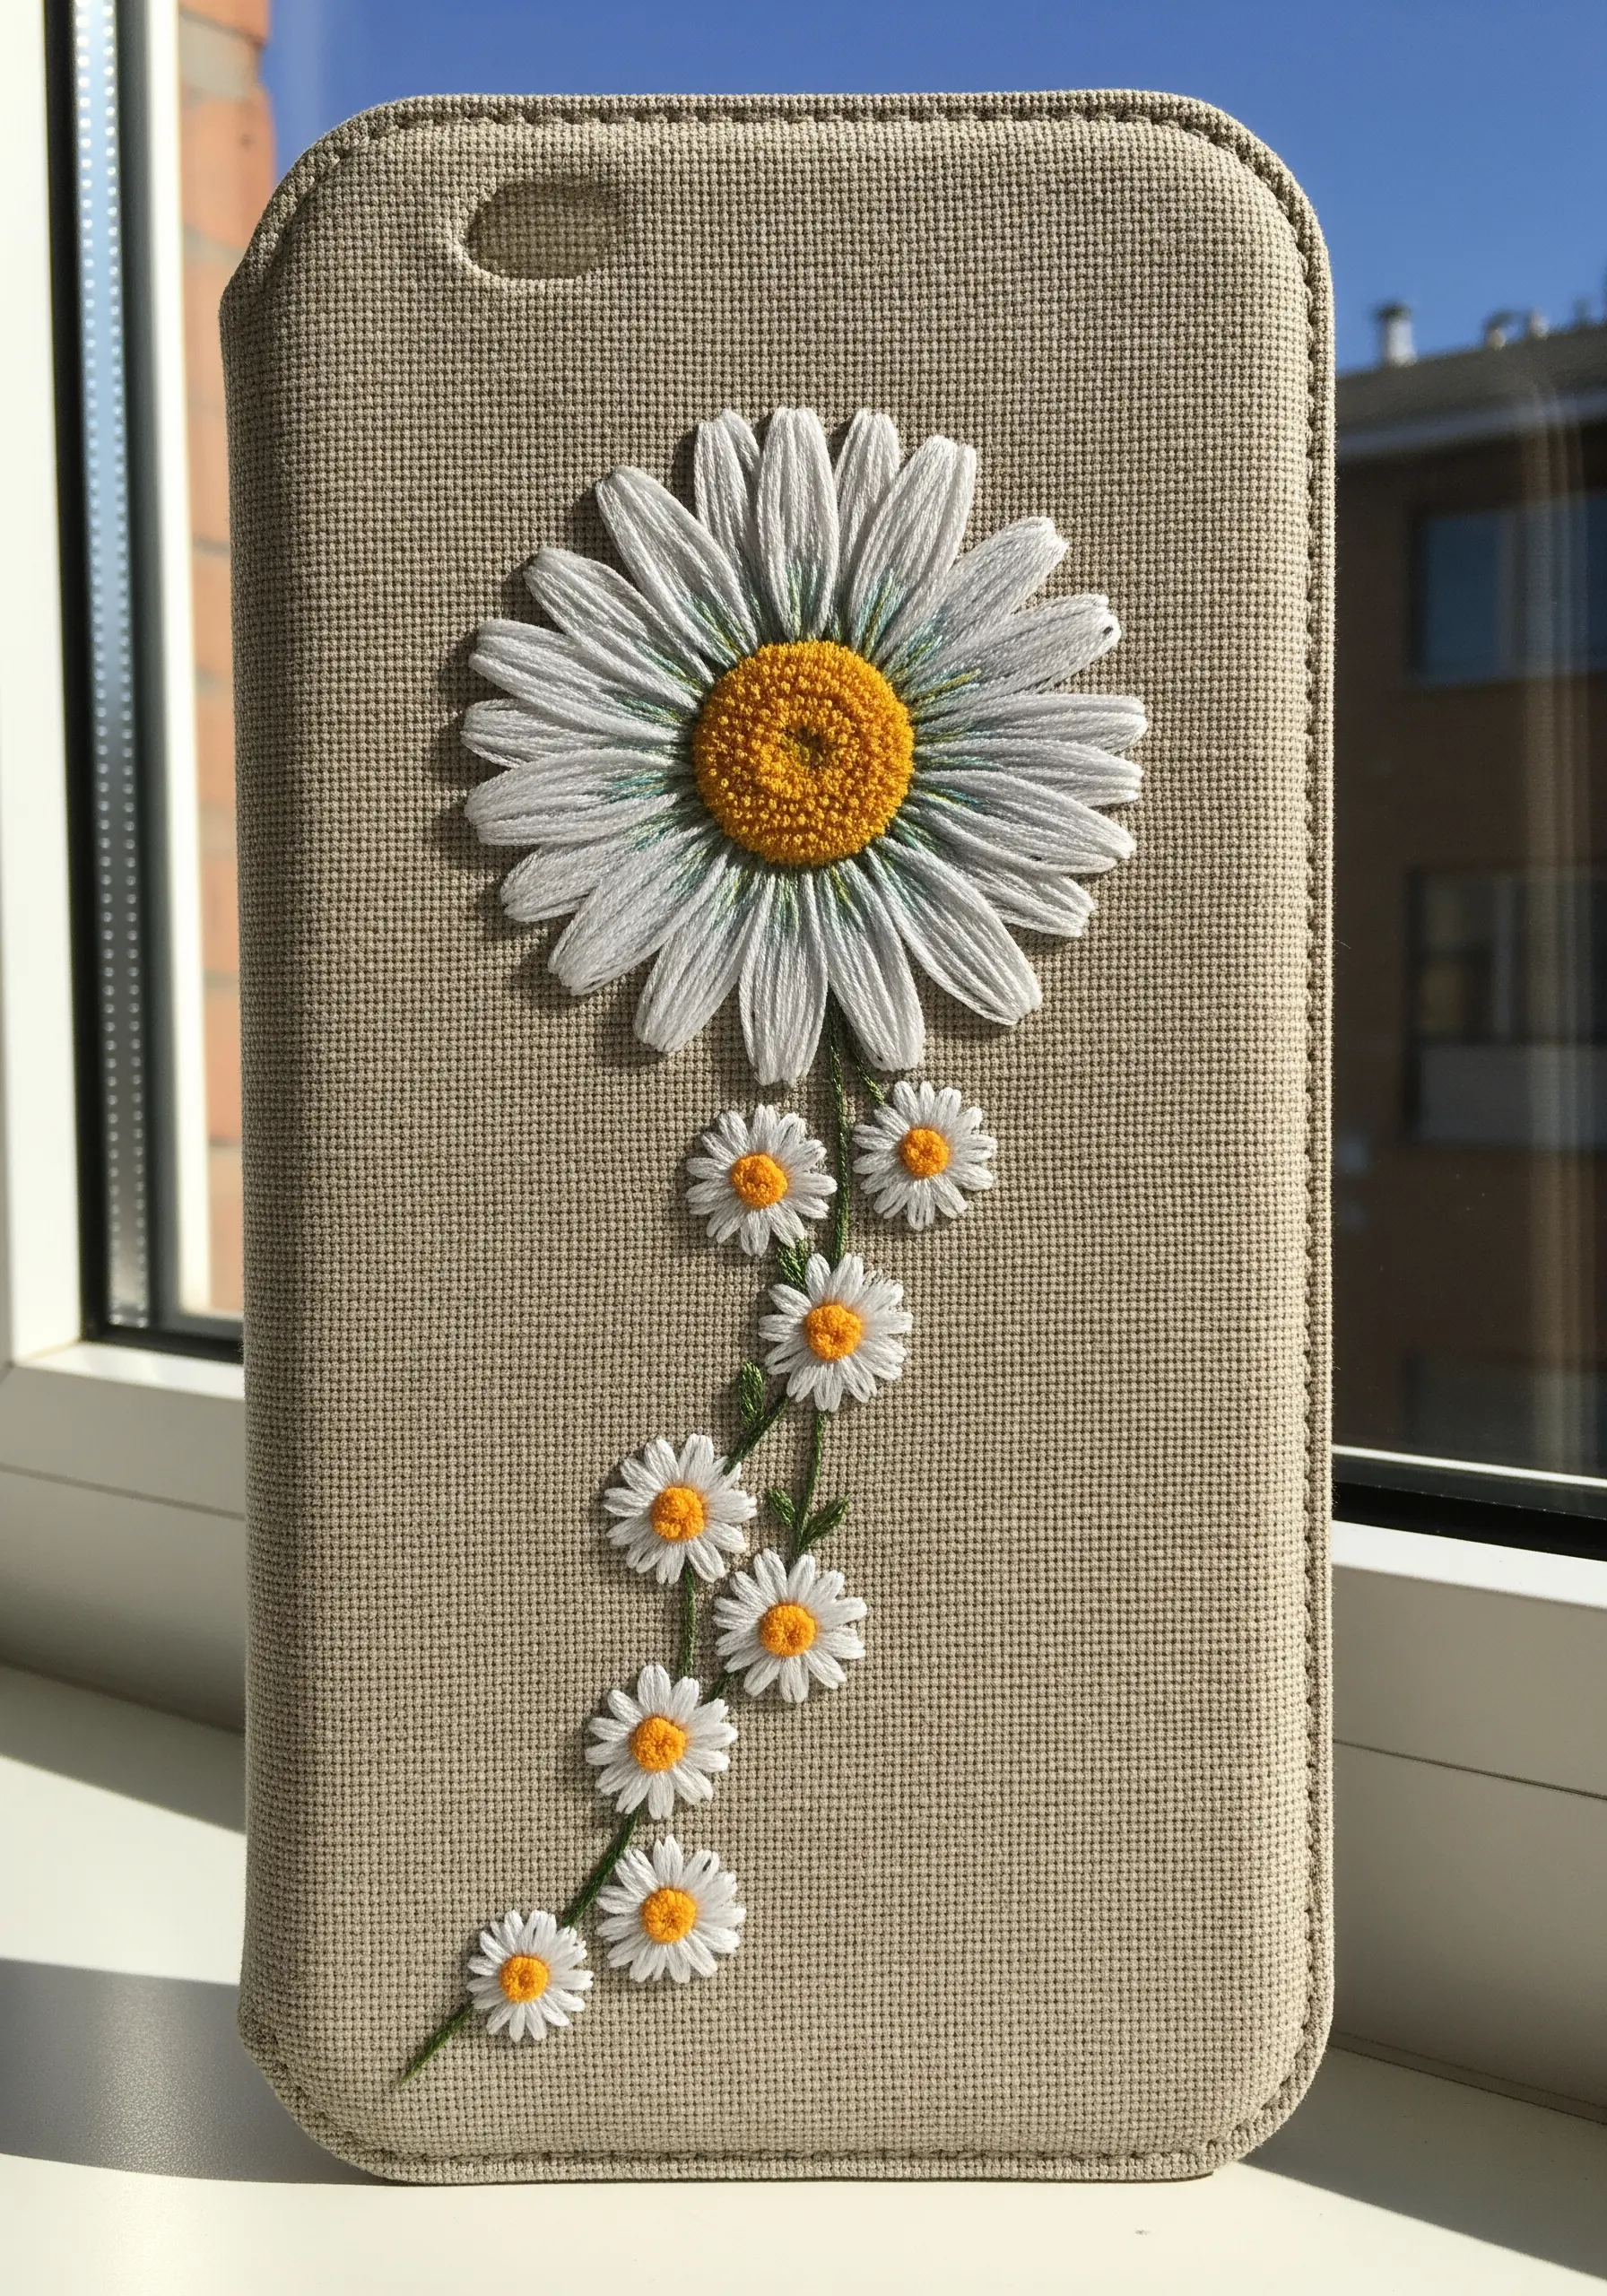
Create a strong focal point by juxtaposing one large, detailed flower with a cascade of smaller, simpler ones.
Dedicate your time to the large daisy, using thread-painting techniques and multiple shades to give it realistic depth.
For the smaller flowers, use a quick and simple lazy daisy stitch.
This contrast in scale and complexity naturally draws the eye to your master stitchwork, making the entire composition more dynamic and visually engaging.
18. Weave Centers for Rustic Texture
Introduce a new texture by creating woven centers for your daisies.
Instead of French knots, make a spider web woven wheel: create a foundation of an odd number of straight stitches, like the spokes of a wheel.
Then, bring a new, thicker thread (like perle cotton or even fine twine) up near the center and weave it over and under the spokes until the circle is full.
This technique adds a rustic, tactile element that contrasts beautifully with the smooth petals.
19. Add Dimension with Two-Tone Petals
Give your flowers instant dimension by working each petal in two shades of the same color.
Using a long-and-short stitch, fill the outer half of the petal with a darker purple, then fill the inner half with a lighter lavender, carefully blending the stitches where they meet.
This simple color-blocking technique tricks the eye into seeing depth and curvature, making the petals look as if they are gently turning away from the light. It’s one of the best embroidery patterns to create a calm bedroom sanctuary.
20. Achieve a Playful Look with Yarn

For a chunky, playful aesthetic perfect for a child’s bag, swap your embroidery floss for fine-gauge yarn or tapestry wool.
Use a large-eyed chenille needle and simple, bold stitches like a satin stitch or chain stitch.
The thickness of the yarn fills spaces quickly and creates an incredibly tactile, soft texture.
Don’t worry about subtle shading; the charm of this style comes from its bold primary colors and satisfyingly chunky finish.


