
There’s a quiet magic in capturing a vast landscape with just a needle and thread. It’s not about replicating a photograph, but about translating a feeling—the crisp air of a mountain peak, the warmth of a desert sunset, the silent grandeur of an ancient forest.
Before you begin your next piece, I want you to set aside the idea of perfection. Instead, focus on texture and light. How can you make that rock feel solid? How can you make that water look like it’s moving? The answer is often simpler than you think.
This collection is your guide to seeing landscapes differently. We’ll explore how changing the direction of a stitch or the weight of a thread can create depth, drama, and a sense of place. Let these ideas become the starting point for stitching your own trails and memories.
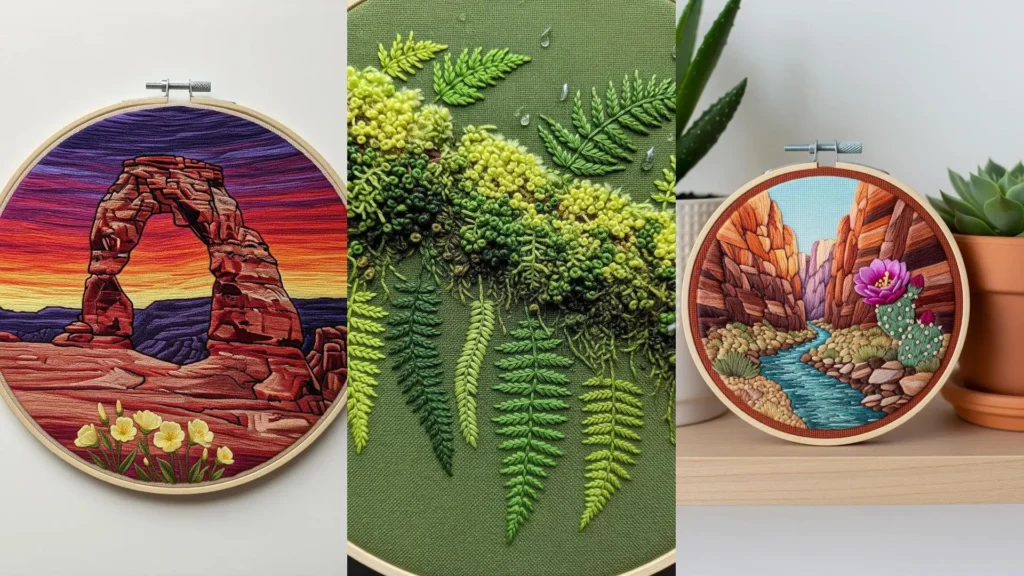
1. Capturing Yosemite’s Granite Texture

To give Half Dome’s rock face a realistic, chiseled texture, use long-and-short stitches that follow the natural planes and shadows of the granite.
Instead of uniform fills, vary your stitch direction and length to mimic the way light hits the stone, creating highlights and deep crevices.
Use a palette of five to seven shades of gray and blue, blending them subtly to add depth without losing the rock’s hard edges.
Contrast this rugged texture with soft, dimensional satin stitch for the foreground poppies and lupines, making them pop against the monumental backdrop.
This technique allows you to capture nature’s textures with painterly precision.
2. Sculpting Desert Canyons with Color

Instead of outlining each rock formation, build the canyon walls with blocks of directional satin stitch.
Lay your stitches to follow the curve and angle of each geological layer, creating a sense of form and dimension.
Use a rich, earthy palette and blend adjacent colors with a few overlapping stitches to soften the transitions, just as sunlight diffuses in a real canyon.
For the water, use horizontal satin stitches in a lighter, contrasting gradient color to create the illusion of reflection and movement.
3. Creating Atmospheric Depth in Mountains
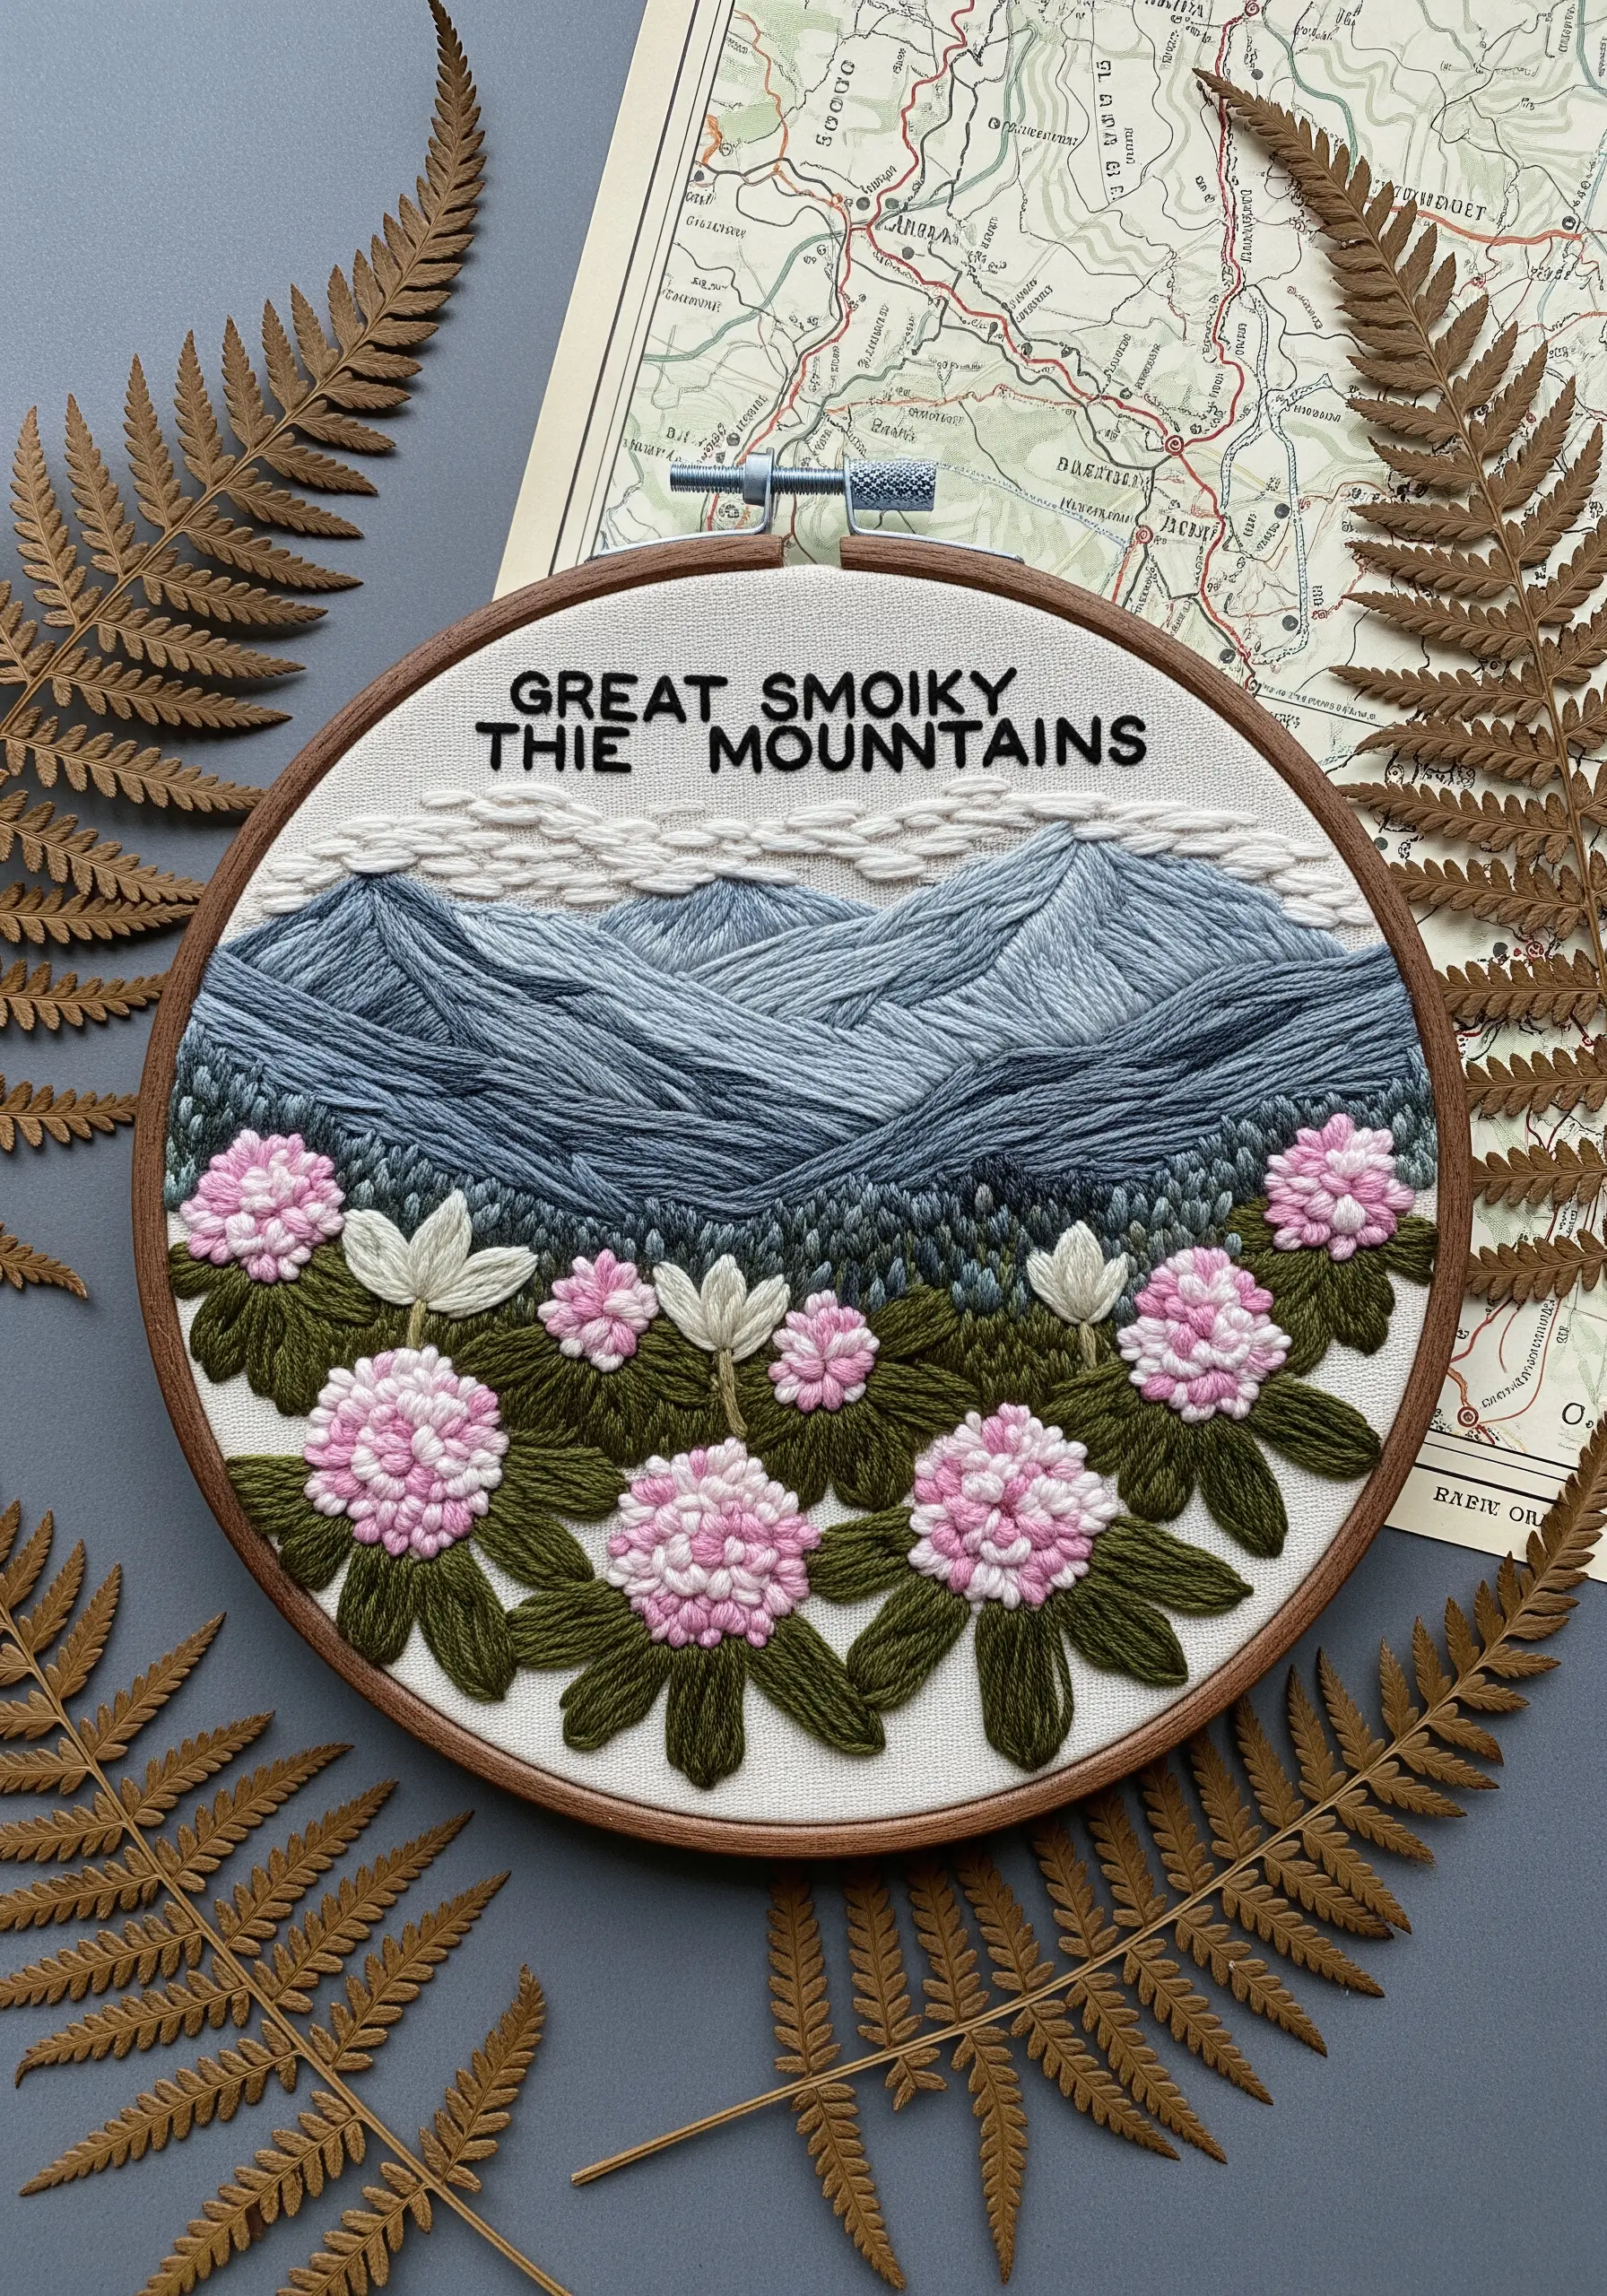
To create the illusion of distance in a mountain range, manipulate your thread weight and stitch density.
For the foreground flowers, use a full six strands of floss or even a soft cotton perle to create bold, touchable texture with French knots and padded satin stitch.
In contrast, stitch the distant mountains with just one or two strands, using long, flowing stitches that are less dense.
This shift in texture makes the foreground feel closer and the mountains recede into a soft, atmospheric haze.
Even the tiny lettering embroidery on top can be adjusted, using a thicker thread to bring it forward.
4. Stitching a Dense and Starry Night Sky

Recreate the brilliance of a desert night sky using a dense concentration of French and colonial knots.
Work on a dark, high-contrast fabric like navy or black linen to make your stitches pop.
Vary the number of thread strands and wraps for each knot to create stars of different sizes and brightness.
Incorporate a few strands of metallic or silvery thread randomly throughout the starfield to add a subtle, shimmering effect that catches the light.
These celestial micro-embroidery ideas transform a simple background into the main event.
5. Building a Three-Dimensional Rocky Shore
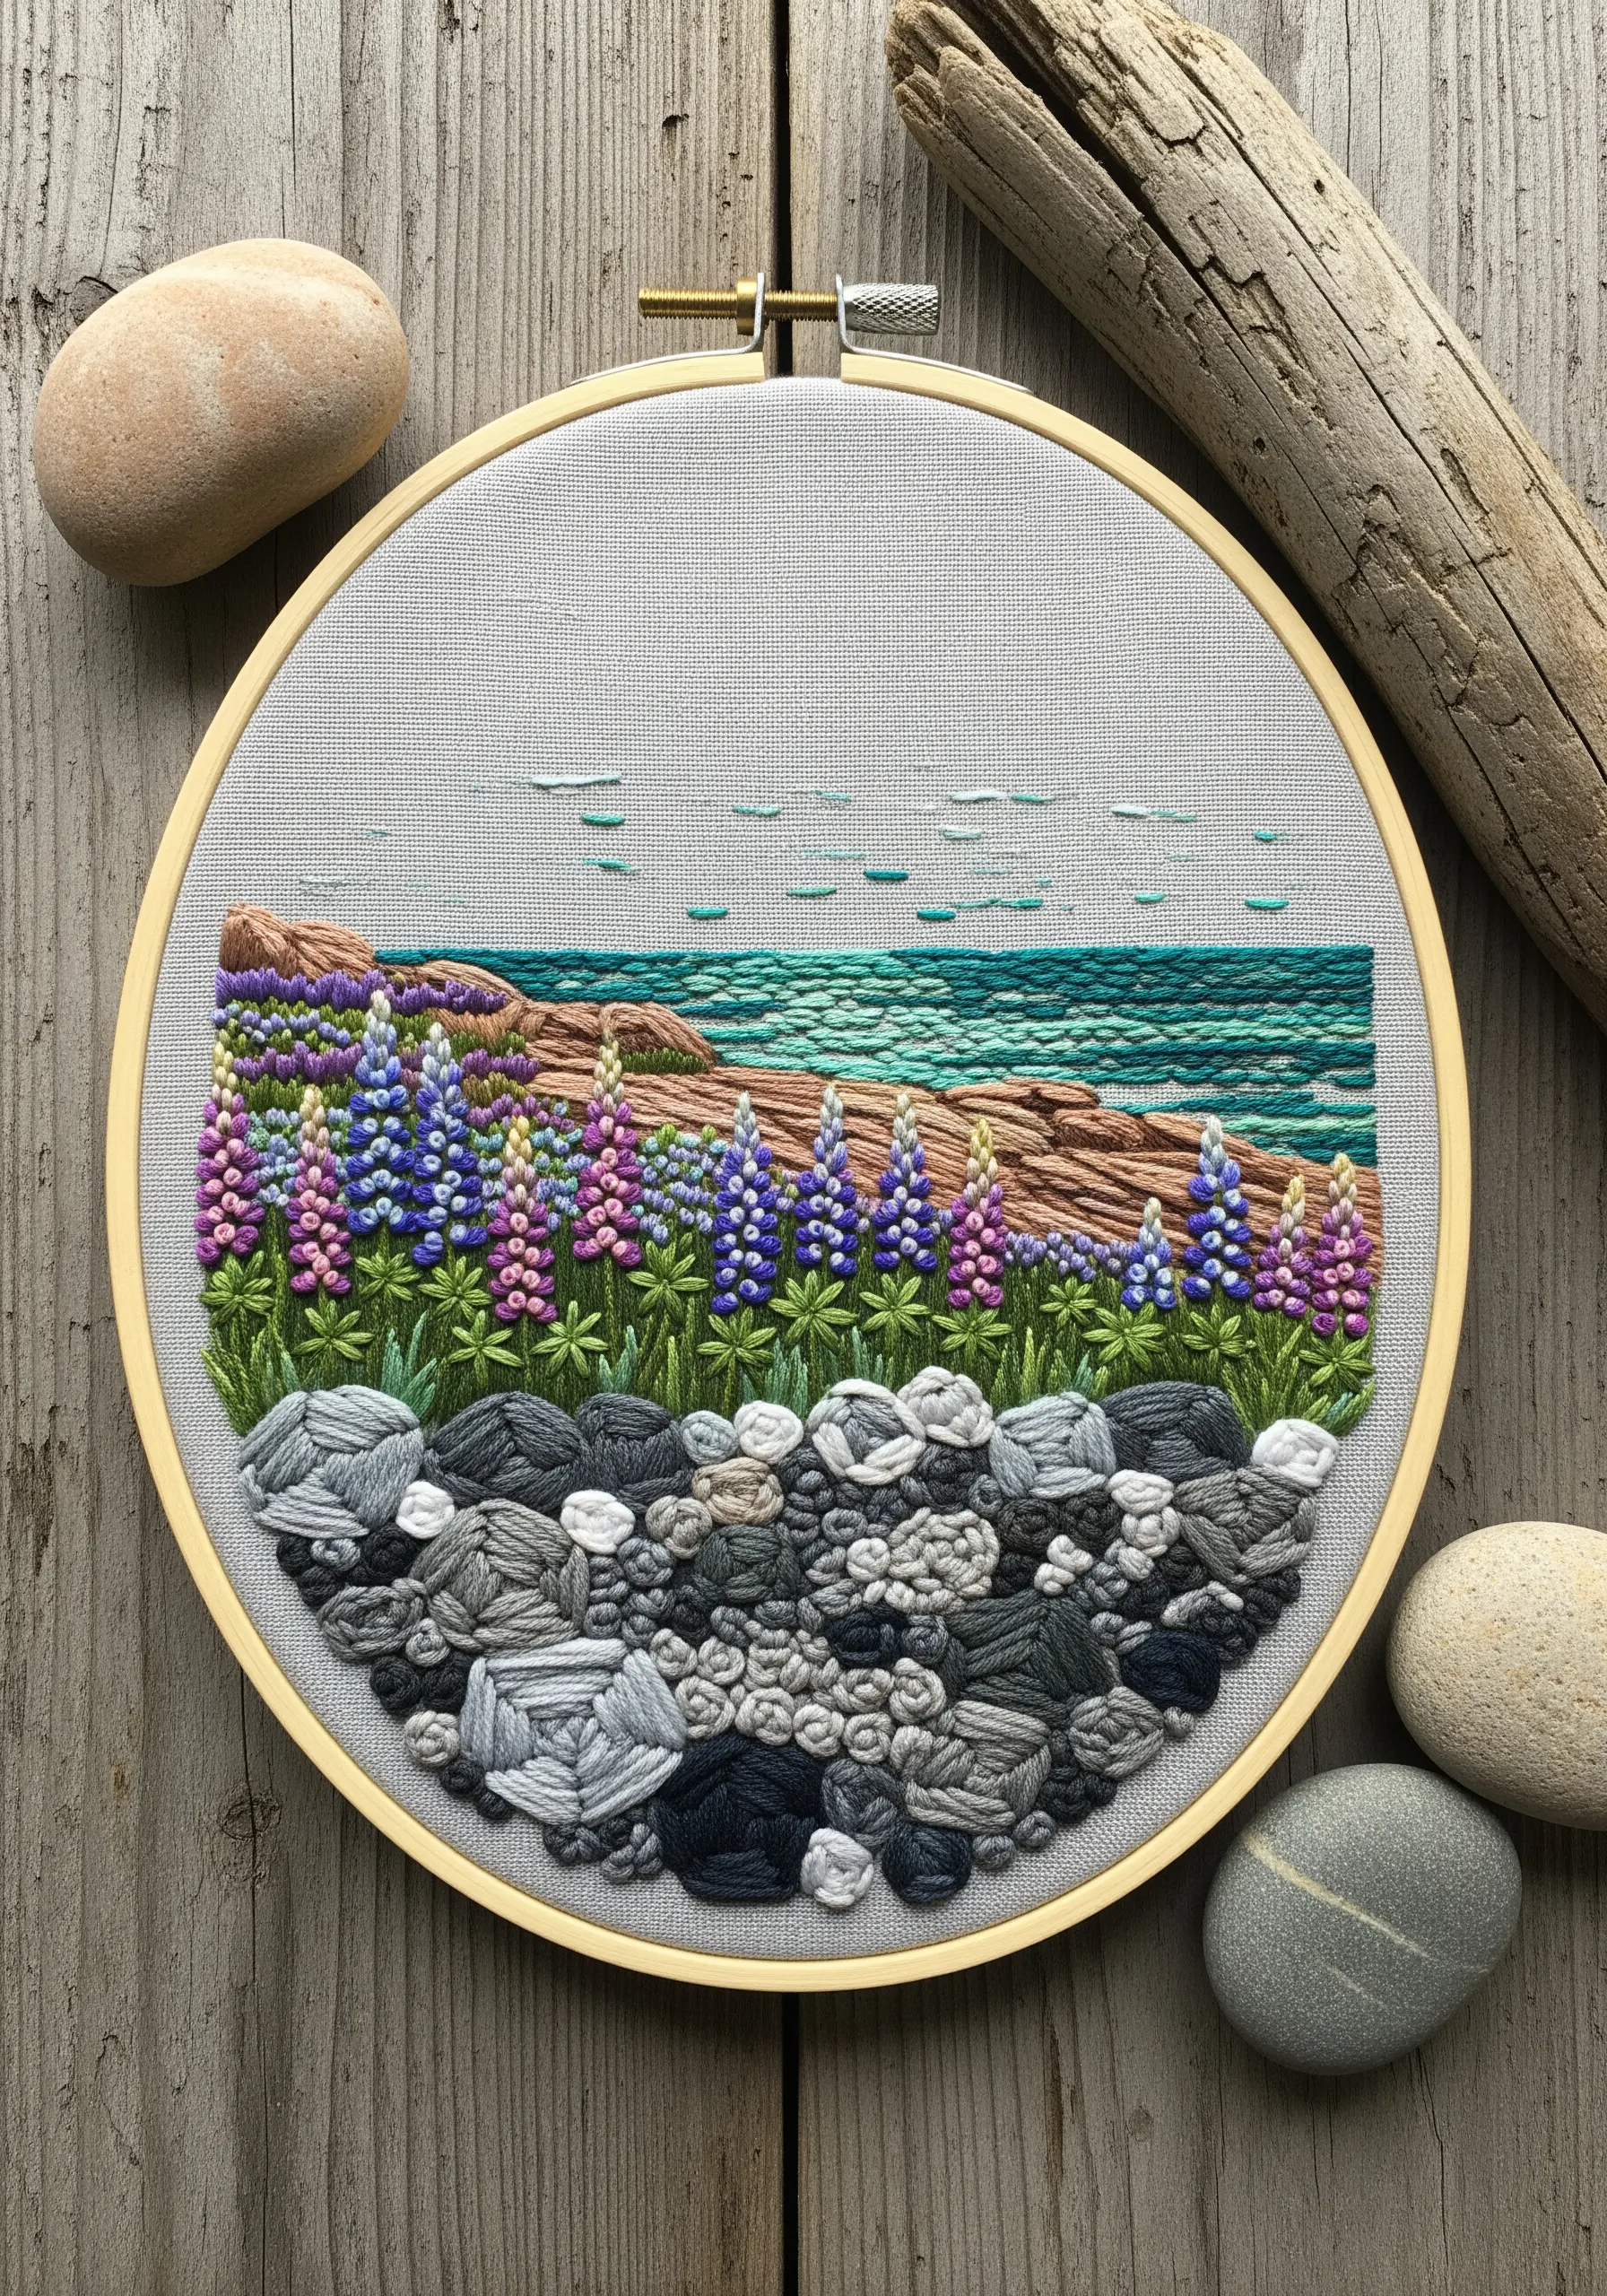
Give coastal rocks tangible weight and form by using padded satin stitch.
First, create a foundation of small, underlying stitches within the shape of each rock, then cover it with smooth satin stitches going in a single, uniform direction.
This padding lifts the stitches from the fabric, giving each rock a rounded, three-dimensional feel.
Use a mix of cool grays, deep blues, and even hints of moss green to give the stones a realistic, weathered look.
These simple nature texture embroidery hacks add incredible depth to your work.
6. Abstracting Nature with Radiating Stitches

Capture the energy of a sunrise or a flower bloom through abstract, radiating stitches instead of a literal depiction.
Start from a central point and work outwards, using simple straight stitches of varying lengths.
Create a dynamic gradient by clustering colors together and allowing them to intersperse at the edges.
This technique is less about precision and more about capturing movement and feeling, making it a perfect exercise in color theory and composition.
The result is a piece full of abstract optical illusion stitches that draw the eye inward.
7. Elevating Landscapes with High-Contrast Textures
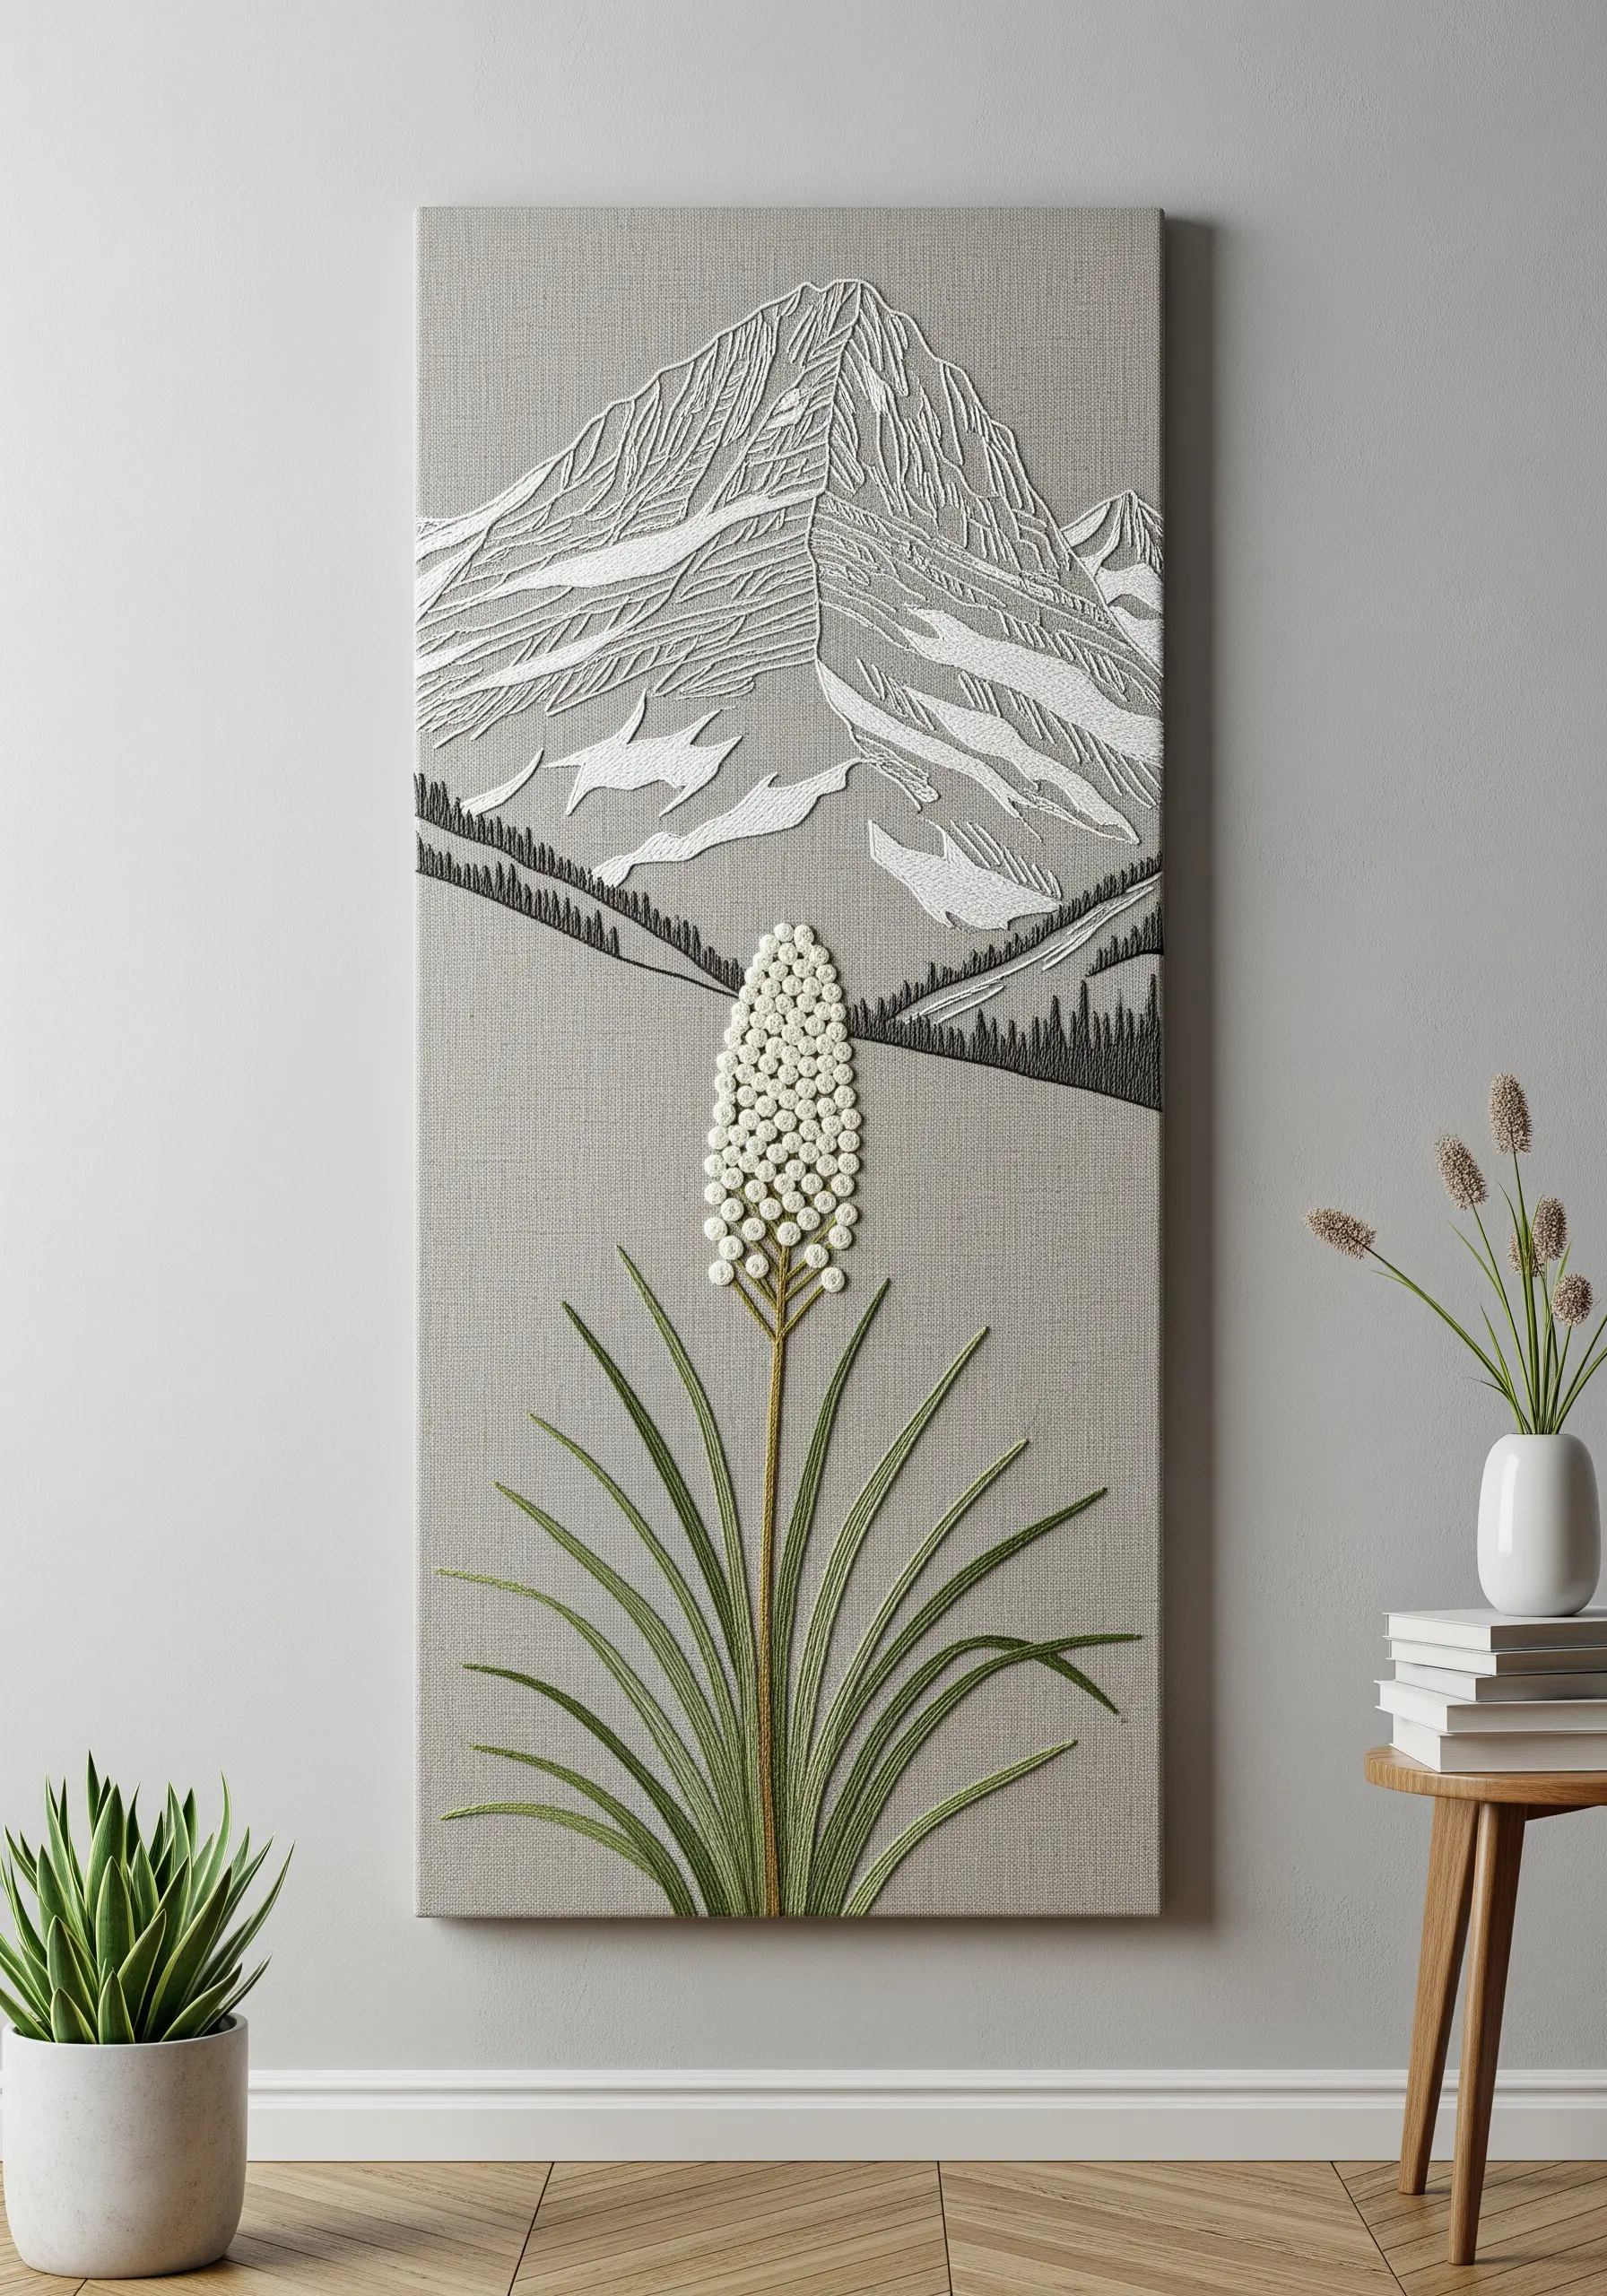
Transform a simple line-art landscape into a sophisticated piece of wall decor by focusing on texture.
Use a thick, raised stitch like a whipped backstitch or chain stitch for the primary mountain outlines in a bright white or silver thread.
Fill the snowy areas with tiny, scattered seed stitches to create a subtle, glittering texture that contrasts with the smooth linen background.
This minimal approach makes your stitch choice the focal point, turning simple lines into a tactile experience.
Embroidery on canvas wall pieces allows for this kind of bold, textural statement.
8. Defining Botanical Shapes with Outline Stitches

To capture the delicate unfurling of fiddlehead ferns, choose an outline stitch that provides both definition and texture.
A whipped backstitch is an excellent choice, as it creates a smooth, rope-like line that stands out against the fabric.
Work the stitch with a slightly lighter green than your fill color to create a natural highlight on the fern’s edges.
This technique is perfect for any design where you want clean, elegant lines that feel deliberate and refined, especially when your work is inspired by tree bark and leaves.
9. Stitching Perspective in a Redwood Forest

Create the dizzying experience of looking up through giant redwoods by mastering stitched perspective.
For the tree trunks, use long-and-short stitches that taper, getting narrower as they reach the top of the hoop to mimic distance.
Use darker brown threads at the base and lighter ones toward the canopy to enhance the sense of height and light.
To avoid a flat canopy, cluster French knots of varying green shades, leaving small gaps to represent the sky peeking through.
You can even embroider realistic shadows along the trunks to heighten the effect.
10. Building a Dense Field of Wildflowers

To create a lush, overflowing field of fireweed, rely on density and layering, not perfect individual flowers.
Use a combination of detached chain stitches for petals and French knots for flower centers and buds, working in a vibrant magenta and pink palette.
Overlap your stitches generously, allowing them to blend together to form a single, textured mass of color.
Add sharp, vertical straight stitches in green for the stems, ensuring they peek through the blossoms to ground the composition.
This method is faster than detailed floral thread painting techniques but achieves a similarly impactful, impressionistic result.
11. Capturing Light and Reflection in Water
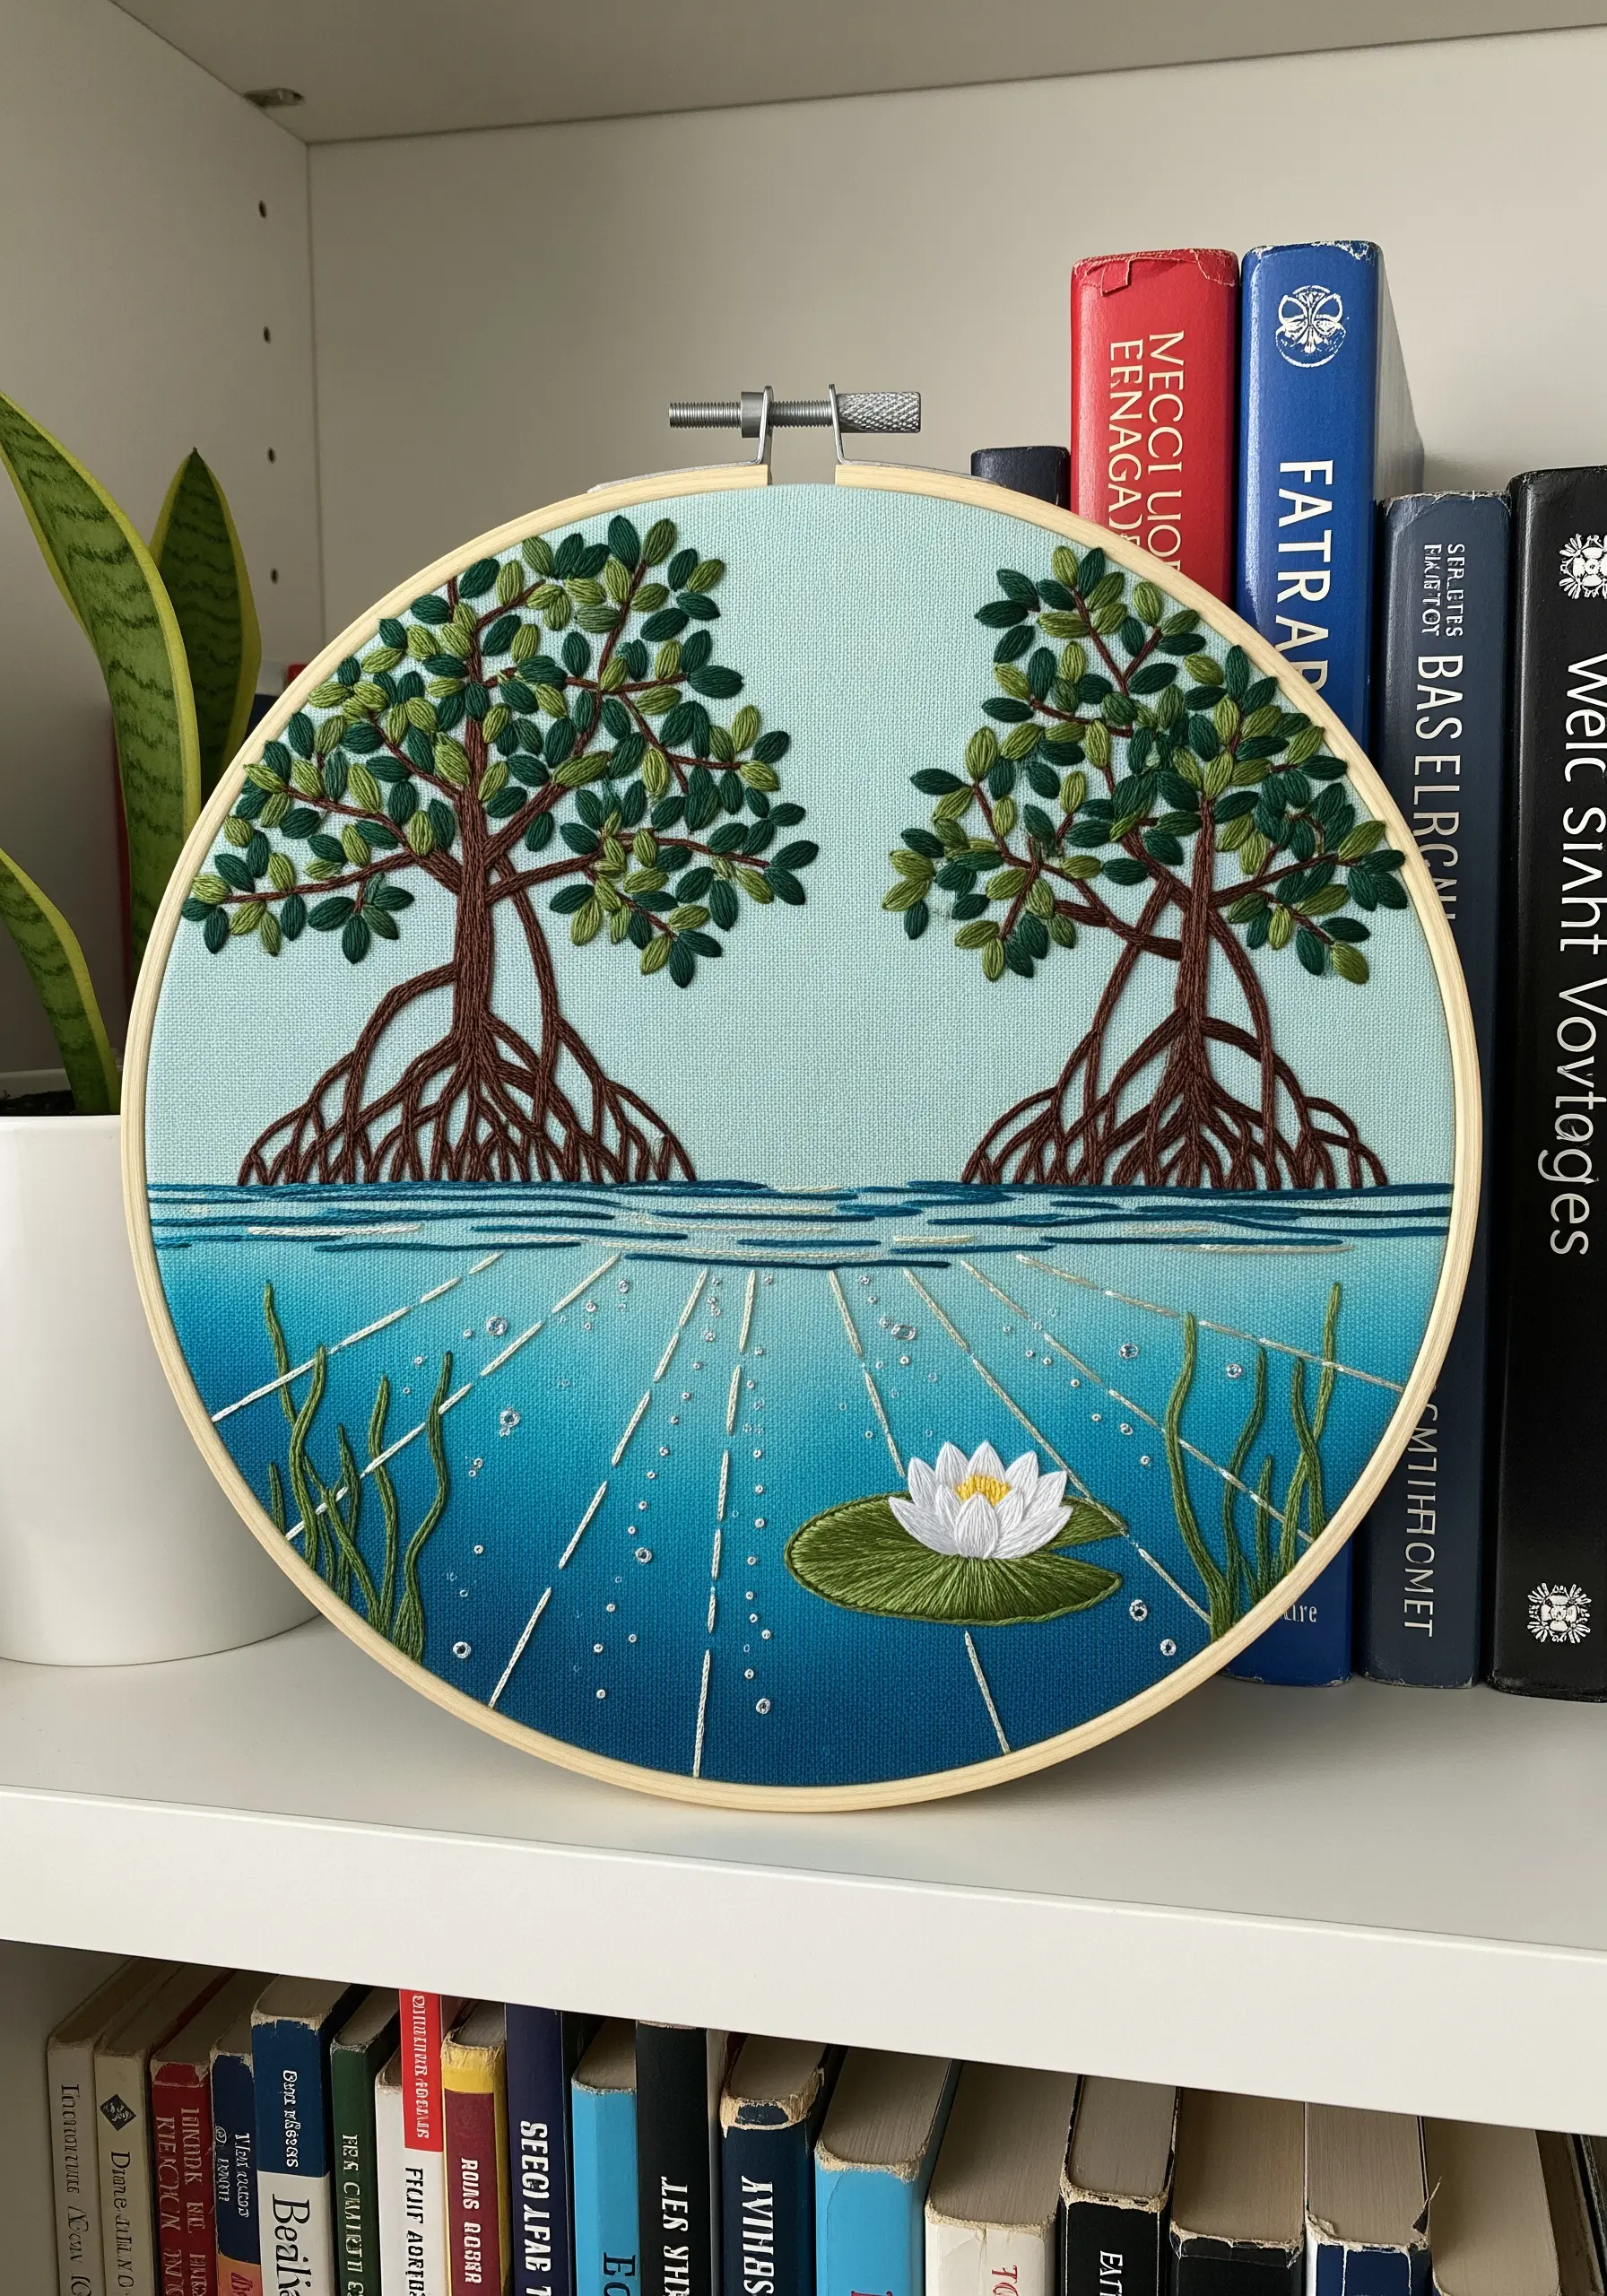
To embroider believable underwater scenes, think about how light travels through water.
Use single strands of white or light blue floss to create long, vertical straight stitches that represent rays of light penetrating the surface.
Keep these stitches slightly separated to maintain their distinct, linear quality.
For the water itself, use horizontal satin stitches in a smooth gradient from dark to light blue.
This contrast in stitch direction is a simple way to capture motion and flow in your embroidery, separating the static light from the moving water.
12. Crafting 3D Petals with Stumpwork
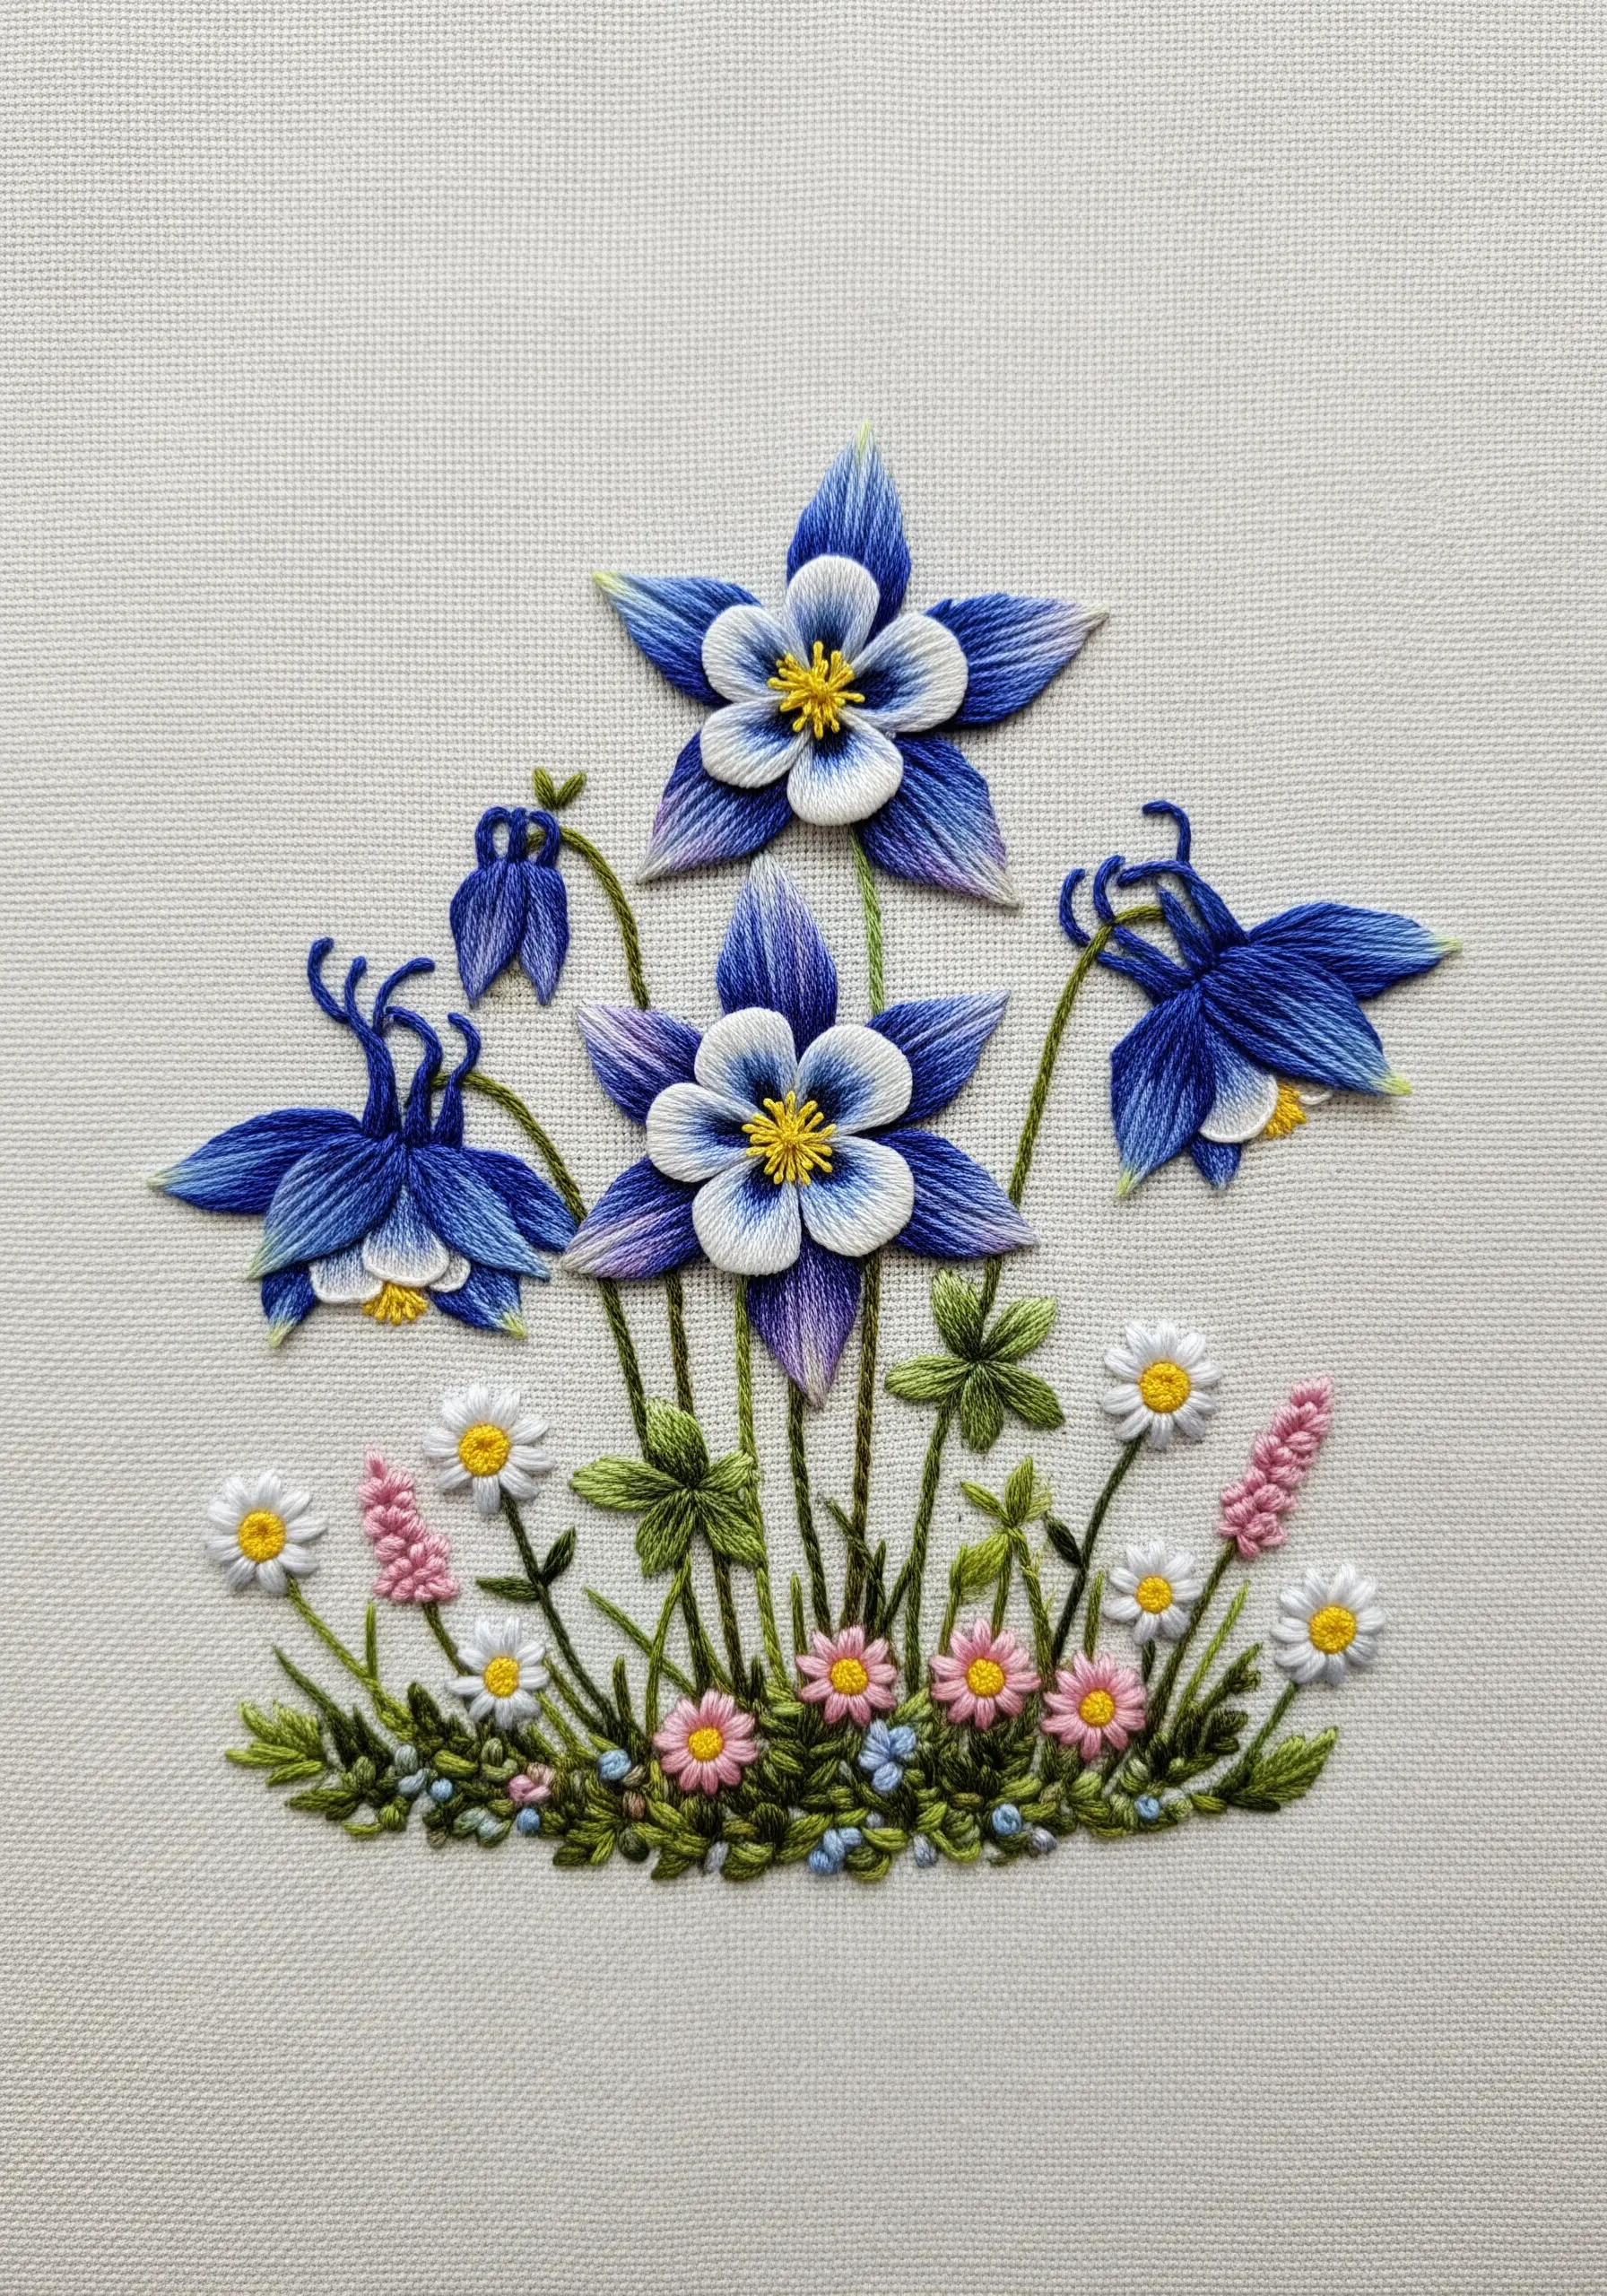
For flowers like the Rocky Mountain Columbine, elevate your design with dimensional stumpwork petals that lift off the fabric.
Create each petal separately by stitching a buttonhole stitch over a wire frame, blending colors to create a soft gradient.
Once complete, cut the petals out and gently bend the wire to give them a natural, curved shape before attaching them to your main embroidery.
The resulting 3D effect adds breathtaking realism and depth, especially when combined with delicate watercolor-style leaf embroidery blends on the fabric below.
13. Blending a Seamless Sunset Sky
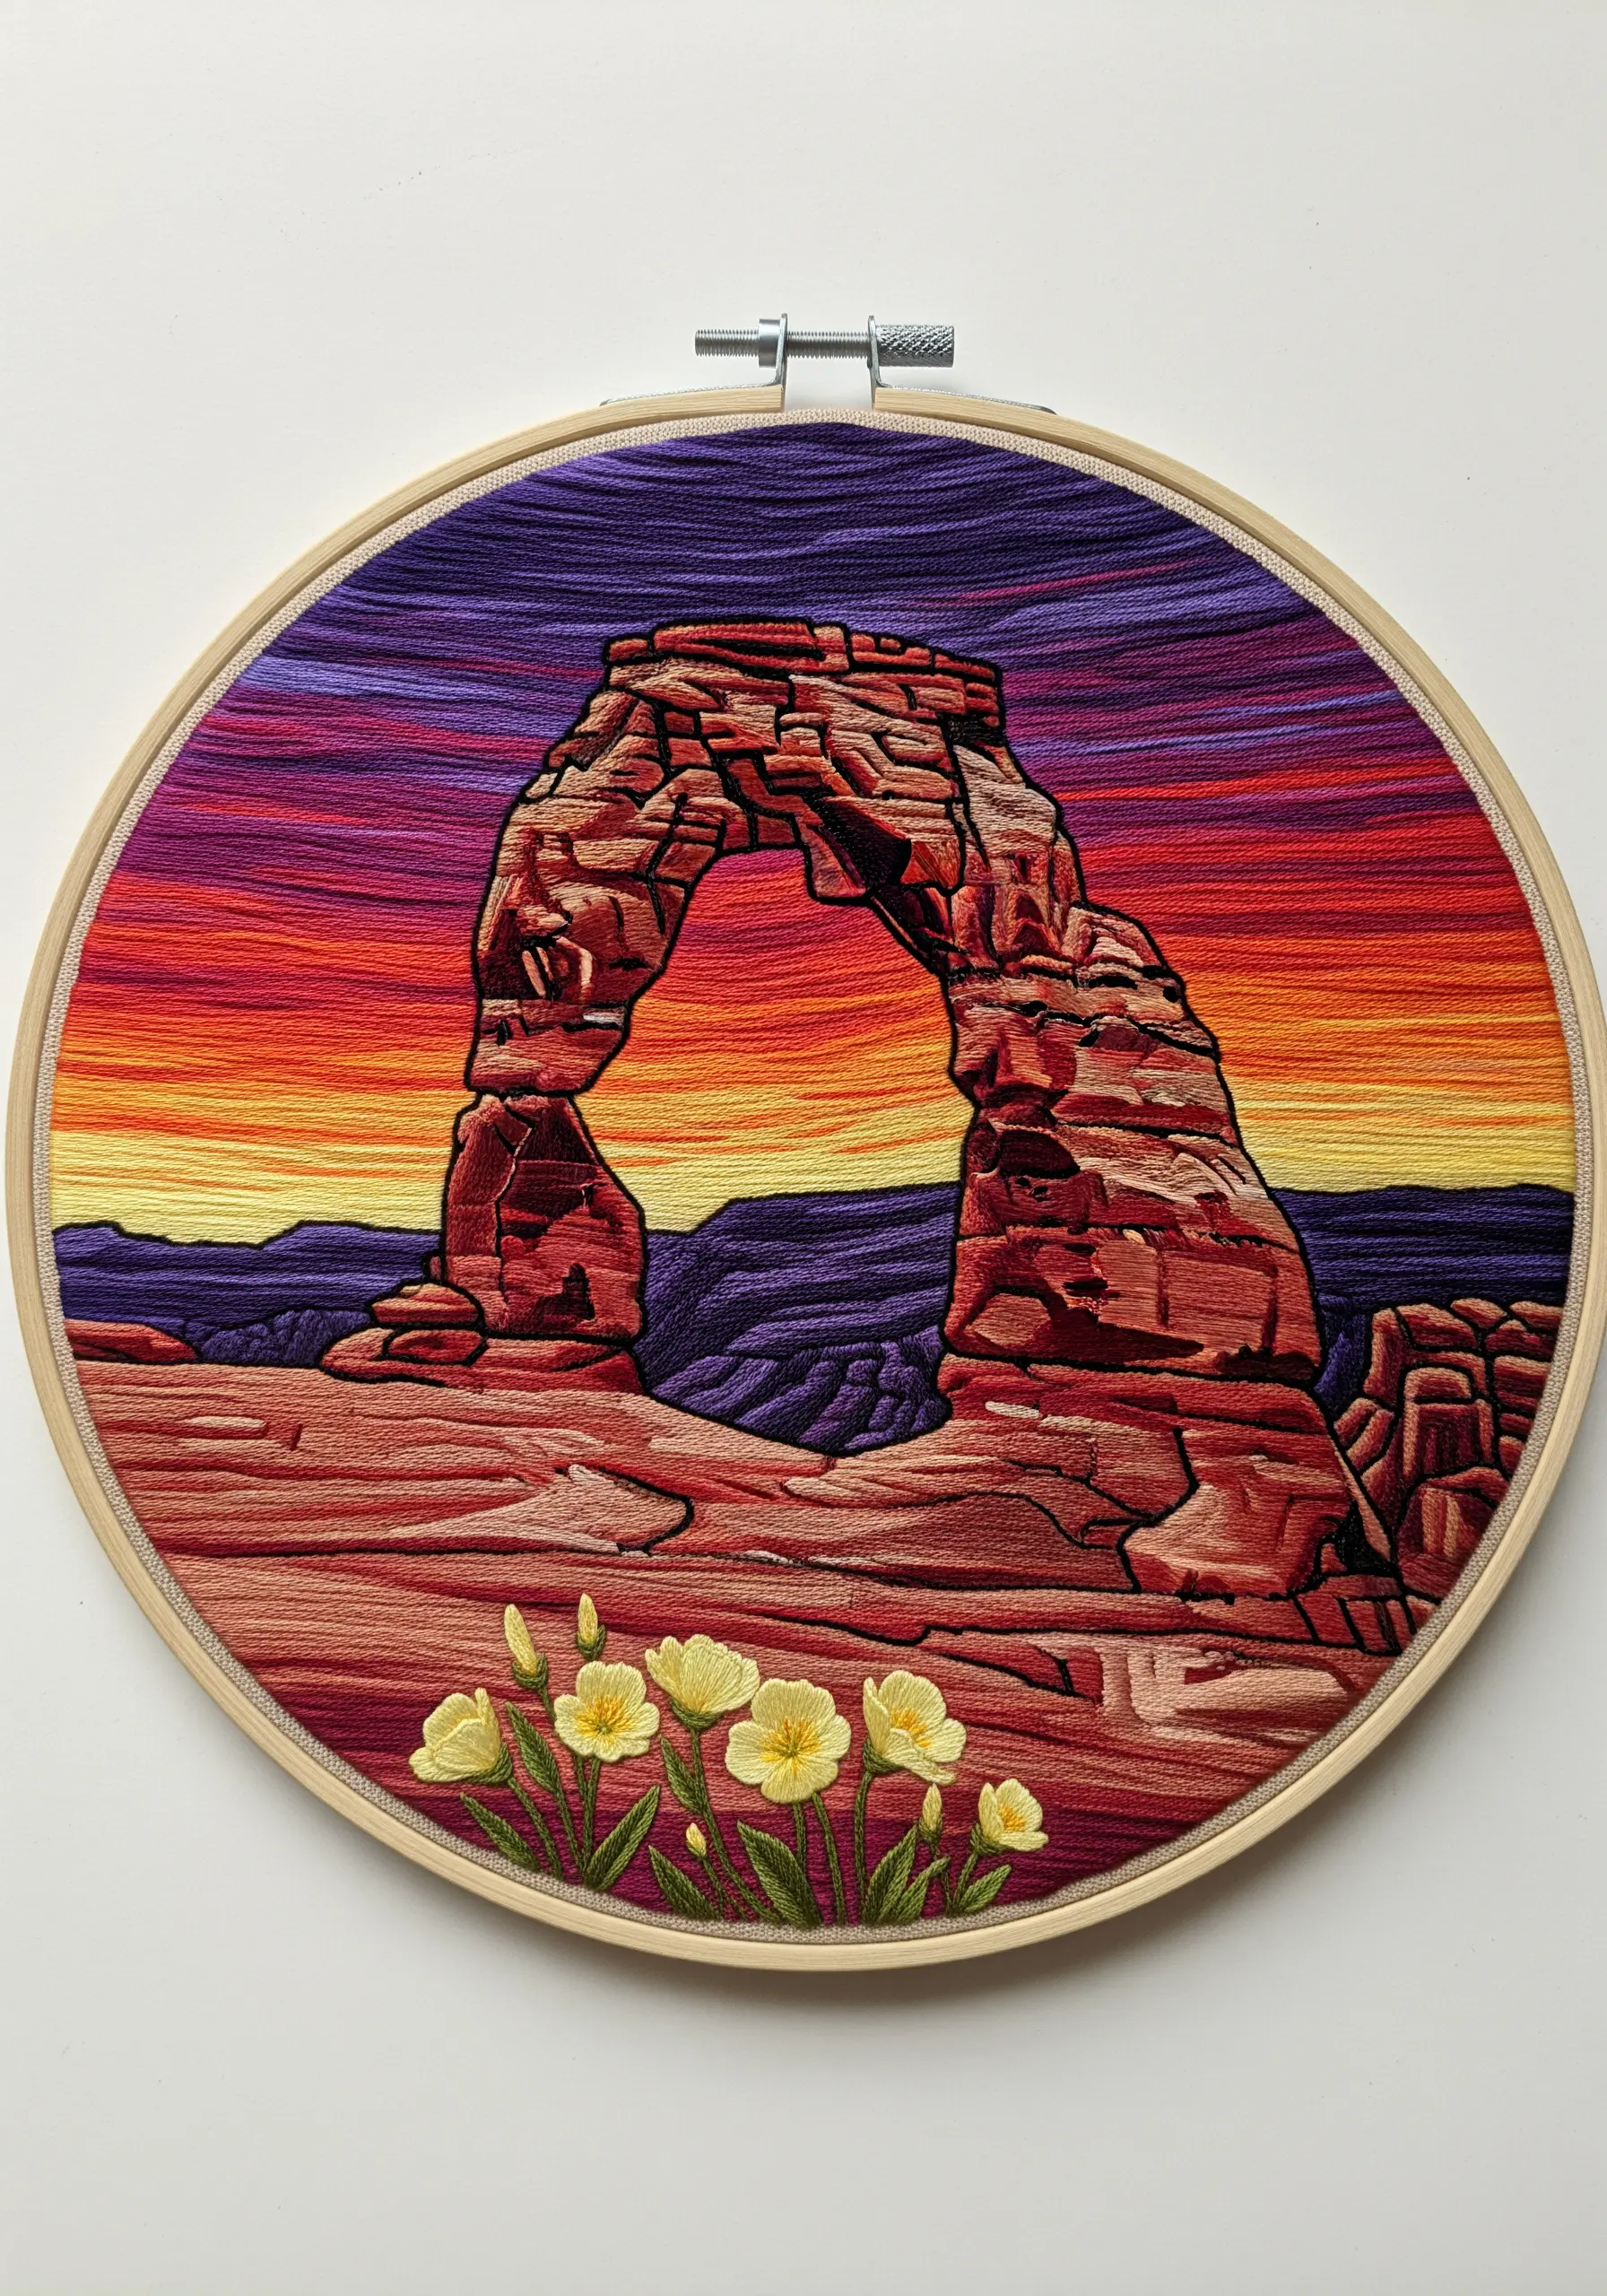
Achieve a smooth, painterly sunset over Arches National Park with meticulous long-and-short stitch.
Work in horizontal rows, using just a single strand of floss to ensure your stitches blend flawlessly.
When changing colors, split the stitches of the previous row with your needle to create an imperceptible transition.
This technique requires patience, but it’s the key to creating a sky that glows rather than looks striped.
Even a neutral color gradient embroidery can benefit from this level of precision.
14. Translating Hoop Art to a Grand Scale

To turn a small landscape design into a statement tapestry, switch from floss to chunky yarn and embrace texture.
Use a loose-weave fabric like burlap or monk’s cloth as your base. Instead of precise stitches, focus on textural fills like chain stitch, couching, and even weaving techniques directly on the fabric.
This approach allows you to cover large areas quickly and creates a bold, tactile piece of art.
Large-scale embroidery tapestries are perfect for transforming a room with a single, handmade piece.
15. Defining Cactus Spines with Star Stitches

Instead of using bulky French knots for saguaro cactus spines, opt for a sharper, more delicate stitch.
A star stitch, made with a few small straight stitches radiating from a central point, creates a spiky, realistic texture.
Use a bright white or cream-colored thread with only two or three strands to ensure the spines look sharp and defined against the green cactus body.
This small detail makes a significant difference in achieving realism, much like in realistic animal insect embroidery patterns.
16. Creating Fiery Texture with Turkey Work
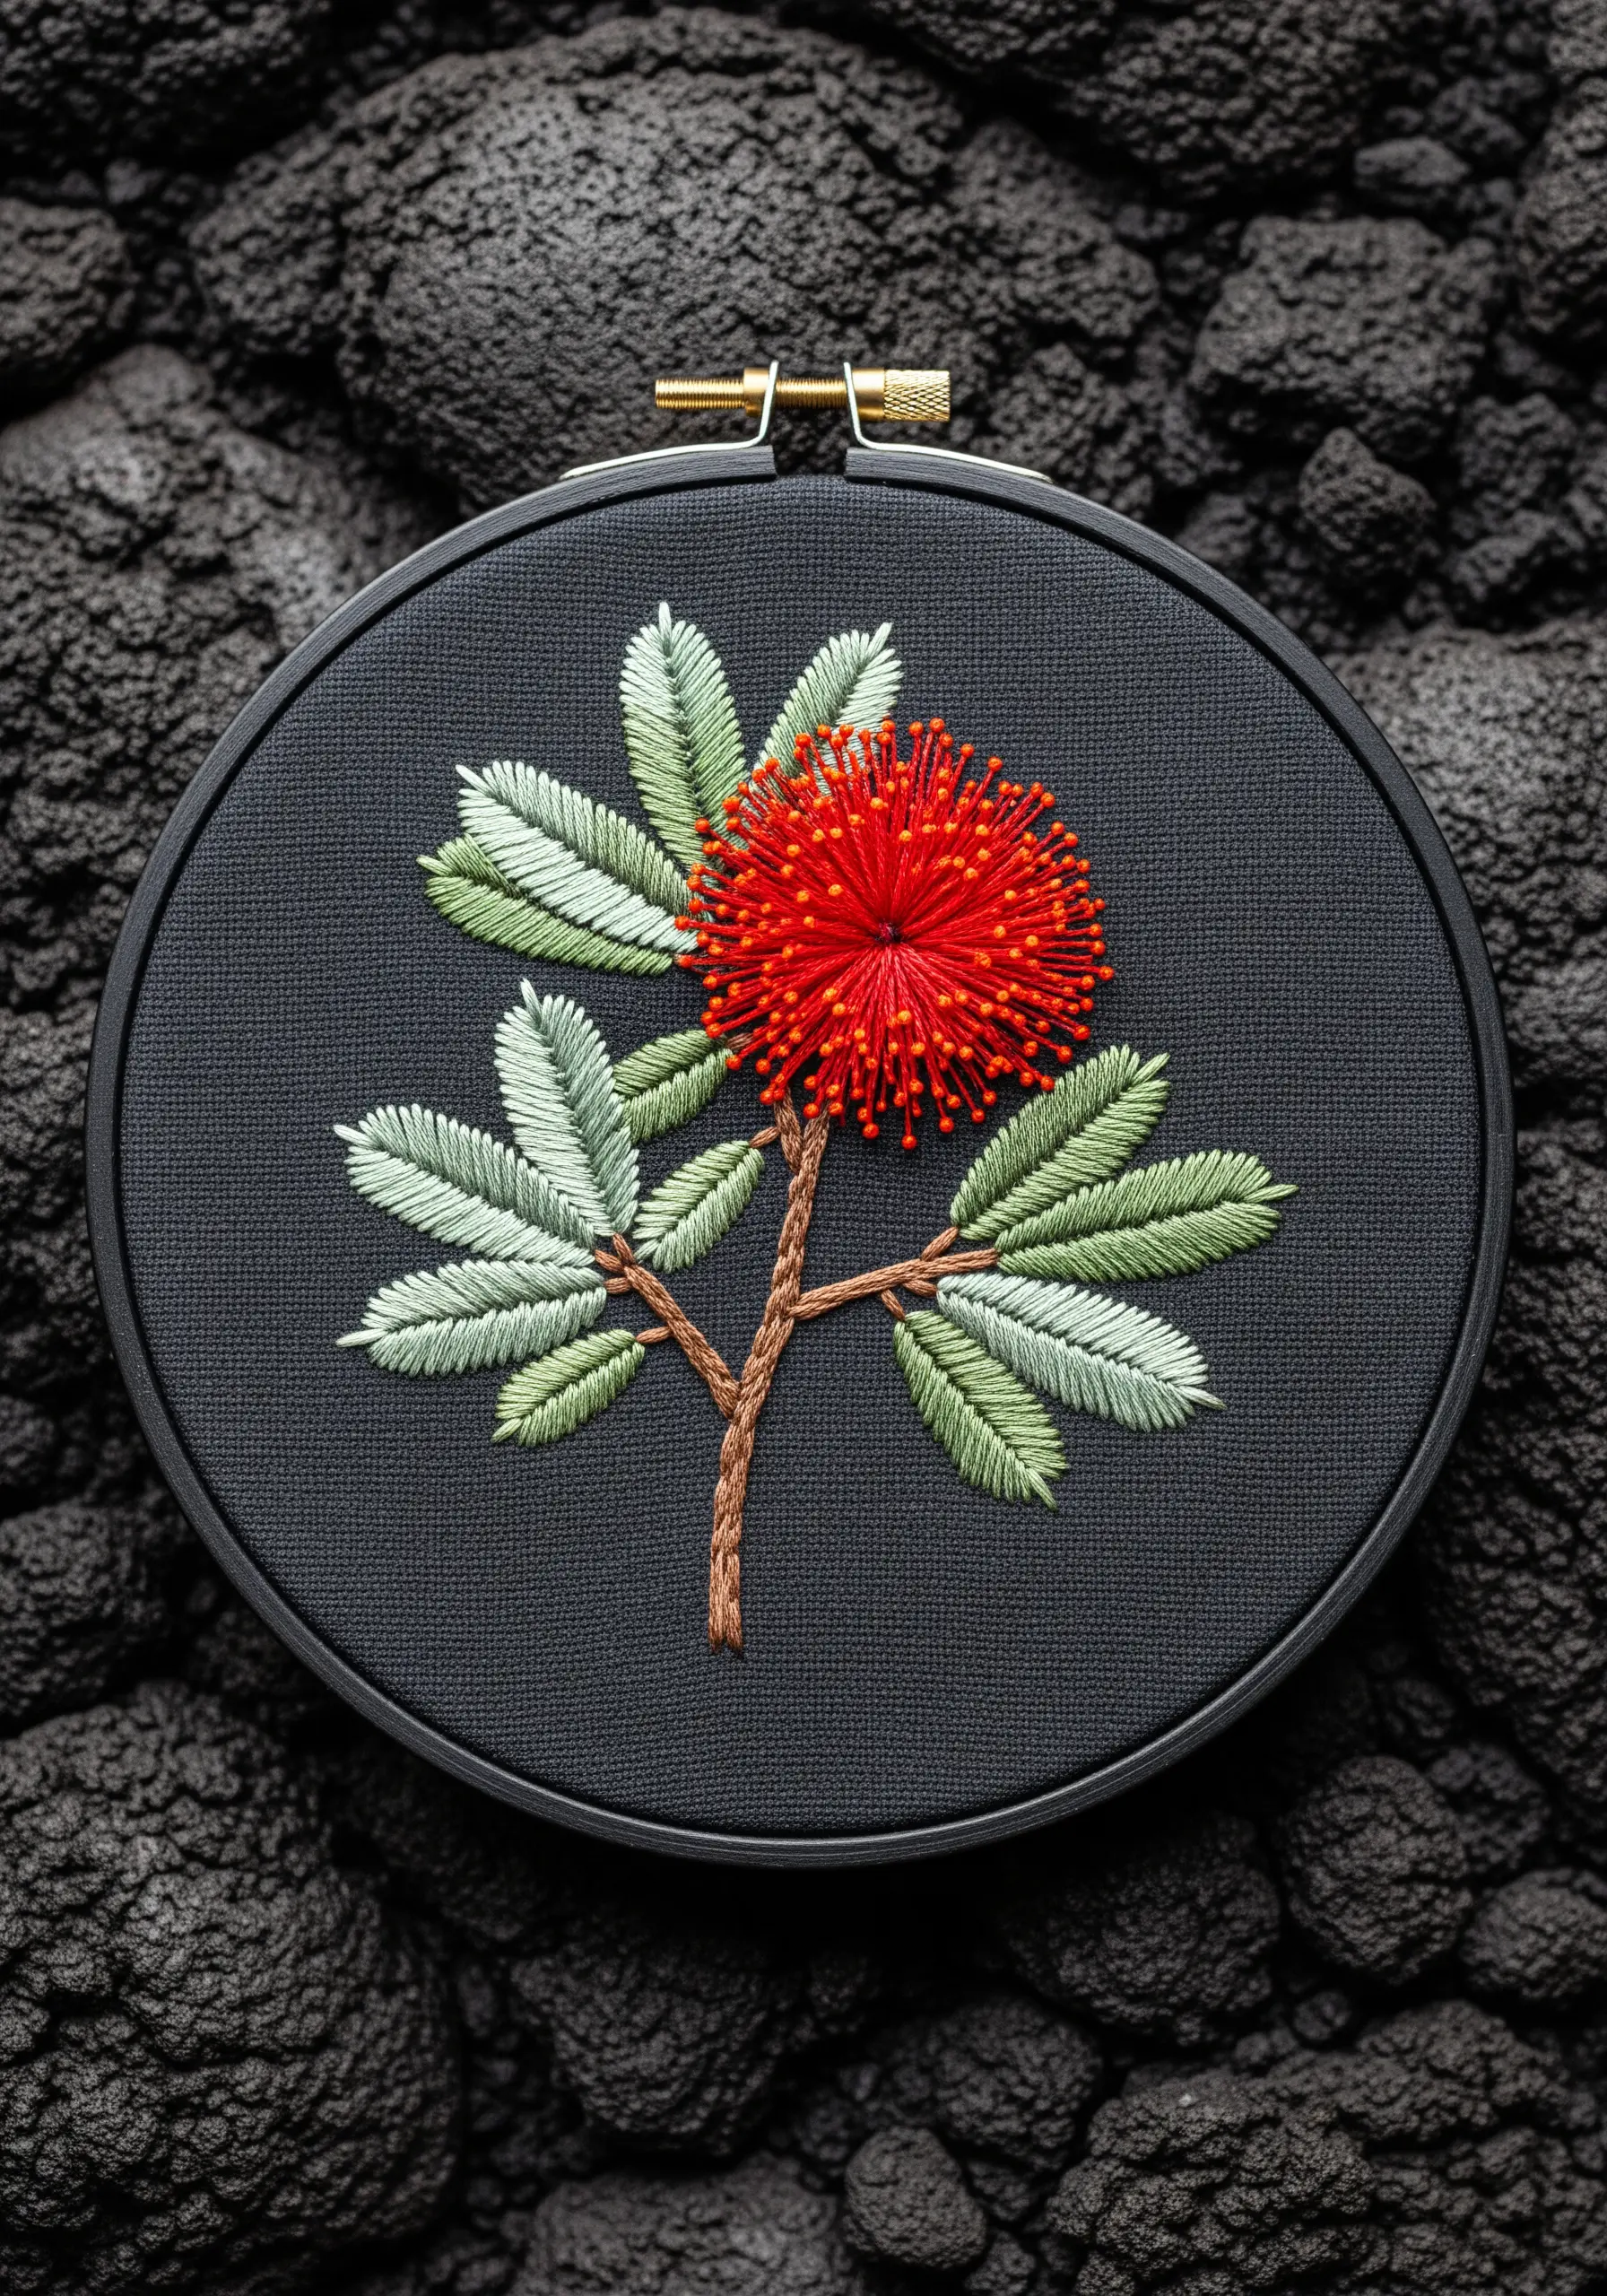
To capture the unique, bristly texture of Hawaii’s ‘Ōhi‘a lehua or New Zealand’s Pōhutukawa flowers, turkey work is the perfect technique.
Create loops of thread using the Ghiordes knot, packing them tightly together to build a dense pile.
Once an area is filled, carefully trim the tops of the loops with sharp scissors to create a fluffy, brush-like effect that mimics the flower’s stamens.
The high-impact texture is ideal for all kinds of tropical flower designs.
17. Layering Textures for a Forest Floor
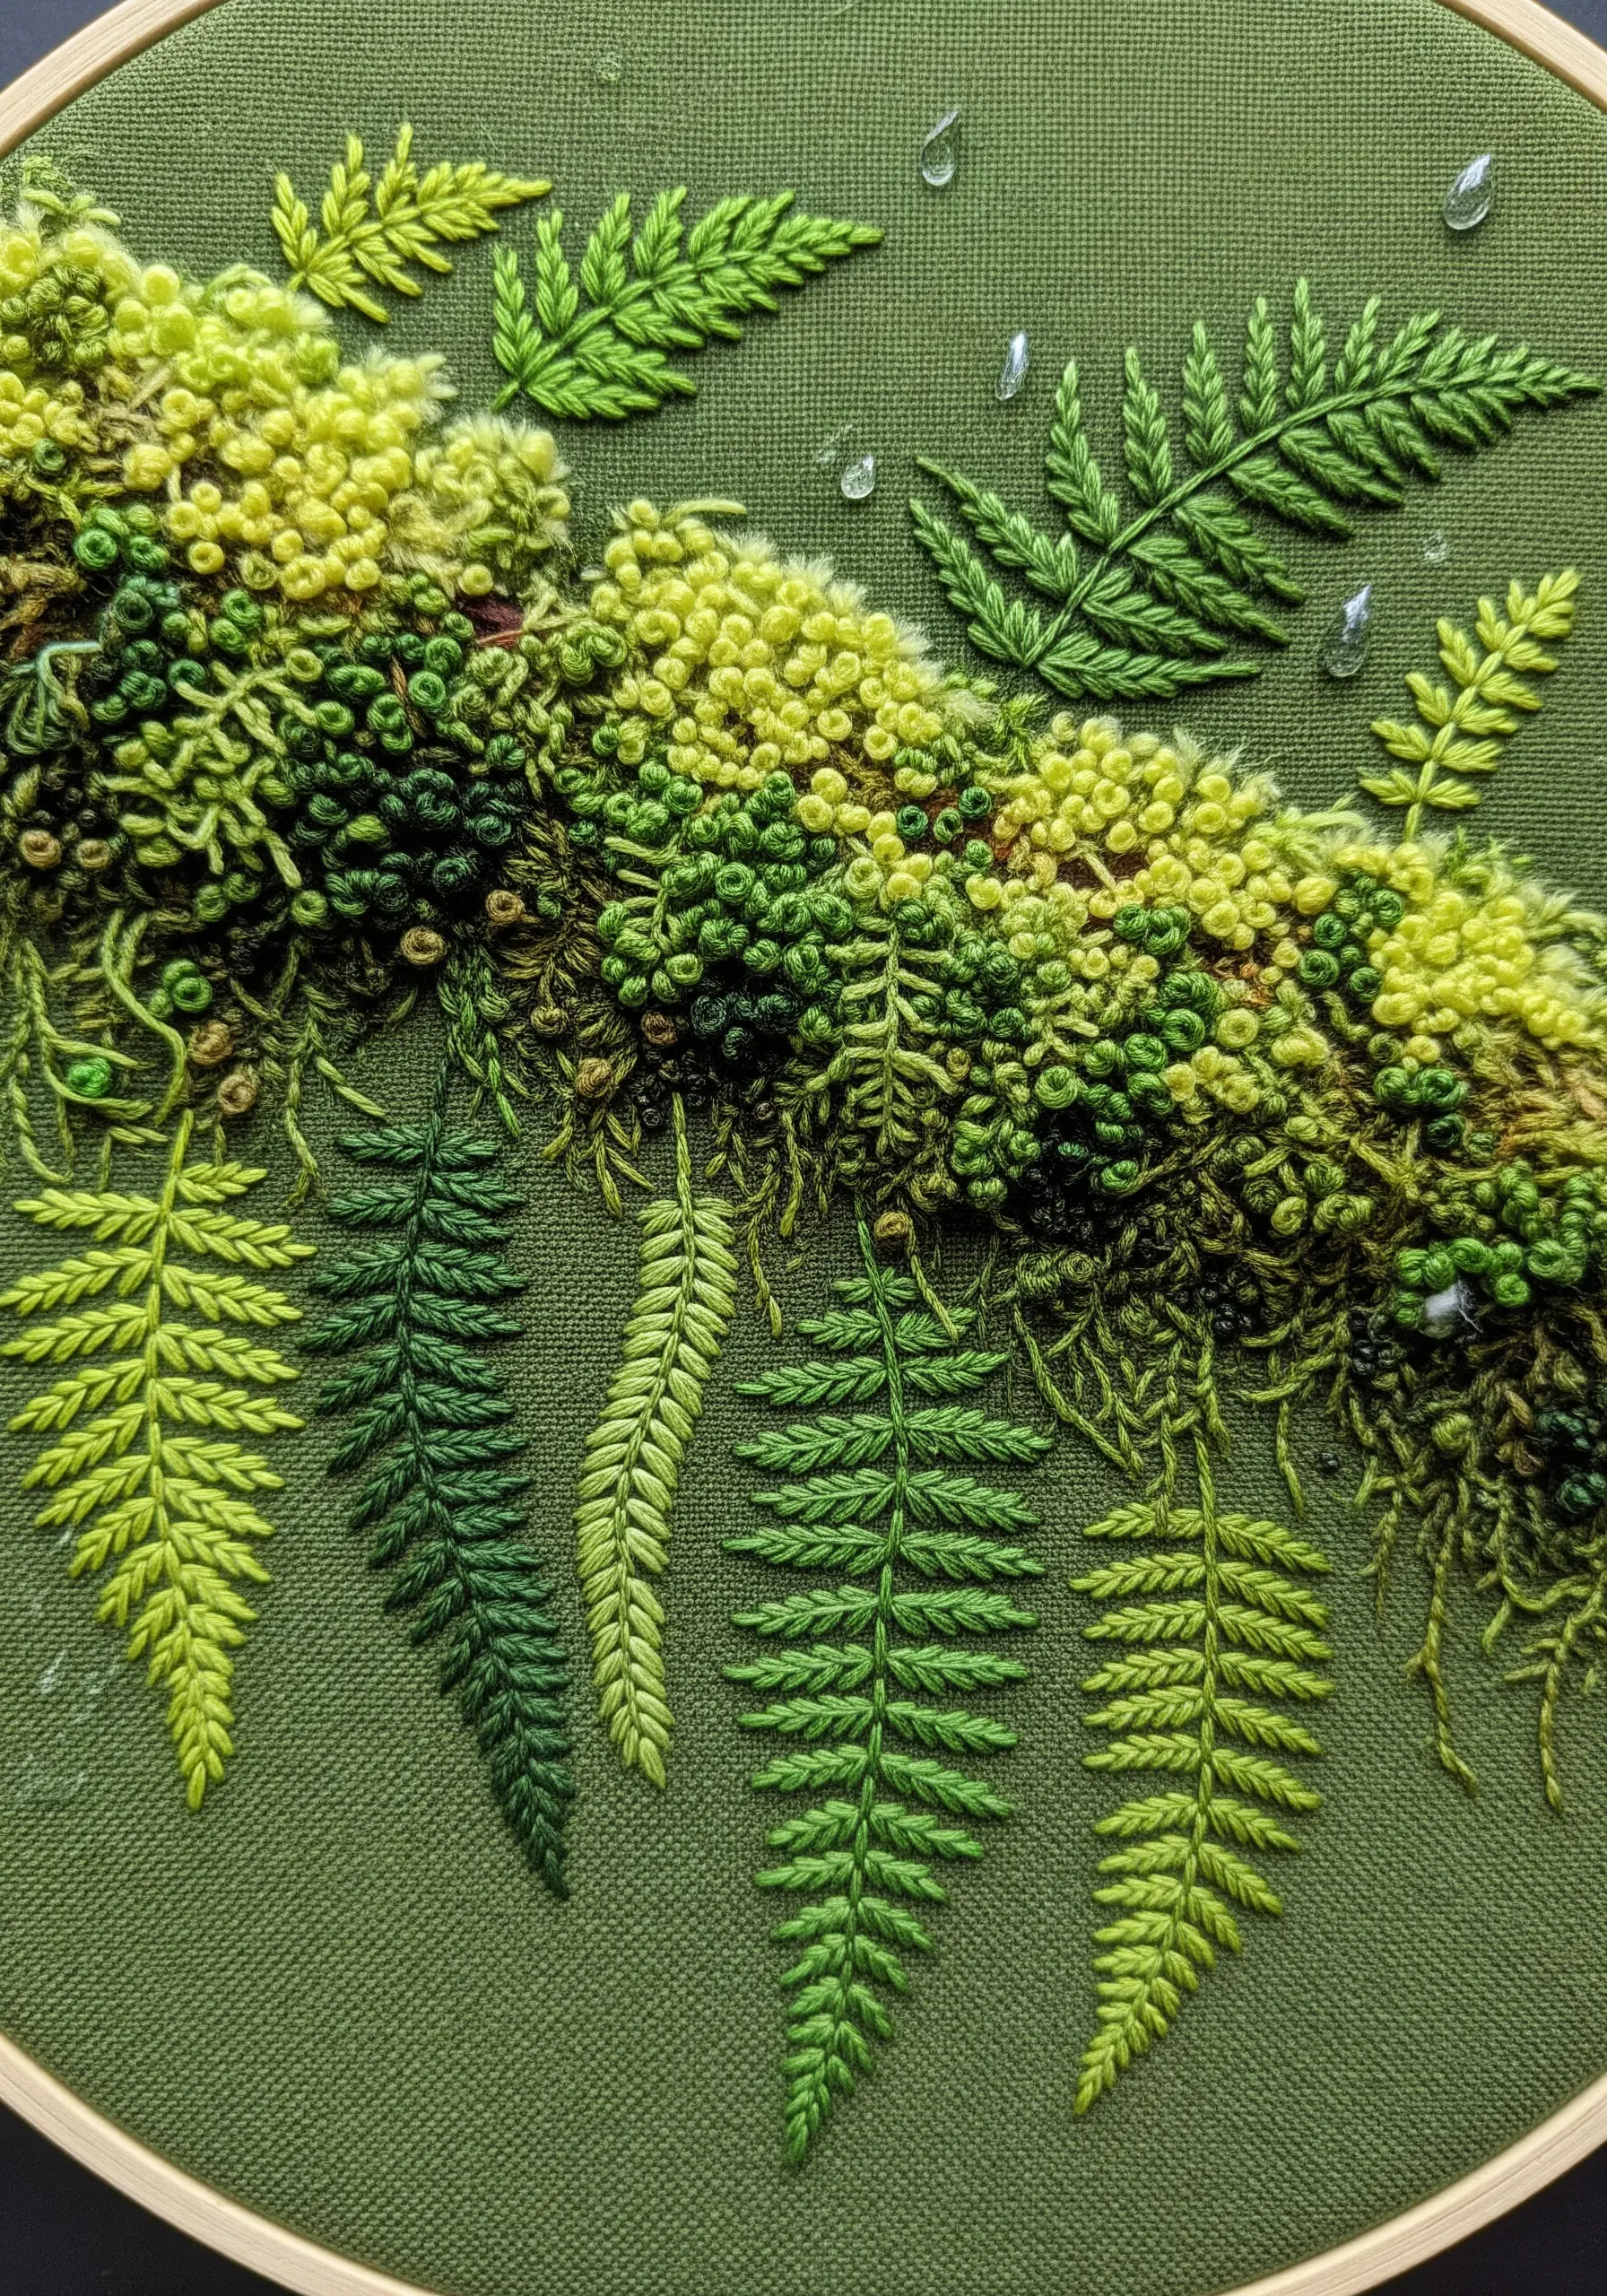
Recreate the rich, varied textures of a forest floor by combining multiple stitches in a monochromatic green palette.
Use dense clusters of French knots in various sizes and shades to form a mossy base.
Incorporate bullion knots or worm stitch for a rougher, more tangled look mimicking fallen debris.
Finally, add meticulously stitched fern fronds using fishbone stitch, allowing them to lay over the knotted base for a truly layered, three-dimensional effect.
Moss fern embroidery textures bring an unparalleled level of realism to nature scenes.
18. Weaving Mountain Layers with Thread

For a stylized landscape like the Blue Ridge Mountains, use woven fill stitches to create texture and pattern within the rolling hills.
Mark out your mountain shapes and fill each section with a different woven pattern, such as basket stitch or darning stitch.
By changing the direction and density of the weave, you can create a sense of overlapping layers and atmospheric haze.
This technique combines the precision of embroidery with the textural appeal of weaving, resulting in a uniquely graphic piece.
Monochrome thread embroidery ideas work especially well with this textural approach.
19. Using Variegated Thread for Geological Lines
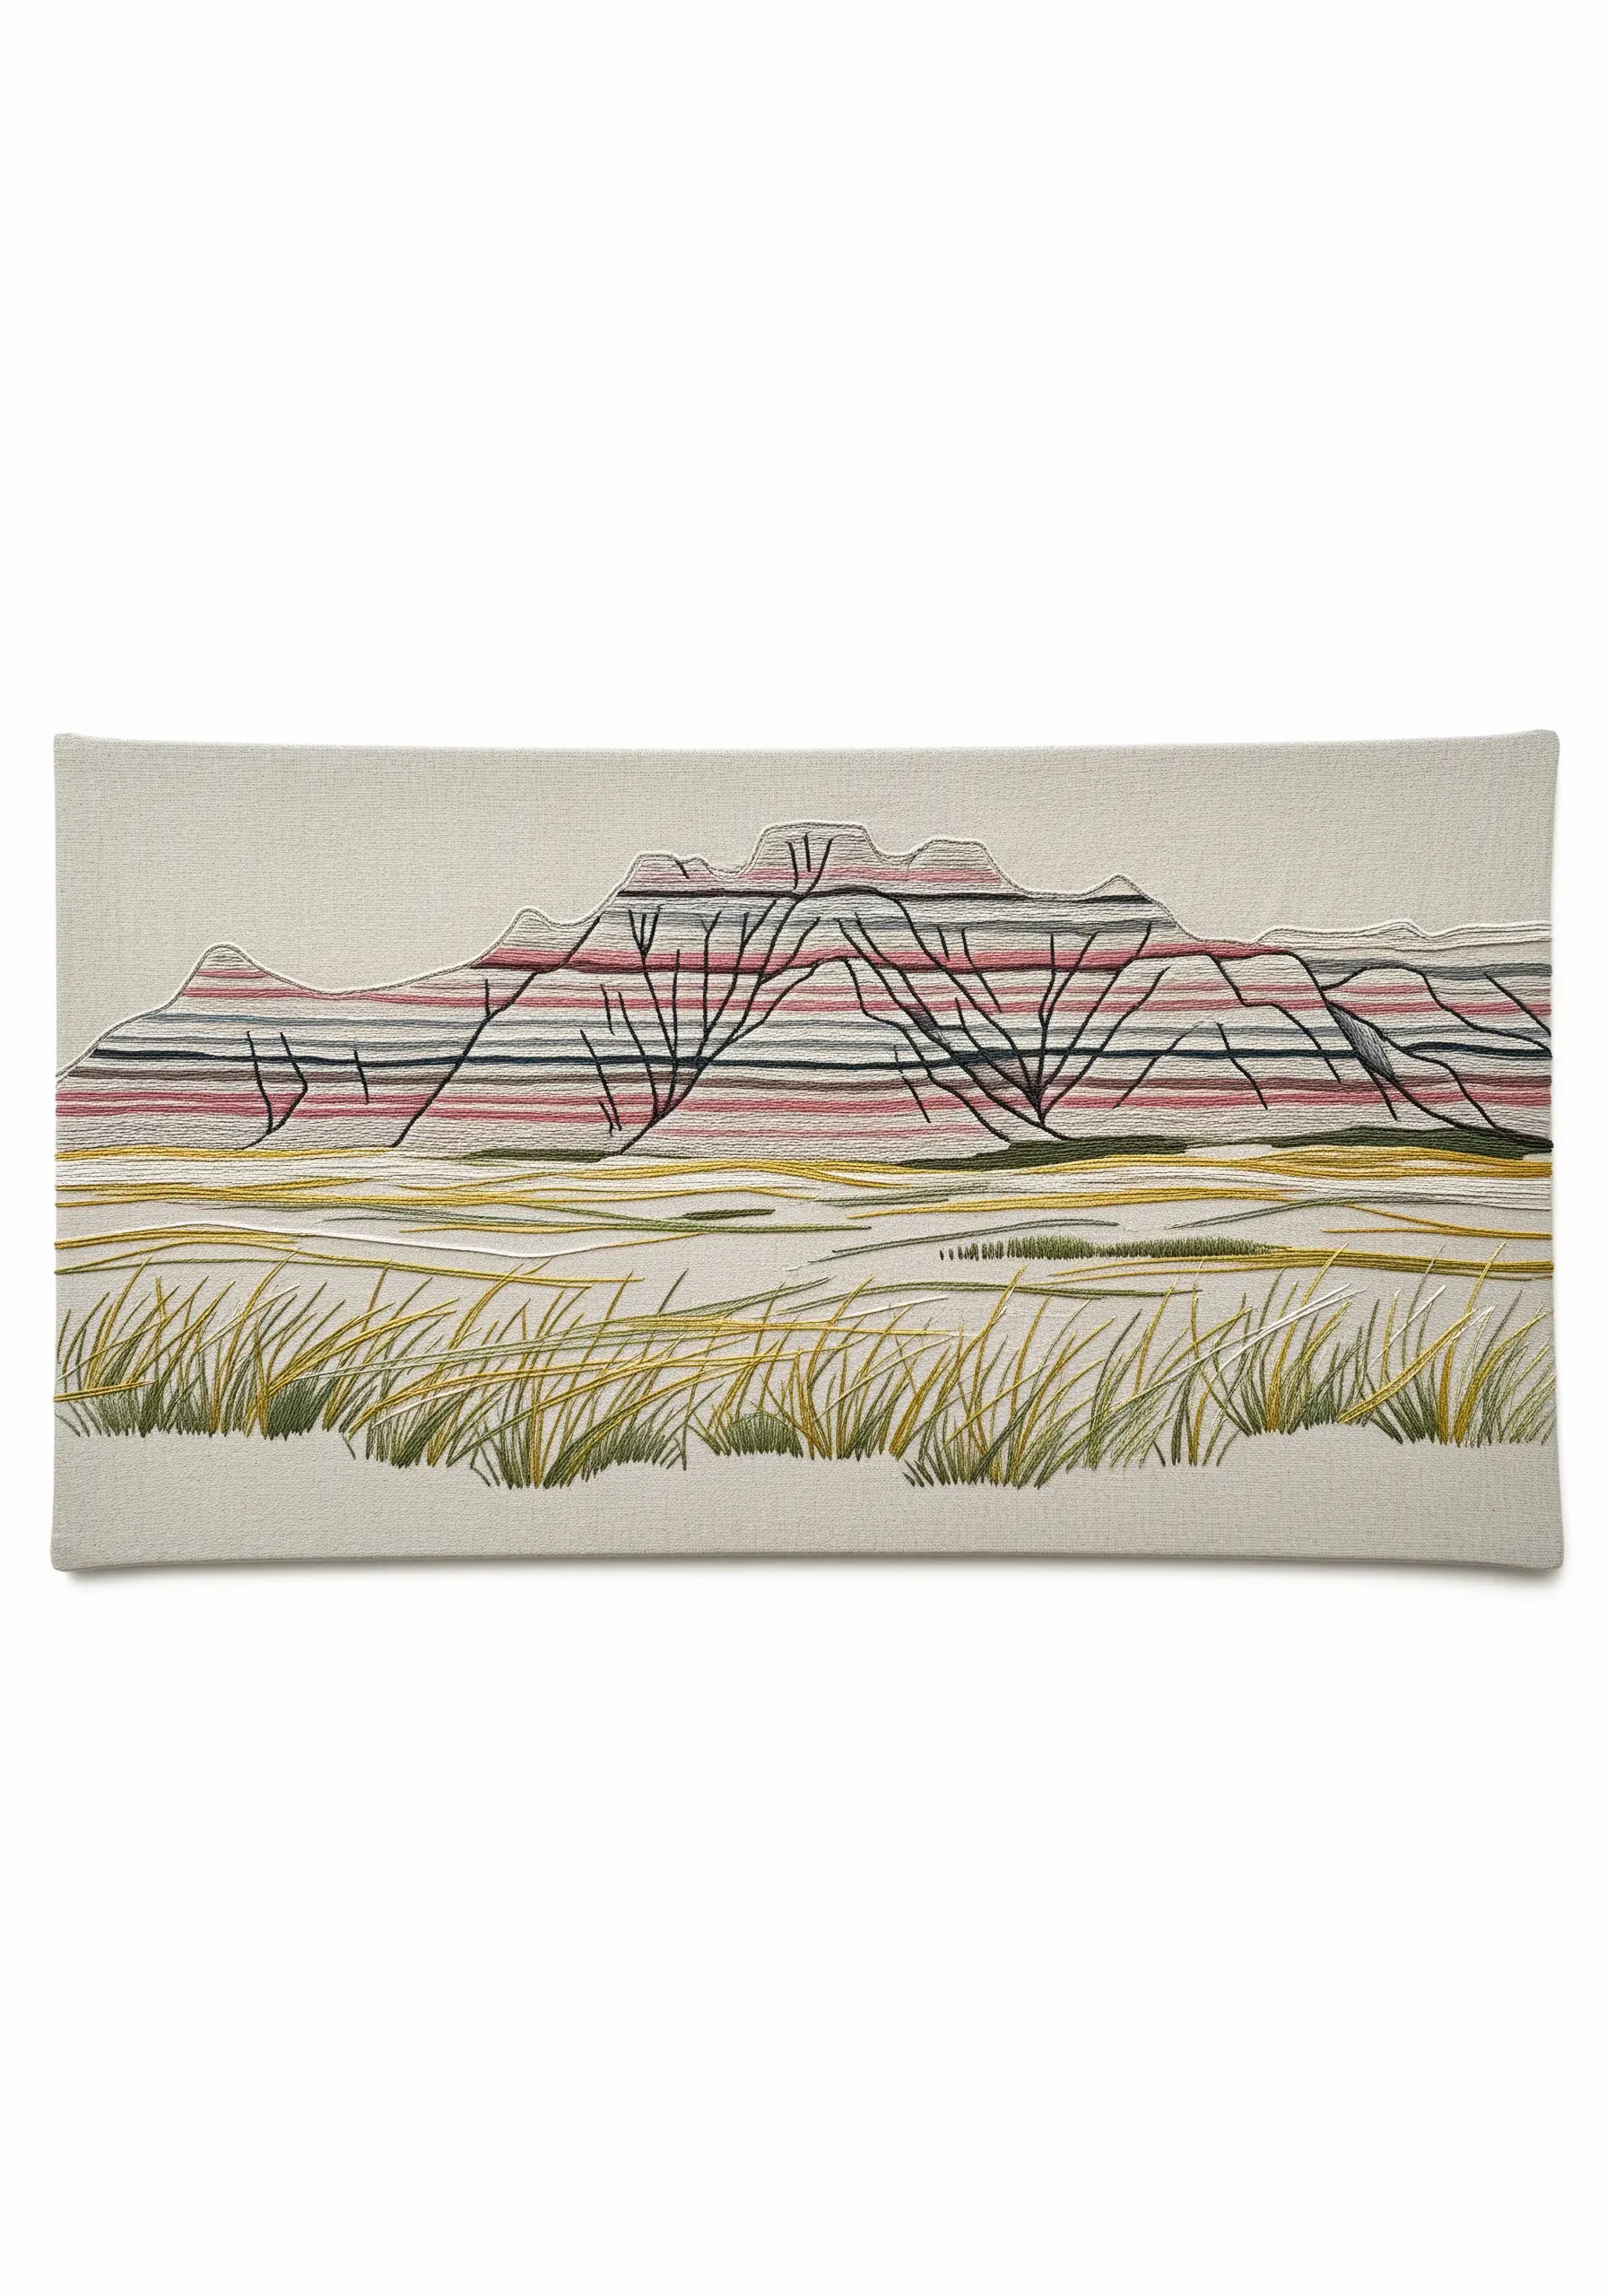
To capture the subtle color shifts in the sedimentary layers of the Badlands, let variegated thread do the work for you.
Choose a thread that contains the key colors of your landscape, such as ochre, rust, and cream.
Use long, horizontal stitches like the stem stitch or backstitch to follow the geological lines.
The thread’s natural color changes will create soft, organic transitions, giving the piece a painterly quality with minimal effort.
Working with variegated thread for gradient magic is a brilliant shortcut to complex color work.
20. Conveying Water Depth with Concentric Stitches
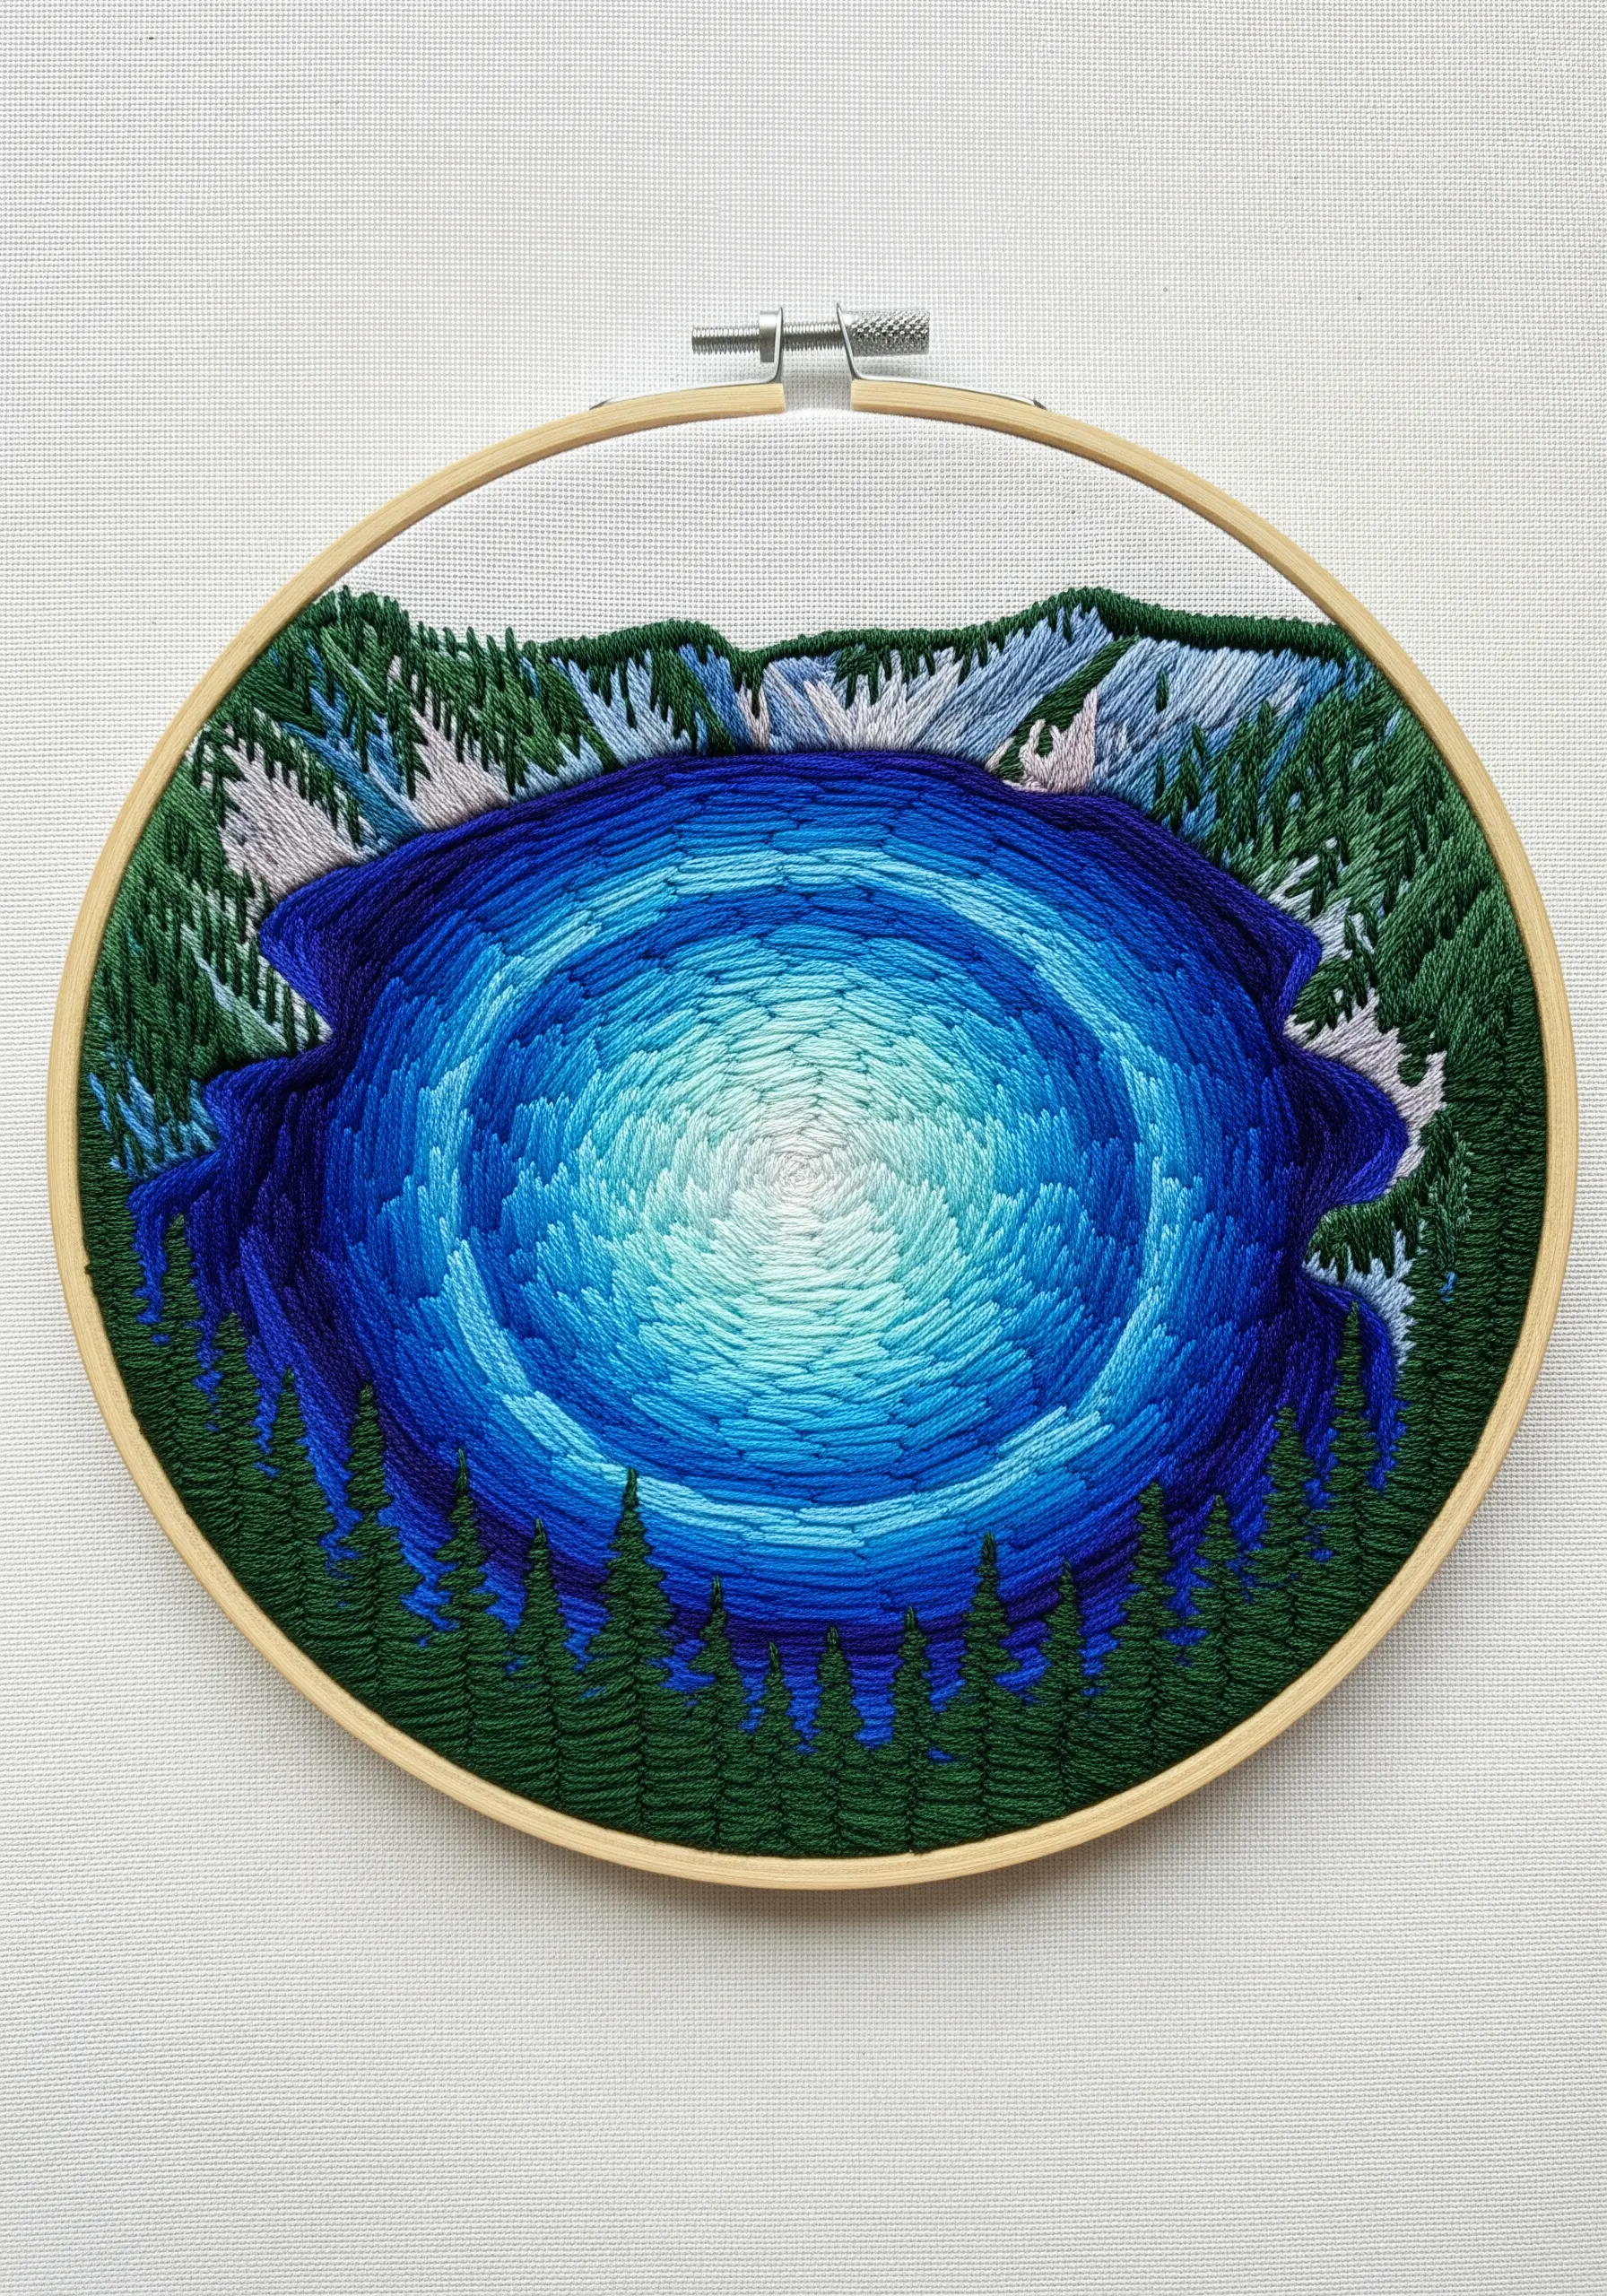
Illustrate the incredible depth of Crater Lake by arranging your stitches in concentric circles.
Start at the center with the lightest shade of aqua blue, working outwards in rings of progressively darker blues and navies.
Use a split stitch or chain stitch to create solid, defined rings of color.
The circular motion of the stitches naturally draws the viewer’s eye down into the center, creating a powerful illusion of depth and stillness.
This is one of the most effective abstract thread embroidery ideas inspired by nature for representing water.
21. Creating Perspective with Diminishing Detail

To make a field of lupines feel vast, create perspective by varying the level of detail from front to back.
In the foreground, stitch each flower with distinct details—individual florets can be made with small French knots or lazy daisy stitches.
As you move into the mid-ground and background, simplify the flowers into simple vertical stitches or even single knots.
This gradual reduction in detail tricks the eye into seeing distance, making your landscape feel more immersive.
You can apply this concept to any repetitive element, such as the leaves in hand-embroidery leaf patterns.
22. The Power of Minimalist Line Art
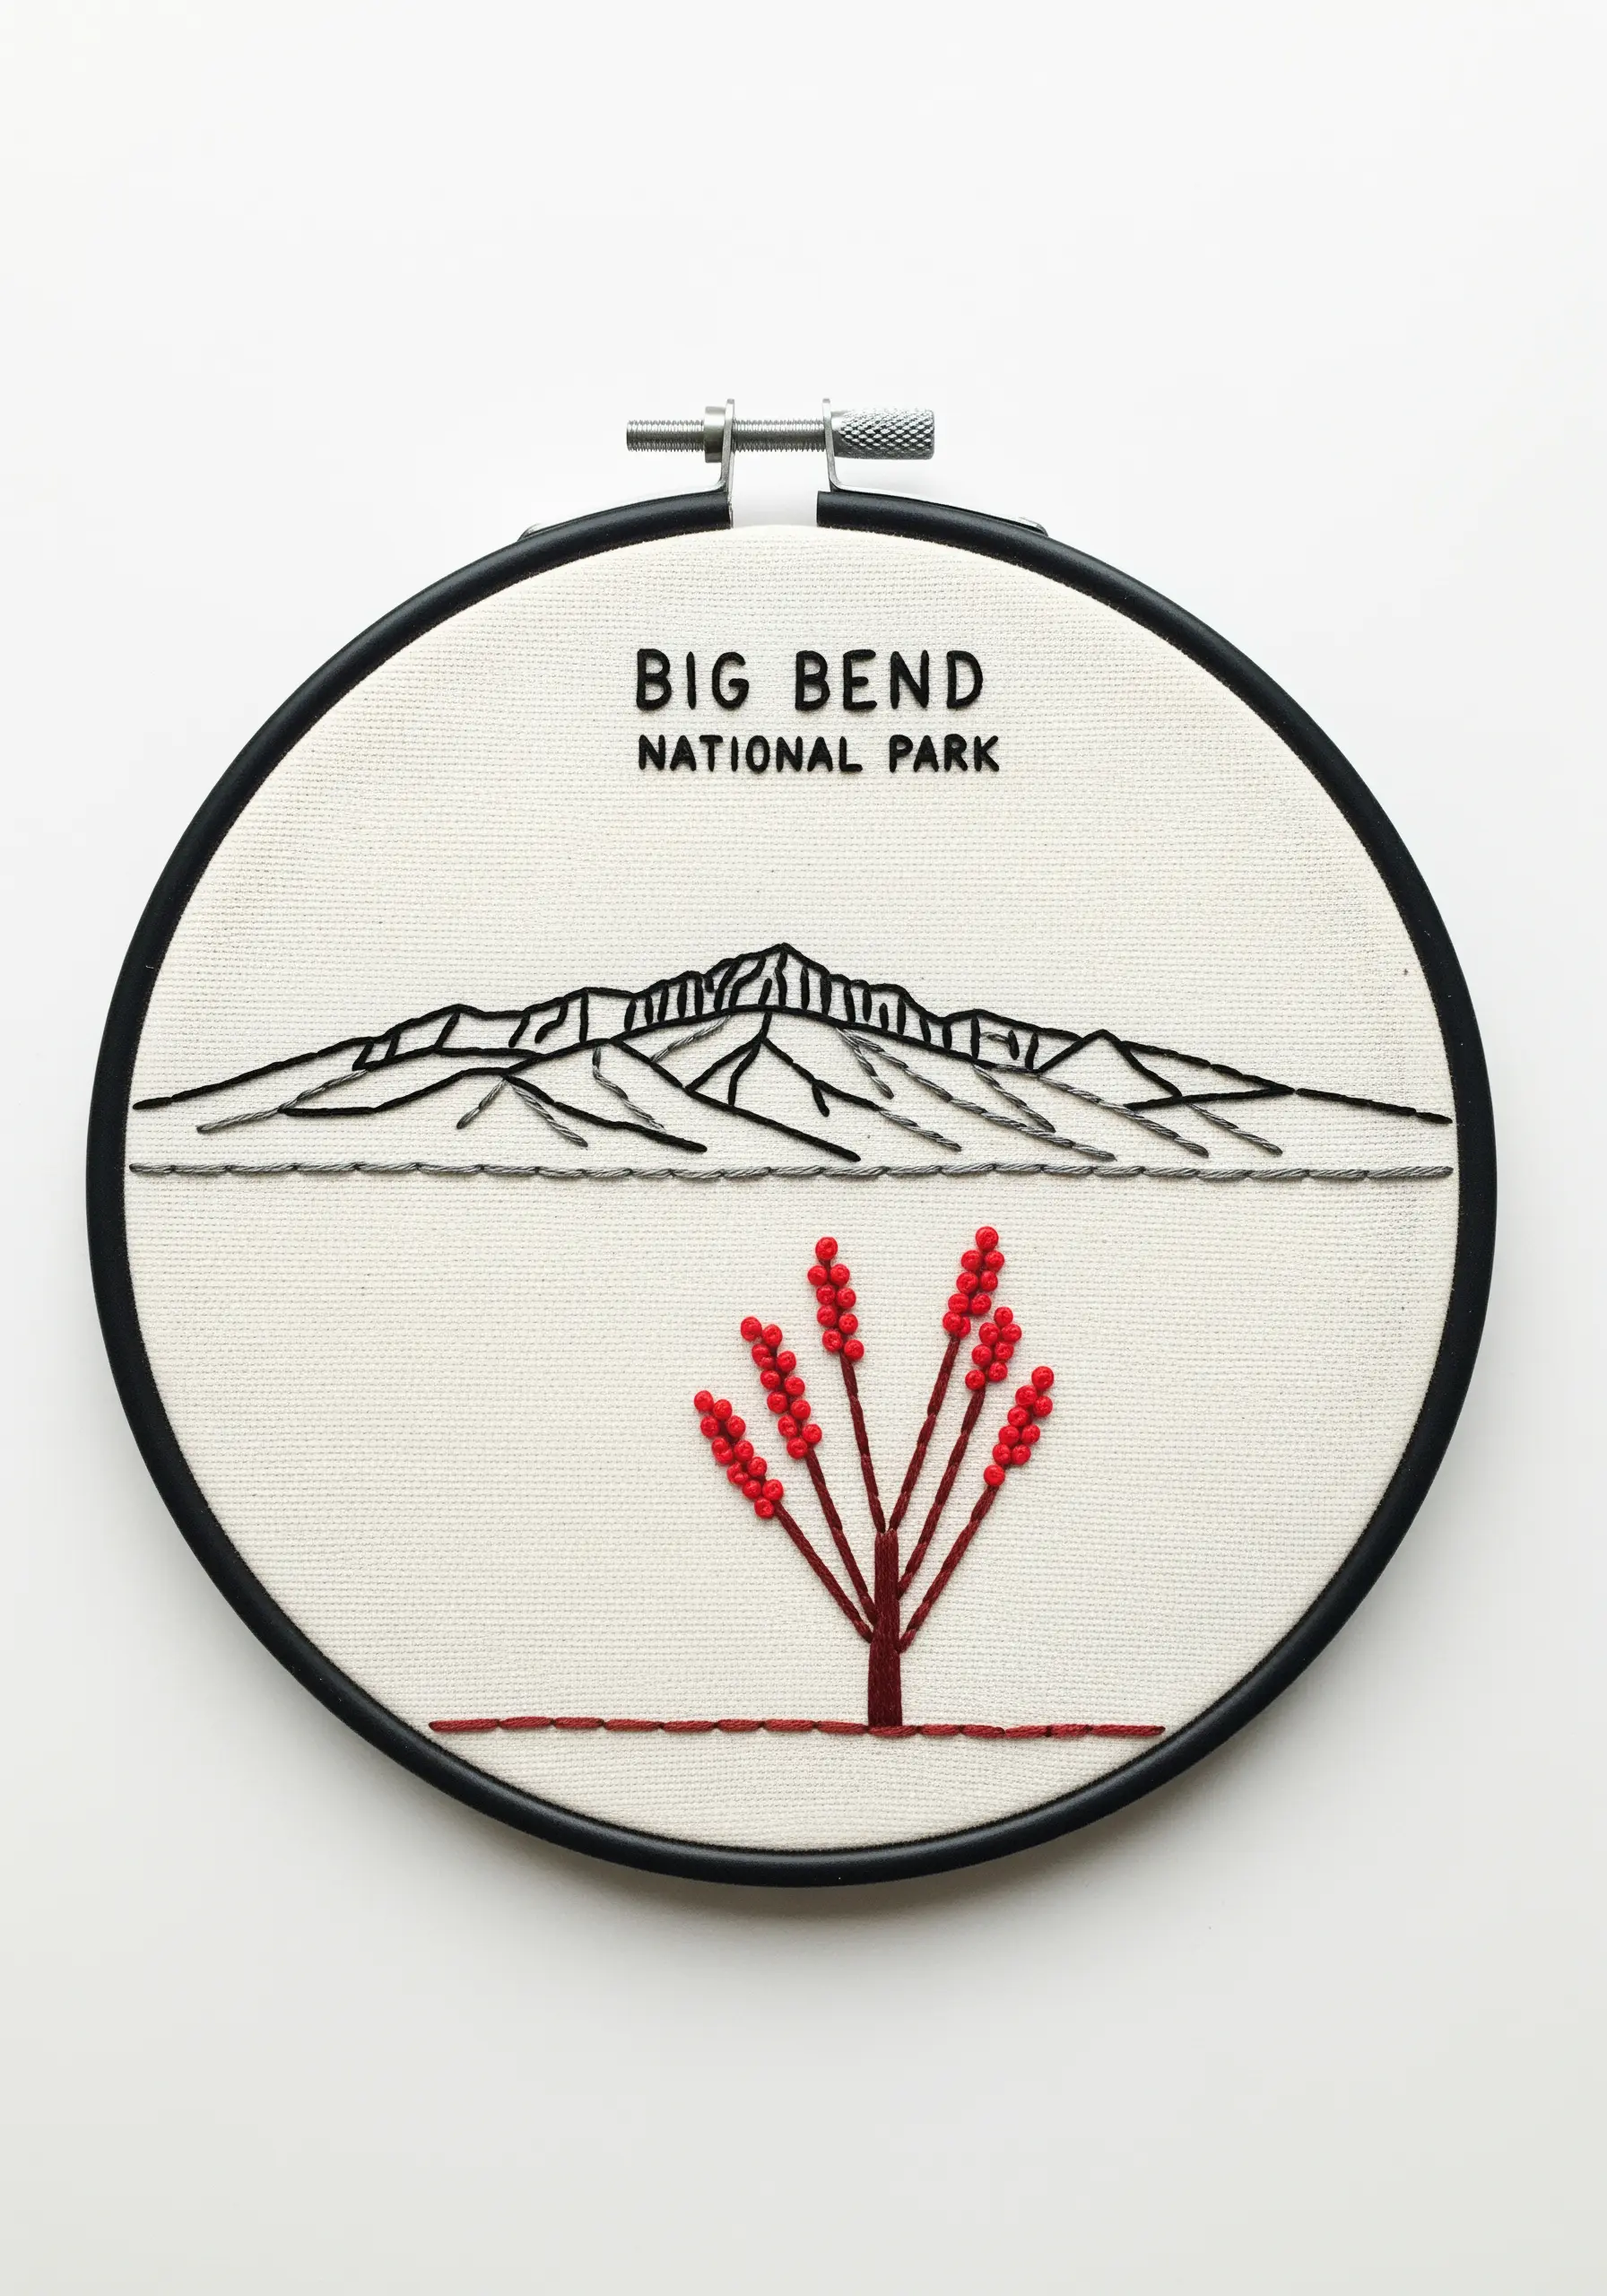
Sometimes, the most powerful landscapes are the ones suggested with just a few careful lines.
To create a clean, modern souvenir of a place like Big Bend, rely on a simple backstitch and the beauty of negative space.
Use only two or three strands of black floss to keep your lines crisp and graphic.
Add a single pop of color in a small, isolated element to draw the eye and create a strong focal point.
This restrained approach produces striking Minimalist stitch designs that feel both modern and timeless.
23. Building Impressionistic Foliage with Knots

To capture the rich, mottled colors of autumn foliage at New River Gorge, think like an impressionist painter and use knots as your brushstrokes.
Fill the hillsides with dense clusters of colonial knots, which are rounder and sturdier than French knots.
Mix reds, oranges, yellows, and deep greens randomly to create a vibrant, textured canopy that blends colors organically.
This technique is forgiving and allows you to build rich dimension by layering knots until you achieve the desired fullness.
It’s a perfect way to capture the textures you’d find on a nature walk.
24. Stitching the Movement of a Waterfall

The key to stitching a waterfall that feels alive is to make your stitches follow the flow of the water.
Use long, vertical straight stitches or long-and-short stitches, allowing them to be slightly uneven and varied in length.
Incorporate multiple shades of white, light gray, and pale blue, letting the colors mix to create the illusion of turbulence and spray.
Contrast the smooth, vertical water with chunky, dark satin-stitched rocks to emphasize the power and motion of the falls.
This technique can turn a simple scene into one of the most stunning embroidered wall hangings.


