

A sofa rarely feels complete with just one or two pillows. But building a collection that feels intentional, rather than cluttered, is an art in itself. This is where your embroidery skills can transform your living space.
Instead of stitching one large, complex piece, think in terms of a family of motifs. A shared color palette, a common theme, or a consistent stitch technique can tie different designs together, allowing you to create a fluid, mix-and-match set that looks curated and deeply personal.
Here, you’ll discover how to use texture, color, and motif placement to build a pillow collection that tells a story. Each idea is a starting point, designed to give you the confidence to adapt, combine, and create a look that is entirely your own.
1. The Art of Tonal Texture
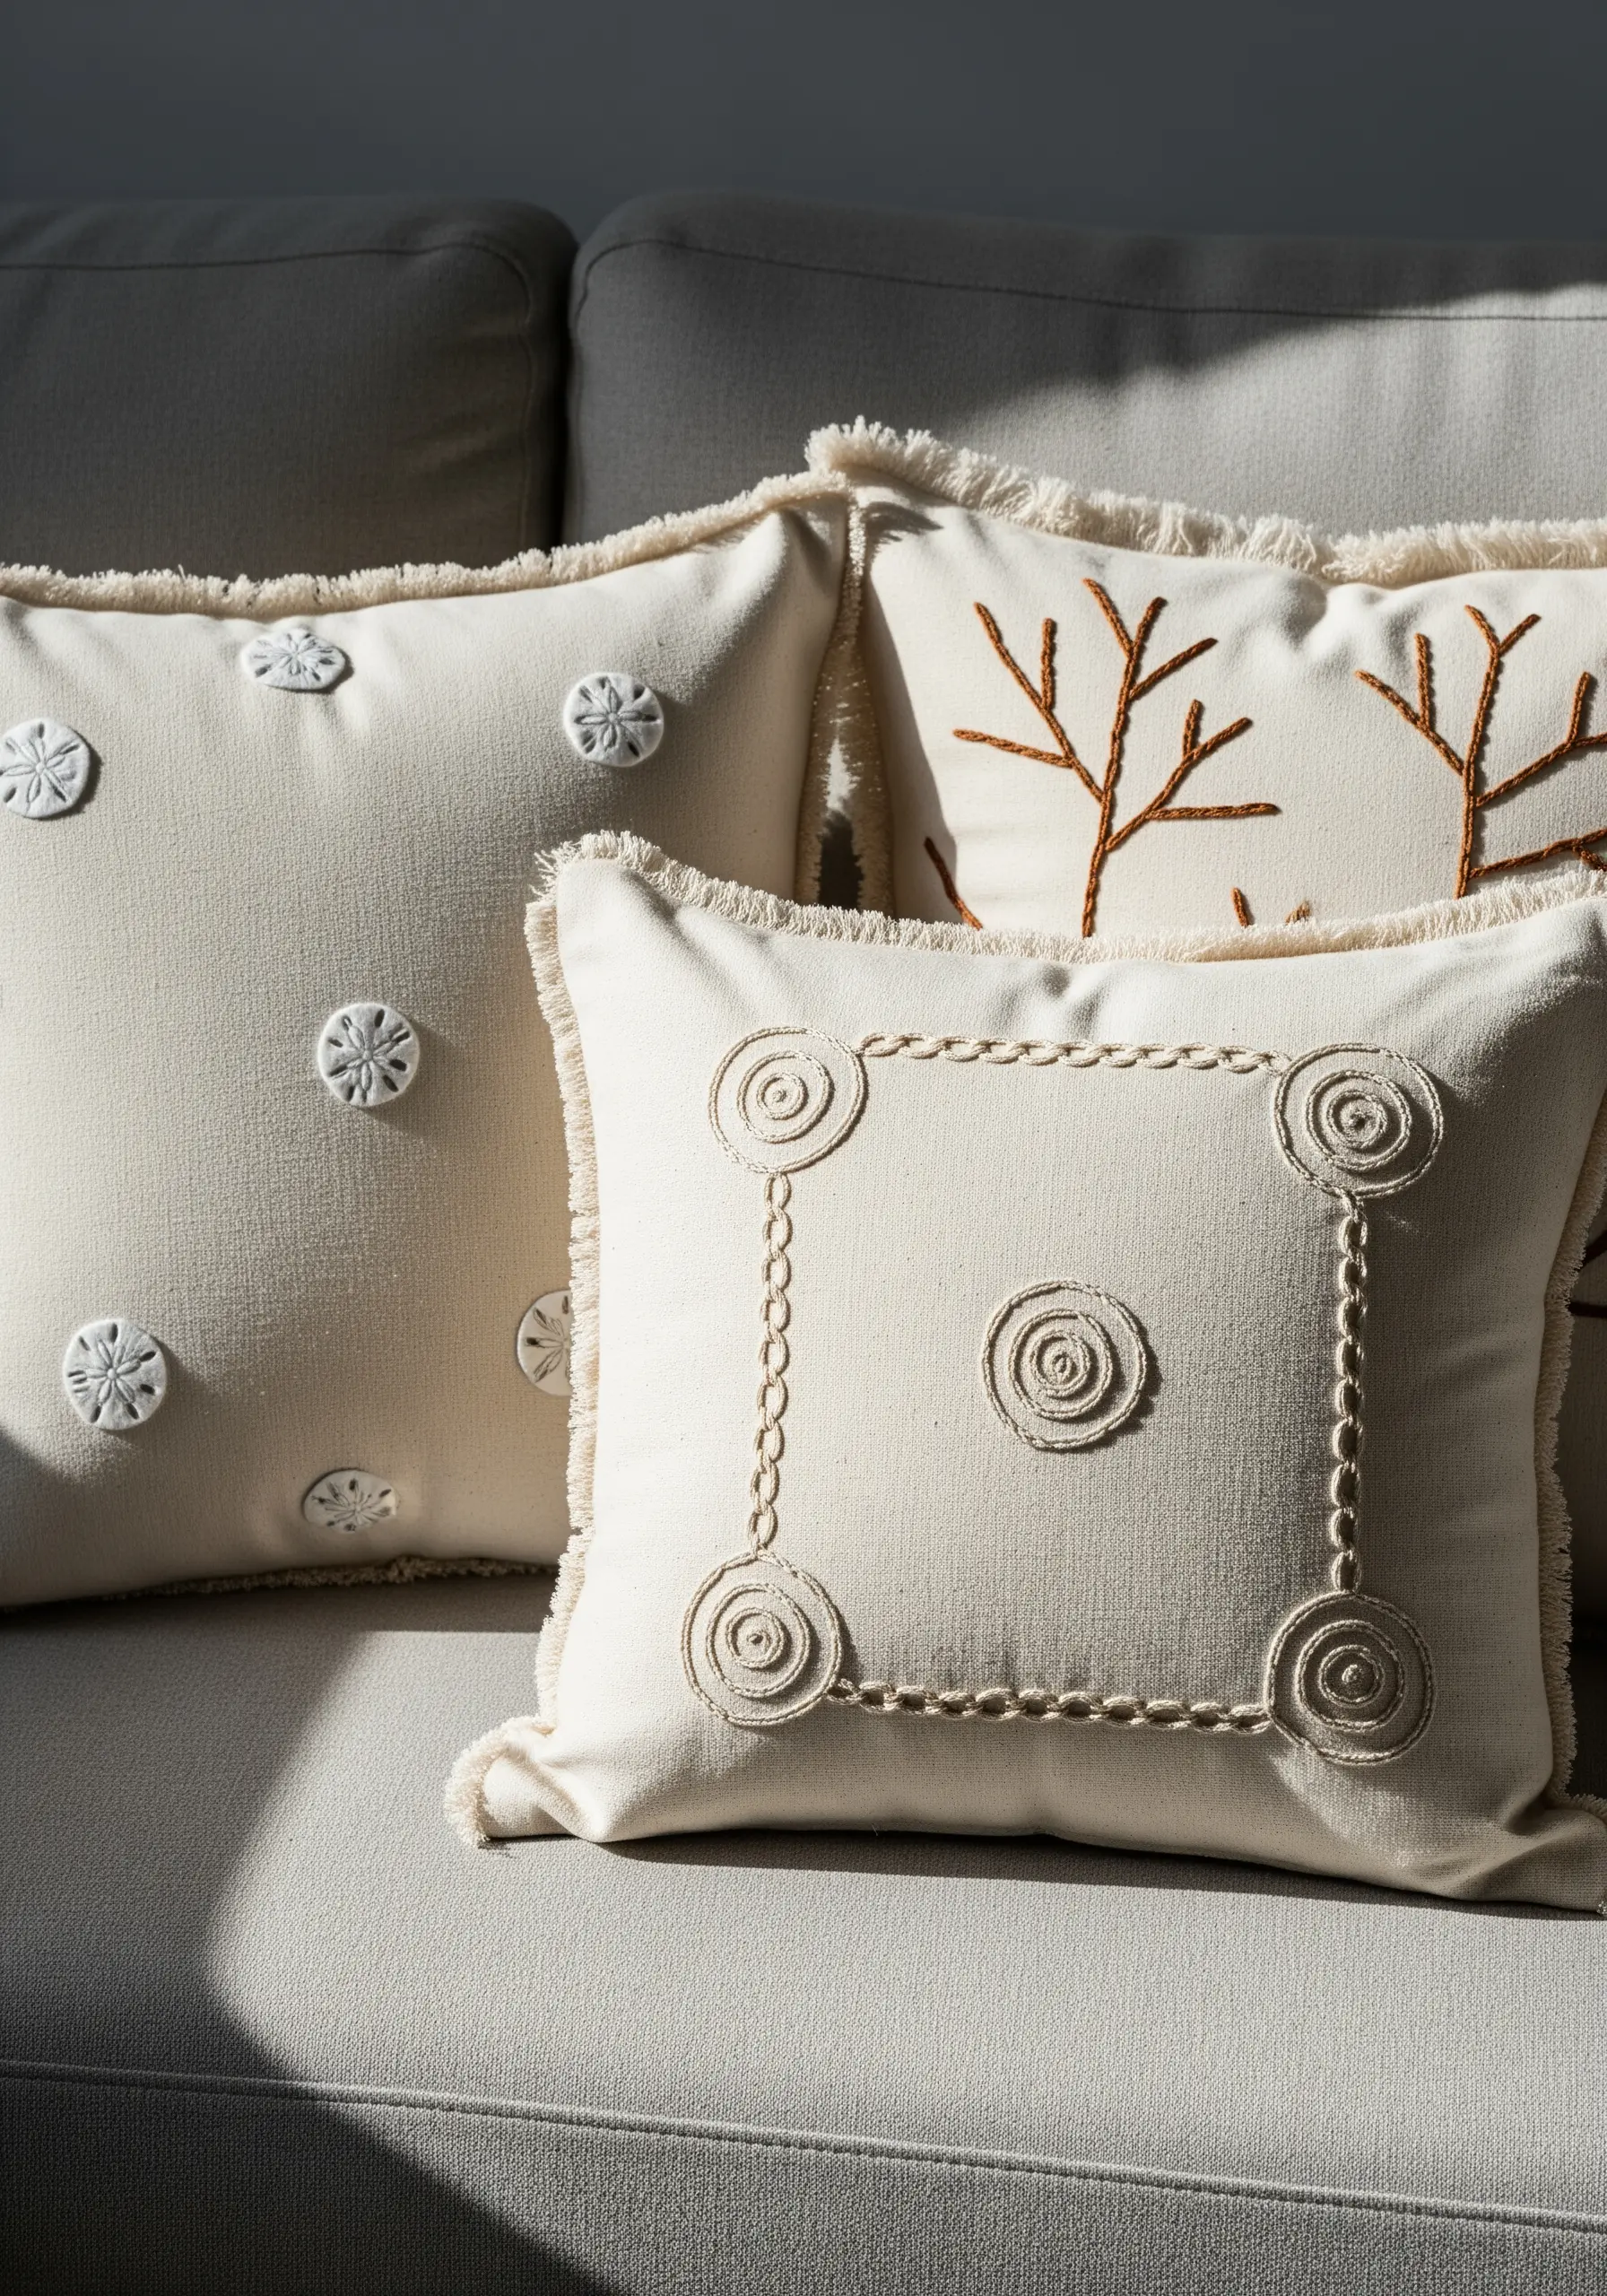
Create sophisticated depth on your pillows by focusing on texture rather than color.
Use a dimensional stitch like the wagon wheel or woven picot to create raised circular medallions that catch the light.
For linear elements, a whipped backstitch or a heavy chain stitch using Perle cotton will produce a raised, rope-like line that adds definition without overwhelming the design.
This approach proves how neutral thread texture combinations can transform simple fabric into a boutique-quality piece.
2. Celestial Sheen on Velvet
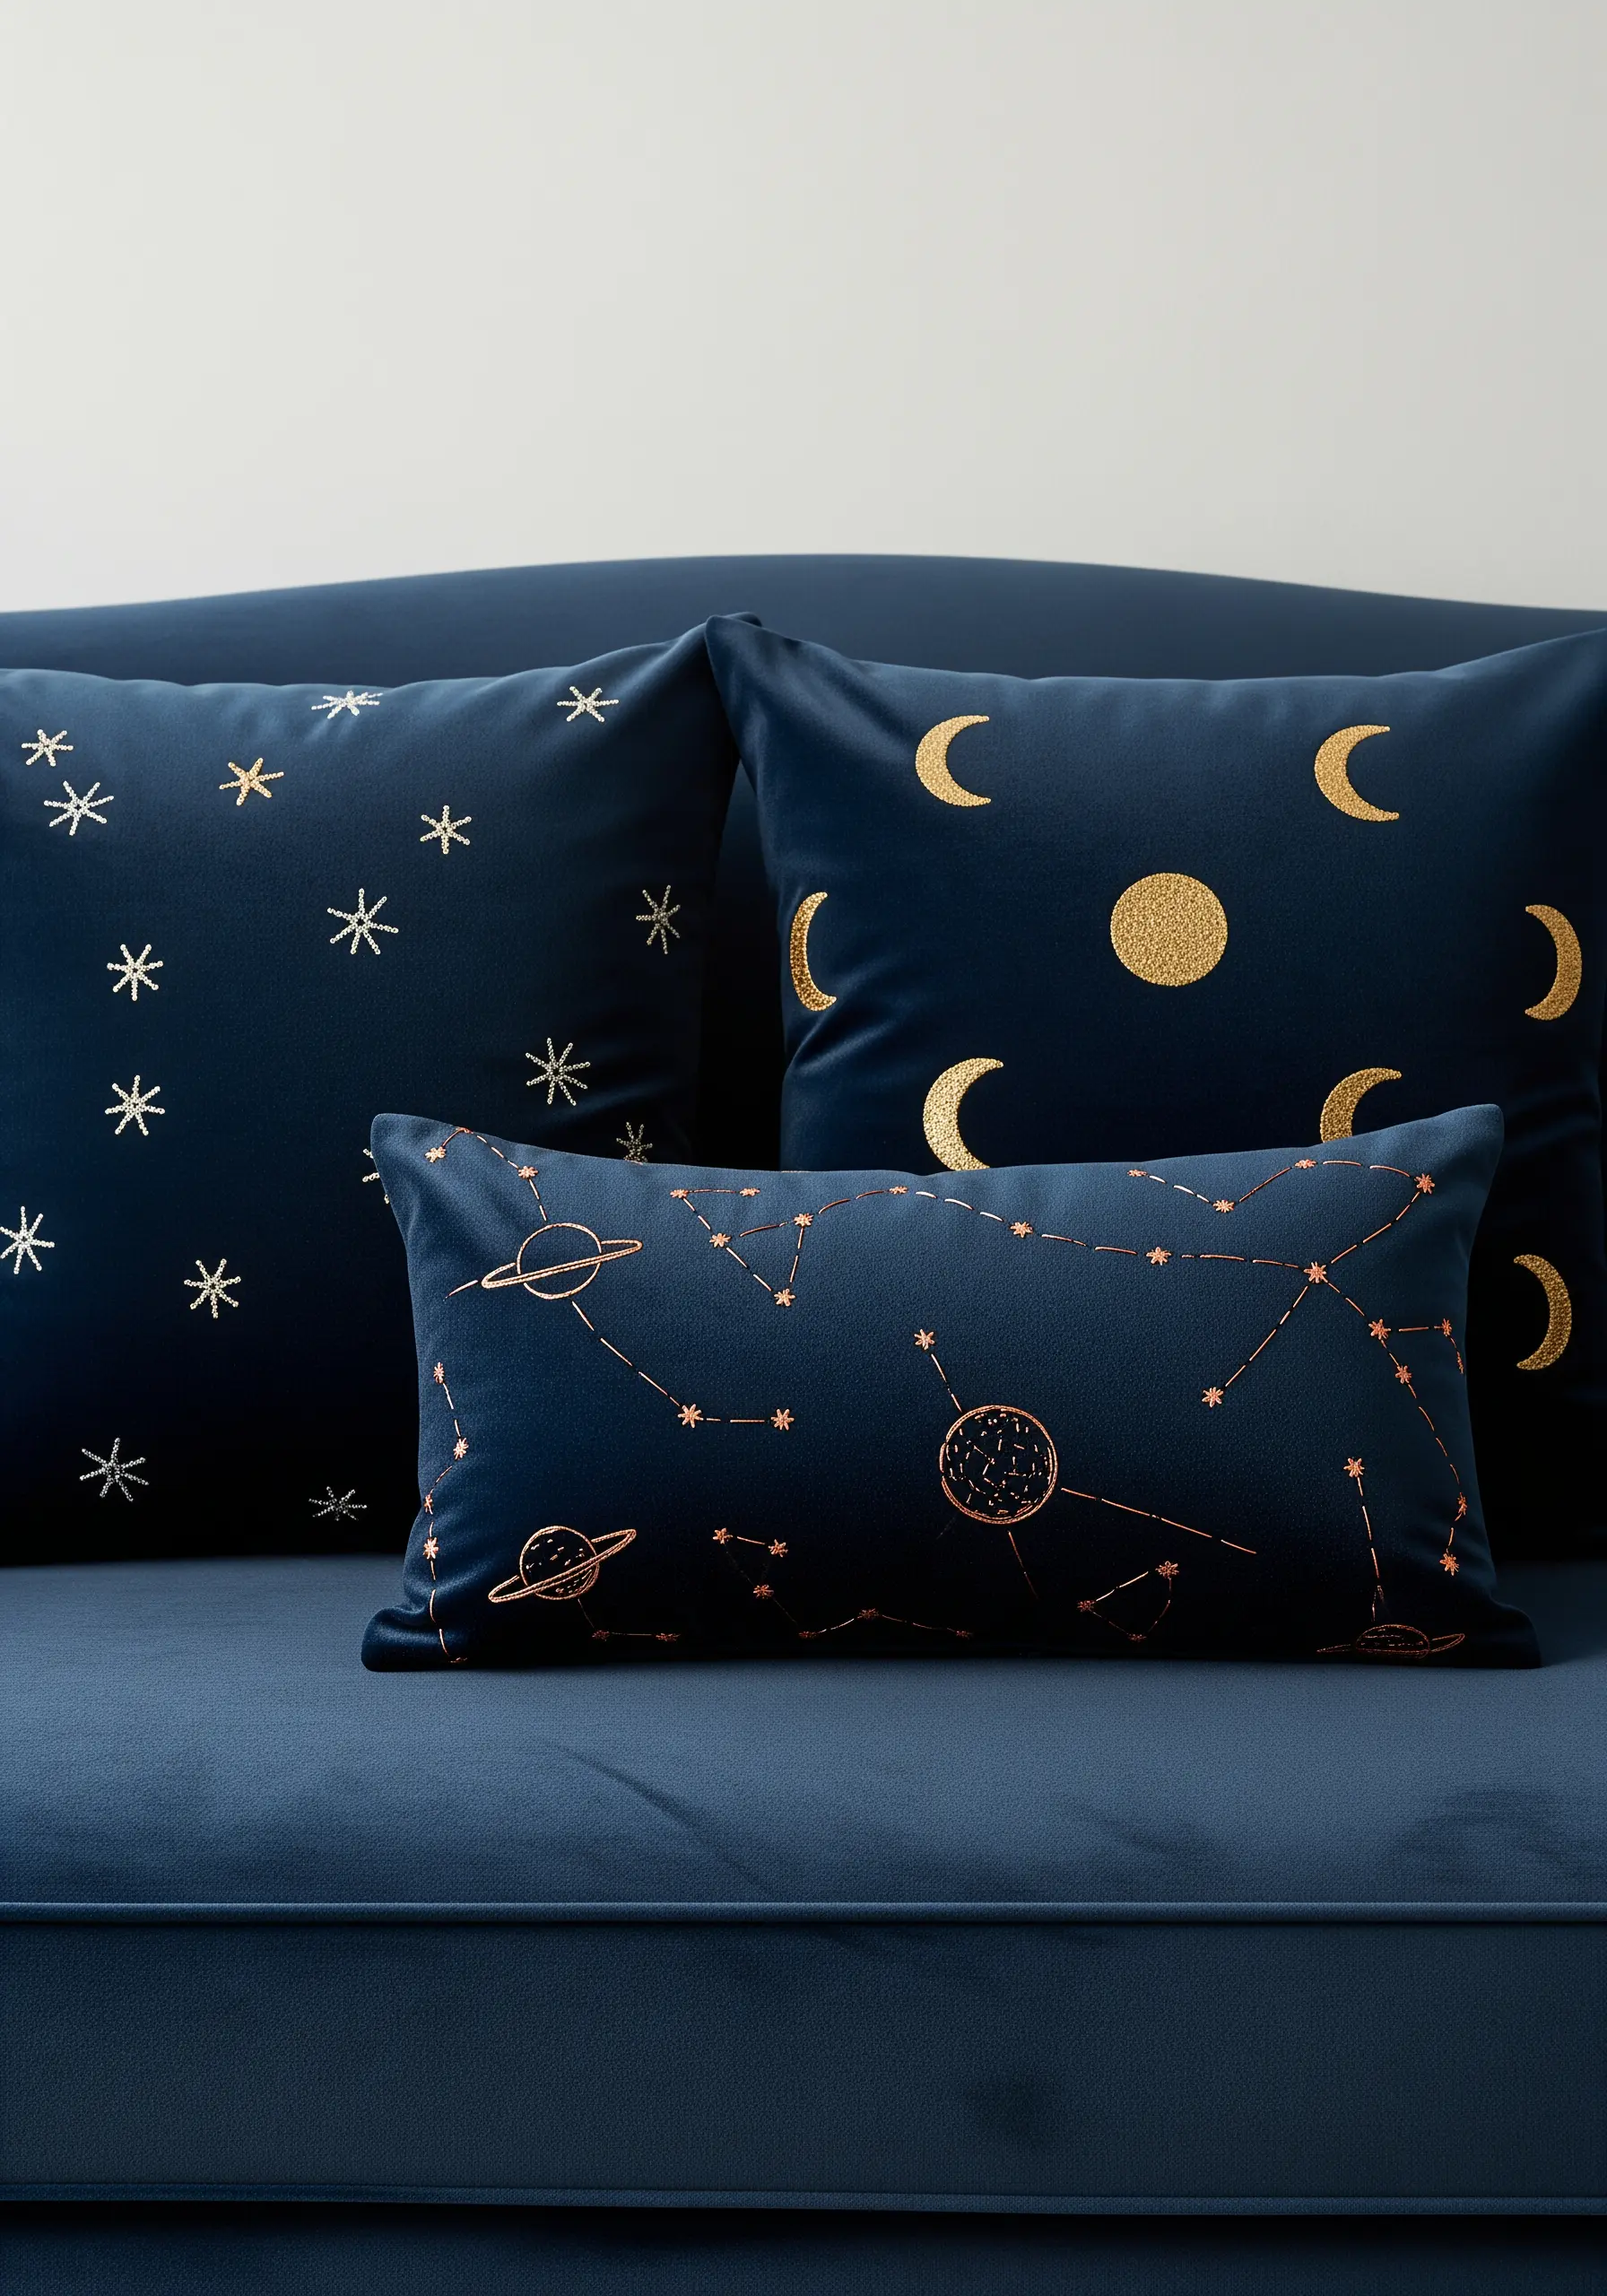
Elevate your design by choosing a fabric with a deep pile, like velvet or velour.
The texture catches the light and makes your metallic threads appear even more luminous.
Use a single strand of metallic floss for delicate starbursts and a couched, thicker metallic yarn for bold crescent moons.
To prevent snagging, work with shorter lengths of metallic thread and use a thread conditioner—this creates a minimal celestial embroidery that feels both modern and magical.
3. Bauhaus-Inspired Geometric Blocks

Create striking visual impact by contrasting bold, flat color fields with delicate line work.
Use a dense satin stitch for the solid shapes, but first, outline each shape with a split stitch.
This provides a slightly raised edge to tuck your satin stitches under, guaranteeing a clean, professional finish.
The primary color palette and sharp geometry make these abstract shapes for pillow covers feel graphic and intentional.
4. Playful Woodland Repeats
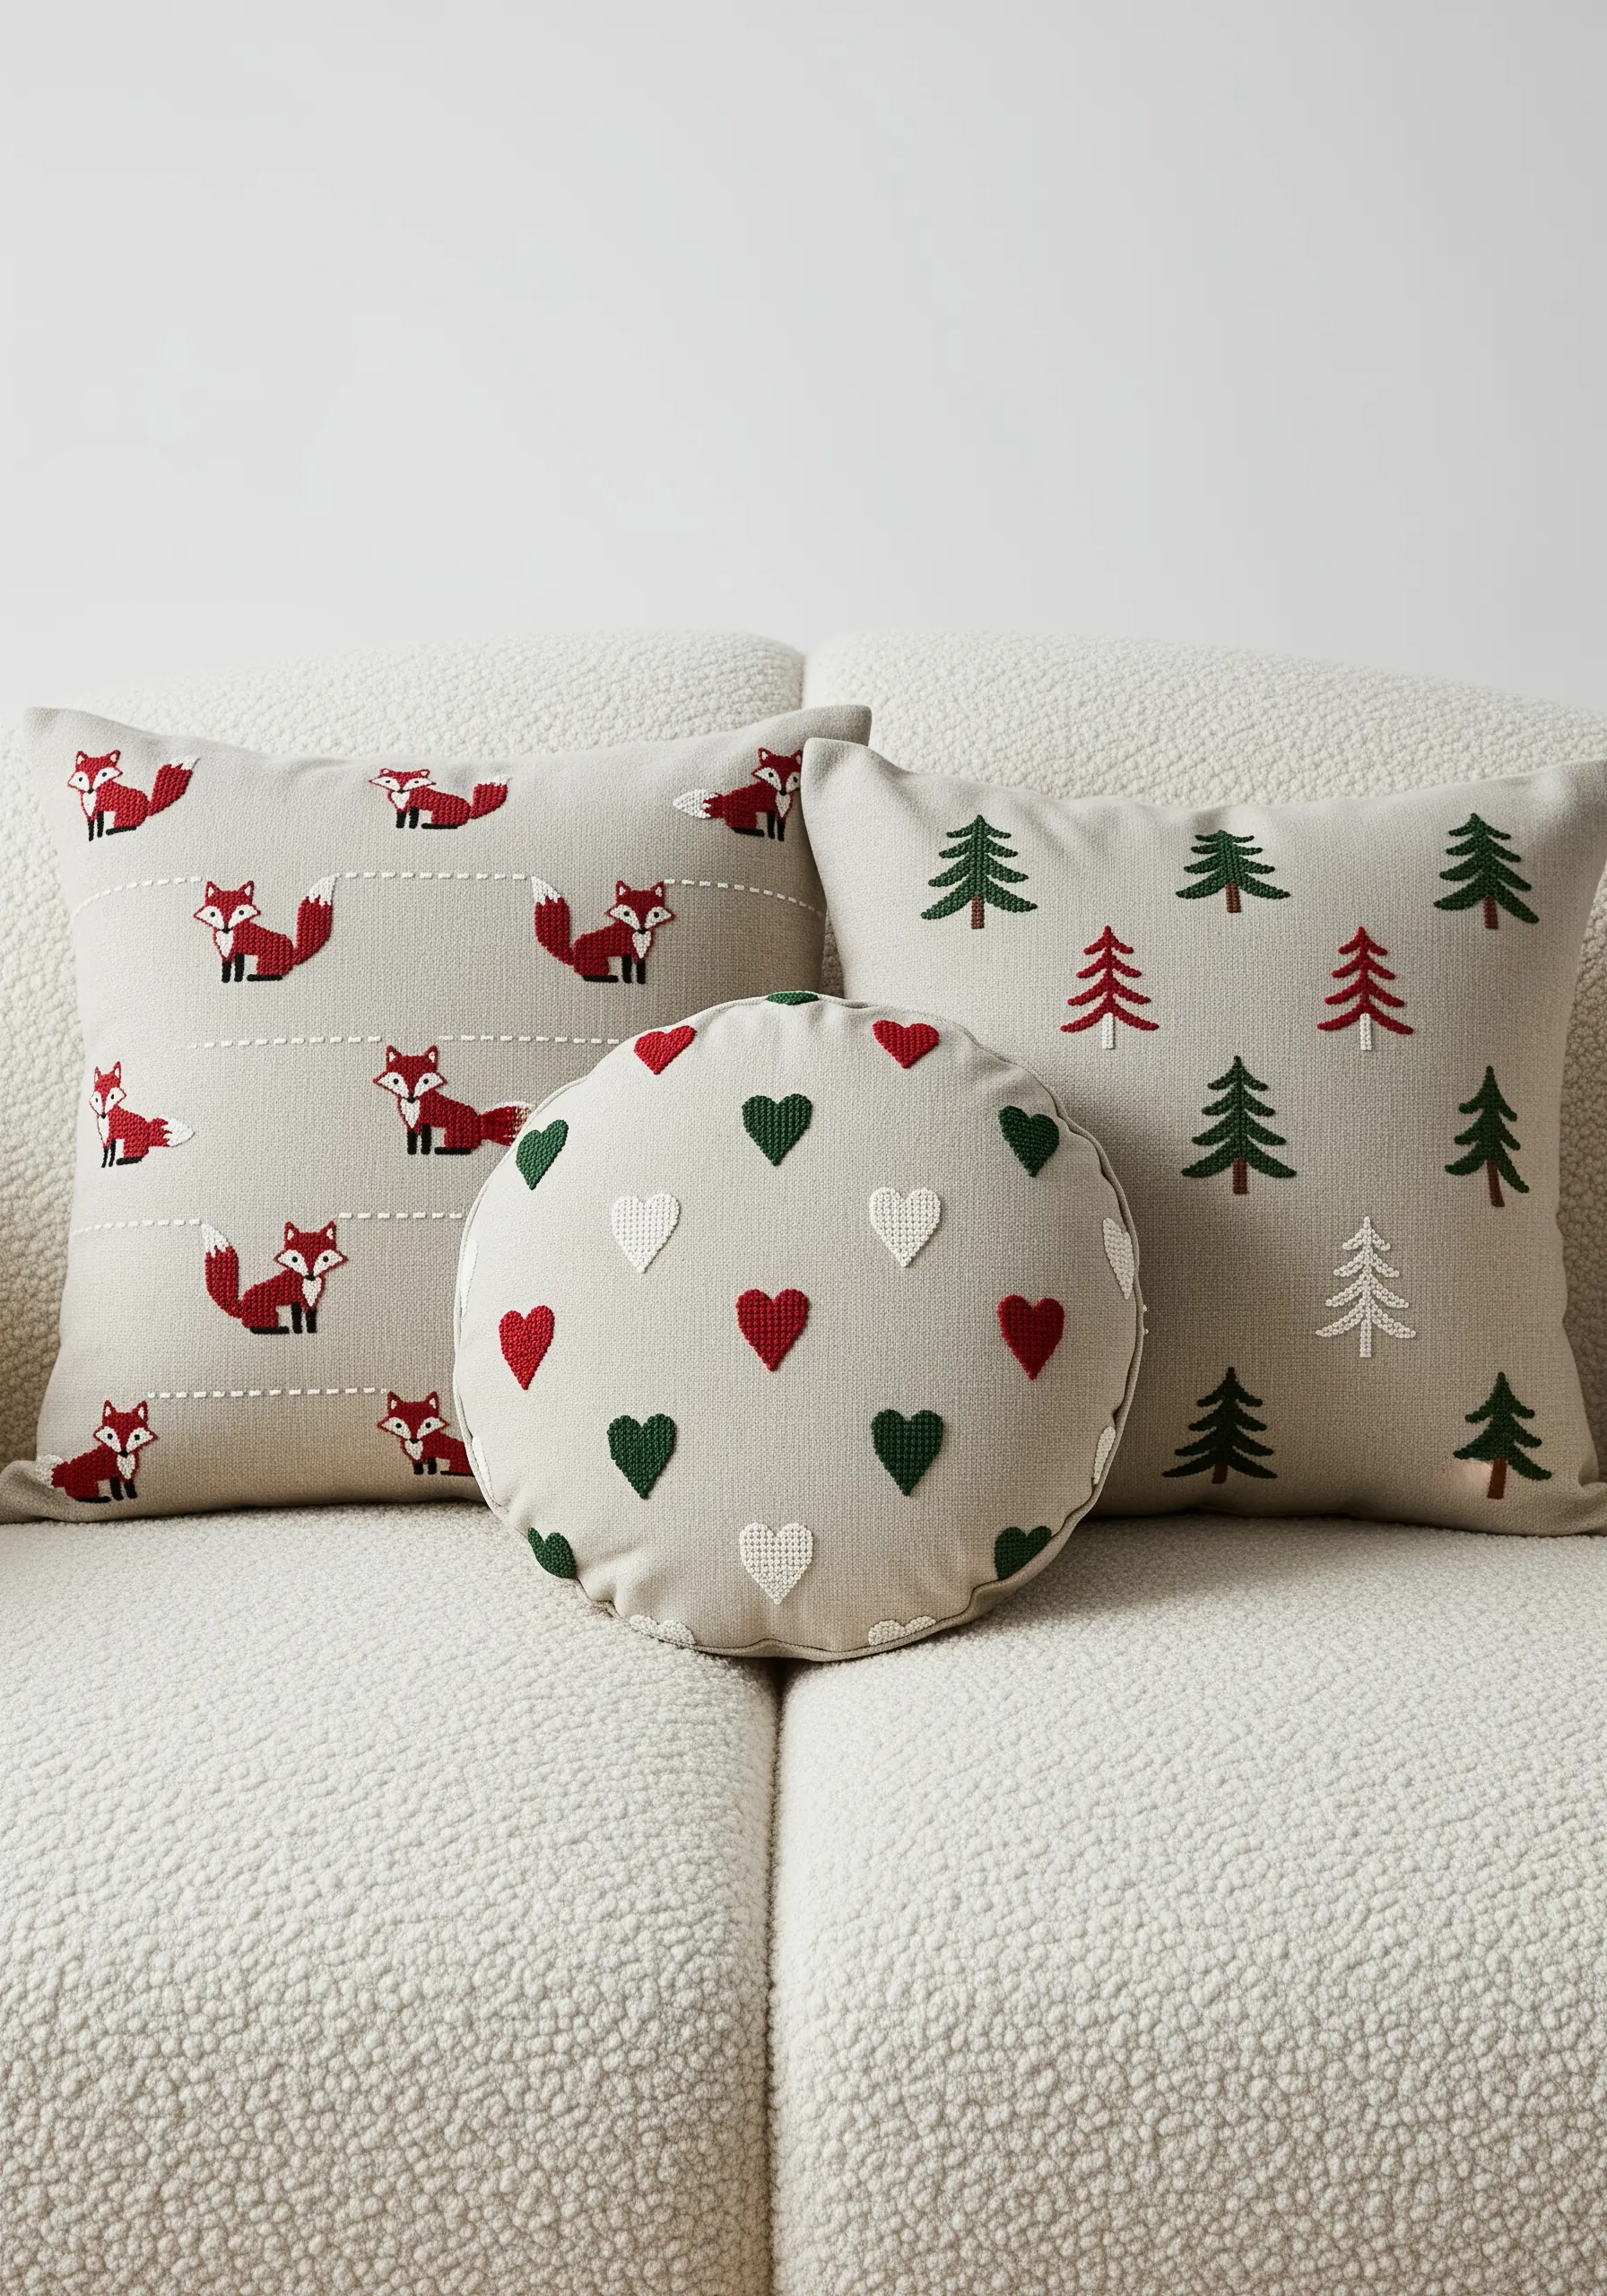
To create a cohesive set from multiple motifs, establish a simple repeat pattern.
The key to making this look polished is consistency in size and spacing, so use a transferable pen and a template for your foxes and trees to ensure uniformity.
For the filled hearts, a padded satin stitch—using a base of small straight stitches—will give them a subtle, three-dimensional lift from the fabric surface.
5. Tropical Modernism in Satin Stitch
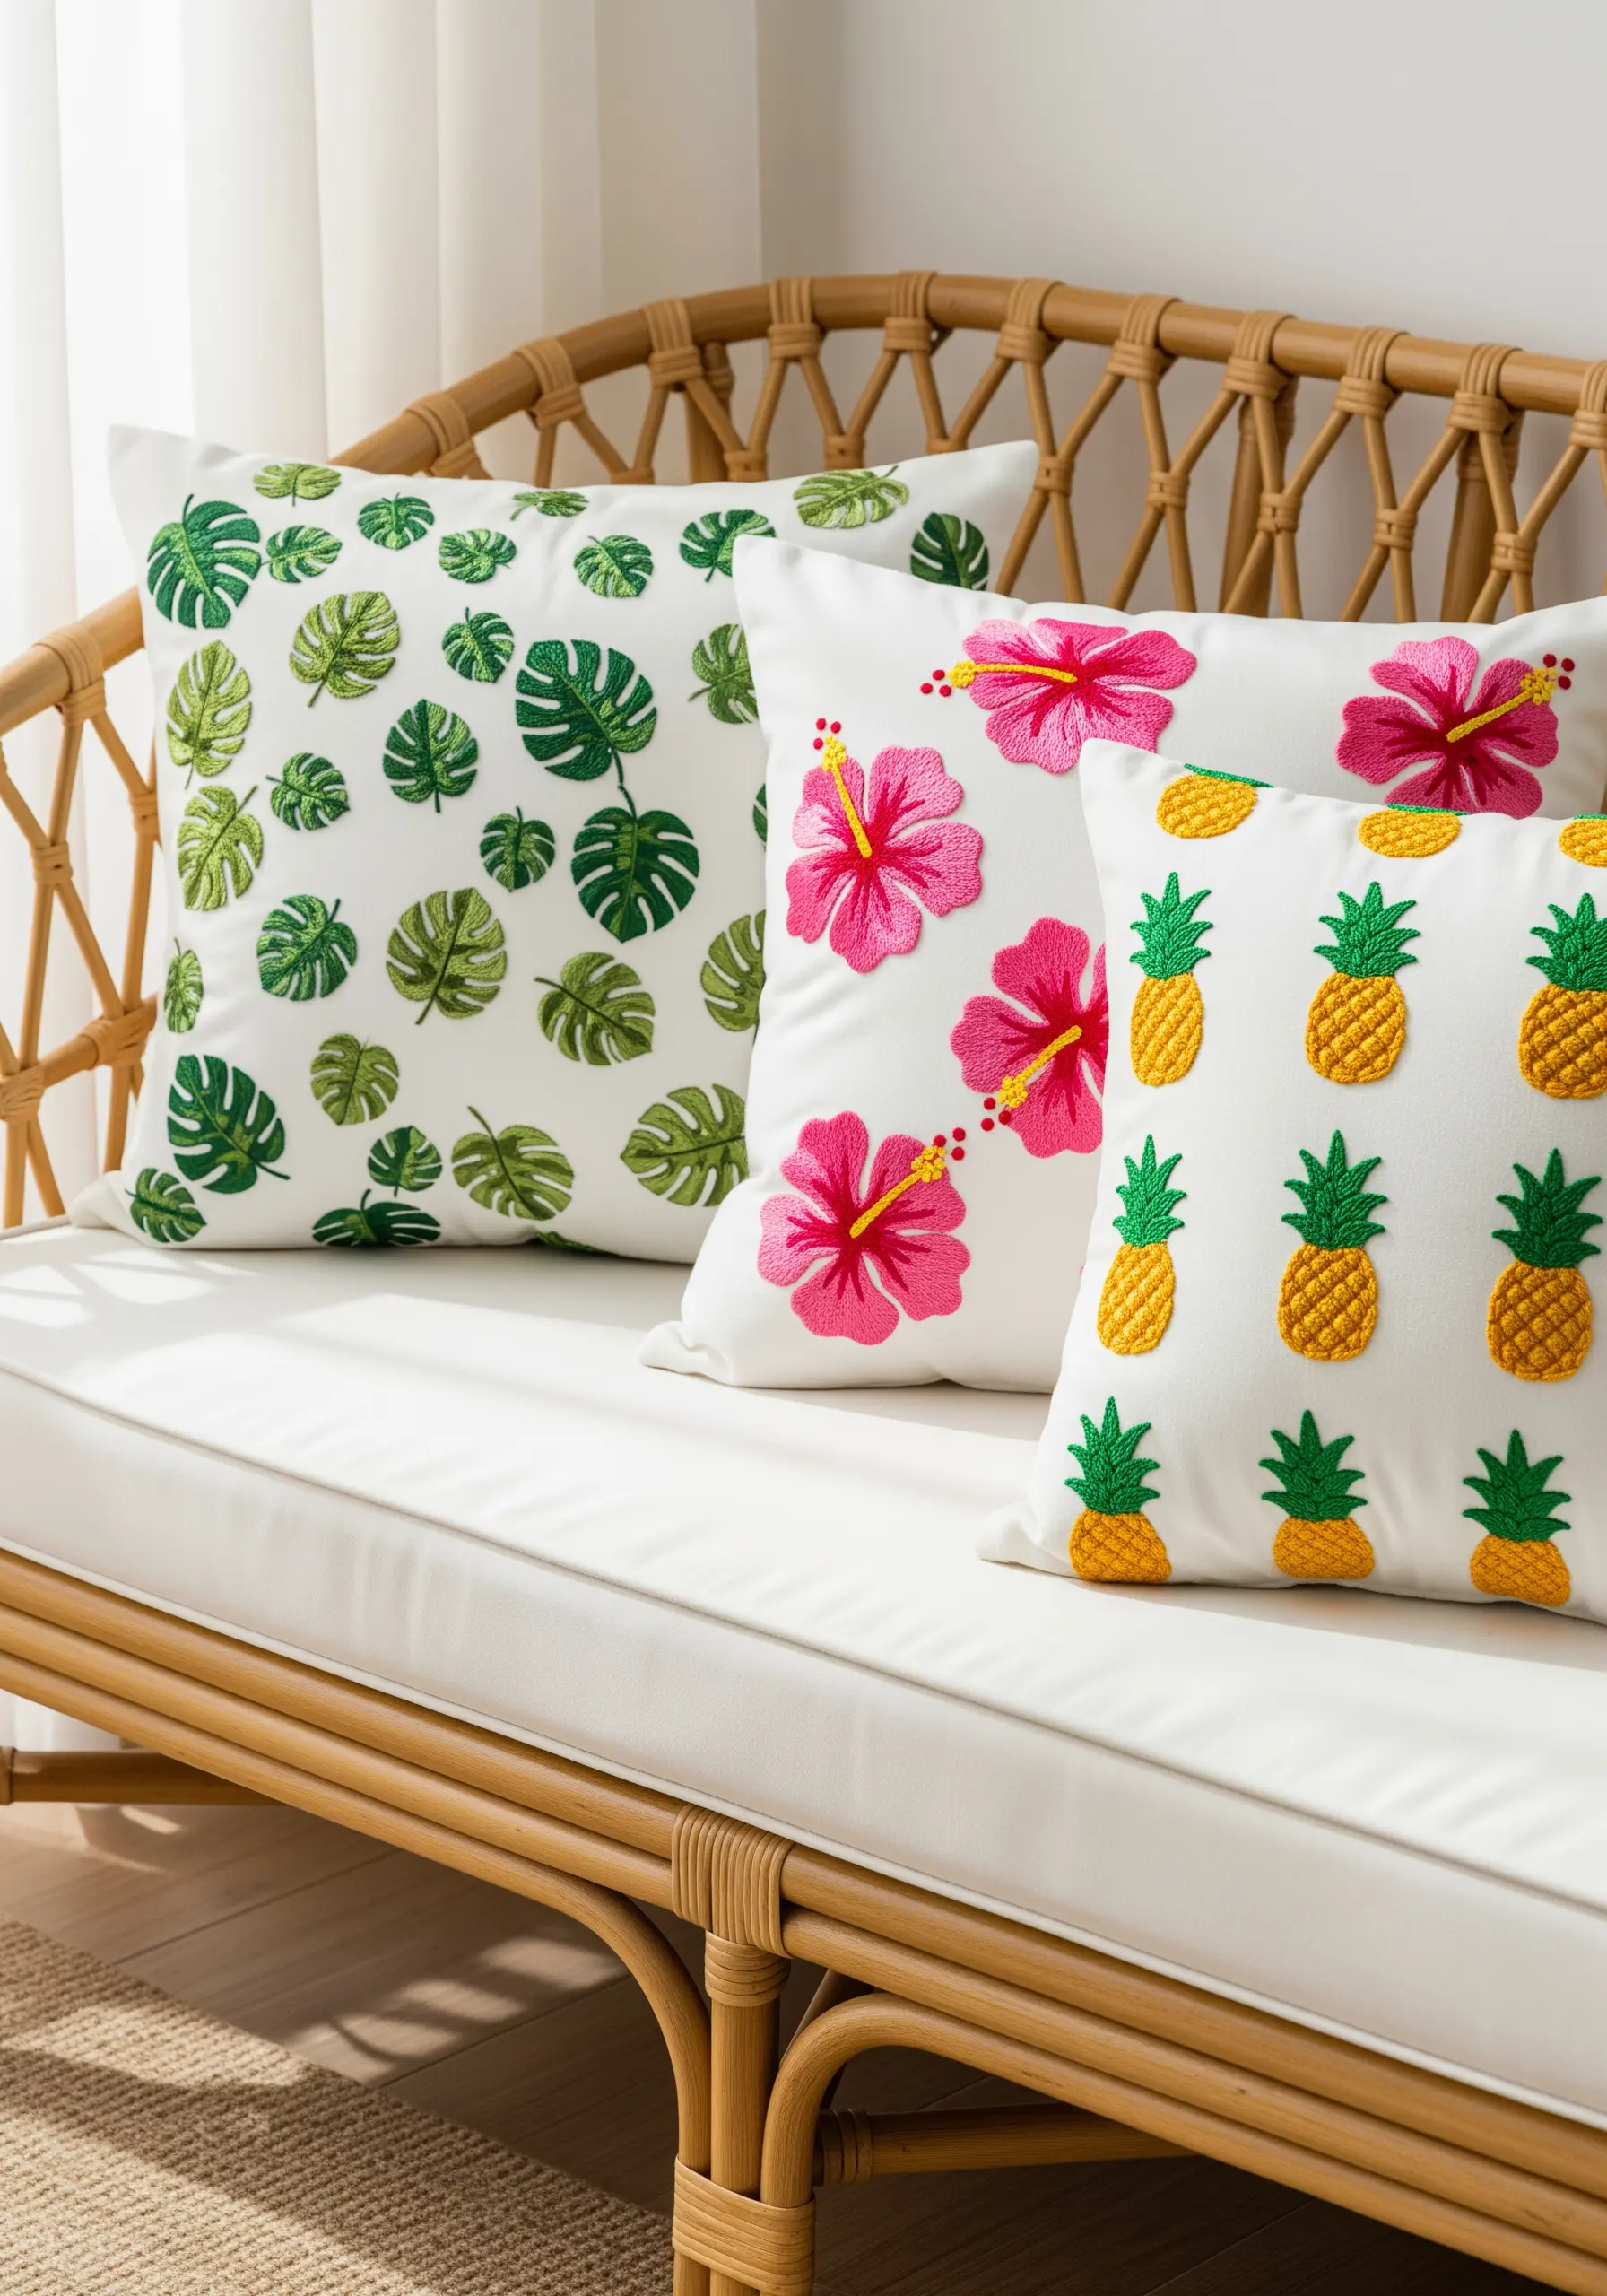
Achieve a clean, modern botanical look by focusing on shape and immaculate color blocking.
Use long-and-short stitch to fill the hibiscus petals, blending two shades of pink for a soft gradient that adds realism.
For the pineapples, combine a yellow satin stitch base with a grid of brown backstitches on top to suggest texture without adding bulk.
This layering technique transforms simple plant-inspired embroidery patterns into fresh and vibrant statements.
6. Art Deco Glamour with Beading
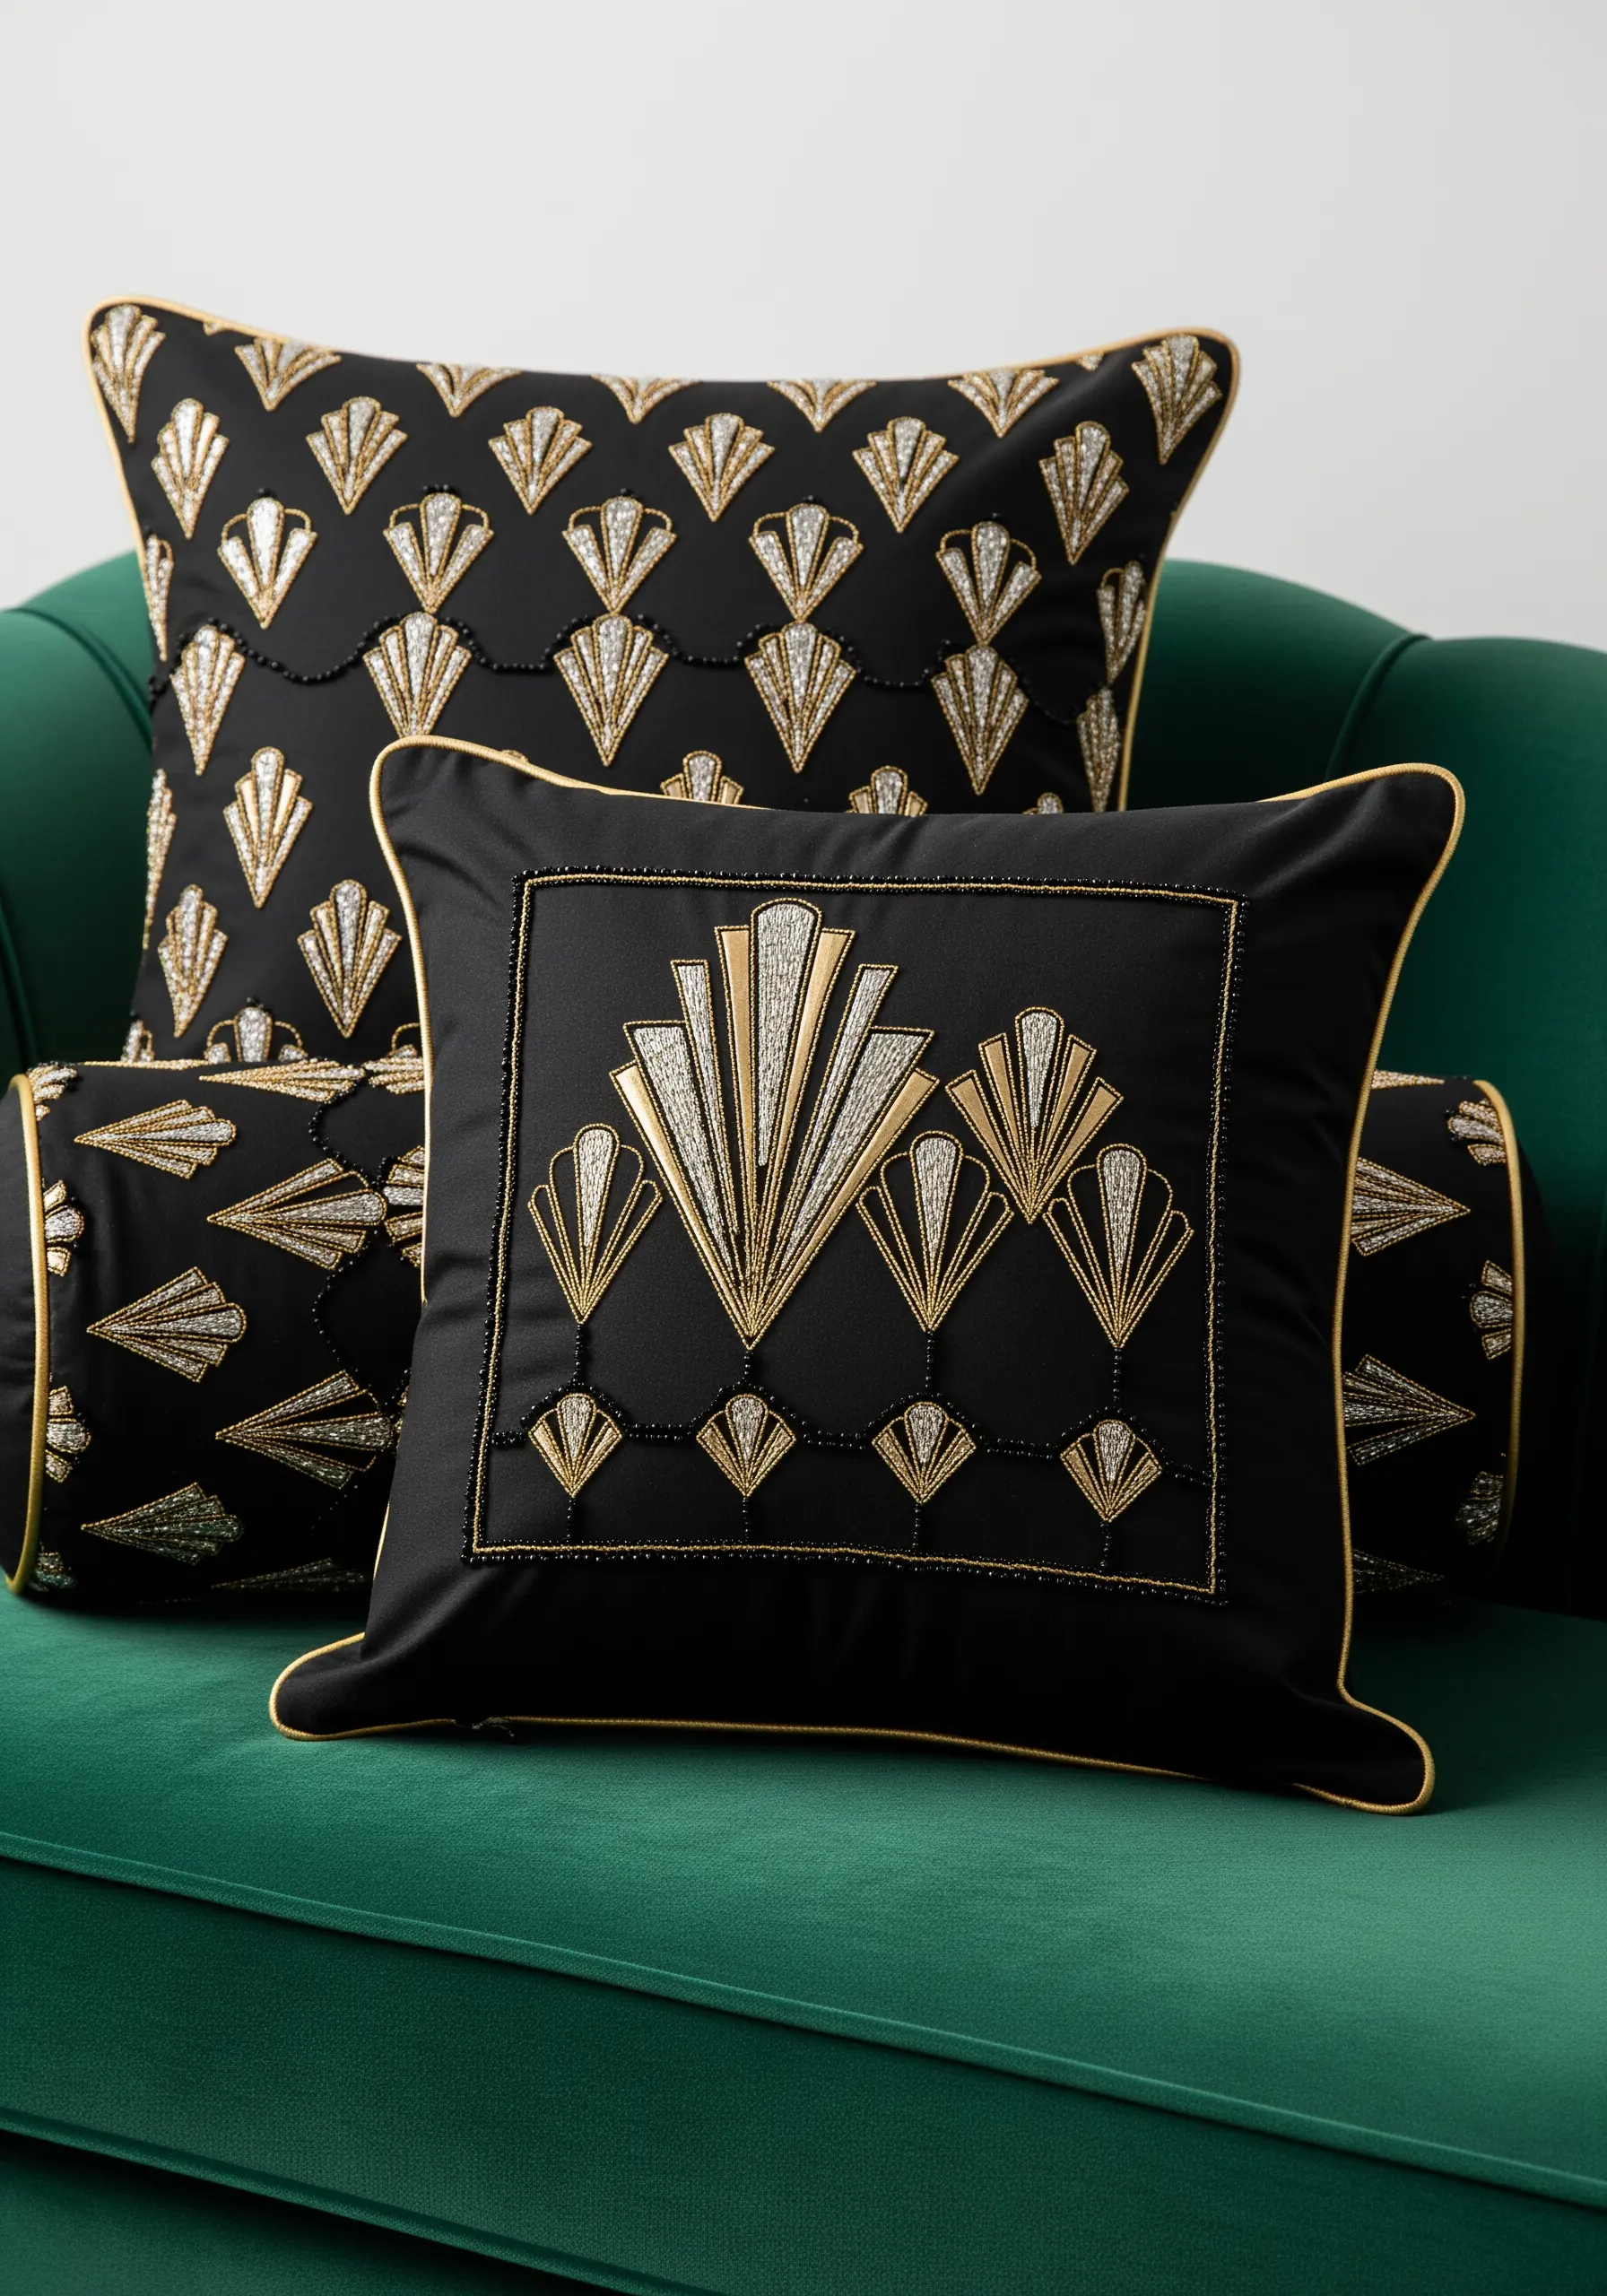
Introduce a touch of opulence by combining metallic threads with strategic beadwork.
Use silver bugle beads to outline the radiating lines of the fan motif; they catch the light and add crisp structure.
Fill the inner segments with a satin stitch using a high-shine gold thread for a beautiful contrast between smooth floss and sharp, reflective beads.
Finish with a simple gold cord piping around the pillow’s edge for a tailored, professional look.
7. Desert Botanicals in Earth Tones
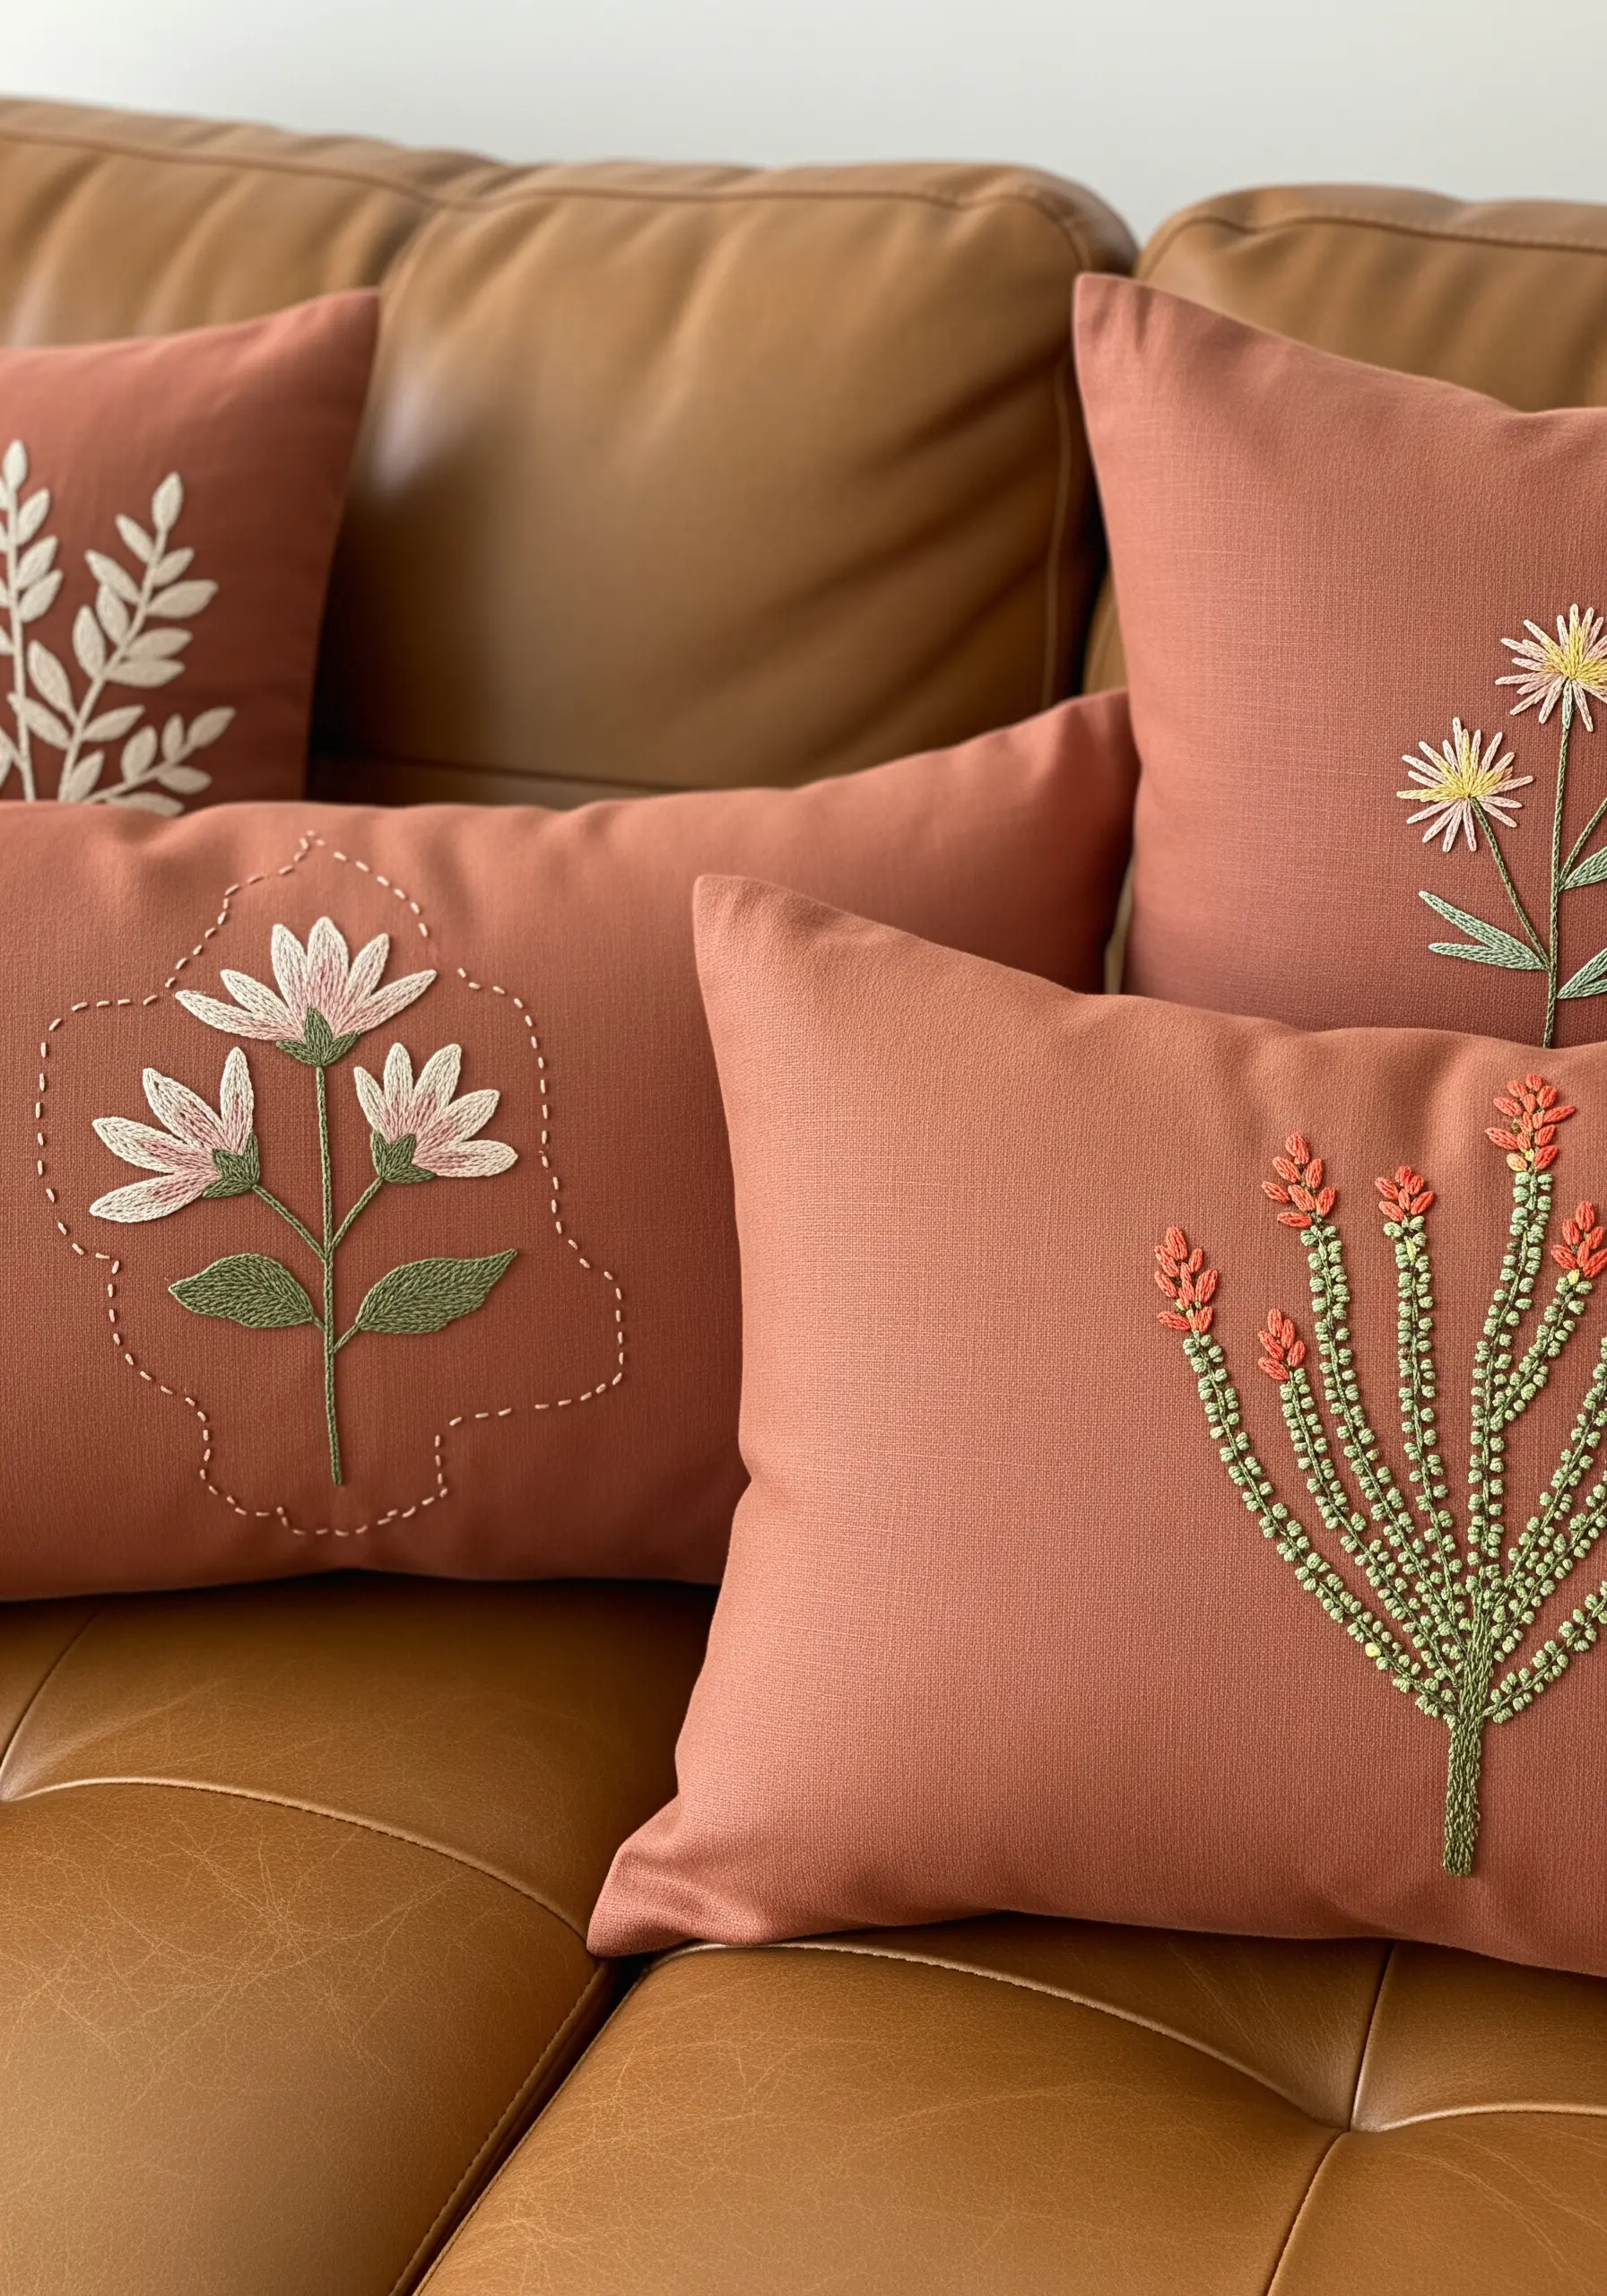
Capture the delicate feel of desert flora by intentionally varying your stitch textures across a single pillow collection.
For the spiky plant, use hundreds of tiny seed stitches or French knots in a vibrant orange to create a pointillist effect.
For the broader petals, a directional satin stitch mimics natural growth patterns.
By keeping the color palette warm and earthy, you can unify wildly different motifs into one harmonious collection of subtle earth-tone embroidery designs.
8. Indigo & Ivory: Japanese-Inspired Contrast
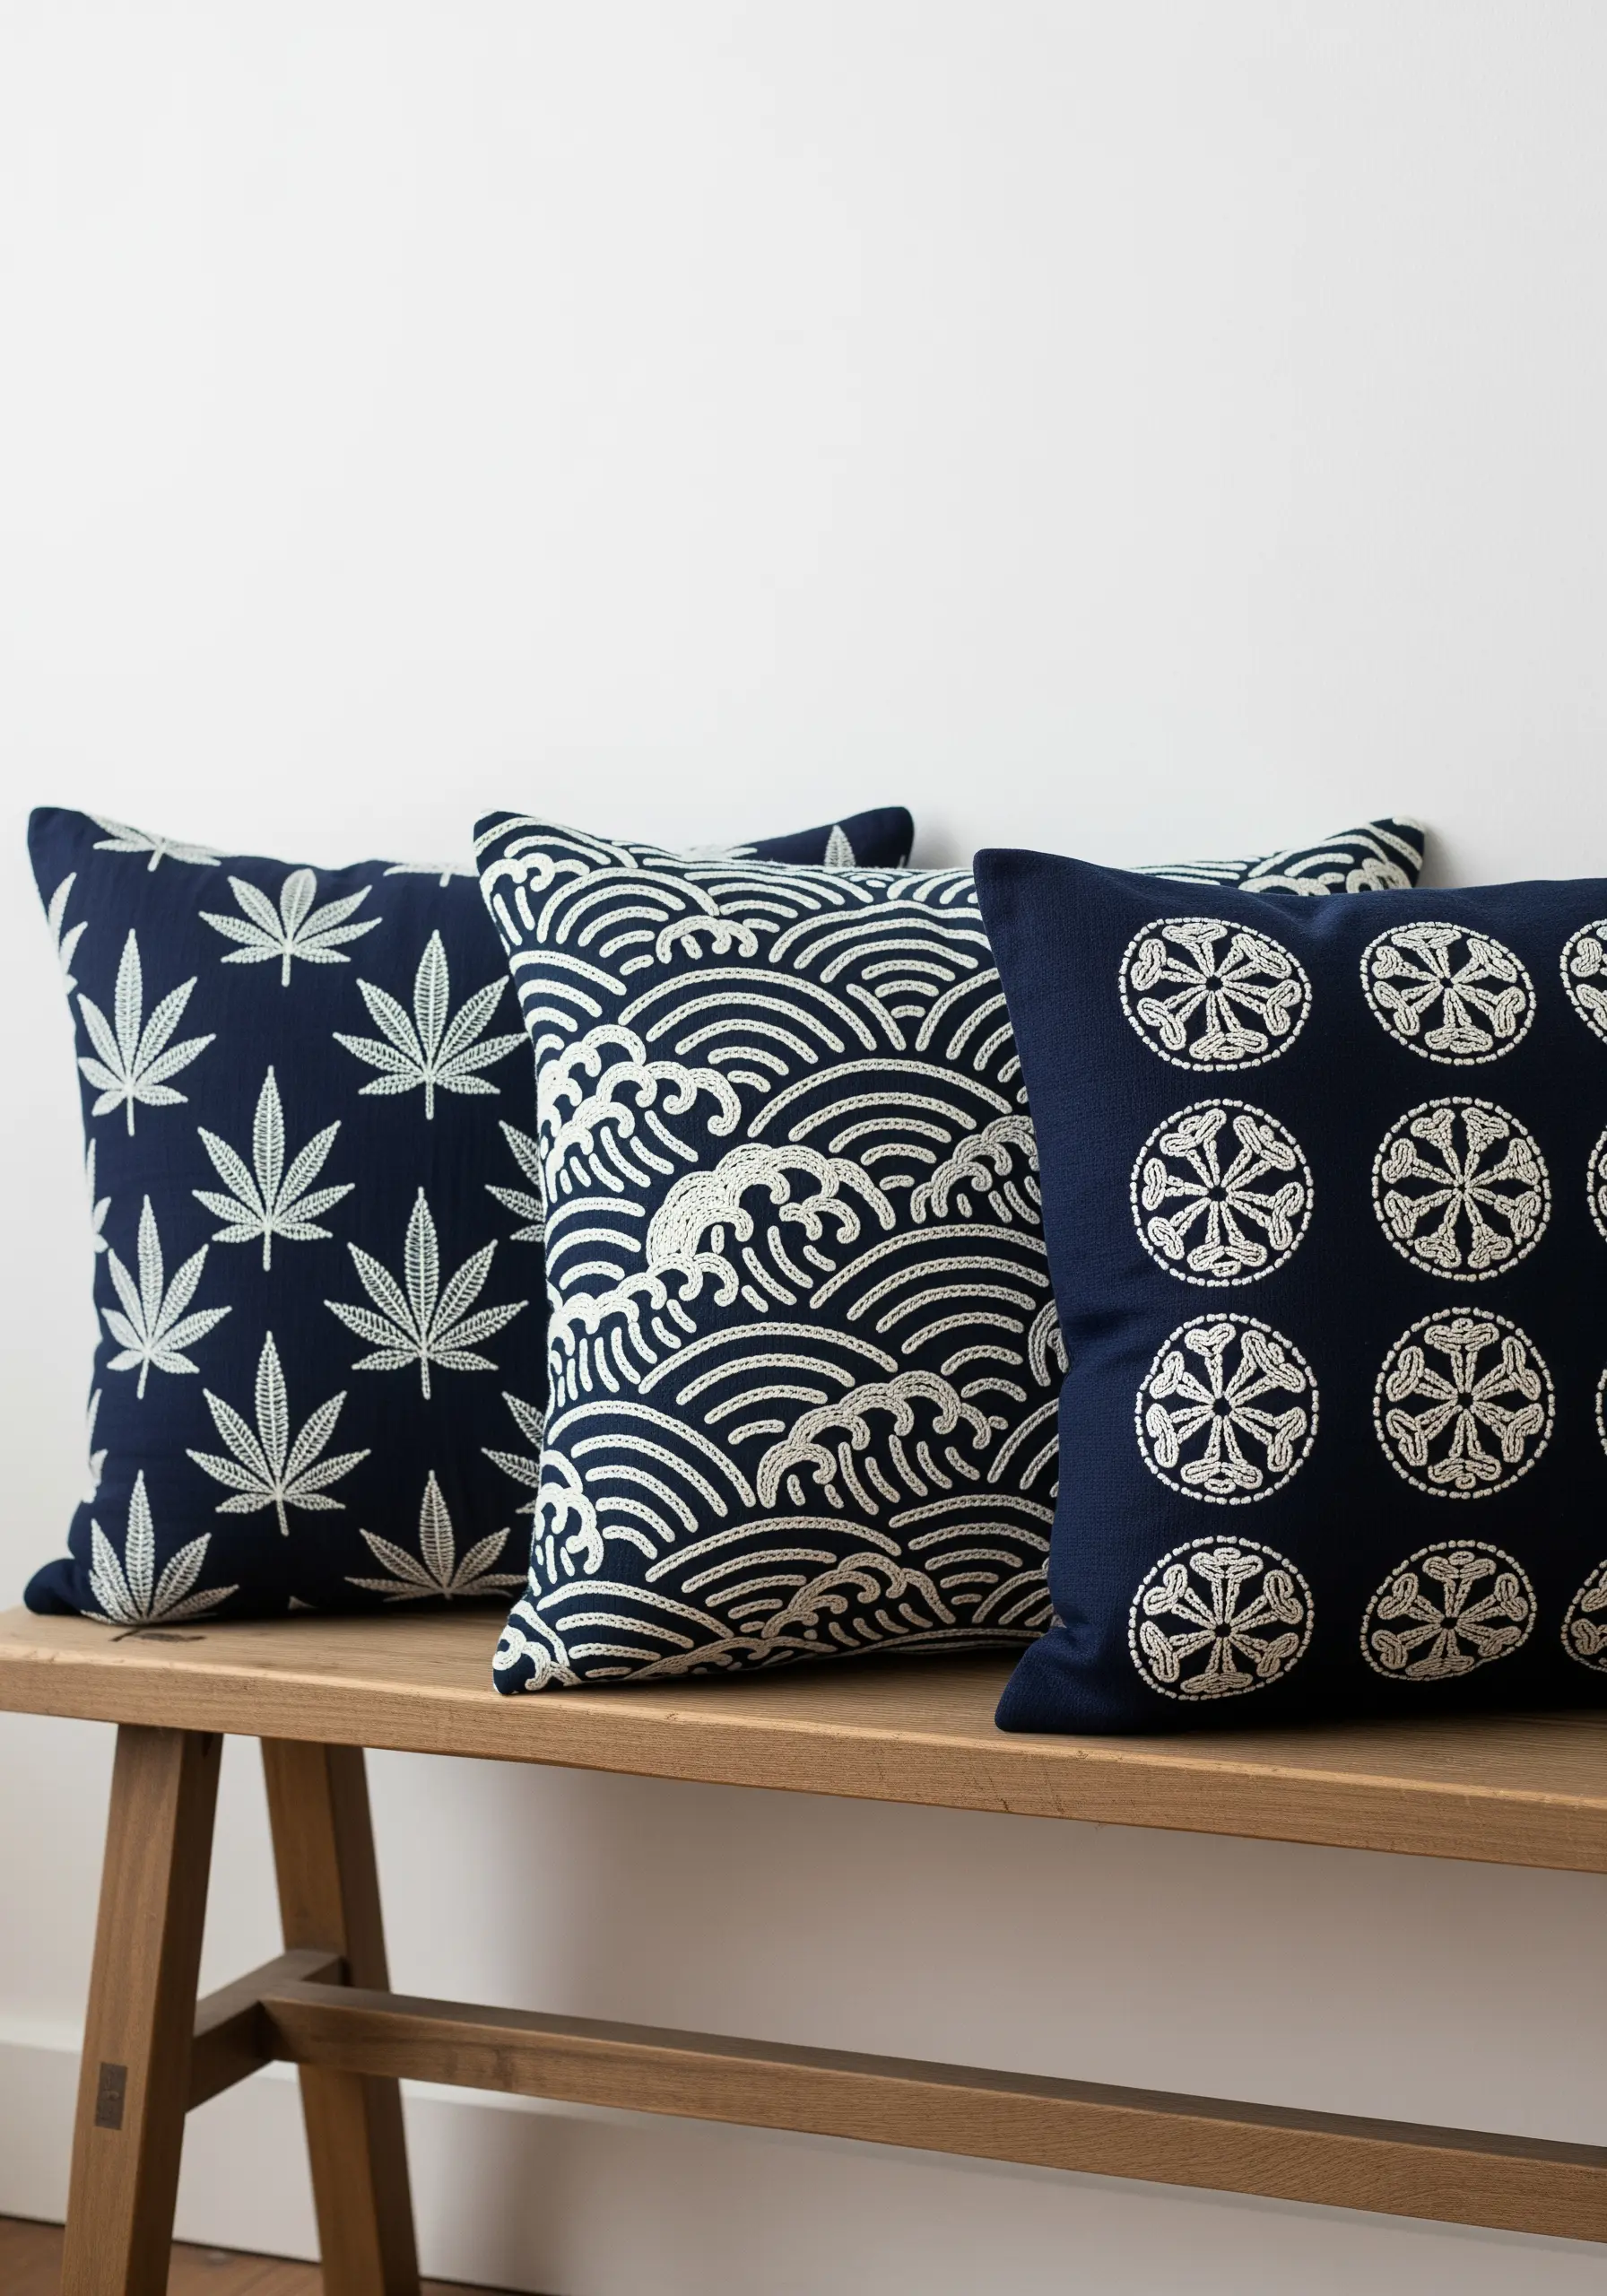
Explore the power of high-contrast design using traditional Japanese patterns for a bold, graphic effect.
The famous Seigaiha wave motif is perfect for practicing curved stem stitch, which creates a smooth, rope-like texture that flows beautifully.
For the geometric crests, a dense satin stitch will give the shapes a solid, clean finish.
Using only a single color thread against dark indigo fabric makes a timeless and striking visual statement.
9. A Meadow on Muted Fabric
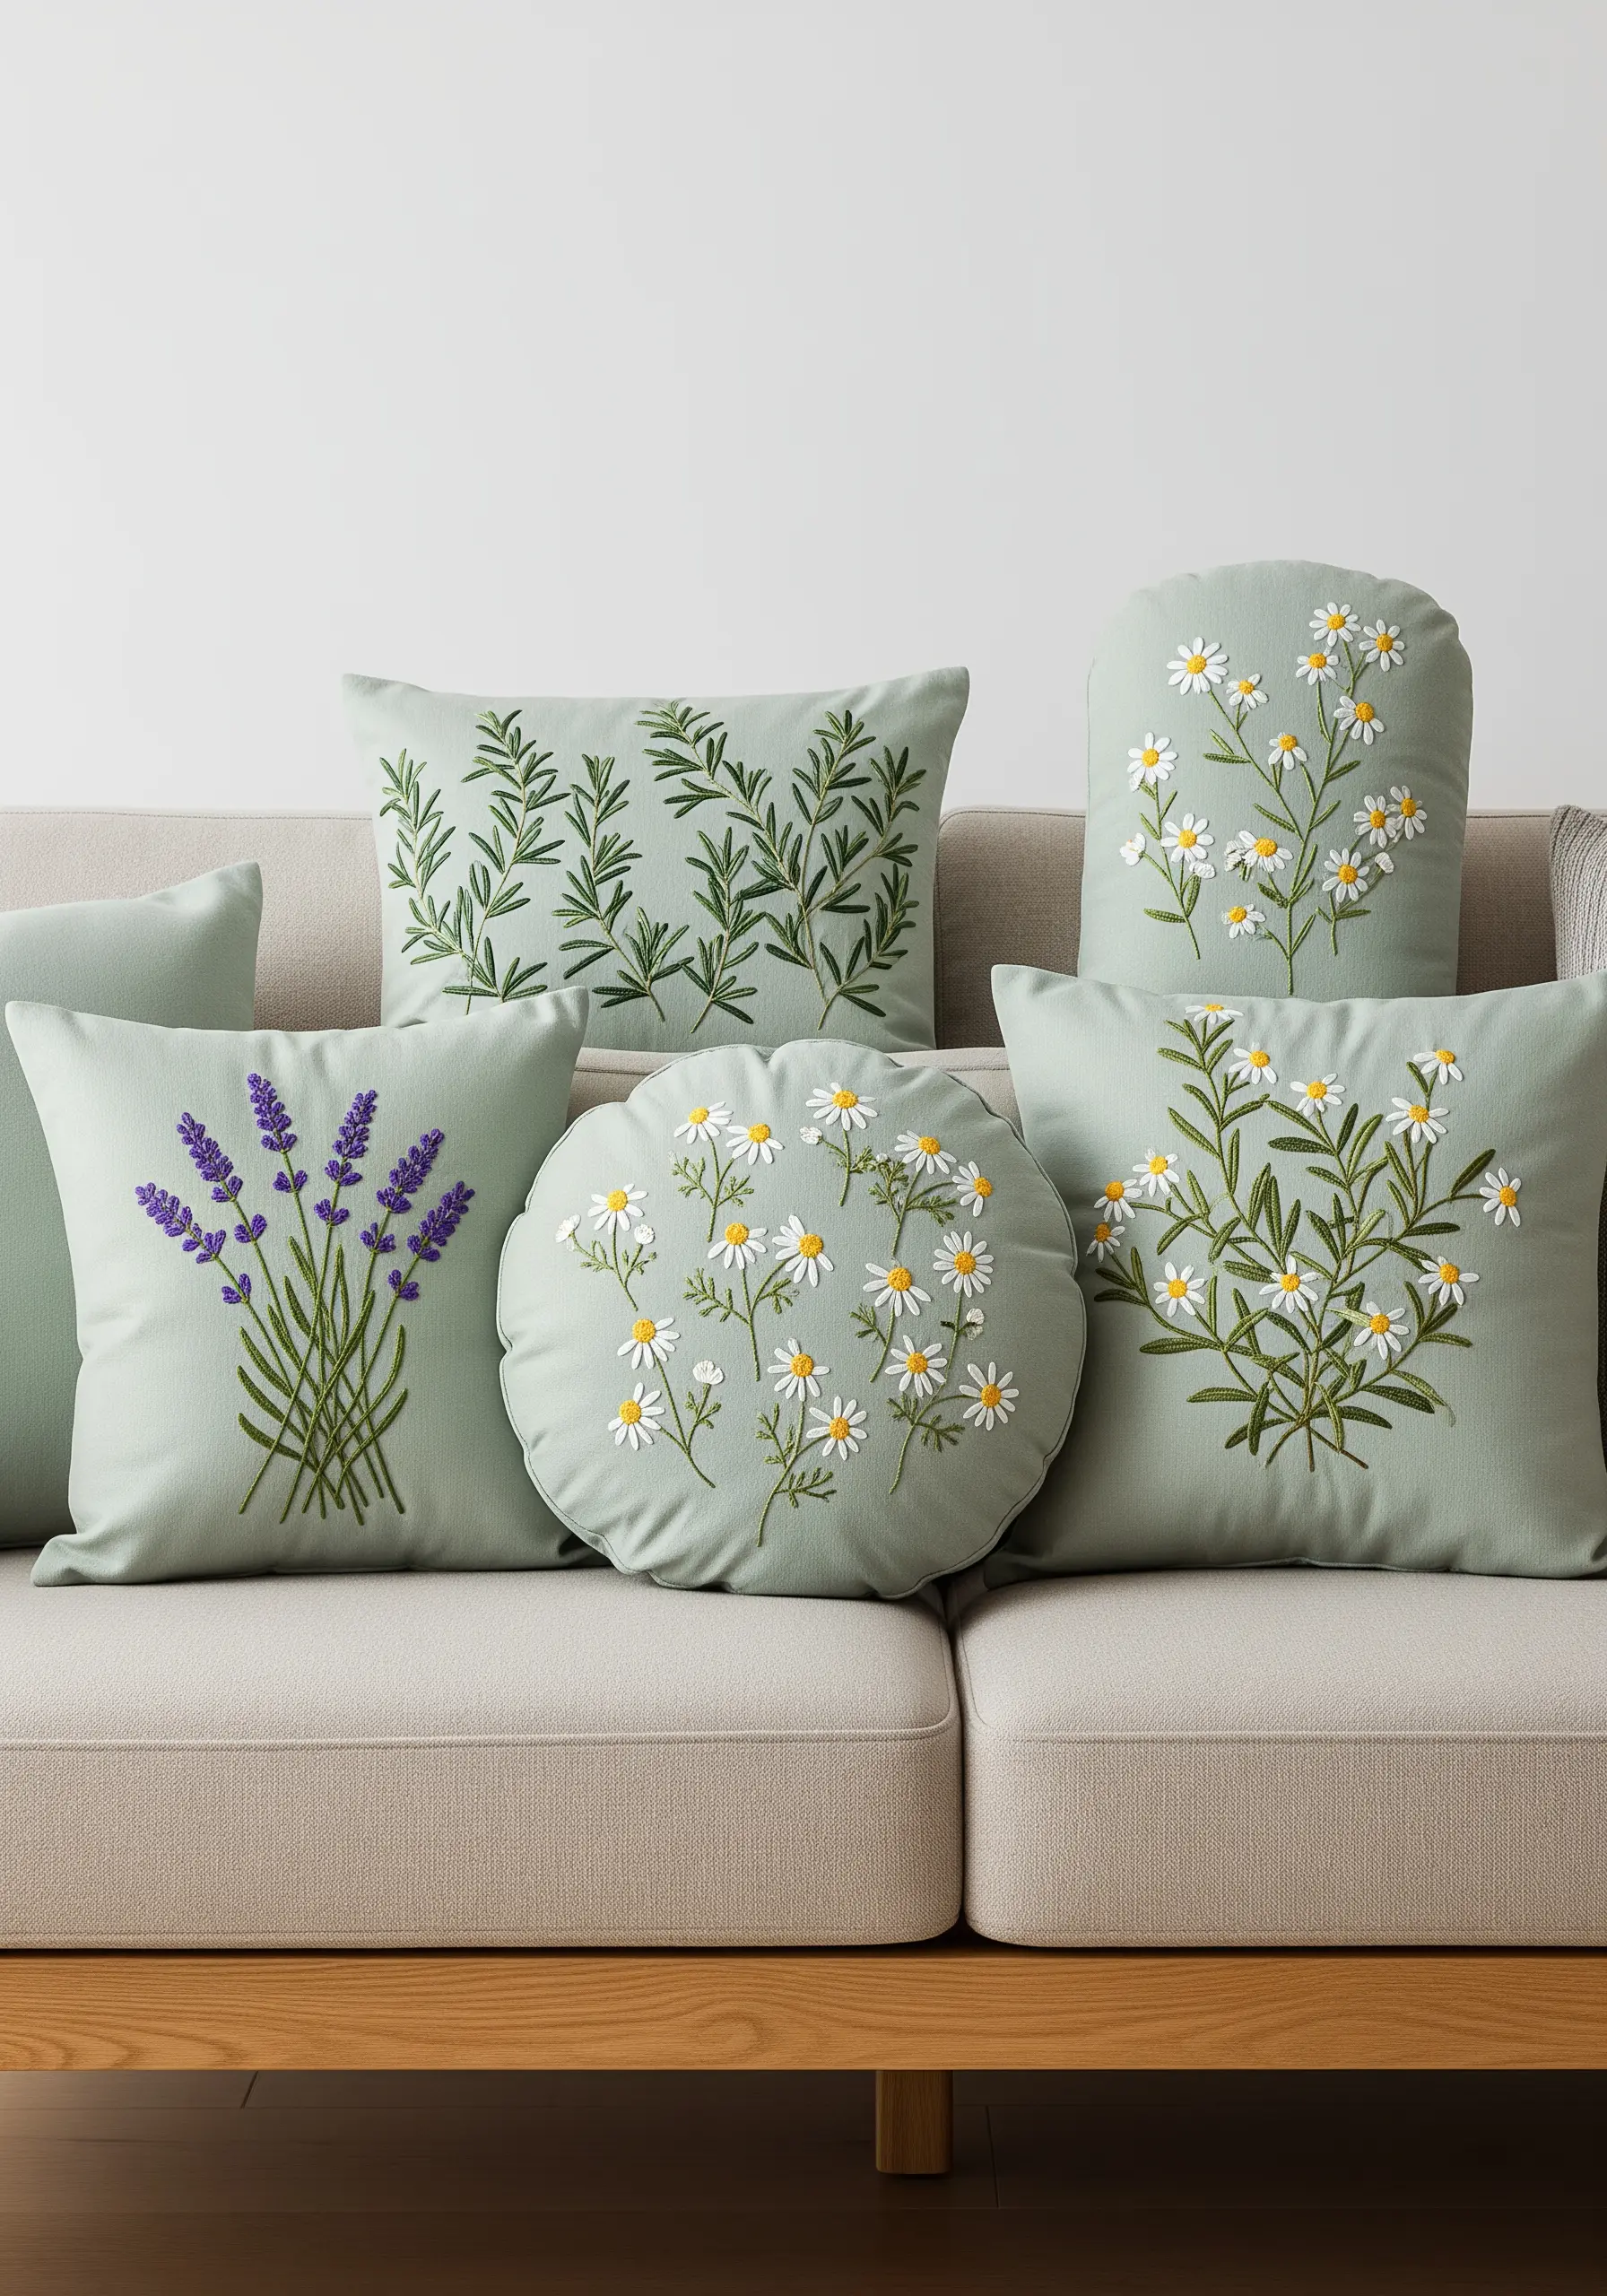
Unify a collection of different botanicals by stitching them all on the same muted background color, like this soft sage green.
Use detached chain stitches (lazy daisies) for the daisy petals and dense clusters of French knots for their centers.
For the lavender, stack rows of small fly stitches to build up the iconic tapered shape.
This transforms your pillow set into wildflower hoop art projects that feel like a single, cohesive garden scene.
10. Dimensional Stitches and Textured Fabric
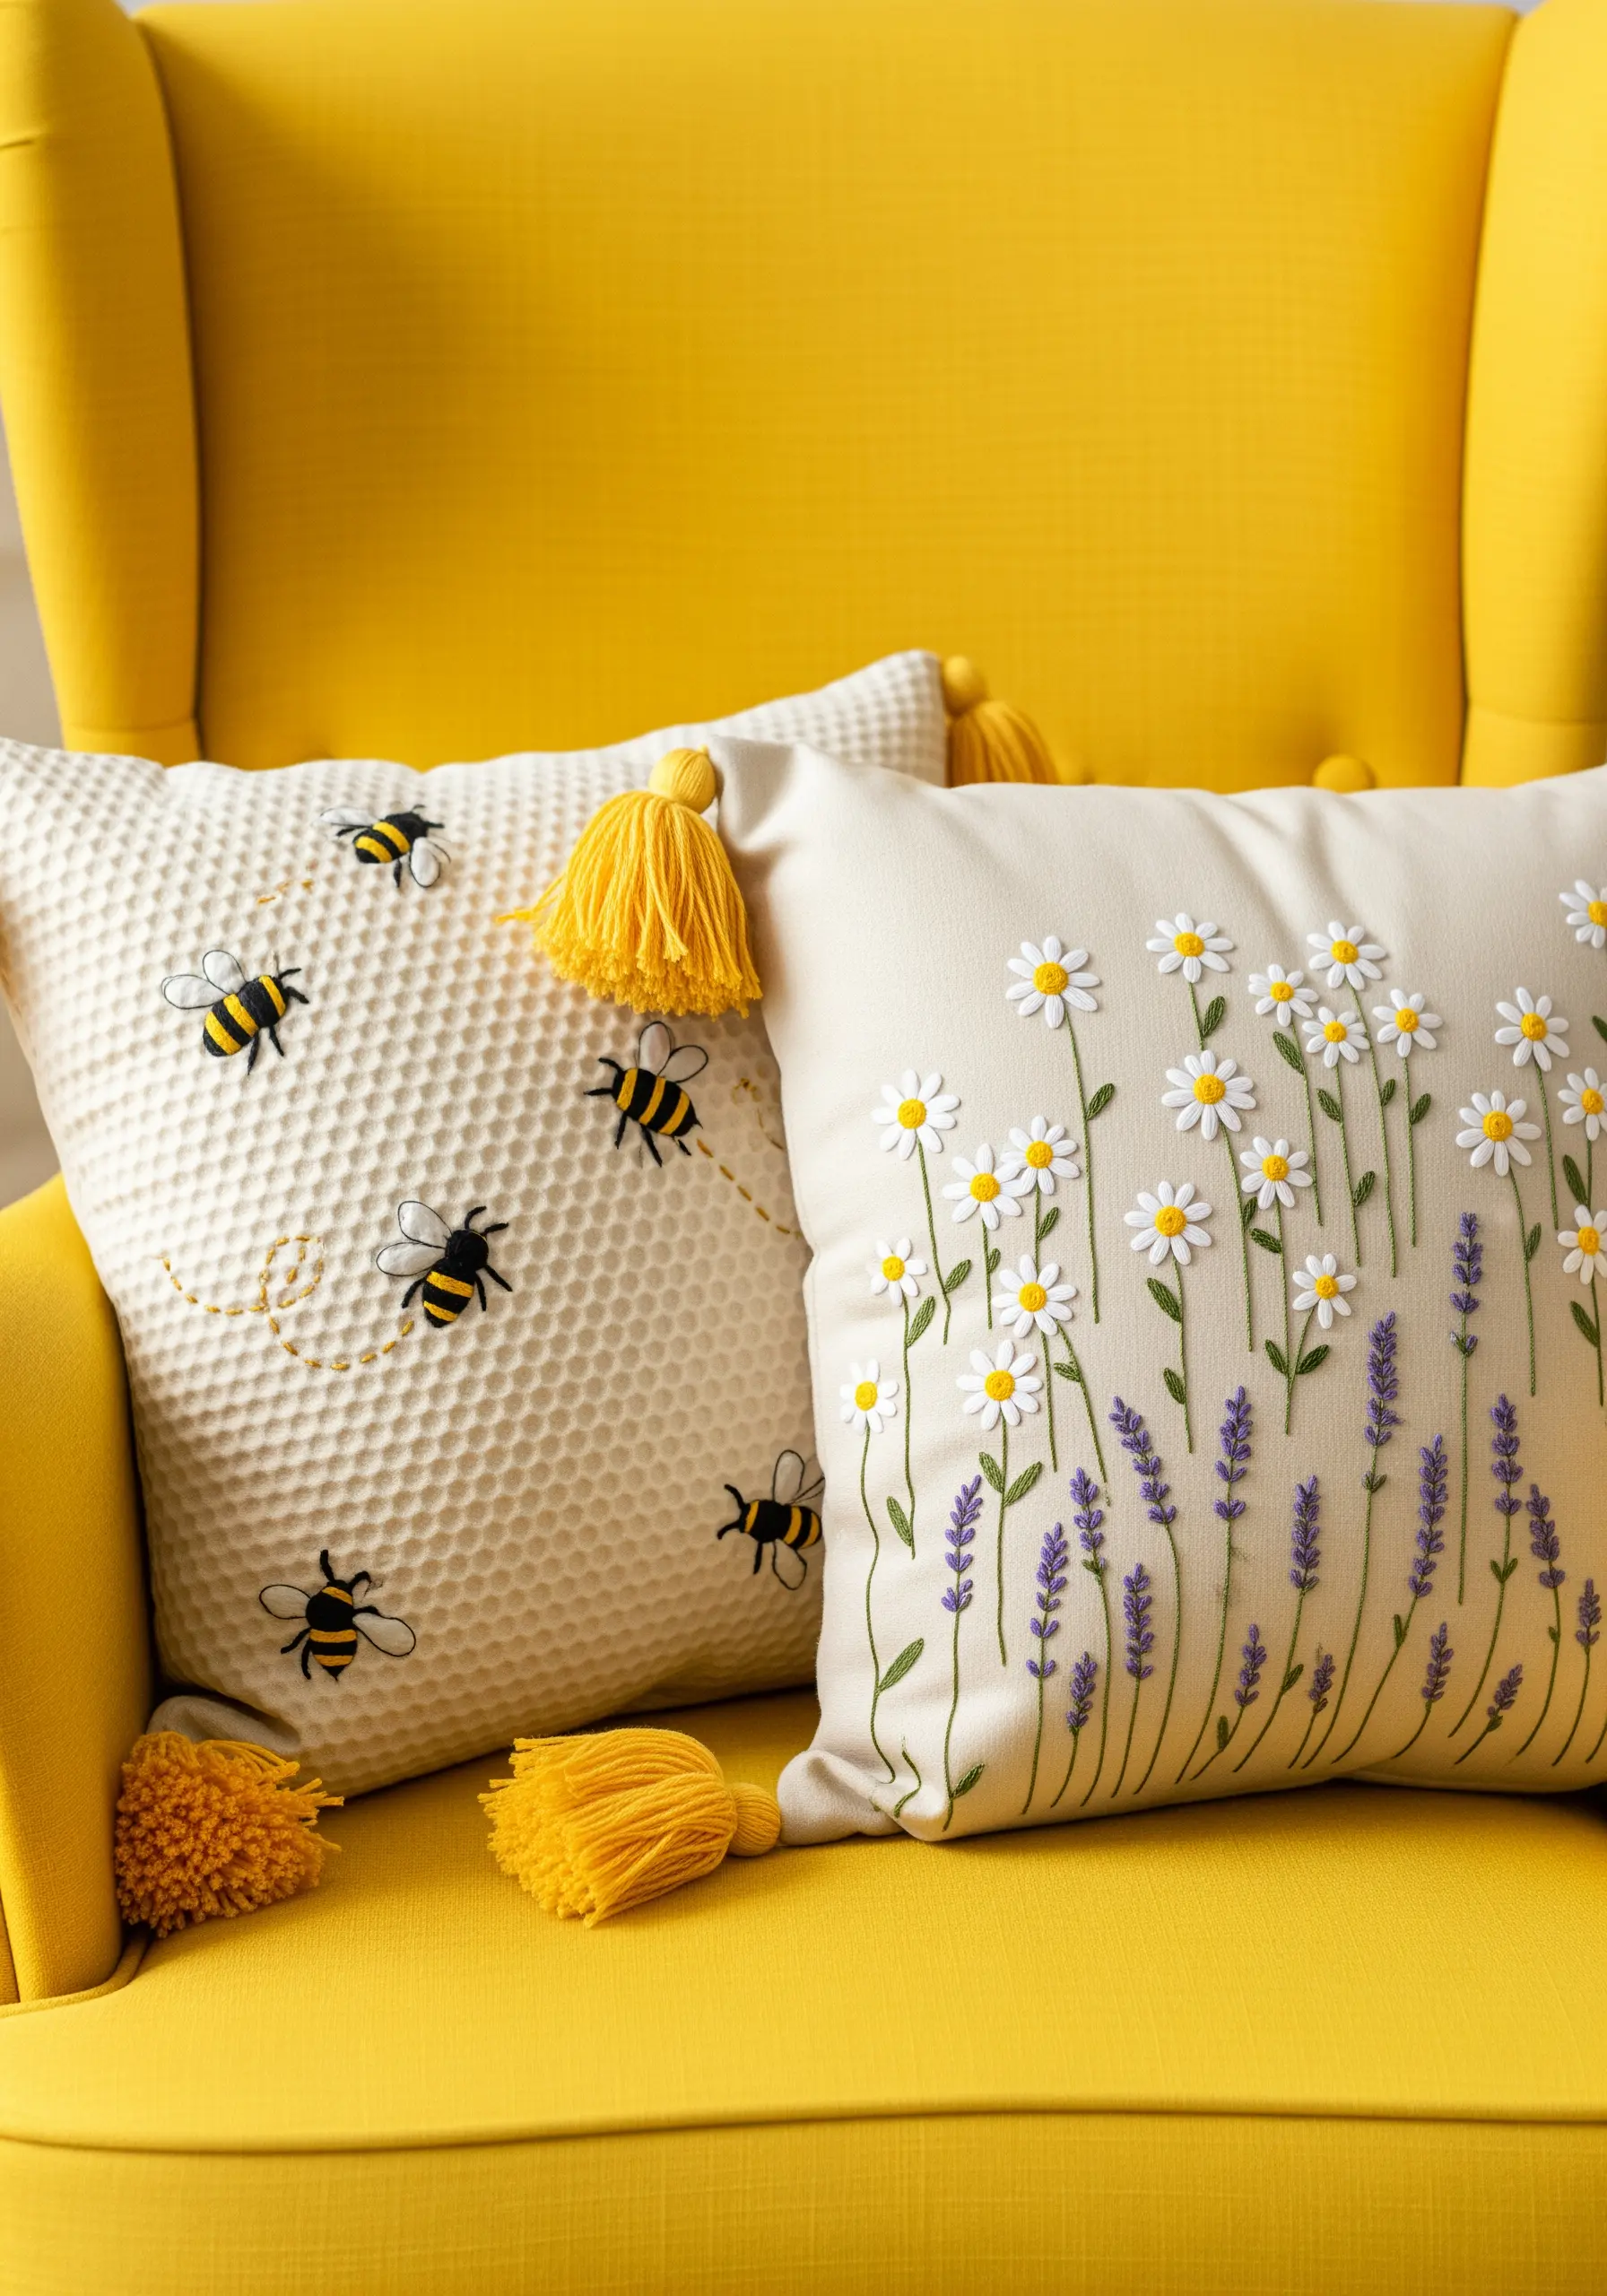
Create a dynamic, tactile set by pairing dimensional fabric with raised stitches.
On the honeycomb-textured pillow, the fabric provides the interest, allowing your bee motifs to be simple satin-stitched bodies with delicate backstitch wings.
For the daisy pillow, create raised petals by working lazy daisy stitches over a single straight stitch foundation.
This small adjustment adds lift and makes the flowers pop, inviting touch.
11. Abstract Forms with Thread Wrapping
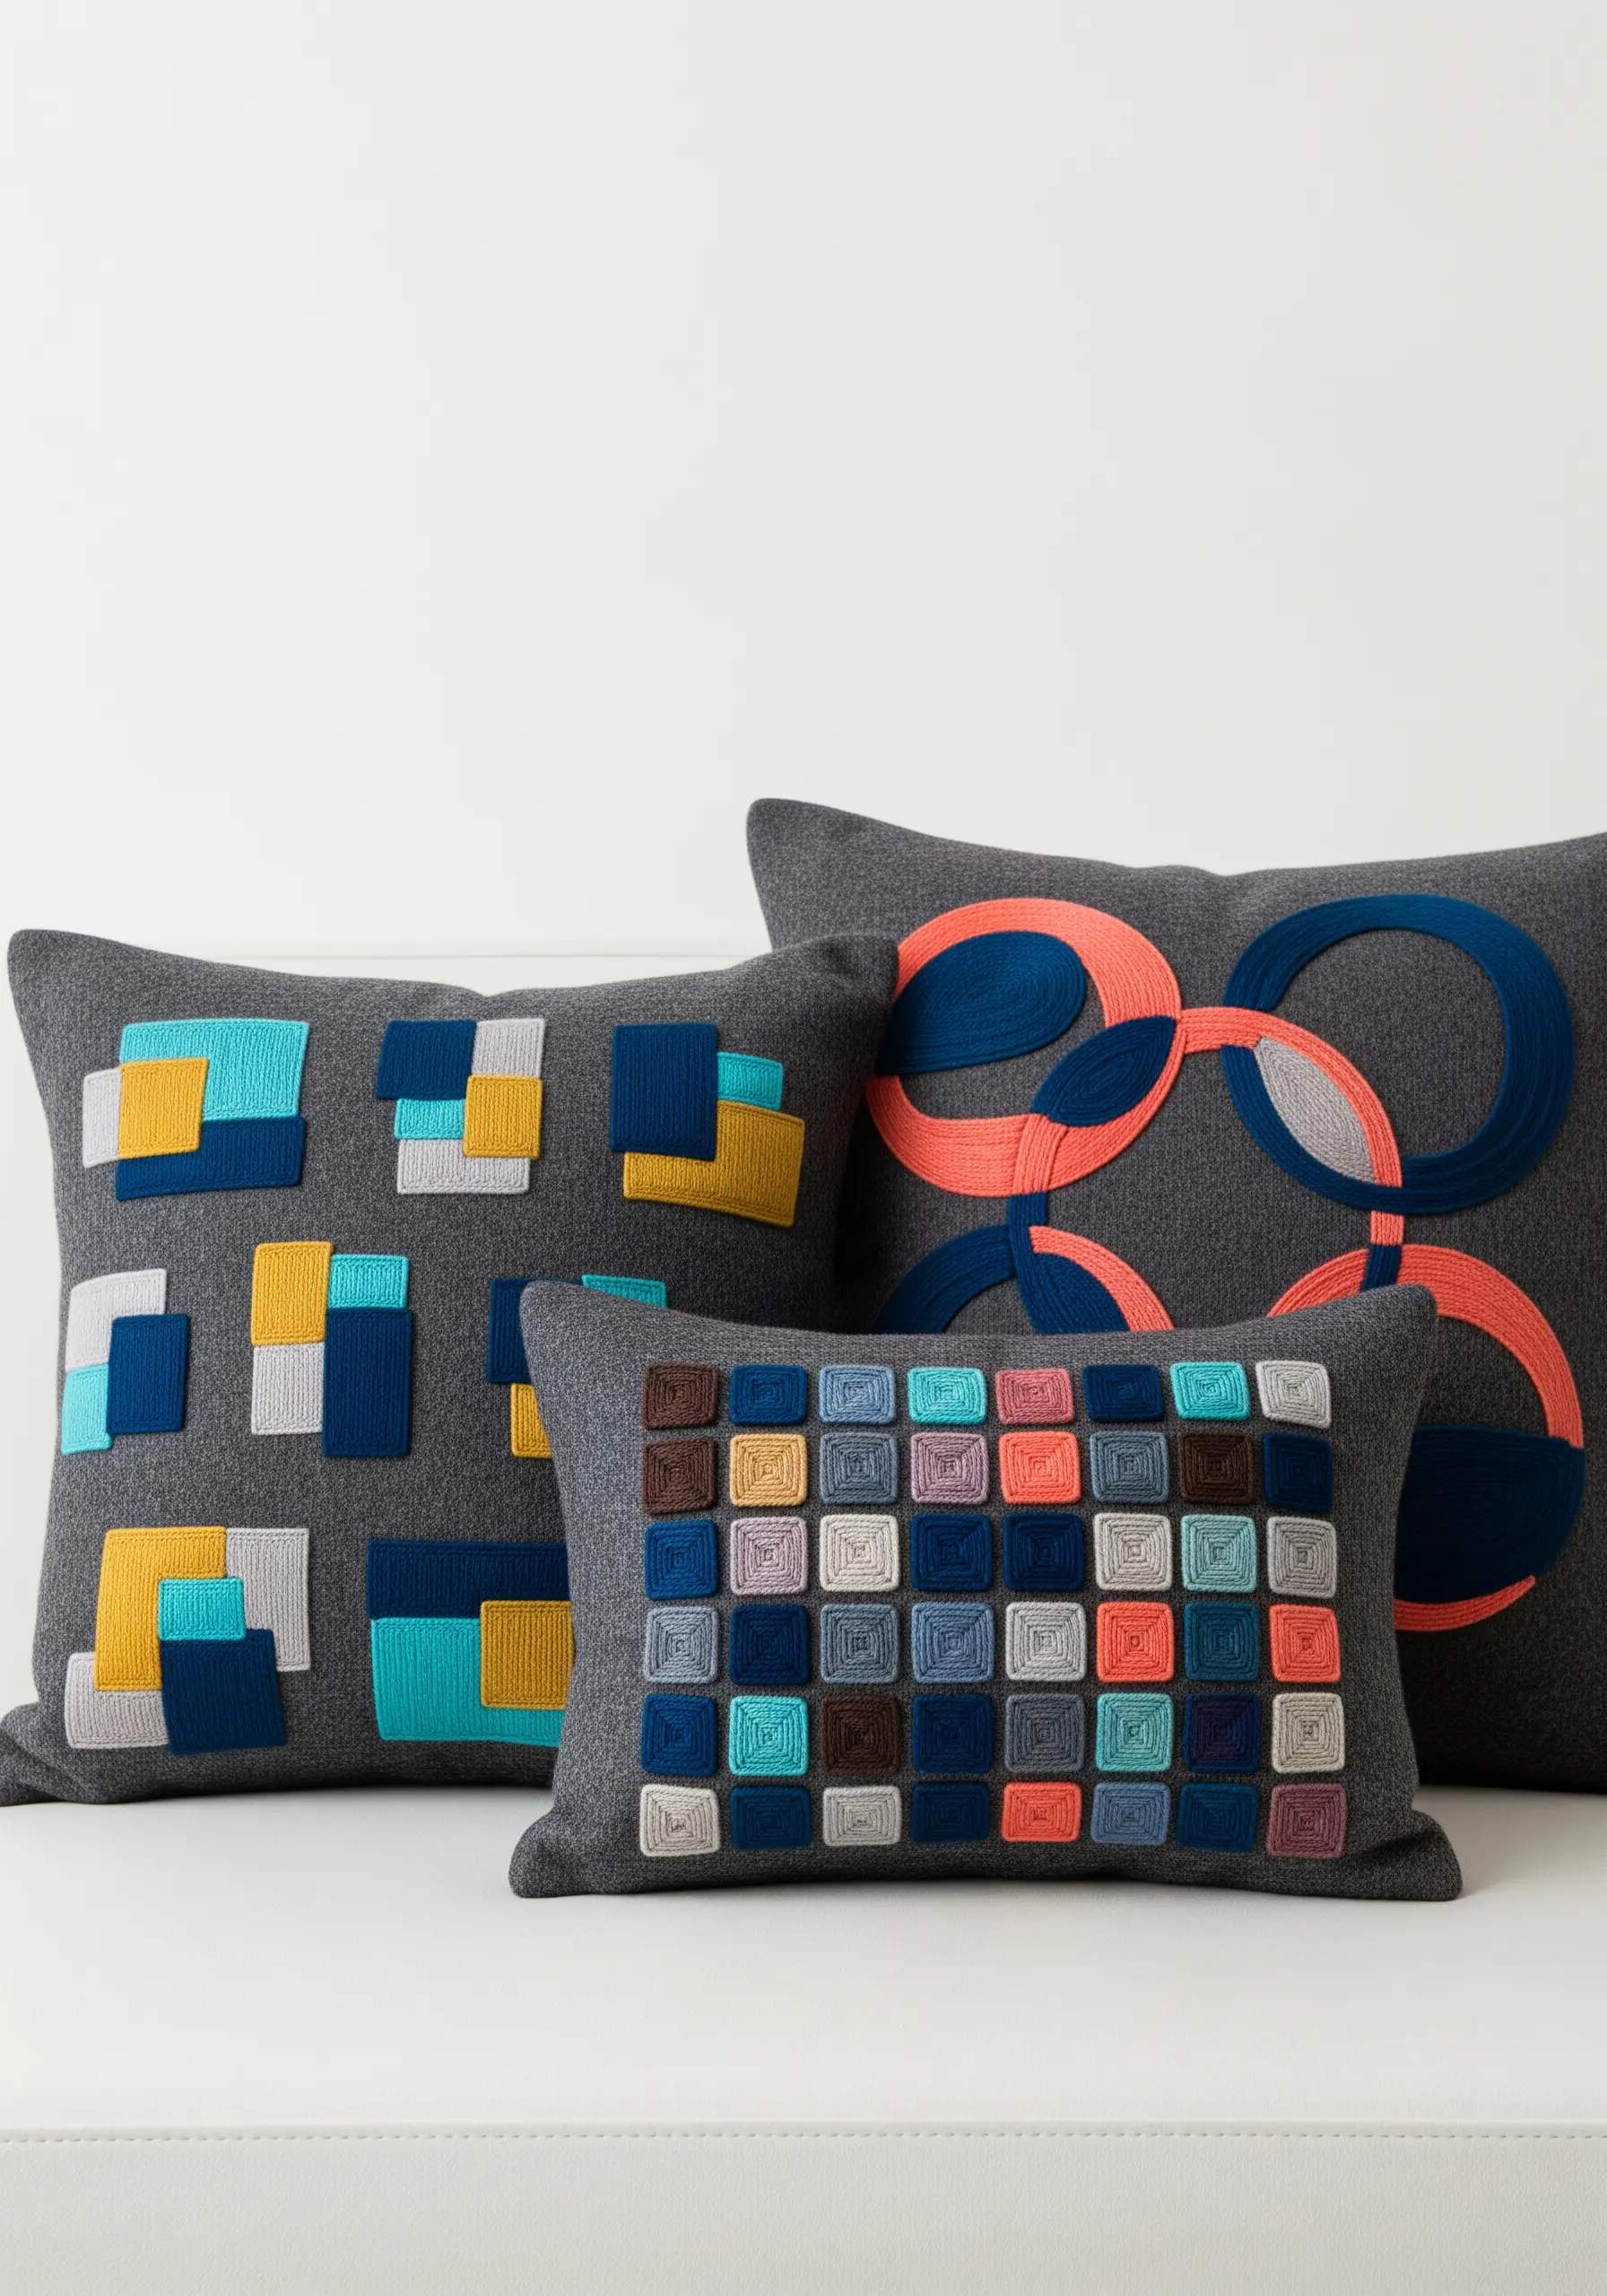
Instead of filling shapes with traditional stitches, explore thread wrapping for a unique, sculptural texture.
Create the outline of your squares or circles with a bold backstitch, then wrap your main thread around the shape, securing it on the back.
To couch the wrapped bundles onto the fabric, use a matching, finer thread for an invisible hold.
This technique gives you a modern, woven appearance that contrasts beautifully with the soft fabric of the pillow.
12. Moroccan Opulence in Metallic Thread
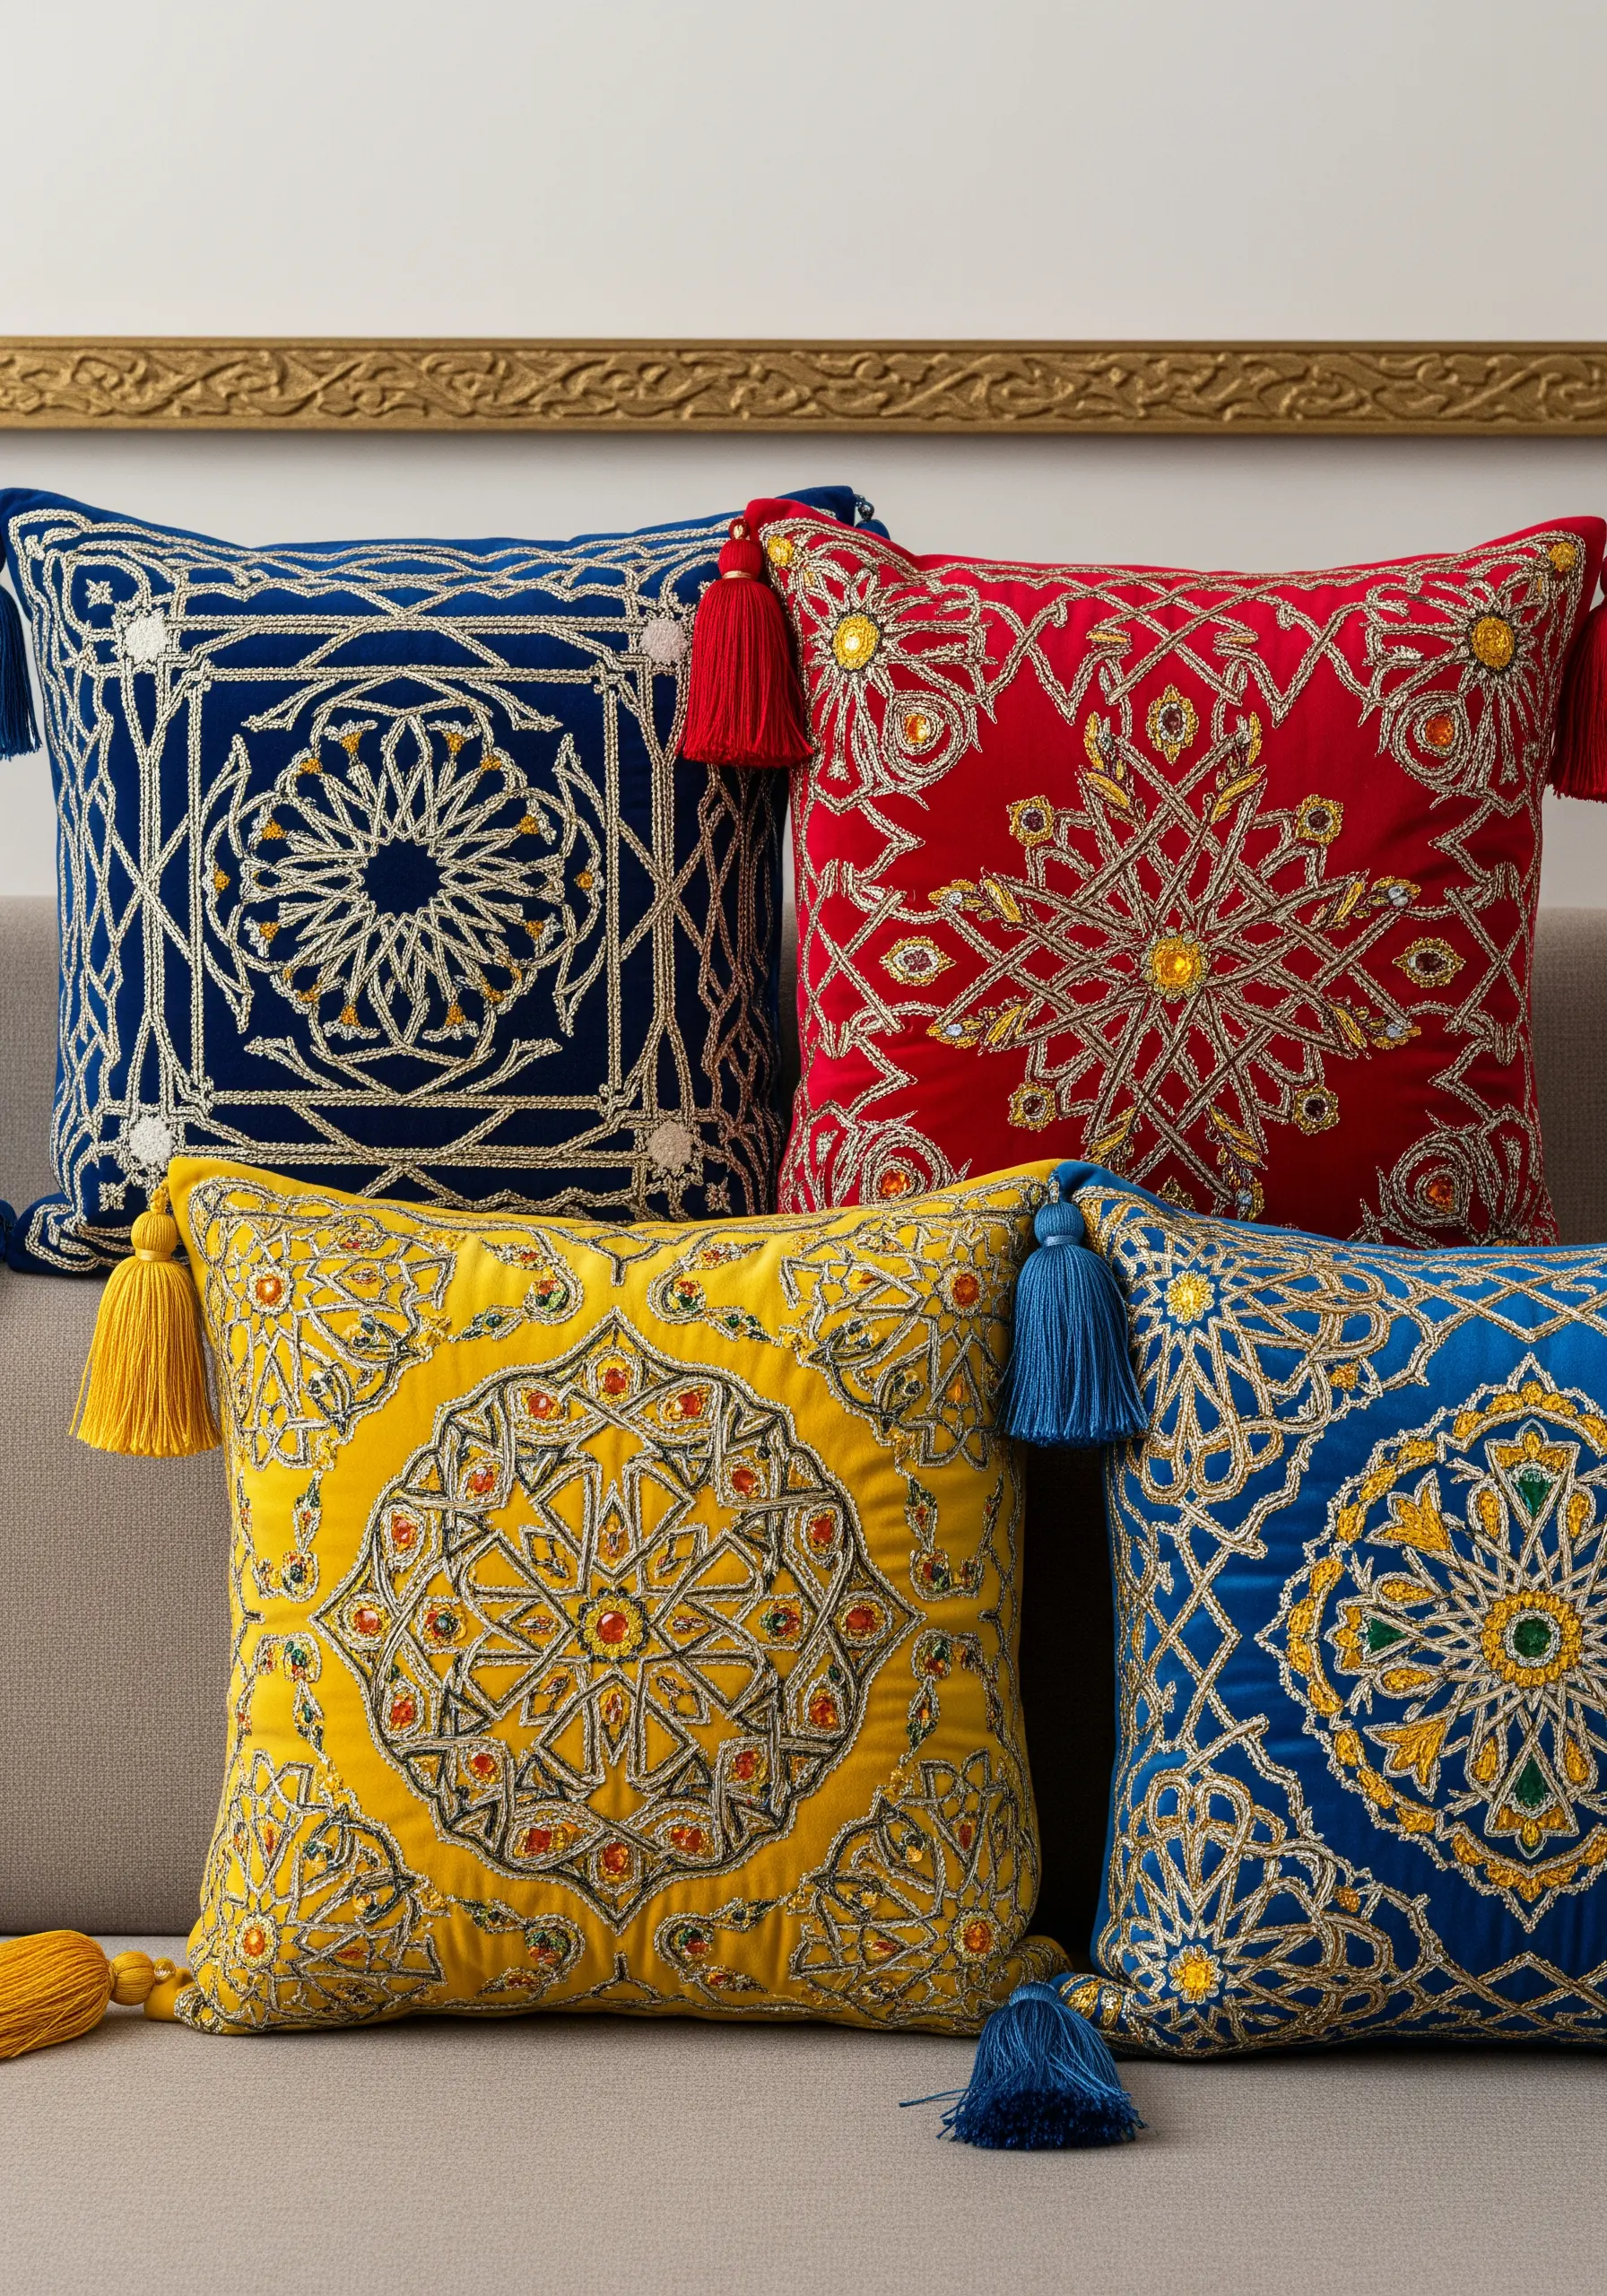
Achieve a luxurious, intricate look by layering different weights and types of metallic thread.
Use a fine metallic floss for the delicate geometric outlines, couching it down with a matching sewing thread.
For bolder, radiating lines, switch to a thicker metallic cord or braid that stands out.
Adding tiny sequins at line intersections enhances the light-reflecting quality and creates brilliant gold thread cushion designs.
13. Cozy Autumnal Appliqué
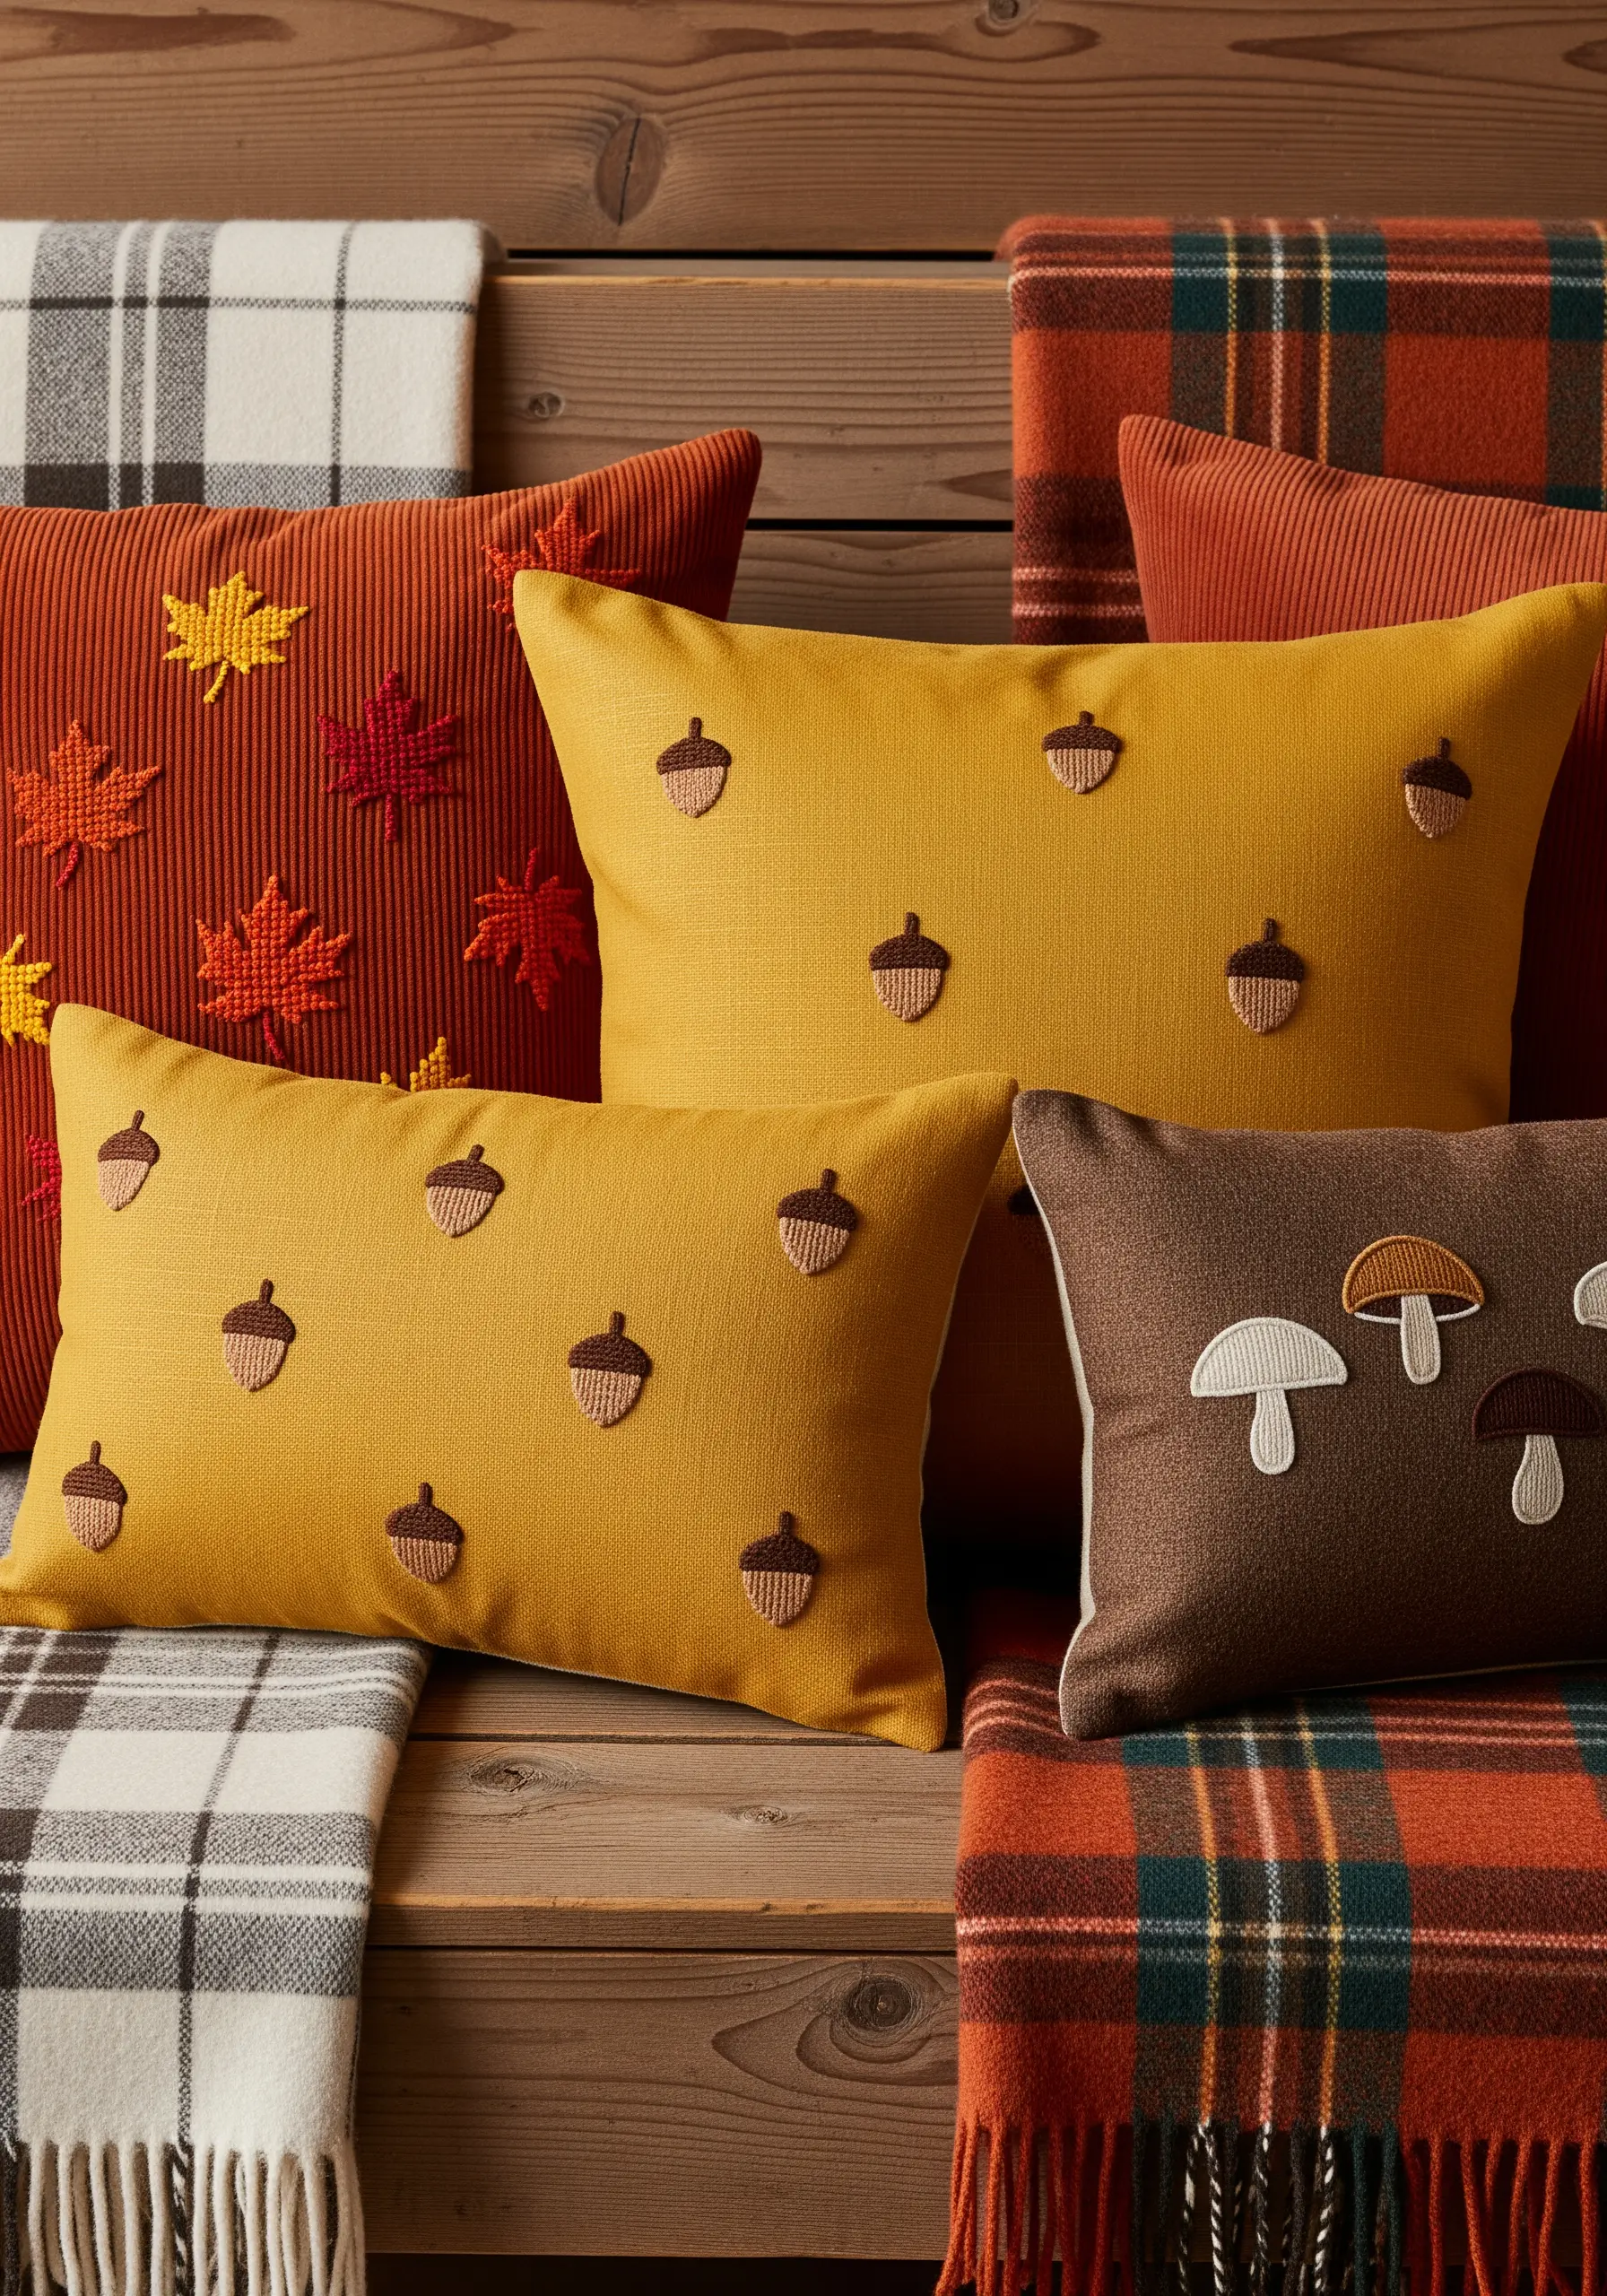
Combine simple embroidery with small felt appliqué pieces for a quick, textural update.
Cut your mushroom and acorn caps from felt and secure them with a decorative blanket stitch around the edge.
Then, use a simple satin stitch for the acorn bodies and stem stitch for the maple leaf veins.
The mix of the soft felt and the slight sheen of embroidery floss creates a cozy, layered effect perfect for the season.
14. Vibrant Aviary Thread Painting
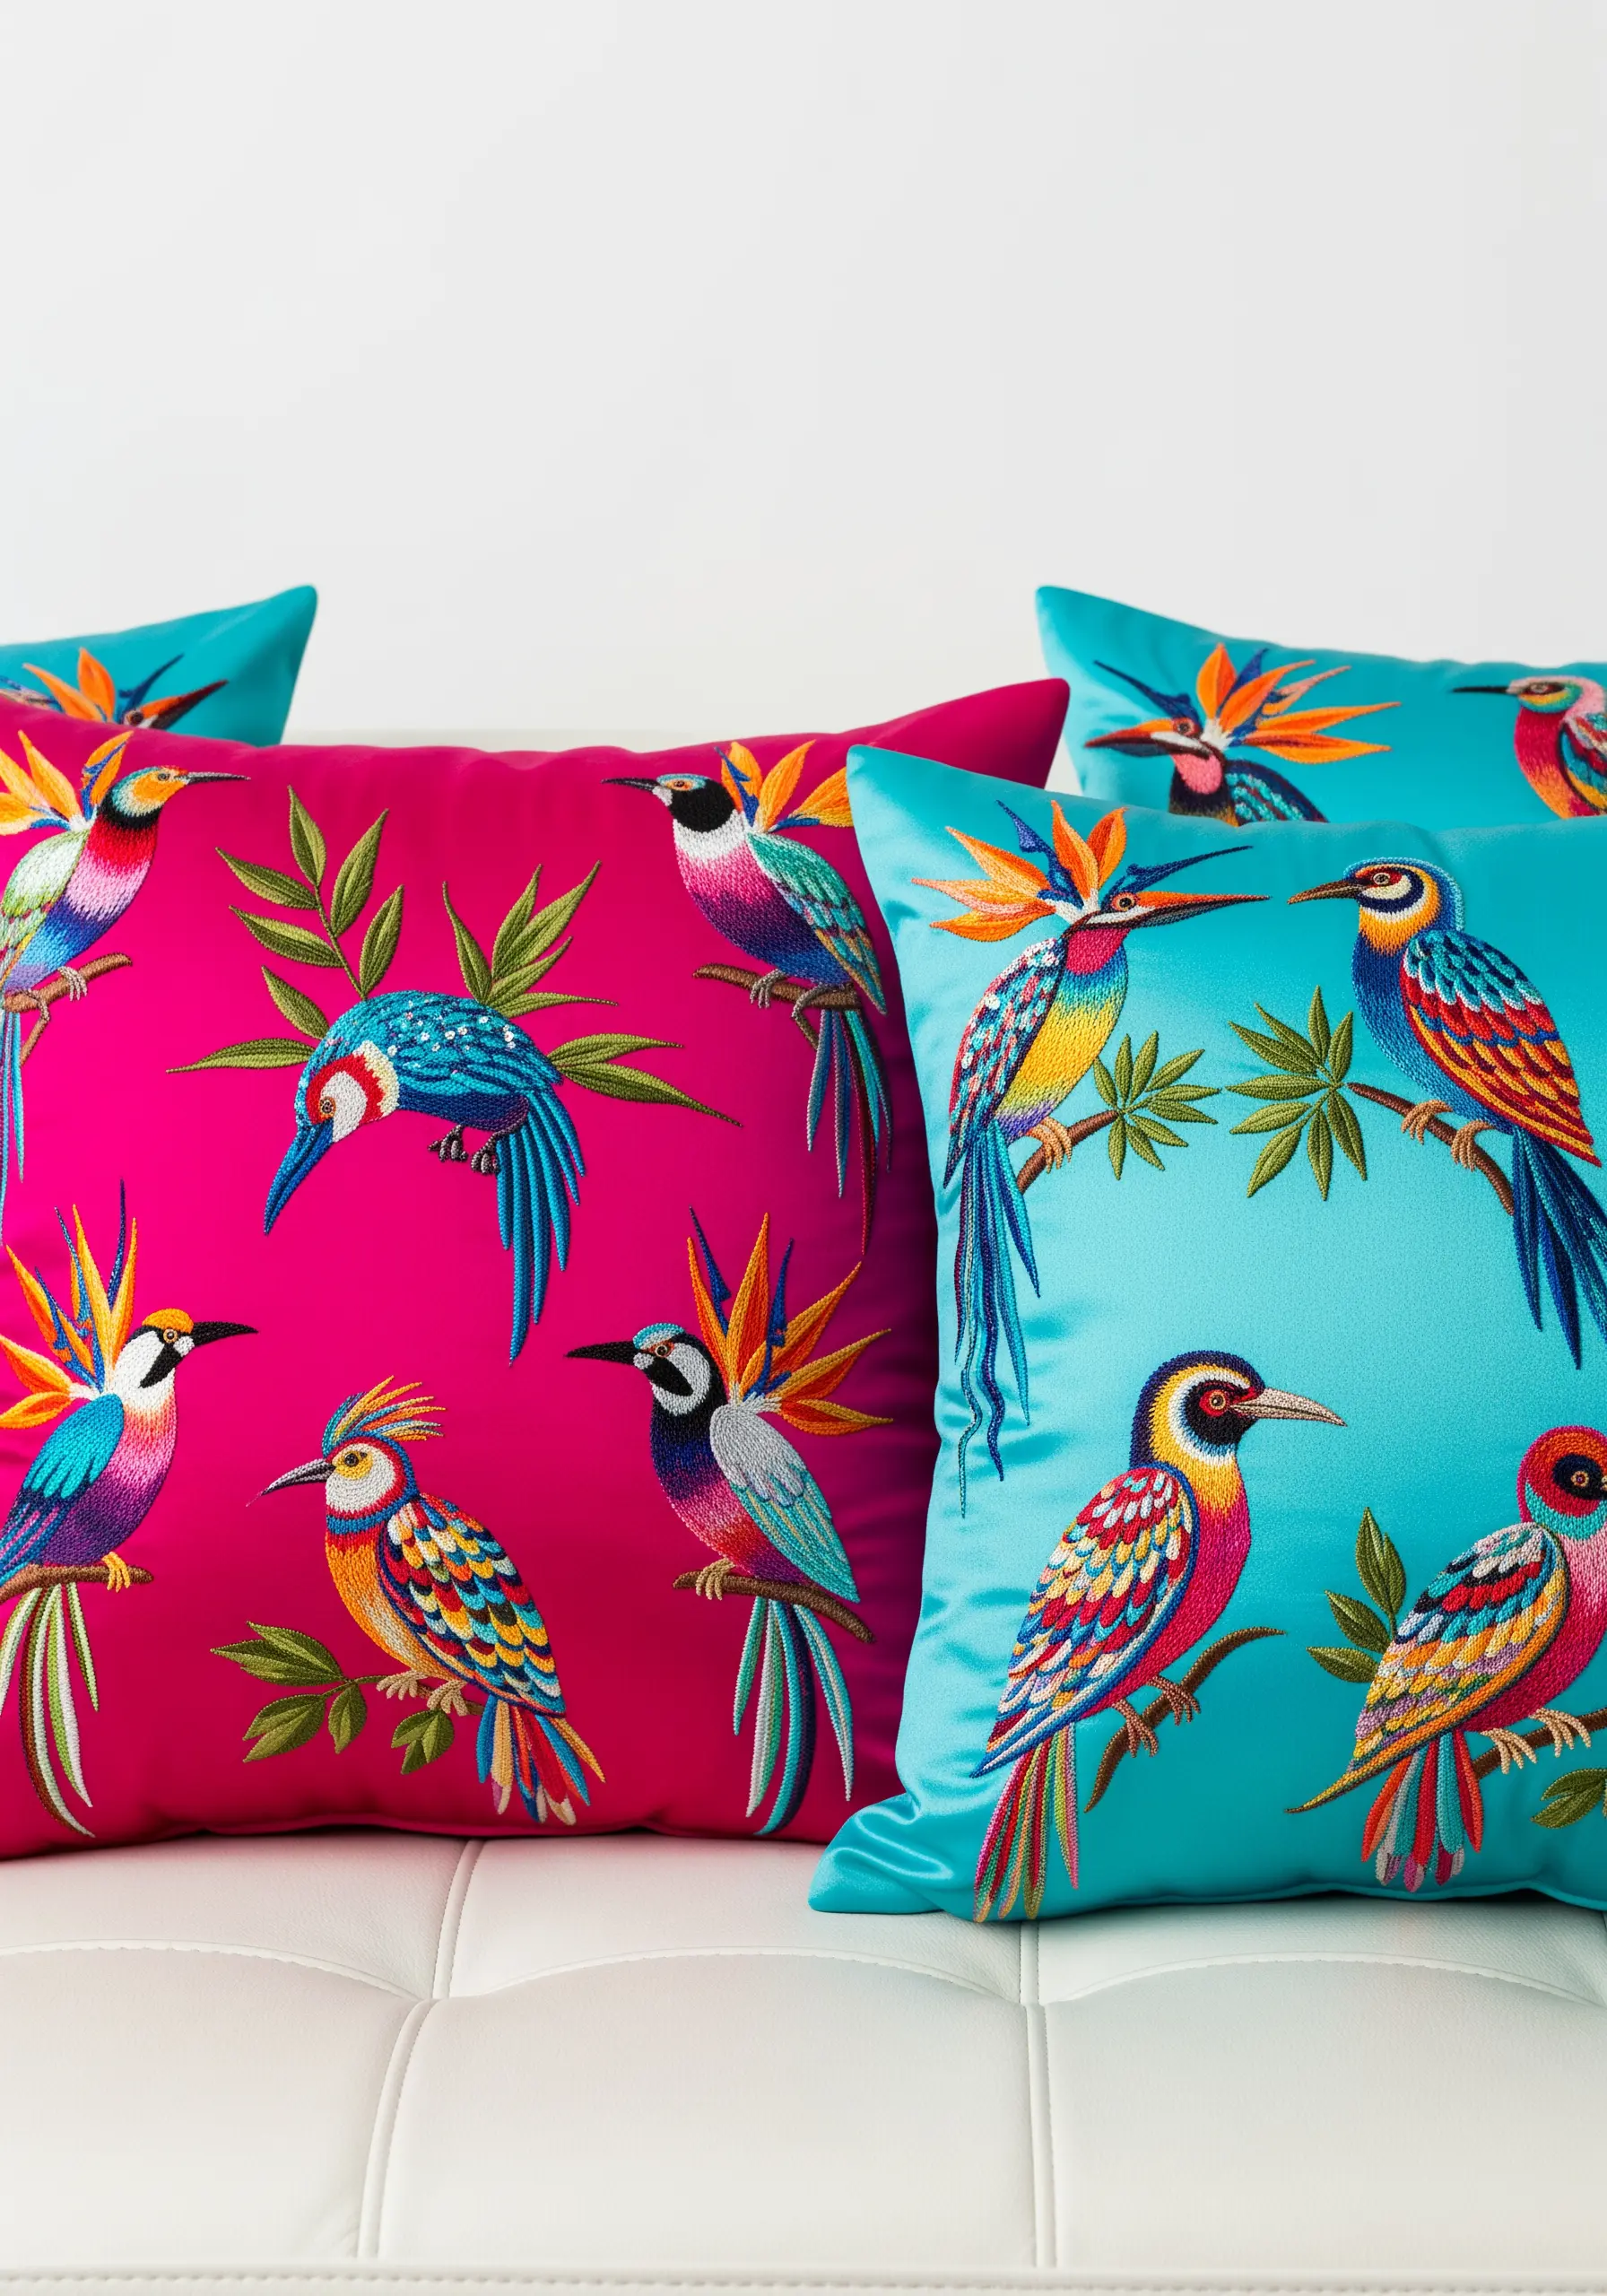
To capture the brilliant plumage of tropical birds, use the long-and-short stitch technique to paint with thread.
Work with a single strand of floss to blend colors seamlessly, creating smooth gradients on the wings and tail feathers.
Don’t be afraid to use unexpected, high-contrast color combinations—a flash of turquoise next to yellow, or pink next to orange—to mimic iridescence.
Vibrant parrot and macaw embroidery color palettes are all about making bold, confident choices.
15. Coastal Textures with Knots and Lines
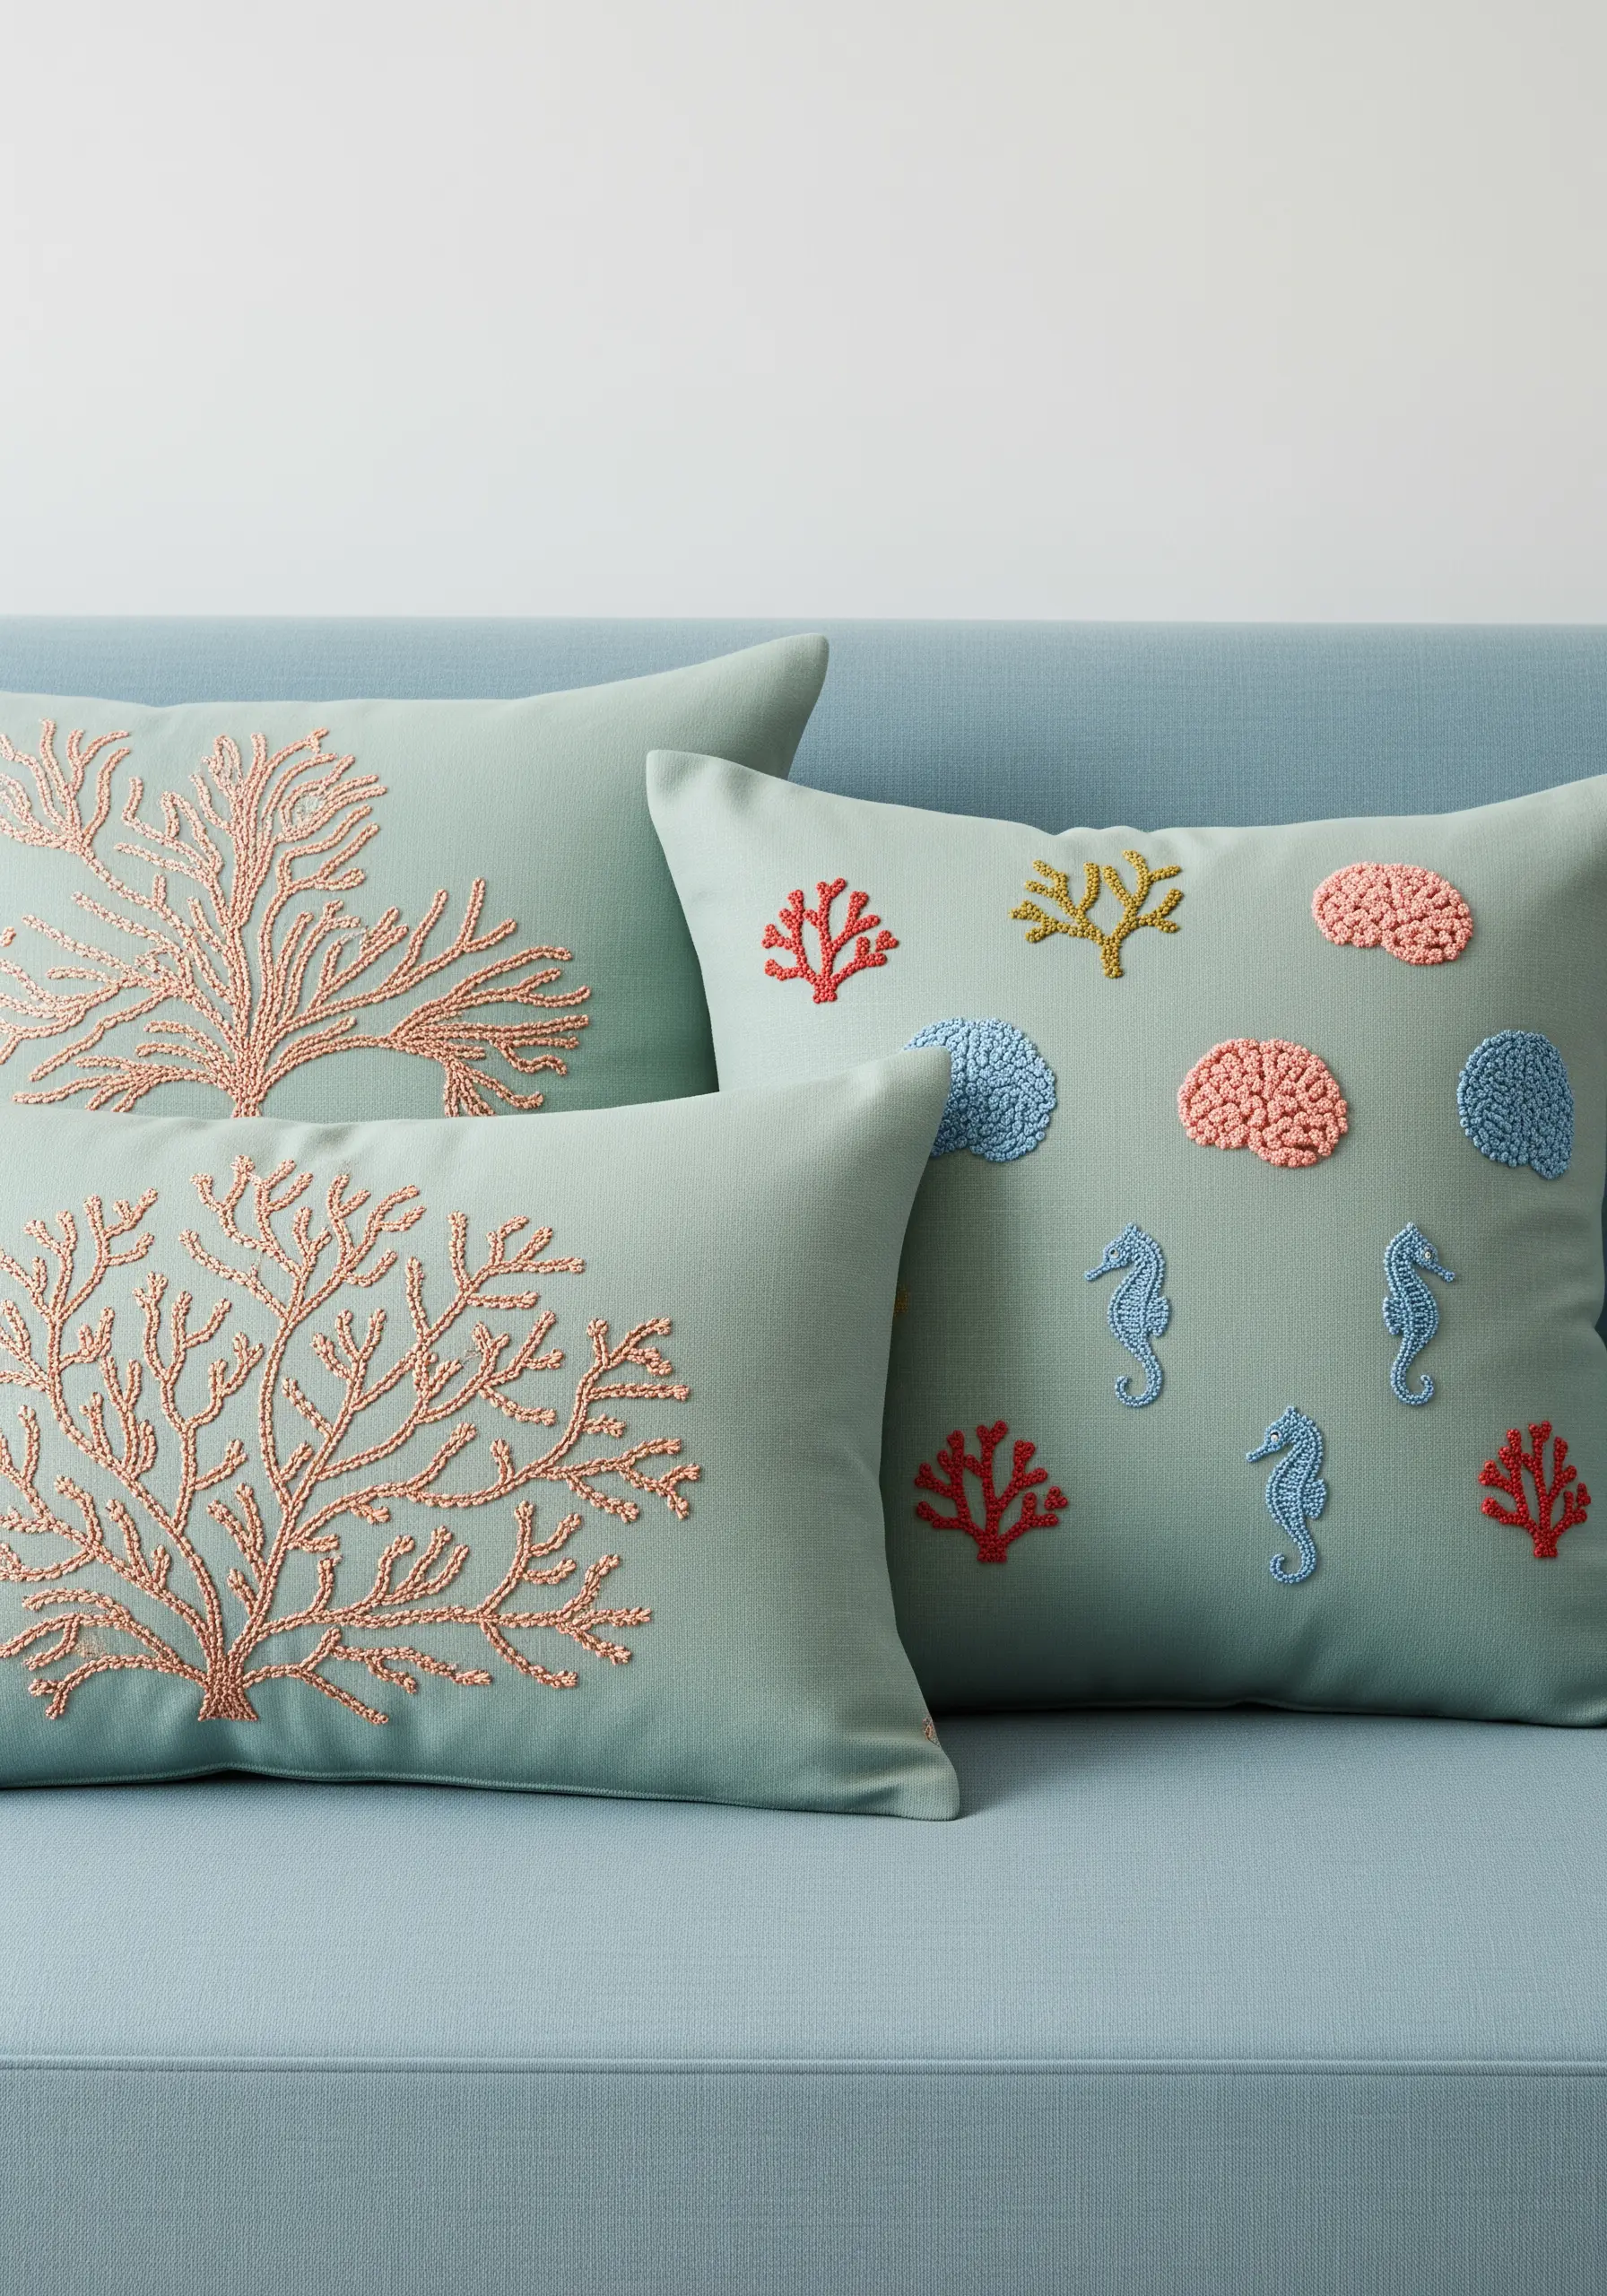
Mimic the varied textures of the ocean floor by assigning a different stitch to each motif.
Create the delicate branches of coral using dense clusters of French knots or bullion knots for a bumpy, organic feel.
For the rounded shells, fill the shapes with a spiraling chain stitch to create a raised surface.
A simple backstitch outline is all you need for the seahorses, allowing this coastal-inspired embroidery collection to feel balanced and dynamic.
16. Mid-Century Modern Menagerie
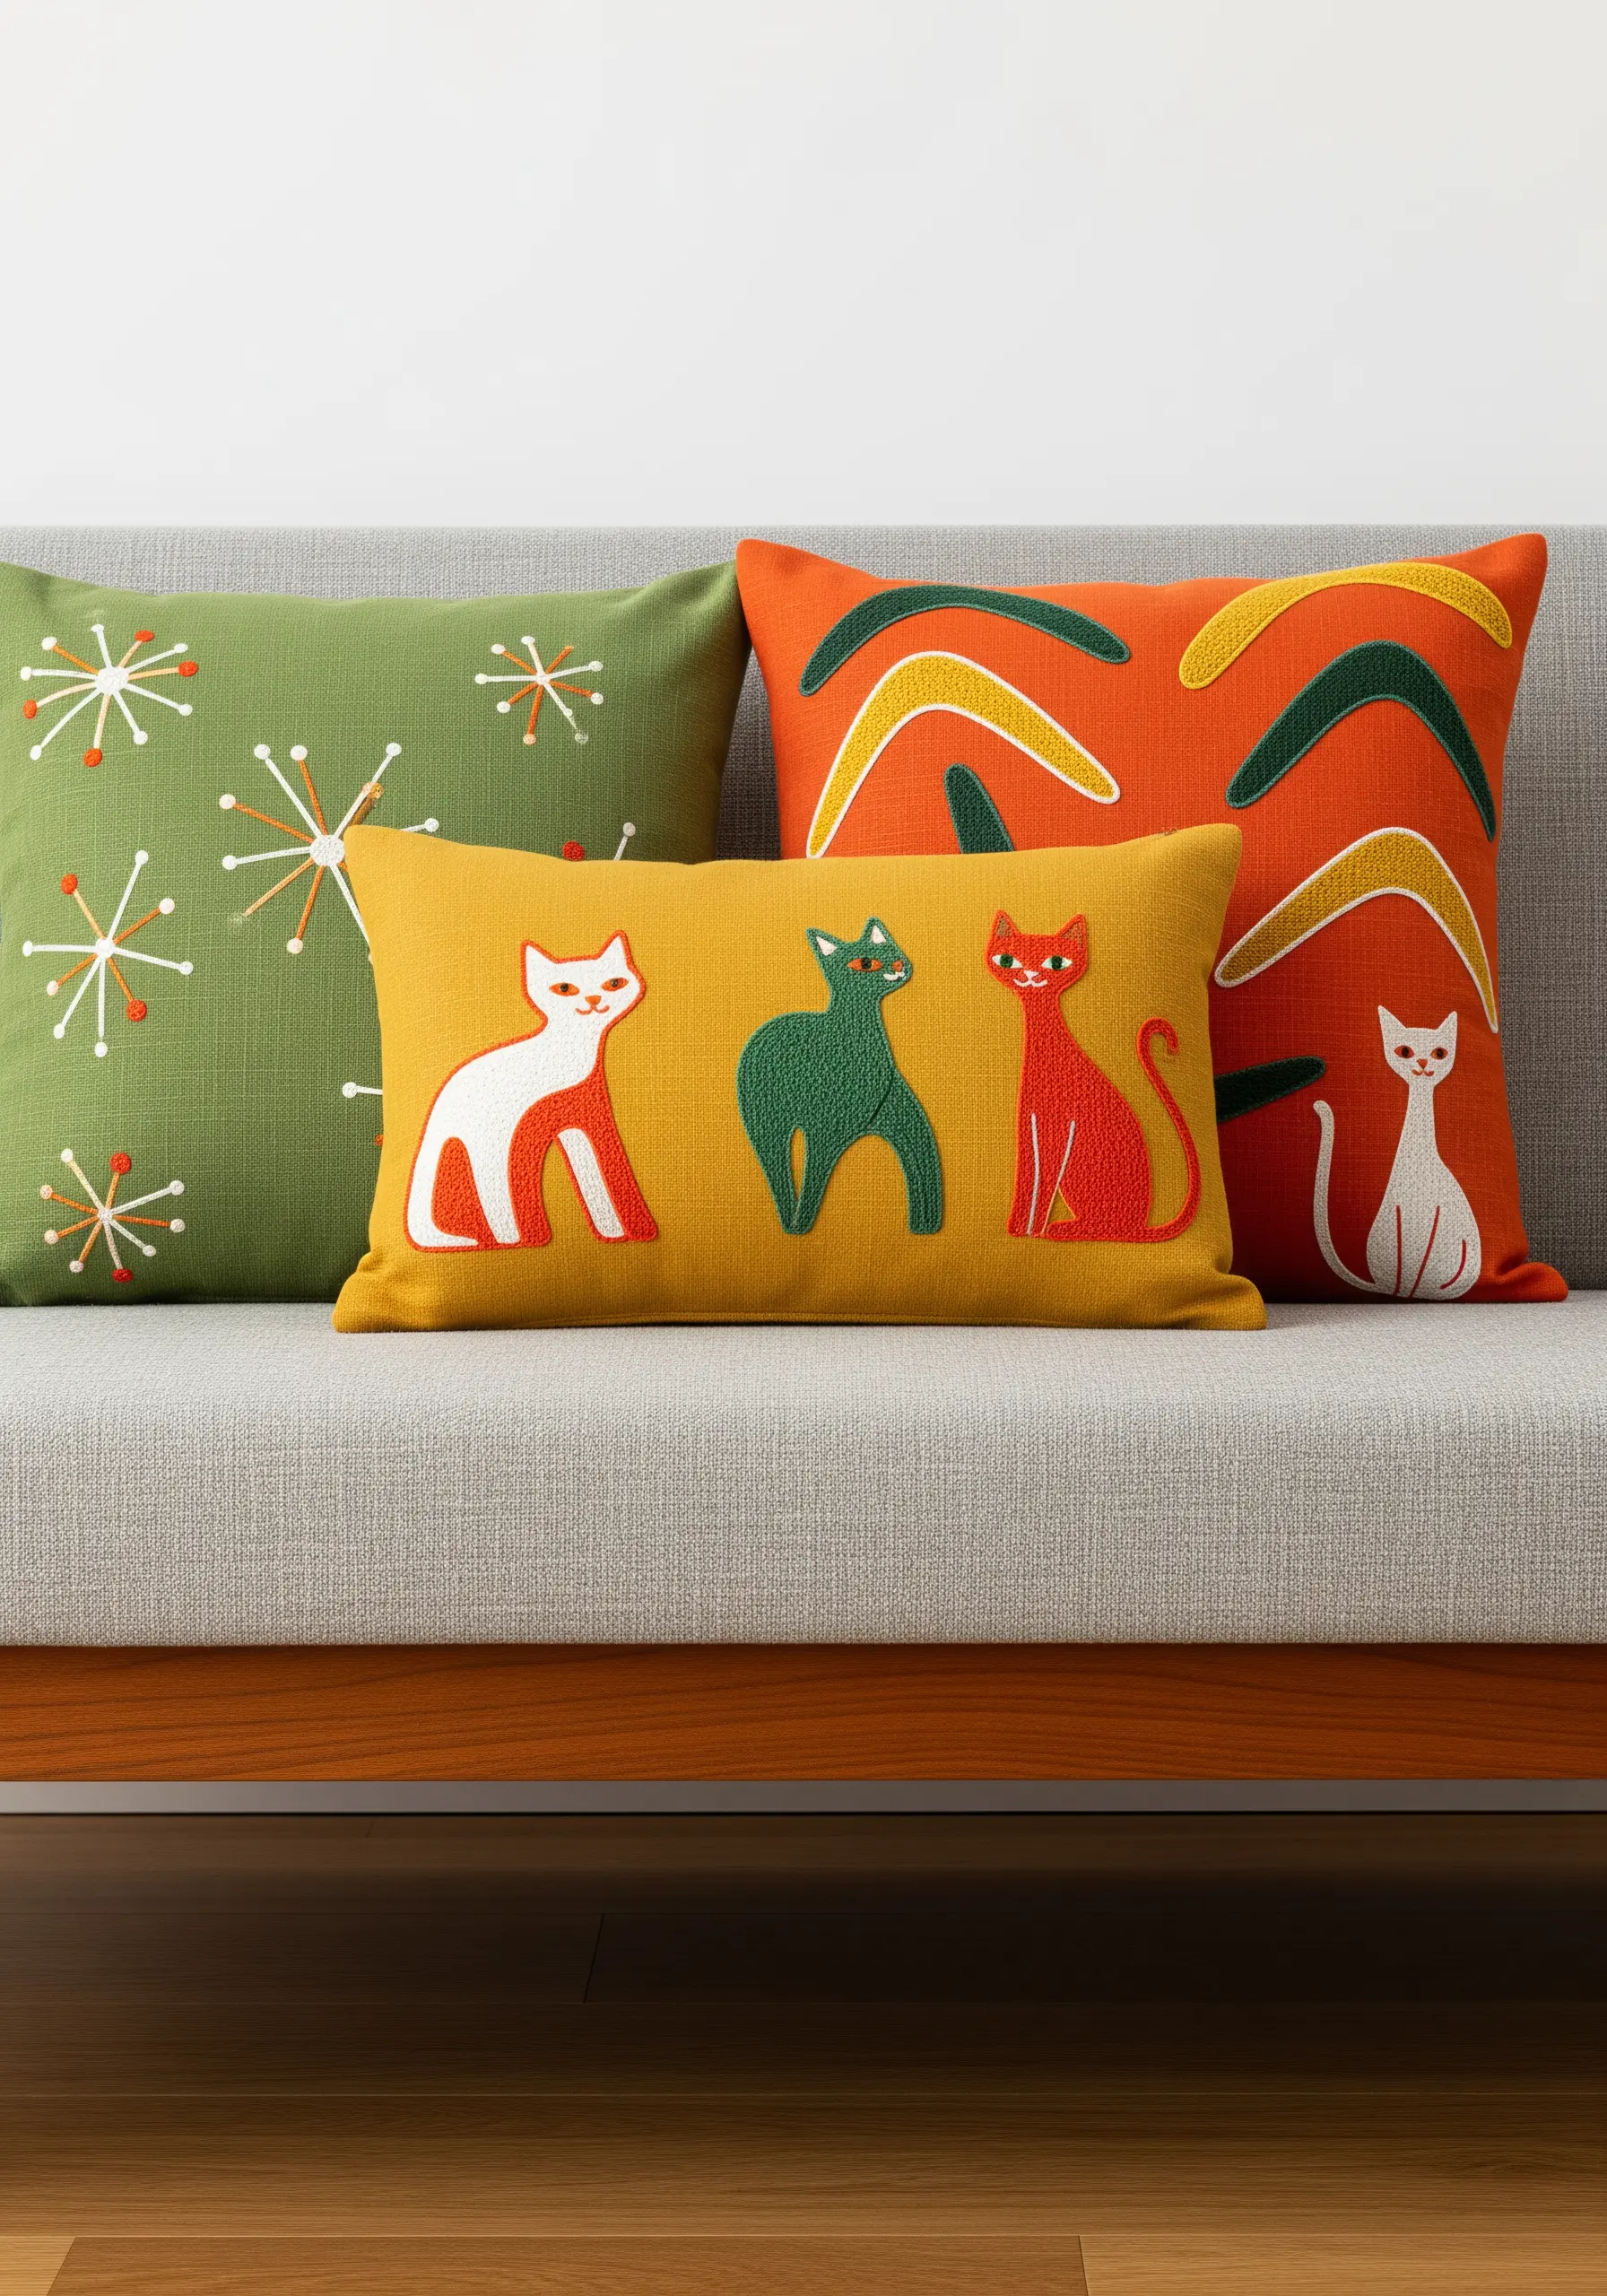
Capture the retro charm of mid-century modern design with clean lines and flat, graphic color blocking.
Fill the cat silhouettes with a perfectly smooth satin stitch, using a split stitch outline first to guarantee a sharp, crisp edge.
For the starbursts, use simple straight stitches of varying lengths radiating from a central point.
The key to mastering this aesthetic is a limited, retro color palette and a focus on stylized, non-realistic shapes.
17. Topographic & Landscape Lines
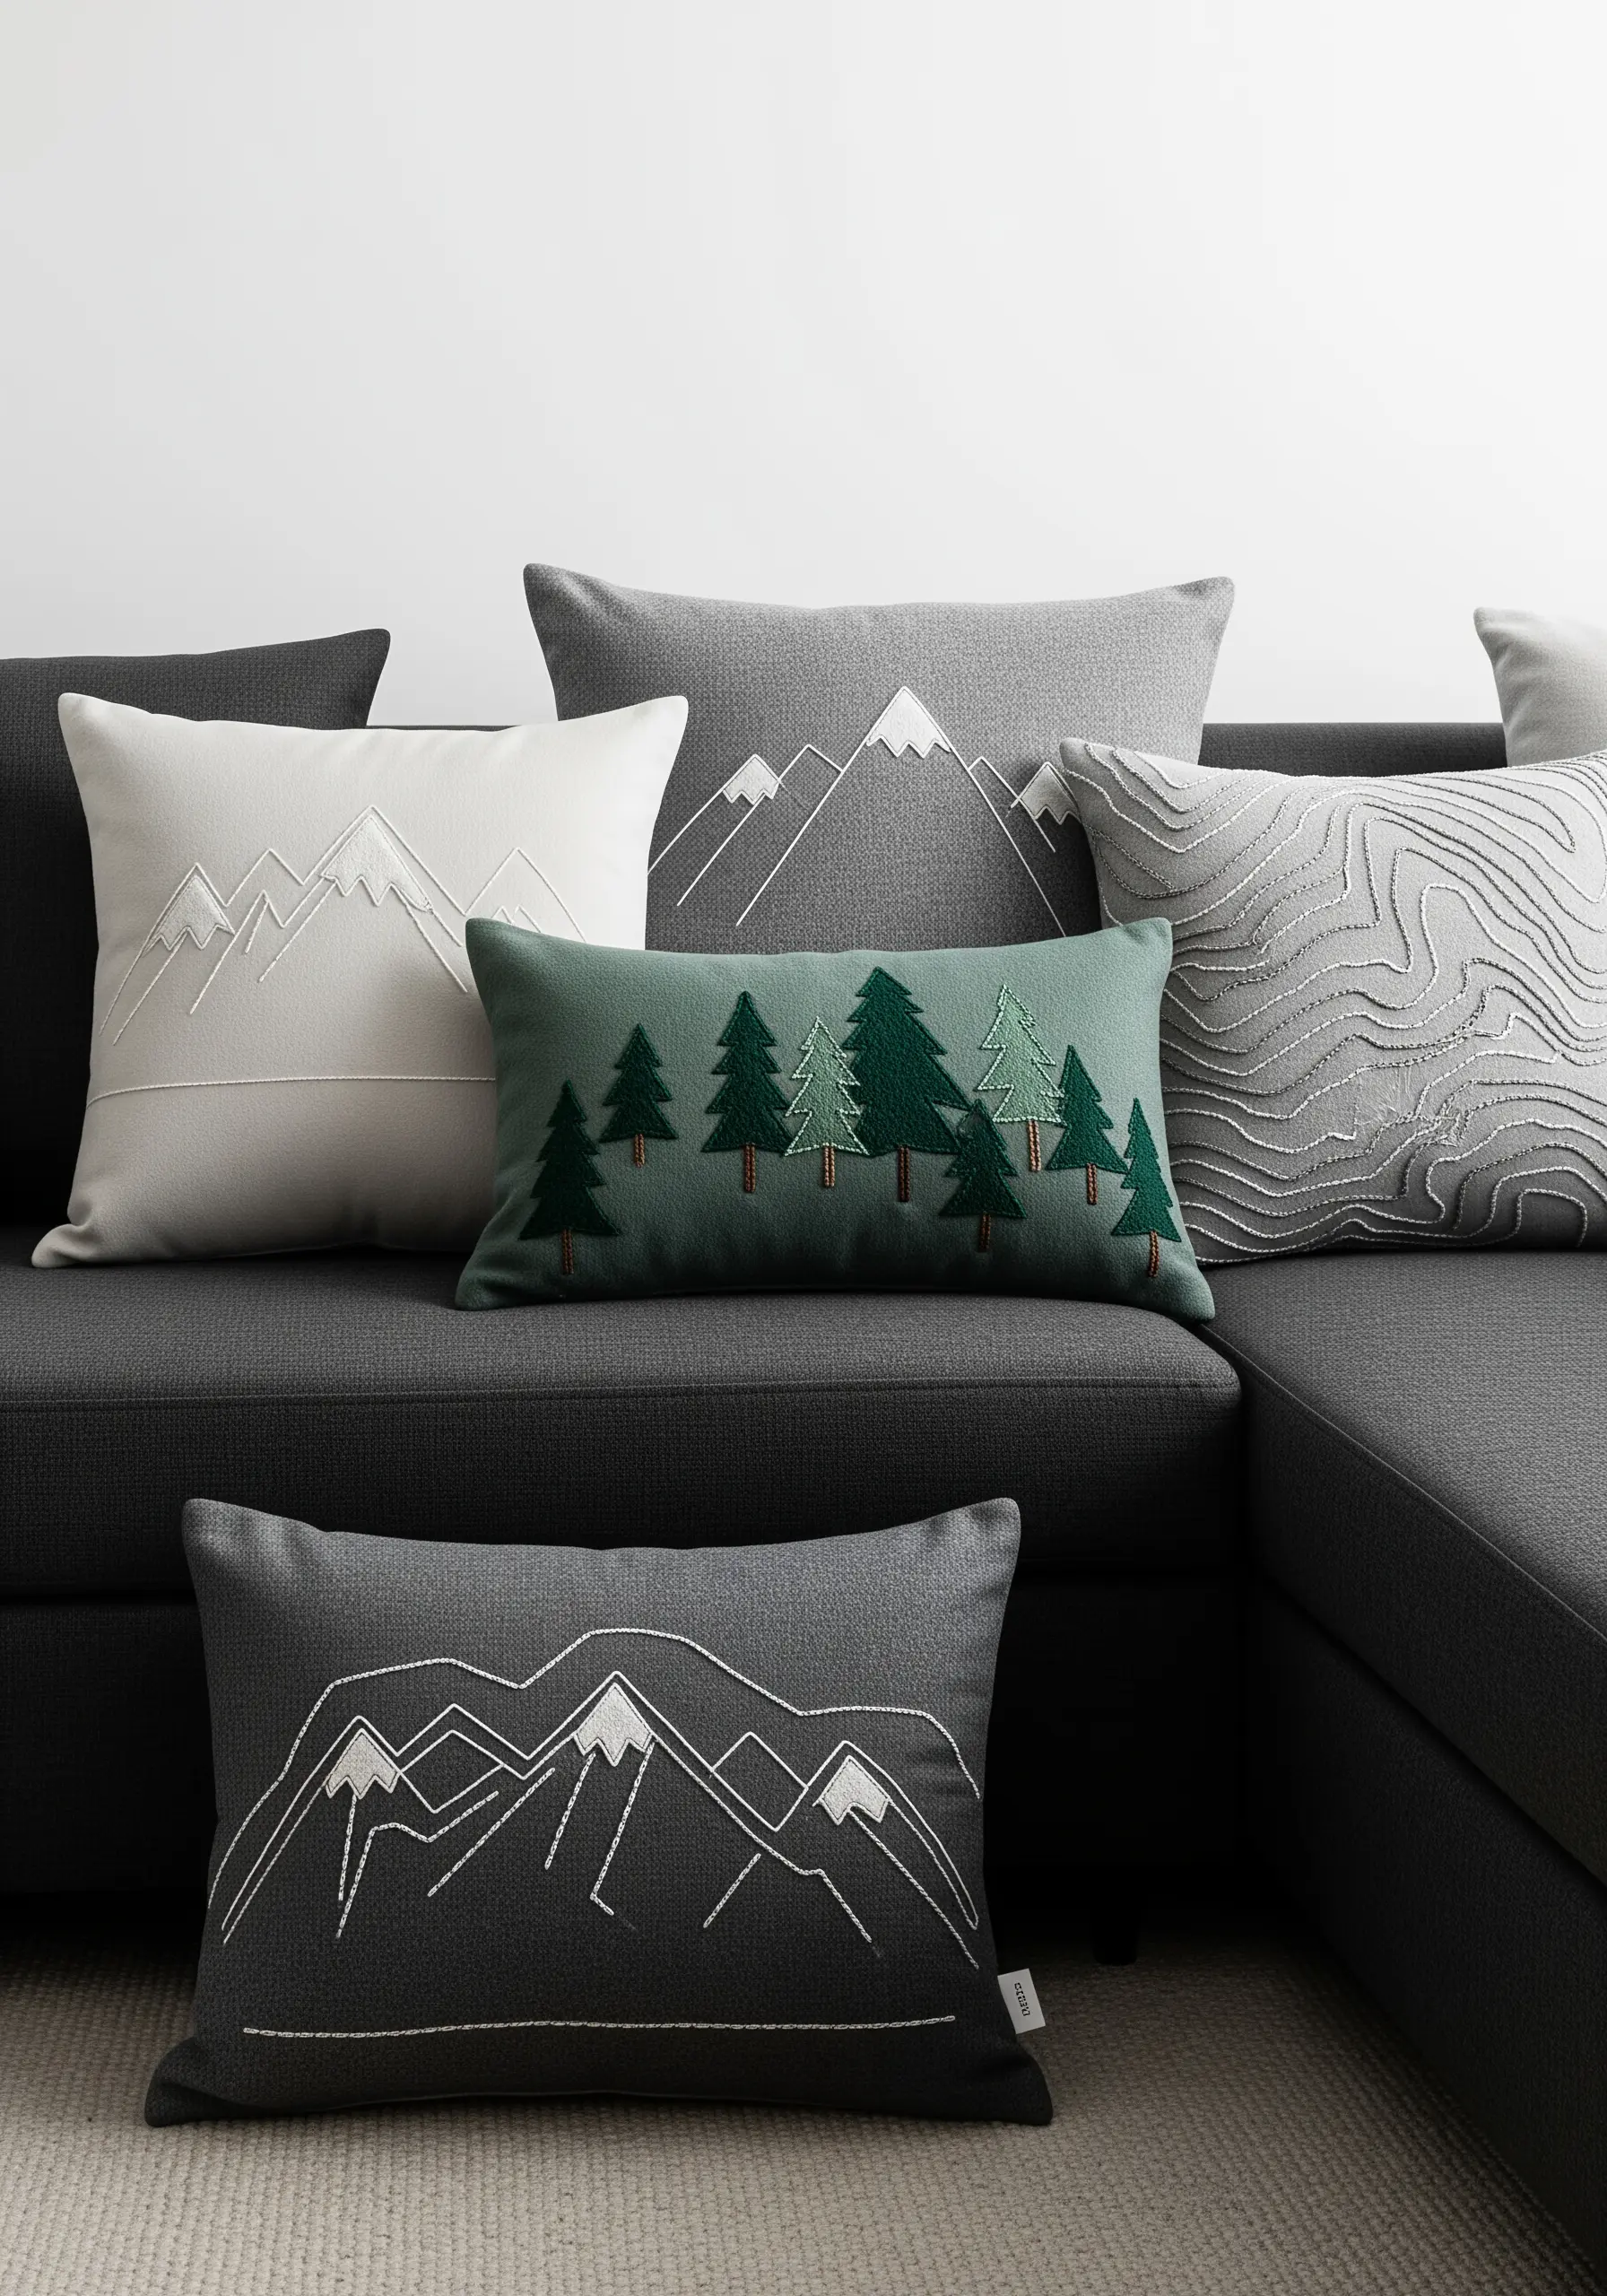
Interpret natural landscapes in two distinct ways for a modern, coordinated set: linear outlines and textural fills.
For the mountain peaks, use a simple backstitch or stem stitch to create a clean, graphic silhouette.
For the forest pillow, fill the tree shapes with vertical seed stitches to suggest pine needles.
The topographic design uses dense, concentric running stitches to feel like a map, turning these into compelling modern thread landscape projects.
18. Hellenic Elegance in Outline
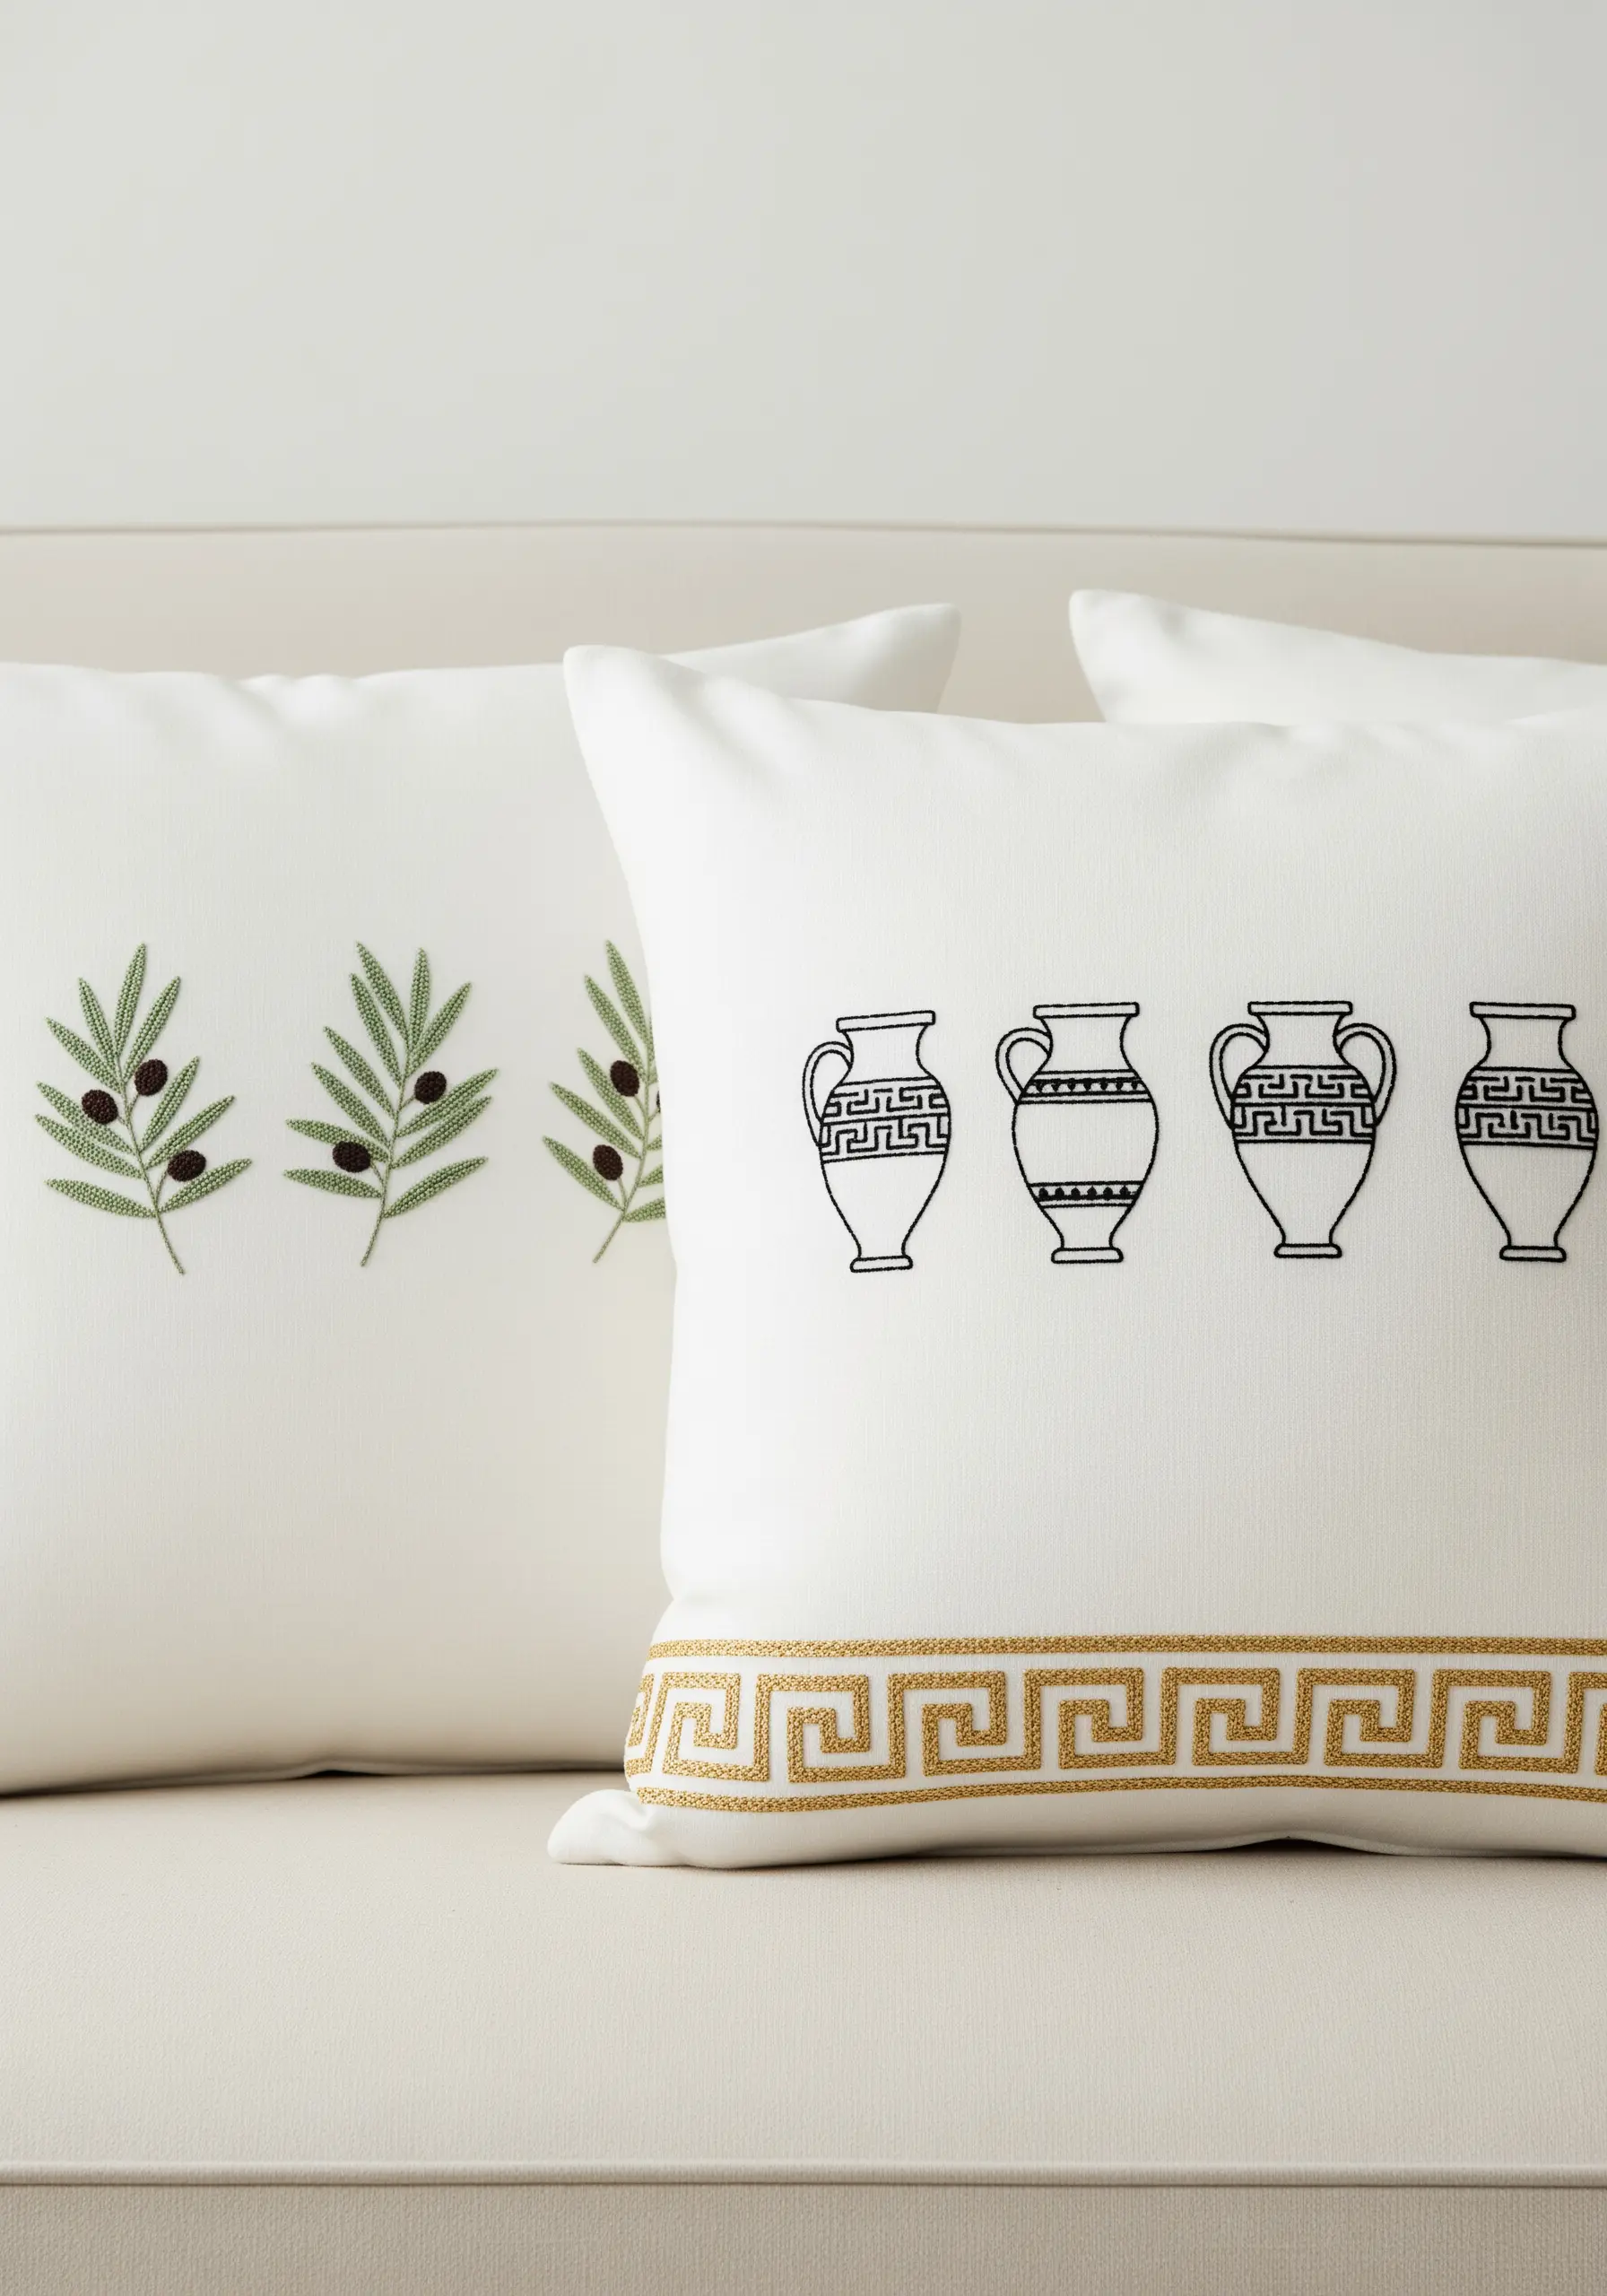
Achieve a sophisticated, classic look with precise and delicate line work.
Use a fine two-strand backstitch or split stitch for the outlines of the Greek vases and olive leaves.
For the small olive fruits, a tight, neat satin stitch will make them stand out with a subtle sheen.
To elevate the Greek key border, work it in a whipped backstitch using a single strand of metallic gold thread for a hint of shimmer.


