

Perhaps you’ve mastered the basic stitches, but now you find yourself wondering how to make your work feel less like a craft project and more like a piece of art. You want that polished, intentional quality you see in beautiful textiles, but aren’t sure how to get there.
The secret isn’t in tackling enormous, complicated patterns. It’s in the small things: a perfectly chosen stitch, an unexpected placement, a thoughtful detail that transforms an ordinary object into something special. A curated space is built from these tiny, meaningful touches.
These ideas are designed to help you do just that. Each one focuses on a specific technique or application that offers a visible improvement. Think of this as your guide to stitching with quiet confidence, turning simple thread and fabric into something truly your own.
1. Elevate a Bookmark with Raised Satin Stitch
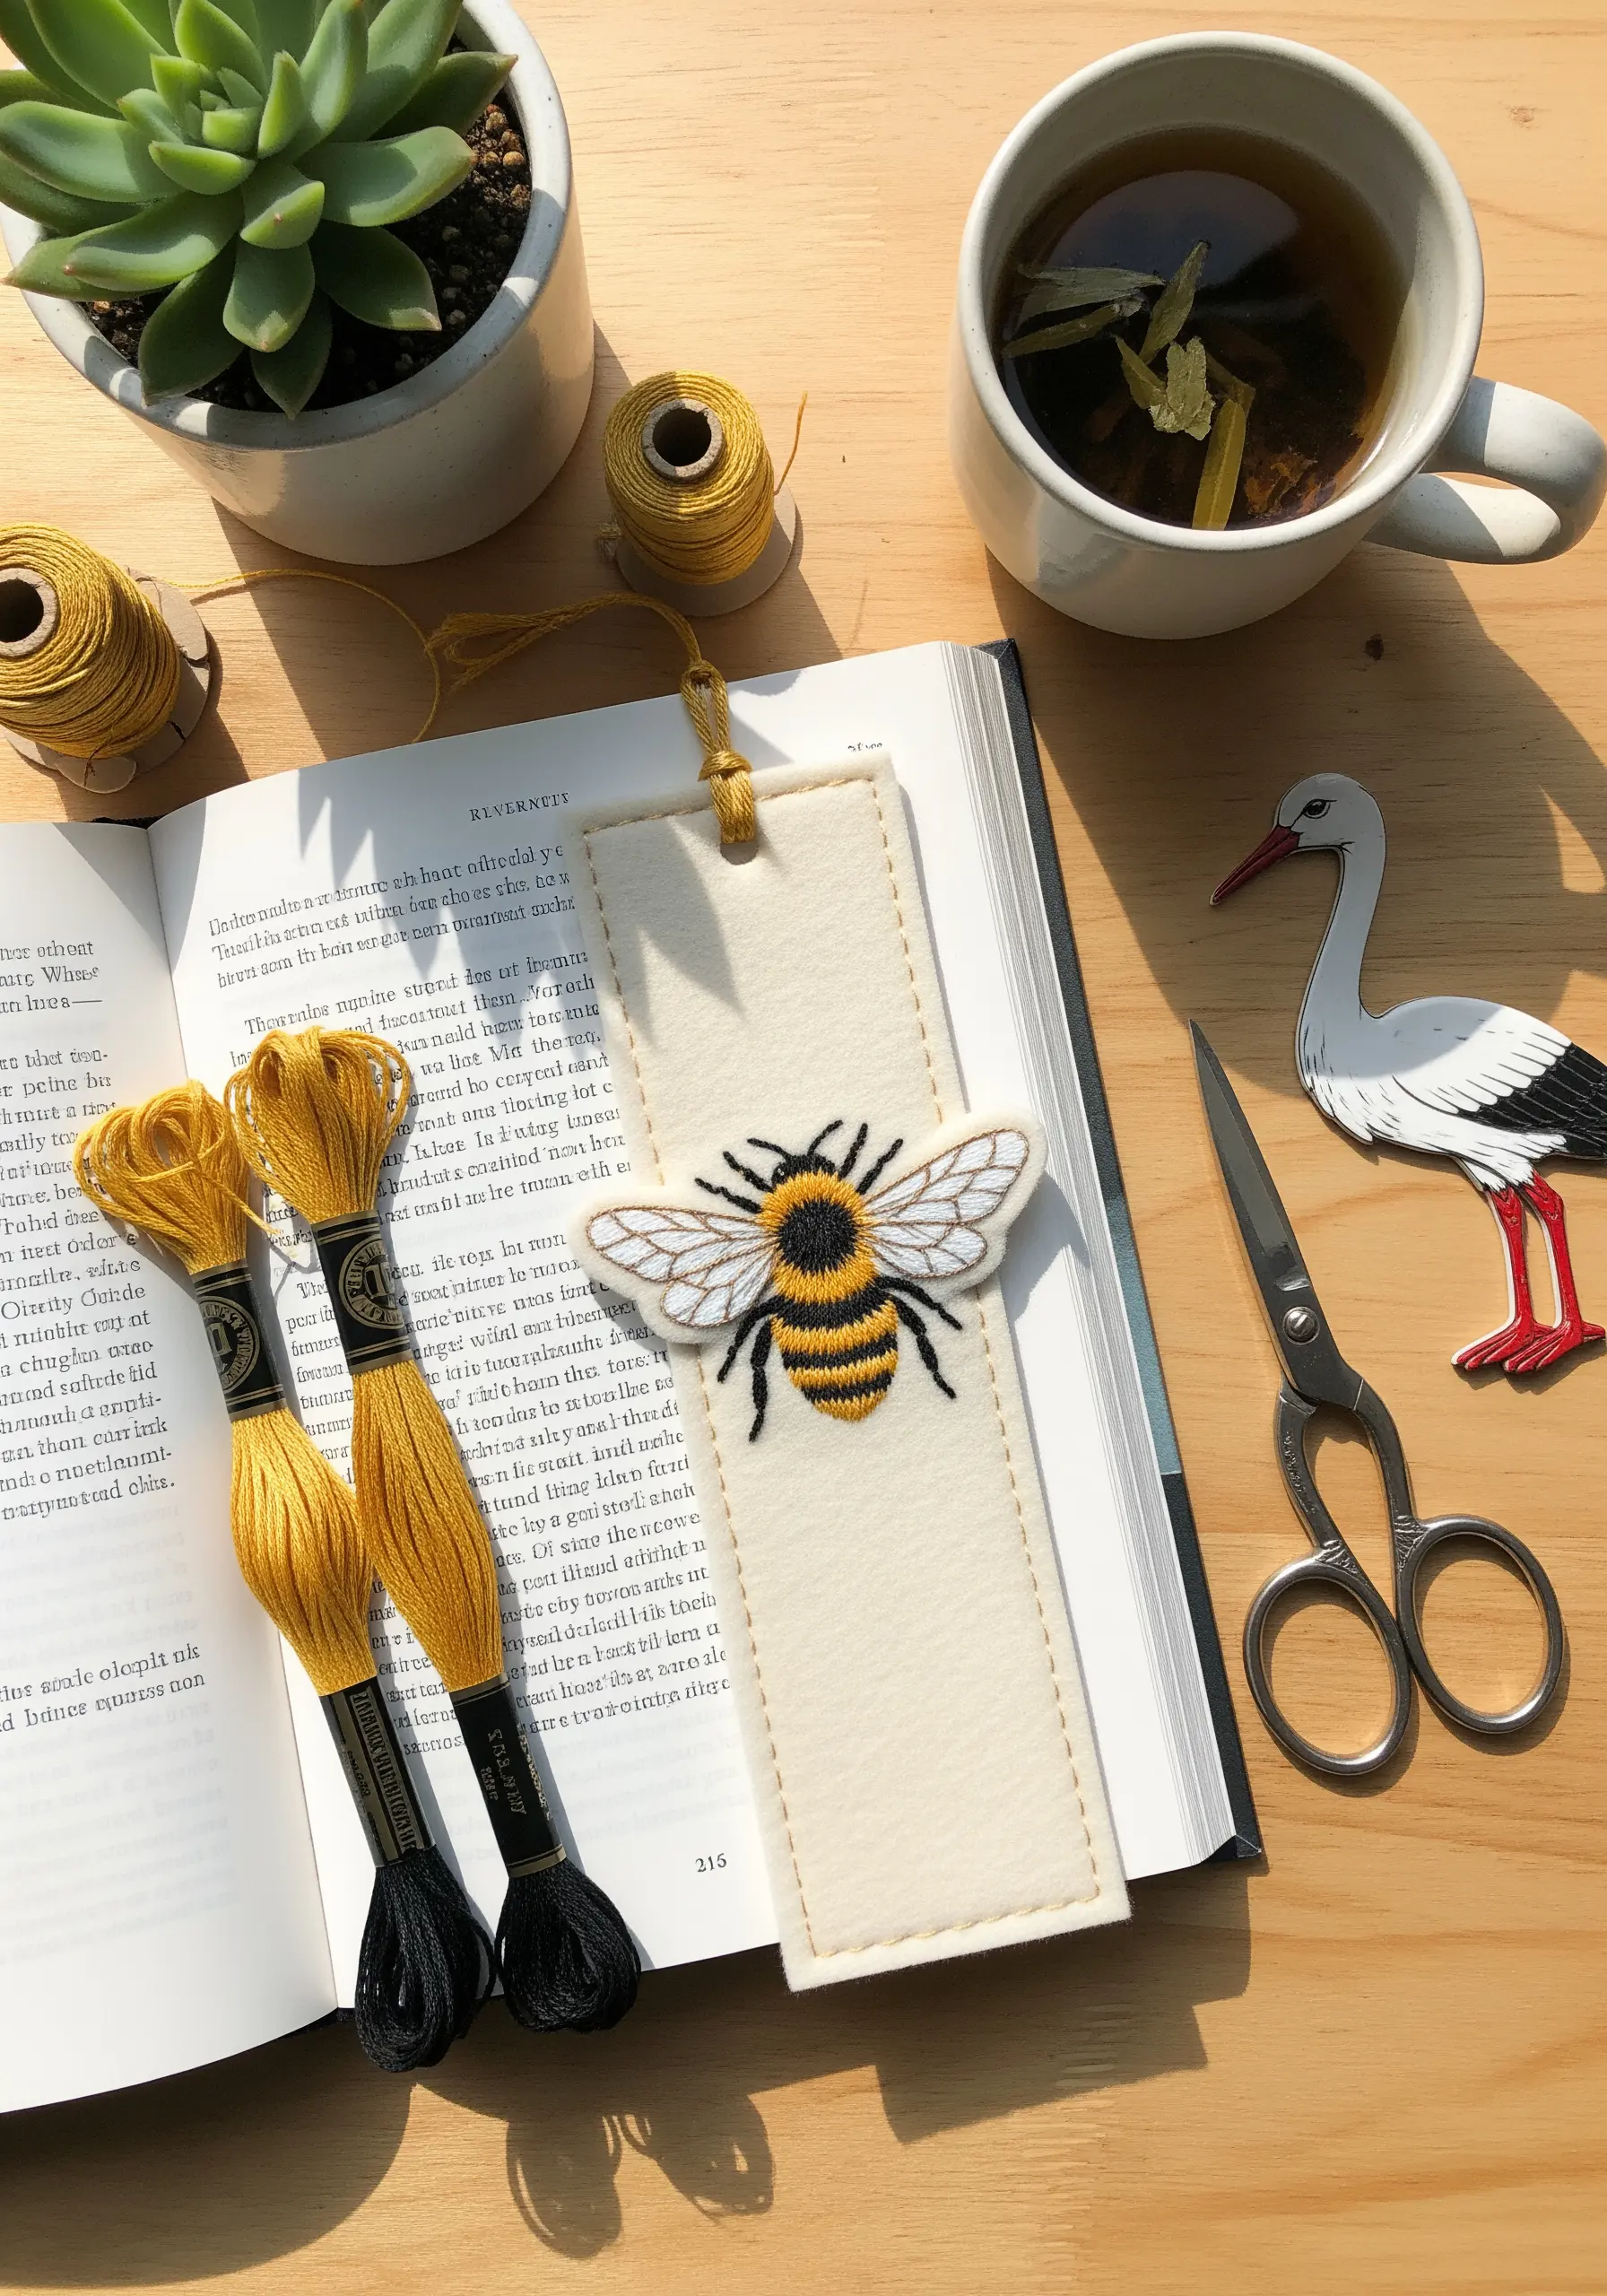
Create a functional piece of art by embroidering on a sturdy base like felt, which won’t fray when cut.
To give the bee’s body a subtle, three-dimensional feel, first lay down a few small straight stitches as padding before covering them with your yellow and black satin stitch.
For the wings, use a single strand of white or off-white floss in an open fishbone stitch to create a delicate, almost translucent effect that mimics reality.
This is one of those handmade art pieces that feel personal and heartfelt, making your reading time even more special.
2. Define Shapes with Graphic Line Art
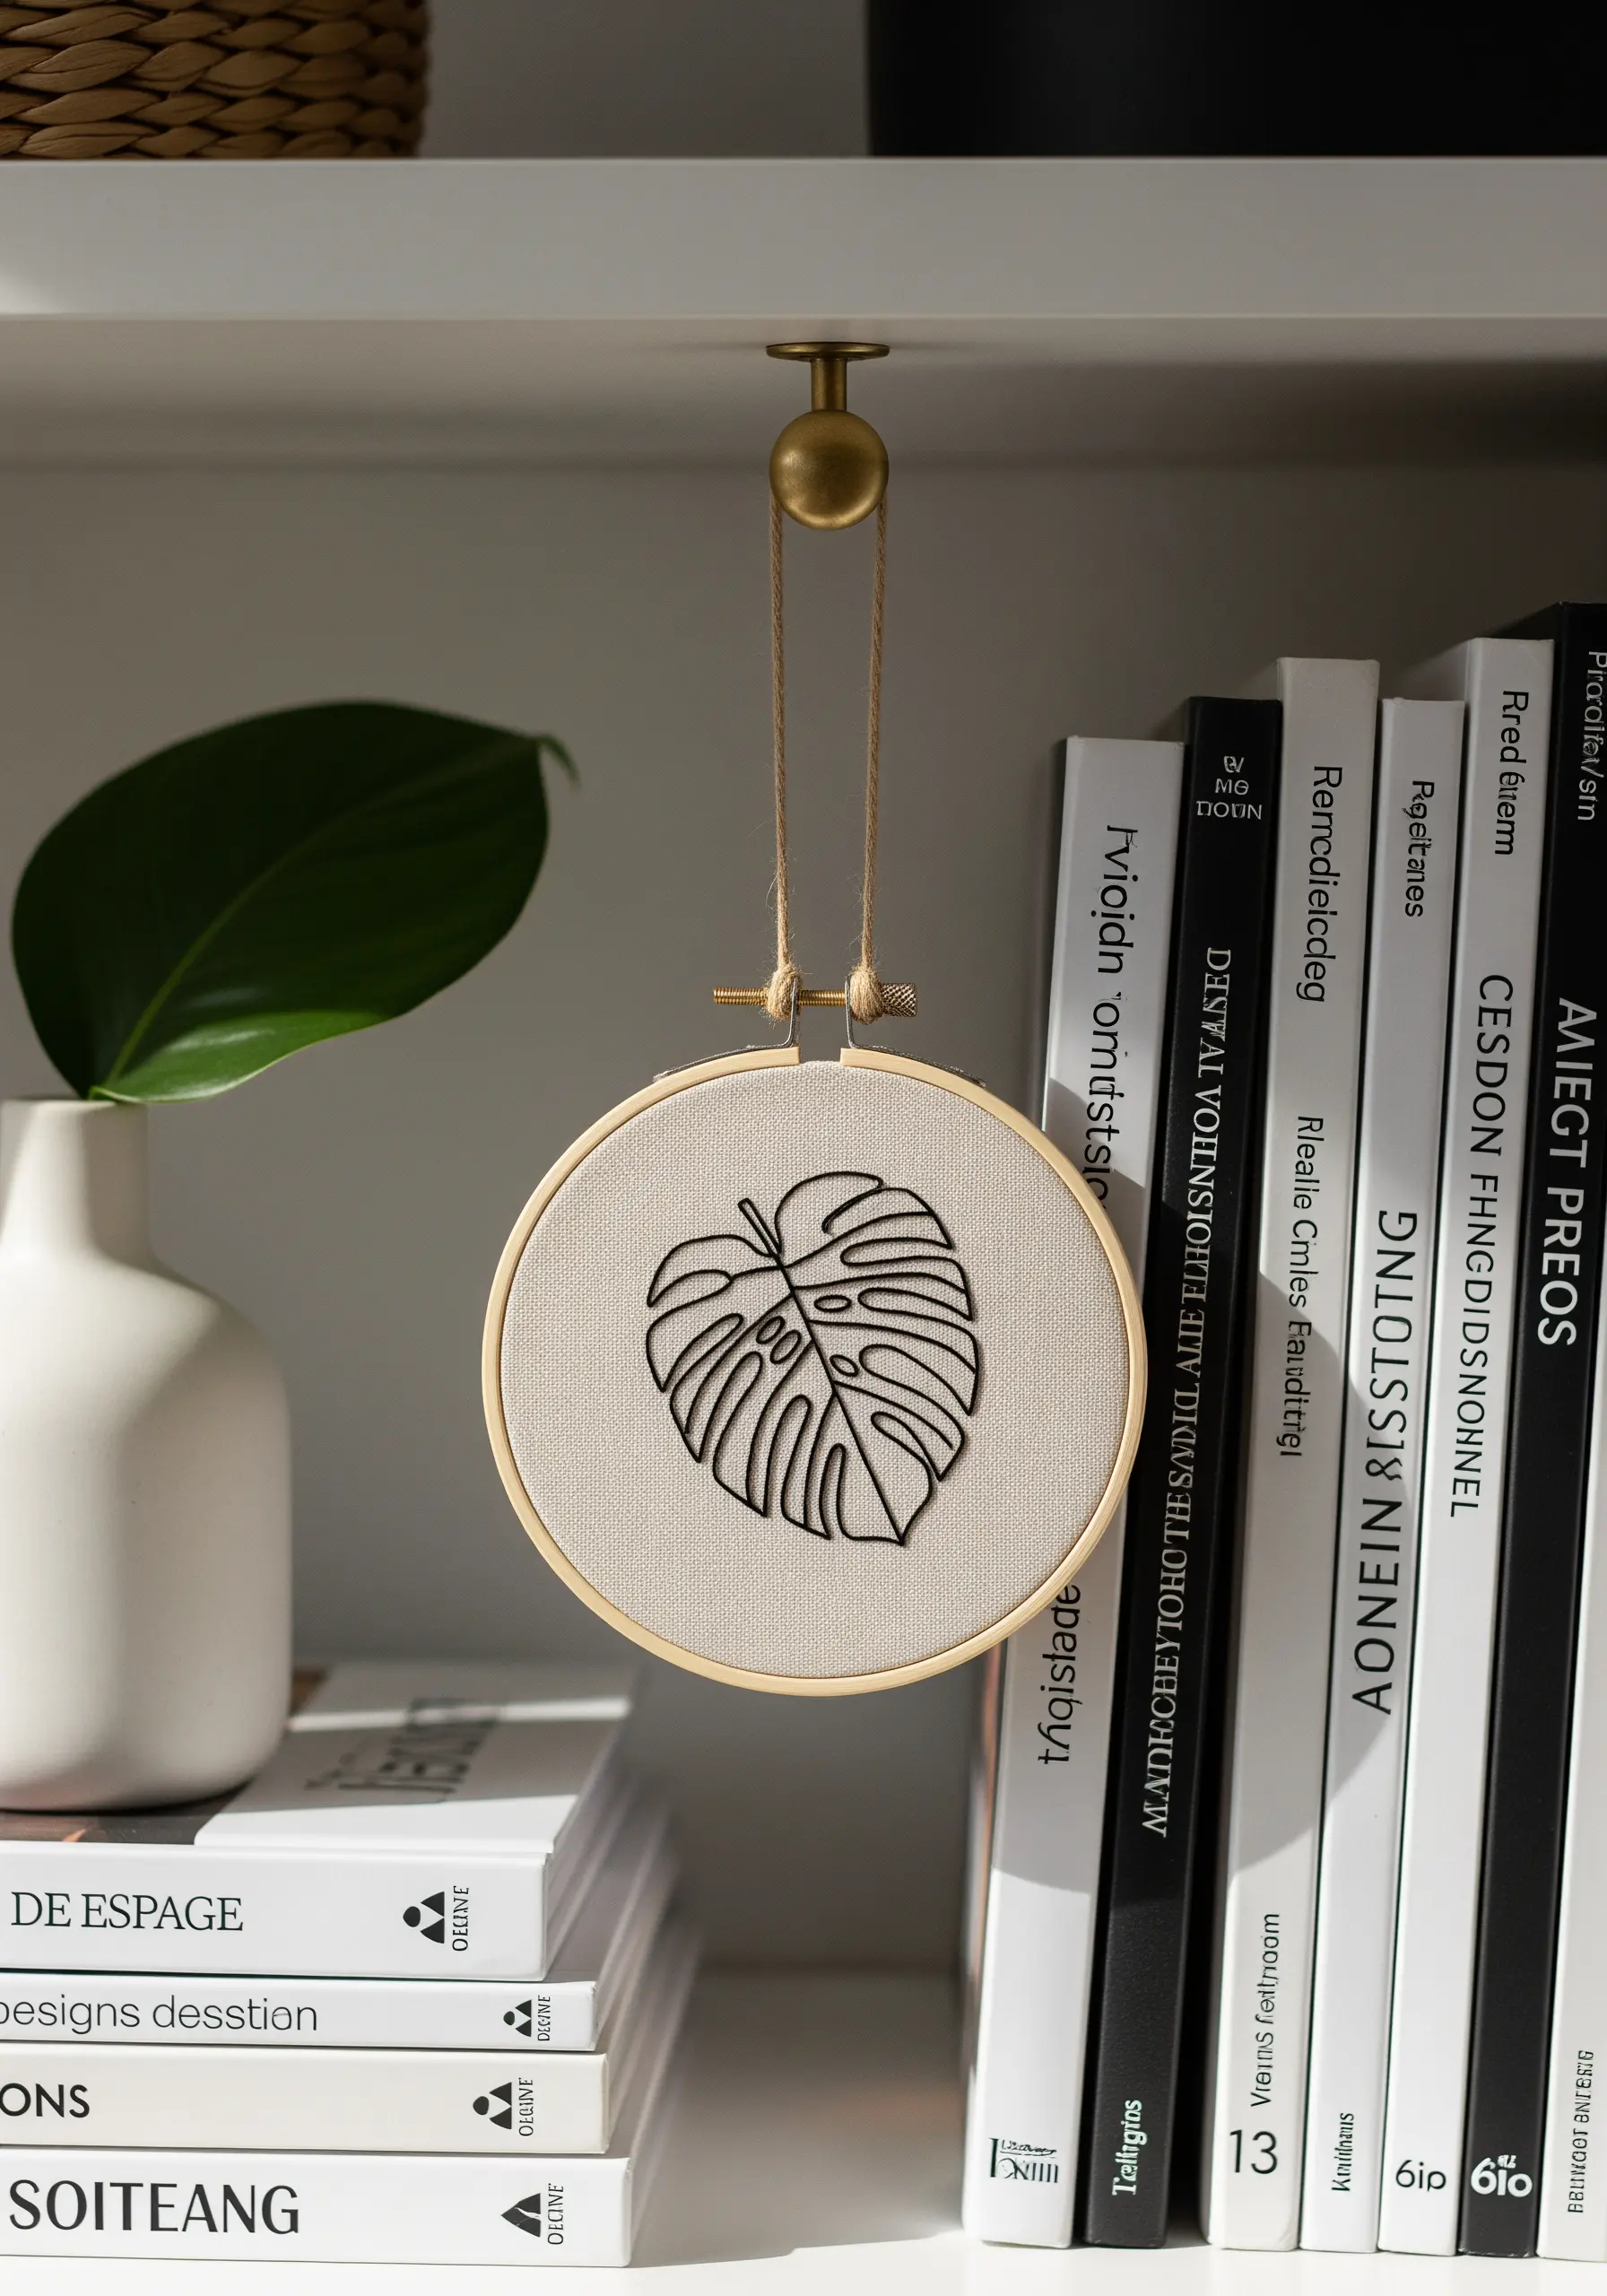
This project celebrates the power of a single, clean outline, where negative space is as important as the stitching itself.
Use a whipped backstitch or a stem stitch with three strands of floss to create a bold, uninterrupted line with a rope-like texture.
The key to a professional finish is consistent tension; pull each stitch taut, but not so tight that it puckers the linen fabric.
This technique elevates a simple botanical into a piece of modern line art.
3. Curate a Celestial Hoop Art Triptych

Unify a set of simple hoops by choosing a consistent color palette—like this navy, white, and gold—and a shared theme.
For the stars and sun rays, blend one strand of metallic thread with two strands of regular cotton floss.
This simple trick makes metallic thread easier to handle and gives a subtle shimmer rather than an overpowering shine.
Displaying them together as a cohesive group turns simple stitches into gallery-style decor.
4. Add a Playful Accent with Collar Embroidery
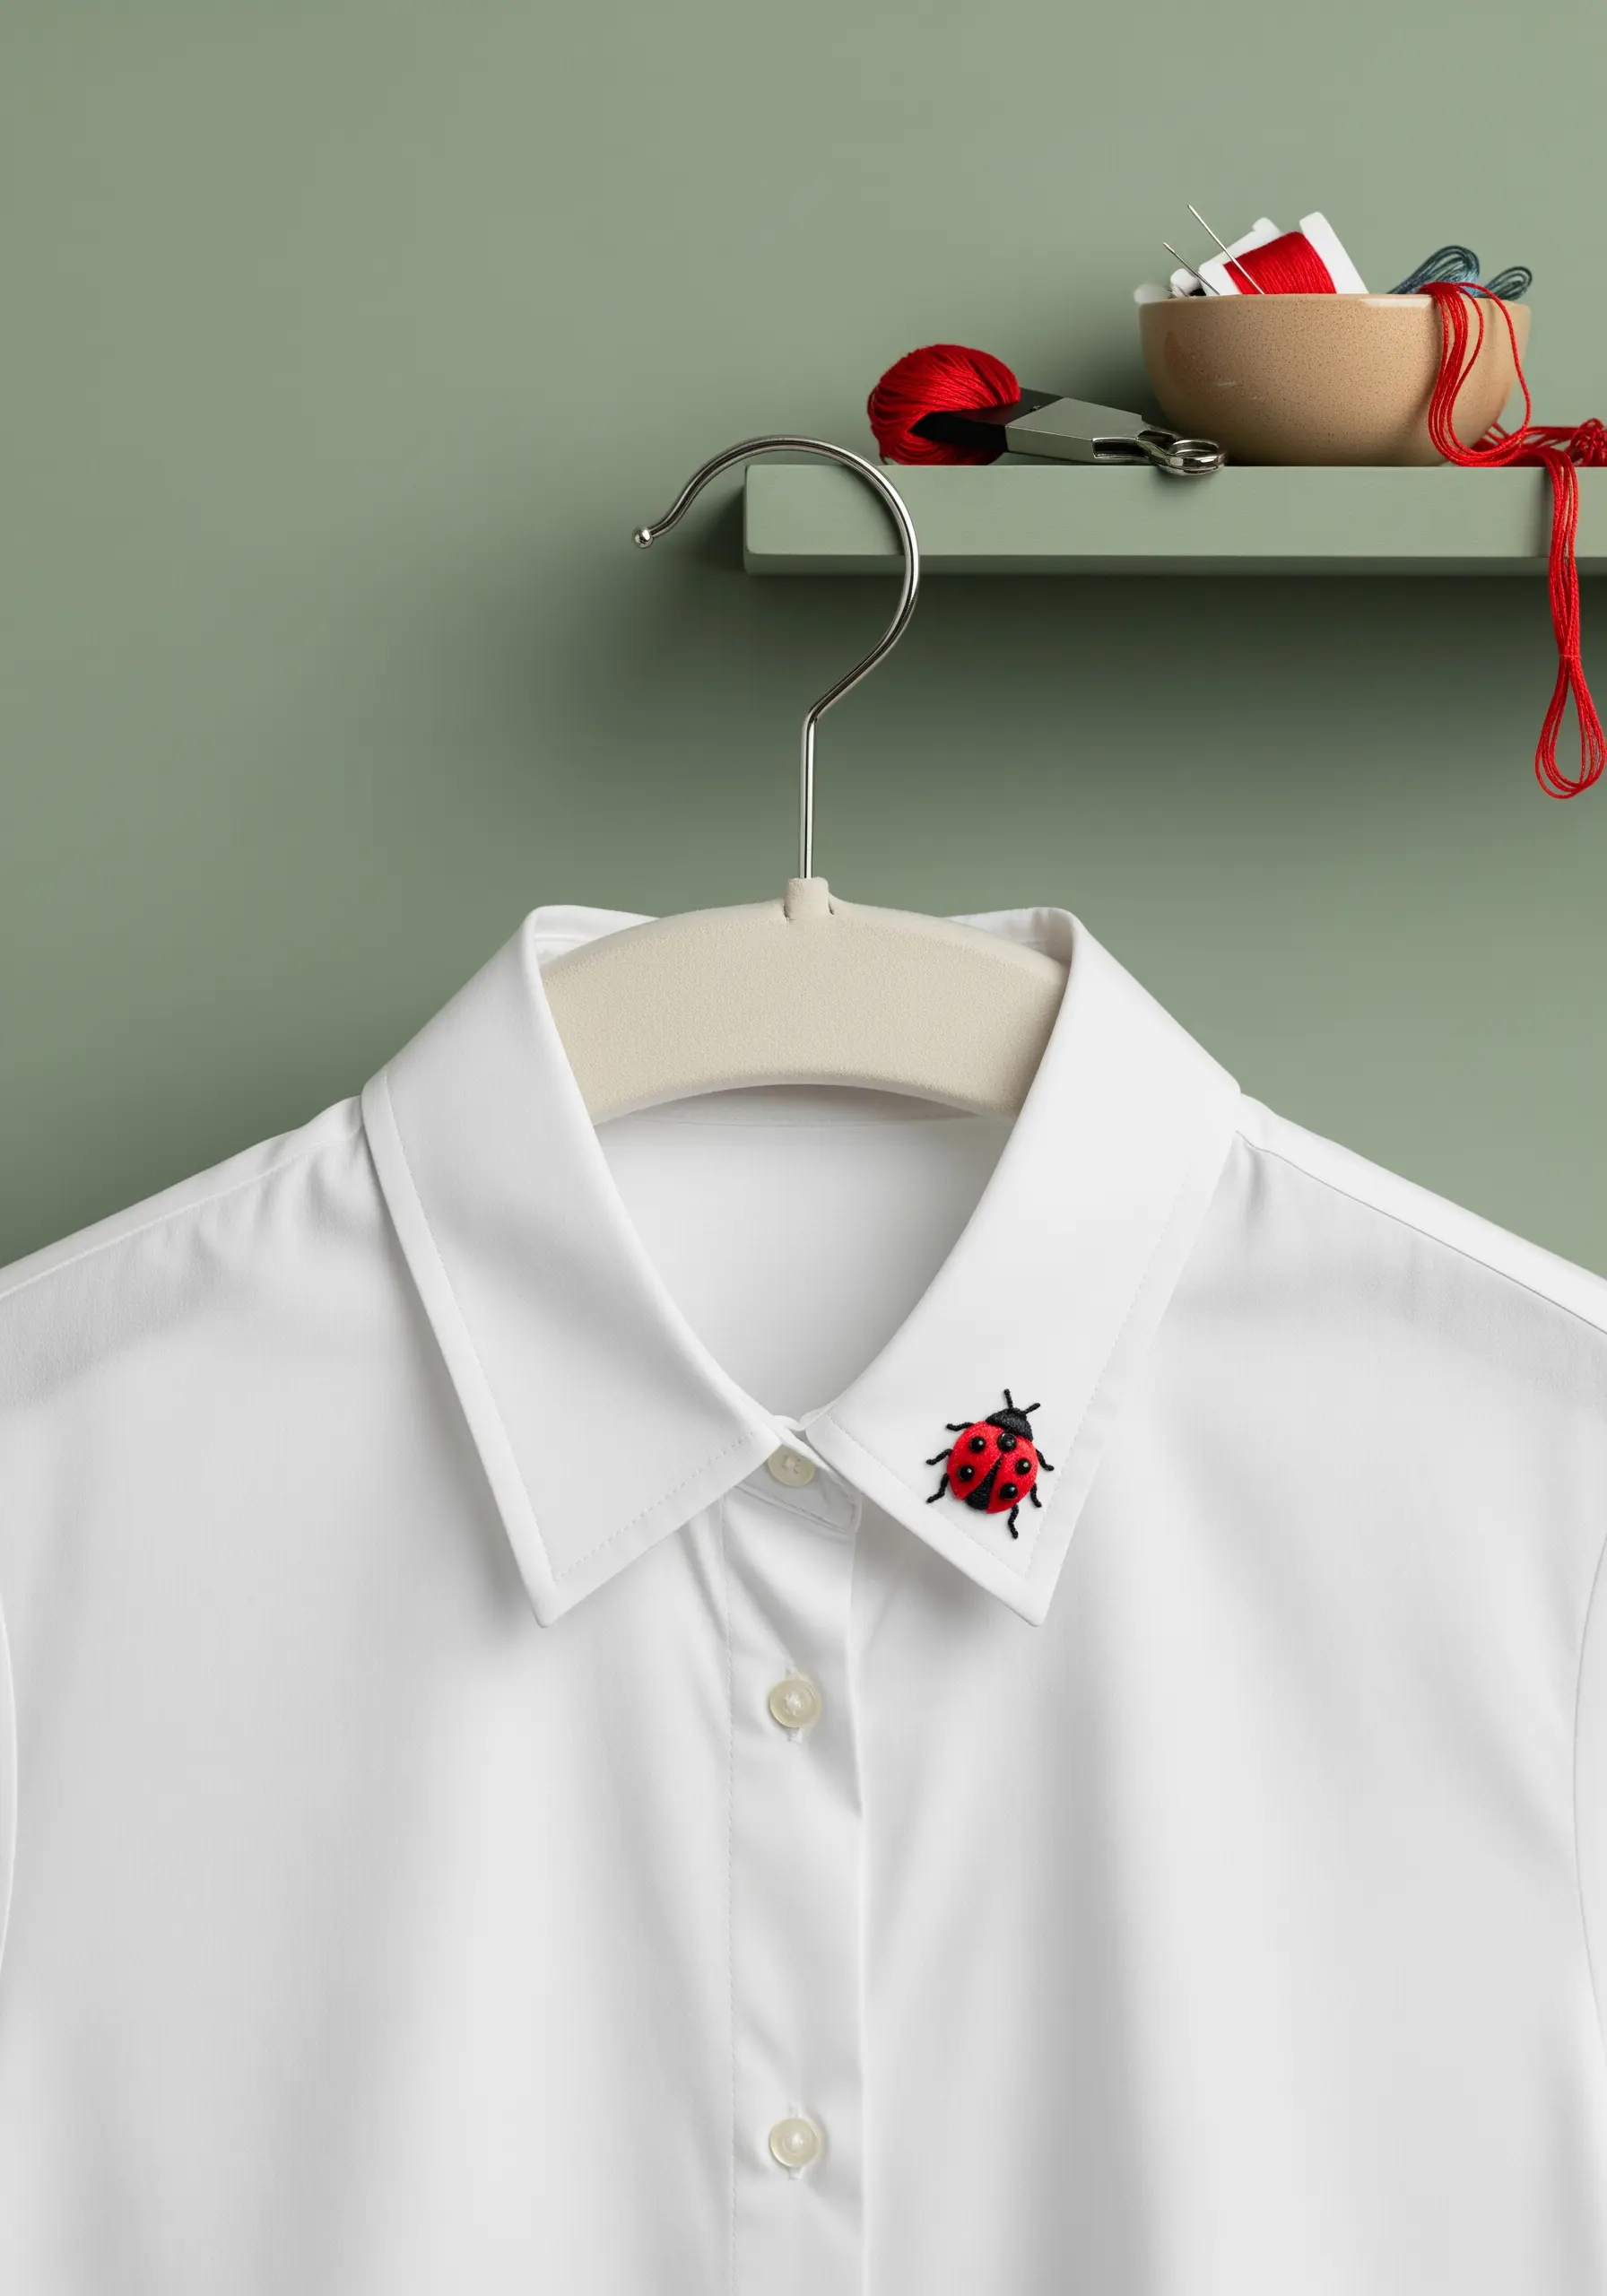
Transform a simple shirt with a tiny, unexpected detail that draws the eye.
Use a water-soluble stabilizer to perfectly place your motif on the collar; it will prevent the fabric from stretching and provide a stable surface for your stitches.
For the ladybug’s shell, a padded satin stitch will give it a nice, rounded shape that stands out against the flat fabric.
The impact comes from the precise placement and the pop of color, making it one of those sneaky small embroidery ideas on clothing that make people look twice.
5. Stitch a Refined Set of Botanical Coasters
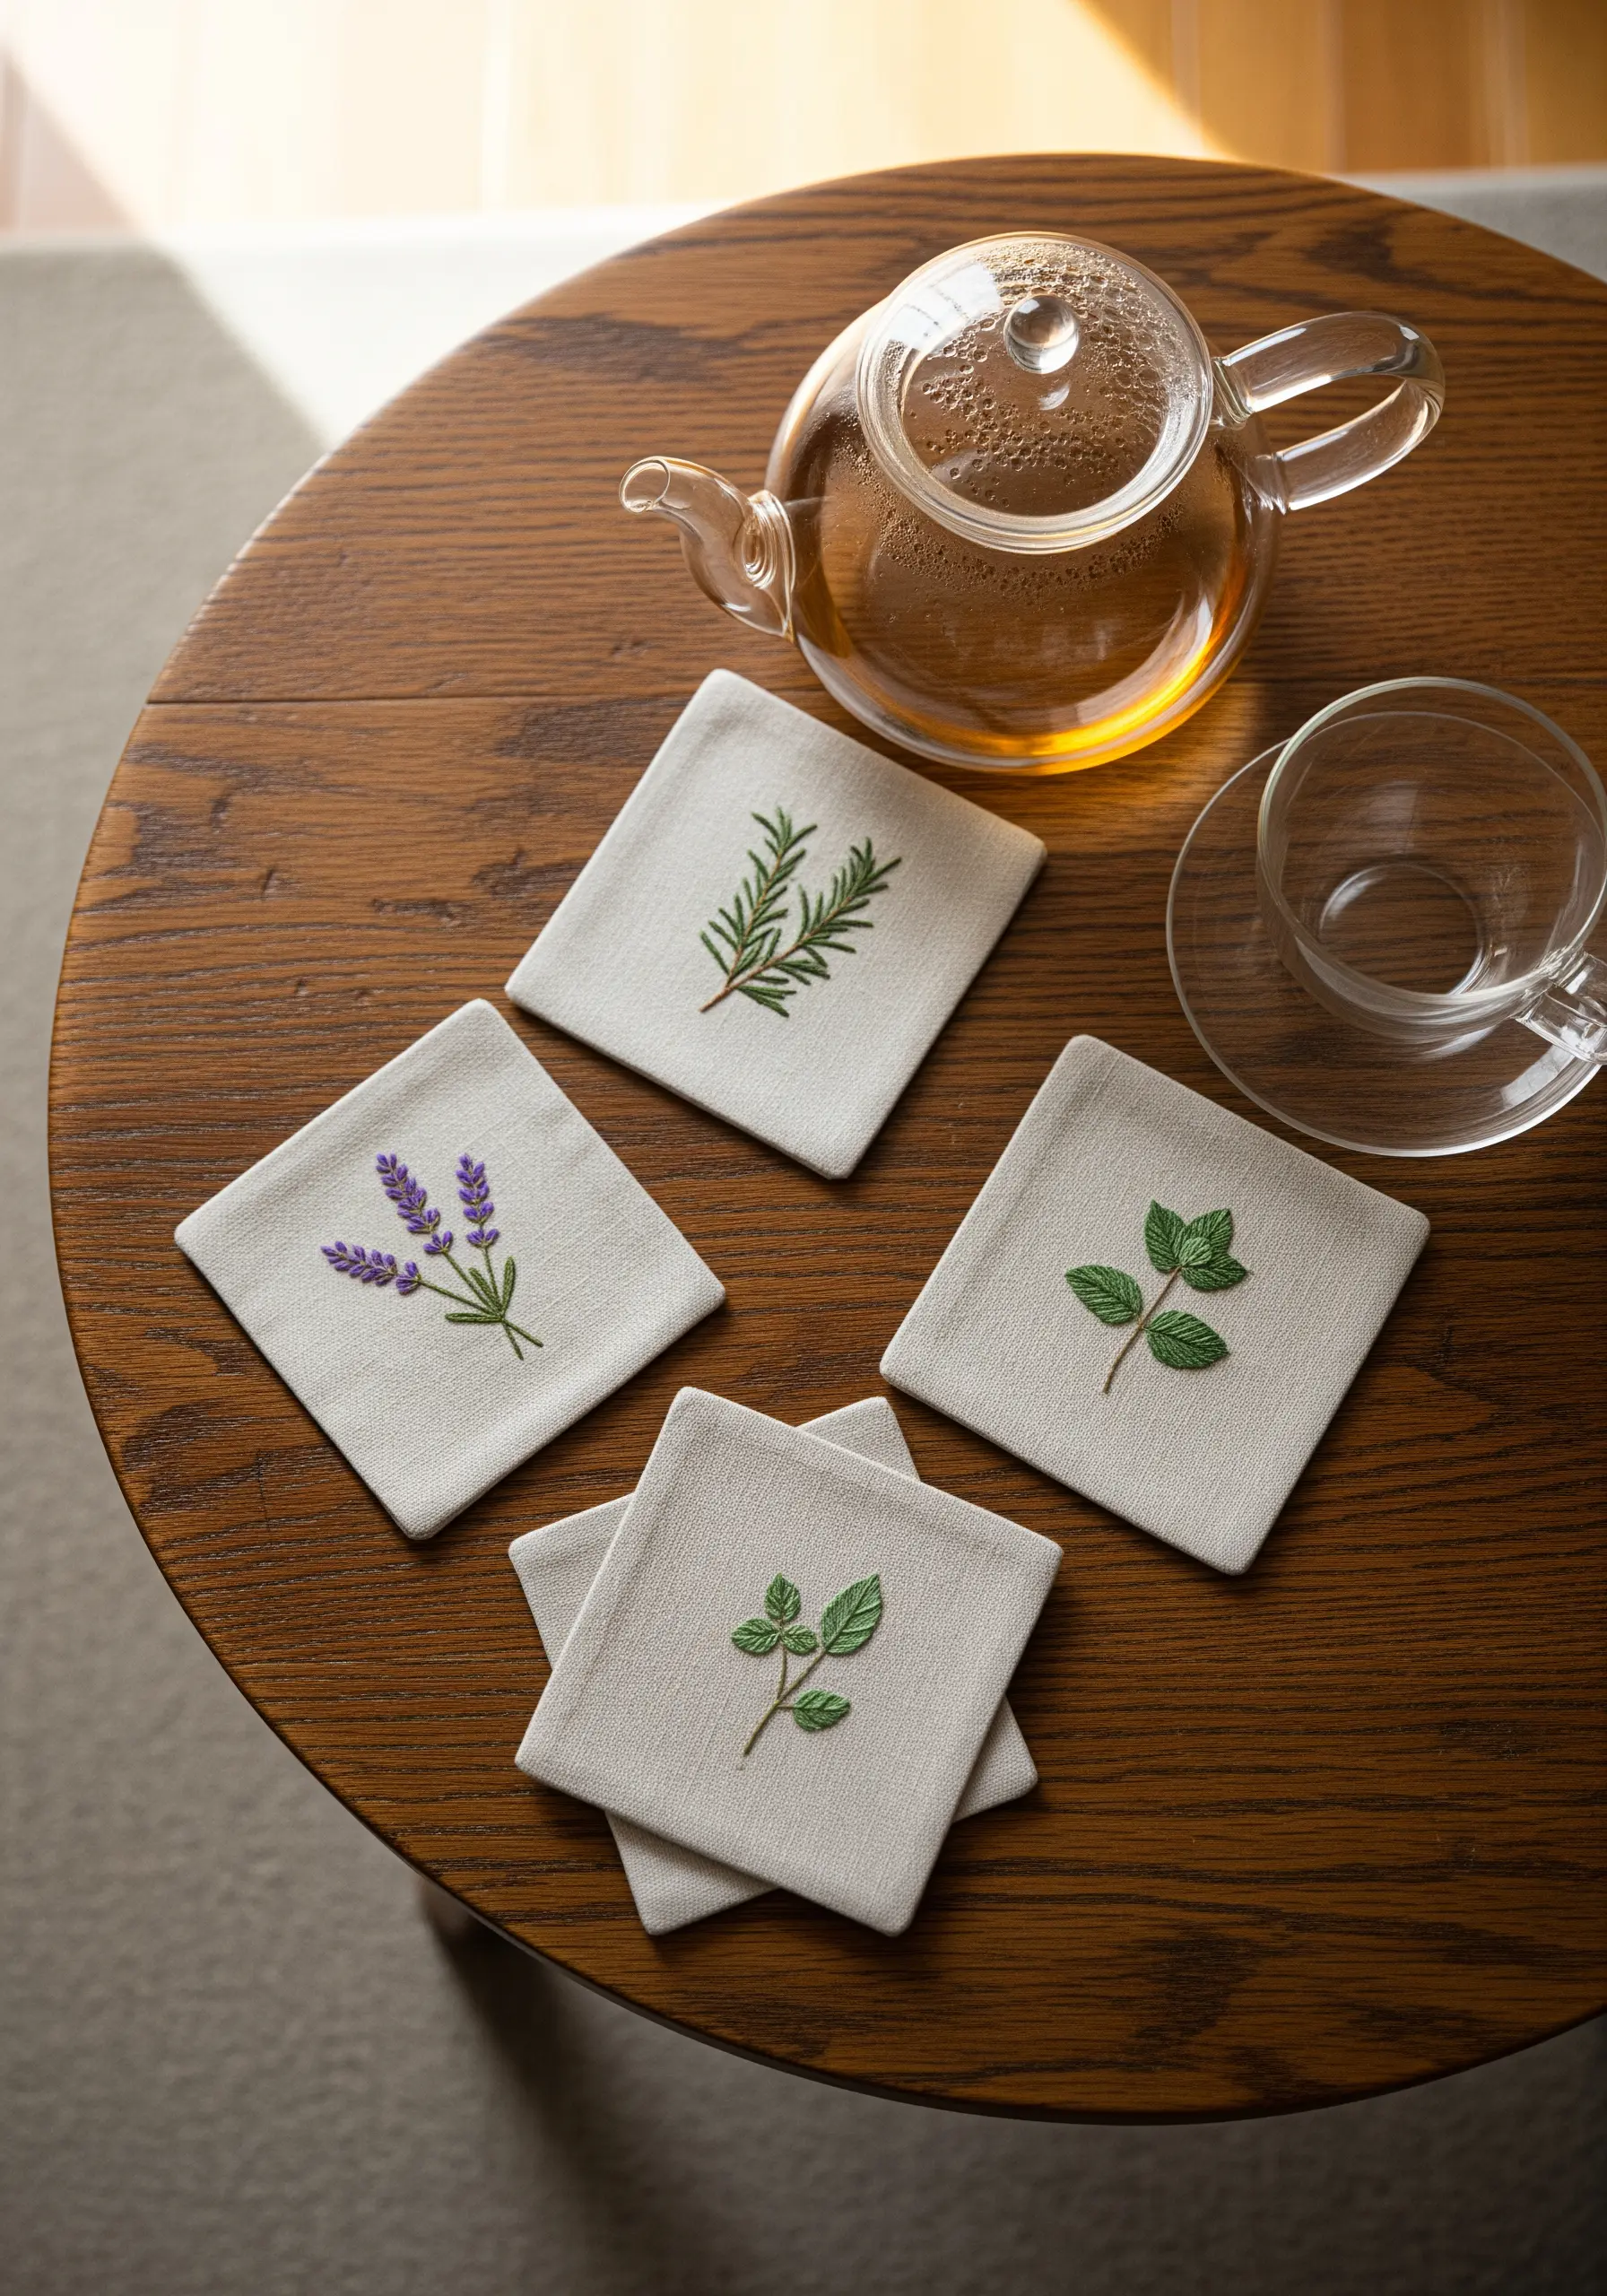
For delicate stems like rosemary or lavender, use a single strand of thread and a fine stem stitch to keep the lines crisp and defined.
For the leaves and blossoms, use detached chain stitches (lazy daisies) or tiny satin stitches to add texture and shape.
The key to a curated set is using the same neutral linen fabric and a complementary color palette across all the coasters, making even simple herbal plant embroidery motifs feel cohesive.
6. Create a Felt Banner with Thread-Painted Wings
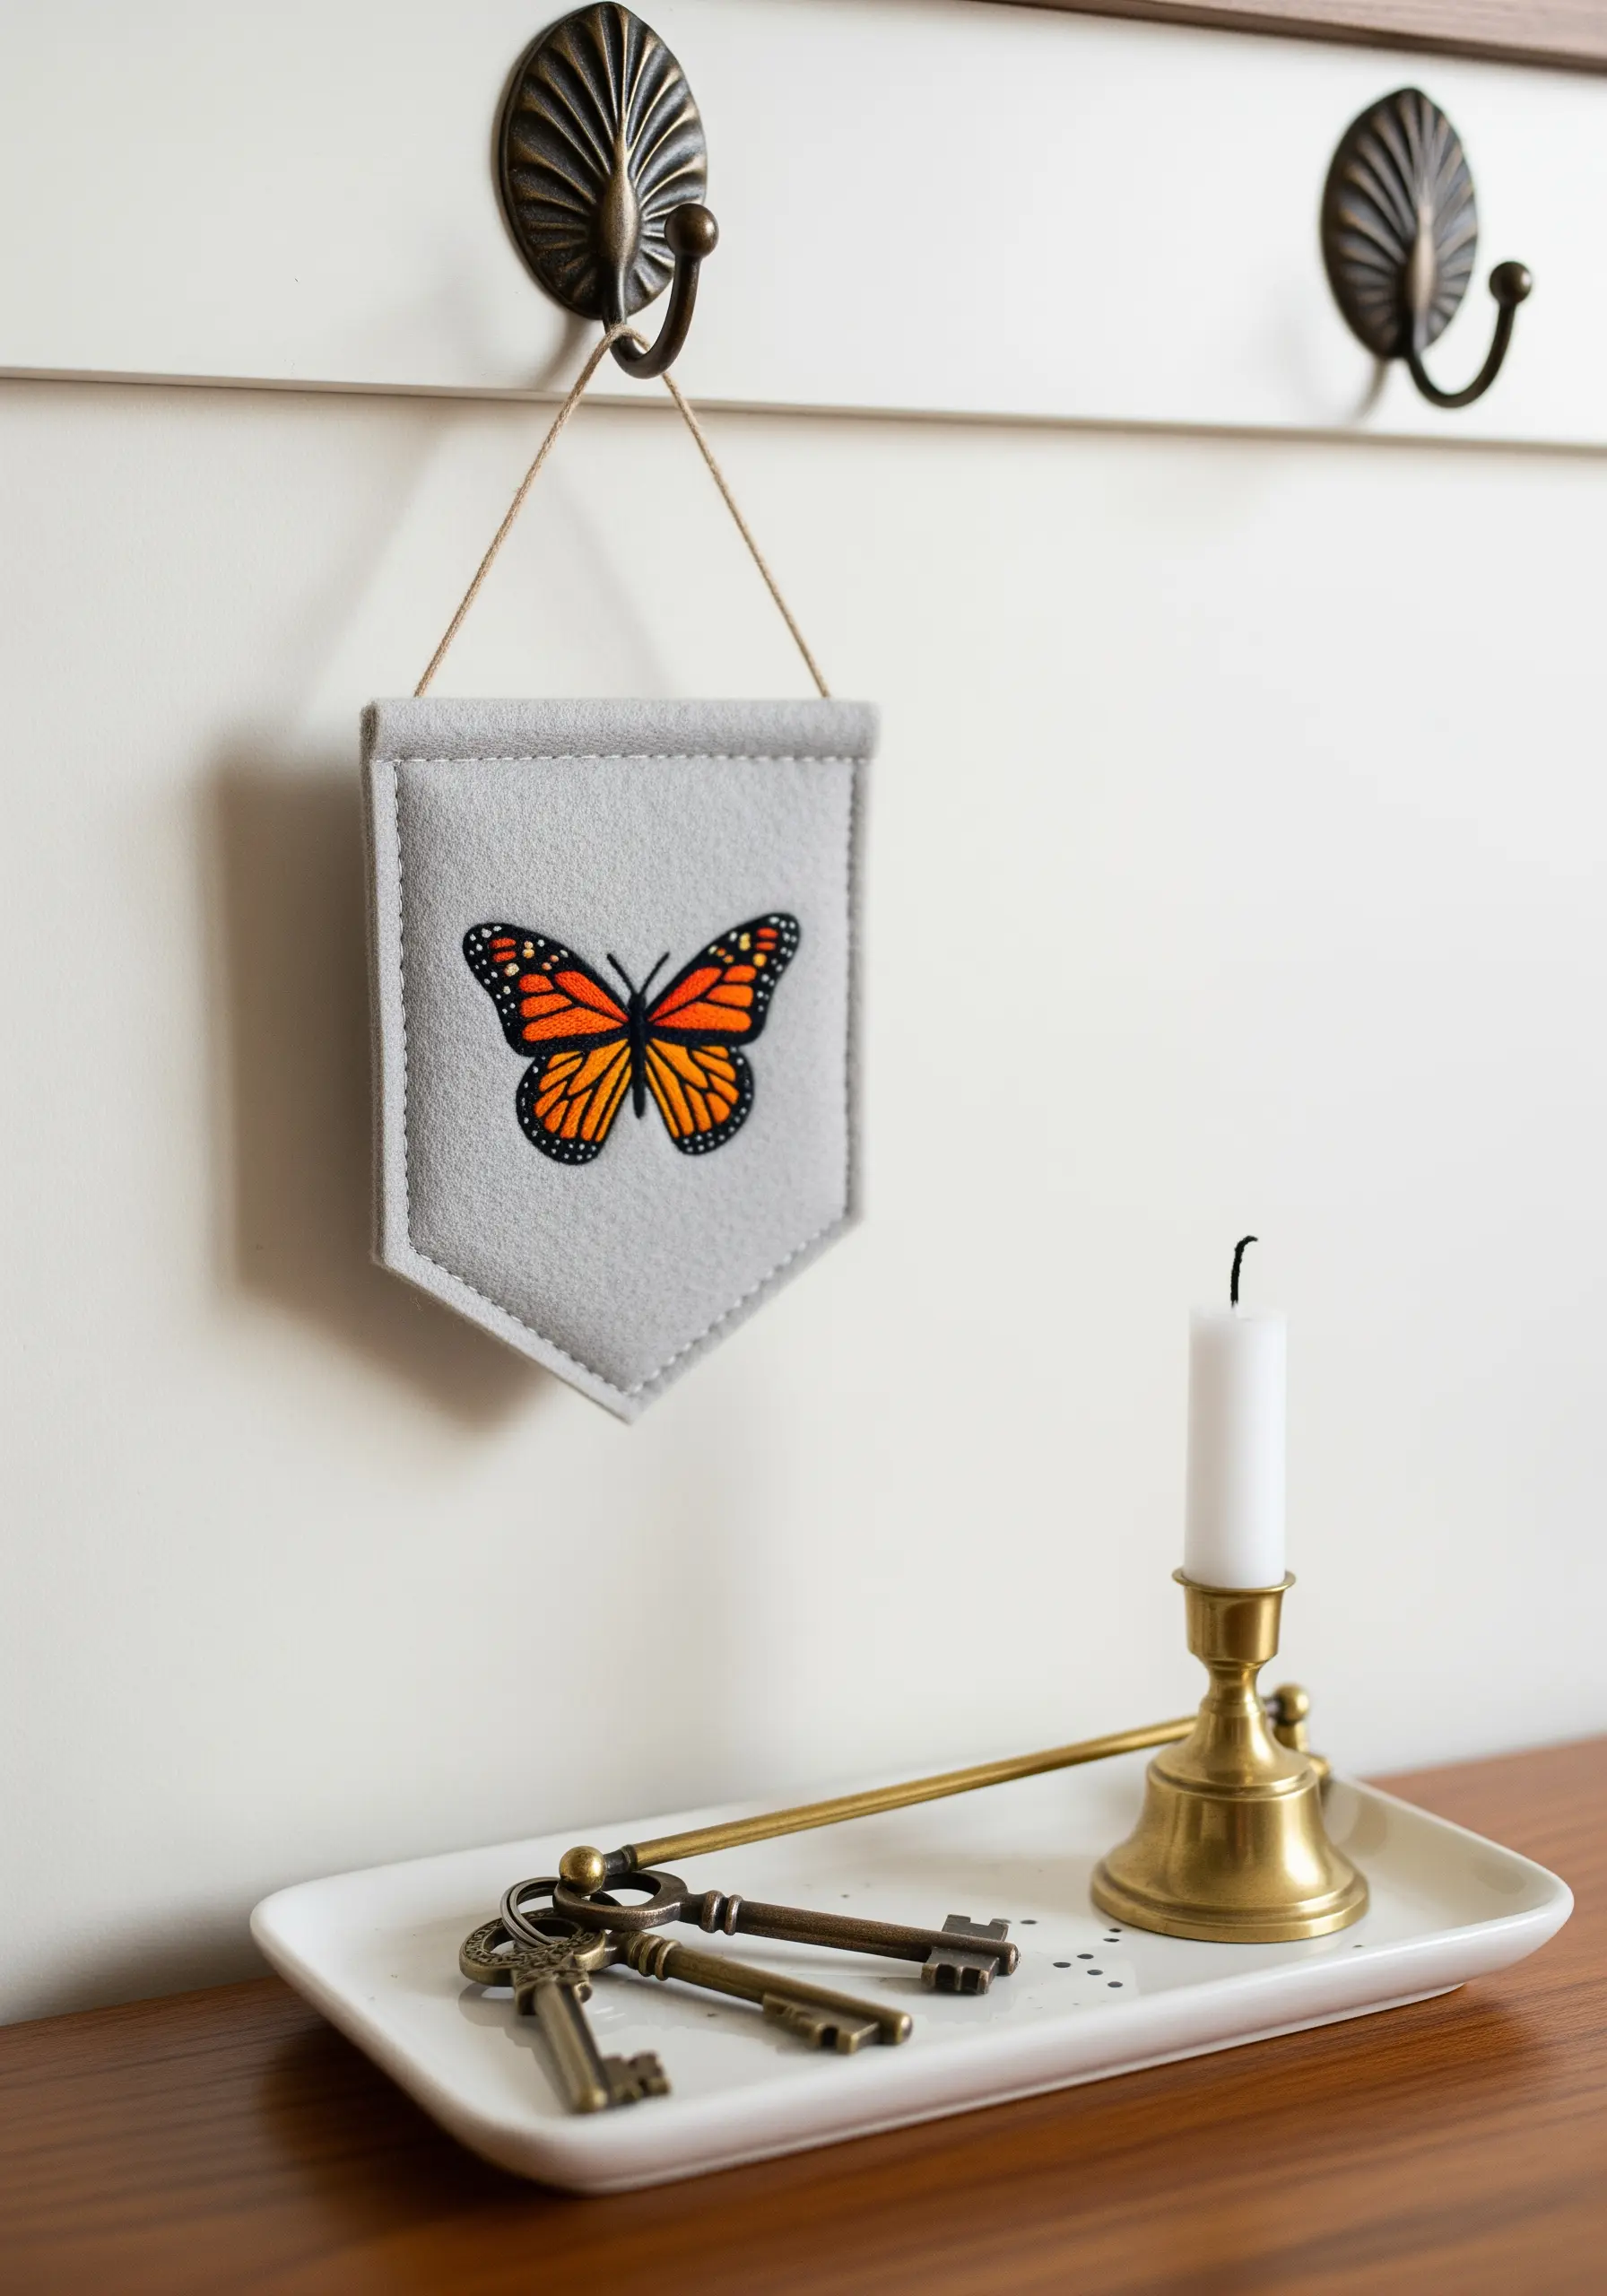
Felt provides a stable, non-fraying base, making it a perfect canvas for a beginner-friendly wall banner.
To create the butterfly’s beautiful gradient wings, use the long-and-short stitch technique with two or three shades of a similar color.
Use just one or two strands of floss to allow for smooth blending, then add a sharp black backstitch outline last to make the colors pop.
7. Craft a Layered Felt and Thread Keychain
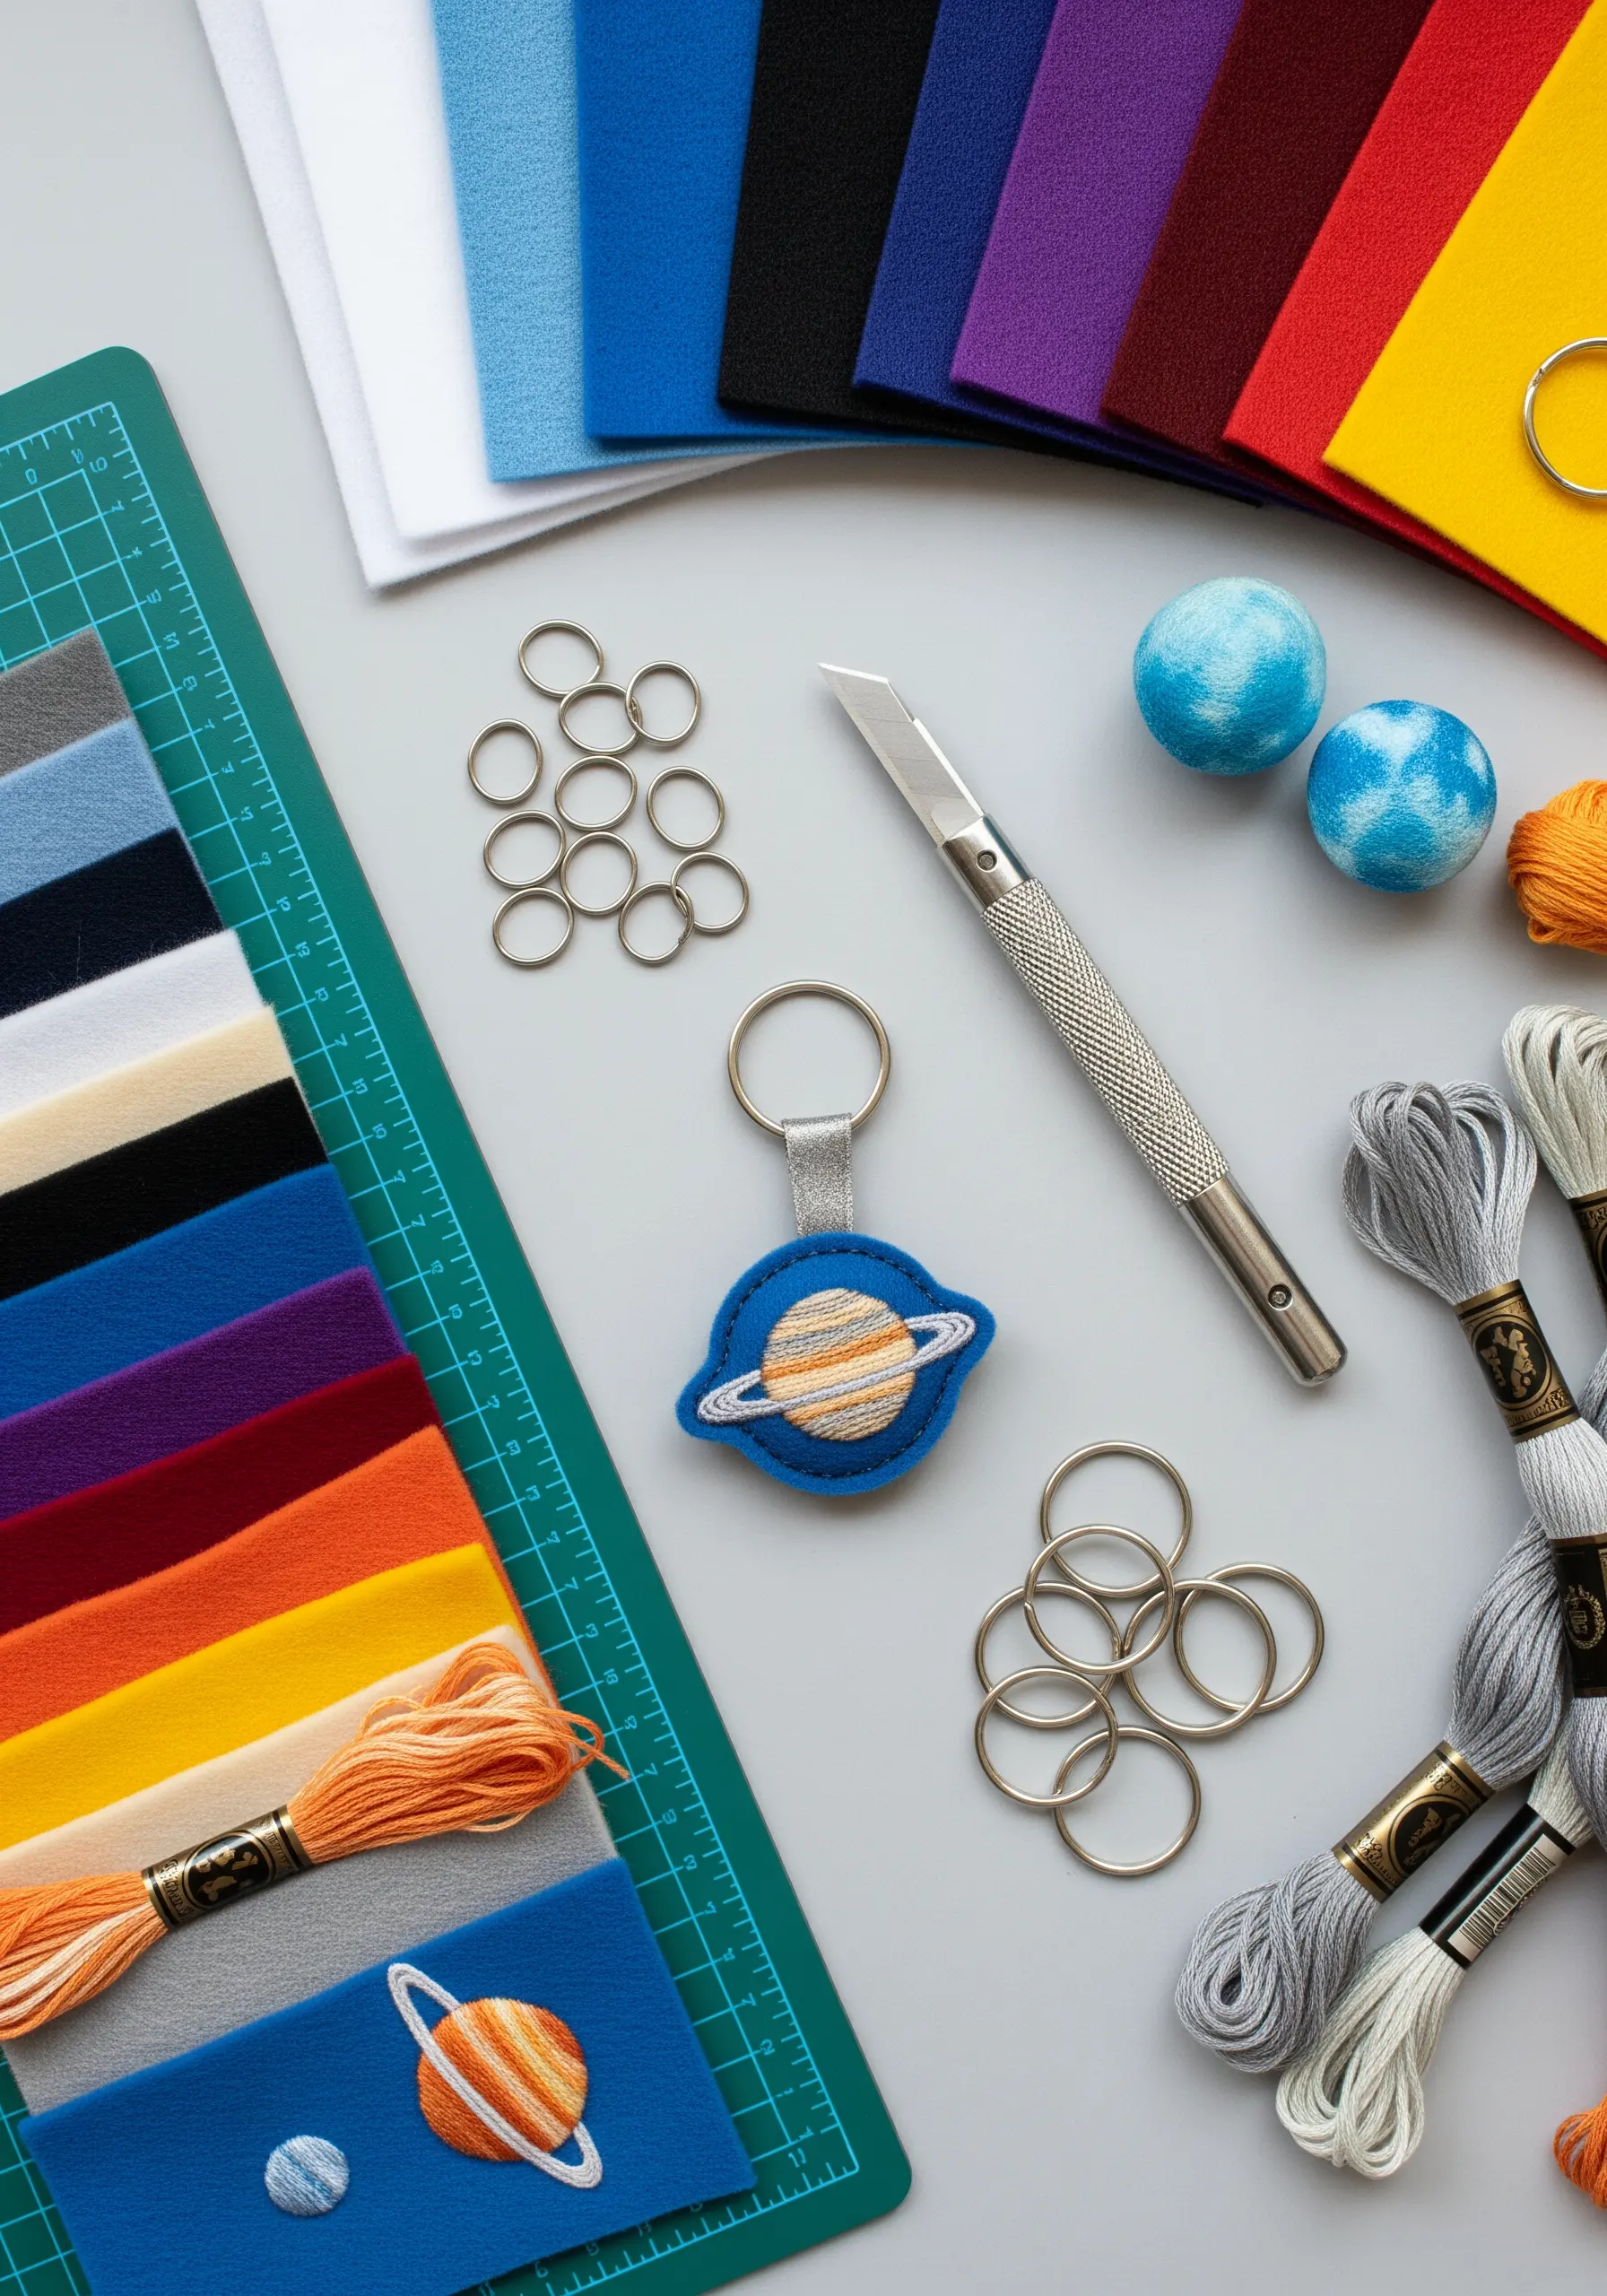
Combine layers of colored felt to create a graphic, dimensional keychain that’s both sturdy and stylish.
Use a simple backstitch to secure the pieces and add details like the planet’s stripes.
For the rings, try couching: lay down a thicker metallic cord and tack it in place with tiny, coordinating stitches for a clean, raised line.
These tiny fabric crafts are perfect for using up your most colorful scraps.
8. Modernize a Tote with a Geometric Patch
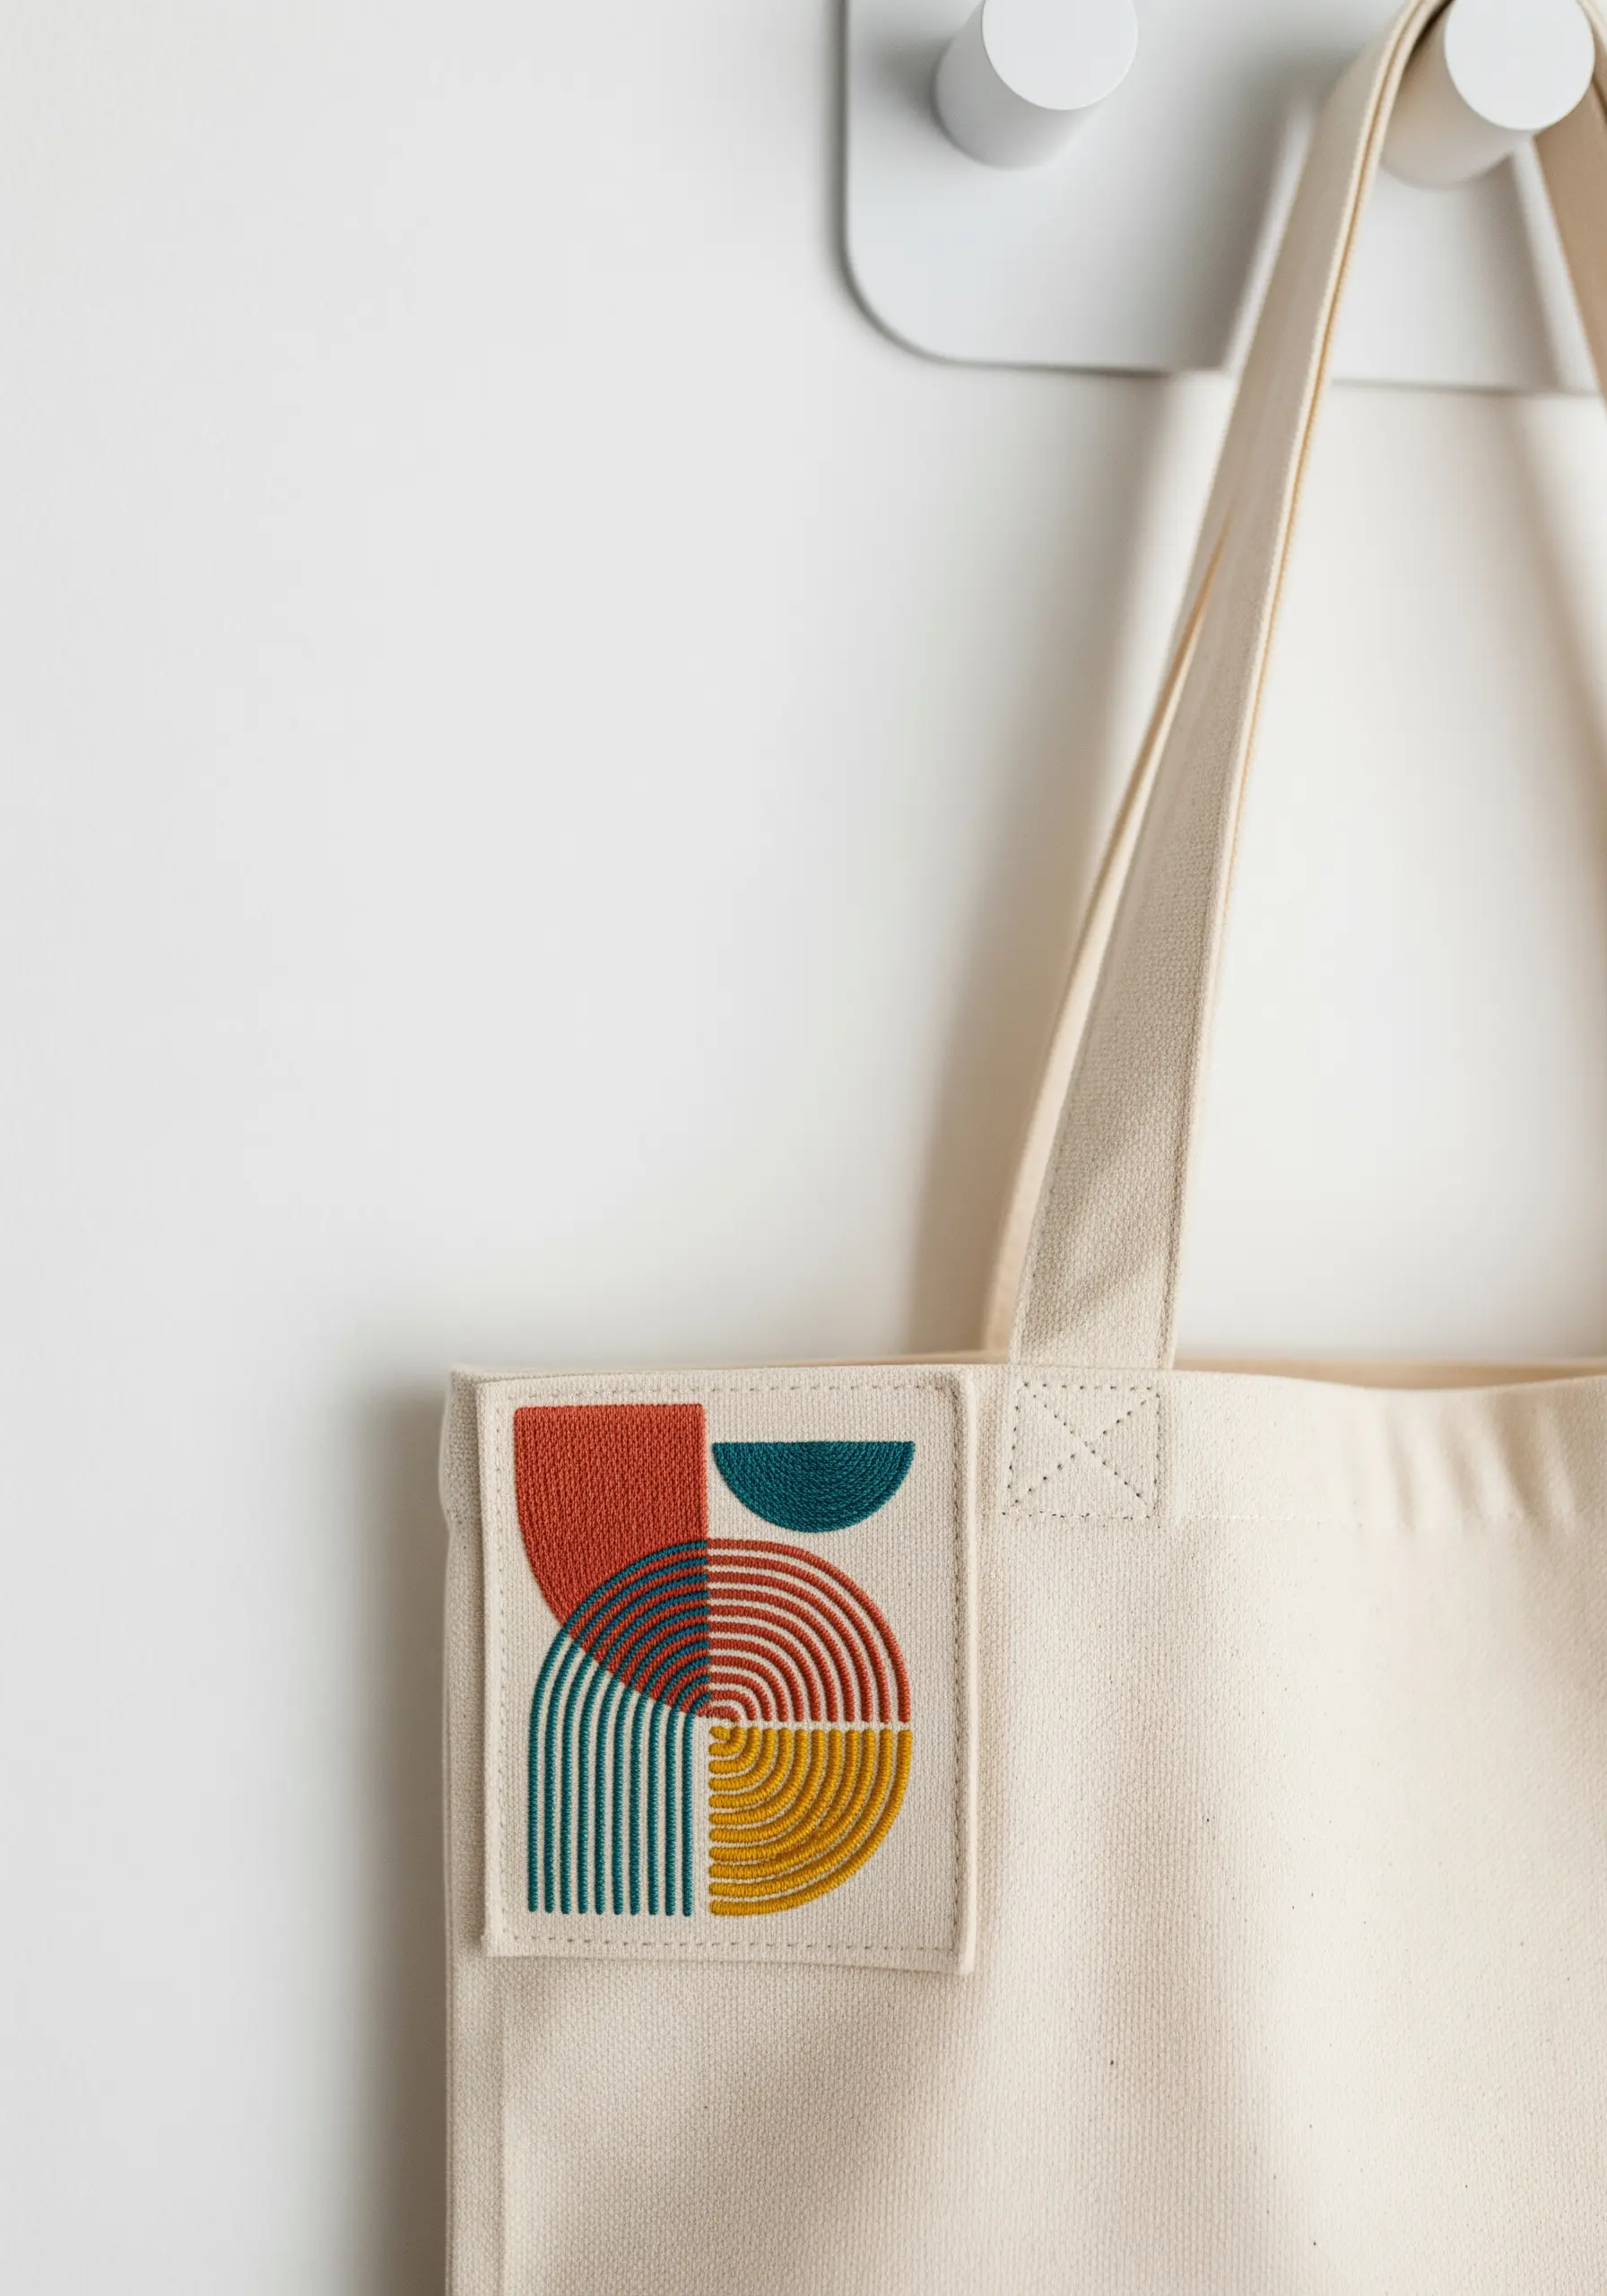
For perfectly crisp geometric shapes, first outline each section with a split stitch. This raised edge acts as a guide and prevents the fill from looking uneven.
Then, fill the shapes with a dense satin stitch, keeping your threads parallel and smooth for a solid, woven appearance.
The clean contrast between curved and straight lines is what gives these abstract geometric hoops their modern, graphic impact when applied as a patch.
9. Capture Lifelike Detail with Thread Painting
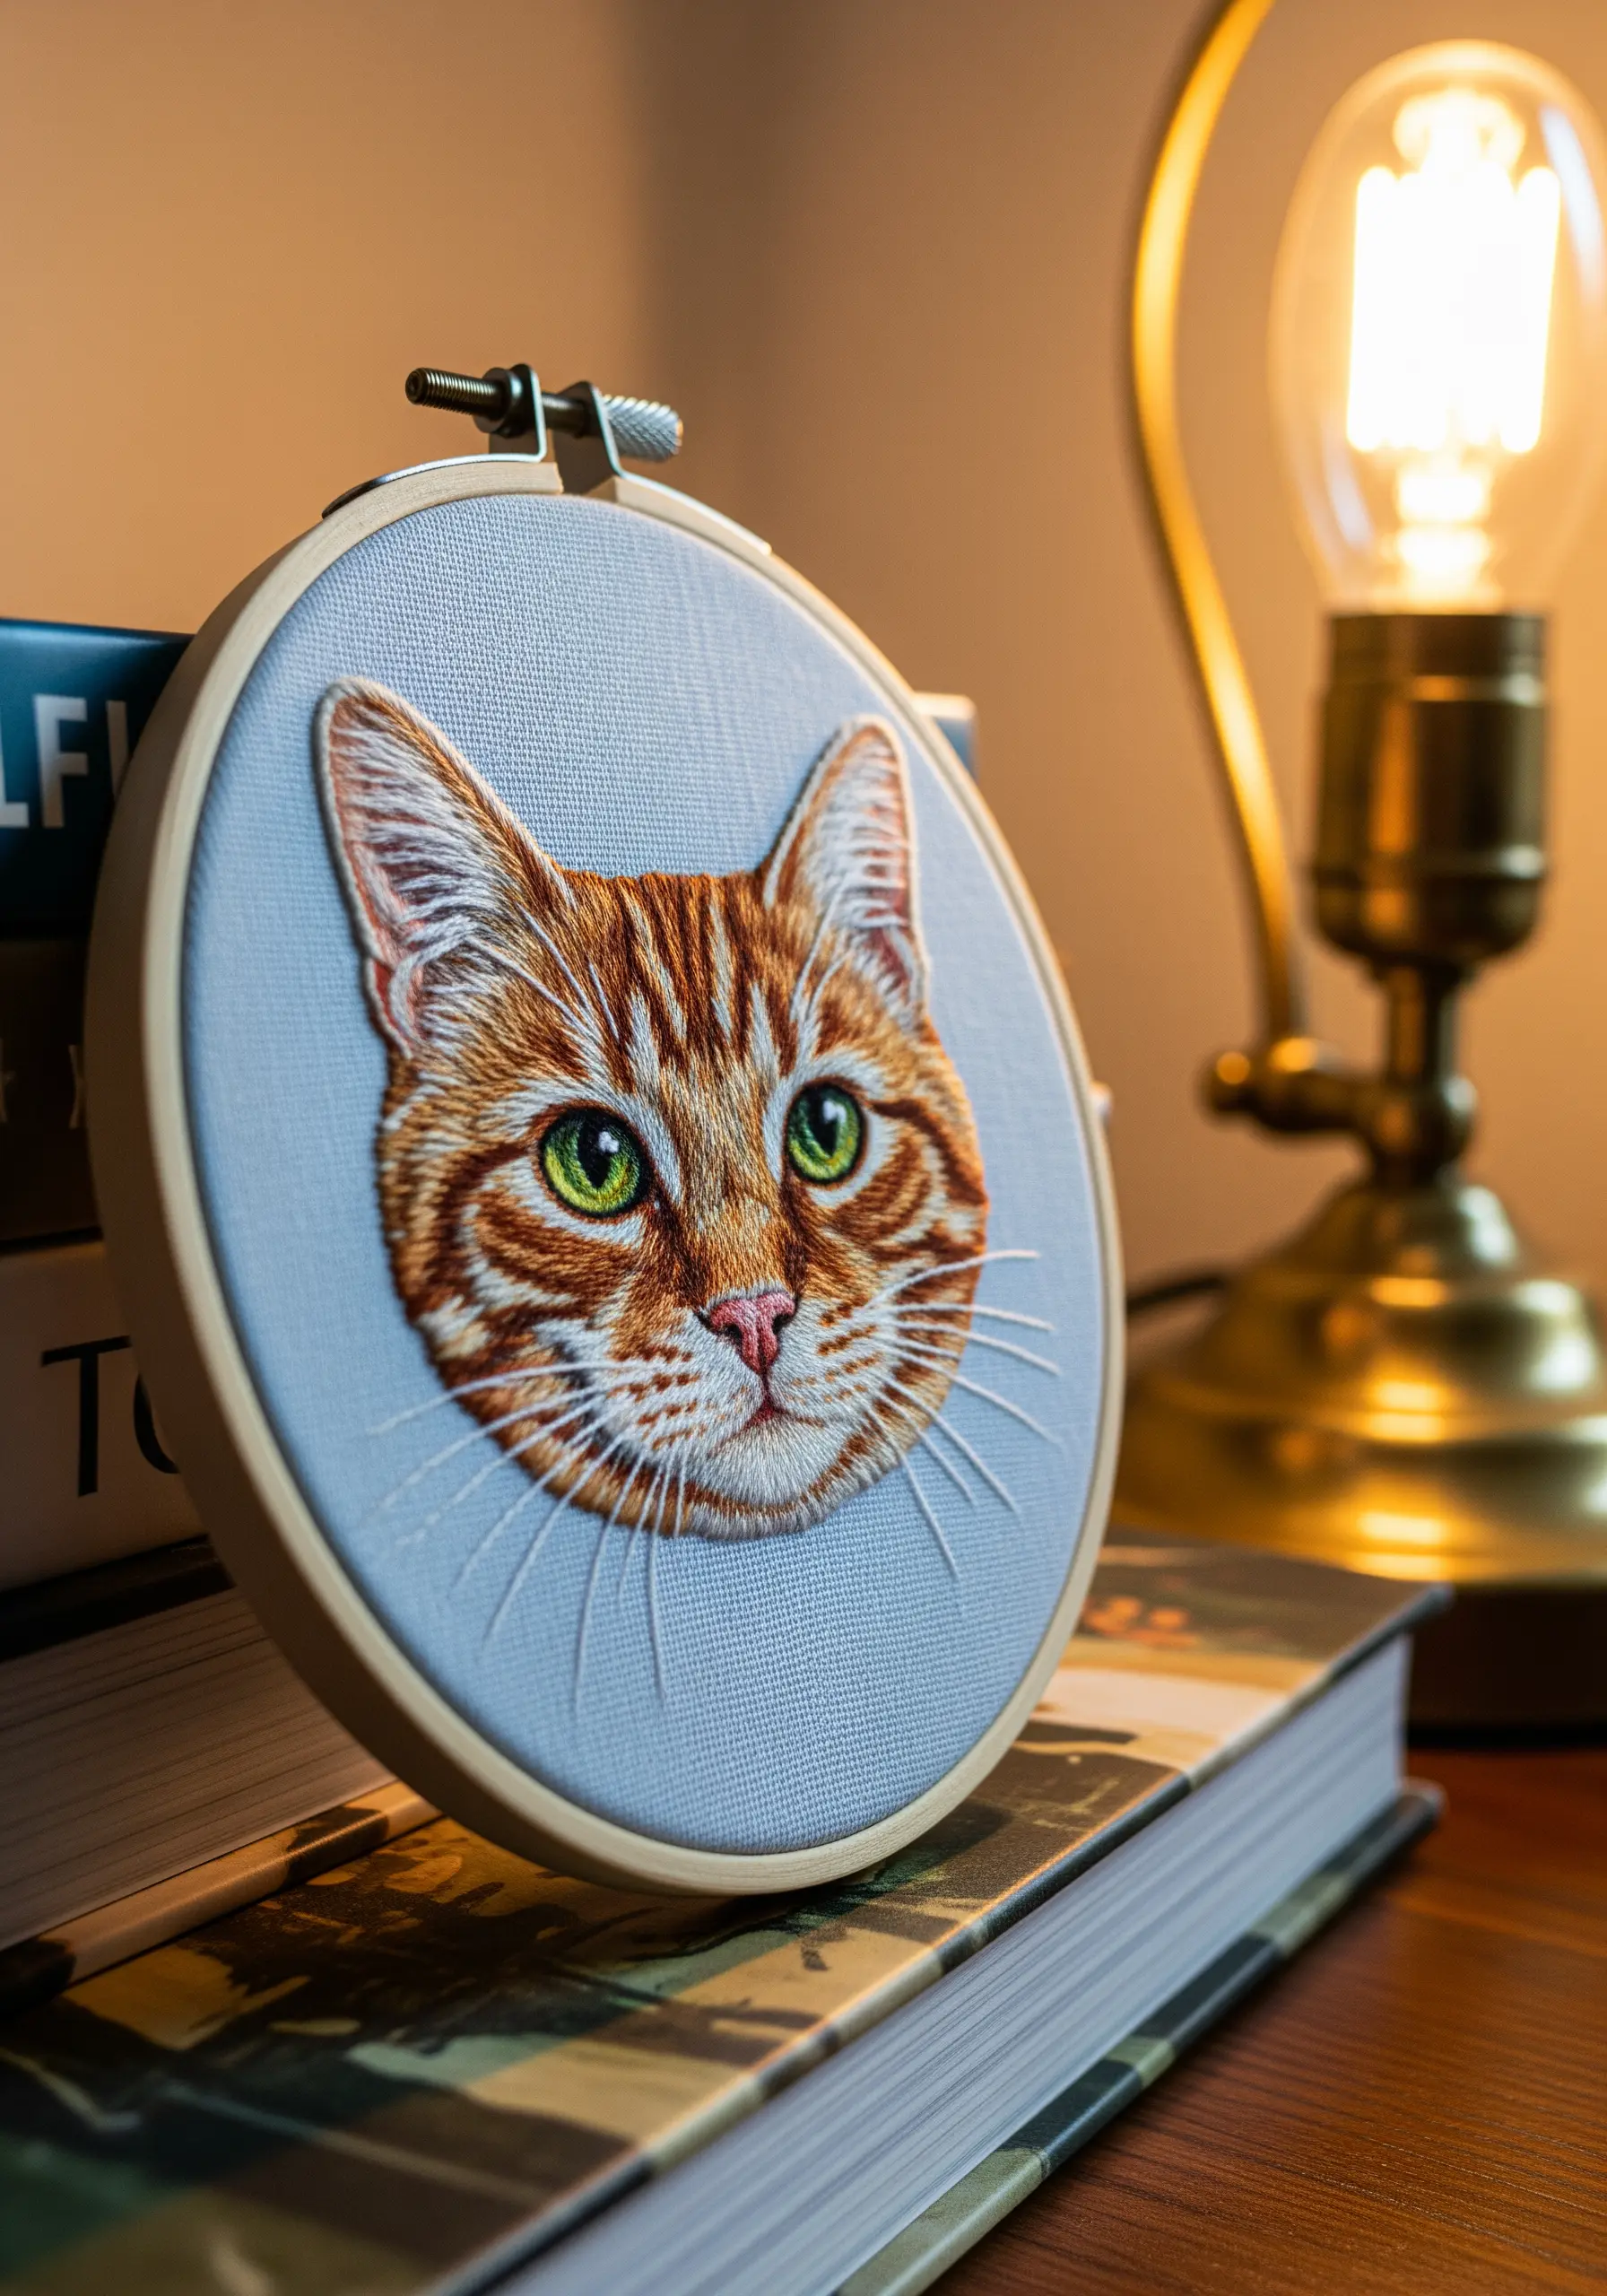
The secret to realistic fur is using a single strand of floss and layering colors with long-and-short stitches.
Always work in the direction of the fur growth, starting with the darker, underlying colors and gradually building up lighter highlights.
For the eyes, a few tiny stitches of a bright color, followed by a single white French knot for the light reflection, brings the portrait to life.
This turns small pet portrait embroidery ideas into treasured keepsakes.
10. Curate a Kitchen Towel with Garden Motifs
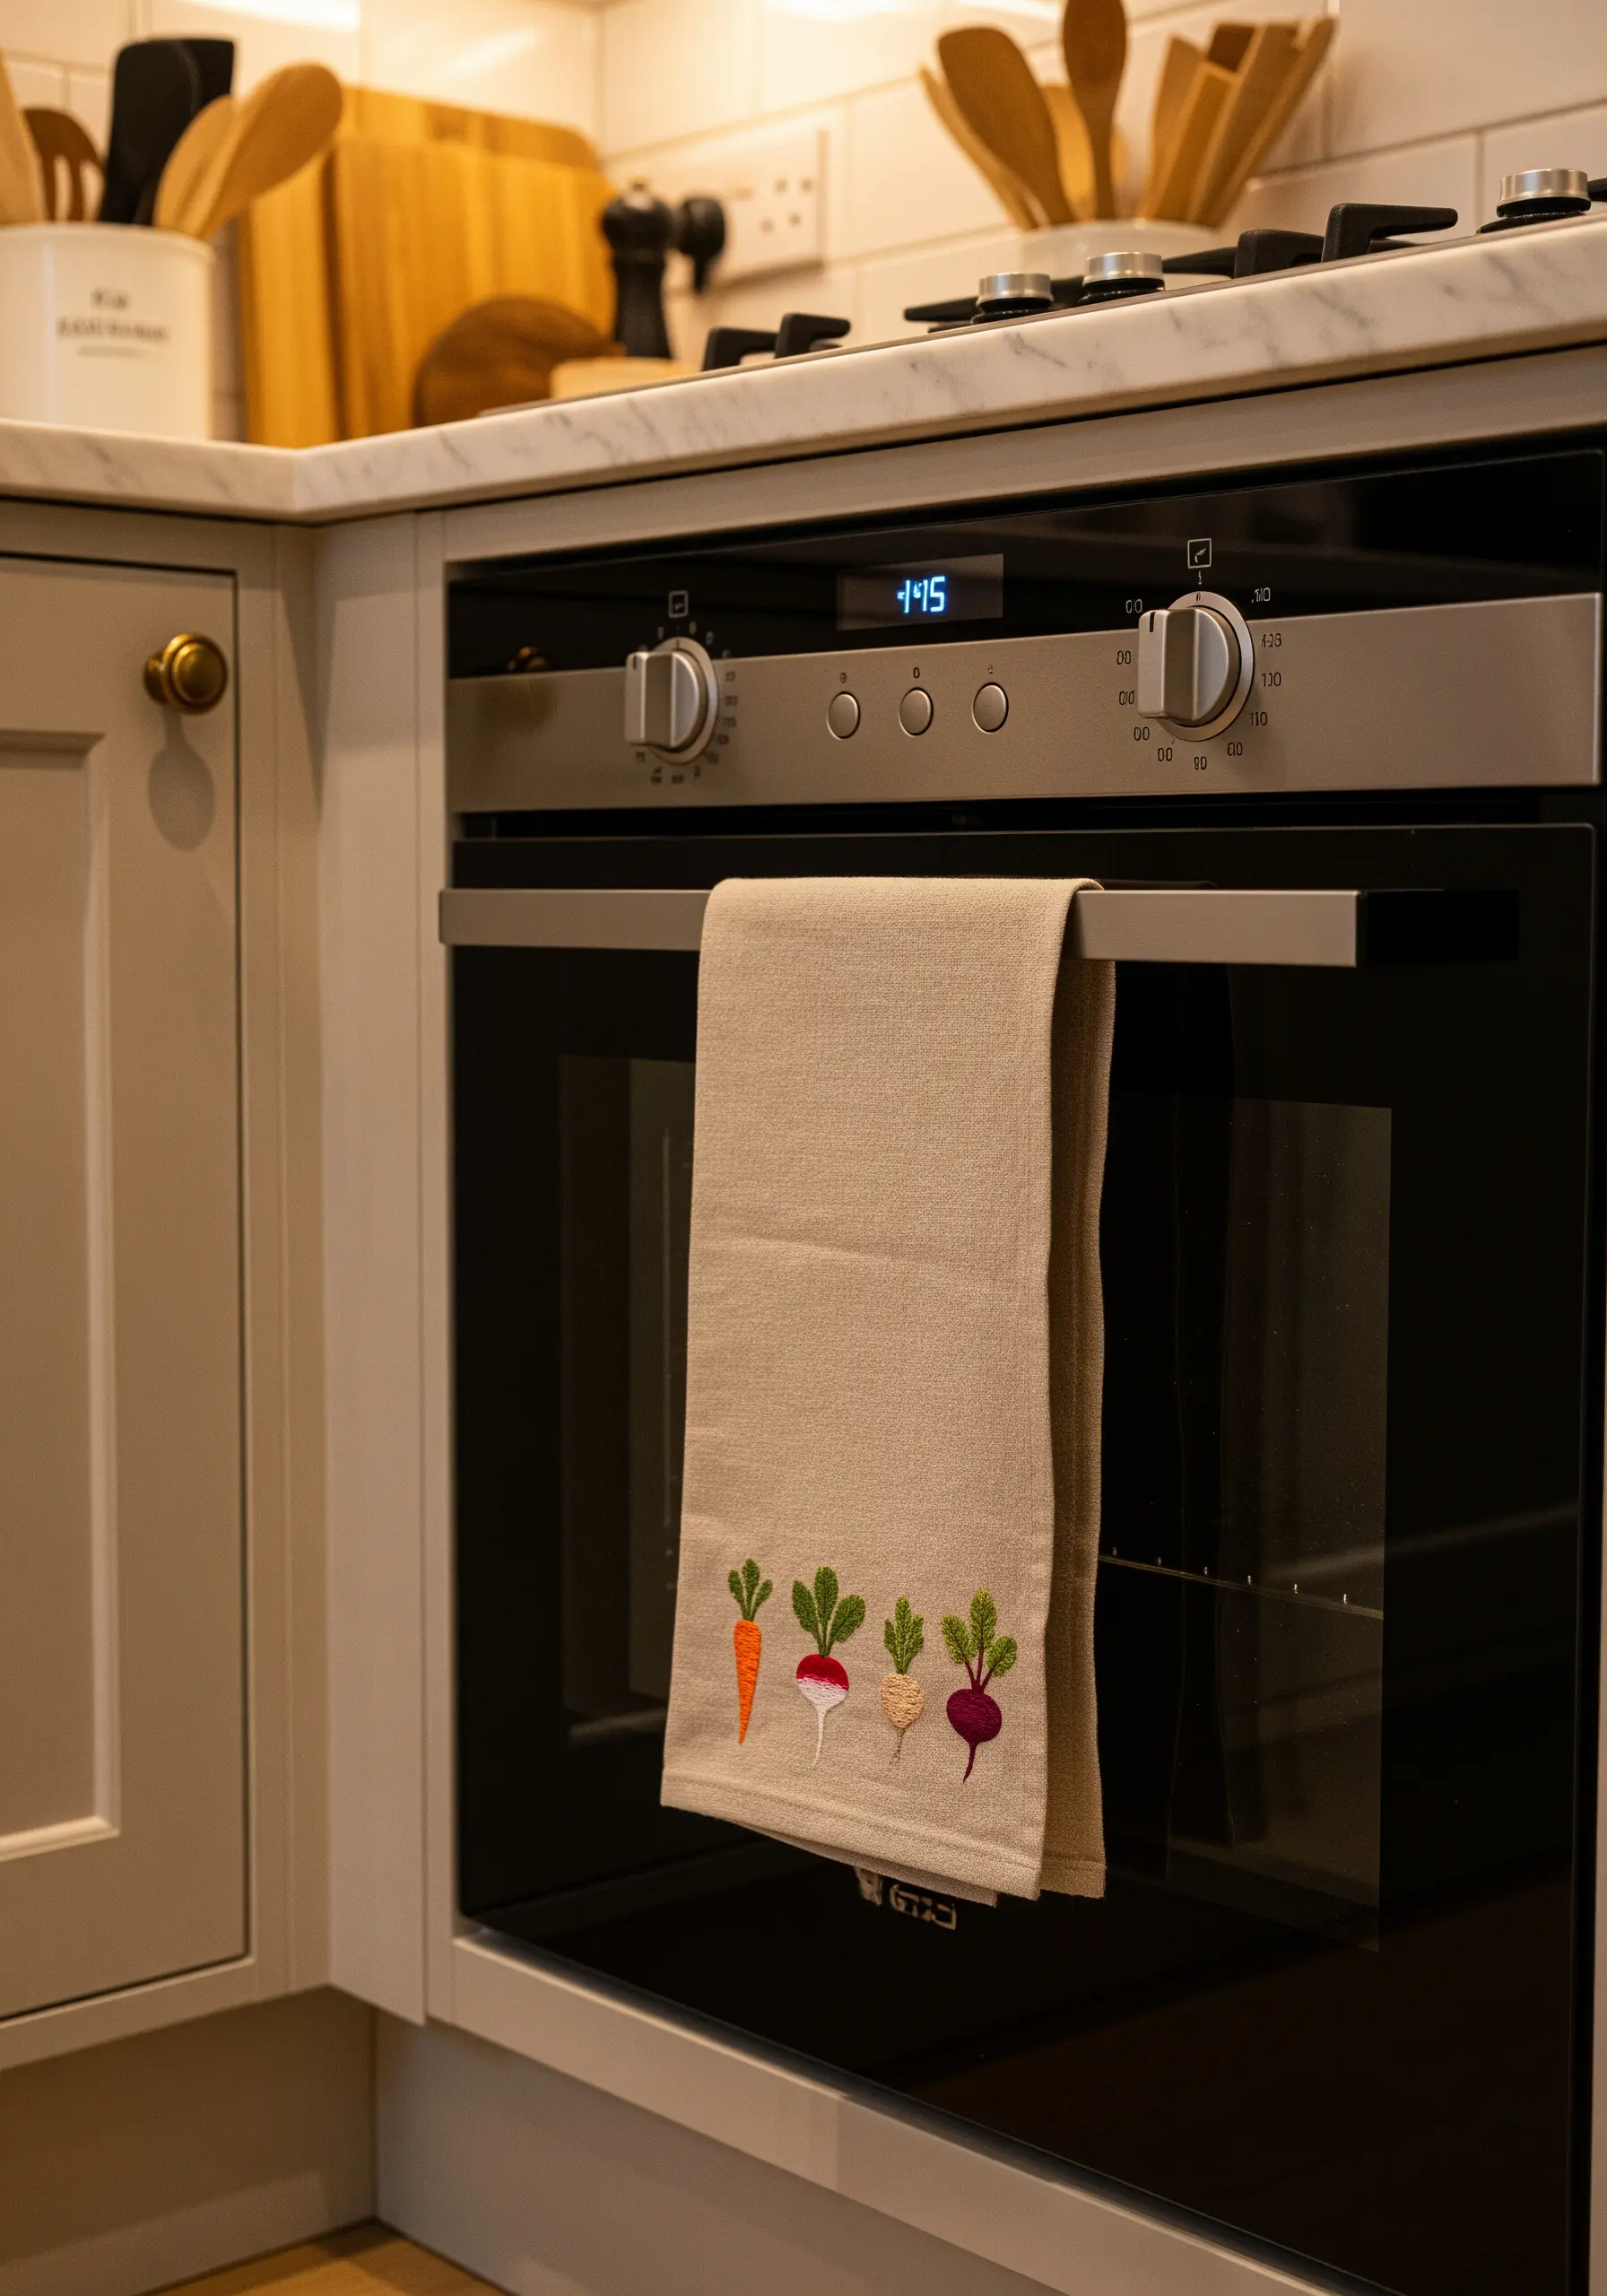
Create a playful, curated look by stitching a row of simple, graphic vegetables.
To make them feel cohesive, maintain a consistent size and spacing between each motif—use a water-soluble pen to draw guidelines before you start.
A simple satin stitch for the main bodies and a few backstitches for the leafy tops are all you need for these mini embroidery patterns.
The charm is in the cheerful repetition and simplicity.
11. Sculpt a Textured Succulent Garden
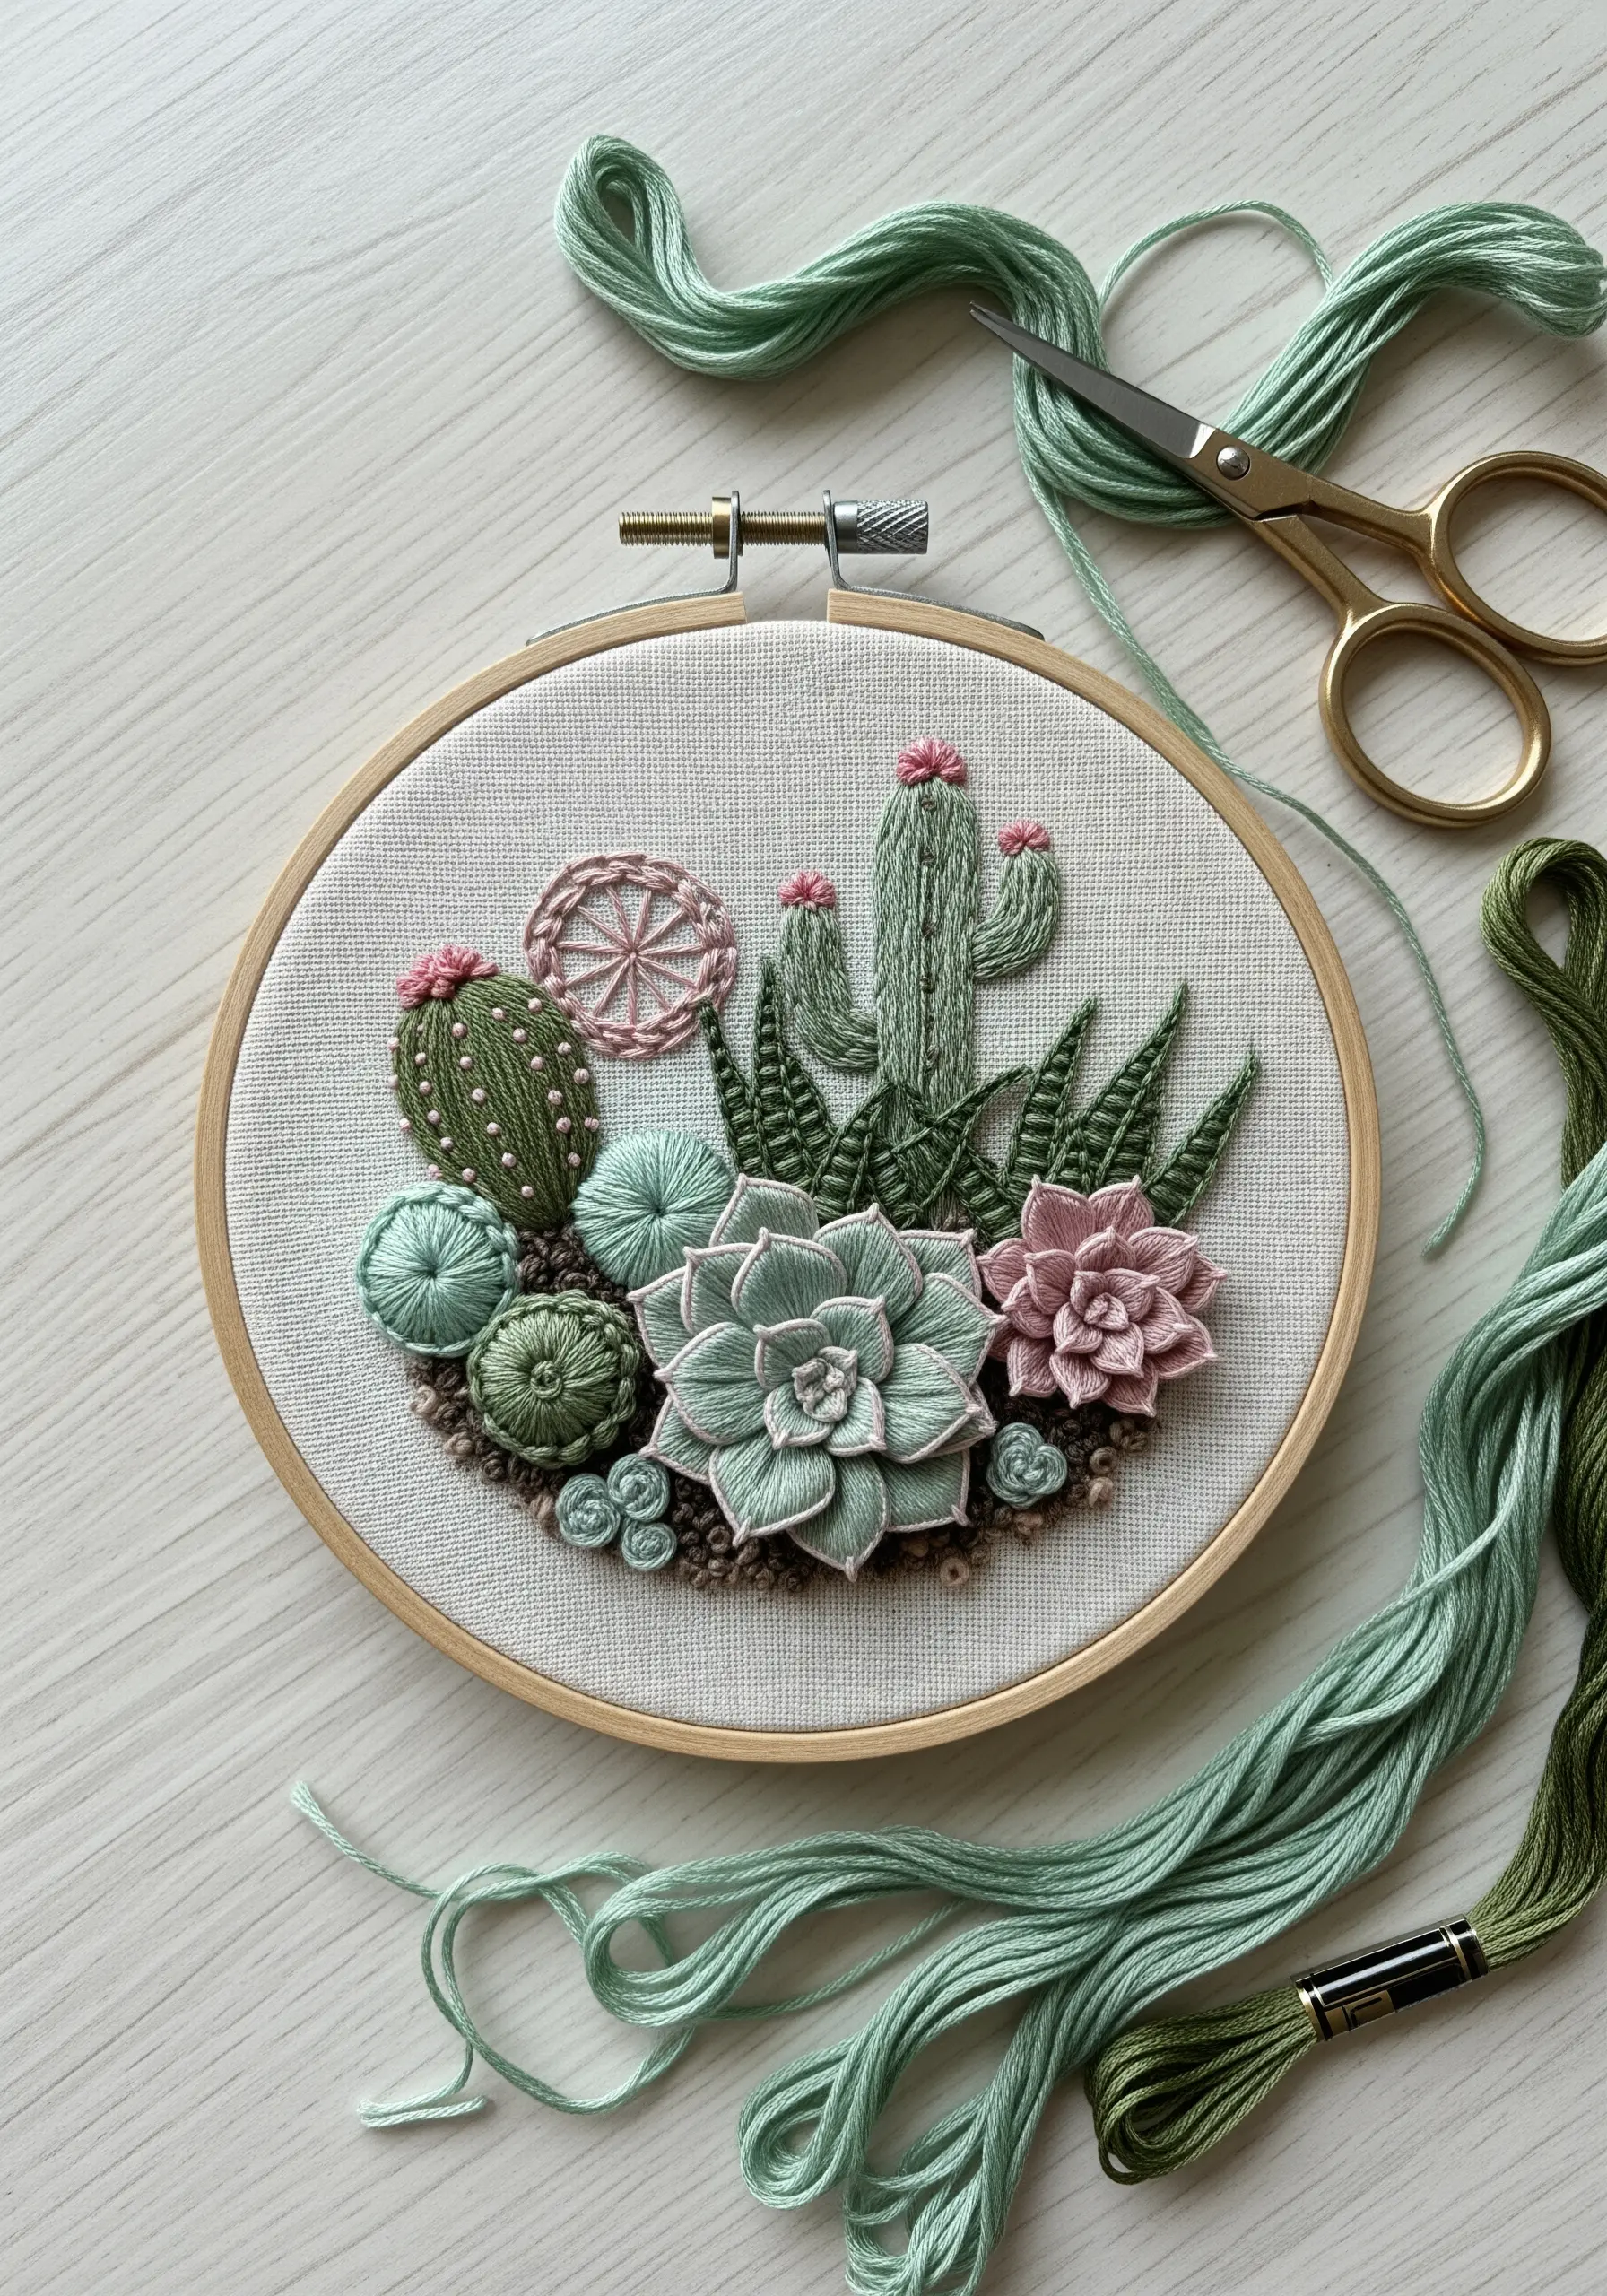
Combine a variety of dimensional stitches to create a tactile botanical landscape that invites touch.
Use woven wheel stitches for the round rosette succulents, layering colors for depth, and padded satin stitch for the taller cacti.
Create the ‘soil’ with a dense collection of French knots in various earthy tones. This project is a masterclass in how statement textured embroidery techniques can transform a flat surface.
12. Personalize a Journal with a Landscape Patch

Create a tiny, iron-on patch to elevate an ordinary notebook into something personal.
For the mountain range, use three or four shades of blue to create a sense of atmospheric depth. Keep the stitches in the back mountains shorter and less dense.
Bring the foreground into focus with sharper, more saturated stitches, and add the stark white snowcaps last for a crisp focal point.
It’s a perfect way to make one of those DIY embroidery gift ideas that will inspire your inner artist.
13. Add a Delicate Motif to a Cozy Throw
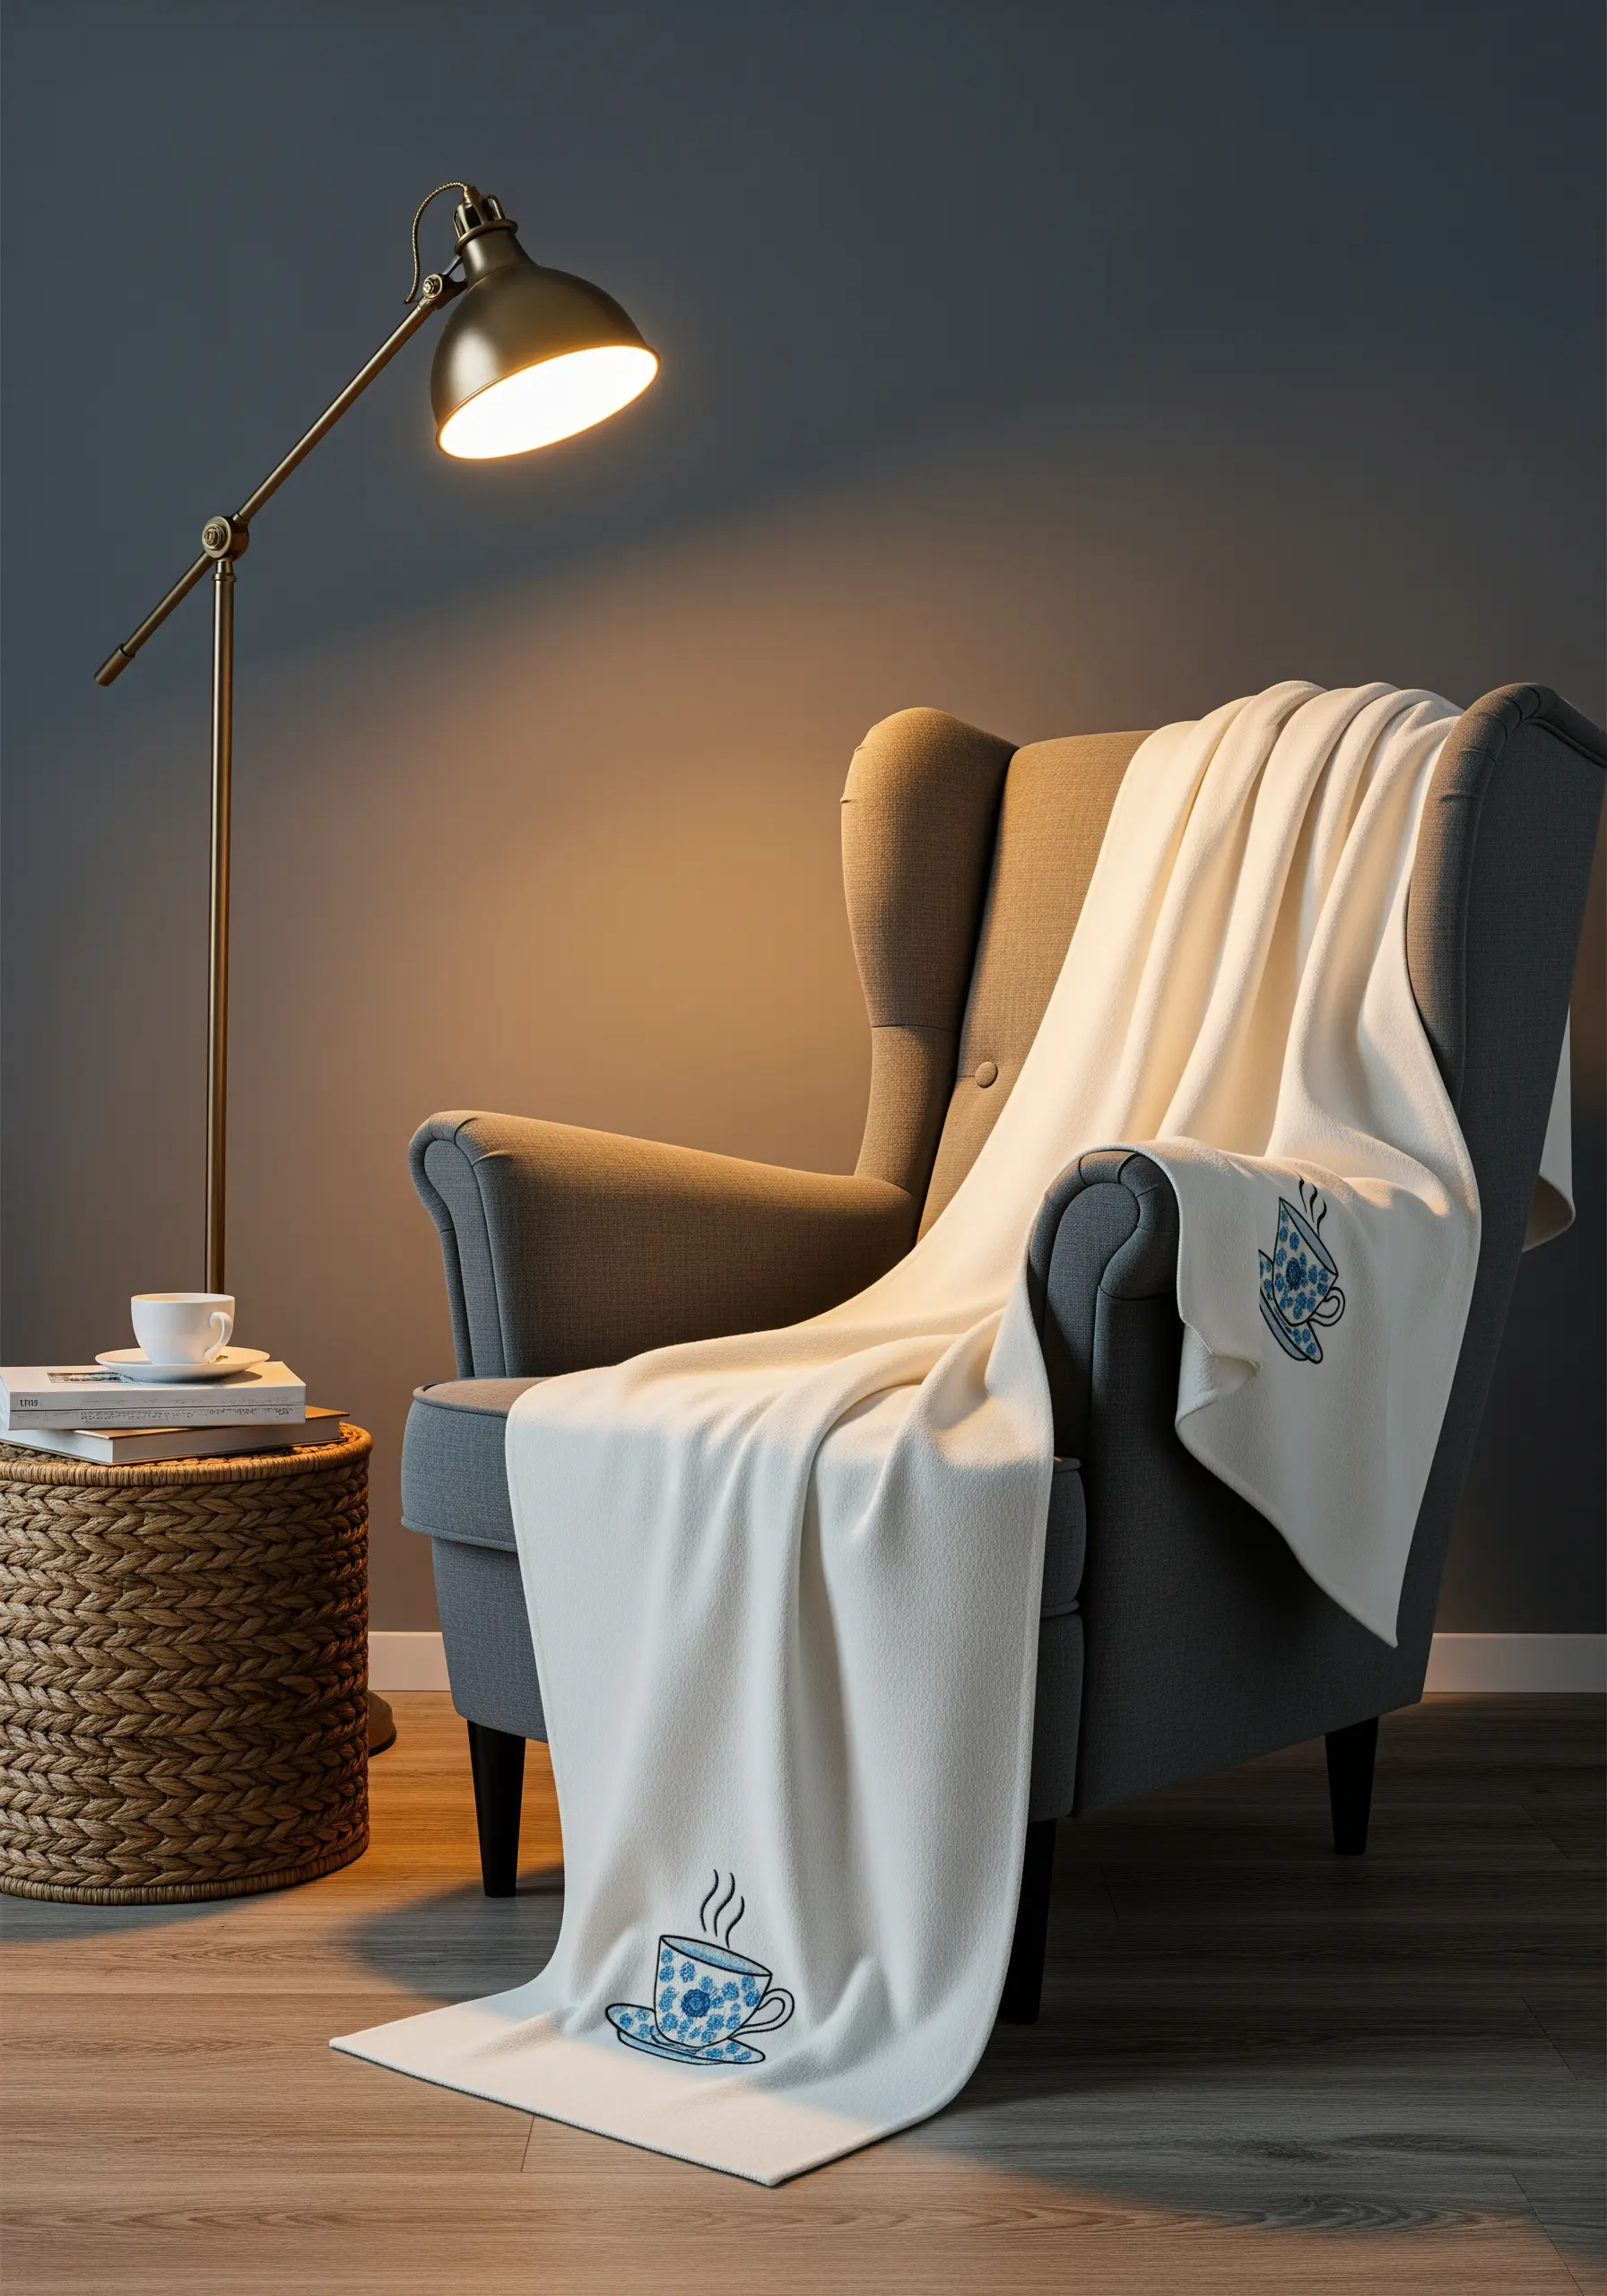
When embroidering on a plush fabric like fleece or chenille, always use a water-soluble stabilizer on top of your fabric.
This simple step prevents your stitches from sinking into the pile and ensures your outlines remain crisp and clean.
A simple backstitch or stem stitch works best for line art on textured fabrics, and choosing a motif with open space avoids creating a stiff patch on the soft blanket.
14. Frame Lettering with a Delicate Wreath
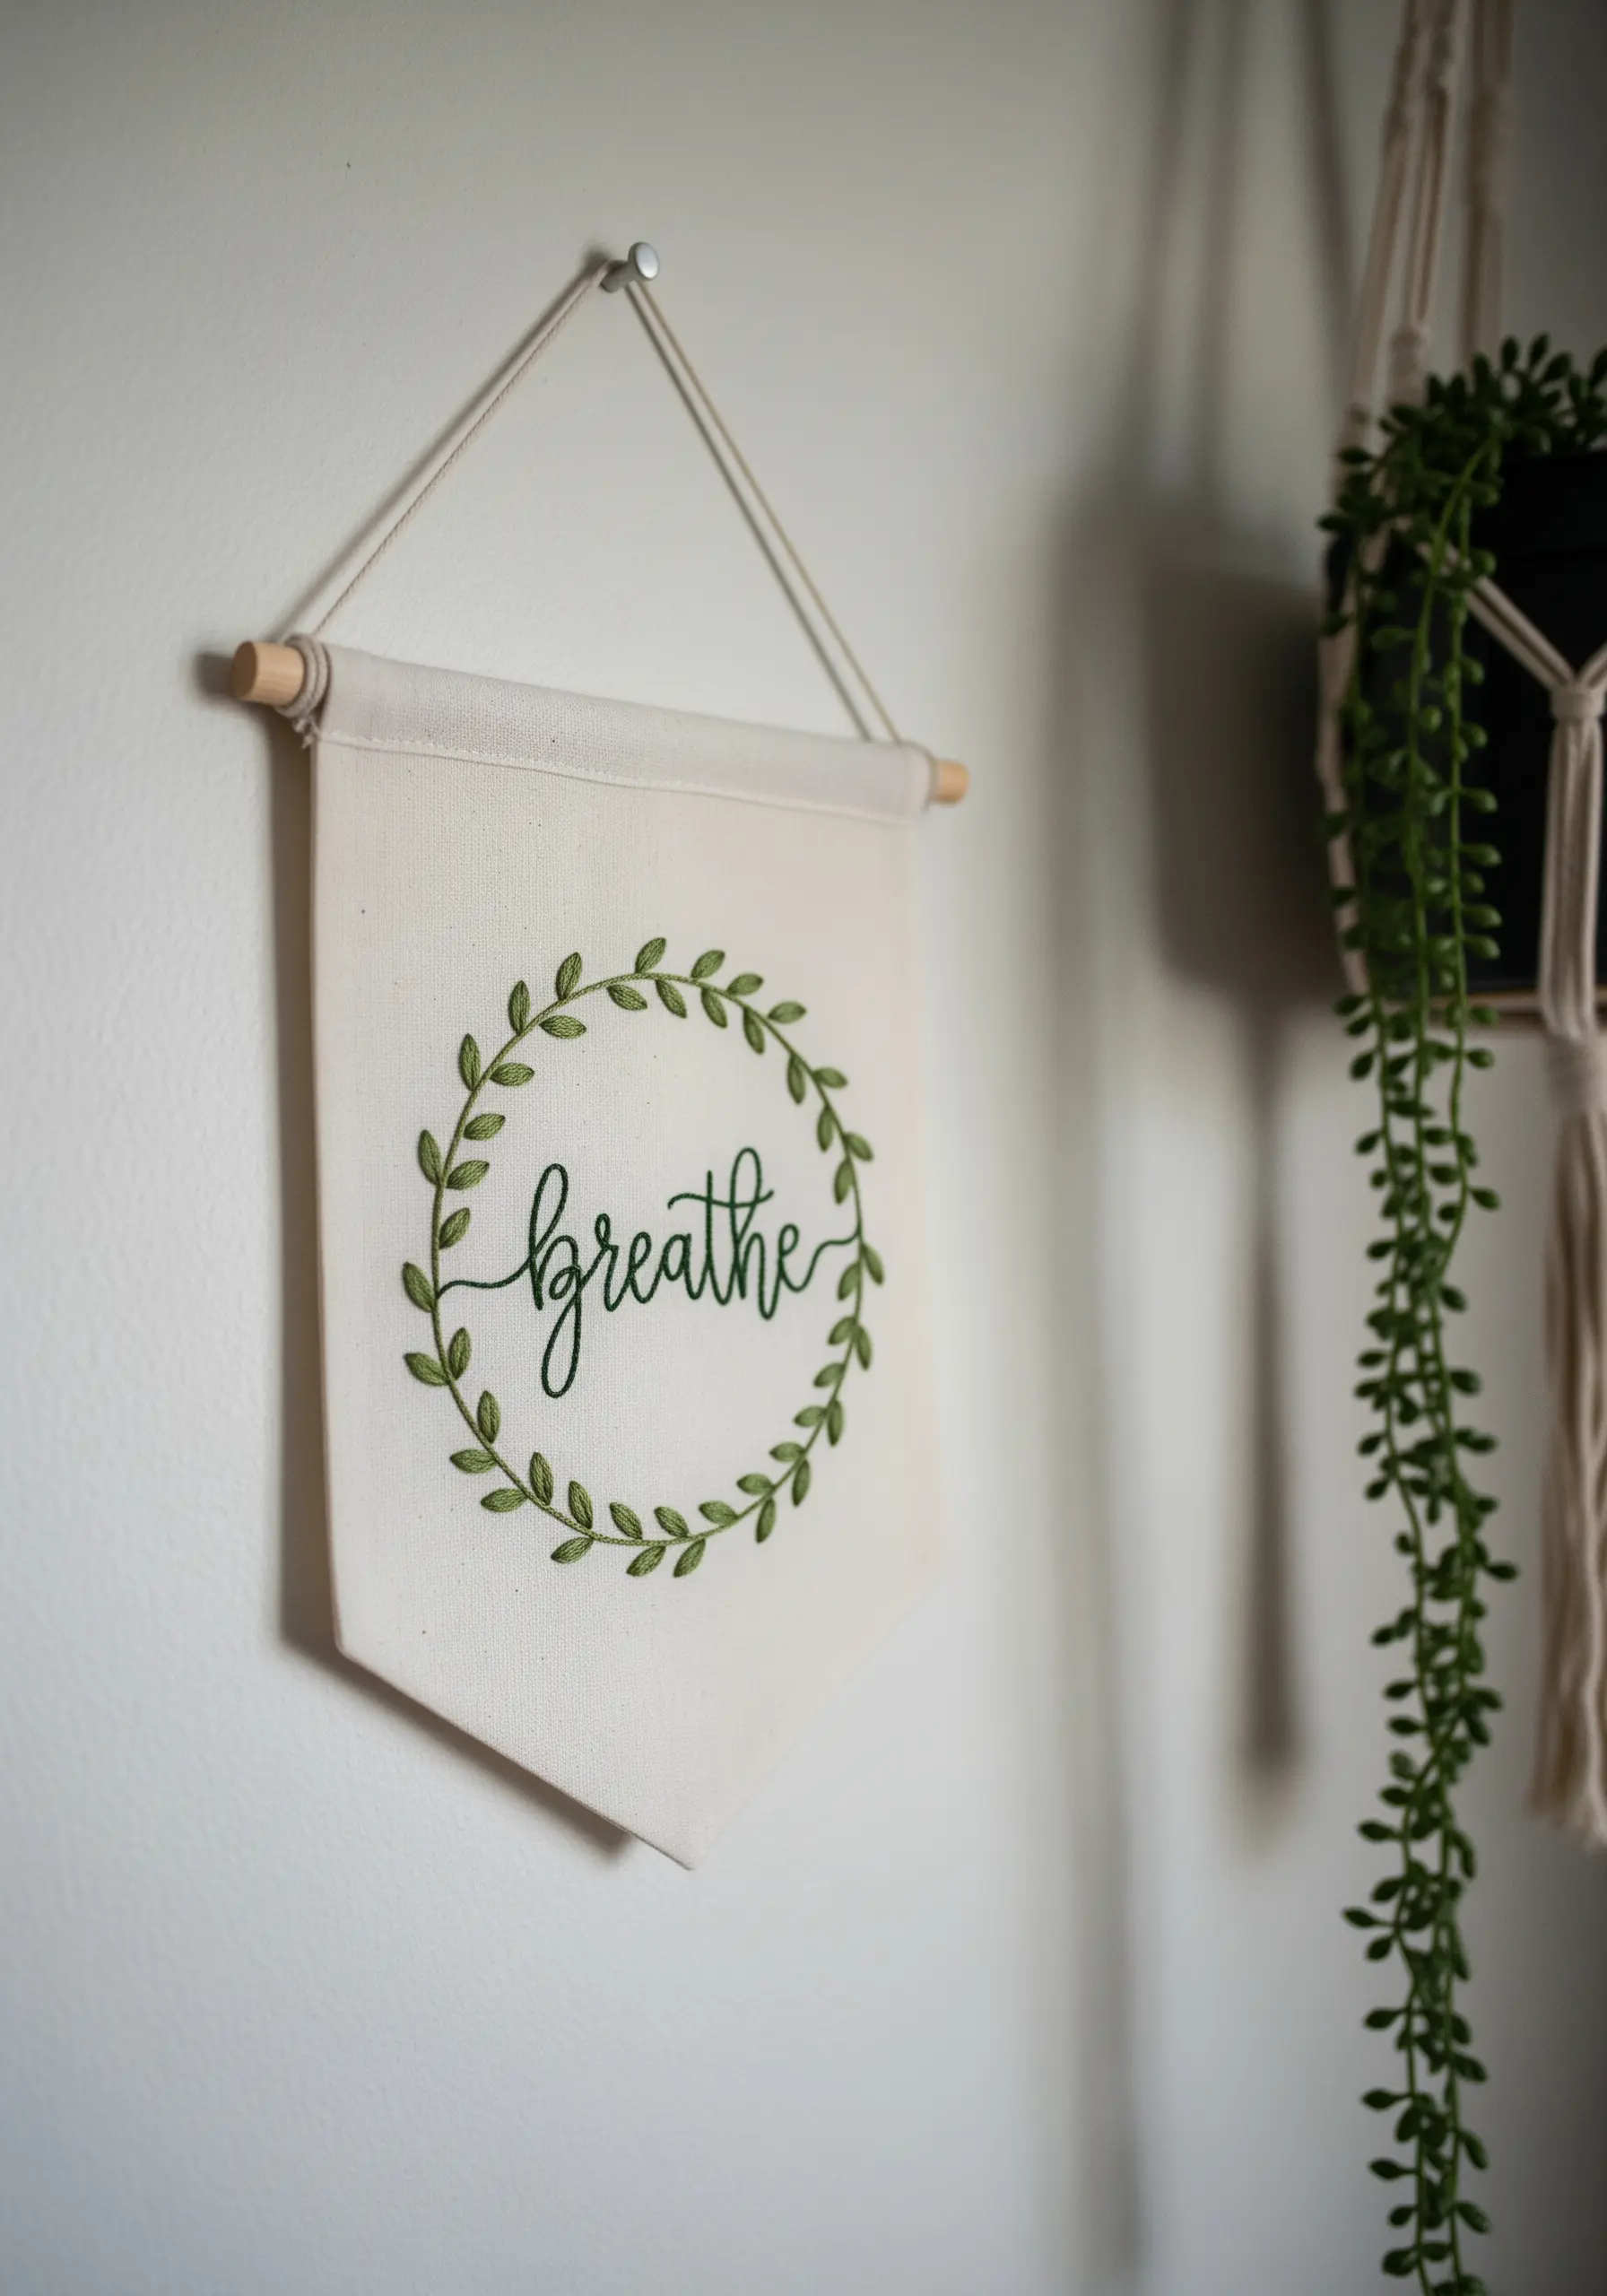
To achieve smooth, elegant script that looks like calligraphy, use a whipped backstitch.
This technique covers the ‘steps’ of a standard backstitch, creating a single, fluid line perfect for cursive lettering.
For the leafy wreath, a fishbone stitch gives each leaf a central vein and a natural, dimensional look. Using two shades of green adds depth and realism.
15. Illuminate Your Stitches on a Lampshade
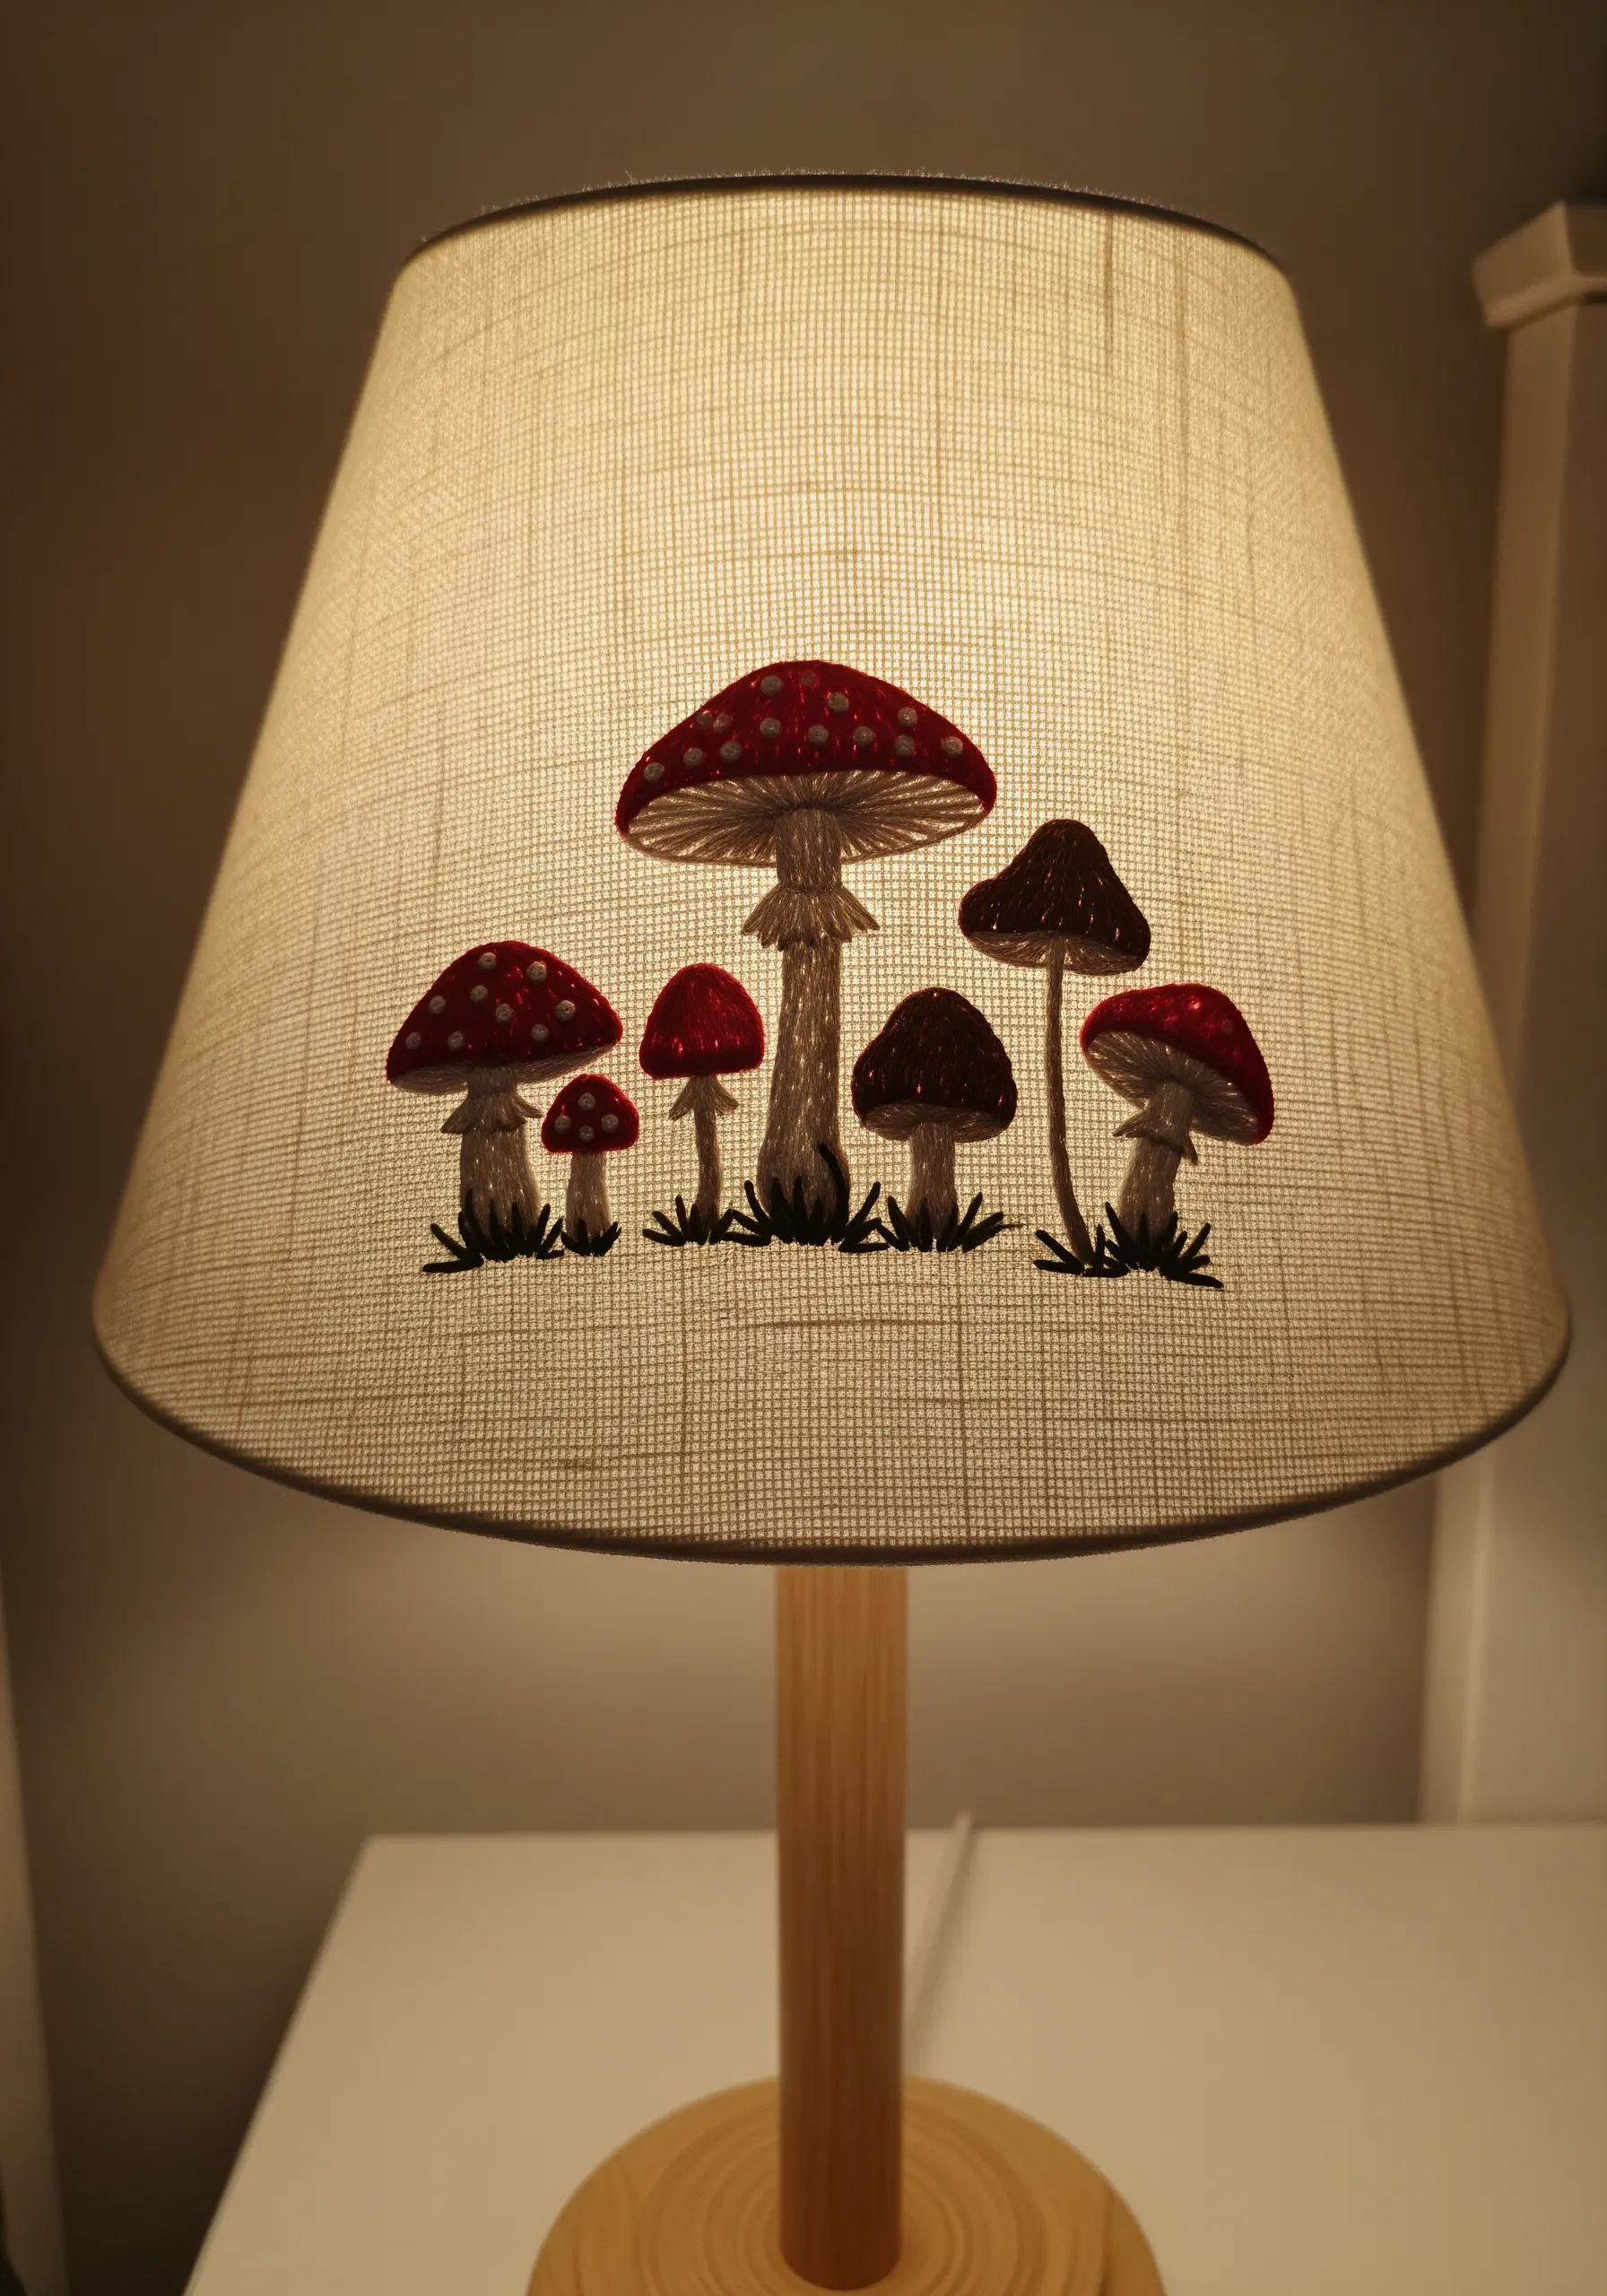
Embroidering directly onto a lampshade turns your work into a backlit piece of art that glows from within.
Choose a linen or cotton shade with a visible weave that’s easy to stitch through, and use a simple backstitch for outlines and satin stitch for fills.
Remember that the light will shine through, so keep the back of your work as tidy as possible by trimming threads closely after securing them.
16. Craft Micro-Wave Magnets from Bottle Caps
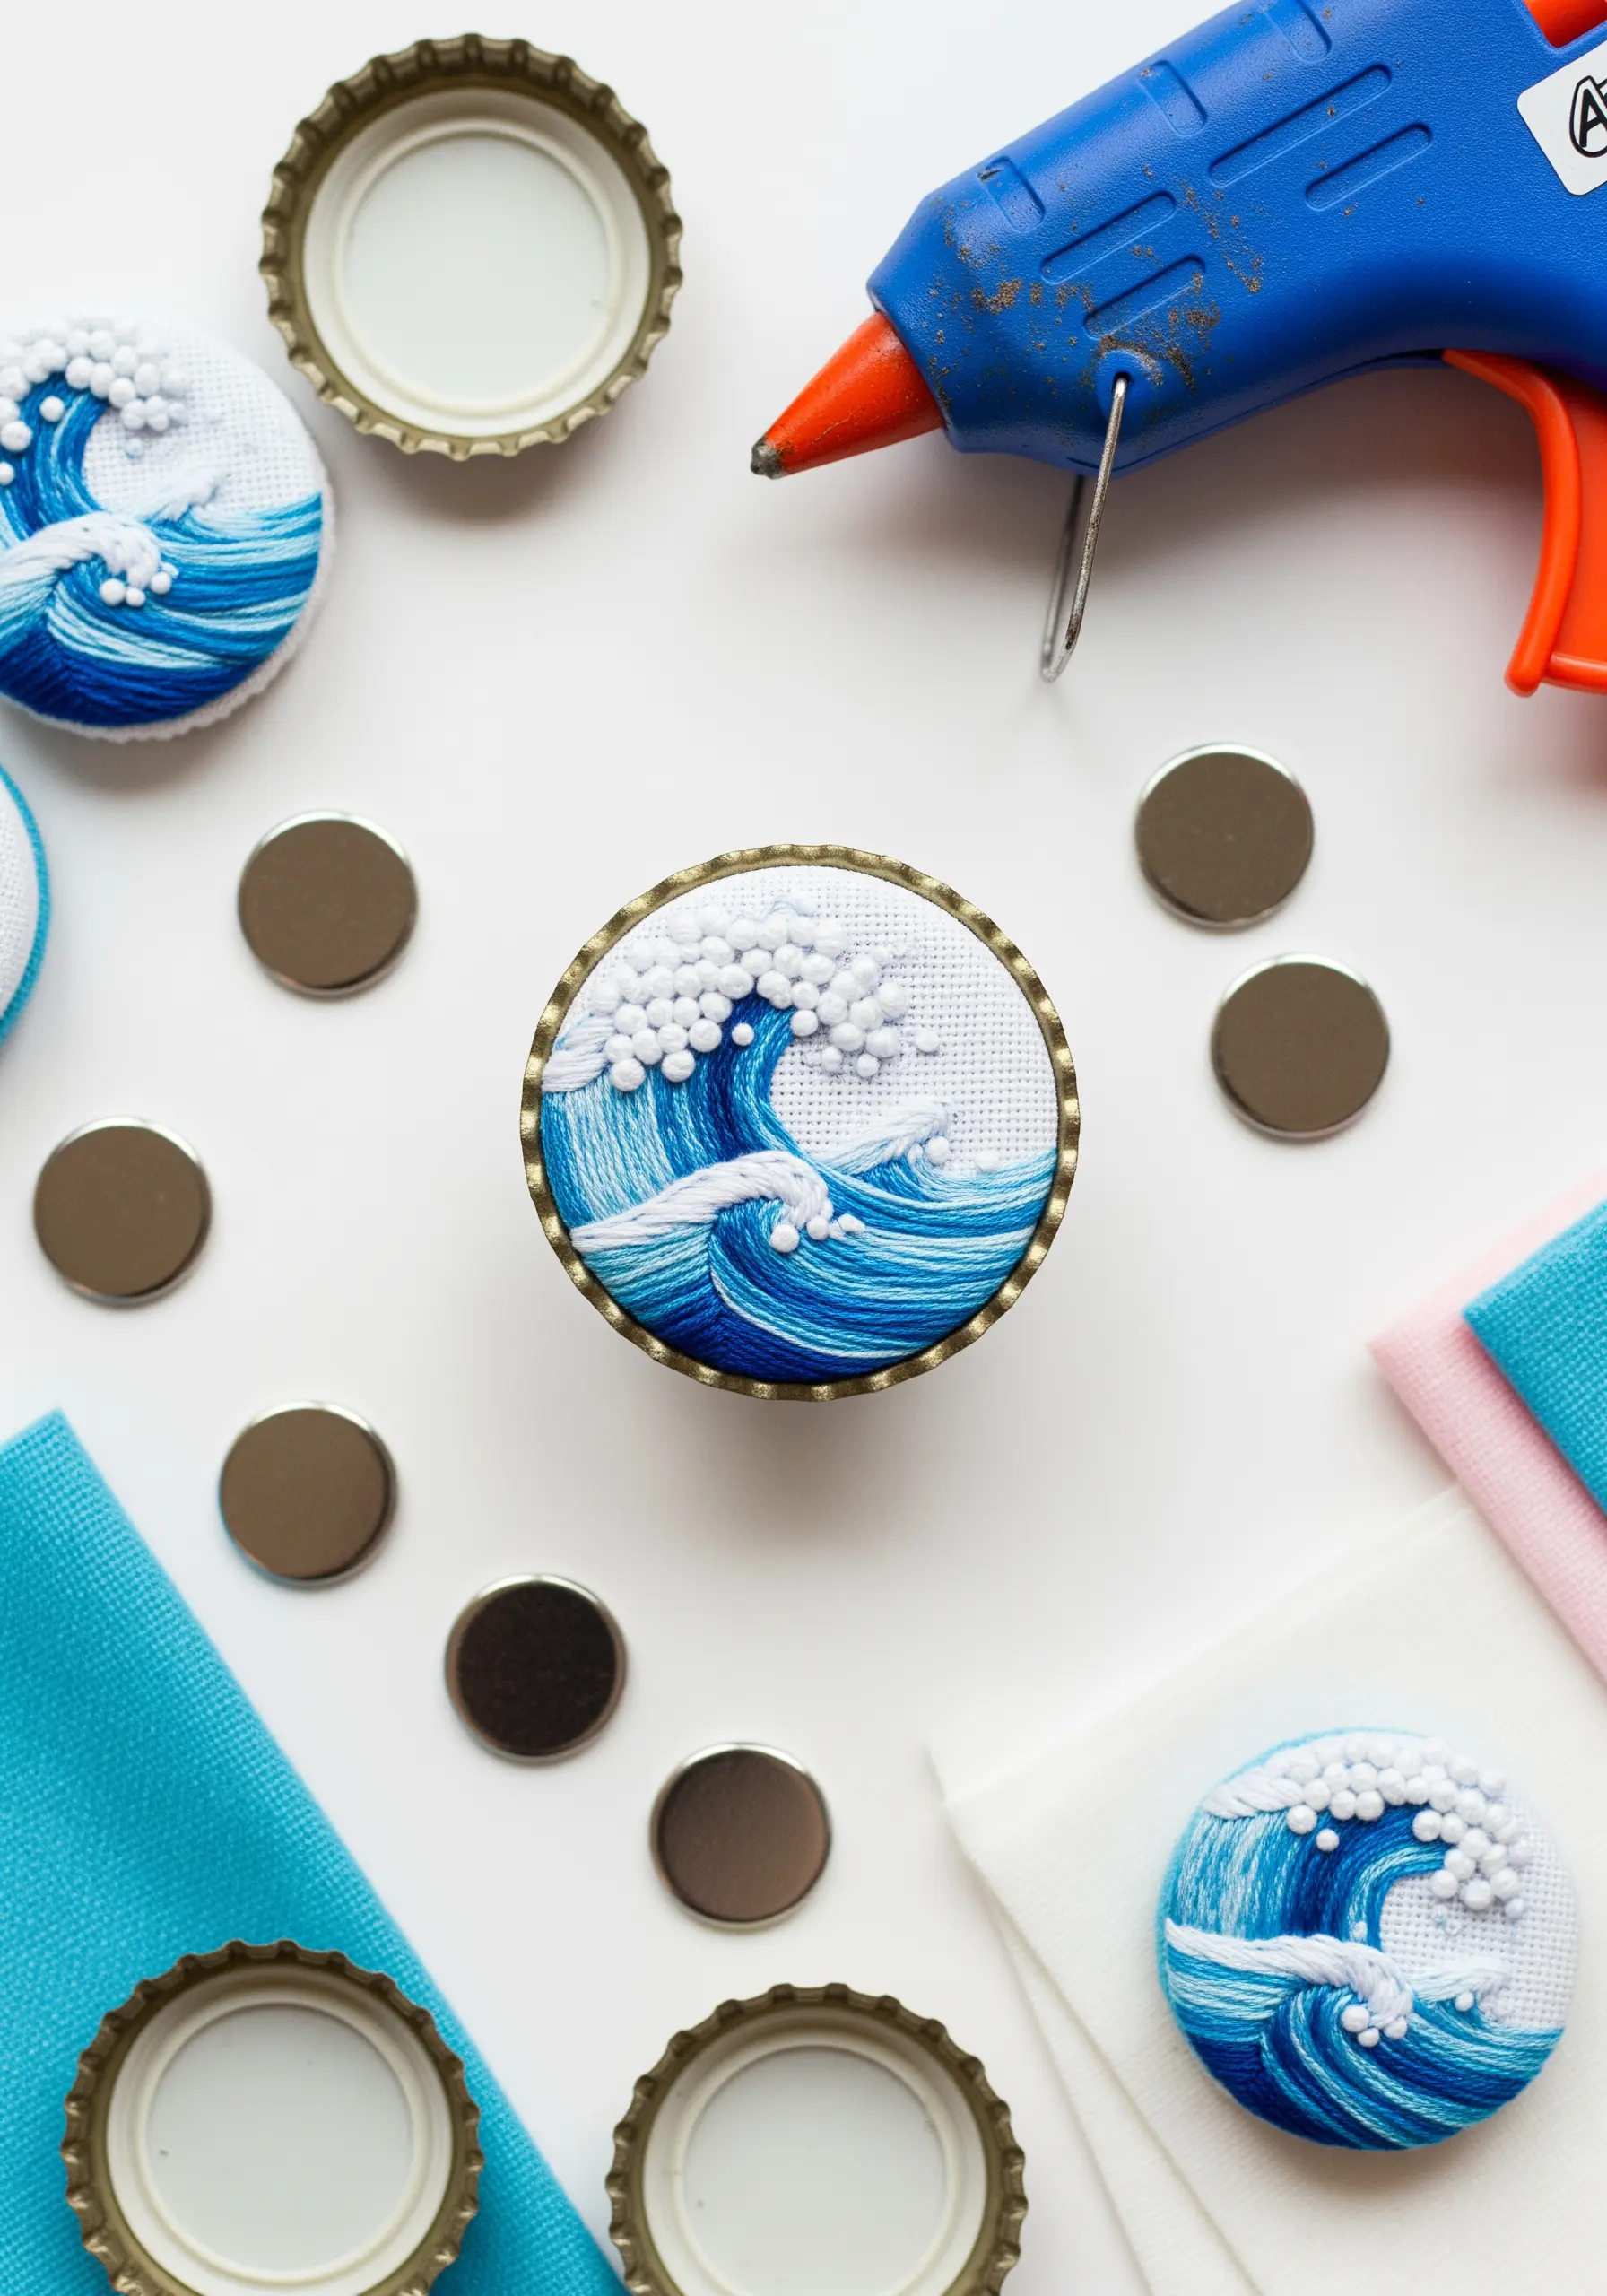
Use bottle caps as tiny, unconventional frames for miniature embroidered scenes.
For the crashing waves, use directional straight stitches in various shades of blue to create movement. The sea foam is a cluster of tightly packed white French knots, which adds wonderful texture.
To assemble, stretch your finished embroidery over a small piece of batting, tuck it into the cap, and glue a magnet to the back.
17. Organize with Elegant Embroidered Labels
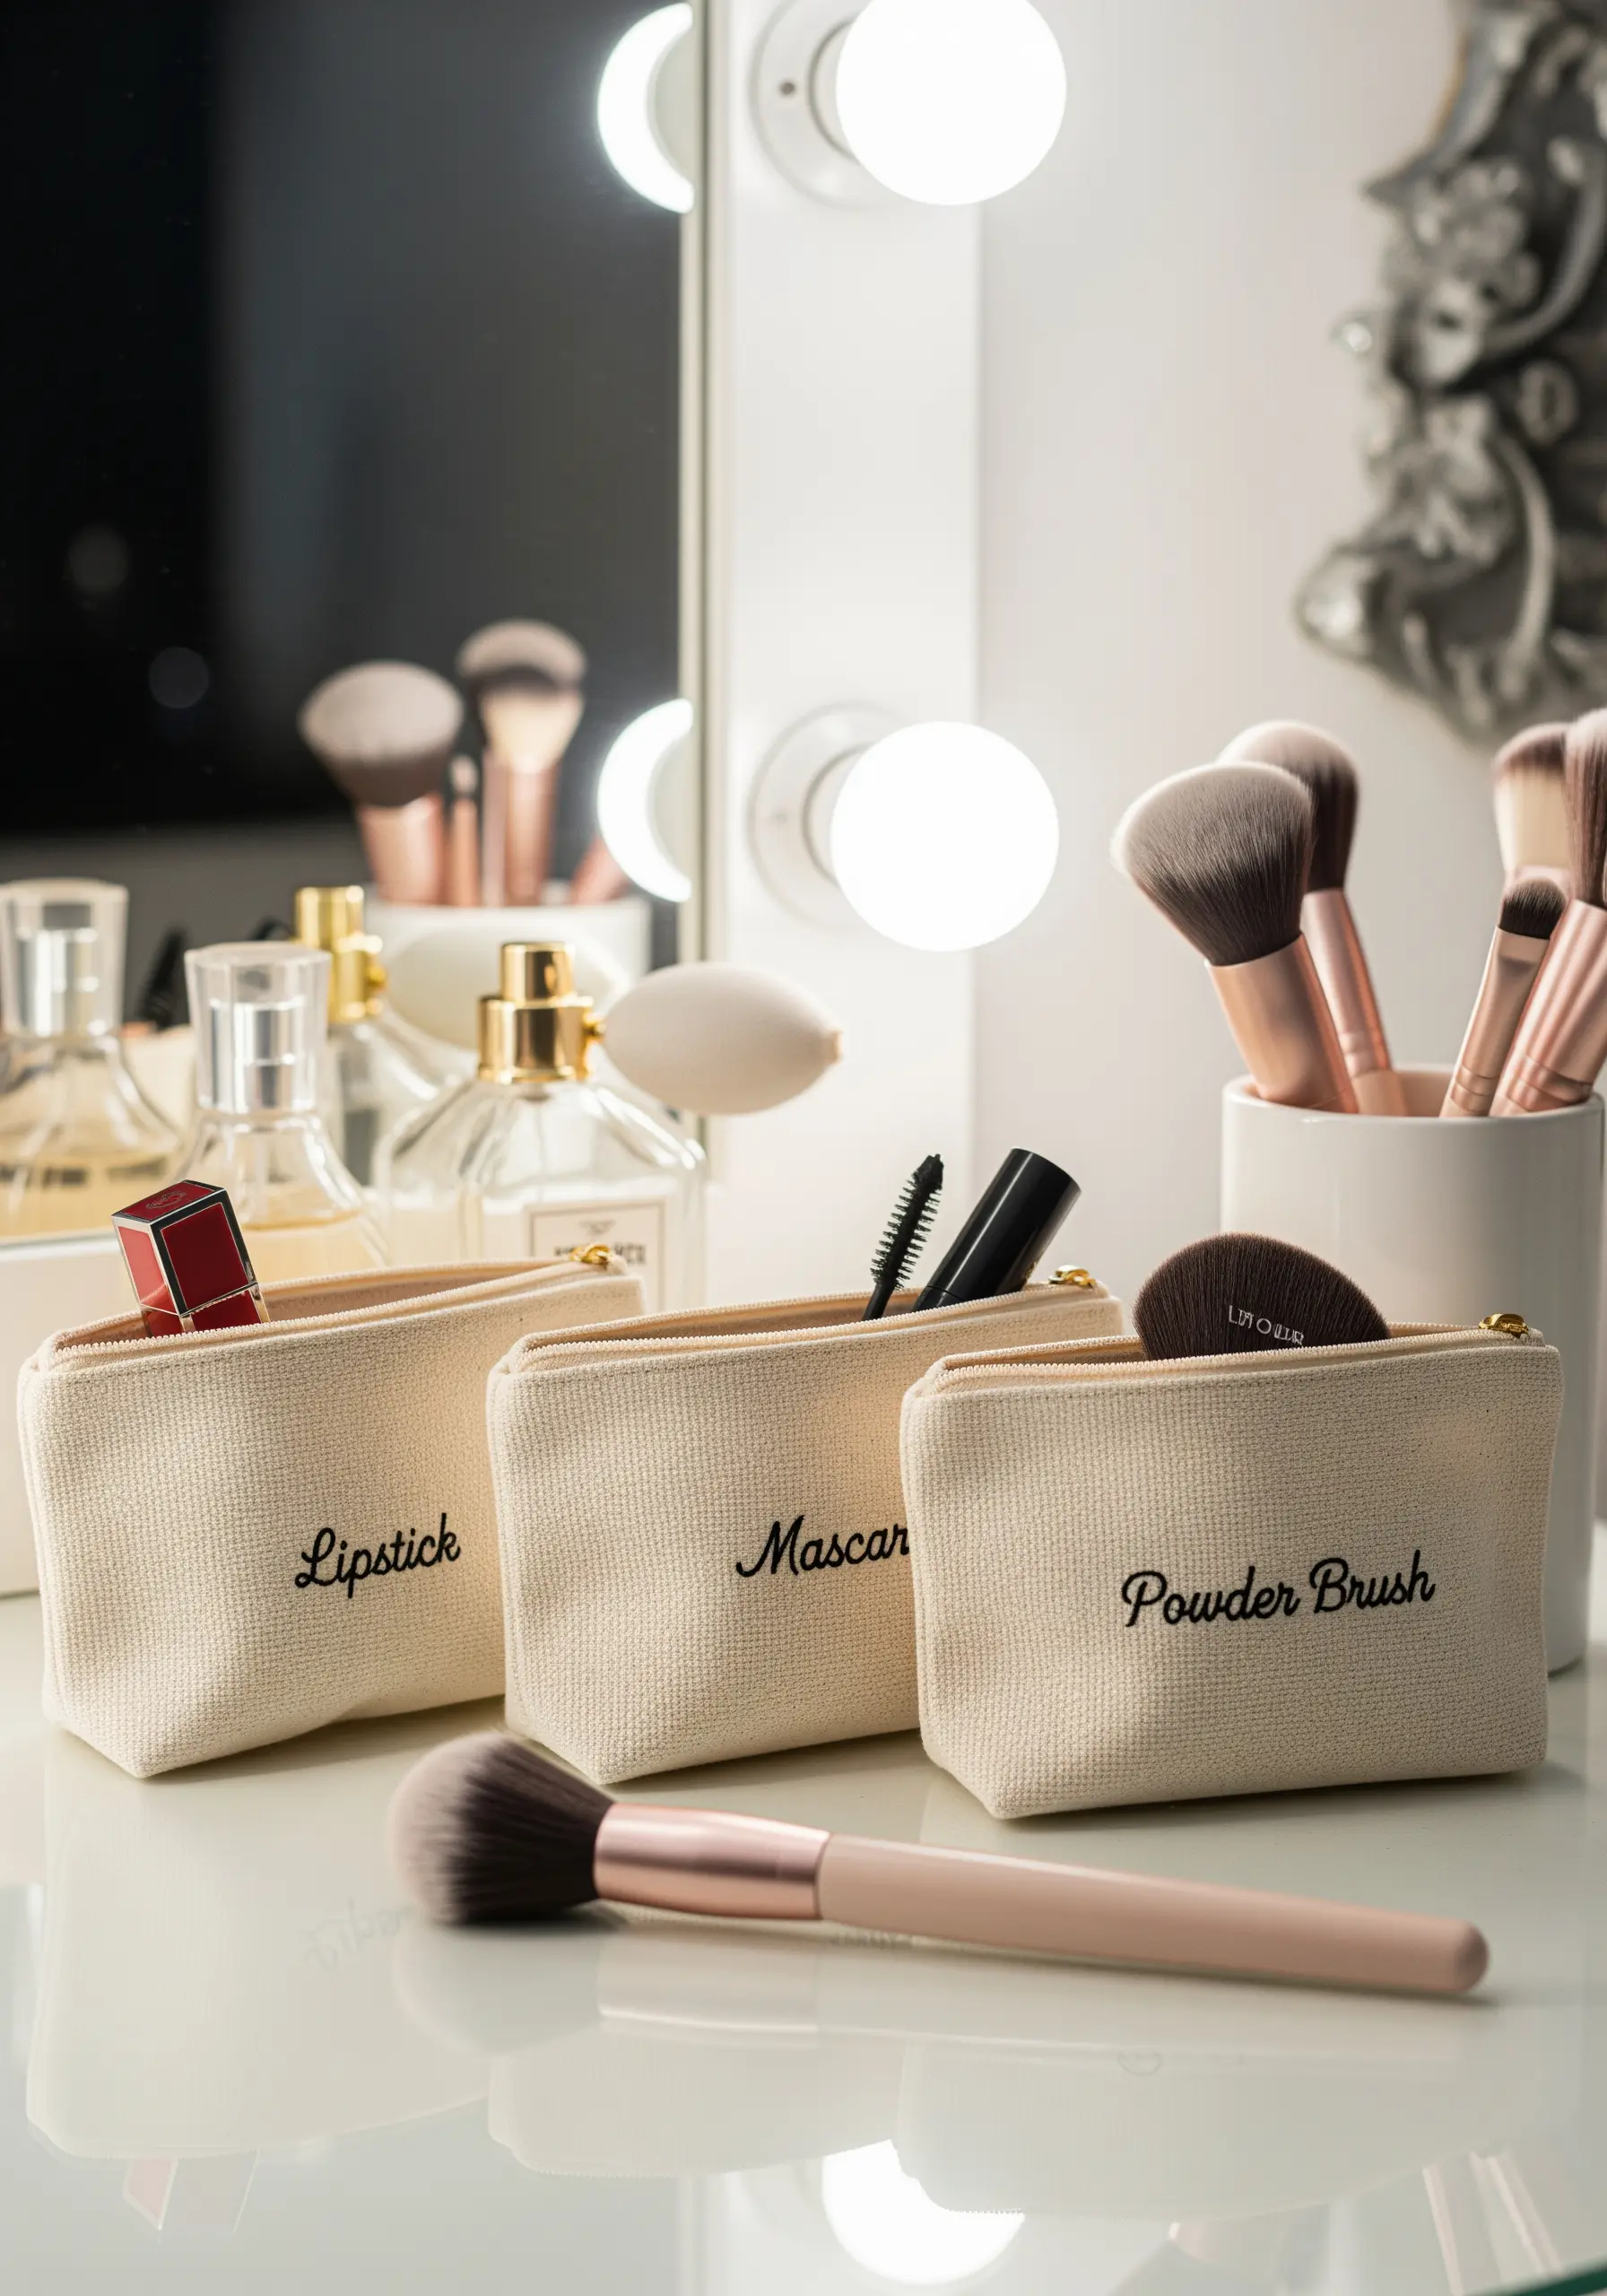
Elevate simple canvas pouches with custom embroidered labels that feel both practical and luxurious.
Choose a clean, readable font and transfer it to the fabric using a fine-tipped, heat-erasable pen.
A two-strand backstitch is perfect for achieving crisp, modern lettering. The key is absolute consistency in your stitch length and tension, which makes the text look polished and professional.
18. Add Timeless Elegance with Monogrammed Linens
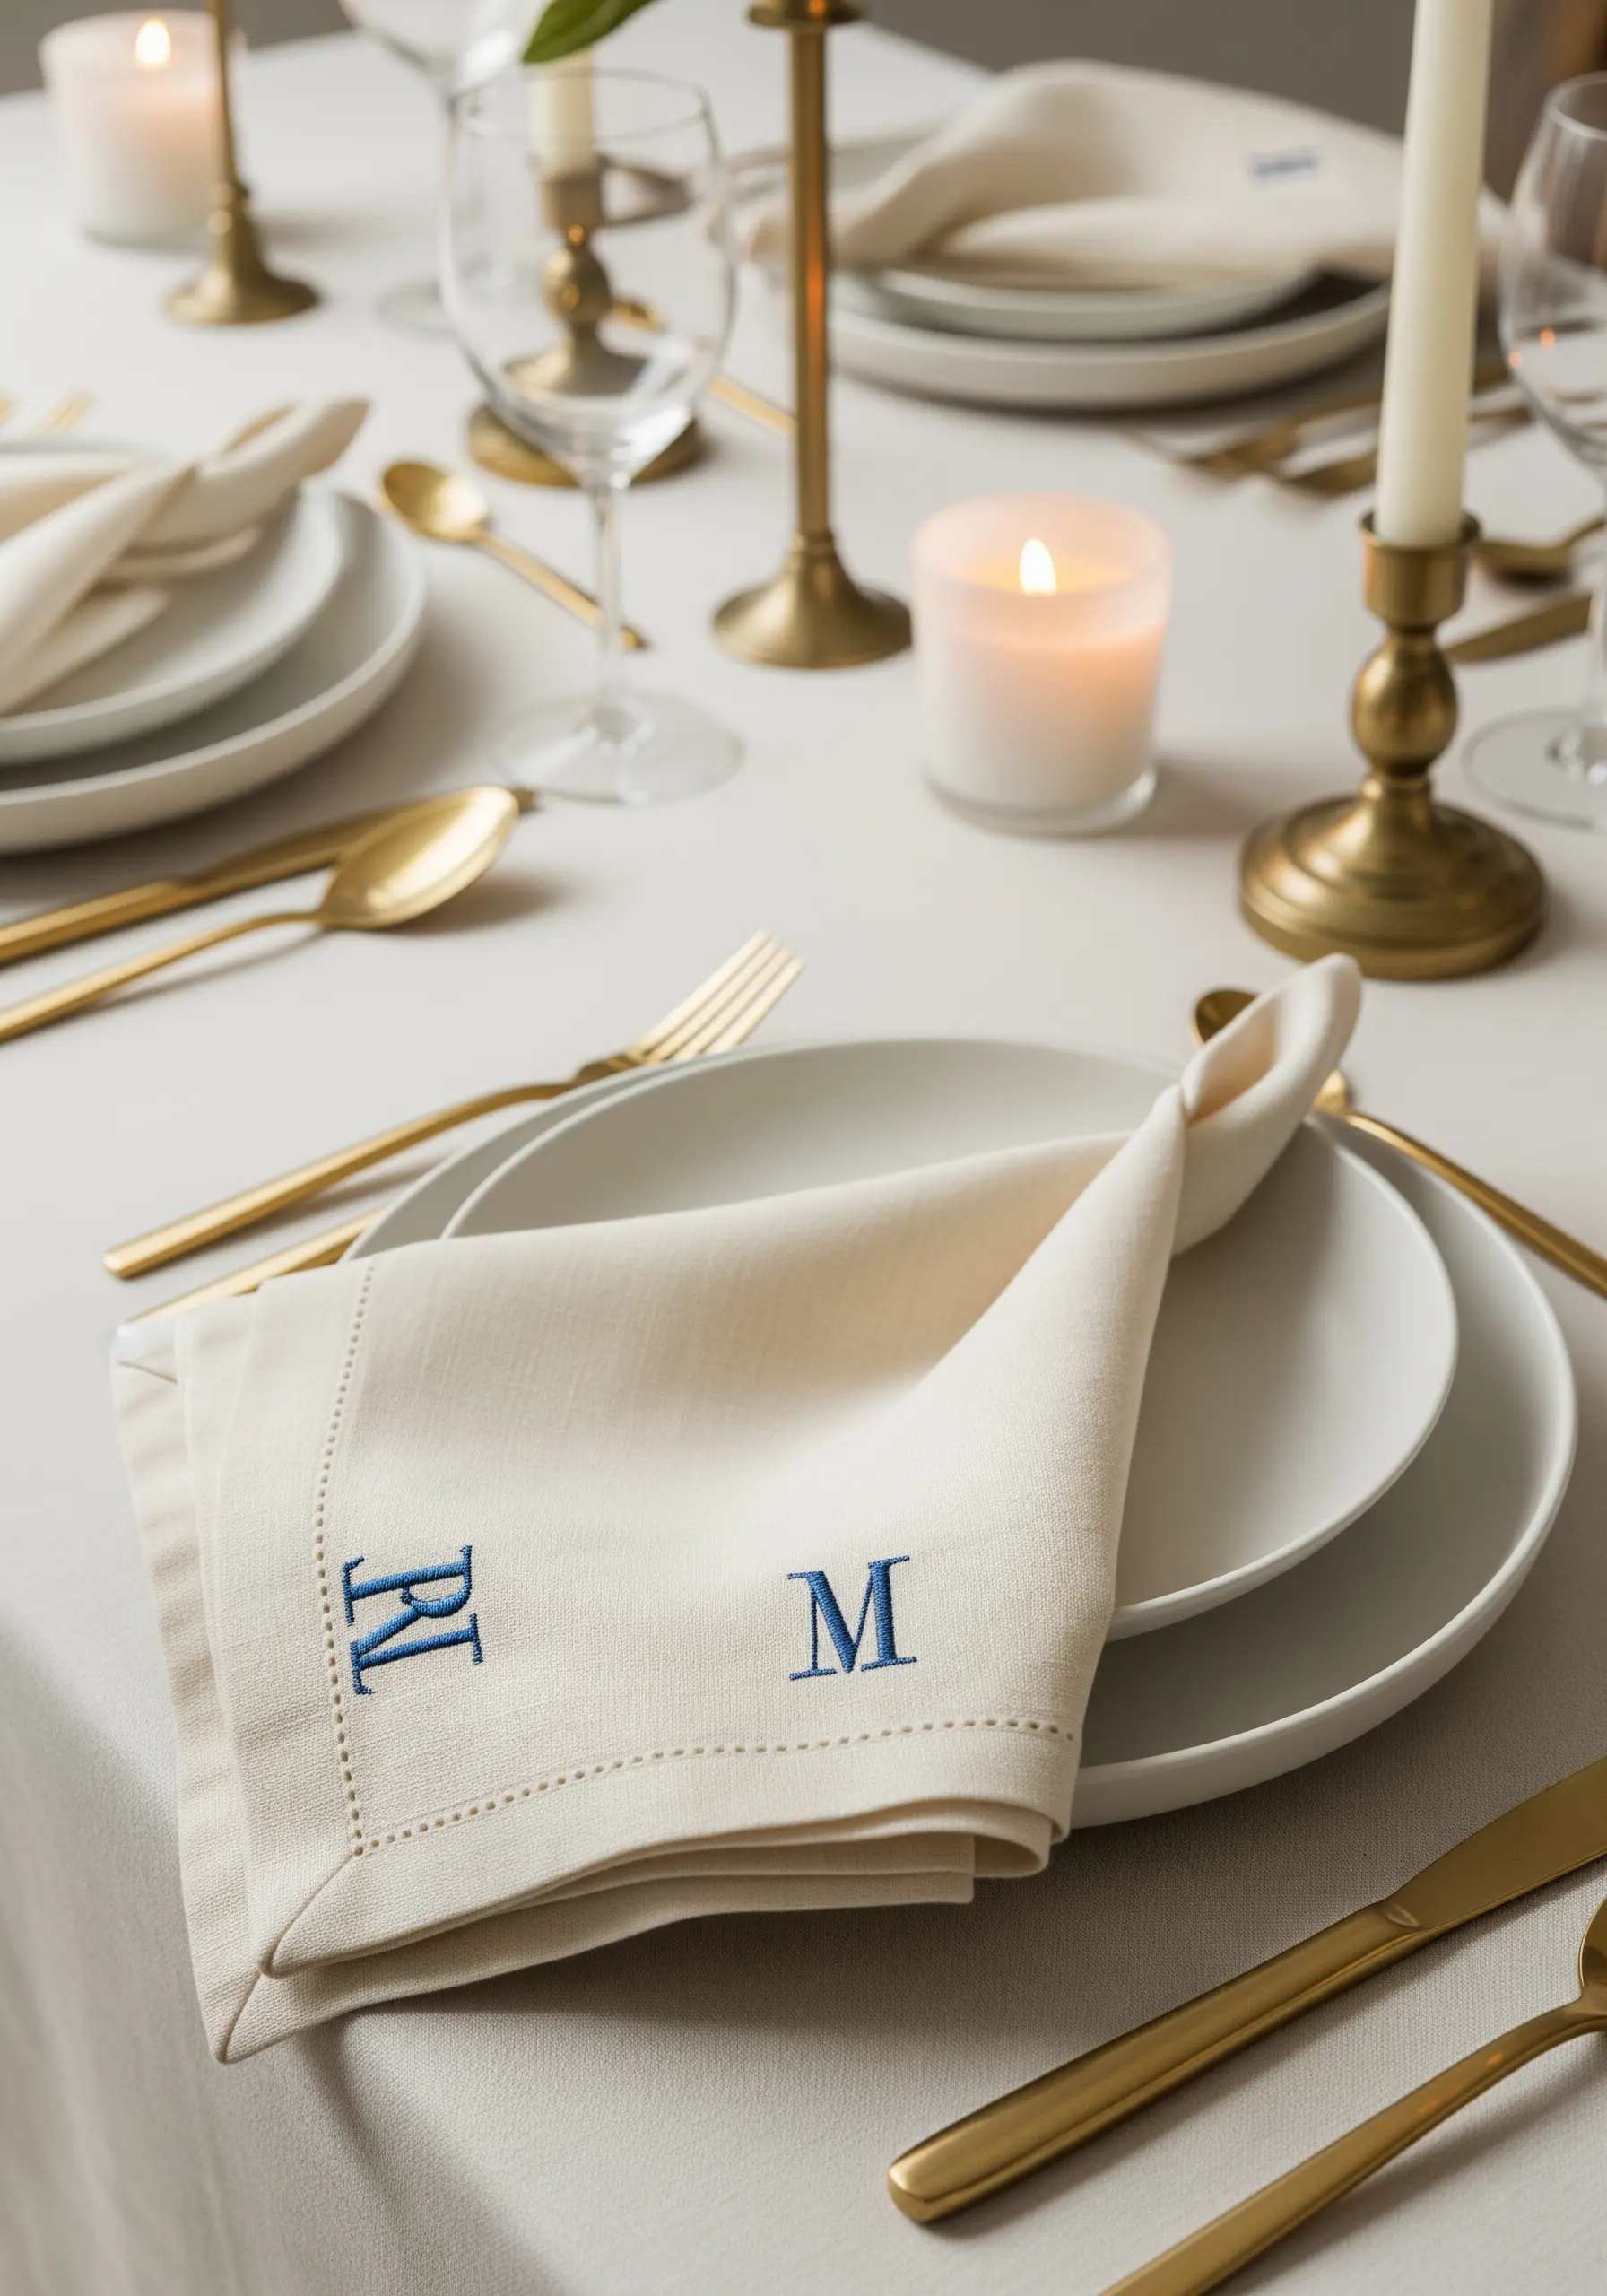
A classic monogram instantly elevates table settings, turning everyday napkins into heirloom pieces.
For a bold, traditional look, use a padded satin stitch. First, create an underlay of small running stitches within the letter’s shape, then cover it with your final satin stitches.
This simple preparation raises the monogram from the fabric, giving it a luxurious, embossed quality that feels wonderful to the touch. It’s a key technique for embroidery table runner placemat ideas, too.
19. Embellish a Pincushion with Tiny Fruit Motifs
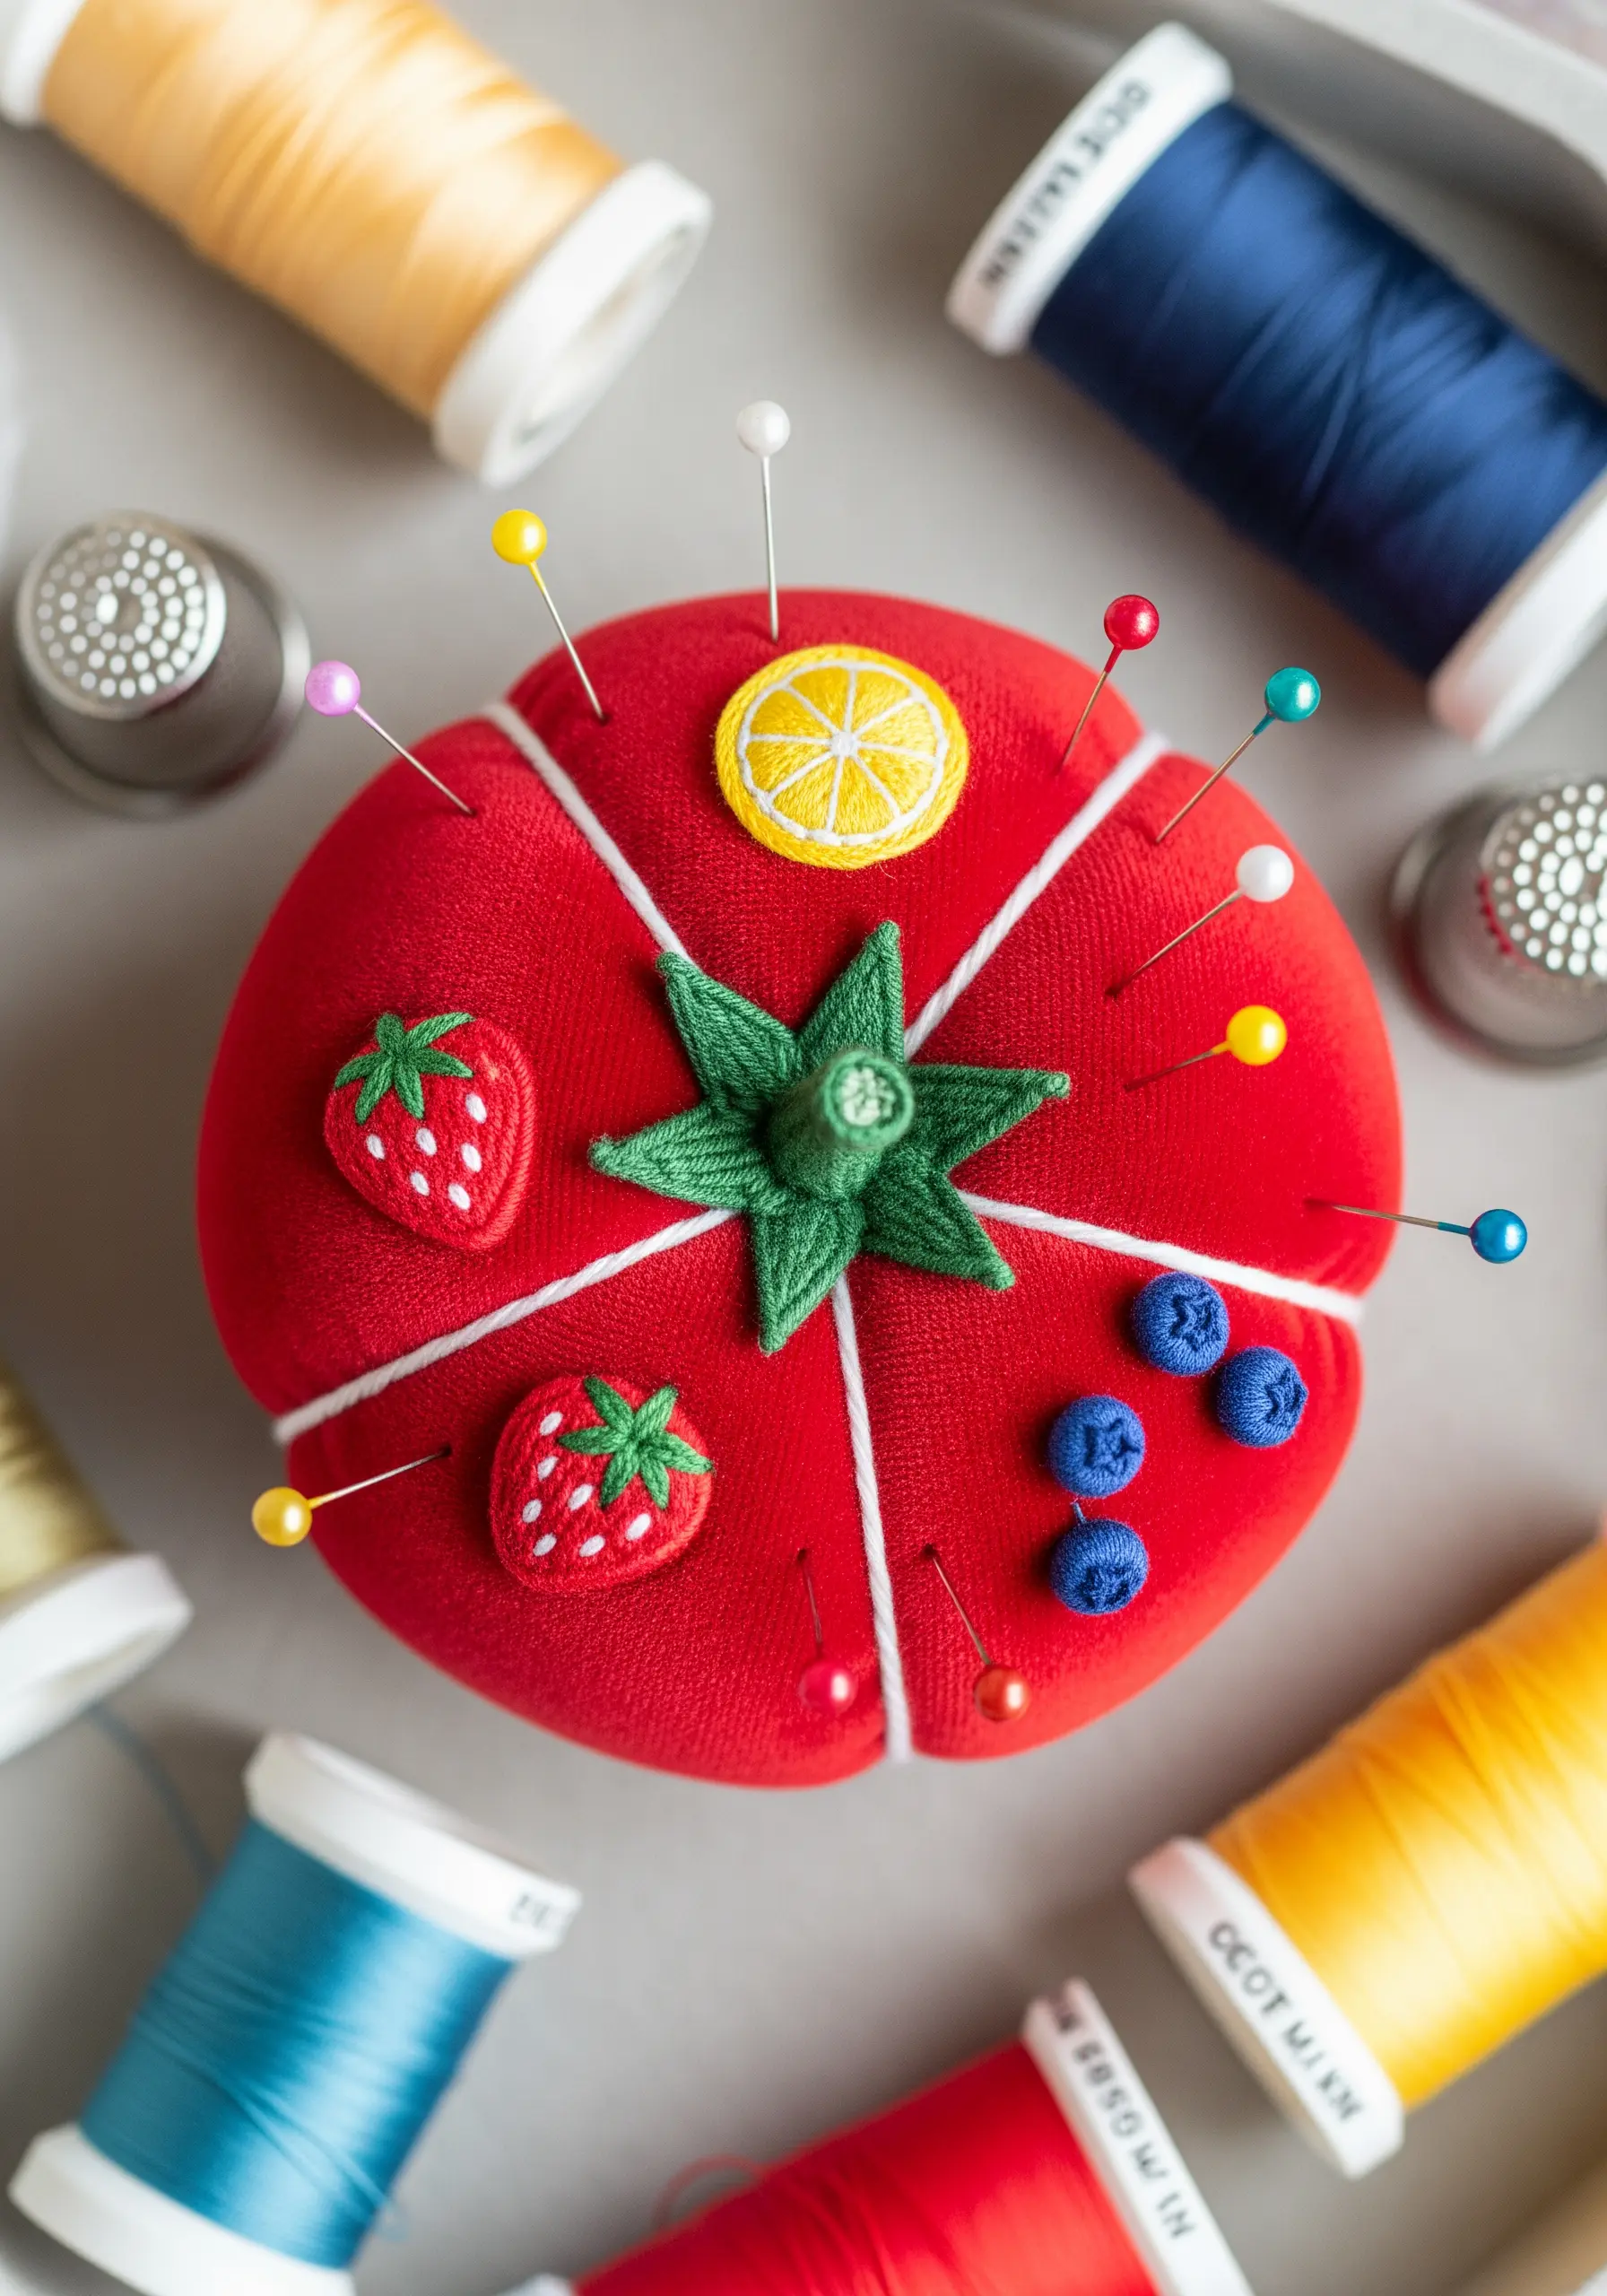
Transform a utilitarian object into something joyful and personal with just a few simple stitches.
Use French knots for the blueberries and scattered seed stitches for the strawberry seeds. For the lemon slice, a combination of backstitch outlines and satin stitch fill creates a clean, graphic look.
These tiny details make a simple tomato pincushion a delightful part of your sewing kit—one of those cozy DIY embroidery crafts perfect for lazy weekend mornings.
20. Add a Playful Cactus to a Denim Jacket
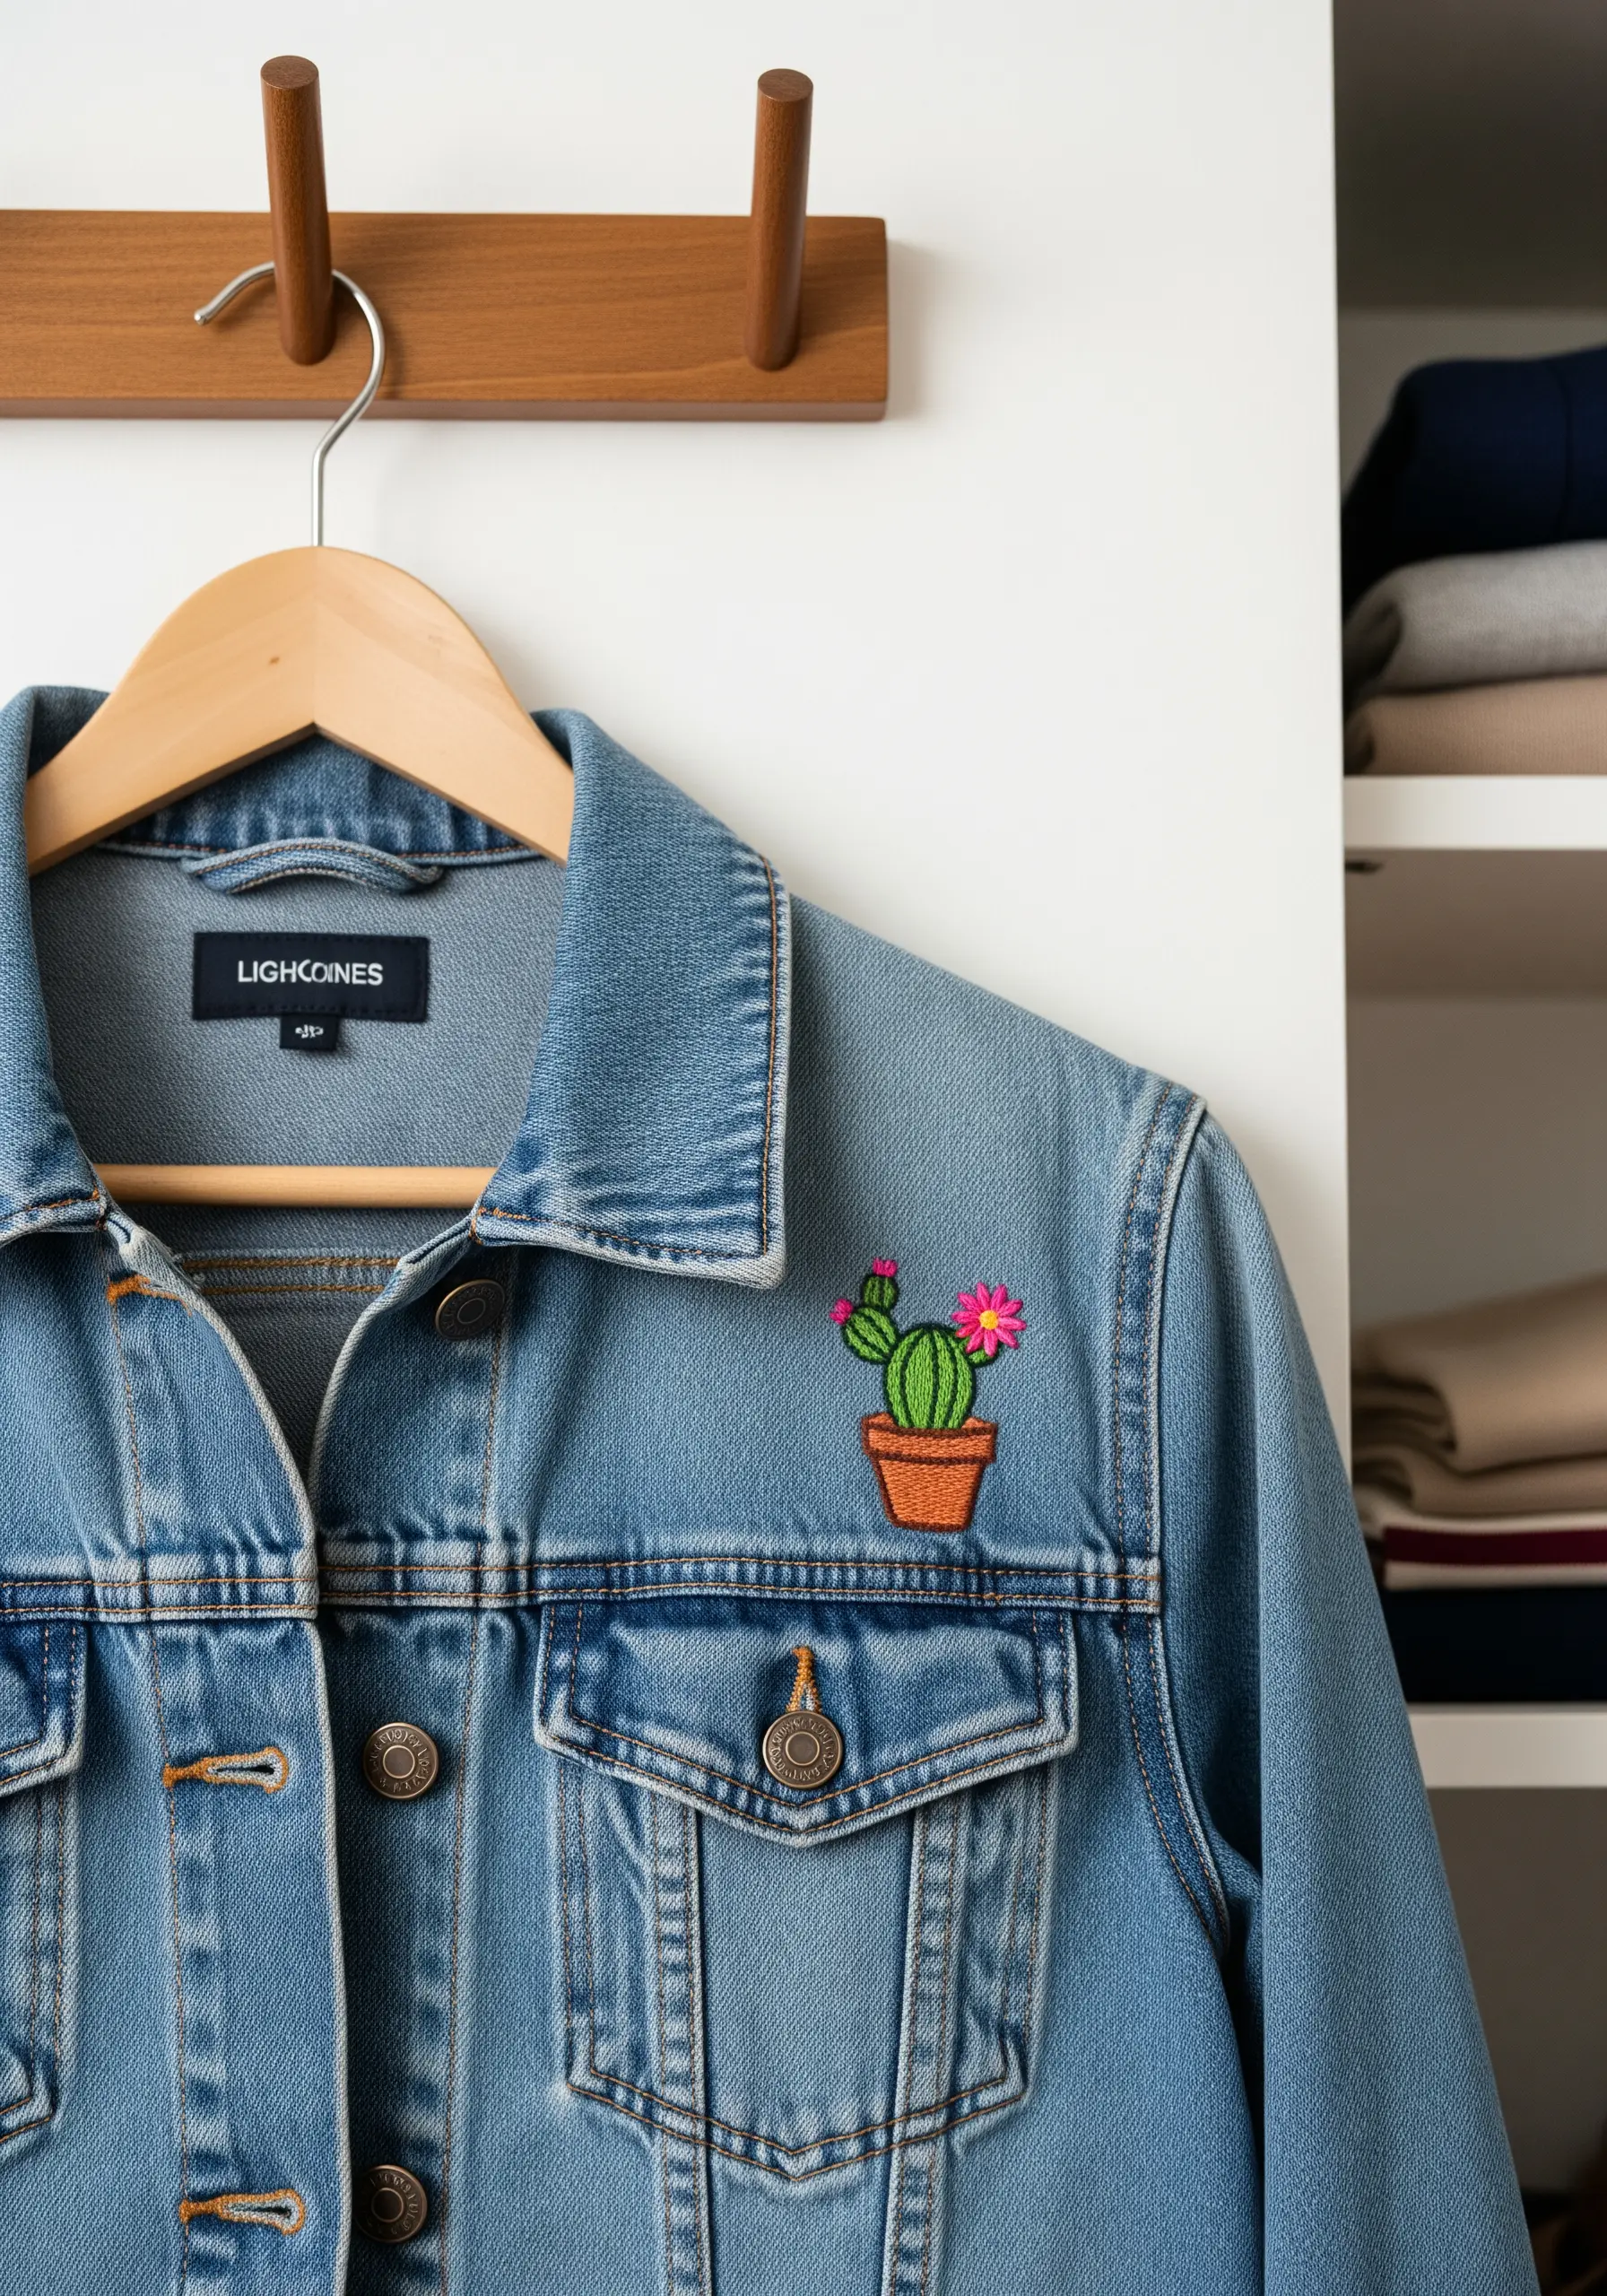
Denim is a wonderfully sturdy fabric for embroidery, so be sure to use a sharp, strong needle and a thimble to protect your fingers.
To make your design stand out against the textured blue, use a dense satin stitch with at least three strands of floss.
For the cactus, stitch vertical lines to mimic its ribbed texture, and use lazy daisy stitches for the flowers to add a soft, contrasting shape. These botanical embroidery ideas give jackets a custom, curated feel.
21. Stitch a Minimalist Line Art Accent
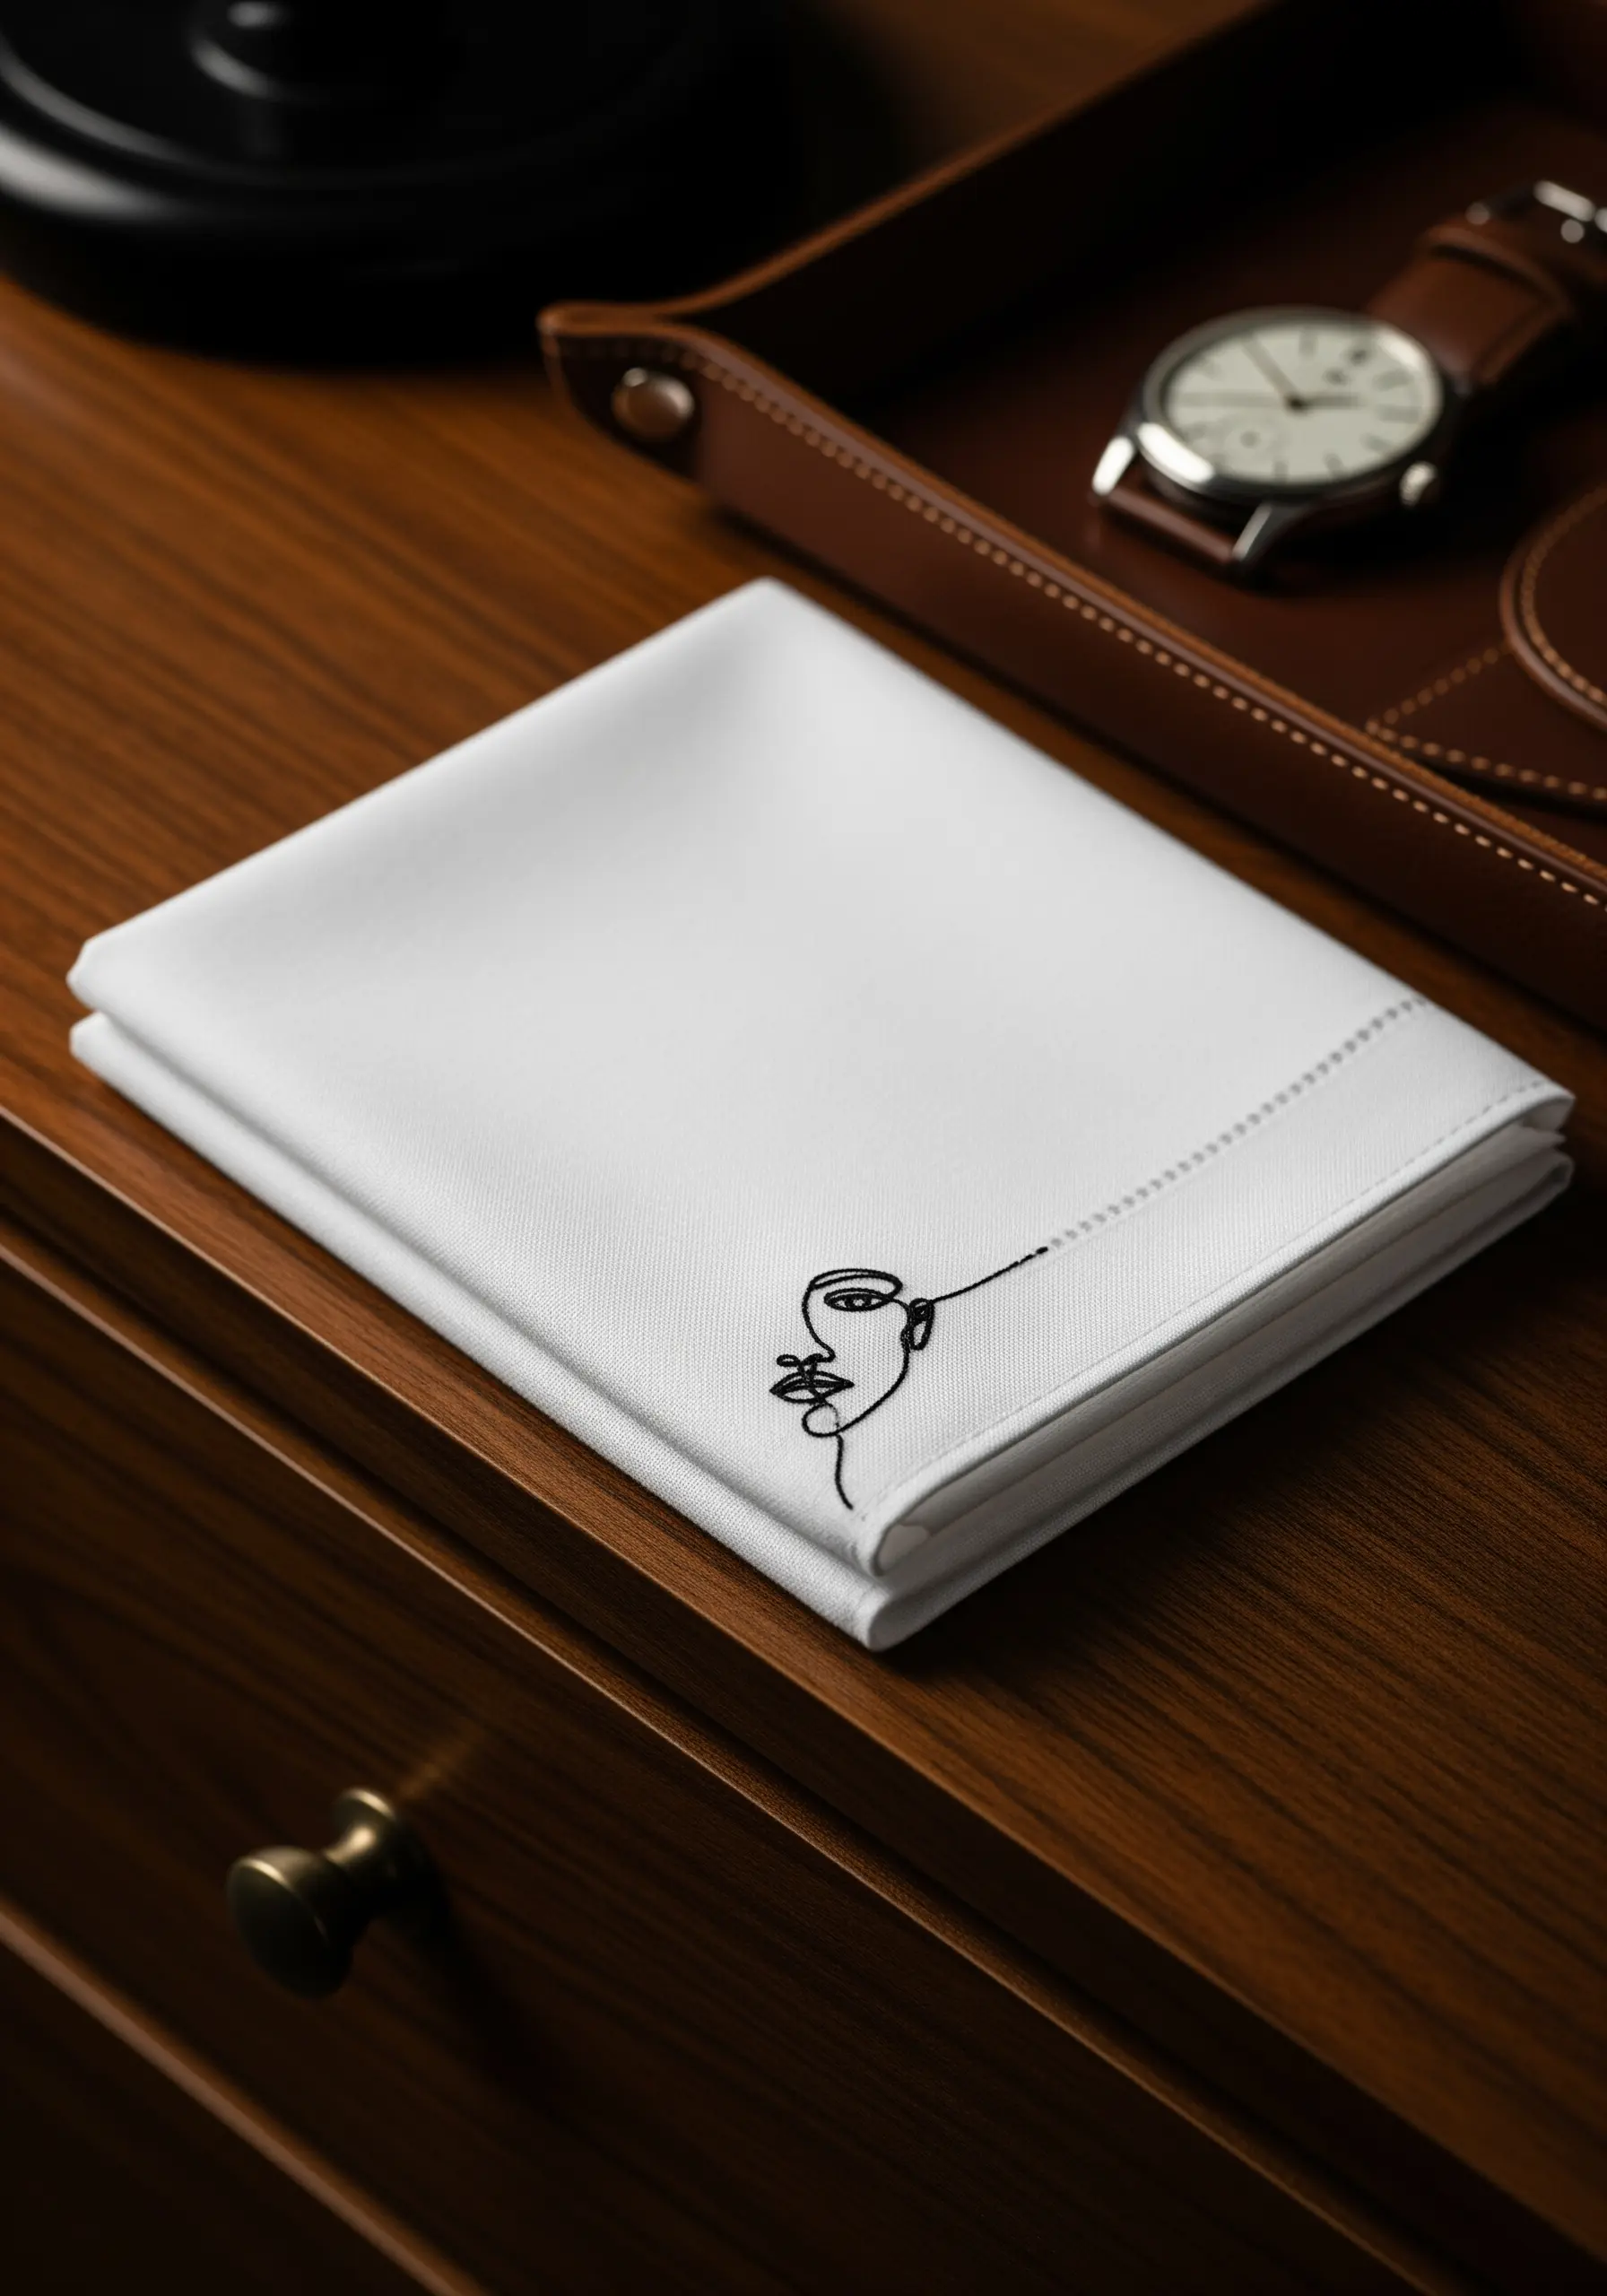
The beauty of single-line art is its fluid, unbroken motion, and you can replicate that with thread.
Use a whipped backstitch or a stem stitch with two strands of floss for a smooth, continuous line.
Avoid pulling your stitches too tight, as this can distort the delicate curves on a lightweight fabric like a handkerchief.
The goal is a line that looks as though it were drawn in a single, effortless stroke, adding quiet sophistication to a simple object.
22. Create an Unexpected Embroidered Light Switch Cover
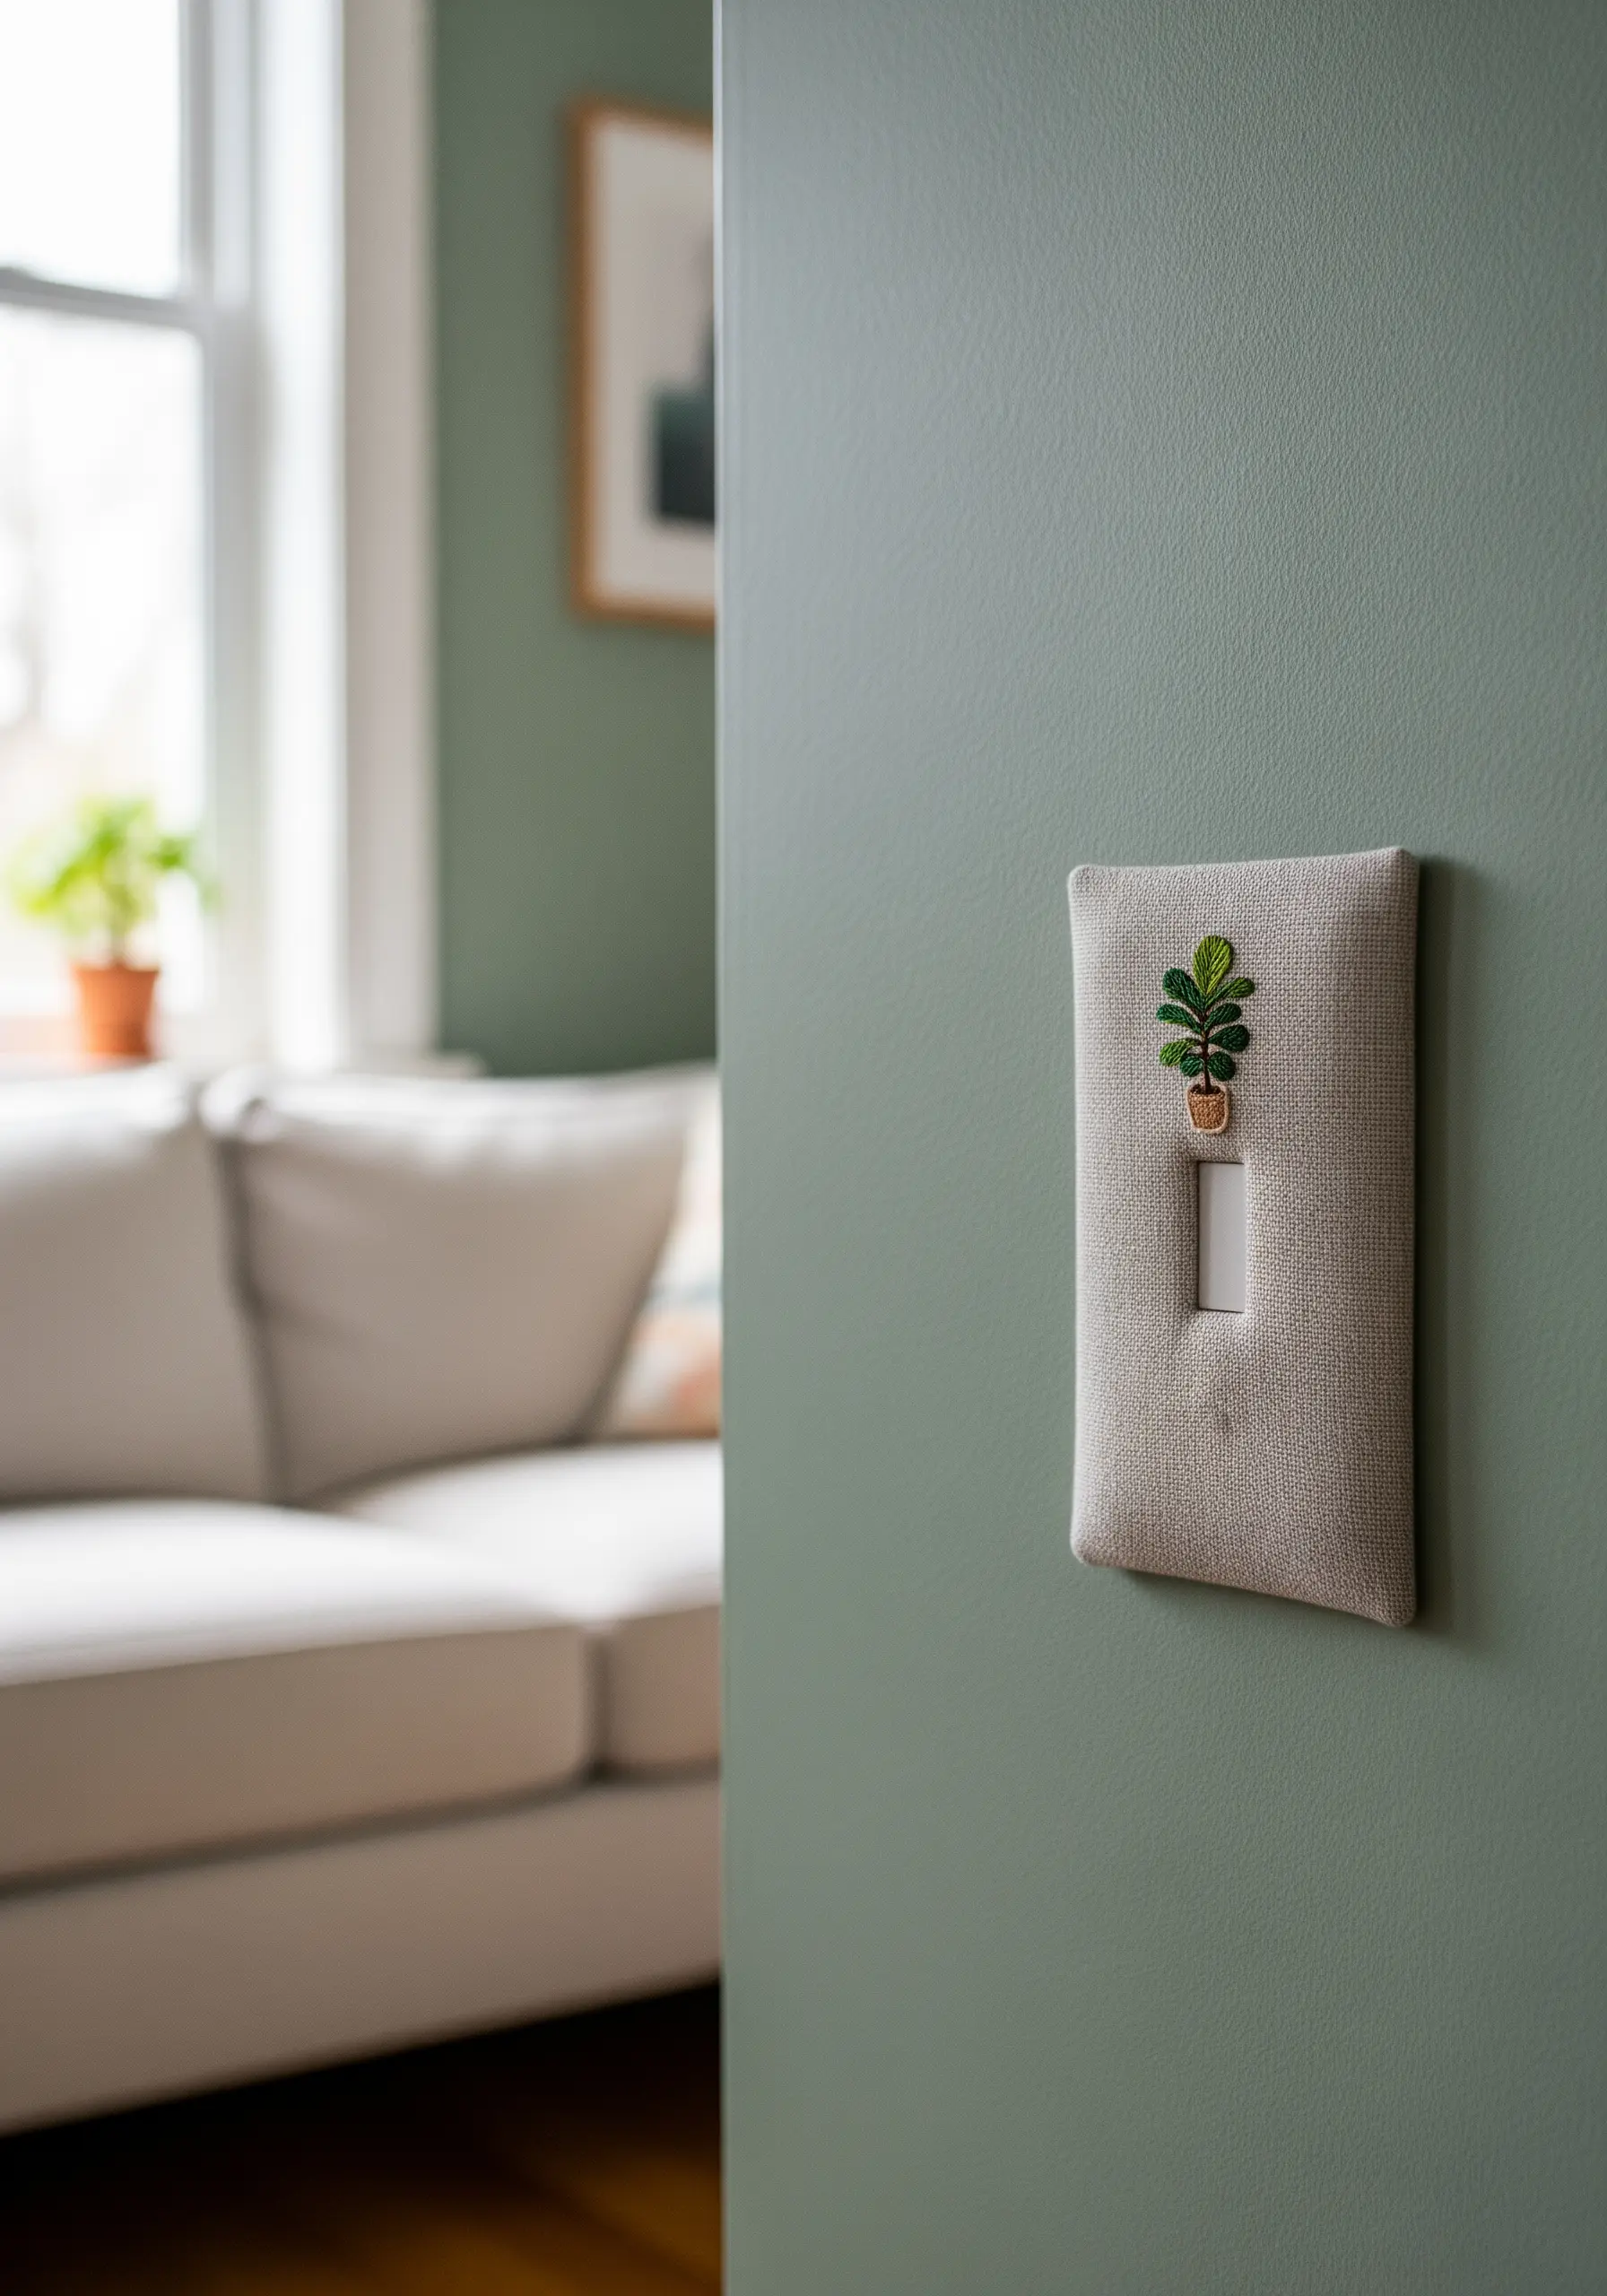
Turn an overlooked, everyday detail into a tiny, charming piece of art that makes your space feel truly custom.
First, create a paper template of your light switch plate. Stitch your design onto a piece of linen that’s larger than the plate.
To assemble, wrap the fabric tightly around the plate, securing it on the back with strong craft glue, then carefully cut out the opening for the switch with a craft knife. This is a perfect example of tiny artistic home touches that make a big statement.
23. Design a Shadow Box of Embroidered Buttons
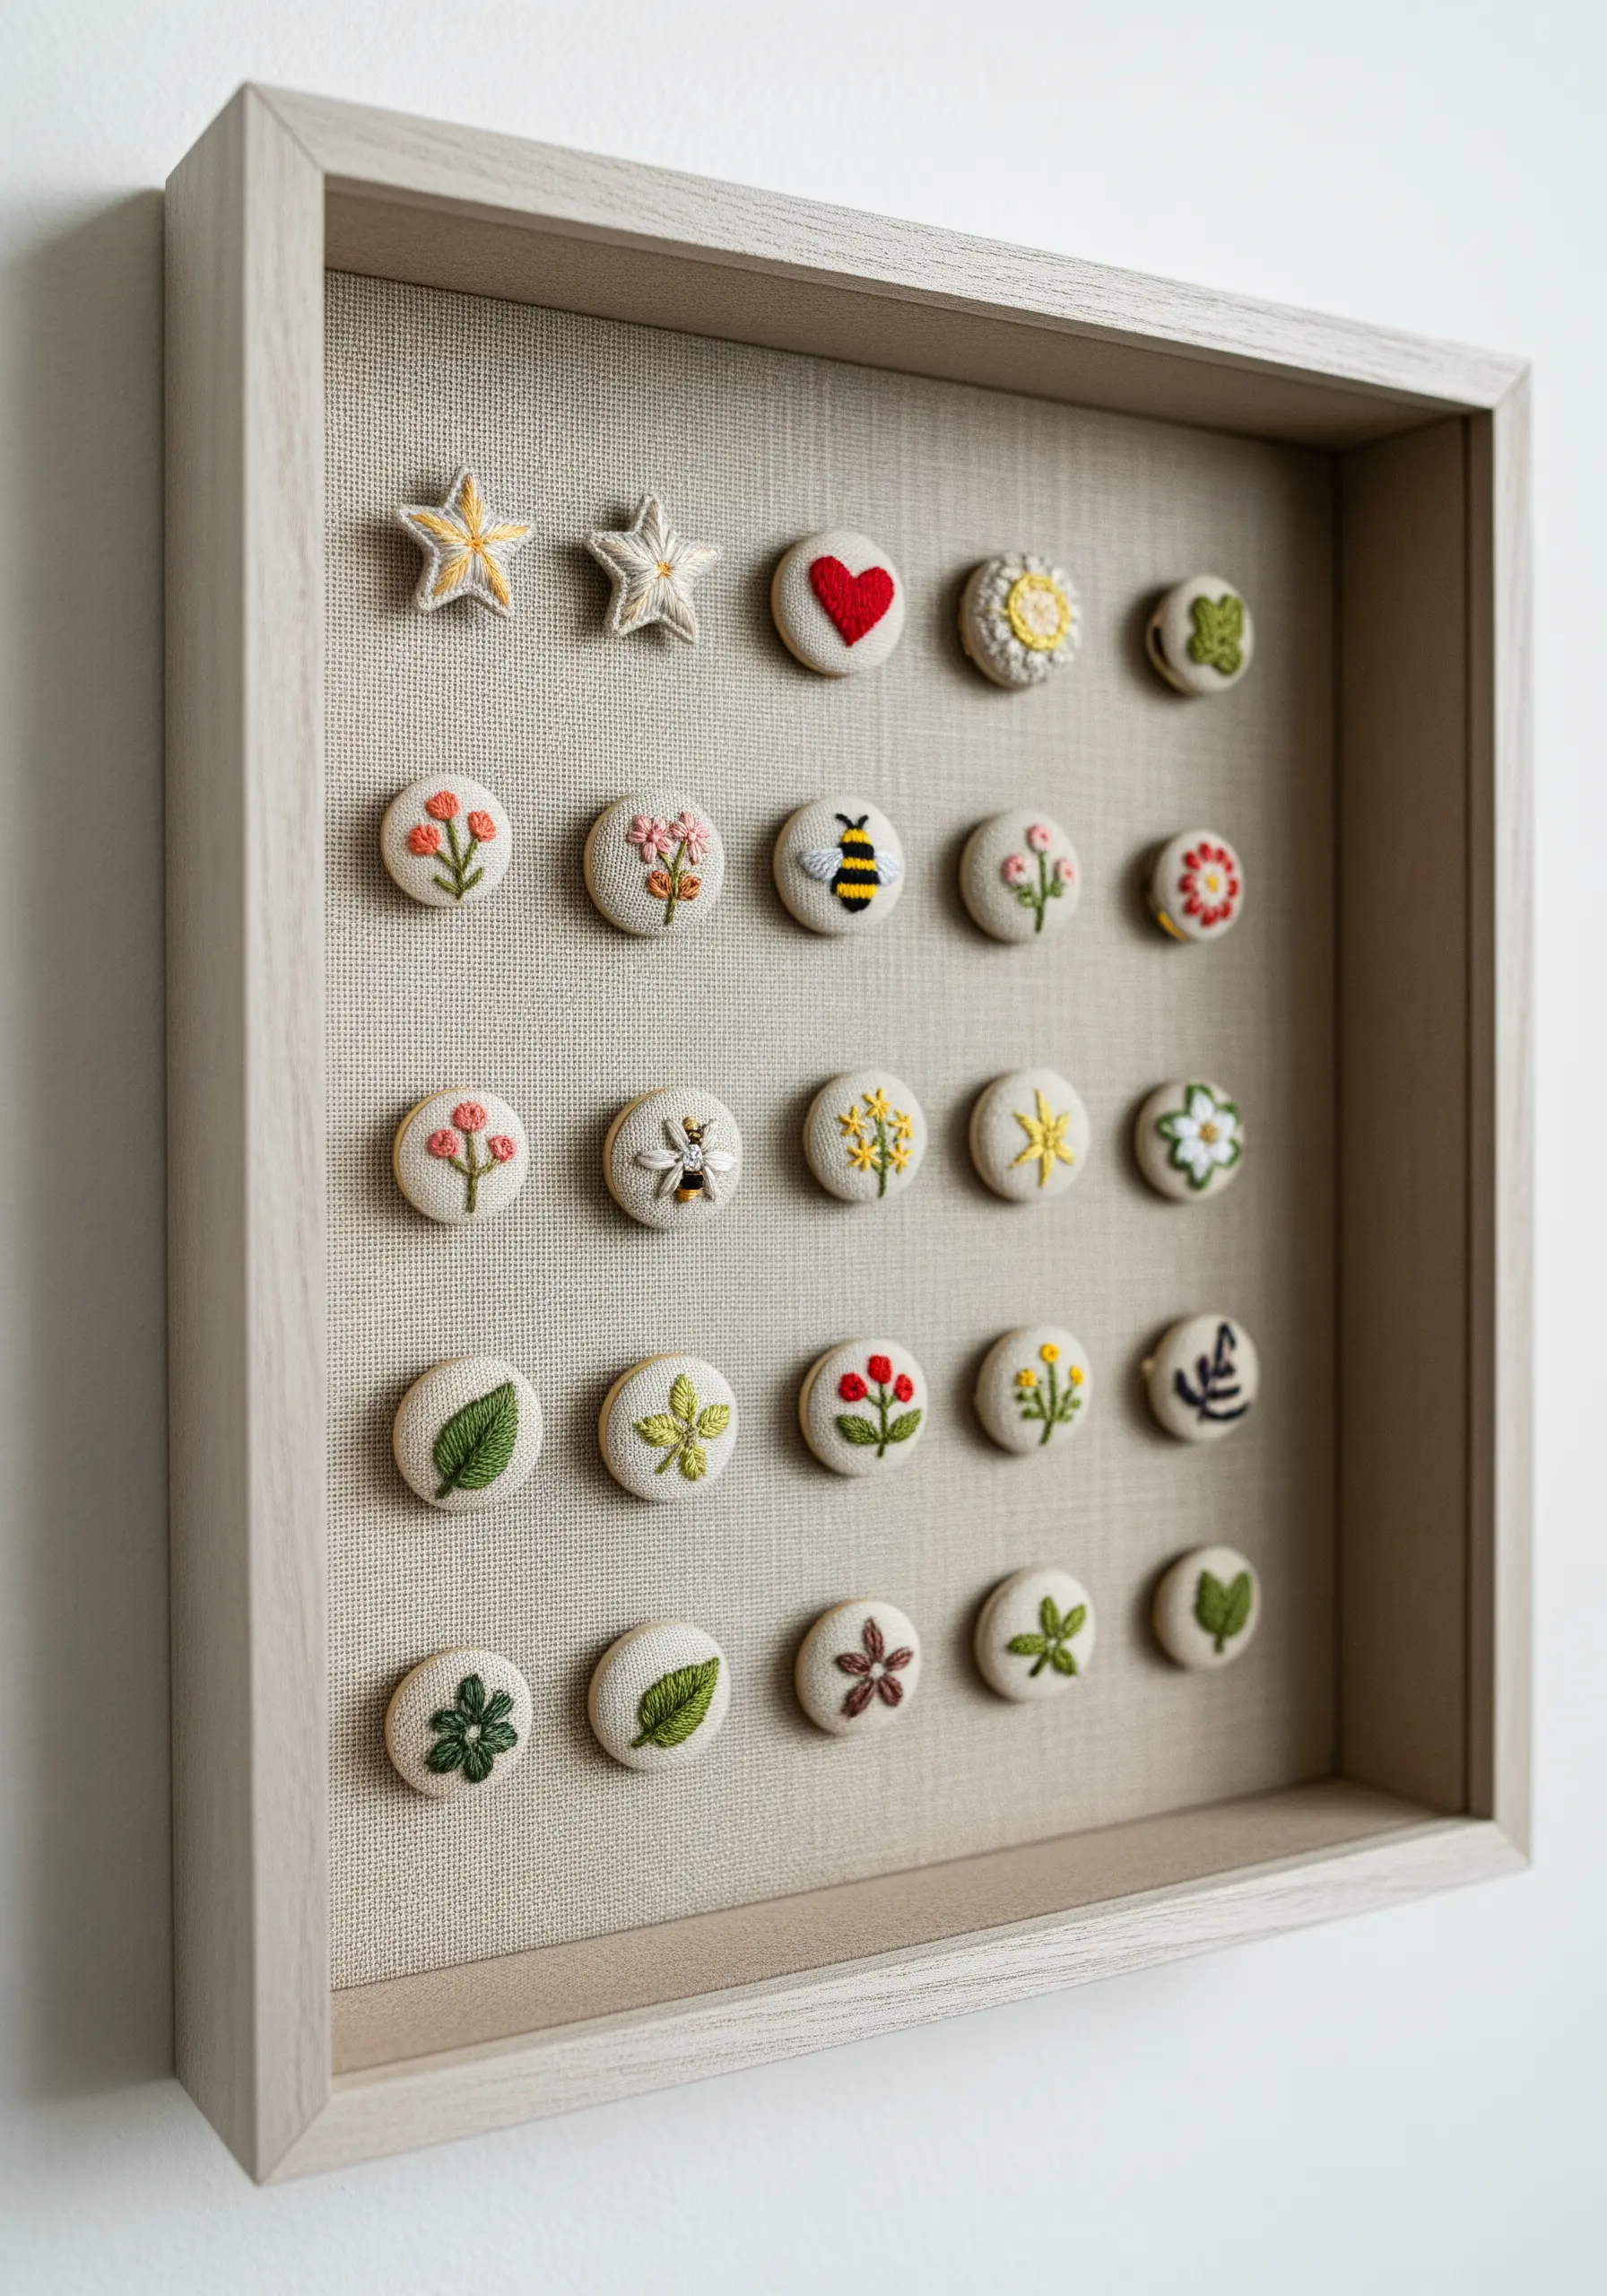
Use fabric-covered button kits to create miniature canvases for your smallest stitching ideas.
Stitch tiny, simple motifs—a single leaf, a heart, a small bee—onto scraps of linen. The constrained space is a wonderful creative exercise, forcing you to simplify your designs to their essence.
Arrange the finished buttons in a neat grid within a shadow box to create a stunning, curated collection that documents your skills.
24. Capture Autumnal Tones on Felt Coasters
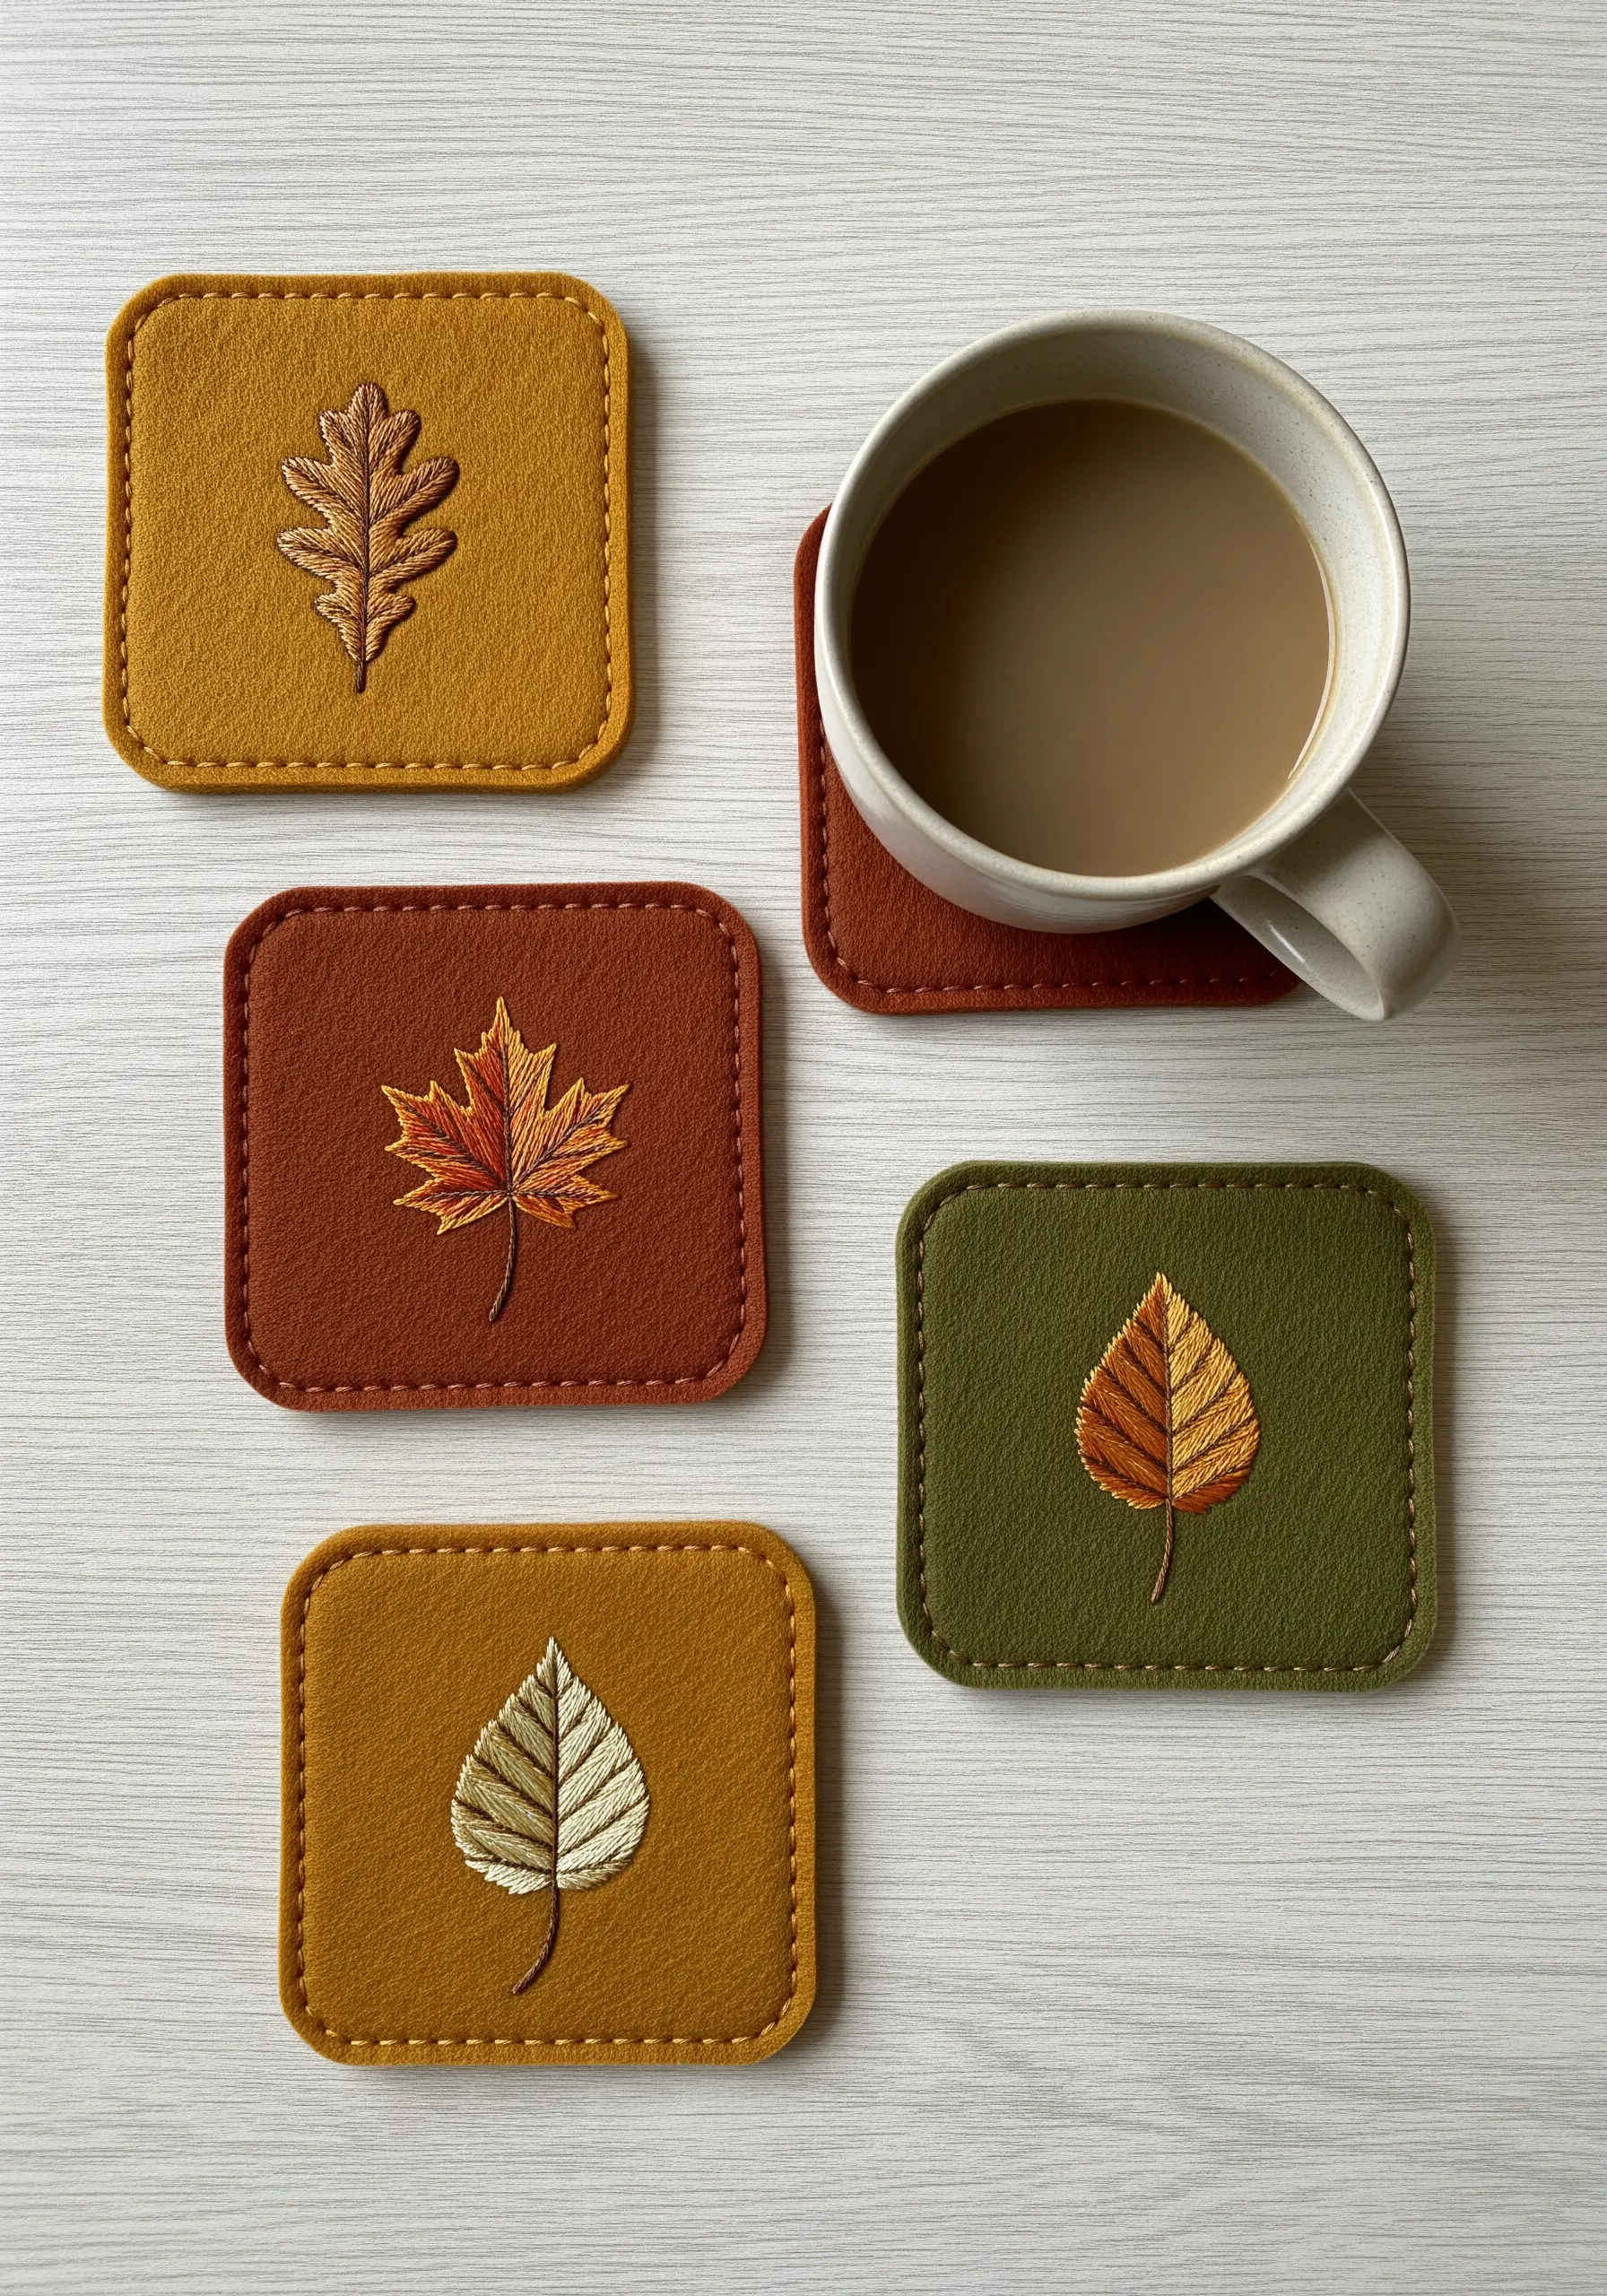
Achieve a realistic, variegated leaf effect by using a simple thread painting technique on sturdy felt.
Use a single strand of floss and blend two or three autumnal colors with long-and-short stitches.
Don’t strive for perfect blending; the slight variations and overlaps in color are what beautifully mimic nature.
Add the leaf veins last with a simple backstitch in a contrasting color to define the structure and add a final touch of detail.
25. Craft an Elegant Curtain Tie-Back
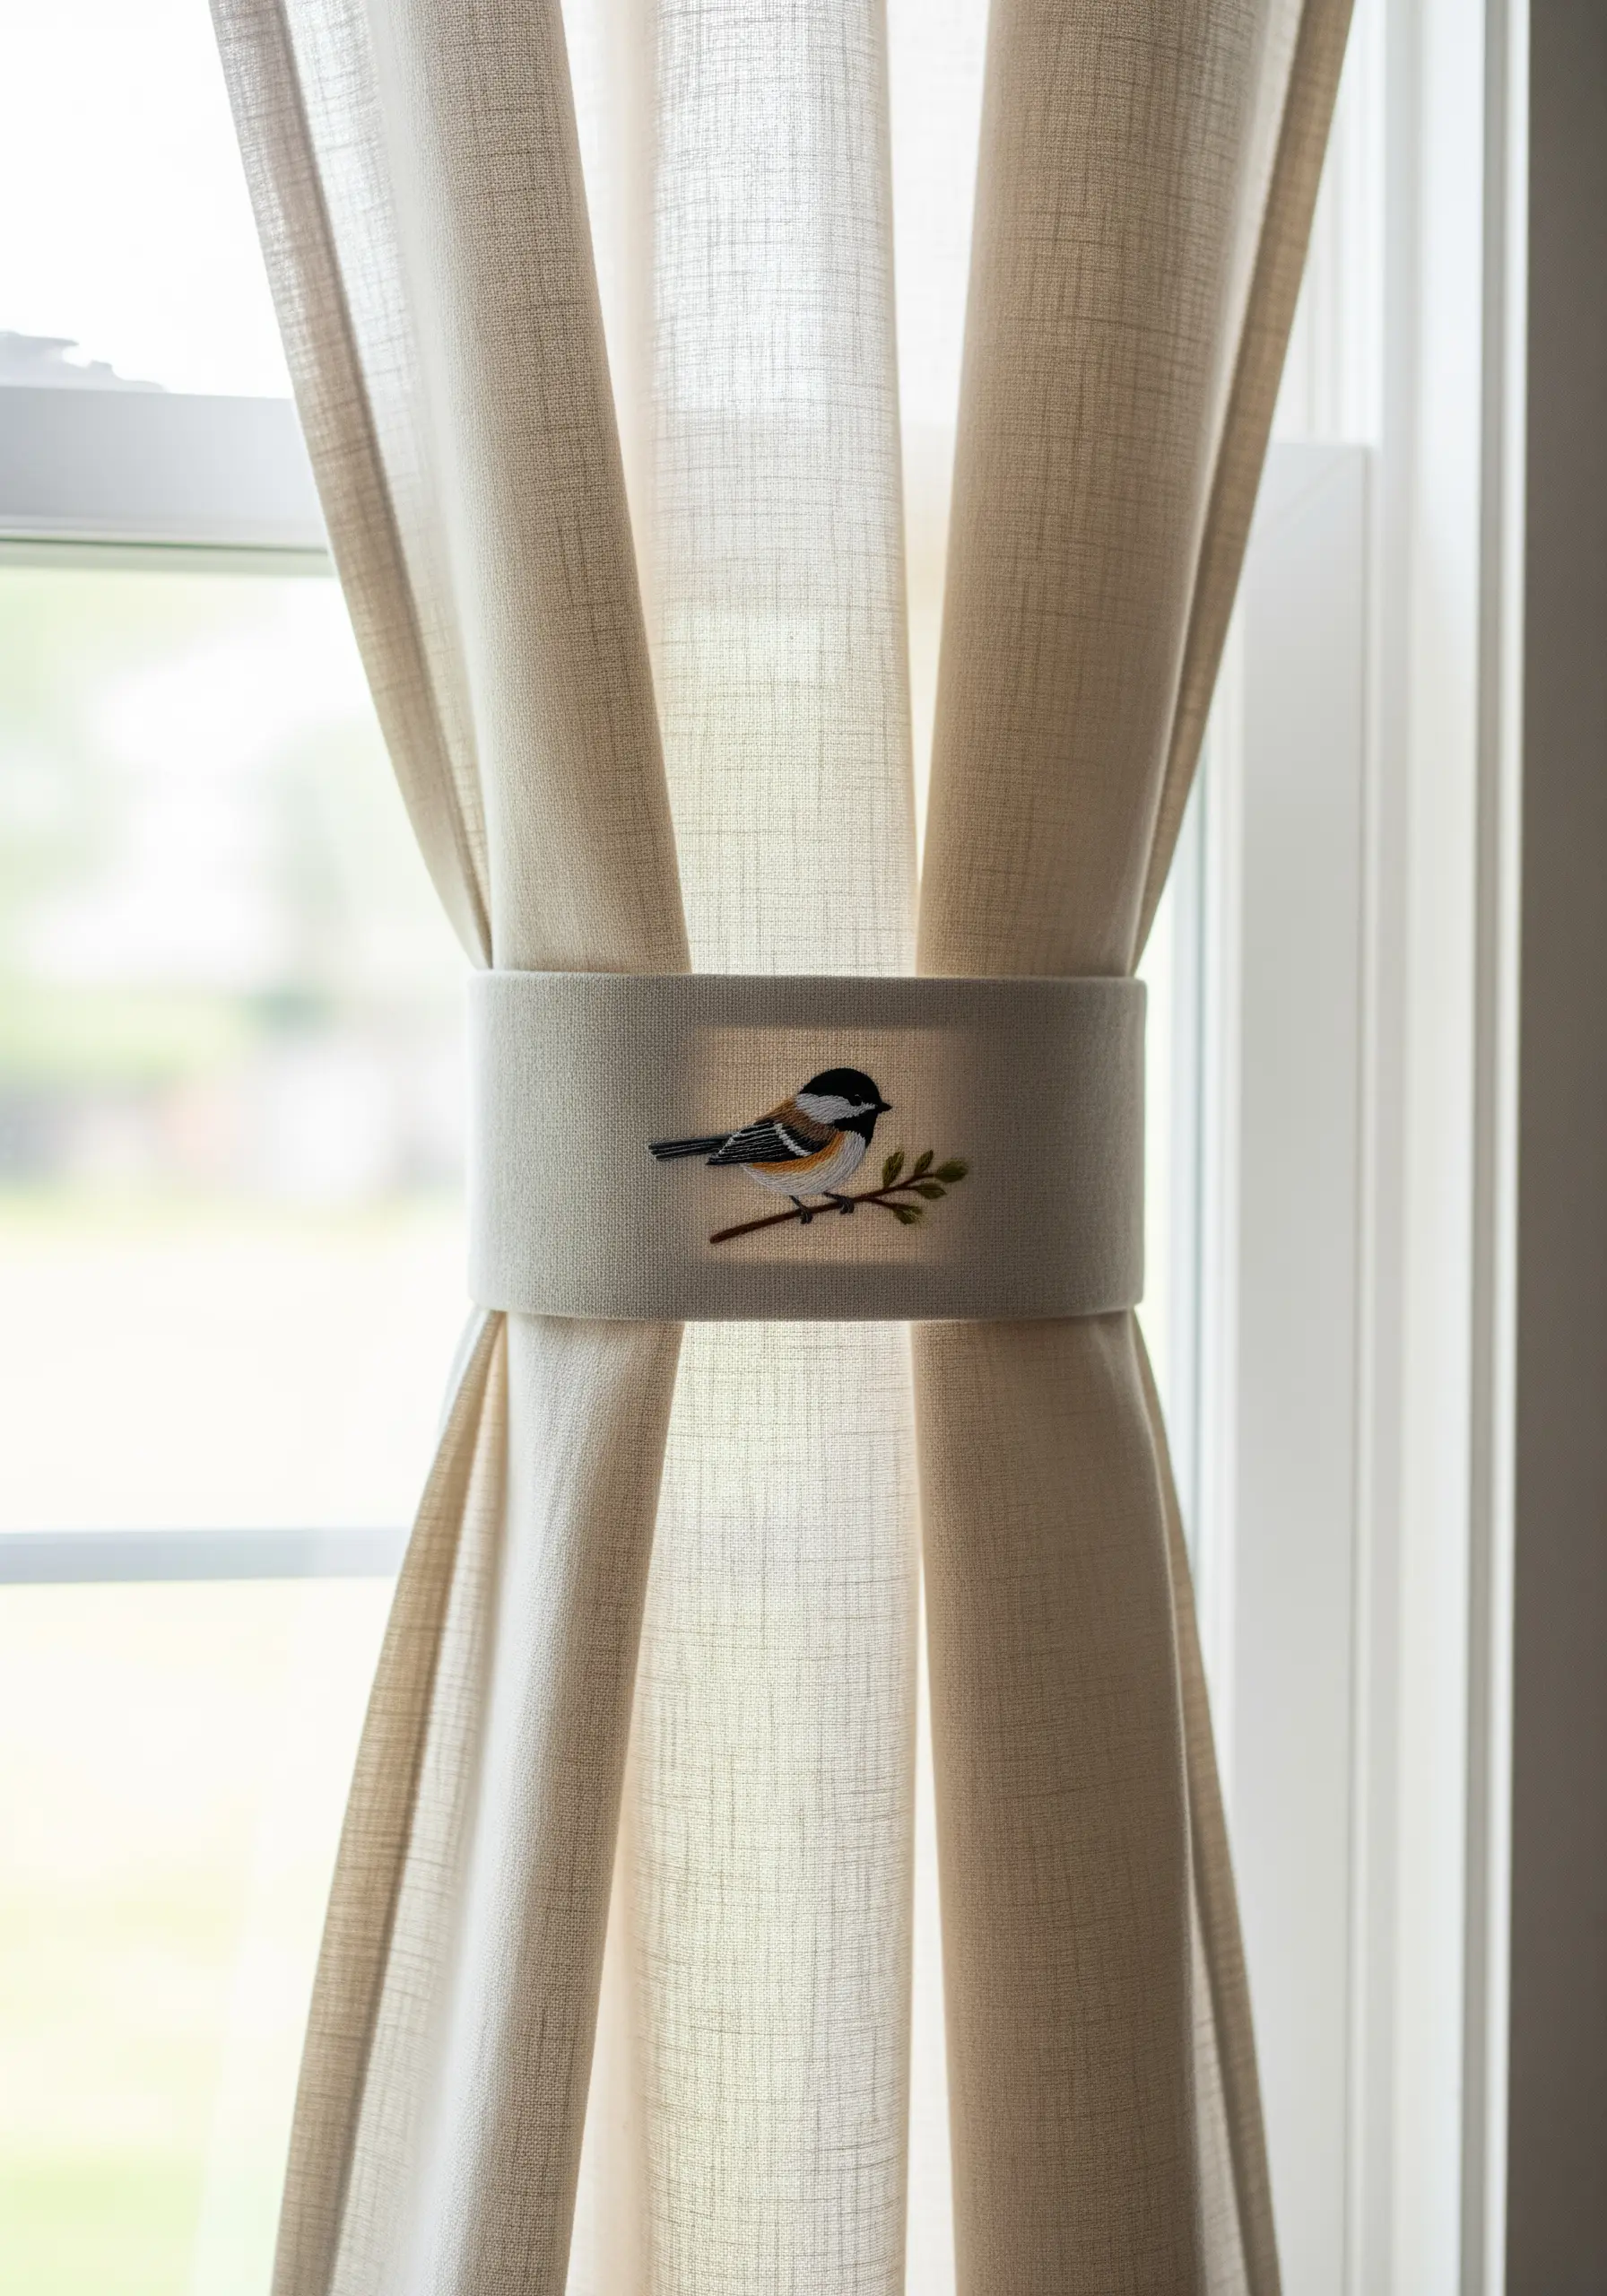
Create a beautiful and functional piece that doubles as a subtle, elegant piece of room decor.
Embroider your central motif onto a sturdy fabric like linen or canvas. To construct the tie-back, back the embroidered piece with a second layer of fabric and stitch them together, leaving an opening to turn it right-side out.
Press it flat and add velcro, ribbon, or a button closure to the ends for a polished detail that makes a room feel complete and considered.


