

Have you ever finished an embroidery piece and felt it was missing a certain spark? You’ve followed the pattern, your stitches are neat, but it doesn’t quite have that polished, artistic quality you admire in the work of others. It’s a feeling I know well, and I want to assure you that the gap between good and stunning is smaller than you think.
Elevating your embroidery isn’t about mastering hundreds of complex stitches or buying expensive new materials. It’s about learning to see your needle and thread as tools for interior design. It’s about making intentional choices—in how you blend your colors, the texture of the fabric you choose, and where you decide to display your finished art.
In the ideas that follow, you’ll find practical ways to transform not just your technique, but the way your work lives in your home. Think of this as your guide to turning simple stitches into personal, tactile art that brings warmth, character, and a quiet sense of pride to every room.
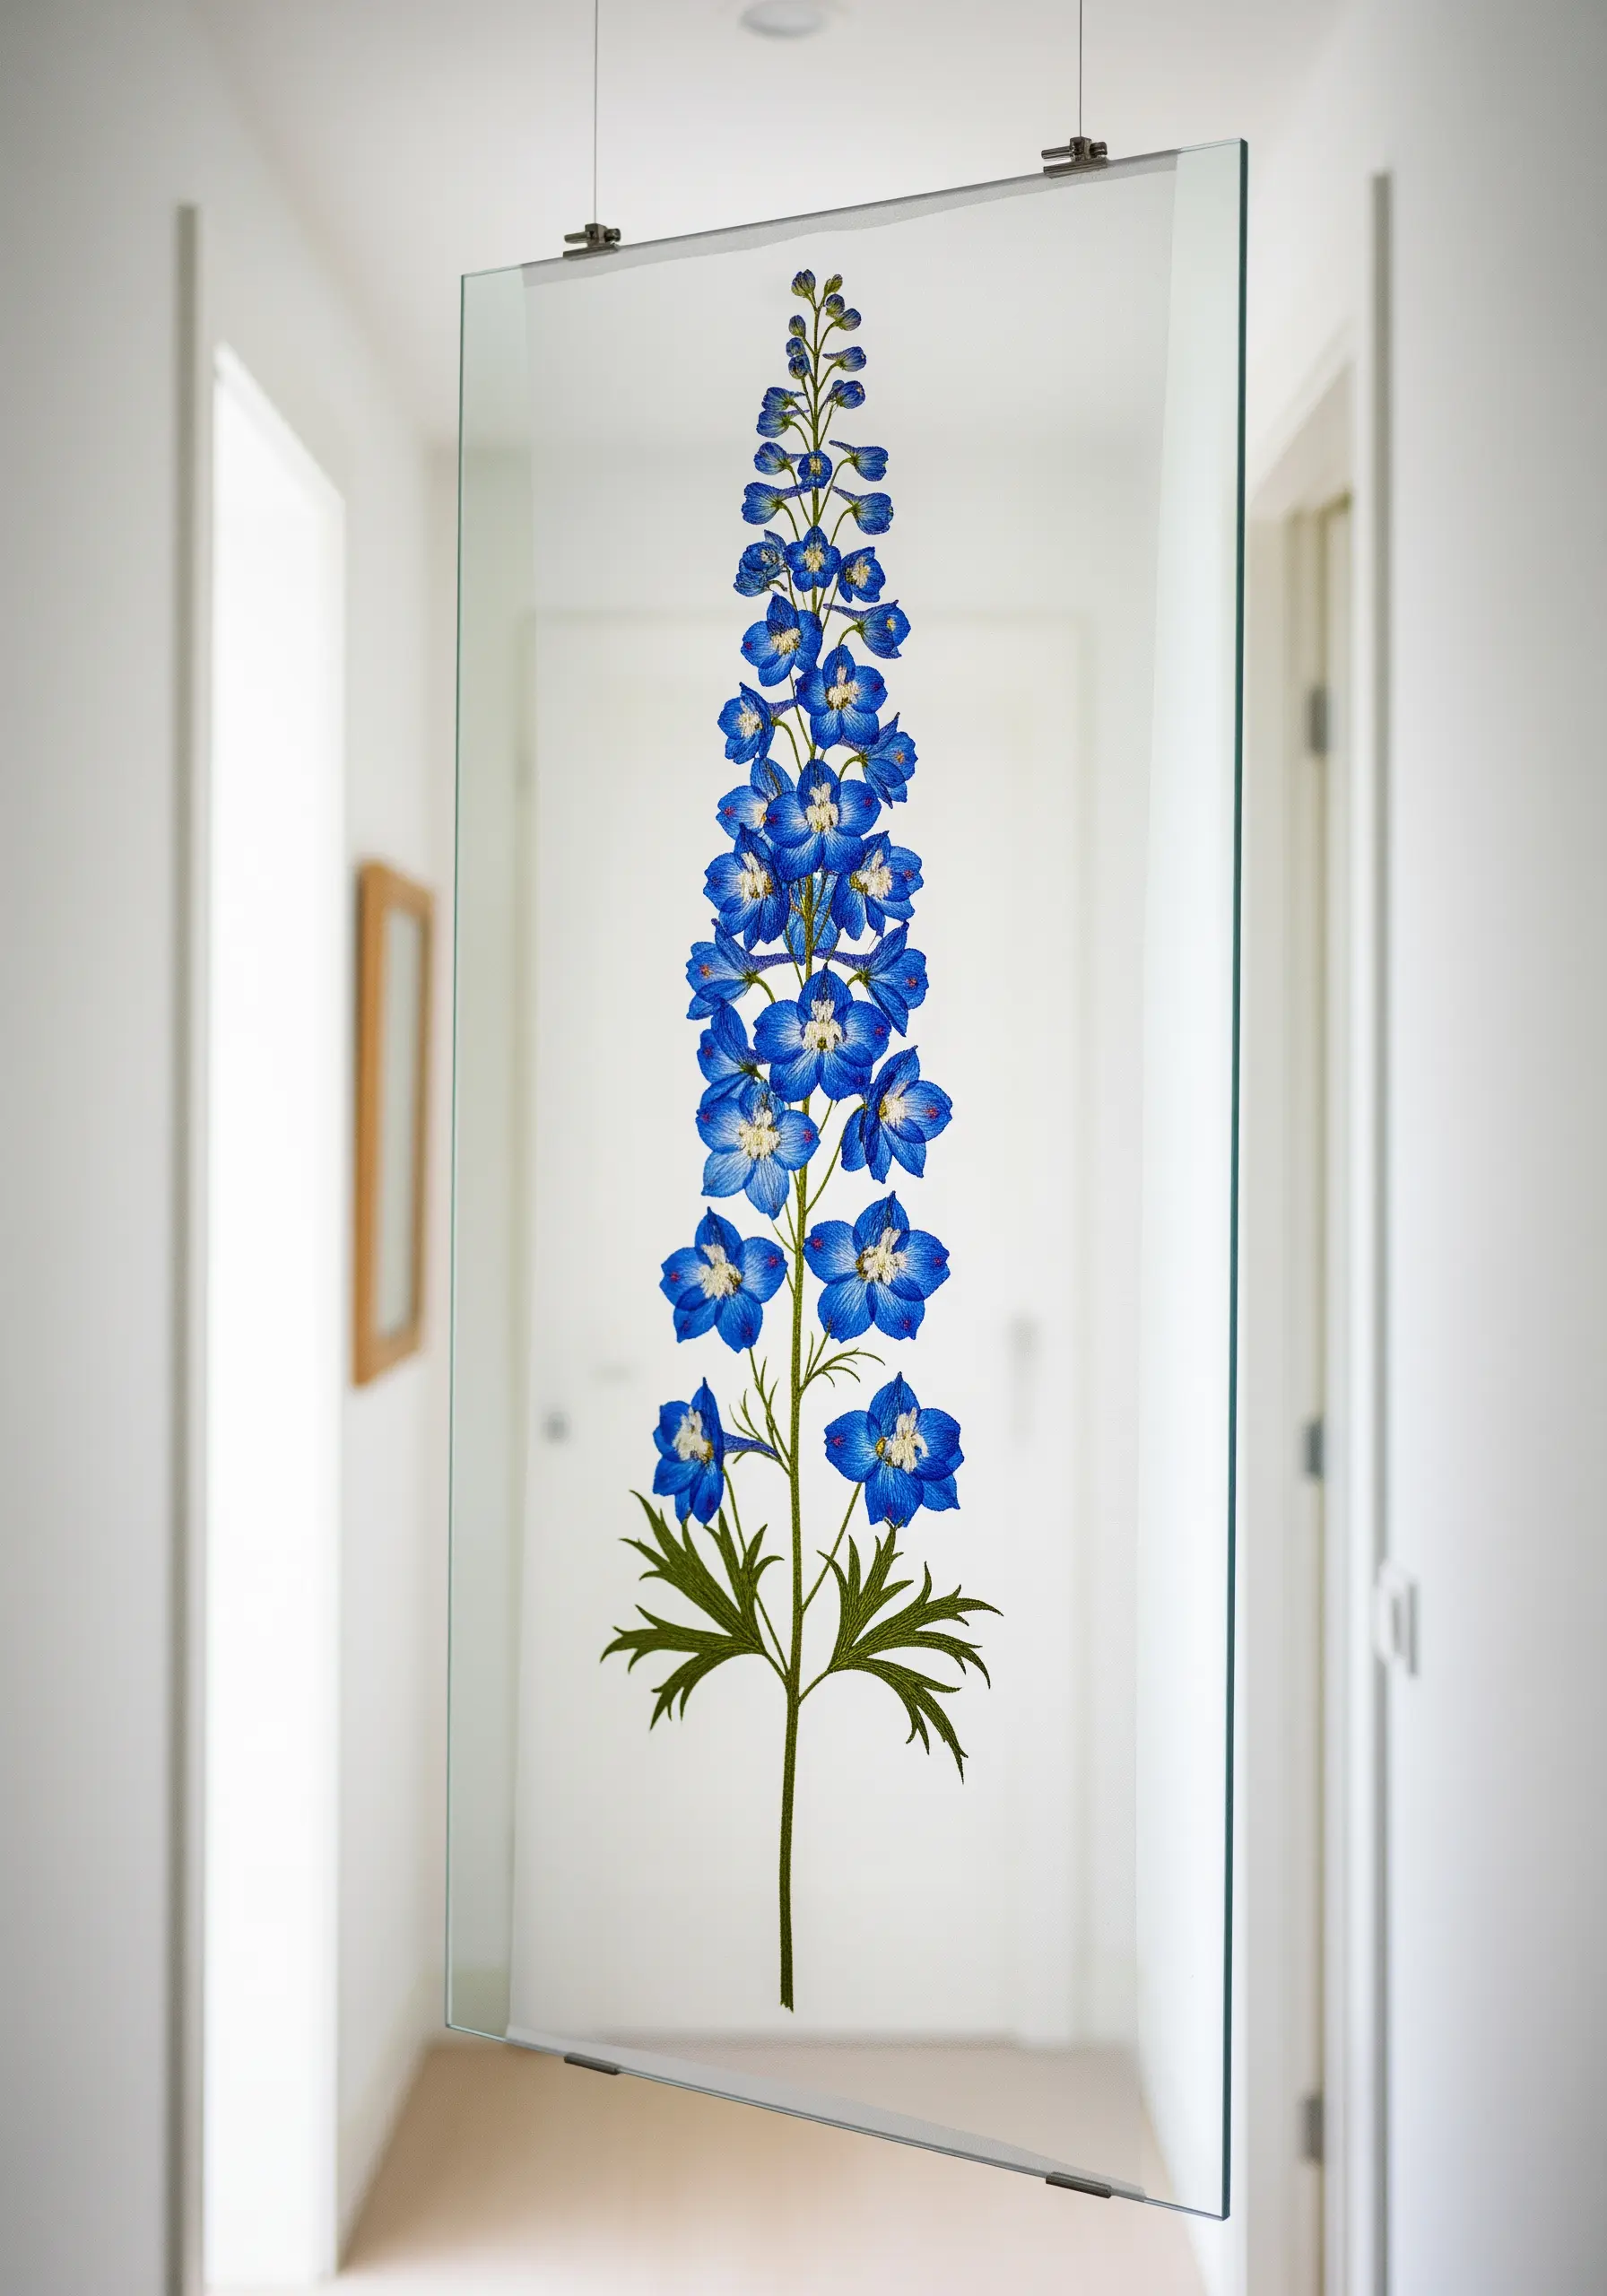
1. Embrace Grand-Scale Botanical Tapestries
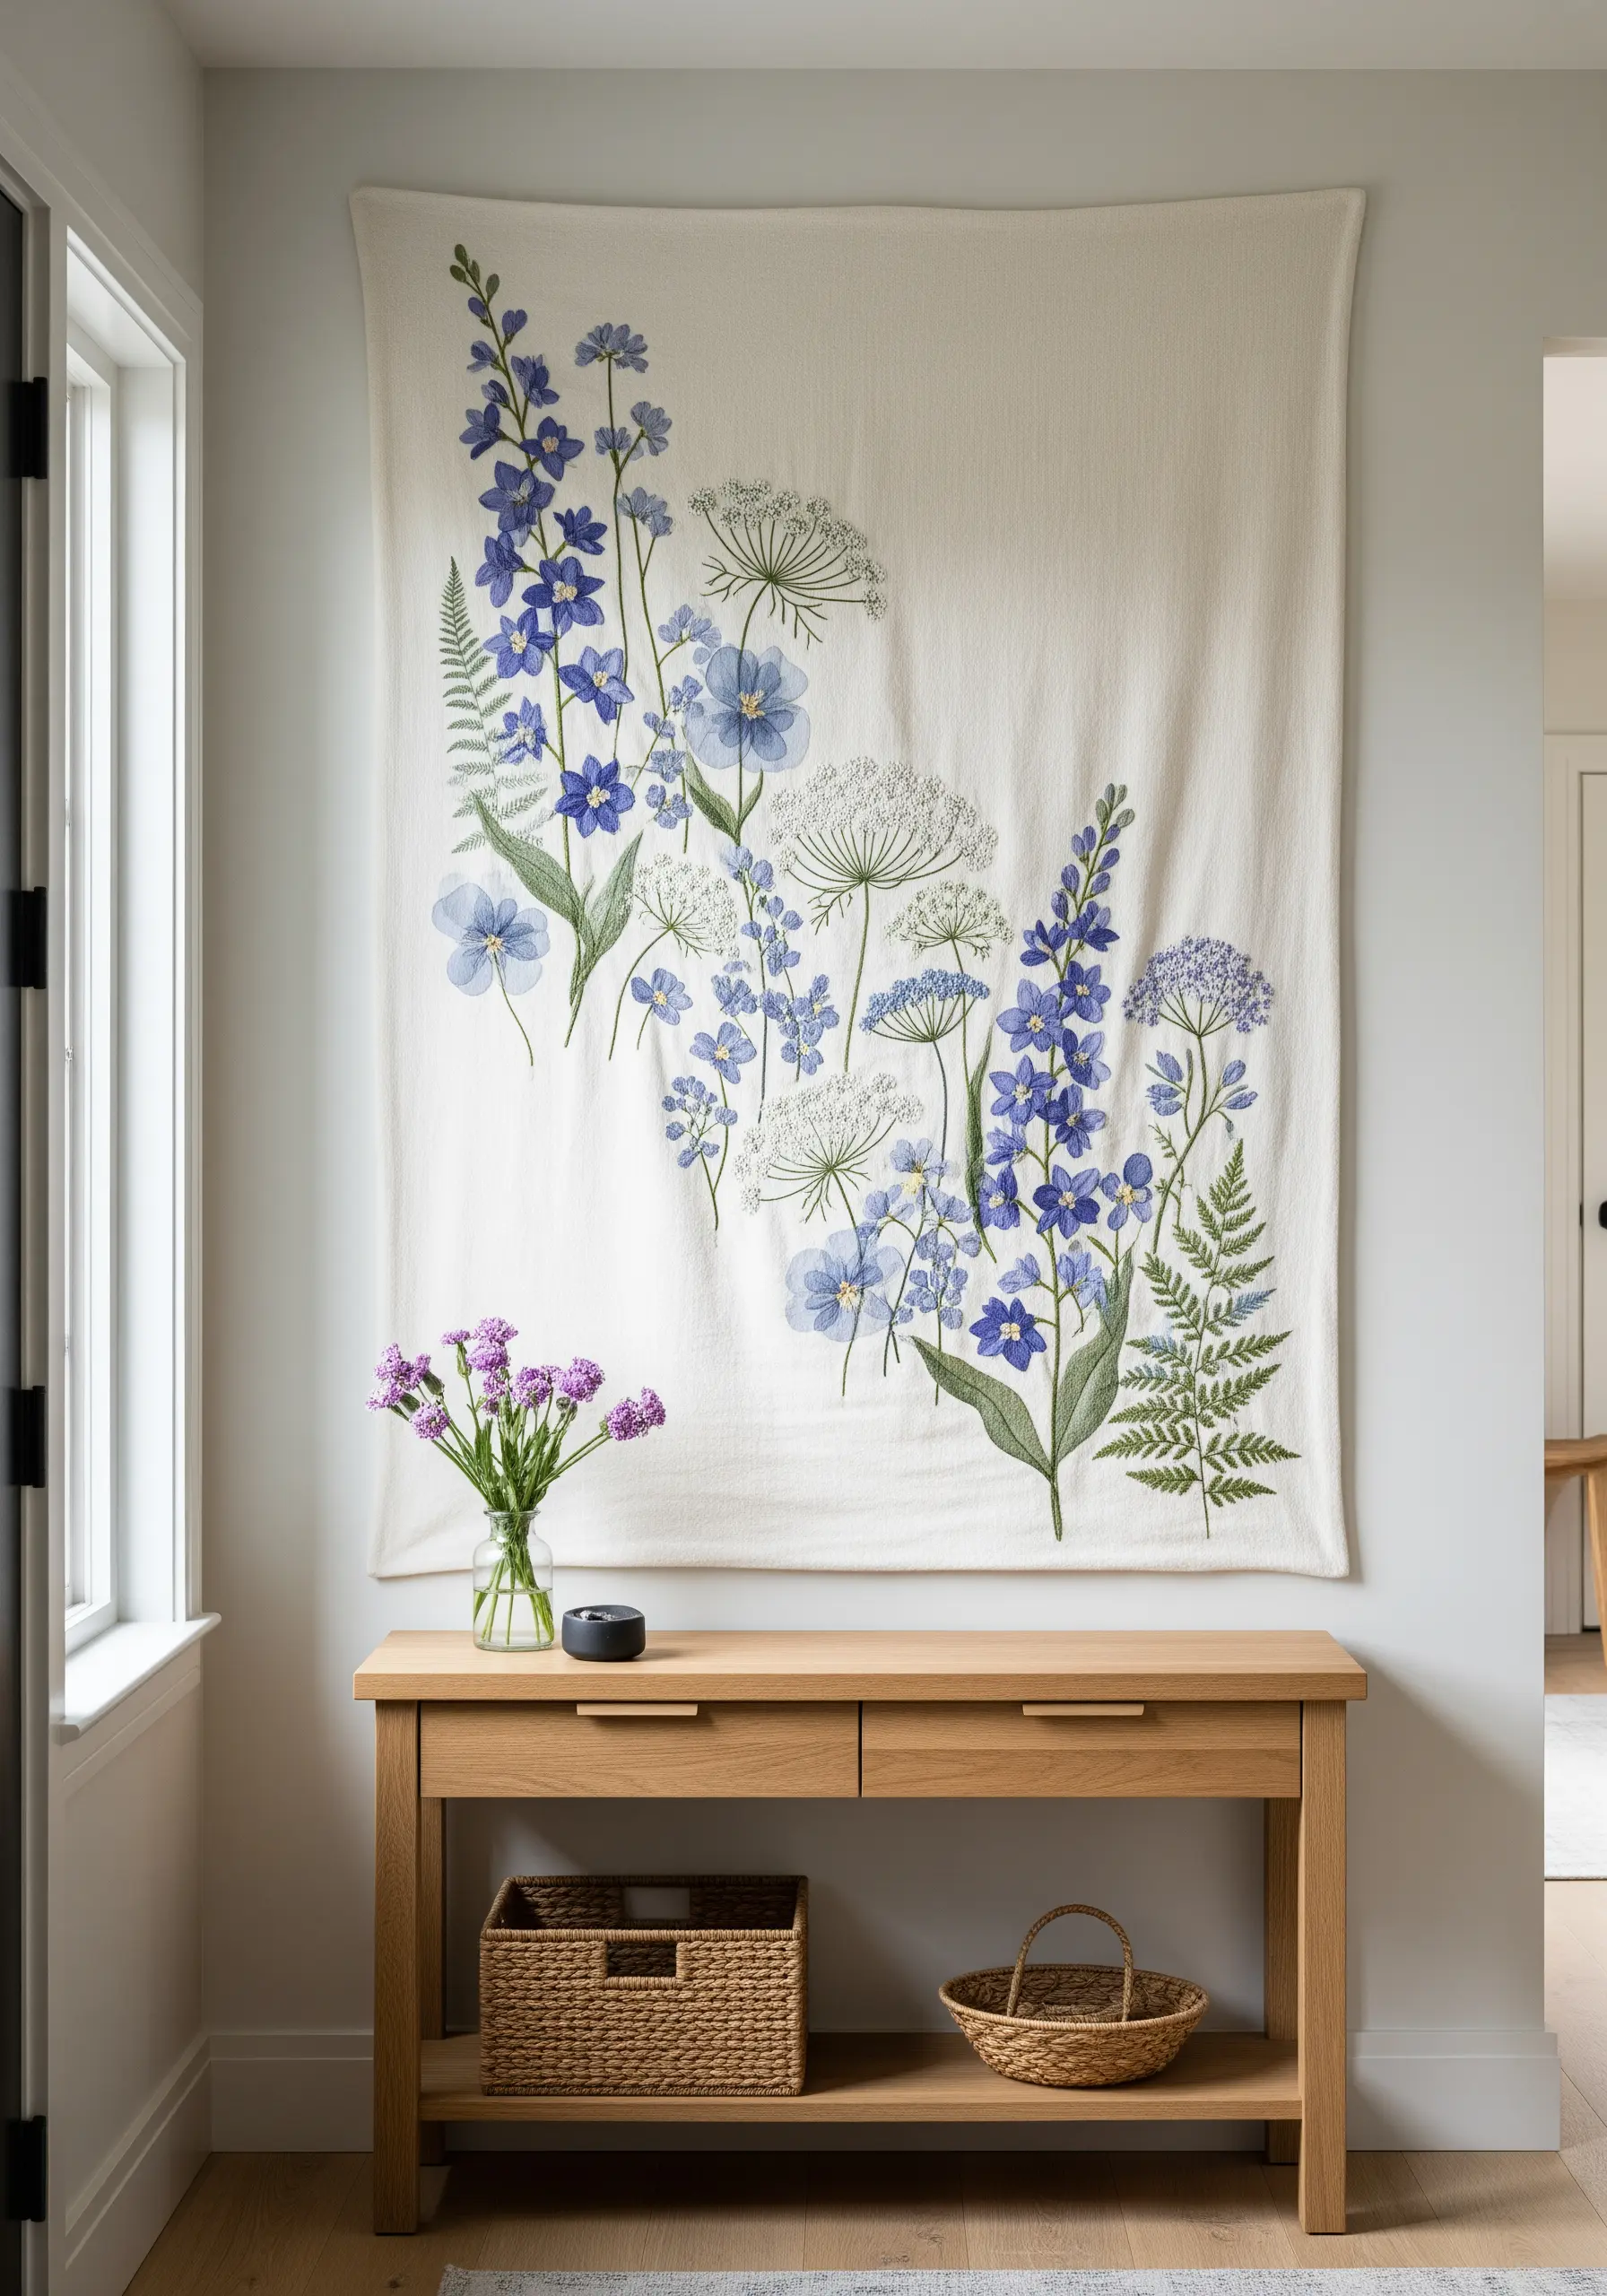
Move beyond the hoop and treat your embroidery as large-format art by creating a statement wall hanging.
Choose a heavy-weight, neutral fabric like linen or cotton canvas that can support the thread density without puckering.
To keep the composition feeling refined, not overwhelming, select a limited color palette—here, varying shades of blue, periwinkle, and green create a cohesive, calming effect.
Use long and short stitches to blend colors in the petals for a soft, painterly look, and rely on stem stitch to give the stalks a clean, structural line.
This approach turns a simple entryway into a curated gallery space with a personal, handmade touch.
2. Animate Your Table with a Meadow-Inspired Runner
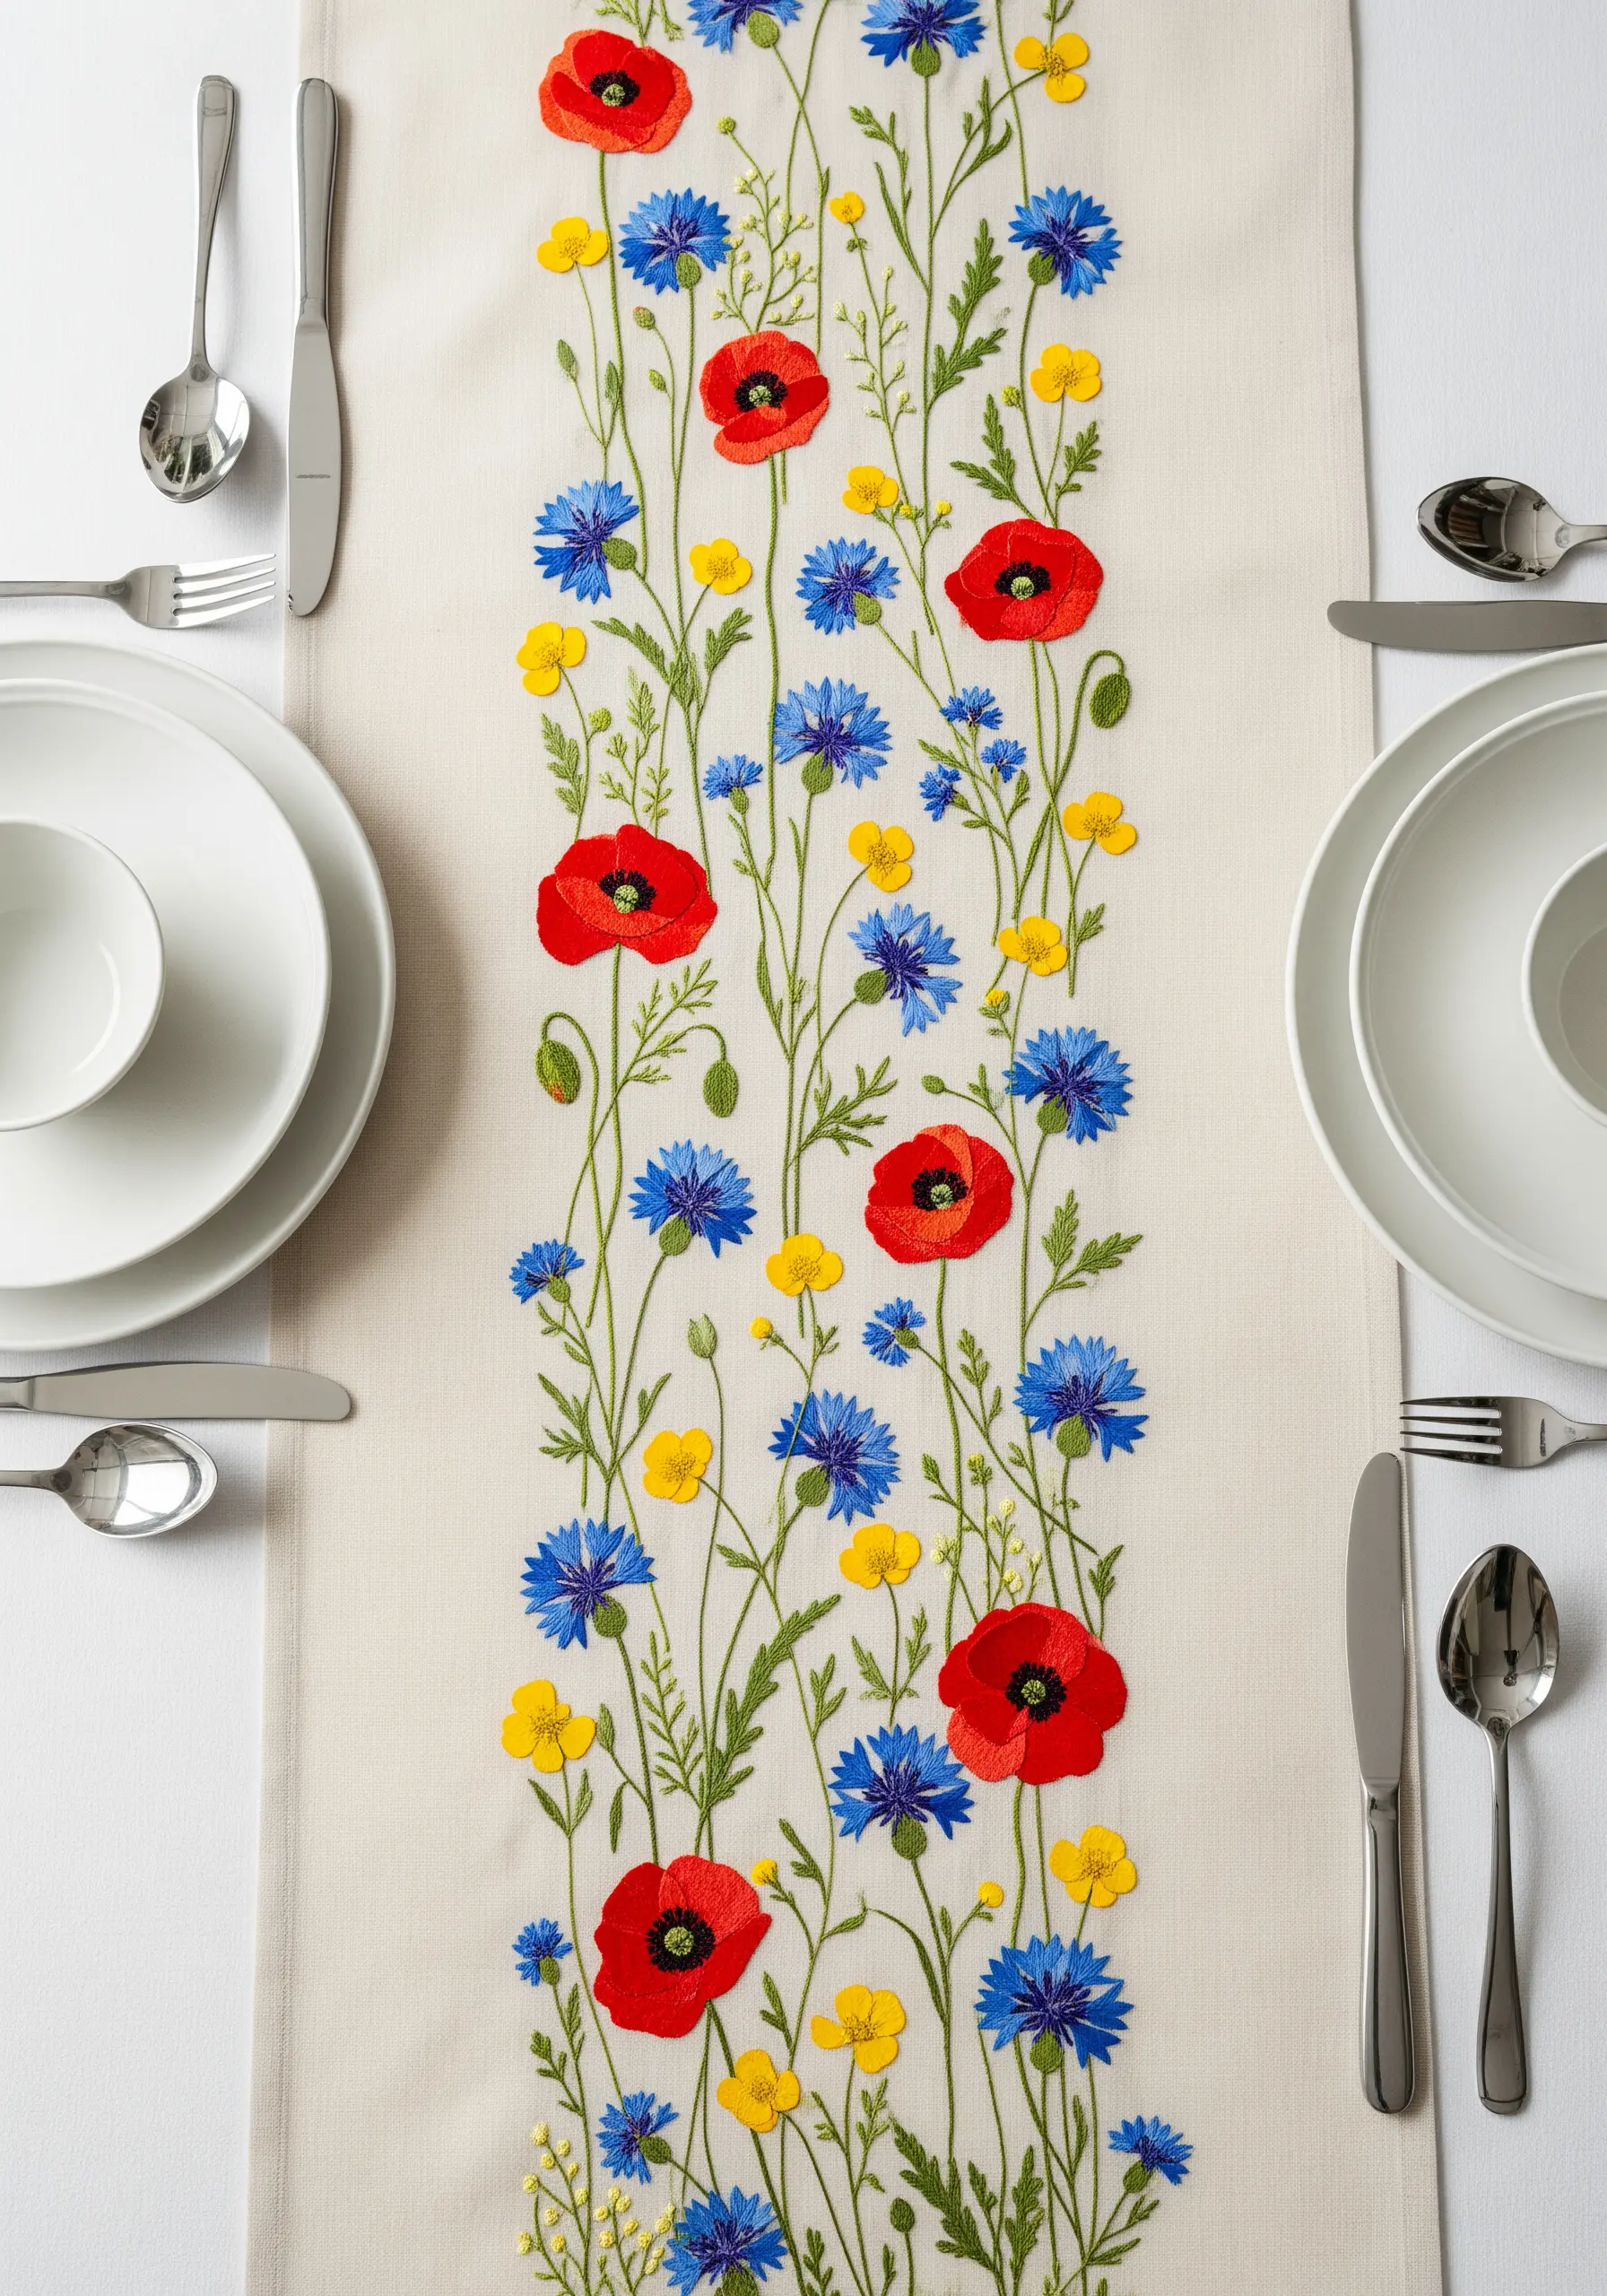
For a long, narrow surface like a table runner, create a design with natural rhythm and movement.
Instead of a rigid, repeating pattern, stitch a meandering line of wildflowers that flows organically down the center.
Vary the height, density, and direction of the stems to mimic the beautiful chaos of a real meadow.
A high-contrast color palette—bold reds, blues, and yellows on a neutral background—makes the design feel vibrant and celebratory, elevating everyday meals.
Use a simple satin stitch for the flower petals to achieve that bold pop of color with a smooth, clean finish.
3. Add Tactile Luxury with Velvet and Floral Wreaths
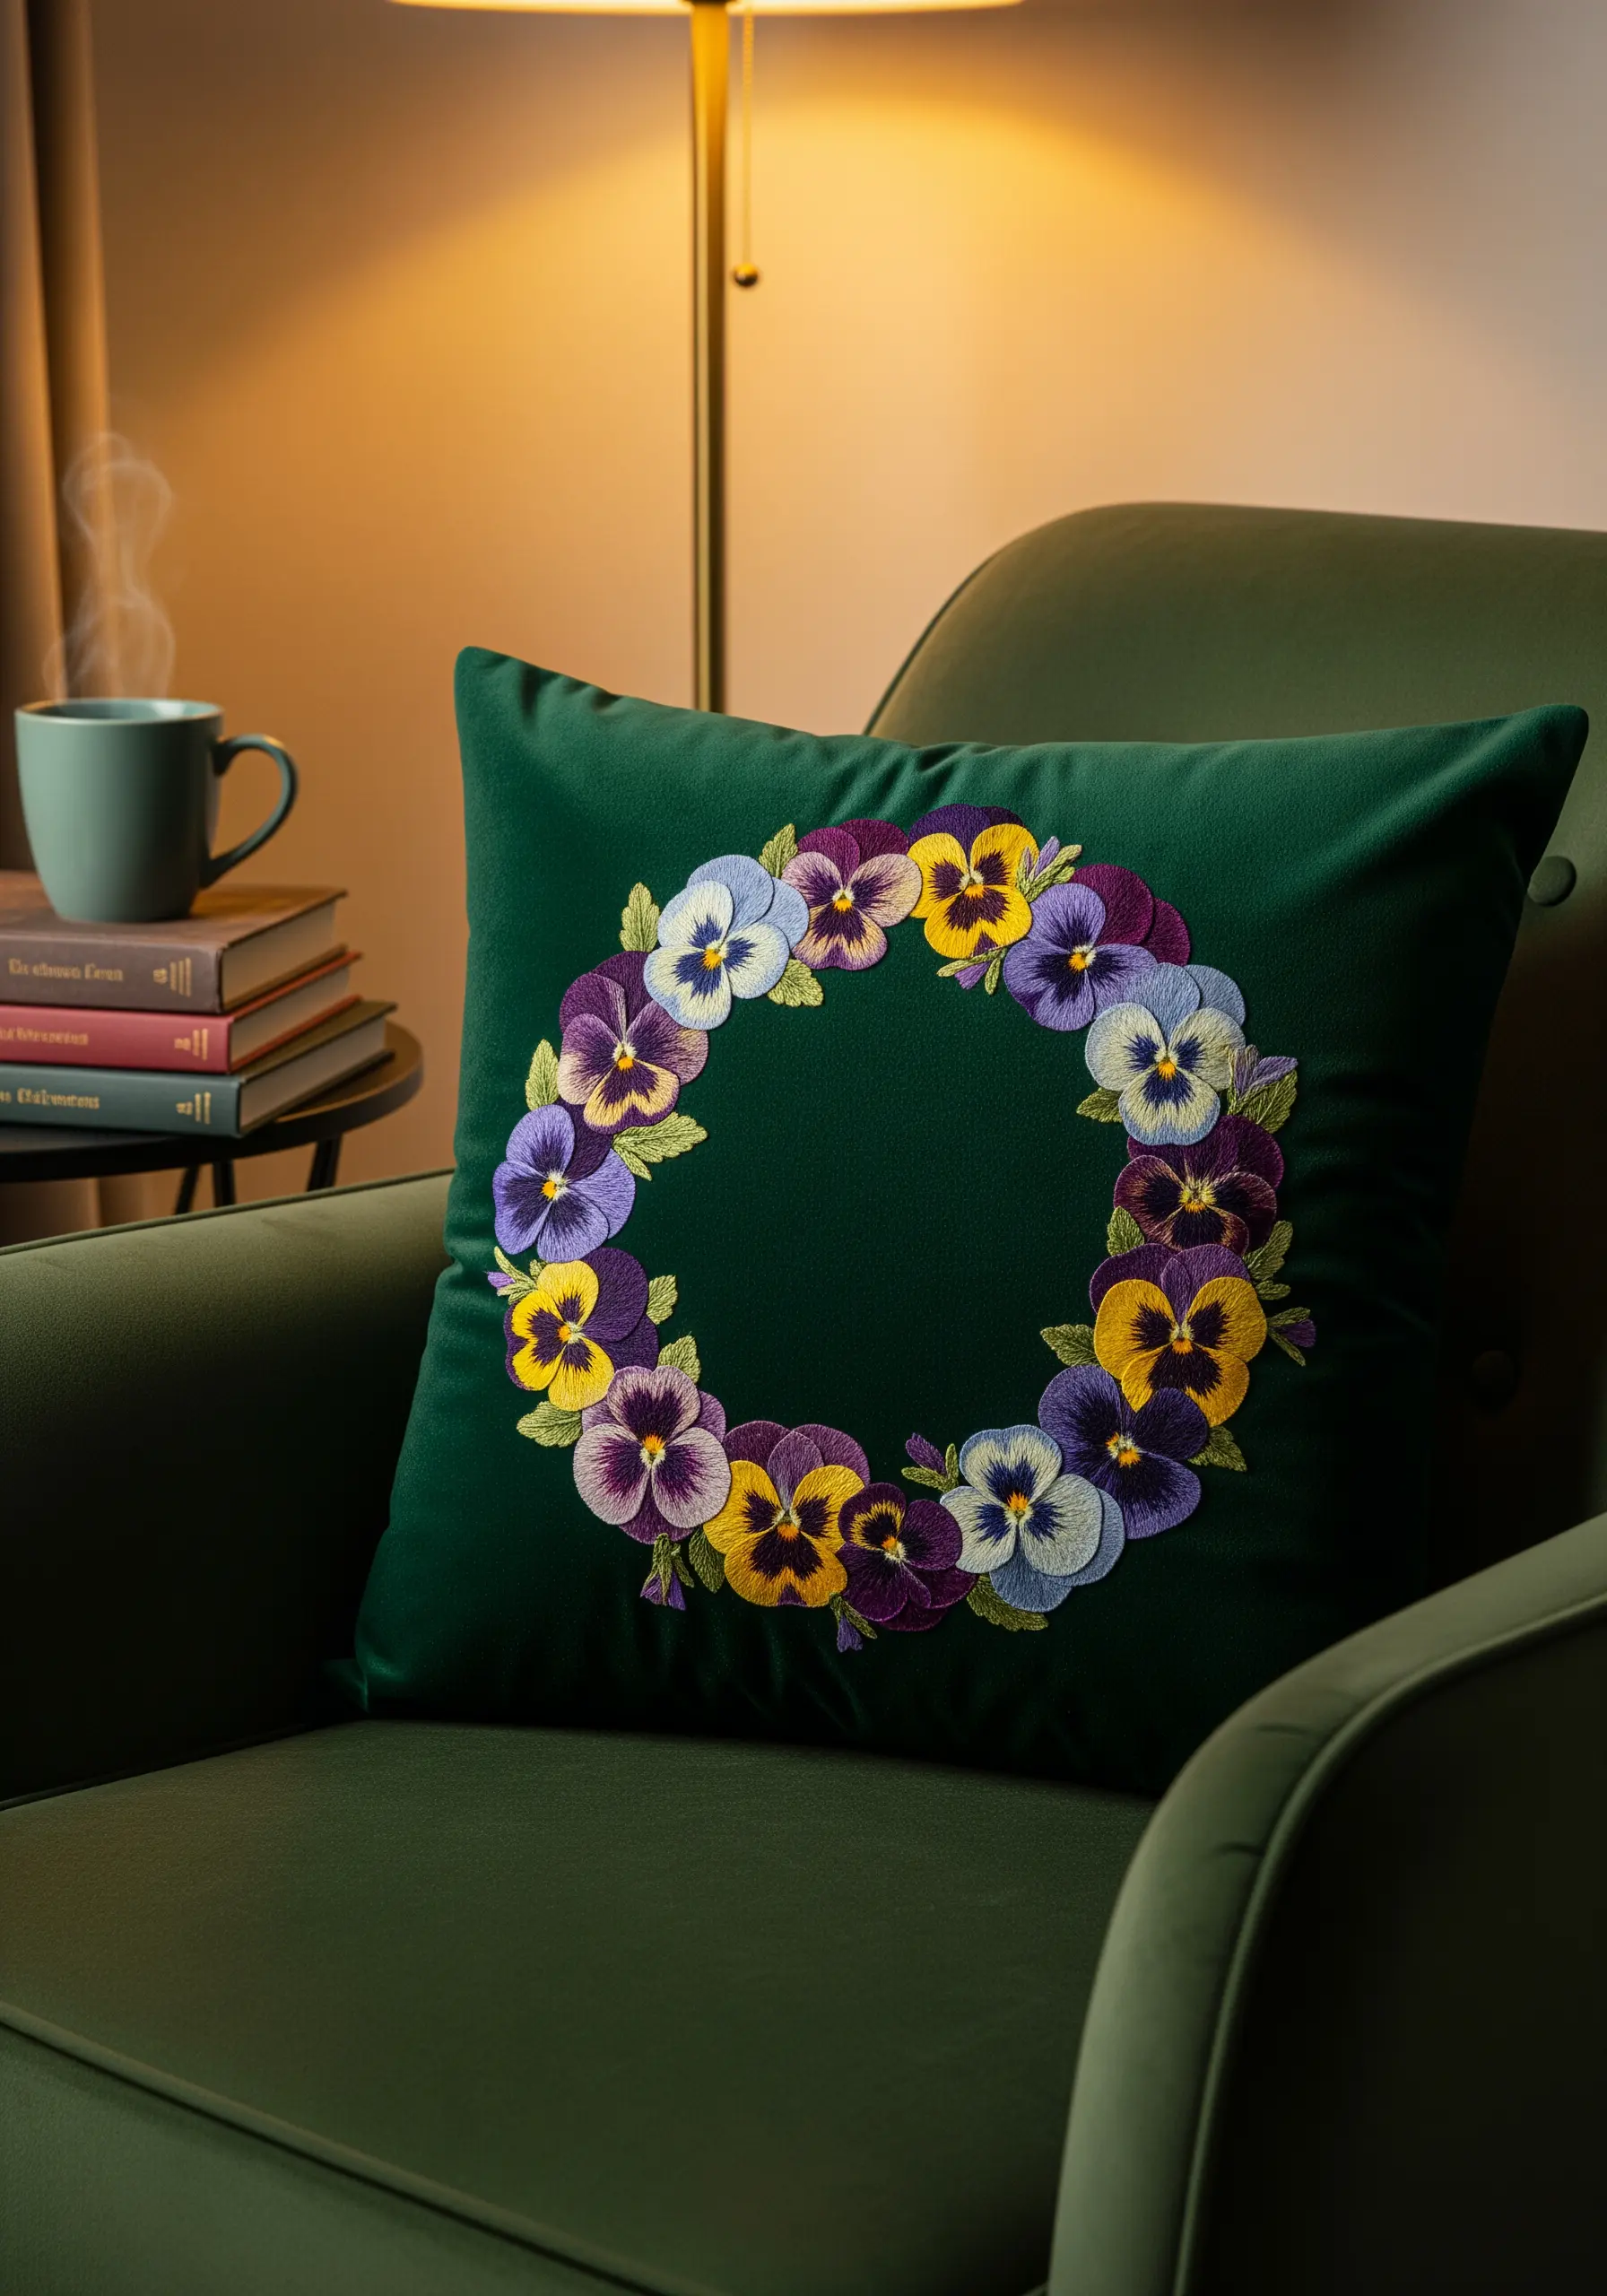
Embroidering on a high-pile fabric like velvet instantly adds a sense of depth and luxury to your work.
Always use a stabilizer underneath to prevent the fabric from stretching and to support your stitches.
The plush texture makes thread painting techniques particularly effective; use three or more shades per pansy petal to create realistic gradients that catch the light beautifully.
The contrast between the soft sheen of the thread and the deep matte of the velvet creates a rich, tactile experience that feels incredibly high-end.
A wreath composition naturally draws the eye, making it a perfect focal point for a statement cushion.
4. Curate a Botanical Triptych with Real Pressed Foliage
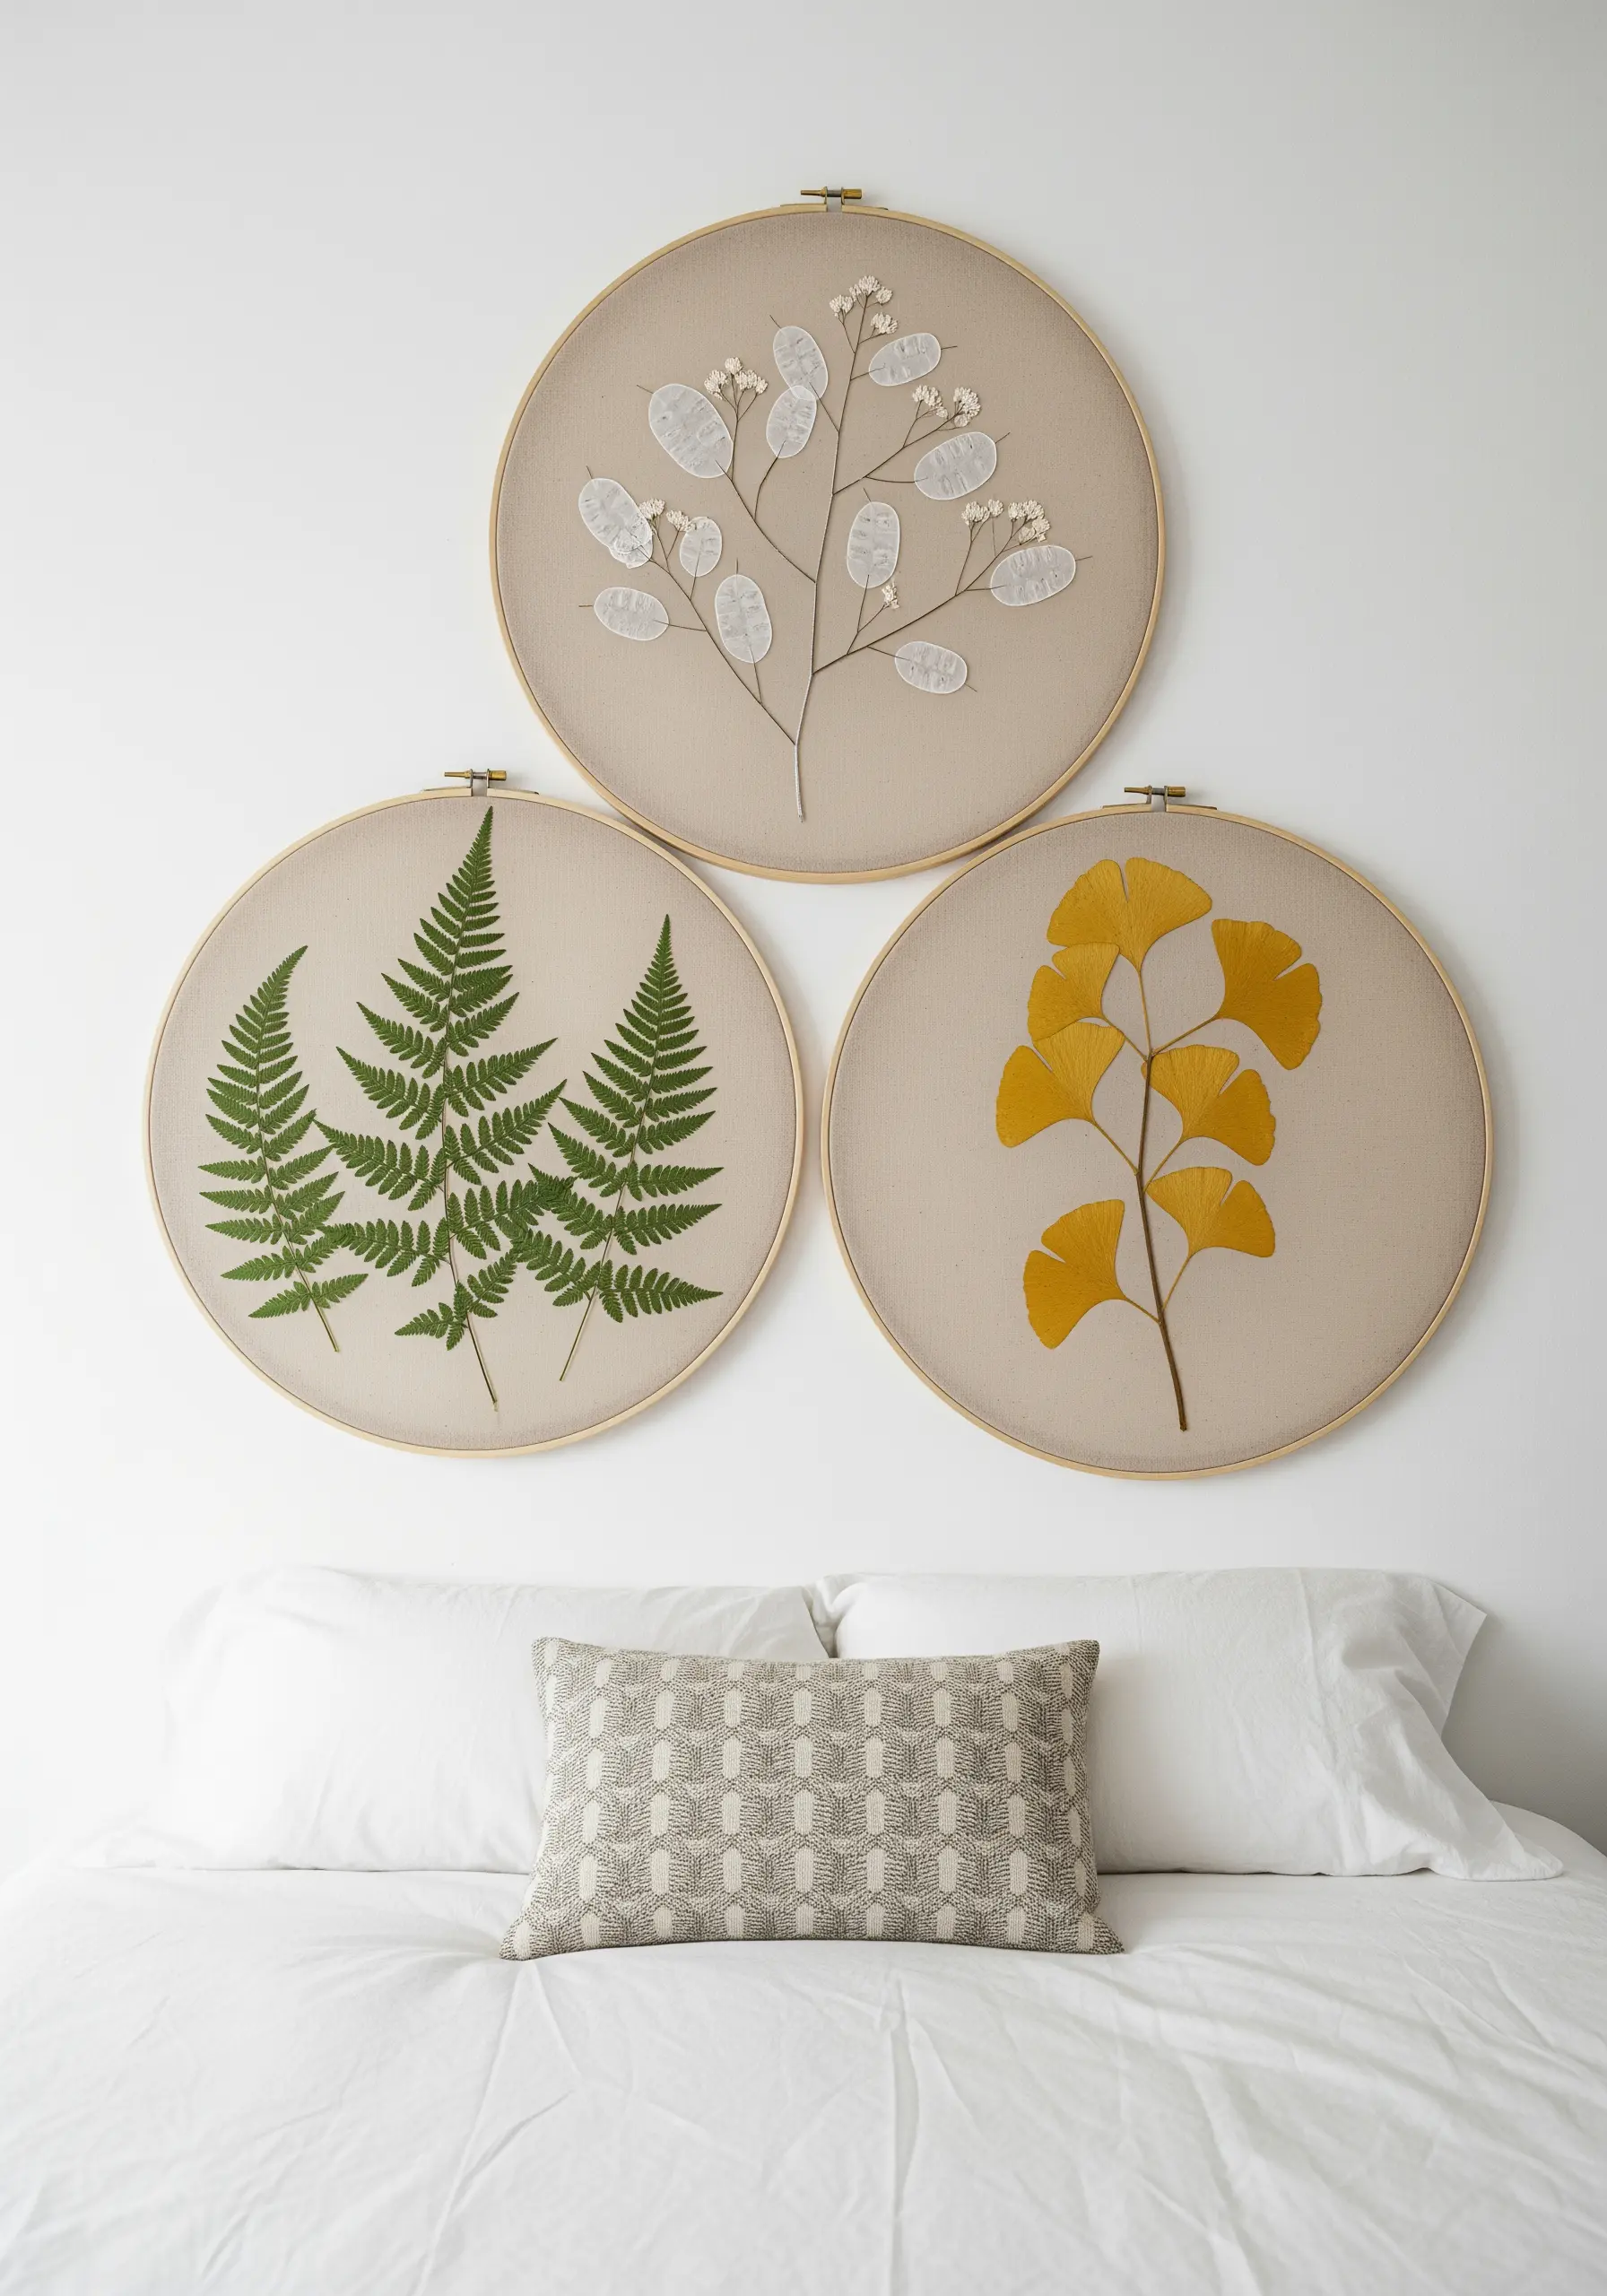
Combine embroidery with the actual pressed botanicals that inspire your work for a modern, mixed-media approach.
Carefully arrange your pressed ferns, leaves, or flowers on a tightly hooped piece of natural linen.
Secure each specimen using tiny, almost invisible couching stitches—use a single strand of thread in a matching color to tack down the stem and delicate edges.
The goal is preservation, not embellishment, so let the plant’s natural form be the hero.
Grouping three hoops as a triptych creates a cohesive, gallery-style display that feels both artistic and deeply connected to nature.
5. Illuminate Your Stitches on a Custom Lampshade
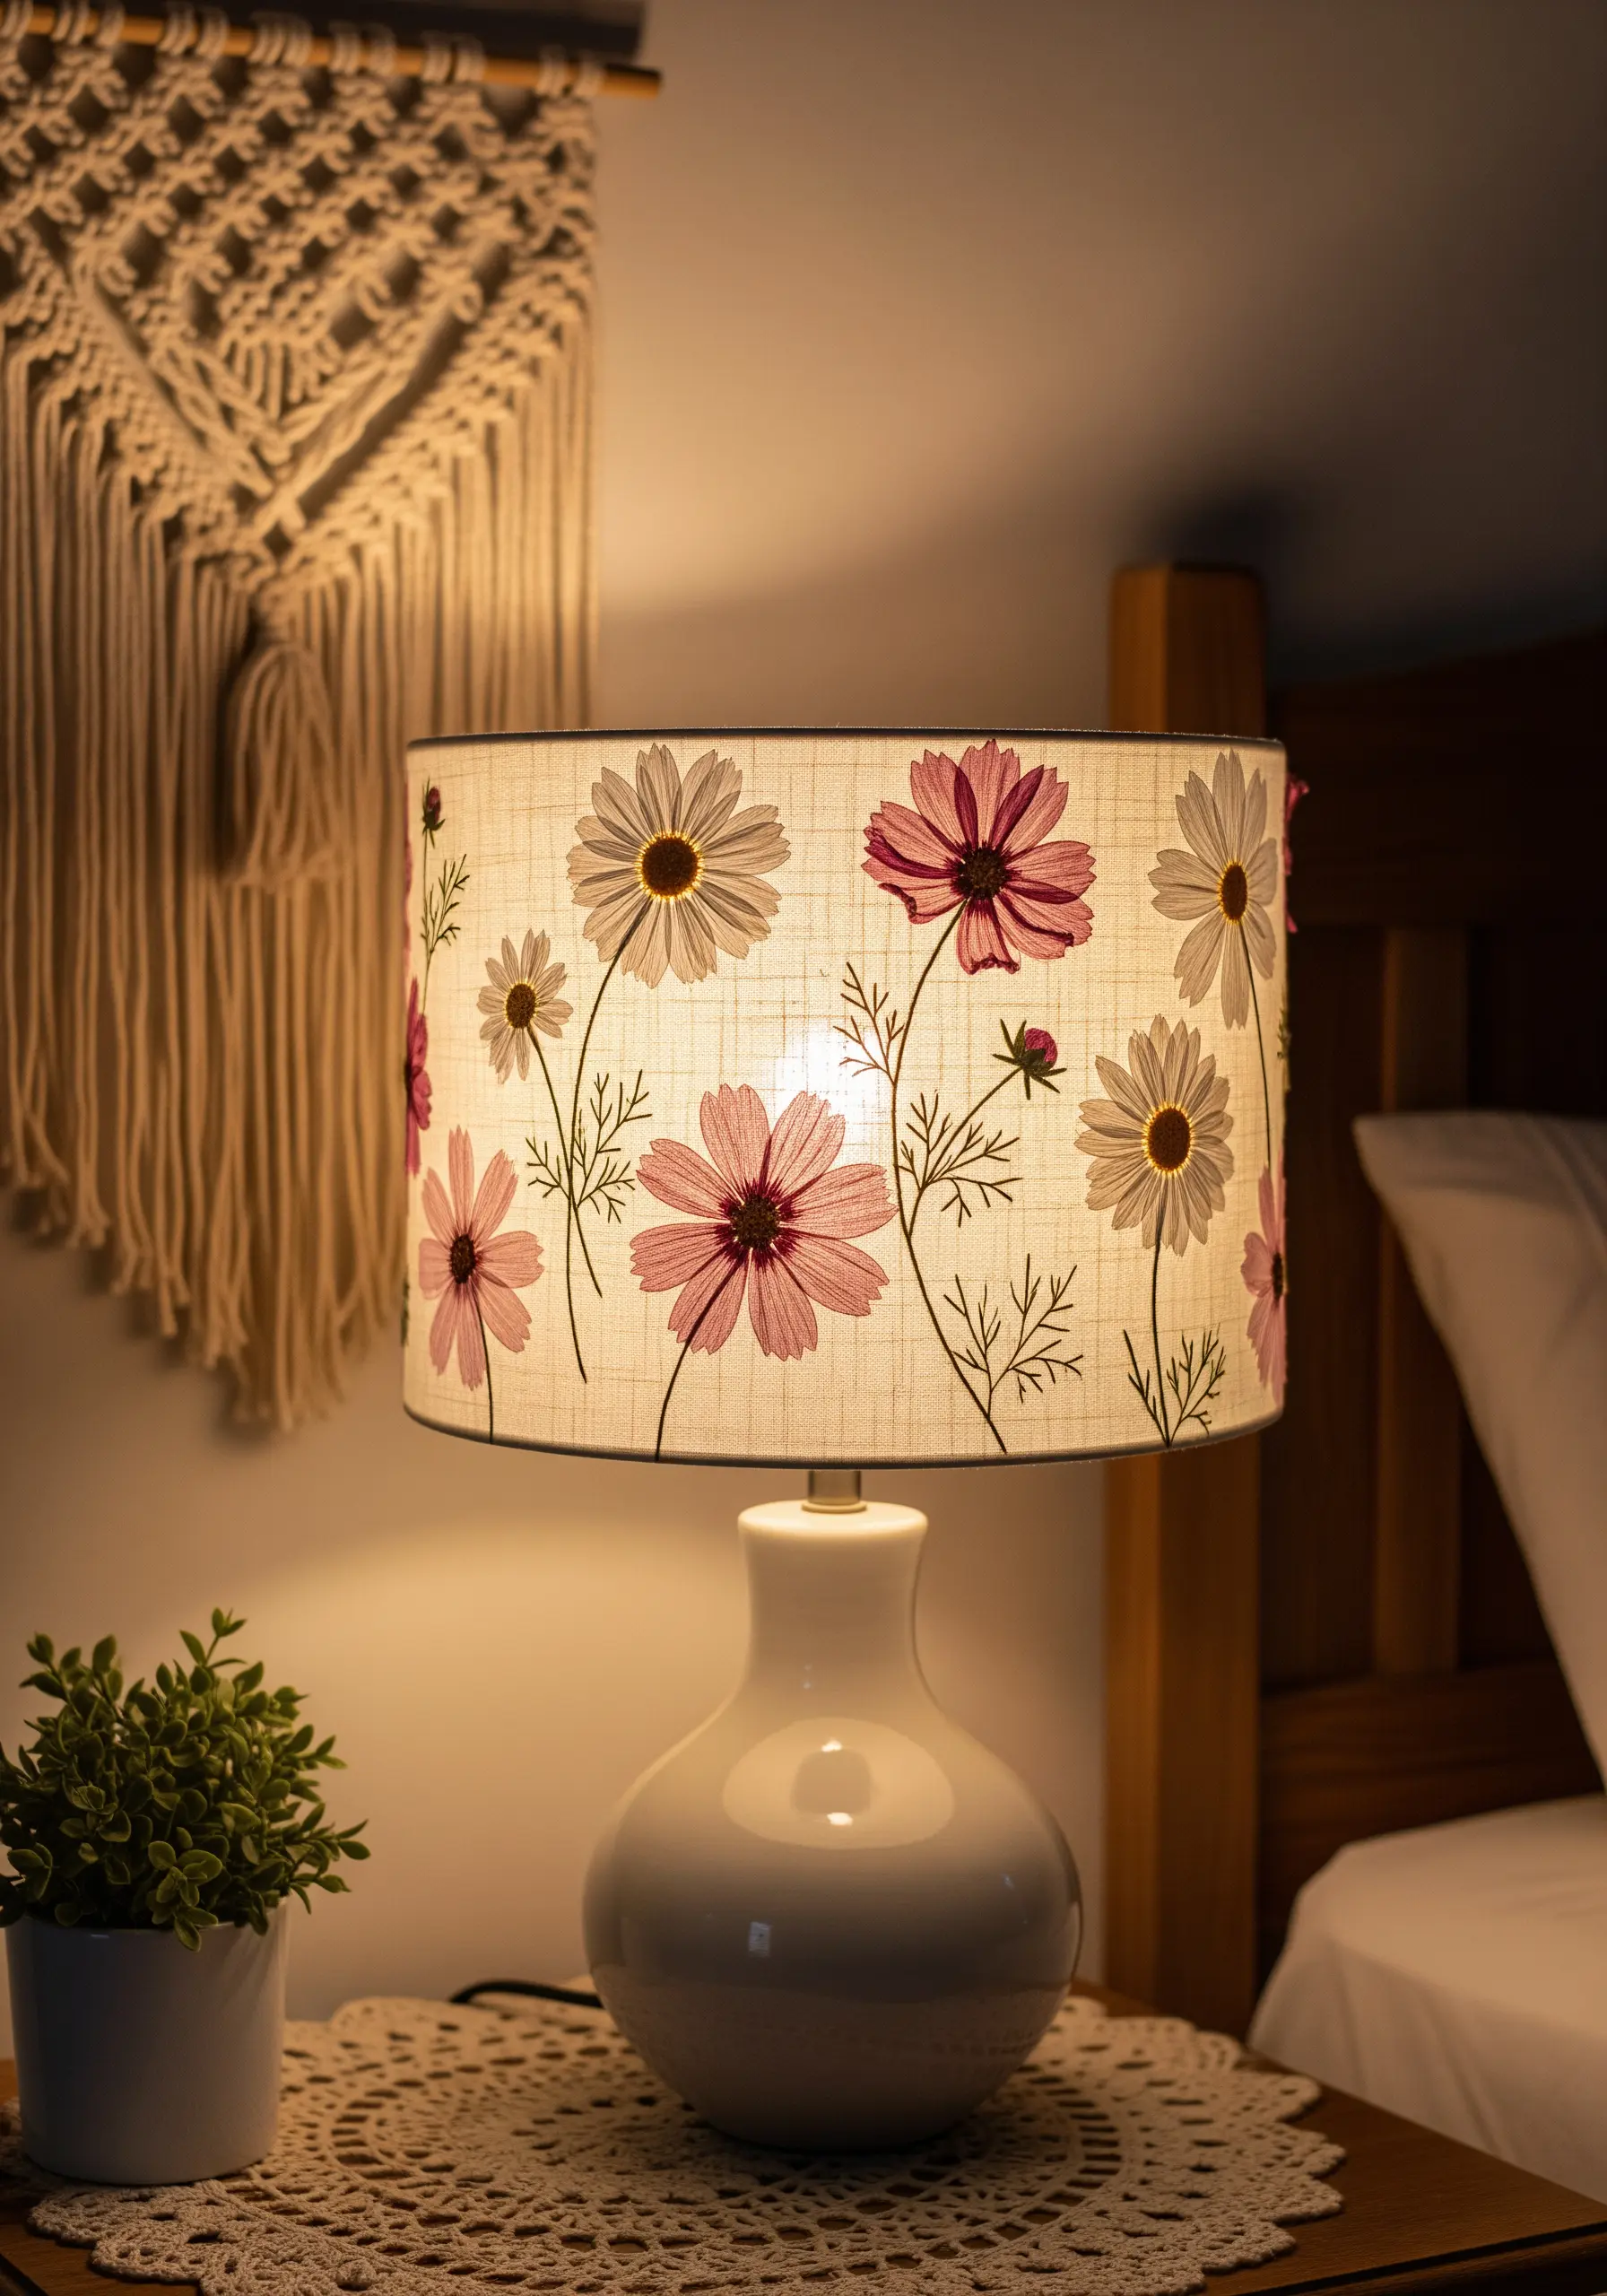
Transform a simple light source into a piece of glowing art by embroidering a custom lampshade.
Choose a translucent, heat-resistant fabric like cotton voile or a fine, light-colored linen that will allow light to pass through.
When backlit, your design becomes a delicate silhouette, so opt for clean lines and open stitches like stem stitch, backstitch, and seed stitch.
Avoid dense satin stitching, as it will create opaque blocks that stop the light.
The effect is a soft, ambient glow that highlights the elegant simplicity of your thread work.
6. Create Ethereal Boundaries with Sheer Embroidered Panels
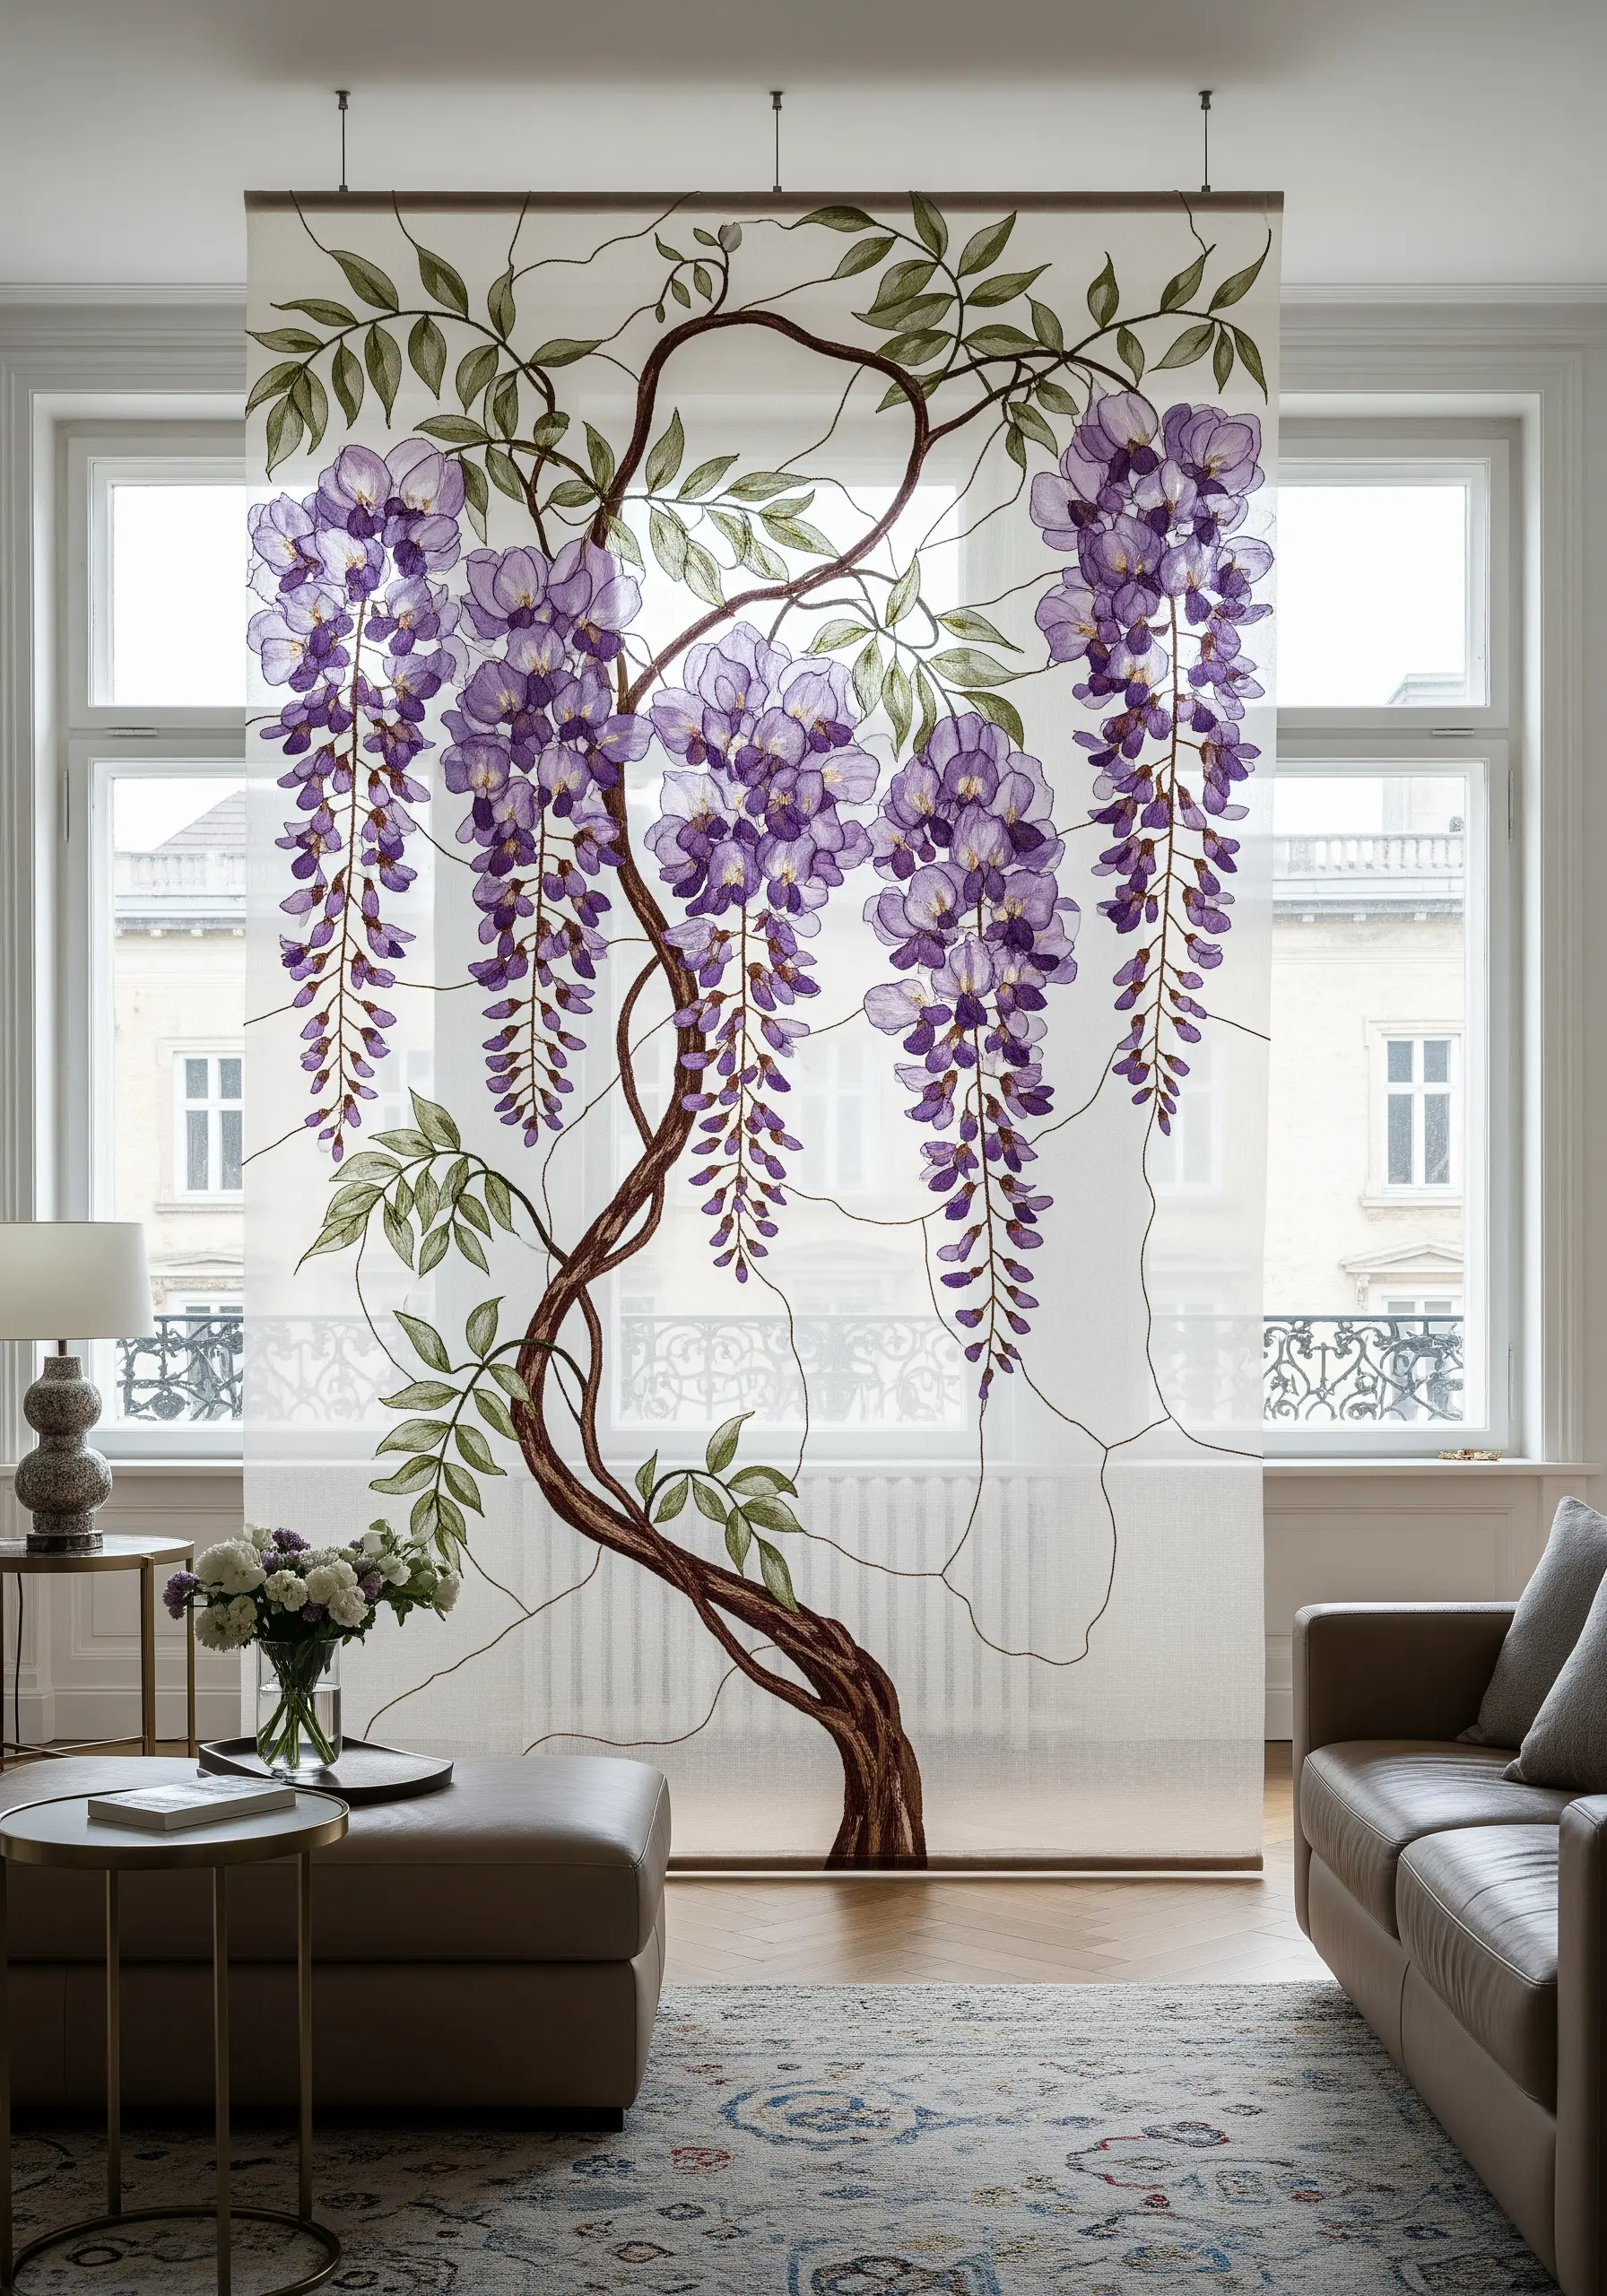
Use embroidery on sheer fabrics to define a space without closing it off completely.
When working on organza or voile, remember that the back of your work will be as visible as the front.
Choose reversible stitches like stem stitch, Holbein stitch (double running stitch), or a very neat satin stitch to ensure a polished look from any angle.
A cascading wisteria design works beautifully on a vertical panel, as it draws the eye downward and allows light to filter through the stitched petals, creating a soft, stained-glass effect.
7. Ground Your Place Settings with Seasonal Motifs
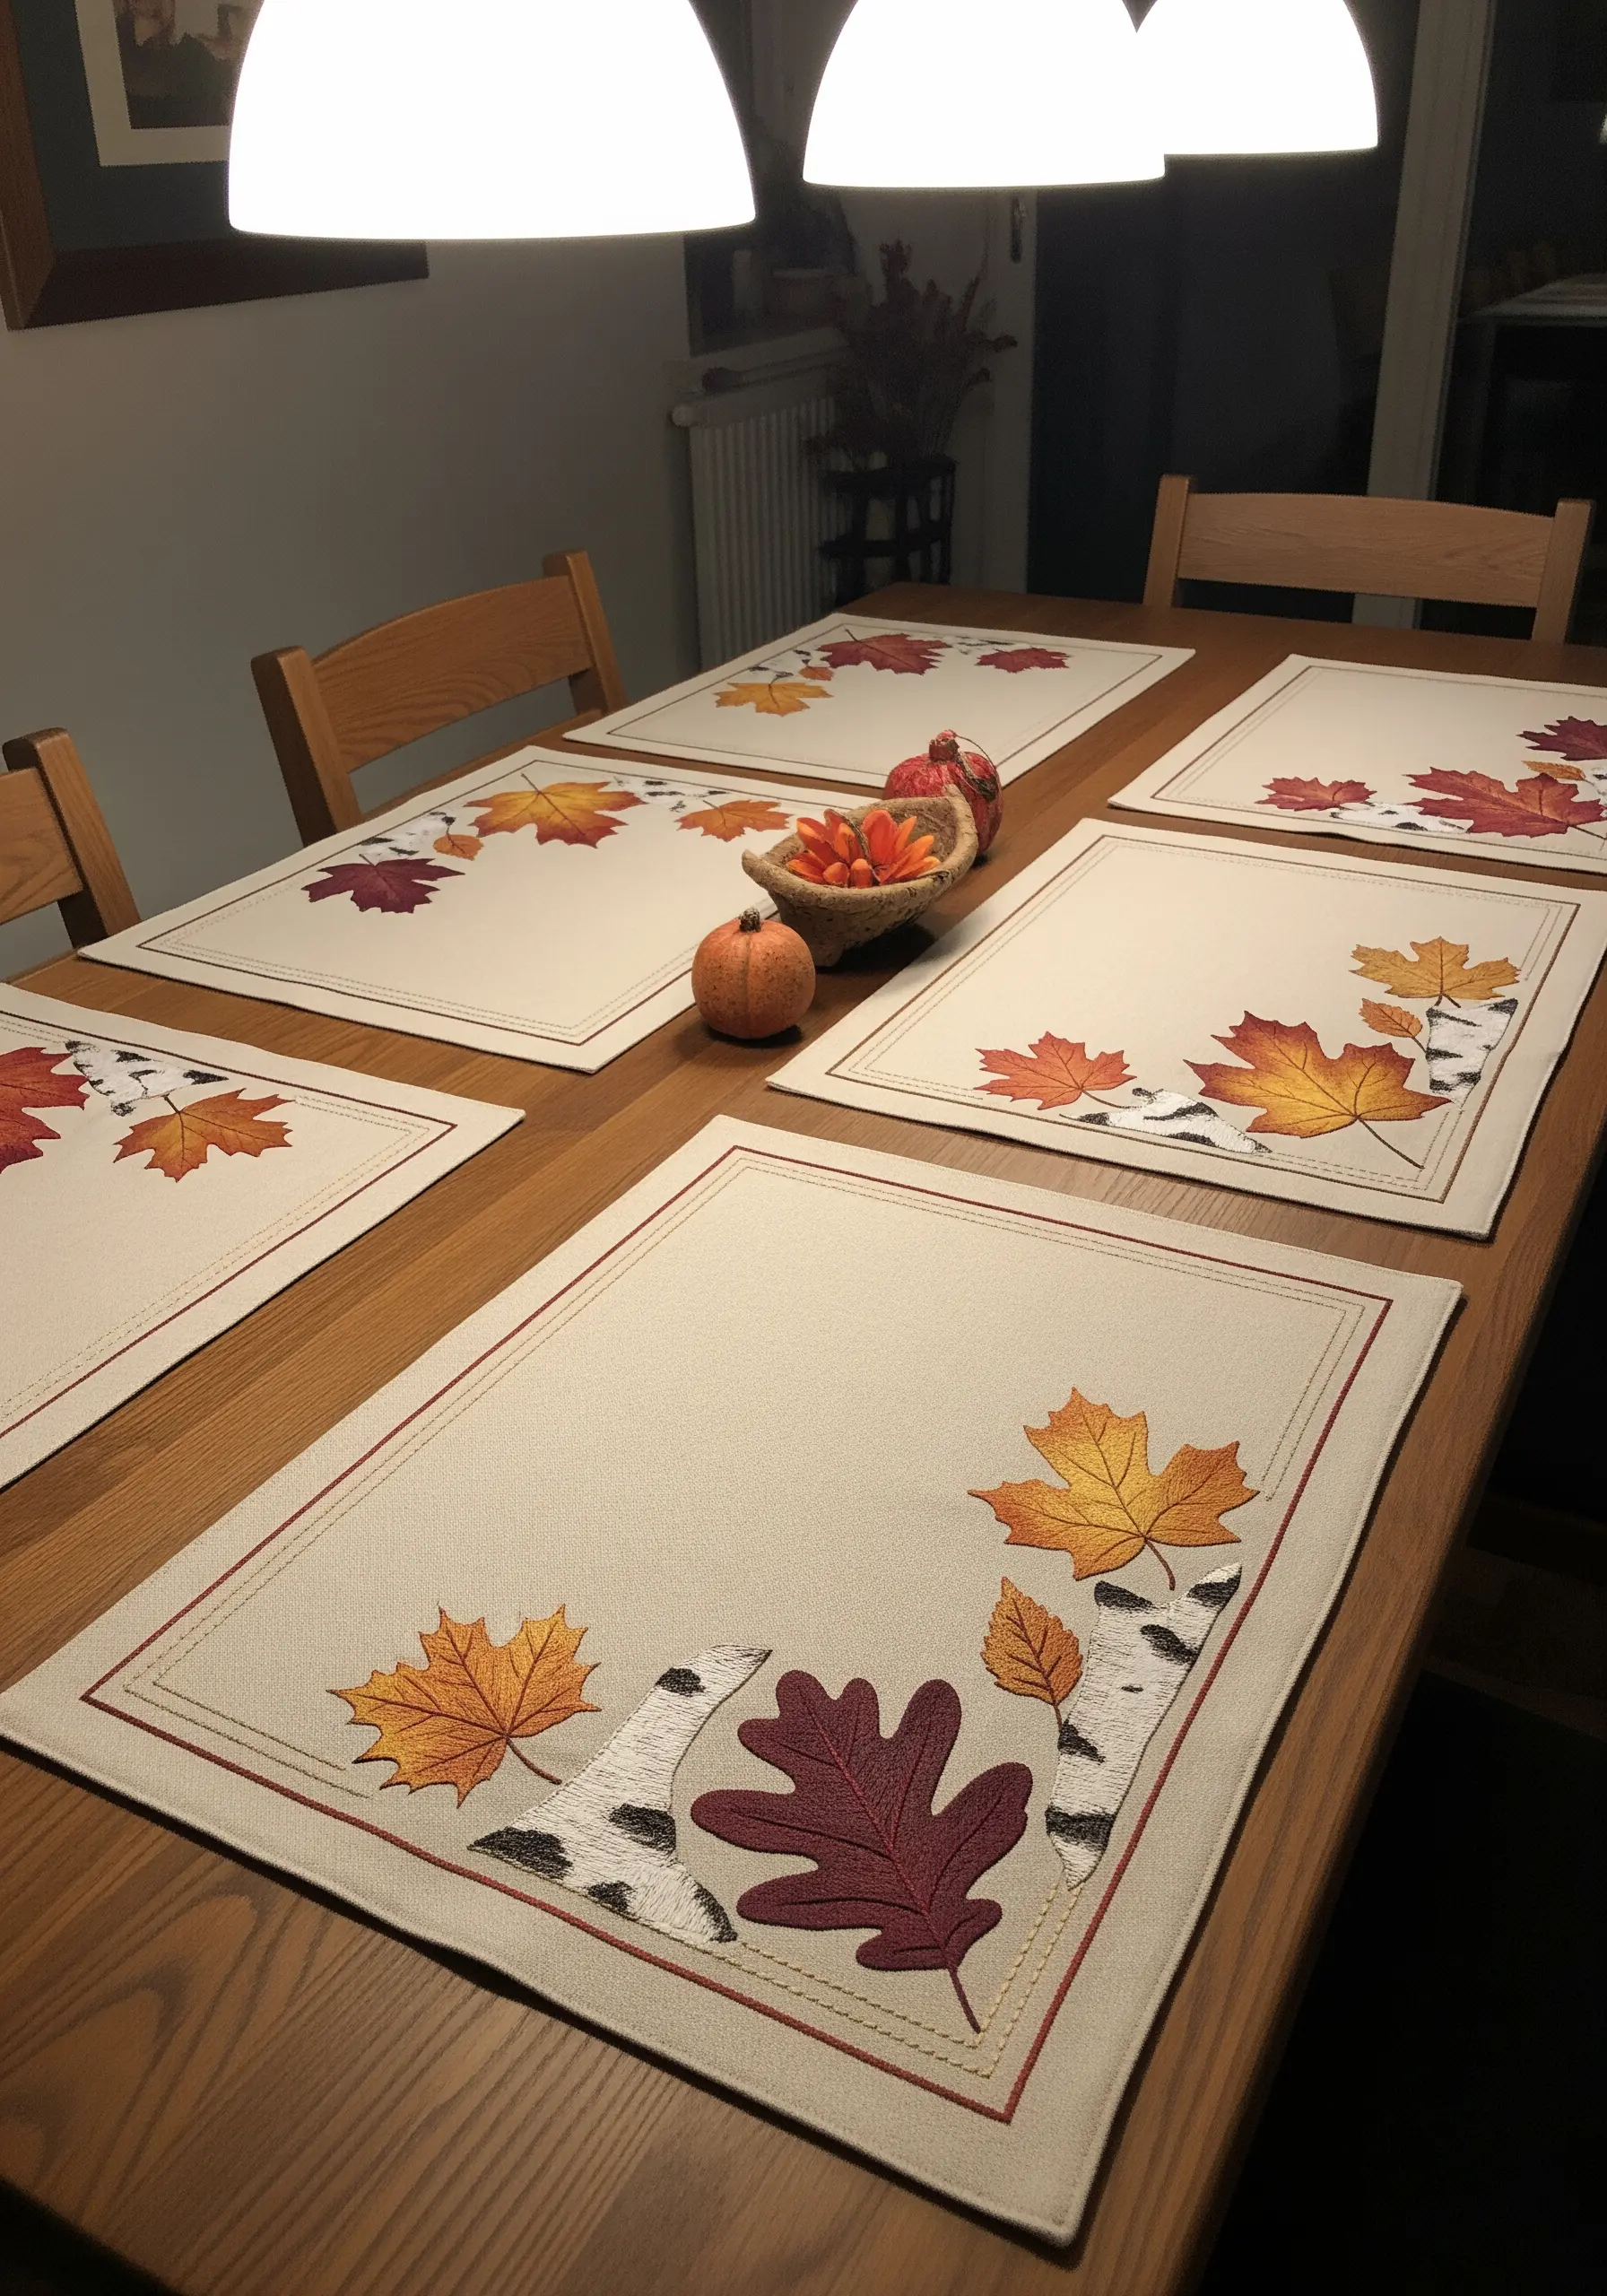
For functional items like placemats, combine appliqué with embroidery to create durable and dimensional designs.
Cut your main leaf shapes from felt or cotton fabric and secure them to the placemat with a clean buttonhole or satin stitch border.
This appliqué technique allows you to cover large areas with color and texture quickly.
Add finer details, like the leaf veins and birch bark texture, with simple straight stitches and French knots on top.
This layered approach results in a rich, tactile piece that is sturdy enough for daily use.
8. Transform a Headboard with Trailing Botanical Lines
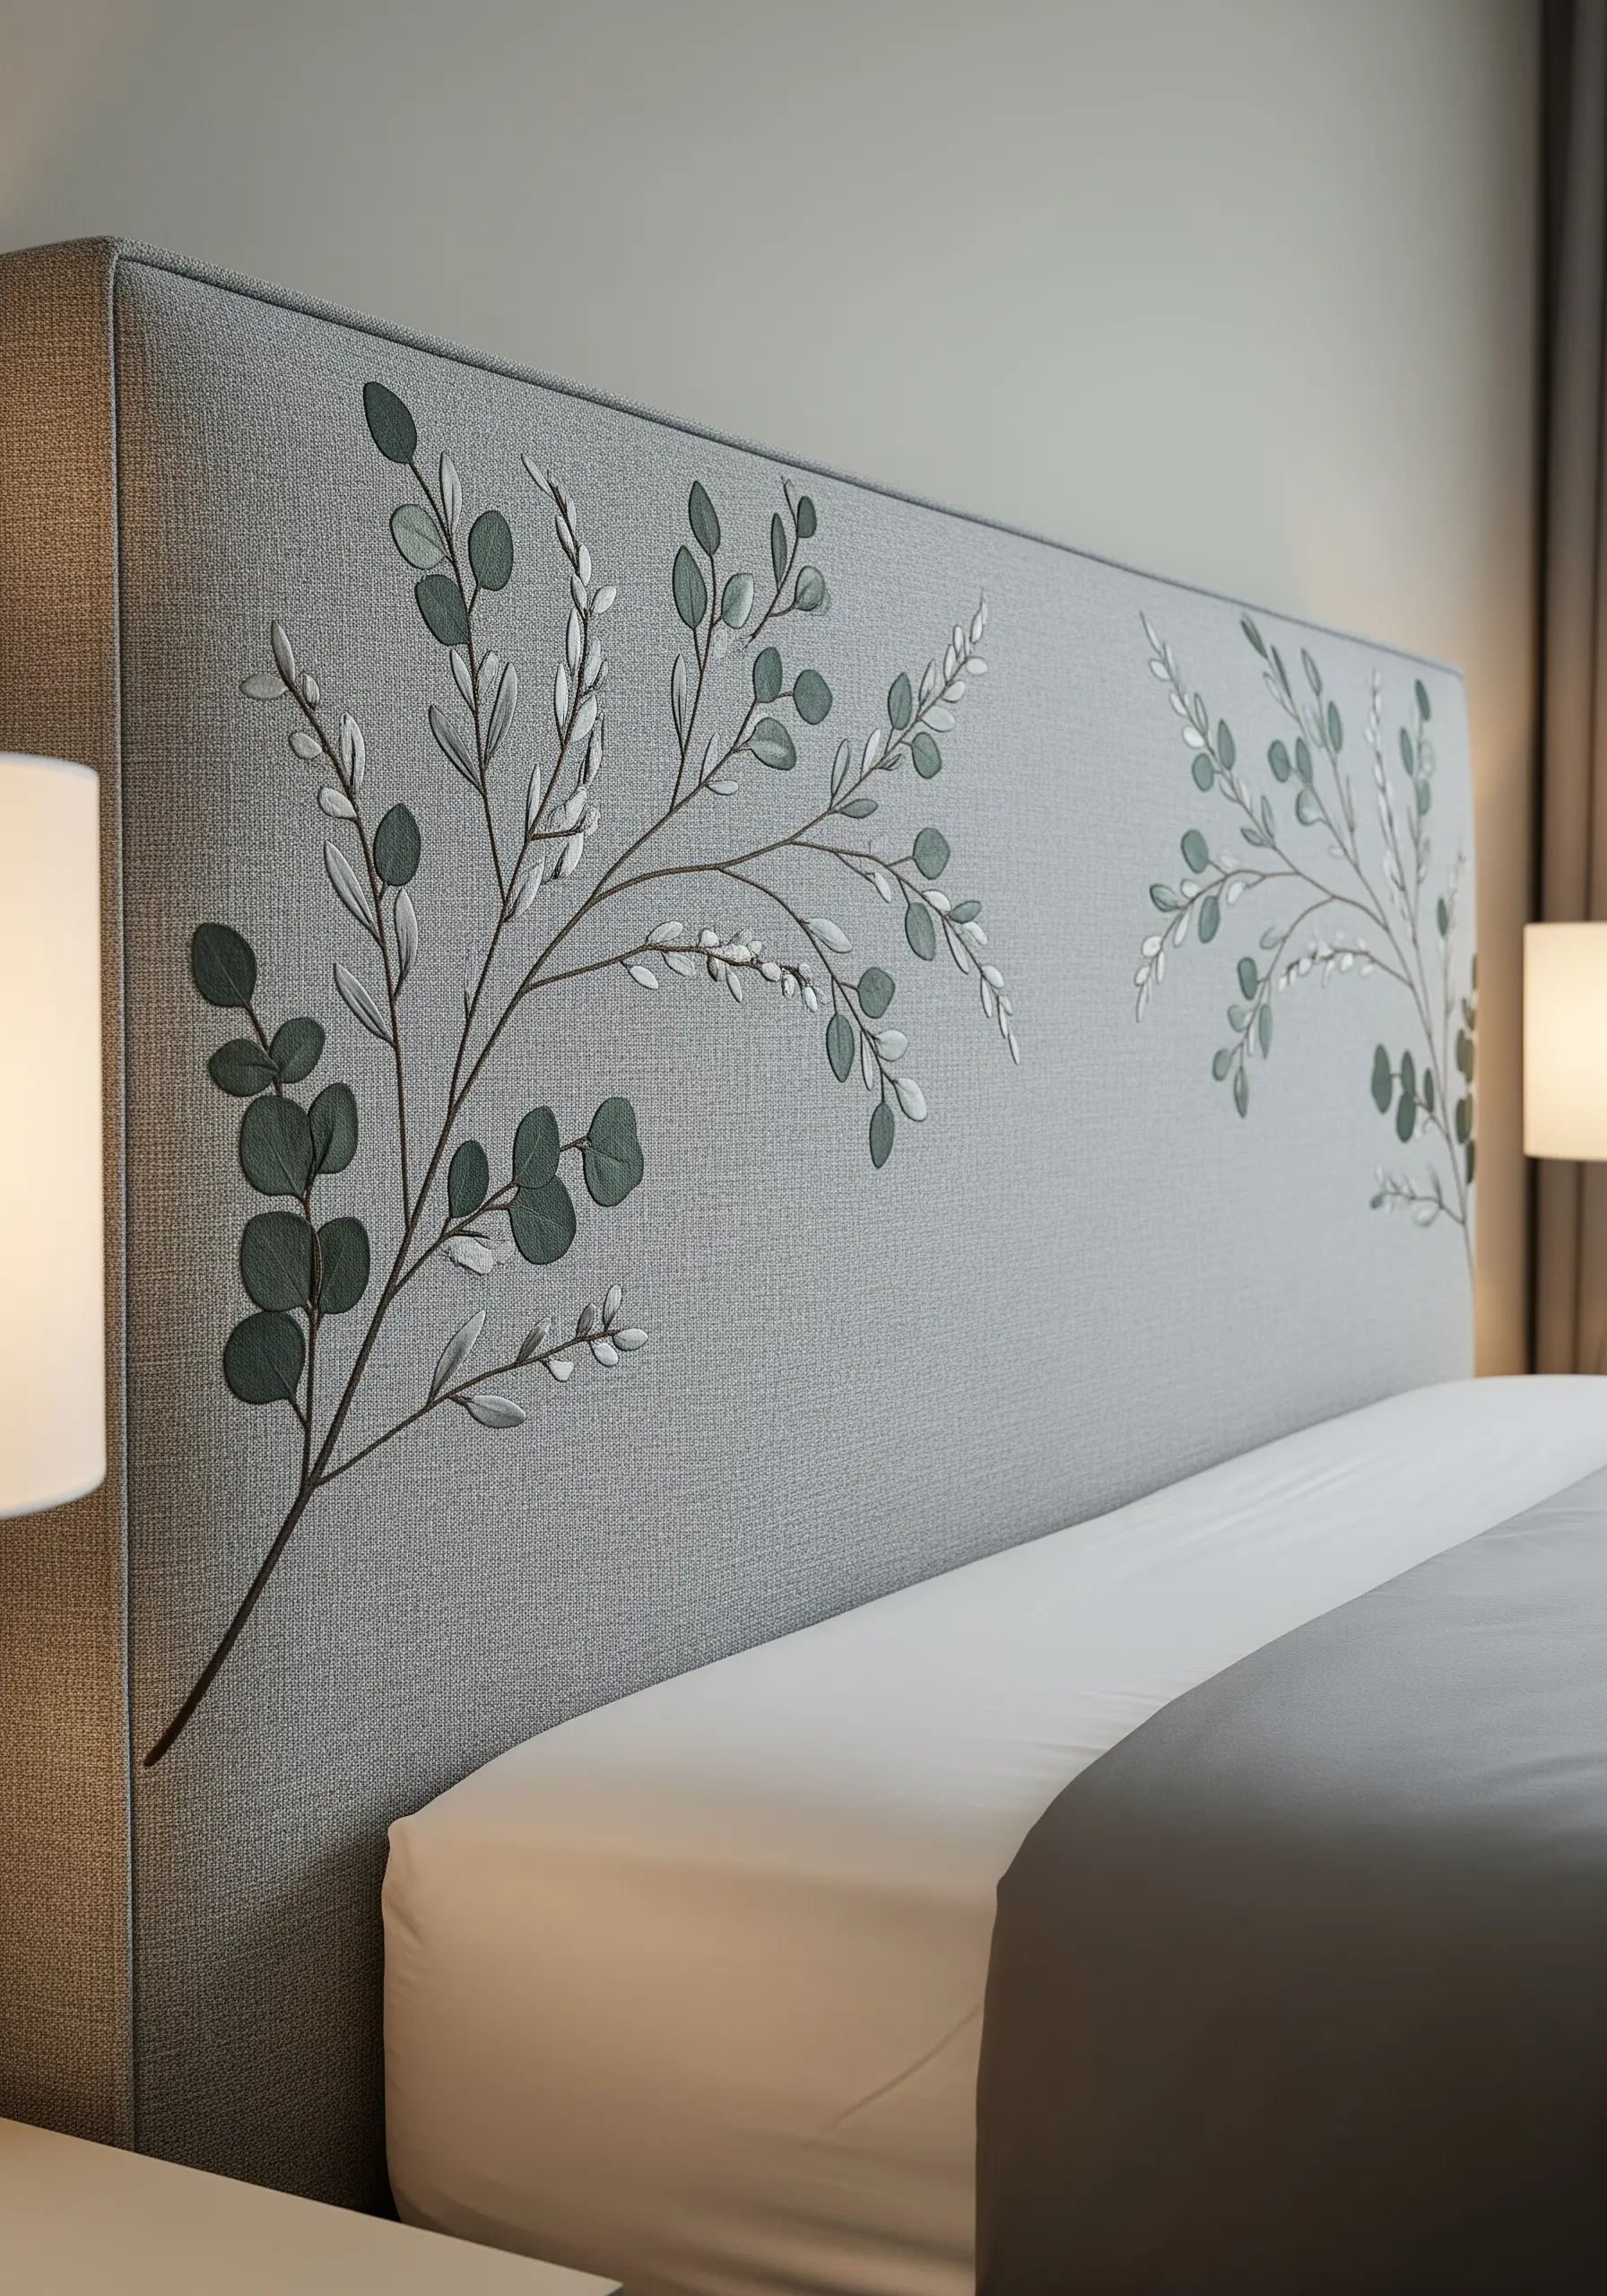
Take your embroidery off the wall and onto your furniture for a truly integrated decor element.
Stitching directly onto an upholstered headboard requires a heavy-duty curved needle, a thimble, and a strong thread like pearl cotton.
Create a more modern and organic feel with an asymmetrical design, allowing a branch to trail gently across the fabric rather than centering it.
A muted, tonal color palette—like these soft greens and greys—adds a layer of sophisticated texture without disrupting the calm of a bedroom sanctuary.
9. Personalize a Journal with a Miniature Botanical Patch
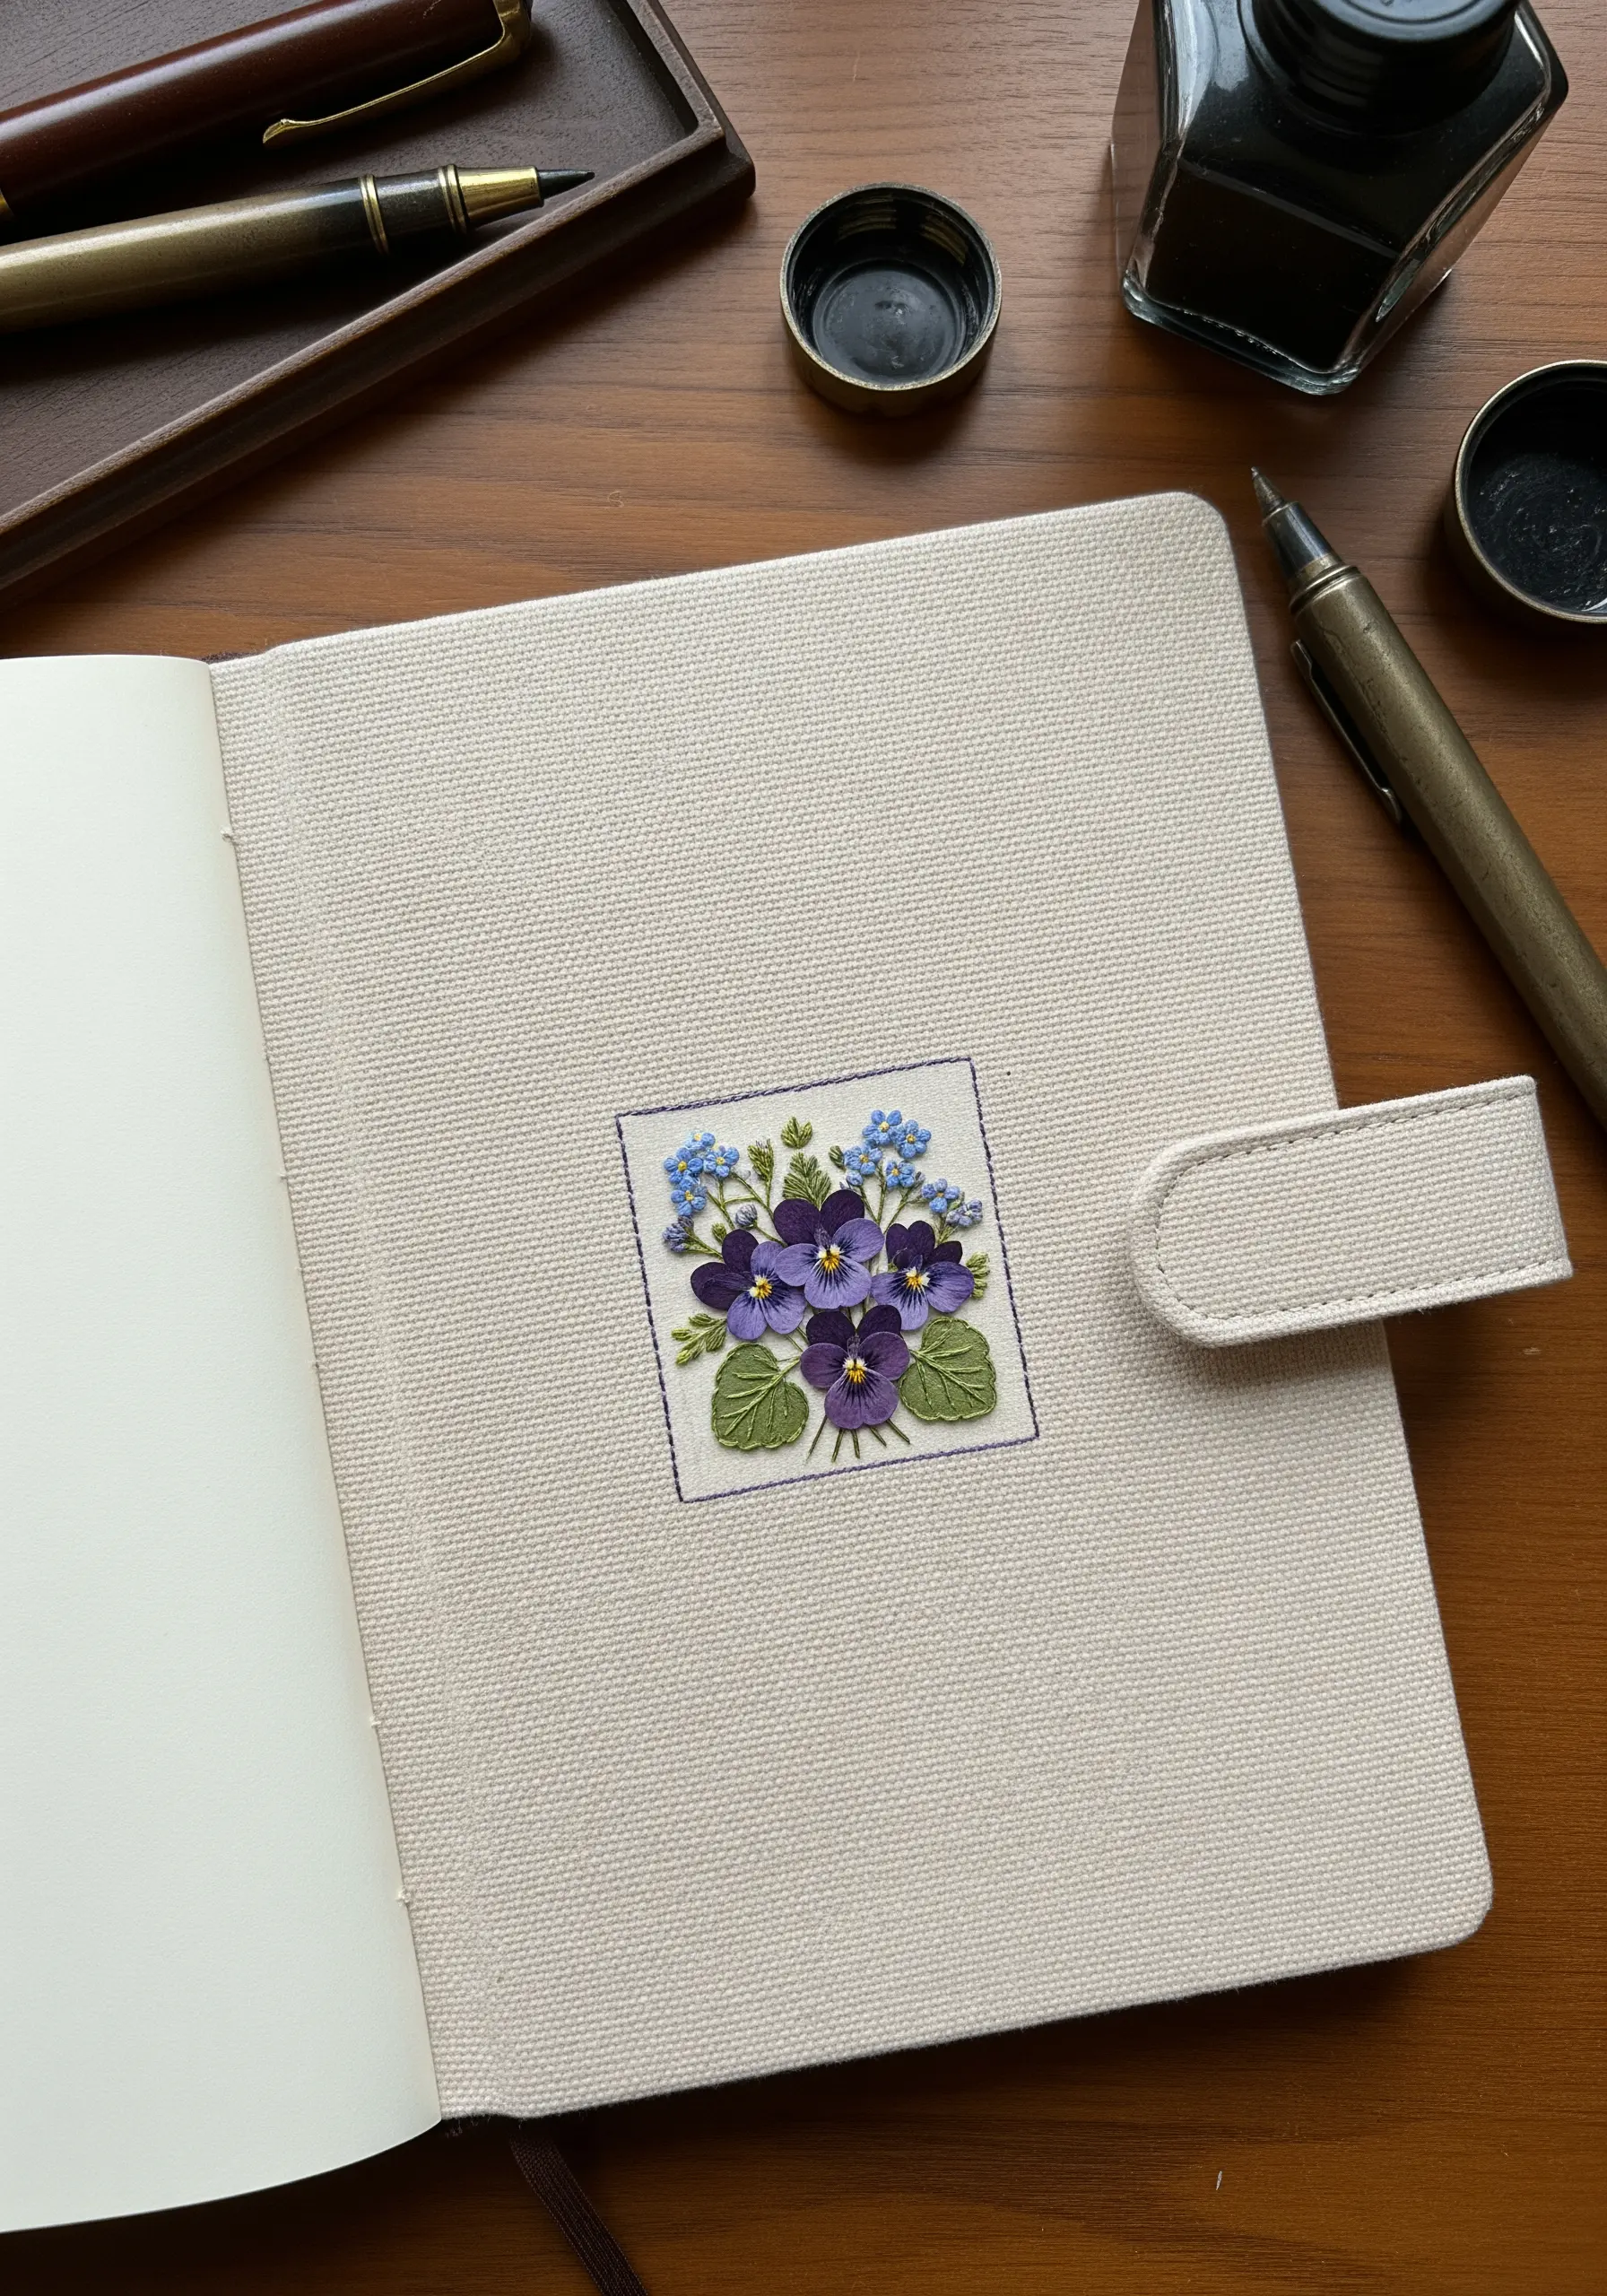
Elevate an everyday object by adding a small, exquisitely detailed embroidered patch.
Stitch your design on a separate piece of sturdy fabric, like canvas or felt. This allows you to perfect the tiny motif without wrestling with the final object.
Once complete, trim the fabric neatly and attach it to your journal cover with permanent fabric glue or a few careful stitches around the edge.
This technique gives your design a raised, emblem-like quality and is a perfect way to use precious scraps of fabric and thread.
10. Simulate Pressed Flowers with Sheer Appliqué
Recreate the delicate, translucent quality of pressed flowers on glass by using layered organza appliqué on fabric.
Cut petal and leaf shapes from different shades of sheer organza and arrange them on your base fabric.
Layering the pieces will create new colors and subtle gradients where they overlap, mimicking the effect of real pressed petals.
Secure the shapes with fine, free-motion machine stitching or nearly invisible hand stitches, adding veins and details to complete the illusion.
This technique achieves a light, airy, and painterly botanical effect.
11. Introduce Subtle Serenity with Lavender Stitches
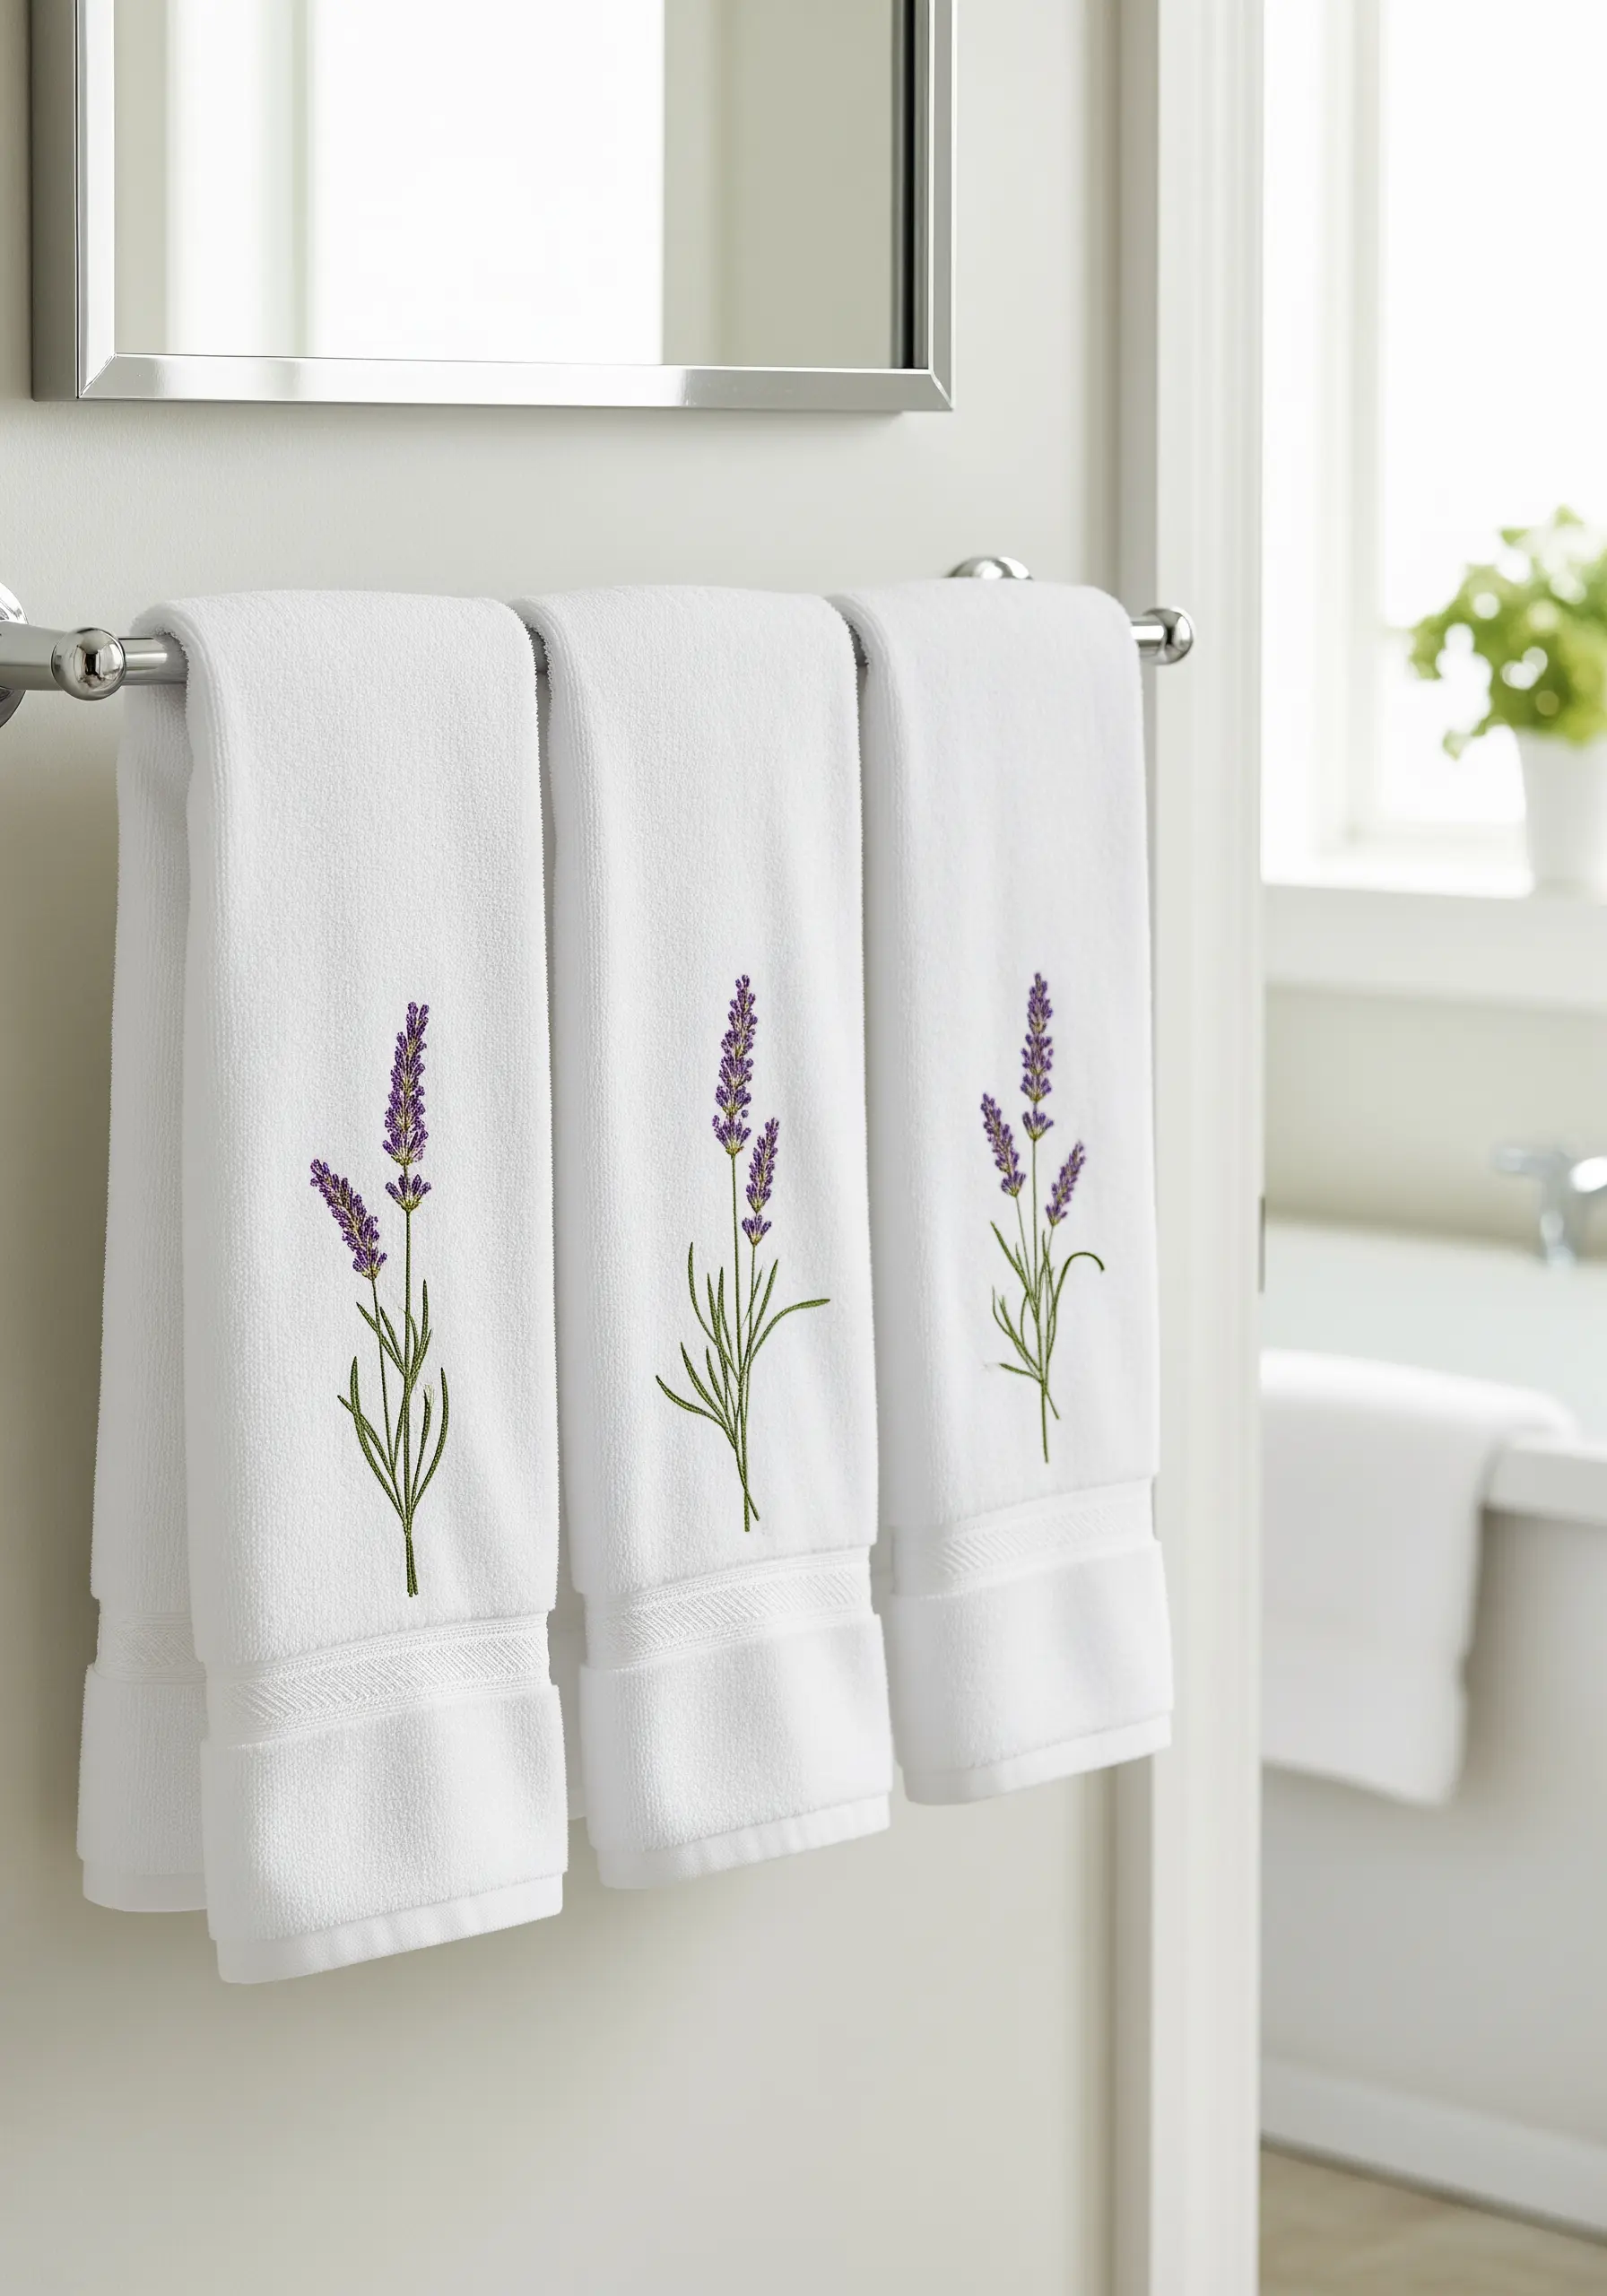
When embroidering on high-pile fabrics like terrycloth towels, the key to a professional finish is a water-soluble stabilizer.
Place a layer on top of the towel before you stitch; this creates a smooth surface and prevents your stitches from getting lost in the fabric loops.
Keep your design simple and elegant. A few sprigs of lavender stitched with detached chain stitches and a clean stem stitch will look refined and spa-like.
The stabilizer dissolves in water, leaving behind crisp, clear stitches that sit neatly on the surface.
12. Stitch a Modern Heirloom with Botanical Blocks
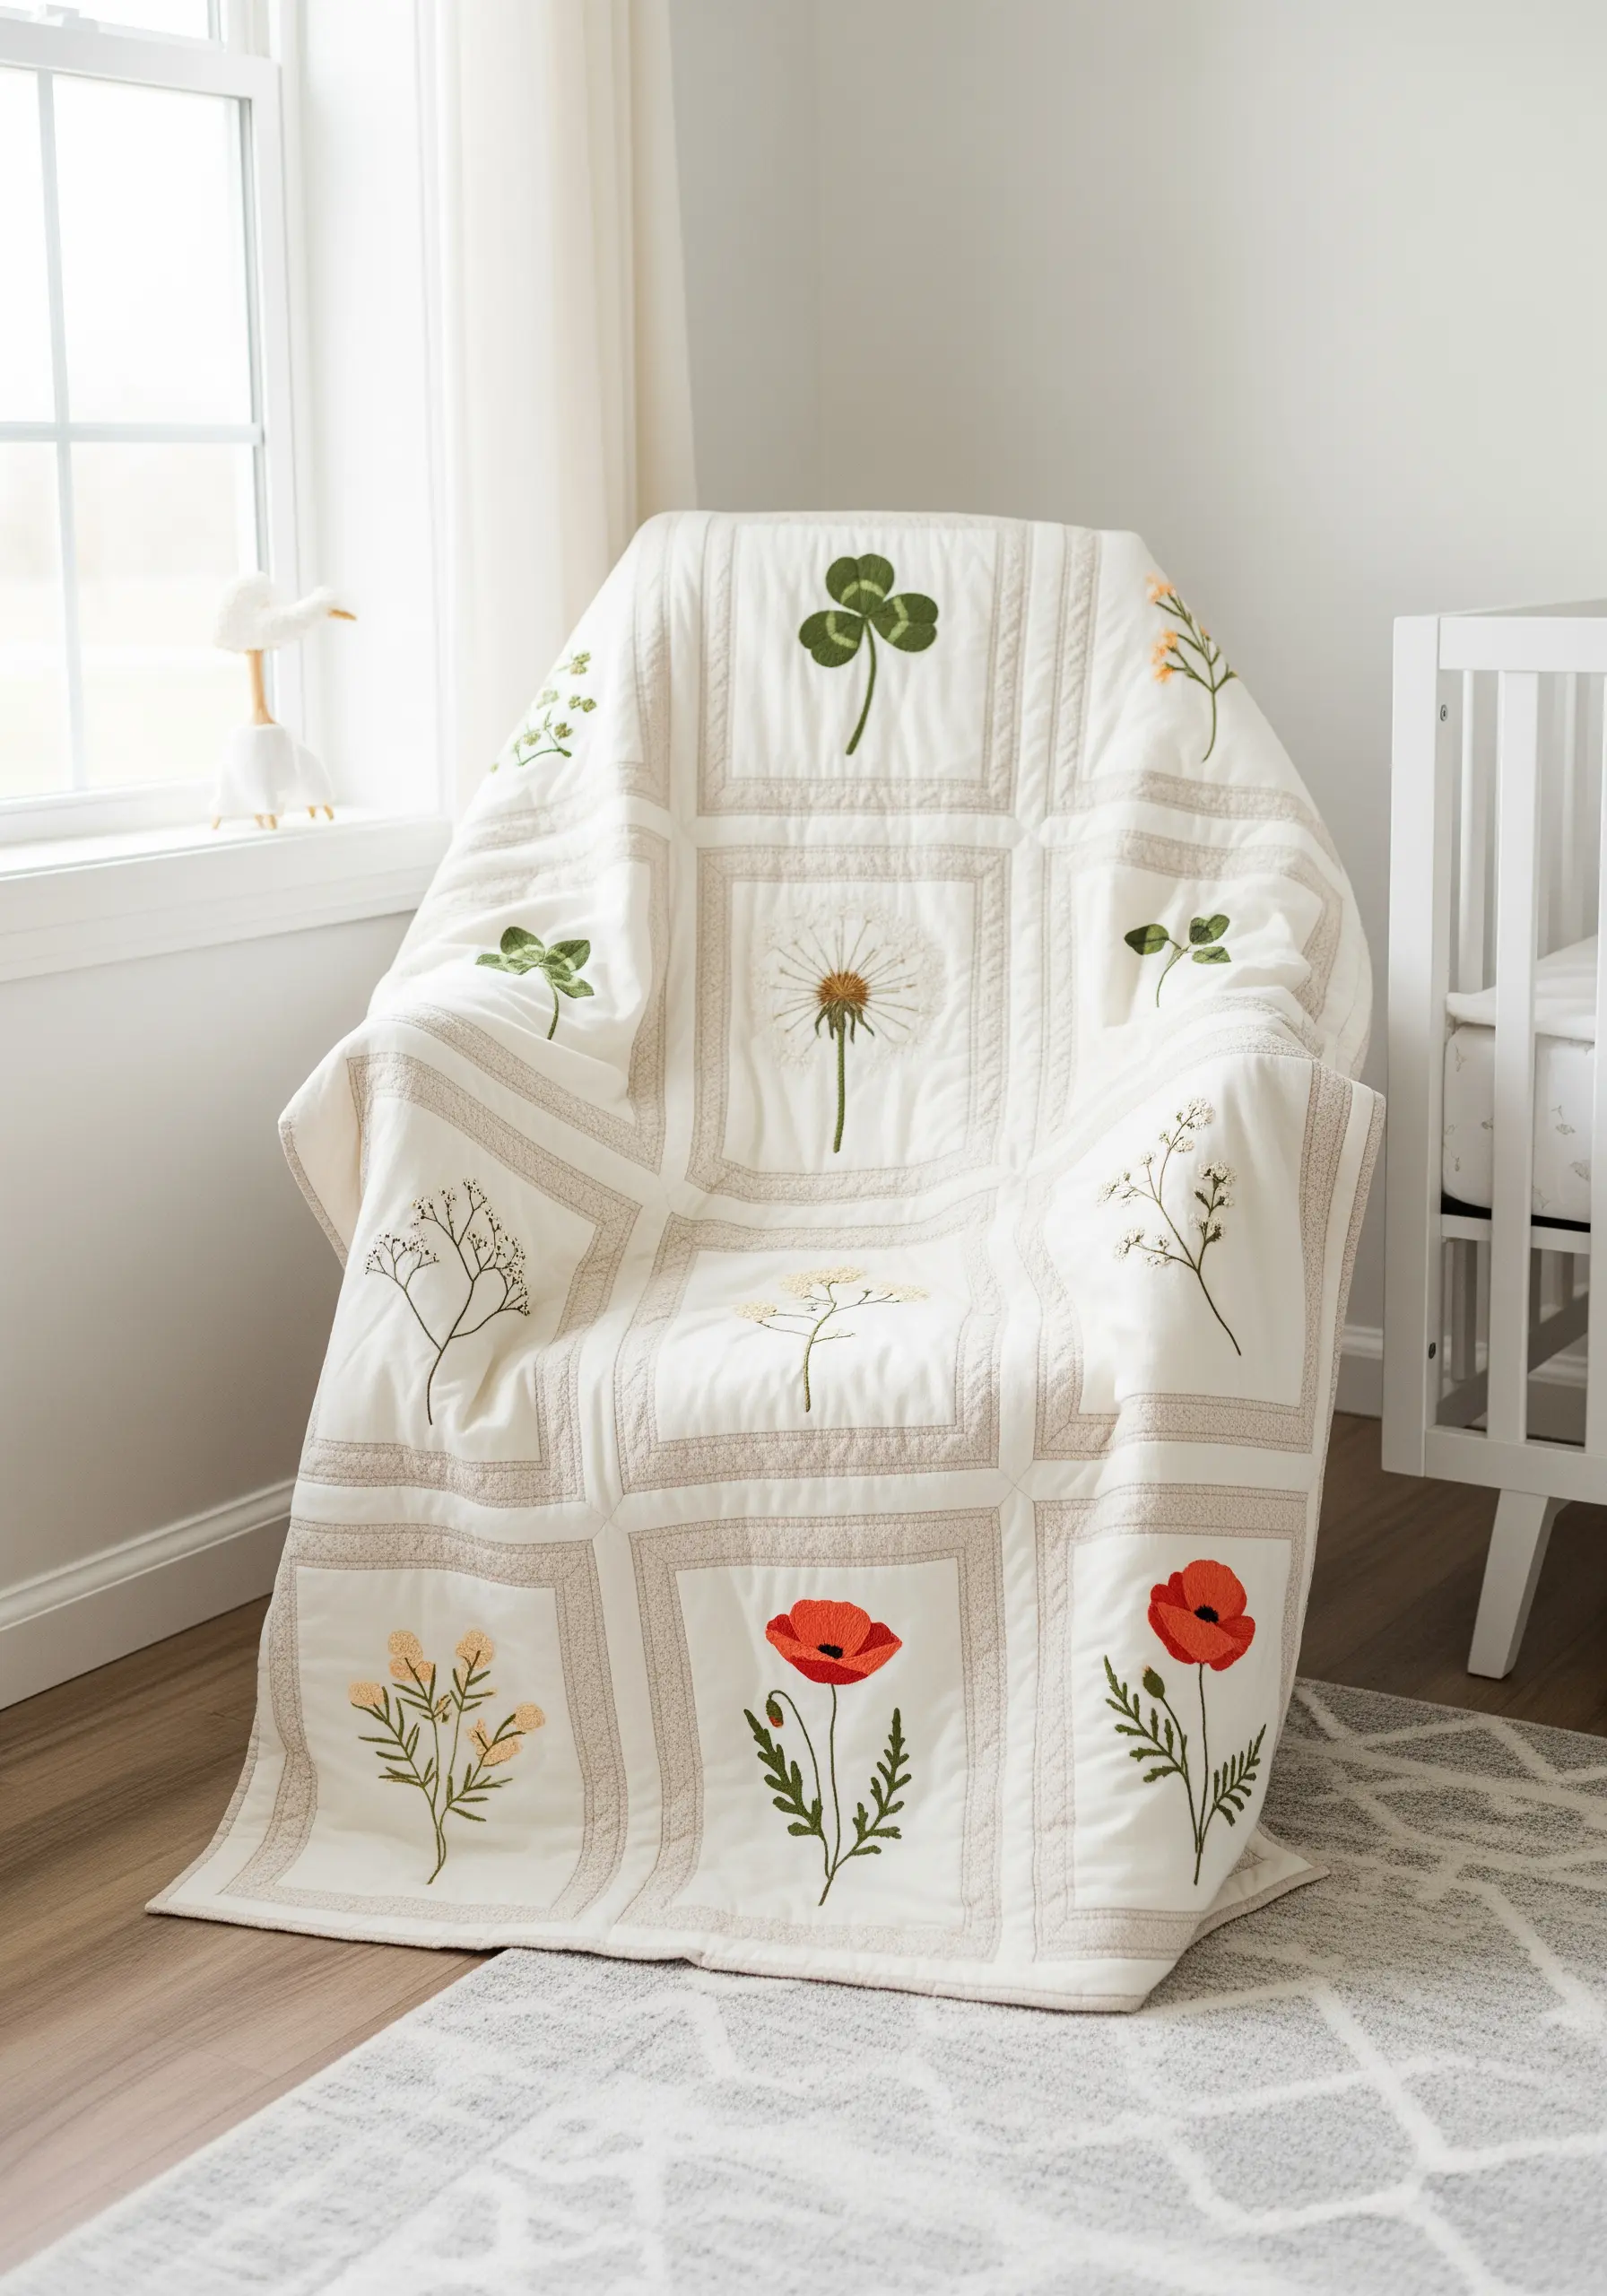
For a large-scale project like a quilt, break the design down into manageable, individual blocks.
This modular approach allows you to focus on perfecting one small botanical motif at a time—a single poppy, a clover, a stem of wildflowers.
Isolating each specimen in its own square creates a clean, contemporary aesthetic that feels like a botanical study.
The quilting stitches that frame each embroidered block not only add texture but also elevate your stitch work, turning each square into a miniature piece of framed art.
13. Filter Sunlight Through Botanical Panel Curtains

Design your embroidery to interact with its environment, especially with natural light.
On semi-sheer panel curtains, tall, vertical wildflower designs act as a beautiful, organic screen that filters and softens sunlight.
The backlighting from the window makes the threads glow, so choose colorfast threads that won’t fade over time.
The repeating vertical lines of the stems draw the eye up, making your windows—and the entire room—feel taller and more spacious.
14. Make a Statement with an Oversized Floral Motif
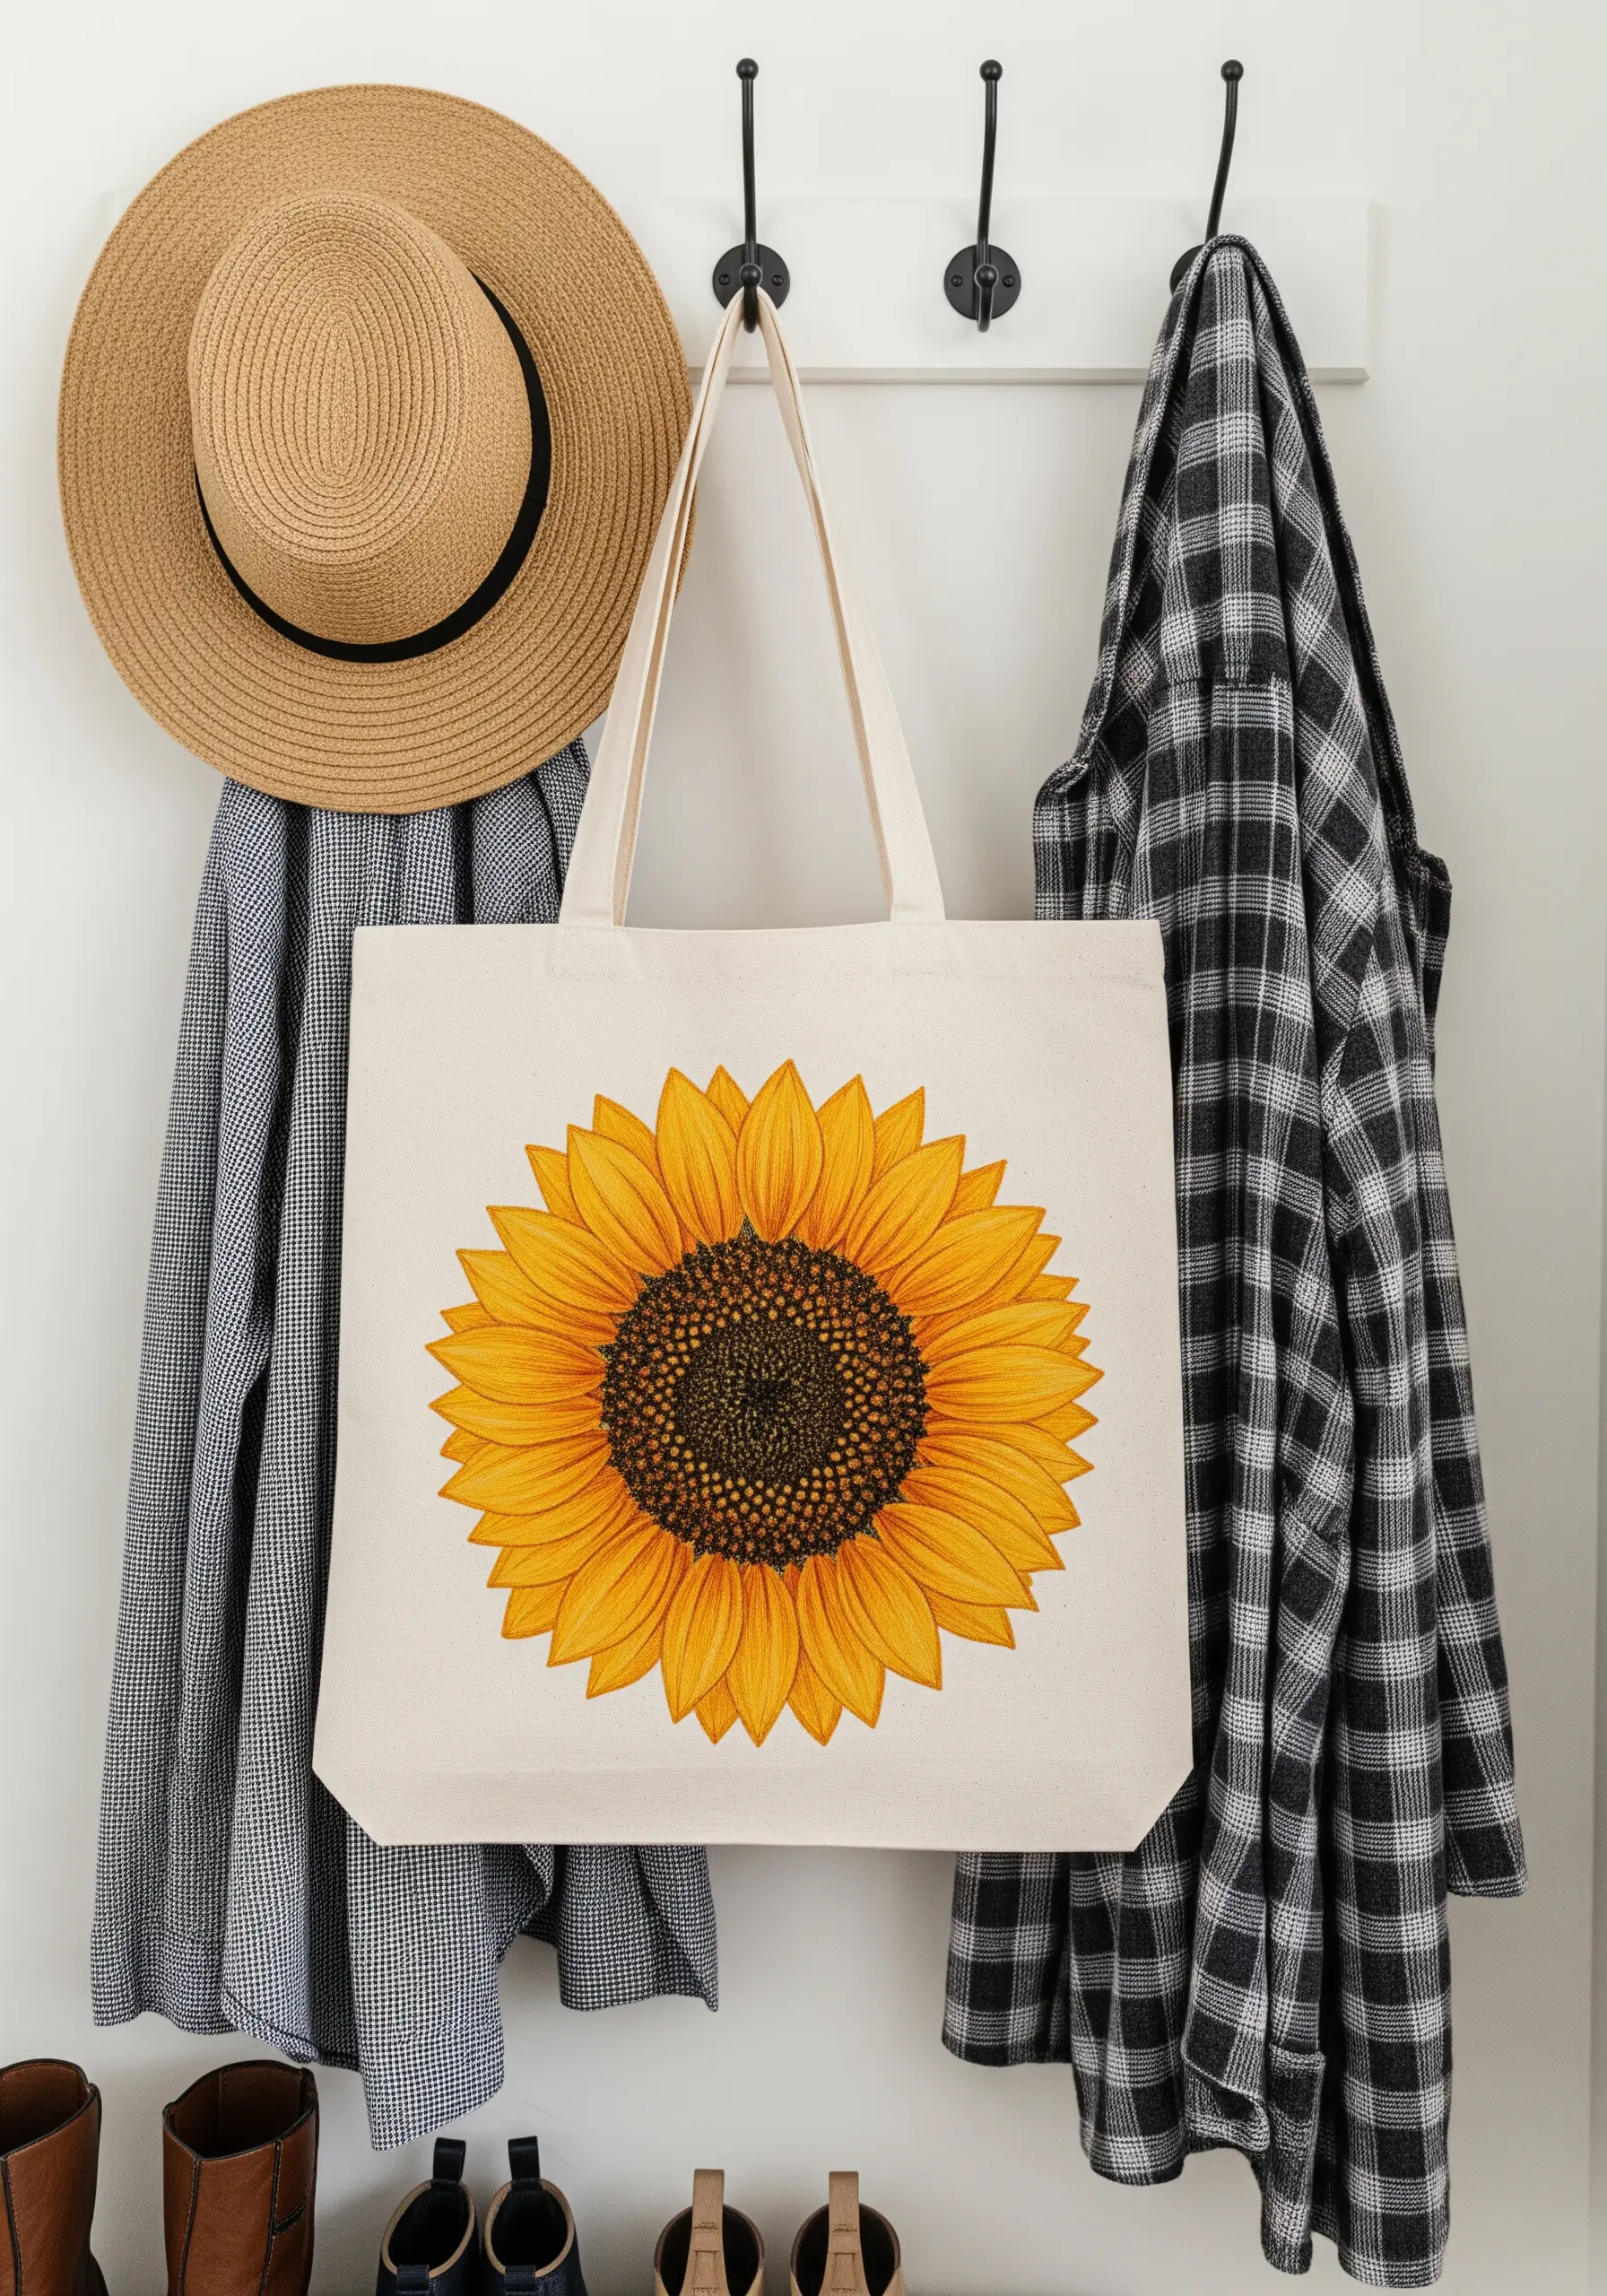
Achieve maximum visual impact on an accessory by focusing on a single, oversized botanical element.
A large-scale sunflower allows you to play with texture in a way that smaller motifs do not.
Create a dense, highly tactile center using a field of French knots or colonial knots in varied shades of brown, gold, and black.
For the petals, use long and short stitch to blend multiple shades of yellow and orange, giving them a realistic, sun-drenched dimension that contrasts beautifully with the knotty texture of the center.
15. Craft a Set of Functional Botanical Coasters
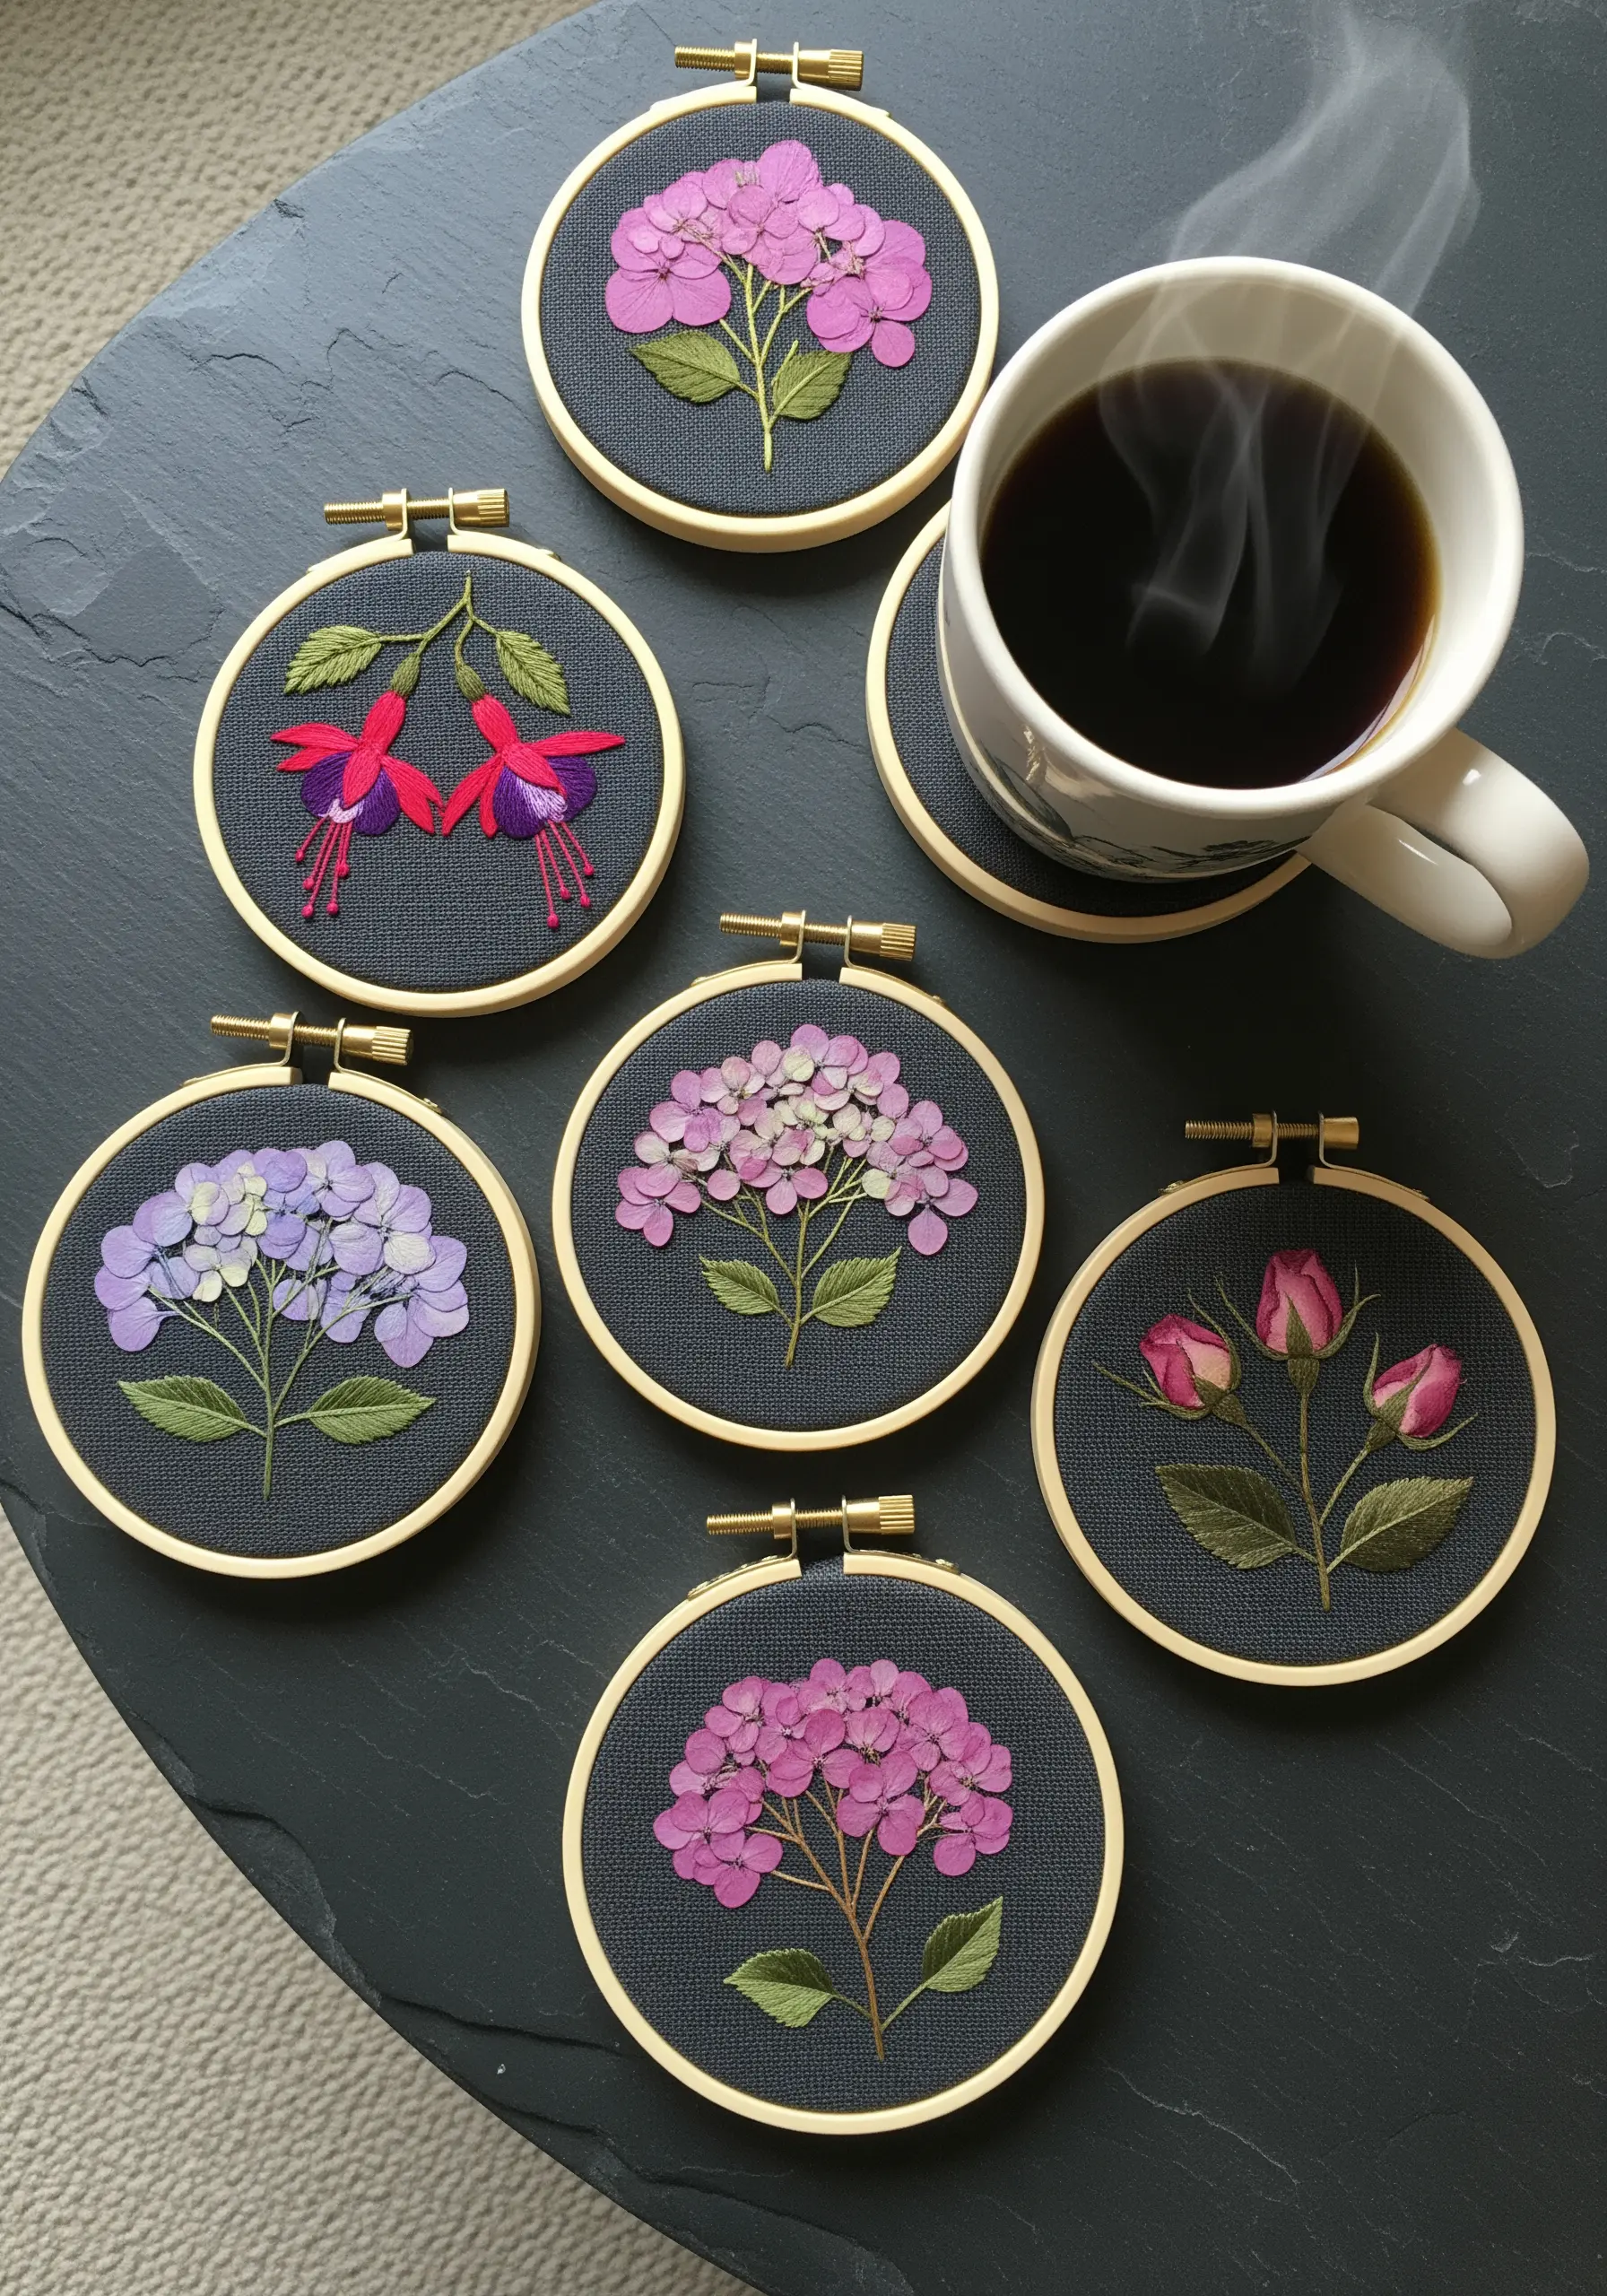
Turn your small-scale embroidery into practical pieces of art for your home.
Using a dark, tightly woven background fabric makes vibrant floral colors appear even more luminous.
For complex textures like hydrangea blossoms, use hundreds of tiny French knots in variegated purple or pink thread to create a dense, cushioned cluster that is both visually stunning and durable.
Finishing these small works in miniature hoops transforms them into elegant, functional coasters that protect your surfaces with handmade style.
16. Add a Graceful Border with Climbing Floral Vines

An embroidered border can transform simple curtains into a bespoke design element.
A design that grows up from the hemline adds a touch of elegance and visual weight to lightweight, sheer fabric without obstructing the view.
The gentle, upward curve of the vines creates a sense of graceful movement.
On delicate fabrics, use just one or two strands of floss to keep the stitching light and airy. A simple whipped backstitch for the vines and detached chain stitches for the bell flowers is all you need for this refined effect.
17. Design a Botanical Gallery Wall with Hooped Specimens
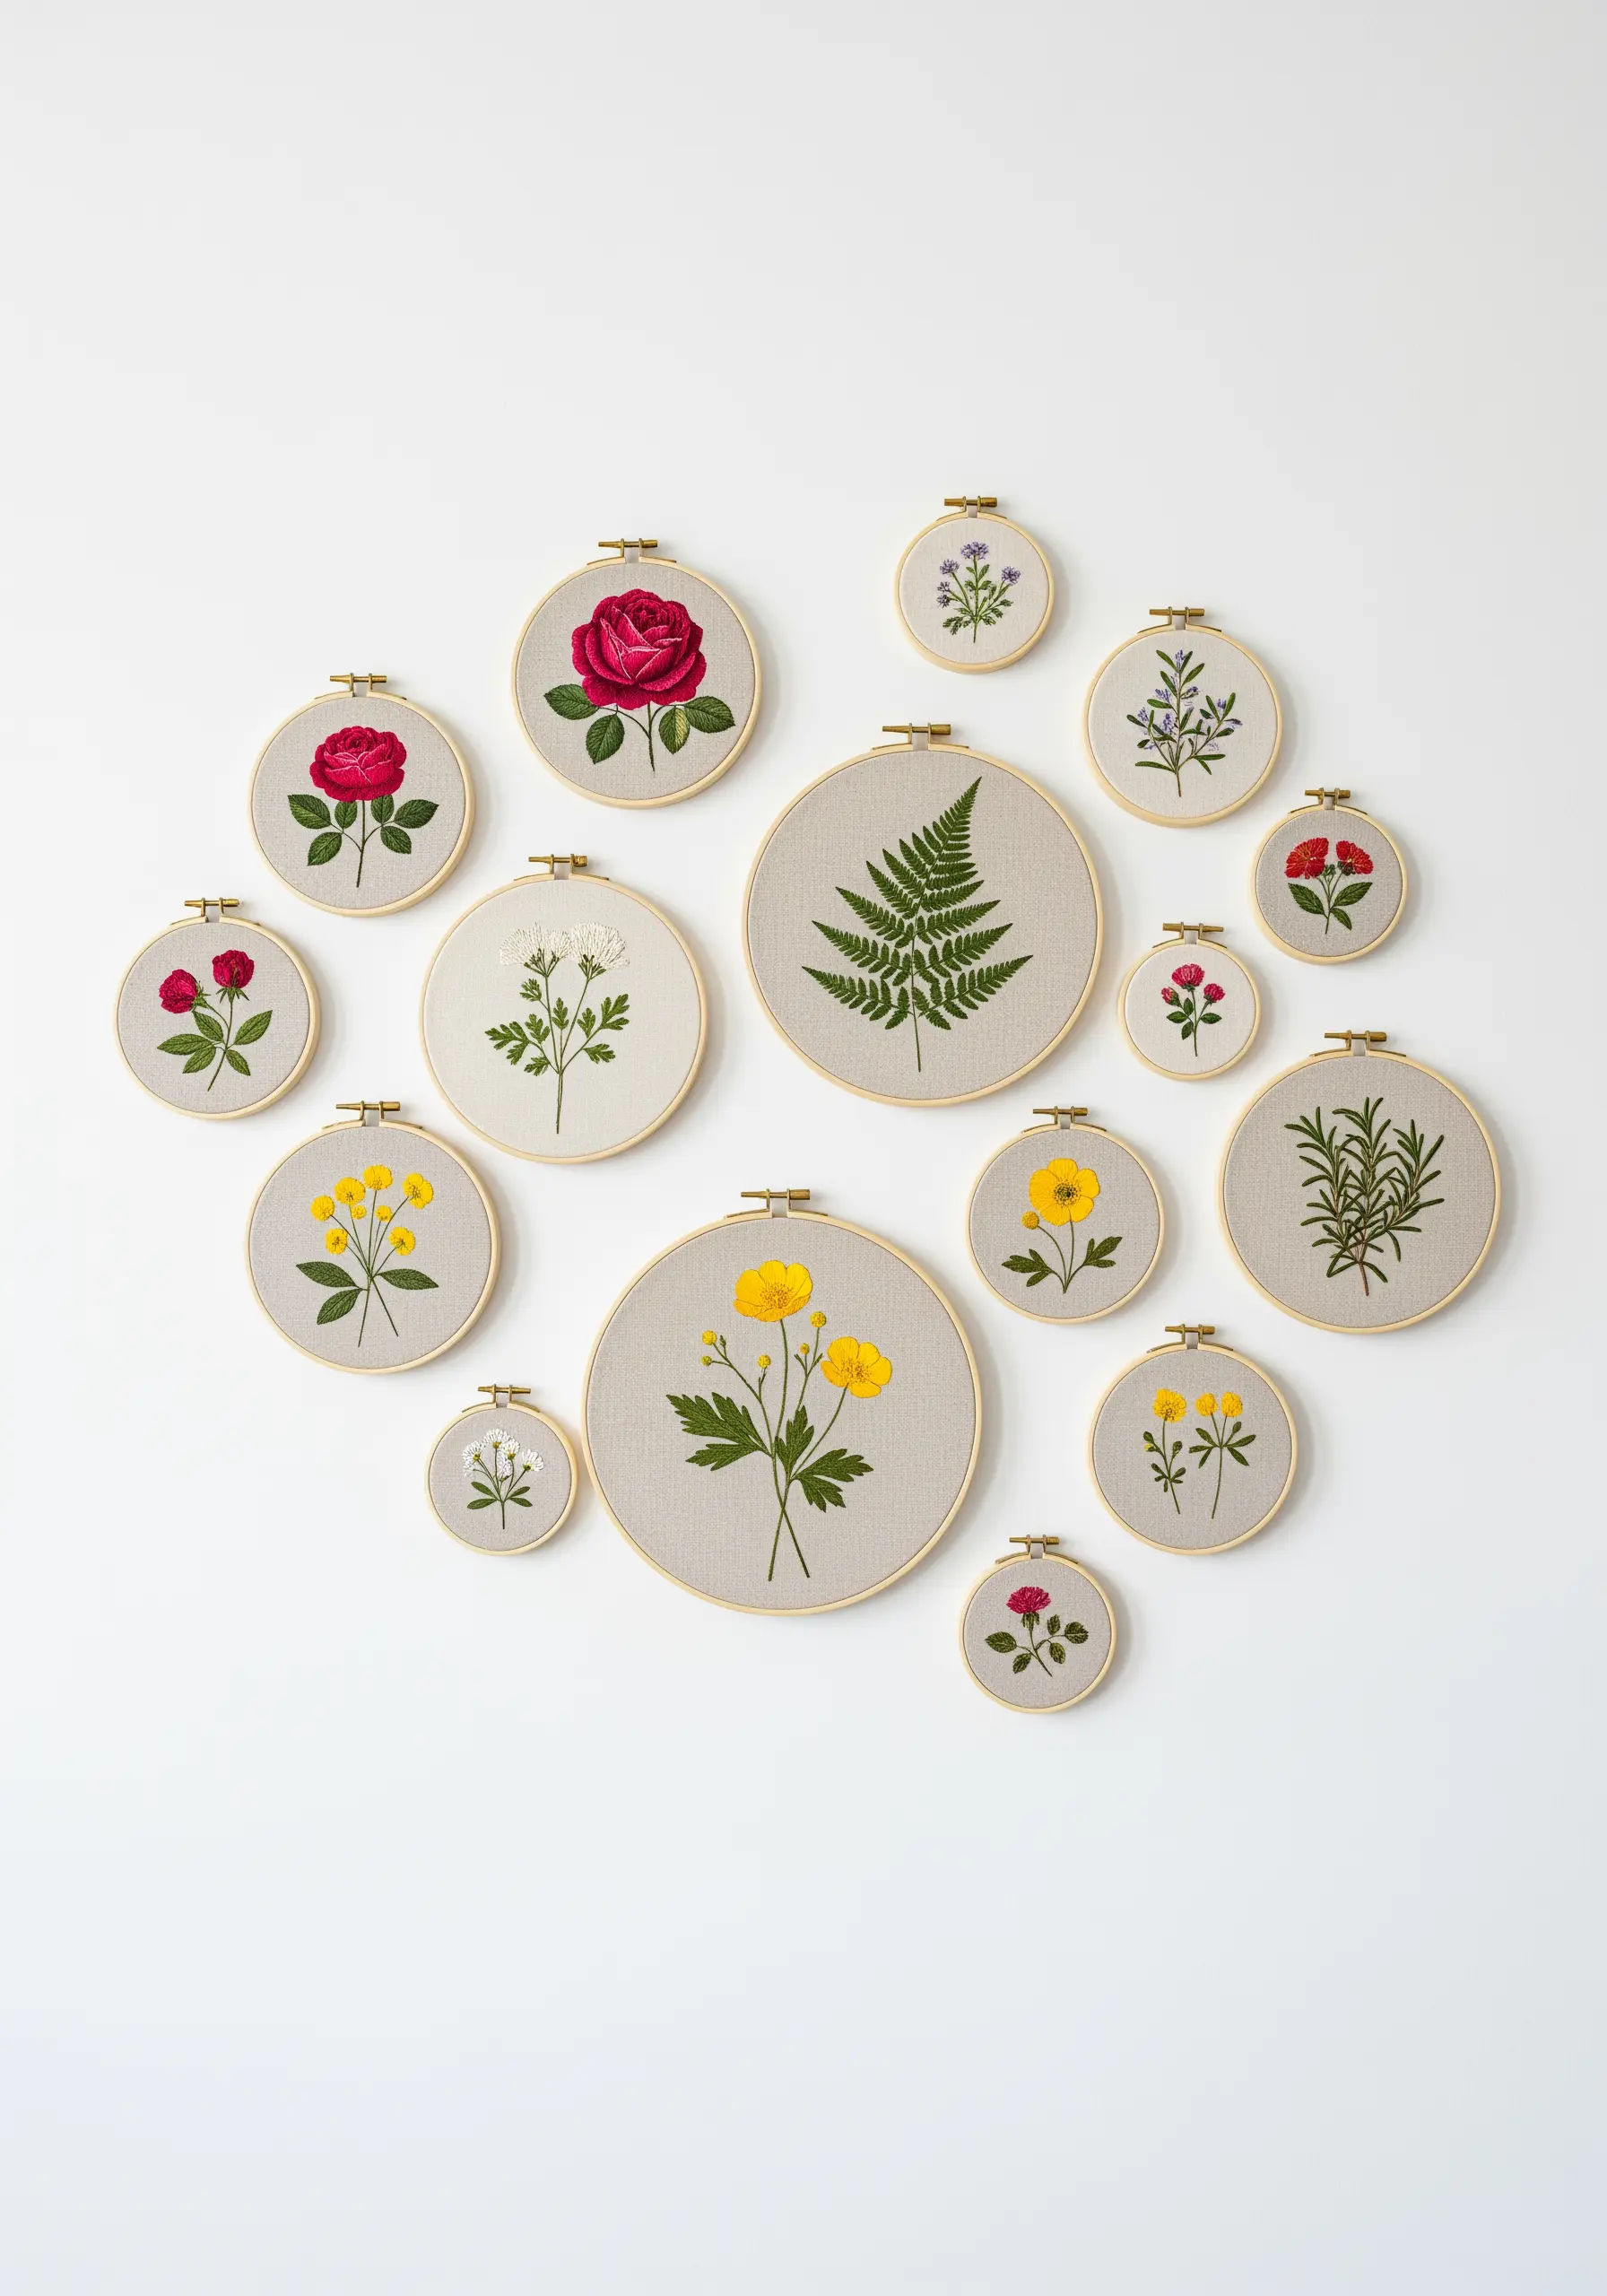
Create a stunning focal point by curating a collection of your botanical embroidery pieces.
To ensure the collection feels cohesive, stick to a consistent element, such as the same neutral linen background fabric or the same style of wooden hoop for every piece.
Vary the hoop sizes and the scale of the botanicals within them to create a dynamic, interesting rhythm on the wall.
Balance complex, multi-colored flowers with simple green foliage to give the eye places to rest. This intentional arrangement transforms individual projects into a single, impressive work of art.
18. Explore Sculptural Dimension with a Statement Screen
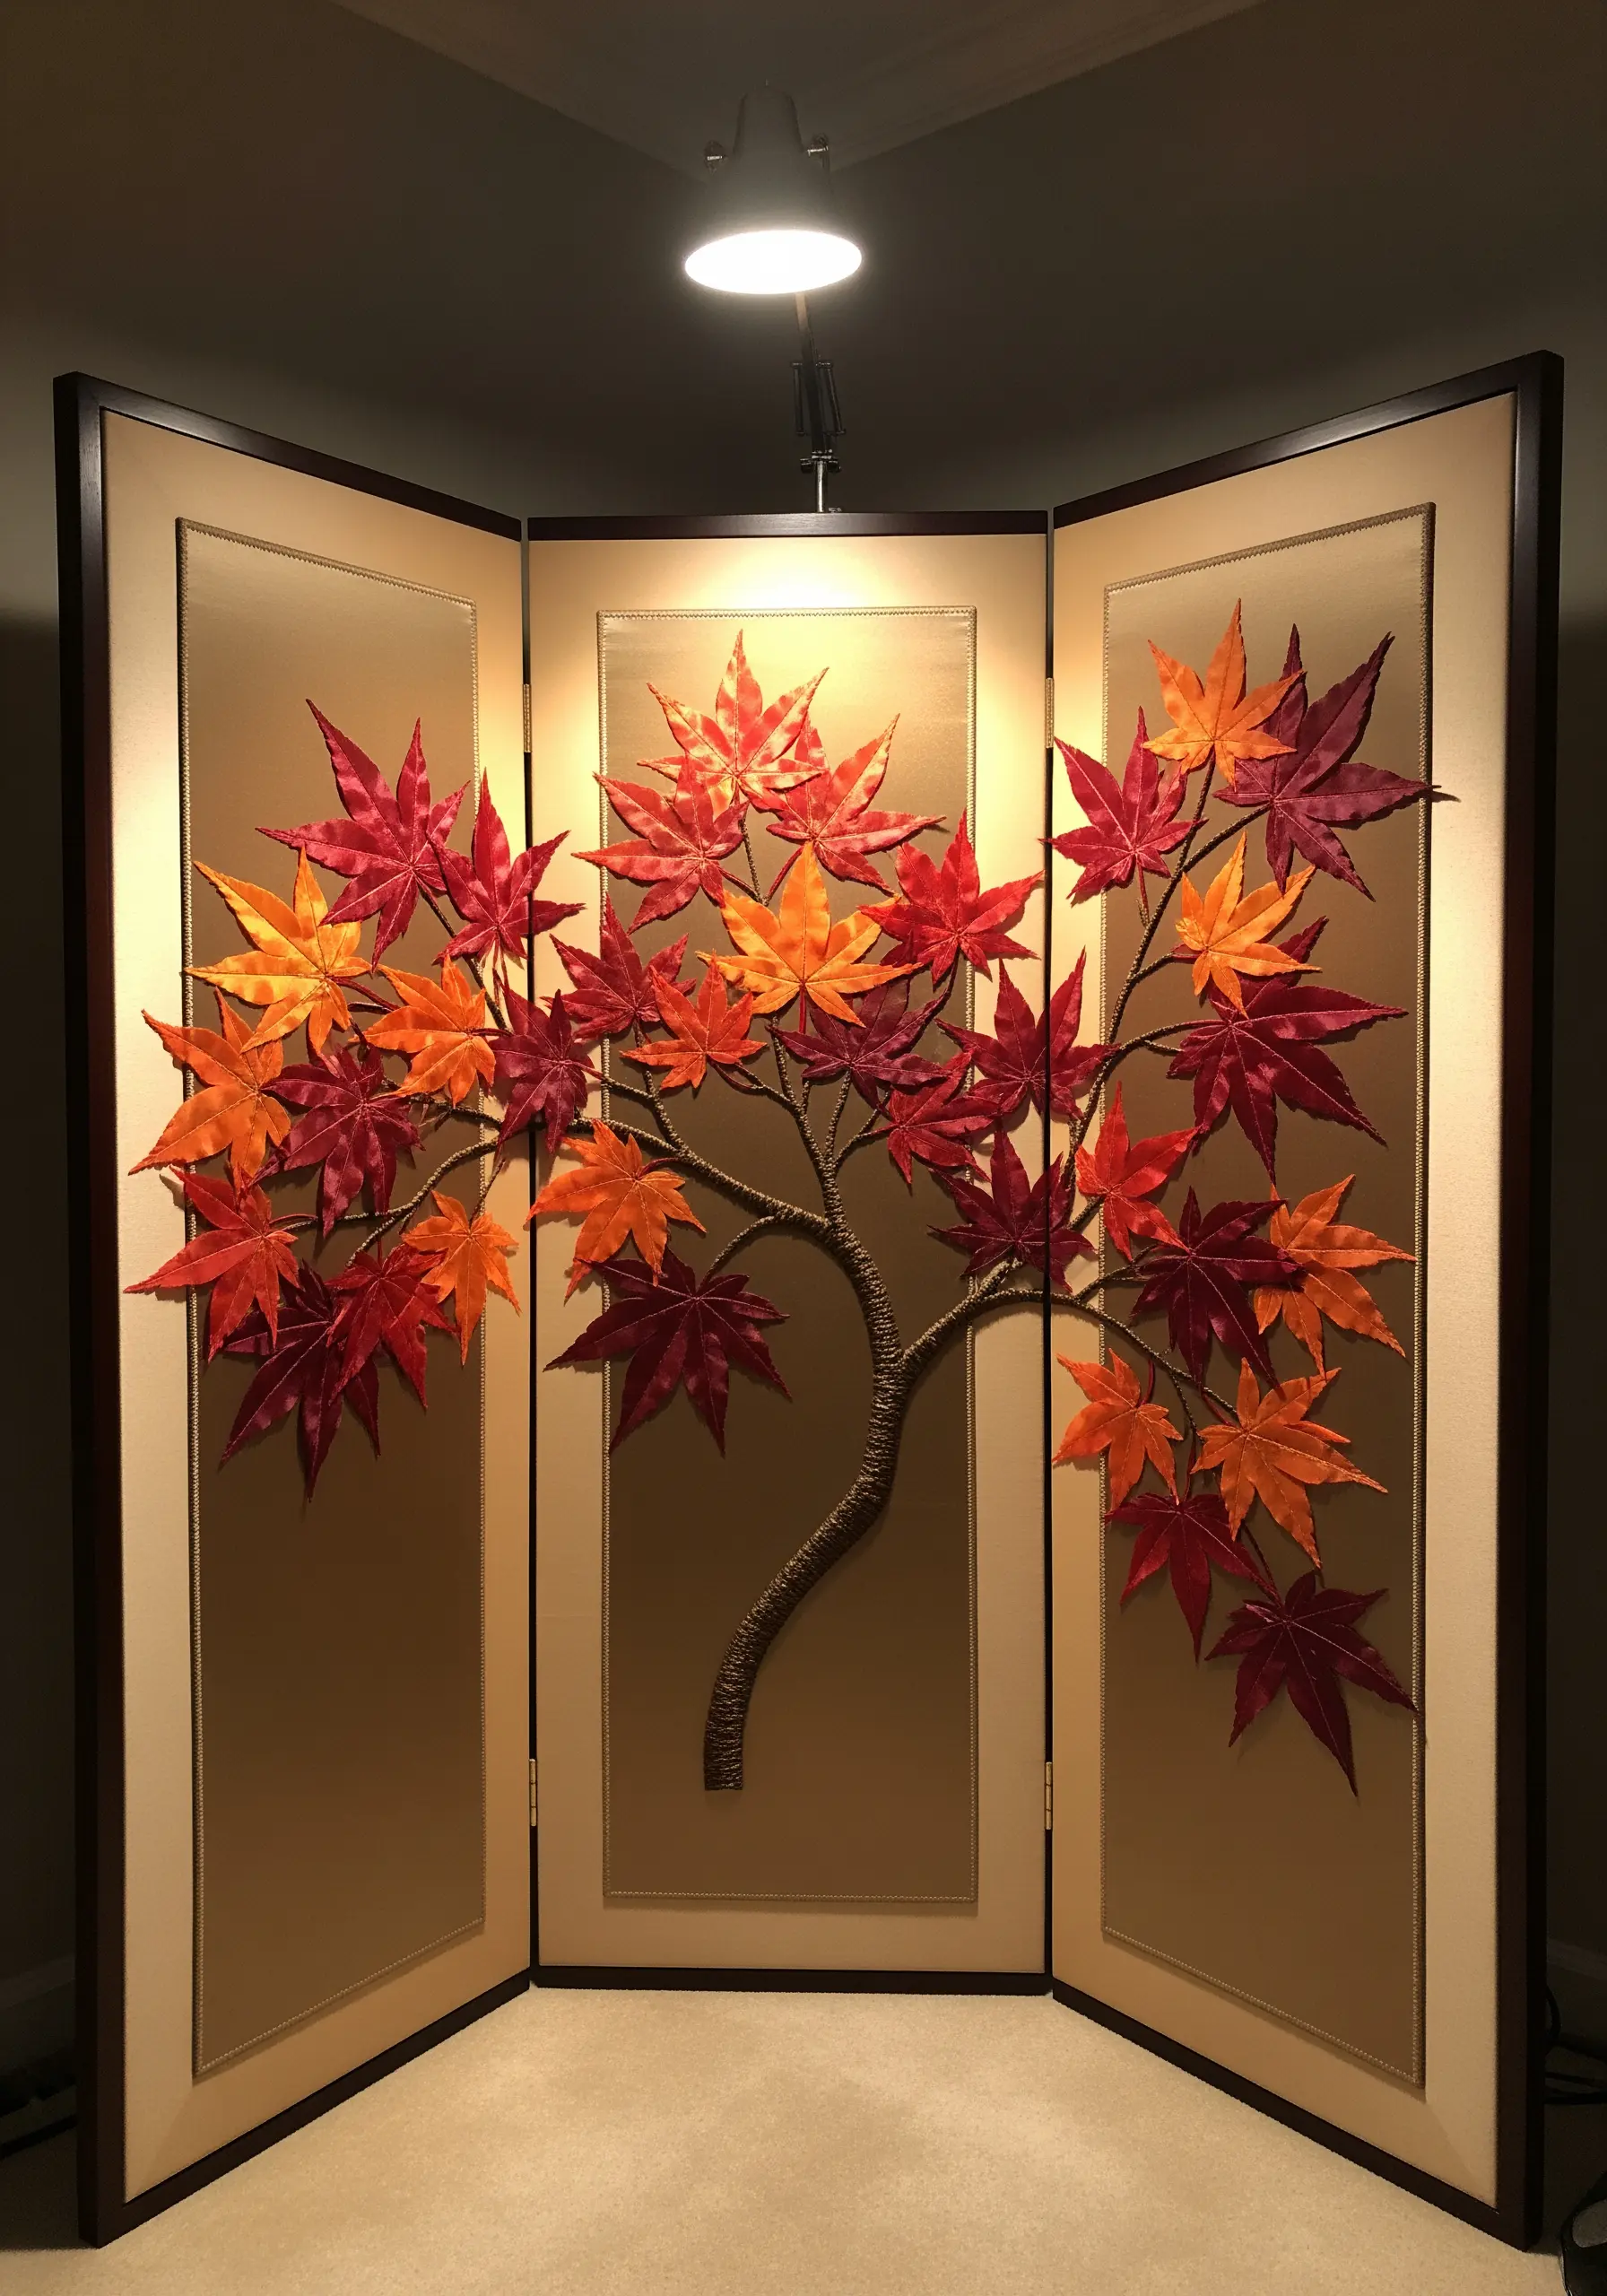
Push the boundaries of embroidery by moving into three-dimensional, sculptural forms.
On a statement piece like a folding screen, use stumpwork techniques to create raised and padded elements, such as the textured tree trunk.
Create the autumn leaves separately by stitching them onto a water-soluble stabilizer or around a thin wire frame. Once finished, cut them out and attach them to the branches individually.
This method creates a truly dynamic piece of statement textured embroidery that plays with light and shadow, casting beautiful, intricate patterns into the room.


