
You have mastered the basic stitches and your satin stitch is smooth and even. But you feel a creative restlessness, a sense that your thread could be doing more. You’re ready to move beyond the hoop and invite new textures to the conversation.
This is where the true artistry begins—not with more complex stitches, but with more thoughtful materials. When you combine embroidery with paper, paint, pressed flowers, or layered fabrics, your thread is no longer just a decorative finish. It becomes a line that connects, a texture that contrasts, and a focal point that tells a richer story.
Here, you’ll find twenty projects designed to build your confidence with mixed media. Each one is an invitation to see your needle and thread as partners to a world of other materials, creating work that is not only beautiful, but also deeply and uniquely yours.
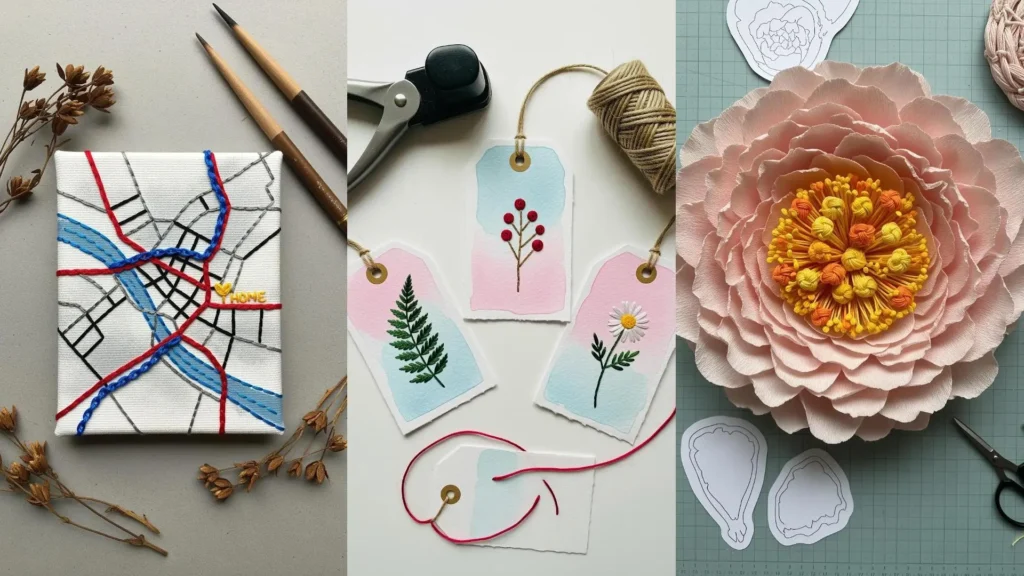
1. Frame Pressed Botanicals with Stitched Details
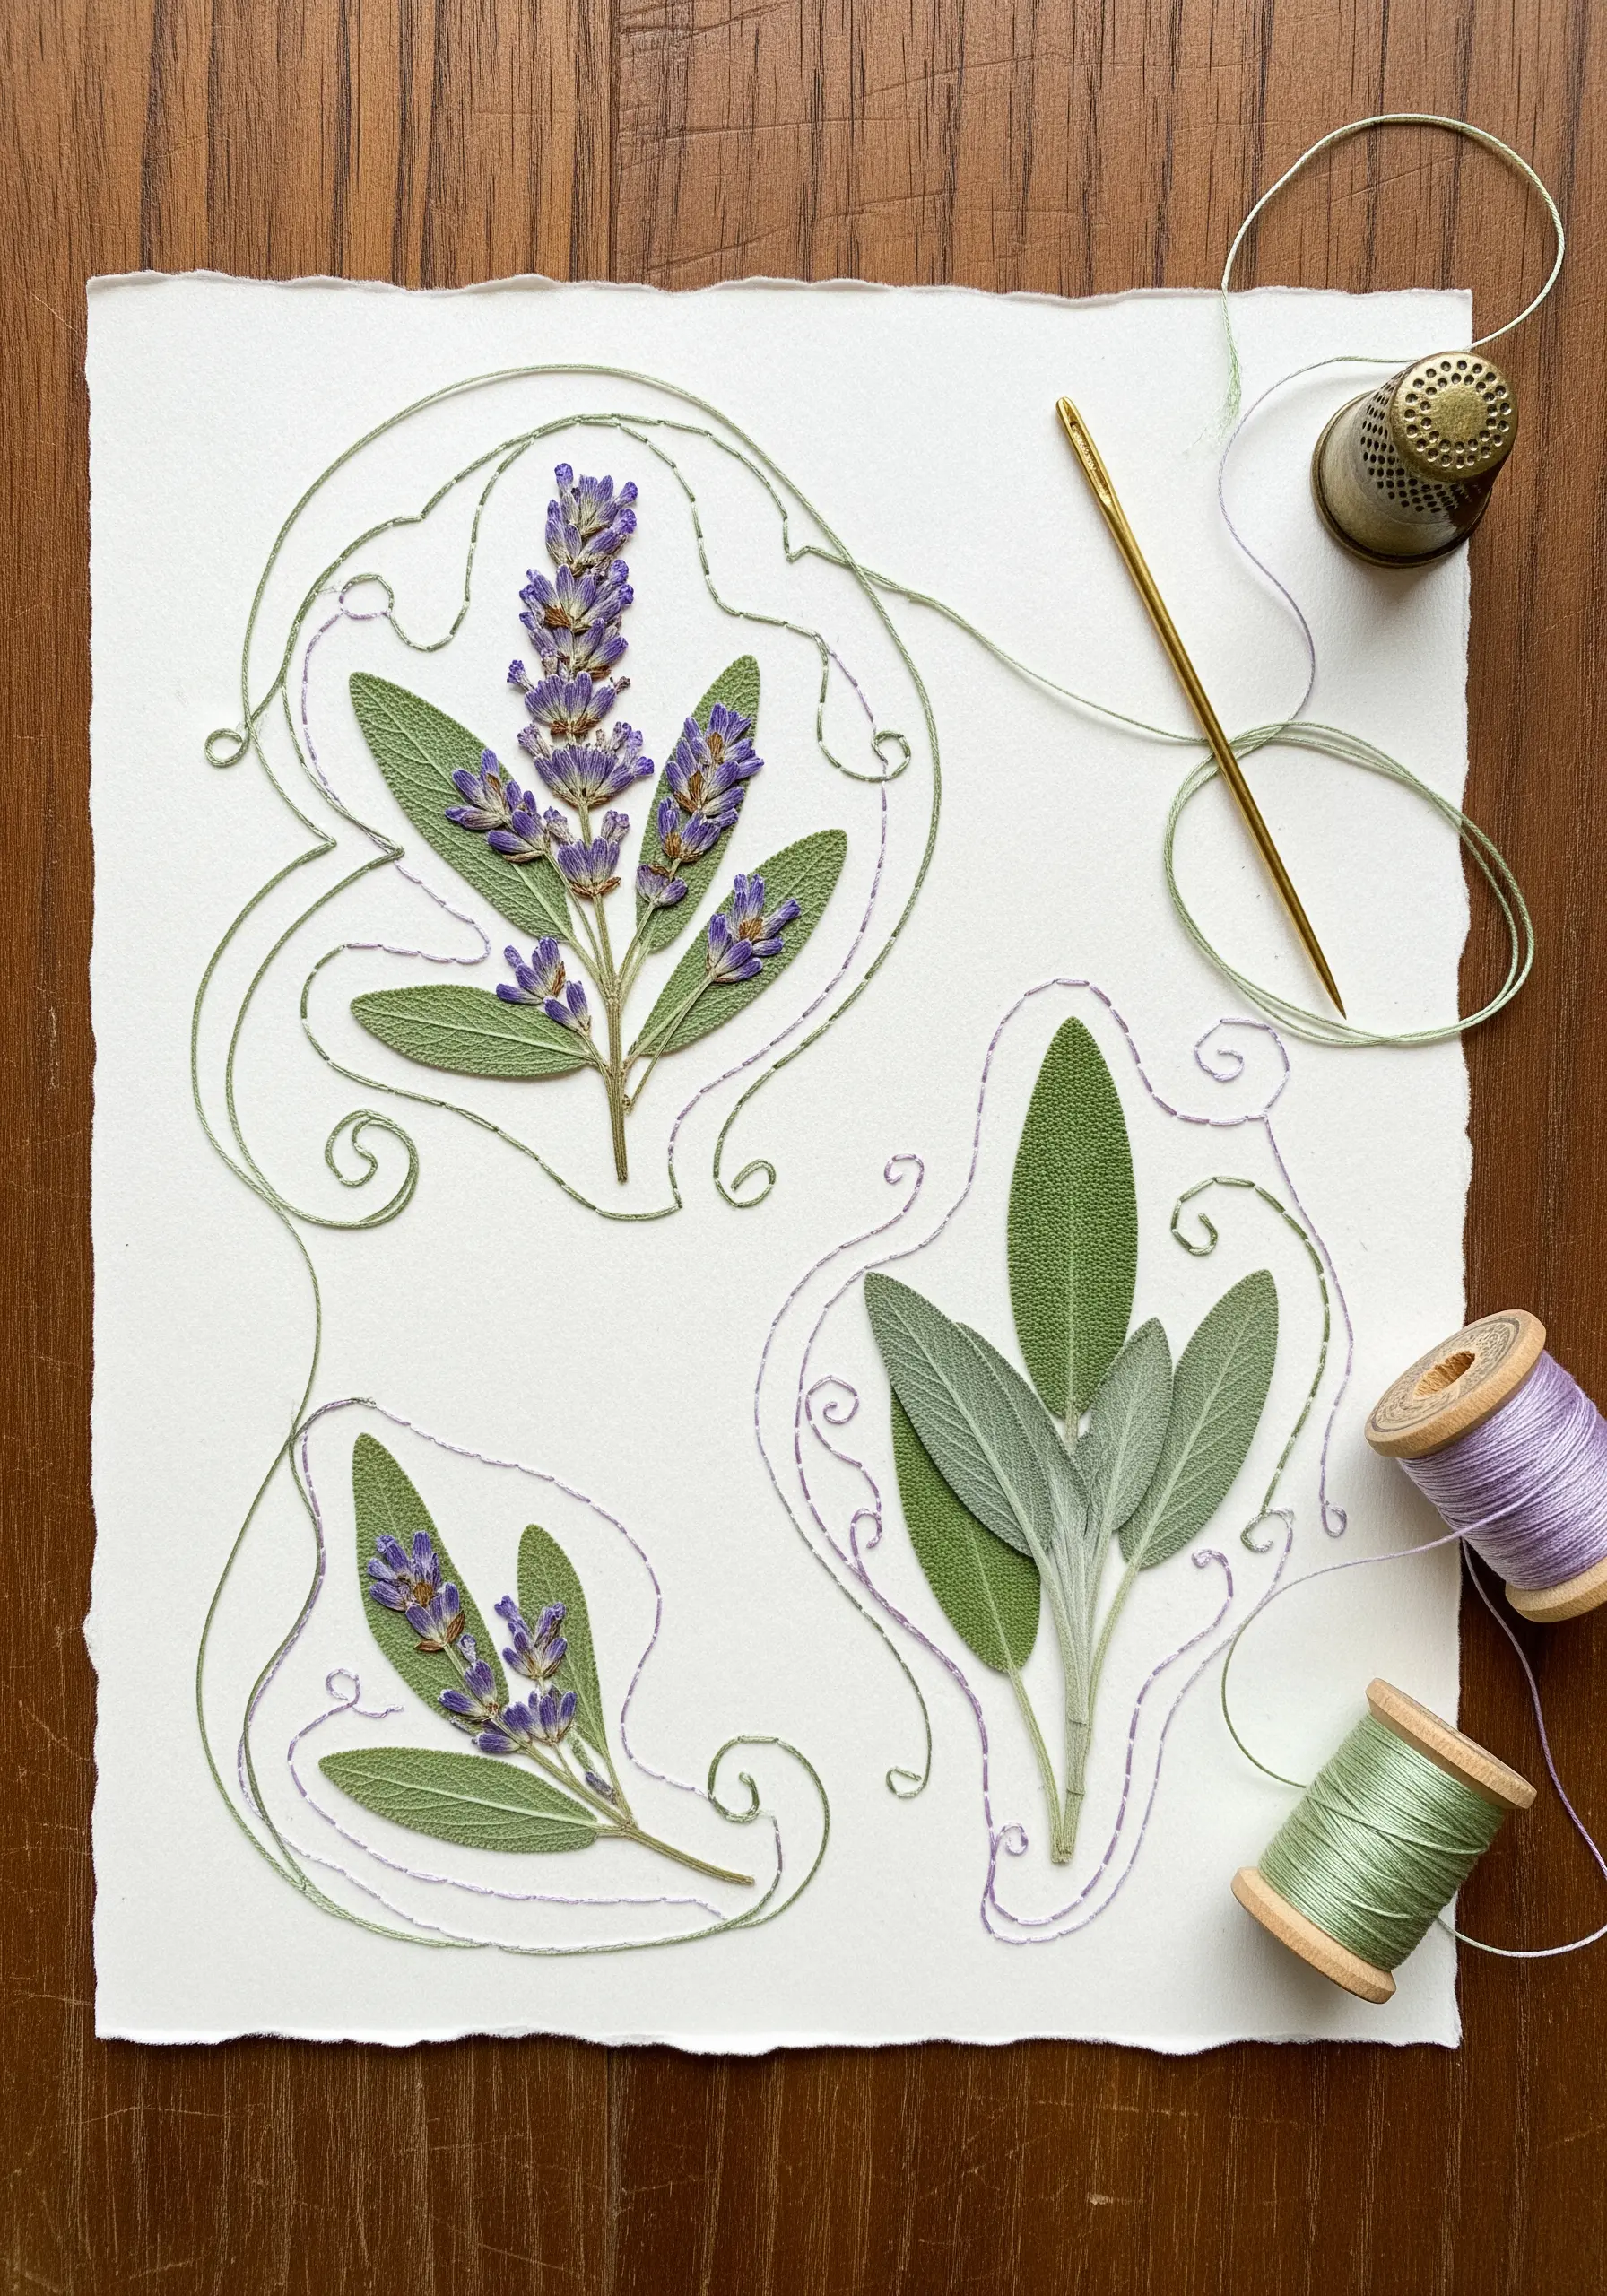
Combine the delicate texture of pressed flowers with the clean line of embroidery by stitching directly onto heavyweight paper.
First, secure your dried lavender or sage leaves with a tiny, hidden dab of archival glue.
Then, using a single strand of floss, couch a decorative thread around the botanical elements to create an elegant, illustrative frame.
Pre-piercing the stitch holes with a fine needle prevents the paper from tearing and ensures your lines are perfectly placed.
This technique transforms natural elements into refined paper art designs, where the thread adds structure without overpowering the organic forms.
2. Layer Vellum for Celestial Depth in Journals
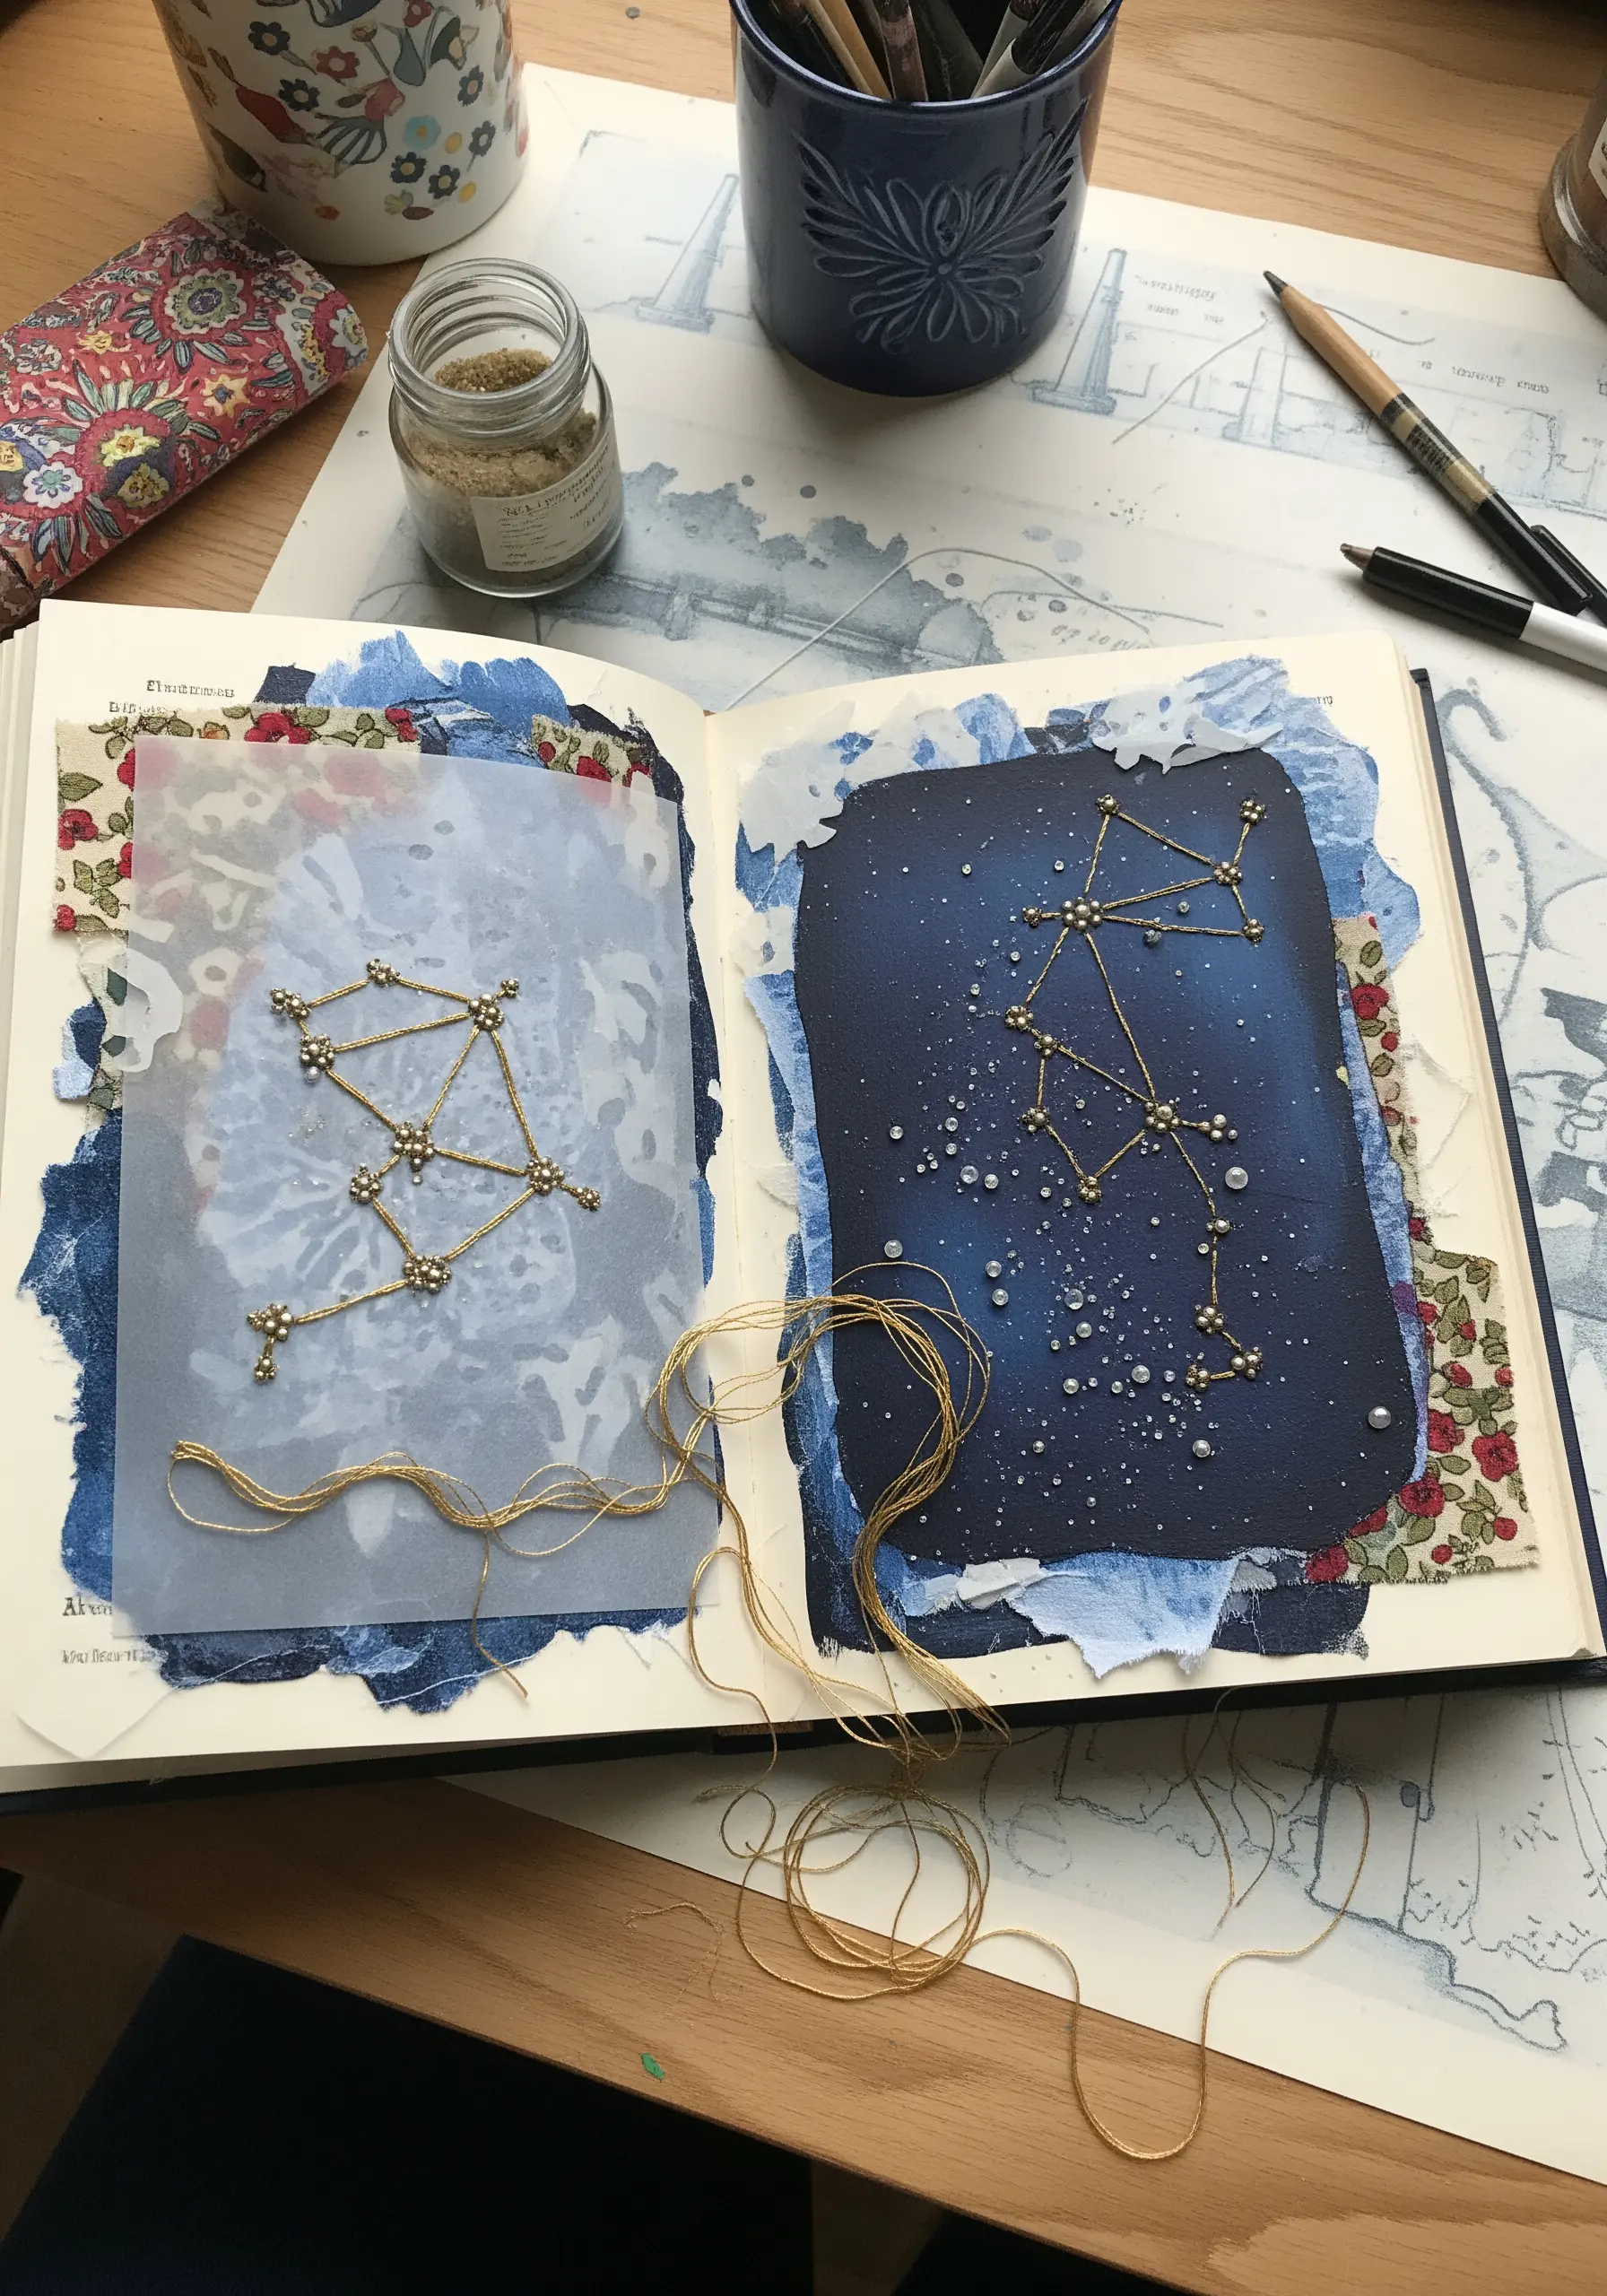
Create an ethereal, layered effect in your art journal by stitching through vellum or other translucent papers.
Start with a painted background—a deep indigo or black works beautifully for a night sky.
Place a sheet of vellum over it to soften the background, then stitch your constellations using a metallic thread to catch the light.
Use small French knots or tiny seed beads for stars; beads offer perfect uniformity and a subtle shimmer.
The layers create a visual depth that makes your embroidered mixed media feel more like a tiny, contained universe.
3. Integrate Woven Fiber into Painted Canvases
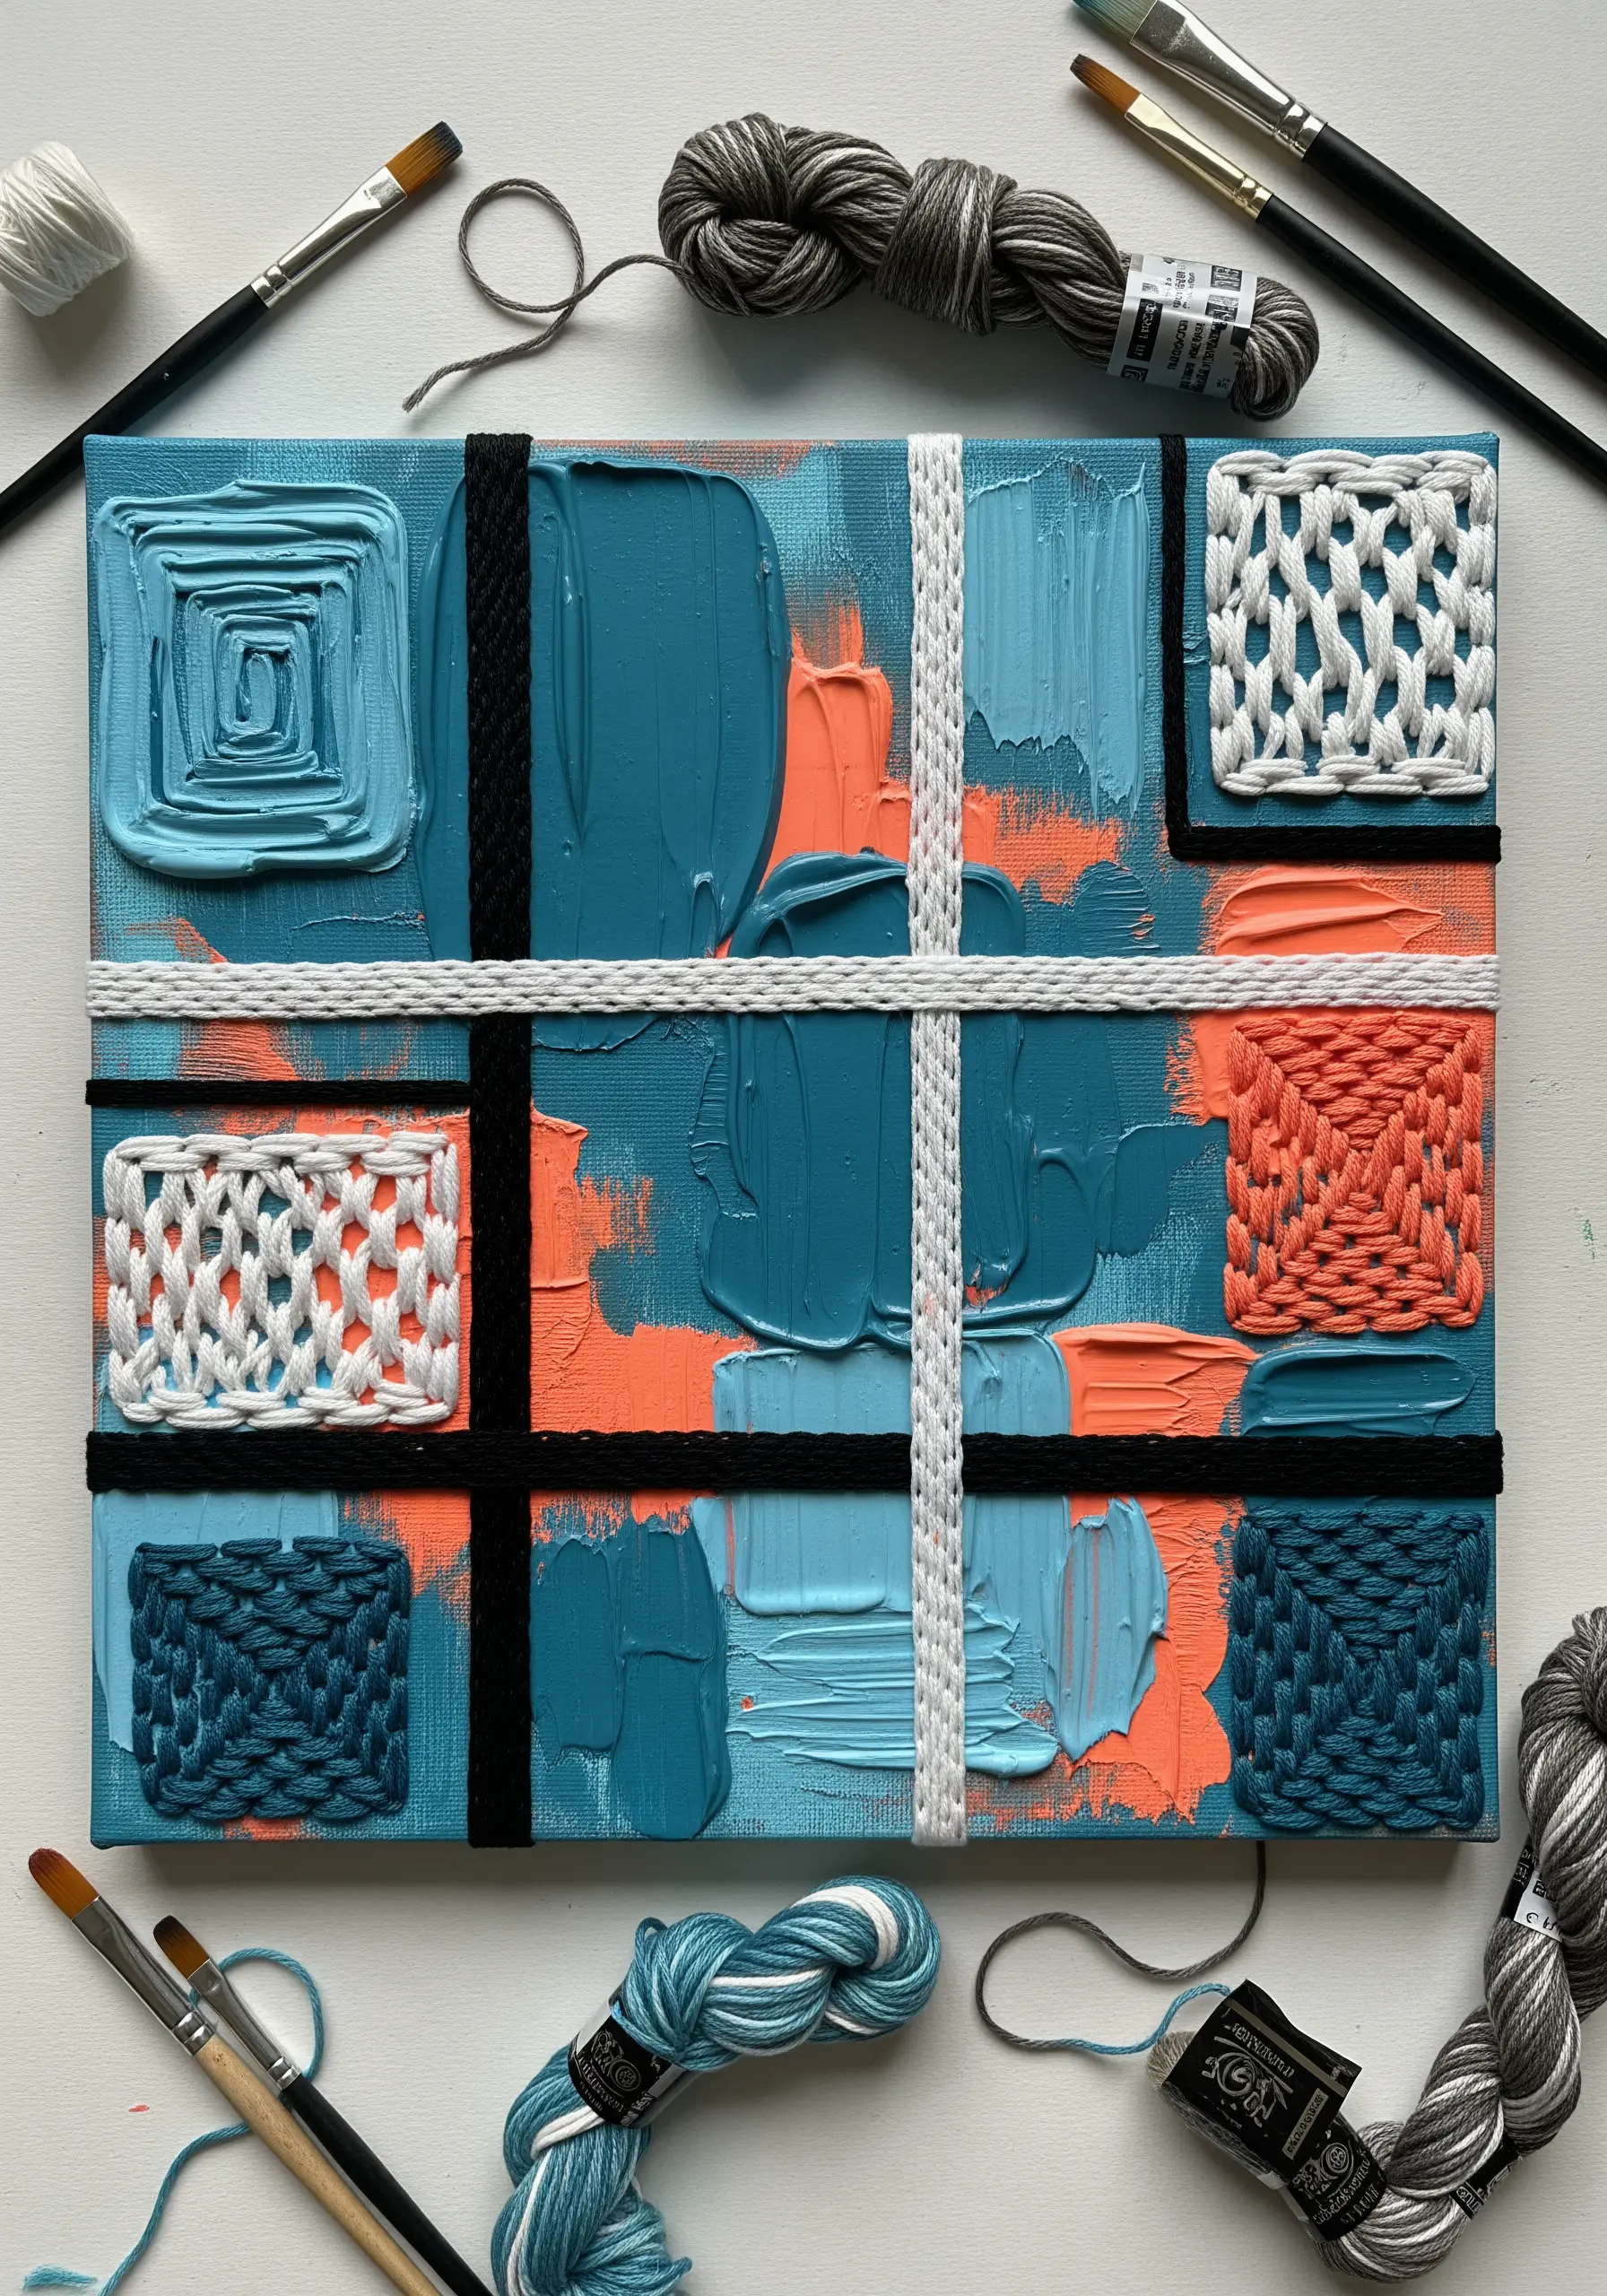
Contrast the smooth, expressive texture of acrylic paint with the soft, geometric structure of woven yarn.
Apply thick, impasto-style paint to your canvas, leaving intentional gaps or blocks in your composition.
On a small cardboard loom, create woven patches using thick, textural yarn that complements your color palette.
You can then either stitch these woven squares directly onto the canvas or mount them from behind for a cleaner, recessed look.
The result is a dynamic piece of yarn wall art where different materials activate the surface in surprising ways.
4. Embellish Vintage Photographs with 3D Florals
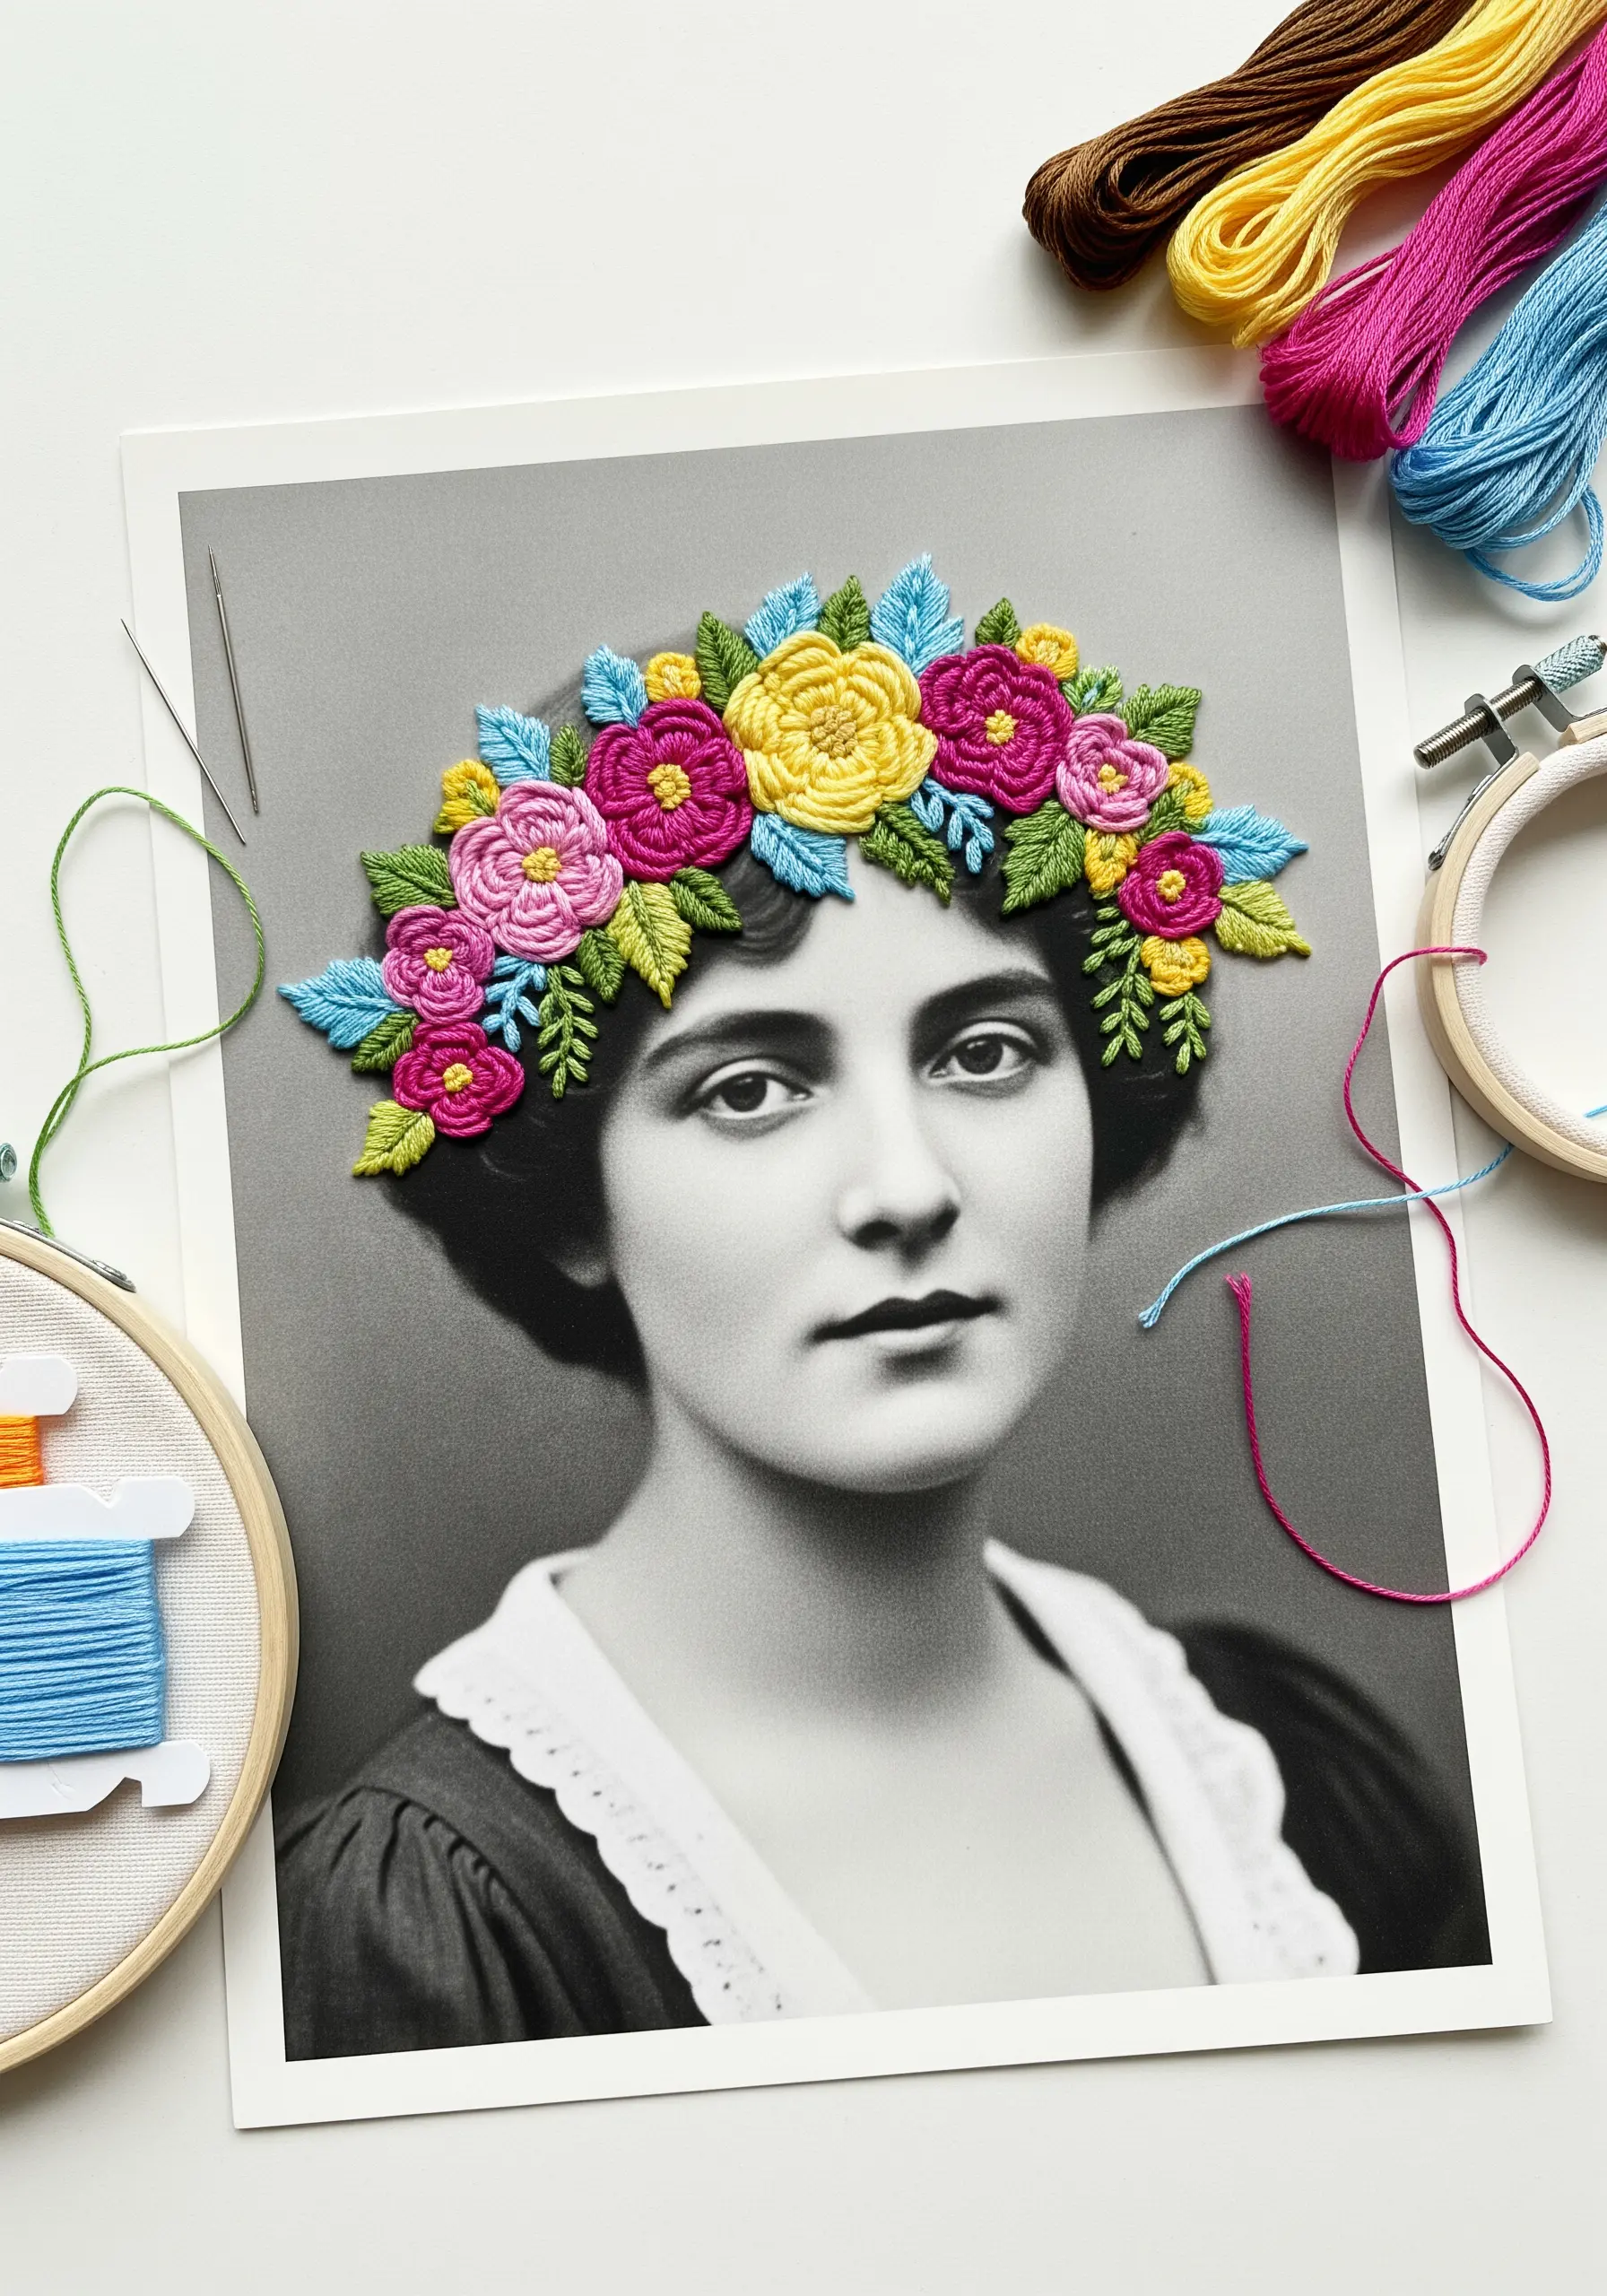
Bring new life to old portraits by embroidering directly onto a photo print.
Choose a high-quality matte print on cardstock, as it’s sturdy enough to handle stitching.
Use dimensional stitches like the woven wheel (for roses), bullion knots (for buds), and French knots (for filler flowers) to create a floral crown that feels truly three-dimensional.
Varying the number of strands—from six for bold petals to two for delicate leaves—enhances the sense of depth.
This transforms a simple photograph into one of your most treasured floral framed embroidery ideas, blending nostalgia with vibrant, tactile art.
5. Center an Embroidered Patch in a Fabric Collage
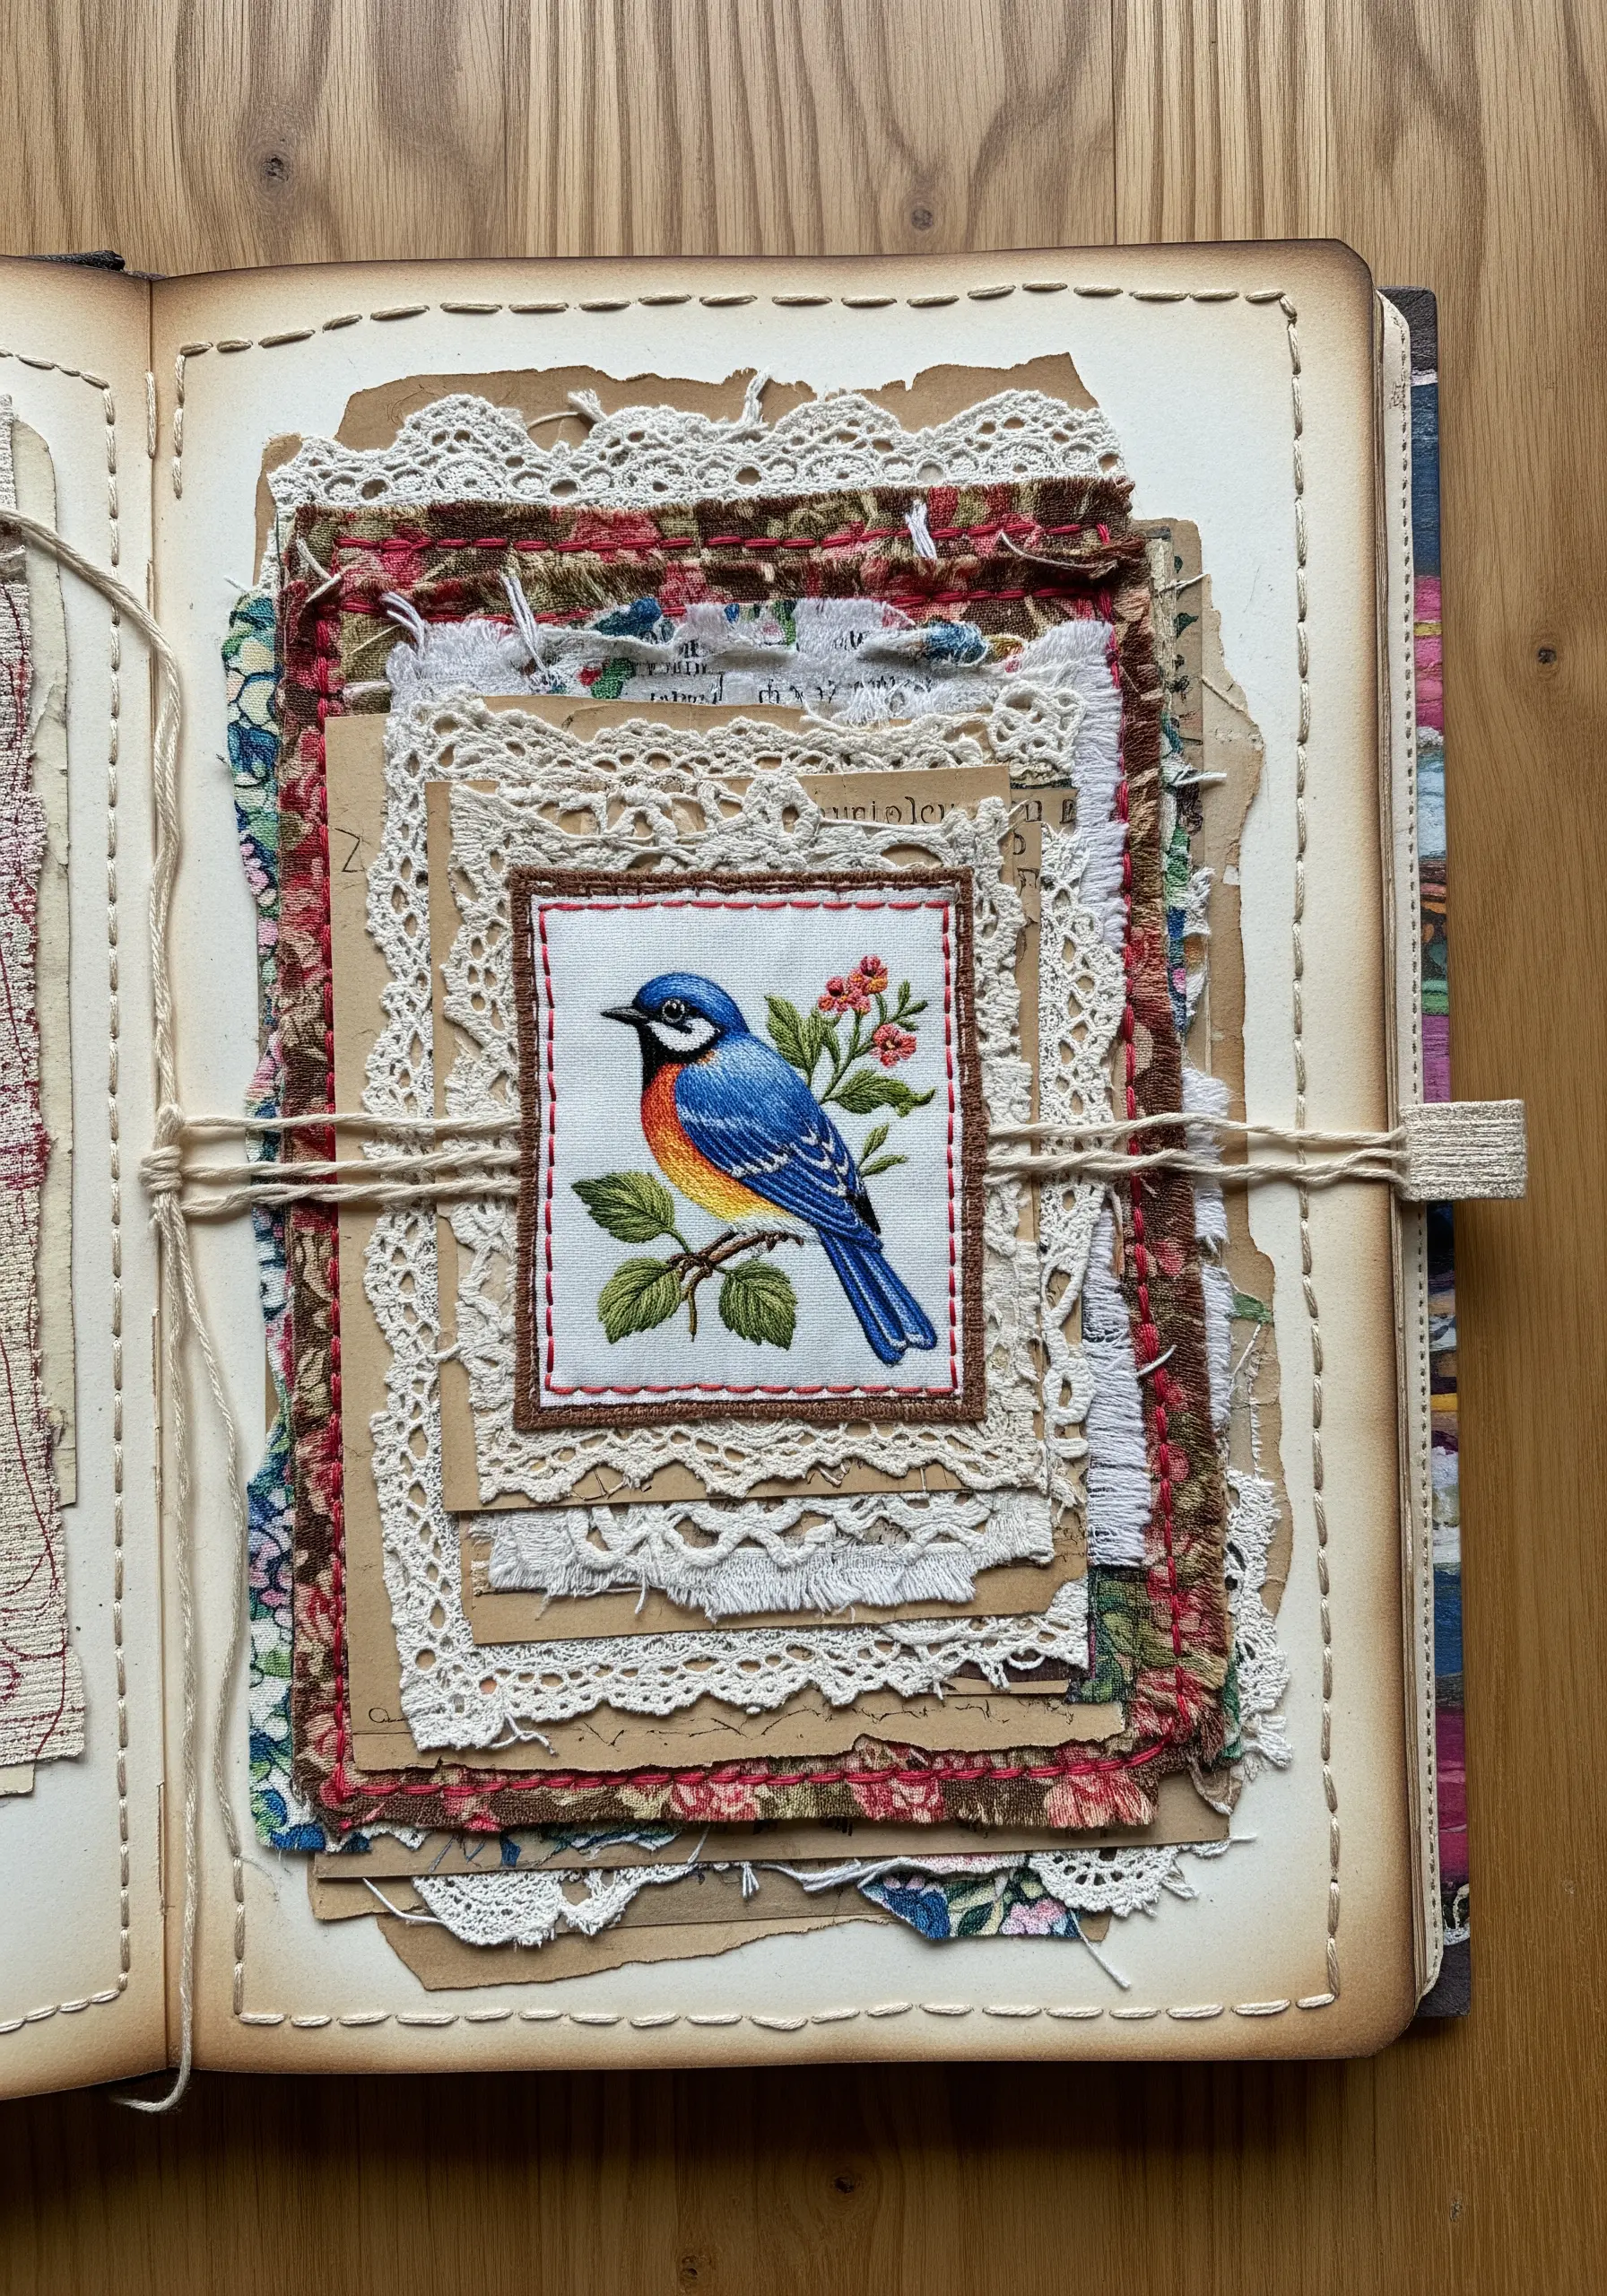
Give your detailed embroidery a rich, narrative context by making it the centerpiece of a layered collage.
Complete your main motif—like a bird or botanical—on a separate, stable piece of fabric first.
Then, build your background by layering scraps of vintage fabric, lace, and textured paper, allowing the raw edges to show.
Place your finished embroidery on top and secure all the layers with a simple, decorative running stitch around the perimeter.
This approach allows your fine stitching to shine while being supported by a backdrop that tells its own story, creating beautiful fabric collage embroidery compositions.
6. Combine Fabric Paint and Sequins for a Luminous Finish
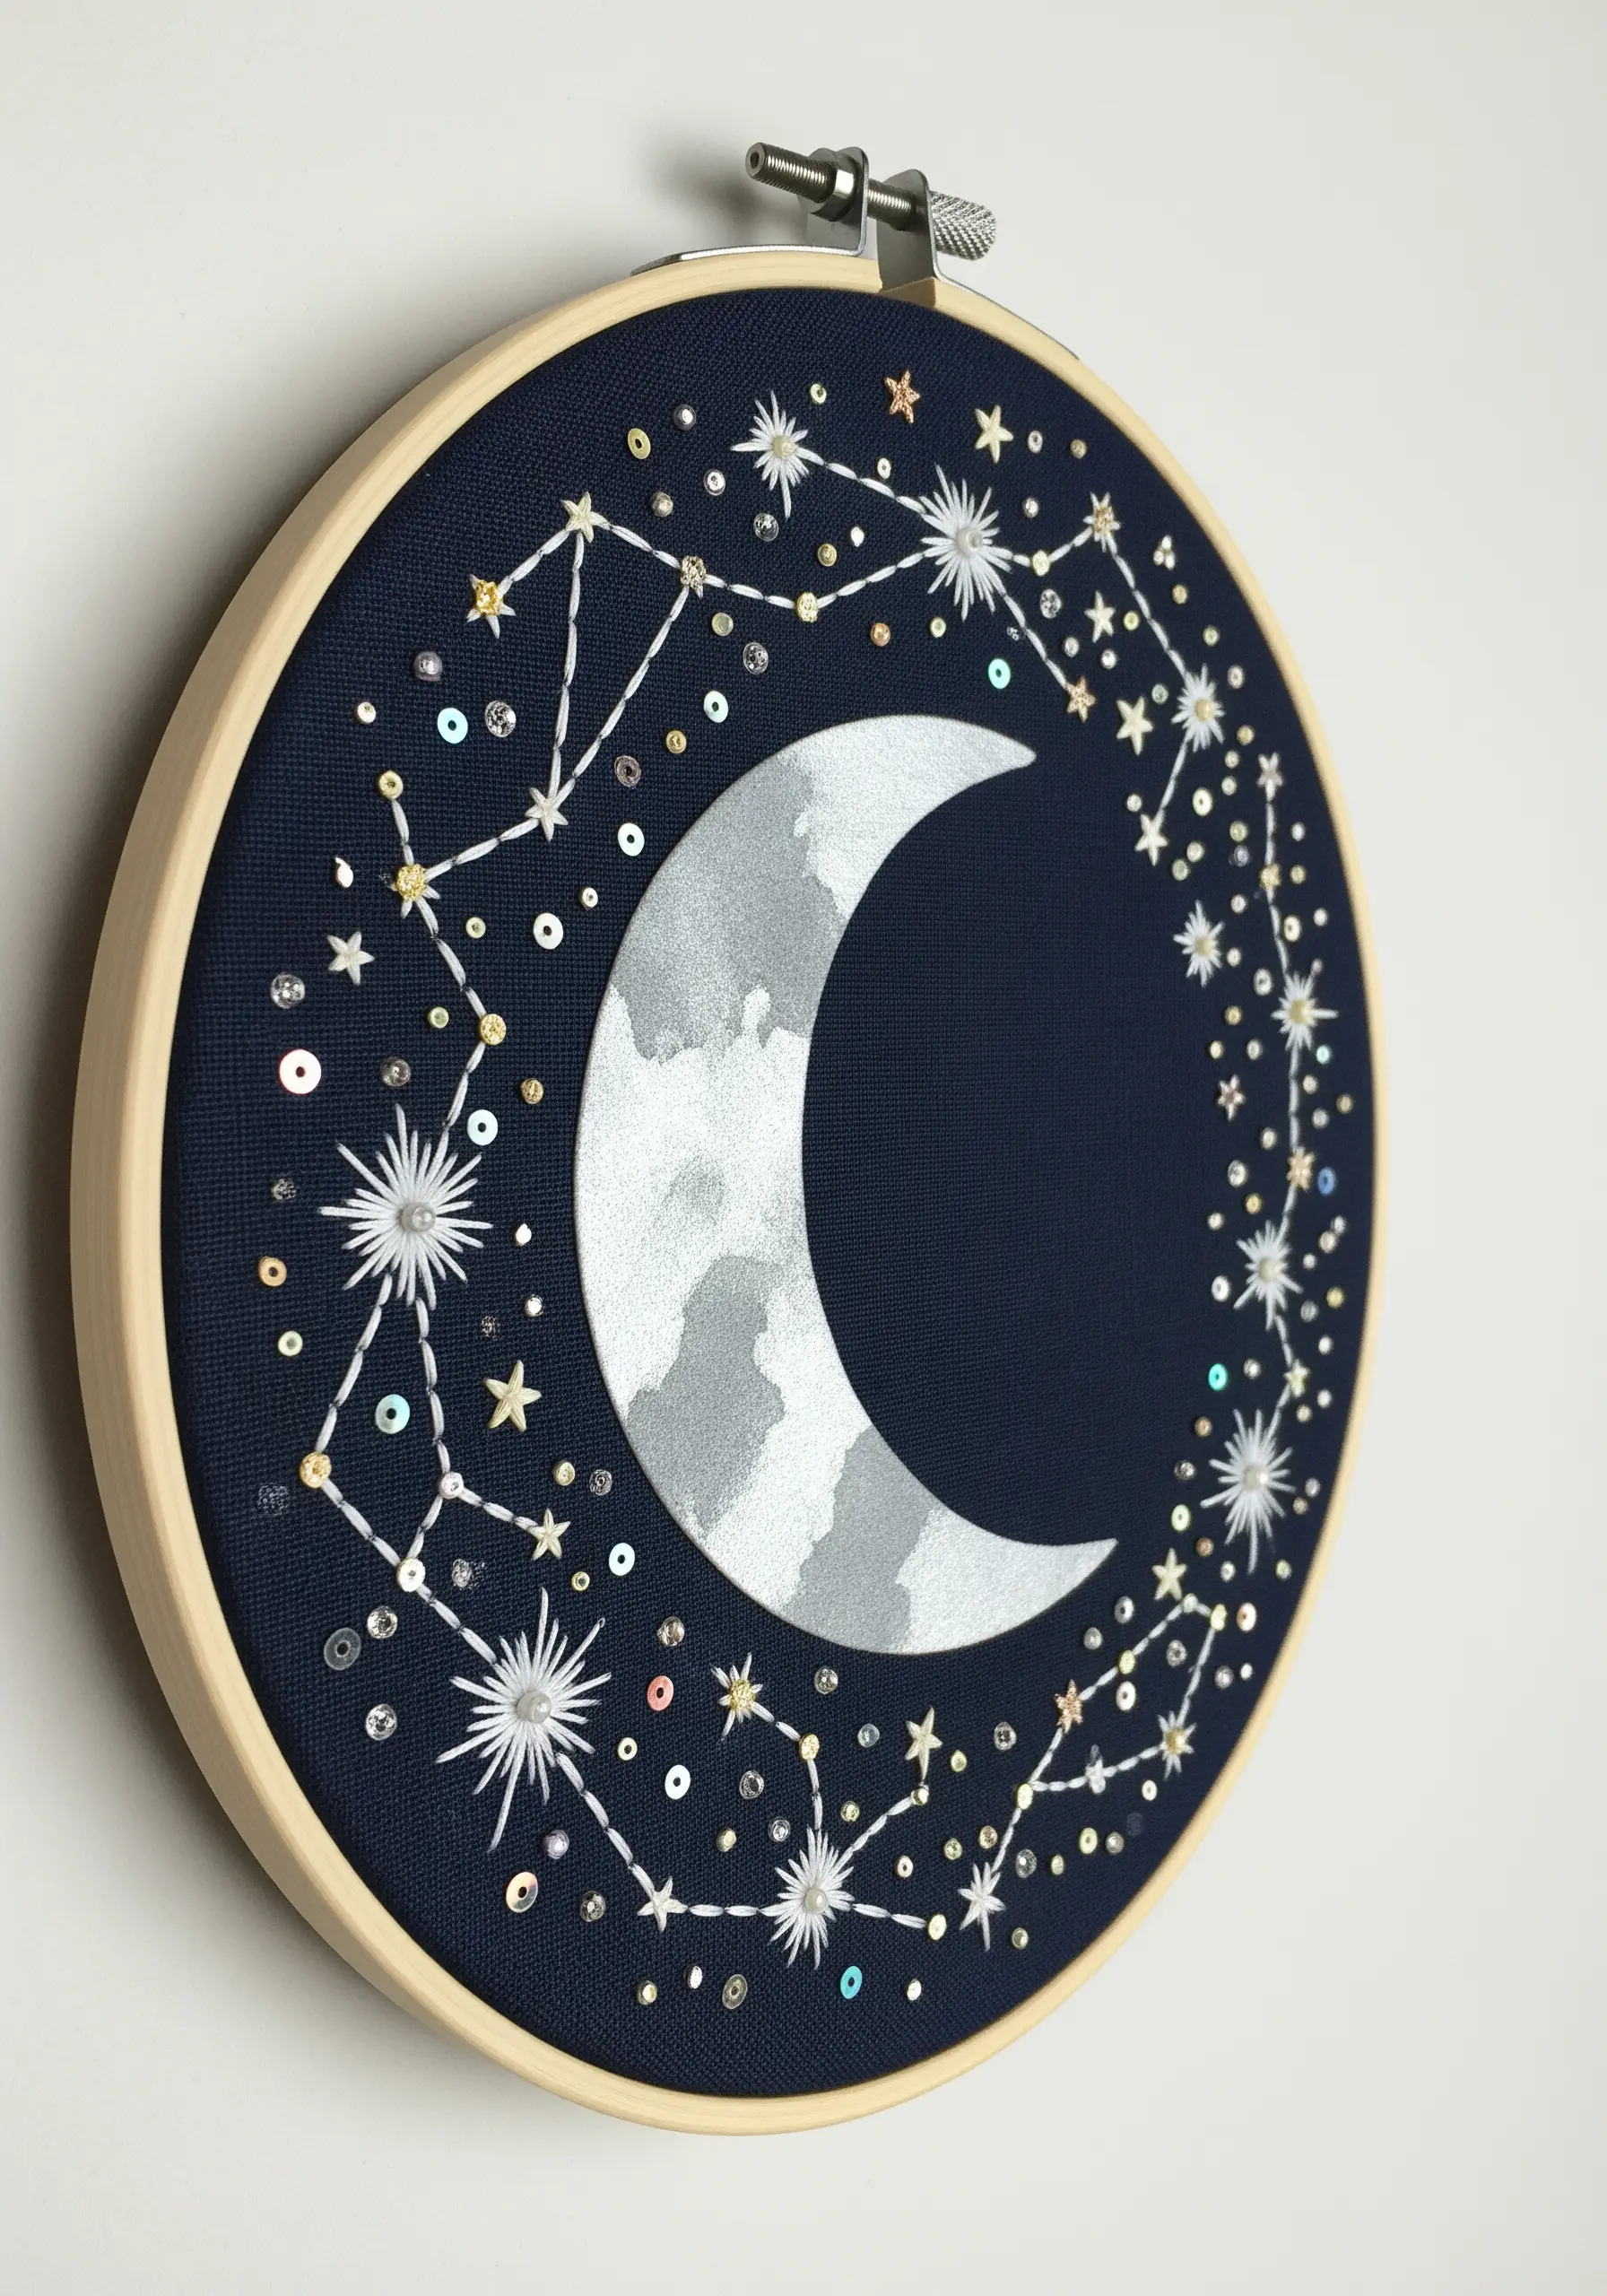
Create a dynamic celestial scene by letting paint and thread perform different tasks.
Use a metallic fabric paint for the moon; its smooth, opaque surface provides a perfect contrast to the texture of thread.
To ensure the paint doesn’t crack, mix it with a fabric medium and let it cure completely before you begin stitching.
For the stars, combine simple star stitches with strategically placed sequins, securing each one with a tiny seed bead in the center for a professional finish and extra sparkle.
This mix of materials elevates simple celestial micro embroidery ideas into captivating hoop art.
7. Elevate Paper Gift Tags with Watercolor and Stitches
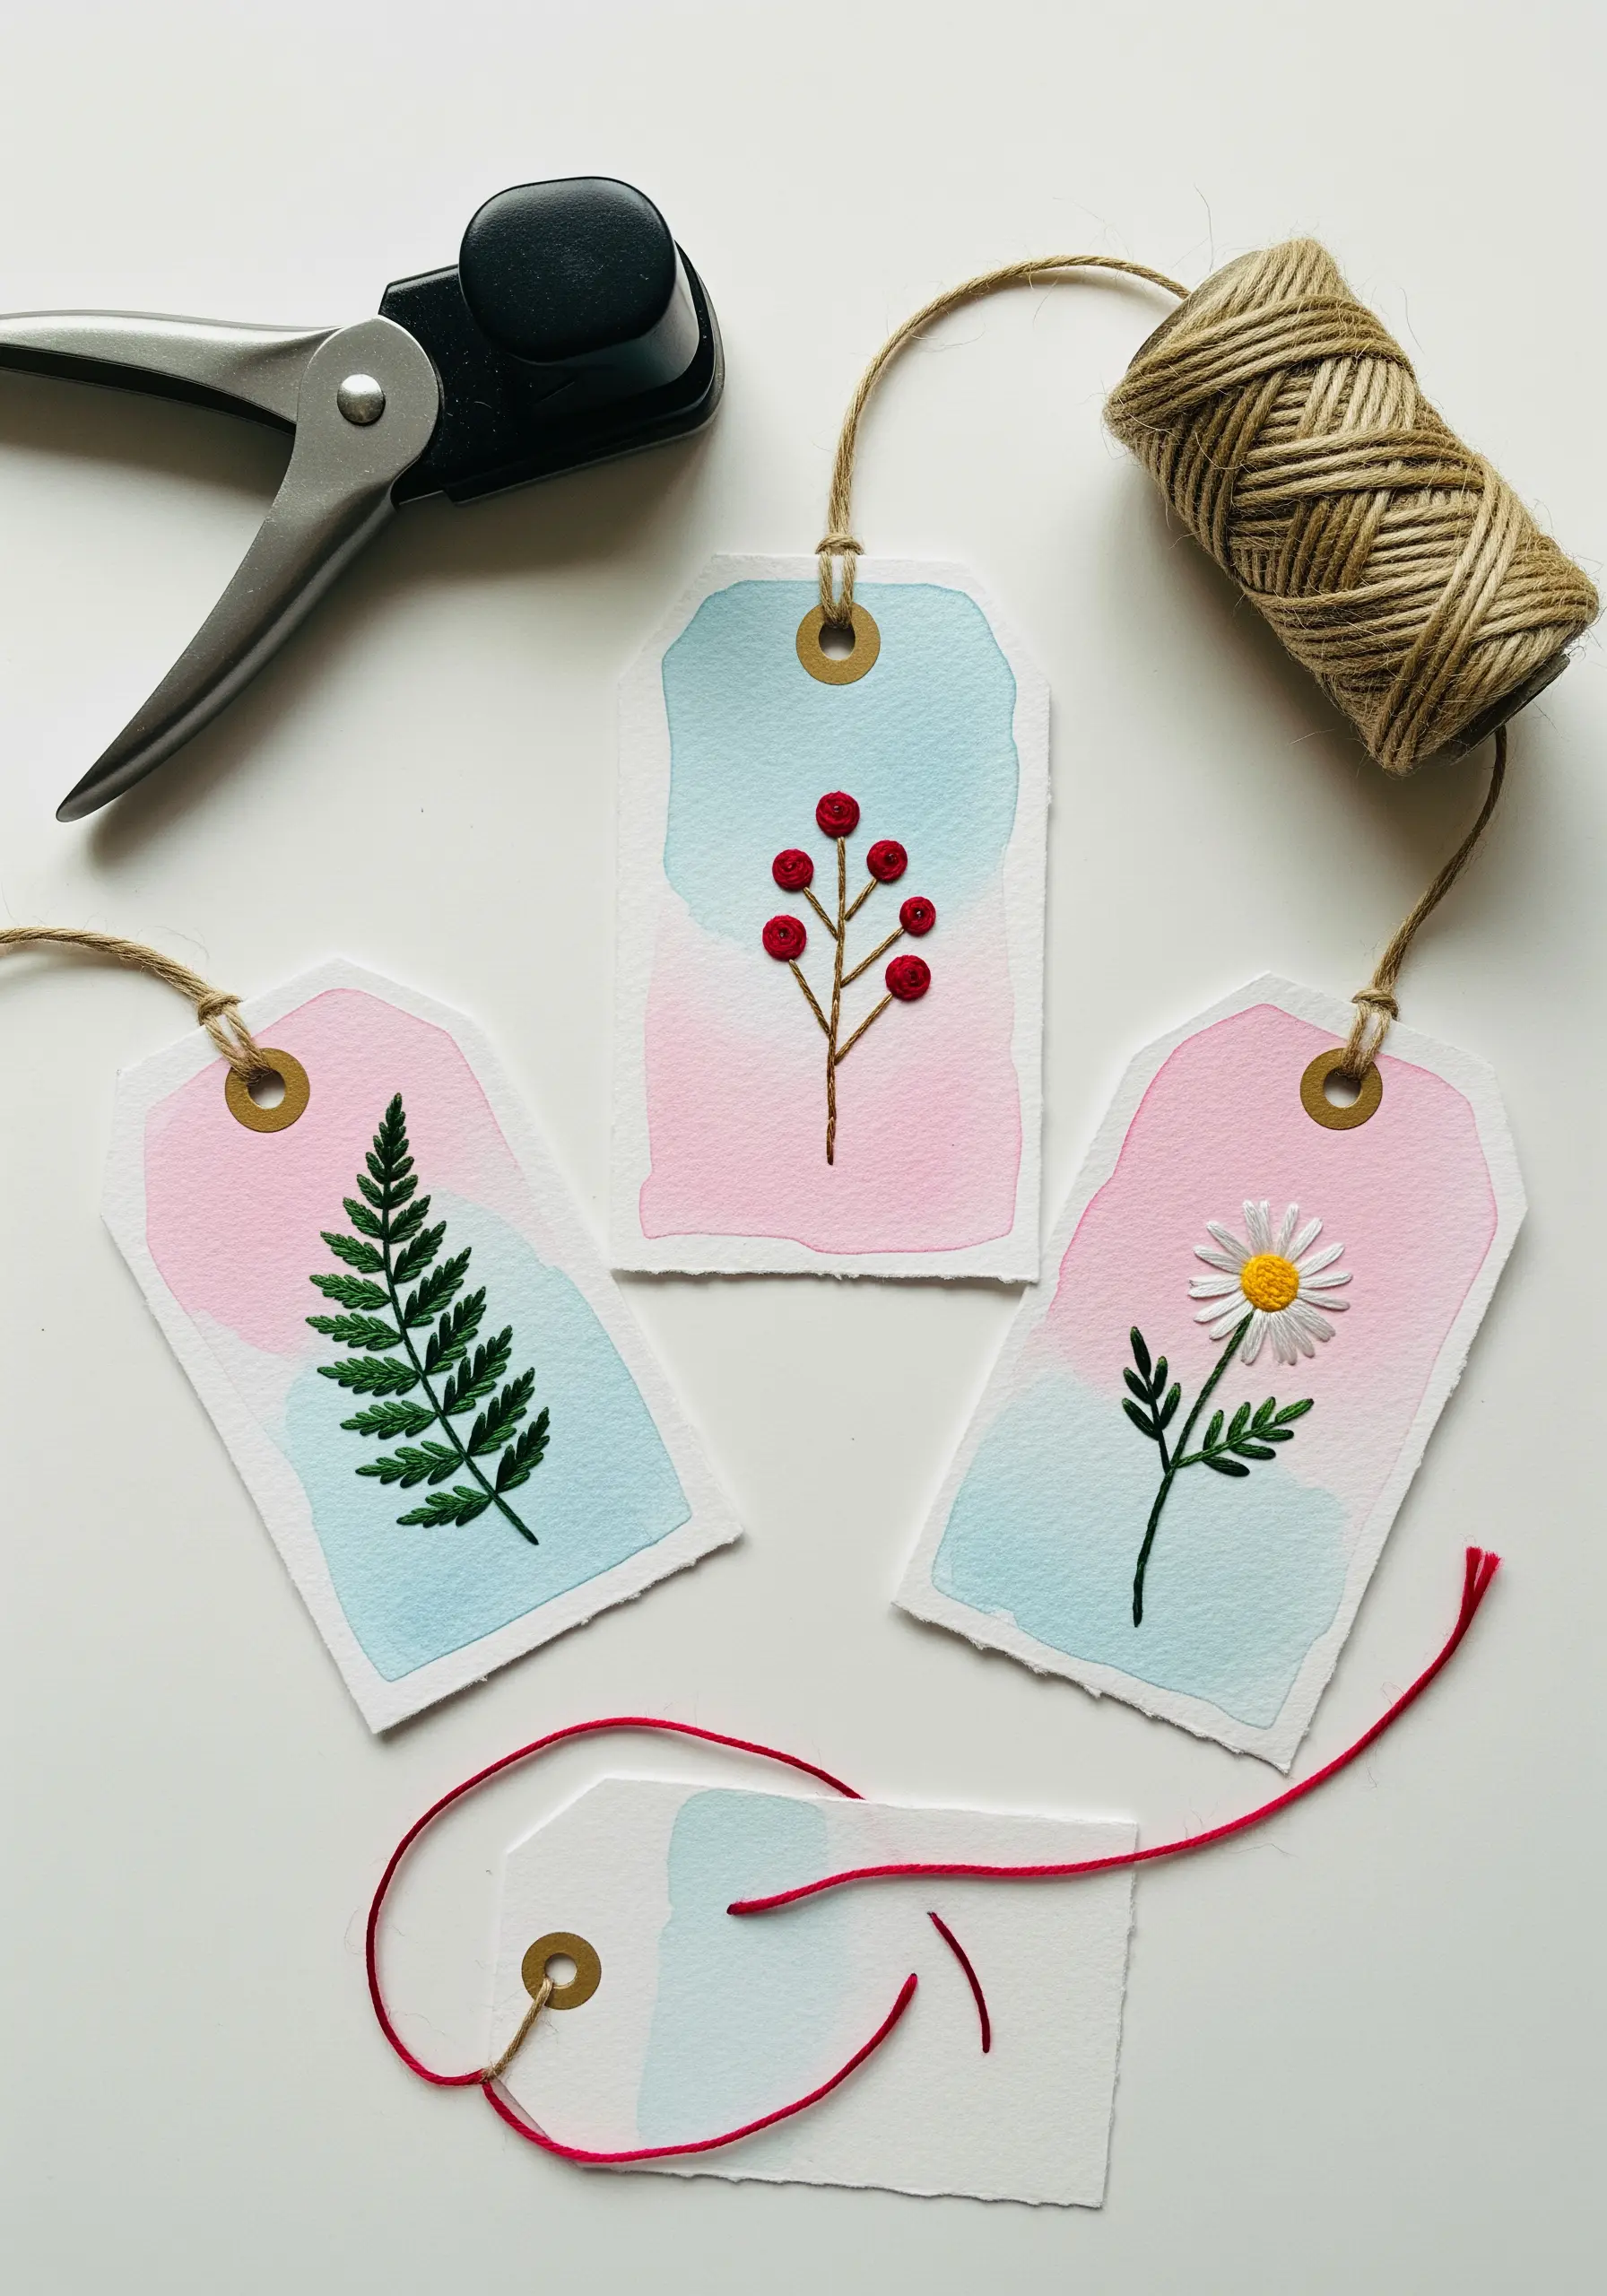
Turn simple gift tags into miniature artworks by combining a soft watercolor wash with delicate embroidery.
Start by applying a light wash of color to heavyweight (140 lb/300 gsm) watercolor paper, letting the colors blend naturally.
Once completely dry, add a simple embroidered motif, like a fern or a daisy, using just one or two strands of floss.
Always pre-pierce your holes with a needle to avoid tearing the paper and to keep your stitches neat.
The combination of soft color and crisp stitches makes for beautiful, small handmade projects that double as thoughtful gifts.
8. Build a Landscape with Layered Fabric Scraps
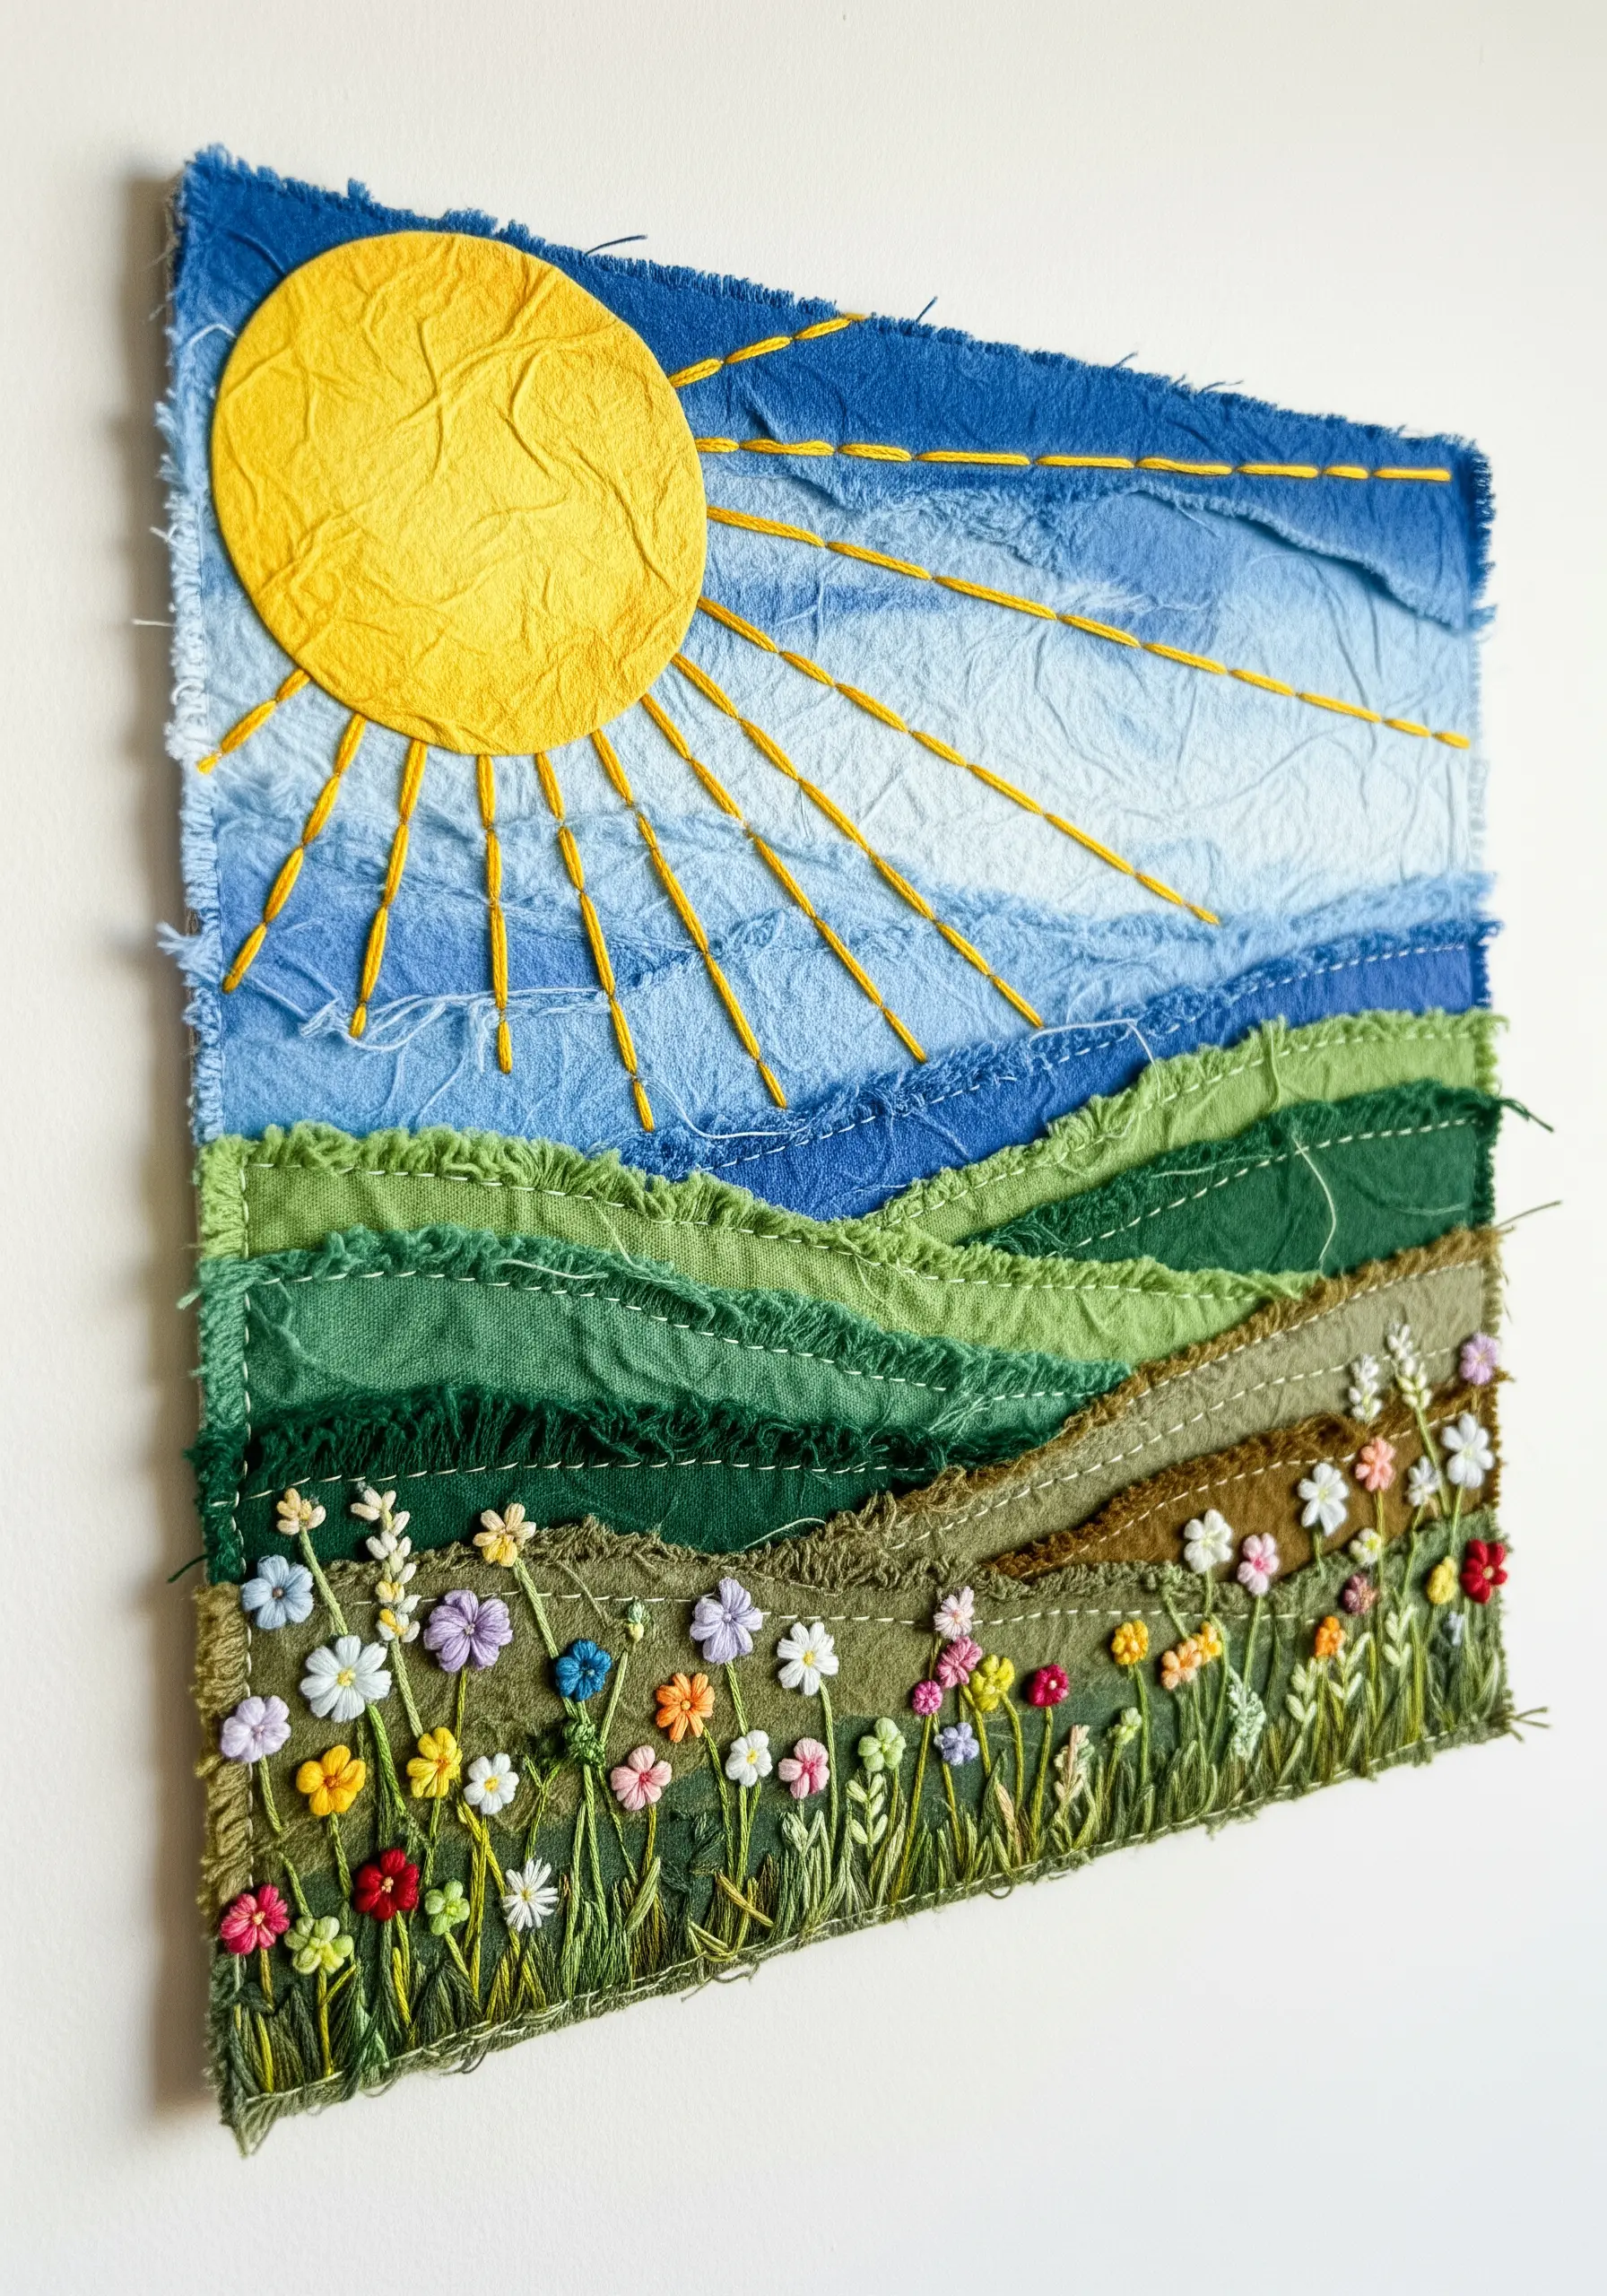
Create a painterly, textured landscape using torn strips of fabric instead of paint.
Arrange different colored and textured fabrics to represent hills, fields, and sky, allowing the frayed, raw edges to define the organic lines of your scene.
Secure the layers with a simple running stitch, which becomes part of the design itself.
Finally, add fine details with embroidery—lazy daisy stitches for wildflowers, long stitches for sunbeams, or French knots for texture.
This is one of the most effective ways to capture nature’s textures using materials you already have.
9. Craft a Realistic Flower Center with Knotted Stitches
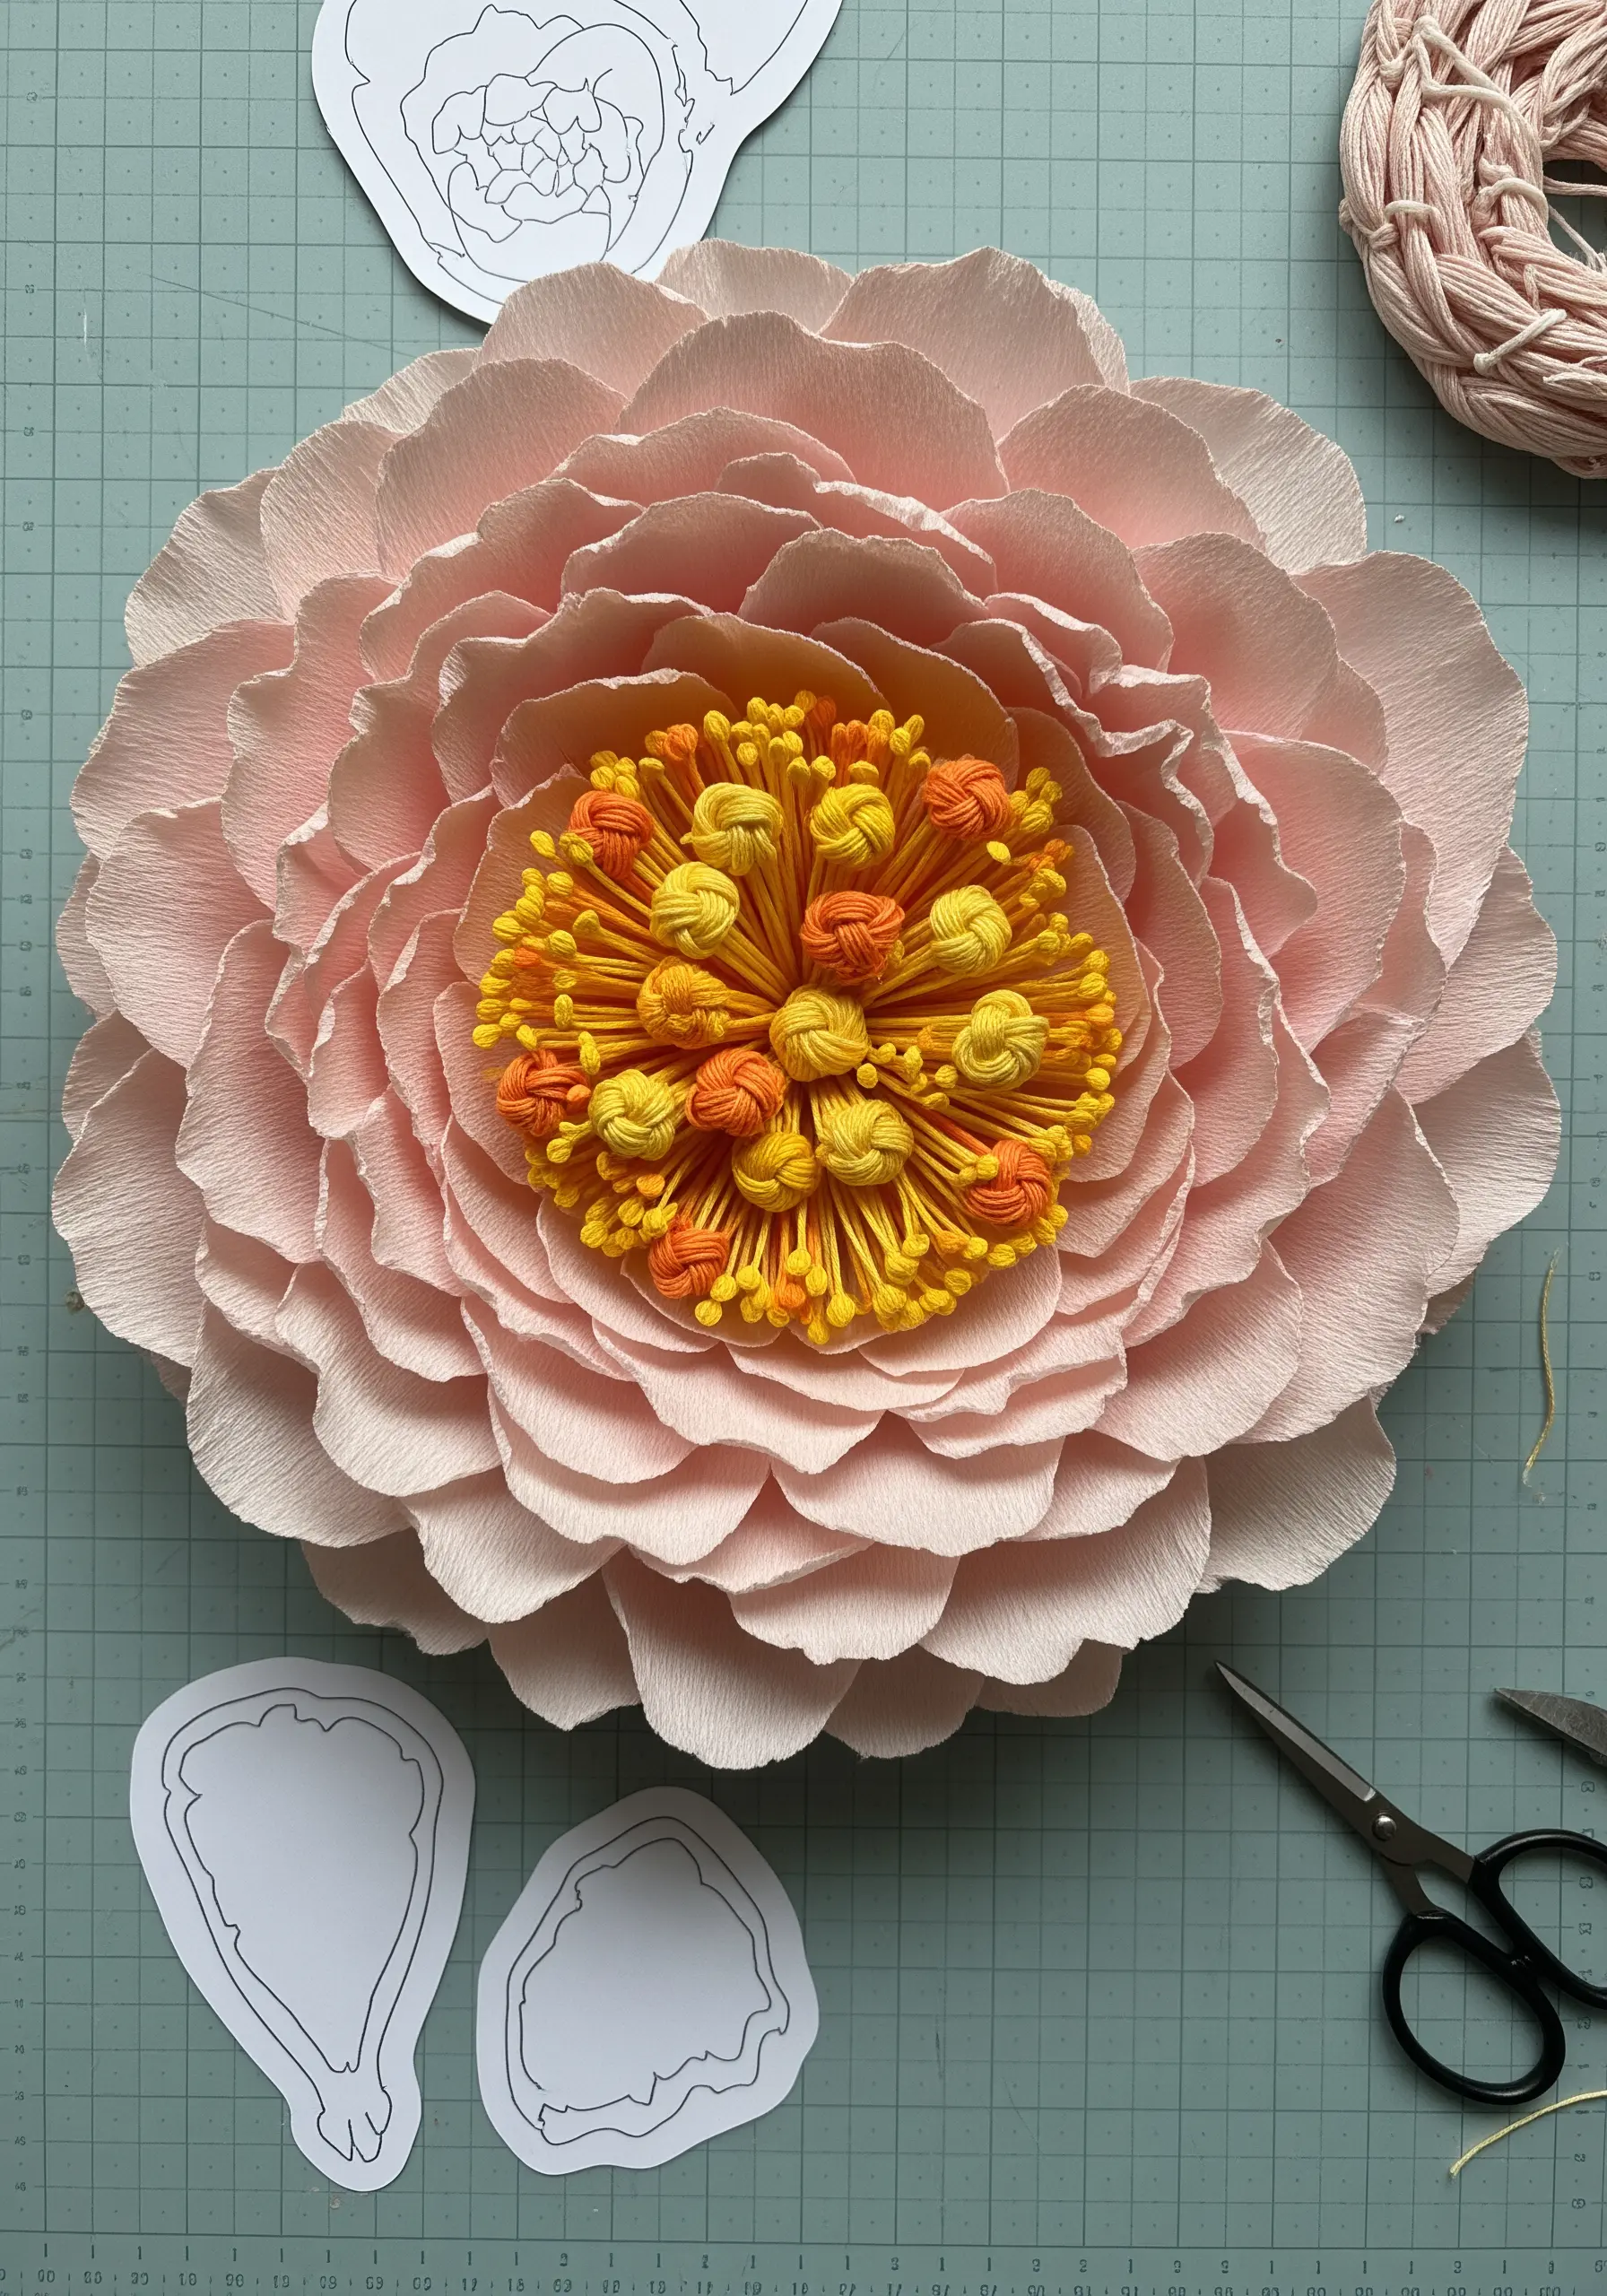
Give your large-scale paper flowers a stunningly realistic focal point by creating the center with embroidery.
Instead of using paper, create the stamen and pistil with a dense cluster of French or Colonial knots on a small felt circle base.
Varying the thread colors (e.g., mixing shades of yellow and orange) and the tightness of the knots adds incredible depth and realism.
The soft, tactile quality of the knotted thread provides a perfect textural contrast to the crisp folds of the crepe paper petals.
It’s one of those unexpected paper art embroidery ideas that completely transforms the final piece.
10. Design an Elegant Lantern with Vellum and Metallic Thread
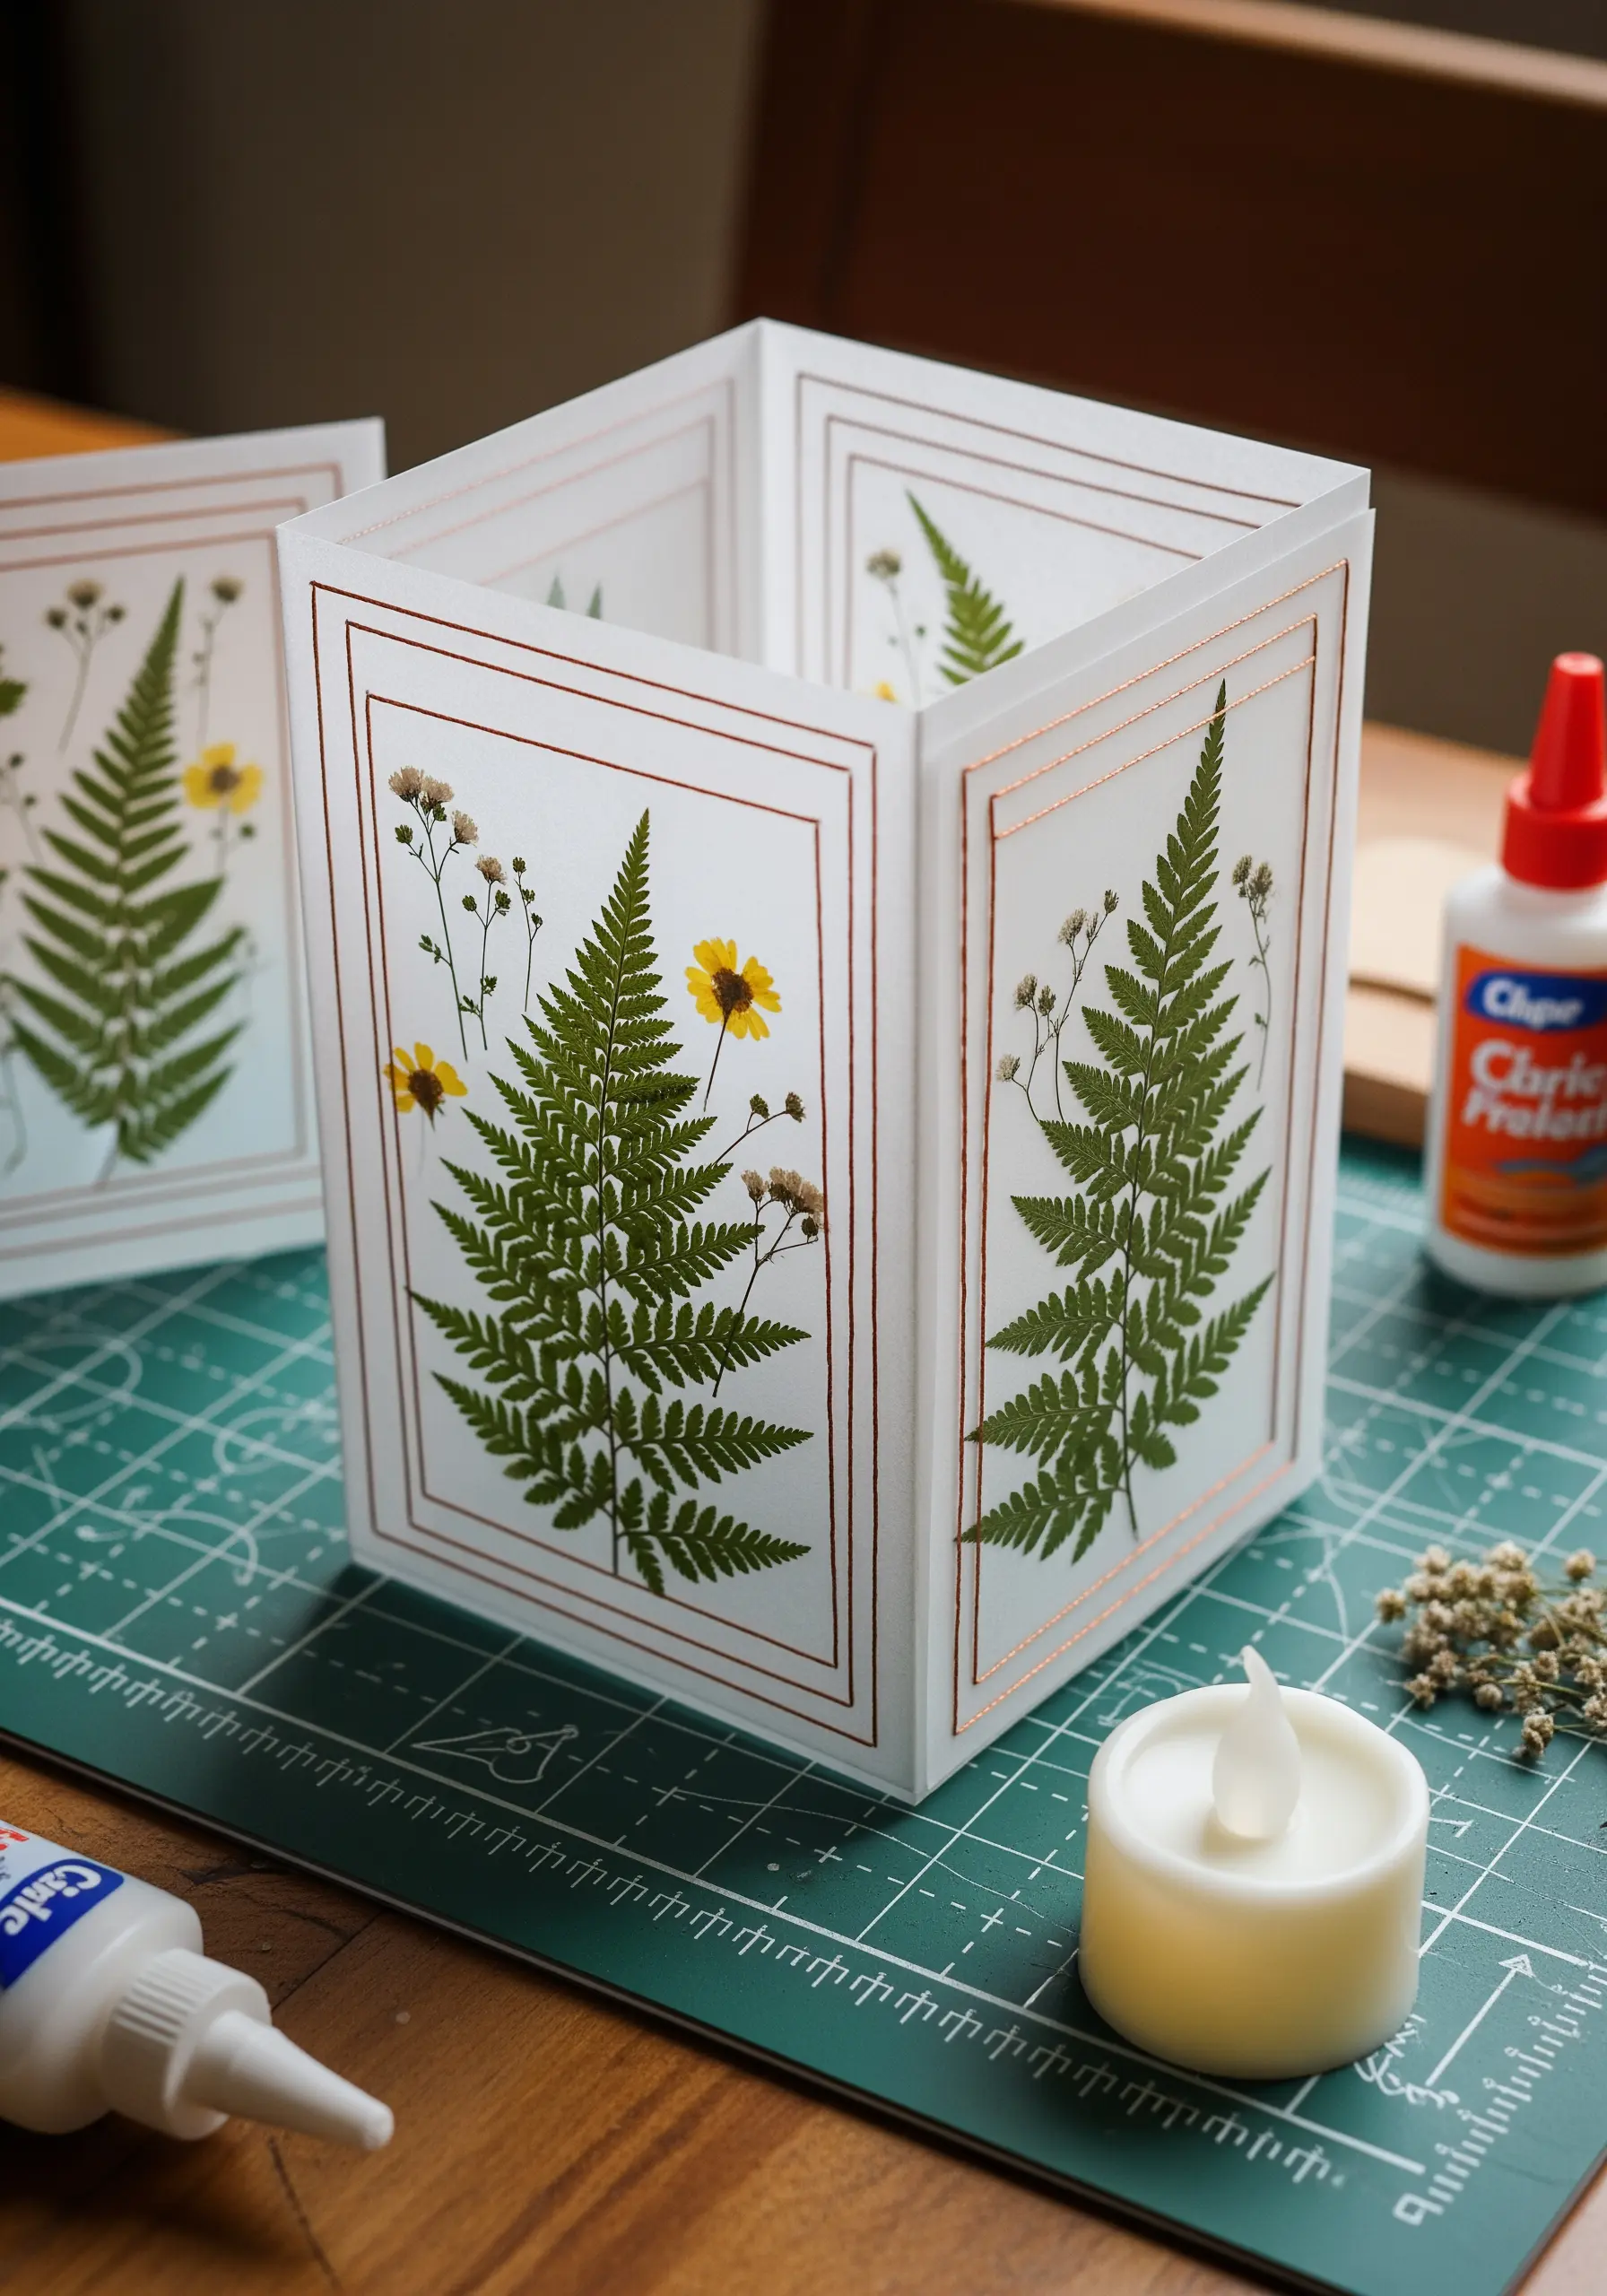
Construct a delicate, glowing lantern by combining pressed botanicals with the clean lines of metallic embroidery thread.
Carefully glue pressed ferns or flowers onto vellum panels.
Once dry, use a simple backstitch with a shimmering copper or gold thread to create a modern, geometric border around each botanical element.
The metallic thread catches the light beautifully, adding a touch of sophistication and structure that frames the organic shapes within.
This project is a perfect example of how paper art DIYs can be both simple and incredibly elegant.
11. Create Padded Lettering Over a Collage Base

Make your embroidered text the undeniable hero of a busy composition by using a padded satin stitch technique.
First, create your vibrant mixed-media collage on a journal cover or canvas board using paper, paint, and fabric scraps.
To create the raised letters, cut the shapes from a piece of felt, tack them into place, and then cover them completely with smooth satin stitches.
This underlying layer of felt is the key to achieving that satisfying, puffy dimension that lifts the letters off the surface, turning simple words into a tactile statement.
It’s a wonderful way to personalize journals and daily planners.
12. Illustrate Flowing Hair with Fabric and Paper Strips
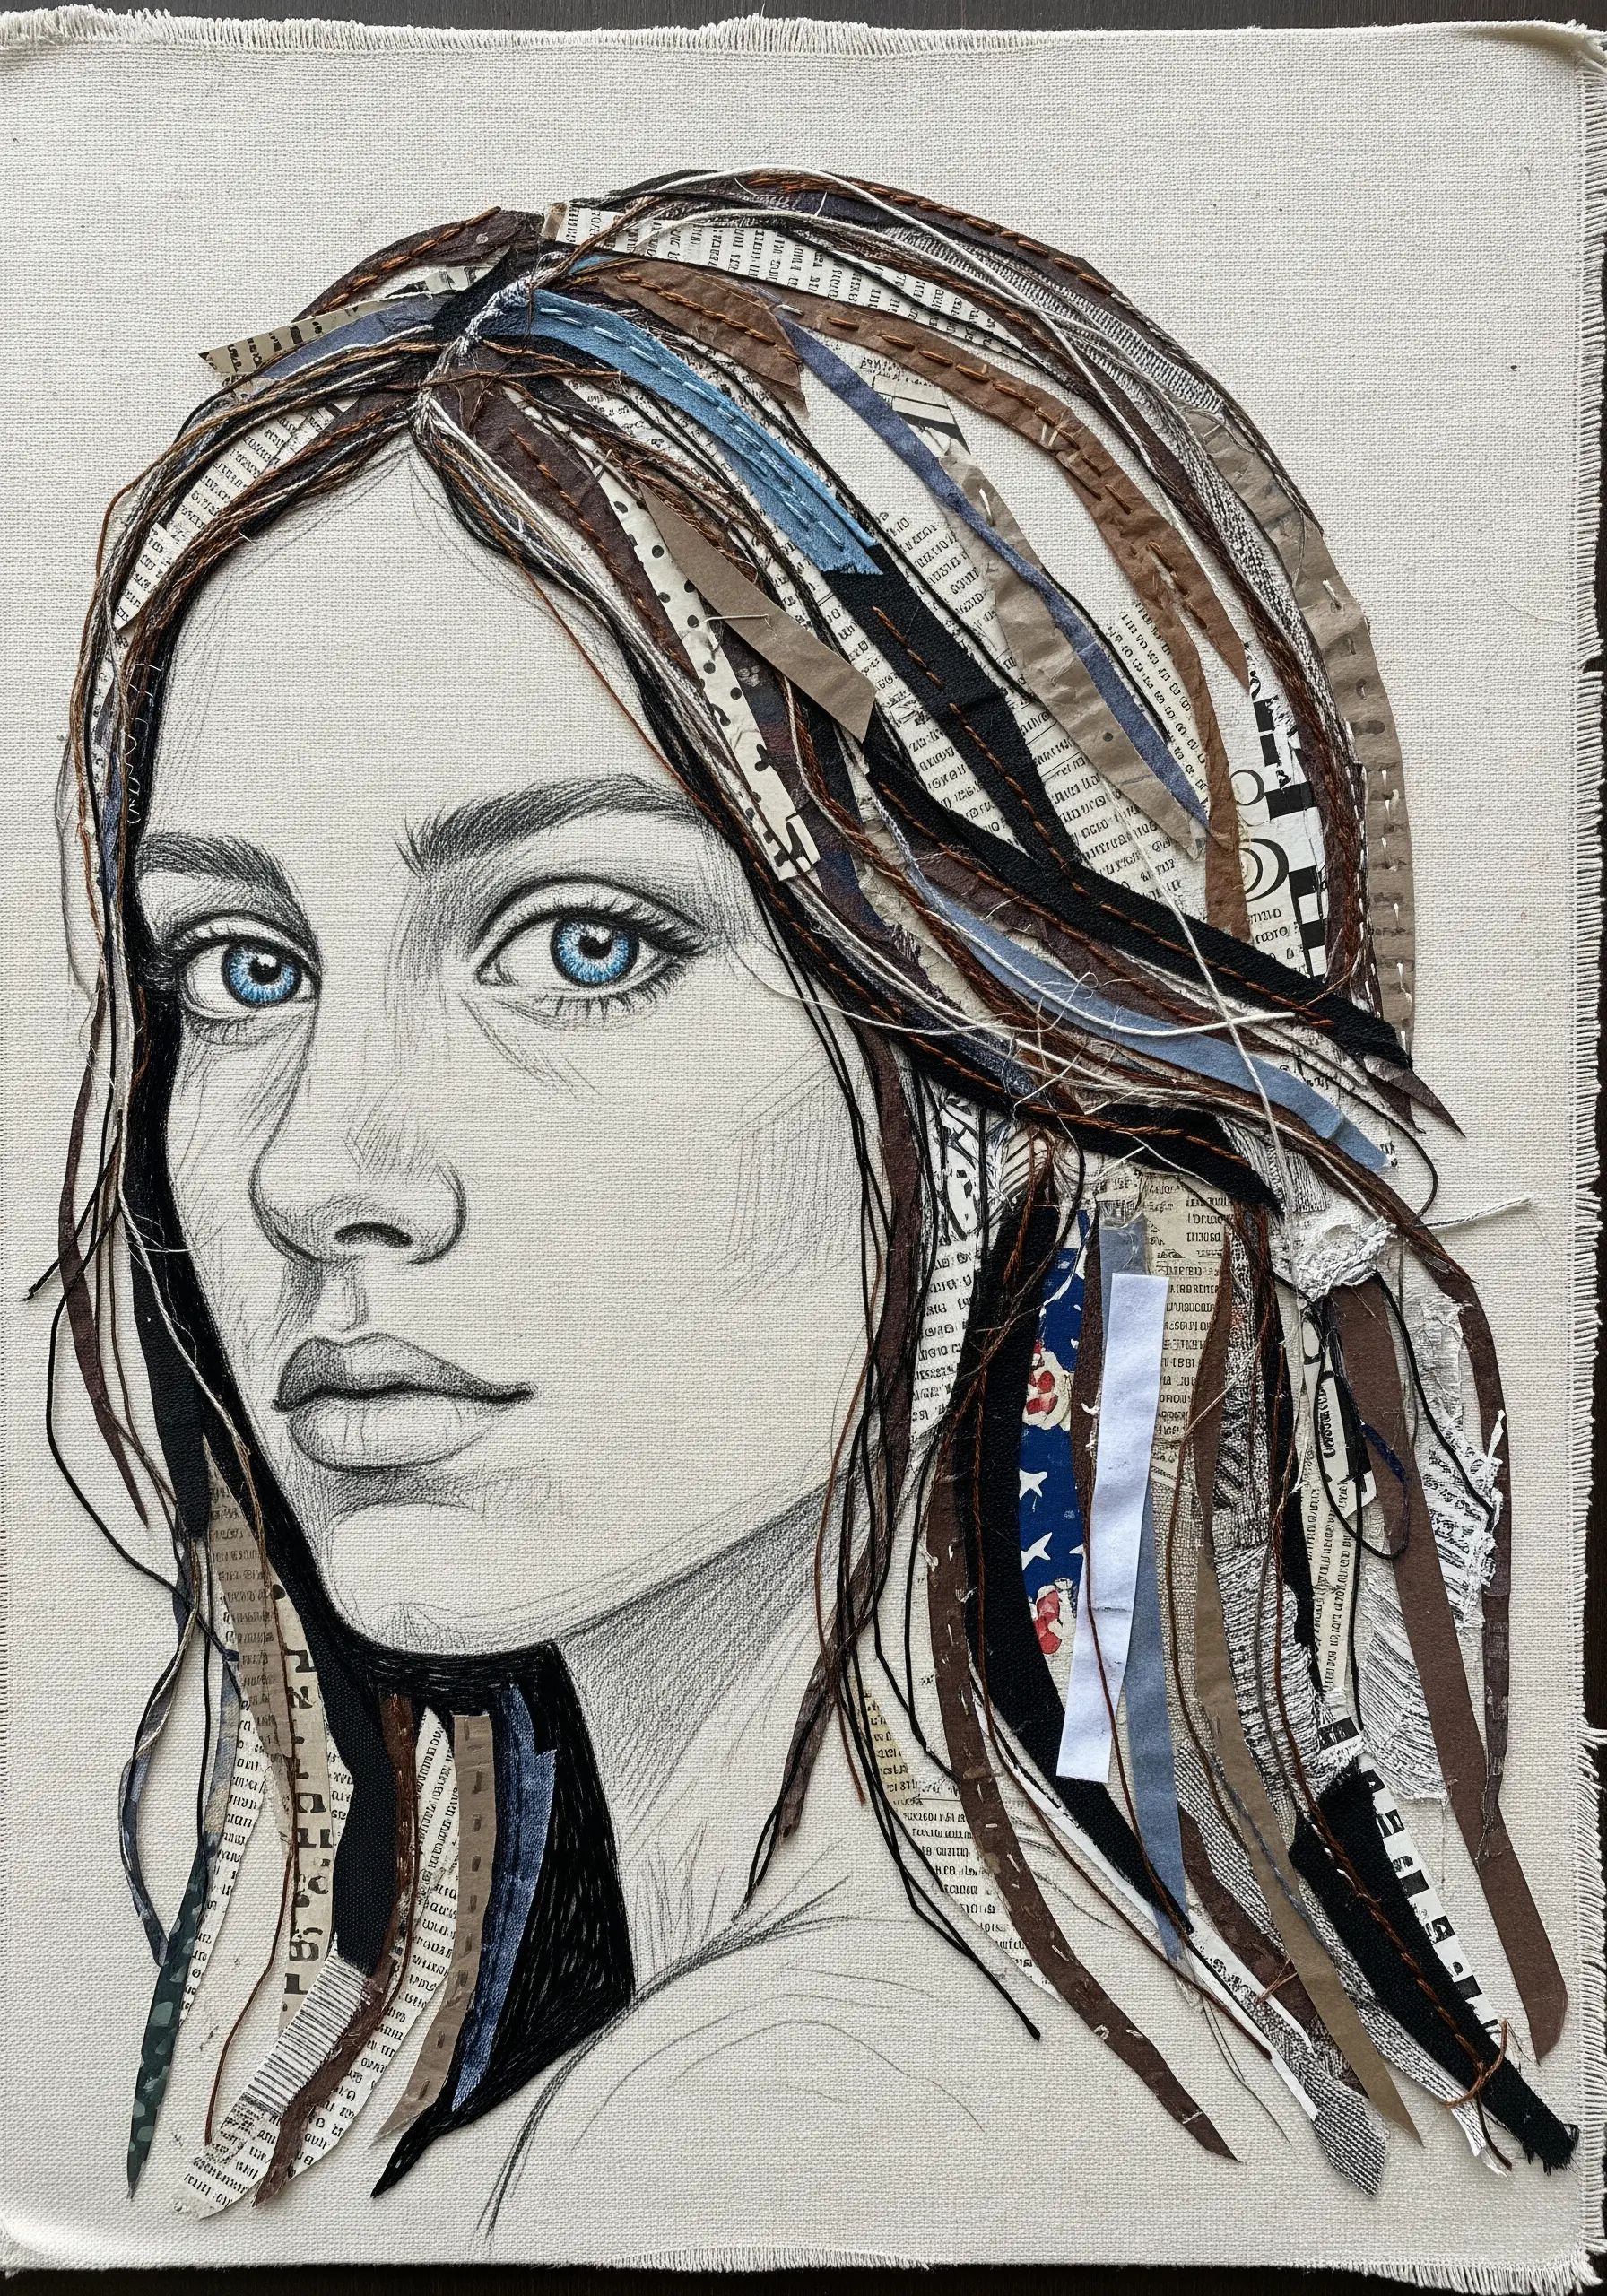
Move beyond thread and use torn strips of fabric and paper to create hair with incredible movement and texture in a mixed-media portrait.
Begin with a simple line drawing of a face on a sturdy canvas.
Then, audition and layer various strips of patterned fabric, old book pages, and textured ribbons to form the shape and flow of the hair.
Secure each piece with a few stitches or a touch of fabric glue, but leave the ends loose to enhance the feeling of dimension and freedom.
This technique is central to creating fabric collage embroidery artworks with emotional depth.
13. Contrast Geometric Stitches with a Watercolor Wash
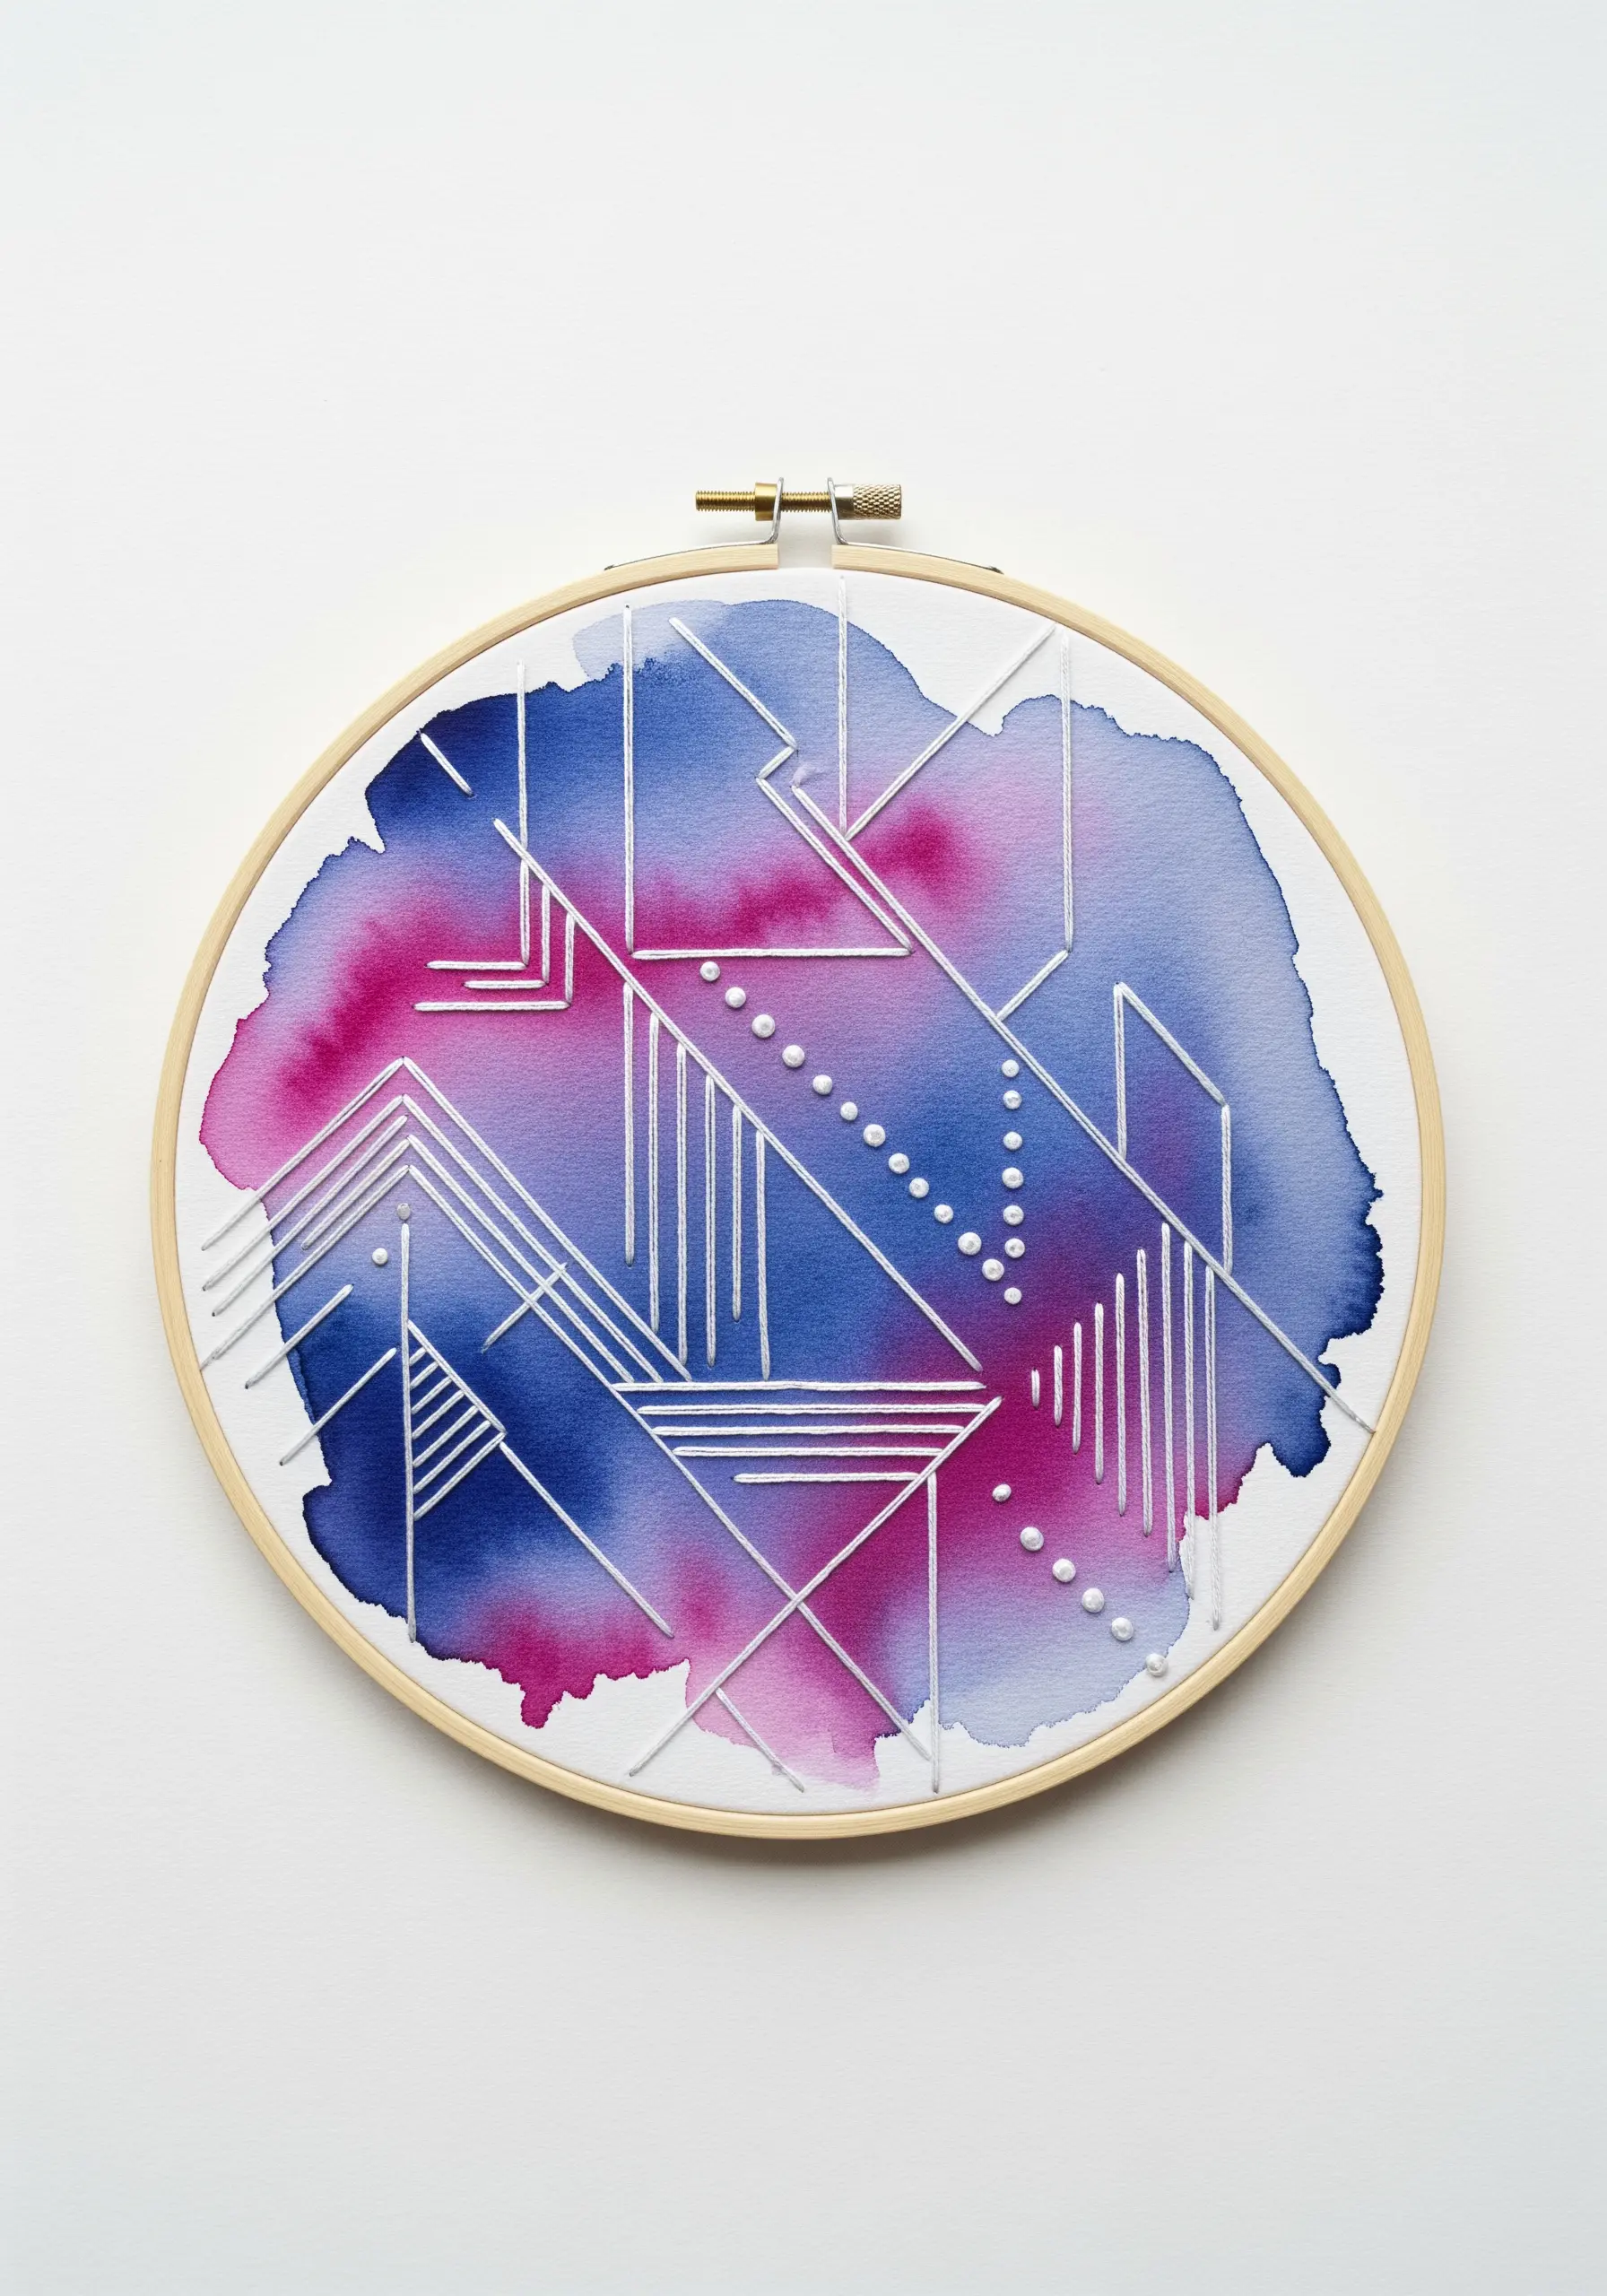
Explore the powerful interplay between structure and spontaneity by embroidering clean, geometric lines over a soft watercolor background.
Stretch your fabric tightly in a hoop before applying watercolor paint to prevent unwanted bleeding.
Once the organic, free-flowing wash is completely dry, stitch your design using a single, high-contrast color like bright white.
The precision of a simple backstitch and the uniform dots of French knots create a striking architectural feel against the softness of the paint, resulting in minimalist embroidery wall art.
14. Trace Personal Journeys on an Embroidered Map
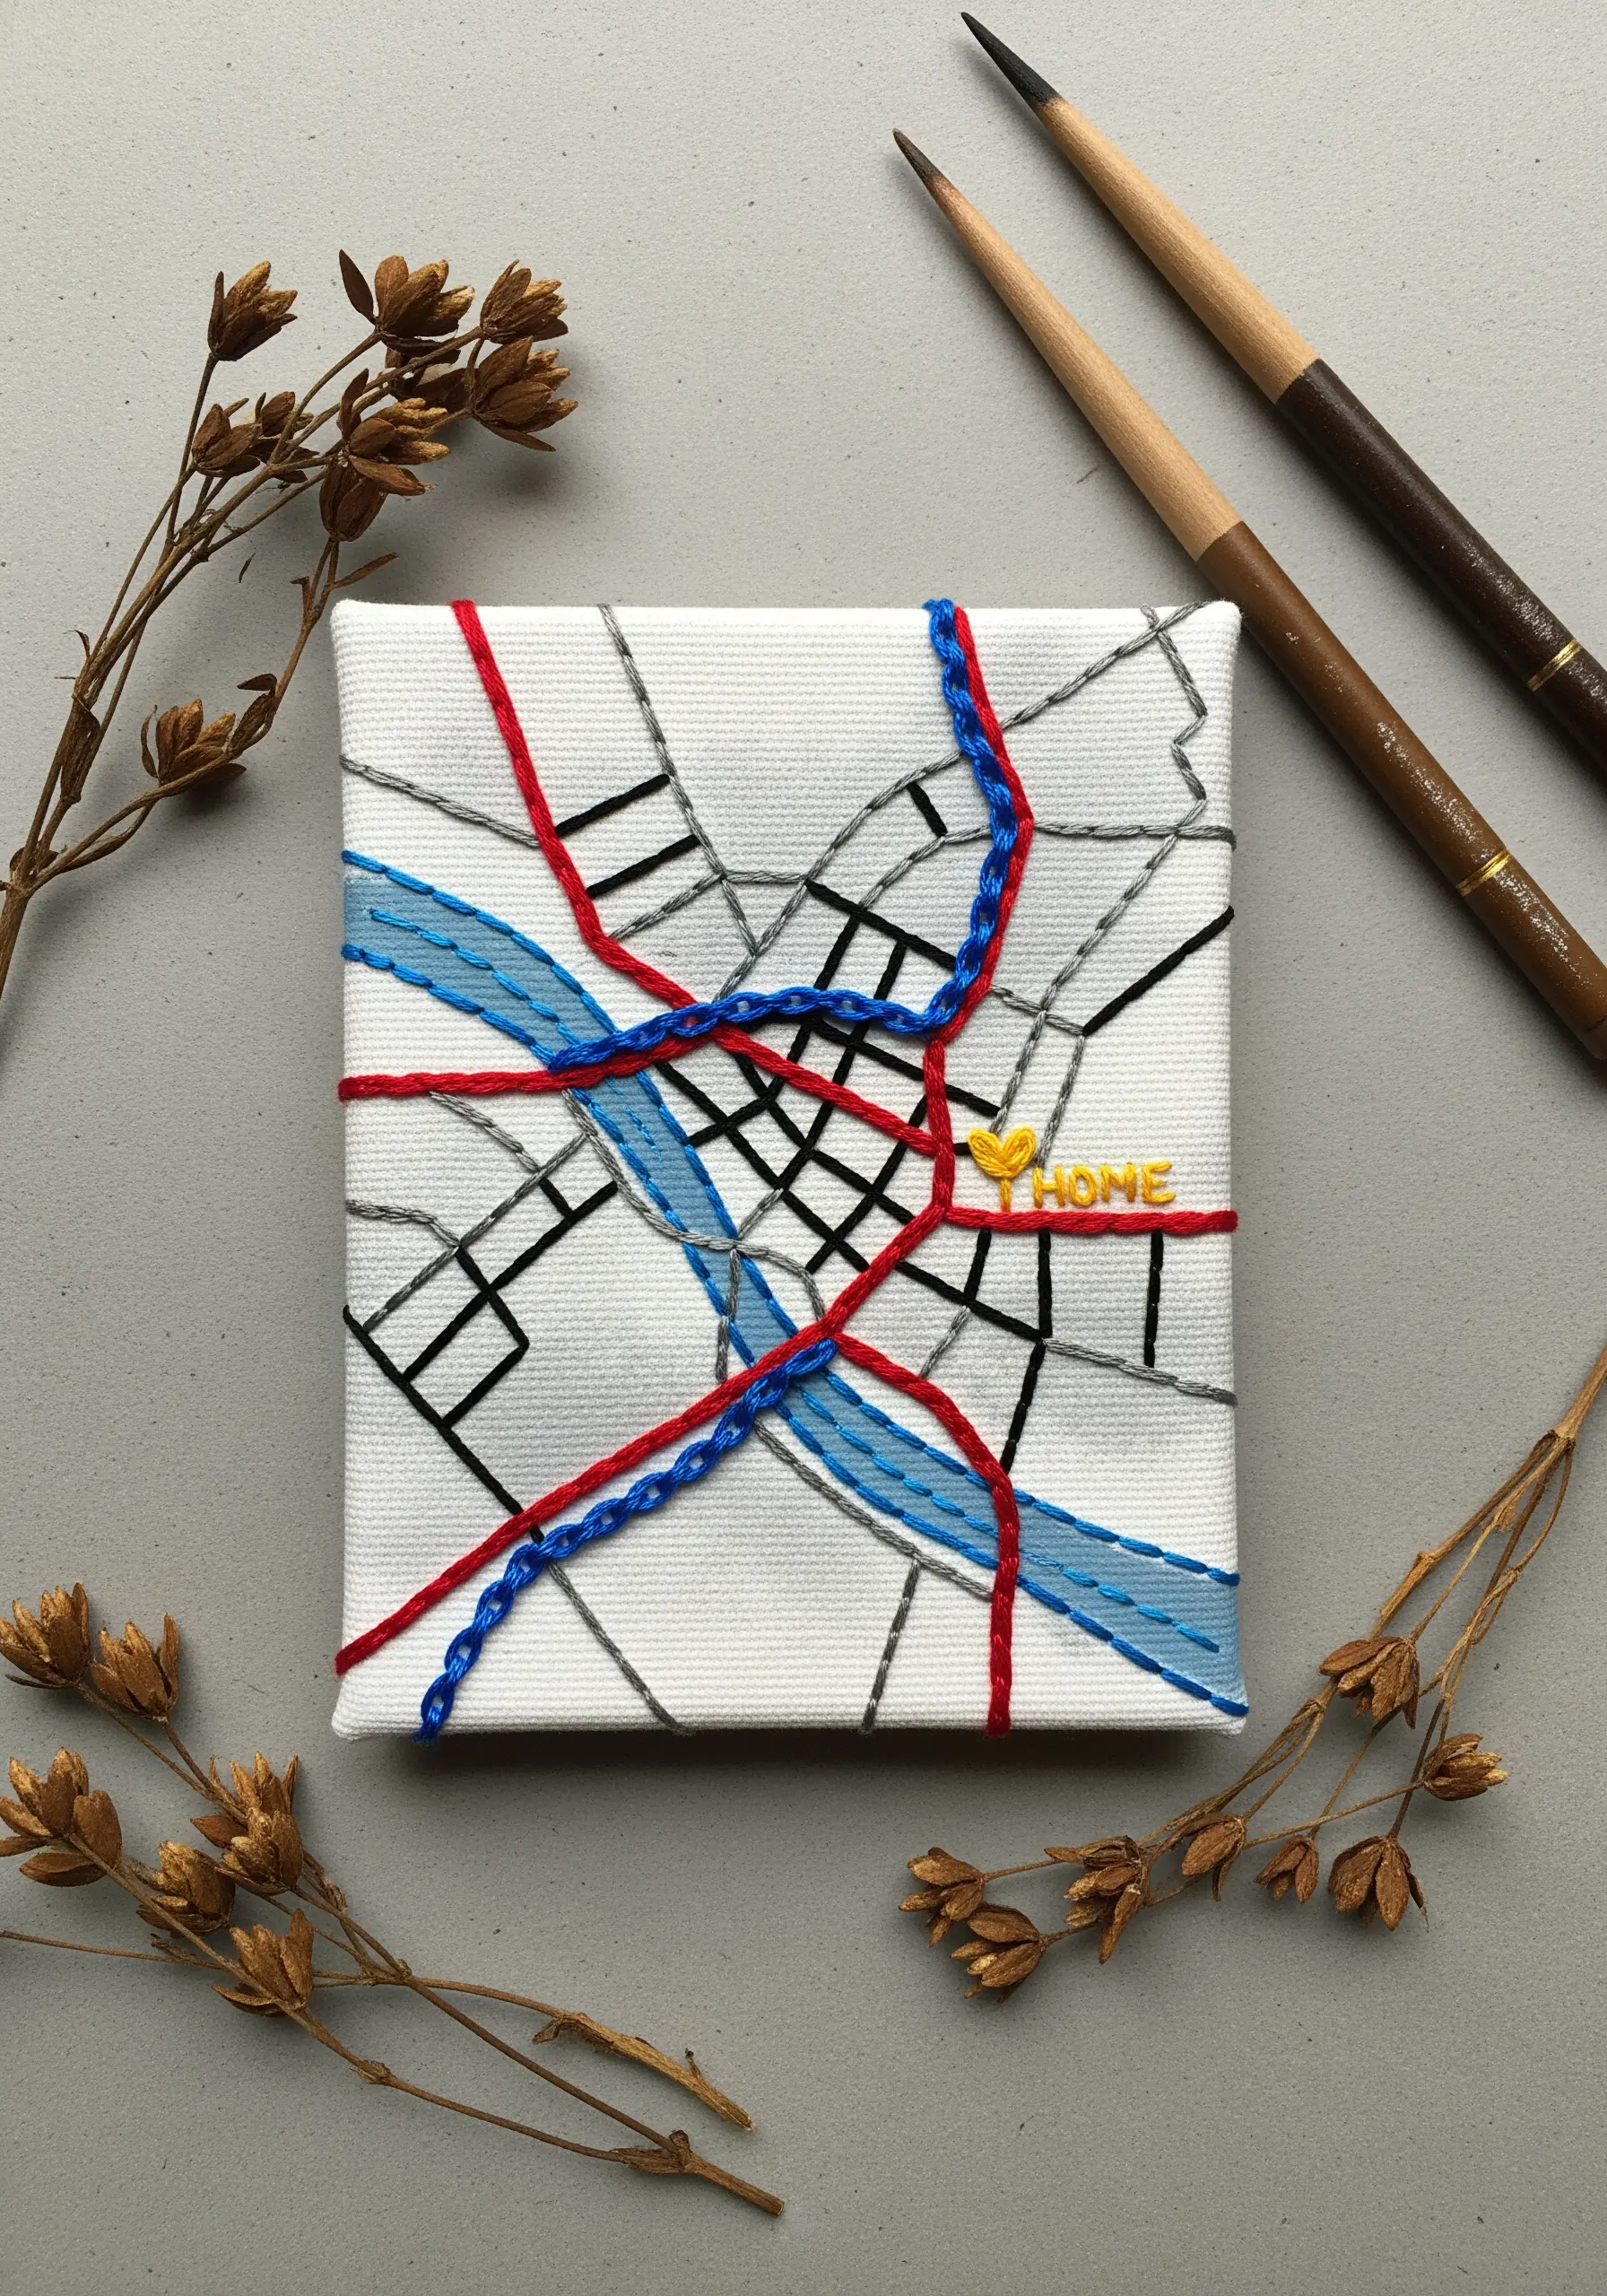
Transform a simple map into a personal narrative by tracing significant routes with thread.
Lightly draw or transfer your map onto a small stretched canvas, which provides a firm, easy-to-stitch surface.
Assign different stitches or colors to different elements to create a visual key: a thick chain stitch for a river, a simple backstitch for roads, and a bold satin stitch for a special location.
This turns a flat graphic into a tactile record of memory, creating meaningful travel-inspired string art maps.
15. Weave Stitched Paper Elements into a Wall Hanging
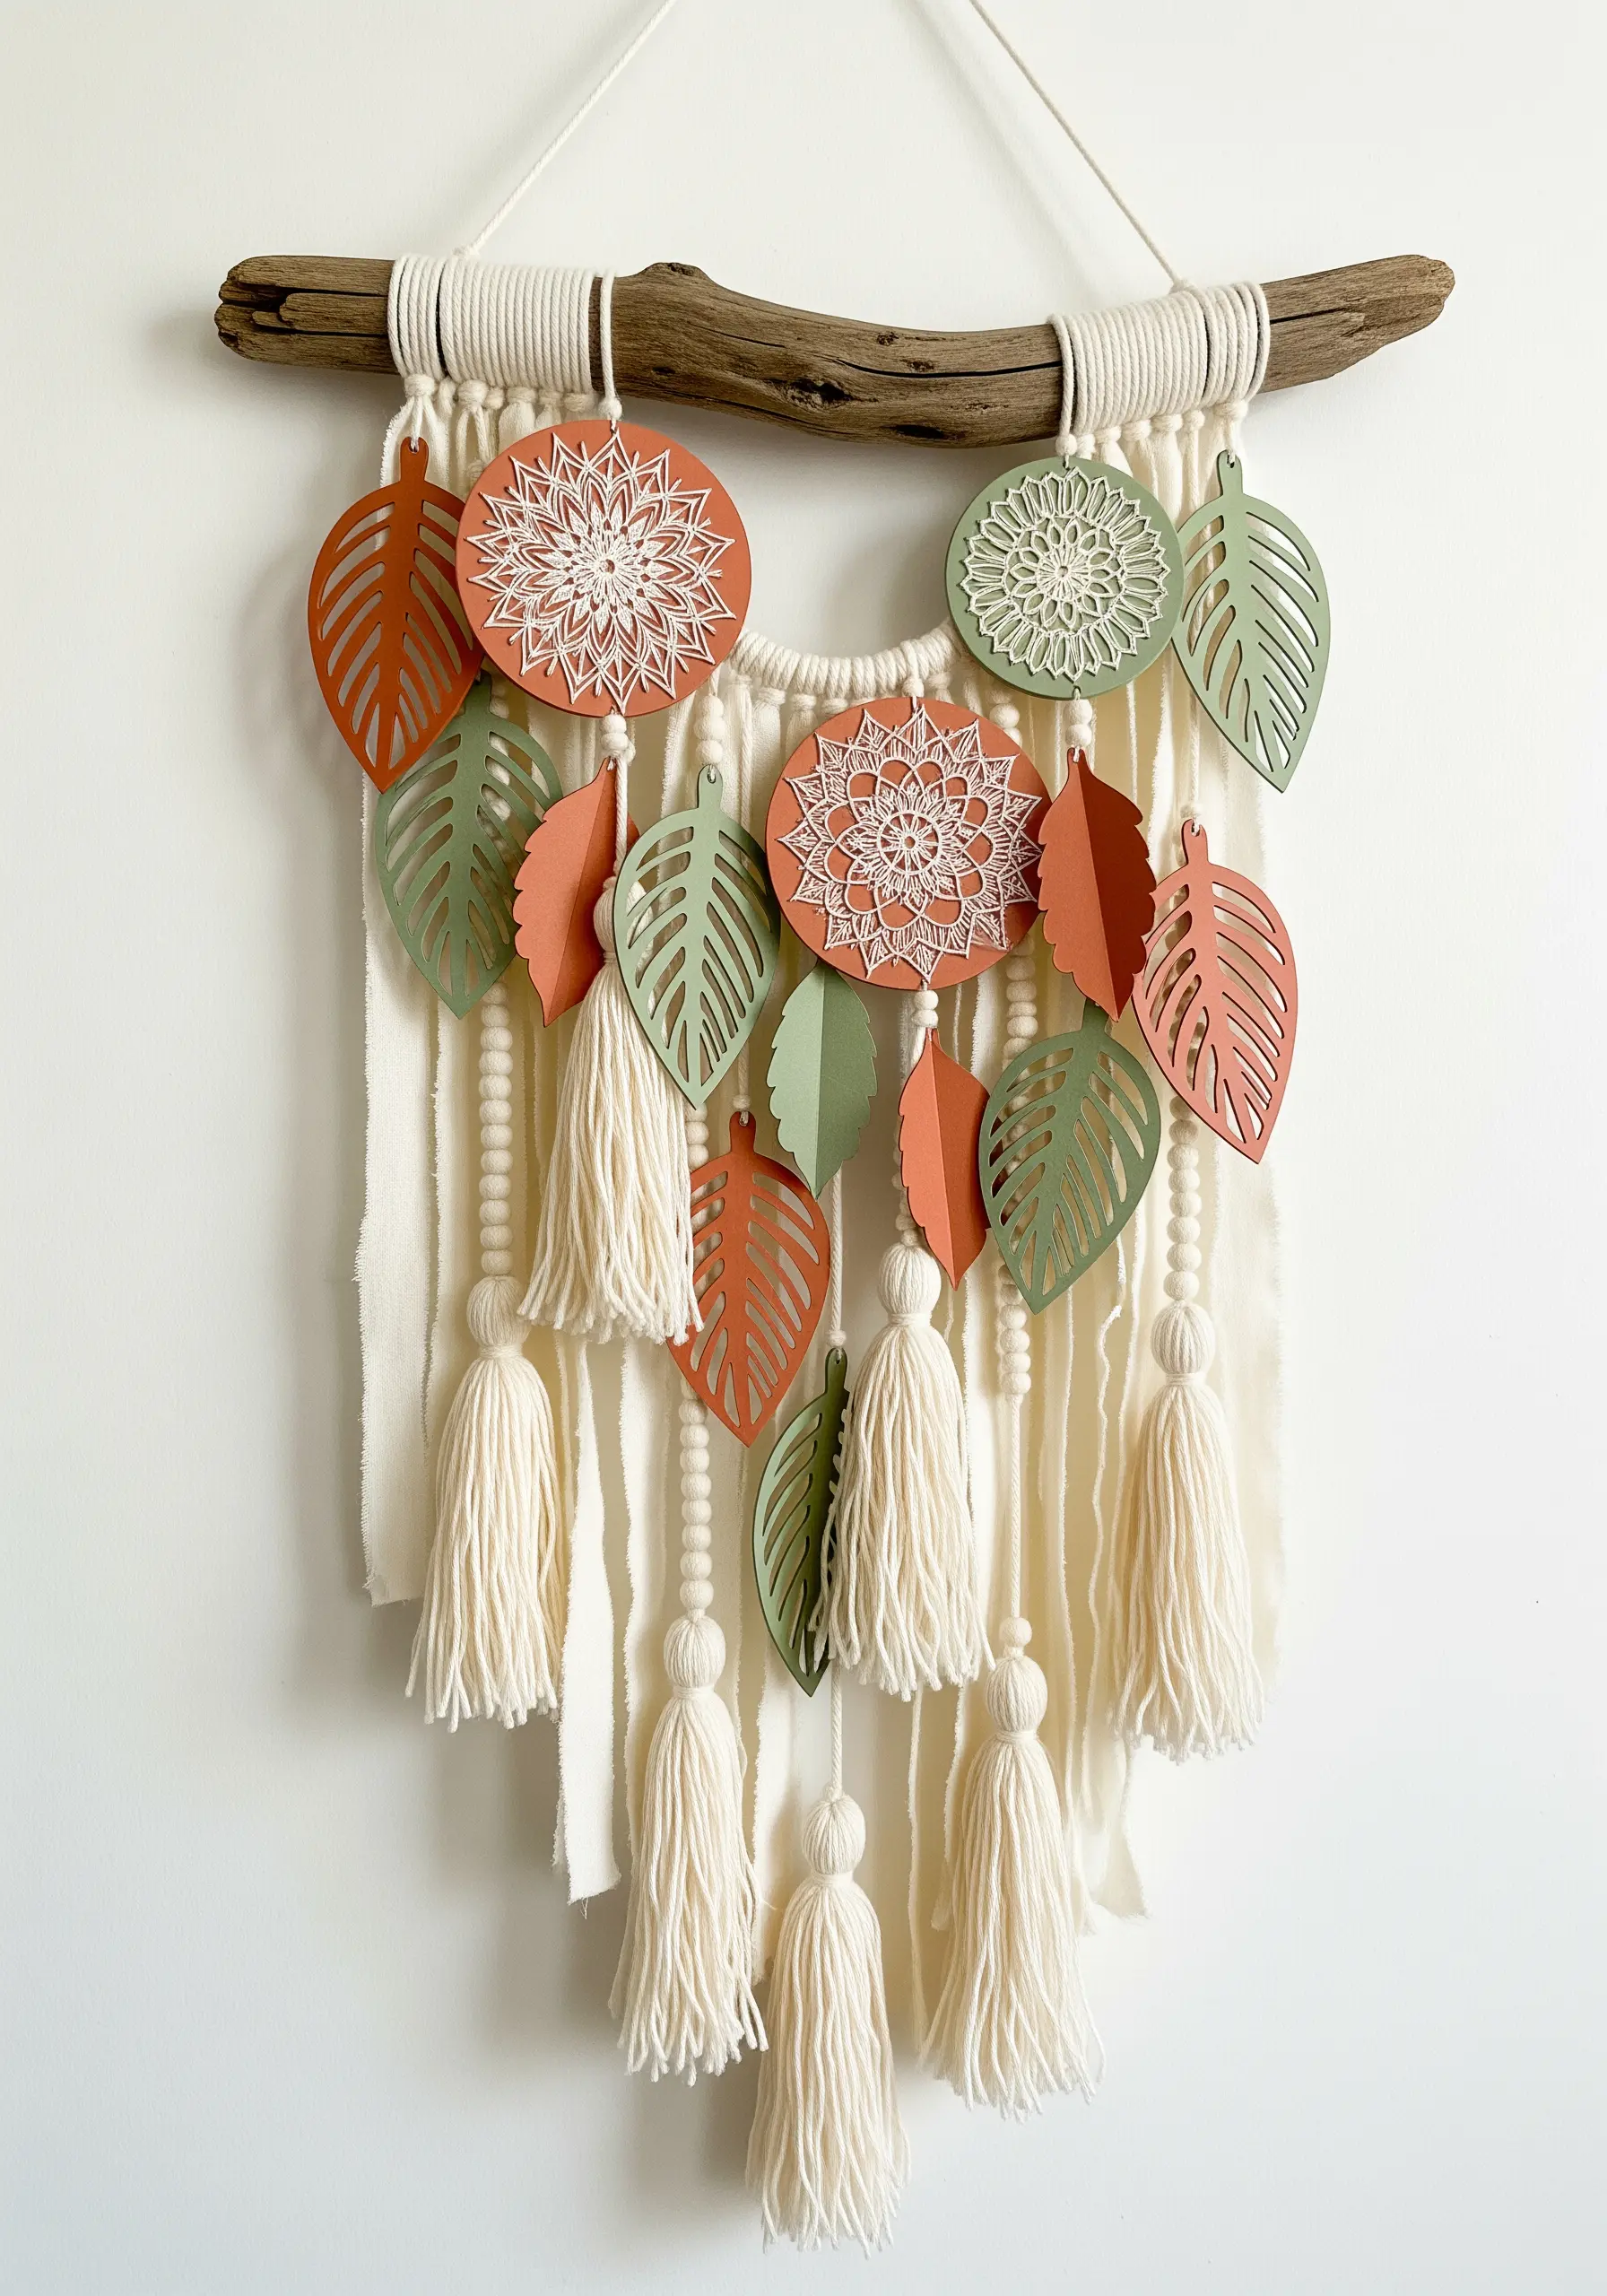
Elevate a simple yarn wall hanging by incorporating elements of stitched paper for a sophisticated, bohemian look.
Embroider mandalas or leaf motifs onto heavy cardstock using a simple backstitch.
Then, carefully cut them out and integrate them into your design alongside yarn tassels, wooden beads, and macrame knots.
The crisp, graphic quality of the stitched paper provides a striking contrast to the soft, pliable textures of the fiber.
It’s a simple addition that makes for truly stunning embroidered wall hangings.
16. Unify a Paper Collage with a Couched Outline
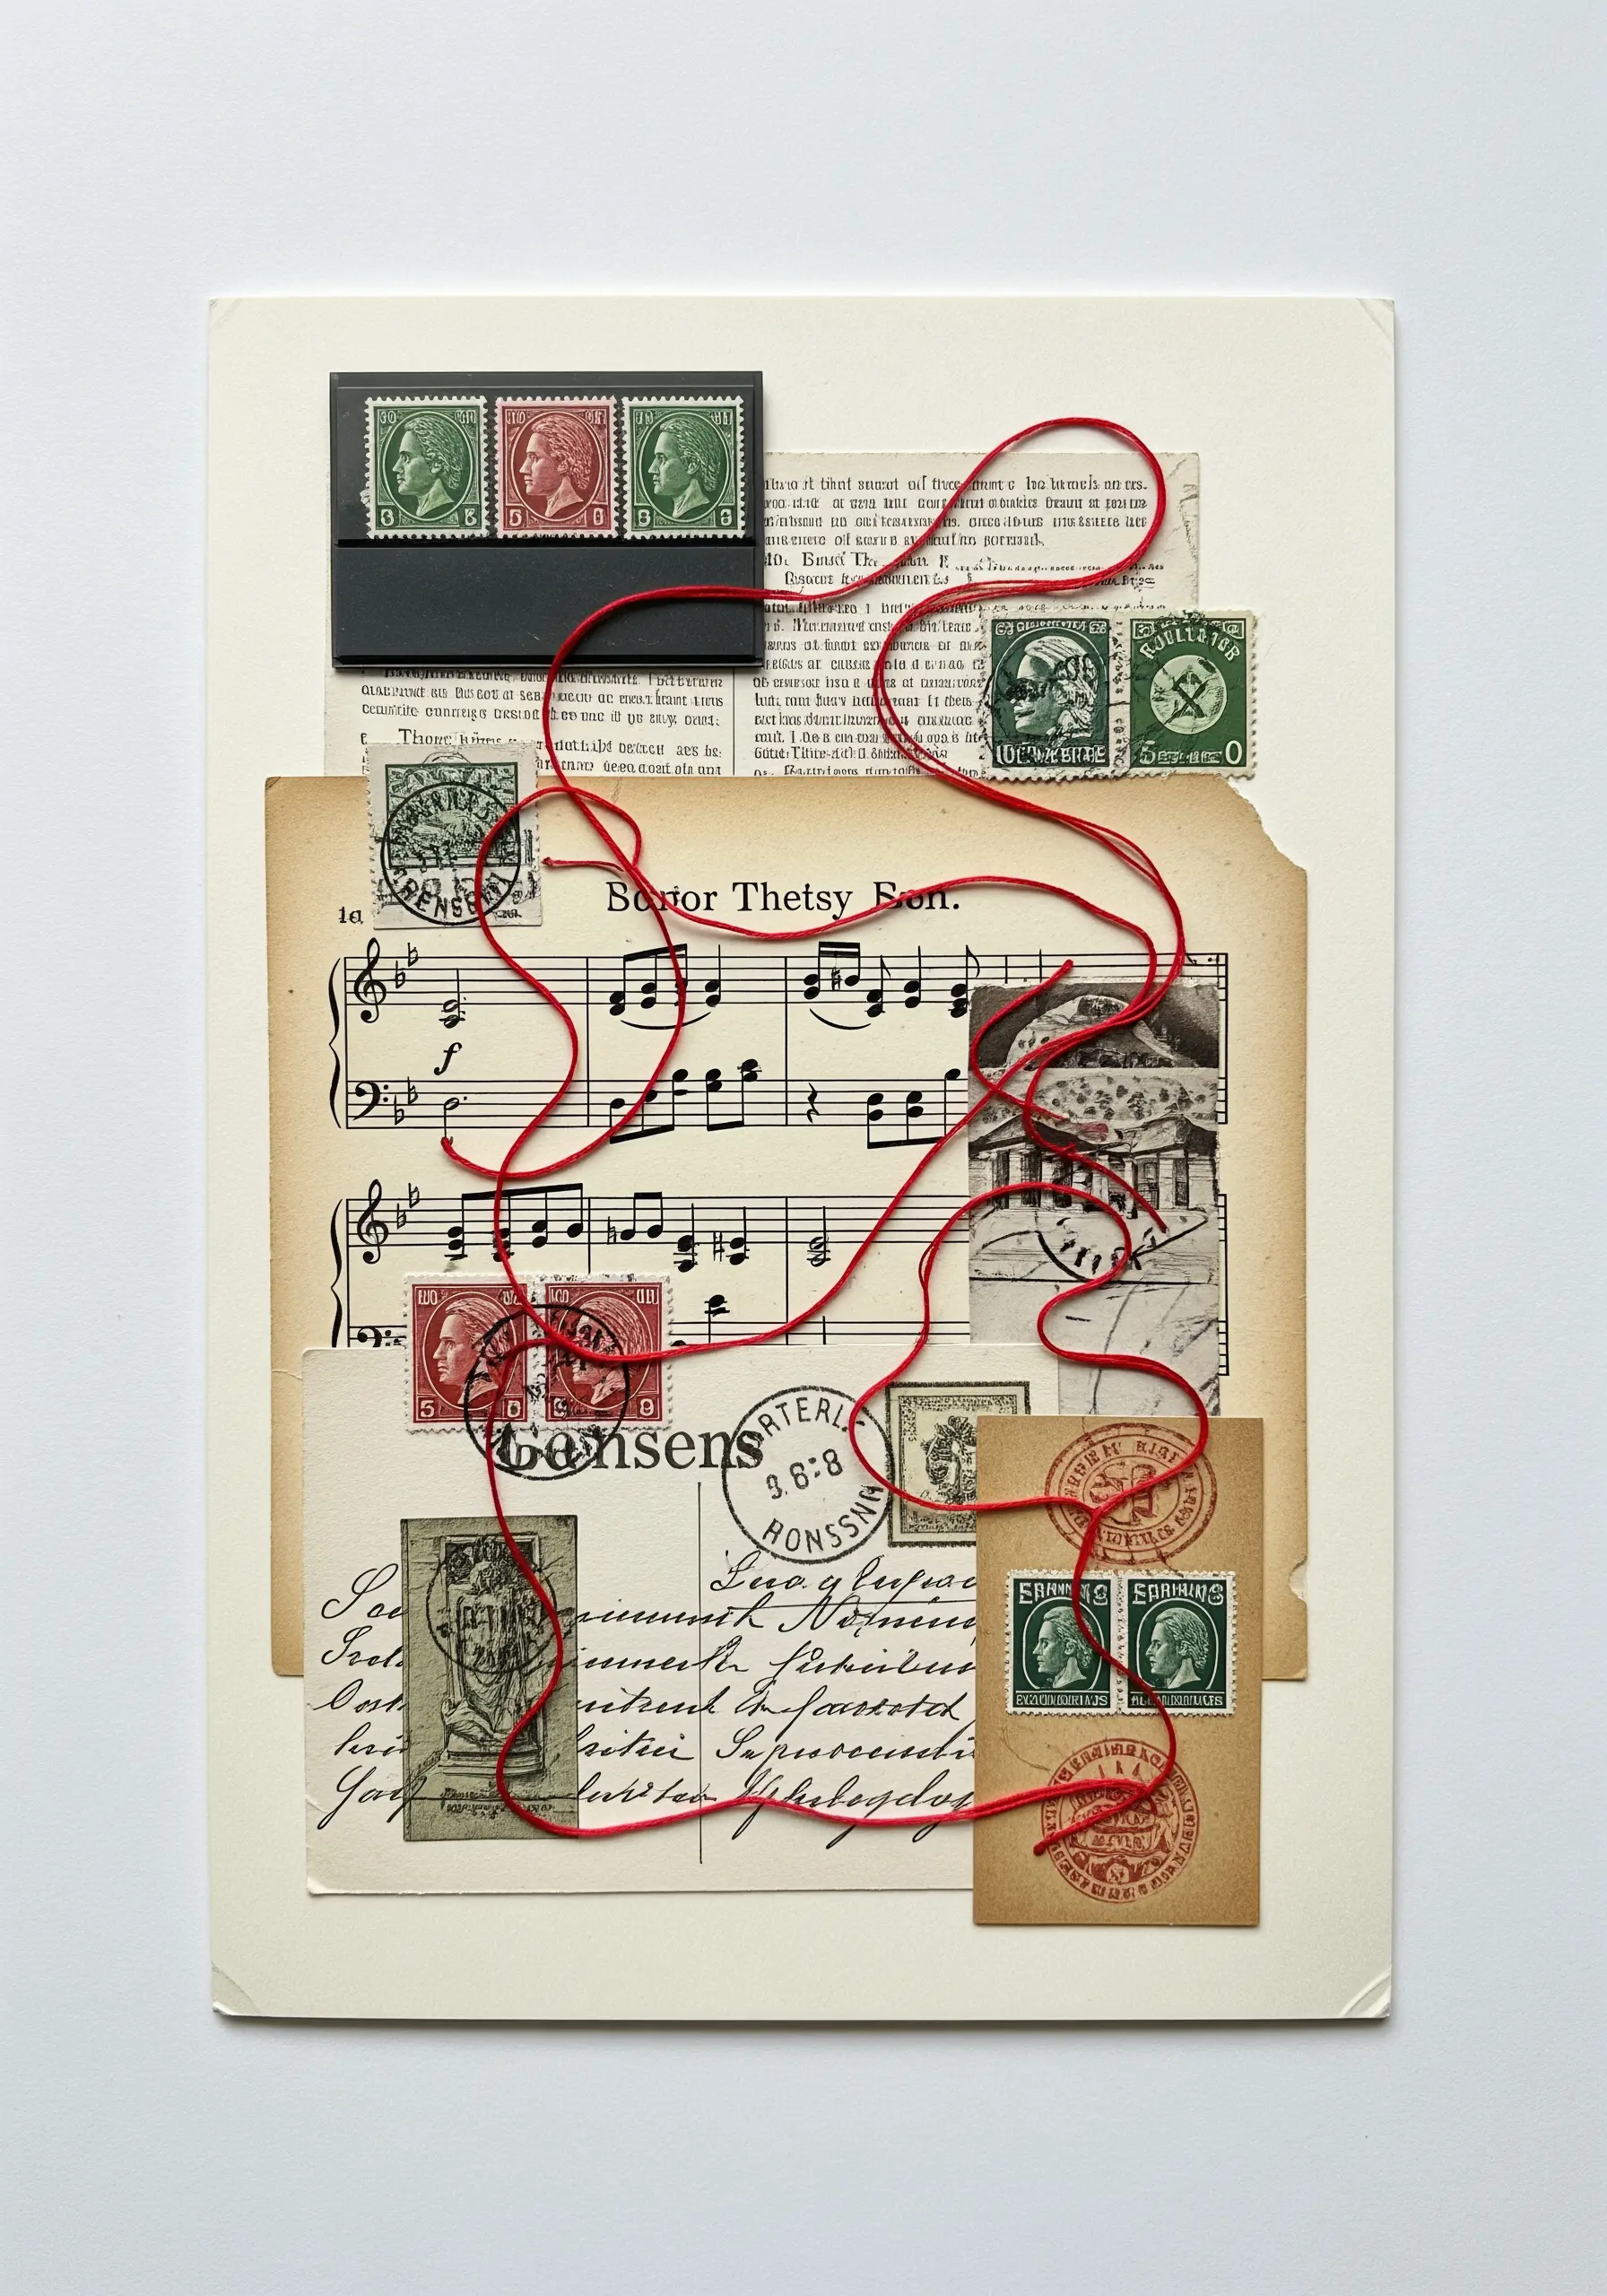
Bring harmony to a busy paper collage by using a single, bold thread to ‘draw’ a unifying shape over the top.
After assembling your collage with elements like sheet music, vintage stamps, and old letters, choose a thick yarn or multiple strands of floss in a contrasting color.
Lay this thread down in a continuous, flowing line over your composition and tack it in place using a simple couching stitch.
This technique creates a dominant focal point that visually connects all the disparate pieces, an essential skill for creating compelling creative collage inspirations.
17. Stitch Textural Sea Foam Over a Painted Sky
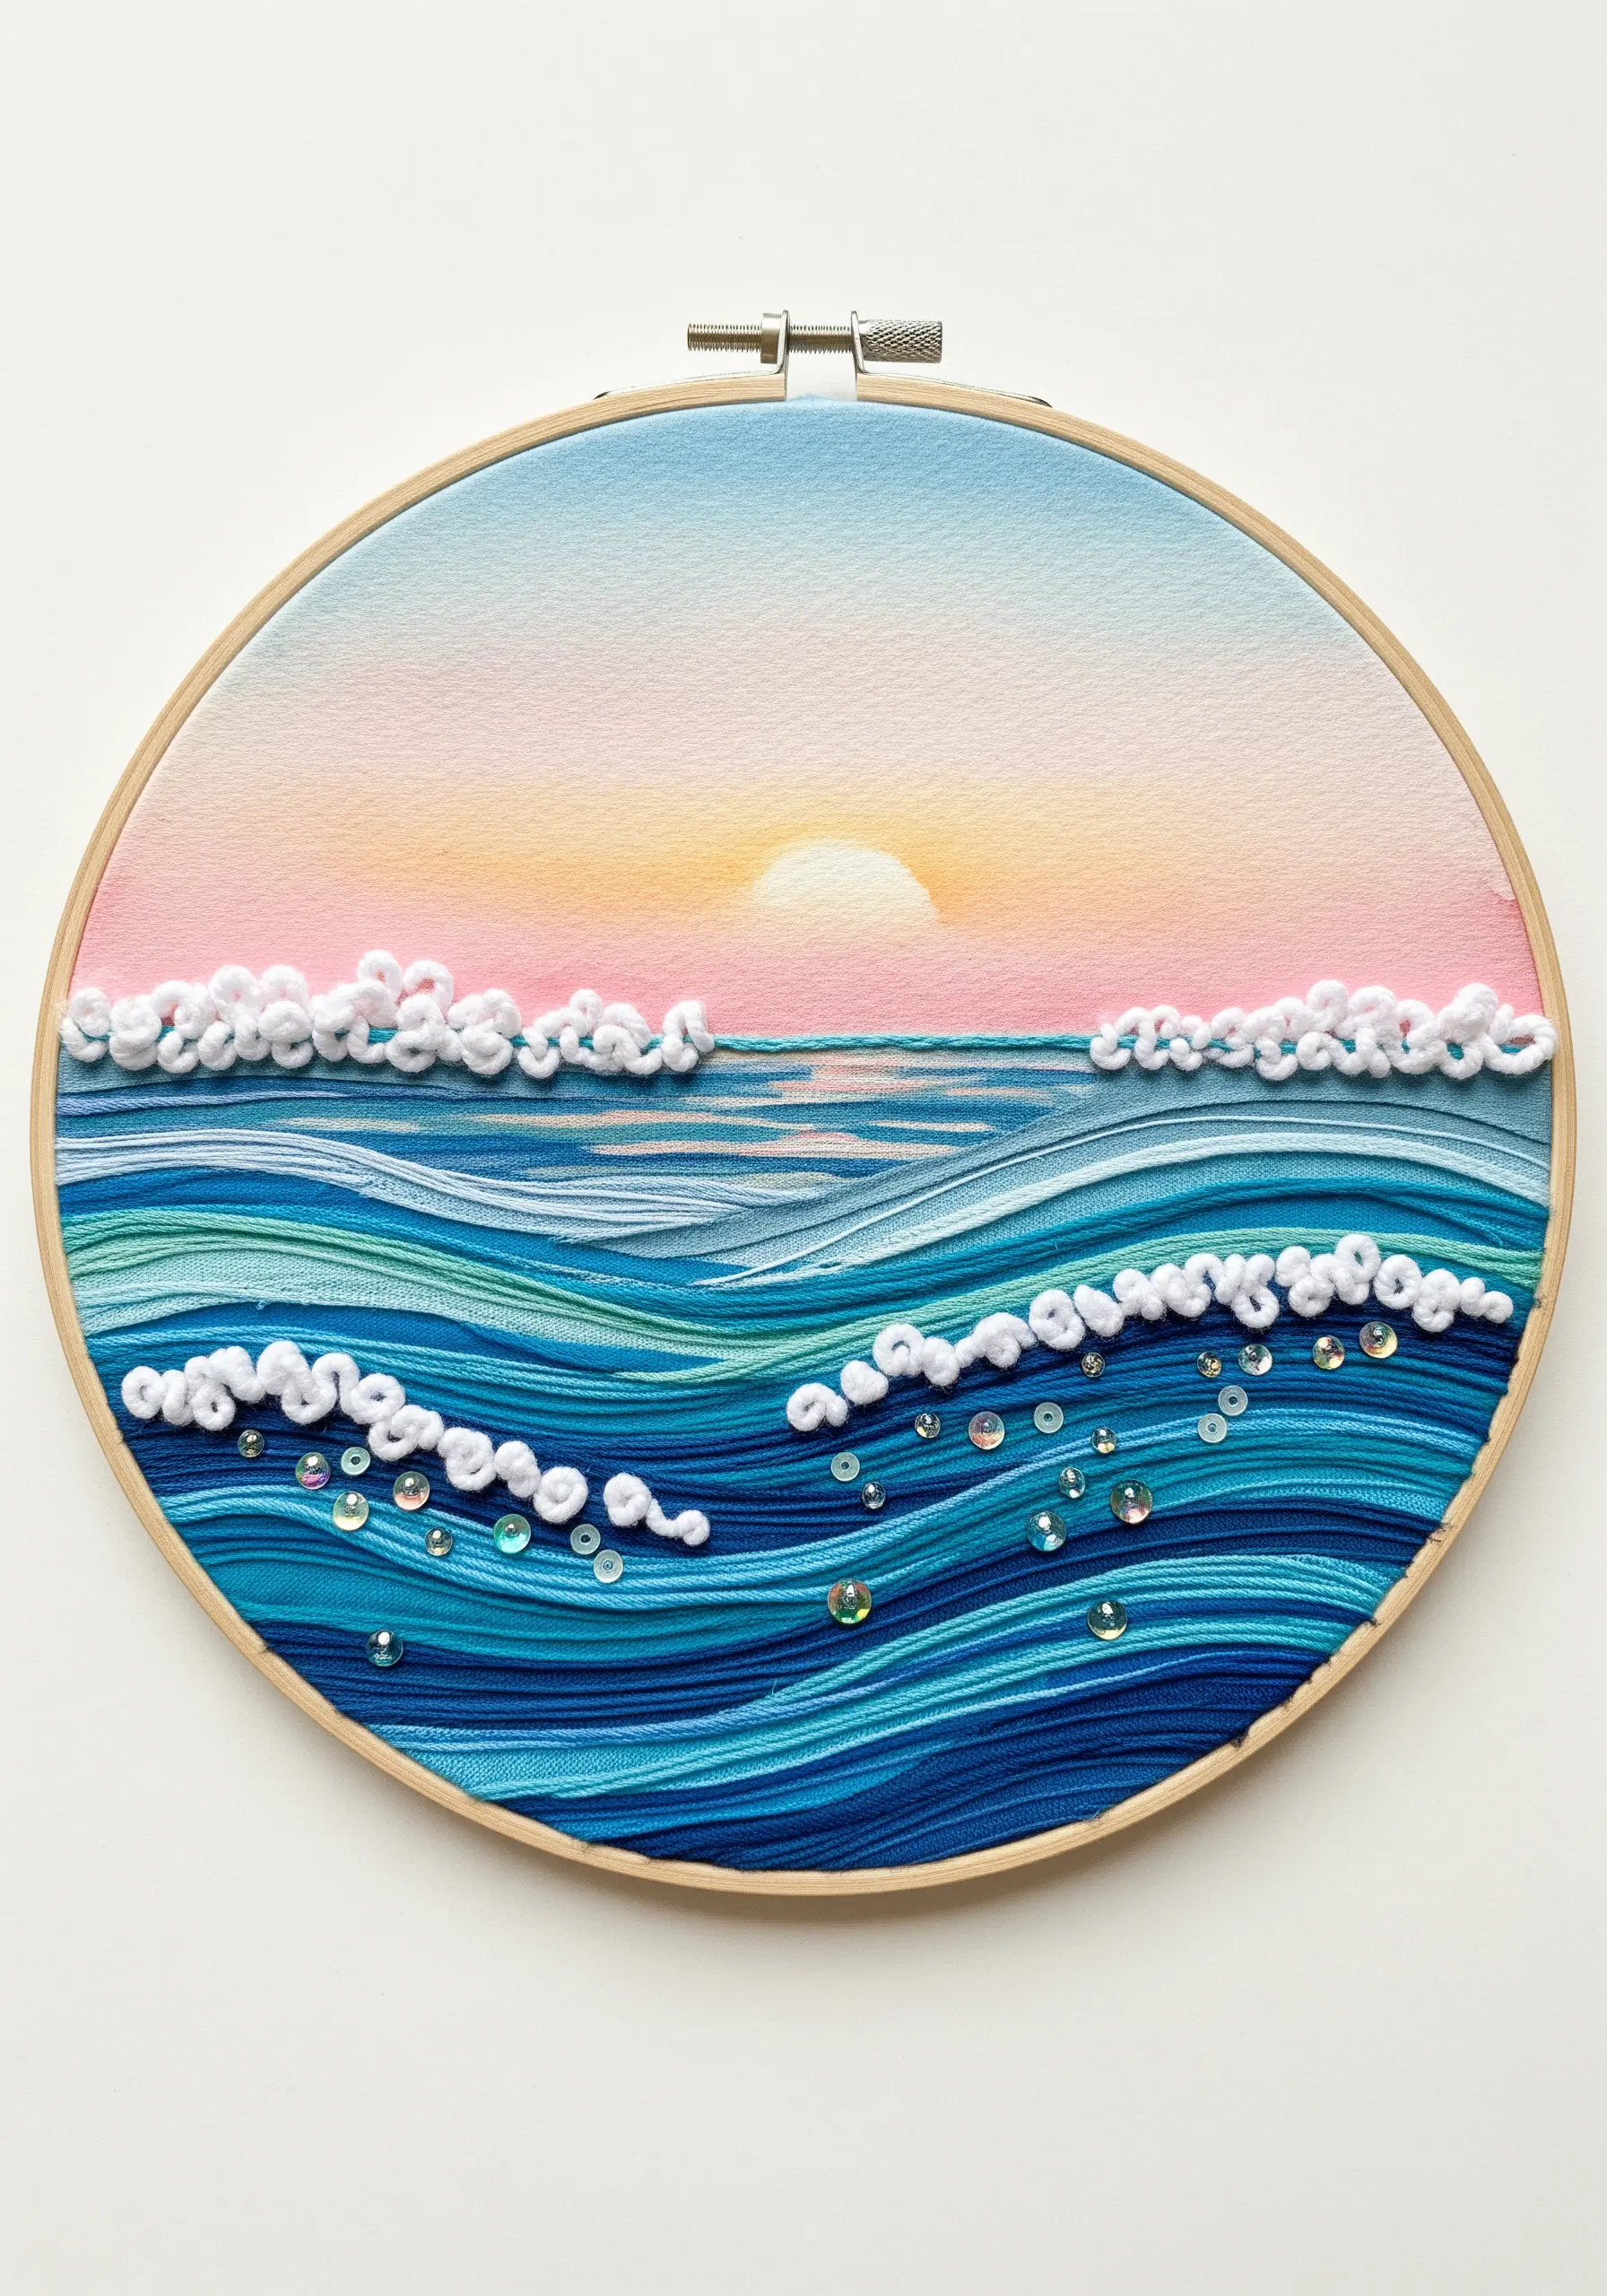
Create a seascape with incredible depth by separating the textures of sky and water.
Paint the soft, blended sunset gradient directly onto your fabric first, providing a smooth, atmospheric backdrop.
Once dry, build the ocean using thread. Use long satin stitches for the flat surface of the water and then add highly textural stitches like bullion knots and chunky French knots for the breaking waves and sea foam.
The contrast between the flat paint and the dimensional knots creates a powerful sense of movement and realism in your coastal-theme tiny embroidery art.
18. Create Geometric String Art with Metallic Floss
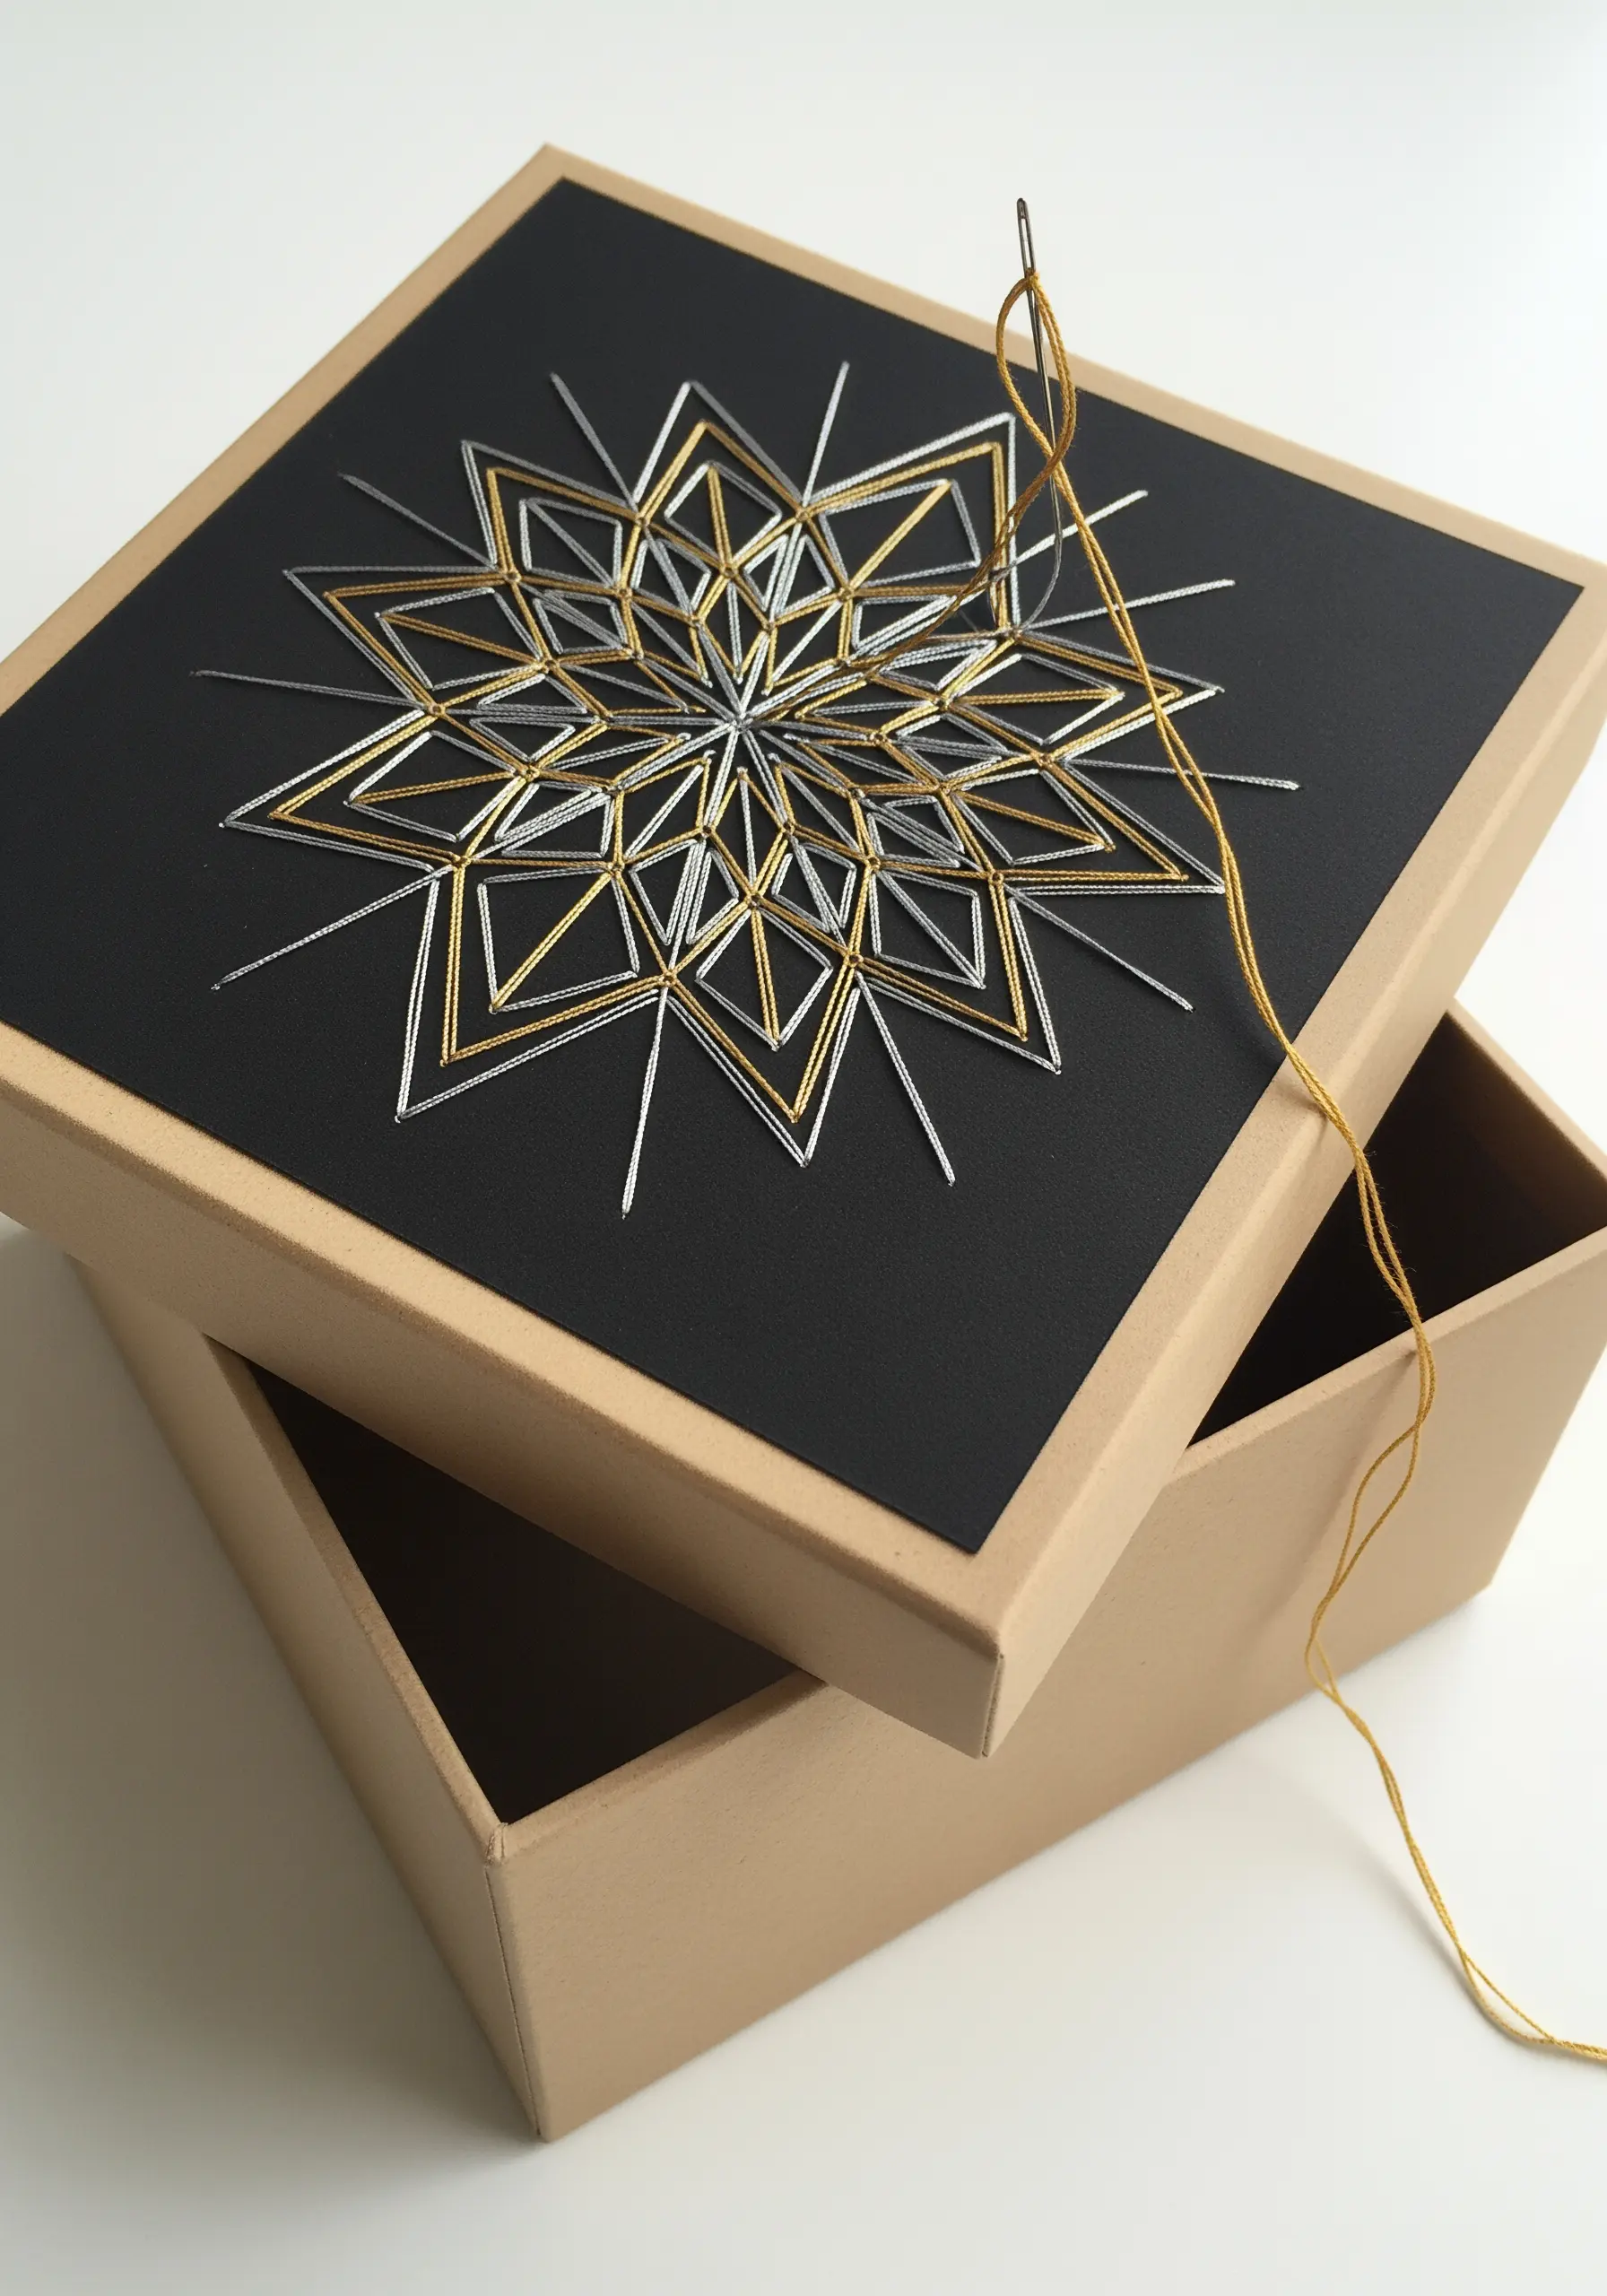
Use the principles of string art to create a precise, shimmering geometric design on a box lid or a piece of cardstock.
Begin by printing a template and piercing holes at each intersecting point.
Using metallic embroidery floss, which offers more shine and delicacy than typical string, wrap the thread from point to point, pulling it taut to create perfectly straight lines.
The interplay of layered silver and gold threads against a dark background results in a sharp, modern design, perfect for abstract metallic thread projects.
19. Add Selective Embroidery to Nature Illustrations
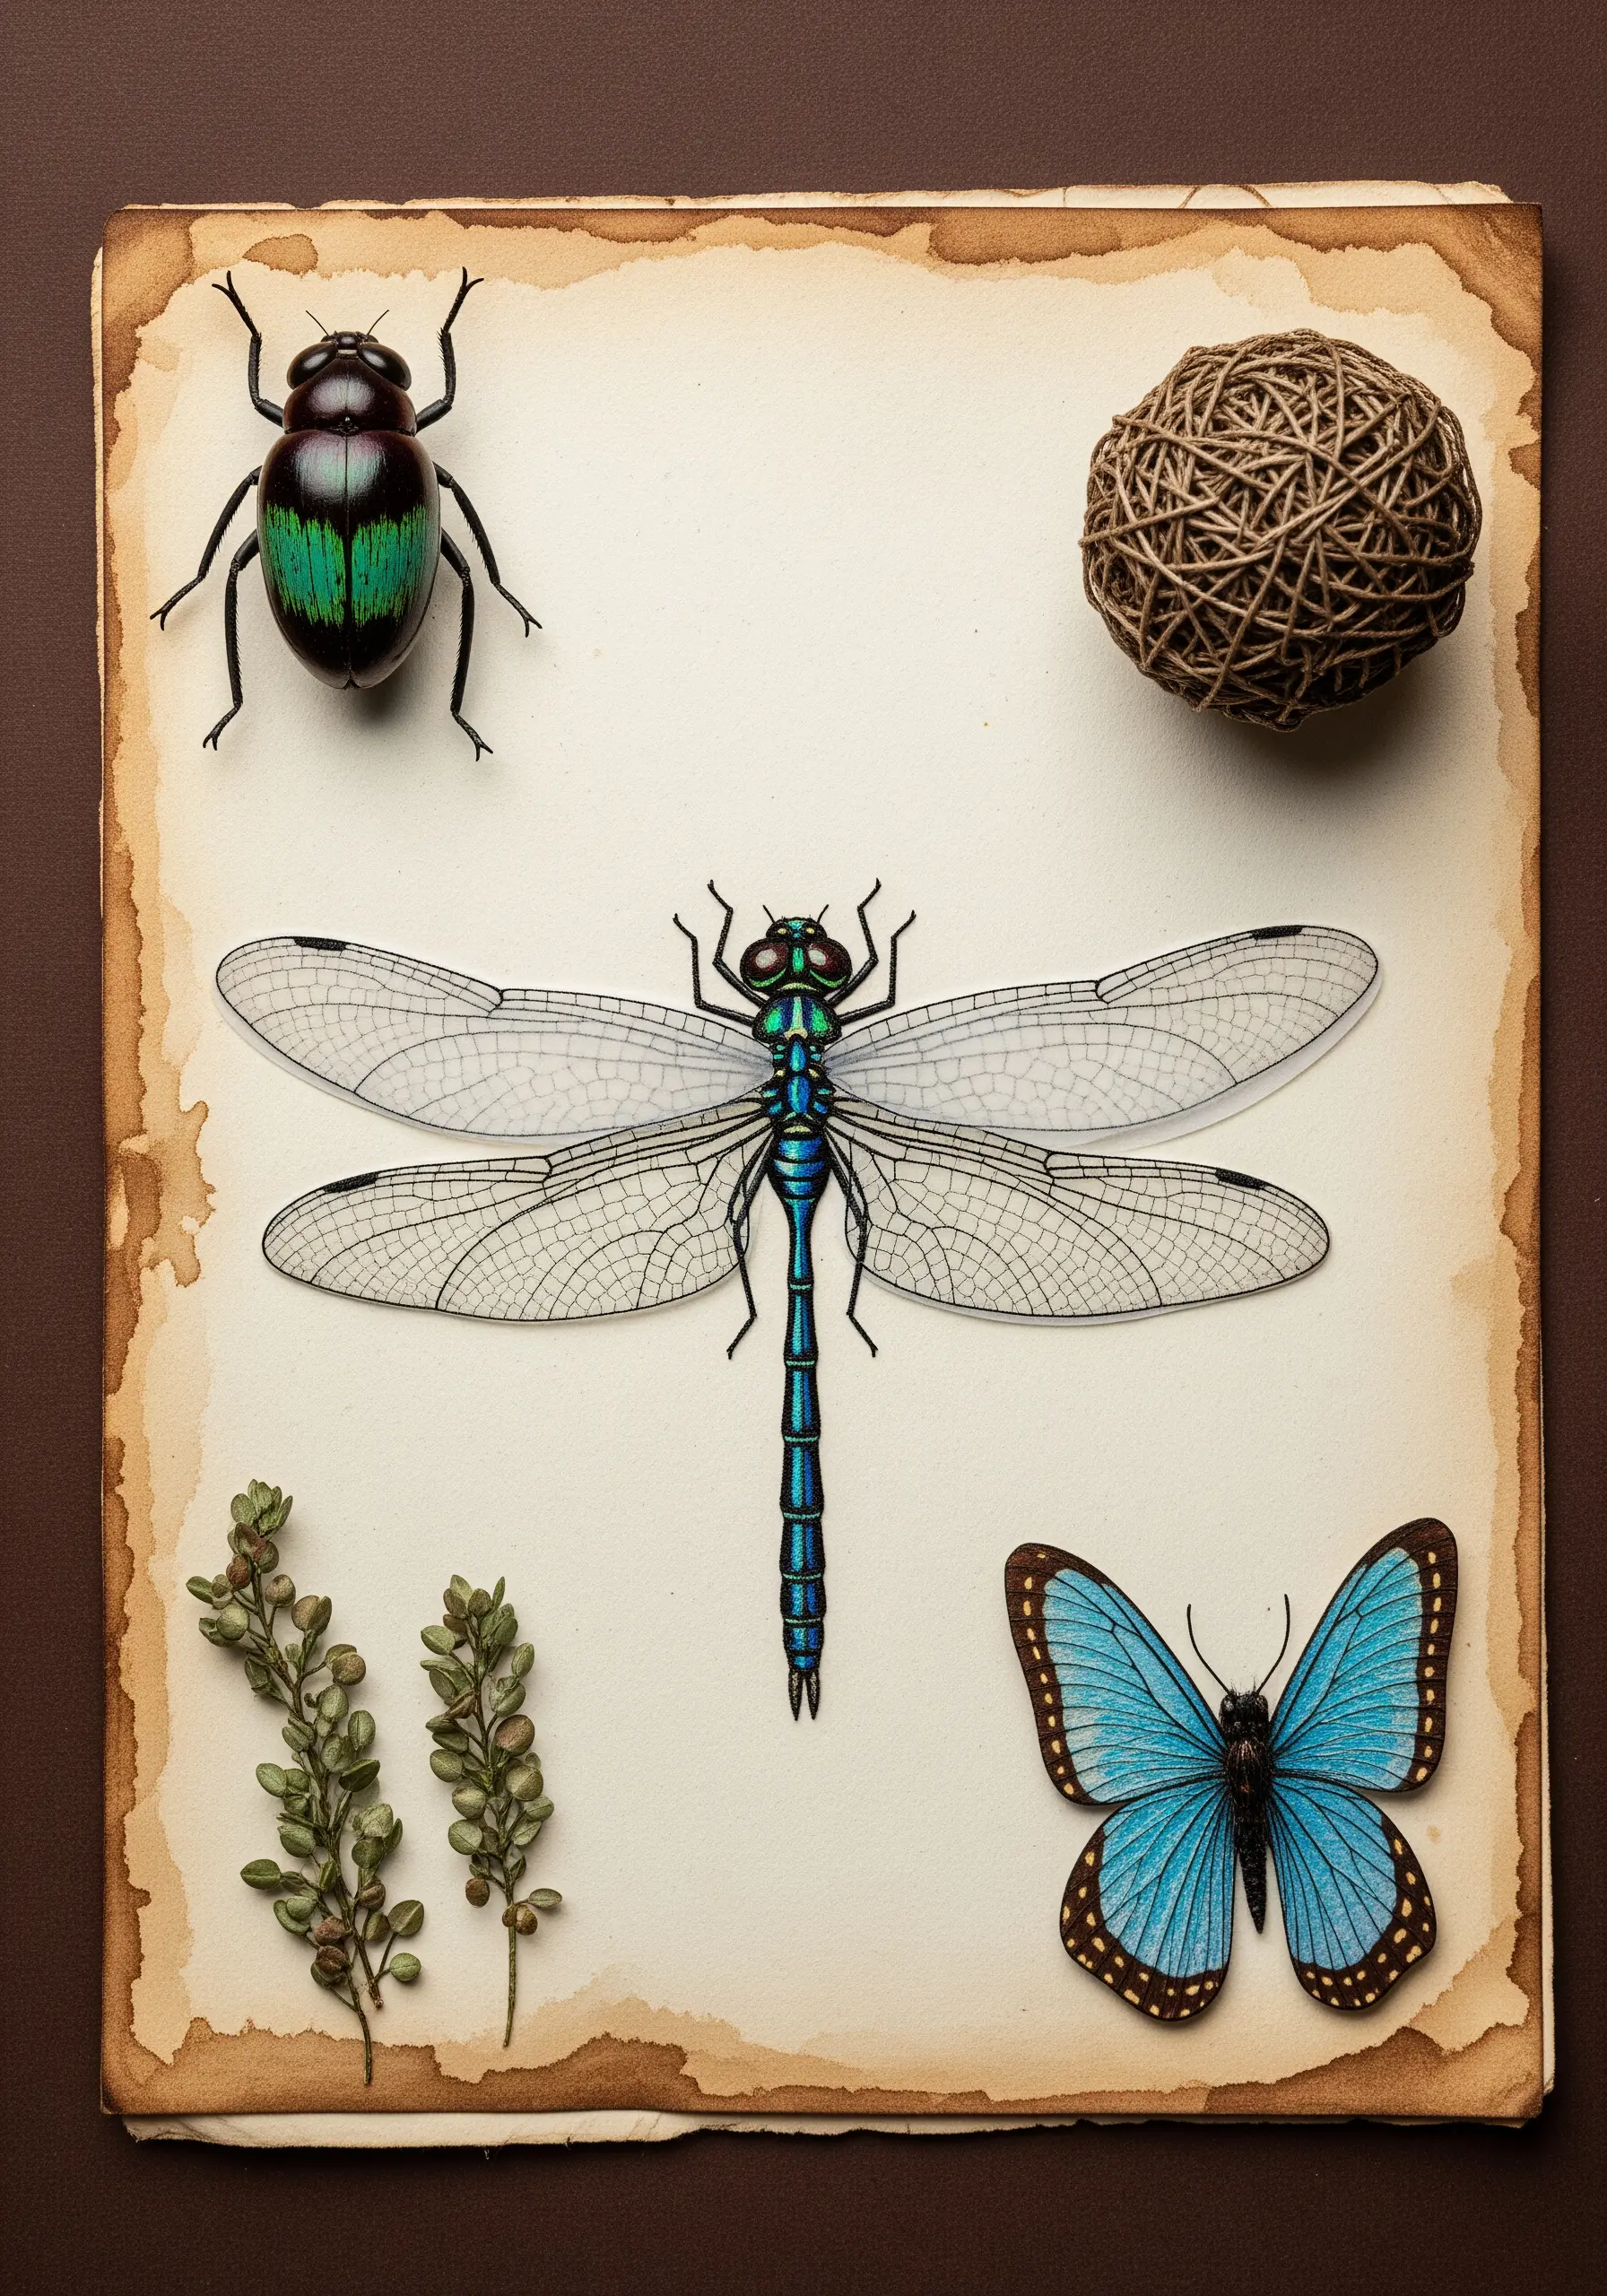
Enhance a printed botanical or entomology illustration with focused, textural embroidery to make it come alive.
Instead of stitching the entire image, select just one or two key features to highlight—the iridescent body of a beetle, the delicate veins on a dragonfly’s wings, or the soft texture of a moth.
Use a smooth satin stitch or a long-and-short stitch with a thread that has a natural sheen, like silk or rayon.
This selective approach adds a surprising element of realism and dimension, ideal for devoted realistic animal insect embroidery patterns.
20. Contrast Sculptural Paint with a Single Thread
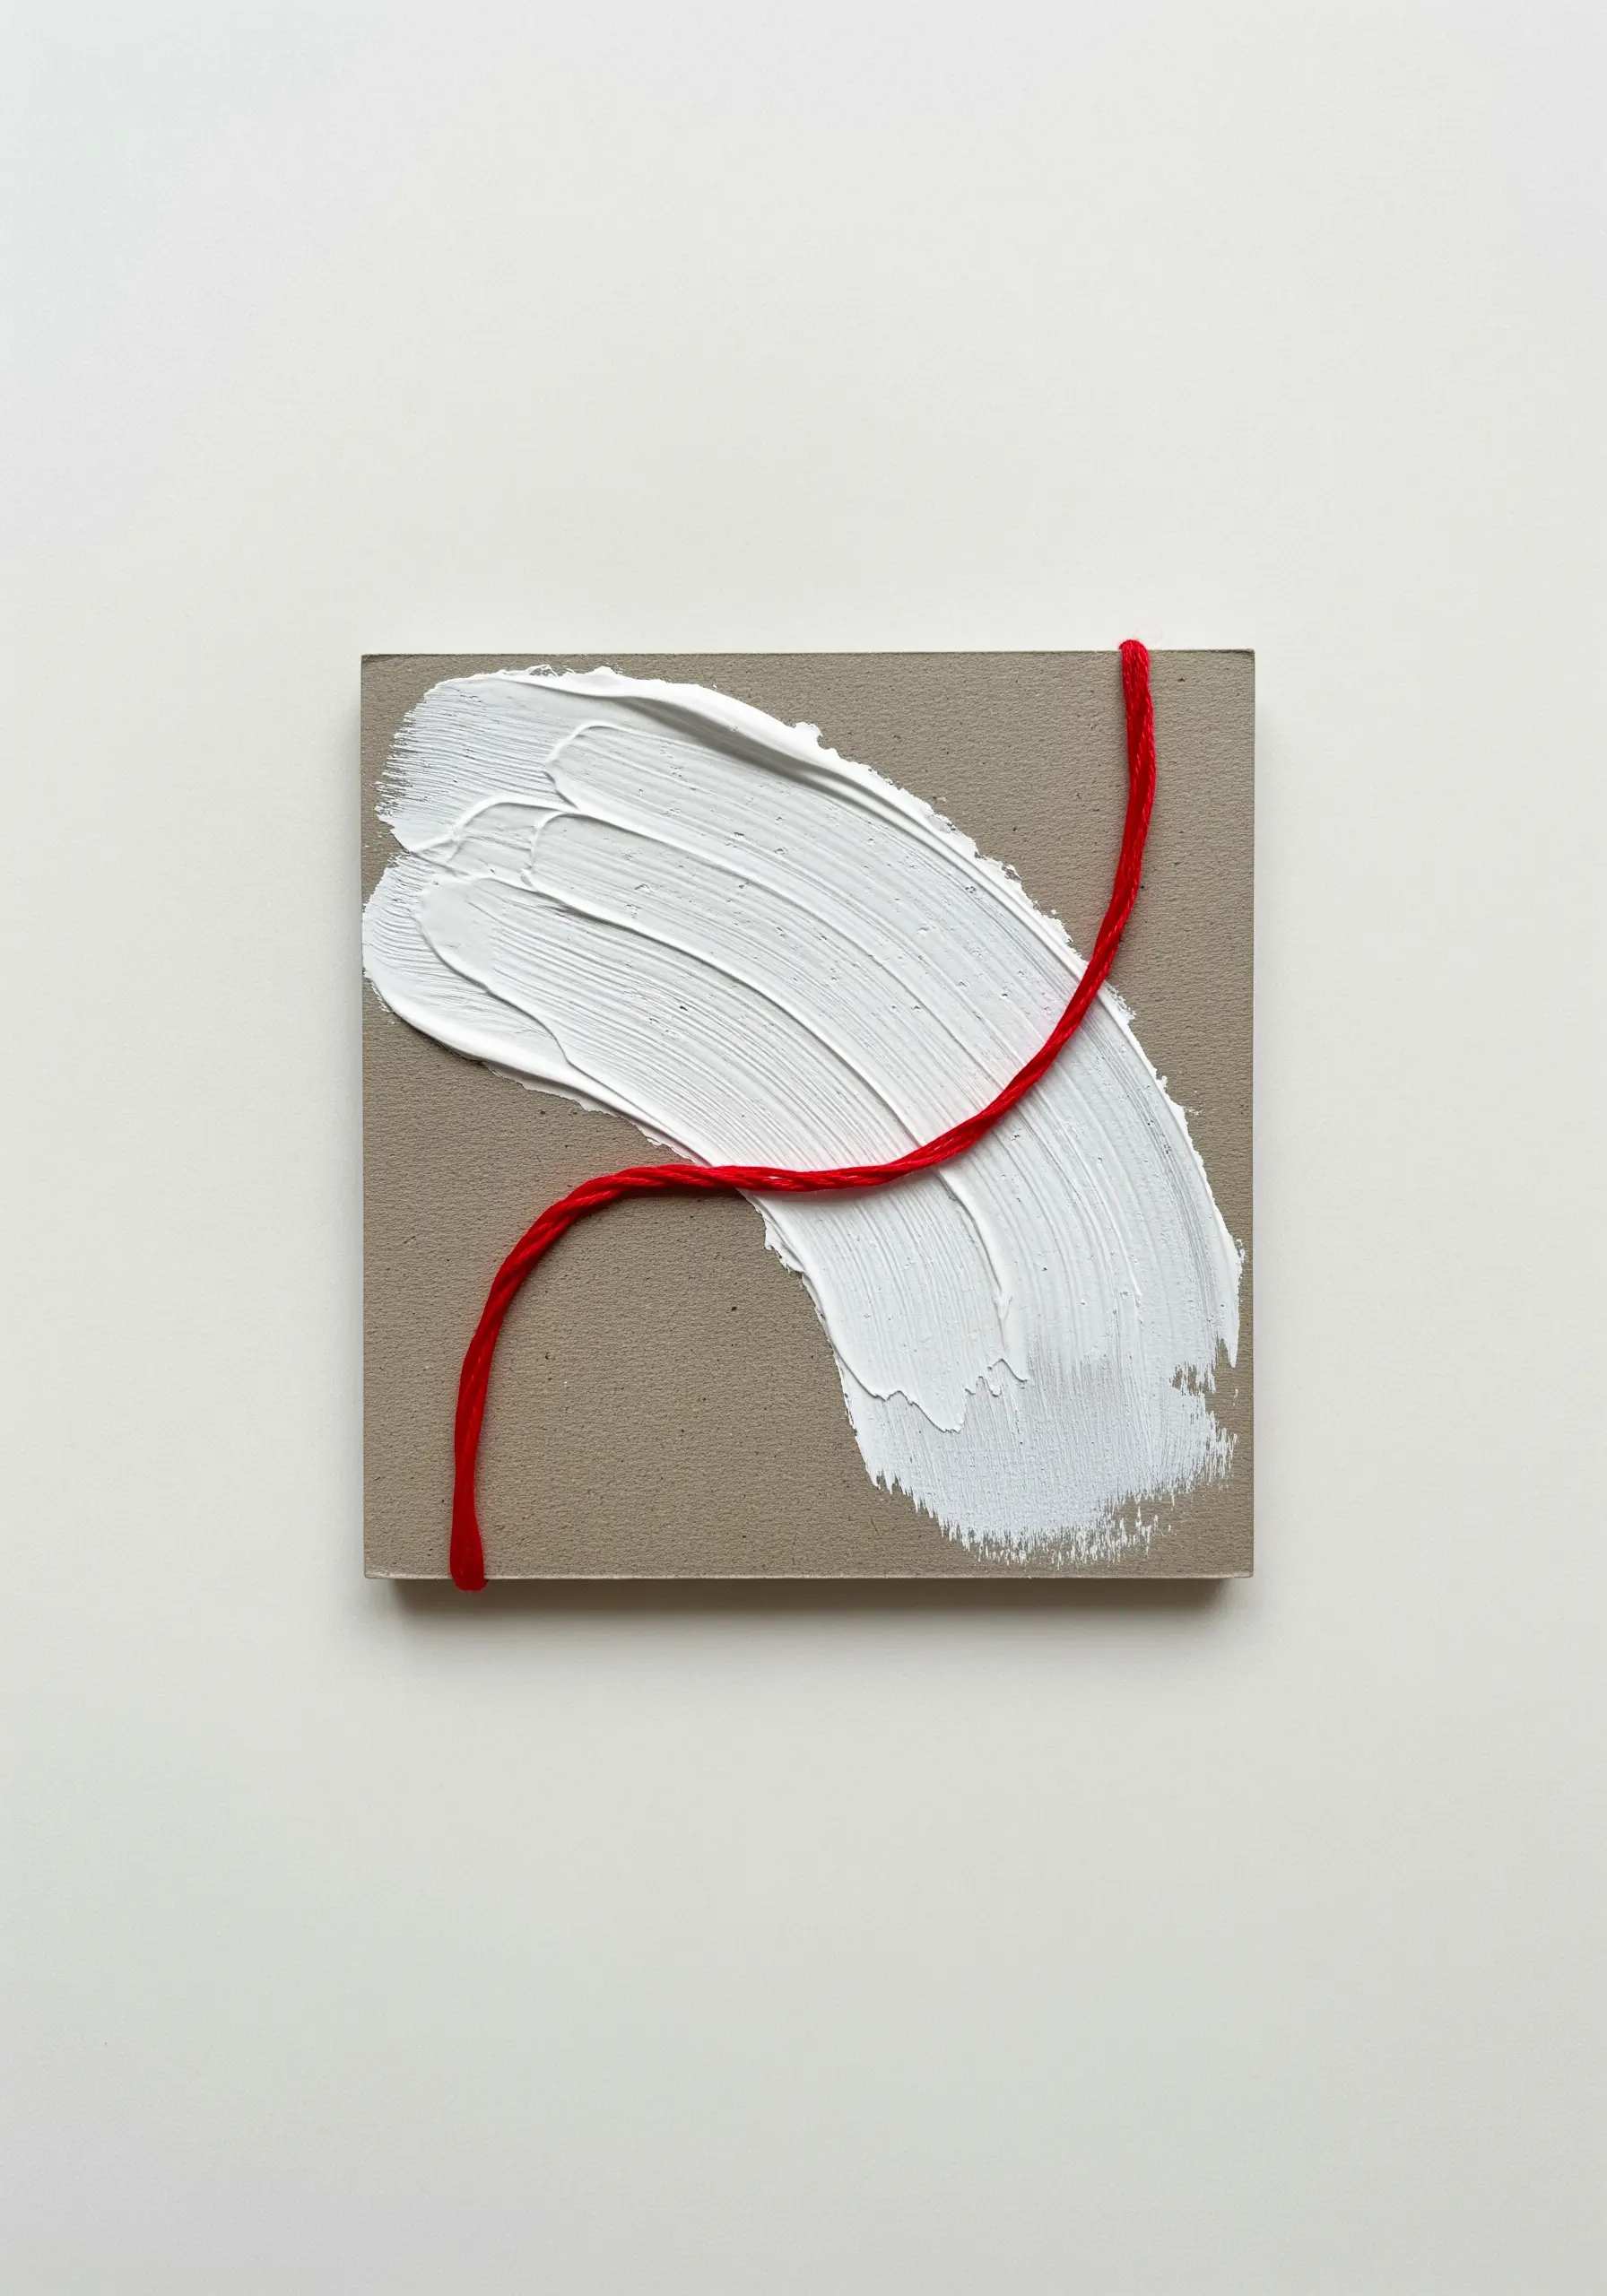
Explore minimalist composition by pairing a thick, expressive swipe of paint with the clean tension of a single thread.
Apply heavy body acrylic paint, gesso, or modeling paste to a small canvas or cardboard square, creating a beautifully imperfect, sculptural texture.
After it dries completely, pierce two holes and stretch a single, bold-colored thread across the paint.
The taut, graphic line of the thread against the organic, matte texture of the paint creates a powerful visual dialogue and is a perfect entry into abstract thread embroidery ideas.


