

A simple canvas tote is more than just a bag; it’s a blank surface waiting for a story. You already have the desire to create something beautiful, but perhaps you feel stuck, wondering how to make your stitches look less like a craft project and more like a piece of wearable art.
The transformation you’re seeking doesn’t come from learning dozens of complex stitches. It comes from intention—from understanding how a padded satin stitch can make a strawberry feel plump, how layering creates a meadow you could step into, or how a single strand of thread can capture the delicacy of a falling petal.
Here, you’ll find more than just inspiration. You’ll find the specific techniques and thoughtful adjustments that elevate your work. It’s time to pick up your needle not just to stitch, but to paint, to sculpt, and to grow a garden you can carry with you every day.
1. The Immersive Wildflower Meadow

To create the illusion of a dense, wild meadow, you must think in layers.
Begin with the elements in the background, like the lavender and filler foliage, using simple stem stitches and straight stitches.
Next, introduce your mid-ground flowers, such as the daisies, using detached chain stitches for the petals and French knots for the centers.
Finally, stitch the foreground poppies with a rich satin stitch, allowing them to physically overlap the other elements. This layering is what creates convincing depth and texture.
Use a heavy canvas tote that can support the density of the stitching without puckering or losing its shape.
2. The High-Contrast Poppy Statement
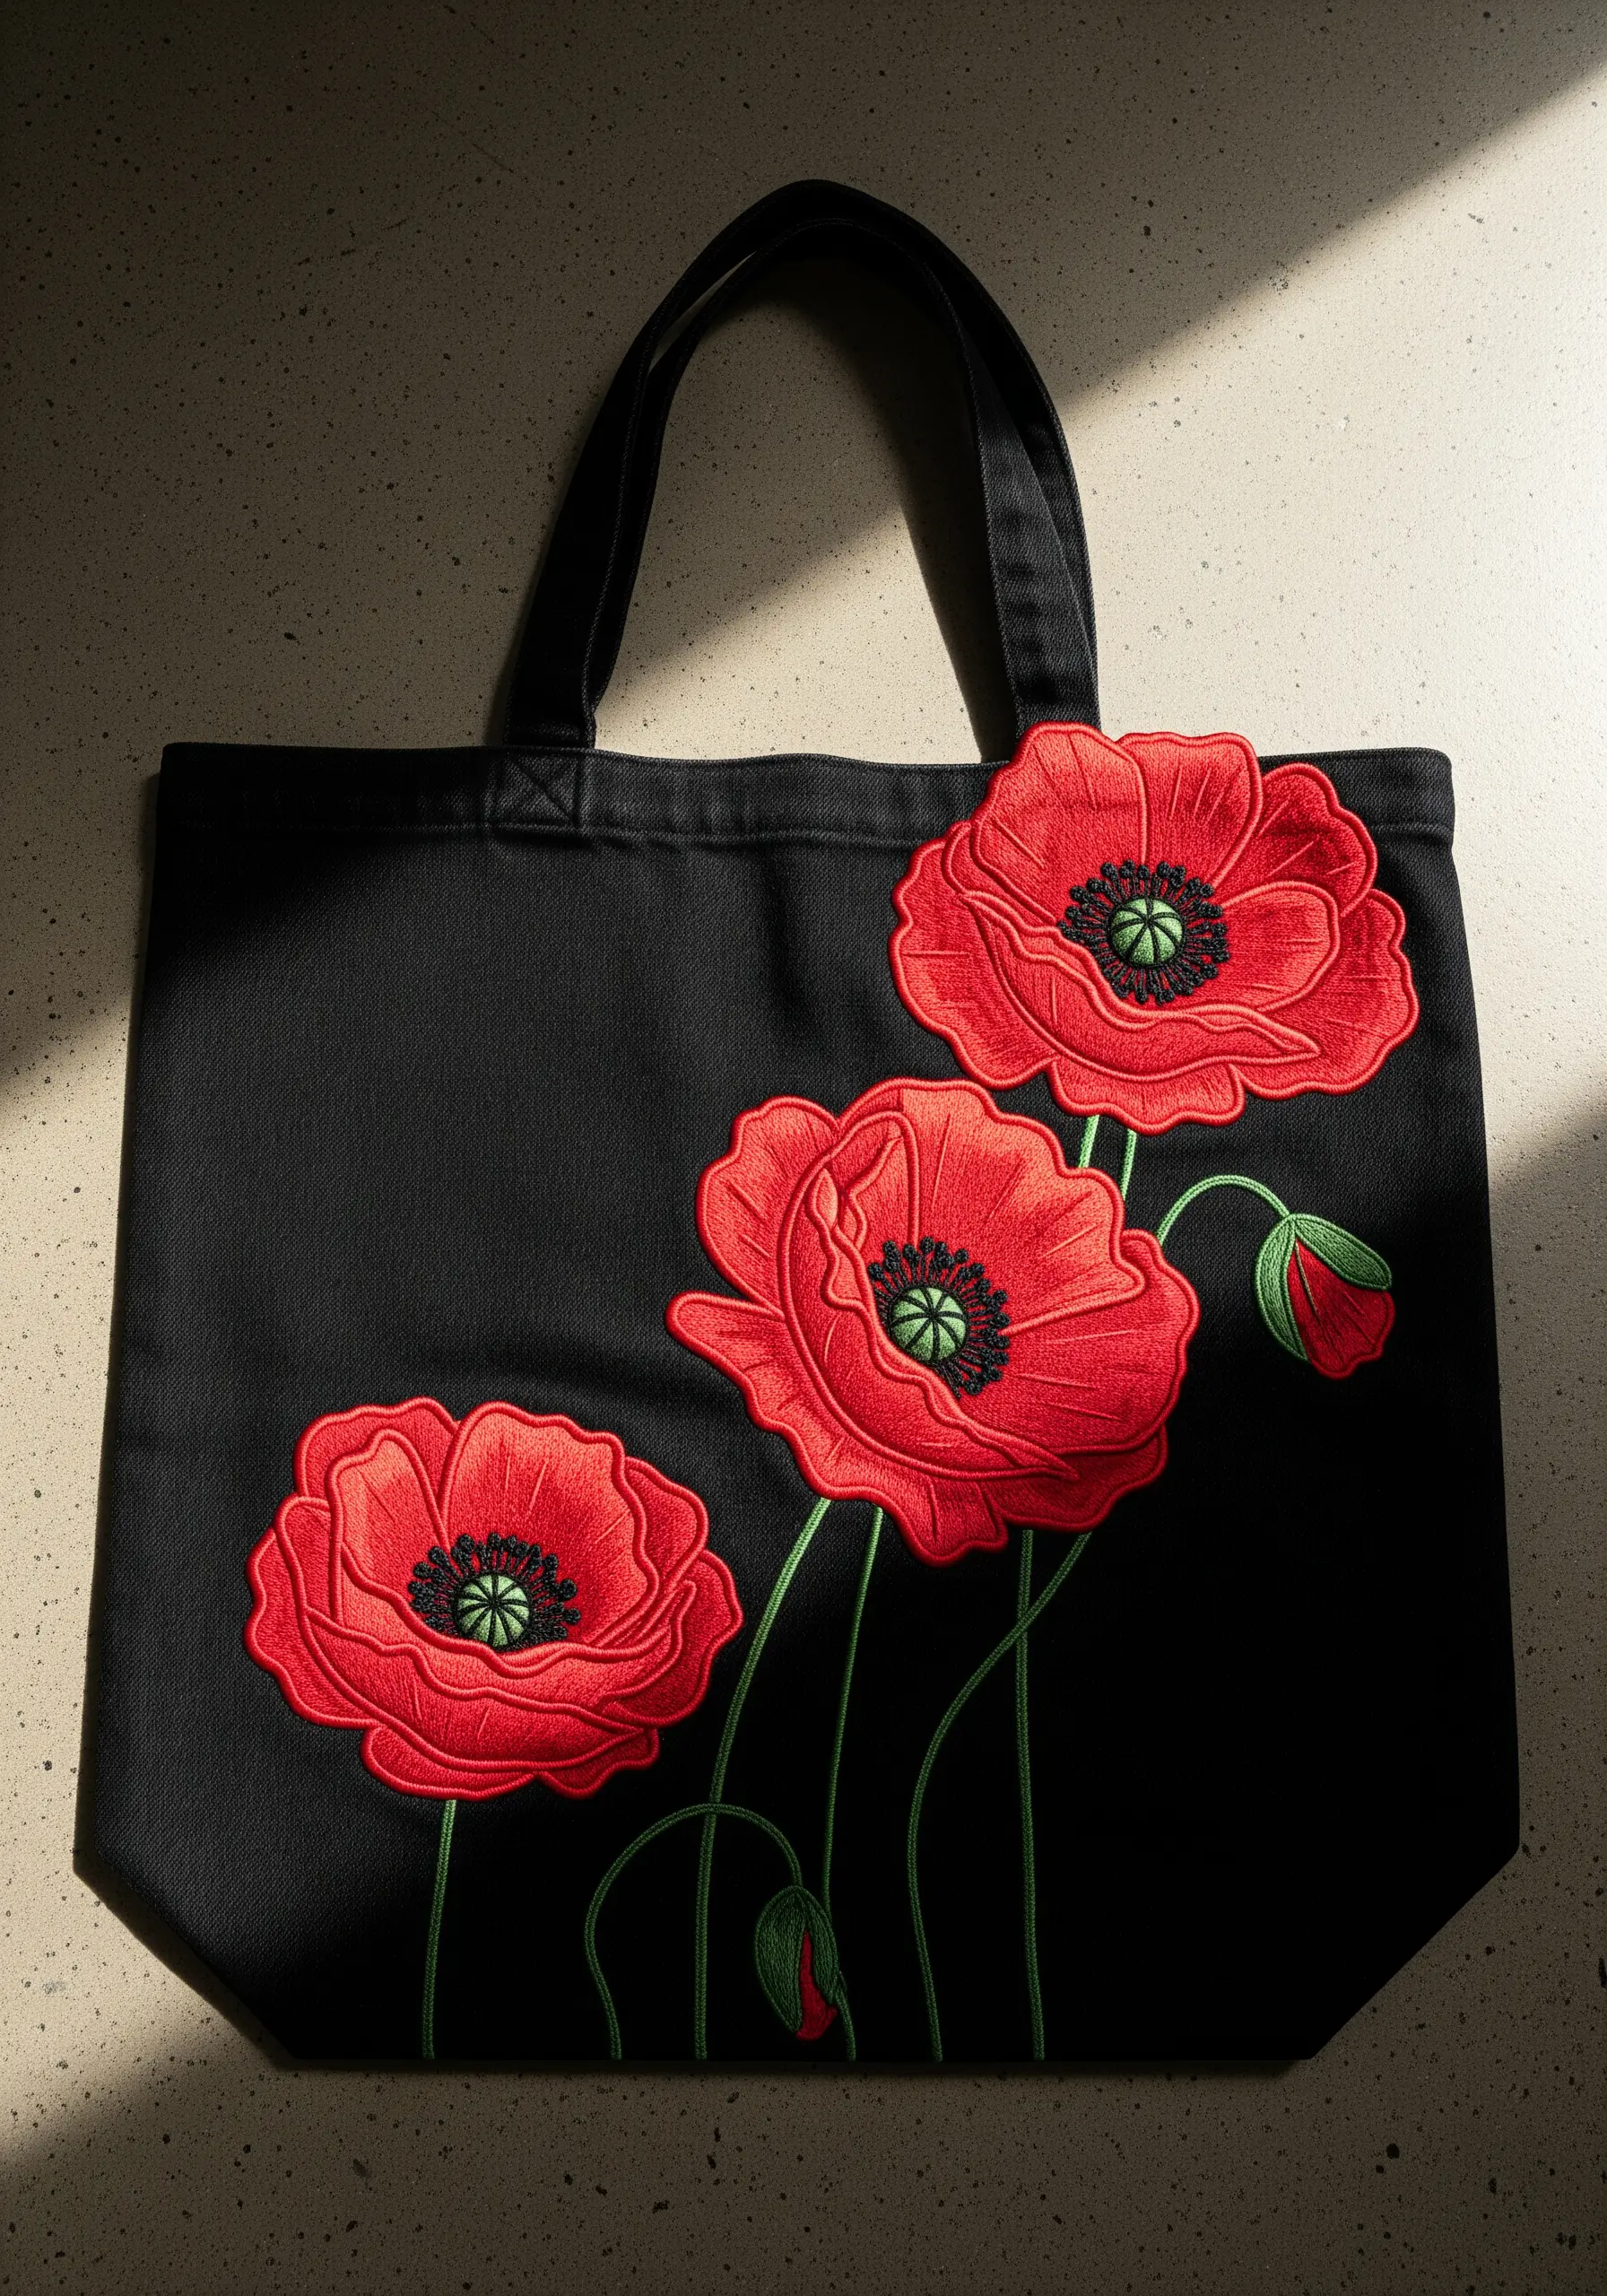
This design gains its power from the stark contrast between vibrant red thread and black fabric.
To ensure your edges are impeccably clean, first outline each petal with a precise split stitch. This raised line acts as a perfect boundary for your fill stitches.
Fill the petals using a long-and-short stitch, blending two or three shades of red to give the flowers subtle volume and prevent them from looking flat.
For the centers, build up dense French knots in black and dark green to create a realistic, seed-like texture that draws the eye.
3. The Minimalist Botanical Wreath
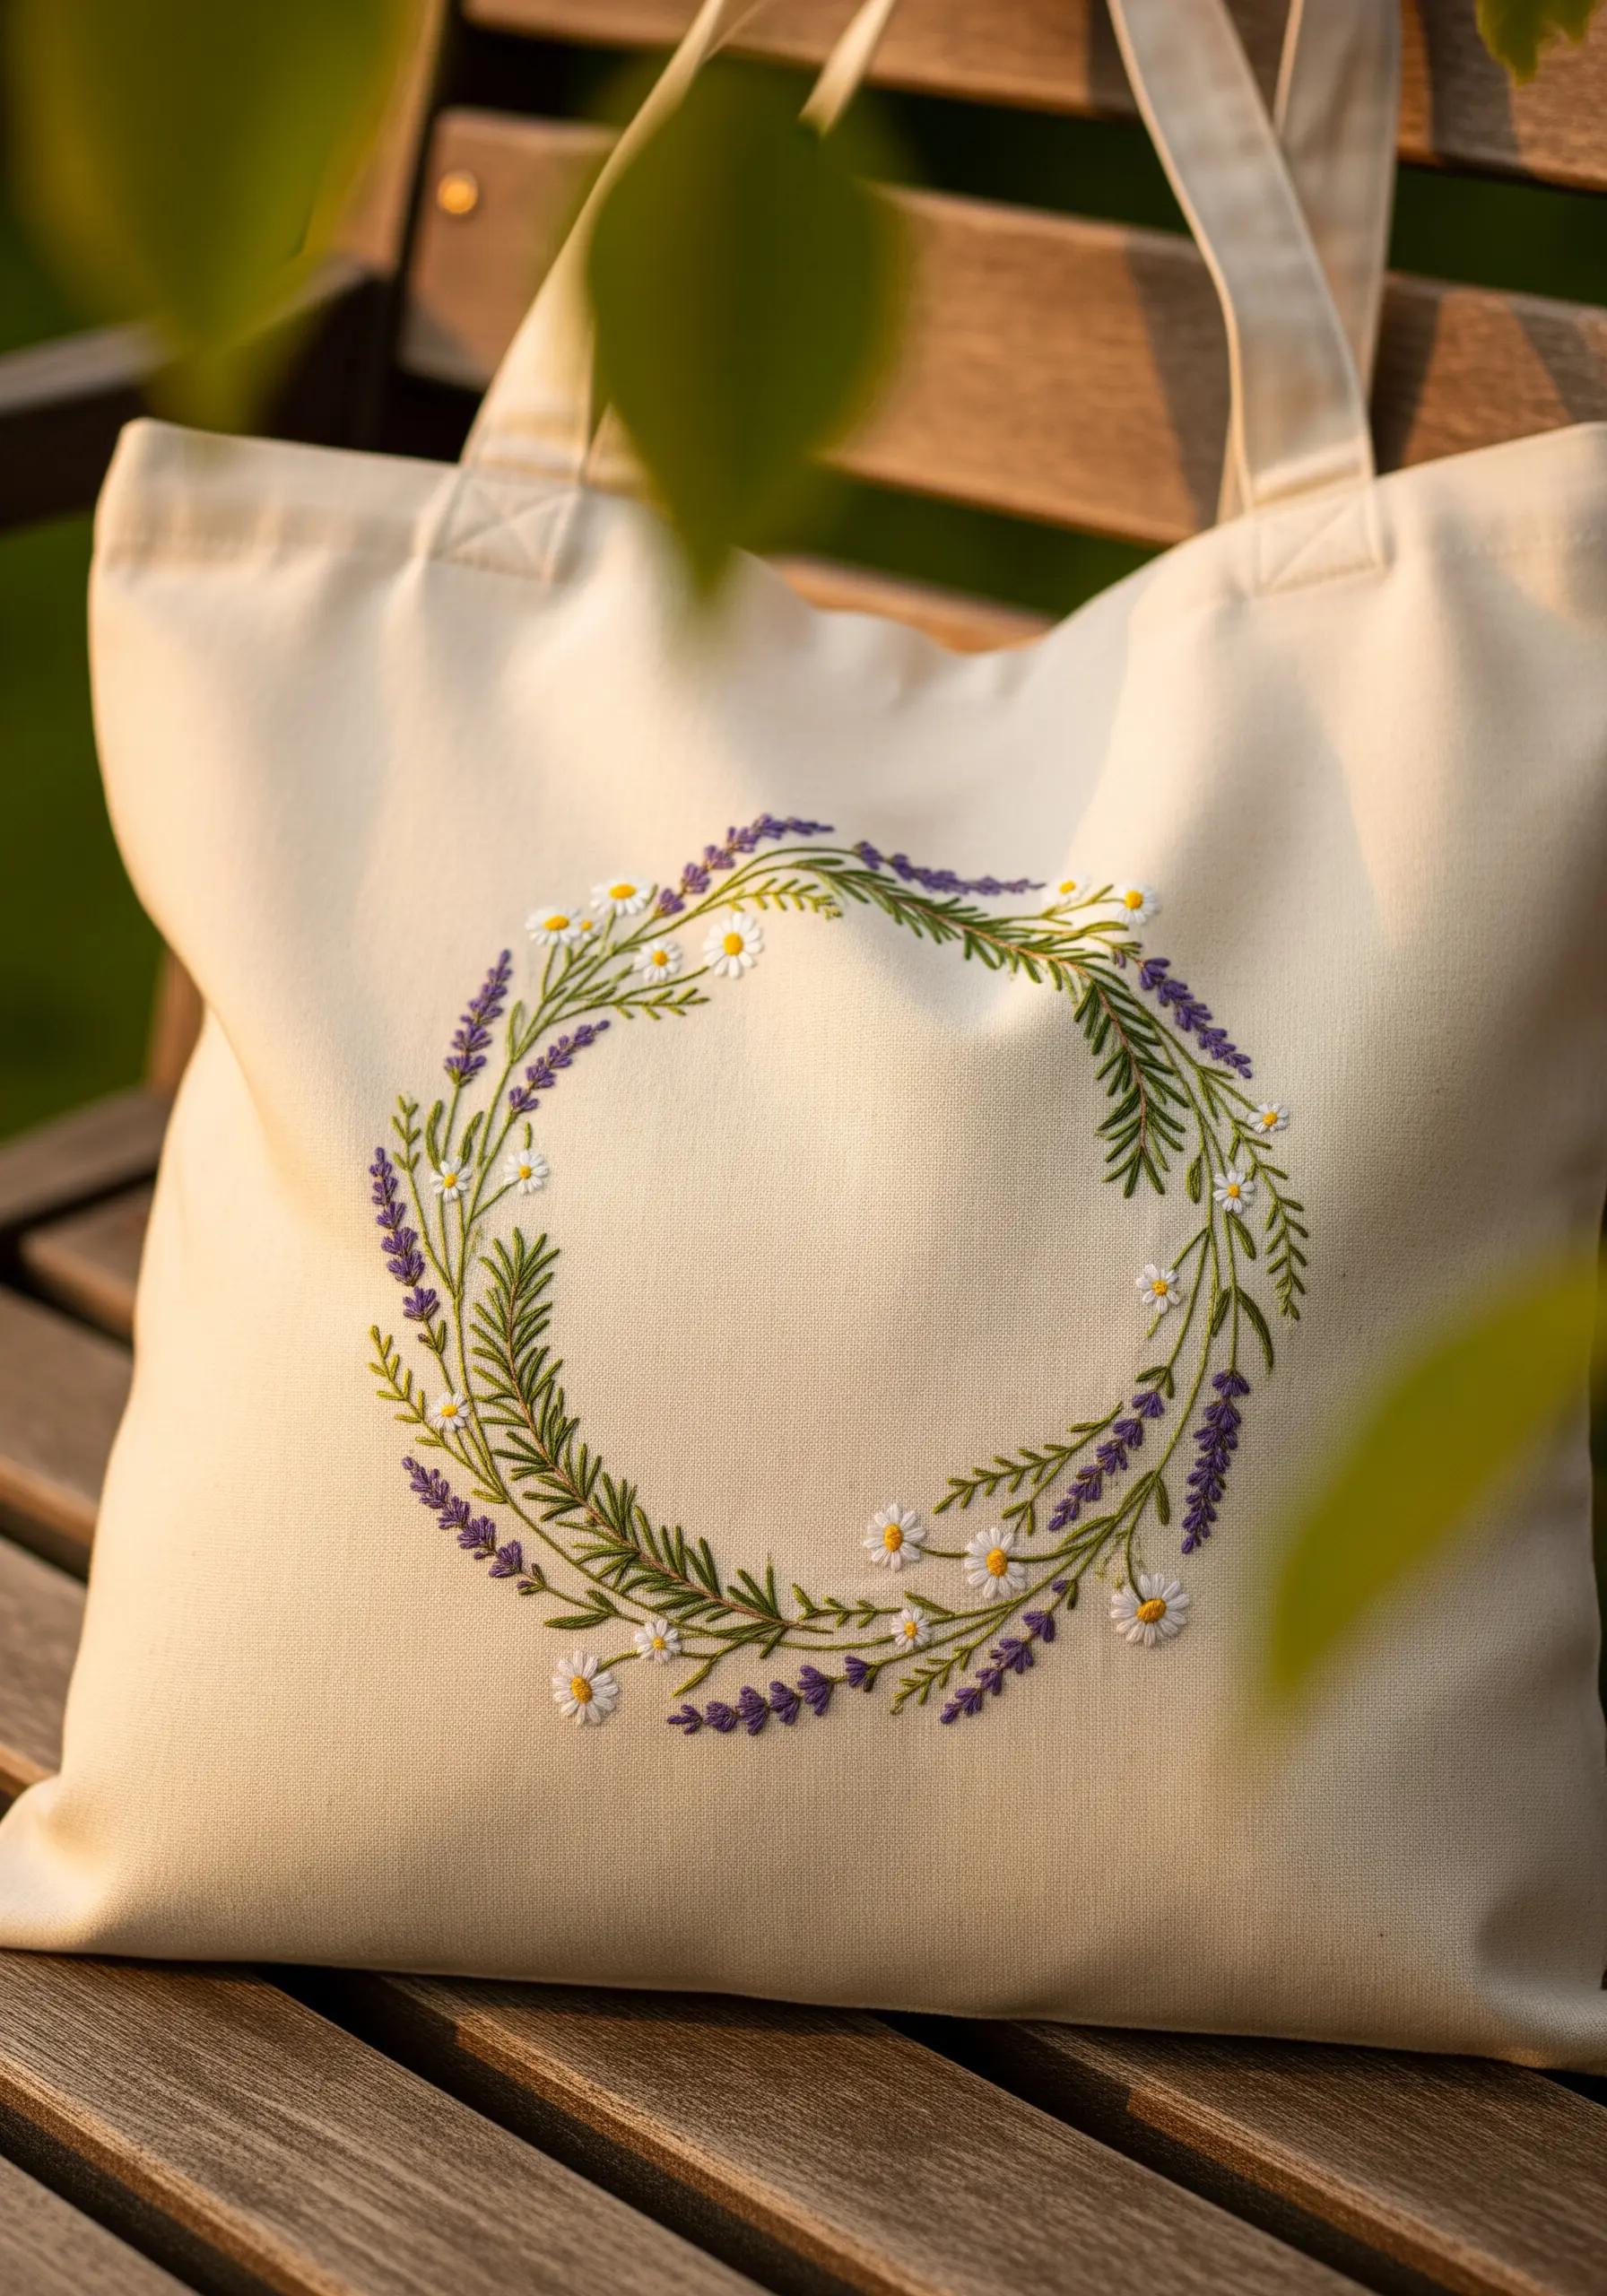
The elegance of this design lies in its use of negative space; the wreath is meant to frame the empty center, not fill the entire surface.
Work with a light hand, using only one or two strands of floss for a delicate, illustrative quality.
Create the lavender sprigs with tiny straight stitches or French knots clustered along a stem-stitched line.
For the daisies and greenery, use lazy daisy and fern stitches, ensuring they are spaced apart to maintain the design’s airy, light feel. This is one of those neutral-tone embroidery designs that turn blank tote bags into chic everyday accessories.
4. The Tropical Composition on Jute
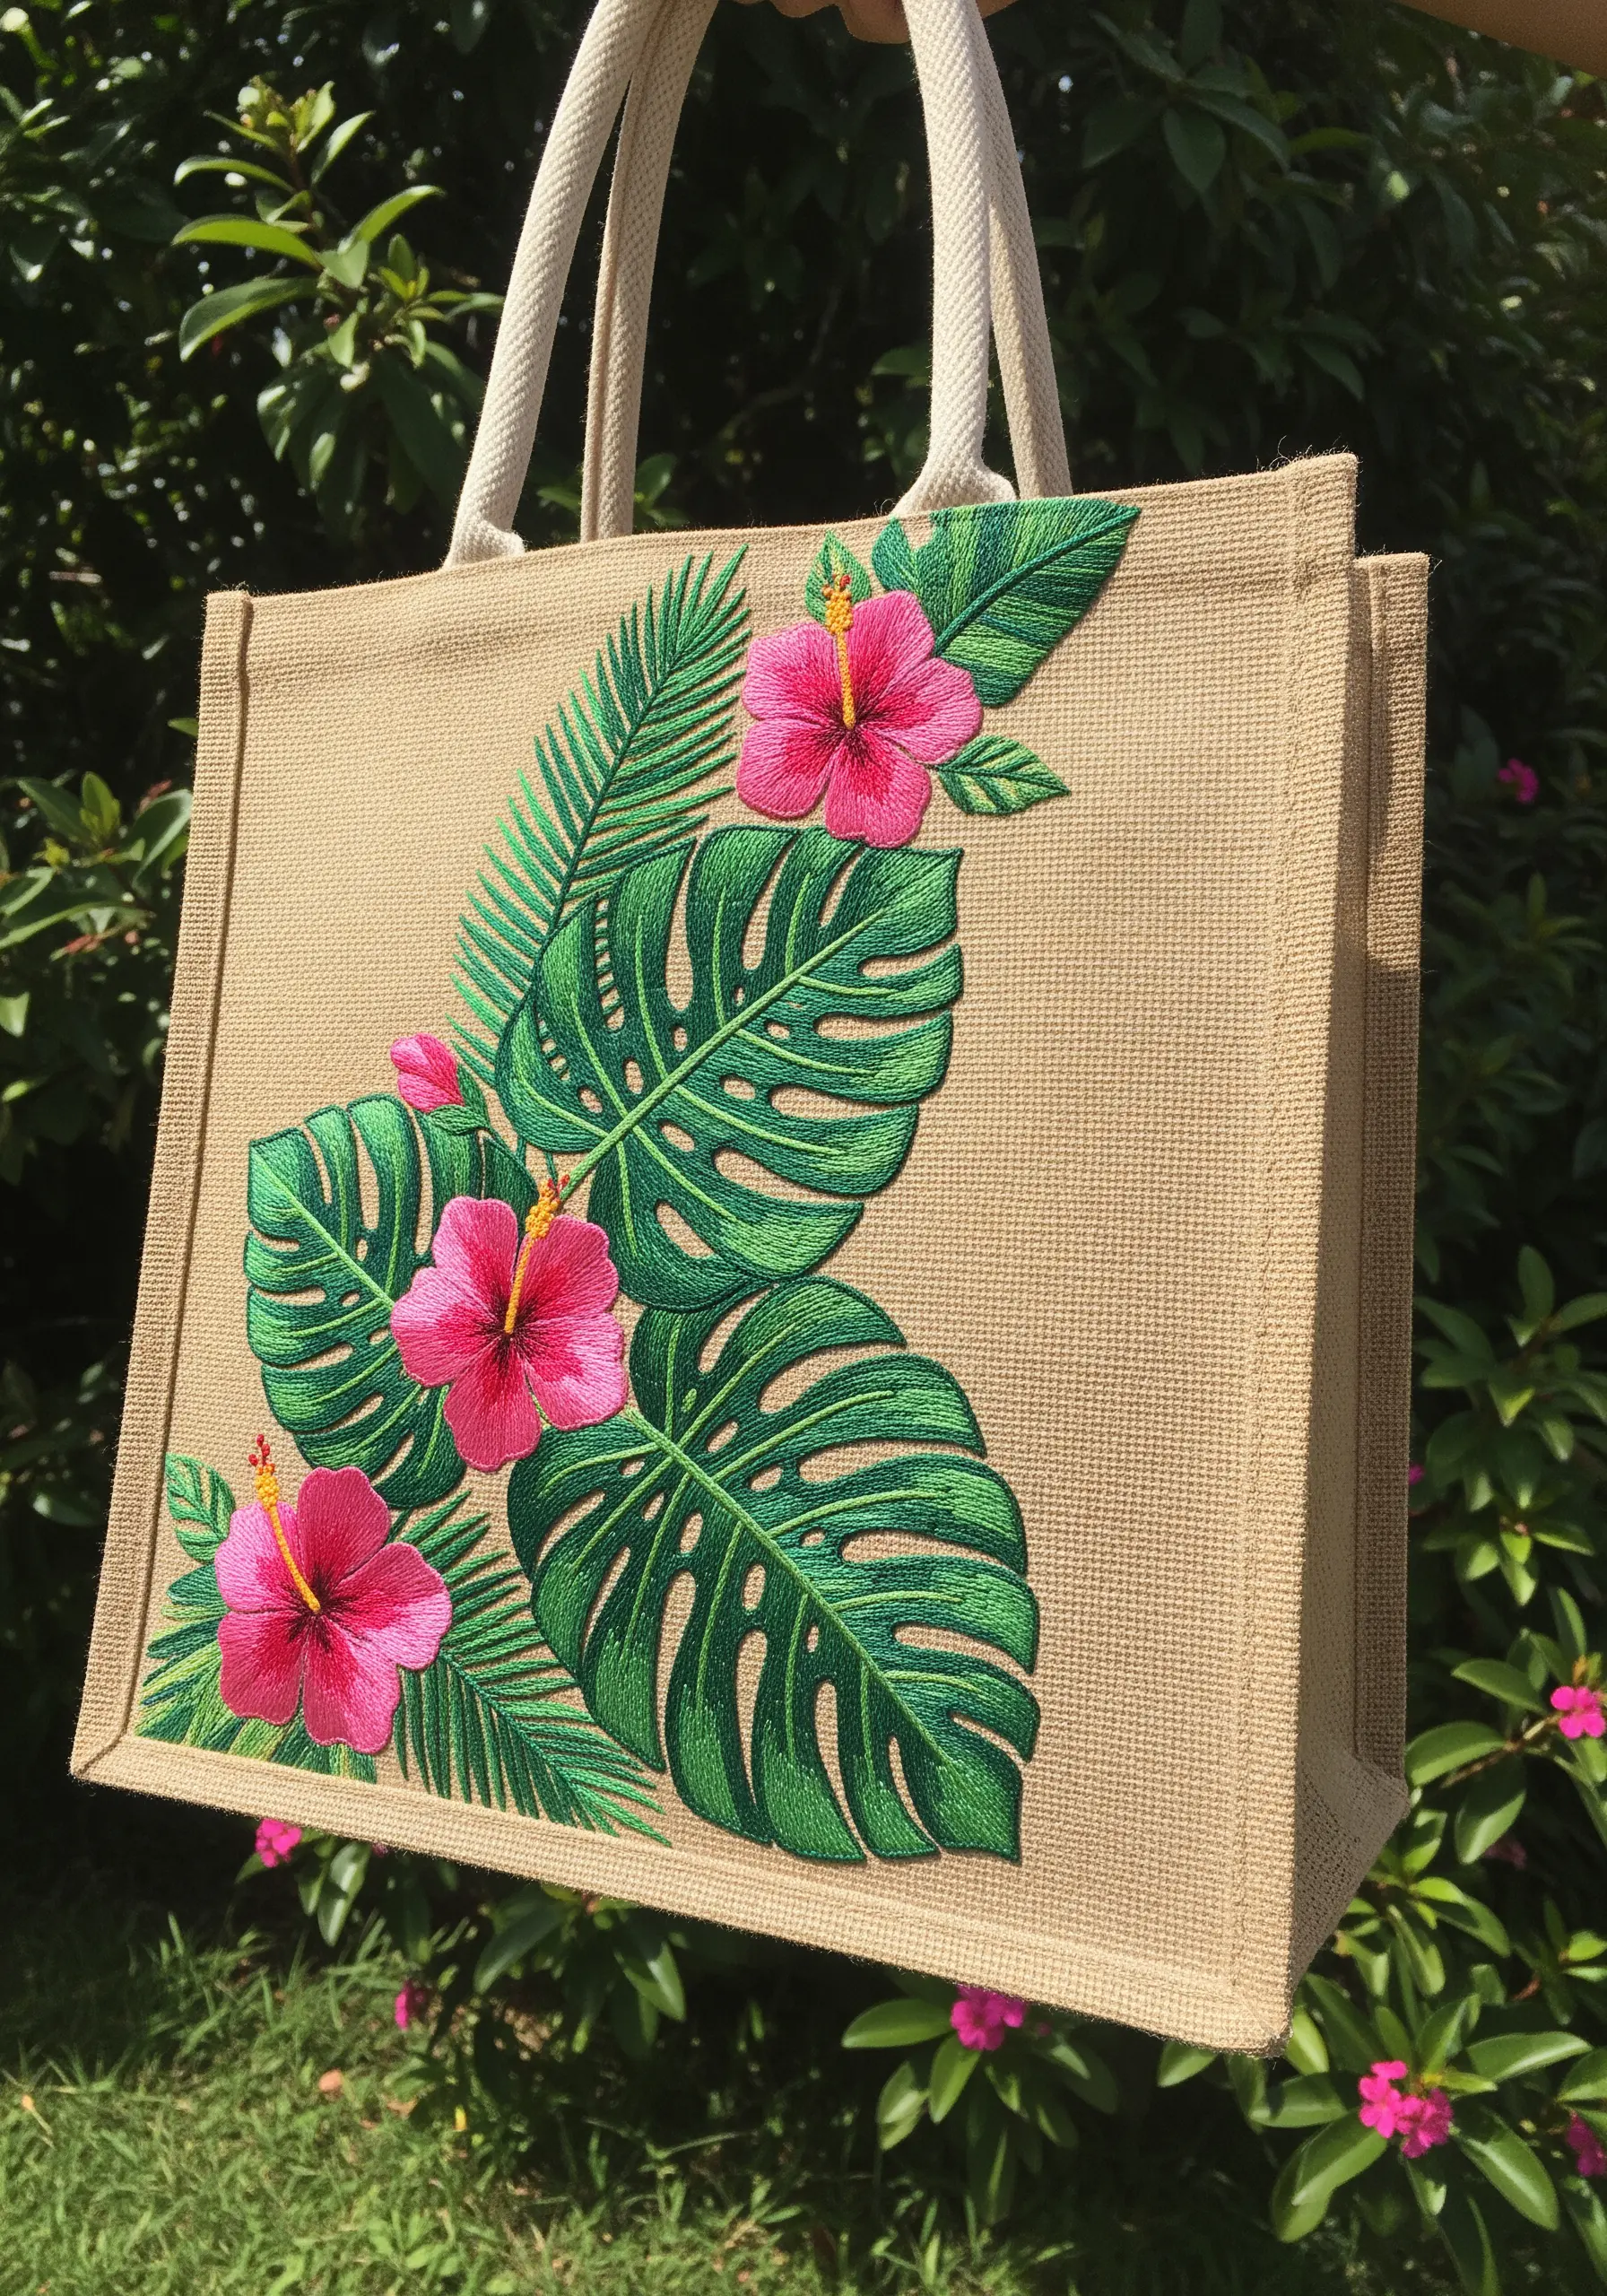
Stitching on a coarse, open-weave fabric like jute requires a different approach than cotton or linen.
Always use an iron-on stabilizer on the back of your stitching area. This prevents the jute from stretching and keeps your stitches from sinking into the weave.
Use all six strands of embroidery floss or even a thicker pearl cotton to achieve the opaque, solid coverage needed for the bold leaves and flowers.
To create a subtle sheen and mimic the look of veins on the large monstera leaves, divide them into smaller sections and angle your satin stitches differently in each one.
5. The Asymmetrical Cherry Blossom Branch

Bring your blossoms to life by introducing three-dimensional elements.
Stitch most flowers flat against the fabric using a simple satin stitch, but for a few key blossoms, use a detached buttonhole stitch to create petals that lift away from the surface.
Give the branch itself a sense of weight and texture by using a padded satin stitch or by couching a thicker brown thread.
Enhance the feeling of movement by scattering a few single stitches around the main branch, suggesting petals caught in a gentle breeze. This technique helps capture Japanese-inspired elegance on fabric.
6. The Painterly Saturated Bouquet
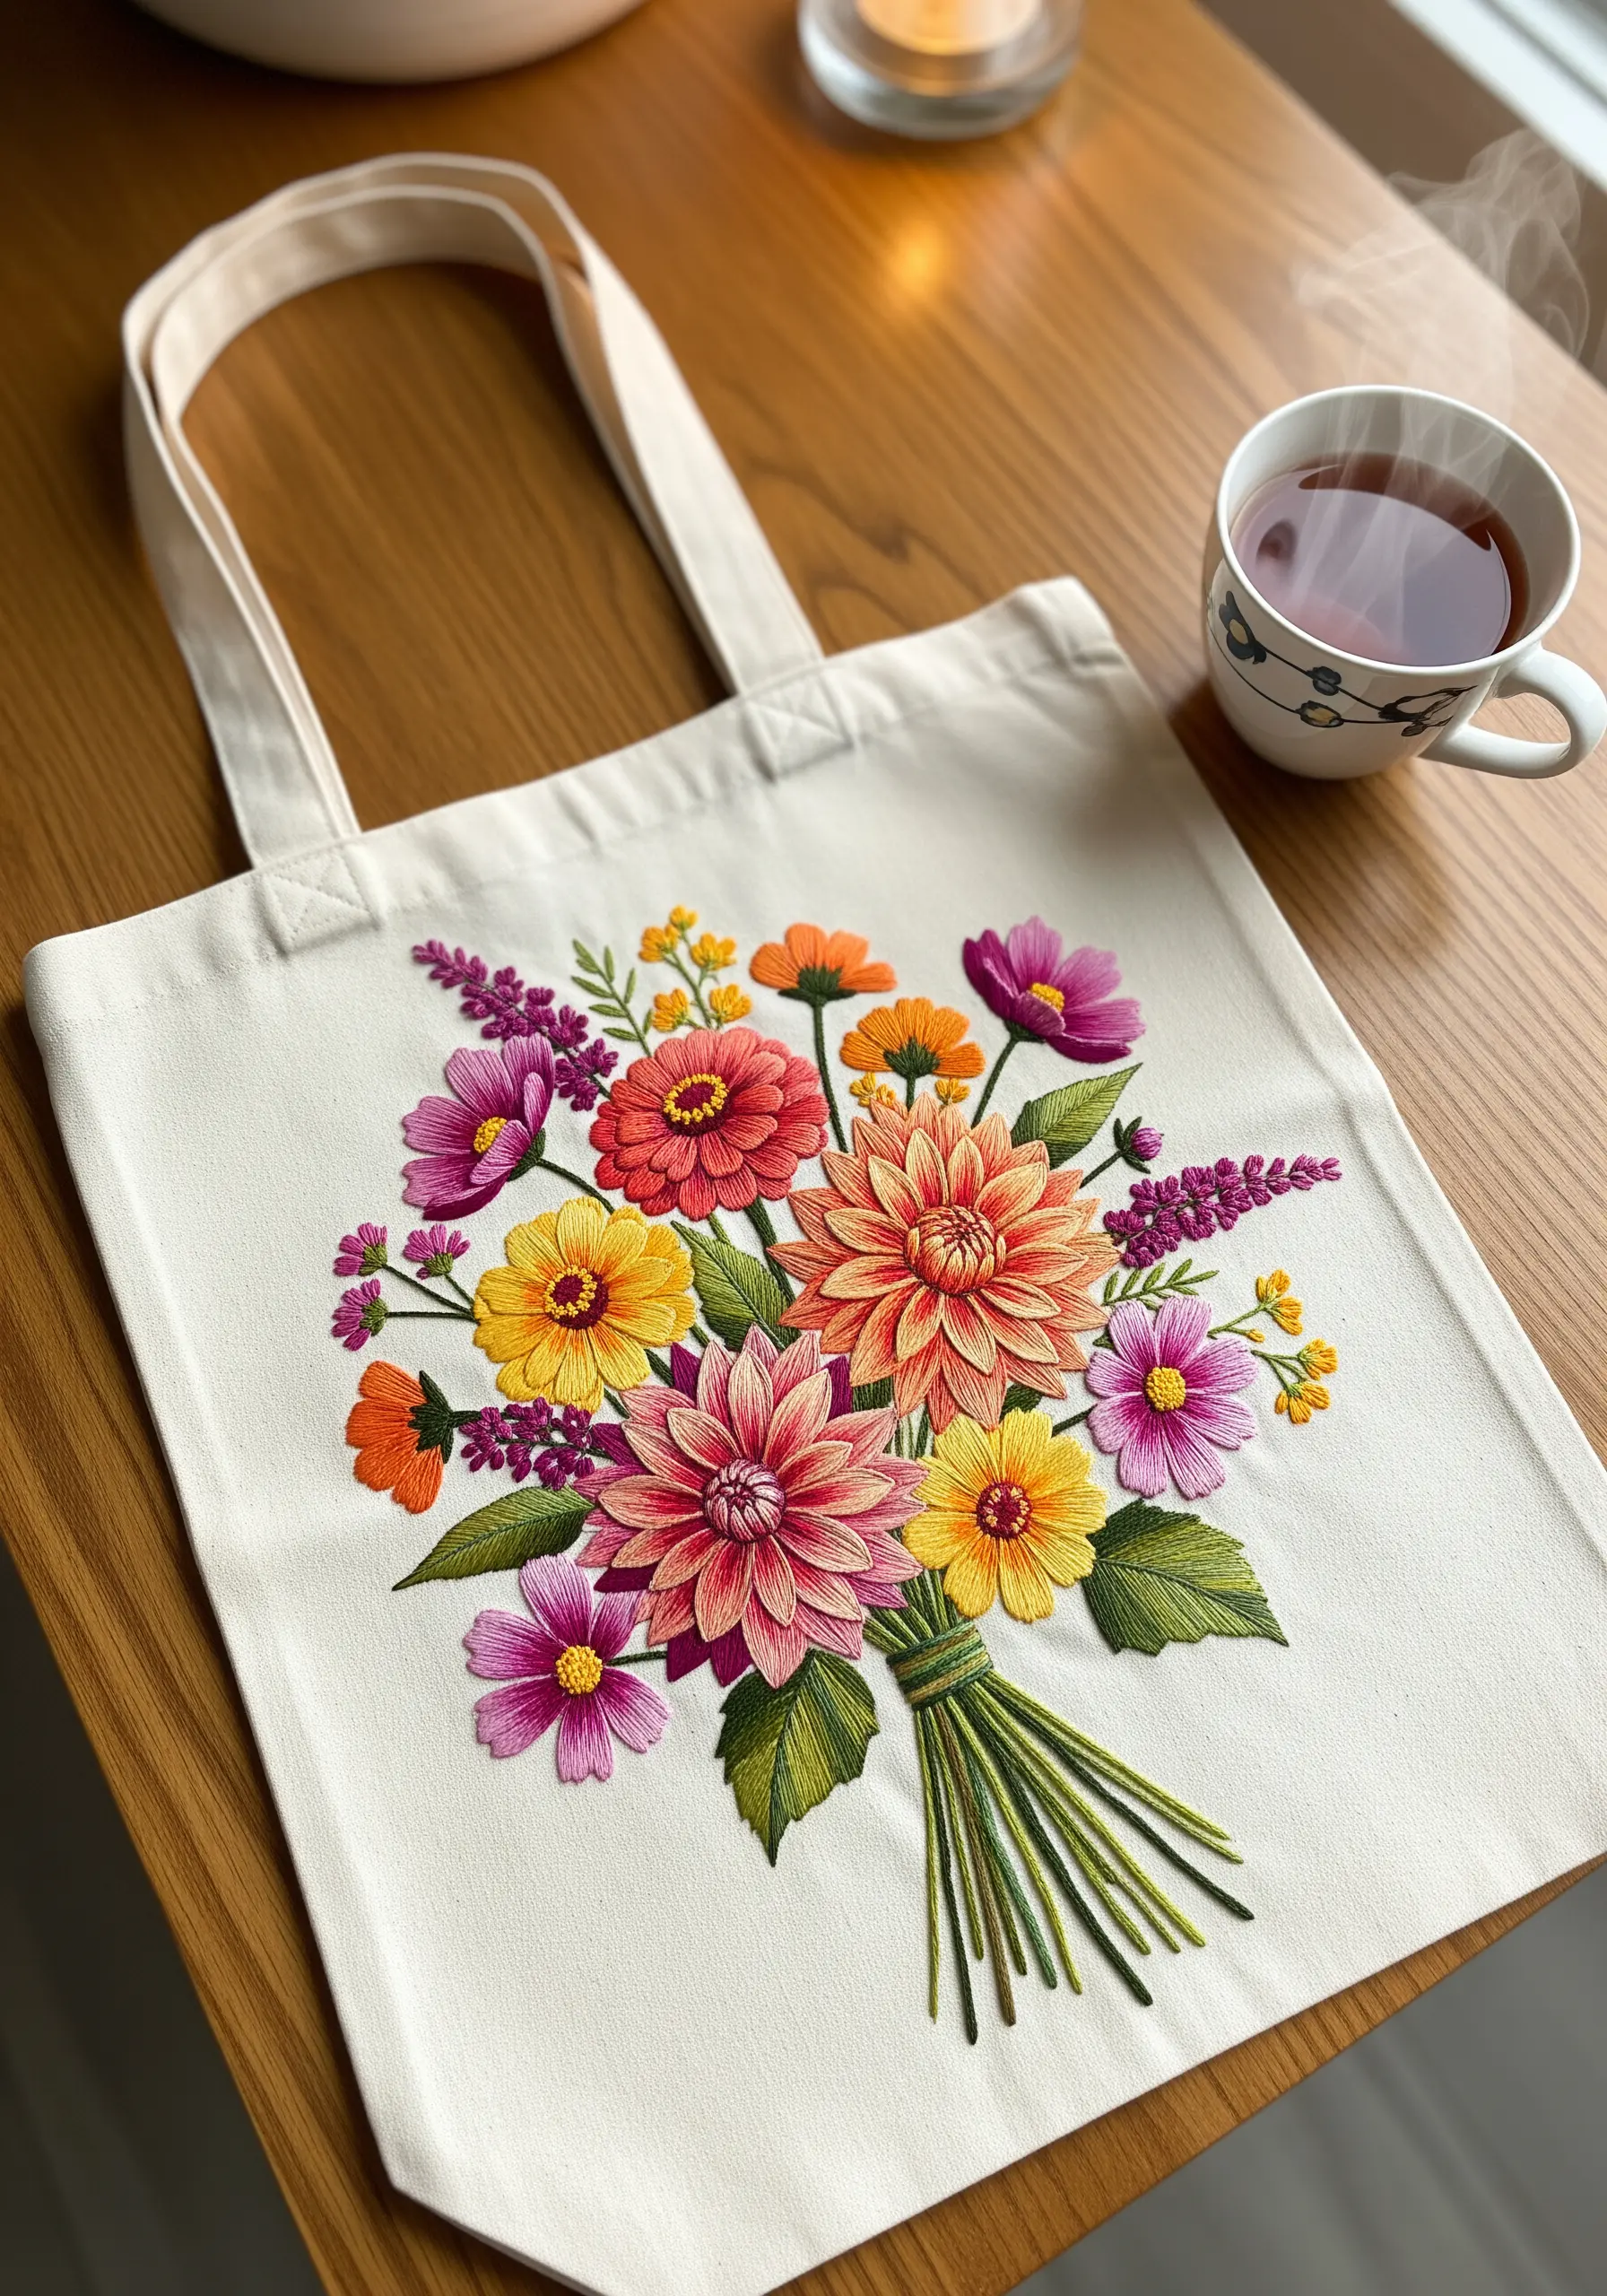
To achieve this rich, painted look, you will use a technique called thread painting, which relies on the long-and-short stitch.
For each flower, select a family of at least three related shades (light, medium, dark) to create realistic gradients.
Work with a single strand of floss to allow for the most seamless blending between colors. Your stitches should be staggered and overlap slightly, just like brushstrokes.
Don’t shy away from a vibrant, saturated color palette; the interplay of warm and cool tones is what gives this bouquet its energy and life.
7. The Woodland Floor Botanical
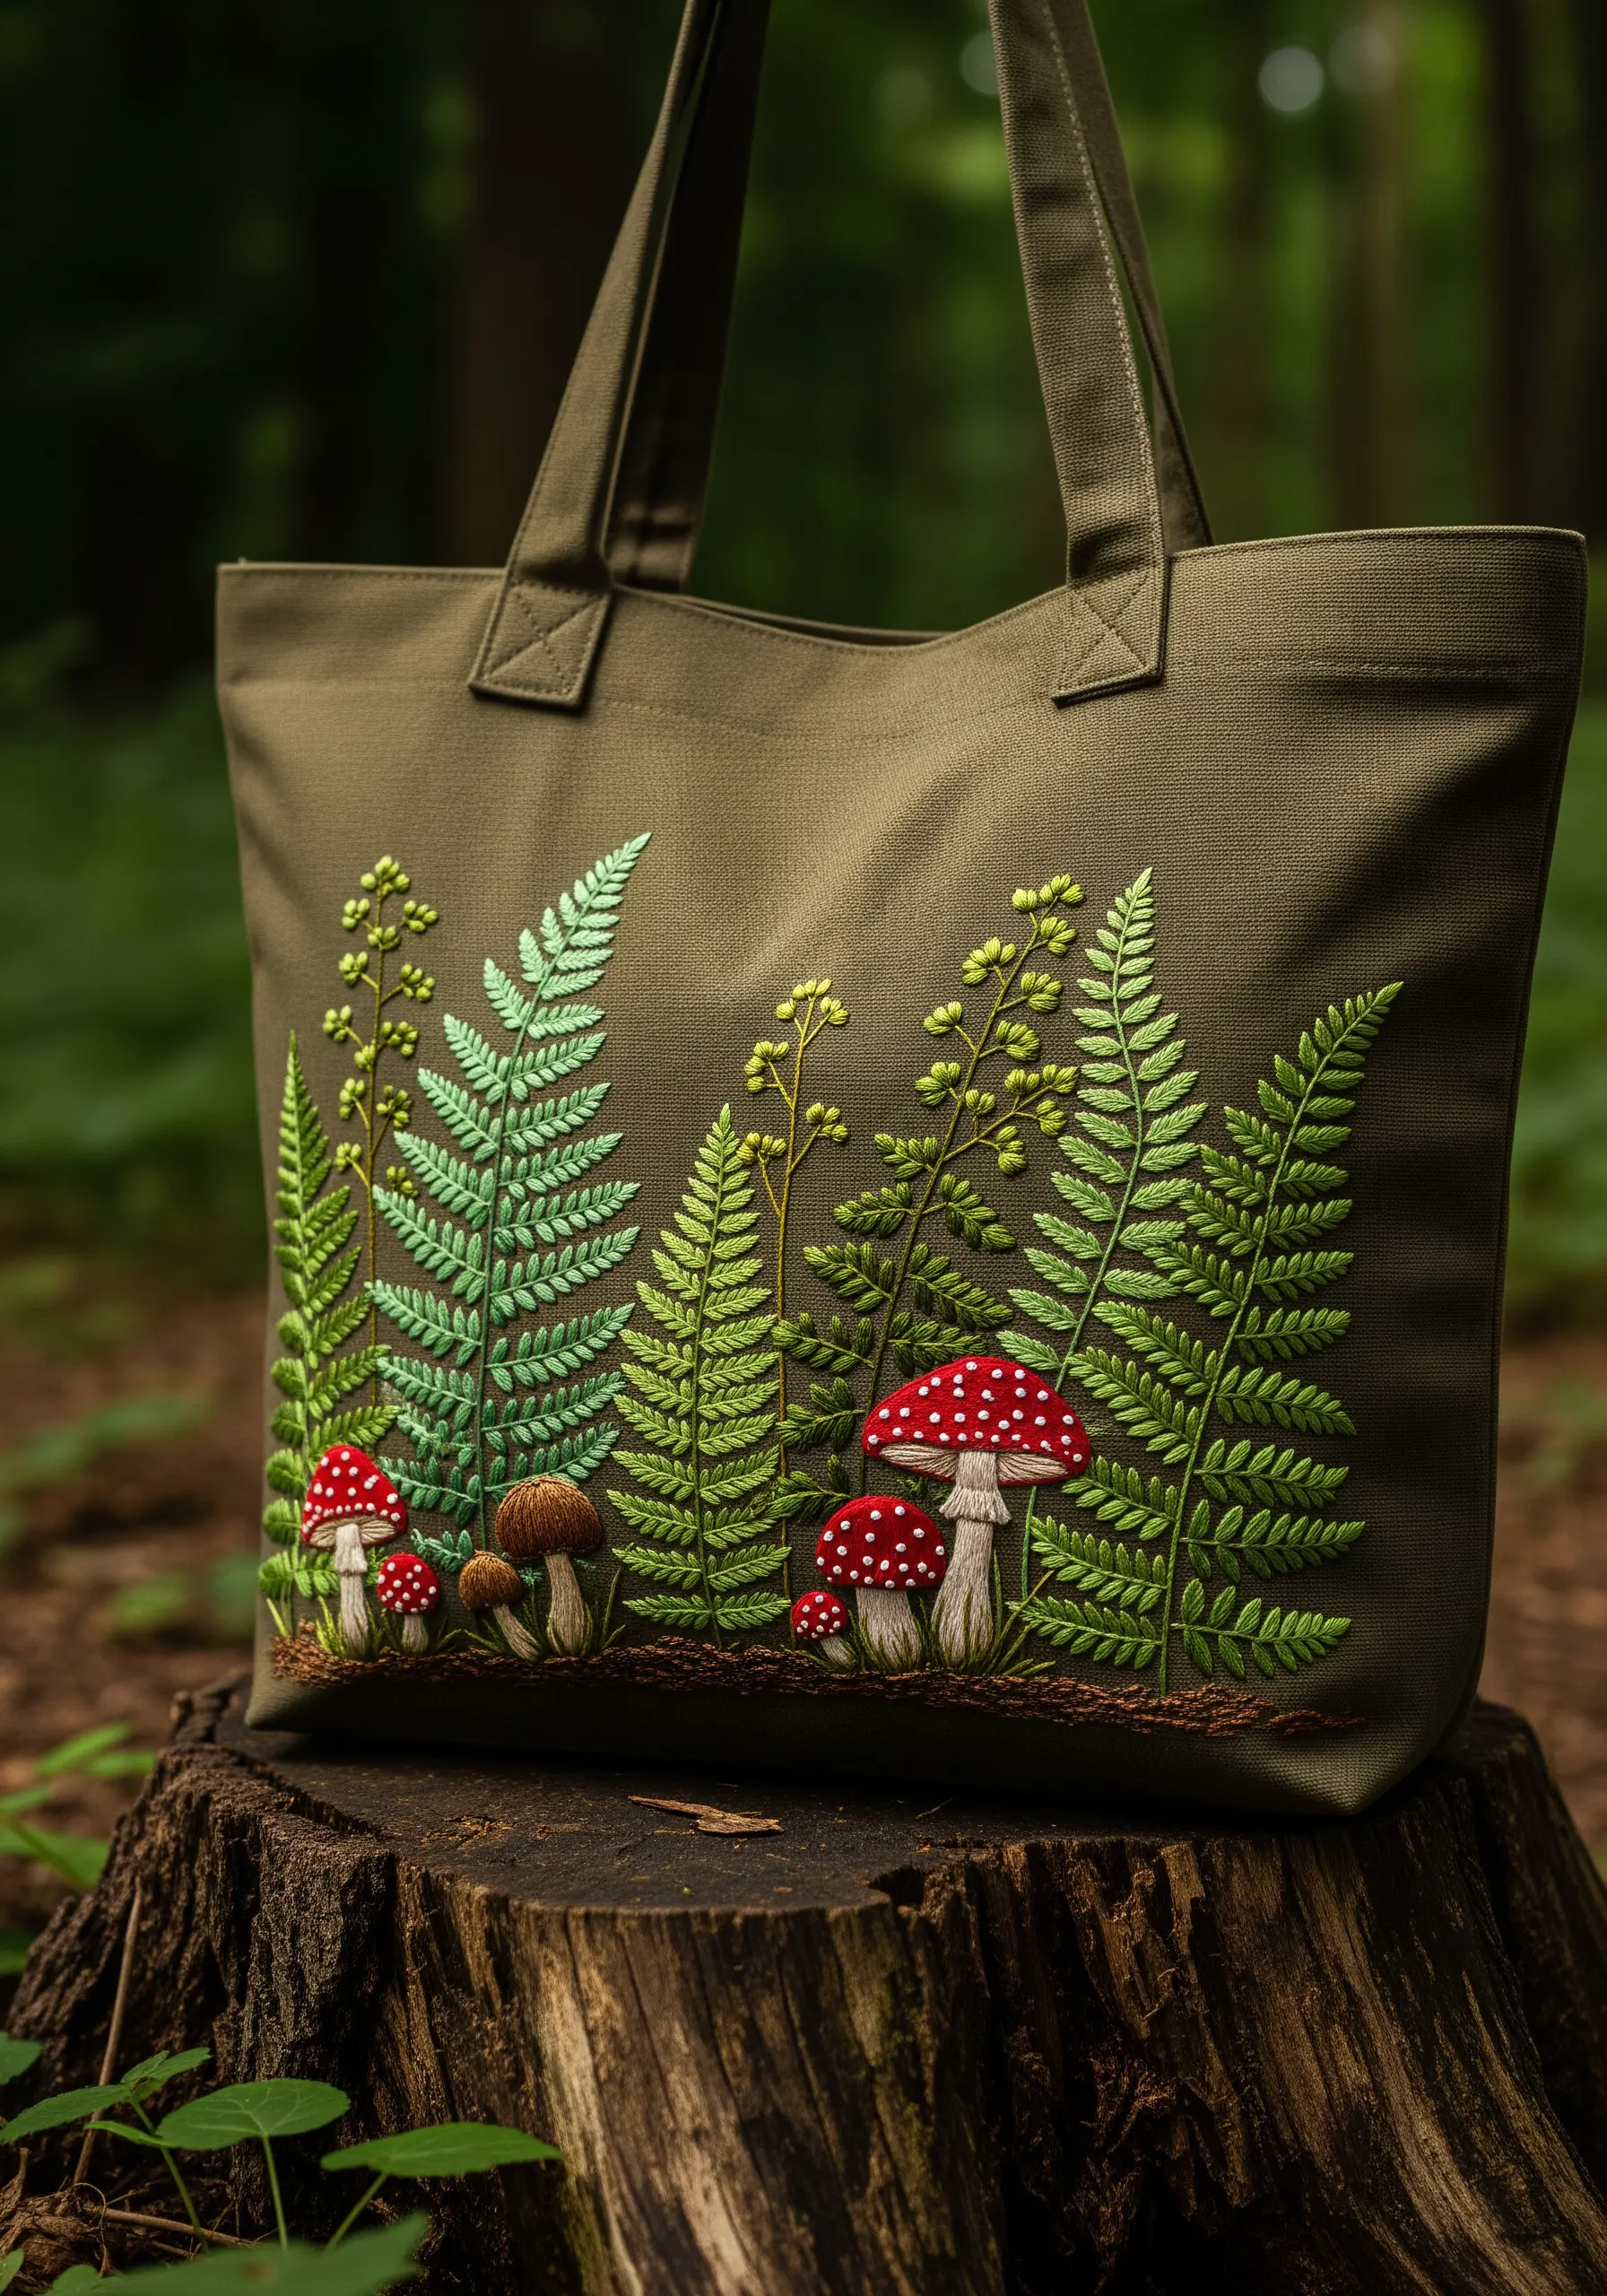
This design is a masterclass in texture, bringing a forest floor scene to life on fabric.
Create the delicate fern fronds with fern stitch or fishbone stitch, using several shades of green to add realism and depth.
For the mushroom caps, use a padded satin stitch. First, create a small under-layer of stitches, then cover it with your final satin stitch. This technique gives the caps a wonderfully rounded, 3D effect.
The choice of an olive-green tote is intentional; it acts as a natural, earthy base that makes the bright greens and reds of the botanicals stand out beautifully. It’s a perfect example of nature-inspired leaf clusters to embroider on tote bags.
8. The Graphic Sunflower Trio
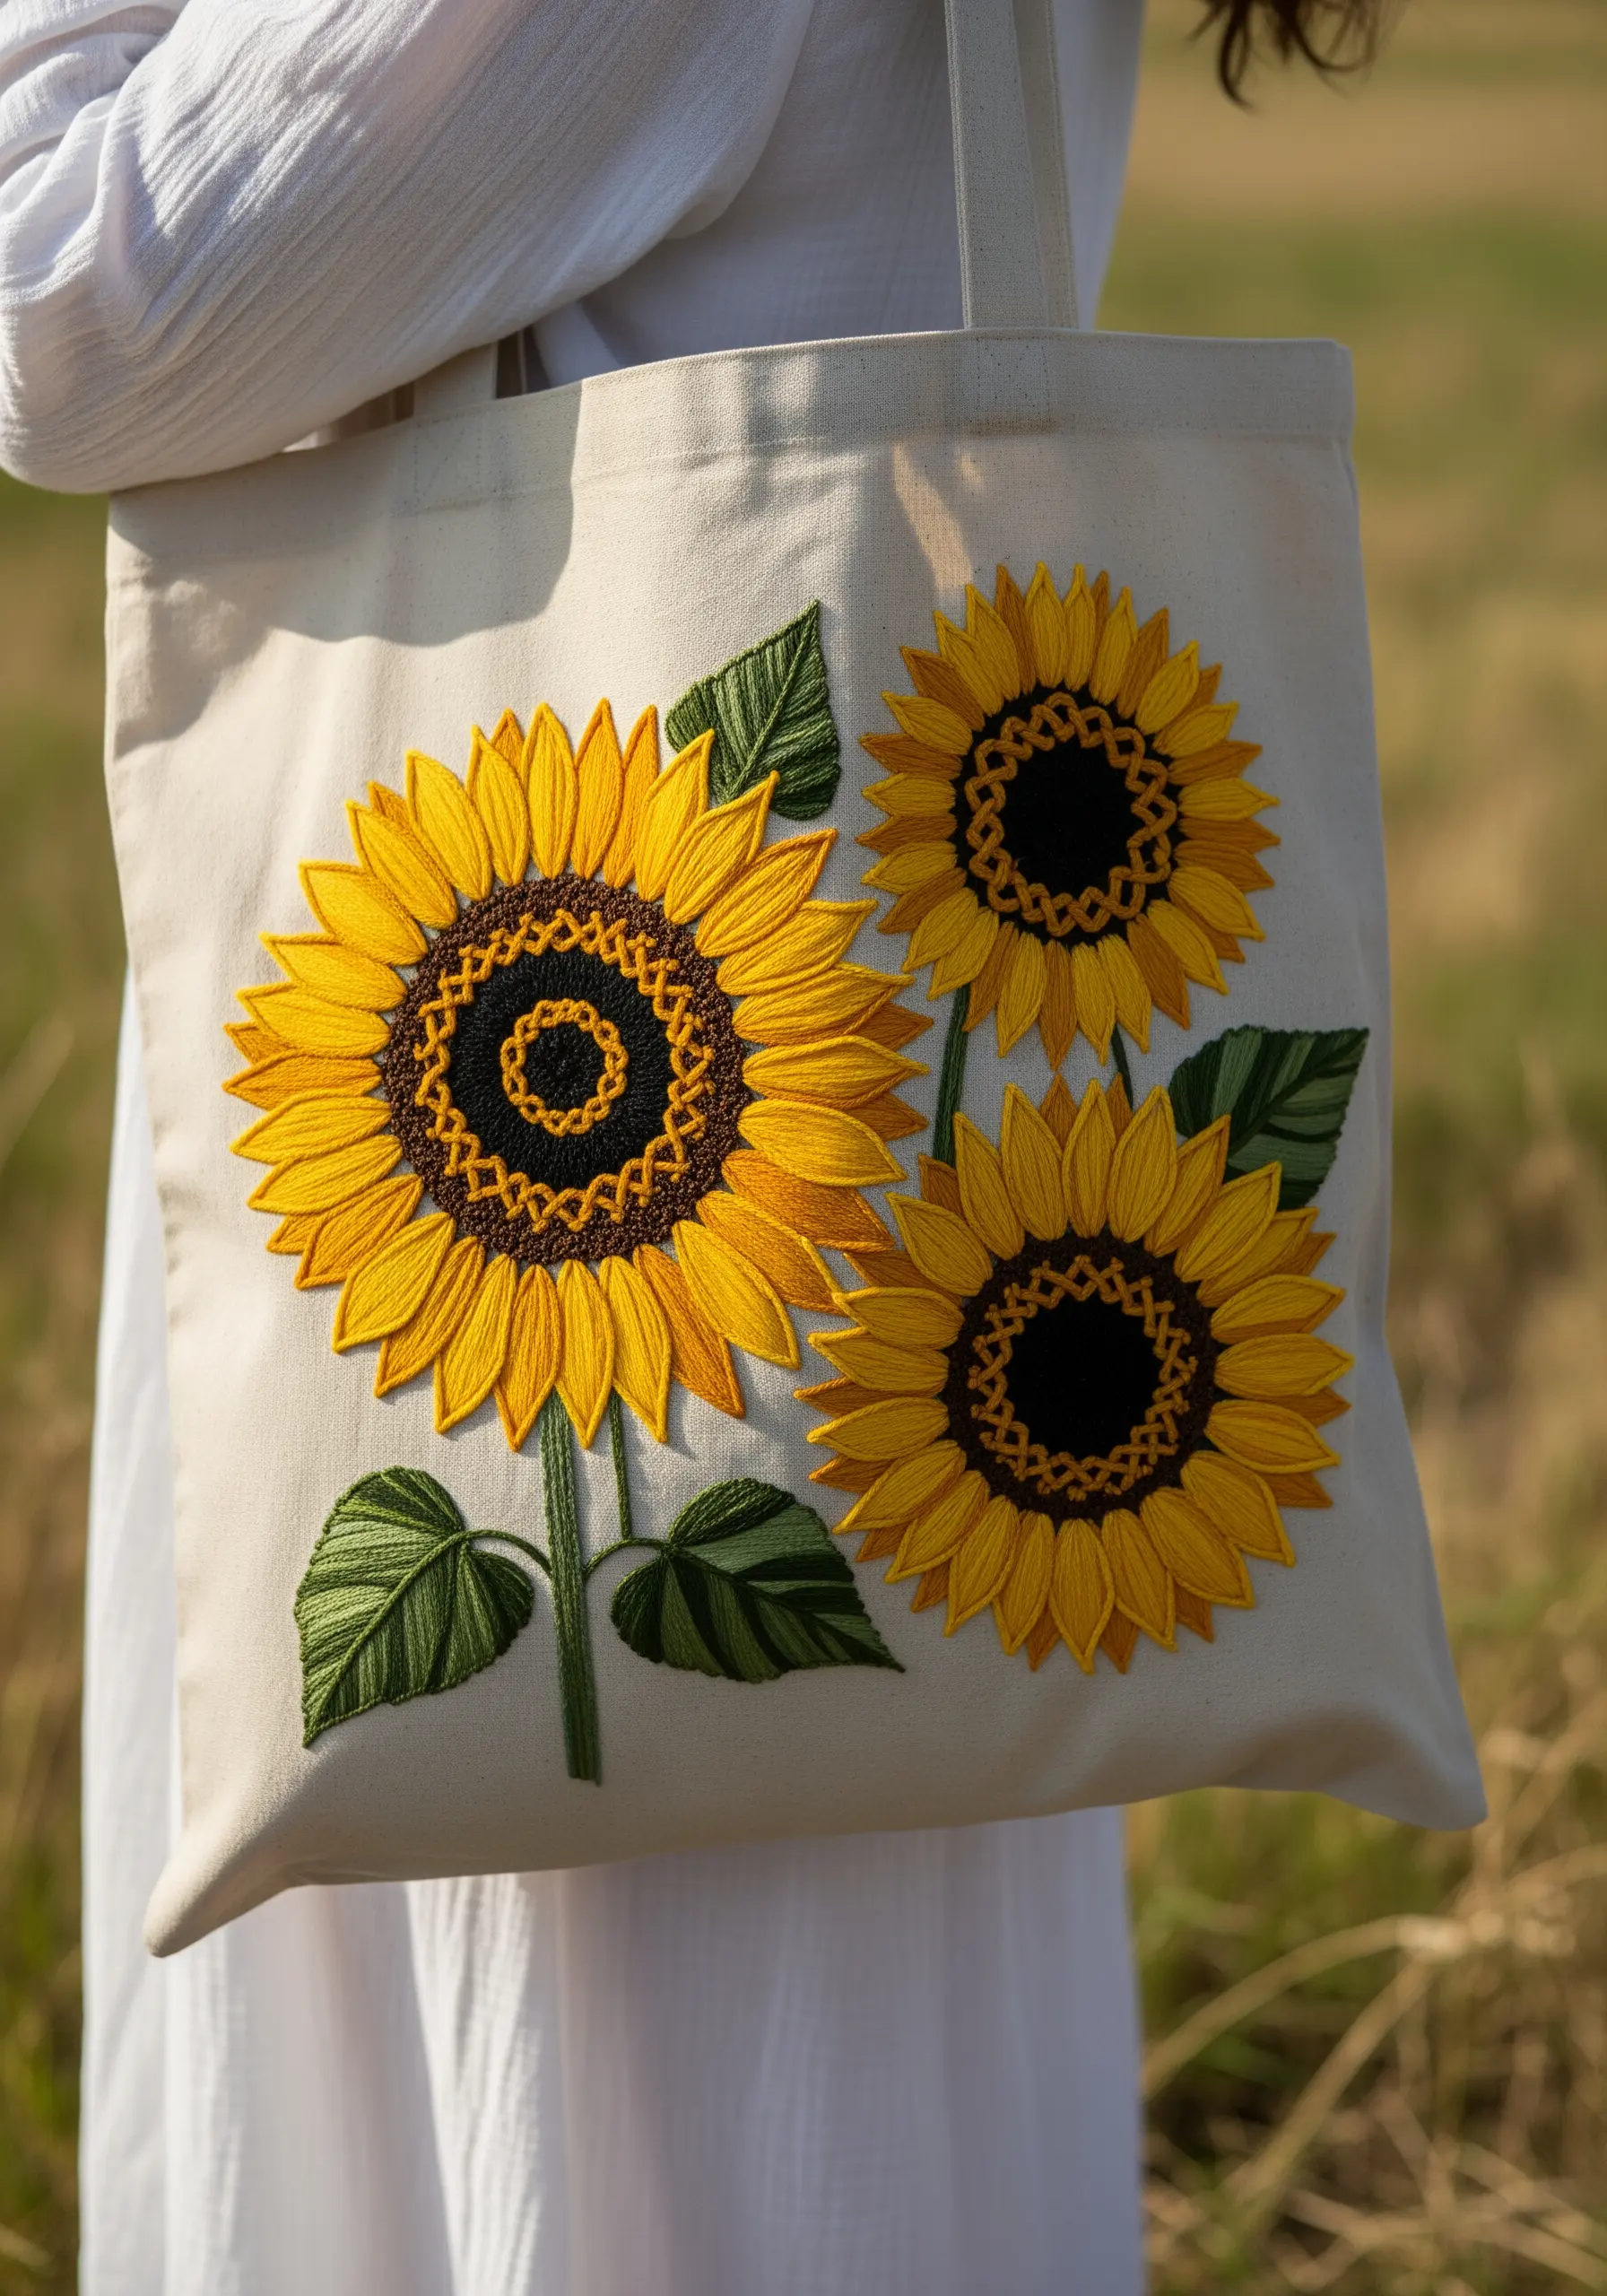
The success of a stitched sunflower hinges on capturing the unique texture of its center.
Fill the center disc with a dense field of French knots, using dark brown and black threads to create the illusion of thousands of tiny seeds.
For the petals, use a long, smooth satin stitch. Ensure your stitches lie flat and parallel, creating a silky surface that contrasts with the bumpy center.
Arrange the sunflowers so they overlap slightly and vary in size. This simple compositional trick makes the design feel more dynamic and natural.
9. The Trailing Woven Rose Vine

You can create these stunning, dimensional roses with one simple, magical stitch: the woven wheel stitch.
Start by creating a small base of five straight stitches radiating from a central point, like the spokes of a wheel.
Then, using a tapestry needle, weave your thread over and under these spokes, working from the center outwards until the spokes are completely covered and a rose has formed.
Use different shades and vary the size of your roses for a more organic feel, connecting them with a simple stem stitch vine.
10. The Modern Succulent Sampler
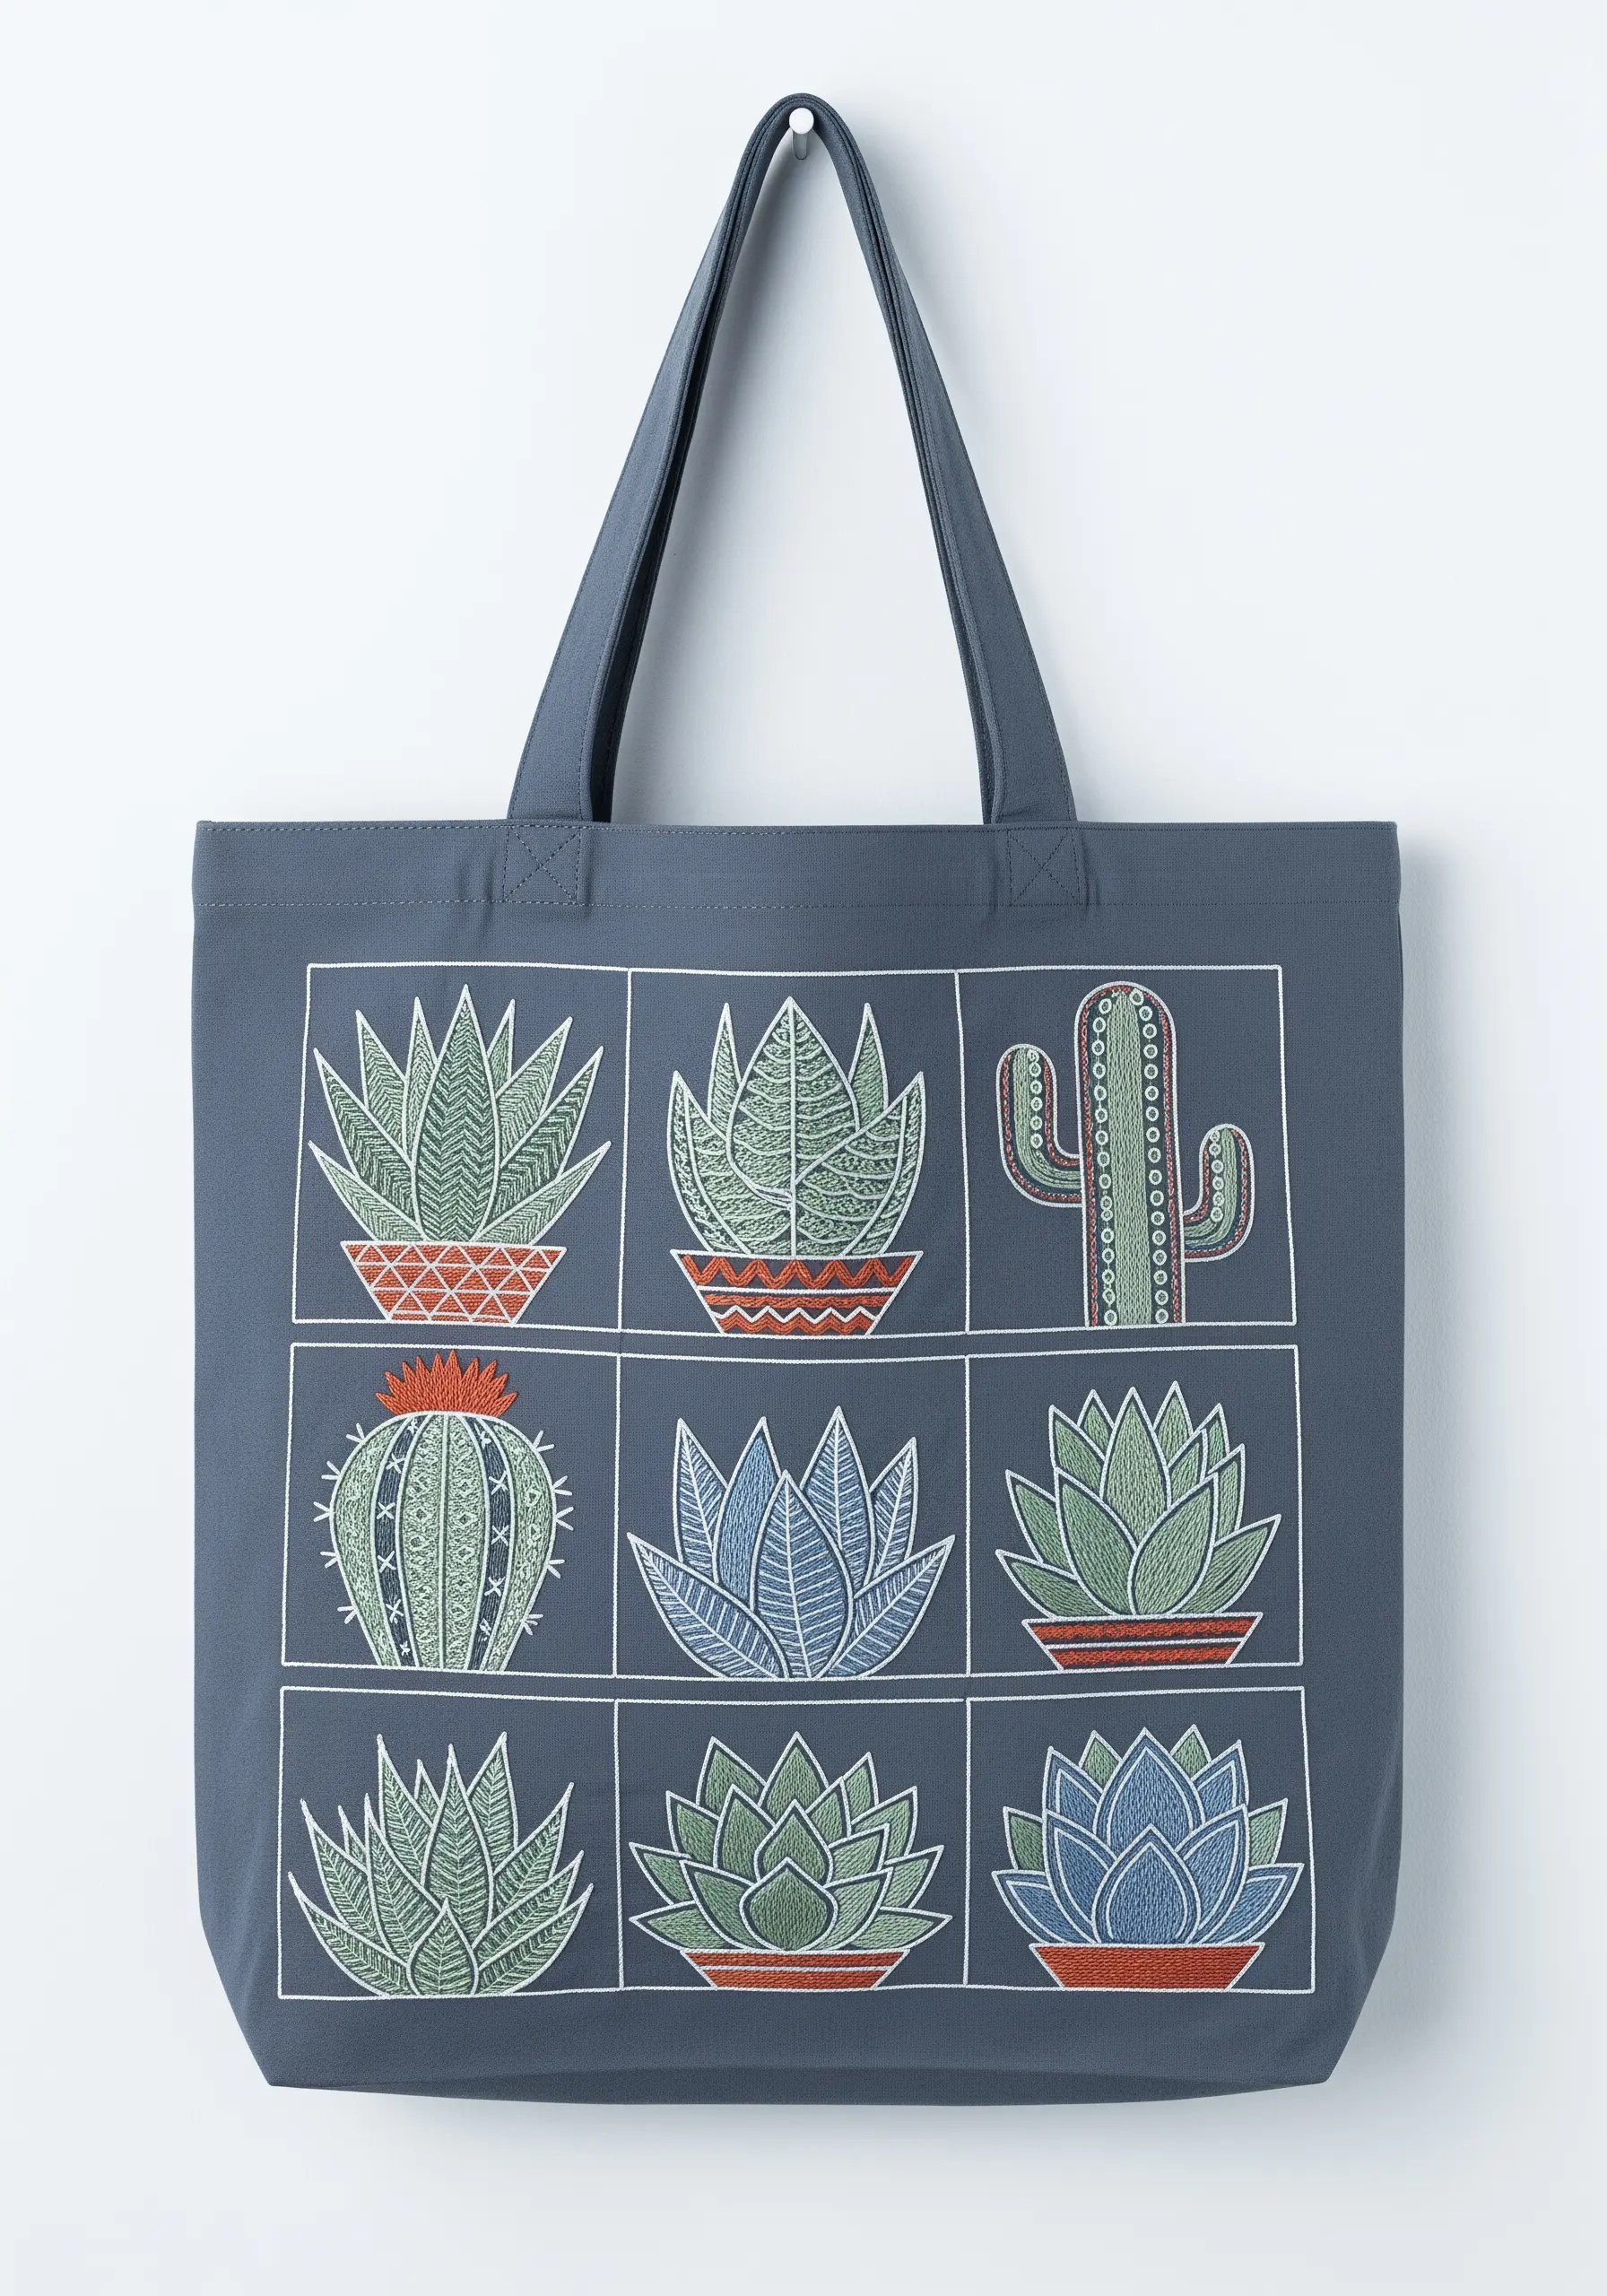
This design transforms simple botanical shapes into a modern, graphic statement piece.
Establish the structure by stitching a clean grid with a simple backstitch in a contrasting color like white. This frame instantly elevates the composition.
Within each square, use a different combination of basic stitches—satin stitch, seed stitch, French knots—to give each succulent a unique texture and personality.
A restrained color palette of greens, blues, and terracotta keeps the overall look cohesive and sophisticated. This is a fresh take on botanical stitch art ideas to transform plain tote bags.
11. The Variegated Climbing Ivy
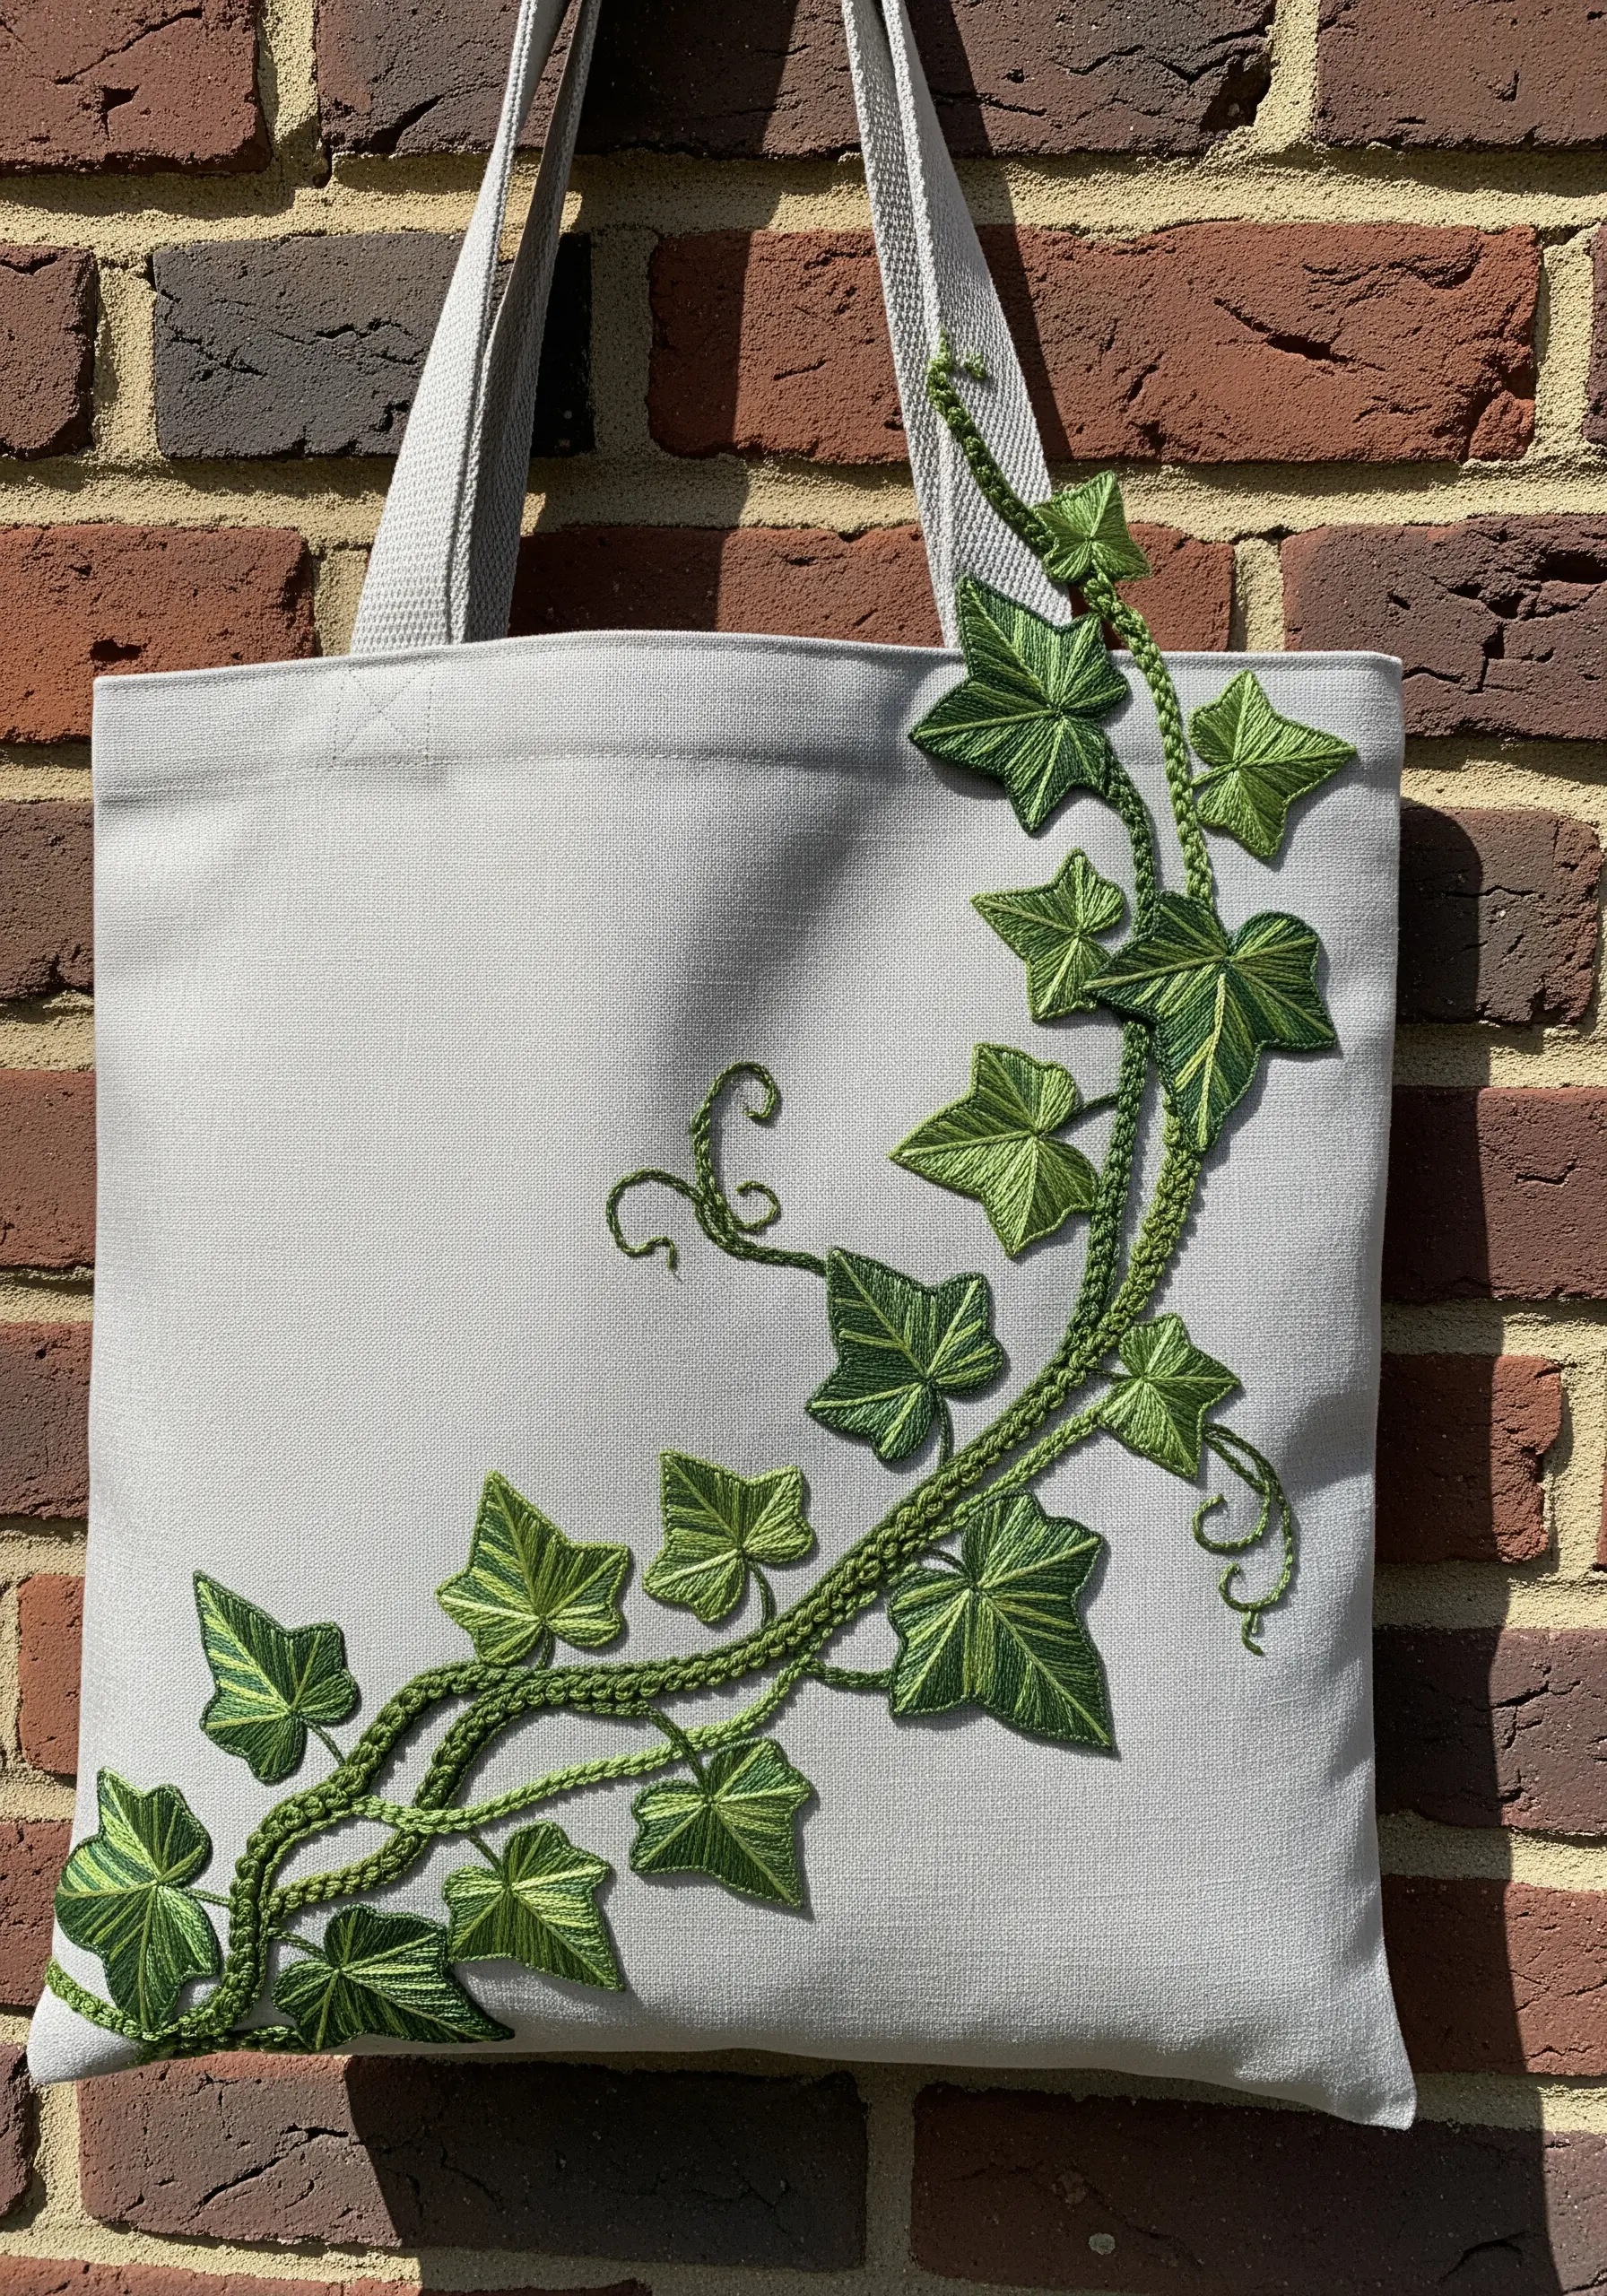
Achieve beautifully shaded, natural-looking leaves with minimal effort by using variegated embroidery floss.
This special thread contains multiple colors or shades in a single strand, creating automatic color variations as you stitch.
Use the fishbone stitch for the ivy leaves. This stitch has a central spine that beautifully showcases the subtle color shifts in the thread.
For the main vine, create texture by couching several strands of floss together, tacking them down with a separate, finer thread.
12. The Minimalist Dandelion Wish
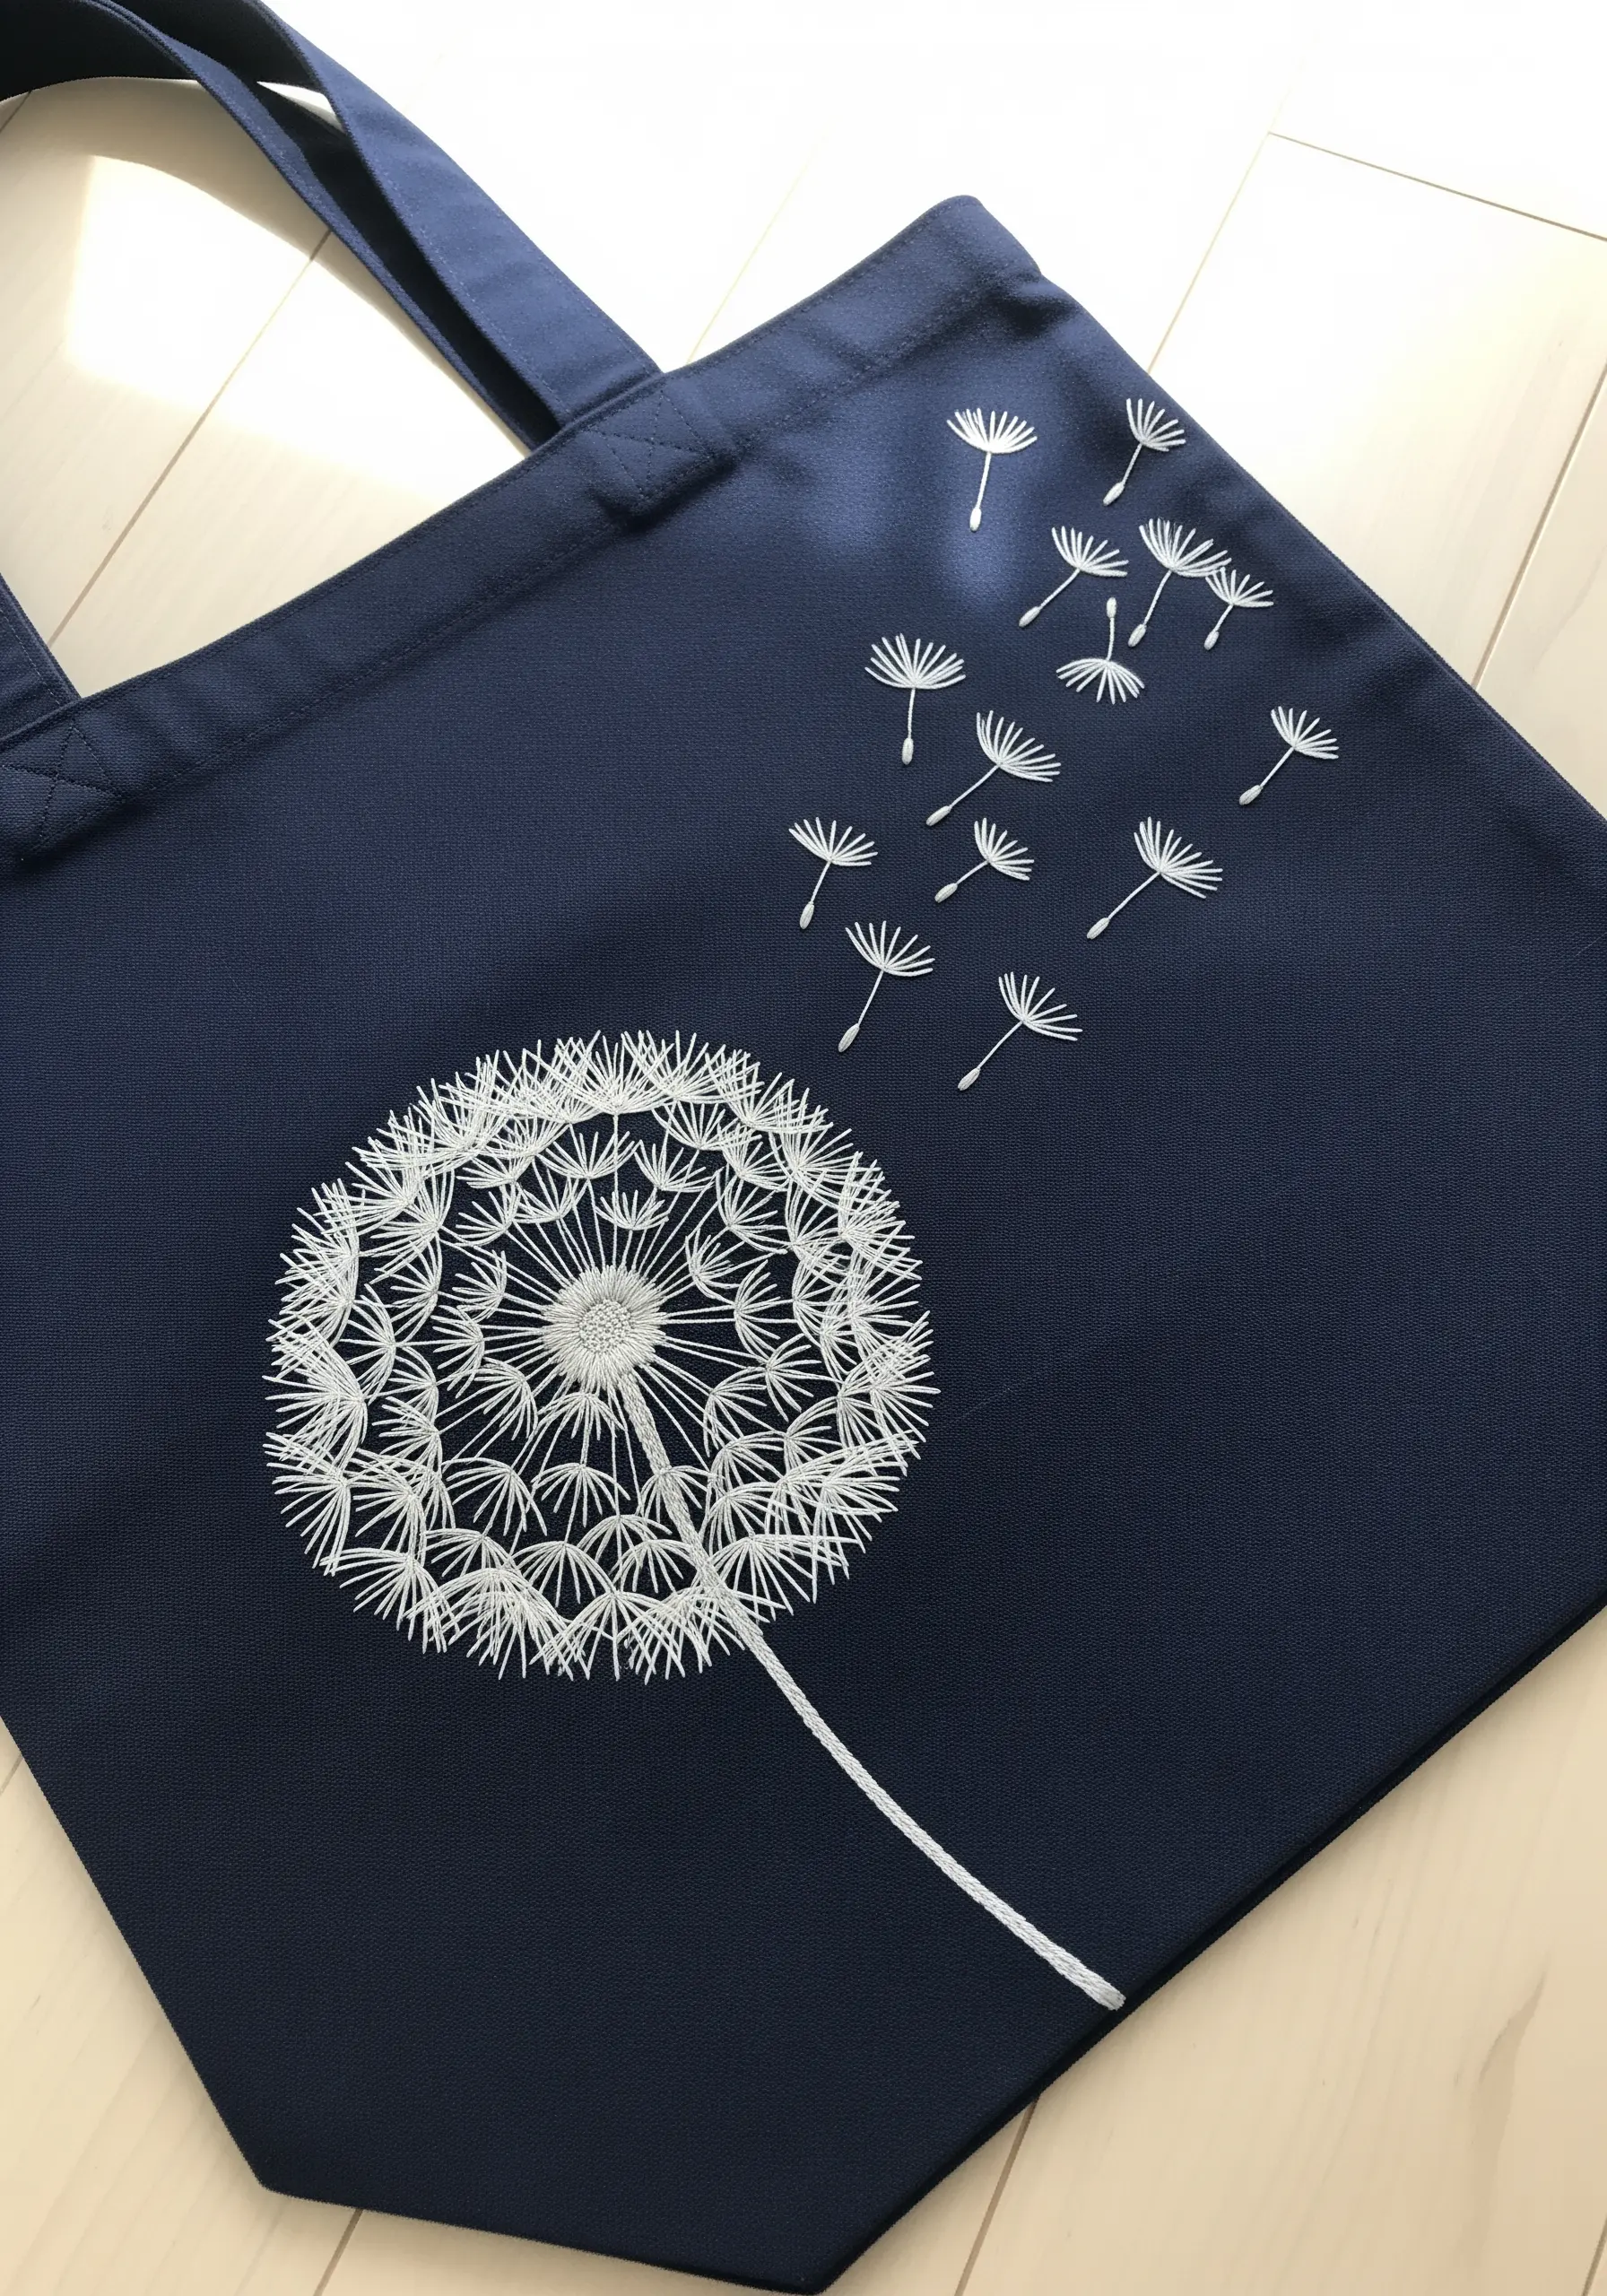
This design is a beautiful exercise in creating movement and delicacy with the simplest of stitches.
The dandelion head is formed by a burst of single straight stitches radiating from a central point. Use a very fine, single strand of white floss to keep it looking light and airy.
Create the drifting seeds with a tiny straight stitch for the stem and a small V-stitch or fly stitch for the pappus.
Carefully vary the angle and spacing of the seeds as they travel across the bag to create a convincing illusion of being carried by the wind. The high contrast makes this one of the most effective minimal stitch motifs.
13. The Moody Anemone & Dahlia Bouquet
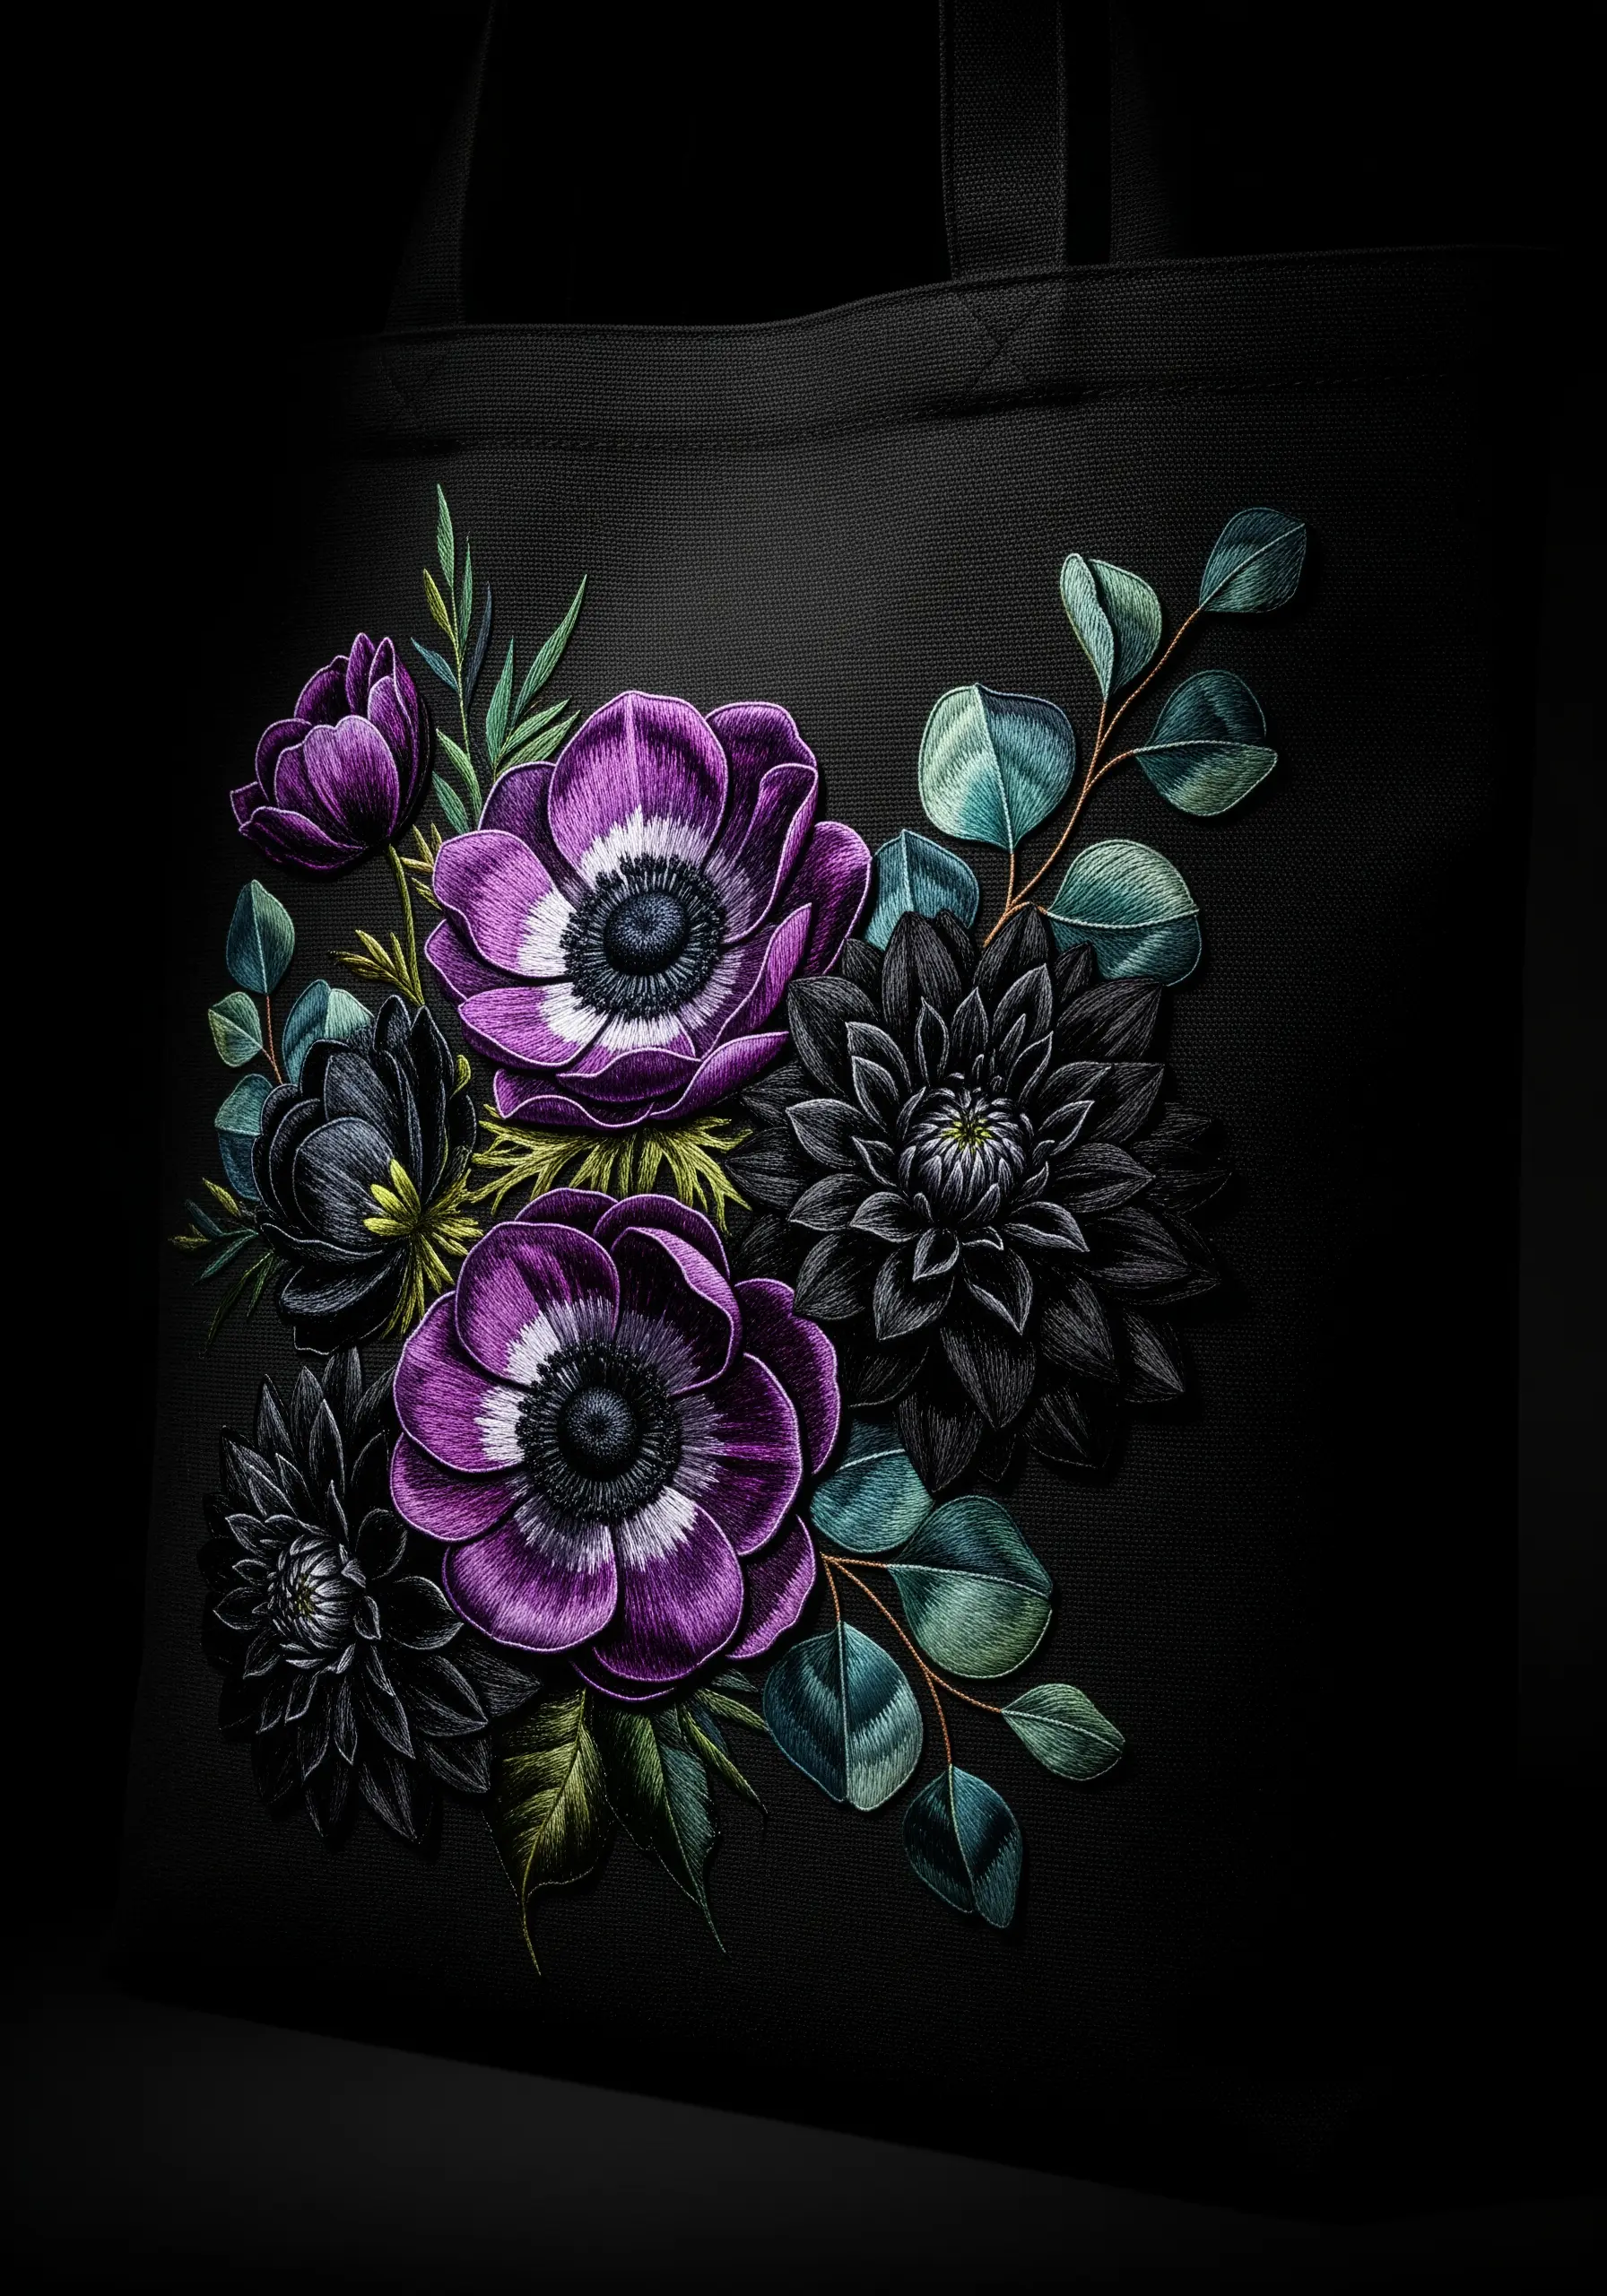
A dark fabric background is your secret weapon for creating drama and making colors appear exceptionally rich.
For the anemones, use long-and-short stitch to softly blend white, deep purple, and hints of black, giving the petals a velvety, realistic depth.
To prevent the black dahlia from getting lost, you must define it with texture. Use directional satin stitches that will catch the light from different angles, and outline each petal with a single strand of dark grey to create subtle separation.
This composition is a perfect example of evening garden floral embroidery ideas using deep purples and night sky blues.
14. The Scattered Herbalist’s Garden
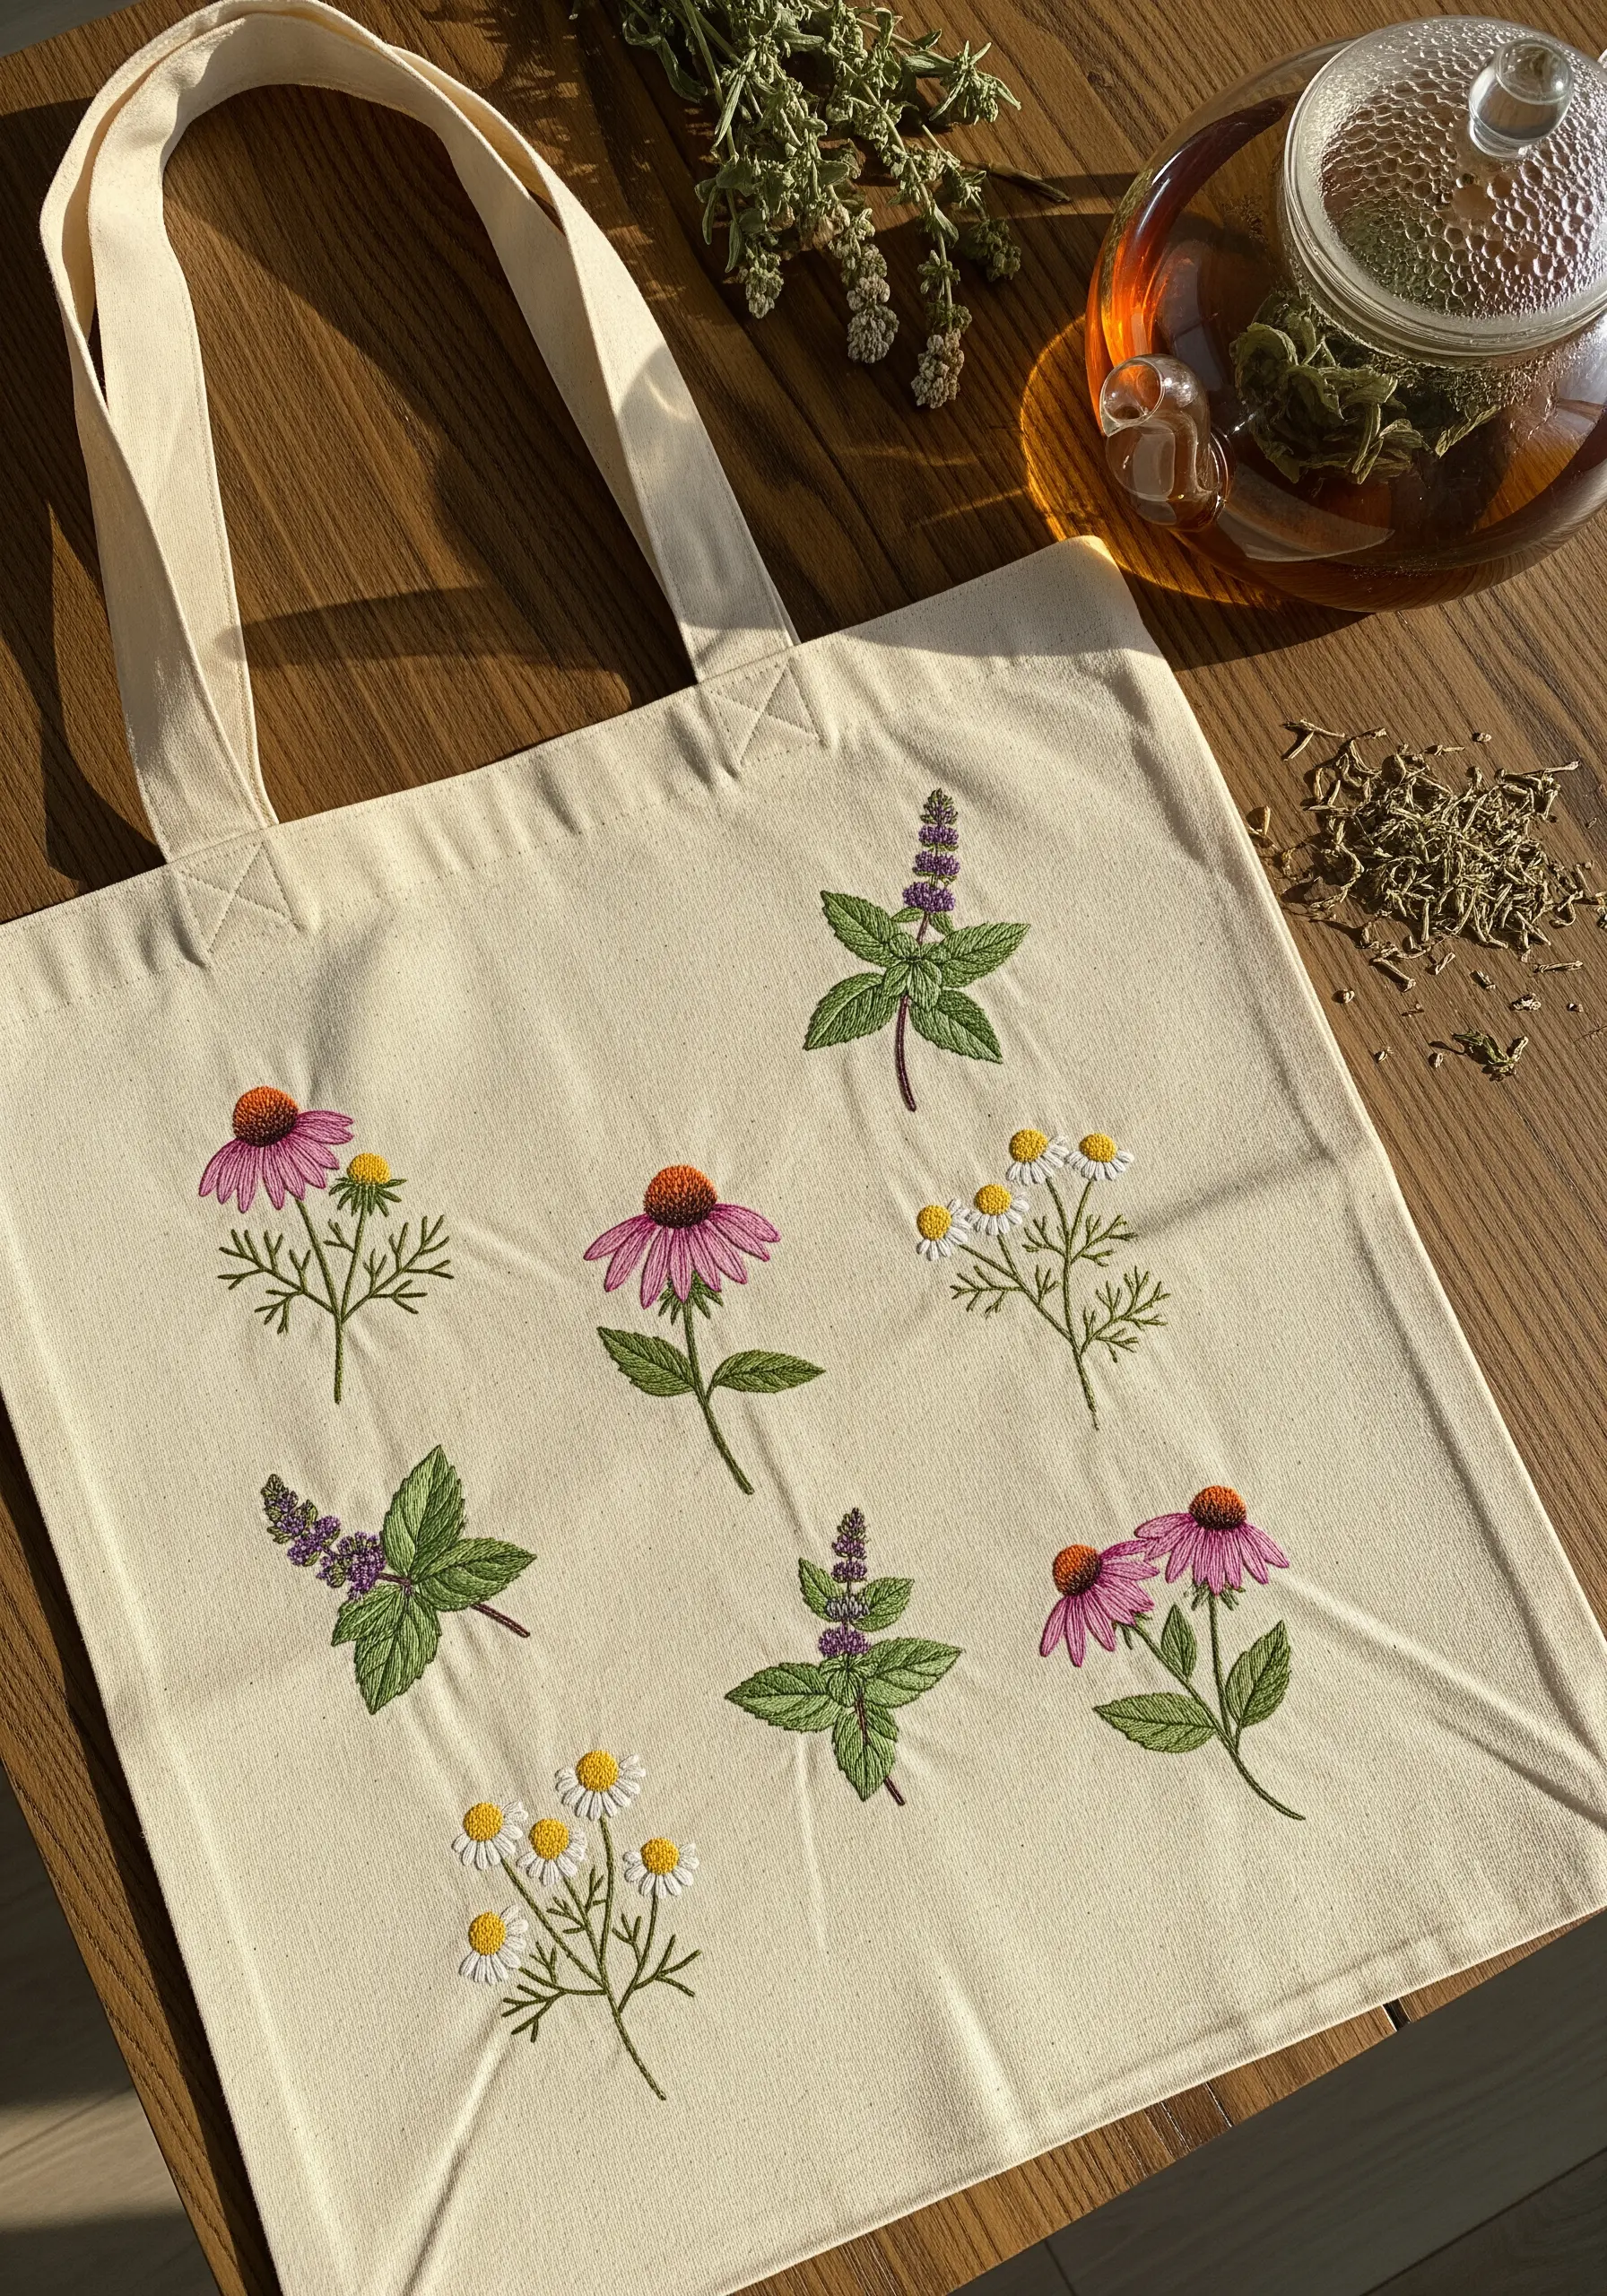
Embrace a clean, illustrative style by stitching each herb as a separate botanical specimen.
This scattered composition feels calming and intentional, allowing each plant to be appreciated on its own.
Focus on simple, precise stitches: lazy daisy for chamomile petals, satin stitch for echinacea, and a neat stem stitch for all the stems and leaves.
The key to this style is getting the shapes right. Referencing a botanical illustration book can help you capture the distinct character of each herb with just a few well-placed stitches.
15. The Cascading Autumn Leaves
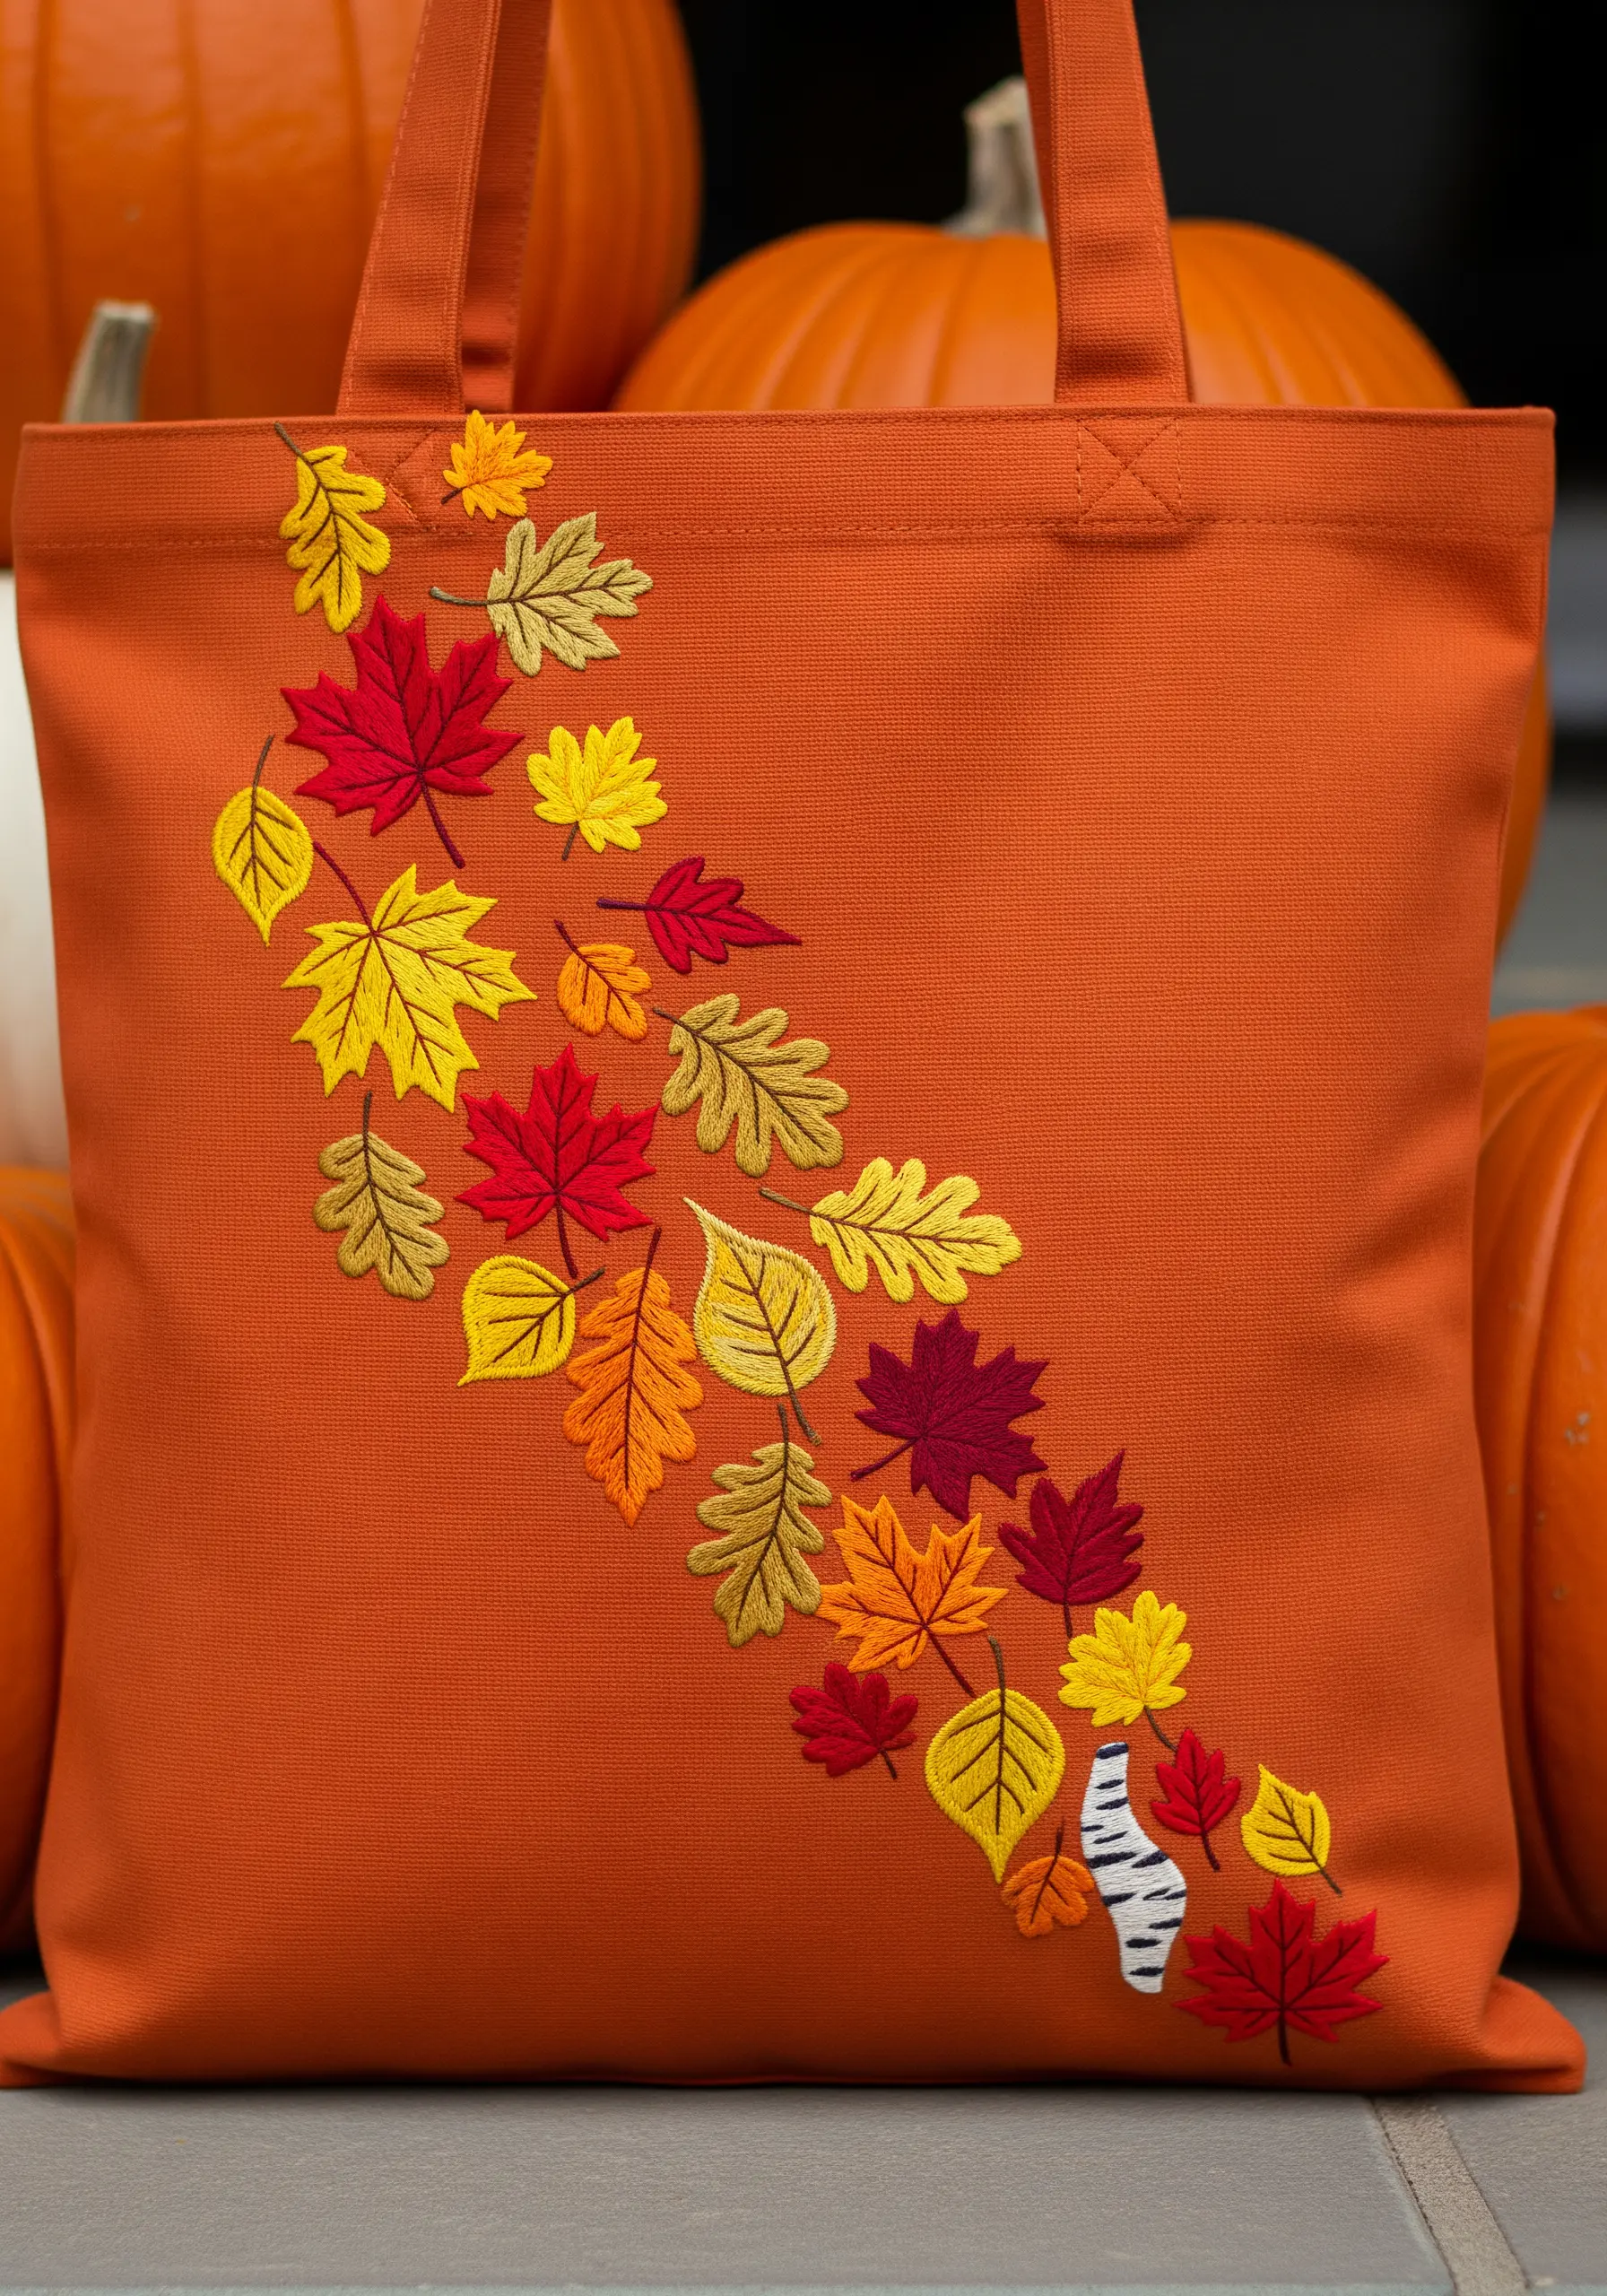
Guide the viewer’s eye and create a beautiful sense of motion by arranging your leaves in a soft, cascading S-curve.
Stitch each leaf using fishbone stitch or leaf stitch. Both techniques create a natural-looking central vein and allow for easy color blending.
Work with a warm, harmonious autumn palette. Outlining each leaf with a slightly darker shade will provide just enough definition to make it stand out against the orange tote fabric.
The small birch branch at the base of the design is a clever detail that grounds the composition and provides a clear starting point for the falling leaves.
16. The Sweet Strawberry Patch Border
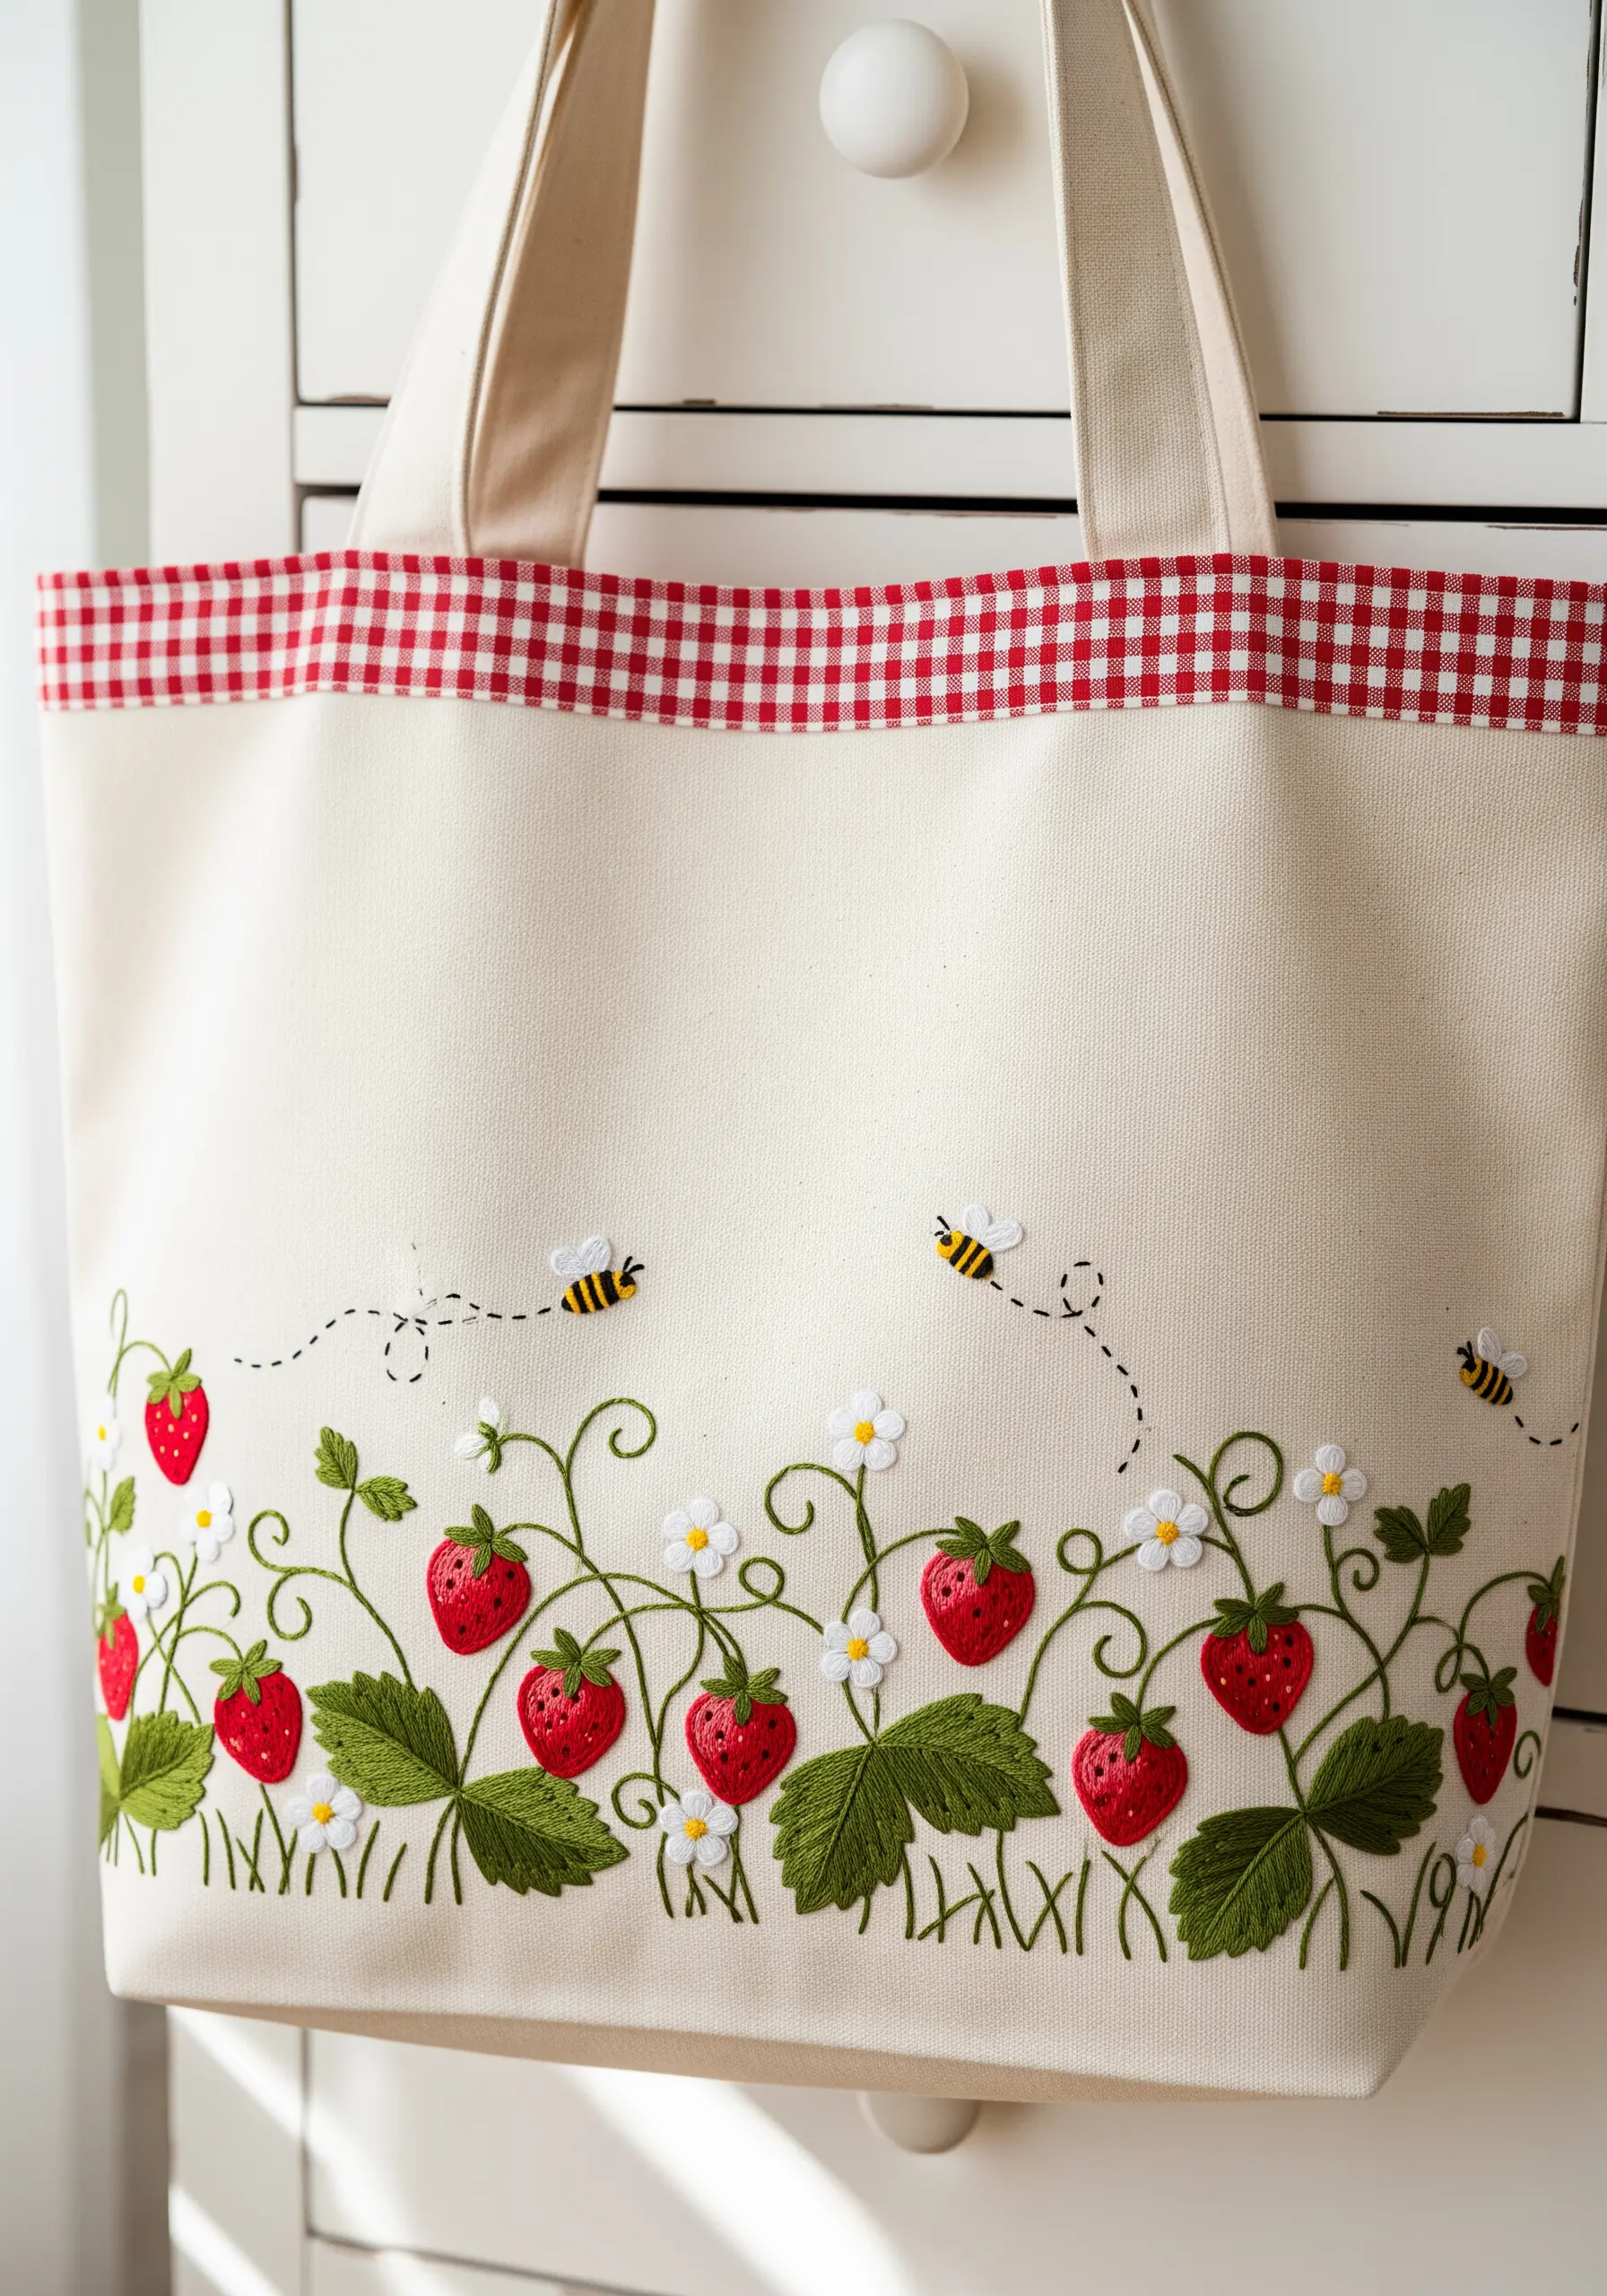
The charm of this design comes from its delightful textures and whimsical details.
To give the strawberries a plump, rounded shape, first create a small base of padding stitches before covering them with red satin stitch. Then, add tiny yellow seed stitches on top.
Create tiny, charming bees with a yellow-and-black striped satin stitch body and add wings with a single detached chain stitch in a pale grey or off-white.
Connect the bees to the scene with a delicate flight path made from a simple dotted backstitch, adding a final touch of playful movement.
17. The Vibrant Desert Bloom on Jute

When working on a textured background like jute, your best tools are bold shapes and saturated color.
Use a full six strands of floss and simple fill stitches, like satin stitch, to create solid, graphic cacti shapes that won’t get lost in the fabric’s weave.
Add visual interest and define the forms by incorporating simple line details—use backstitch for the saguaro’s ridges and tiny straight stitches for prickly pear spines.
The contrast between the earthy green cacti and the almost-neon pink and yellow flowers is what makes this design so joyful and eye-catching.
18. The Personalized Floral Monogram
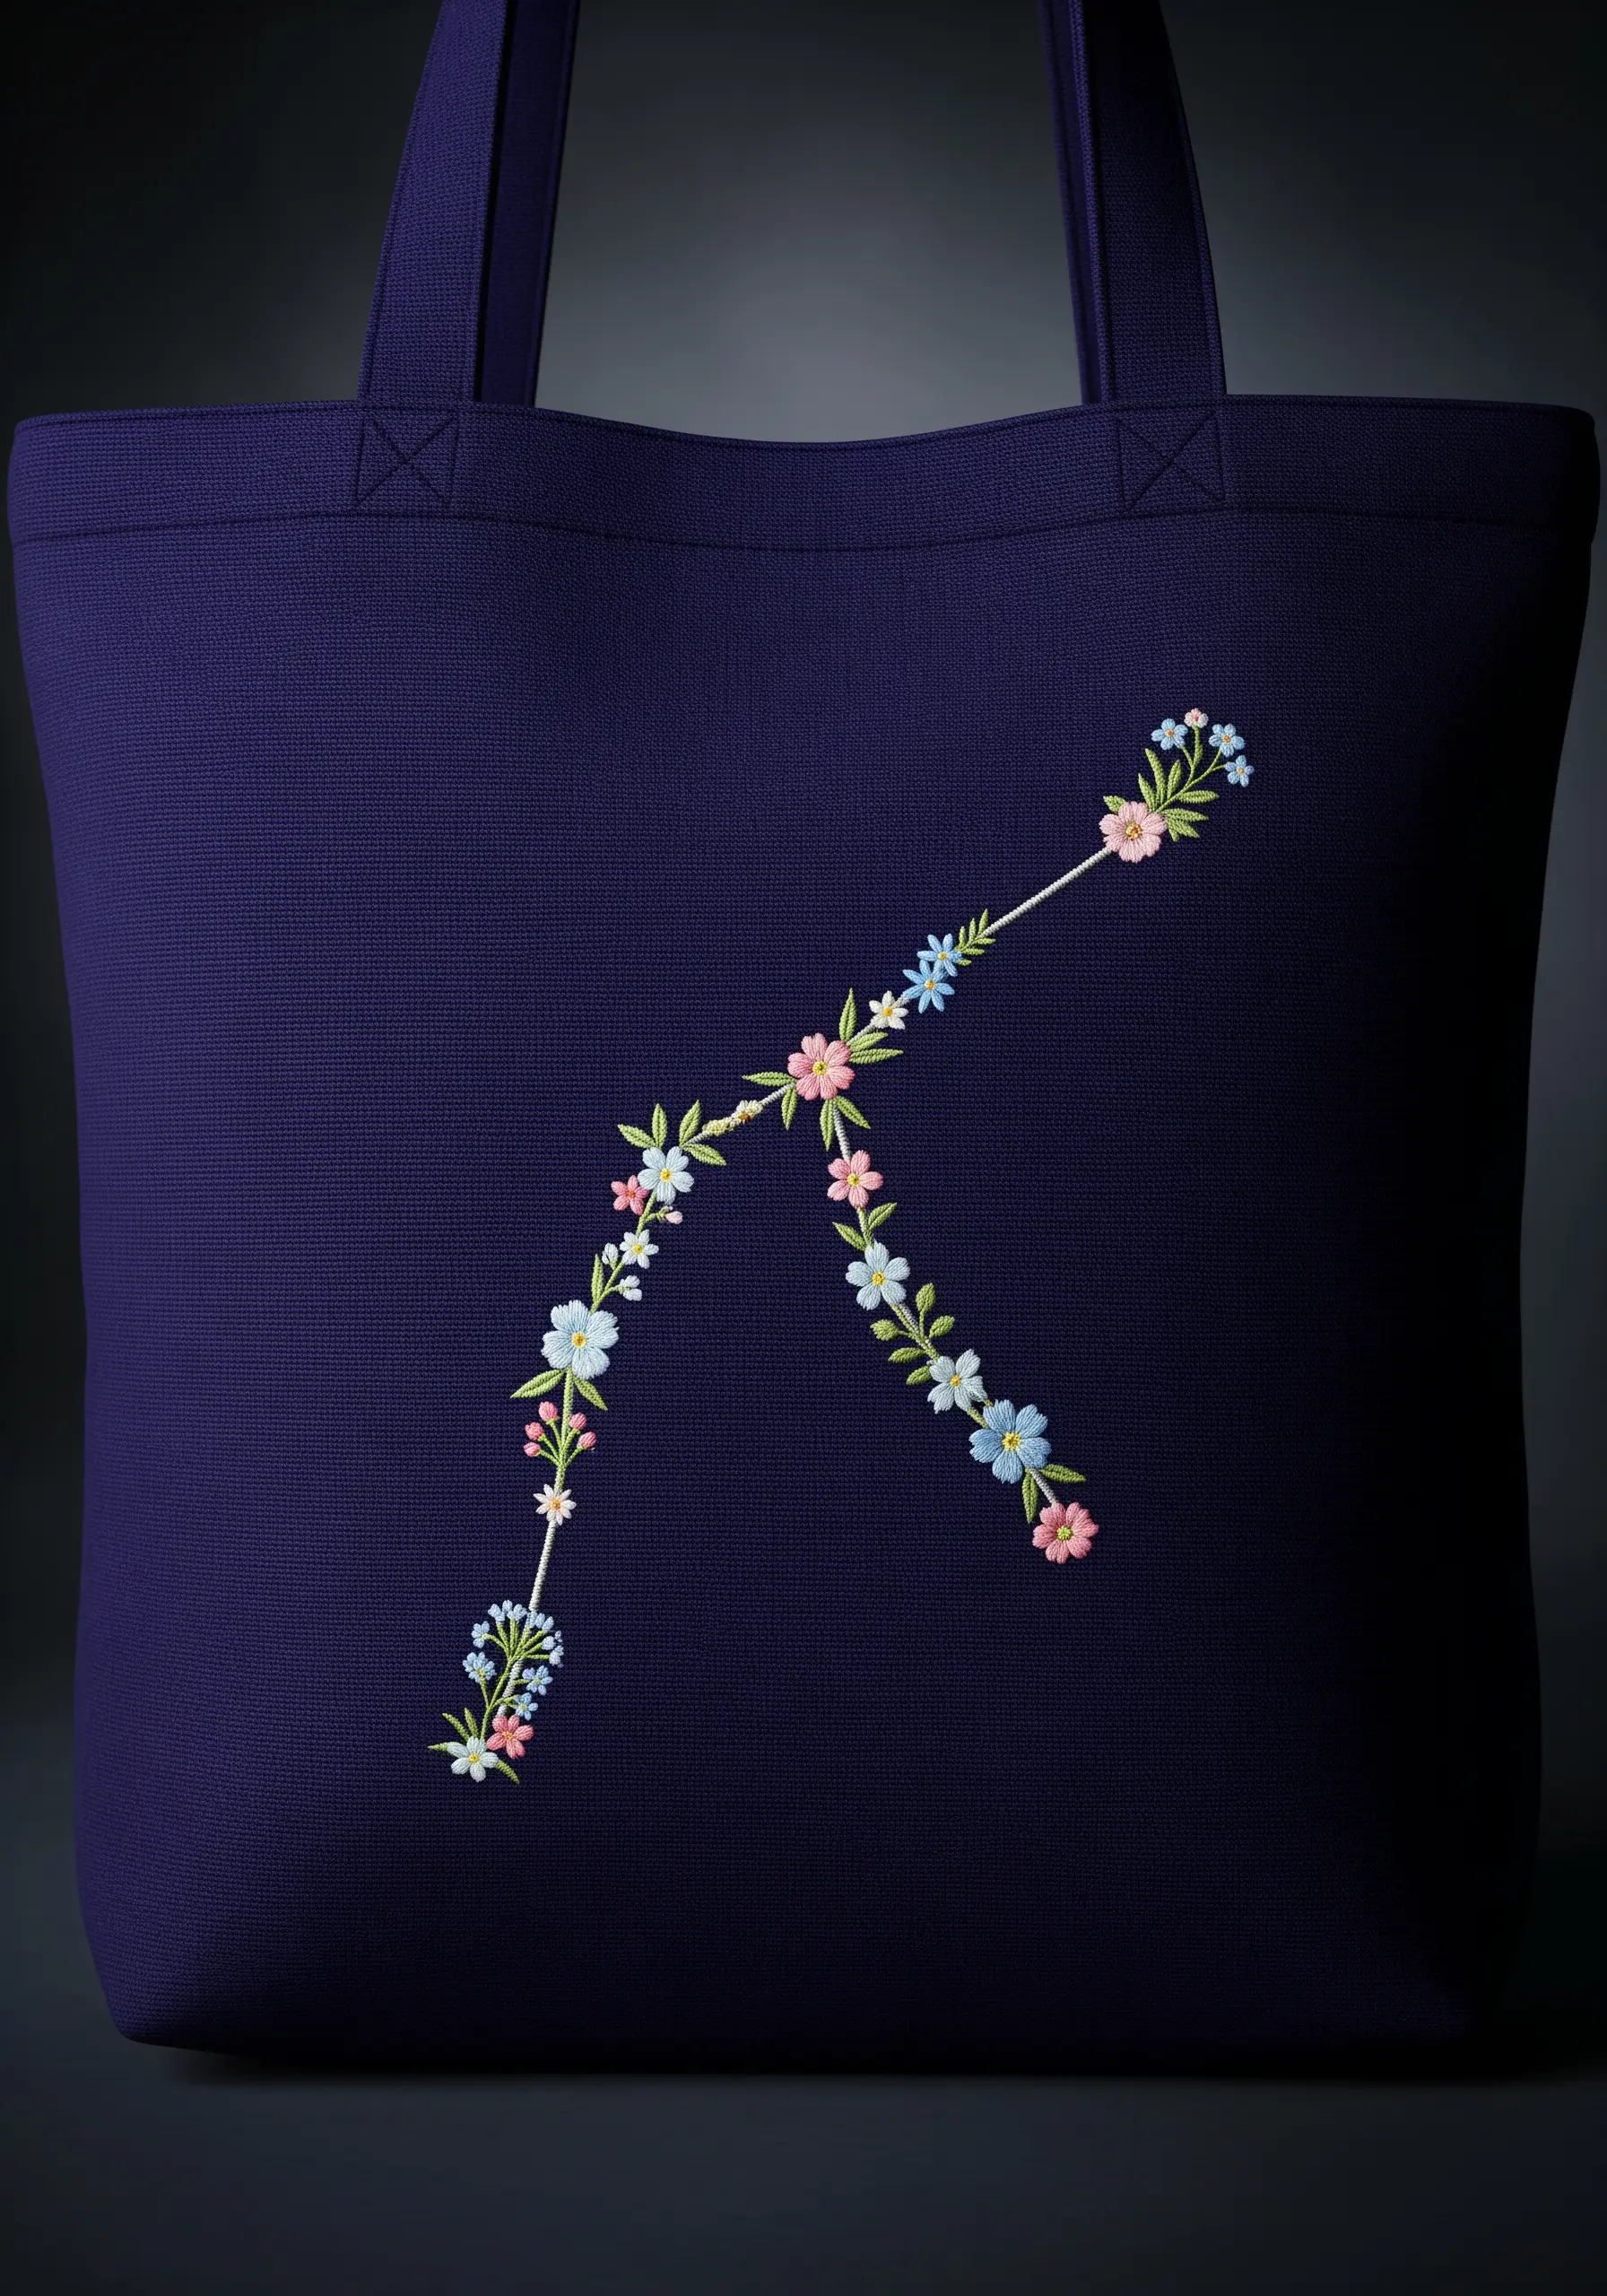
Turn a simple initial into a personal work of art by treating its structure like a trellis for flowers to grow on.
Lightly trace the outline of your chosen letter, then use that line as a guide for your stitching.
Work with a variety of tiny, delicate stitches: French knots for flower buds, lazy daisy stitches for small petals, and tiny fishbone stitches for leaves.
By keeping the color palette soft and cohesive, you ensure the floral elements form a legible letter rather than a confusing cluster. This technique is perfect for creating personalized DIY embroidery ideas for couples and families.
19. The Bold Chunky Yarn Botanicals
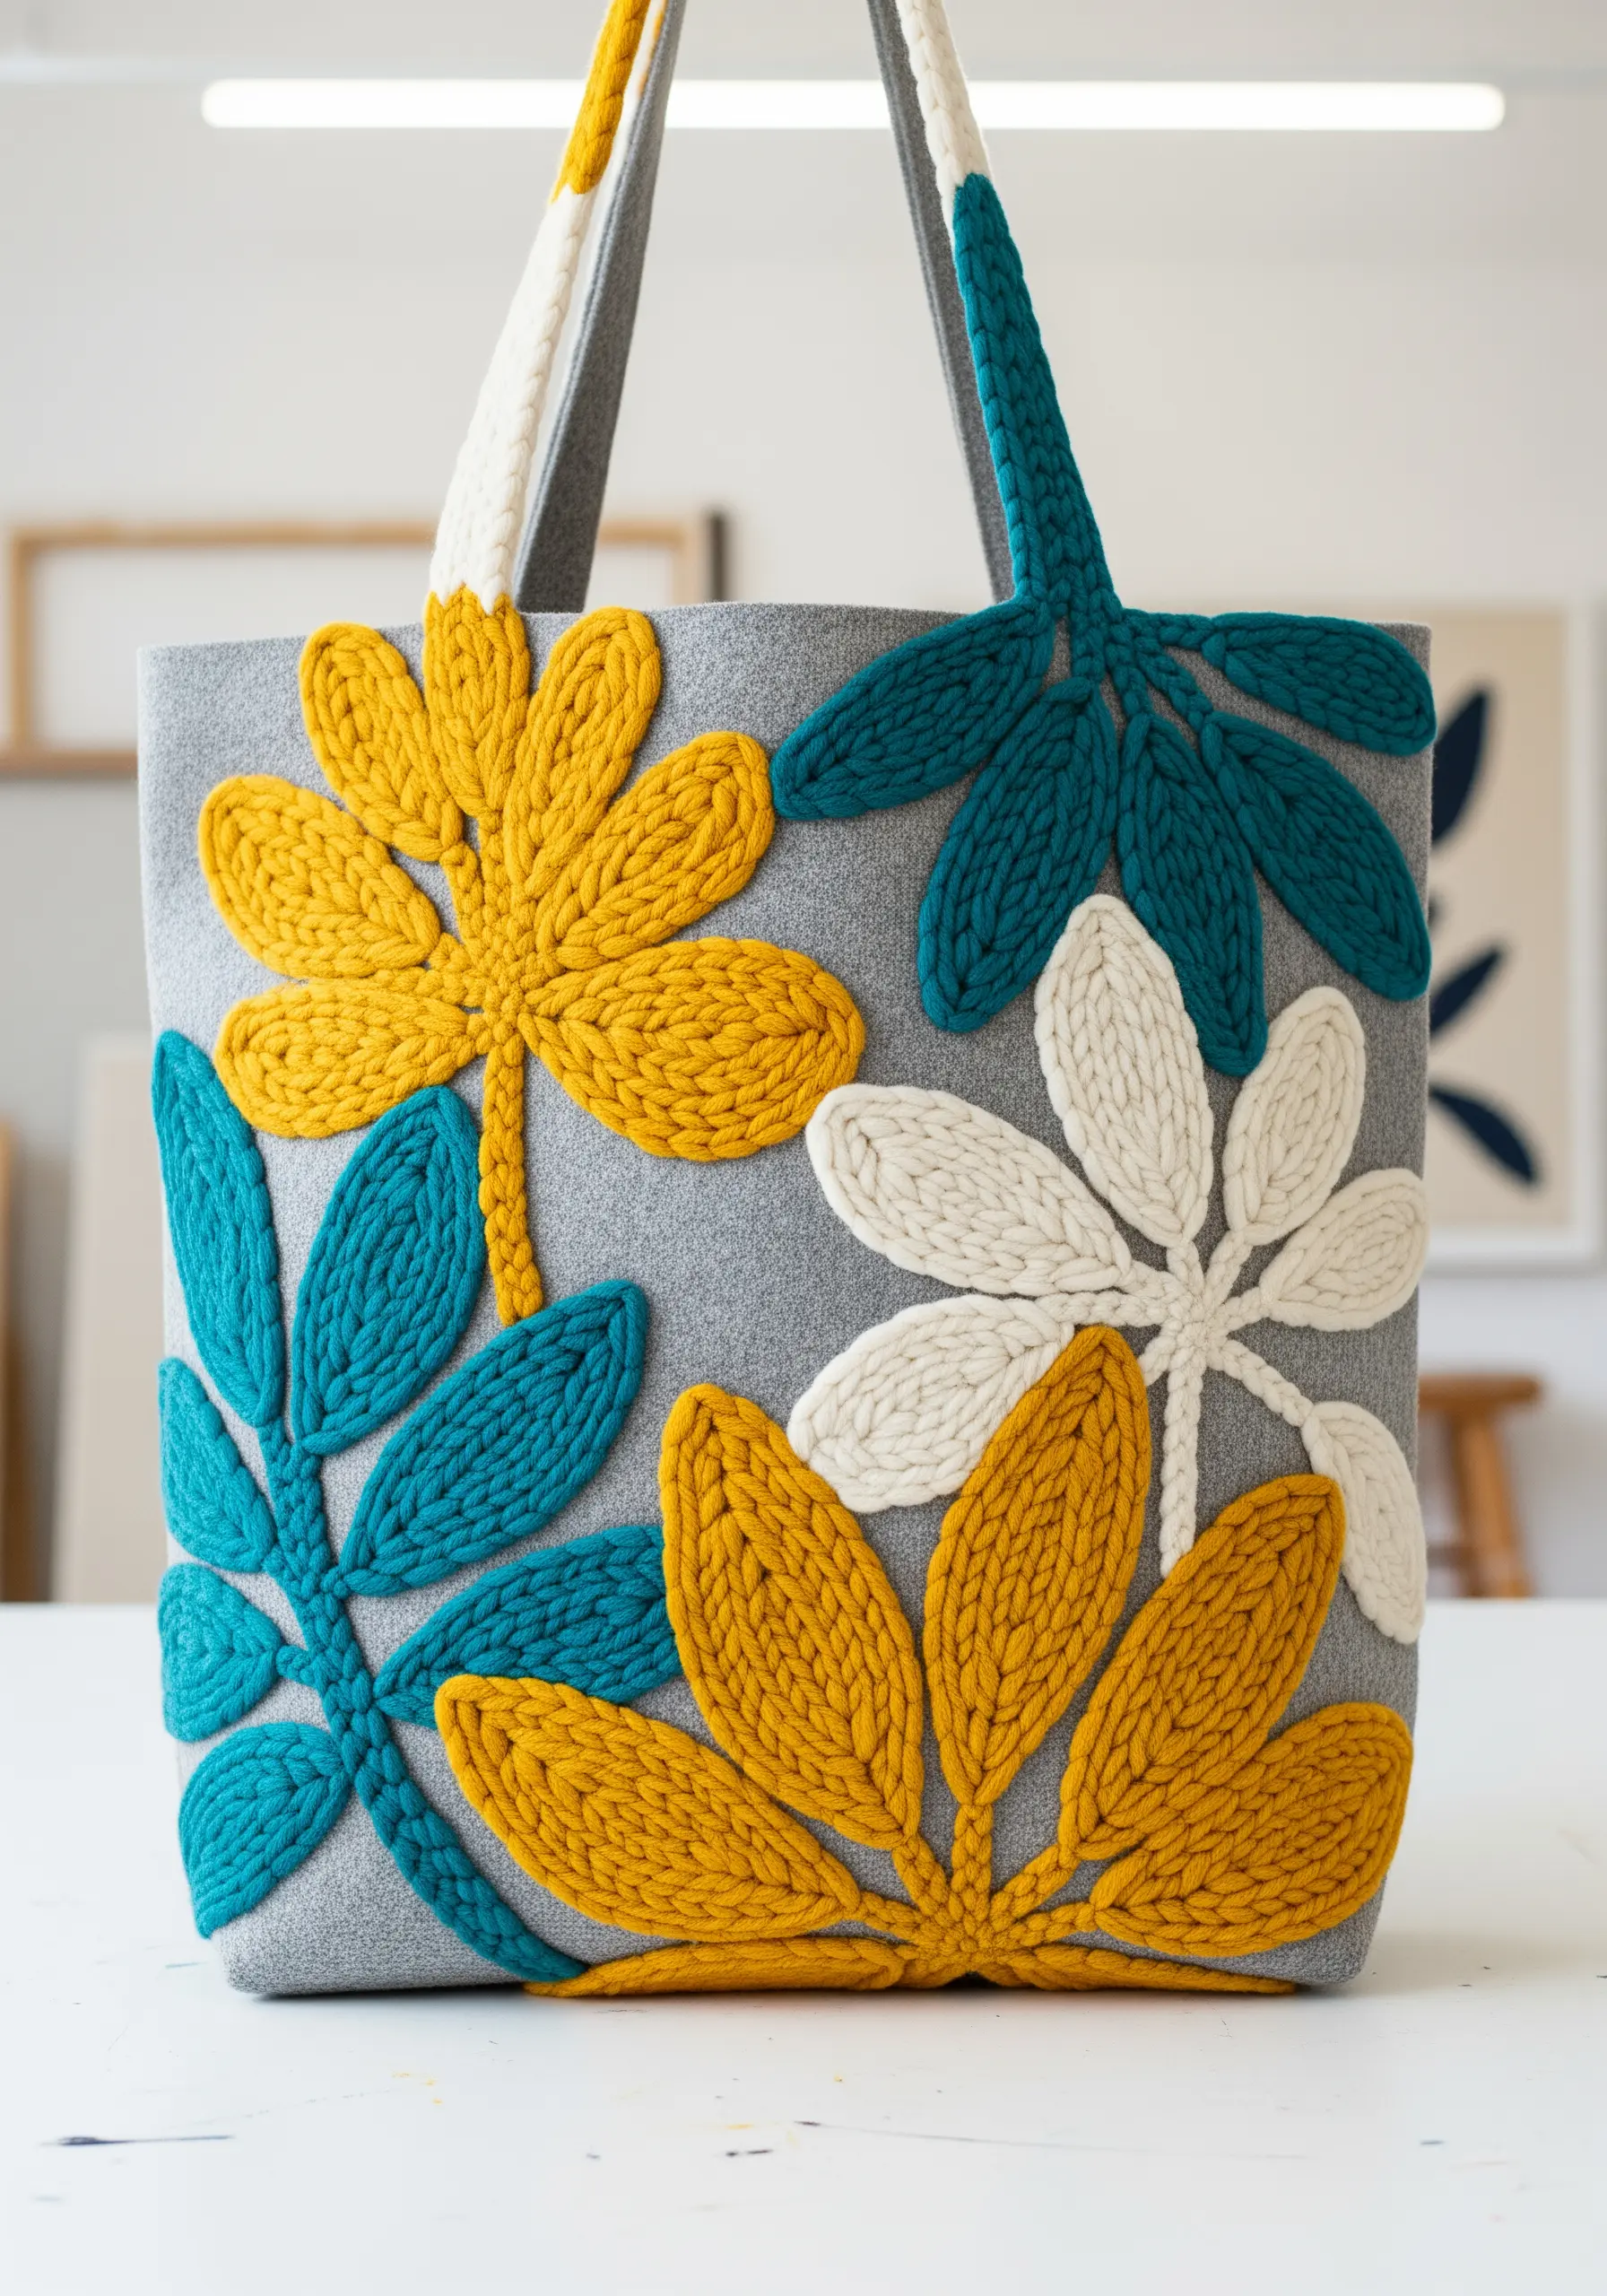
Explore a world of texture beyond floss by incorporating chunky yarn into your embroidery.
You can achieve this highly textural, raised effect through punch needle embroidery or by using a couching technique. To couch the yarn, lay it on the fabric’s surface and tack it down with a matching color of standard floss.
A sturdy fabric like felt is the ideal base, as it can handle the weight and tension of the thick yarn without warping.
Keep your shapes simple and graphic. With this technique, the extraordinary texture is the main focus. It’s an approach often seen in yarn wall art designs that blend modern and boho aesthetics.
20. The French Knot Hydrangea Clusters
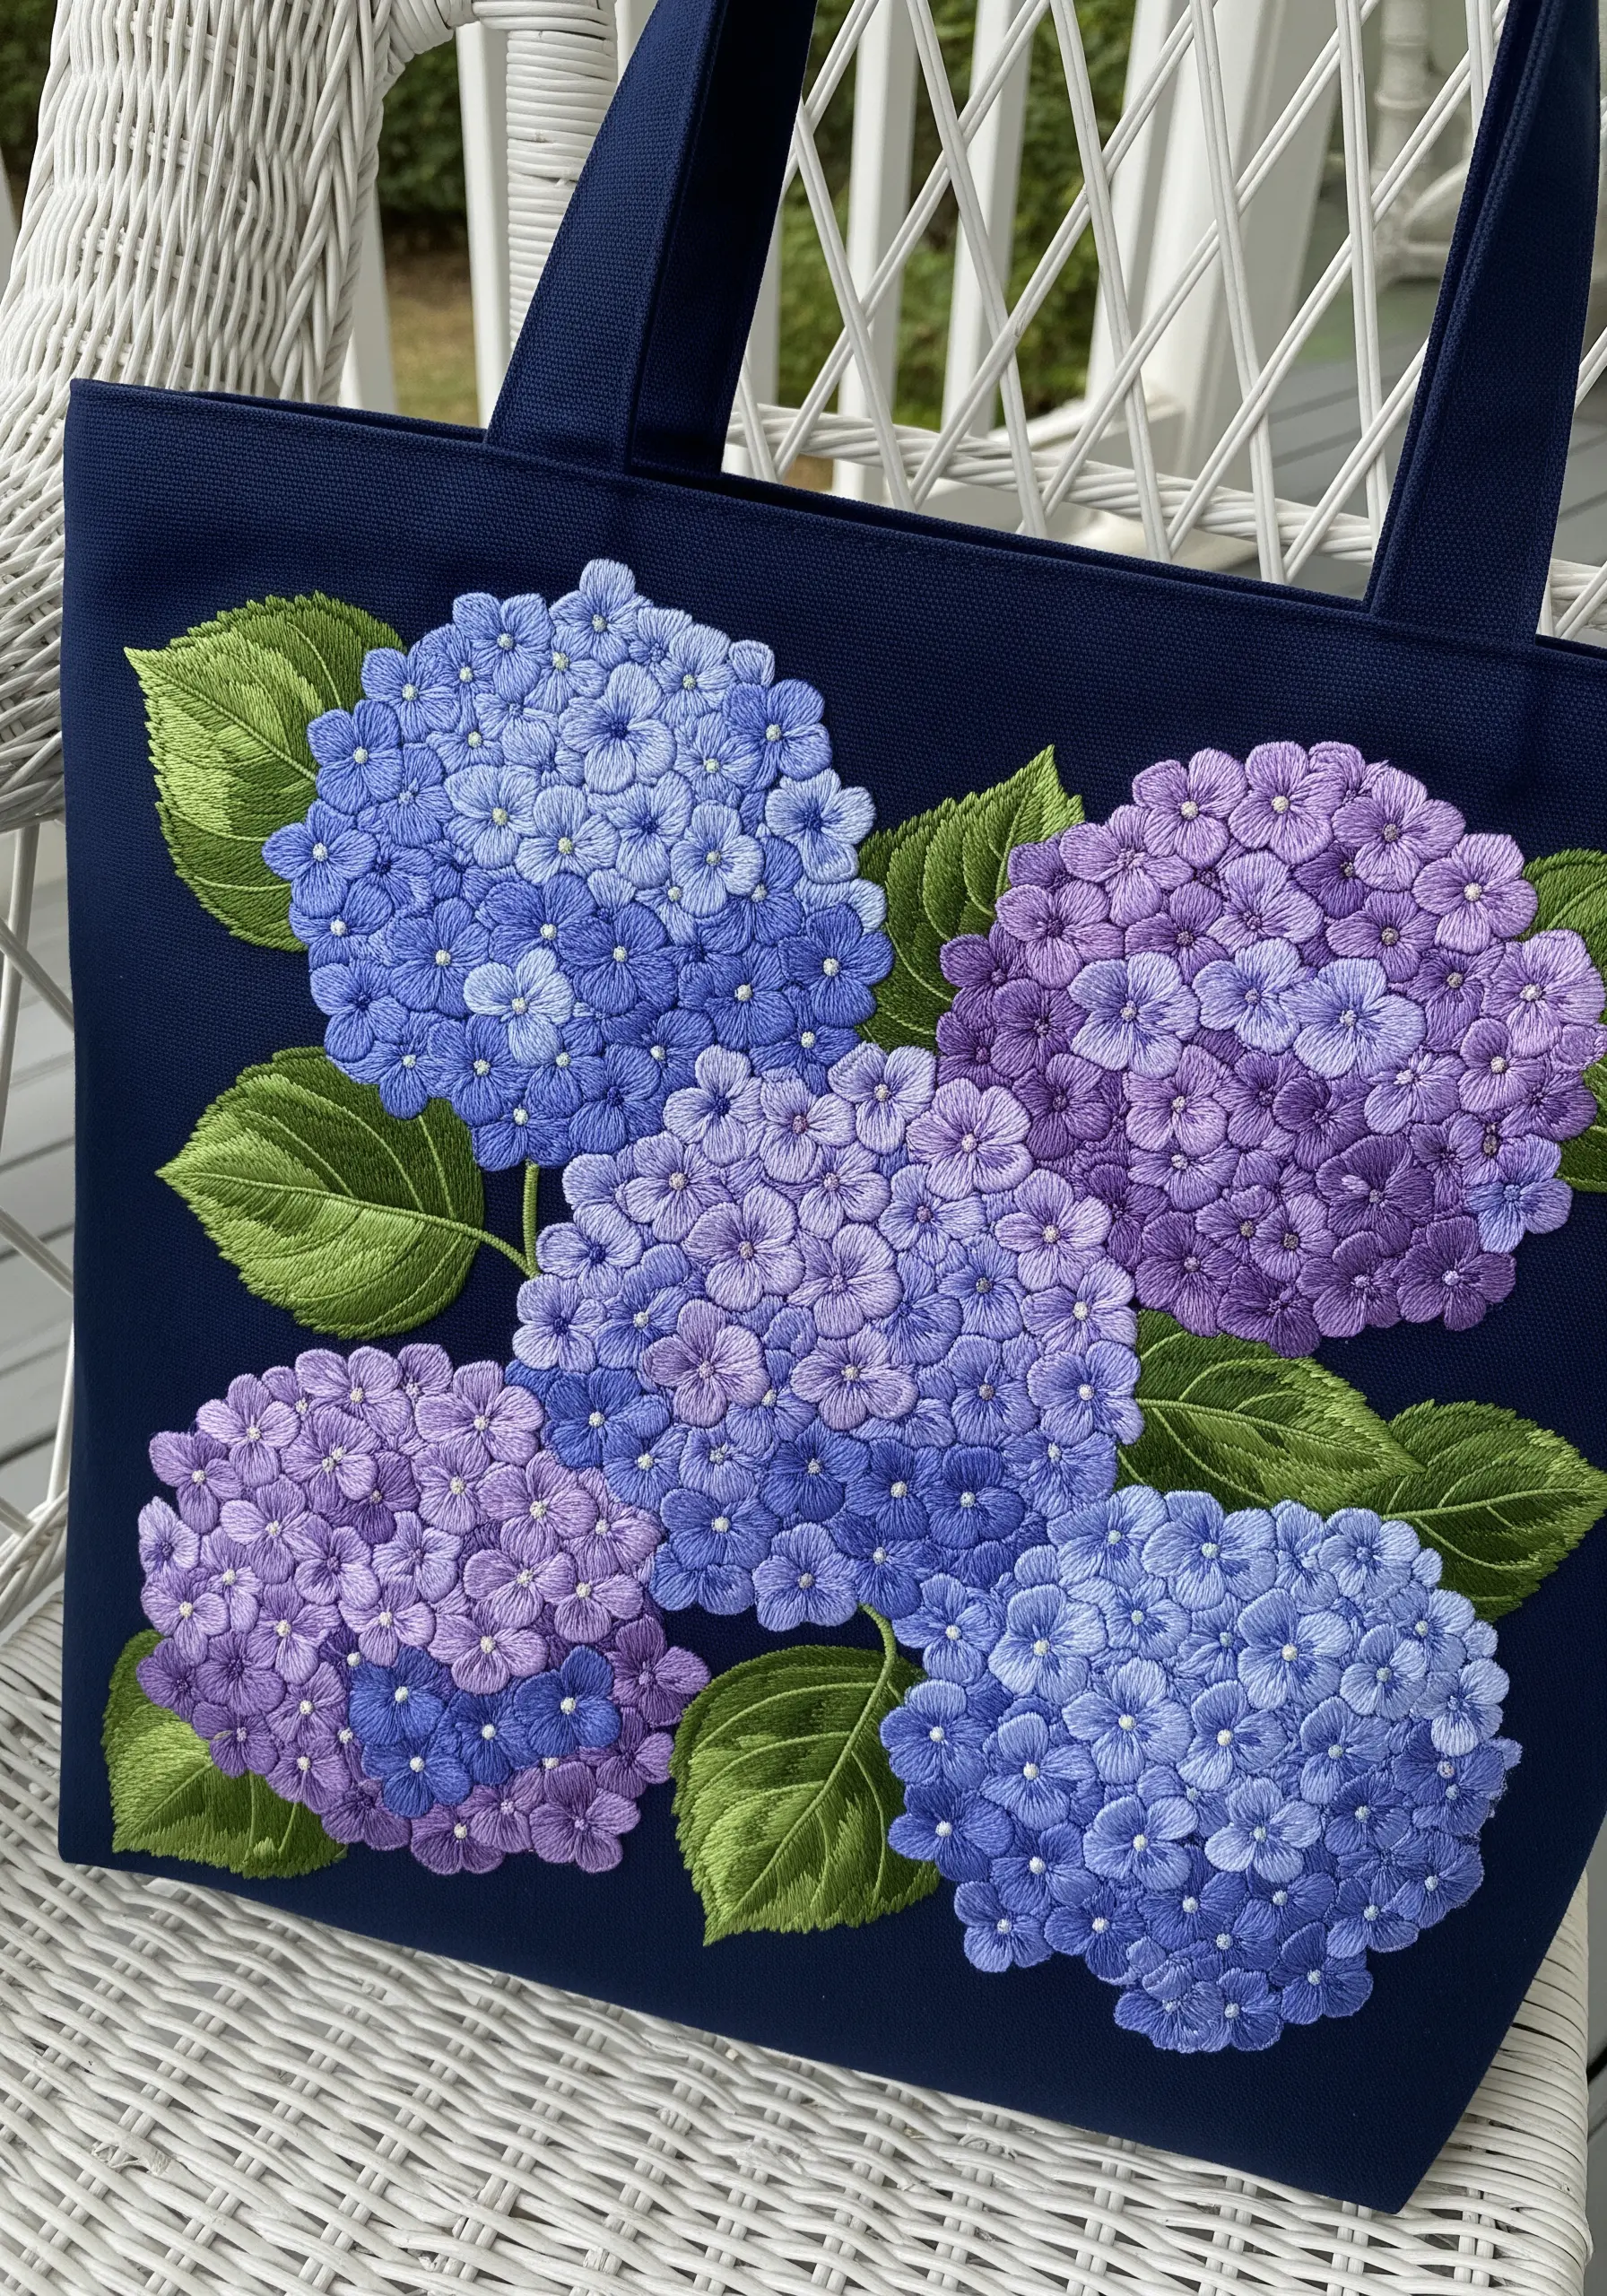
There is no better stitch than the French knot for capturing the full, clustered texture of a hydrangea blossom.
The secret to a realistic look is color variation. For each flower head, work with three or four closely related shades of blue and purple, mixing them together randomly.
Before you begin stitching, lightly trace the circular outline of each cluster. This will help you maintain the classic hydrangea shape as you fill it in with hundreds of knots.
The smooth satin stitch of the leaves provides a perfect textural contrast to the bumpy, dimensional flowers.
21. The Hyper-Realistic Peony Portrait
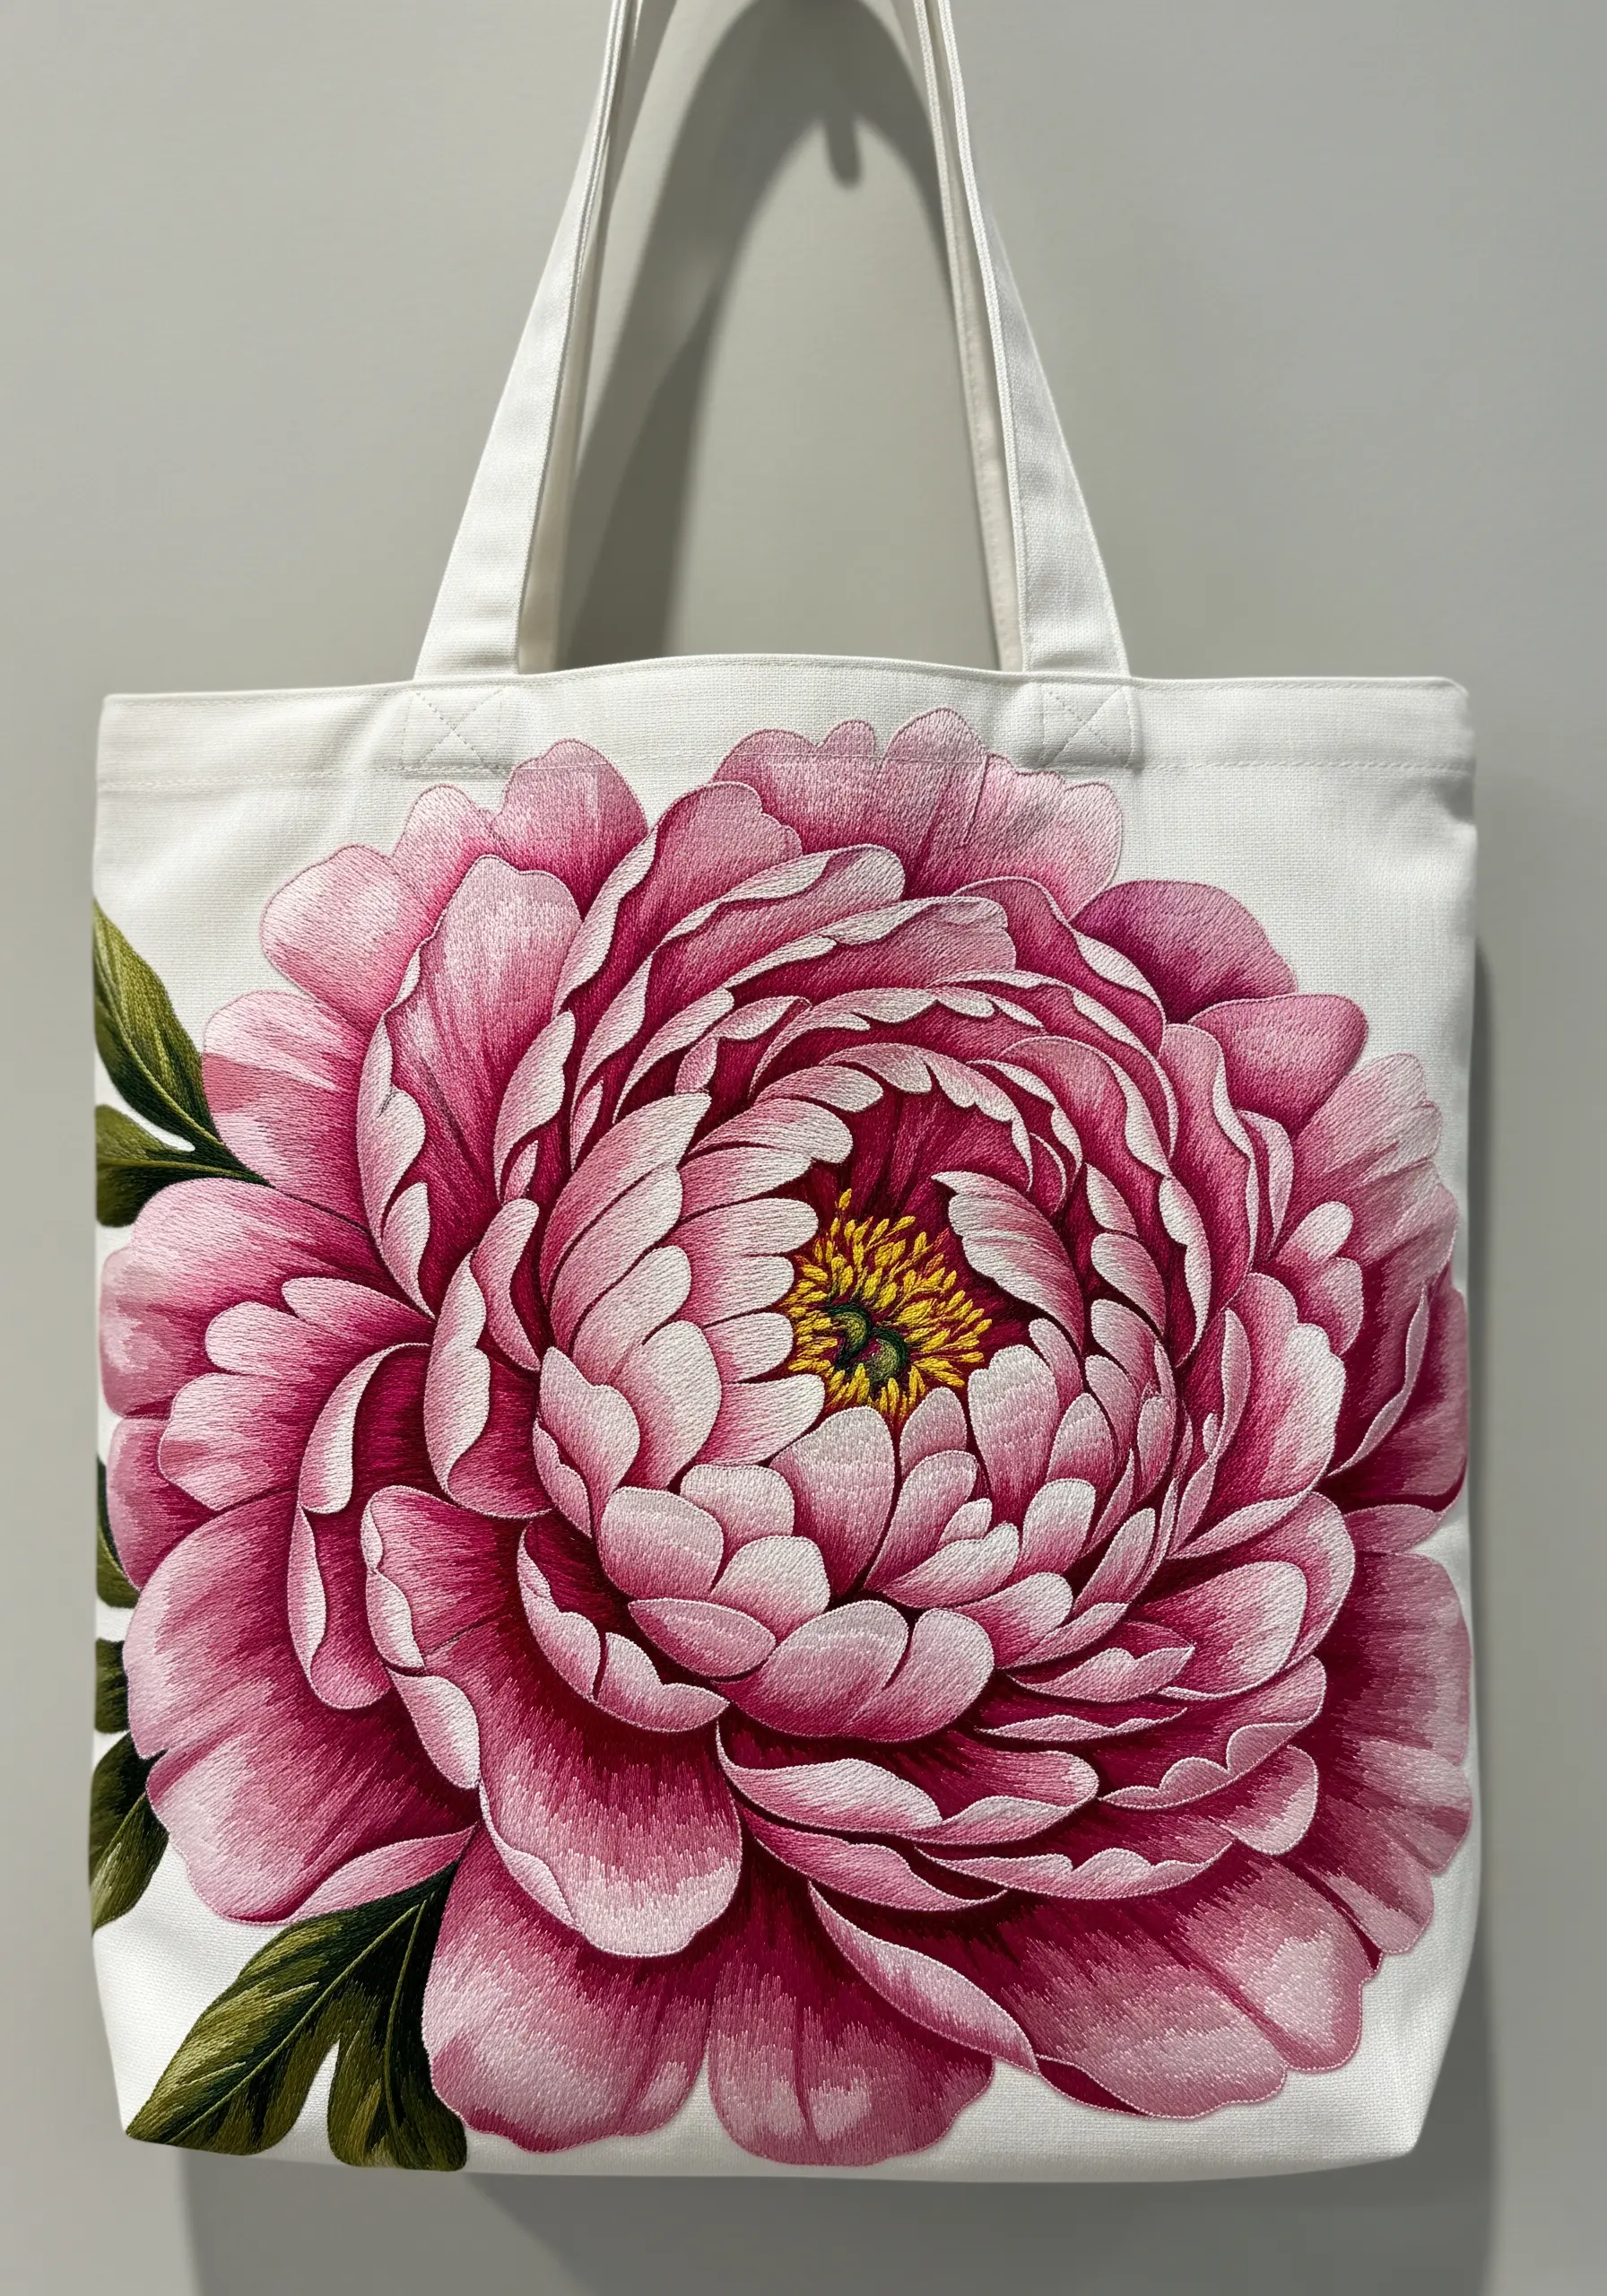
This breathtaking realism is achieved through meticulous thread painting, a technique that treats thread like paint and a needle like a brush.
Work with only a single strand of floss at a time, using the long-and-short stitch to blend a wide range of colors seamlessly.
Before you start, study a photo of a peony and map out your color zones, paying close attention to where light hits and shadows fall within the petals.
Ensure every stitch follows the natural curve and direction of the petal it’s filling. This directional stitching is what creates the illusion of form and turns a flat surface into a three-dimensional masterpiece. It’s a great example of wild garden floral embroidery ideas that look like watercolor paintings on fabric.


