

You have the threads, the fabric, the quiet moments set aside for stitching. But perhaps you feel a subtle gap between the work your hands create and the art you envision for your walls. It’s the difference between a pleasant pastime and a polished piece that truly transforms a room.
That transformation doesn’t require years of training or a complete overhaul of your skills. It begins with small, intentional shifts in how you approach texture, color, and composition. It’s in choosing a whipped backstitch over a standard one for a smoother line, or in adding a layer of padding to your satin stitch for a bolder shape.
Think of this as your guide to closing that gap. Here, you’ll find not just ideas, but the specific techniques behind them—the subtle adjustments that elevate a simple motif into a statement. It’s time to pick up your needle with new confidence and create the art your living room has been waiting for.
1. The Botanical Triptych: Unifying with Texture and Tone

Create a sophisticated botanical series by selecting a single, high-quality background fabric, like an oatmeal linen or neutral cotton canvas.
This consistency provides a cohesive foundation that allows each plant’s unique character to shine.
For delicate stems and leaf veins, use a single strand of floss with a sharp split stitch to achieve fine, elegant lines.
Contrast this by using French knots for lavender buds or small tufts of turkey work for cotton bolls, adding pockets of rich texture that draw the eye.
This interplay between delicate line work and dimensional stitches elevates simple subjects into nature-inspired framed embroidery designs.
2. Abstract Compositions: Mastering Geometrics and Negative Space
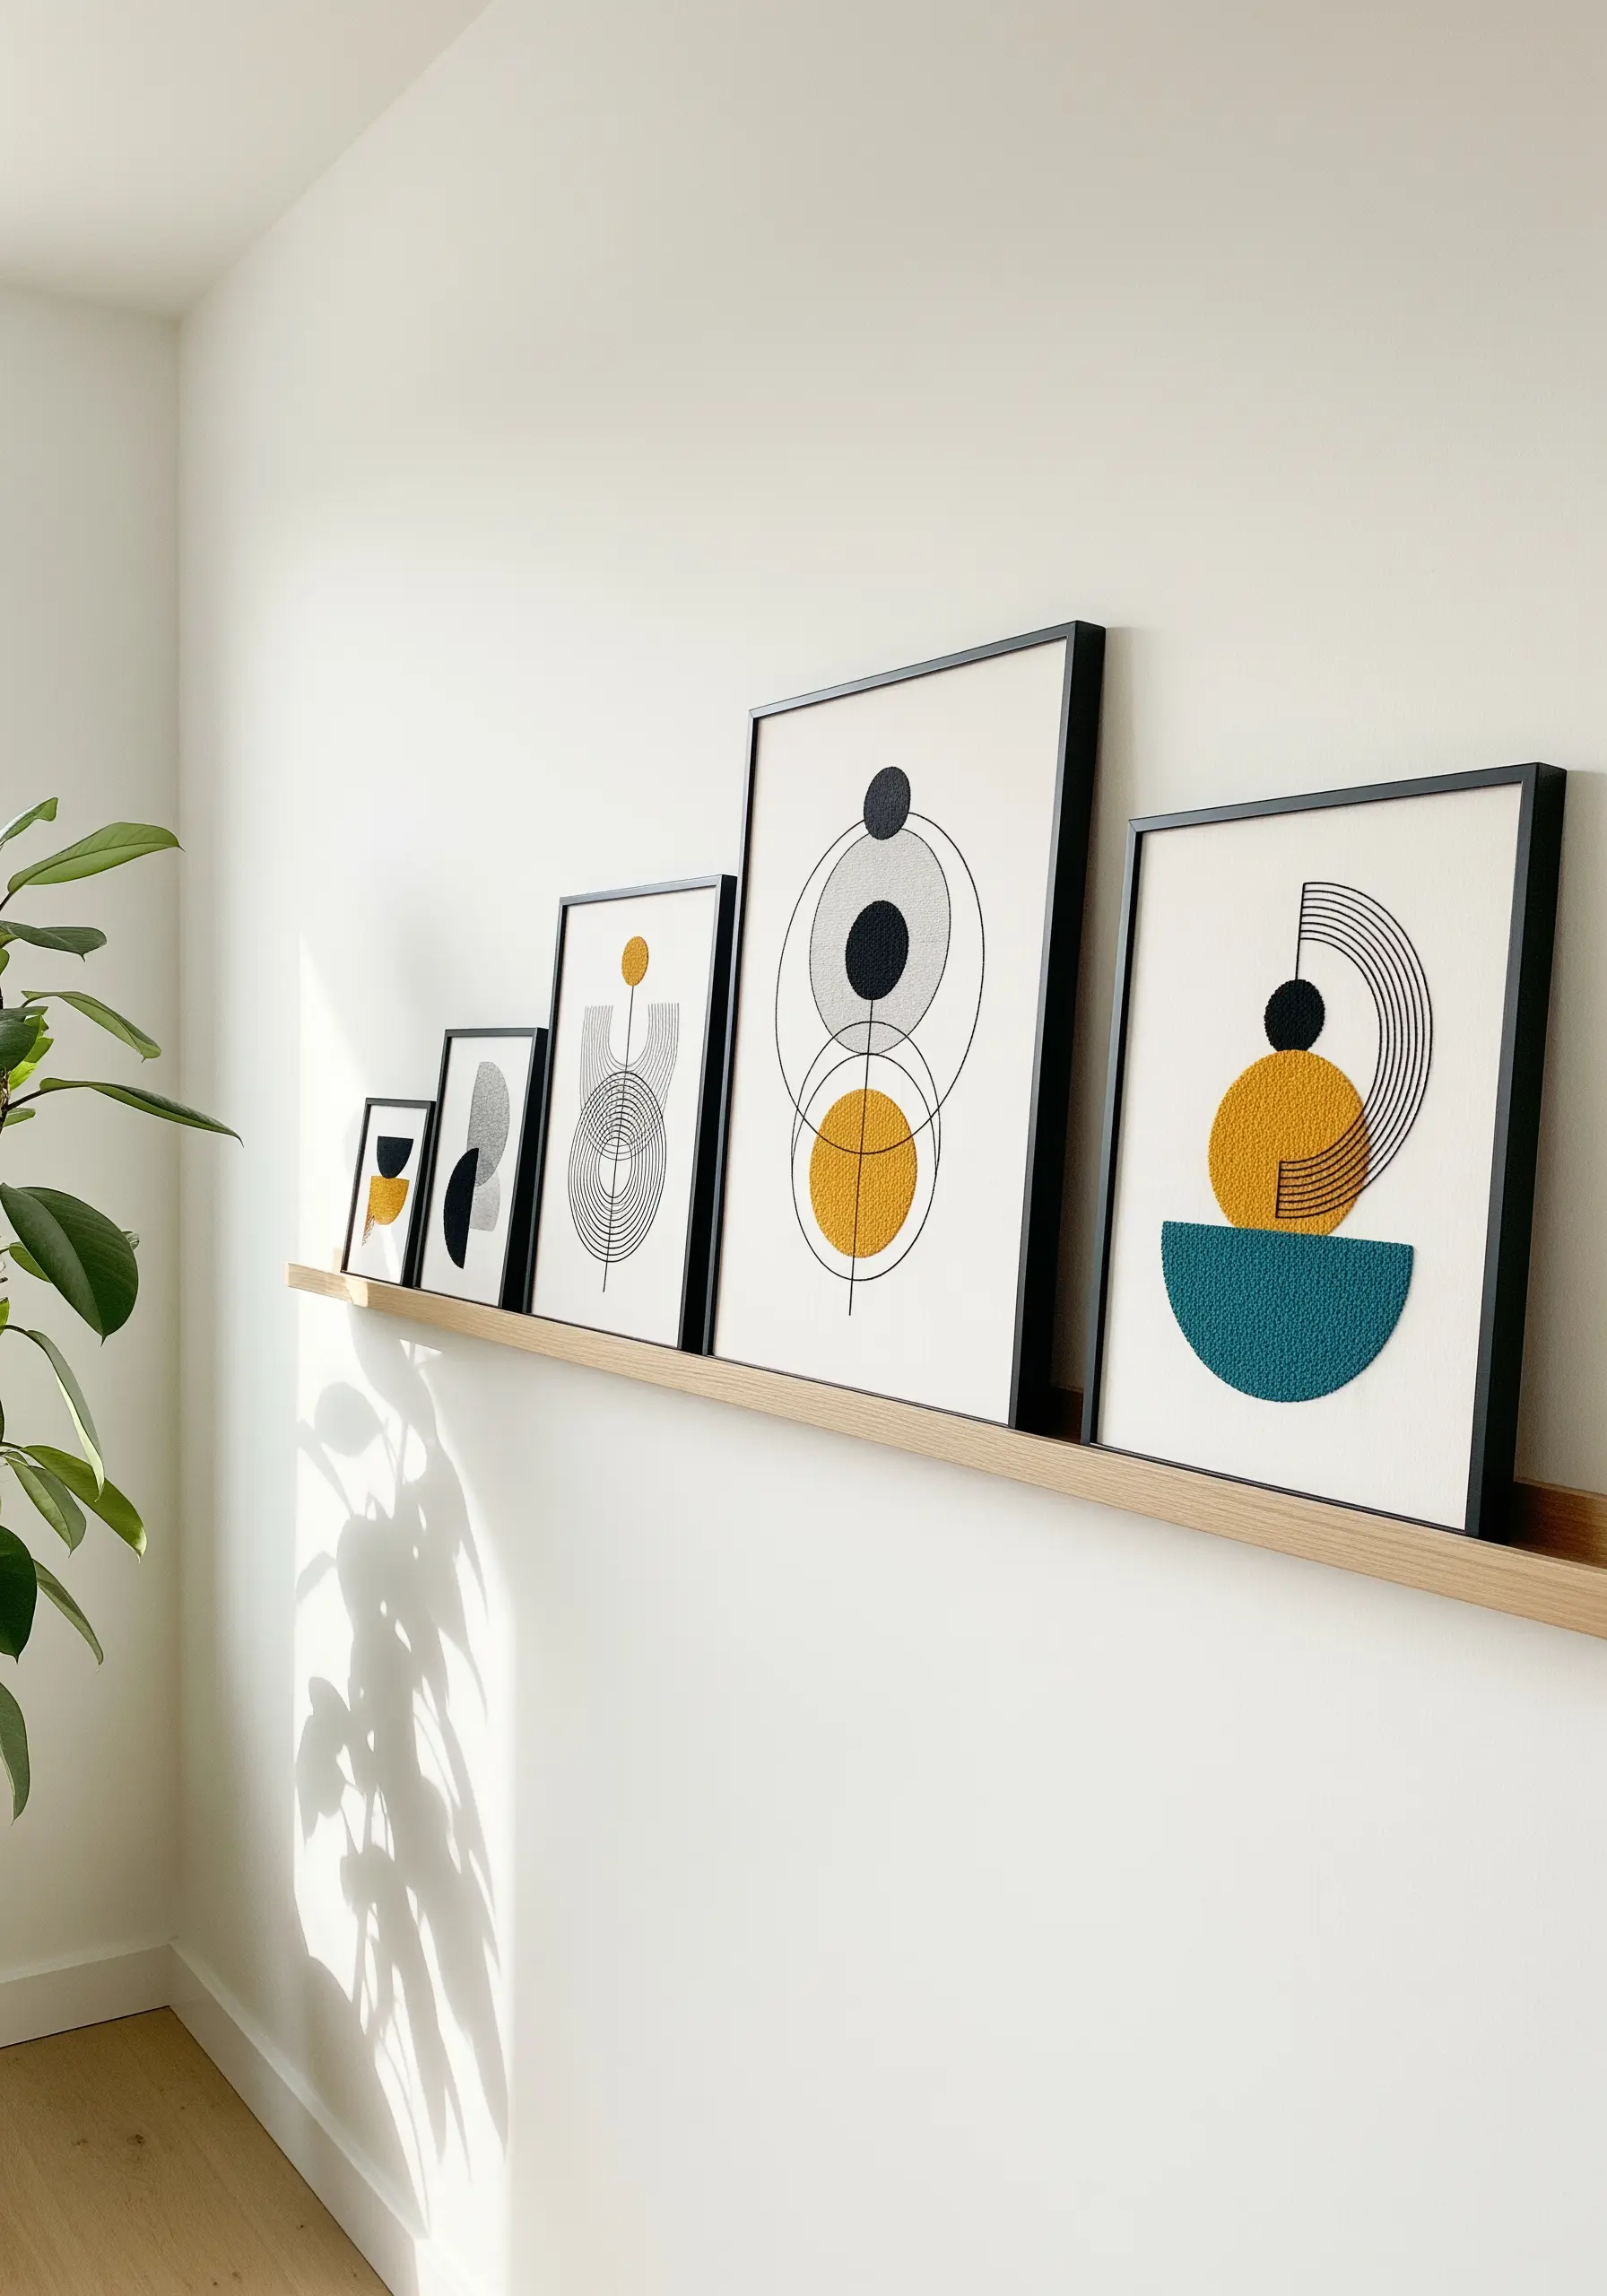
To achieve the clean, dense fills essential for modern abstract art, master the padded satin stitch.
Lay down a foundation of small straight stitches within your shape before covering it with your final satin stitch—this raises the surface slightly for a bolder, more defined look.
For the fine, curved lines, avoid backstitch, which can look segmented. Instead, use couching: lay down a single, perfectly curved piece of thread and tack it in place with tiny, near-invisible stitches.
This preserves the smooth arc and creates a powerful contrast between the flat, filled shapes and the delicate linework.
This is a core technique in creating minimalist abstract thread designs that feel both graphic and handmade.
3. The Art of the Curated Embroidery Gallery Wall
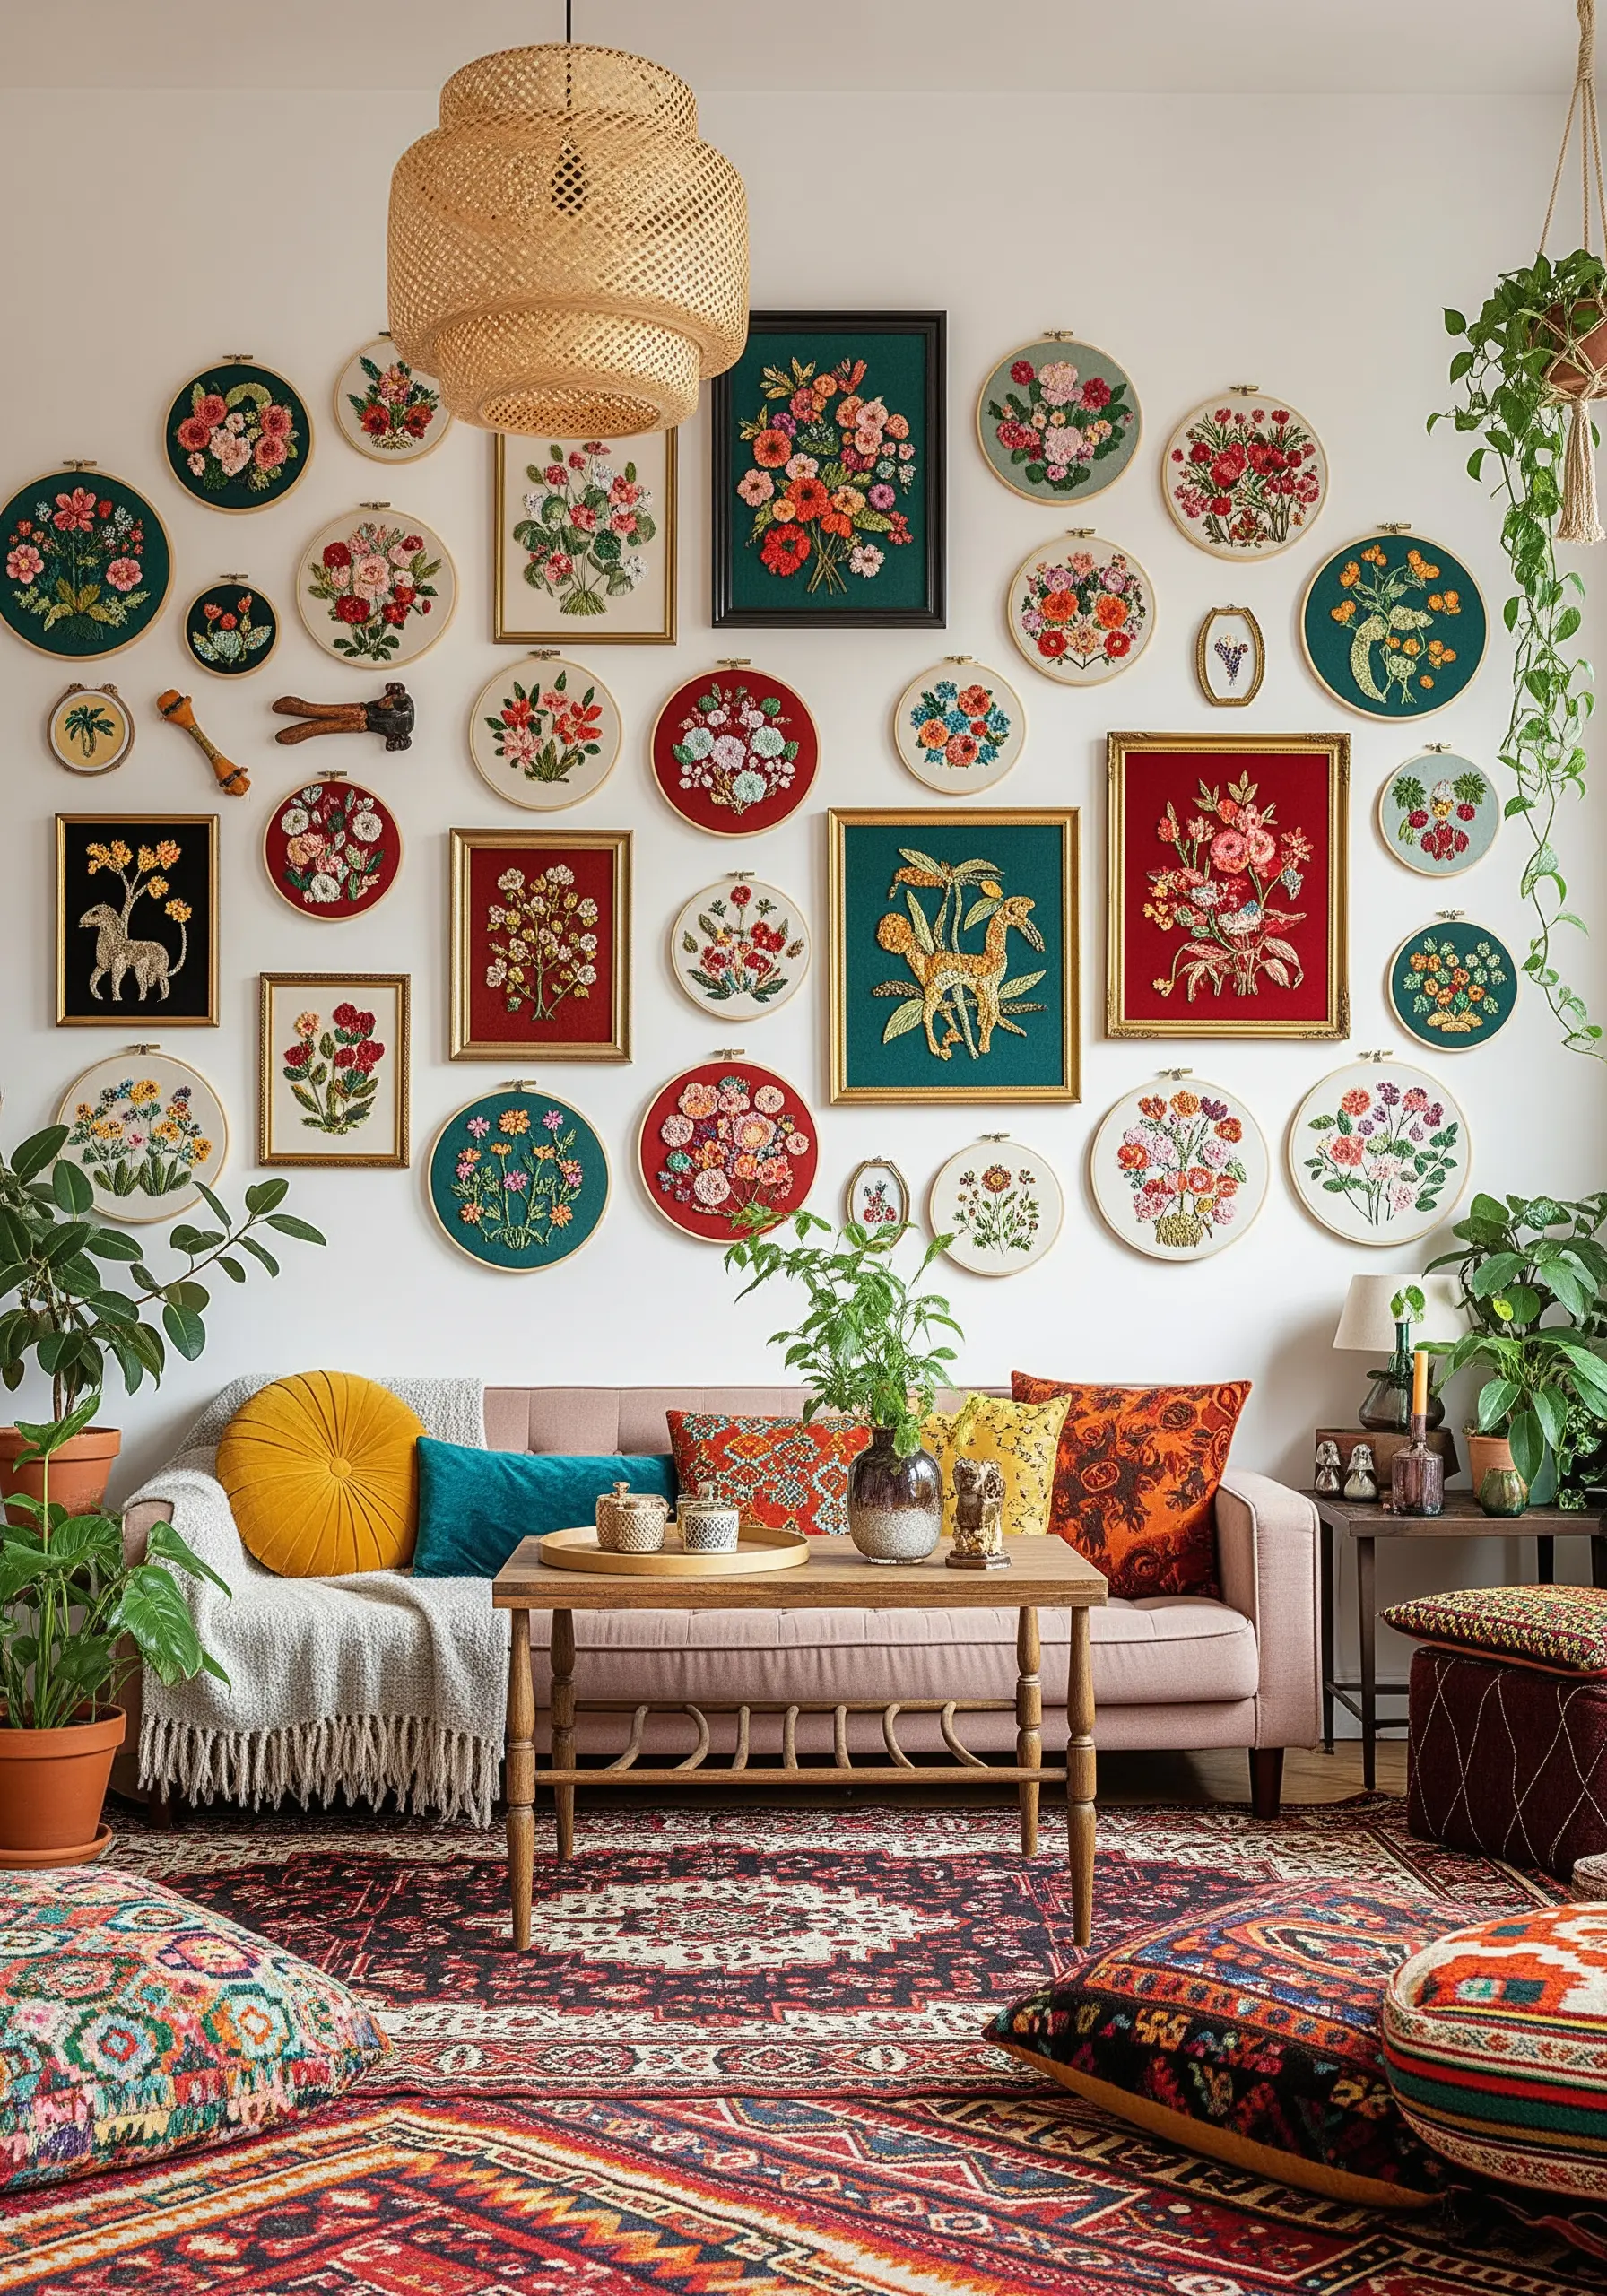
Transform a collection of individual pieces into a stunning focal point by establishing a clear visual theme.
You can unify your display through a consistent color palette—like jewel tones on dark backgrounds—or by repeating a single motif, such as florals, across various designs.
Create dynamic visual rhythm by mixing round hoops with square and rectangular frames. This variation in shape prevents monotony and guides the viewer’s eye across the entire collection.
Arrange your pieces on the floor first to perfect the spacing and balance before hanging them, ensuring your hooped wall collage layouts feel intentional and harmonious.
4. Capturing Mid-Century Modern Style in Thread

The key to the mid-century aesthetic is the interplay between clean color blocking and sharp, energetic lines.
Use a long-and-short stitch to fill the organic shapes, ensuring your stitches lie flat and smooth to create solid fields of color.
For the iconic starburst motifs, use single, taut straight stitches radiating from a central point. Vary the thread weight—a thicker Perle cotton for some rays, a finer floss for others—to add subtle depth and dynamism.
This approach transforms simple stitches into a piece of modern thread art that honors the era’s design principles.
5. Creating Oceanic Depth with High-Contrast Color
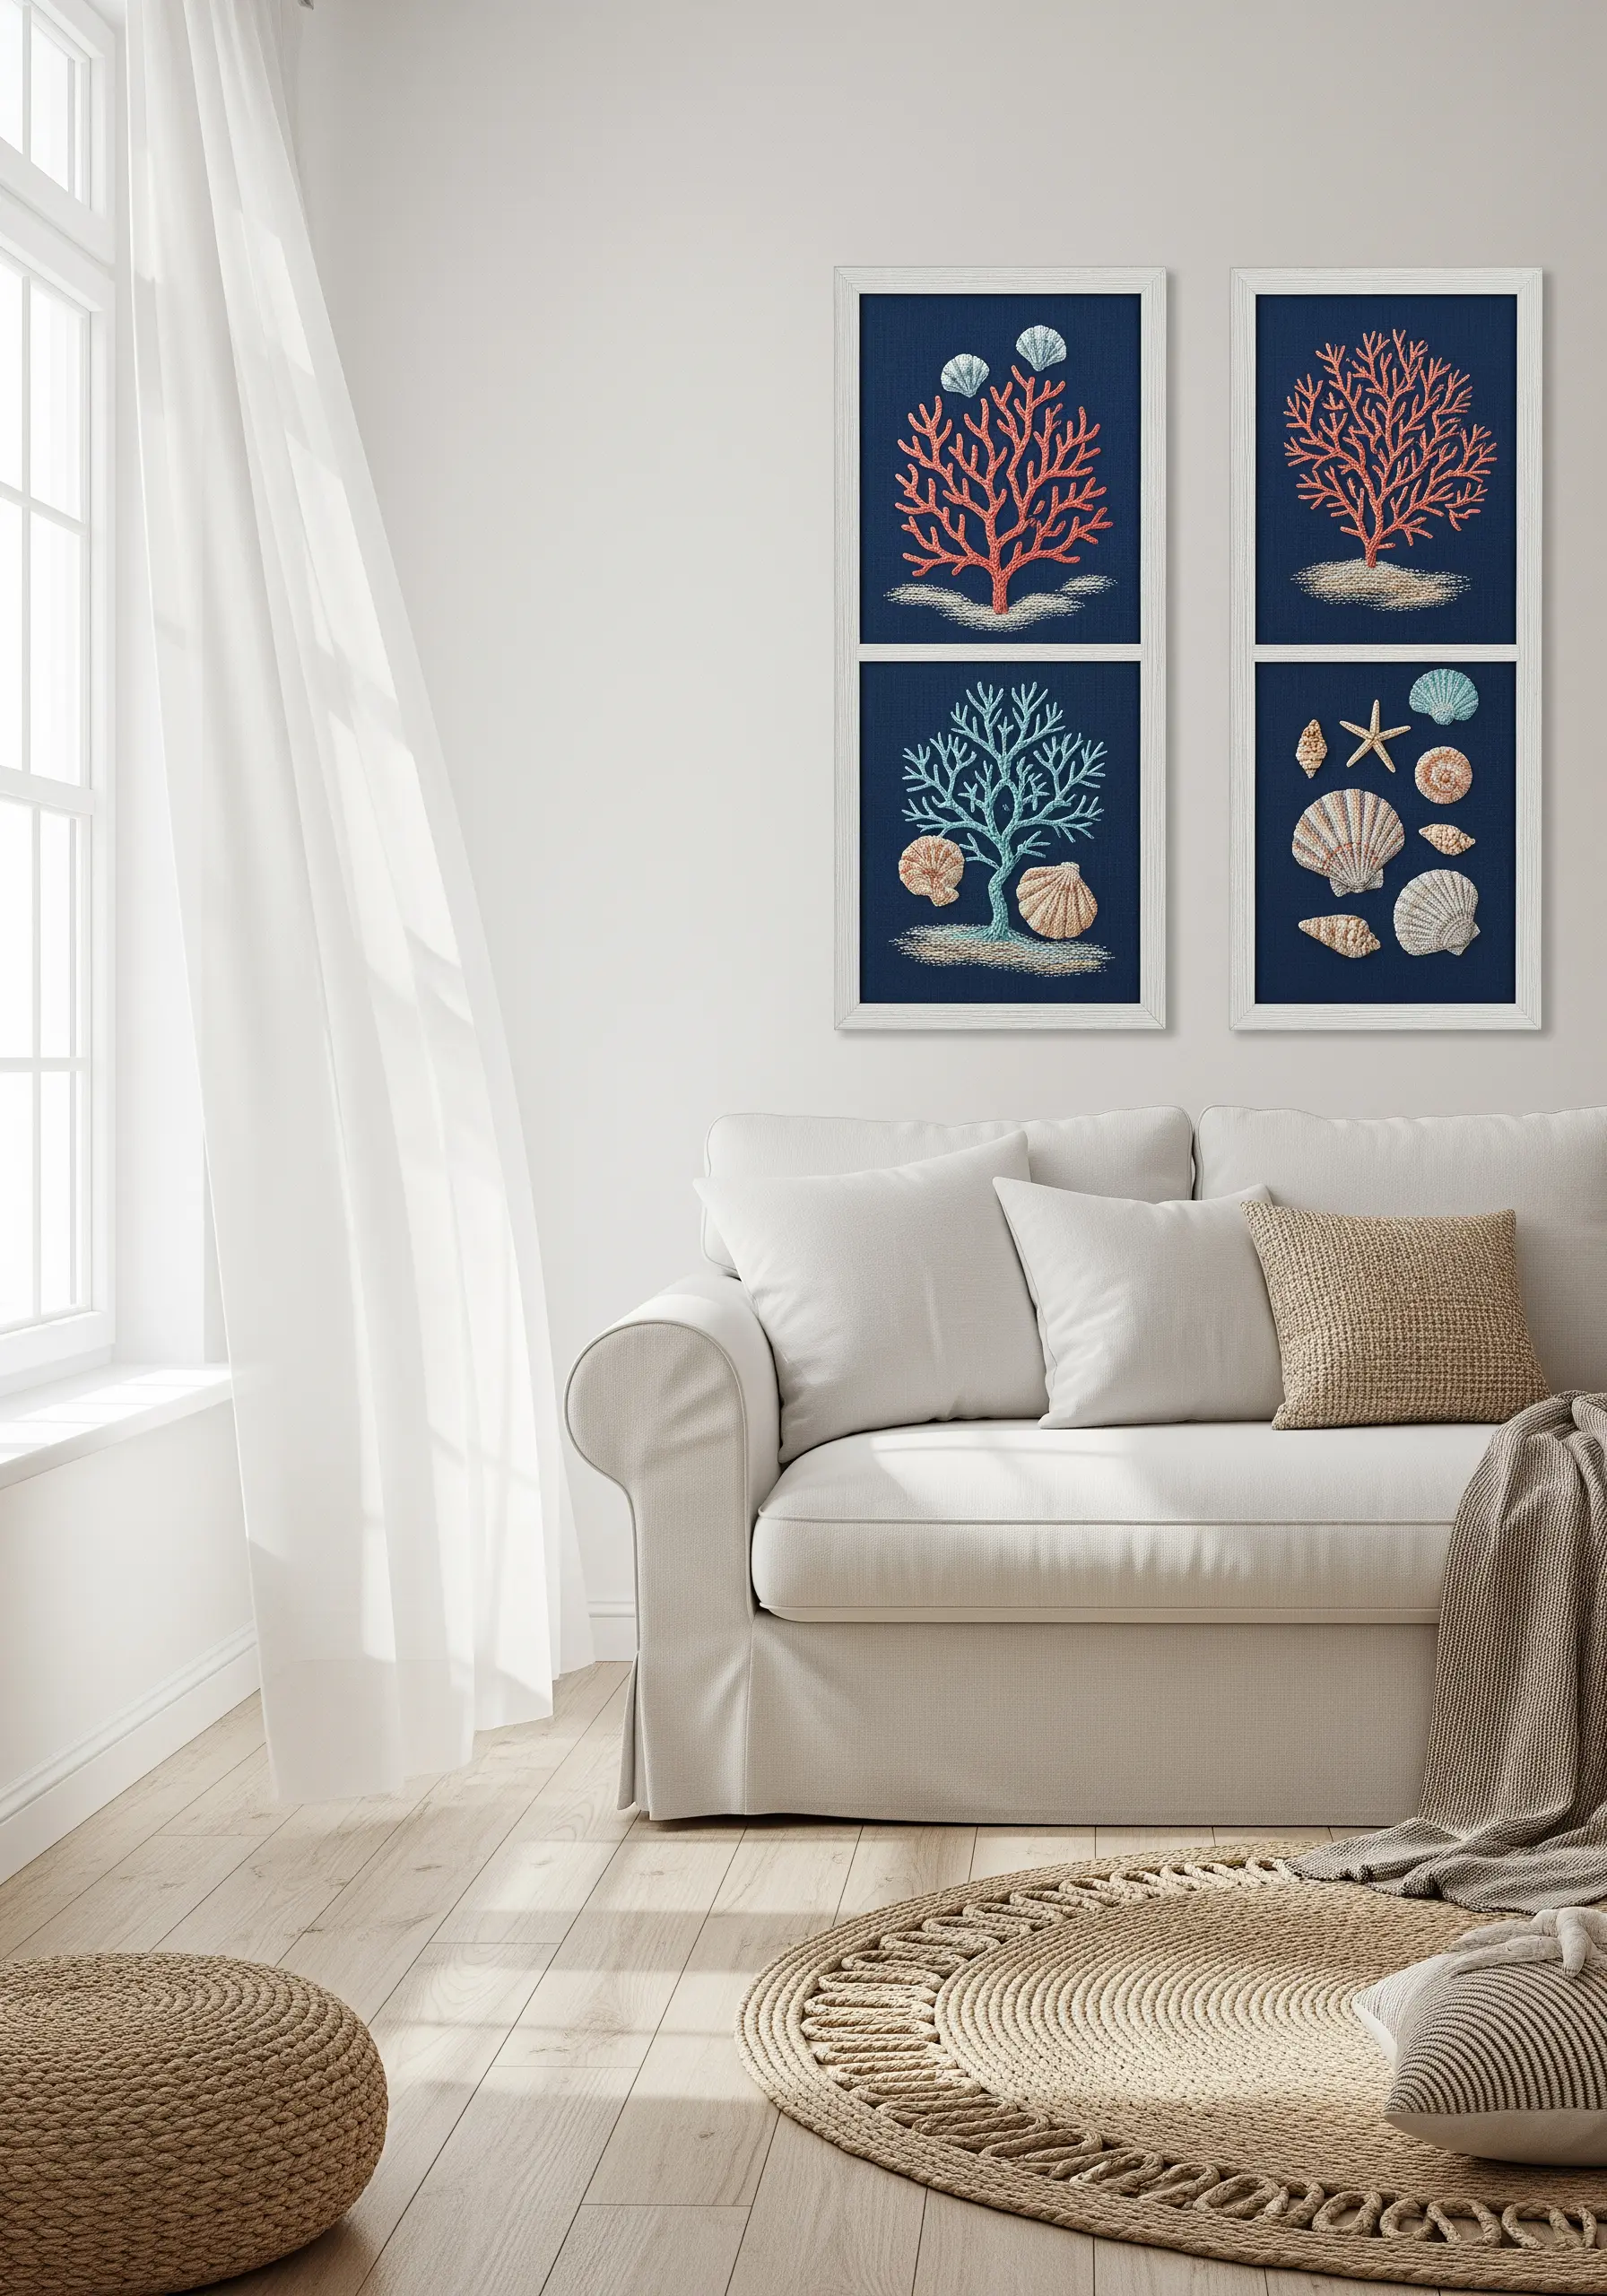
Make your colors radiate by choosing a deep, contrasting background fabric like navy or black linen.
This forces the lighter, brighter threads to pop, creating immediate visual drama without complex stitching.
For the branching coral, use a whipped backstitch or raised stem stitch band; this creates a rounded, dimensional line that mimics the coral’s natural form.
For seashells, blend two or three closely-related shades of floss within a single satin-stitched shape to suggest the subtle iridescence and curvature of the shell’s surface.
These tiny sea-inspired embroidery ideas gain immense power from their smart use of color and texture.
6. Large-Scale Line Work: Architectural Precision in Thread
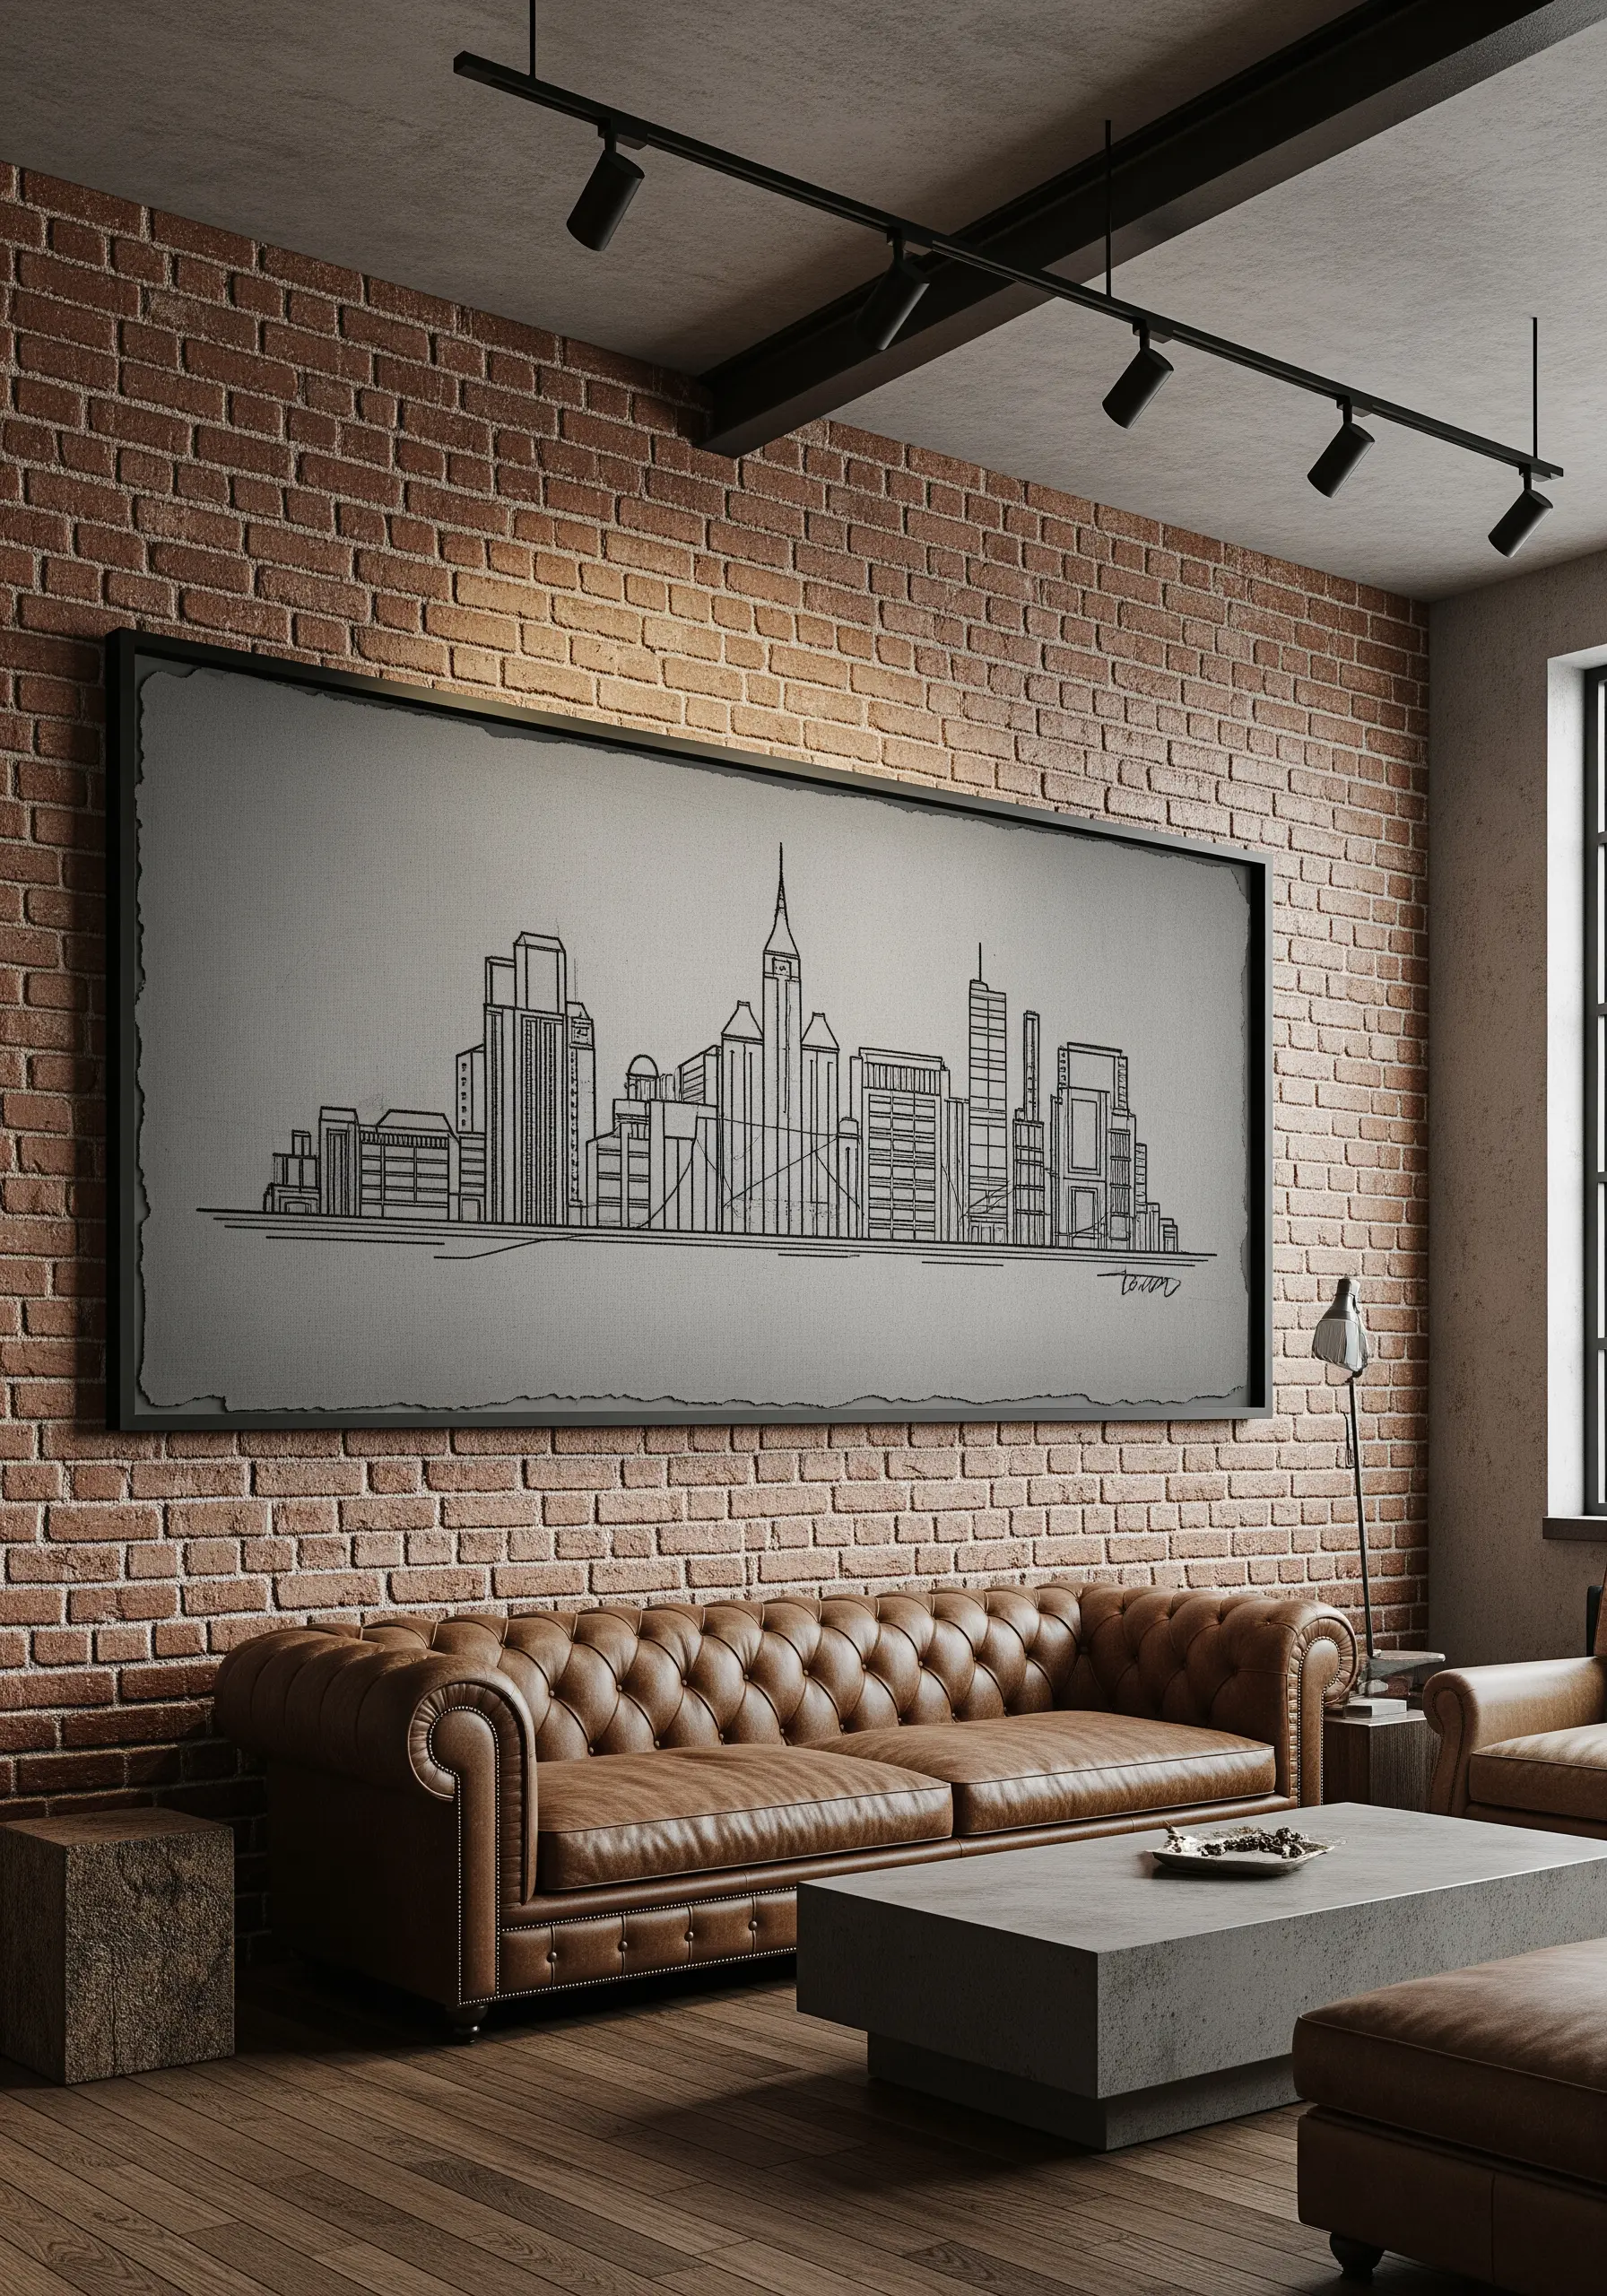
When translating architectural sketches to fabric, clarity and precision are paramount.
Choose a single, strong stitch, like a stem stitch or backstitch, and use it consistently throughout the entire piece.
Opt for a heavier thread, such as a #8 or #5 Perle cotton, to give your lines weight and presence, especially on a large canvas.
The most crucial element is maintaining a uniform stitch length. This discipline is what gives the final piece its polished, graphic quality, turning a simple line drawing into a powerful statement.
It’s the foundation for modern thread landscape projects that feel both artistic and intentional.
7. The Luminous Sunburst: Mastering Metallic Threads
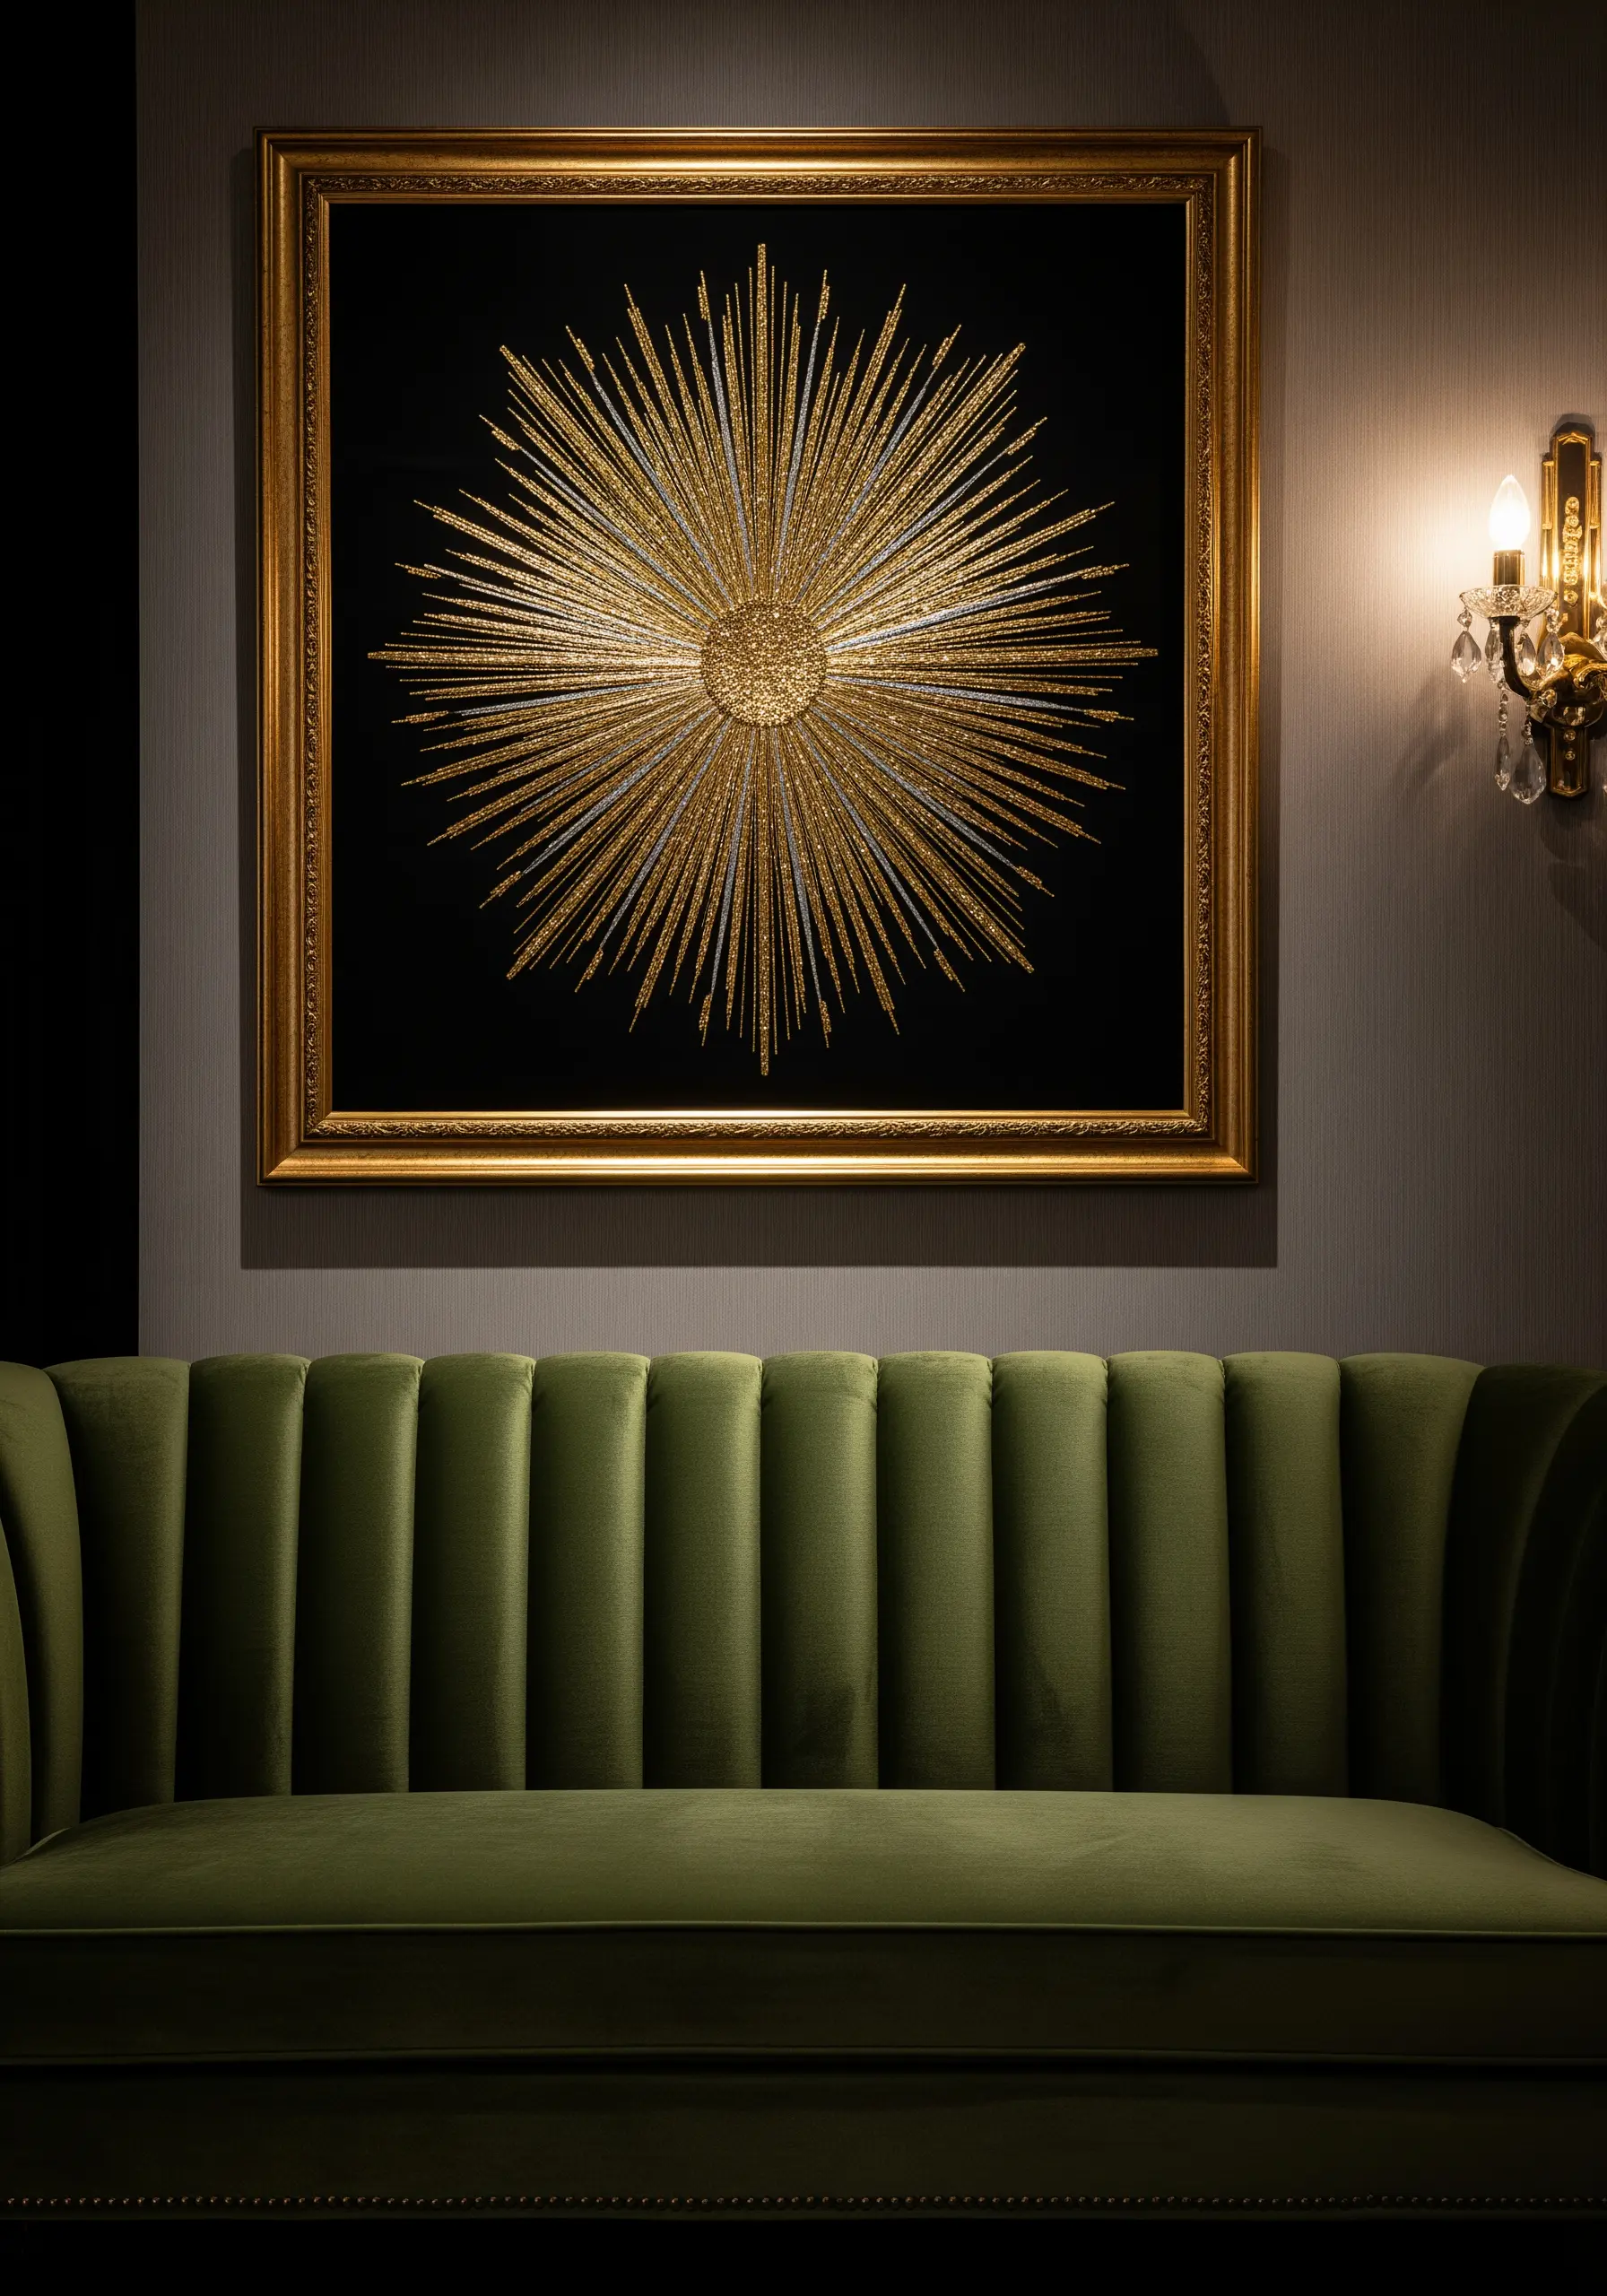
To create a truly show-stopping piece, combine metallic thread with a dark, light-absorbing fabric like cotton velvet.
Metallic threads can be challenging, so work with shorter lengths (no more than 12 inches) and use a thread conditioner like beeswax to reduce friction and prevent fraying.
Create the sunburst with radiating straight stitches of varying lengths. For the center, fill a small circle with French knots or seed stitches using the same metallic thread to create a dense, sparkling core from which the rays emanate.
These luxury metallic thread wall decor ideas are all about maximizing the play of light.
8. Embroidered Kintsugi: The Beauty of Mended Lines

Channel the Japanese art of Kintsugi by stitching elegant ‘cracks’ onto your fabric.
To create the thick, molten-gold effect, use a couching stitch. Lay down a heavy metallic cord or multiple strands of gold floss at once, and tack it to the fabric with a second, finer thread.
This technique gives your lines a solid, sculptural quality that a simple backstitch cannot achieve.
Enhance the wabi-sabi aesthetic by using a fabric with natural texture, like linen or raw silk, and leaving the edges frayed before framing. This is one of those organic handmade pieces that tells a story of resilience.
9. Celestial Motifs: Creating Atmosphere with Subtle Detail

For nocturnal subjects like moths and moons, atmosphere is everything. Choose a dark, matte fabric like black or navy cotton to serve as your night sky.
Create the moth’s delicate wing patterns using long-and-short stitch with a limited, sophisticated palette—think greys, creams, and a single metallic accent.
For the moon phases and stars, resist the urge to use thick thread. Instead, use a single strand of white or silver floss. This fine line work makes the celestial elements appear crisp and distant, adding a sense of magic and scale.
These minimal celestial embroidery wall designs rely on restraint for their power.
10. Creating a Layered Botanical Tapestry

To embroider a dense jungle of leaves without it becoming a flat, green mass, you must create the illusion of depth.
Always stitch the elements that are farthest away first. Fill these background leaves with simple satin or long-and-short stitches.
For the leaves layered on top, introduce a new element of texture or direction. Change the angle of your satin stitches or switch to a chain stitch fill. This subtle shift is enough for the brain to register the overlapping leaves as separate objects, creating a lush, dimensional effect.
These plant-inspired embroidery hoop sets look incredibly complex but are built on this simple principle.
11. The Power of Monochromatic Thread Painting

Creating a compelling landscape with only black, white, and grey requires a focus on texture and value.
Instead of relying on color, assign different stitches to represent different natural elements. Use dense French knots for rocky ground, short seed stitches for sandy shores, and long, directional straight stitches for the movement of water.
Control light and shadow by varying your thread weight. Use a full six strands of black floss for the darkest shadows in the foreground, and taper to a single strand of grey for the distant, hazy mountains.
This is how neutral thread texture combinations can create breathtaking depth.
12. Illustrative Stitching: Bold Lines and Bright Fills

To achieve a playful, storybook quality in your embroidery, embrace the power of a strong outline.
Use a thick, dark thread—like black Perle cotton—and a bold stitch like a chain stitch or a three-strand stem stitch to define all your shapes first.
Once your outlines are in place, fill them with bright, solid colors using a simple satin stitch. This technique creates a clean, graphic look reminiscent of classic illustrations, making it perfect for cute children’s room art.
The contrast between the dark outline and the vibrant fill is what gives the piece its joyful energy.
13. Sculptural Landscapes with Yarn and Fiber

Move beyond embroidery floss to create art with dramatic, sculptural texture.
Using thick fibers like wool yarn, you can achieve a raised, three-dimensional effect that commands attention. The couching technique is ideal: lay down your yarn in flowing lines and tack it in place with a matching or contrasting color of embroidery floss.
This method allows you to create bold color fields and sweeping curves quickly, turning your fabric into a canvas for textured yarn wall art.
The texture itself becomes the star of the show.
14. Thread Painting a Luminous, Blended Sky
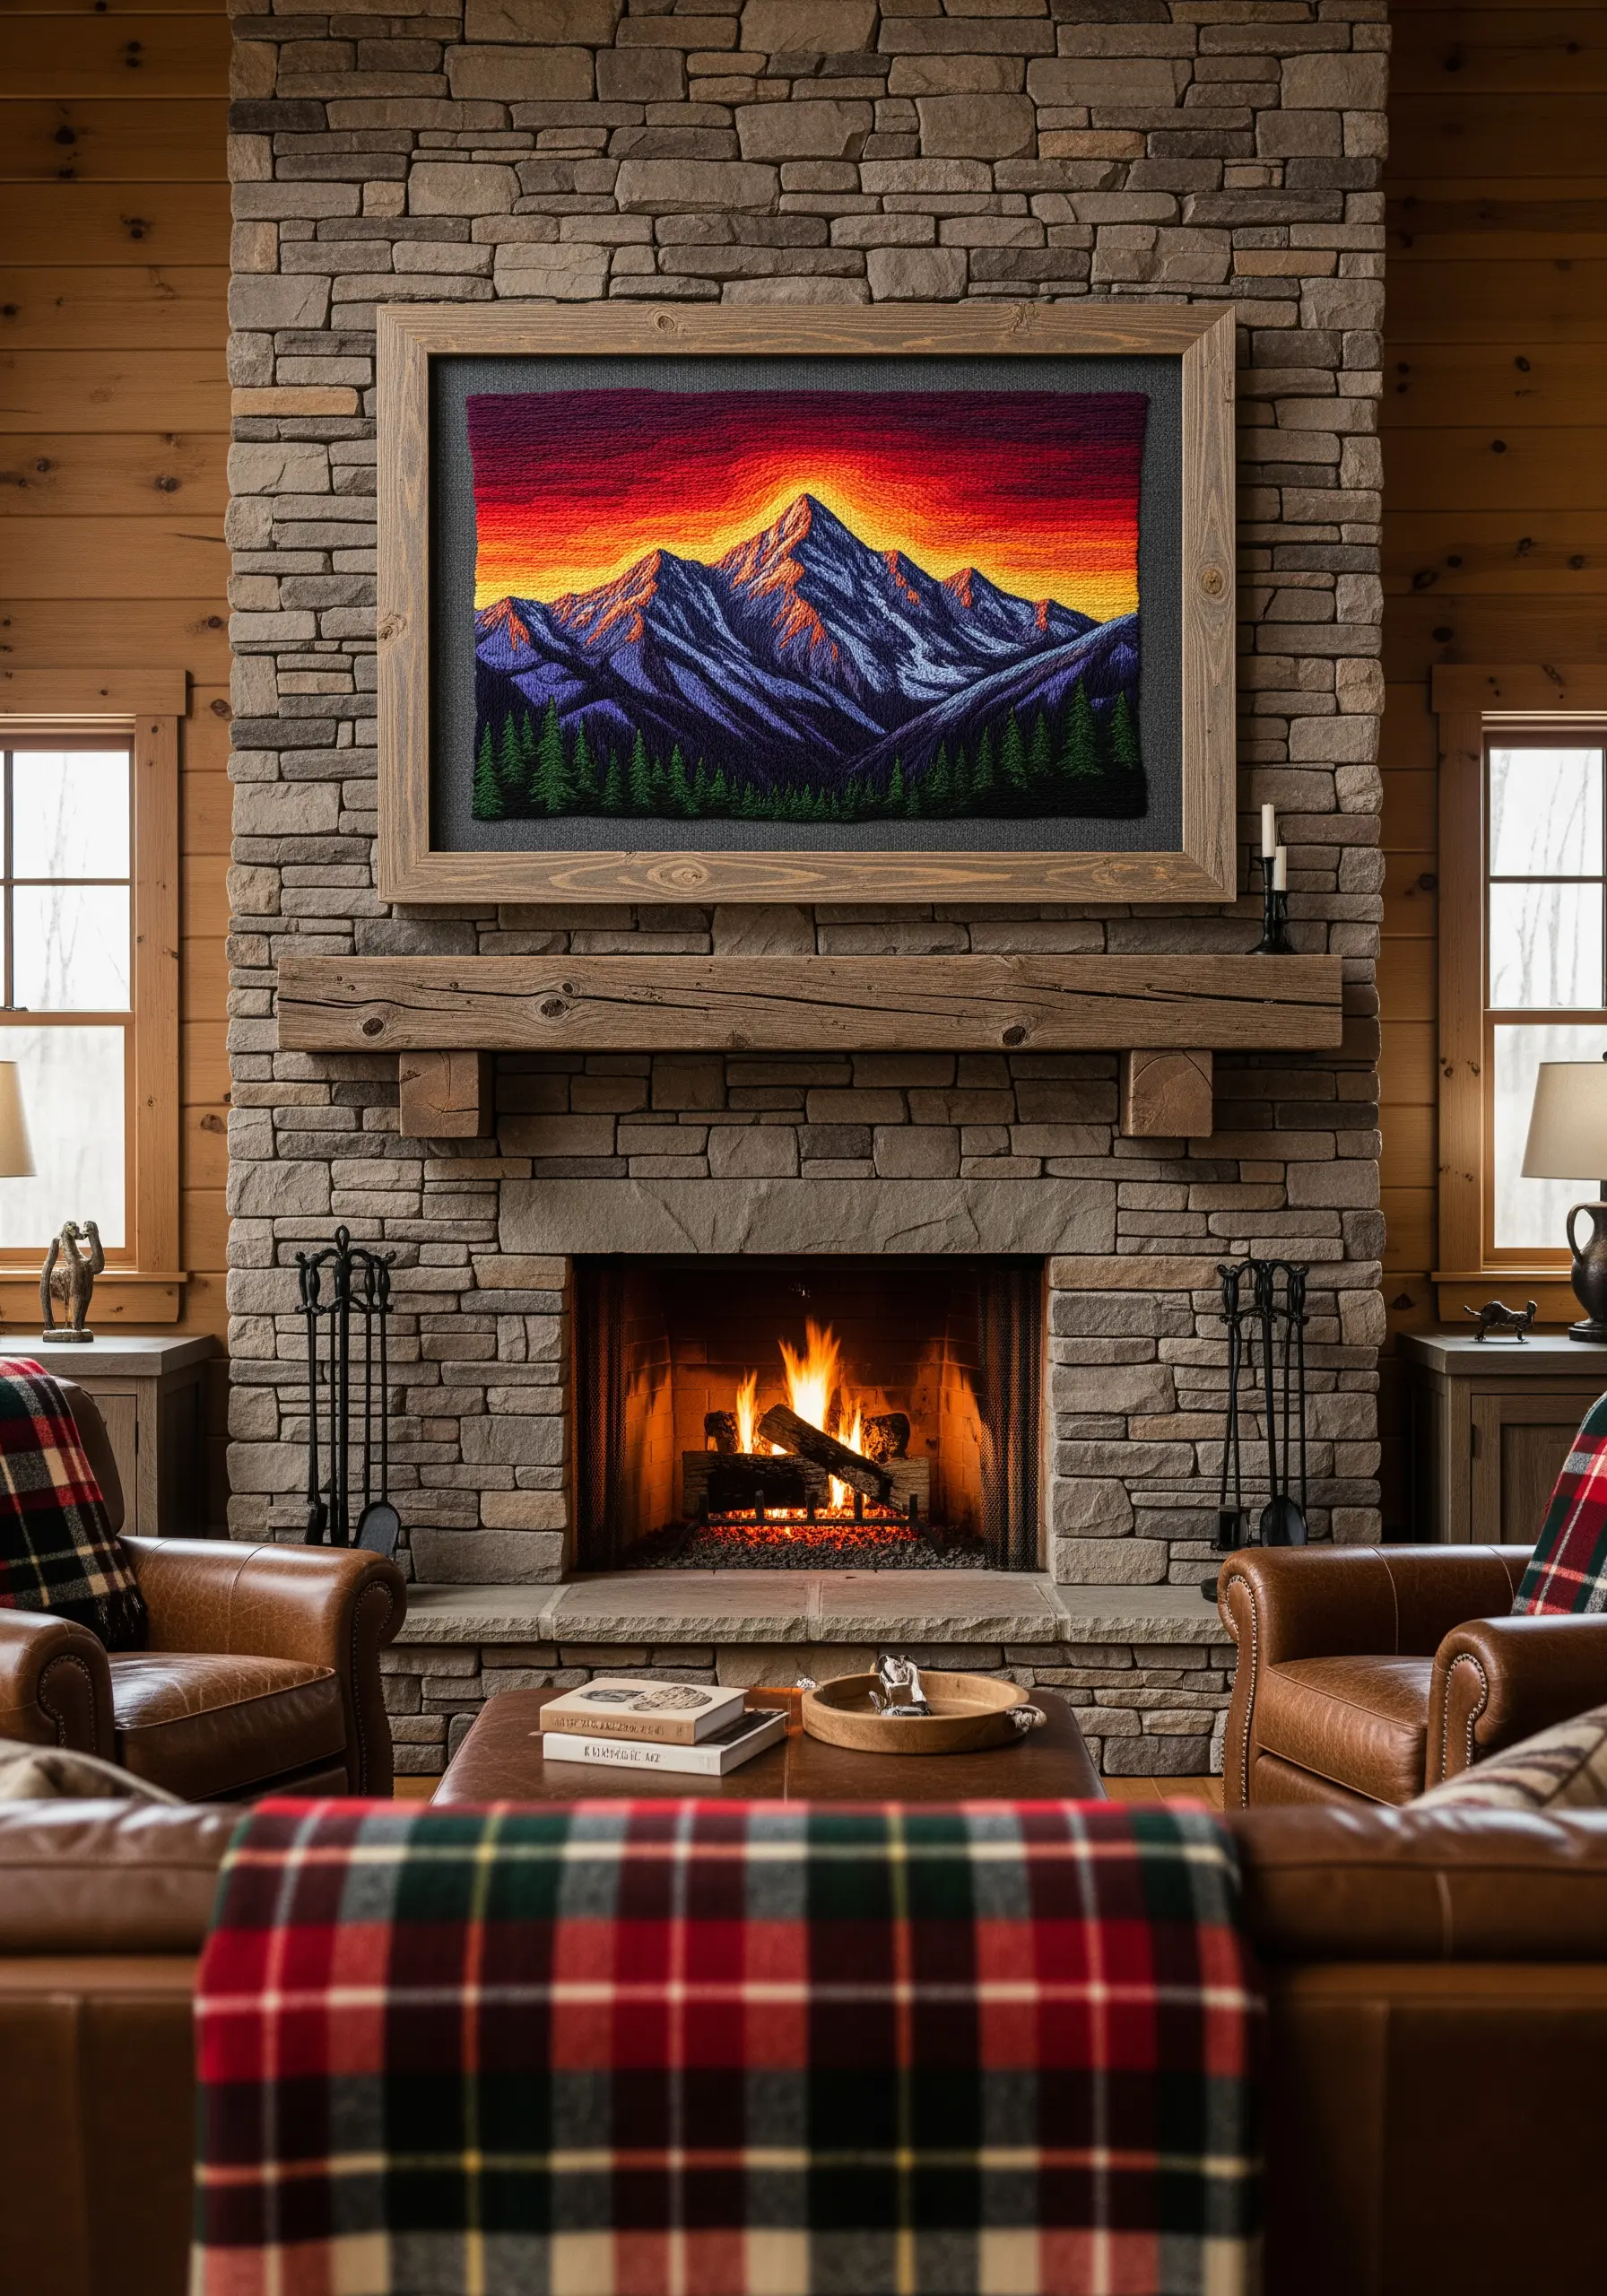
A realistic gradient sky is one of the most rewarding challenges in embroidery, and the key is the long-and-short stitch.
Work in horizontal rows, starting with your lightest color at the horizon. Make your first row of stitches with varying lengths.
When you begin the next row with your second color, bring your needle up through the stitches of the previous row, interlocking them. This staggering and overlapping is what creates a seamless, painterly blend.
This technique turns thread into paint, allowing you to capture the breathtaking beauty of a nature scene.
15. Silk Shading for Timeless Chinoiserie Elegance

To capture the delicate, painterly quality of Chinoiserie, your material choices are as important as your stitches.
Work with a single strand of silk floss on a luminous background fabric like silk dupioni or a high-quality satin. The natural sheen of these materials enhances the luxurious feel.
Use needle painting (long-and-short stitch) to blend colors on the bird’s feathers and flower petals, creating soft, subtle shifts in tone rather than hard edges.
The goal is to mimic the soft brushstrokes of watercolor painting, resulting in vintage-inspired embroidery wall decor with an air of grace and sophistication.
16. Ethereal Constellations on Sheer Fabric
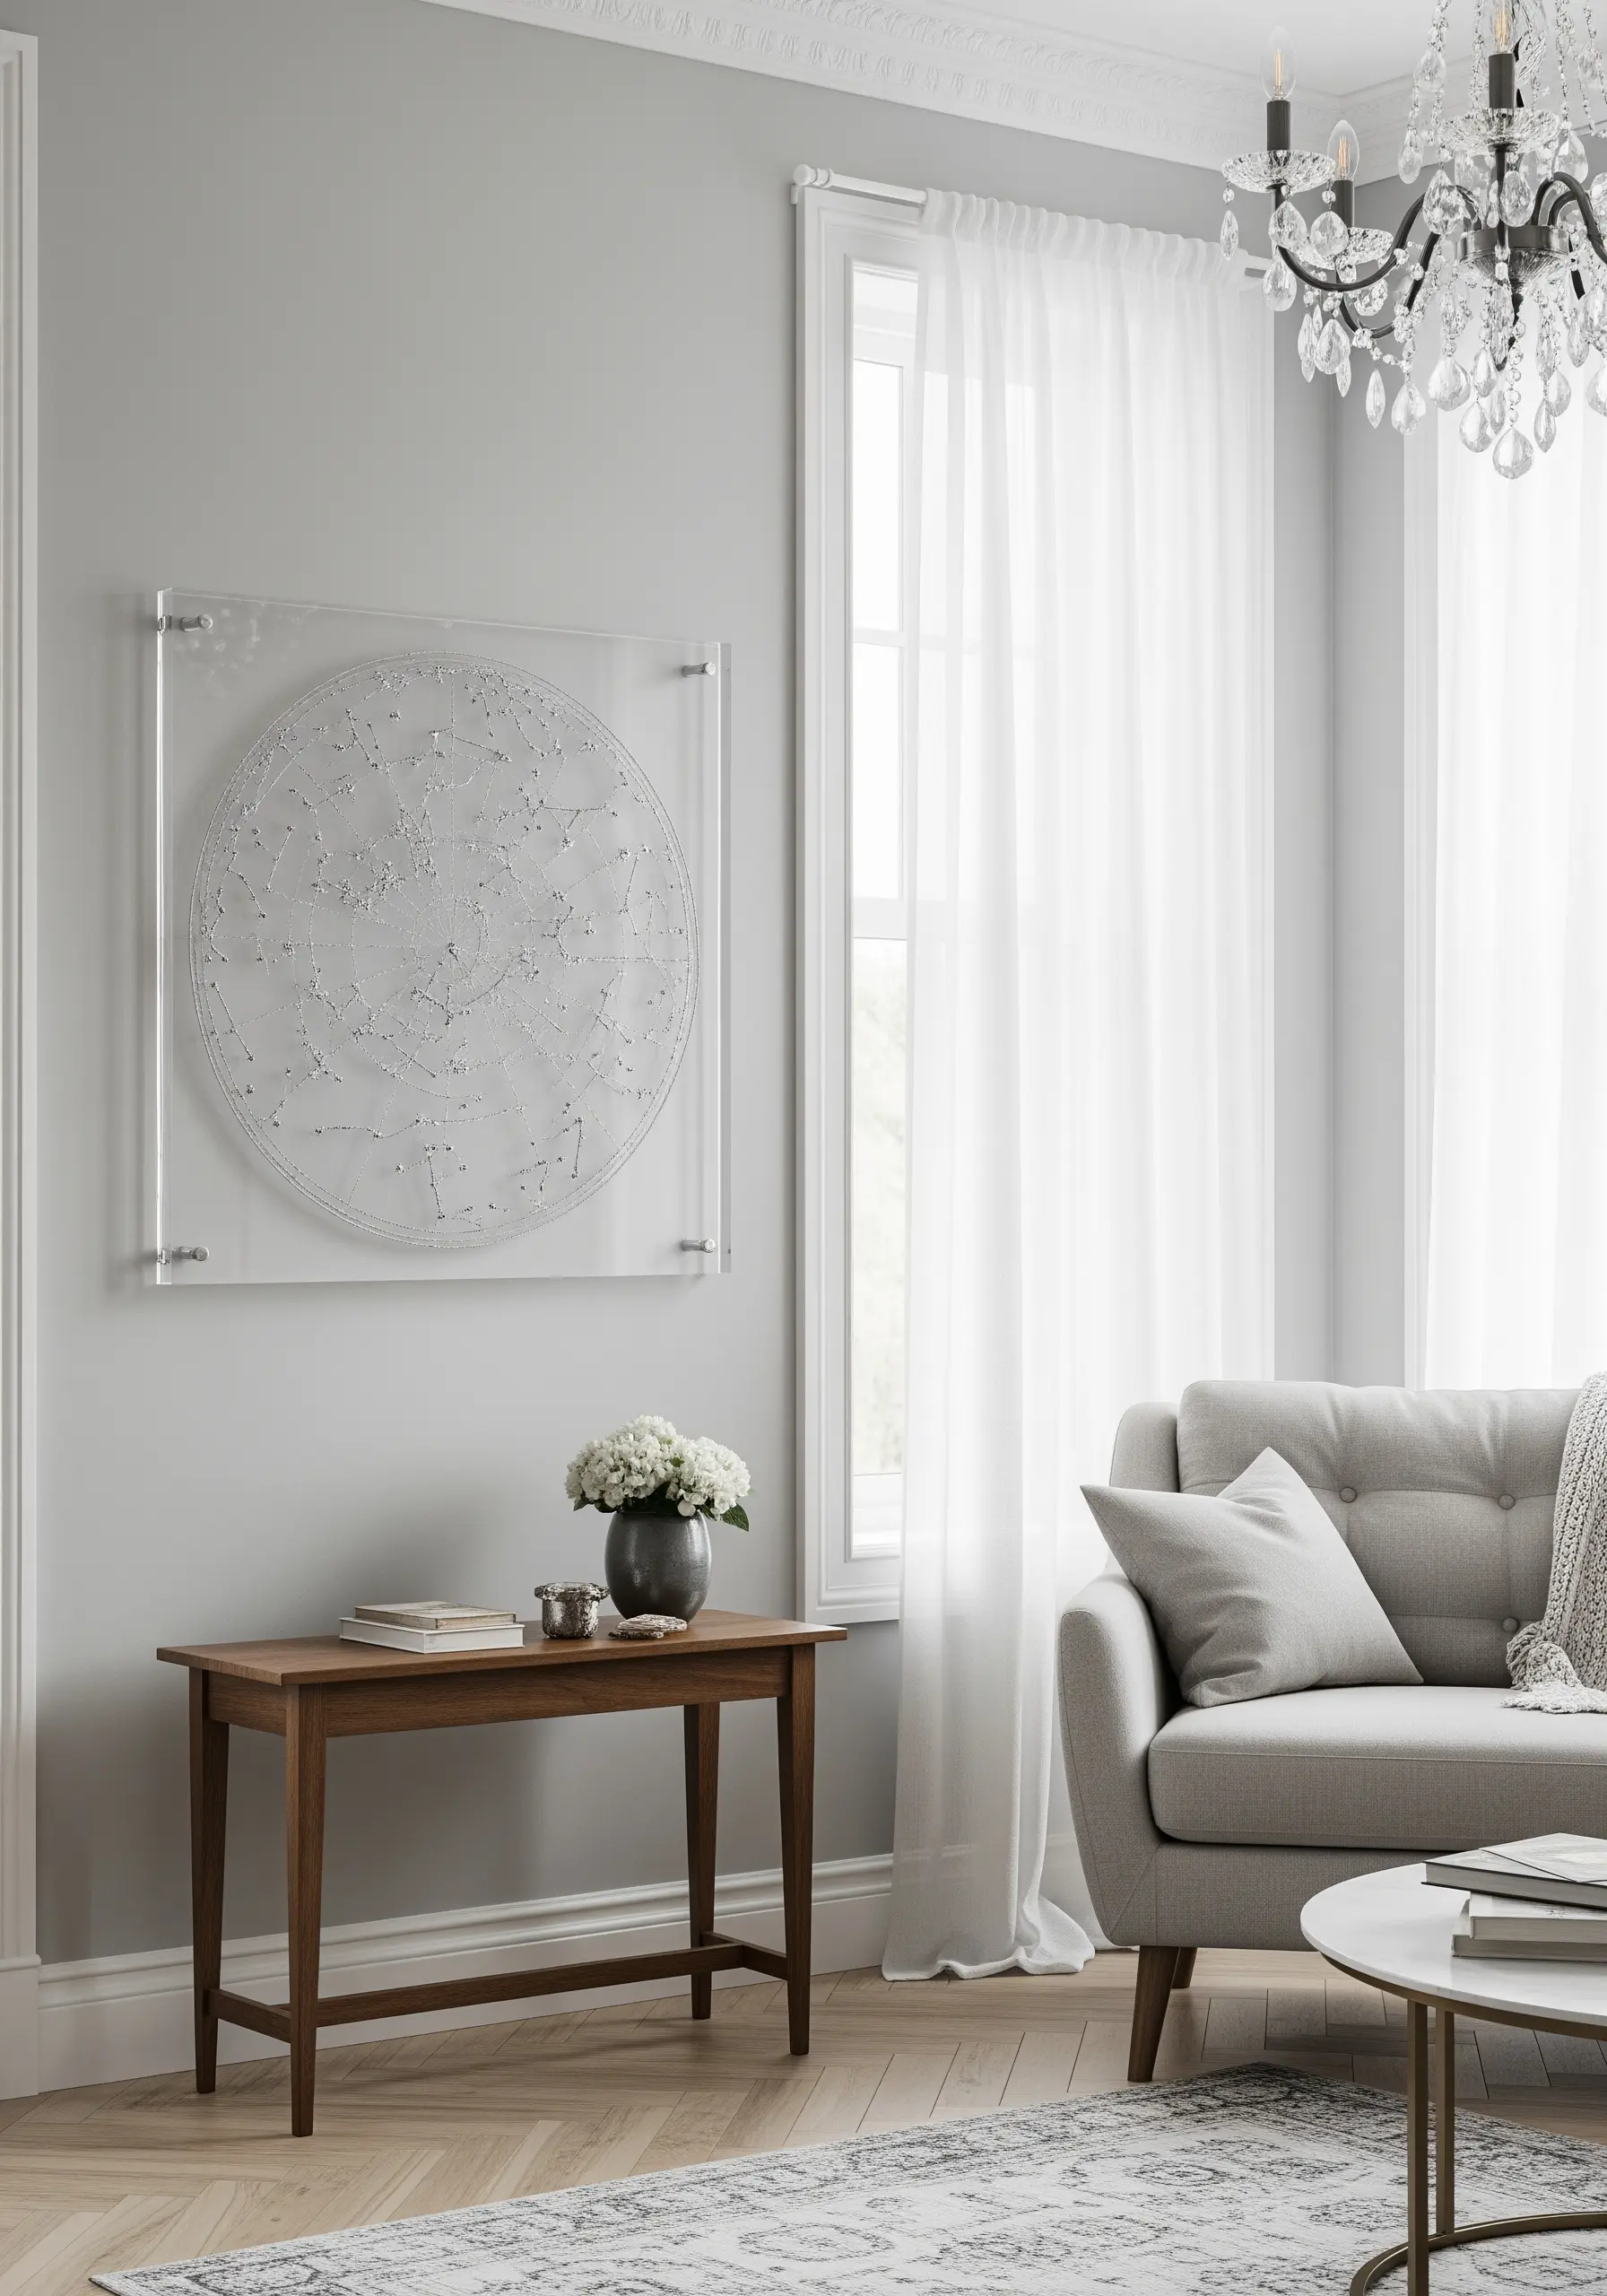
For a design that seems to float in mid-air, stitch directly onto a sheer fabric like tulle or organza.
To prevent the delicate fabric from puckering, you must use a stabilizer. Hoop your tulle with a layer of water-soluble stabilizer, stitch your design, and then simply wash the stabilizer away.
Use a simple backstitch for the constellation lines and tiny French knots or seed stitches for the stars. Once complete, mount the tulle in a floating acrylic frame for a clean, contemporary finish.
This project is a perfect example of how minimalist embroidery art pieces can make a major impact.
17. Inspired by Suzani: Bold Color and Rhythmic Pattern
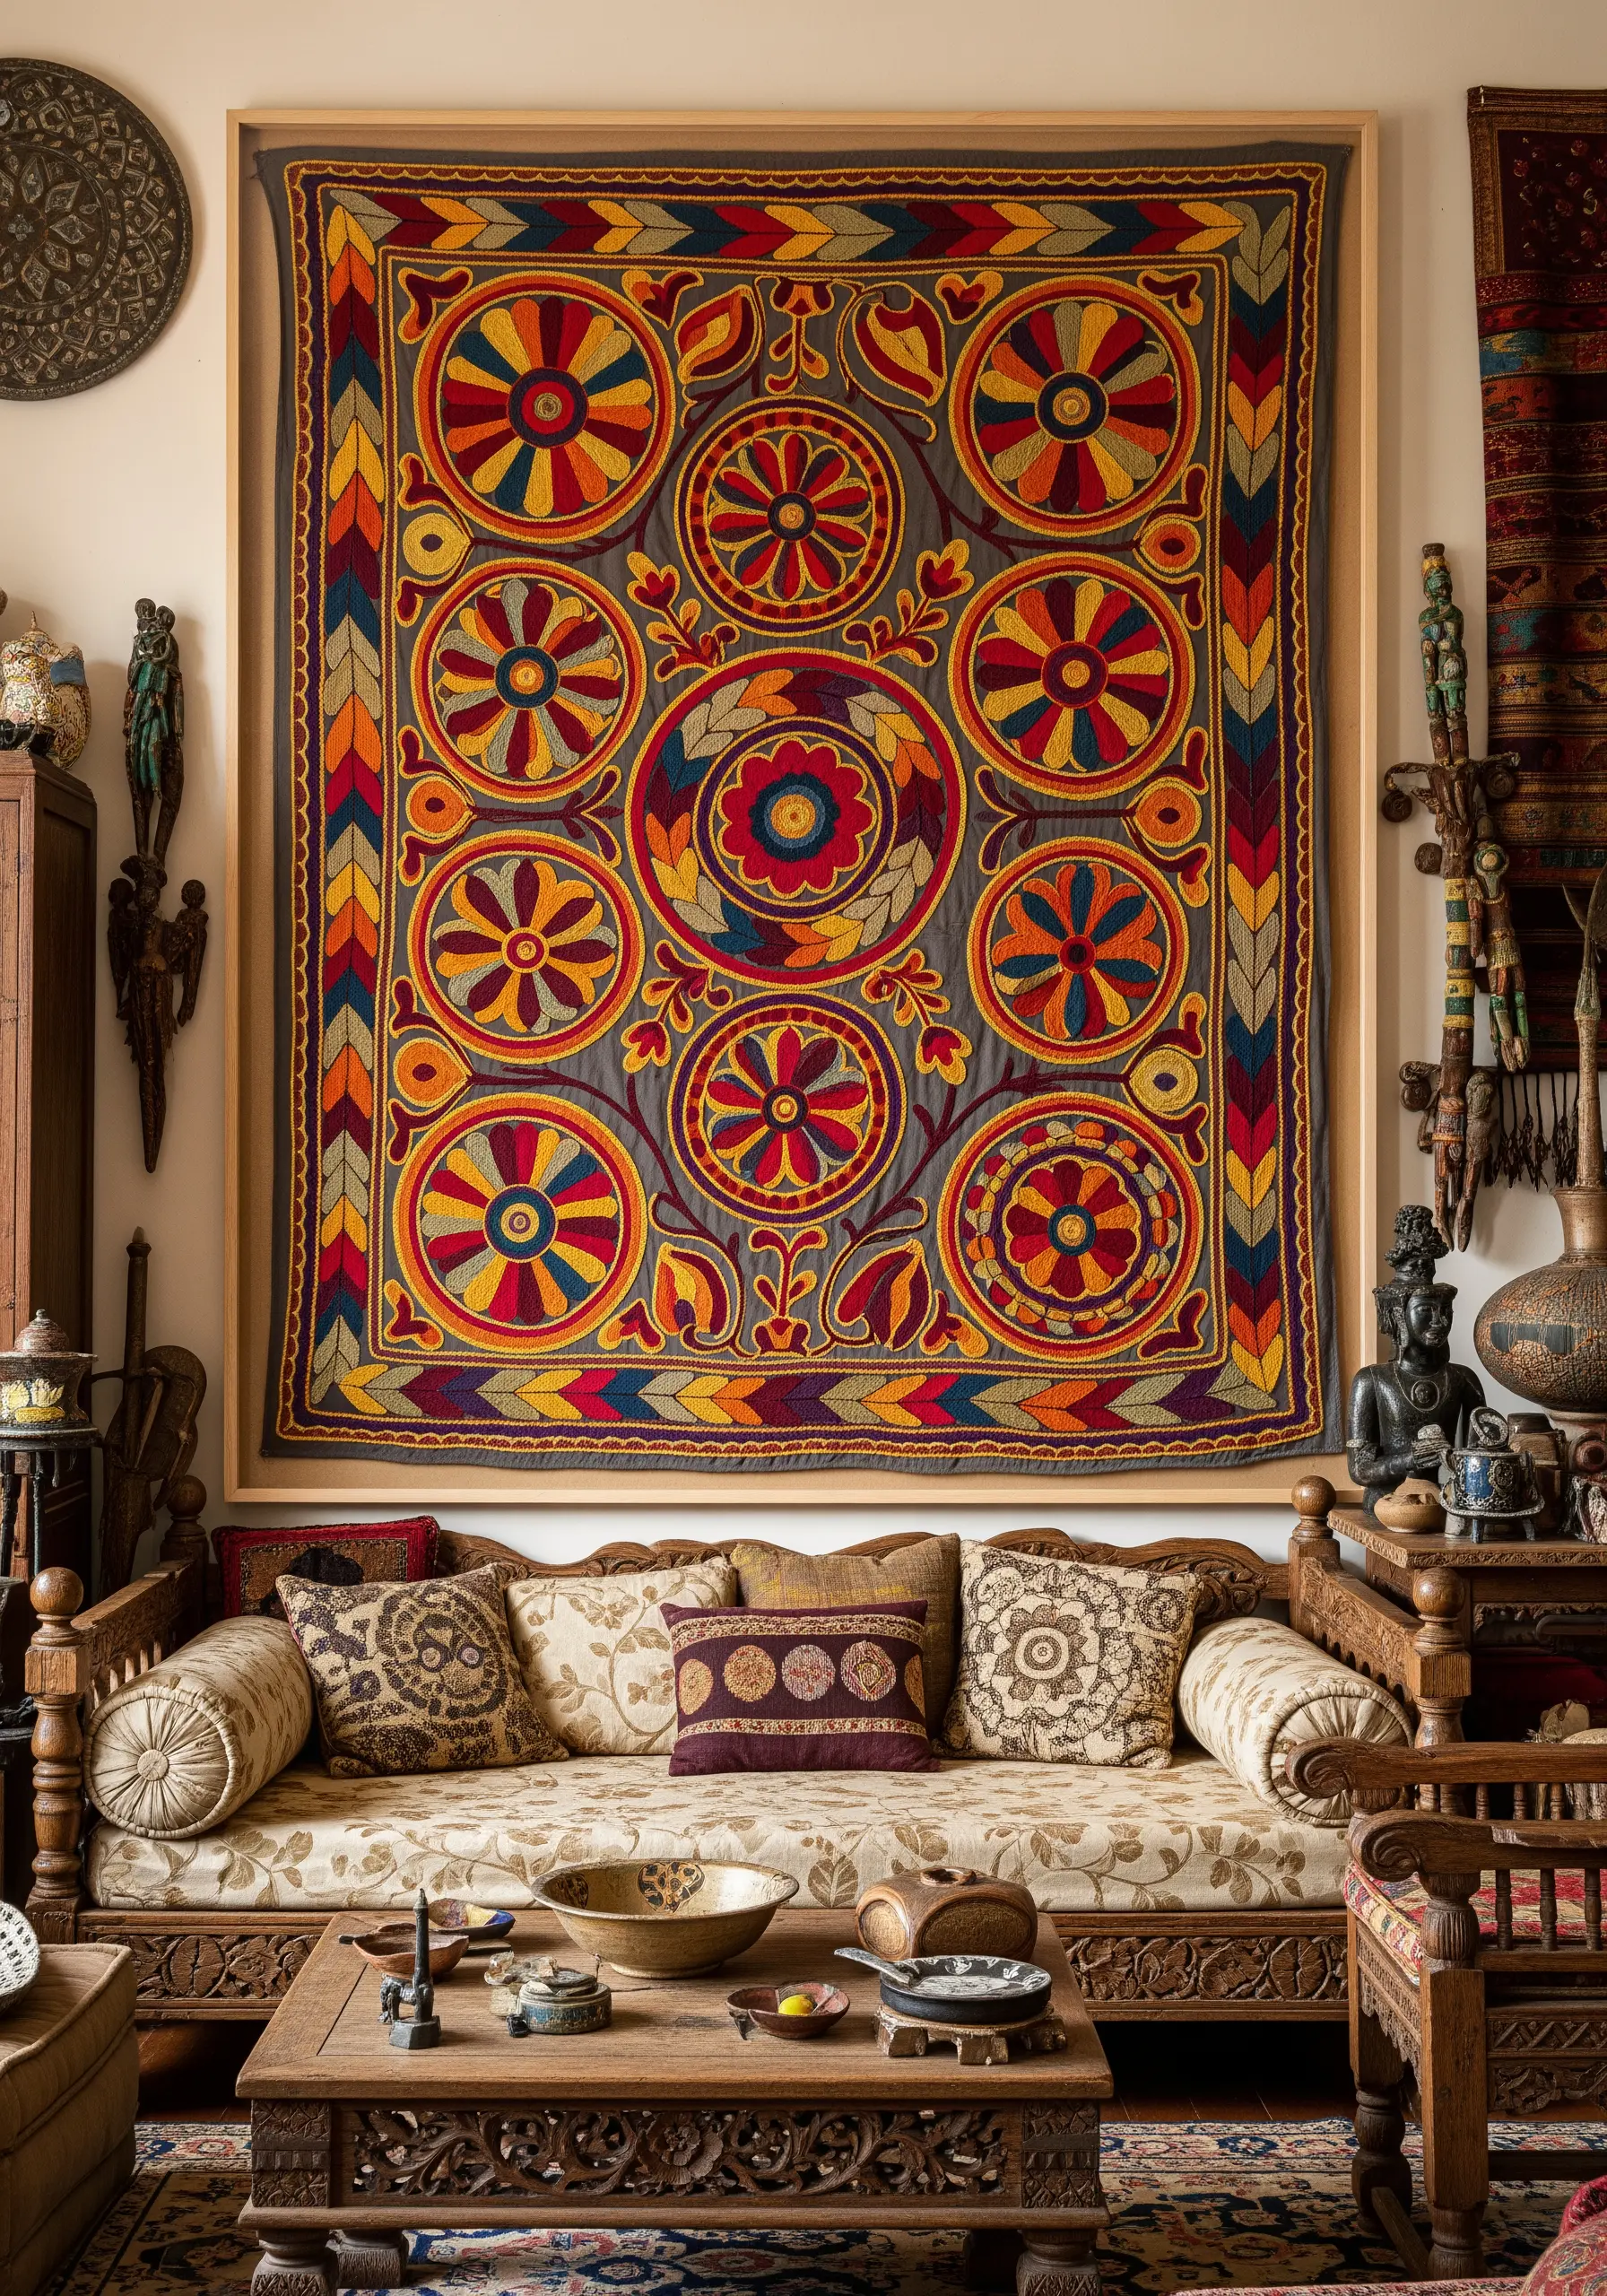
Capture the vibrant energy of traditional Suzani textiles by focusing on two key elements: bold, symmetrical motifs and the rhythmic texture of chain stitch.
Build your design around repeating floral medallions, leaves, and circular shapes. Don’t be shy with color—a palette of reds, golds, blues, and warm earth tones is characteristic.
Use the chain stitch for both outlines and fills. Working the stitch in dense, concentric rows creates a beautiful, corded texture that is the hallmark of this style, transforming your fabric into rich traditional cultural textile wall art.
18. The Art of the Single Continuous Line
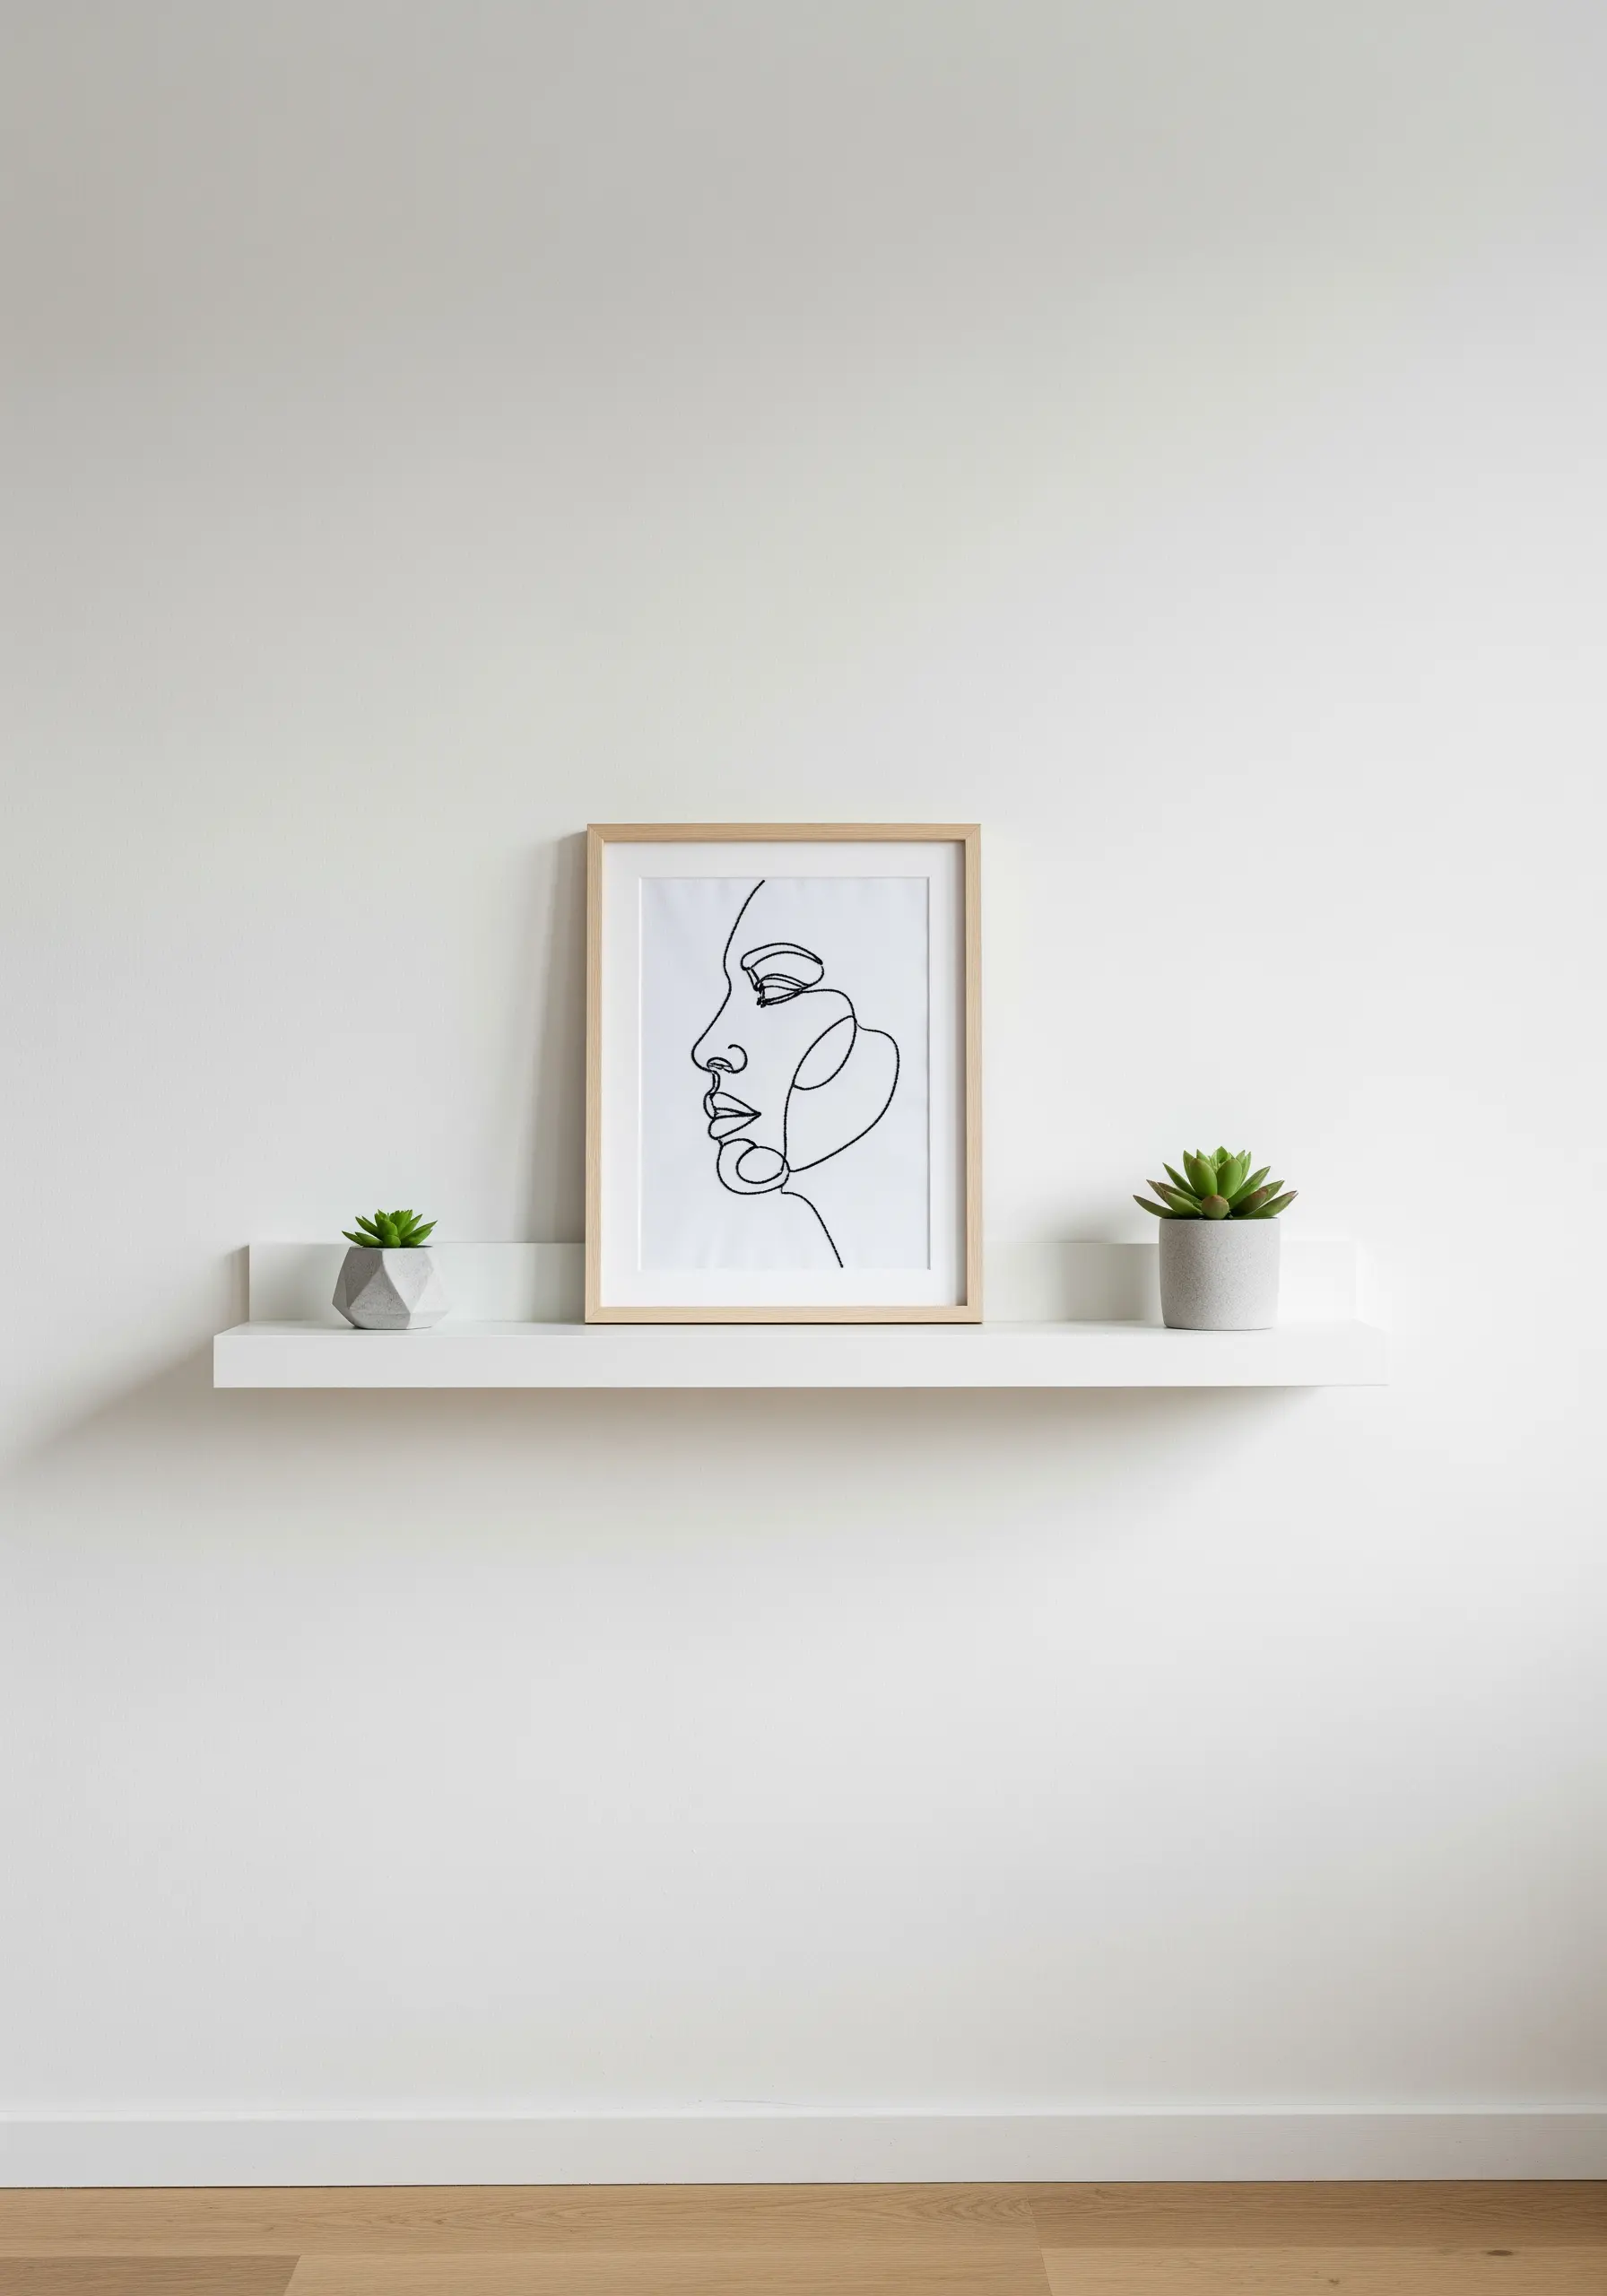
The power of a single-line drawing lies in its fluid, uninterrupted movement. To replicate this in thread, your stitch choice is critical.
Use a whipped backstitch: first, create a standard backstitch line, then weave a second thread through the stitches on the surface without piercing the fabric. This covers the gaps and creates one solid, smooth line.
Alternatively, a perfectly executed stem stitch can achieve a similar rope-like effect.
This technique is the essence of minimal line drawing embroidery, where simplicity speaks volumes.
19. Graphic Impact with Pop Art Typography

To make your embroidered letters look as crisp and bold as a printed poster, the secret is in the preparation.
Before you begin your satin stitch, outline the entire letter with a precise split stitch. This creates a slightly raised edge that acts as a dam, containing your satin stitches and ensuring a perfectly sharp, clean border.
Fill the shape with a dense, flat satin stitch, keeping your threads parallel and your tension even.
This two-step process is the key to creating thread-based typography ideas that have professional graphic punch.
20. Layering a Textured Wildflower Meadow
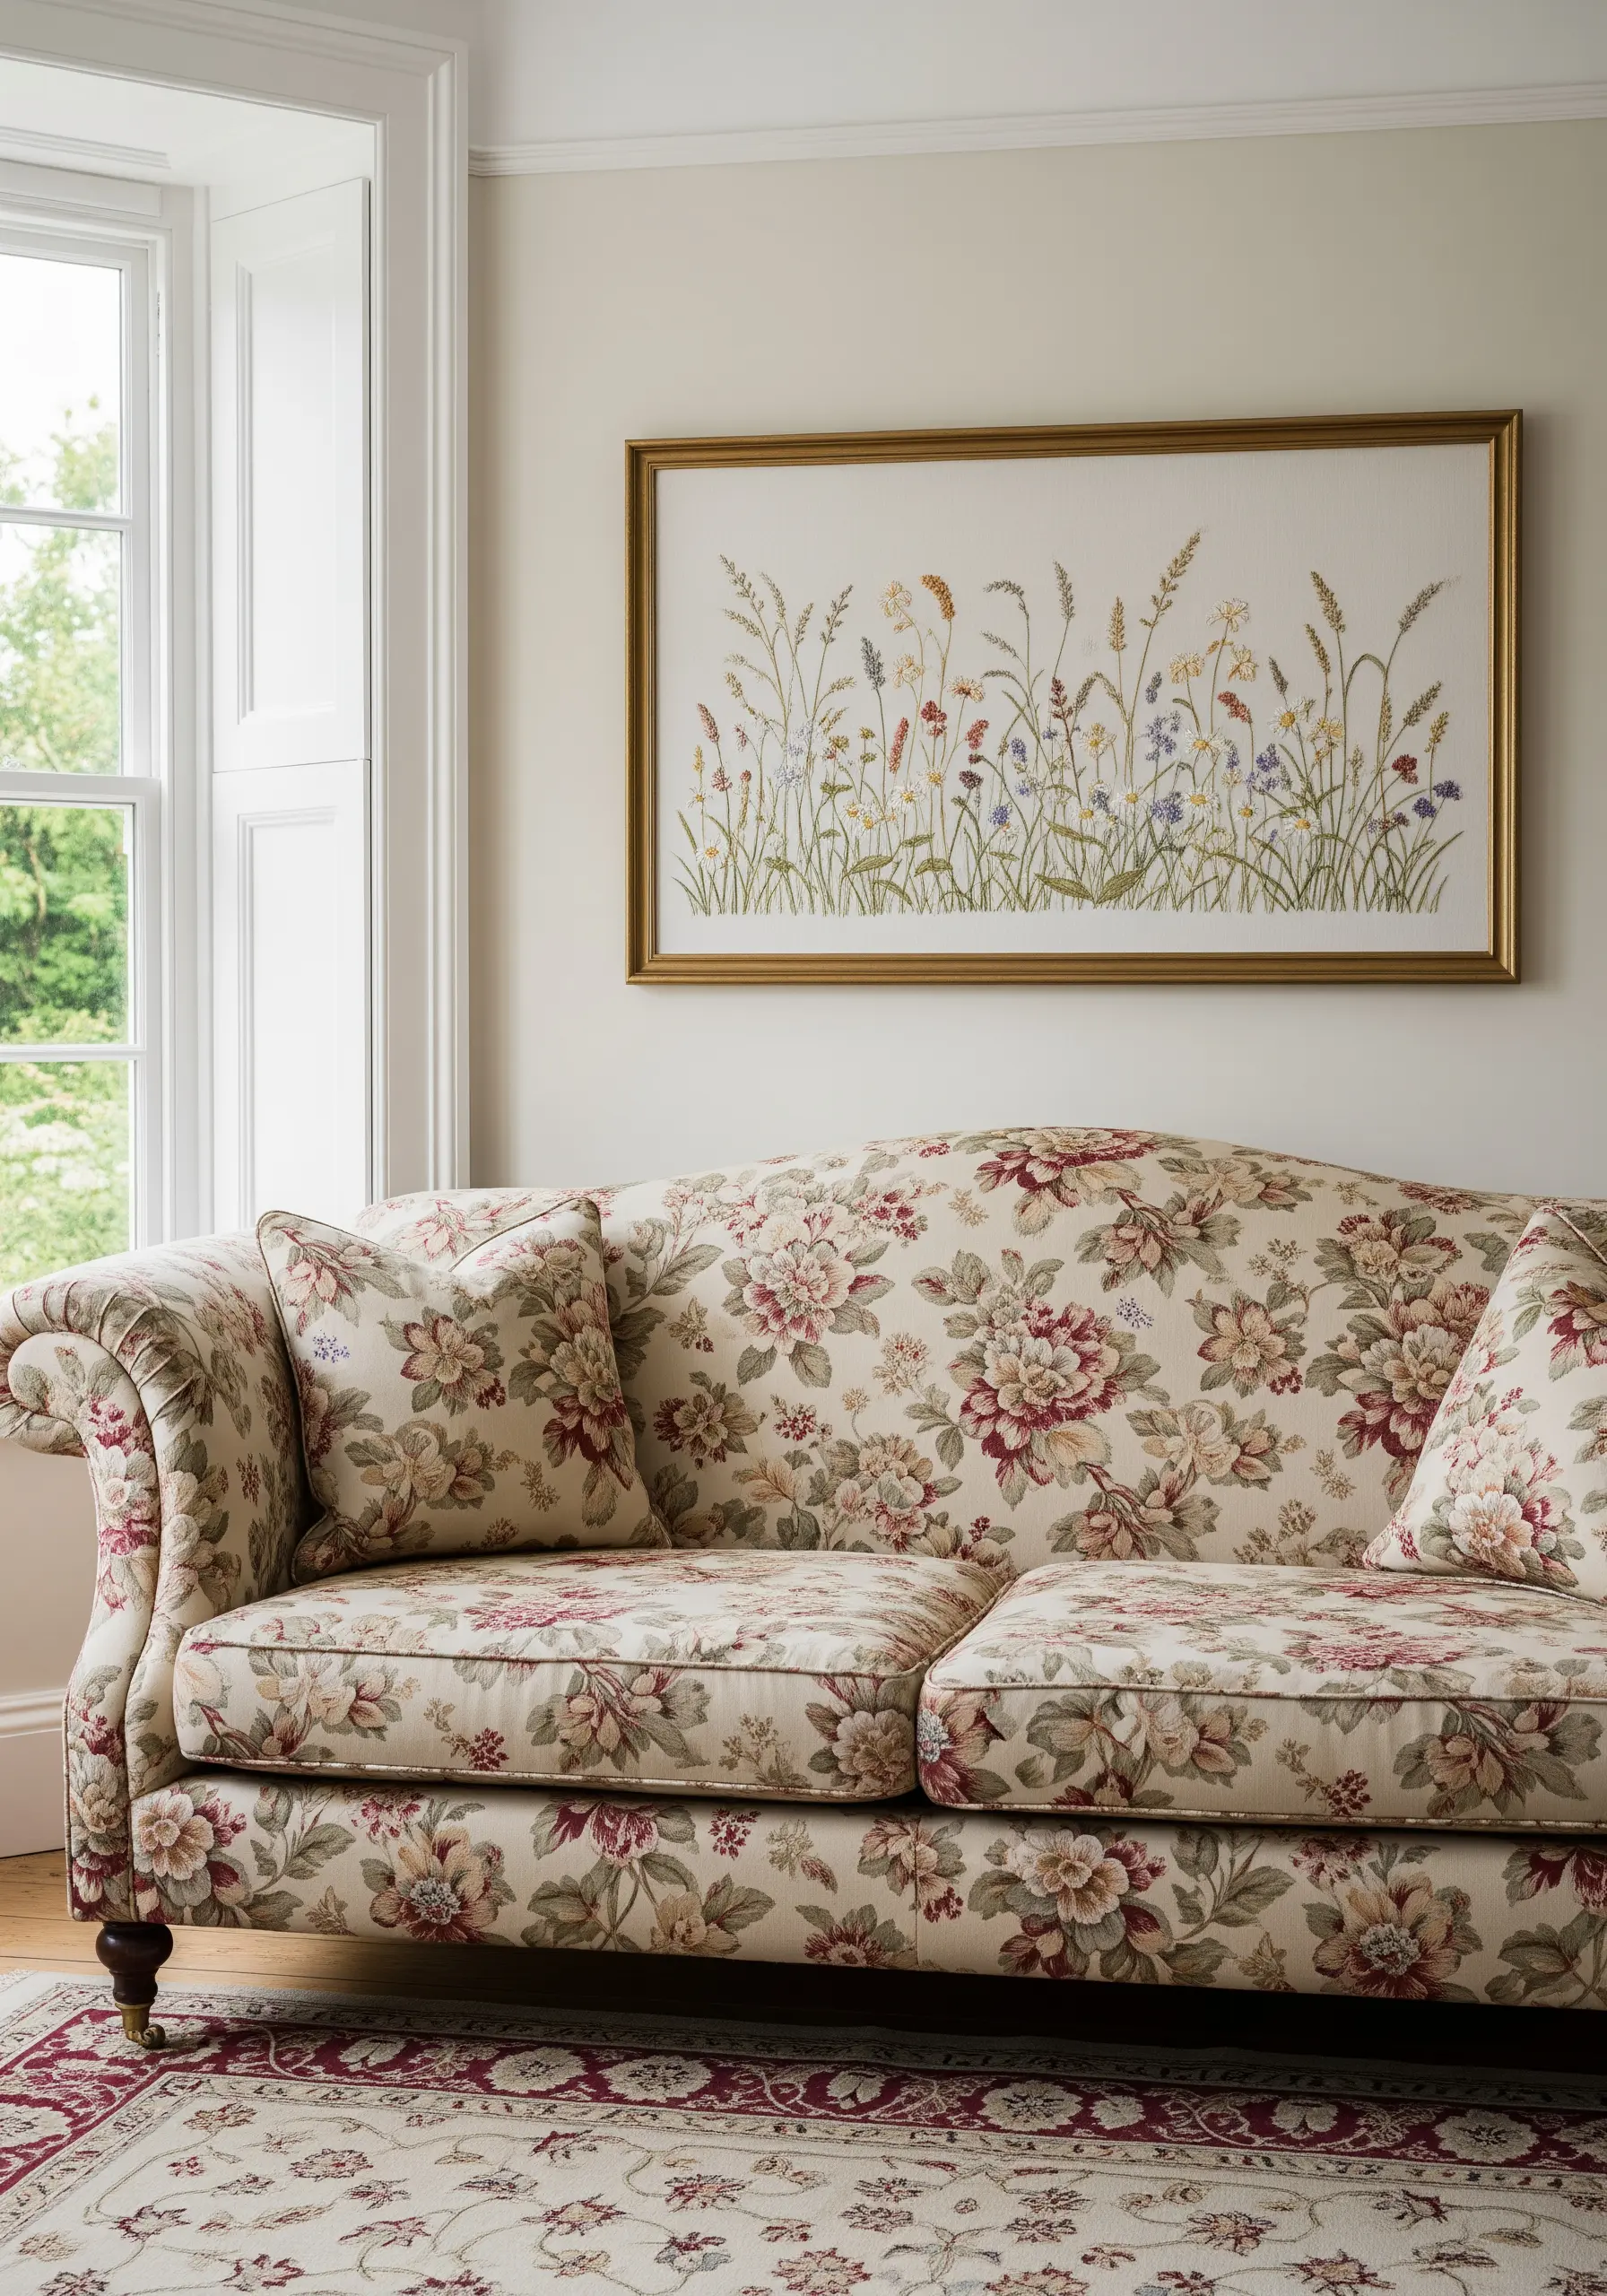
A convincing embroidered meadow is built in layers, just like a real one. Start from the ground up.
Create a base layer of varied green straight stitches for grass and stems. Then, pepper the scene with French knots and lazy daisy stitches to represent smaller, background blossoms.
Finally, add your ‘hero’ flowers in the foreground using more dimensional stitches. Woven wheel roses, bullion knot lavender, and cast-on stitch flowers will stand out and create a wonderful sense of depth and realism.
It’s a beautiful way to create wildflower hoop art projects that feel alive.
21. Capturing Desert Botanicals in Thread

Succulents and cacti provide a fantastic opportunity to play with texture. Go beyond simple satin stitch to bring them to life.
For a ribbed saguaro, use rows of chain stitch to mimic its vertical form. For the fleshy pads of a prickly pear, use a padded satin stitch to give them a plump, rounded appearance.
Create realistic spines with tiny, individual straight stitches or seed stitches, and add a pop of color with a cluster of bright red or pink French knots for the flowers.
This focus on texture is what makes botanical hoop embroidery projects truly captivating.
22. The Anatomical Floral: Melding Science and Romance

The striking beauty of this piece comes from the contrast between clinical detail and romantic abundance.
For the anatomical heart, use disciplined thread painting (long-and-short stitch) with reds and pinks to create the smooth, shaded texture of muscle tissue. Keep your stitches orderly and directional.
In contrast, let the flowers be more wild and textural. Use bullion knots for lush roses and French knots for smaller filler blooms. Stitching on a dark, dramatic background like black velvet or deep burgundy linen will make the entire composition feel rich and decadent.
These are the kinds of dramatic dark thread embroidery designs that stop you in your tracks.
23. Translating Natural Textures into Abstract Art
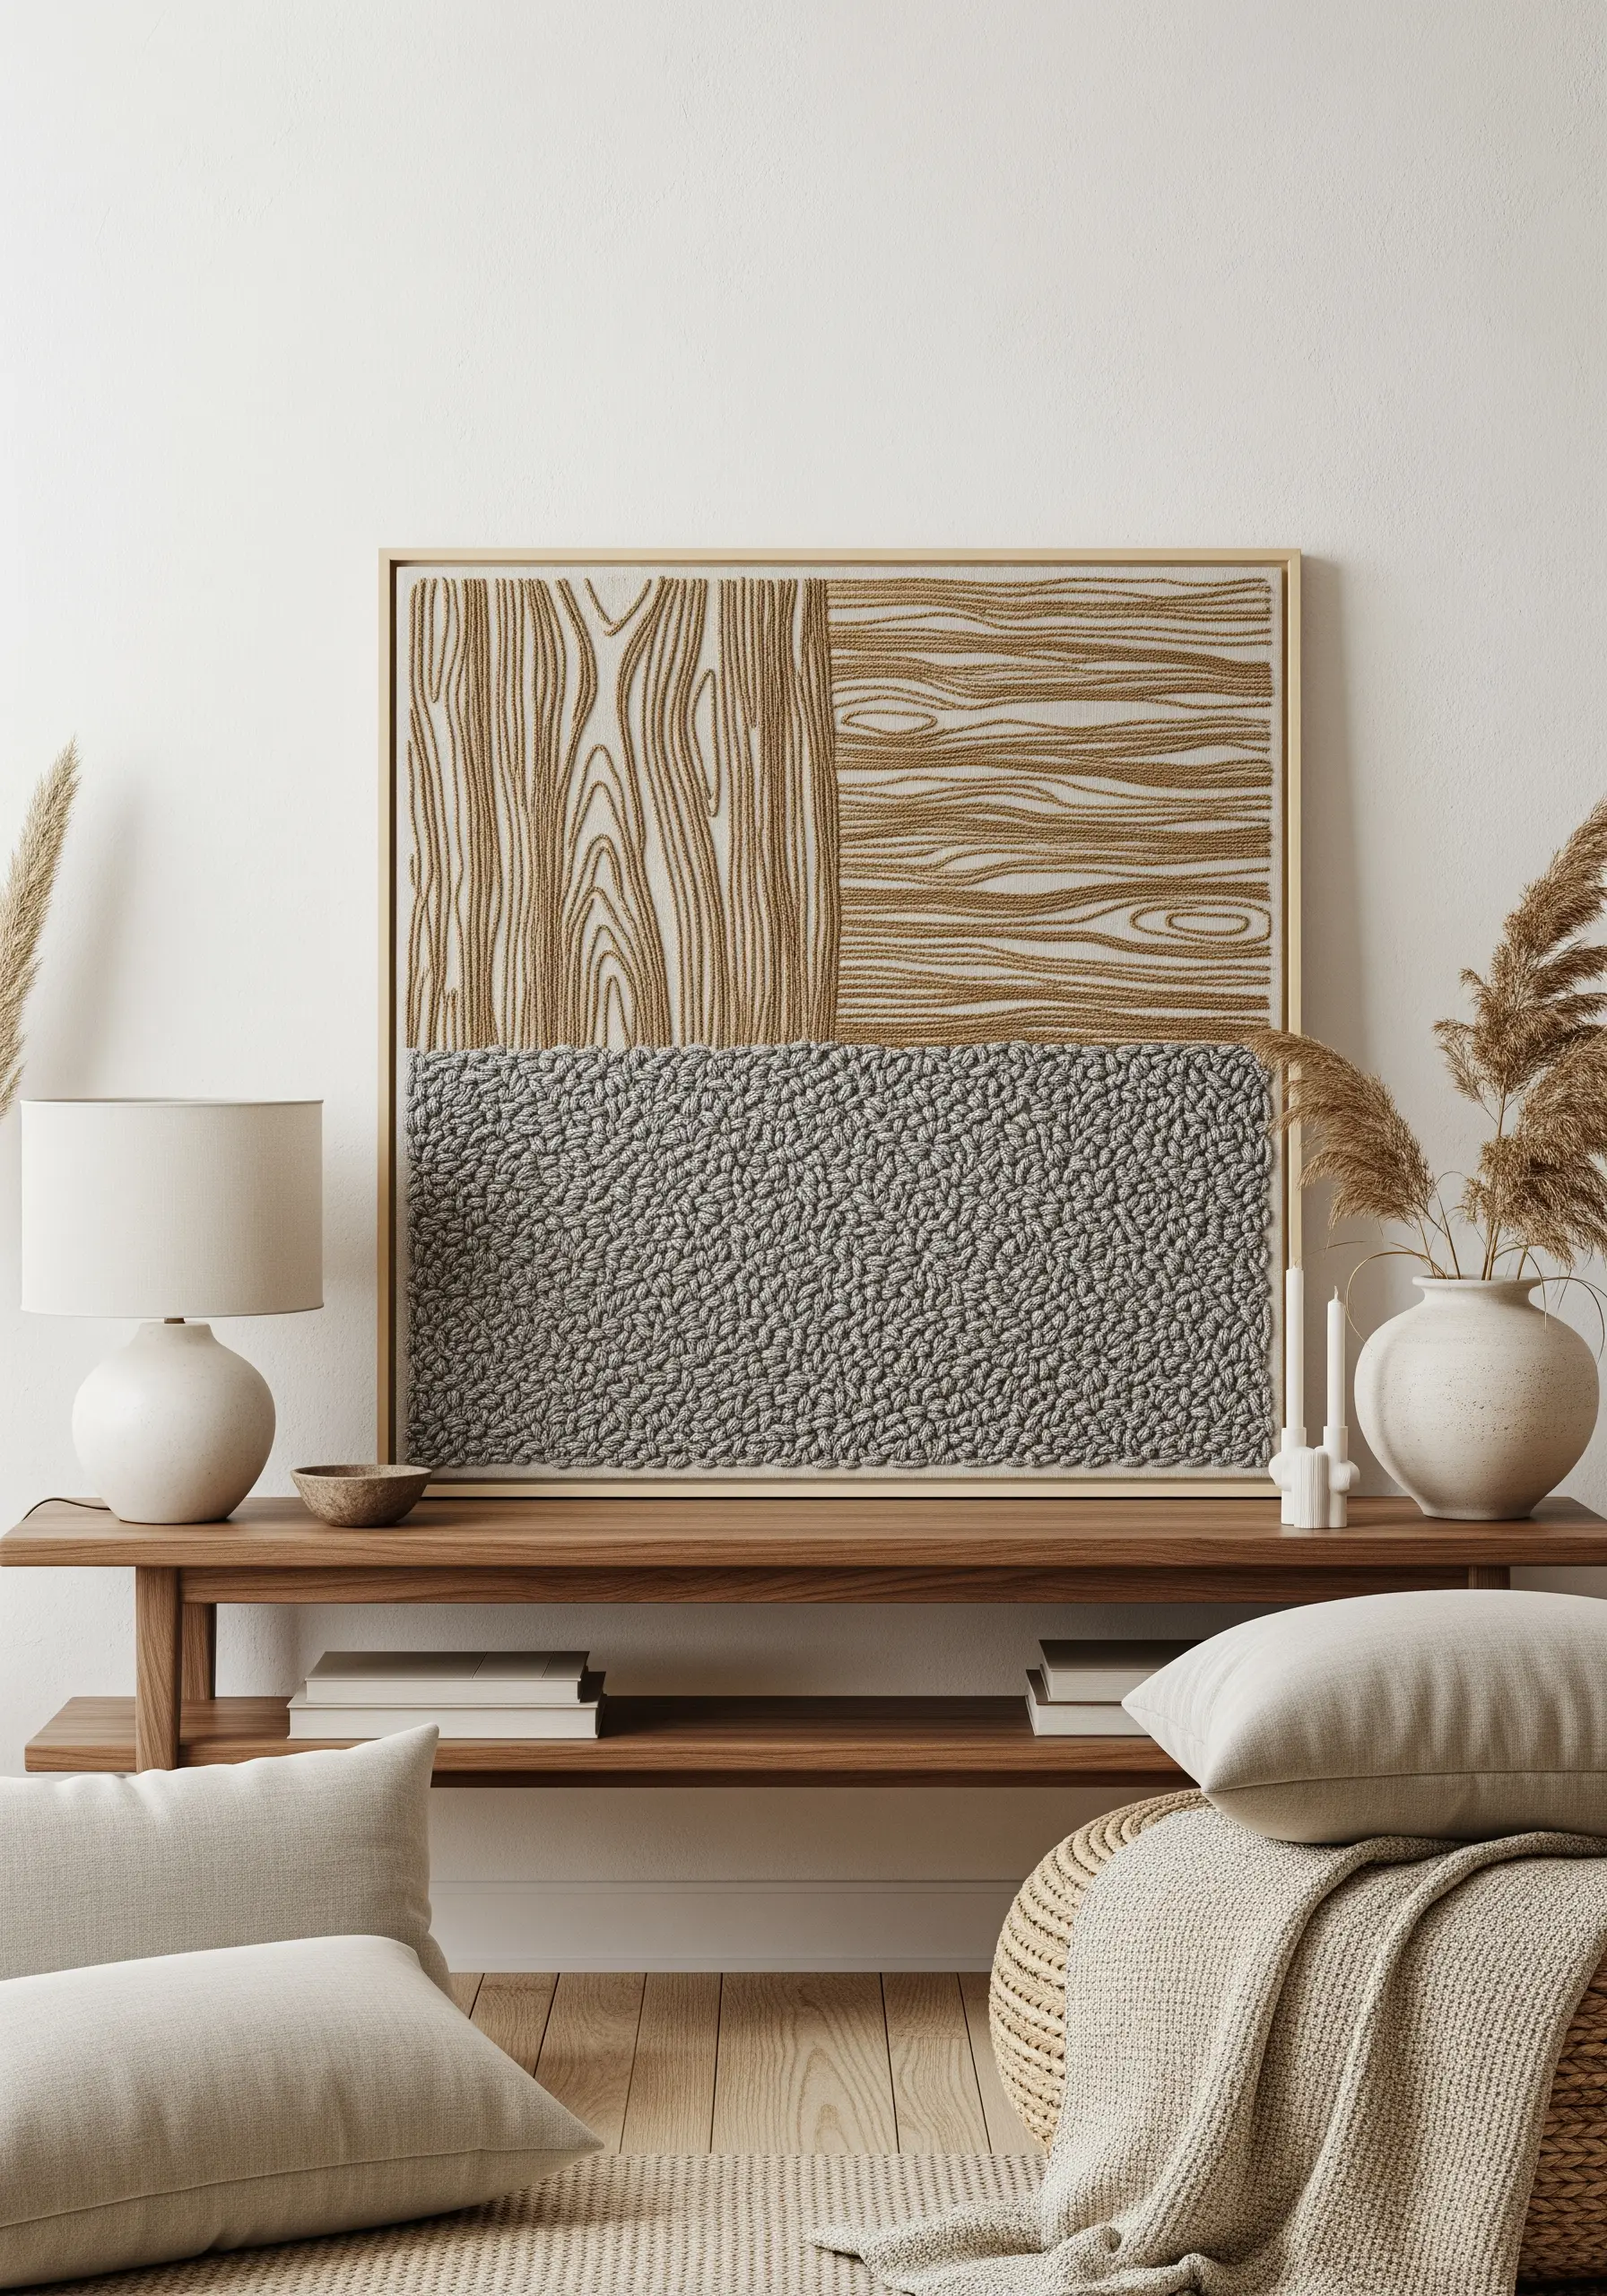
This style of abstract embroidery is about seeing the world as a collection of textures and translating them into stitches.
To capture the feeling of wood grain, use long, flowing lines of stem stitch or split stitch, varying your shades of brown and beige to mimic the organic pattern.
For a pebble-like texture, fill a space with a dense sea of French knots. Vary the size of the knots (by wrapping the thread once, twice, or three times) and use several shades of grey to create randomness and depth.
This thoughtful approach is how you can embroider natural textures in a modern, abstract way.
24. Gentle Textures for Modern Nursery Decor

When embroidering for a nursery, prioritize soft, tactile, and simple forms. The goal is a gentle, calming aesthetic.
Instead of standard floss, use a fluffy chenille thread or a soft wool to stitch the cloud; this immediately adds a touchable, three-dimensional quality that is delightful in a child’s space.
Keep the other elements graphically simple: a clean backstitch for the rainbow’s arcs and simple straight stitches for the sun’s rays.
Using a limited, pastel color palette on a neutral fabric ensures the finished nursery stitch art feels soothing and sweet, not overstimulating.


