

There’s a quiet magic in watching a sunbeam catch the threads of a finished embroidery piece. It’s more than just decoration; it’s a small, handcrafted moment of peace you’ve created for yourself, placed right where the light comes in.
But how do you move from simply following a pattern to creating something that feels truly alive and personal? The answer is in the details—the way a stitch is angled to catch the light, the choice to use one strand of floss instead of two for delicate shading, or the surprising texture of a French knot against smooth satin stitch.
In these projects, I want you to look beyond the motif and focus on the technique. See how a change in stitch direction can mimic the sheen on a bird’s wing, or how padding can make a berry look plump enough to eat. These are the small adjustments that elevate your work from a craft into an art form. Let’s begin.
1. Render Lavender with Dimensional Texture
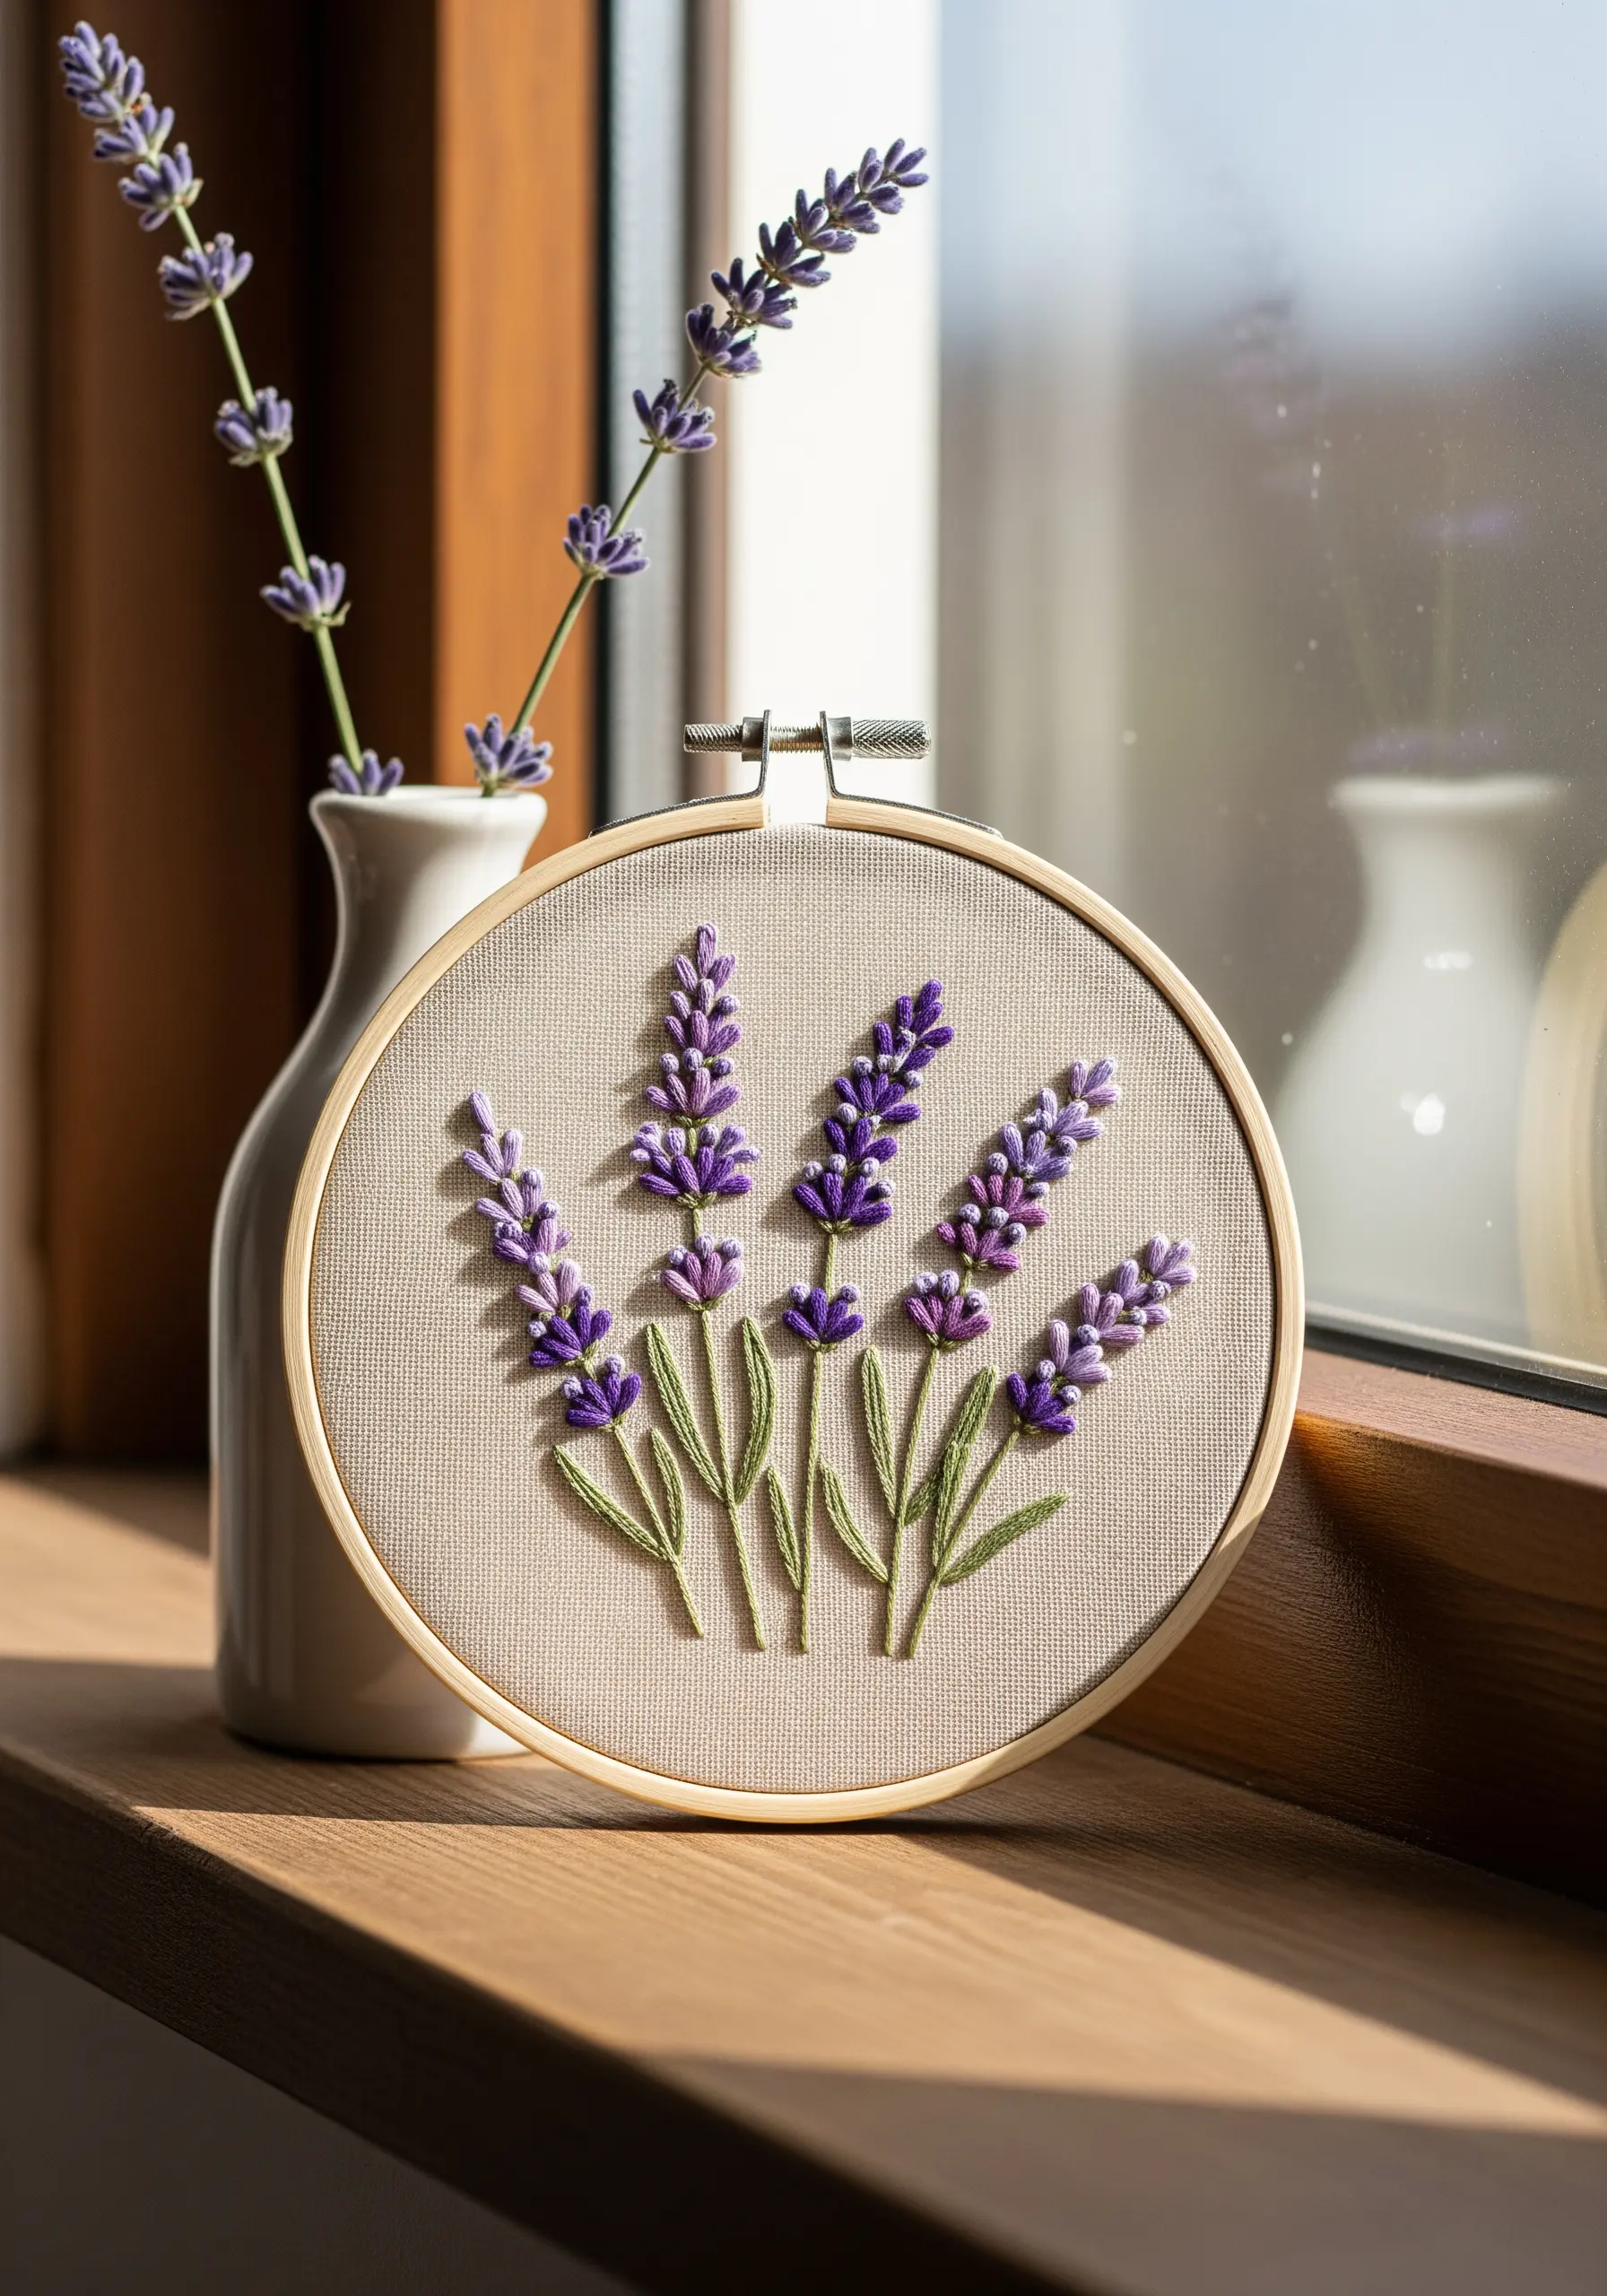
Give your lavender stalks a tactile, raised quality by using a combination of French knots and straight stitches.
For the blossoms, cluster French knots tightly at the top of each stem, using two or three shades of purple to create depth.
As you move down the stalk, transition to single, detached chain stitches or short straight stitches to mimic the tapering buds.
This technique avoids the flatness of satin stitch and makes the florals feel more organic and full, especially in natural light.
Use a sturdy, evenweave linen in a neutral tone like oatmeal or dove gray to let the vibrant purples stand out.
These lavender-inspired embroidery designs work beautifully for creating a calm atmosphere.
2. Capture a Monarch’s Delicate Transparency
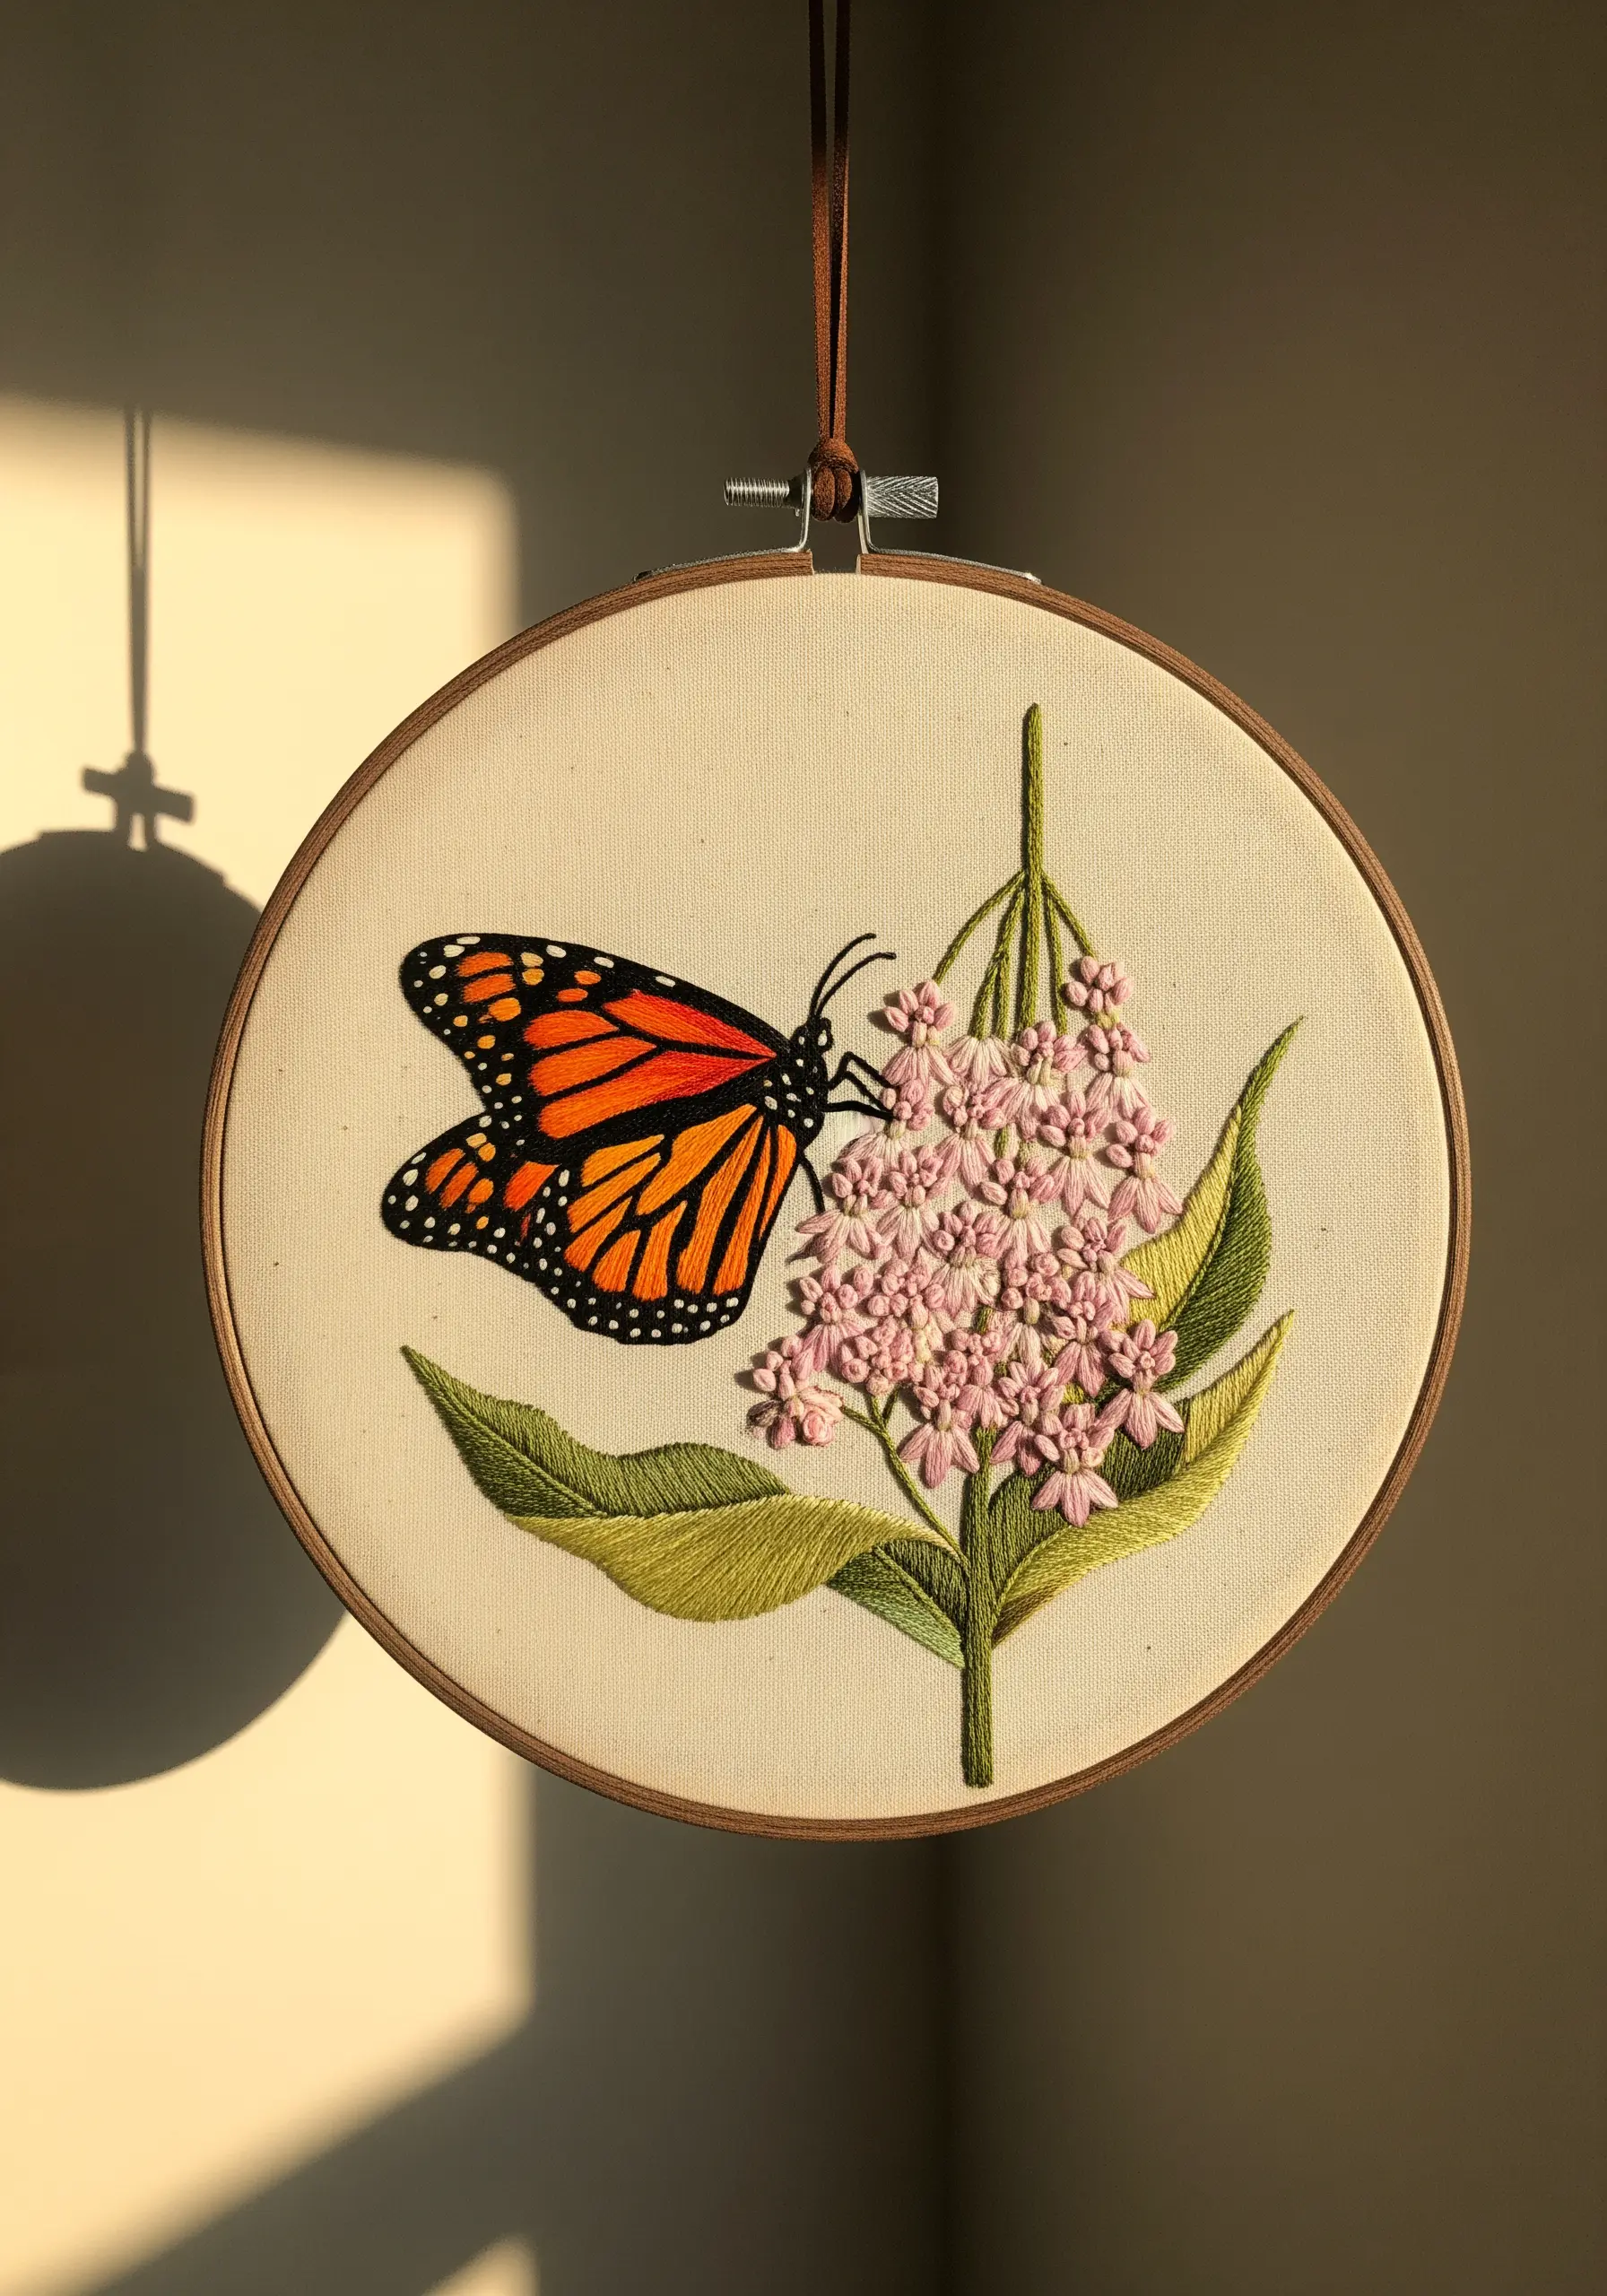
To achieve the lifelike vibrancy of a monarch’s wings, approach it like a painting, using single strands of thread for fine detail.
Work the orange and black sections with long-and-short stitch, blending the colors subtly where they meet to avoid harsh lines.
For the iconic white spots, use a single, precise French knot or a tiny satin stitch—this keeps them crisp against the black background.
The real secret is in the black outlines; use a fine split stitch to create sharp, delicate borders that define the wing’s structure without overwhelming it.
This focus on blending and sharp linework transforms a simple motif into a dynamic piece of art that makes fabric come alive.
3. Recreate Fern Fronds with Directional Stitching

The key to a realistic fern is ensuring every stitch follows the natural growth pattern of the fronds.
Begin with a central stem in a simple backstitch or stem stitch, using a slightly darker green thread to create an anchor.
For the individual leaves, use a fishbone stitch, angling your stitches outward from a central vein at approximately 45 degrees.
This directional work creates a subtle herringbone texture that catches the light and mimics the structure of a real fern leaf.
Varying the green tones from one frond to the next adds another layer of realism, suggesting new growth and mature leaves.
Mastering these leaf vein stitch methods will elevate all your botanical work.
4. Achieve Plump Strawberries with Padded Satin Stitch

To make your strawberries look juicy and three-dimensional, use a padding technique before you apply the final color.
First, fill the strawberry shape with a base of small, horizontal straight stitches using a neutral or matching color thread.
Then, work your final red satin stitches vertically over this padded base. This slight lift creates a rounded surface that catches light beautifully.
For the seeds, use tiny yellow French knots, pulling them tight to create a neat, embedded look rather than a raised dot.
This contrast between the smooth, padded fruit and the textured leaves makes the entire composition more dynamic and appealing.
5. Build Atmospheric Depth in Mountain Landscapes

Create the illusion of distance in a mountain scene by varying your thread weight and stitch density.
For the peaks in the background, use a single strand of gray or pale blue thread and open, airy stitches to suggest haze and distance.
As you move to the foreground, switch to two or three strands and use denser, more directional satin stitches to define the rocky textures.
Use vertical straight stitches for the tree trunks and clusters of French knots or seed stitches for the foliage, making them denser and darker at the front.
These mountain landscape thread painting techniques turn a flat image into a scene with perspective.
6. Mimic Iridescence with Strategic Color Blocking
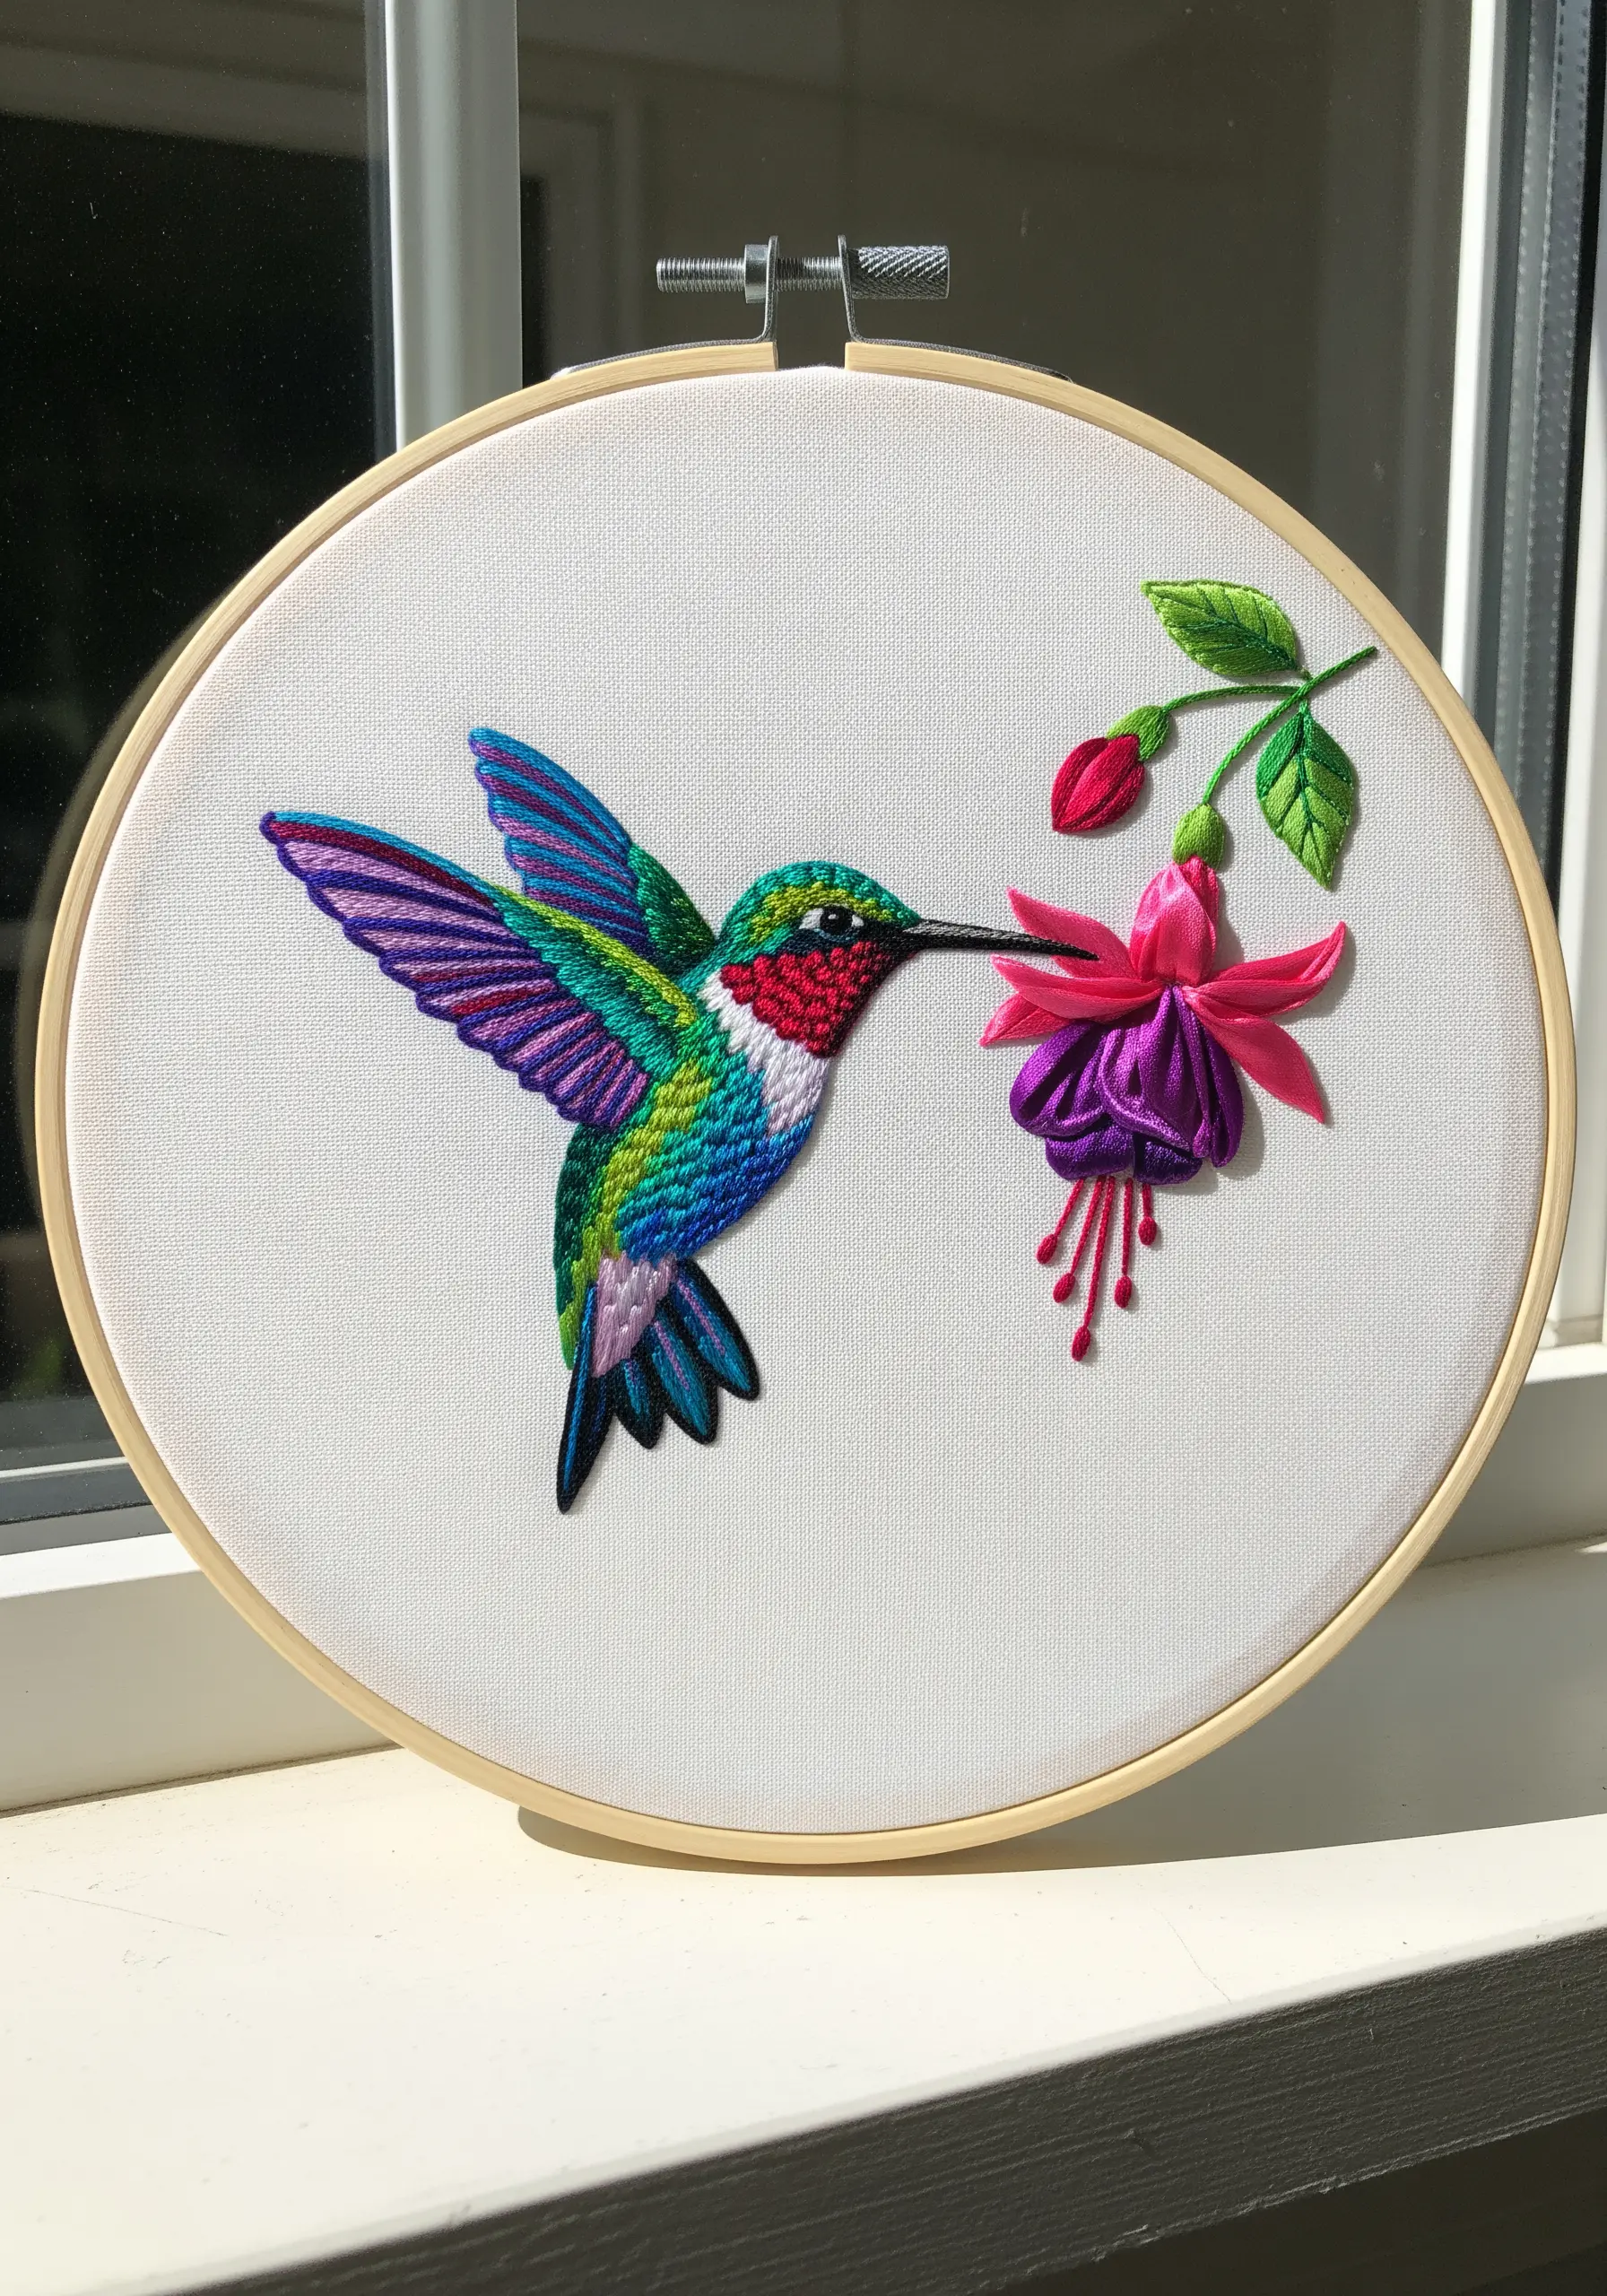
To capture the jewel-toned shimmer of a hummingbird, think in terms of color fields rather than fine blending.
Use a sharp, clean satin stitch for each block of color—the turquoise, the green, the ruby red—placing them side-by-side with minimal overlap.
The magic happens in the stitch direction. Angle the stitches on the head differently from those on the chest and wings. This makes the light reflect from each section differently, creating a dynamic, iridescent effect.
For the fuchsia flower, use detached buttonhole stitches for the petals to give them a three-dimensional, bell-like shape that stands away from the fabric.
7. Create a Fuzzy Bee with Turkey Work Stitch

To give your bumblebee a soft, fuzzy texture that begs to be touched, use the Turkey work stitch for its body.
Create loops of black and yellow thread, secure them, and then carefully trim the loops to create a short, dense pile that resembles fur.
For the delicate, transparent wings, switch to a single strand of light gray or off-white thread and outline the shape with a fine backstitch.
Fill the interior of the wings with a few sparse straight stitches or seed stitches to suggest veining without adding bulk.
This contrast between the plush body and the ethereal wings is what brings these tiny animal embroidery designs to life.
8. Ground Your Design with Rustic Burlap
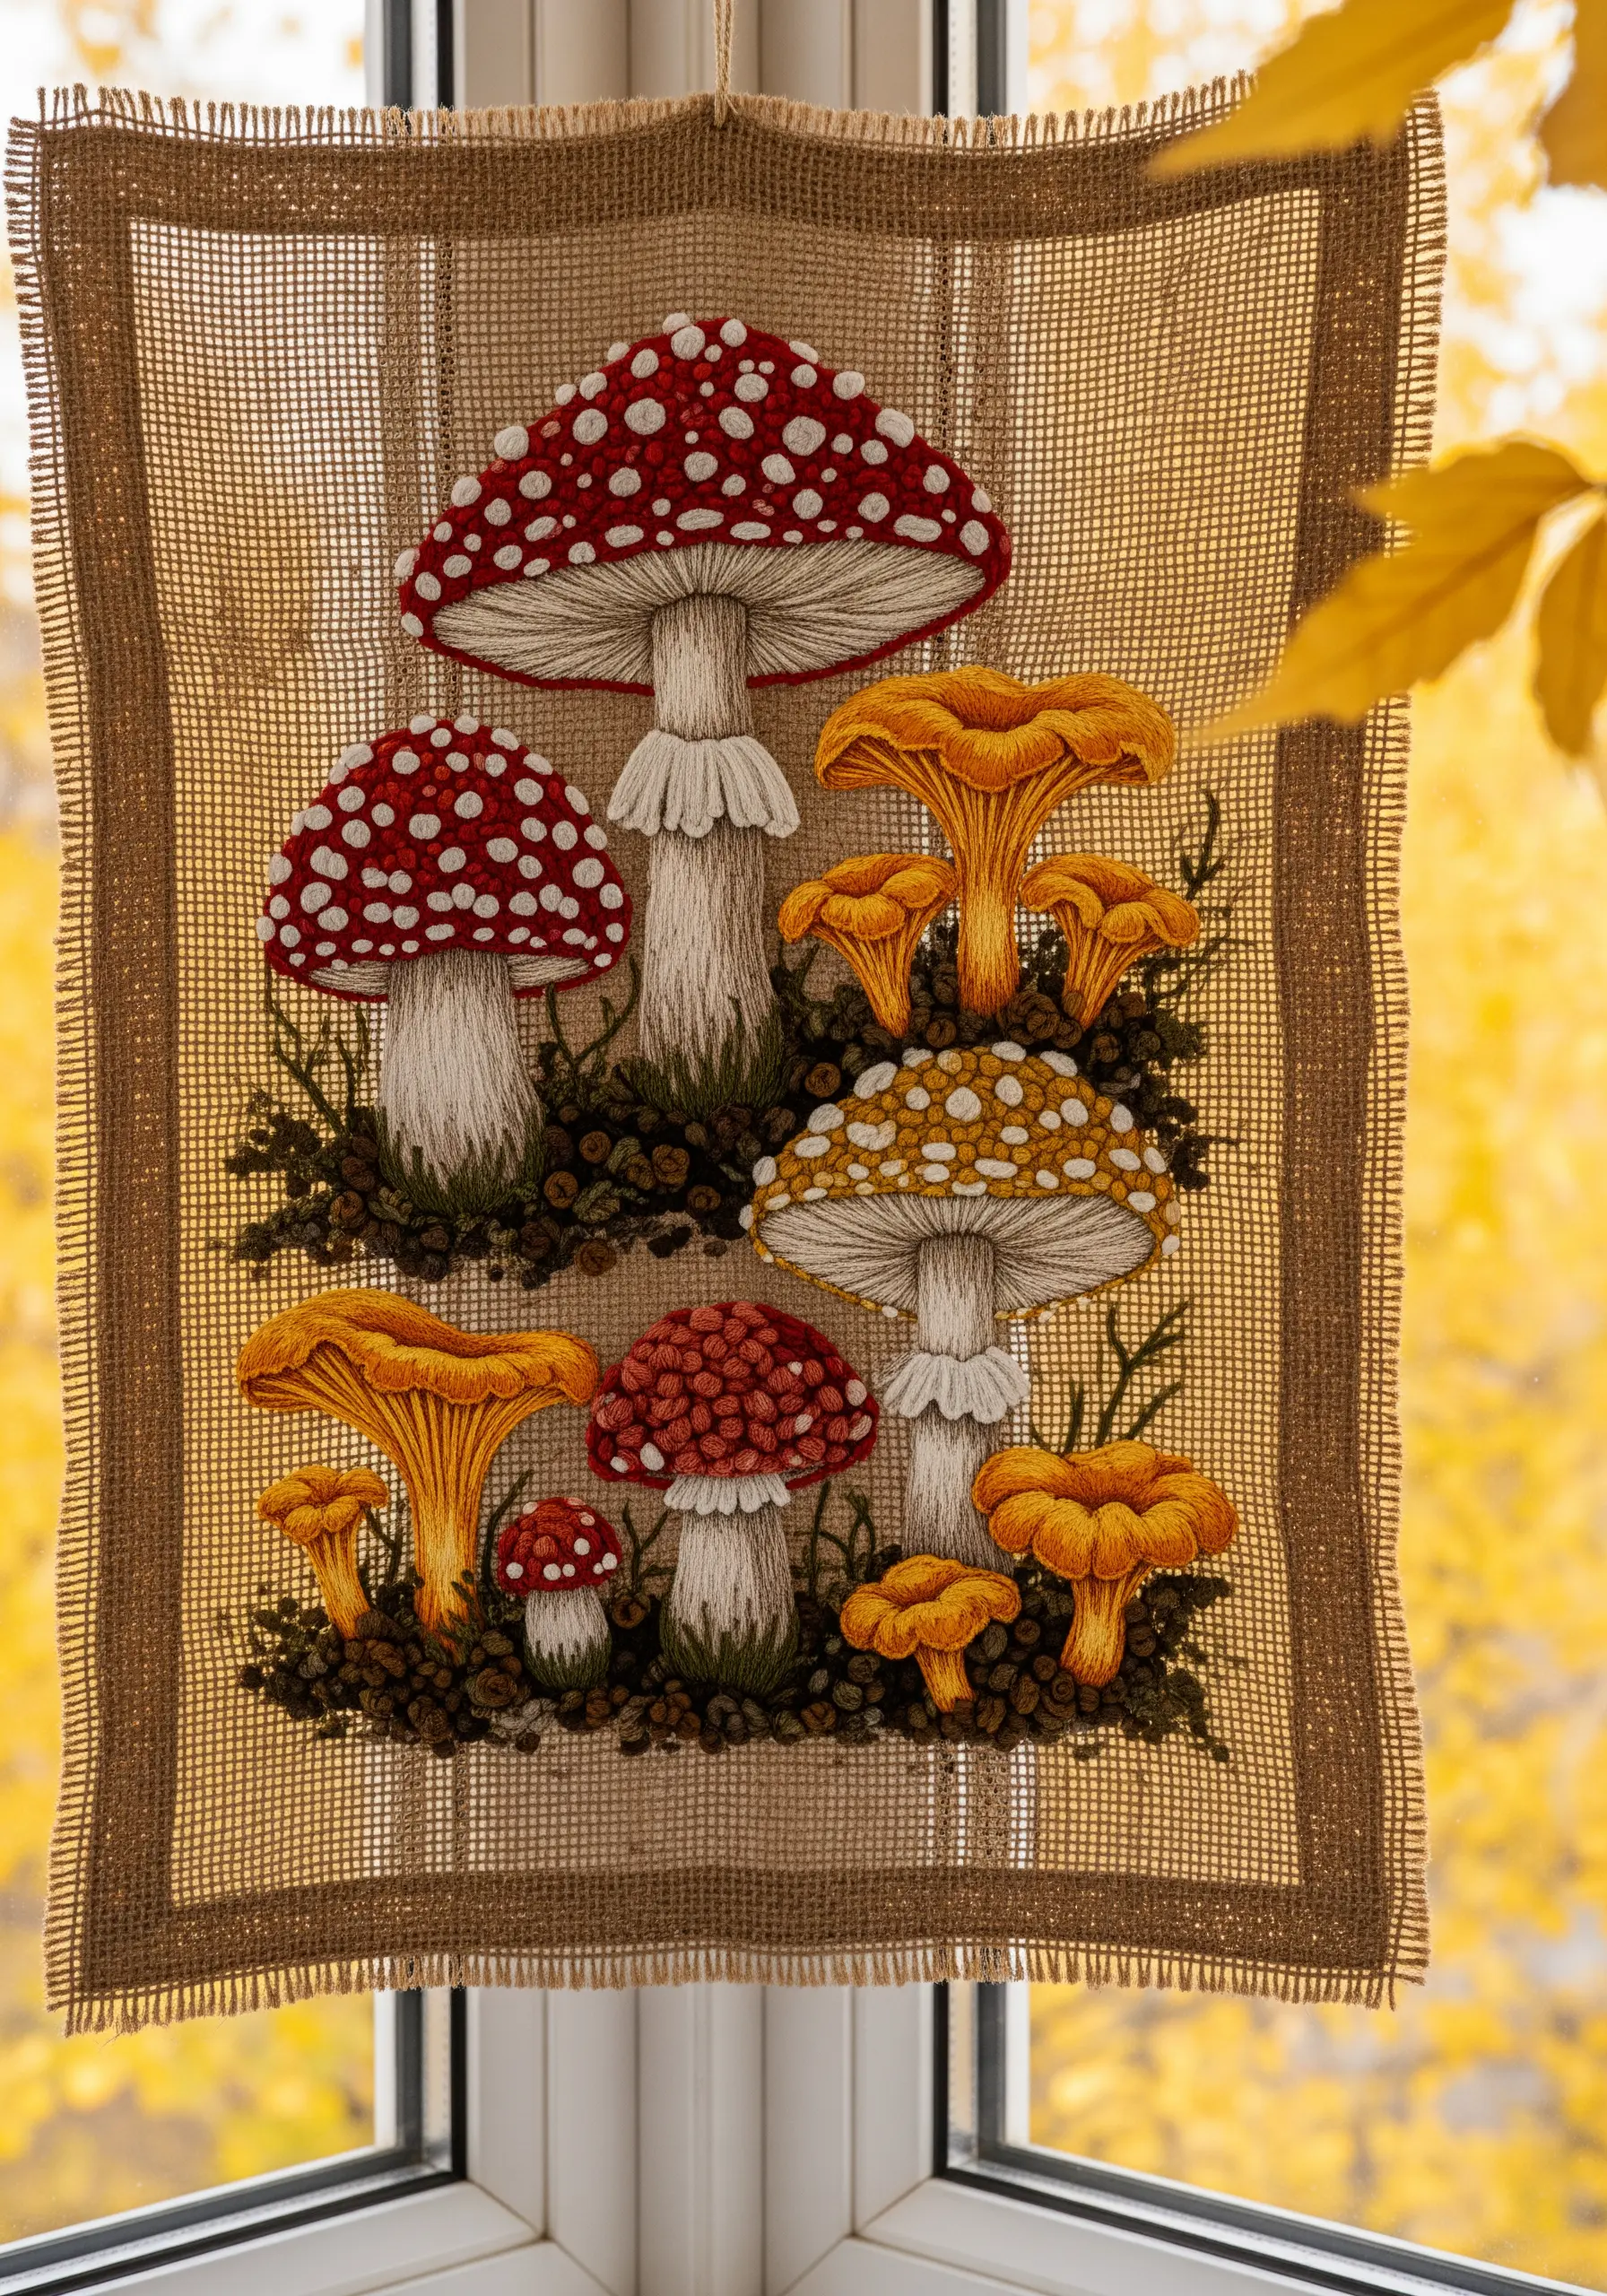
Stitching on burlap offers a completely different experience and aesthetic, perfect for earthy, woodland themes.
The open weave of burlap requires you to use more strands of floss—typically all six—to ensure full coverage and prevent stitches from sinking in.
Use a tapestry needle with a blunt tip, which will help you navigate between the fabric threads rather than piercing them.
Focus on bold shapes and textural stitches like satin stitch and French knots, as intricate line work can get lost in the fabric’s texture.
These forest floor botanical stitch ideas are enhanced by the fabric’s rustic character.
9. Stitch on Sheer Fabric for an Ethereal Effect
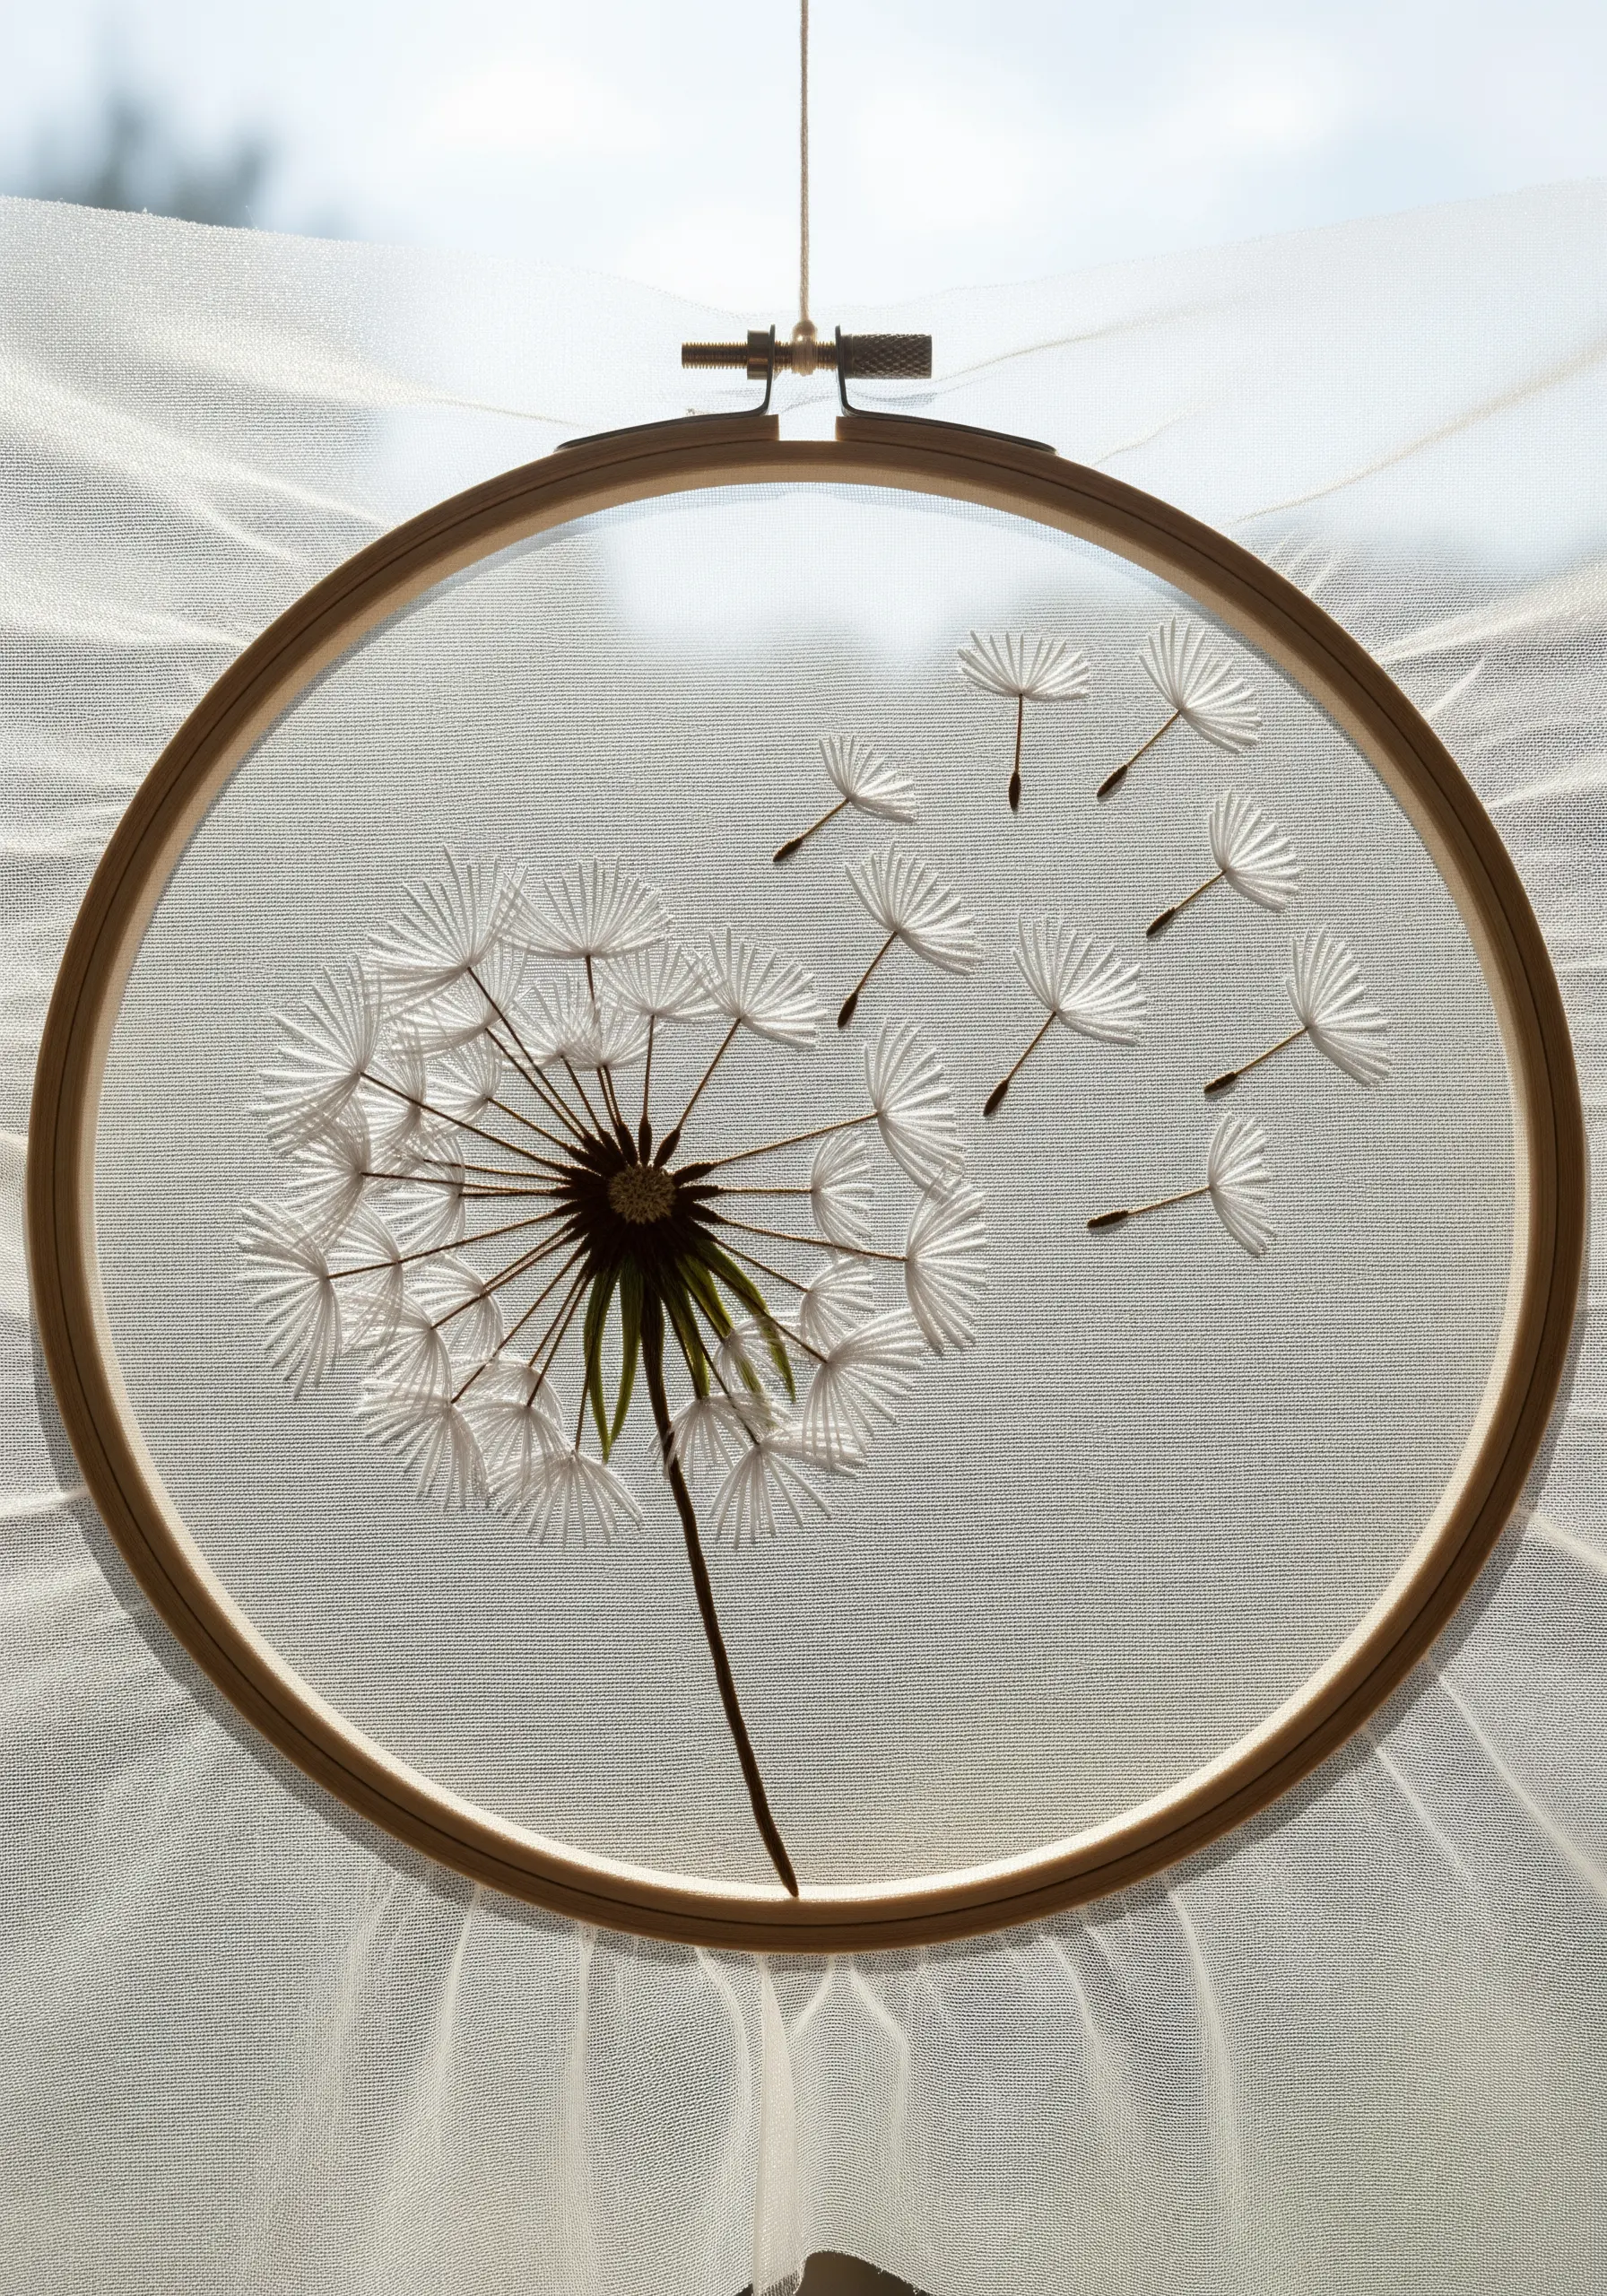
Embroidering on organza or tulle creates a magical, floating effect that is perfect for delicate subjects like dandelions.
You must use a stabilizer to prevent the sheer fabric from puckering. A water-soluble stabilizer is ideal, as it washes away completely, leaving only your stitches.
Use very fine thread and a sharp, small needle to make clean holes in the delicate fabric.
Every stitch will be visible from both sides, so your work needs to be exceptionally neat. Plan your stitch path to minimize travel threads on the back.
This technique masterfully combines thread and negative space to create breathtakingly light art.
10. Embrace the Charm of Cross-Stitch Wildflowers
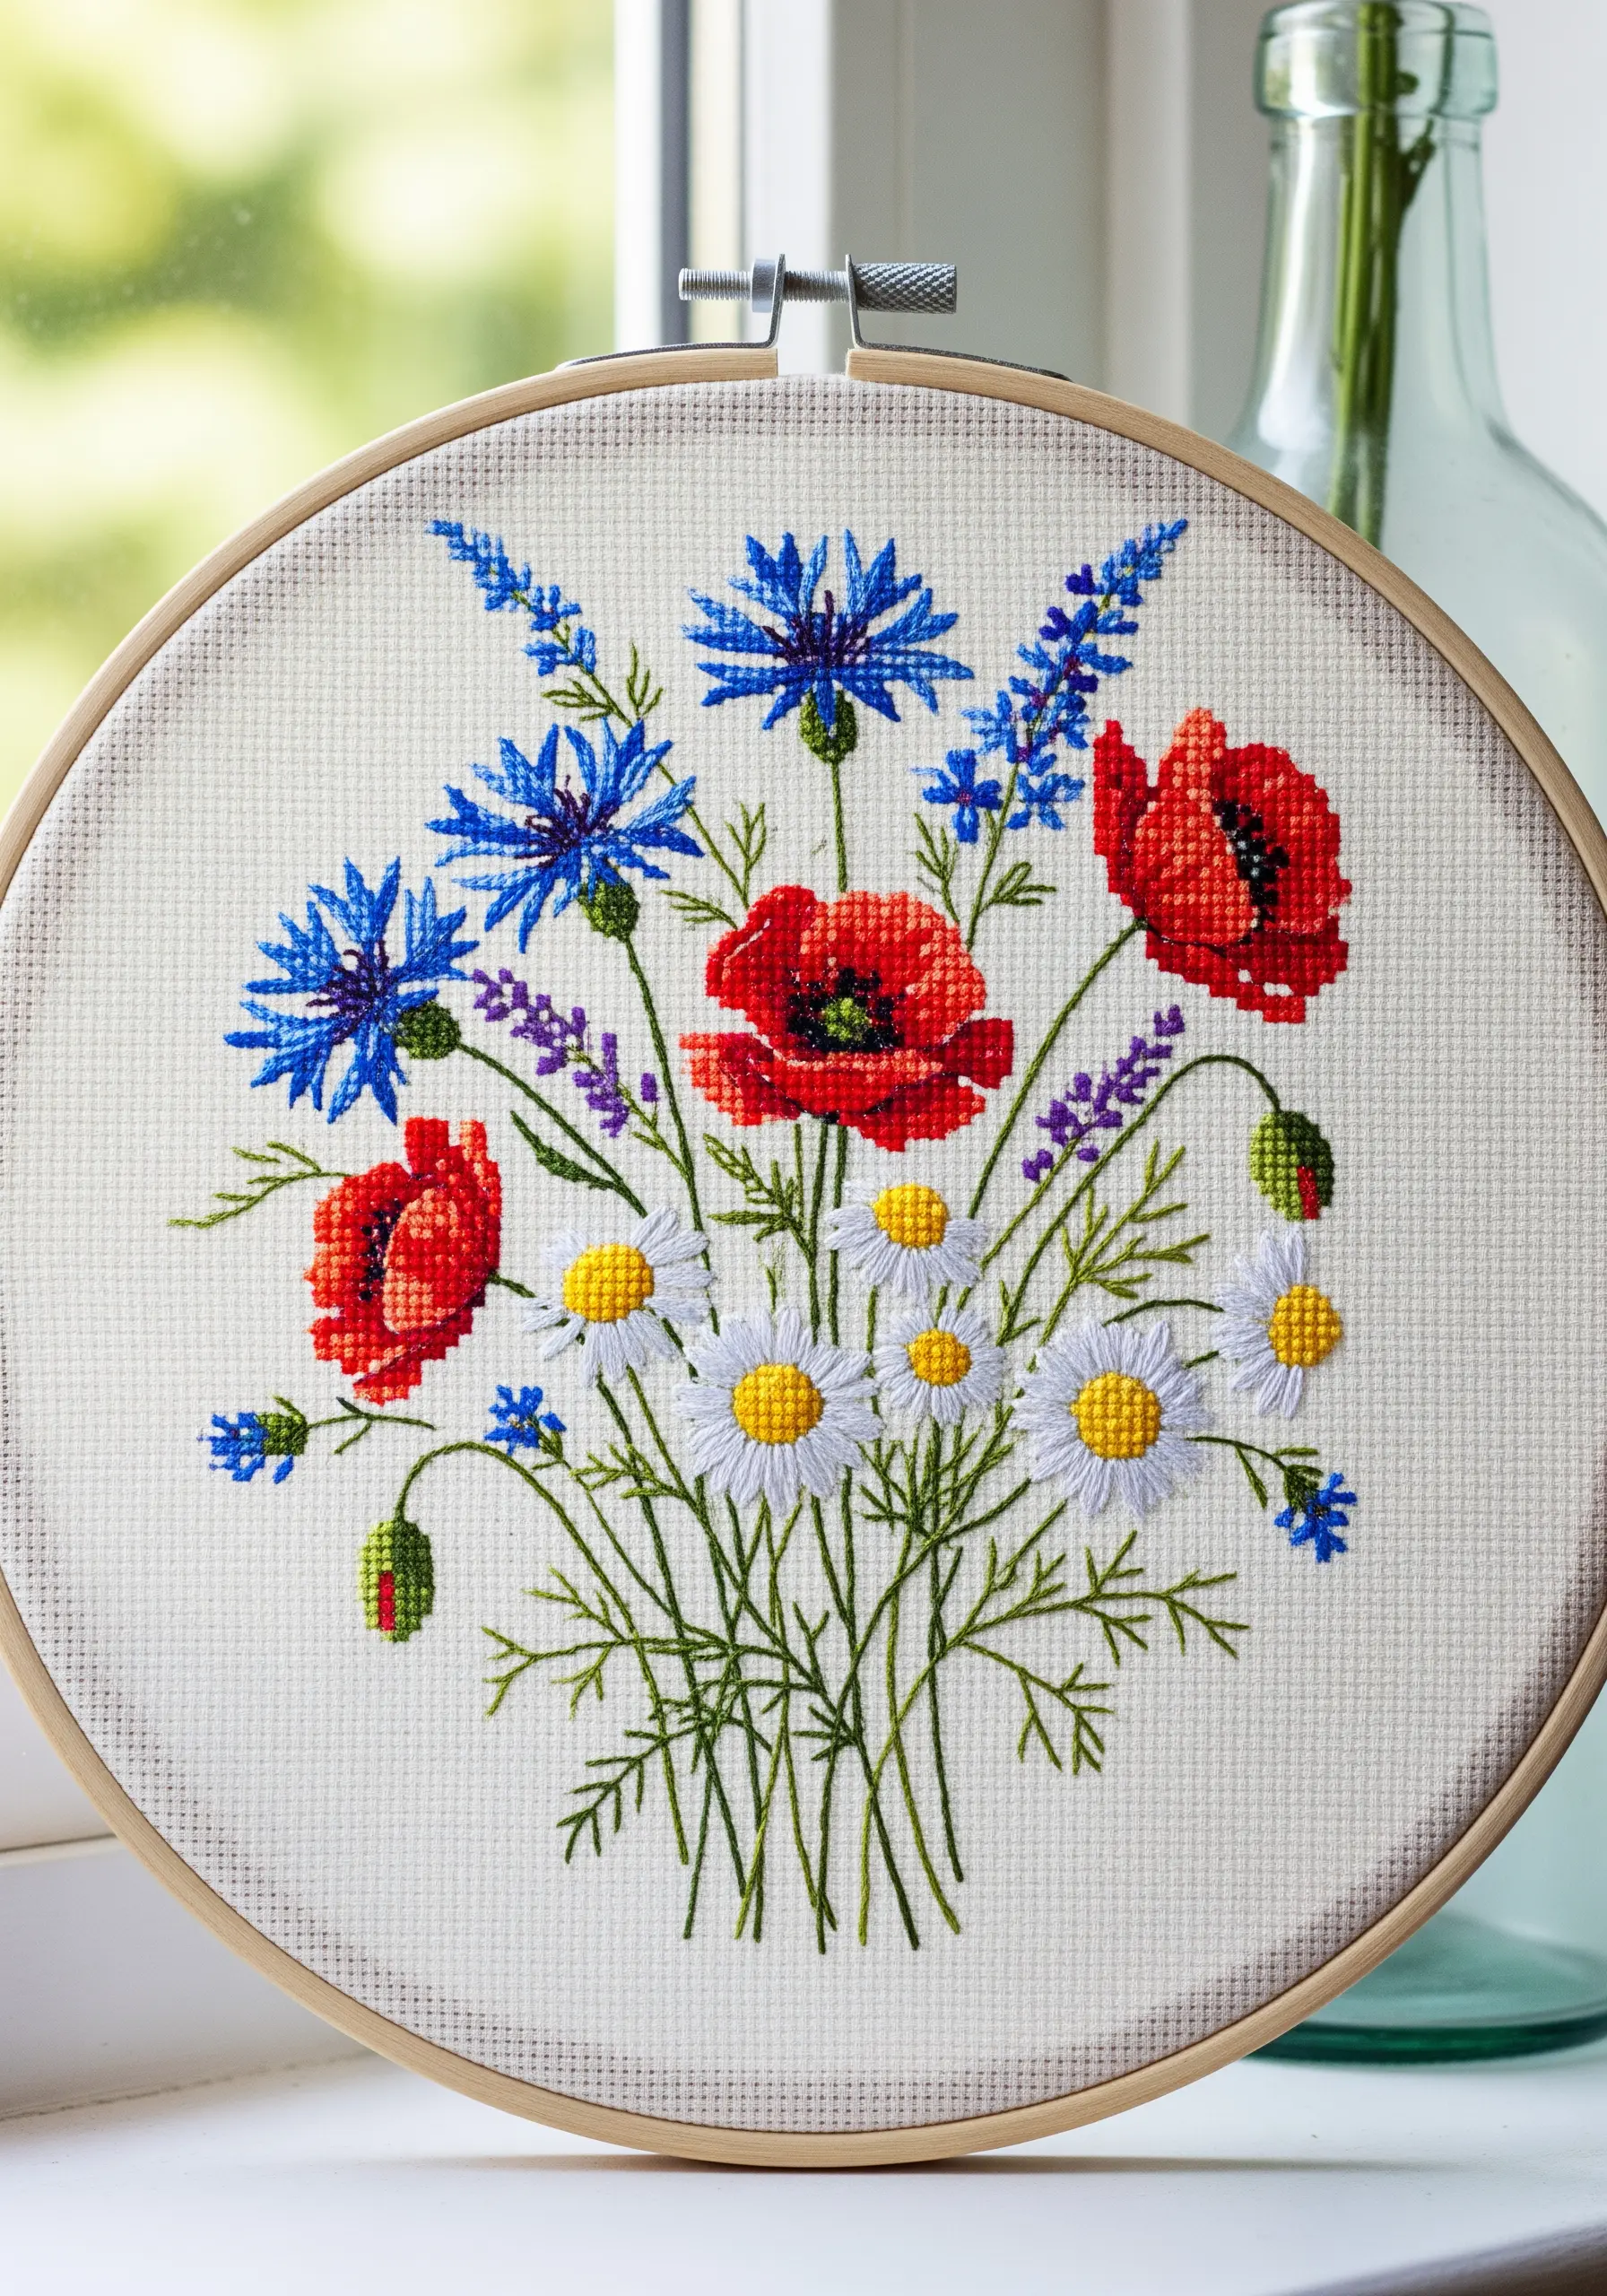
Cross-stitch offers a structured, graphic alternative to freeform embroidery, lending a nostalgic, pixelated charm to floral bouquets.
Work on Aida cloth, whose gridded structure guides your stitches for perfect uniformity. The ‘count’ of the fabric (e.g., 14-count) determines the final size of your stitches.
To create blended, painterly effects, use a technique called ‘tweeding,’ where you combine one strand from two different colors in your needle at the same time.
For delicate stems and outlines, switch from full cross-stitches to a simple backstitch, which will give you clean lines that define the shapes.
11. Define Graphic Succulents with Bold Outlines

Give your embroidered succulents a modern, illustrative look by emphasizing strong, clean outlines.
First, fill each leaf section with a smooth satin stitch, paying close attention to the direction to create planes of light and shadow.
Once the fills are complete, use a contrasting color—like dark gray or black—to trace the edges of every leaf with a precise backstitch or stem stitch.
This technique contains the colors, sharpens the edges, and gives the entire piece a clean, graphic novel-style finish that feels contemporary and bold.
These sharp lines make houseplant embroidery motifs pop, especially when displayed on a stretched canvas.
12. Illuminate a Night Scene with French Knots
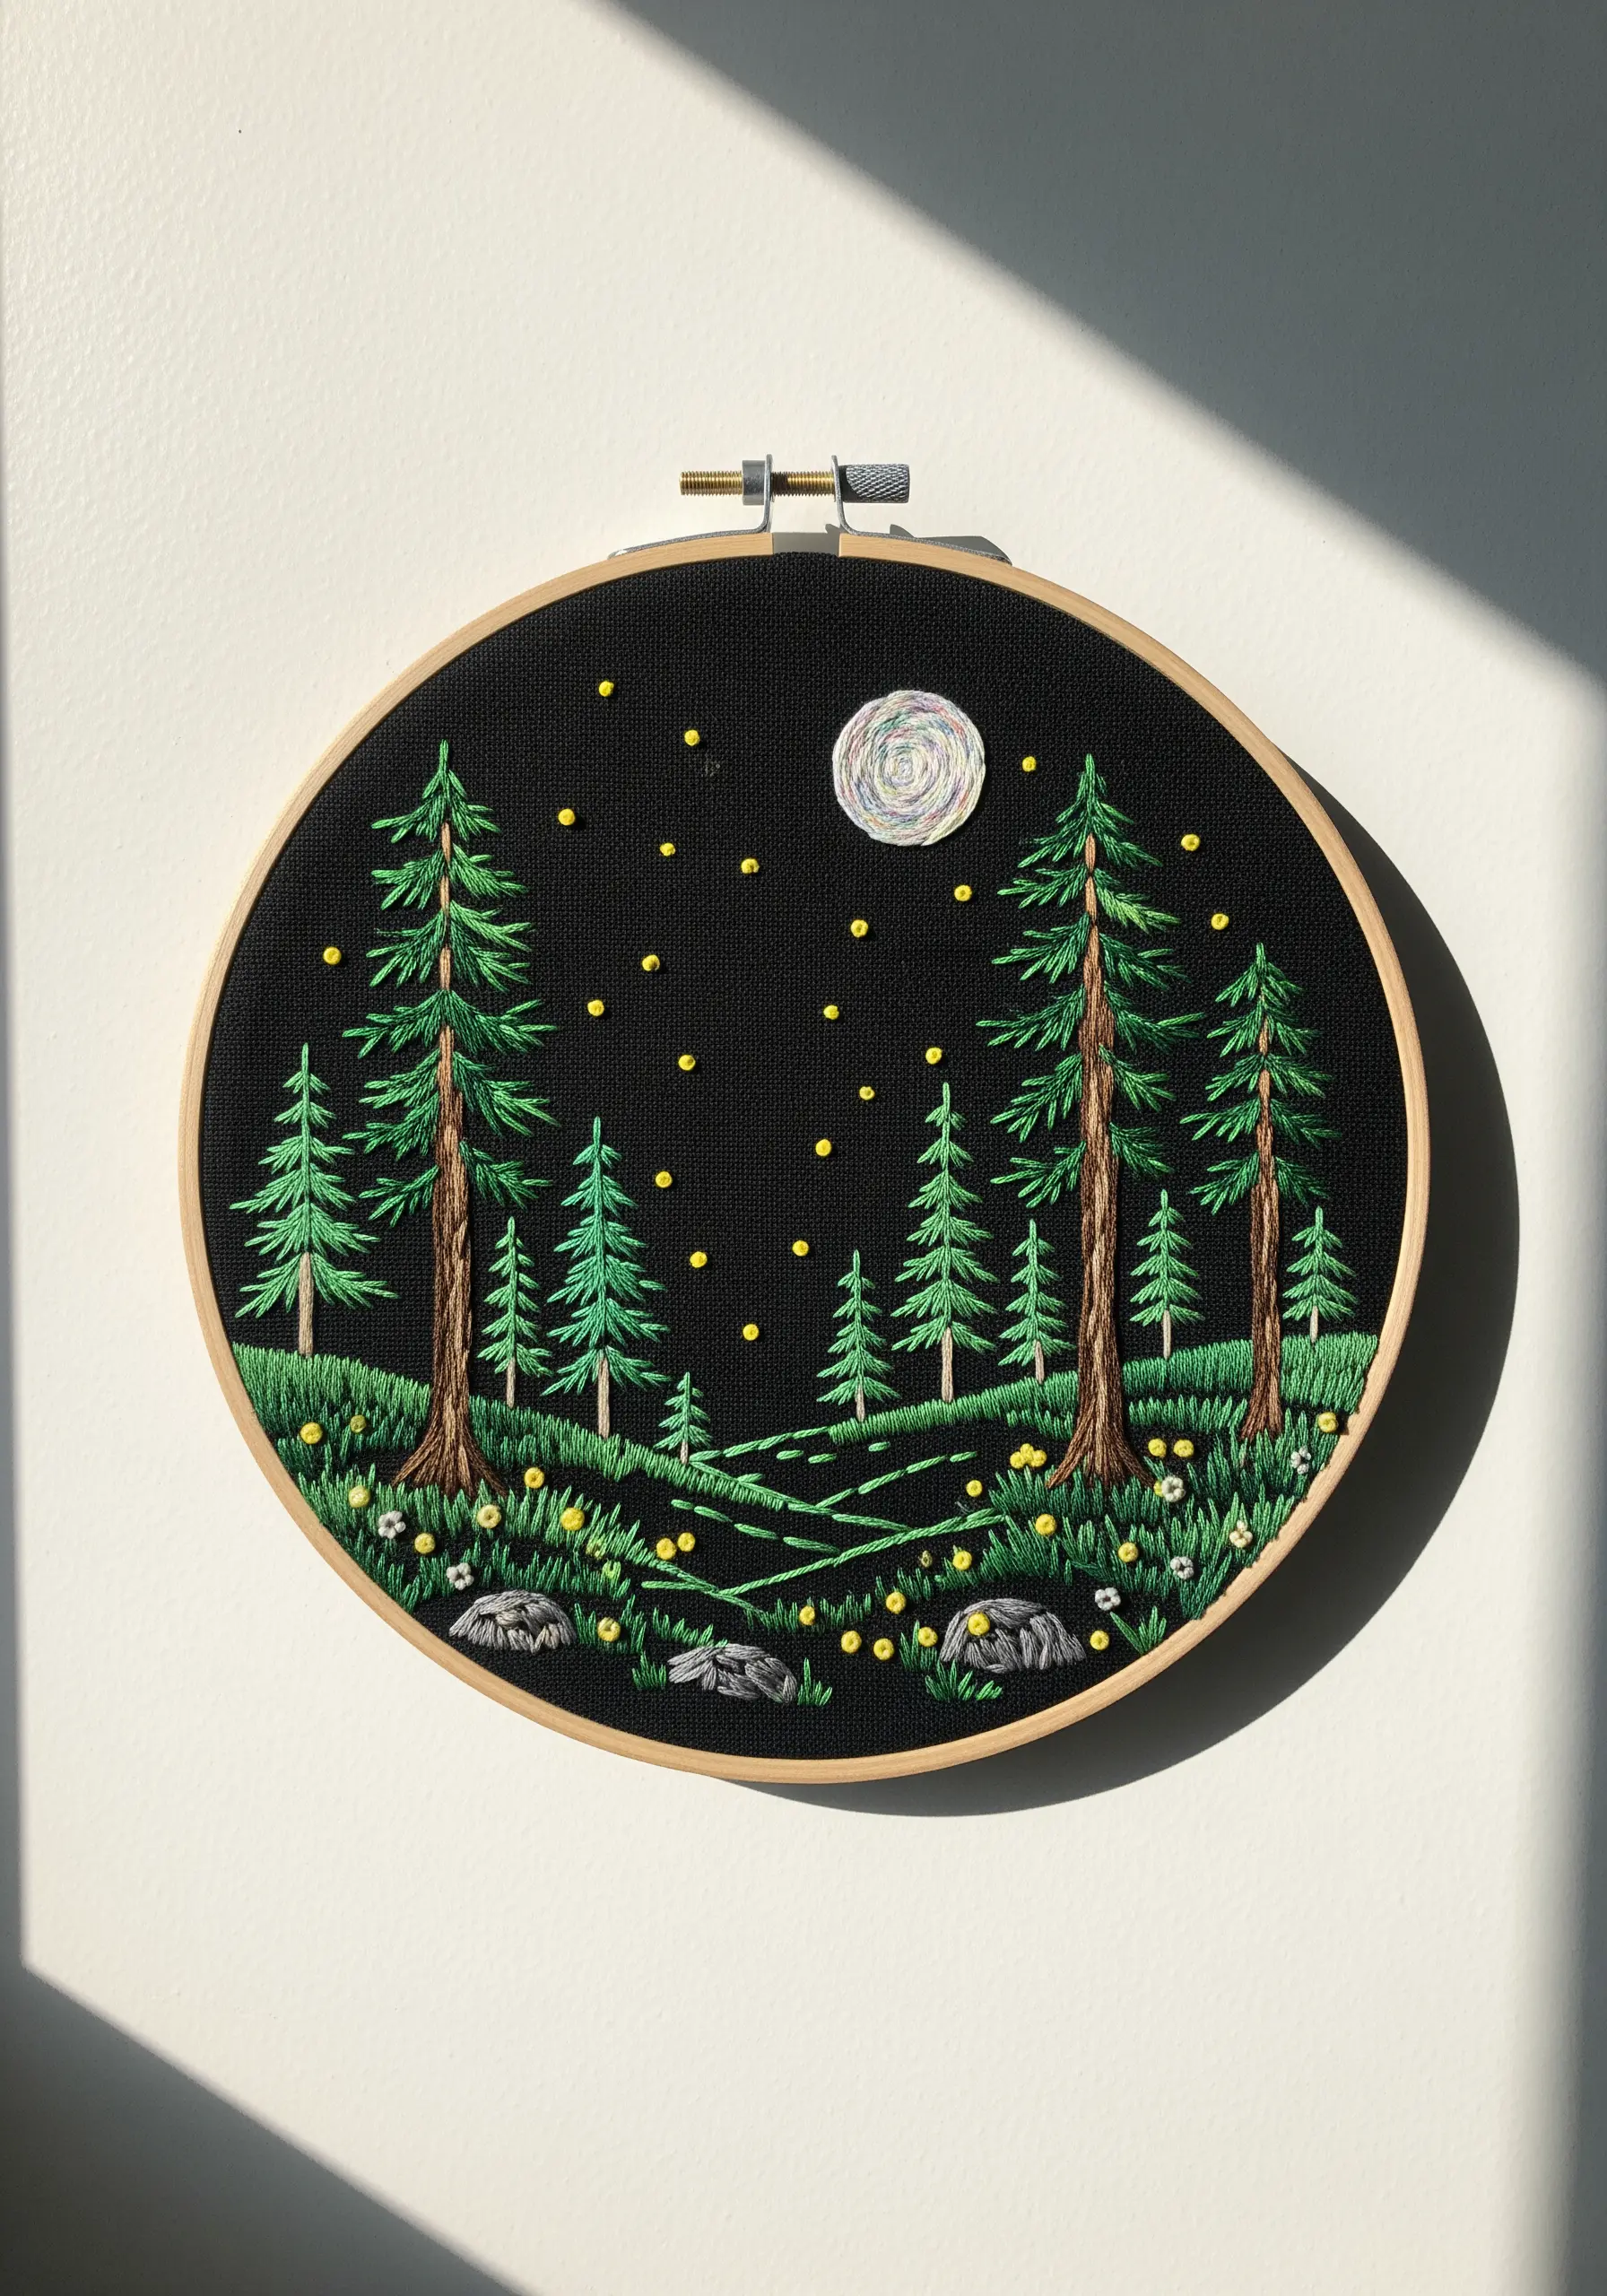
Create a magical, starry night sky by stitching onto black or navy blue fabric and using French knots for celestial details.
Use a bright yellow or metallic gold thread for the stars. Vary the number of wraps around your needle (one, two, or three) to create stars of different sizes and brightness.
Scatter them randomly across the sky for a natural effect, concentrating them in some areas to suggest a milky way.
For the moon, use a silver or light gray thread and fill the shape with satin stitches that follow its curve, creating a soft glow.
This contrast of textures against a dark background is perfect for capturing moody, magical moonlit florals and landscapes.
13. Cluster Lazy Daisy Stitches for Delicate Blossoms
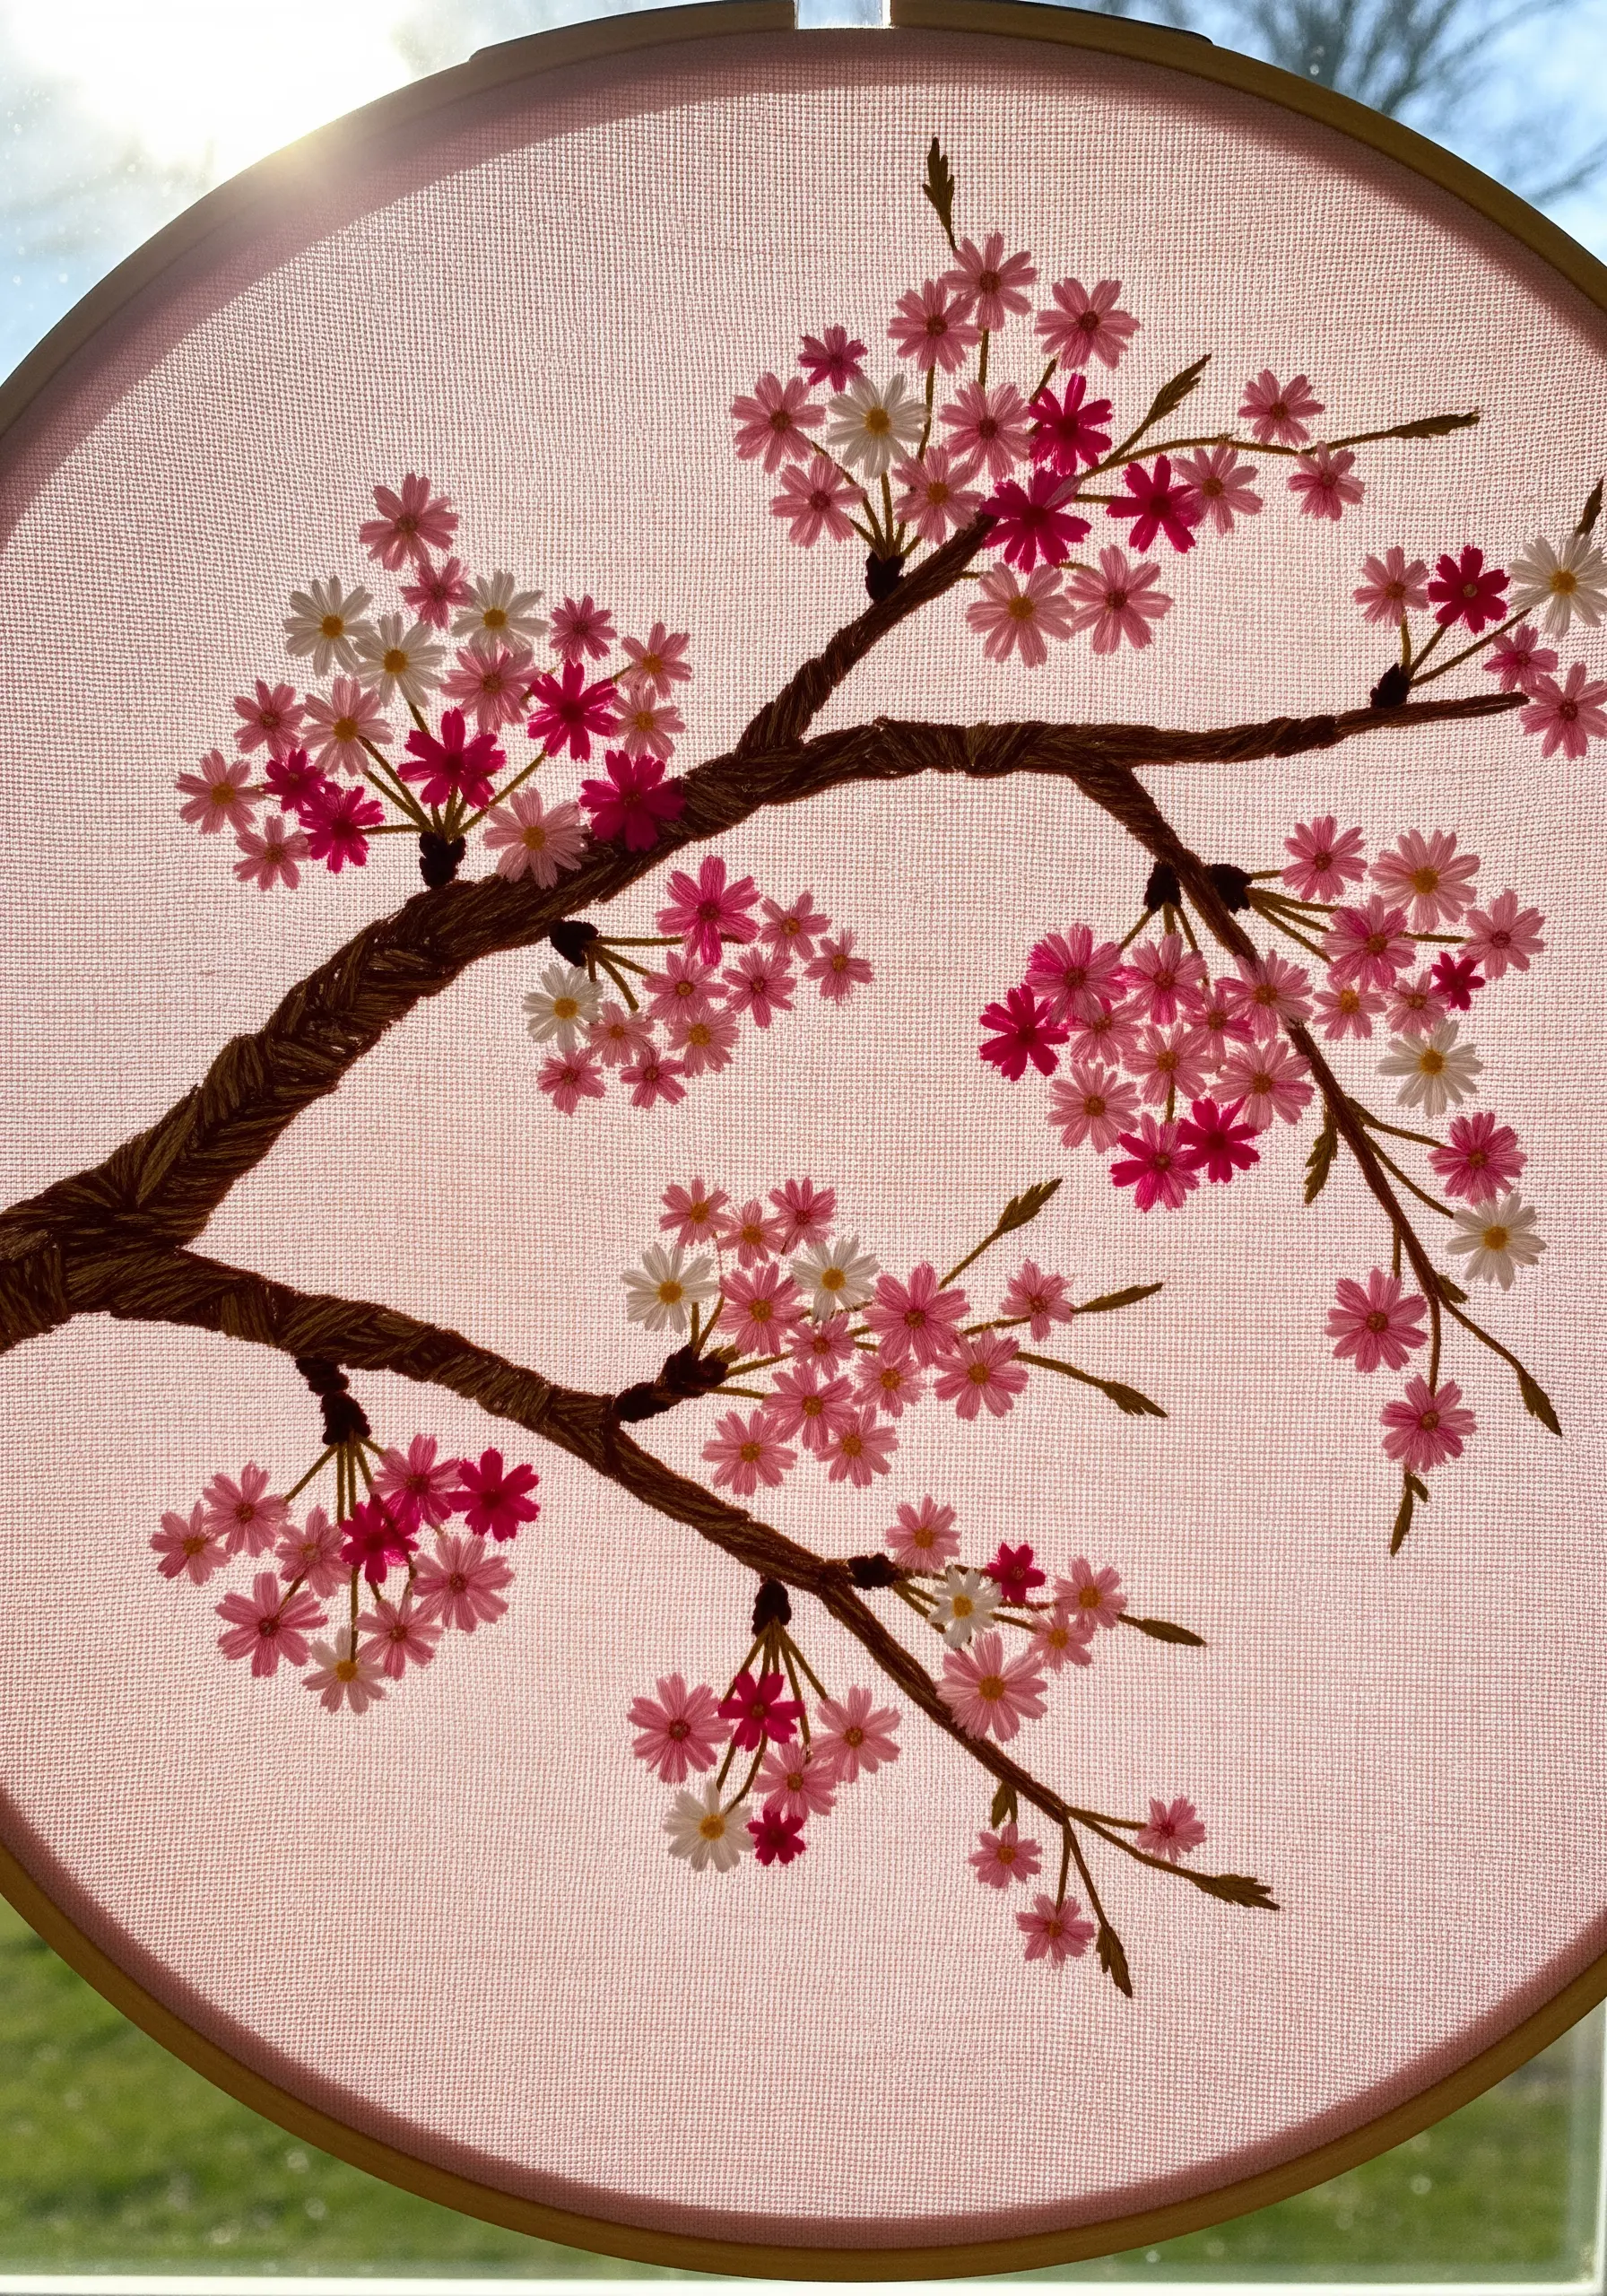
The lazy daisy stitch is perfect for creating clusters of small, delicate flowers like cherry blossoms with speed and consistency.
Arrange five or six lazy daisy stitches in a circle to form a single blossom, leaving a small space in the center.
Use a variety of pinks and whites—sometimes even within the same blossom cluster—to give the branches a more natural, varied appearance.
For the branches, use a thicker thread or a whipped backstitch to create a textured, bark-like surface that contrasts with the delicate petals.
This is one of the most effective spring equinox botanical themes you can stitch to welcome the season.
14. Explore Sculptural Dimension with Stumpwork
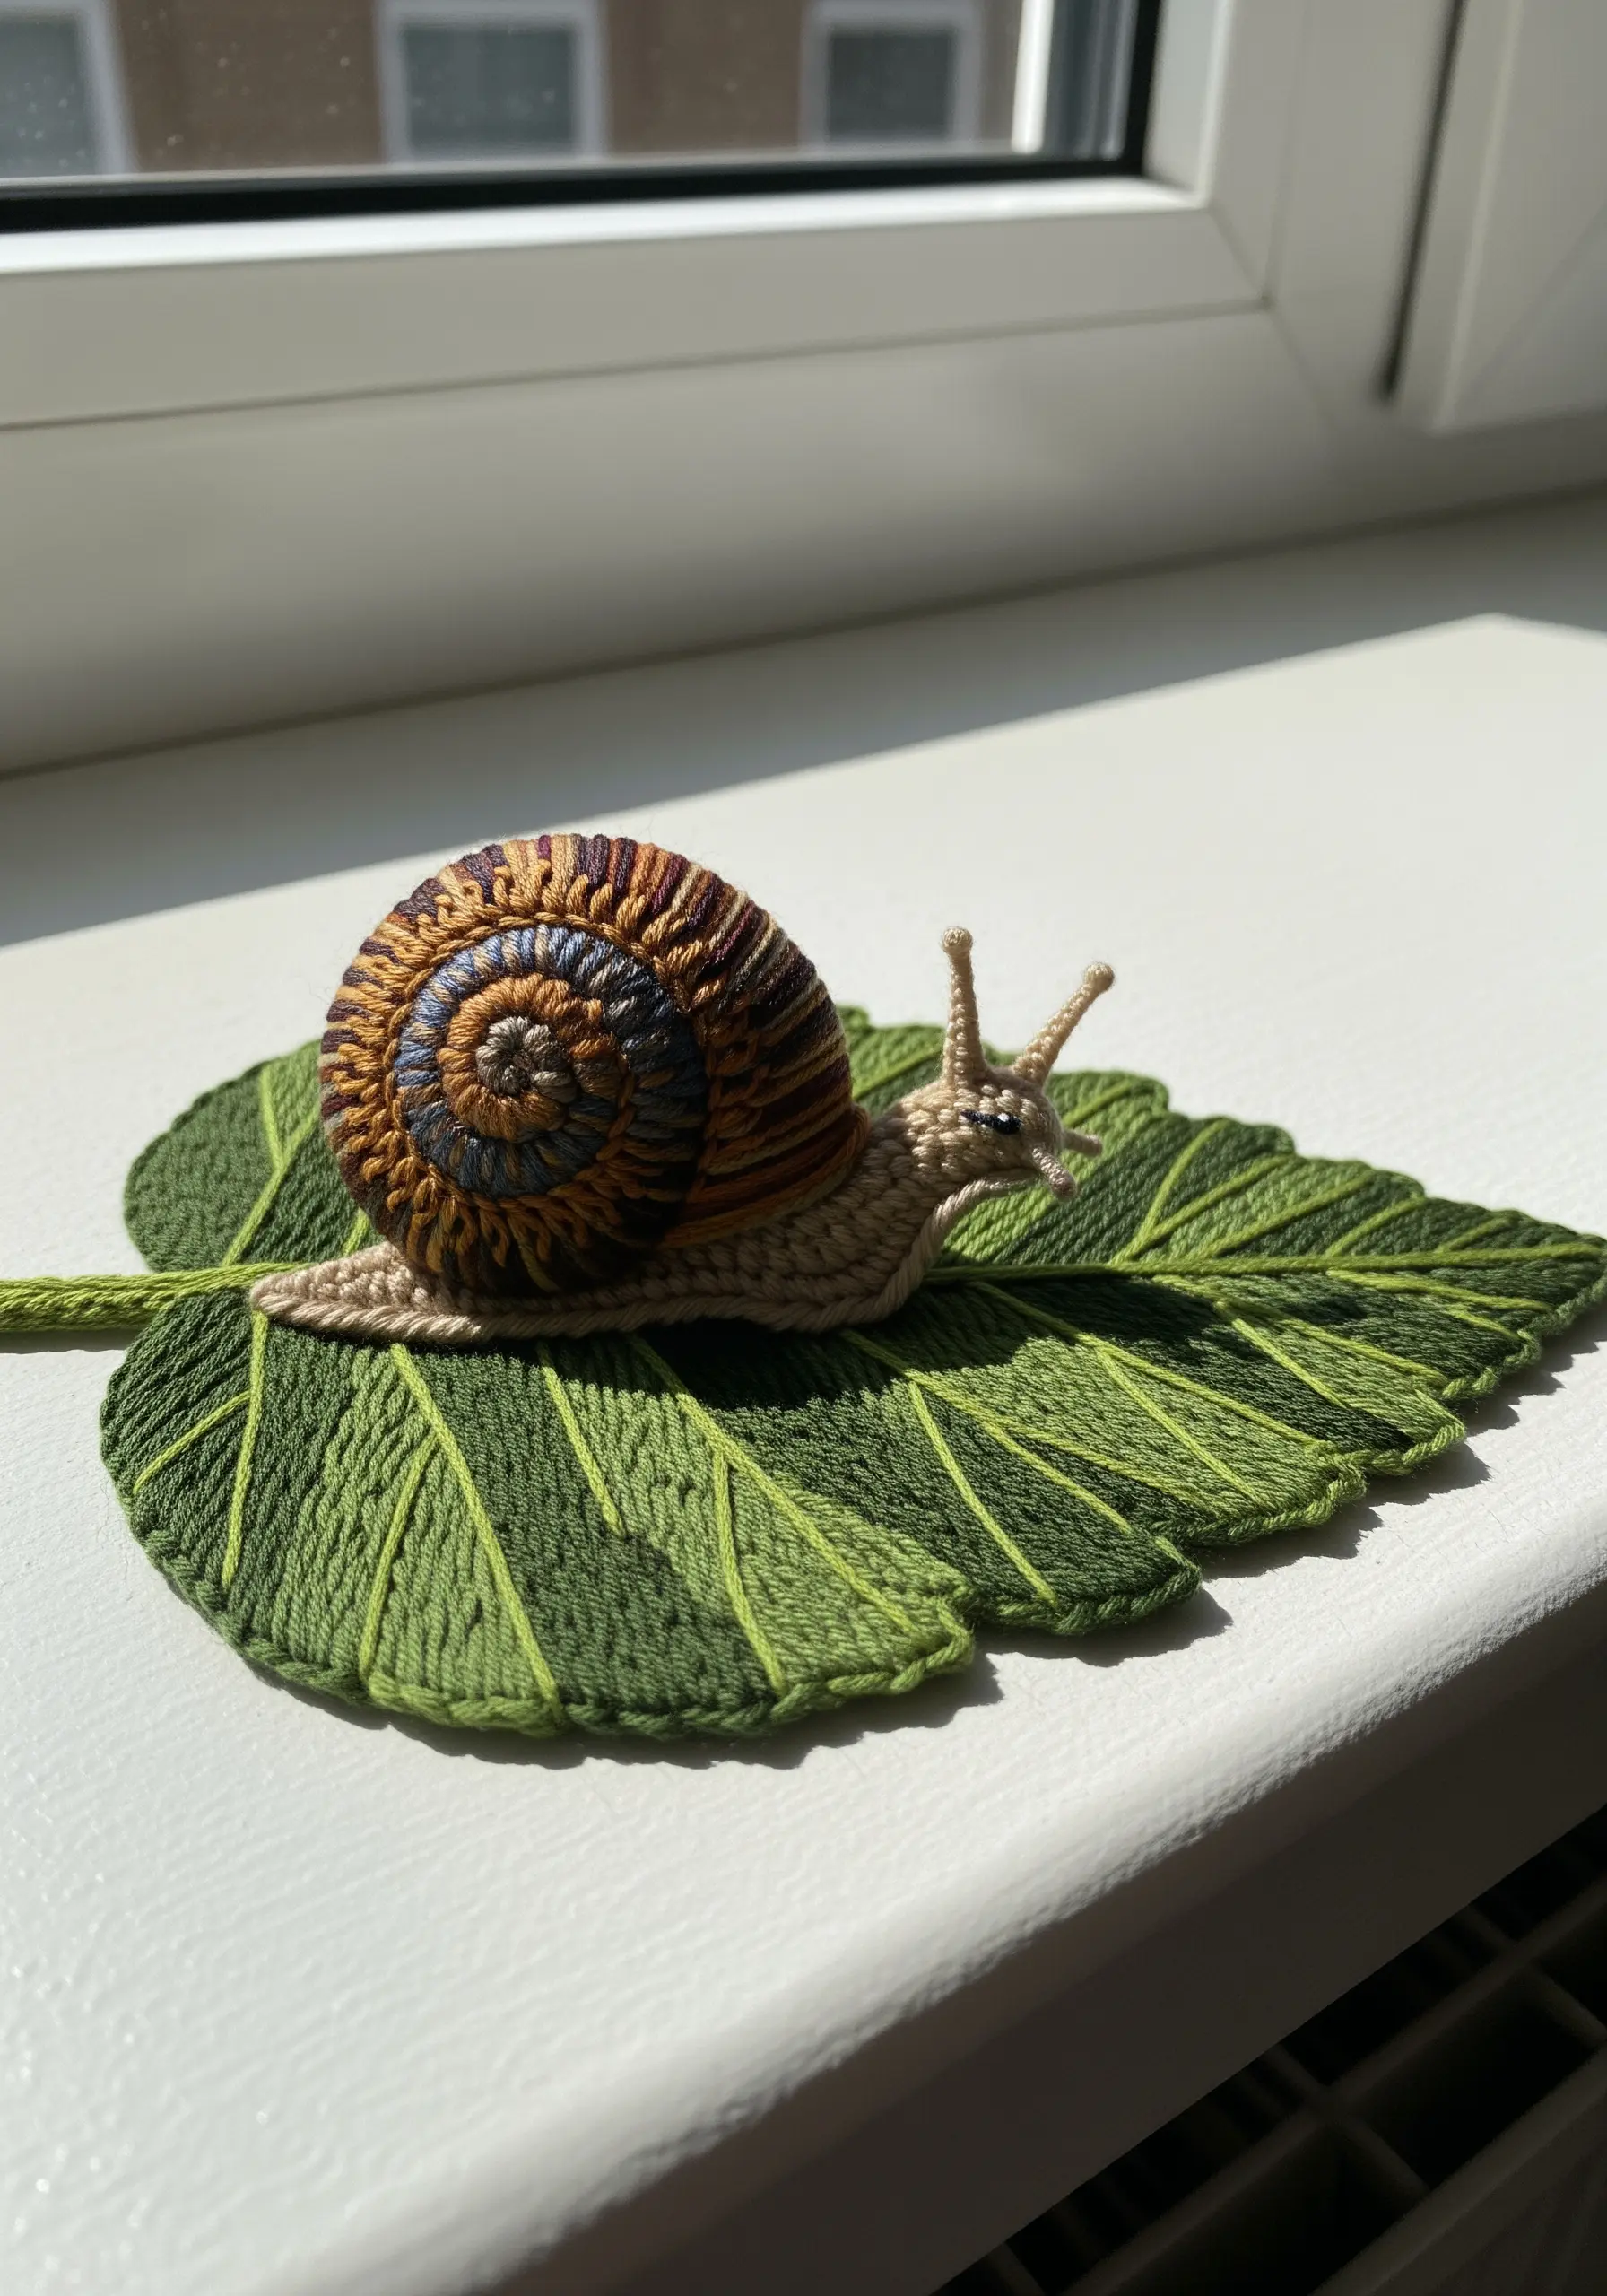
Elevate your embroidery from two dimensions to three by incorporating stumpwork techniques for elements like a snail’s shell.
Stitch the shell separately on a spare piece of fabric over a wire frame. Use tightly packed satin stitches or buttonhole stitches to cover the wire completely.
Once finished, carefully cut the shell out, leaving a small fabric border around the edge, and then stitch it onto your main fabric.
This raised, wired element adds incredible realism and shadow, turning your hoop into a small sculptural piece.
These contemporary texture techniques create stunning, tactile art.
15. Master Thread Painting for Photorealistic Florals
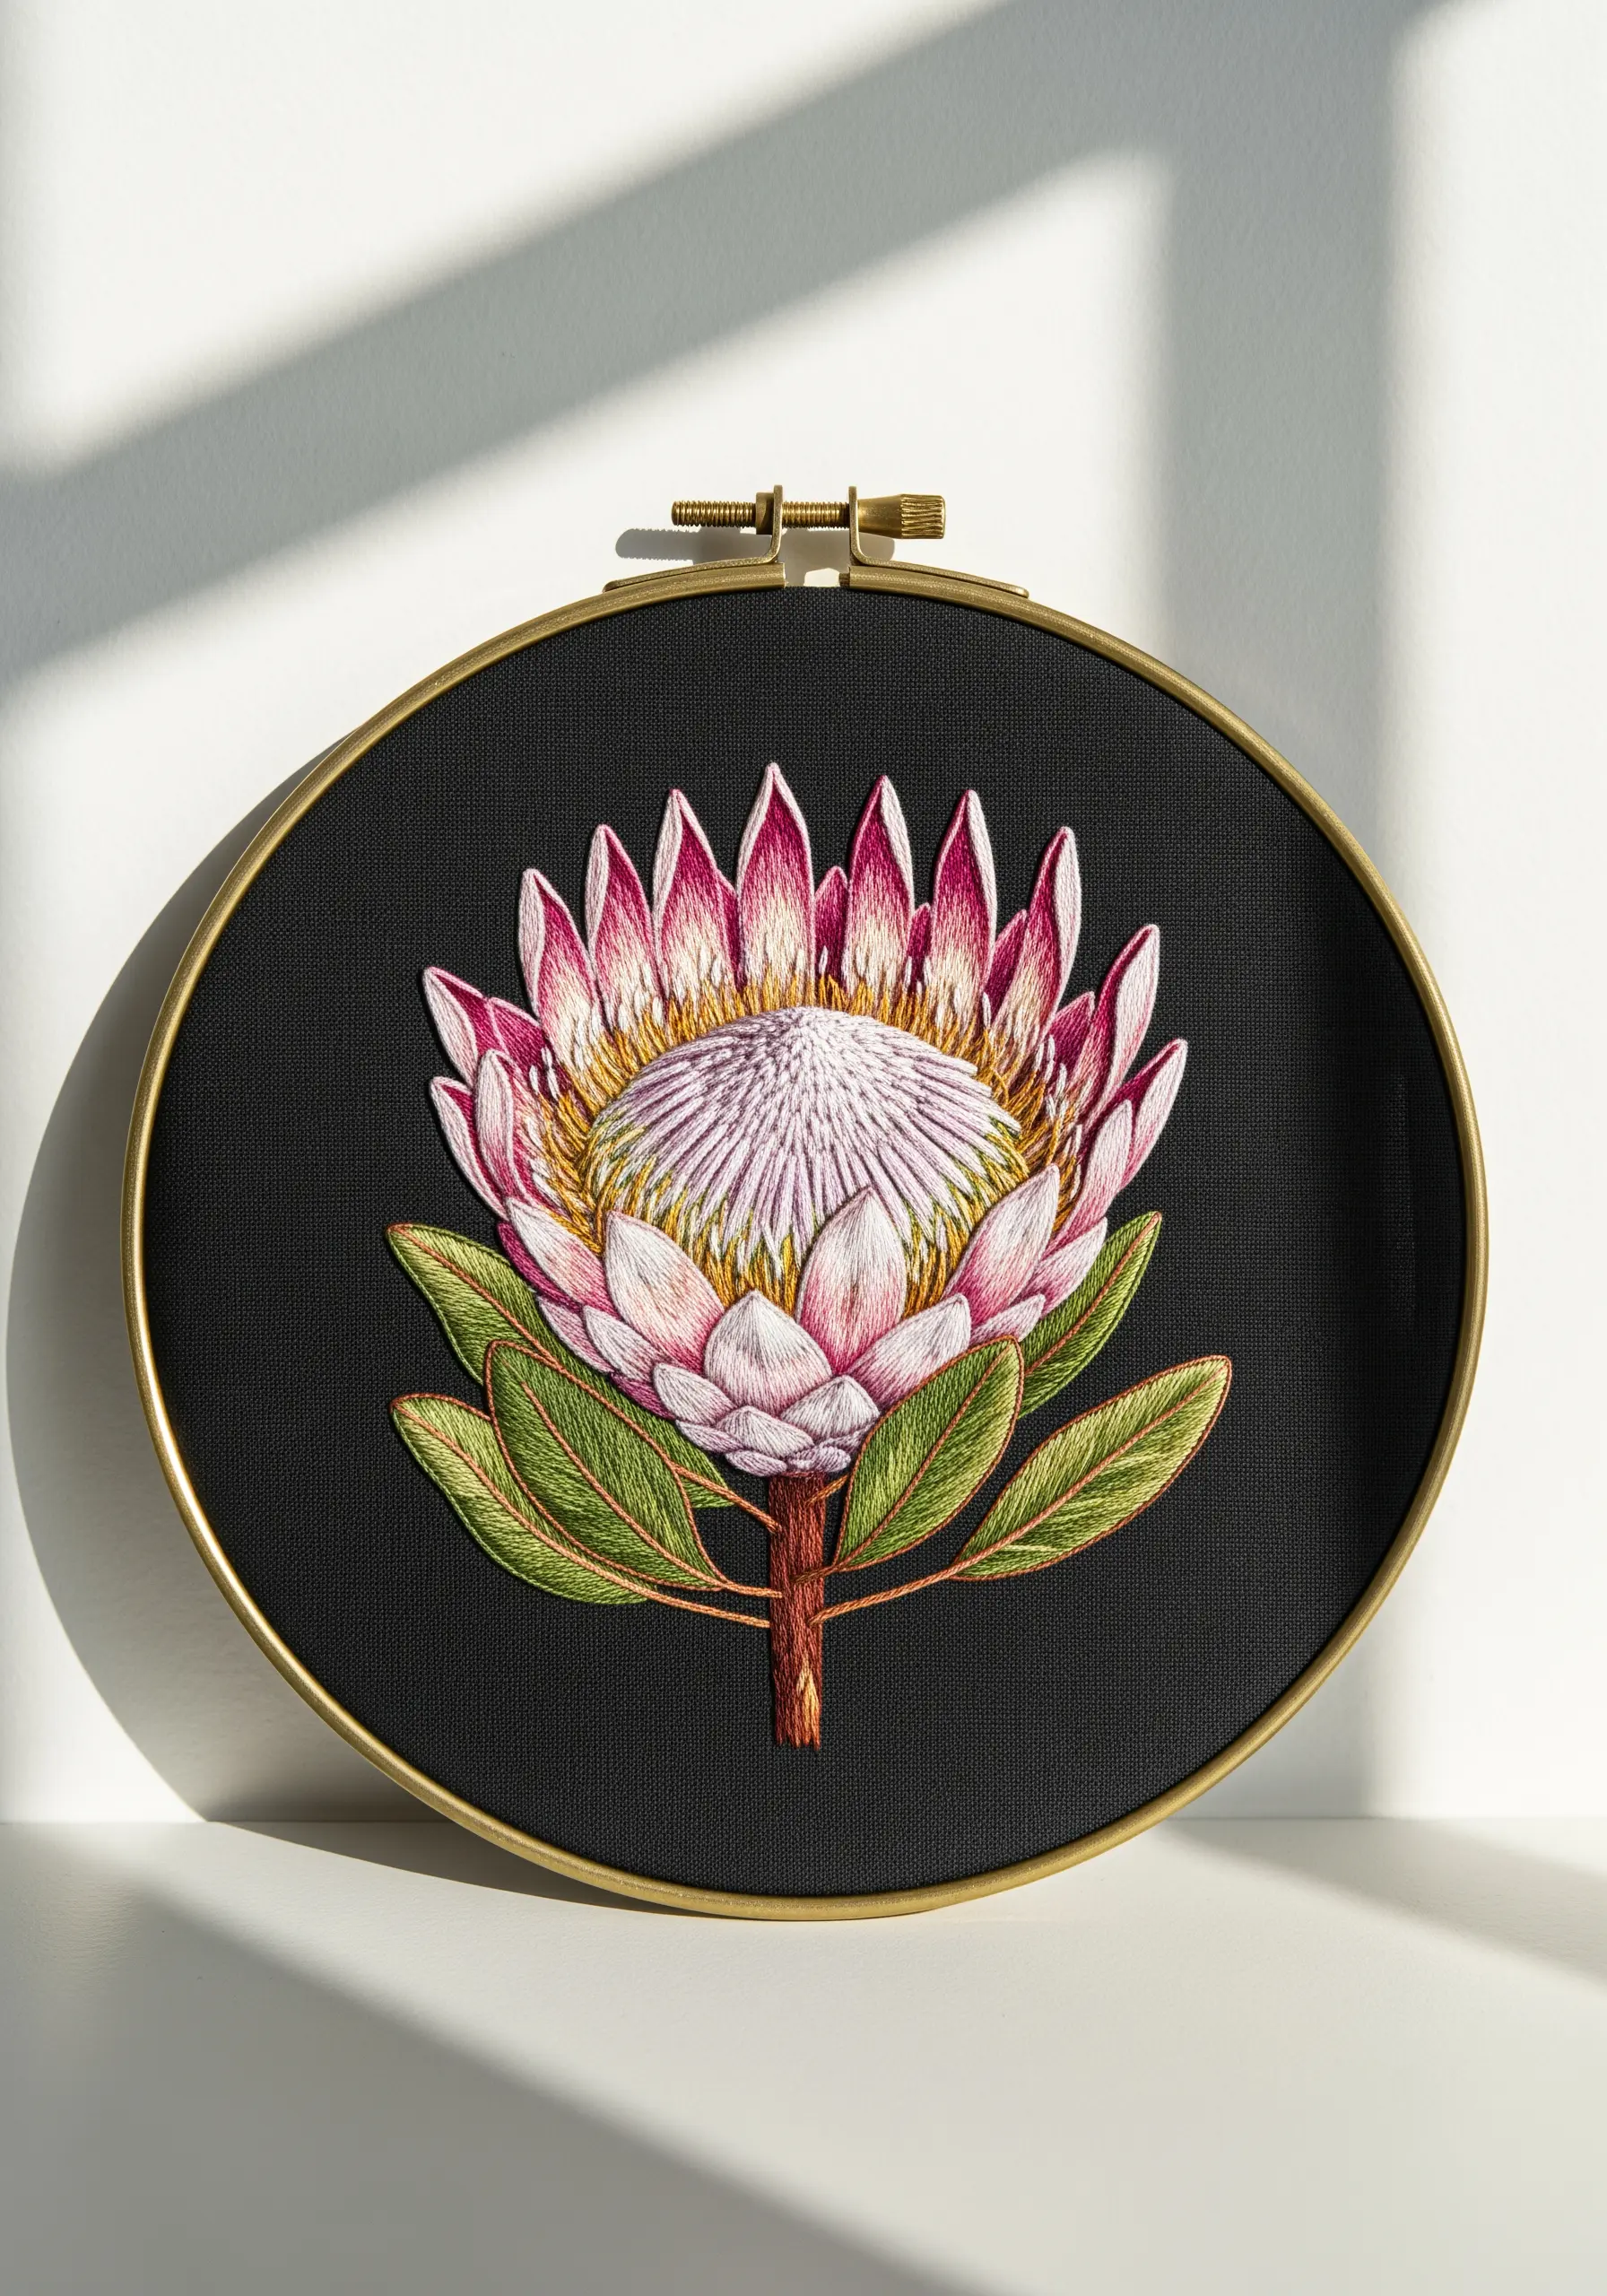
Achieve the smooth, gradient shading of a Protea flower by mastering the long-and-short stitch, the core of thread painting.
Work in rows, staggering your stitch lengths to blend colors seamlessly. Use a single strand of floss for the finest control over your gradients.
Map out your color zones beforehand. Start with the lightest shade in one area and gradually introduce darker tones to create shadows and form.
The key is patience and overlapping your stitches just enough to create a flawless transition, like brushstrokes in a painting.
With these abstract thread painting ideas, you can turn any photograph into a stitched masterpiece.
16. Create Fluffy Snow with Wool Roving
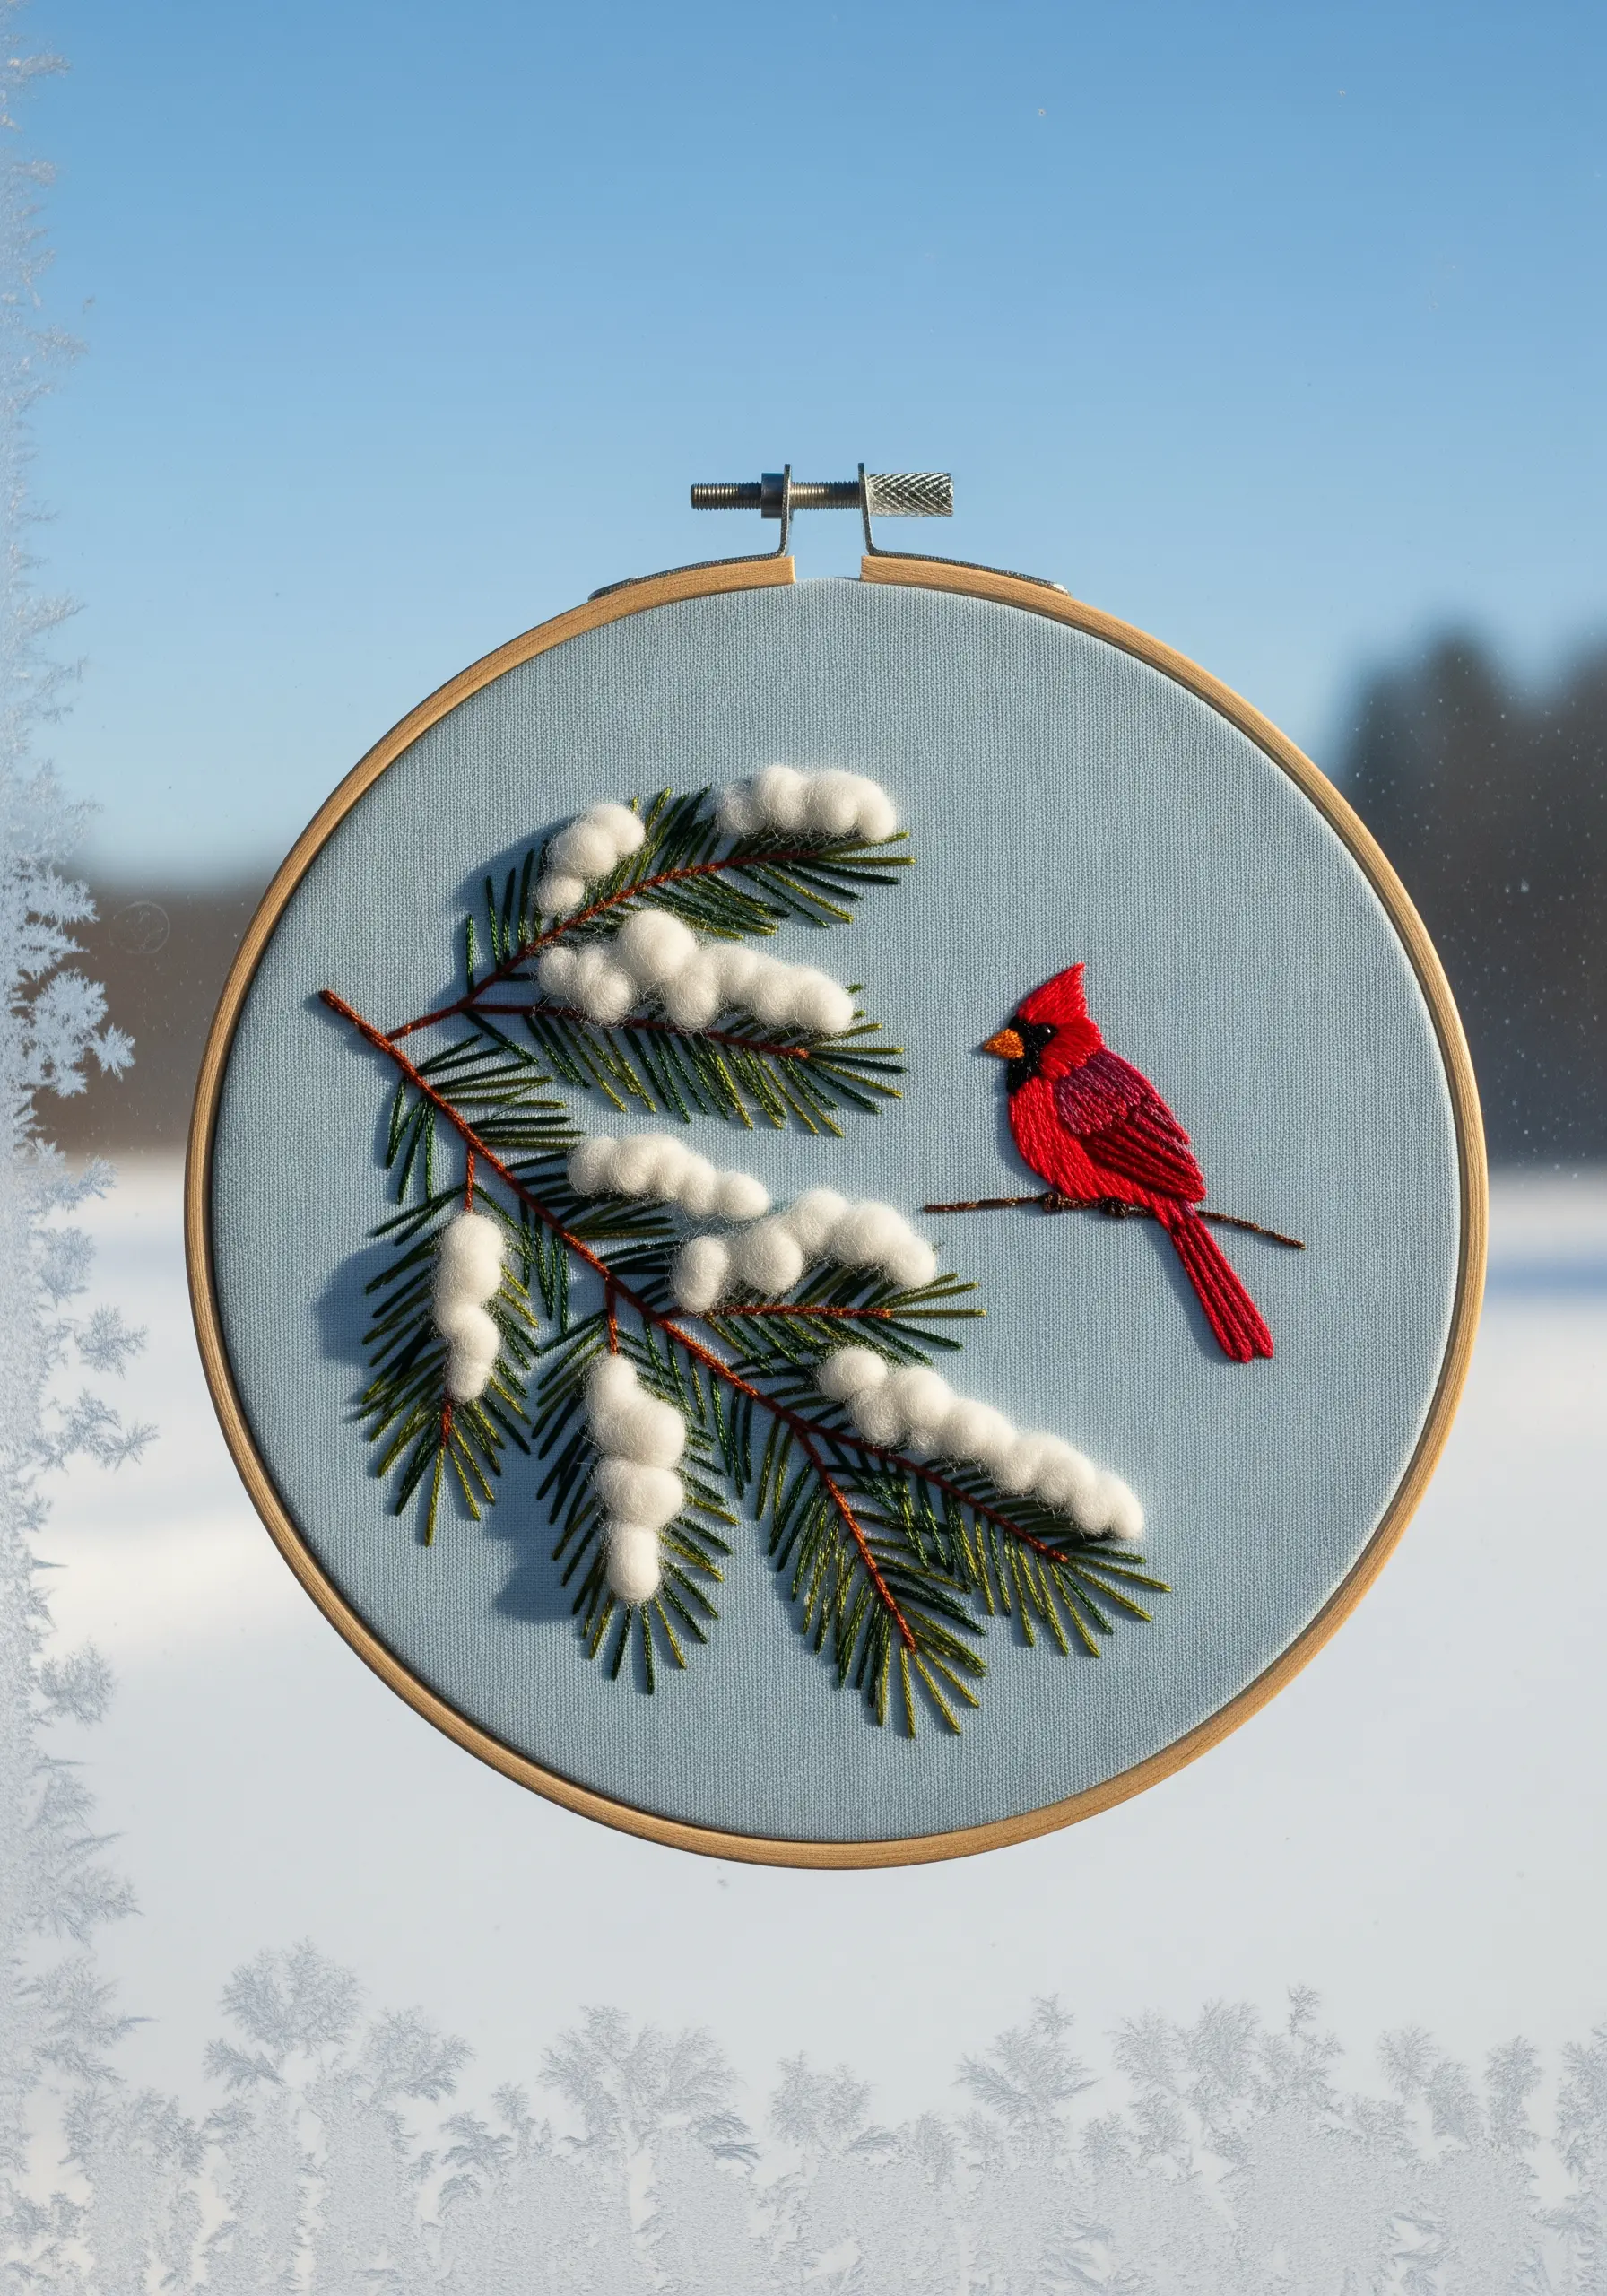
For a soft, three-dimensional snow effect on pine branches, incorporate needle felting techniques into your embroidery.
Take small tufts of white wool roving and use a felting needle to repeatedly poke them into your base fabric until the fibers lock in place.
This creates a wonderfully soft, mounded texture that looks far more realistic than French knots or satin stitch for fresh-fallen snow.
Embroider the pine needles and the cardinal first, then add the felted snow on top to make it look like it has just settled.
This mixed-media approach is perfect for seasonal embroidery decor that captures the magic of winter.
17. Design a Textured Undersea Window Curtain
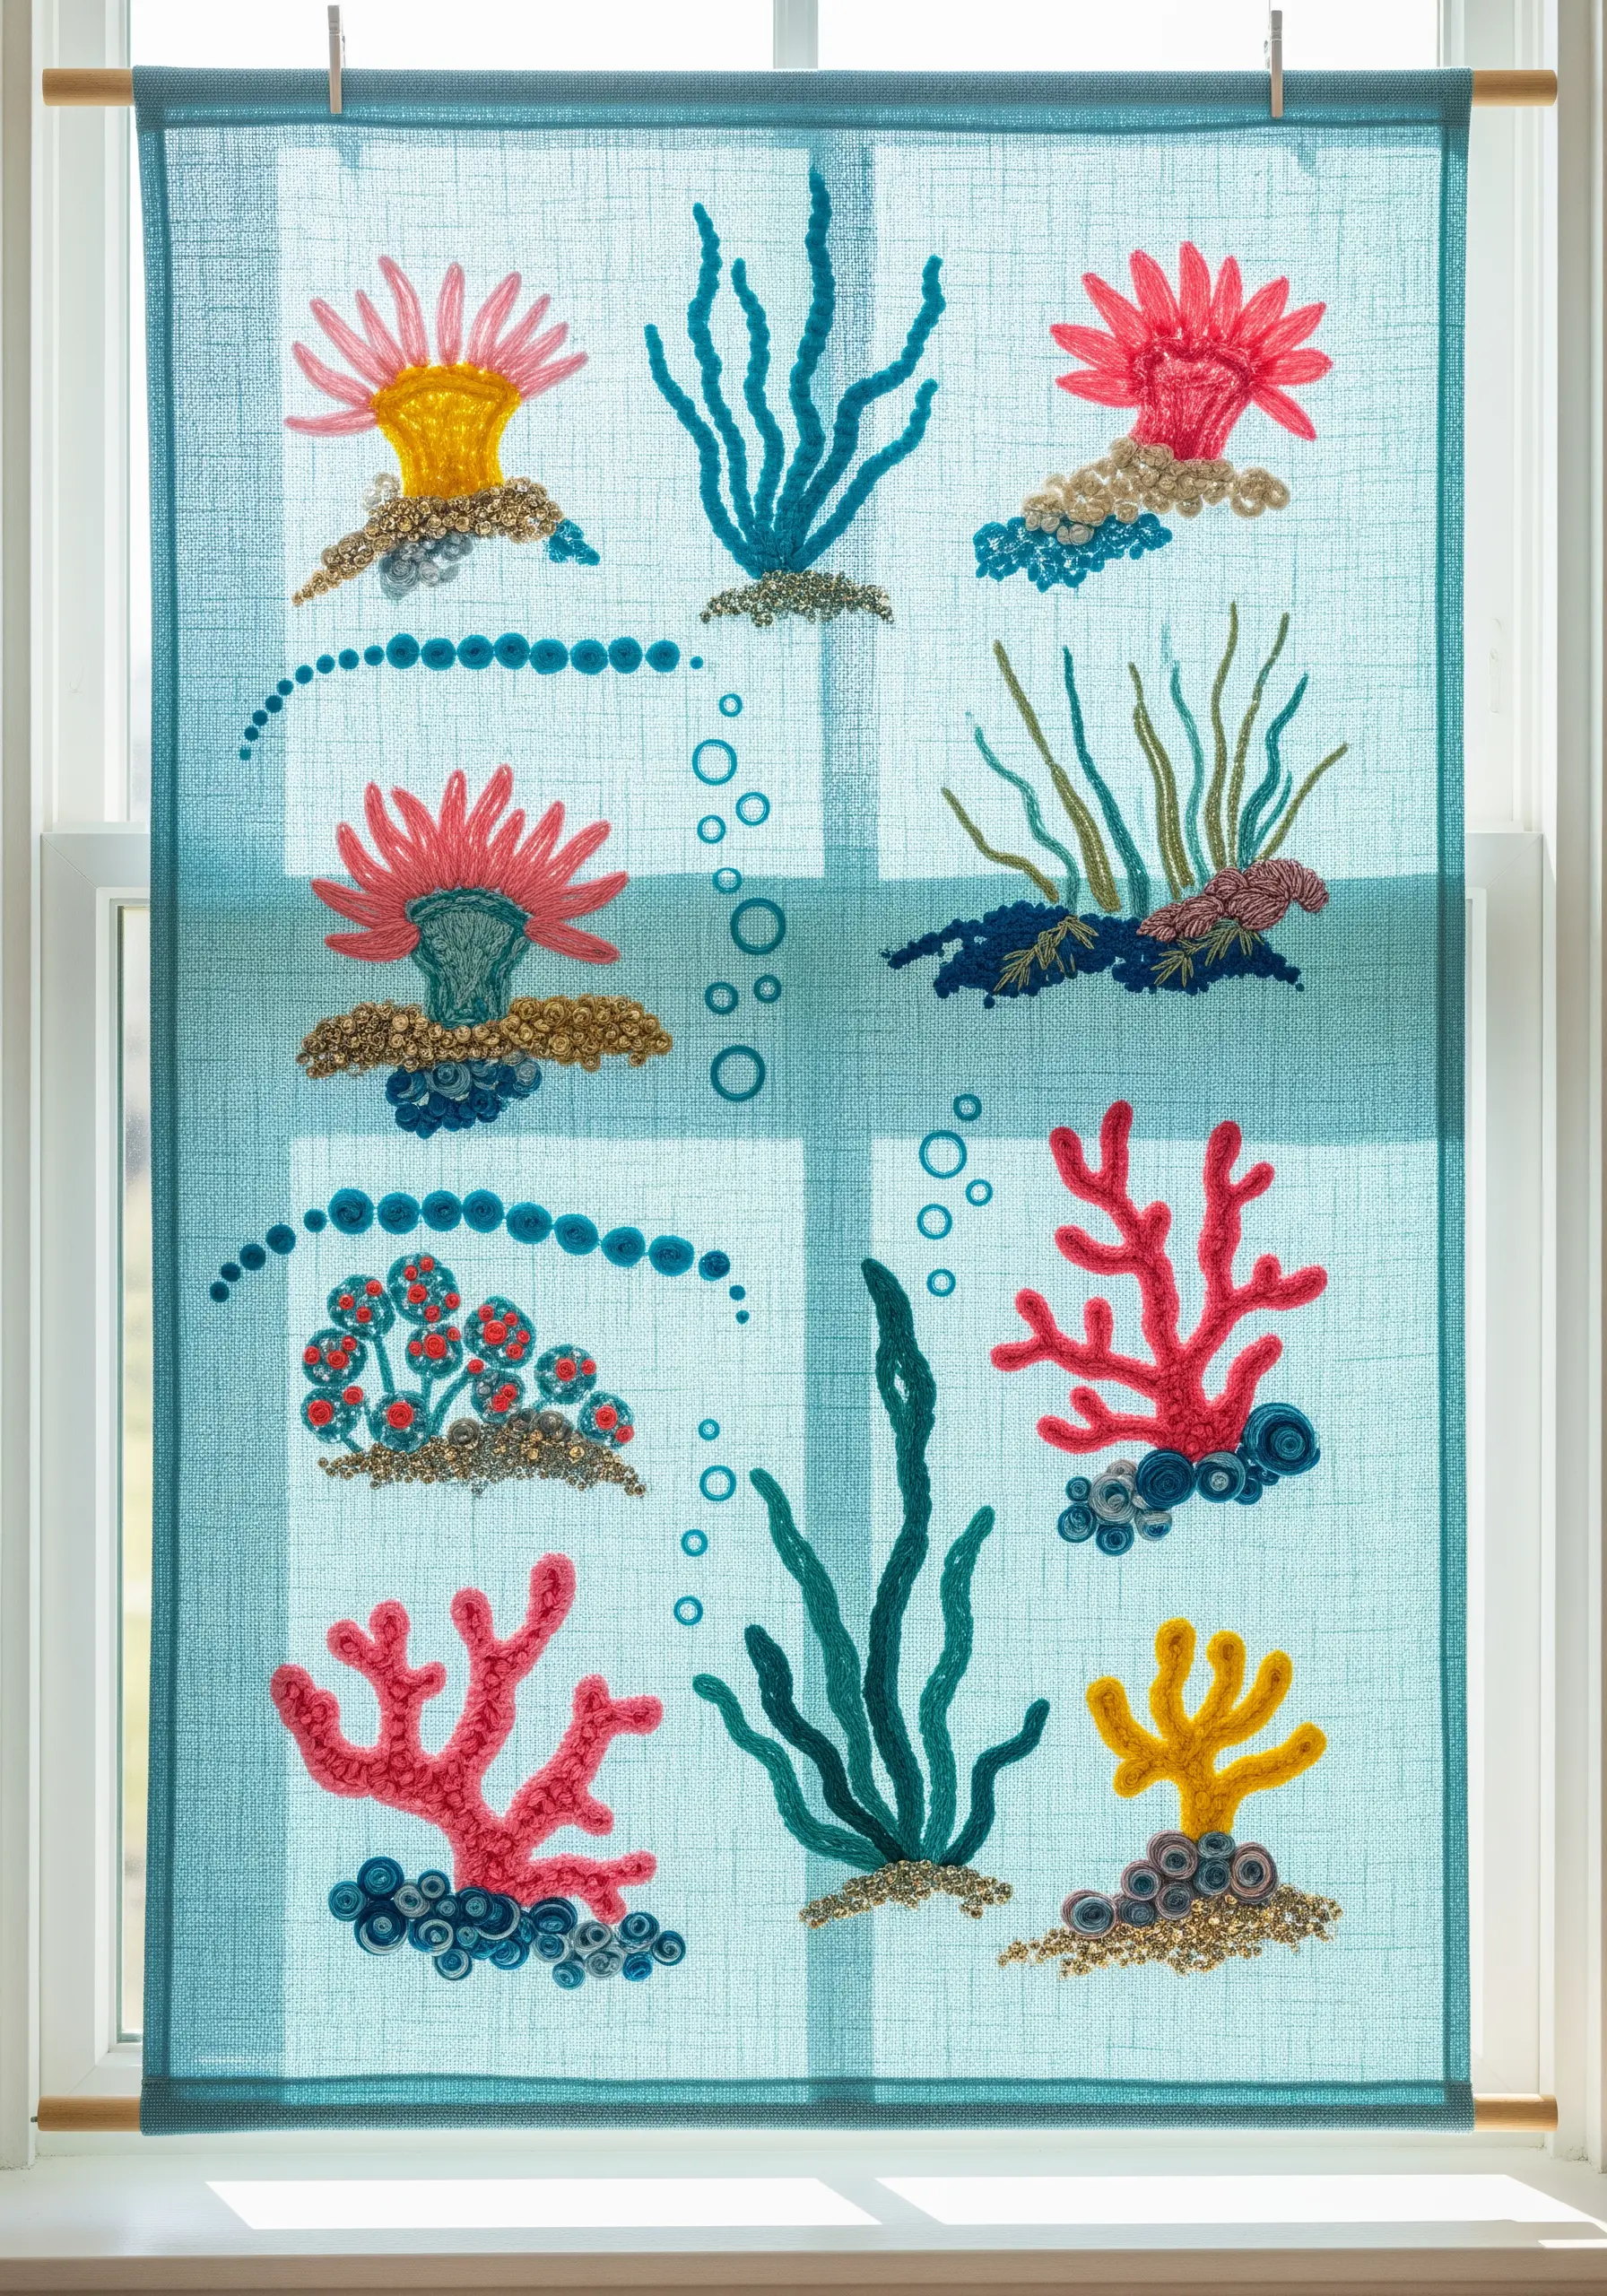
Transform a simple linen curtain into a vibrant coral reef using a variety of textural stitches and fibers.
Use thick, chunky wool yarn and couching stitches for the seaweed to give it dimension and movement.
For the coral bases, experiment with clusters of bullion knots or colonial knots, which create dense, bobbled textures resembling real coral formations.
Incorporate beads or metallic threads sparingly to mimic the sparkle of light filtering through water.
These ocean-inspired hoop embroidery ideas work beautifully on a larger scale like a curtain panel.
18. Capture Elegance with Minimalist Line Art
Sometimes, the most impactful designs are the simplest. A single, continuous line can convey shape and movement with incredible elegance.
Choose a high-contrast combination, like dark thread on light fabric, to make the linework the star of the show.
Use a smooth, consistent stitch like a whipped backstitch or a stem stitch to ensure your lines are fluid and unbroken.
The key to success is in the tension—keep it even to avoid any puckering, especially around curves.
You can create beautiful one-line embroidery wall arts that feel both modern and timeless.
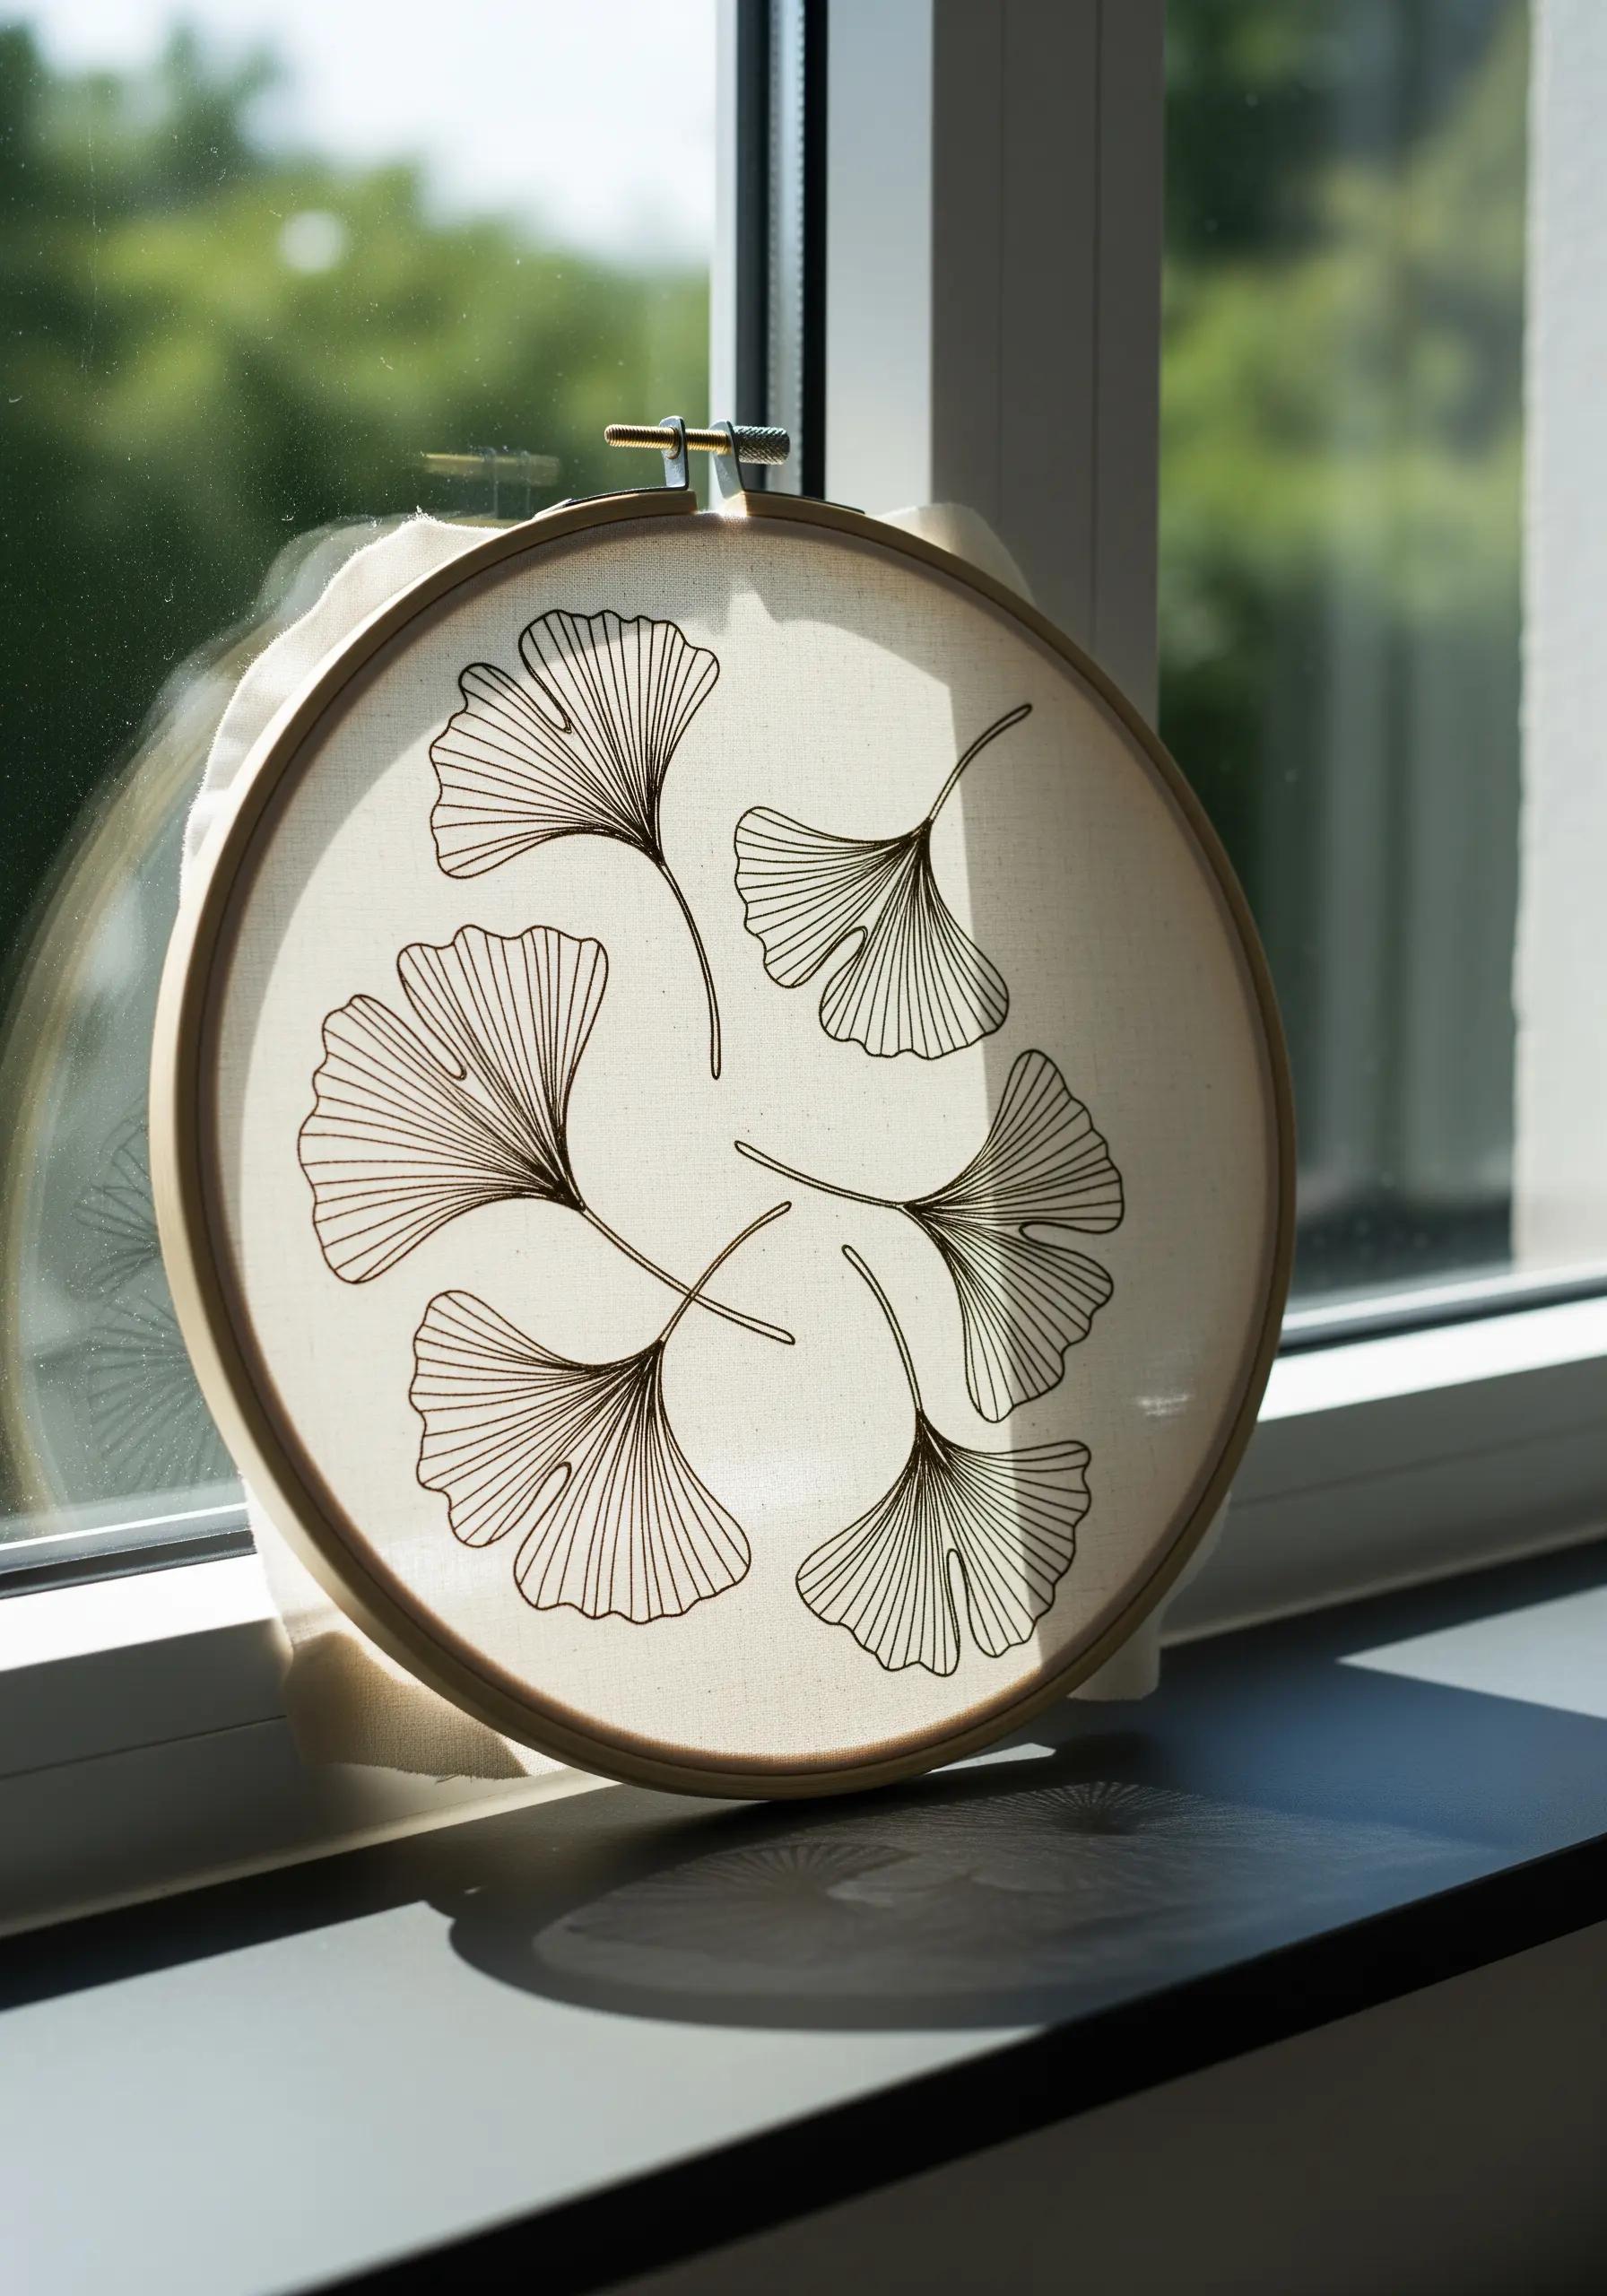
19. Create Soft Highlights on Eucalyptus Leaves
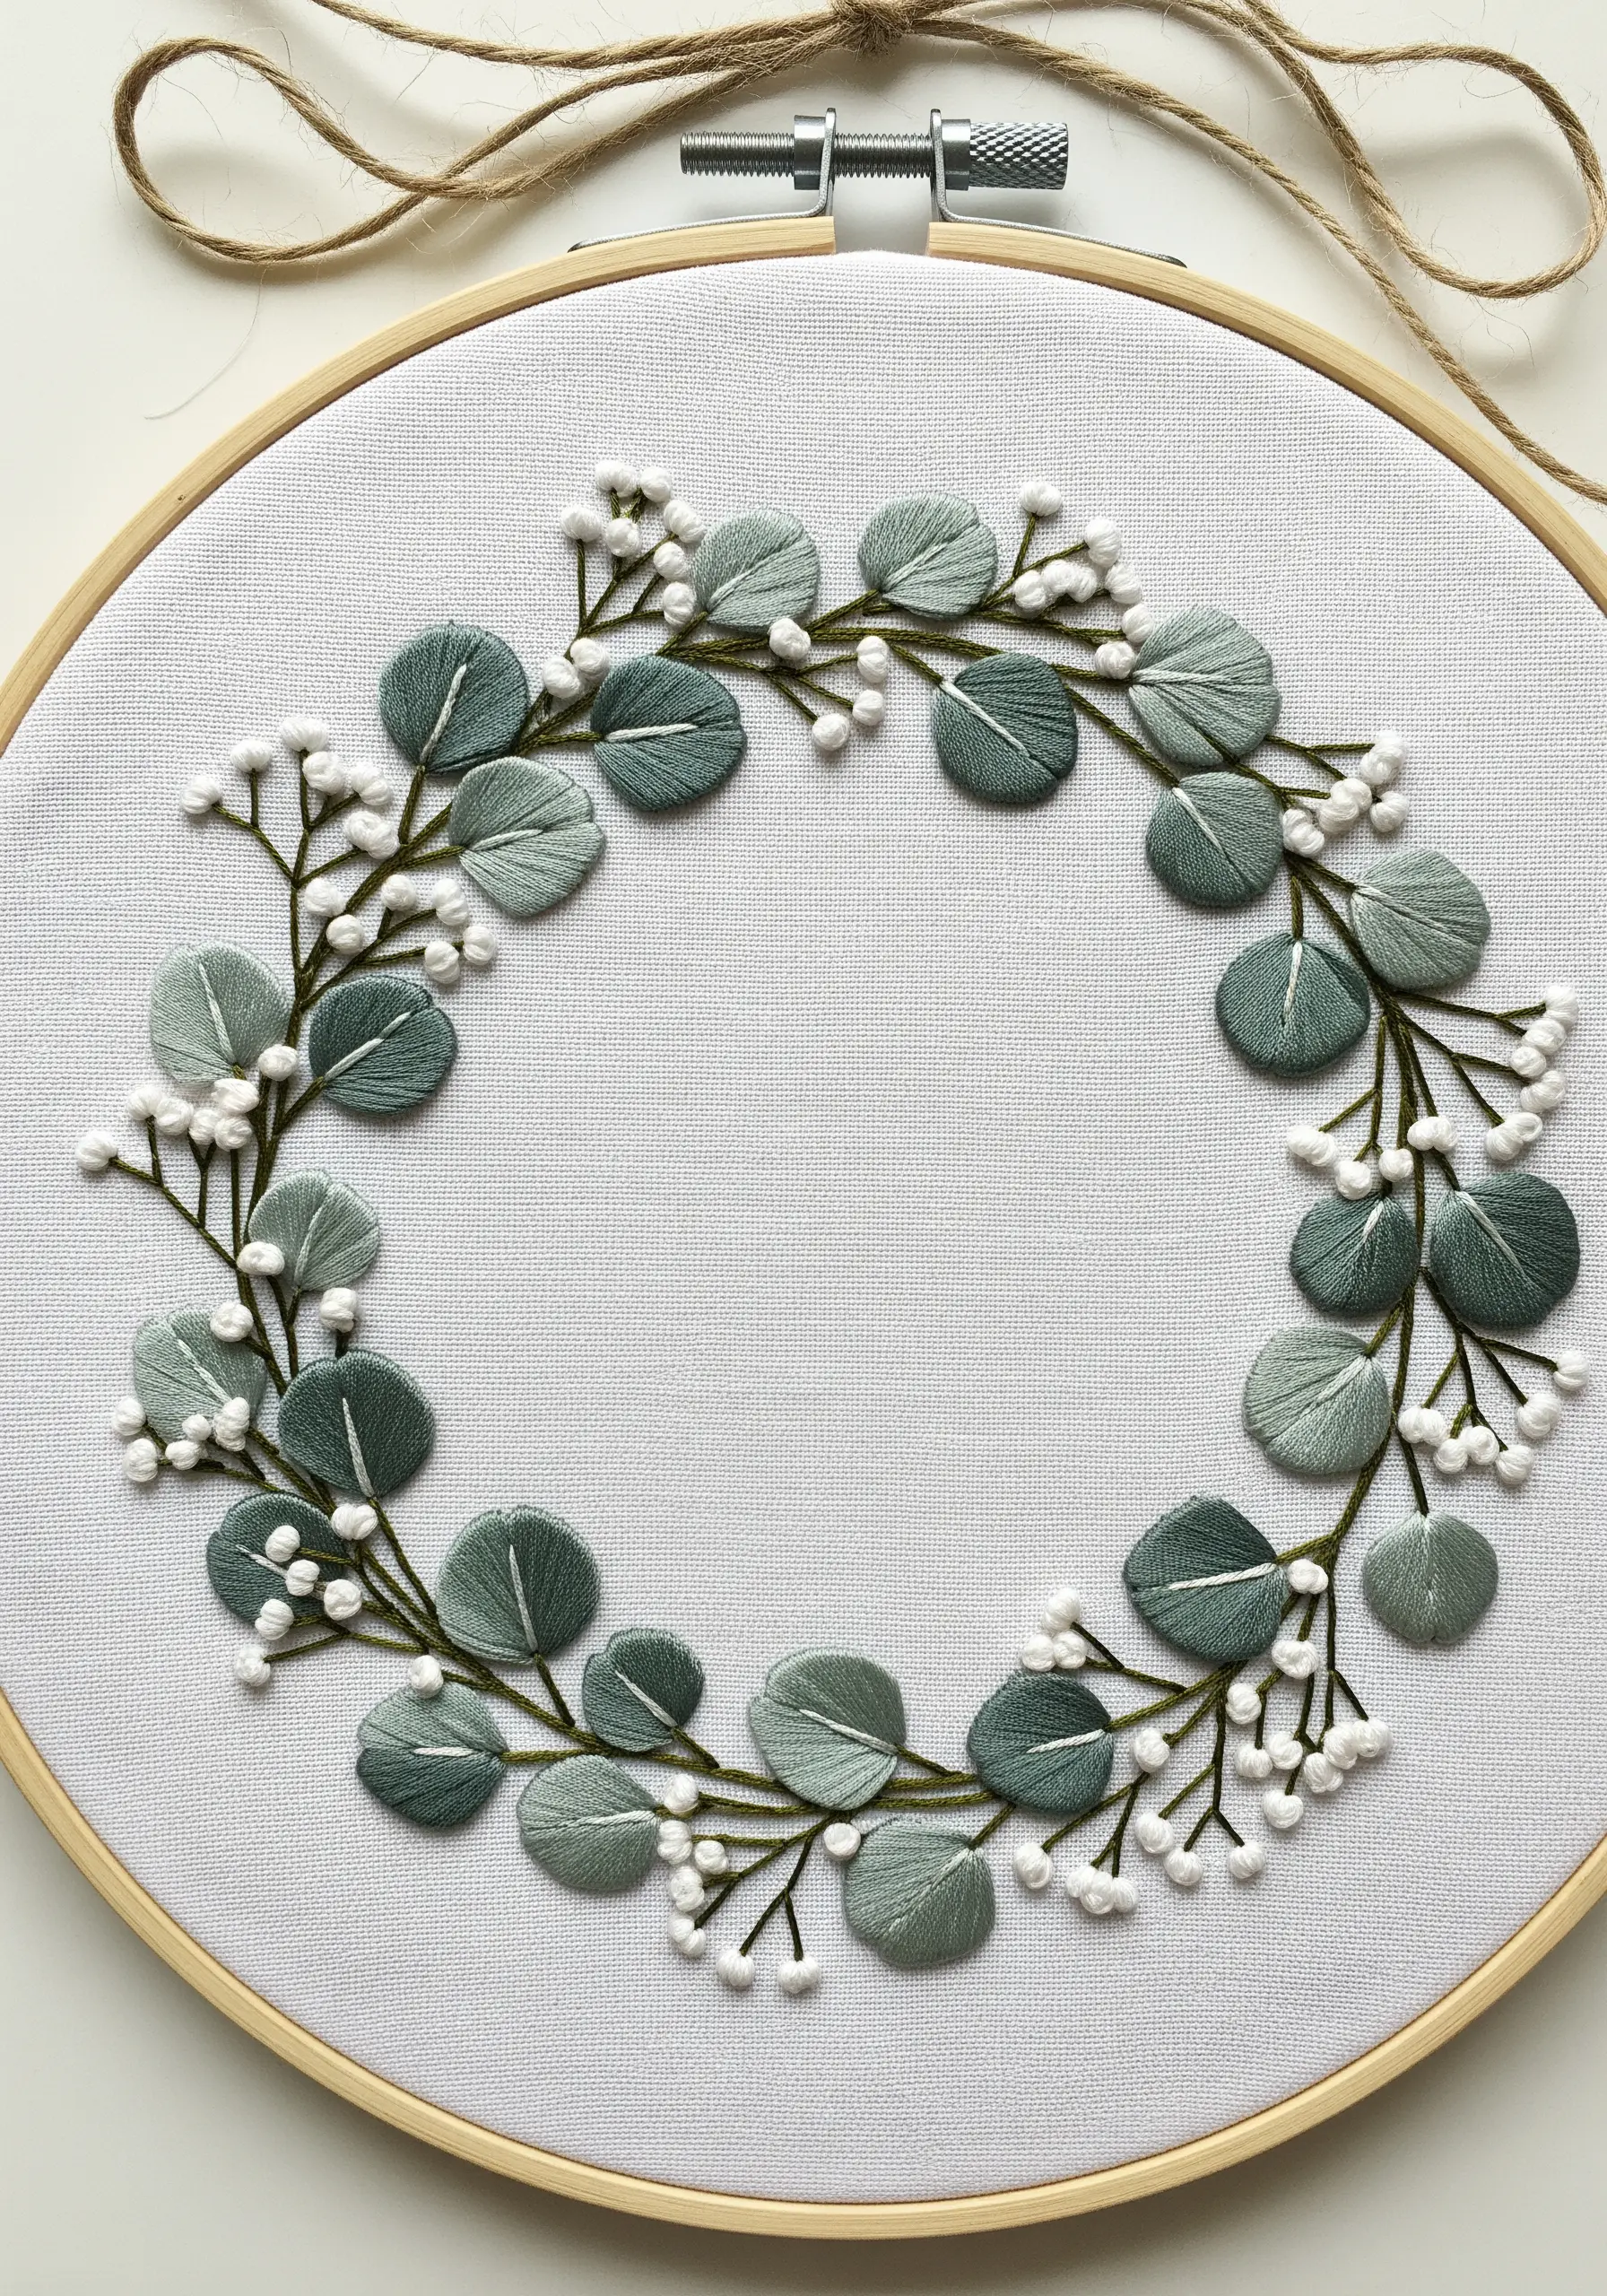
To replicate the soft, silvery sheen of eucalyptus leaves, use satin stitch with a central dividing line.
Instead of filling the entire leaf with one block of stitches, work each half separately, angling your stitches down and away from a central stem stitch line.
This creates a subtle ridge down the middle of the leaf, which catches the light and mimics a real leaf’s vein and structure.
Use a matte cotton floss in several muted sage and blue-green tones for an authentic, soft finish.
These gentle botanical embroidery stitches are perfect for creating a peaceful, calming wreath.
20. Build a Dense Sunflower Center with Knots
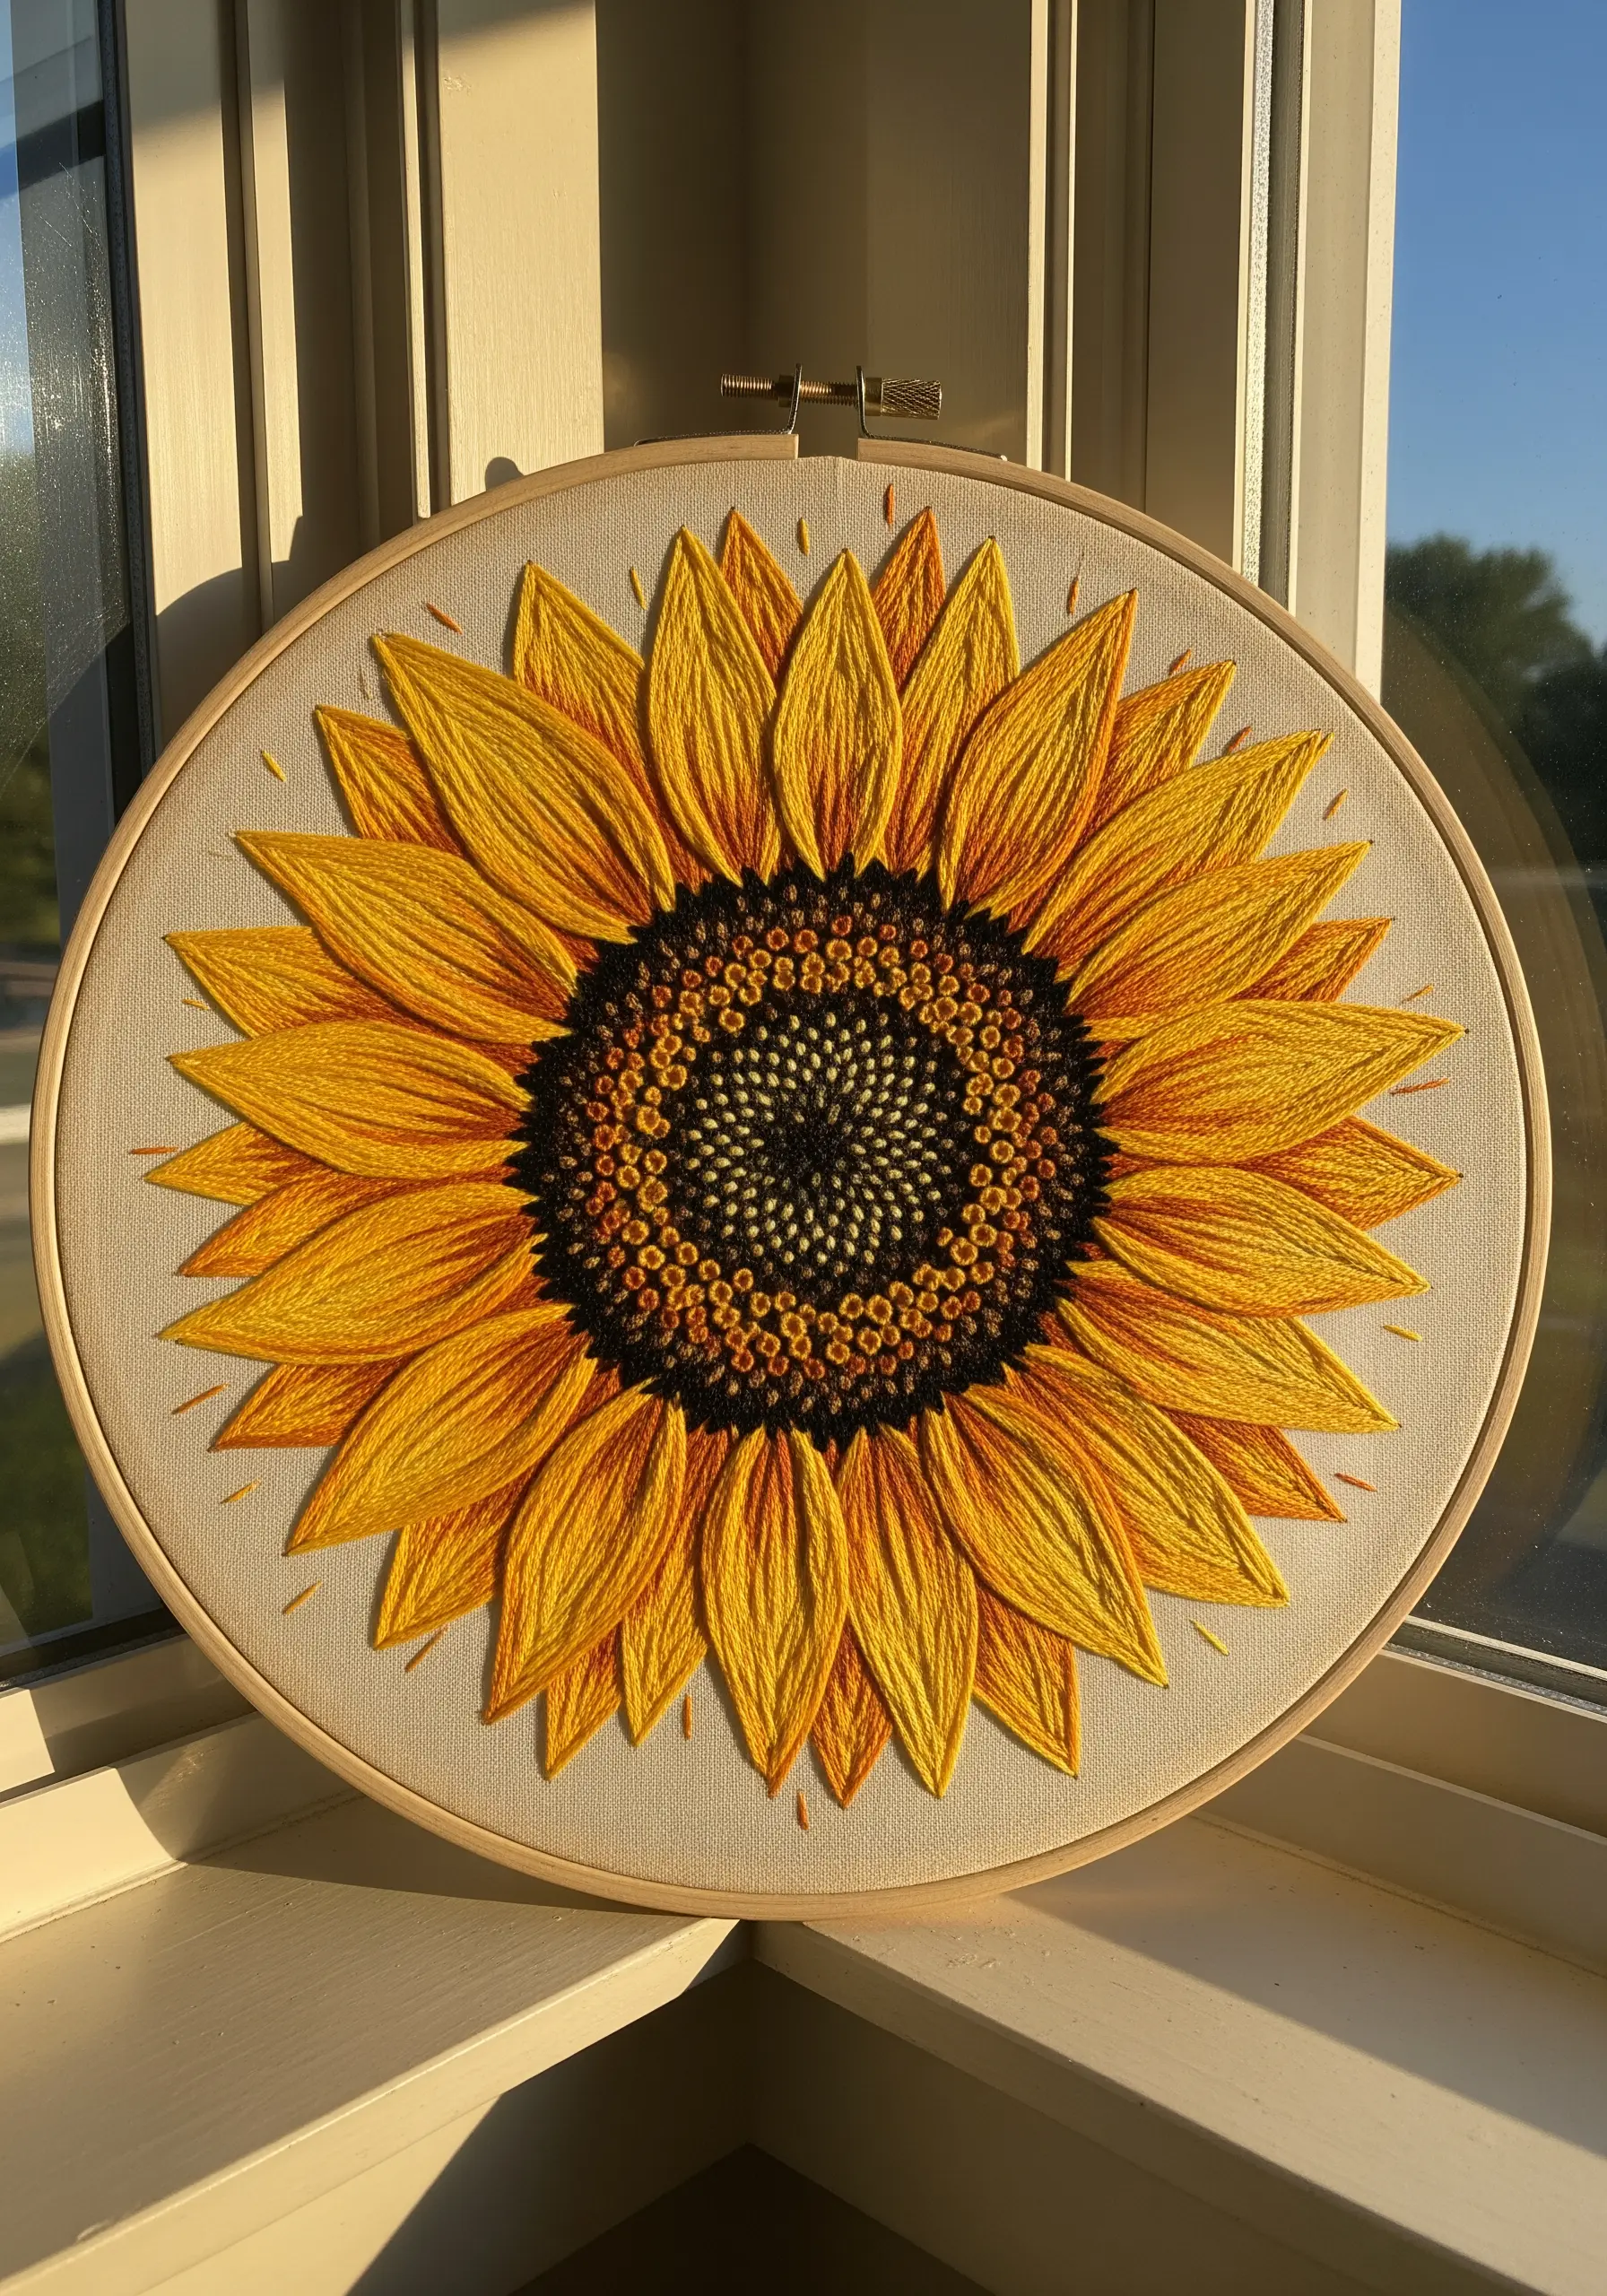
The key to a convincing sunflower is creating a dense, seed-packed center with layers of texture.
Fill the outer ring of the center with dark brown or black French knots, packing them tightly together.
For the inner section, switch to a lighter brown or yellow-gold thread and use colonial knots, which are slightly flatter and rounder than French knots.
This subtle shift in knot style and color creates the illusion of depth and the spiral pattern of seeds.
The contrast between the highly textured center and the smooth satin-stitched petals is what makes the flower pop.
21. Combine Appliqué with Delicate Embroidery
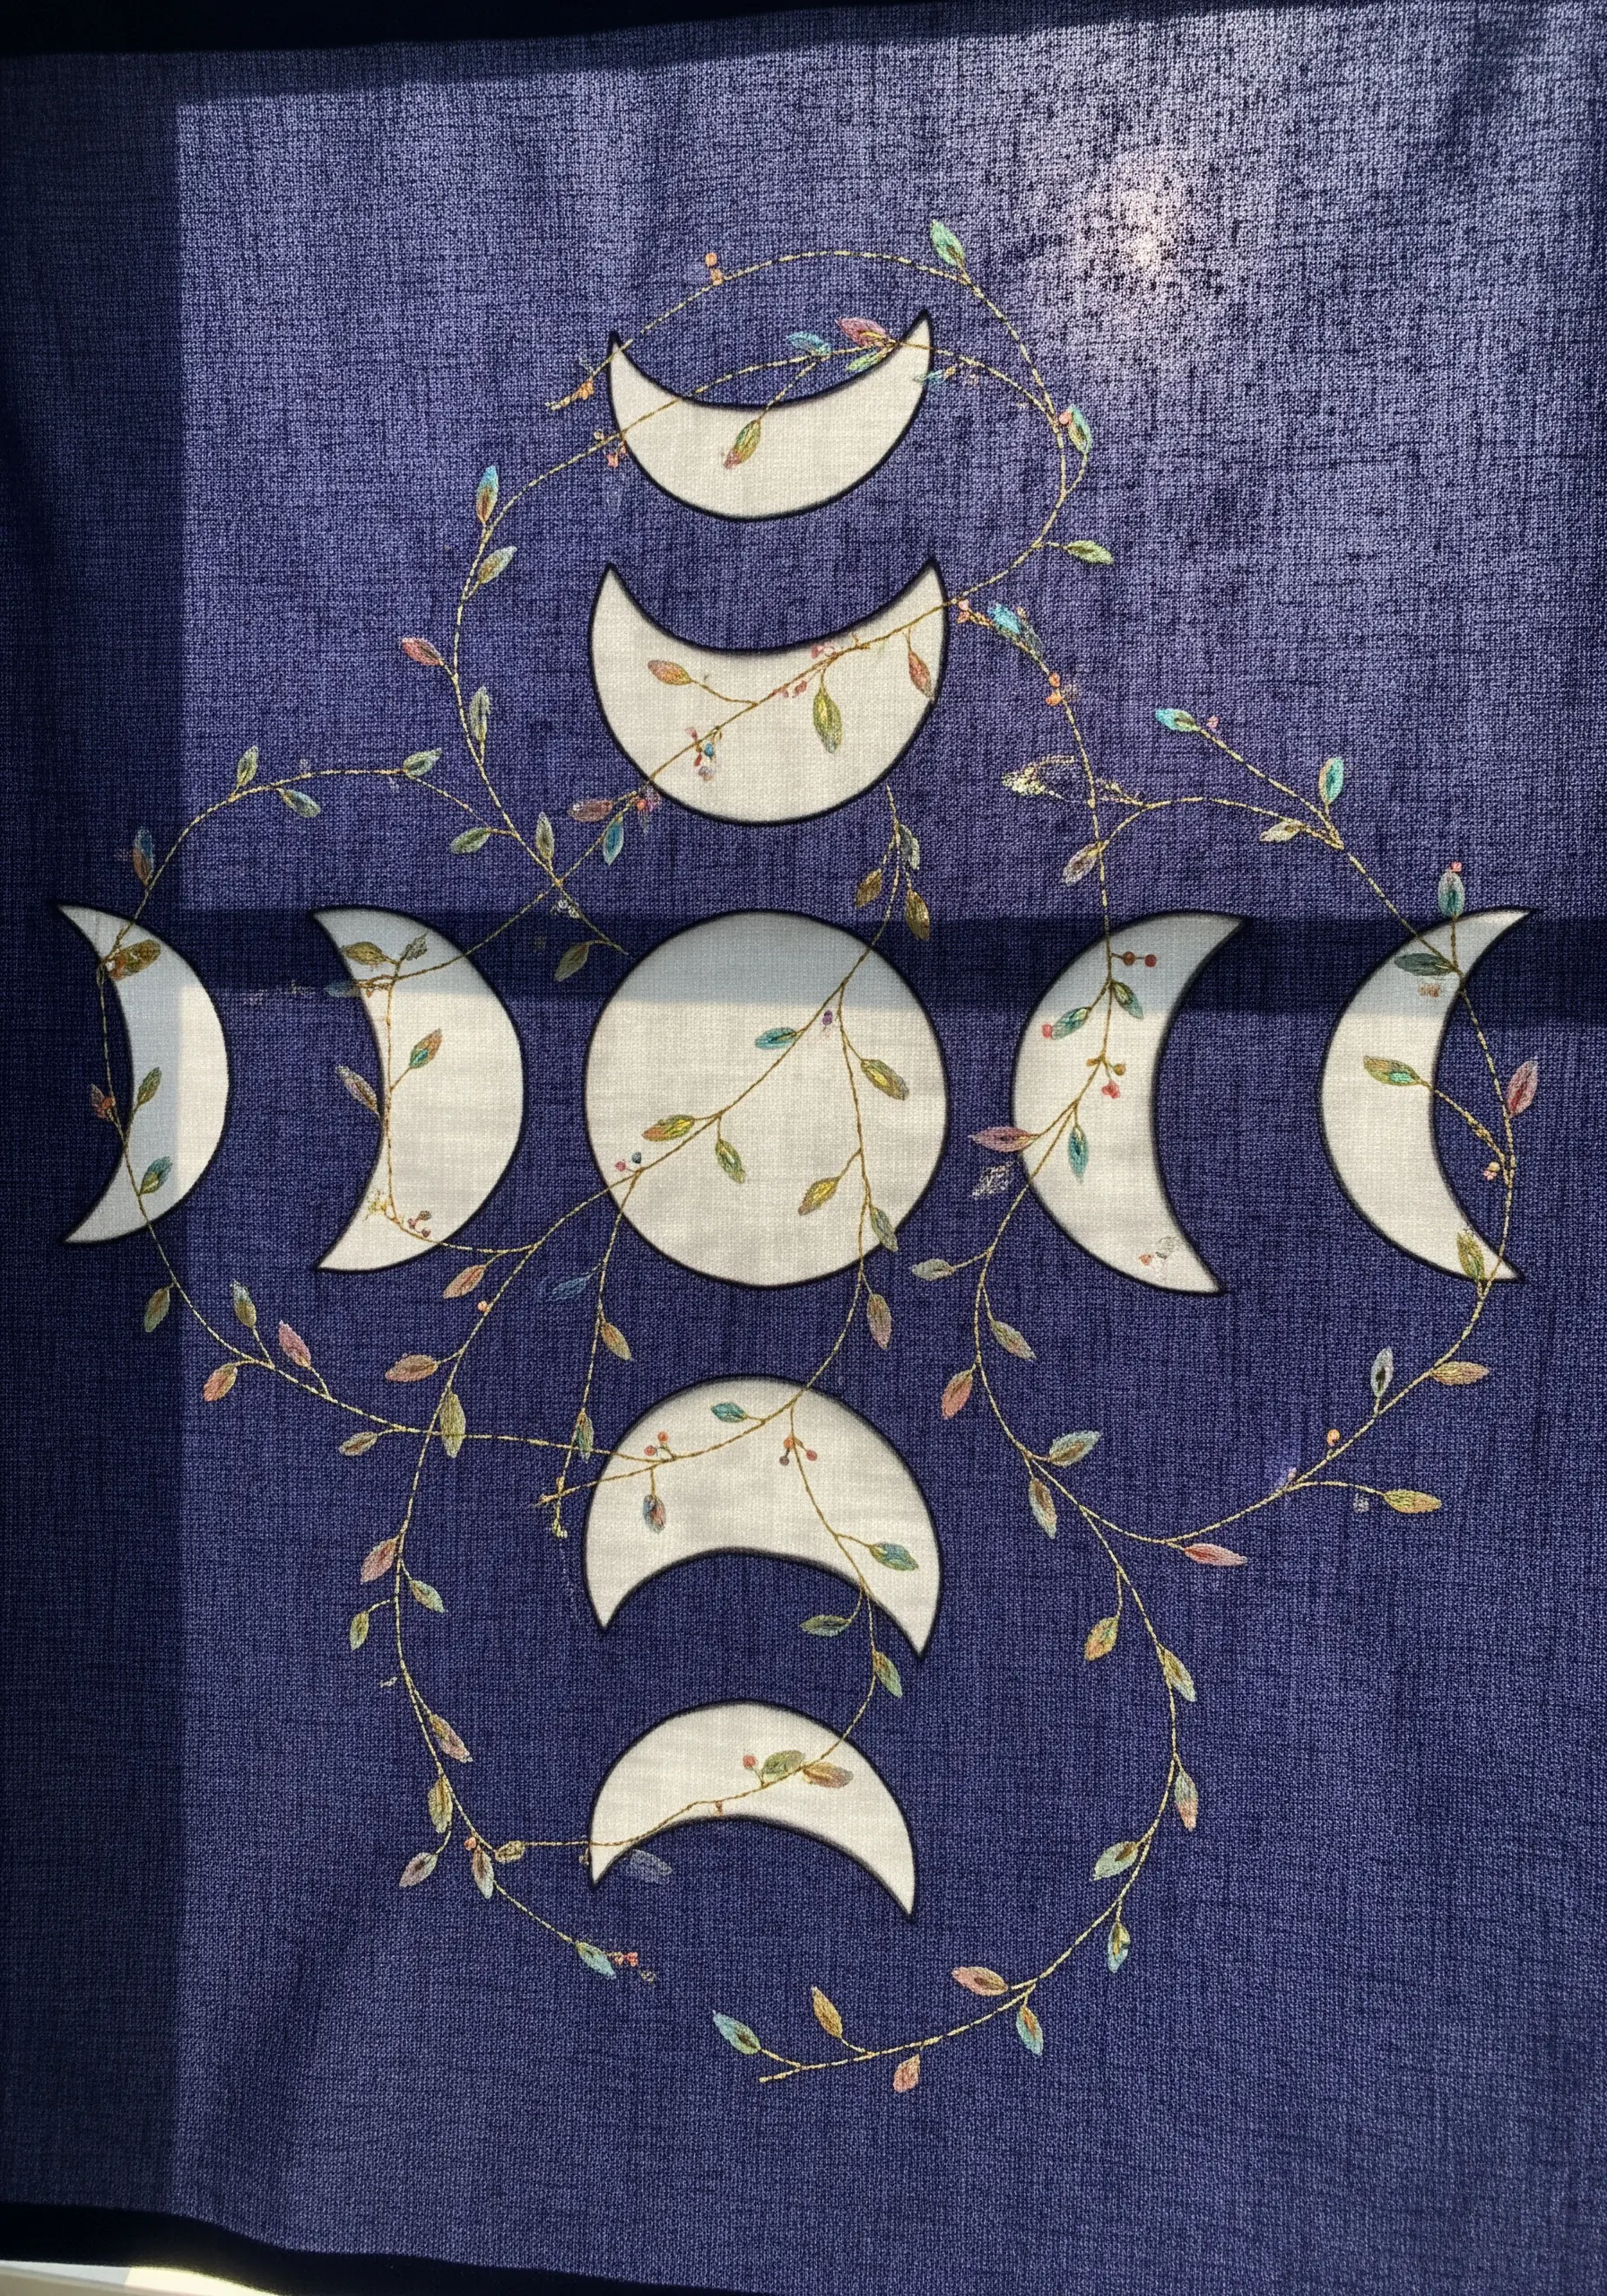
For crisp shapes like these moon phases, use appliqué to create a solid base before adding your stitched details.
Cut your moon shapes from a piece of white cotton fabric, using a fusible backing like Heat’n Bond to temporarily adhere them to your dark background fabric.
Secure the edges of each appliqué piece with a neat, tiny blanket stitch using a matching white thread.
Once the moons are secure, you can embroider the delicate vines and leaves over them, using variegated thread to add subtle color shifts.
This technique is surprisingly effective, almost like making scrap fabric collage embroidery.
22. Use Padding for Plump, Realistic Berries
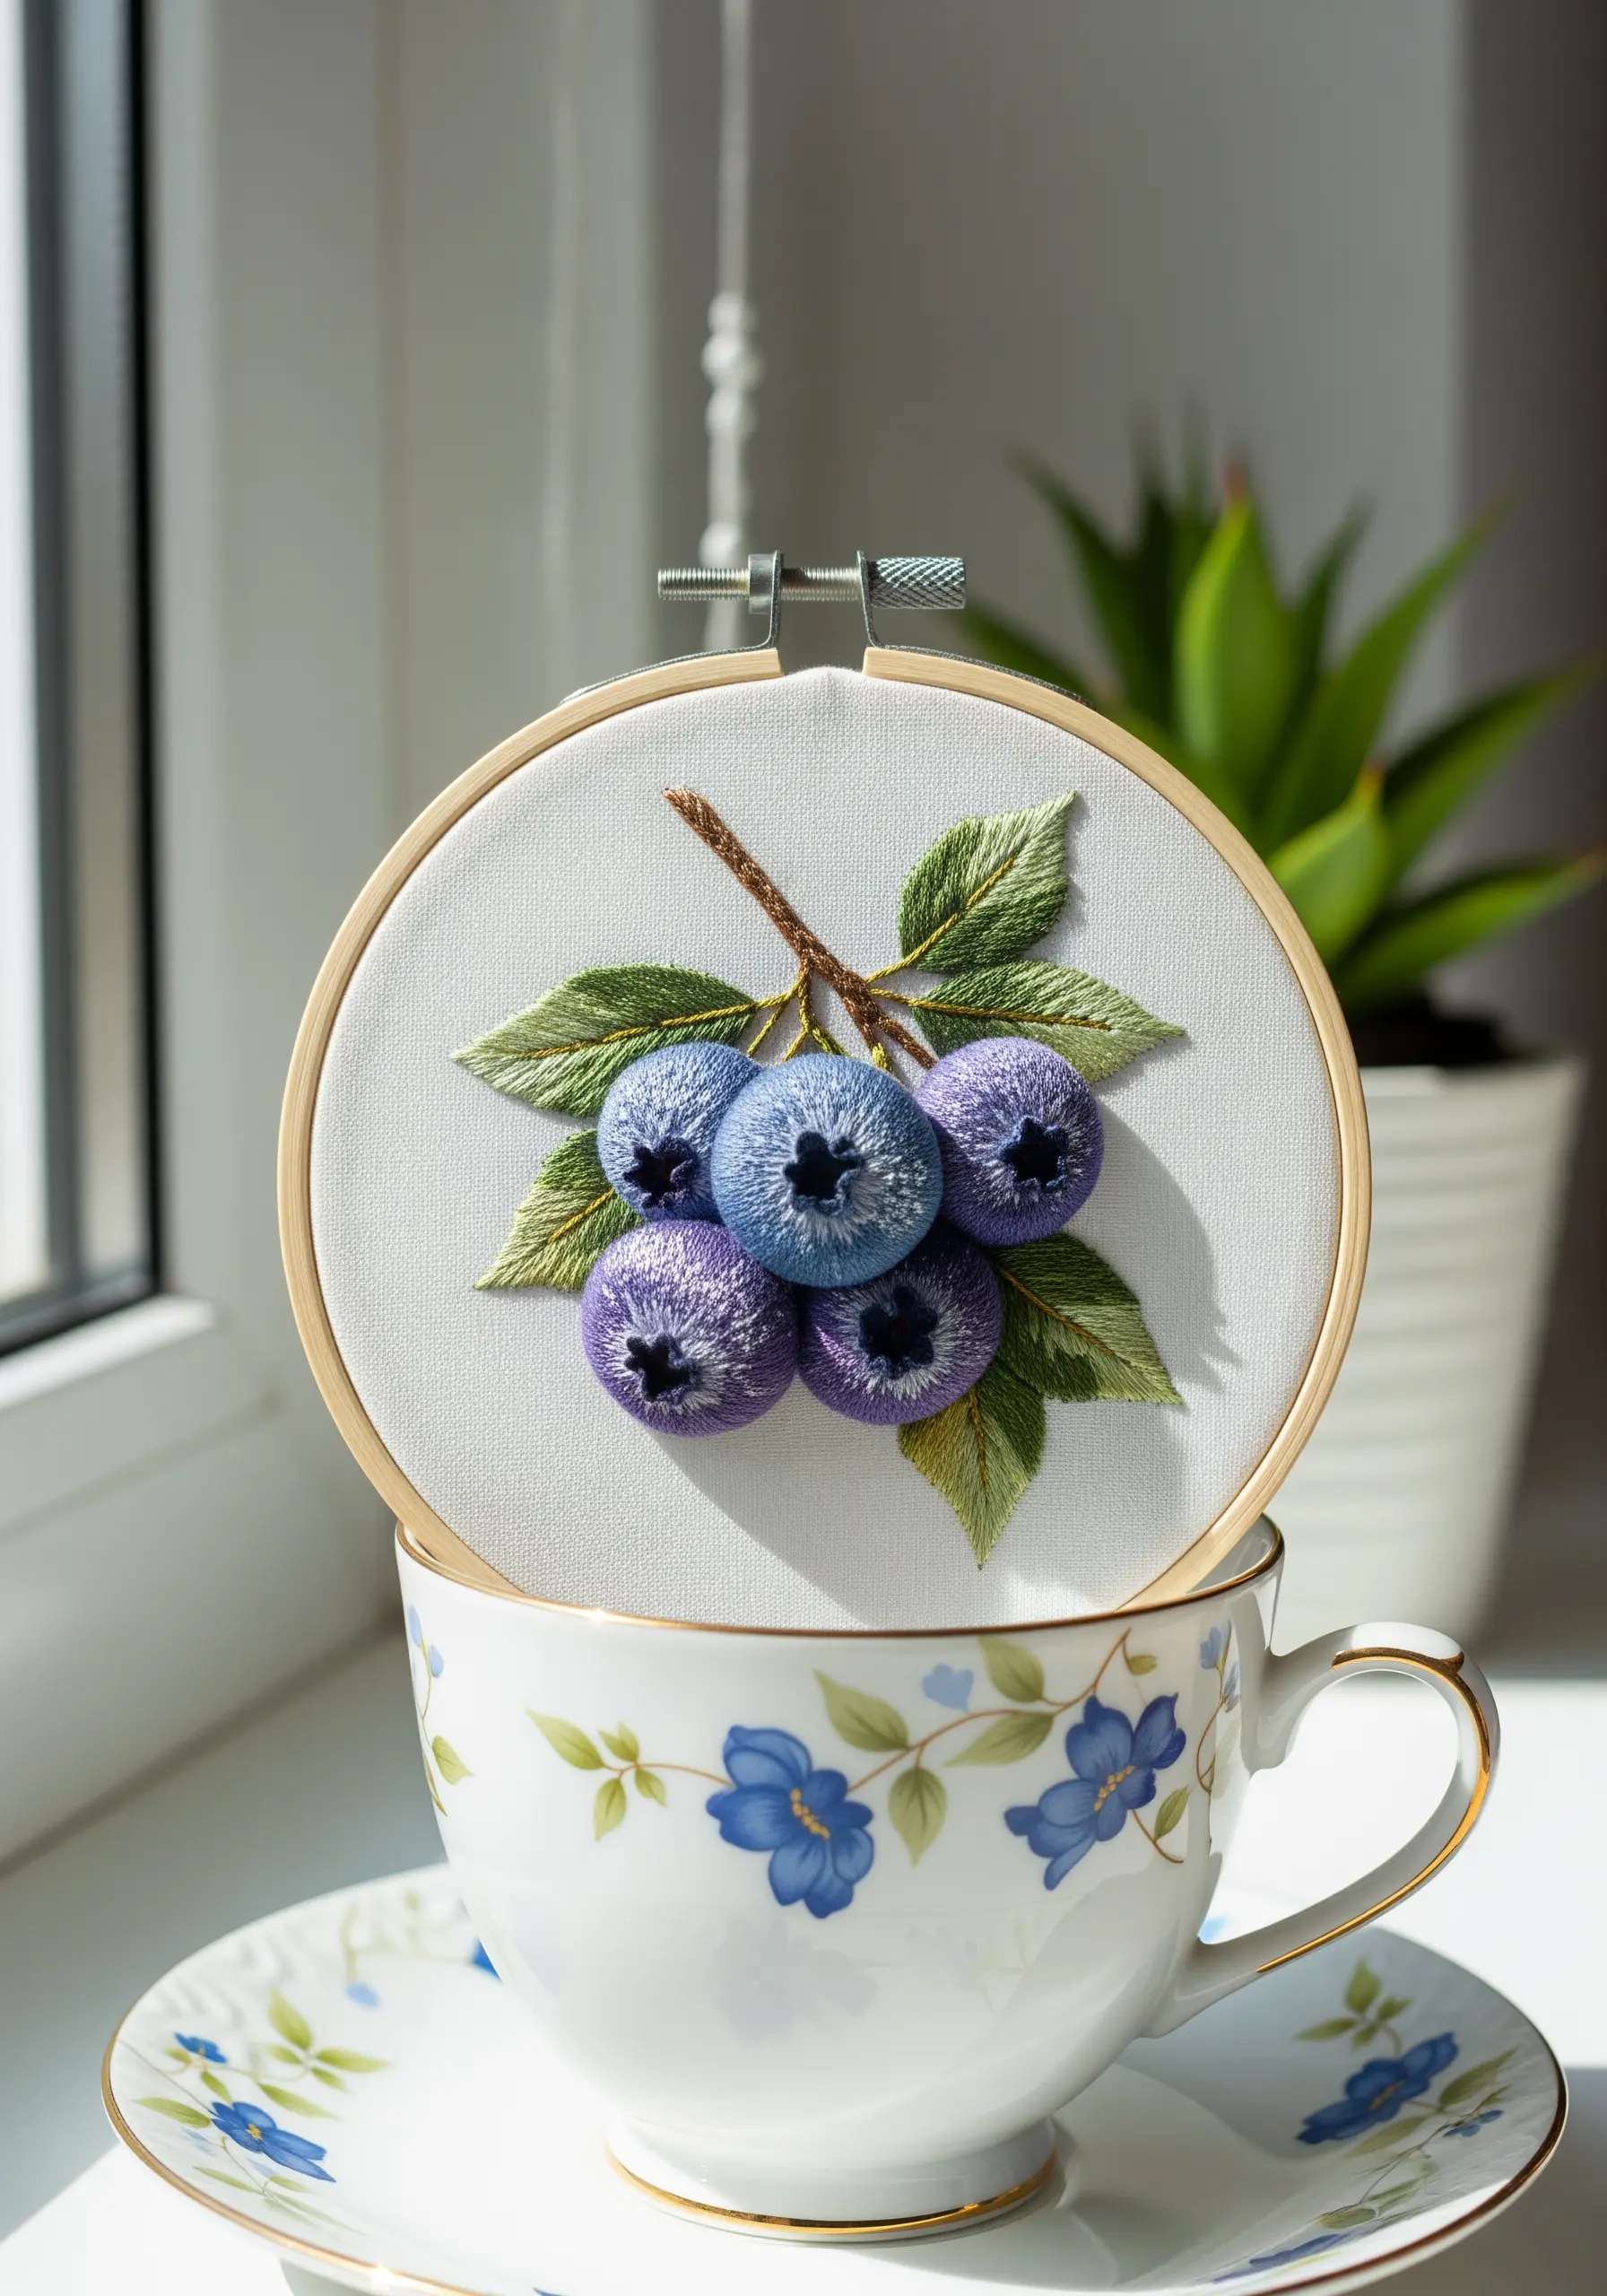
To make blueberries look so plump you could almost pick them, employ a padded satin stitch technique for a high-relief effect.
First, create a base layer within the berry’s shape using several layers of seed stitches or felt cut to size. This underlay provides the volume.
Then, stitch your final layer of satin stitch over the padding. Use multiple shades of blue and purple, and angle your stitches to follow the curve of the berry to enhance its roundness.
A few tiny white straight stitches at the blossom end add the final touch of realism. This is one of the best statement textured embroidery techniques for still life.
23. Paint a Landscape with Dense Stitches
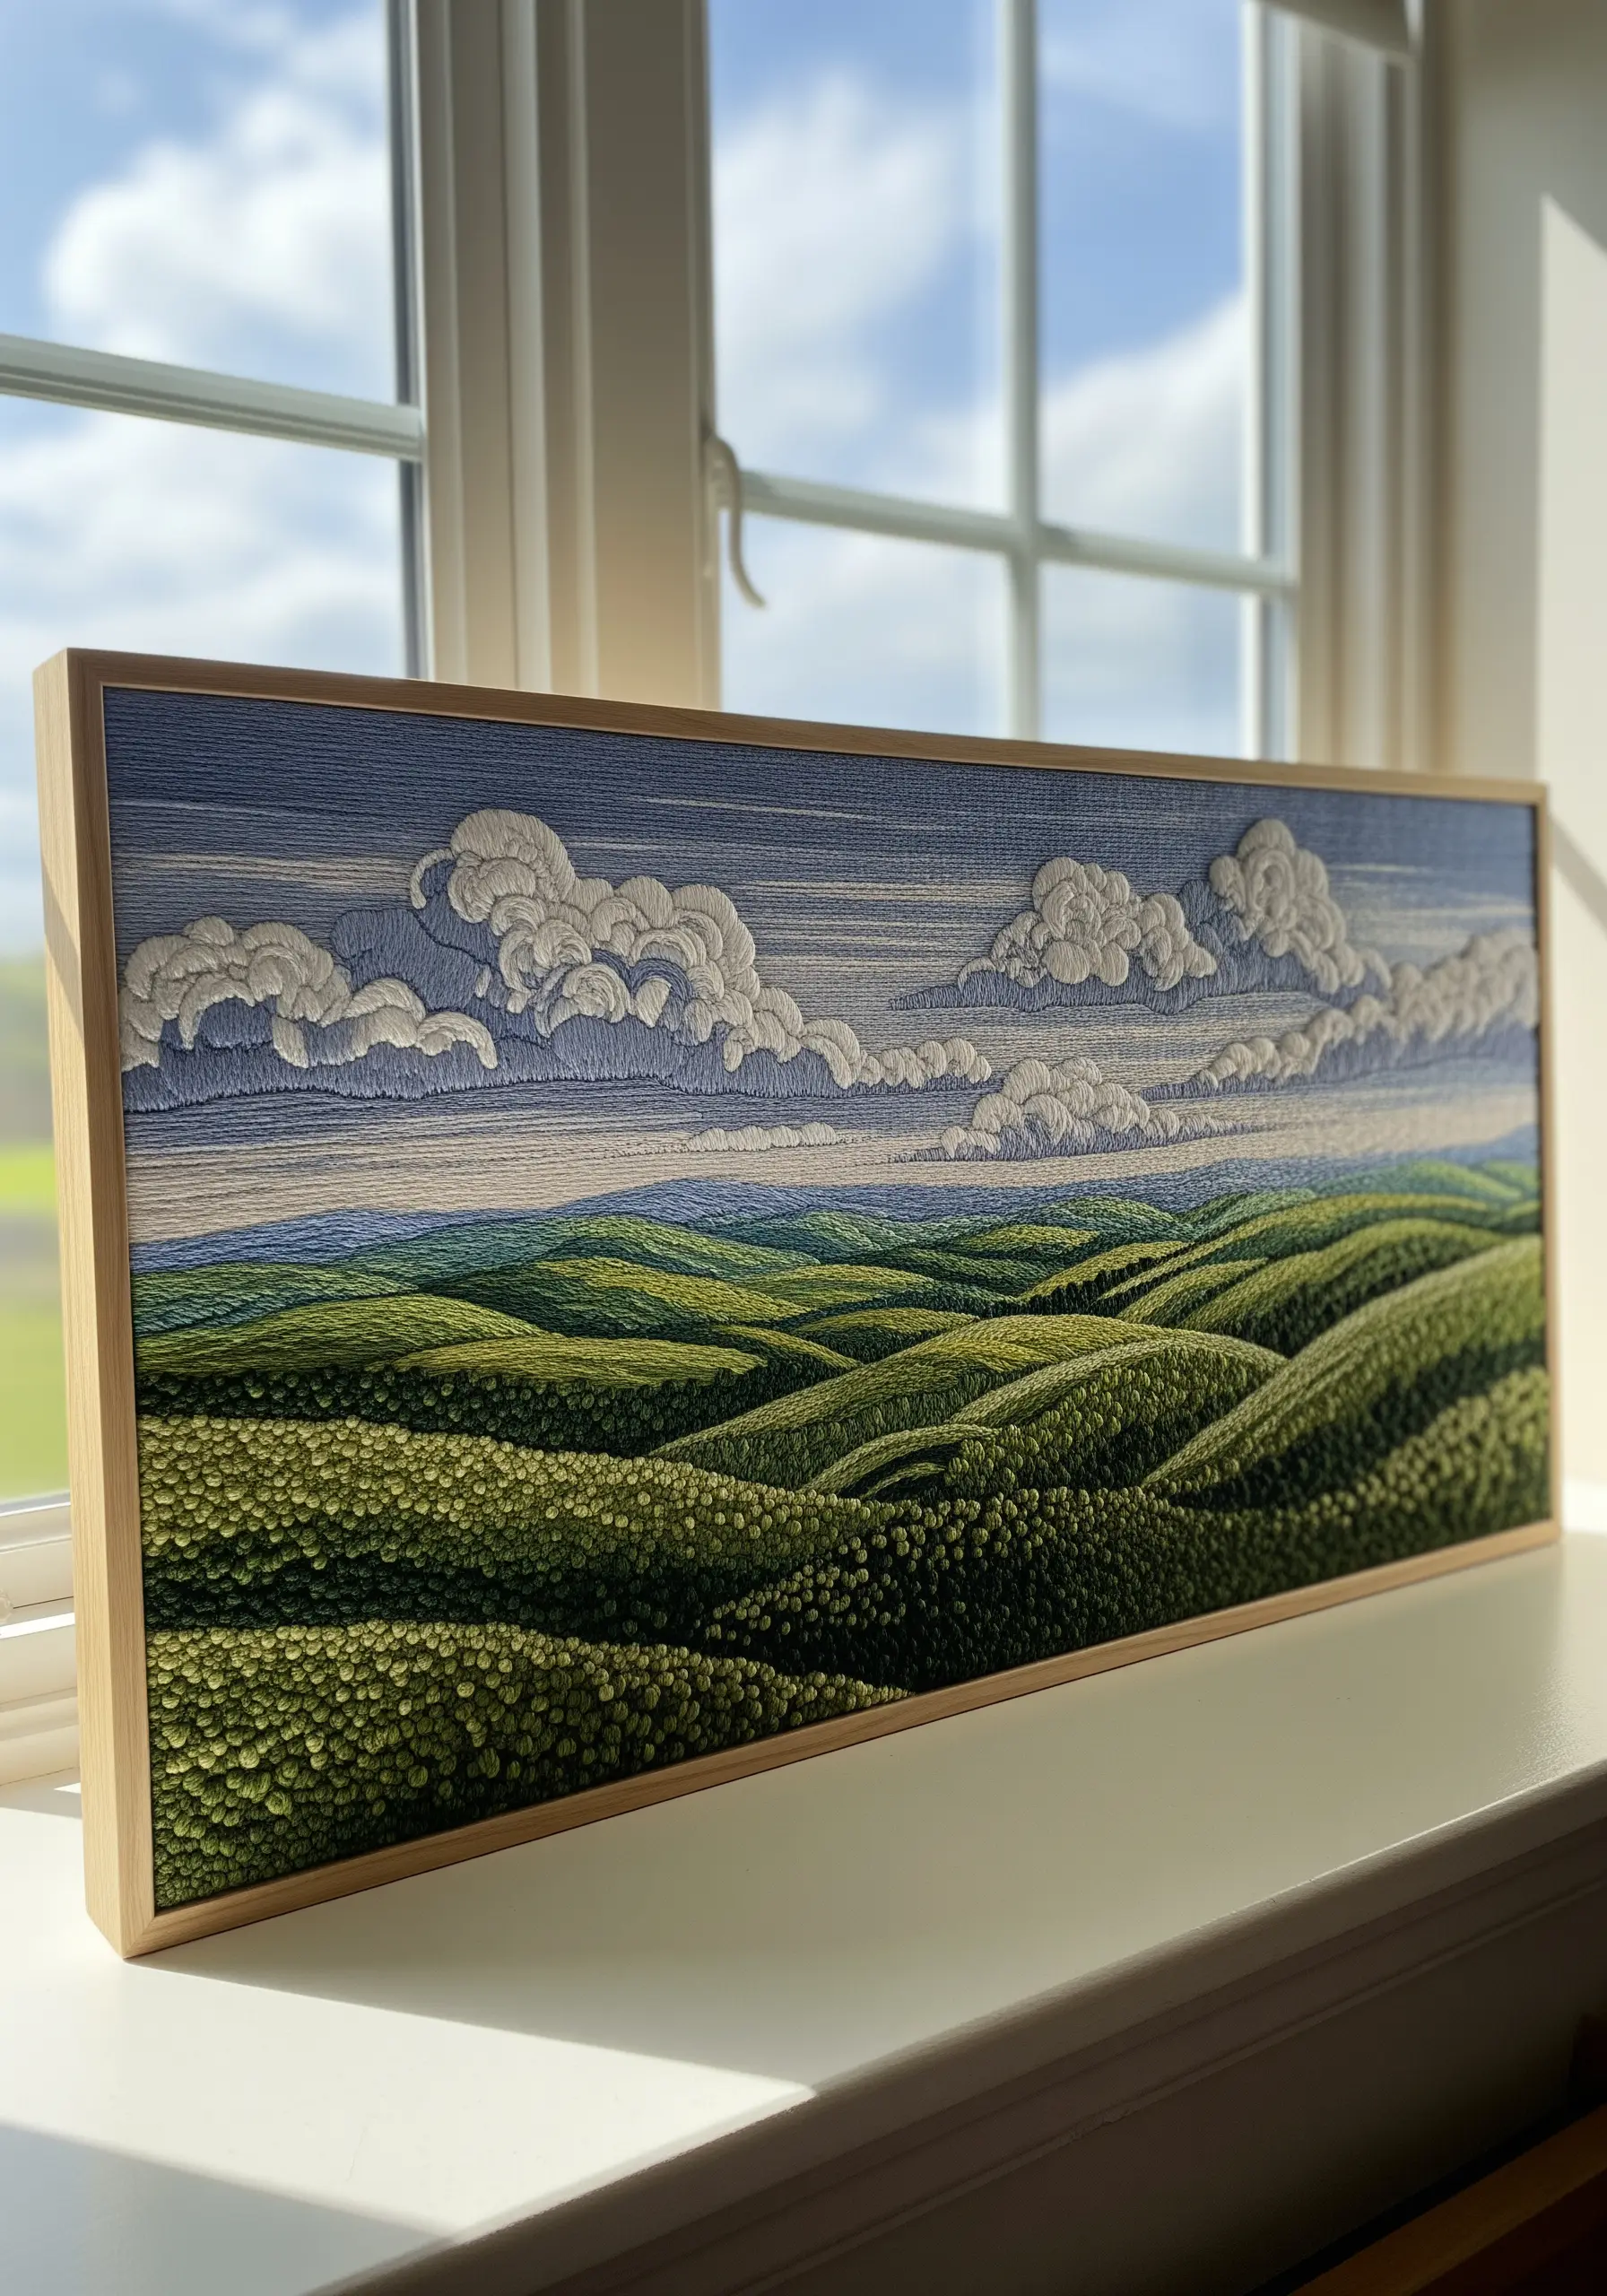
For a large-scale, painterly landscape, fill the entire canvas with thread, using stitch direction to define contours and textures.
Use short, dense straight stitches or seed stitches for the grassy hills, varying the shades of green to show light and shadow on the rolling terrain.
For the sky and clouds, use longer satin stitches, following the direction of the wind or cloud formations to create a sense of movement.
This all-over stitching technique, known as thread painting, requires patience but results in a rich, tapestry-like finish that is incredibly rewarding.
You can use this method with nature-inspired embroidery ideas to transform your favorite view into art.
24. Achieve Bold Simplicity with Satin Stitch
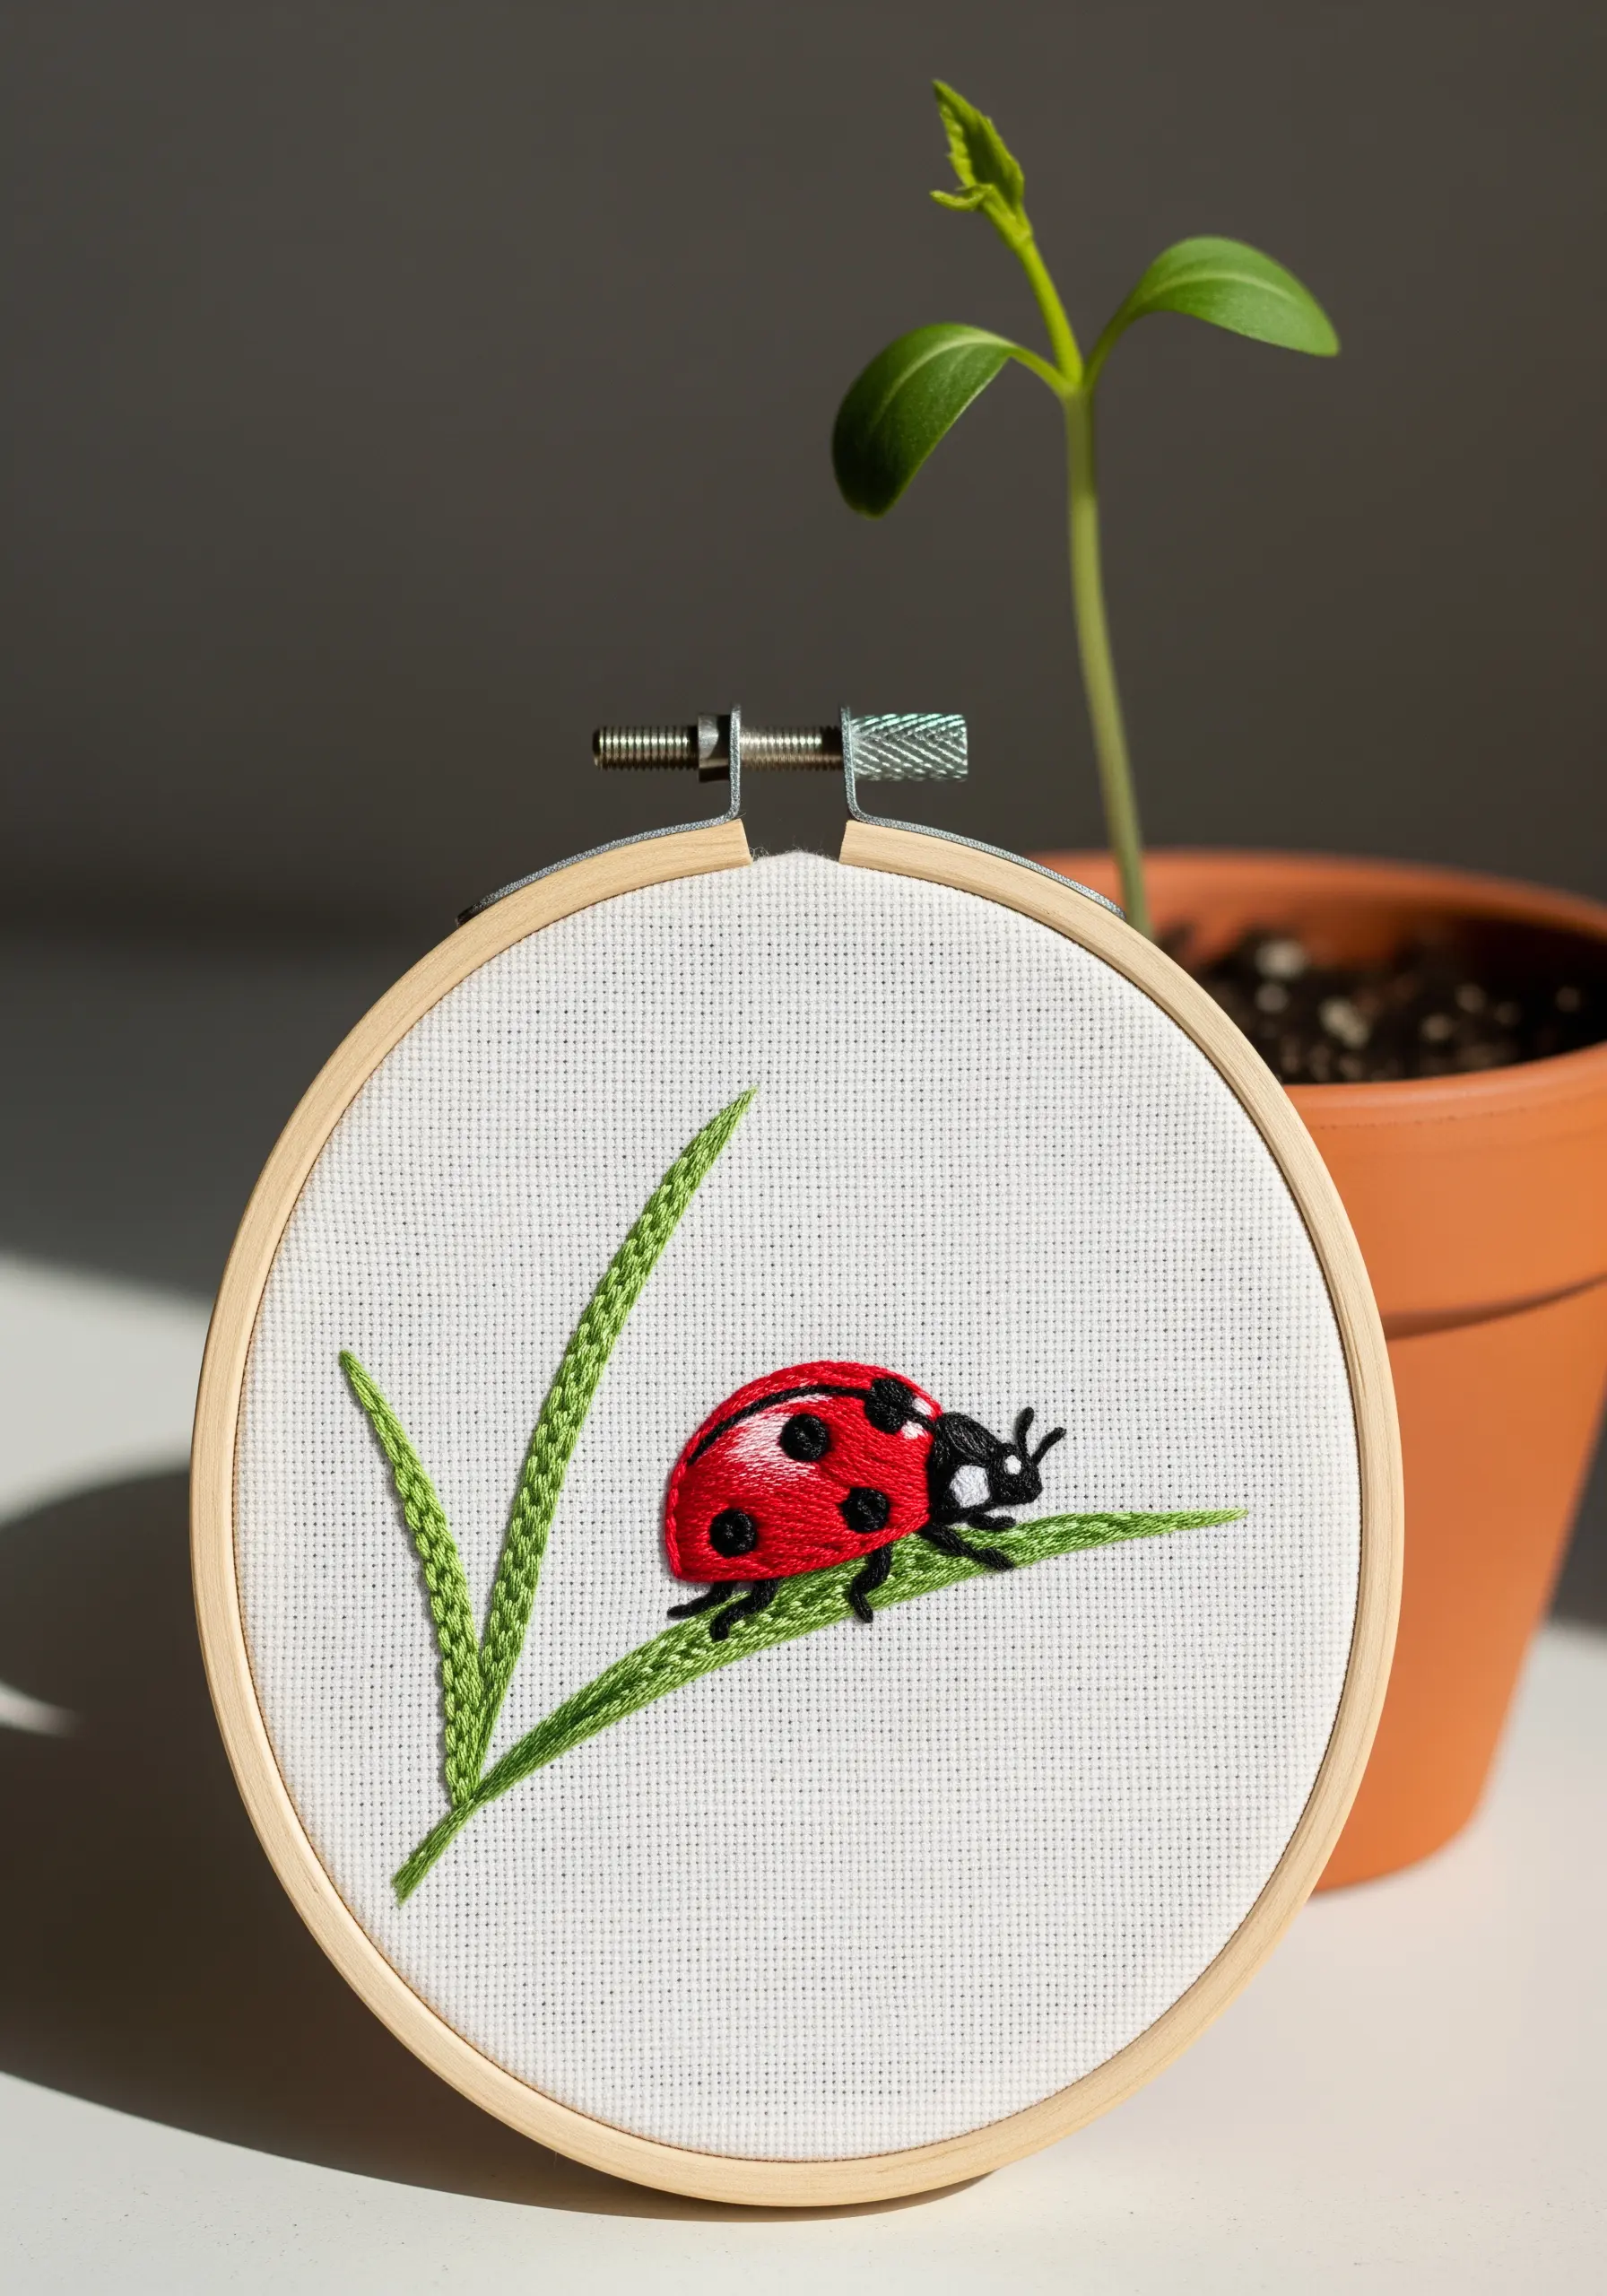
Sometimes, a simple, perfectly executed satin stitch is all you need for a clean and striking design.
For the ladybug’s shell, outline the shape first with a split stitch. This creates a raised, clean edge that makes your subsequent satin stitches easier to keep neat.
Fill the shape with parallel satin stitches, ensuring each one lies flat and snug against the last, without overlapping or leaving gaps.
Use a high-quality, six-strand cotton floss for a smooth, lustrous sheen that makes the red color truly pop.
Even simple mini embroidery patterns look incredibly polished with this technique.
25. Embrace an Expressive, Deconstructed Style

Let your process show by intentionally leaving your threads long and loose for a dynamic, sketch-like effect.
Use bold satin stitches for the poppy petals, but don’t worry about perfect edges. Allow the shapes to be a little uneven and organic.
For the stems and background, use long, expressive straight stitches and leave the ends trailing on the front of the work.
This deconstructed approach celebrates the medium itself—the thread—and adds a raw, emotional energy to the piece that a perfectly polished design might lack.
This is a way to stitch sound and movement into your fabric.
26. Tell a Story with a Four-Seasons Composition

Use a single motif, like a tree, to explore color theory and texture as it changes through the seasons.
Divide your hoop into four quadrants. For spring, use French knots in light greens and pinks. For summer, use dense, leafy fishbone stitches in vibrant greens.
In autumn, switch to a warm palette of reds, oranges, and yellows, using a mix of satin stitches and seed stitches for falling leaves.
For winter, leave many branches bare with simple backstitch and use white or silver thread for frost and snow.
These seasonal wall art projects are a beautiful way to mark the passage of time.
27. Add Detail to Printed Fabric
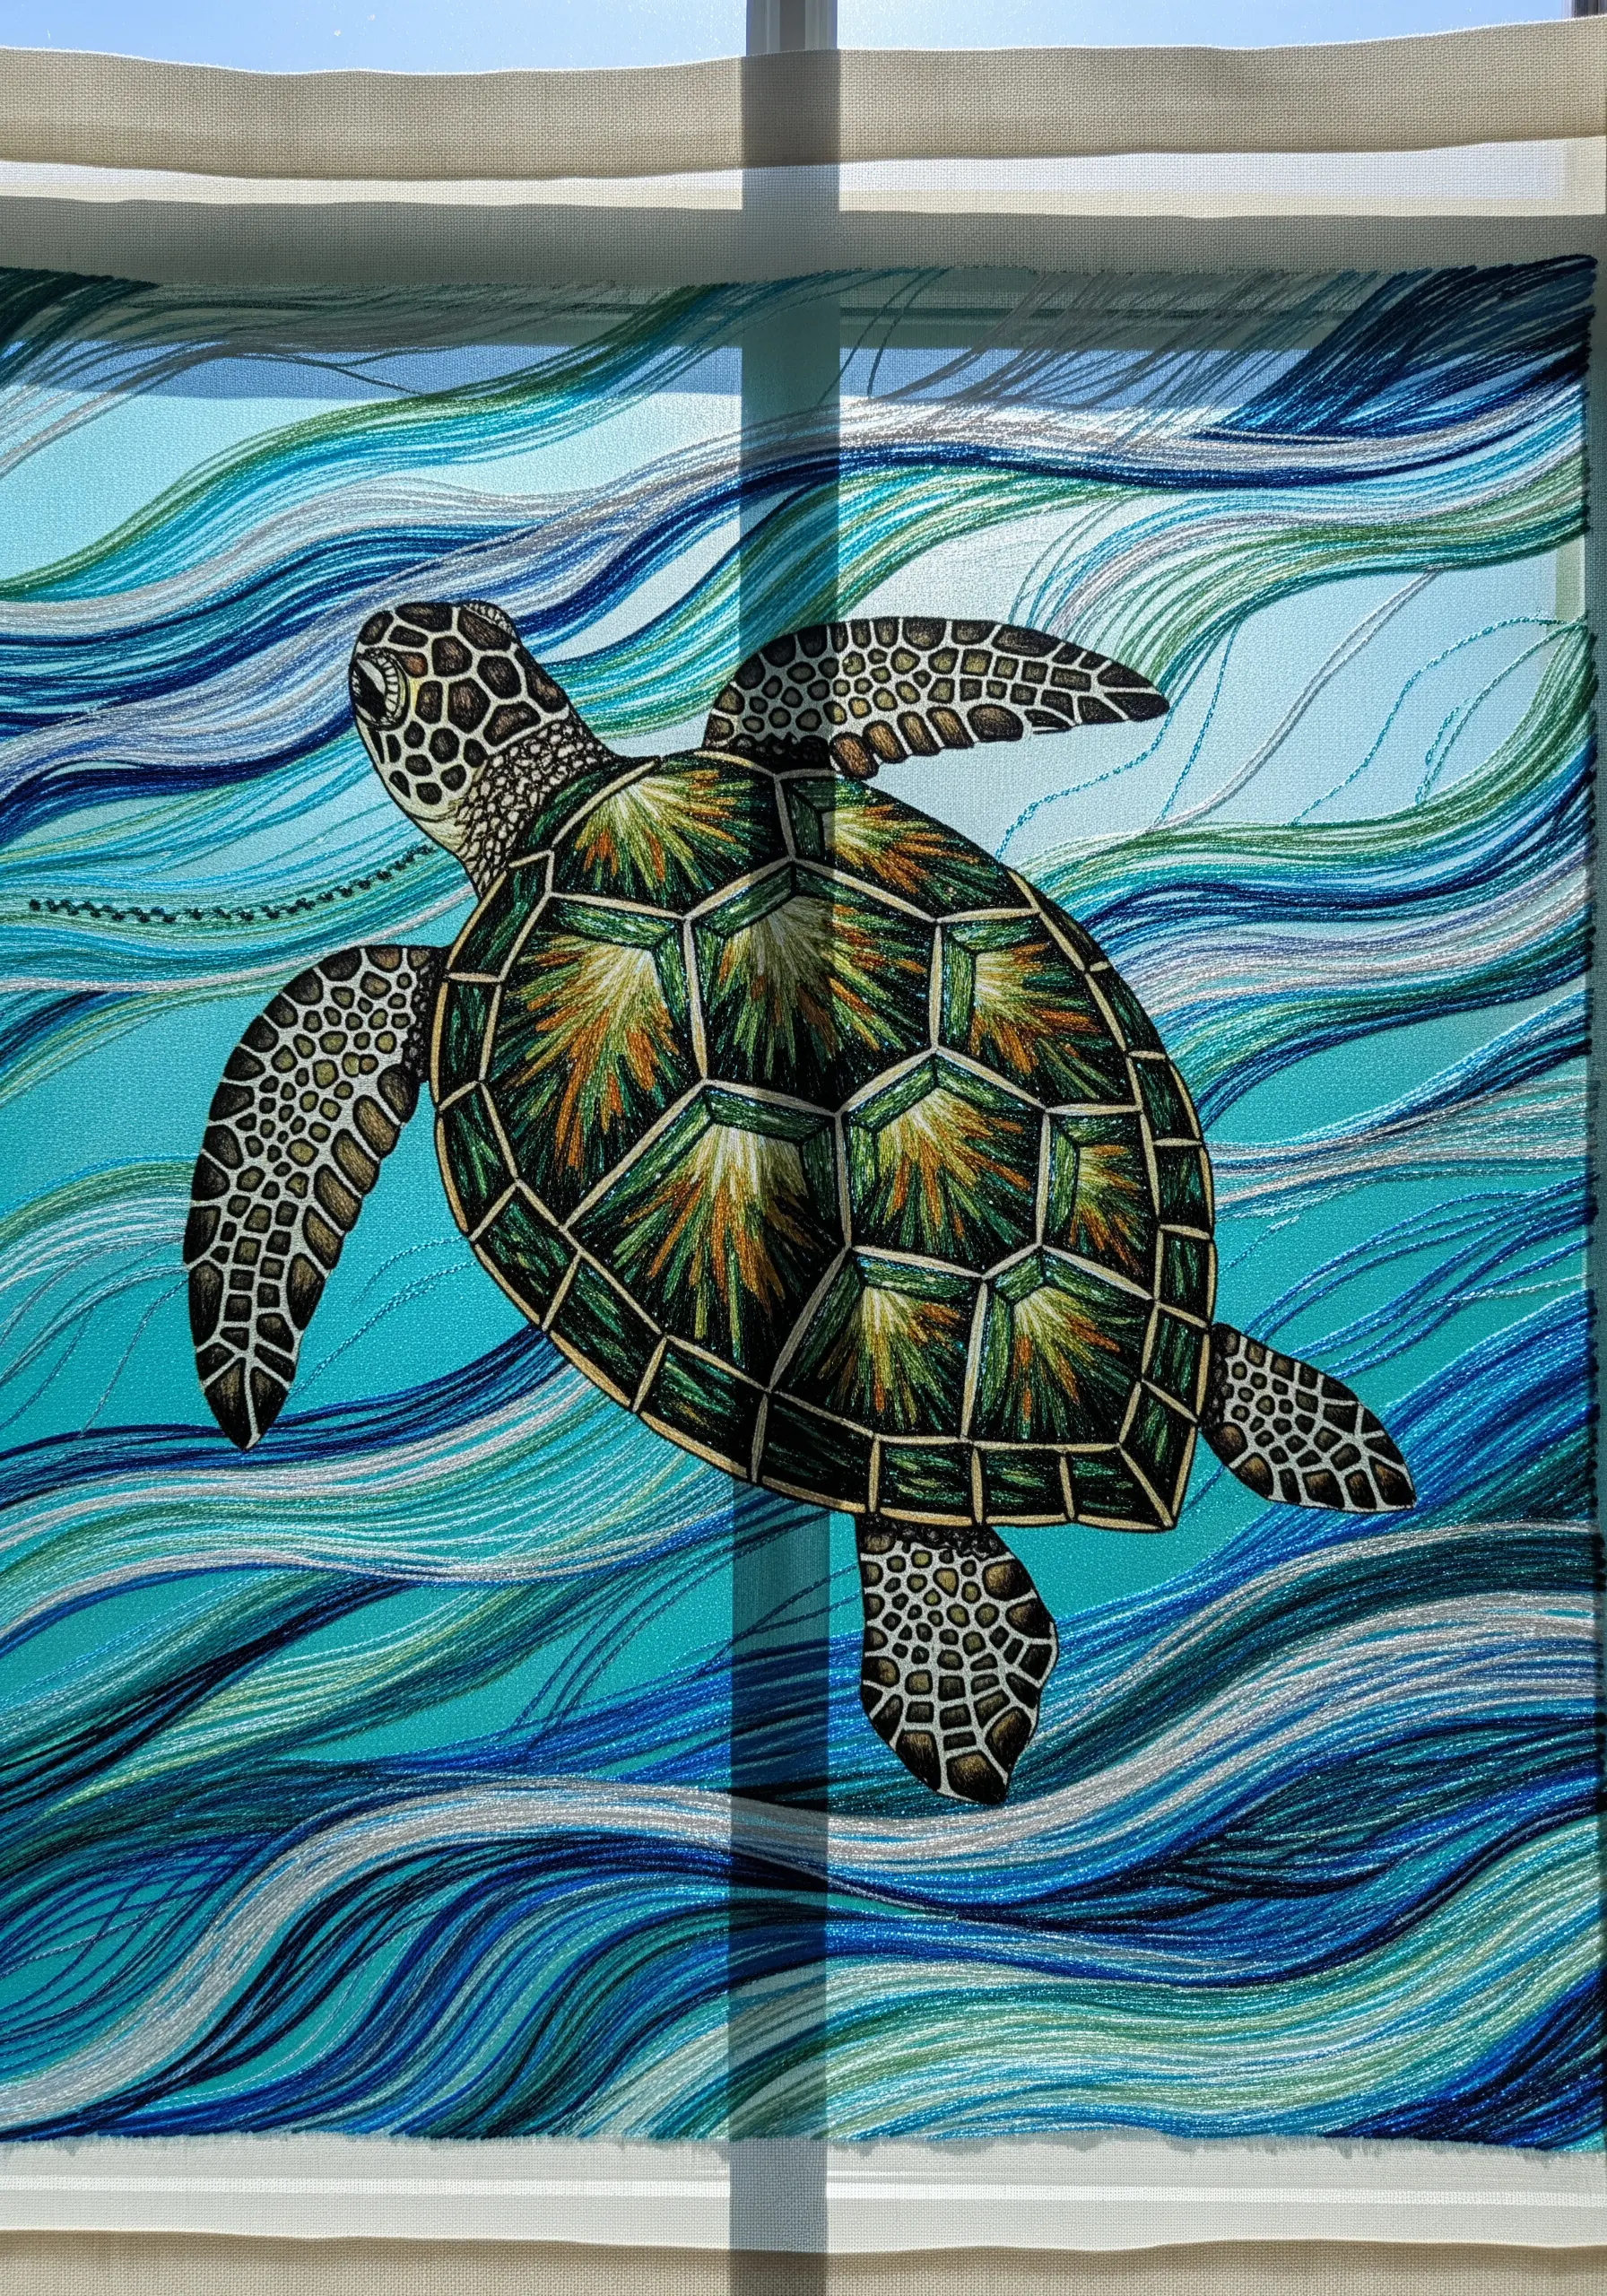
Create incredible depth and complexity by embroidering over a pre-printed fabric panel.
Use the printed design as your guide, almost like a paint-by-numbers canvas. You don’t have to cover every inch; focus on adding highlights and texture.
On the turtle’s shell, use long-and-short stitch in metallic or silk threads to add shimmer and dimension to the printed pattern.
For the water, use wavy backstitches or stem stitches in various shades of blue to create a sense of flowing movement over the printed background.
This mixed-media approach allows you to create intricate sea animal embroidery ideas with stunning results.
28. Stitch Realistic Fur with Long-and-Short Stitch

To create the soft, dense fur of a sleeping fox, the long-and-short stitch is your most essential tool.
Work in the direction of the fur growth, using single strands of floss for the most control over blending.
Start with a base color and introduce lighter and darker shades in layers, staggering your stitches to create a soft, seamless gradient.
For the fluffiest parts, like the tail and chest, make your stitches slightly longer and less dense to create more volume and softness.
This technique is perfect for all kinds of adorable forest animal embroidery ideas, bringing them to life with realistic texture.
29. Create a Delicate Trellis on Sheer Fabric
When displayed in a window, embroidery on sheer fabric allows light to pass through, creating a beautiful stained-glass effect.
Choose a lightweight fabric like voile or organdy that has a bit more stability than tulle but is still transparent.
Use a fine-tipped, water-erasable pen to transfer your design, as a heavy line will be visible through the fabric.
Keep your stitches light and airy—lazy daisy stitches for petals, simple backstitches for vines—to maintain the delicate feel.
These climbing plant stitch designs are perfect for this technique, appearing to grow in the light.
30. Add a Secret Glow with Special Threads

Surprise and delight with a design that has a hidden element: a constellation that only appears in the dark.
Stitch your mountain landscape as usual, using standard cotton floss for the peaks and trees.
For the bear constellation and surrounding stars, switch to a high-quality glow-in-the-dark embroidery thread.
This thread looks like a simple off-white or pale green in daylight but will emit a bright glow after being charged by sunlight.
This is a playful twist on modern neon-on-black thread art, creating magic when the sun goes down.
31. Blend Colors Within Feathers for a Soft Look

To create soft, painterly transitions of color within a single feather, use the long-and-short stitch with a color-blending approach.
Instead of finishing one color section before starting the next, intersperse stitches of the new color into the edge of the previous one.
Work with single strands of floss to achieve the most subtle and seamless gradients, mimicking how colors merge in a real feather.
Use a central stem stitch as the feather’s shaft, and angle all your long-and-short stitches outwards from it for a realistic growth pattern.
You can create nearly any effect with abstract color blend stitch ideas and this technique.


