

There is a unique power in dark thread. It doesn’t shout for attention with bright colors, but instead commands it with quiet confidence, drama, and sophistication. It asks you to look closer, to appreciate the form of a line, the density of a texture, and the story told in pure shadow and light.
Many of us hesitate, worried that a monochrome palette will look flat or simplistic. But the secret to breathtaking dark-thread embroidery isn’t about adding more color—it’s about mastering texture, line weight, and composition. It’s about making every single stitch count.
Think of this collection not just as inspiration, but as a technical guide. Each piece reveals a specific technique—a way to build dimension with French knots, create fluid lines with couching, or add painterly depth with tonal shading. These are the small adjustments that create a profound impact, transforming your work from a simple stitching project into a piece of intentional, expressive textile art.
1. Master Large-Scale Texture with Directional Stitching
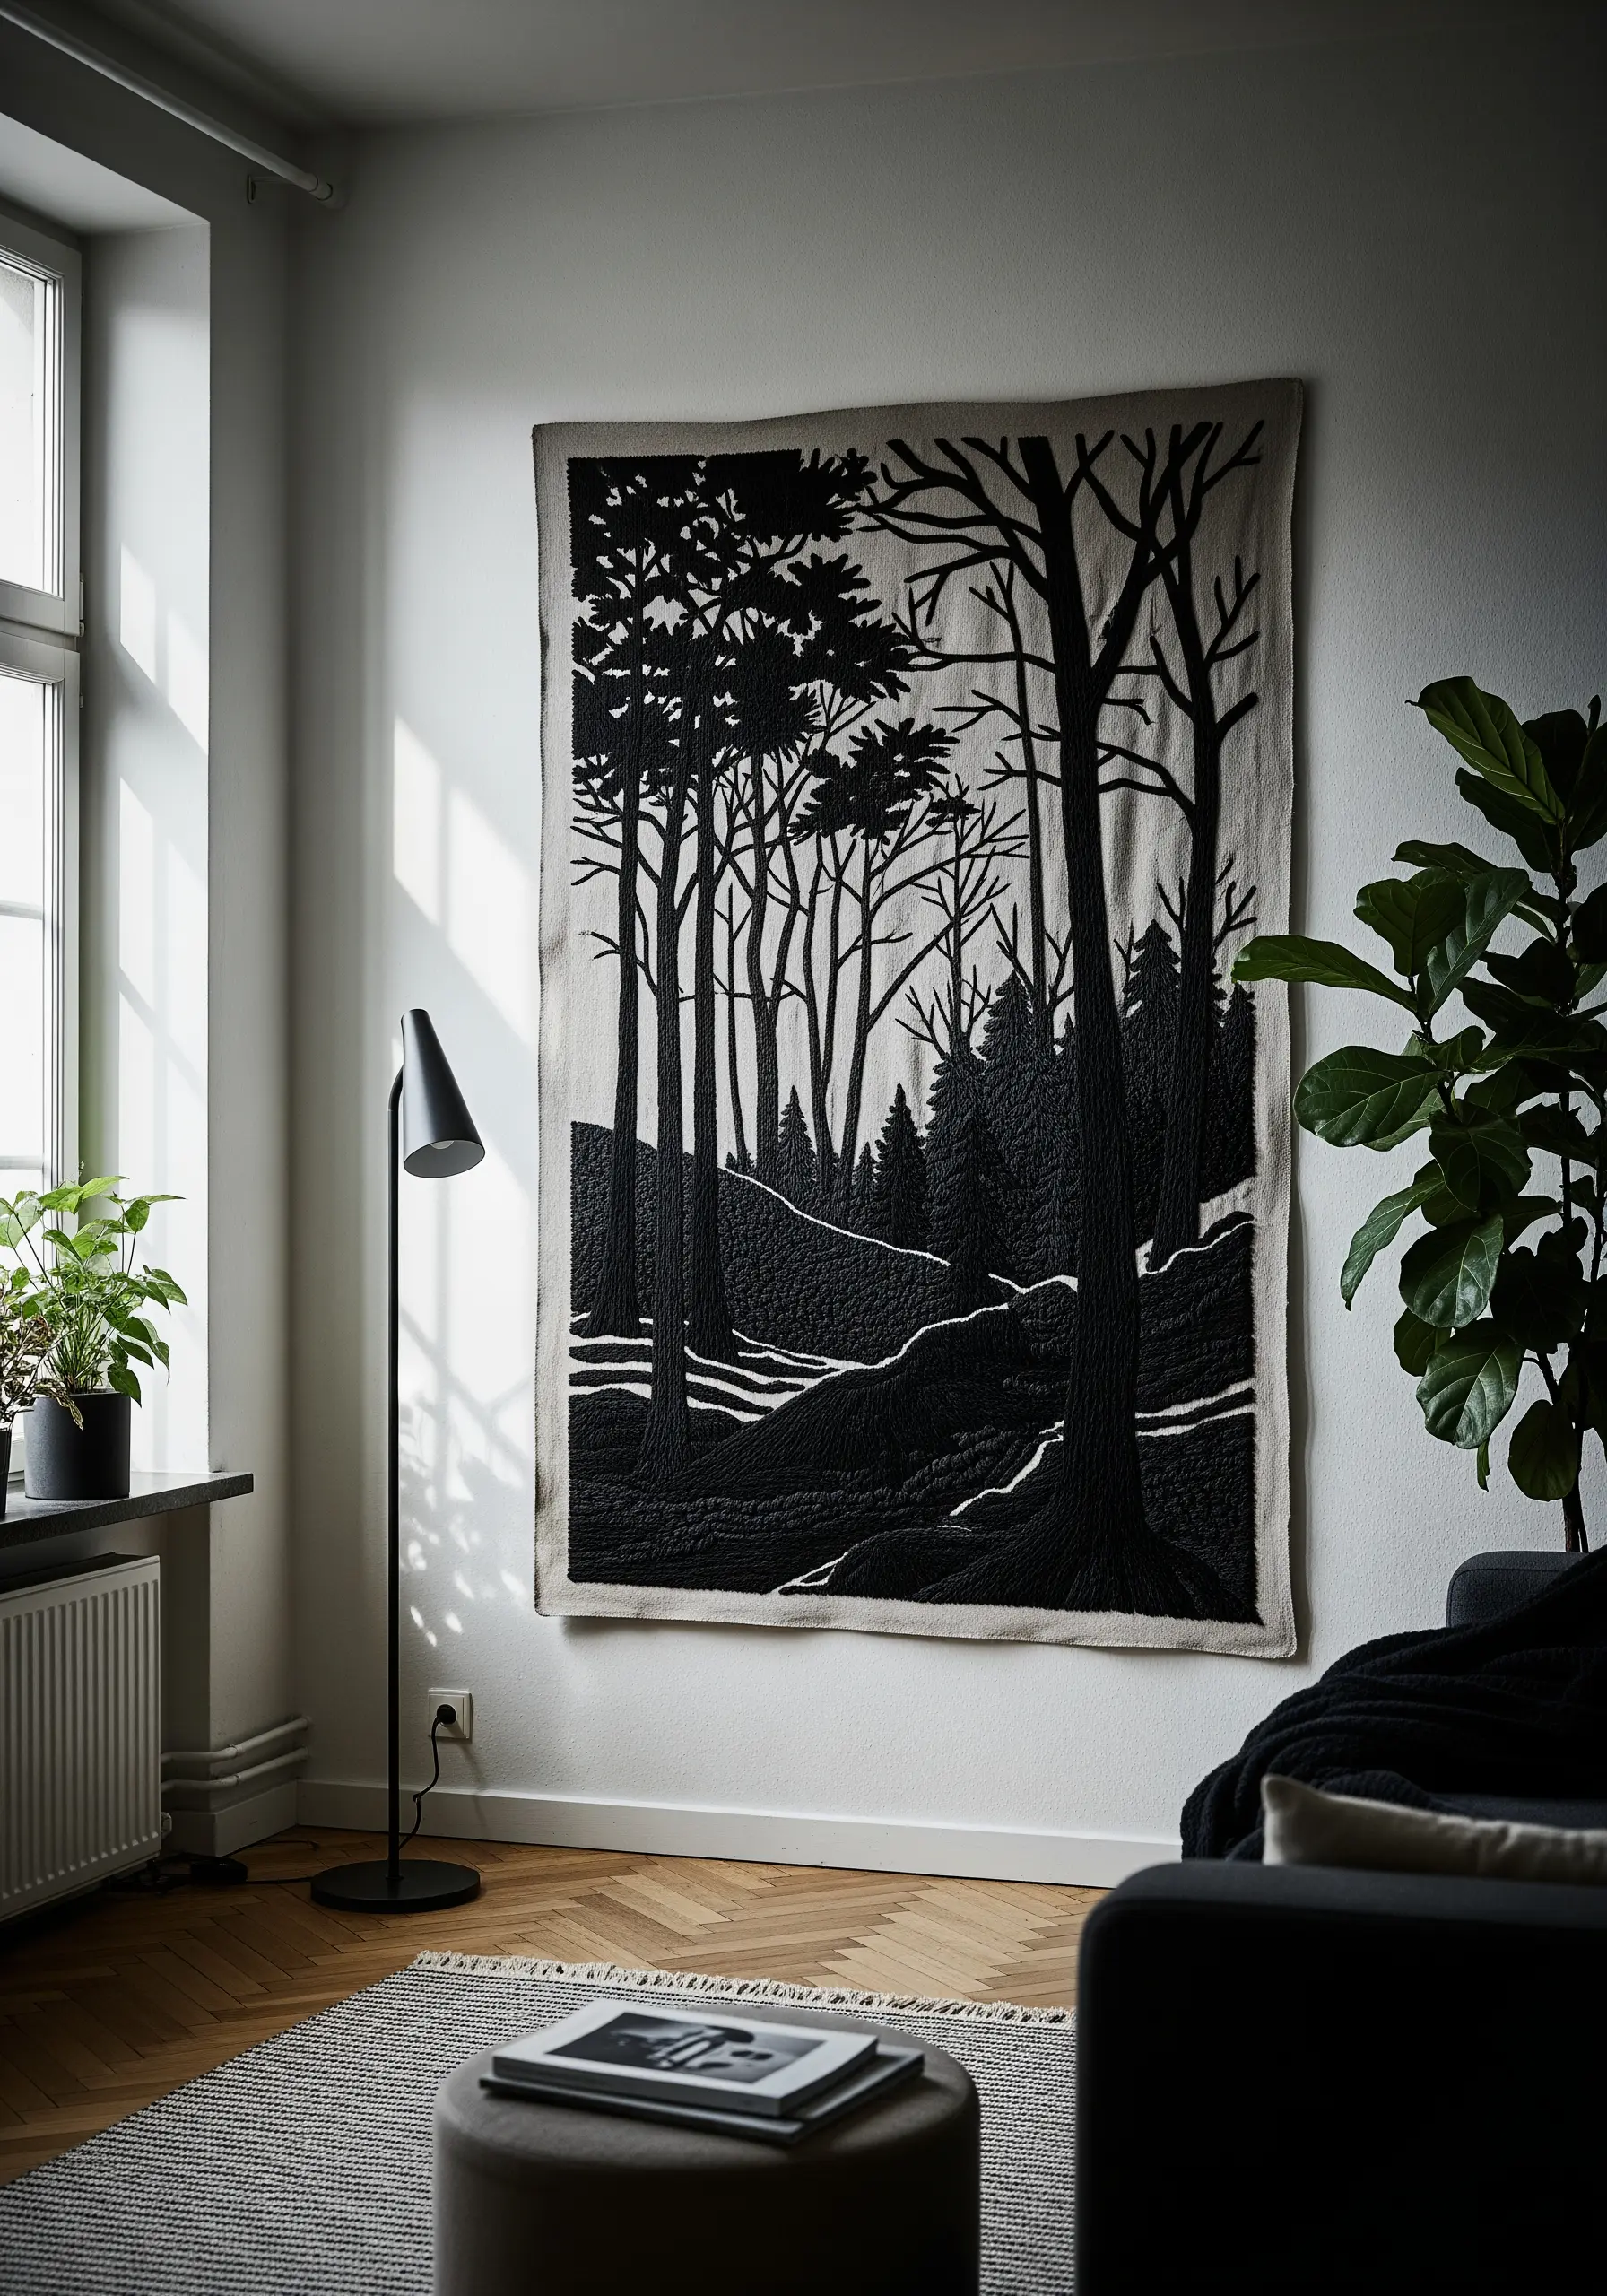
For a piece with this much presence, you must control the texture to prevent it from looking flat.
Use a dense long-and-short stitch to fill the solid black areas, ensuring the direction of your stitches follows the form you want to create—vertically for tree trunks, horizontally for ground shadows.
This directional approach adds subtle dimension that catches the light differently across the surface.
Work on a heavy-duty fabric like cotton canvas, which can support the weight of dense stitching without puckering, to create textile hangings to fill large walls with authority.
2. Create Luminous Texture with French Knot Fills
To give solid black shapes a rich, tactile dimension, fill them entirely with French knots.
Before you begin filling, outline your shape with a sharp split stitch using two strands of floss.
This simple step acts as a ‘fence,’ containing your knots and ensuring the final silhouette is crisp and intentional.
Vary the number of times you wrap the thread around the needle (once or twice) to create subtle variations in knot size, which gives the surface a more organic, pebbled texture.
This method transforms simple shapes into engaging minimal embroidery wall pieces.
3. Achieve Vintage Illustration Detail with Single-Thread Outlines

To capture the precision of an anatomical engraving, your stitch choice is paramount.
Use a single strand of dark red or black floss and a fine needle to work the entire design in a meticulous backstitch or stem stitch.
This creates a clean, consistent line that mimics ink.
For the delicate shading, use tiny straight stitches to build cross-hatching textures.
The key to this aesthetic is consistency in your stitch length, which lends a professional, illustrative quality to the work, perfect for dark academia-inspired decor.
4. Balance Bold Lines and Delicate Details for Graphic Impact

The power of a graphic motif lies in its contrast, not just of color, but of line weight.
Use all six strands of floss with a satin stitch to create the thick, solid black sections of the moth’s wings.
For a slightly raised, more dramatic effect, you can pad the satin stitch by laying down a foundation of straight stitches first.
Then, switch to a single strand of thread for the delicate antennae and decorative accents.
This intentional variation in thread weight is what makes the design feel balanced and sophisticated, ideal for boho-style embroidery decor.
5. Elevate Line Art with a Continuous Whipped Backstitch

The elegance of botanical line art depends on flawlessly smooth curves.
Instead of a standard backstitch, which can appear segmented, elevate your outlines with a whipped backstitch.
First, lay down a foundation of simple backstitches along your design line.
Then, using a second length of the same thread, pass your needle under each backstitch without piercing the fabric, ‘whipping’ the thread around the foundation.
This technique creates a raised, cord-like line that is exceptionally smooth and perfect for minimalist line art nature embroidery.
6. Build Sculptural Form with High-Density Couching
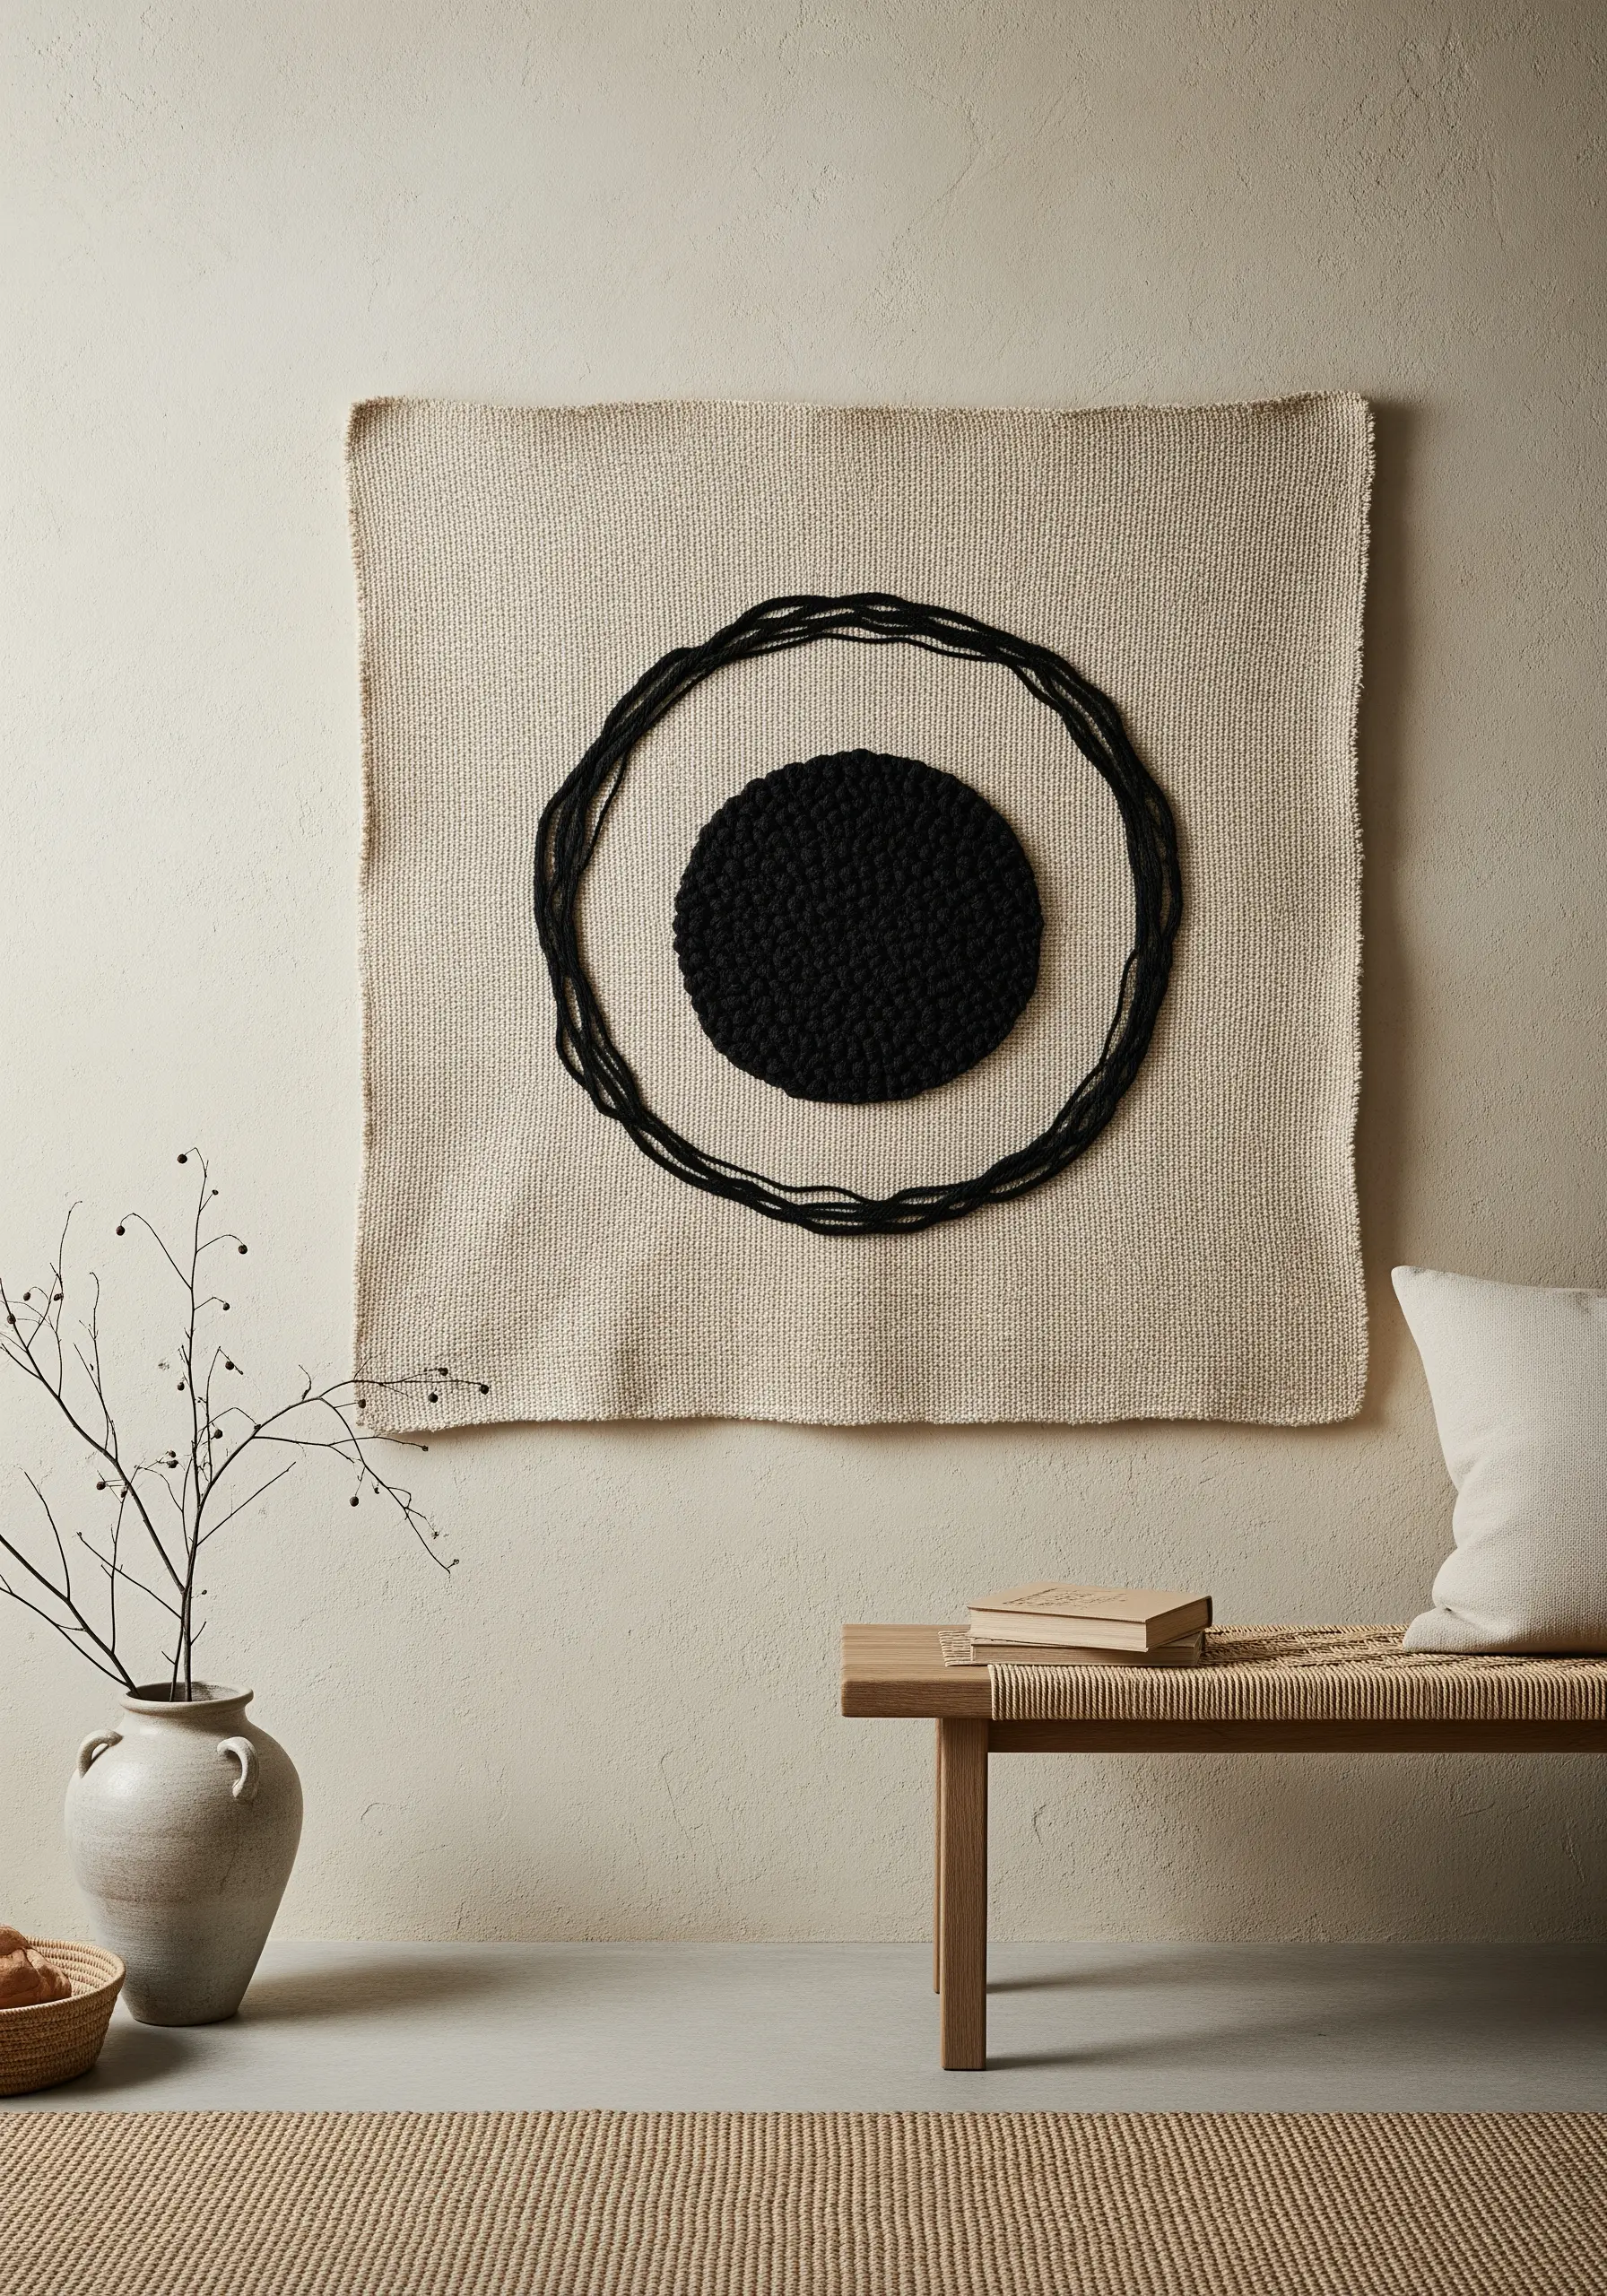
Move beyond flat embroidery and create pieces with sculptural presence.
This effect is achieved by couching a very thick fiber, like chunky yarn or rope, onto your base fabric.
Lay the thick yarn in your desired shape—a tight spiral for the center circle, a loose ring for the outer one.
Then, use a standard six-strand embroidery floss to tack the yarn down at regular intervals, making your tacking stitches small and discreet.
This technique turns simple shapes into compelling abstract thread sculpt designs.
7. Translate Digital Forms into Thread with Vertical Satin Stitch
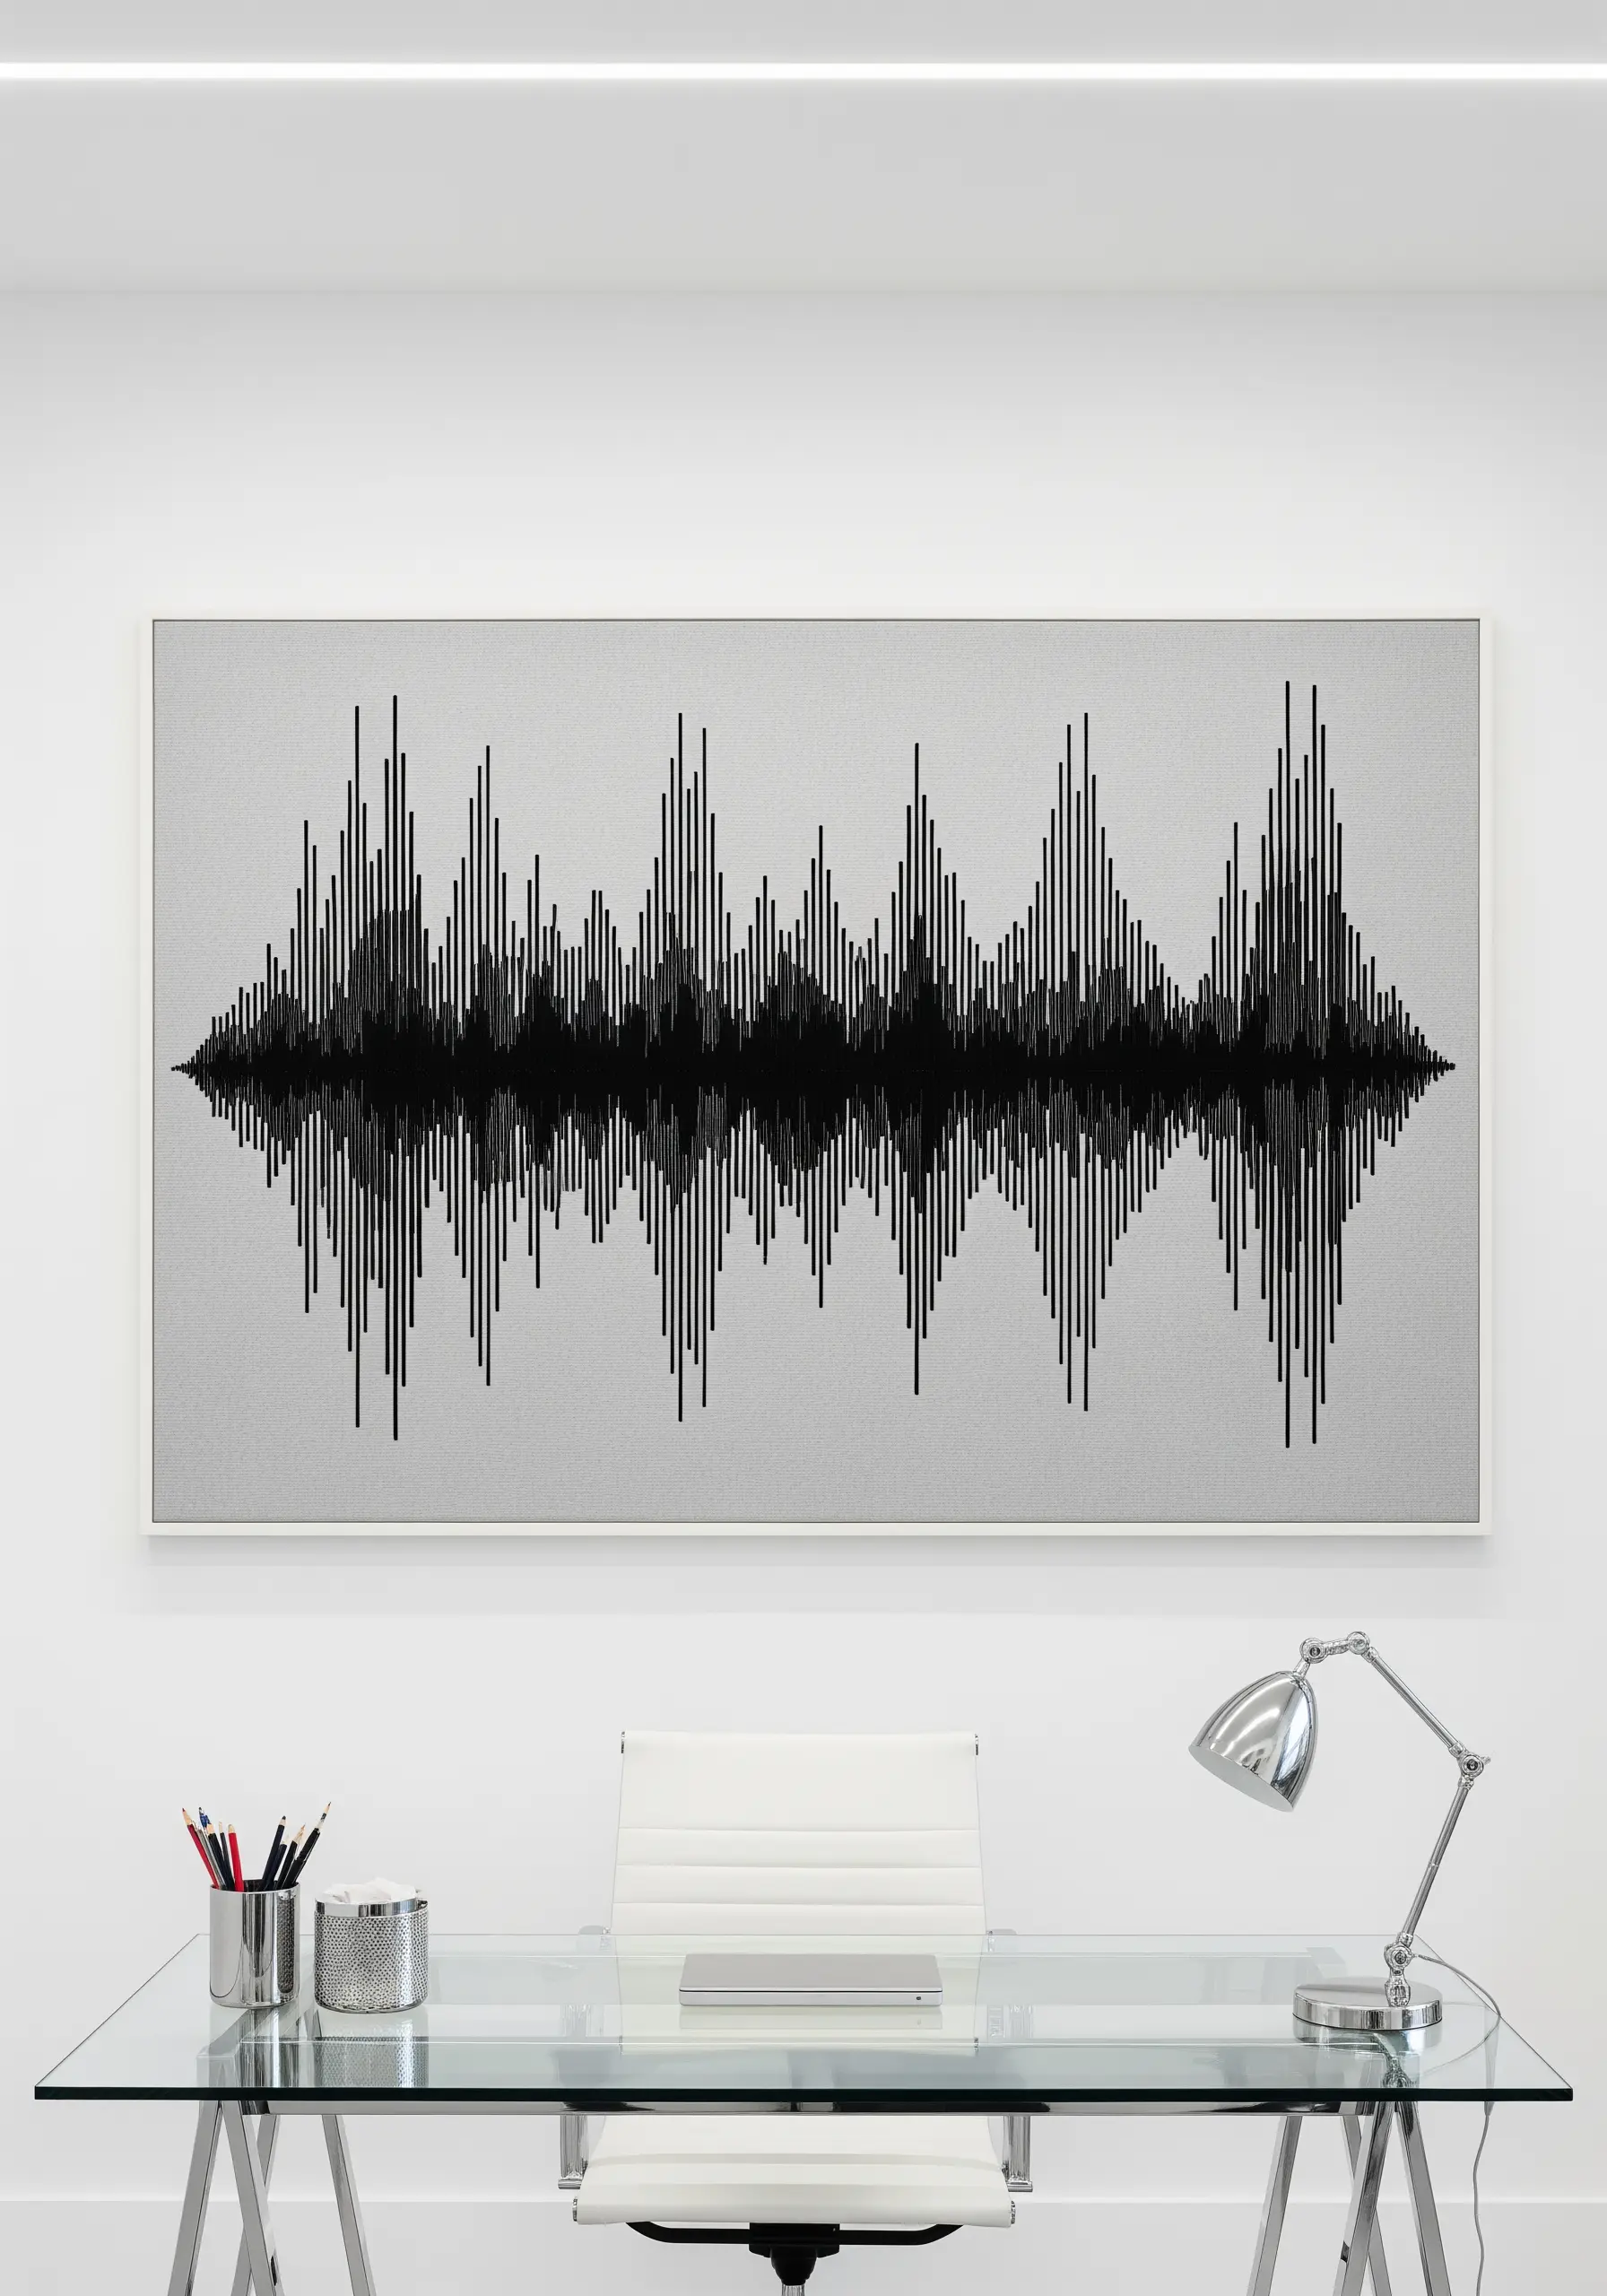
Recreating the precision of a digital soundwave requires absolute control over your stitches.
To achieve these clean vertical bars, use a dense satin stitch, ensuring each stitch is perfectly parallel to the last.
Working on a fabric with a clear grid, like an evenweave linen, will help you keep the lines straight and evenly spaced.
Always use a stabilizer on the back of your fabric to prevent the dense stitches from pulling and distorting the clean rectangle, a key for sharp minimal geometry stitch projects.
8. Create the Illusion of Movement with Varied Stitch Density

To make a flock of birds feel dynamic rather than static, avoid stitching each one identically.
Use a sketchy, gestural approach with simple straight stitches and seed stitches.
For the birds you want to appear closer, pack the stitches more densely to create a darker, more solid form.
For those in the distance, use fewer stitches, leaving more of the background fabric visible.
This subtle shift in density is a simple but highly effective way to create depth and movement in your embroidery motifs that make your bedroom feel handcrafted and warm.
9. Use Thick Couching for Fluid, Continuous Line Portraits

The power of single-line art is its unbroken, fluid quality, which can be difficult to achieve with traditional stitches.
Instead, couch a thick black yarn or cord to your fabric.
This technique allows you to lay out the entire design, perfecting every curve and proportion before committing with a single stitch.
Once you are happy with the placement, use a thin, matching thread to tack it down discreetly.
This preserves the gestural energy of the drawing, making for impressive one-line embroidery wall arts.
10. Master Optical Effects with Precise Geometric Fills

For hypnotic geometric patterns, precision is non-negotiable.
Work on an evenweave fabric where you can count the threads to ensure absolute symmetry in your design.
Use a dense satin stitch for the solid black areas, keeping all your stitches flowing in the same direction to create a uniform, light-reflecting surface.
The stark contrast between the meticulously stitched black thread and the clean white fabric is what gives these geometric abstract thread patterns their mesmerizing, high-impact quality.
11. Add Moody Depth with a Tonal Palette
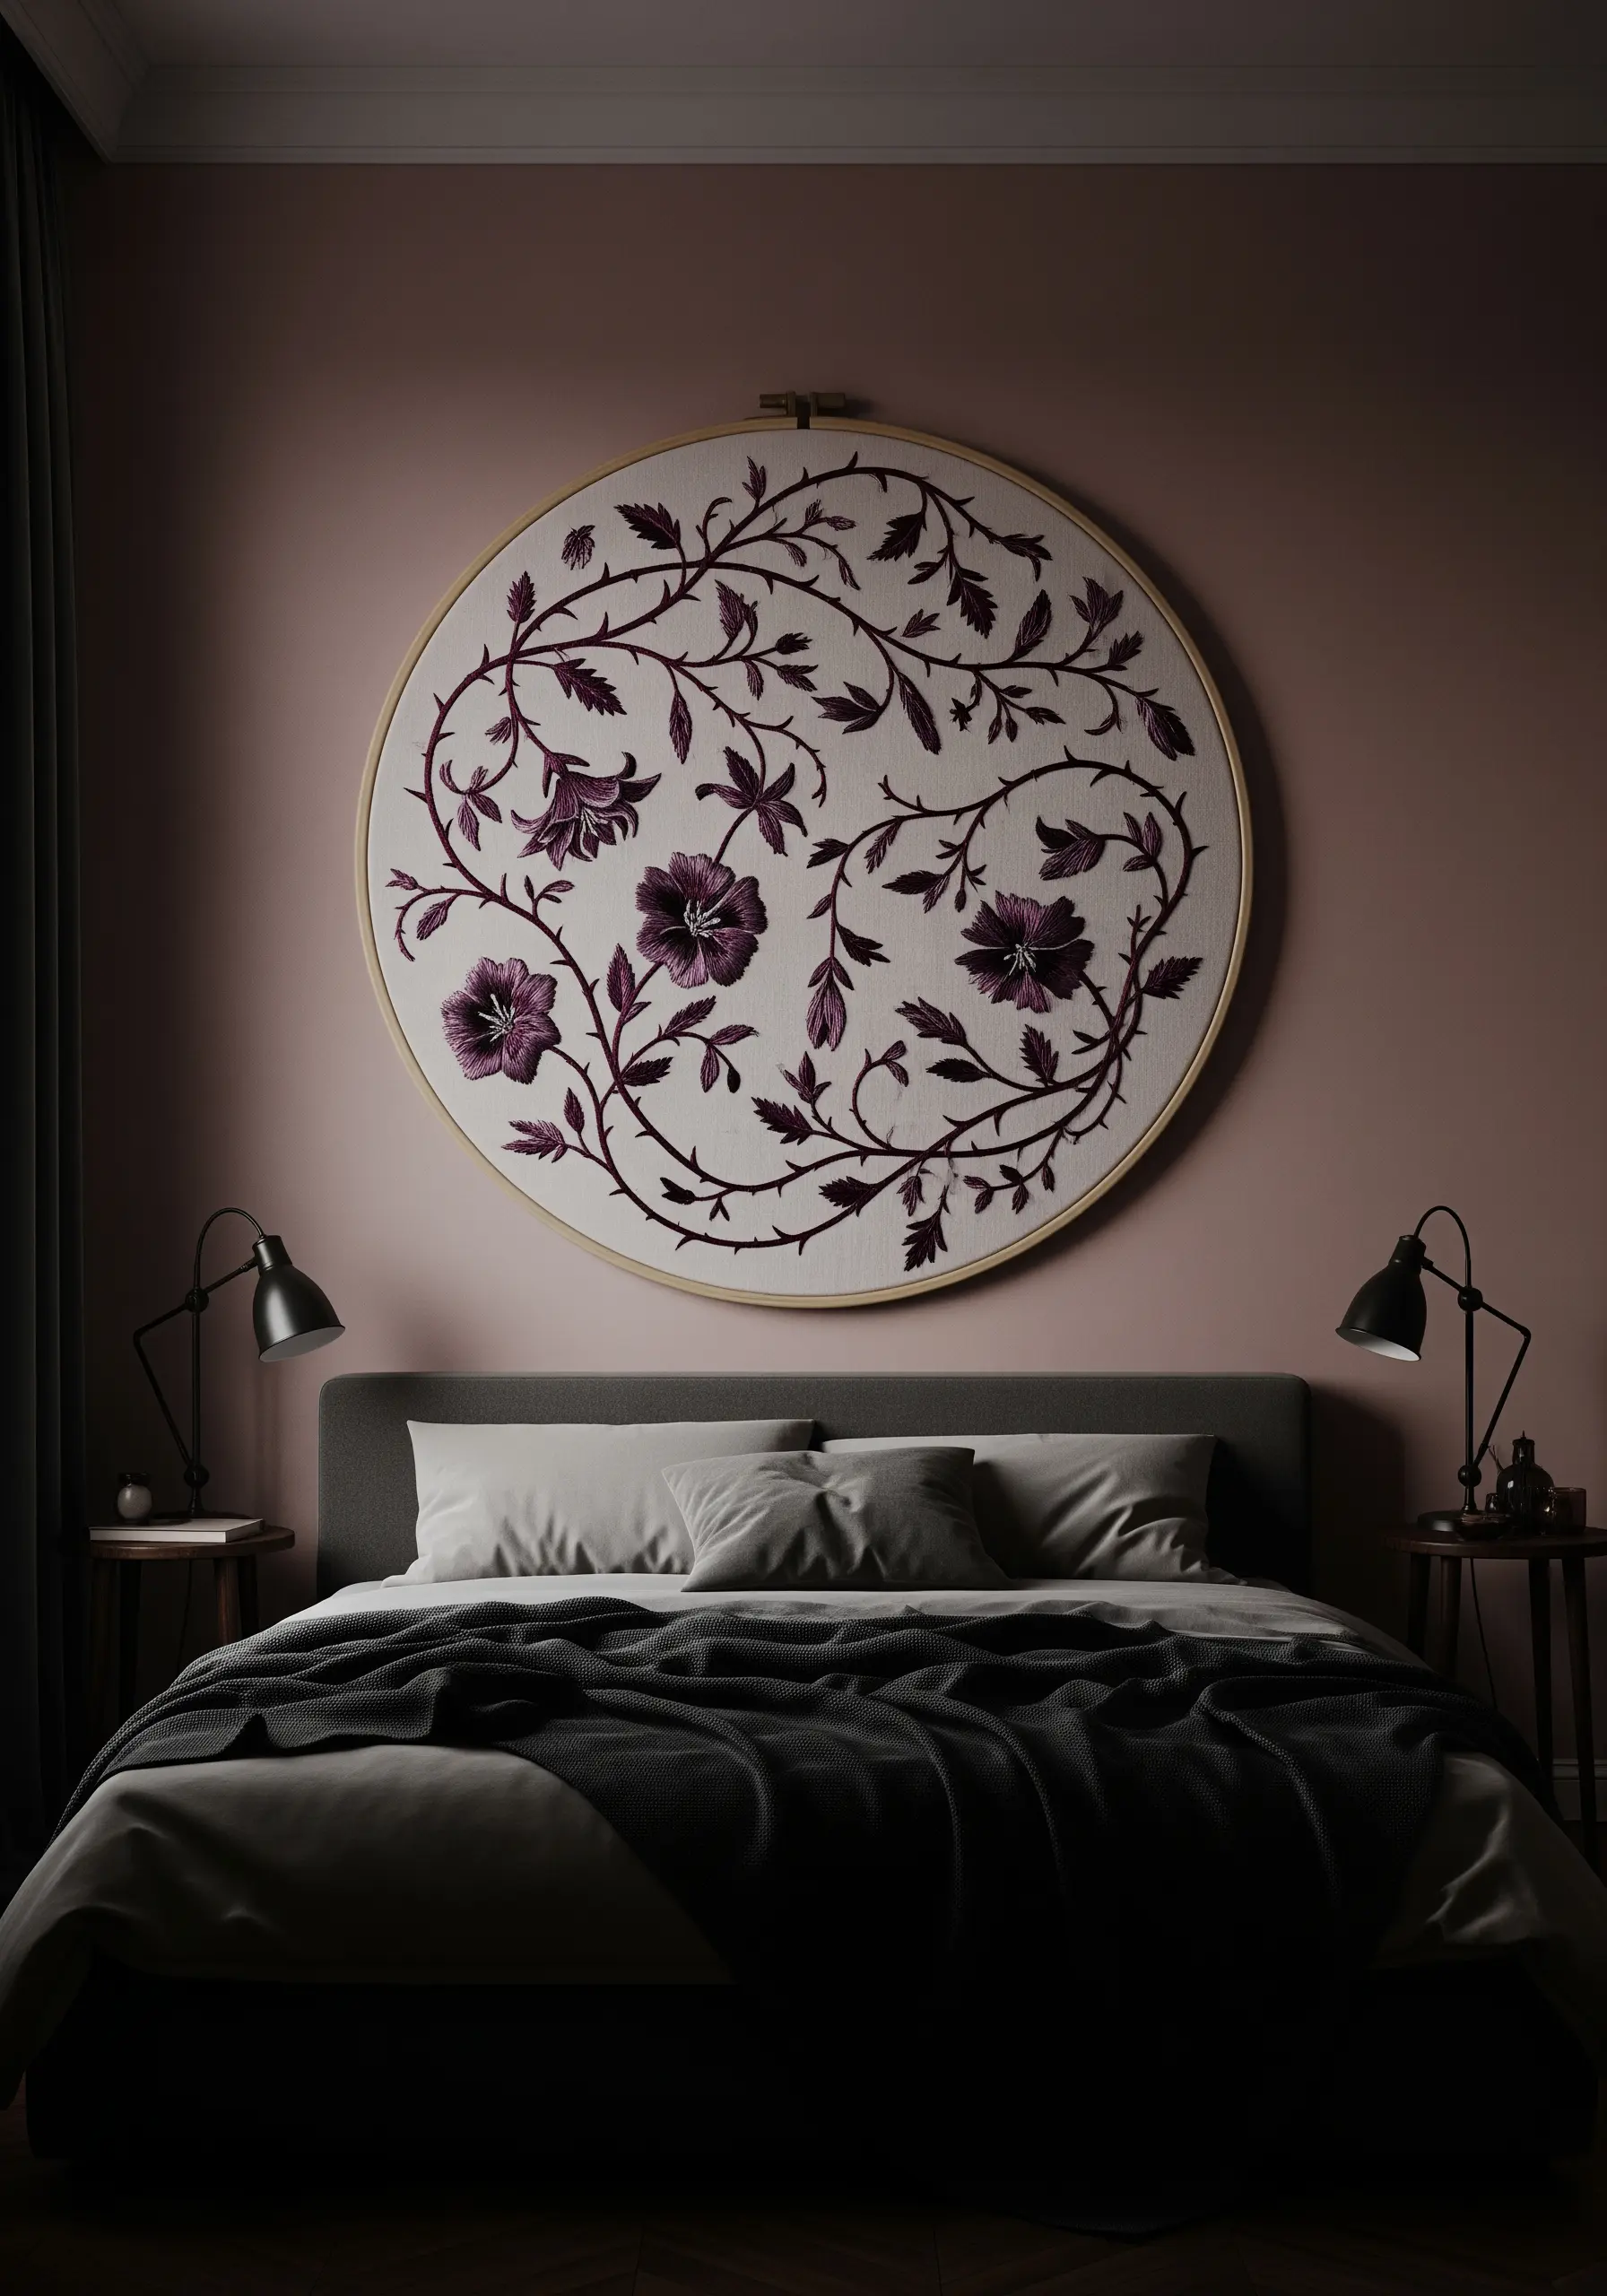
To prevent a dark floral piece from feeling flat, introduce subtle color variations.
Instead of using only stark black, build a palette of deep charcoal, midnight blue, and rich aubergine.
Use a long-and-short stitch to blend these tones seamlessly within the petals and leaves.
This technique introduces a painterly depth and complexity that makes the design feel far more luxurious and alive than a simple silhouette, creating truly gentle botanical embroidery stitches perfect for tranquil bedroom decor.
12. Define Botanical Forms with Directional Hatching
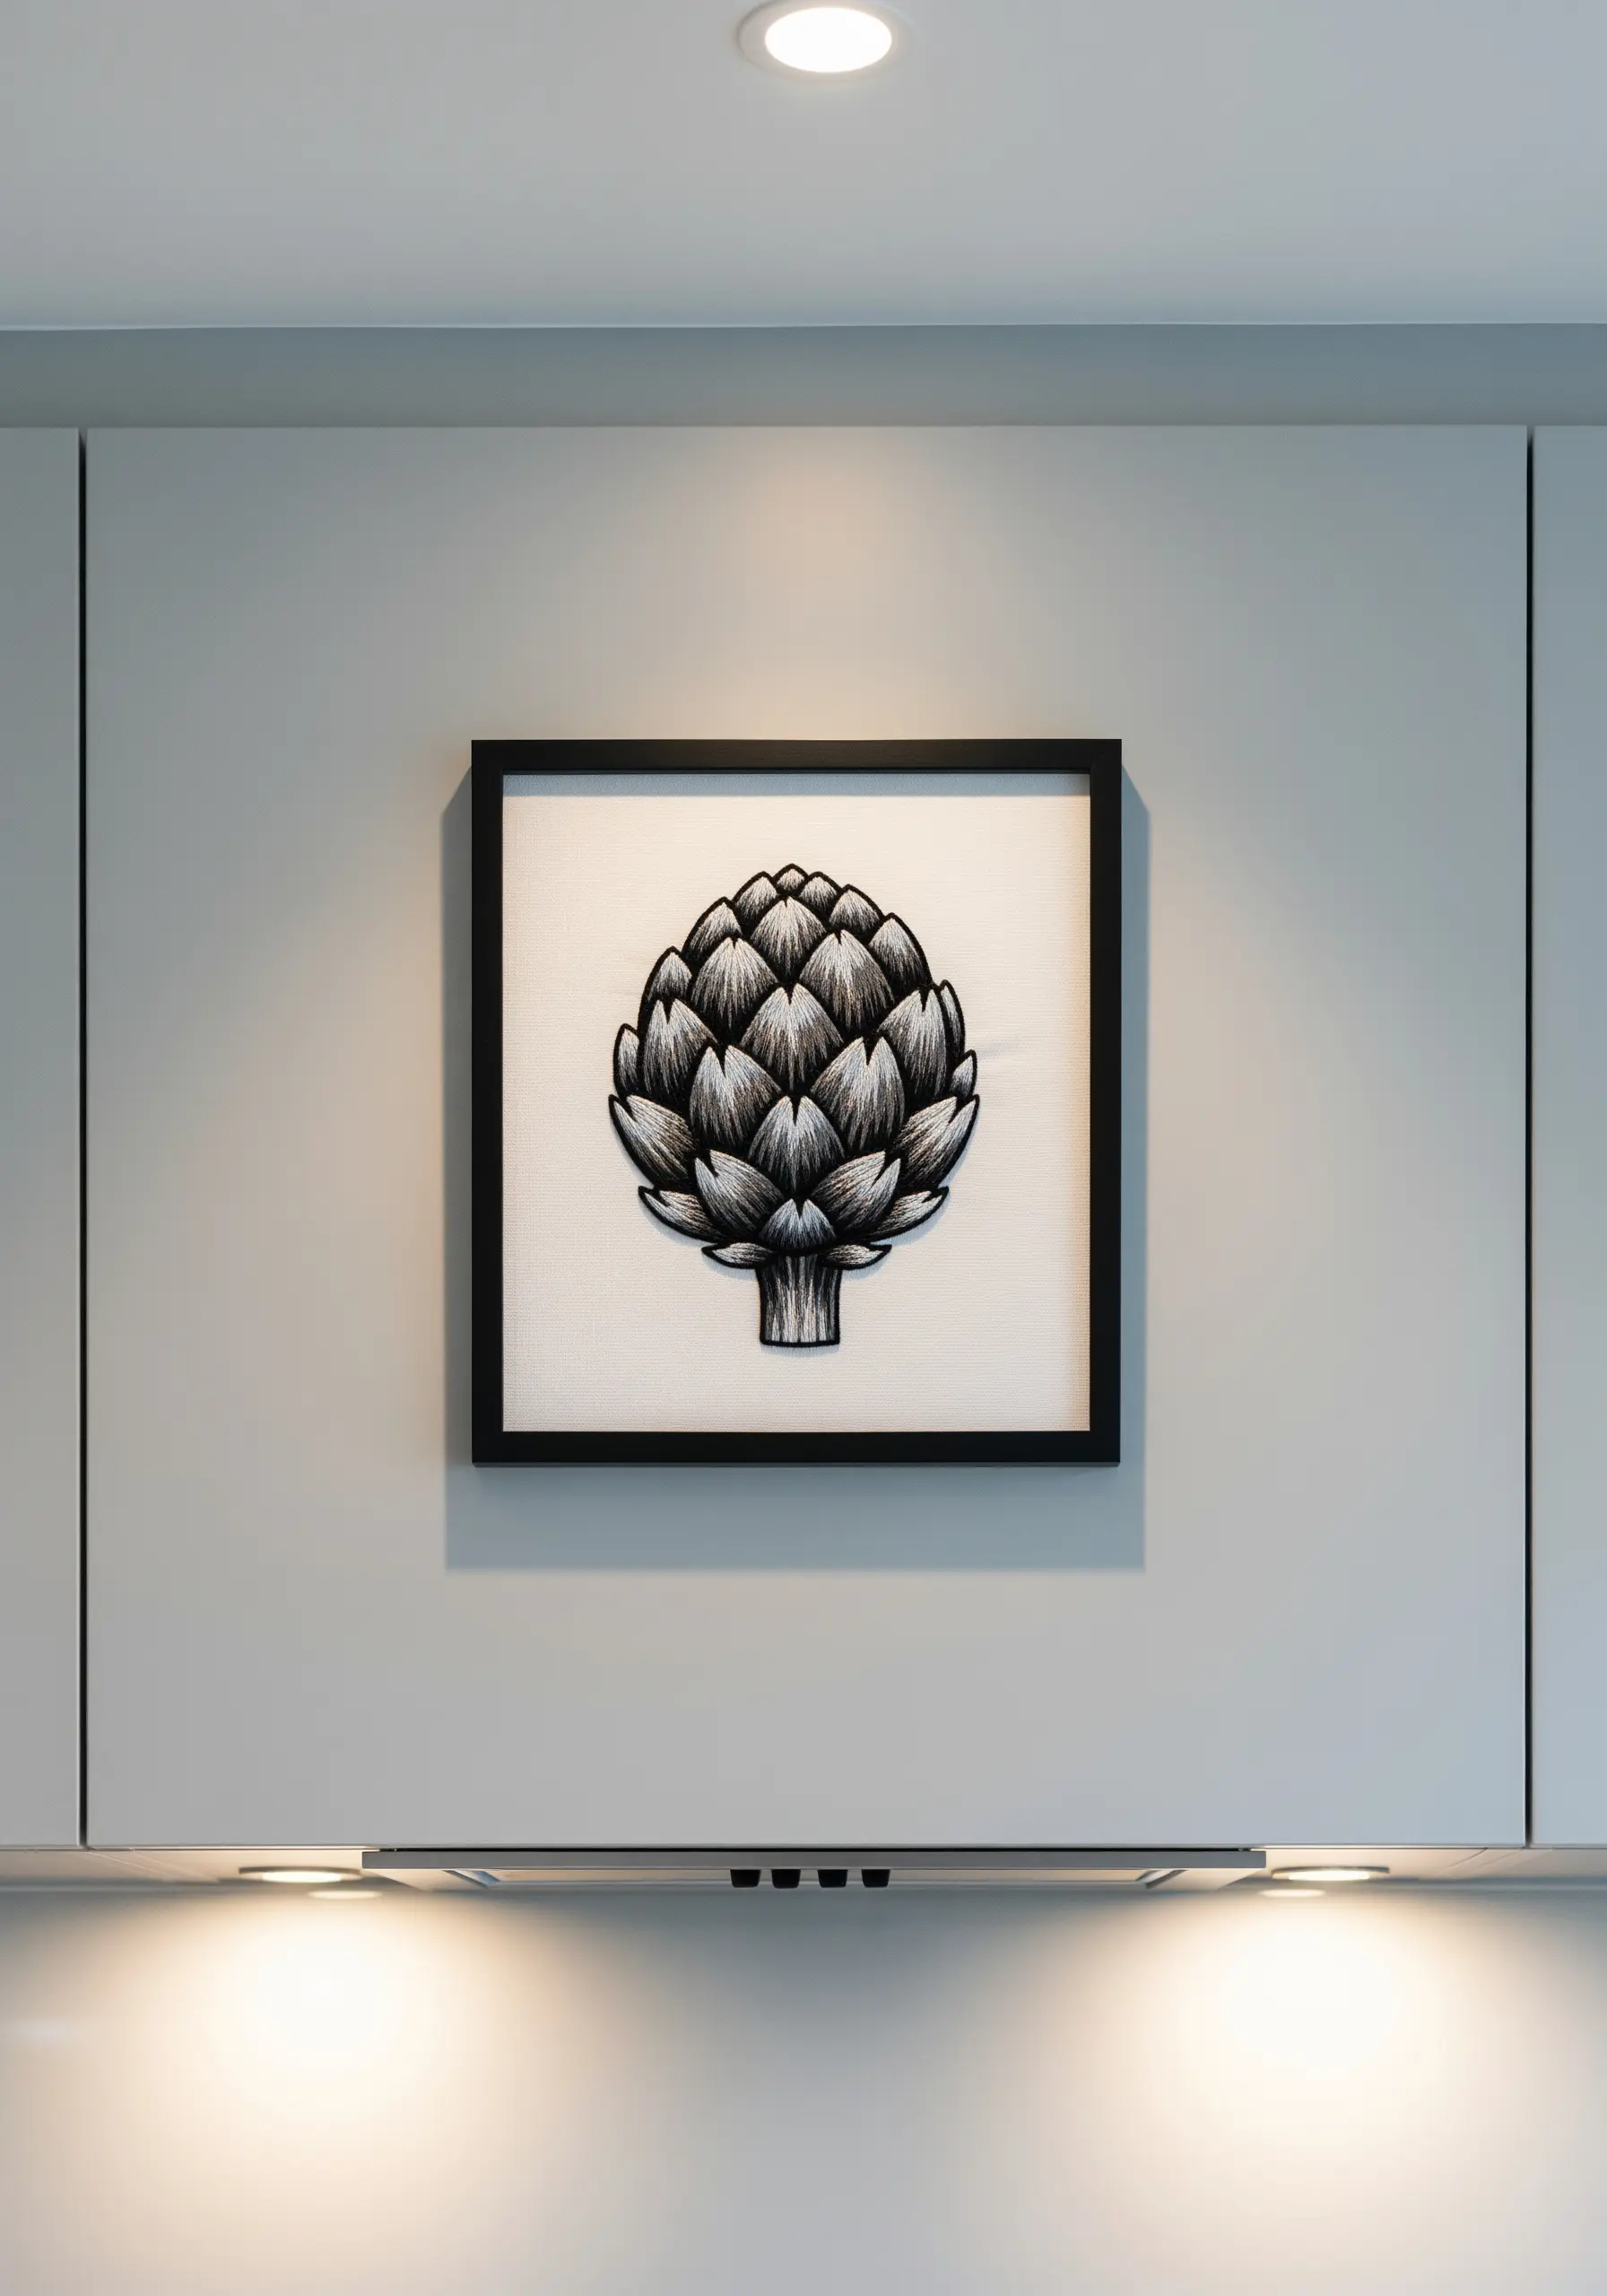
Capture the structured beauty of an artichoke by thinking like an illustrator.
Instead of filling each leaf with a solid satin stitch, use lines of backstitch or straight stitch to create shading.
Angle your stitches to follow the natural curve of each leaf, a technique known as contour hatching.
Place stitches closer together for darker shadows and farther apart for highlights.
This approach gives the vegetable a wonderful sense of form and dimension, perfect for minimal fruit botanical embroidery patterns for kitchen wall decor.
13. Capture Organic Detail with a Whipped Stem Stitch

For the intricate, sprawling network of tree roots, you need a stitch that is both defined and flexible.
A whipped stem stitch is the perfect solution; it creates a raised, cord-like line that flows smoothly around tight curves without losing its definition.
Vary your thread weight to enhance realism: use a thicker thread for the main, gnarled roots, and taper down to a single strand for the finest rootlets.
This variation brings a natural sense of scale and complexity to tree ring & bark texture embroidery patterns.
14. Use Stippling to Create Delicate Tonal Gradients

Mimic the fine detail of scientific illustrations by using dots instead of lines.
Create your shading and texture with thousands of tiny seed stitches or single-strand French knots.
This technique, called stippling, gives you incredible control over value and gradients.
Place your stitches very close together for deep shadows and scatter them sparsely for lighter areas.
It is a patient, meditative process that results in beautifully detailed minimal ocean-inspired embroidery pieces.
15. Manage Intricate Detail with a Split-Stitch Foundation

When tackling a design as complex as a map, every line must be clean and unwavering.
Use a split stitch with two strands of floss for all your outlines.
It creates a solid, sharp line that won’t fray or shift, giving your work a professional, graphic finish.
For any areas that need to be filled, complete the split stitch outline first; it provides a perfect, crisp edge to fill against with your satin stitch.
This is the secret to creating sharp and legible modern embroidered tapestry designs.
16. Mimic Painterly Gestures with Layered Turkey Work

To achieve the thick, dimensional texture of a heavy brushstroke, you must build up the fabric’s surface.
Use the Turkey work stitch with a thick black yarn to create dense, plush loops.
After filling a shape, you can leave the loops for a shaggy texture or trim them with sharp scissors to create a rich, velvety pile.
This technique adds immediate sculptural depth, making it ideal for creating dynamic abstract thread painting ideas.
17. Achieve a Flawless Fill on Large Shapes with Brick Stitch

Filling a large, solid shape with satin stitch can be unforgiving, often resulting in puckering or uneven tension.
Instead, use a brick stitch.
This technique involves creating rows of short, staggered straight stitches, much like bricks in a wall.
It produces a beautifully smooth, woven-like surface that lies perfectly flat and has a subtle texture.
It is the ideal choice for creating flawless fills in cloud-soft embroidery hoops for nursery walls.
18. Convey Weightlessness with Open and Airy Stitches

To capture the delicate essence of a falling feather, you must embrace negative space.
Avoid heavy, dense fill stitches.
Instead, use an open stitch like the fly stitch to create the feather’s barbs, placing them far enough apart to let the background fabric show through.
For the central shaft, a single, fine line of backstitch is all you need.
This minimalist approach is key for minimalist embroidery designs inspired by nature that feel light and ethereal.
19. Create Cascading Foliage with Detached Chain Stitches
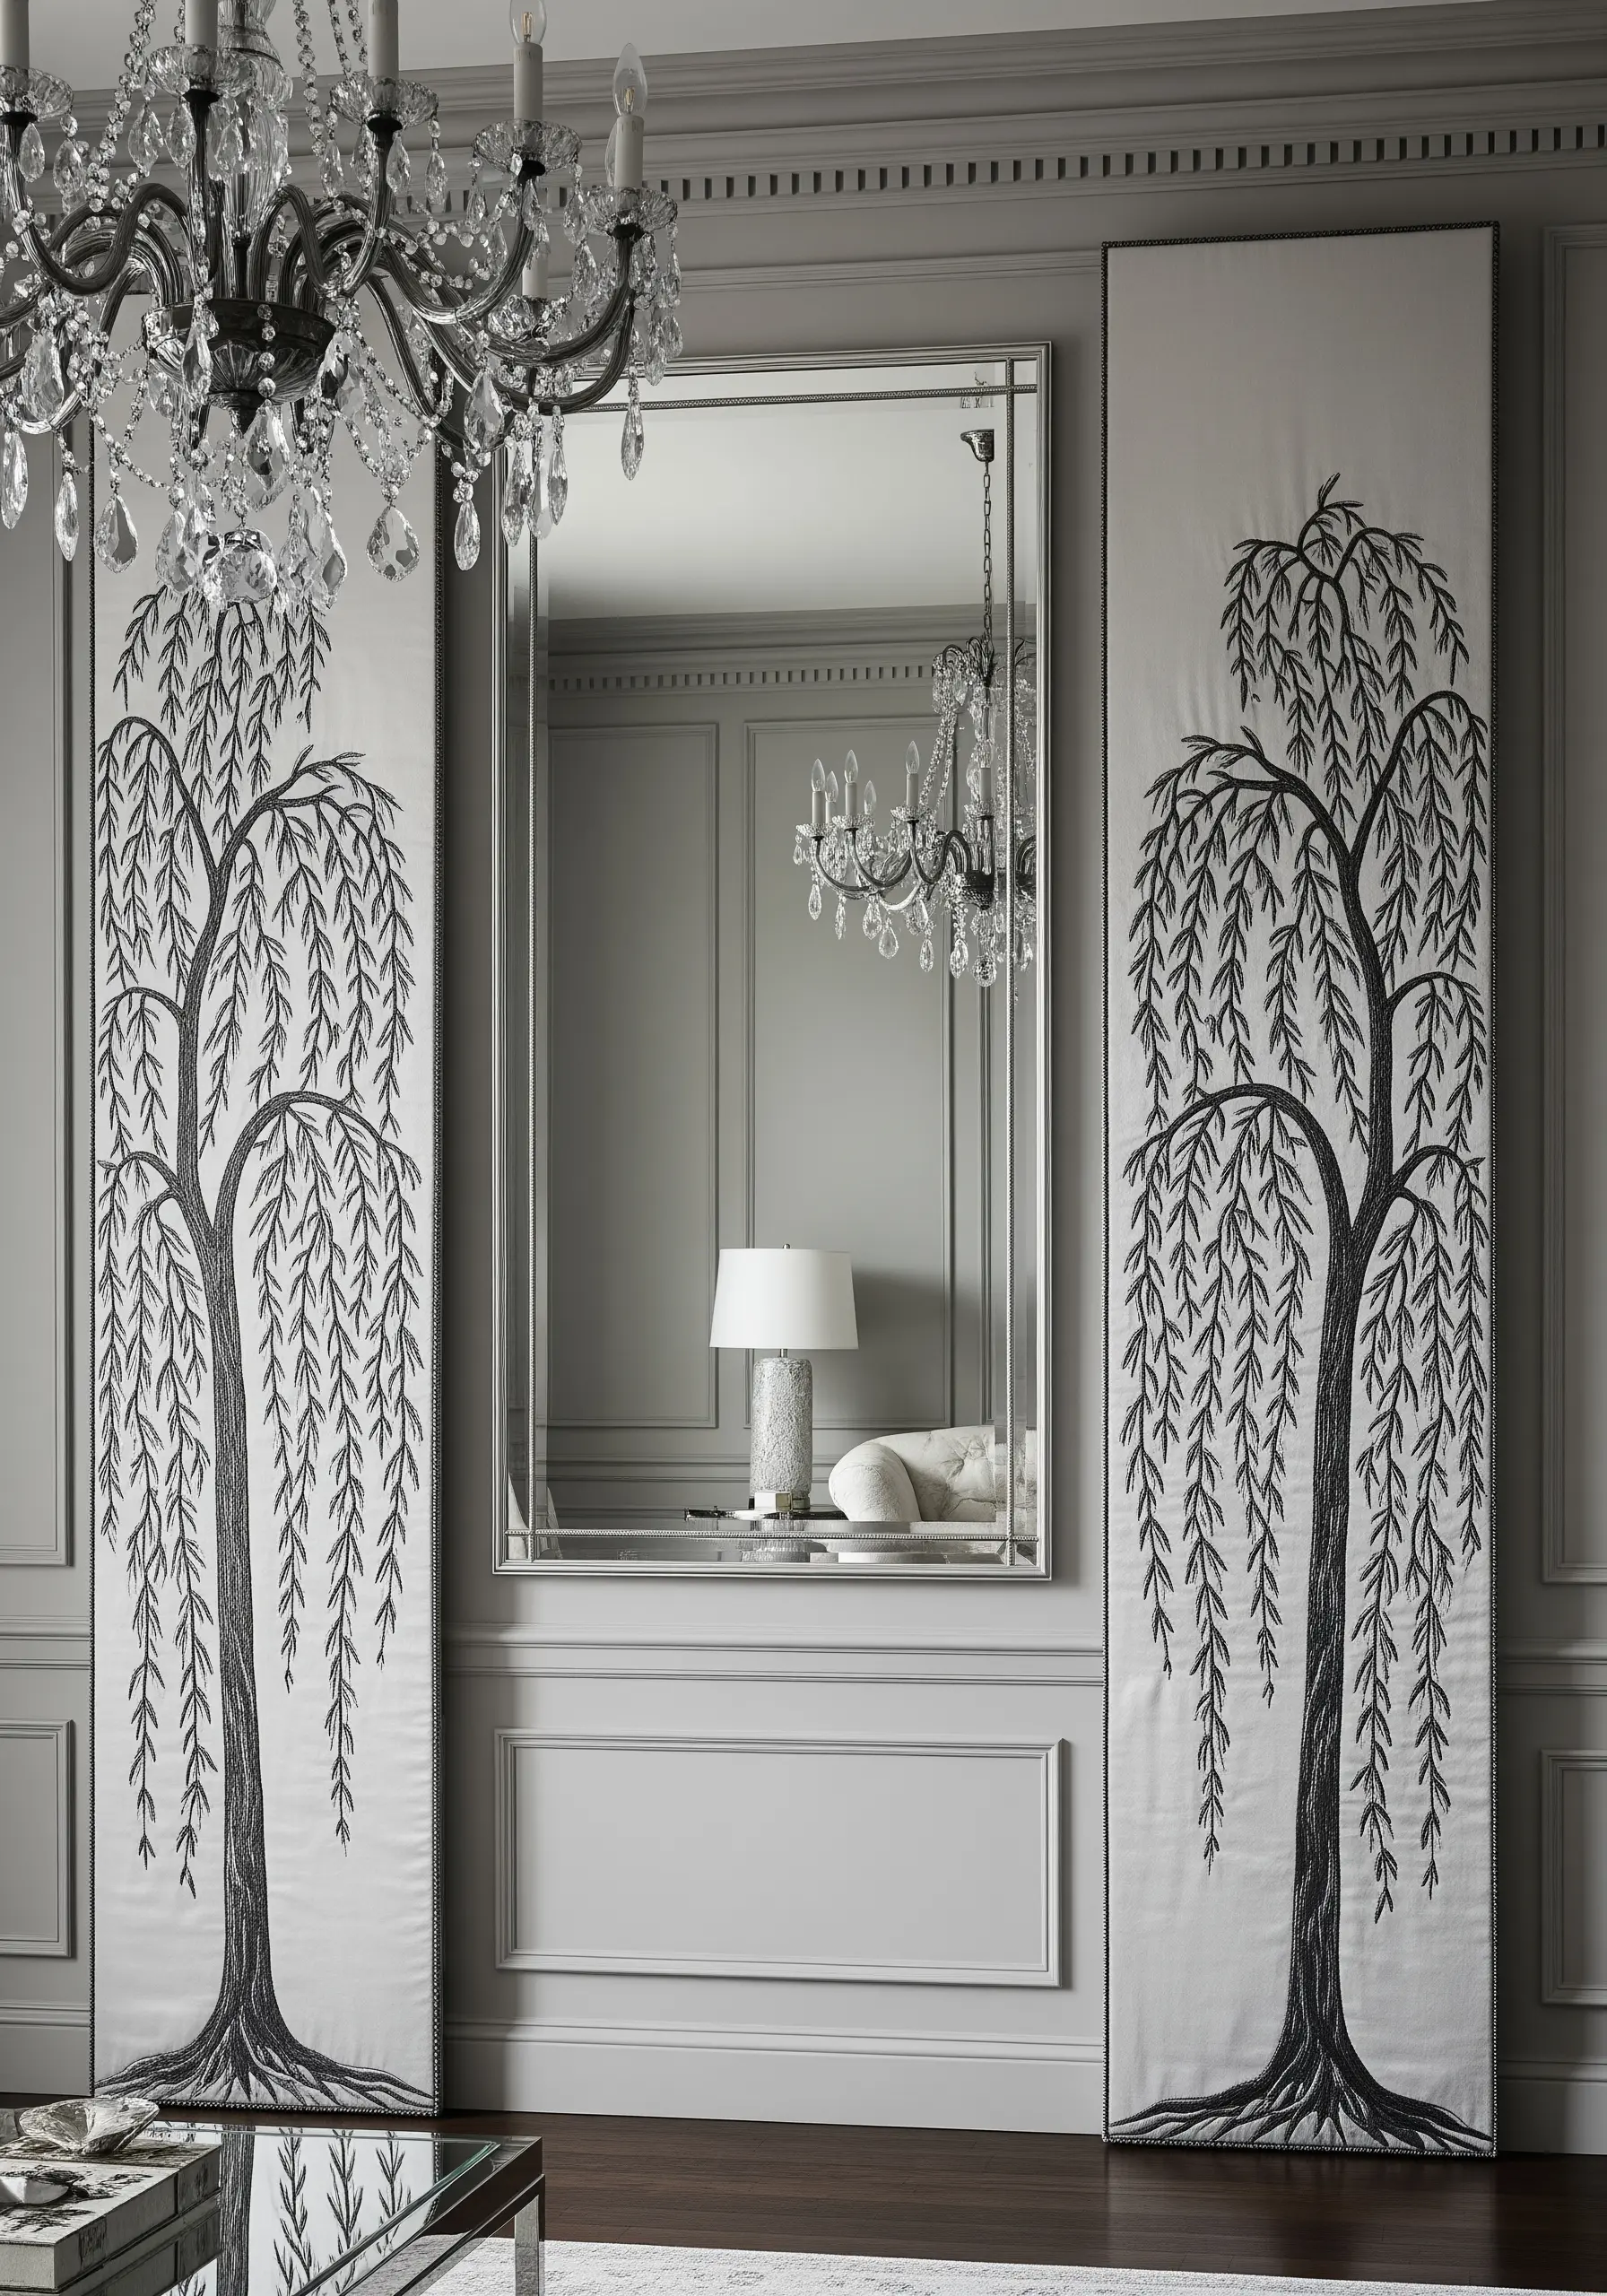
The graceful, weeping habit of a willow tree can be beautifully rendered using detached chain stitches, also known as lazy daisies.
Work them in long, flowing vertical lines, slightly varying the length and angle of each stitch to create a natural, cascading effect.
Using a lighter weight thread—just two or three strands—will prevent the foliage from appearing bulky and will enhance the tree’s delicate appearance, transforming your fabric into one of many beautiful organic decor embroidery patterns.
20. Build Iridescence Over a Solid Black Base

To create the illusion of a shimmering, iridescent surface, you must first establish deep shadows.
Fill the main body of the beetle with a dense, perfectly smooth black satin stitch.
Once this base is complete, use single, long straight stitches of metallic or silk threads in shades of green, blue, and purple over the top.
These stitches will catch the light and appear to glow against the dark background, demonstrating one of the most effective and unexpected ways to use metallic thread.
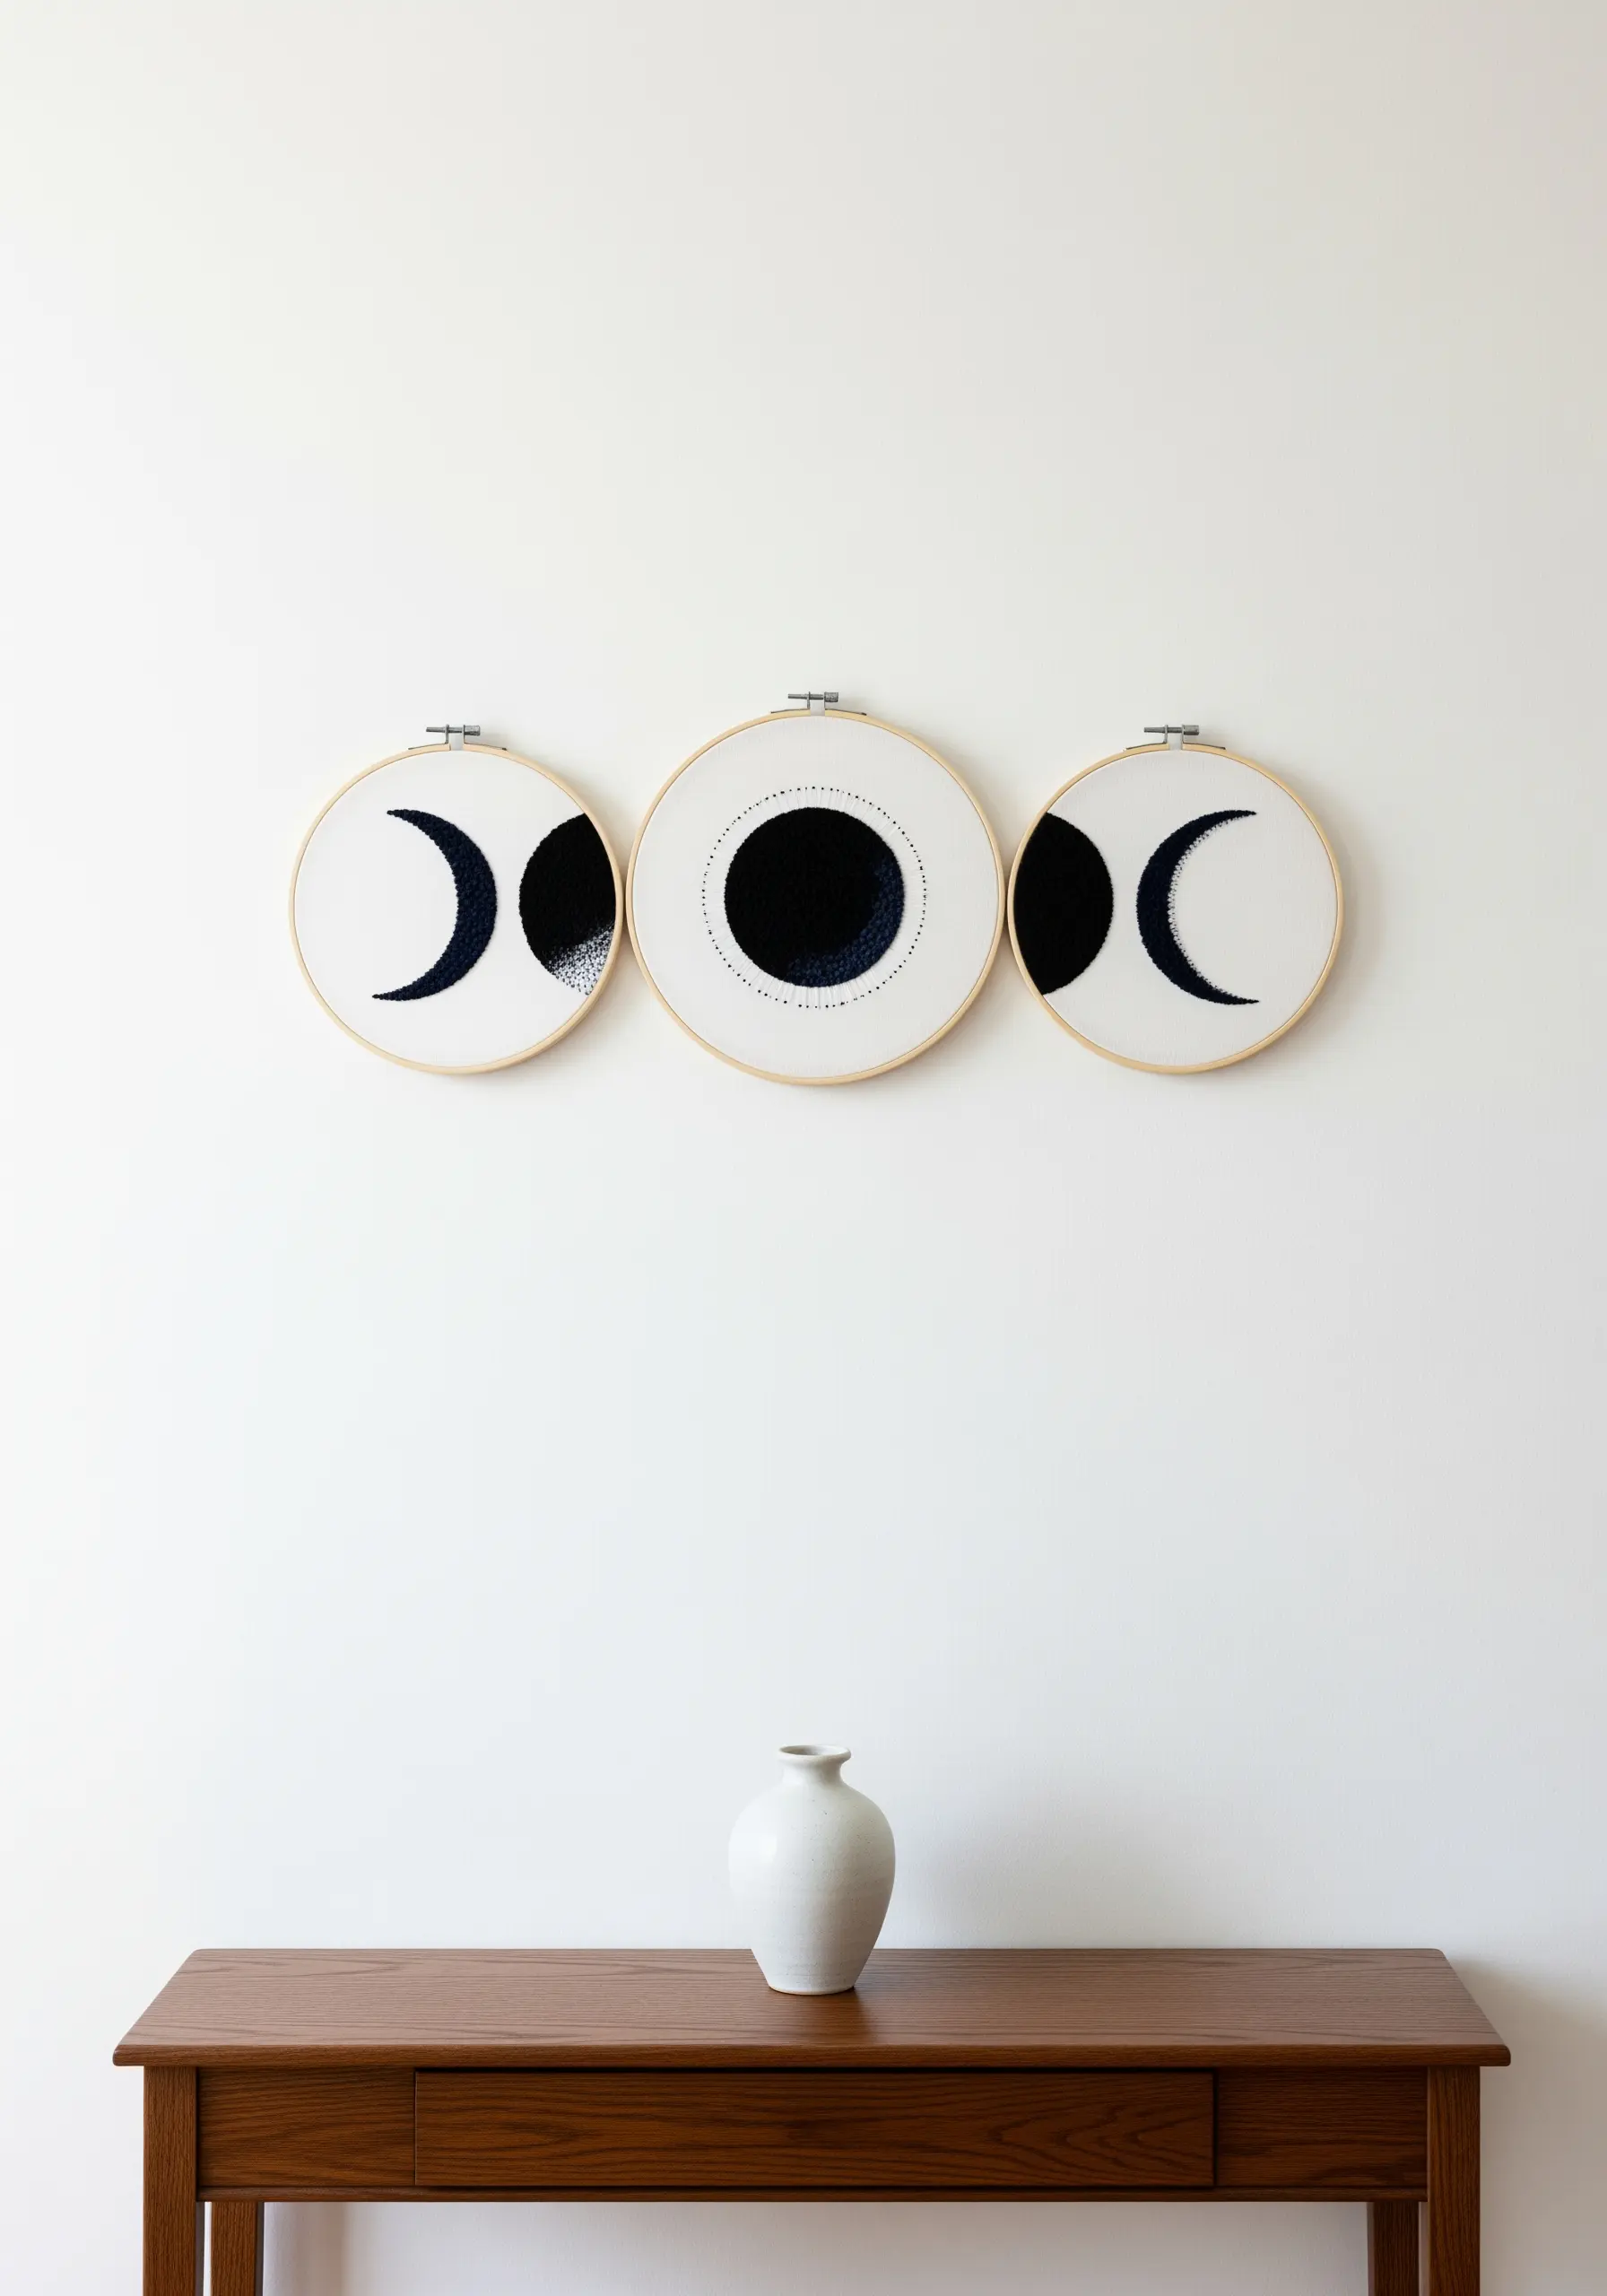
21. Arrange a Cohesive Hoop Gallery with Rhythmic Repetition

The visual power here comes from the collection as a whole.
To create a cohesive series, maintain consistency across each piece: use the same fabric, thread color, and stitch techniques.
You can vary the hoop sizes to add interest, but keep the core elements uniform.
When you display them, think about the flow of the space.
Arranging them along a diagonal line, as if ascending a staircase, creates a dynamic rhythm that guides the eye, turning individual pieces into stunning hooped wall collage layouts.
22. Combine Linear and Fill Stitches for Topographic Texture

Evoke the ruggedness of a mountain landscape by combining two distinct types of stitching.
Use a crisp, clean backstitch to define the sharp, geometric ridgelines of the peaks.
For the shaded faces of the mountain, fill the areas with dense straight stitches or running stitches.
By varying the direction of these fill stitches, you can create the illusion of different rock facets, adding a powerful sense of dimension to your mountain landscape thread painting techniques.
23. Emulate Ink Brushstrokes with Variable-Width Satin Stitch
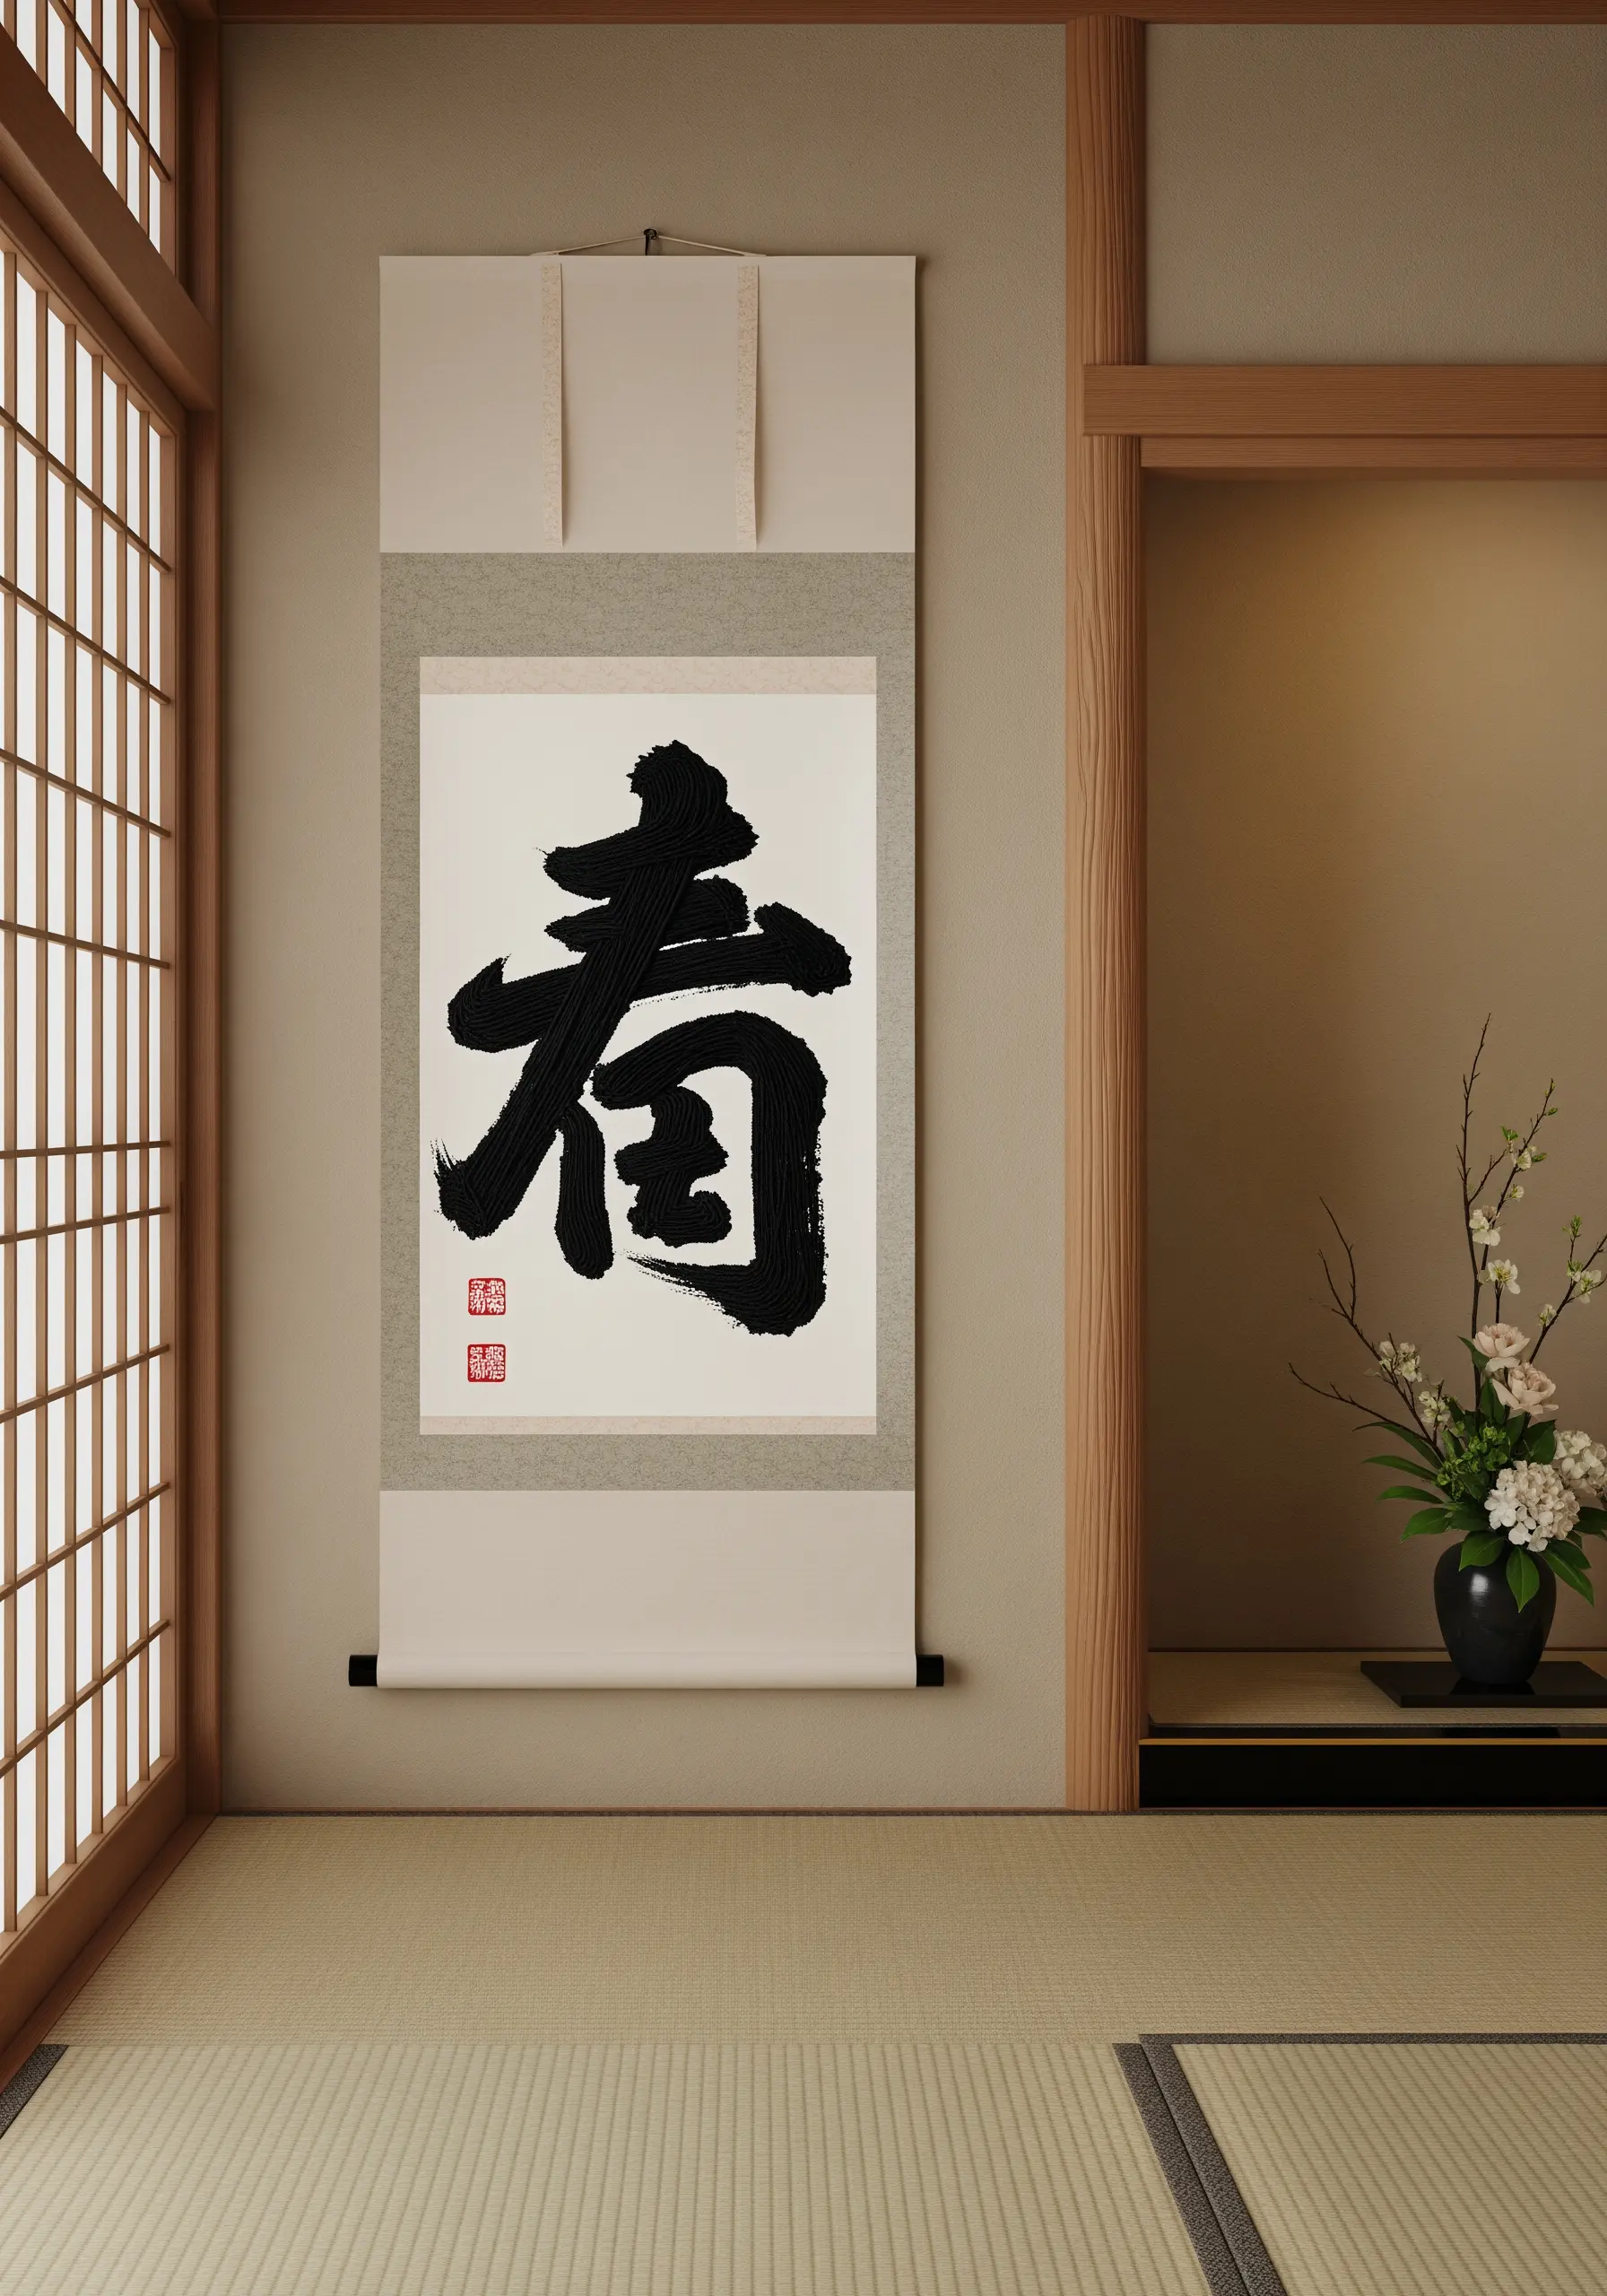
To capture the fluid energy of calligraphy, you must replicate its characteristic thick and thin strokes.
A simple line stitch won’t work; instead, use a satin stitch and consciously vary the length of your stitches within each stroke.
Start with short stitches for a thin line, gradually lengthen them to create a wider section, then shorten them again to taper the end.
Using a lustrous black silk thread will further enhance the illusion of wet ink, perfect for Japanese Zen-inspired embroidery designs.
24. Create Rhythmic Visuals with a Limited Color Palette

A repeating motif, much like wallpaper, has a deeply calming and satisfying visual effect.
To ensure the final result is sophisticated rather than busy, strictly limit your color palette.
Here, just a deep burgundy and black on a neutral ground create a rich and cohesive look.
Use a simple backstitch for the outlines and fill the seeds with tiny French knots for a touch of texture.
The disciplined repetition transforms the fabric into one of many simple stitched patterns that pair perfectly with modern furniture.
25. Achieve Architectural Precision with a Water-Soluble Stabilizer

For a design with the intricate geometry of a Gothic window, a perfect pattern transfer is essential for success.
Print your design directly onto a sheet of water-soluble stabilizer (like Sulky Fabri-Solvy).
Adhere it to your fabric and stitch directly through the paper, following the lines with perfect accuracy.
When you’re finished, the stabilizer dissolves away in water, leaving only your flawless stitching.
This method is foolproof for creating intricate abstract monochrome thread designs.
26. Tell a Story with High-Contrast Silhouettes

The power of these designs lies in their clarity and the story they suggest through simple, bold shapes.
To create this woodblock-print effect, you need a flawless fill stitch.
Use a dense satin stitch with all six strands of floss, ensuring each stitch lies perfectly flat and parallel to the one before it.
The stark, graphic quality of the black silhouette against the clean background gives these simple motifs a strong narrative feel, perfect for dark academia cushion embroidery patterns.
27. Create Organic Symmetry with a Random Fill-Stitch Mix
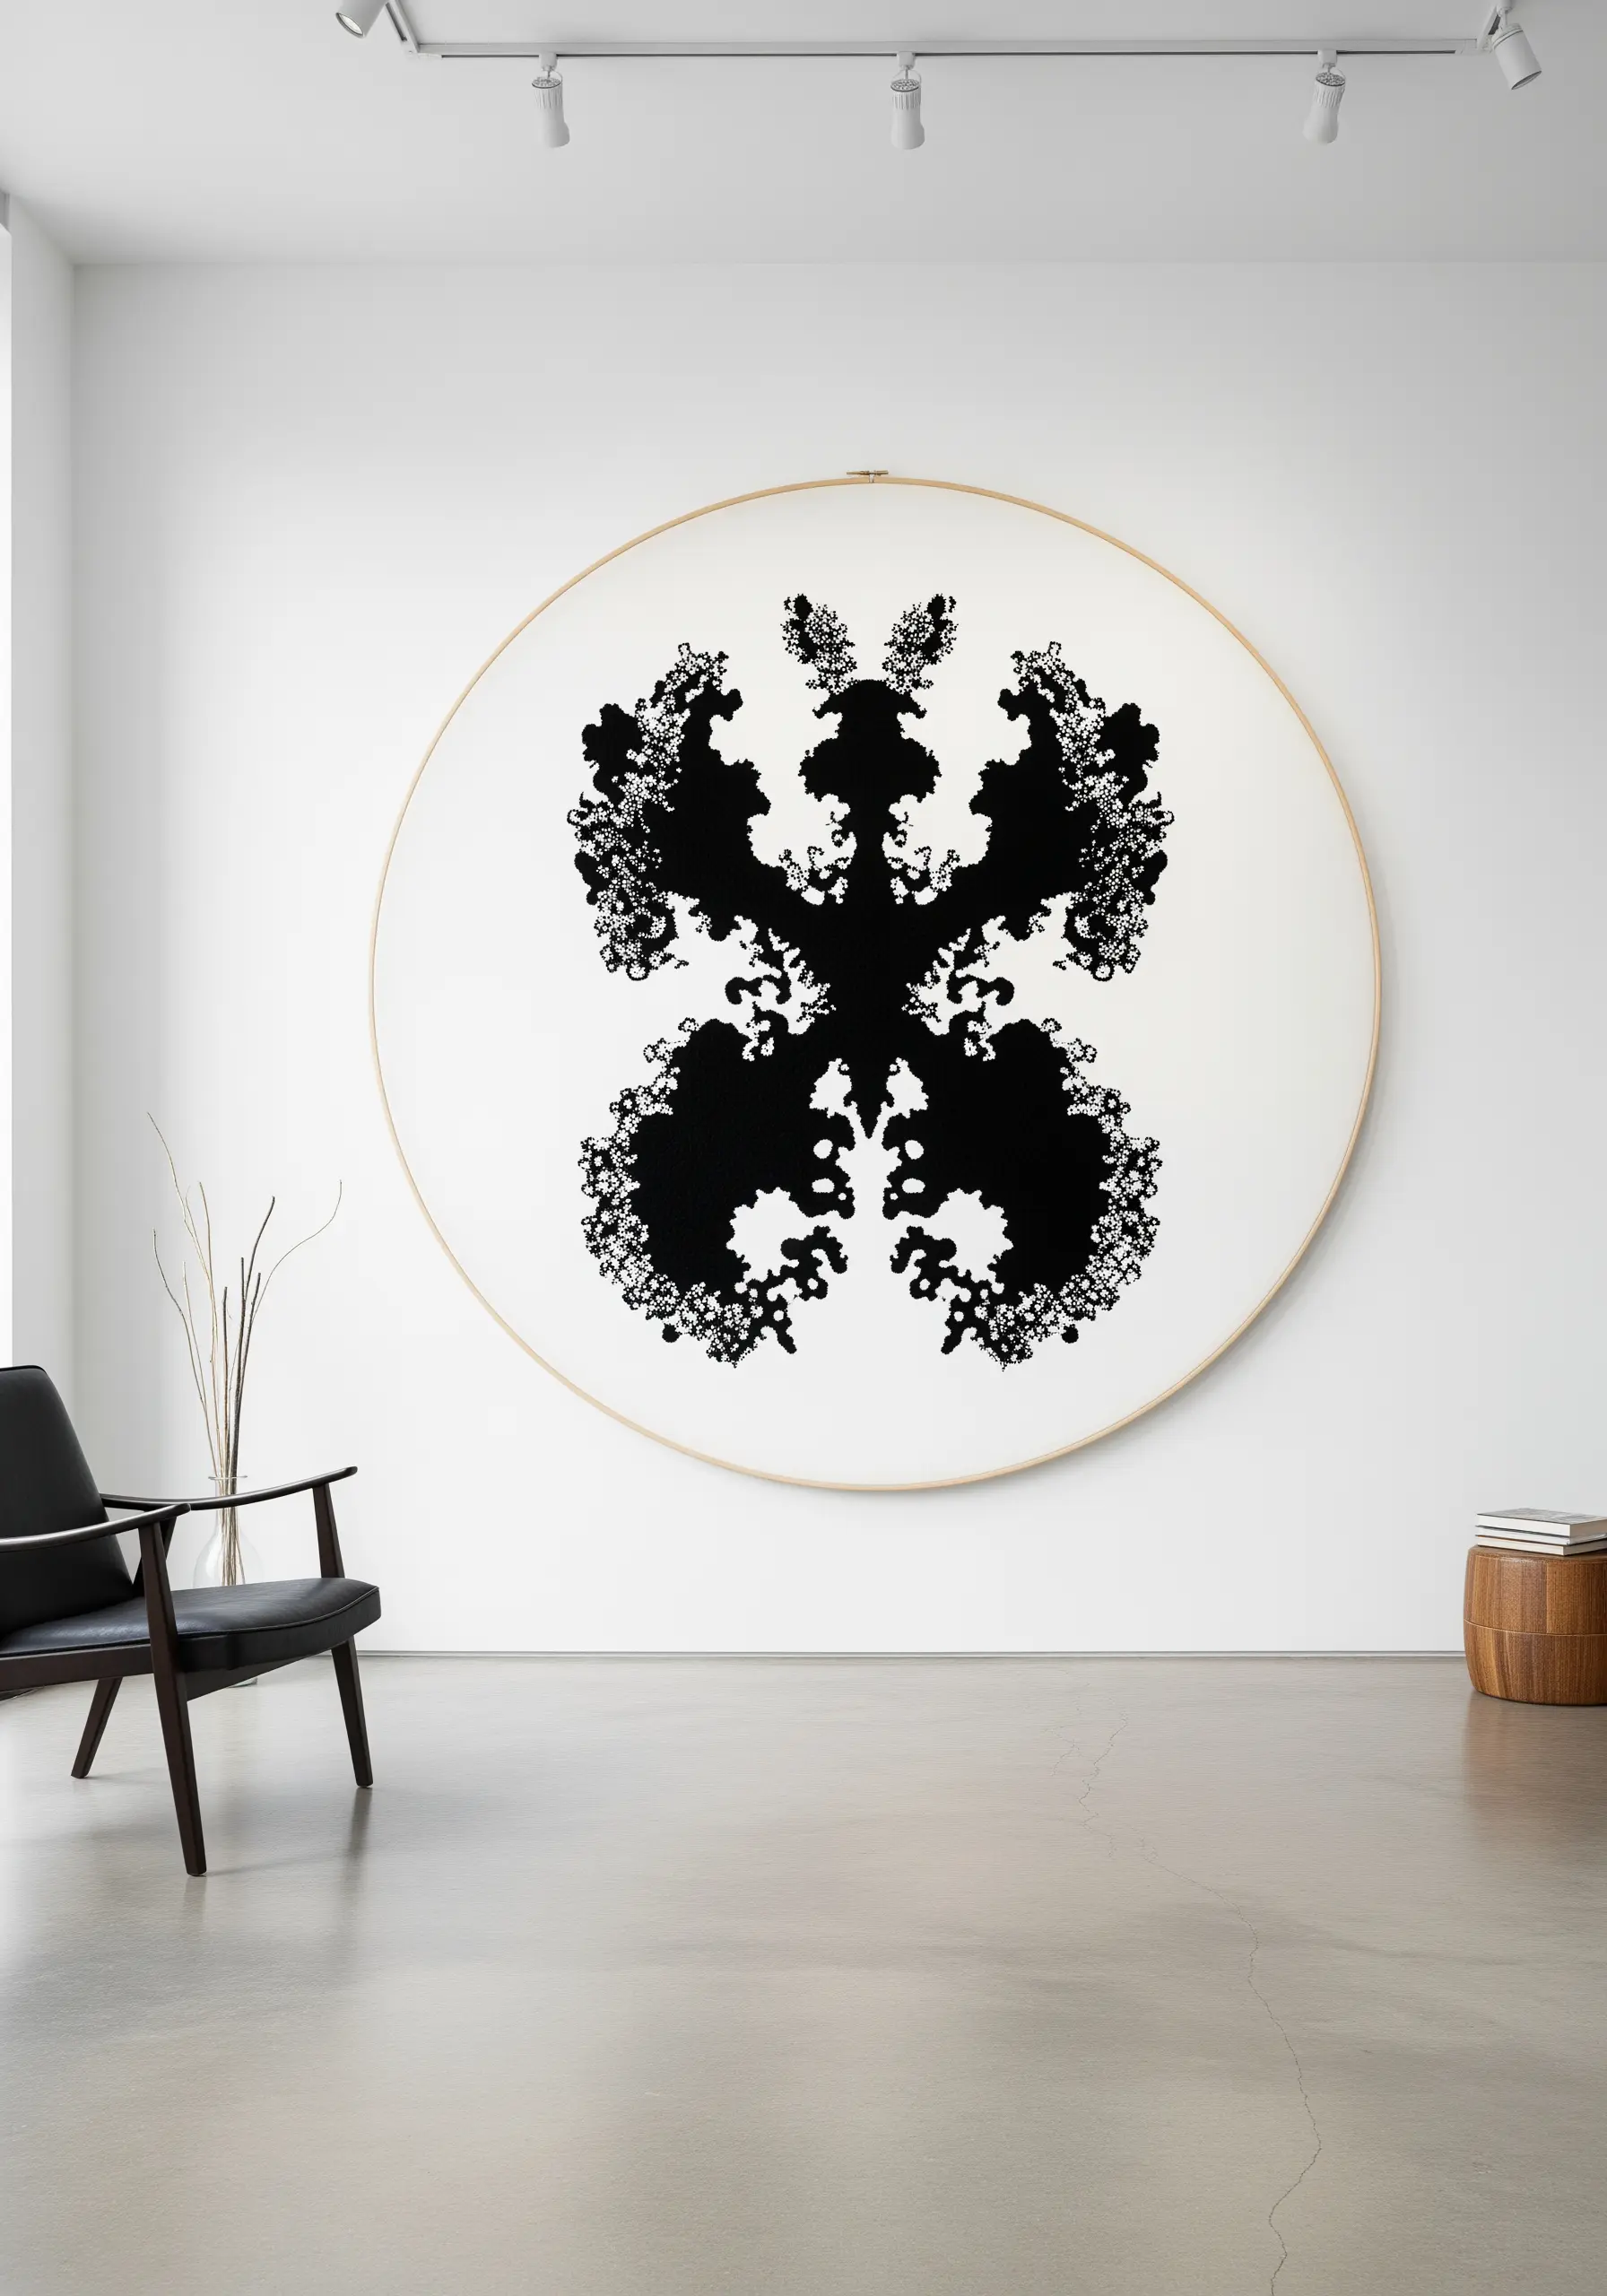
An inkblot design needs to feel both perfectly symmetrical and organically random.
To achieve this, transfer a precise mirror-image design onto your fabric.
Then, fill the shape with a chaotic mix of stitches: dense clusters of French knots, scattered seed stitches, and short, multi-directional straight stitches.
This combination of varied textures mimics the way ink pools and bleeds into paper, resulting in dynamic abstract texture-play designs.
28. Emphasize Form with Contrasting Outline and Fill Techniques
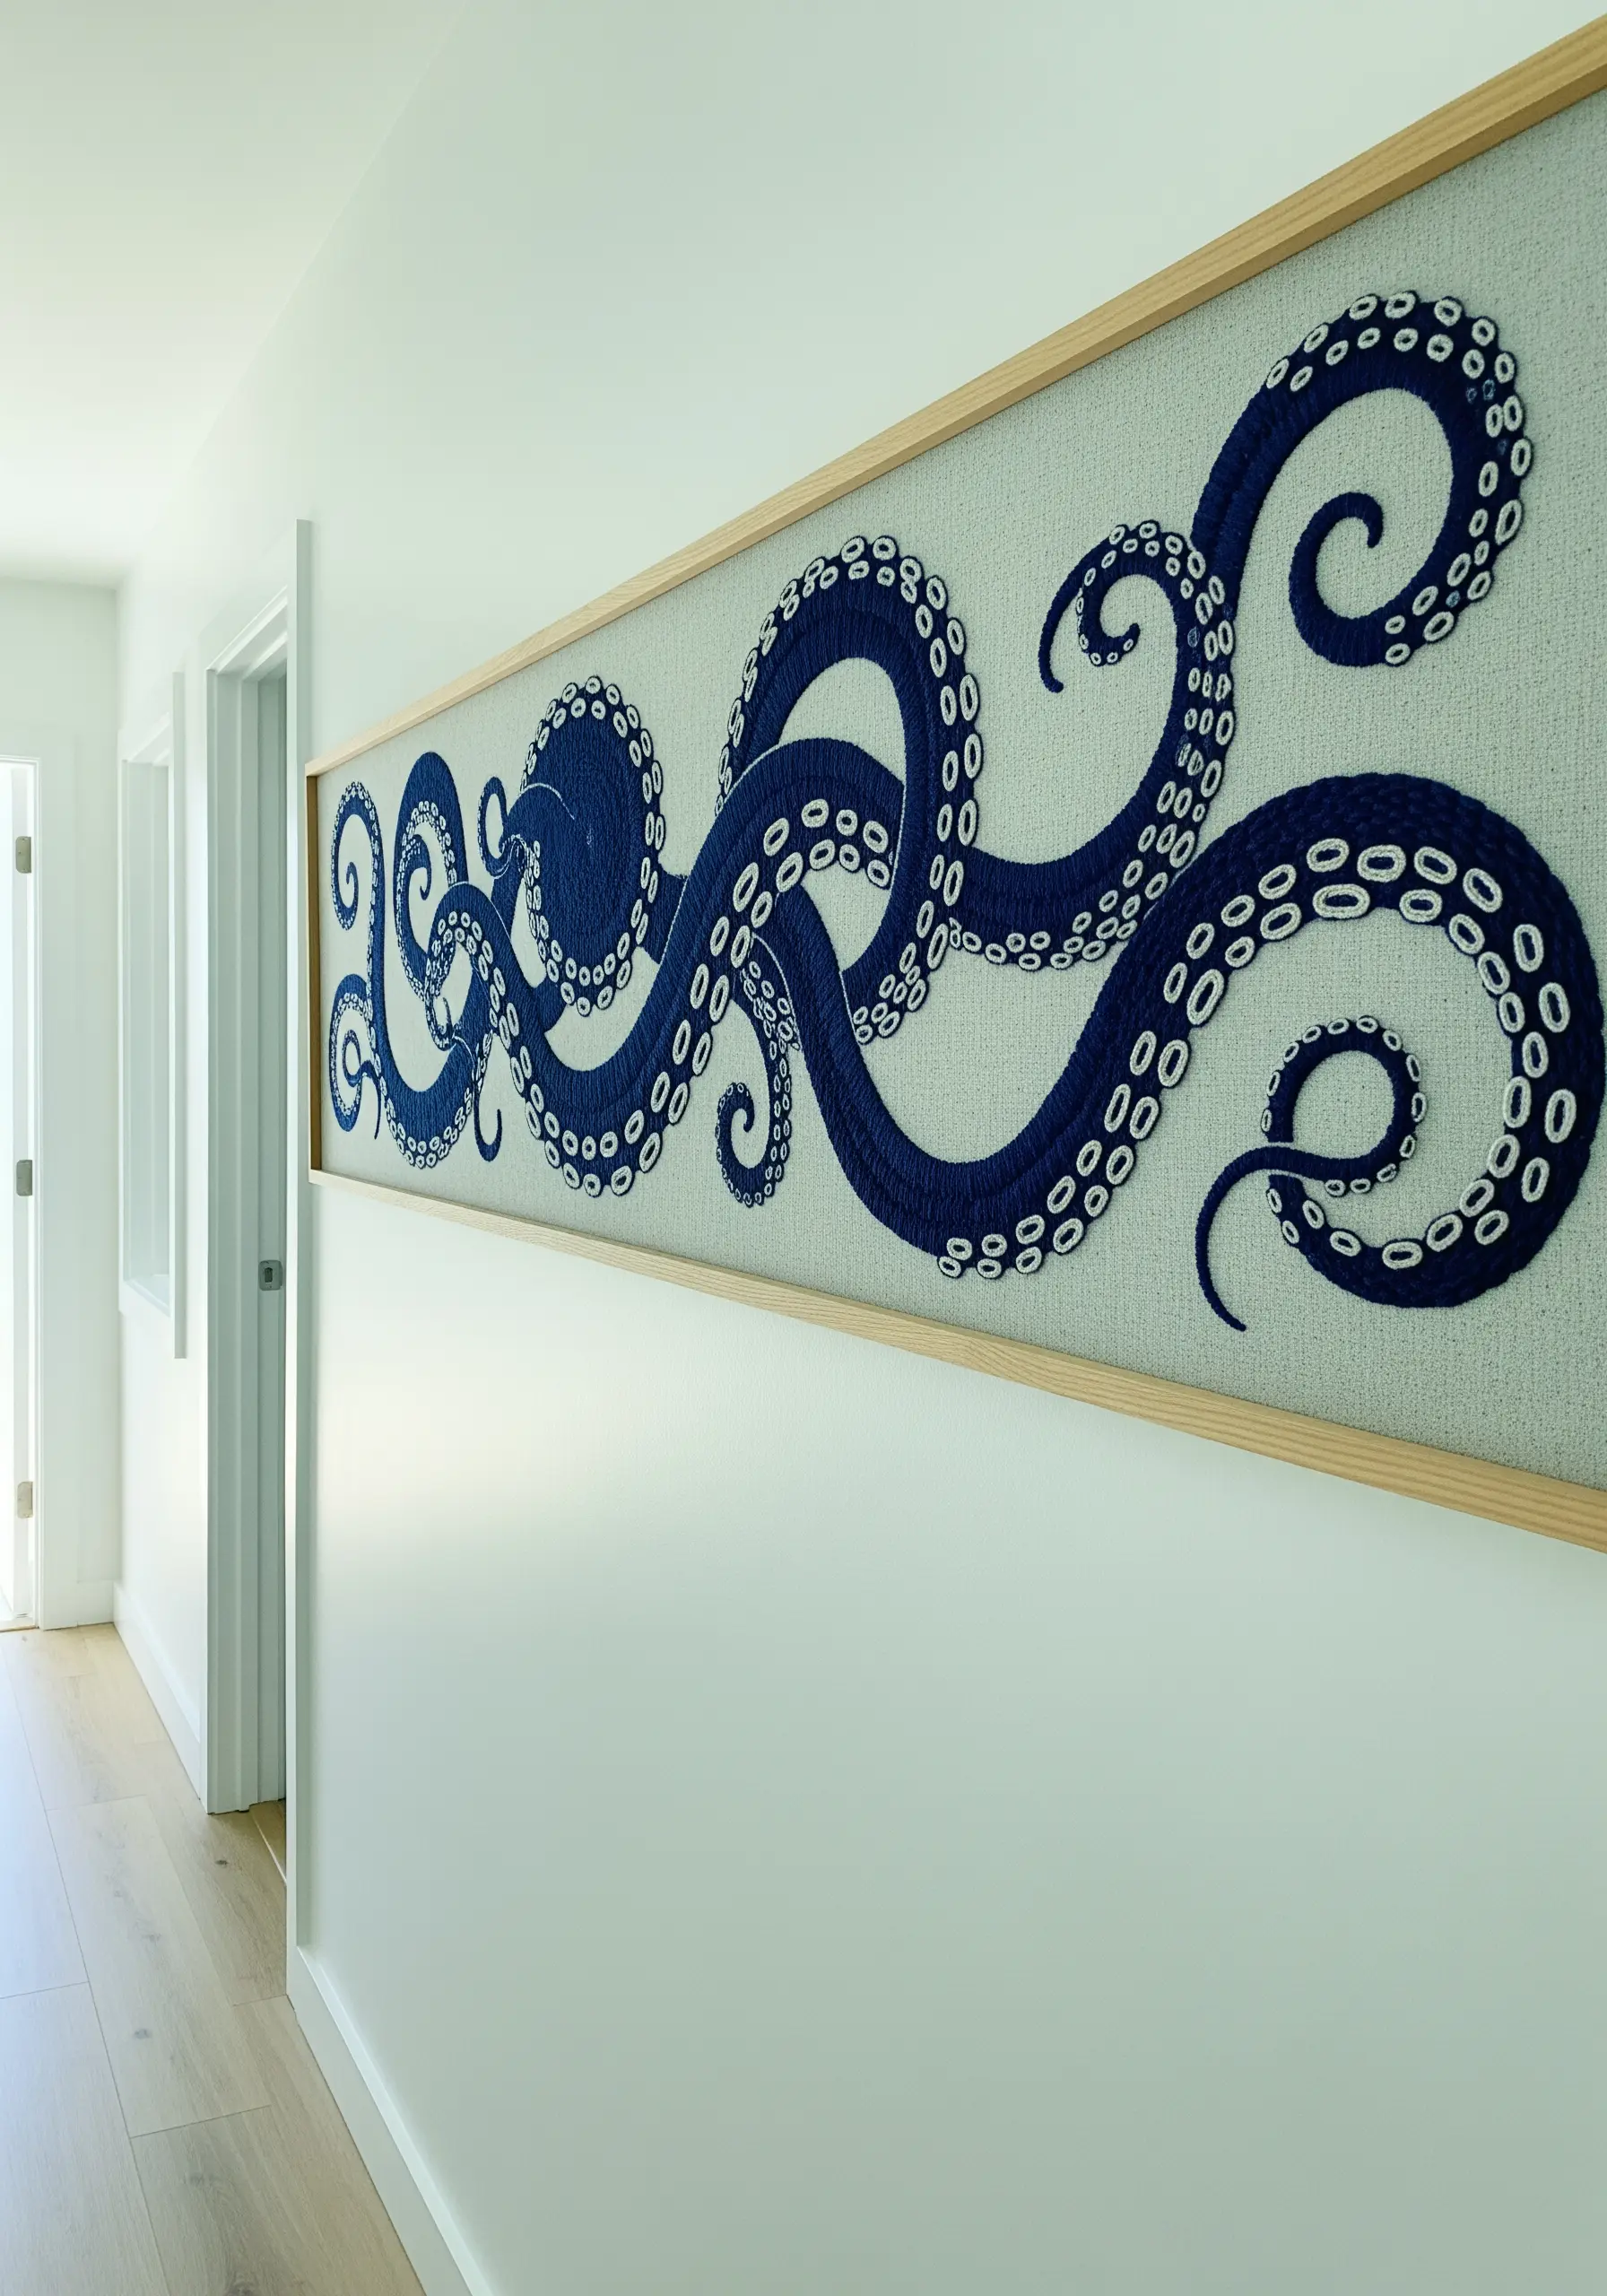
Make the tentacles appear rounded and dimensional by using contrasting threads and stitches.
First, create the suction cups using a bright white or light gray thread, filling each small circle with a tiny satin stitch or a single French knot.
Then, come back with a dark navy or black thread to outline the entire tentacle and fill the main body.
The sharp contrast between the light, textured dots and the dark, smooth fill creates a powerful illusion of depth, perfect for bold sea animal embroidery ideas.
29. Combine Thread and Beads for Luxe Art Deco Glamour

Capture the opulence of the Art Deco era by mixing the matte texture of thread with the sparkle of beads.
Fill alternating panels of the fan with a smooth, black satin stitch for a deep, light-absorbing finish.
In the remaining panels, use a beading needle and matching thread to meticulously sew on rows of gold seed beads.
This interplay between matte thread and reflective beads is the key to creating glamorous, high-contrast gold thread luxury wall art projects.


