

A triptych does more than just display three pieces of embroidery; it tells a story in chapters. It invites you to think like a curator, connecting color, texture, and theme across separate canvases to create a single, cohesive narrative. This isn’t about filling hoops—it’s about building a world, one stitch at a time.
Here, you’ll discover how to move beyond single motifs and design sets that flow together with intention. We’ll explore how to use stitch direction to show growth, how thread weight can create distance, and how a consistent color palette can unify a scene from dawn to dusk. These aren’t just patterns; they are techniques for storytelling with thread.
Whether you’re capturing a plant’s life cycle or a sweeping landscape, the principles are the same: balance, contrast, and connection. Let these ideas guide you toward creating embroidered stories that feel deliberate, polished, and deeply expressive, turning a simple wall into a gallery of your own making.
1. Illustrate the Dandelion’s Life Cycle with Directional Stitches
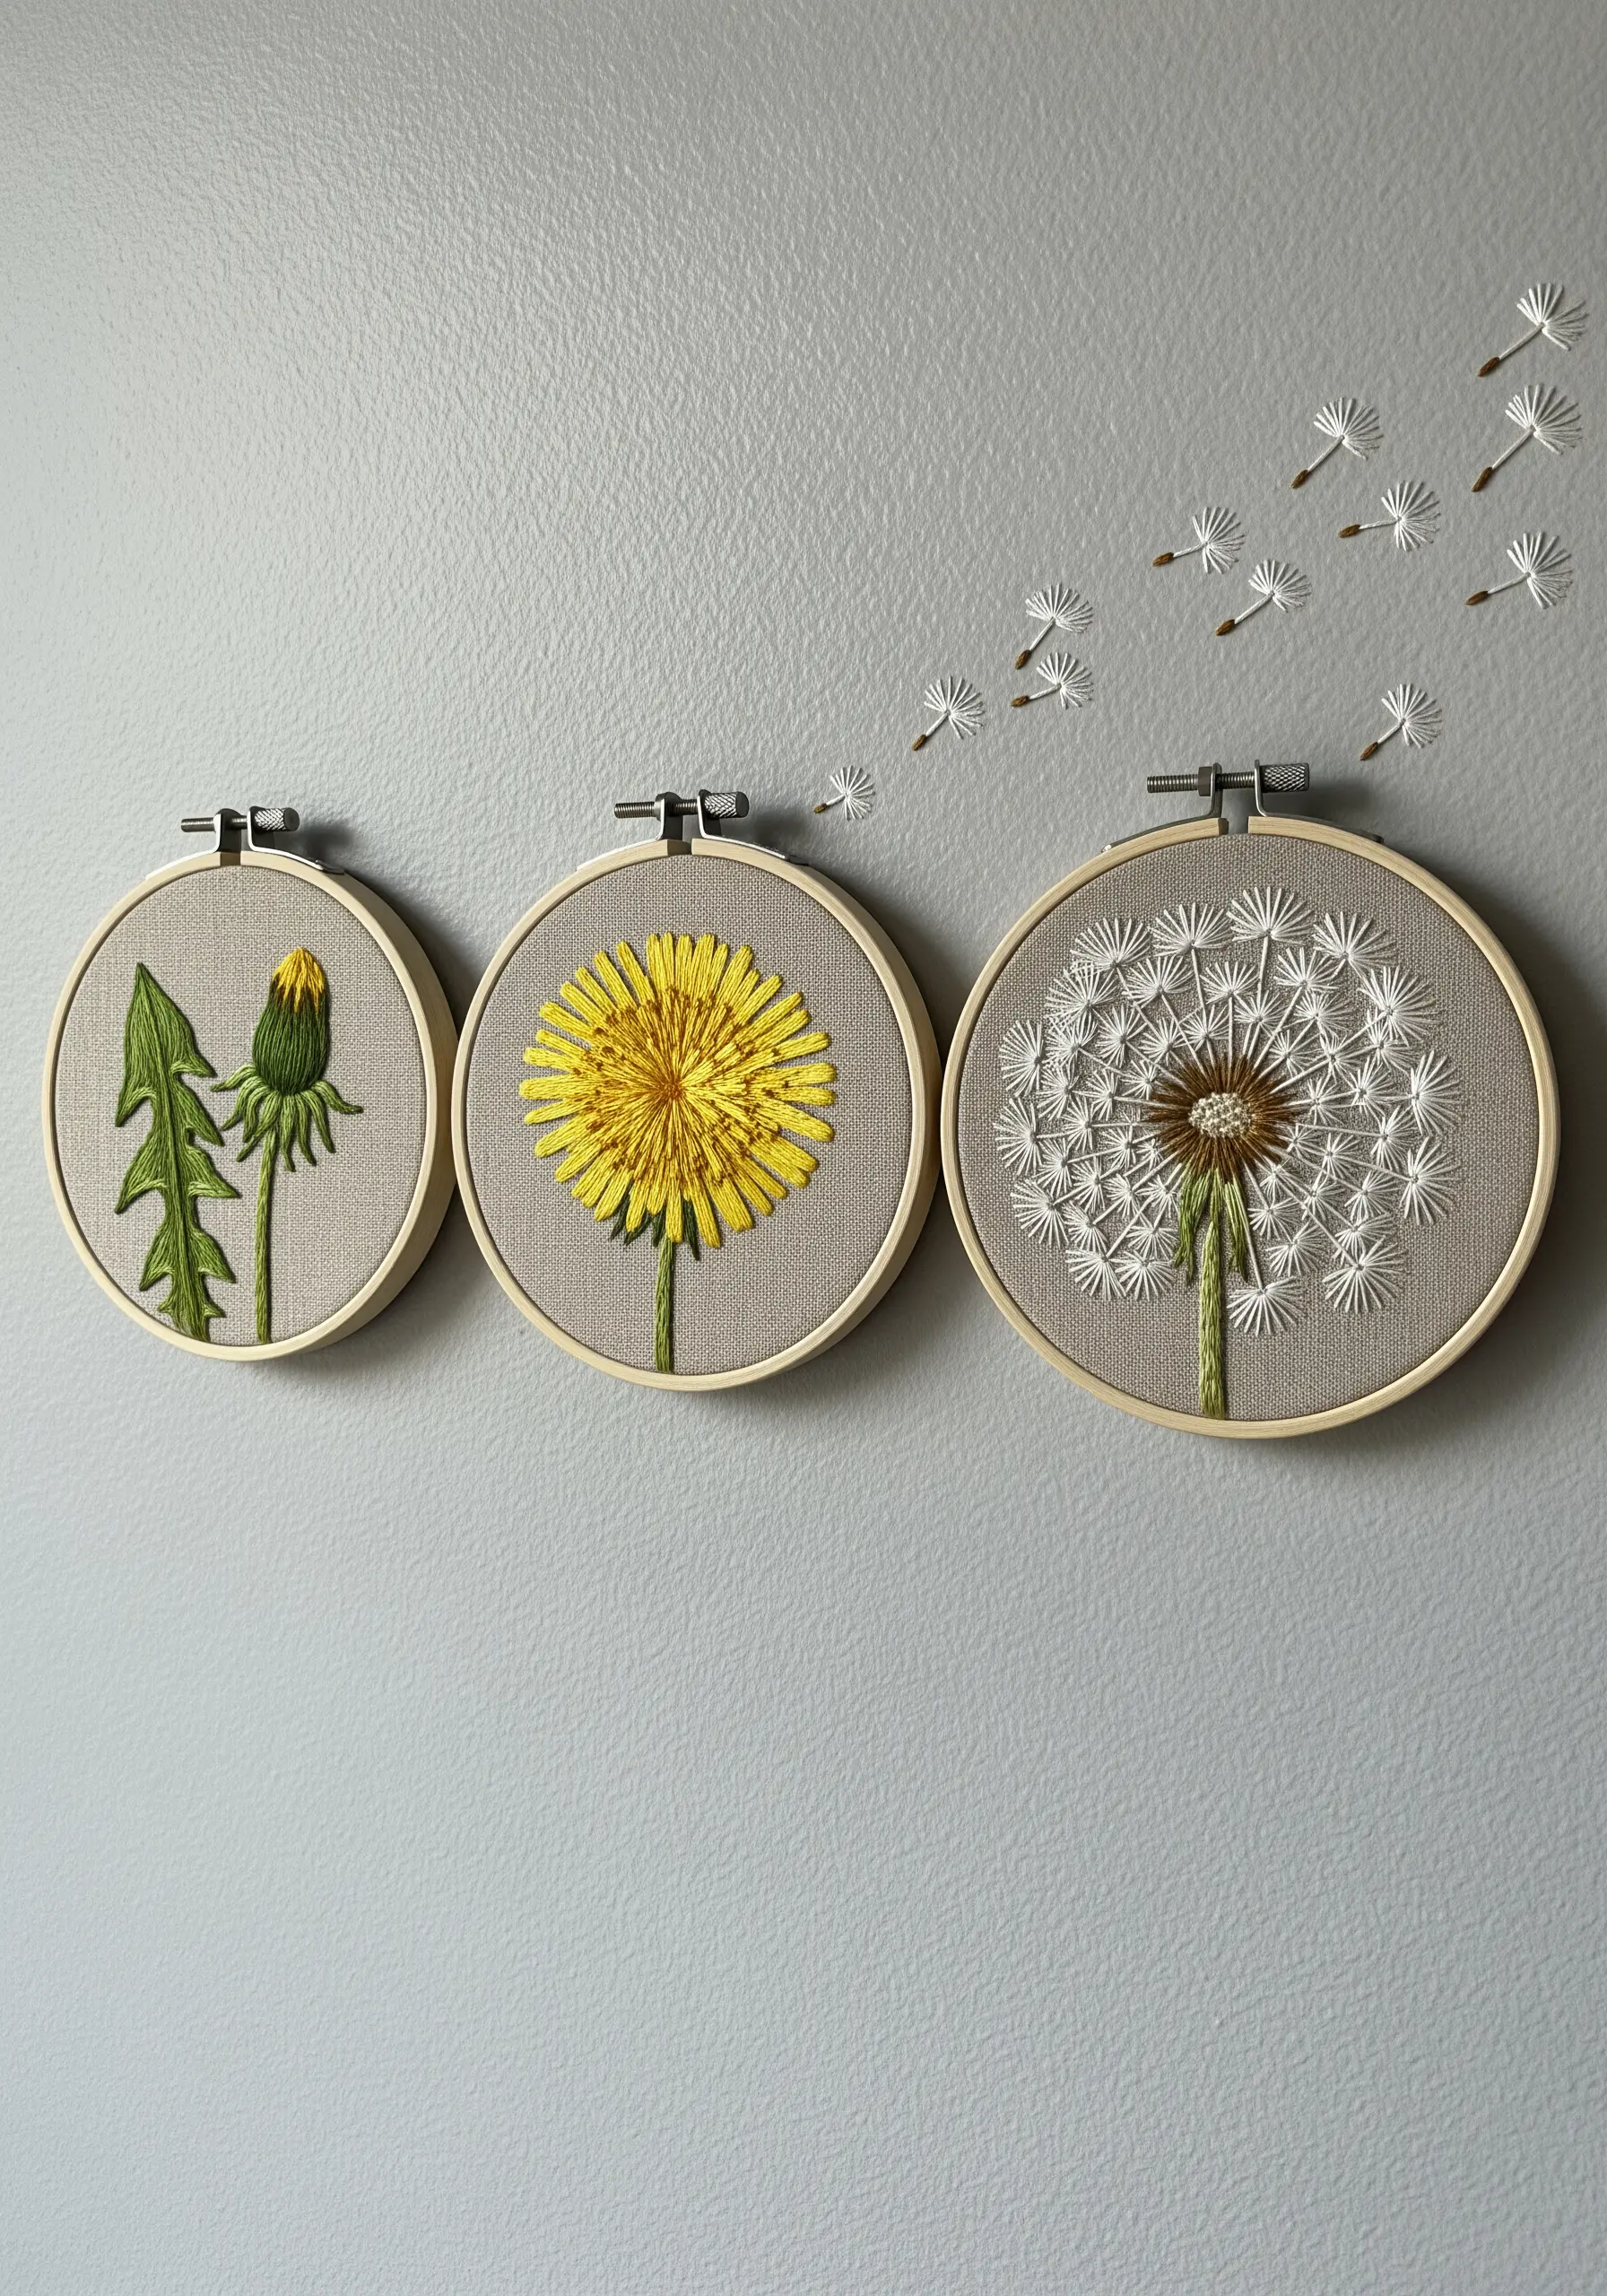
To capture the transformation from bud to seed head, let your stitch direction tell the story.
For the closed bud, use short, vertical satin stitches that hug its form.
When stitching the bright yellow flower, radiate your stitches from the center outward, just as the petals grow, to create natural movement and light.
The seed head requires a different touch: use straight stitches for the parachute-like pappus, varying their length and angle slightly to avoid a stiff, uniform look.
Finally, for the seeds drifting away, use a single strand of white or off-white floss to create a sense of weightlessness and distance, transitioning your story from the hoop to the wall itself.
2. Create a Dynamic Narrative with 3D Stumpwork
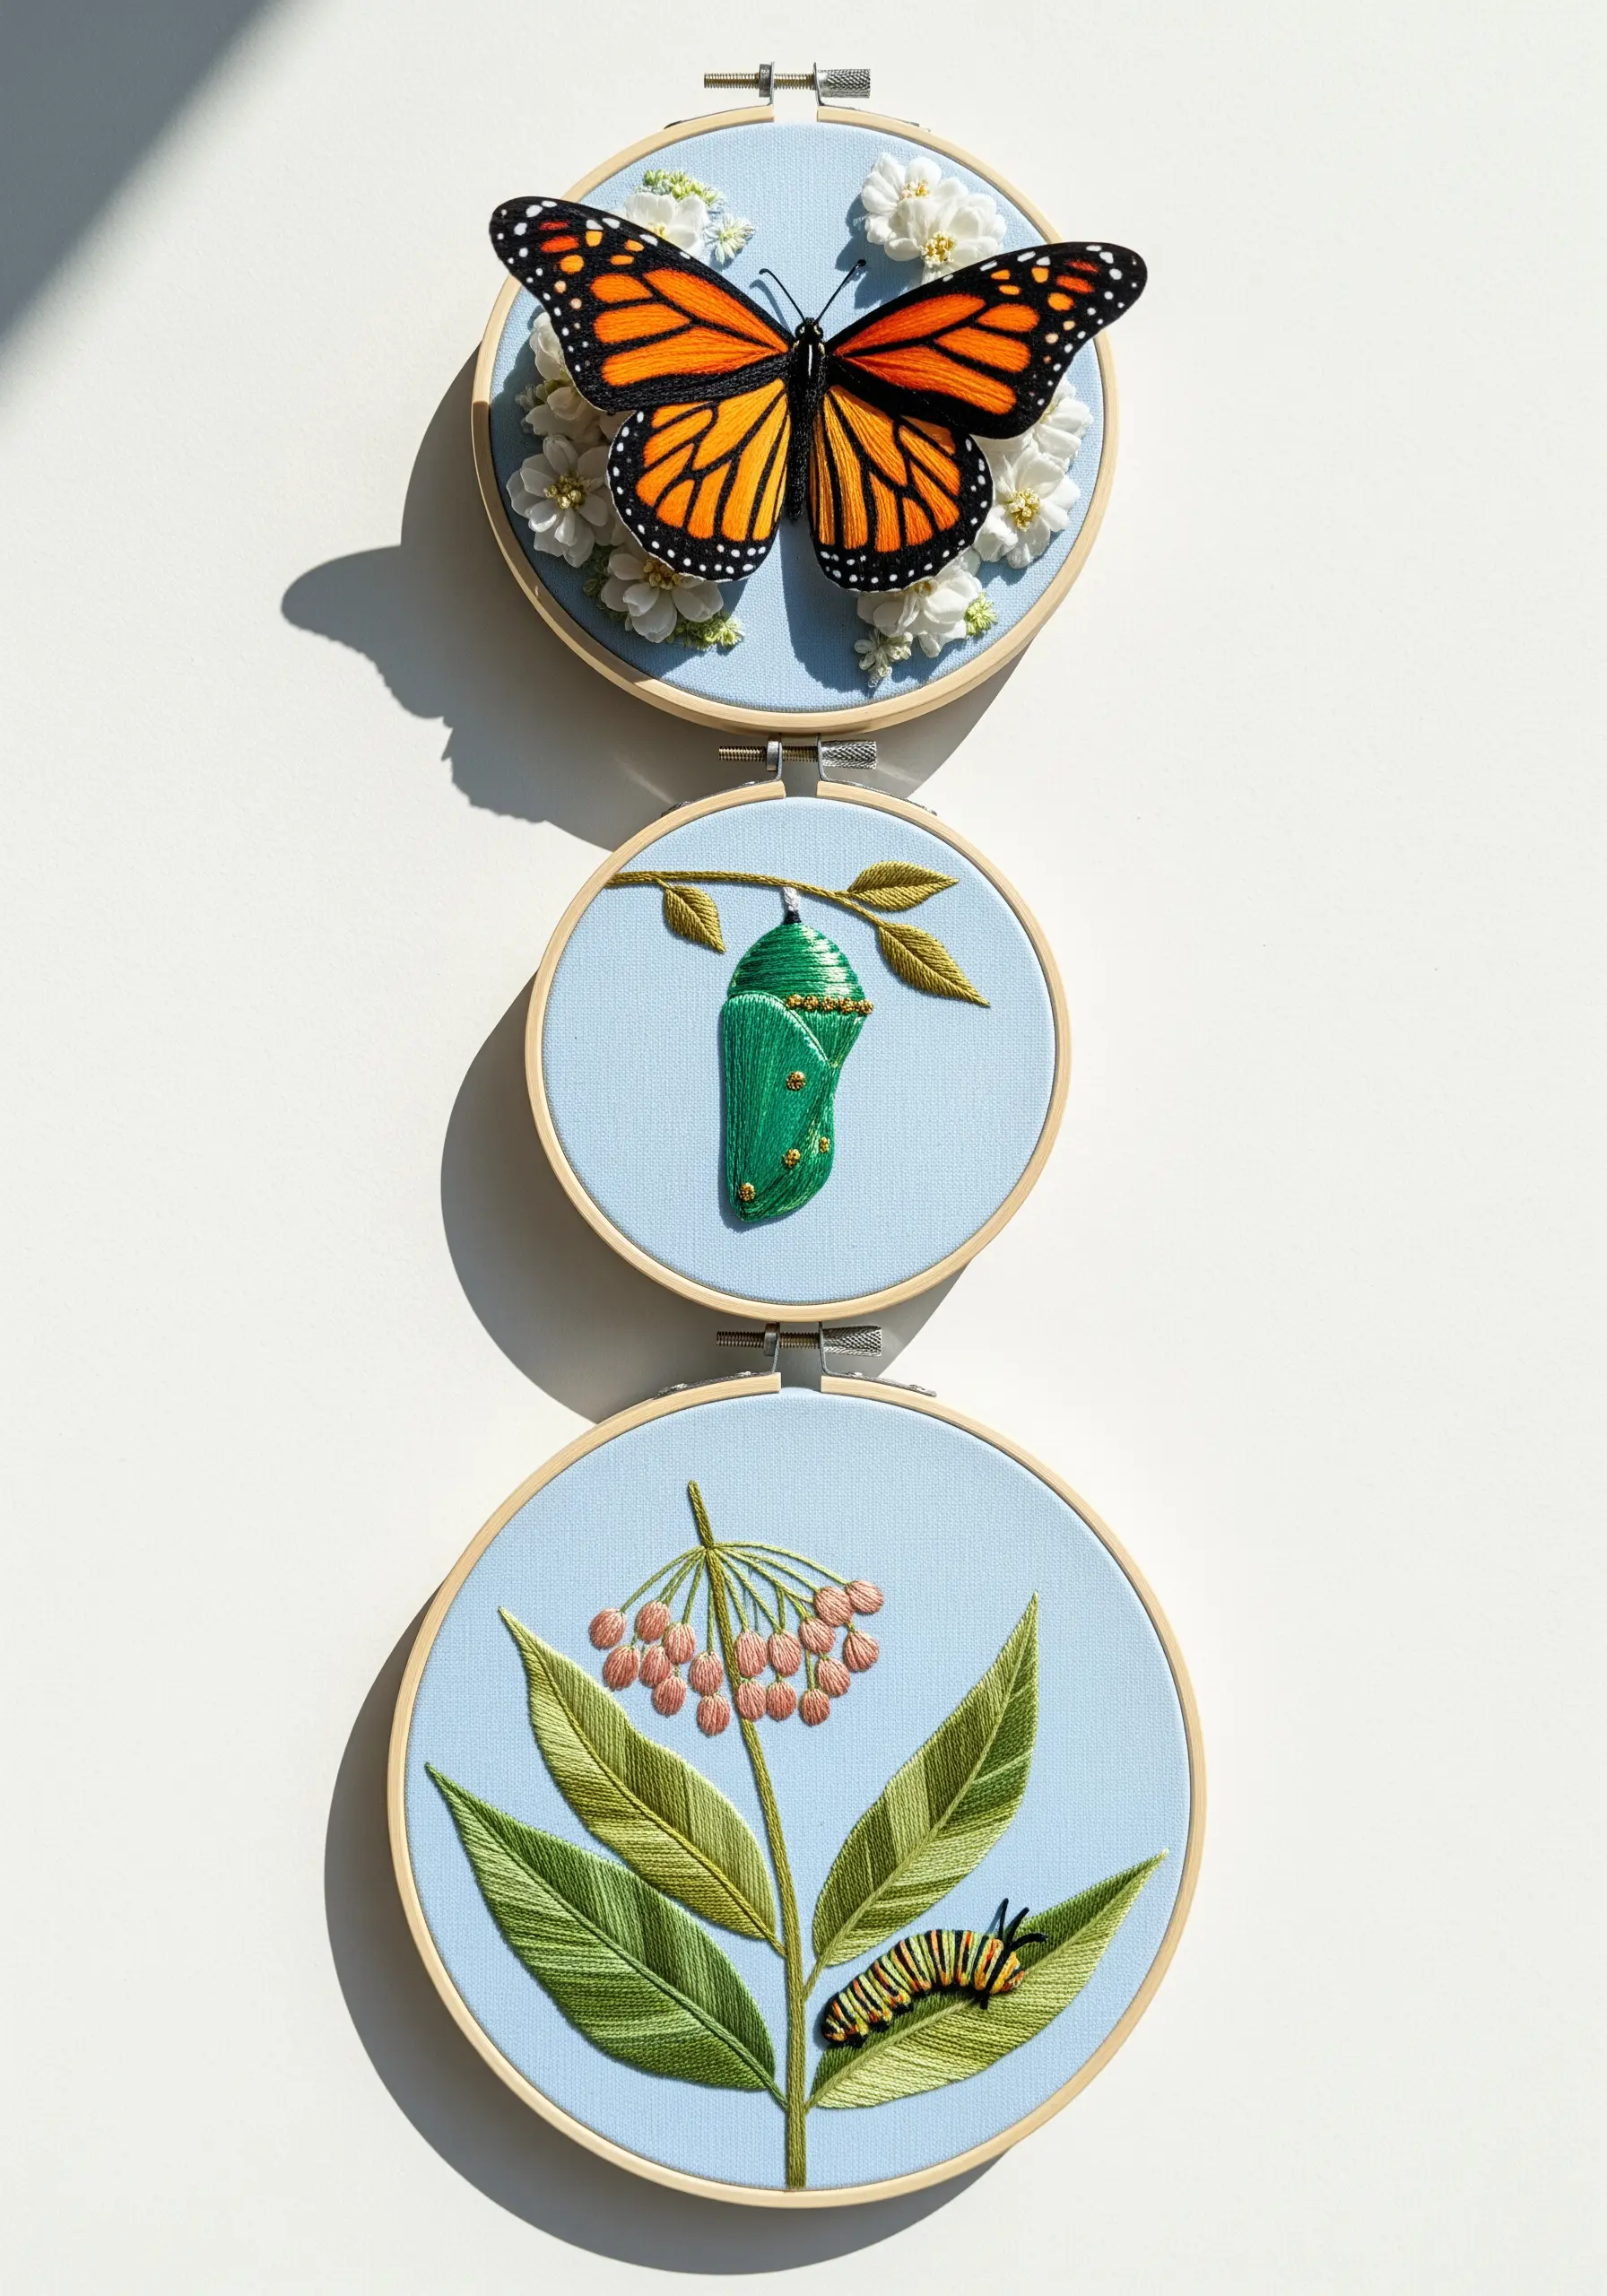
Take your storytelling beyond the fabric by incorporating stumpwork techniques for key elements.
For the chrysalis, use a padded satin stitch over a felt or cotton base to achieve a plump, three-dimensional form that looks ready to hatch.
The monarch butterfly’s wings can be stitched separately on a piece of fabric stabilized with wire, then cut out and attached to the main hoop, allowing them to lift off the surface.
This method turns a flat image into a living scene, creating shadows and depth that draw the viewer in.
Use wildflower thread painting techniques to blend the vibrant oranges and bold blacks for a hyper-realistic effect on the wings.
3. Emphasize Clean Lines with a Split-Stitch Outline
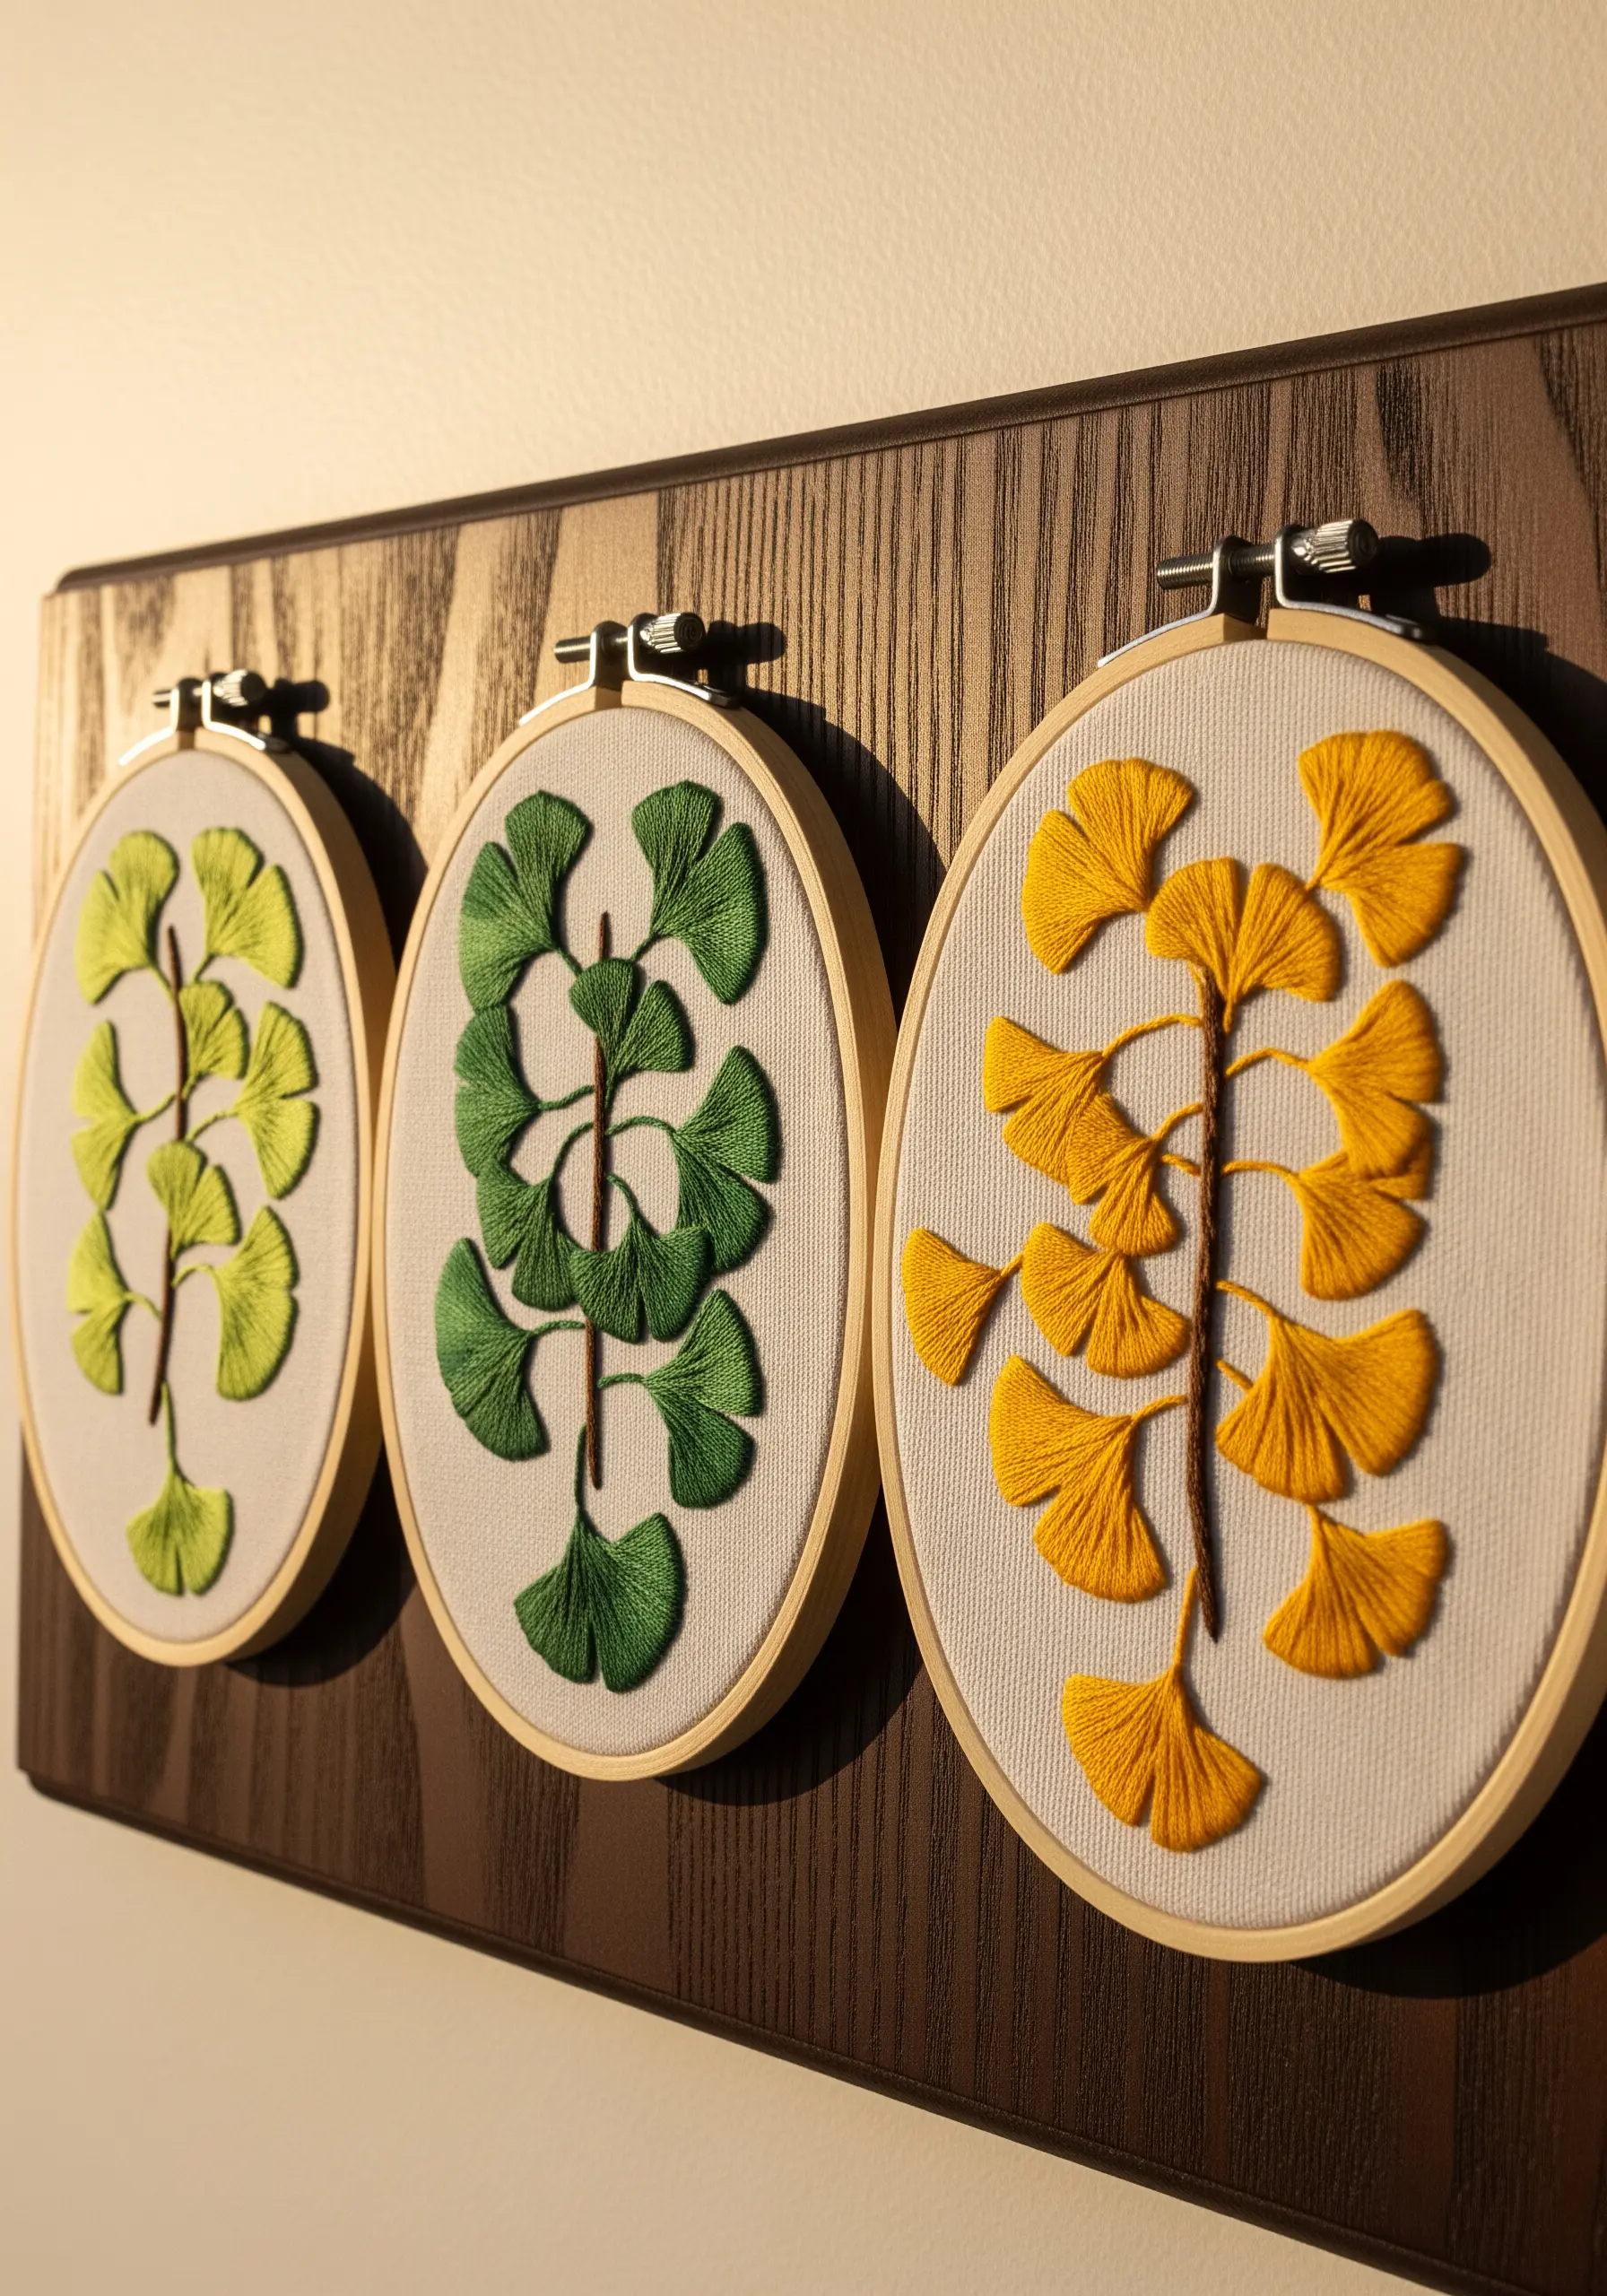
When working with bold, solid shapes like these ginkgo leaves, a perfect edge is everything.
Before you begin your satin stitch, trace the outline of each leaf with a single line of split stitch using the same color floss.
This simple preparation creates a slightly raised, stable border for your satin stitches to rest against, preventing them from slipping and ensuring a crisp, clean finish.
It’s a small step that transforms a good satin stitch into a professional one, making your colors appear more solid and your shapes more defined.
4. Build Rich Earth Textures with French Knots
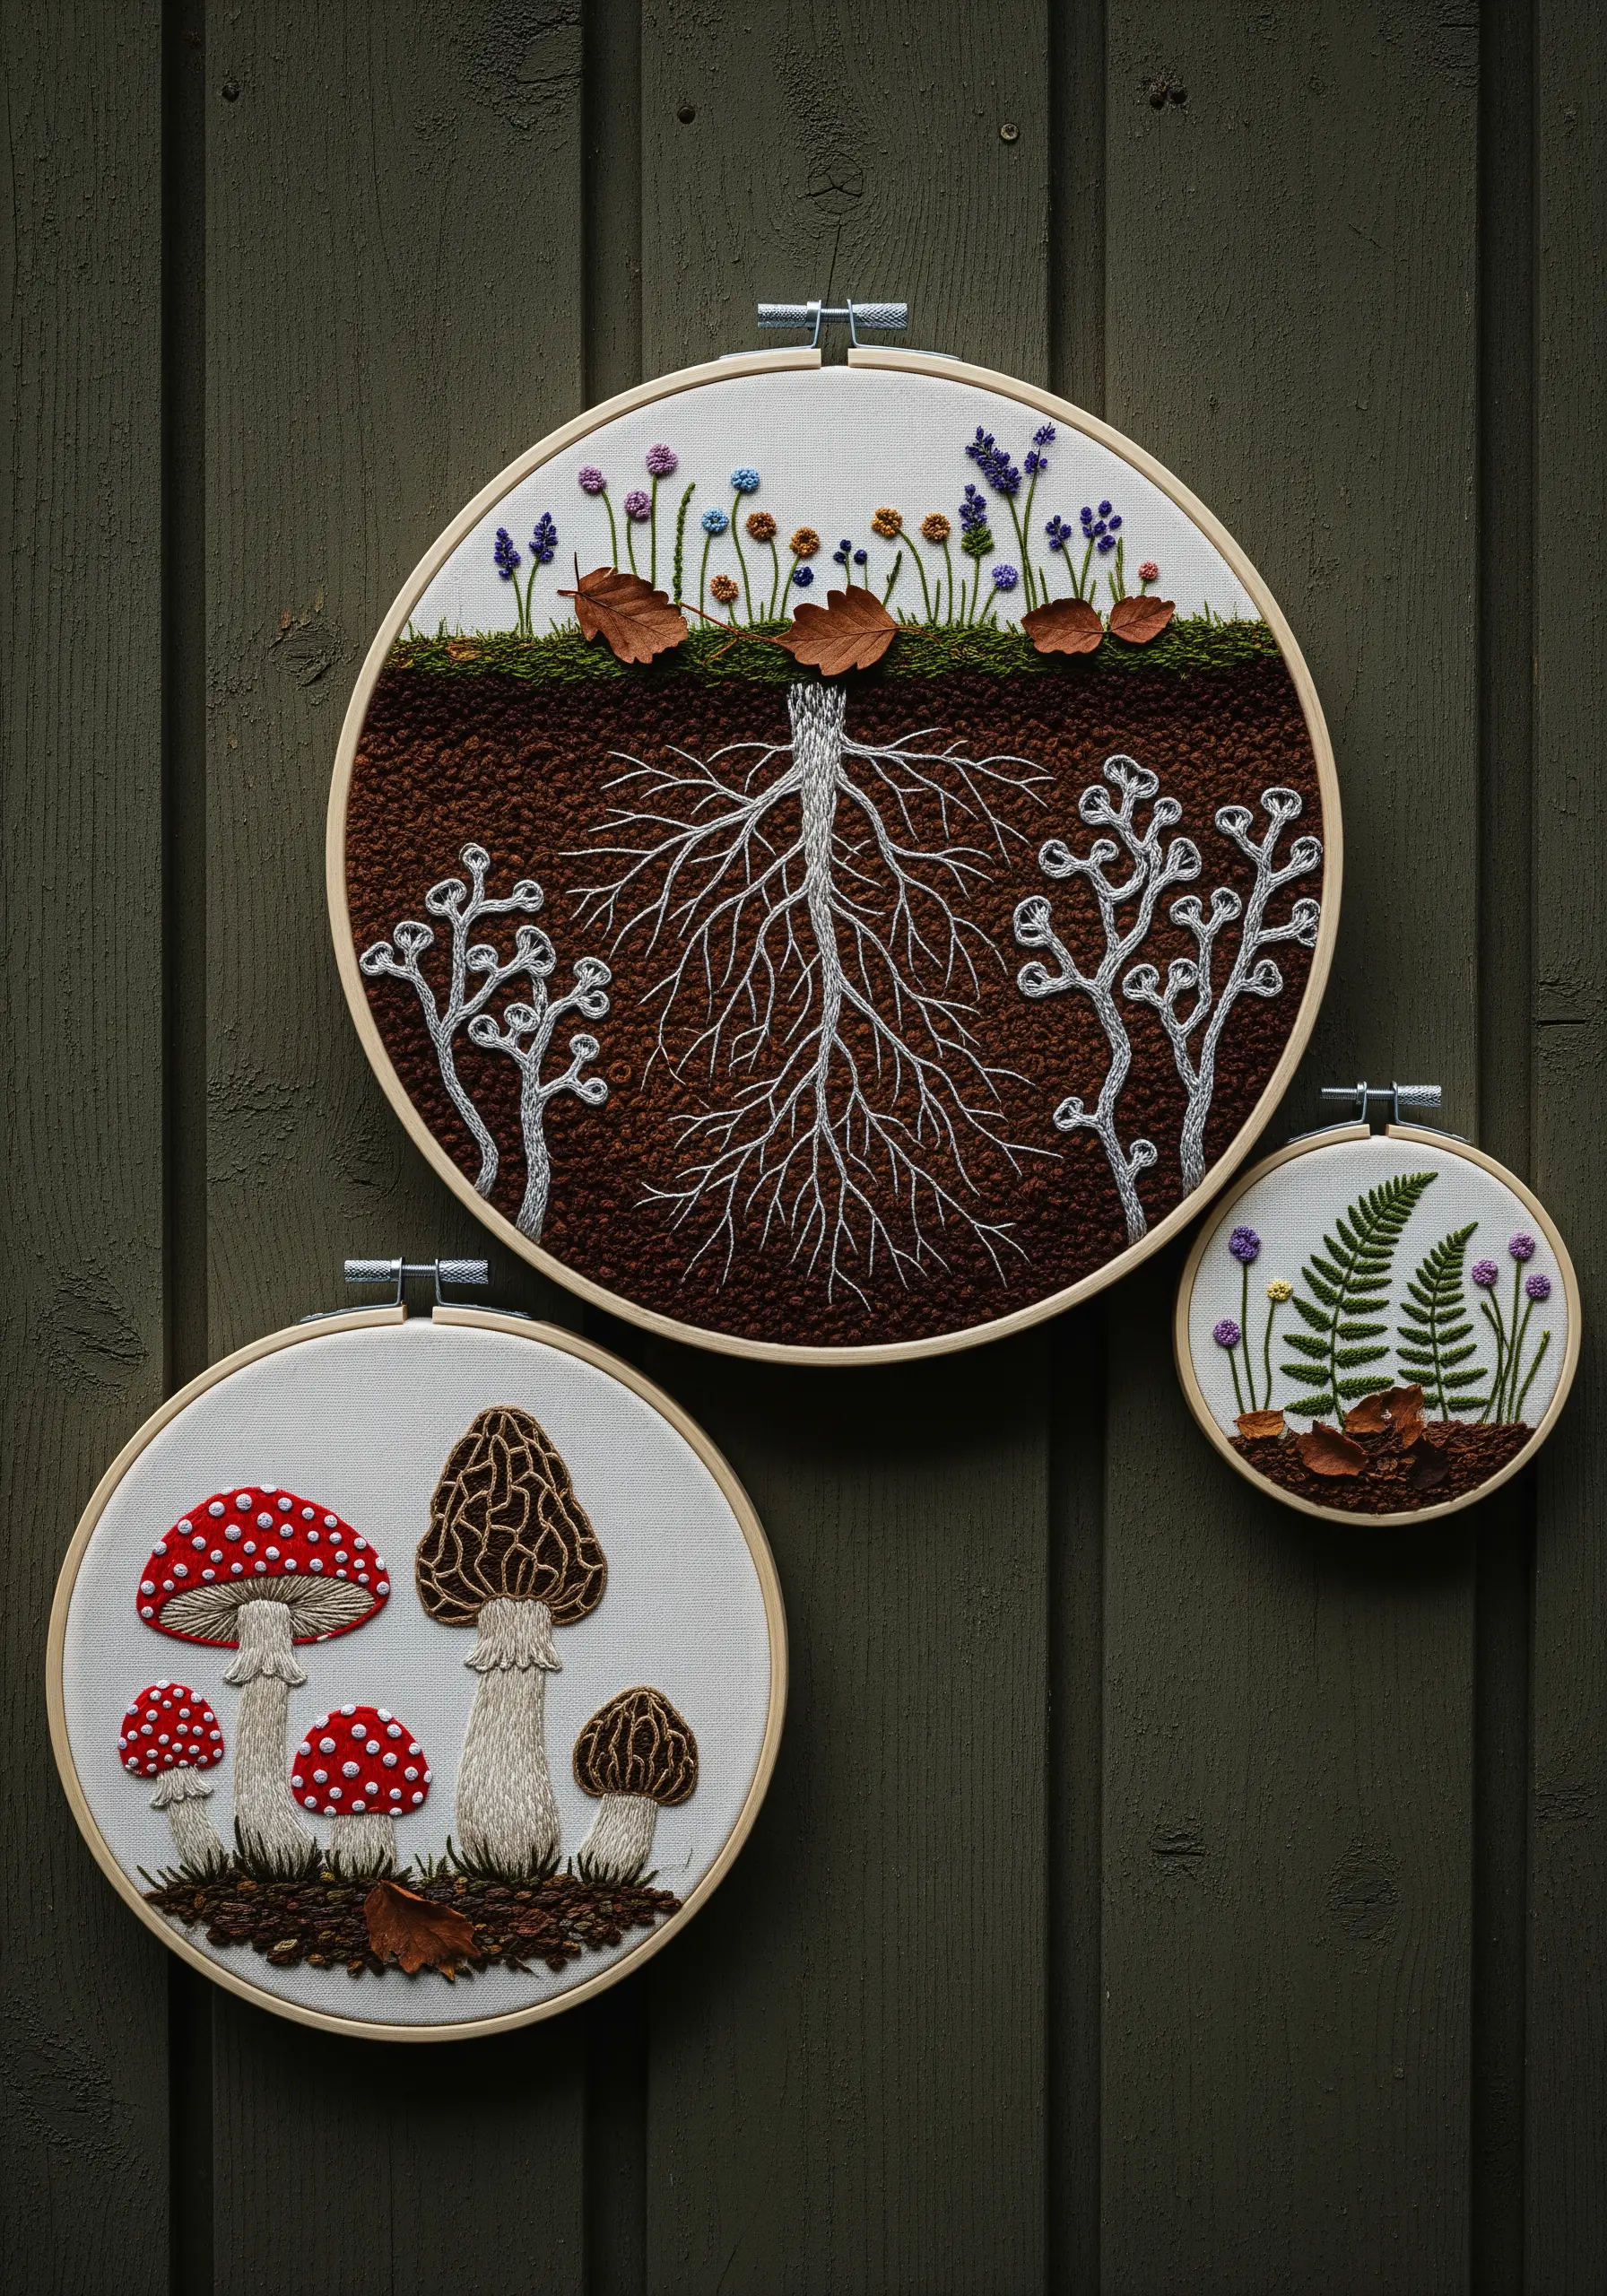
To give your soil dimension and prevent it from looking flat, fill the area with densely packed French knots.
Vary the number of wraps around your needle (one, two, or three) and use several shades of brown and black thread to create a crumbly, organic texture.
This technique contrasts beautifully with the smooth satin stitch of the mushrooms and the delicate lines of the roots.
For the roots, use a whipped backstitch or stem stitch with a lighter-colored thread; this adds definition and makes them stand out against the dark, textured earth you’ve created.
5. Design a Continuous Flow Across Multiple Hoops
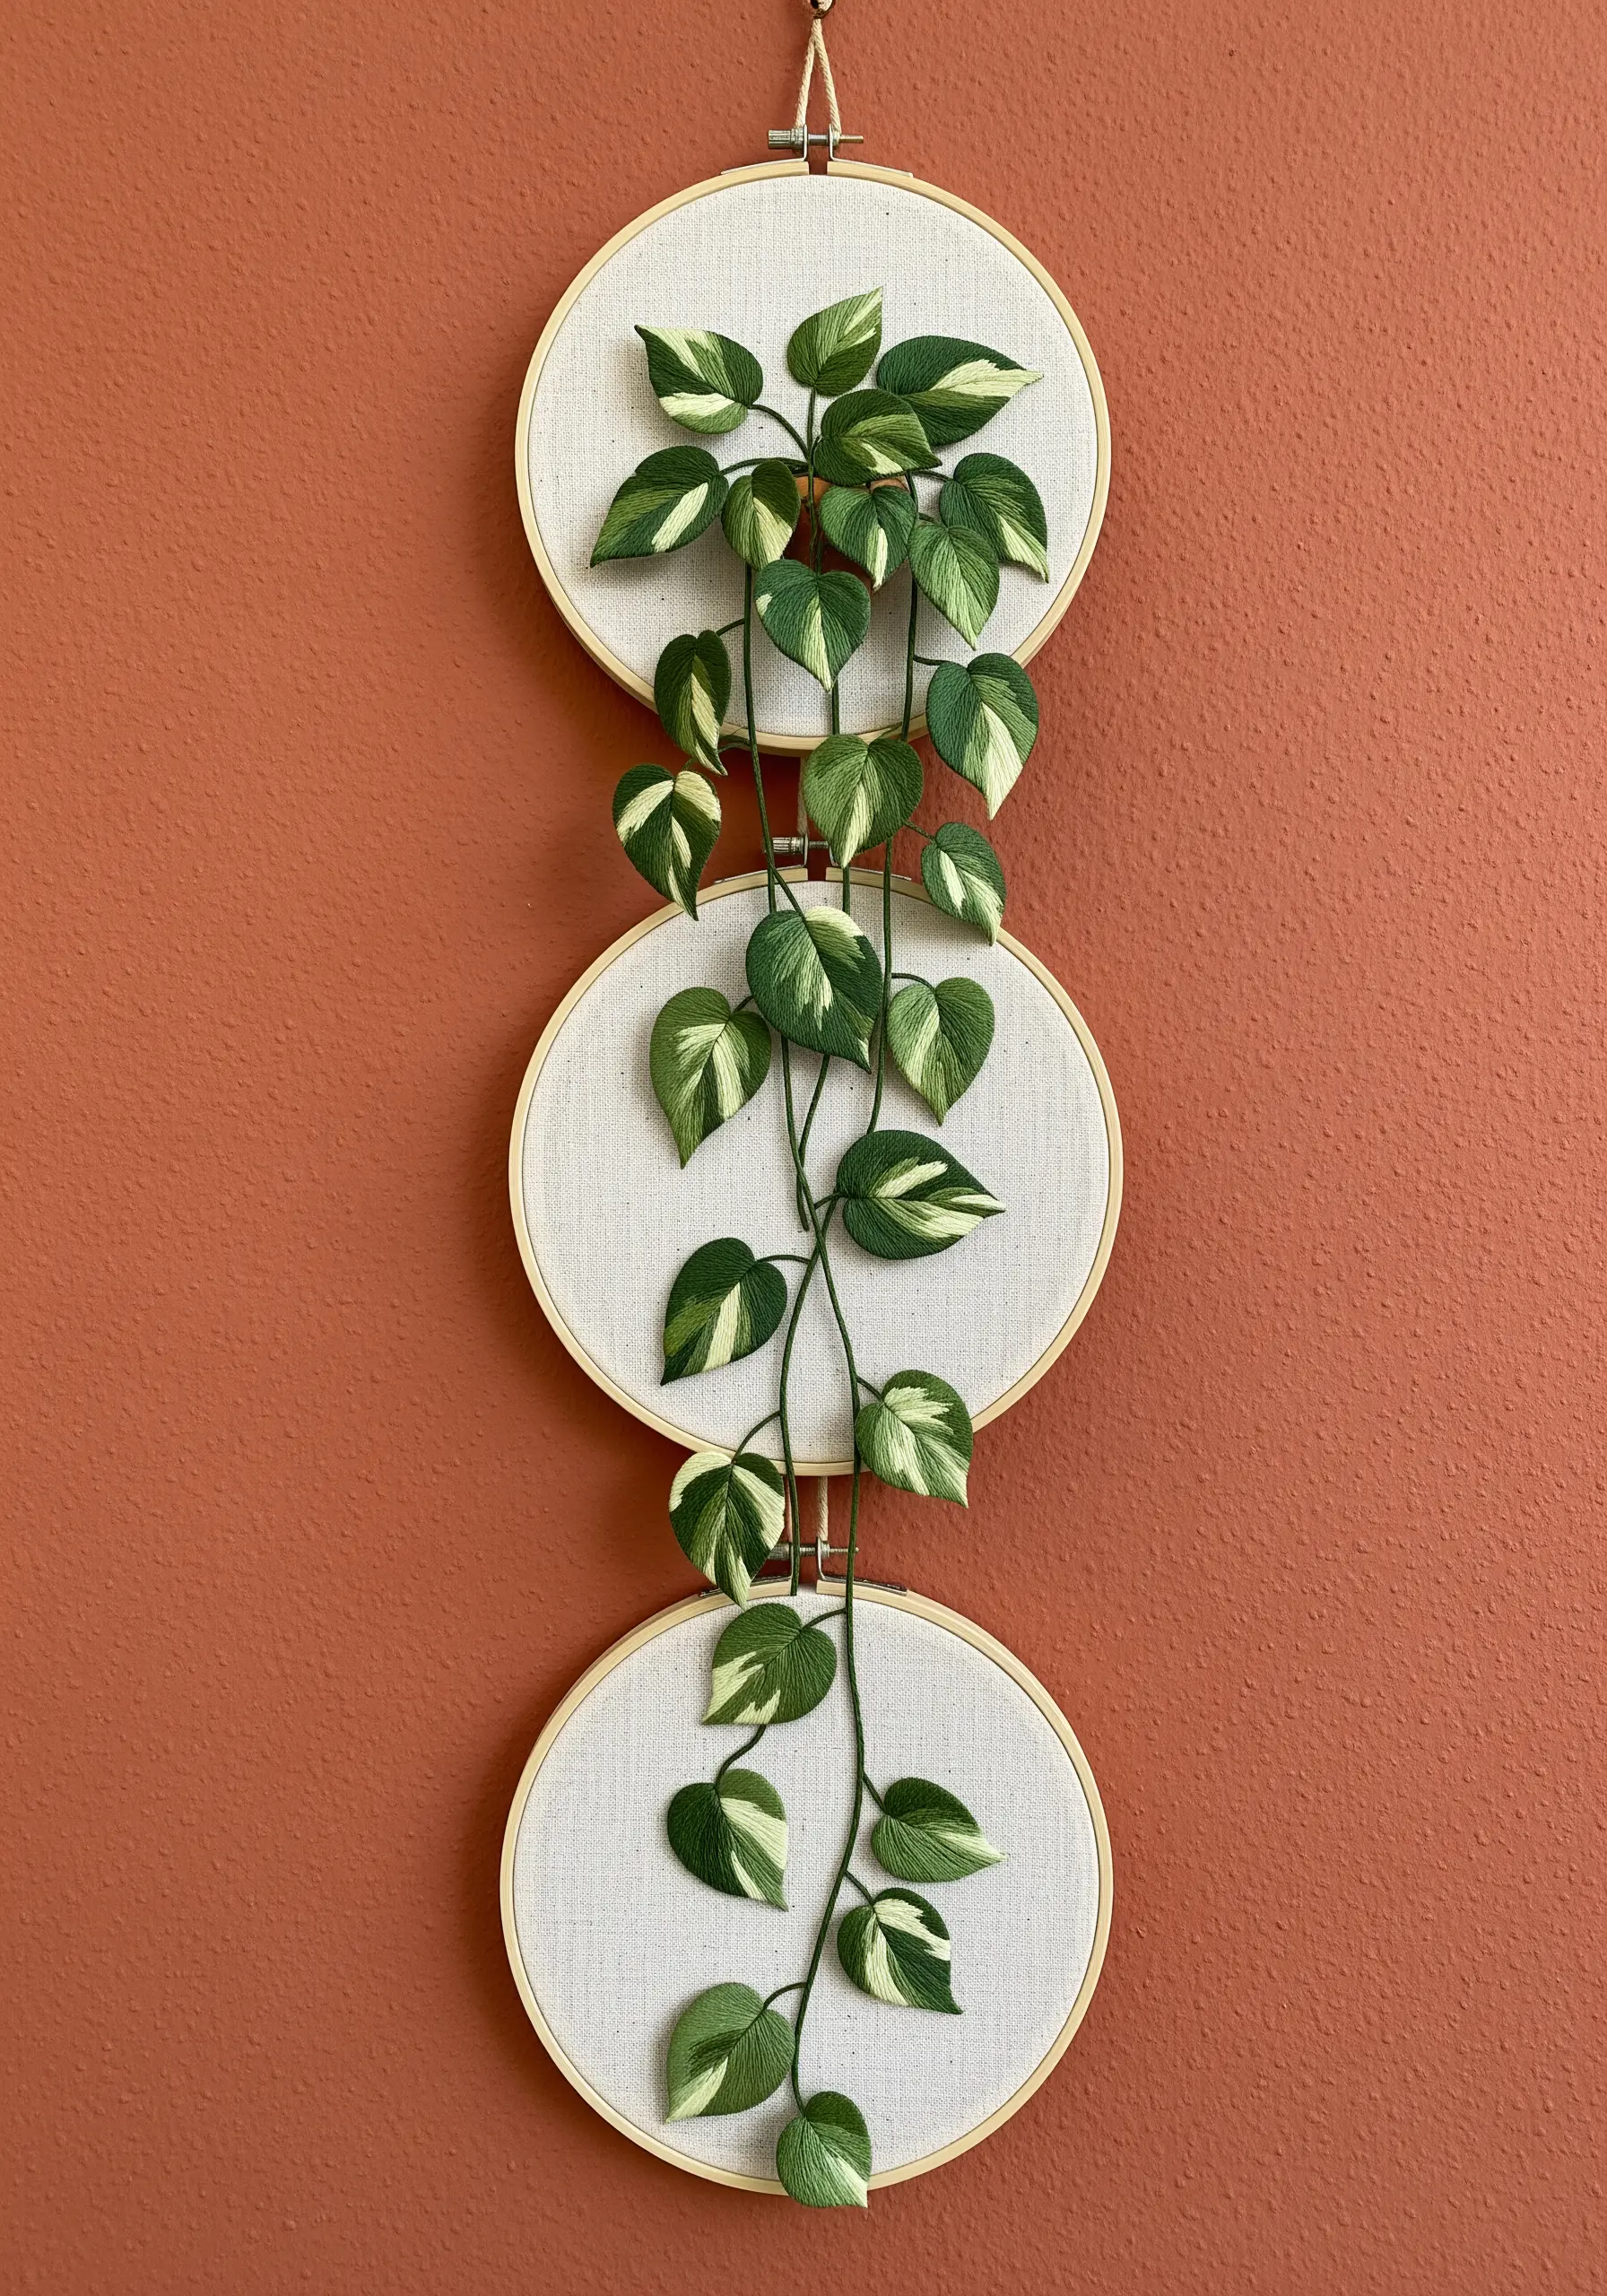
To make a single vine flow seamlessly across a vertical triptych, careful planning is essential.
First, lightly sketch the main stem across all three pieces of fabric while they are laid out together, ensuring the curves align perfectly where the hoops will meet.
Use a directional satin stitch or long-and-short stitch for the leaf variegation, angling your stitches to follow the natural lines of the leaf.
This attention to stitch direction makes the foliage look more dynamic and less like a simple color fill, turning your three separate hoops into one cohesive, plant-inspired hoop art design.
6. Create Atmospheric Perspective with Thread Weight
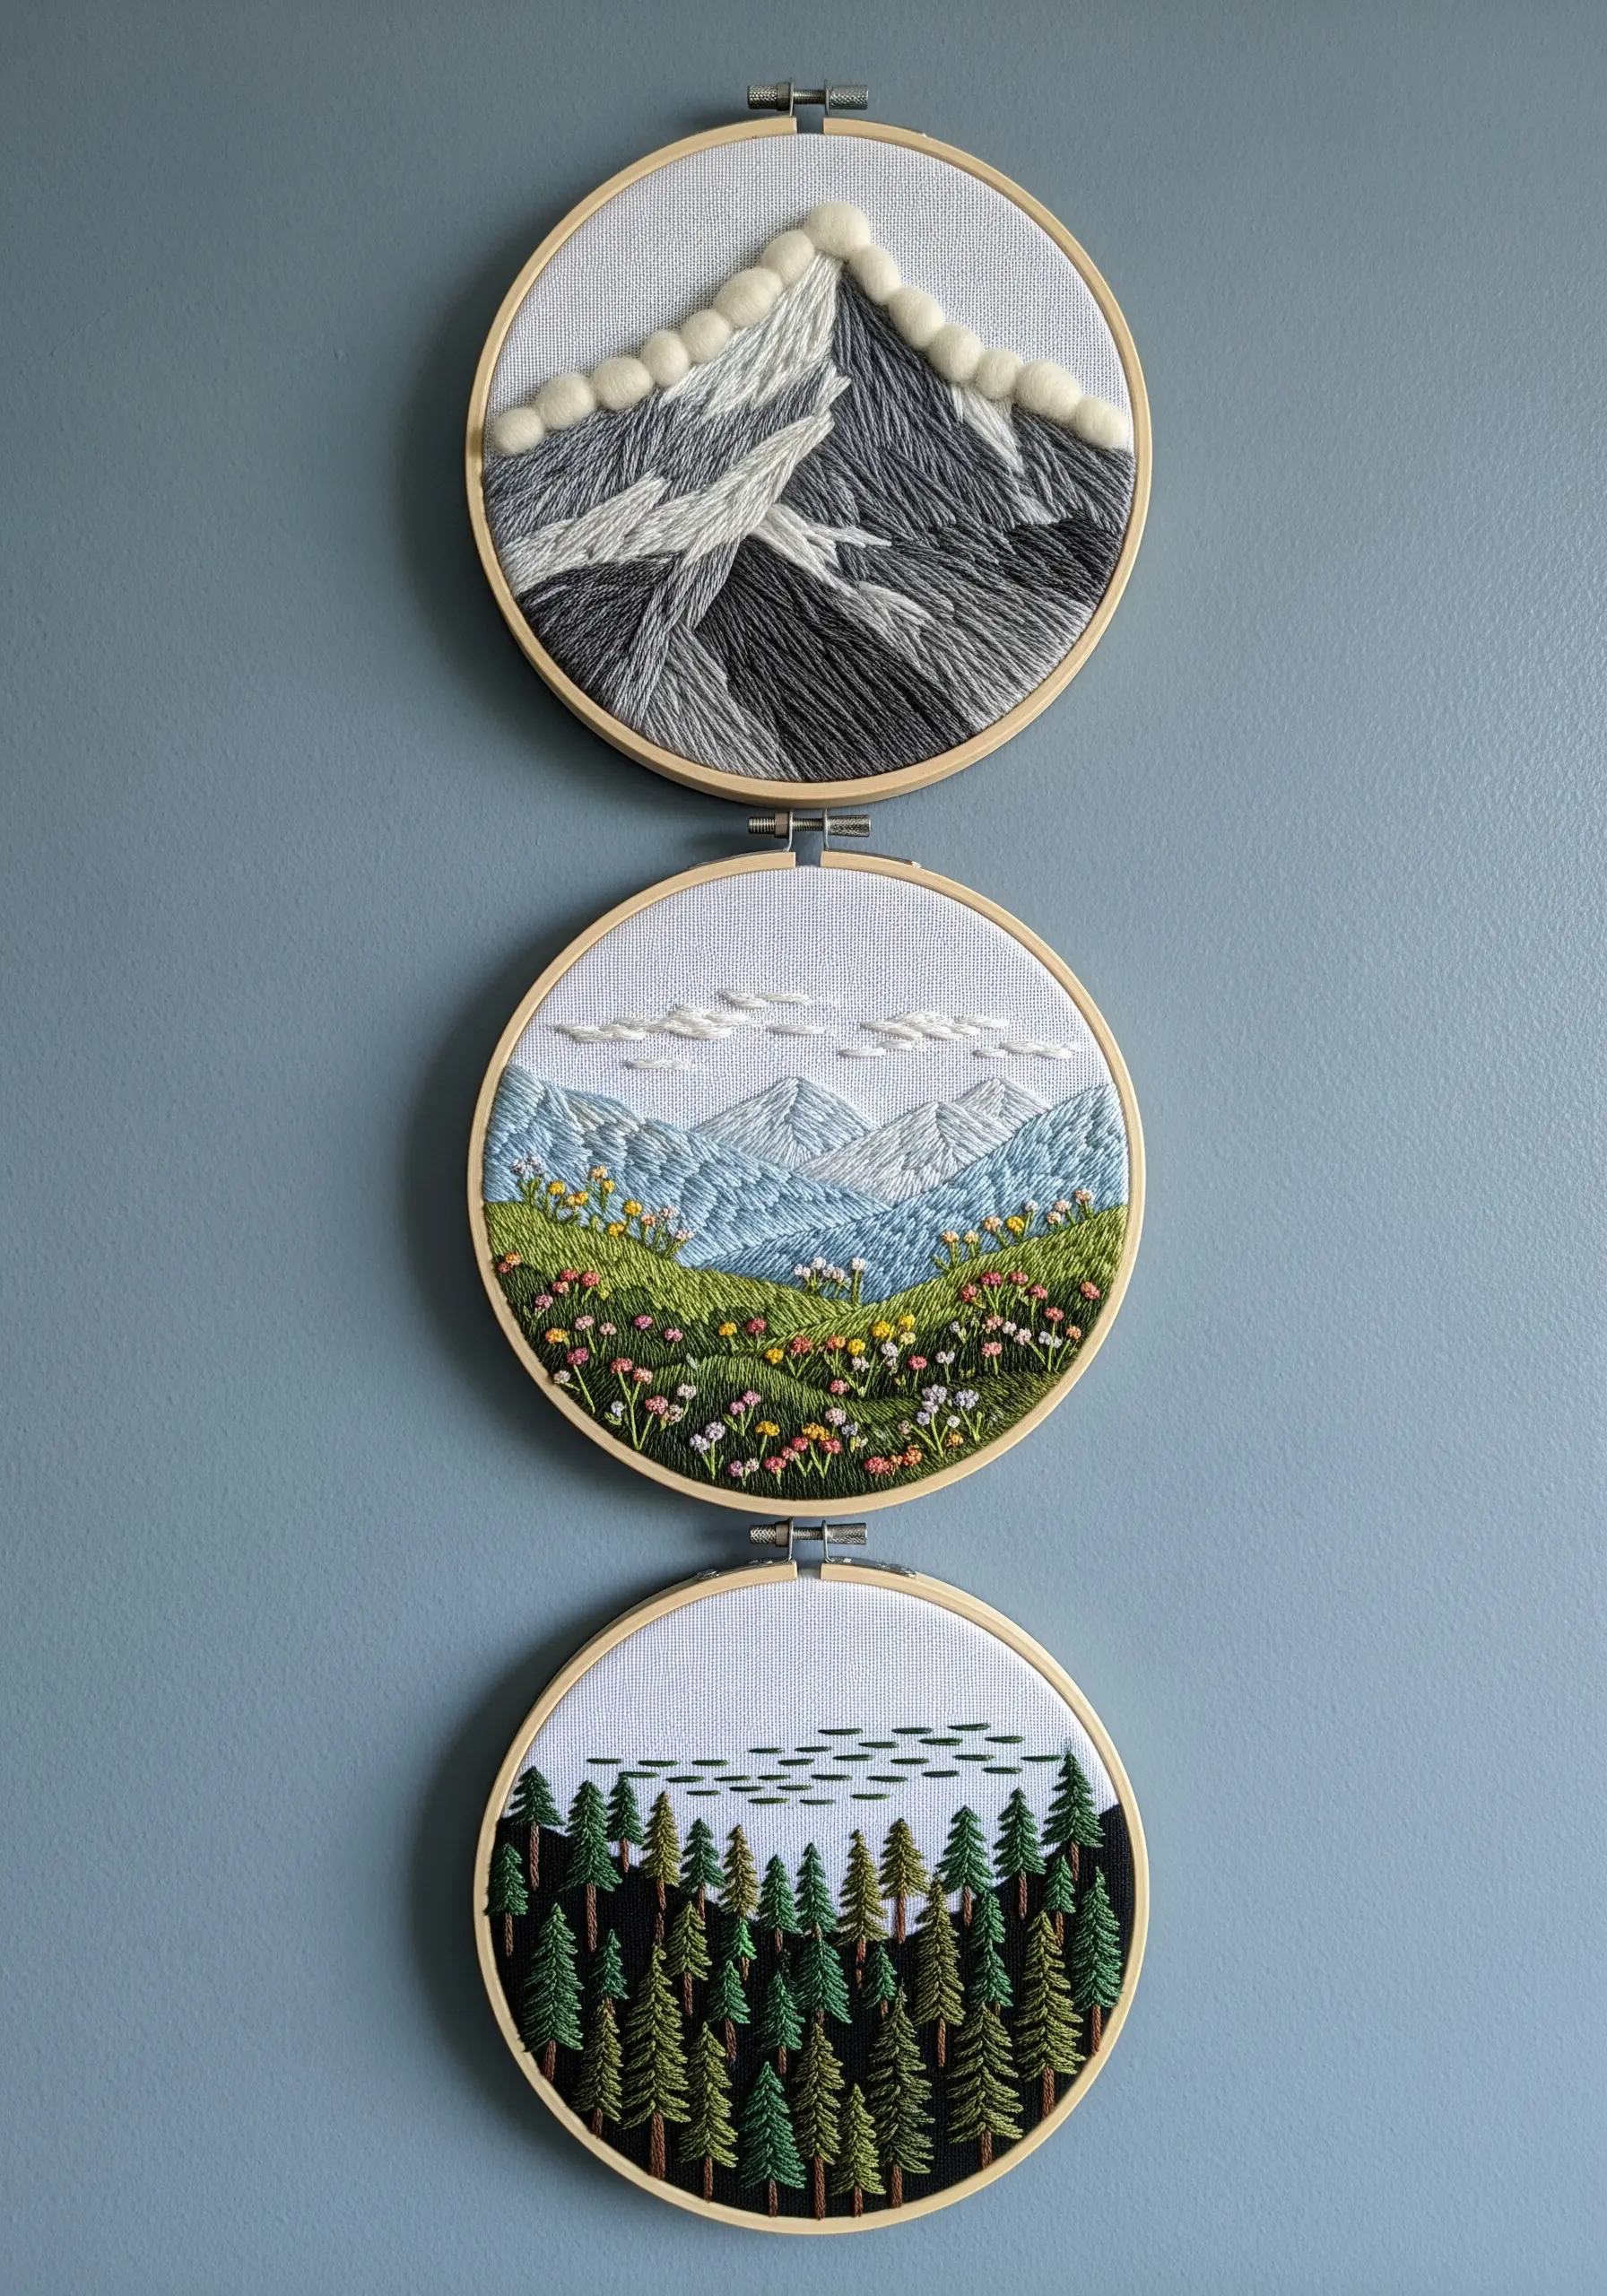
Evoke a sense of distance in your landscape triptych by adjusting the thickness of your thread.
For the distant mountains in the middle hoop, use only one or two strands of floss for a finer, more delicate appearance that suggests haze and distance.
In contrast, use a full six strands or even chunky wool roving for the snowy mountain peak in the top hoop, giving it a bold, tactile presence that feels closer.
This simple manipulation of thread weight is a powerful tool for creating depth and making your relaxing nature scenes feel vast and immersive.
7. Achieve Luminous Florals on Dark Fabric
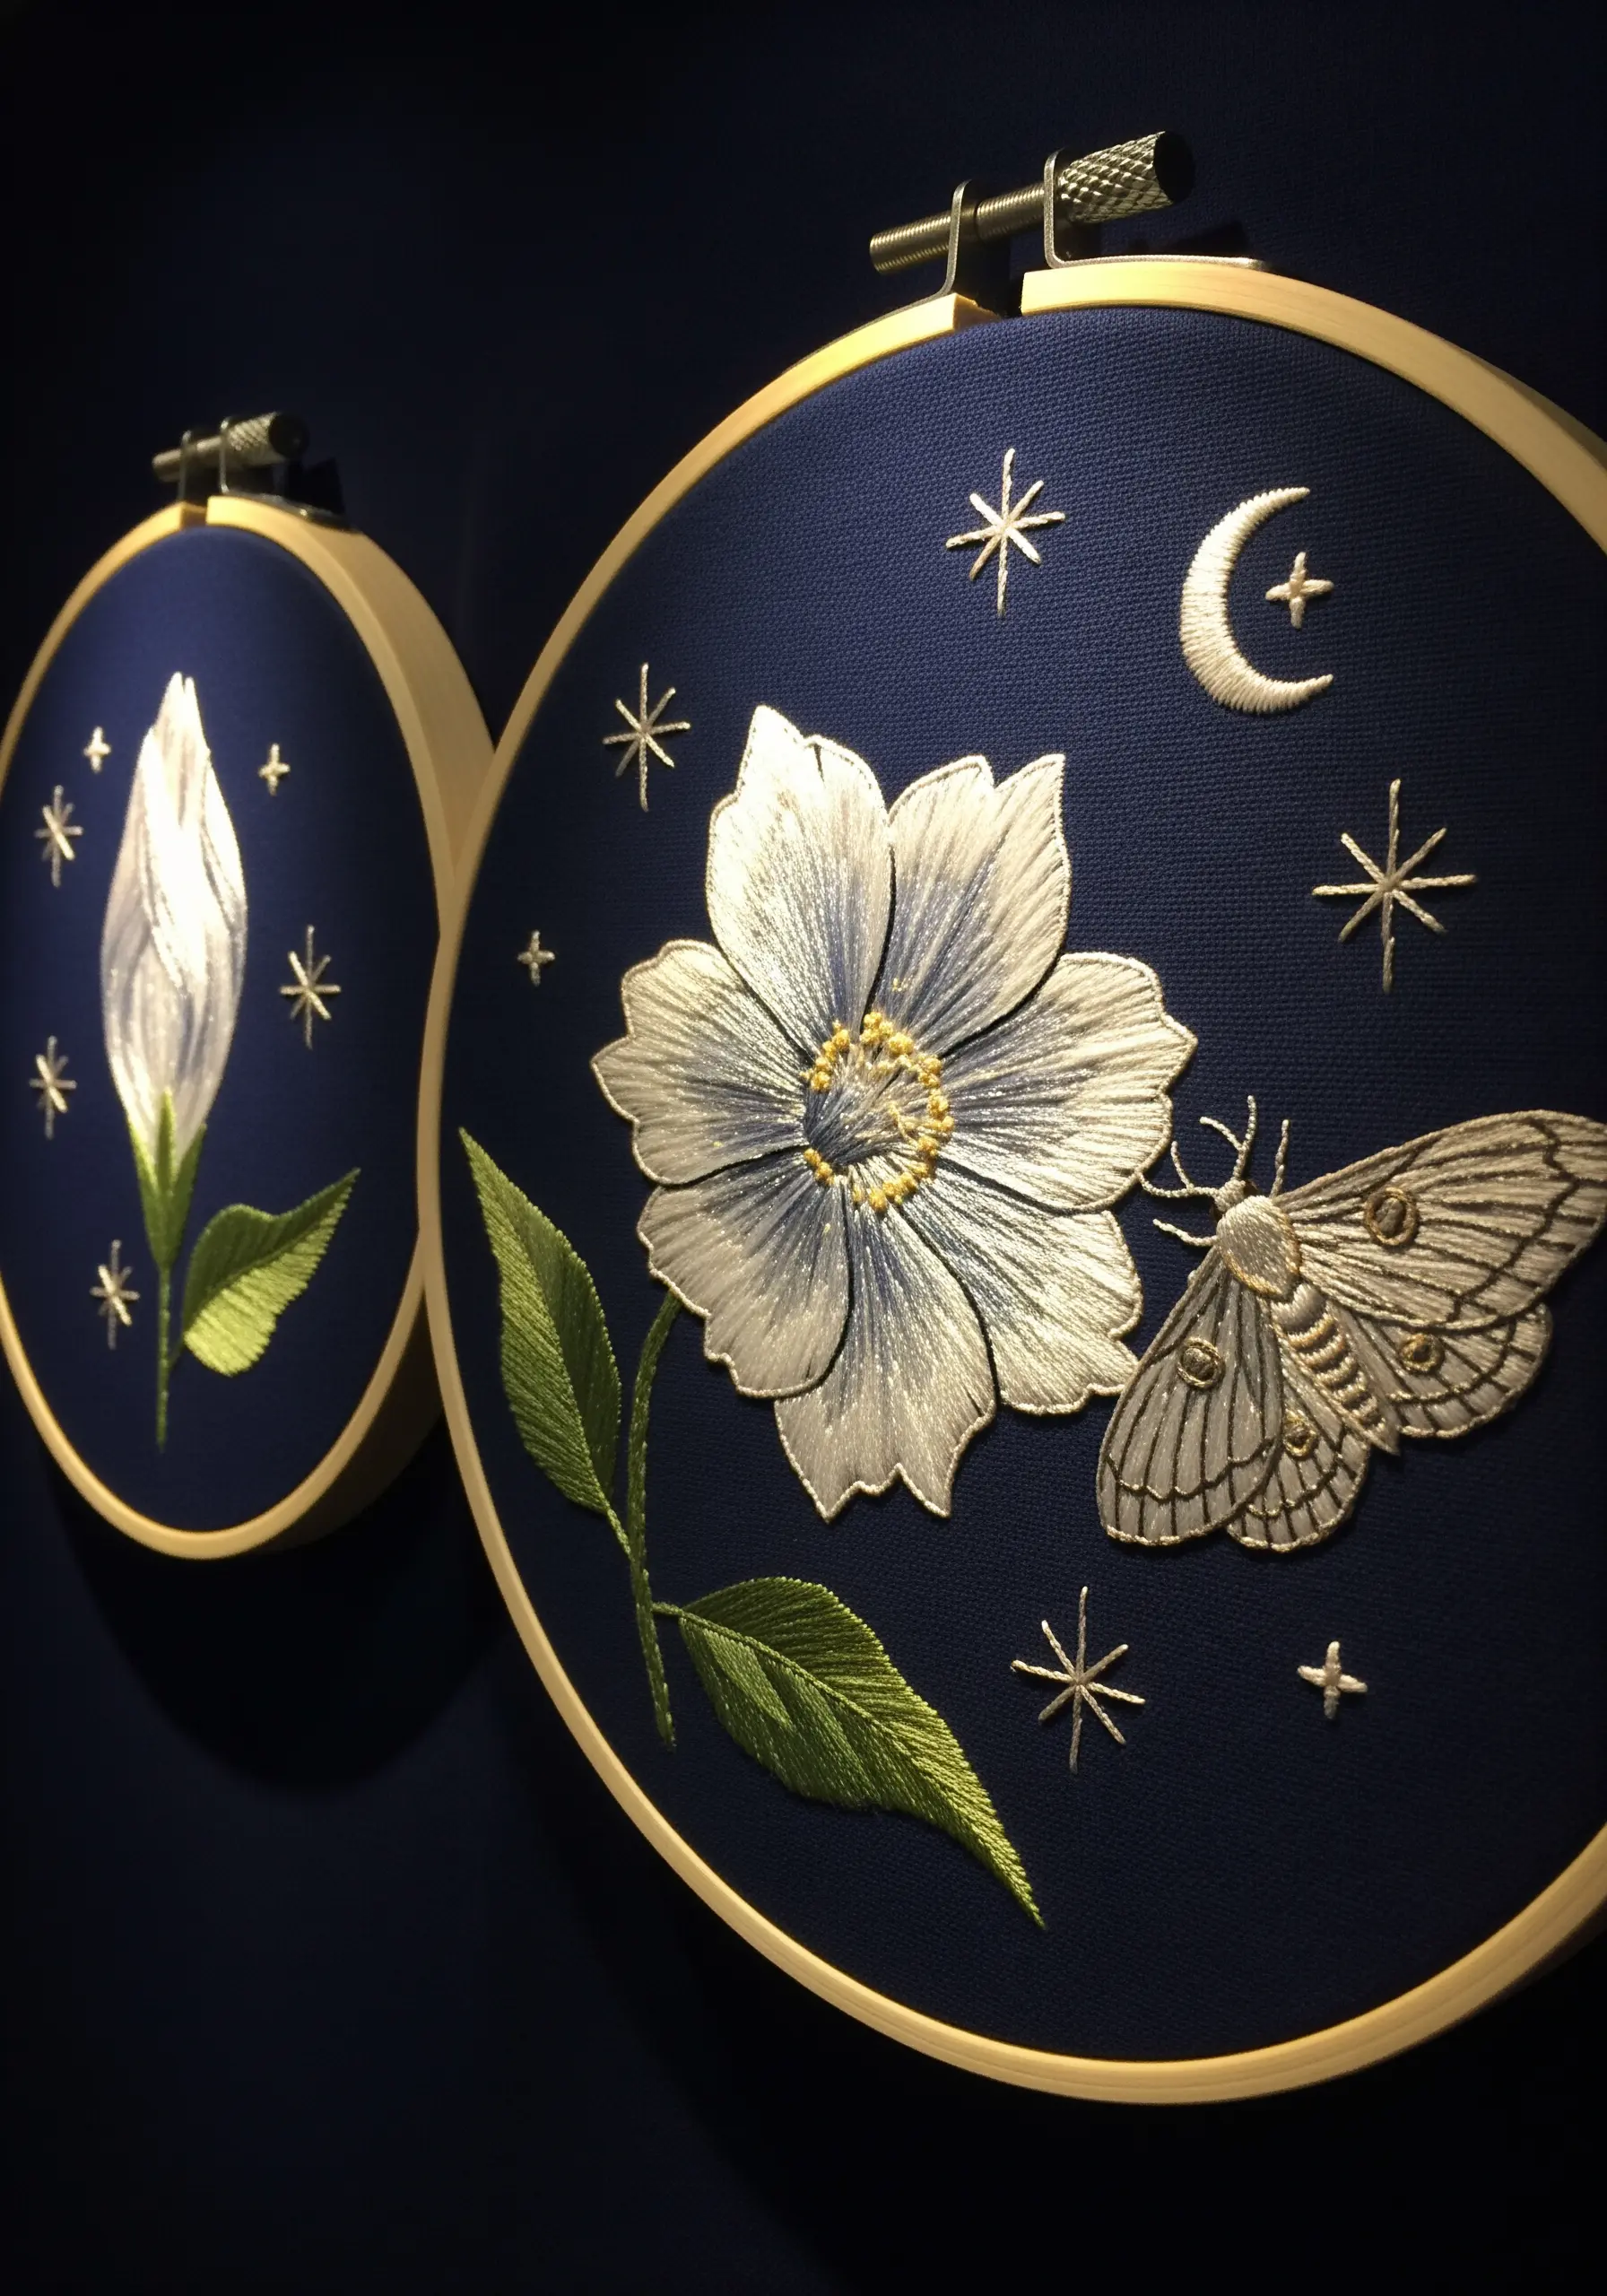
When stitching light-colored motifs on a dark background, you need to ensure your threads remain bright and opaque.
Before you stitch the white and silver petals, lay down a base layer of long-and-short stitch in plain white.
Stitching your final colors over this foundation prevents the dark fabric from showing through, making your metallic and pale threads appear more luminous and vibrant.
For an extra shimmer, choose a thread with a bit of satin or silk in its composition to catch the light beautifully against the matte navy canvas.
8. Tell a Story of Time with a Cohesive Color Palette

Unify a day-to-night desert scene by using a consistent, yet evolving, color palette across all three hoops.
Carry a few key colors—like the dusty pink of the sand and the sage green of the cacti—through each design, adjusting their tone to match the light.
In the night scene, the pinks become deeper purples. In the sunrise, they are bright and golden. In the daytime, they are true to life.
This thoughtful color transition creates a harmonious narrative, making the set feel like a single, continuous story rather than three separate pictures.
9. Mimic Stone and Wood with Varied Stitch Textures
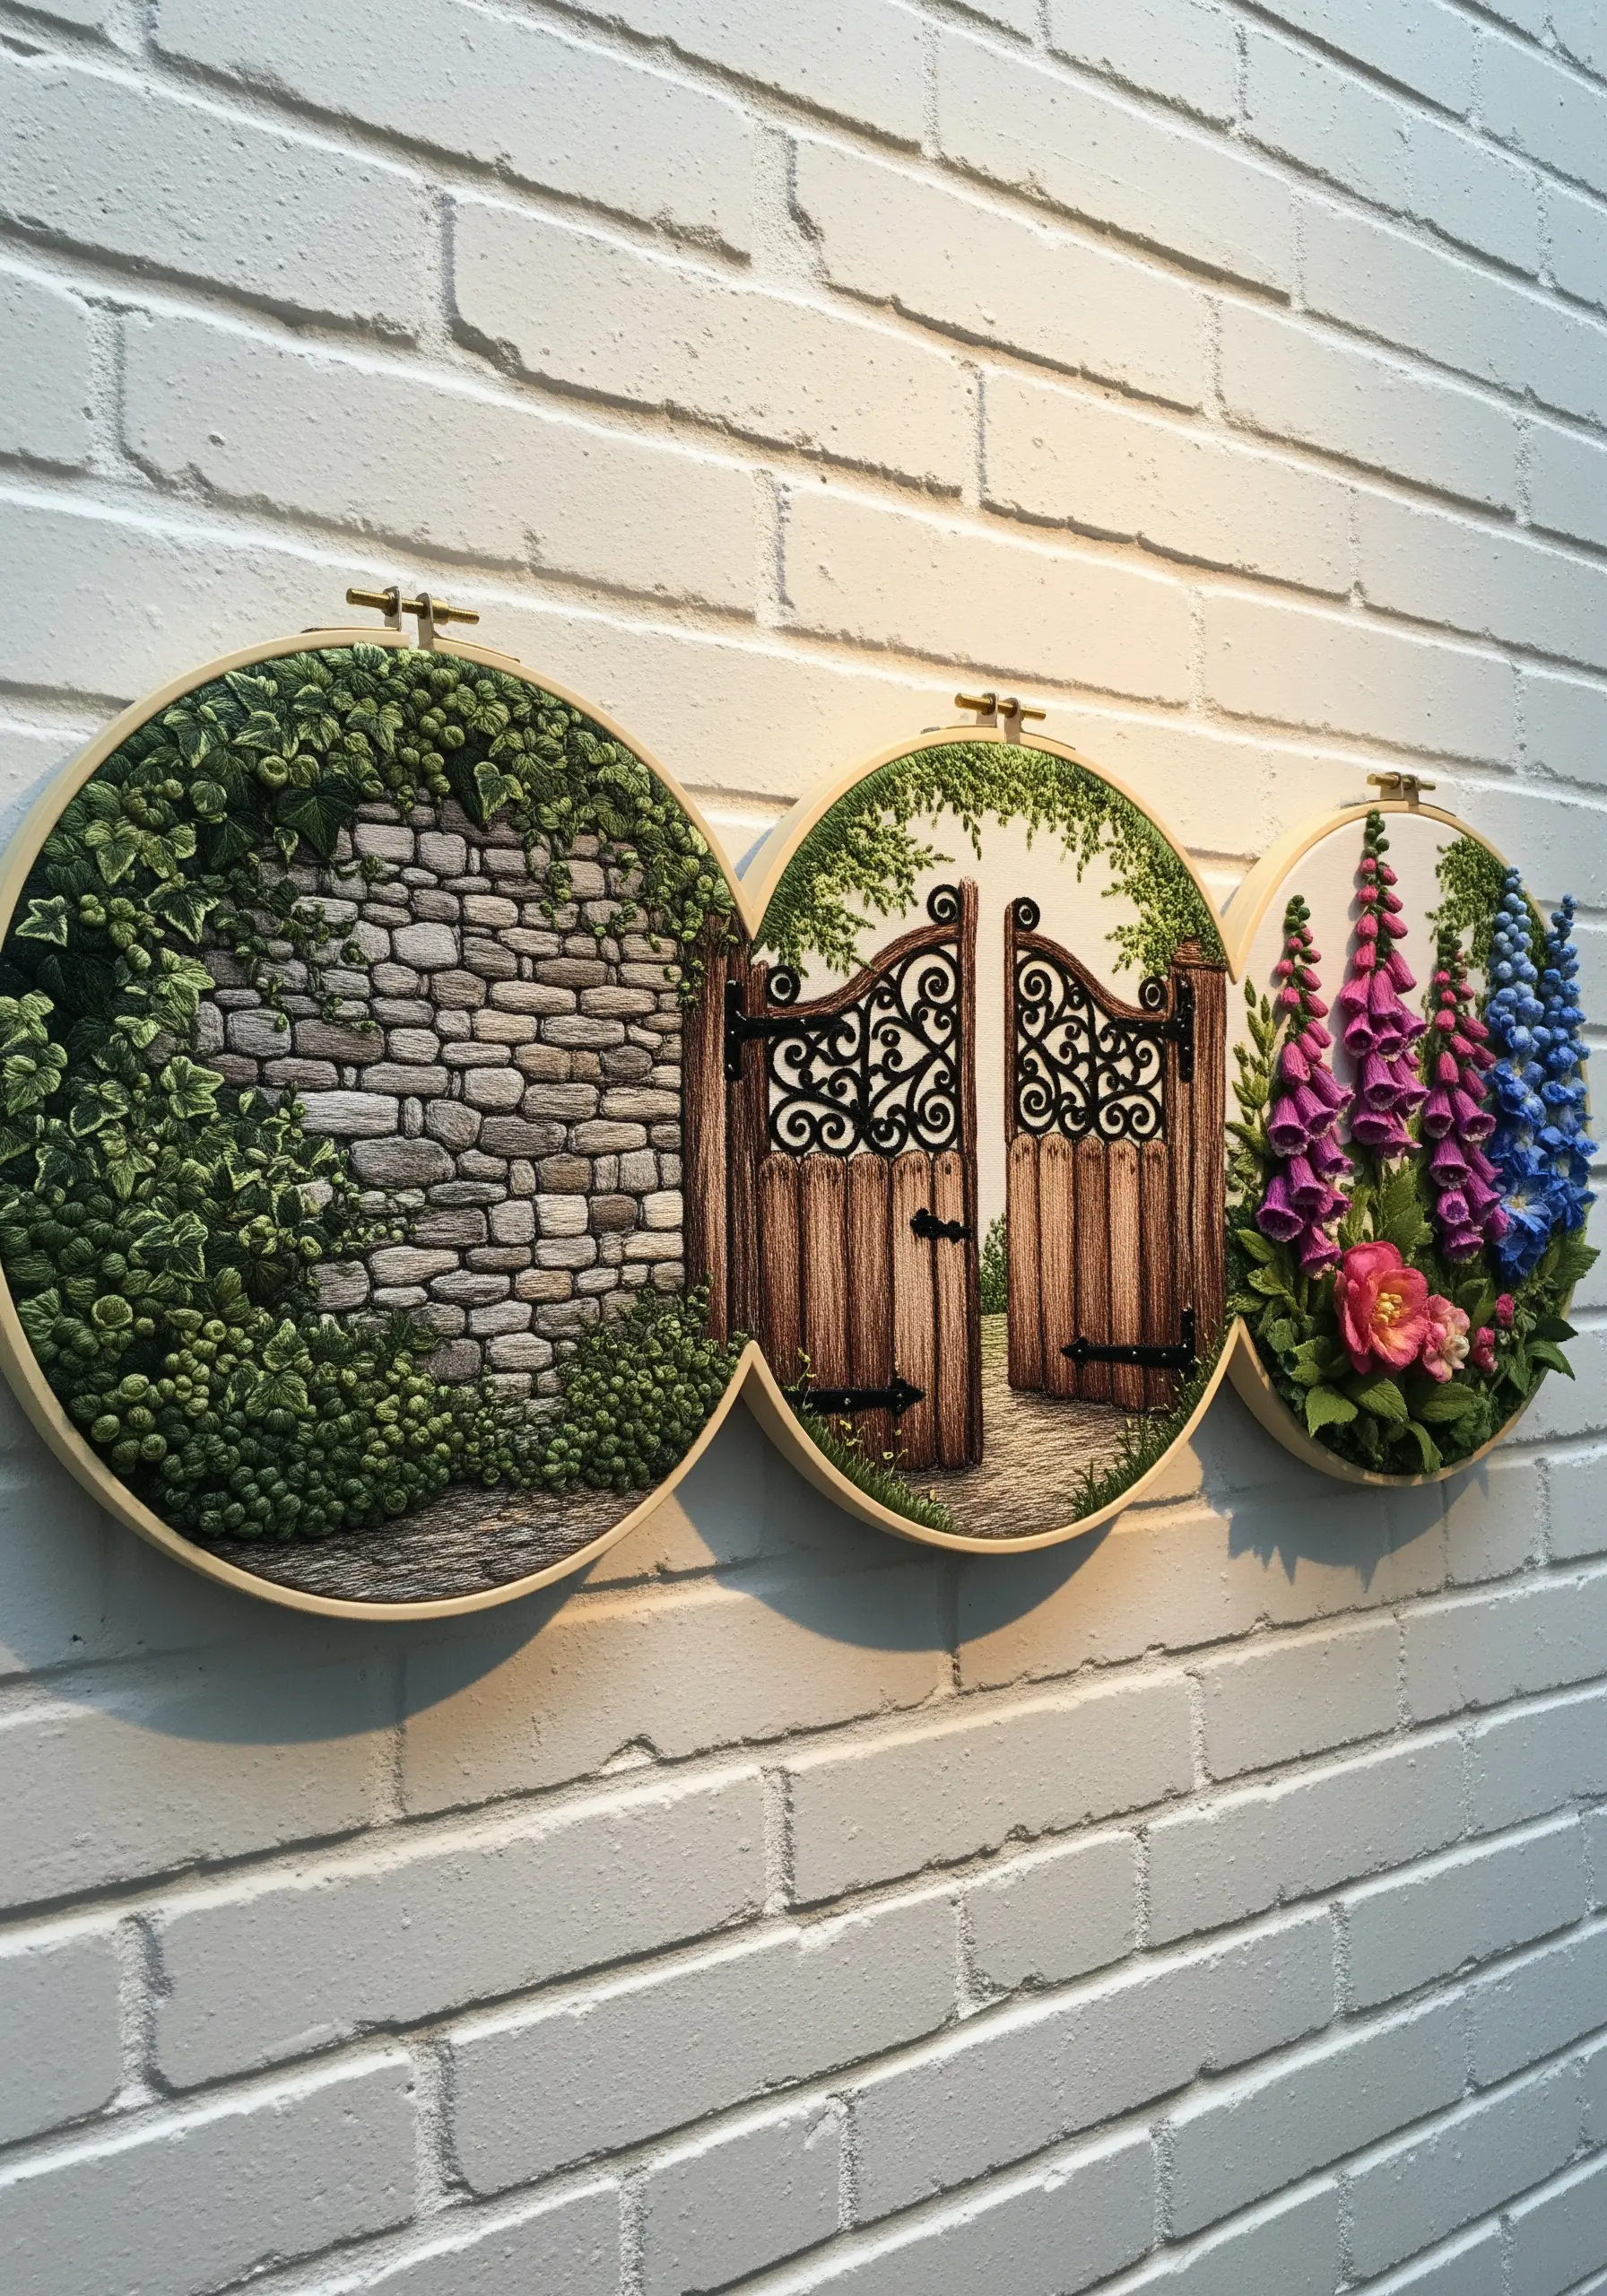
To recreate the rugged texture of a stone wall, avoid uniform stitches.
Use single-strand satin stitches in varying lengths and directions, layering shades of grey, beige, and taupe to mimic the uneven surface of old stone.
For the wooden gate, keep your satin stitches long and strictly vertical, using several shades of brown to suggest wood grain.
This intentional contrast between the chaotic, short stitches of the stone and the orderly, long stitches of the wood creates a realistic and visually interesting scene, elevated by the statement textured embroidery techniques of French knot ivy.
10. Layer Stitches for Realistic Coastal Landscapes

Capture the essence of a windswept coastline by layering different stitches to build texture.
Use a dense field of French knots and seed stitches for the sandy dunes, which contrasts beautifully with the smooth, plump satin stitch of the succulents.
For the ocean waves, couch thick, twisted white yarn over flowing satin stitches in shades of blue to create the look of seafoam cresting on the water.
Finally, incorporate real tiny seashells at the water’s edge to introduce a mixed-media element that adds surprise and authenticity.
11. Make Colors Vibrate Against a Black Background

Black fabric is the perfect canvas for making jewel-toned threads appear intensely saturated.
To stitch the hummingbird, select threads with a high sheen, like rayon or silk, as their reflective quality will stand out dramatically against the matte black cotton.
Use the long-and-short stitch technique for the bird’s feathers and the fuchsia petals, allowing you to blend multiple bright colors seamlessly for a painterly, iridescent effect.
The high contrast makes every stitch count, turning your embroidery into a striking piece of bold color-pop embroidery.
12. Achieve Delicate Lettering with a Single Thread
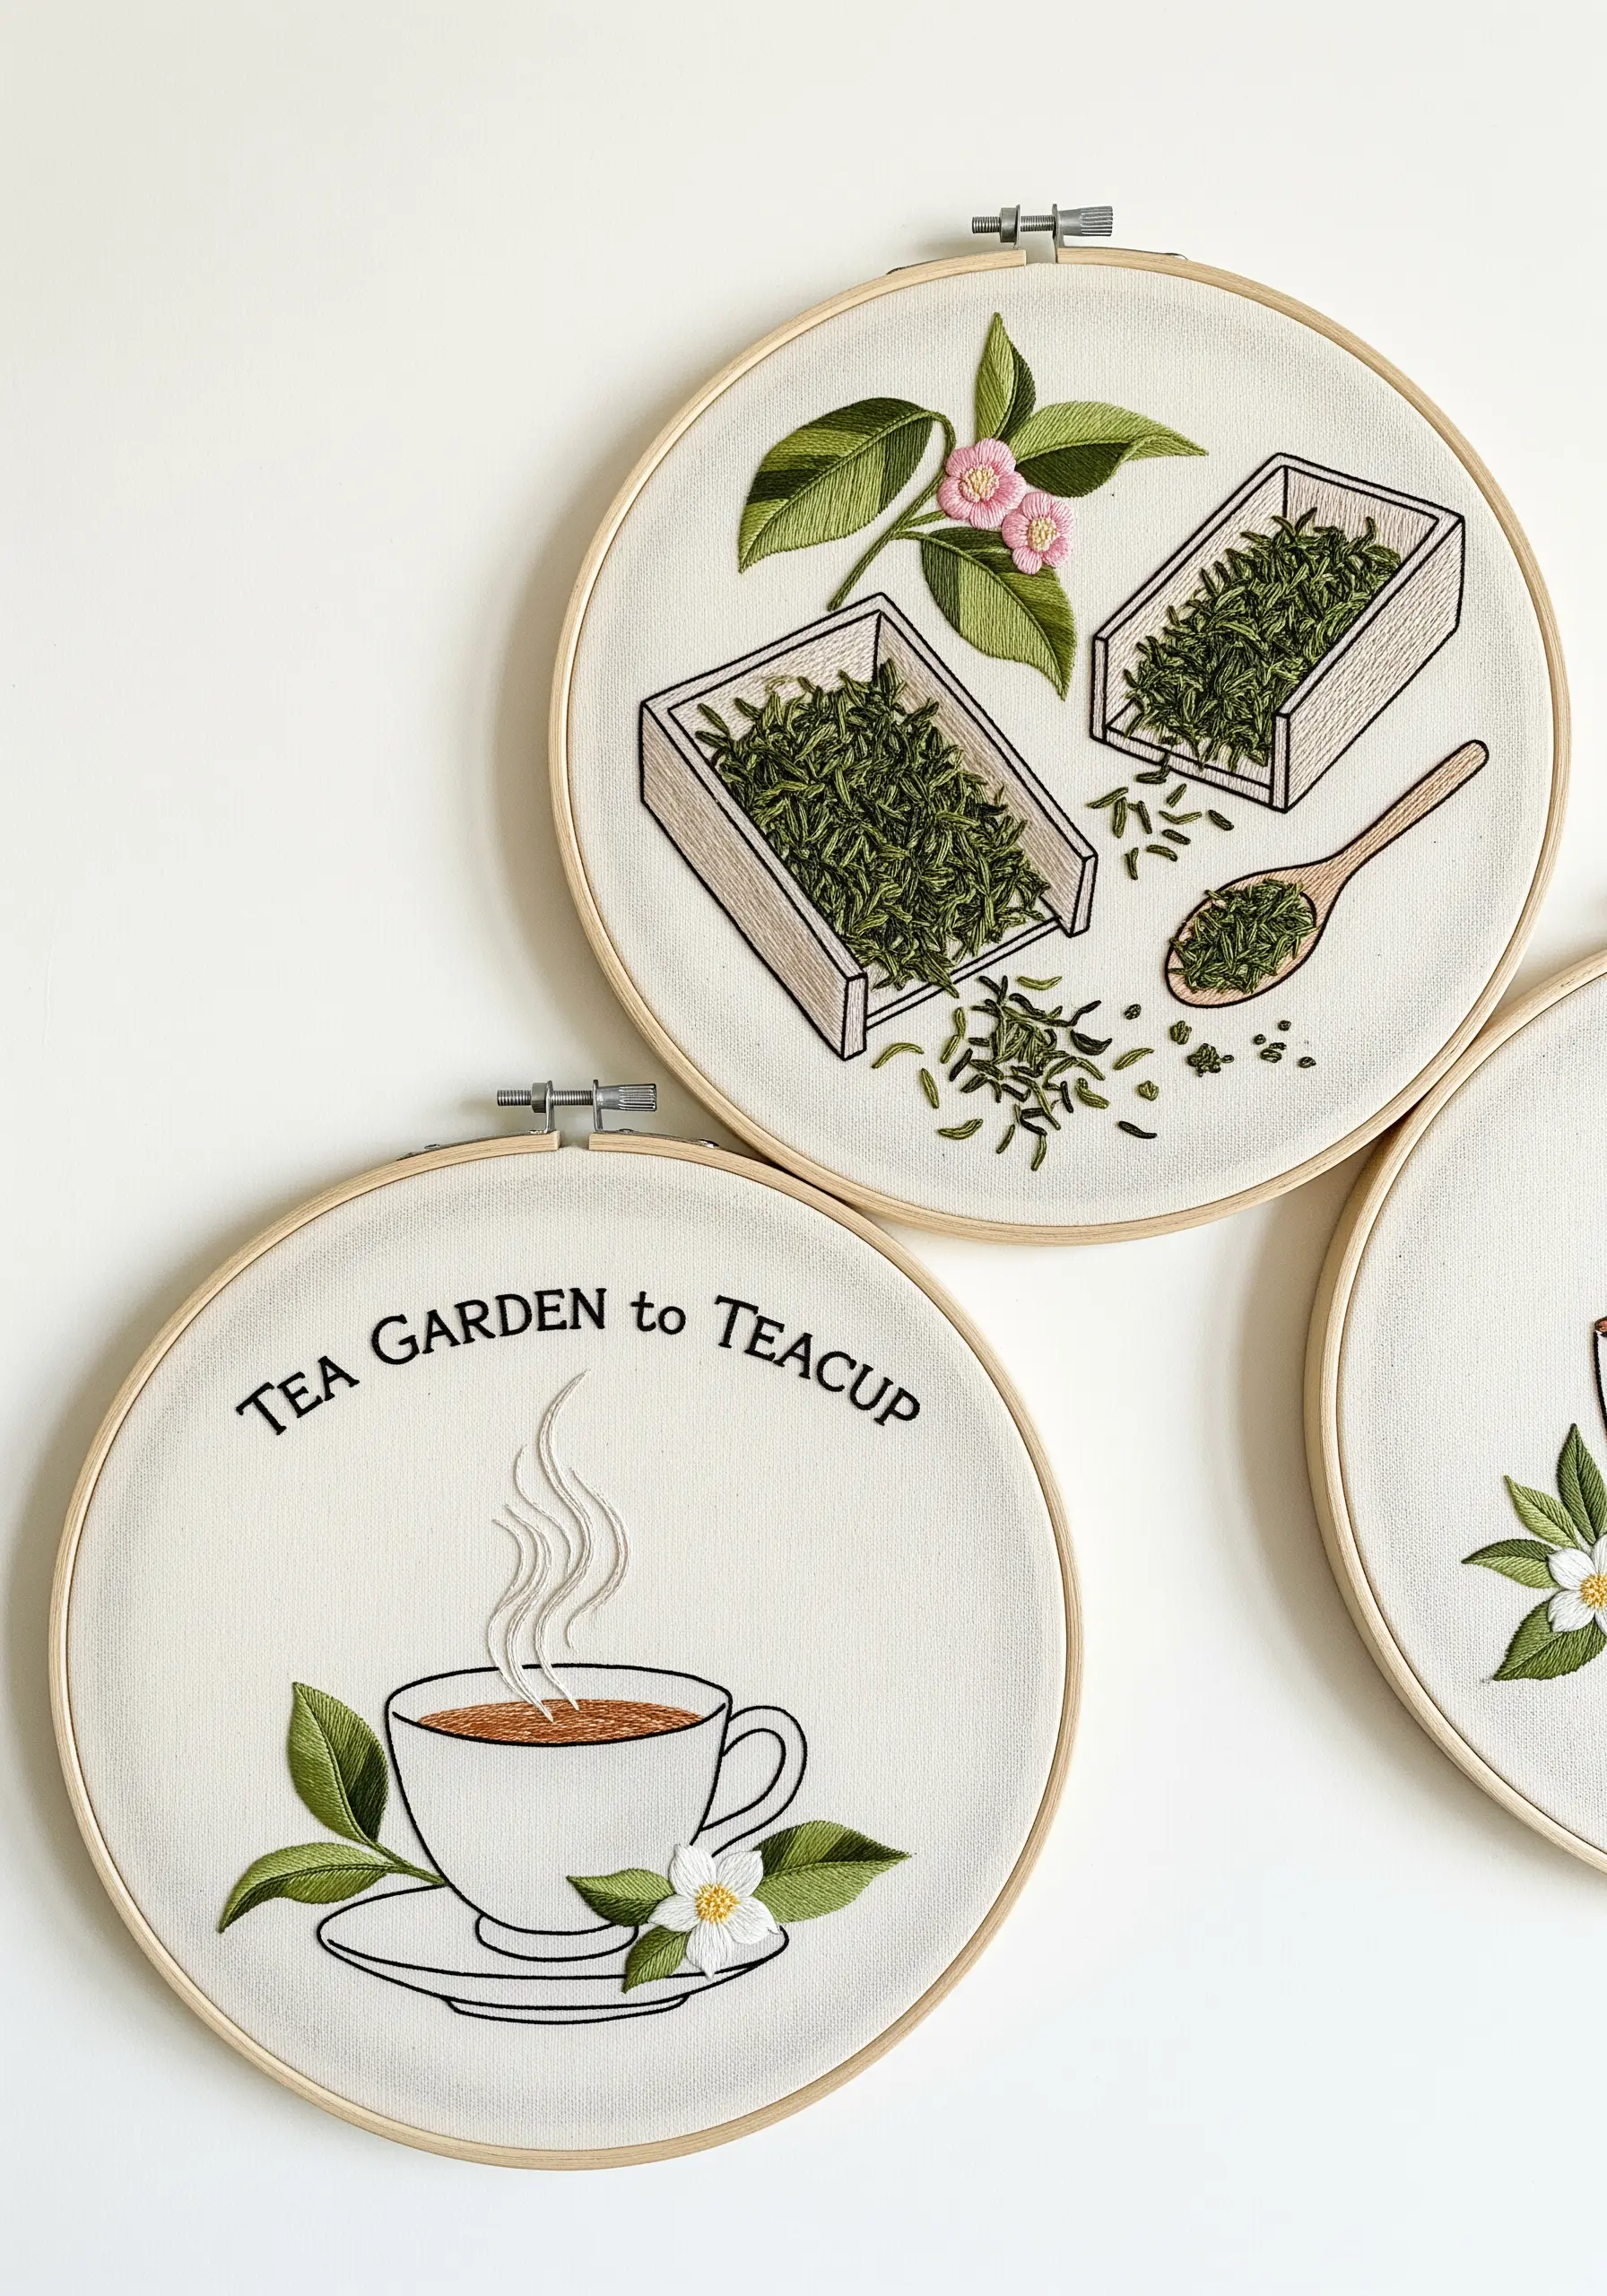
For crisp, readable text that doesn’t overwhelm your botanical motifs, precision is key.
Use a single strand of floss and a simple backstitch or stem stitch. A single thread ensures the curves of the letters remain smooth and elegant, whereas thicker thread can make them appear bulky or jagged.
To keep your lines perfectly even, consider printing your text on water-soluble stabilizer. You can stitch directly over it and then dissolve it away, leaving only your flawless lettering behind.
13. Integrate Tiny LED Lights for a Magical Glow
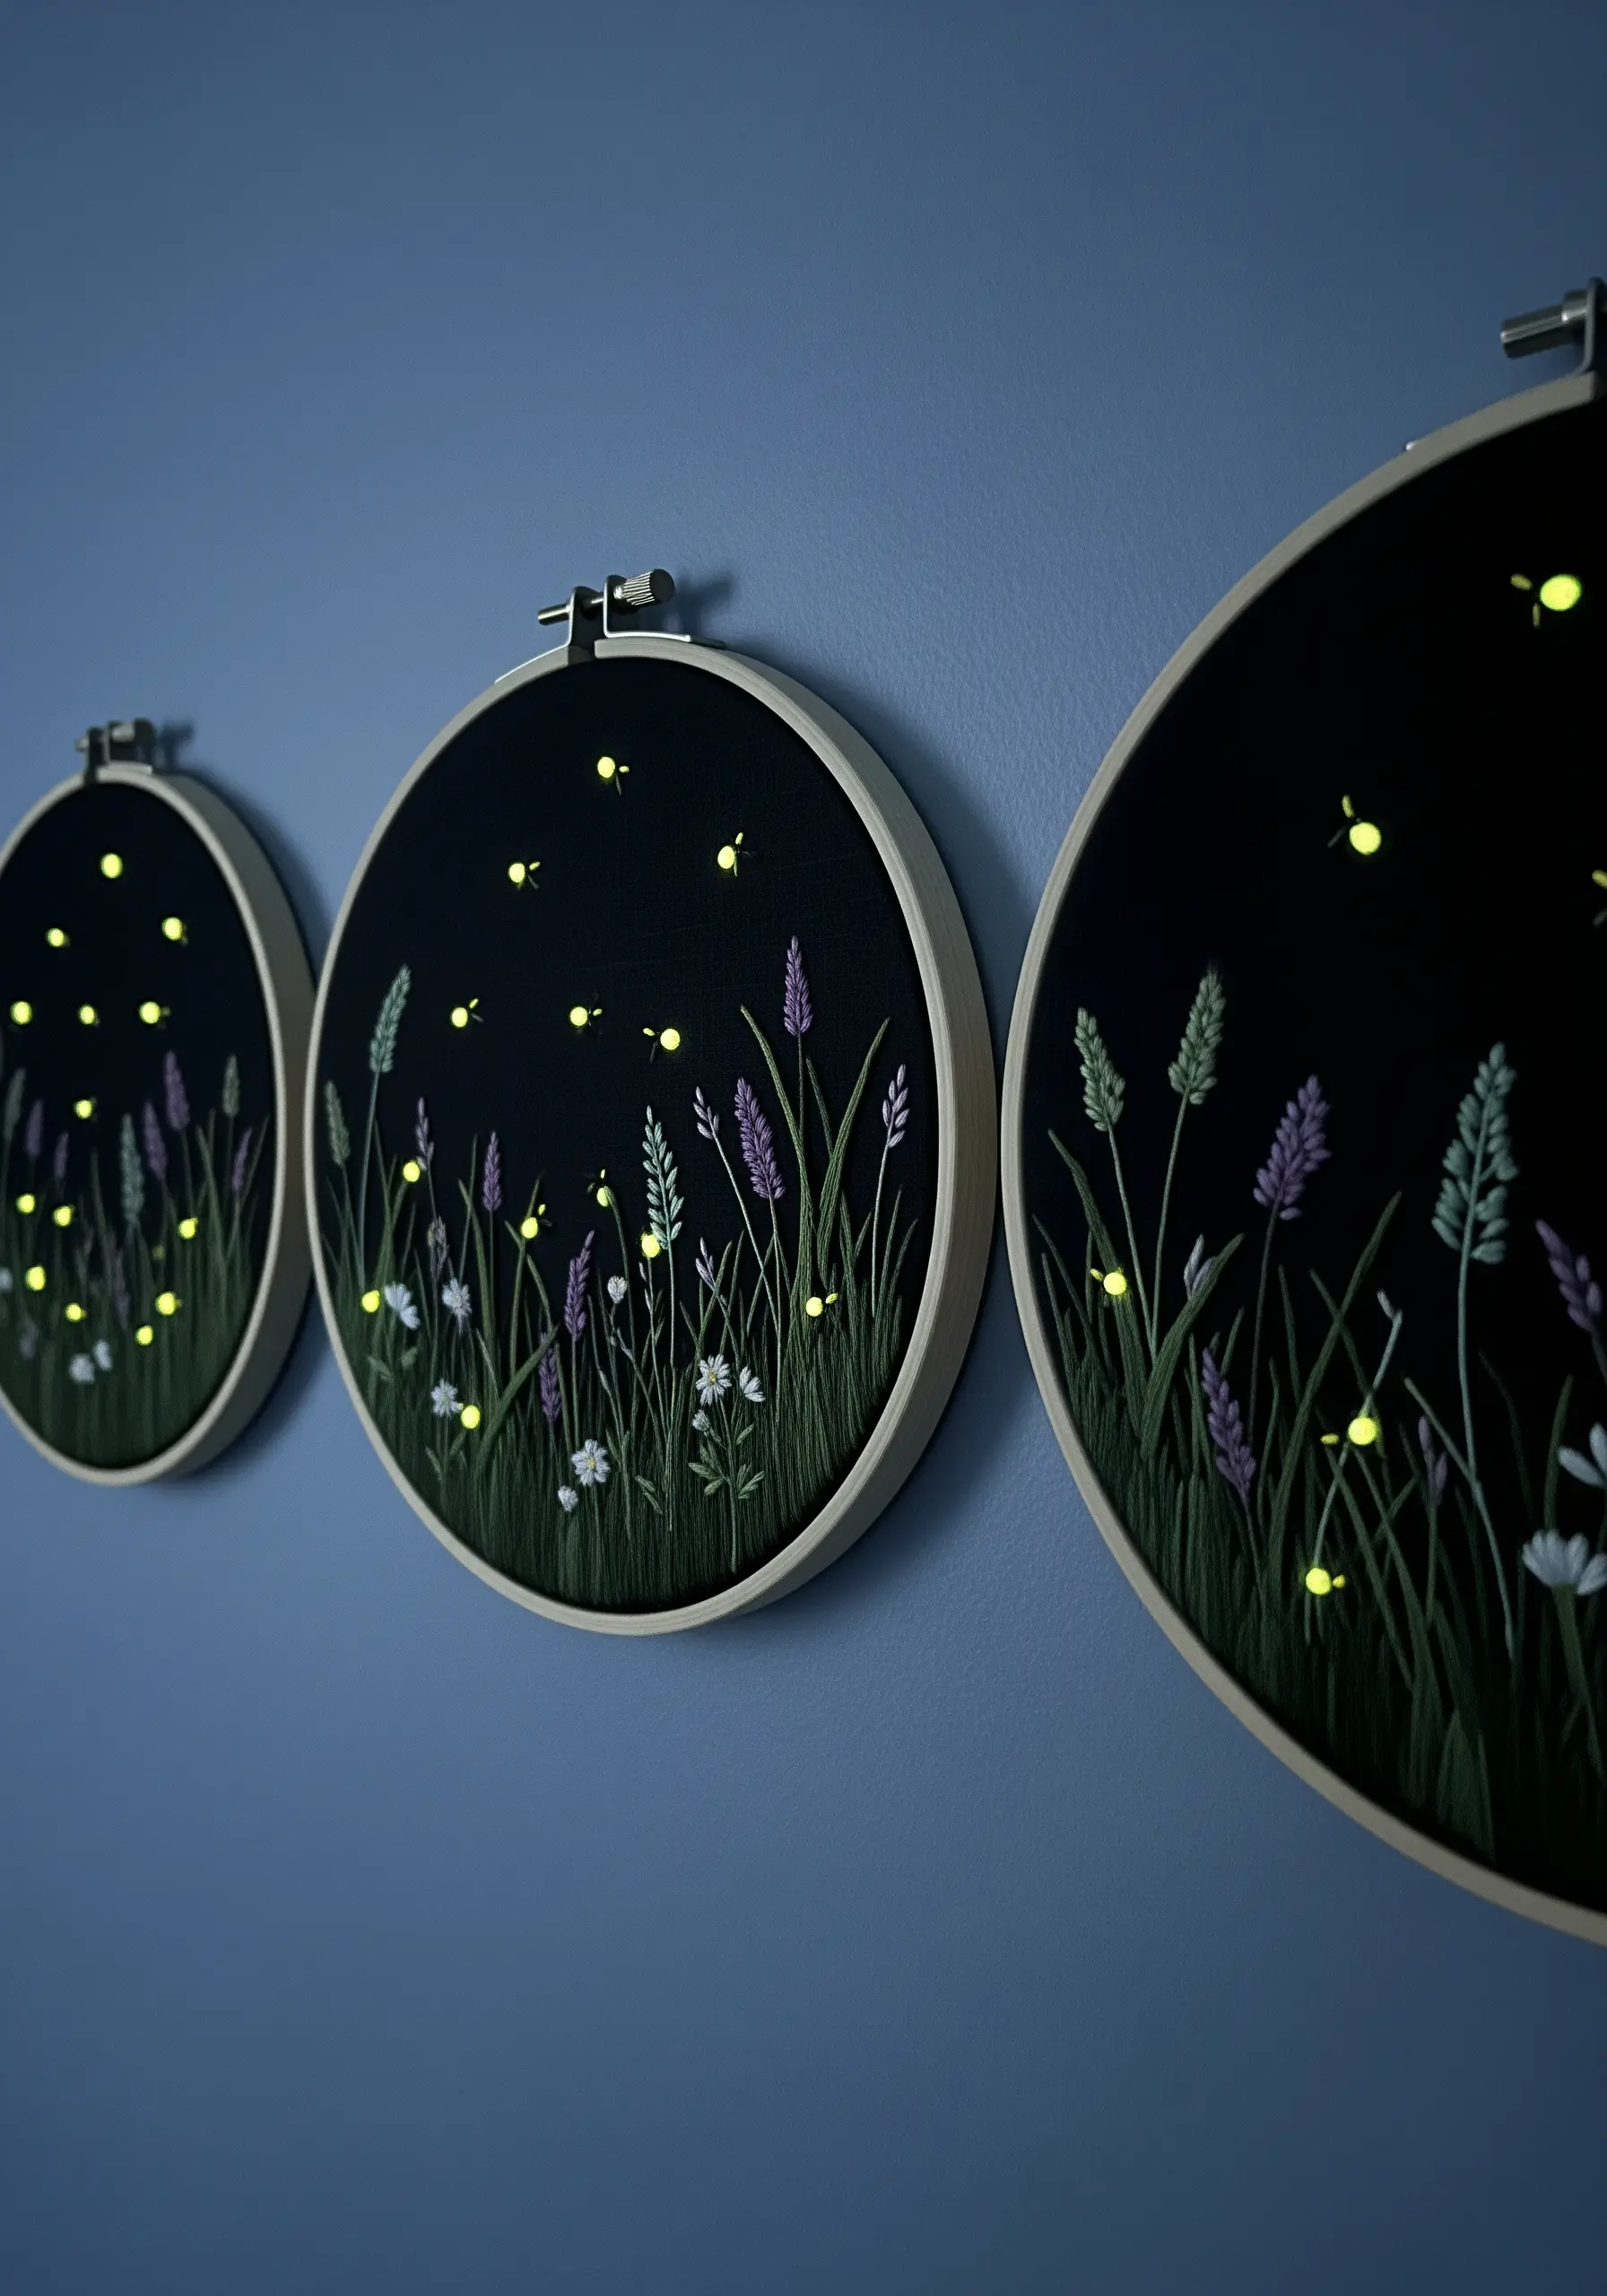
To bring a firefly meadow to life, you can weave a string of tiny ‘fairy’ LED lights into your finished embroidery.
First, complete your floral stitching on the dark fabric. Then, from the back, carefully poke the small LED bulbs through the fabric at scattered points, securing the thin wire with a few small stitches.
Stitch a few French knots with glow-in-the-dark thread among the lights to enhance the effect when the lights are off.
This simple addition transforms your handmade wall art into an interactive, magical piece.
14. Recreate Botanical Illustrations with Fine-Line Stitching
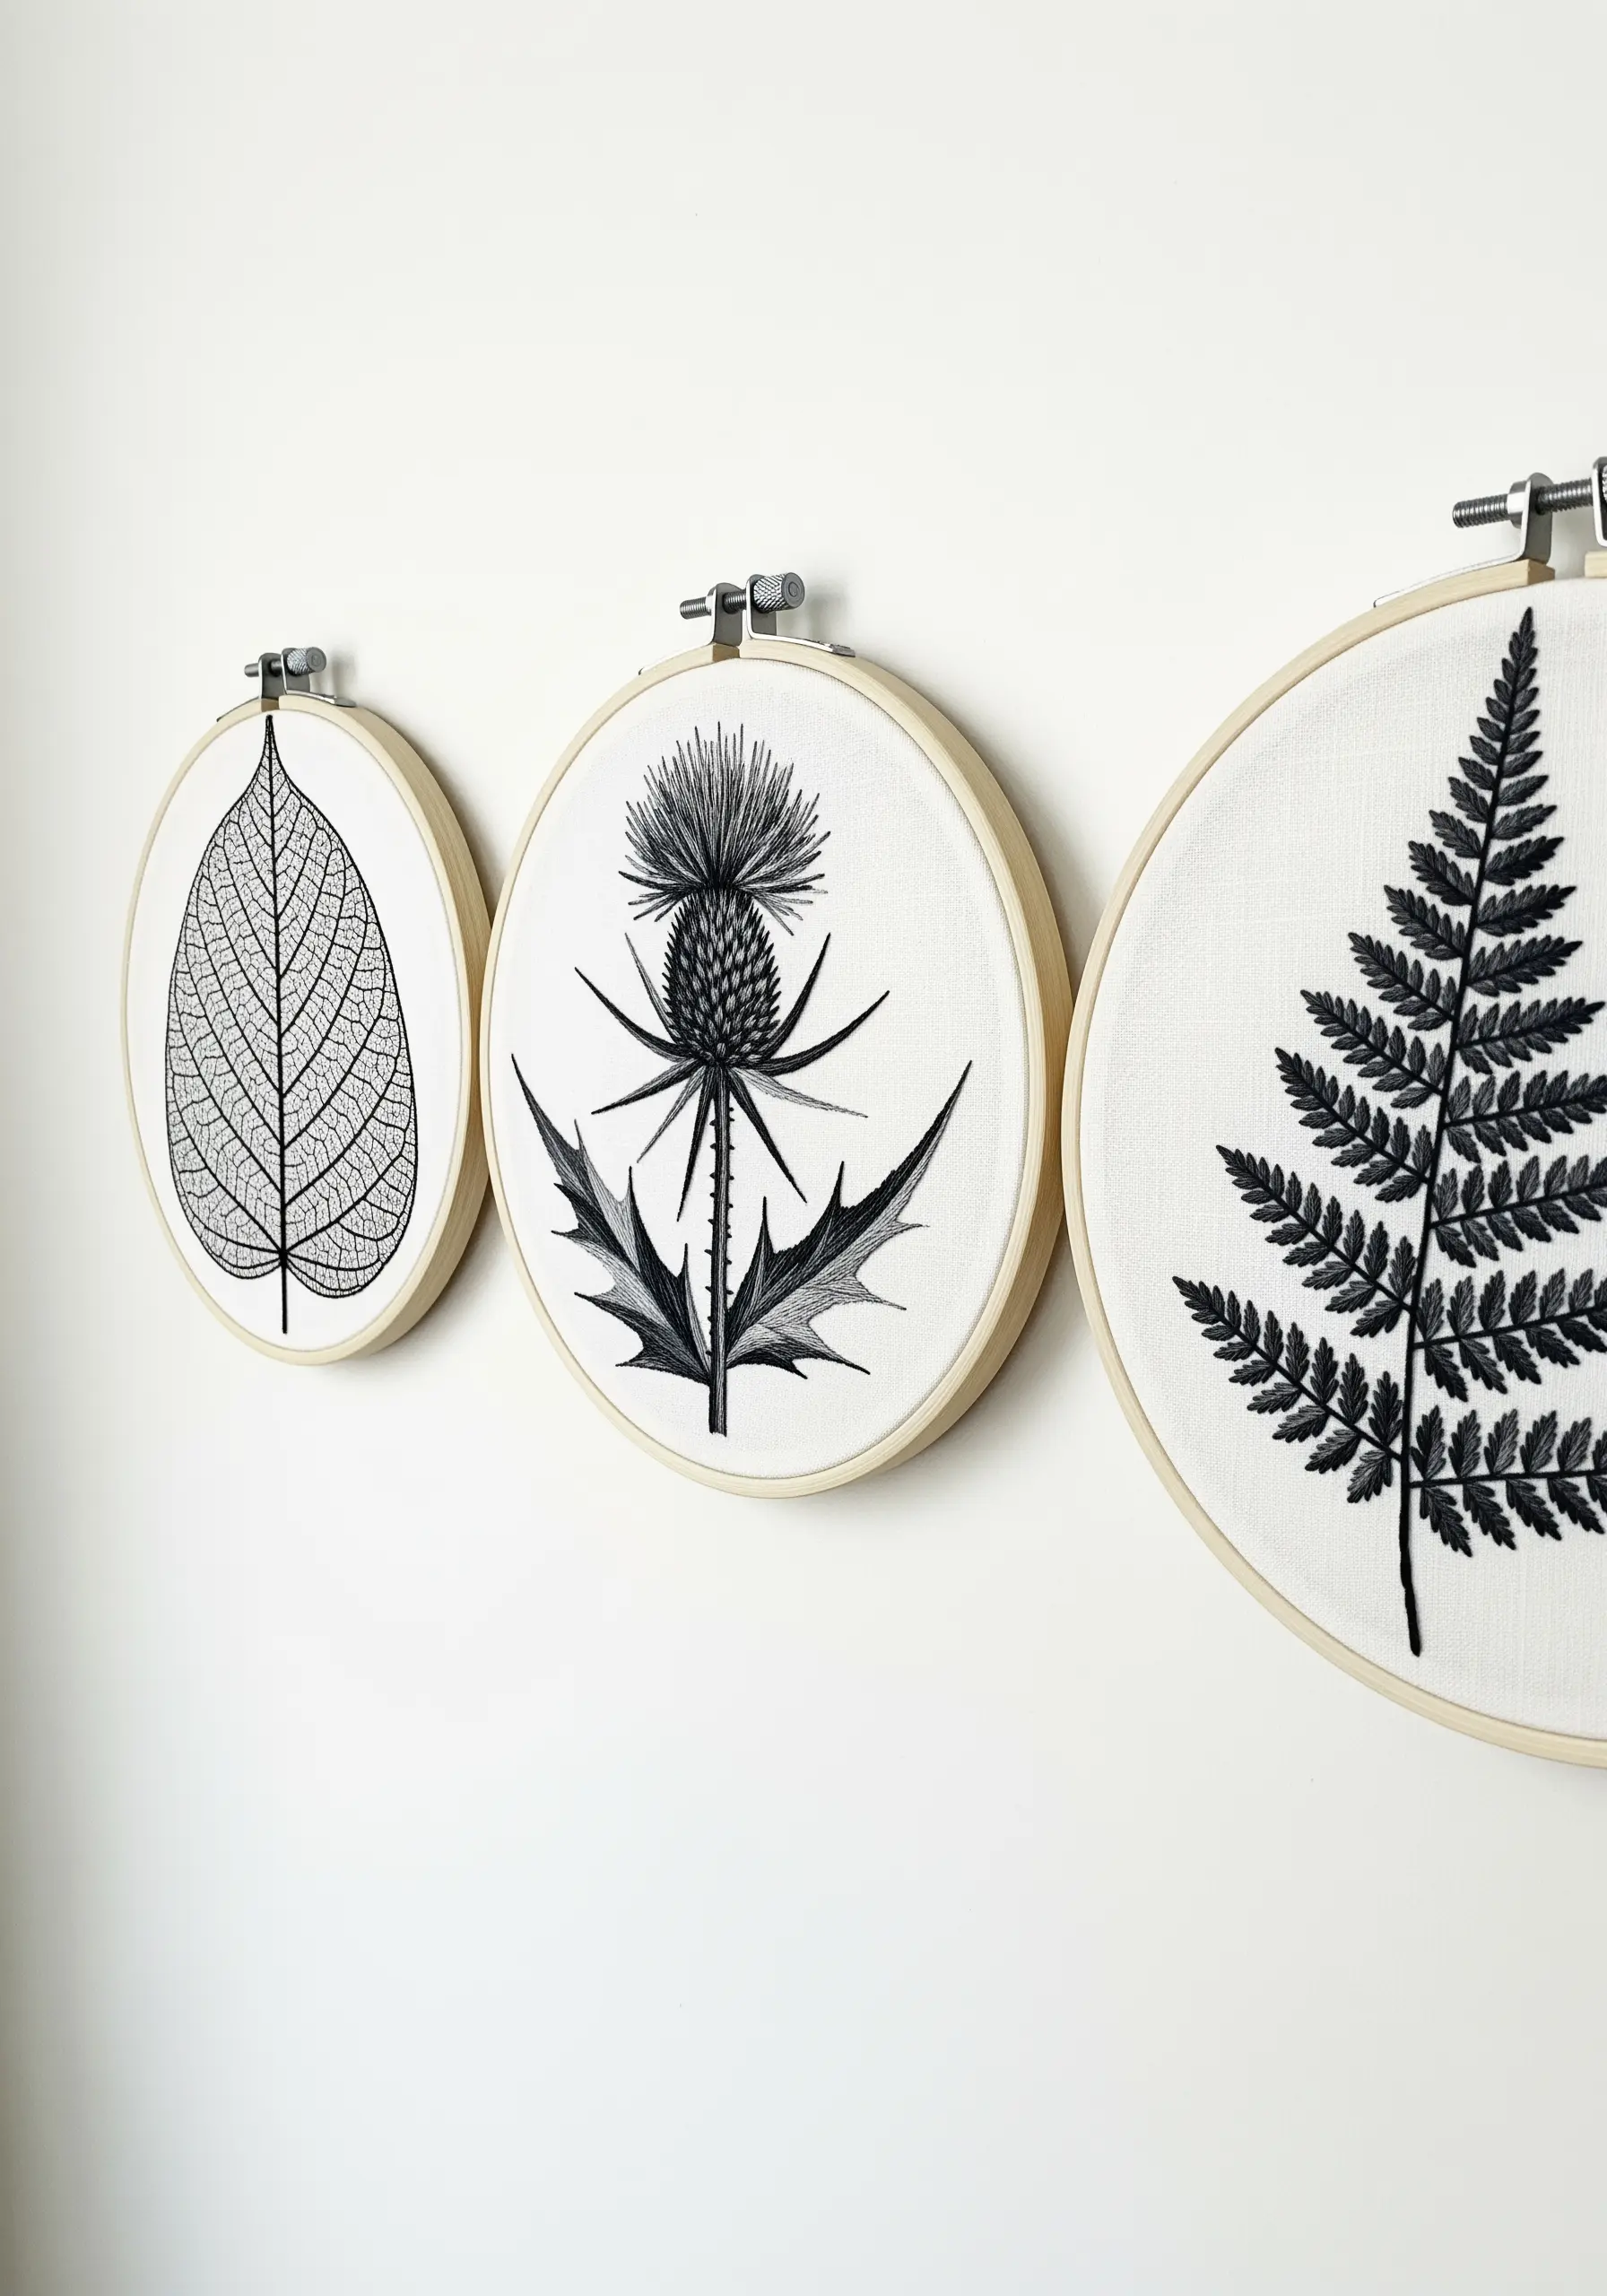
To capture the detailed, scientific look of a botanical illustration, you need to think like an engraver.
Work exclusively with a single strand of black thread on a high-contrast white or off-white fabric, such as linen or tightly woven cotton.
Use a tiny backstitch or split stitch for the outlines and delicate straight stitches for the shading and fine veins of the leaves.
The key is consistency and precision. This minimalist approach focuses all the attention on the form and texture of the plant, creating a sophisticated, graphic look.
15. Create Depth in a Floral Field with Layering

To avoid a flat-looking field of sunflowers, create the illusion of depth by strategically layering the flower heads.
Stitch the sunflowers in the ‘back’ row first. Then, stitch the flowers in the ‘front’ row, allowing their petals to slightly overlap the ones behind them.
This simple technique of physical layering immediately establishes a foreground and background.
Further enhance the effect by making the background flowers slightly smaller and using a shade or two darker for their centers, which makes them appear to recede.
16. Use Directional Satin Stitch to Define Form
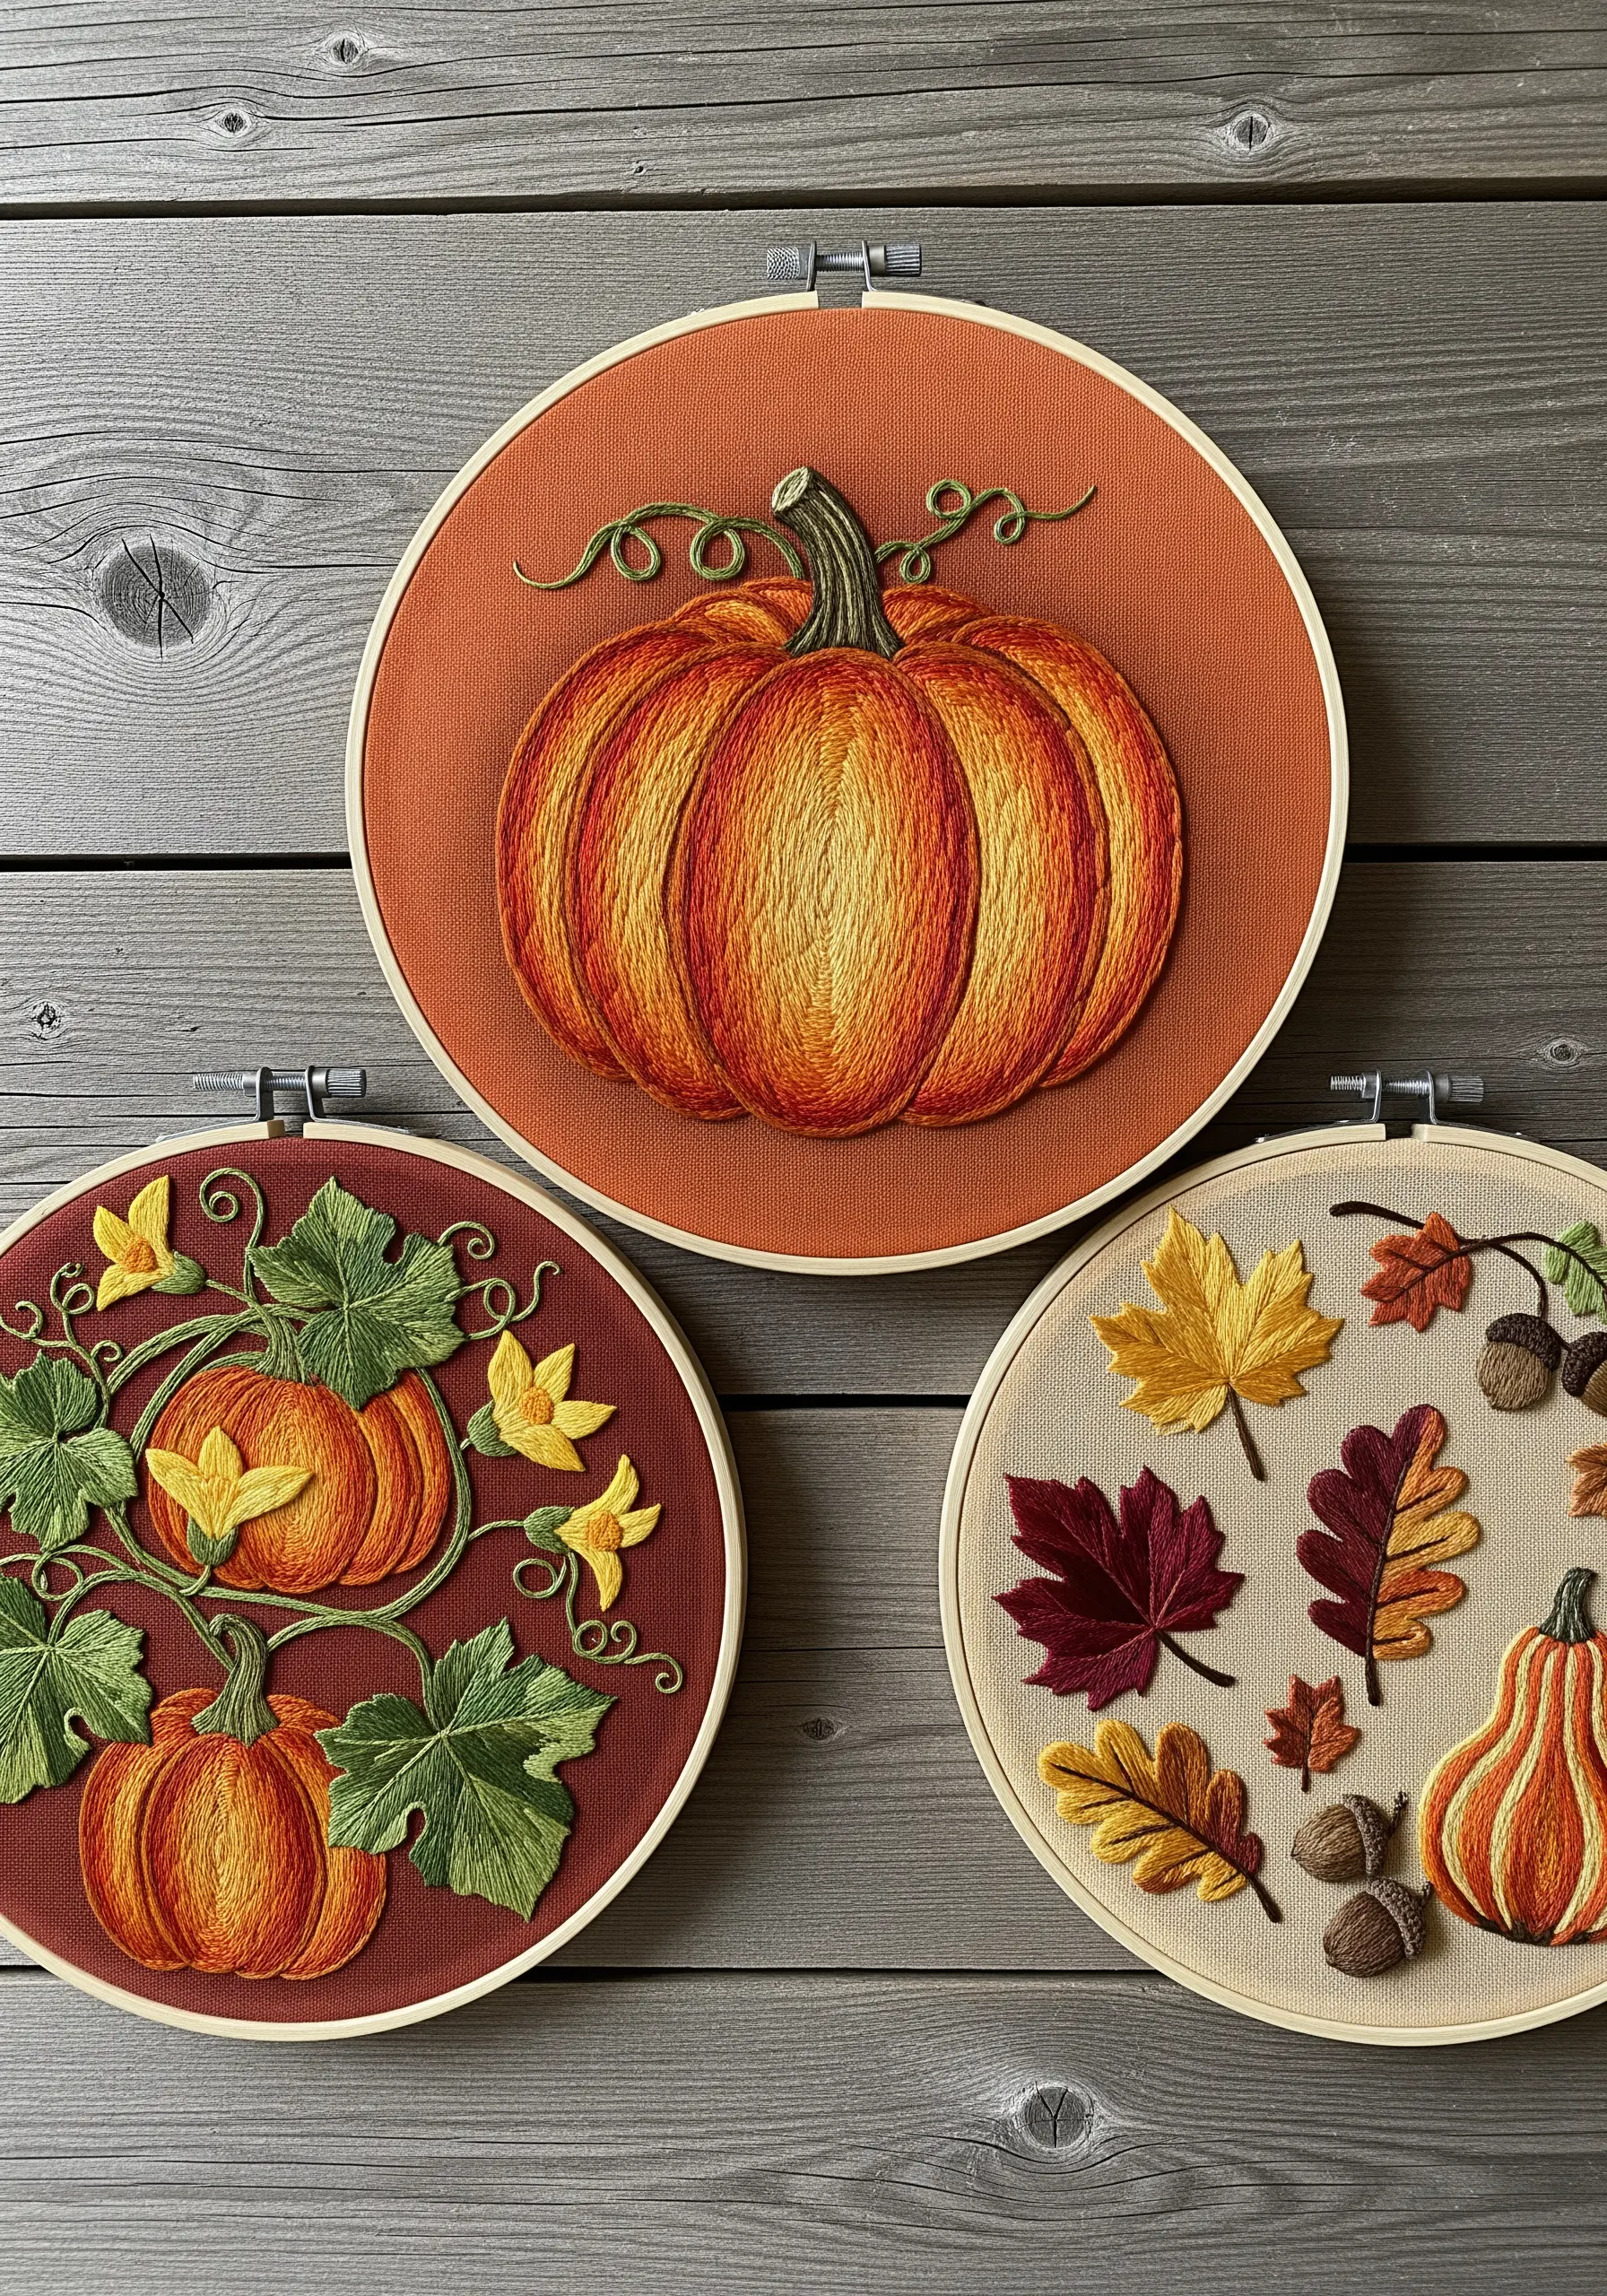
A pumpkin’s distinct shape comes from its curved segments, and your stitches should follow that form.
Instead of filling the entire pumpkin with one uniform direction of satin stitch, treat each curved segment as its own shape.
Angle your long-and-short stitches to follow the curve of each segment, from the stem outwards. This creates natural-looking highlights and shadows, giving the pumpkin a rounded, three-dimensional appearance without needing complex shading.
This approach transforms a flat shape into a believable object with weight and form.
17. Balance Detail and Simplicity in a Thematic Triptych
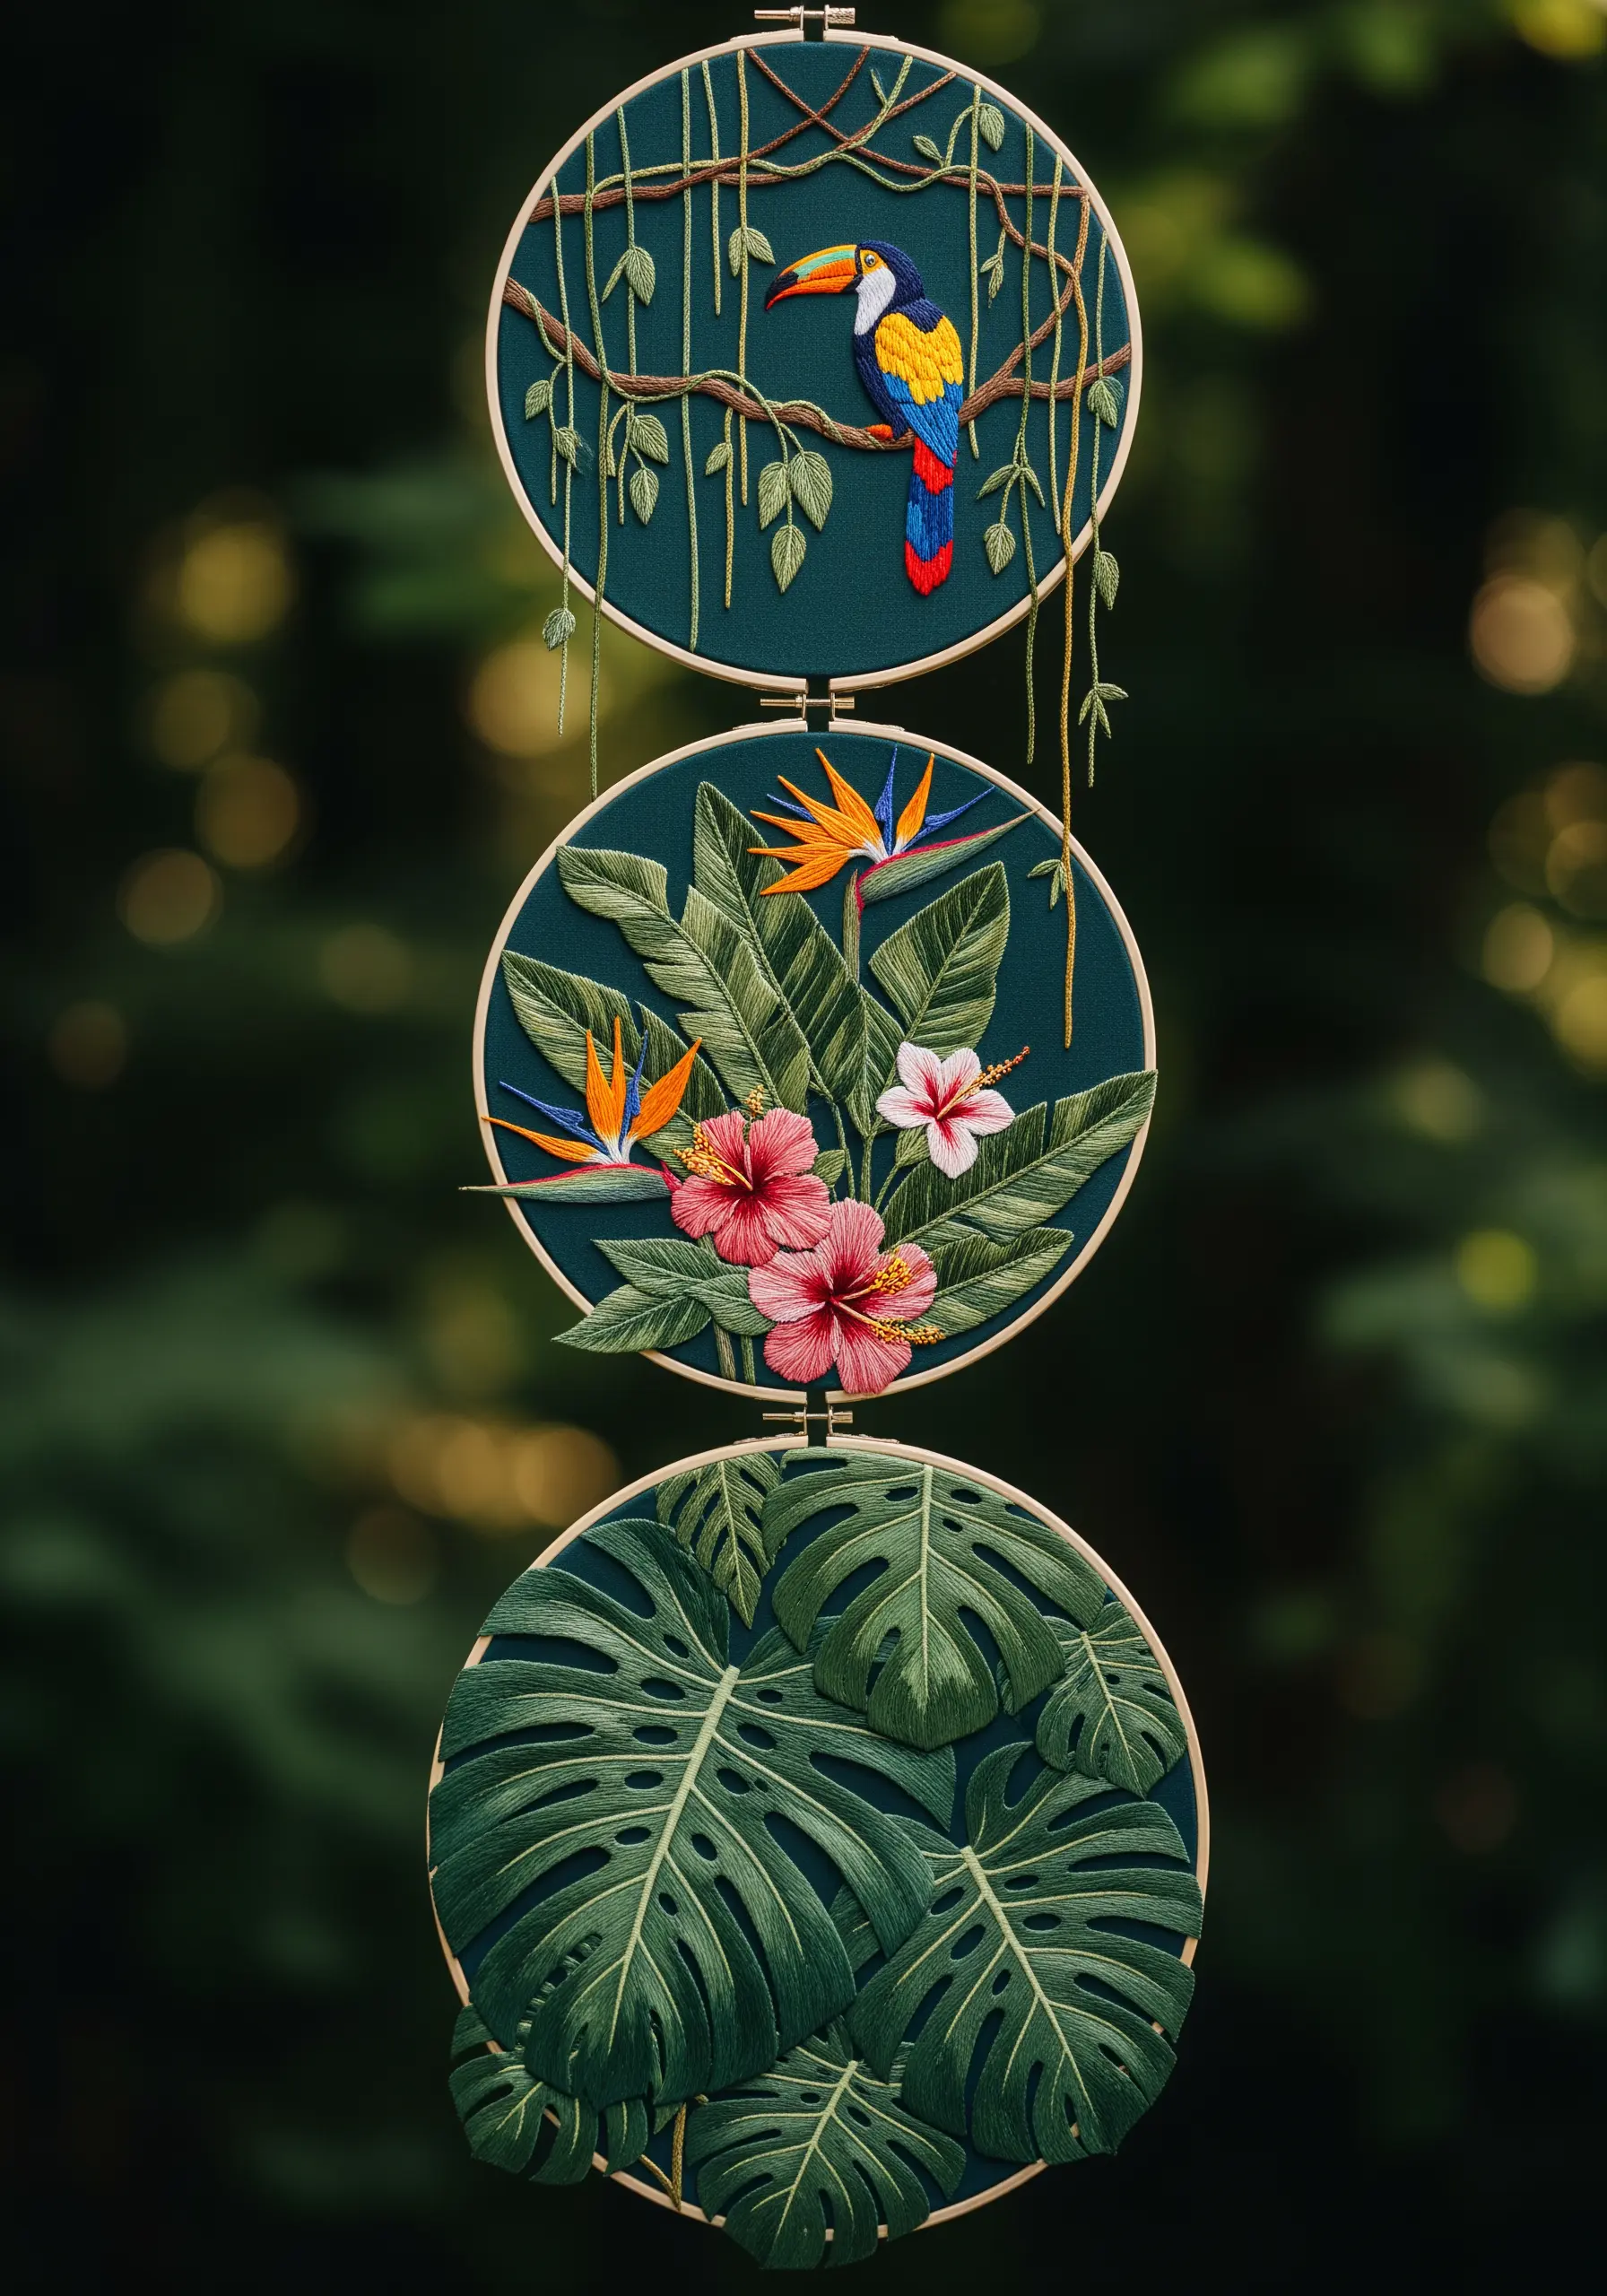
When creating a triptych with a central theme, you can tell a richer story by varying the complexity of each hoop.
Dedicate one hoop to a detailed, ‘close-up’ scene, like the bird of paradise and hibiscus flowers, using intricate long-and-short stitches.
Use another hoop for a simpler, more graphic element, like the monstera leaves, which relies on shape and clean satin stitch.
The third hoop can feature a single, iconic subject, like the toucan. This variation in focus creates a balanced and dynamic composition that keeps the eye moving.
18. Evoke Serenity with Minimalist Textures
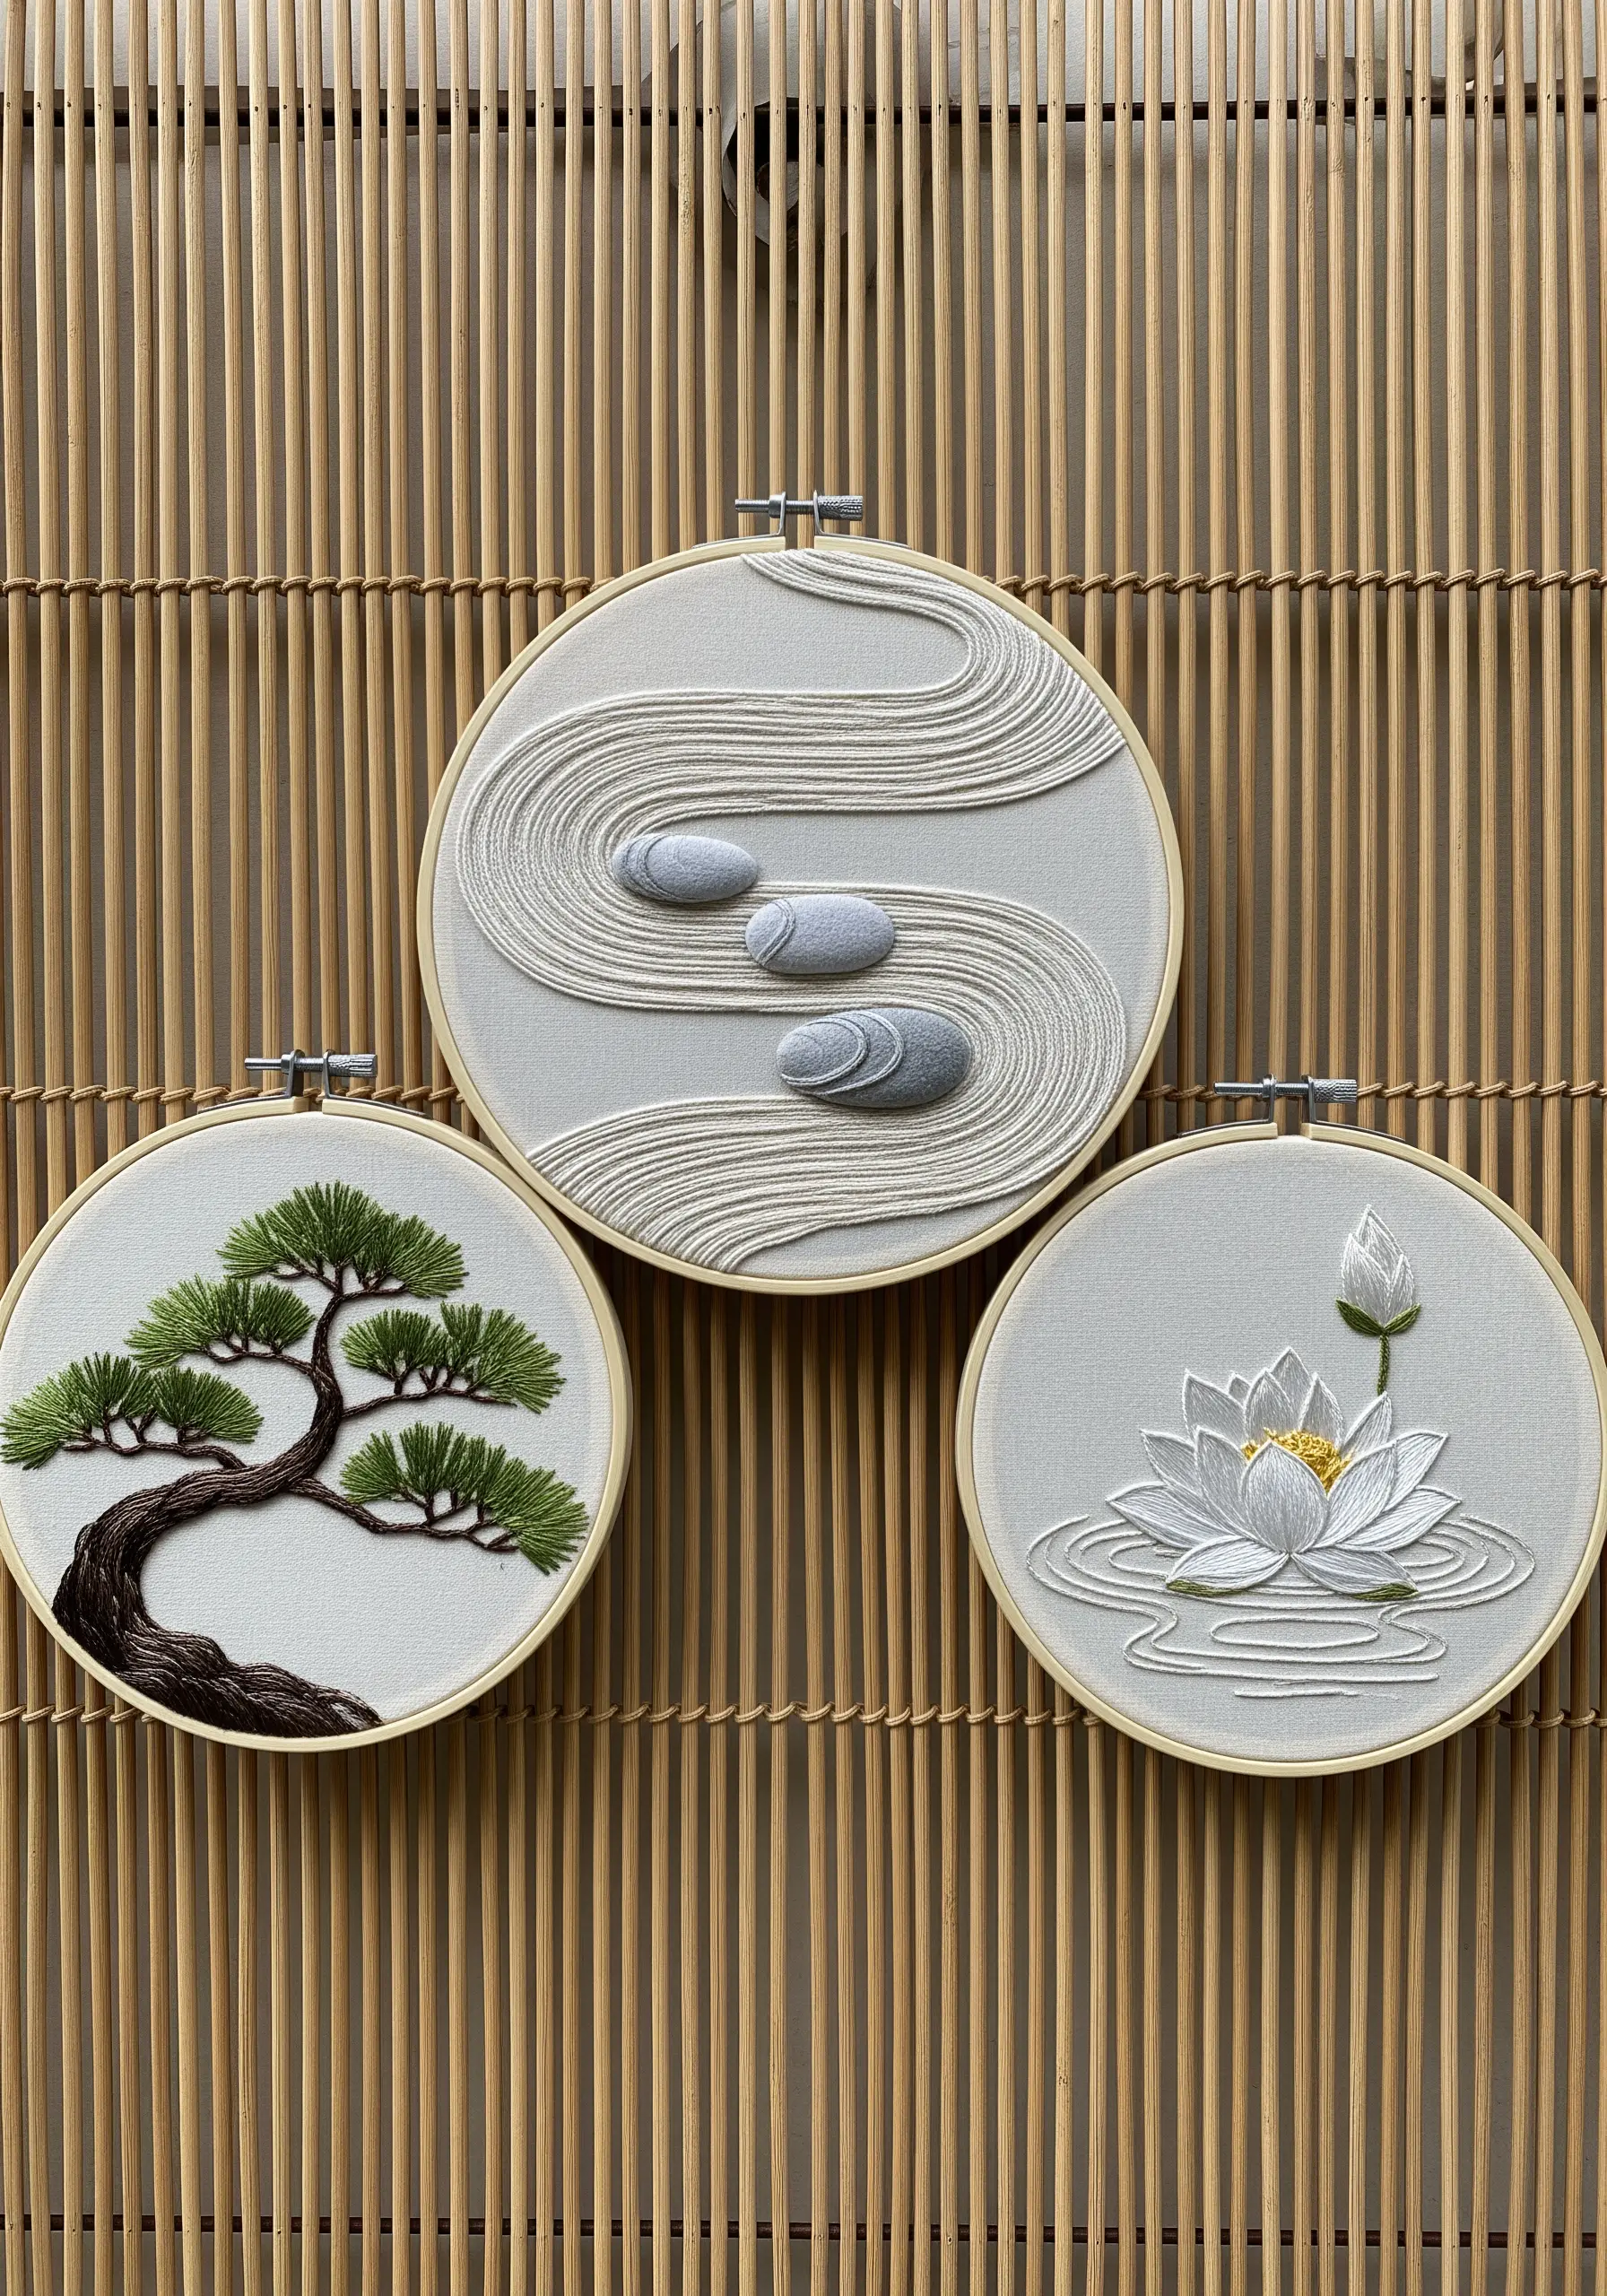
To capture the quiet feeling of a zen garden, focus on the elegance of line and texture rather than color.
For the raked sand, use a couching technique with a thicker thread or fine yarn laid on the fabric in sweeping curves and secured with tiny, near-invisible stitches of a matching thin thread.
Use padded satin stitch for the smooth stones to give them a subtle, raised dimension.
This focus on organic texture within a monochromatic palette creates a profoundly calm and meditative piece.
19. Create Soft, Tactile Snow with Turkey Work
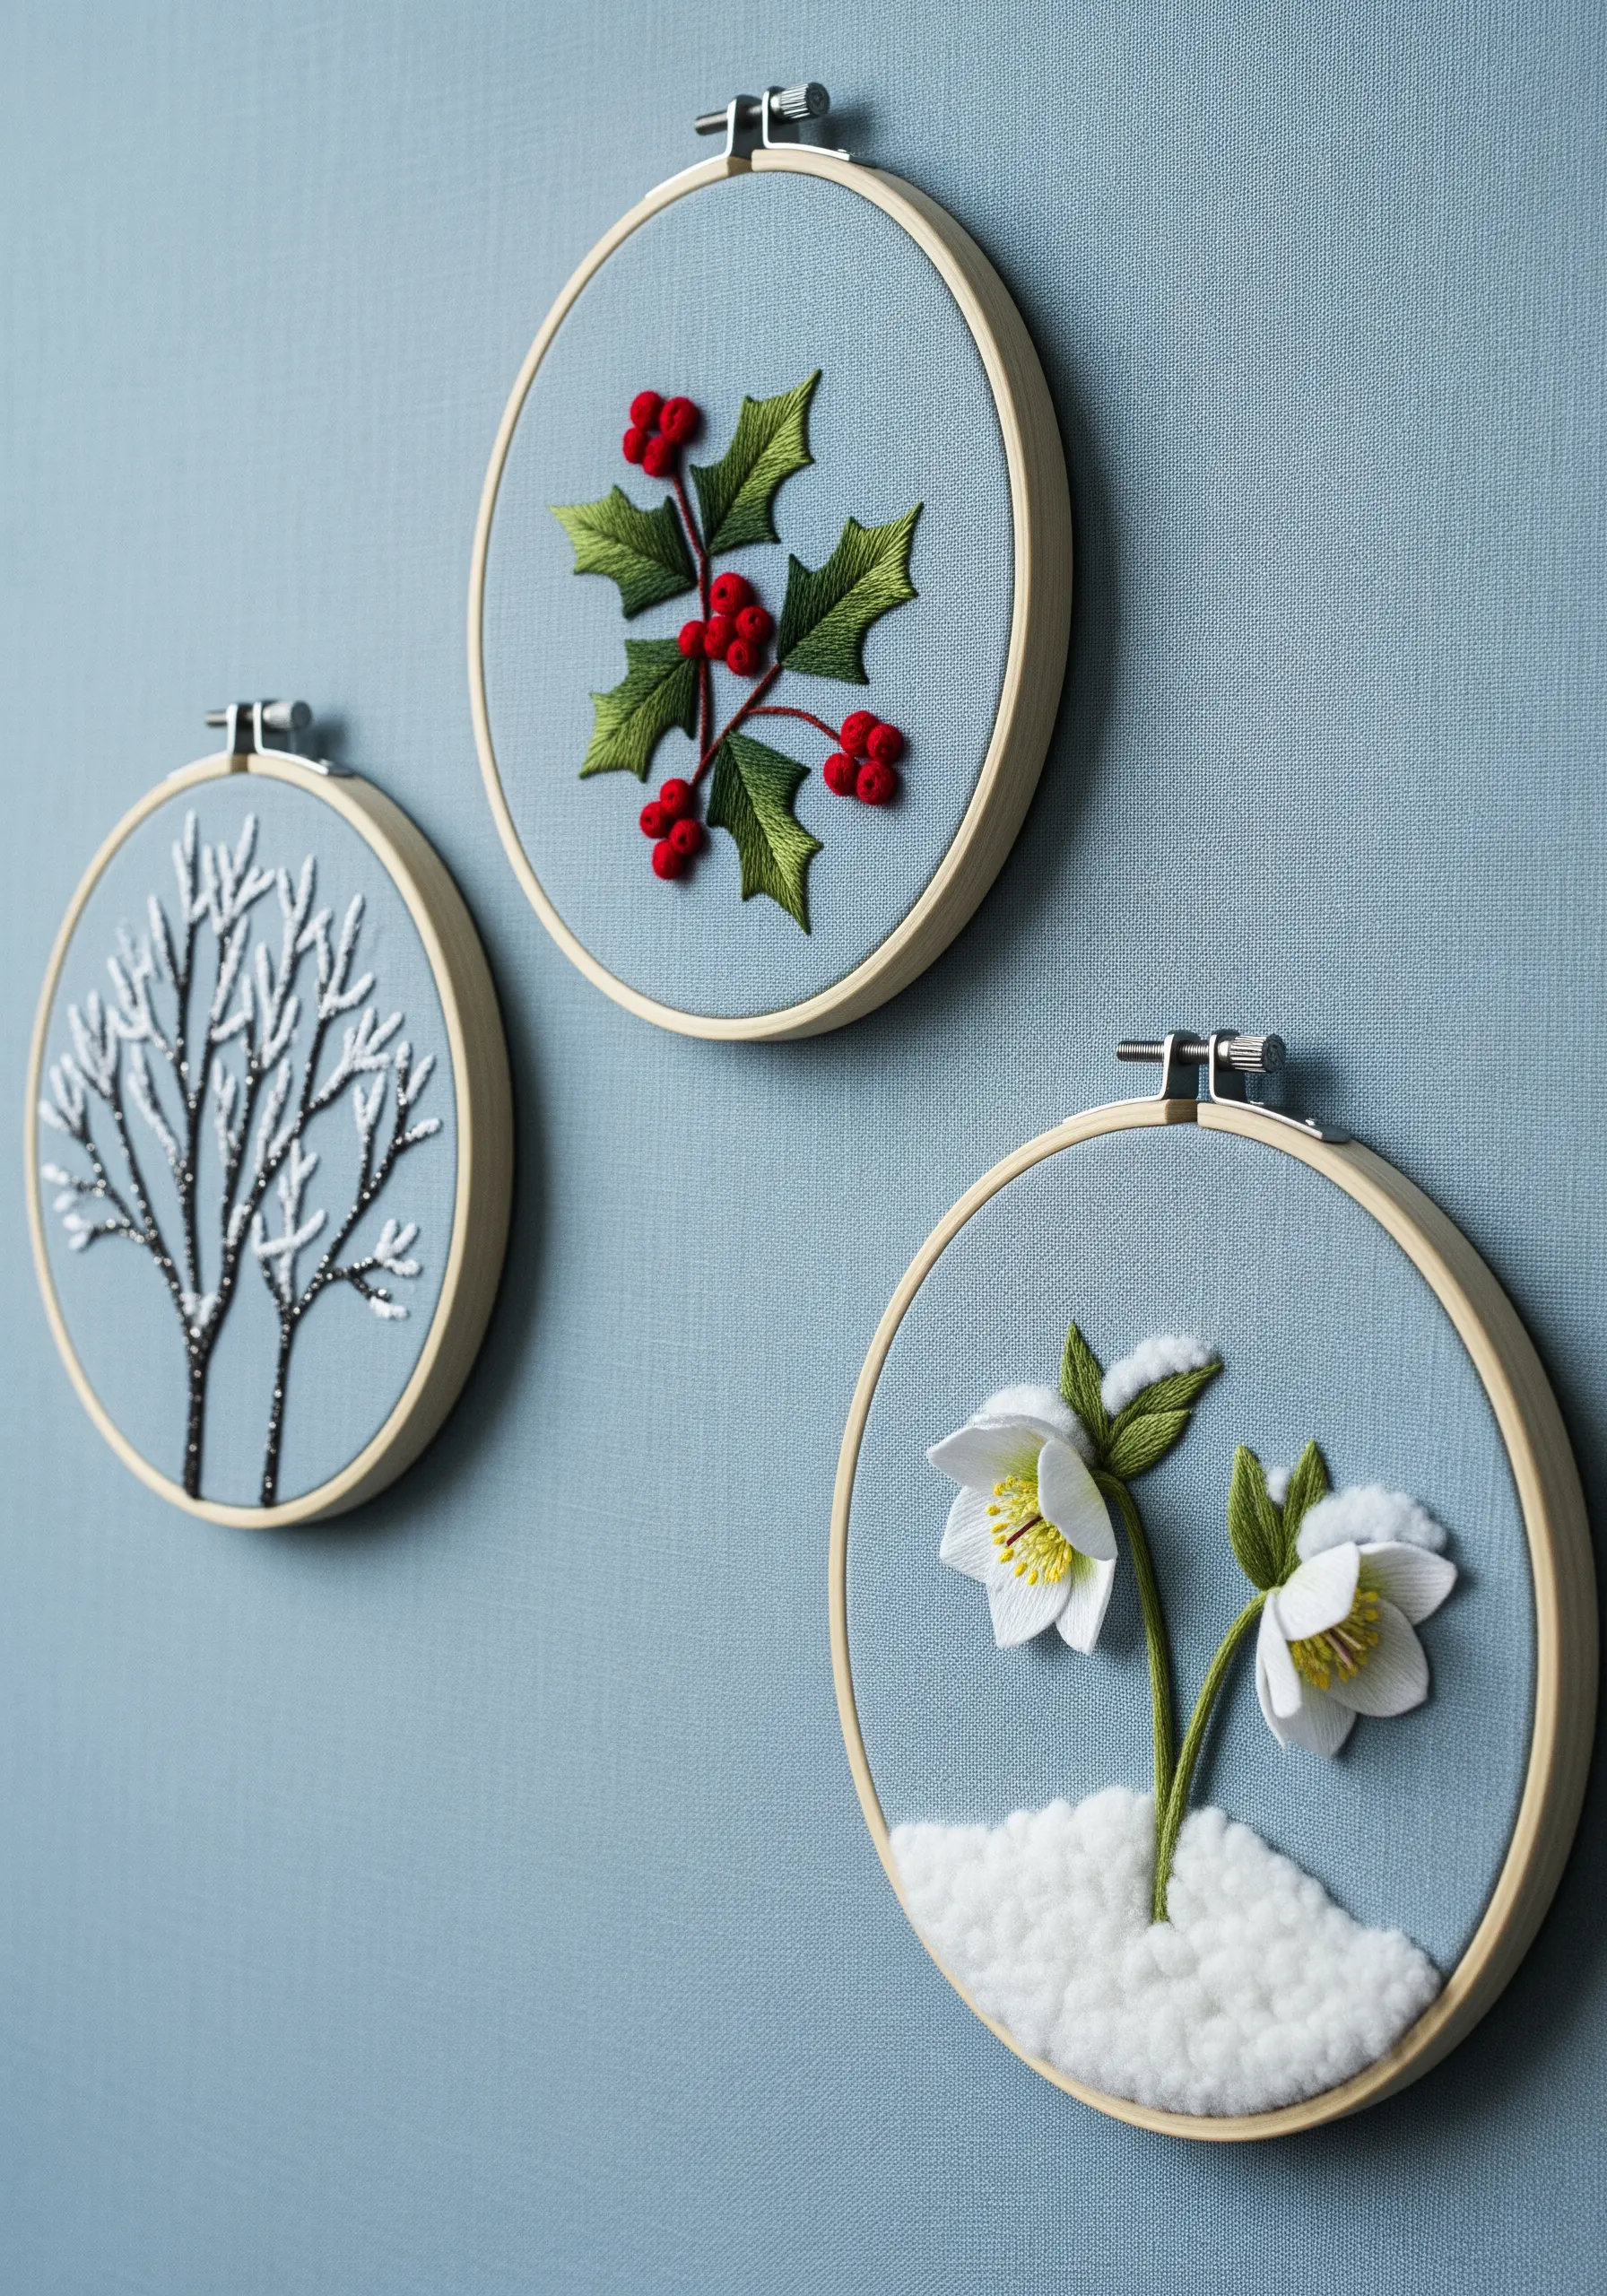
For a realistic, fluffy snow effect, the turkey work stitch is your best friend.
Create loops of soft white wool or chenille thread, leaving them uncut for a gentle, mounded look on the ground, or trimming them short for a more frosted texture on the tree branches.
This highly textural stitch provides a wonderful tactile contrast to the flat satin stitch of the holly leaves and the delicate beads used for the berries.
It’s a technique that invites touch and makes your winter scene feel cozy and immersive.
20. Define Herbal Textures with a Mix of Stitches
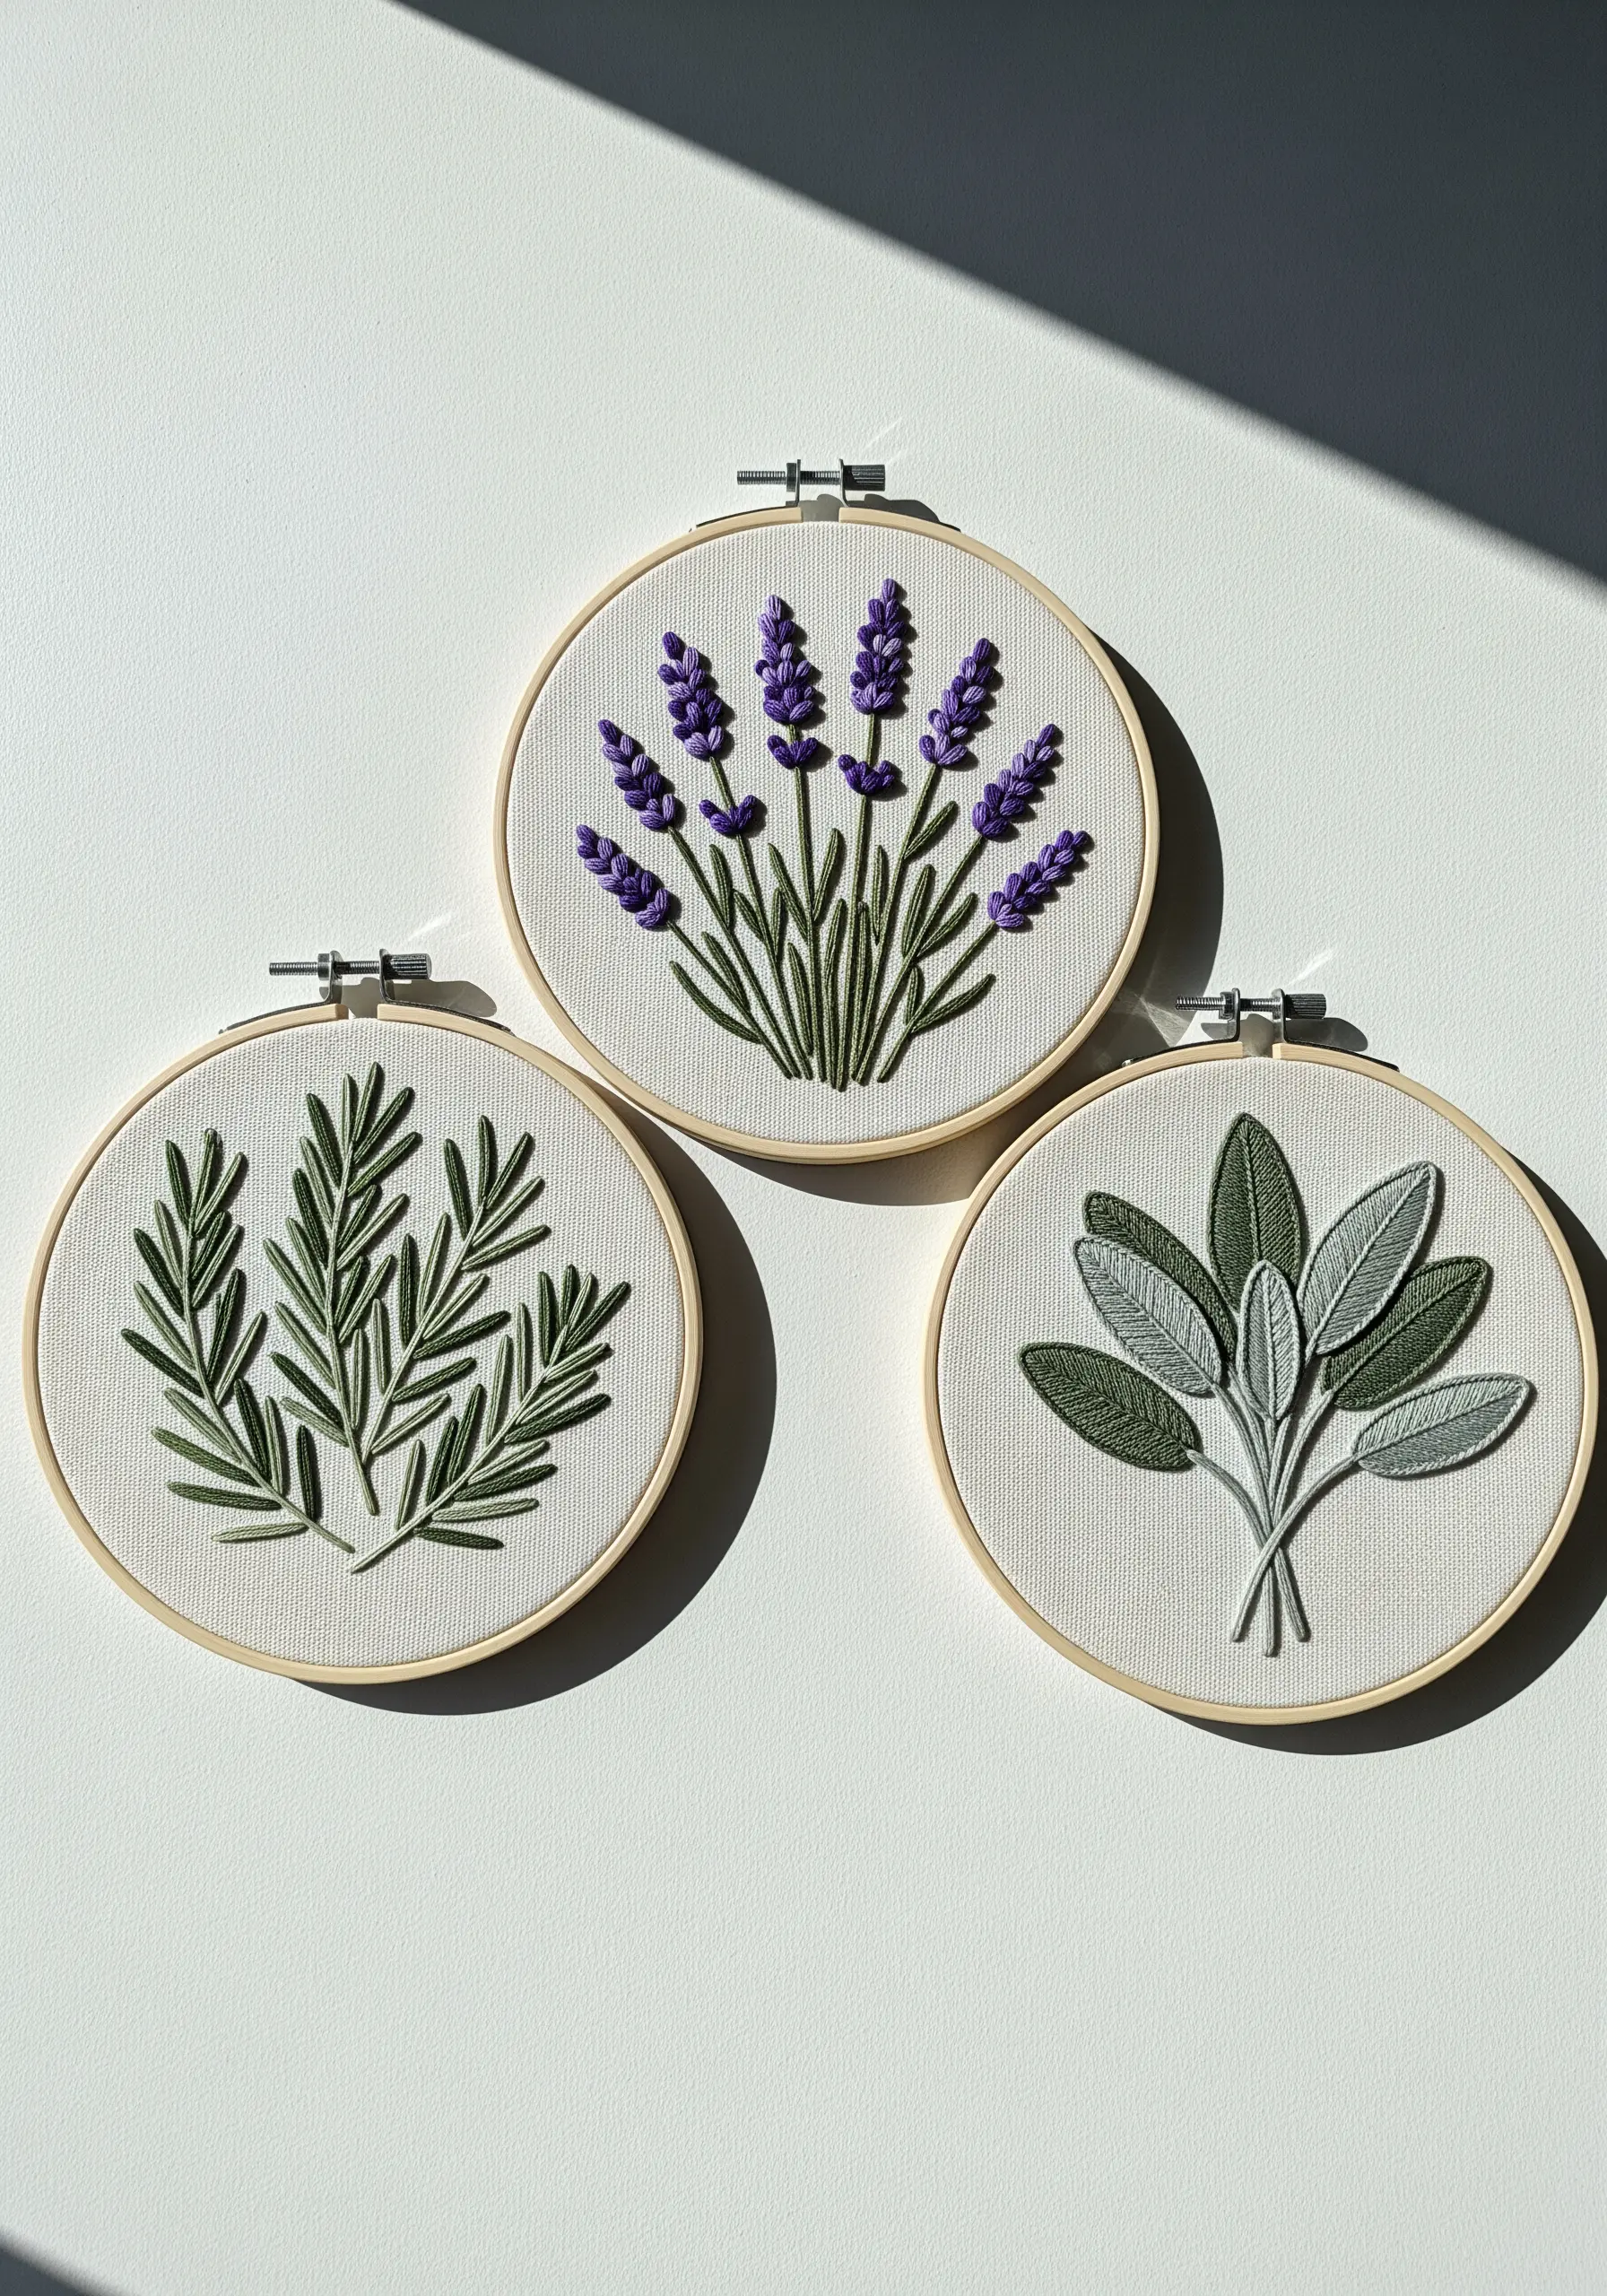
Capture the unique character of different herbs by assigning them distinct stitch combinations.
Use detached chain stitches (lazy daisies) for the woody, needle-like leaves of rosemary.
For lavender, create the florets with a cluster of French knots or bullion knots at the top of each stem.
The soft, broad leaves of sage are perfectly rendered with a smooth satin stitch, using two or three shades of grey-green to suggest their velvety texture.
This thoughtful approach makes each herb instantly recognizable and texturally unique.
21. Use a Vertical Format for Underwater Scenes
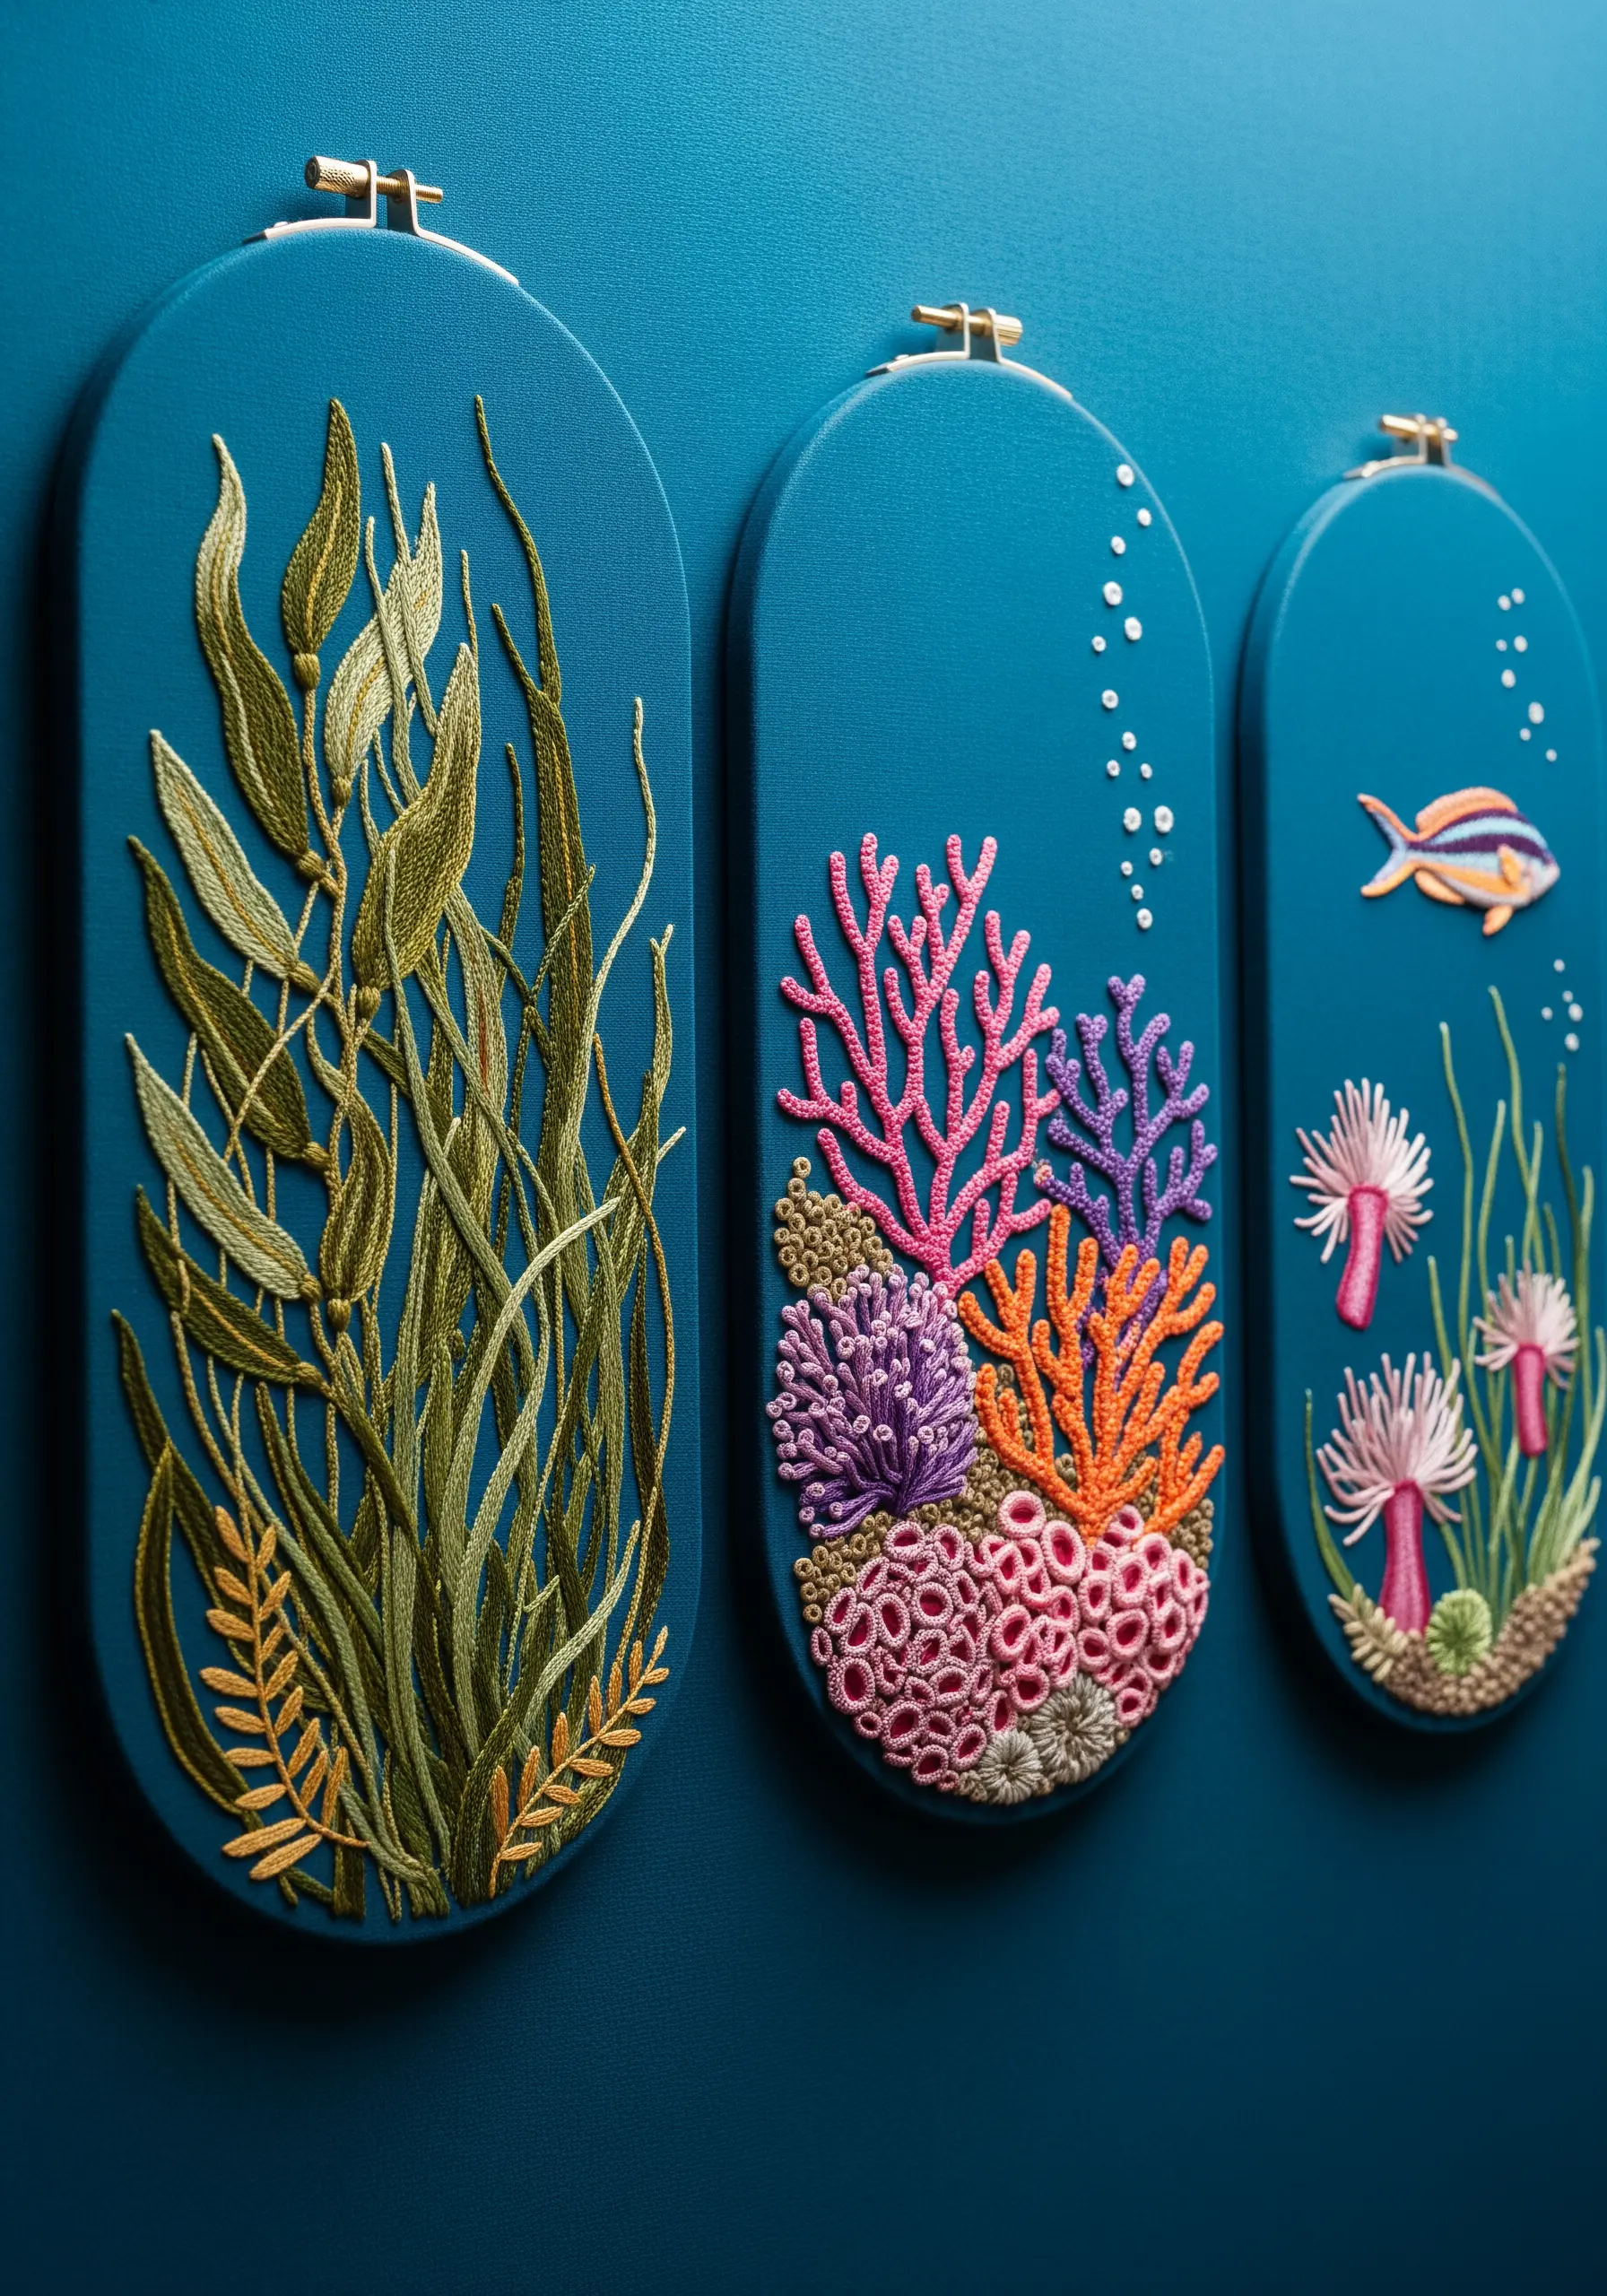
An oval hoop, oriented vertically, is uniquely suited for depicting the graceful, upward movement of underwater plants.
Use the elongated canvas to your advantage by stitching long, flowing stems of seaweed and kelp that guide the eye from the bottom to the top of the hoop.
Fill the space with a variety of stitches: long-and-short stitch for wide leaves, fishbone stitch for slender grasses, and clusters of French knots for coral.
The vertical format enhances the sense of being submerged, looking up toward the light.
22. Achieve Botanical Realism with Thread Painting

For flowers with complex color gradients like foxglove, the long-and-short stitch, also known as thread painting, is essential.
Work with a single strand of floss and blend shades of purple, magenta, and white within each bell-shaped petal to create a soft, realistic transition from light to shadow.
Place tiny, precise French knots or straight stitches inside the petals to replicate their delicate spots.
This meticulous technique elevates your work from a simple floral pattern to a stunningly realistic botanical portrait, especially effective against a stark black background.
23. Create Dimension on Burlap with Layered Stitches

Burlap’s open weave can be challenging, but it provides a wonderful rustic texture that you can build upon.
Use thicker threads, like pearl cotton or all six strands of embroidery floss, to ensure good coverage.
Create raised, dimensional flowers like the roses using the woven wheel stitch (or spider web rose stitch). For the delphiniums, cluster French knots or use bullion stitches.
Layering these highly textural stitches over the coarse burlap creates a rich, rustic cottagecore effect that feels both charming and sophisticated.
24. Replicate Mushroom Textures with Strategic Stitching

To capture the unique surfaces of different mushrooms, choose your stitches wisely.
For the morel’s pitted cap, use a combination of stem stitch for the ridges and seed stitch with a darker thread for the recesses to create depth.
The iconic fly agaric’s spots are perfect for raised satin stitches or small, padded appliques to make them pop.
For the delicate gills of the chanterelle, use rows of closely packed, tiny straight stitches in a slightly lighter shade than the cap. This attention to textural detail makes each fungus distinct and lifelike.
25. Stitch a Luminous Moon with Circular Shading
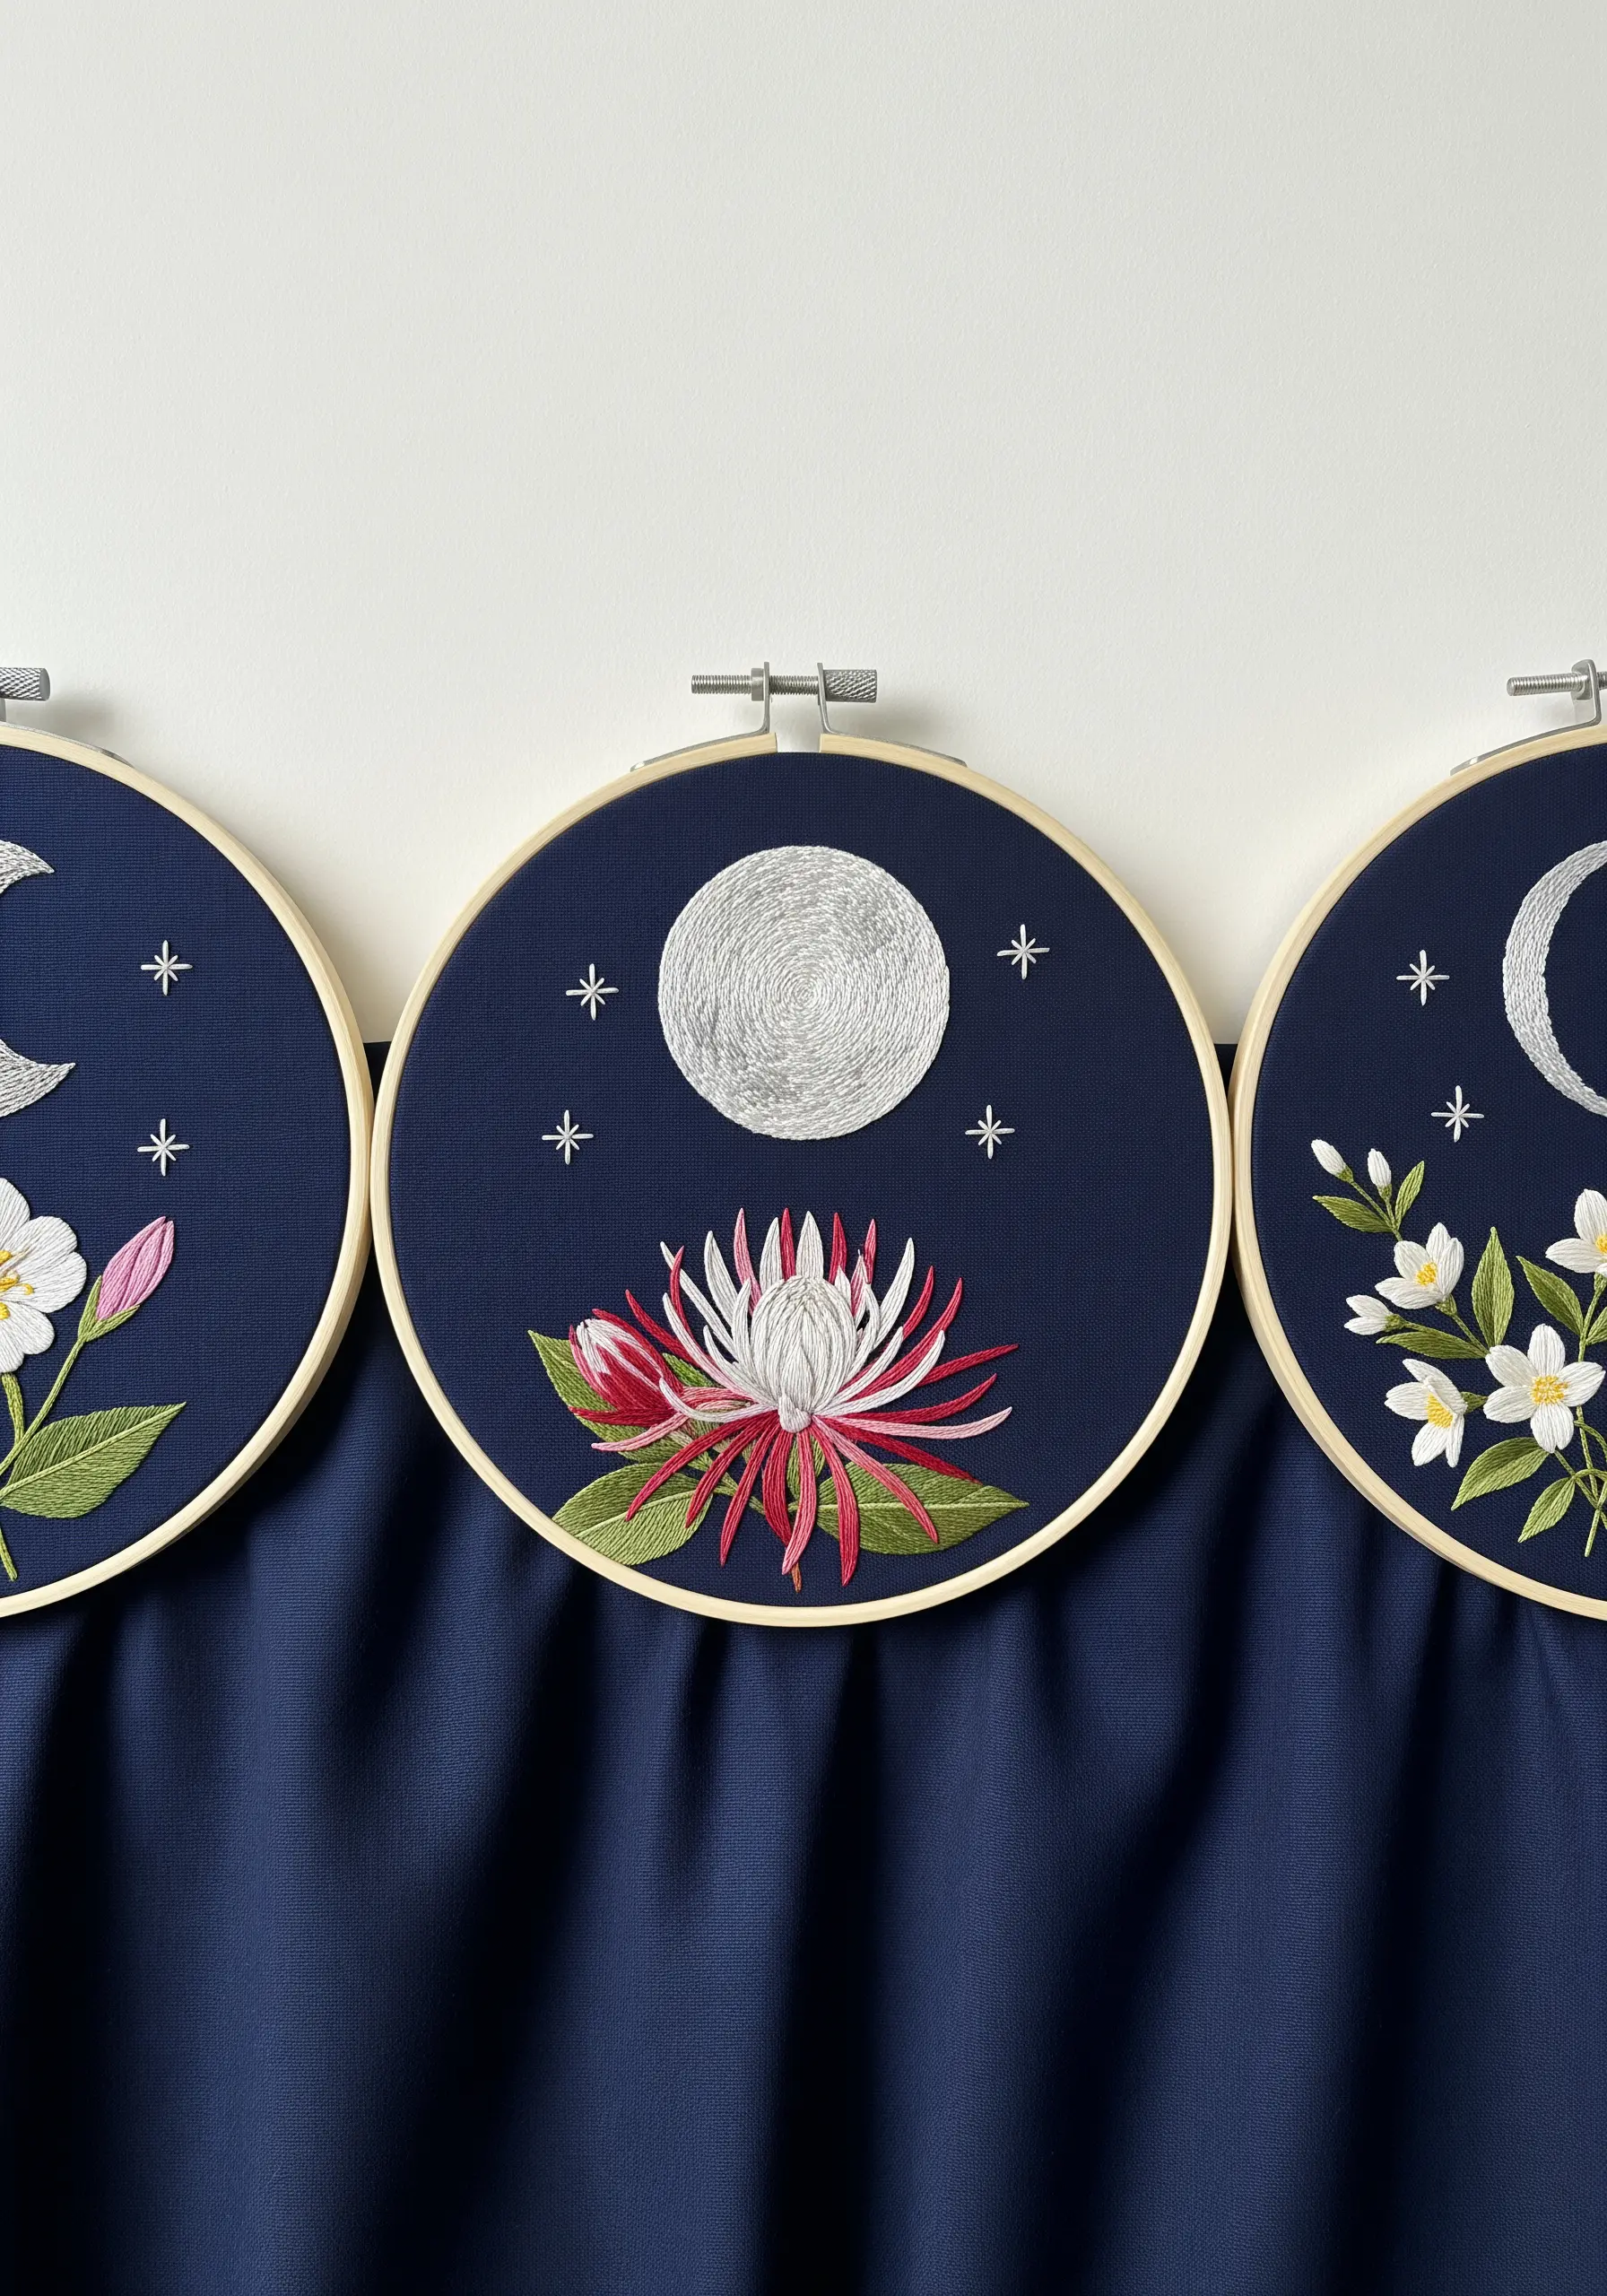
To create a moon that appears to glow, stitch it with concentric circles of long-and-short stitch.
Start from the outer edge with a darker grey or silver and work your way toward the center with progressively lighter shades, ending with pure white at the brightest point.
This radial stitching pattern mimics the way light emanates from a central point and gives the moon a subtle, shimmering depth.
Use a metallic silver thread for the final highlights and surrounding stars to complete the celestial effect on your moon and stars embroidery.
26. Convey Distance in a Landscape with Tiny Knots

To embroider a vast lavender field that stretches to the horizon, you need to create an illusion of perspective.
In the foreground, use larger, more defined French knots or bullion stitches with thicker, brighter purple thread for the lavender blooms.
As you move toward the horizon line, gradually decrease the size of your knots and switch to fewer strands of a duller, more grey-toned purple.
This creates atmospheric perspective, making the distant rows look hazy and far away, transforming your three flat panels into a single, deep landscape.
27. Master Carnivorous Plants with 3D and Beading Techniques
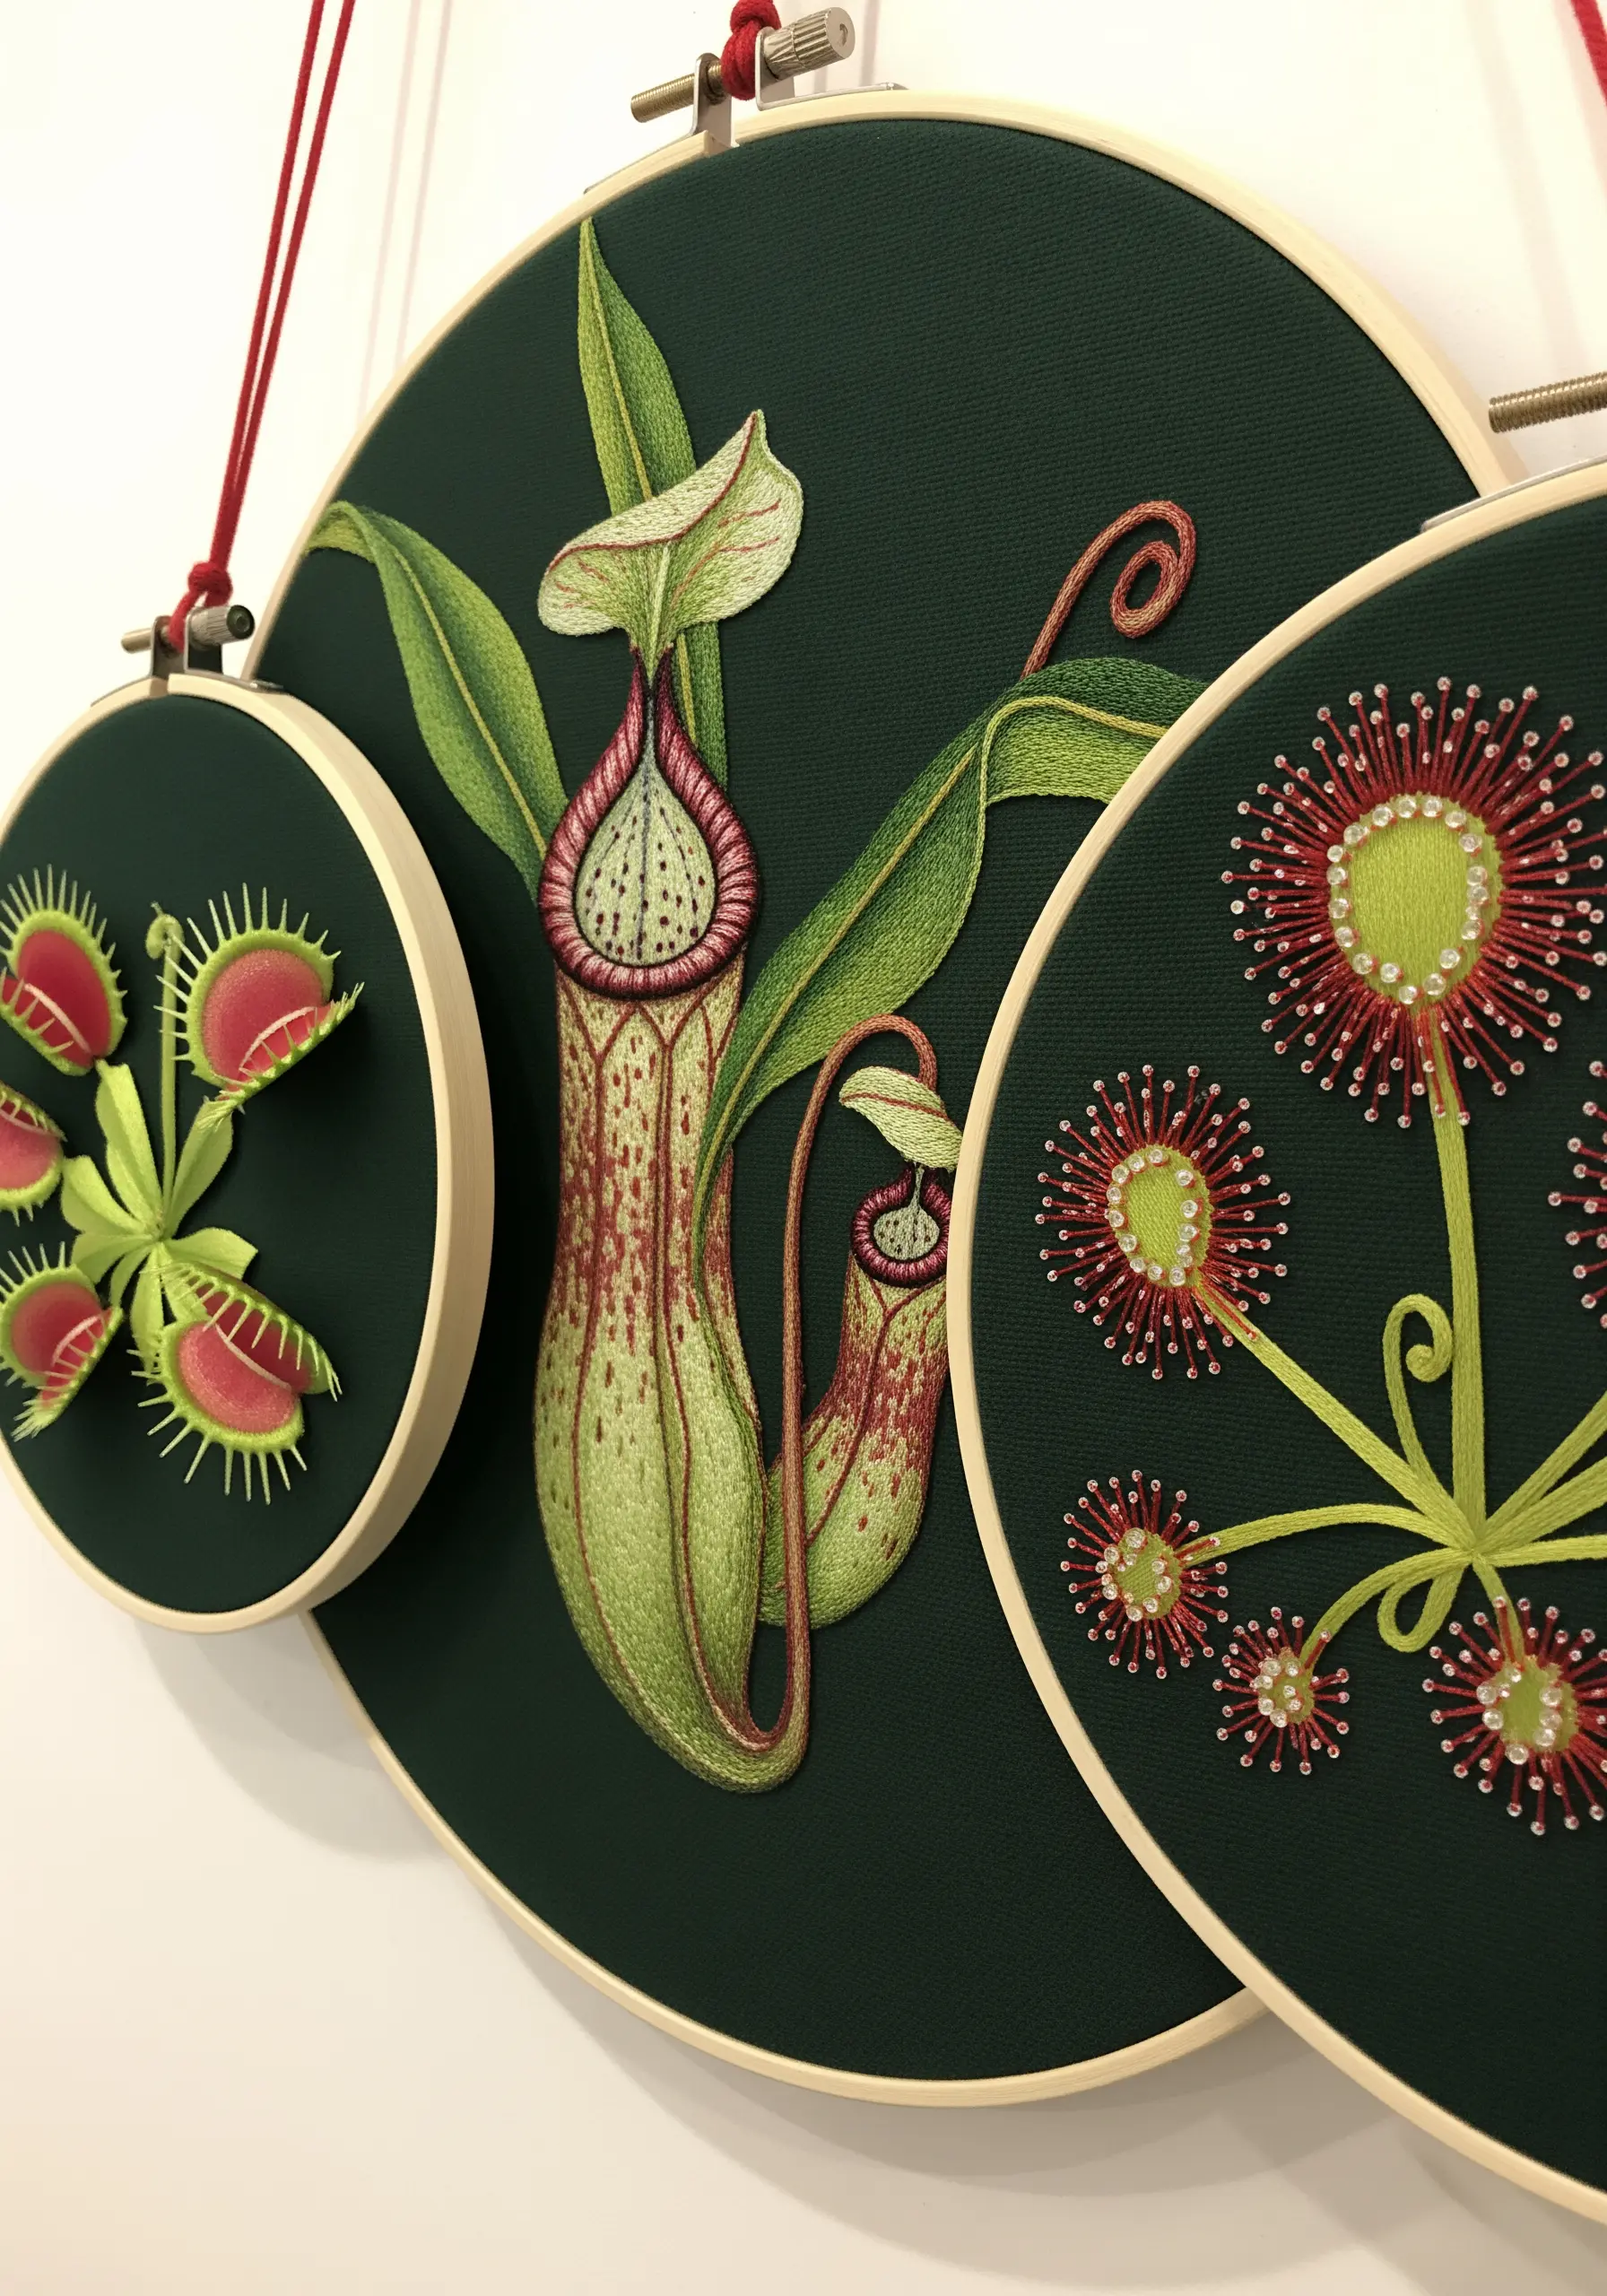
Carnivorous plants offer a fantastic opportunity for detailed, dimensional stitching.
For the Venus flytrap, create the ‘traps’ using a detached buttonhole stitch over a wire frame, allowing you to shape them into realistic cups.
To capture the glistening dew on the sundew, stitch tiny glass seed beads at the end of each stalk with red thread. This not only adds sparkle but also provides an authentic, tactile texture.
These mixed-media embroidery ideas are what make complex botanical subjects truly come alive.
28. Deconstruct a Plant for a Botanical Study
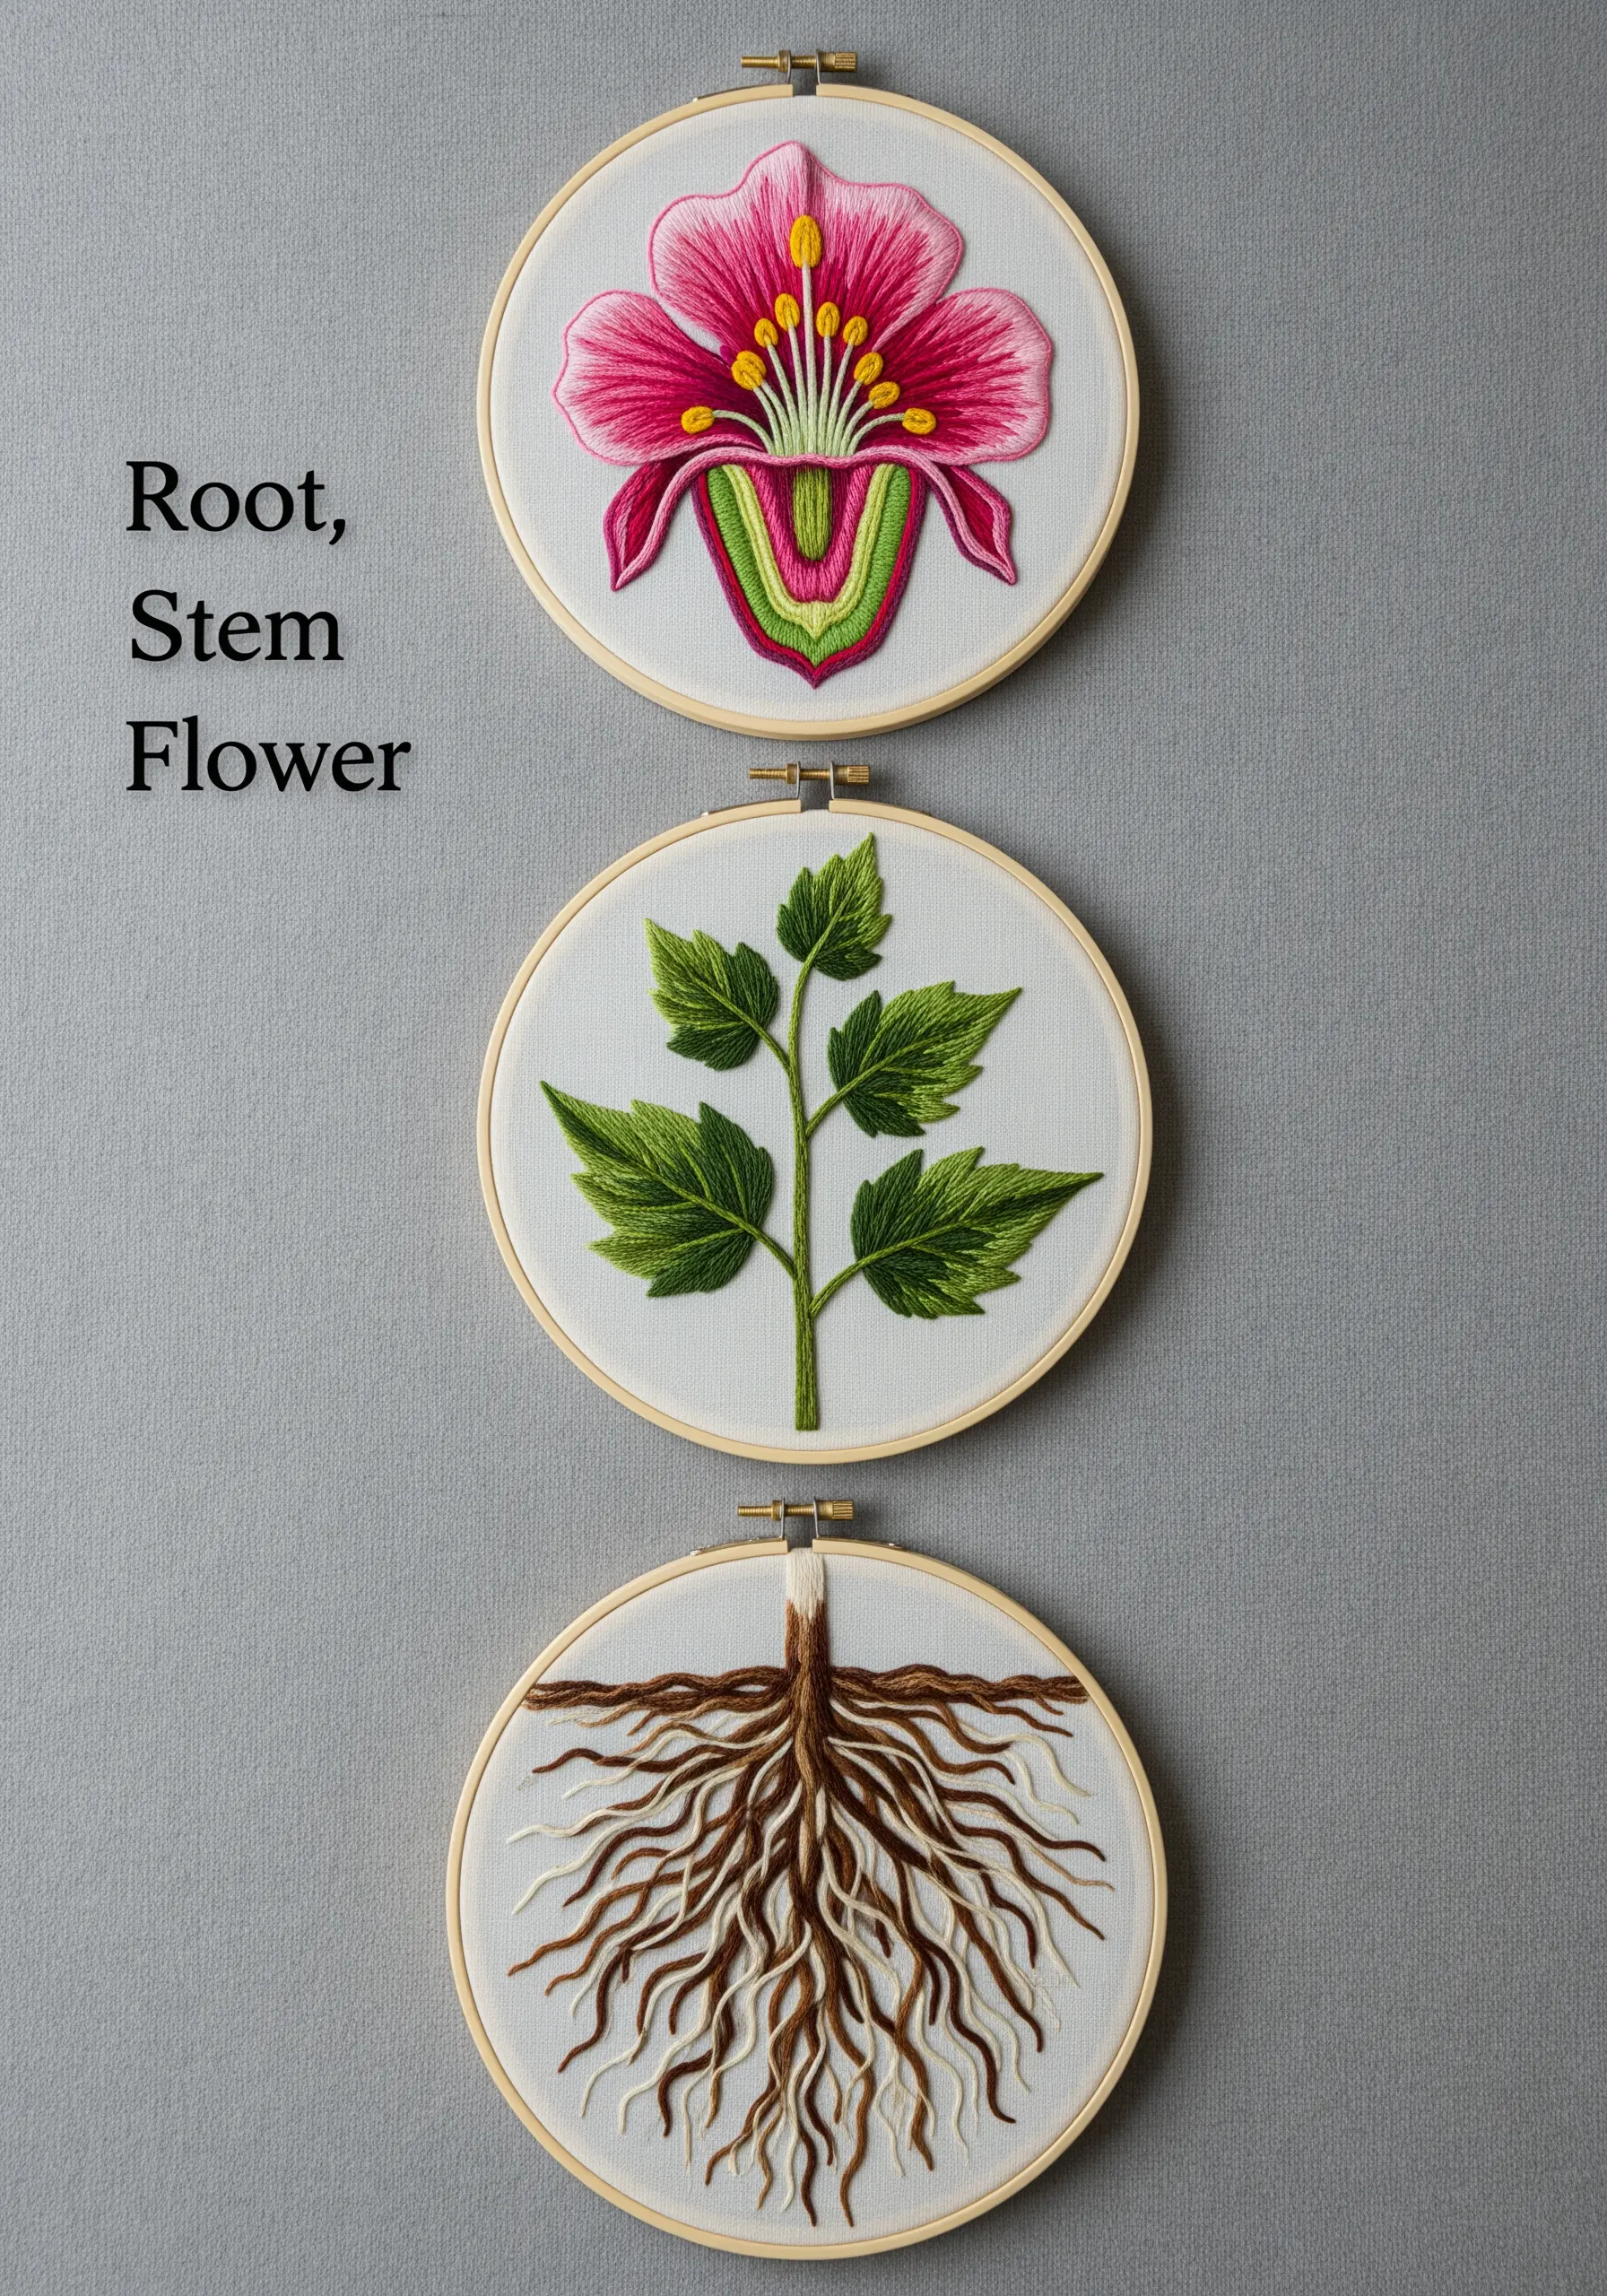
Create a triptych that feels like a page from a botanist’s notebook by dedicating each hoop to a different part of the plant: root, stem, and flower.
For the intricate root system, use a tangled mix of stem stitch and backstitch in various shades of brown and cream to show depth.
The stem and leaves are ideal for practicing clean fishbone or satin stitches.
In the flower, you can combine multiple techniques—like thread painting for the petals and French knots for the stamen—to showcase its complex anatomy.
This deconstructed approach is both educational and artistically compelling.
29. Create an Asymmetrical Composition for Visual Interest
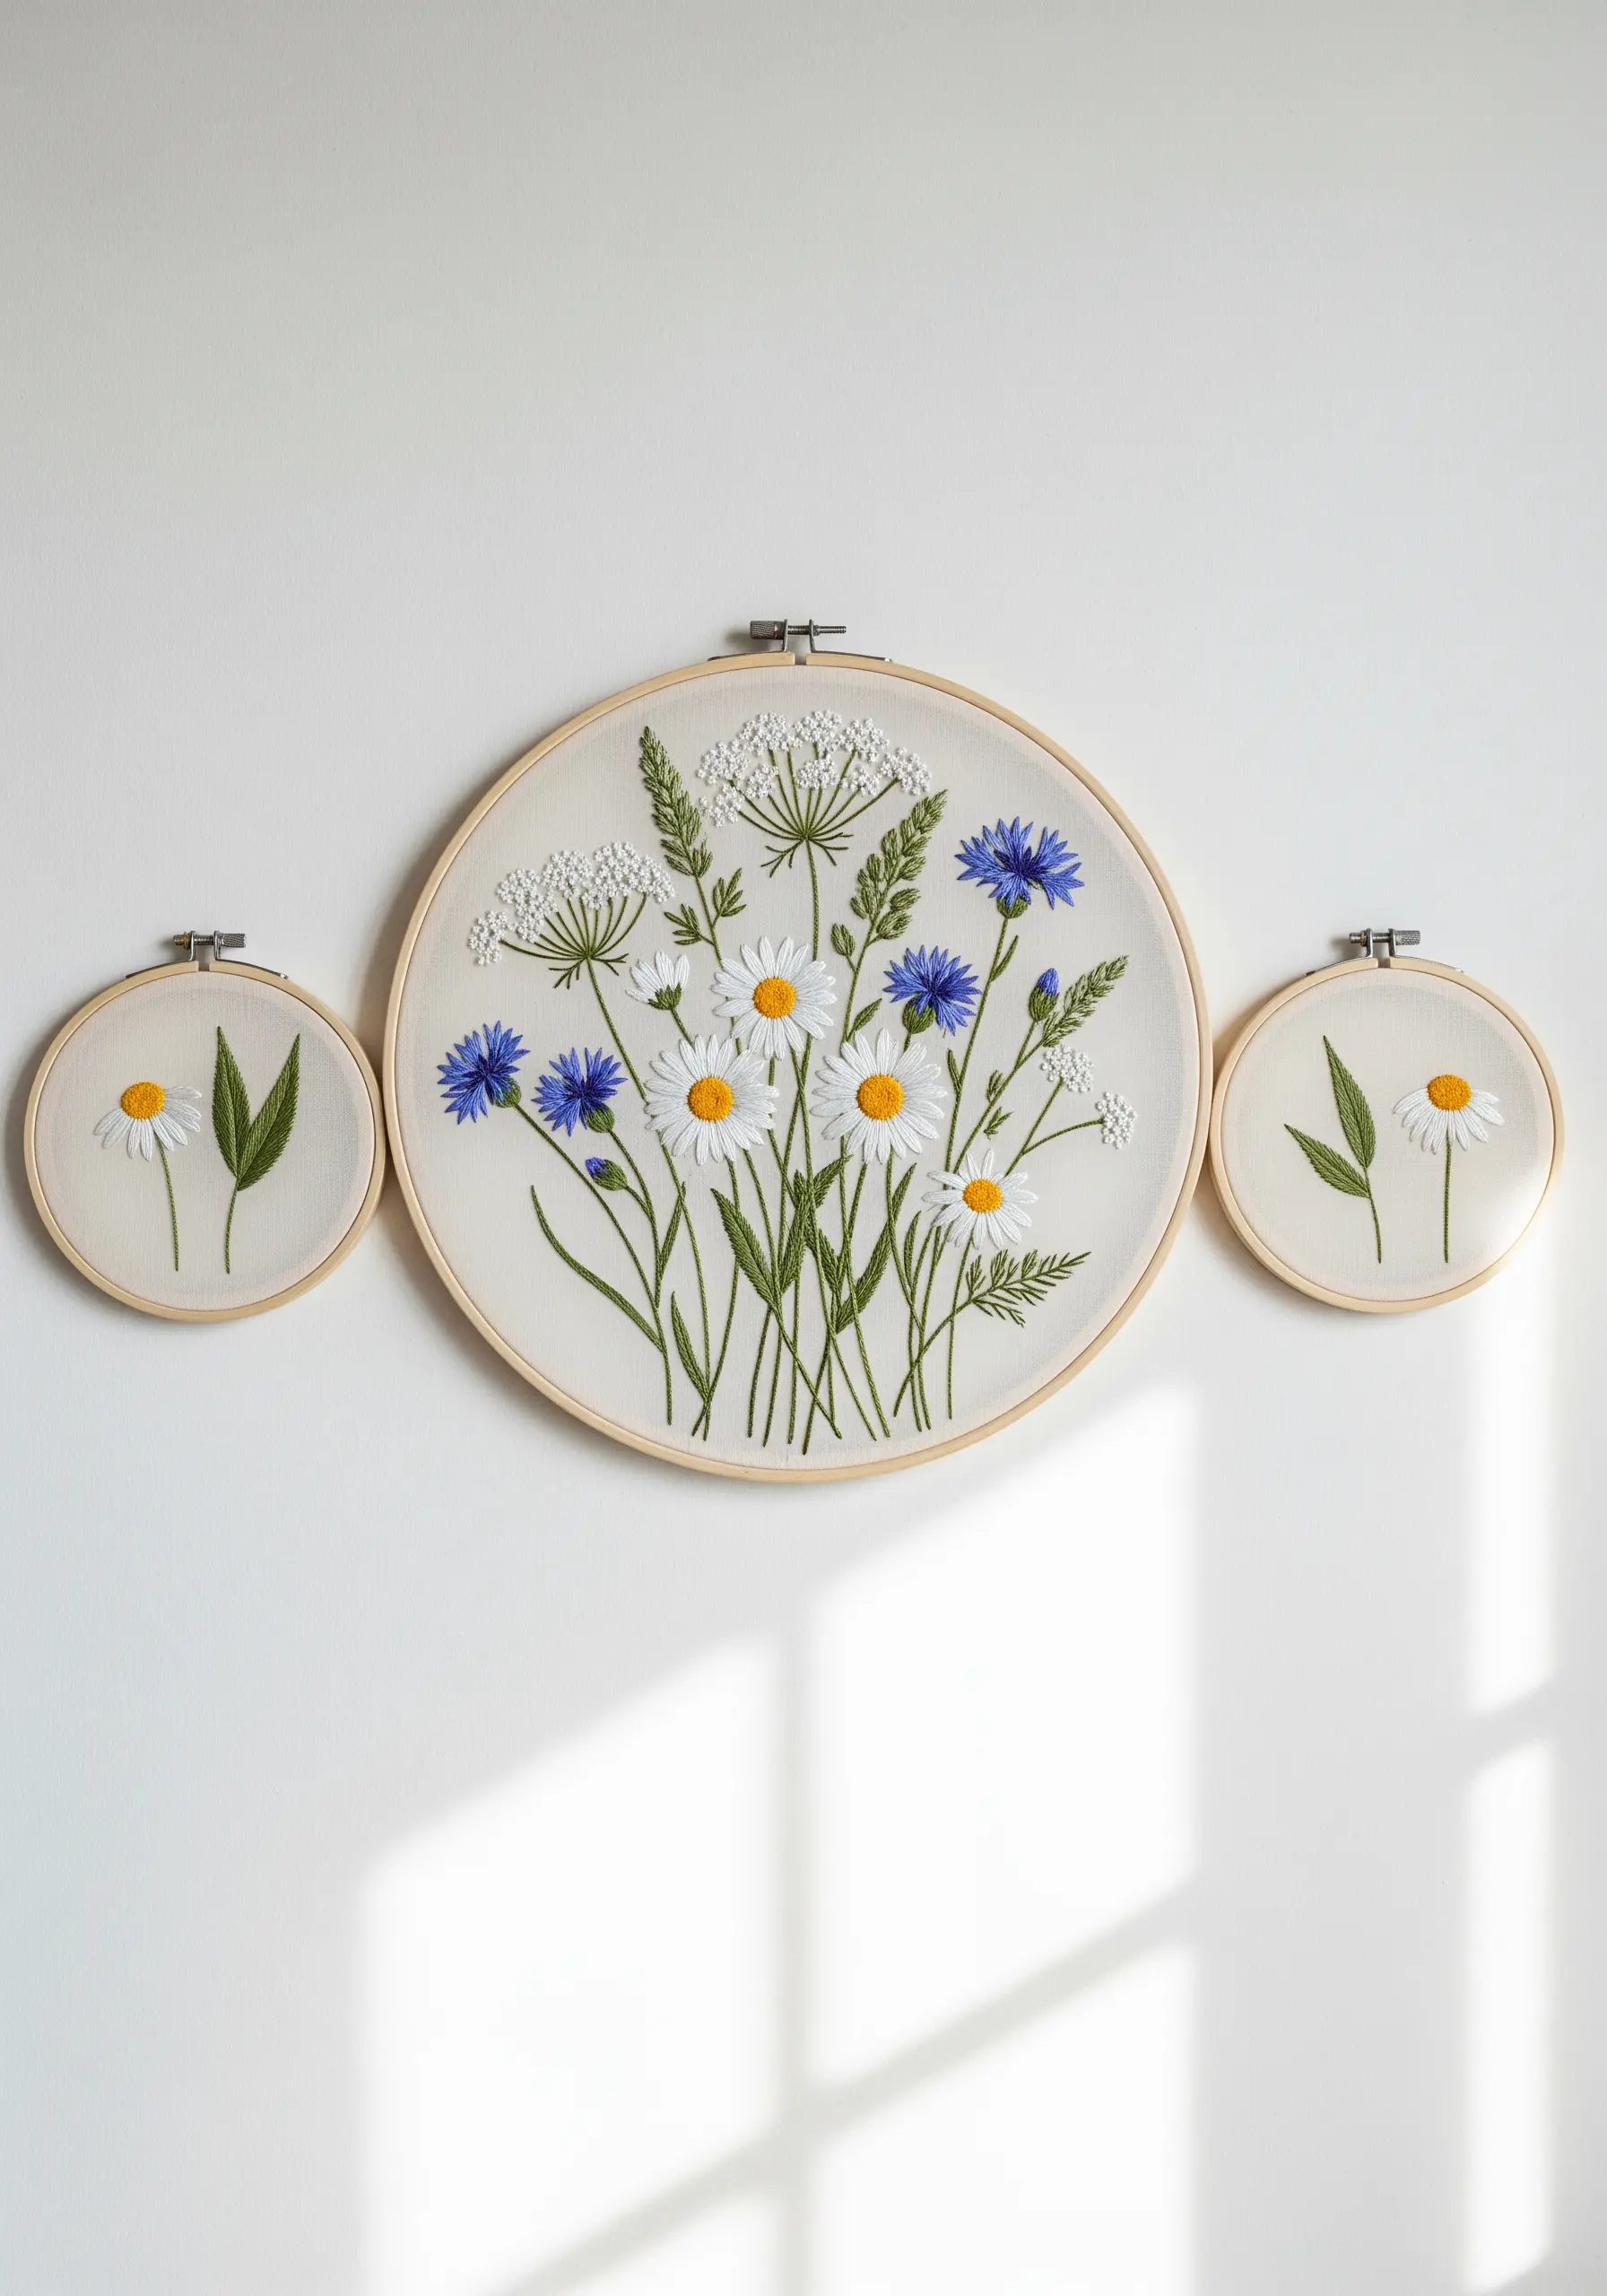
Break away from symmetrical layouts by using hoops of different sizes to create a dynamic arrangement.
Use a large central hoop for your main composition—the full wildflower bouquet—and flank it with two smaller hoops featuring isolated elements, like a single stem or leaf.
This ‘macro and micro’ approach creates a focal point while adding supporting details that enrich the story.
It encourages the eye to move between the hoops, building a more engaging and modern narrative than a simple, uniform row.


