

That plain throw pillow on your sofa is more than just a cushion—it’s a blank canvas waiting for a story. And with the right colors and techniques, you can transform it from a simple accessory into the focal point of the entire room.
This isn’t about overwhelming you with complex patterns. It’s about empowering you with smart, specific choices. Think of how a single line of thick, couched yarn can add sculptural depth, or how blending three shades of pink instead of one can make a flower petal breathe with life.
These ideas are your starting point. Use them to explore the interplay of color, texture, and composition. Notice how a bold stitch on dark fabric feels electric, while a soft gradient on cream feels painterly. Let your needles and thread turn a simple textile into a piece of personal, expressive art that makes your space feel truly yours.
1. Sculptural Geometry with Wrapped Couching
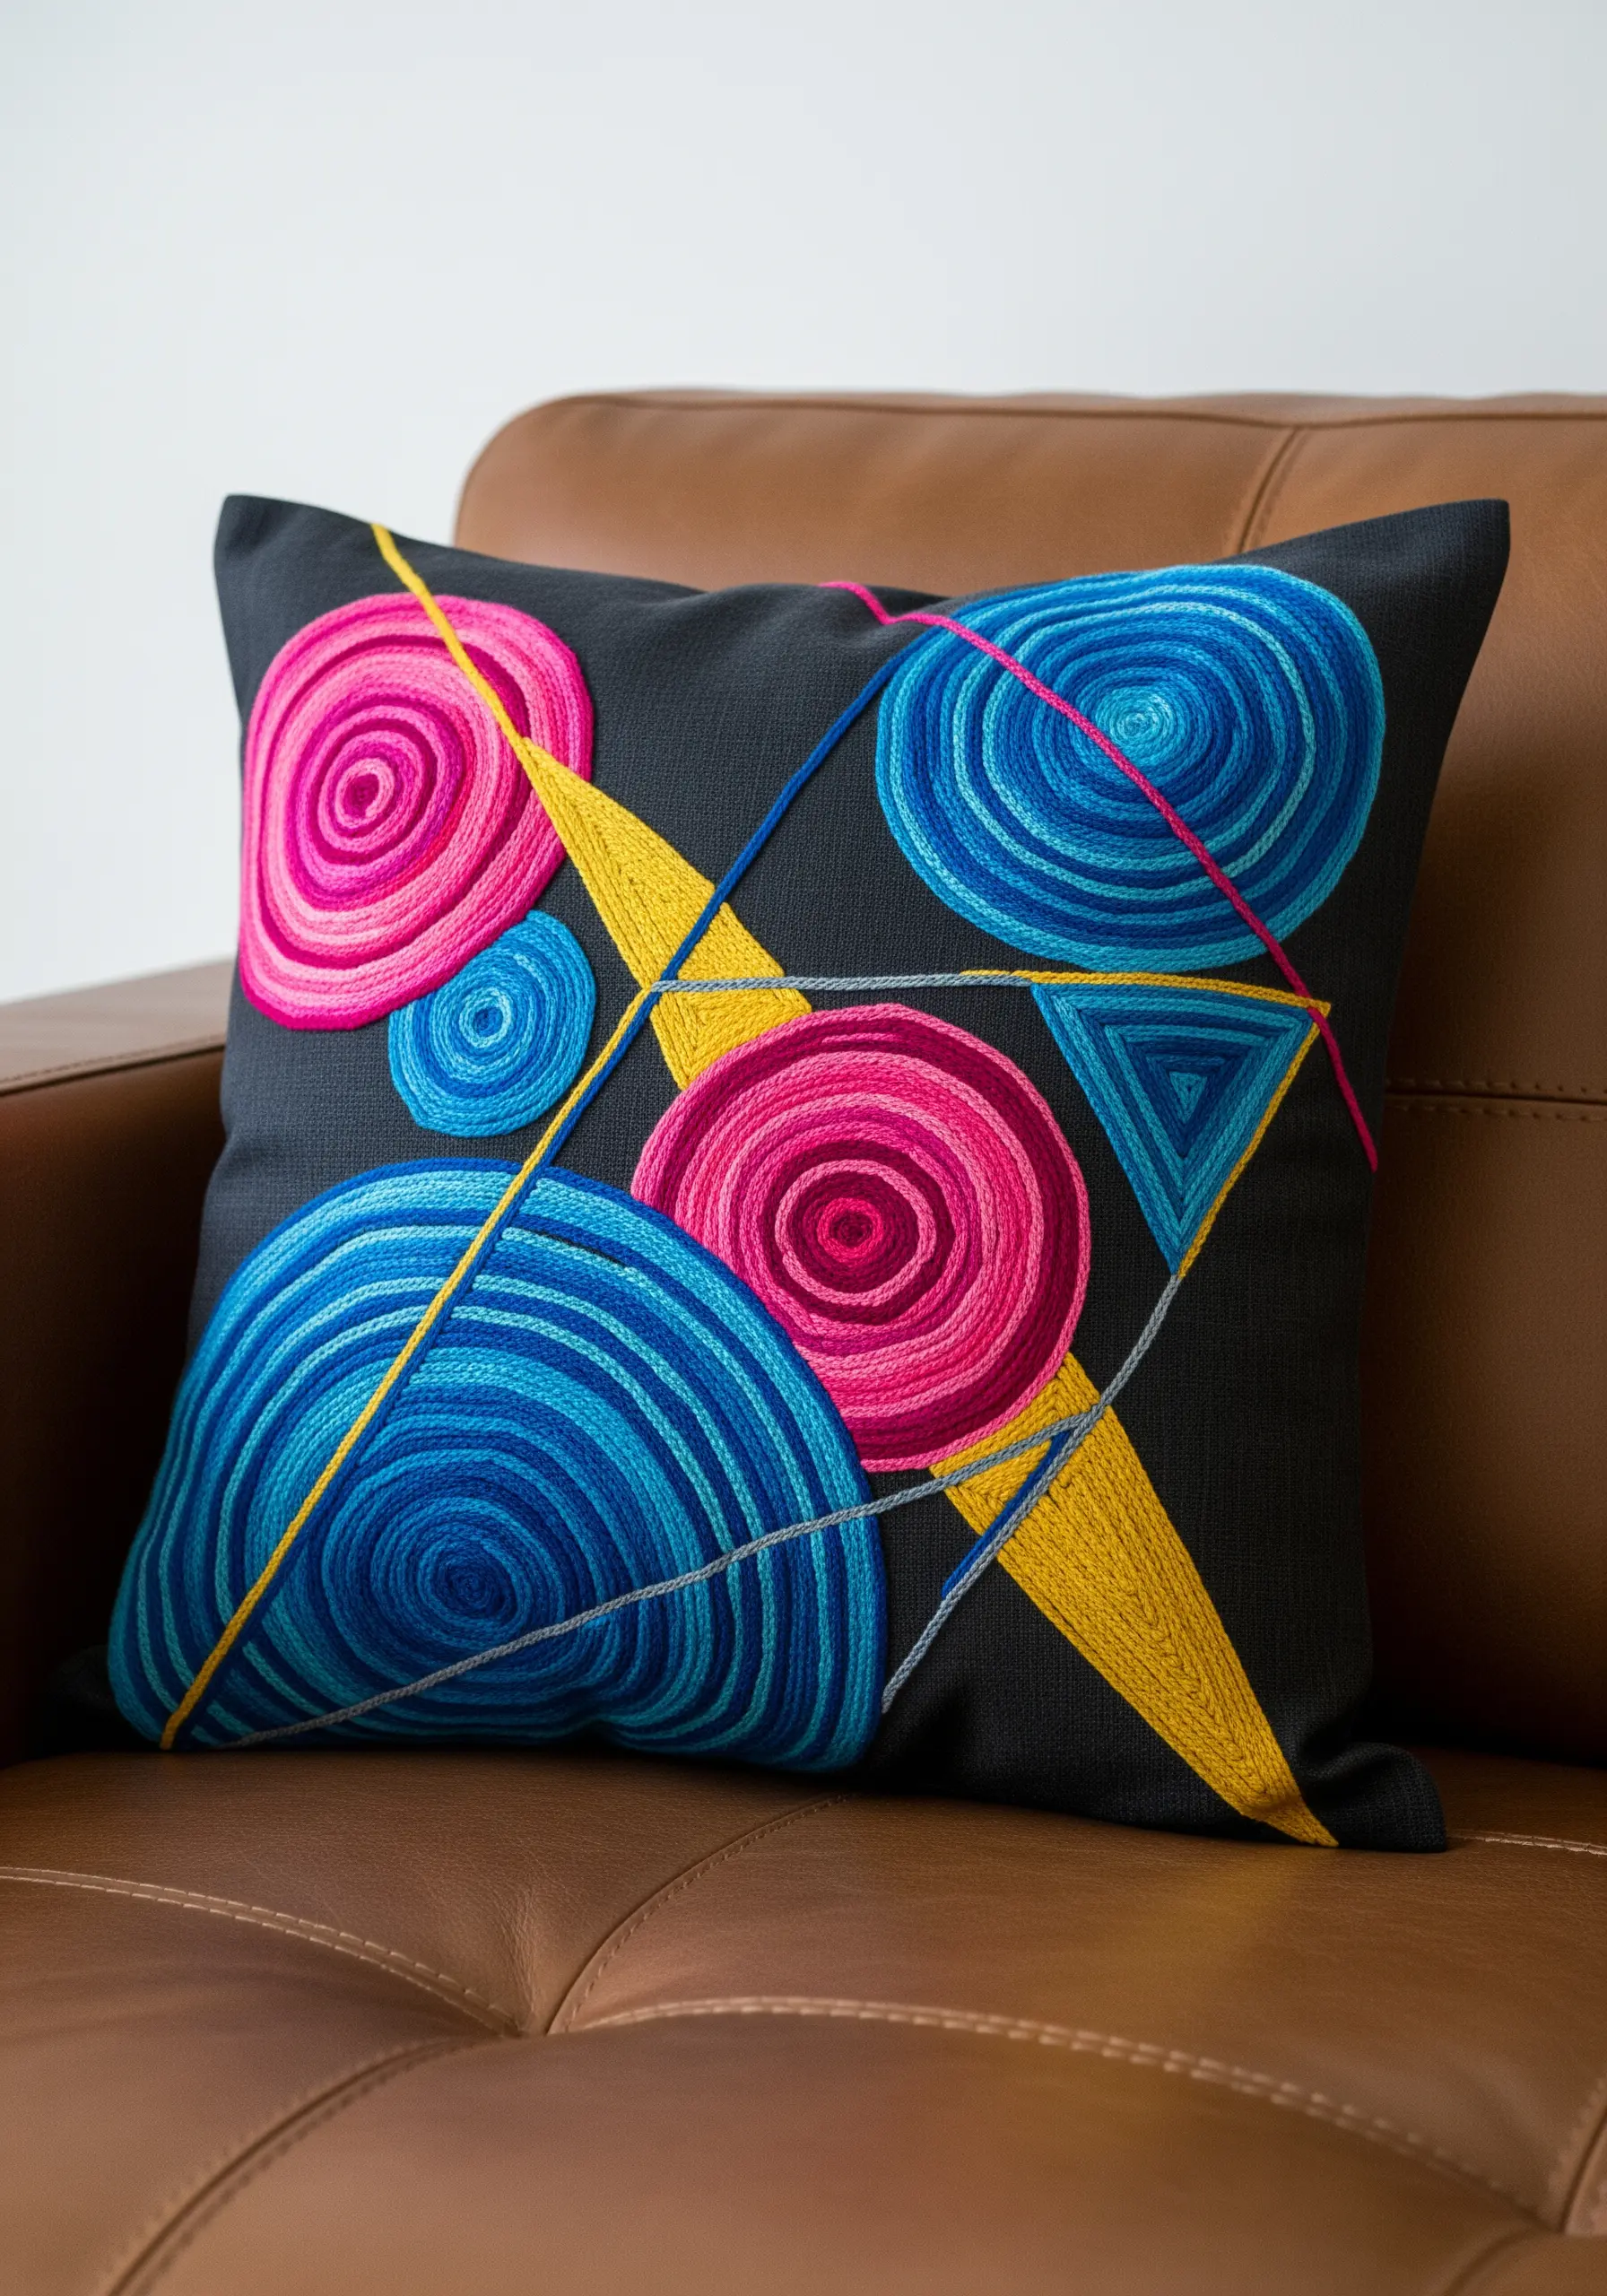
Create bold, graphic texture by couching thick yarn or multiple strands of embroidery floss onto your pillow cover.
Lay down your primary yarn in a spiral and use a contrasting, thinner thread to tack it in place with small, evenly spaced stitches.
This technique allows you to build raised, dimensional shapes that feel both modern and tactile, turning a simple pillow into a piece of fiber art.
The tension of your couching stitches is key—keep it firm enough to secure the yarn without puckering the base fabric.
This approach is perfect for creating abstract geometric hoops and transferring that energy to a larger textile canvas.
2. Achieve Painterly Depth with Thread Blending

Move beyond flat color by using long-and-short stitch to create smooth, realistic gradients in floral petals.
Select three or four adjacent shades of a single color, working from dark to light to give each petal a sense of light and shadow.
For the flower centers, use tightly packed French knots in a contrasting color like bright yellow to add a pop of texture that draws the eye.
This thread painting technique works beautifully on smooth fabrics like sateen or silk, where the natural sheen of the thread can truly shine.
3. Block Bold Color with Directional Satin Stitch

For a clean, graphic look, divide your design into distinct color blocks and fill each one with a dense satin stitch.
The secret to a flawless finish is stitch direction; angle your stitches to follow the natural curves of each shape, enhancing its form and dimension.
Before filling, outline each section with a split stitch using the same color—this creates a raised, sharp edge that prevents colors from bleeding into one another and gives your work a professional look.
This method is ideal for creating cute animal embroidery hoops with a bold, illustrative style.
4. Create a Neon Grid with Raised Chain Stitch

Make simple lines pop by using a raised chain stitch, which creates a thick, rope-like texture that stands off the fabric surface.
Choose high-contrast neon threads against a dark, textured pillow fabric like navy wool or black canvas for maximum visual impact.
When stitching the grid, work all horizontal lines first, then weave the vertical lines over and under for an authentic woven appearance.
This technique adds a playful, three-dimensional quality that elevates a simple pattern into a sophisticated design statement.
5. Frame Jewel Tones with Metallic Outlines
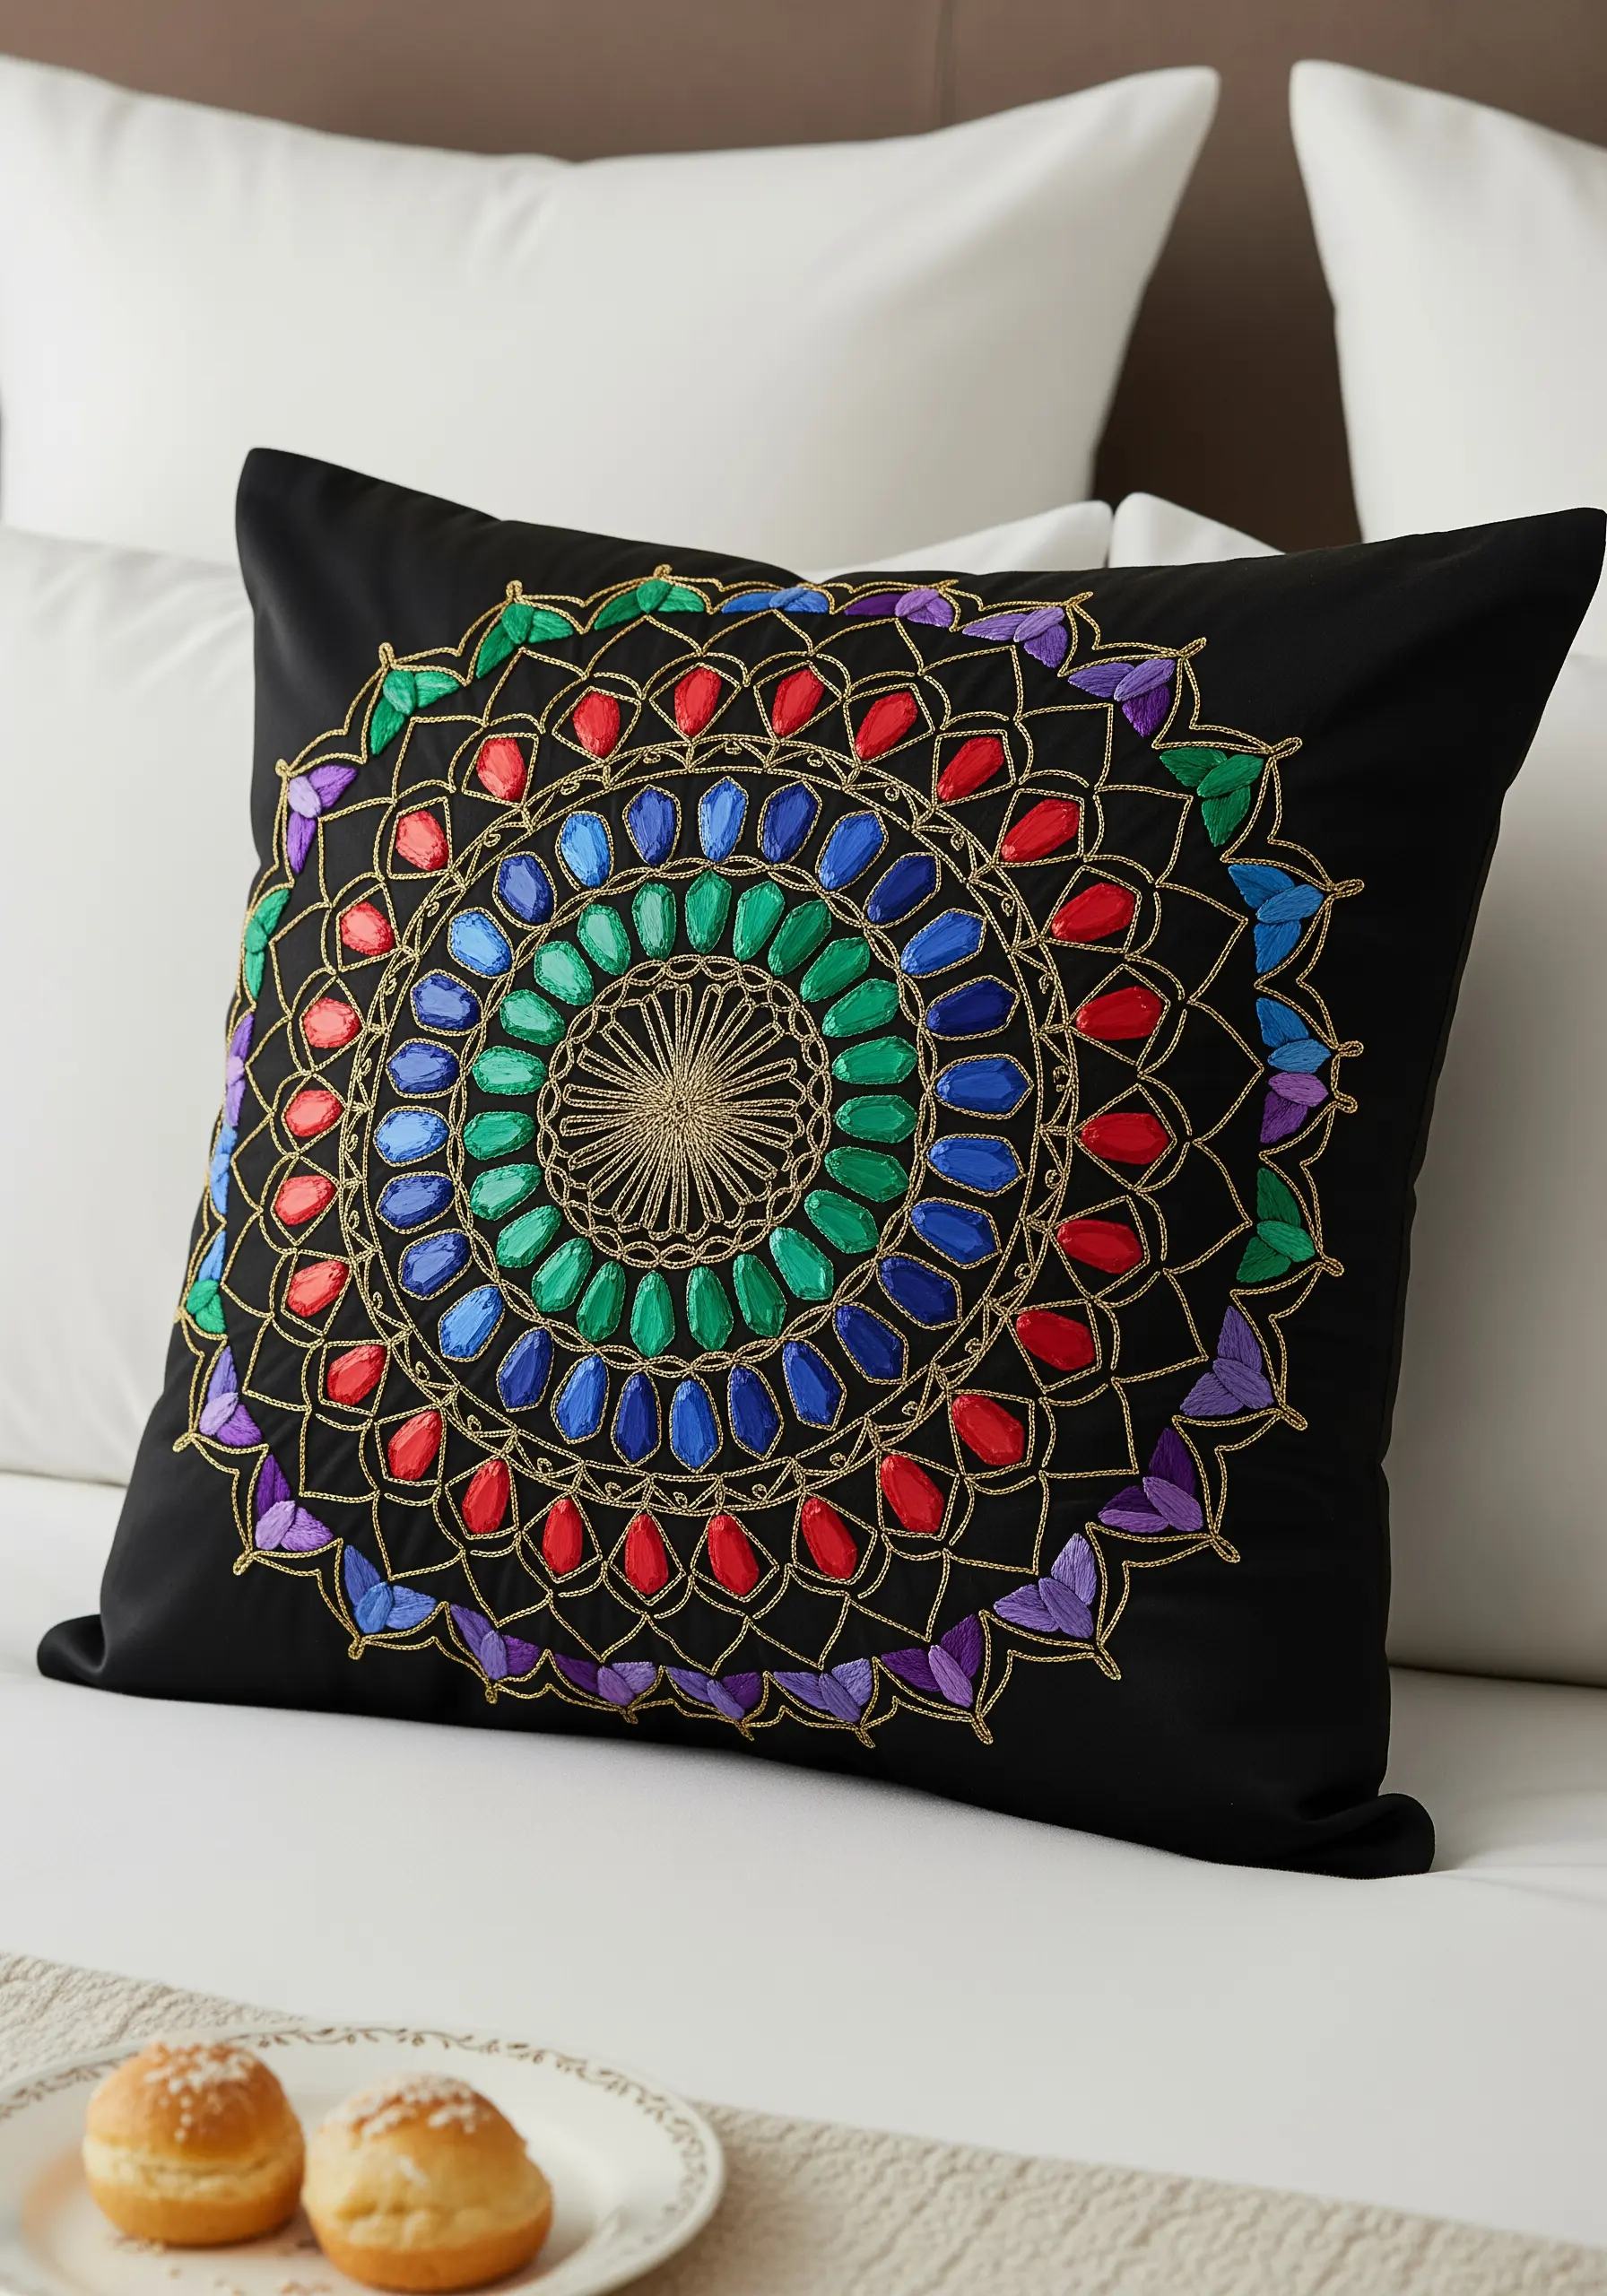
Elevate simple satin-stitched shapes by outlining them with a fine metallic thread, such as gold or silver.
This technique mimics the look of stained glass or cloisonné, adding a touch of luxury and defining each color field with precision.
Use a single strand of metallic thread and a simple backstitch or stem stitch for the outlines—this ensures the line is delicate enough to frame the colors without overpowering them.
The contrast between the matte or satin floss and the shimmering metallic thread creates a rich, dynamic surface that catches the light beautifully.
Consider this for gold-thread cushion designs to add instant elegance.
6. Master the Appliqué with a Satin Stitch Edge

For large areas of solid, bold color, combine fabric appliqué with embroidery for a clean, efficient, and impactful result.
Cut your shape from a non-fraying fabric like felt or use a fusible backing on cotton, then iron it onto your pillow.
Secure the shape by stitching a clean, tight satin stitch border all the way around its edge, covering the raw fabric completely.
This method gives you perfectly smooth color fields and a raised, defined outline that makes your design pop.
7. Build Landscapes with Chunky Yarn and Woven Stitches

Introduce dramatic, sculptural texture into your embroidery by incorporating thick, chunky yarn for dominant features like water or clouds.
Use couching or a wide basketweave stitch to lay down the yarn, creating a bold, tactile element that contrasts beautifully with finer details.
For the flowers, create raised 3D textures with woven wheel stitches (also known as spider web roses), which are quick to make and add instant dimension.
This mix of materials turns a simple landscape into a rich, eye-catching mixed-fiber wall hanging for your sofa.
8. Appliqué with Inset Piping for a Retro Finish

Achieve a clean, retro-modern look by using fabric appliqué with an inset embroidered border that mimics piping.
First, cut and apply your fabric shapes to the pillow cover using a lightweight fusible web.
Then, instead of stitching over the edge, use a stem stitch or narrow satin stitch just inside the border of each shape.
This creates a subtle, recessed line that defines the form without a heavy outline, giving the design a polished, almost graphic-designed appearance.
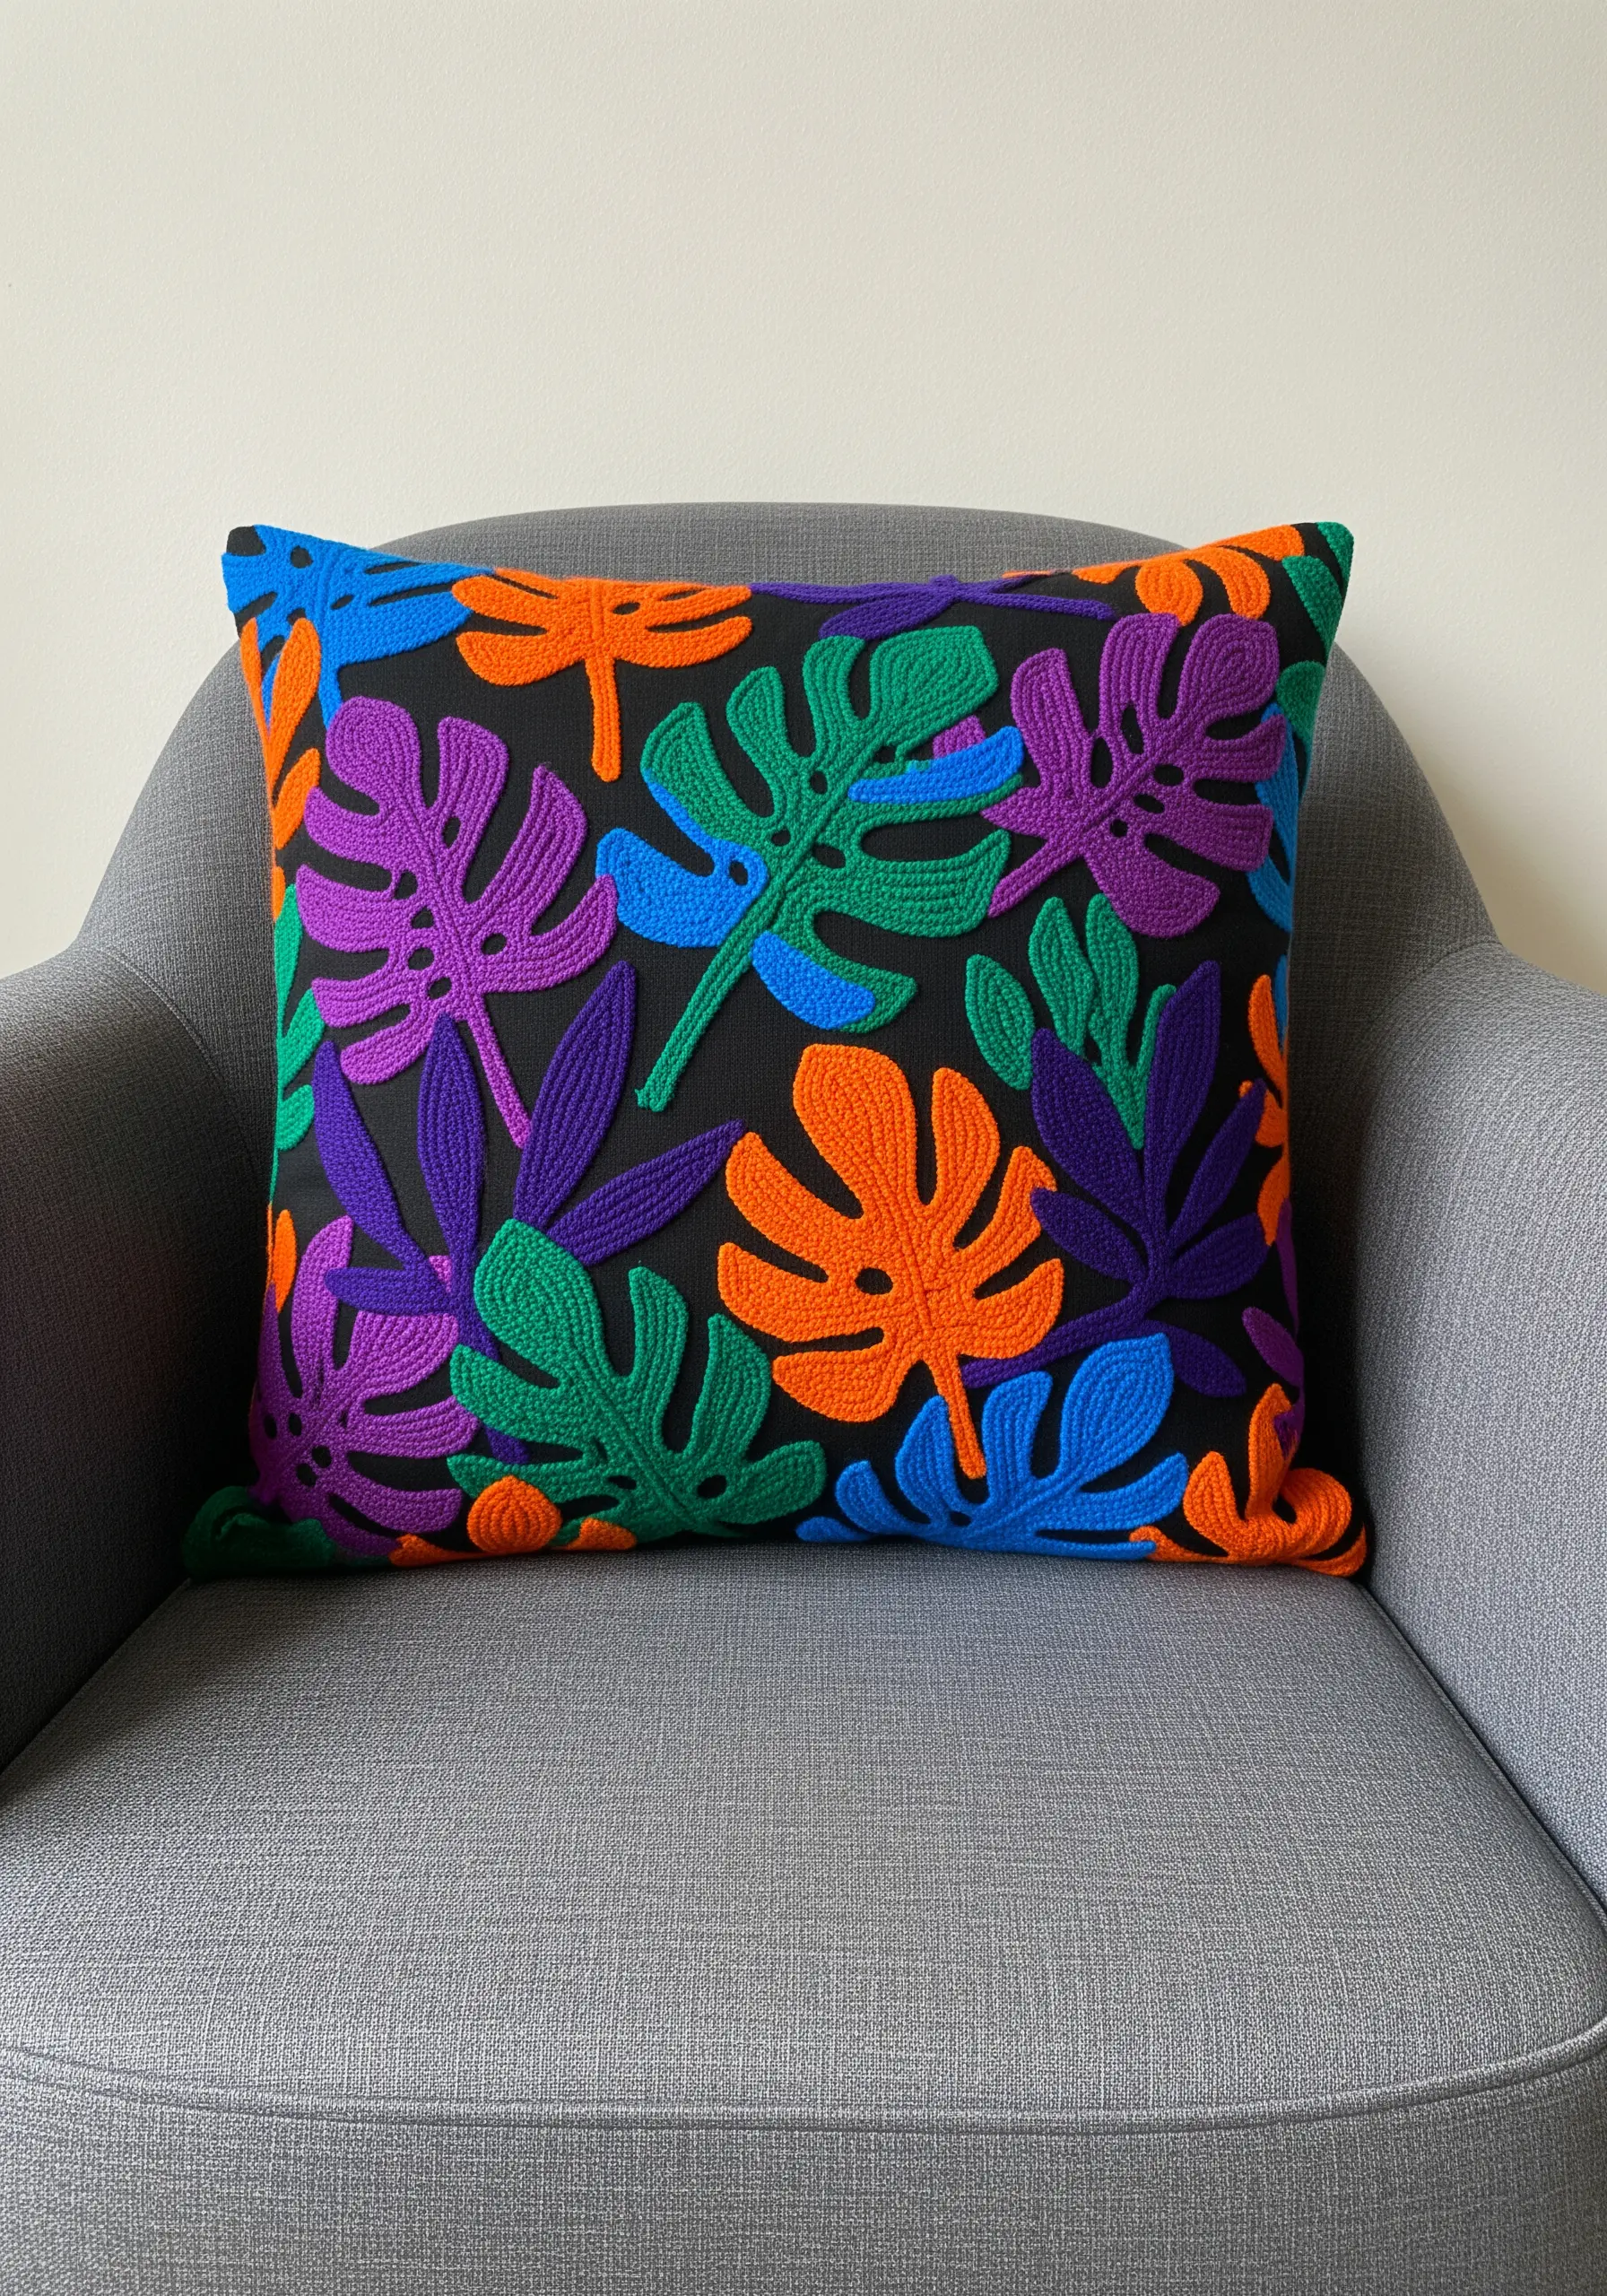
9. Define Botanicals with Contrasting Outlines

Make your botanical designs stand out by filling the leaves with one color and outlining them in another, contrasting shade.
Use a fishbone stitch or satin stitch to fill the body of each leaf, creating a smooth, solid base.
Then, trace the veins and the outer edge with a delicate backstitch in a contrasting color, like gold thread on magenta or cyan.
This technique adds sharp definition and a modern, illustrative quality to classic plant-inspired embroidery patterns.
Finish with a playful pom-pom trim for extra flair.
10. Create Abstract Energy with Raised Stem Stitch
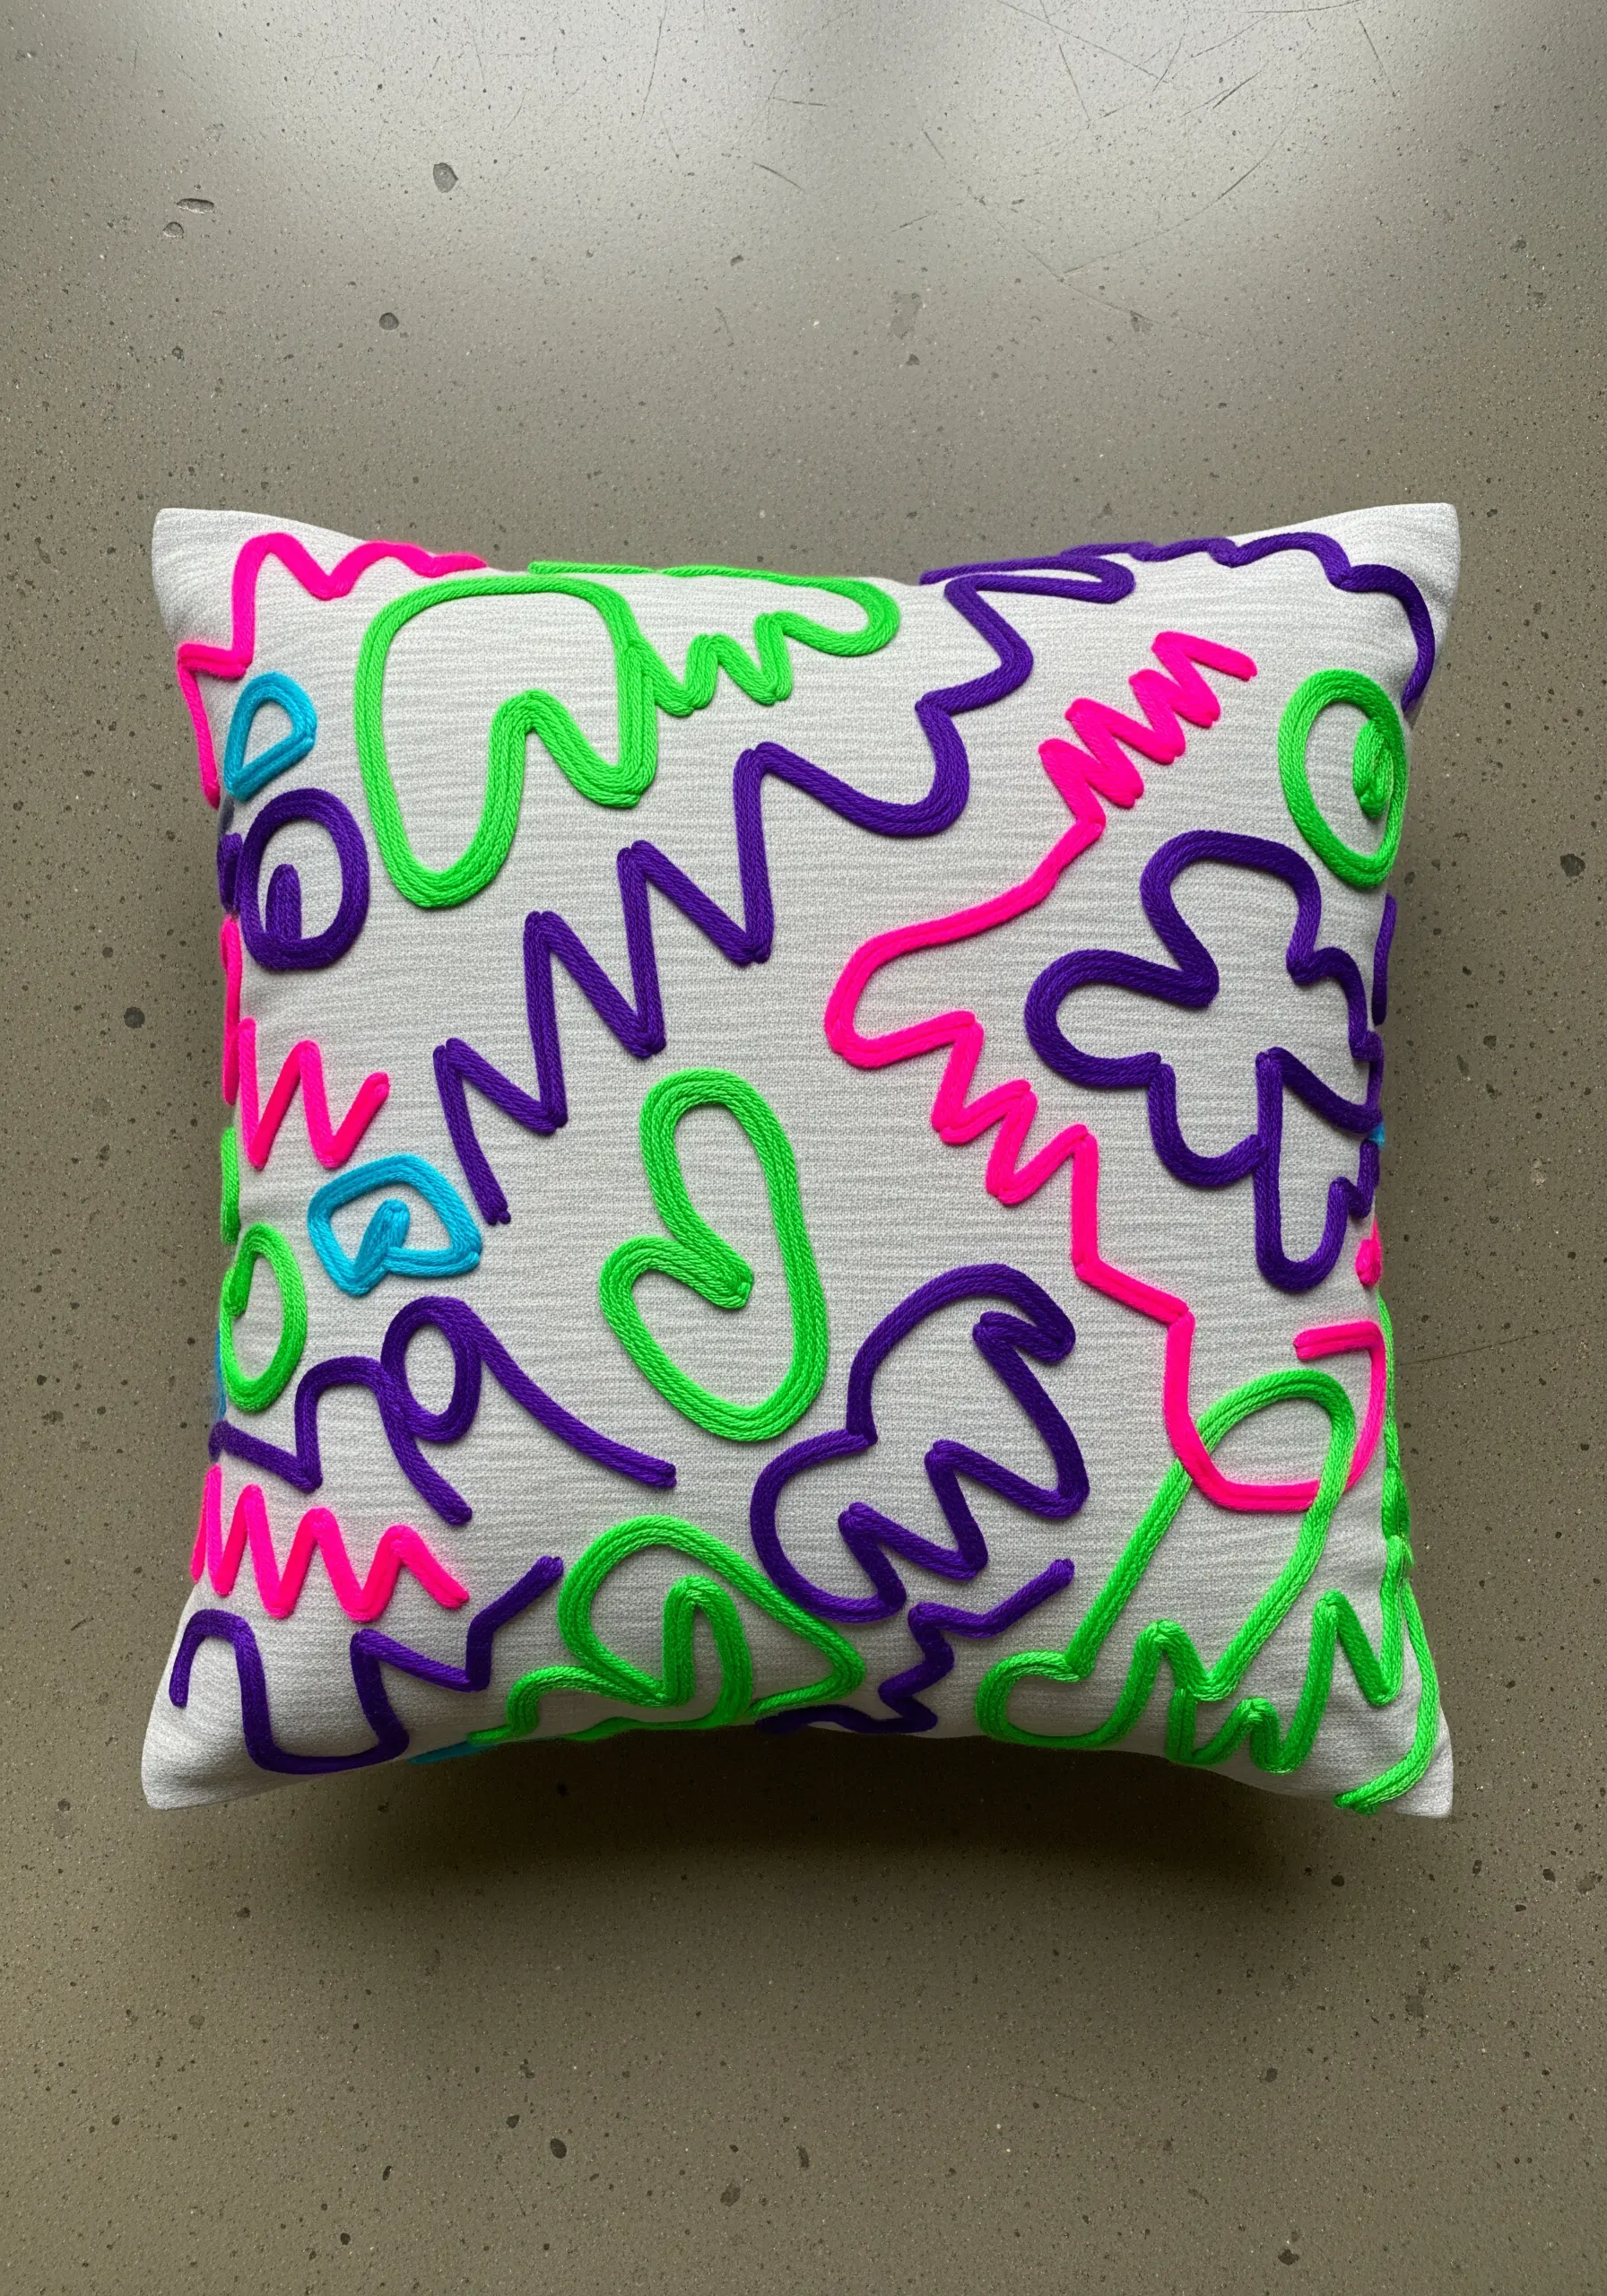
Embrace playful abstraction by using a thick, raised line stitch to create a high-energy, doodle-like pattern.
Use all six strands of your floss or even pearl cotton and a stem stitch to create smooth, rope-like curves and squiggles.
The key to this design is overlapping the lines and using a vibrant, almost-neon color palette to create a sense of movement and spontaneity.
This technique works especially well on a textured fabric, as the smooth, raised lines contrast with the woven background.
11. Blend Colors with a Gradient Satin Stitch
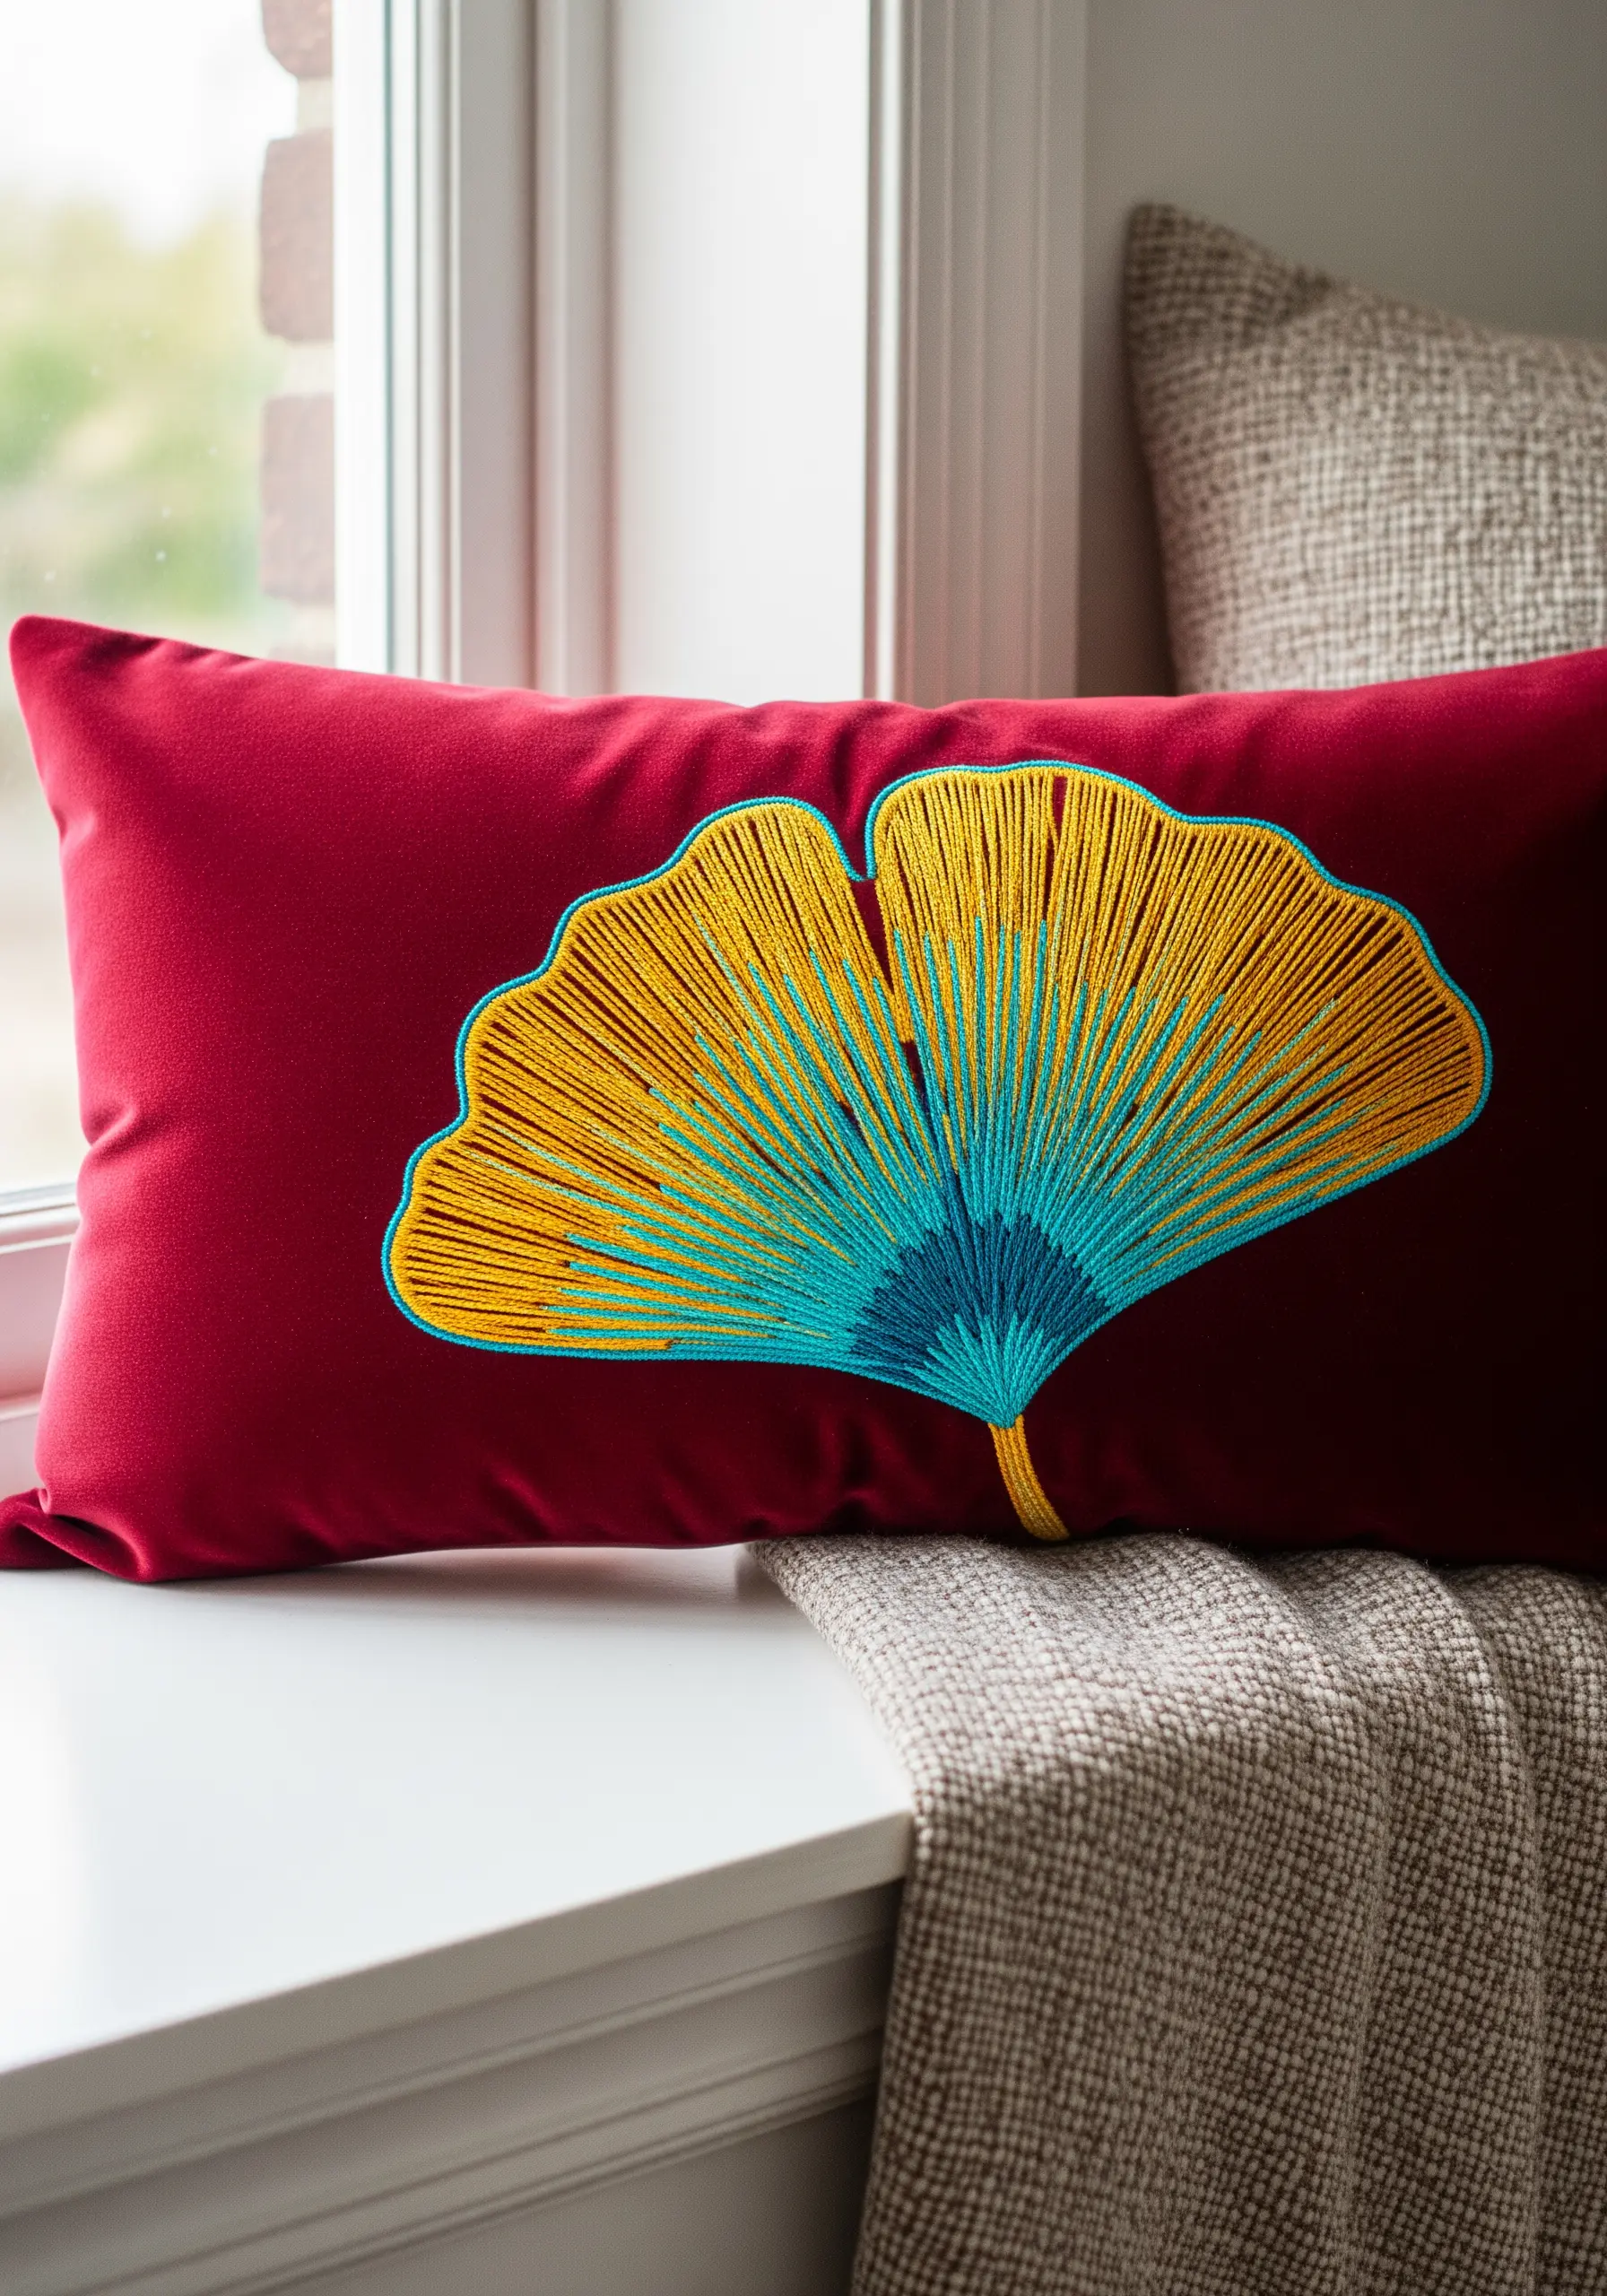
Create a stunning ombré effect within a single shape using a technique that blends long-and-short stitch with satin stitch.
Start at one end of the leaf with your first color (yellow), making satin stitches of varying lengths.
Introduce the second color (cyan) by bringing the needle up through the middle of the previous stitches, seamlessly blending the two shades together.
This gives you a smooth, professional-looking gradient that adds incredible depth to even simple shapes, perfect for nature-inspired leaf clusters.
Outline the final shape with a clean backstitch to sharpen the edges.
12. Elevate Simple Shapes with Textured Fill Stitches

Instead of a basic satin stitch, fill geometric shapes with a more textured alternative for greater visual interest.
Try a seed stitch, French knots, or even a simple cross-stitch to fill the bands of color in this concentric square design.
Using a fill stitch with a noticeable texture makes the vibrant colors feel more substantial and adds a handmade, tactile quality to the minimalist pattern.
This is one of the easiest simple embroidery decor ideas that offers maximum impact.
13. Add Sparkle with Sequins and Bugle Beads
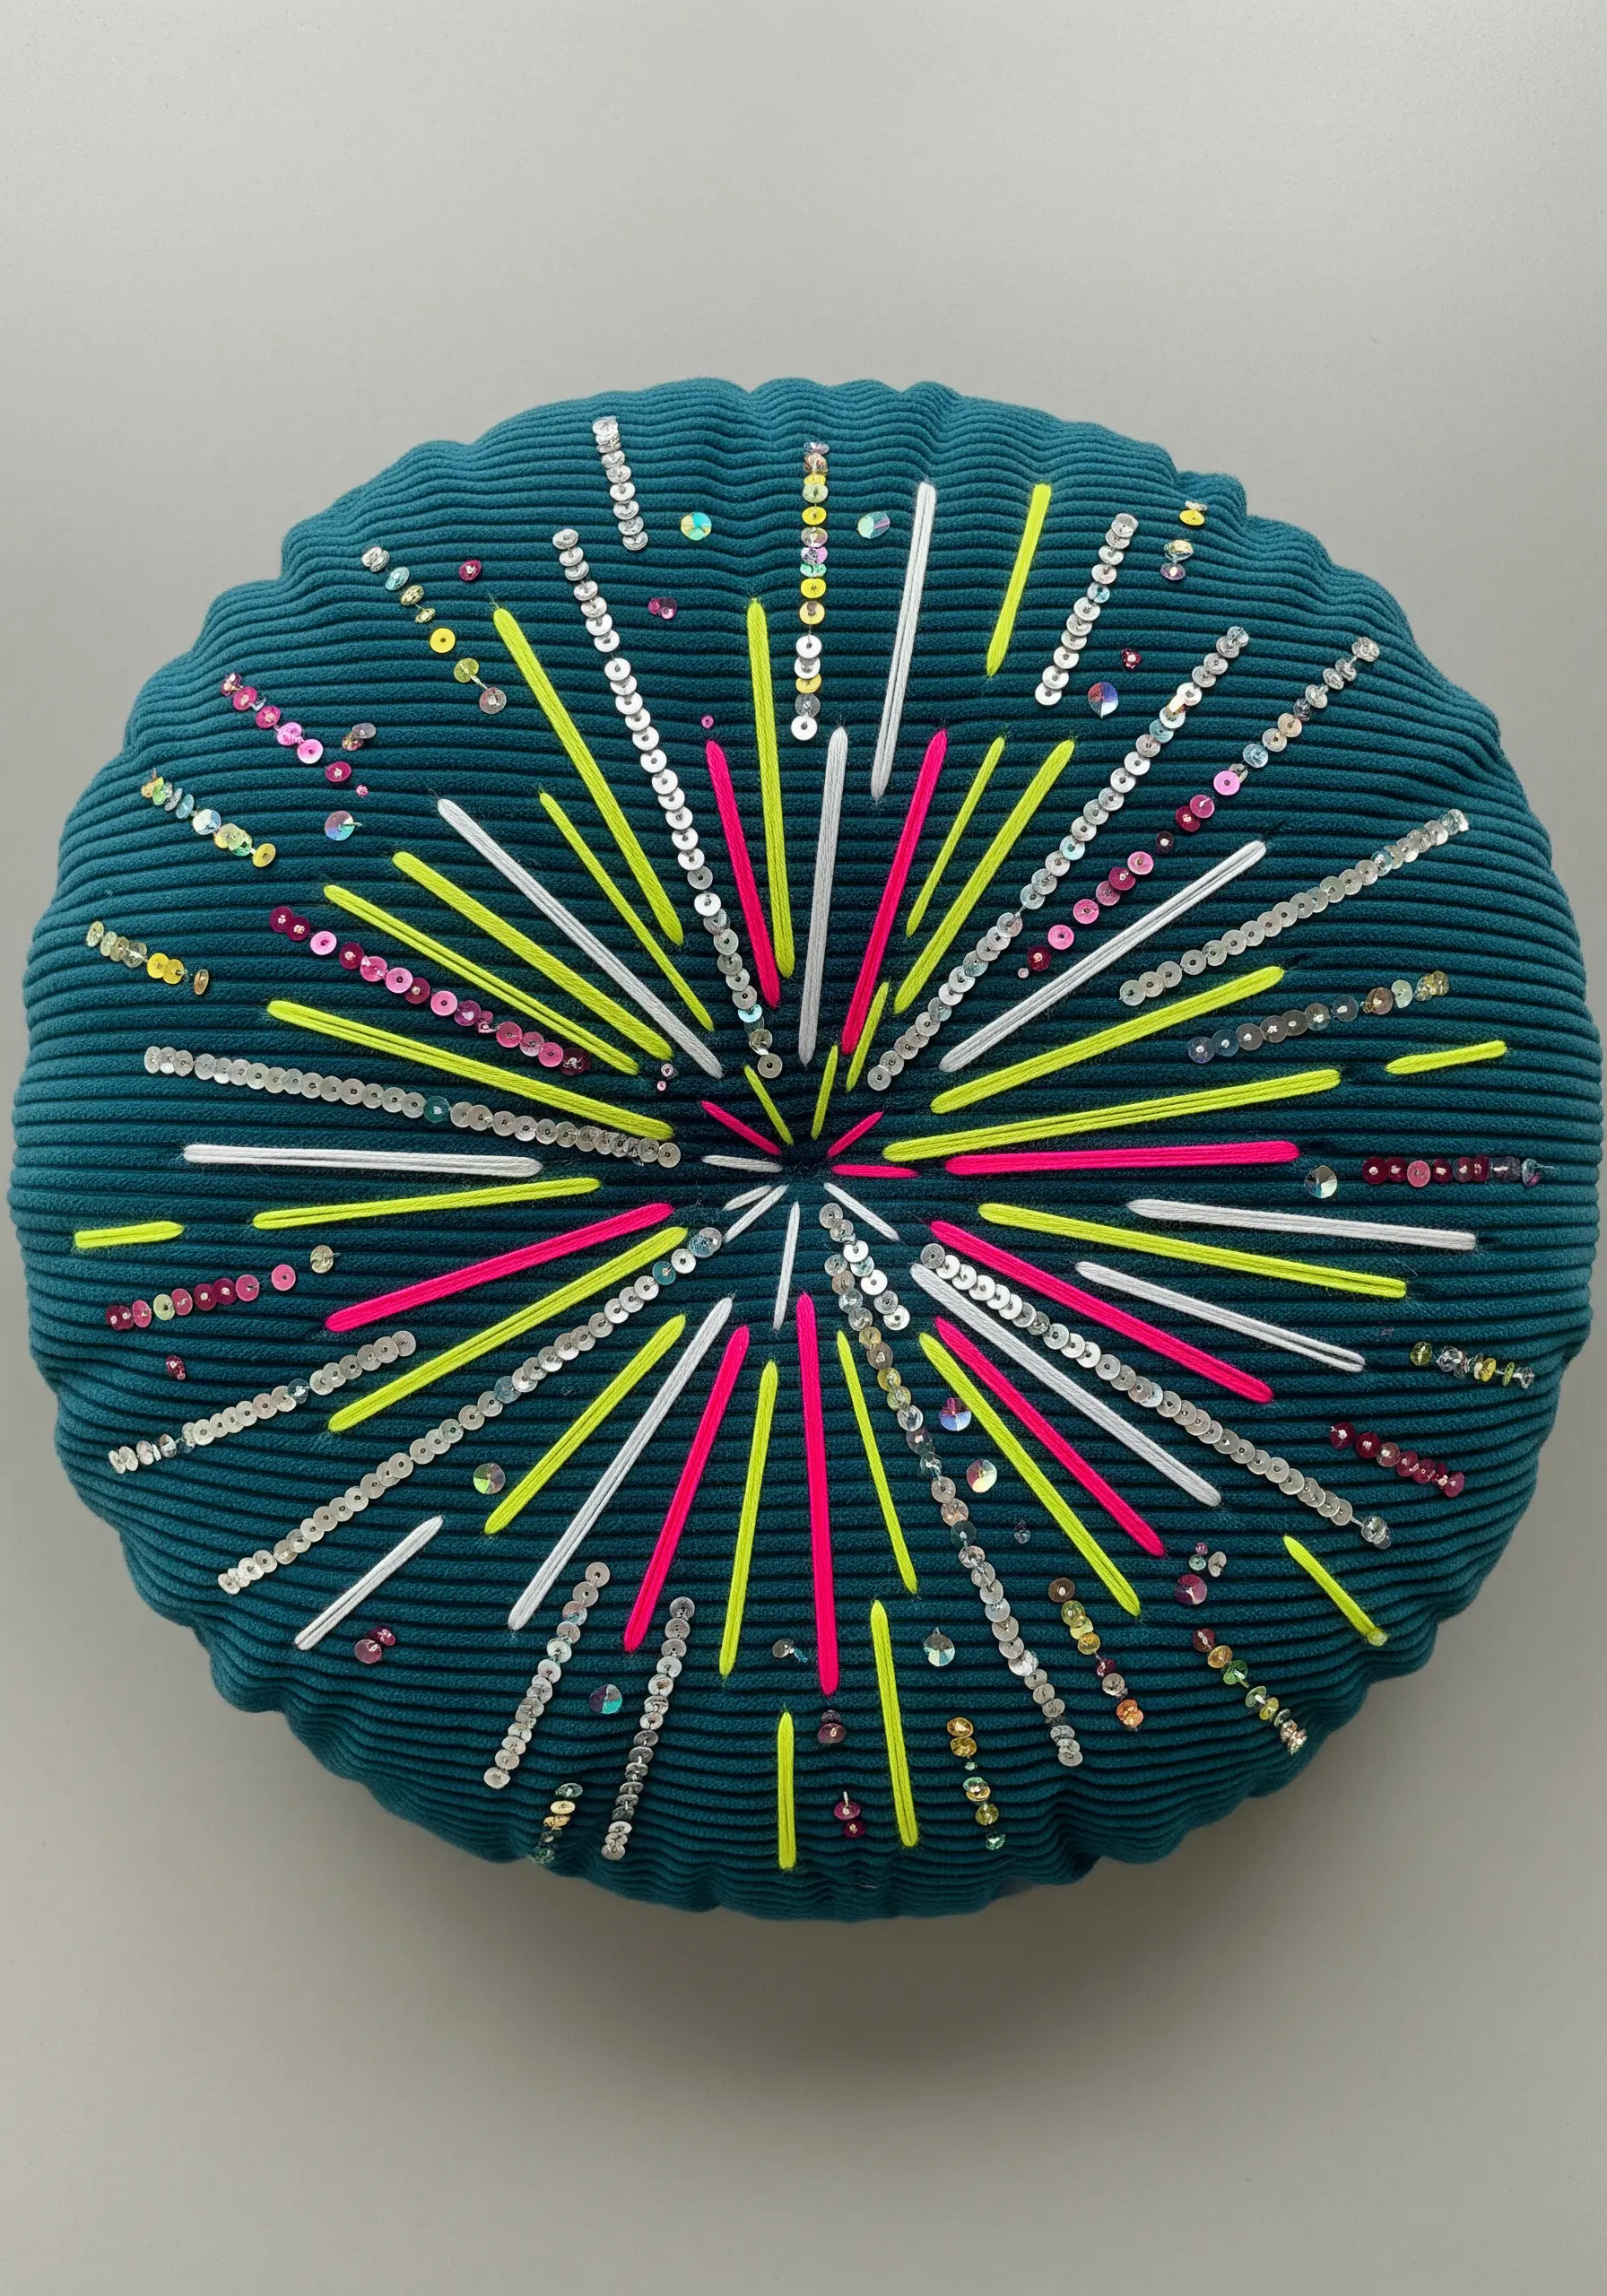
Combine thread with other materials to create a festive, celebratory design that catches the light.
Stitch down lines of sequins using a simple backstitch, adding a single seed bead to anchor each one for extra security and a professional finish.
Intersperse these with lines of long bugle beads and bold satin stitches in a neon floss to create a dynamic firework or starburst effect.
The mix of textures—smooth beads, sparkling sequins, and soft thread—results in a design that is visually and physically engaging, turning your pillow into a true statement piece.
14. Isolate Motifs for a Modern, Balanced Composition

Create a sense of calm and focus by stitching individual motifs with plenty of negative space around them.
Instead of filling the entire pillow, arrange your elements thoughtfully, allowing the background fabric to be part of the design.
Use a crisp satin stitch for the bodies and a sharp backstitch for the outlines and scales to ensure each fish is a clean, self-contained graphic.
This approach gives your work a modern, airy feel that highlights the quality of your stitching.
15. Create a Dense Texture with Overlapping Chain Stitch Fill
For a bold, almost carpet-like texture, fill large shapes with rows of chain stitch worked closely together.
Stitch your first row following the outline of the leaf, then work subsequent rows directly beside it until the entire shape is filled.
This technique creates a dense, woven texture that is incredibly durable and has a satisfyingly raised feel.
The directional lines of the chain stitch add a sense of movement, making it a more dynamic choice than a standard satin stitch for filling large areas.
This method is fantastic for wildflower embroidery patterns that need texture.
16. Recreate Digital Aesthetics with Padded Satin Stitch

Capture a playful, retro video-game vibe by creating padded satin stitch appliqué.
Cut your block shapes from felt and place a thin layer of batting or extra felt underneath before positioning them on the pillow.
Stitch over the entire shape with a vertical satin stitch, pulling the thread taut to create a slightly beveled, three-dimensional effect on each block.
The slight padding makes the primary colors pop and gives the geometric shapes a soft, almost pixelated dimensionality.
17. Incorporate 3D Elements with Ribbon Embroidery

Add stunning, realistic dimension to your florals by switching from floss to silk or satin ribbon.
Create the red poppy petals using a detached buttonhole stitch or a simple loop stitch, which allows them to lift off the fabric for a true 3D effect.
For the lavender, use the ribbon to make clustered French knots along a stem-stitched stalk.
This mix of materials provides a textural richness that standard thread alone cannot achieve, making your pillow a true tactile delight. Explore more floral-inspired ribbon embroidery ideas to master this technique.
18. Create Art Deco Elegance with Metallic and Satin Stitch

Evoke the glamour of the Art Deco era by pairing bold, geometric shapes with the shimmer of metallic thread.
Alternate sections of smooth satin stitch in a vibrant color like coral with sections of a lustrous gold or bronze metallic thread.
To make the metallic thread easier to work with, use shorter lengths to prevent tangling and consider a thread conditioner like beeswax.
This combination of textures and high-contrast colors on a rich velvet base creates a look of pure, confident luxury.
19. Play with Scale and Texture for a Whimsical Feel

Create a charming, storybook-style design by combining multiple stitch textures within a single motif.
Use a padded satin stitch for the mushroom caps to give them a rounded, dimensional shape. Add French knots for the spots.
For the gills underneath, use a series of straight stitches fanning out from the stem, creating a delicate, linear texture.
Finally, stitch the stems with a vertical satin stitch or chain stitch to differentiate their texture from the caps. It’s a perfect way to bring cottagecore cushion embroidery designs to life.
20. Achieve Intricate Detail with Seed Stitch Shading

For incredibly detailed shading and color blending, use tiny seed stitches instead of long-and-short stitches.
Fill each section with small, scattered straight stitches, layering different colors to create a pointillist-like effect.
This technique allows for subtle, nuanced gradients and gives the surface a texture that resembles fine beadwork.
Outline the entire piece and add details like legs and antennae with a sharp, dark backstitch to contain the intricate color work and provide definition.
21. Make Typography Pop with Appliqué and Outlines
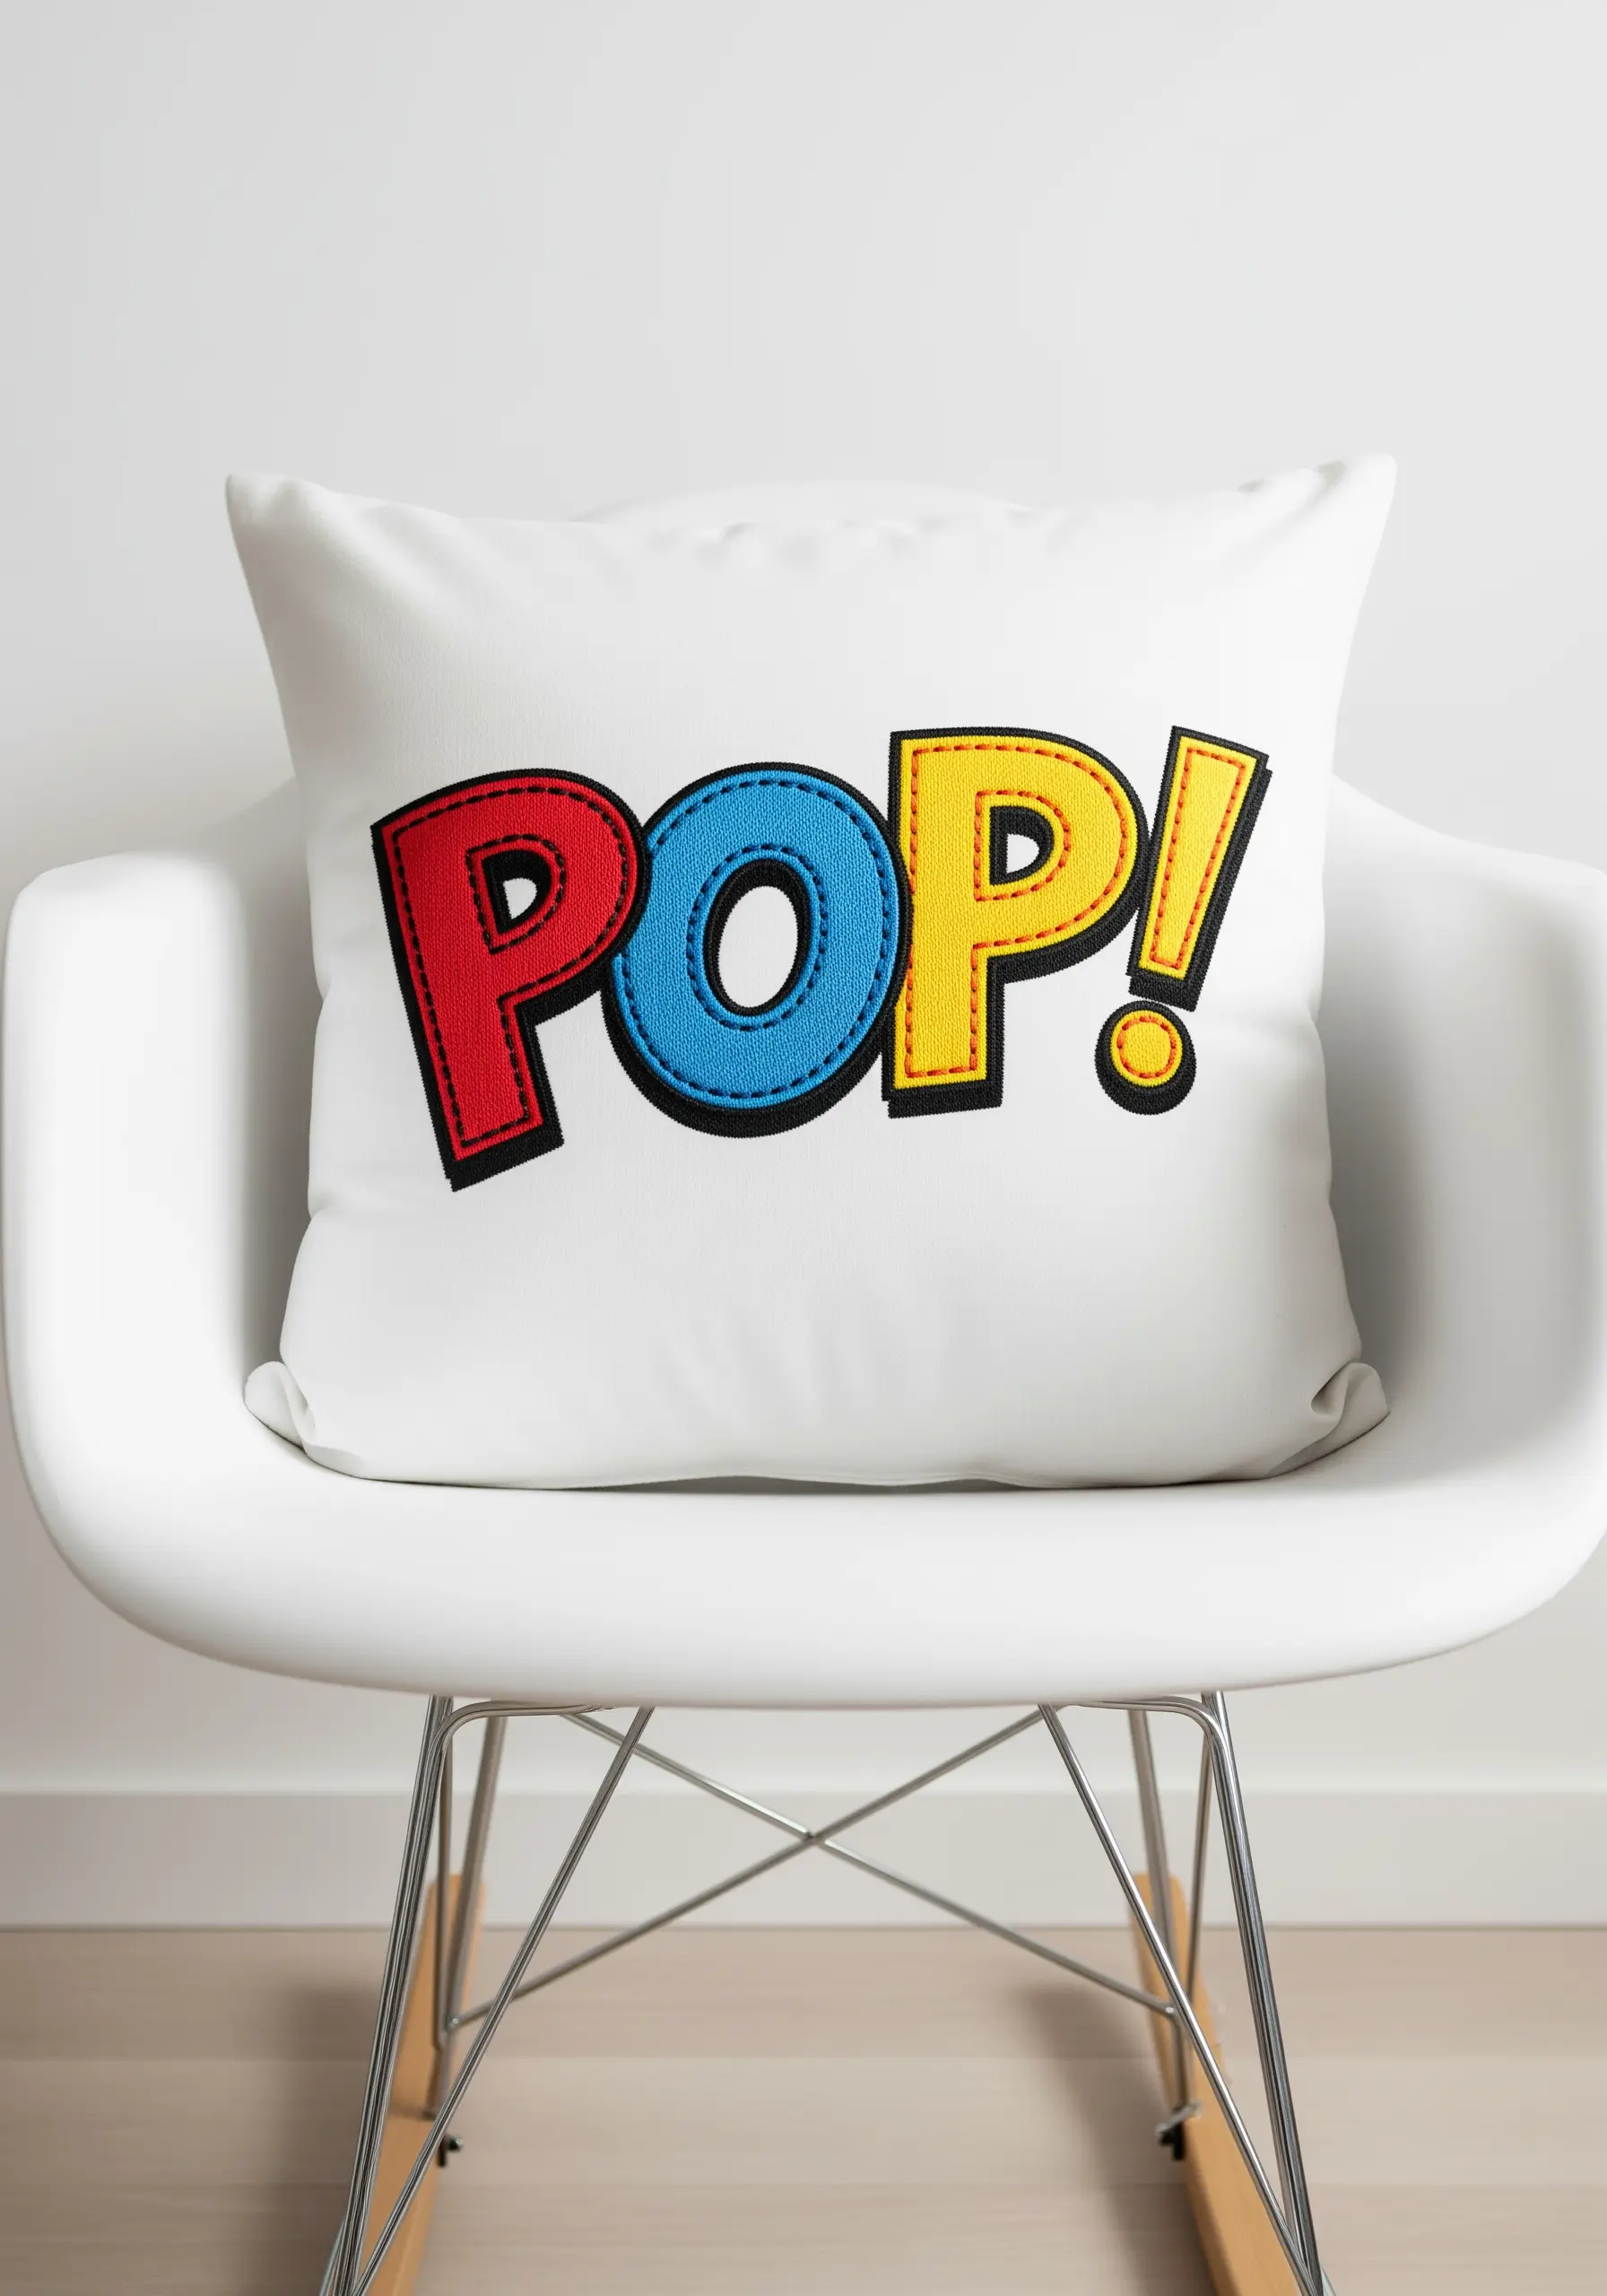
Give your embroidered words a bold, graphic-novel feel by combining felt appliqué with a contrasting running stitch outline.
Cut your letters from brightly colored felt and secure them to the pillow with a fabric glue or fusible web.
Then, use a thick black thread (like all six strands of floss or pearl cotton) to add a simple running stitch or backstitch just inside the edge of each letter.
This adds a hand-drawn, illustrative quality and makes the letters pop, turning a simple word into a piece of art.
22. Capture Iridescence with Graduated Thread Painting

Mimic the shimmering, color-shifting quality of a peacock feather with careful thread blending and directional stitching.
Use a long-and-short stitch with multiple shades of green, gold, and turquoise, ensuring your stitches flow outward from the central ‘eye’ just as they would in nature.
Incorporate a single strand of metallic floss alongside your regular thread in the brightest areas to add a subtle, light-catching shimmer.
The deep green, ribbed corduroy fabric enhances the luxe feel and provides a perfect backdrop for these majestic peacock embroidery designs.
23. Create Fluid Shapes with Whipped Backstitch

For smooth, continuous outlines in abstract designs, a whipped backstitch is your best friend.
First, create your entire design using a basic backstitch. Then, take a second thread (in the same or a contrasting color) and ‘whip’ it around each backstitch without piercing the fabric.
This technique covers the gaps in a standard backstitch, resulting in a solid, rope-like line that is perfect for creating fluid, lava-lamp-inspired shapes.
Using a bright, multi-color palette on a neutral gray background makes the organic forms feel vibrant and alive.
24. Explore Geometric Patterns with Cross Stitch

Leverage the natural grid of a rustic fabric like burlap or Aida cloth to create sharp, geometric patterns with cross stitch.
The beauty of this technique lies in its simplicity and rhythm. You can build complex-looking zig-zags and diamonds with a single, easy-to-master stitch.
Use a thick thread, like tapestry wool or multiple strands of floss, to ensure your stitches are plump and fully cover the fabric grid.
The contrast of a precise, graphic pattern on an organic, textured fabric creates a beautiful modern-rustic balance.
25. Stitch an Electric Cityscape with Vertical Satin Stitch

Capture the vibrant energy of a city at night using bold, vertical satin stitches to create stylized skyscrapers.
Block out the building shapes with high-contrast colors like magenta, purple, and cyan against a black fabric background to represent the night sky.
Use horizontal satin stitches in a contrasting color to suggest lit windows, and scatter bright yellow French knots above for stars.
The uniform direction of the stitches gives the design a sleek, architectural feel, while the electric palette makes it dynamic and modern.


