

Before you begin your next project, take a moment to look at the fabric in your hands—a well-loved denim jacket, a plain canvas tote, or a set of linen napkins. These are not just blank surfaces; they are opportunities to add a layer of personality and art that is uniquely yours. With a needle and thread, you can transform the ordinary into something cherished and full of life.
This is where your artistry truly begins: in choosing the right stitch not just for the pattern, but for the texture you want to feel. It’s in blending two shades of grey to capture the soft fur of a koala, or in using a bold, clean satin stitch to define the graphic form of a panda. These small, intentional decisions are what elevate your work from a simple craft to a piece of textile art.
Let these designs inspire you to see upcycling as more than just mending or covering a flaw. See it as a collaboration with an object’s past. You are adding the next chapter to its story, one thoughtful, beautiful stitch at a time.
1. Create a Mixed-Texture Koala on Denim
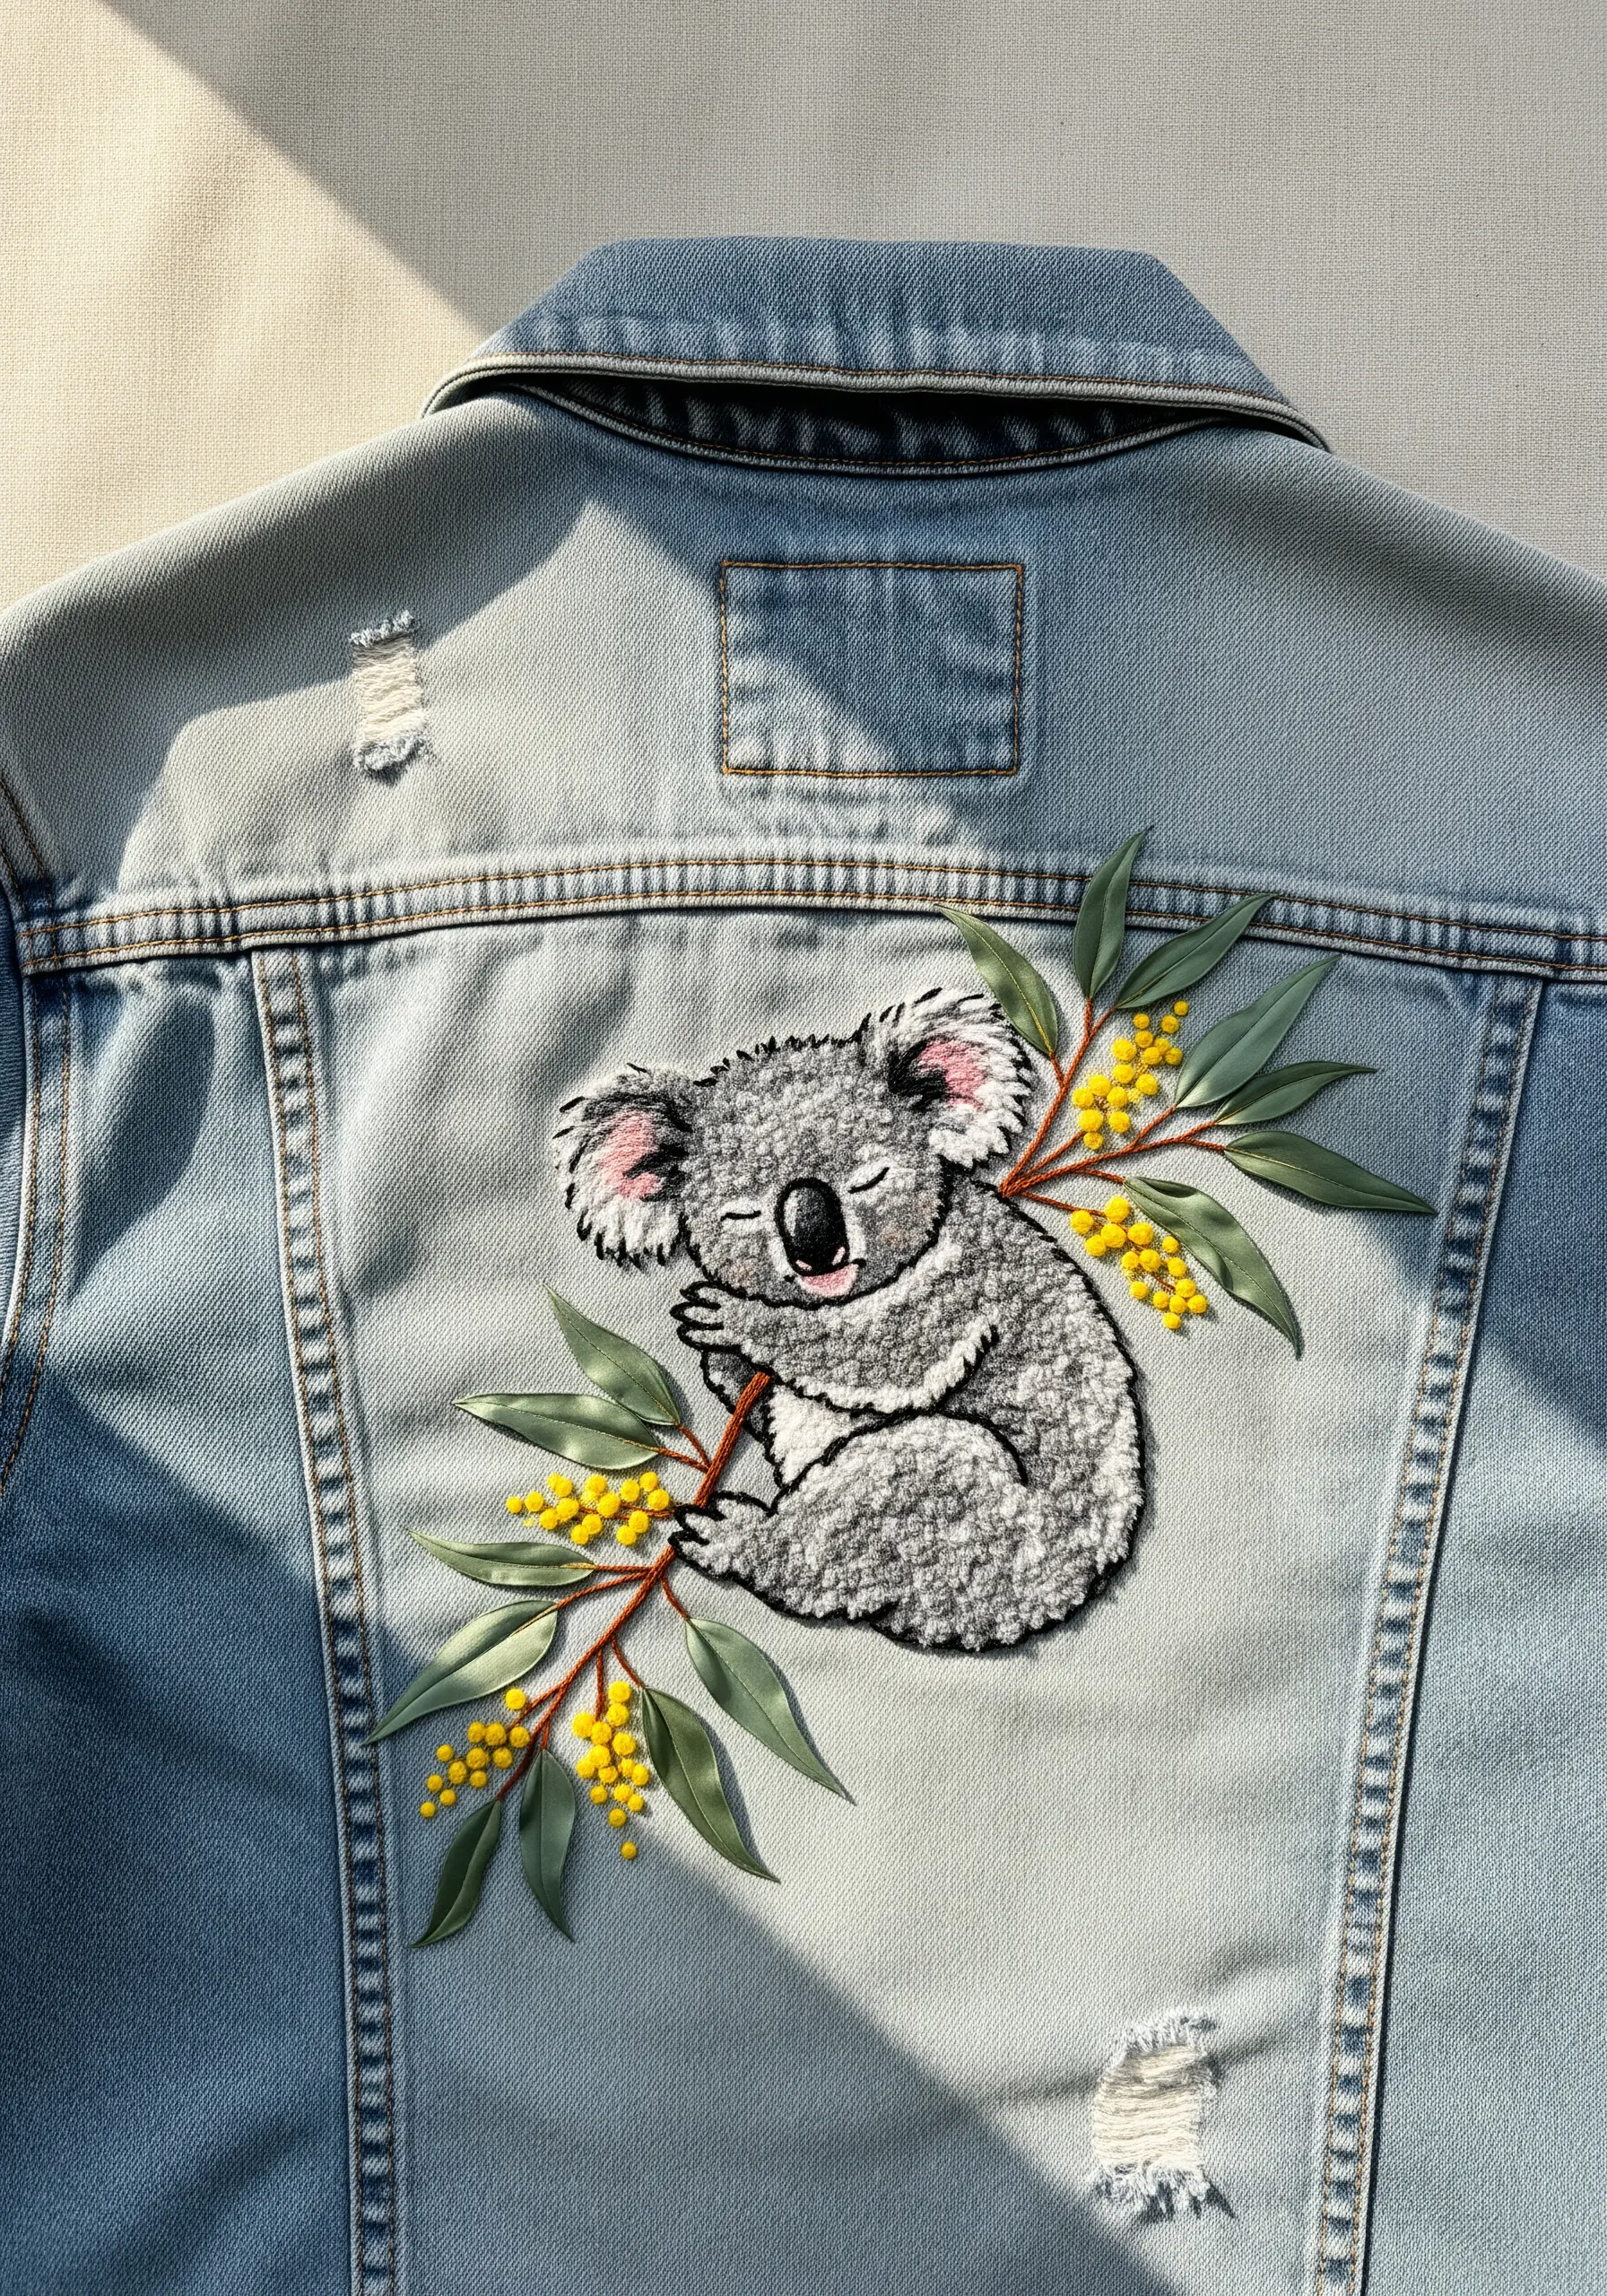
When upcycling a denim jacket, focus on contrasting textures to make your design stand out.
Use a dense field of French knots or turkey work for the koala’s body to create a plush, touchable fur that contrasts with the smooth denim.
For the leaves and branches, stitch with satin stitch using a high-sheen rayon or silk thread, which will catch the light differently than the matte cotton of the koala.
Always use a medium-weight cut-away stabilizer on the inside of the jacket to prevent the dense stitching from puckering the fabric over time.
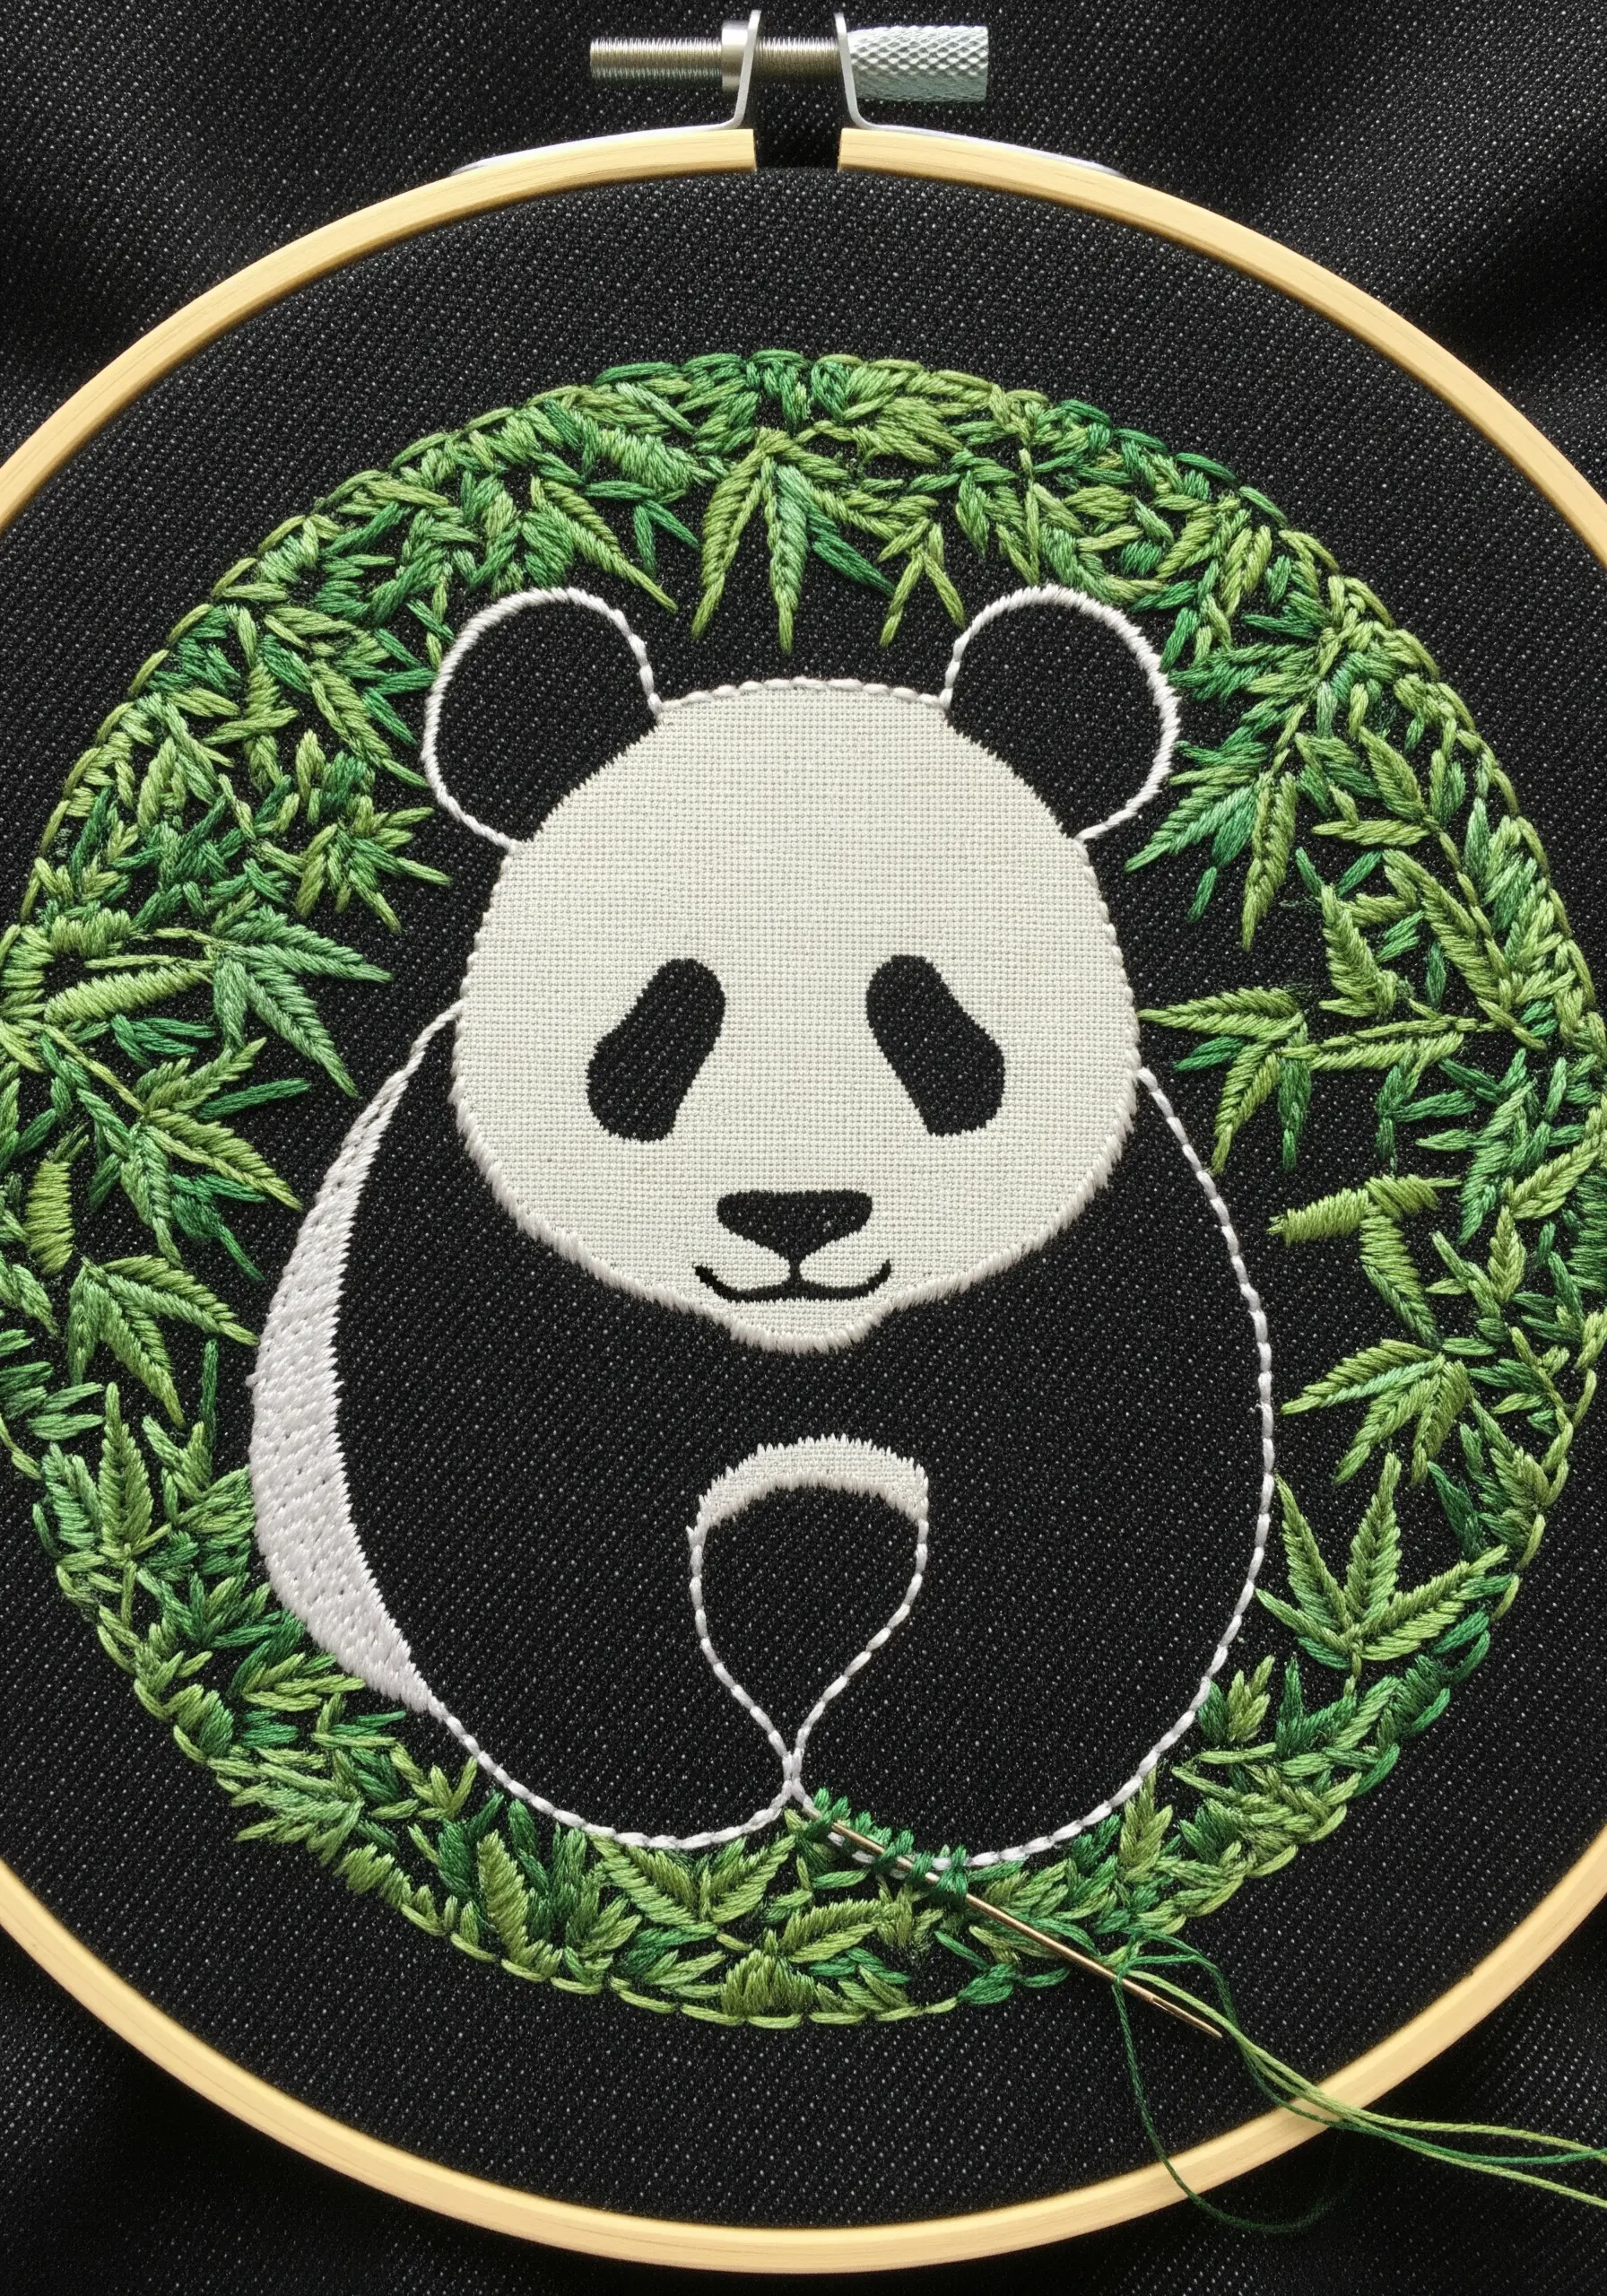
2. Achieve Bold Edges on a Canvas Tote
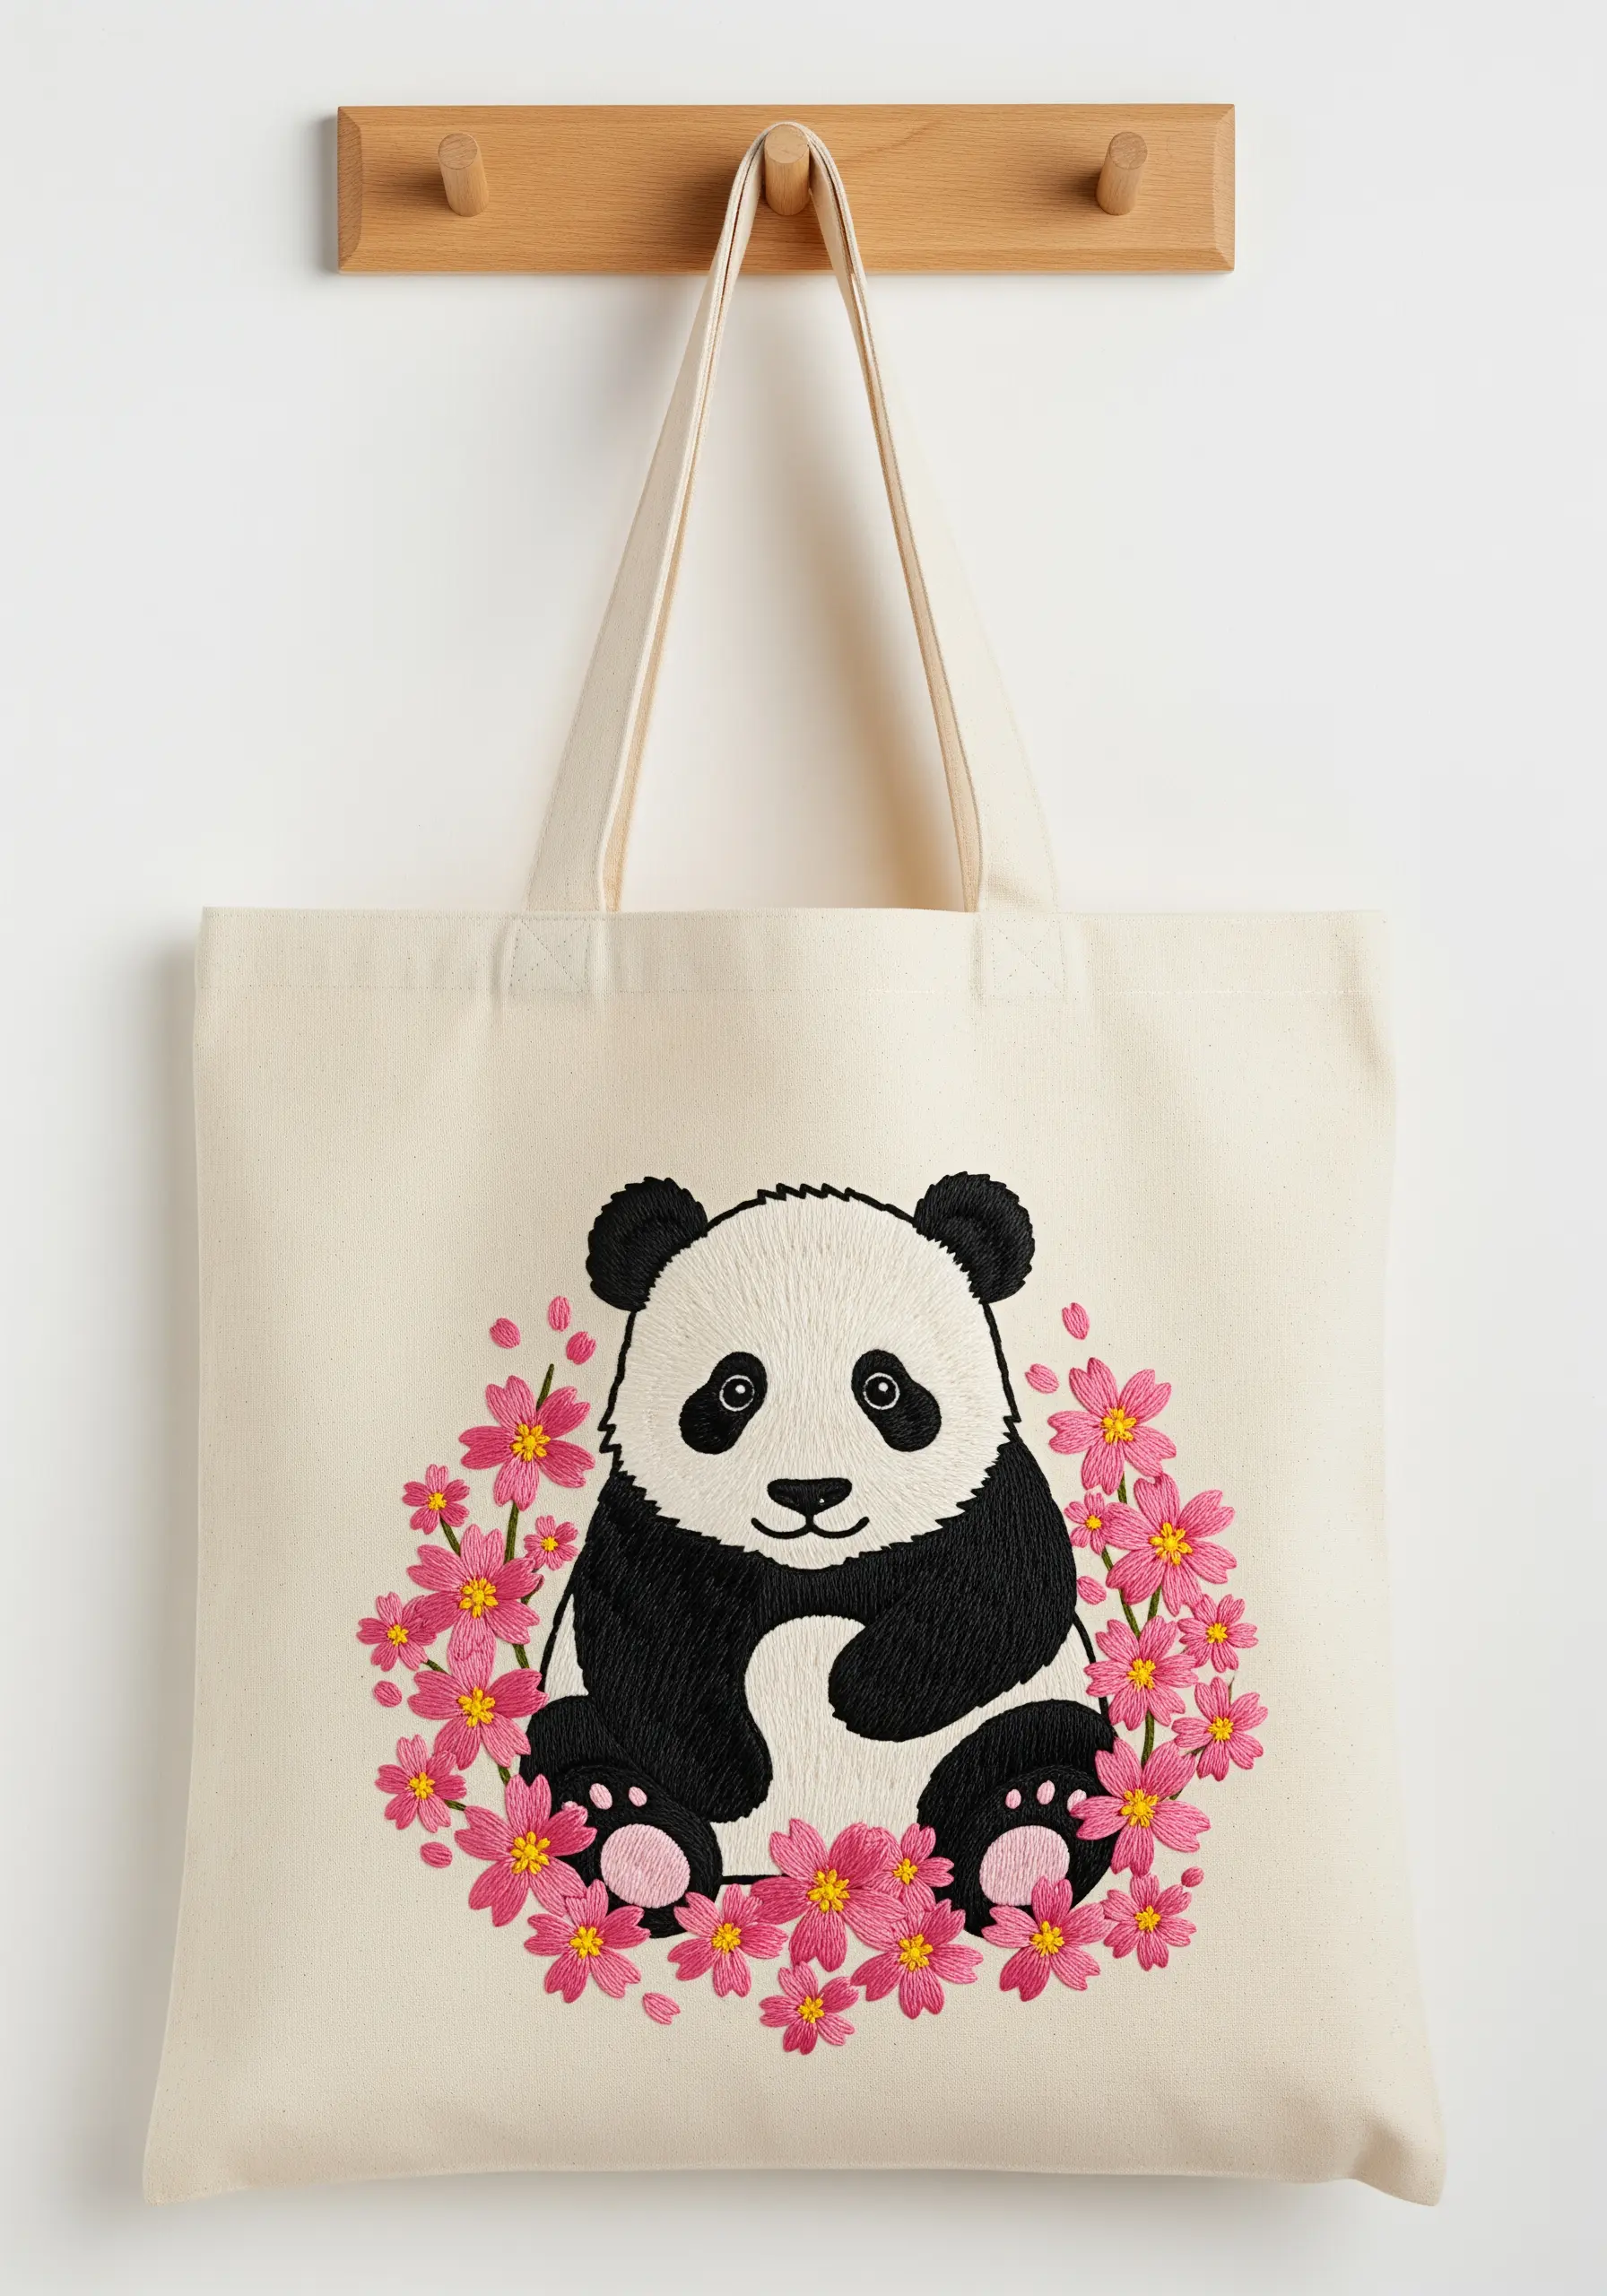
To give your panda motif a sharp, graphic finish on a tote bag, prepare your satin stitch fills with a split-stitch outline.
This simple preliminary step acts as a raised barrier, allowing you to tuck your satin stitches underneath it for an exceptionally clean and controlled edge.
Contrast the solid black-and-white fill of the panda with scattered lazy daisy stitches for the flowers; this creates visual balance and prevents the design from feeling too heavy.
Using a durable canvas tote means your stitches have a stable foundation, perfect for these kinds of personalized tote bag embroidery designs.
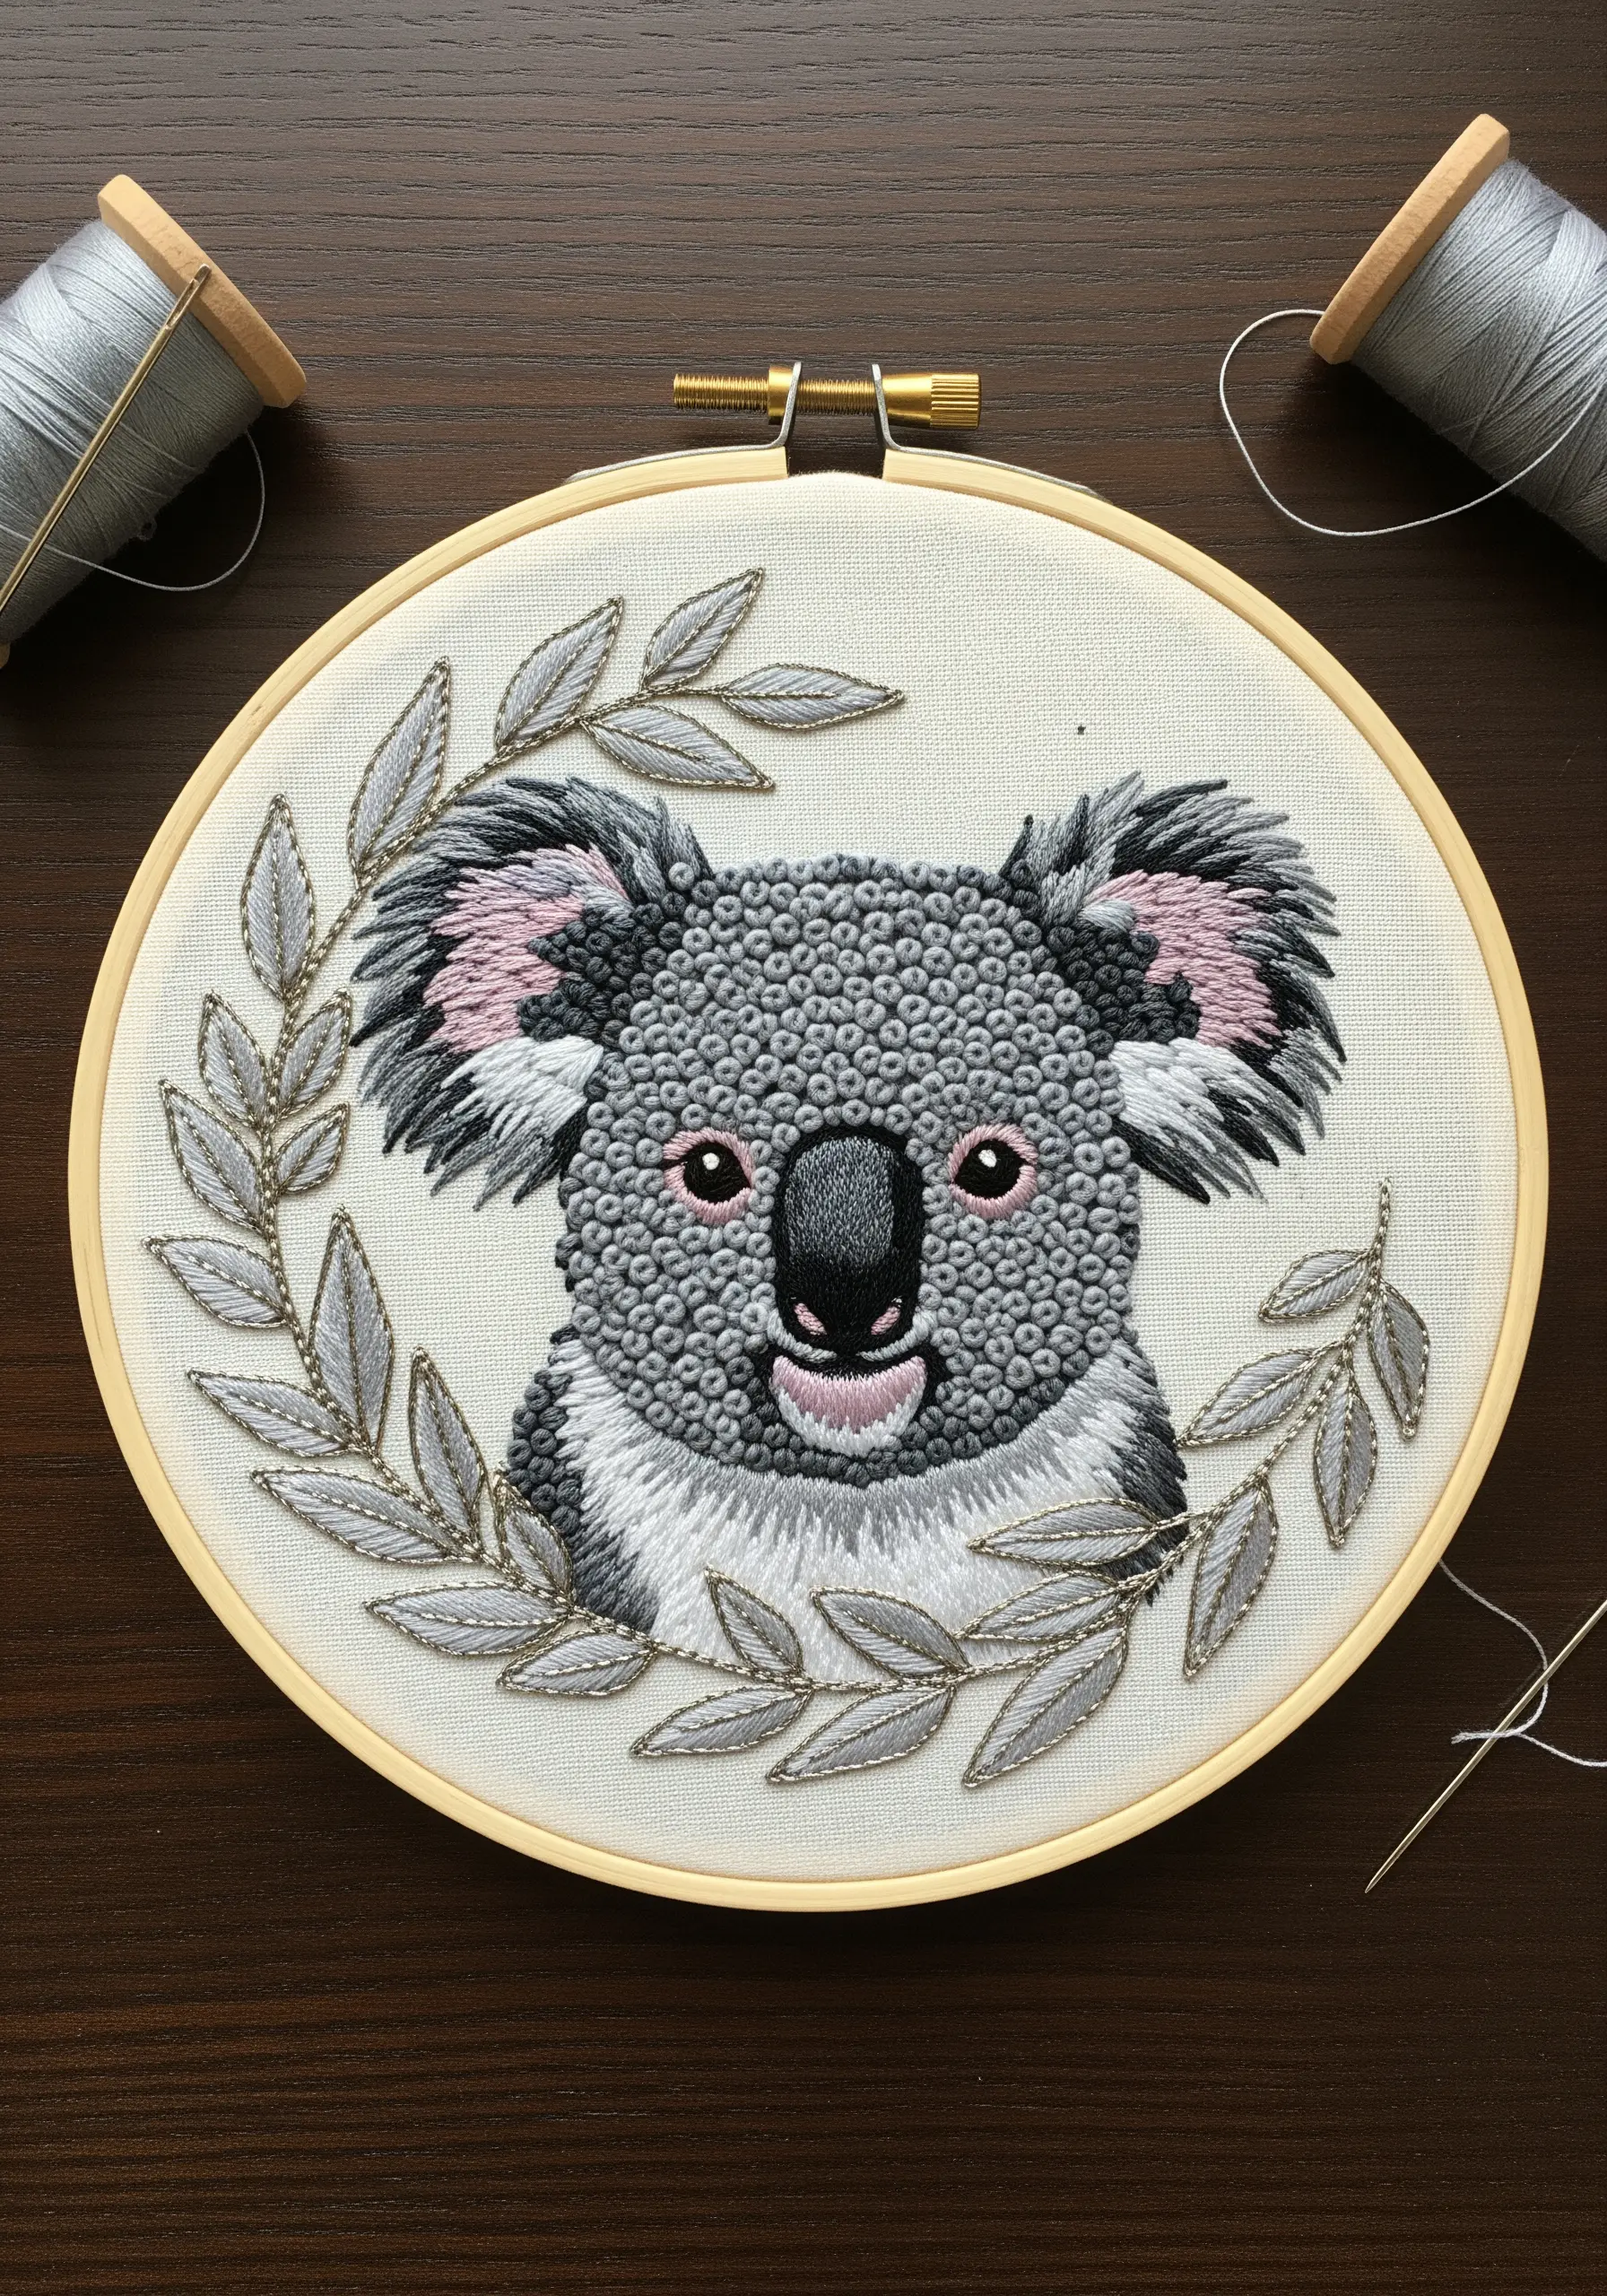
3. Blend Soft Gradients for a Realistic Portrait
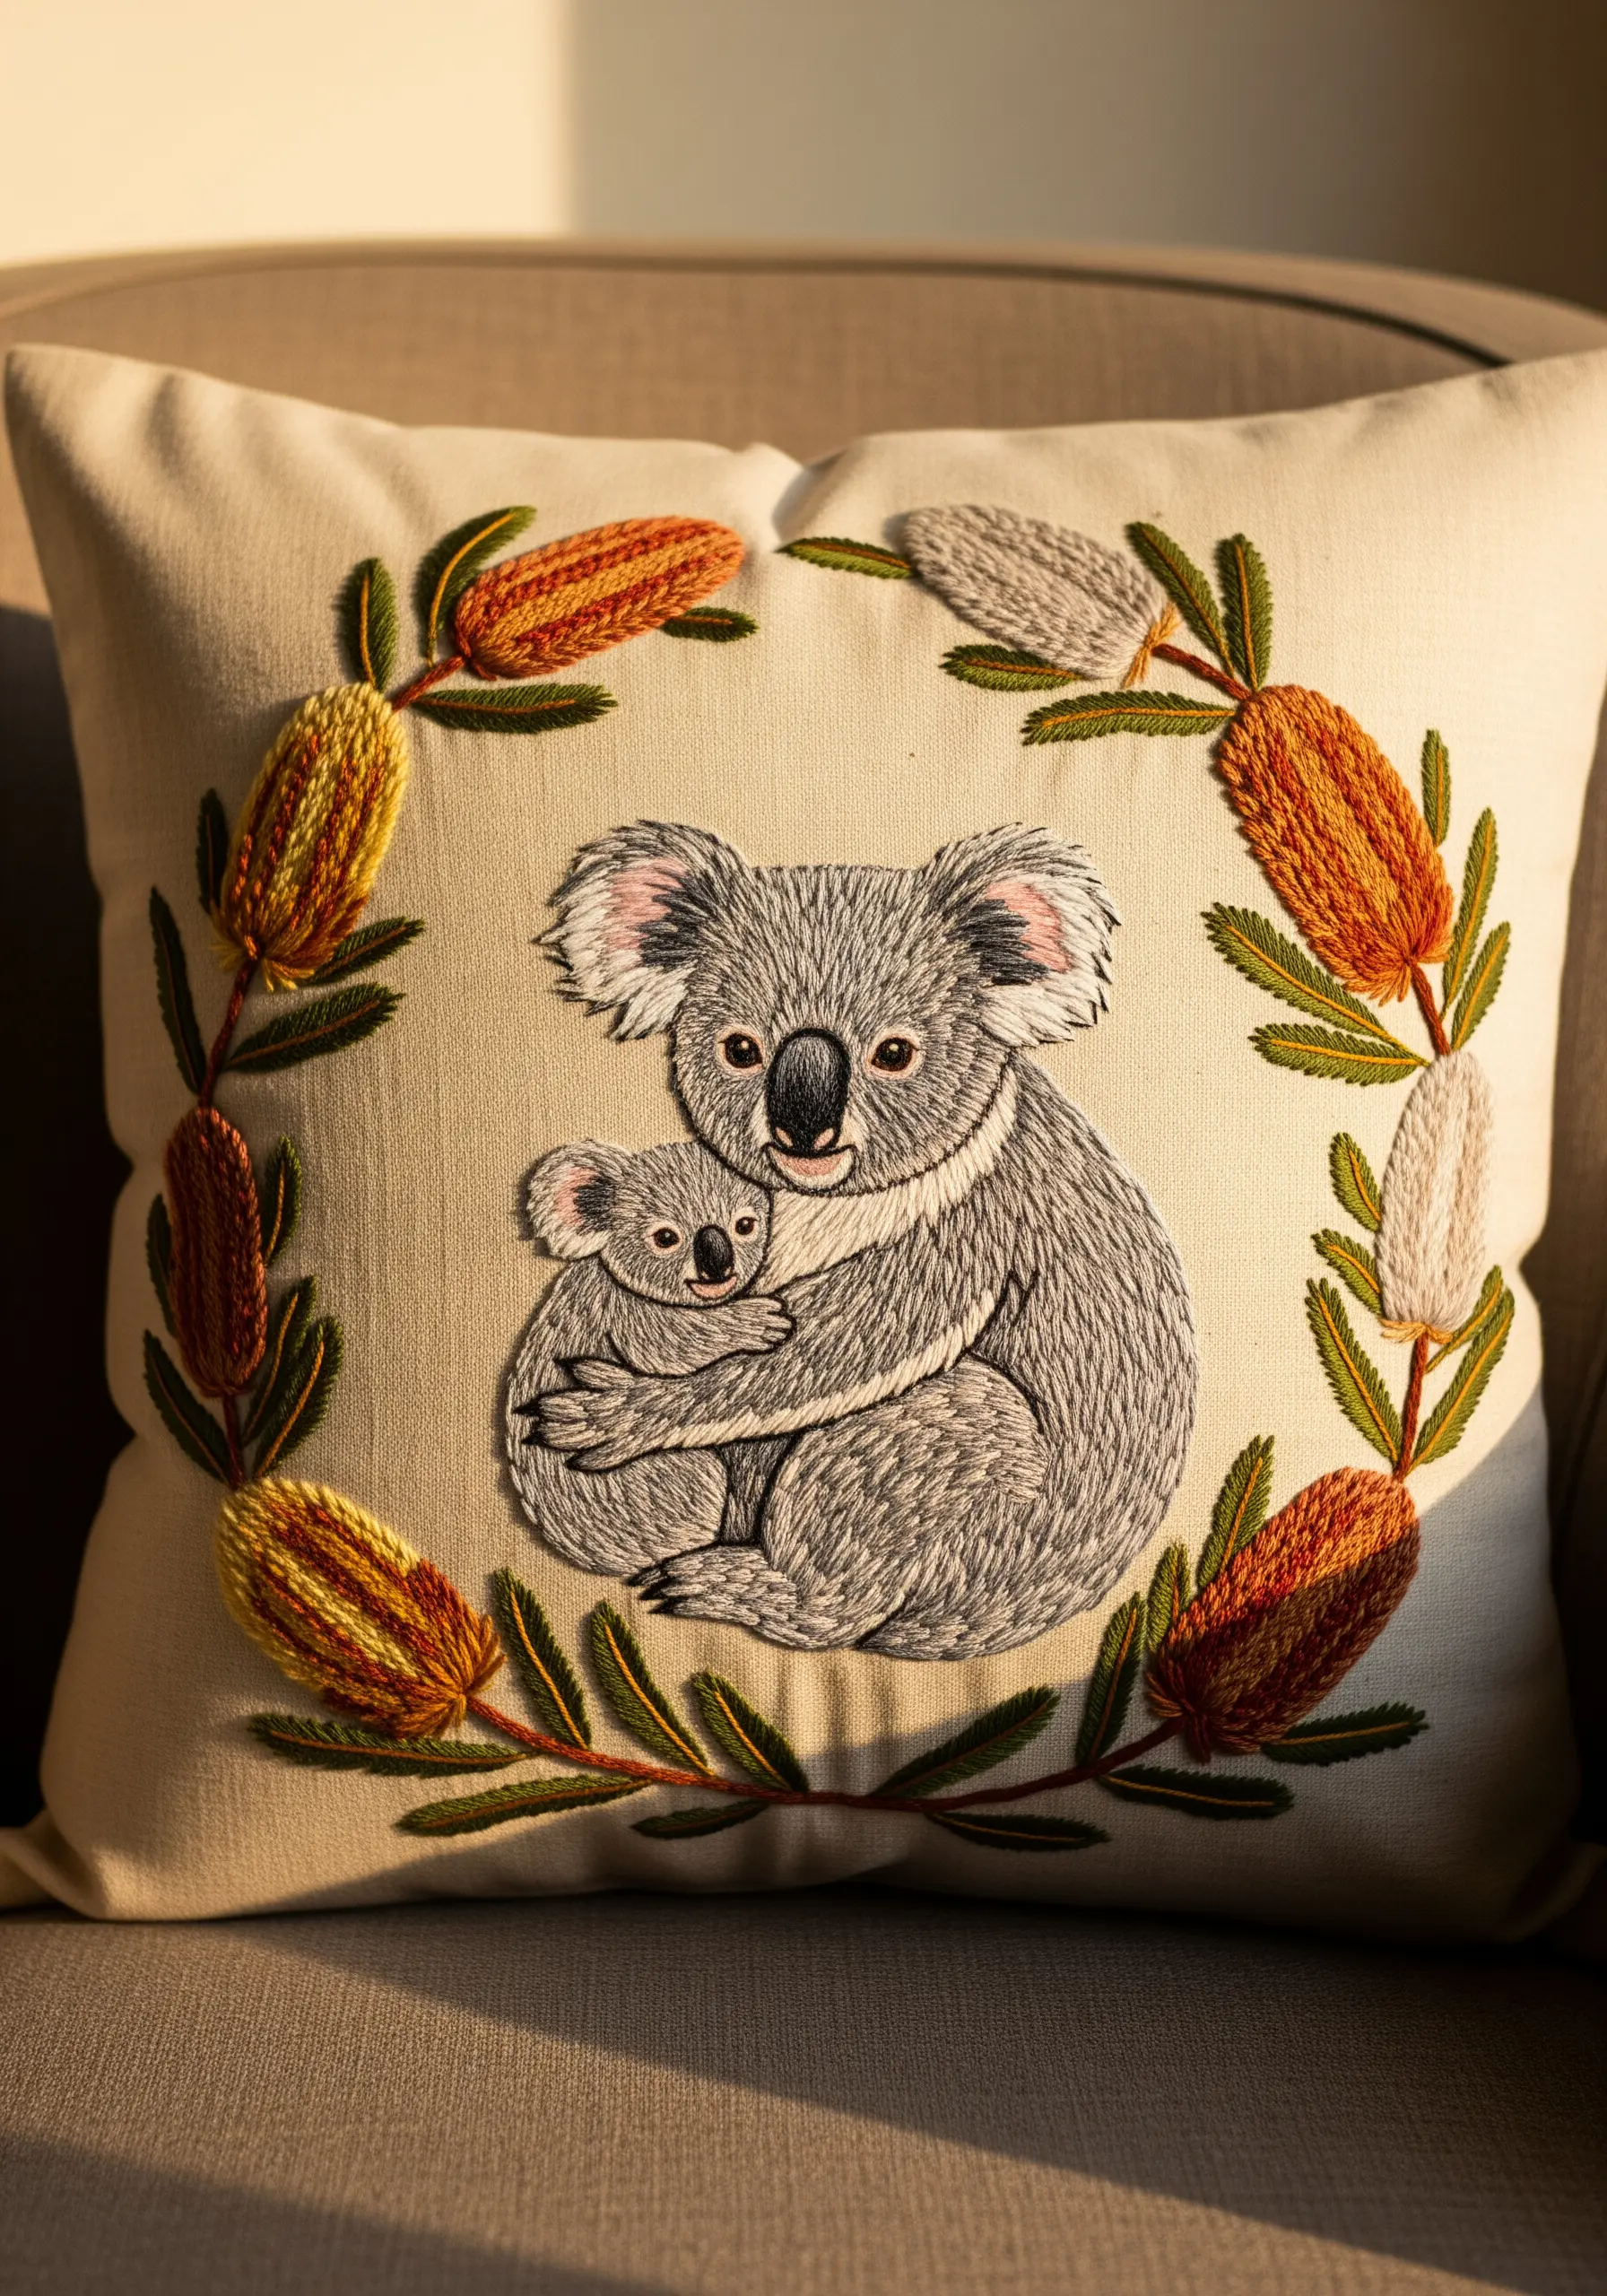
When stitching a portrait, whether on a pillow or in a hoop, use the long-and-short stitch technique to create soft, realistic fur.
Work with a single strand of six-strand floss and blend at least three shades of grey—a dark, mid-tone, and light—to build depth.
Keep your stitches directional, following the way the fur would naturally grow on the animal to enhance the realism.
For the surrounding banksia flowers, use a chunkier turkey work stitch to create a bristly texture that beautifully contrasts with the soft fur of the koalas.
This technique elevates simple embroidered pillow covers into works of art.
4. Master Playful Appliqué for Quick Upgrades
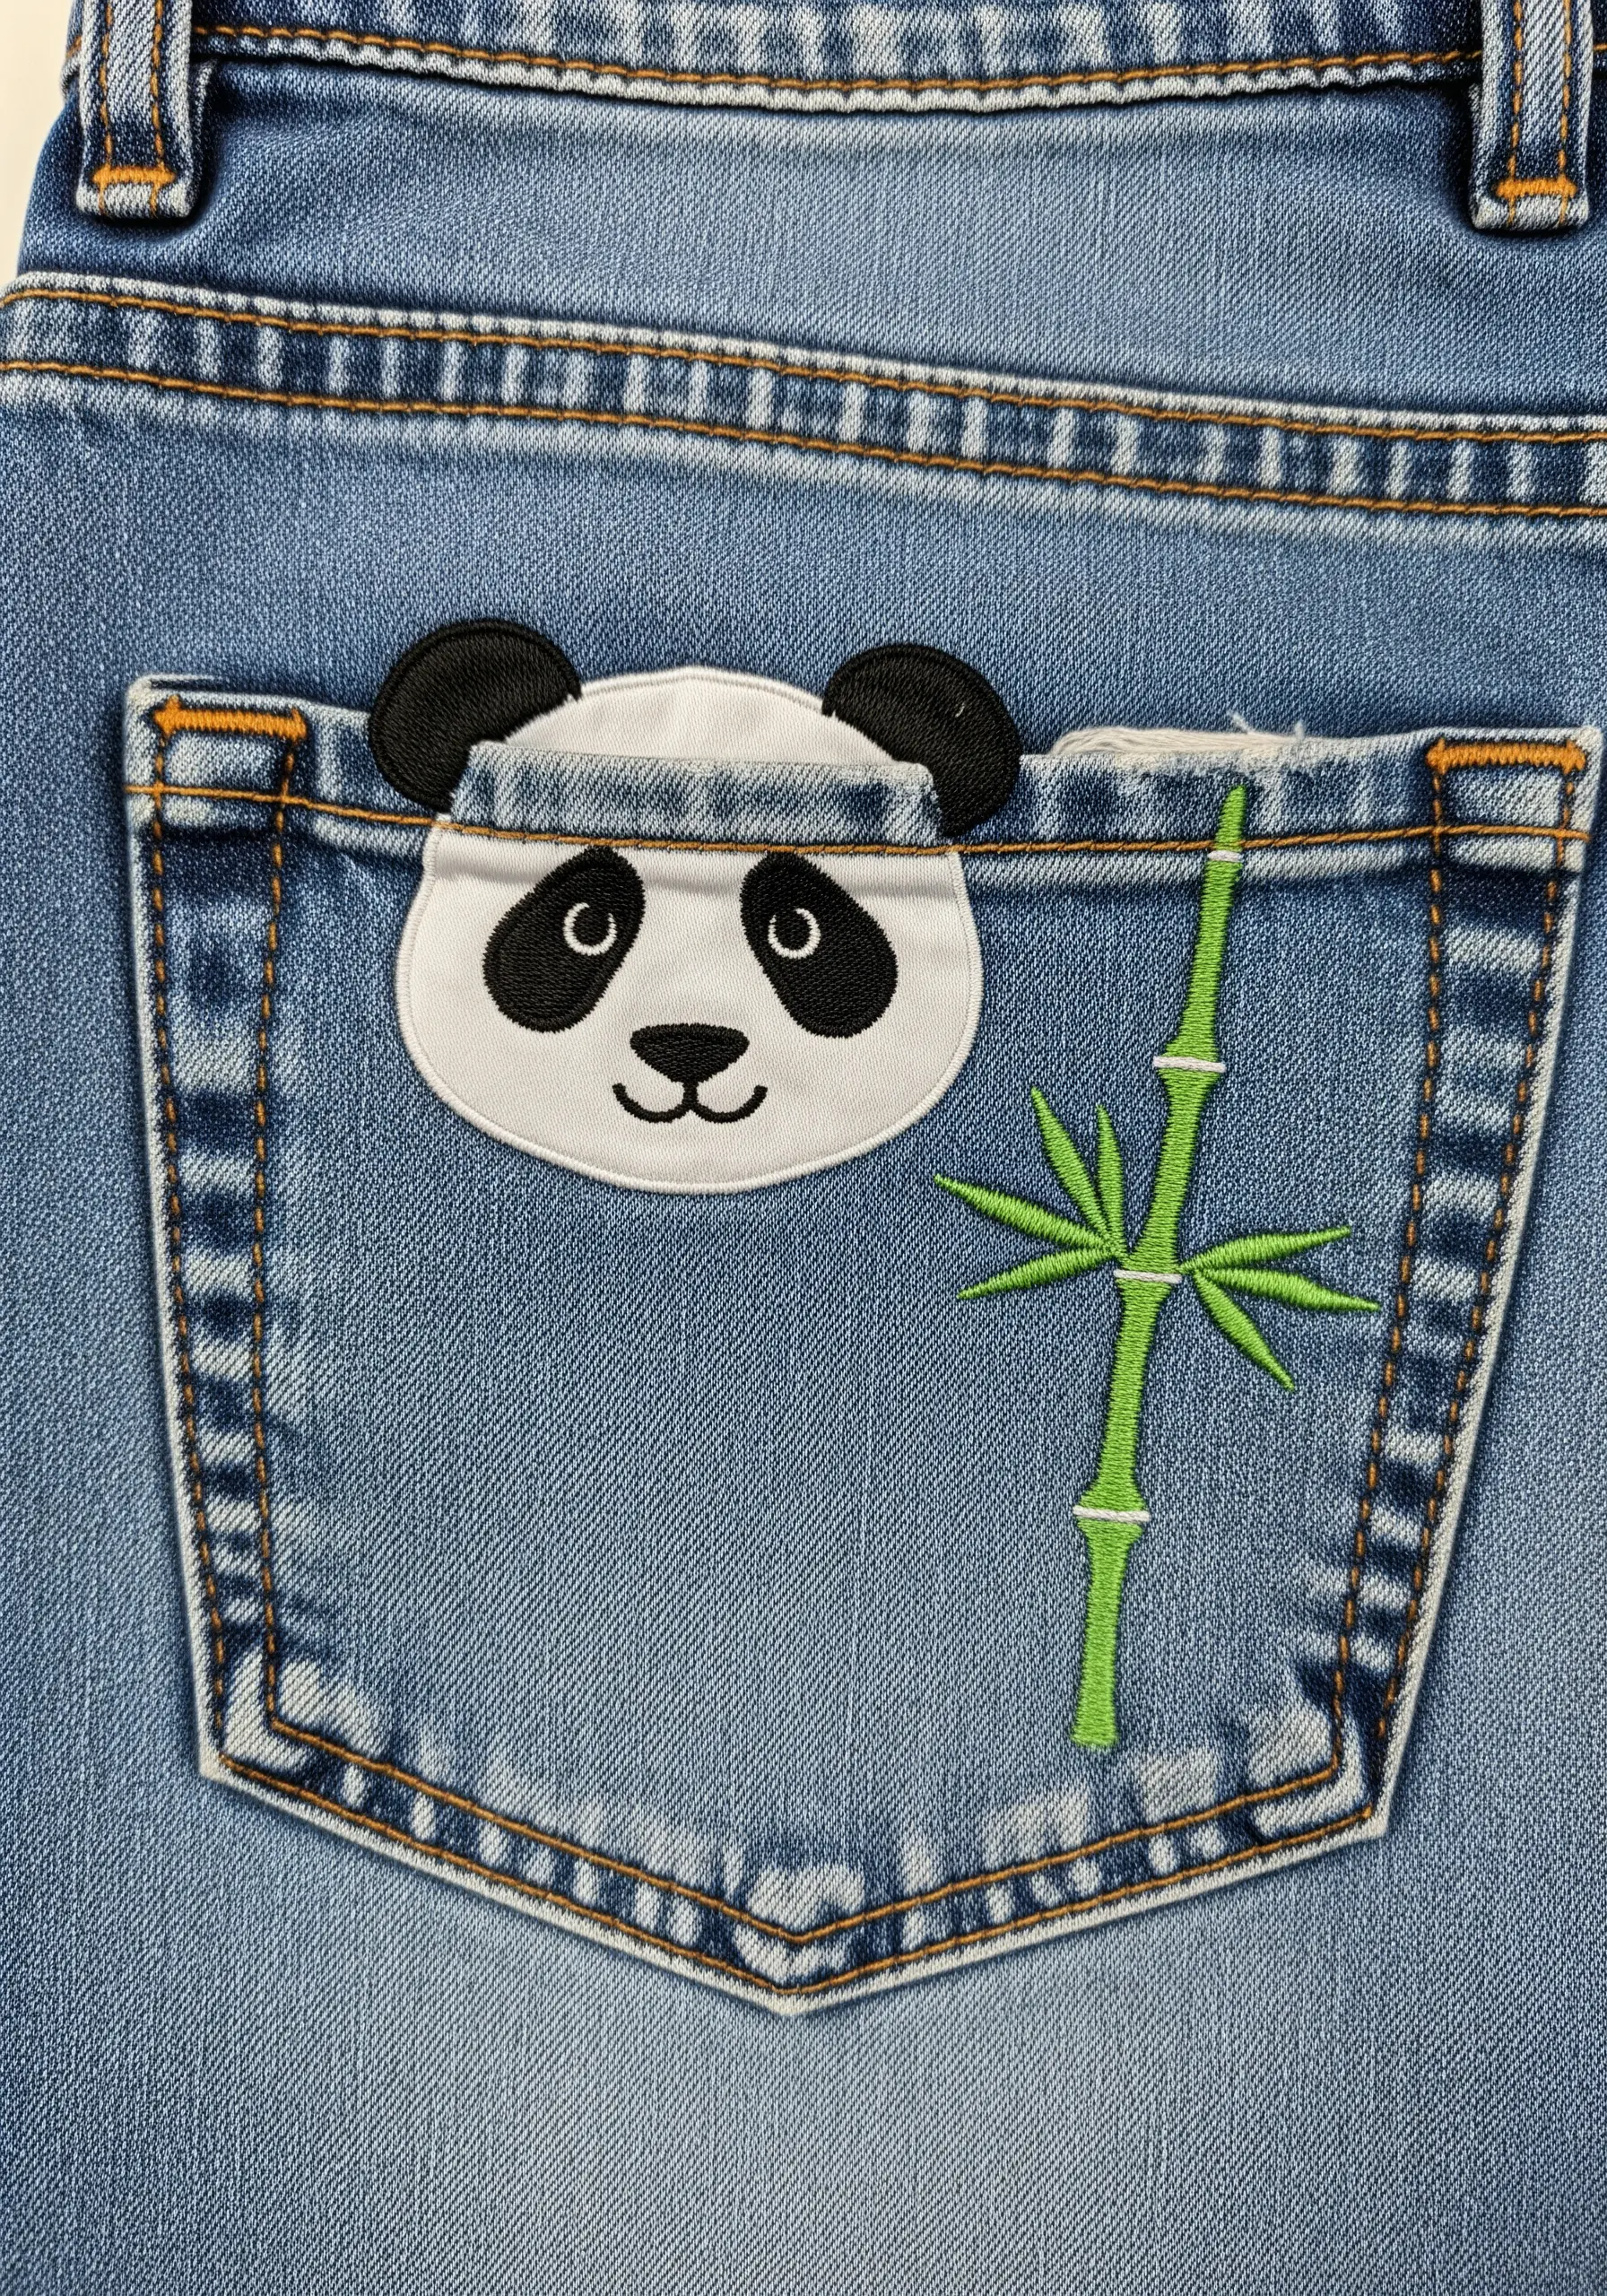
Combine simple embroidery with fabric appliqué to add personality to old jeans in minutes.
Cut the panda’s head from a piece of sturdy white felt or cotton twill, which won’t fray easily, and secure it with a neat backstitch or machine stitch just inside the edge.
Add facial features with a few simple satin stitches and French knots.
This method allows you to add a charming detail quickly without committing to a full, time-consuming fill stitch, making it one of the most effective minimalist pocket embroidery ideas.
5. Sculpt with French Knots for Ultimate Texture
Transform a simple koala portrait into a piece of textured art by filling the entire face with French knots.
Create subtle contours and shading by varying the number of strands in your needle—use three strands for fuller, more raised knots and two strands for flatter, denser areas.
For the fine fur around the ears and neck, switch to straight stitches to create a soft, wispy edge that contrasts with the nubby texture of the knots.
This focus on texture makes even adorable forest animal embroidery ideas feel sophisticated and modern.
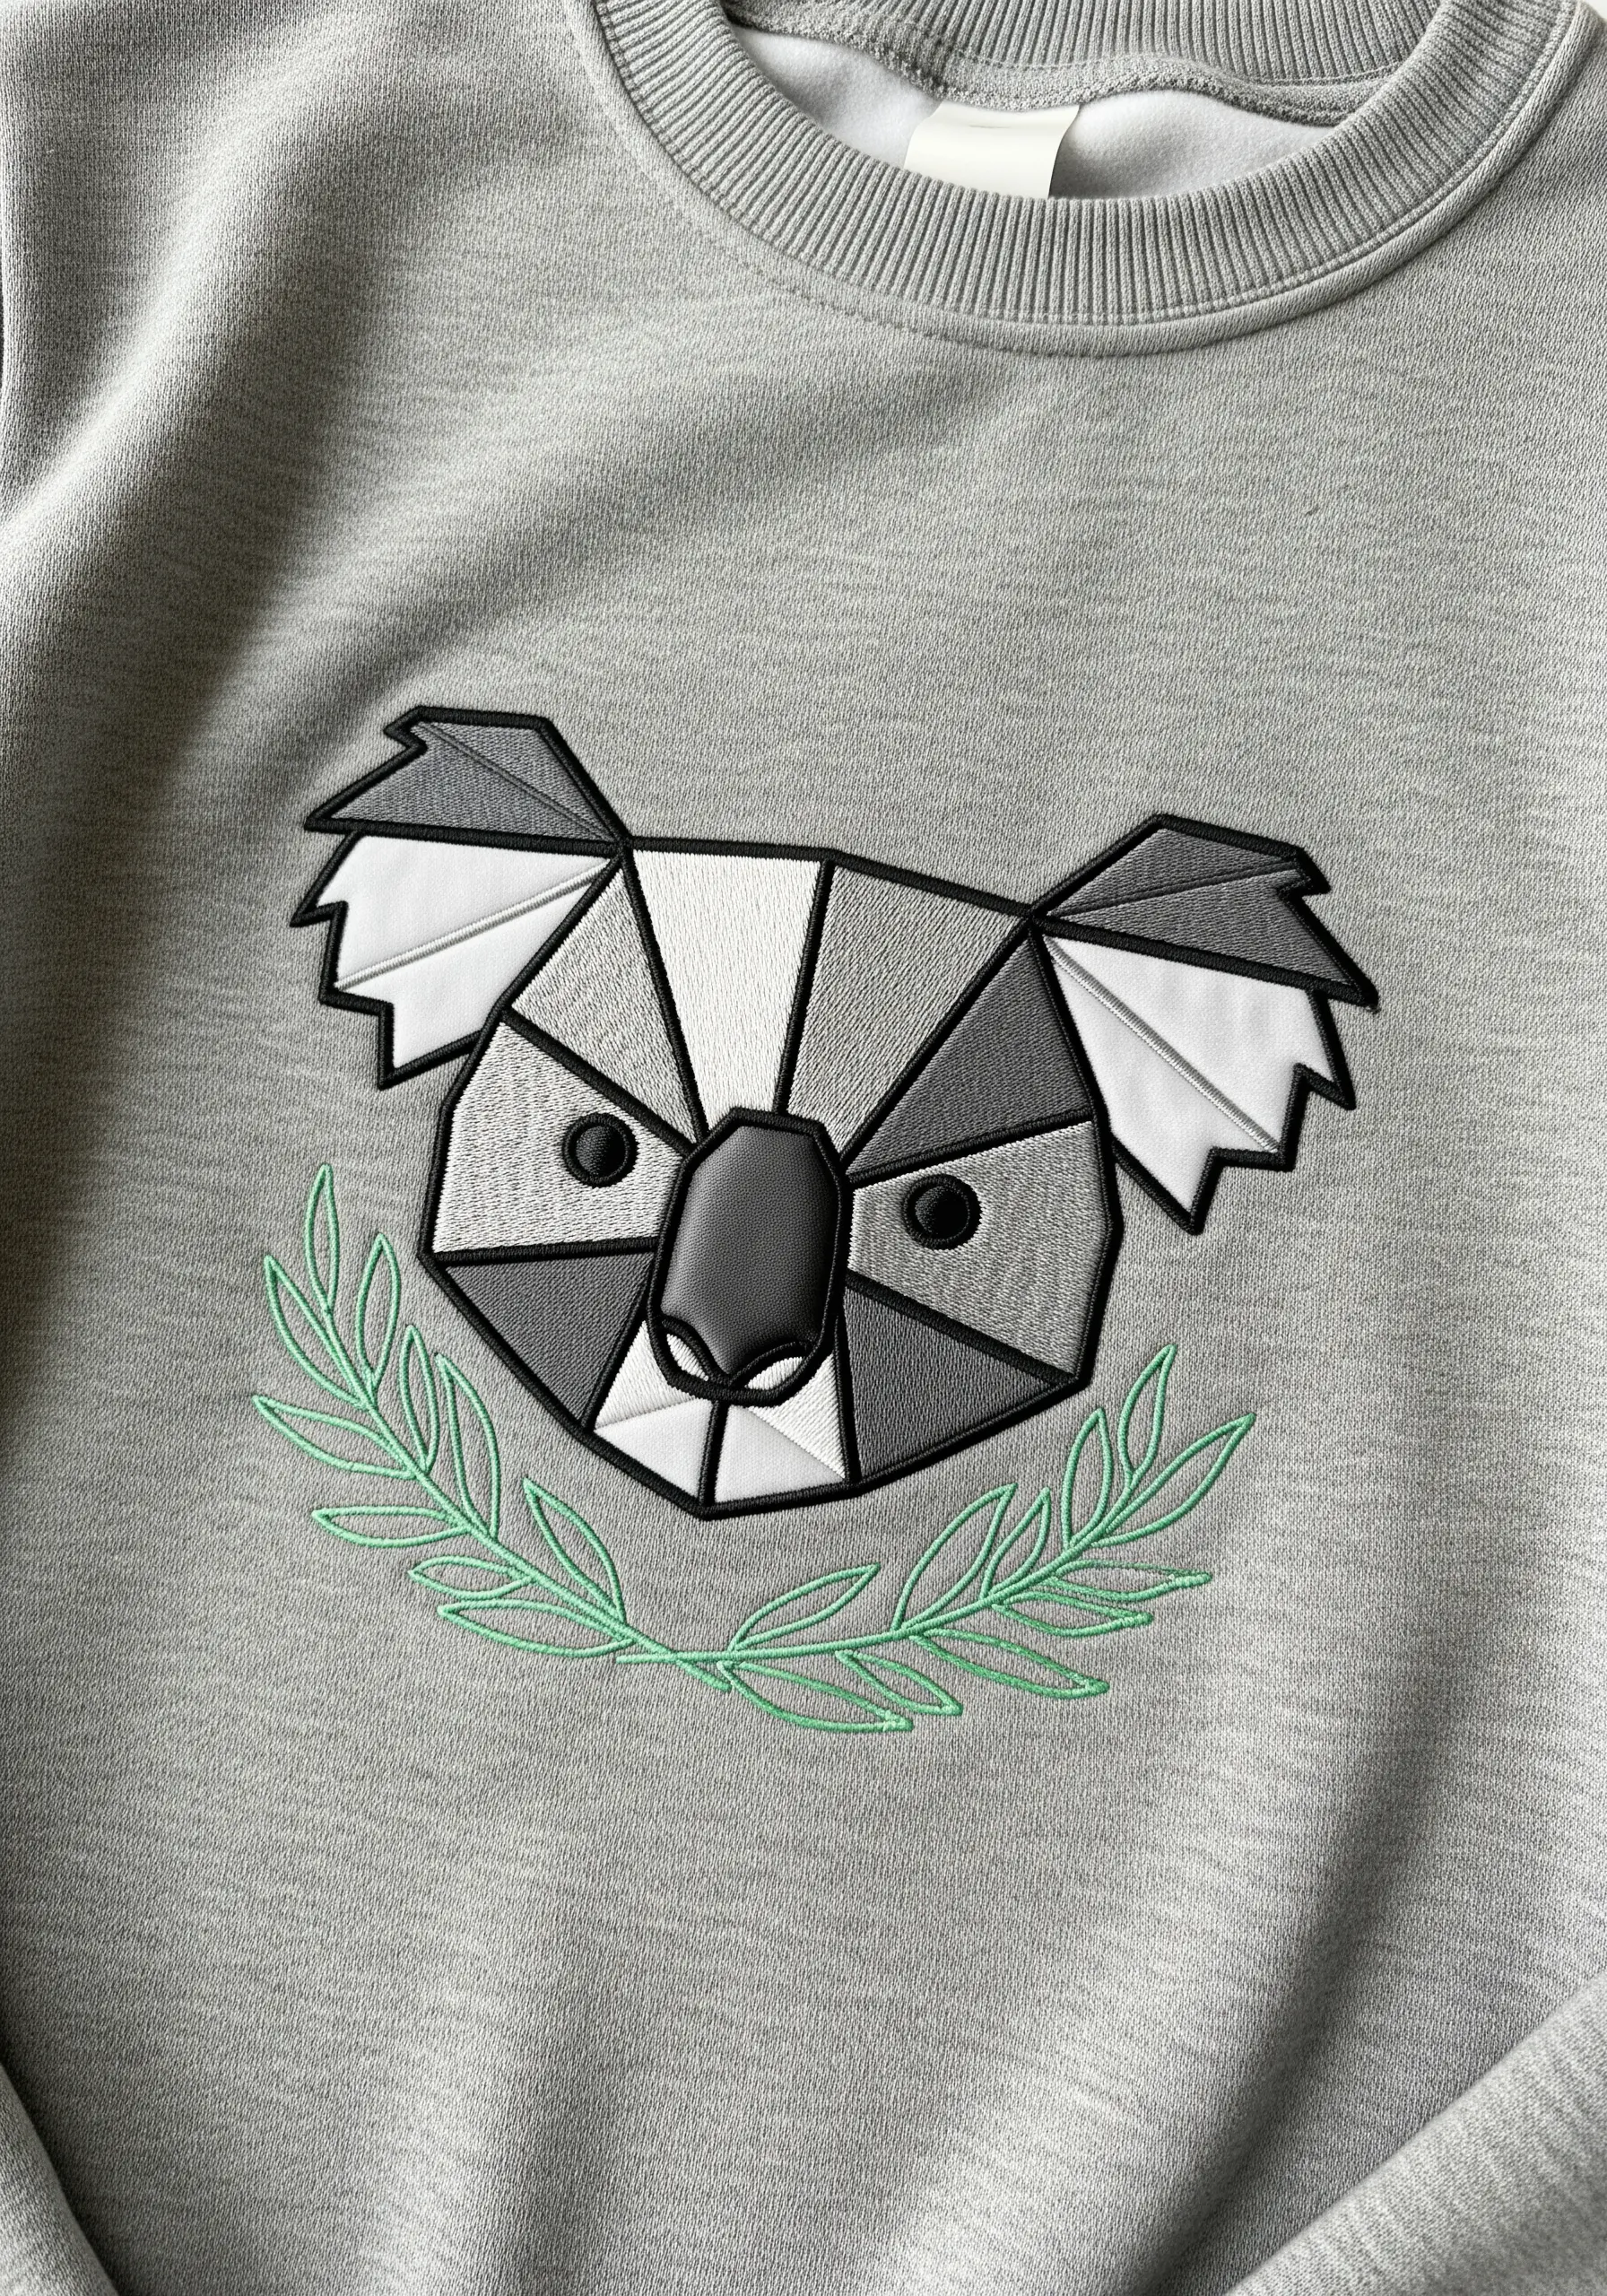
6. Make Colors Pop on Dark Apparel
When embroidering on a dark sweatshirt, your thread colors can appear dull as the background fabric shows through.
To counteract this, lay down a base layer of long-and-short stitch in white or a very light grey before adding your final colors.
This under-stitching acts as a primer, making your greens, whites, and blacks appear more vibrant and opaque.
For a design like this, use a peel-and-stick stabilizer on the front for pattern transfer and a soft, permanent backing on the inside for comfort against the skin.
It’s a professional trick for all trendy hoodie embroidery designs.
7. Frame Appliqué with a Decorative Border
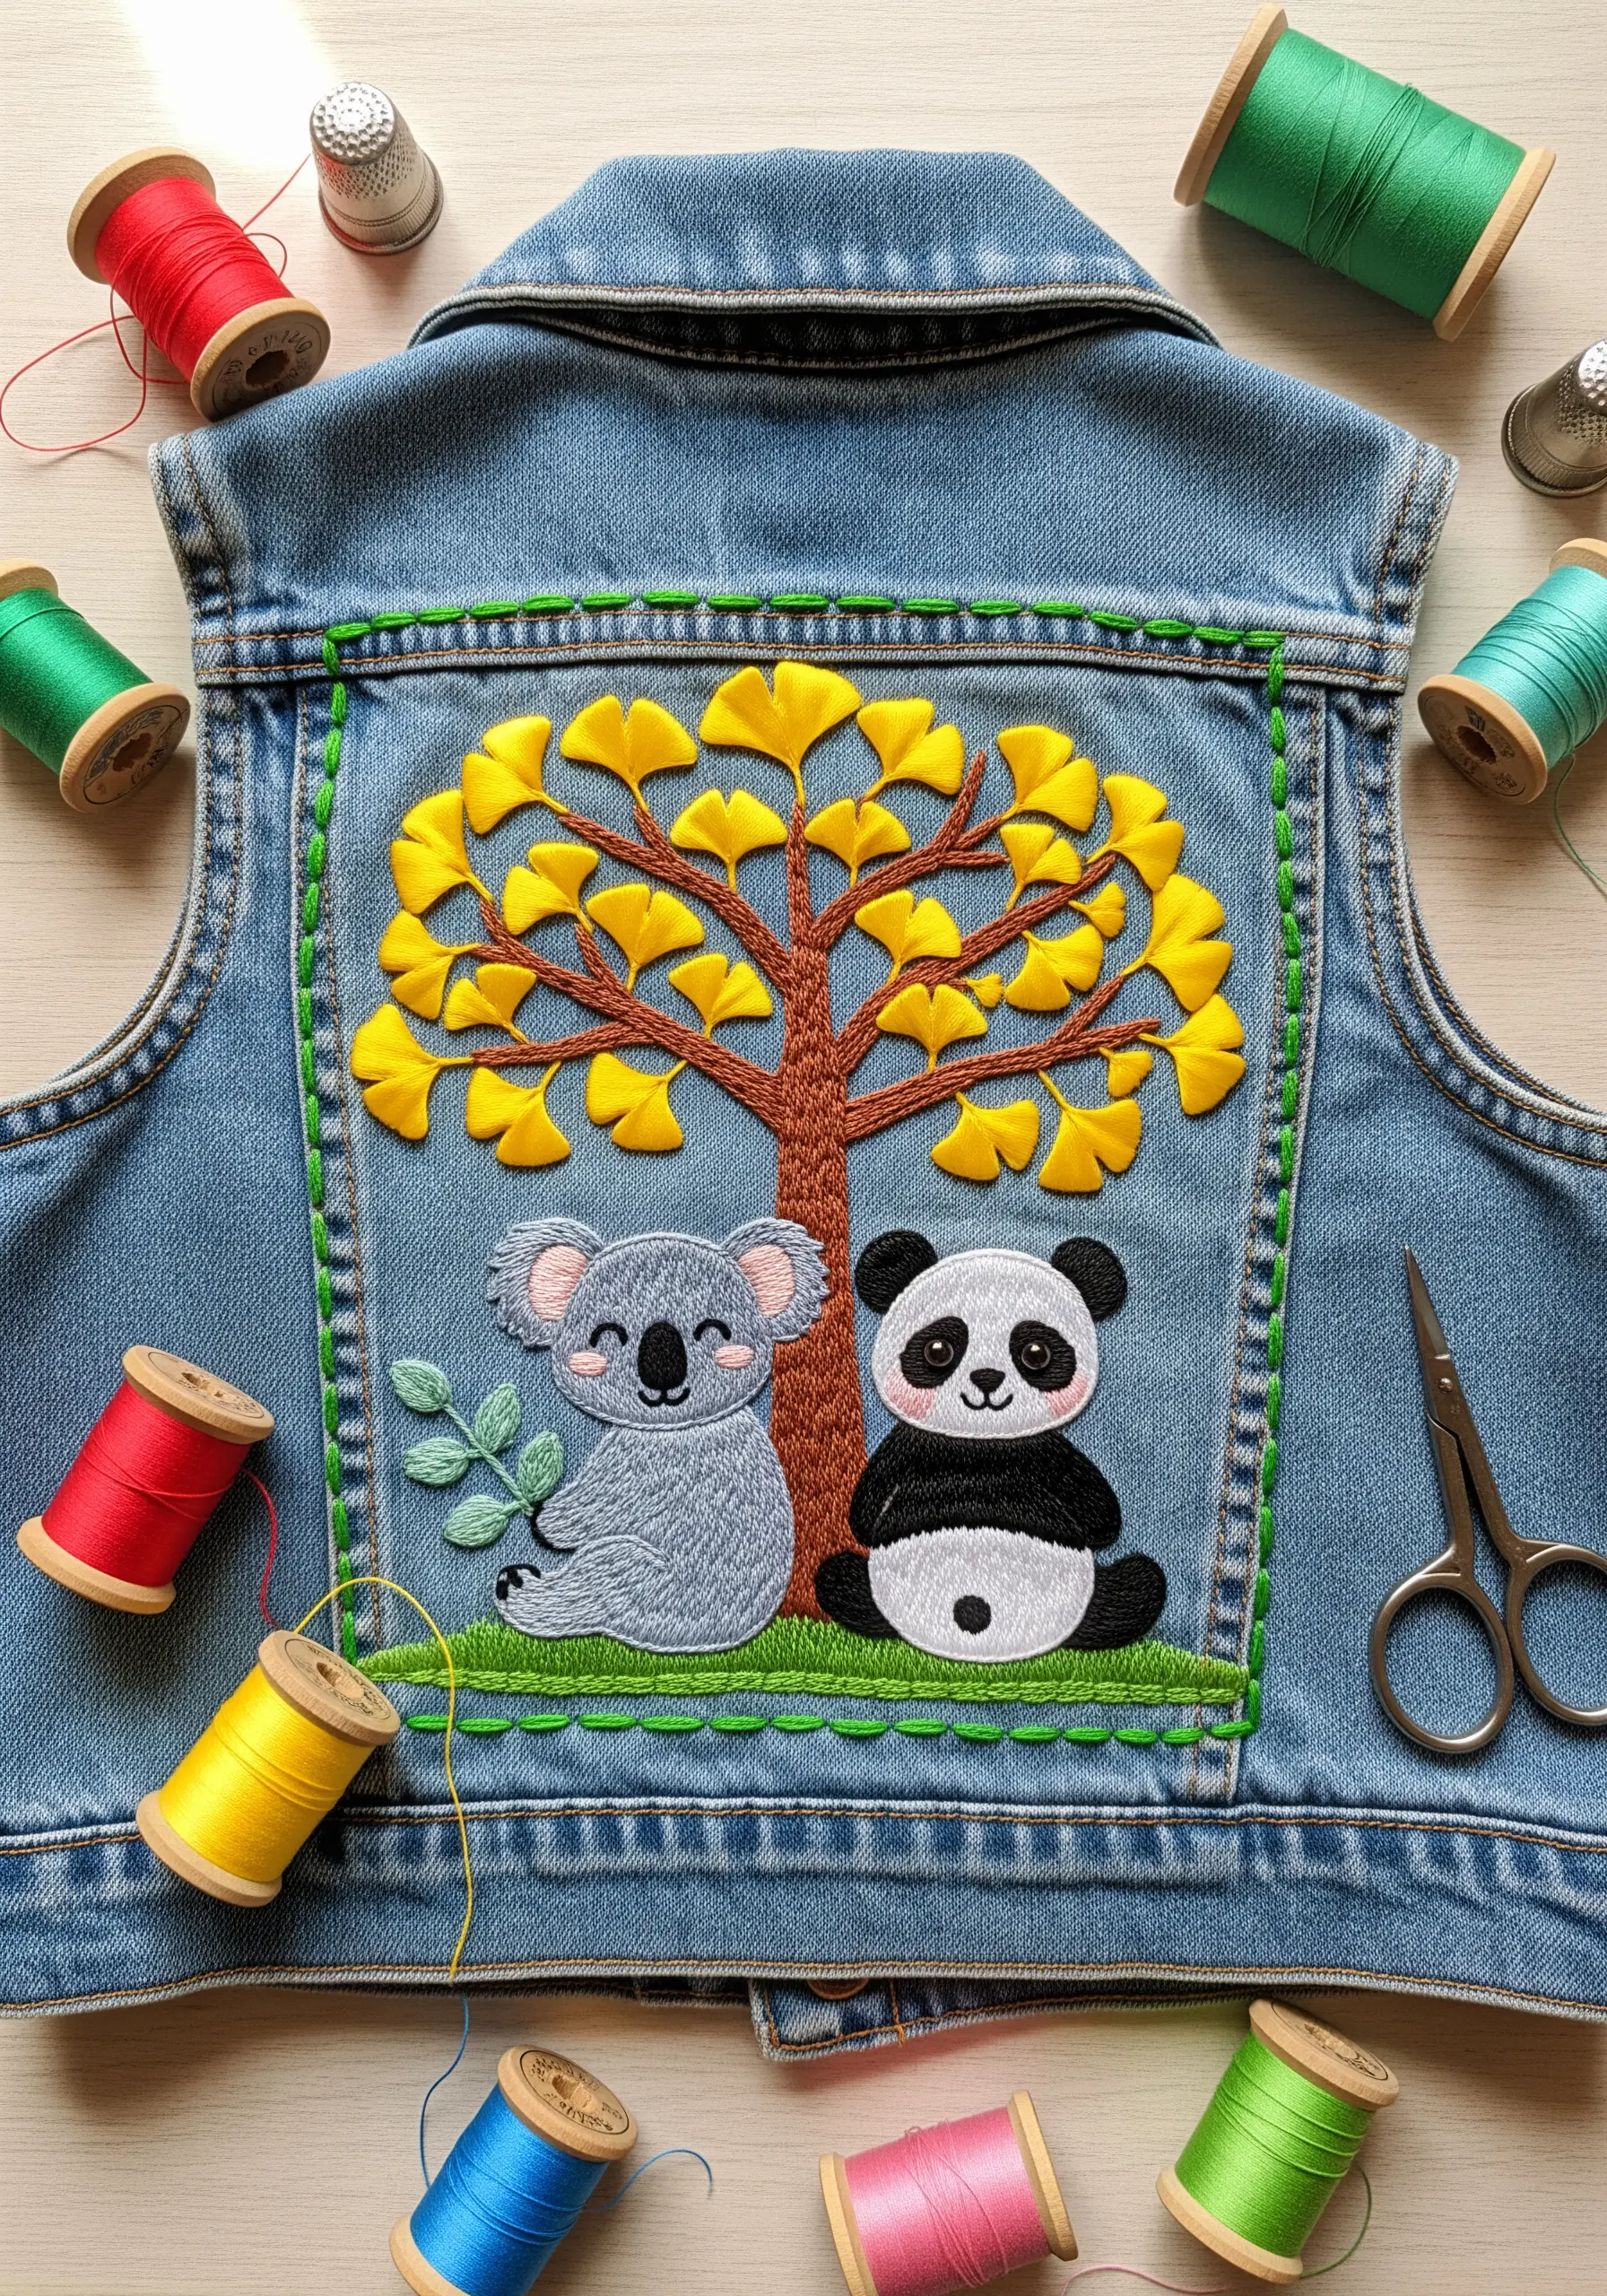
Combine appliqué and embroidery to create a durable, cartoon-style statement piece on the back of a denim vest.
Use felt for the animal and tree shapes, as its non-fraying edge is easy to work with. Secure each piece with a clean blanket stitch around the perimeter.
Instead of leaving the background denim plain, frame your scene with a decorative running stitch or chain stitch to define the space and give the project a finished, patch-like feel.
This method turns simple fabric collage embroidery animals into polished, intentional art.
8. Add Subtle Elegance with Asymmetrical Embellishment
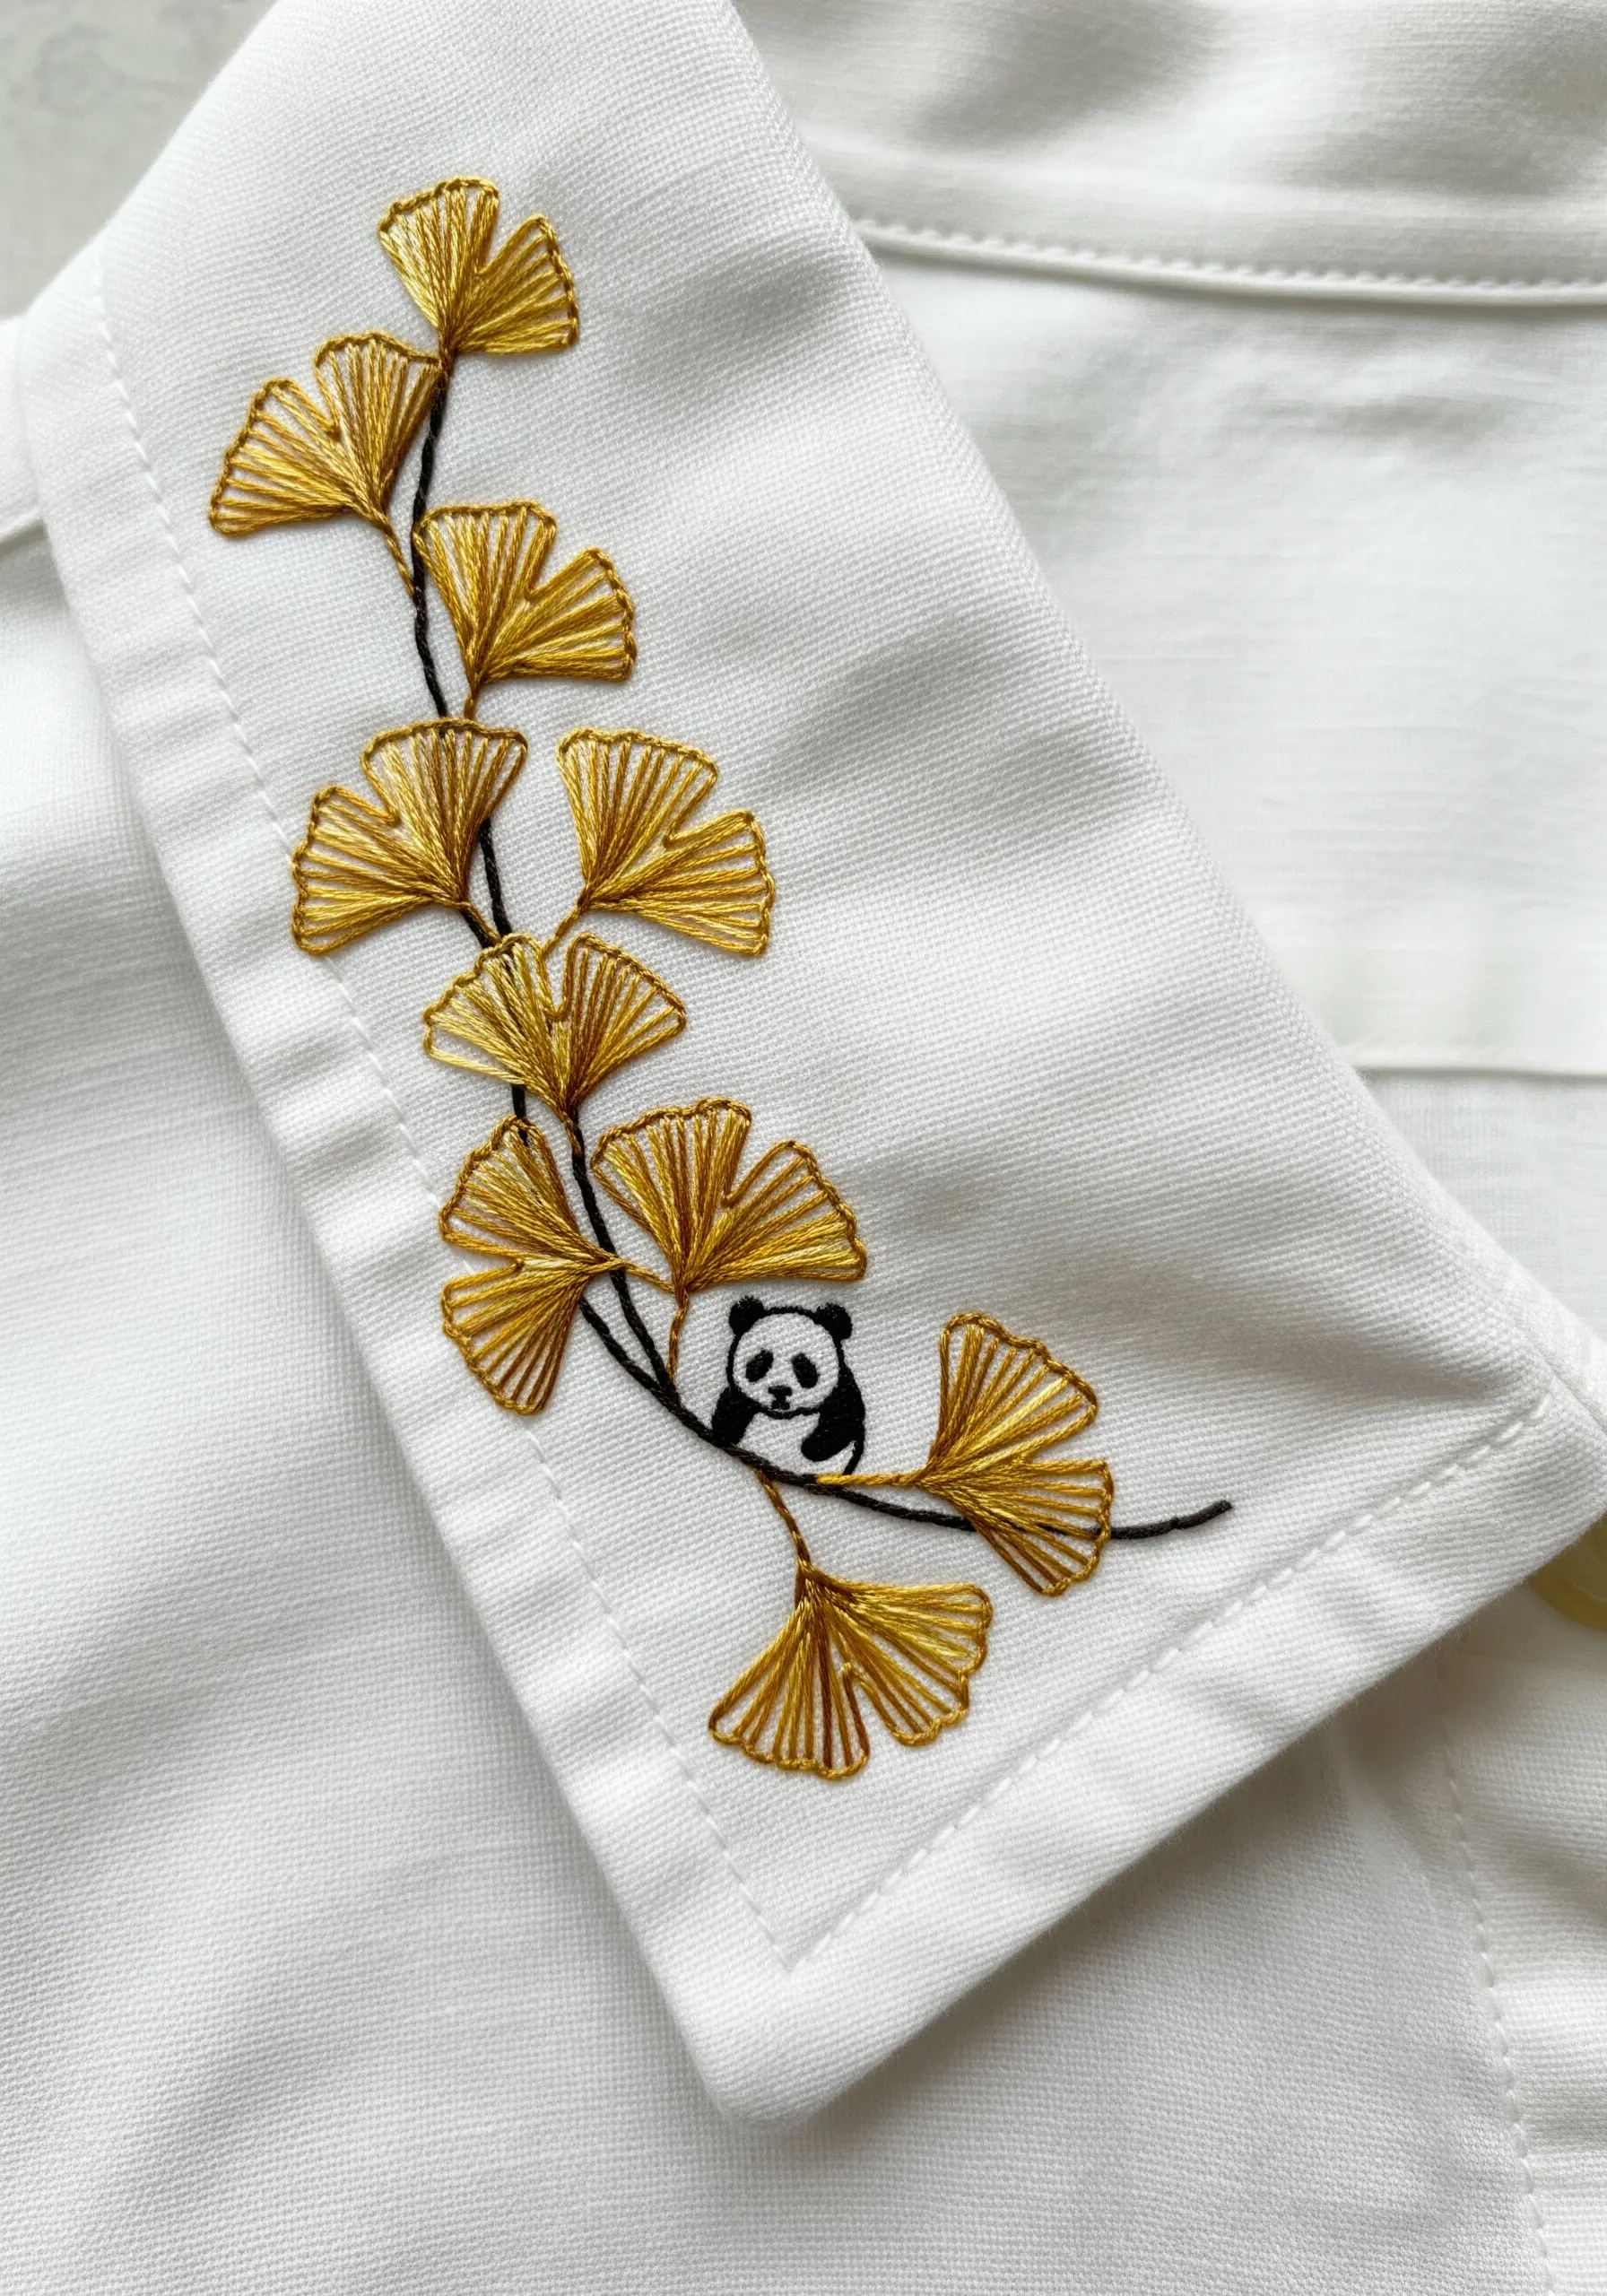
Upcycle a plain white shirt by adding a small, unexpected detail to an unconventional spot like the collar tip.
Use a delicate fishbone stitch for the ginkgo leaves to give them a natural, veined appearance, and outline the stems with a single-strand backstitch for sharpness.
An asymmetrical design feels more modern and considered than a centered motif.
These detailed floral border stitch concepts can be adapted for cuffs, plackets, and hems to give thrifted garments a bespoke quality.
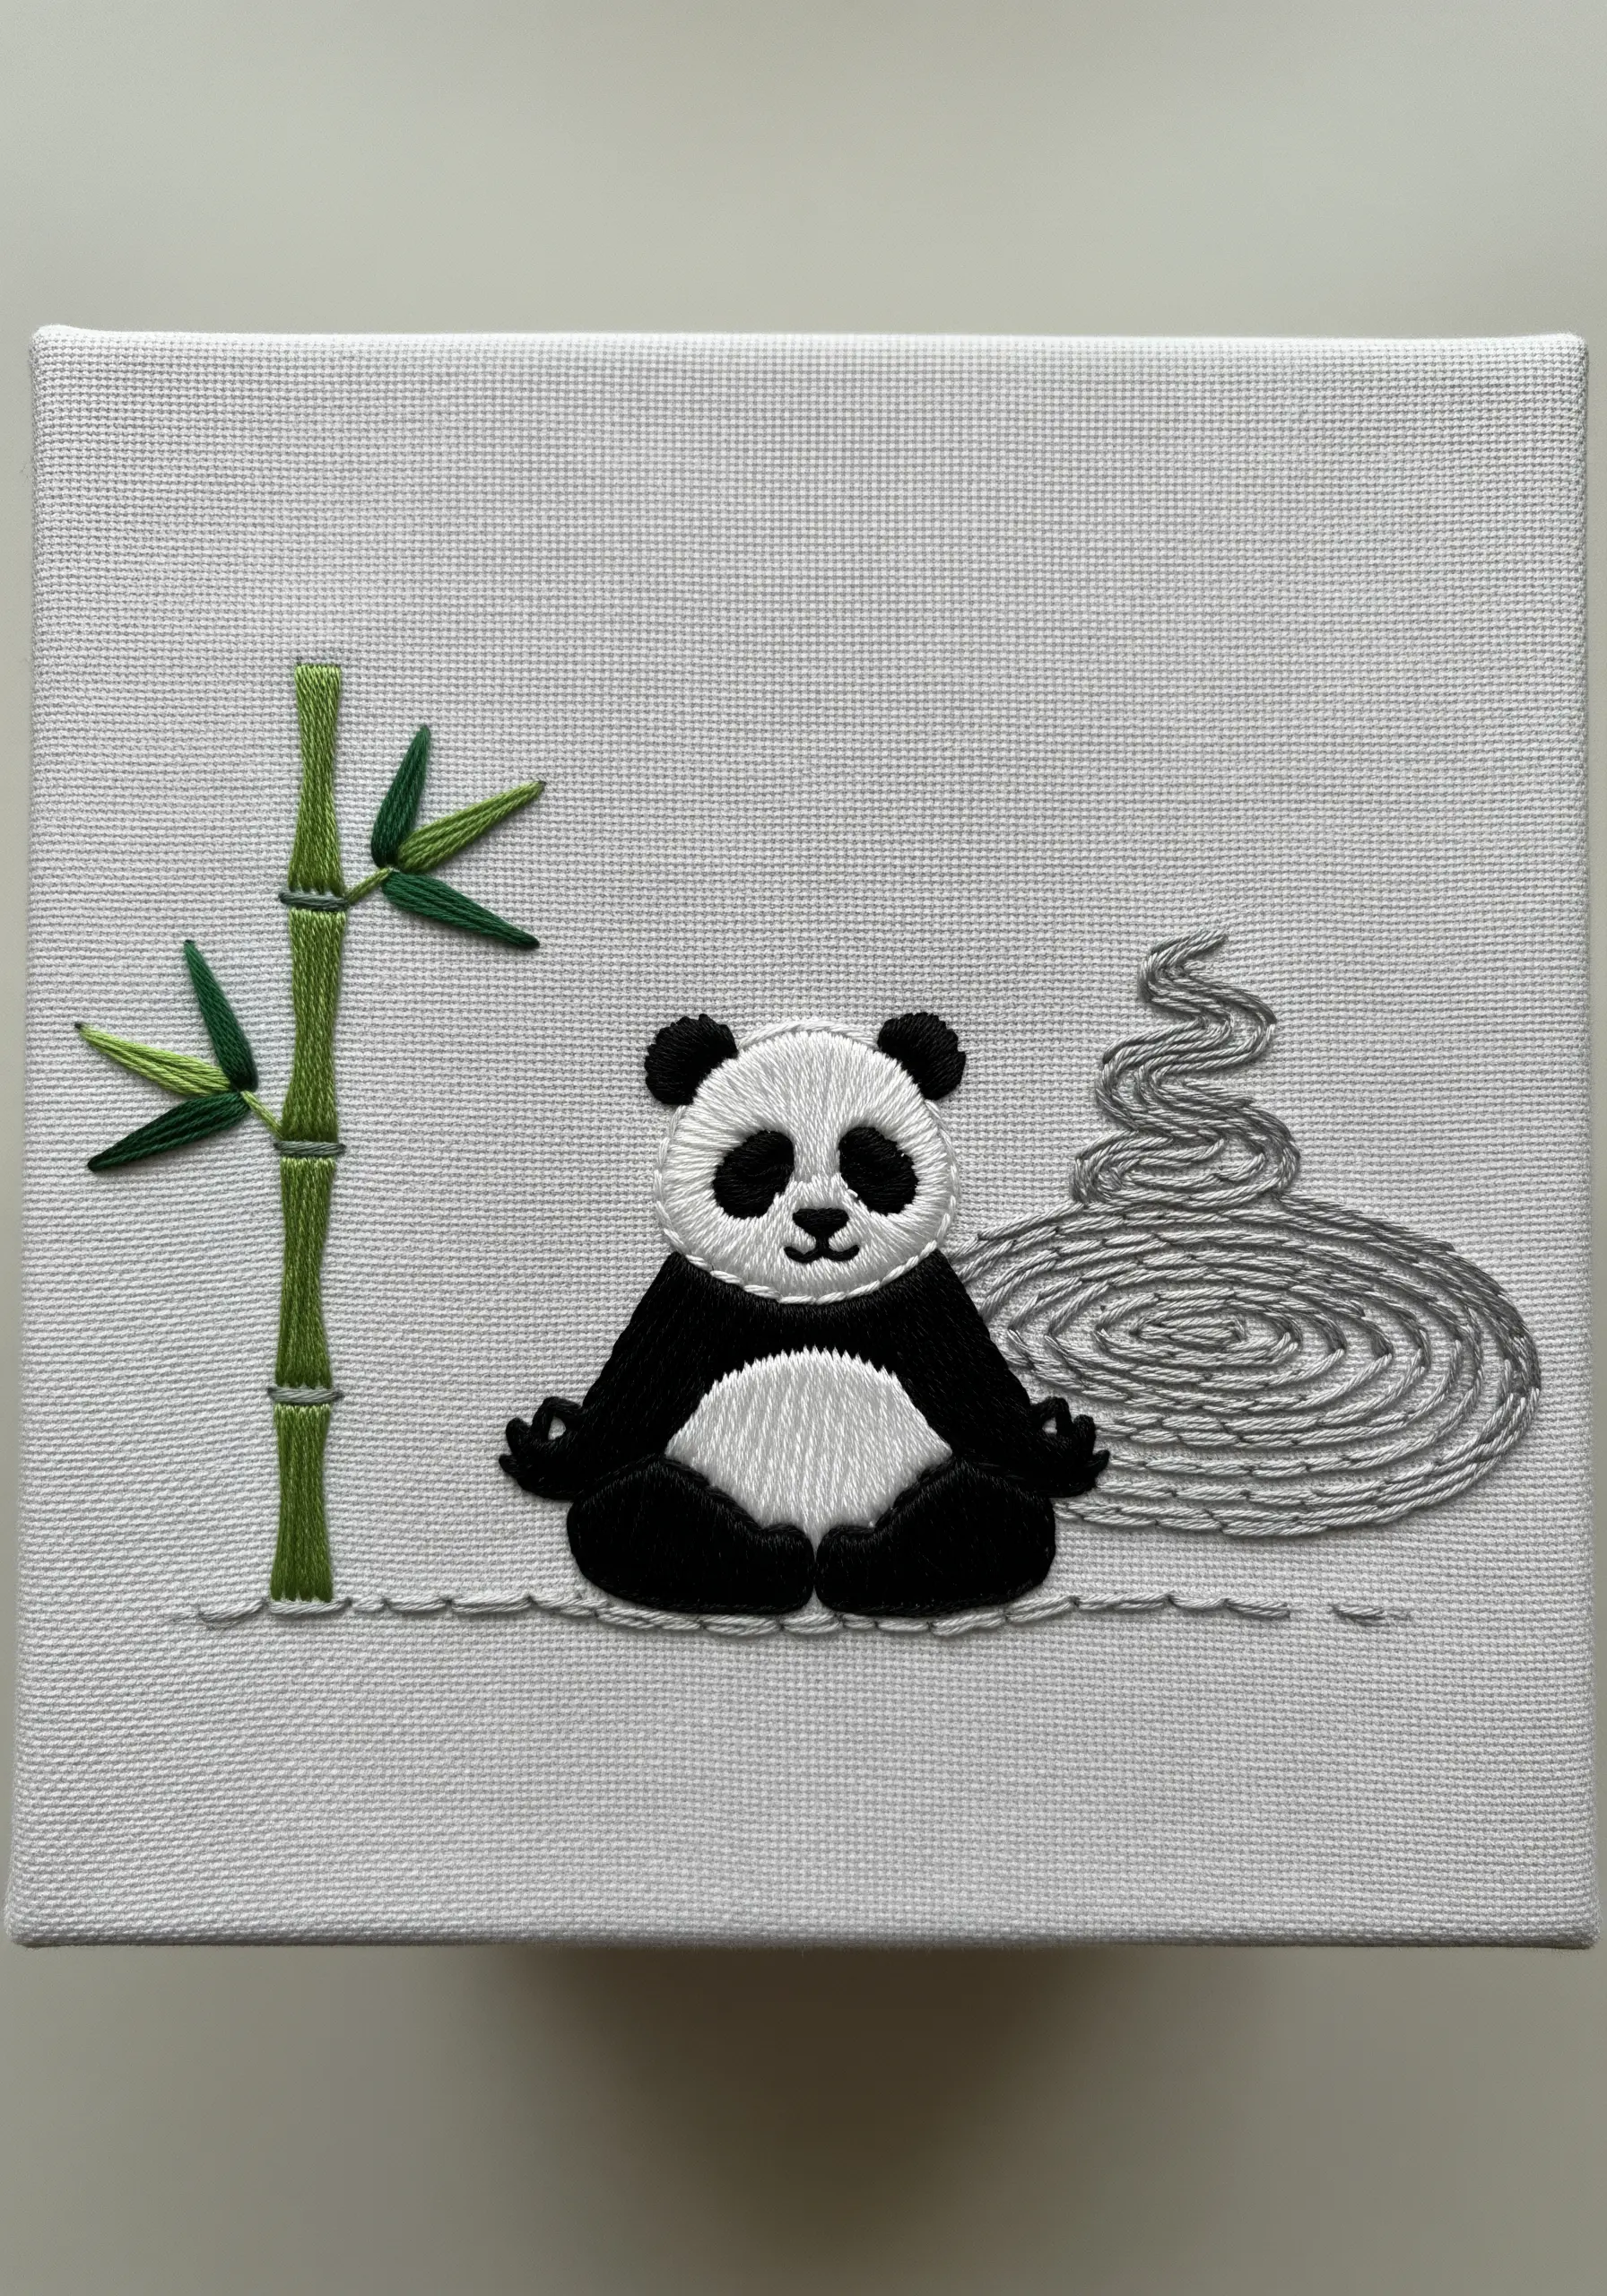
9. Use Negative Space for High-Impact Art
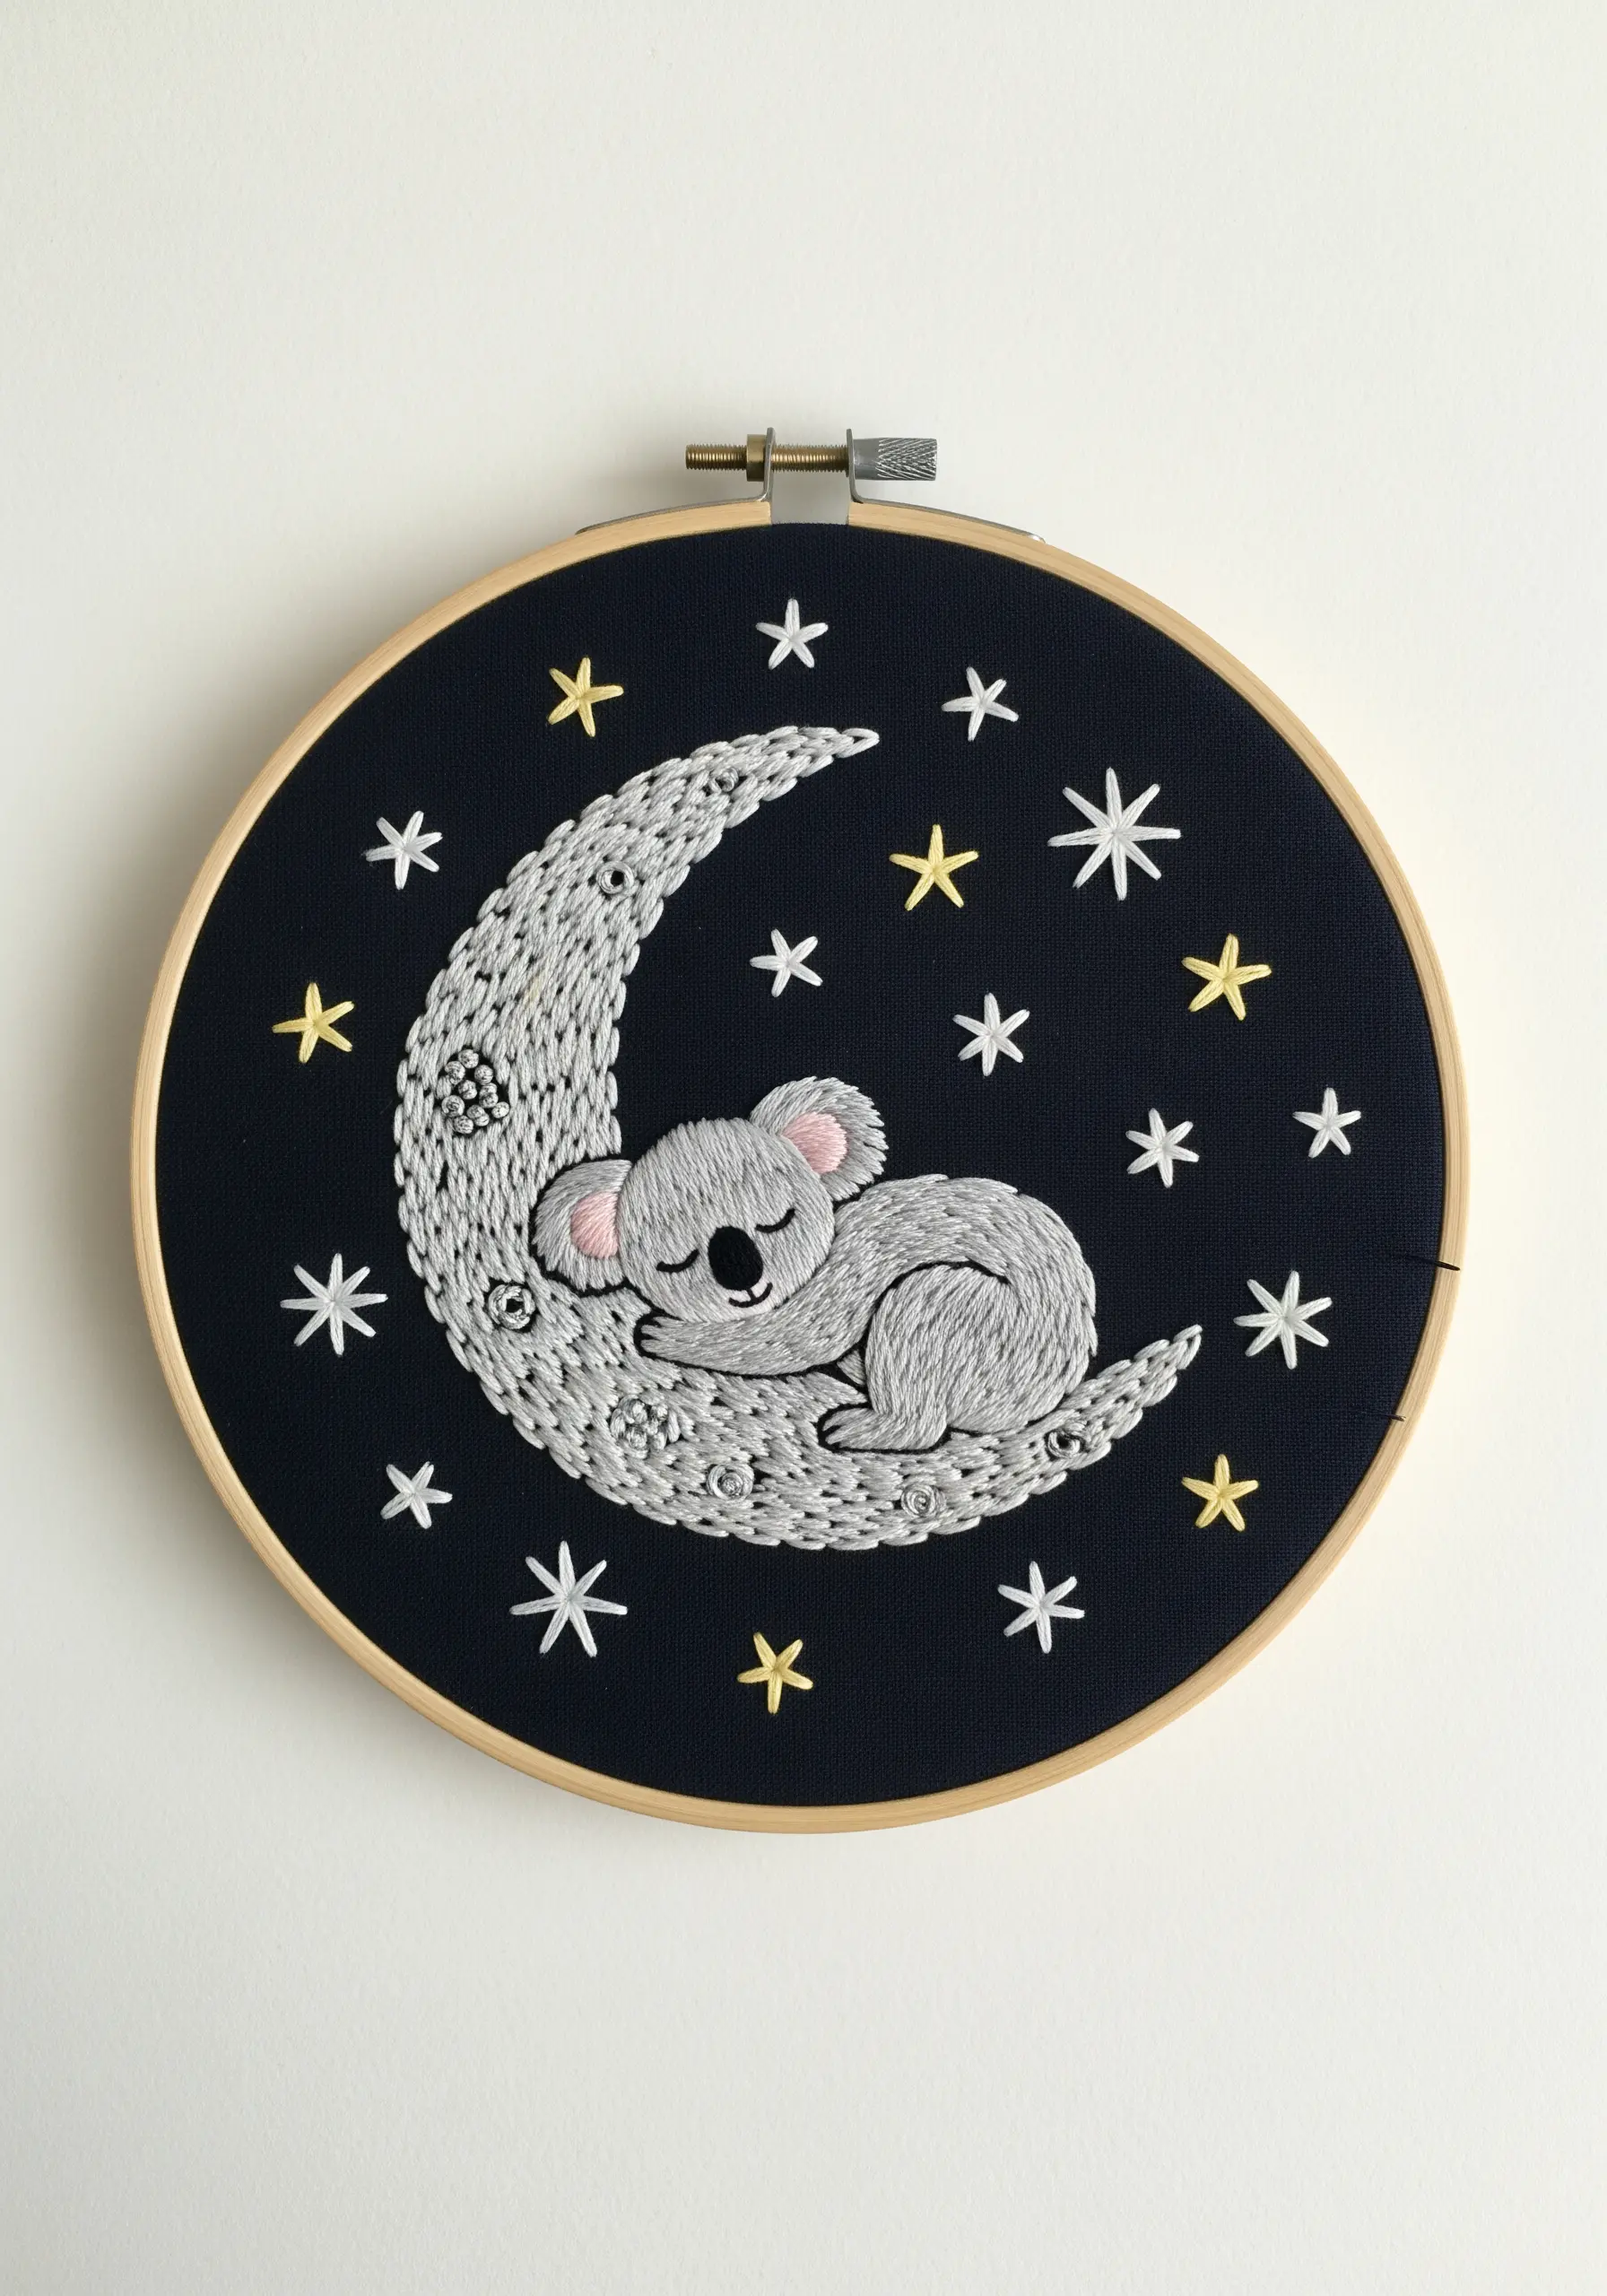
Create a dramatic narrative by stitching with light threads on dark fabric, allowing the unstitched background to become a key part of your composition.
On the moon, combine different fill stitches—like seed stitch and French knots—to create varied textures that suggest craters and shadows.
Use simple starburst stitches in white and pale yellow to scatter across the ‘sky,’ drawing the eye around the central koala motif.
Exploring moon and stars embroidery ideas on dark linen or cotton immediately elevates your hoop art.
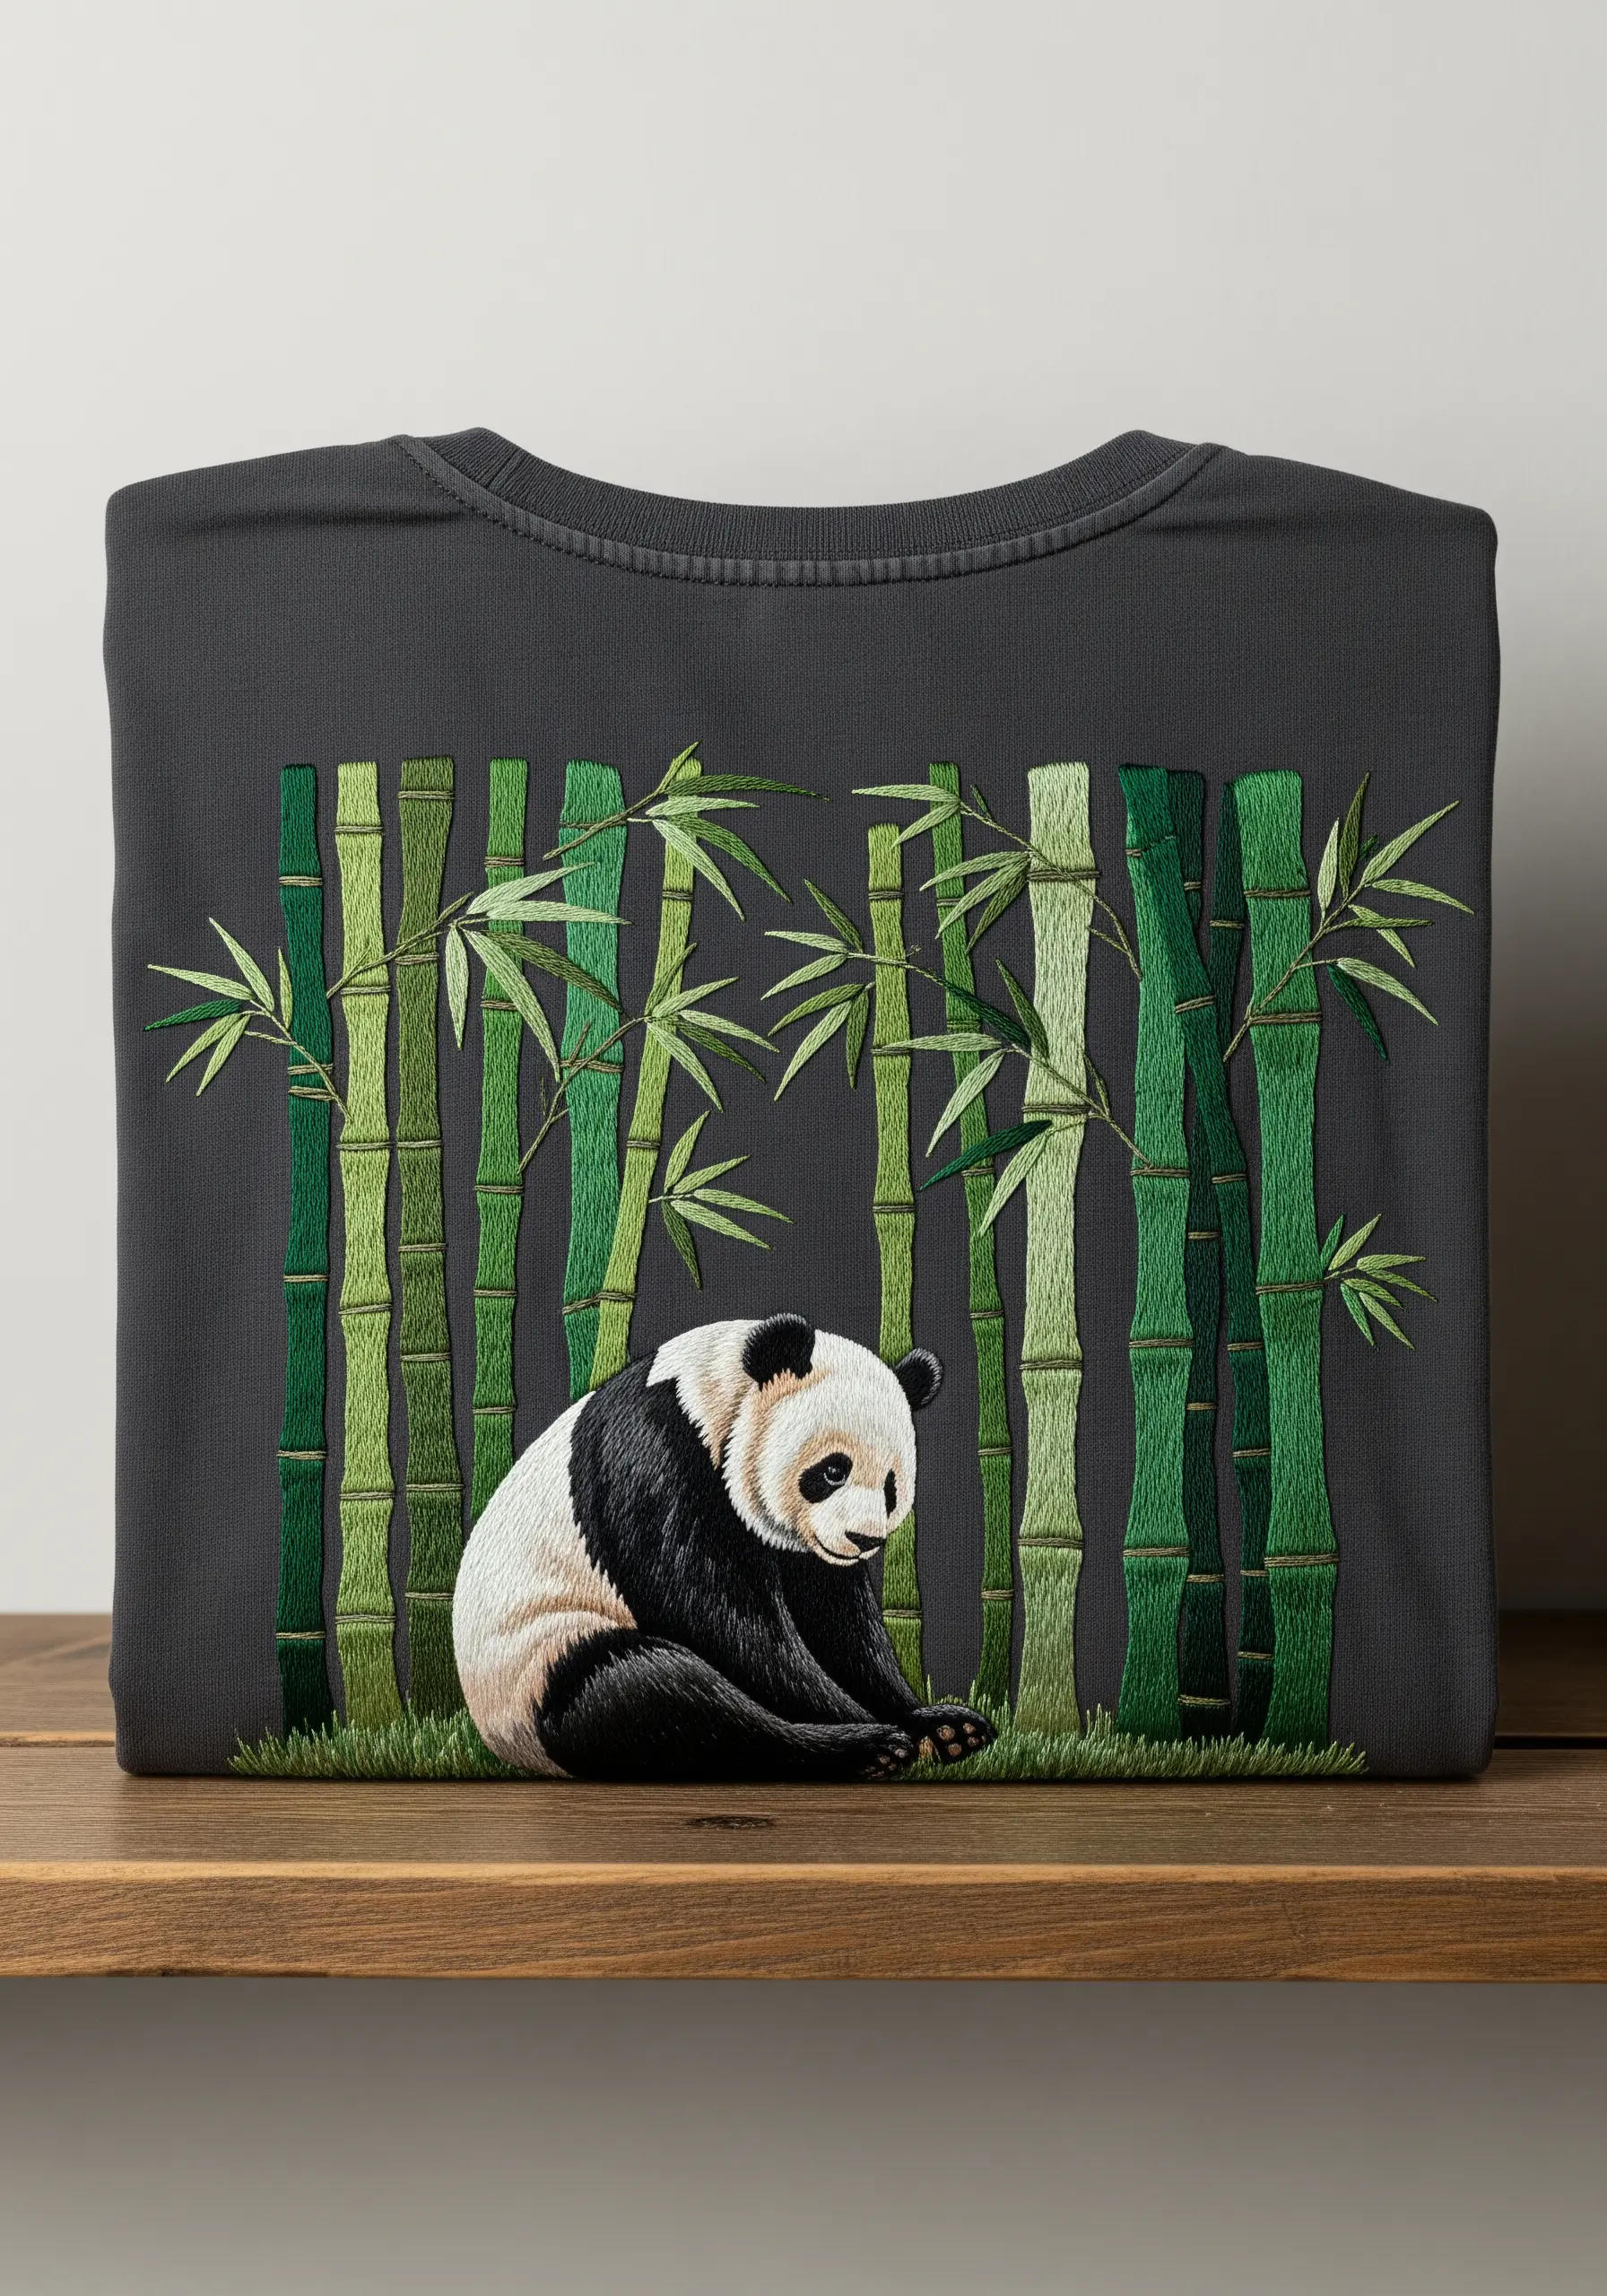
10. Paint a Background with Abstract Stitches
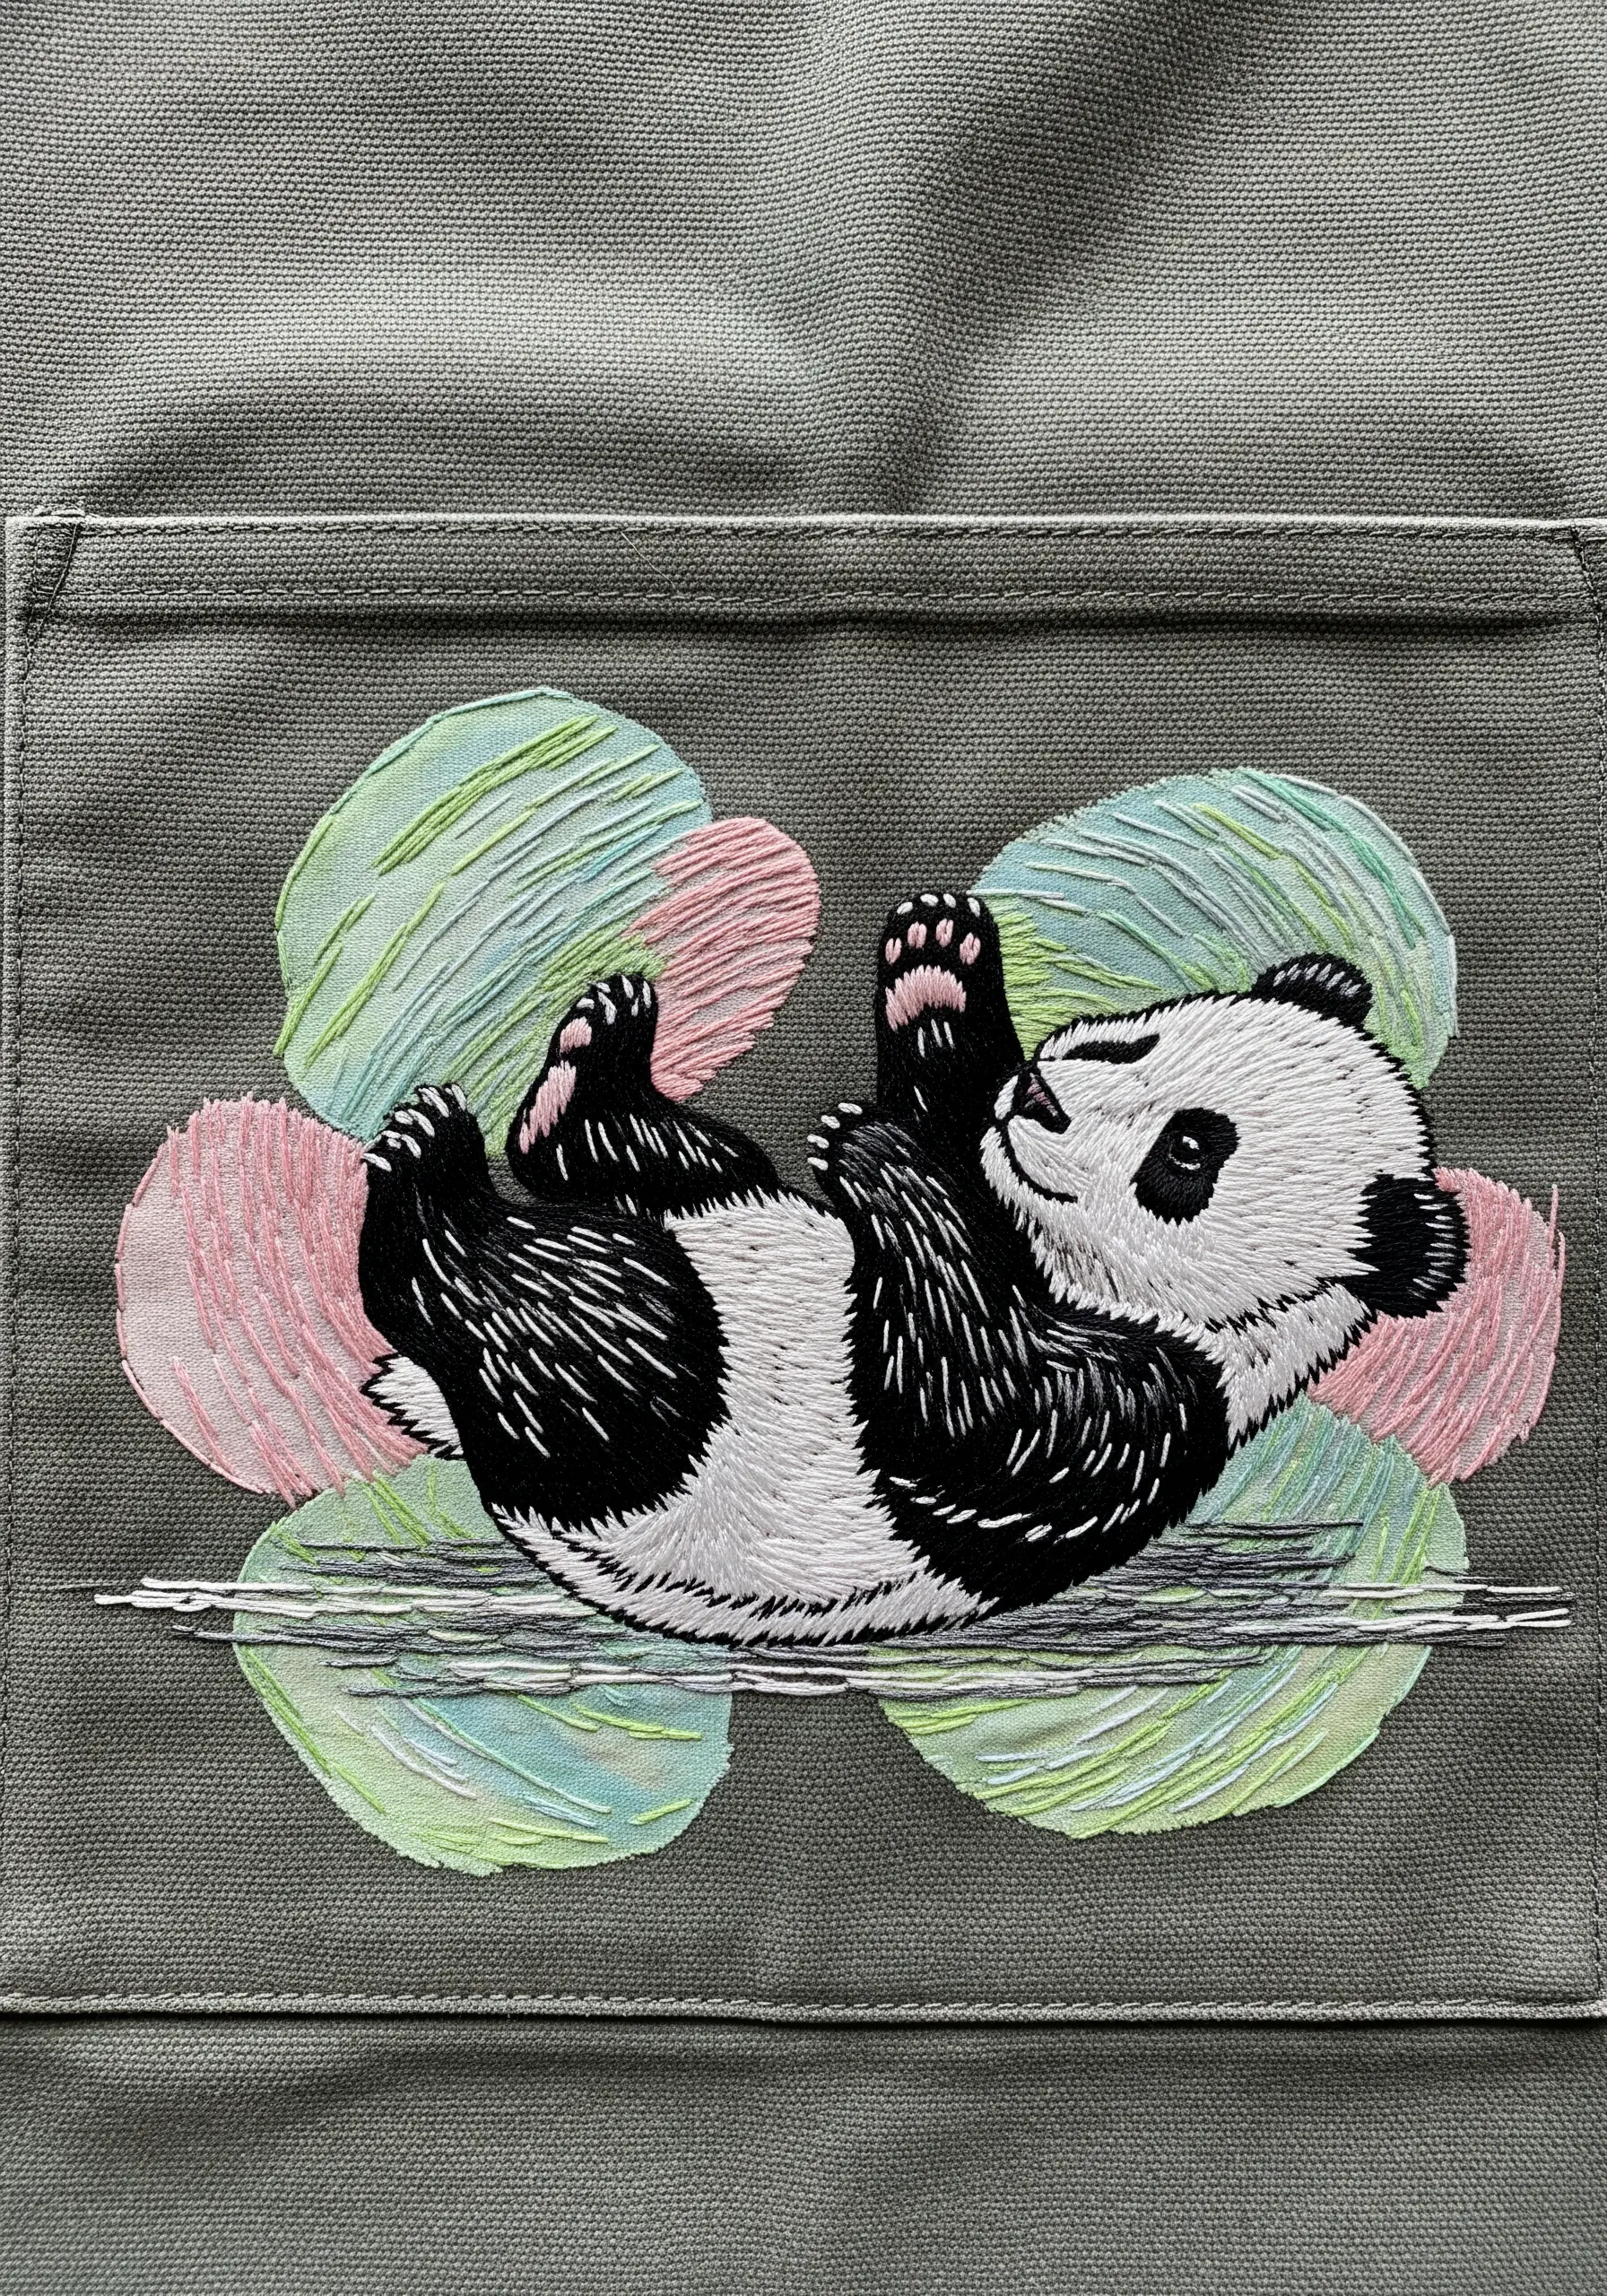
Instead of a solid background, create a soft, painterly effect using long, overlapping straight stitches in variegated or multiple pastel threads.
Don’t worry about making the stitches uniform; their irregular length and direction are what create the dreamy, watercolor-like feel.
This soft-focus background provides a beautiful contrast to the crisp, detailed thread painting of the panda, making the animal the clear focal point.
It’s a technique that transforms simple designs into expressive, abstract thread painting styles.
11. Master Directional Stitching on Linen
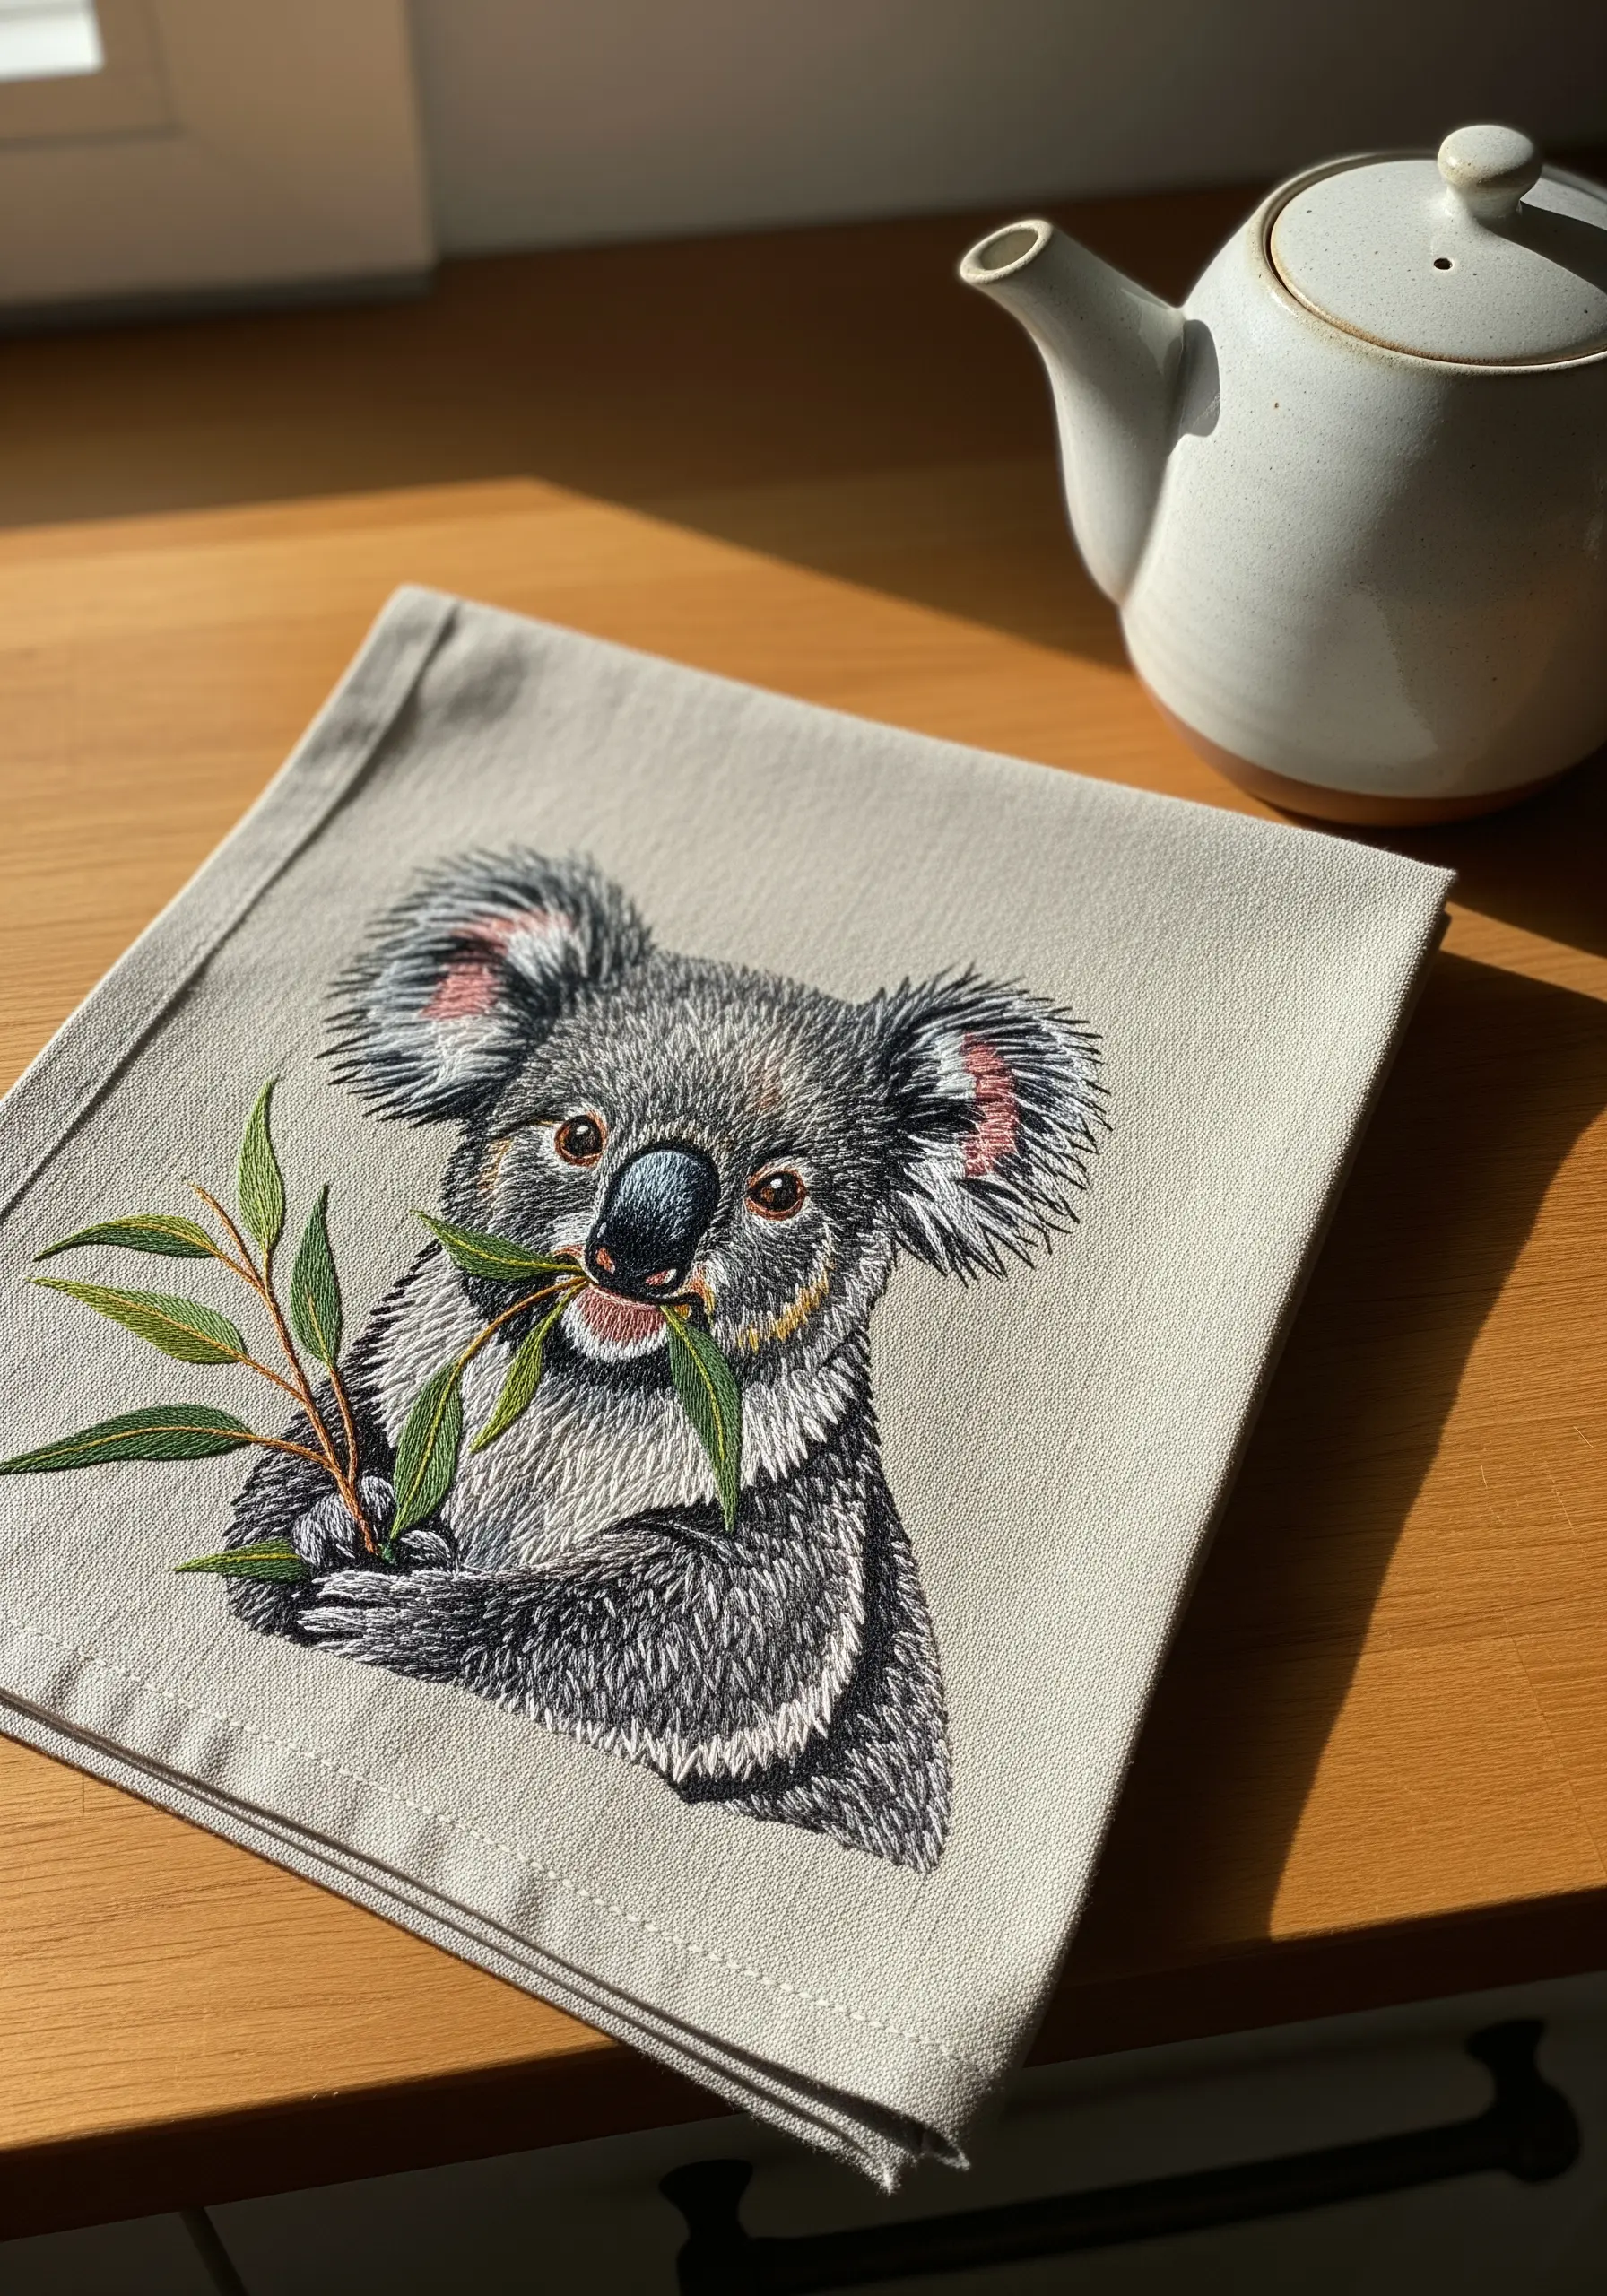
To achieve a realistic, lifelike quality on a linen tea towel or napkin, pay meticulous attention to the direction of your stitches.
Use long-and-short stitch for the koala’s fur, angling your needle to follow the contours of its face and body, which creates a sense of form and movement.
For the eucalyptus leaves, use a fishbone stitch to create a central vein and ensure the stitches flow outward at a natural 45-degree angle.
This thoughtful approach is how you elevate linen table napkins into luxury style.
12. Craft Durable Felt Patches for Upcycling
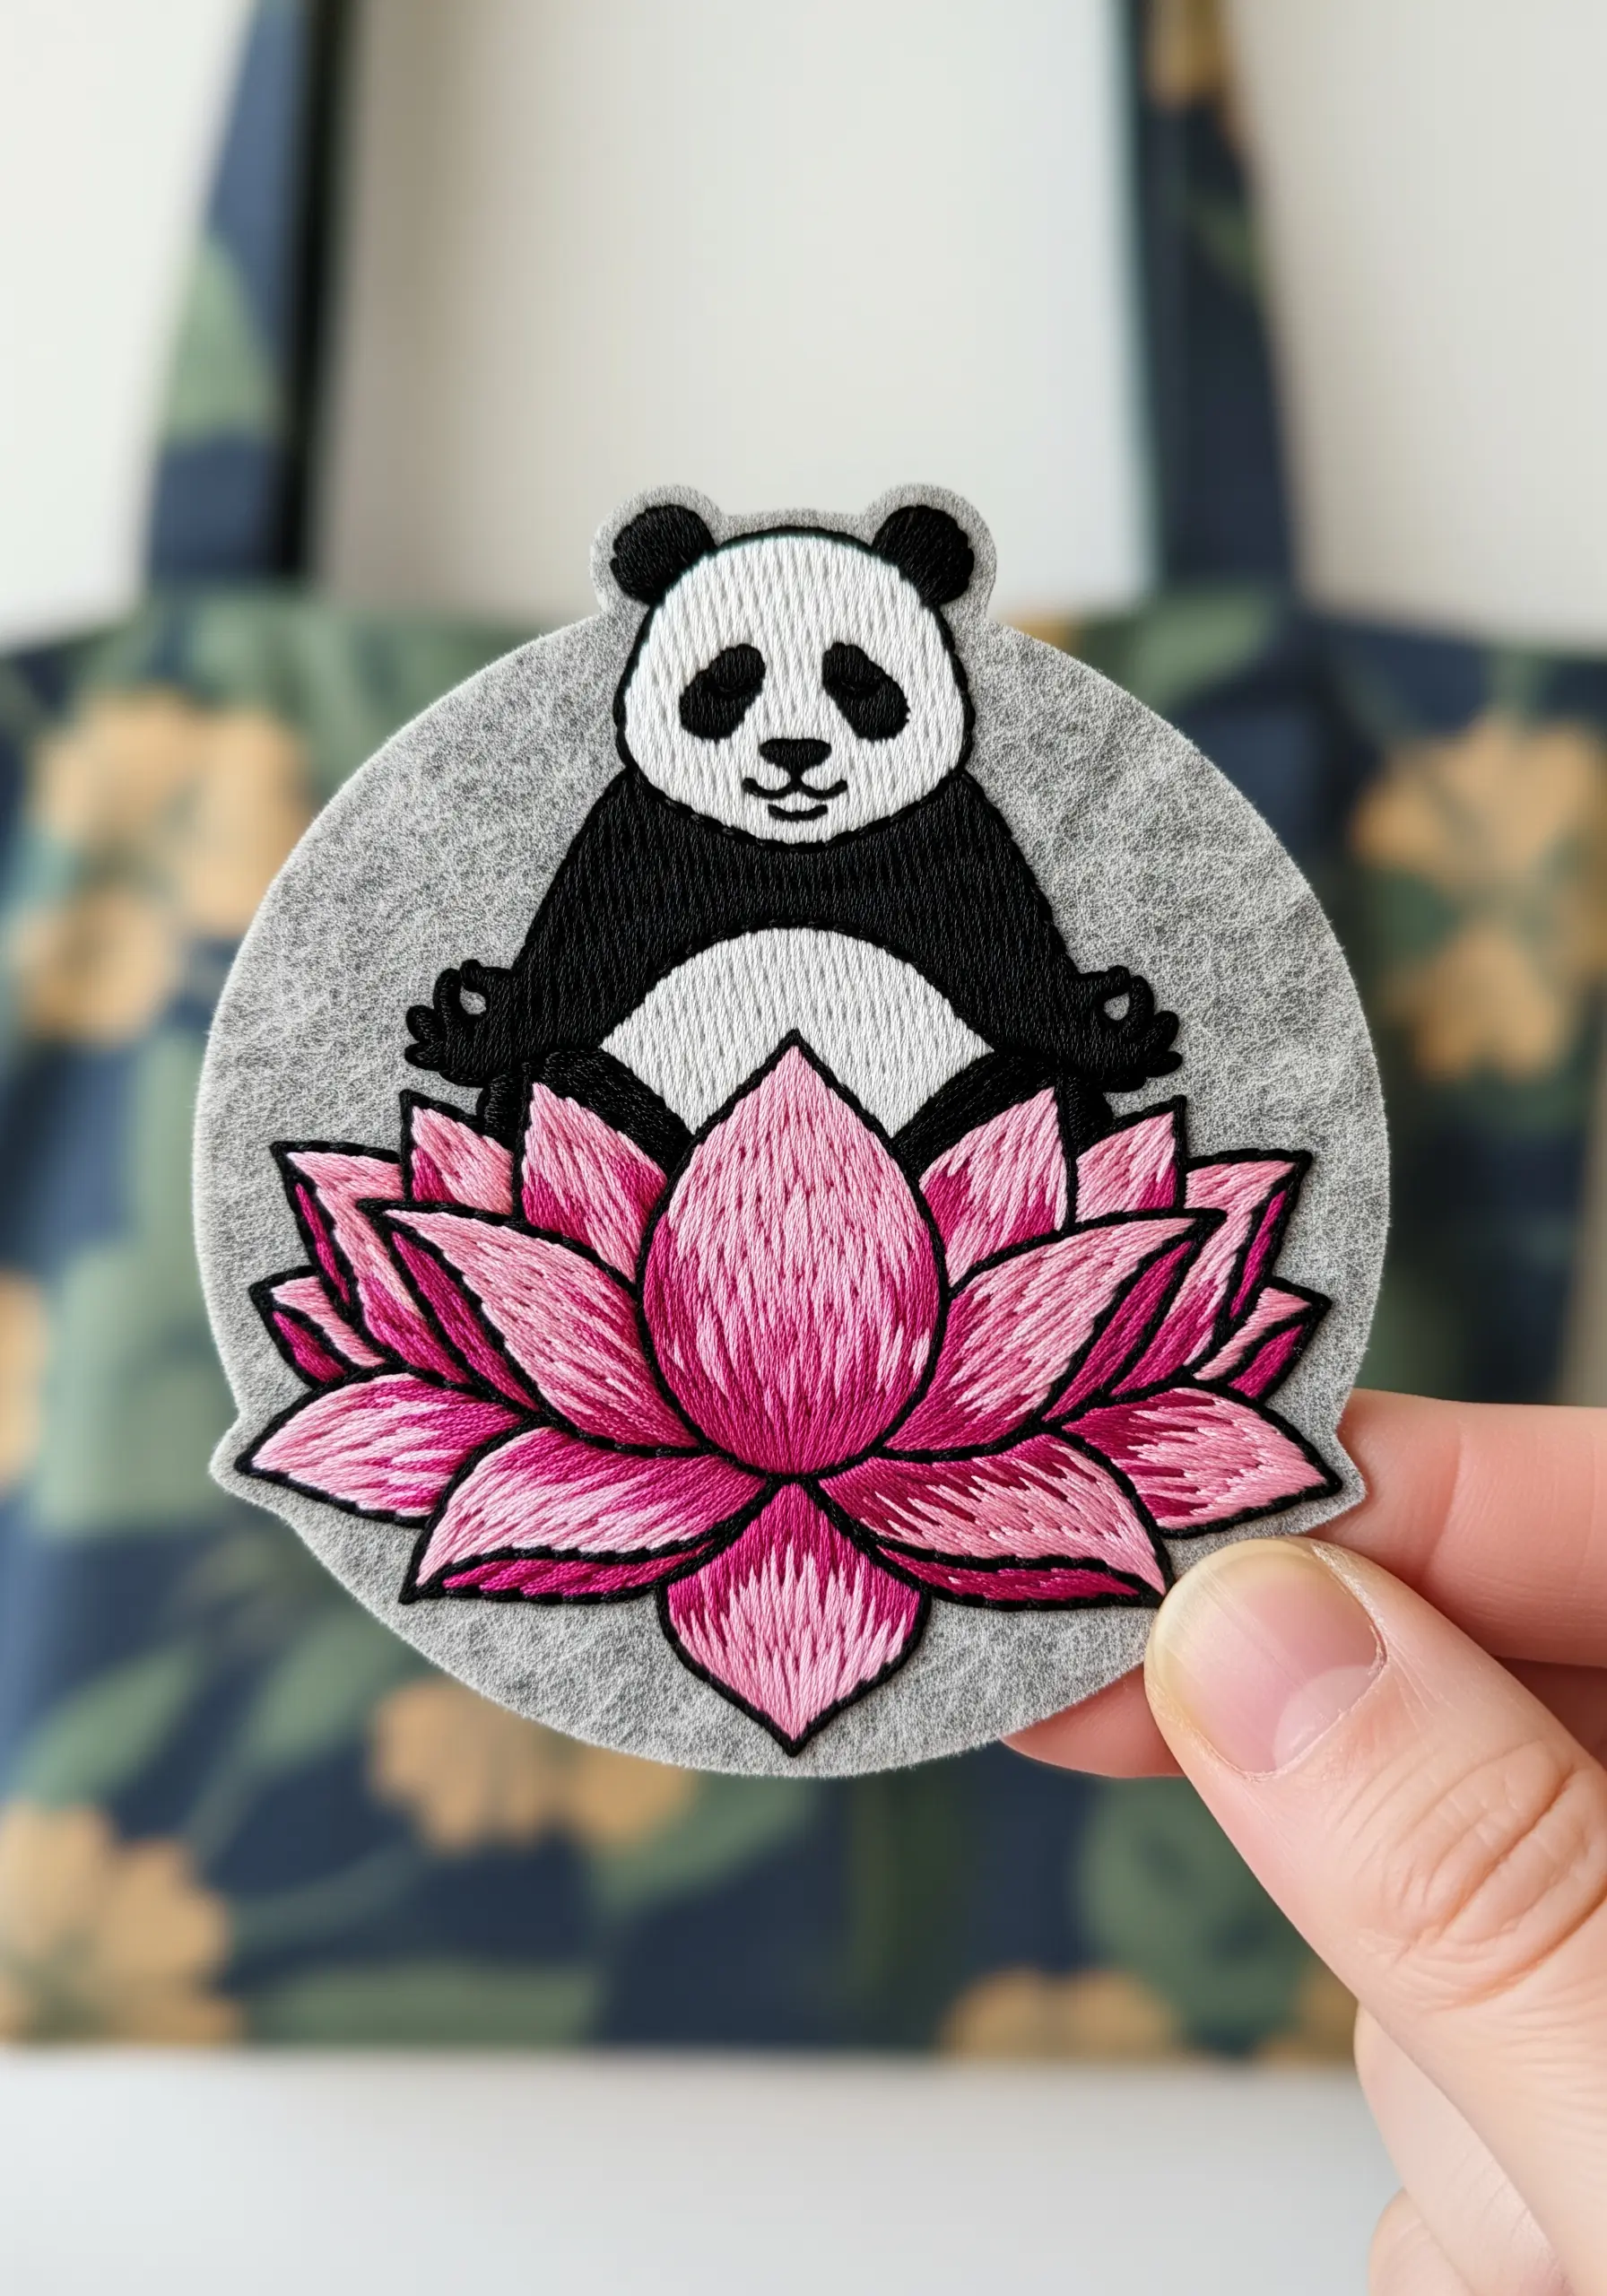
Create versatile, iron-on patches by stitching your design onto a piece of stiff felt instead of directly onto a garment.
Complete your embroidery—using satin stitch for the lotus and outlines for the panda—then trim the felt, leaving a 2-3mm border around the edge of your stitching.
Apply a sheet of iron-on adhesive (like HeatnBond UltraHold) to the back, and you have a durable, professional-looking patch you can add to any upcycled bag, jacket, or hat.
This is the simplest way to make tiny hoop patch style embroidery portable and permanent.
13. Explore Geometric Appliqué with Faux Leather
For a clean, modern take on an animal portrait, combine embroidery with appliqué using unconventional materials like faux leather or vinyl.
Cut geometric shapes from different shades of grey, white, and black material and arrange them to form the koala’s face. Because these materials don’t fray, you don’t need to finish the edges.
Secure the pieces with fabric glue and then add a sharp, contrasting backstitch outline around each shape to integrate them into the fabric and provide a handcrafted finish.
This technique is perfect for creating bold, geometric abstract thread patterns.
14. Design a Minimalist Repeating Border

Transform a plain scarf or blanket edge with a simple, repeating motif that adds a touch of handmade charm without overwhelming the piece.
Keep the elements minimal: use a simple backstitch for the bamboo stalks and tiny satin stitches or French knots for the panda faces.
To ensure even spacing, create a small paper template and use a disappearing ink pen to mark the placement of each panda and bamboo cluster along the hem.
This is an elegant way of turning simple scarves into botanical fashion statements.
15. Add Dimension with Couched Yarn
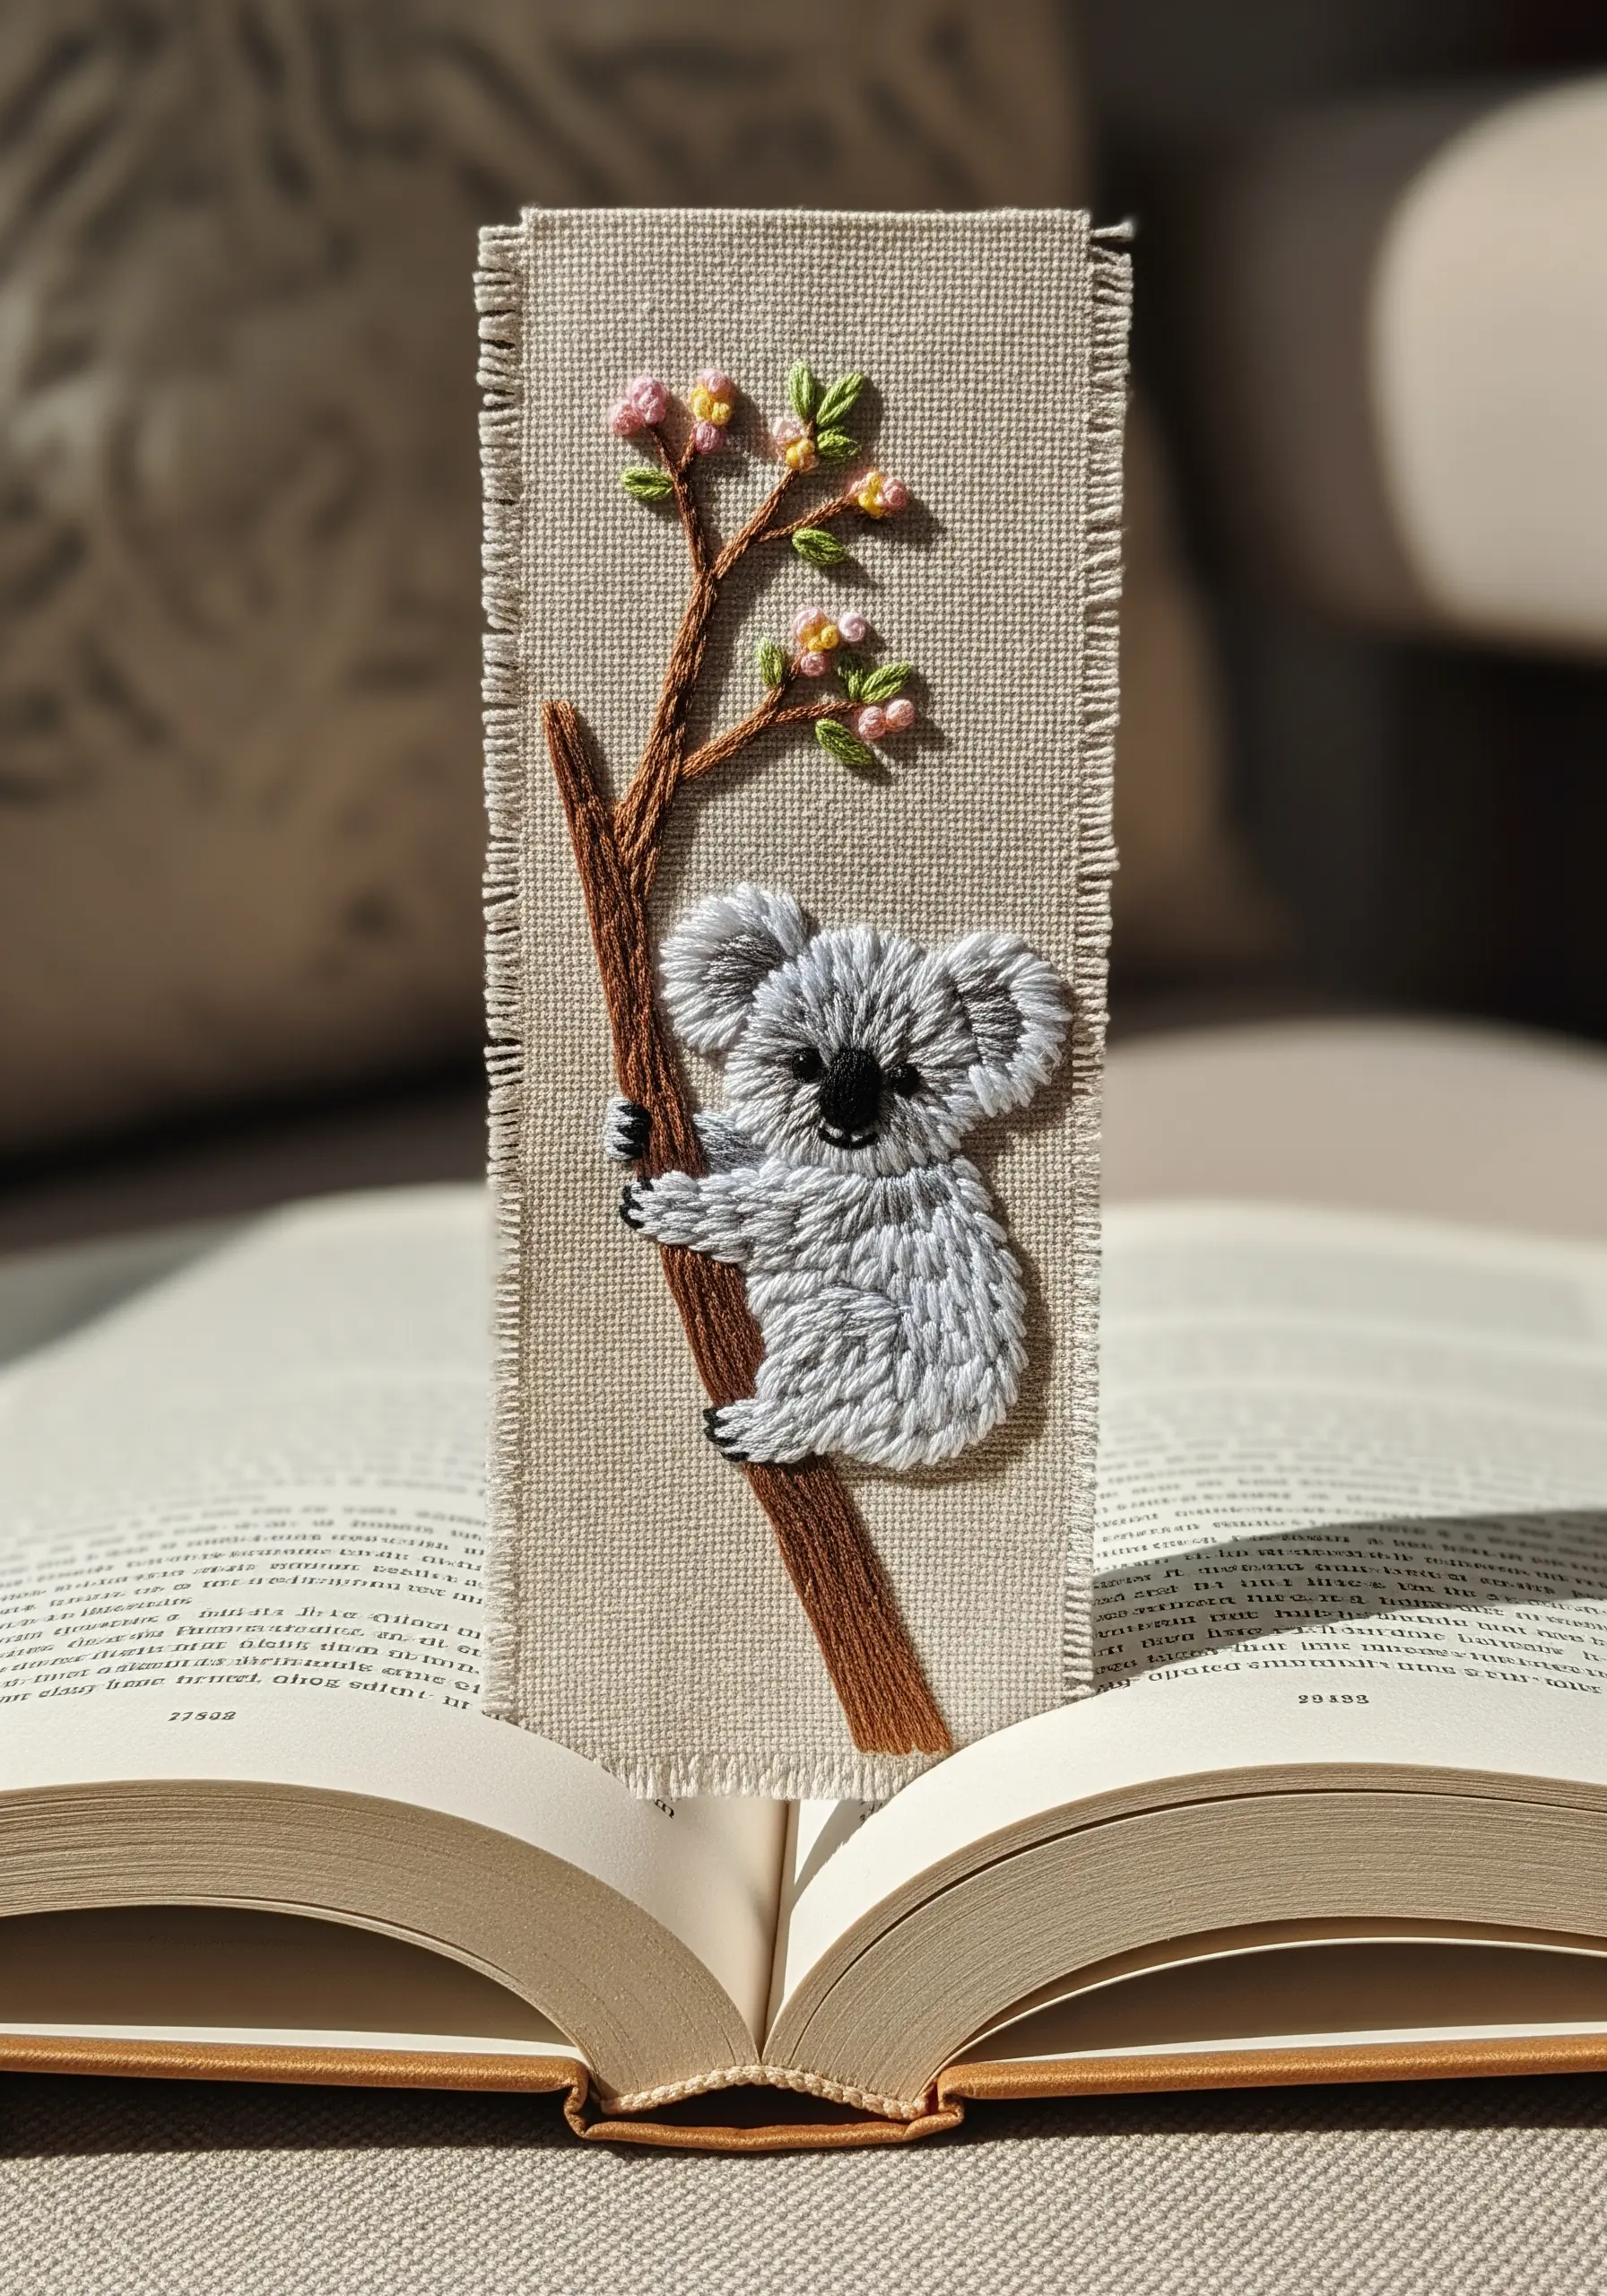
Create bold, dimensional lines quickly by using couching, a technique where you lay a thick fiber (like yarn) onto the fabric and tack it down with a thinner thread.
This is perfect for the tree branch, giving it a rustic, substantial texture that would take hours to achieve with satin stitch.
Contrast the thick, smooth yarn with fluffy French knots for the koala’s fur and delicate bullion knots for the flower buds.
This mixed-fiber approach makes DIY cozy embroidery bookmarks feel wonderfully tactile and unique.
16. Master Large-Scale Thread Painting
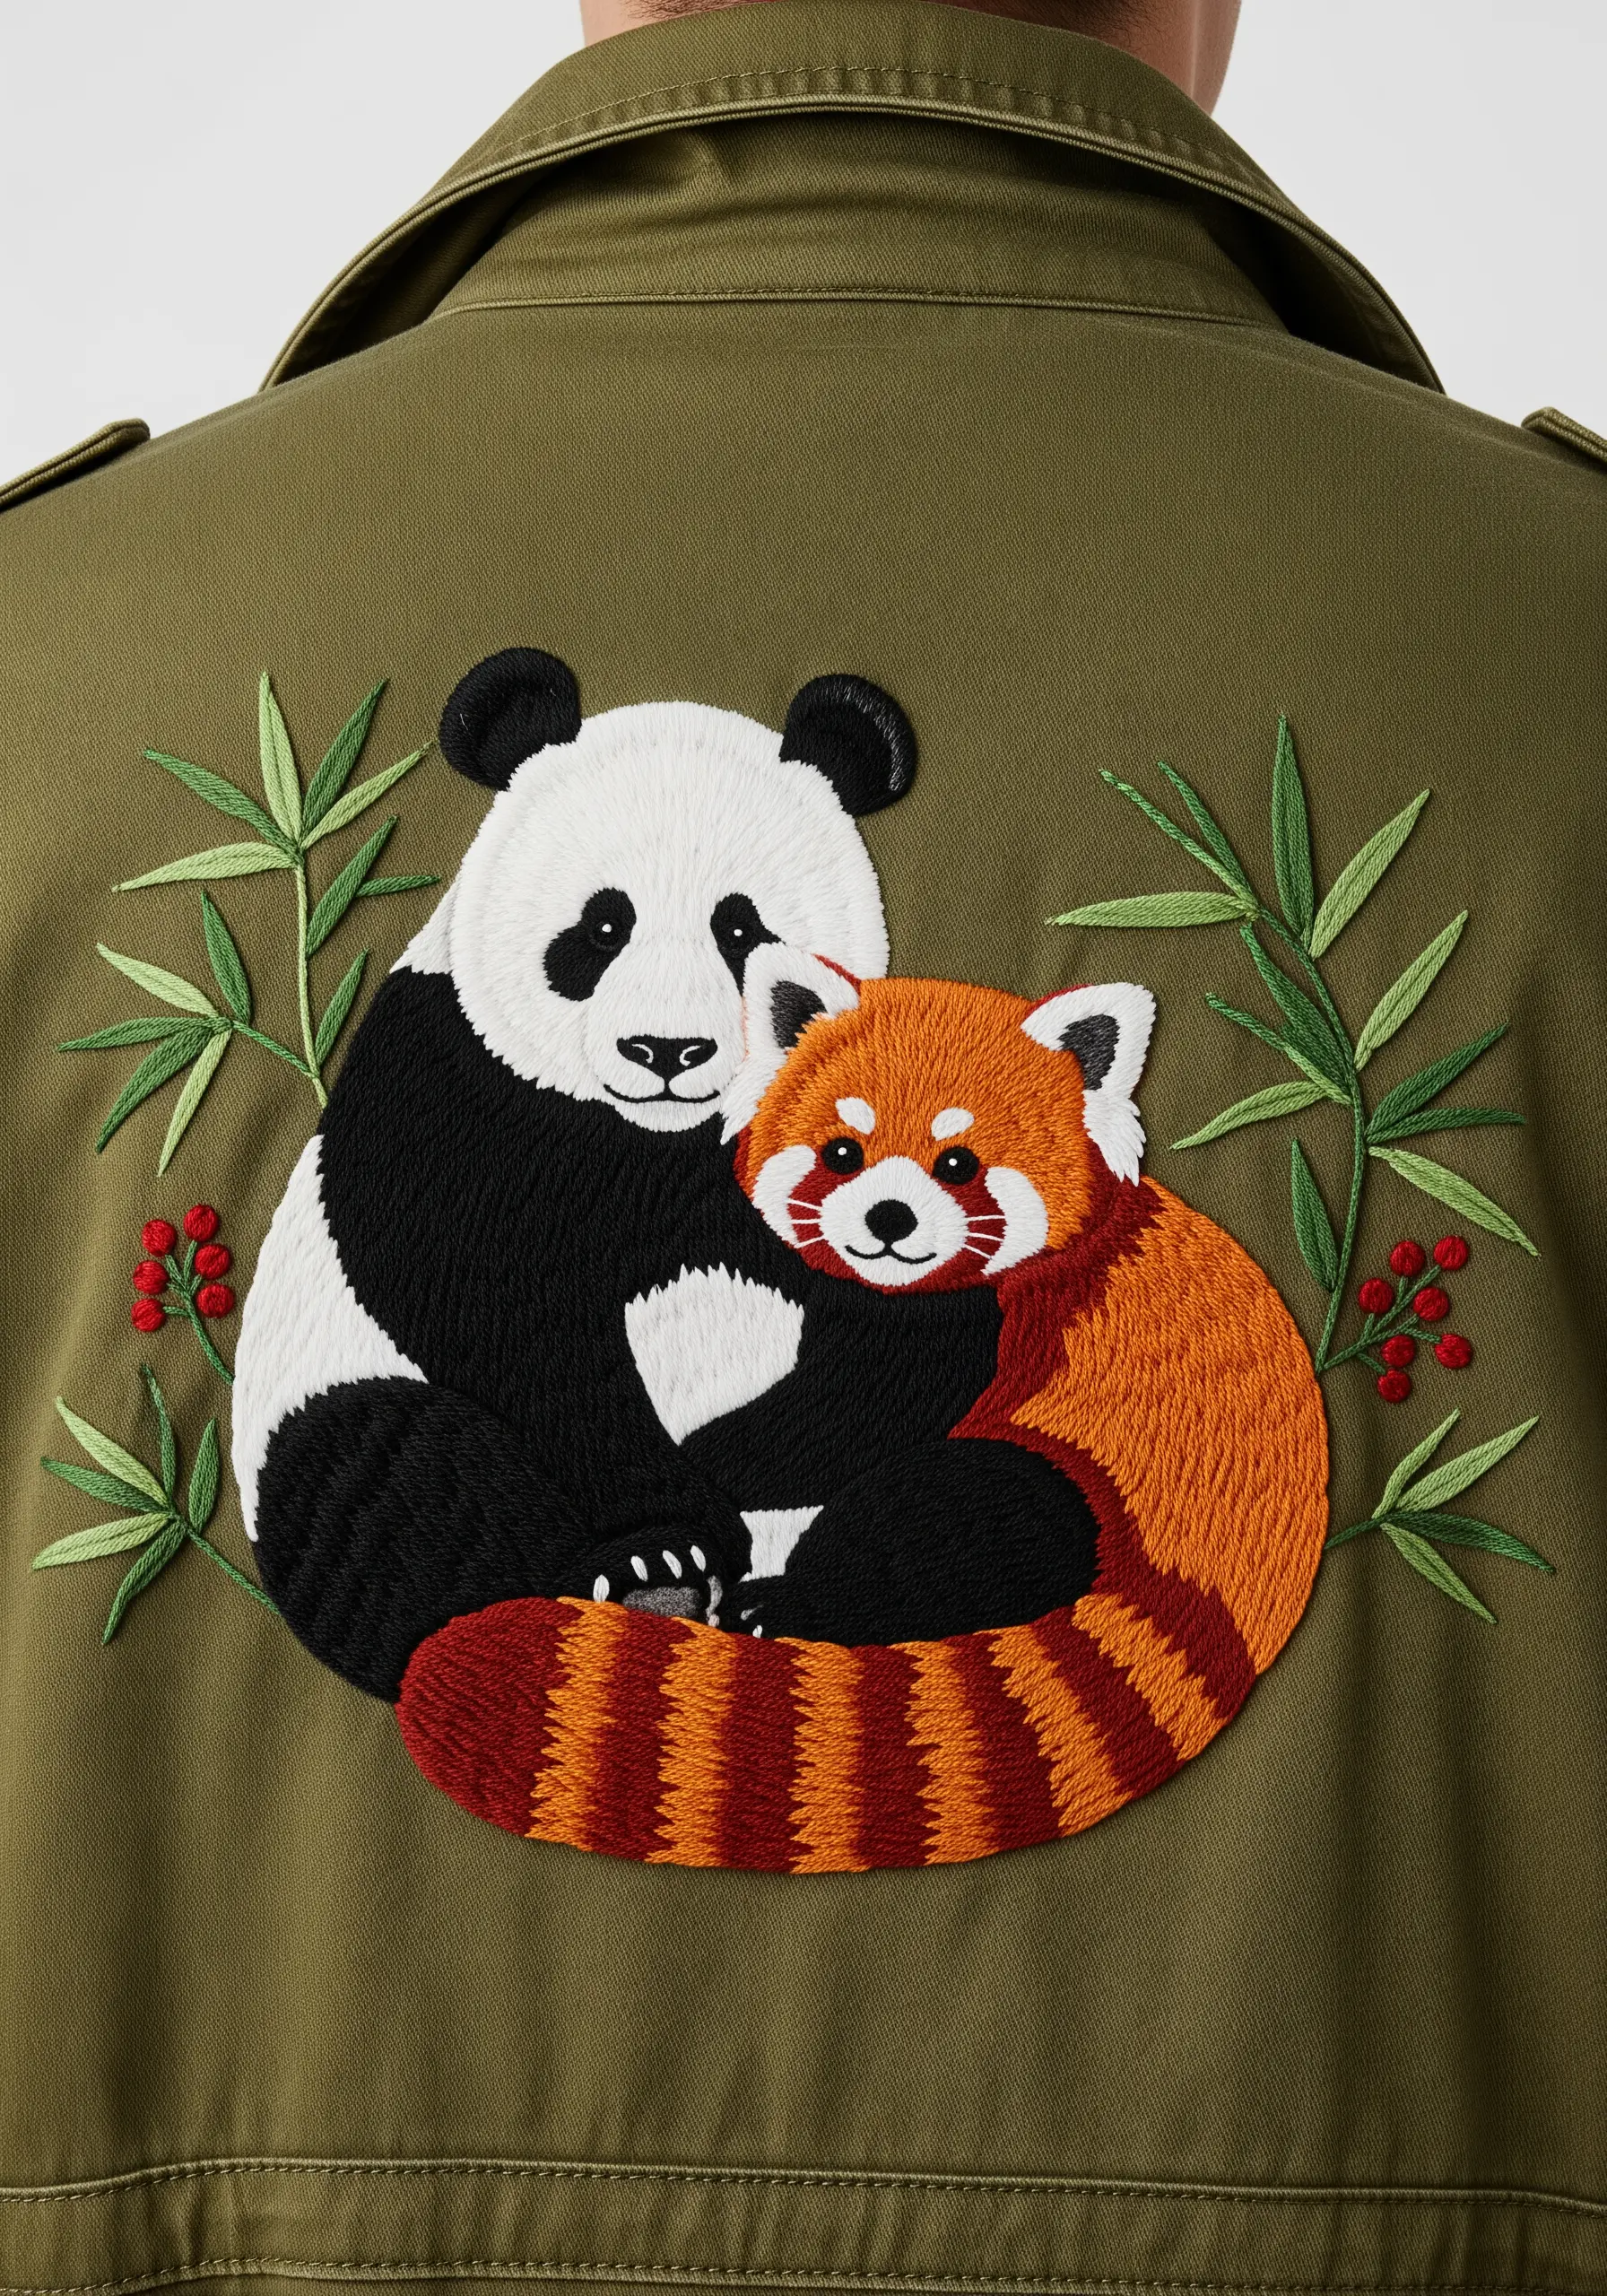
When tackling a large, full-coverage design on the back of a jacket, break the image down into smaller, manageable sections.
Stitch each color block separately, paying close attention to the way your long-and-short stitches blend into the next section to avoid creating harsh lines.
Always use a heavy-duty stabilizer and hoop the fabric tightly to support the weight of the dense stitching and prevent distortion.
While time-consuming, this technique turns everyday apparel into wearable art, perfect for funky streetwear embroidery designs.
17. Create Drama with Metallic Line Art
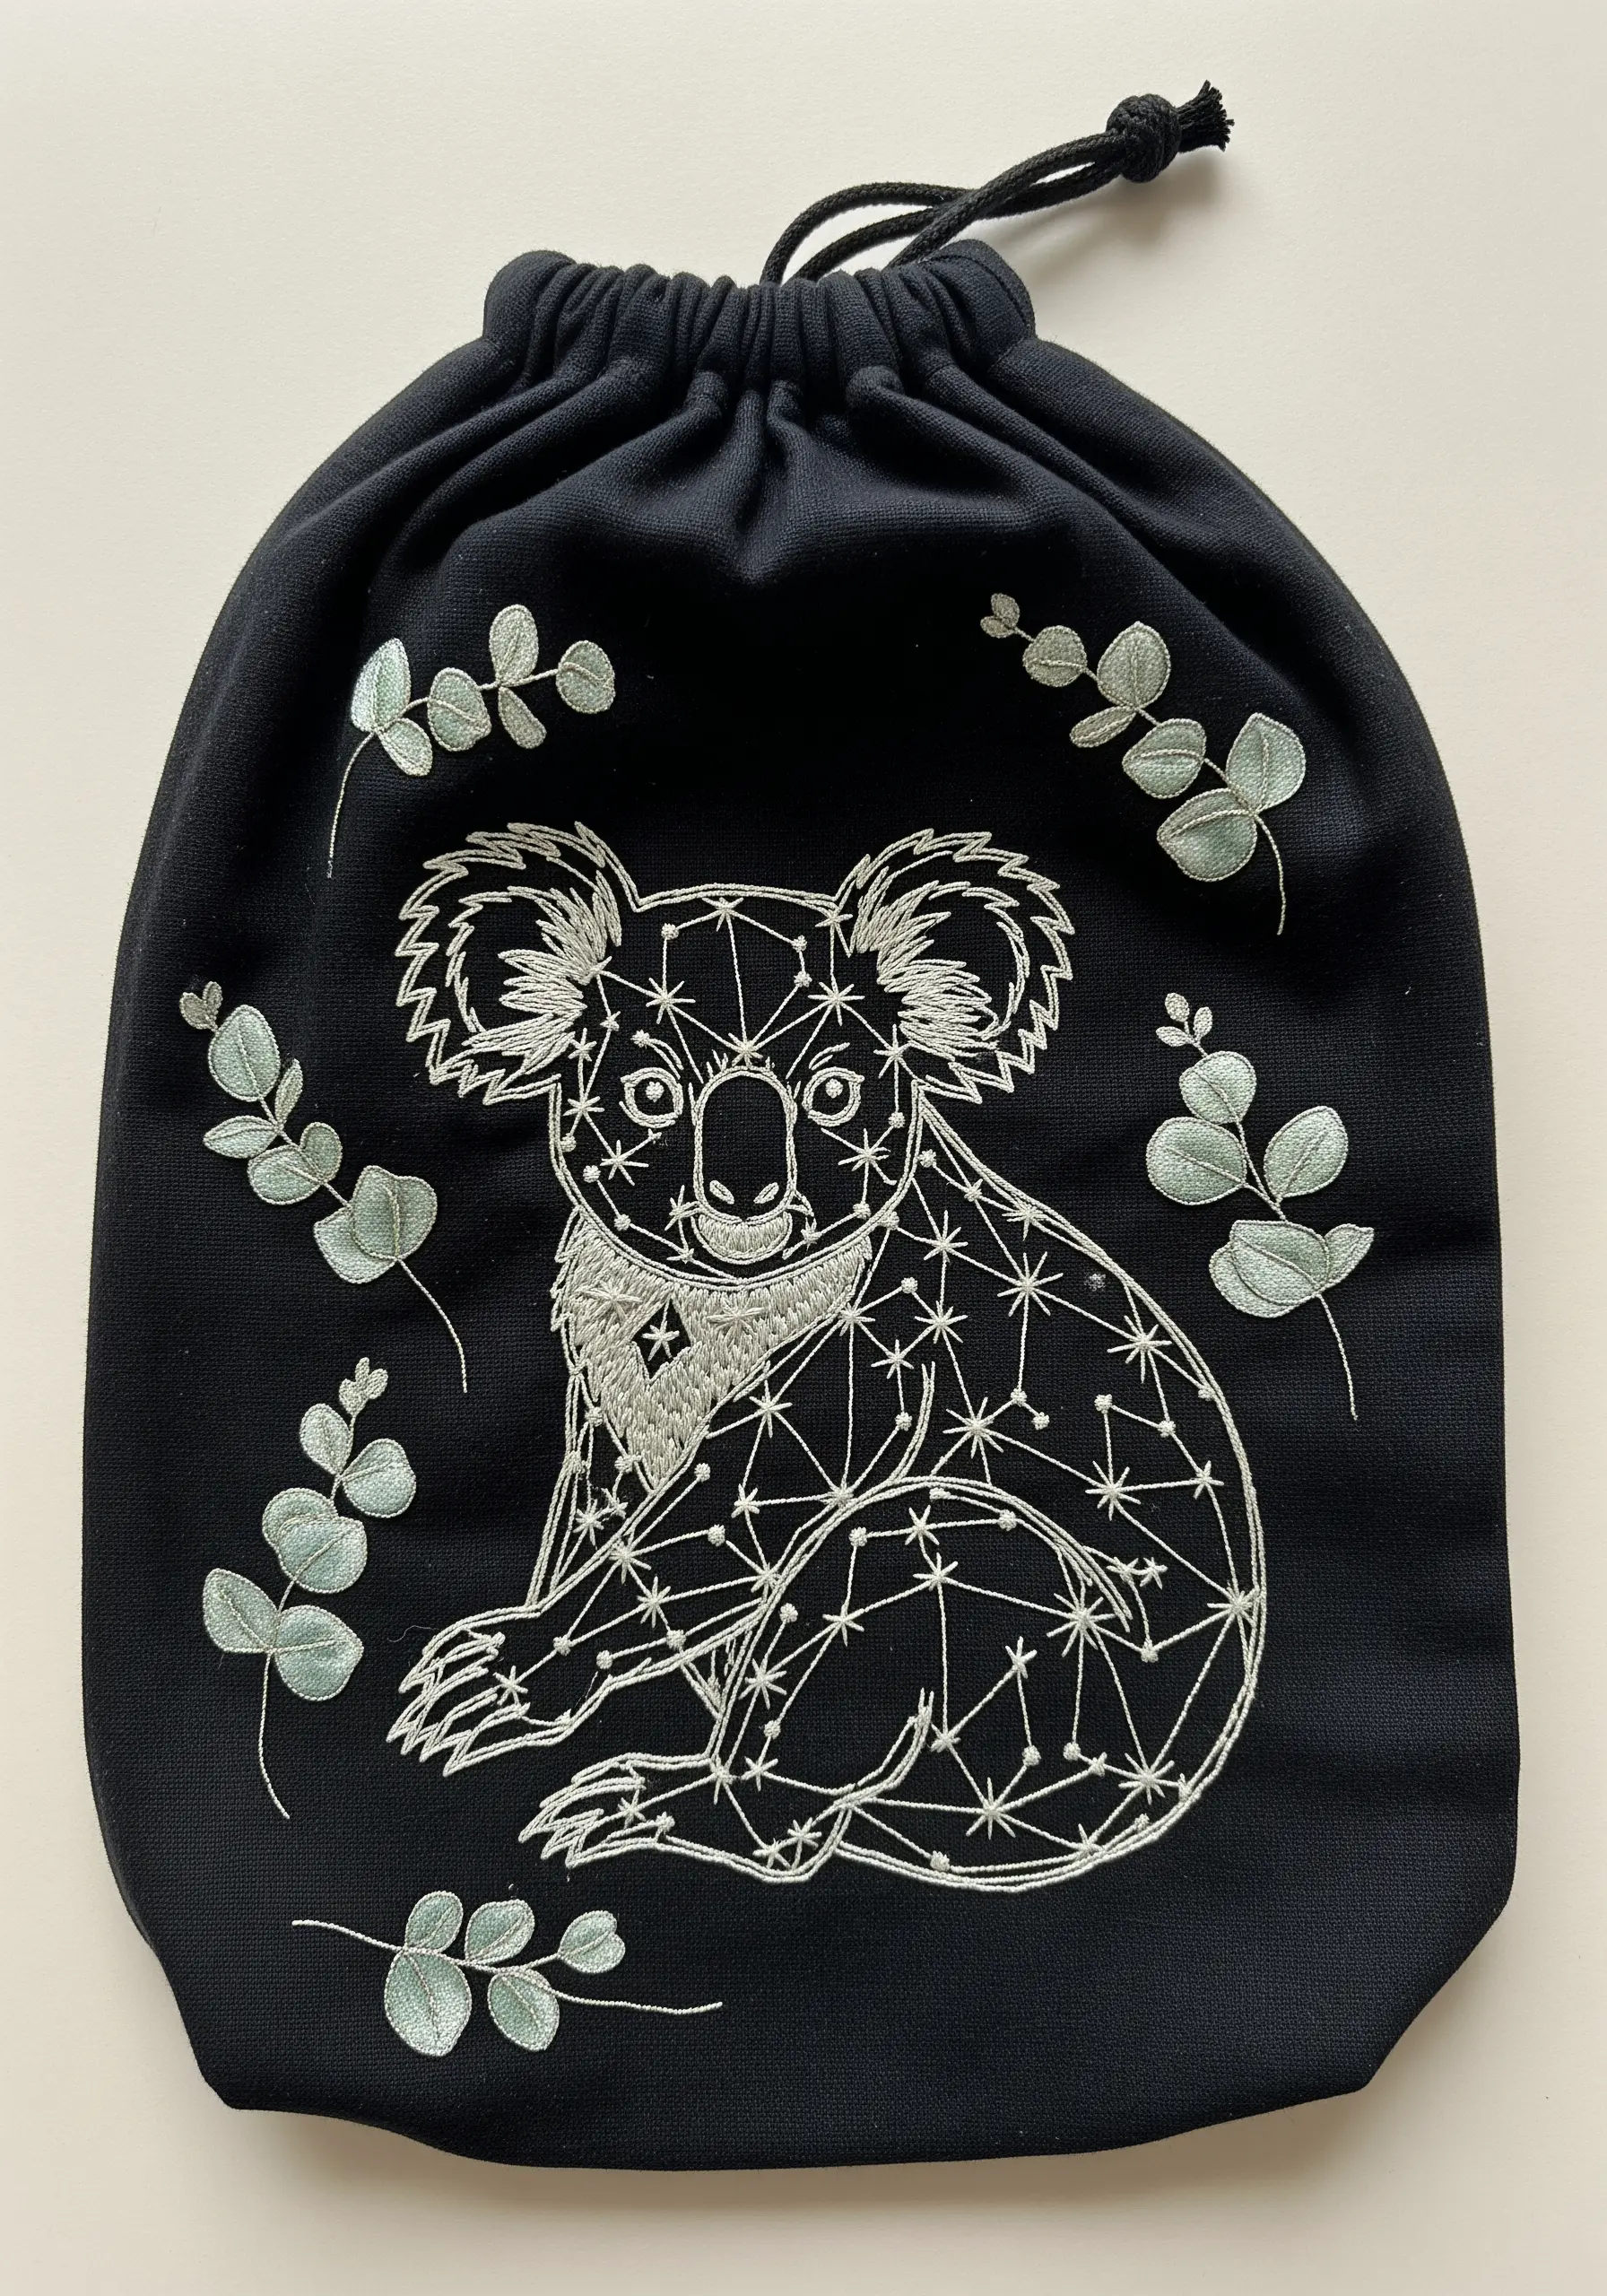
Give a simple line drawing a celestial, modern twist by stitching it entirely in a single color of metallic or silver thread on dark fabric.
To handle metallic thread, which can be prone to tangling and fraying, use a shorter length of thread than usual (no more than 12 inches) and a needle with a larger eye.
A thread conditioner like beeswax can also make it smoother to work with.
There are many unexpected ways to use metallic thread, and this high-contrast approach is one of the most striking.
18. Build a Lush Wreath with Layered Stitches
Create a dense, multi-dimensional foliage wreath by layering different types of stitches and shades of green.
Start with a base of larger stitches like fishbone or fly stitch for the main leaves. Then, fill in the gaps with smaller, textural stitches like lazy daisies and single straight stitches.
Use at least three or four shades of green to create highlights and shadows, giving the wreath a more realistic, vibrant appearance.
This demonstrates simple ways to layer leaf stitching for a rich, botanical effect.
19. Upcycle a Journal with Dimensional Bark
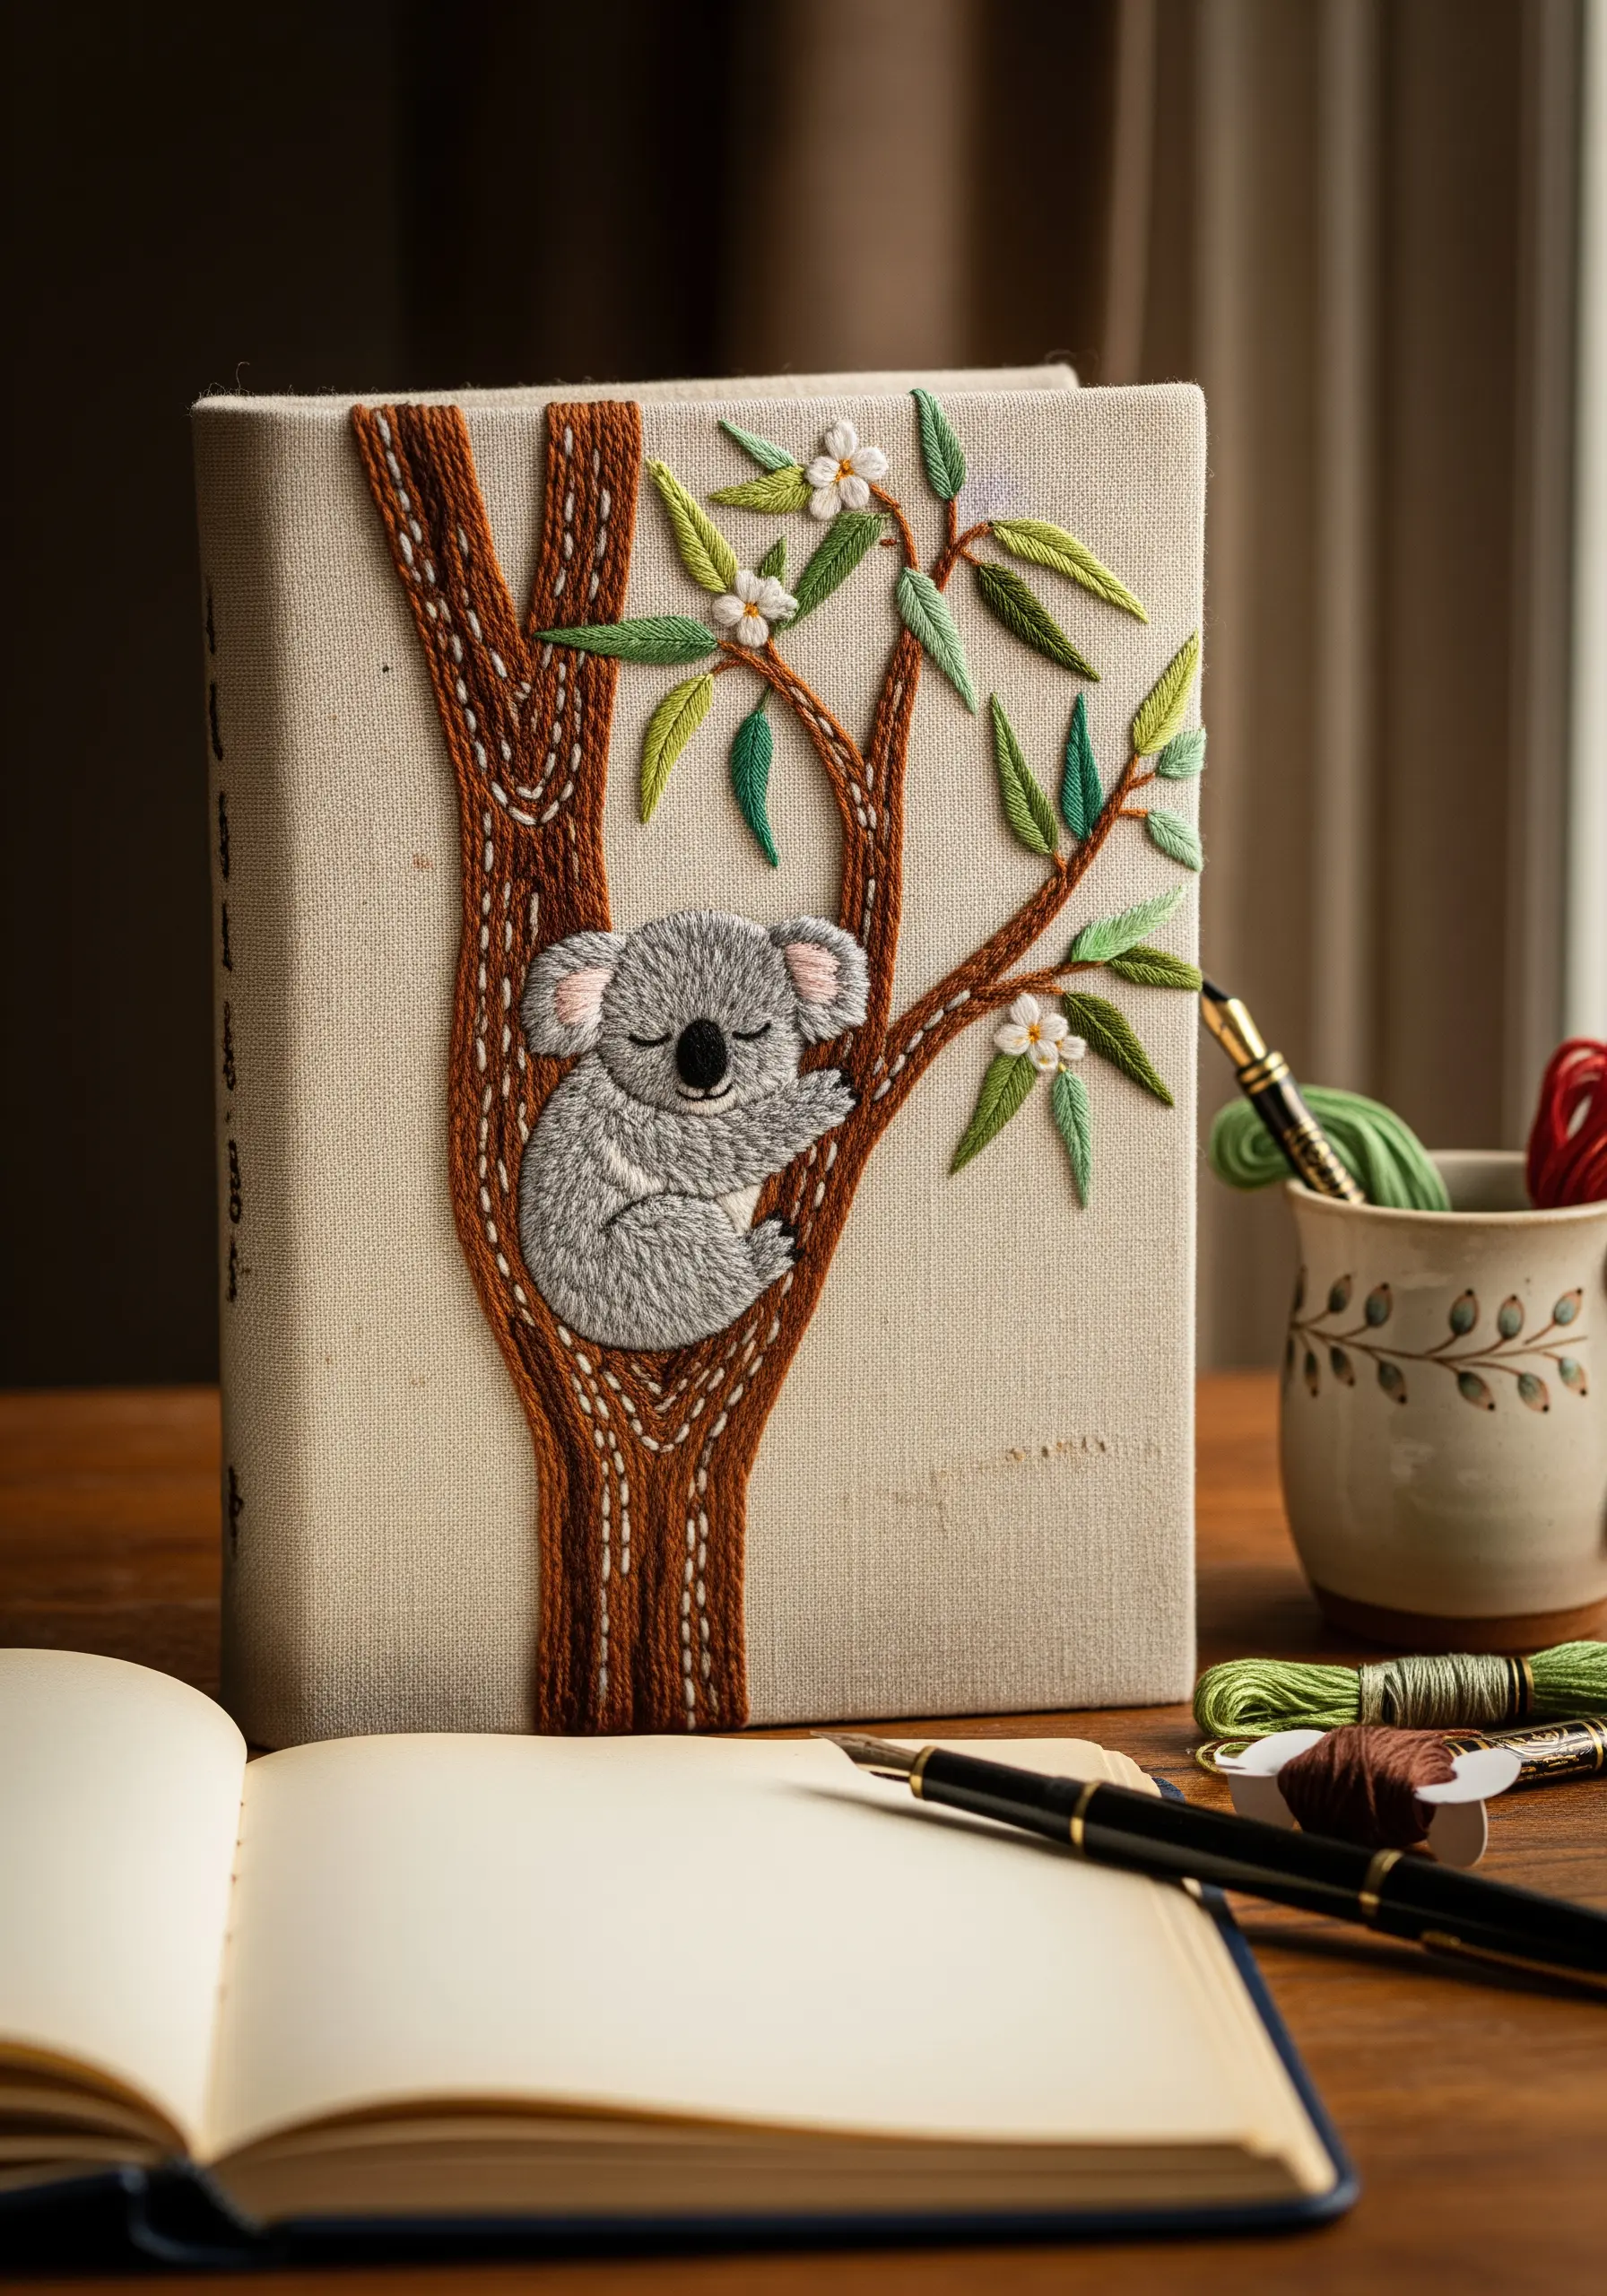
Transform a plain notebook cover into a tactile piece of art by focusing on organic textures.
For the tree trunk, use a chunky chain stitch or couched yarn in variegated brown thread to mimic the rough texture of bark.
Contrast this with soft, plush French knots for the sleeping koala, making it look nestled and cozy.
Adding small sweet embroidery ideas like this to everyday objects is a perfect eco-friendly project.
20. Achieve Photorealism with Blended Threads
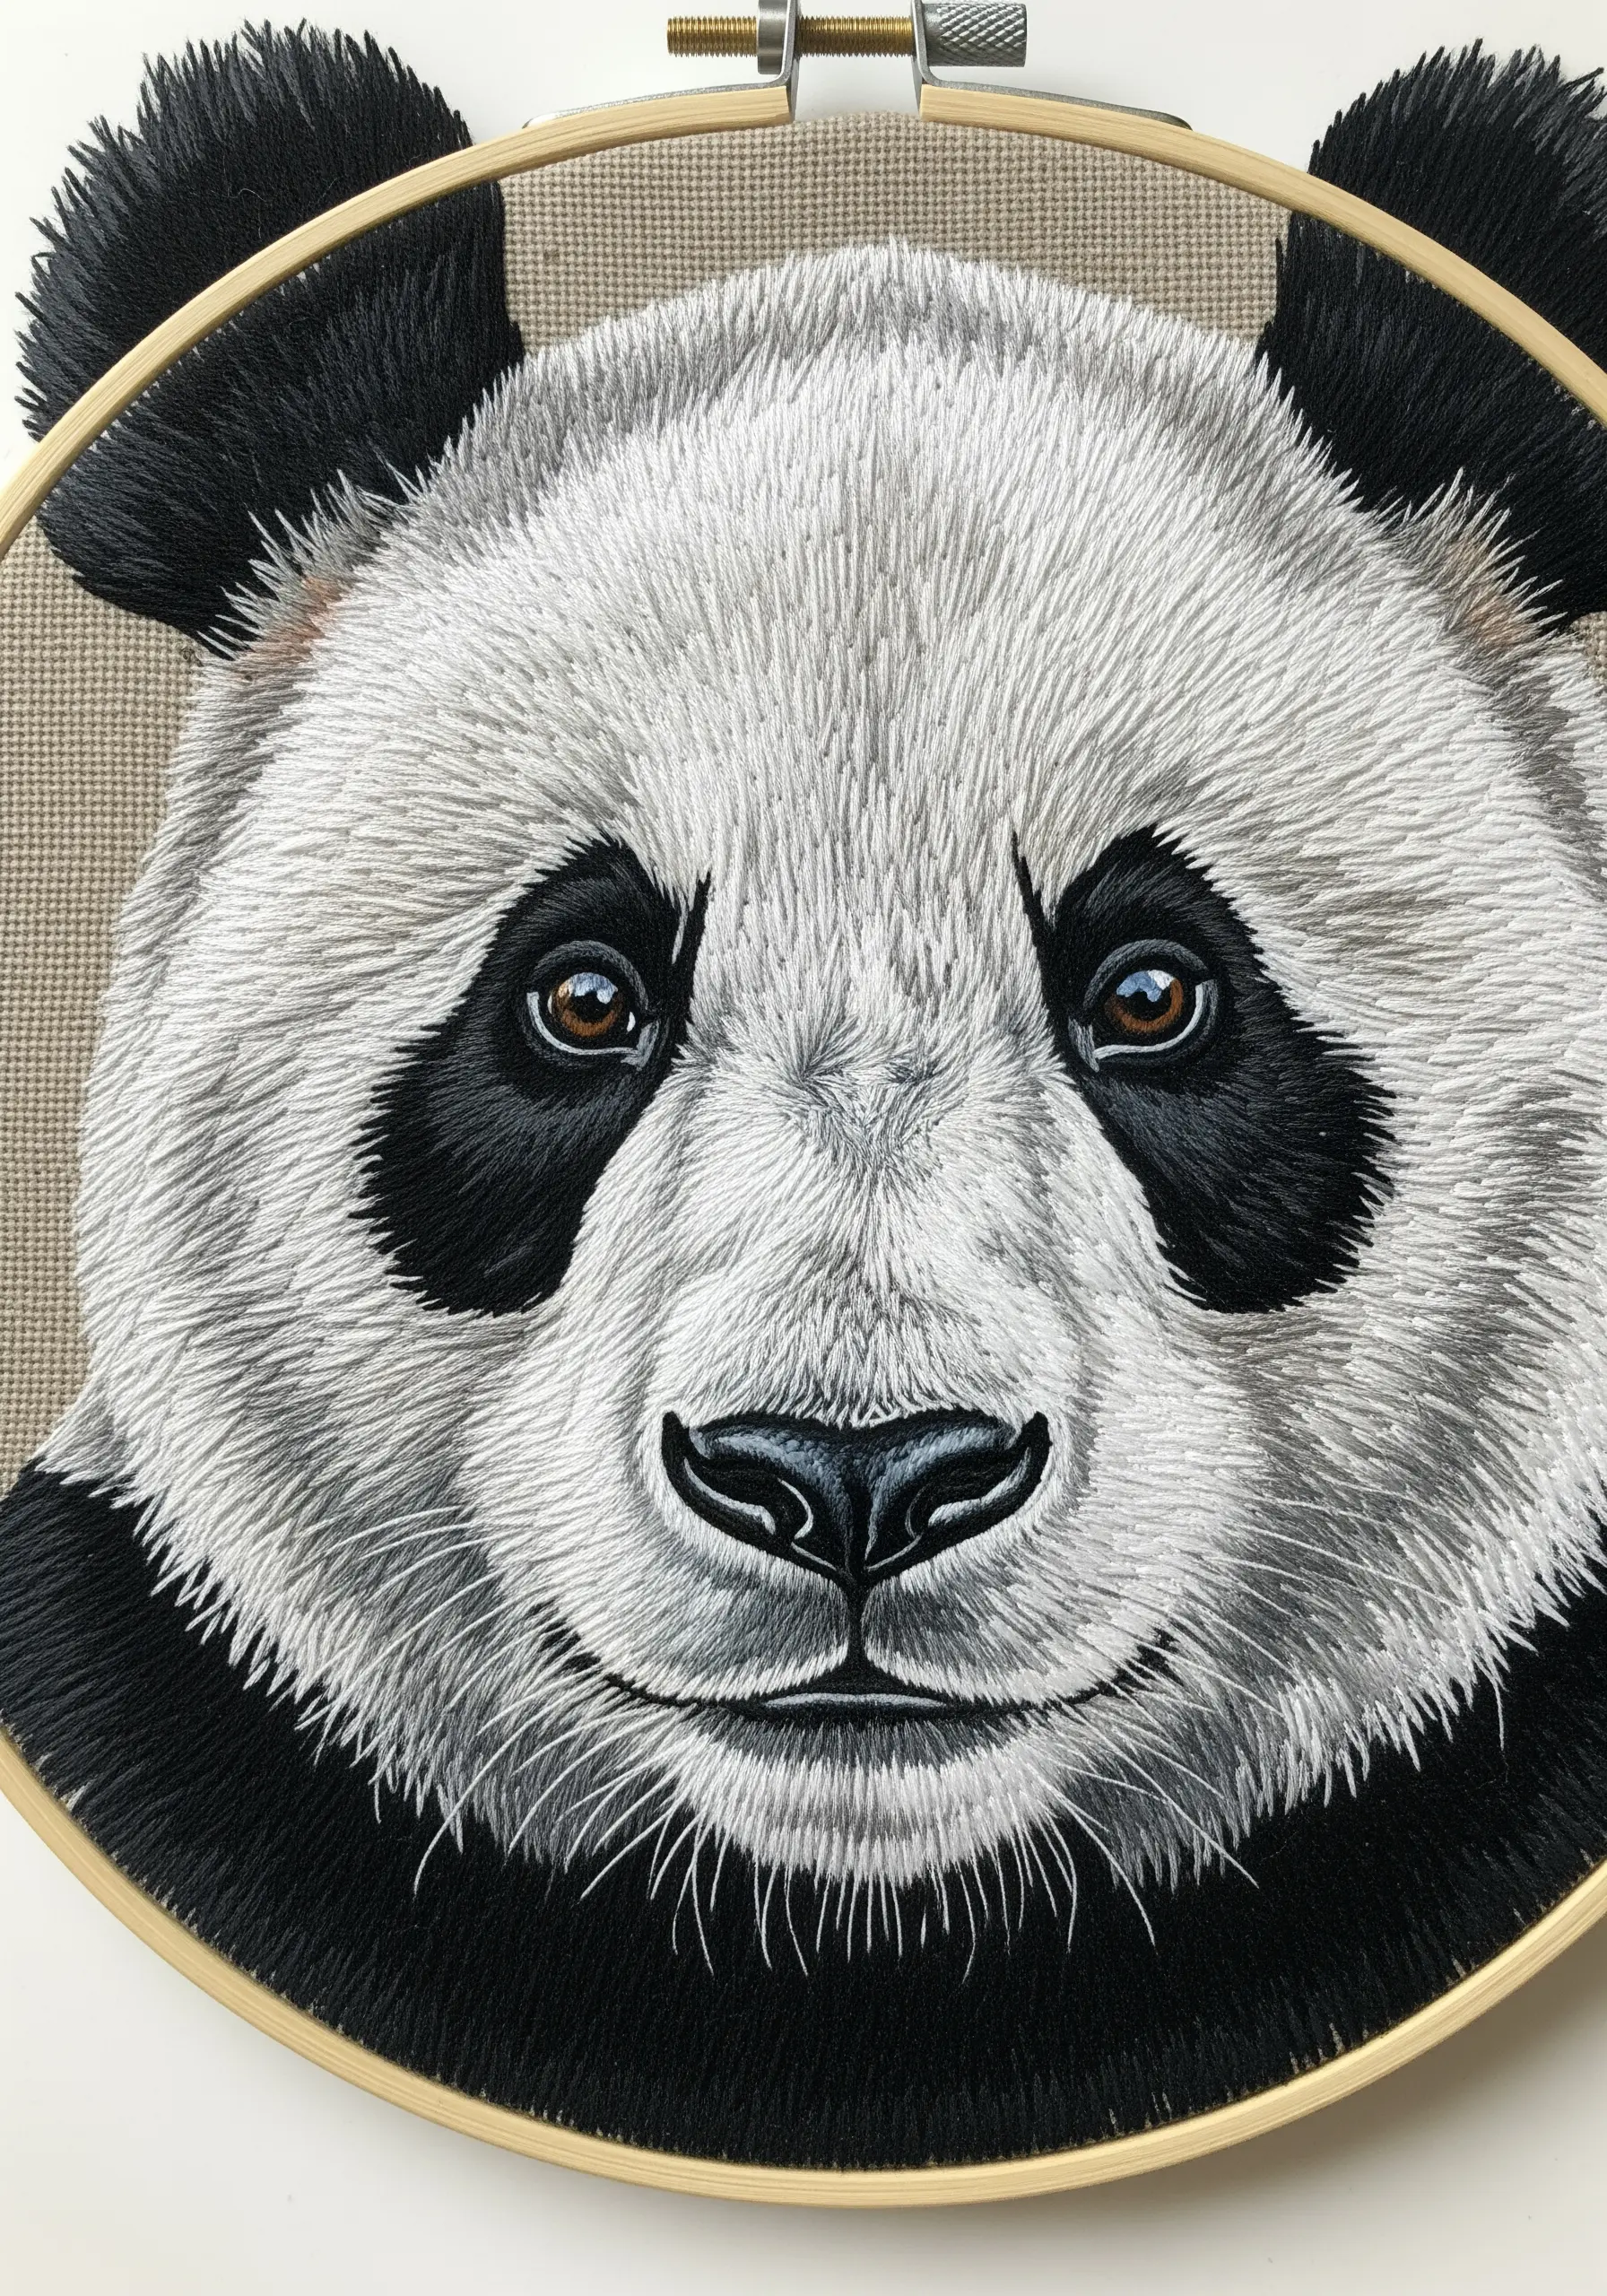
To create a shockingly realistic portrait, the magic is in the blending and the use of single strands of floss.
Work with multiple needles threaded with adjacent shades (e.g., light grey, medium grey, dark grey) at the same time, allowing you to create seamless gradients where the colors meet.
Keep your long-and-short stitches incredibly small and tight, almost like pencil strokes, ensuring they follow the direction of the fur’s growth.
This technique turns thread into paint, resulting in modern thread portraits that look shockingly realistic.
21. Add a Minimalist Motif to Knitwear
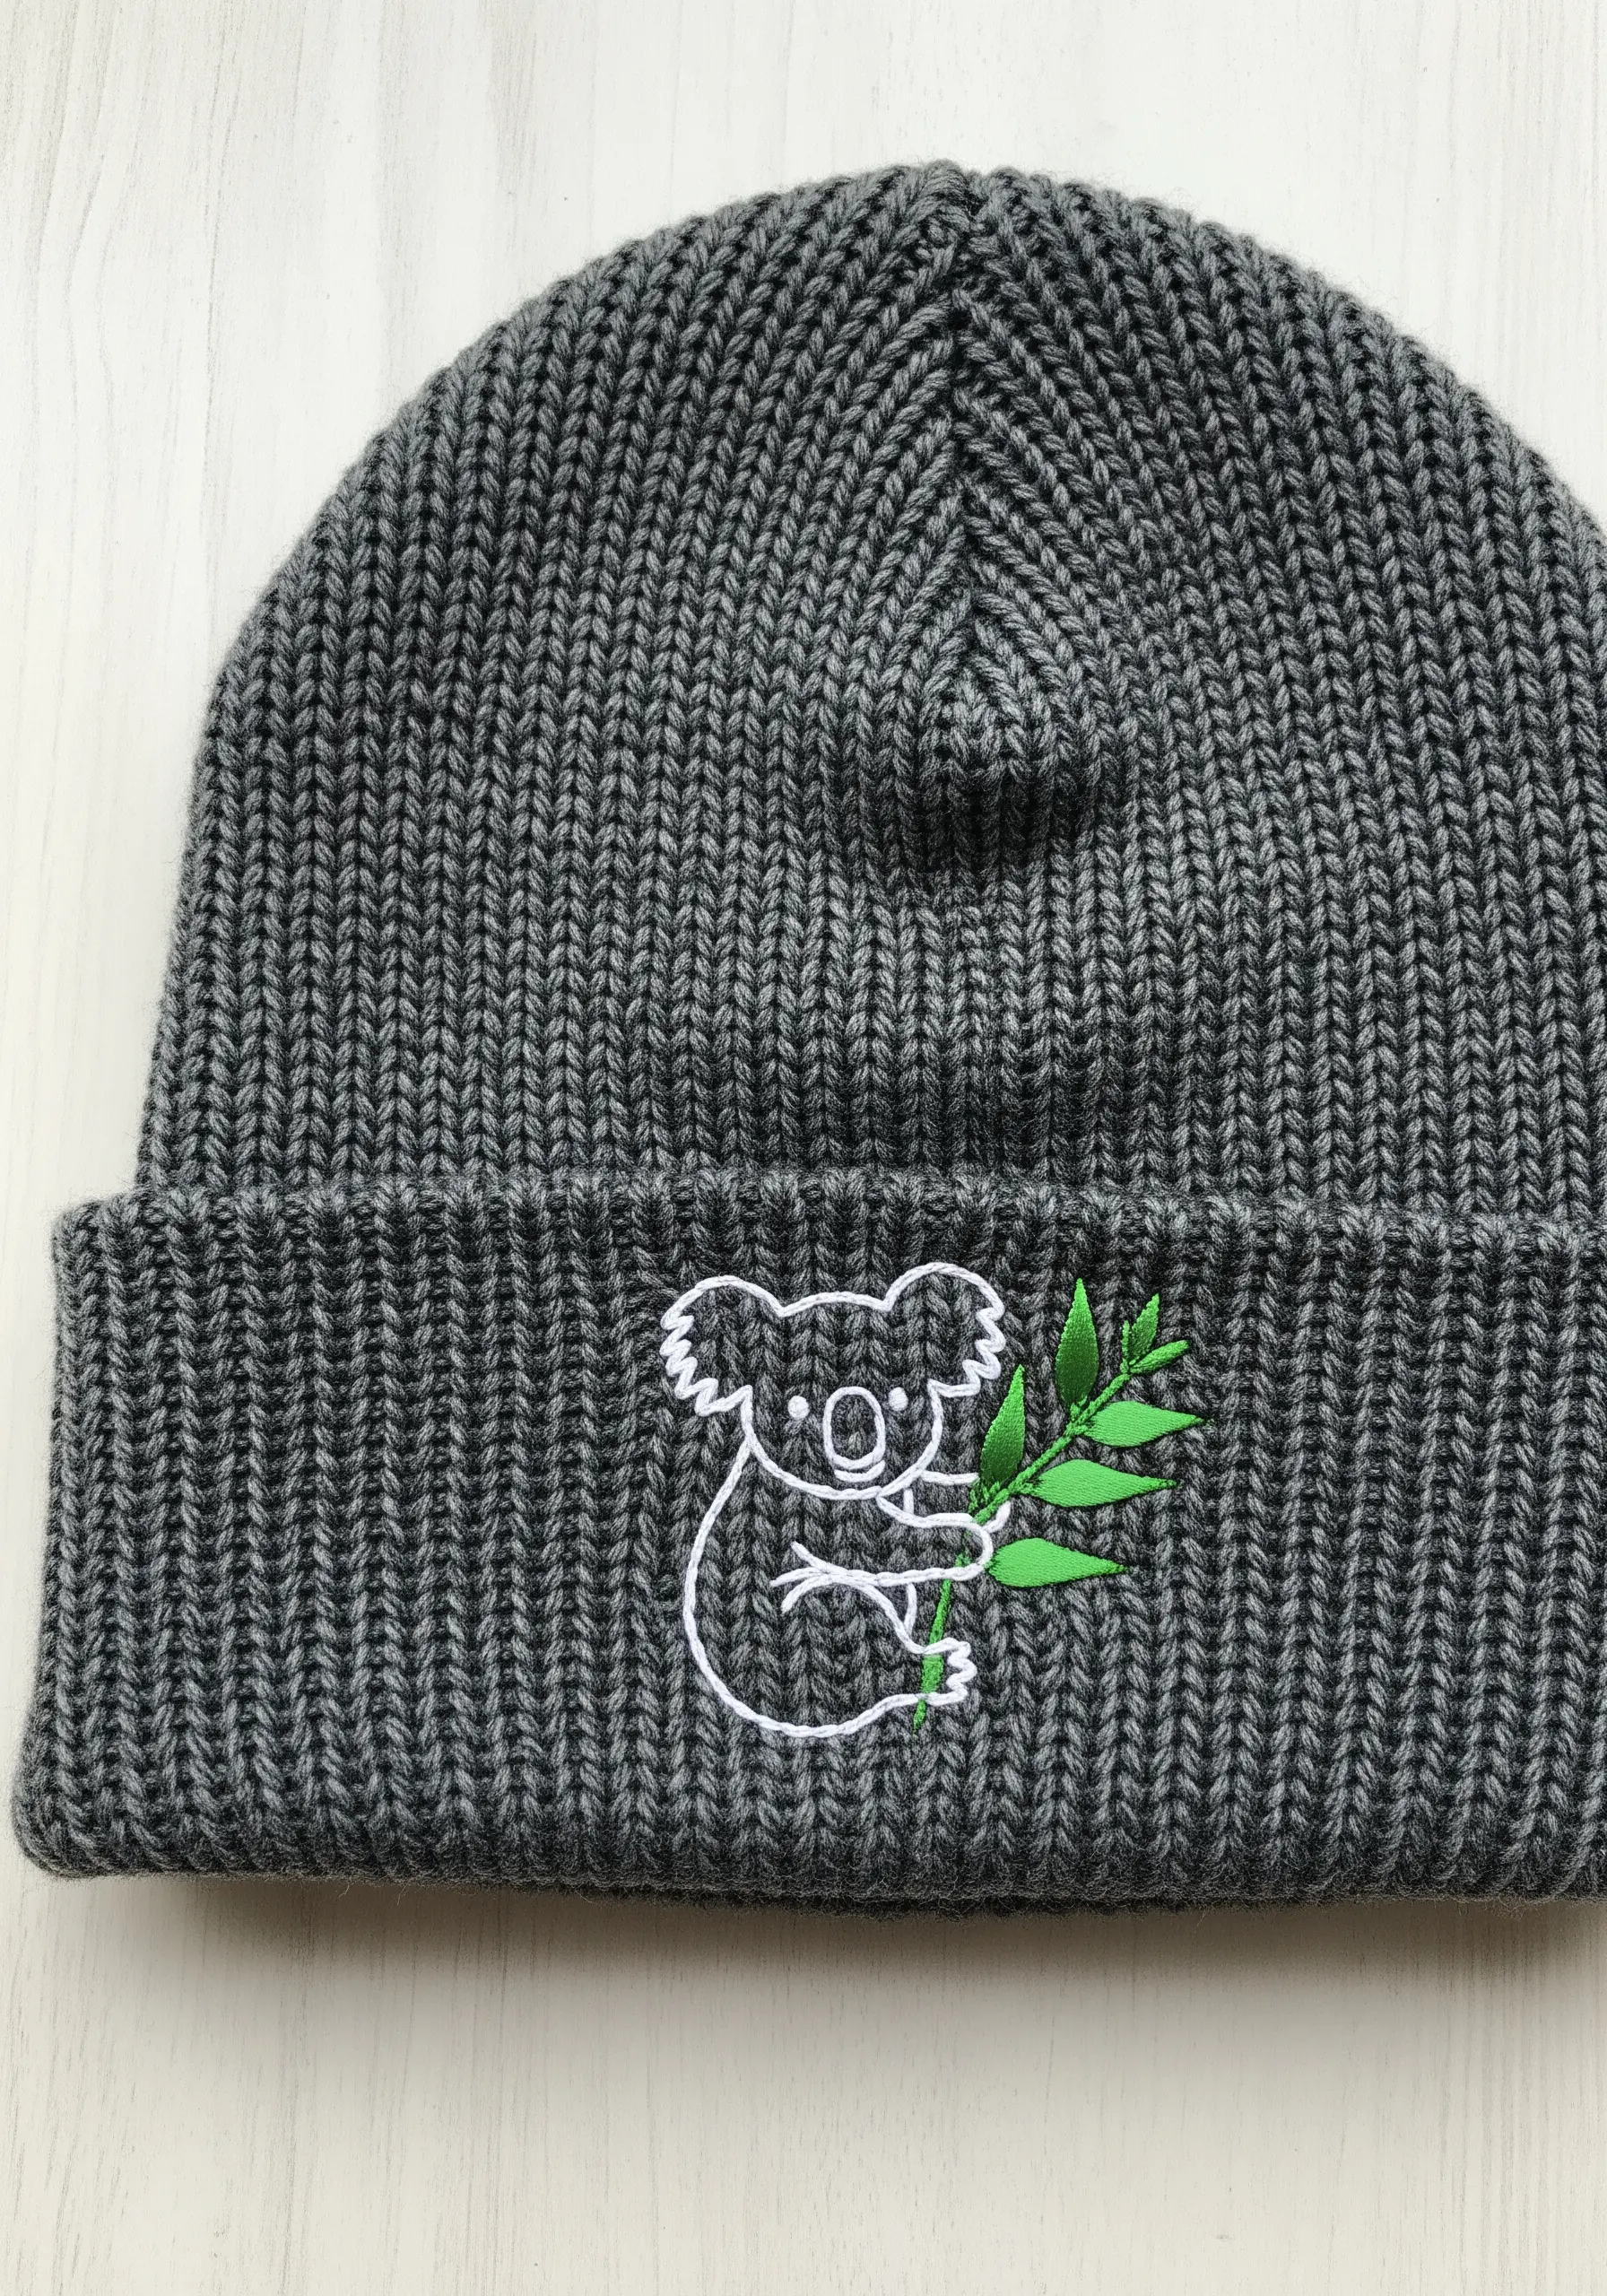
Embroidering on a stretchy ribbed beanie requires a light touch to avoid distorting the knit.
Use a water-soluble or light cut-away stabilizer on the inside to give the fabric stability while you stitch. Opt for a simple outline design rather than a heavy, filled one.
A backstitch or stem stitch works perfectly, as it has enough flexibility to move with the fabric.
These minimal stitch motifs are ideal for adding a custom touch to thrifted winter accessories.
22. Stitch Dynamic Motion with Abstract Splatters
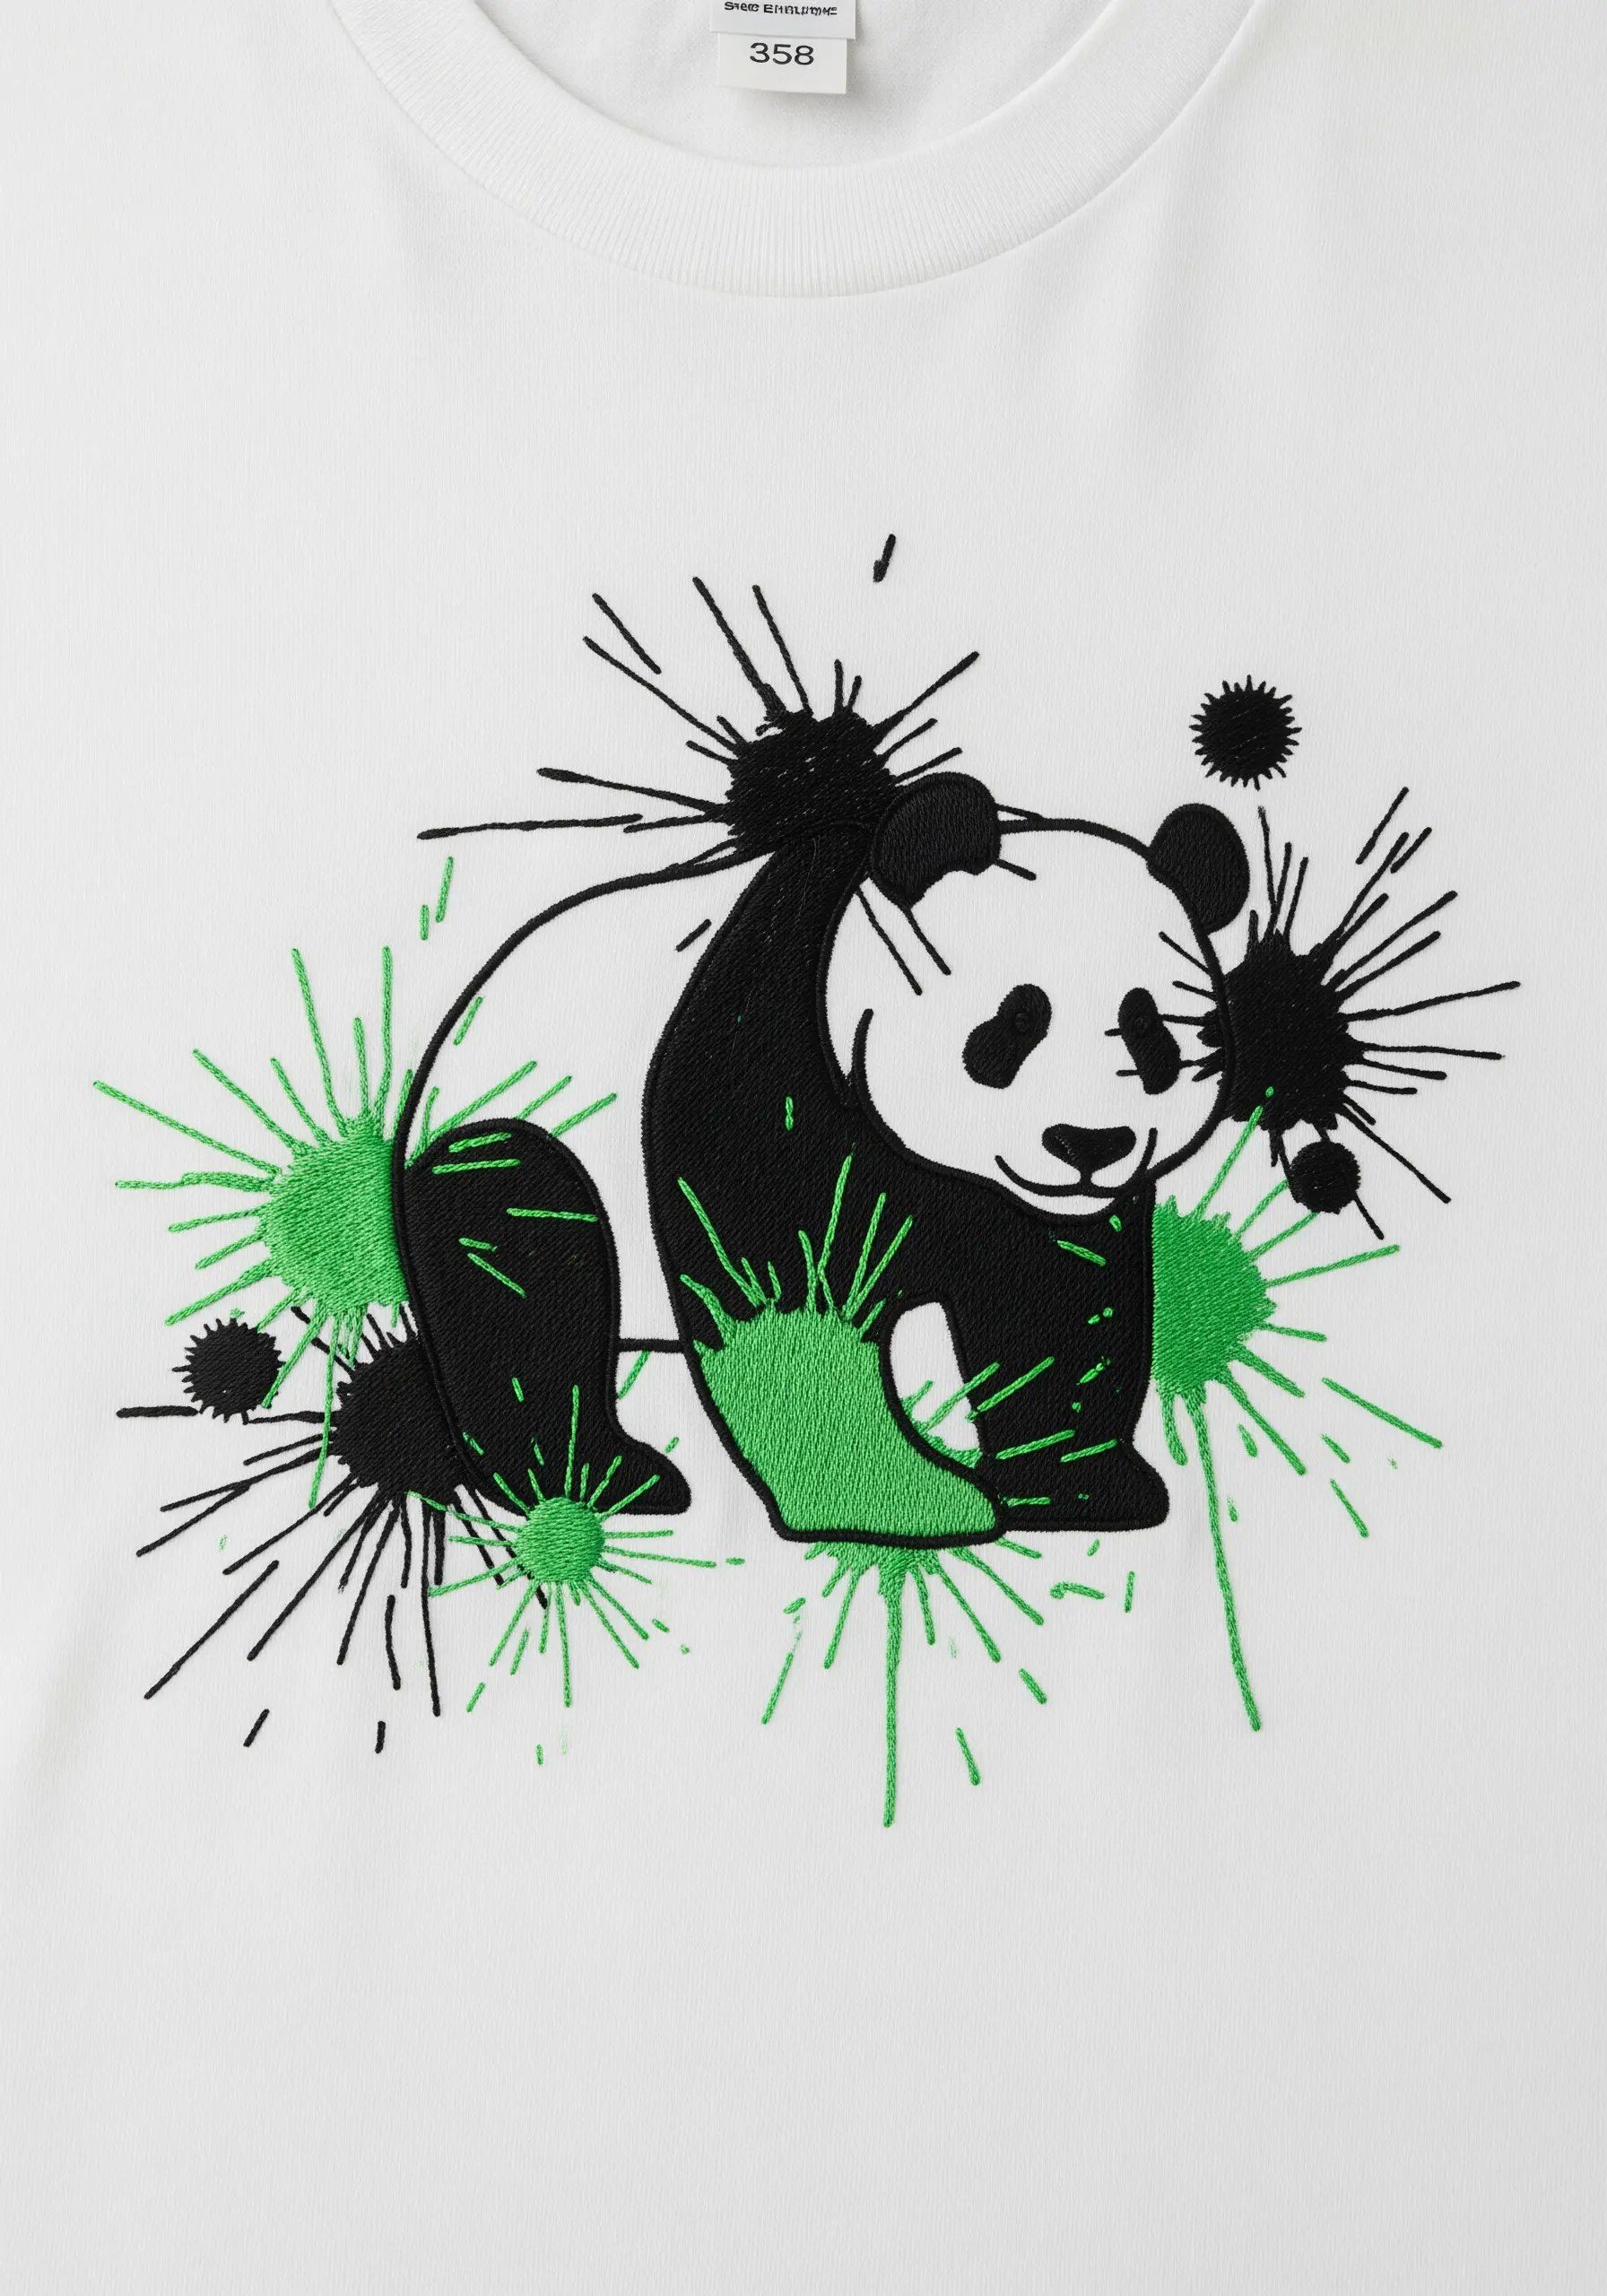
Capture a sense of energy and movement by incorporating abstract ‘paint splatters’ into your design.
Create these by using long, radiating straight stitches that vary in length and thickness (use 1, 2, or 3 strands of floss).
For the smaller ‘drips,’ use single, detached chain stitches or tiny seed stitches.
This technique adds a contemporary, graphic-art feel to an otherwise simple panda silhouette, showing how abstract broken shape designs can convey powerful energy.
23. Create a Rustic Wall Hanging with Appliqué
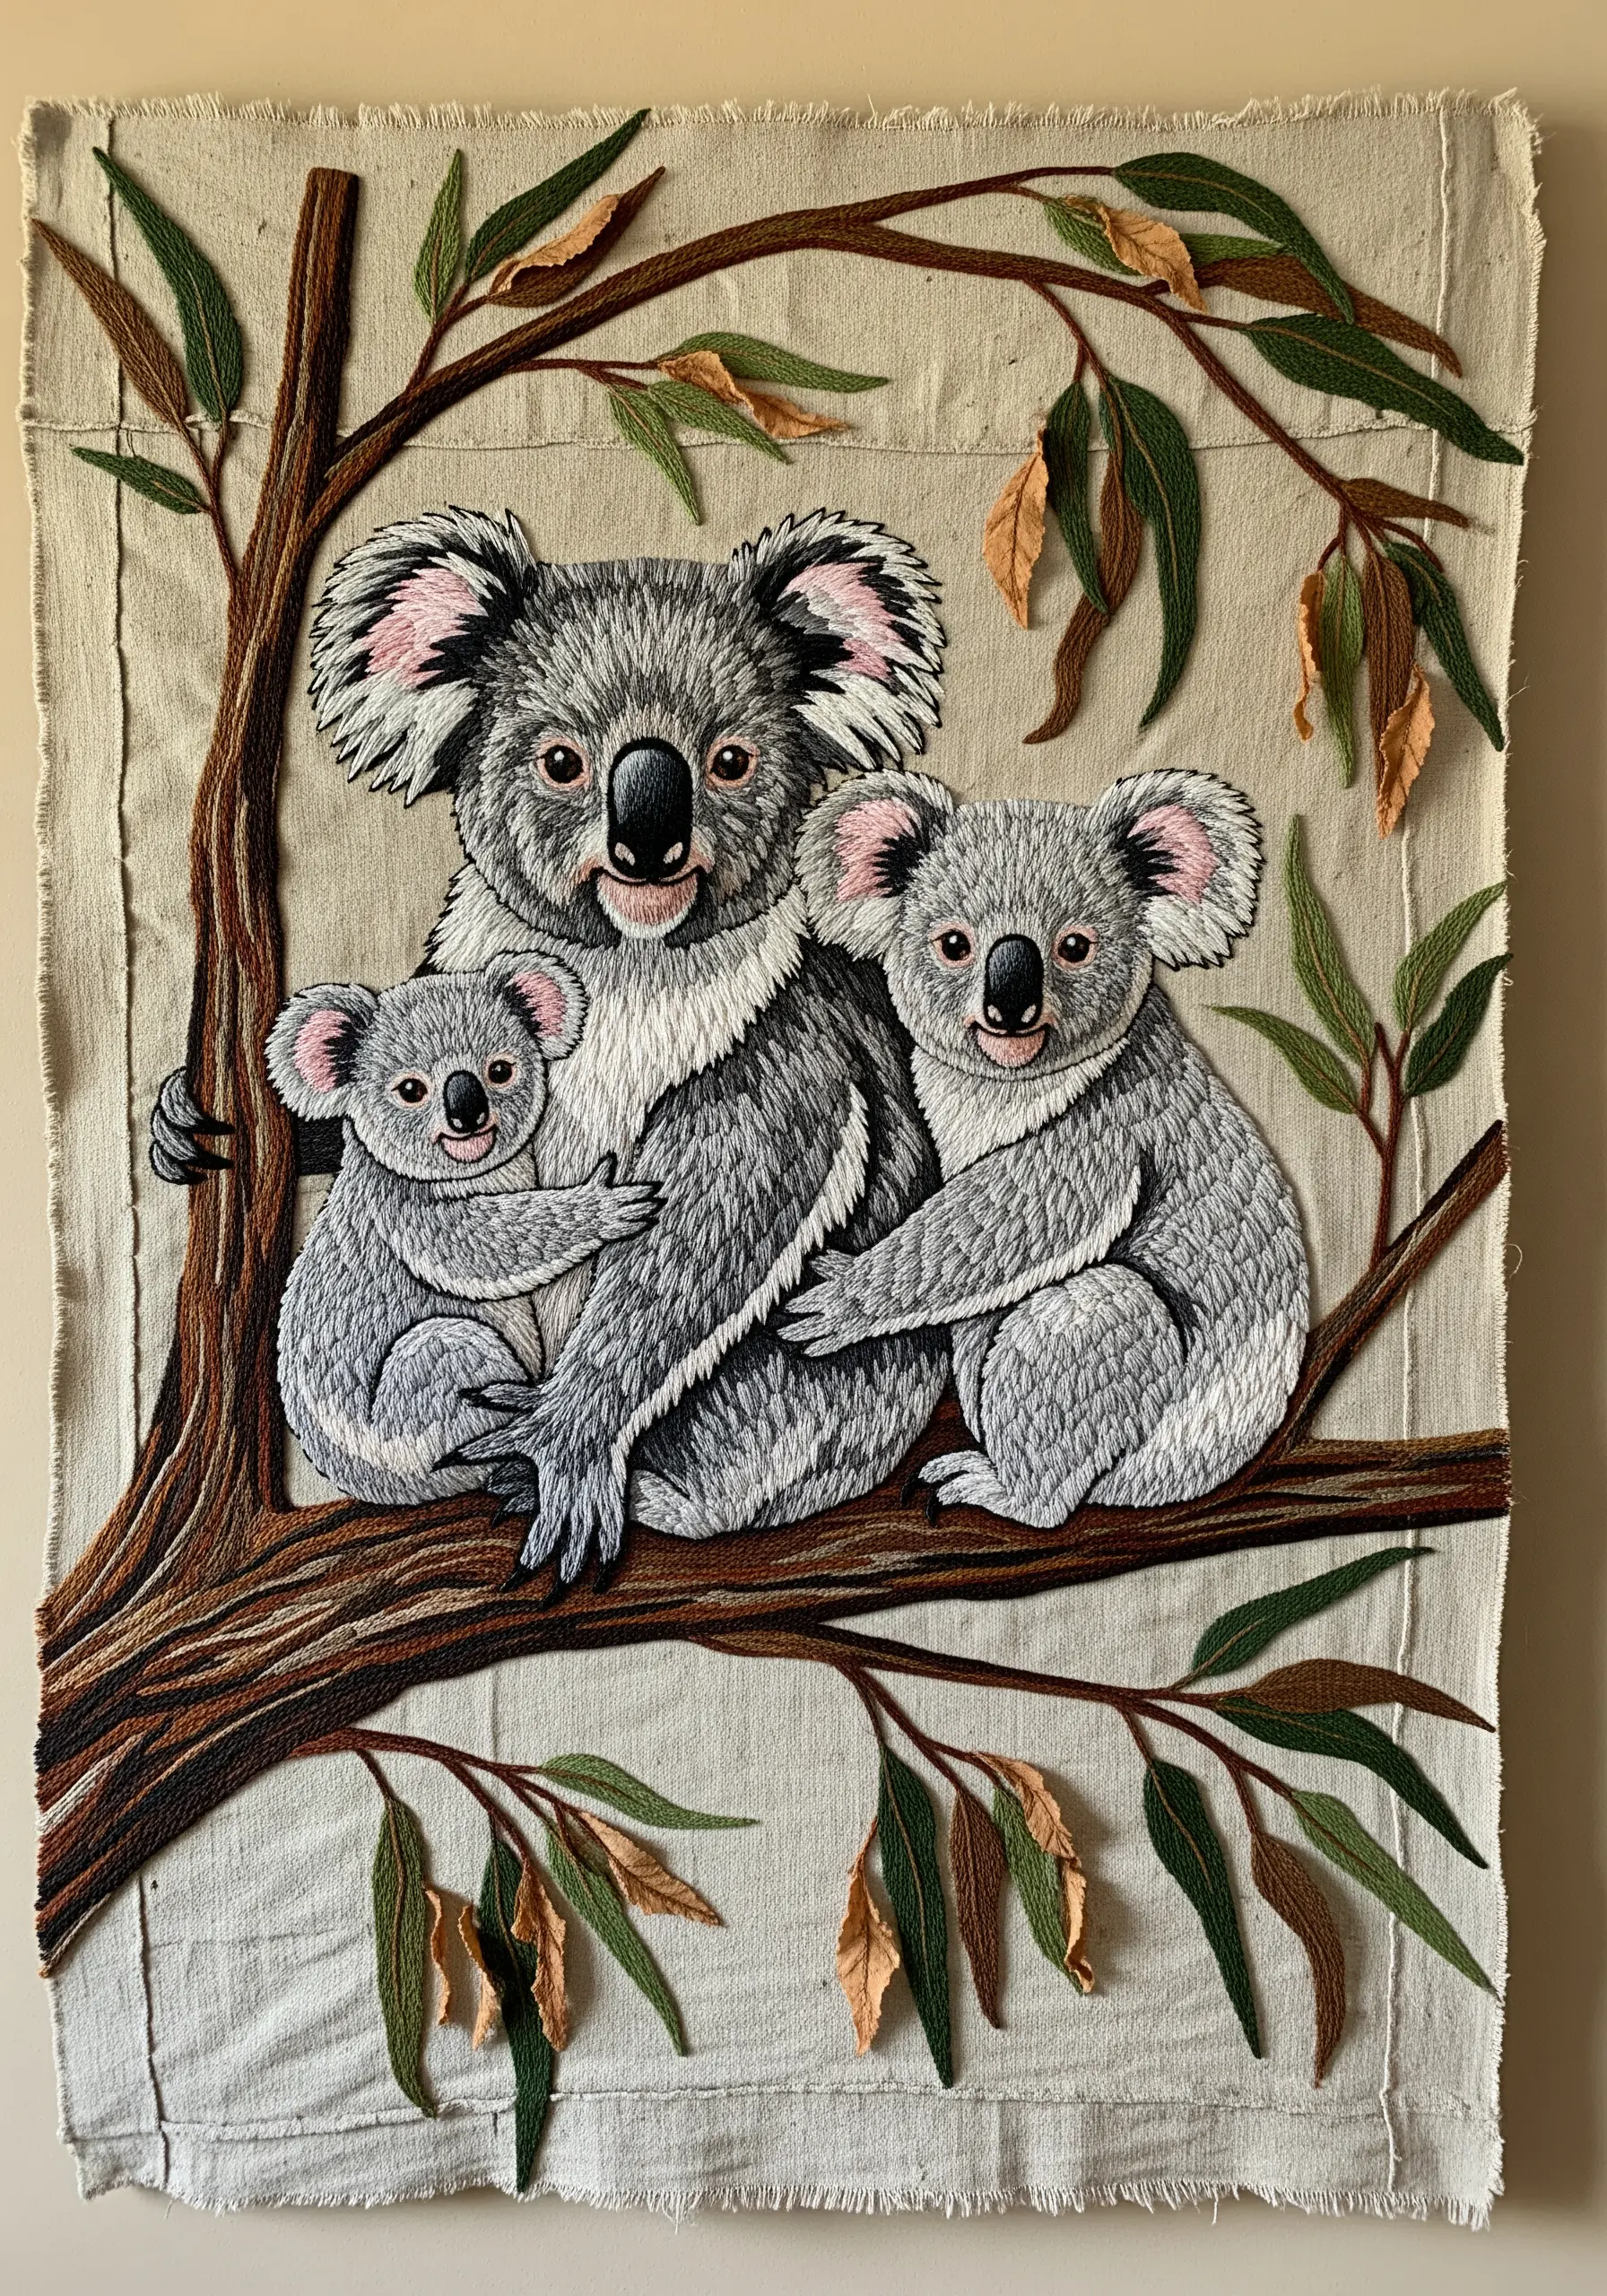
Give your embroidery a rustic, organic feel by working on a piece of raw-edged canvas or linen.
Combine traditional thread painting for the koalas with appliqué for some of the leaves. Cut leaf shapes from scraps of brown and green fabric and attach them with a single central stitch, allowing the edges to lift slightly for a 3D effect.
This mixed-media approach adds depth and texture, turning a simple embroidery into tactile handmade wall art embroidery ideas.
24. Embroider on Stretched Canvas
For a clean, gallery-ready presentation, try embroidering directly onto a small, stretched artist’s canvas.
You will need a sharp, strong needle and a thimble to push it through the primed surface. Pre-piercing the holes with an awl along your design lines can make stitching much easier.
Use simple, bold stitches like satin stitch and couched thread, as the rigid surface is not well-suited for delicate, complex work.
This method offers a modern alternative to hoop frames and works well with Japanese zen inspired embroidery designs.
25. Craft Perfectly Filled Lettering
To achieve flawless, professional-looking embroidered text, always start by outlining each letter with a split stitch or backstitch.
This raised edge serves as a guide and a boundary for your fill stitches. Then, fill the letters with dense, even satin stitches, keeping them parallel to each other.
For a large design on a tote bag, use all six strands of cotton floss to fill the space more quickly and create a bold, solid look.
Mastering this technique will improve all your thread based typography ideas.
26. Design a 3D Landscape with Knots

Go beyond flat stitching and build a three-dimensional surface using a dense field of French knots or bullion knots.
For the grassy hill, use several shades of green floss and vary the tension of your knots—tighter knots for some areas, looser ones for others—to create a wonderfully plush and uneven texture that mimics a field.
This tactile approach is a fantastic way to create 3D textures without special tools, relying solely on stitch variation.
27. Stitch a Cohesive Set for a Polished Gift
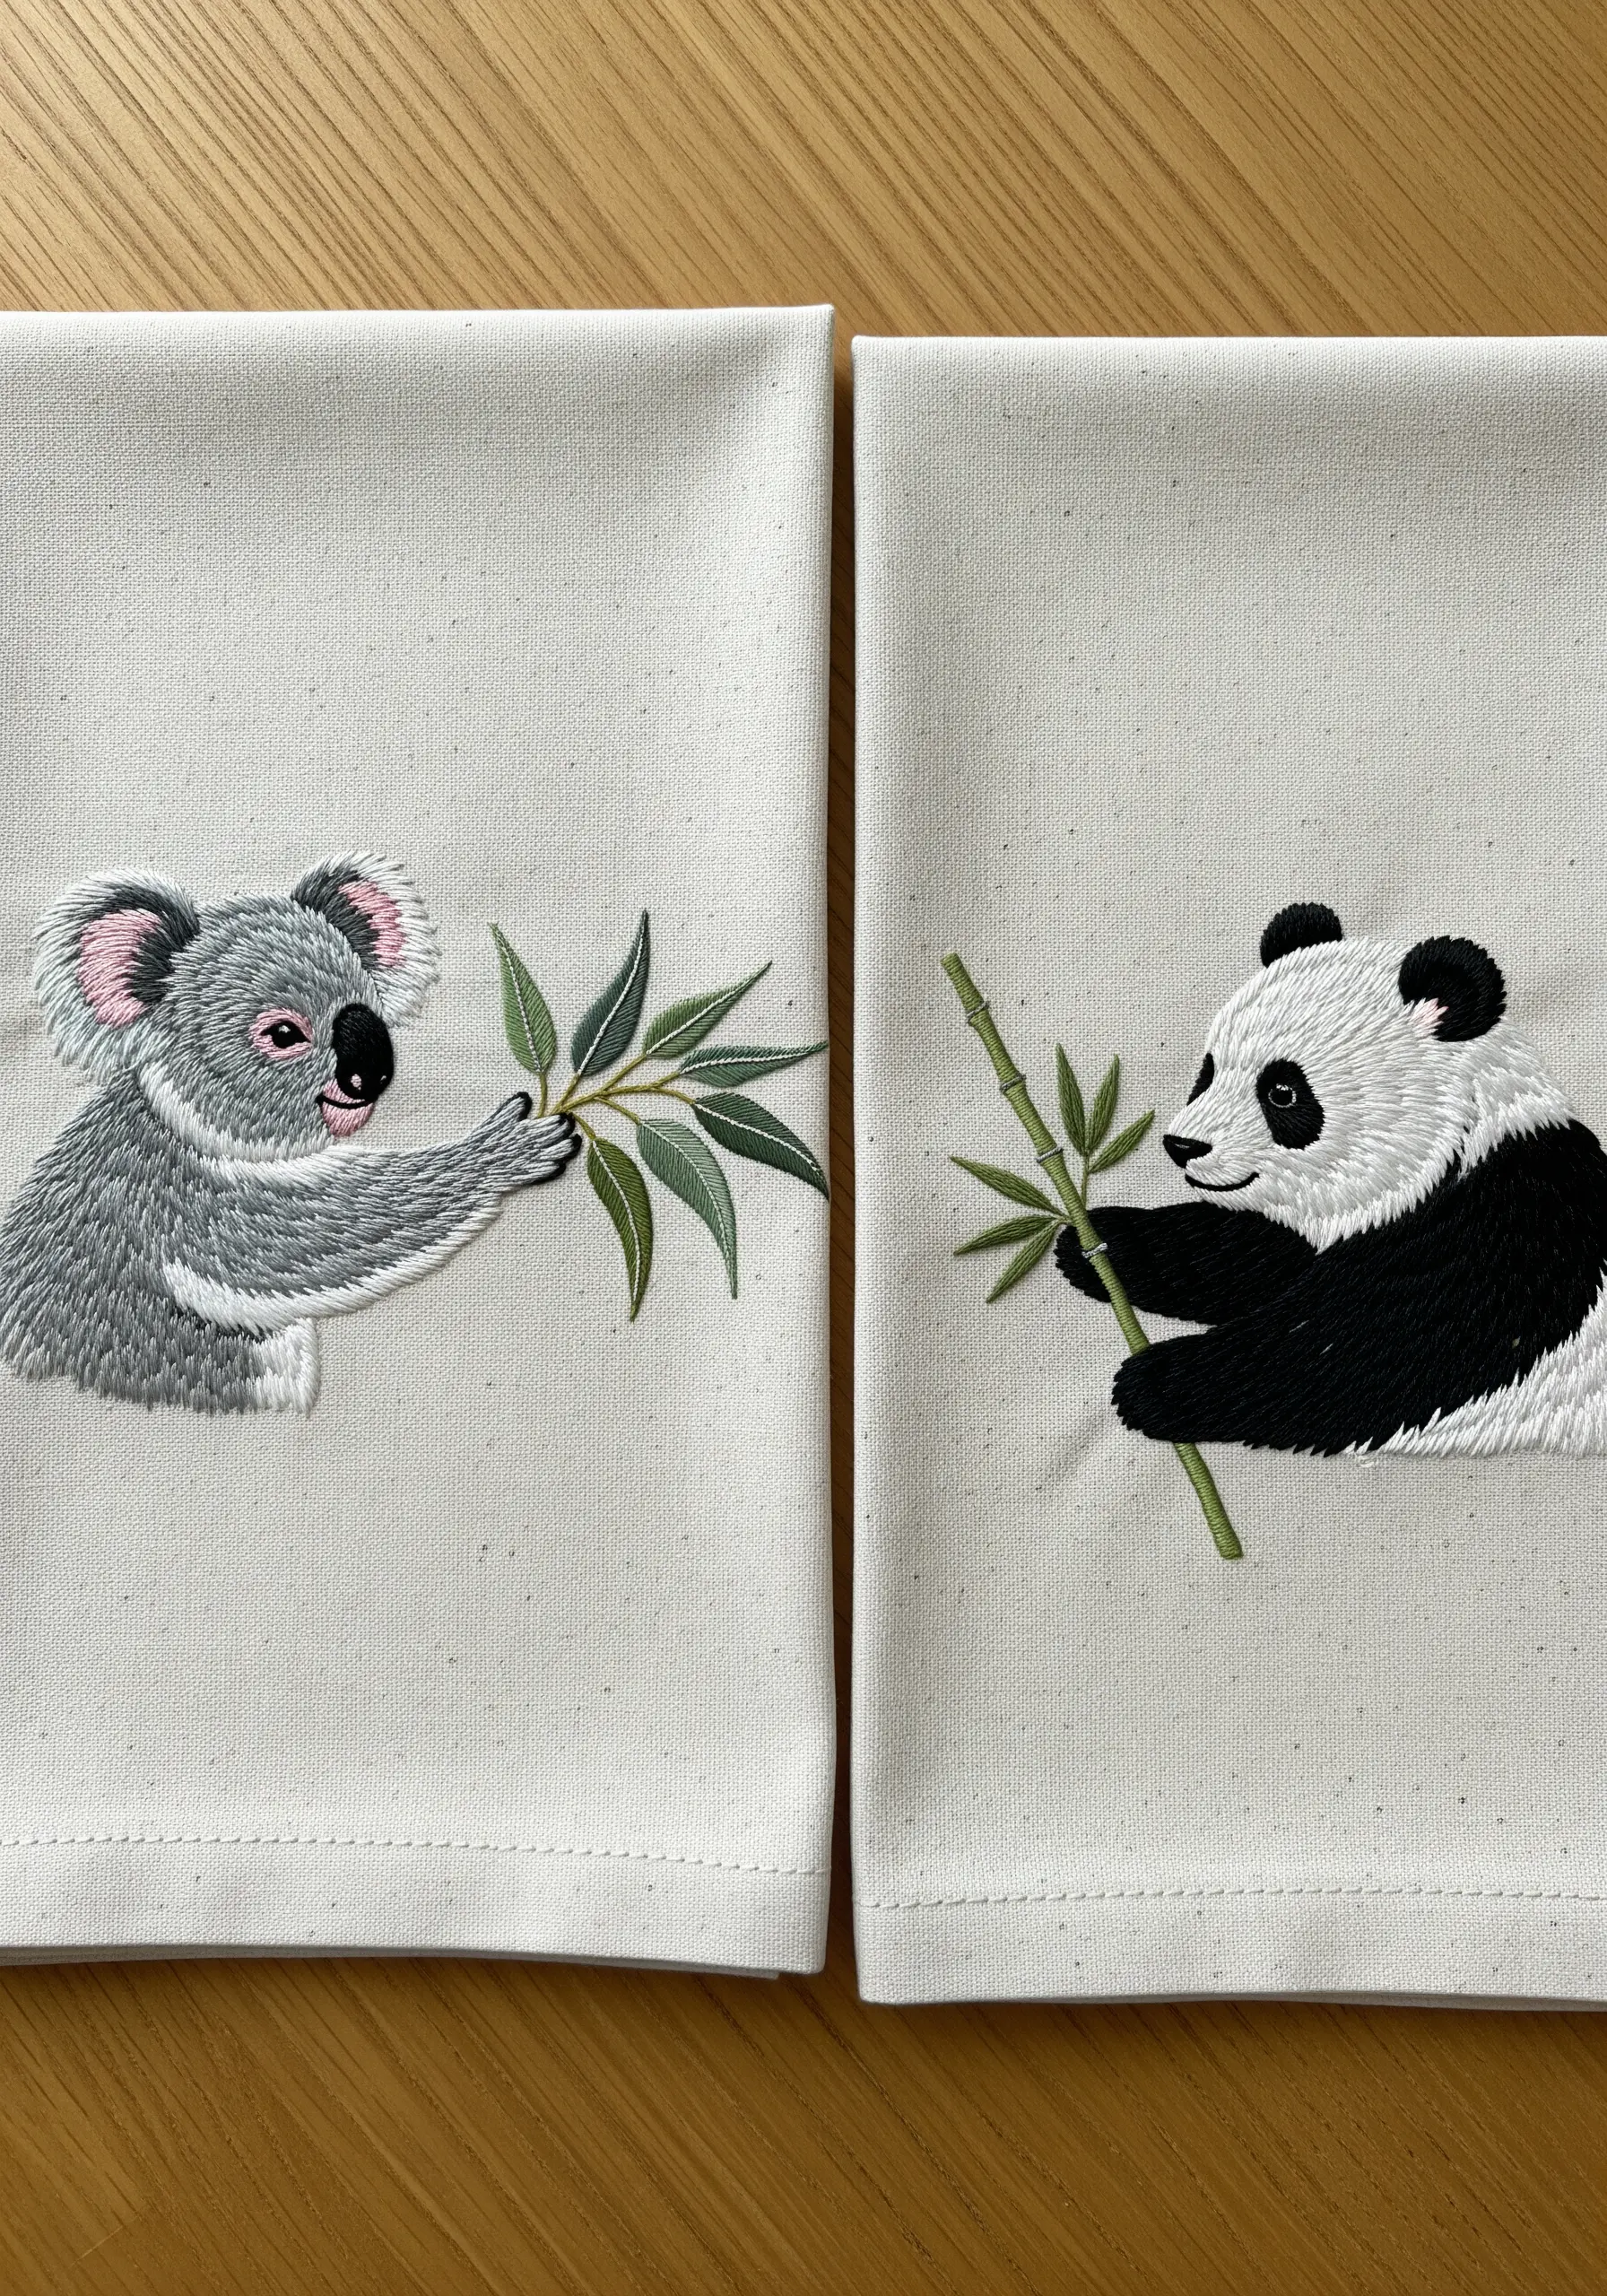
When upcycling a pair of plain napkins or tea towels, create a coordinating set by stitching related motifs that share a visual story.
Use the same thread palette, stitch style, and scale for both the koala and the panda to ensure they look like an intentional pairing.
The simple act of sharing a branch links the two designs compositionally, turning them from individual pieces into a cohesive set.
This is a fundamental principle for designing effective table linen embroidery motifs.


