

If you’ve ever felt that your embroidery could be more intentional or polished, the answer isn’t always more complexity. Often, the most stunning results come from stripping a design back to its essential form: the silhouette.
Working with outlines and simple shapes teaches you to see the true character of a subject. It forces a focus on the quality of your line, the consistency of your stitches, and the harmony of your composition. This is where you develop a confident, artistic hand.
This collection is designed to help you explore that power. You’ll see how adjusting your thread weight, changing the direction of a stitch, or choosing a high-contrast palette can transform a simple plant shape into a piece of modern art. Let’s begin.
1. Master the Bold Monstera Outline

Create a clean, graphic statement by focusing on the power of a single line.
Use all six strands of your embroidery floss to achieve a thick, confident outline that stands out against the neutral fabric.
Opt for a stem stitch instead of a backstitch for the curved sections; it creates a smoother, rope-like texture that prevents jagged edges on your leaf.
This technique is not about filling space but about defining it, making the negative space just as important as the stitched line.
2. Add Realistic Ferns to Home Décor
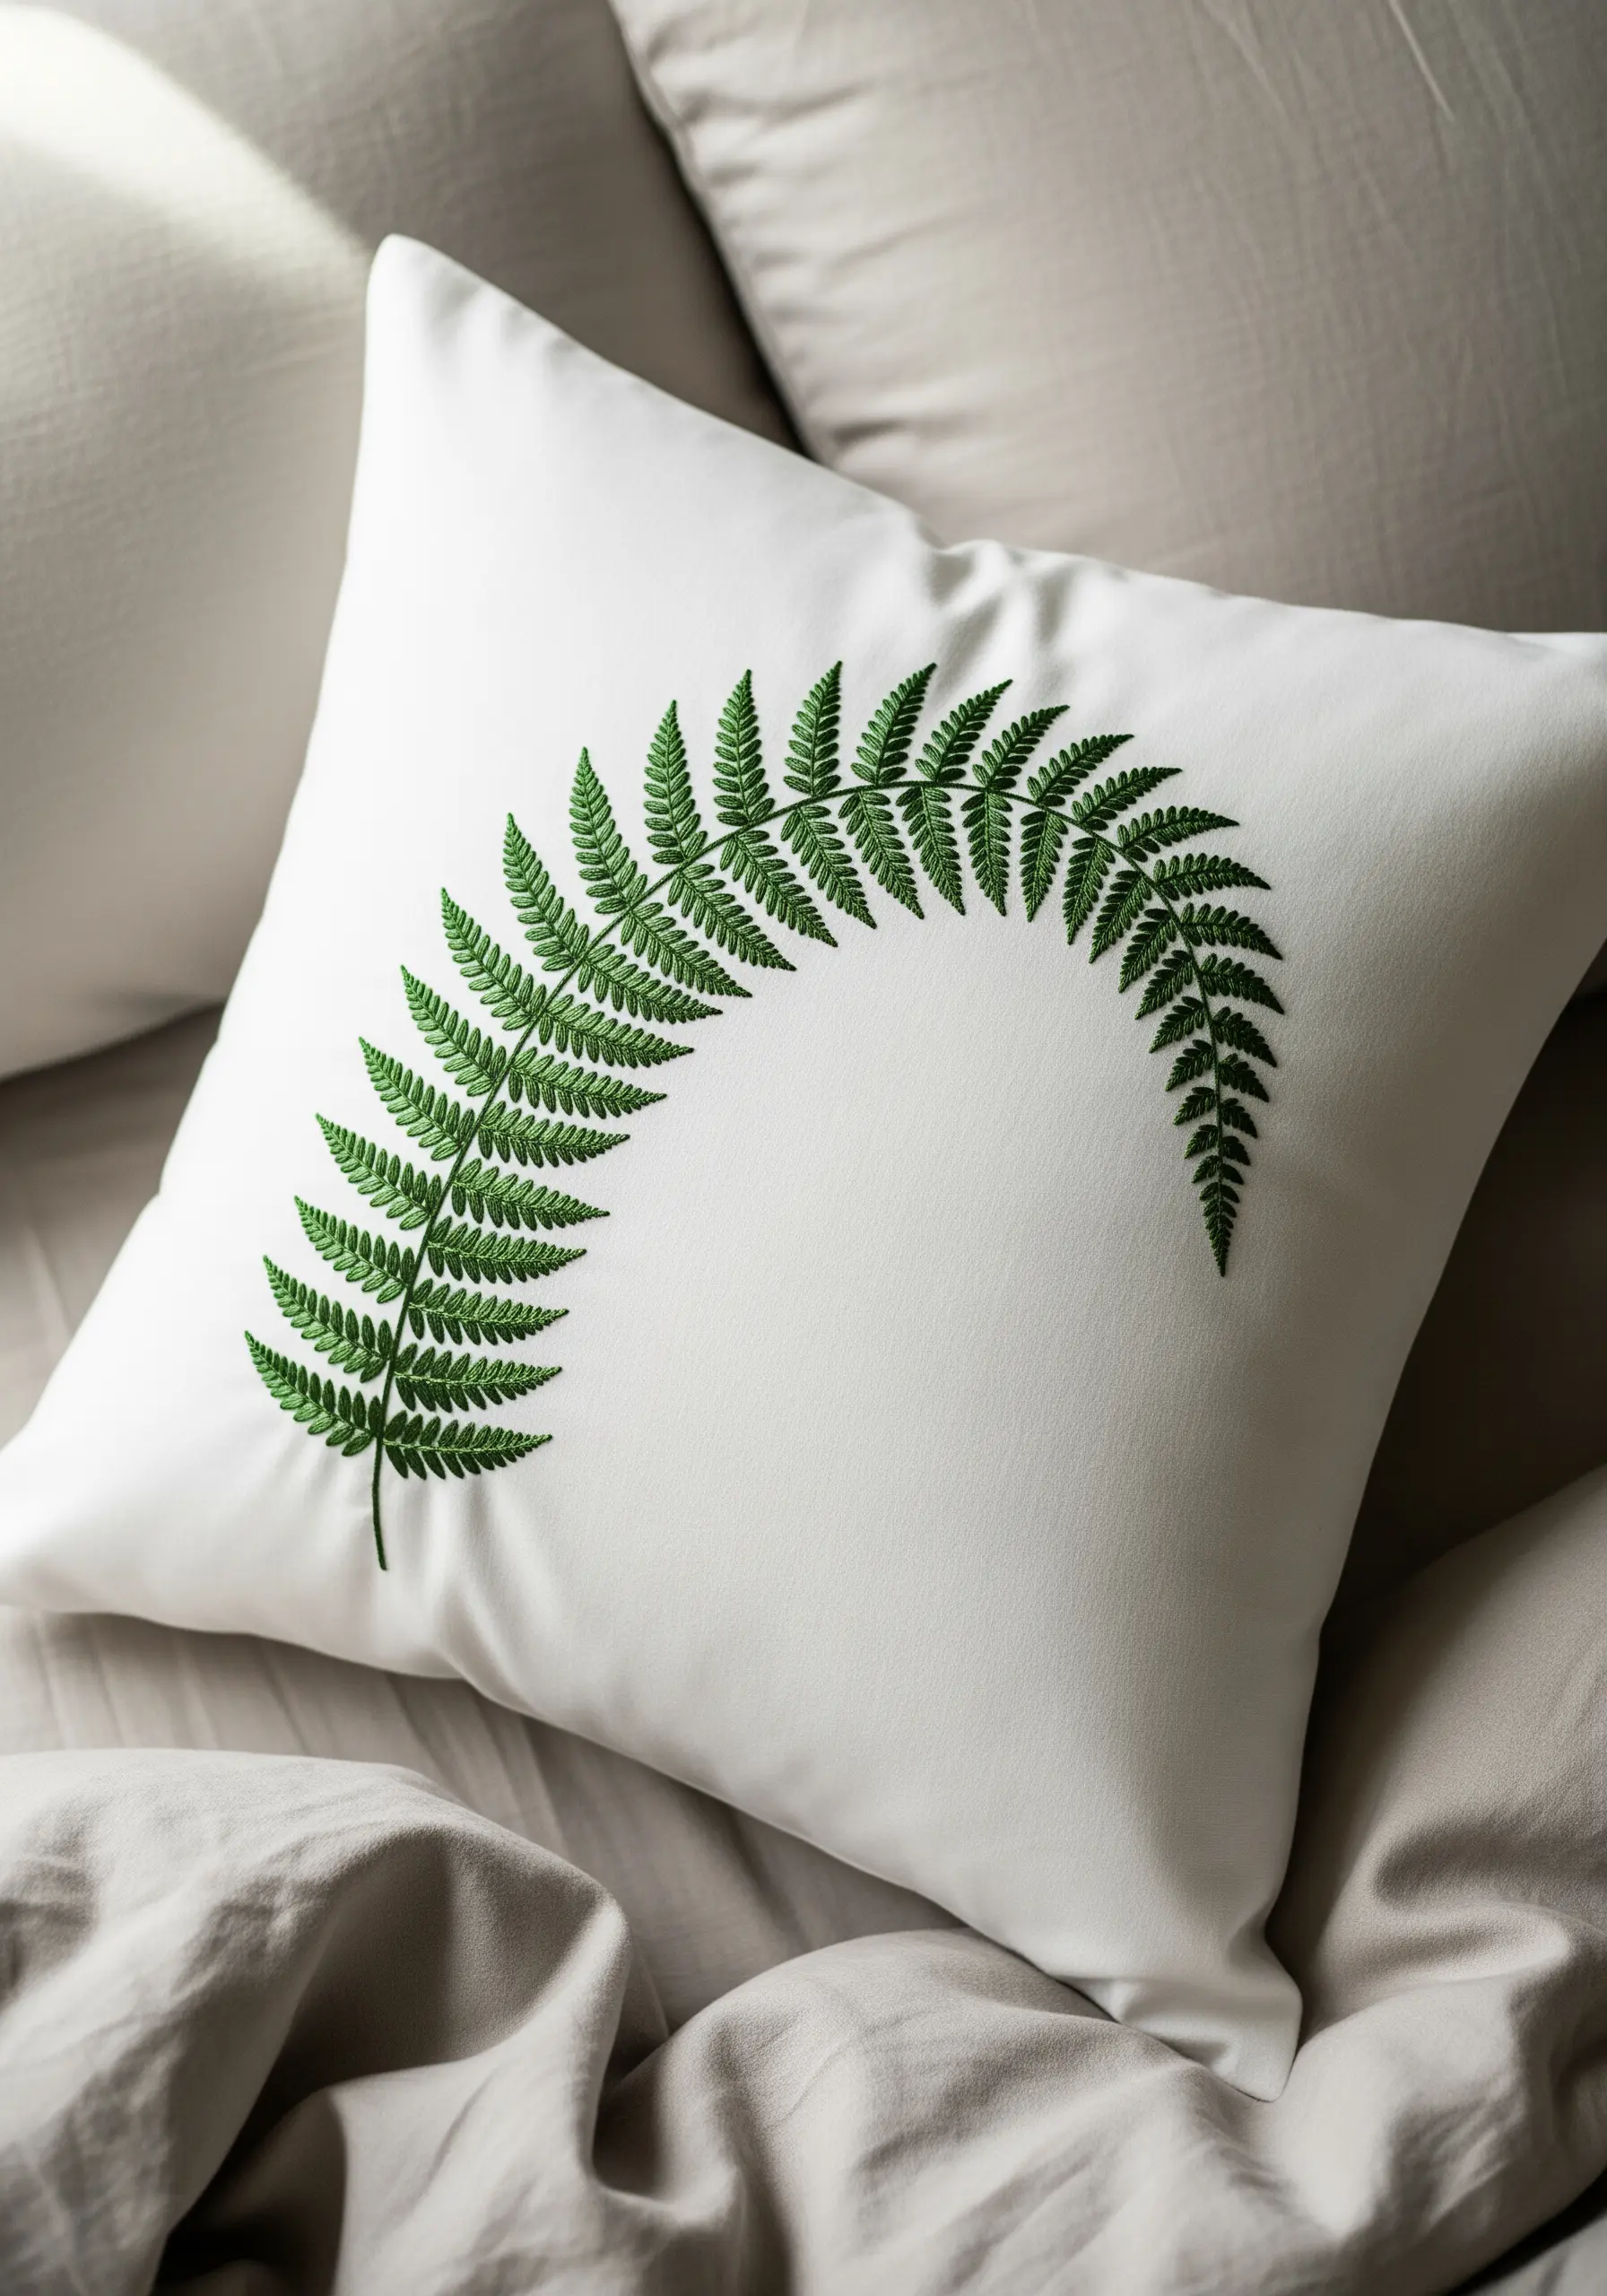
Translate a delicate botanical form onto functional items like pillow covers for an elegant touch.
Use a short, dense satin stitch for each individual fern leaf, ensuring your stitches are parallel and close together for a smooth, solid appearance.
Contrast the full leaves with a very fine stem stitched with only two strands—this distinction in thread weight creates visual depth and realism.
Choose a high-quality cotton or linen blend fabric that can support the stitch density without puckering. These embroidery cushion pillow ideas turn everyday objects into art.
3. Create a Dynamic Ginkgo Leaf Pattern
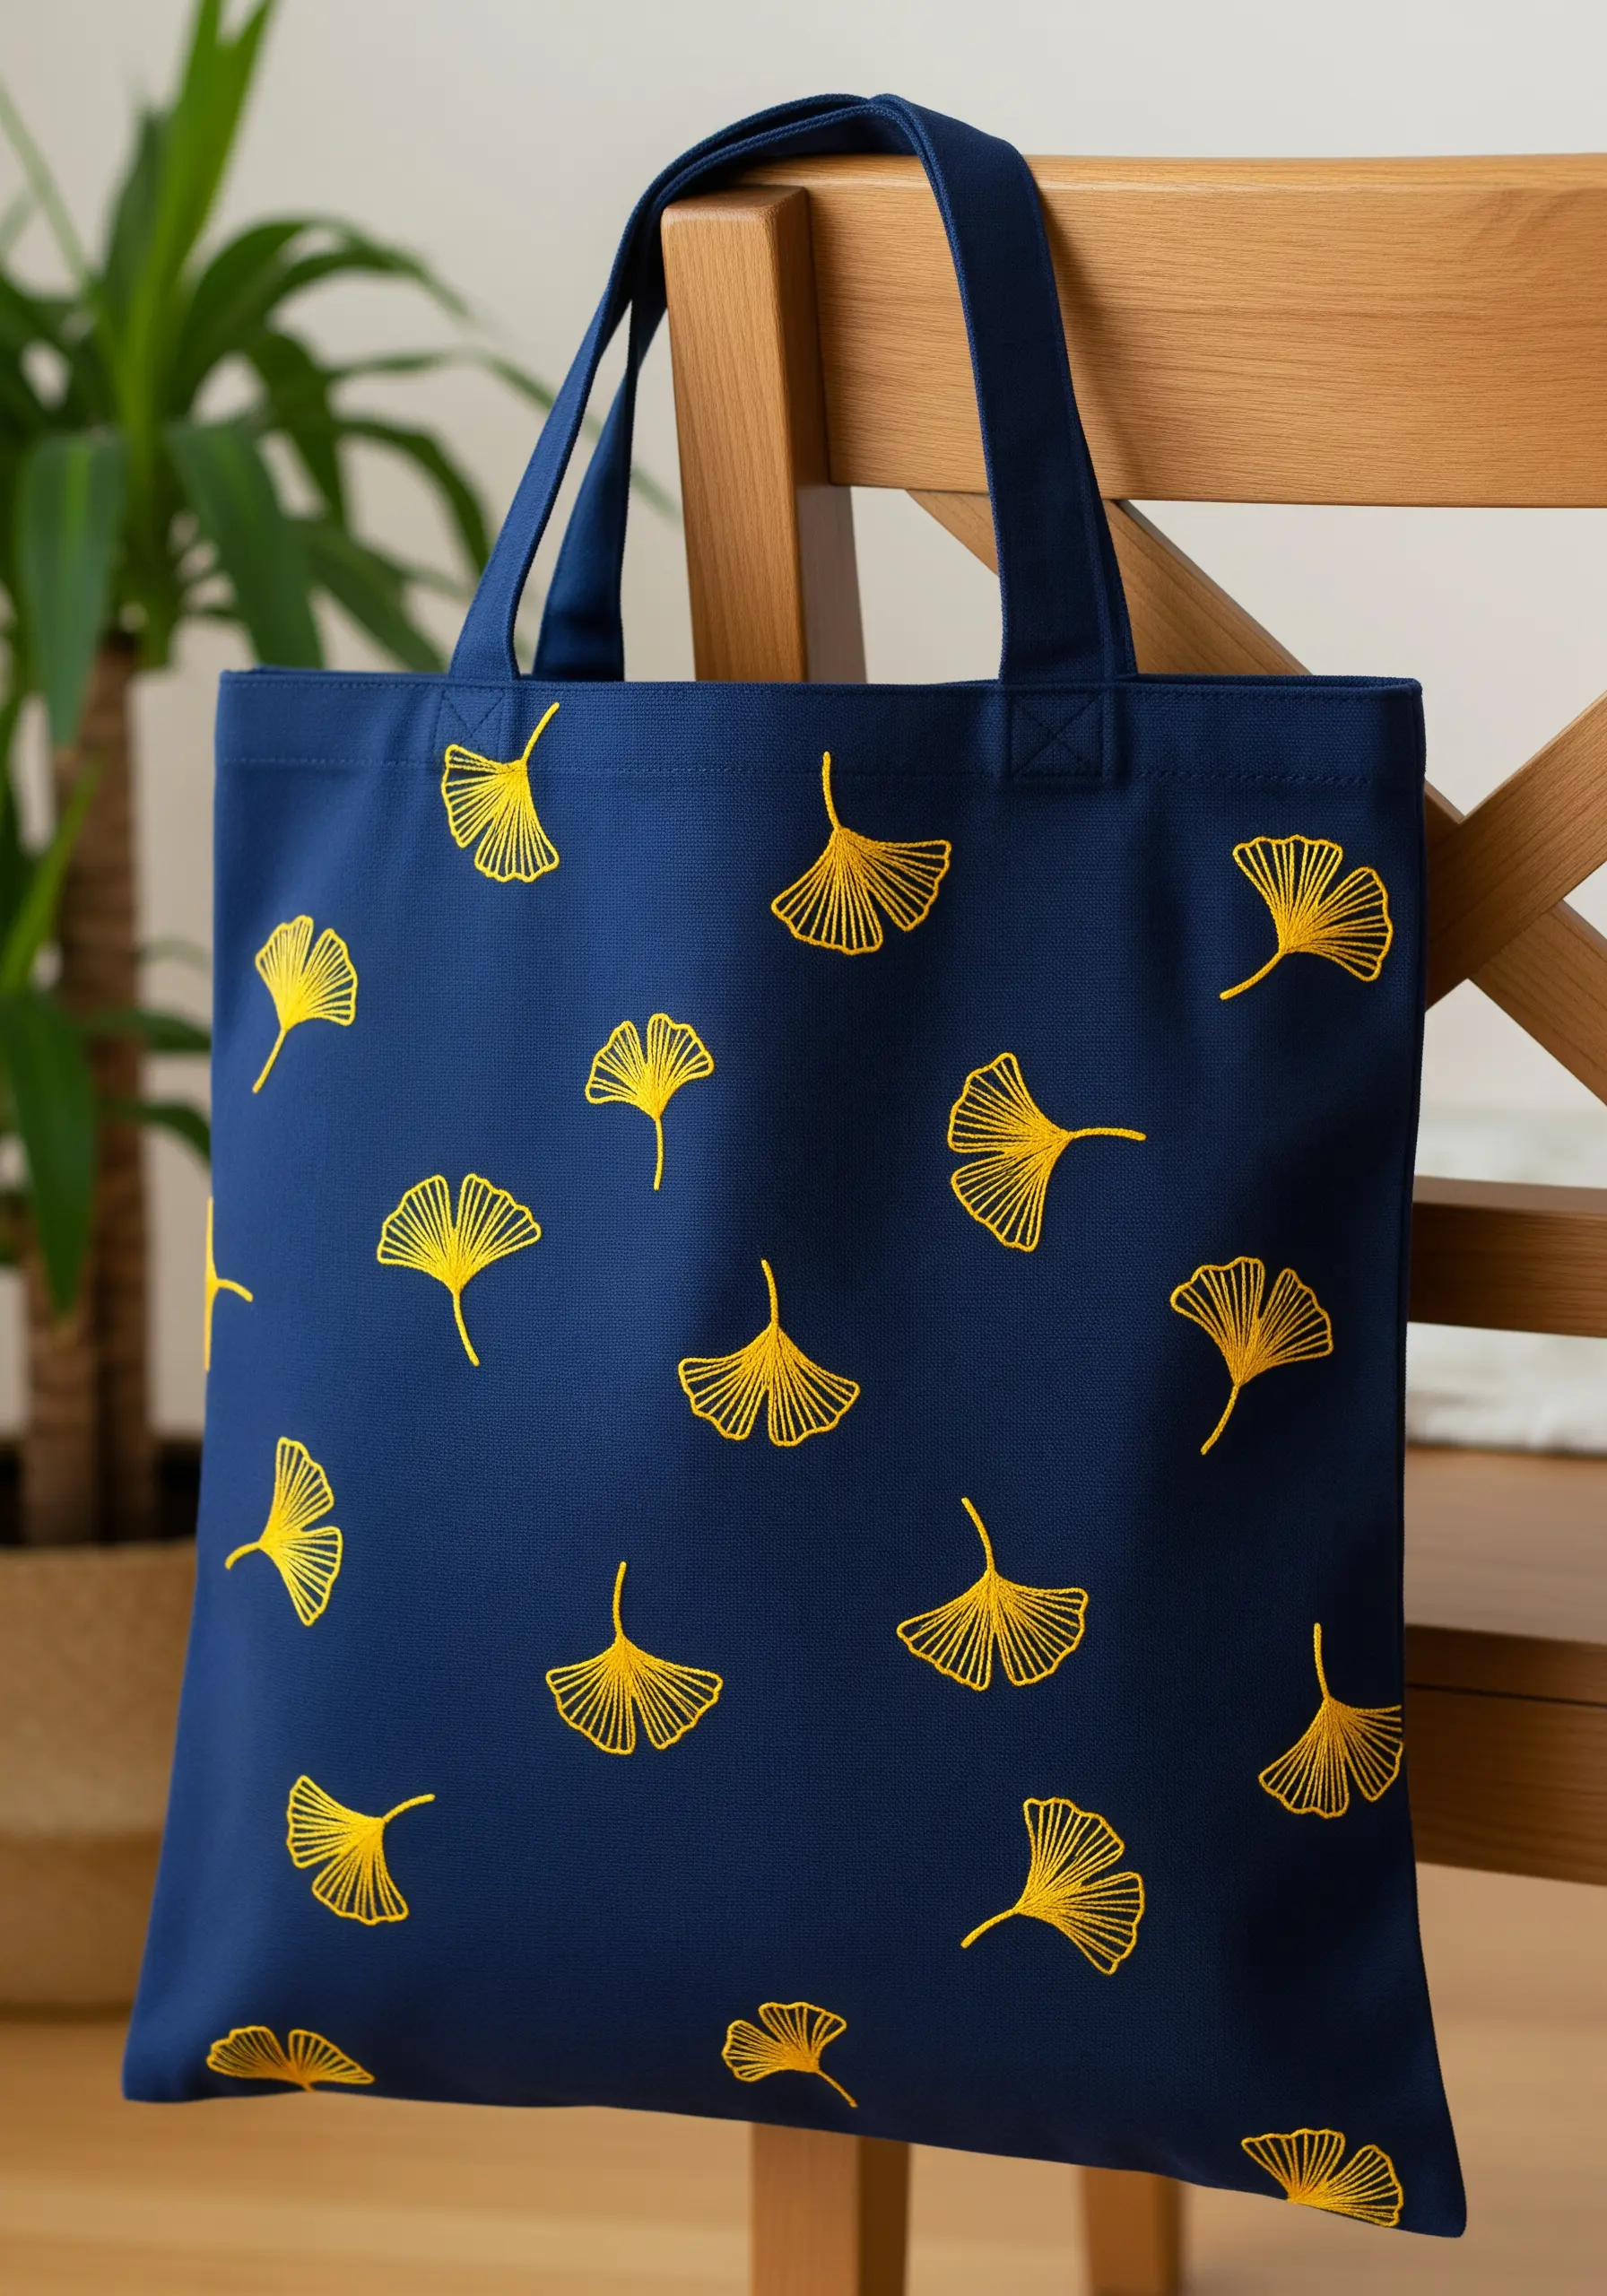
Transform a simple tote bag by scattering a single motif to create a dynamic, custom pattern.
For the fan-shaped ginkgo leaves, use a satin stitch, angling your stitches to radiate from the base of the leaf to the outer edge to mimic natural growth.
The high contrast between the golden yellow thread and the deep navy canvas makes the design pop, proving that a simple two-color palette can have a powerful impact.
Vary the orientation of each leaf slightly to give the overall pattern a sense of movement and prevent it from looking too rigid or uniform.
4. Stitch Elegant Botanical Linens
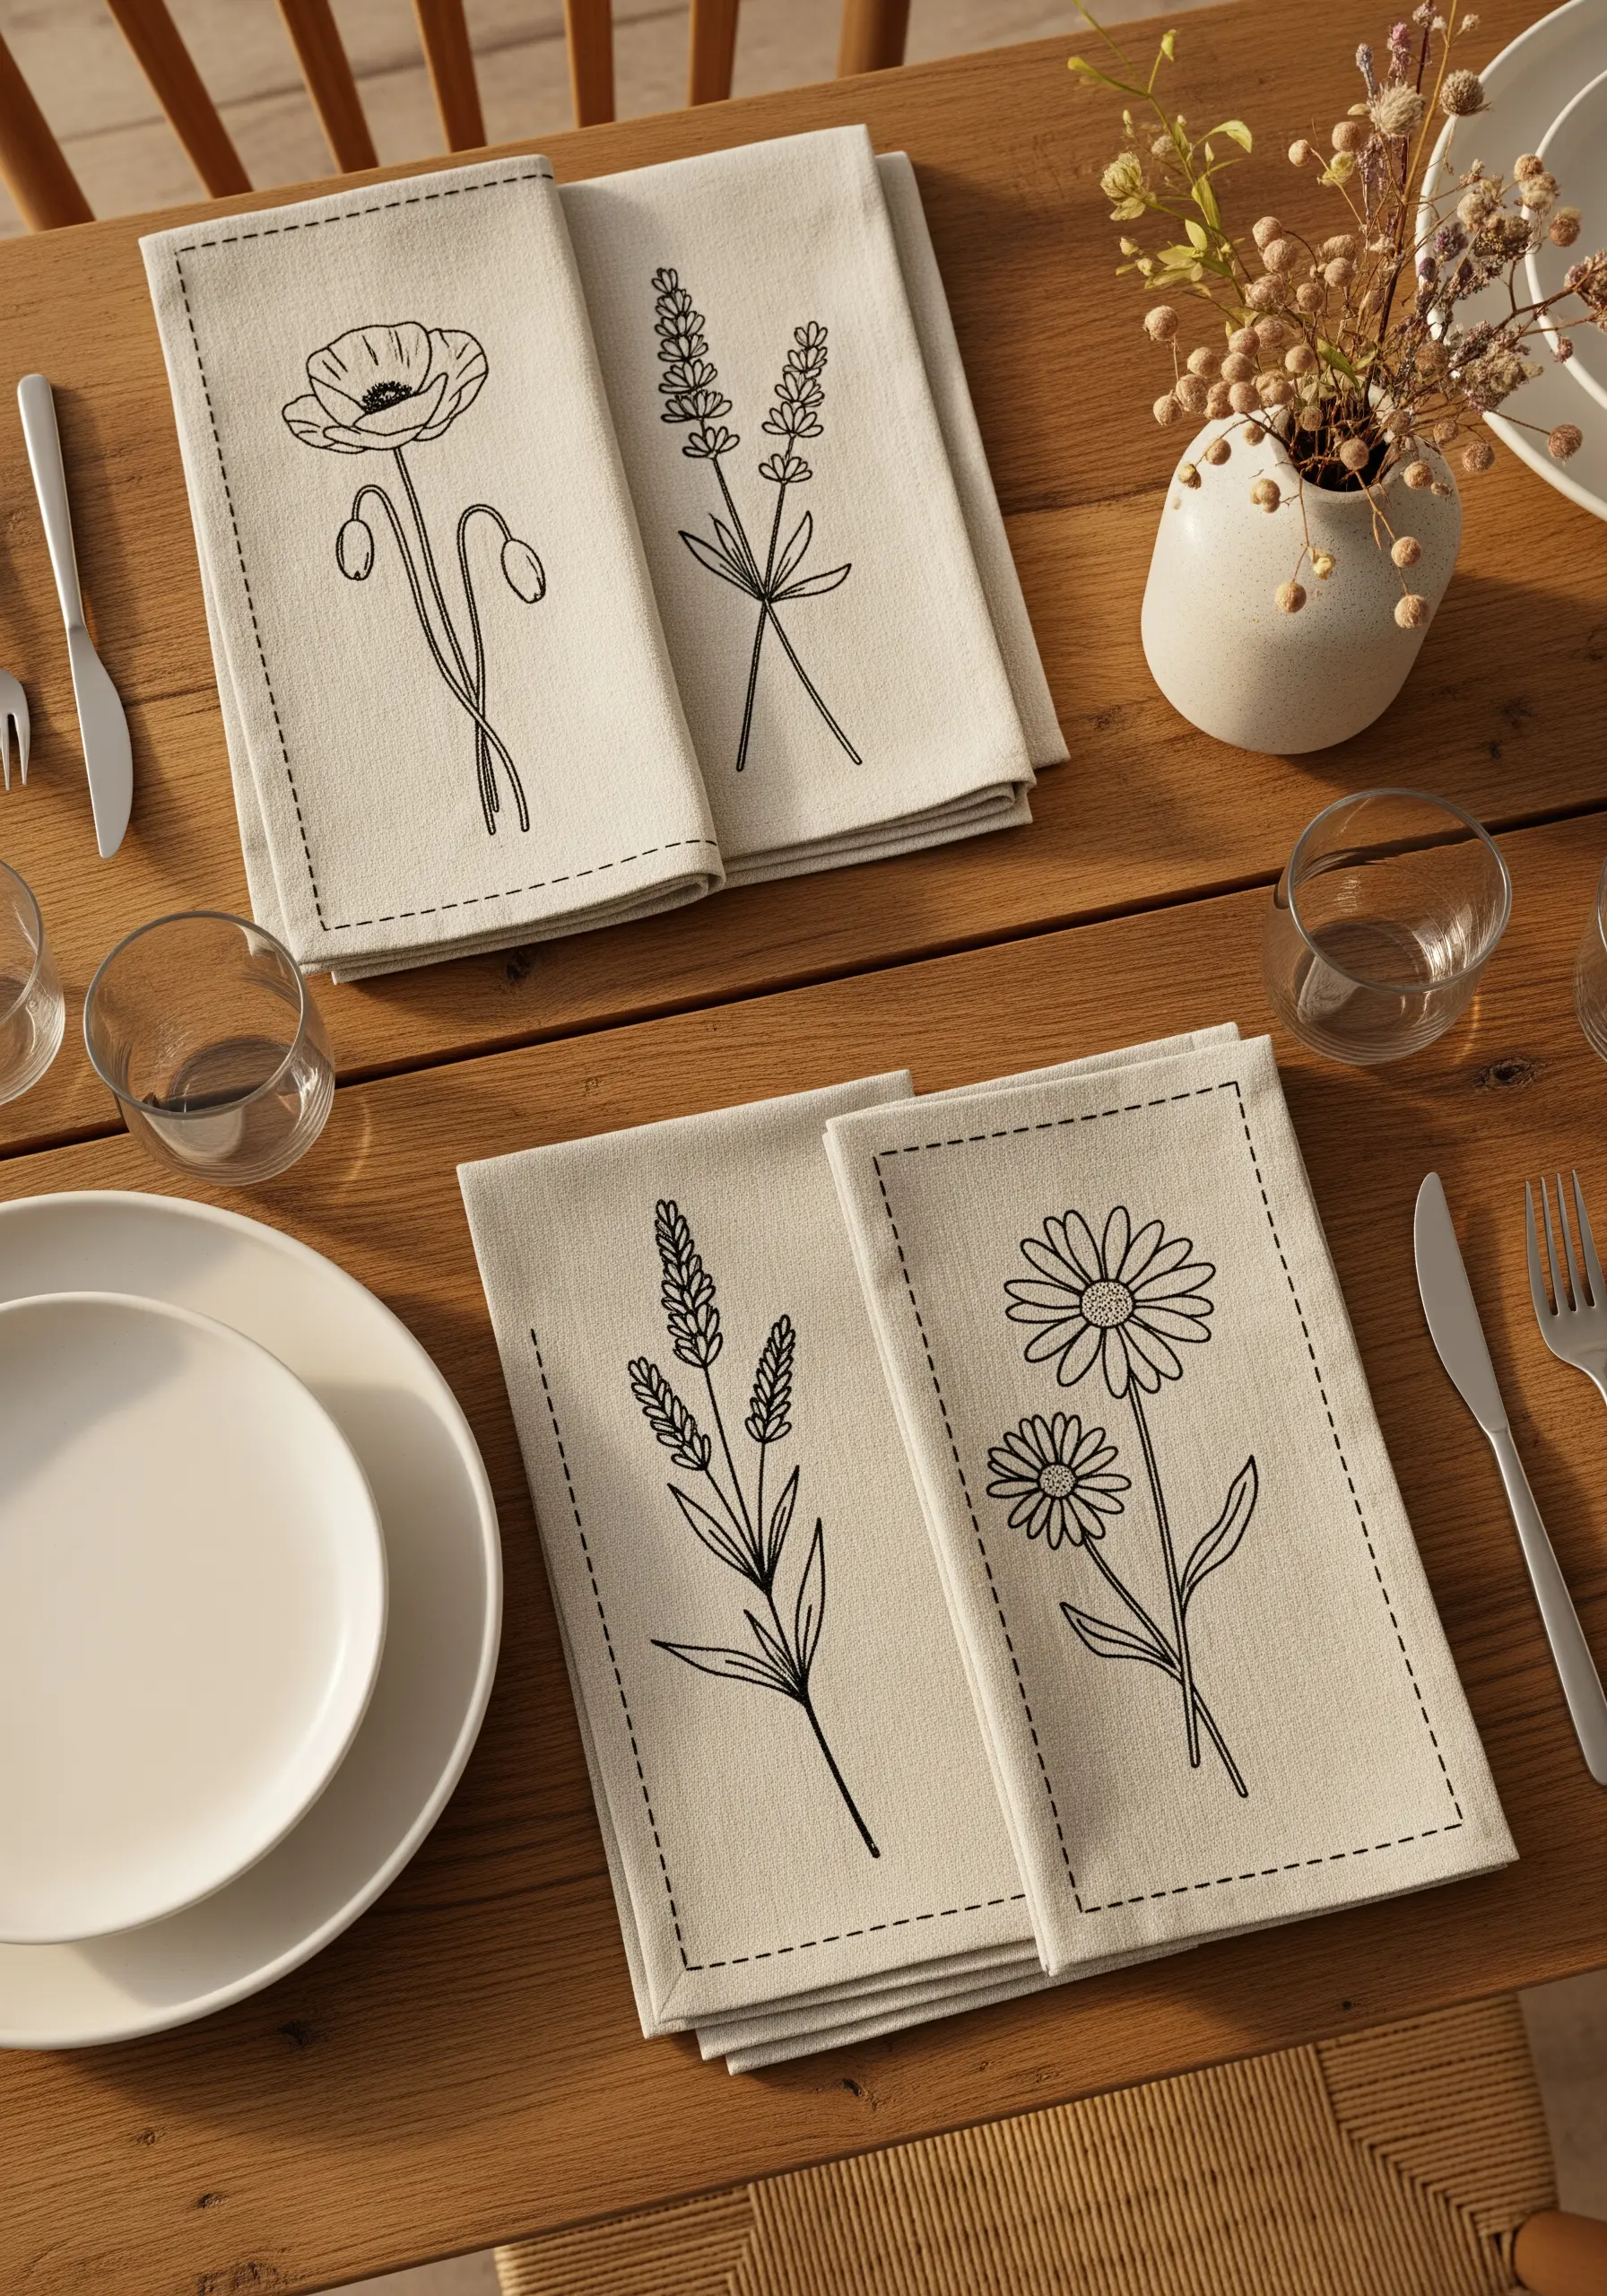
Elevate your table setting with minimalist line-art botanicals on napkins or placemats.
Use only two or three strands of black floss to keep the lines delicate and refined, preventing the design from feeling heavy on the fine linen.
A simple backstitch is perfect for these outlines, but you can add a hint of texture by using a stem stitch for the main stems.
The decorative running stitch border frames the artwork, making the napkin feel like a finished piece and adding a touch of heirloom style table linen charm.
5. Explore Texture with a Eucalyptus Branch
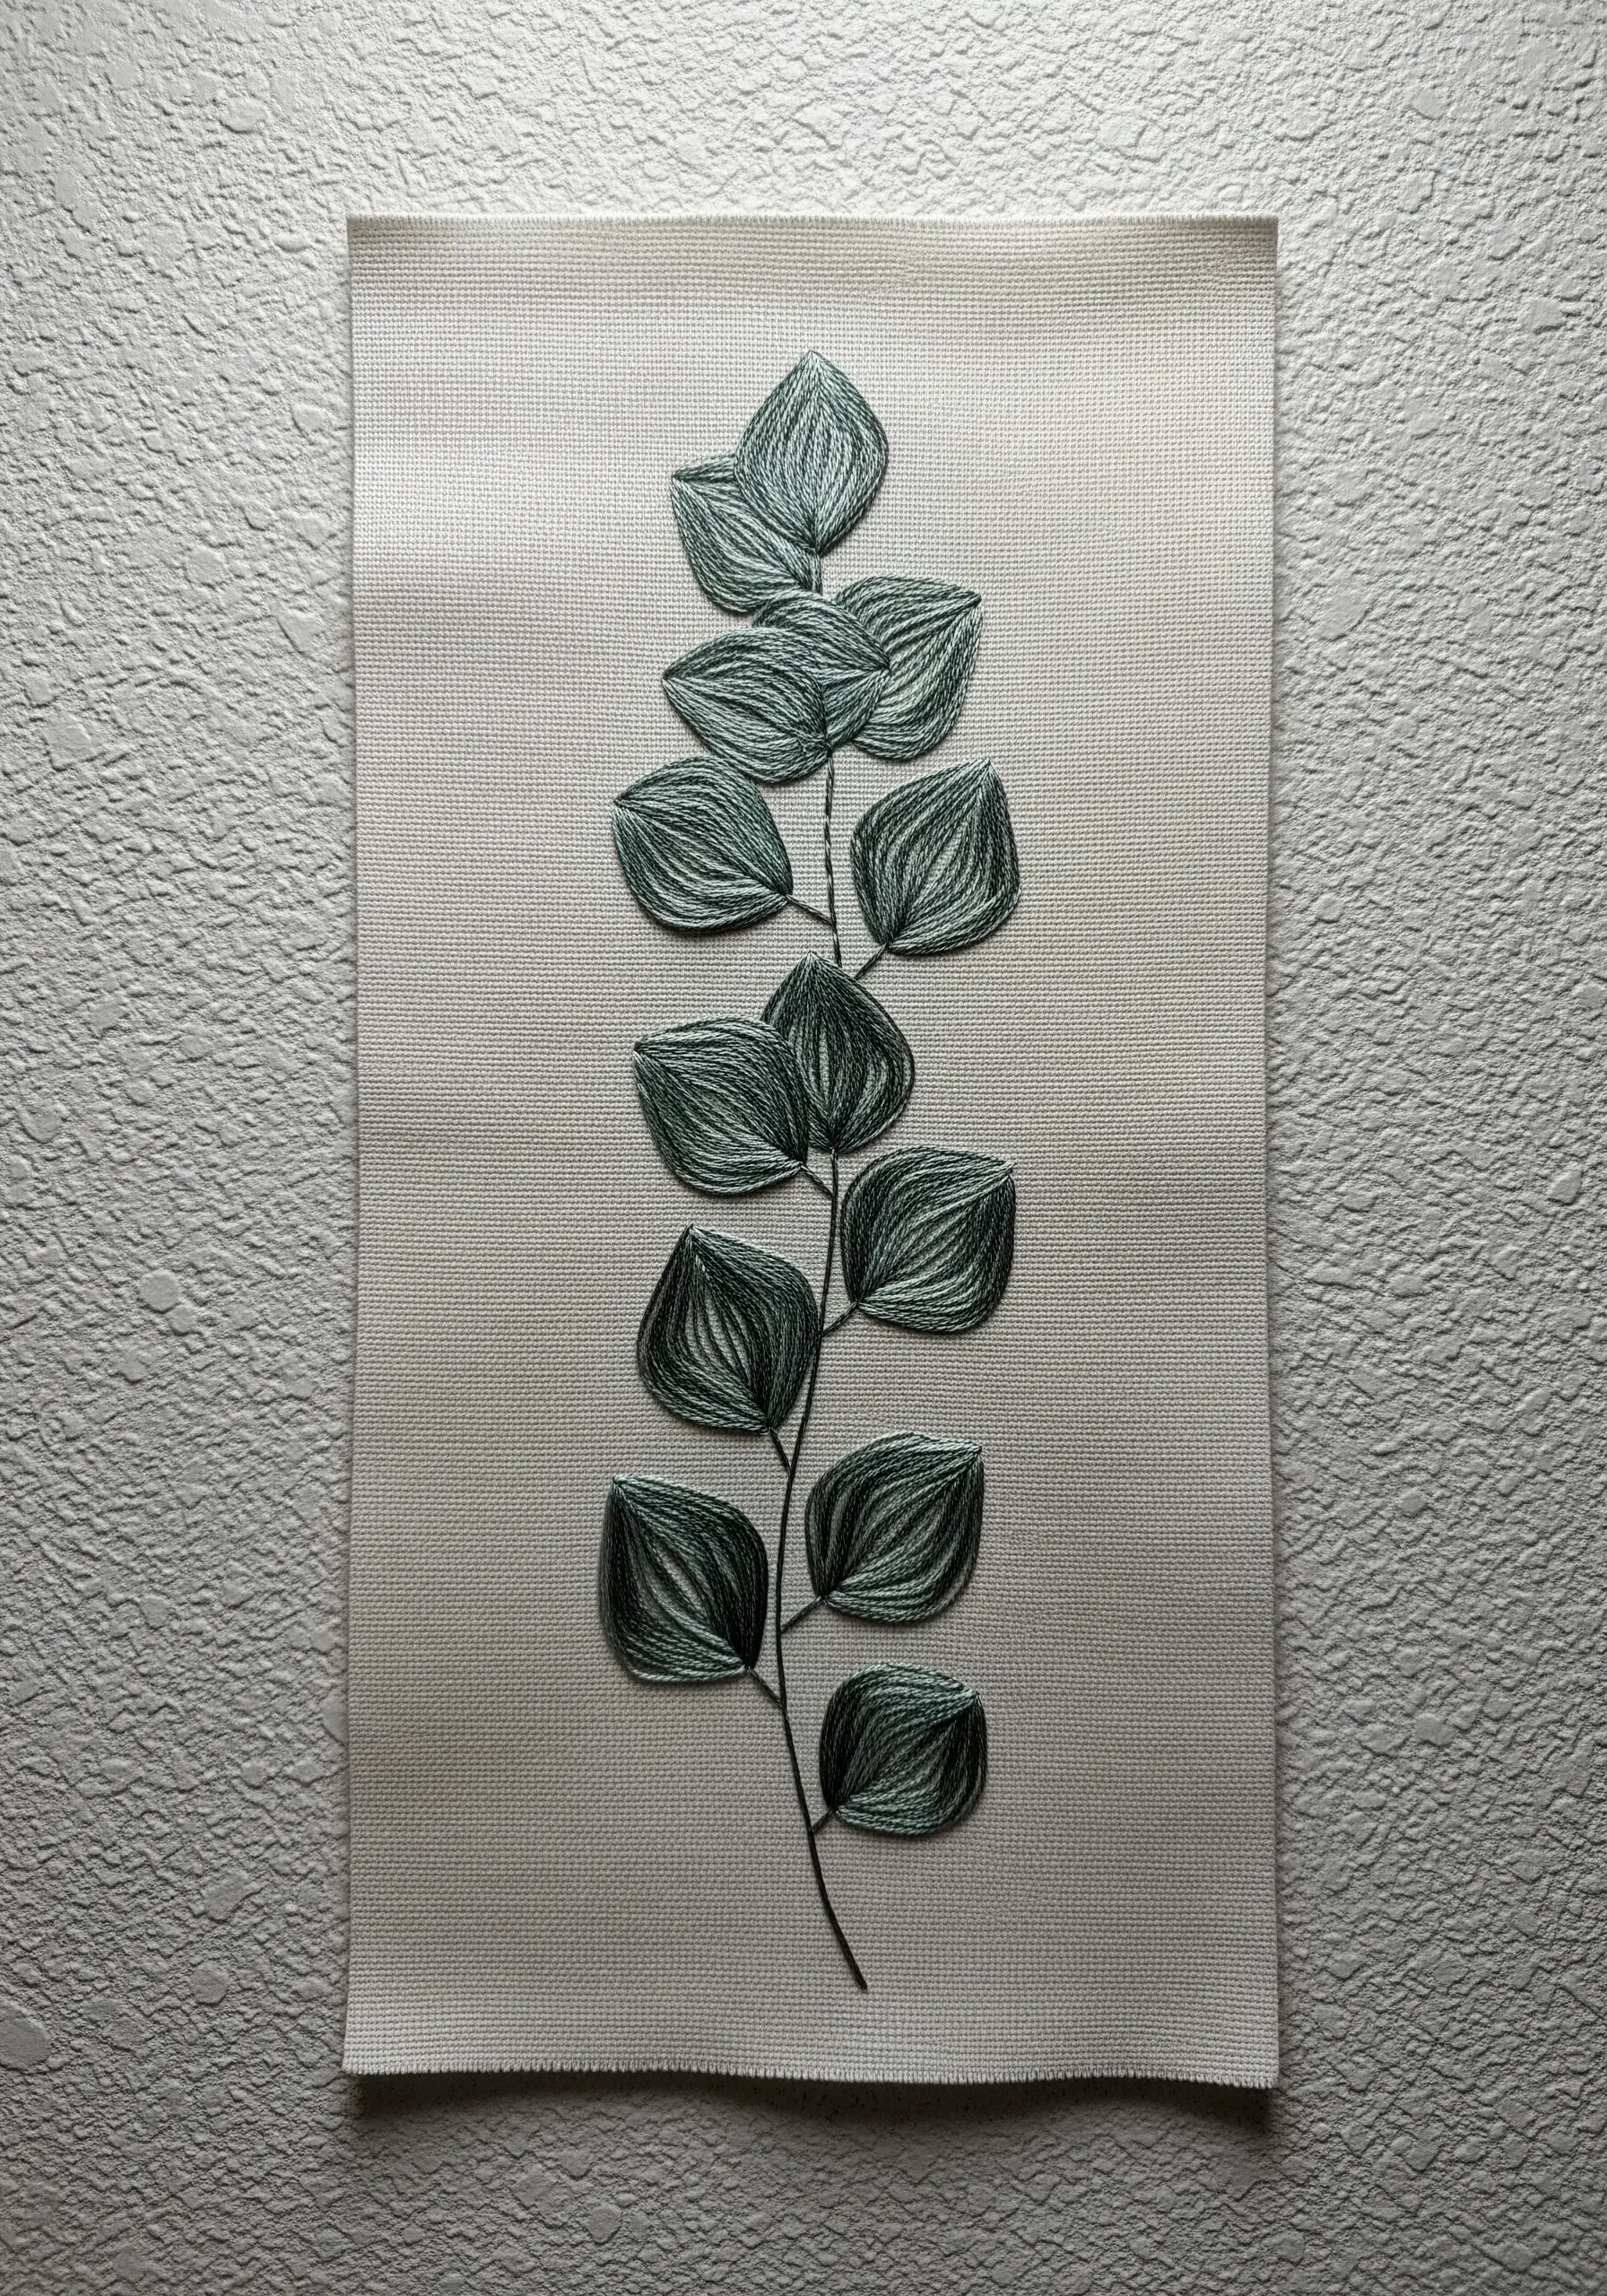
Move beyond a simple outline by introducing directional stitches to create texture and the illusion of light.
Fill each eucalyptus leaf with long, straight stitches, varying their angles slightly to catch the light differently.
Use a variegated or ombré thread in muted greens and grays to achieve subtle color shifts without changing your floss.
This technique gives the leaves a painterly, shimmering quality, turning a flat silhouette into a piece rich with depth and movement, perfect for earth-toned art that feels organic.
6. Embellish Denim with a Crisp White Outline

Add a personal touch to your denim jacket with a high-contrast plant silhouette.
Place a layer of tear-away stabilizer behind the denim before you begin stitching; this prevents the fabric from stretching and ensures your lines remain sharp.
Choose a bright white thread to create a bold, graphic statement that stands out against the blue wash of the denim.
A simple backstitch or stem stitch works beautifully here, transforming a pocket into a miniature canvas for tiny motifs that instantly add personality to jeans.
7. Compose a Minimalist Cactus Trio
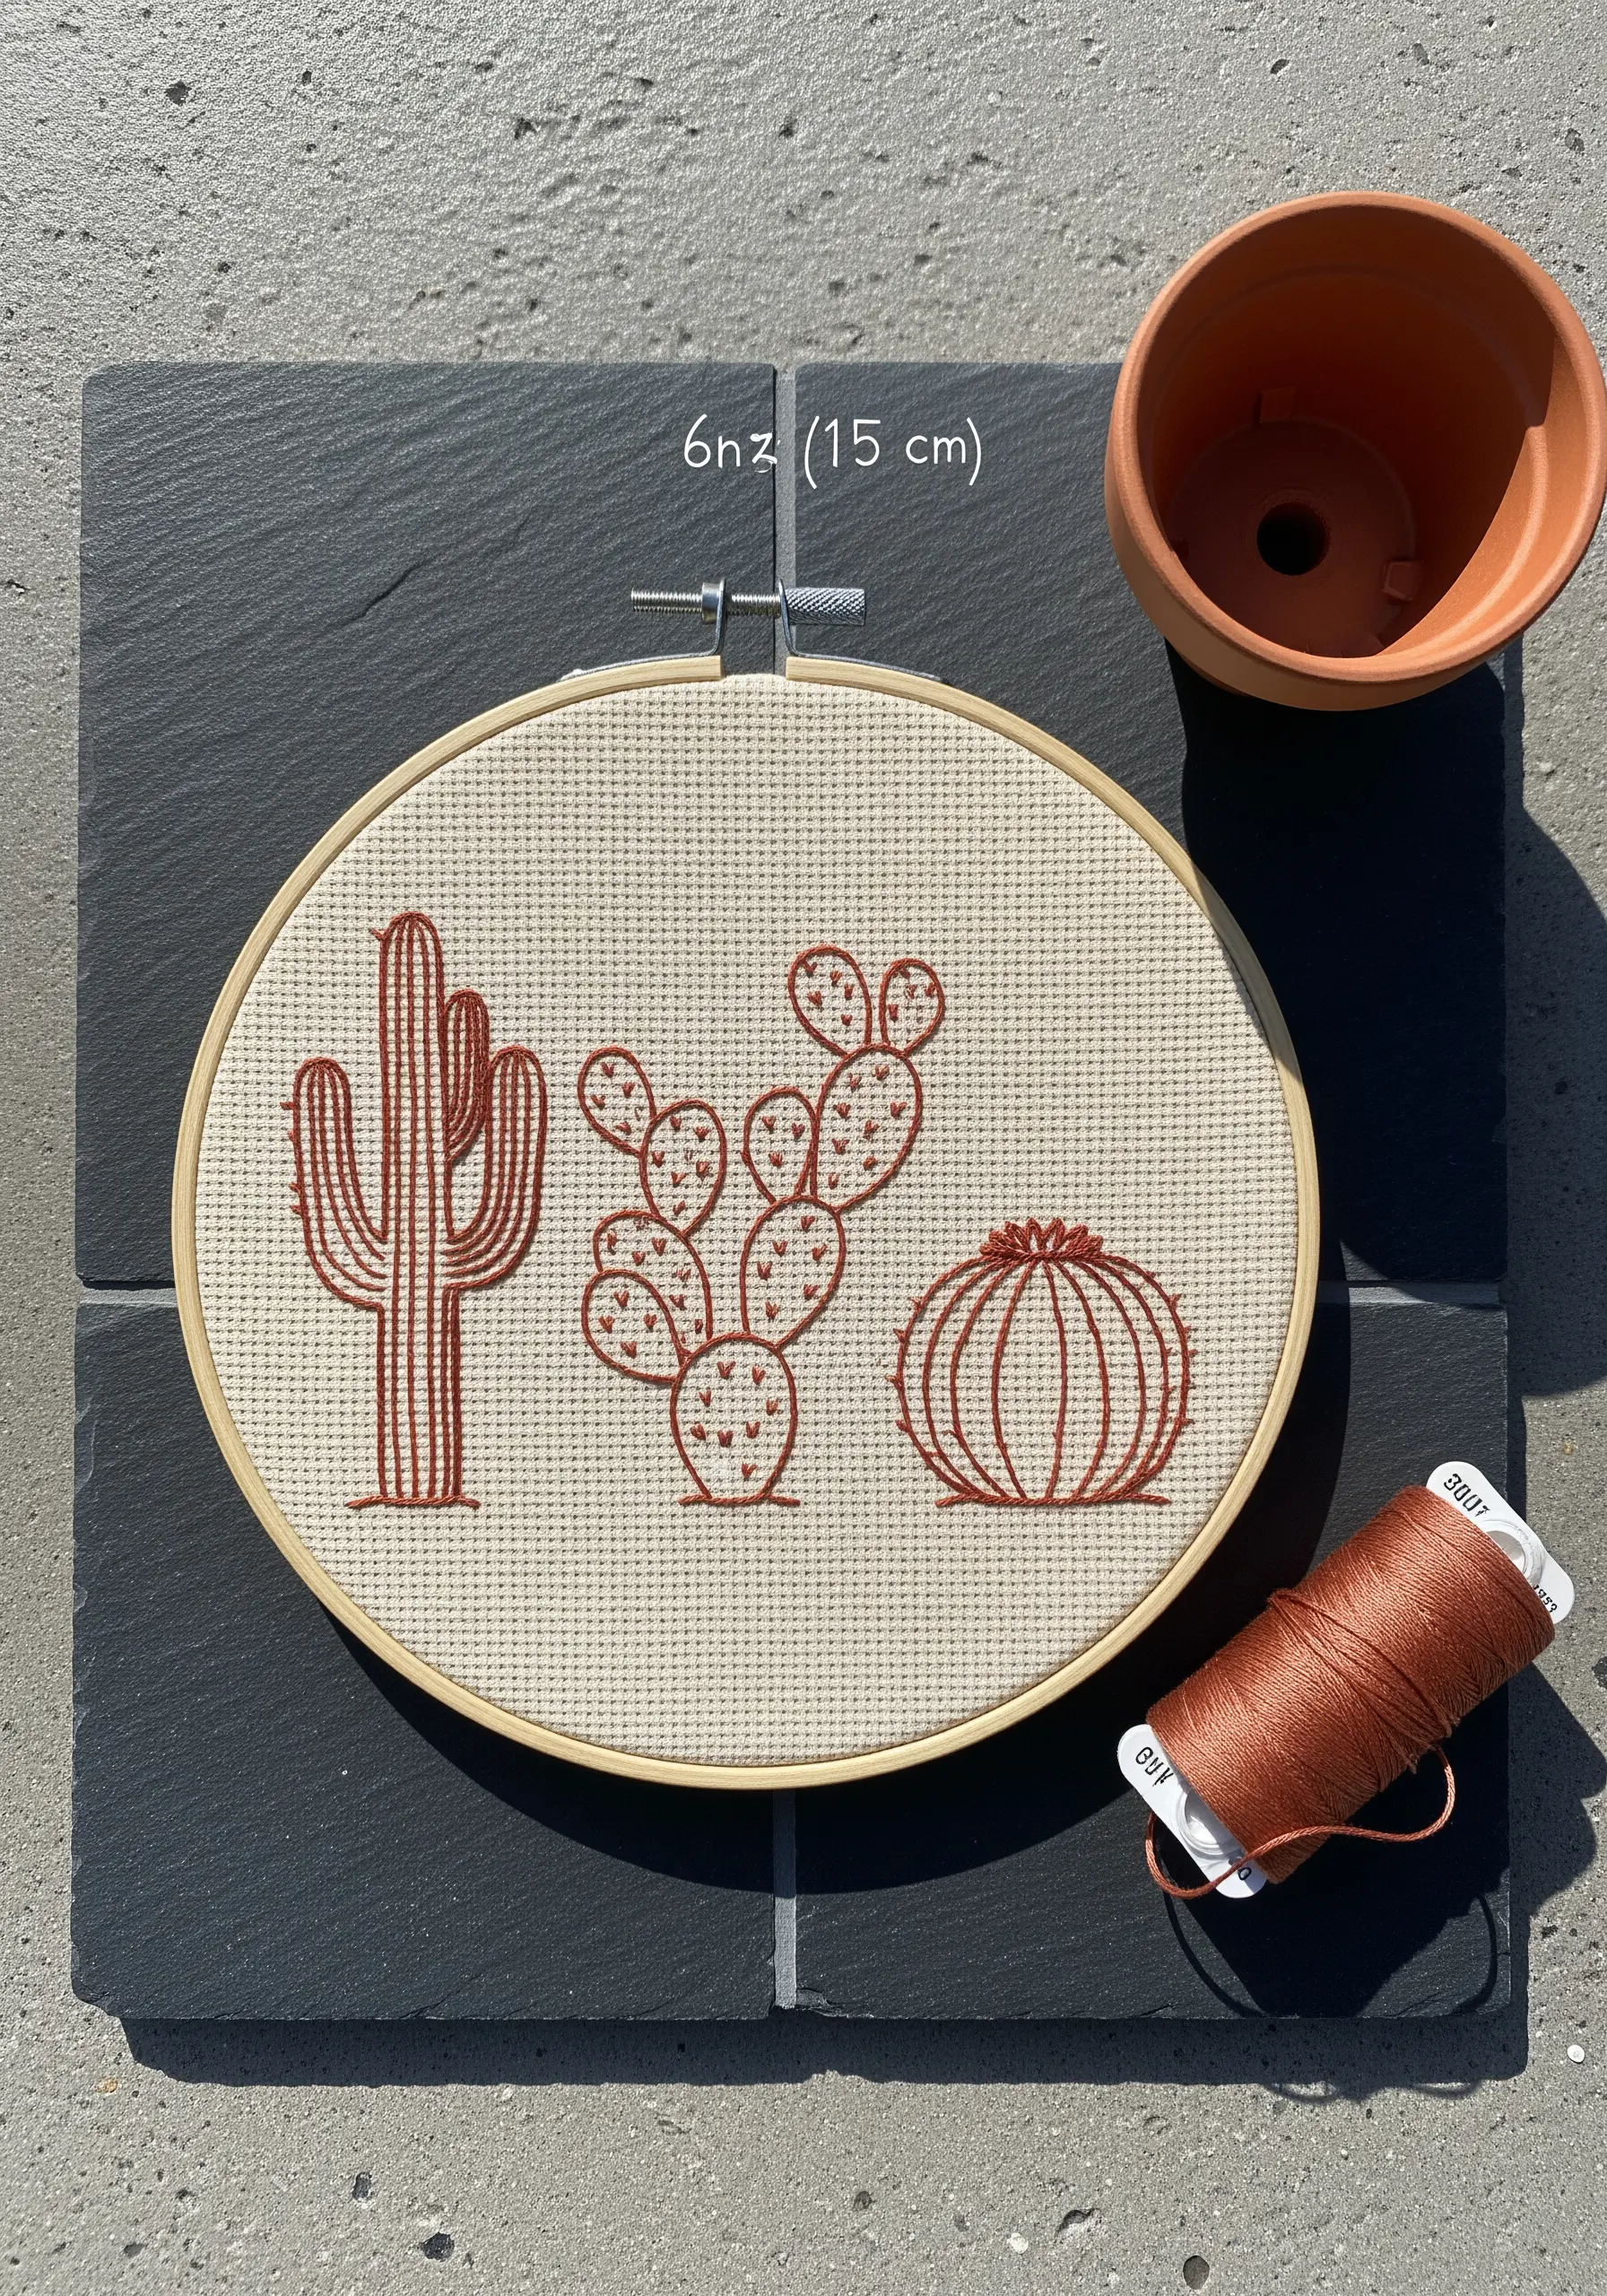
Arrange simple silhouettes into a balanced composition for clean, modern hoop art.
Use a single terracotta-colored thread to unify the three distinct cactus shapes, creating a cohesive and harmonious design.
Vary the line work within each cactus—using parallel vertical lines for the saguaro and dotted seed stitches for the prickly pear—to add subtle texture and interest.
Stitching on Aida cloth gives the piece a slightly rustic, grid-like feel that complements the simple geometry of the cacti, making it one of those minimalist embroidery patterns perfect for entryway decoration.
8. Define Form with Textured Stitches
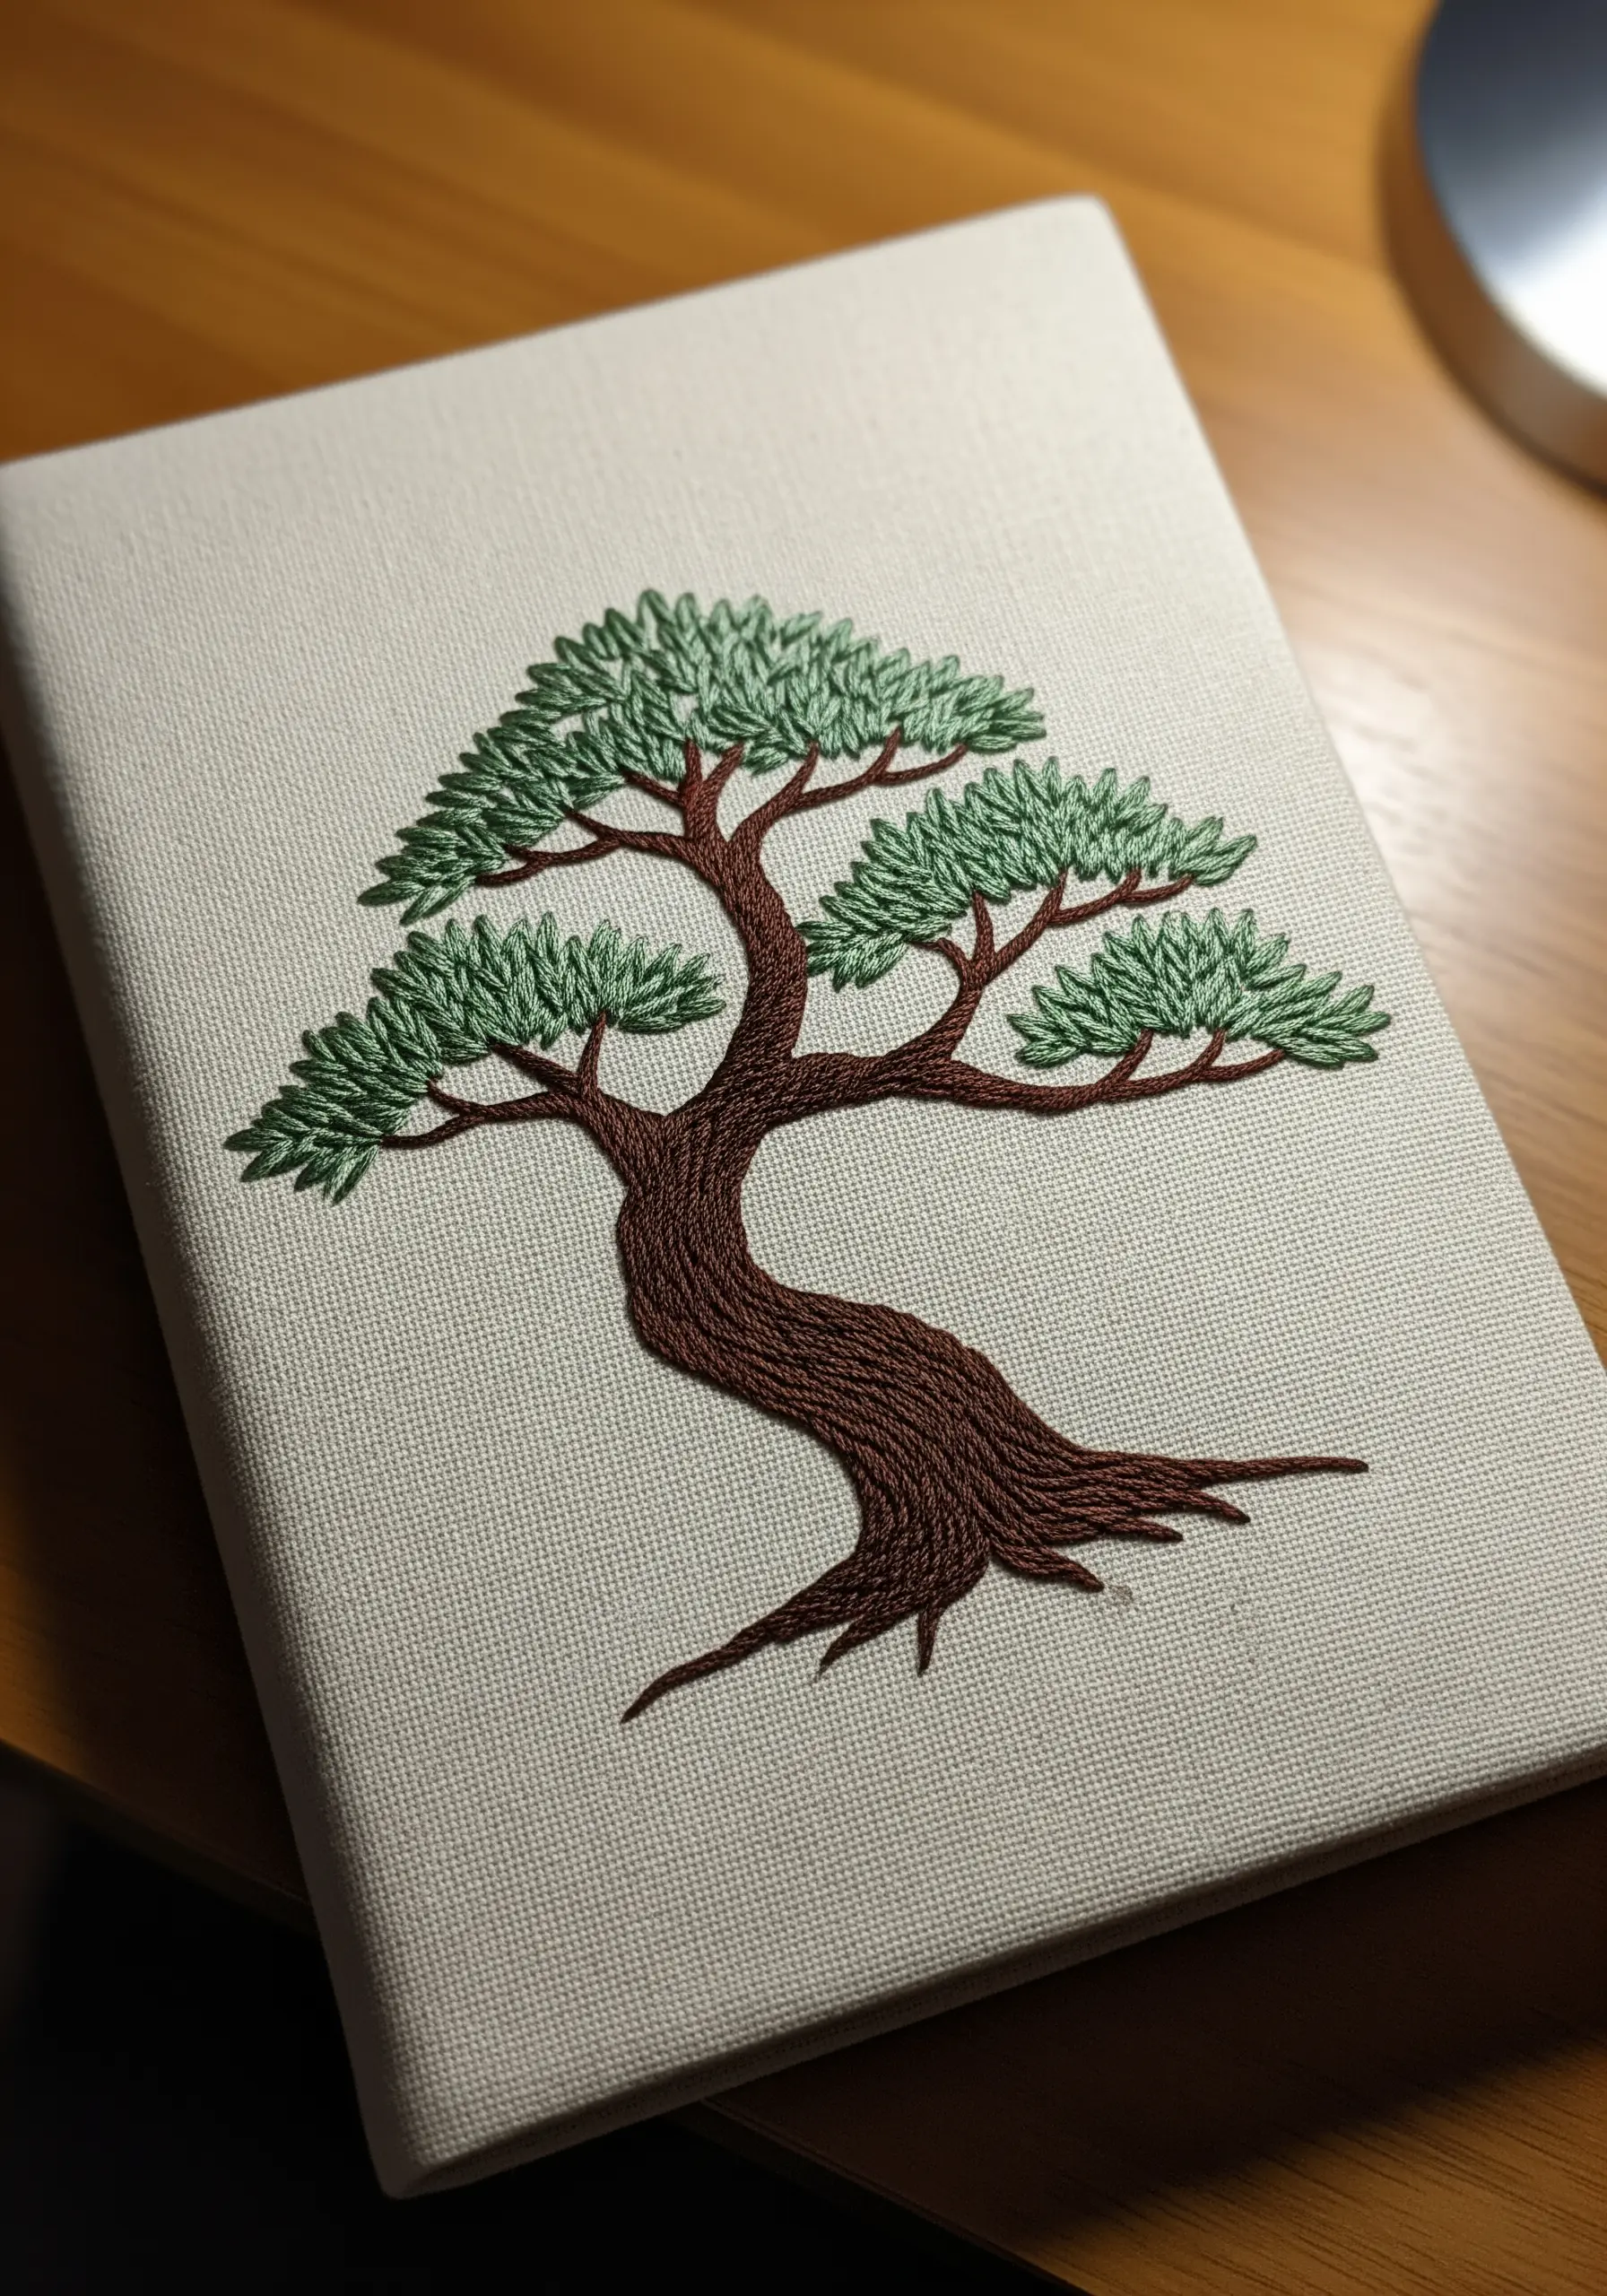
Combine different stitches within one silhouette to distinguish between textures like bark and leaves.
Use a dense, slightly chaotic fill of short straight stitches or seed stitches for the foliage to give it a lush, clustered appearance.
For the trunk and branches, switch to a more linear, textured stitch like a whipped backstitch or a heavy chain stitch to suggest the roughness of bark.
This contrast in stitch technique adds sophisticated detail and dimension, making the entire piece feel more lifelike and tactile, perfectly capturing tree ring bark texture.
9. Create Movement with Directional Fill
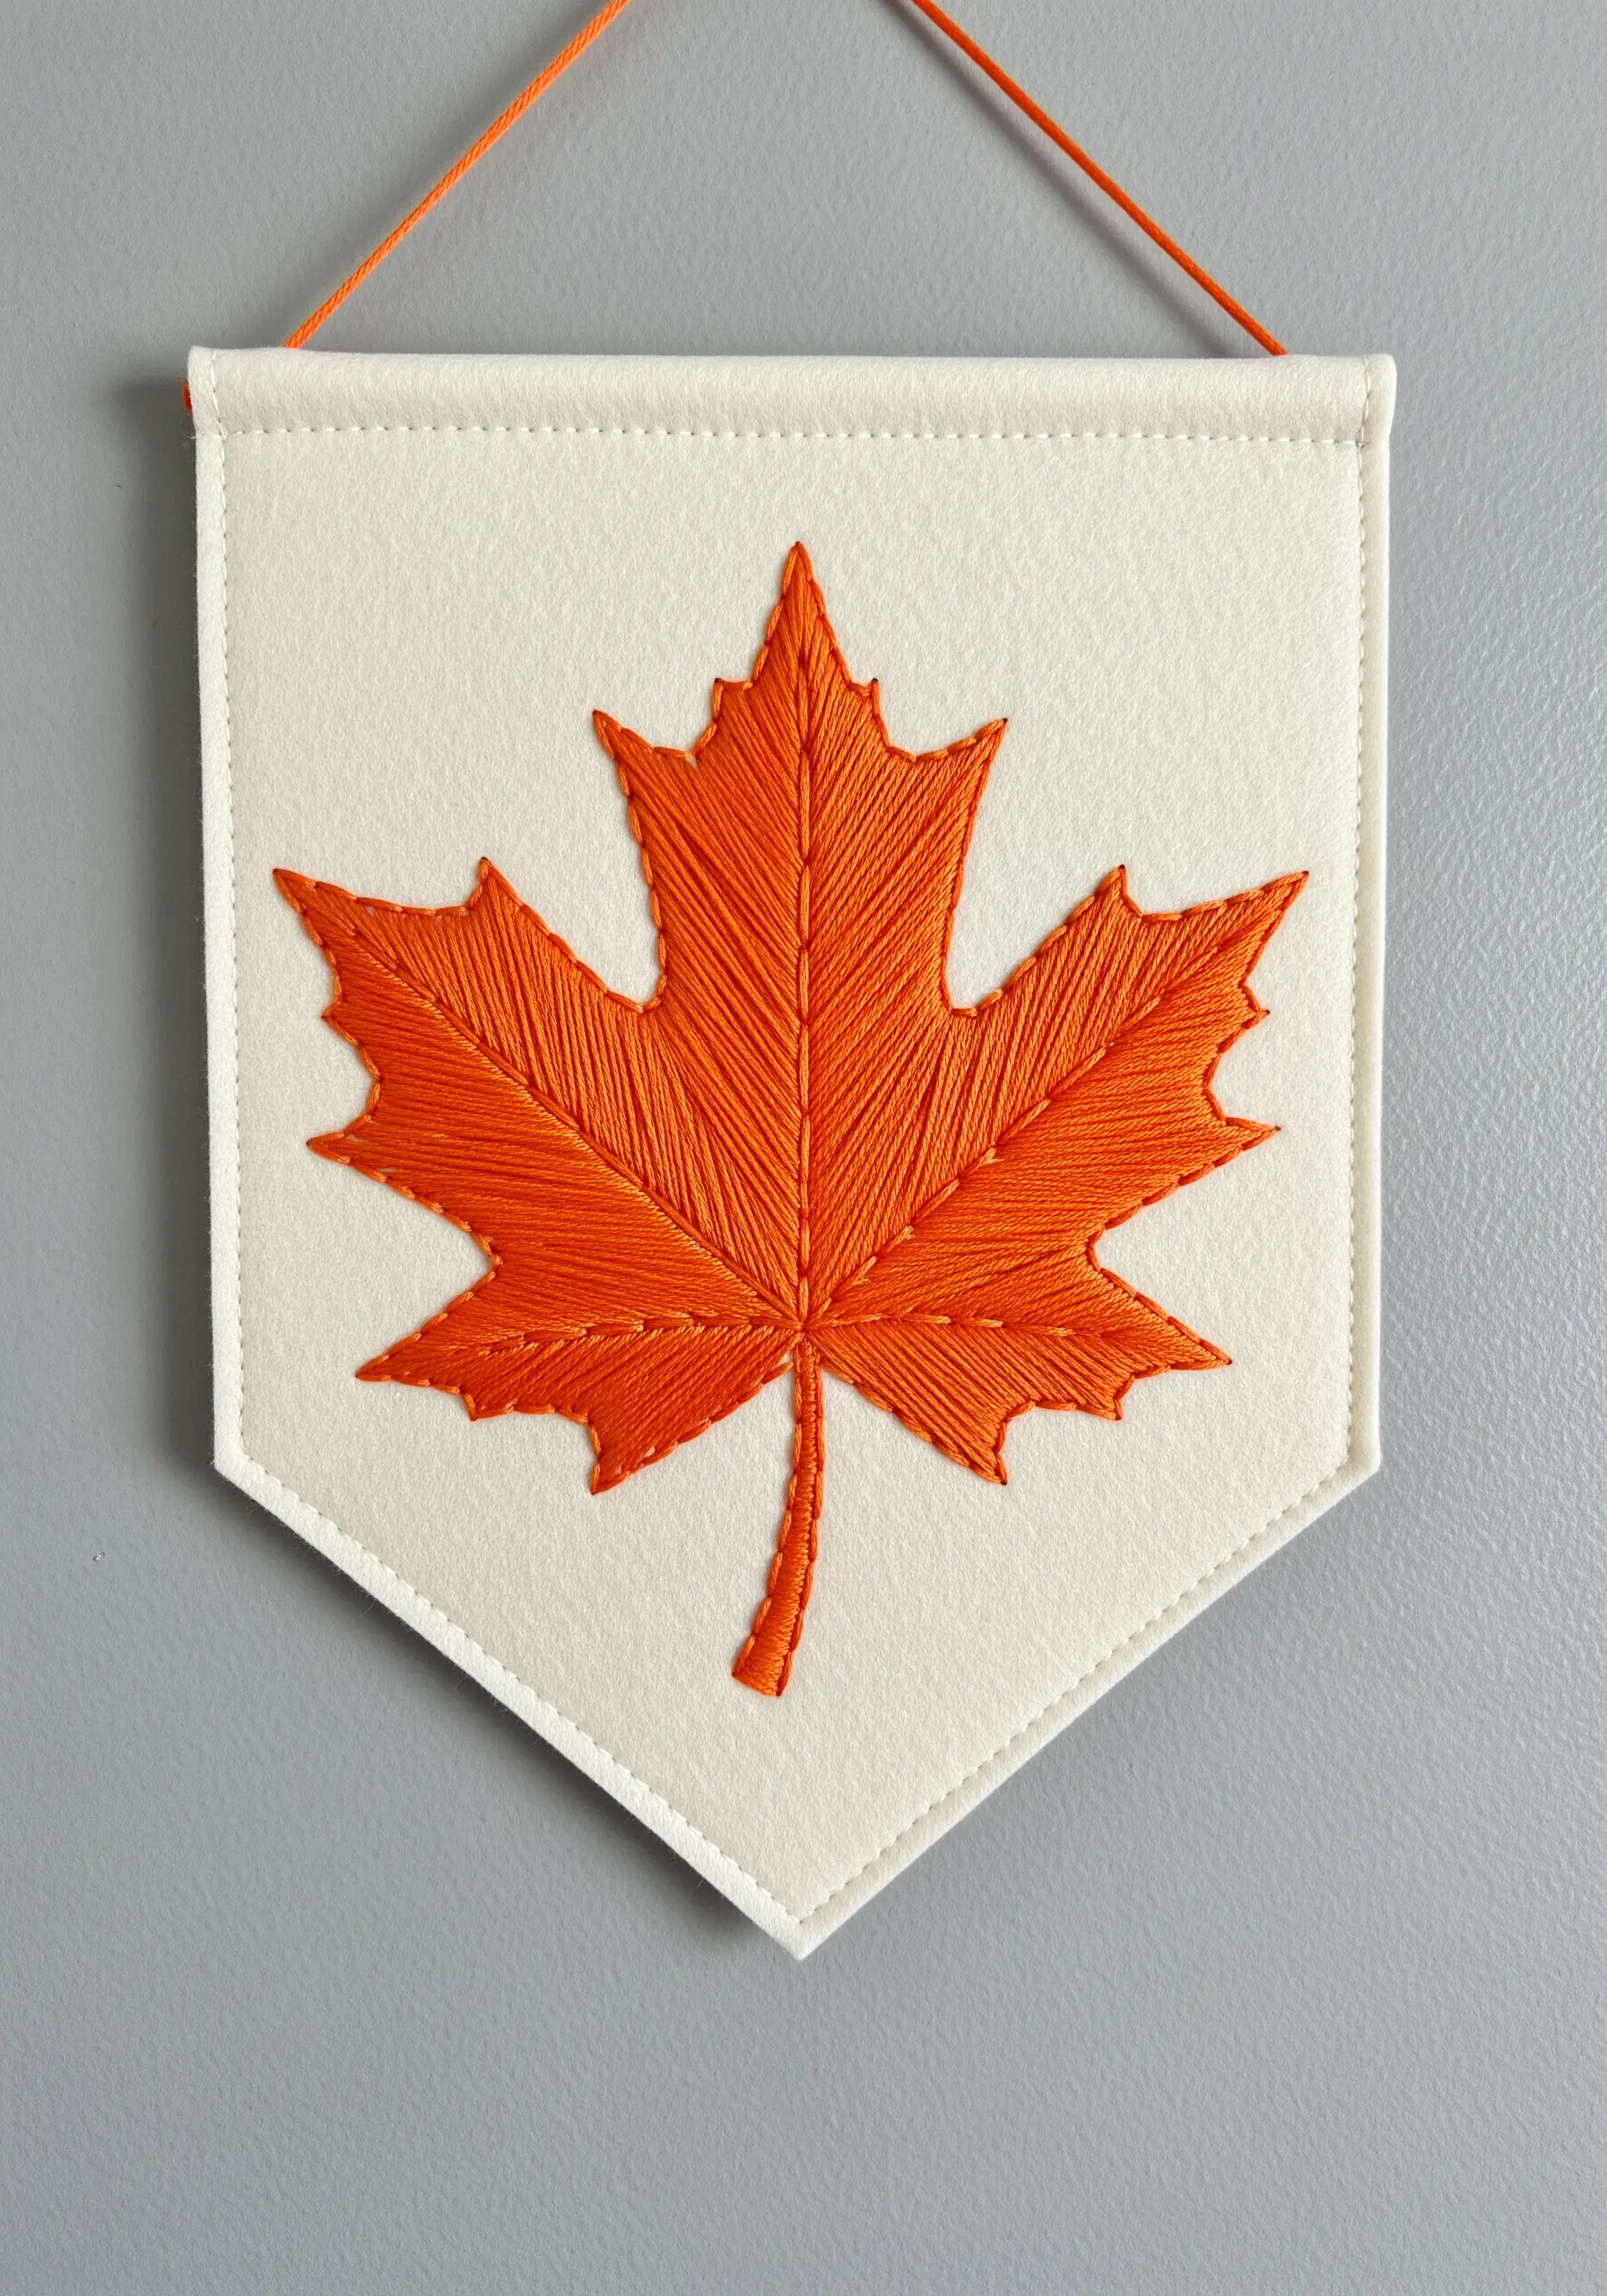
Use the direction of your stitches to guide the eye and create a sense of natural movement within a filled shape.
Instead of filling the maple leaf with uniform horizontal or vertical satin stitches, angle your stitches to follow the direction of the leaf’s veins, radiating from the center outwards.
This technique, known as directional fill, makes the flat silhouette appear more dynamic and organic.
Stitching on felt provides a stable, non-fraying base, making it an ideal choice for creating banners and other seasonal framed embroidery pieces.
10. Capture Delicacy with Varied Thread Weight
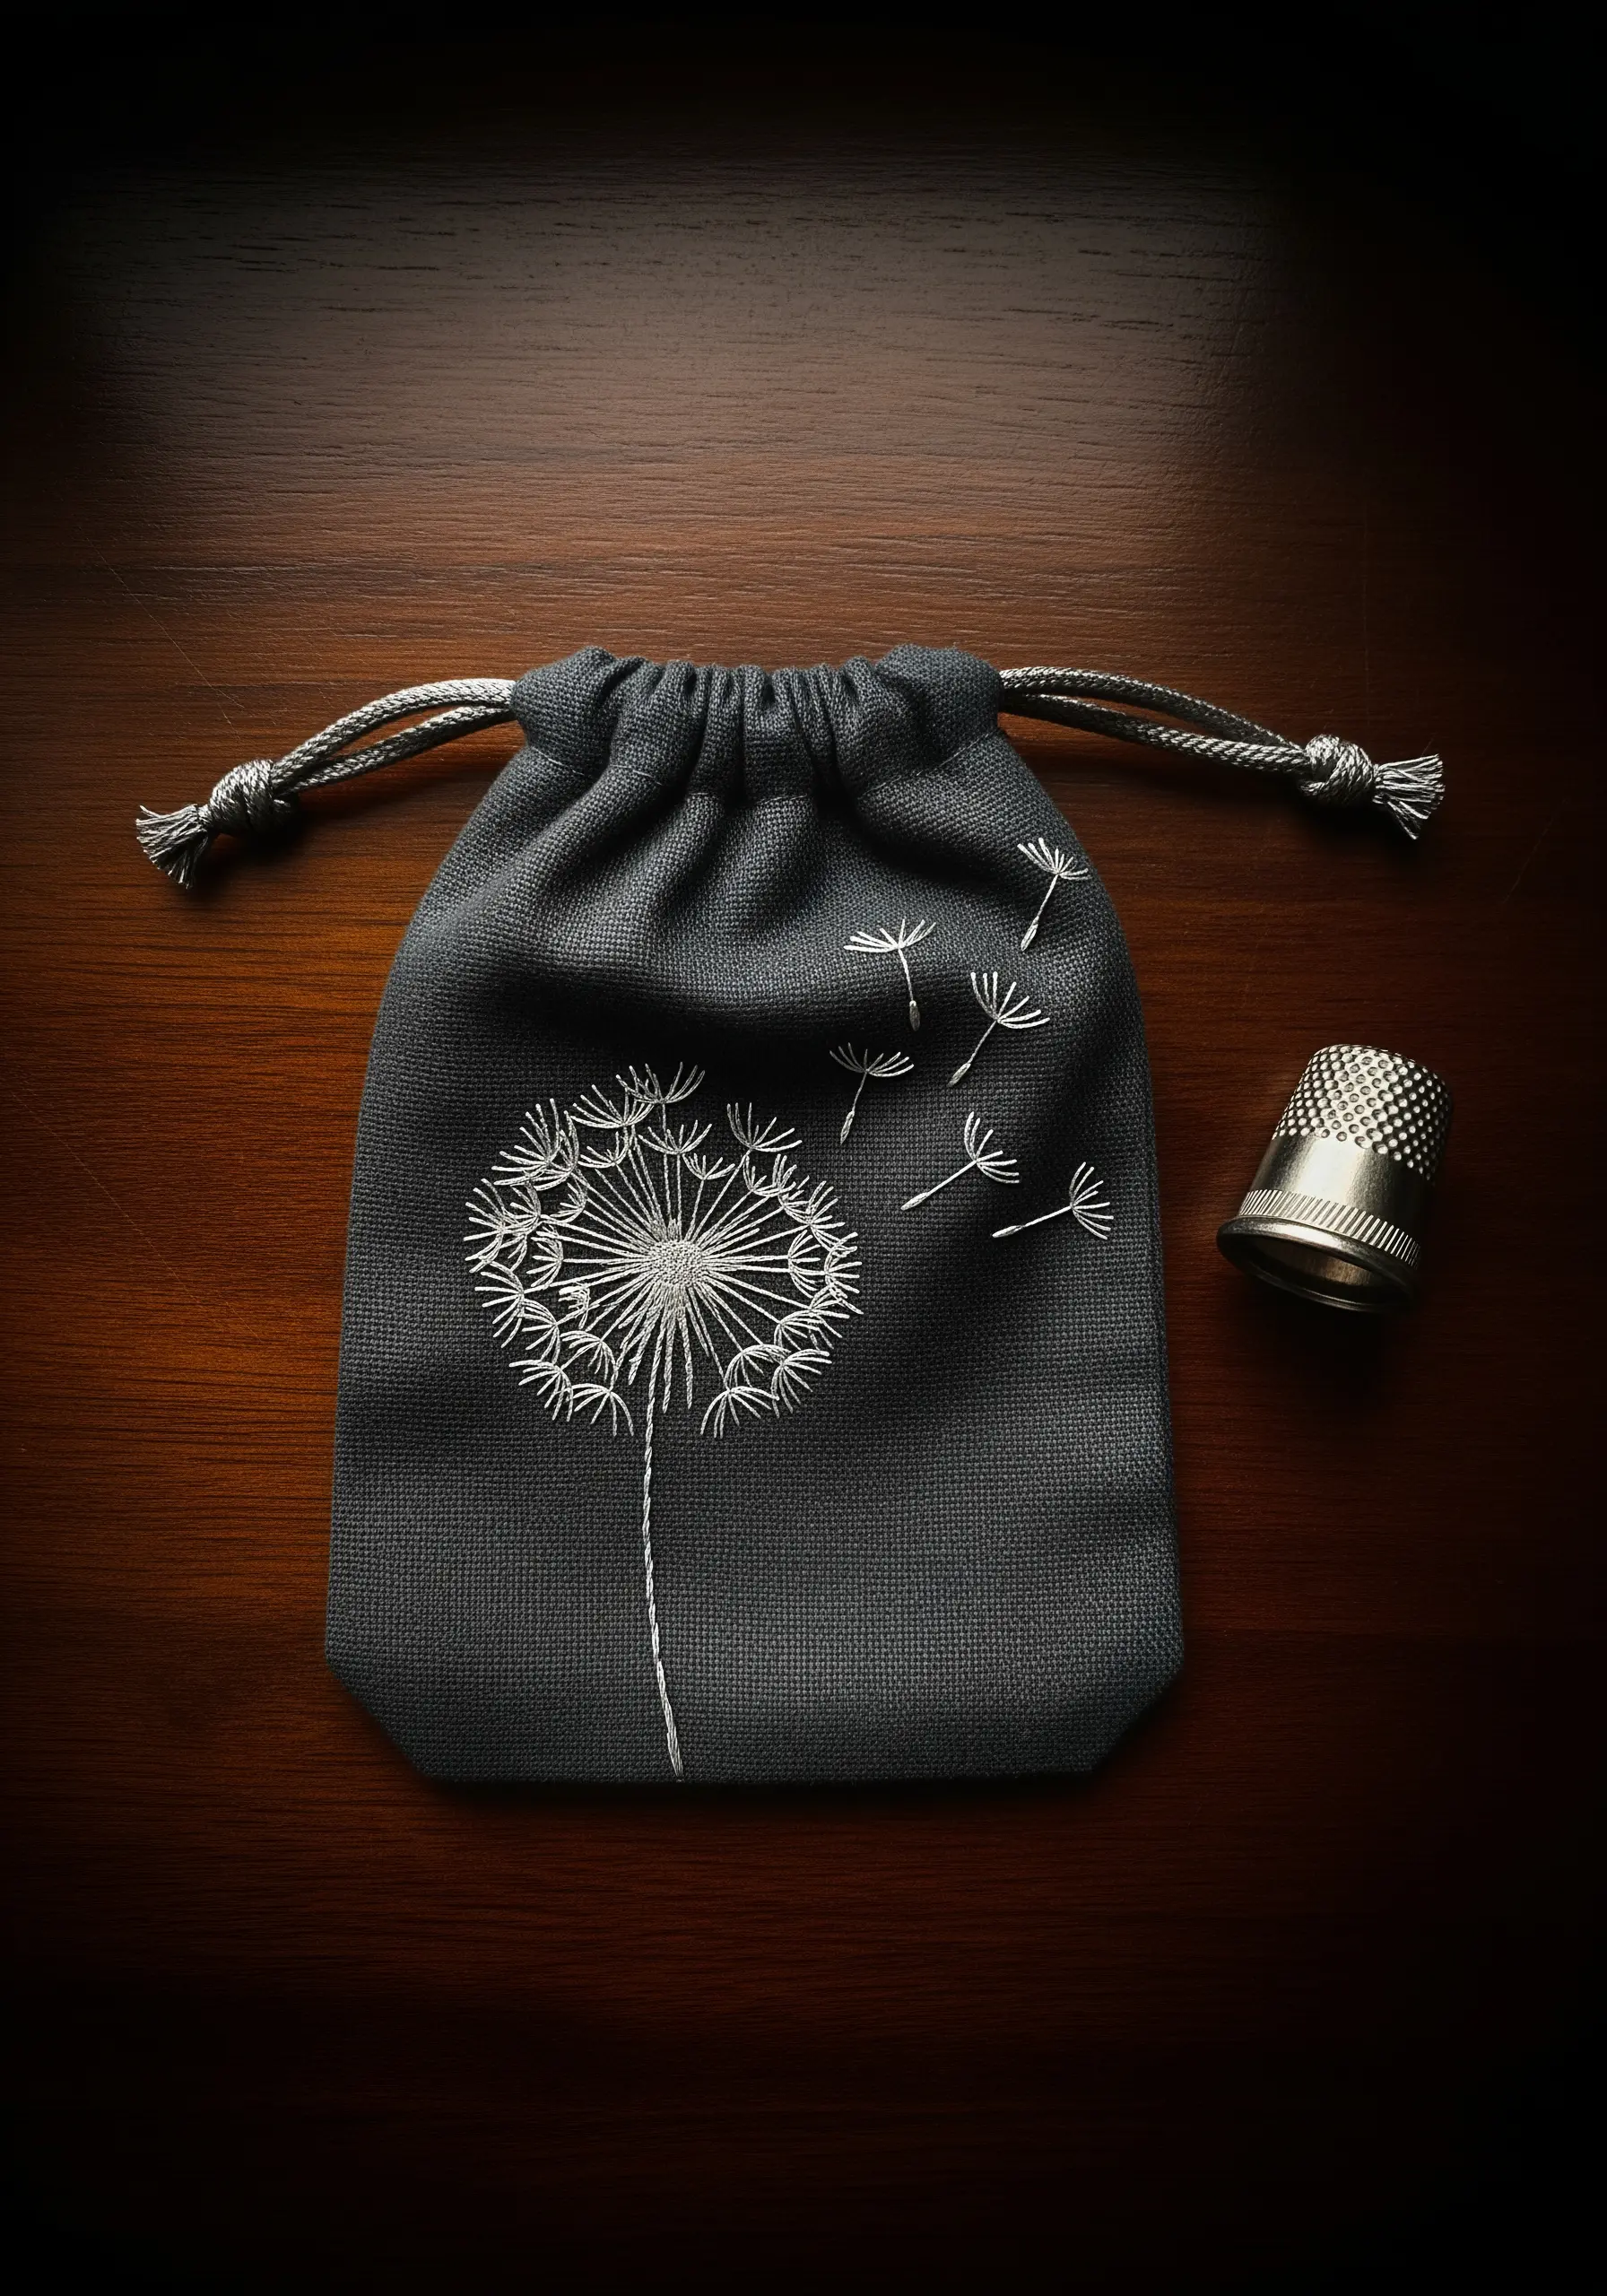
Convey a sense of weightlessness and movement by strategically adjusting the number of strands you use.
Stitch the central dandelion head with two or three strands for a solid yet delicate appearance.
For the seeds floating away, switch to a single strand of floss. This subtle change makes them appear lighter and more ethereal, as if they are truly drifting on the wind.
These small adjustments are what elevate simple dandelion and wildgrass stitch projects into evocative art.
11. Add Dimension with a Two-Tone Palette
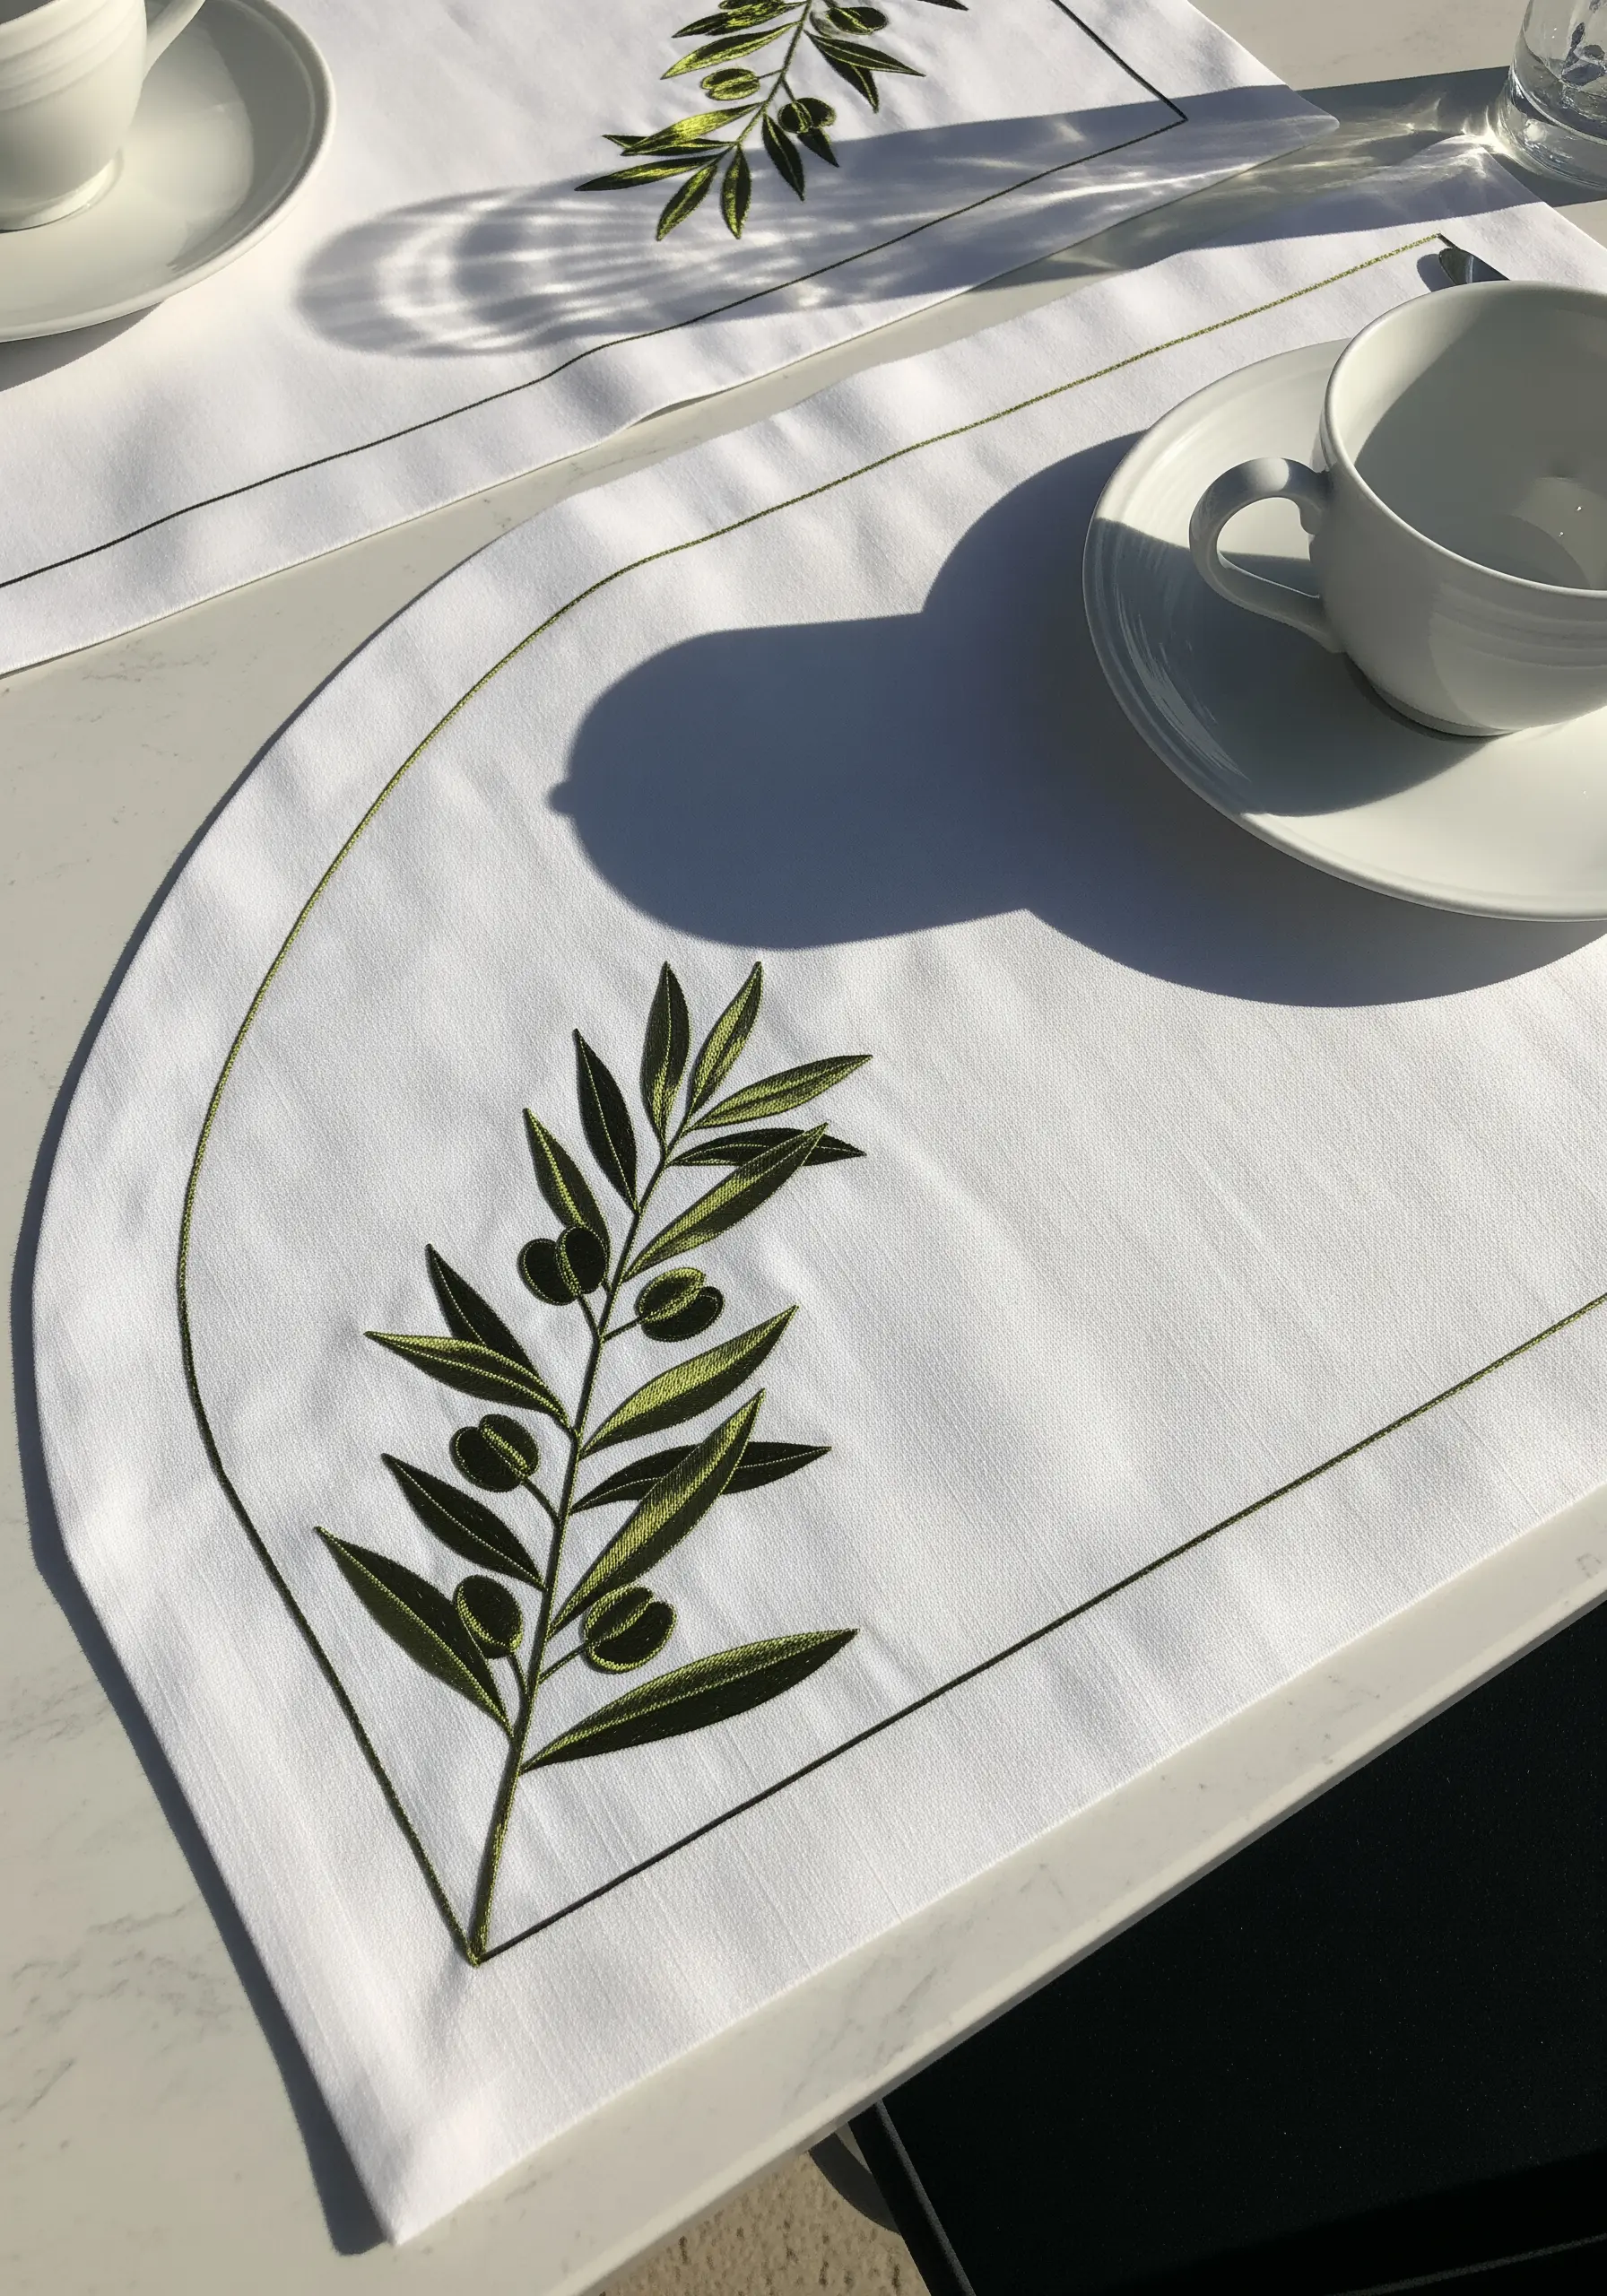
Create depth in a simple silhouette using just two shades of the same color.
Outline the olive leaves in a lighter, brighter green, then fill the olives themselves with a slightly darker, more muted tone.
This simple color shift immediately separates the elements, making the olives appear solid and rounded against the flatter plane of the leaves.
It’s an incredibly effective technique for adding dimension without resorting to complex shading, perfect for embroidery table runner placemat ideas that need to look polished.
12. Frame a Neckline with a Climbing Vine
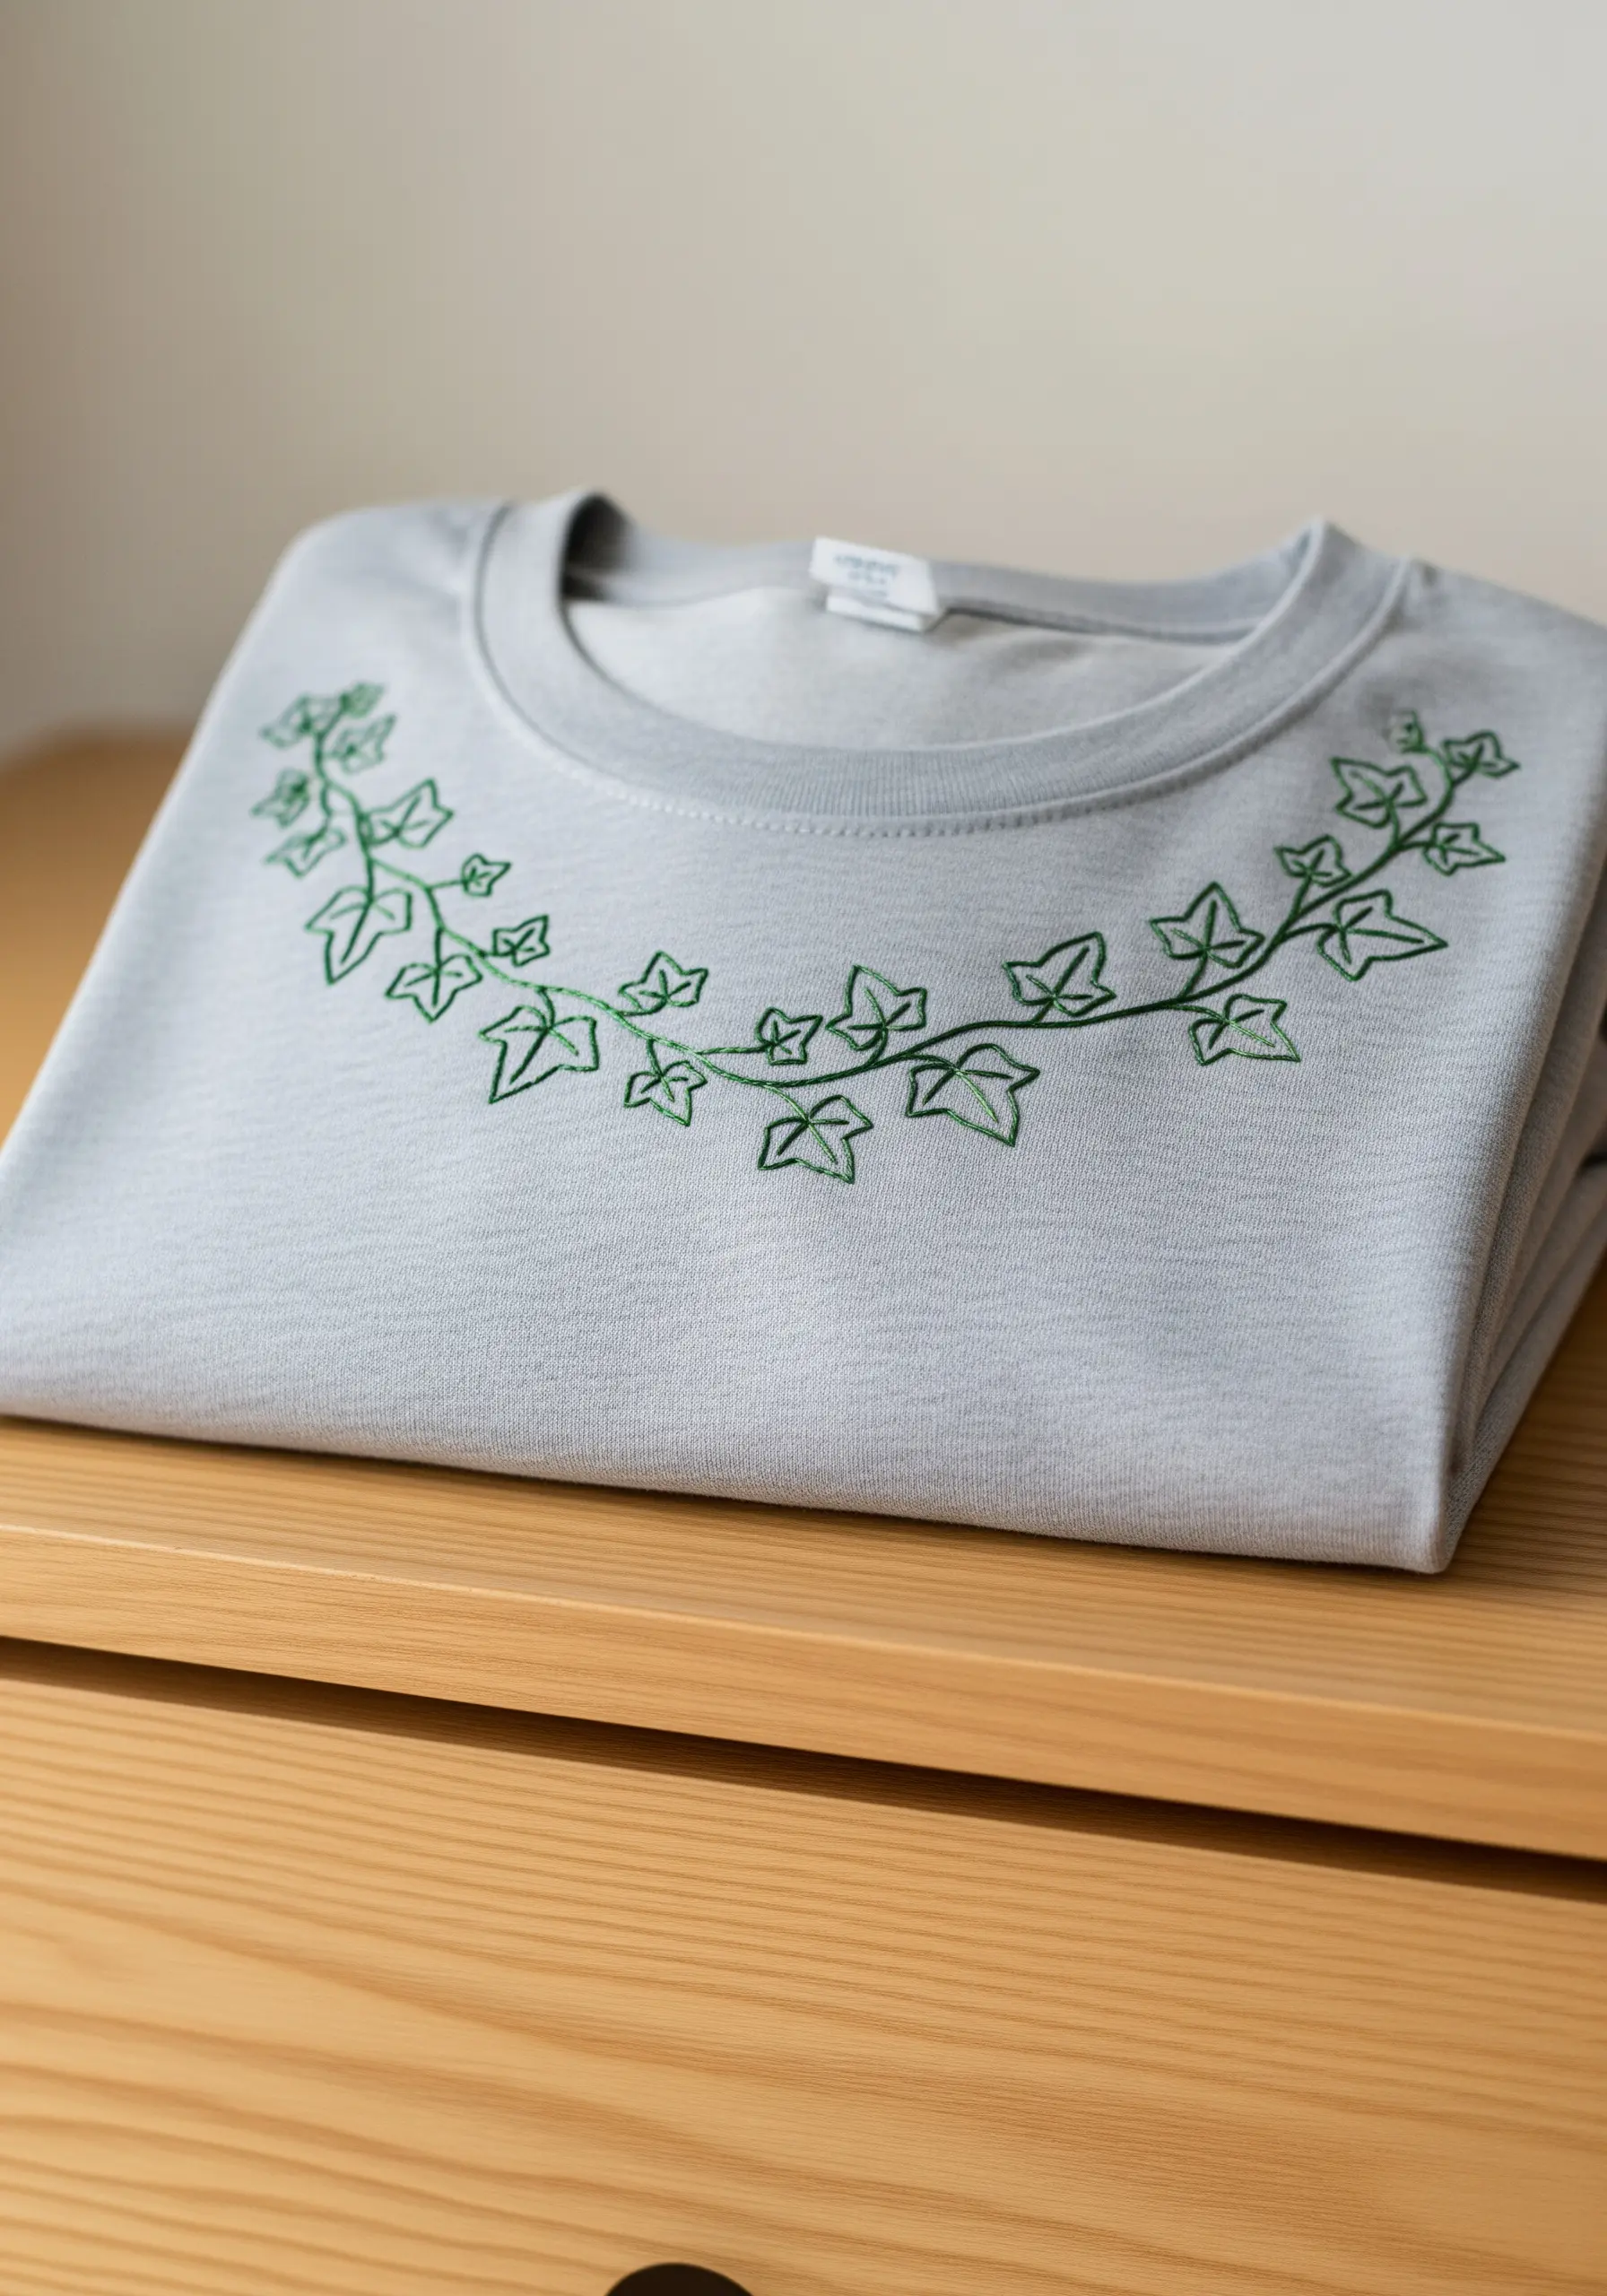
Use a plant silhouette to create an elegant, organic frame around the collar of a t-shirt or sweatshirt.
Map out the curve of your vine with a water-soluble pen first to ensure it follows the neckline evenly.
Alternate between two or three similar shades of green for the leaves to give the garland a more natural, less uniform look.
This simple embellishment is a beautiful way to transform your daily office outfits or casual wear into something special.
13. Design a Botanical Triptych
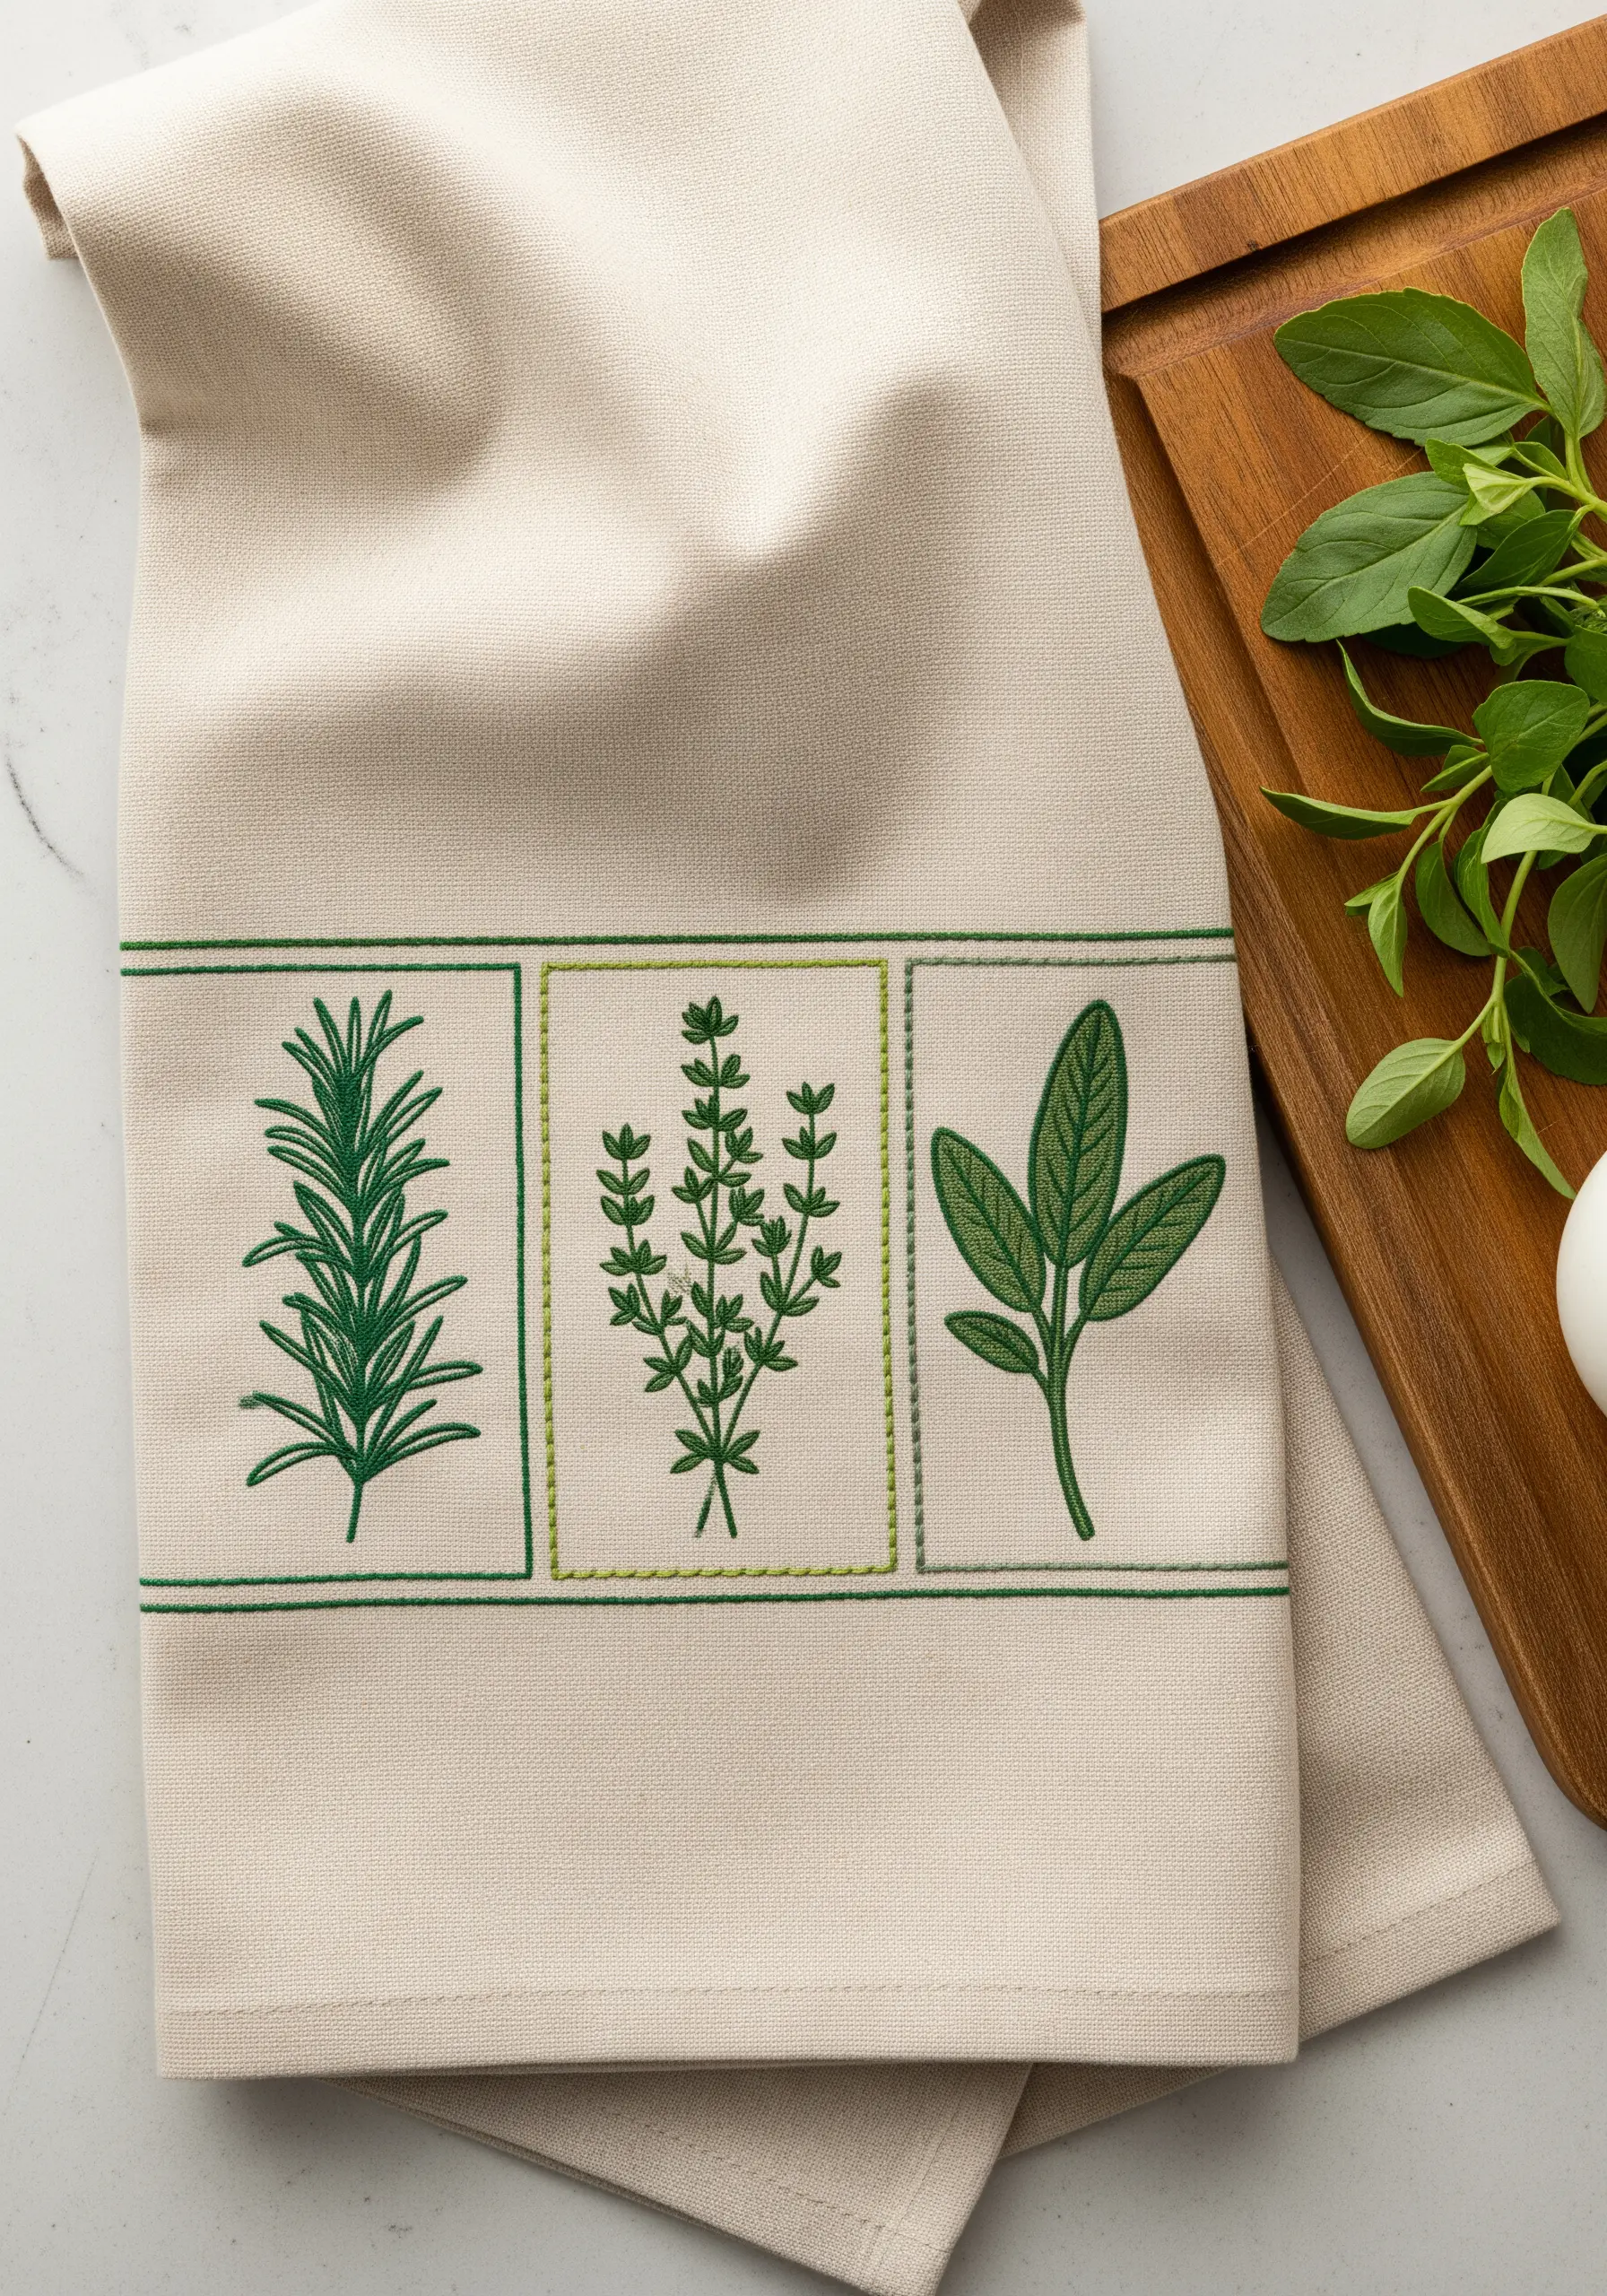
Organize individual plant silhouettes into a cohesive set by framing them within stitched borders.
Embroider each herb—rosemary, thyme, and sage—in its own panel, creating a clean, organized composition.
Use a simple backstitch in a contrasting color to create the rectangular frames, which ties the separate elements together visually.
This panel approach is perfect for embroidered kitchen towel designs, samplers, or any project where you want to showcase a collection of motifs.
14. Create a Landscape with Layered Silhouettes
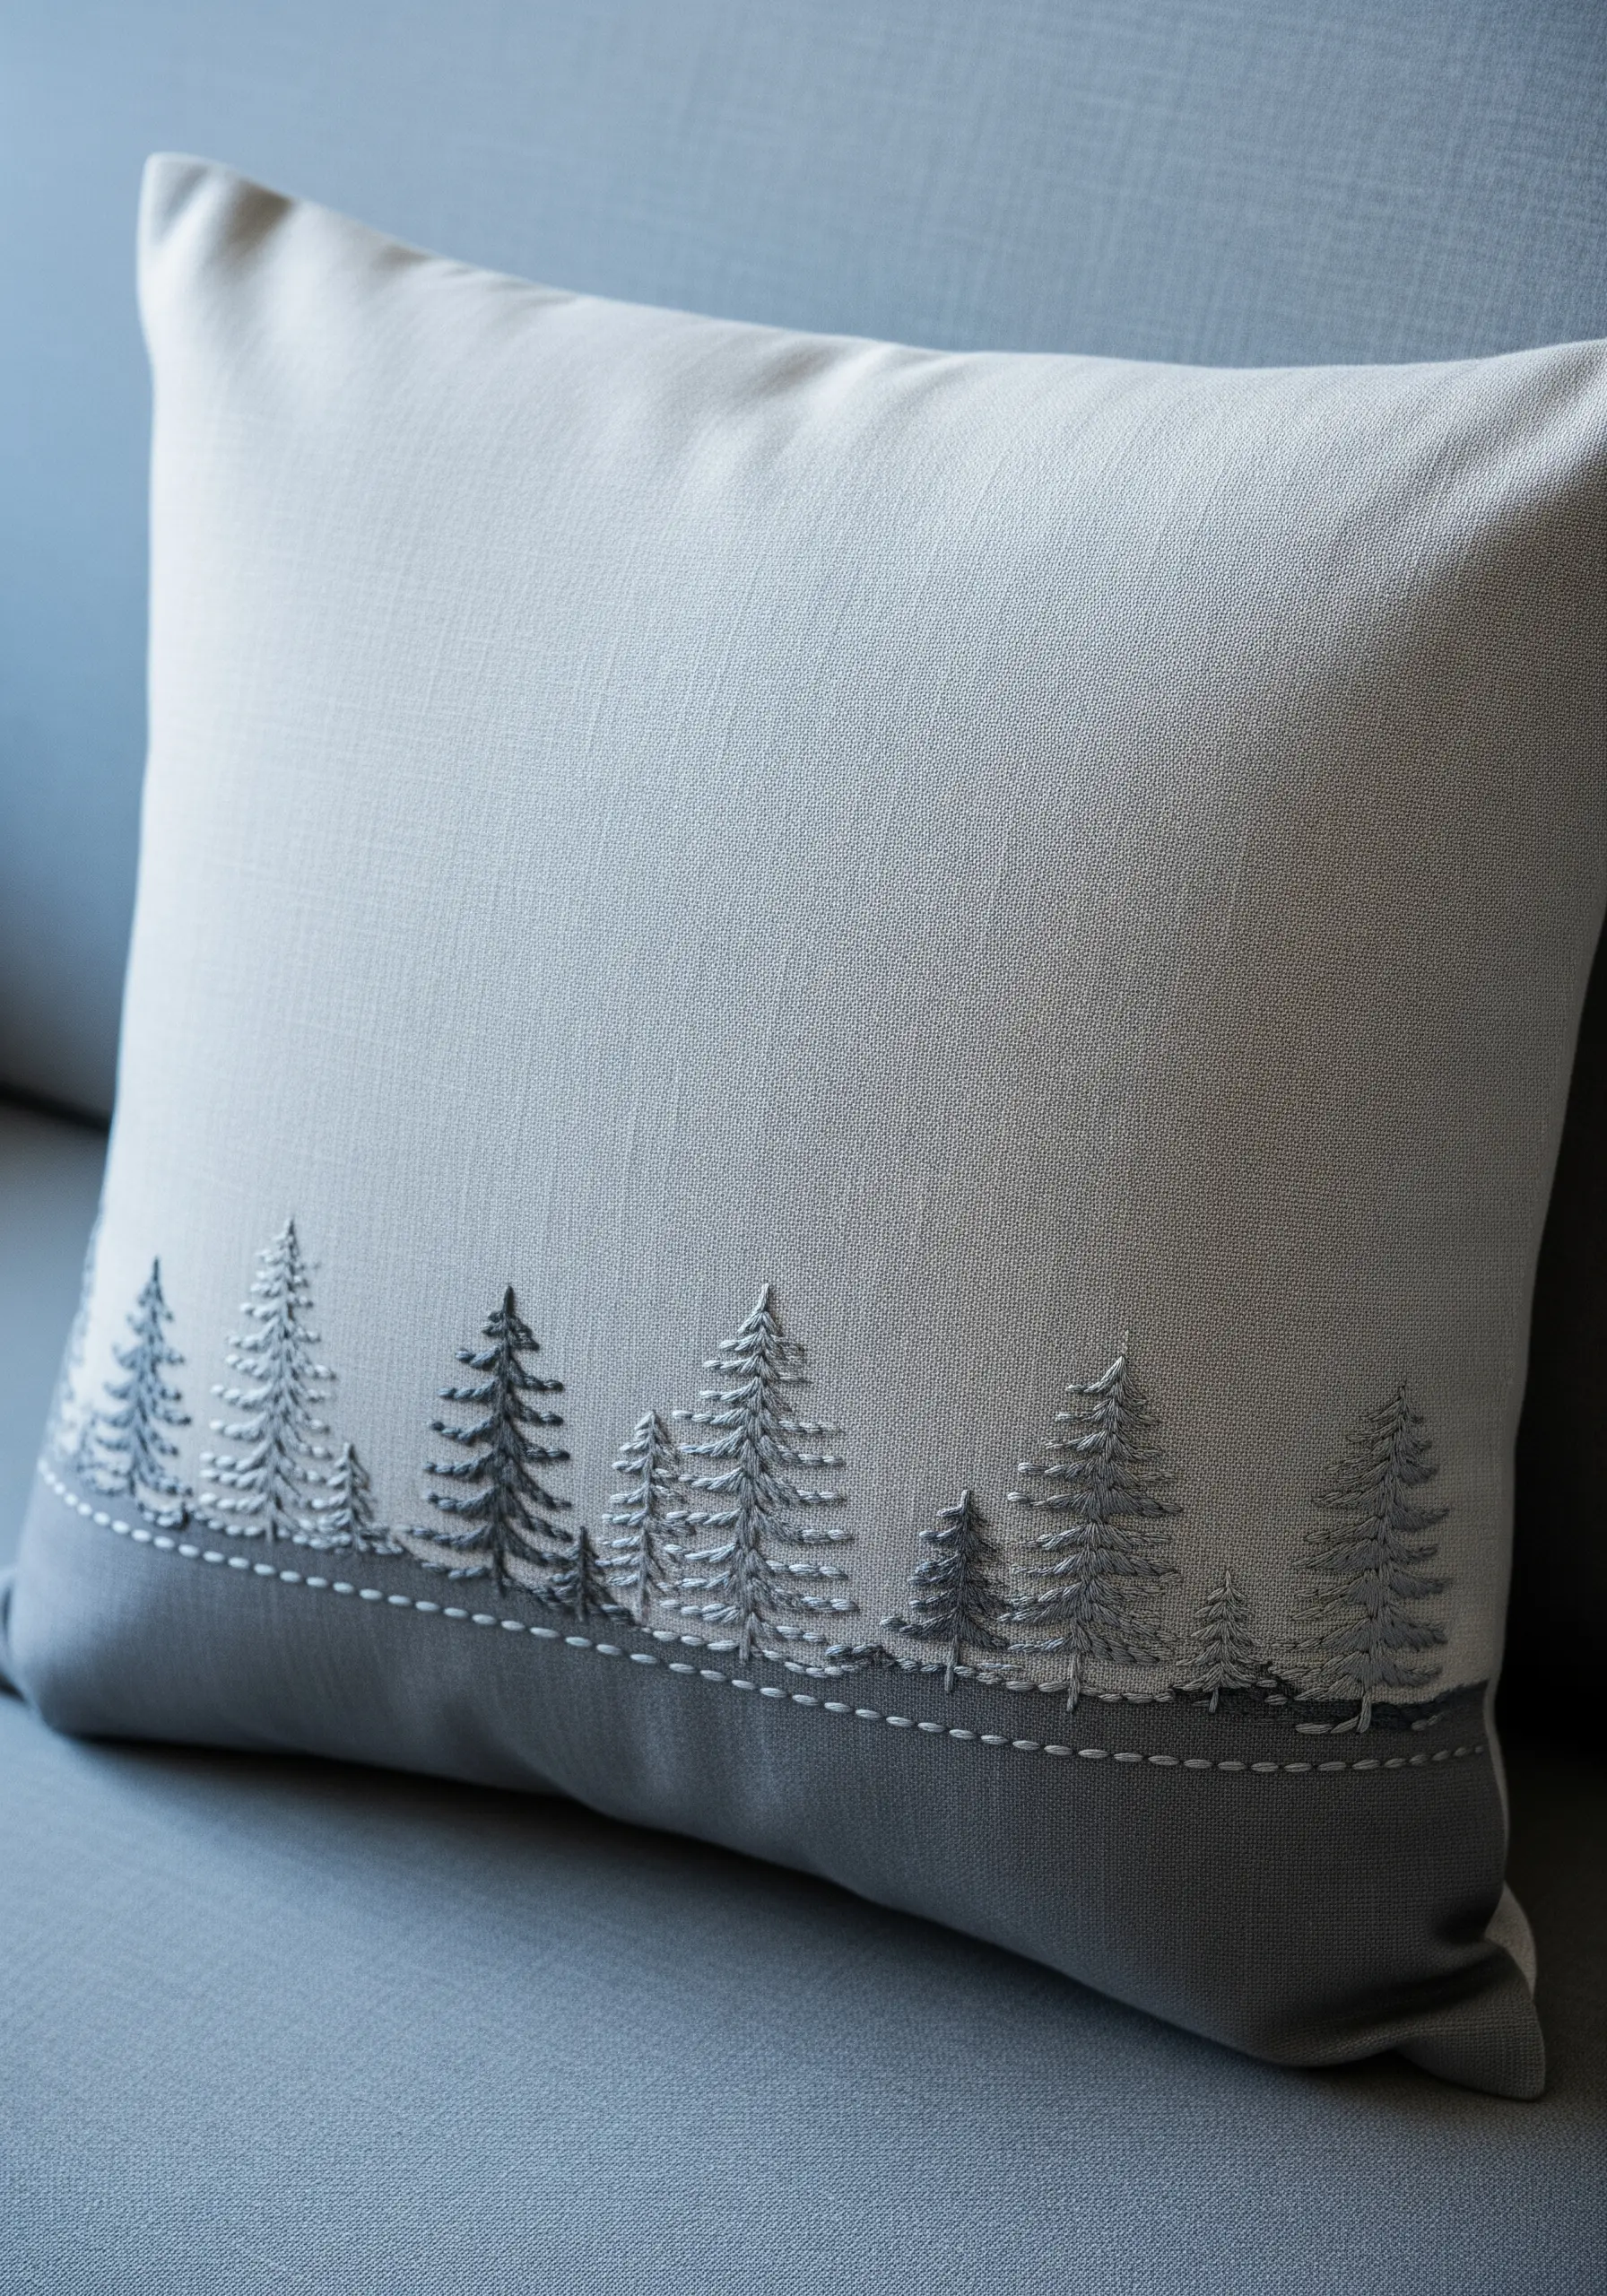
Suggest depth and perspective by layering simple tree silhouettes in varying tones.
Stitch the trees in the foreground using a darker shade of gray and a slightly denser fill stitch.
For the trees in the background, switch to a lighter gray and use sparser stitches. This subtle shift makes them appear farther away.
A simple running stitch line for the ground anchors the scene, turning a plain pillow into one of those simple embroidery projects for a cozy minimalist bedroom.
15. Stitch on Heavy Canvas with Confidence
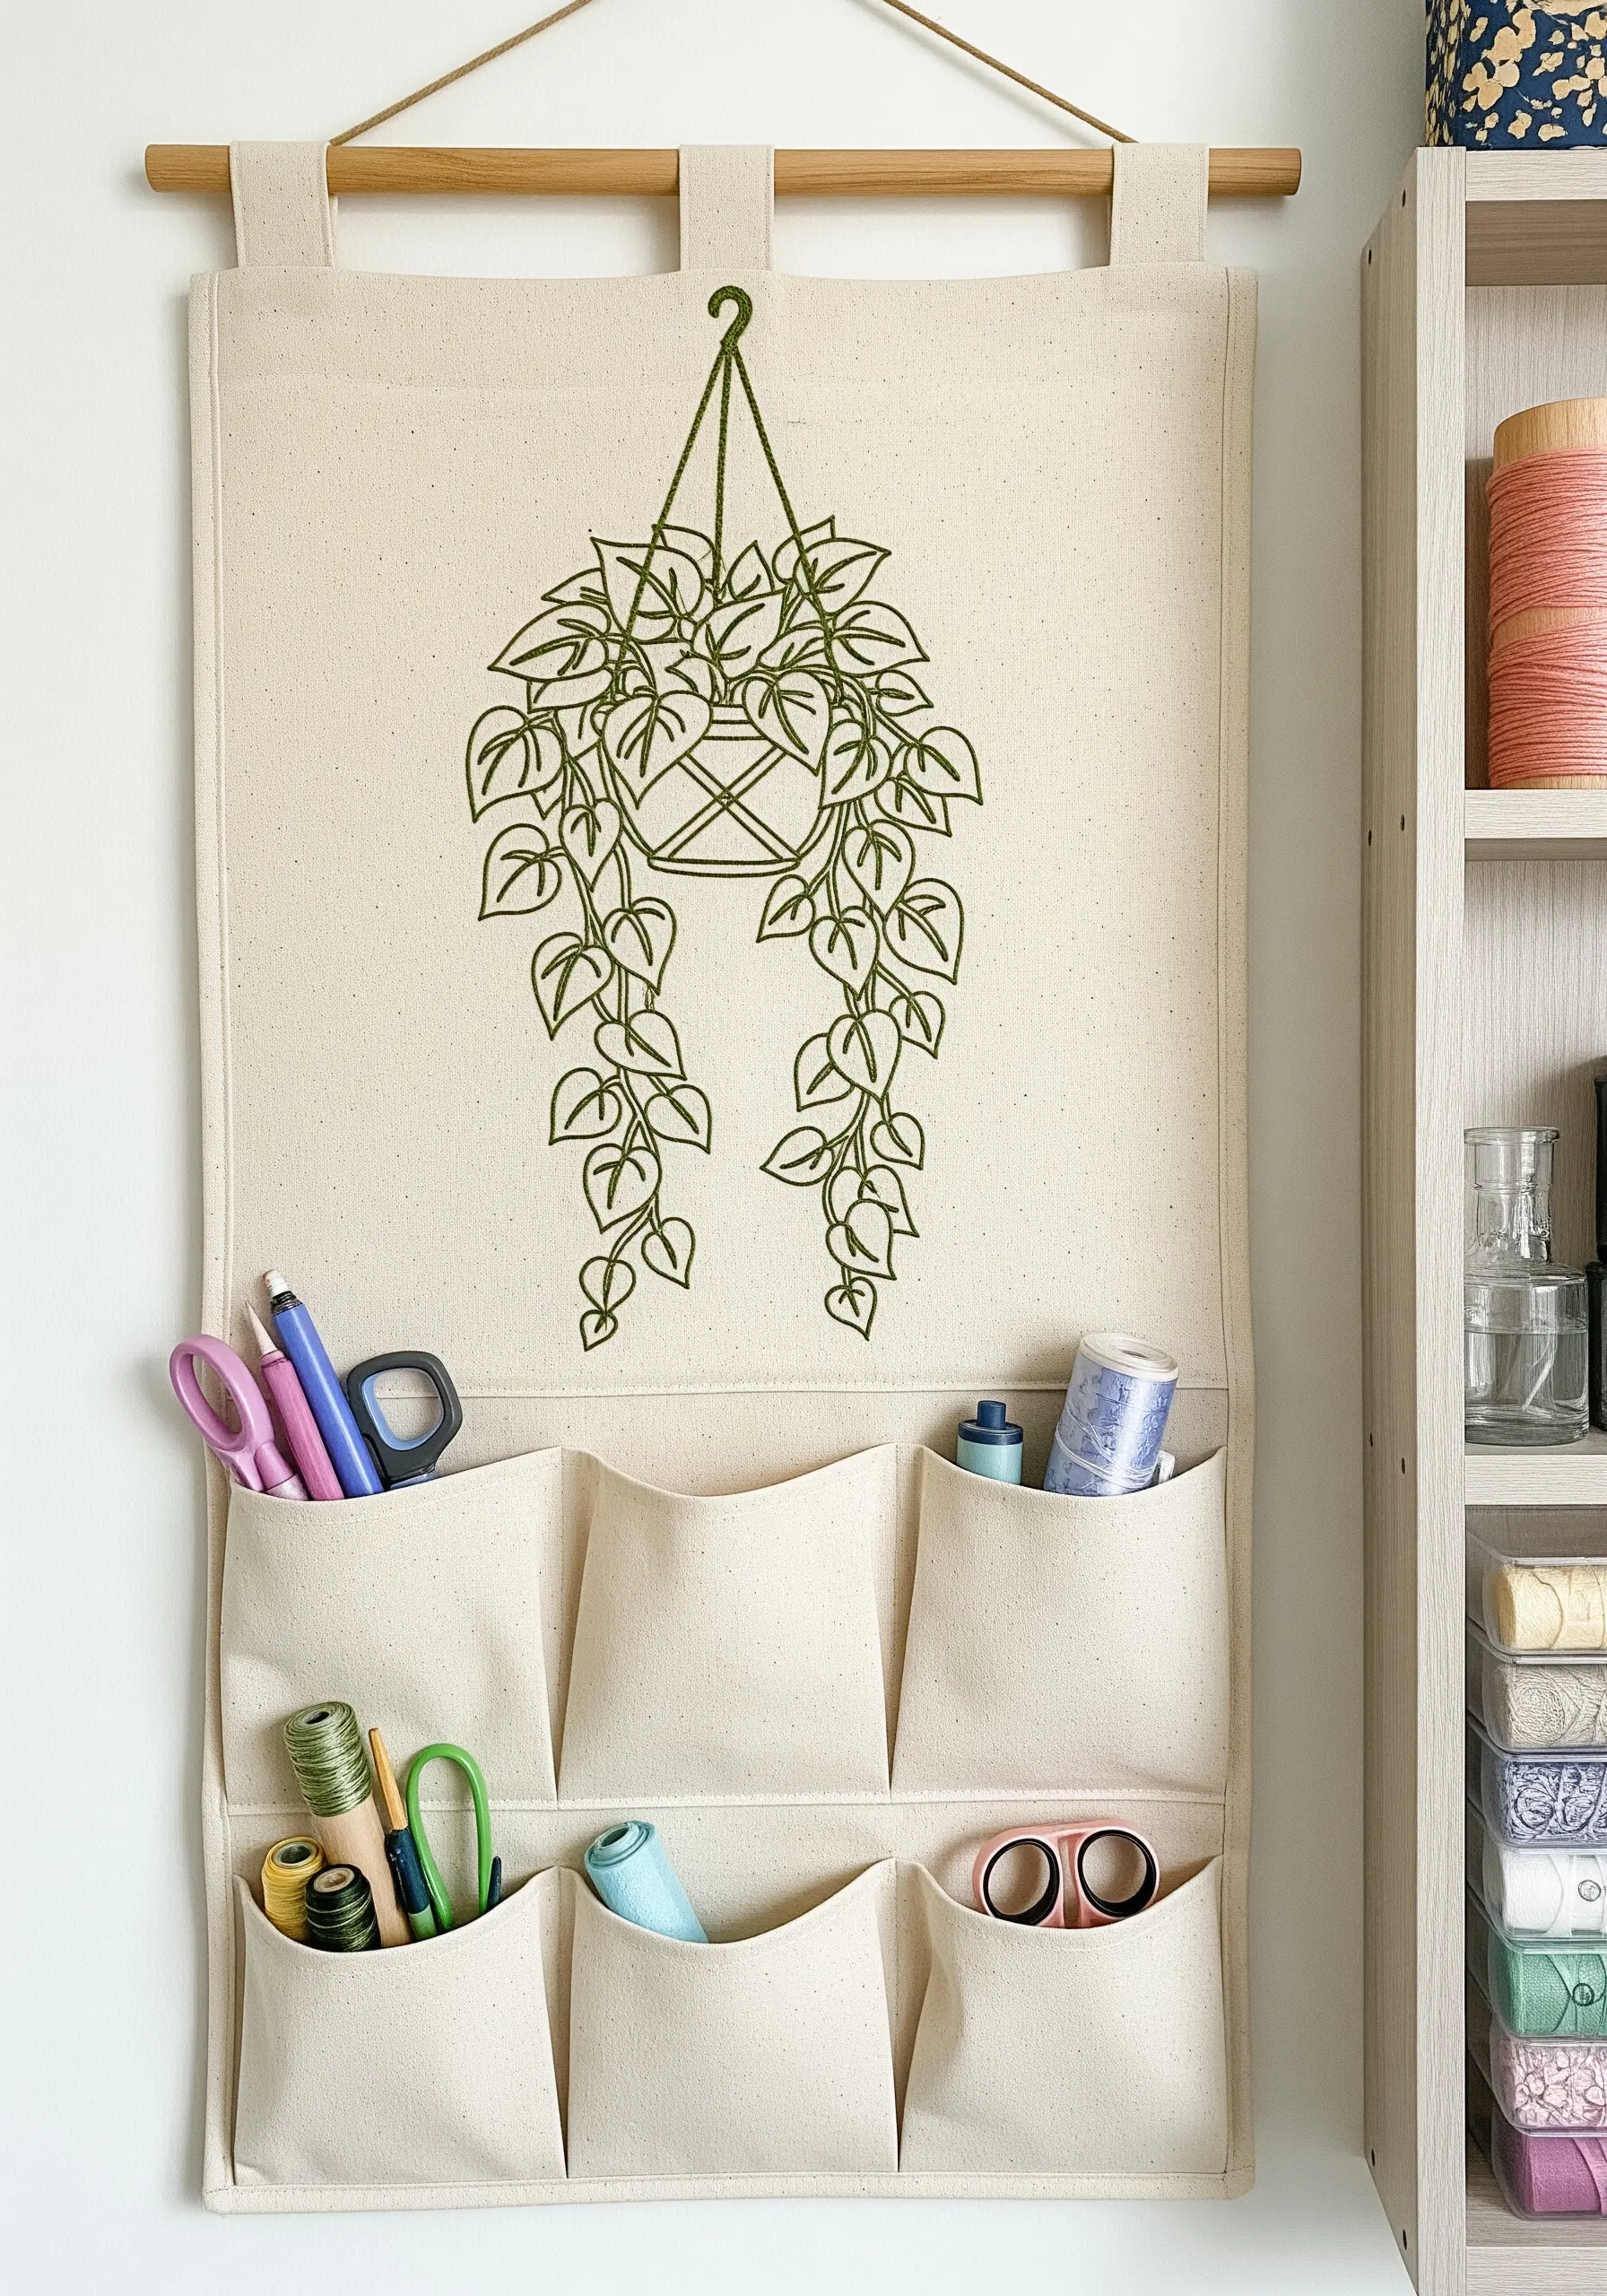
Adapt your tools and thread choice when working on durable fabrics like canvas for functional items.
Choose a thicker thread, such as Pearl Cotton No. 8 or use all six strands of standard floss, to create a bold line that won’t get lost in the fabric’s heavy weave.
Use a sharp, strong needle (a size 18-22 chenille needle works well) to penetrate the canvas without straining your hands.
This approach ensures your design is robust enough for everyday use, perfect for embroidery projects to style bookcases and storage organizers.
16. Master Graphic Contrast with a Thistle
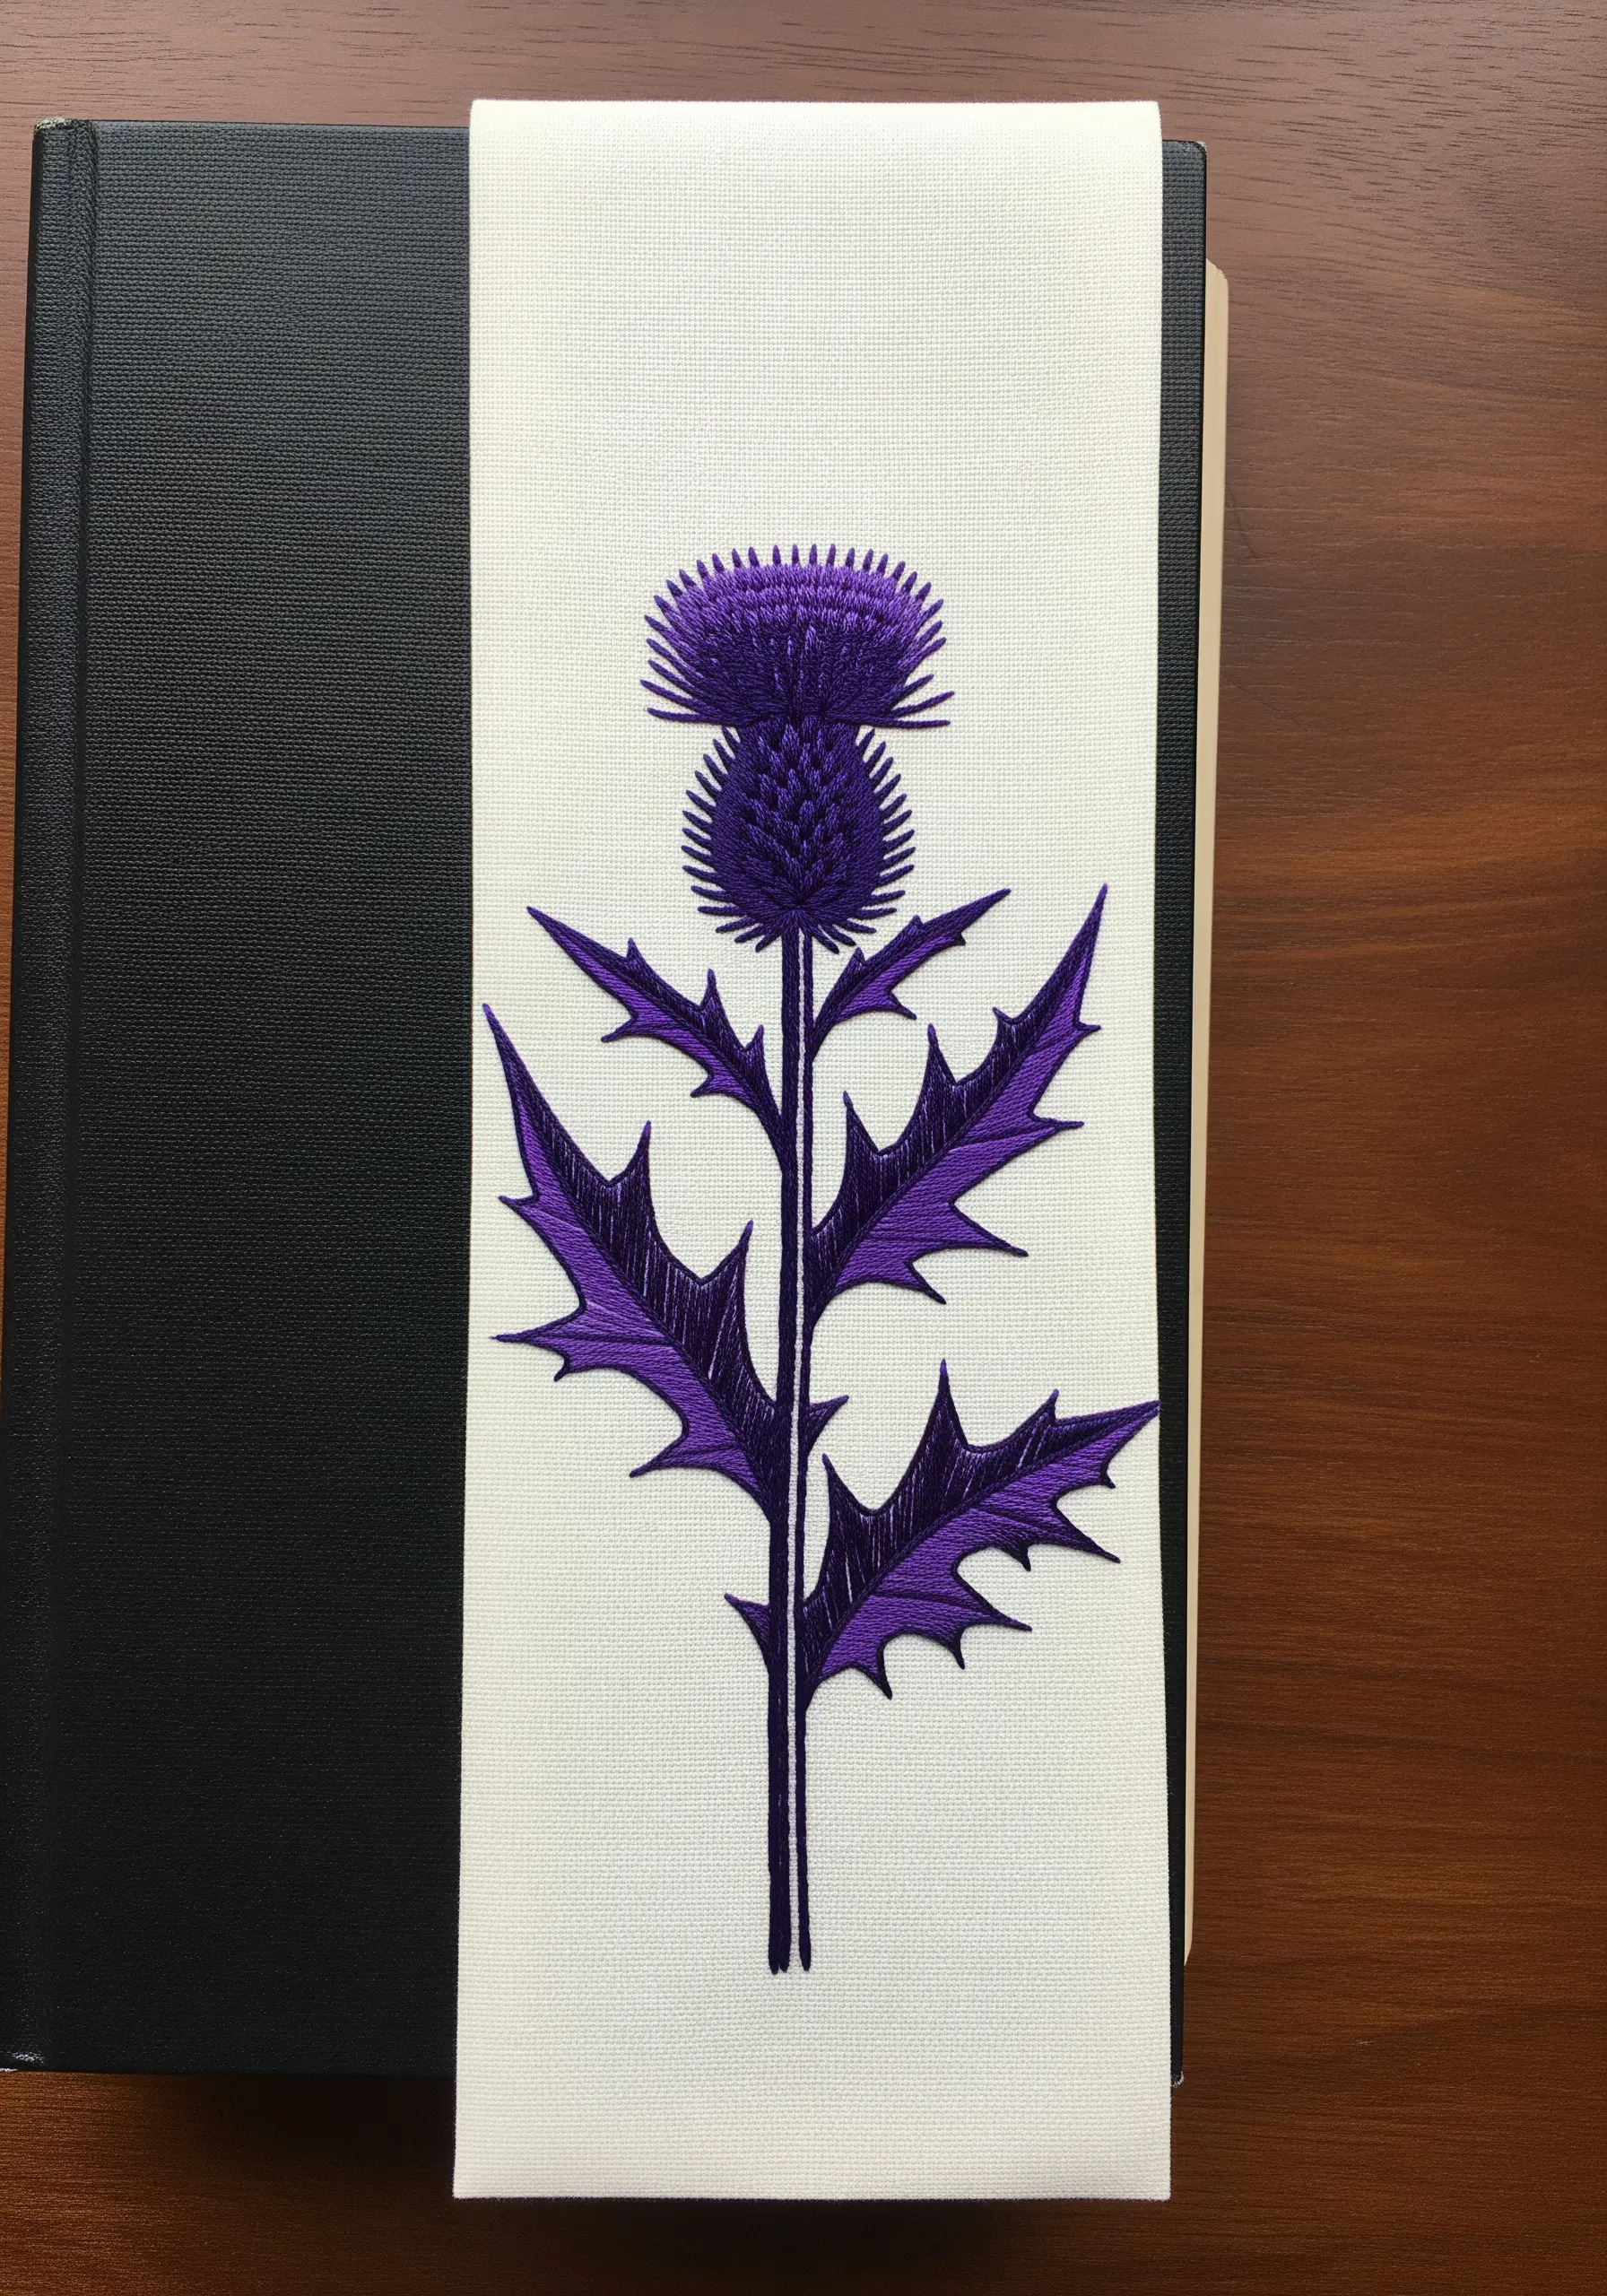
Make a powerful statement by pairing a vibrant, saturated color with a crisp, neutral background.
The intense violet of the thistle silhouette creates a striking visual against the bright white linen, emphasizing the plant’s sharp, architectural form.
Use a dense satin stitch to fill the shapes completely, giving the design a solid, almost print-like quality that enhances its graphic appeal.
This high-contrast approach is perfect for motifs with strong, recognizable shapes.
17. Adapt Designs for Highly Textured Surfaces

When embroidering on unconventional materials like a jute placemat, simplify your design and amplify your materials.
Forget fine details; they will be completely lost in the coarse weave of the jute. Instead, focus on a large, simple silhouette like this palm leaf.
Use thick yarn or macrame cord instead of floss, and opt for large, bold stitches like a long straight stitch or couching to secure the yarn to the surface.
This approach leans into the material’s texture rather than fighting against it, creating beautiful yarn wall art techniques for functional items.
18. Combine Outline and Texture in a Large Motif

For a large-scale silhouette like a sunflower, combine a clean outline with a textured fill to add interest and avoid a flat appearance.
Use a stem stitch or whipped backstitch in a bright yellow to define the petals, giving them a sharp, clean edge.
Fill the center of the sunflower with a dense collection of French knots or seed stitches in a dark brown to mimic the texture of seeds.
This mix of techniques is one of the small embroidery ideas you can finish in under an hour that has a big visual payoff on items like aprons.
19. Layer Line Art over a Color Block
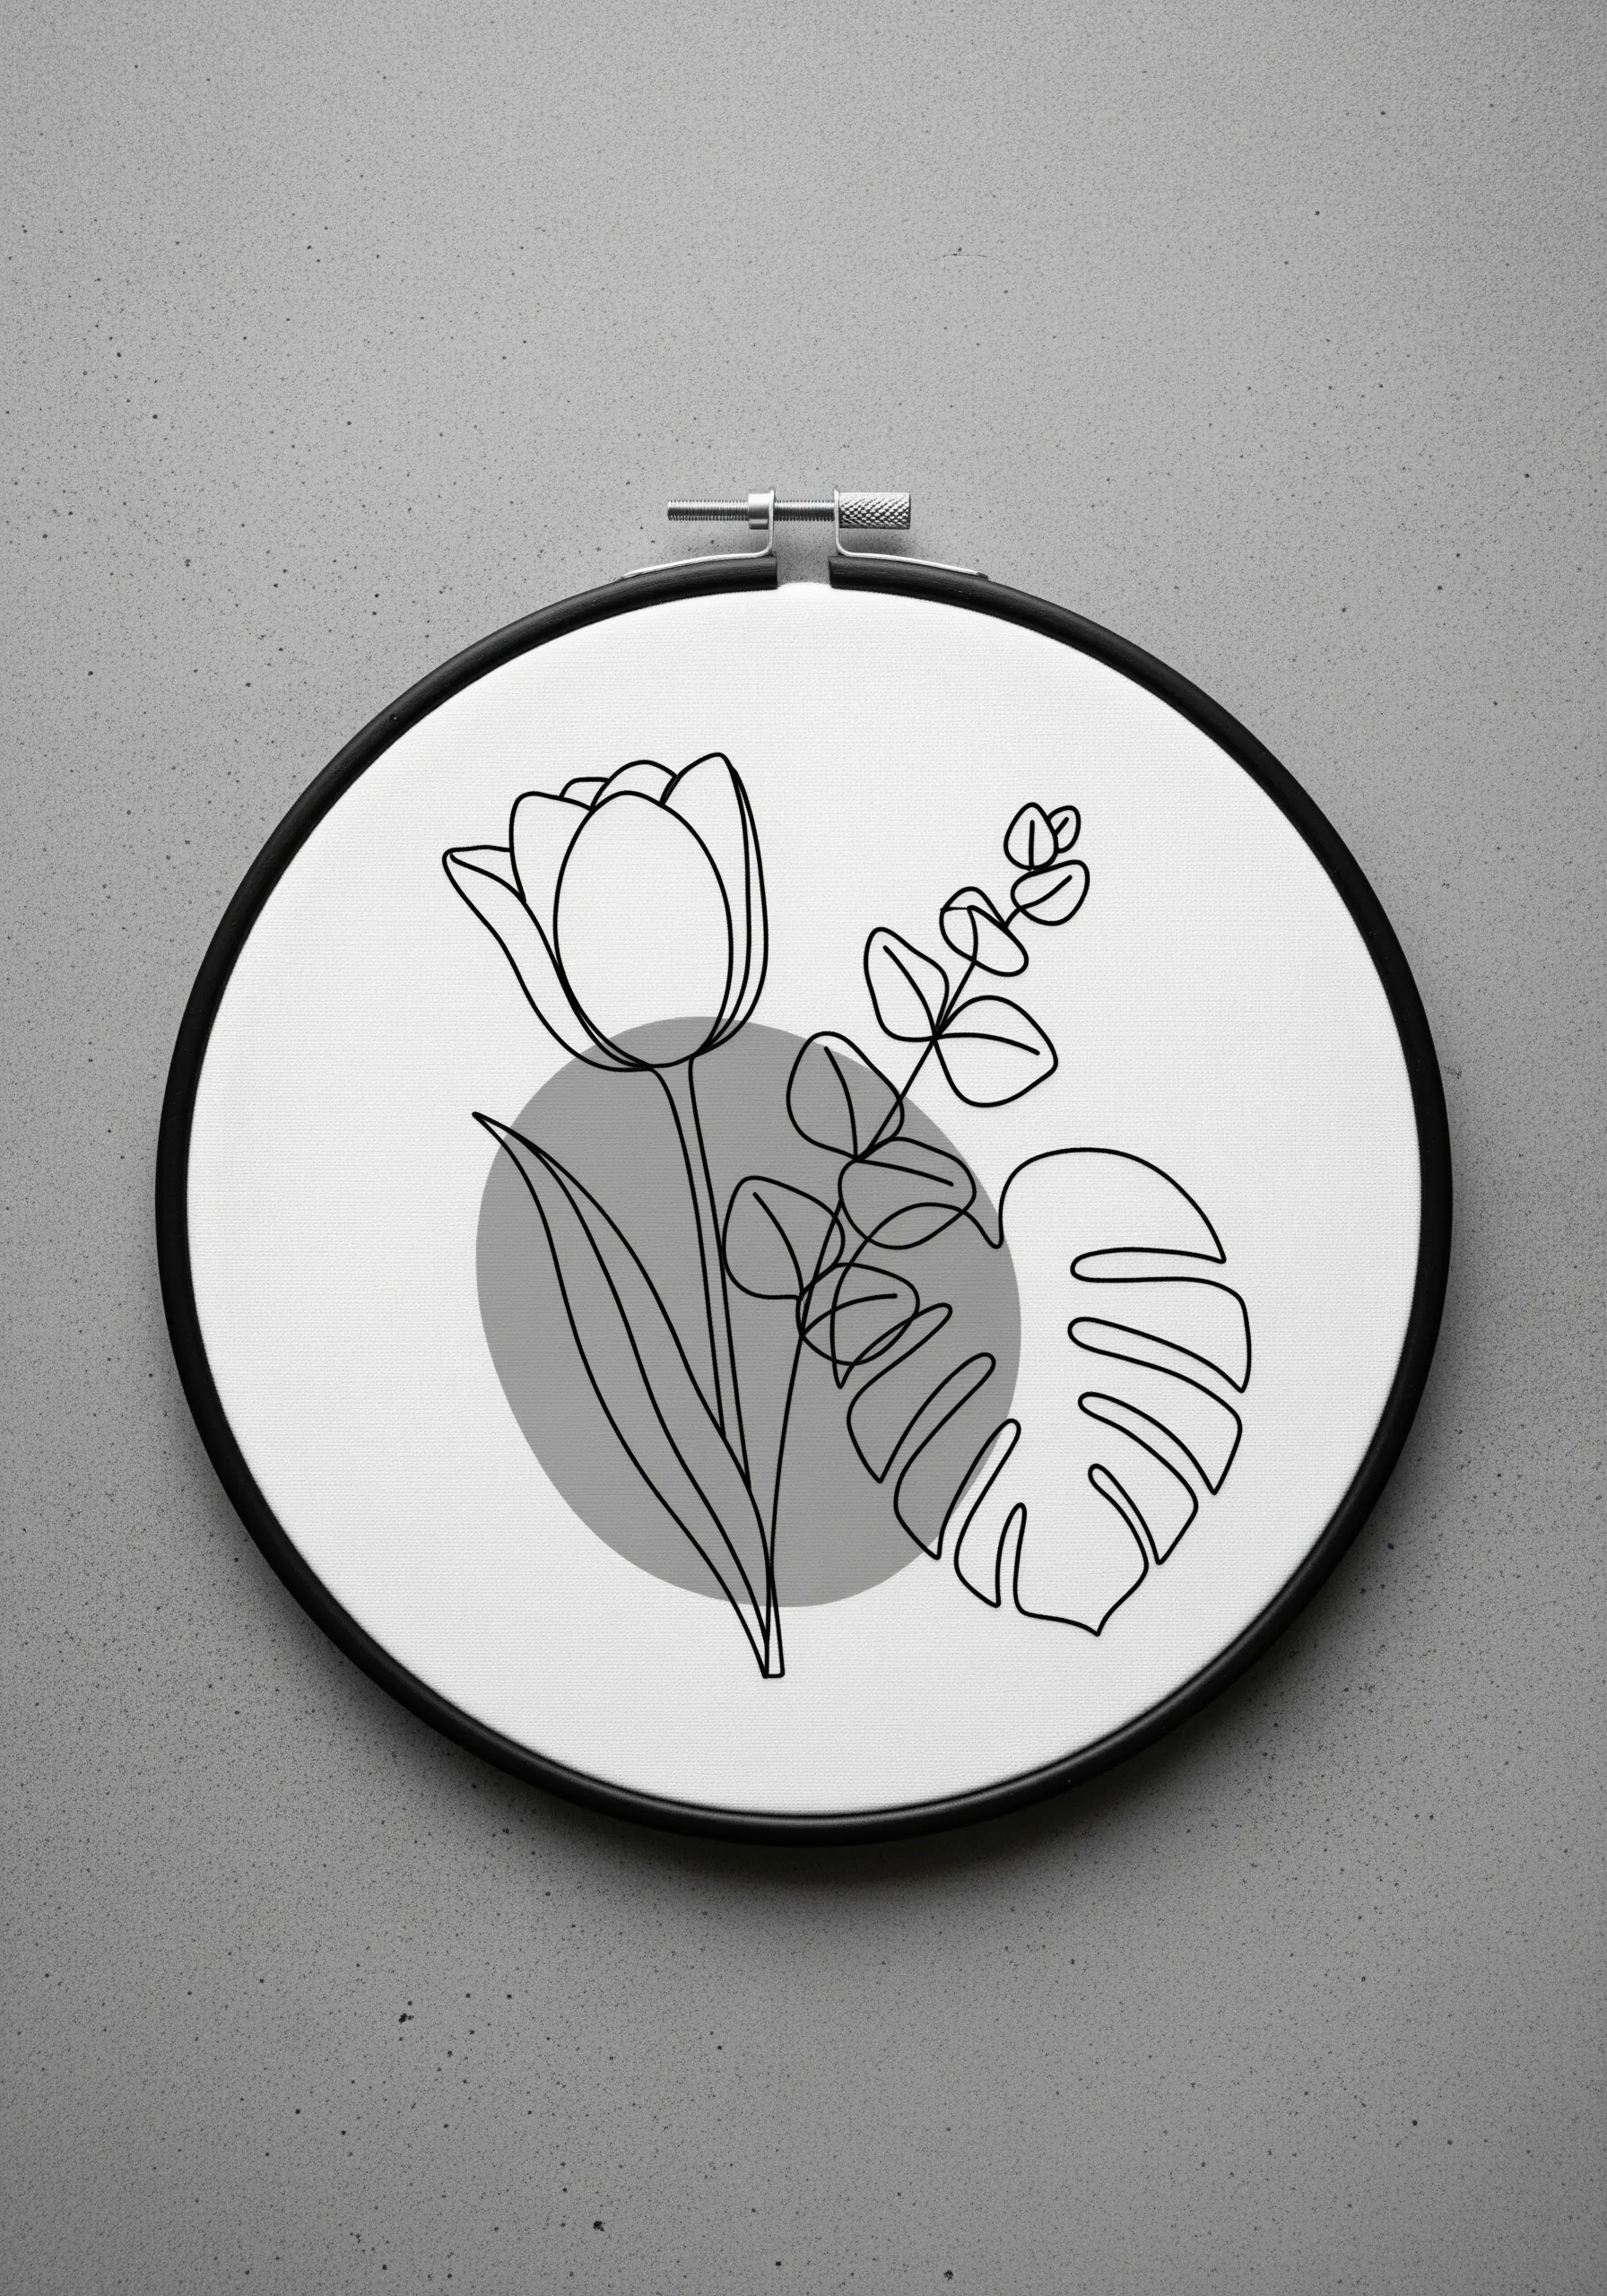
Create a contemporary composition by layering a simple line-art silhouette over a block of solid color.
You can create the color block by either filling an area with dense satin stitch or, for a quicker method, by applying a circle of fabric paint or appliqueing a piece of felt onto your base fabric.
Stitch your fine-line botanicals over the color block using a contrasting thread, allowing the lines to interact with the shape behind them.
This technique adds depth and a graphic design sensibility, transforming simple sketches into sophisticated modern line art.


