

You don’t need to know how to draw to create a portrait that feels alive. Forget the pressure of capturing a perfect likeness with a pencil or brush. Instead, I want you to think like a sculptor, but with fabric and thread as your medium.
Fabric collage embroidery allows you to build a face piece by piece, focusing on shape, color, and texture rather than precise lines. Each scrap of patterned cotton, strip of worn denim, or piece of delicate lace holds its own story and character. Your job is simply to arrange them.
In the ideas that follow, you’ll discover how to let your materials do the expressive work. You will learn to see how a simple running stitch can define a jawline, how layered fabric can mimic the softness of fur, and how a few well-placed beads can bring a sparkle to the eye. This is your invitation to create portraits with depth, personality, and soul—no drawing skills required.
1. Build Texture with Fabric Strips and Braids
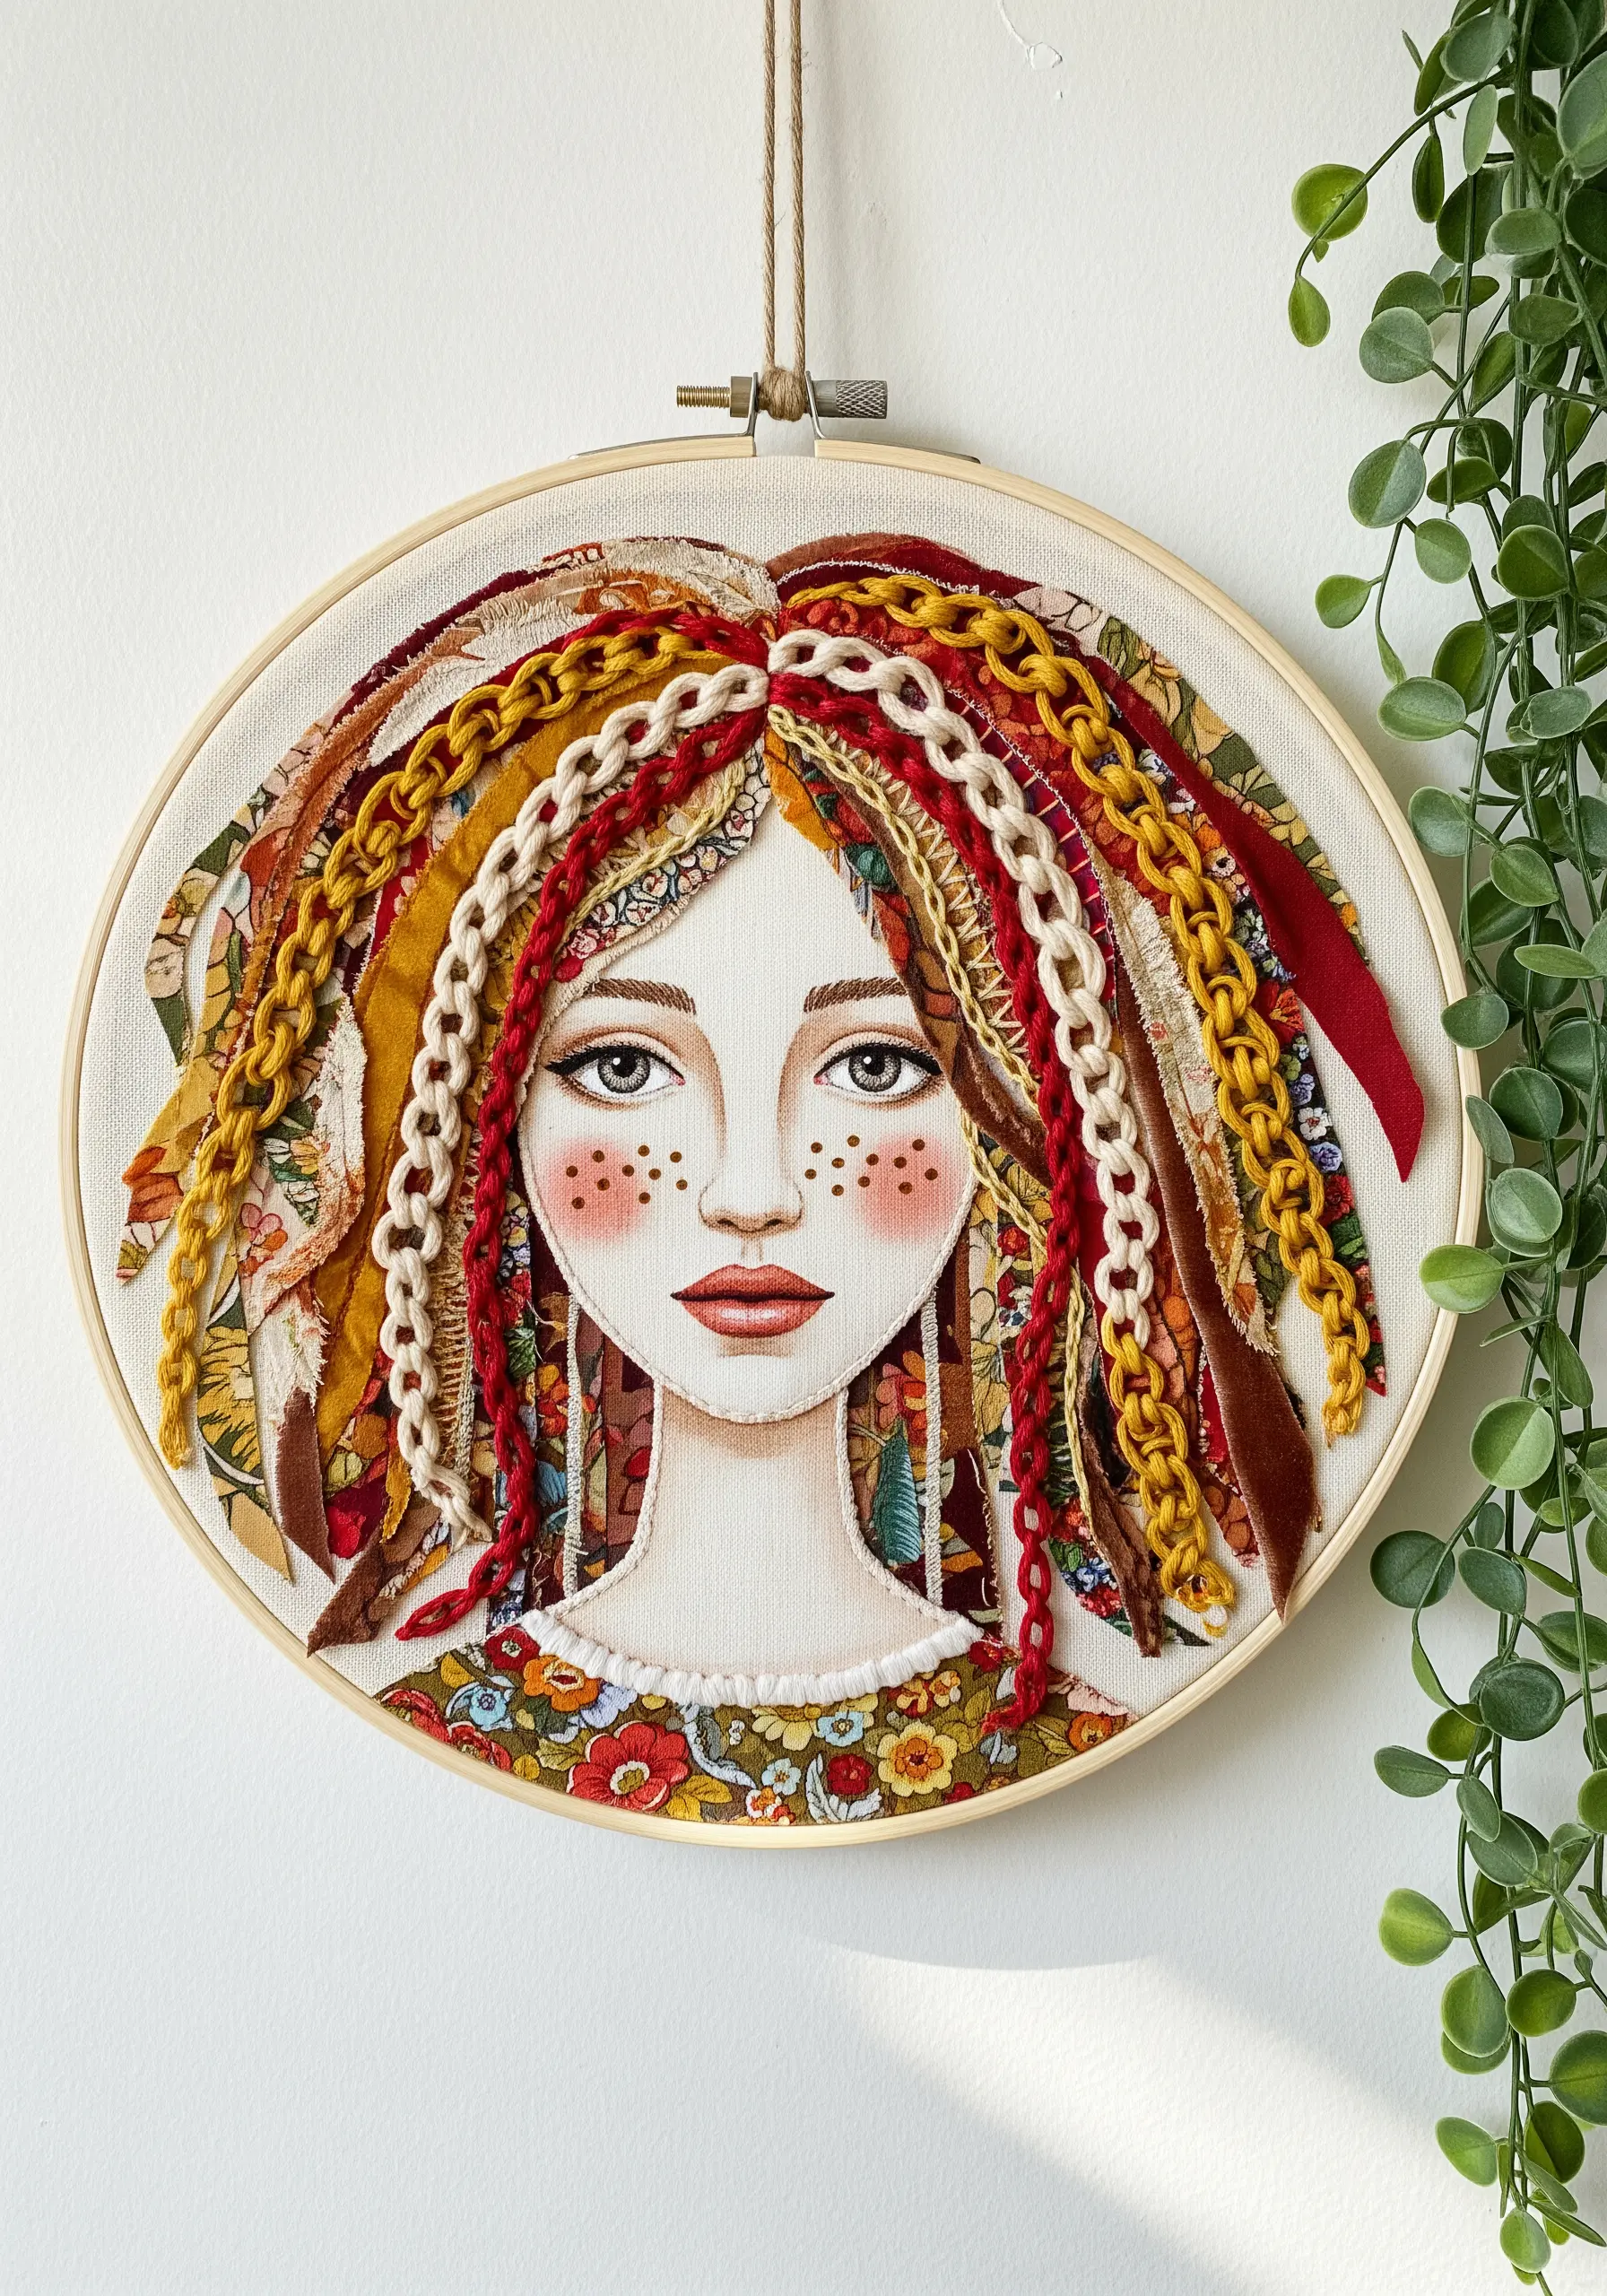
You don’t need complex stitches to create dynamic hair; let your fabric scraps do the work.
Cut various fabrics—cottons, silks, and even lightweight upholstery samples—into thin strips of differing widths.
Layer these strips, allowing them to overlap and twist, then secure them with occasional tacking stitches to create a sense of movement.
For added dimension, braid thick yarn or soft cording and couch it between the fabric sections—this introduces a clean, graphic line that contrasts beautifully with the raw edges of the fabric.
This method transforms flat portraits into statement textured embroidery techniques perfect for expressive wall art.
2. Block in Color with Dense Thread Painting

Create a bold, graphic effect by treating your thread like paint.
Instead of collage, map out areas of light and shadow as distinct color blocks.
Fill each shape with meticulously straight satin stitches, packed tightly together to form a smooth, solid surface.
To keep your edges crisp, outline each block with a single backstitch line before filling it in; this acts as a barrier and ensures a clean transition between colors.
The result is a powerful, almost screen-printed look that emphasizes form over fine detail.
3. Sculpt Wrinkles with Directional Yarn Couching
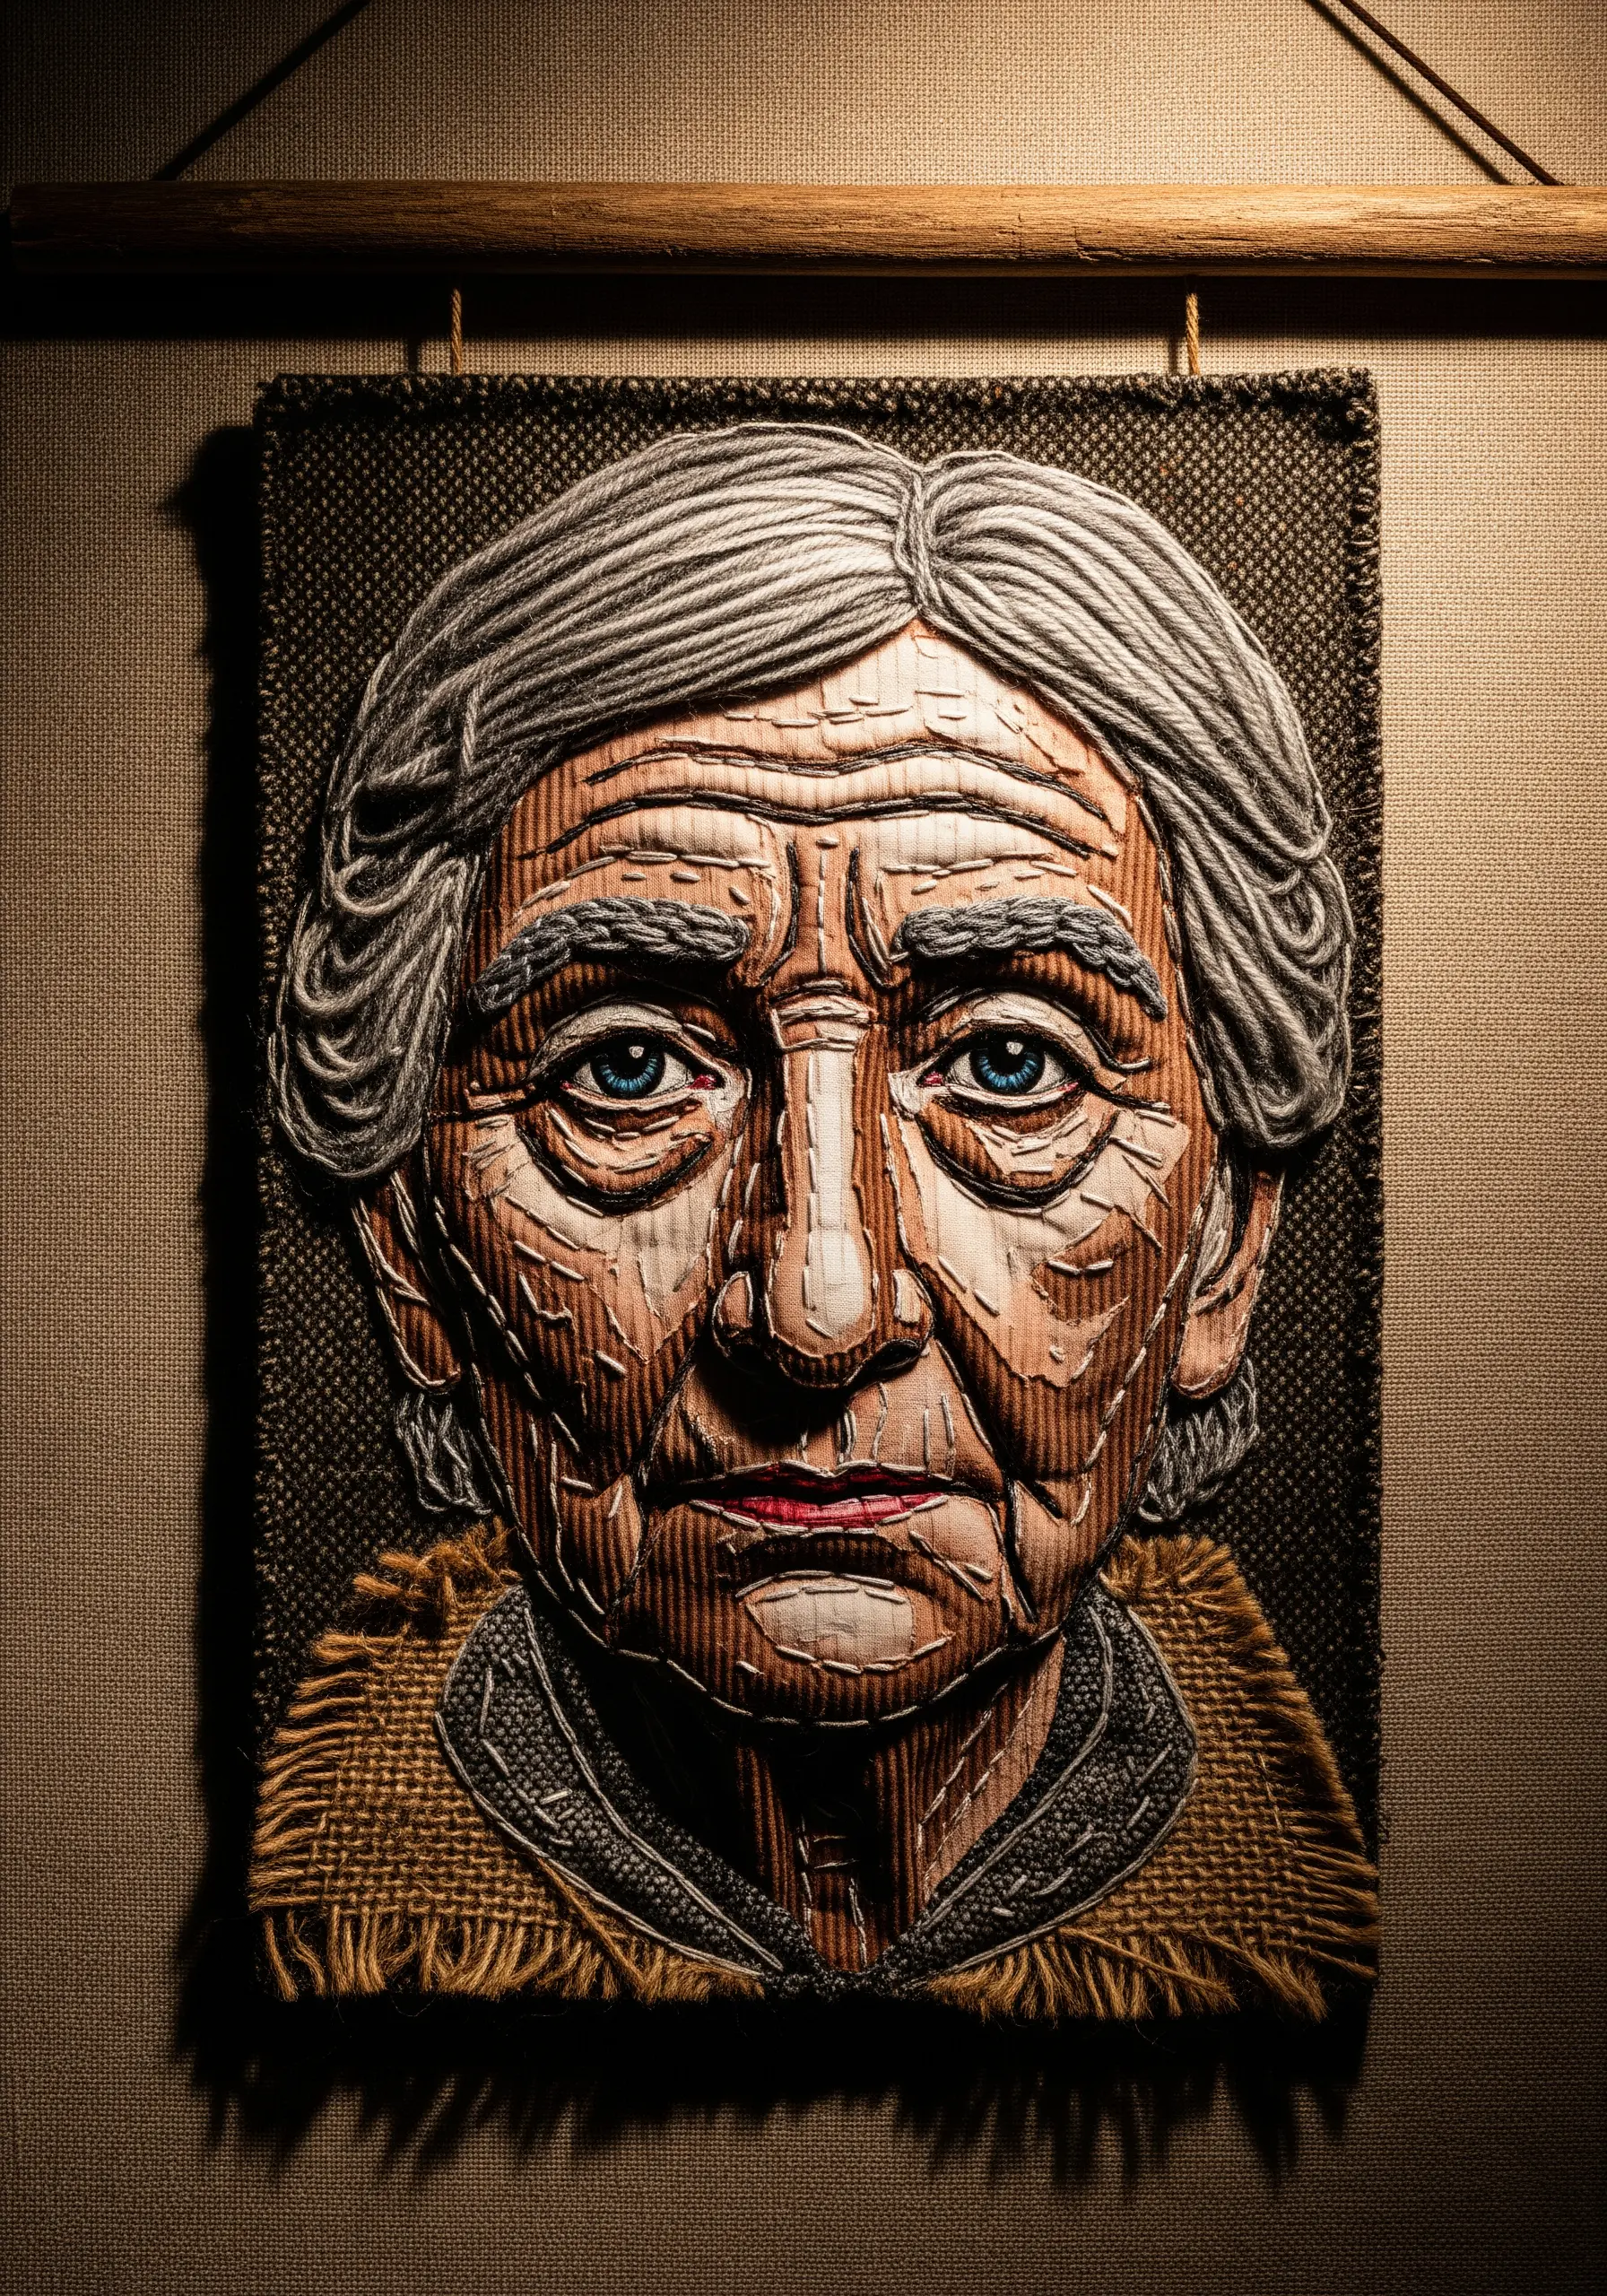
Capture the character of an older face by using thick yarn to draw the lines of time.
Lay down strands of wool or cotton yarn, following the natural contours and wrinkles of the face.
Use a thinner, matching thread to tack the yarn in place with small, almost invisible couching stitches.
Vary the spacing of your couched lines—closer together in areas of deep shadow and further apart on smoother planes—to build realistic depth.
This technique turns simple lines into a powerful tool for sculpting form and conveying emotion.
4. Embellish Appliqué with Regal Beads and Sequins

Transform a simple fabric collage into a fantastical creature by introducing embellishments strategically.
After securing your primary appliqué shapes, use sequins and beads to add focal points and catch the light.
Arrange them in clusters or lines to highlight curves, like the antlers or eyes, which draws the viewer’s attention.
Combine metallic fabrics with iridescent sequins for a magical quality that feels both opulent and otherworldly.
This layering of texture and shine is perfect for designs that add royal charm to any piece.
5. Deconstruct a Portrait with Abstract Shapes and Line Art
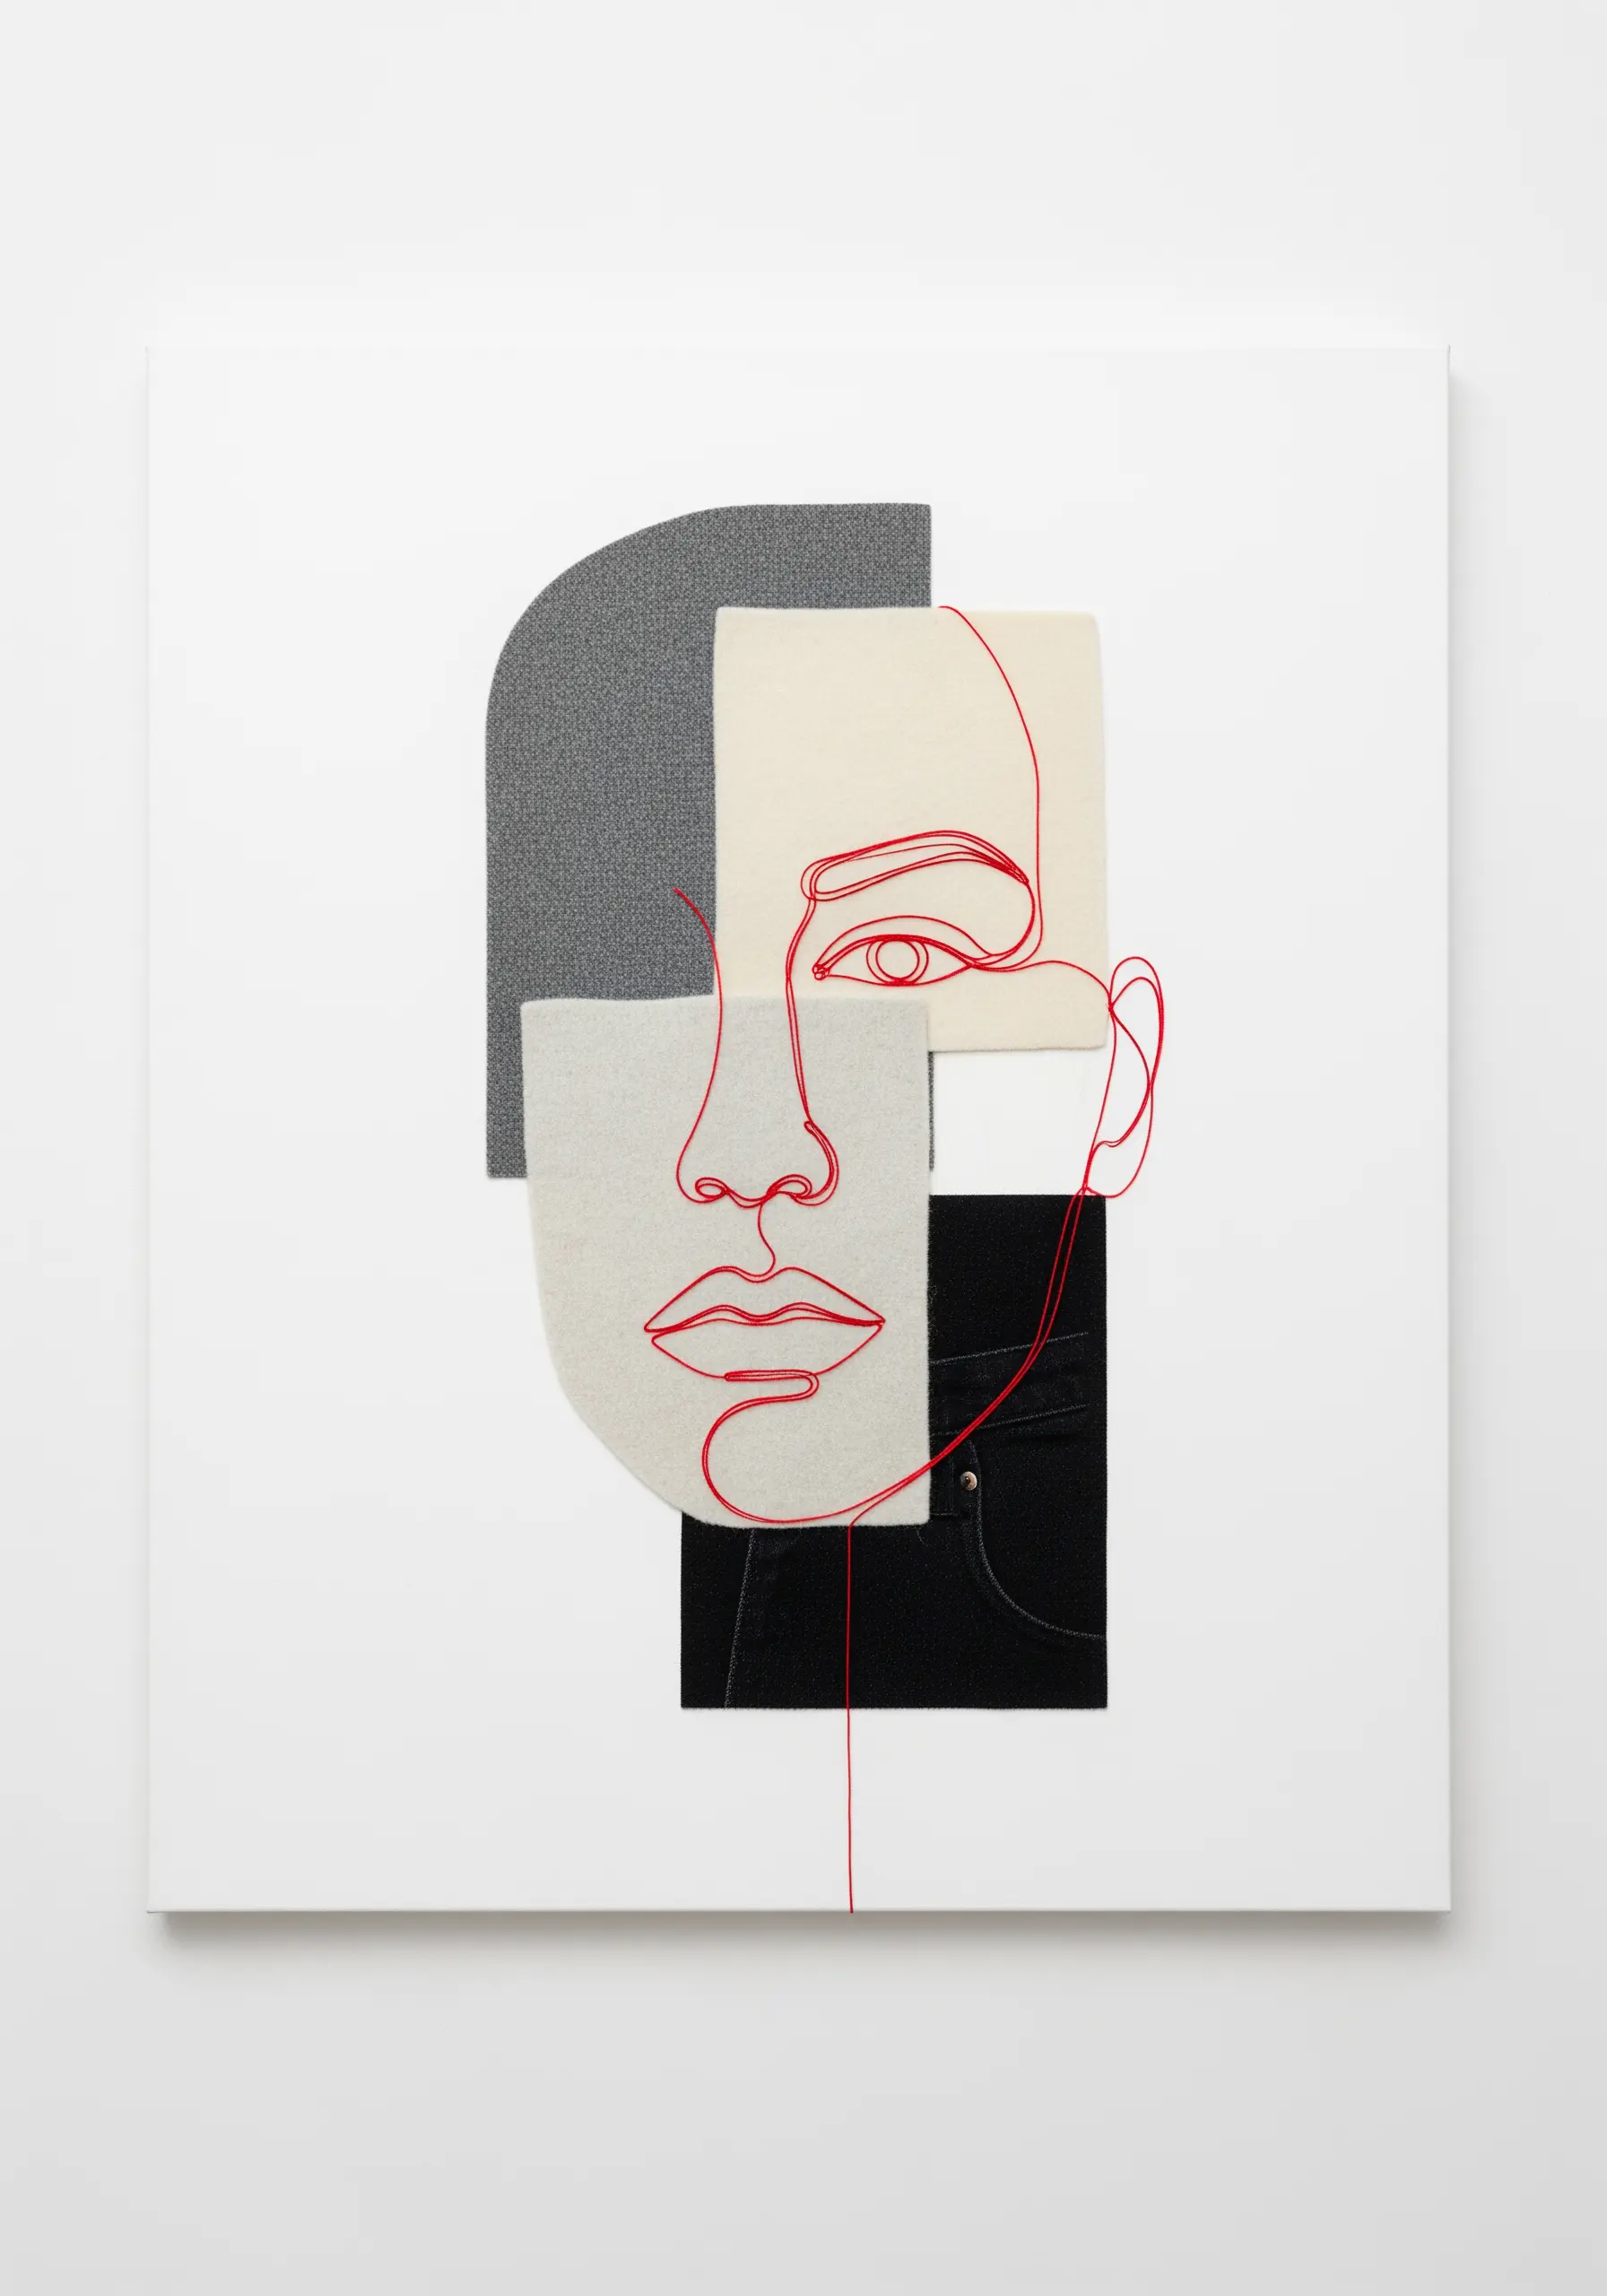
Suggest a face rather than rendering it literally for a modern, artistic interpretation.
Start by cutting geometric and curved shapes from textured fabrics like wool felt or denim, and arrange them to imply the structure of a head.
Then, use a single, continuous line of thread in a contrasting color to stitch the facial features over the top.
Let the thread travel freely across the fabric shapes and empty space, connecting the elements and creating a dynamic composition.
This approach combines the clean feel of minimal line drawing embroidery ideas with the tactile nature of collage.
6. Integrate 3D Elements for Playful Dimension
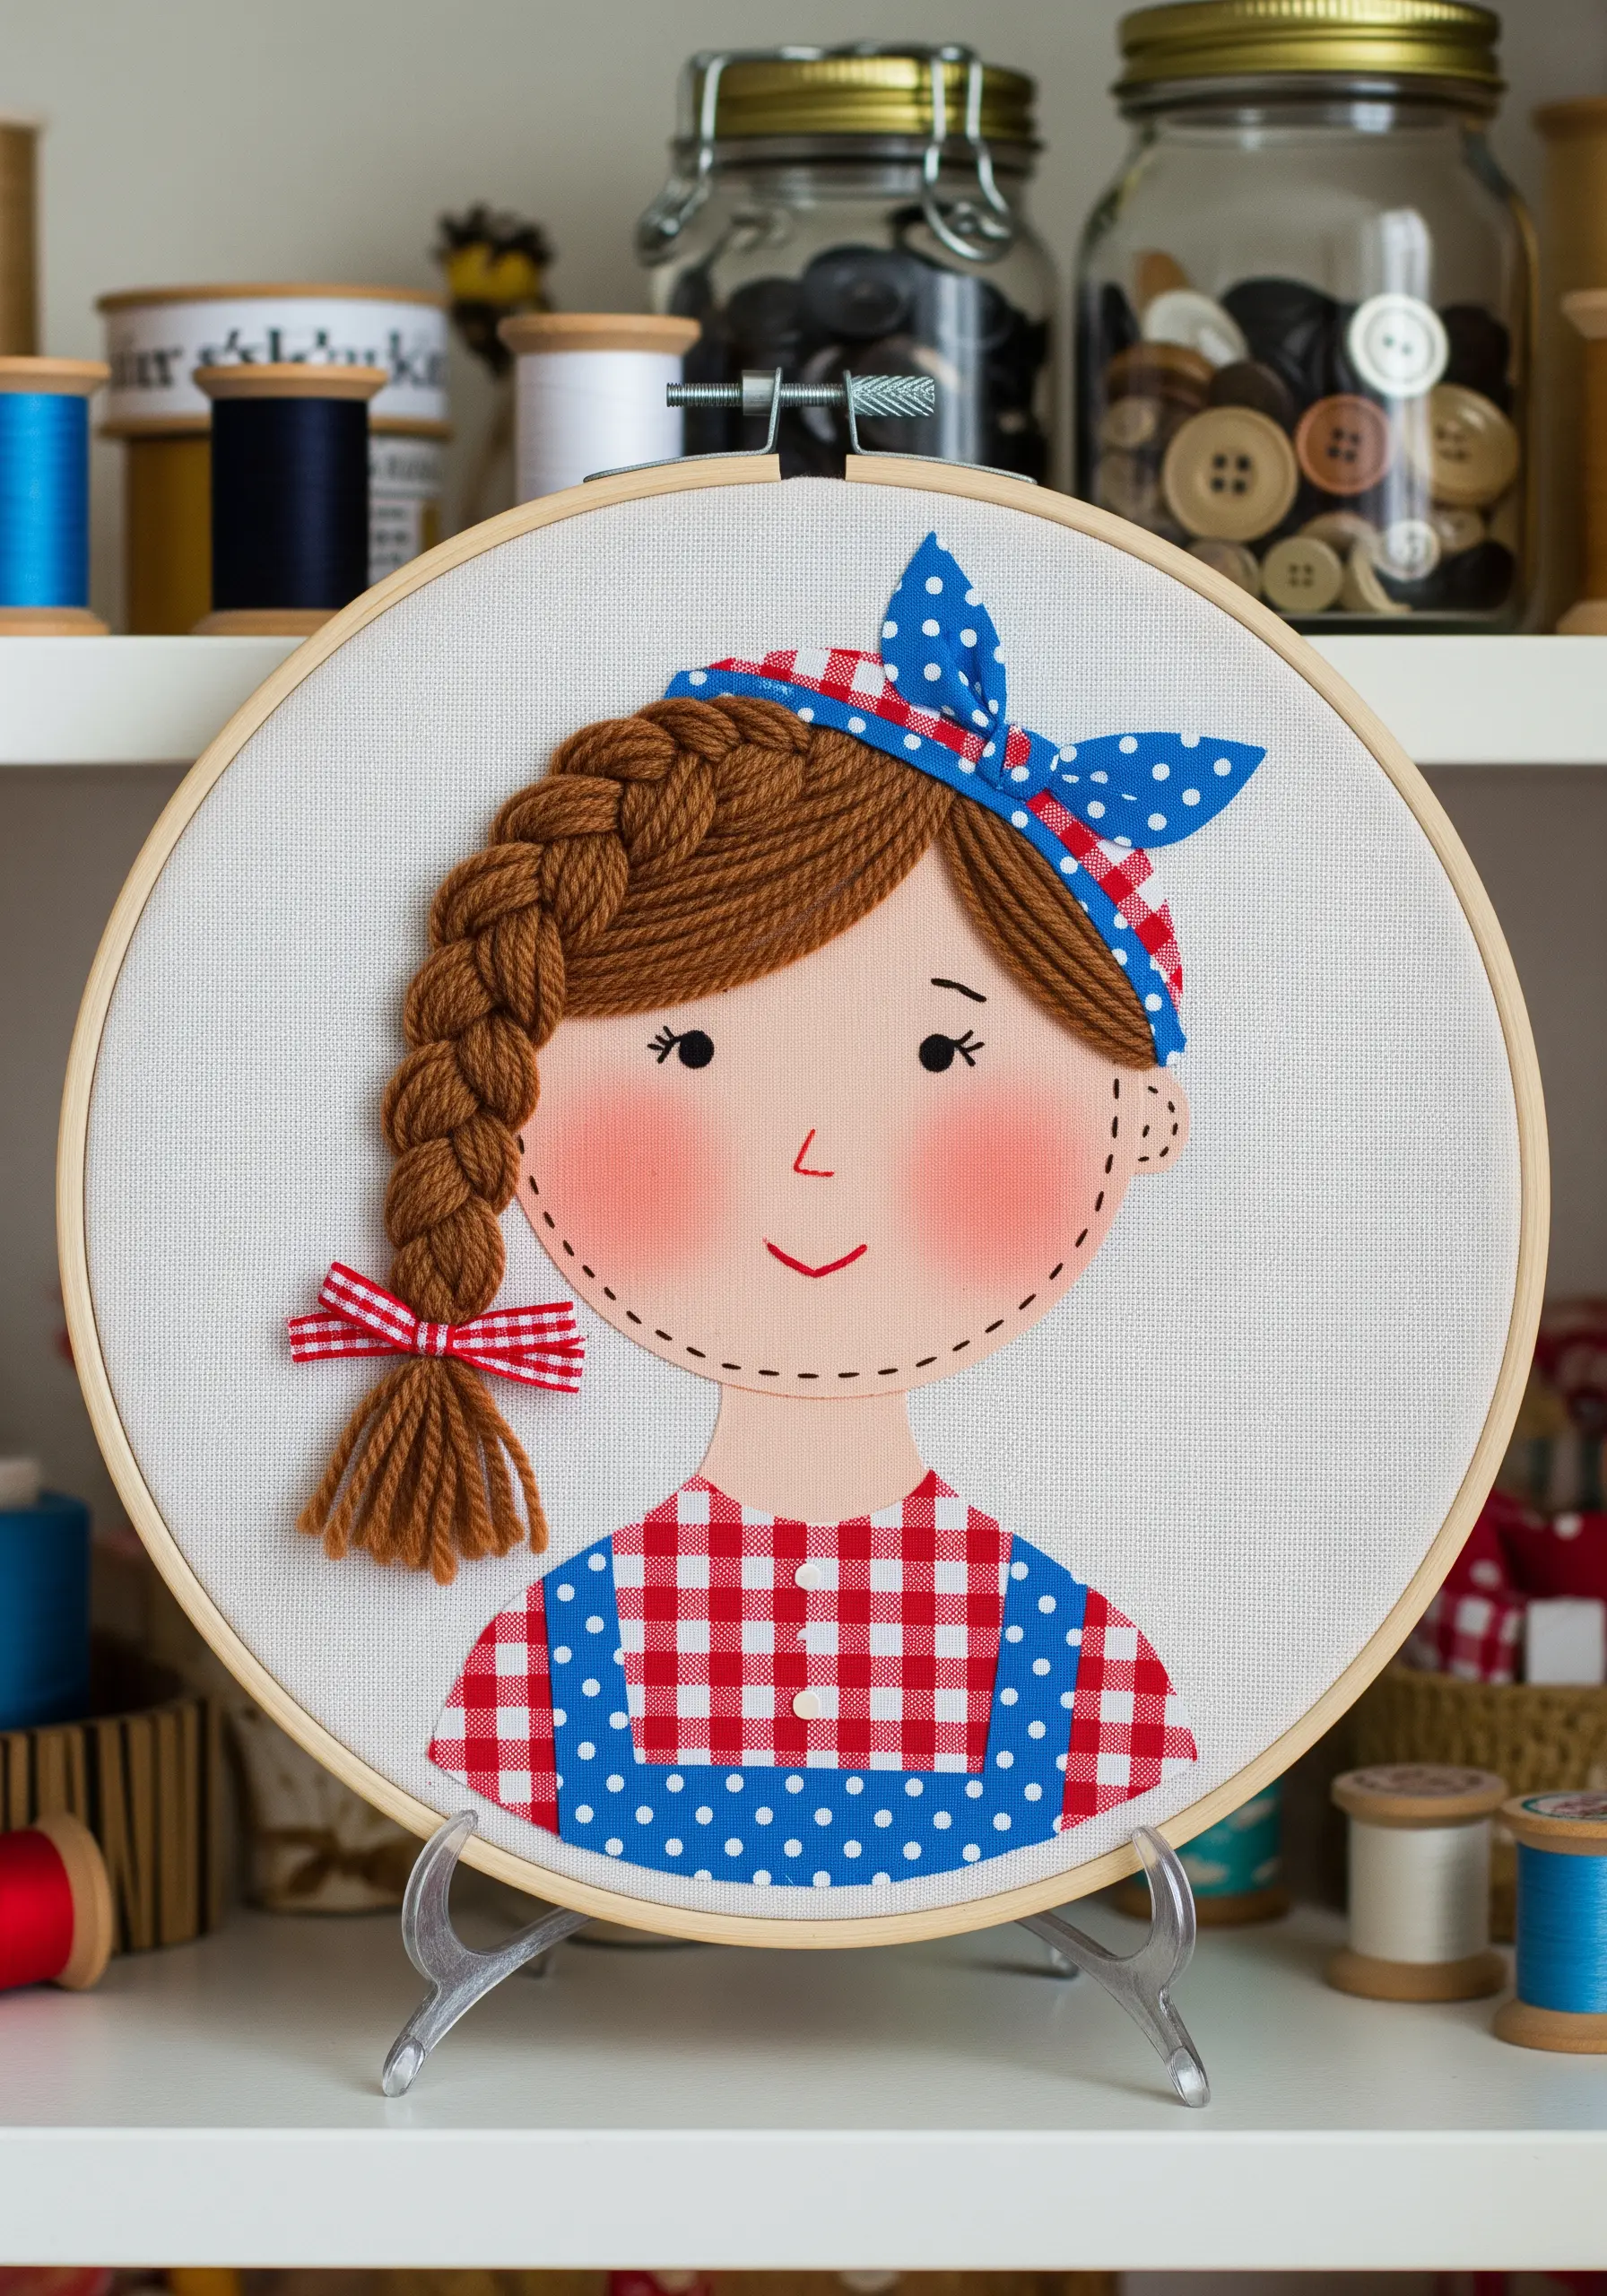
Bring a storybook character to life by adding elements that physically pop off the fabric.
Instead of stitching hair, create a thick, three-dimensional braid from embroidery floss or yarn and securely attach it to your appliqué base.
Similarly, use a small fabric bow or ribbon to complete the hairstyle, letting the ends remain loose.
These tactile details invite touch and make the portrait feel more animated and engaging, turning a simple hoop into a delightful object.
7. Simulate Fur with Layered, Cut Fabric
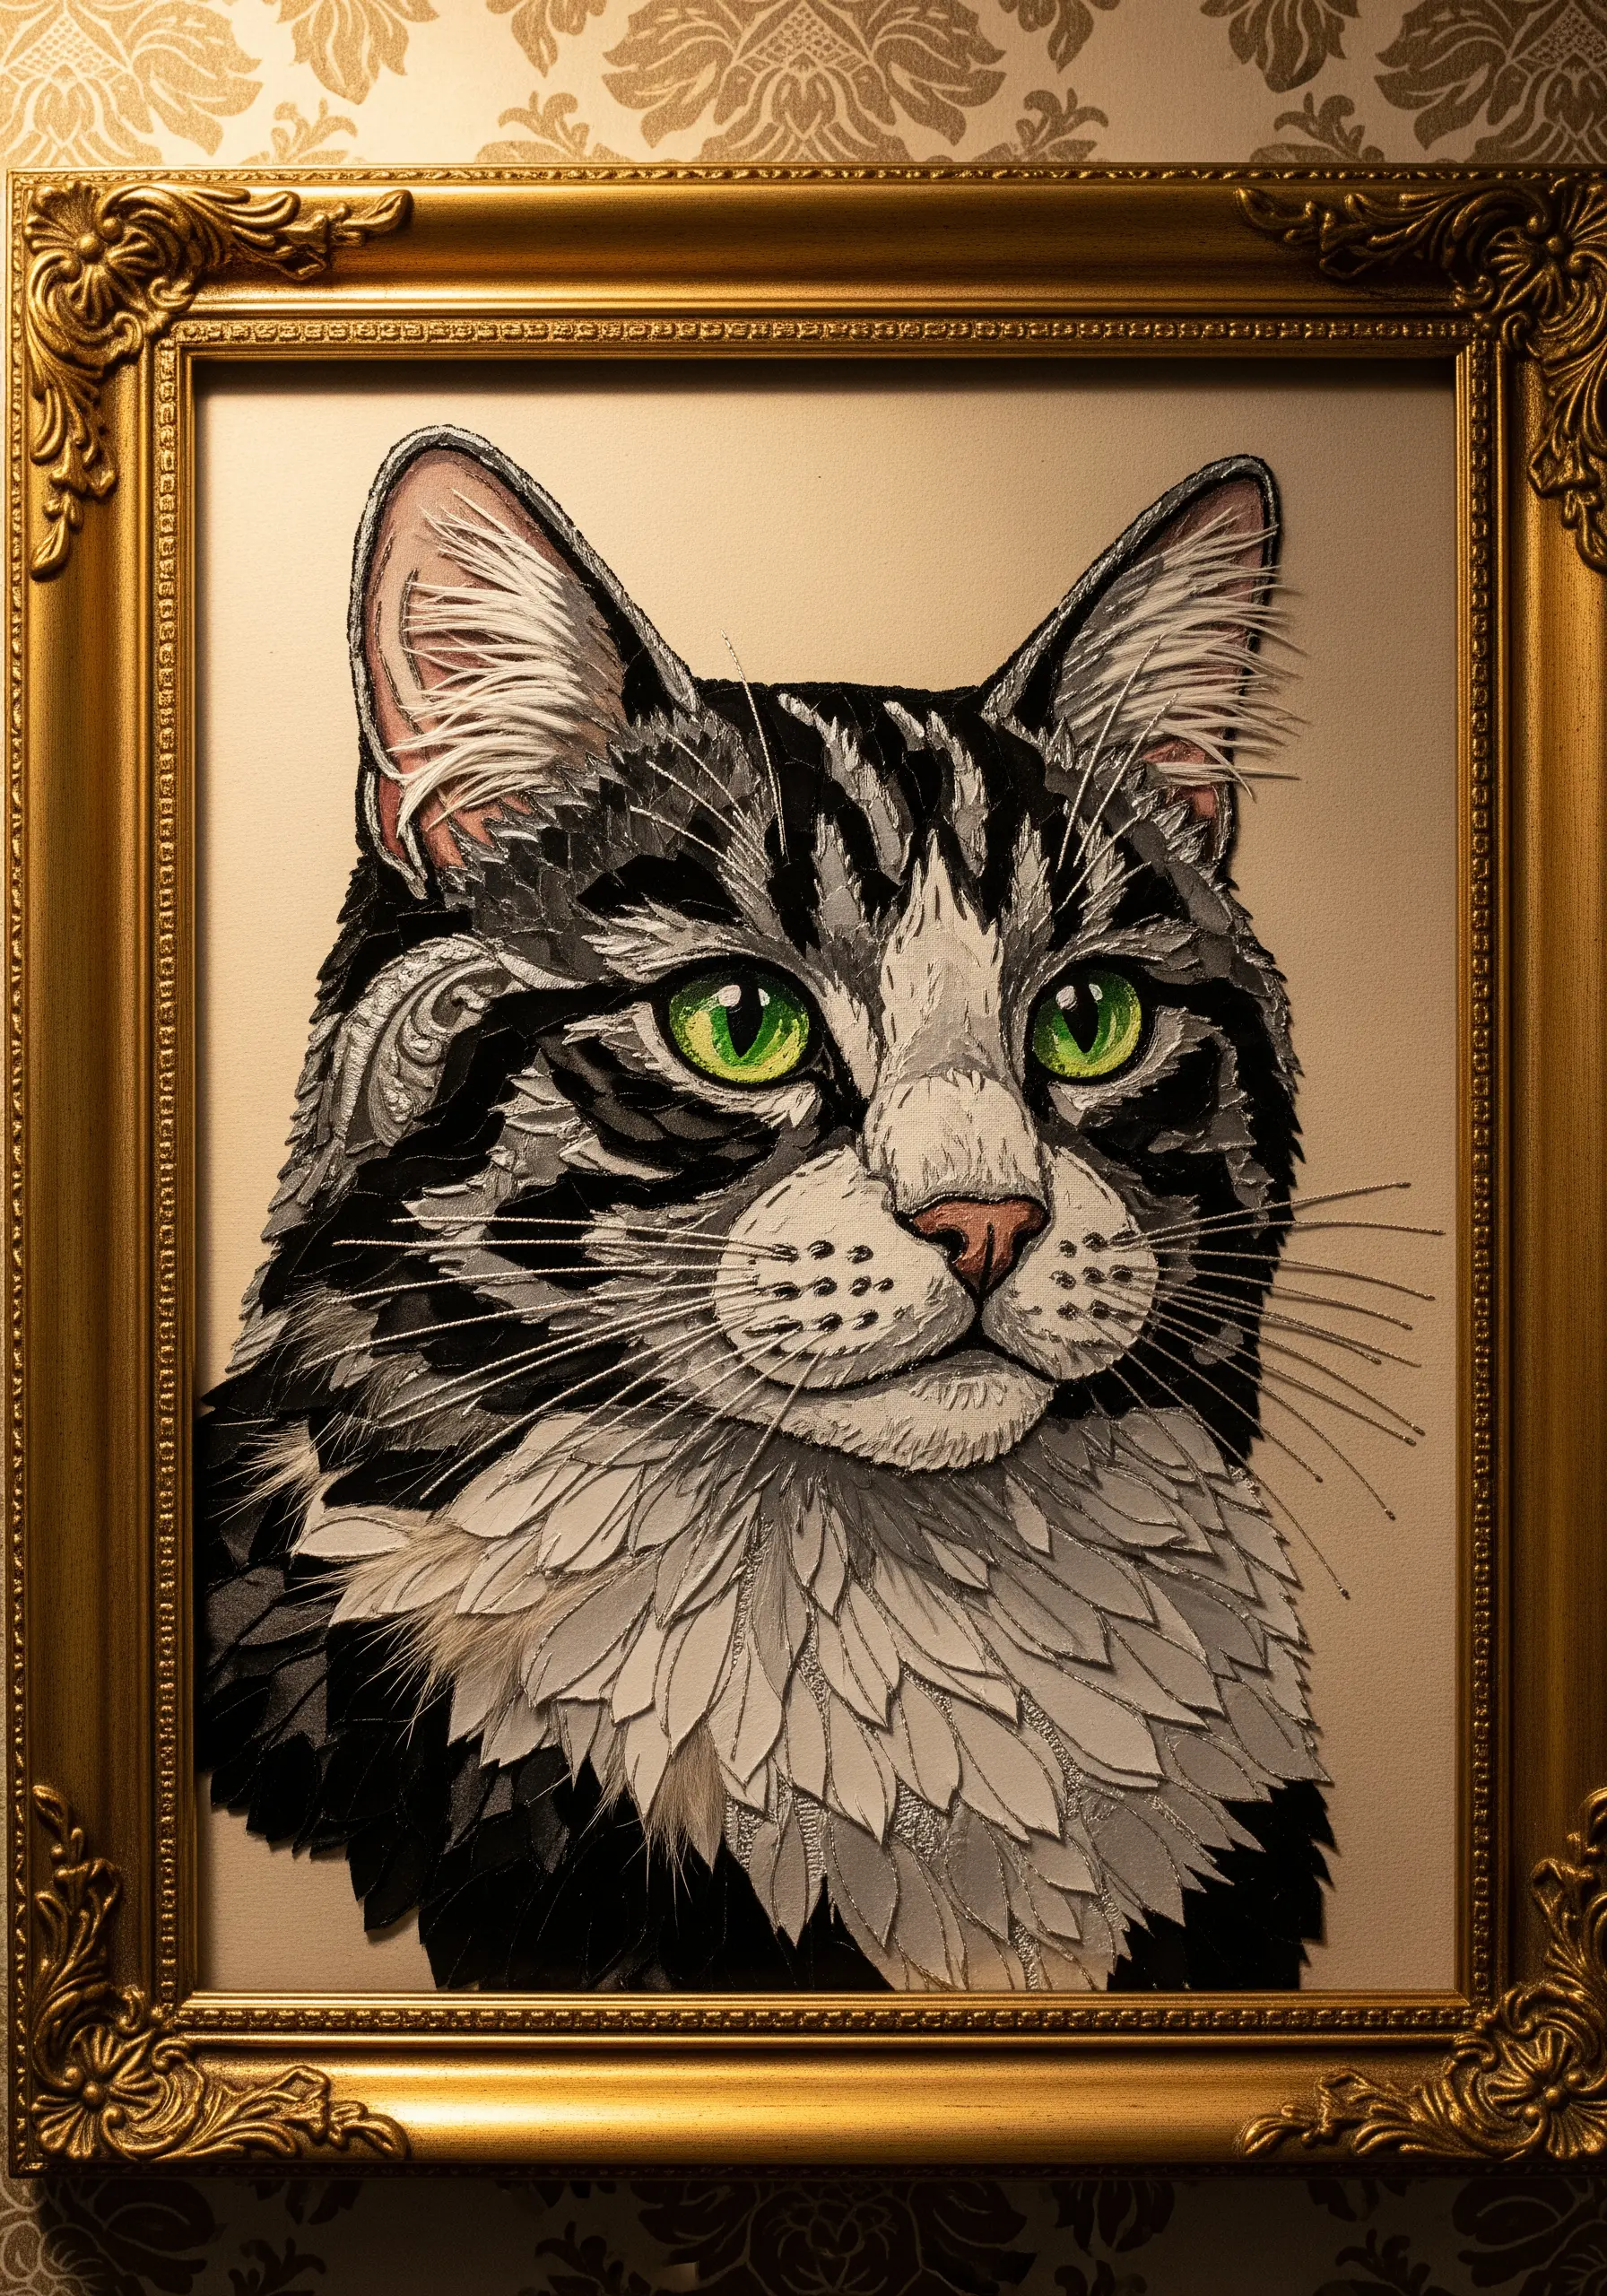
Achieve the realistic texture of fur without intricate thread painting.
Cut small, petal-like shapes from various fabrics in your desired color palette—think black, white, and grey cottons for a tabby cat.
Start from the bottom and layer the fabric pieces like shingles on a roof, stitching only the top edge of each piece down.
This allows the bottom edges to lift slightly, creating incredible depth and the illusion of dense fur.
For fine details like whiskers, switch to a simple straight stitch using a single strand of stiff, white thread.
These techniques are perfect for small pet portrait embroidery ideas that feel incredibly lifelike.
8. Let Bold Fabric Patterns Define the Features
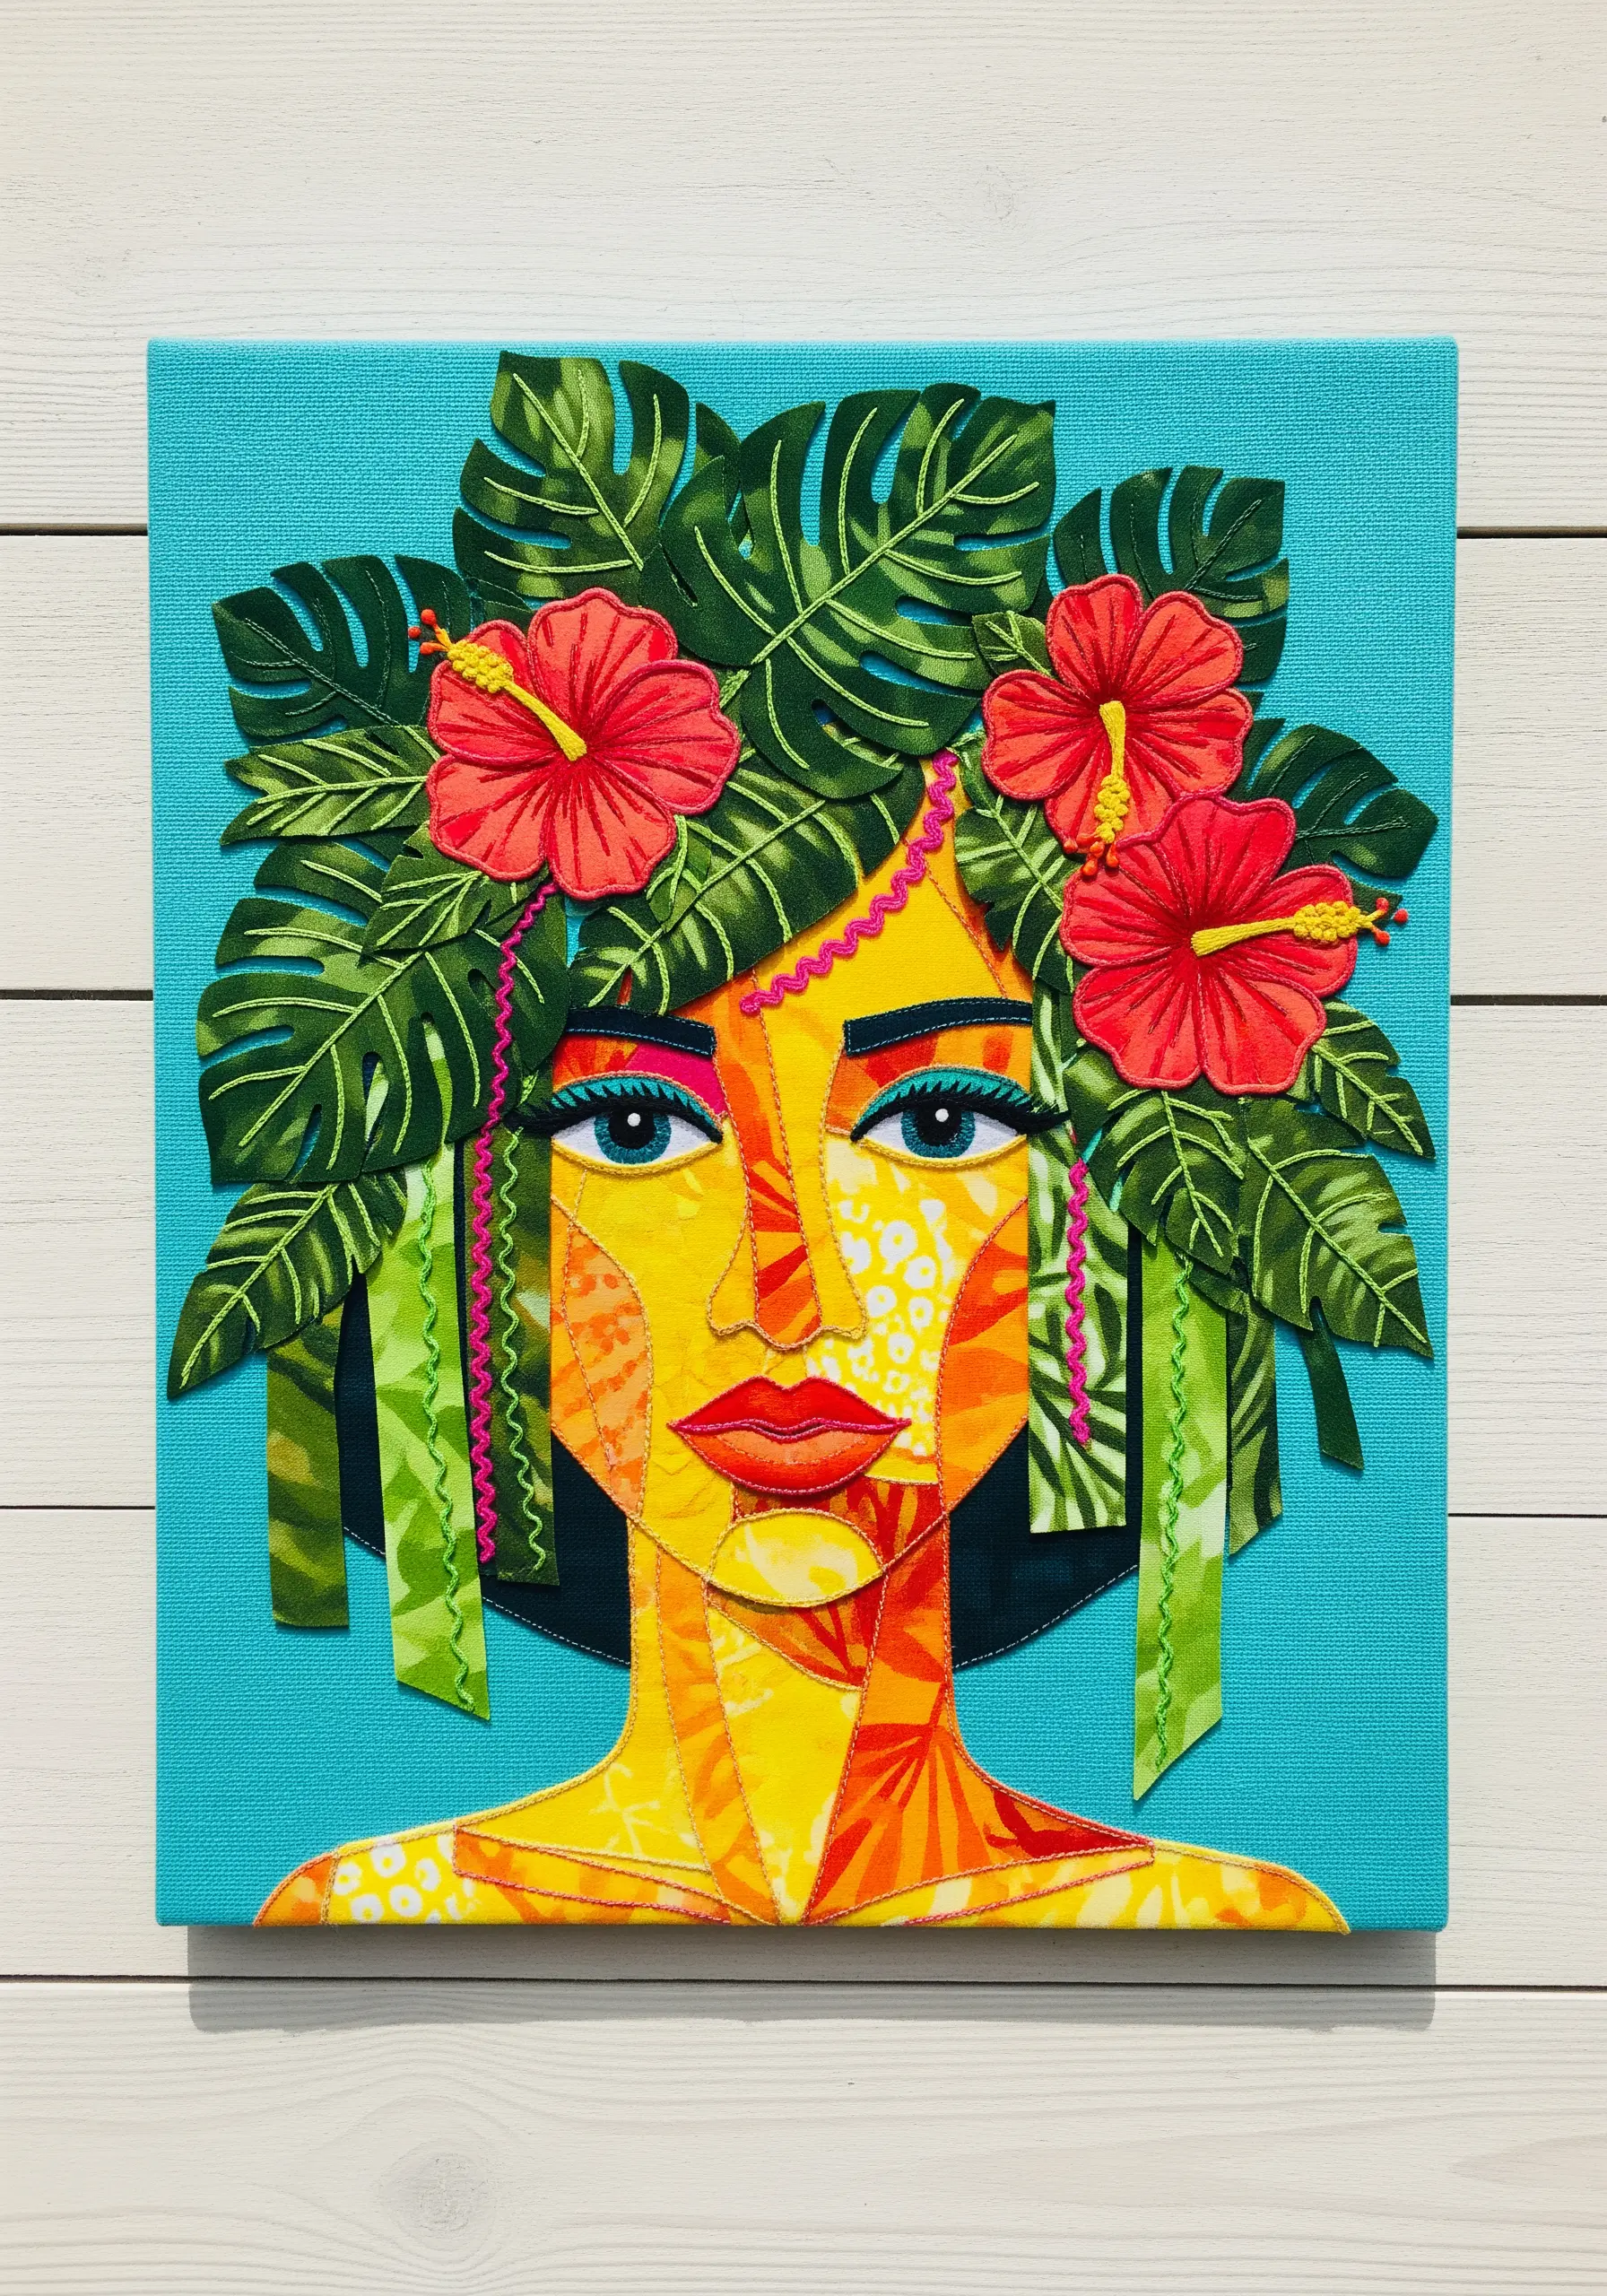
When using vibrant, patterned fabrics, you can simplify your stitching and let the textiles shine.
Cut your collage pieces from a variety of busy prints, focusing on how the colors and shapes within the fabric can suggest light and shadow.
Instead of covering edges with satin stitch, use a simple running stitch or backstitch in a contrasting color to outline each shape.
This approach celebrates the fabric itself, turning the patterns into an integral part of the portrait’s personality and making boho fabric collage embroidery pieces that pop with energy.
9. Tell a Story with Symbolic Clothing Fabrics

Use fabric choices to build a narrative and add personality to your portrait.
Incorporate meaningful textiles for clothing, such as denim for a work jacket, plaid flannel for a shirt, or a delicate floral for an apron.
These fabrics instantly provide context and character, telling the viewer about the person’s life or personality without needing a single word.
Secure the pieces with a simple whipstitch around the edges, letting the fabric patterns remain the focus.
10. Create Celestial Magic on Dark Velvet
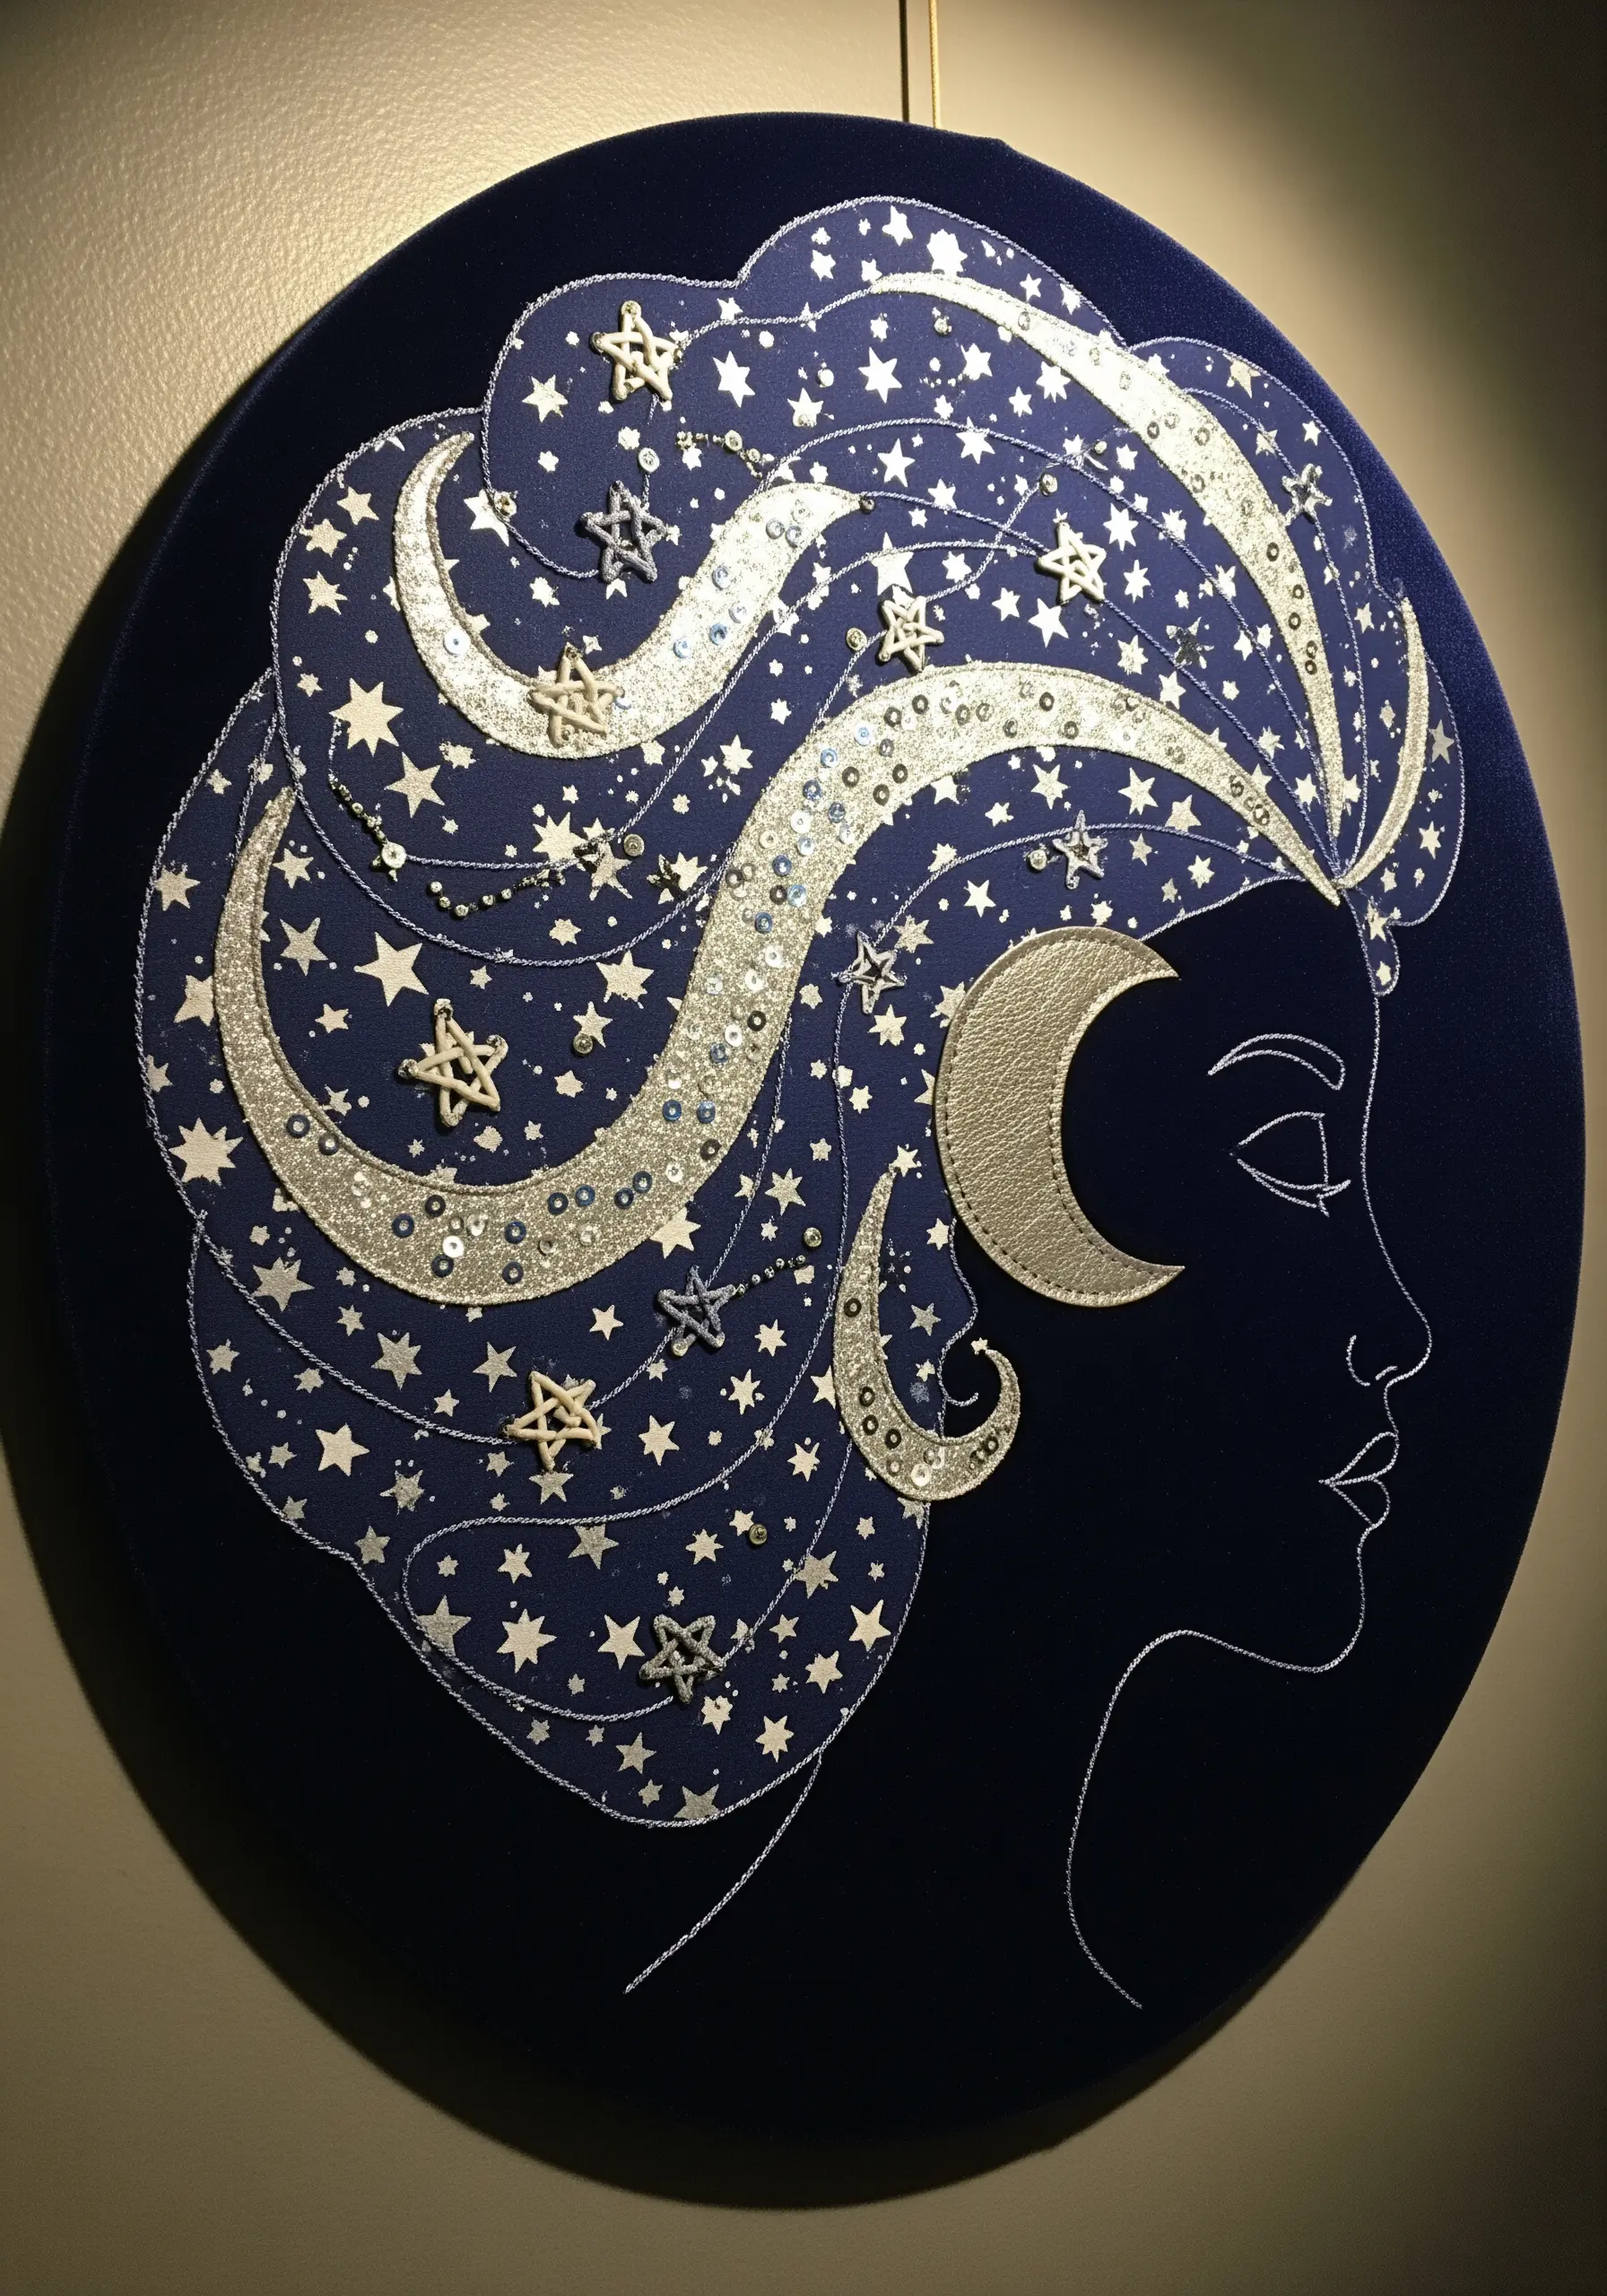
Use a dark, luxurious background fabric like velvet to make metallic and light-colored elements appear to glow.
Cut celestial shapes—moons, stars, and swirling galaxies—from metallic faux leather, glittery fabric, or silver lamé.
Arrange these appliqué pieces to form flowing hair, then scatter tiny silver sequins and beads to represent a starfield.
The deep, light-absorbing pile of the velvet creates maximum contrast, making this a perfect technique for moon and stars embroidery ideas that feel truly luminous.
11. Build a Monochrome Portrait with Texture

Explore a single color by focusing entirely on texture and material.
Gather a collection of fabrics in shades of white, cream, and ecru, but with varied textures: lace, cable knit, linen, and cotton eyelet.
Create your portrait background by arranging strips of these fabrics, then use pieces of chunky knit or textured appliqué for the hat and sweater.
The interplay of light and shadow across the different surfaces creates a rich, dynamic piece, proving that neutral thread texture combinations can be incredibly compelling.
12. Incorporate Reflective Surfaces for a Modern Edge
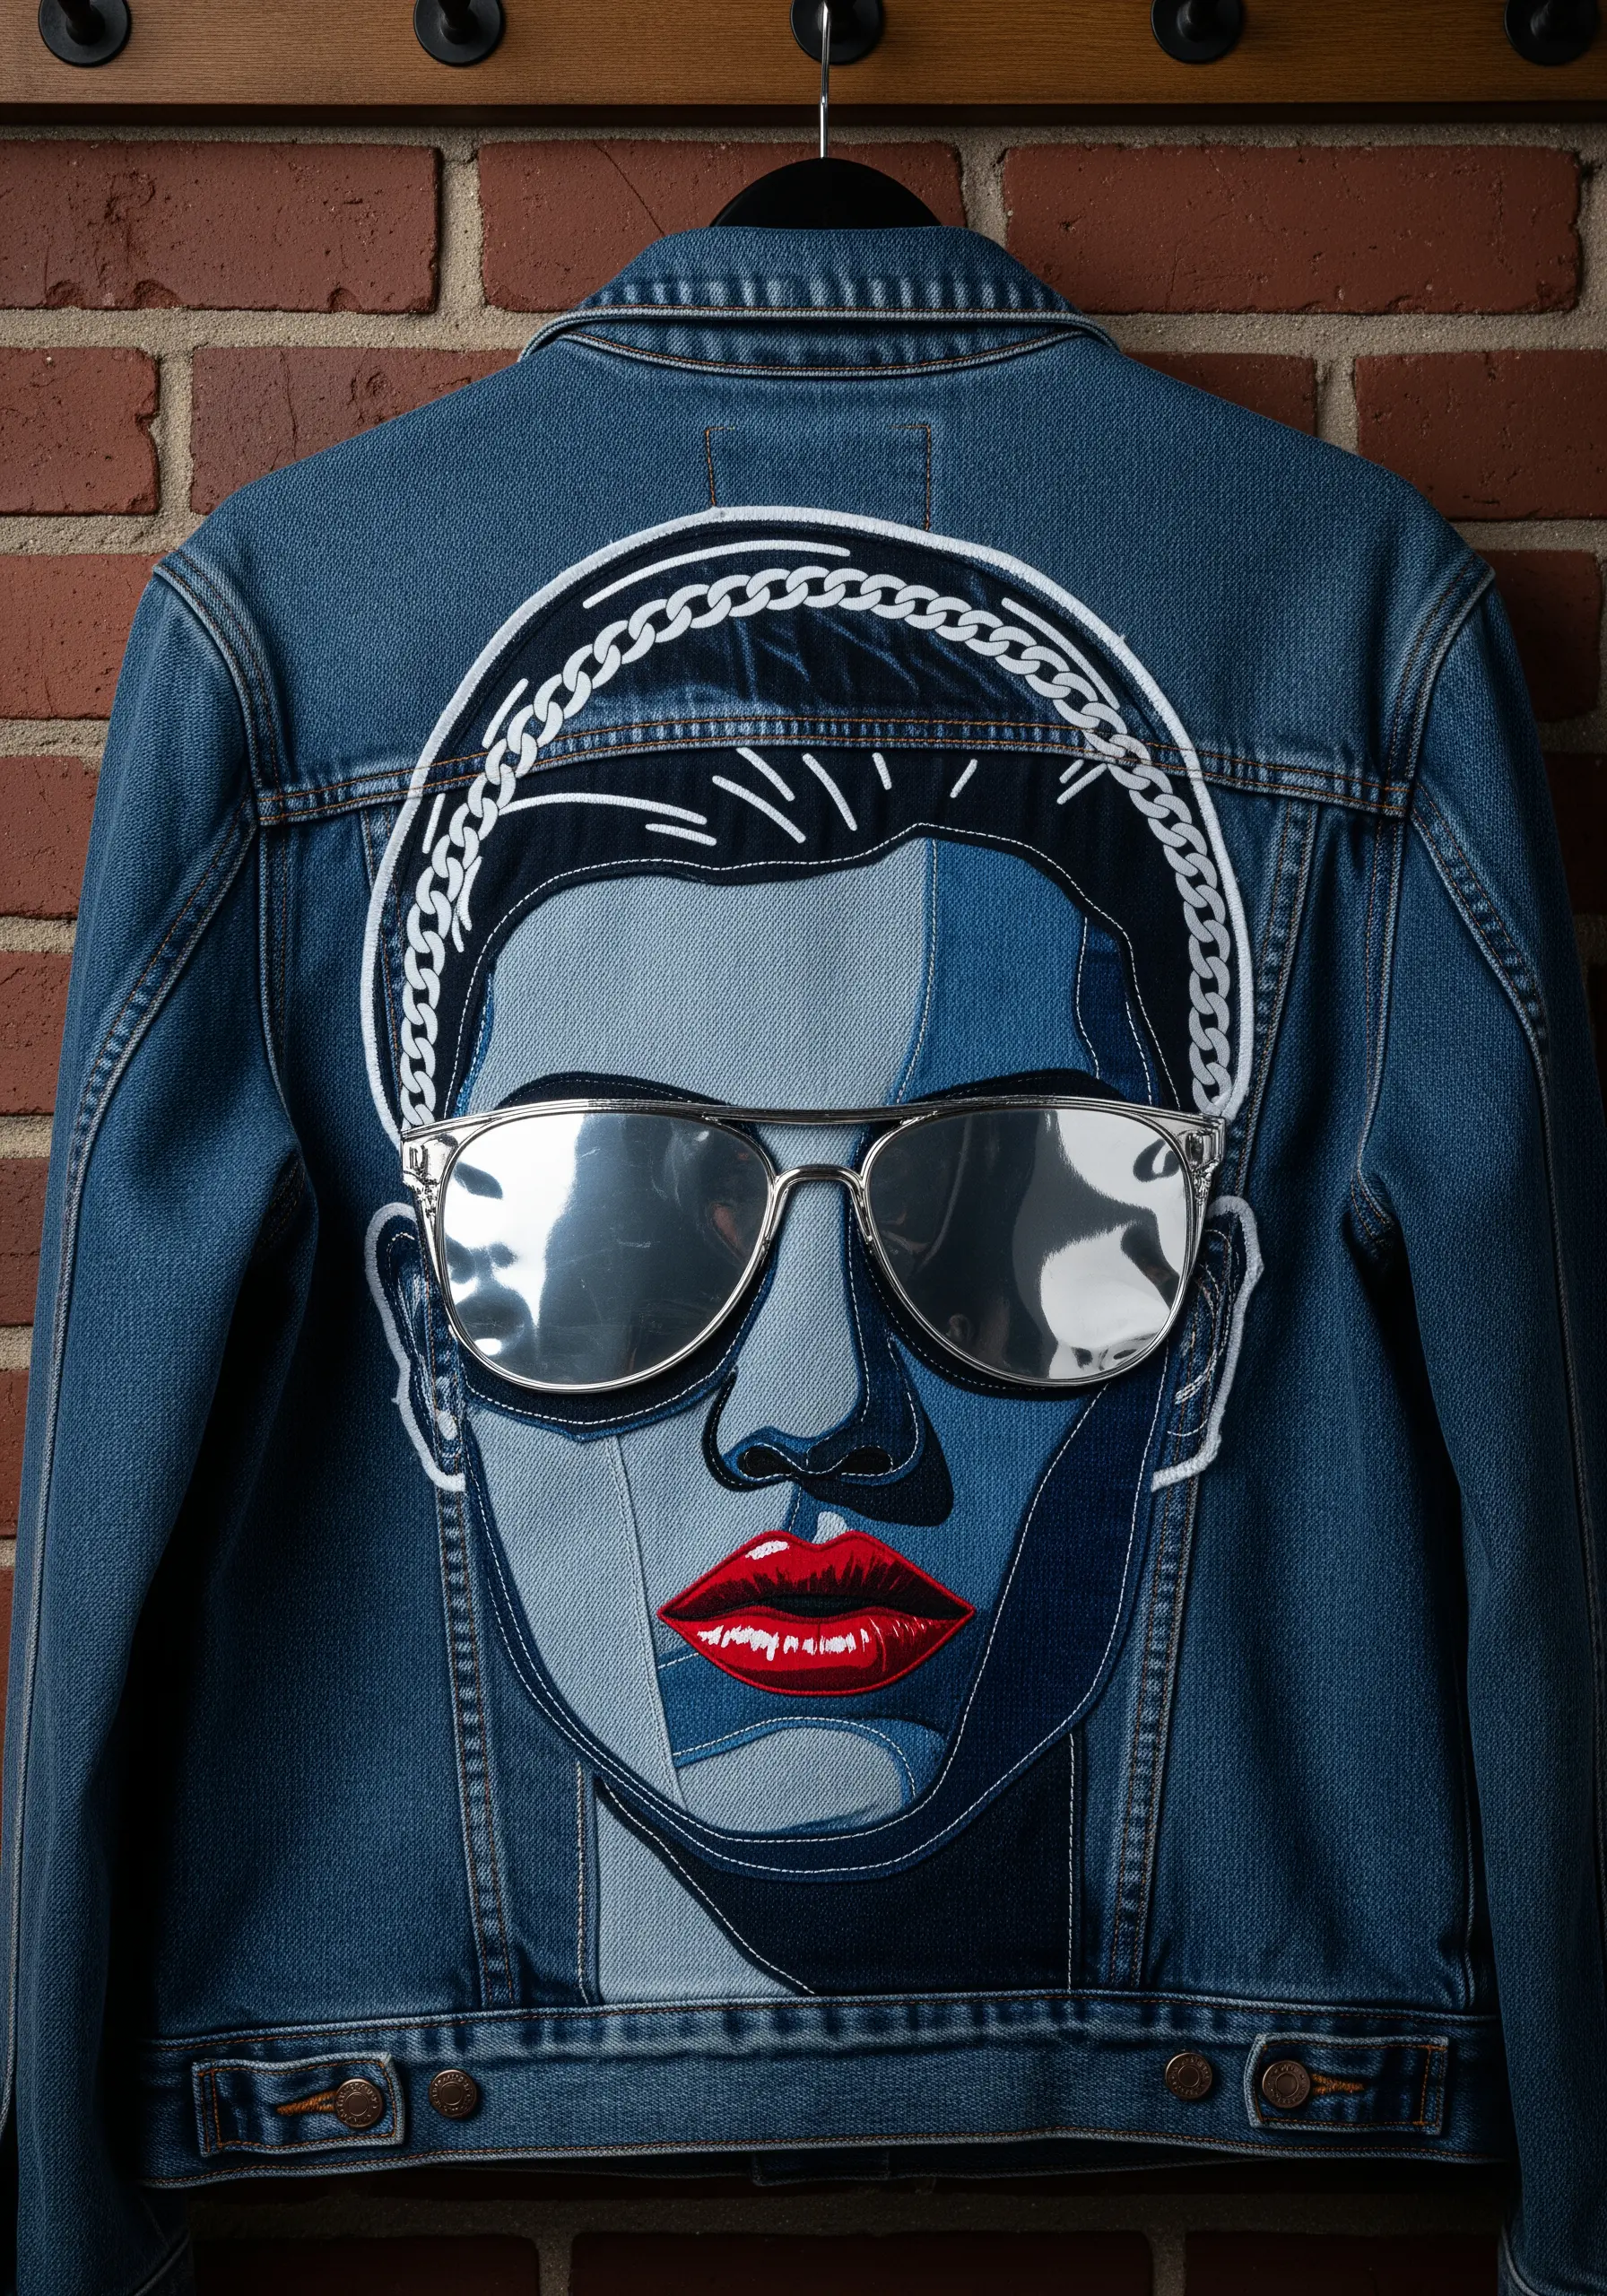
Push the boundaries of embroidery by introducing non-traditional, reflective materials.
For elements like sunglasses, use mirrored acrylic or metallic vinyl instead of fabric.
You can purchase these materials with adhesive backing or carefully stitch them on by punching holes along the edges with an awl.
The unexpected reflection adds a dynamic, interactive quality to the piece, turning a denim jacket into a wearable work of modern thread illusion.
Contrast the sleek, hard surface of the mirrors with soft satin-stitched lips for maximum impact.
13. Achieve a Watercolor Effect with Sheer Fabrics
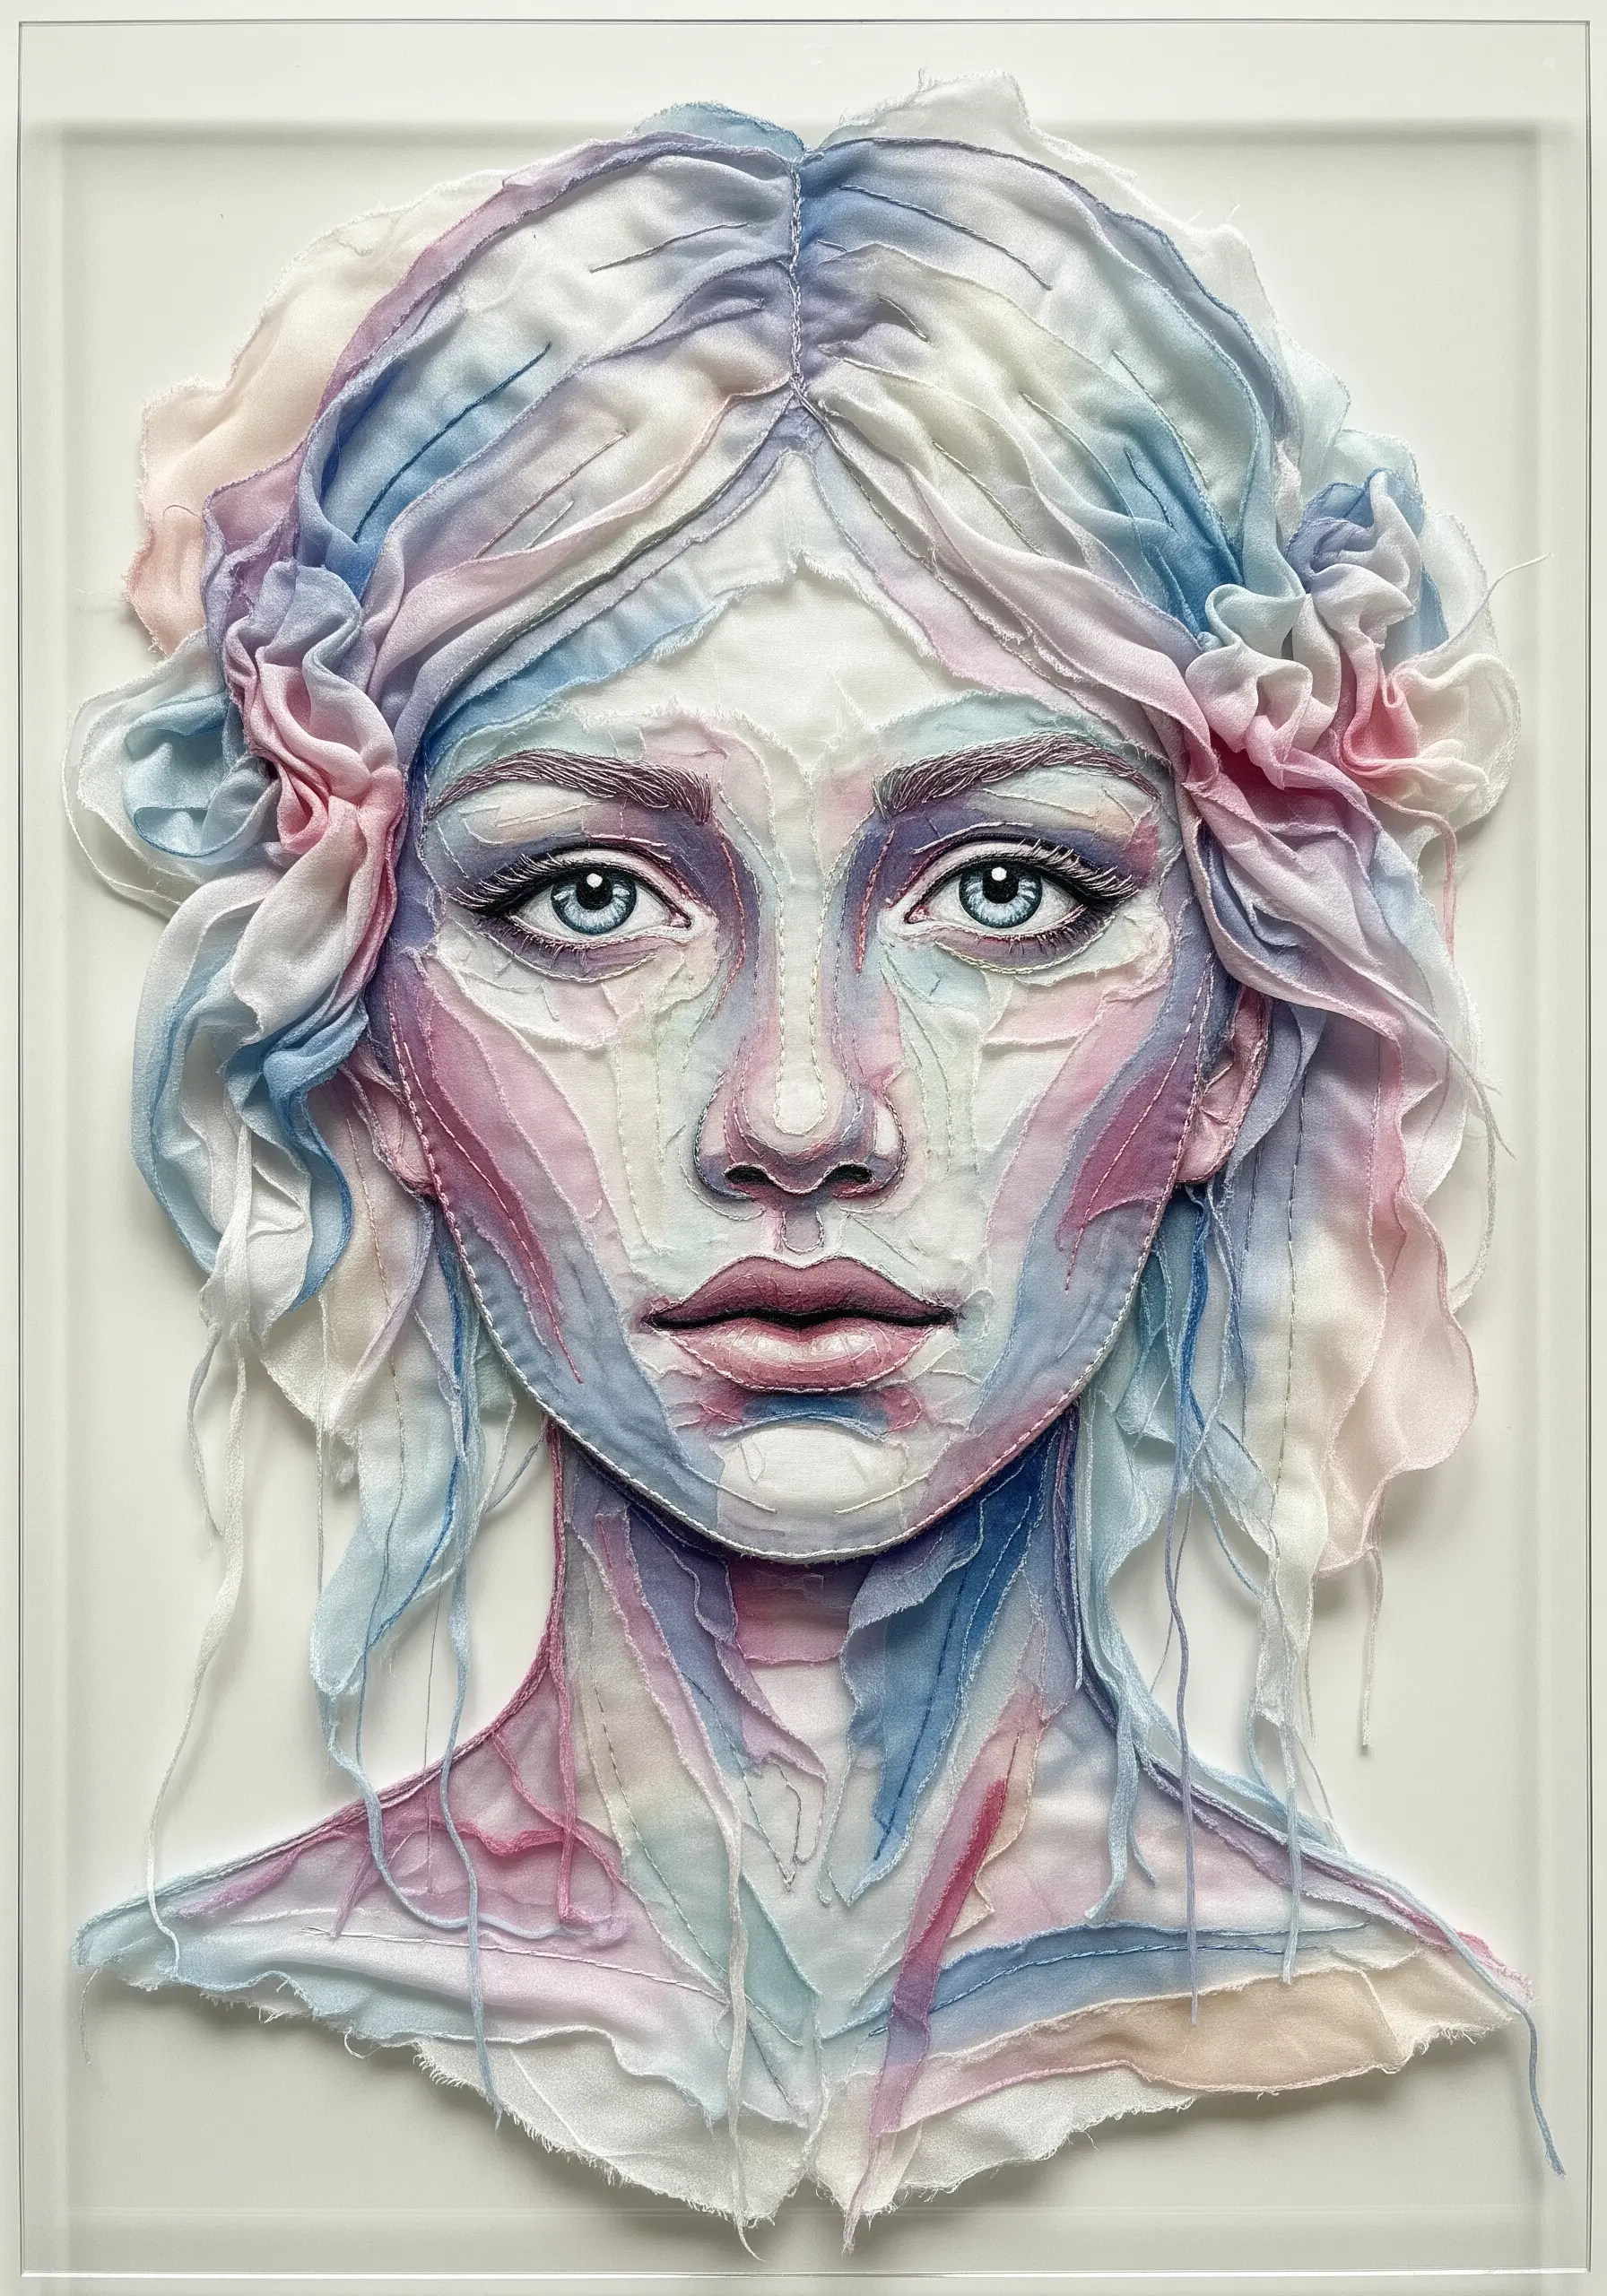
Mimic the soft, blended look of watercolor paint by layering translucent fabrics.
Use materials like silk organza, chiffon, or even hand-dyed cheesecloth.
Cut soft-edged pieces and overlap them, allowing the colors underneath to show through. This creates delicate, subtle color shifts and gradients.
Secure the layers with minimal, delicate stitches so the focus remains on the ethereal quality of the fabric. The result is organic thread art that mimics watercolor without any paint.
14. Design Playful Characters with Yarn and Buttons
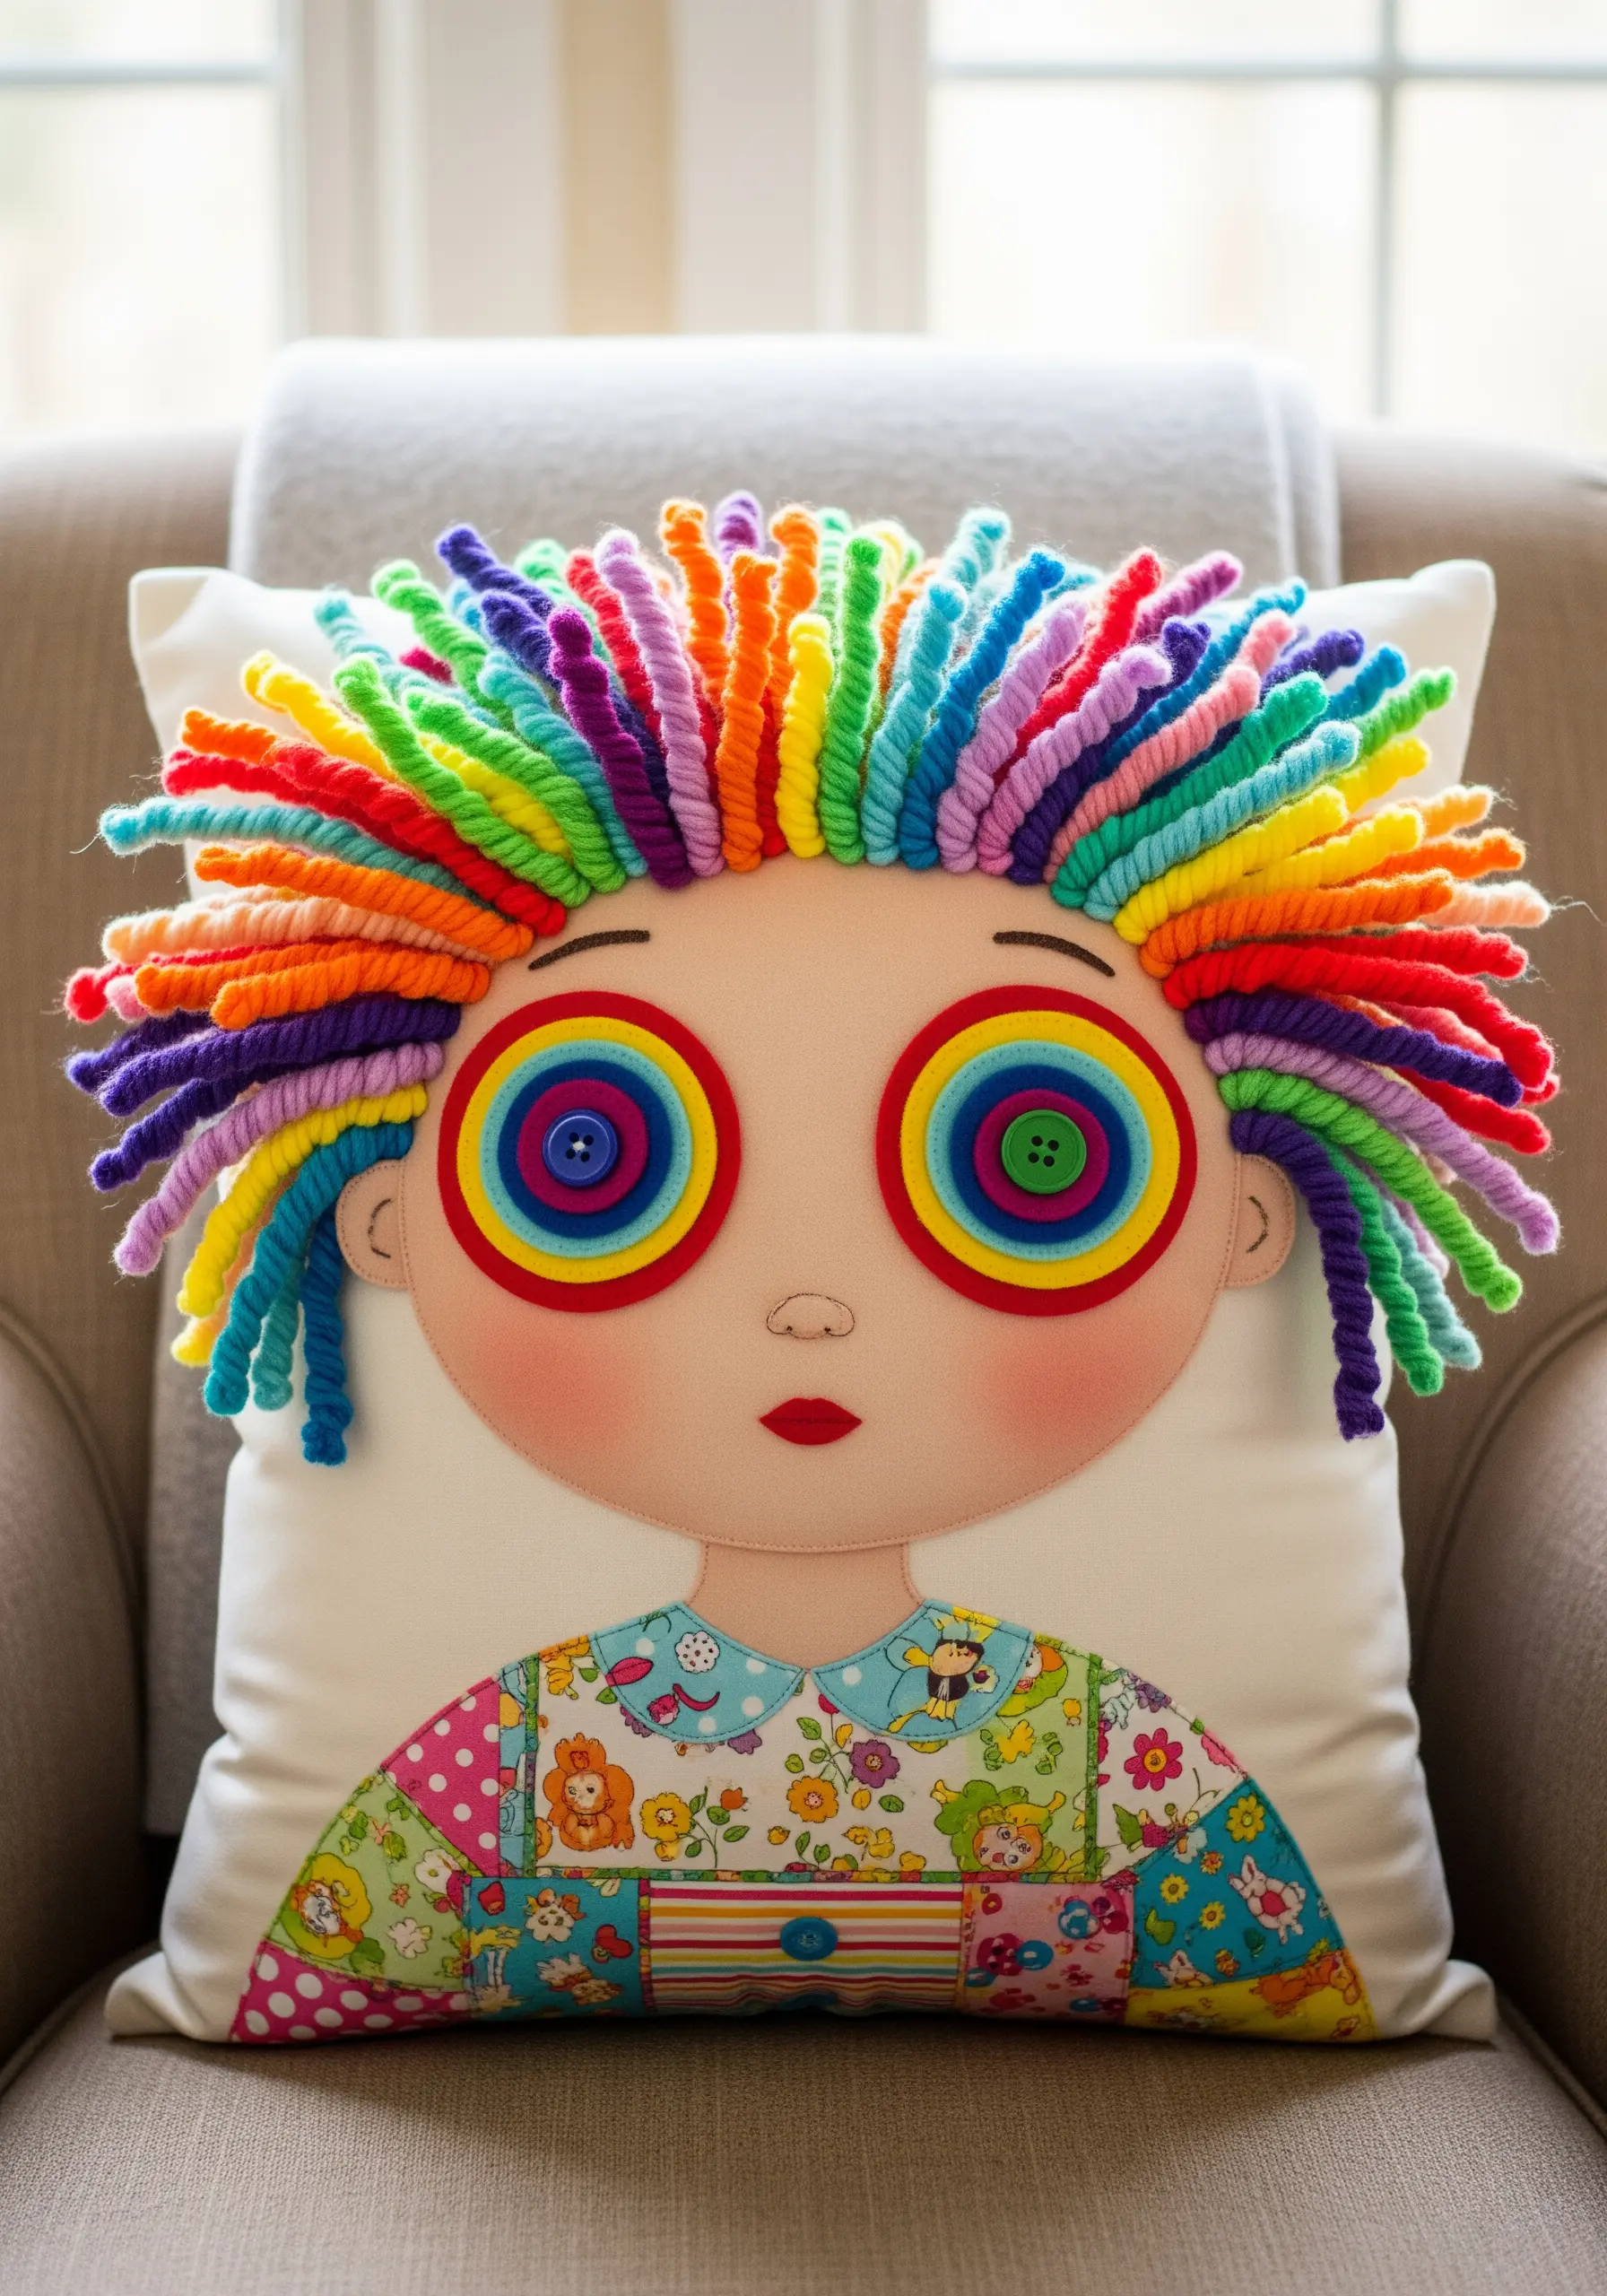
Create whimsical, tactile portraits perfect for cushions or children’s decor.
Form the hair by wrapping colorful yarn around a pencil to create coils, then stitch them securely to the head for a springy, 3D effect.
For the eyes, layer circles of felt and top them with vintage buttons to add charm and a focal point.
This mix of soft yarn, hard buttons, and patterned fabric makes the piece wonderfully interactive and fun, perfect for embroidered cushion covers.
15. Create Drama with Frayed Edges and a Dark Palette
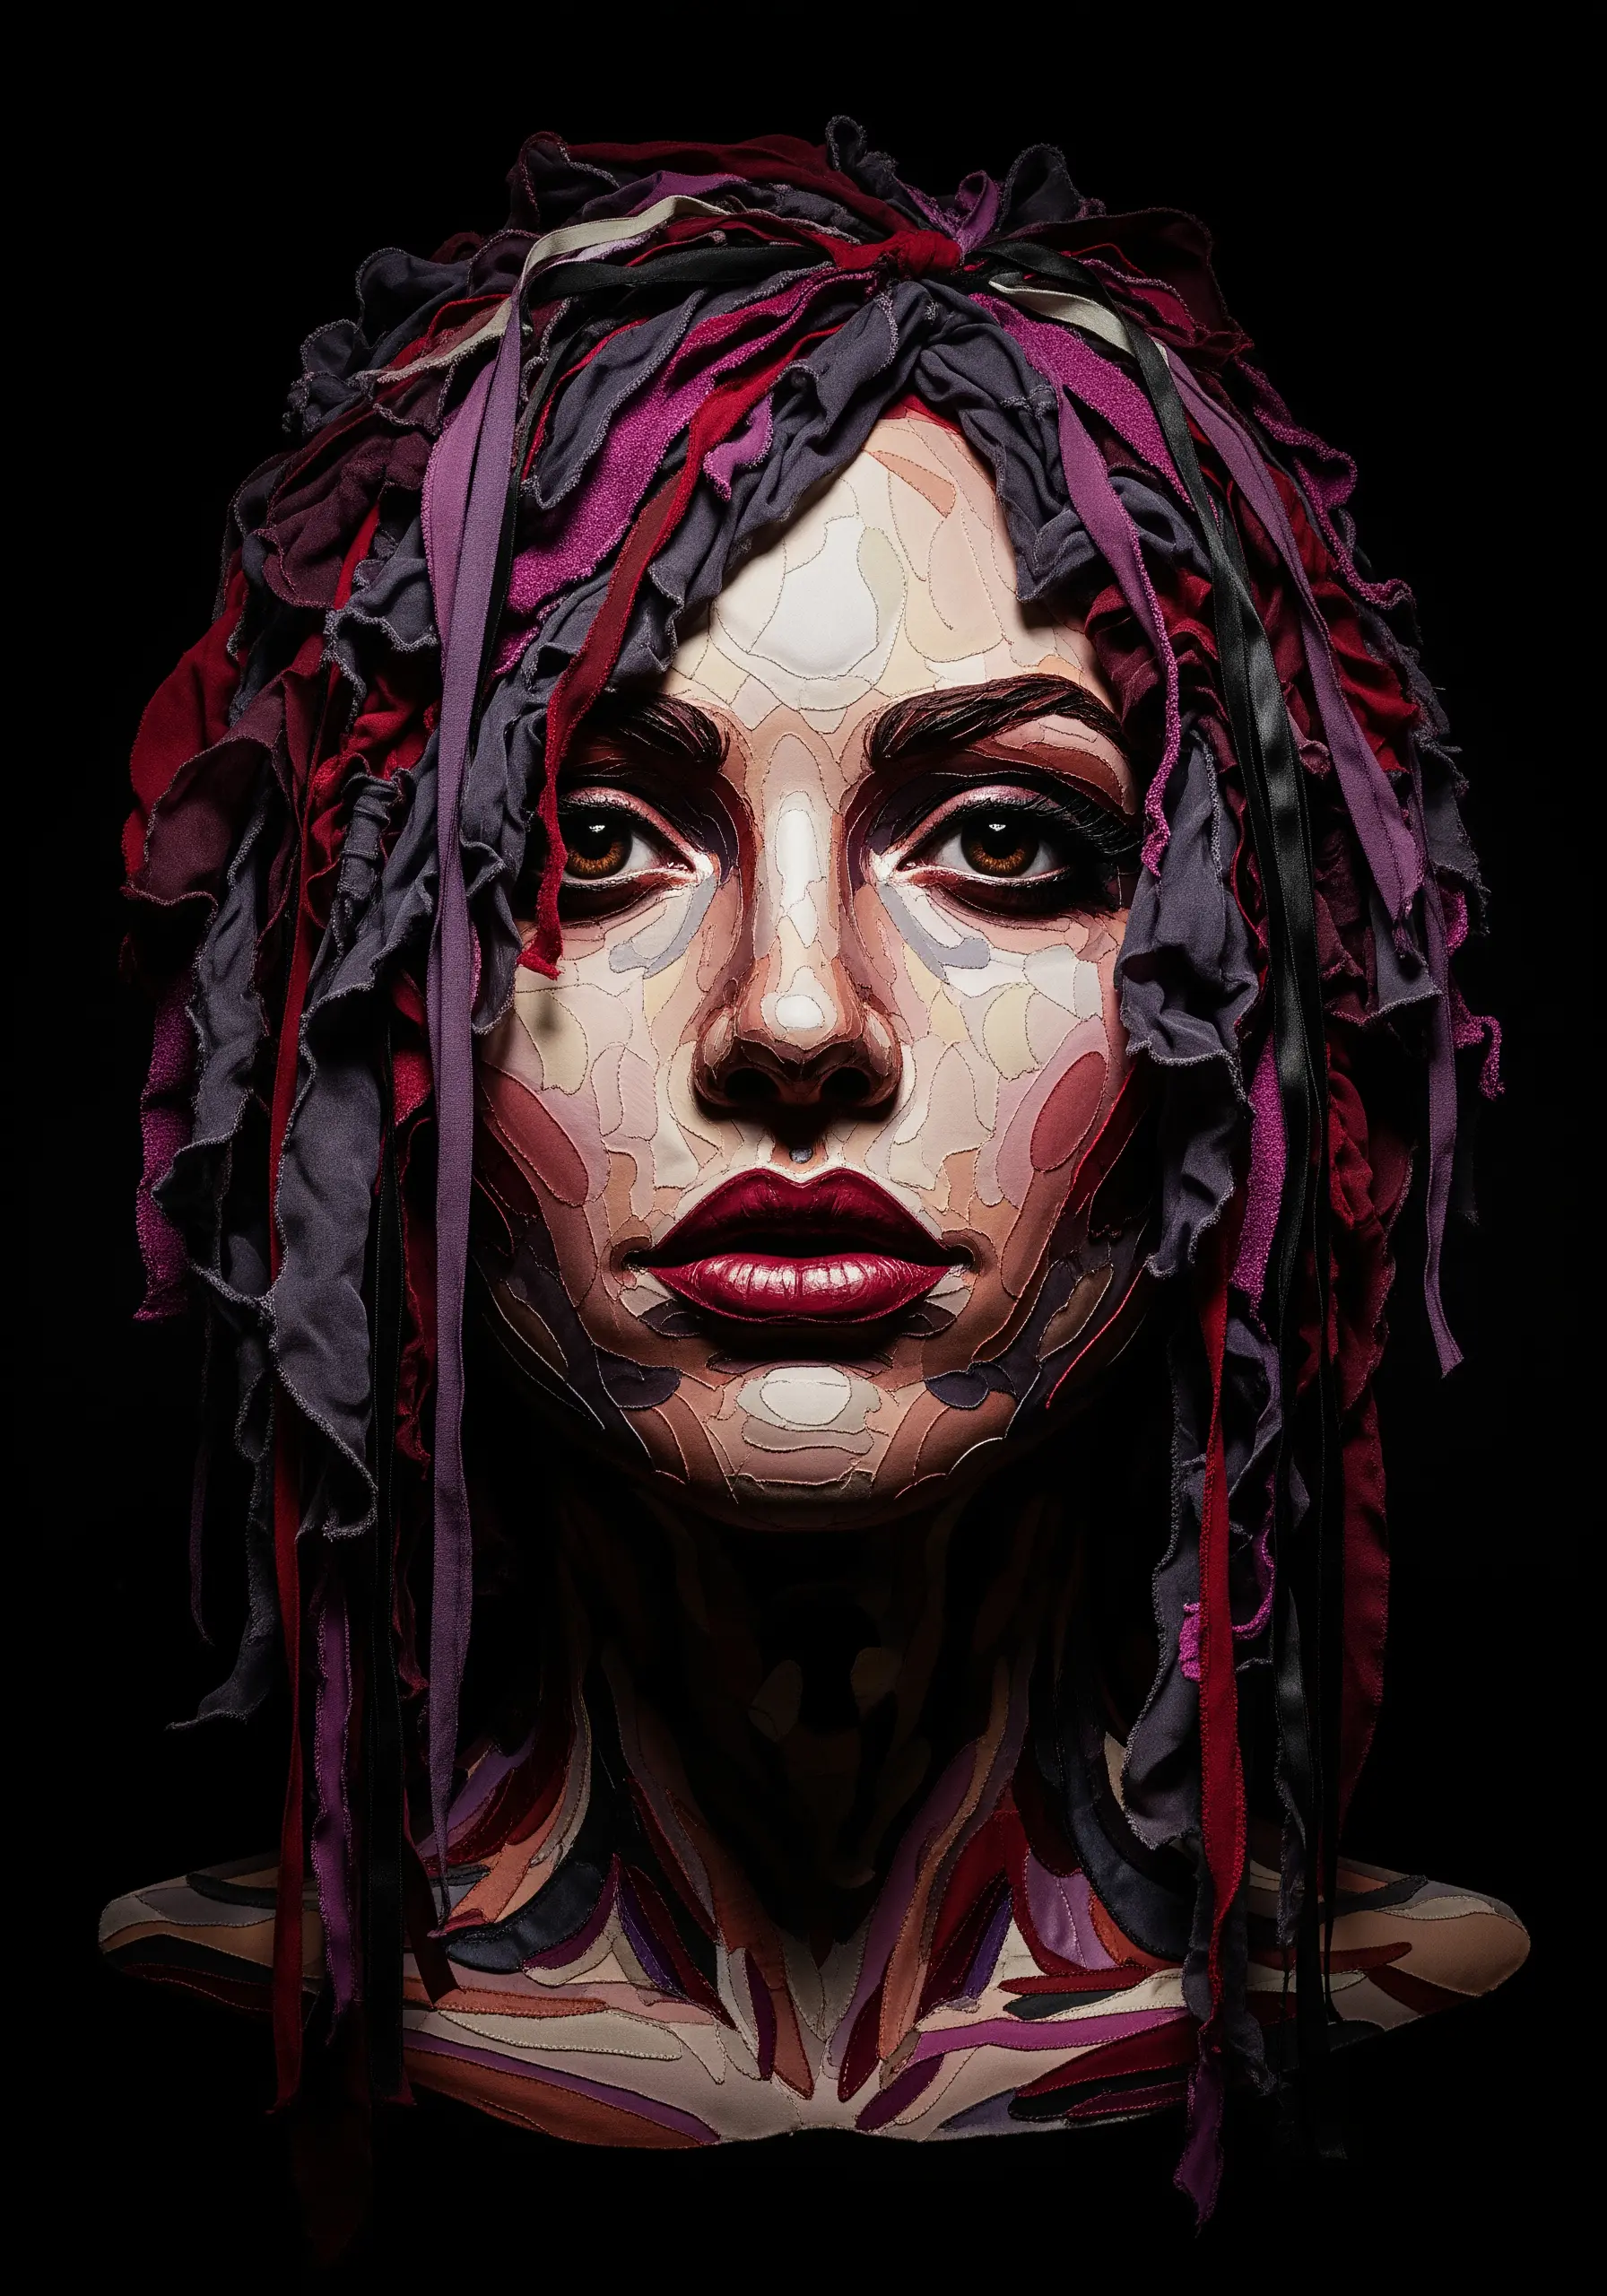
Build a moody and intense portrait by leveraging texture and a high-contrast background.
Use dark fabrics in shades of plum, crimson, and charcoal, cutting them into strips and fraying the edges before application.
Arrange these textured strips loosely to form voluminous, wild hair, tacking them down just enough to hold their shape.
Set against a solid black background, the rich colors and rough textures create a dramatic, shadowed effect that is both powerful and mysterious.
This technique is ideal for dramatic dark thread embroidery designs.
16. Craft a Shaggy Coat with Varied Fabric Strips
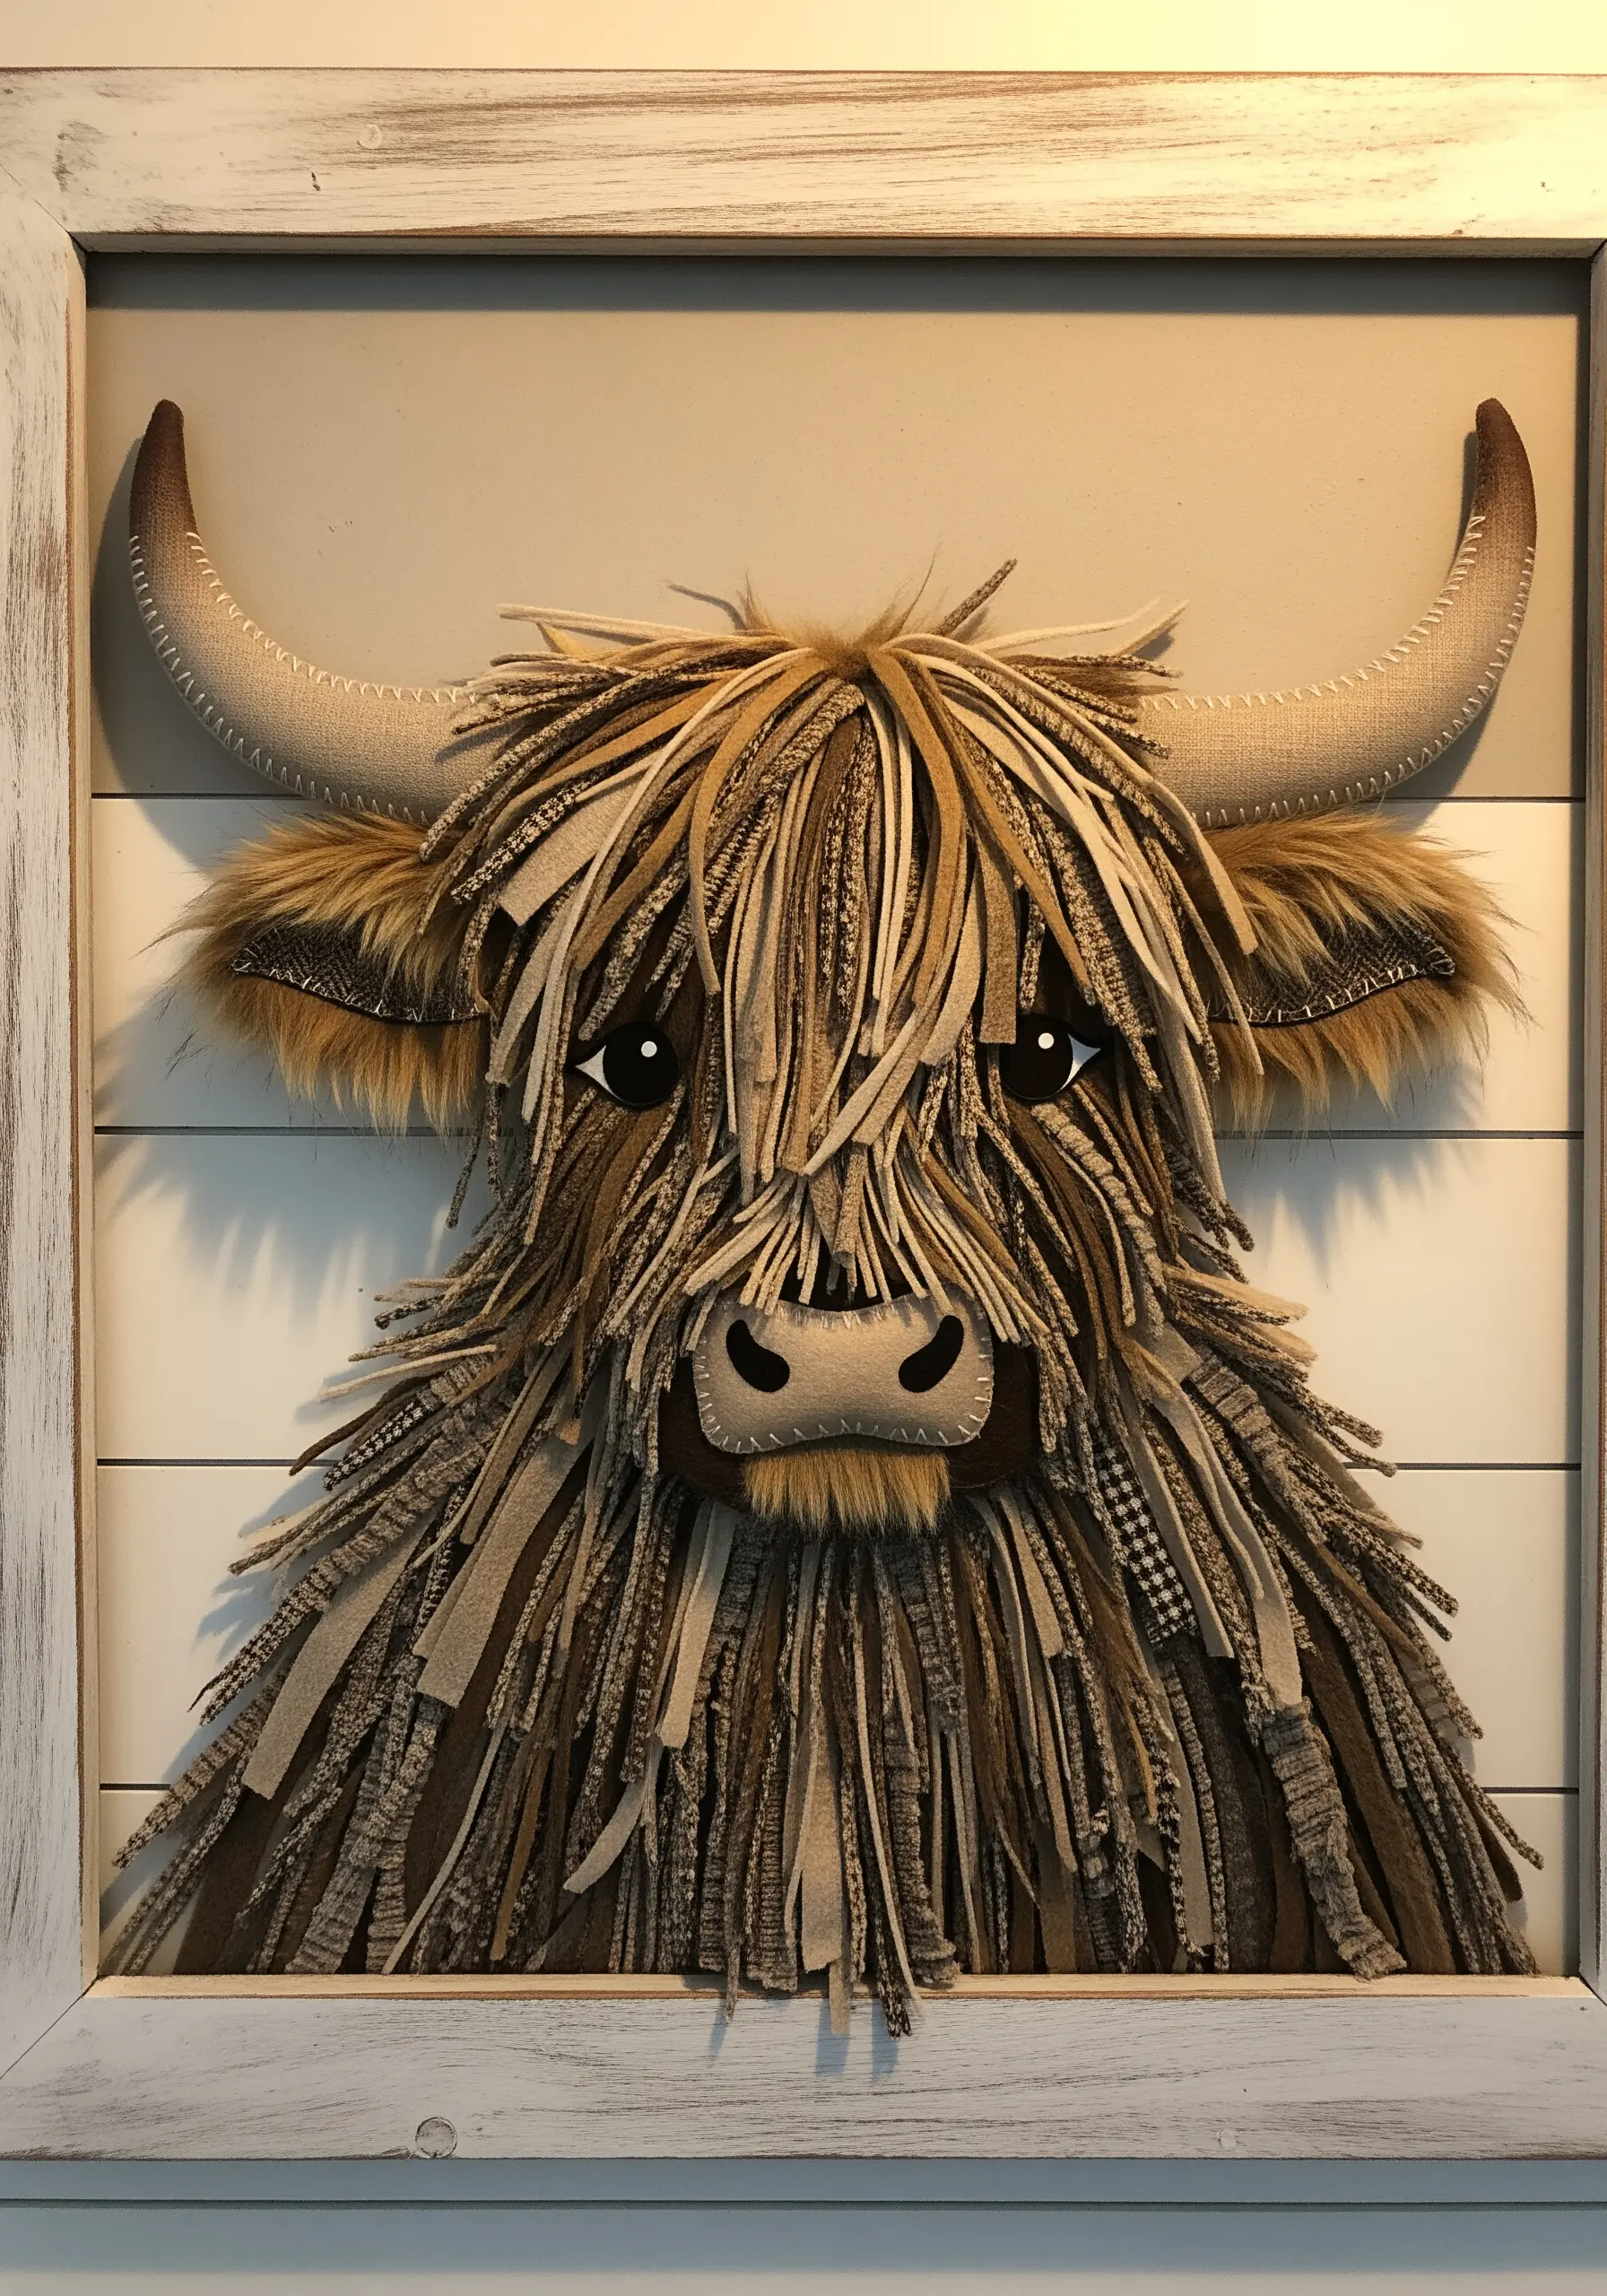
Recreate the look of a highland cow’s shaggy fur by layering strips of textured, neutral fabrics.
Gather materials like faux suede, tweed, linen, and burlap in earthy tones.
Cut them into long, thin strips and layer them densely, stitching them down at the top so they hang freely.
Mix in some faux fur for extra softness and dimension. For the horns and nose, switch to a smooth, stuffed fabric appliqué to contrast with the shaggy texture.
This creates wonderfully organic texture embroidery designs that are surprisingly easy to assemble.
17. Replicate Stained Glass with Bold Black Outlines

Achieve a luminous, stained-glass effect by framing fabric pieces with strong black lines.
Cut geometric shapes from various solid-colored fabrics, representing the panes of glass.
Arrange them on your base fabric, leaving a small gap between each piece.
Then, use a thick black thread and a wide satin stitch or couching technique to create the heavy ‘leading’ that defines each shape.
The result is a graphic and vibrant portrait that seems to glow from within, like modern neon on black thread art.
18. Embrace the Process with an Unfinished Aesthetic
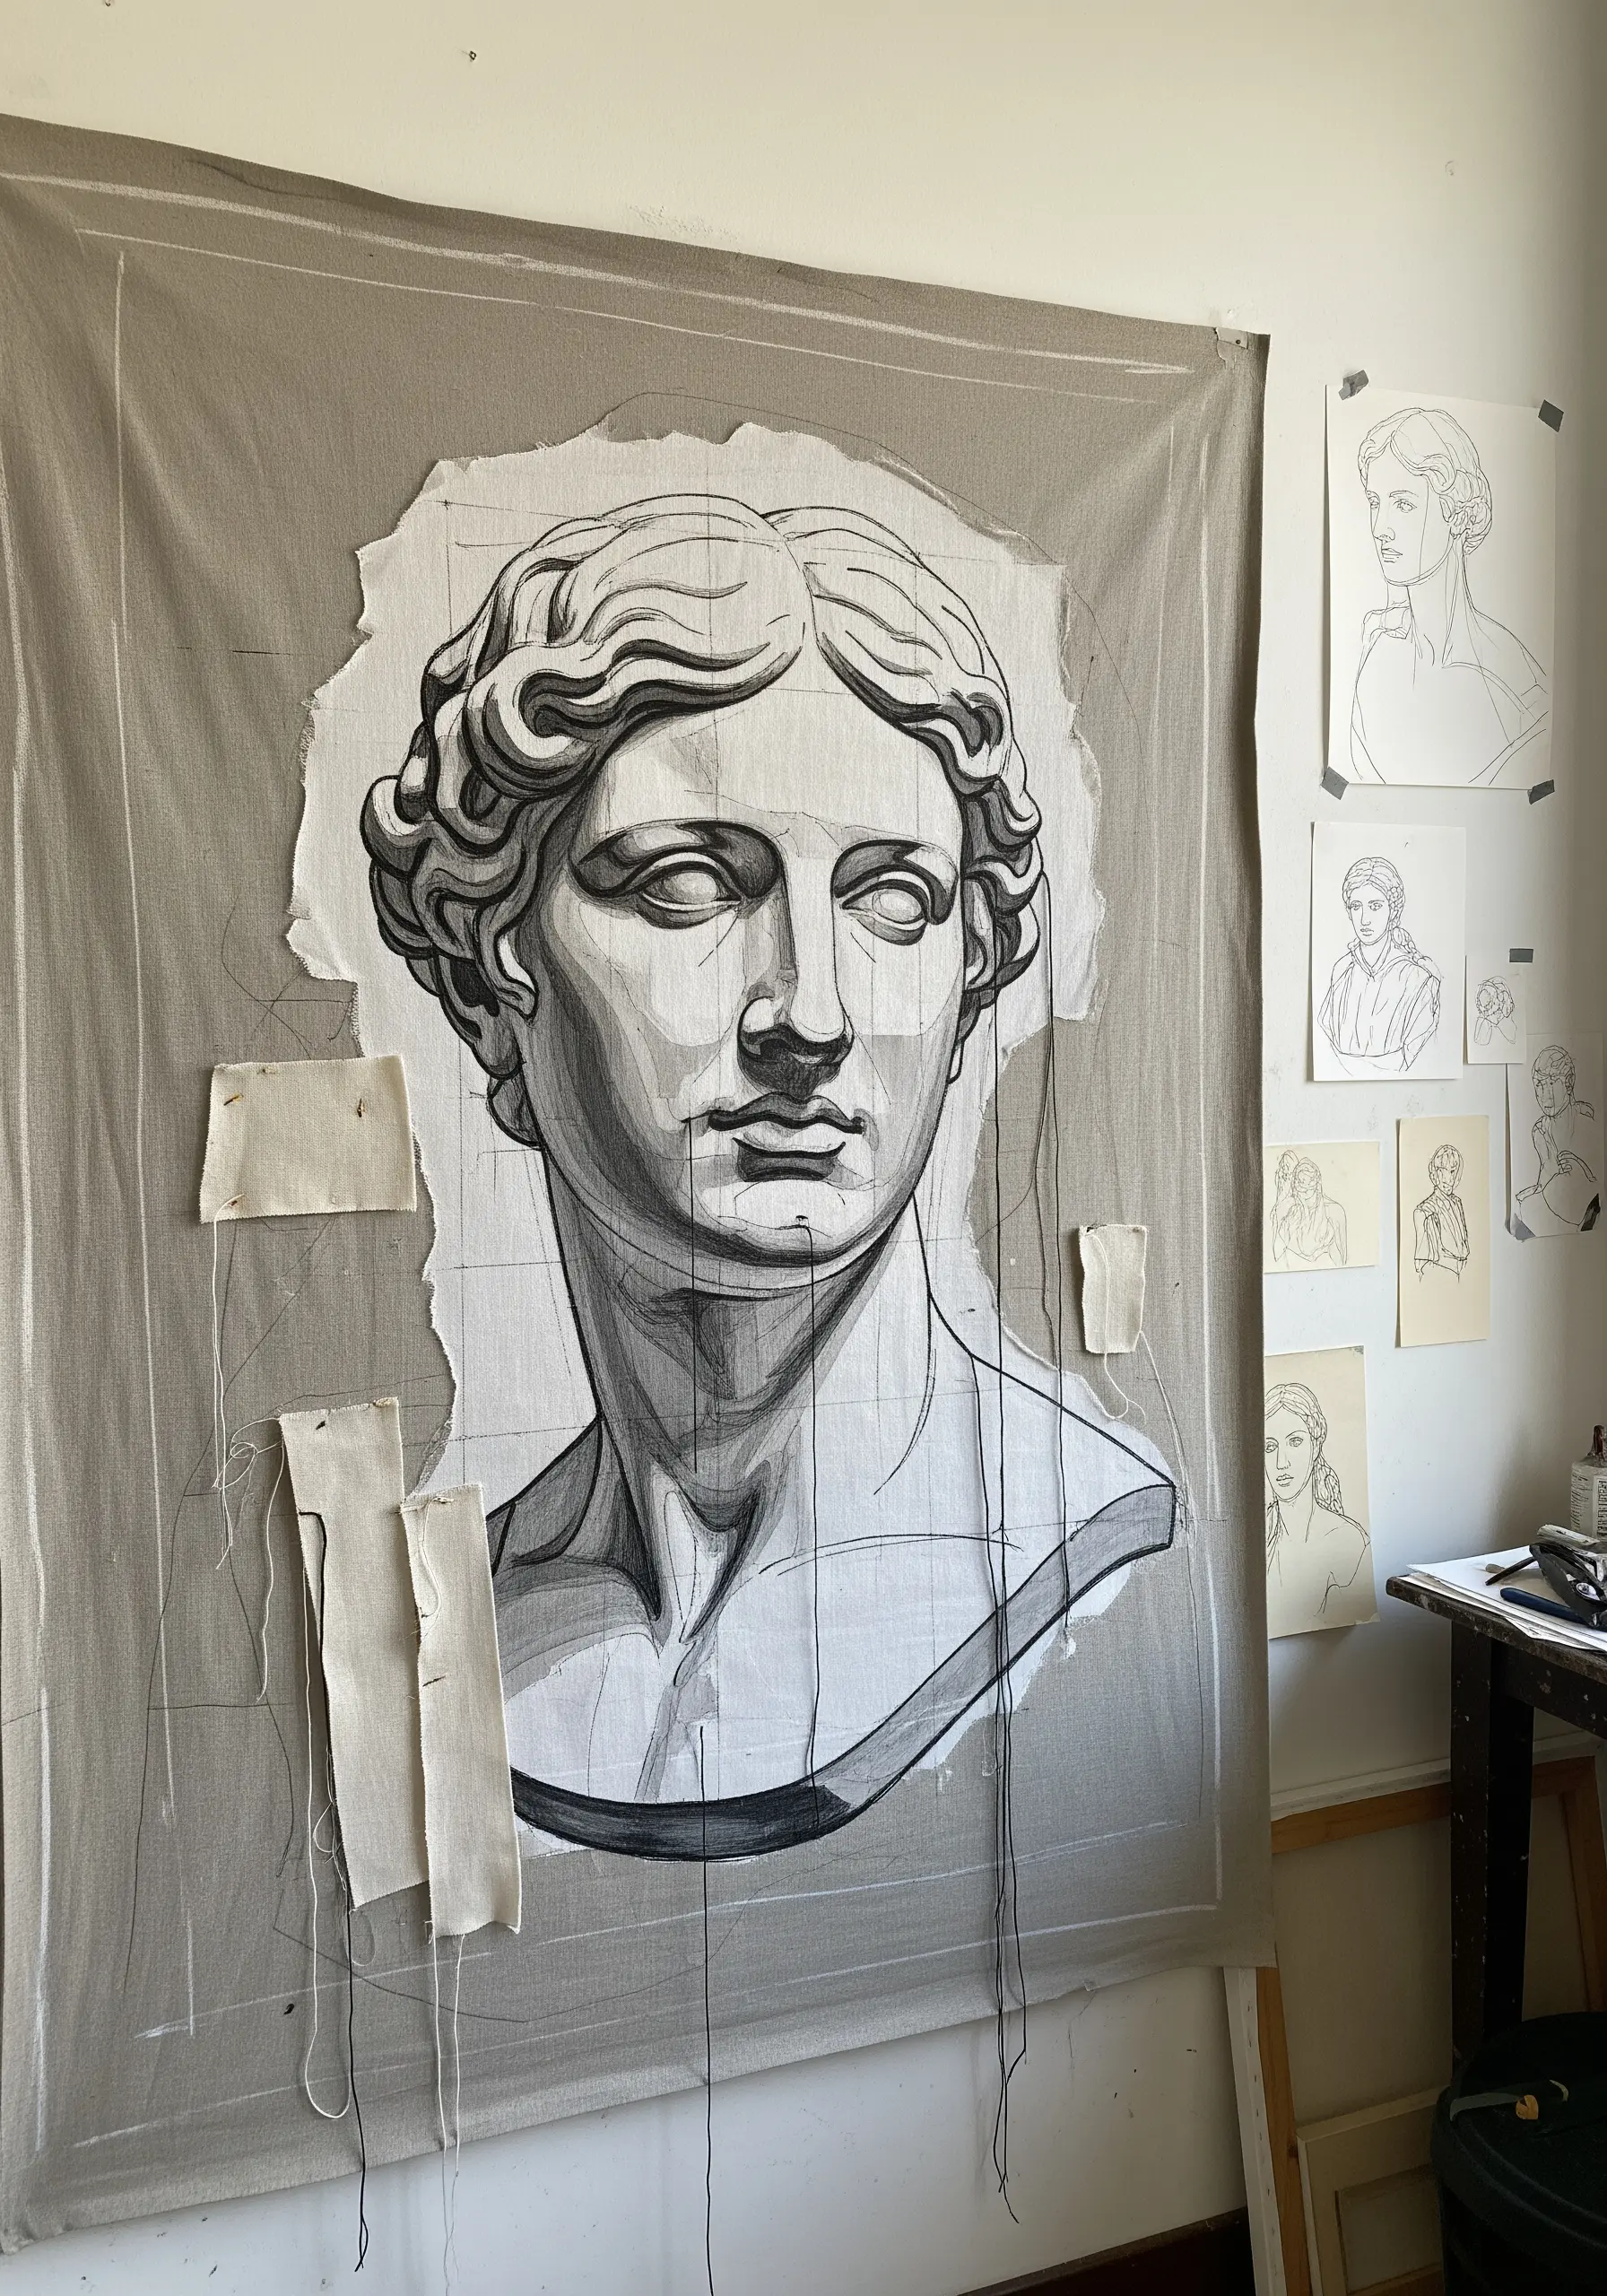
Turn your portrait into a commentary on the artistic process by leaving the ‘bones’ of the work visible.
Work on a large piece of raw, un-hooped canvas, and sketch your design directly onto it.
Use loose, expressive stitches and appliqué, but leave some basting threads, pins, and fabric swatches attached.
This deconstructed approach gives the piece a dynamic, studio-like energy, showing the hand of the artist and making it feel like a captured moment of creation.
It’s a beautiful way to create handmade art pieces that feel personal and authentic.
19. Add Authenticity with Period-Specific Embellishments

Elevate a historical portrait by incorporating accessories true to the era.
For a 1920s flapper, create the portrait with simple appliqué and clean line work for the facial features.
Then, add the finishing touches: a headband made from a strip of real sequins and a soft, delicate feather tucked into the side.
These dimensional, tactile additions instantly transport the viewer and make the character feel more complete and believable.
20. Introduce Surrealism with Found Objects
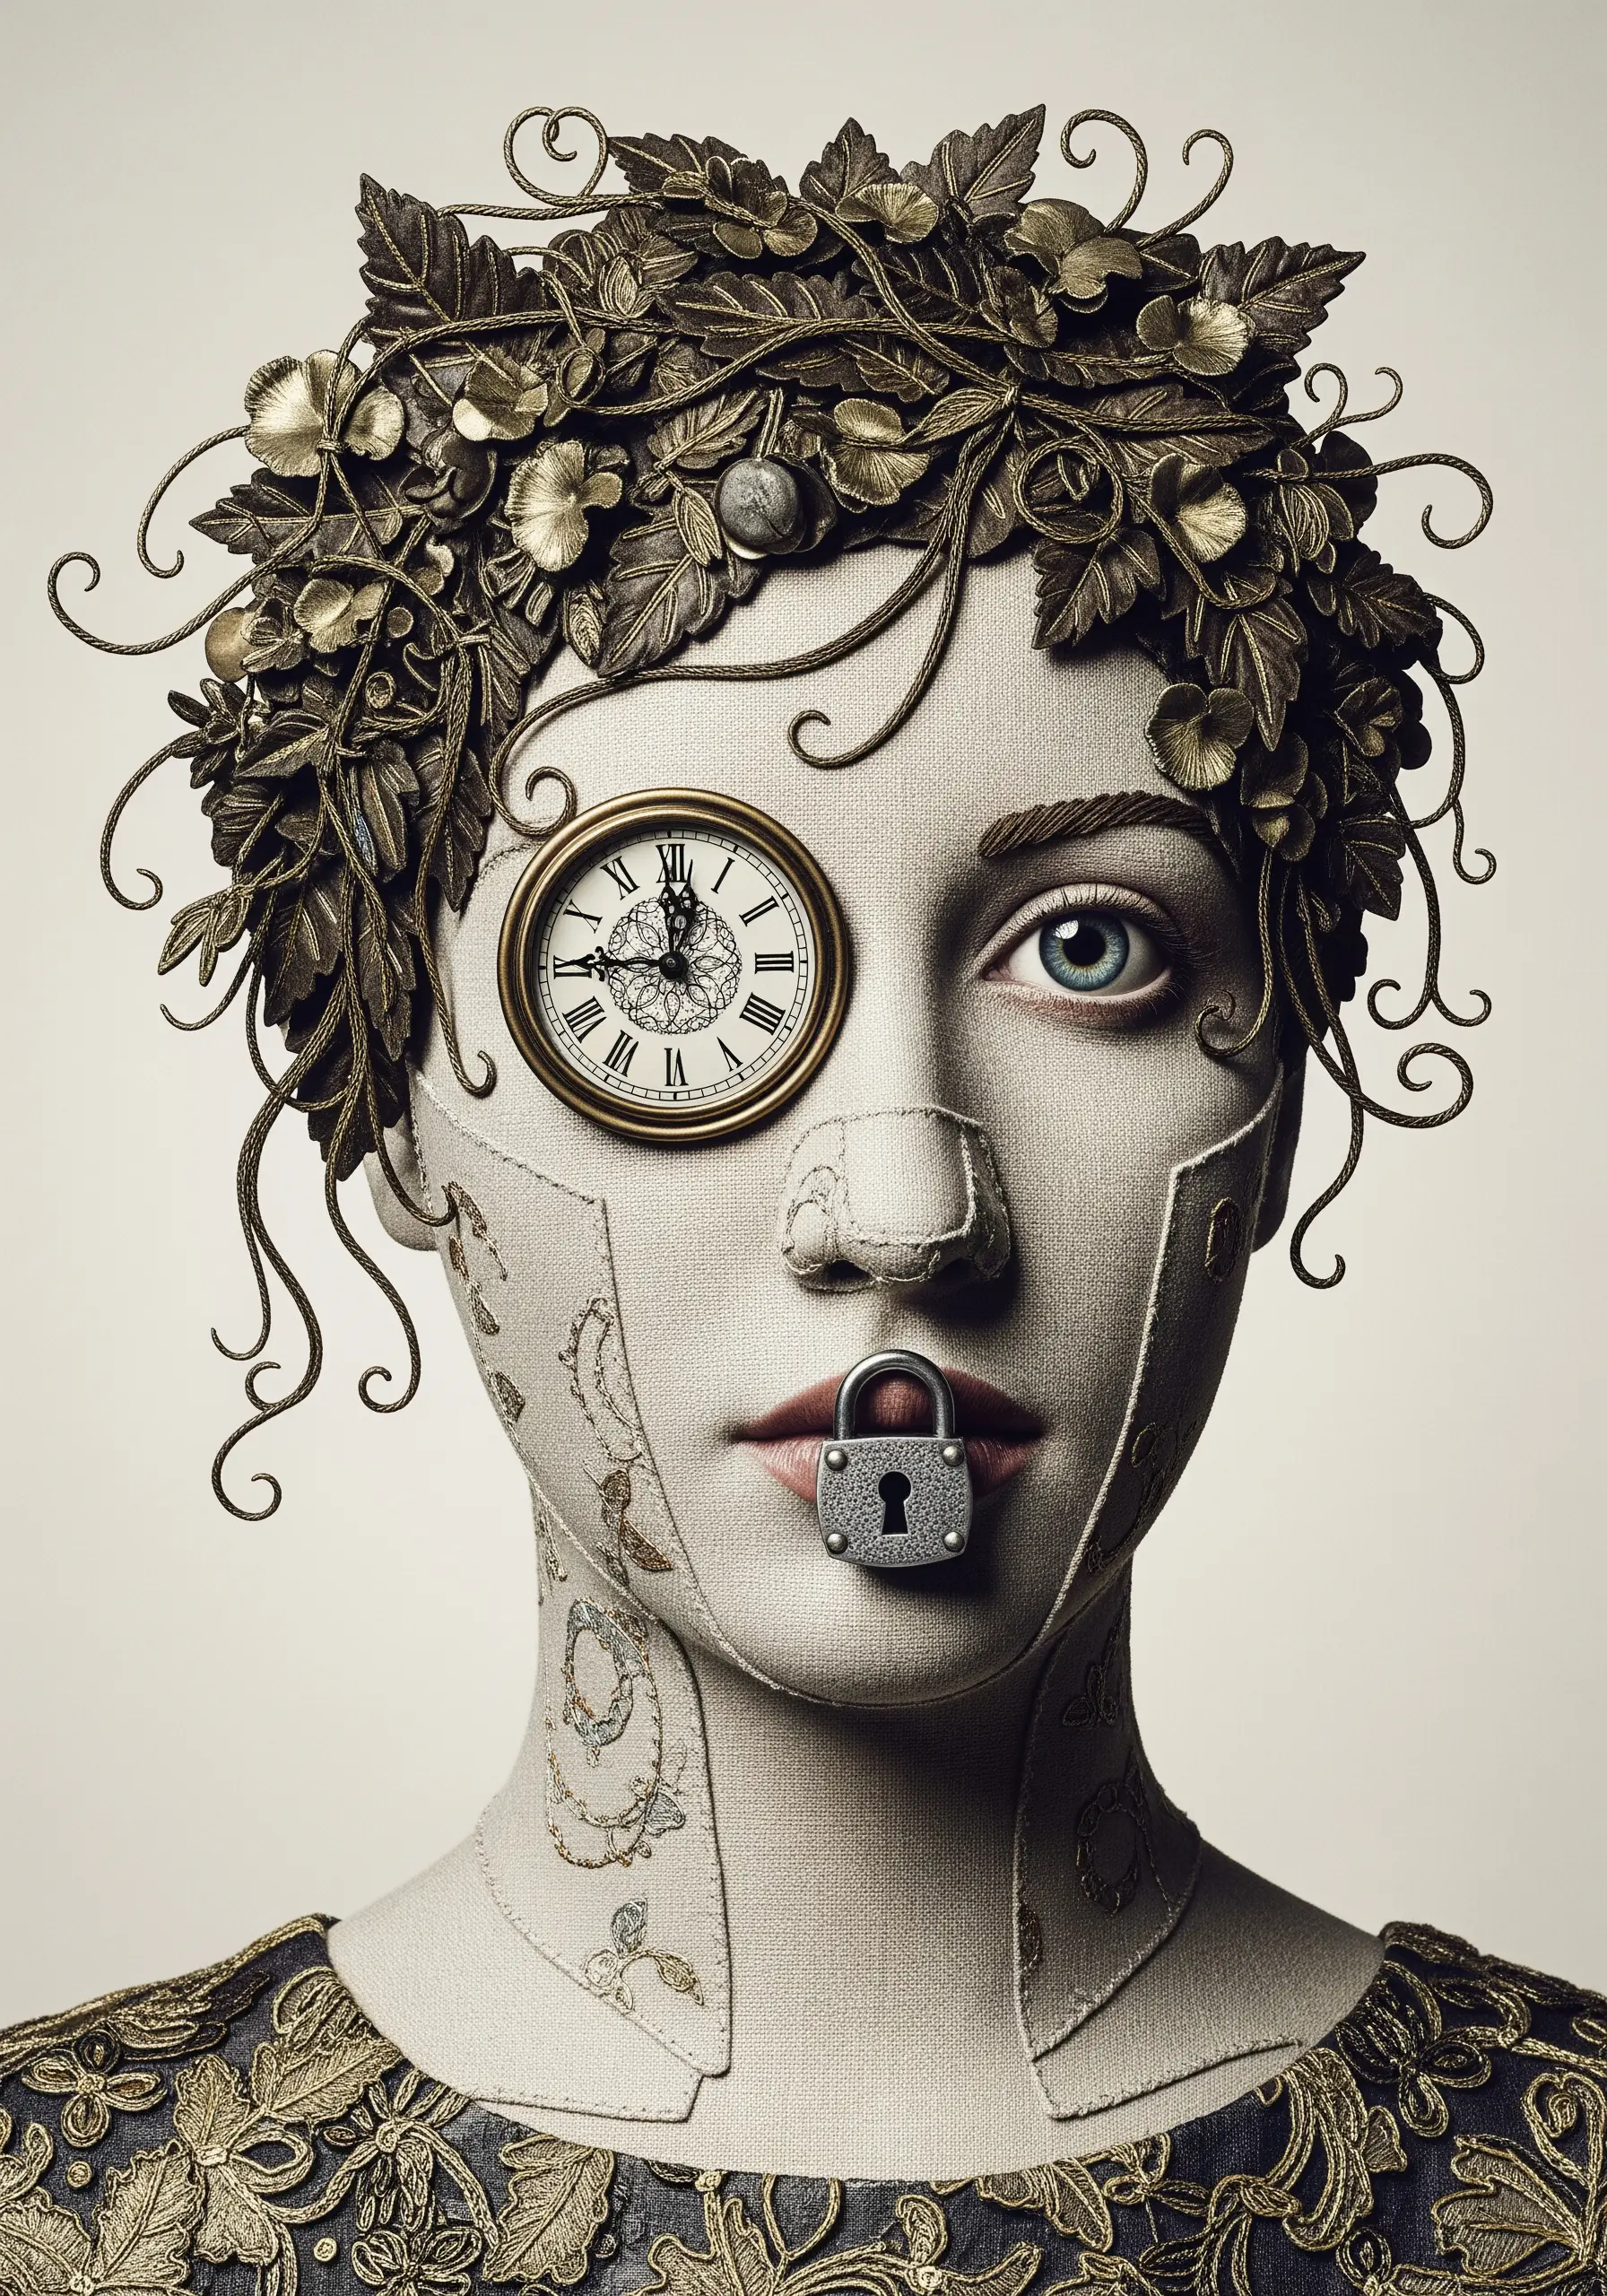
Challenge convention by integrating unexpected, three-dimensional objects into your fabric collage.
Build a surrealist portrait by replacing an eye with a vintage watch face or placing a small, metal lock over the mouth.
Secure these objects firmly to the fabric by stitching through holes or using a strong, clear adhesive.
This mixed-media approach transforms the portrait from a simple likeness into a thought-provoking piece of conceptual art, perfect for those who love creative embroidery projects that look expensive.
21. Mimic Nature with Textured Yarns and Fibers
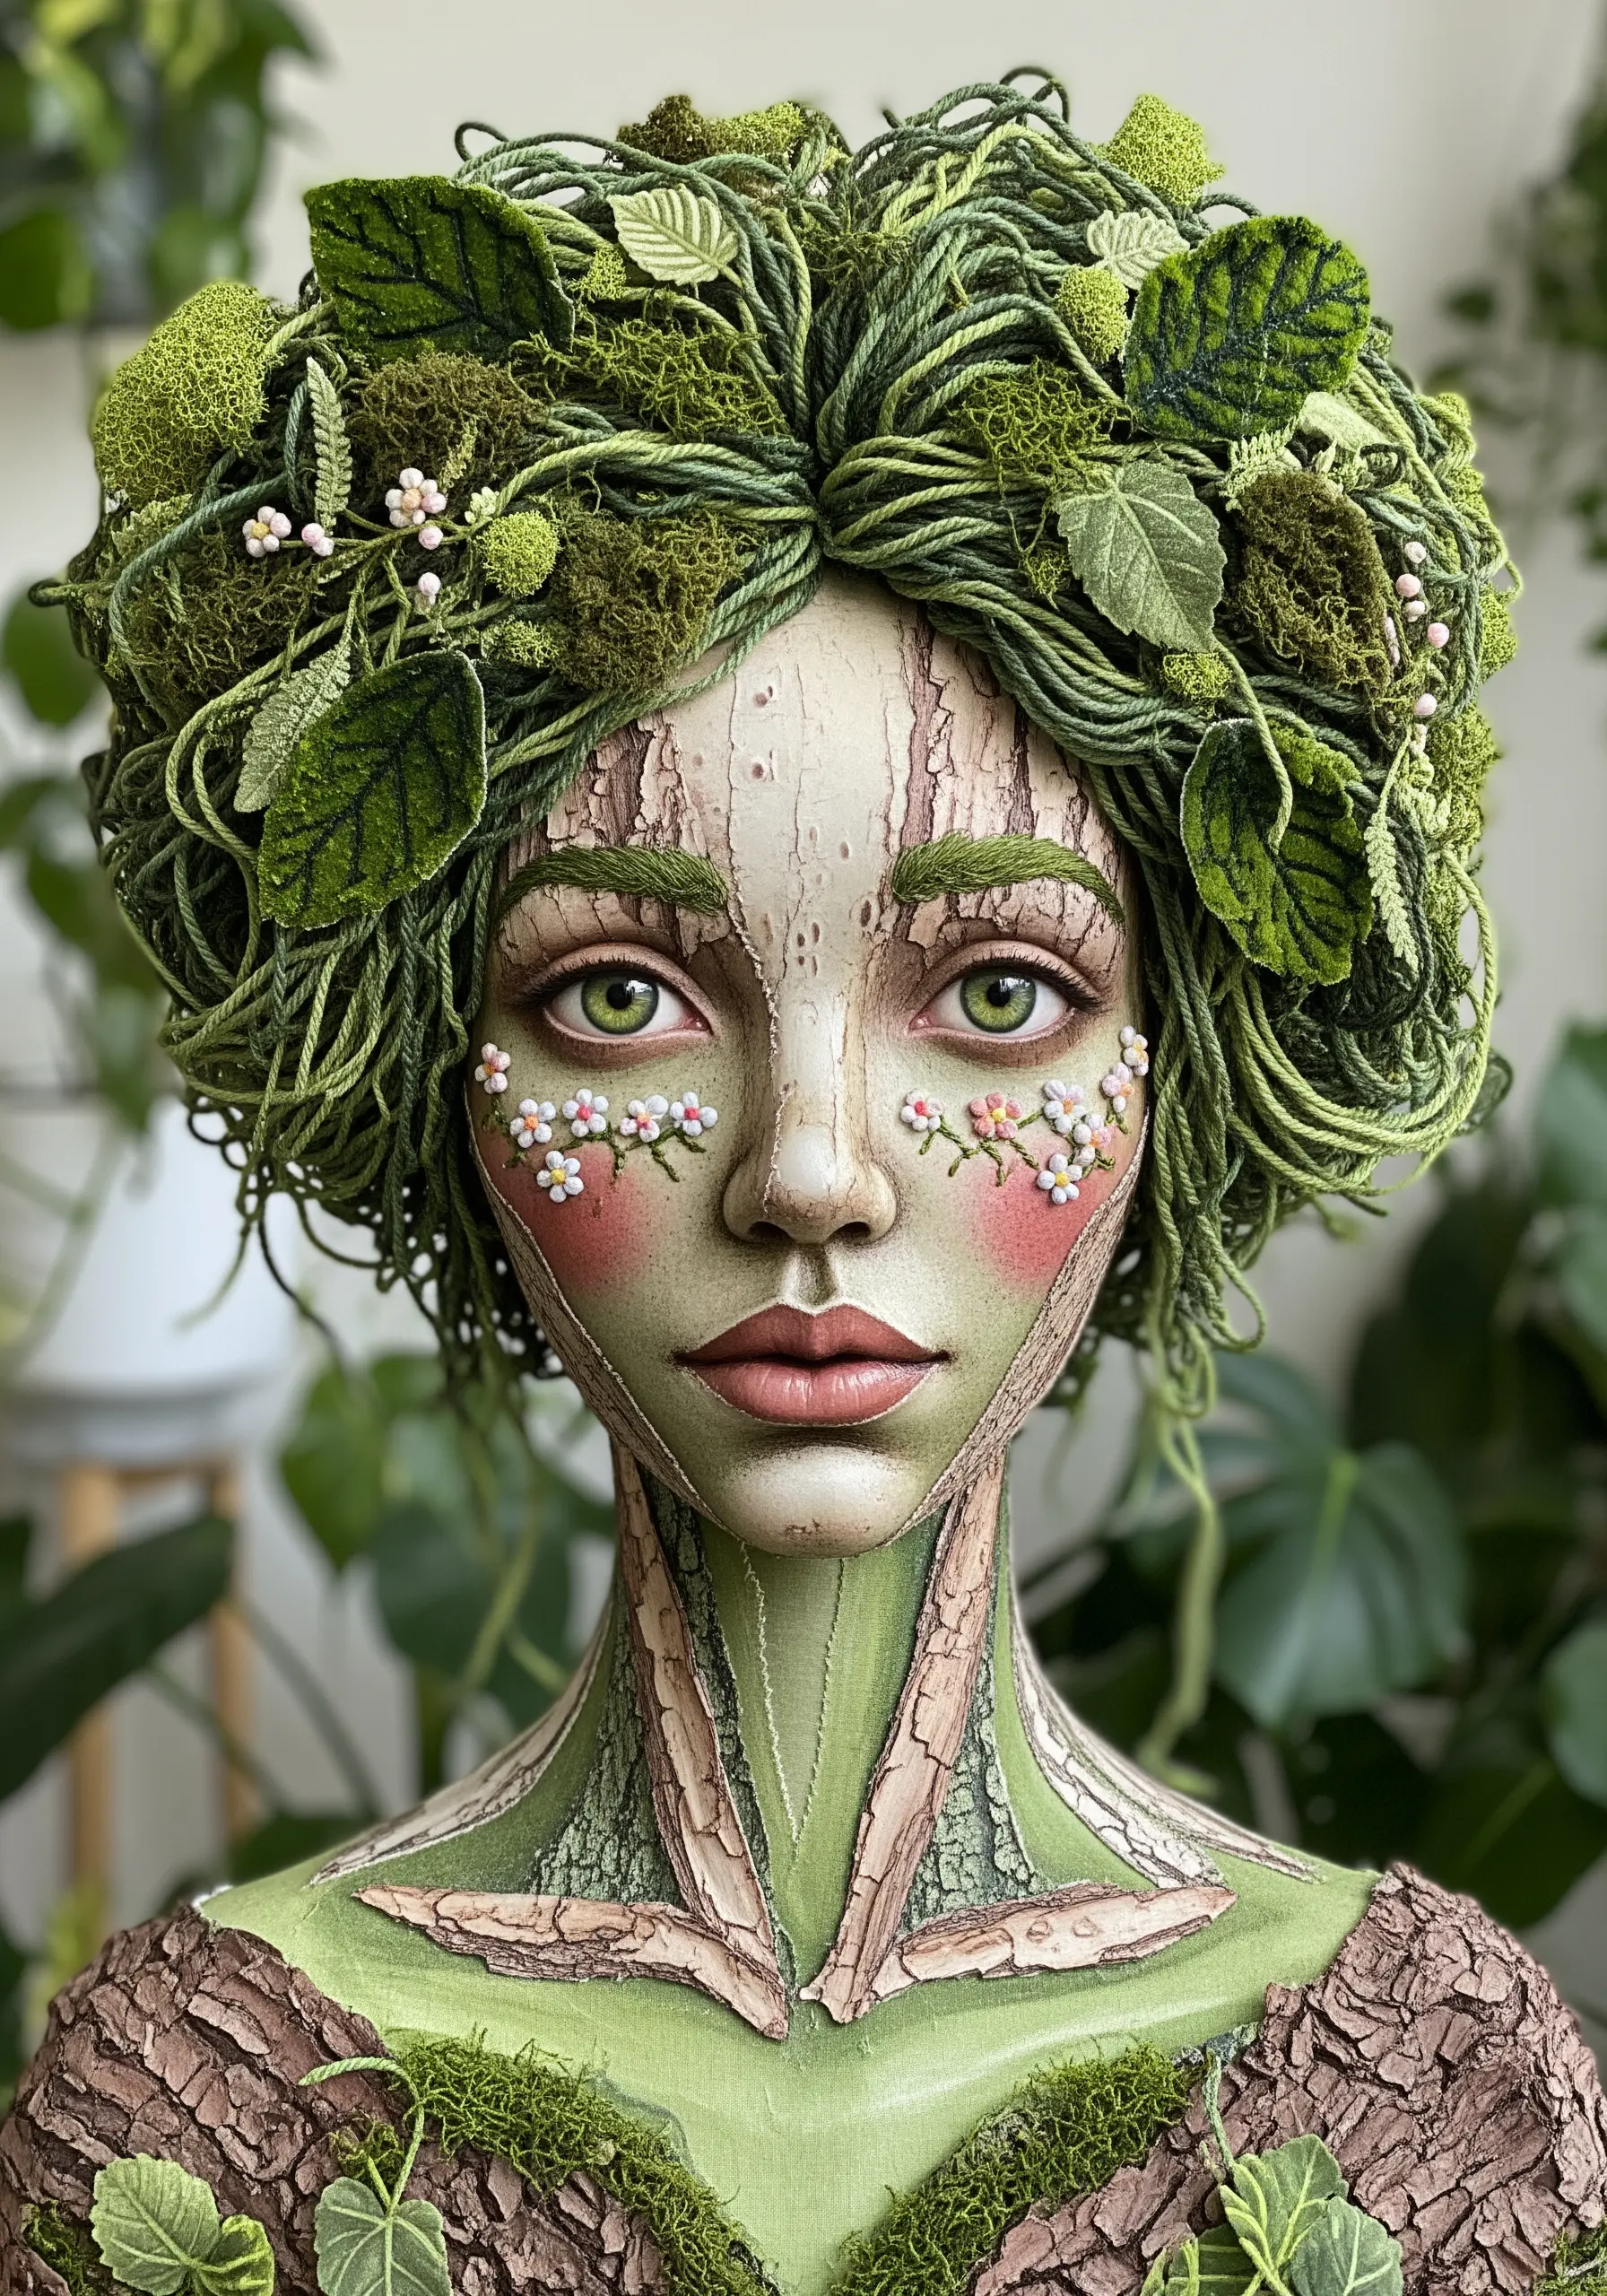
Create a portrait that feels like it grew from the earth by using materials that mimic natural textures.
Use bouclé yarn and French knots in various shades of green to build up a moss-like texture for the hair.
Incorporate small, dried floral elements or appliqué tiny felt leaves for added realism.
For the skin, try appliquéing fabric that you’ve painted and cracked to resemble tree bark.
This project is a beautiful example of ways to embroider natural textures for a stunning organic effect.
22. Sculpt Hair with Coiled Trims and Cording
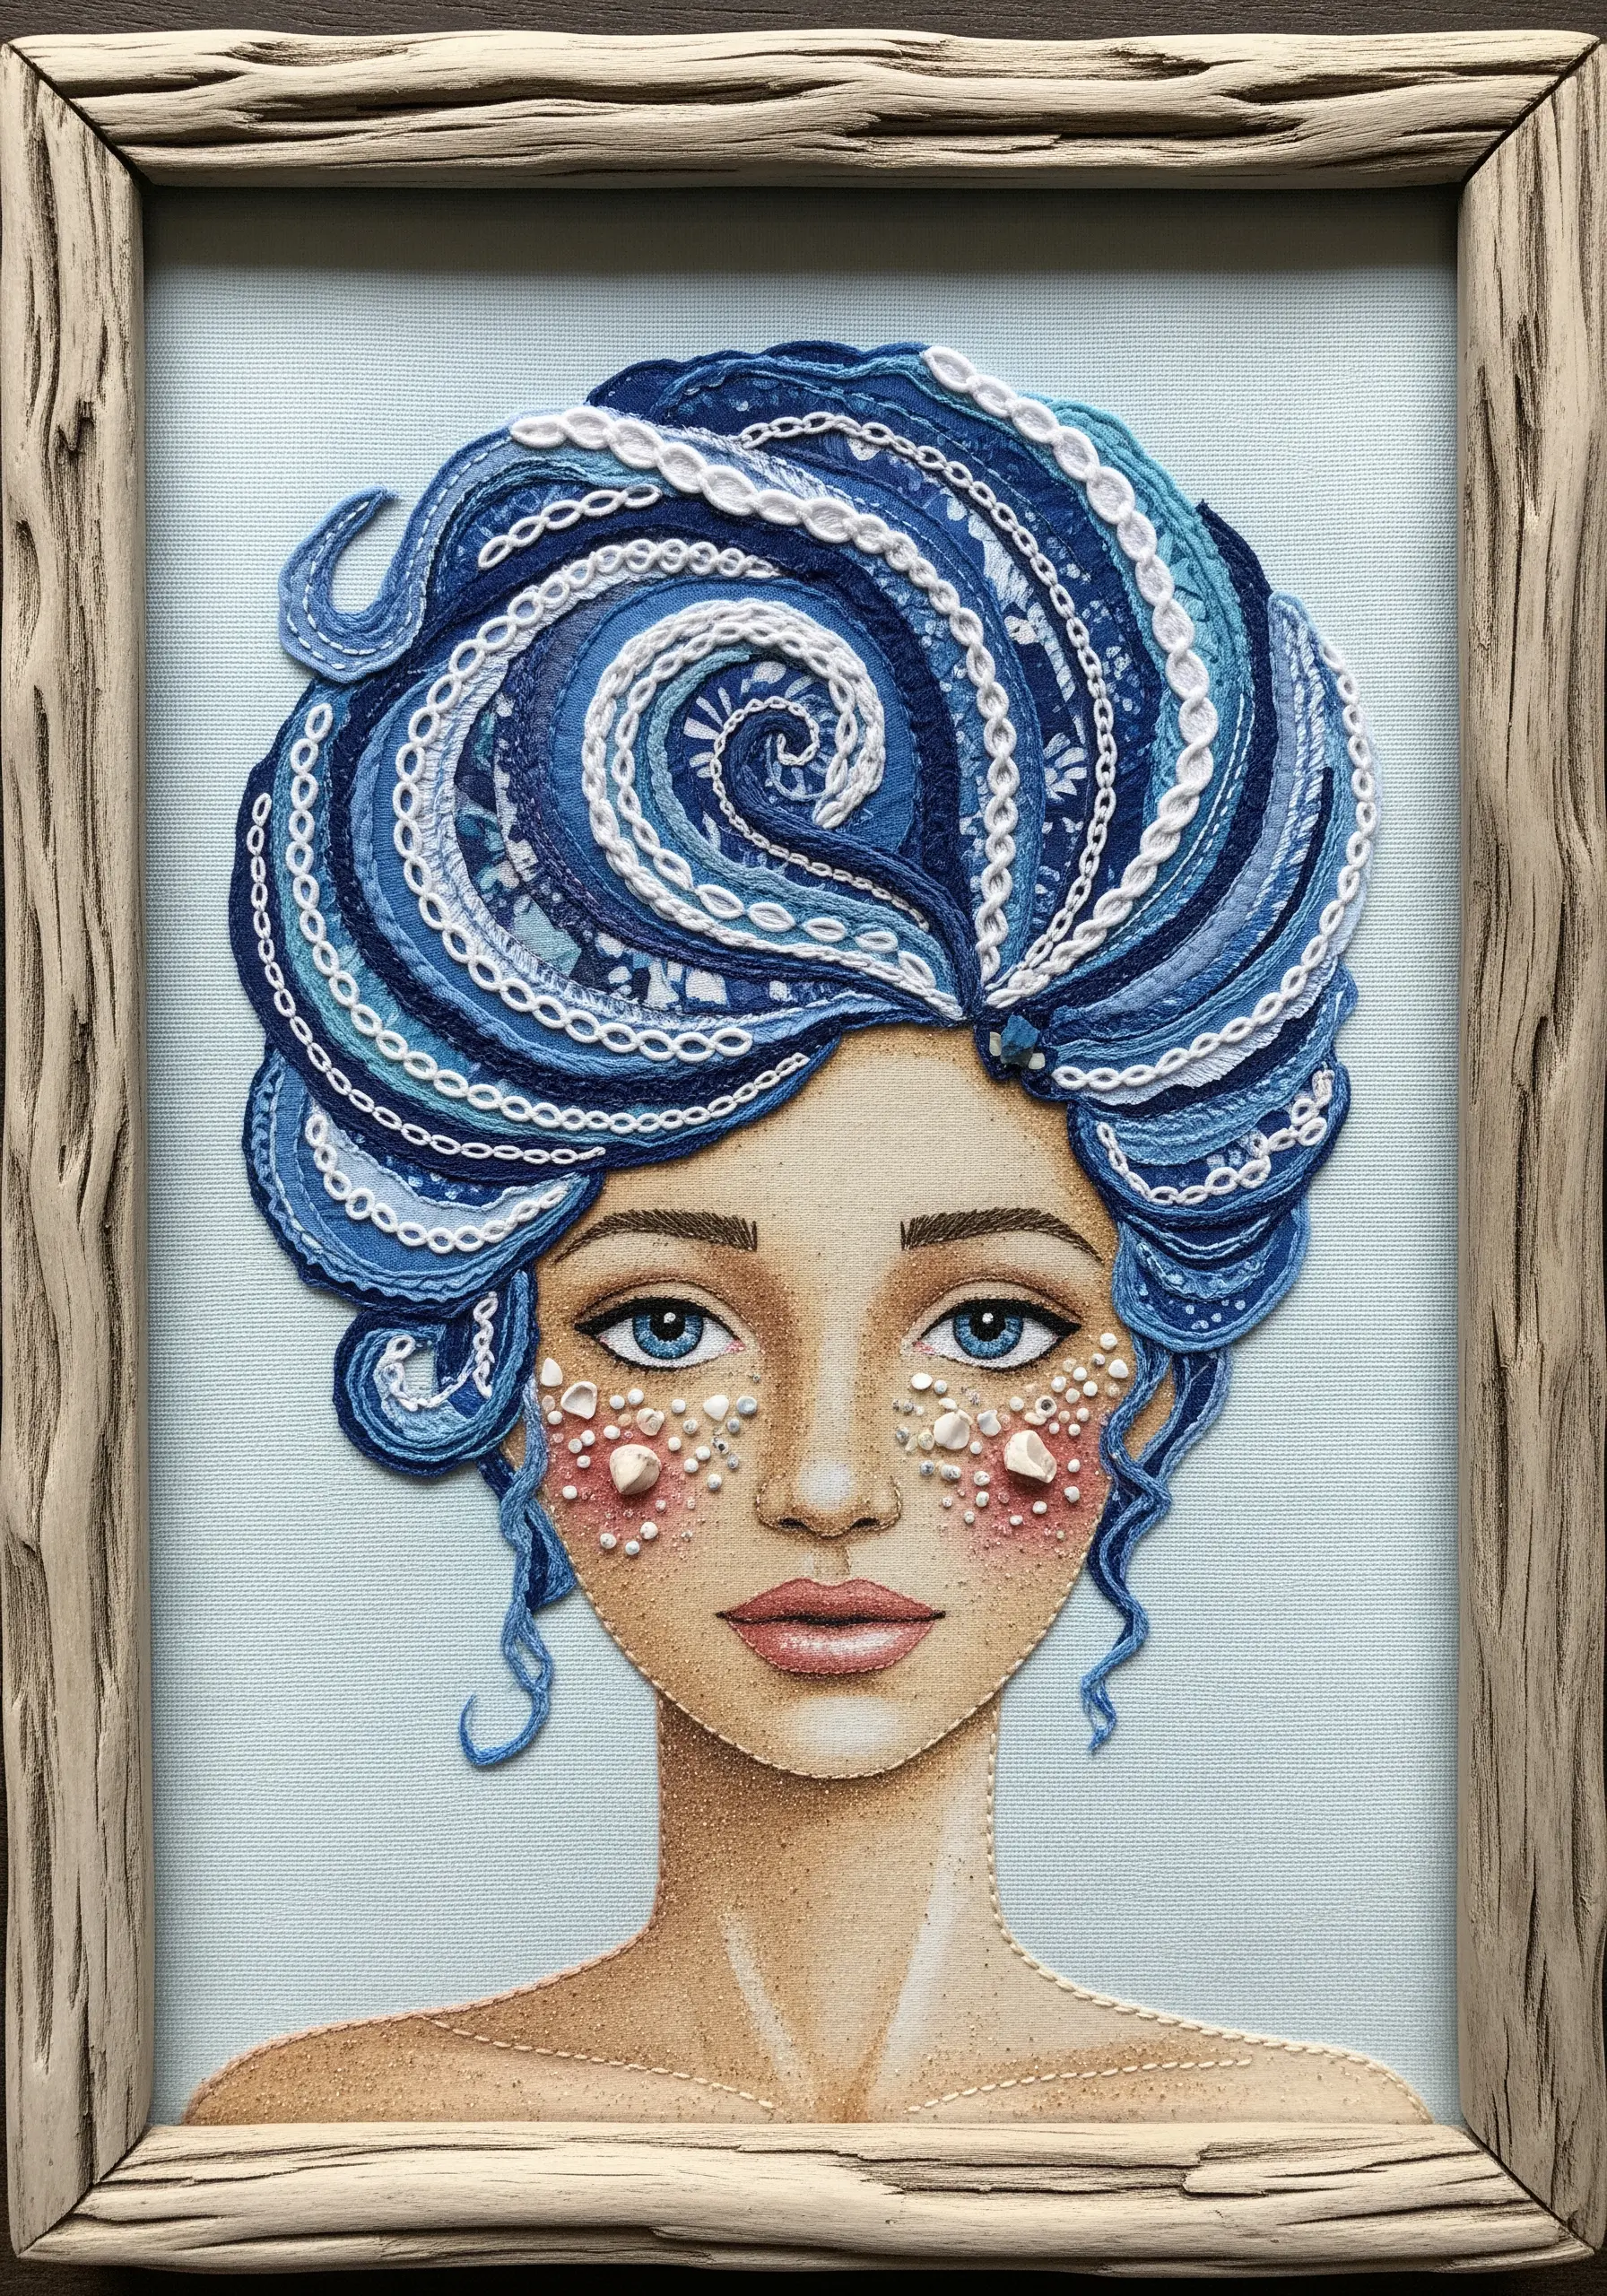
Give your portrait’s hair incredible dimension and pattern by using various decorative trims.
Instead of fabric strips, use lengths of lace, rickrack, braided cord, and pearl strings.
Couch these trims onto your base fabric in tight swirls and flowing waves to build up the hairstyle.
The combination of different textures creates a rich, sculptural effect that is both elegant and visually fascinating, ideal for creating ocean-marine embroidery wall themes with a sense of movement.
23. Construct a Face with Geometric Patchwork

Build a modern, abstract portrait by breaking the face down into geometric facets.
Use a variety of fabrics—solids, stripes, and polka dots—to fill in the angular shapes.
This creates a dynamic push-and-pull between the flat, graphic patterns and the three-dimensional form of the face.
Define the portrait with crisp appliqué edges rather than heavy stitching, allowing the shapes and patterns to be the main focus.
This is a great technique for anyone who loves abstract patchwork embroidery mashup ideas.
24. Create a Soft, Gentle Look with Felt Appliqué
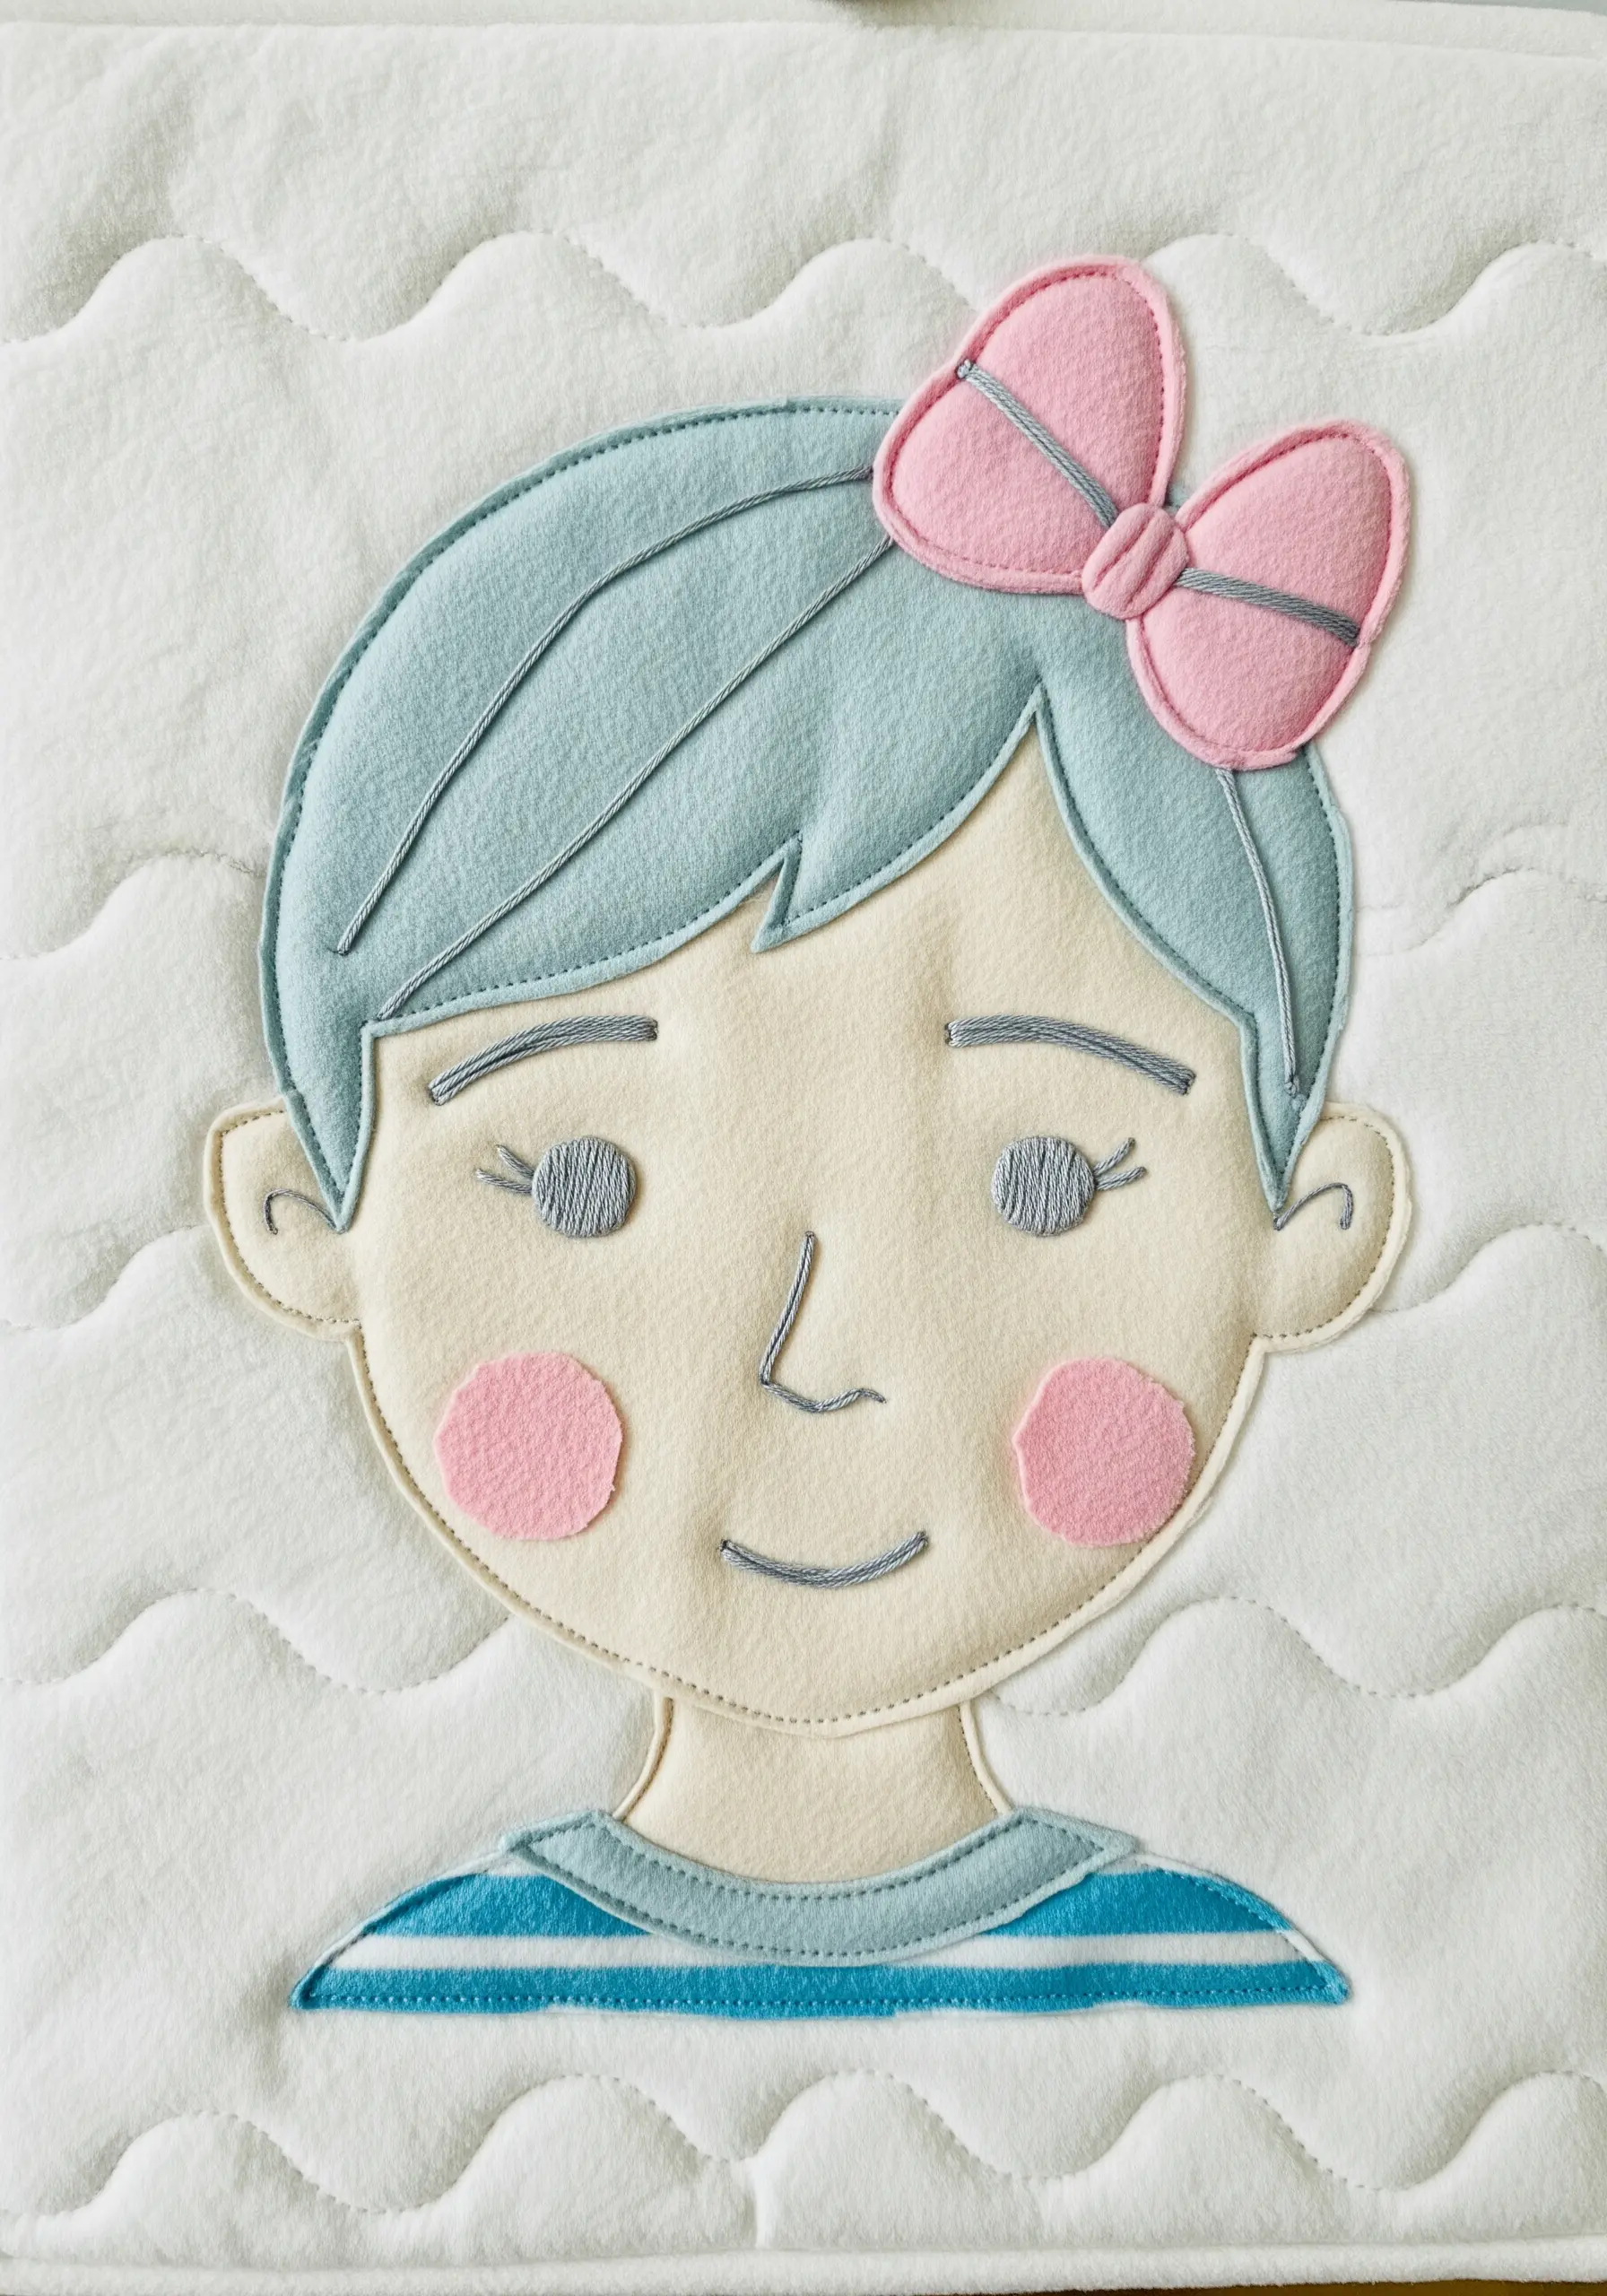
For a sweet, storybook feel, use felt for your main appliqué pieces.
Felt’s non-fraying edges allow for clean, crisp shapes that are easy to cut and apply.
Layer simple shapes for the hair, face, and clothing, then add gentle details with a few strands of embroidery floss—a simple backstitch for the smile and satin stitch for the eyes.
Stitching onto a soft, quilted background enhances the cozy, gentle feel, making it perfect for nursery decor or quick, cute stitch designs to embellish baby clothes.


