
You know that moment when you finish a floral embroidery piece, step back, and realize it looks… flat? It’s not that your technique is wrong. It’s usually that you’re stitching the idea of a flower rather than the structure of one. Real petals have direction, weight, and distinct textures that a simple satin stitch can’t always capture on its own.
The secret to modern, realistic botanical art isn’t about buying the most expensive silk threads or mastering complex, obscure knots. It is about decision-making. It’s choosing to angle your needle to follow the curl of a peony petal, or deciding to cut your thread to create the fuzzy tuft of a thistle. It is about understanding that a poppy center isn’t just a black dot—it’s a dense, shadowy texture.
I have curated these 30 examples not just to show you pretty pictures, but to break down exactly what makes them work. From controlling the sheen of your thread to building architectural layers that lift off the fabric, these are the practical shifts you can make in your very next hoop to turn “nice” stitching into art that feels alive.
1. Mastering the directional flow of peony petals

Real petals rarely lie flat; they curl, fold, and overlap. To capture this peony’s volume, you must treat each petal as a separate surface with its own grain direction.
Use wildflower thread painting techniques to blend your pinks from dark bases to light tips, ensuring your stitches follow the curve of the petal rather than a straight line.
This creates the illusion of a cupped shape, giving the bloom a heavy, luxurious feel that satin stitch alone cannot achieve.
2. High-contrast definition for red poppies

A poppy’s visual impact comes from the stark contrast between its paper-thin red petals and the dense, dark center. Use a split stitch outline to create a crisp edge before filling the petals with long-and-short stitch.
For the center, don’t just use black; mix in dark greys or deep purples to prevent it from looking like a void.
This is one of those bold and colorful framed embroidery patterns that relies on clean edges to look professional.
3. Sculptural wirework for 3D golden roses

When you want to move beyond the fabric surface, stumpwork is your answer. By stitching over a fine wire armature, you can detach the petals and physically bend them into shape.
This technique turns flat embroidery into statement textured embroidery that catches the light differently from every angle.
Use a lustrous rayon or silk thread for that metallic gold sheen, wrapping the wire tightly to hide the mechanics completely.
4. Floating cherry blossoms on transparent tulle

Embroidering on organza or tulle requires a delicate hand, as you cannot hide messy backs. The result, however, is magical—blossoms that appear to float in mid-air.
Keep your knots invisible or use waste knots, and ensure your thread tension is light to avoid puckering the mesh.
These botanical hoop embroidery projects are perfect for layering over other textures or hanging in windows.
5. Constructing volume with woven picot petals

A sunflower needs to feel robust and heavy. Replace standard flat stitches with woven picot stitches for the petals; this creates a detached, structural element that stands off the fabric.
For the center, tightly packed French knots in varying shades of brown add the necessary density.
This approach transforms simple motifs into organic texture embroidery designs that invite touch and interaction.
6. capturing the velvety face of pansies
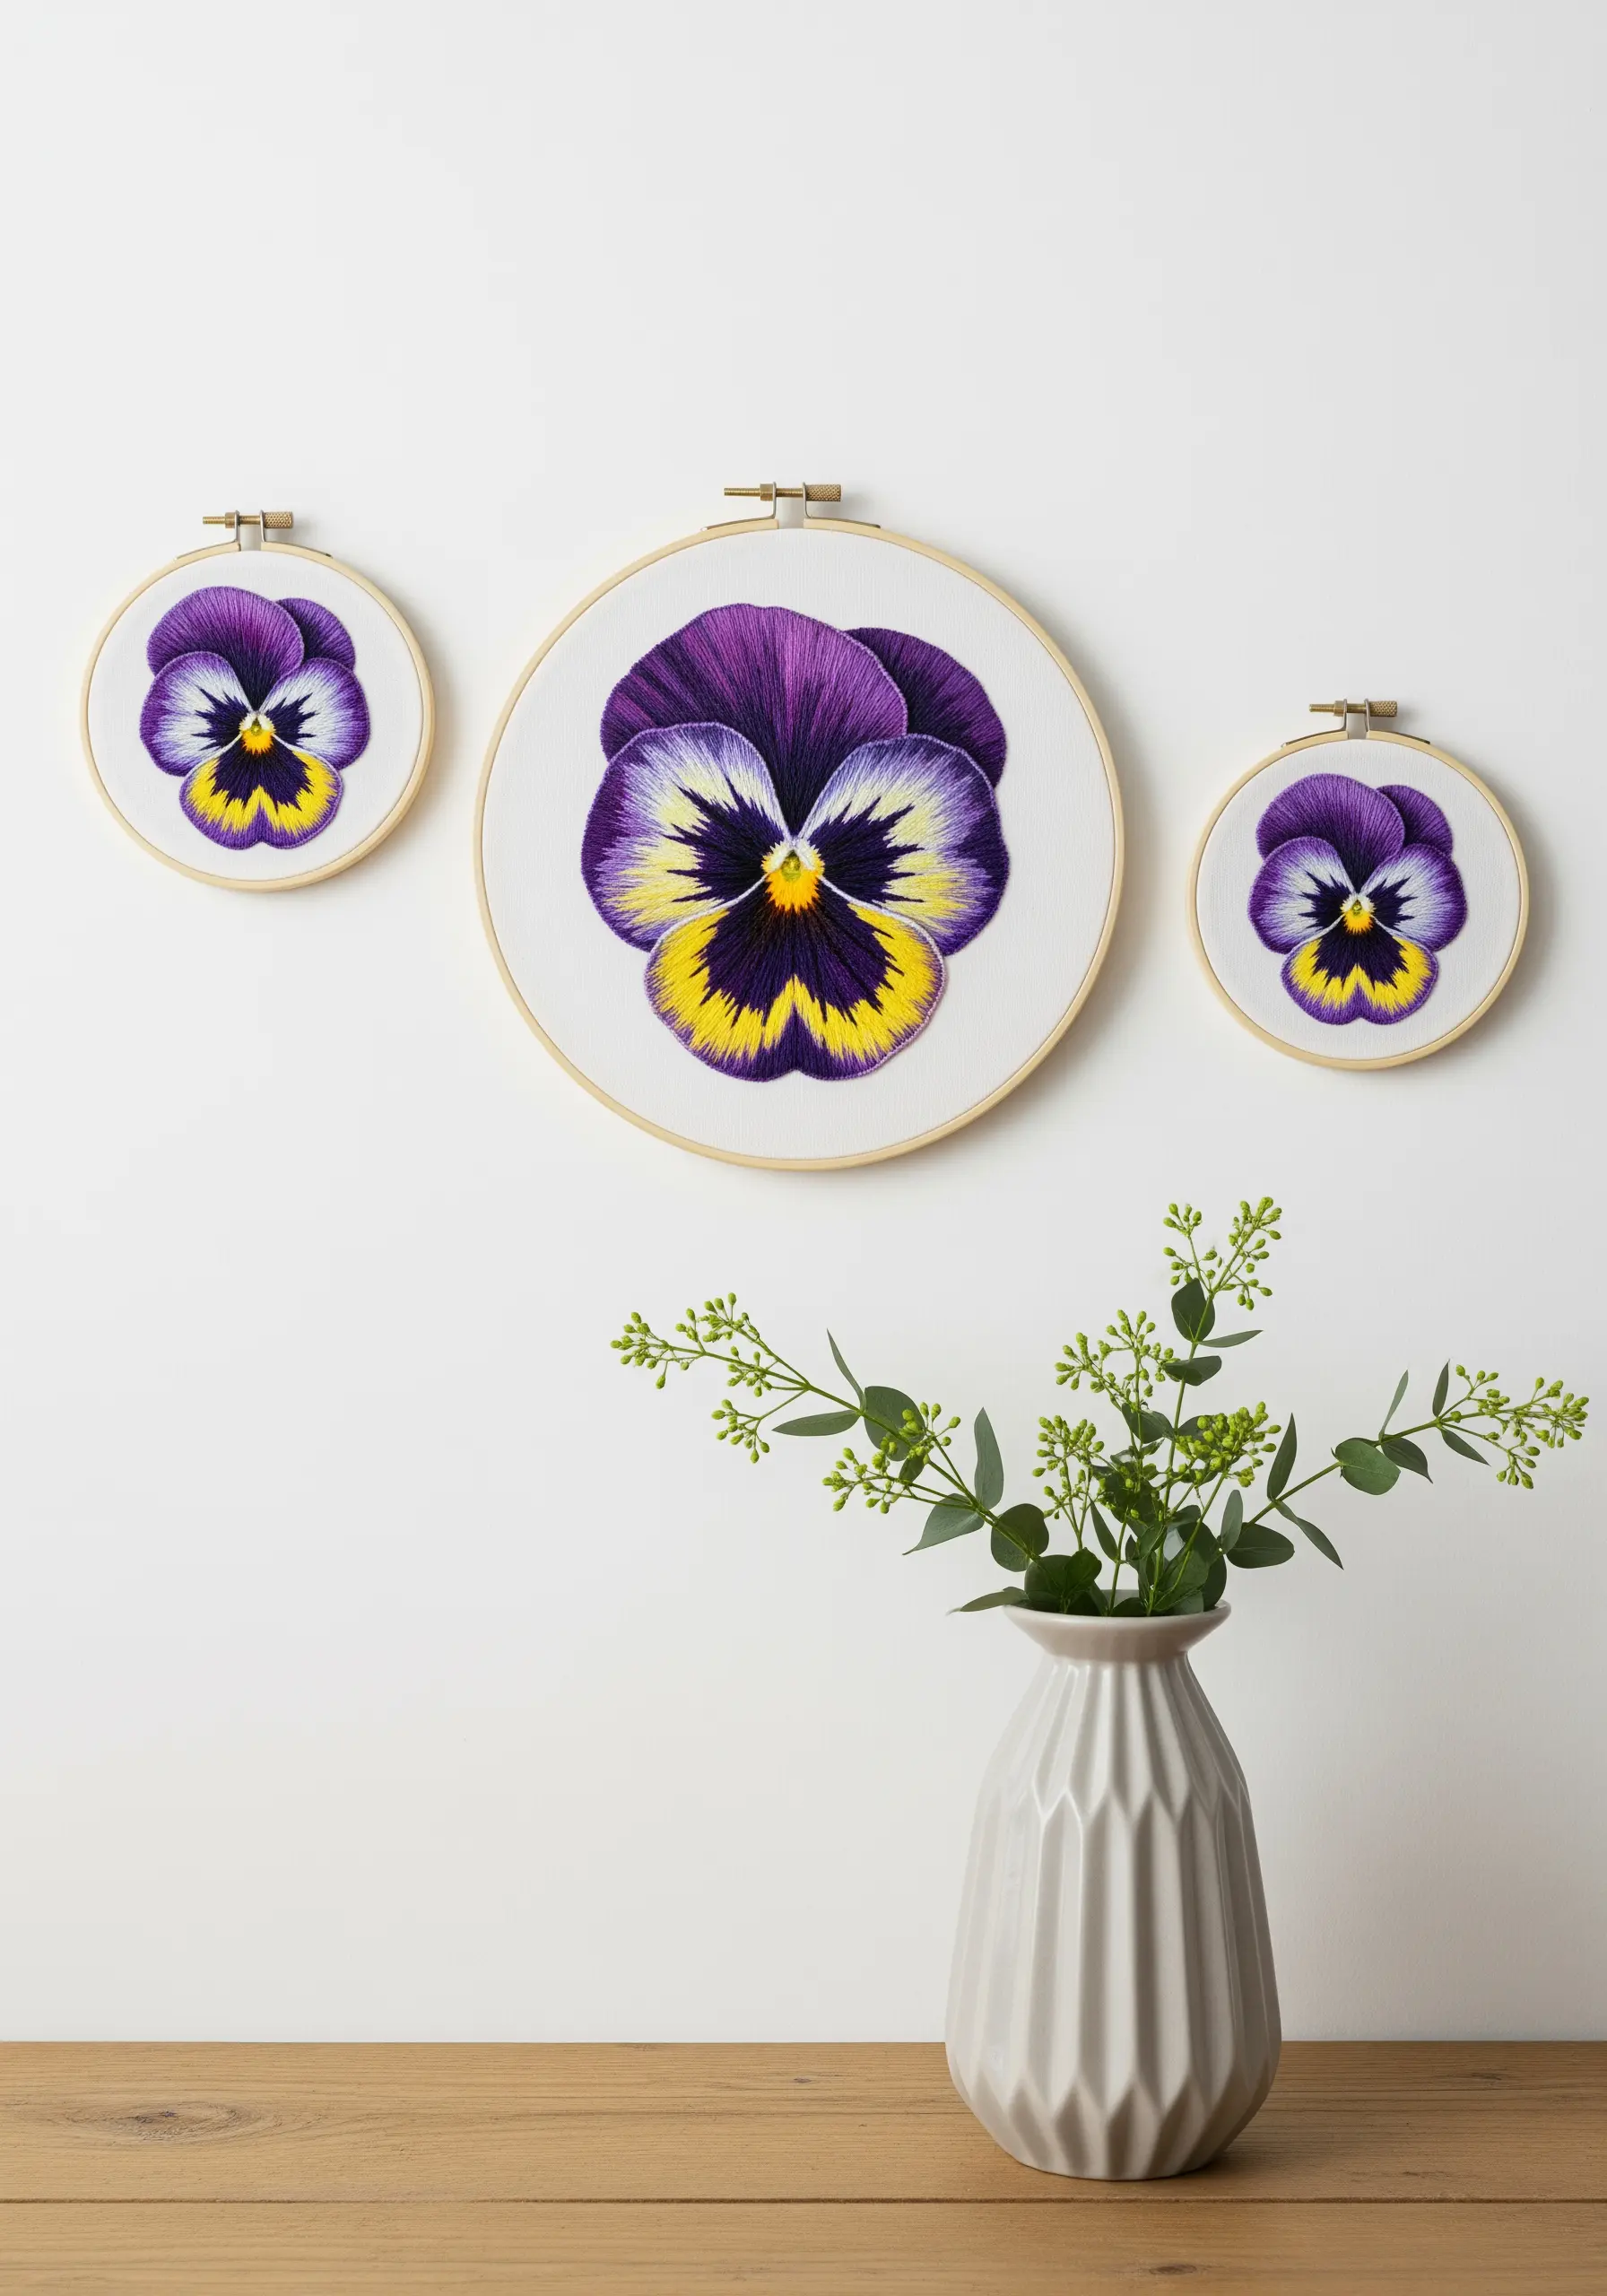
Pansies are defined by their unique color blocking and ‘faces.’ The key here is seamless blending between the deep purple, bright violet, and yellow centers.
Thread painting is essential; overlay single strands of thread to blur the lines between colors.
These color blending thread patterns work best when you study a real flower to see exactly where the pigments bleed into one another.
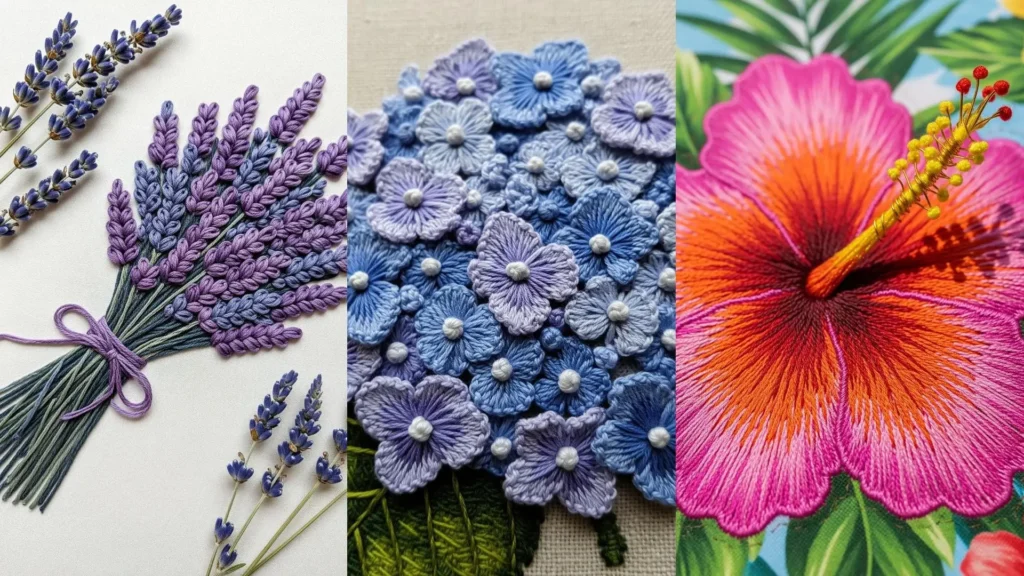
7. clustered textures for hydrangea blooms

A hydrangea isn’t one flower, but a globe of many. To replicate this, avoid outlining a circle and filling it in. Instead, stitch individual four-petal florets using bullion knots or cast-on stitches.
Overlap them slightly to eliminate gaps and build a dome shape naturally.
These hydrangea embroidery ideas rely on patience and repetition to create a rich, tactile surface.
8. dramatic lighting on dark fabric

White thread on black fabric creates instant drama, but it requires careful shading to define the petals. You can’t rely on color changes, so you must rely on stitch direction and grey mid-tones to show depth.
Leave slivers of the black background visible between petals to act as natural outlines.
This style of modern thread art elevates a simple botanical into a moody, sophisticated portrait.
9. simulating the glossy texture of tulips

Tulips have a smooth, almost waxy sheen. To achieve this, your satin stitch or long-and-short stitch must be perfectly aligned with the vertical growth of the petal.
Blend vivid oranges into yellows seamlessly, using a single strand of floss for the smoothest finish.
Mastering these plant embroidery color palettes allows you to mimic the way light reflects off a curved surface.
10. using bullion knots for lavender buds

Lavender is deceptively simple, but flat stitches often make it look like wheat. Use the bullion knot or cast-on stitch to create the cylindrical, bead-like shape of the buds.
Vary the purple tones within a single stalk—darker at the bottom, lighter at the tip—to add dimension.
These lavender-inspired embroidery designs are perfect for adding texture to a composition without overwhelming it.
11. symmetrical gradients in lotus designs
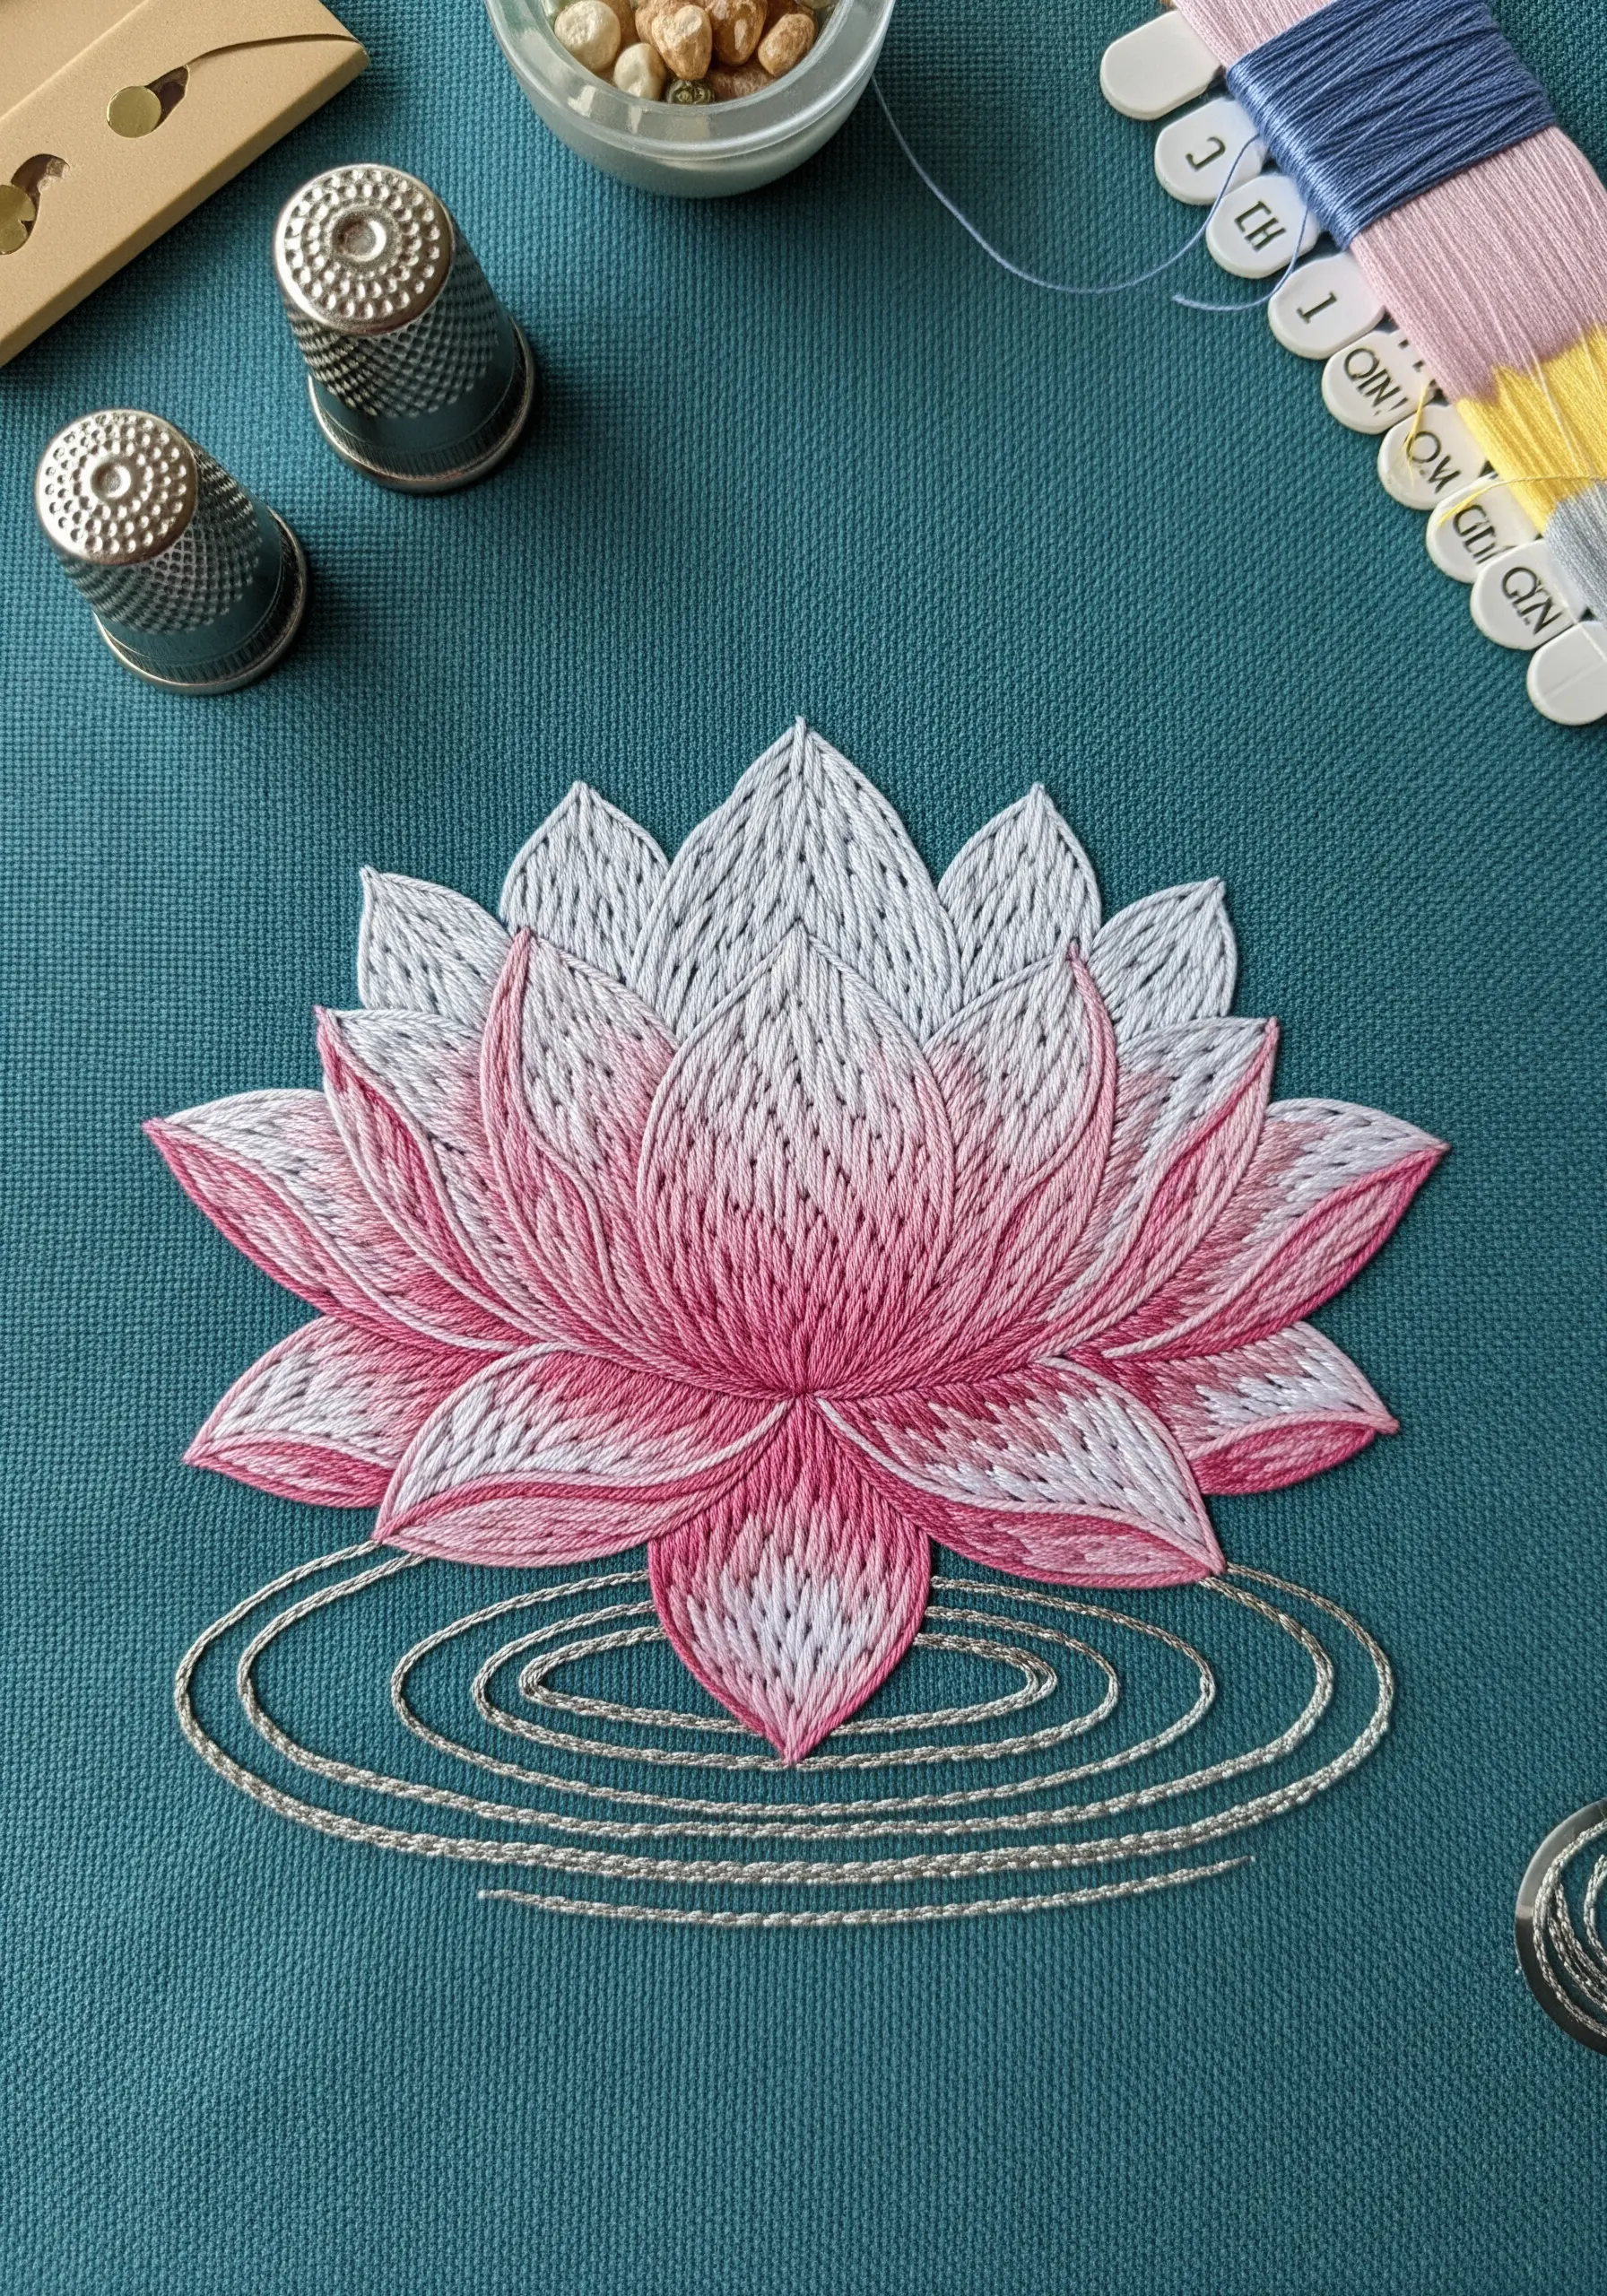
For a lotus, symmetry is as important as color. This design uses a stylized shading technique where the gradient flows from a pink base to a white tip on every petal uniformly.
This creates a calm, mandala-like effect. It is less about realism and more about perfect execution of the ombre gradient thread embroidery ideas.
Ensure your center point is perfectly marked before you begin to maintain the balance.
12. creating plump succulent leaves

Succulents hold water, so your stitches should look full and thick. The woven wheel stitch (or spider web stitch) is ideal here, but shaped into ovals rather than perfect circles.
Use a thick thread or even yarn to build height quickly.
These creative embroidery projects benefit from ‘over-filling’ the stitch slightly to ensure the edges curl under, looking fleshy and real.
13. durable florals for denim embellishment
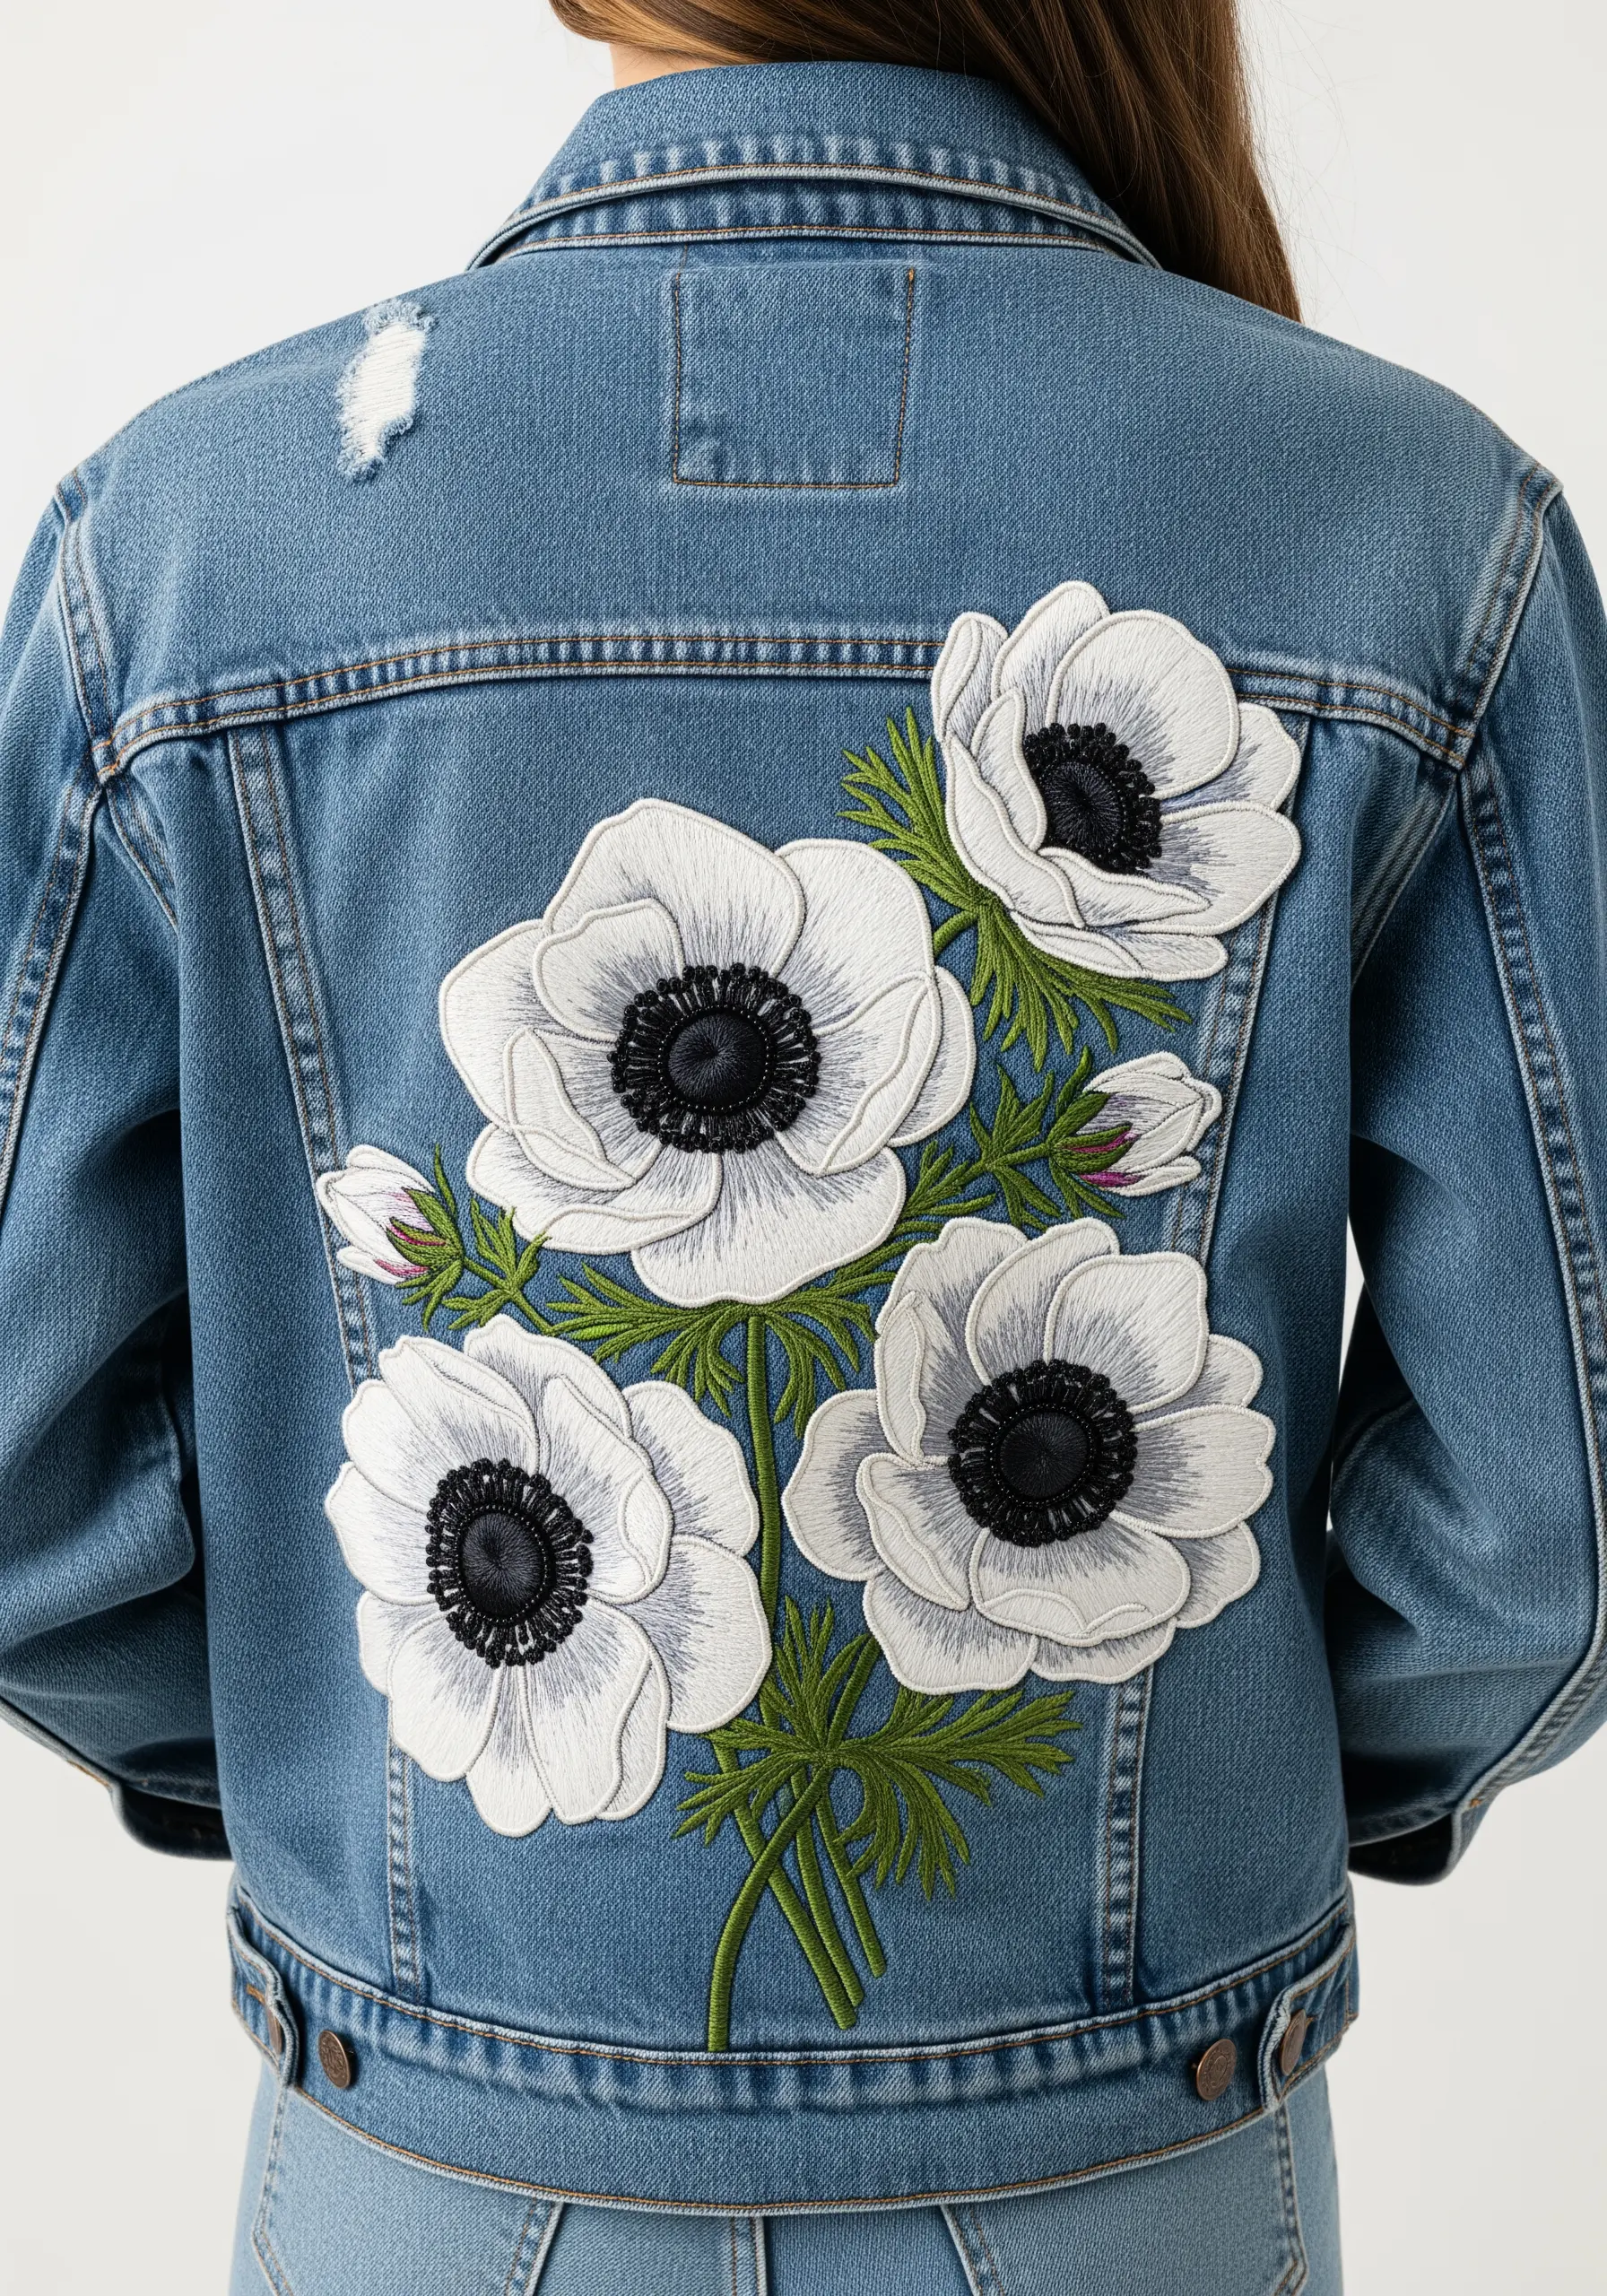
When stitching on denim, your design must be robust enough to handle wear. These white anemones use a dense satin stitch that is firmly anchored.
Always use a stabilizer on the back of the jacket to prevent the denim from distorting under the tension of the thread.
These botanical embroidery ideas for turning plain denim jackets into fashion require shorter stitch lengths to avoid snagging.
14. geometric precision in dahlia petals

Dahlias are nature’s geometry. To stitch them, you must work from the outside in (or inside out) in strict concentric circles, overlapping the previous layer slightly.
This ’tiled’ effect is crucial. If you stitch randomly, you lose the flower’s signature architecture.
It’s a perfect candidate for botanical garden sampler ideas where precision is the main skill being practiced.
15. adding structural stamens to hibiscus

A hibiscus isn’t complete without its prominent stamen. Don’t try to stitch this flat; use a wrapped wire or a stiffened thread structure that physically protrudes from the center.
Combine this with vibrant, tropical gradients in the petals.
This technique moves into the realm of mixed media embroidery crafts, adding a professional, museum-quality finish to the piece.
16. seamless gradients on fern fronds

Ferns require a steady rhythm. The challenge is the gradient—transitioning from dark green at the base to lime at the tip without distinct bands of color.
Use a split stitch fill or very careful satin stitch blending. Keep the central stem incredibly thin to maintain elegance.
These fern and ivy embroidery ideas teach you specific control over green palettes and delicate tapering.
17. managing pile direction on velvet foxgloves

Stitching on velvet is luxurious but tricky because the fabric pile shifts. Use a water-soluble stabilizer on top of the velvet to keep your stitches from sinking into the fluff.
The foxglove details—the tiny spots inside the bell—should be done with French knots for contrast.
Projects like this are top-tier floral embroidery wall decor projects that add texture and depth to a room.
18. turkey work for fluffy thistle texture

You cannot stitch a thistle with flat thread alone. Use ‘Turkey work’ or loop stitch, then cut and fluff the threads to create the purple tuft.
Trim it into a rounded shape with sharp scissors—like giving your embroidery a haircut.
This fits perfectly with soft texture embroidery projects, adding a surprise tactile element that mimics nature perfectly.
19. negative space for dandelion fluff

A dandelion seed head is mostly air. Do not over-stitch. Use single strands of white thread and leave ample space between the spokes.
The background color is critical here—blue or black works best to make the white ‘seeds’ pop.
This style of dandelion and wildgrass stitch projects teaches you the confidence to leave parts of the fabric bare.
20. spiral layering for ranunculus

The ranunculus is known for its tightly packed, spiral layers. Use heavy cast-on stitches or bullion knots arranged in a continuous spiral from the center outward.
Using a variegated yellow thread adds natural depth without you having to change threads constantly.
This results in stunning handmade art objects that look more like sculpture than flat textile work.
21. capturing the gravity of bluebells

Bluebells hang; they don’t stand straight. Your stem stitch needs to have a graceful arch, and the bell flowers should look like they are being pulled down by gravity.
Use a padded satin stitch for the flower heads to give them a slight roundness at the base.
These soft neutral floral embroidery patterns add a sense of movement and gentle weight to your composition.
22. architectural definition in proteas

Proteas are stiff, structural flowers. Use a split stitch or heavy outline to define the rigid bracts before filling them.
Contrast is key—mix soft pinks with sage greens and deep burgundies to capture the ‘prehistoric’ feel of the bloom.
These bold shapes are excellent for statement embroidery pieces where you want the flower to look strong, not fragile.
23. lustrous threads for chrysanthemum curves

The petals of a chrysanthemum curve inward and outward in a complex dance. To prevent a messy look, use a high-sheen thread like pearl cotton or silk.
Each petal should be a distinct, looped satin stitch or a bullion knot that holds its curve.
Using distinct thread types makes this a candidate for luxury metallic thread wall decor, even if you stick to copper or bronze tones.
24. pointillism shading for lilacs

A lilac cluster is just hundreds of tiny blooms. Don’t stitch them all. Use French knots in three shades of purple mixed with small daisy stitches.
By clustering them tightly at the top and loosely at the bottom, you create a conical shape through density.
These garden-inspired hand embroidery projects are great for using up scrap purple threads.
25. serrated edges on carnations
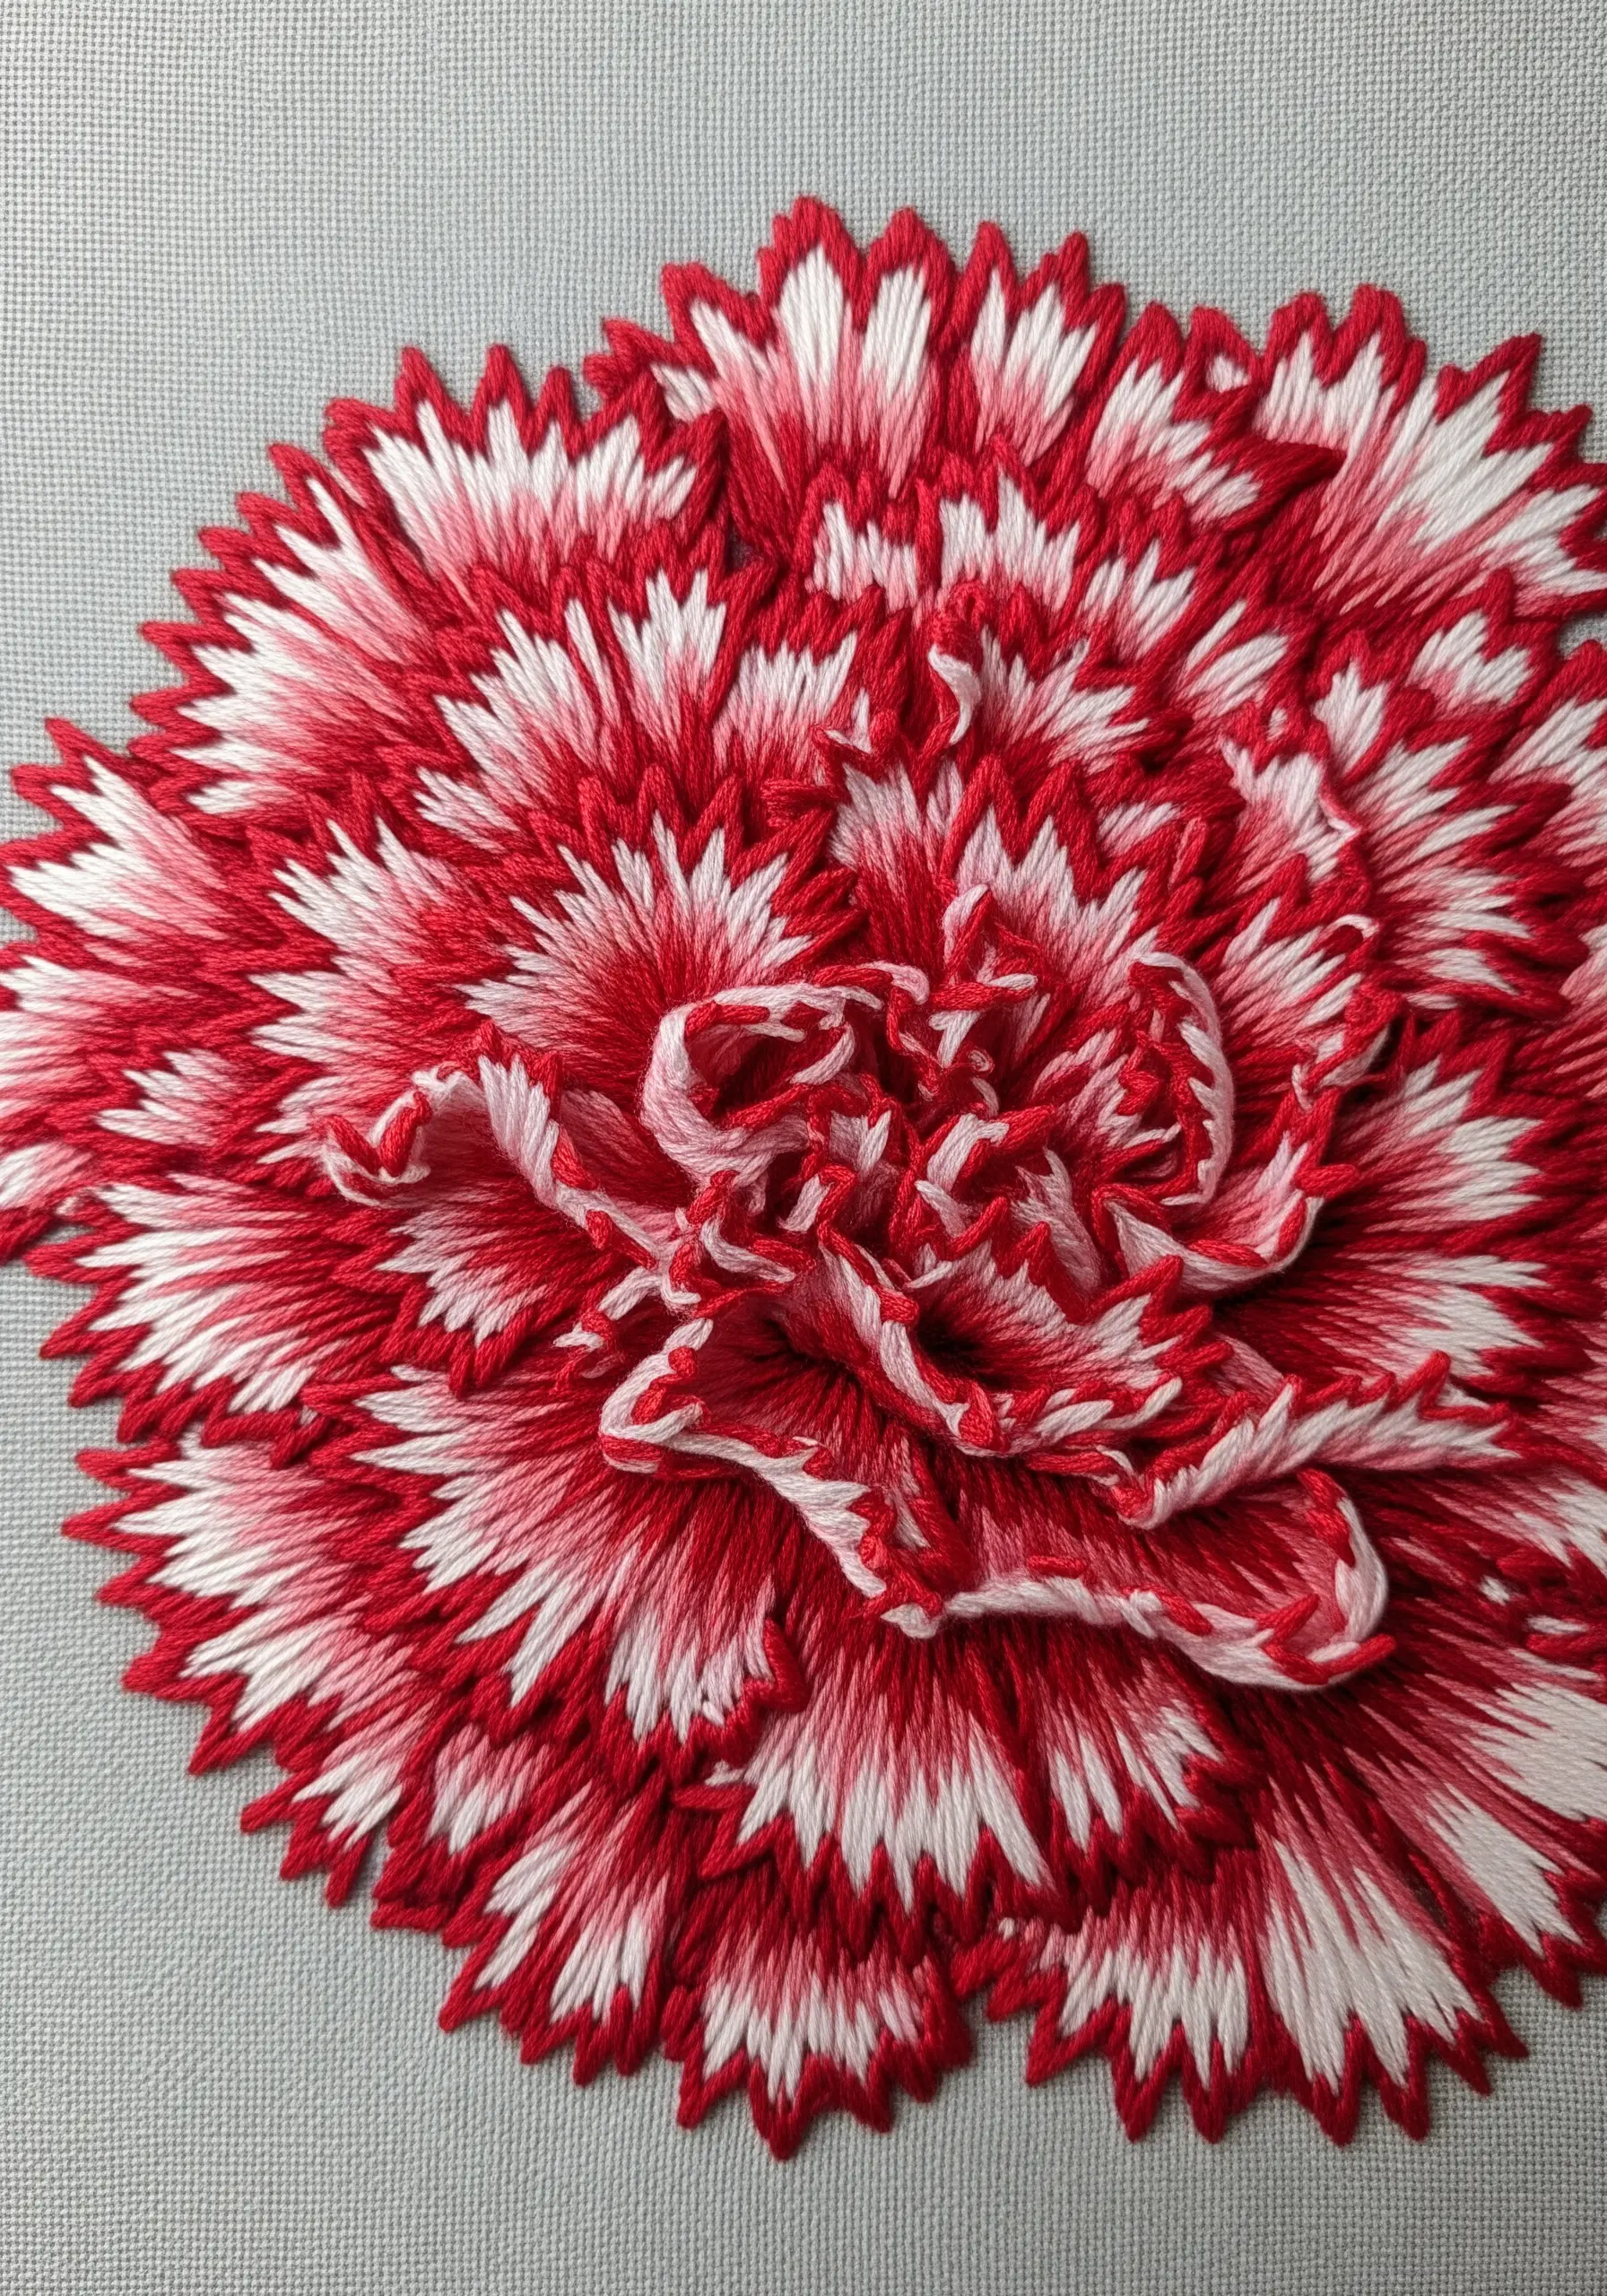
The signature of a carnation is its jagged petal edge. Do not smooth this out. Use short, sharp stitches at the tip of the petal in a contrasting color (like white on red).
Layer the petals deeply, so the bottom ones are almost hidden, creating a ruffled ball effect.
This attention to detail fits well with vintage floral bouquet patterns, evoking a classic botanical illustration style.
26. precise shaping for bleeding hearts

The bleeding heart flower hangs delicately in a perfect heart shape. Symmetry is vital here. Outline the heart first, then fill it with satin stitch to keep the curves smooth.
The white ‘drop’ at the bottom should be stitched last to sit on top of the pink.
These designs are staples in romantic embroidery patterns, symbolizing deep emotion and grace.
27. textural contrast in cosmos centers

A cosmos has smooth, ray-like petals and a bumpy yellow center. Exaggerate this contrast. Keep the petals flat and silky with satin stitch, but go wild with French knots in the center.
Mix yellow and orange knots to give the center volume and shadow.
This is a classic technique found in simple embroidery projects that yield high visual rewards.
28. flowing wisteria for garment draping

Wisteria is meant to cascade. When embroidering on clothing, place the vines so they flow over the shoulder or down the back naturally.
Use a mix of loose chain stitches and knots to simulate the dangling racemes. The movement of the fabric will enhance the design.
See how hand embroidered sleeve ideas use gravity to make the floral motif feel alive.
29. detailed patterns on orchid petals

Orchids often have intricate spots or veins. Don’t ignore them. Stitch the base petal color first, then use tiny seed stitches or micro-knots for the spots.
This layering creates depth and prevents the pattern from looking like a cartoon.
This level of detail is similar to micro embroidery portrait designs, where precision is paramount.
30. varying height in wildflower meadows

A meadow isn’t flat; it has tall grasses, medium stems, and low ground cover. Replicate this by using stitches of different ‘heights’—flat satin stitch for background leaves, and raised knots or woven stitches for foreground blooms.
Overlap stems to create a dense, tangled look rather than isolated flowers.
Explore wildflower hoop art projects to see how layering creates a chaotic, beautiful ecosystem.


