

When you sit down with a needle and thread, you’re doing more than just making stitches. You are creating a mood, a memory, a piece of your home’s story. Table linens, in particular, are the perfect canvas—they are both beautiful and functional, waiting to be transformed from simple cloth into something that feels deeply personal.
But how do you move beyond a simple pattern and create something that feels truly alive and artful? The secret isn’t in complexity, but in intention. It’s in choosing the right stitch to mimic a leaf’s texture, in blending two shades of green to capture the afternoon light, or in arranging a border so it flows with natural grace.
These ideas are here to guide that intention. Think of them not as rigid rules, but as gentle suggestions from my studio to yours. Let them inspire you to pick up a napkin, a placemat, or a runner, and stitch a little piece of nature that will bring joy to your table for years to come.
1. Create an Airy, Overlapping Fern Border

To capture the delicate nature of ferns, use fishbone stitch for the individual fronds.
This stitch creates a central spine and angled sides that perfectly mimic a fern’s texture.
Work with two or three closely related shades of green—like sage, moss, and forest—and alternate them randomly to give the border natural depth and prevent it from looking flat.
For the main stem connecting the fronds, a simple backstitch is all you need, allowing the intricate leaves to remain the focus of your heirloom-style table linen embroidery.
2. Stitch a Raised Autumn Leaf Appliqué
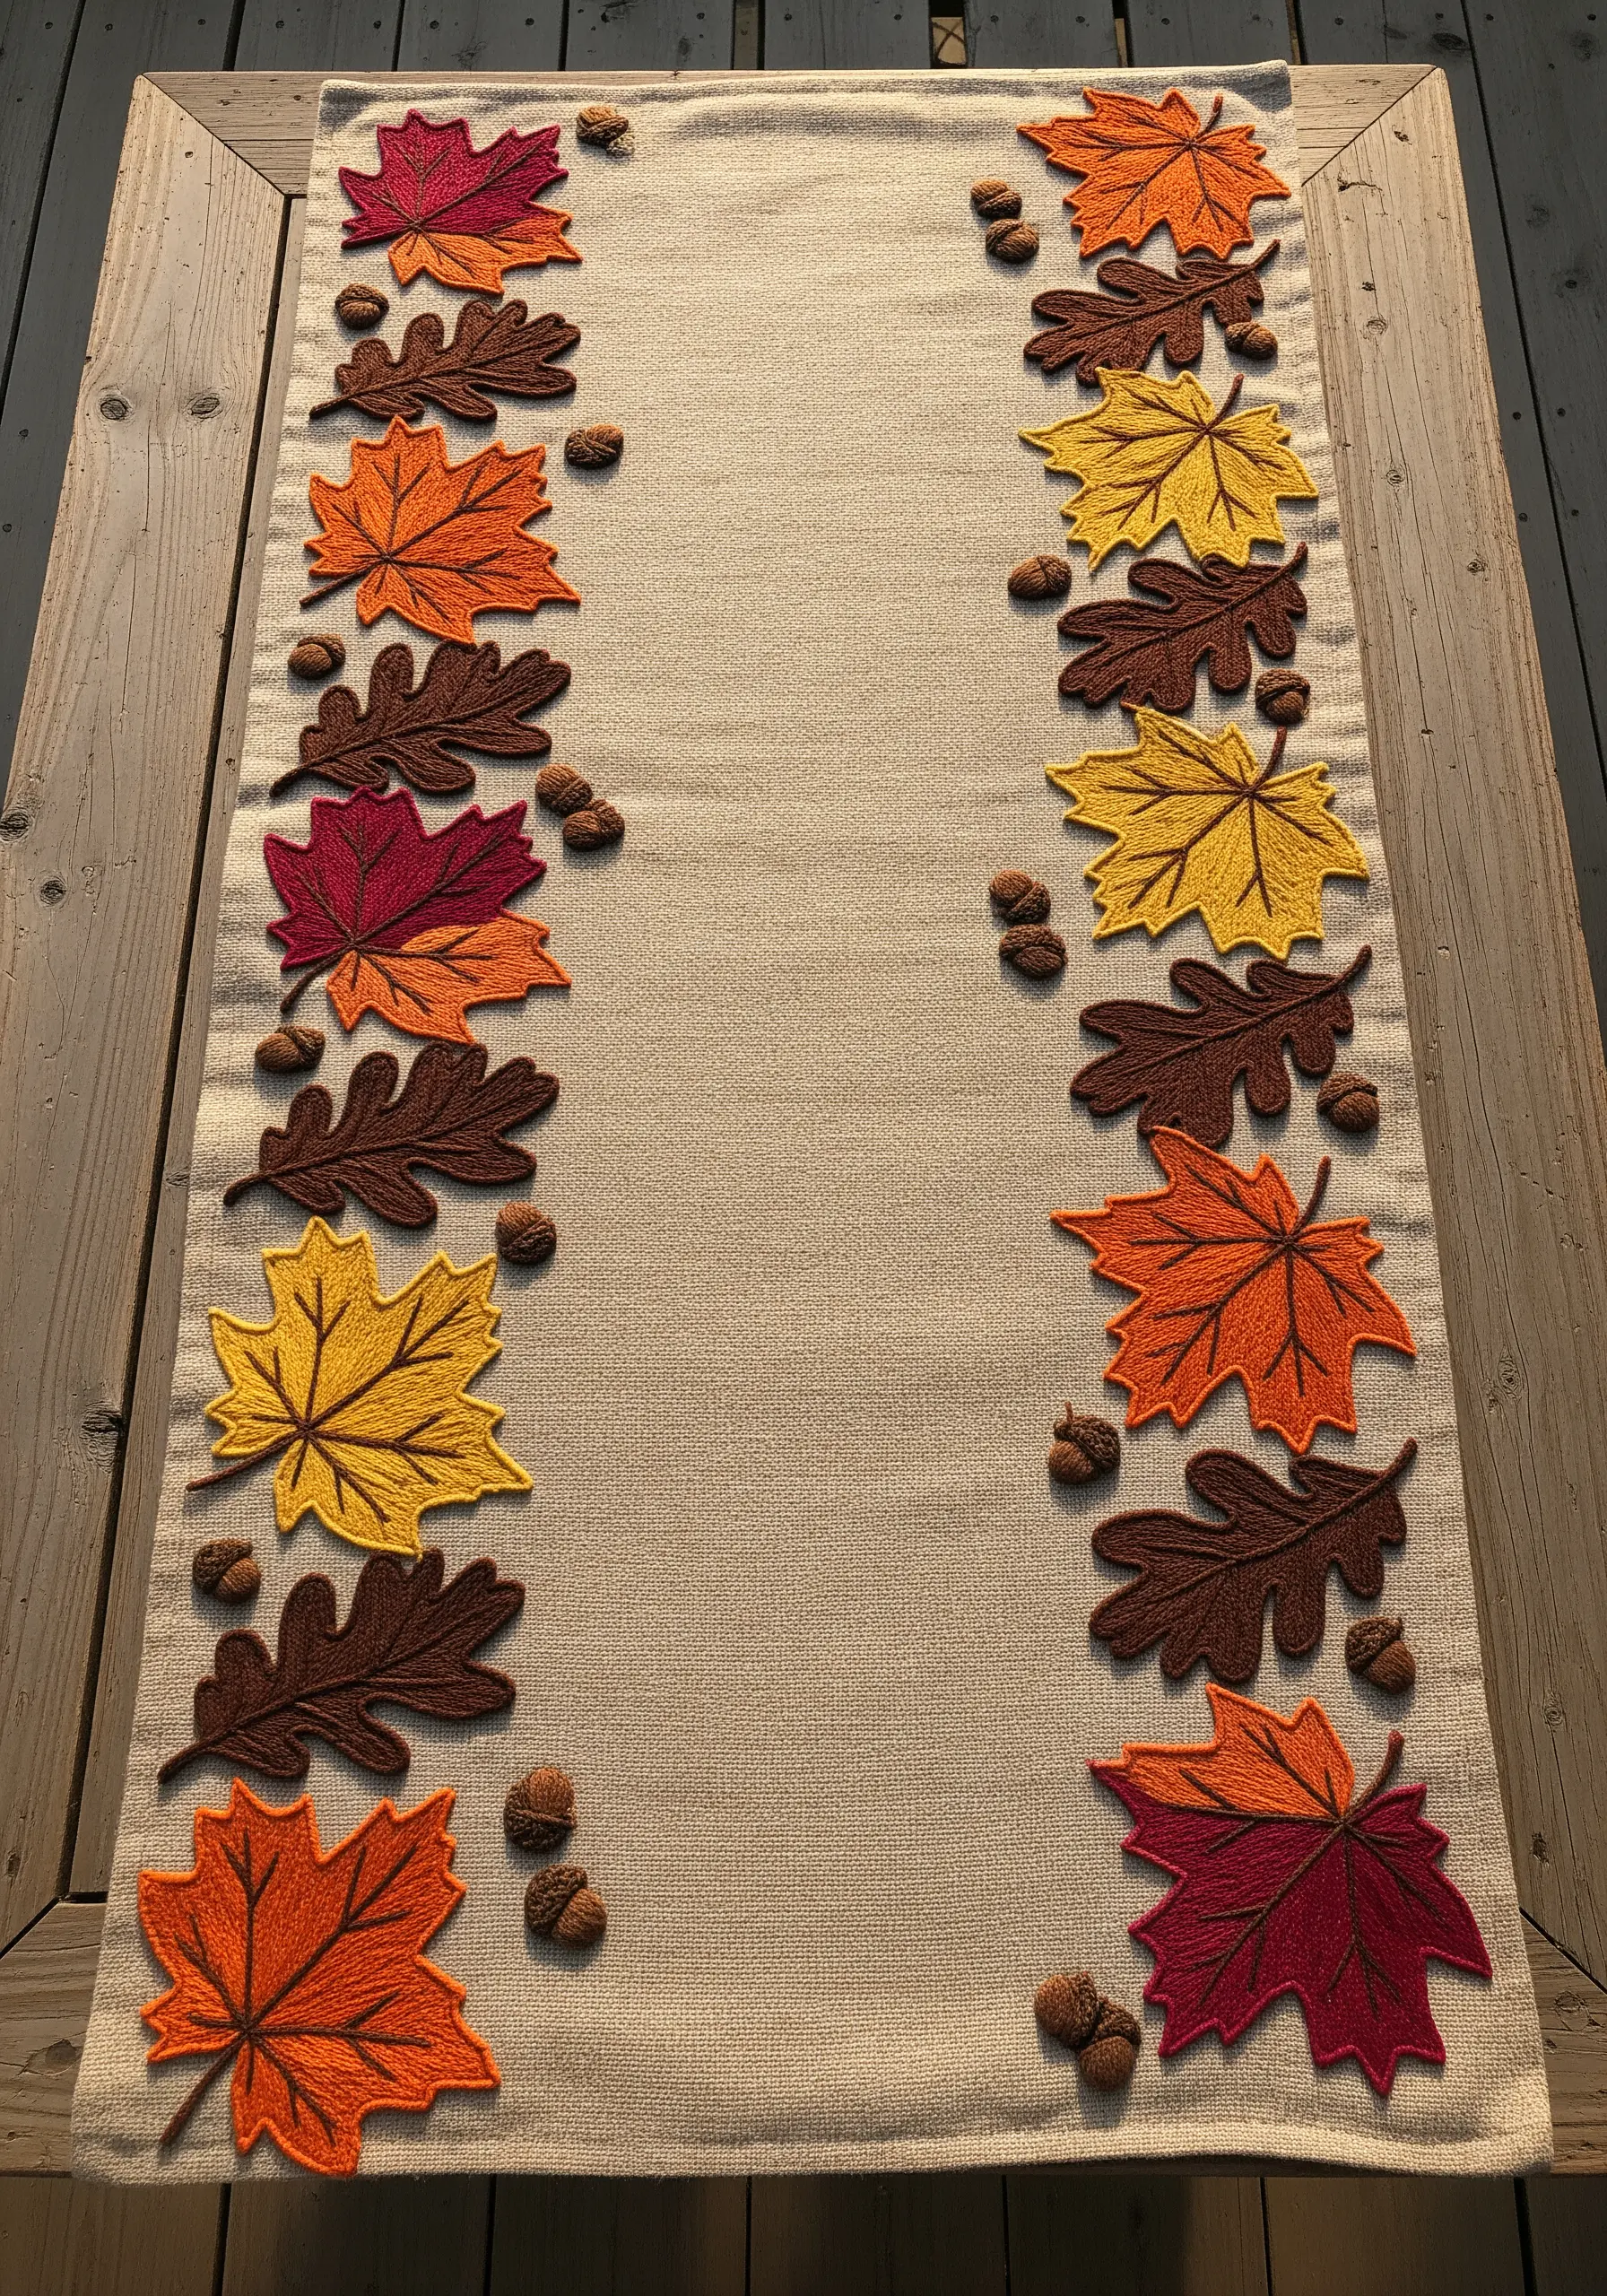
For a bold, textural look, combine appliqué with embroidery.
Cut your leaf shapes from felt in rich autumnal colors and attach them to the runner with a temporary fabric glue.
Then, use a tight, even buttonhole stitch around the edges with a contrasting dark thread to secure the shape and create a clean, raised outline.
Add central veins with a simple backstitch to complete the effect, giving you a dimensional design that is much faster to complete than filling the entire shape with thread.
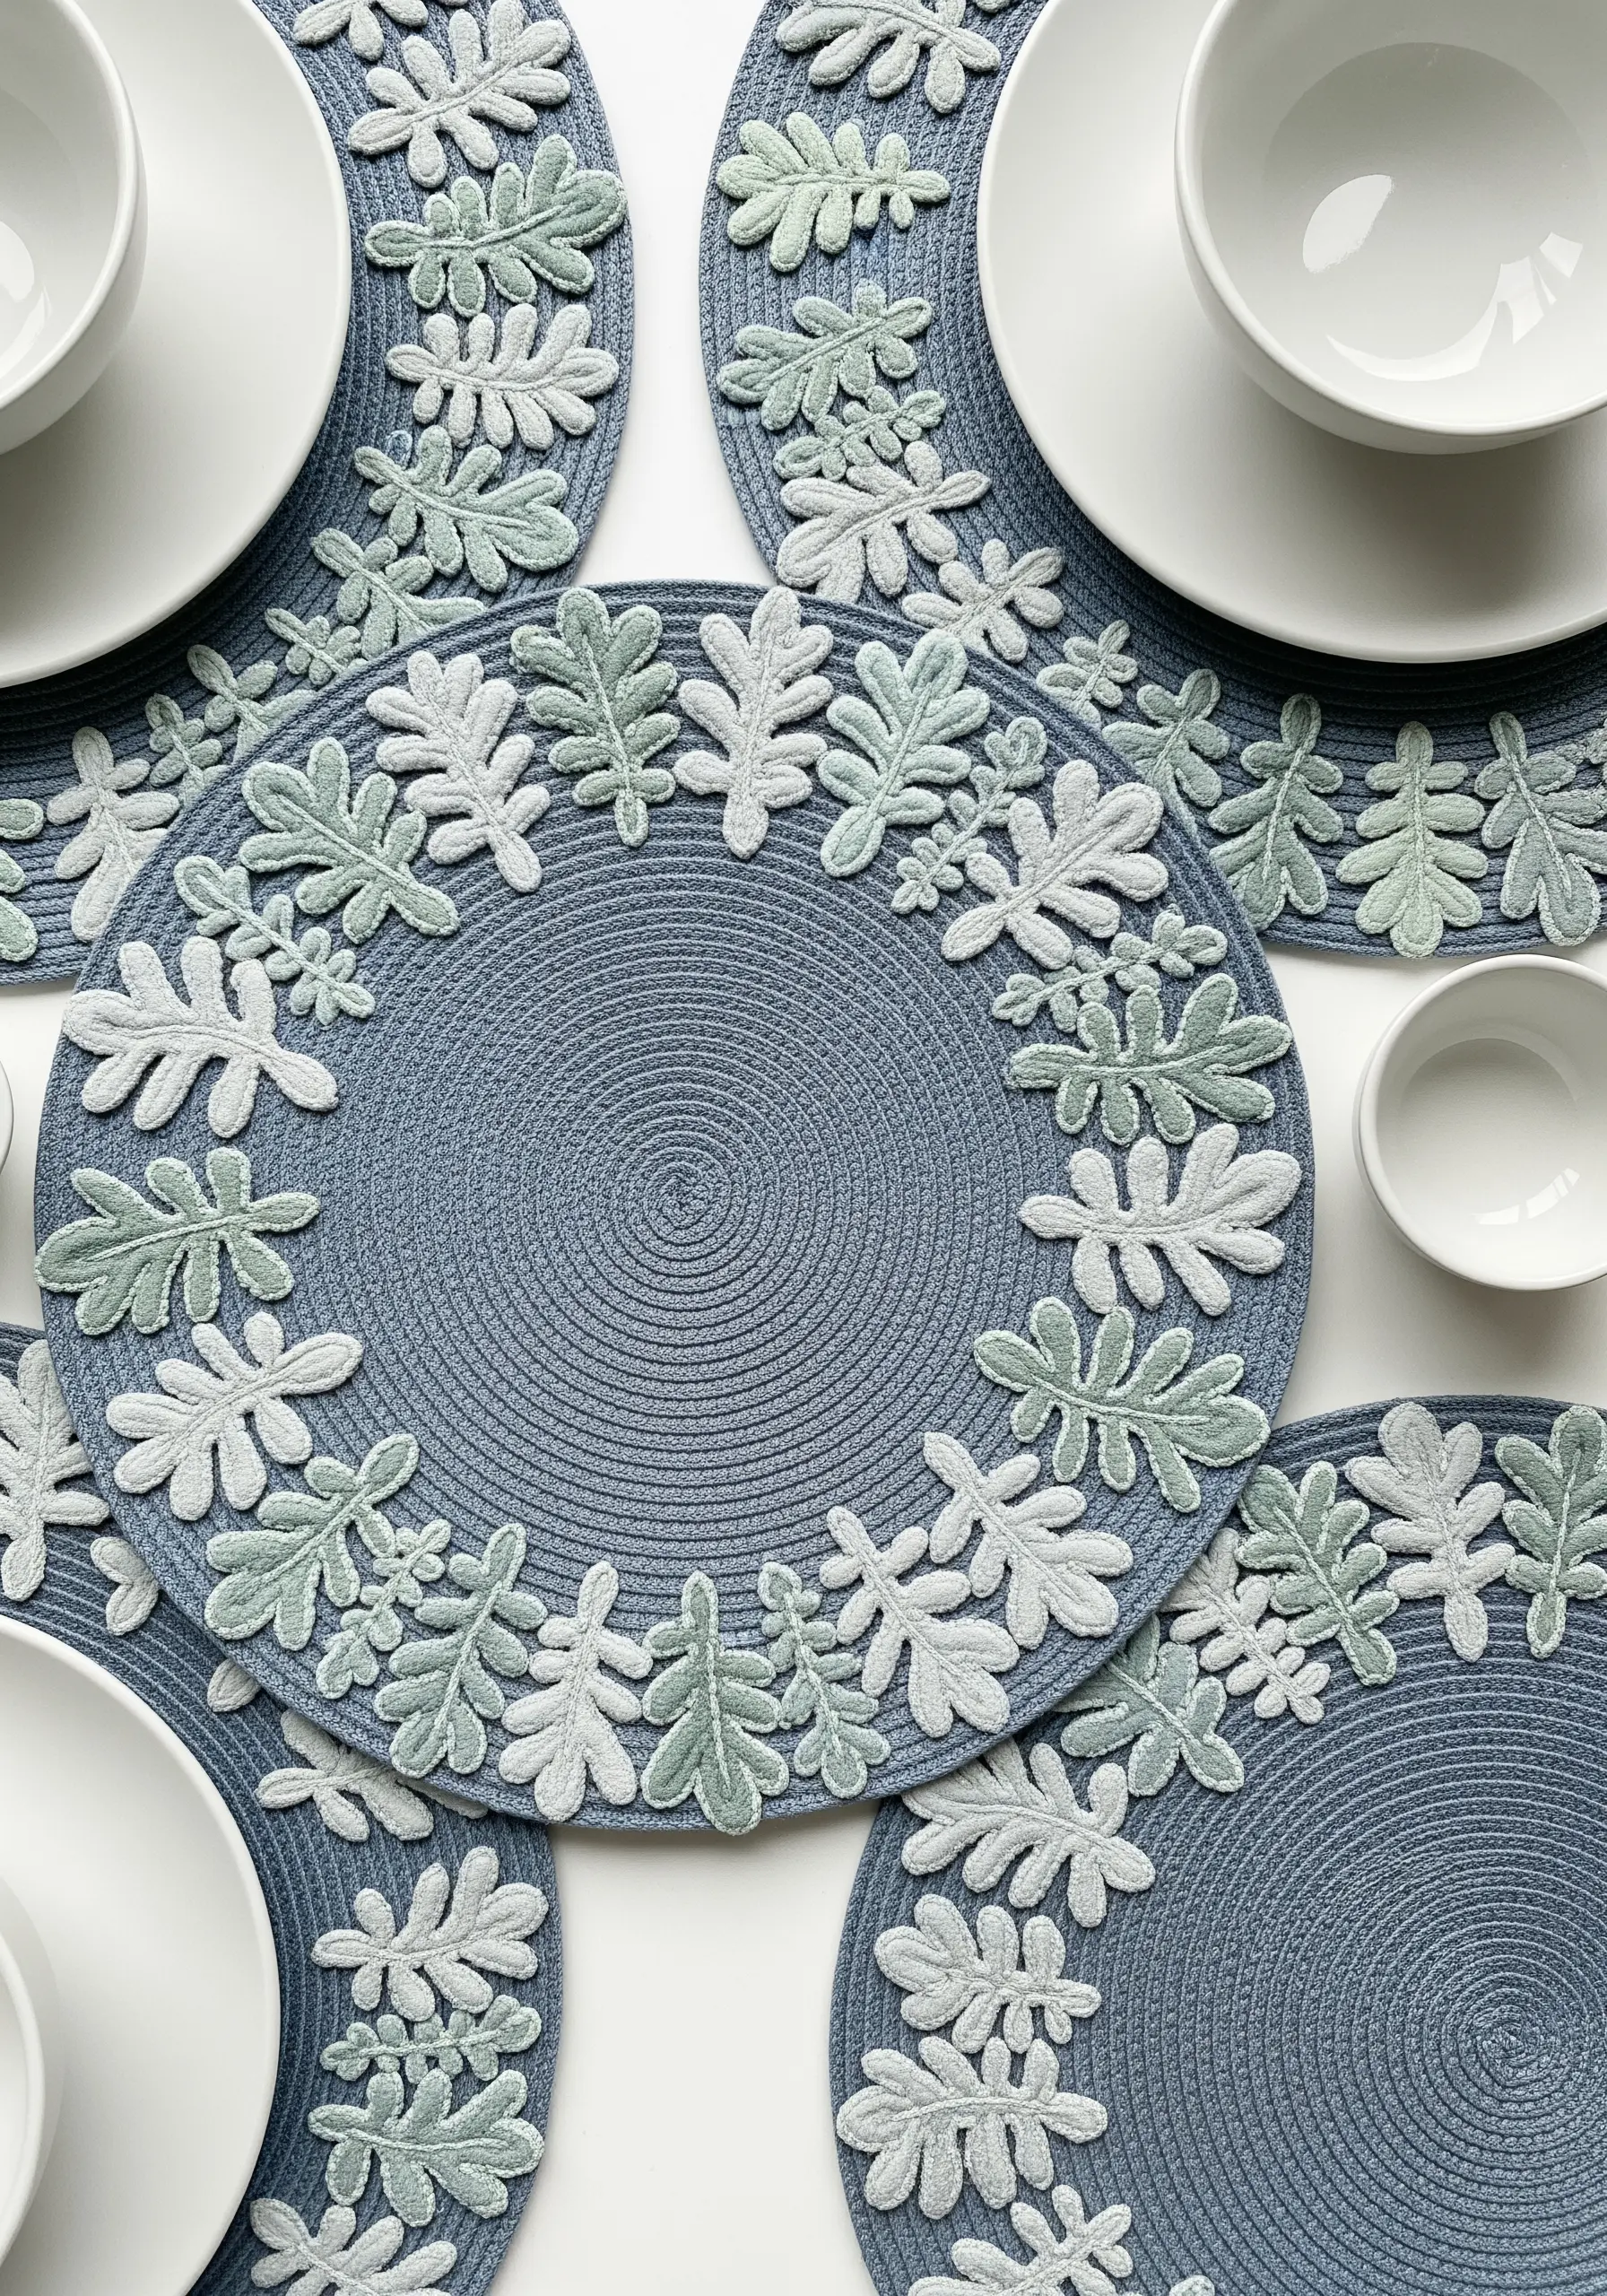
3. Master the Flawless Eucalyptus Corner
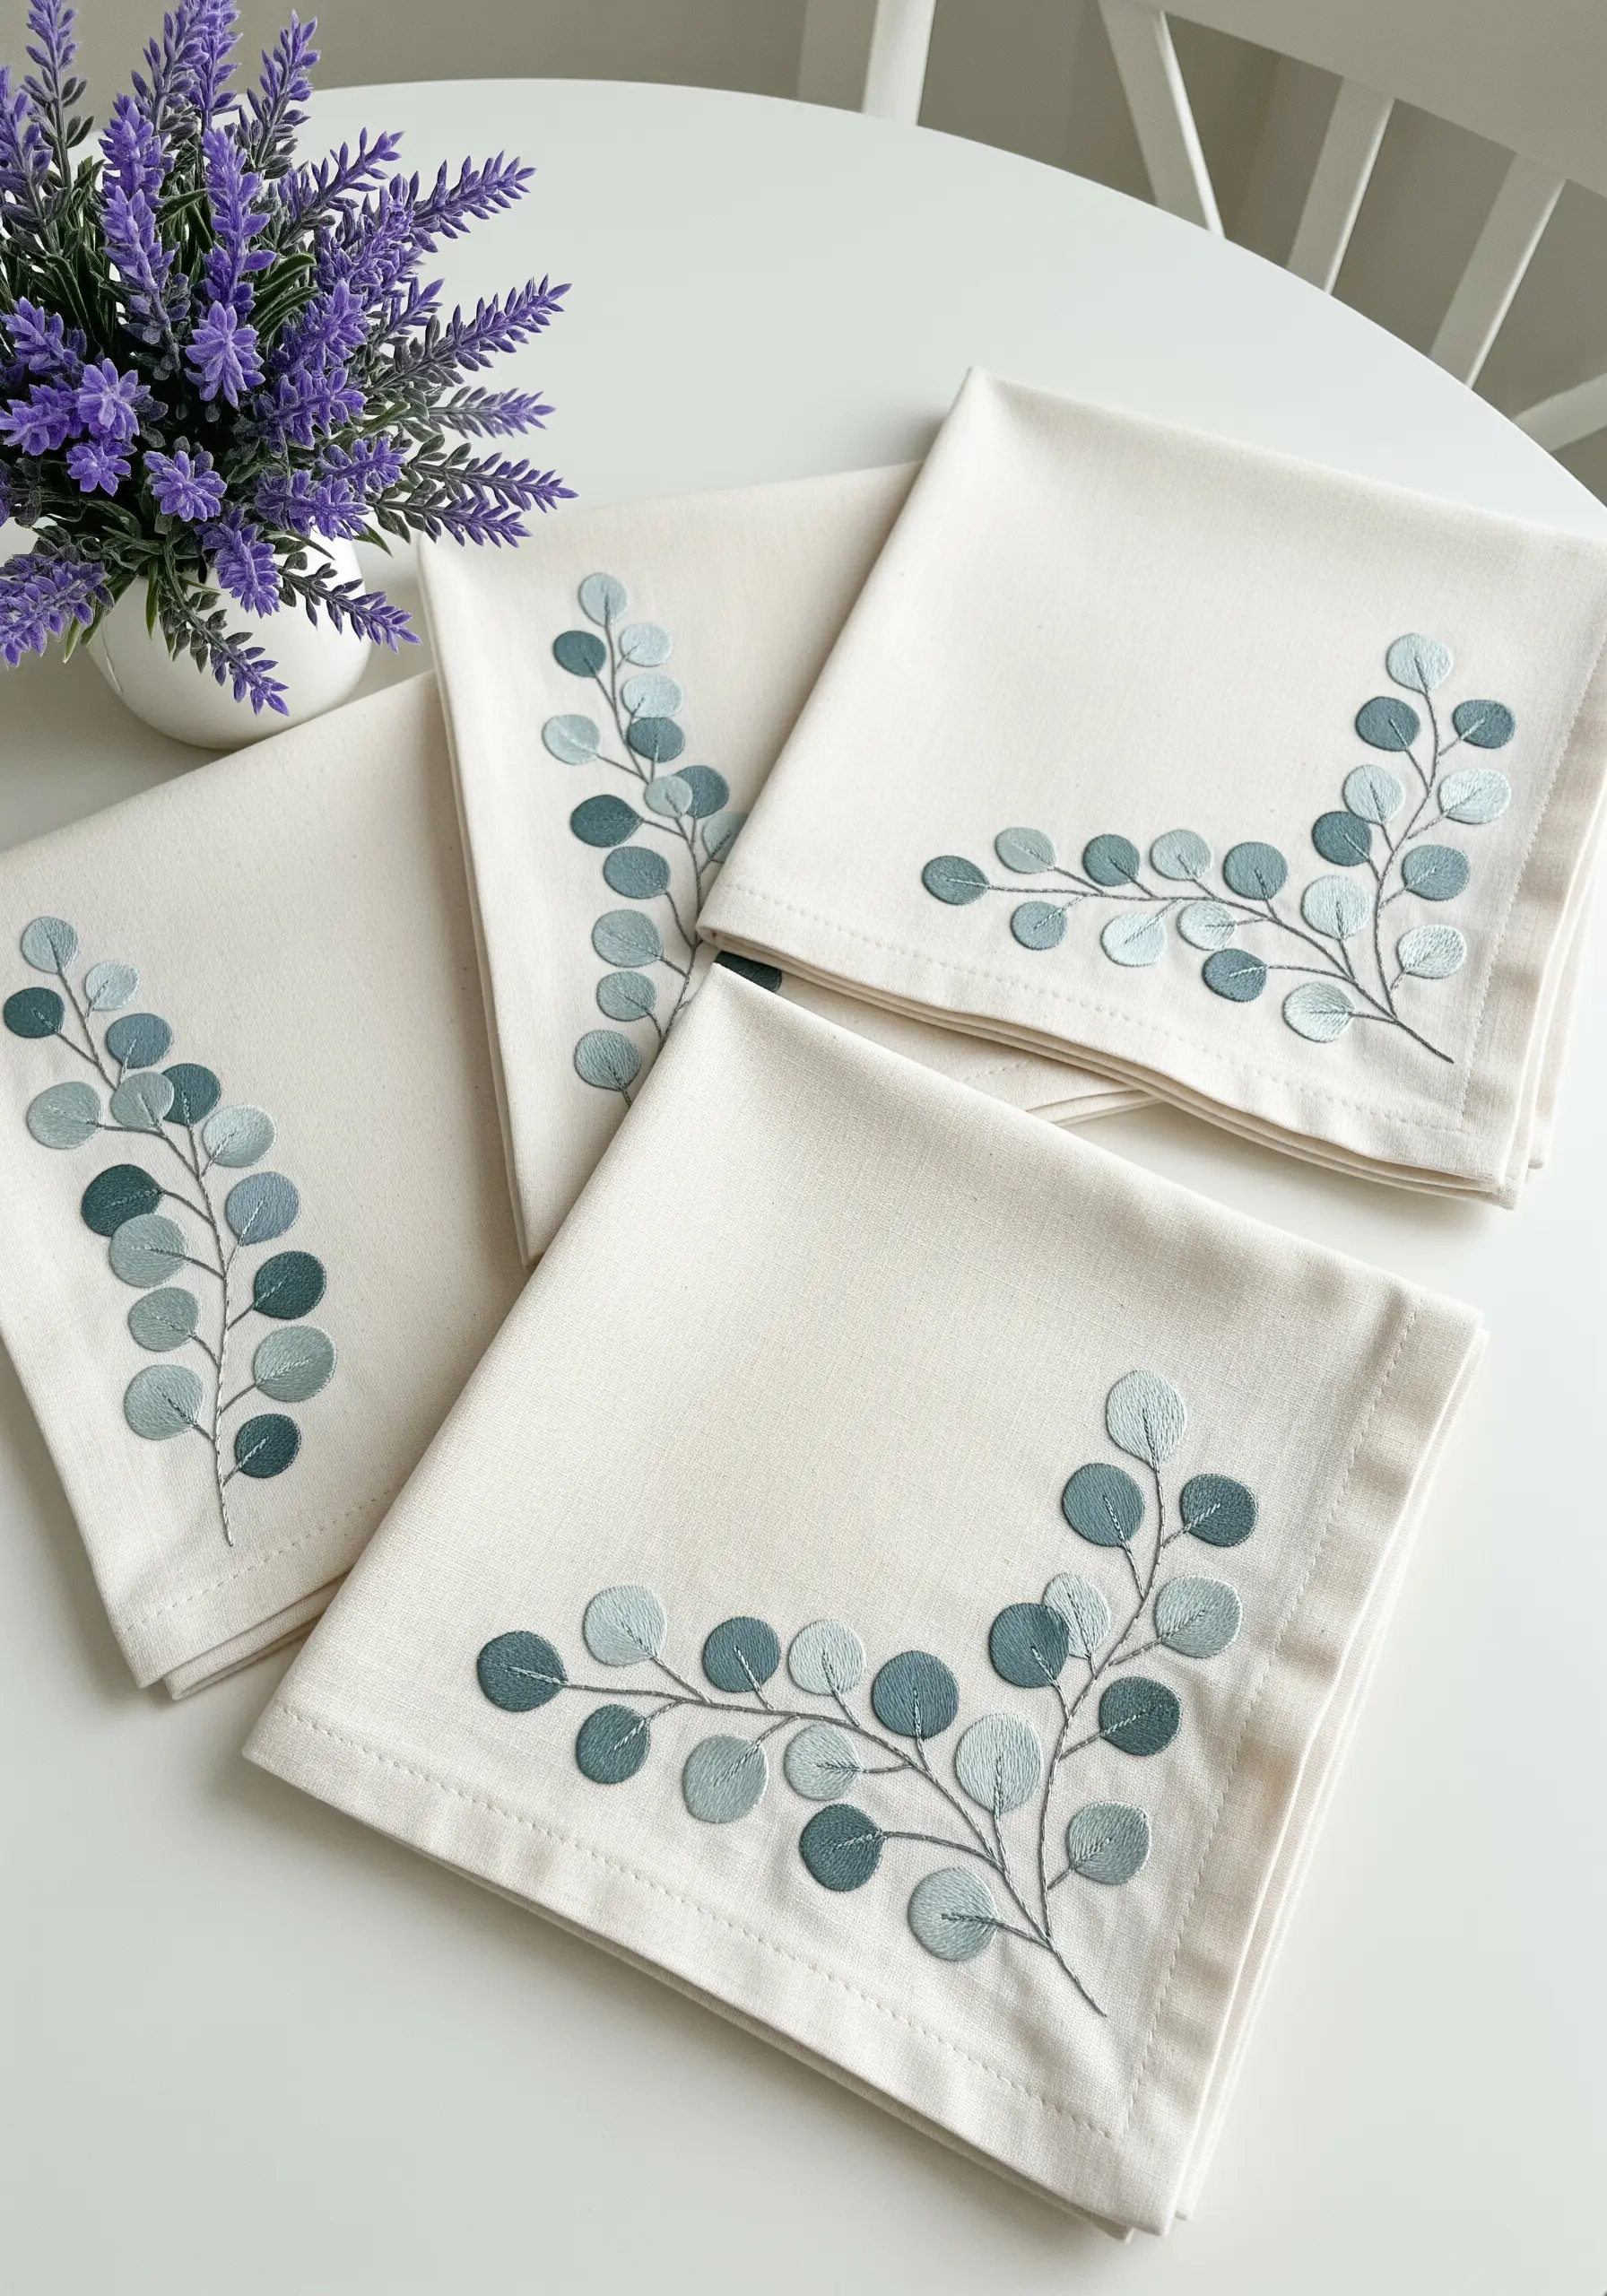
The key to this modern, serene design is a perfect satin stitch.
To achieve that smooth, almost machine-like finish, first outline each leaf with a tiny split stitch using a single strand of floss.
Then, fill the shape with satin stitch, using two strands and making sure your needle goes just outside the split stitch outline.
This technique creates a slightly padded, perfectly defined edge, transforming a simple stitch into a professional detail. A muted, dusty blue-green color palette enhances the calm aesthetic of these minimalist embroidery projects.
4. Weave a Textured Ivy Wreath
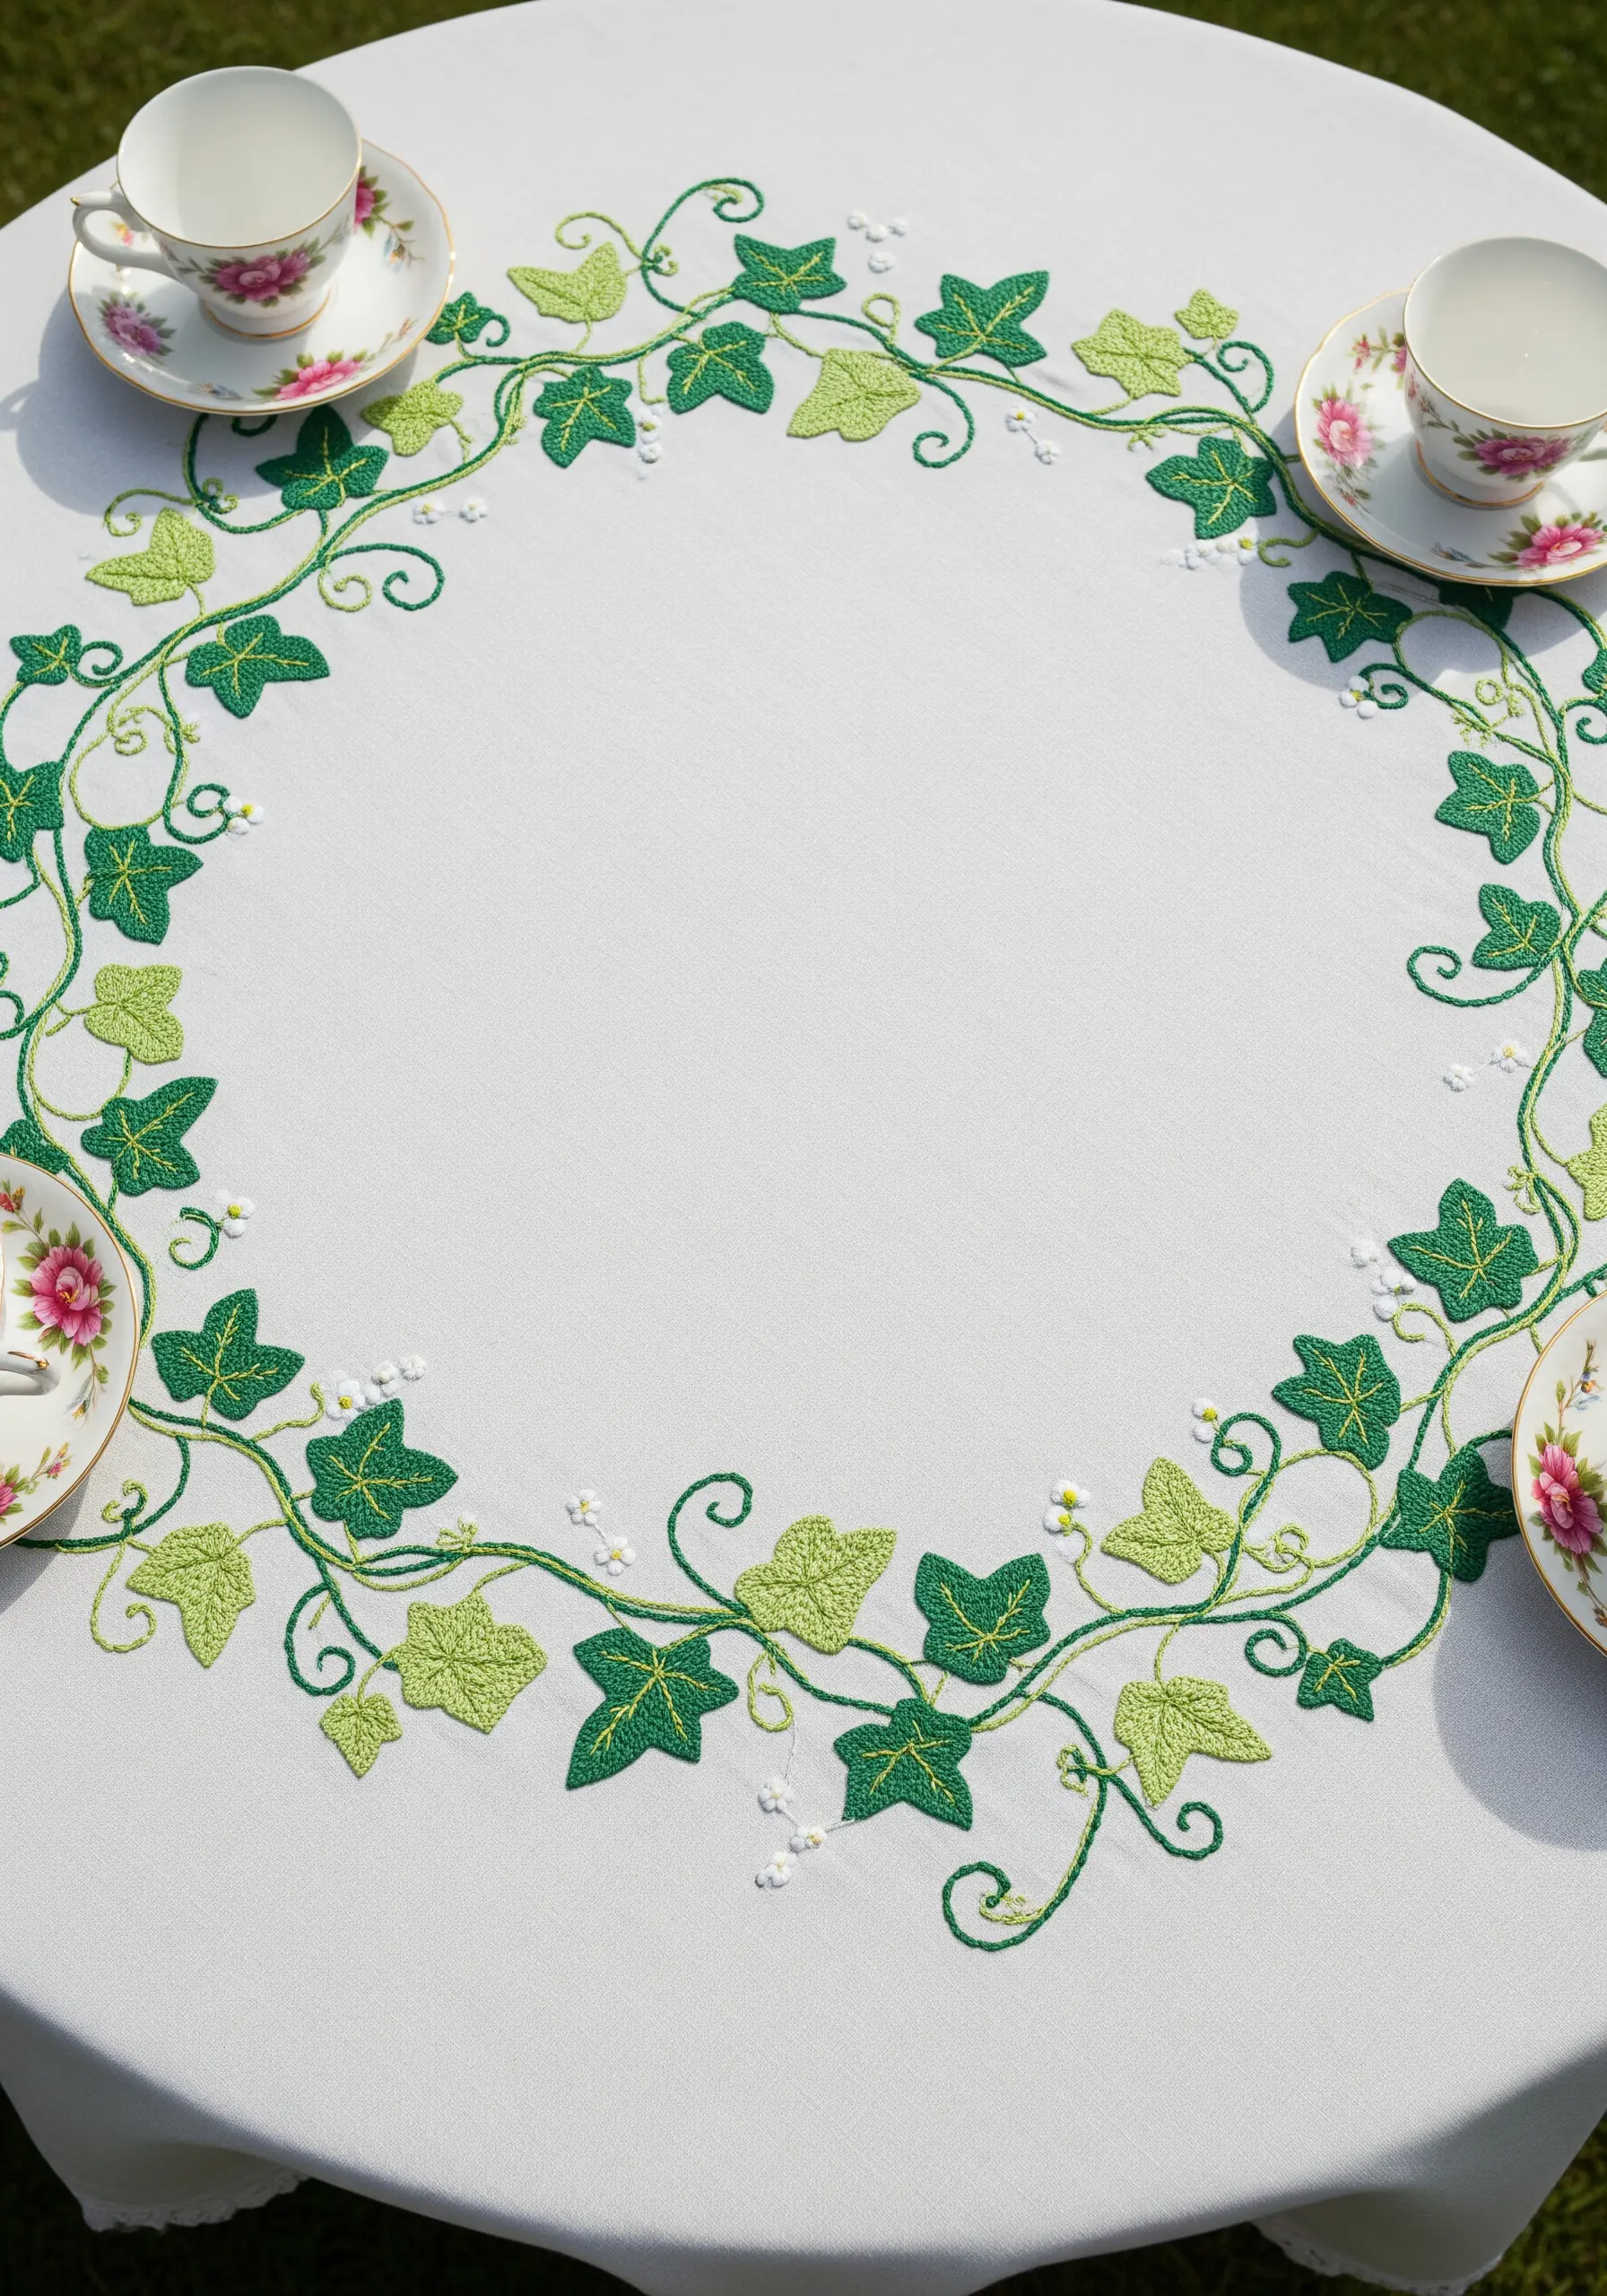
Give your winding ivy vines a rope-like, dimensional quality by using a whipped backstitch or a thick stem stitch.
This creates a continuous, flowing line that feels more organic than a simple backstitch.
Fill the leaves with satin stitch, alternating between two shades of green to add visual interest and keep the wreath from feeling monotonous.
Finally, scatter a few tiny French knots in white or cream to suggest blossoms, adding a delicate finishing touch to your wildflower hoop art projects on linen.
5. Design a Gilded Ginkgo Leaf Border
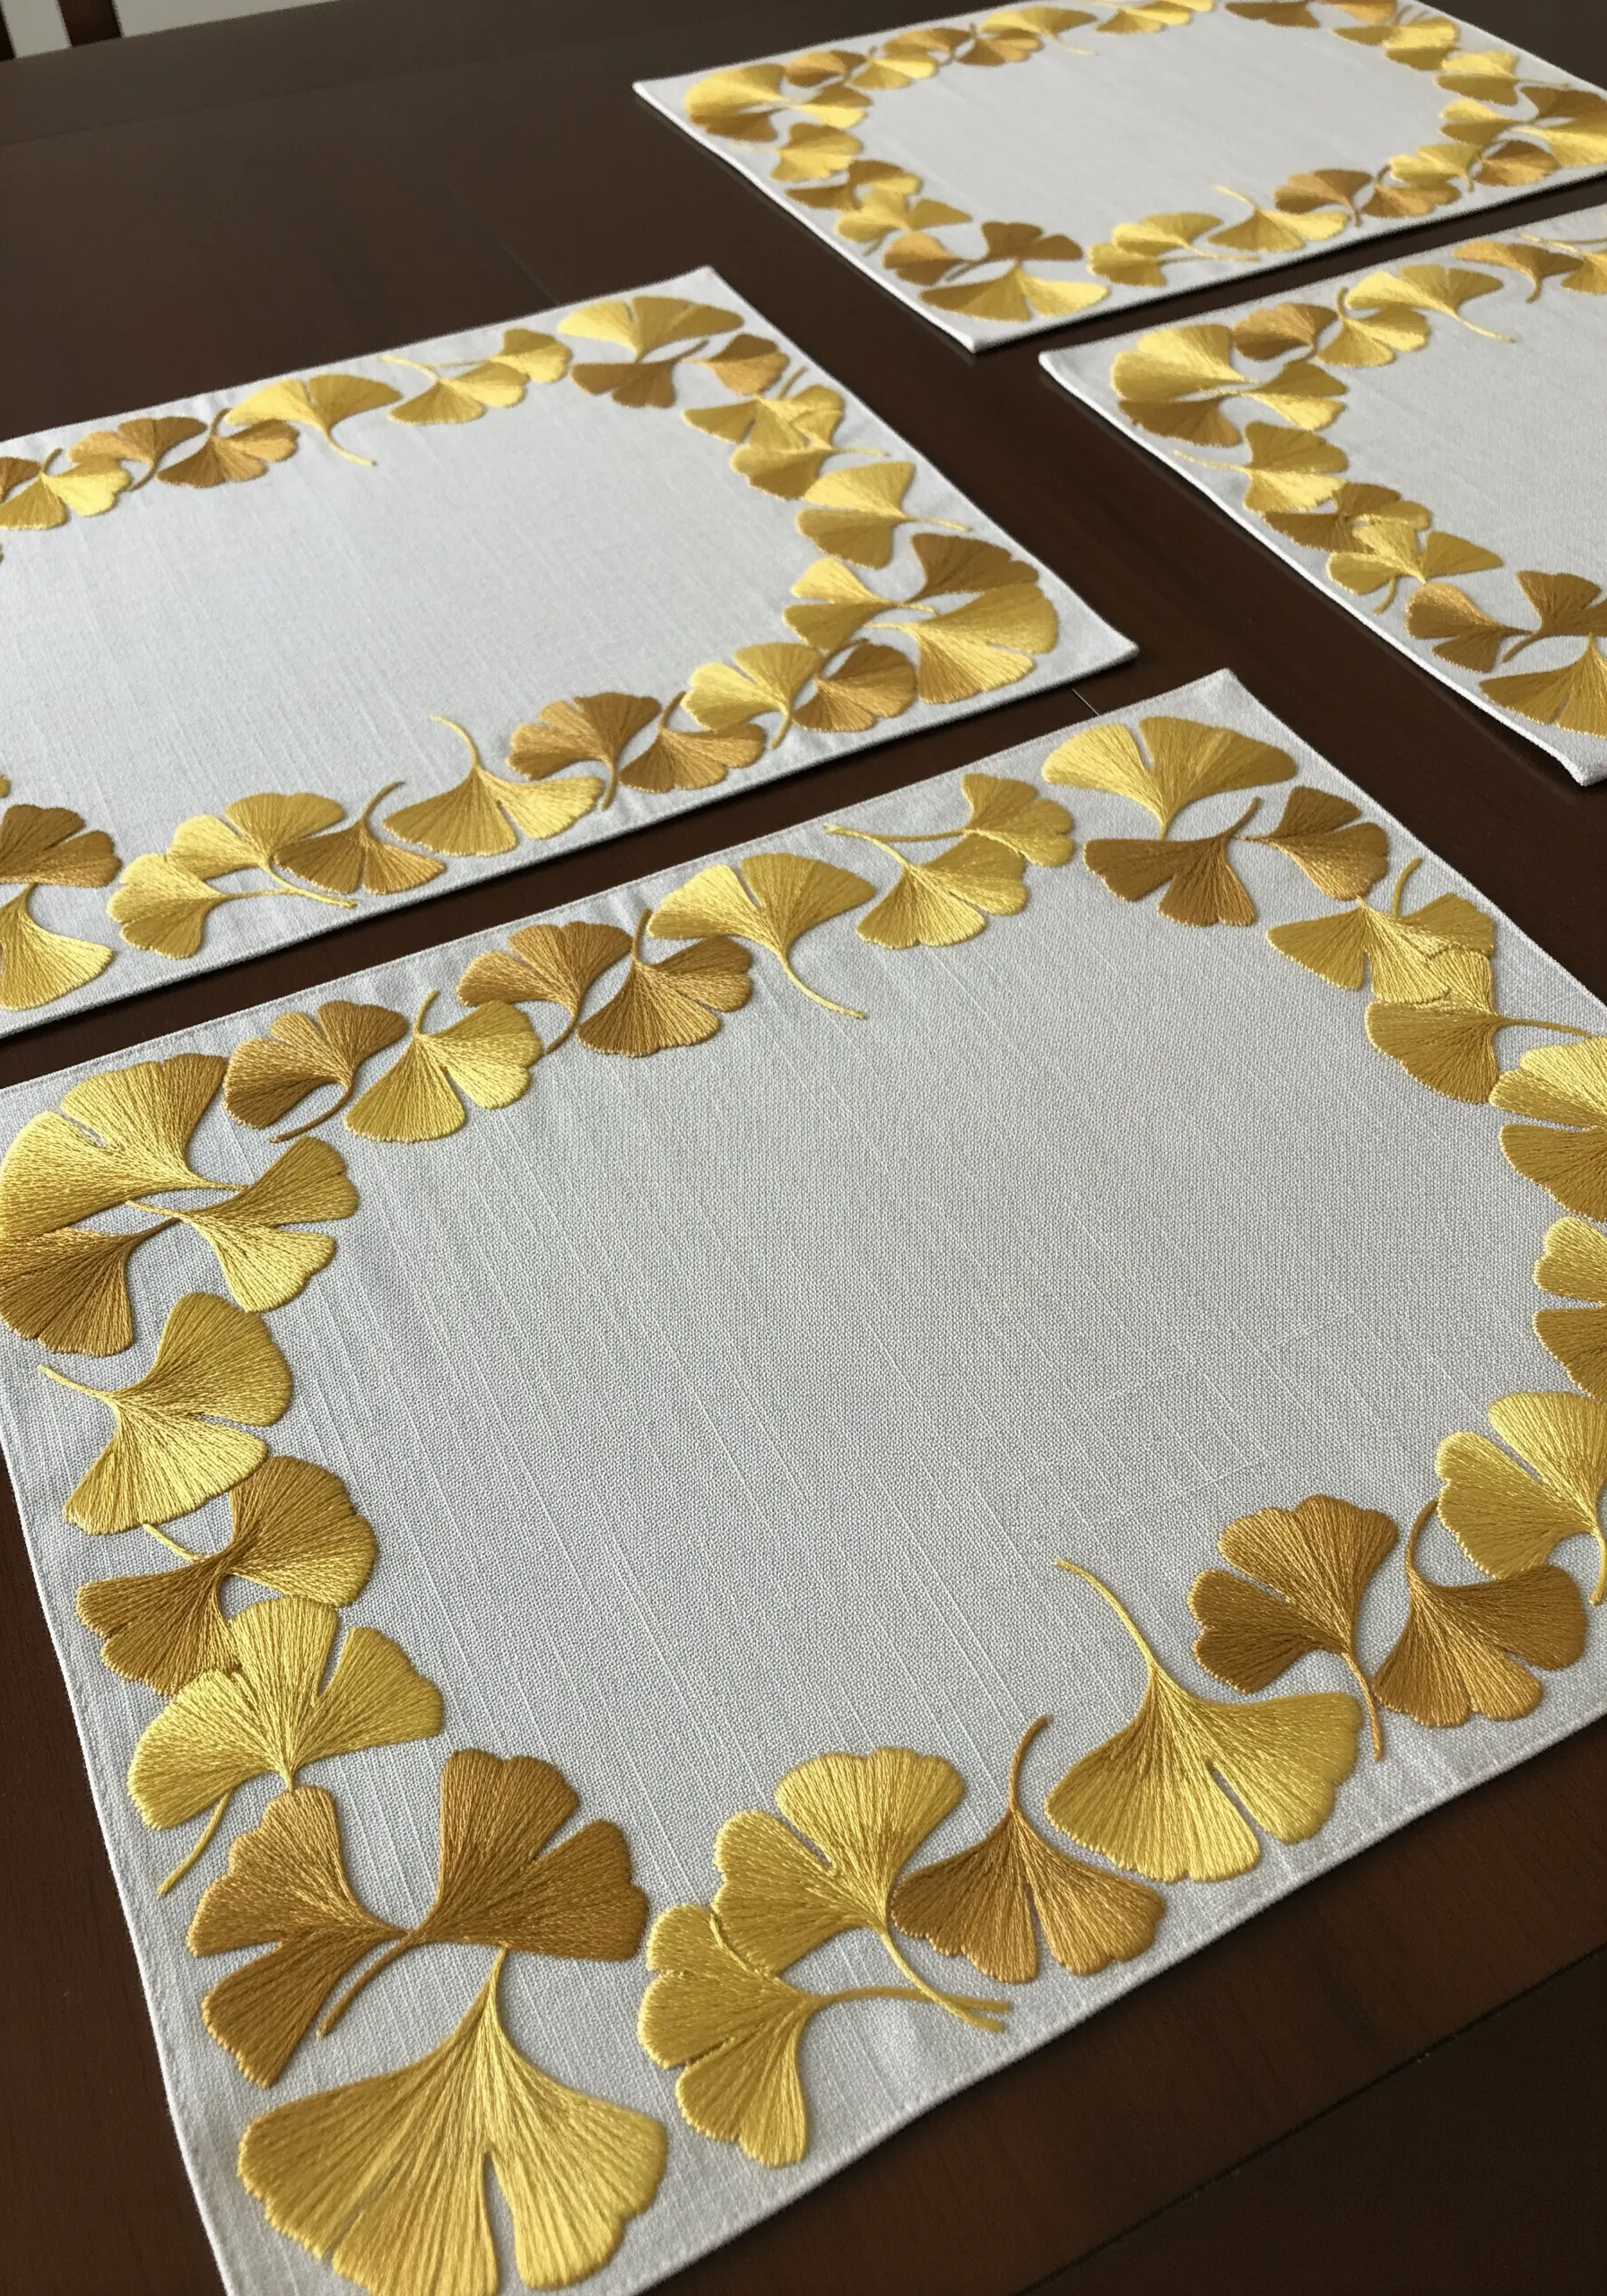
When working with metallic thread, stitch direction is everything.
For ginkgo leaves, use a fishbone stitch or an angled satin stitch, ensuring all your stitches radiate outward from the base of the leaf to mimic its natural fan shape.
This technique allows the light to catch the metallic fibers uniformly, creating a brilliant shimmer.
To prevent frustration, use a thread conditioner and a needle with a larger eye; these are two unexpected ways to use metallic thread that dramatically reduce tangling and breakage.
6. Compose a Whimsical Mixed-Leaf Frame
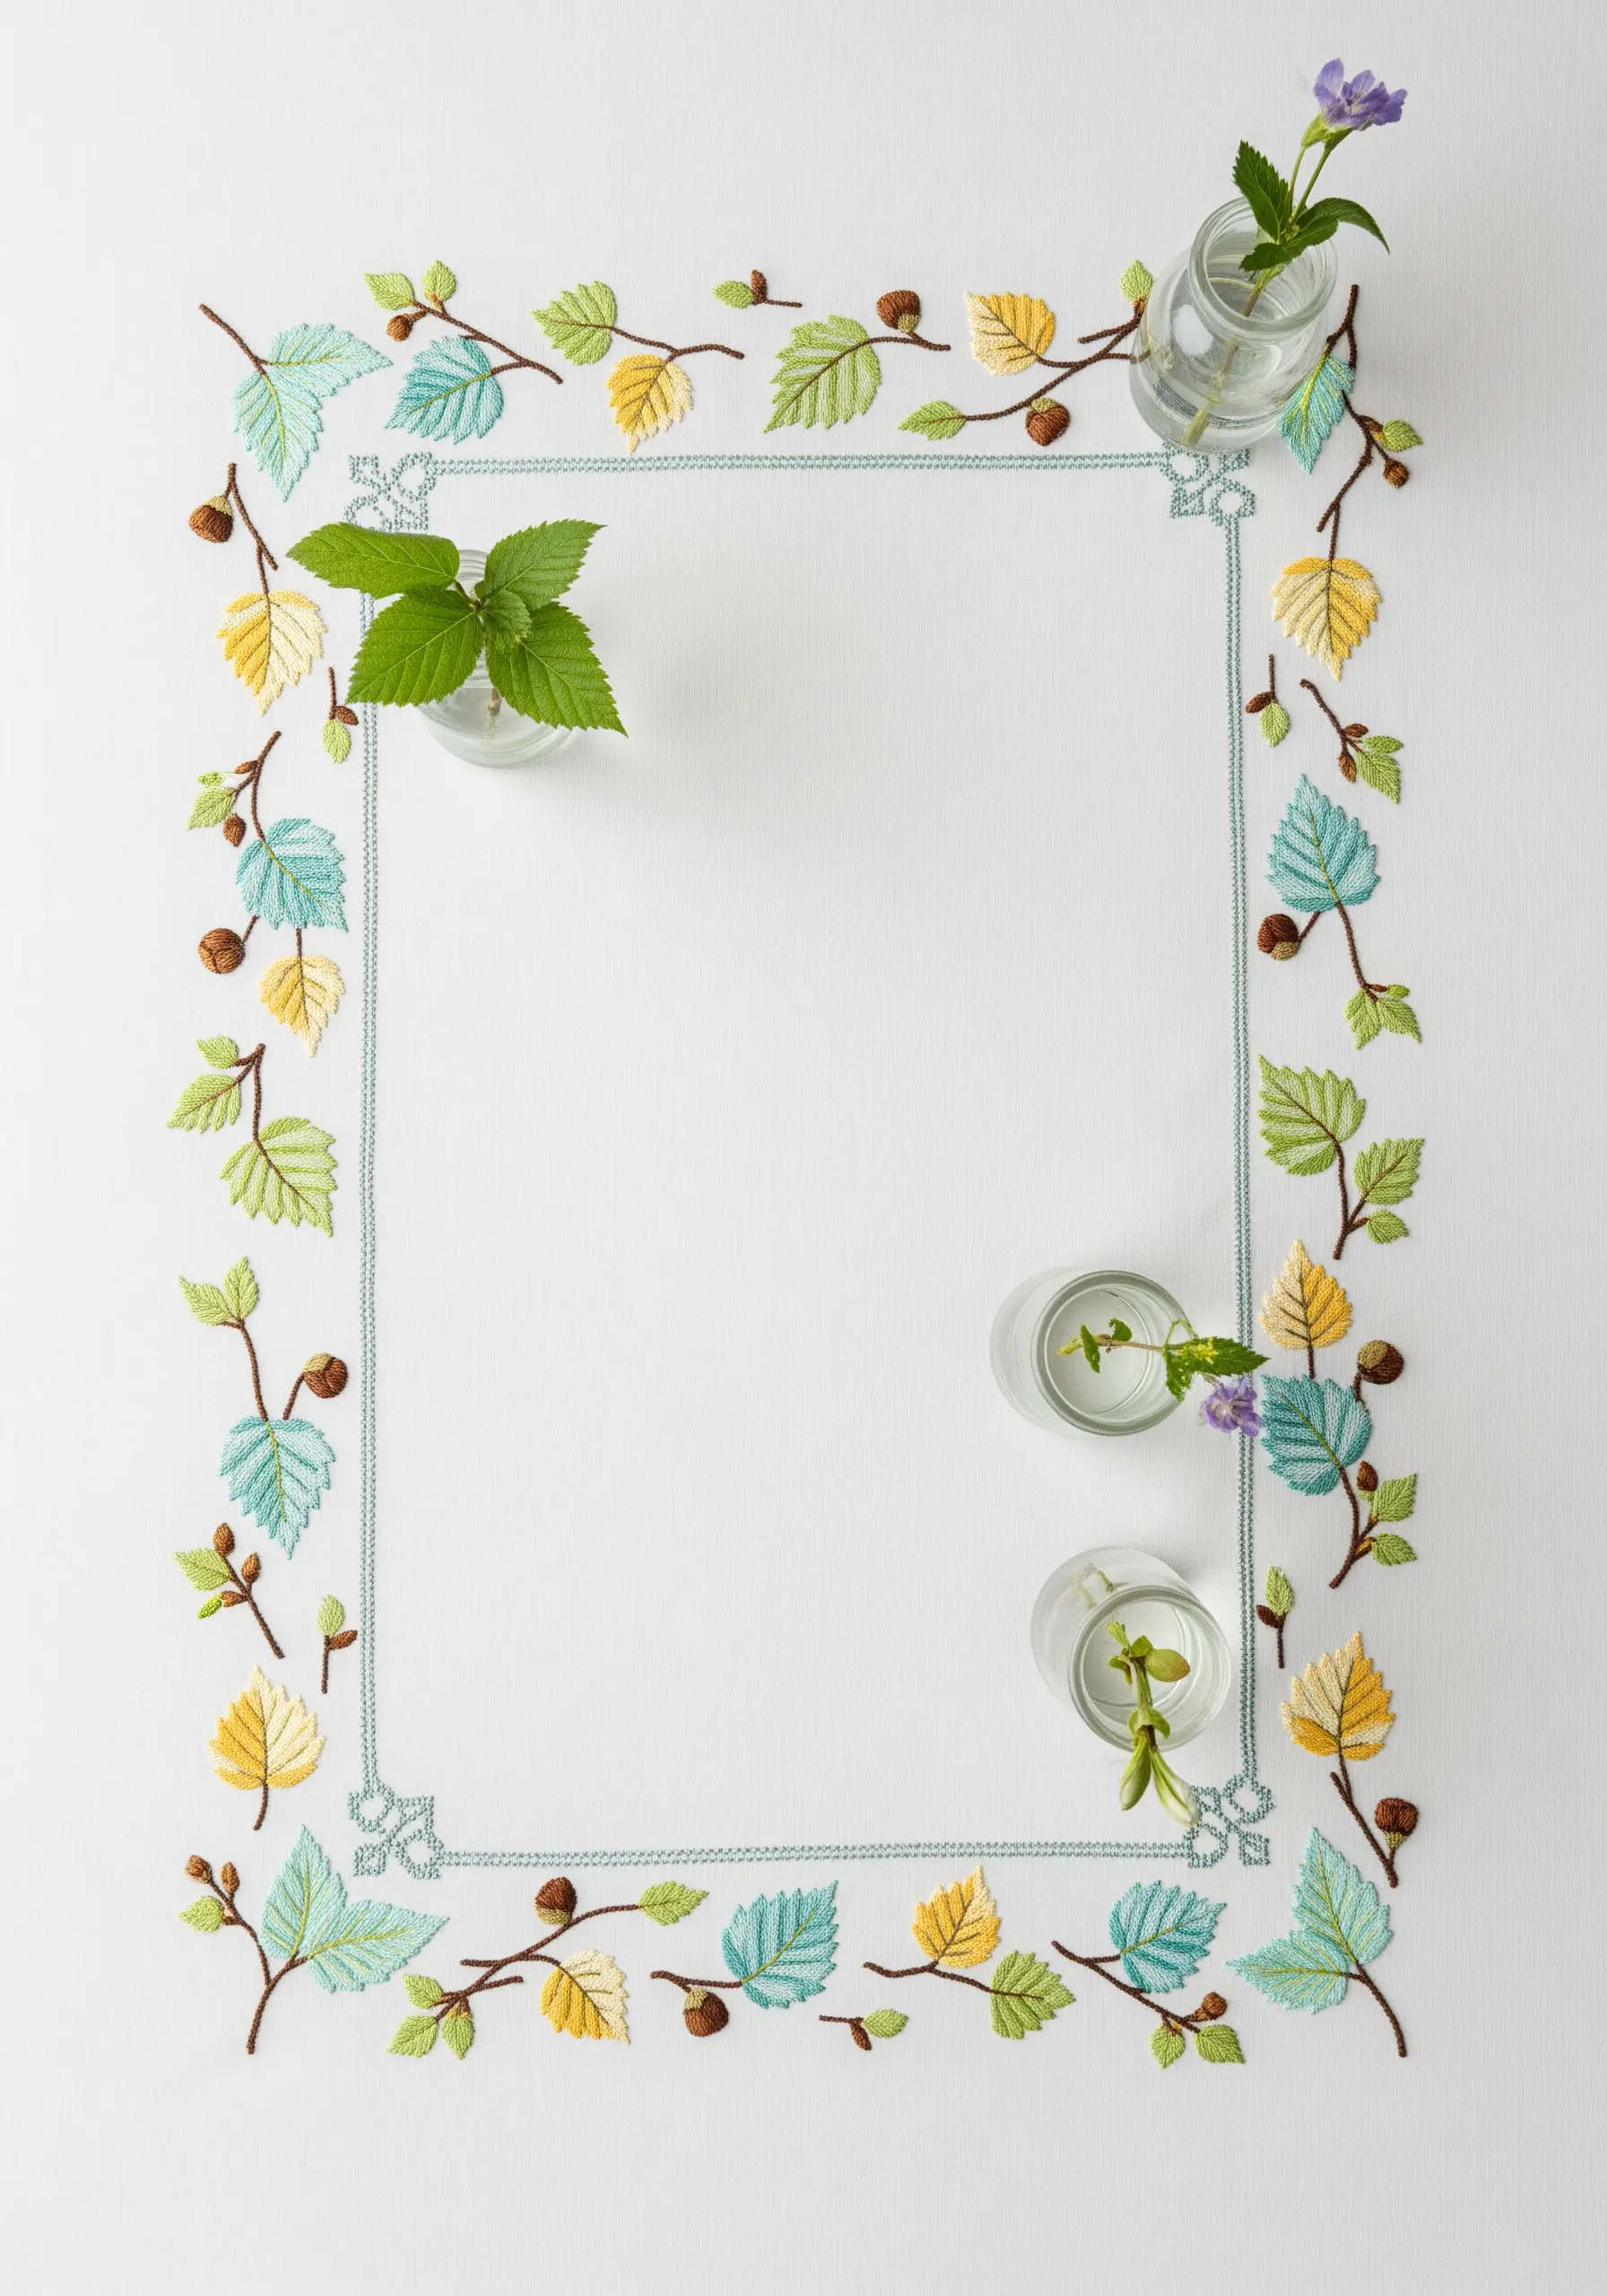
Create a light, playful border by varying not just the color, but the type and direction of your leaves.
Combine small, satin-stitched leaves with longer, fishbone-stitched ones, and point them in different directions to create a sense of natural, breezy movement.
Use a pastel color palette—soft blues, yellows, and greens—to keep the look airy and cohesive.
Add tiny brown French knots to represent acorns or buds, grounding the delicate design with small, textural details.
7. Craft a Regal Oak Leaf Runner

To achieve this formal, luxurious effect, focus on raised texture and high contrast.
Outline the oak leaves with a couched gold cord—a technique where you lay a thick thread on the surface and tack it down with smaller stitches.
Fill the leaves with a pattern like laid work or a simple satin stitch in a matching metallic thread.
The deep green fabric makes the gold feel even more opulent, creating a luxury metallic thread wall decor effect for your table.
8. Stitch a Graceful, Asymmetrical Willow Branch
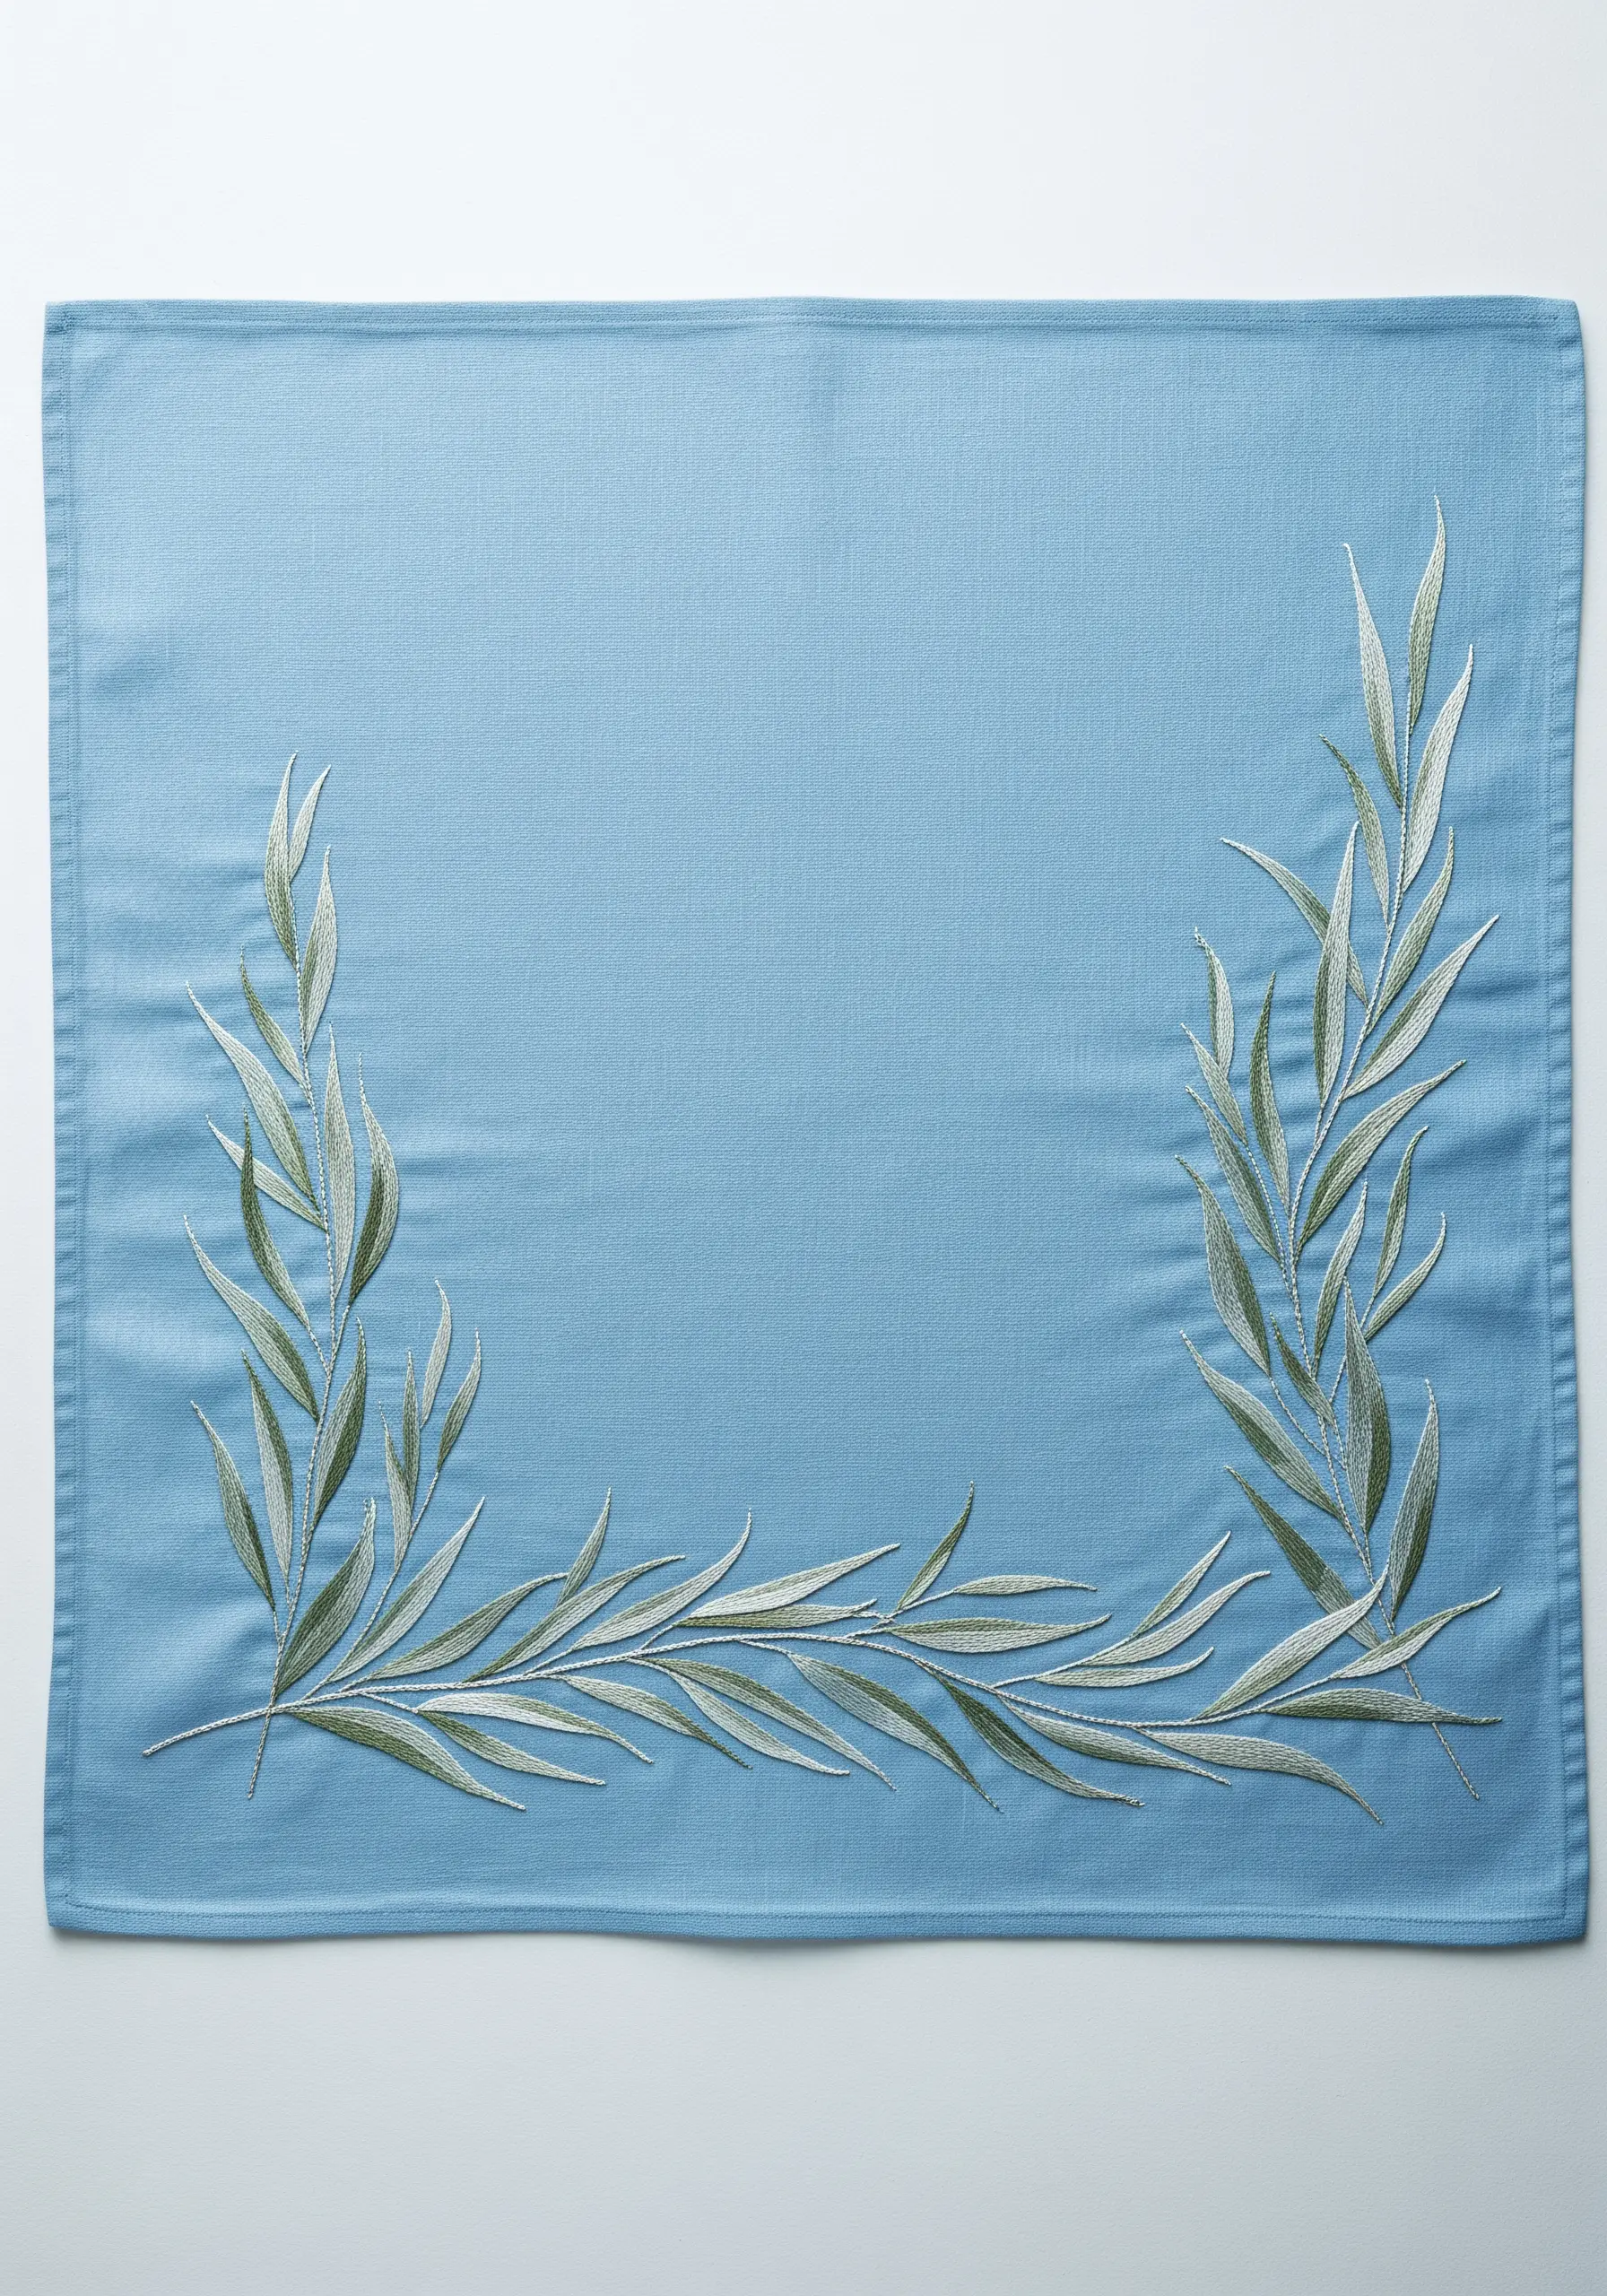
Capture the soft, flowing movement of willow leaves with split long-and-short stitch.
This stitch allows for seamless blending of colors, perfect for creating the subtle green-and-white gradient that gives willow its silvery appearance.
Instead of a full border, place the design asymmetrically—sweeping up from one corner and along one edge.
This creates a more modern, dynamic composition that draws the eye and feels less traditional than a repeating pattern.
9. Create a Bold, Graphic Monstera Border
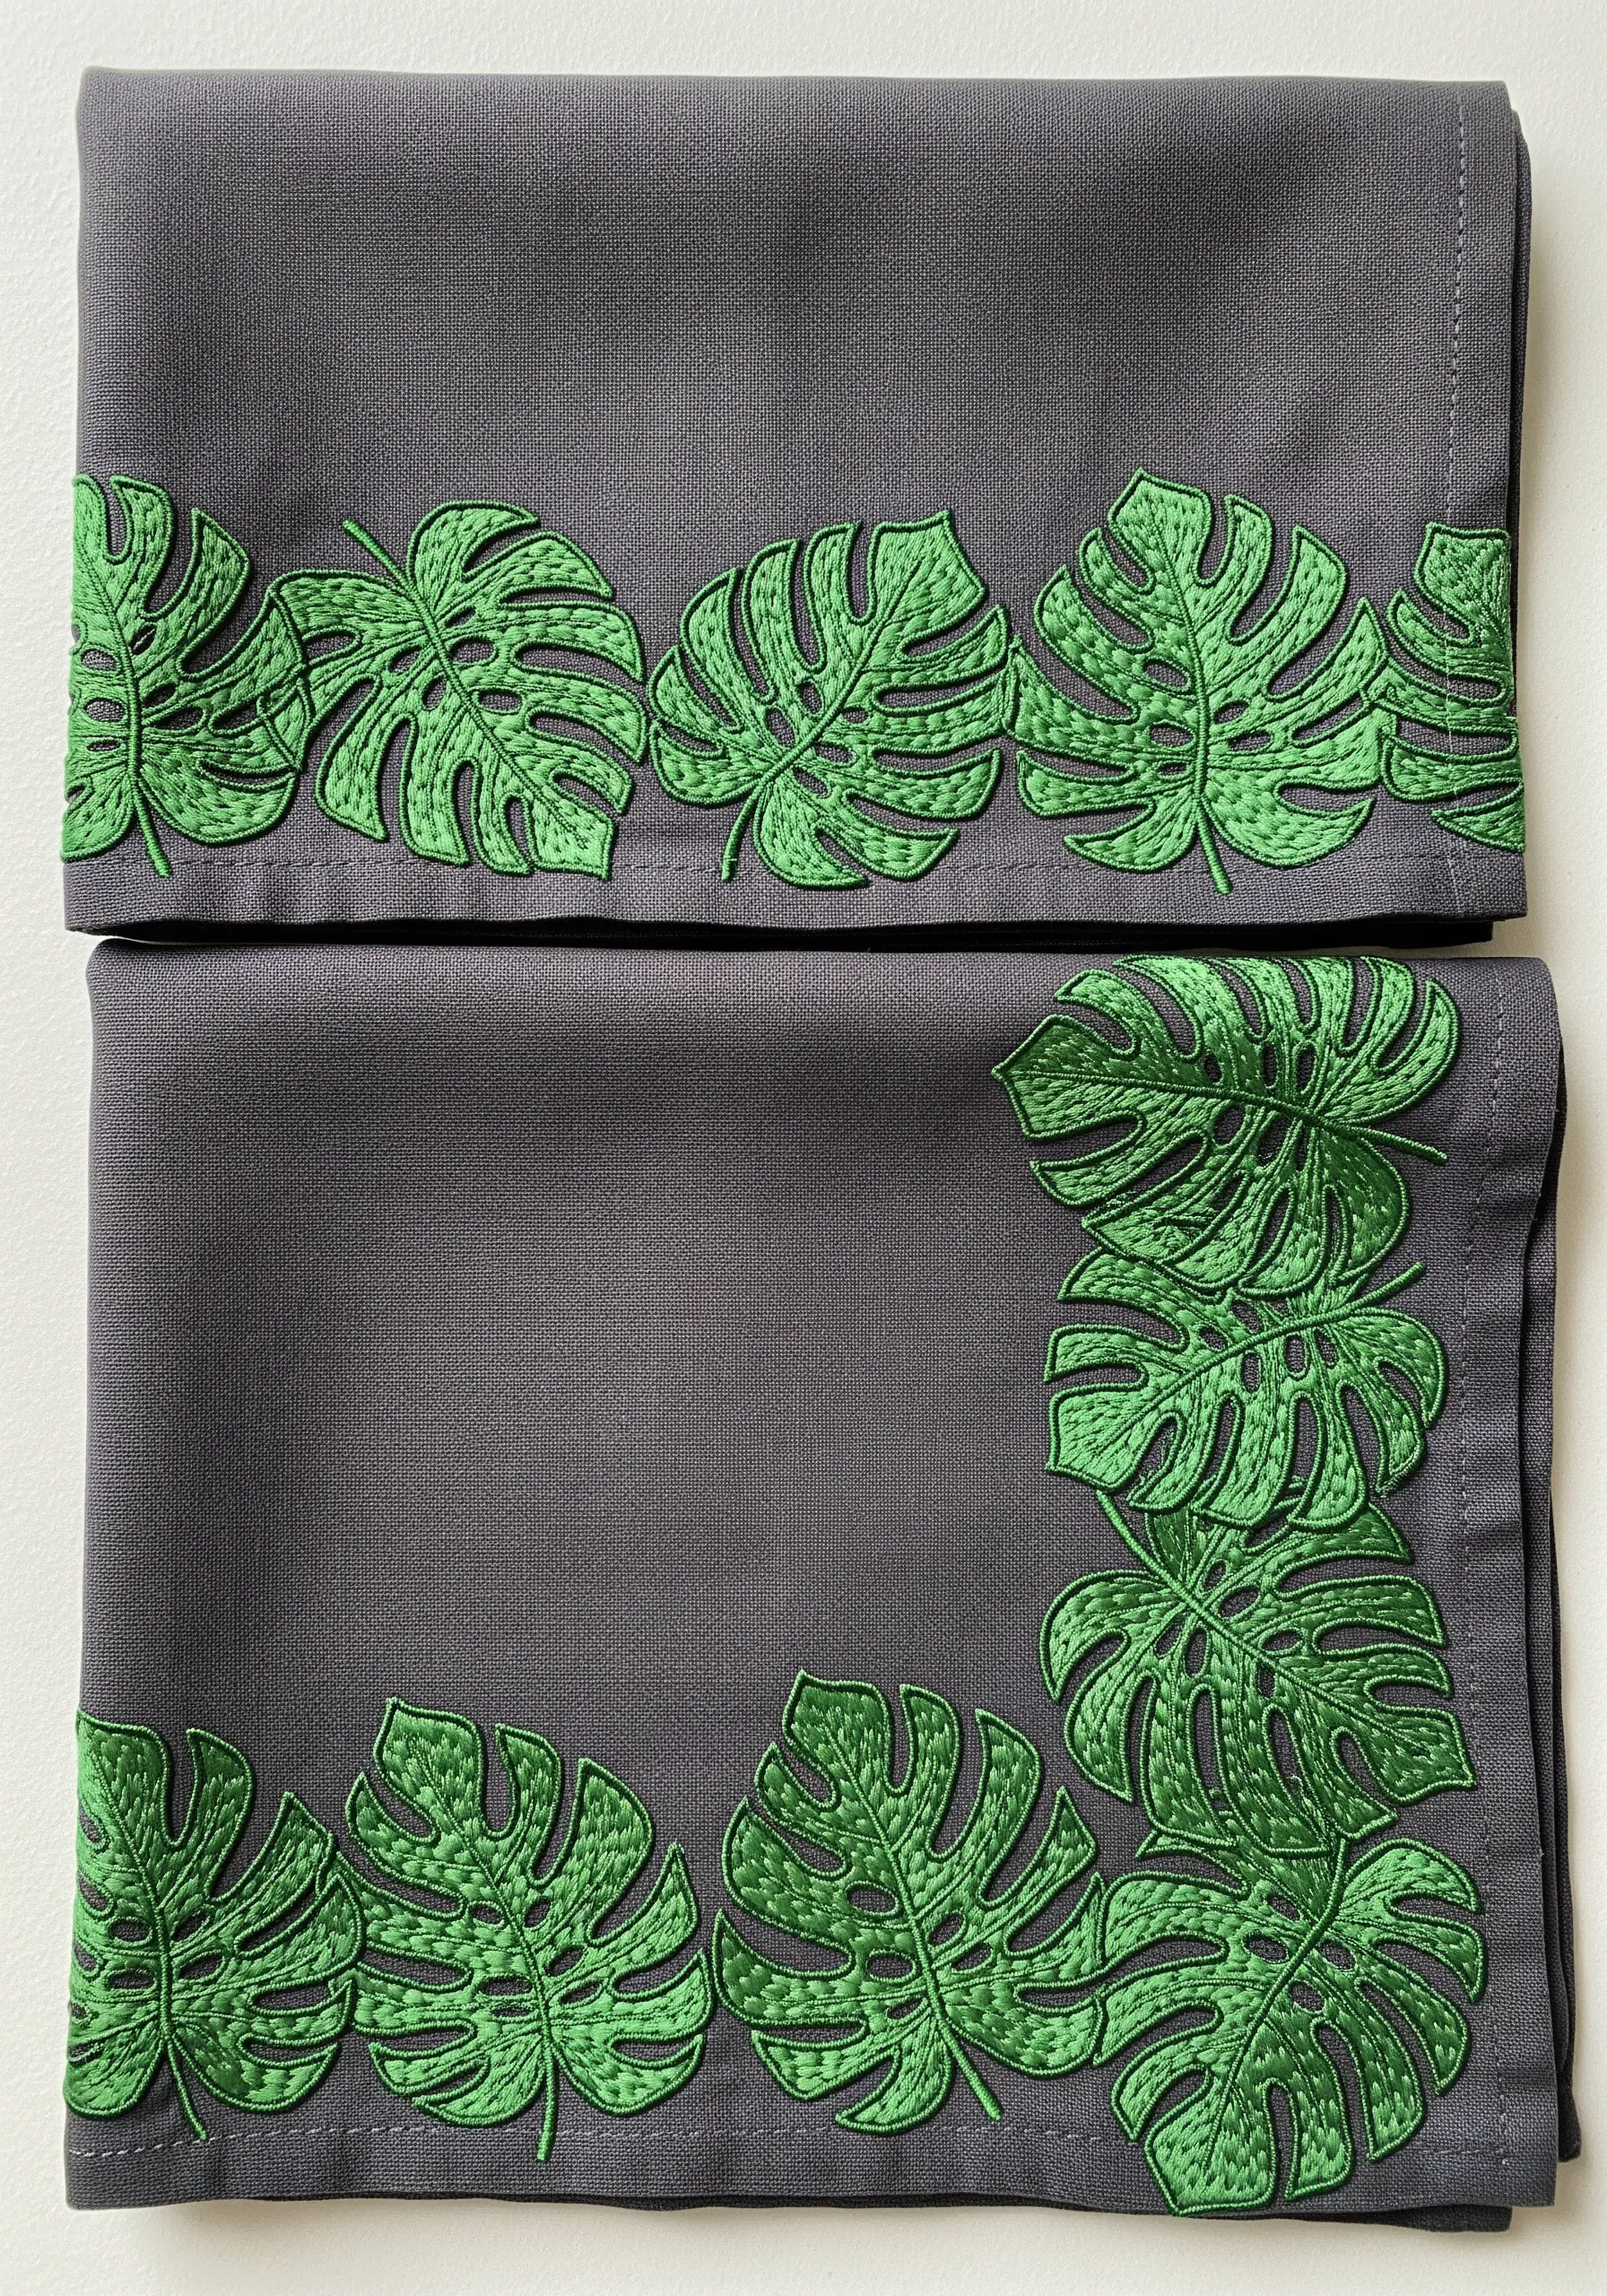
For a modern and tropical vibe, a monstera leaf border provides high impact.
The key to this design is creating sharp, clean edges and defining the iconic leaf splits.
Use a dense satin stitch, and treat each leaf segment as its own separate shape, angling your stitches toward the central vein.
To make the bright green pop, choose a contrasting neutral fabric like charcoal grey or black. The dramatic contrast elevates the design from simple leaf embroidery to a statement piece.
10. Detail a Classic Olive Branch Runner

Bring a touch of the Mediterranean to your table with classic olive branches.
Use fishbone stitch for the leaves to create that essential central vein and texture.
For the olives, use chunky, 3-4 wrap French knots or colonial knots, which are more rounded and secure.
Stitch the branches with a slightly twisted thread or a darker brown backstitch to mimic a woody texture, contrasting with the smooth leaves and round olives.
11. Embroider a Sweet Strawberry Vine
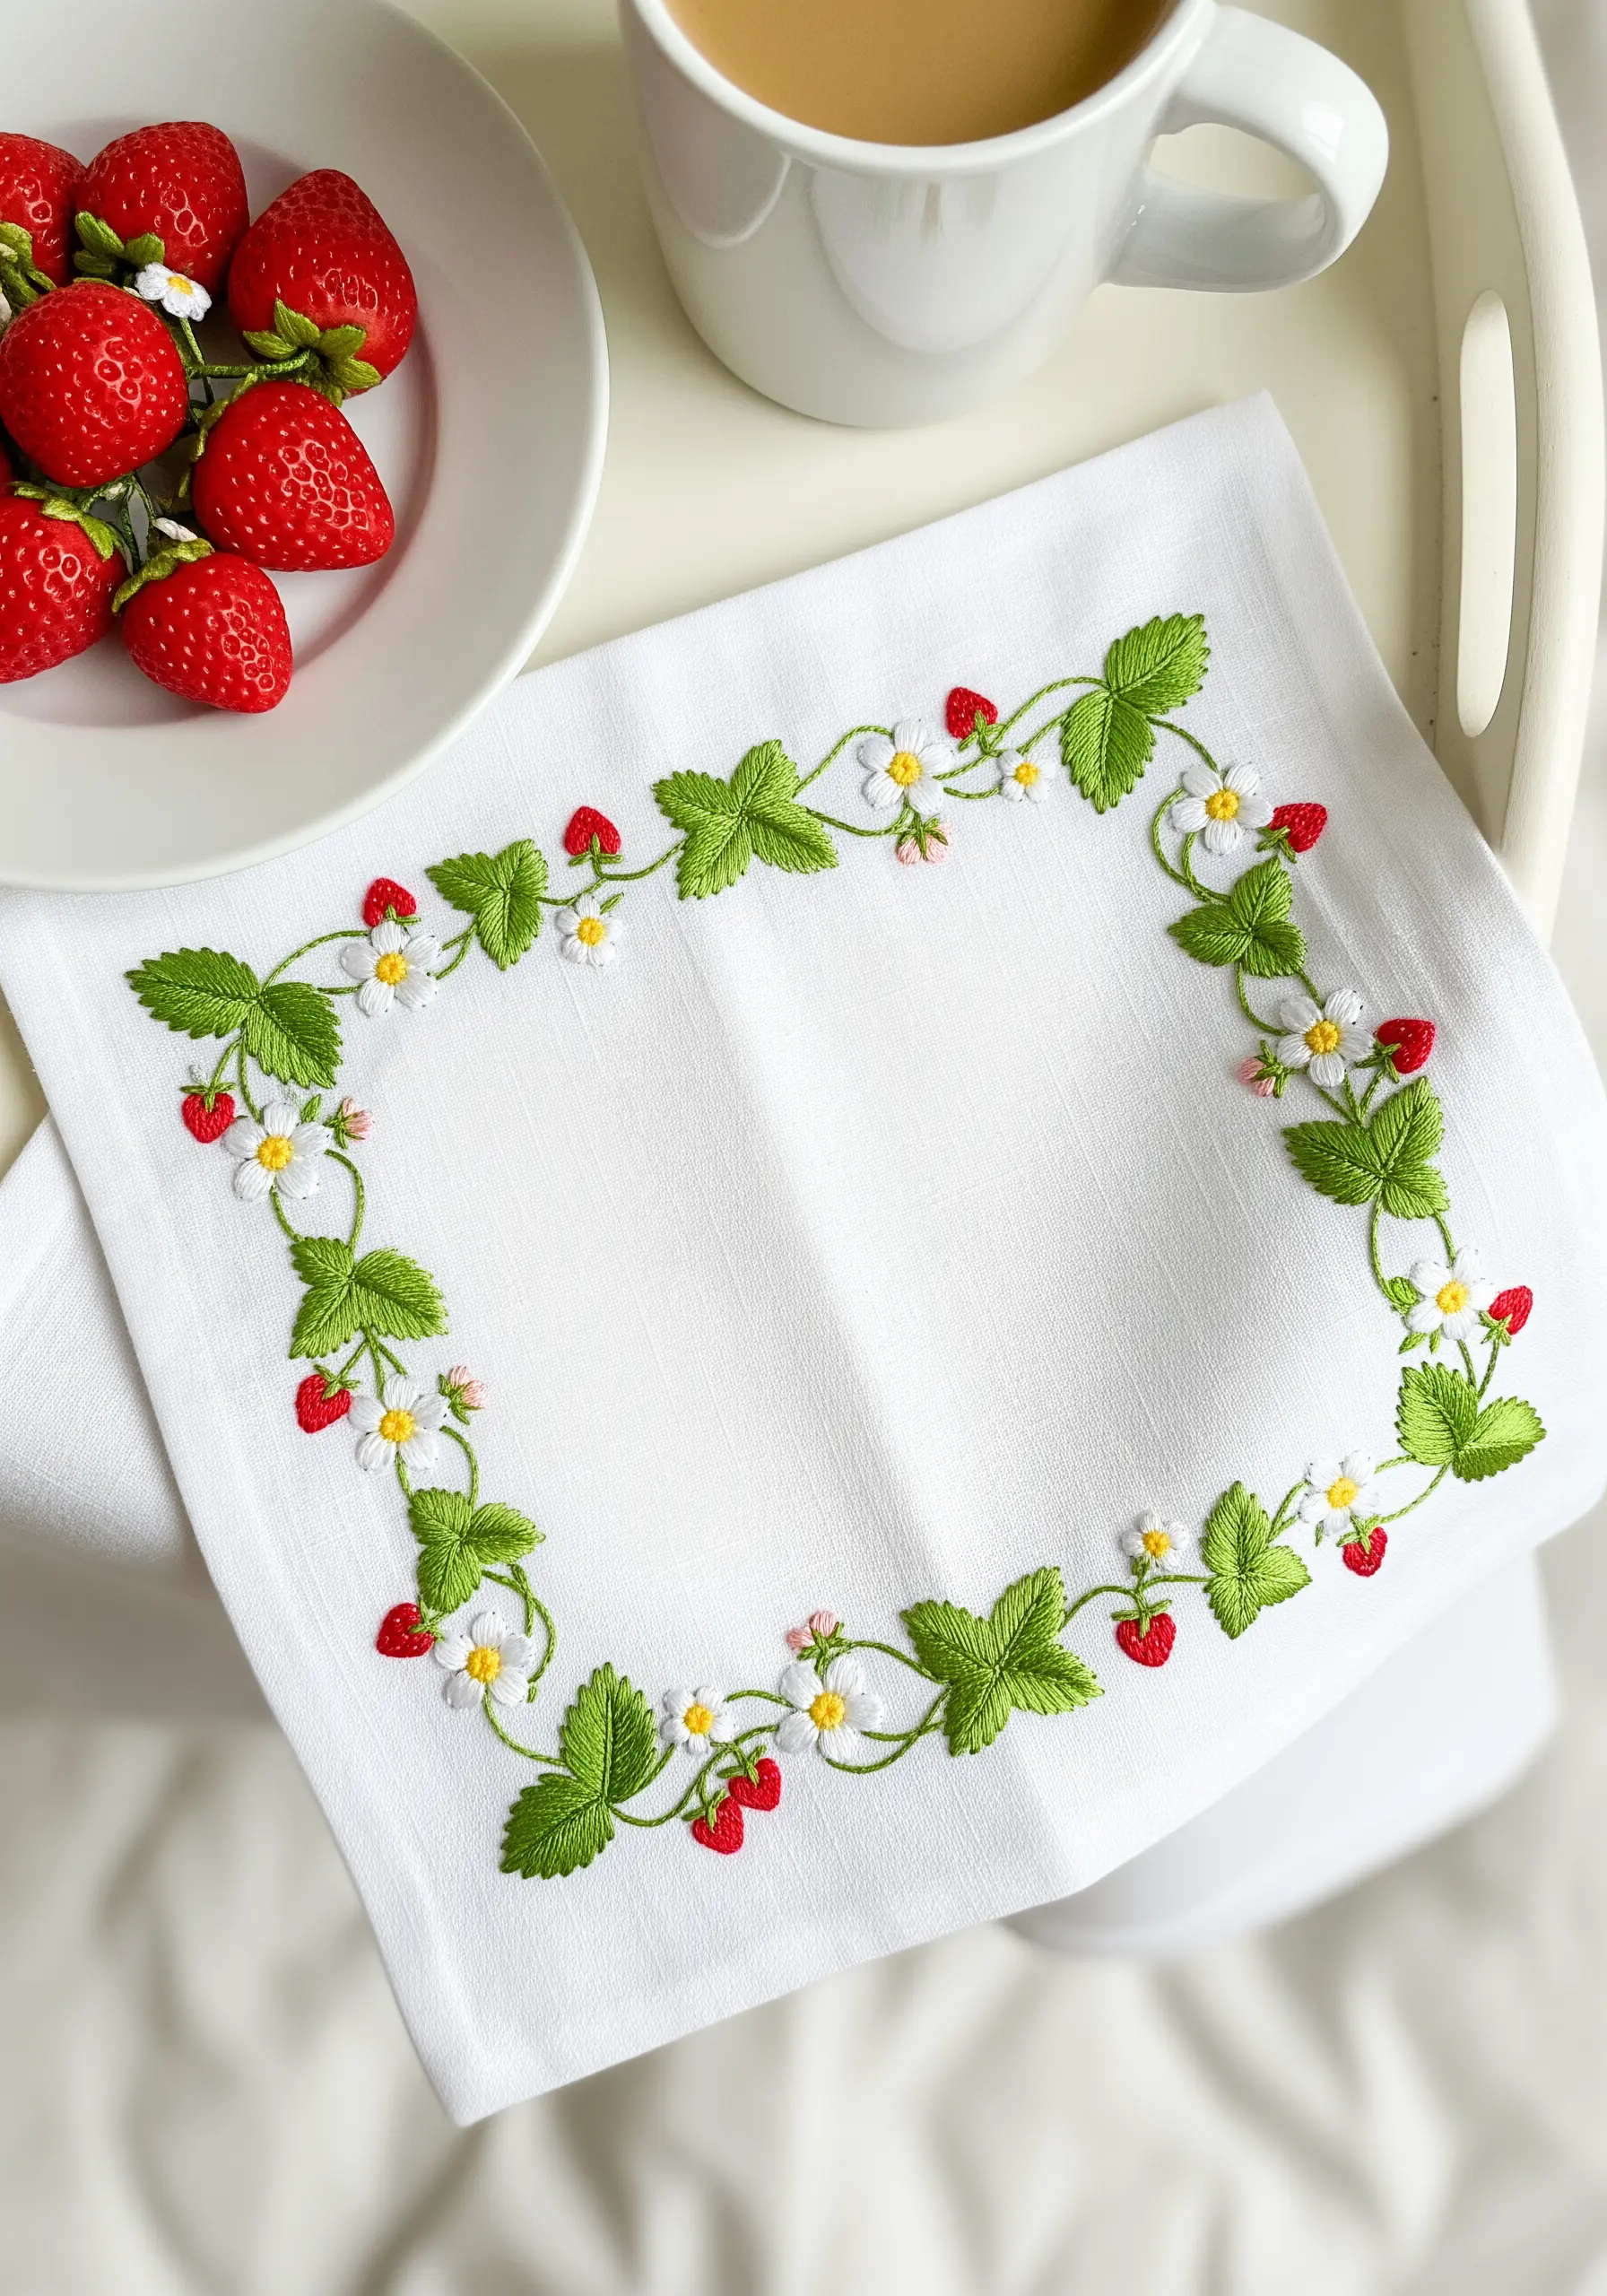
This charming design relies on a mix of textures to feel lively and sweet.
Use a padded satin stitch for the leaves to make them pop, and fill the tiny strawberries with red satin stitches topped with yellow seed stitches for texture.
For the white blossoms, use detached chain stitches for the petals and a single yellow French knot for the center.
This combination of stitches creates a delightful, multi-dimensional effect perfect for cottagecore cushion embroidery designs and linens alike.
12. Create a Frosted Leaf Appliqué Edge
This unique border has a dimensional, appliqué-like quality you can achieve entirely with thread.
Trace your leaf pattern onto a piece of water-soluble stabilizer.
Using your sewing machine’s satin stitch or by hand with a dense buttonhole stitch, embroider the leaves completely, filling them with color.
Once finished, dissolve the stabilizer, leaving you with freestanding embroidered ‘patches’ that you can then tack onto the edge of your placemat for a clean, cut-out effect.
13. Build a Lush, Overlapping Laurel Garland
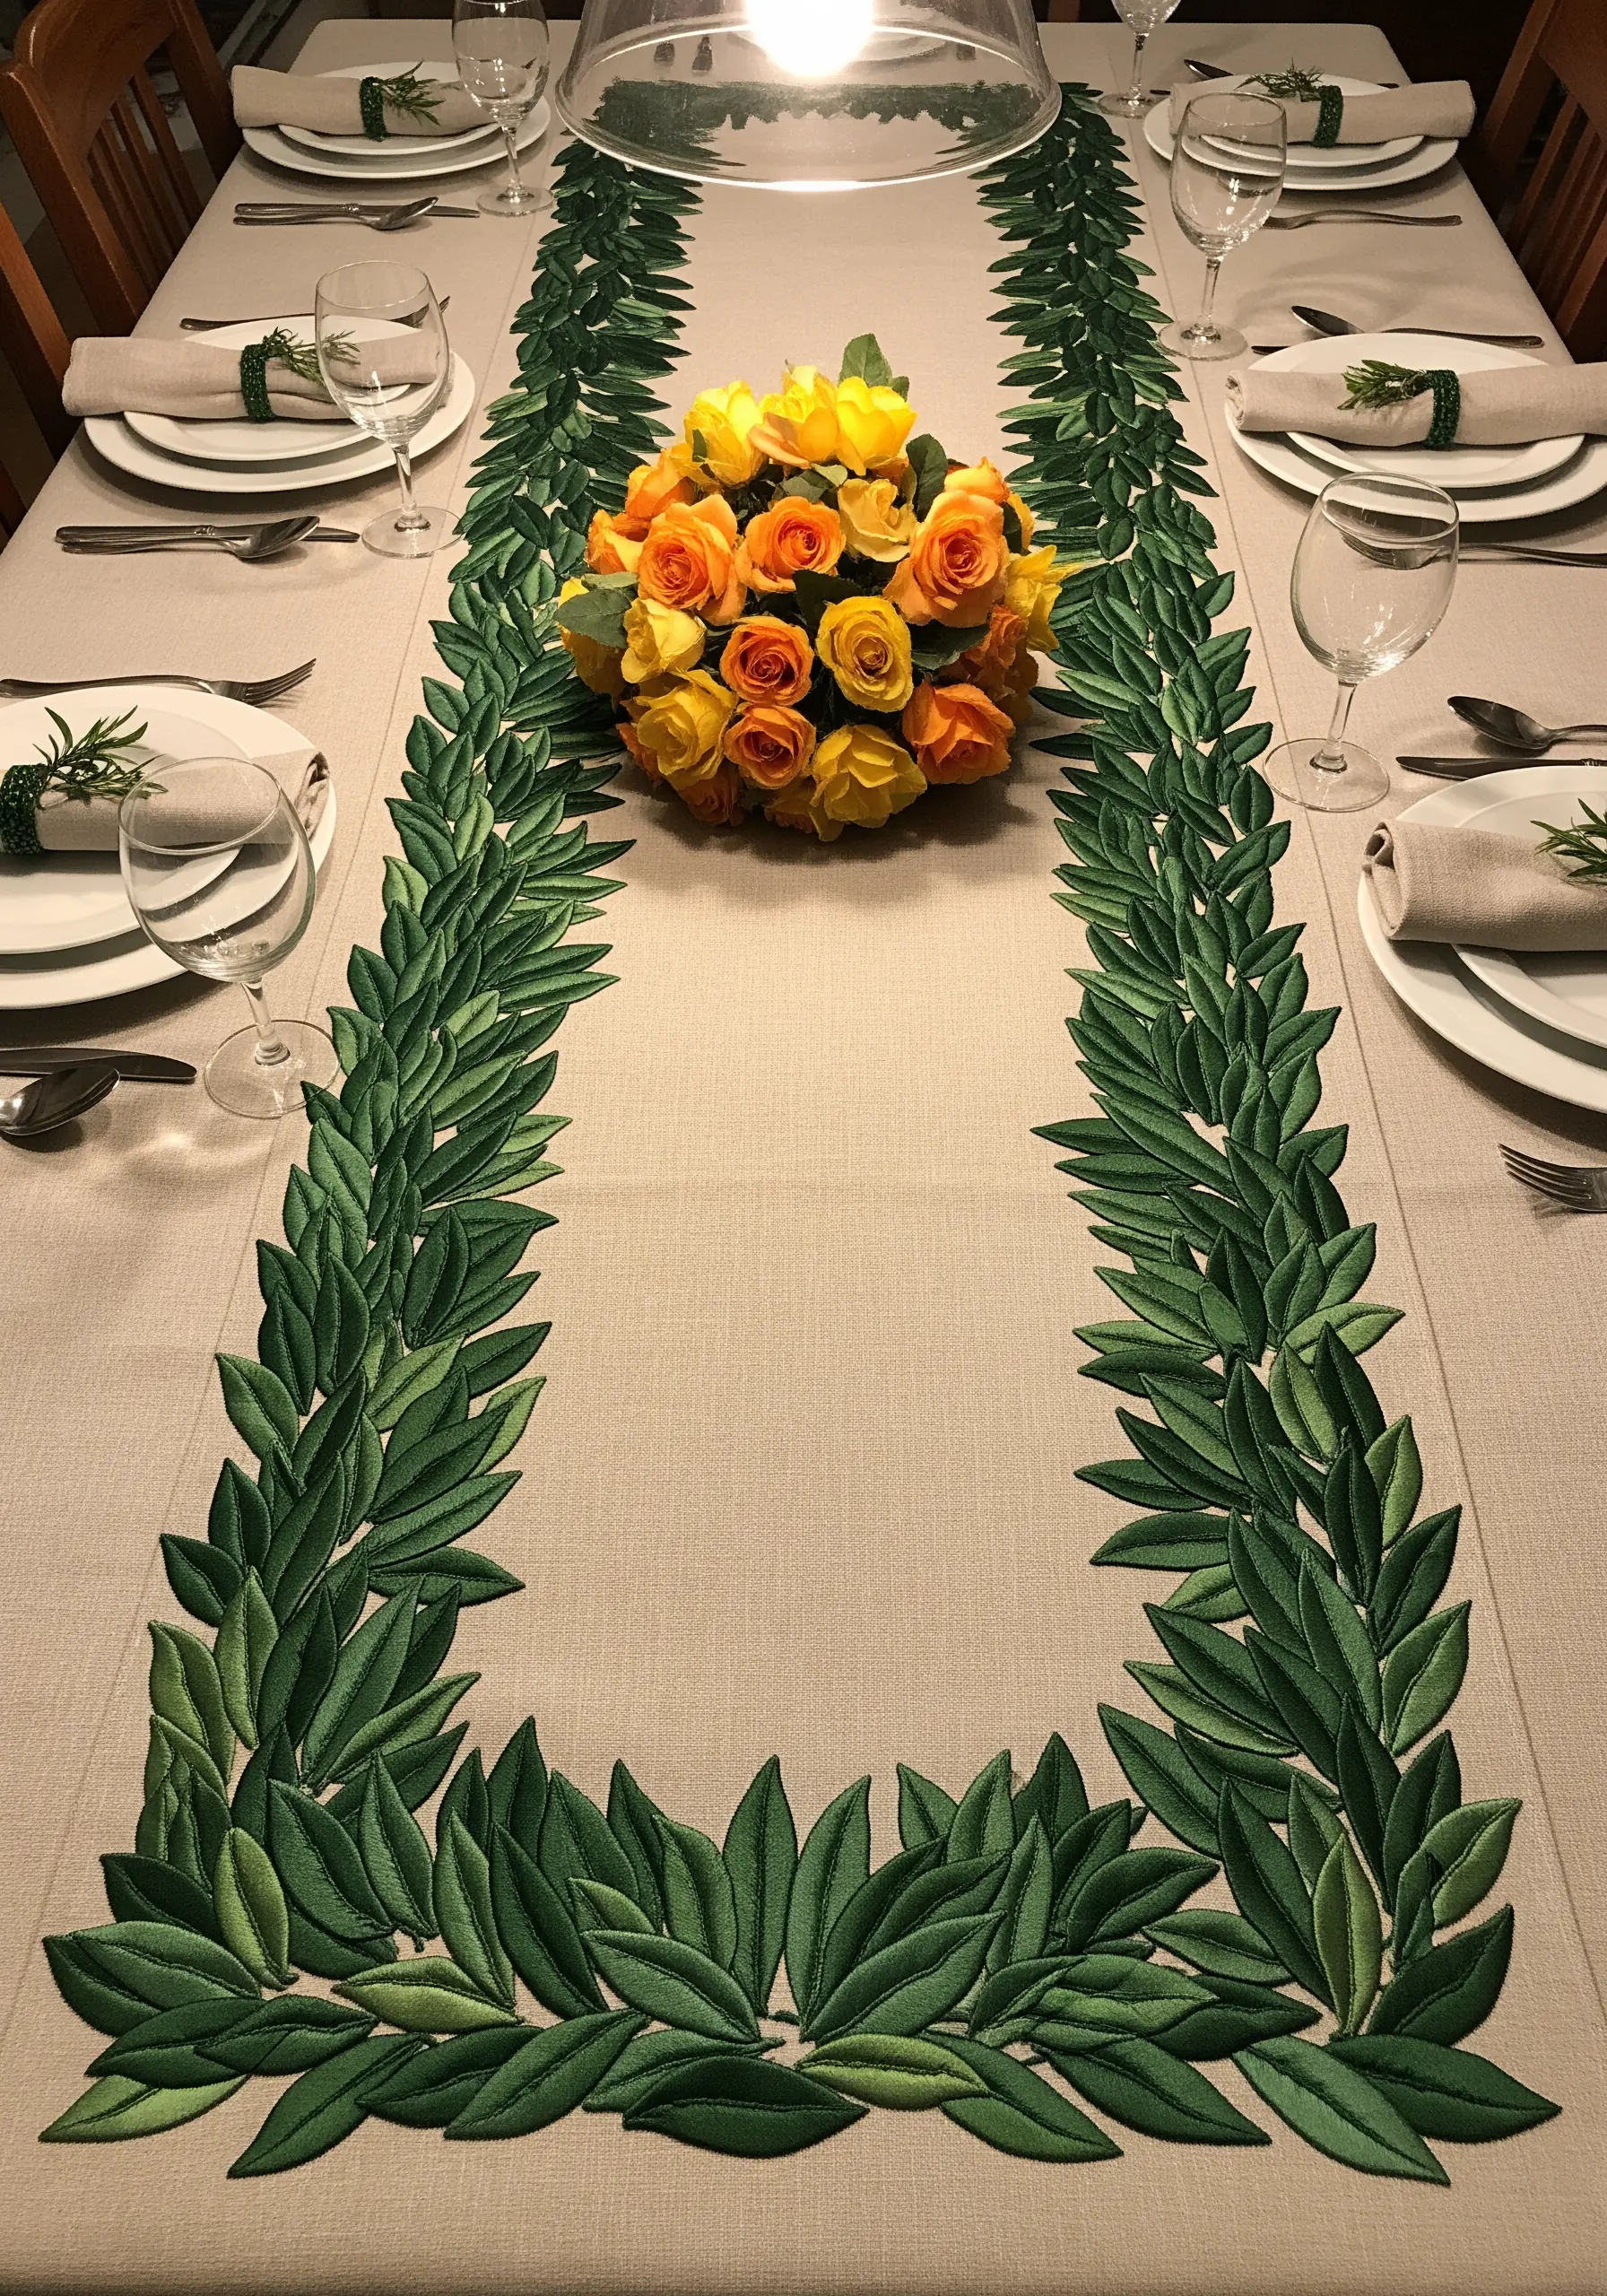
The secret to a full, dense laurel border is layering.
Use fishbone stitch for each leaf, but as you work your way along the garland, slightly overlap each new leaf on top of the last one.
Alternate between two or three shades of green to enhance the feeling of depth and dimension.
This overlapping technique creates a design that looks rich and sculptural, turning a simple leaf shape into a substantial, elegant garland.
14. Blend a Shimmering Metallic Autumn Corner

For an elegant autumnal feel, work with a palette of metallic threads in copper, bronze, and gold on a dark, moody fabric like burgundy or forest green.
Use long-and-short stitch to fill the maple leaves, allowing you to seamlessly blend the different metallic tones together within a single leaf.
This technique creates a beautiful, shimmering gradient that captures the richness of the season and gives the design a luxurious, almost painterly quality.
15. Stitch a Minimalist Leaf and Stem Chain
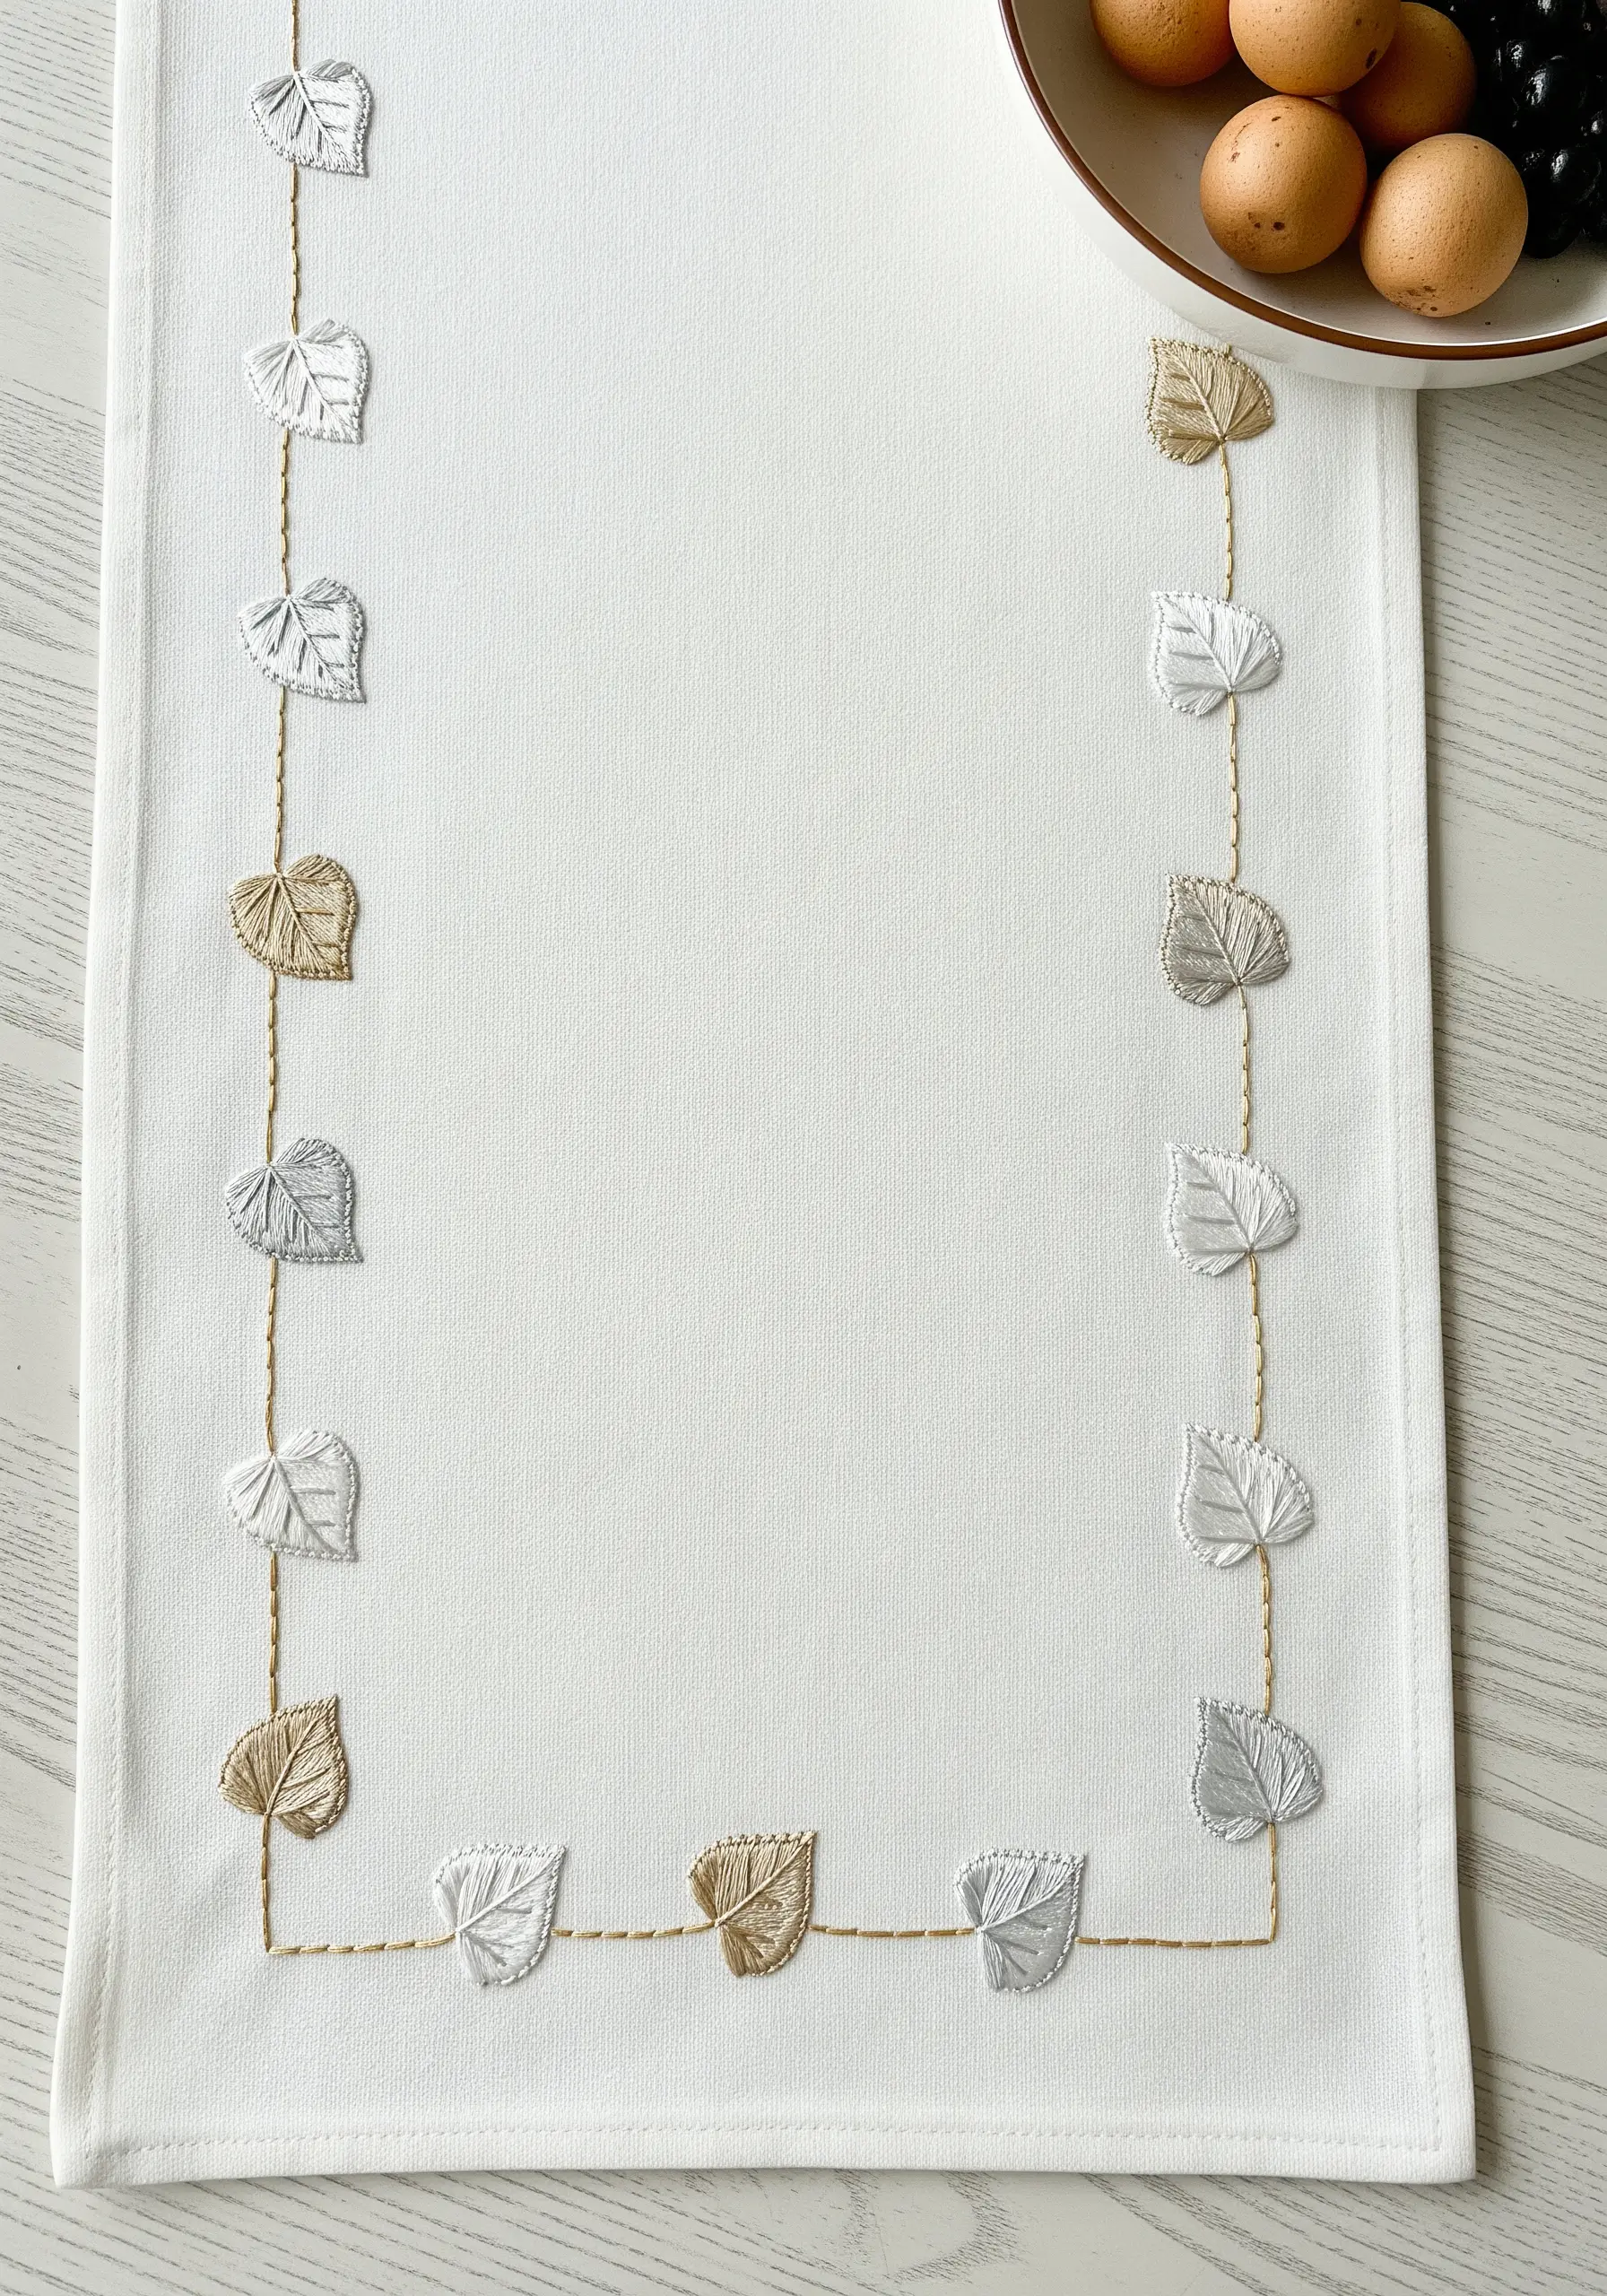
This design proves that simplicity can be incredibly elegant.
Focus on perfect execution of a few simple elements: small satin-stitched leaves and a delicate connecting line.
To elevate the line, use a couched metallic thread—lay down a strand of gold or silver floss and tack it in place with tiny, invisible stitches of a matching sewing thread.
The contrast between the soft matte leaves and the shimmering line creates a sophisticated, jewelry-like border.
16. Illustrate a Detailed Kitchen Herb Border

Capture the unique character of different herbs by varying your stitches and using a very fine thread.
Use a single strand of floss for the entire design to achieve a detailed, botanical illustration style.
Stitch rosemary with short, straight stitches angled off a central stem. Create thyme with tiny detached chain stitches for leaves. For sage, use a fishbone stitch to mimic its veined texture.
This focus on detail turns a simple border into a celebration of garden herb embroidery patterns.
17. Design a Monochromatic Fern Frame
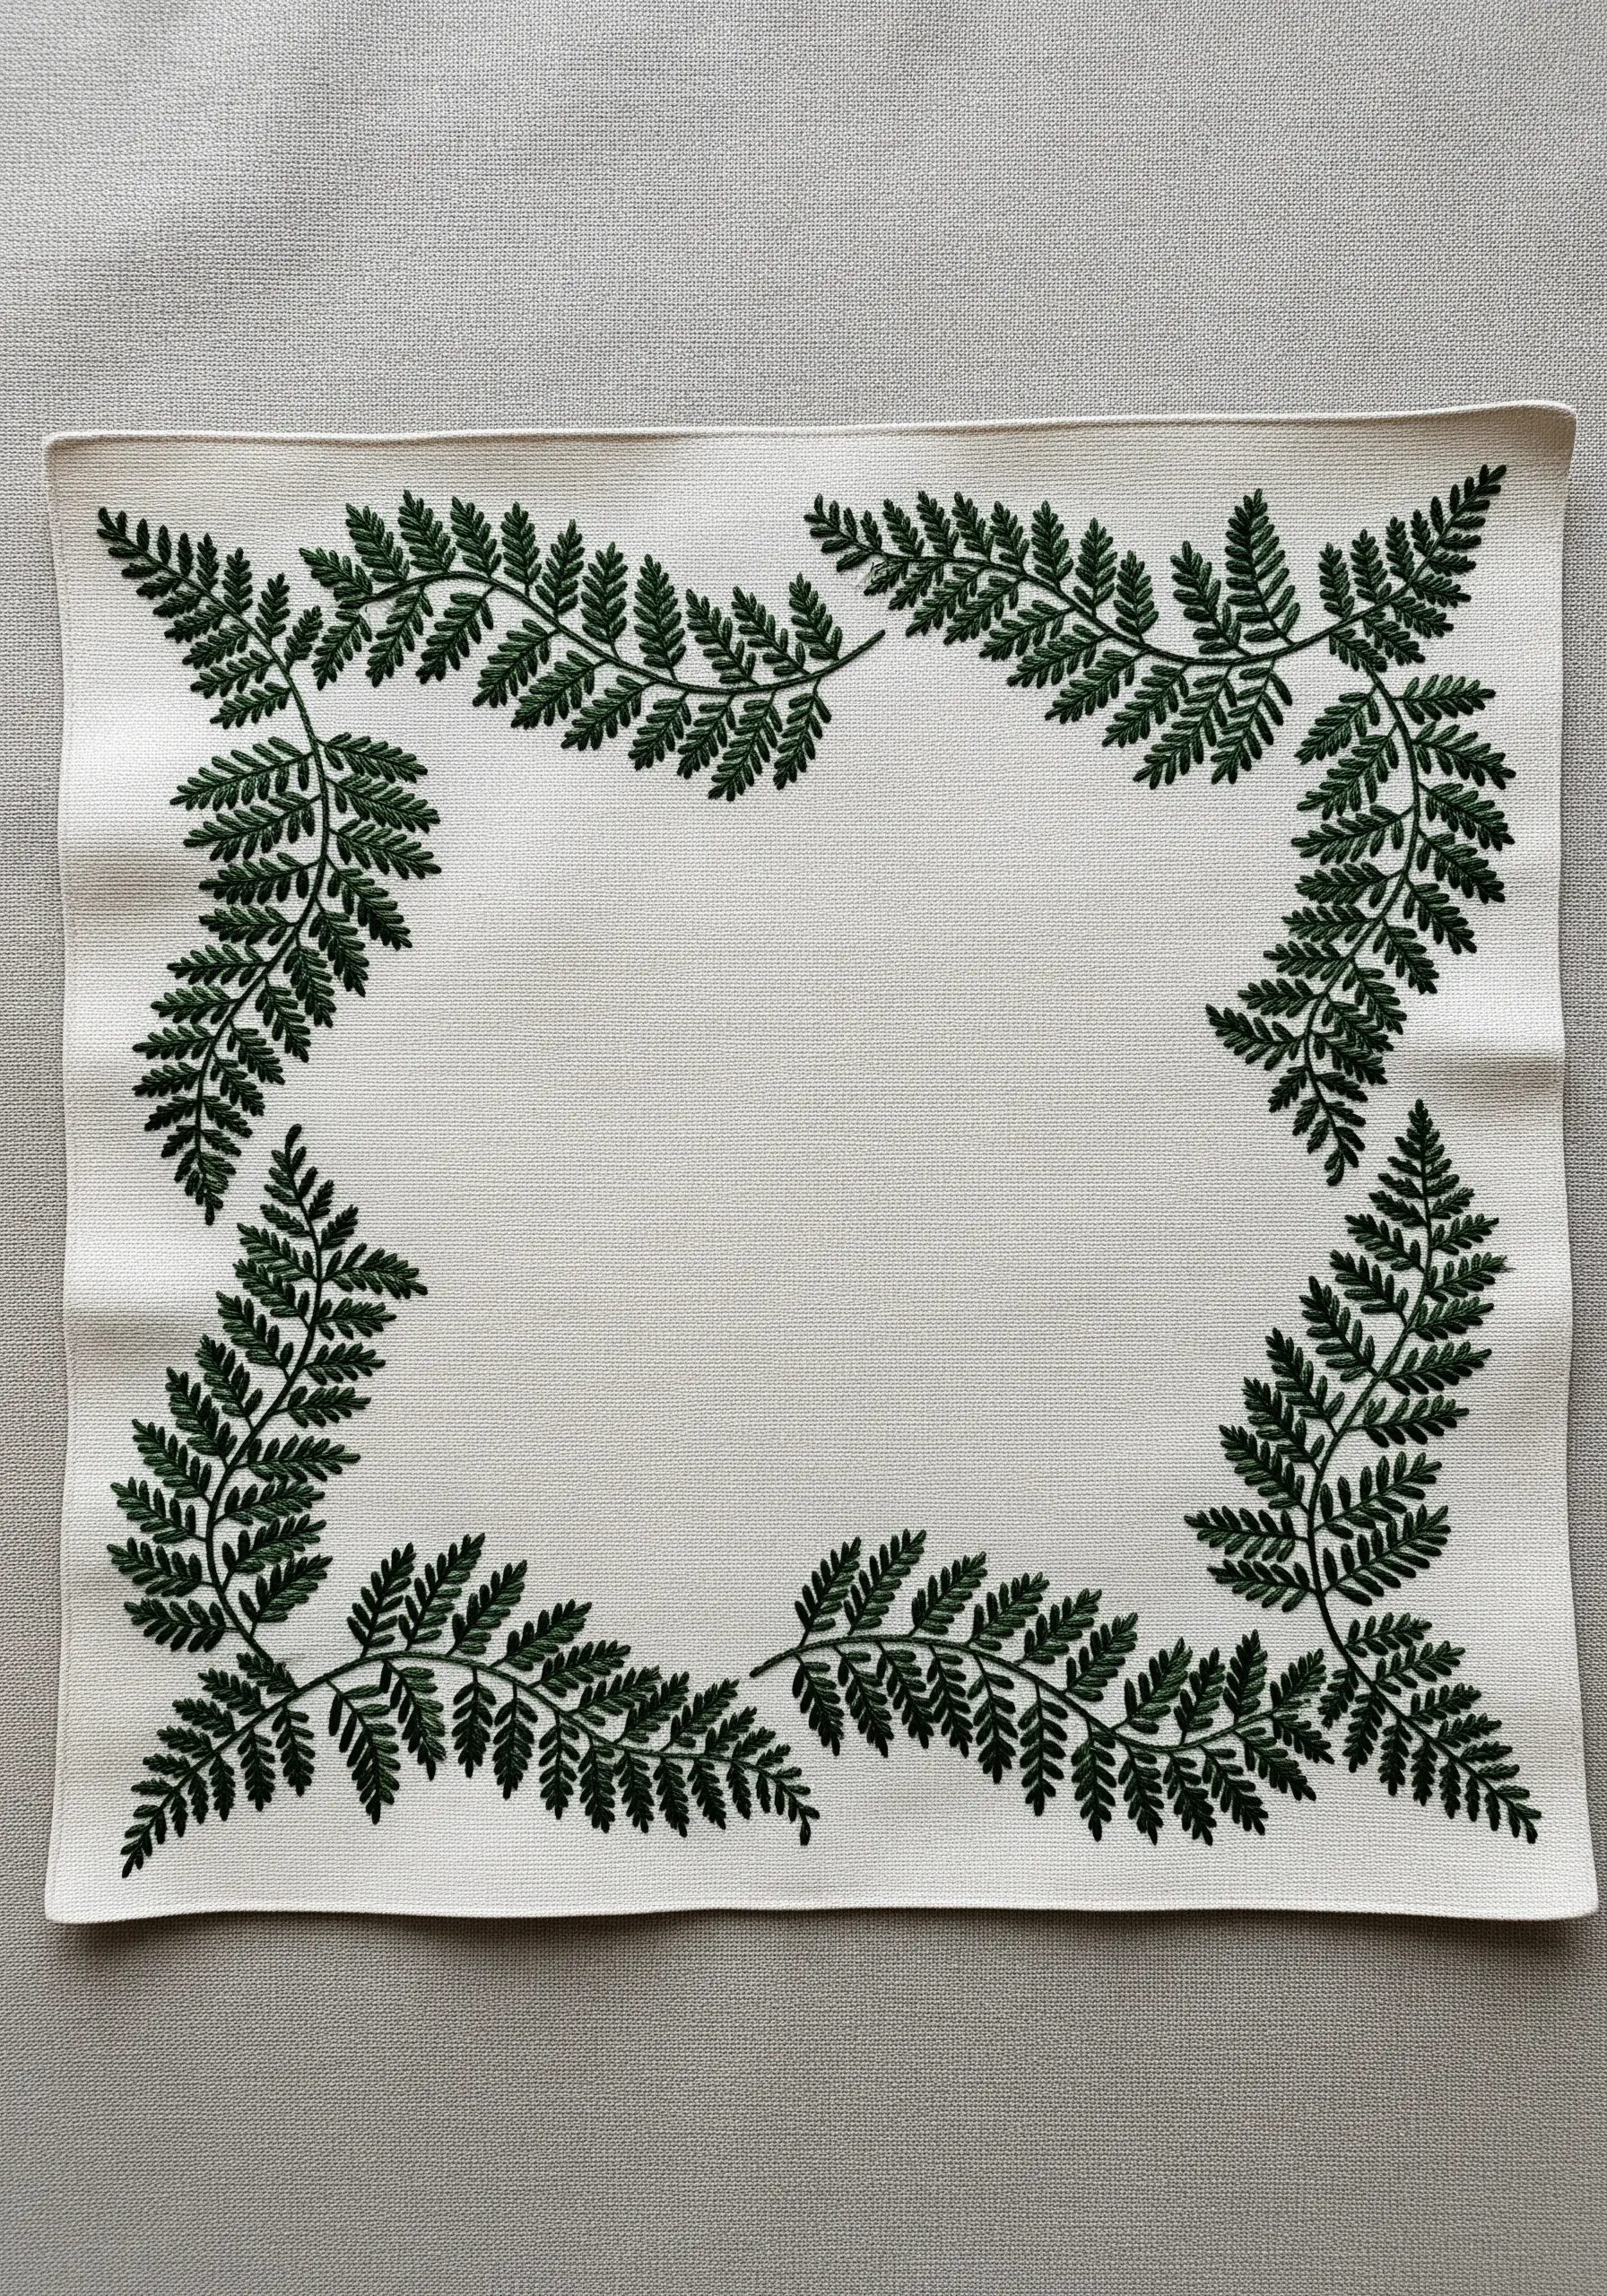
Create a sophisticated and modern look by removing color variation and focusing solely on texture.
Using a single, deep shade of green, fill the entire fern border with a consistent fishbone stitch.
Without different colors to distract the eye, the texture of the thread and the way light hits the angled stitches becomes the main feature.
This technique creates a design that feels both classic and contemporary, relying on the elegance of pure form.
18. Create a Frosty, Star-Kissed Winter Branch
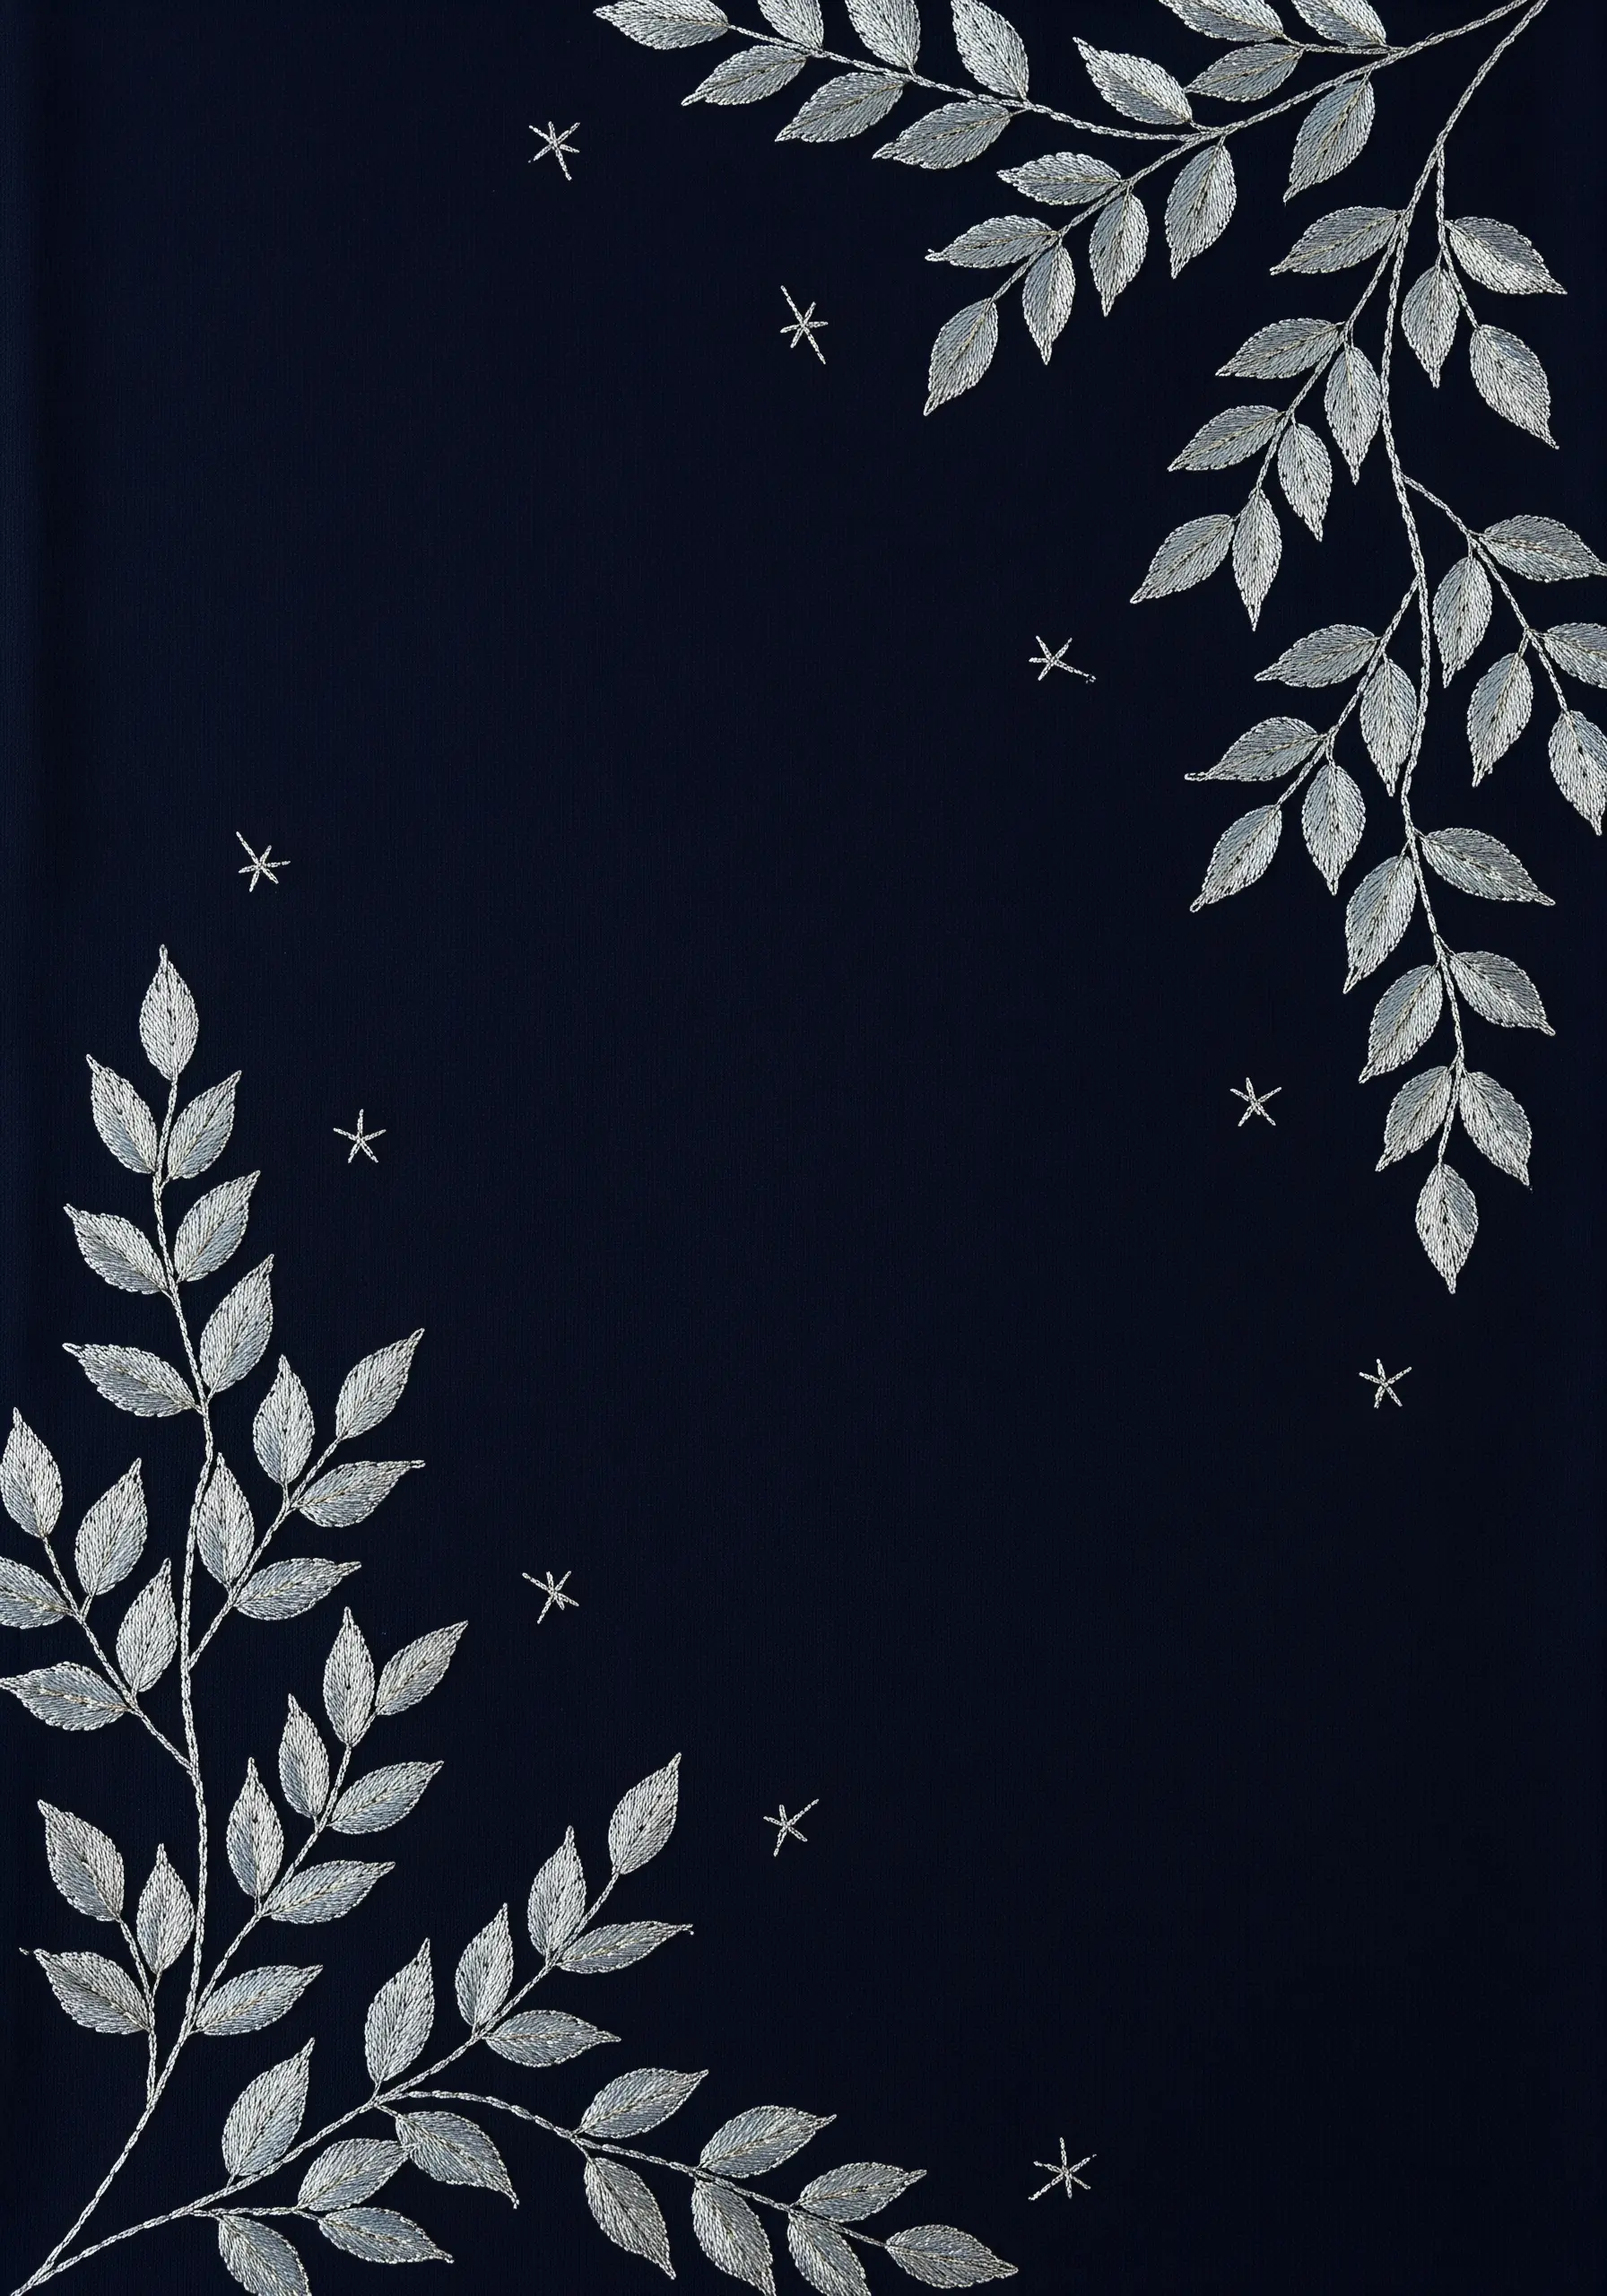
Evoke the magic of a clear winter night with high-contrast colors and a touch of sparkle.
Use a silver or pearlescent white thread to stitch delicate branches on a deep navy or black linen.
Fill the leaves with a simple satin stitch or fishbone stitch. Then, scatter tiny, star-like straight stitches or French knots in the negative space around the branches.
The dramatic contrast makes the silver thread shimmer, creating a celestial, ethereal border.
19. Define a Graphic Shamrock on Gingham
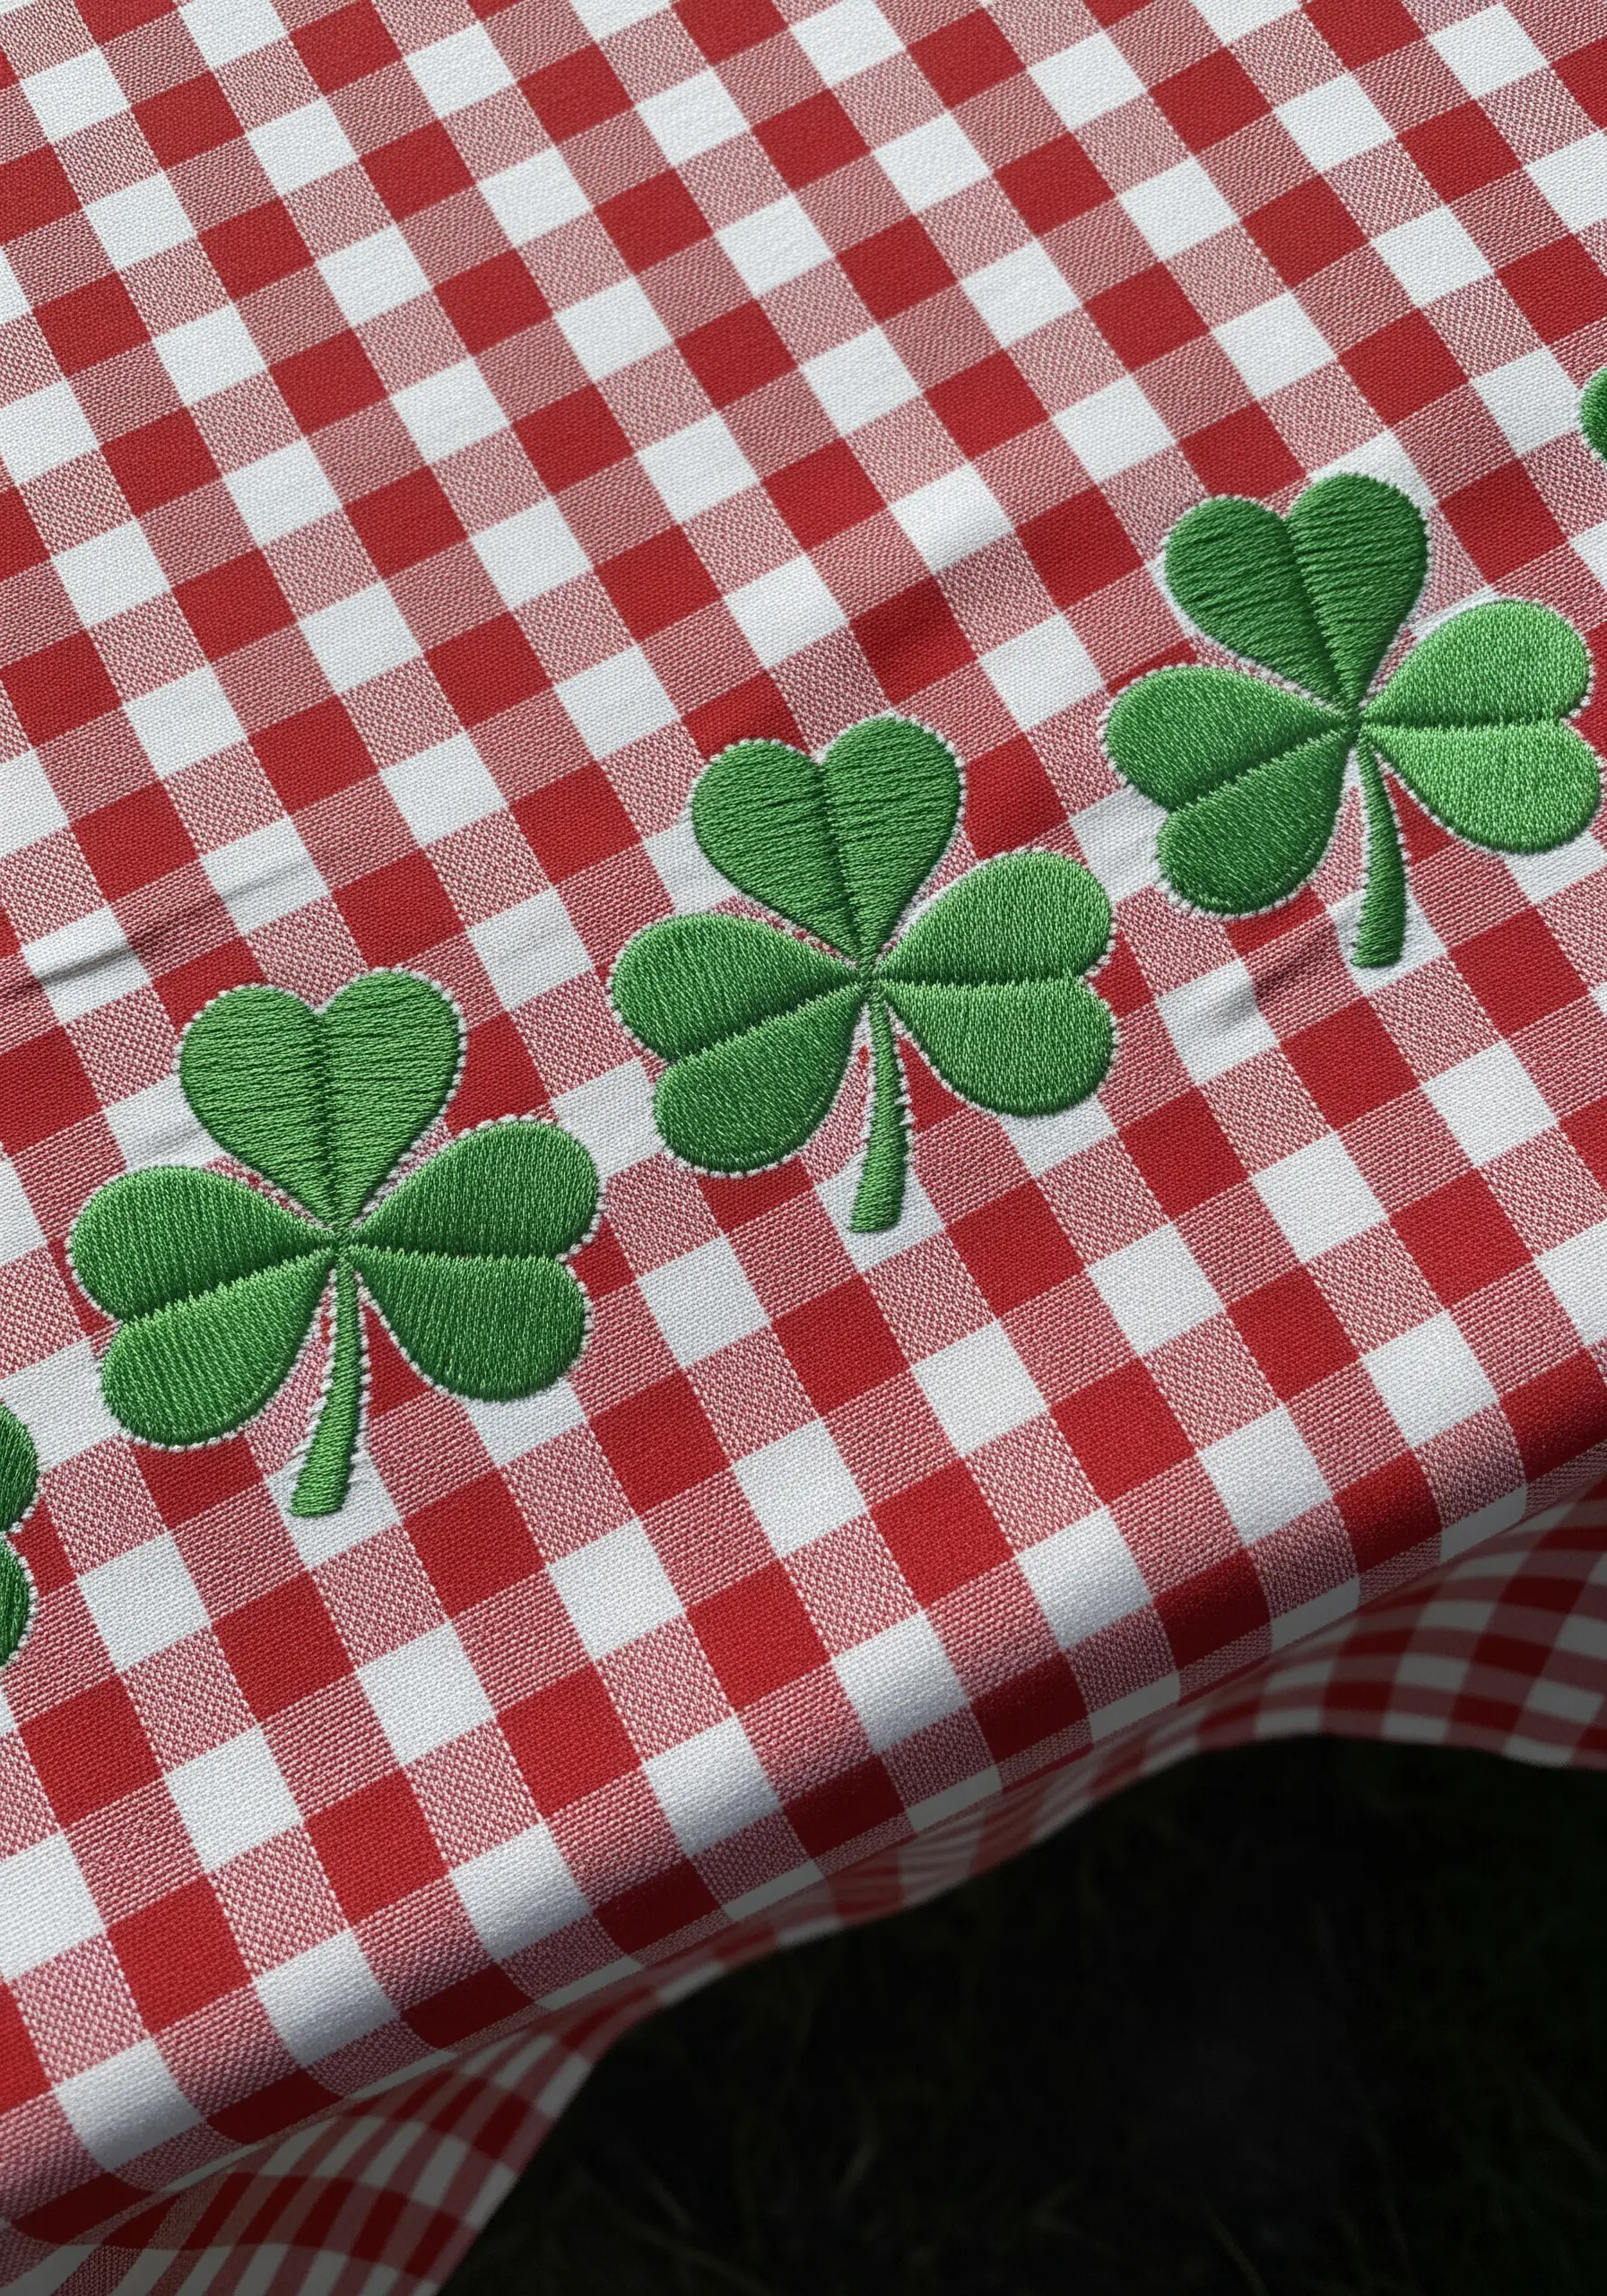
When embroidering on a patterned fabric like gingham, a strong outline is essential to prevent your design from getting lost.
First, fill the shamrock shapes with a clean, even satin stitch in a bright, vibrant green.
Then, go back and outline the entire shape with a neat backstitch or stem stitch using a slightly darker green or even a white thread.
This outline acts as a visual barrier, making the shamrock pop cleanly against the busy background.
20. Tell a Seasonal Story with a Leaf Gradient
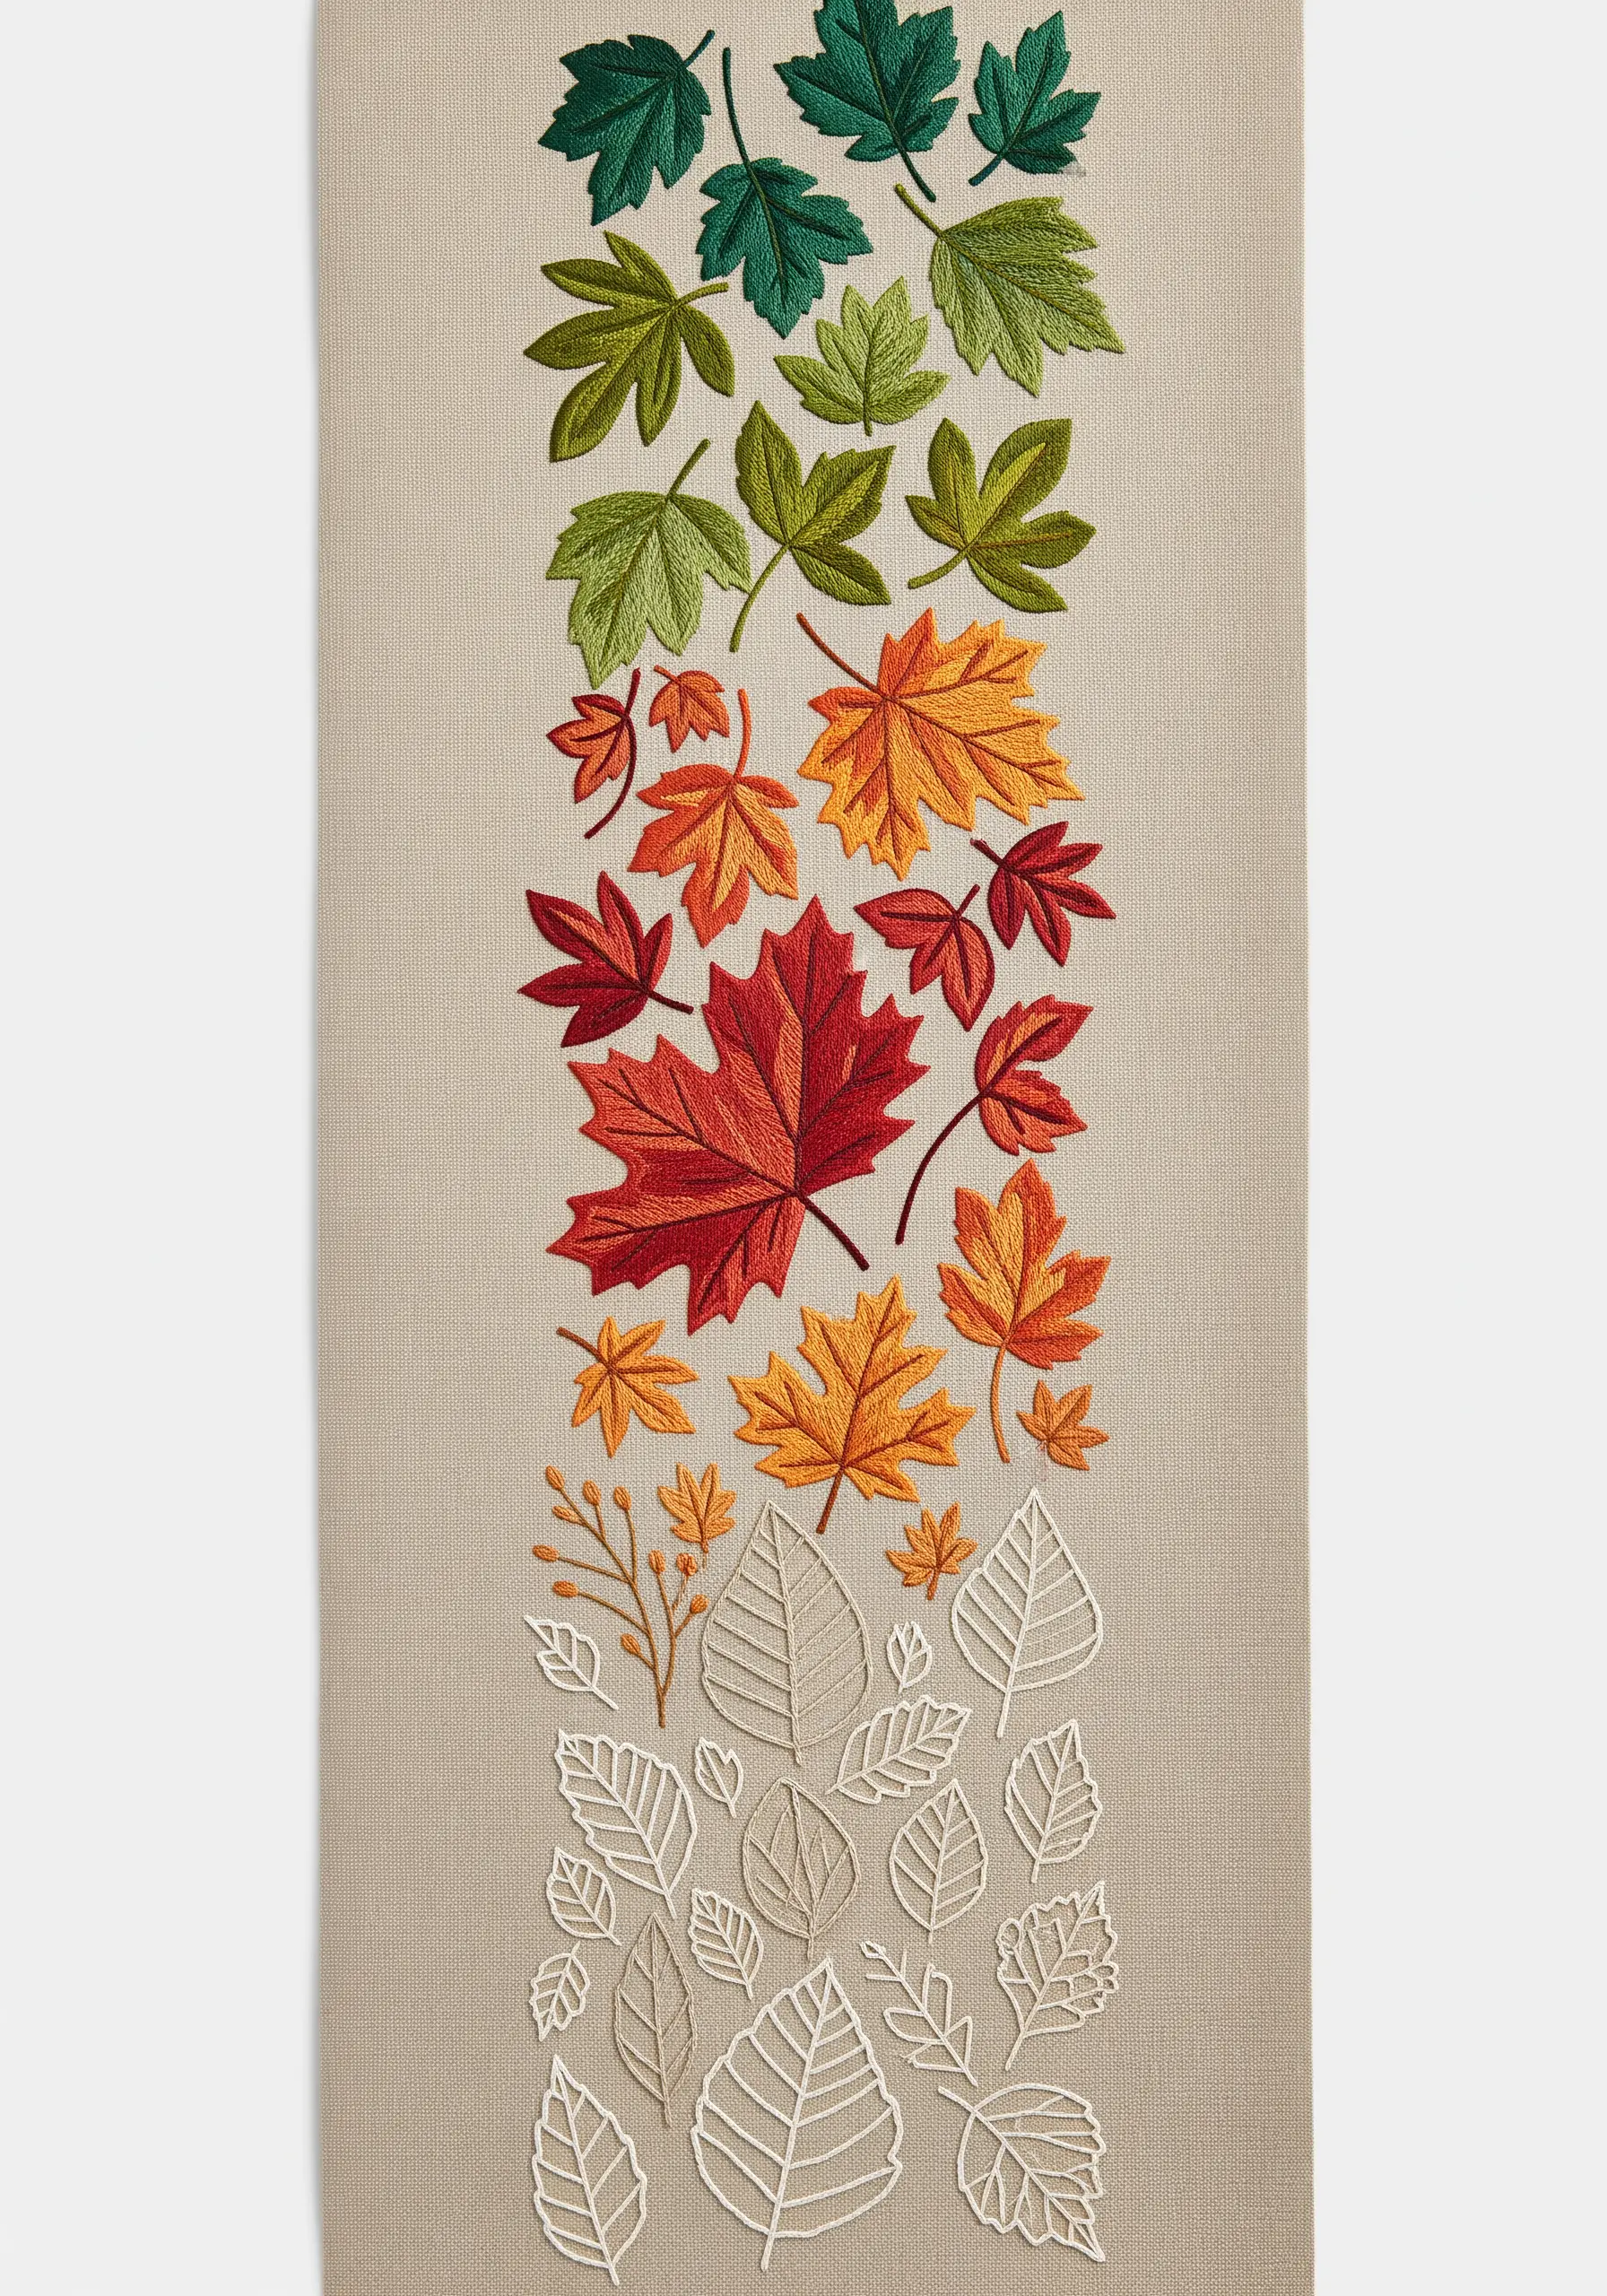
Transform a simple table runner into a narrative piece by stitching a gradient of leaves that represent the changing seasons.
Start at one end with lush green leaves filled with long-and-short stitch.
Gradually transition the colors through yellow, orange, and red, still using a fill stitch. Finally, as you reach the other end, switch to simple backstitch outlines in white or cream to represent bare winter branches.
This design tells a beautiful visual story and showcases your skill with both color and line work, much like seasonal pillow embroidery ideas.
21. Achieve a Soft, Painterly Leaf Effect

Create a delicate, almost water-colored look by using a soft color palette and a specific stitch.
Use split long-and-short stitch to fill the leaves, which allows you to blend shades of dusty sage and mint green seamlessly.
The gentle color transition removes any harsh lines, giving the leaves a soft, ethereal quality.
Pairing this with a complementary fabric, like this dusty rose linen, creates a sophisticated and romantic color harmony.
22. Add a Bold, Chunky Braided Yarn Border
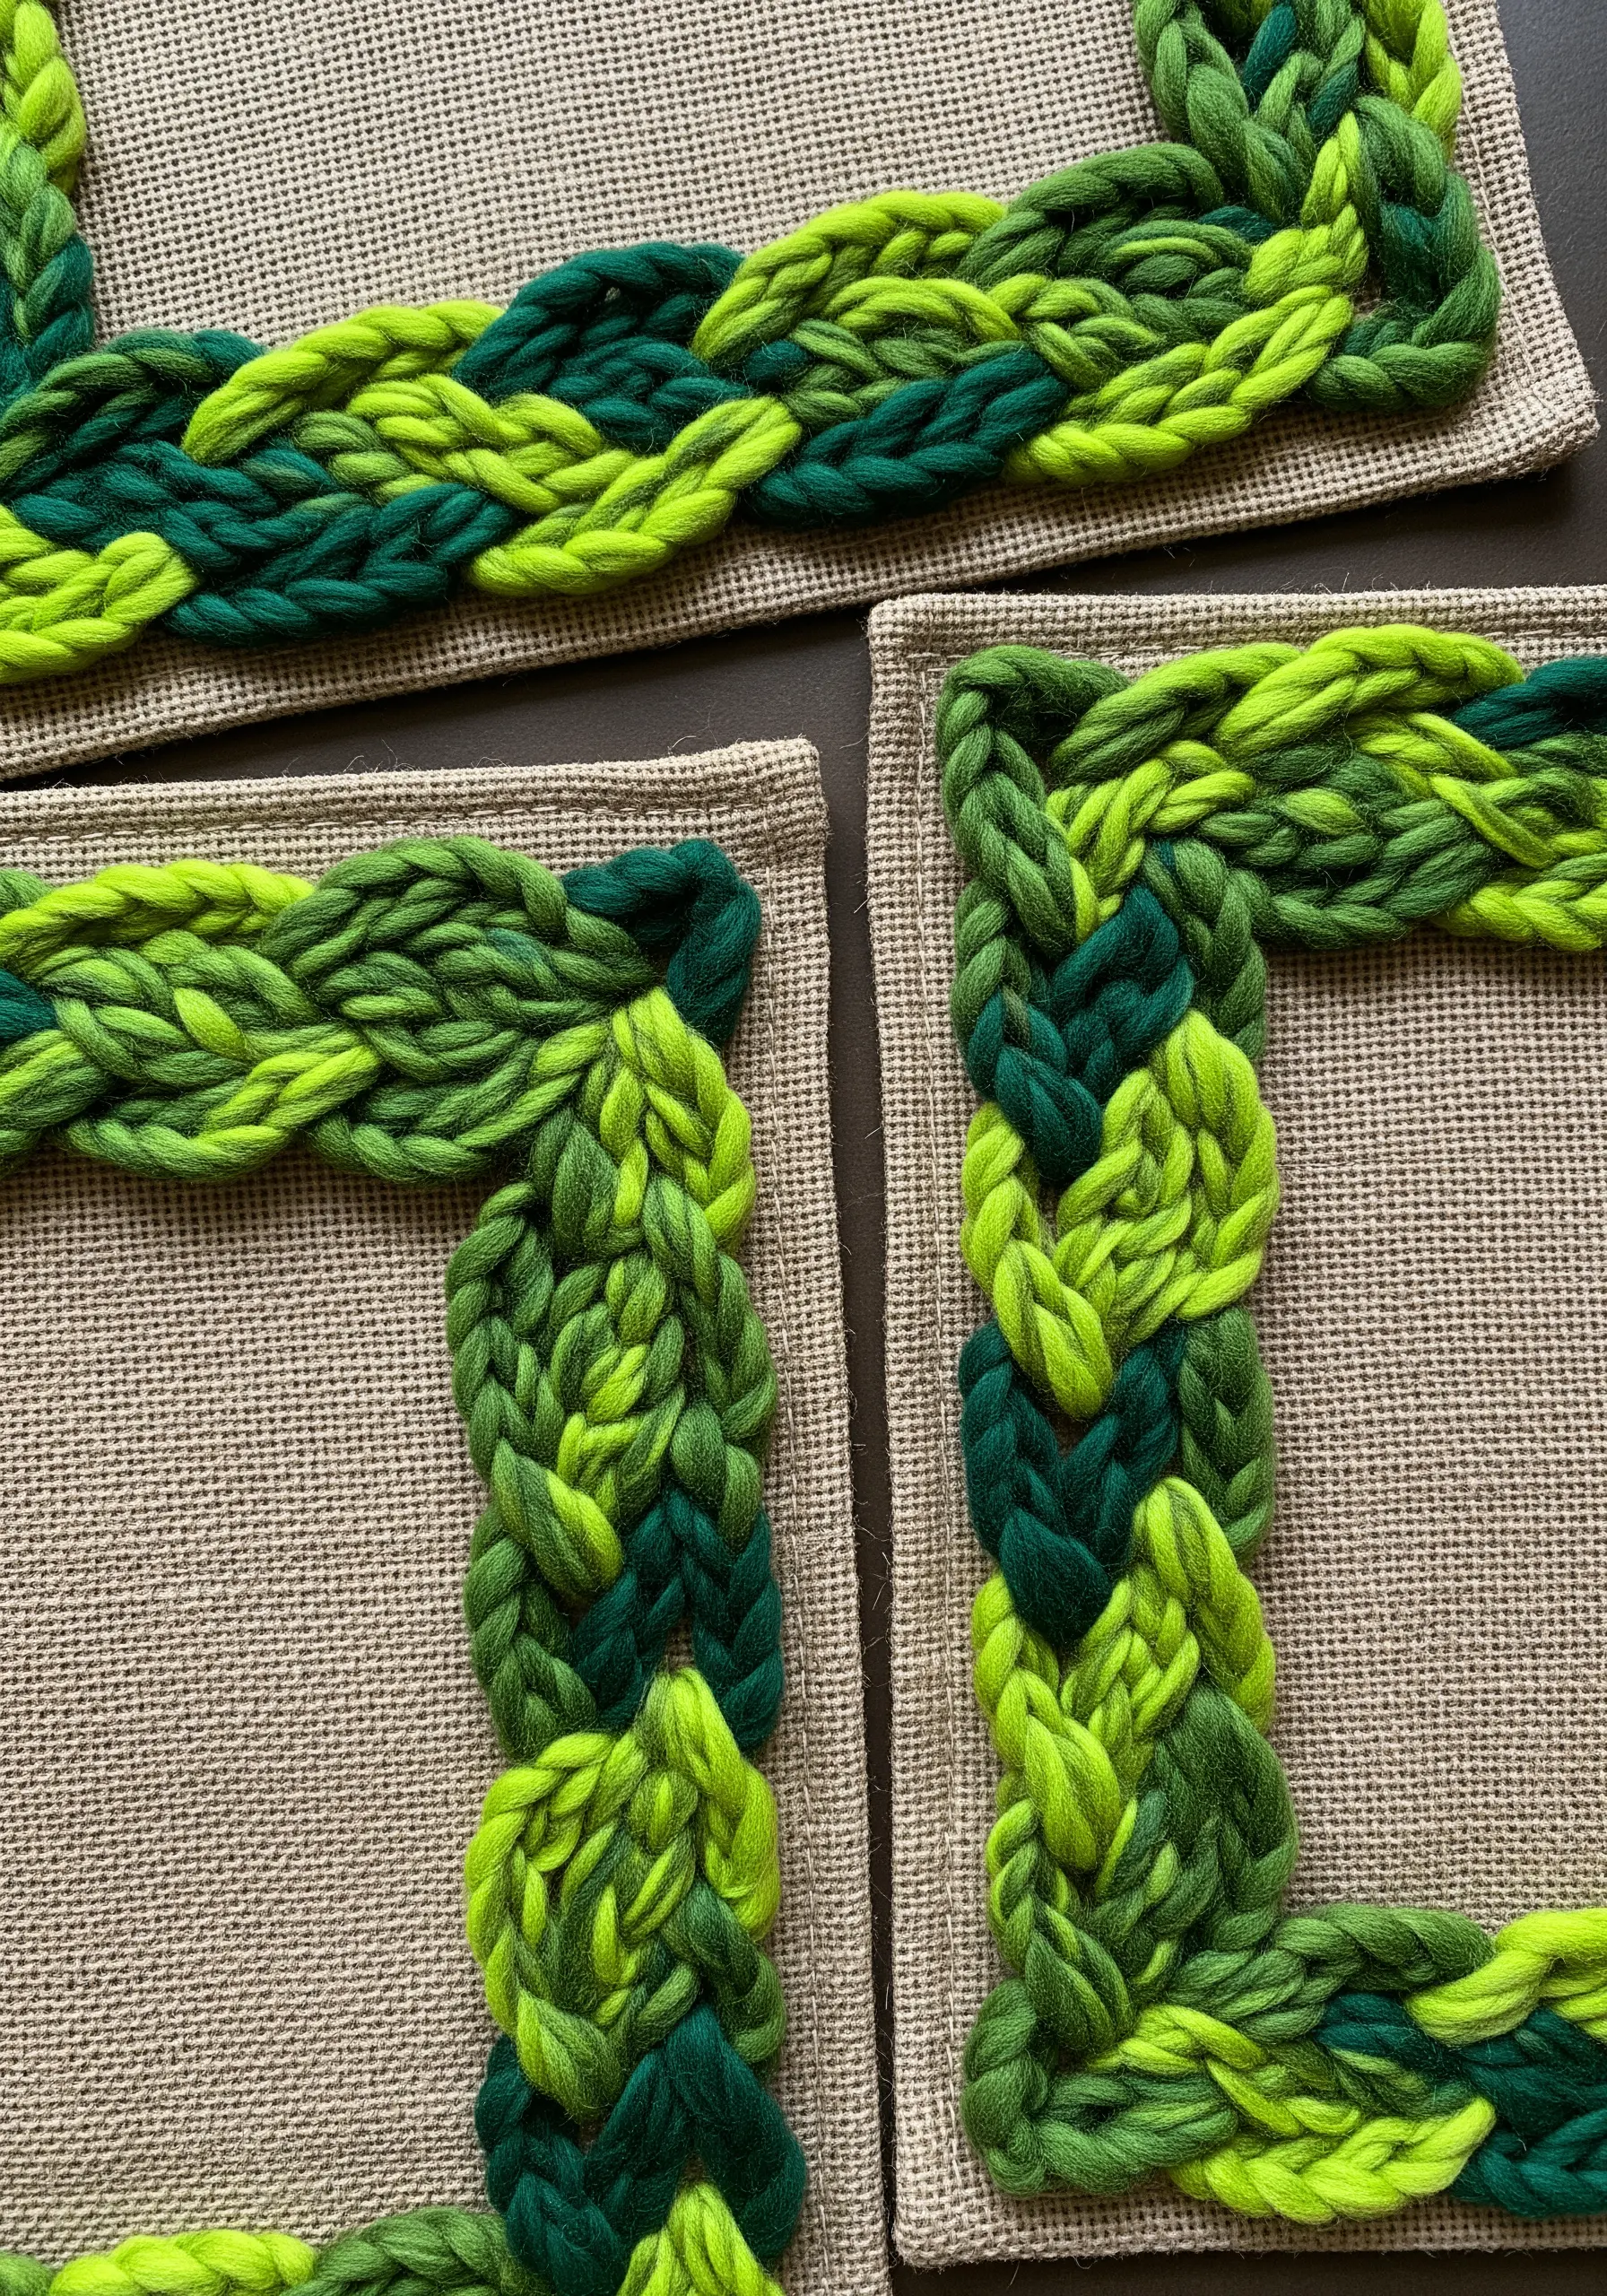
For maximum texture with minimal stitching time, incorporate chunky yarn into your design.
Create a three-strand braid using two or three shades of green wool roving or chunky yarn. Then, lay the braid along the border of your placemat and use a matching embroidery floss to couch it down, tacking it to the fabric every inch or so.
This creates a dramatic, 3D frame that introduces a wonderful, cozy texture to your table setting, showcasing organic texture embroidery ideas.
23. Craft a Dainty, Minimalist Ivy Chain

Sometimes, the most elegant statement is the most subtle one.
Create this delicate border using just a single strand of floss for the entire design. Use a simple backstitch for the connecting vine.
For the tiny leaves, use just three small, straight stitches arranged in a fan shape at each interval.
This minimalist approach is quick to execute but results in a refined, understated border that whispers rather than shouts.
24. Paint with Thread for Realistic Grape Leaves

To capture the rich, variegated color of grape leaves, you need to think like a painter.
Use the long-and-short stitch, also known as thread painting, to blend multiple colors—greens, yellows, and deep reds—within a single leaf.
This technique creates realistic gradients and depth. For the whimsical tendrils, couch a curly, textured yarn or a tightly twisted strand of floss onto the fabric to give them a lively, three-dimensional spring.
Mastering wildflower thread-painting techniques will elevate all your botanical work.
25. Stitch a Fresh and Vibrant Mint Border

While this design appears printed, you can replicate its fresh, vibrant look with careful stitching.
The key to capturing the texture of mint leaves is to use at least three shades of bright green and white for highlights.
Fill the leaves with directional satin stitch or long-and-short stitch, making sure your stitches follow the natural curve and crinkle of the leaves.
Add small stitches of the lightest green or white on the top edges to mimic how light catches the surface, making them look crisp and realistic.
26. Explore Bold Color with a Contrasting Palette
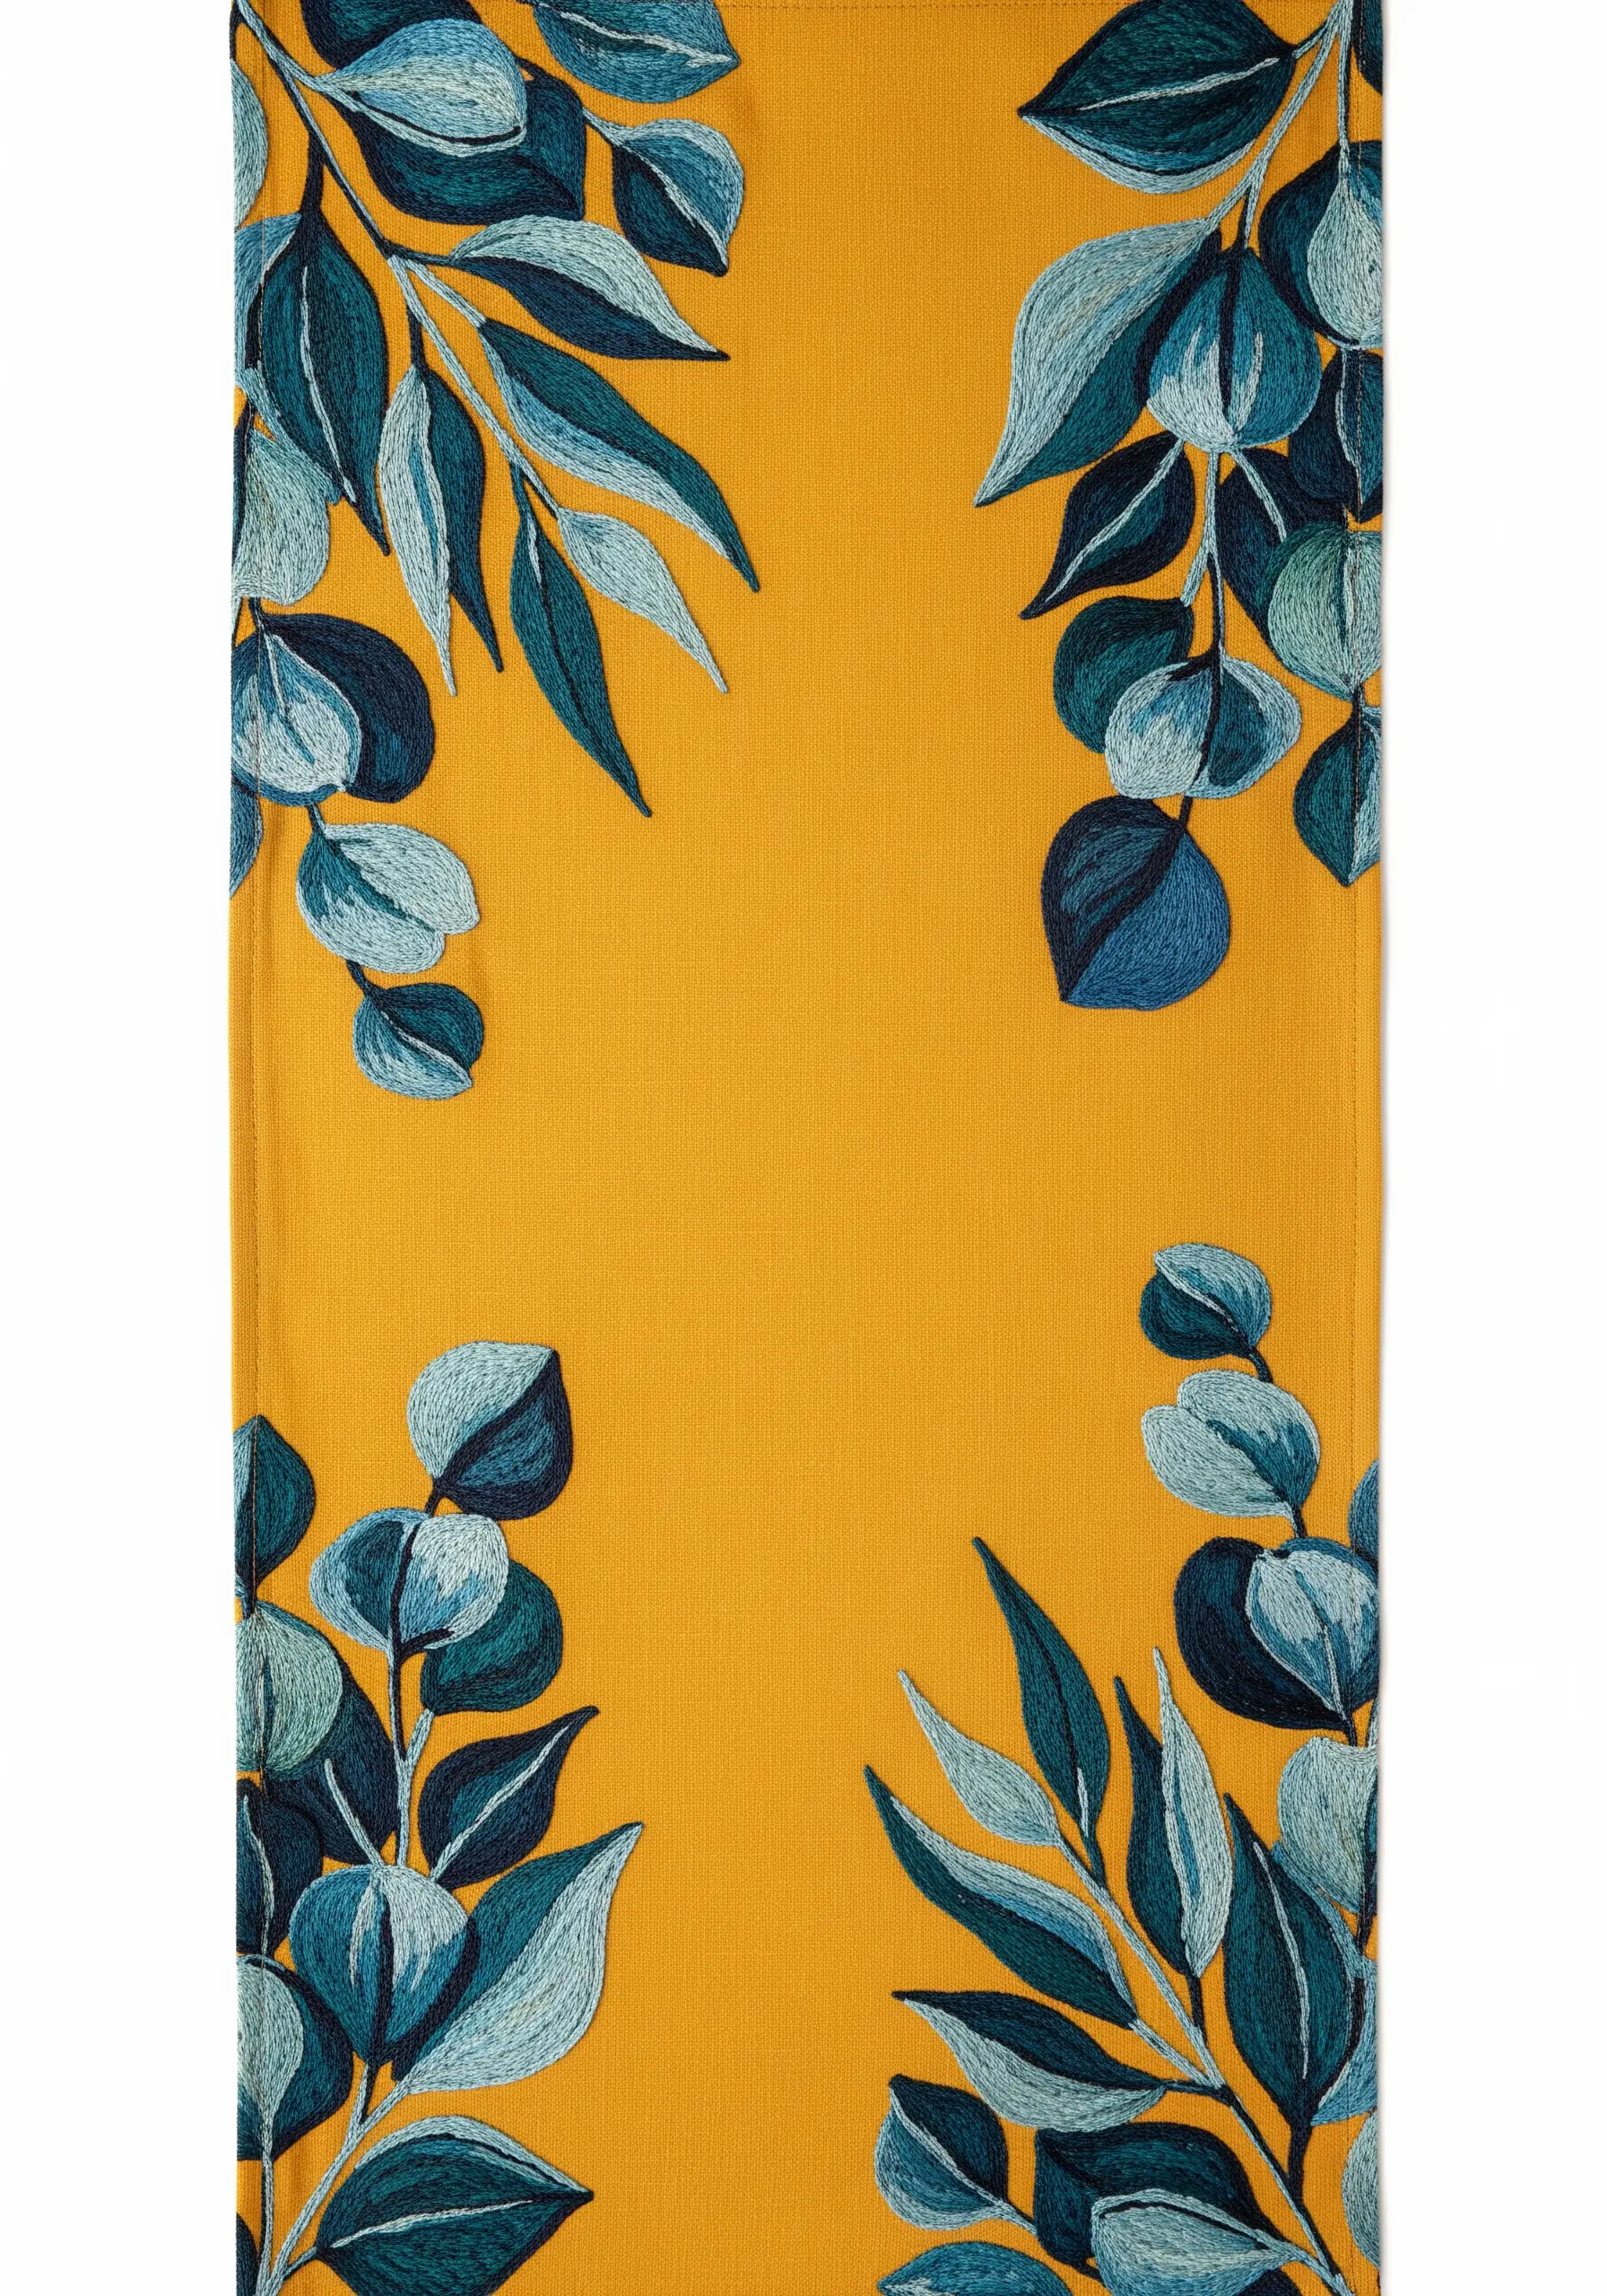
Step away from traditional green and explore a more artistic color palette.
Pairing deep blues and teals with a warm, mustard-yellow fabric creates a stunning, high-contrast look that feels modern and bold.
Use long-and-short stitch to blend the different shades of blue within the leaves, giving them dimension and form.
This use of complementary colors—blue and yellow—is a fundamental principle of color theory that guarantees a visually exciting result.
27. Create a Festive Holly and Twig Frame
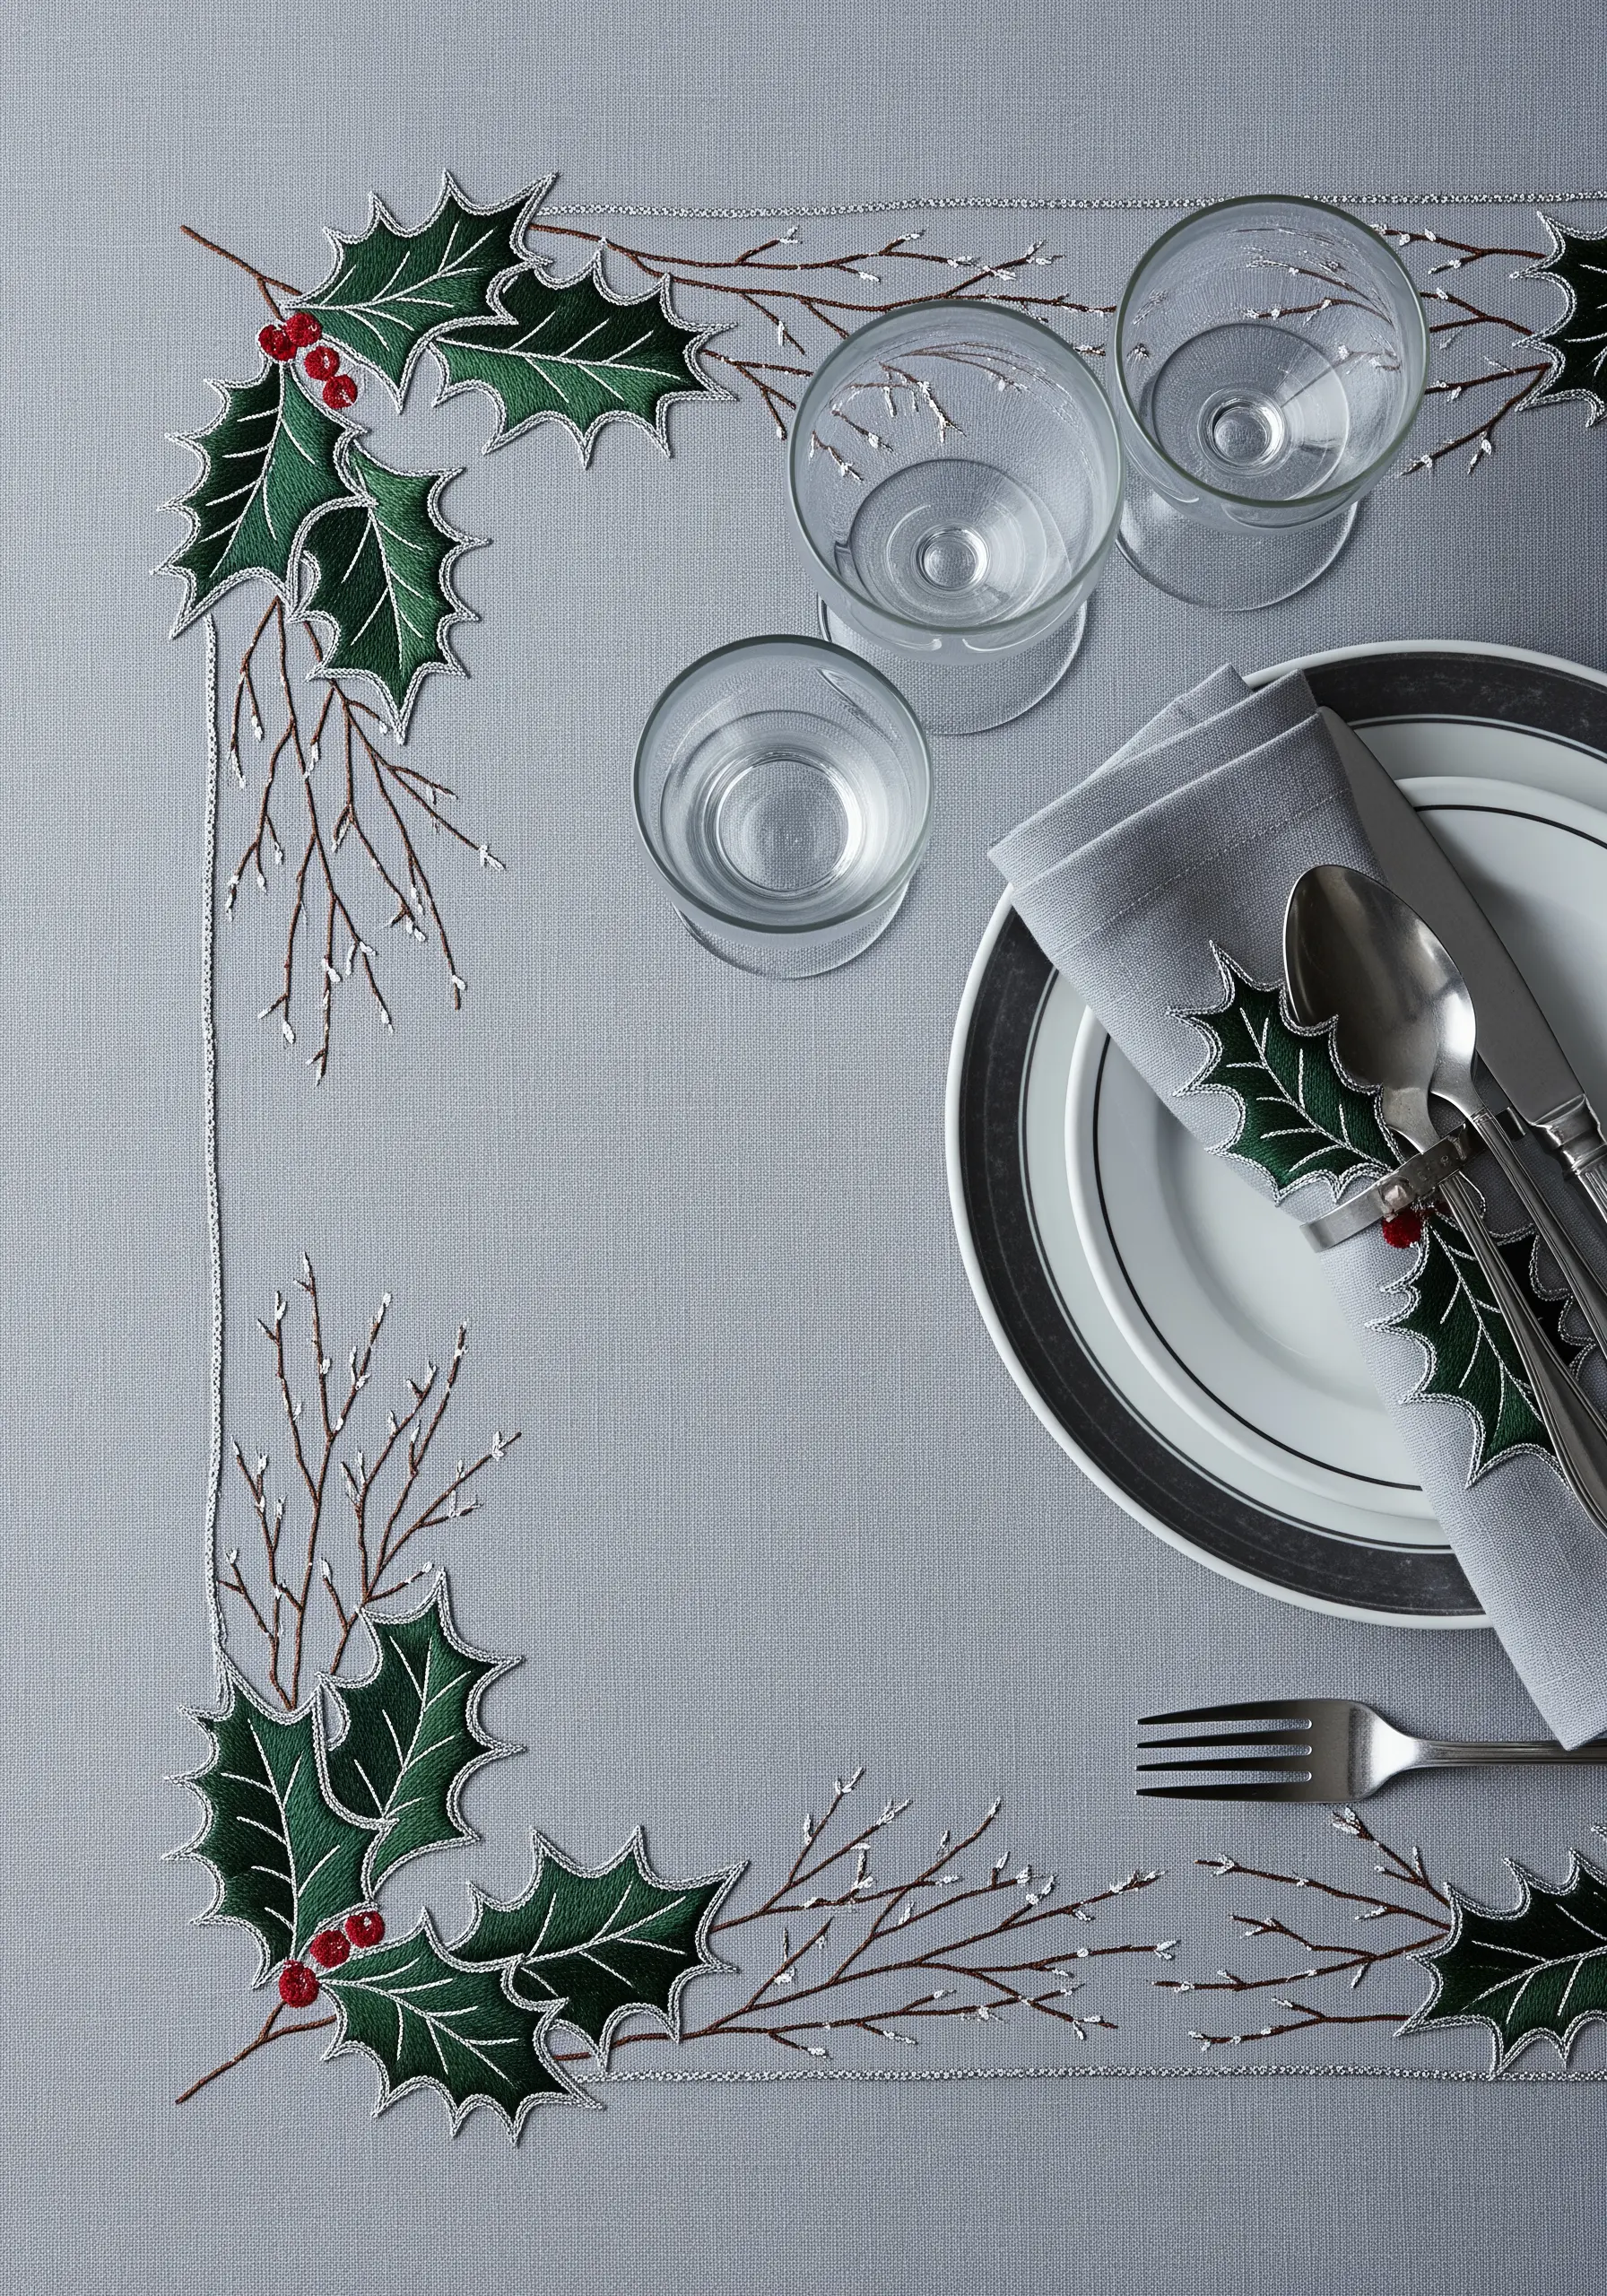
Combine different textures to create an elegant and balanced winter design for your holiday-themed table linen embroidery.
Stitch the holly leaves with a padded satin stitch to make them bold and solid, adding three red French knots for the berries.
For the delicate bare branches, use a light touch: couch a single strand of silver metallic thread or use a sparse, open backstitch.
This contrast between the substantial leaves and the airy, fragile branches creates a beautiful and sophisticated composition.
28. Build a 3D Layered Leaf Tapestry
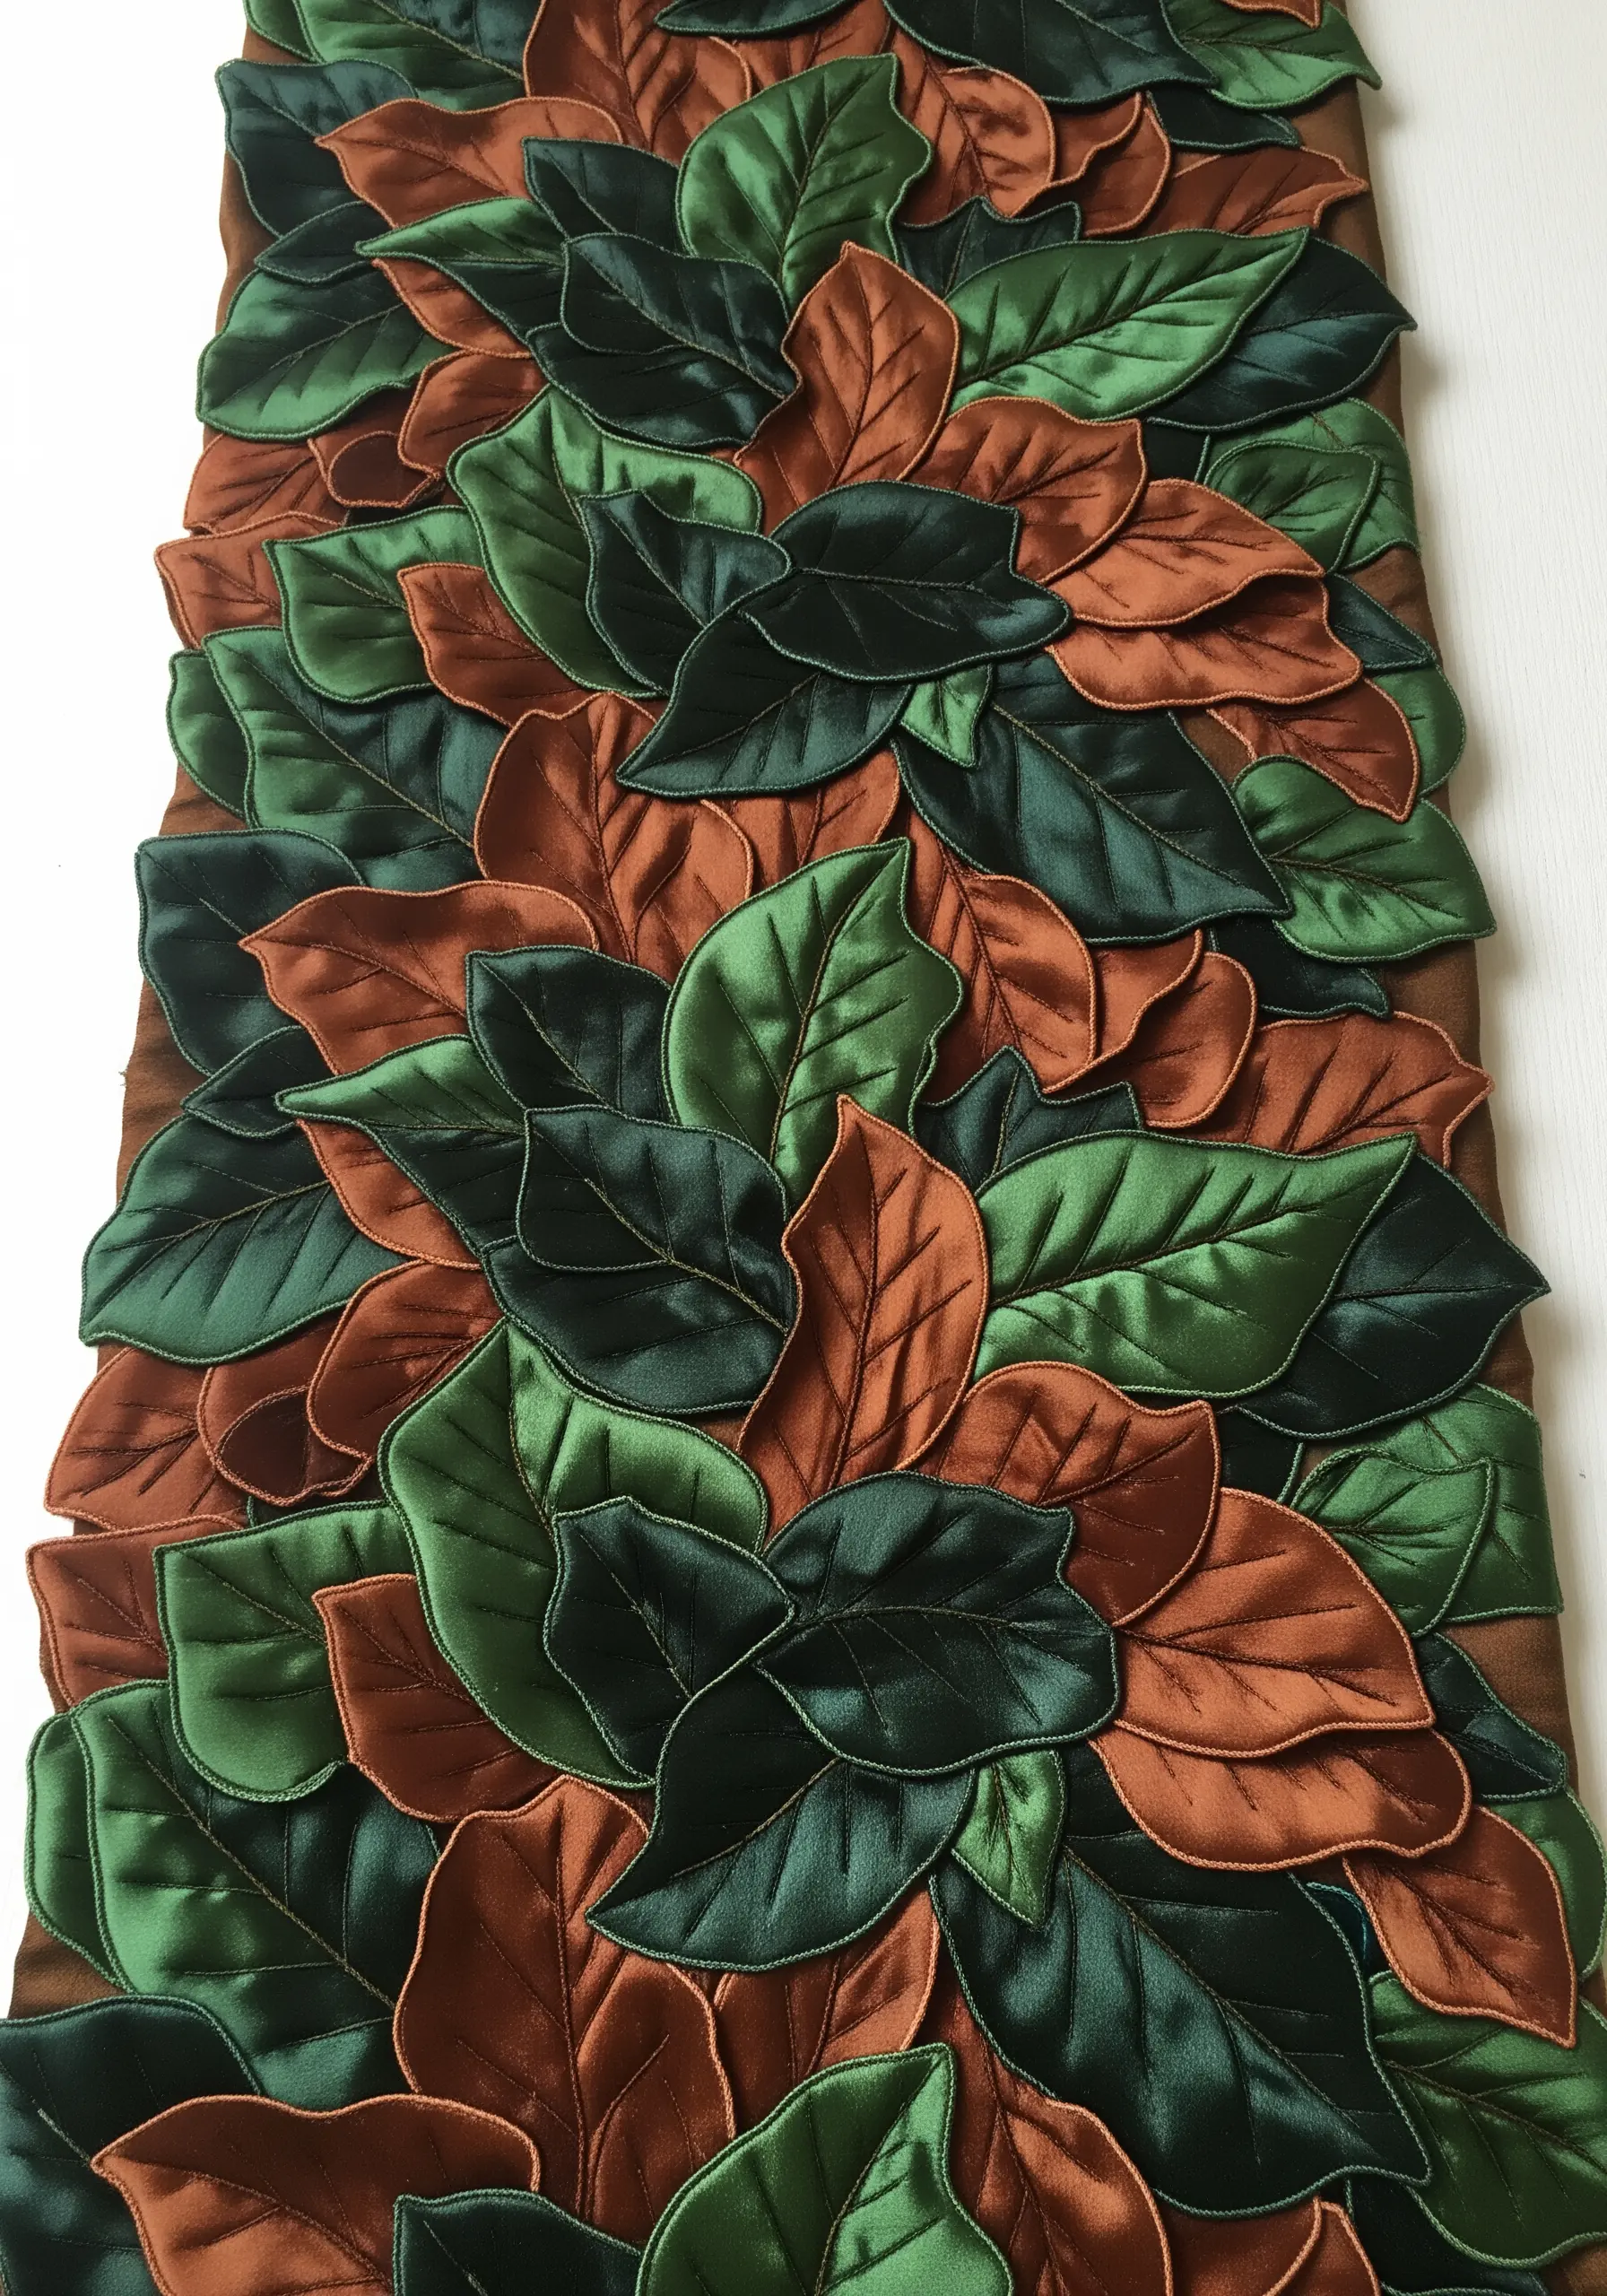
For the ultimate textural statement, move into three-dimensional stumpwork.
Create individual leaves by stitching around a thin wire frame with buttonhole stitch on a spare piece of fabric. Fill the inside with long-and-short stitch.
Once complete, cut each leaf out and bend the wire to give it a natural shape.
Arrange and stitch these individual leaves onto your table runner in dense, overlapping layers. This is one of the most advanced statement textured embroidery techniques, creating a truly spectacular, touchable piece of art.


