

There comes a moment in every stitcher’s journey when you want to move beyond just following a pattern. You feel a desire to make work that not only fills a hoop but also breathes life into a corner of your home. It’s not about adding more complexity, but about adding more intention.
Think of your thread as another tool for interior design. Consider how the texture of a French knot can make a space feel cozier, or how the sheen from a perfectly angled satin stitch can catch the morning light. Your embroidery can be more than just art on a wall; it can be an integral layer of the room’s atmosphere, a soft, tactile story that you’ve told yourself.
These projects are your invitation to explore that next step. They are built on techniques that elevate your work with subtle, thoughtful adjustments. Trust your hands, pay attention to the details, and allow yourself to create pieces that feel deeply and uniquely yours.
1. Master the Satin Stitch for Luminous Leaves
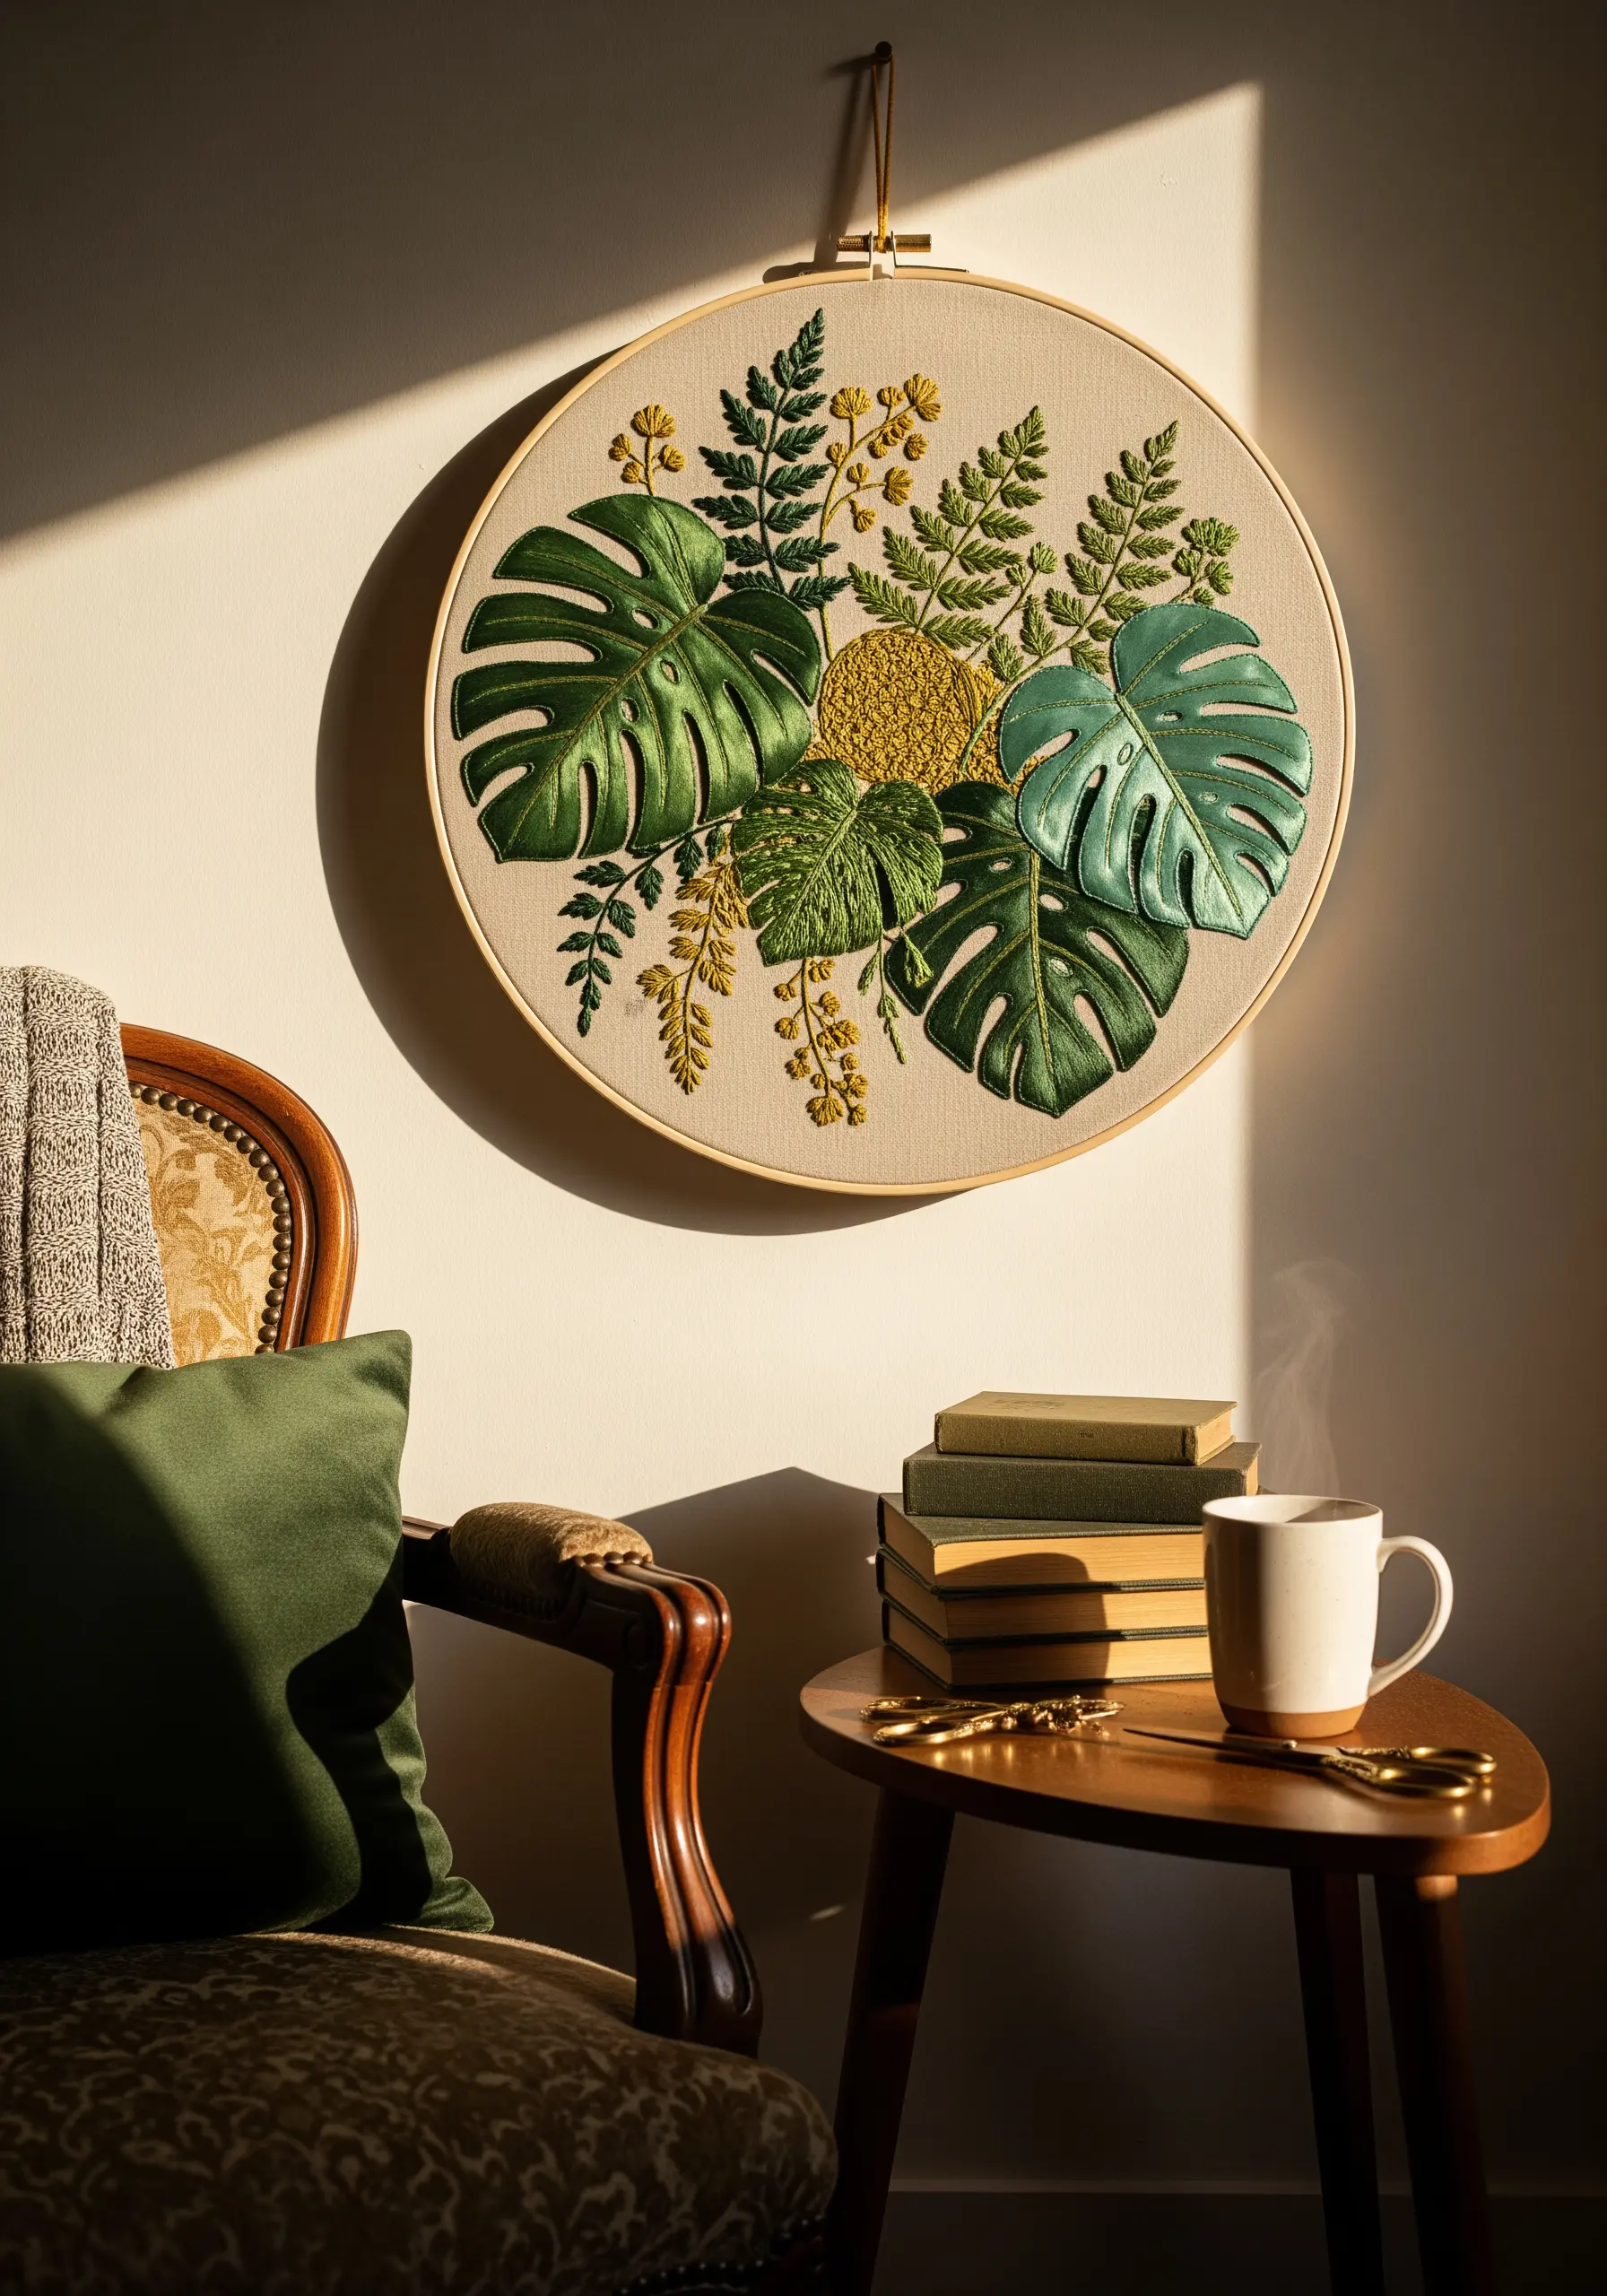
To achieve that smooth, light-catching sheen on botanical leaves, the direction of your satin stitch is everything.
Always angle your stitches to follow the natural growth and veins of the leaf, which creates realistic highlights and shadows.
Before you begin, outline each leaf section with a single line of split stitch in a matching color.
This simple preparation creates a slightly raised, clean edge that keeps your satin stitches perfectly contained, preventing gaps and ensuring a polished, professional finish.
For added depth, use two closely related shades of green thread—one for each half of the leaf—to create a subtle, lifelike gradient.
2. Create Cosmic Depth with Metallic and Specialty Threads
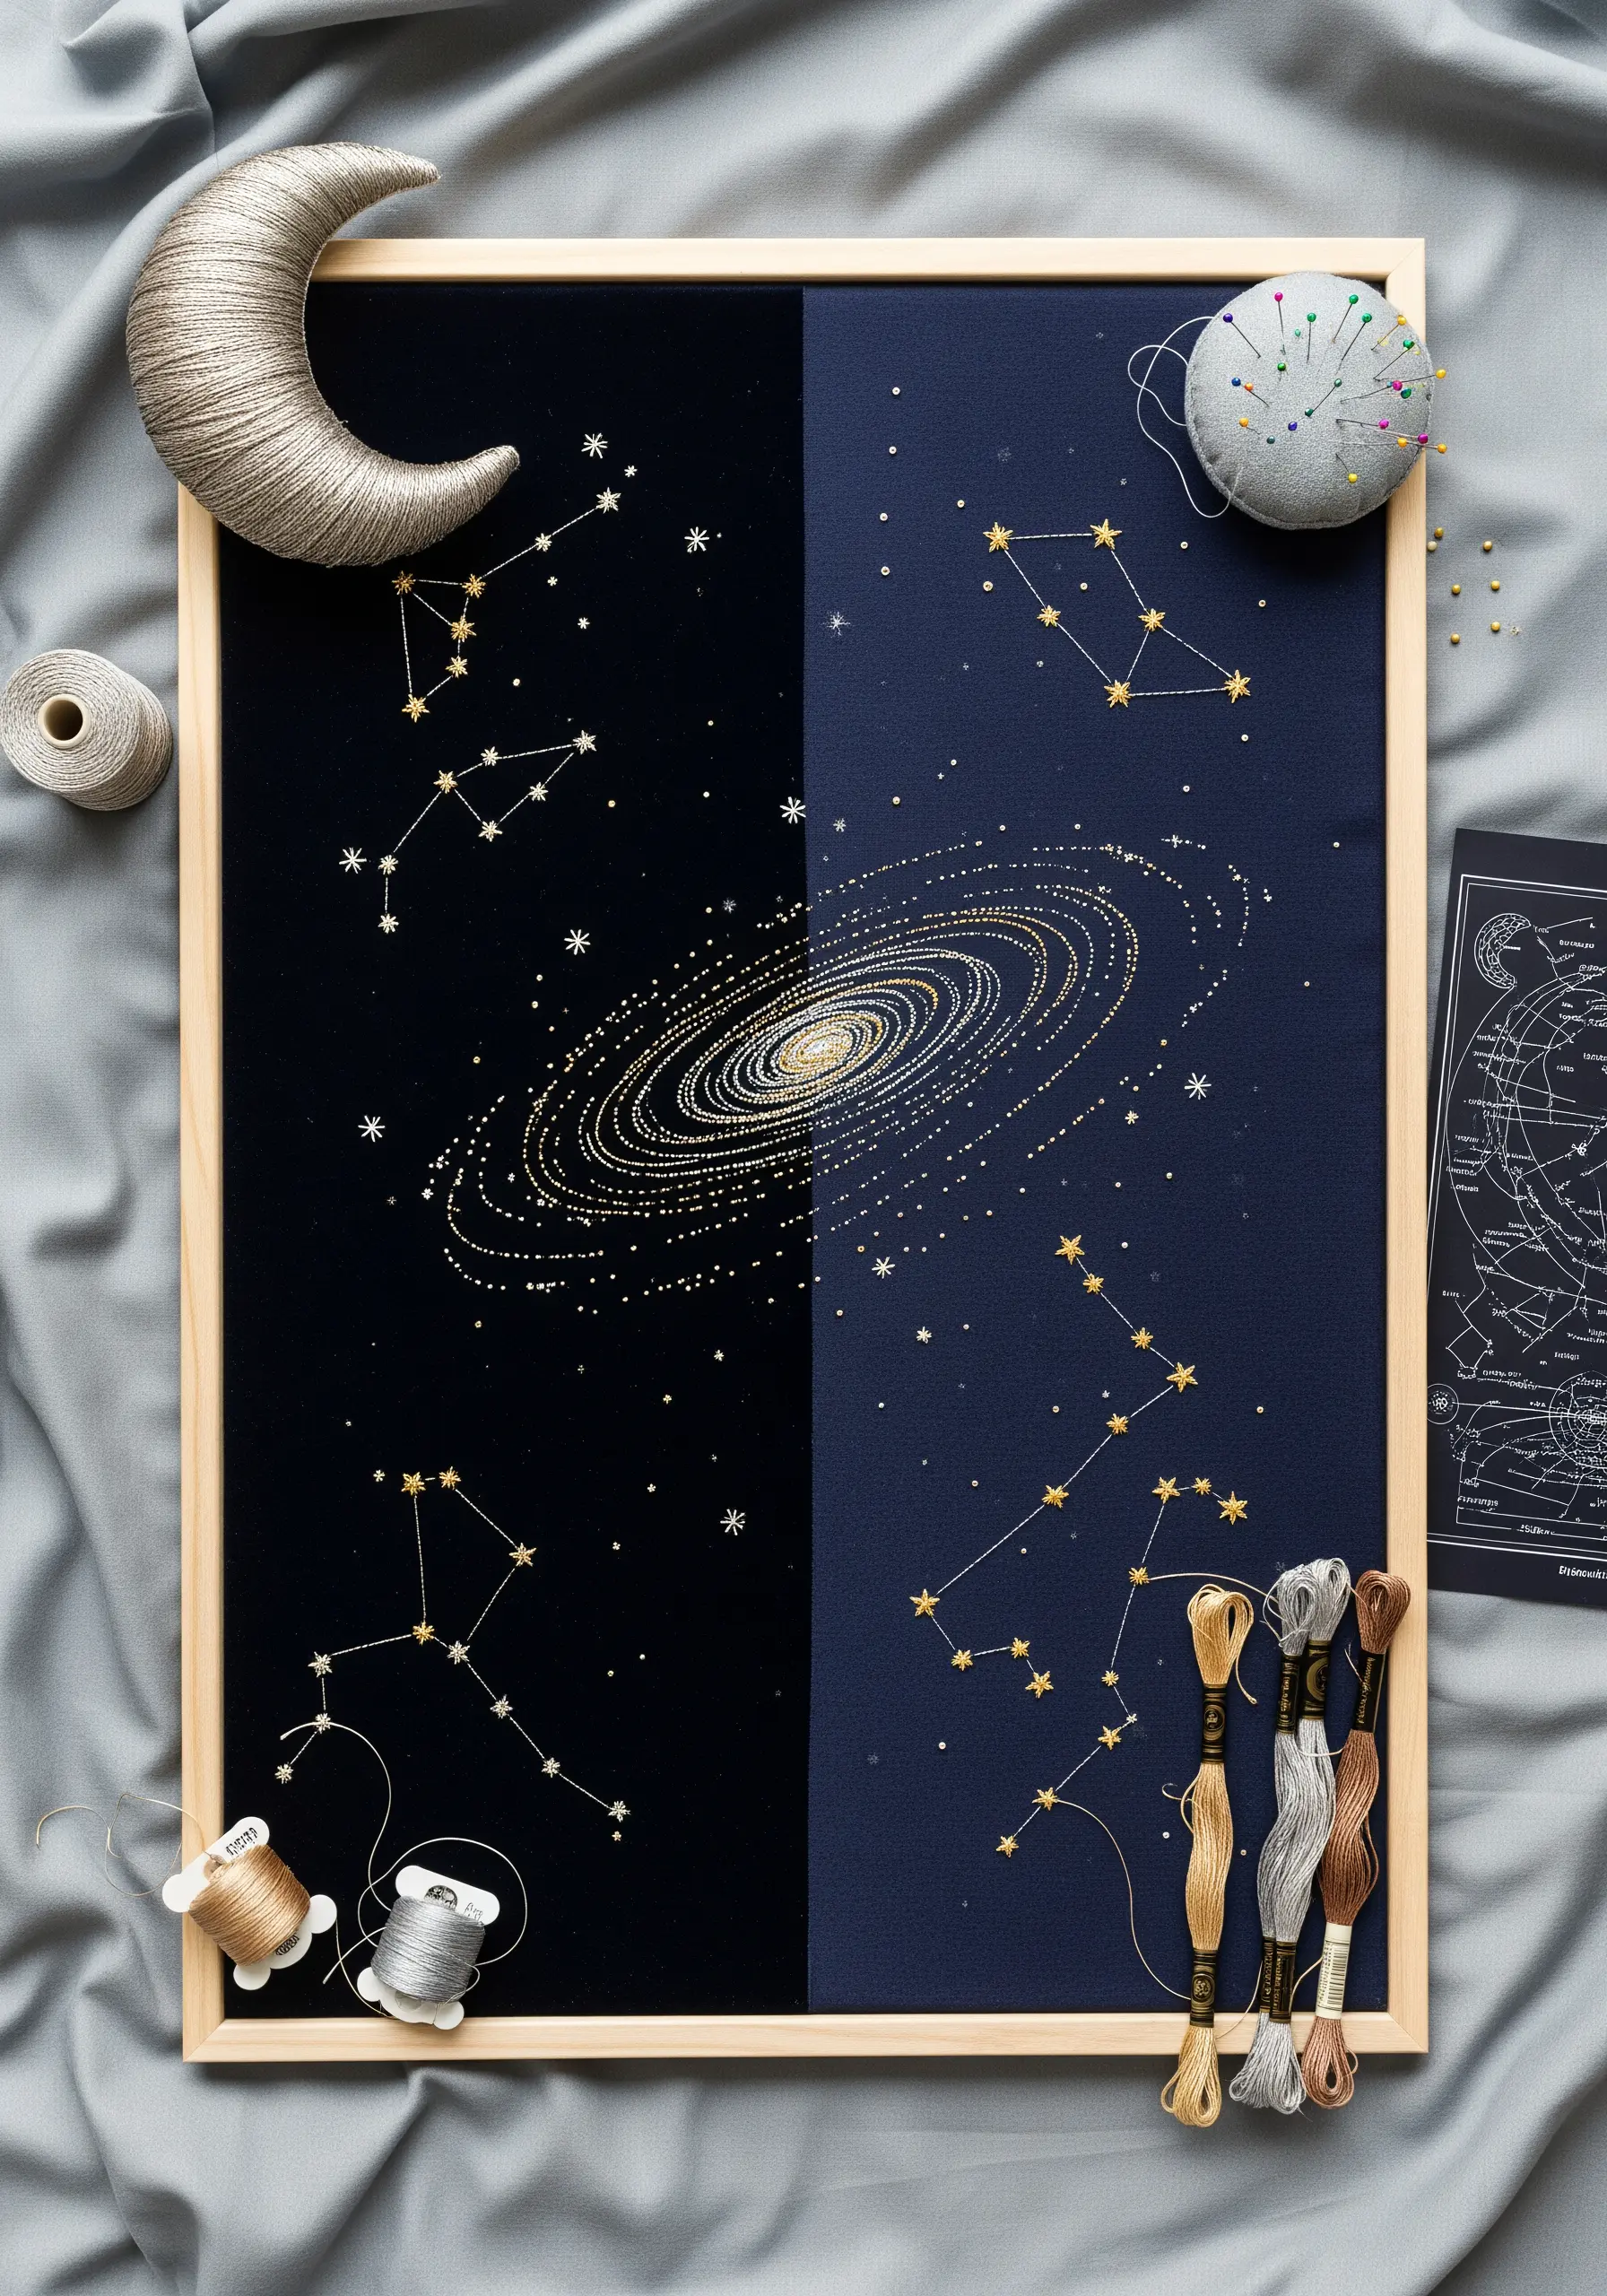
Working with metallic thread requires a gentle touch to avoid fraying.
Cut shorter lengths than you normally would—about 12 inches—and consider using a thread conditioner to help it glide through the fabric.
For distant star clusters and galaxies, use a single strand of metallic thread to create tiny, scattered seed stitches.
Use a thicker, brighter thread or a small French knot for foreground constellations to make them pop, creating an illusion of astronomical depth on your dark fabric canvas.
A split background of black velvet and navy linen adds another layer of texture and visual interest.
3. The Art of the Unbroken Line in Embroidery
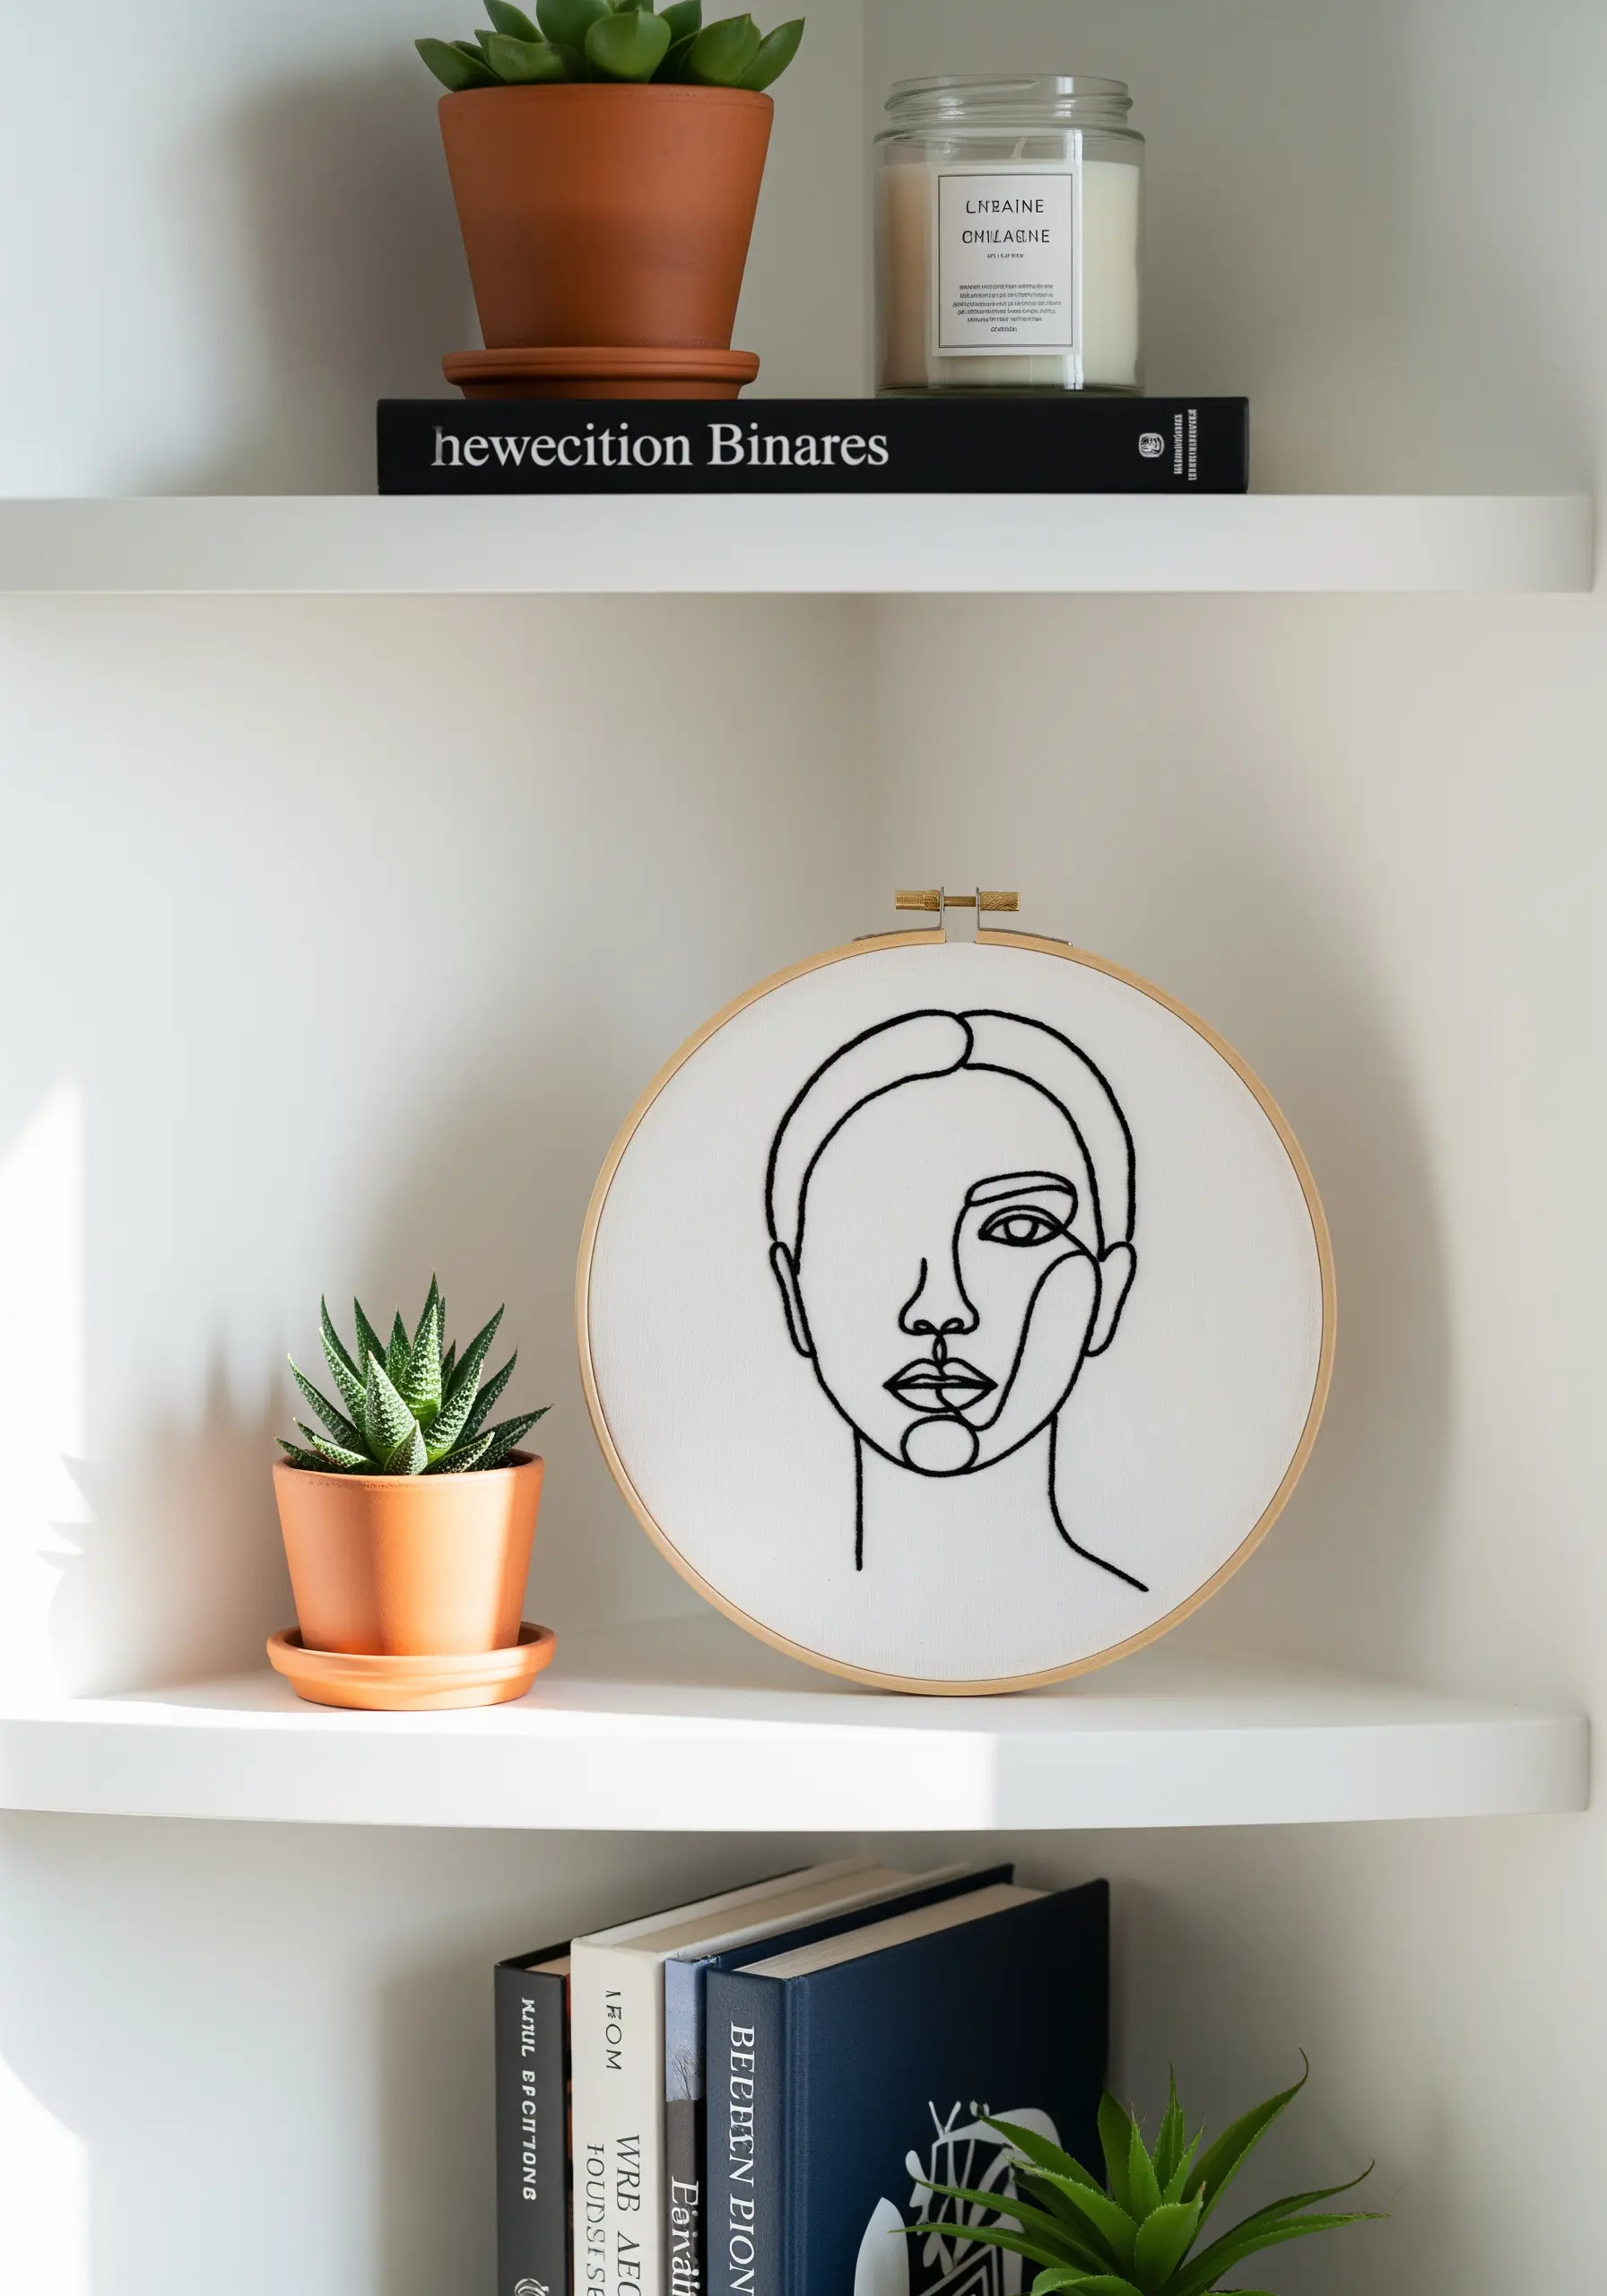
The power of one-line embroidery lies in its fluidity and consistency.
To create a seamless line that flows without interruption, choose your stitch wisely.
A whipped backstitch is excellent for this, as the wrapping motion smooths out the segmented look of a standard backstitch.
For tight curves, switch to a stem stitch, which naturally creates graceful arcs.
The most critical factor is maintaining even thread tension throughout the entire design to prevent any puckering on the crisp, unforgiving canvas.
4. Blend Weaving and Embroidery for Sculptural Texture

Expand your definition of embroidery by incorporating weaving techniques to build sculptural, tactile landscapes.
Use a frame loom to create your base, varying the weight and texture of your yarns—from fine cotton to chunky wool roving—to establish the foundational shapes of your scene.
Once woven, add embroidered details directly onto the surface.
Incorporate dense clusters of French knots for mossy ground, use Turkey work for shaggy clouds, and add long, straight stitches to suggest rain or light rays. This blend of disciplines transforms a flat piece into immersive yarn wall art.
5. Layering Thread to Paint with Texture and Light
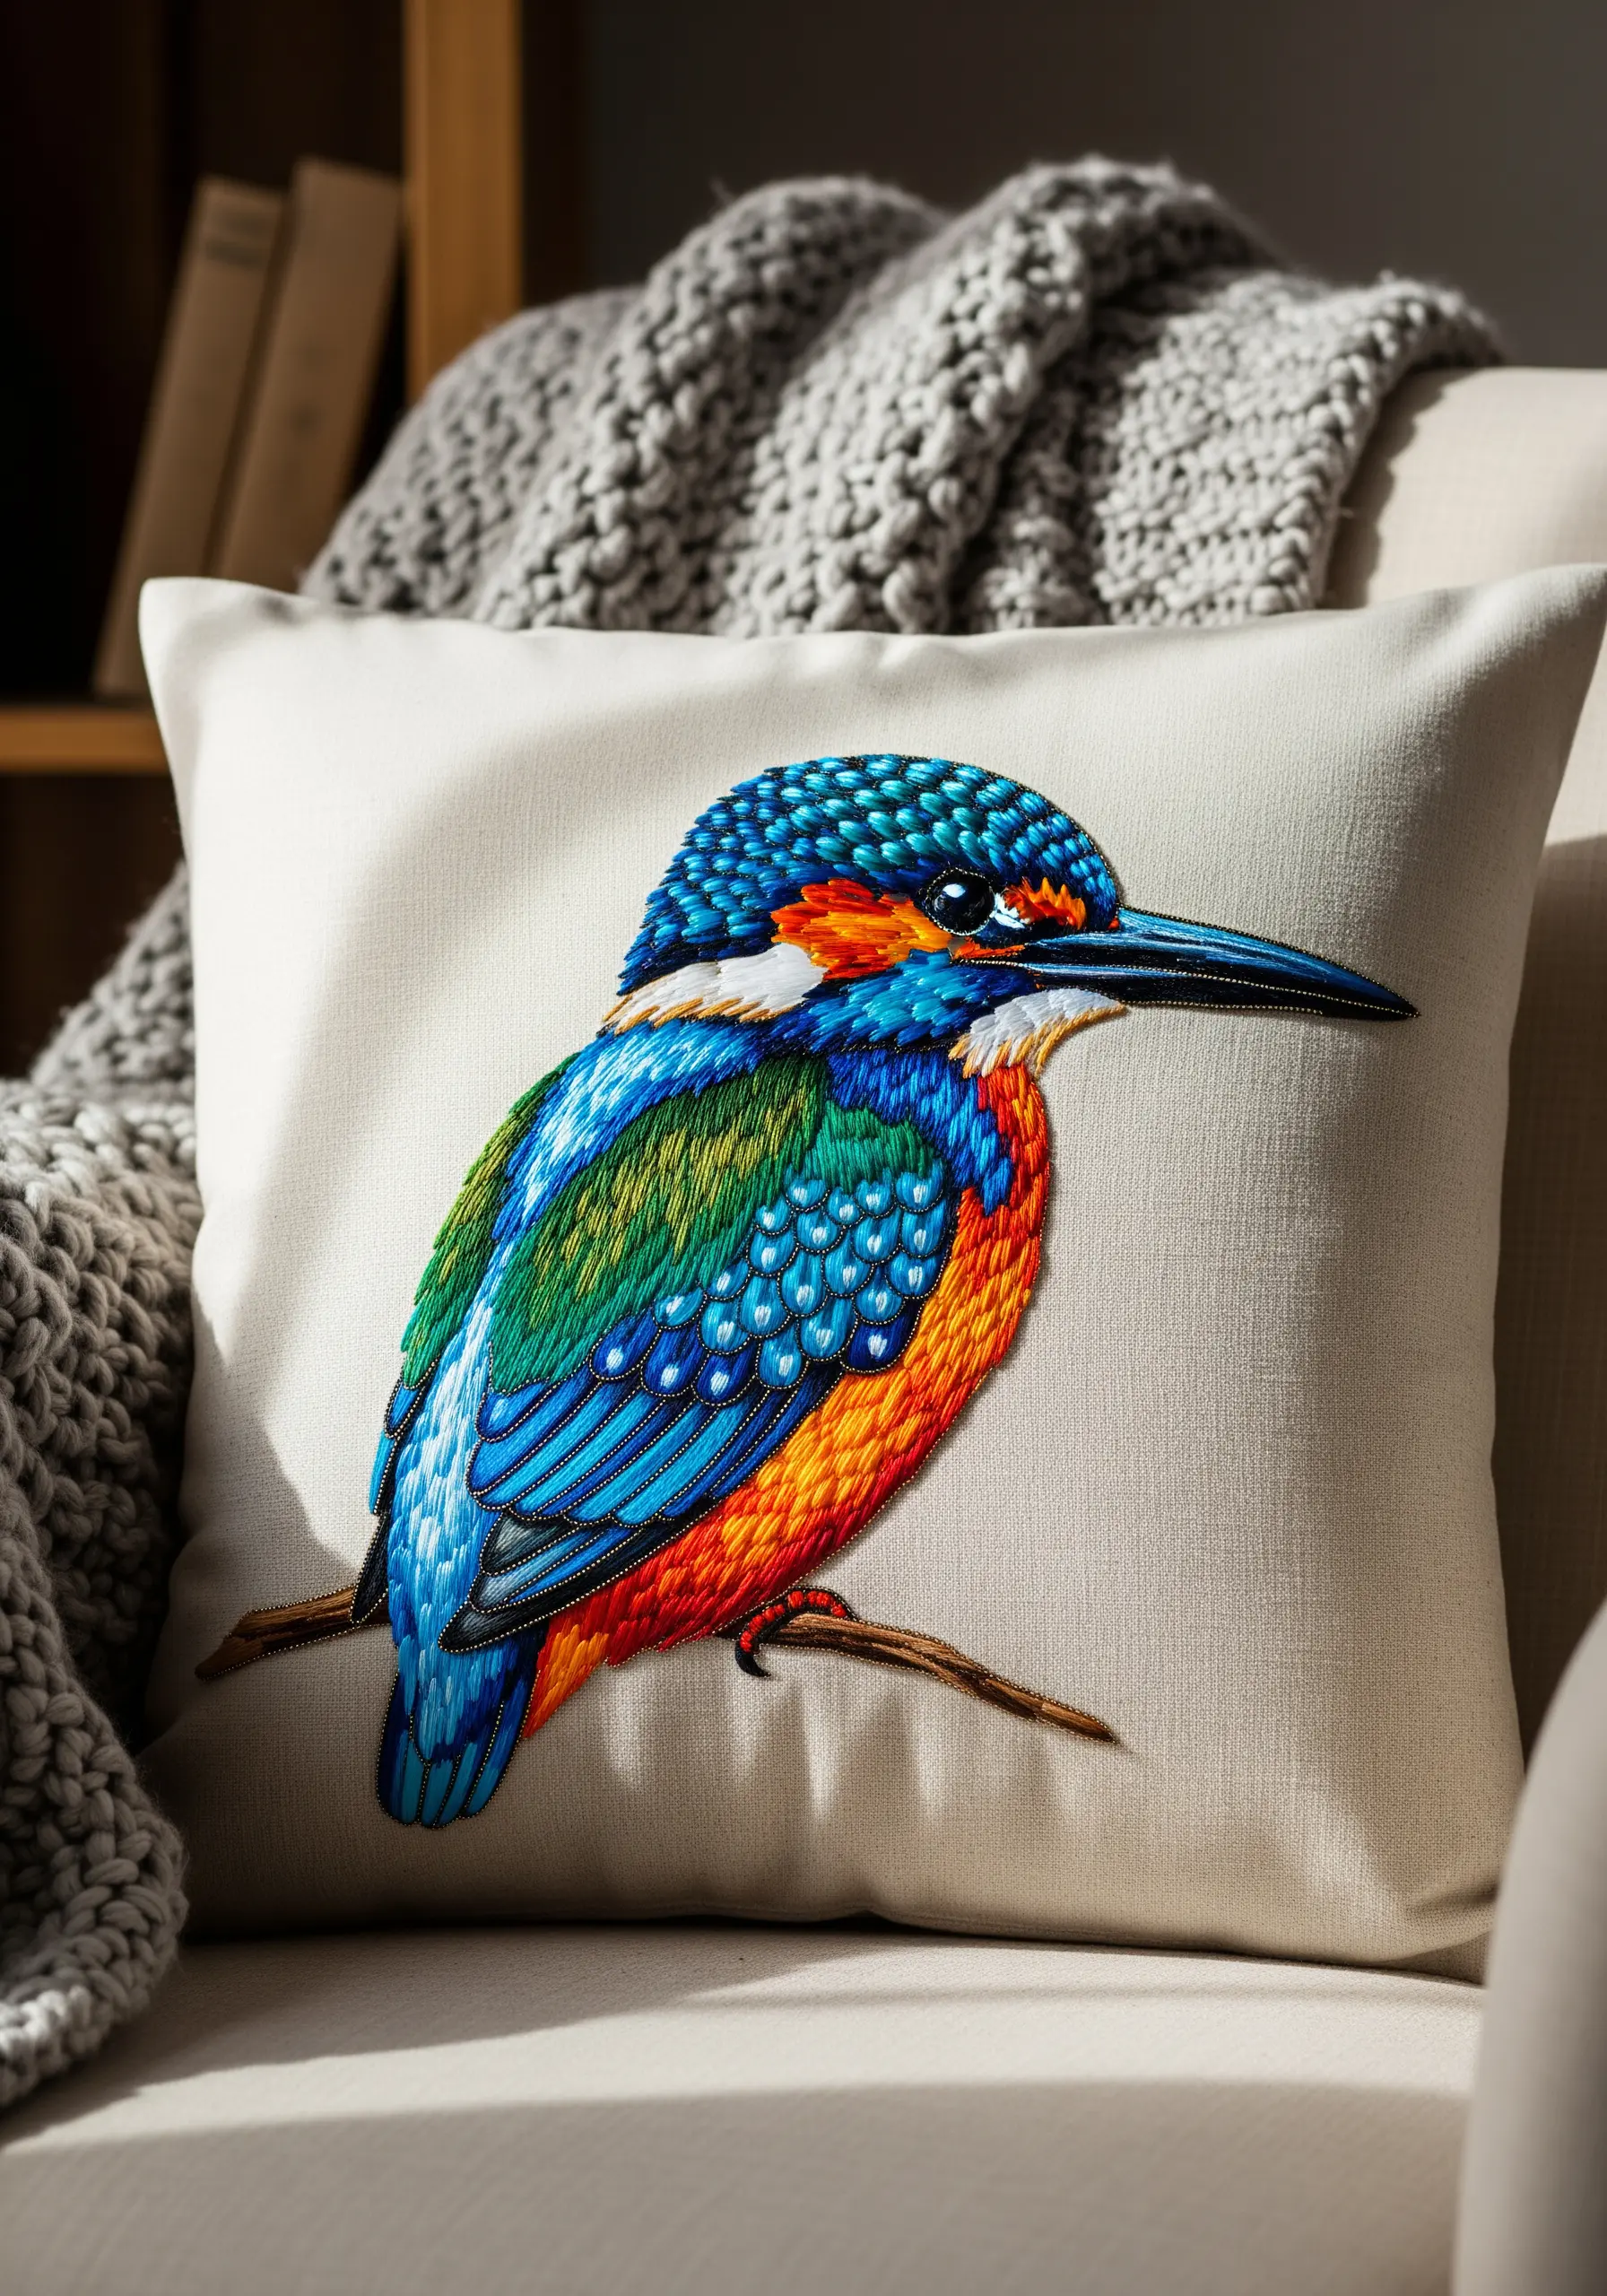
This vibrant kingfisher is a masterclass in thread painting, where stitches act as brushstrokes.
Use the long-and-short stitch as your primary tool, blending shades of floss to create seamless color transitions that mimic the iridescence of feathers.
Pay close attention to stitch direction; it should follow the contours of the bird’s body to create form and movement.
For the intricate, scale-like texture on the head, use tightly packed, overlapping French knots or small seed stitches in contrasting blues.
This layering of both color and stitch type is what gives these modern thread art projects their stunning realism.
6. Capture Delicate Details in a Botanical Herb Series

When stitching a collection of herbs, select stitches that reflect the unique texture of each plant.
For rosemary, use short, straight stitches angled upwards to mimic the spiky needles.
For thyme, use tiny, delicate French knots clustered along a stem-stitched branch to suggest its tiny leaves.
Lazy daisy stitches work perfectly for the broader leaves of basil, giving them a natural shape and lift.
Stitching on Aida cloth provides a subtle grid that helps with spacing and scale, ensuring your garden herb embroidery patterns look crisp and uniform as a set.
7. Tell a Story with Felt Appliqué and Embroidery
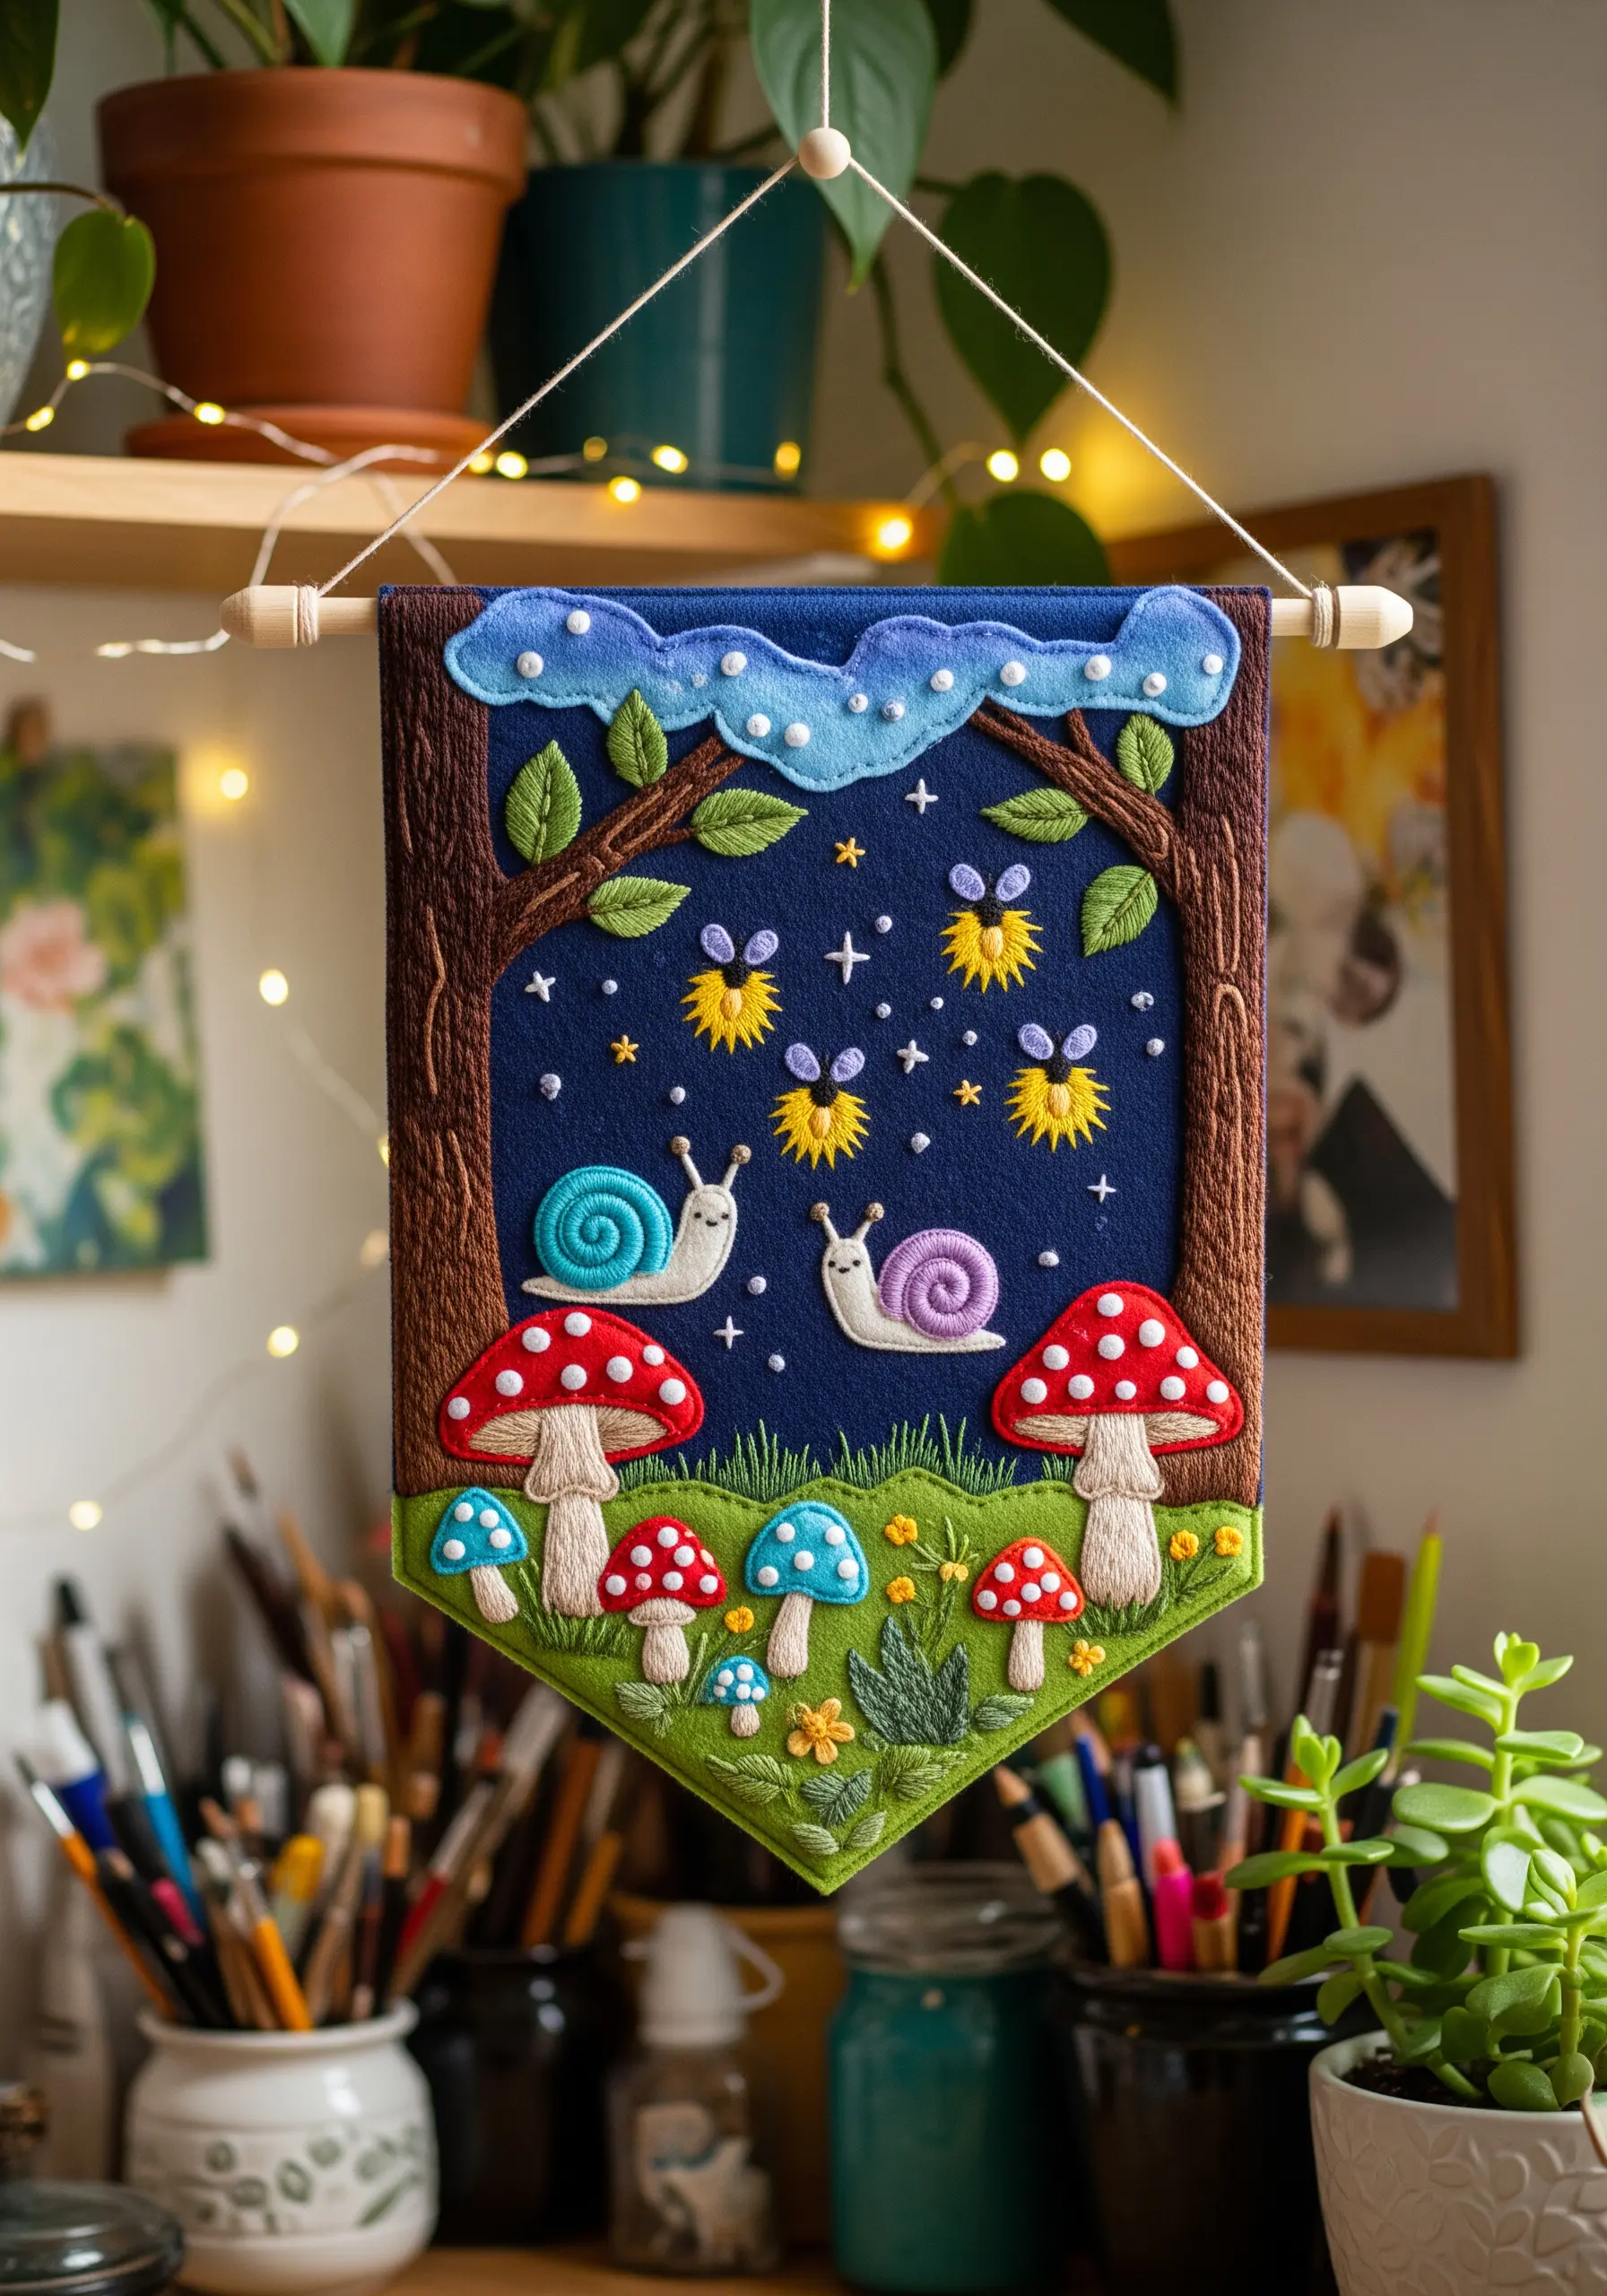
Combine the soft, solid forms of felt with delicate thread details to create a dimensional, storybook scene.
Cut your felt shapes first—the mushrooms, snails, and tree trunks—and secure them to your background fabric using a decorative blanket stitch around the edges.
This not only attaches the appliqué but also adds a charming, handcrafted border to each element.
Then, bring the scene to life with embroidery: add satin stitch swirls to the snail shells, tiny French knots for glowing fireflies, and straight stitches for blades of grass. This layering technique makes for truly magical fabric collage embroidery.
8. Achieve Graphic Impact with Abstract Geometric Forms
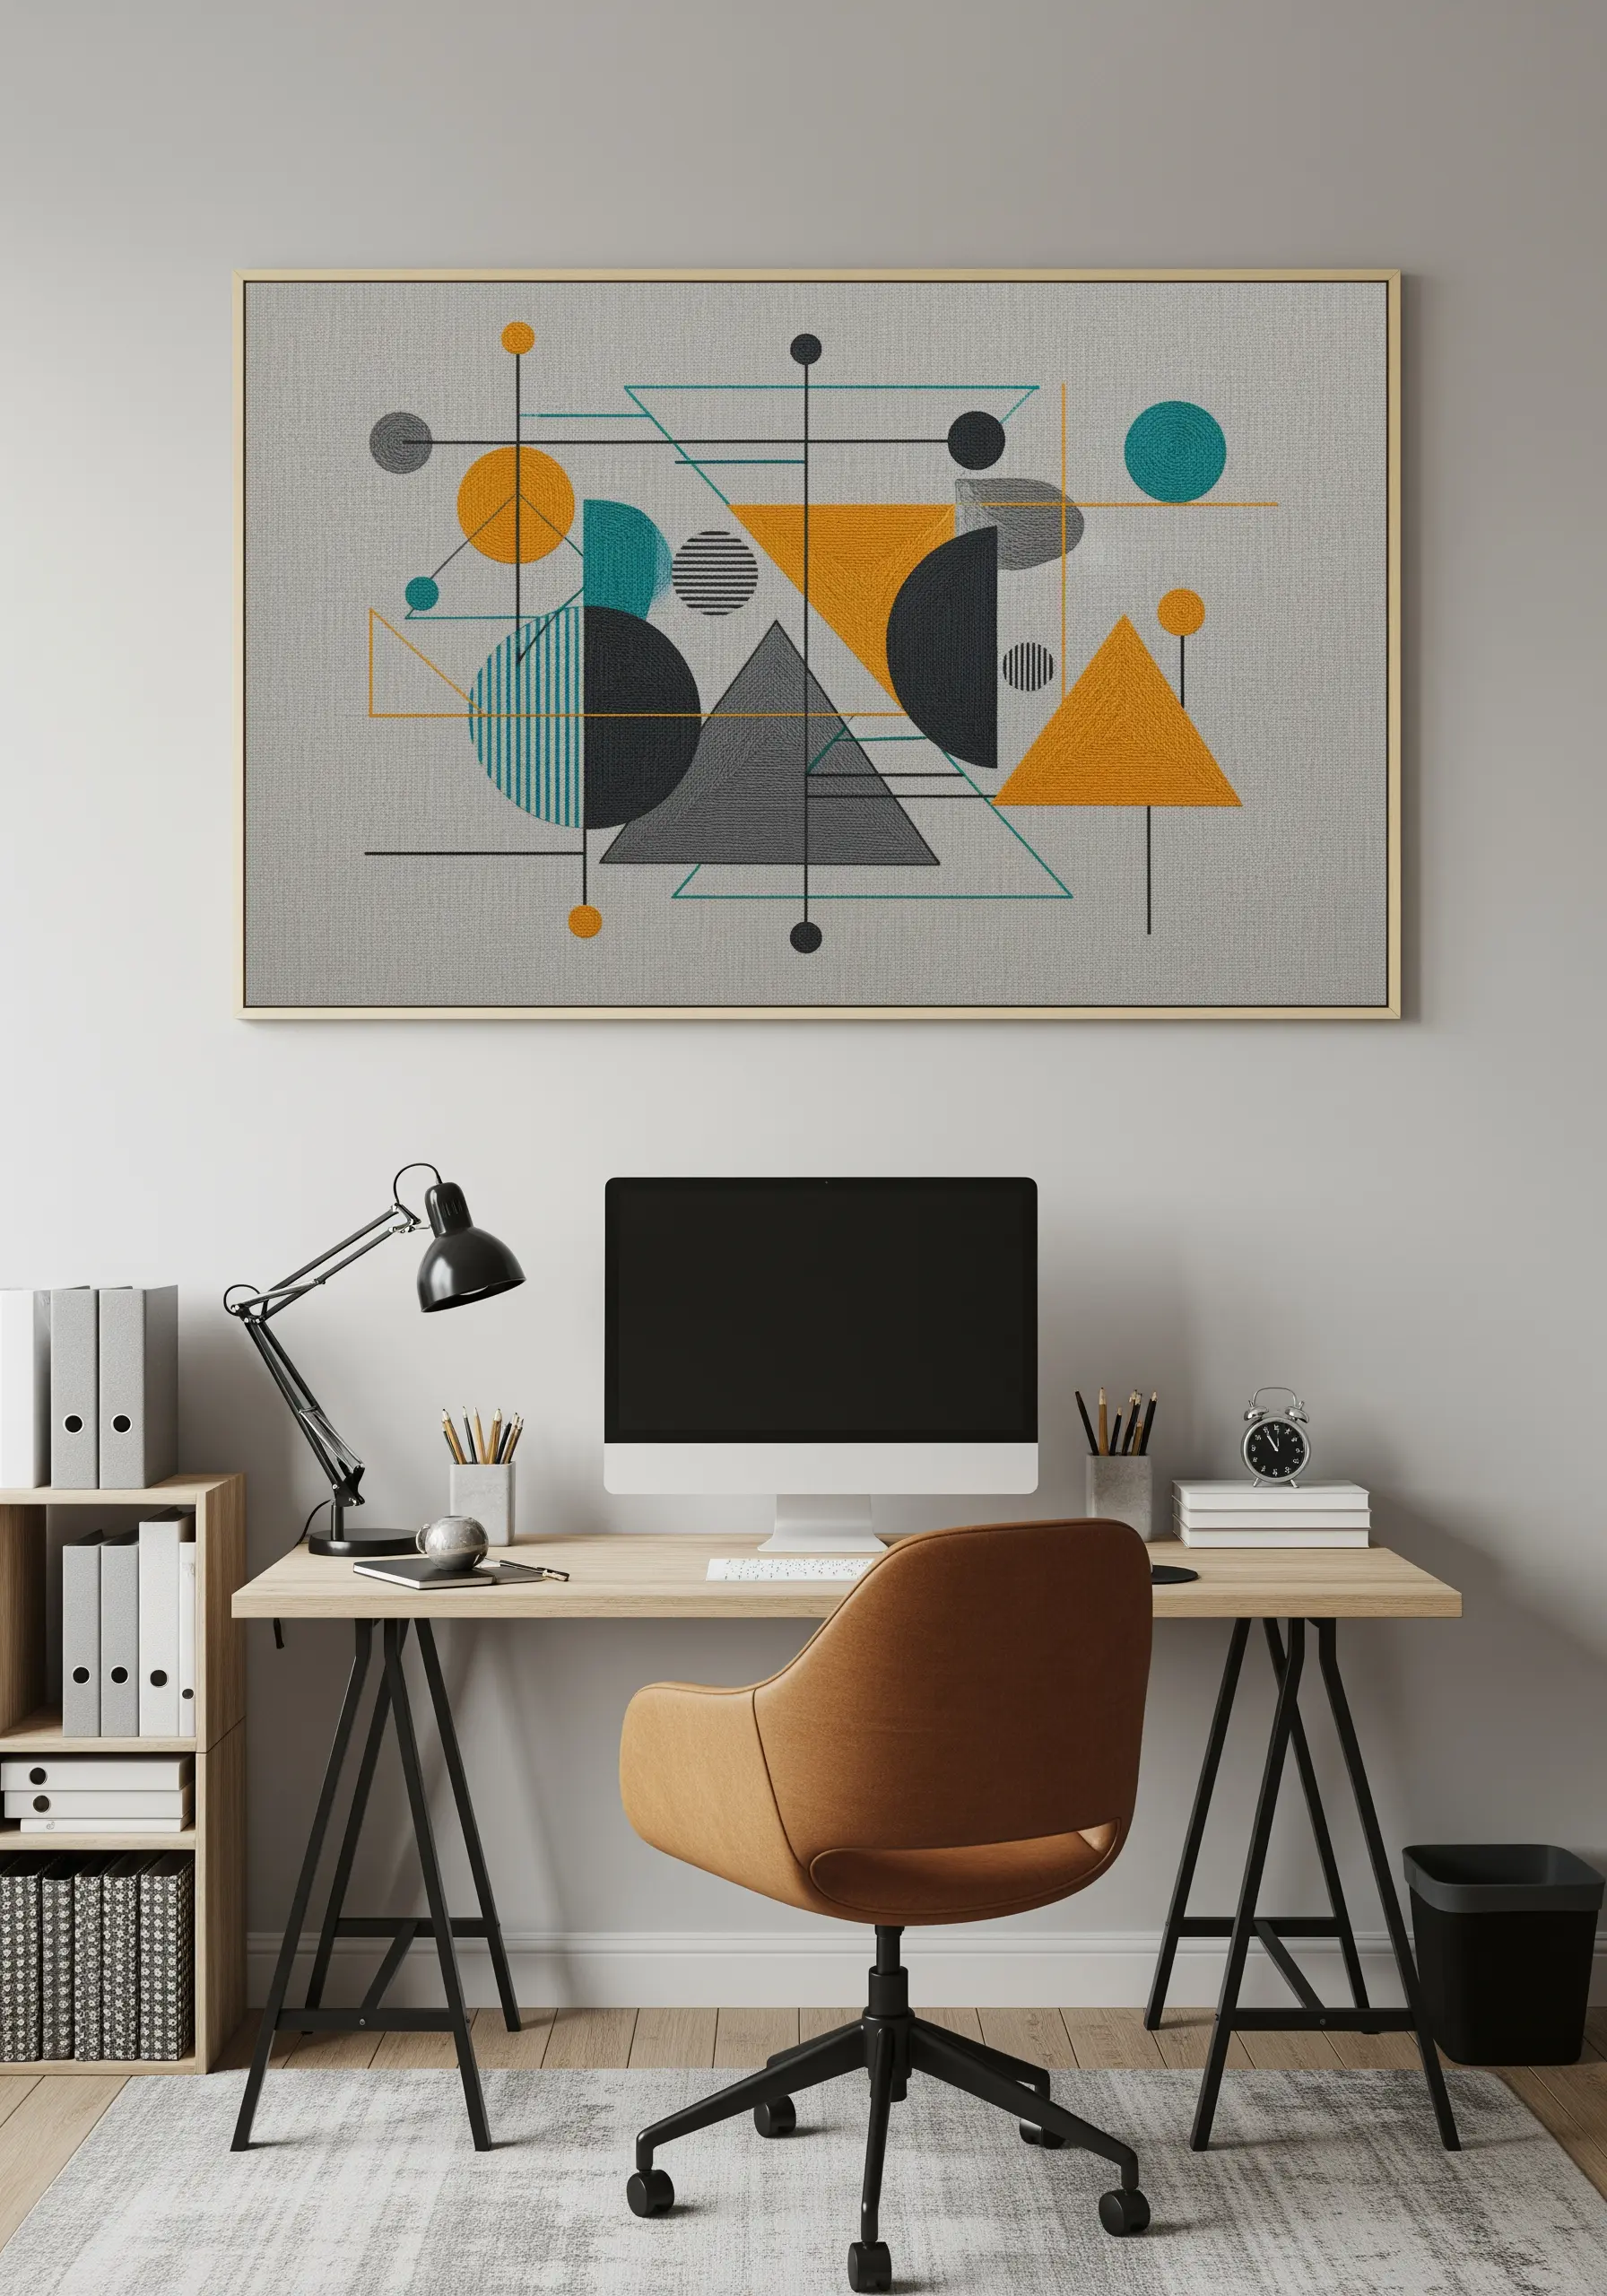
For clean, hard-edged geometric shapes, precision is key.
Always outline your triangles, circles, and rectangles with a tight split stitch before you begin filling them in.
This raised edge acts as a barrier, allowing you to pack your satin stitches tightly against it for a perfectly sharp, defined shape with no gaps.
Work with a limited, high-contrast color palette—like mustard, teal, and charcoal—to create a sophisticated piece that feels intentional and modern. These abstract geometric hoops are perfect for a contemporary home office.
9. Add a Soft Finish with Fabric Trims and Embellishments
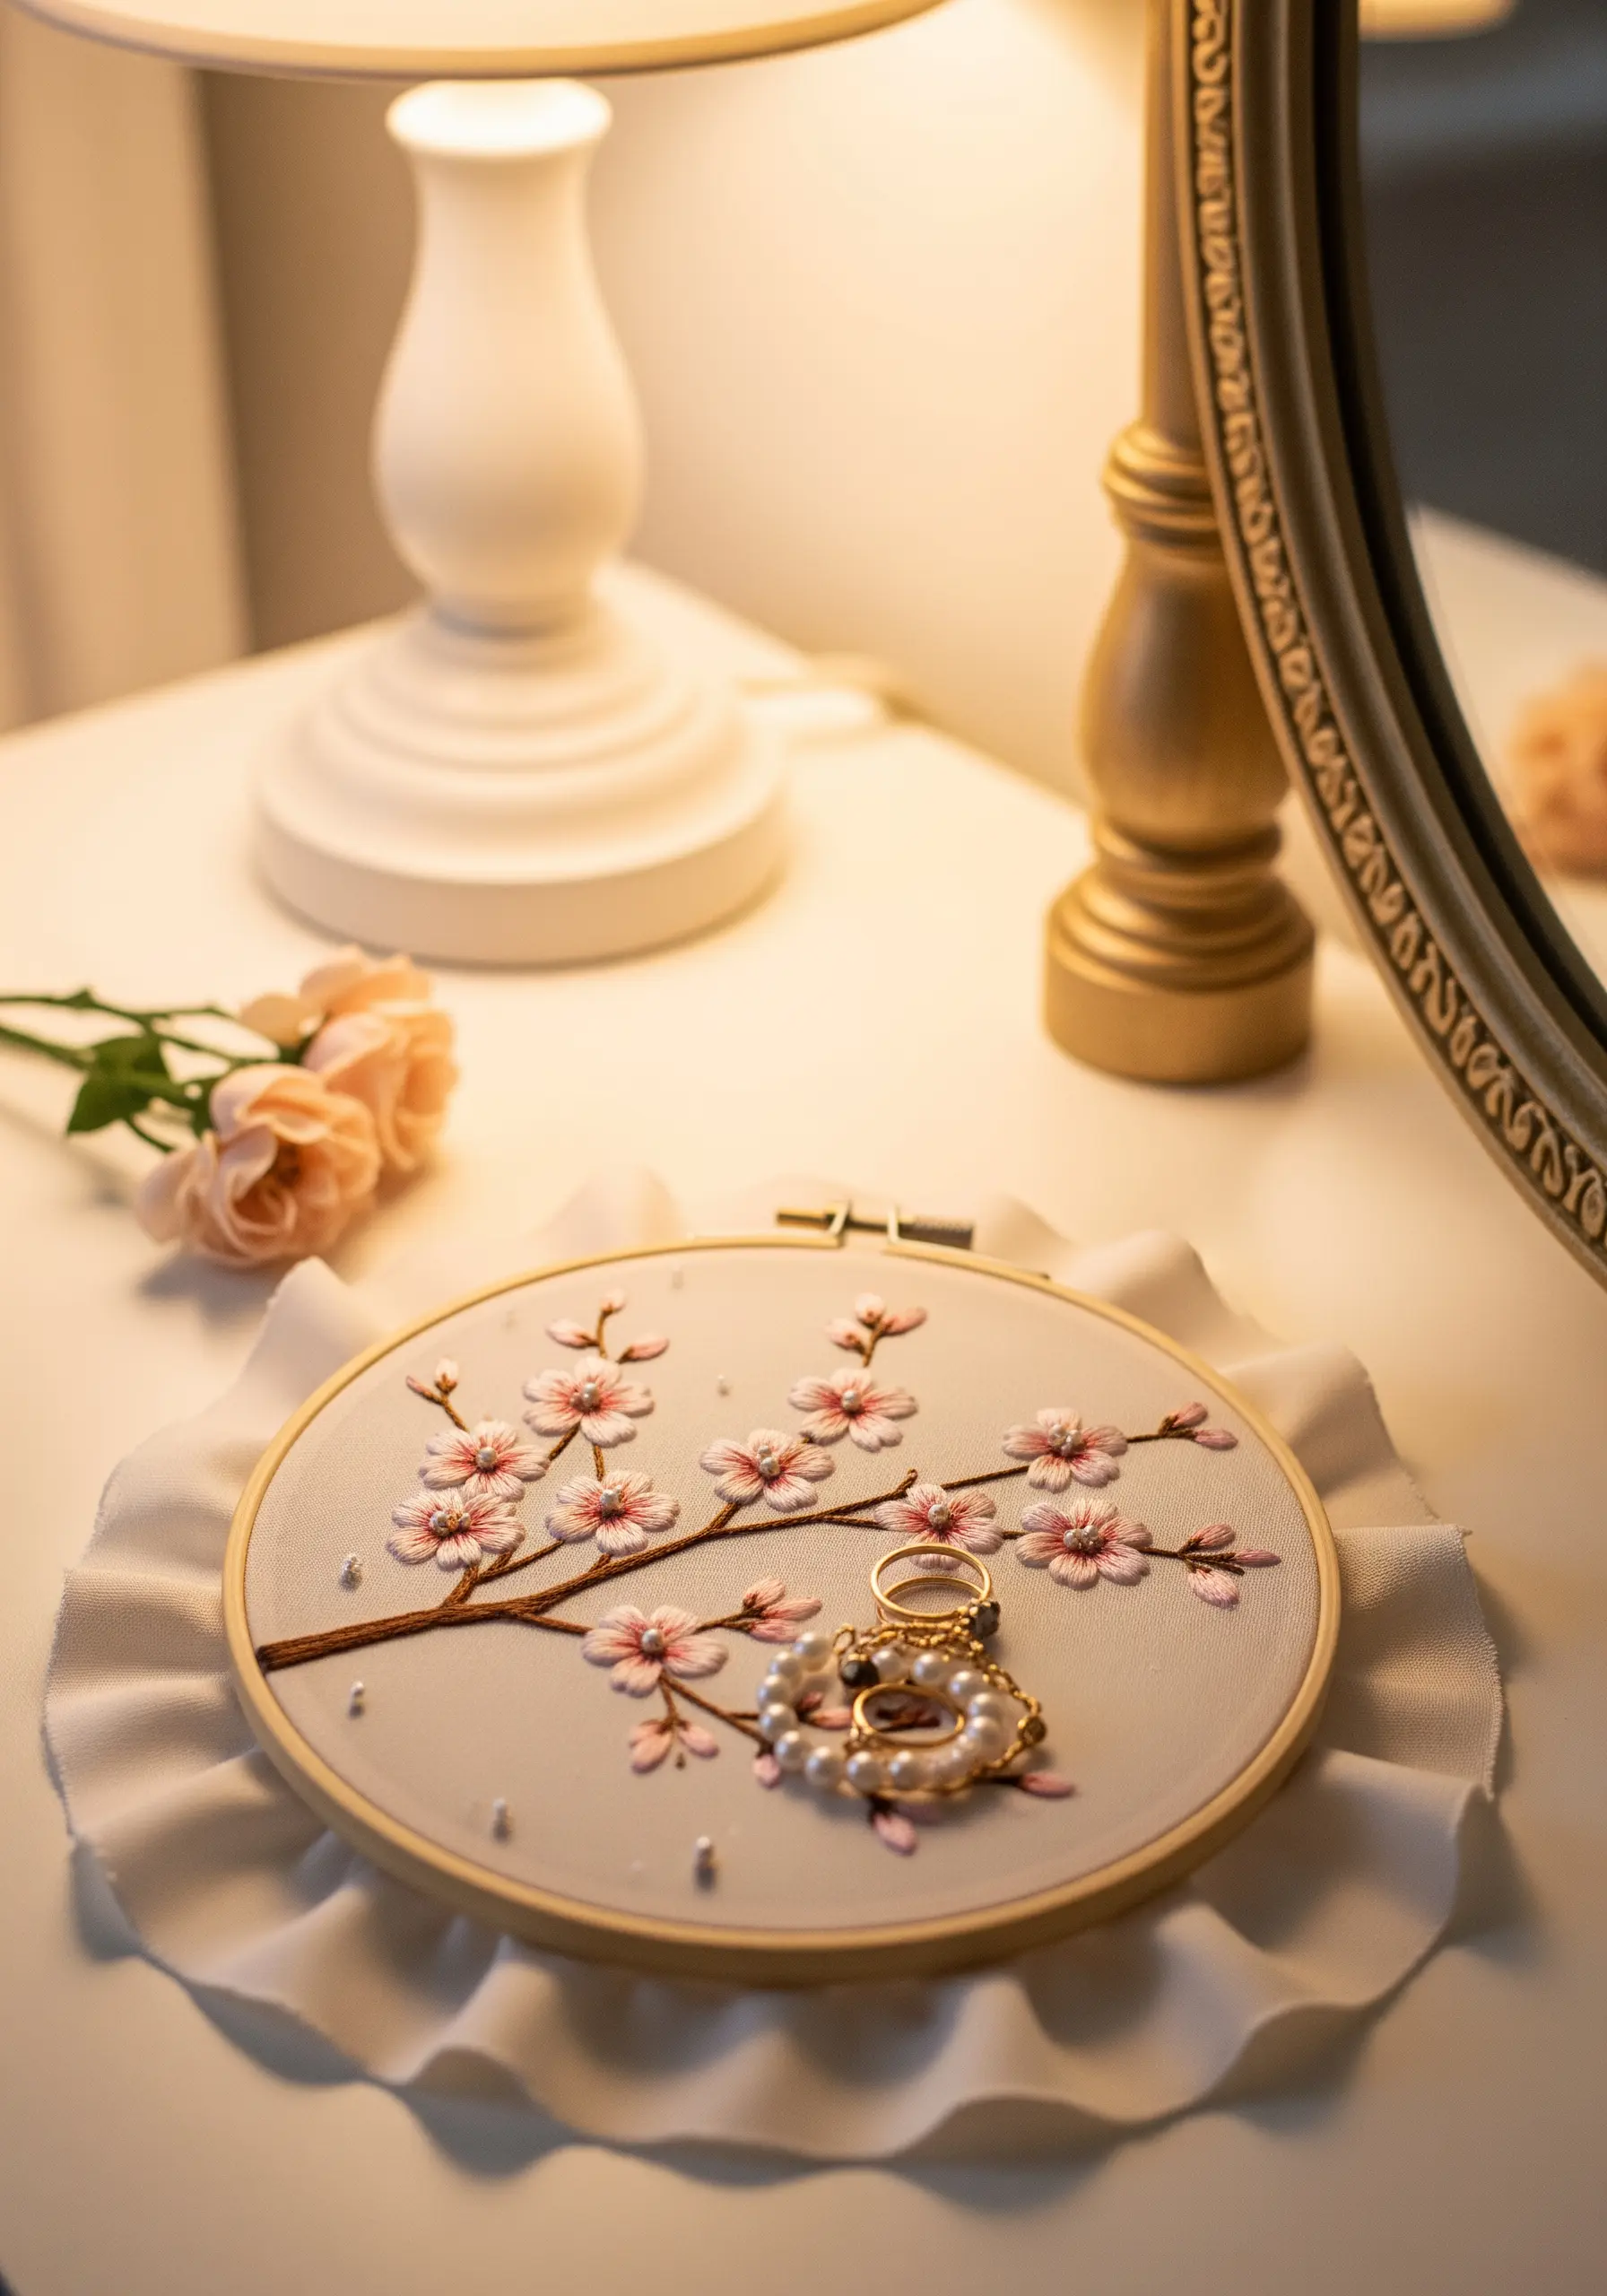
Elevate a simple floral design by considering how you finish and frame it.
After stitching the delicate cherry blossoms, add tiny seed pearls or white French knots to the center of each flower for a touch of texture and light.
Instead of leaving the hoop bare, create a soft ruffled trim from a strip of silk or cotton voile.
Gather the fabric and glue it to the back edge of the inner hoop before securing your work. This thoughtful finishing touch transforms your project into a truly romantic embroidery pattern.
10. Create Atmospheric Perspective in Landscape Embroidery
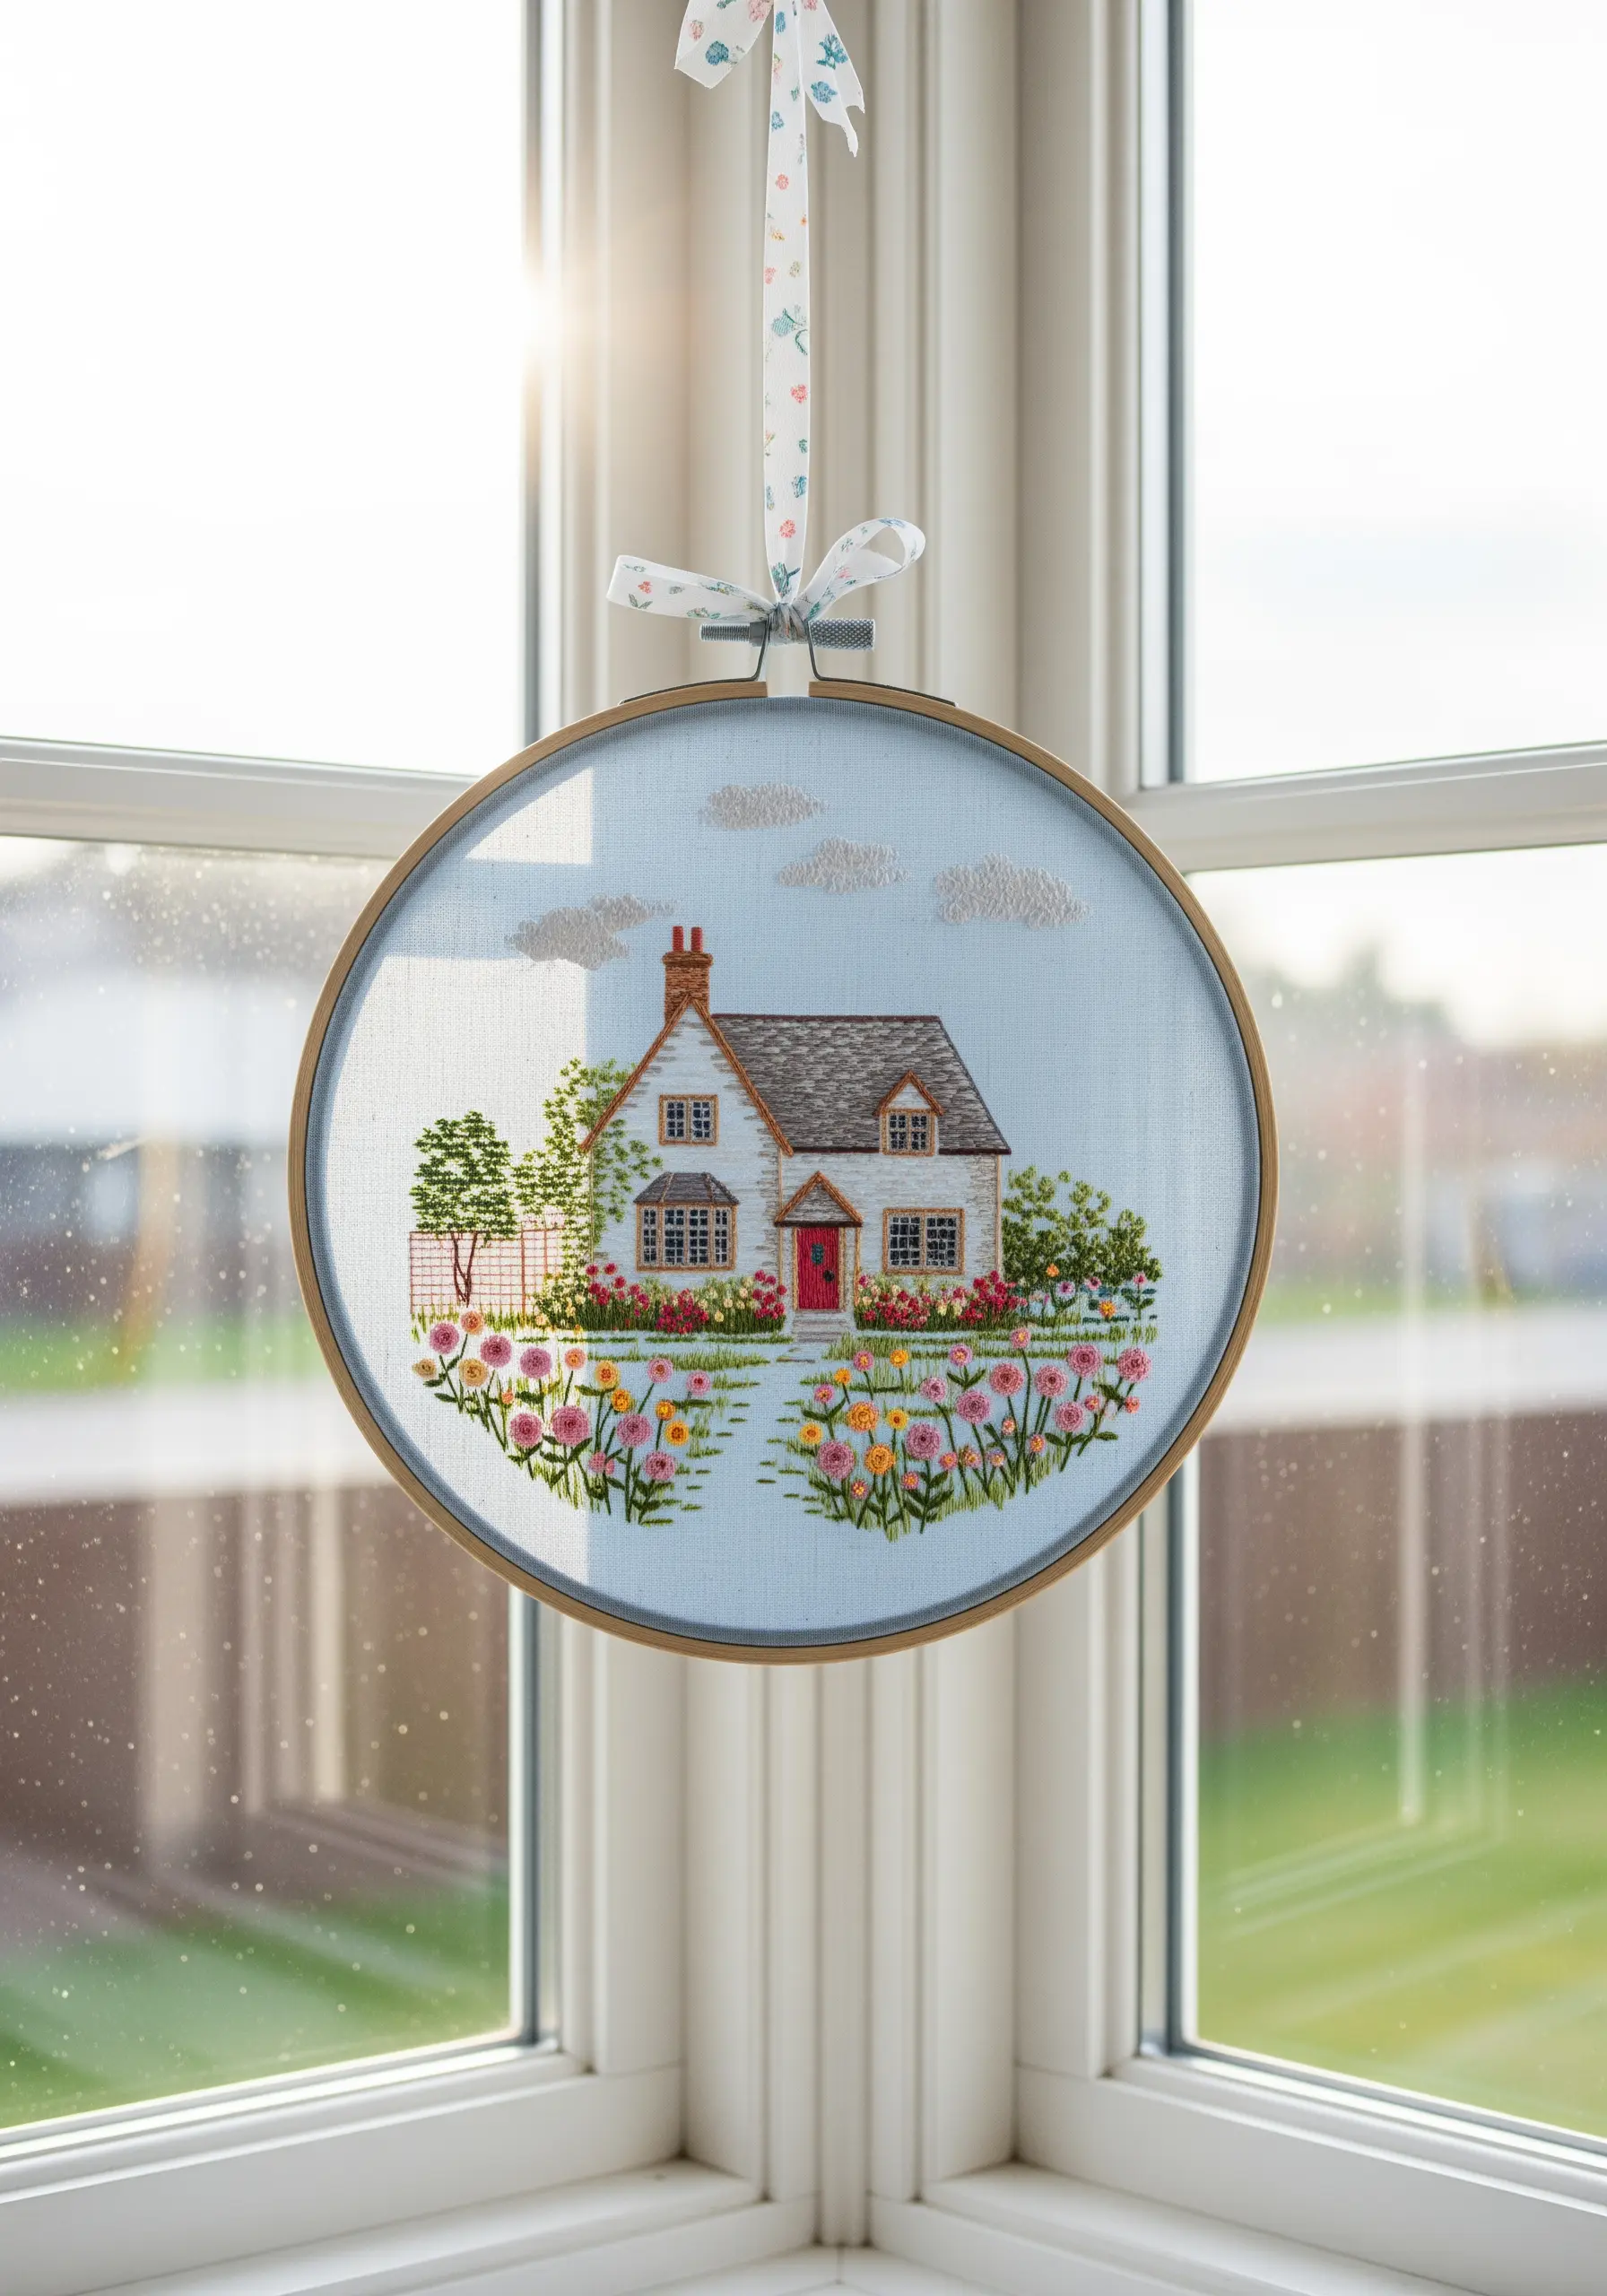
To give your embroidered landscapes a convincing sense of depth, you need to manipulate thread weight and stitch density.
For elements in the distance, like the clouds and trees, use only one or two strands of floss and simple, flat stitches like seed stitch or backstitch.
As you move to the foreground, increase your thread count to four or even six strands for the flowers and foliage.
Use highly textured stitches like French knots, bullion knots, and woven wheel roses to make the foreground physically pop from the fabric. This contrast is what makes nature-themed embroidery projects feel immersive.
11. Engineer Realism with 3D Stitches and Sheer Fabric
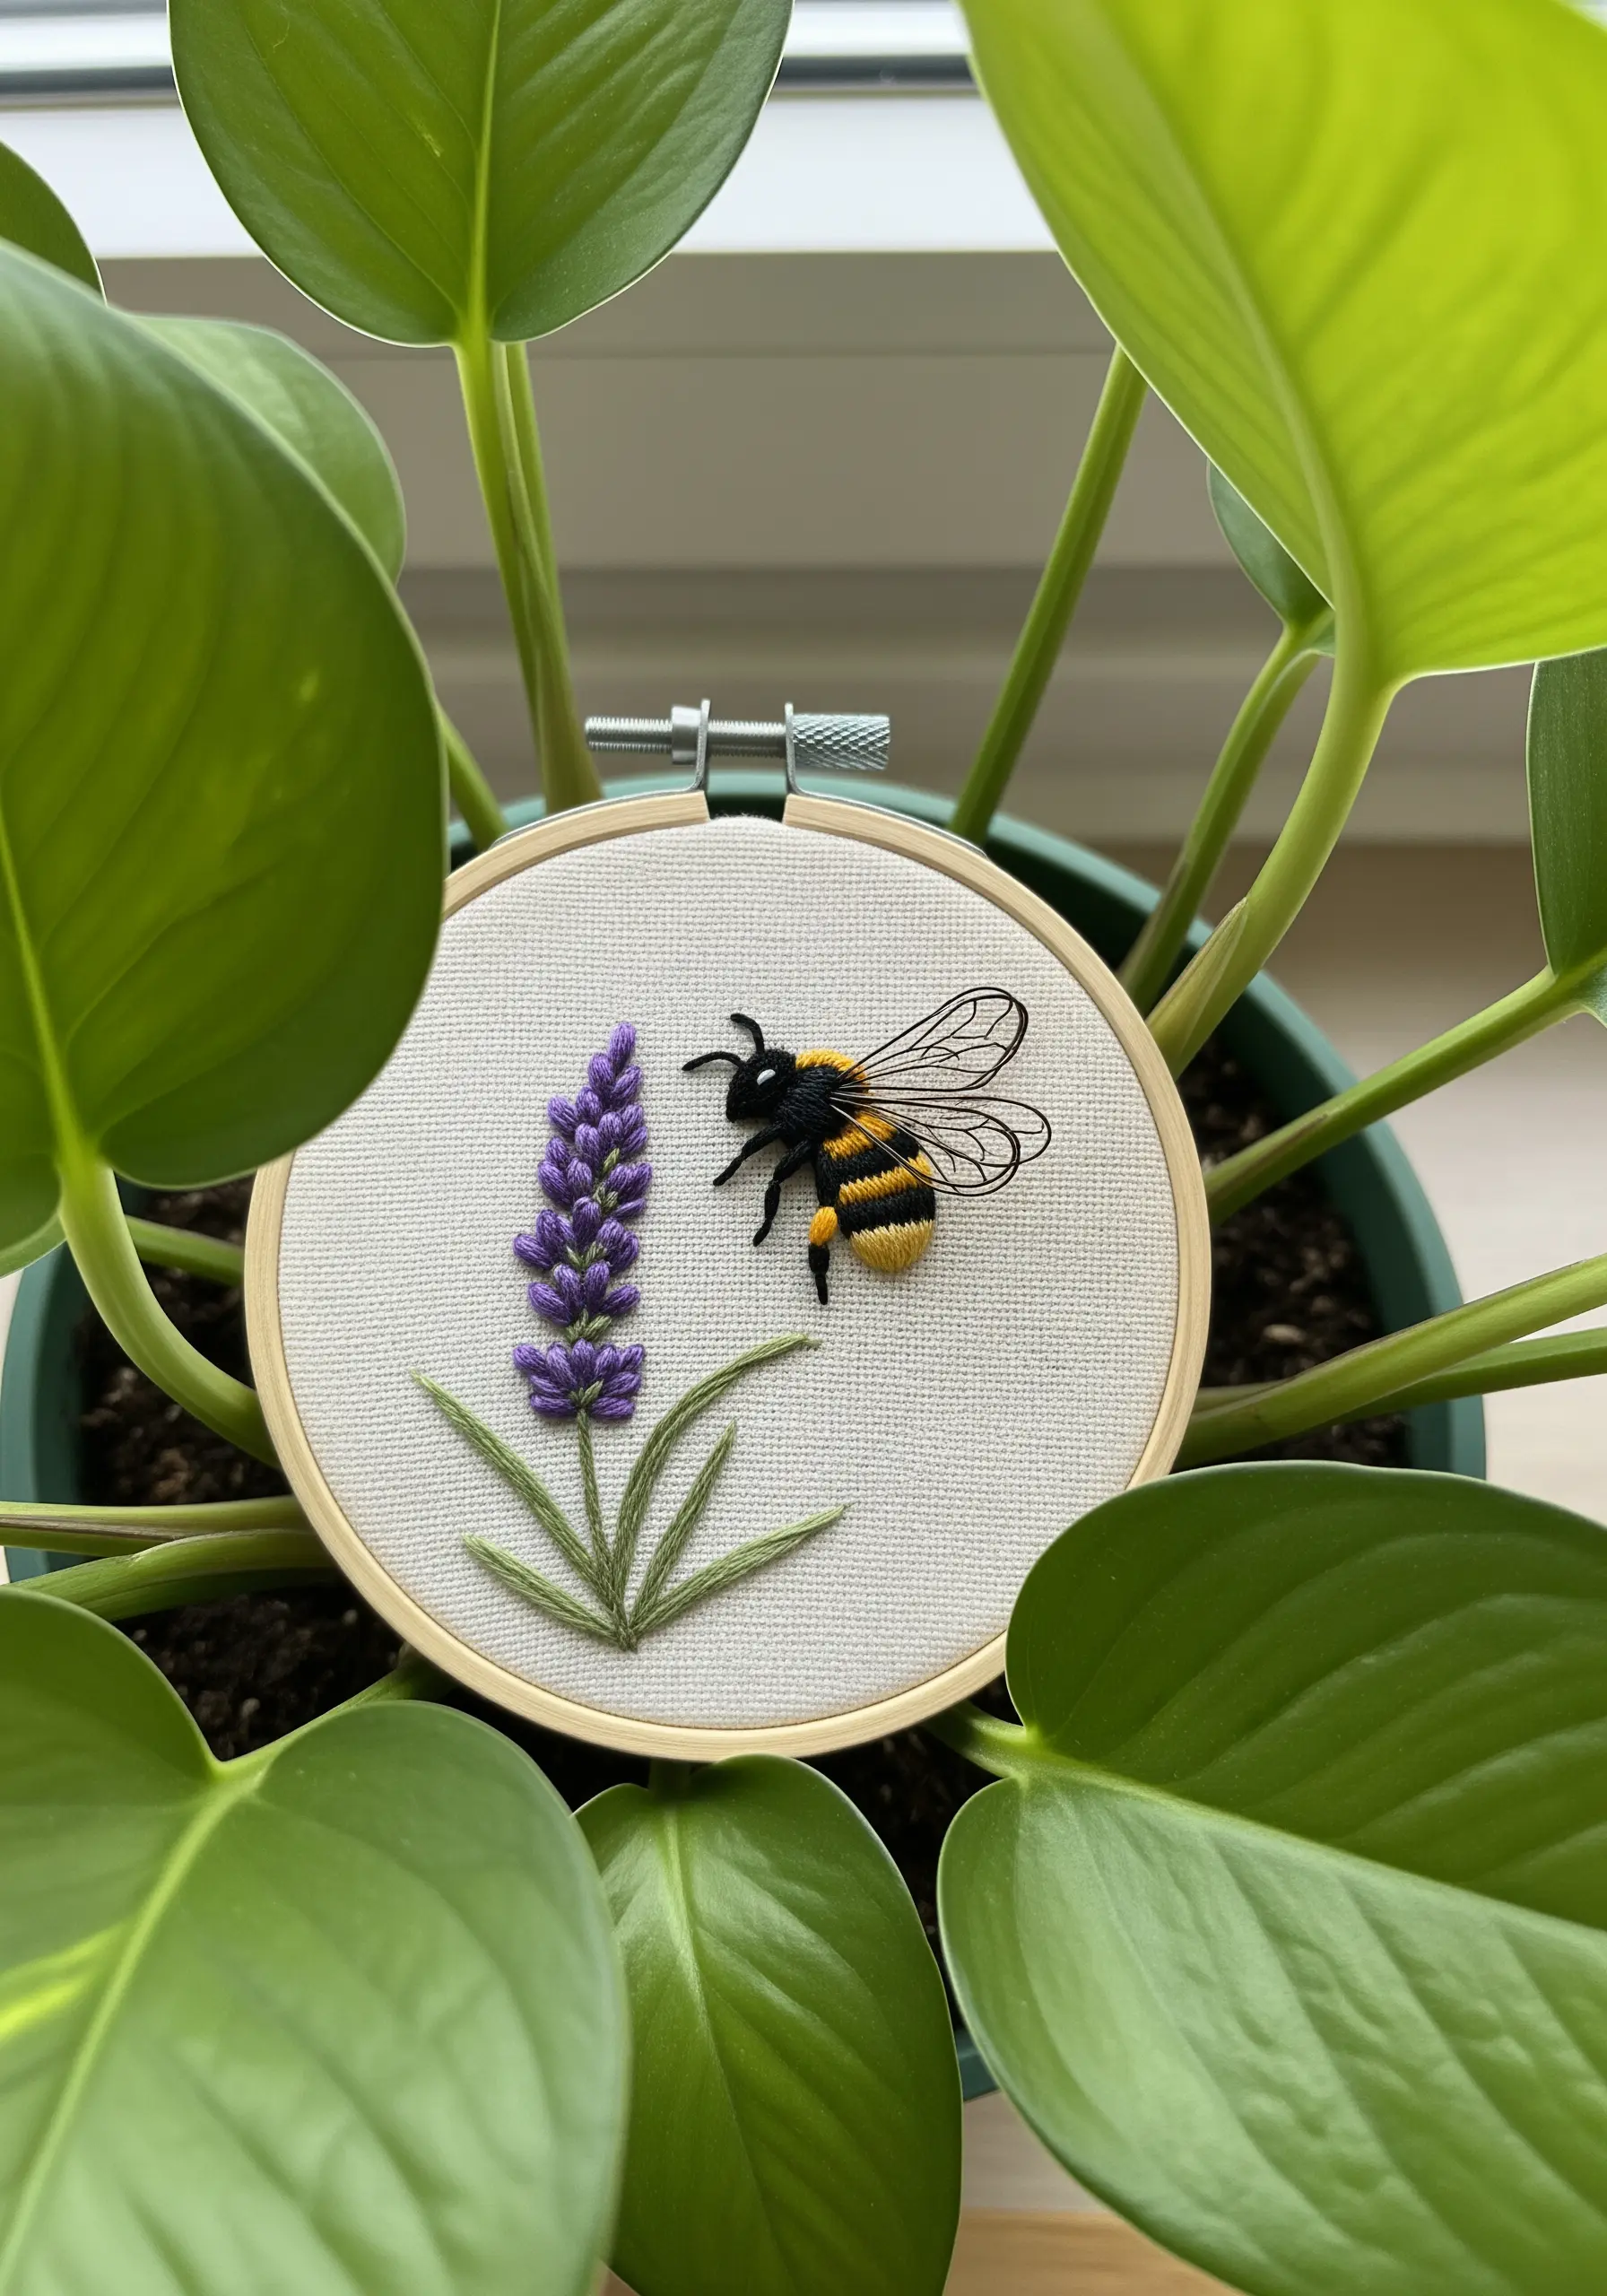
To bring an embroidered insect to life, you need to think in three dimensions.
Create the bee’s fuzzy, textured body using the Turkey work stitch—a technique where you leave loops on the surface and then trim them to create a soft, pile-like effect.
For the delicate, transparent wings, don’t stitch directly on your main fabric.
Instead, embroider the veins onto a small piece of sheer organza, cut the wing shapes out carefully, and then appliqué them onto the body. This is a foundational technique for creating 3D embroidery wall art pieces.
12. Design a Large-Scale Statement Piece for a Dramatic Wall
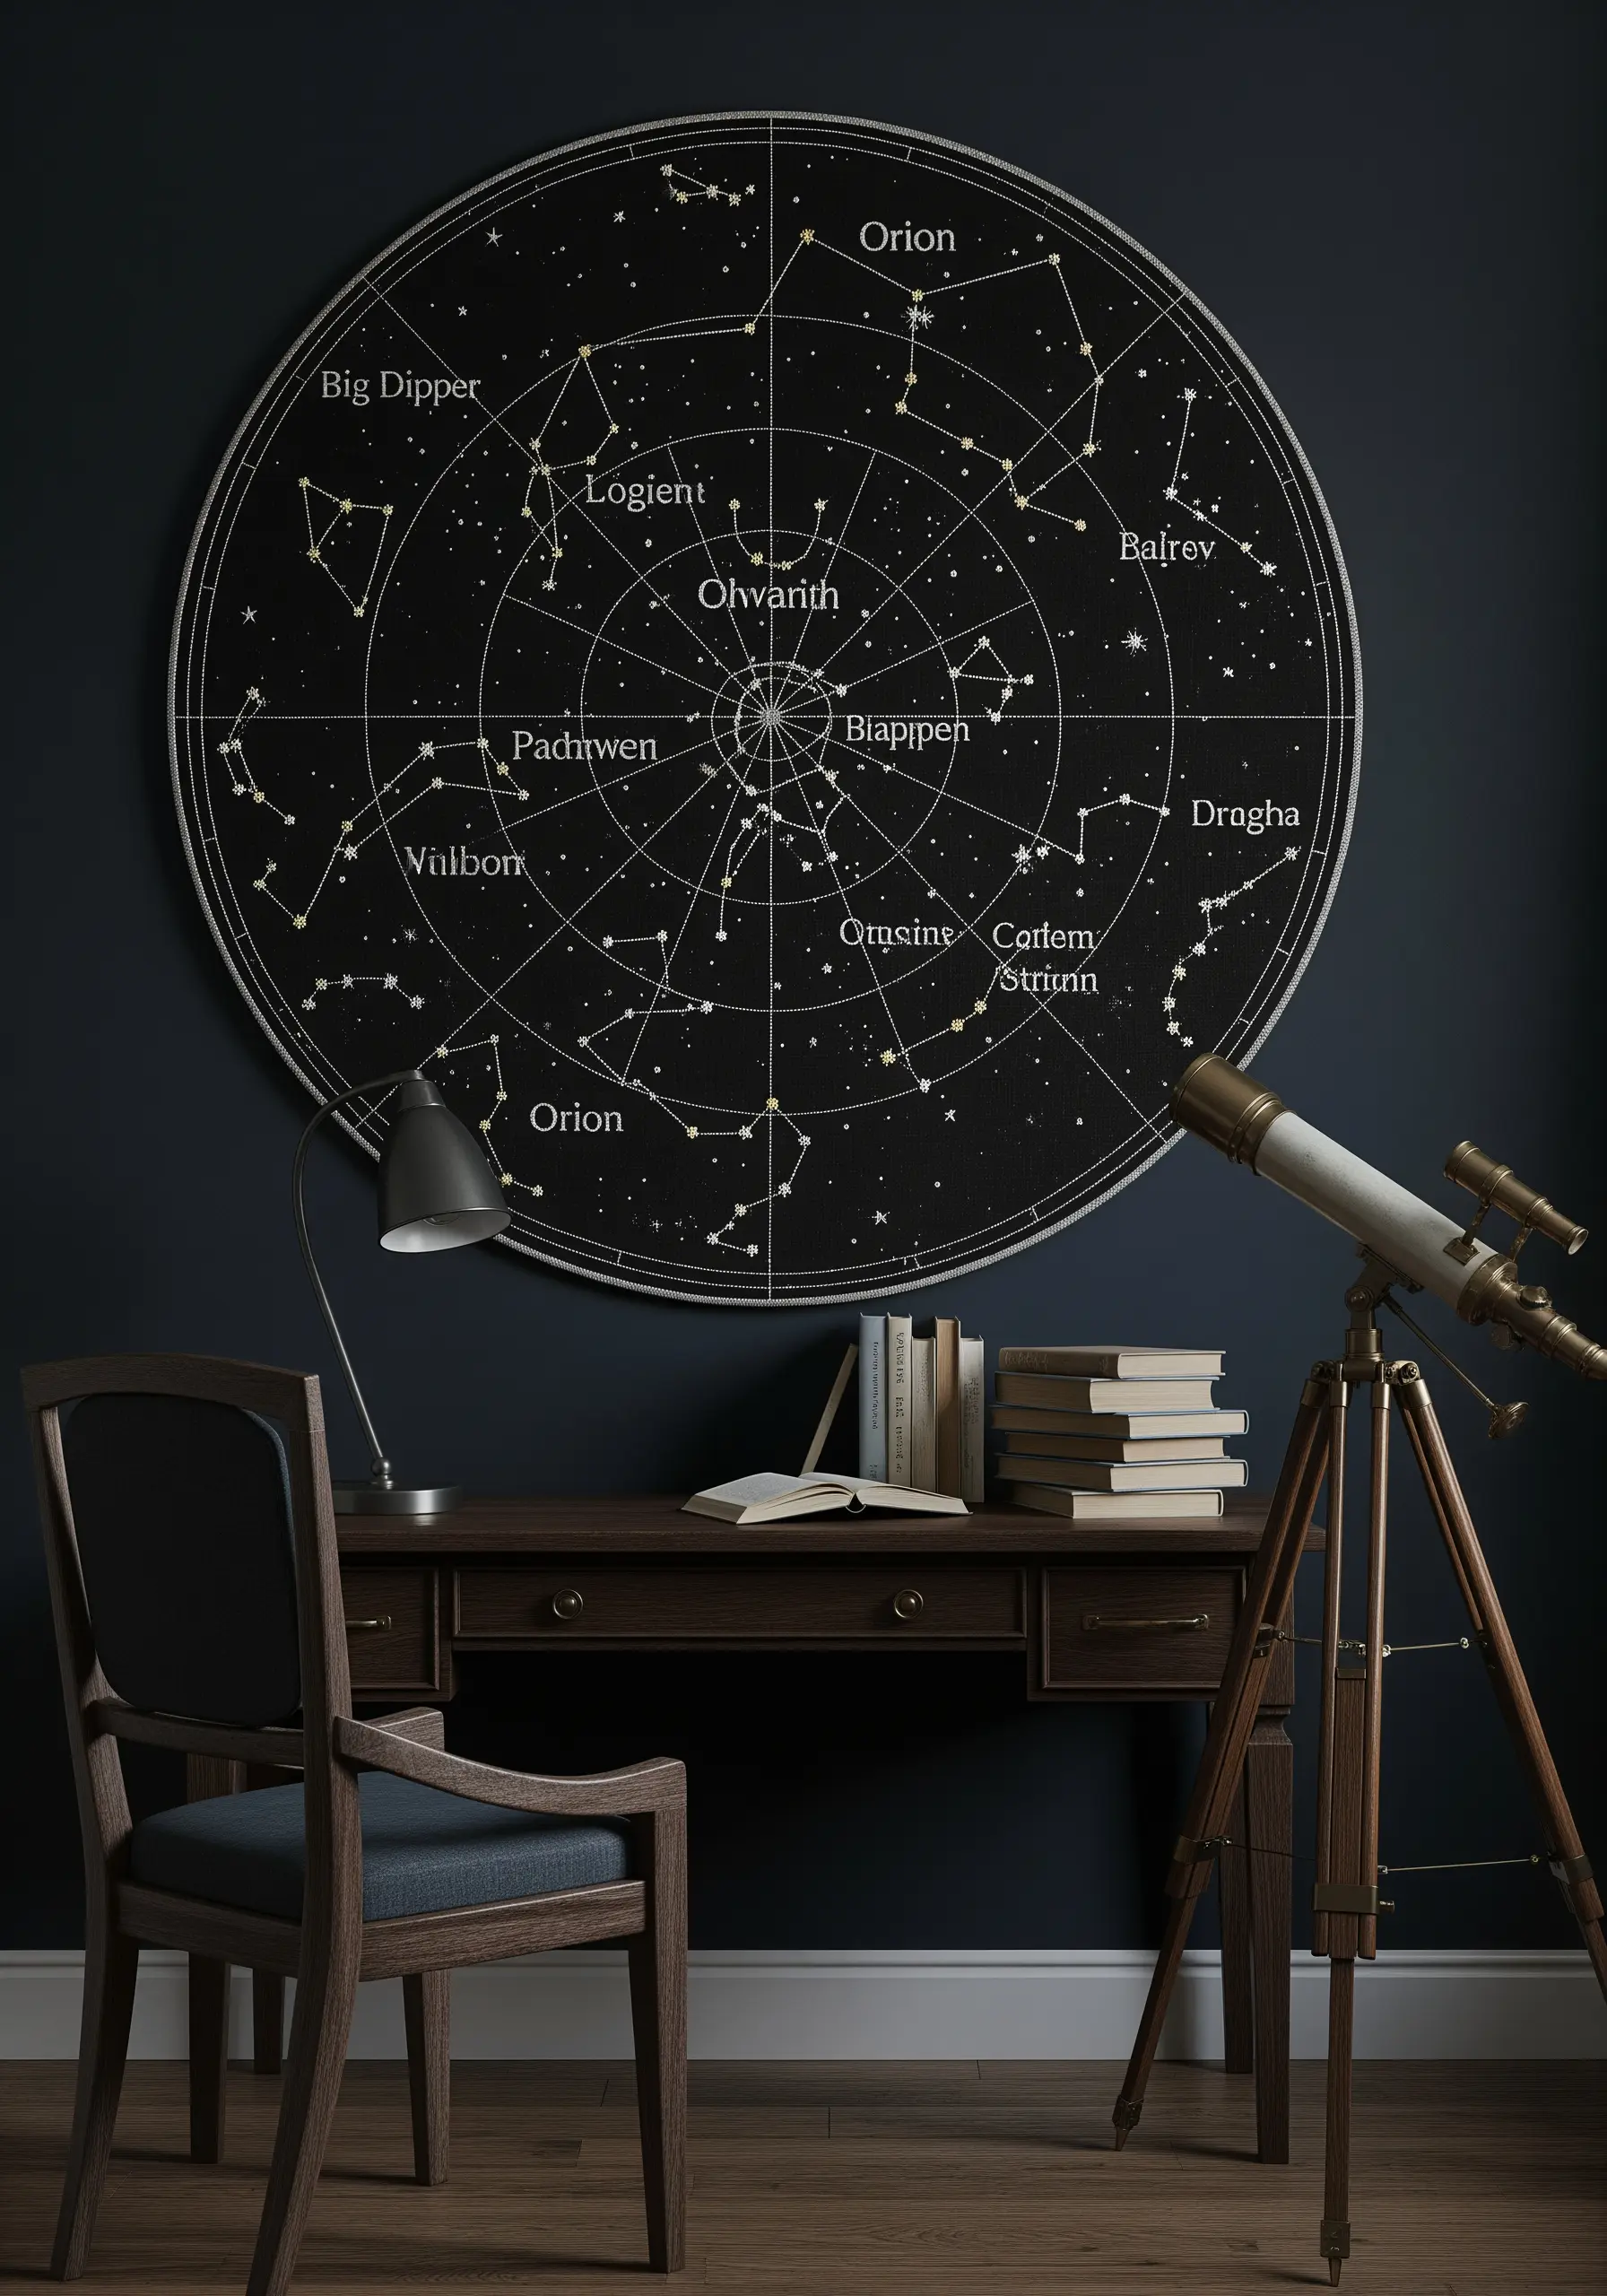
Taking on a large-scale embroidery project requires planning, but the result is a truly breathtaking focal point for any room.
To transfer a complex design like a star chart accurately, use a digital projector to cast the image directly onto your fabric and trace the lines with a water-soluble pen.
For consistency across such a large area, stick to simple, elegant stitches: a clean backstitch for lines and lettering, and French knots in varying sizes for stars and celestial points. These are the secrets to memorable statement embroidery pieces.
13. Find a Meditative Rhythm in Symmetrical Mandalas

The beauty of stitching a mandala lies in its calming, repetitive patterns. To ensure your design remains perfectly symmetrical, always begin your work from the center and stitch outwards, completing one full ring of the pattern before moving to the next.
Use a single, consistent outline stitch, like a chain stitch or a split stitch, for the entire piece.
This allows the vibrant color gradient to be the star of the show. Creating modern mandala stitch patterns is as much about the process as it is about the final, stunning result.
14. Master Clean Lettering for Elegant Typography
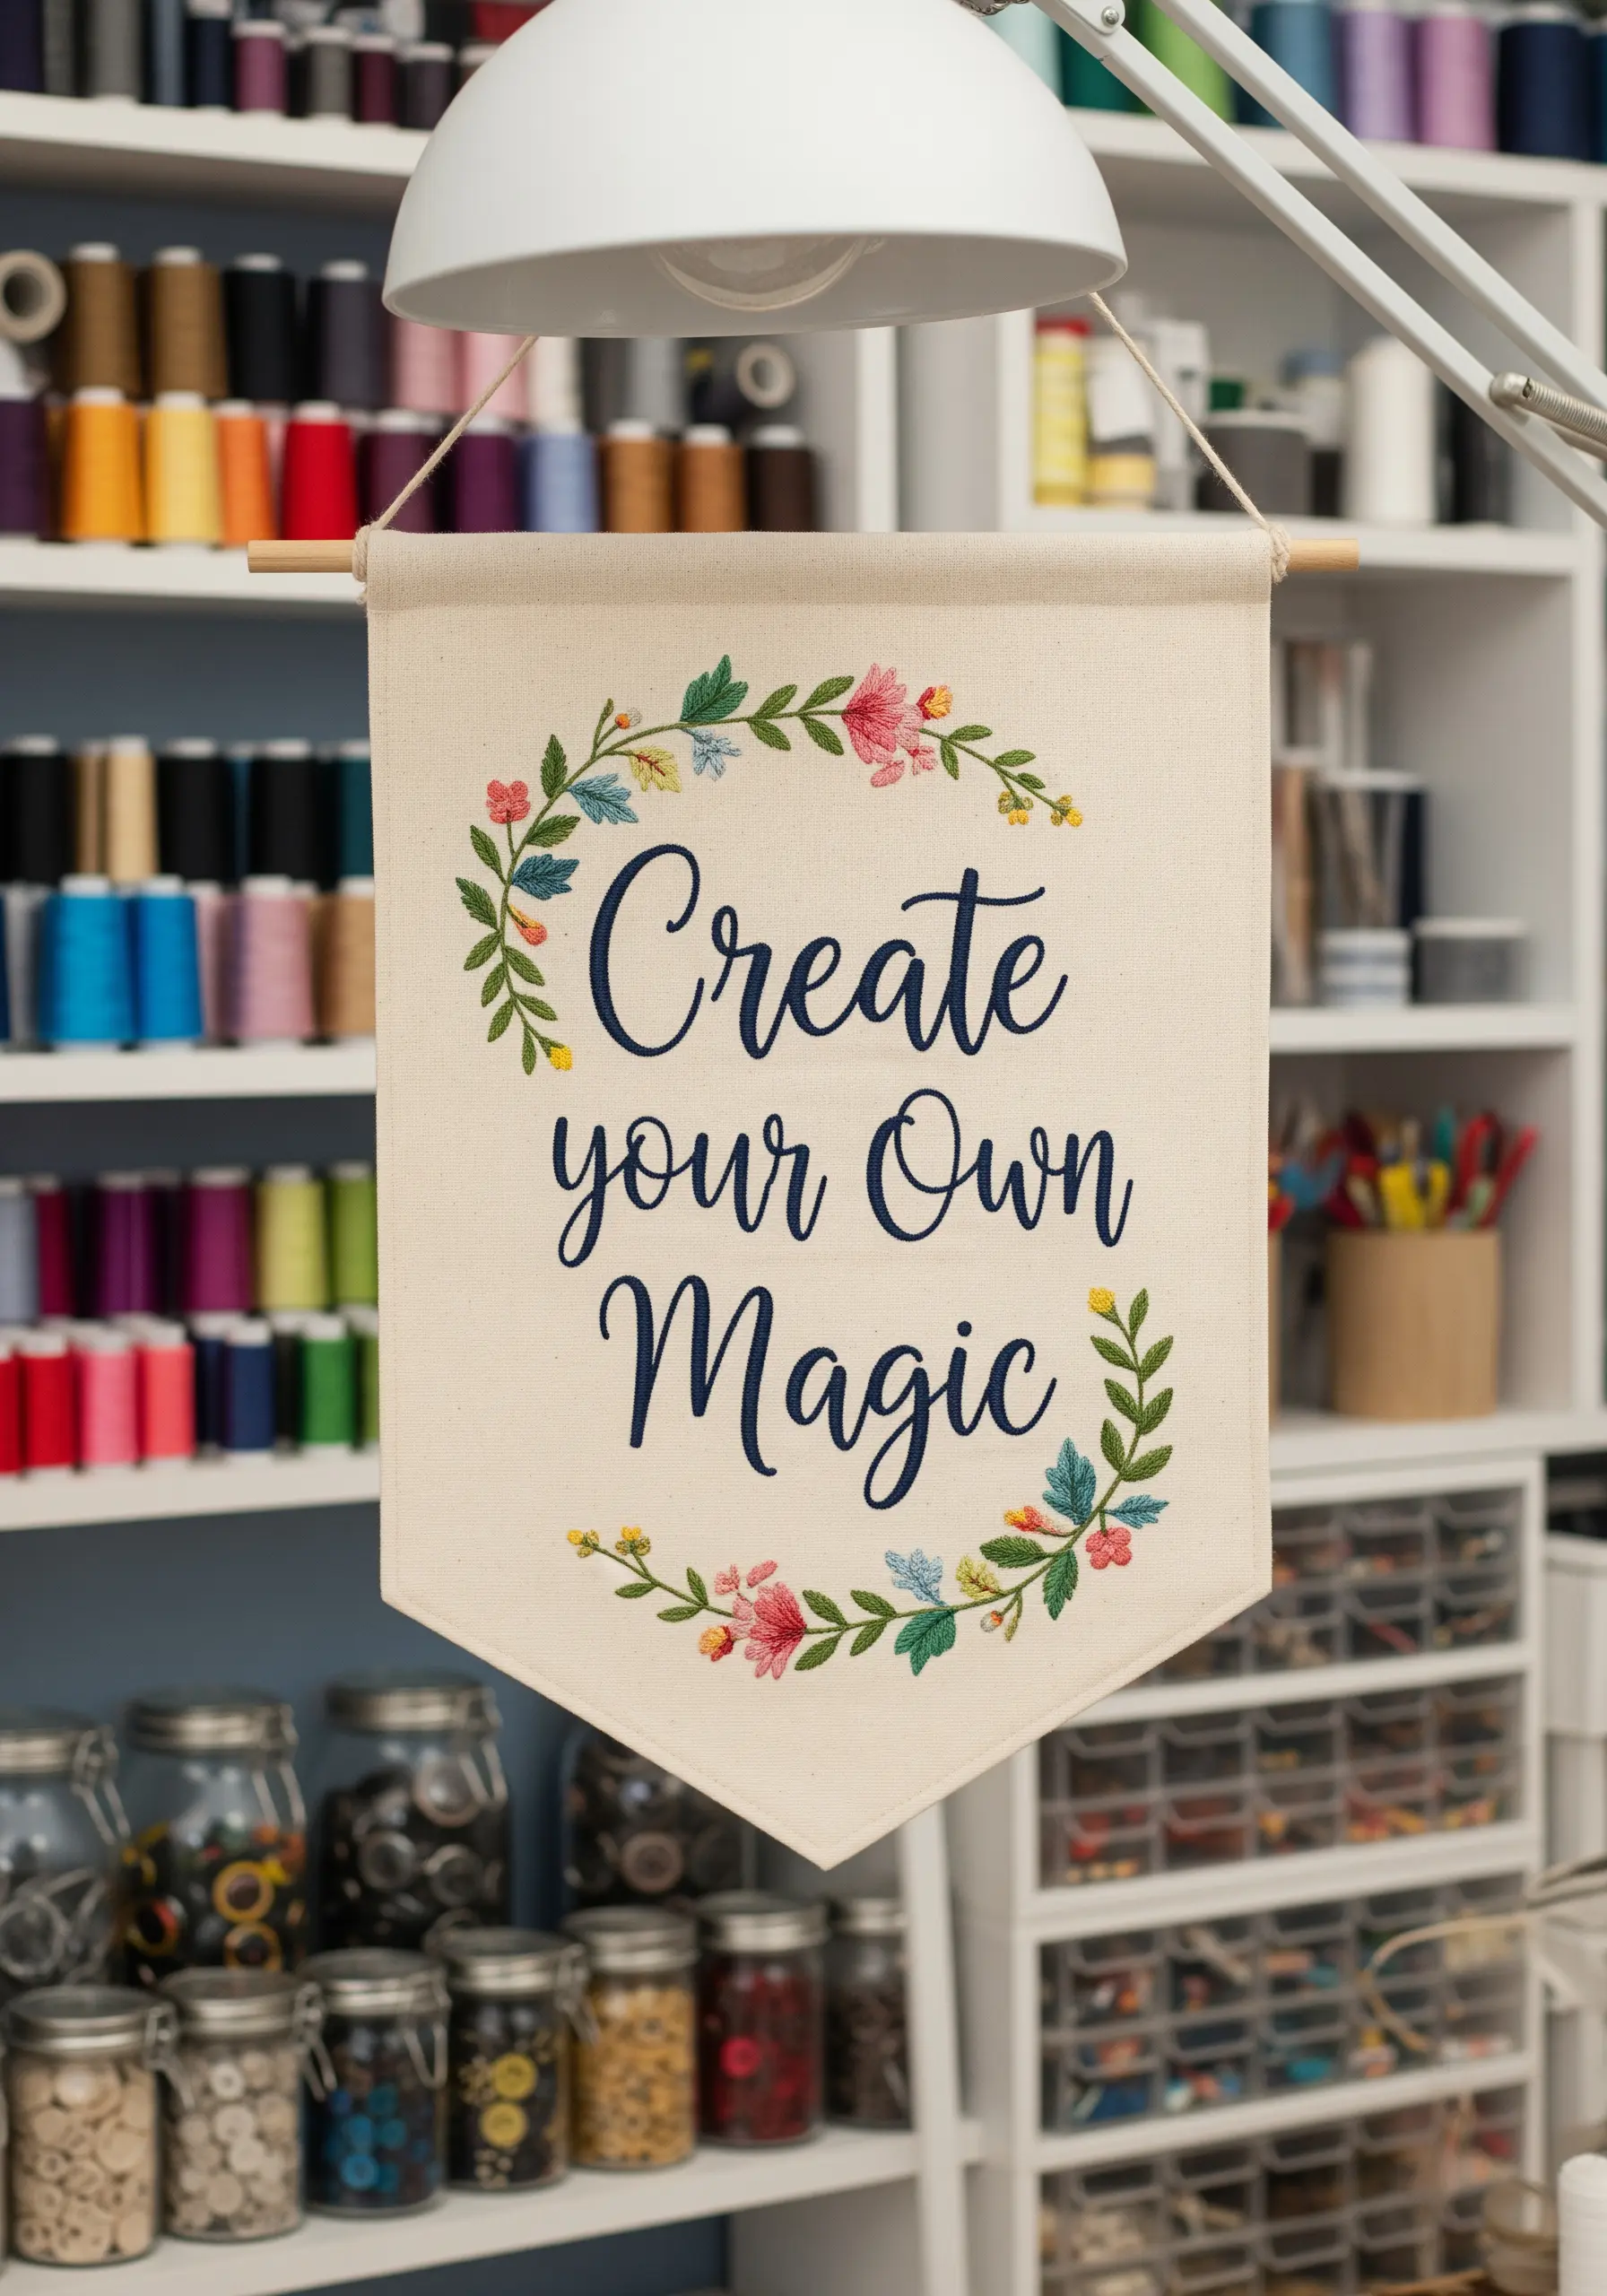
To achieve crisp, readable embroidered text, your stitch choice should match the font style.
For elegant, flowing script like this, a stem stitch is the ideal choice because it creates a smooth, rope-like line that handles curves beautifully.
For more structured, blocky fonts, a simple backstitch provides the necessary rigidity.
Always use fewer strands of floss than you think you need—two or three at most—to keep the lines delicate and prevent the letters from looking bulky. This technique elevates simple inspirational quote designs into art.
15. Adorn 3D Objects with Custom Embroidered Fabric
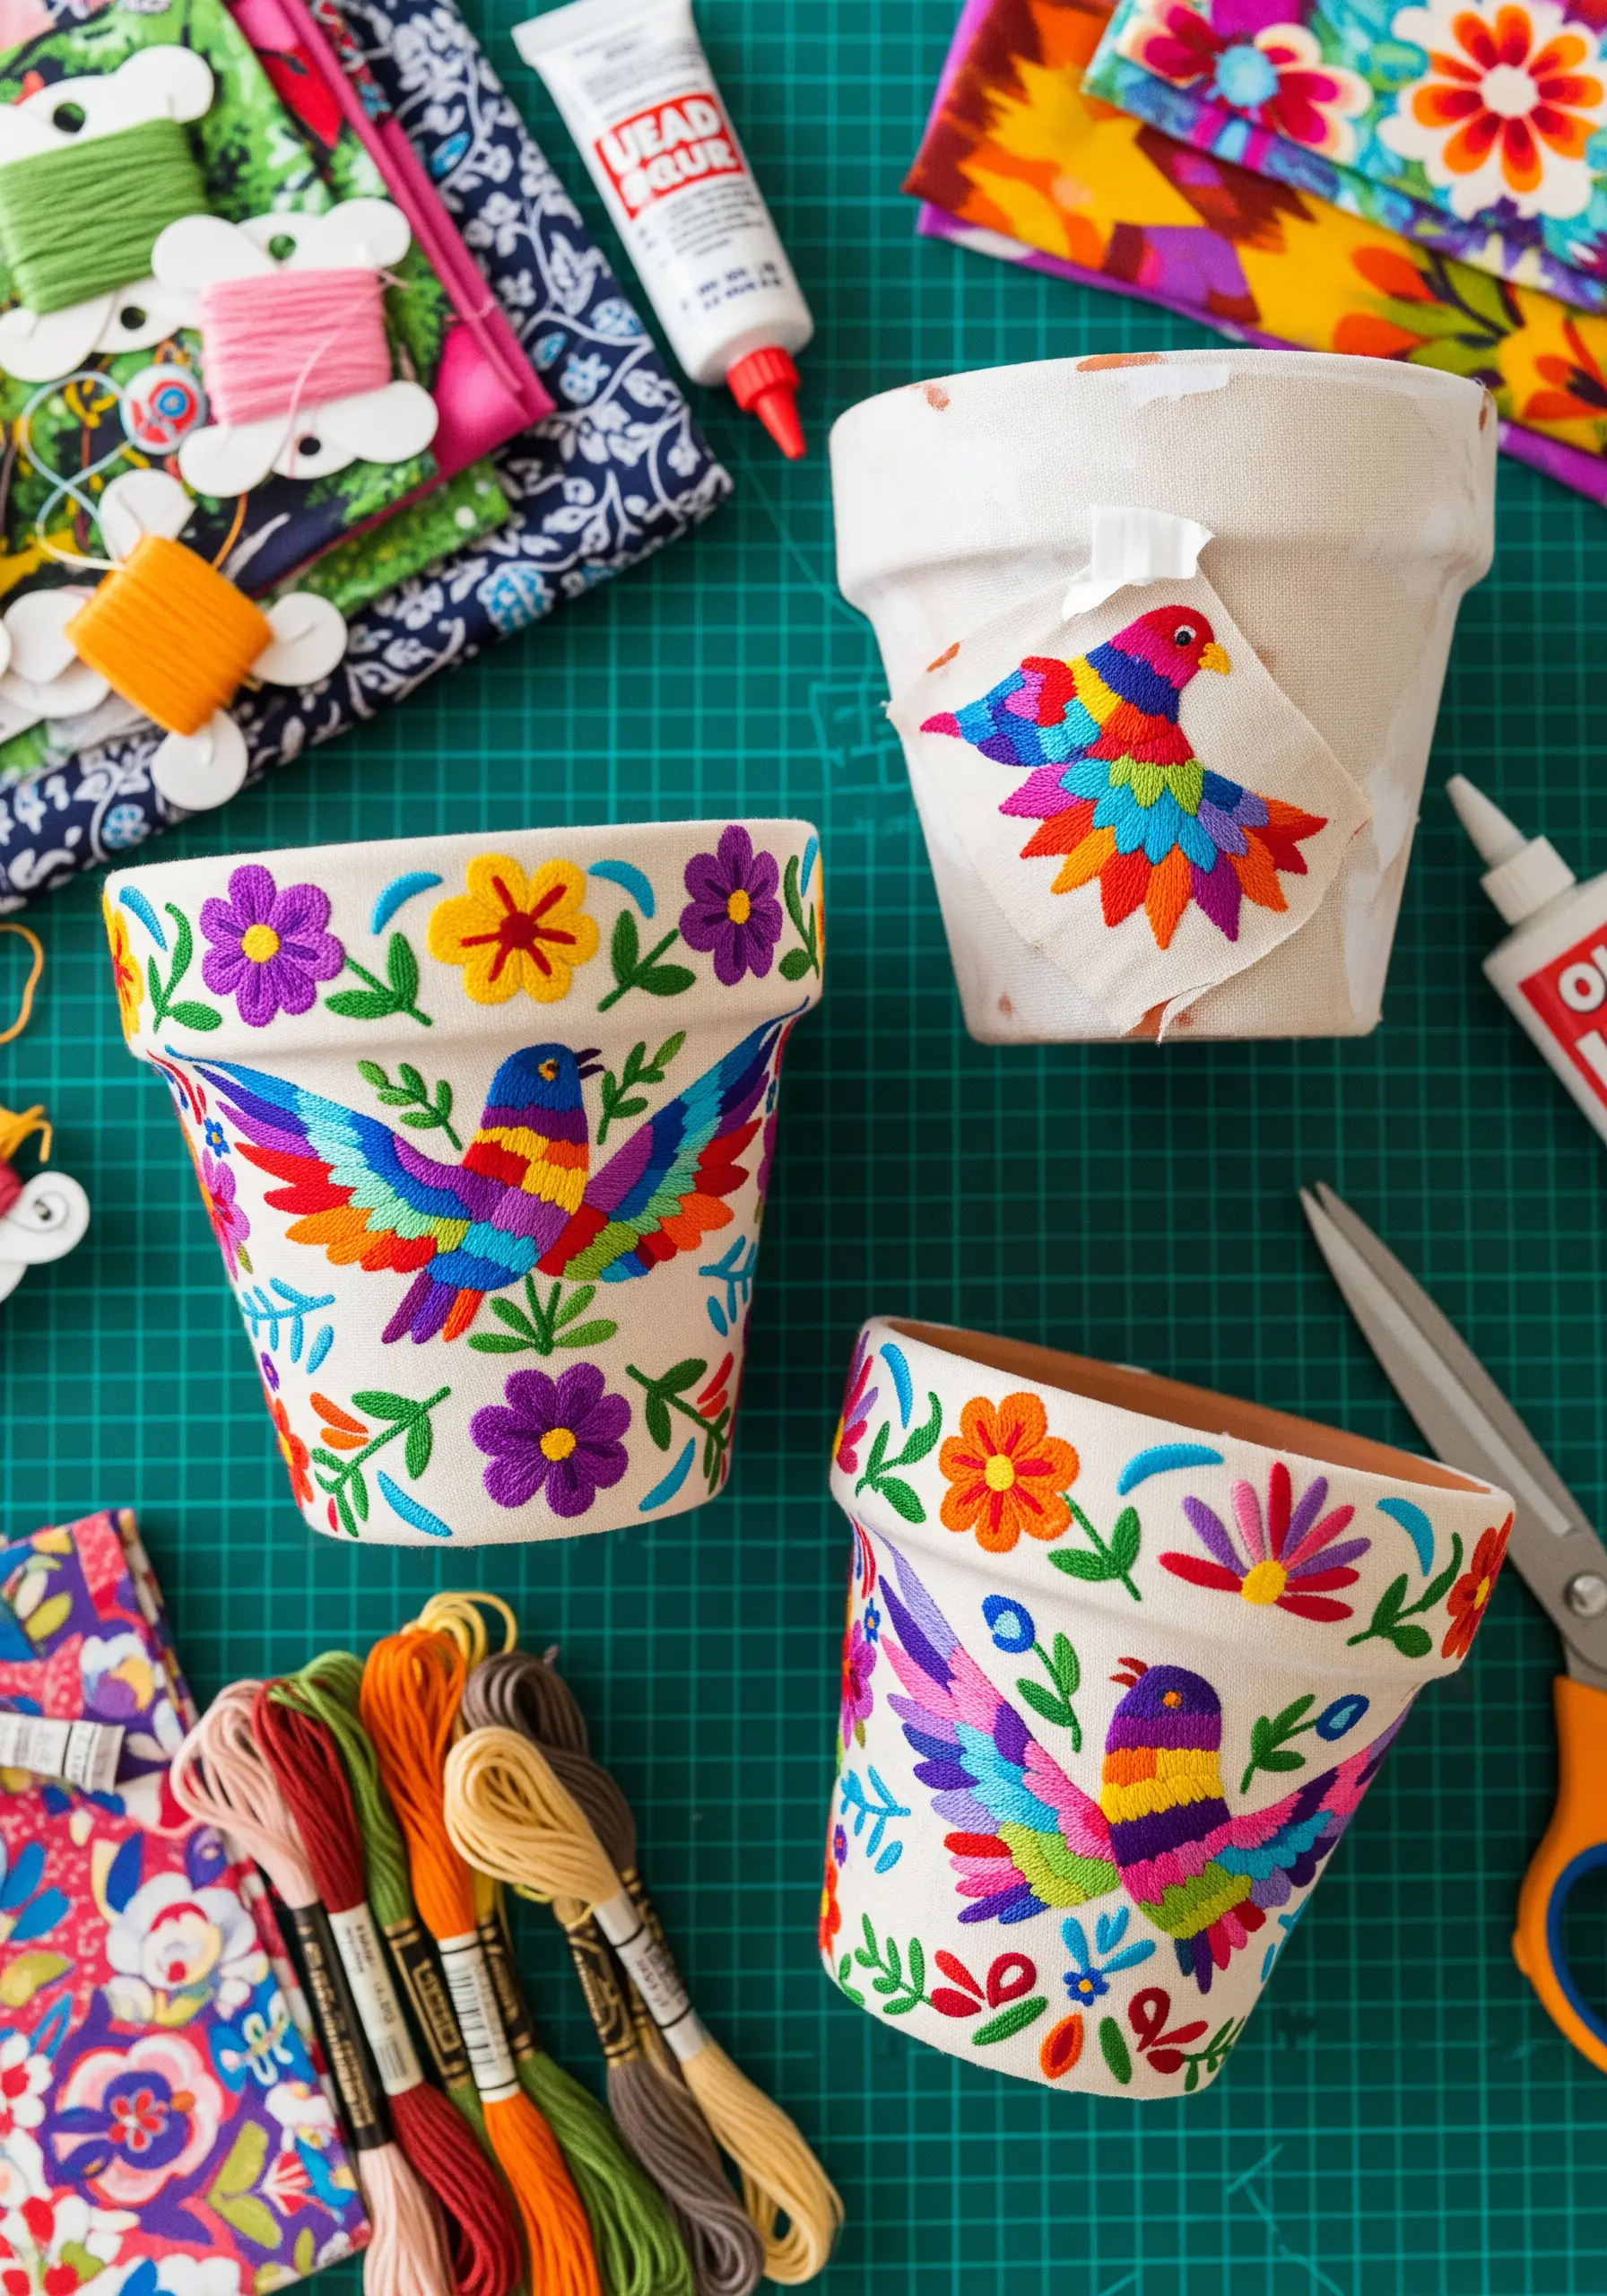
Take your embroidery off the wall by using it to embellish three-dimensional objects.
First, complete your vibrant, folk-art-inspired design on a sturdy piece of canvas fabric, leaving plenty of excess material around the edges.
Apply a thin, even layer of a strong fabric adhesive or decoupage glue to the outside of a clean terracotta pot.
Carefully smooth your embroidered fabric over the surface, pressing out any air bubbles as you go. This method allows you to transform simple, artistic objects you can craft with simple everyday materials into bespoke decor.
16. Sculpt Crashing Waves with Knots and Directional Stitches

To capture the chaotic energy of the sea, you must build layers of texture.
Create the deeper, calmer water with long, horizontal straight stitches and split stitches, varying the shades of blue to suggest depth.
For the frothy, crashing sea foam, densely pack the area with French knots and bullion knots of different sizes using white and pale blue threads.
You can even couch down a thick, textural white yarn in swirling patterns to create the crest of the wave. These statement textured embroidery techniques give the scene a powerful, sculptural quality.
17. Design an Elegant Repeating Border for Home Textiles
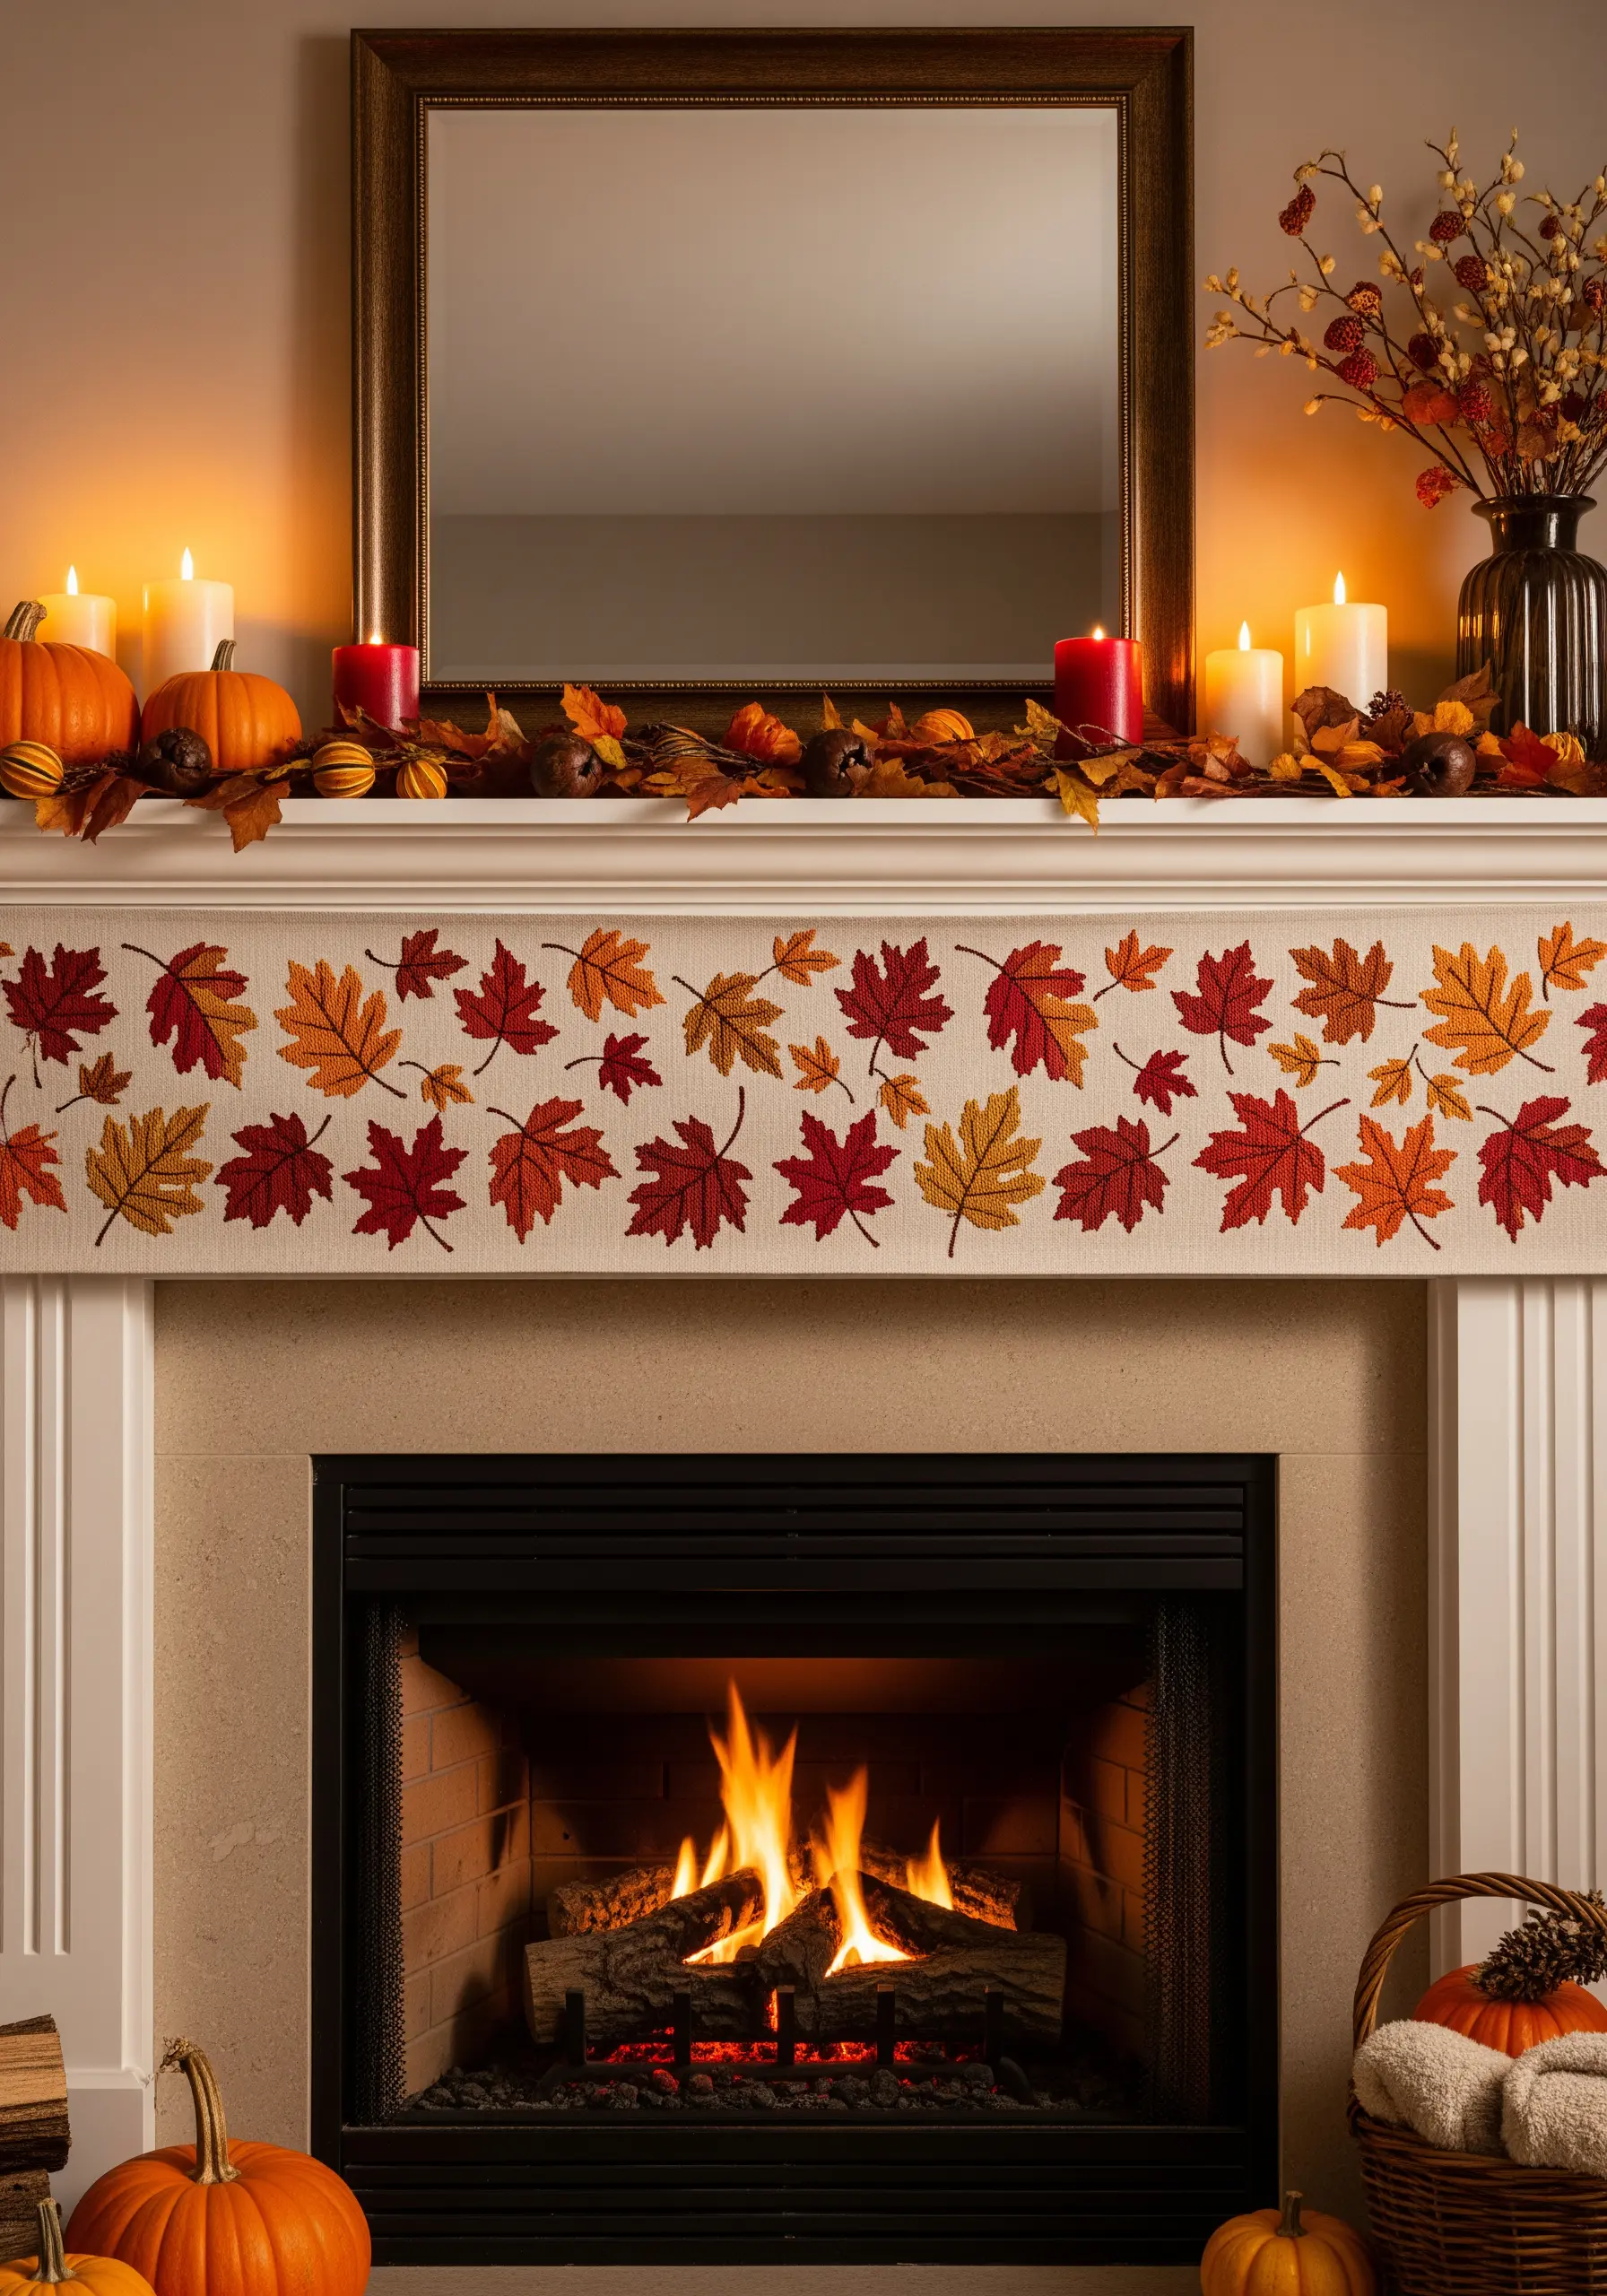
A repeating border is a timeless way to add a custom touch to table linens and home decor.
To ensure your pattern is perfectly uniform, create a stencil of your leaf motif and use a heat-erasable pen to mark the placement along the entire length of the fabric.
The fishbone stitch is an excellent choice for filling in leaves, as it simultaneously creates a central vein and fills the shape with beautifully angled stitches.
By alternating two or three leaf shapes and a warm, autumnal color palette, you can create sophisticated embroidery table runner placemat ideas.
18. Create Personalized Nursery Decor with Soft Textures
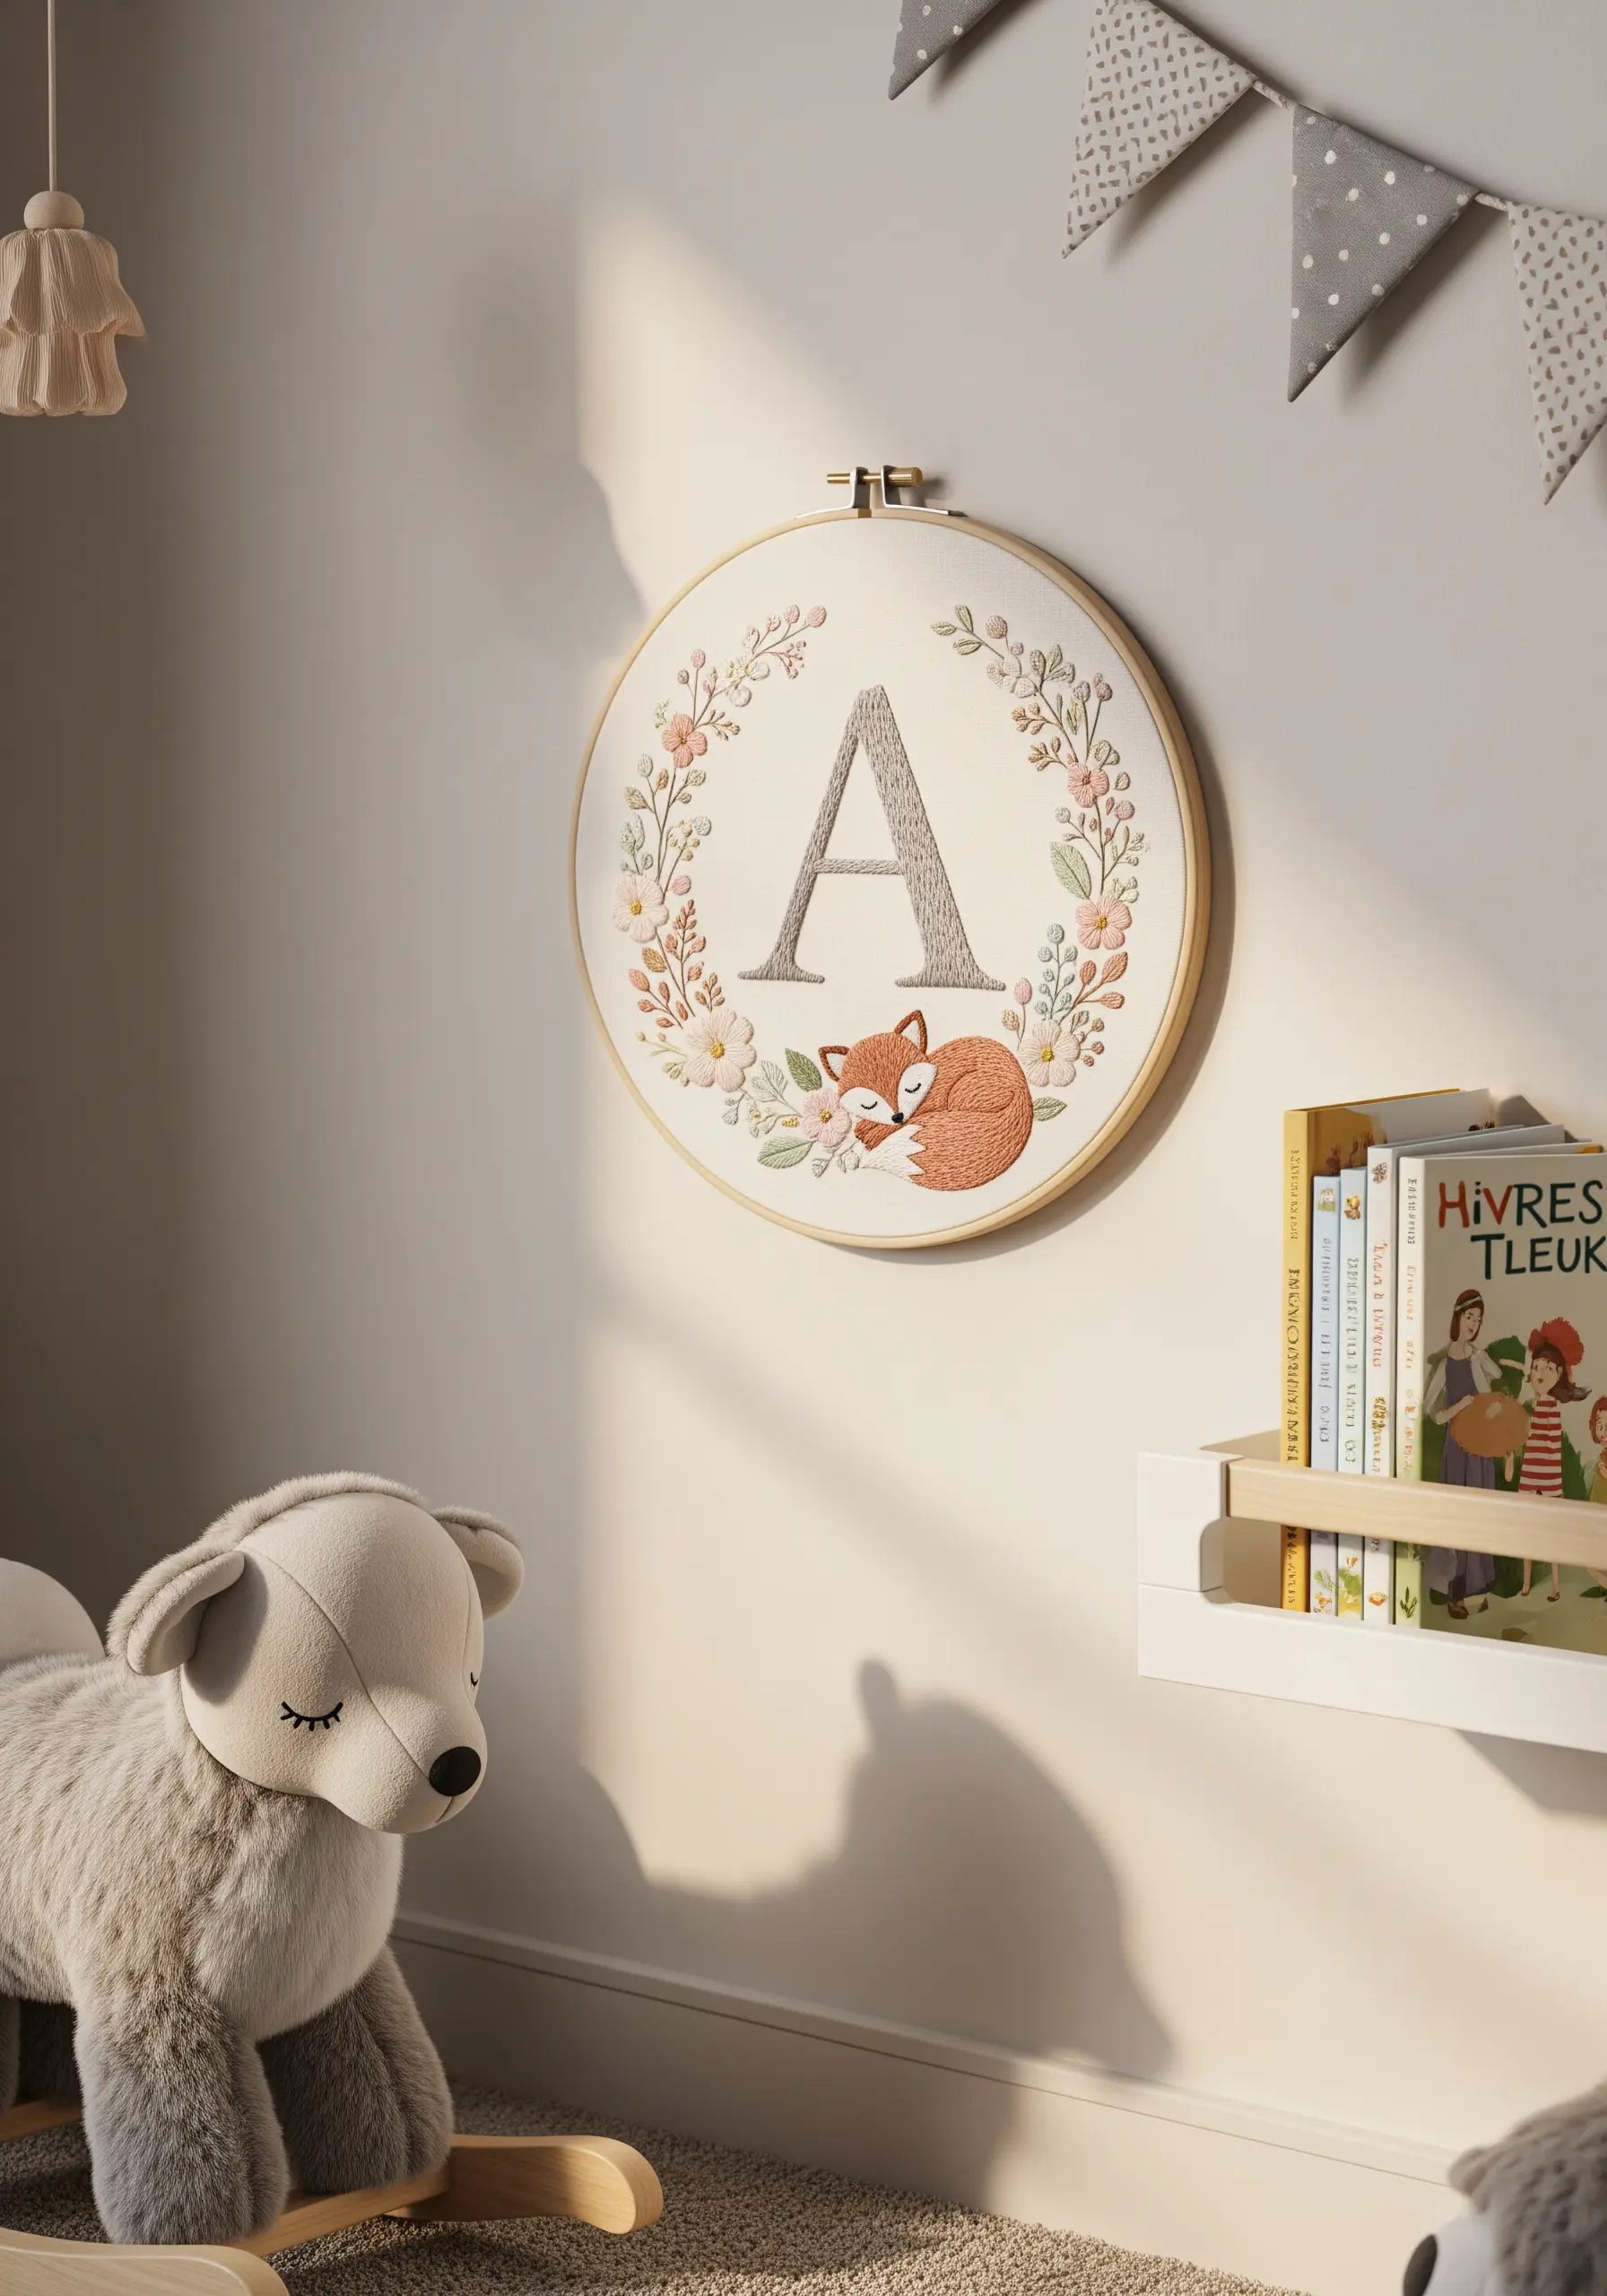
For a gentle, heirloom-quality piece perfect for a nursery, combine several subtle techniques.
Give the monogram a soft, raised dimension by using a padded satin stitch: first, fill the letter with small running stitches, then cover that padding with your final satin stitches.
Use a delicate long-and-short stitch to blend the colors on the sleeping fox, creating a soft, painterly effect.
Frame the central design with a wreath of tiny lazy daisy flowers and French knots to complete these sweet nursery stitch art wall ideas.
19. Energize Your Work with Textured Fill Stitches
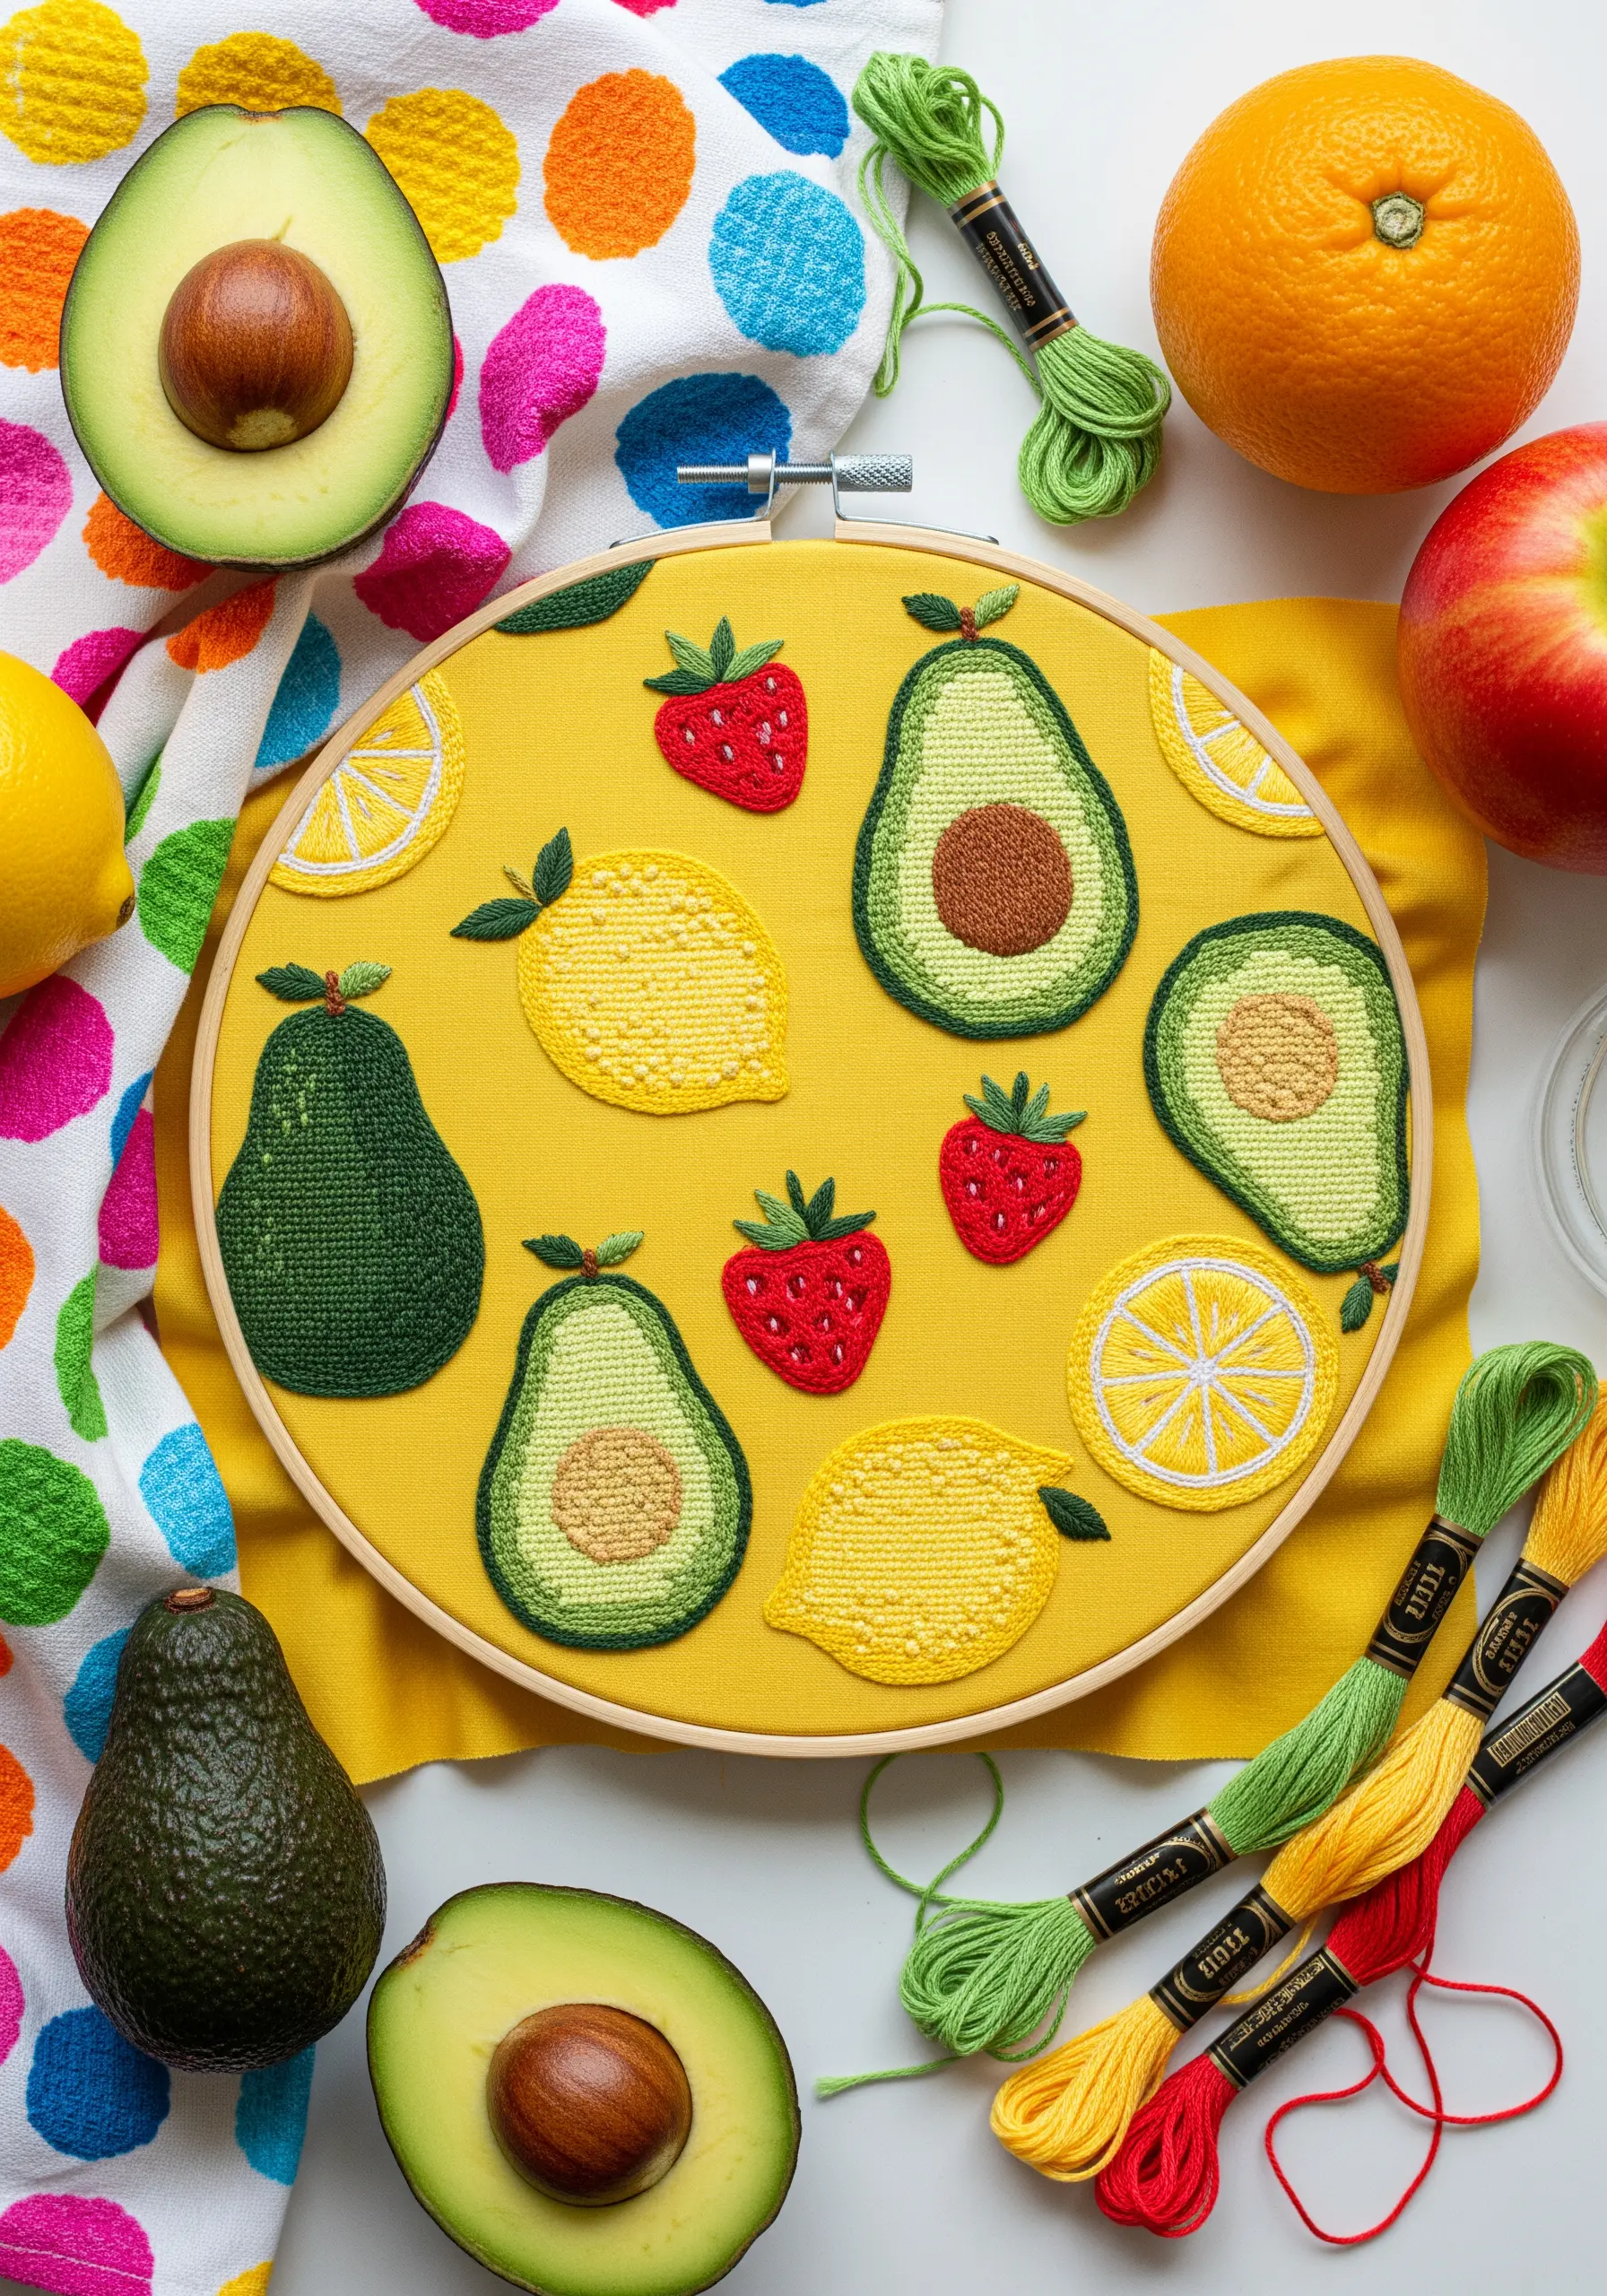
Move beyond the standard satin stitch to give your embroidery a modern, tactile feel.
Instead of a smooth fill, explore different organic texture embroidery ideas that add character to simple shapes.
Use a dense pattern of French knots for the strawberry’s seeded texture, and a spiral of seed stitches to mimic the bumpy rind of a lemon.
For the avocado pit, work your satin stitches in a concentric circle to create a sense of roundness.
This playful approach to filling space makes the entire piece more dynamic and engaging.
20. Transform Functional Objects with Stitched Designs
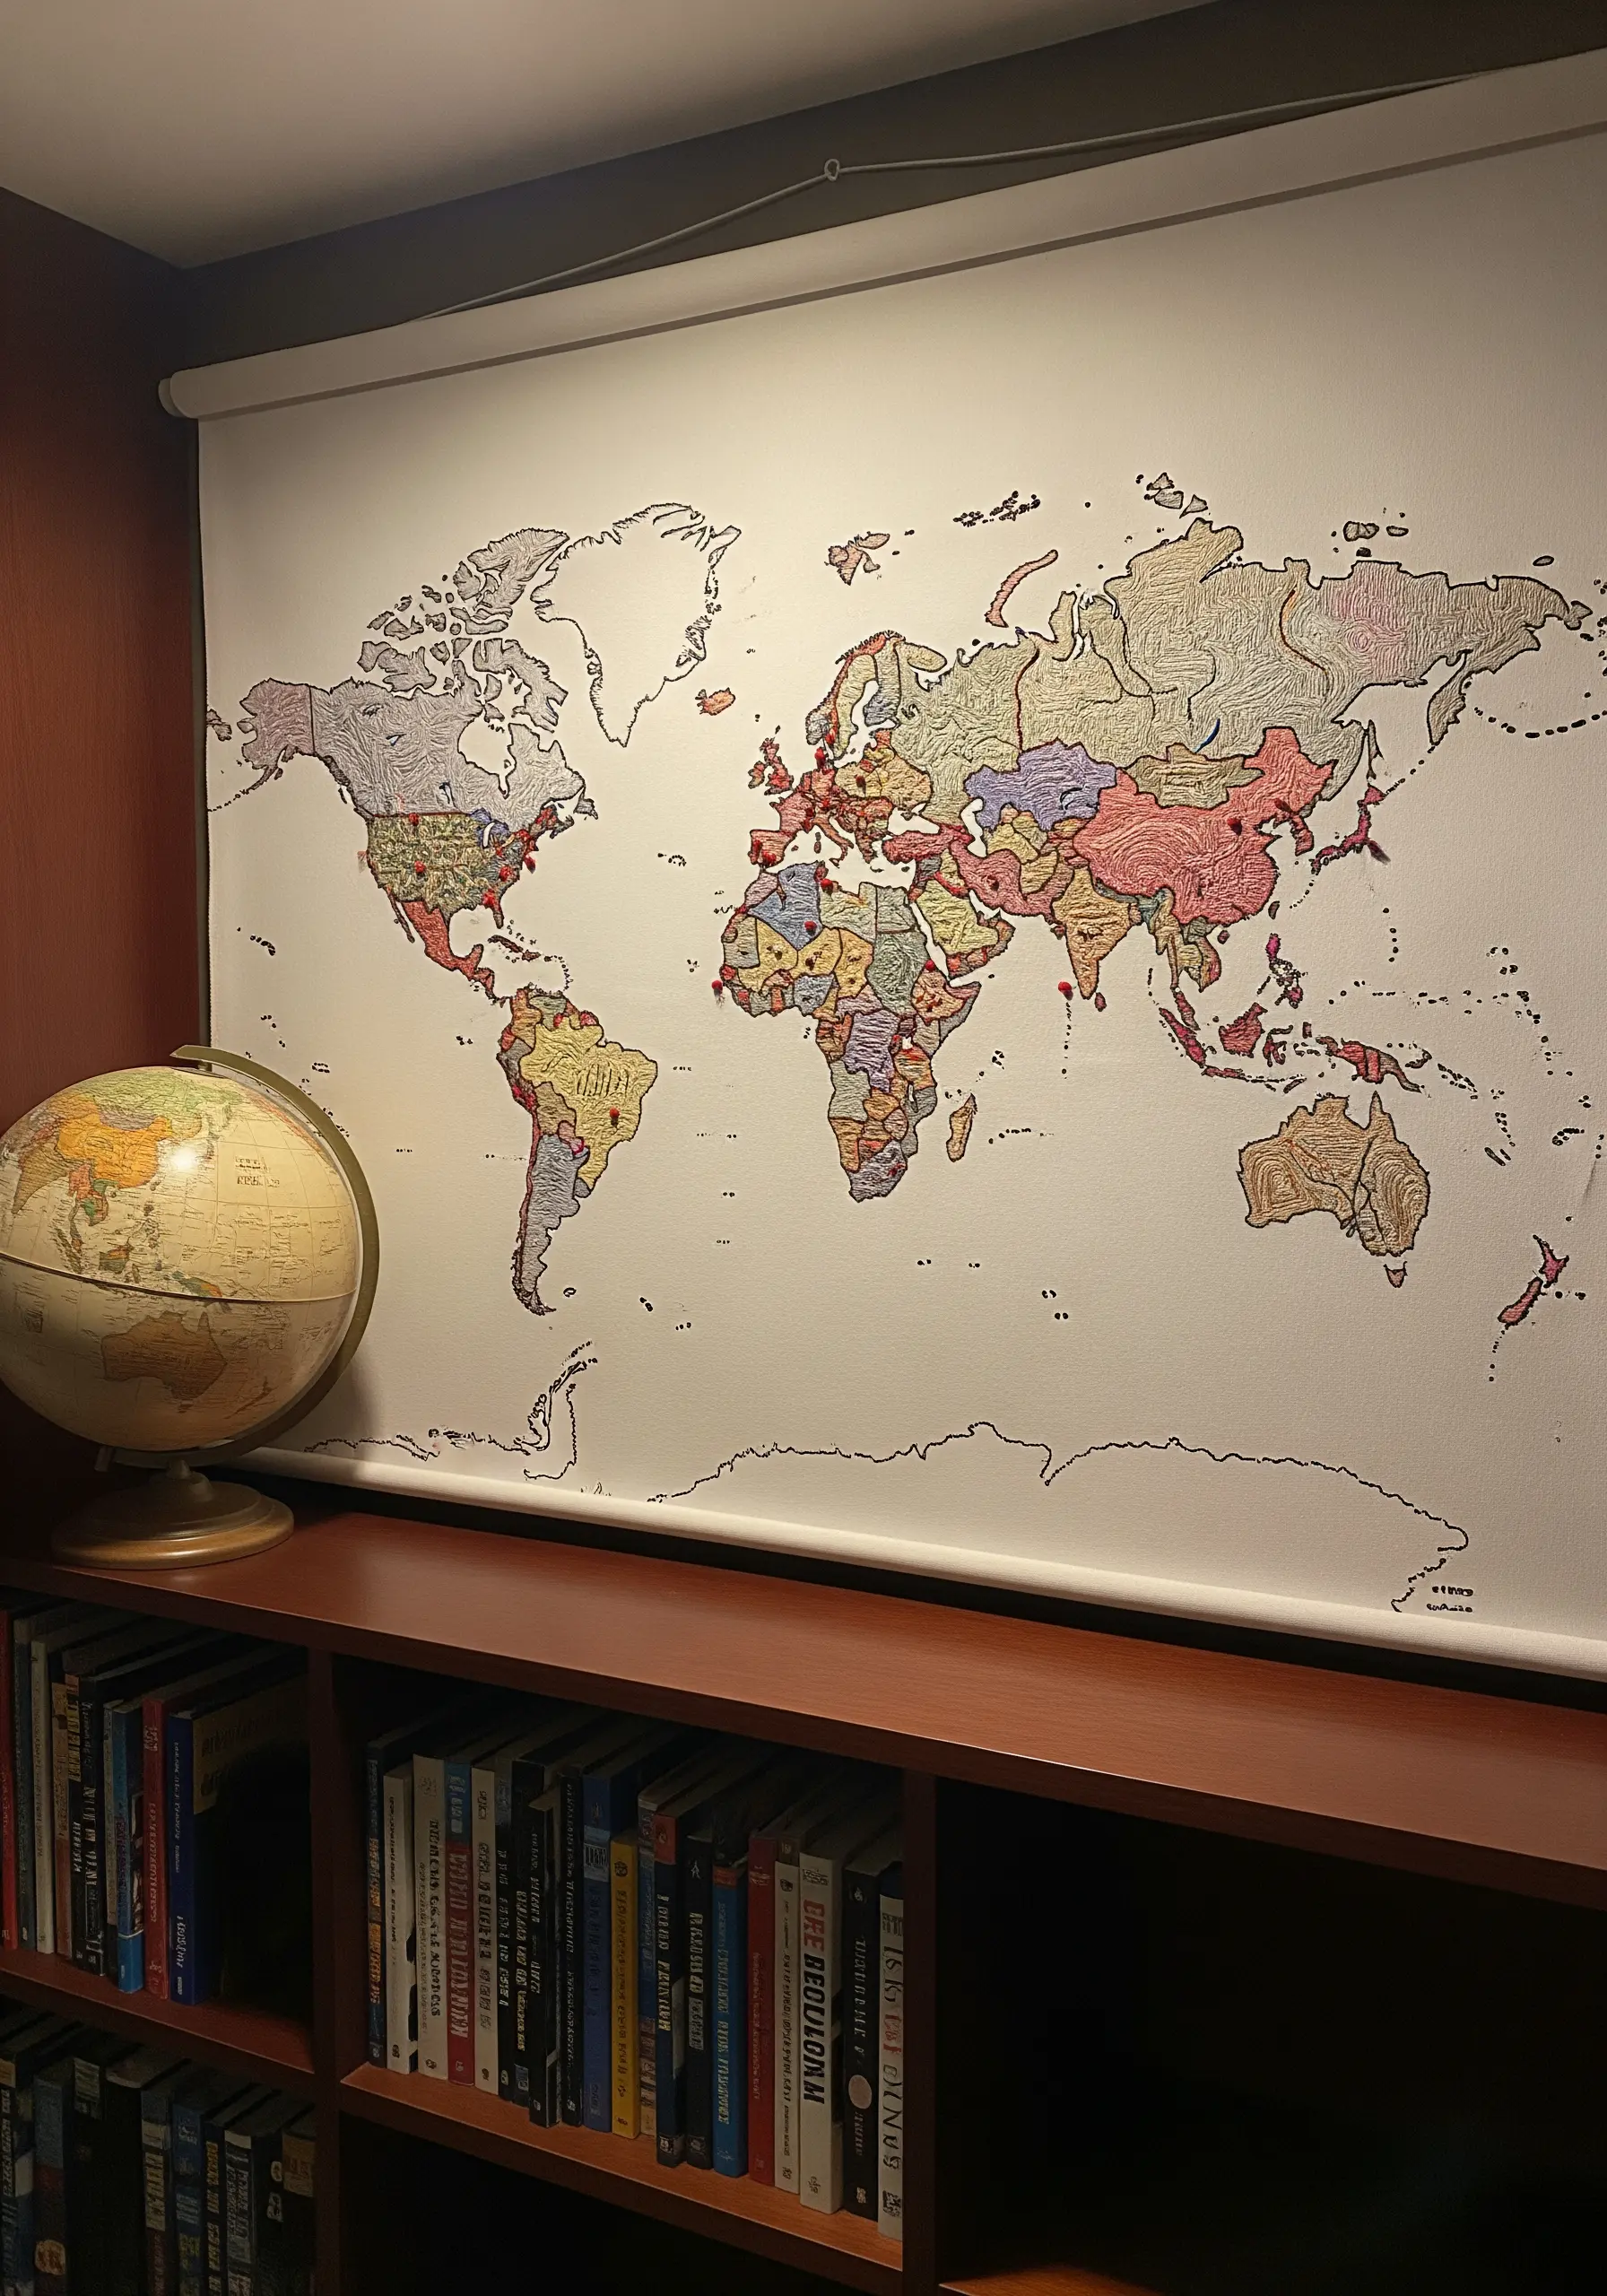
Embroidery doesn’t have to be purely decorative; it can also be functional.
Stitching on a sturdy cotton or linen roller blind transforms it from a plain window covering into a piece of interactive art.
Use a basic backstitch for the outlines of the map to ensure clarity and readability.
A simple project like this can inspire mini travel story embroidery hoops; use different thread colors to fill in the countries and small pins or beads to mark places you’ve visited, creating a living document of your adventures.
21. Curate a Cohesive Hoop Art Gallery Wall
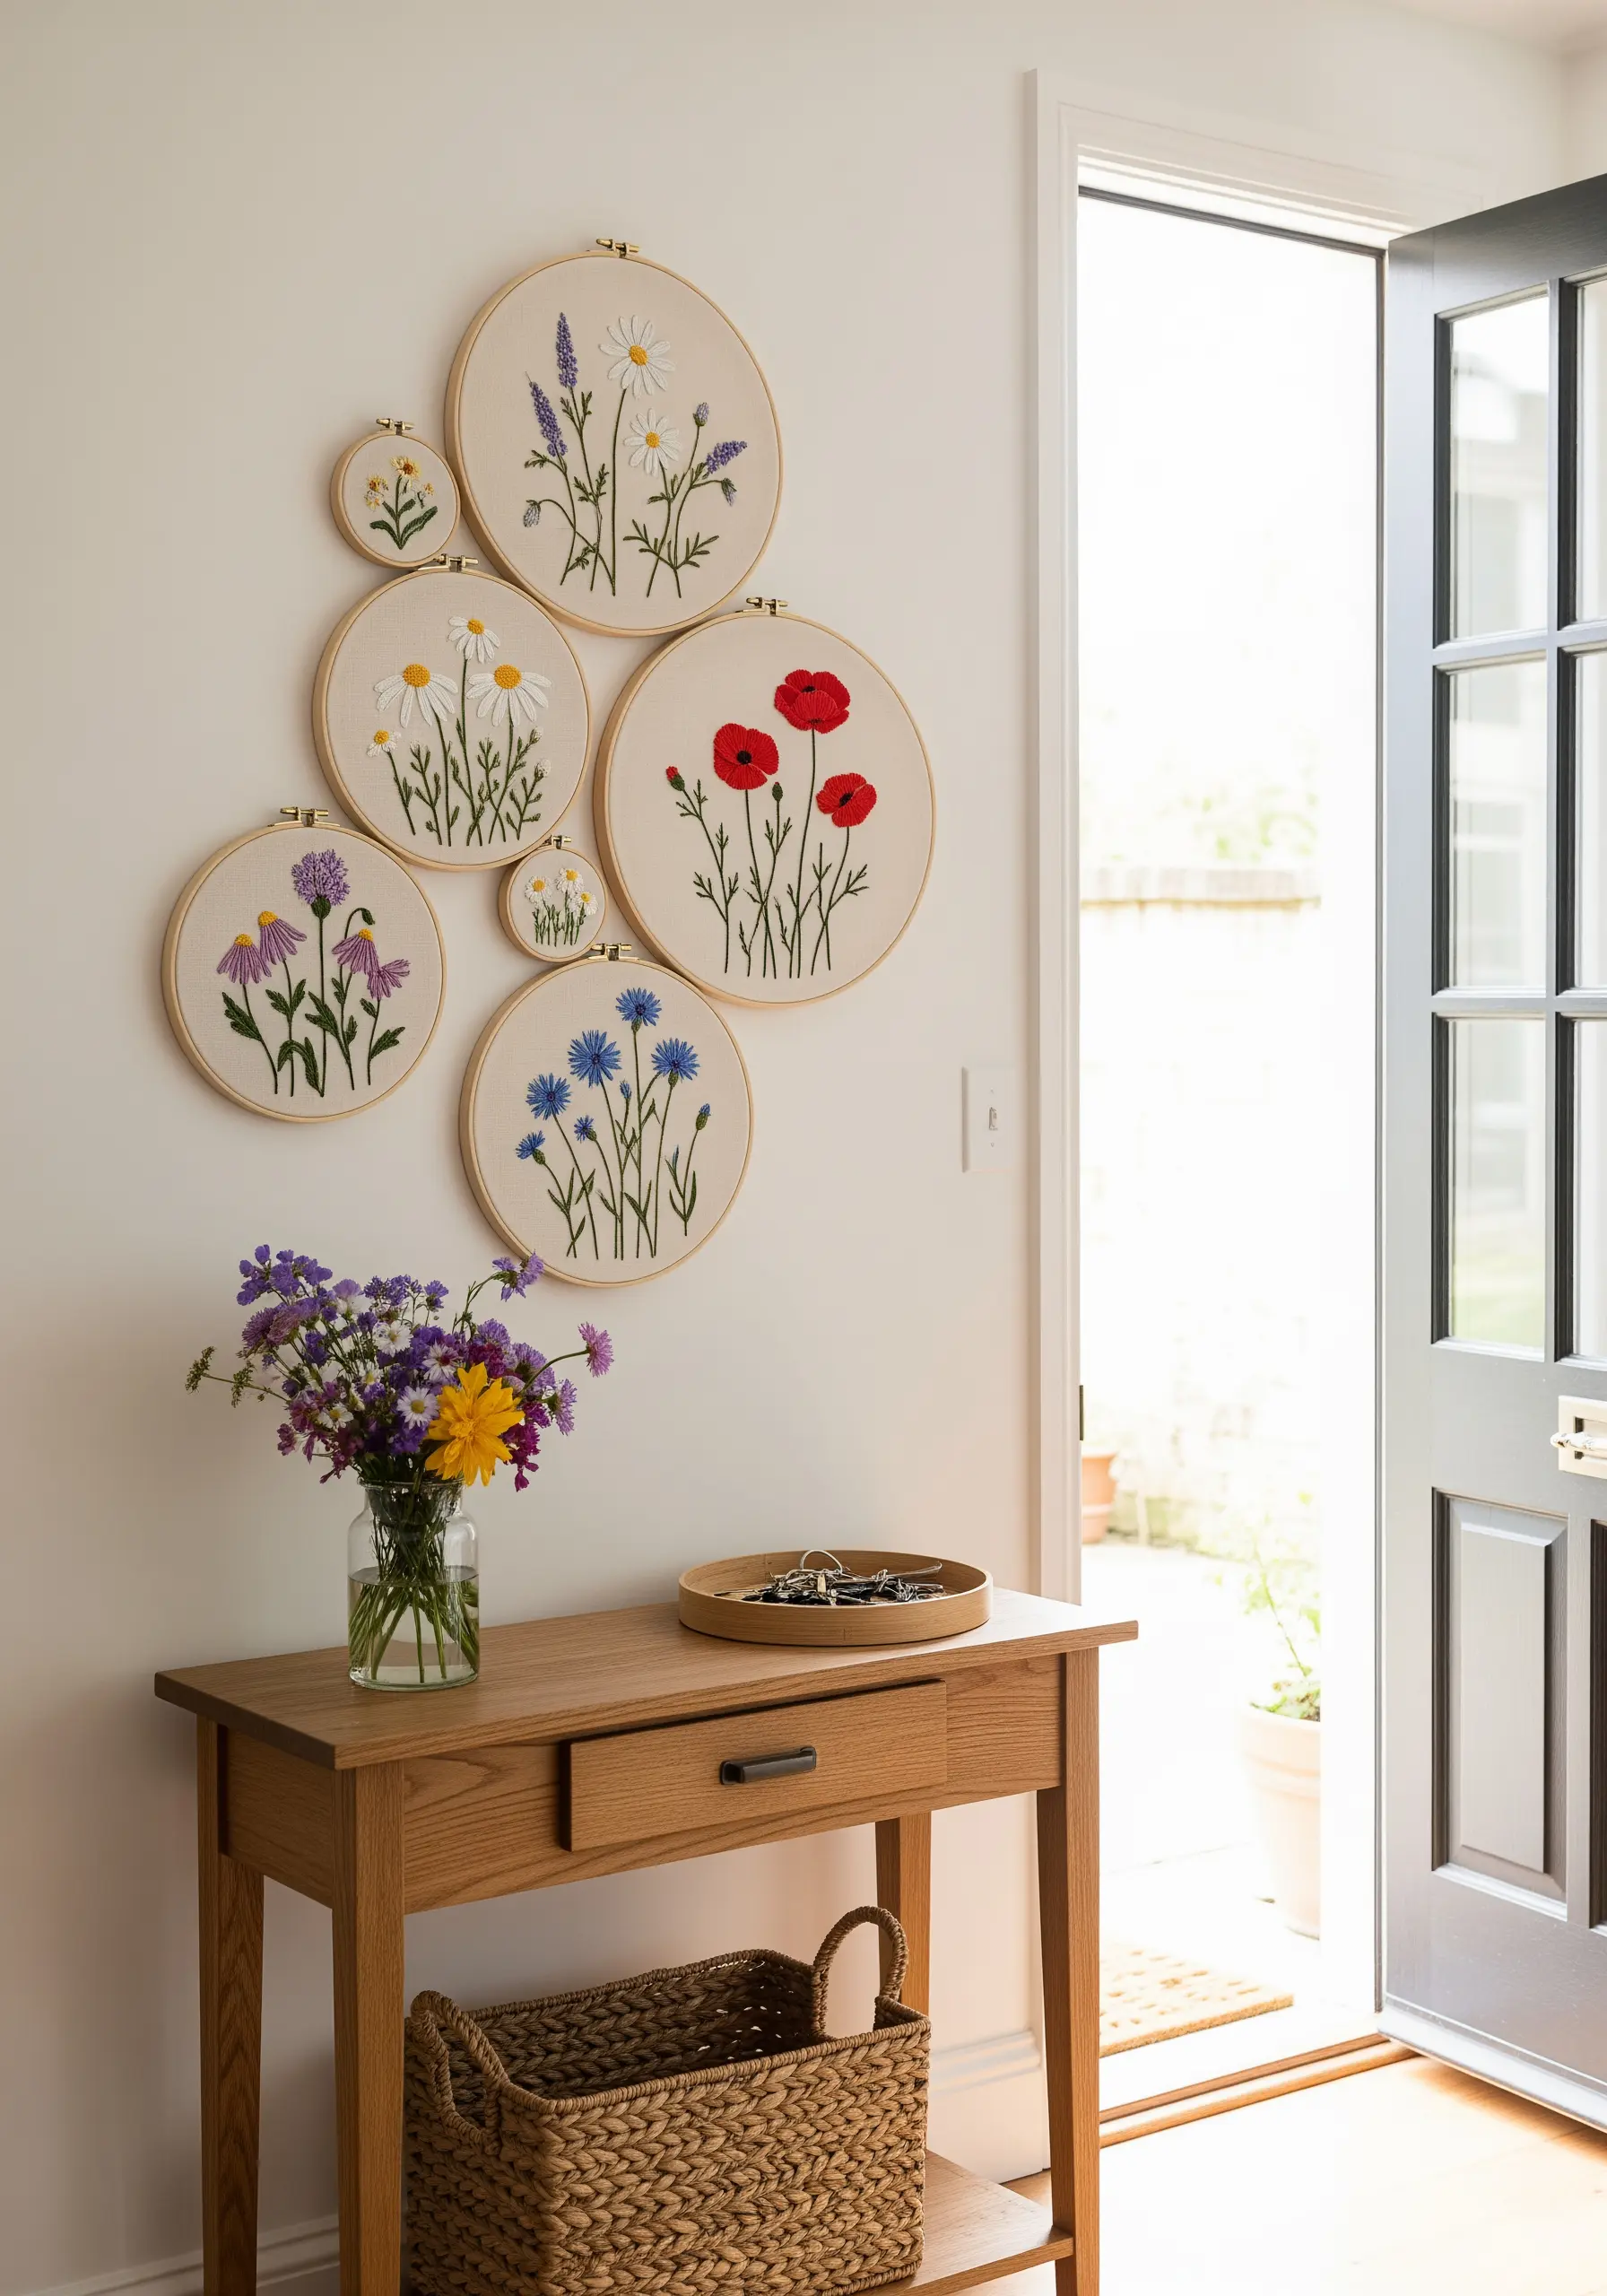
To create a stunning gallery wall, think like a curator.
The key to a cohesive look is to establish a common thread that unites the individual pieces.
This could be a consistent theme, such as wildflowers, or a limited color palette that appears in each hoop.
Vary the hoop sizes and the complexity of the designs—some dense with stitches, others more minimalist—to create visual rhythm and interest.
Before you commit to nails, arrange your finished handmade embroidery hoop designs on the floor to perfect the composition.


