

Have you ever finished a piece and felt it was missing that certain something—that touch of polish that separates the handmade from the designer-made? You have the patience and the passion, but the path to a more refined finish can feel elusive.
The secret isn’t about learning dozens of impossibly complex stitches. Instead, it’s about making intentional choices. It’s in the way you direct your satin stitch to catch the light, the texture you build with a simple French knot, or the clean line you achieve with a perfect backstitch.
Think of these tiny patterns not just as projects, but as opportunities to practice precision. Each one is a small study in texture, color, and form. By focusing on these details, you will build the skills and the confidence to make every piece you create feel thoughtful, elevated, and uniquely yours.
1. Celestial Glow with Satin Stitch and Seed Knots

Create a luminous crescent moon by outlining the shape with a sharp split stitch, then filling it with a dense satin stitch.
For an added glow, use a single strand of metallic thread alongside your regular floss—this subtle shimmer catches the light beautifully.
Scatter tiny French knots and seed stitches around the moon to form a delicate starfield.
This composition works because the solid, smooth texture of the moon contrasts with the scattered, pointillist texture of the stars, creating visual balance and a sense of depth.
You can use this technique to create tiny night sky embroidery designs that feel both simple and magical.
2. Sculptural Leaves with Directional Satin Stitch
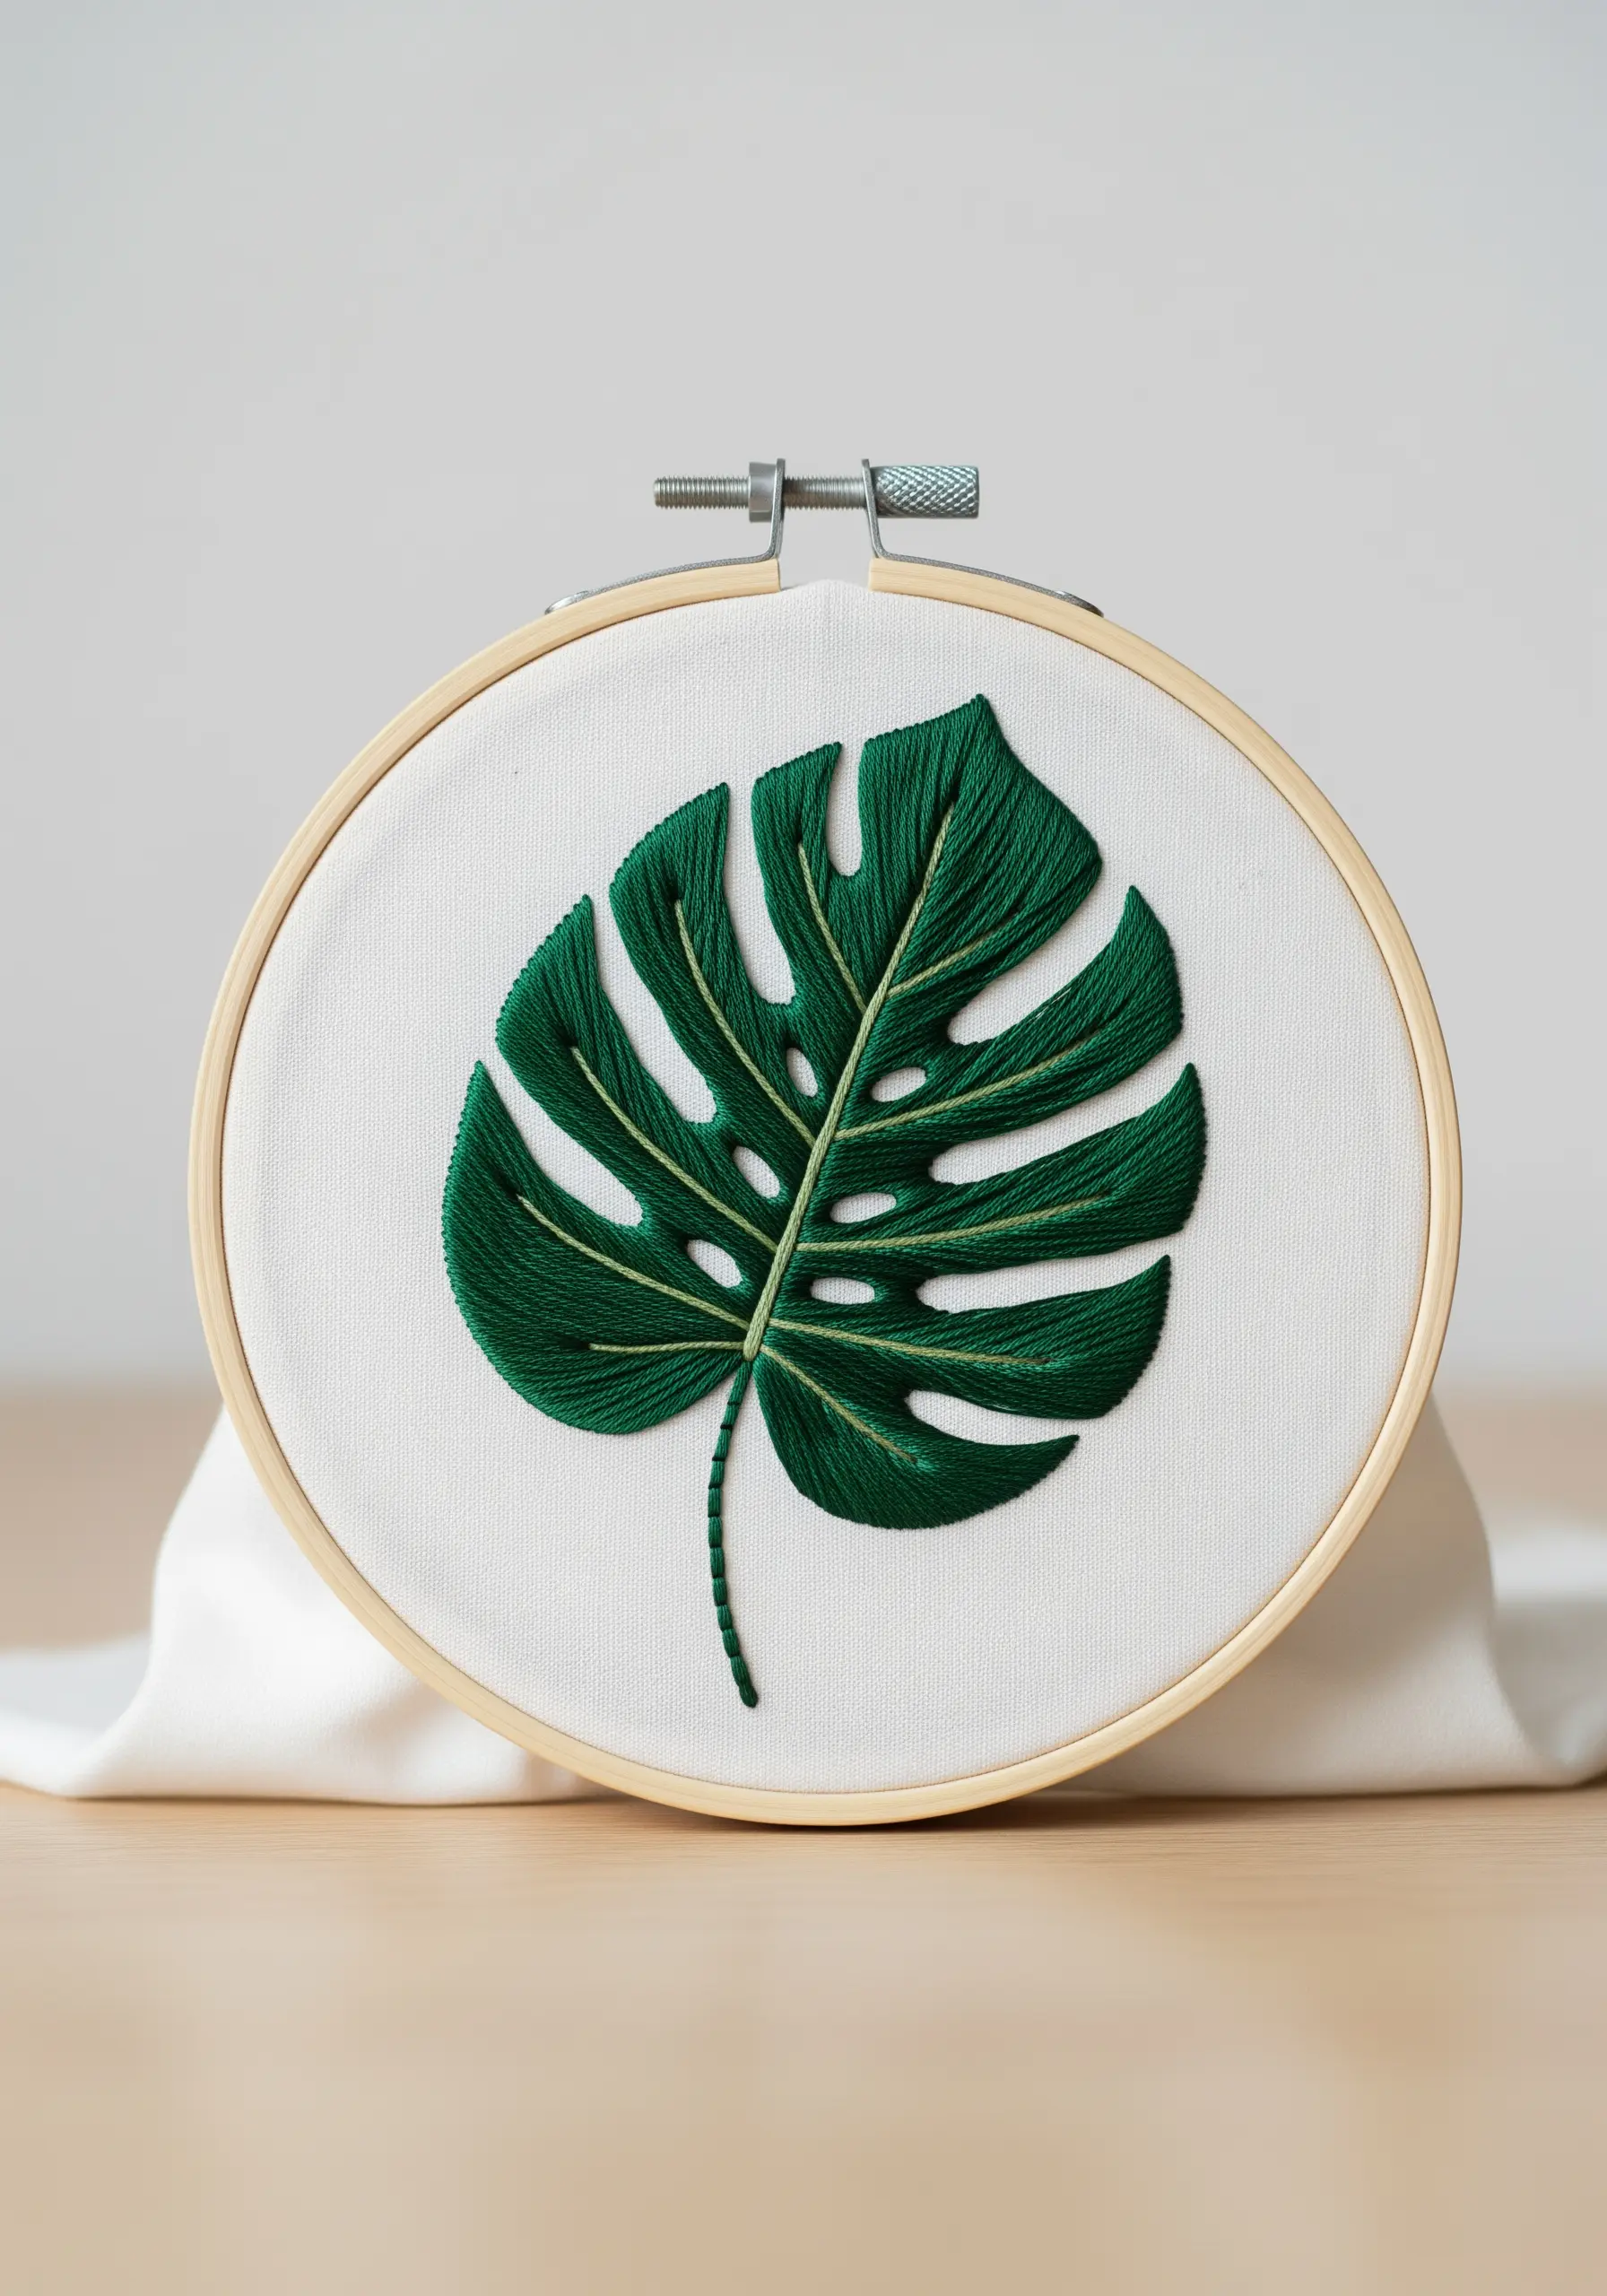
To prevent a large filled area from looking flat, use directional satin stitch to mimic the natural form of the object.
For this monstera leaf, angle your stitches to follow the direction of the veins, changing the angle slightly for each leaf section.
This small adjustment makes the thread reflect light differently across the surface, creating the illusion of curves and dimension.
Using 3-4 strands of floss provides a lush, smooth coverage that enhances the sculptural effect, turning a simple leaf into one of your favorite modern botanical stitches.
3. Modern Appliqué with Felt and Geometric Fills
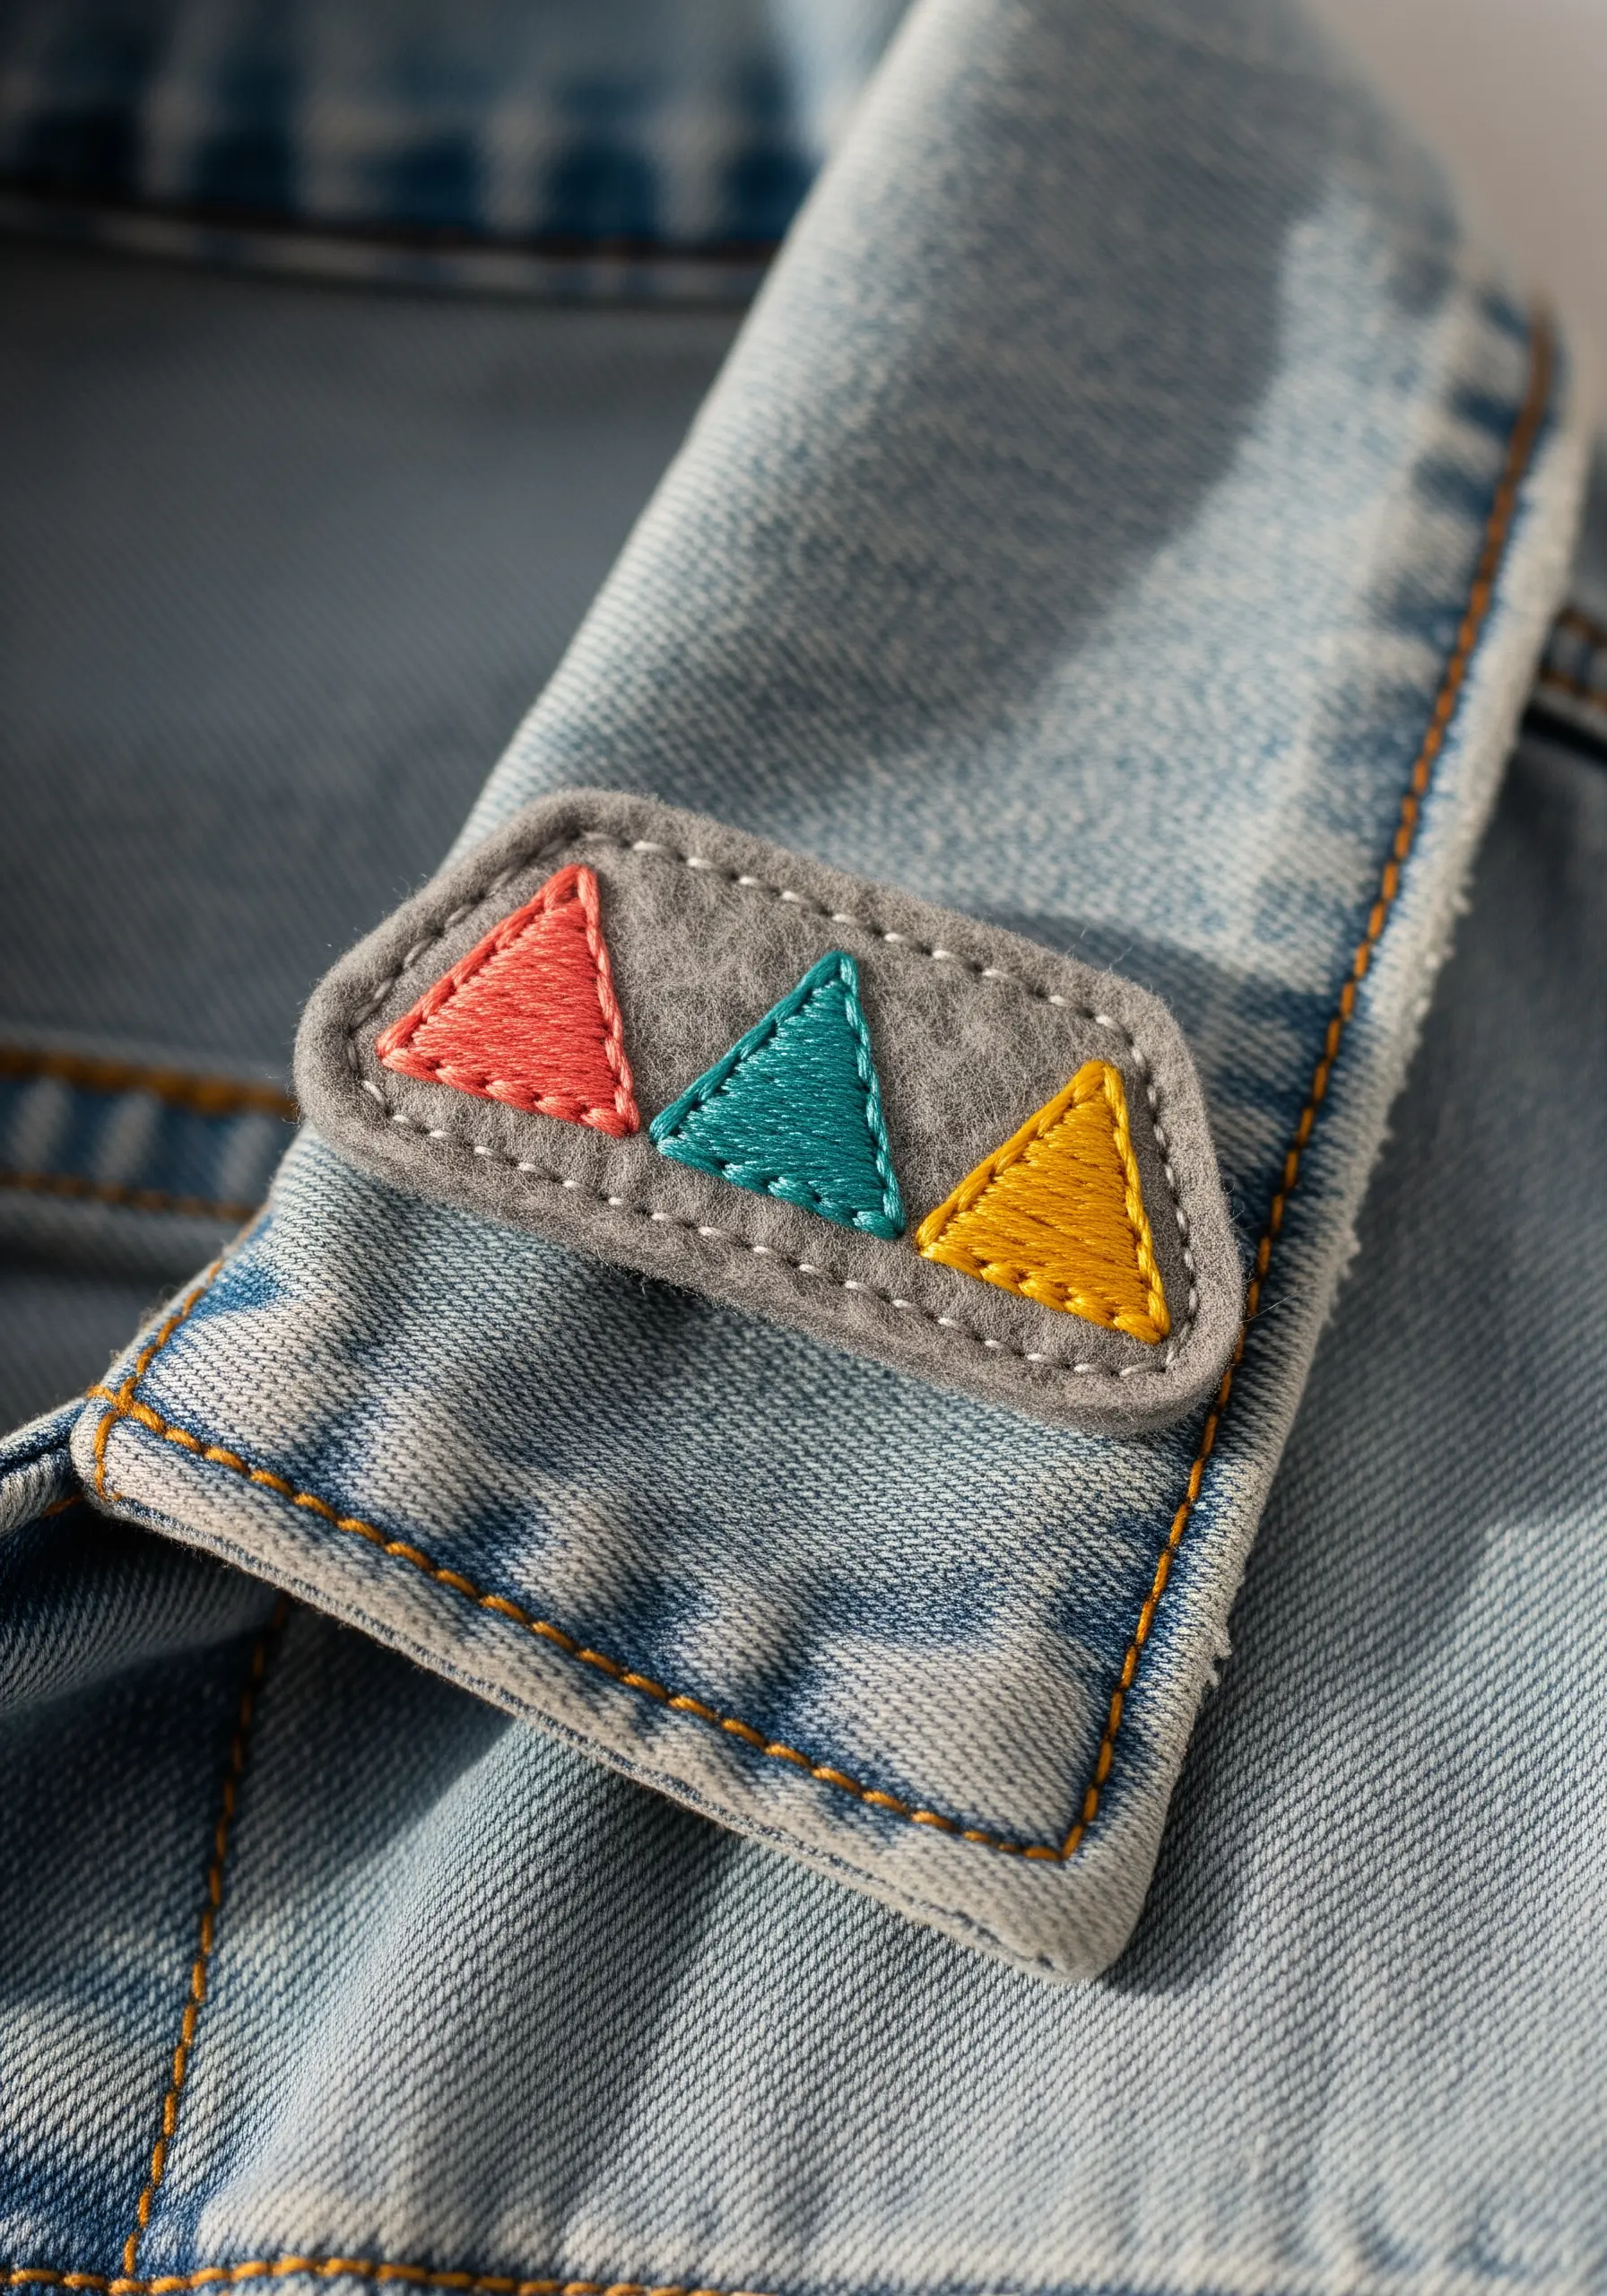
Create durable, high-impact embellishments by embroidering on a felt base first, then applying it as a patch.
Felt provides a stable ground for dense satin stitches and prevents the fabric of your garment from puckering.
Fill your geometric shapes with perfectly parallel satin stitches, using a bright, contrasting color palette for a modern, graphic look.
A simple running stitch secures the patch to the collar, adding a final handmade detail that feels intentional and stylish.
This method allows you to add custom details to thick fabrics like denim without stitching through heavy layers.
4. Crisp Insect Motifs with Texture and Outline
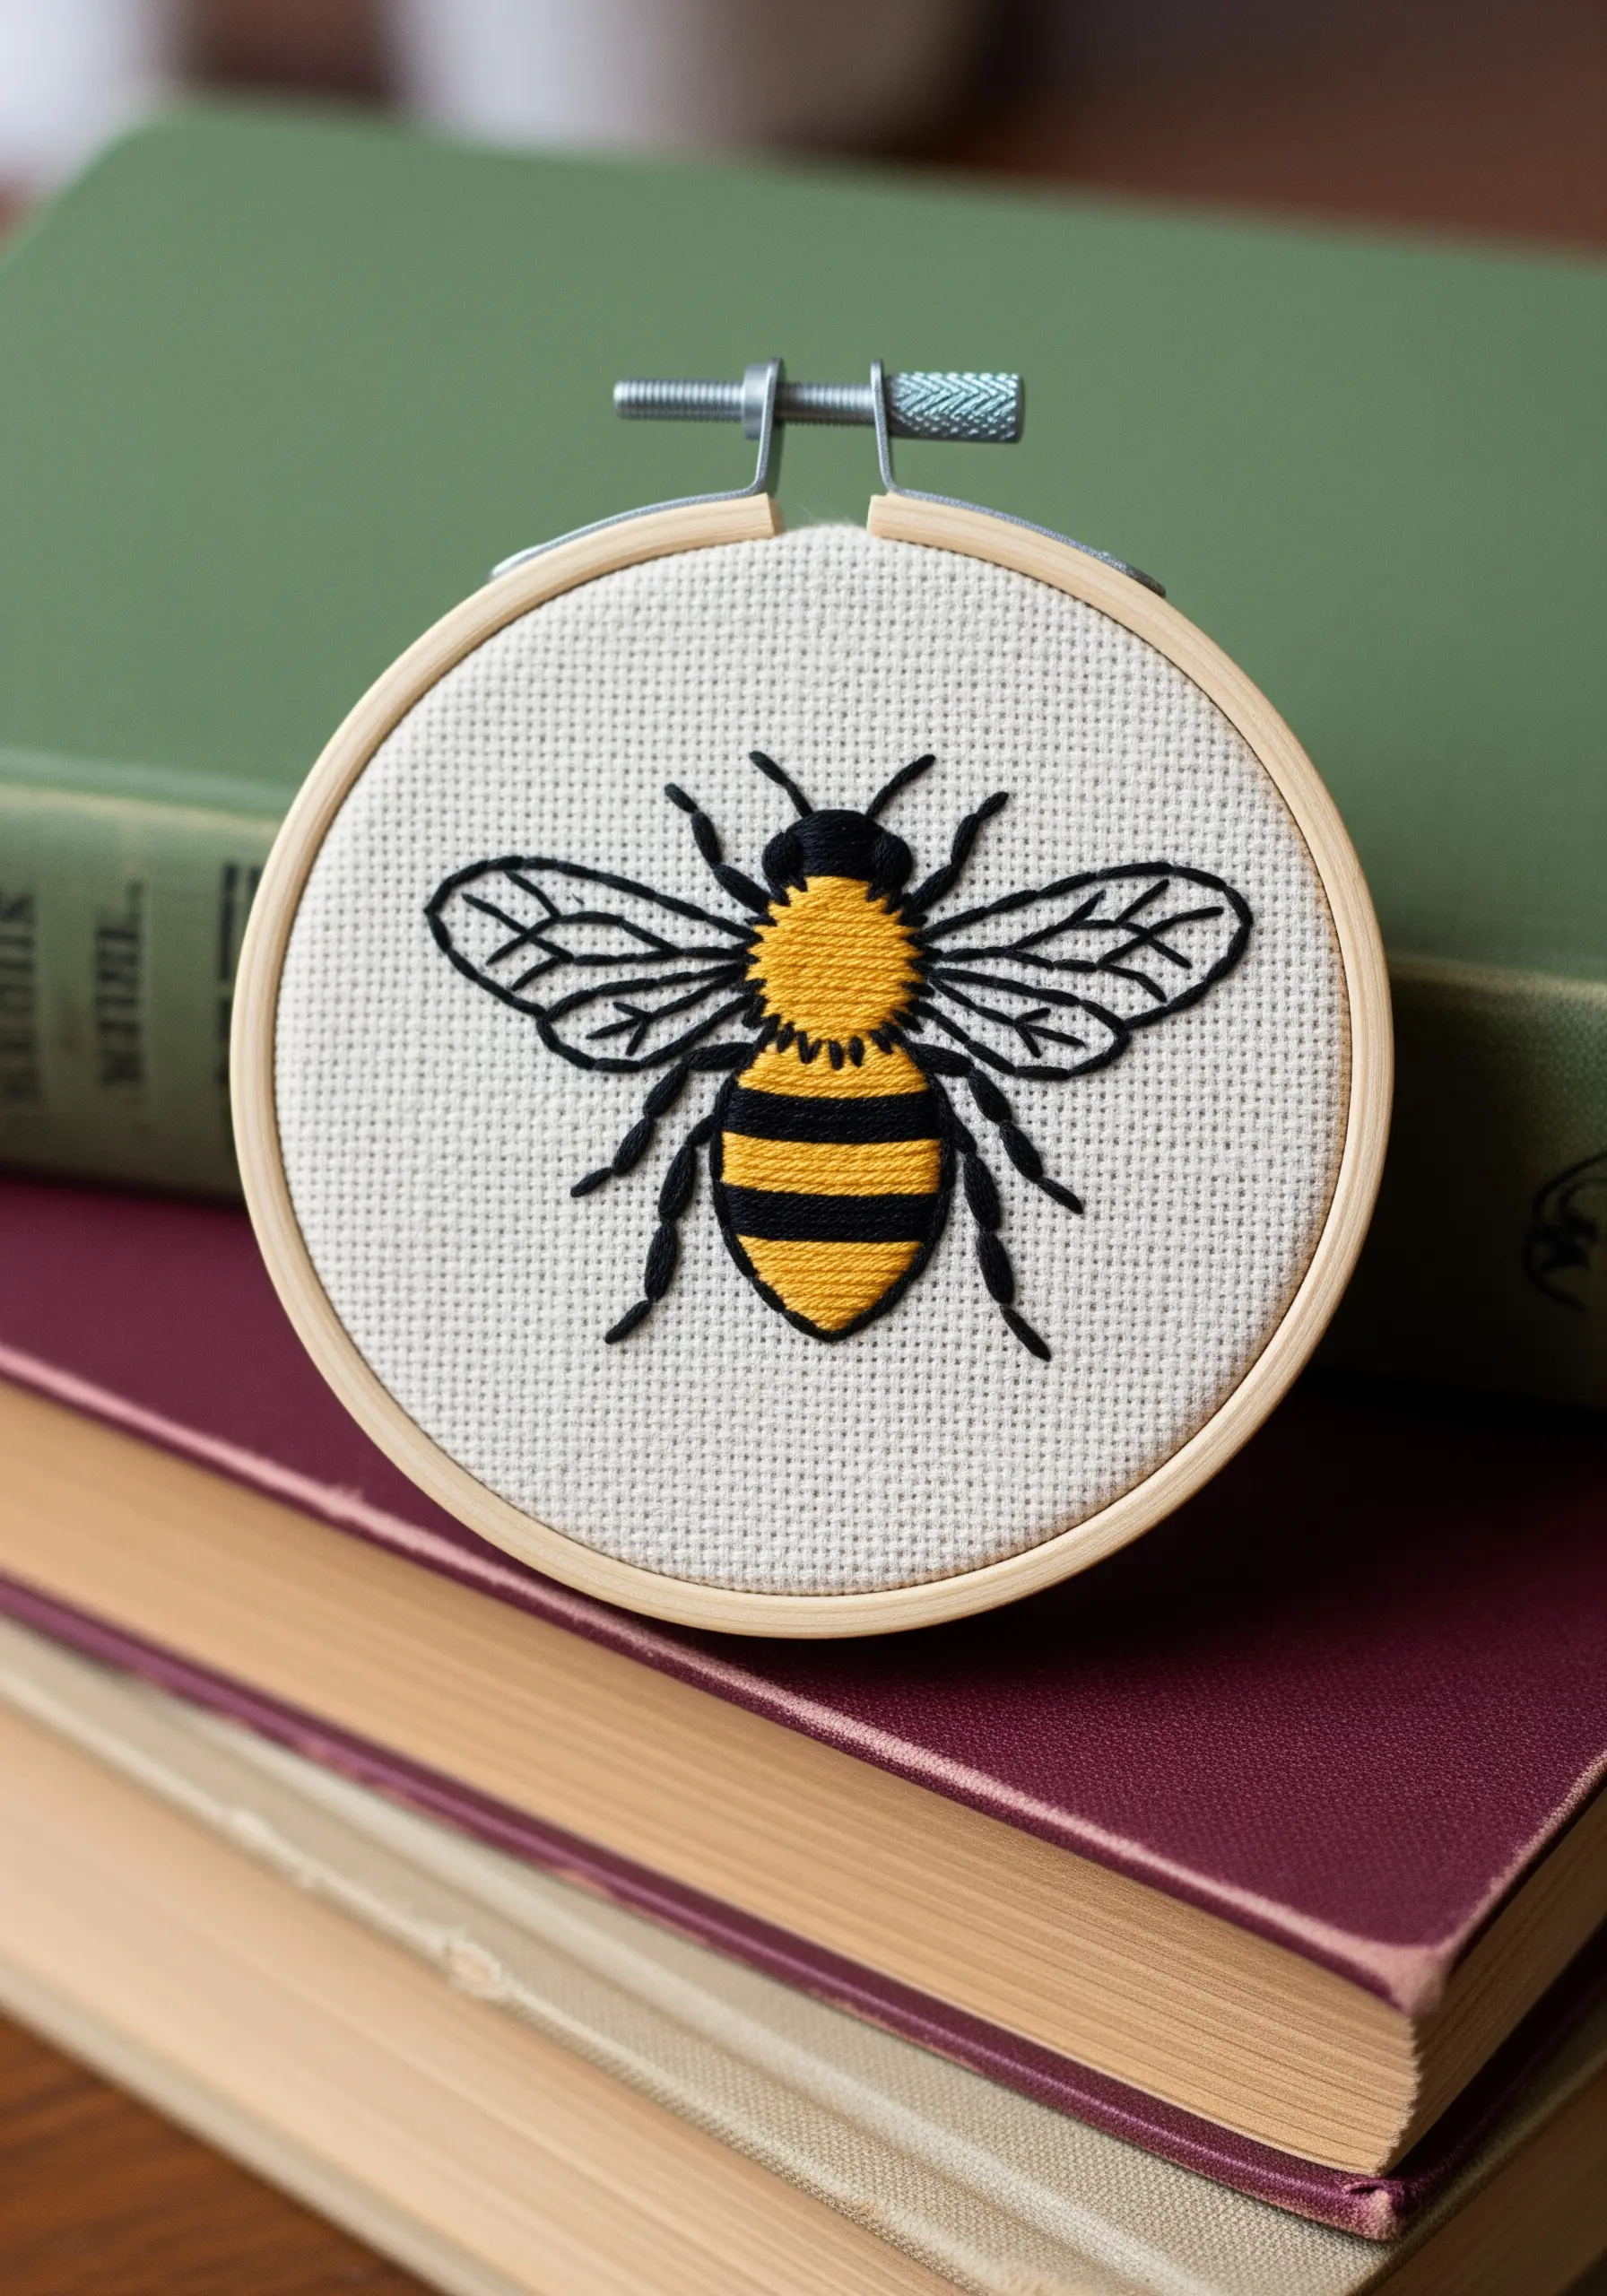
The professional look of this bee comes from the clear separation of textures.
Use a dense, horizontal satin stitch for the fuzzy body, alternating colors for clean, bold stripes.
For the delicate wings, switch to a simple backstitch using only two strands of black floss.
This contrast between the solid, fuzzy body and the light, transparent wings gives the tiny insect a surprising amount of realism and character.
It’s one of those adorable mini stitch ideas that make perfect gifts for nature lovers.
5. Capture Motion with Layered Stitches and Color Blending
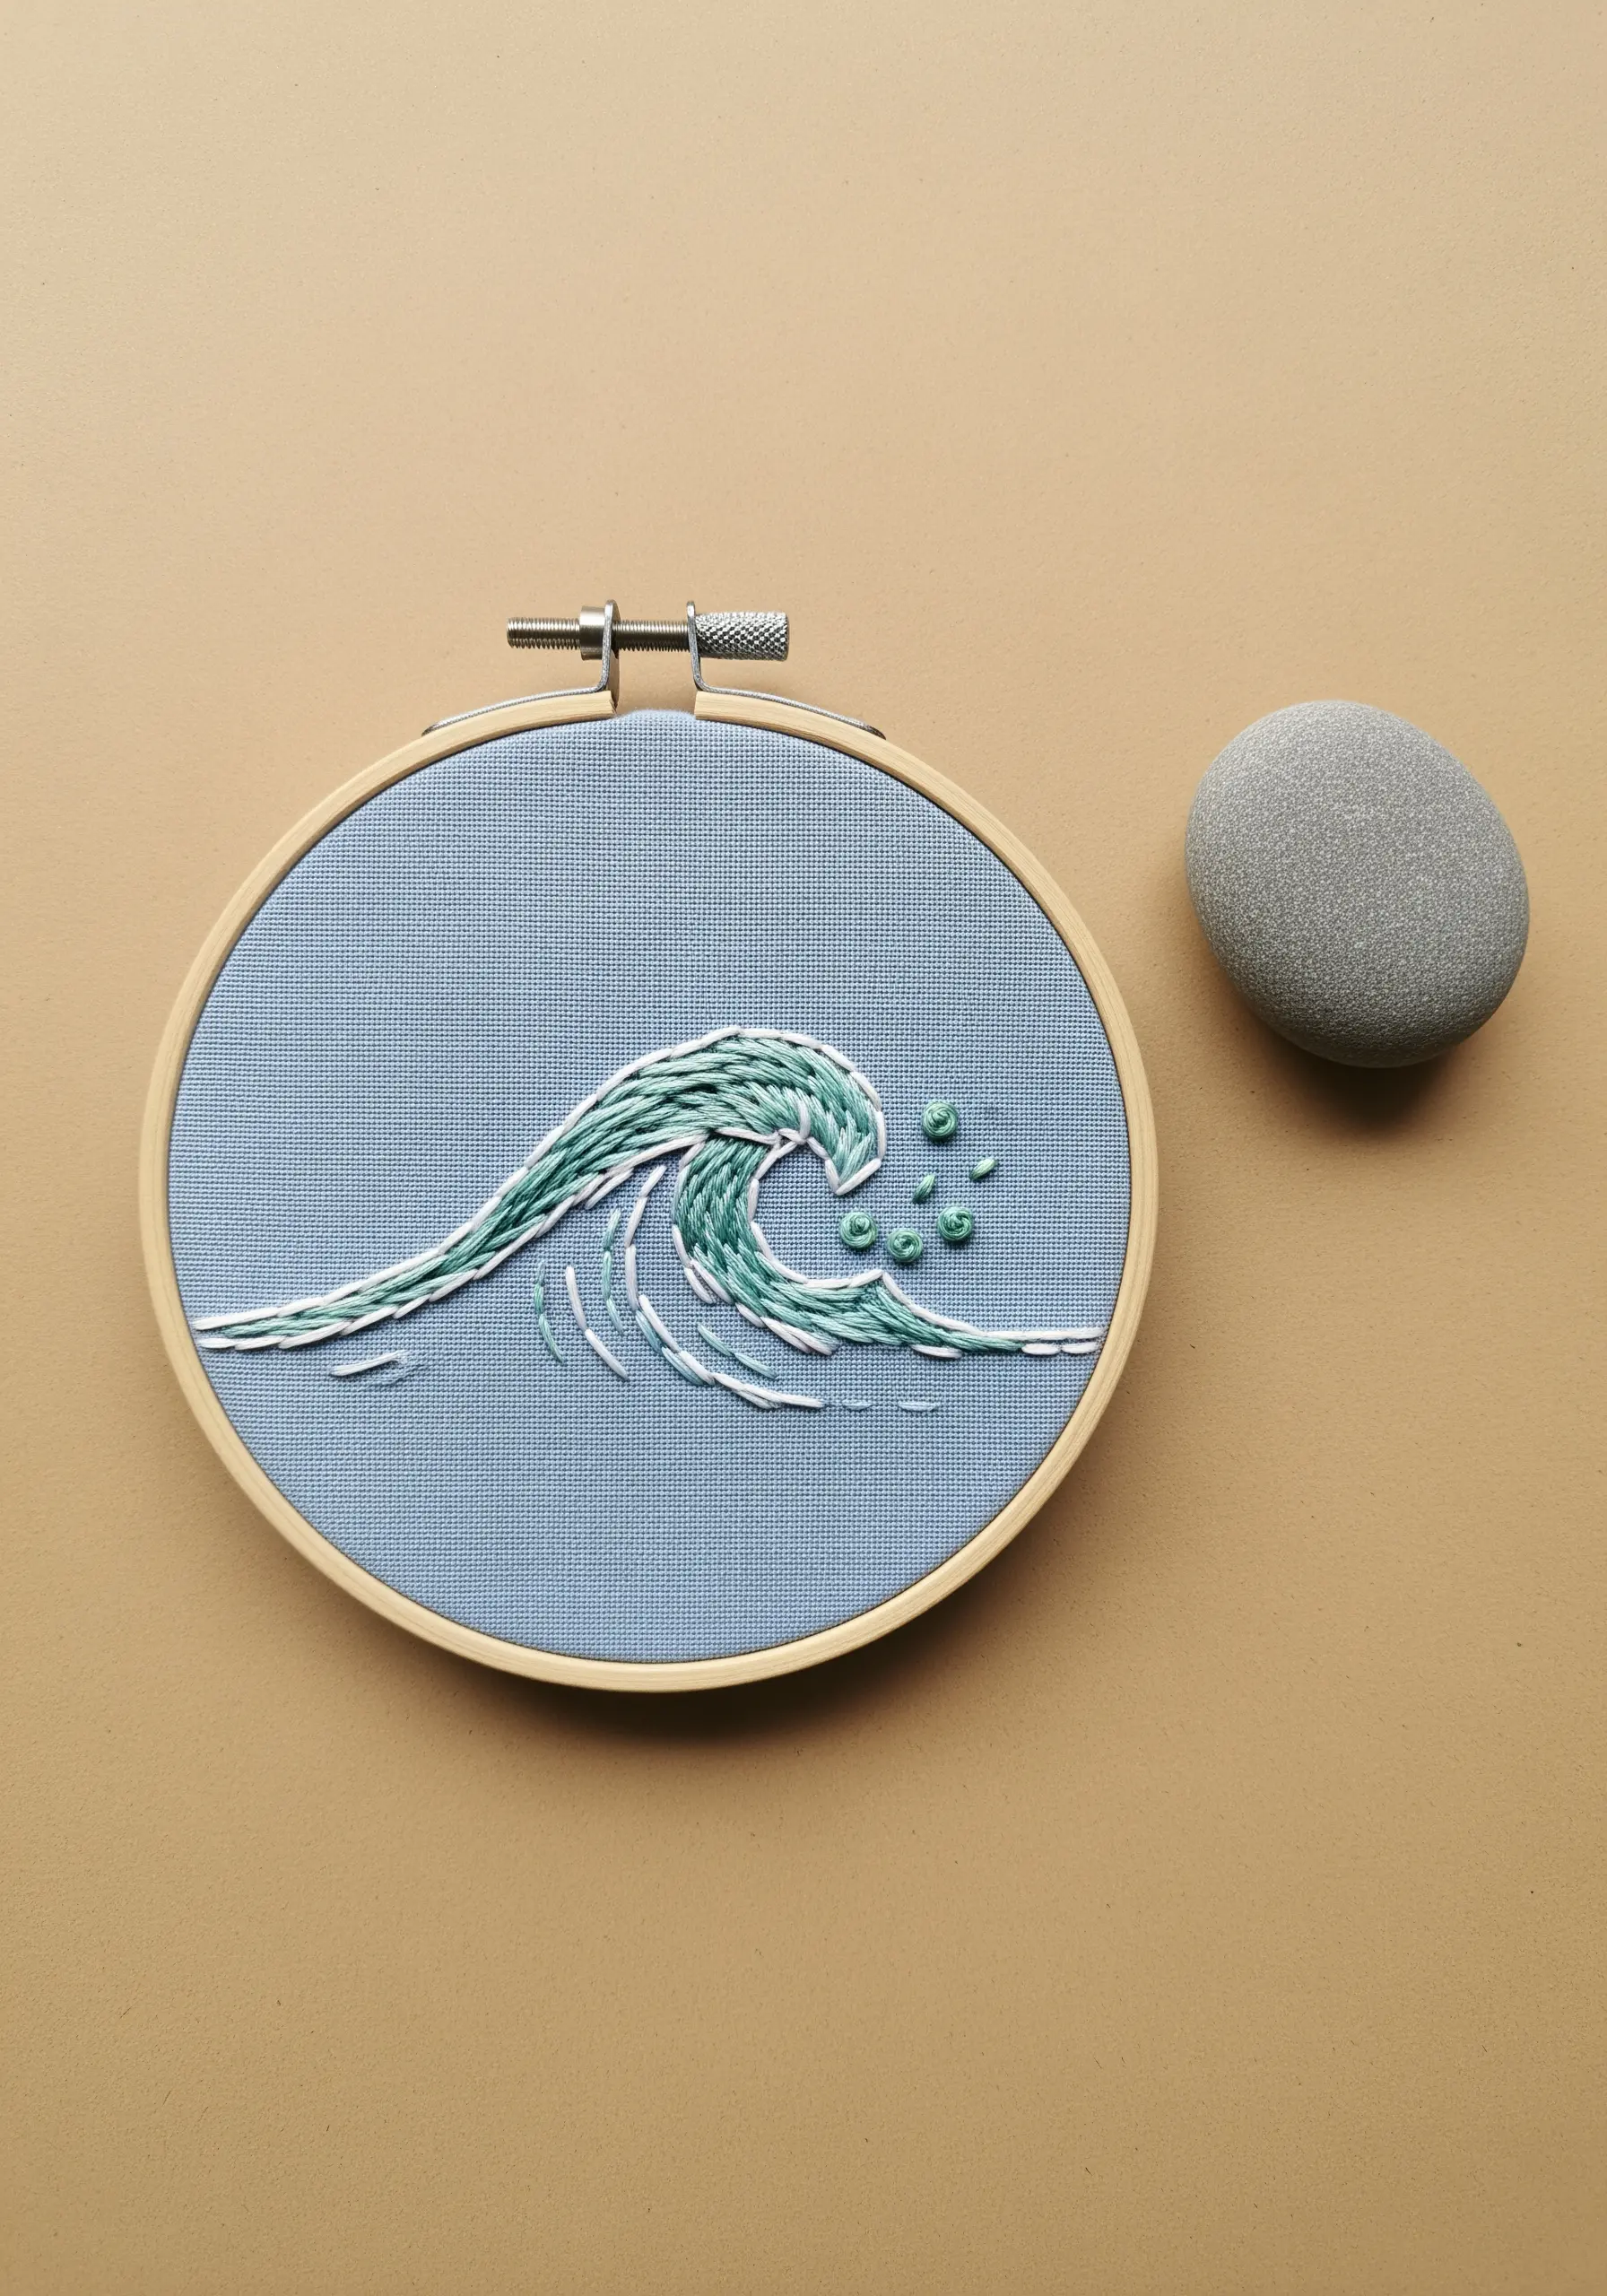
To create the illusion of a flowing wave, use layered straight and split stitches instead of a static outline.
Start with a base of white stitches for the foam, then layer shades of aqua and sea green on top, varying the length and angle of each stitch.
This technique creates a sense of movement and depth that a single color cannot achieve.
Finish with scattered French knots to represent sea spray, adding a final touch of dynamic energy to your ocean-inspired hoop embroidery ideas.
6. High-Contrast Constellations for Minimalist Impact
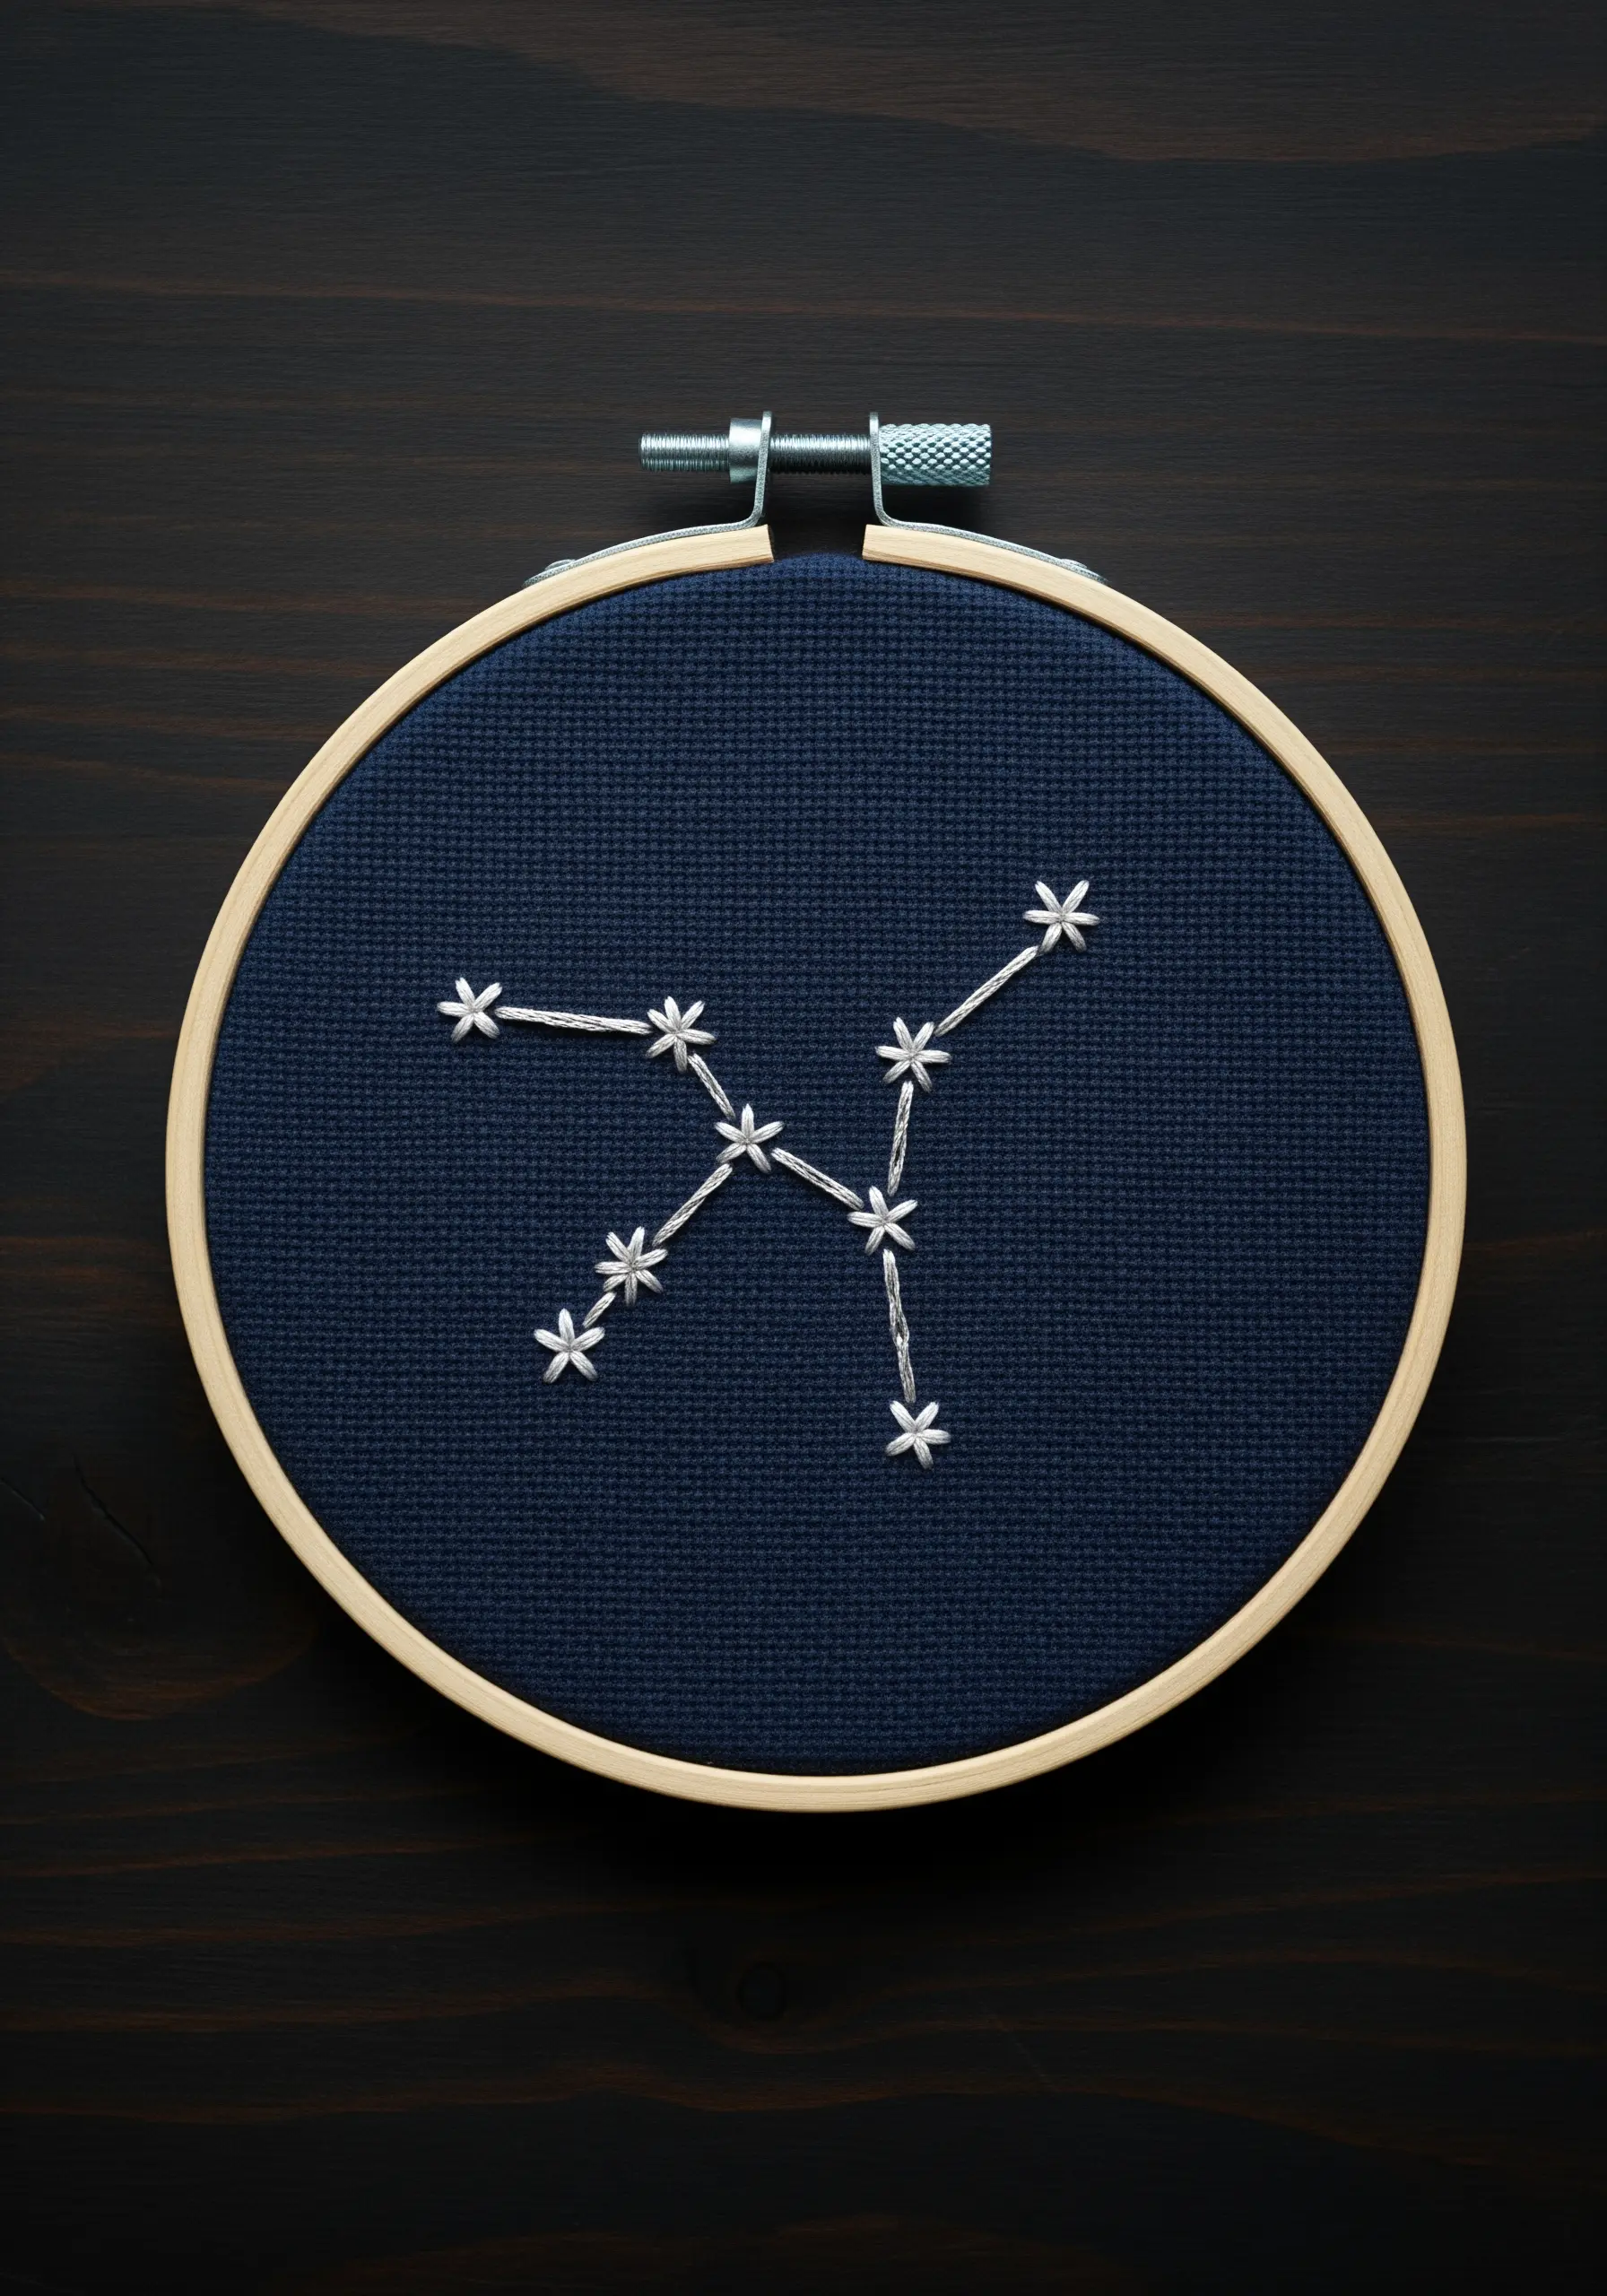
This design is a masterclass in simplicity and contrast.
By choosing a dark navy Aida cloth, the fabric becomes the night sky, allowing a single white thread to shine.
Use lazy daisy stitches for the stars—their petal shape gives a subtle twinkle that a French knot wouldn’t.
Connect them with clean, sharp straight stitches to map out your constellation.
This is a perfect example of how minimal sky and moon designs can deliver maximum elegance with minimal effort.
7. Build Dimensional Florals with Clustered Knots
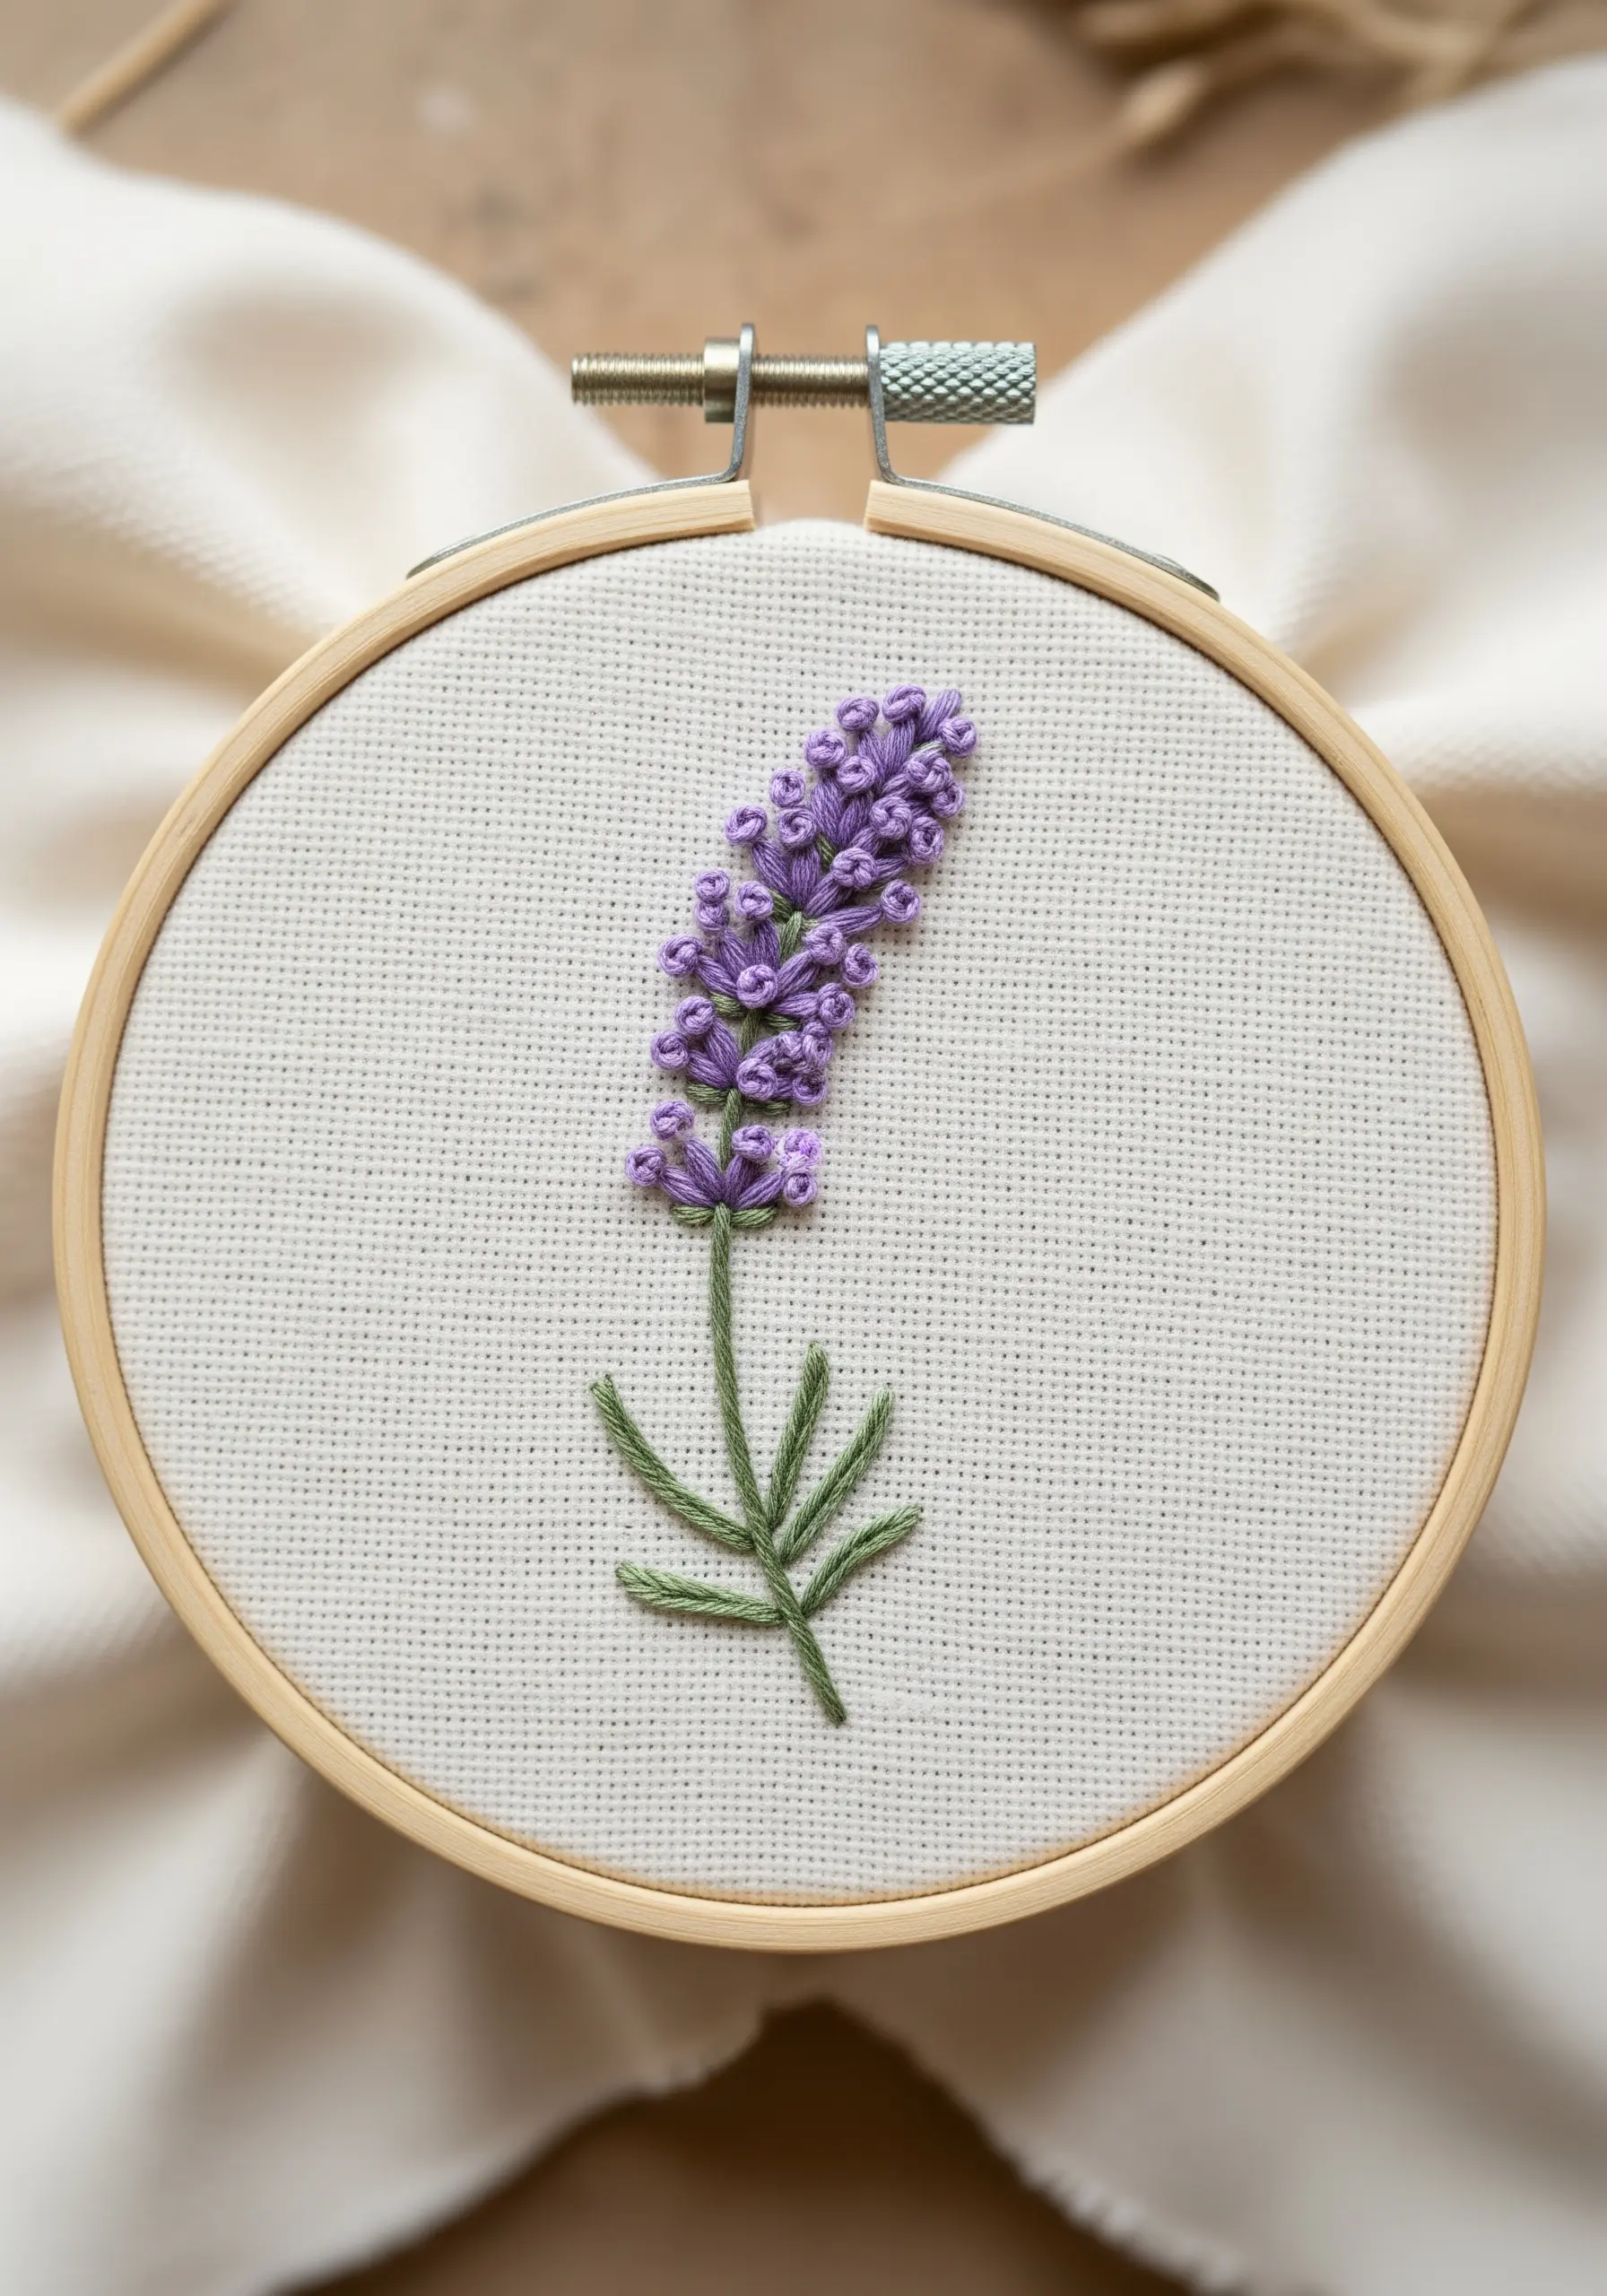
To give your lavender a realistic, plush texture, densely pack French knots to form the blossoms.
Use two slightly different shades of purple and vary your thread count (e.g., three strands for larger knots, two for smaller ones) to create subtle dimension.
Anchor the design with a clean stem stitch for the stalk and simple straight stitches for the leaves.
This mix of textures is what elevates a simple floral motif, making it one of the classic hand-stitched flower stitches every nature lover should try.
8. Flawless Line Art Using the Couching Technique
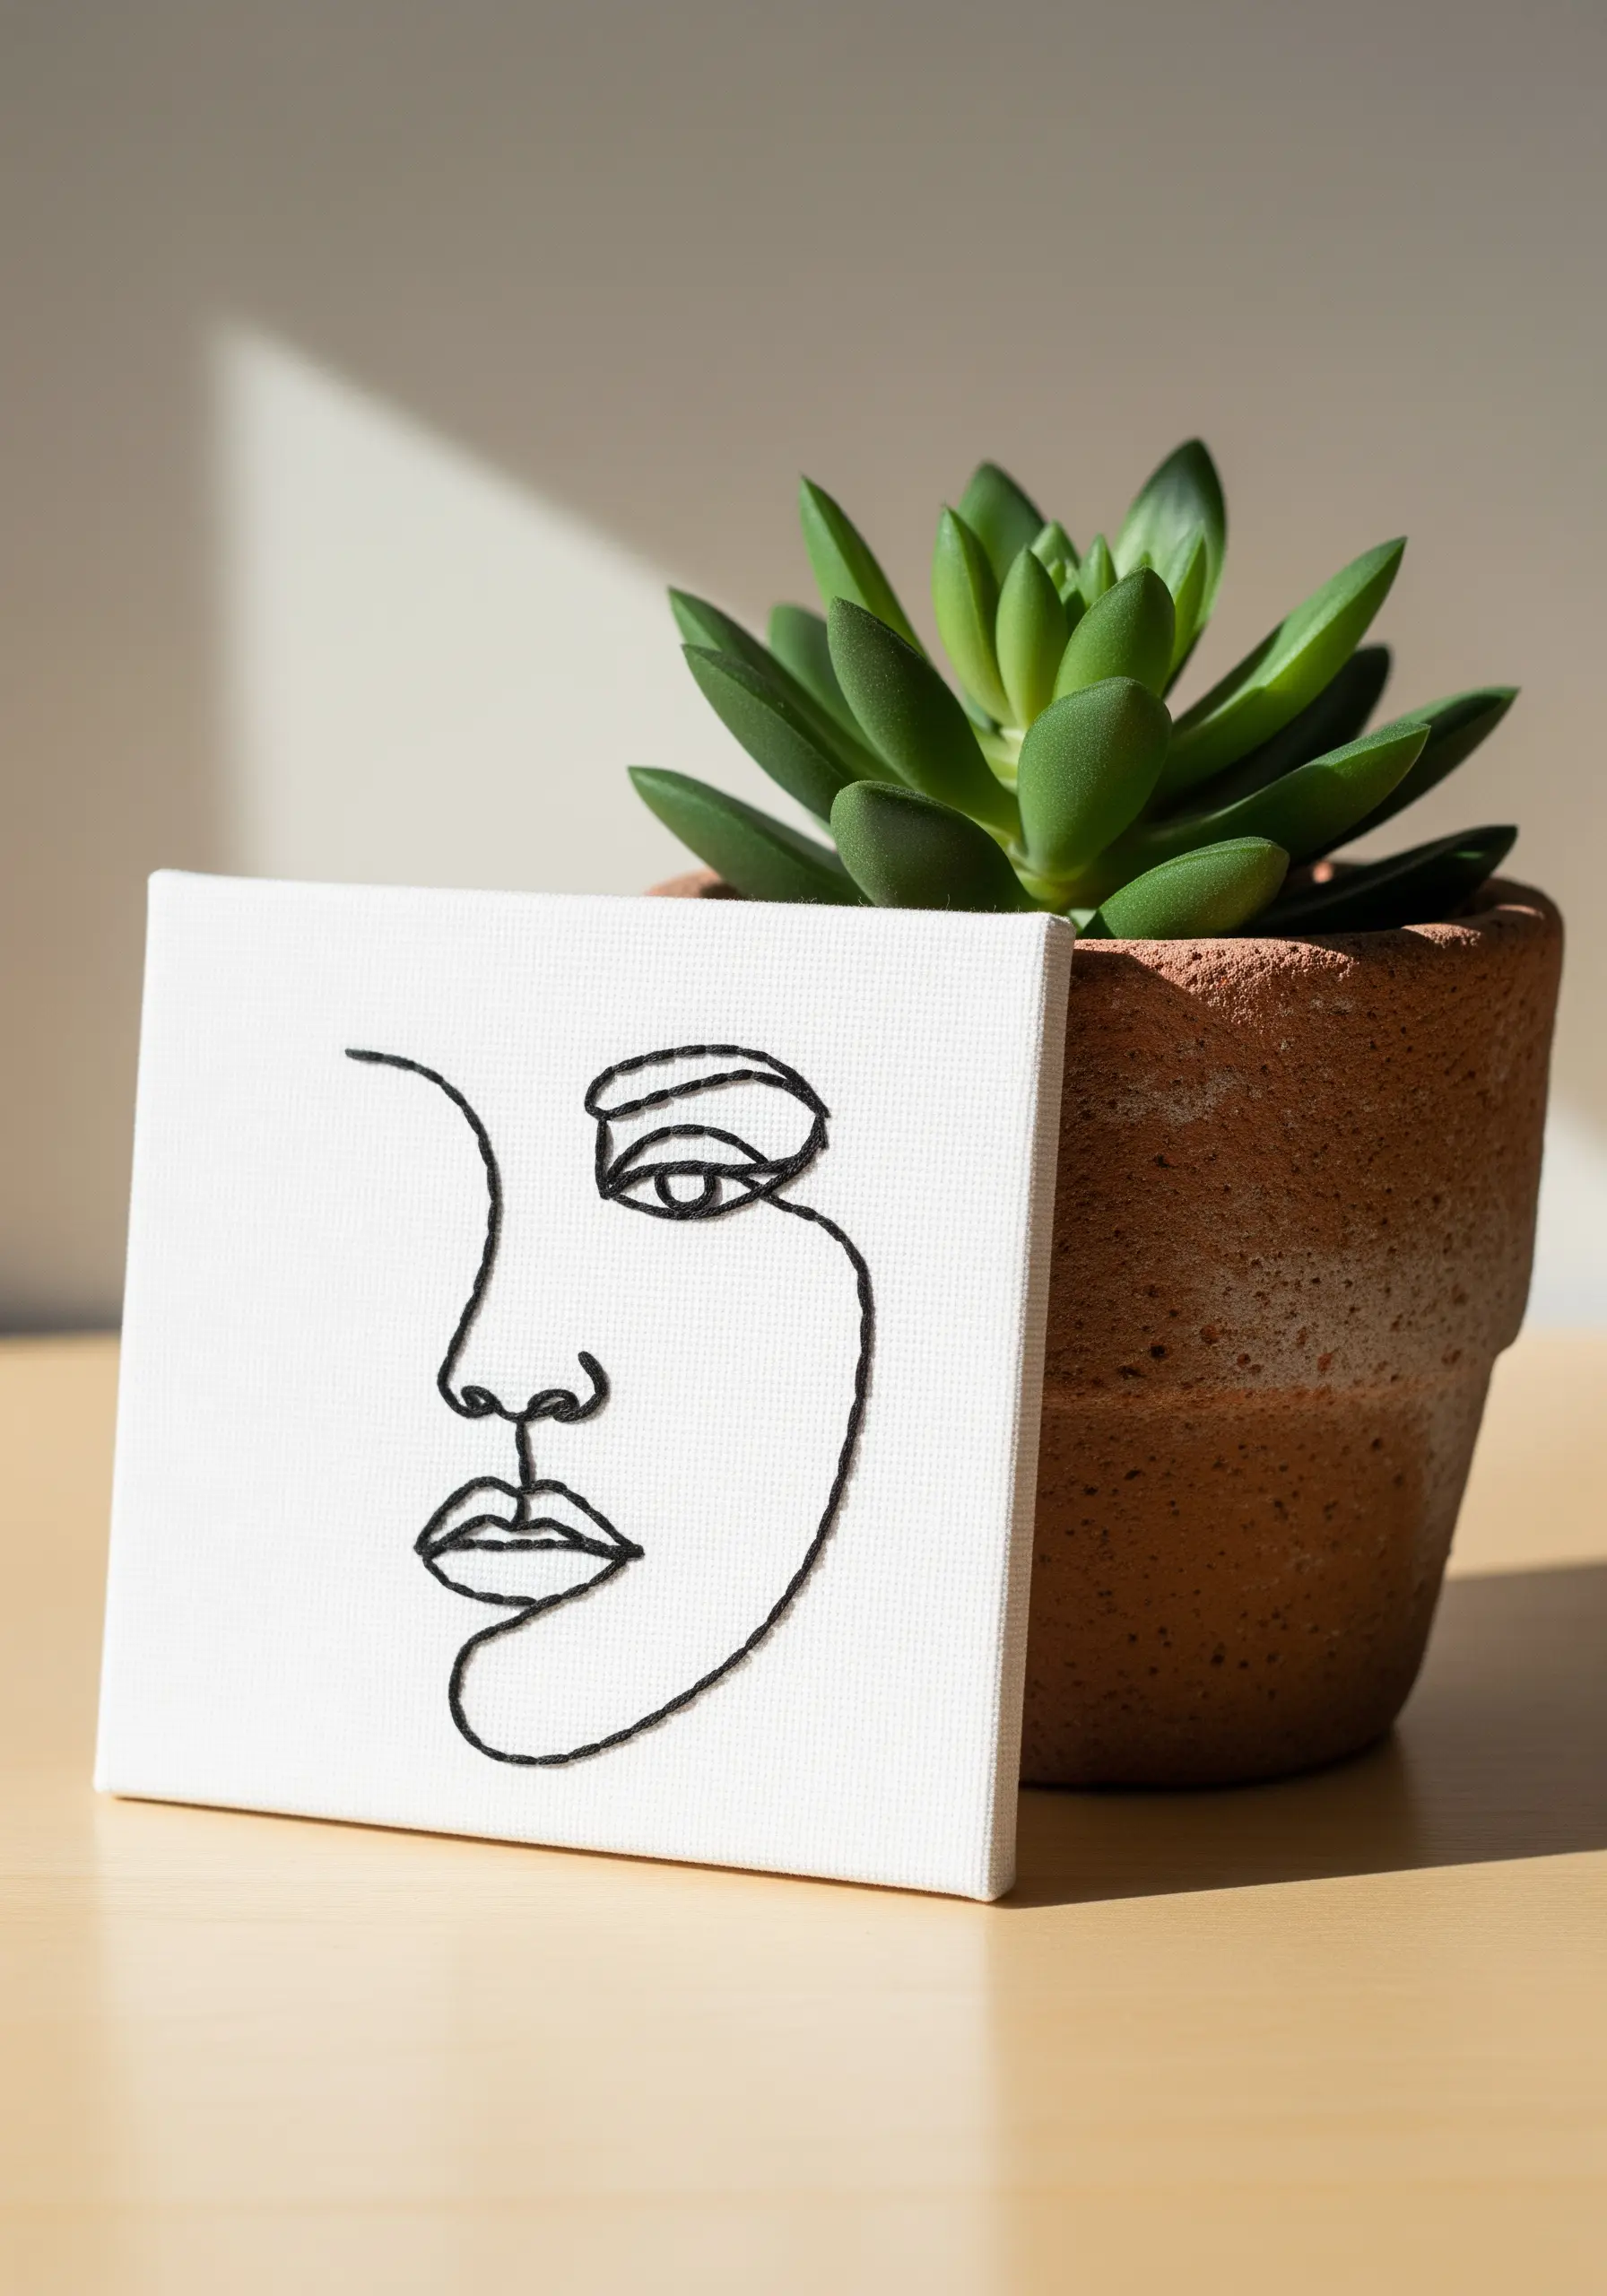
For a perfectly smooth, continuous line, especially on a non-traditional surface like canvas, a simple backstitch can sometimes pull and distort.
Instead, use the couching technique: lay down a thicker thread (like pearl cotton) along your design line, and use a single strand of matching floss to tack it down with tiny, invisible stitches.
This allows you to create flawless curves and sharp angles, making it the ideal method for abstract face line embroidery designs.
9. Create Dramatic Depth with a Monochromatic Palette
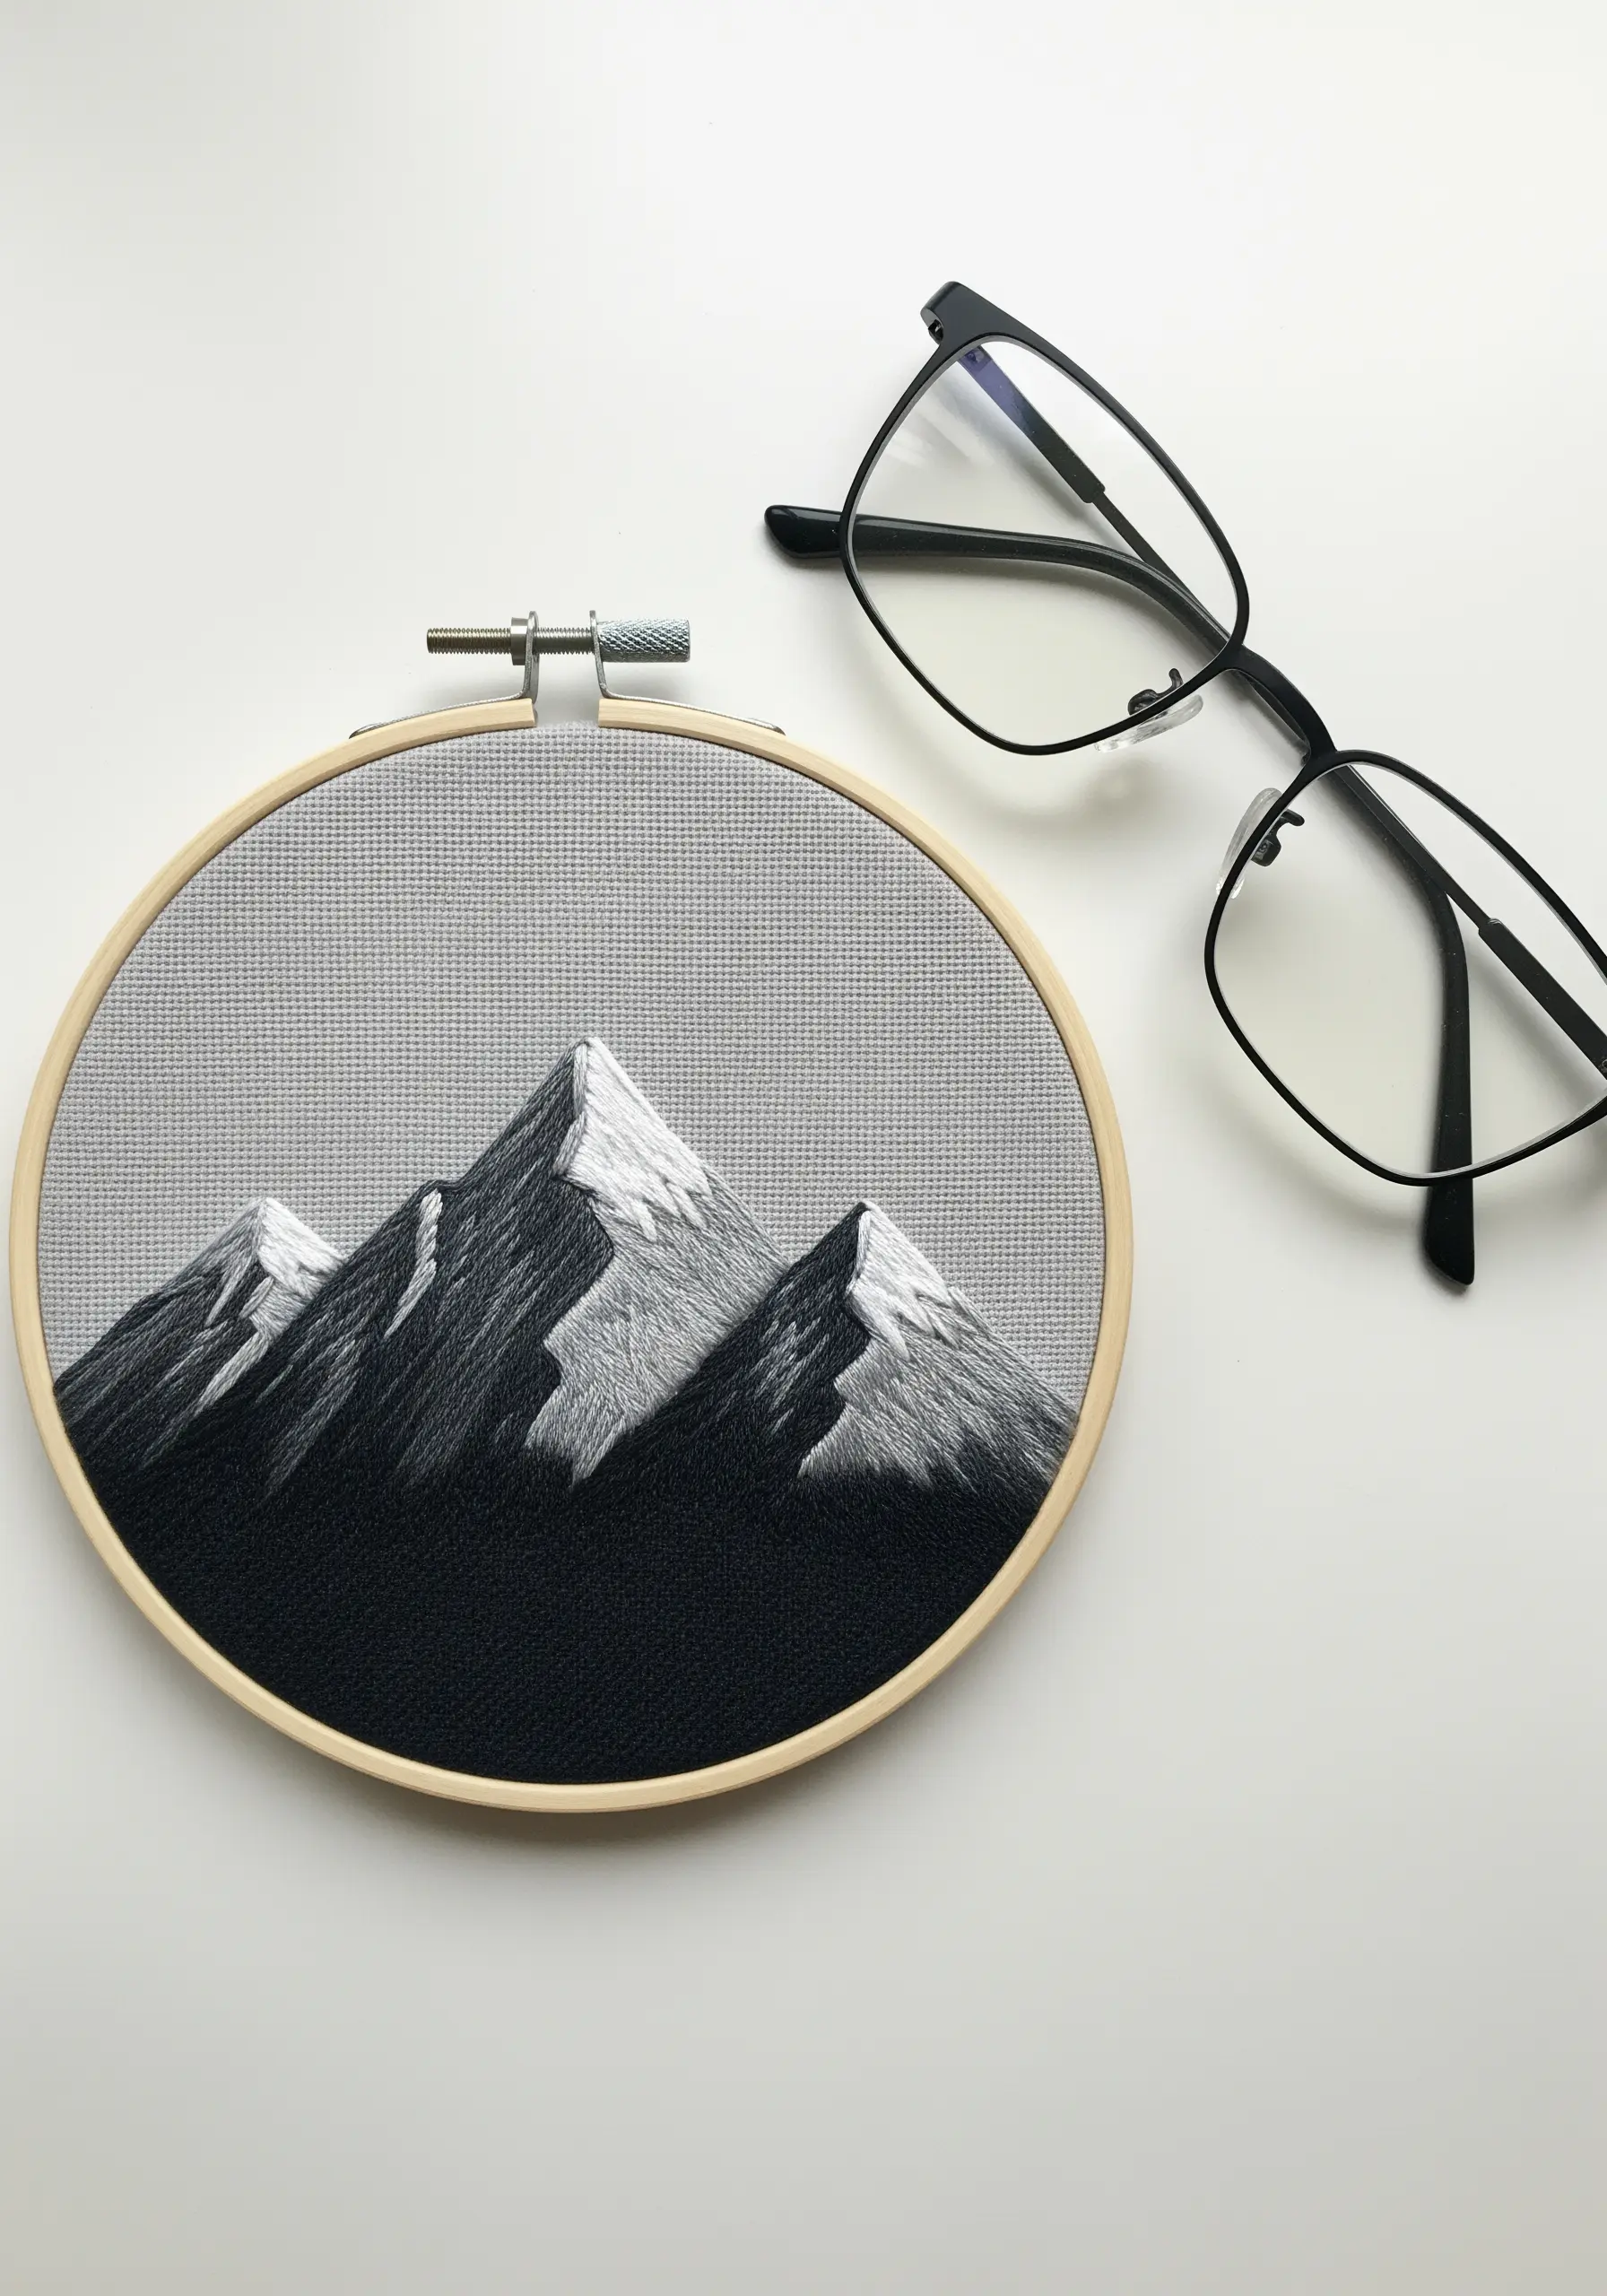
You don’t need dozens of colors to create a breathtaking landscape.
Select a range of five tones, from black to white, to execute this design.
Use long-and-short stitch to blend the shades seamlessly, creating realistic shadows and highlights on the mountain faces.
Pay close attention to the direction of your stitches—angling them to follow the slopes of the mountains enhances the illusion of form and rugged texture.
It’s a powerful approach to mountain landscape thread painting.
10. Achieve Geometric Precision with a Clean Backstitch
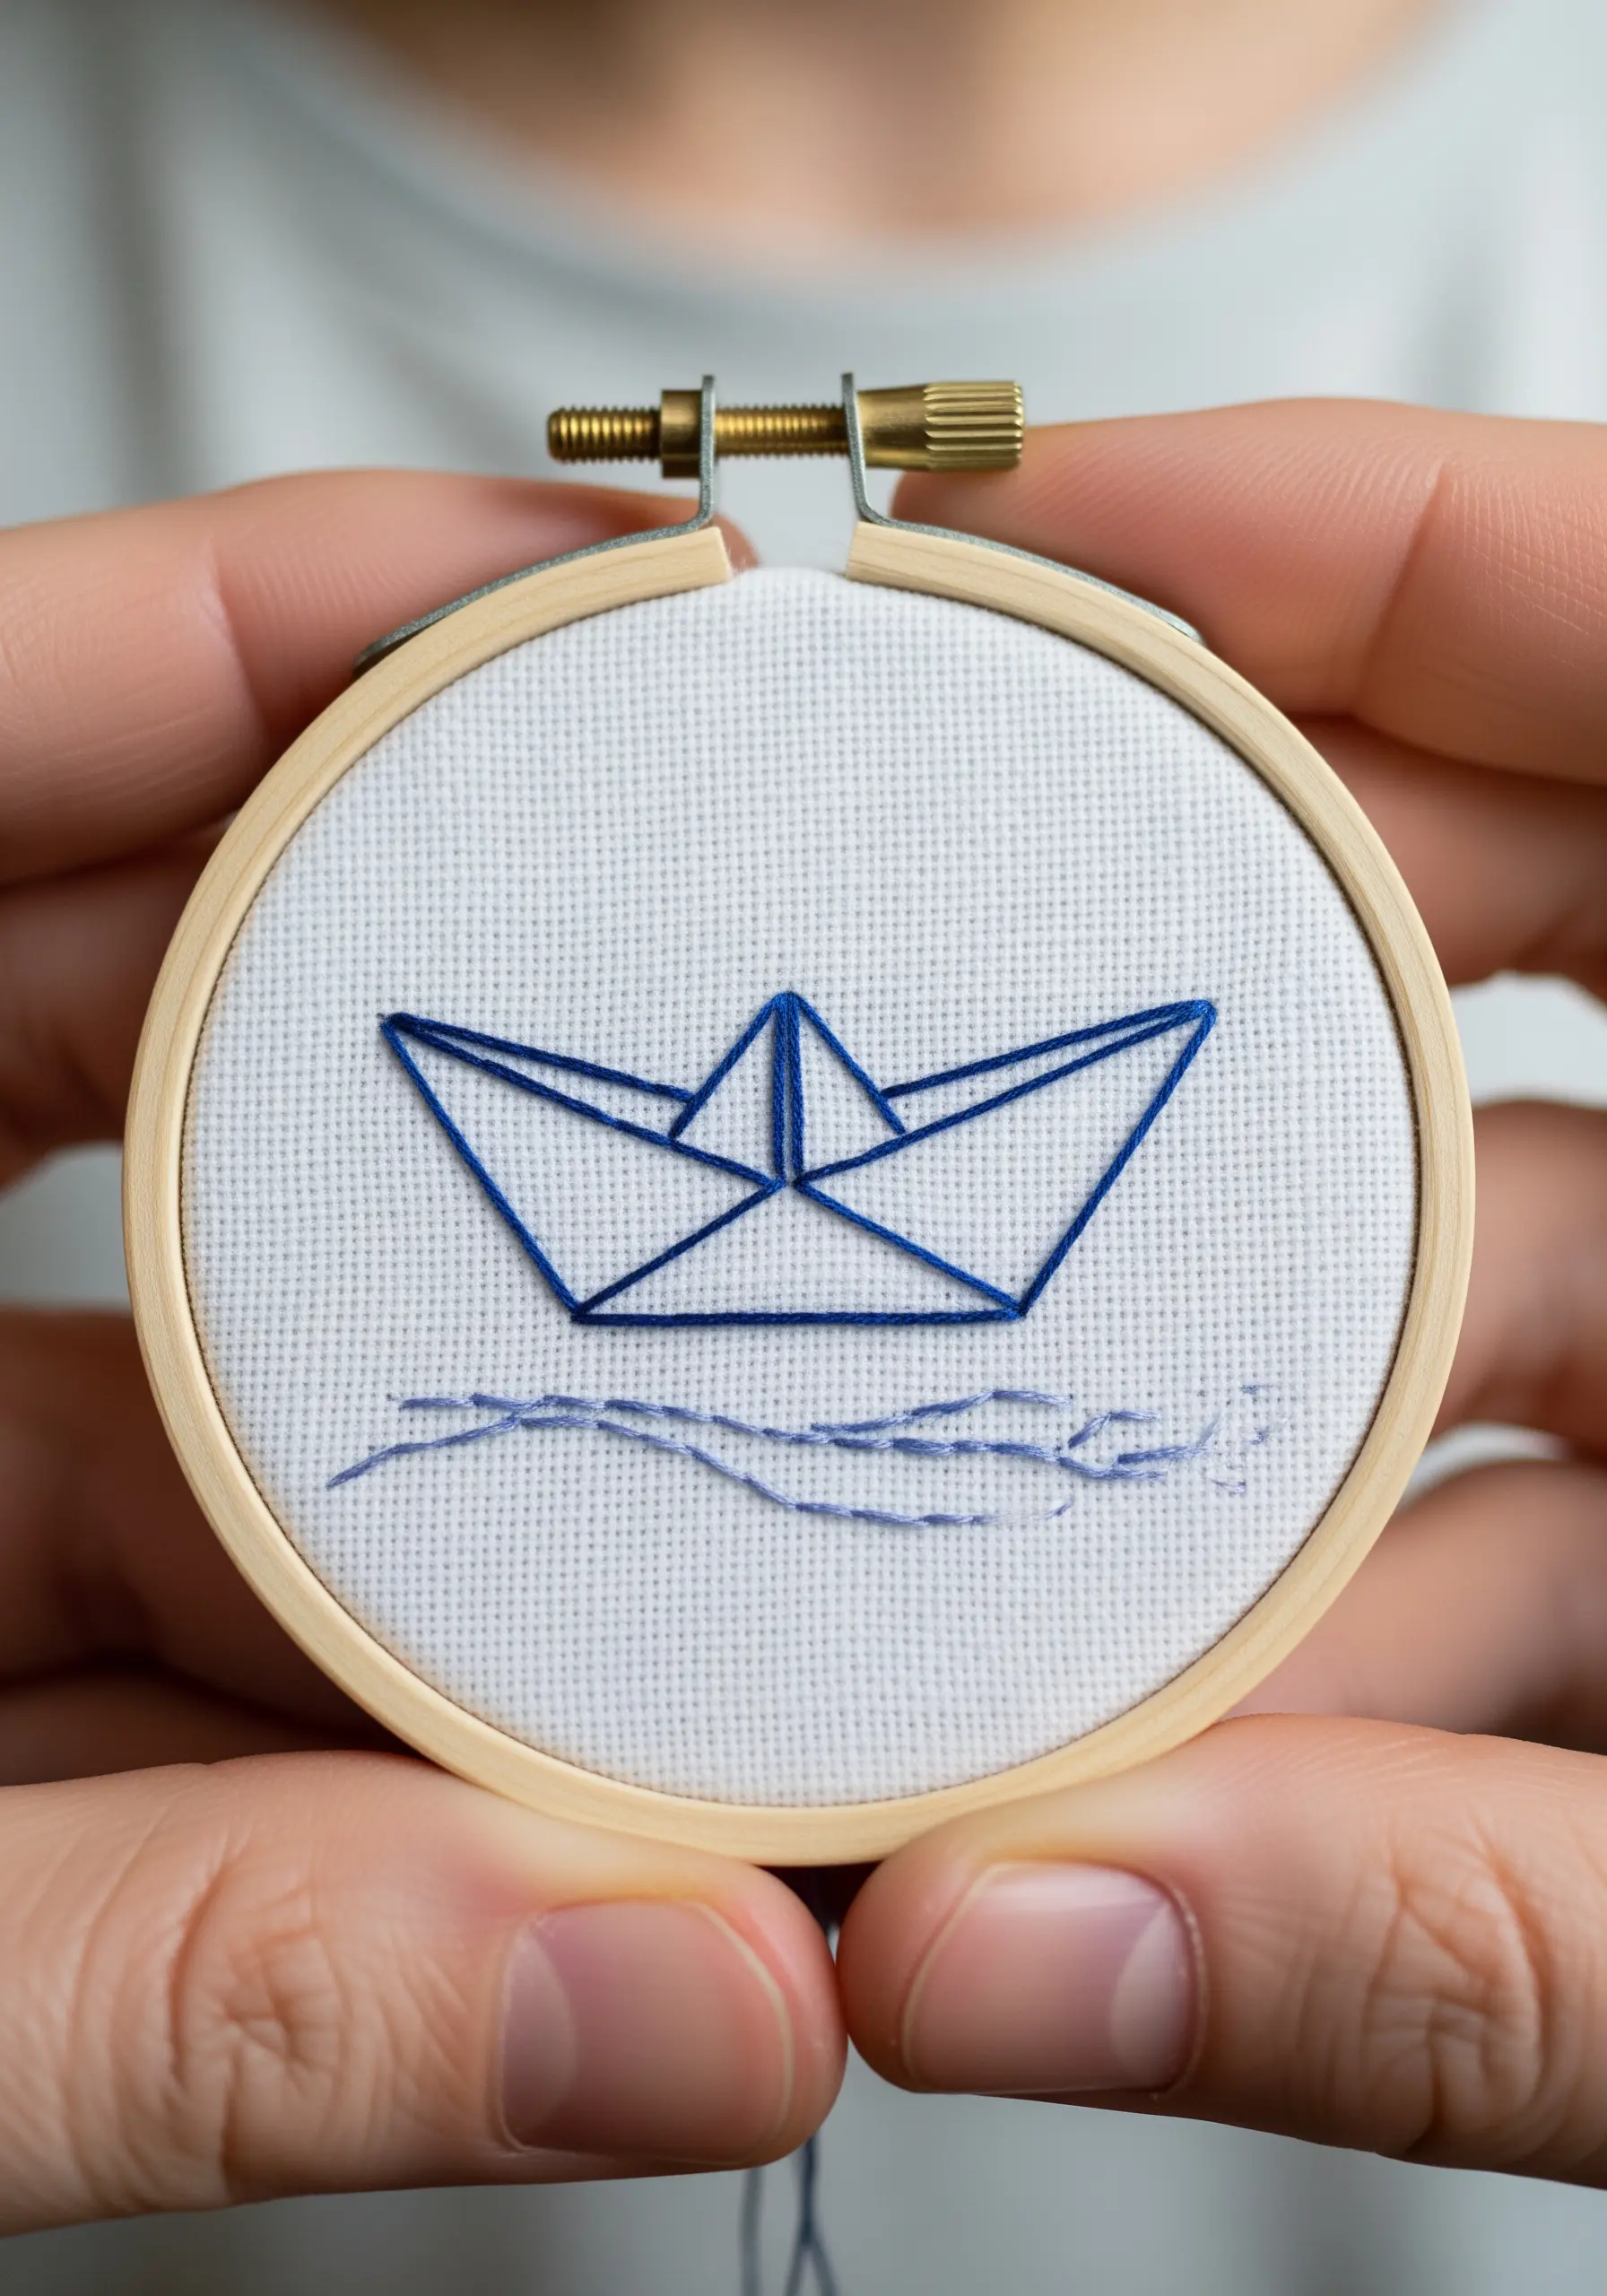
For crisp, graphic designs, a perfect backstitch is your most valuable tool.
Use only two strands of floss to maintain a fine, sharp line.
To create perfect corners, ensure your stitch ends precisely at the point where the lines intersect before starting in a new direction.
The gentle, wavy lines for the water, stitched with a single strand, provide a soft visual contrast that makes the boat’s sharp geometry stand out even more.
This is minimalist embroidery at its finest.
11. Radiating Energy with Layered Straight Stitches
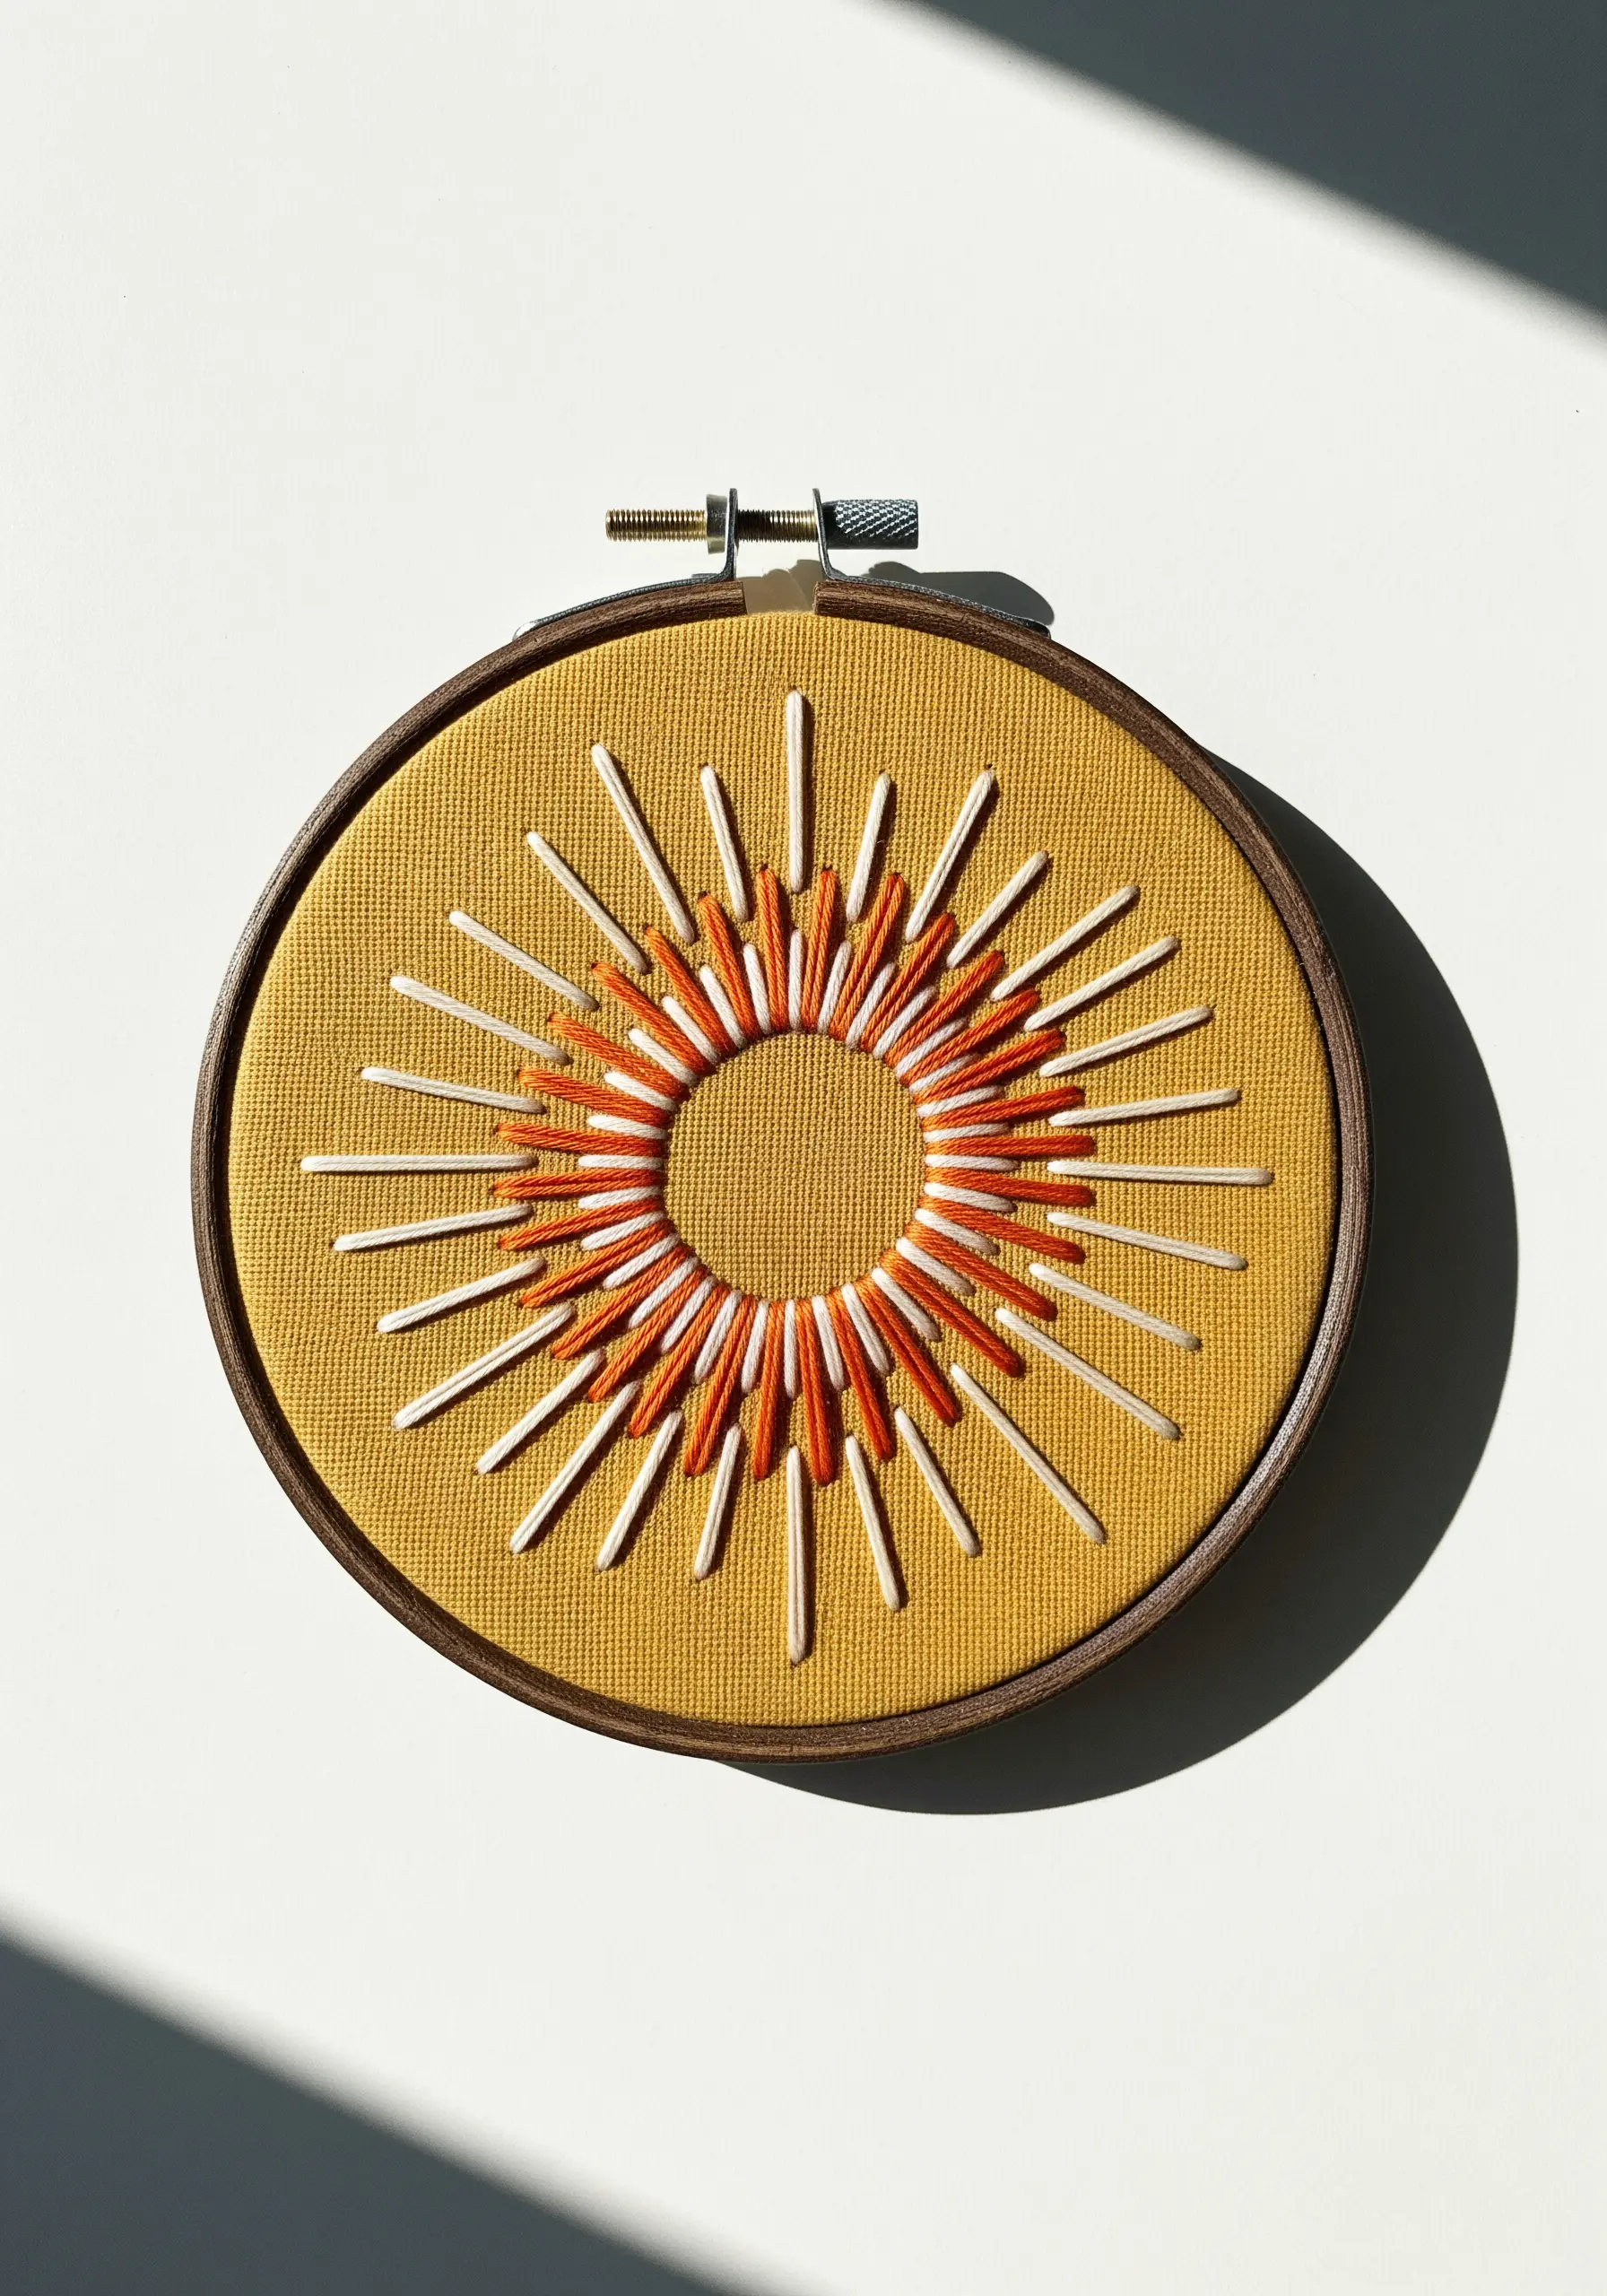
This vibrant sunburst gets its dynamic feel from the deliberate layering of color and length.
Instead of stitching uniform rays, work in concentric circles, alternating between your three colors.
Varying the length of the straight stitches within each layer breaks up the uniformity and creates a more organic, energetic pattern.
This technique turns a simple shape into one of the most effective abstract thread burst techniques for a stunning focal point.
12. Suggest Movement with Delicate, Spaced Stitches
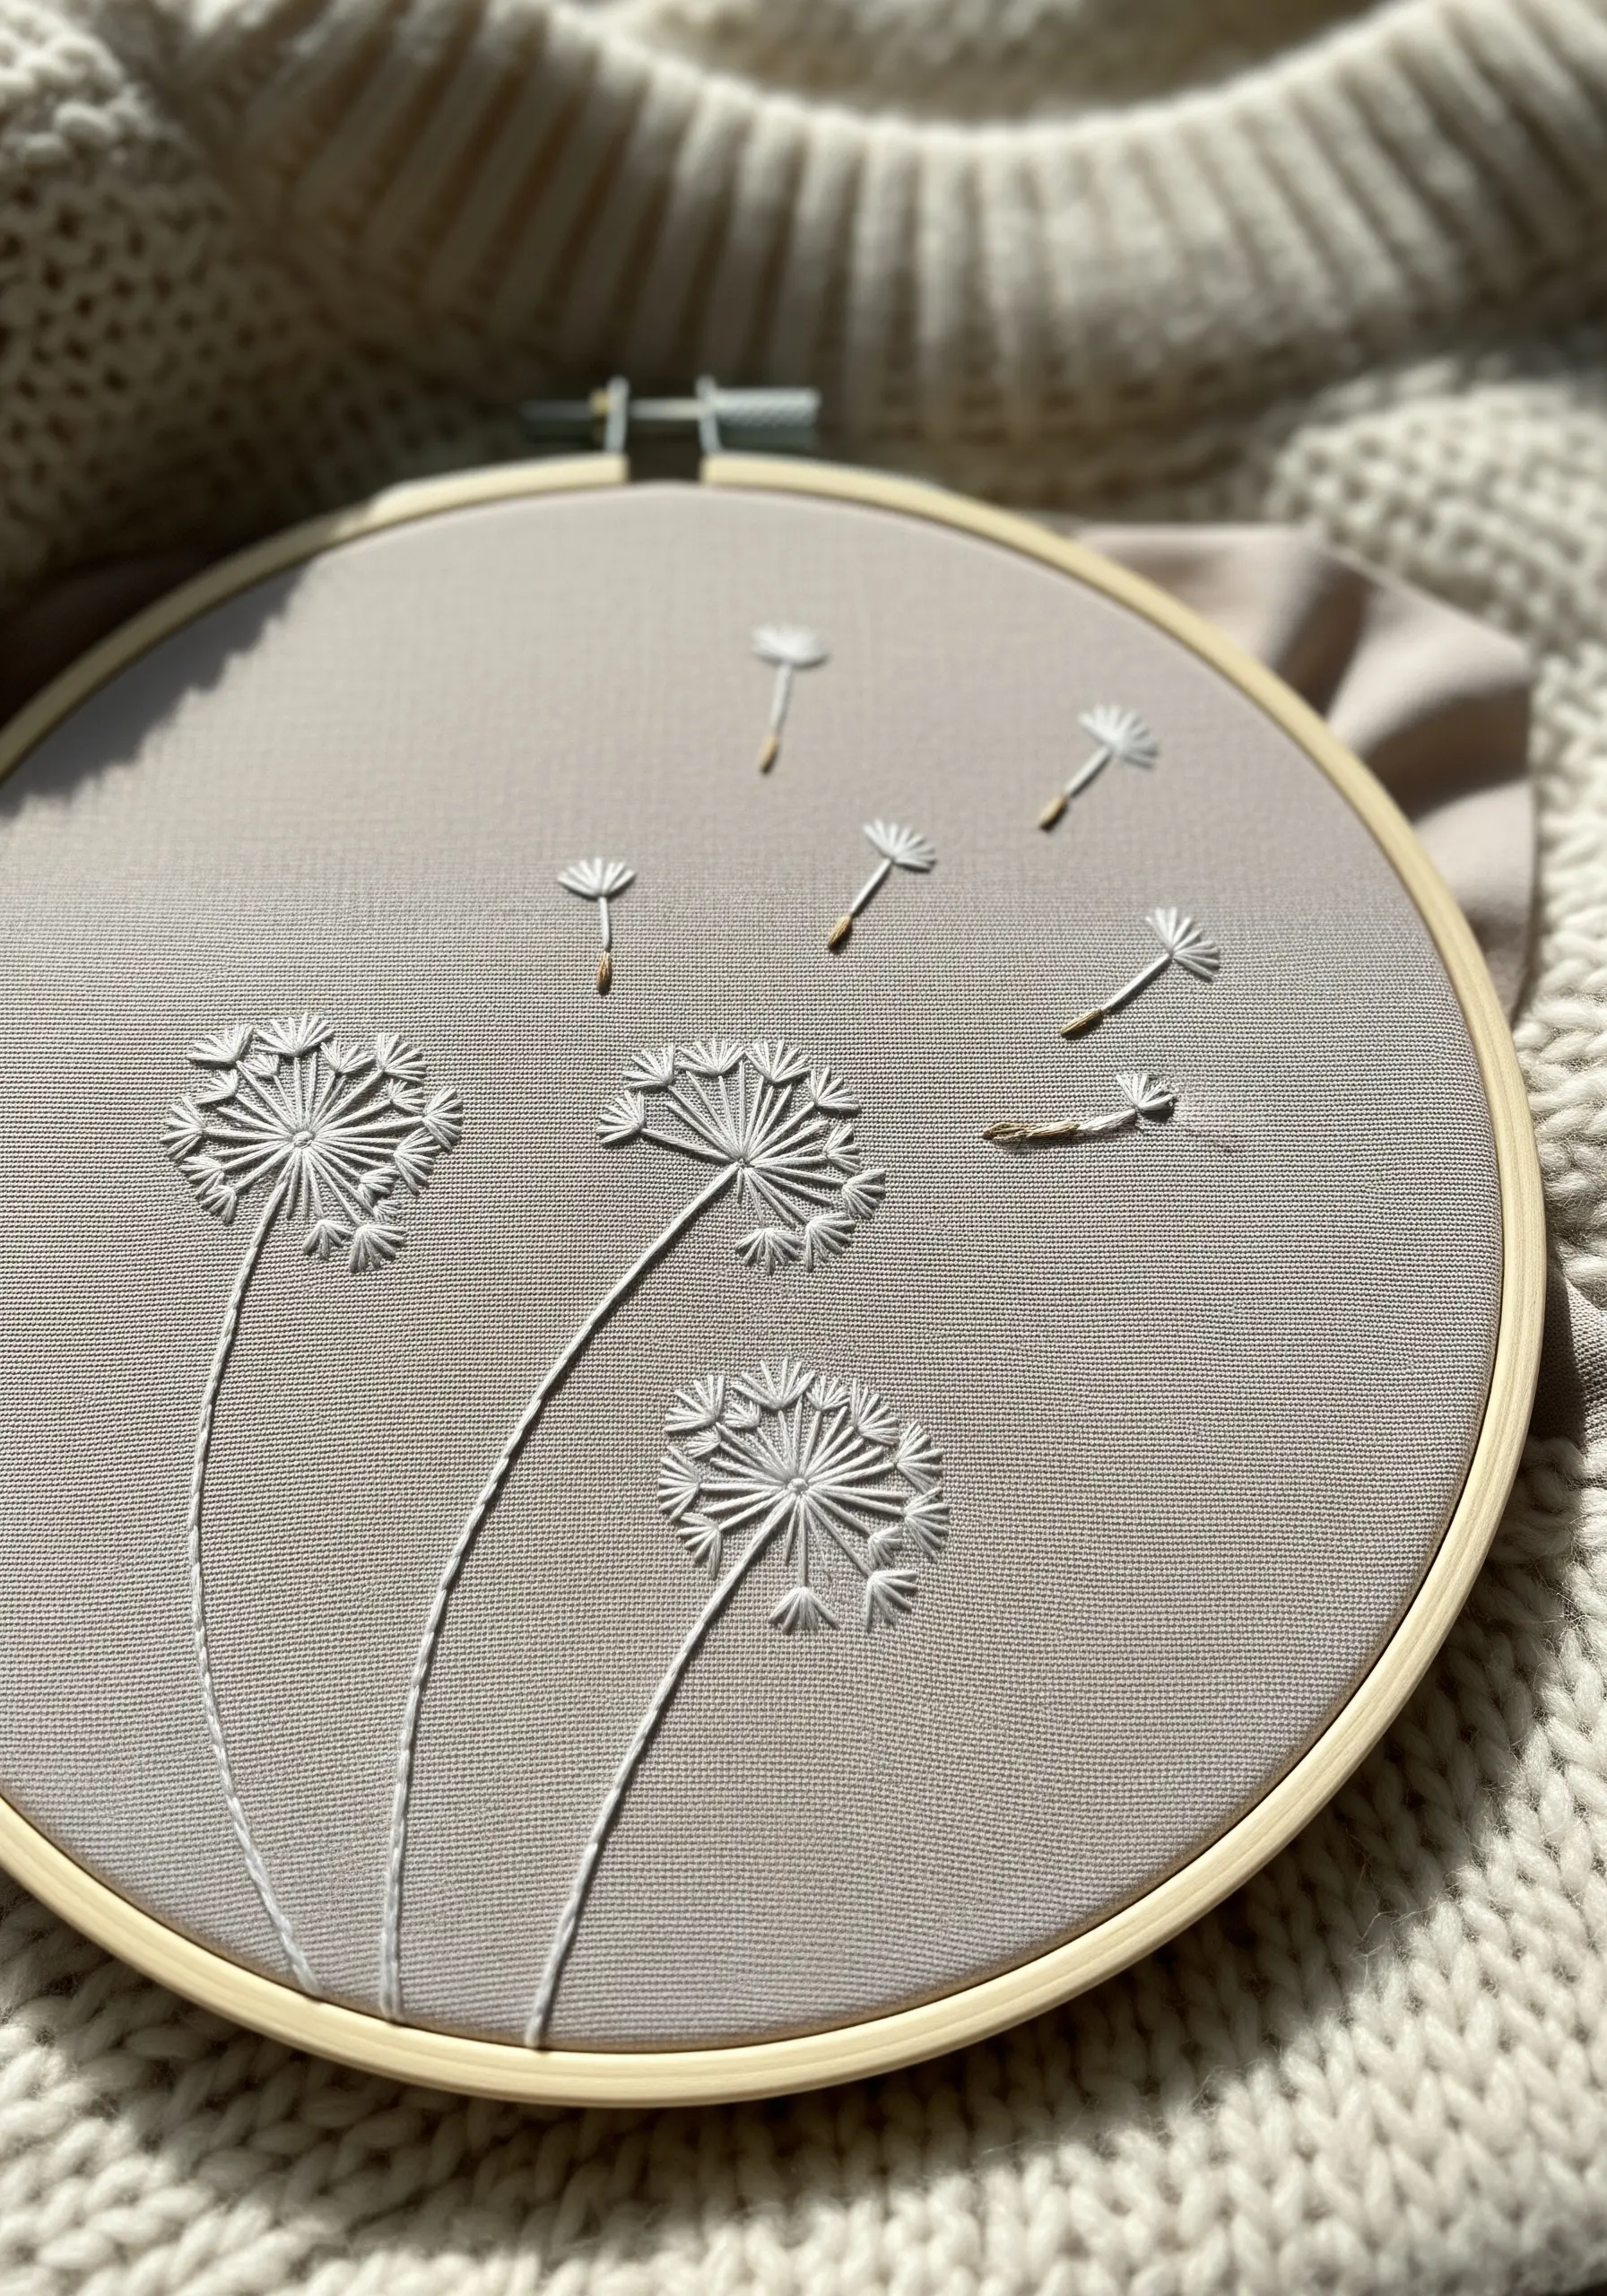
The elegance of this design lies in its use of negative space.
Create the dandelion heads with radiating straight stitches, anchored by a tiny French knot in the center.
The magic happens with the seeds: just a few strategically placed detached stitches are enough to create the illusion of being carried away by the wind.
A graceful, curved stem stitch connects the elements without overpowering them, resulting in minimal embroidery patterns that transform plain linen instantly.
13. Sculpt a 3D Effect with Padded Satin Stitch
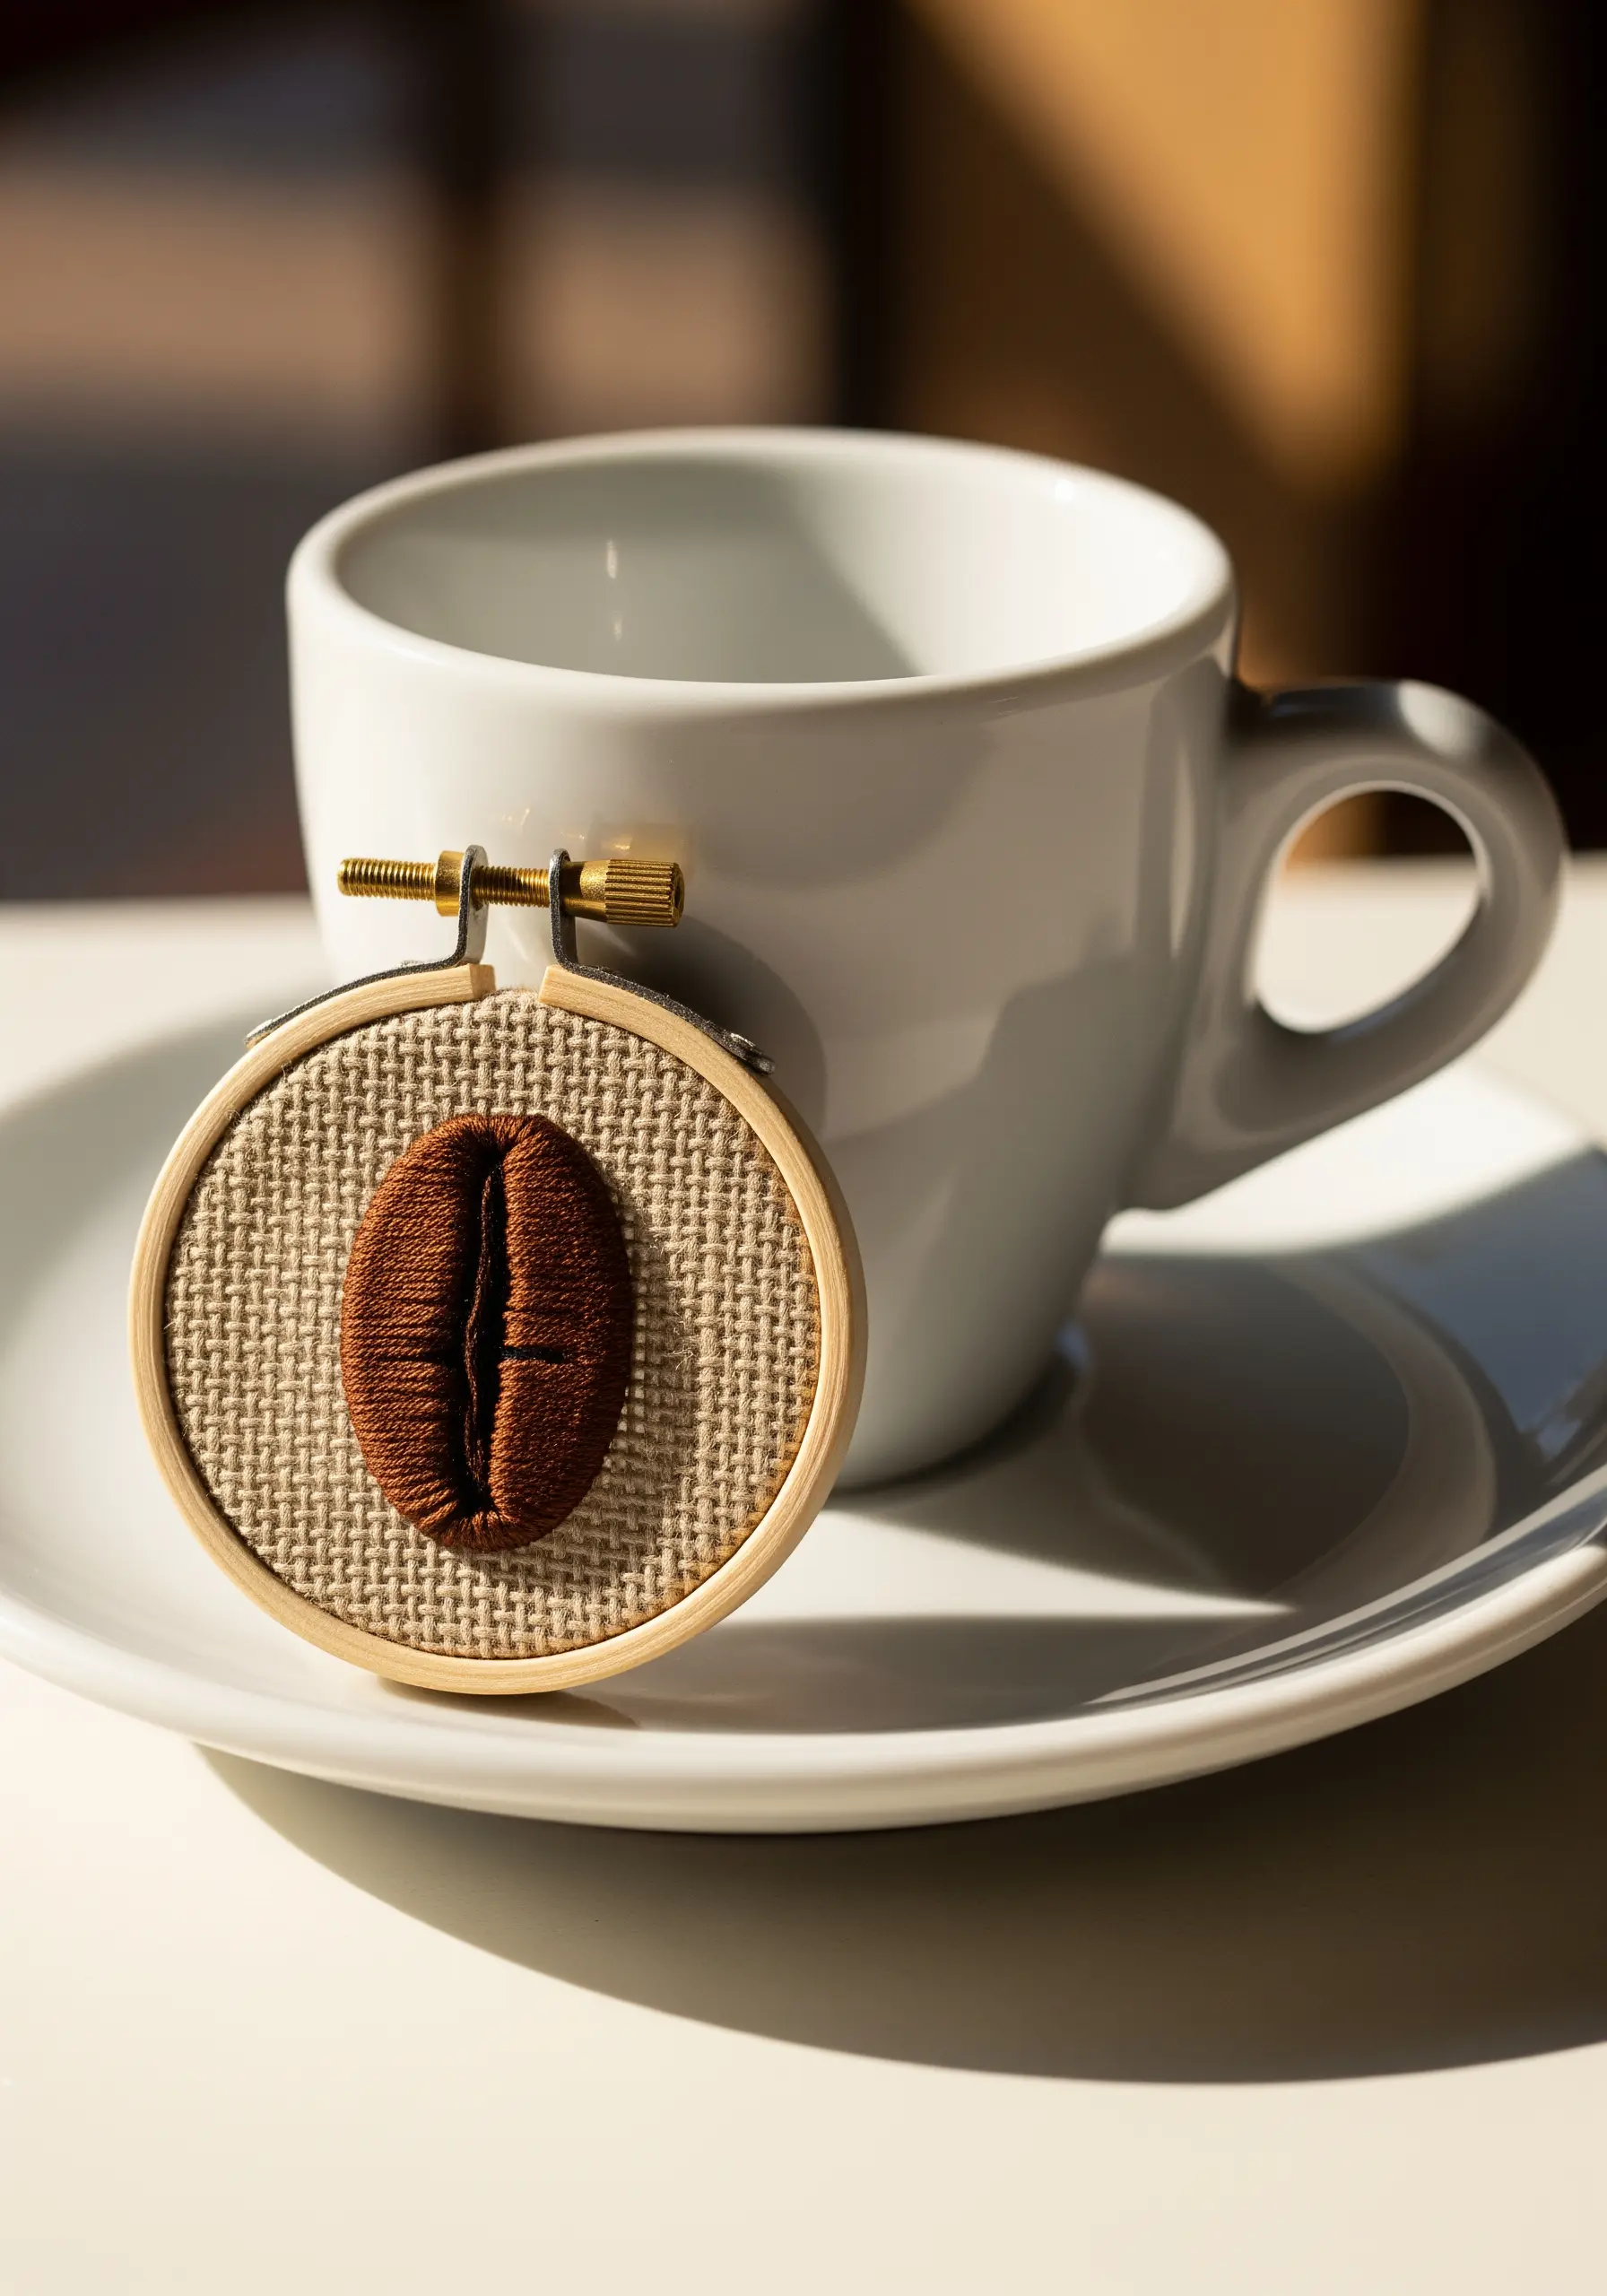
To give a small object a realistic, rounded shape, use padding beneath your final stitches.
First, fill the shape of the coffee bean with a base of small, horizontal straight stitches—this is your padding.
Then, stitch your final layer of satin stitches vertically, completely covering the base layer.
The padding underneath forces the top stitches to curve, creating a plump, three-dimensional effect that makes the object pop from the fabric.
It’s one of those small embroidery ideas that look complex but are super easy.
14. Evocative Outlines for Minimalist Storytelling
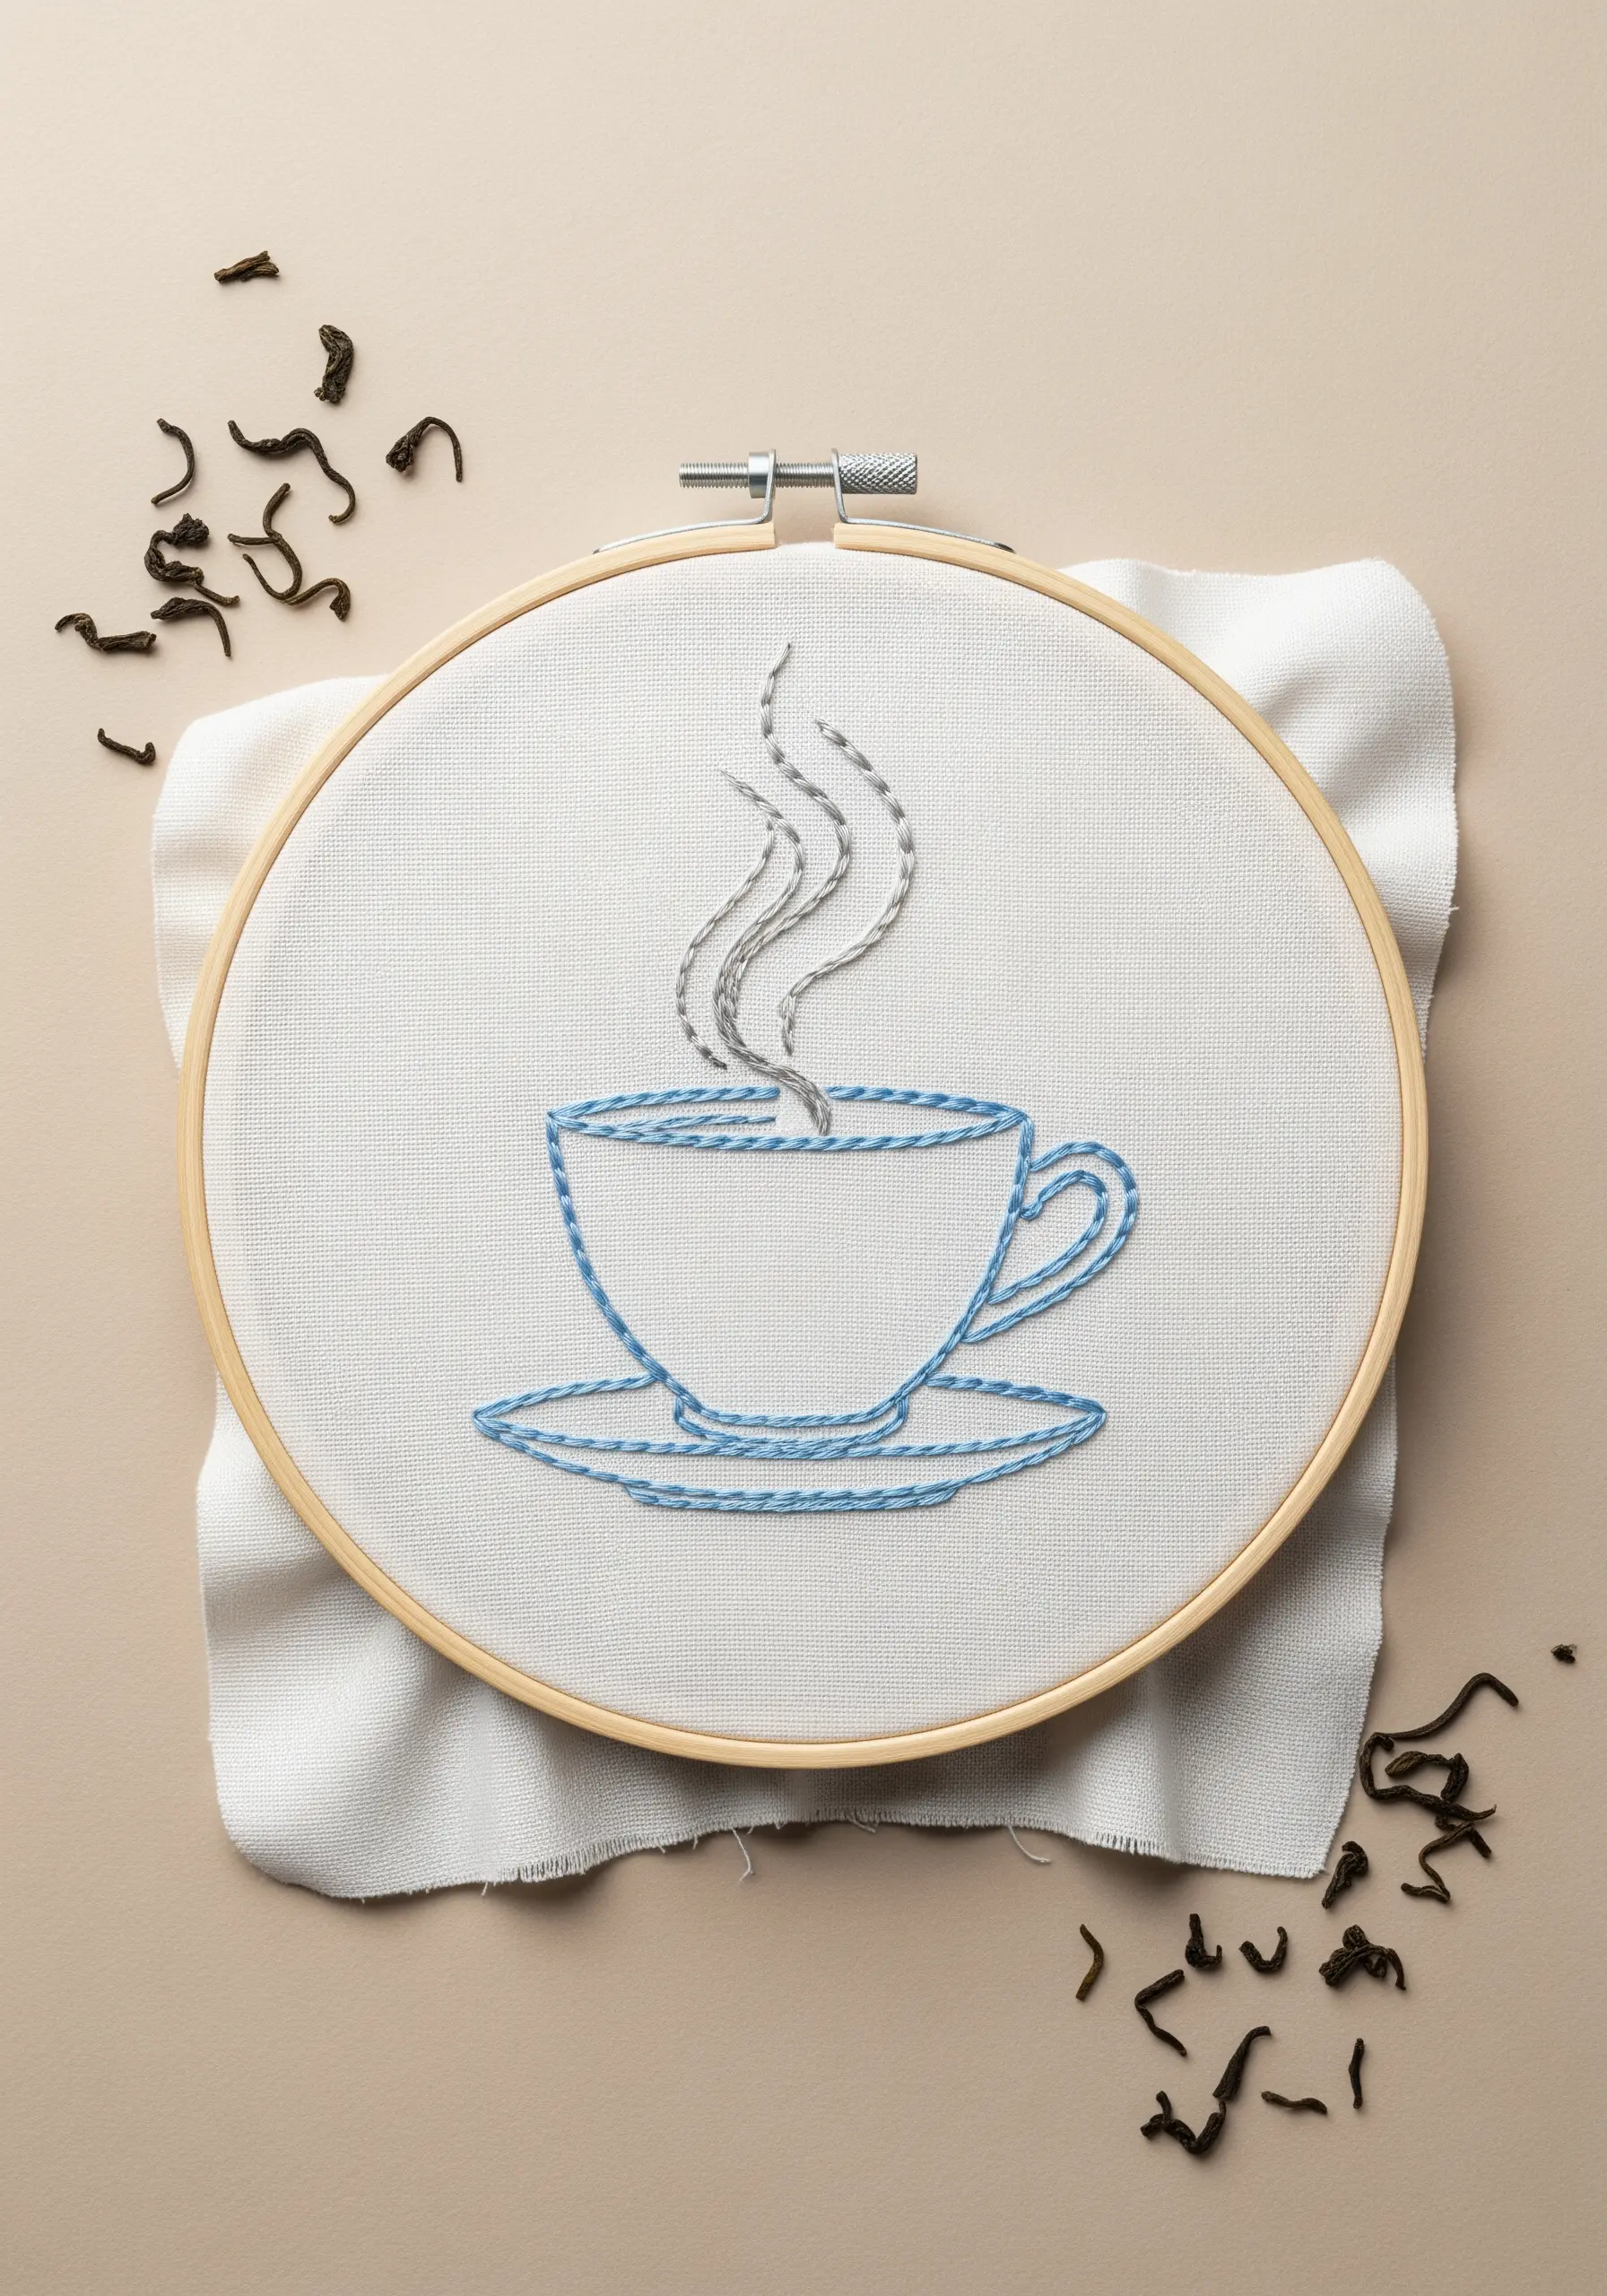
A design doesn’t need to be filled to be powerful; a clean outline can say it all.
Use a smooth split stitch with three strands of floss to give the teacup a solid, defined line.
For the steam, switch to a lighter grey thread and use a whipped backstitch or a simple, flowing backstitch.
This contrast in stitch style and color creates a sense of ethereal movement rising from a solid object, perfect for calm, minimalist kitchen decor.
15. Create Facets with Directional Stitching
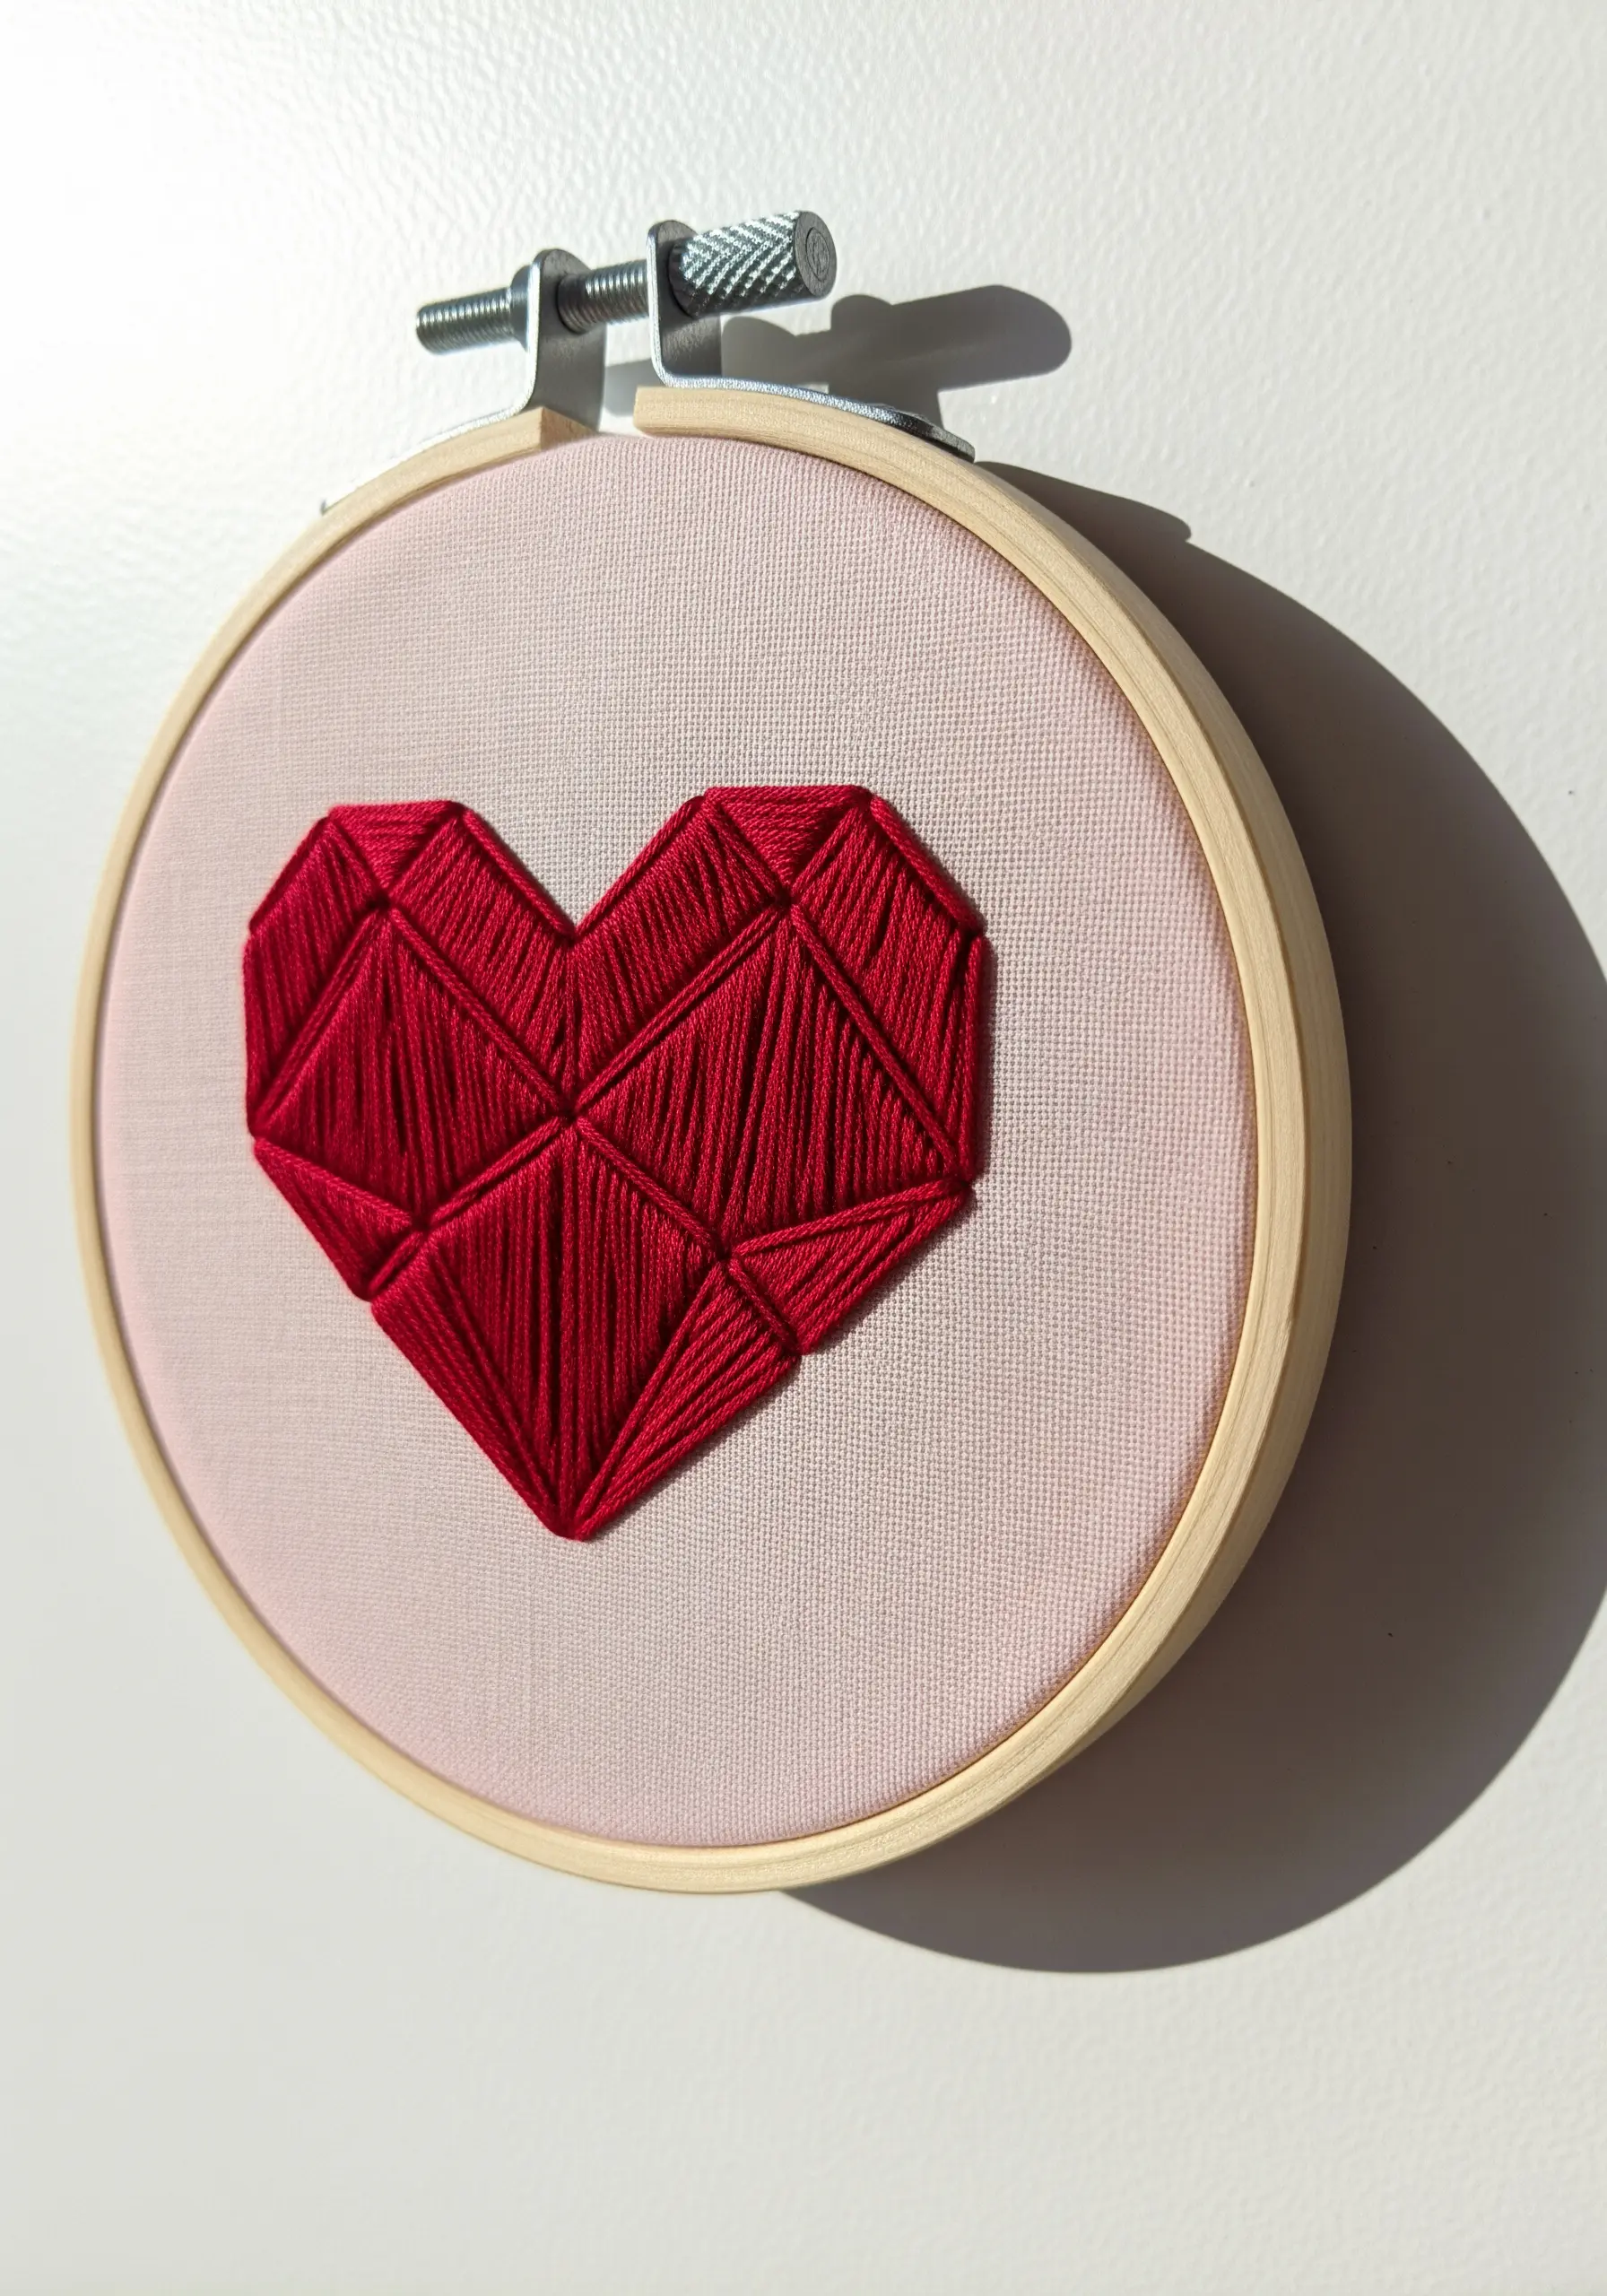
This geometric heart appears complex, but its secret is simple: changing the direction of your satin stitch.
Divide the heart shape into small, triangular sections.
Fill each section with satin stitch, but change the angle of the stitches for every adjacent triangle.
This technique makes light reflect off each facet differently, creating the stunning illusion of a three-dimensional, cut gemstone. It is perfect for geometric framed embroidery patterns.
16. Explore Tactile Art with Woven Fiber Knots
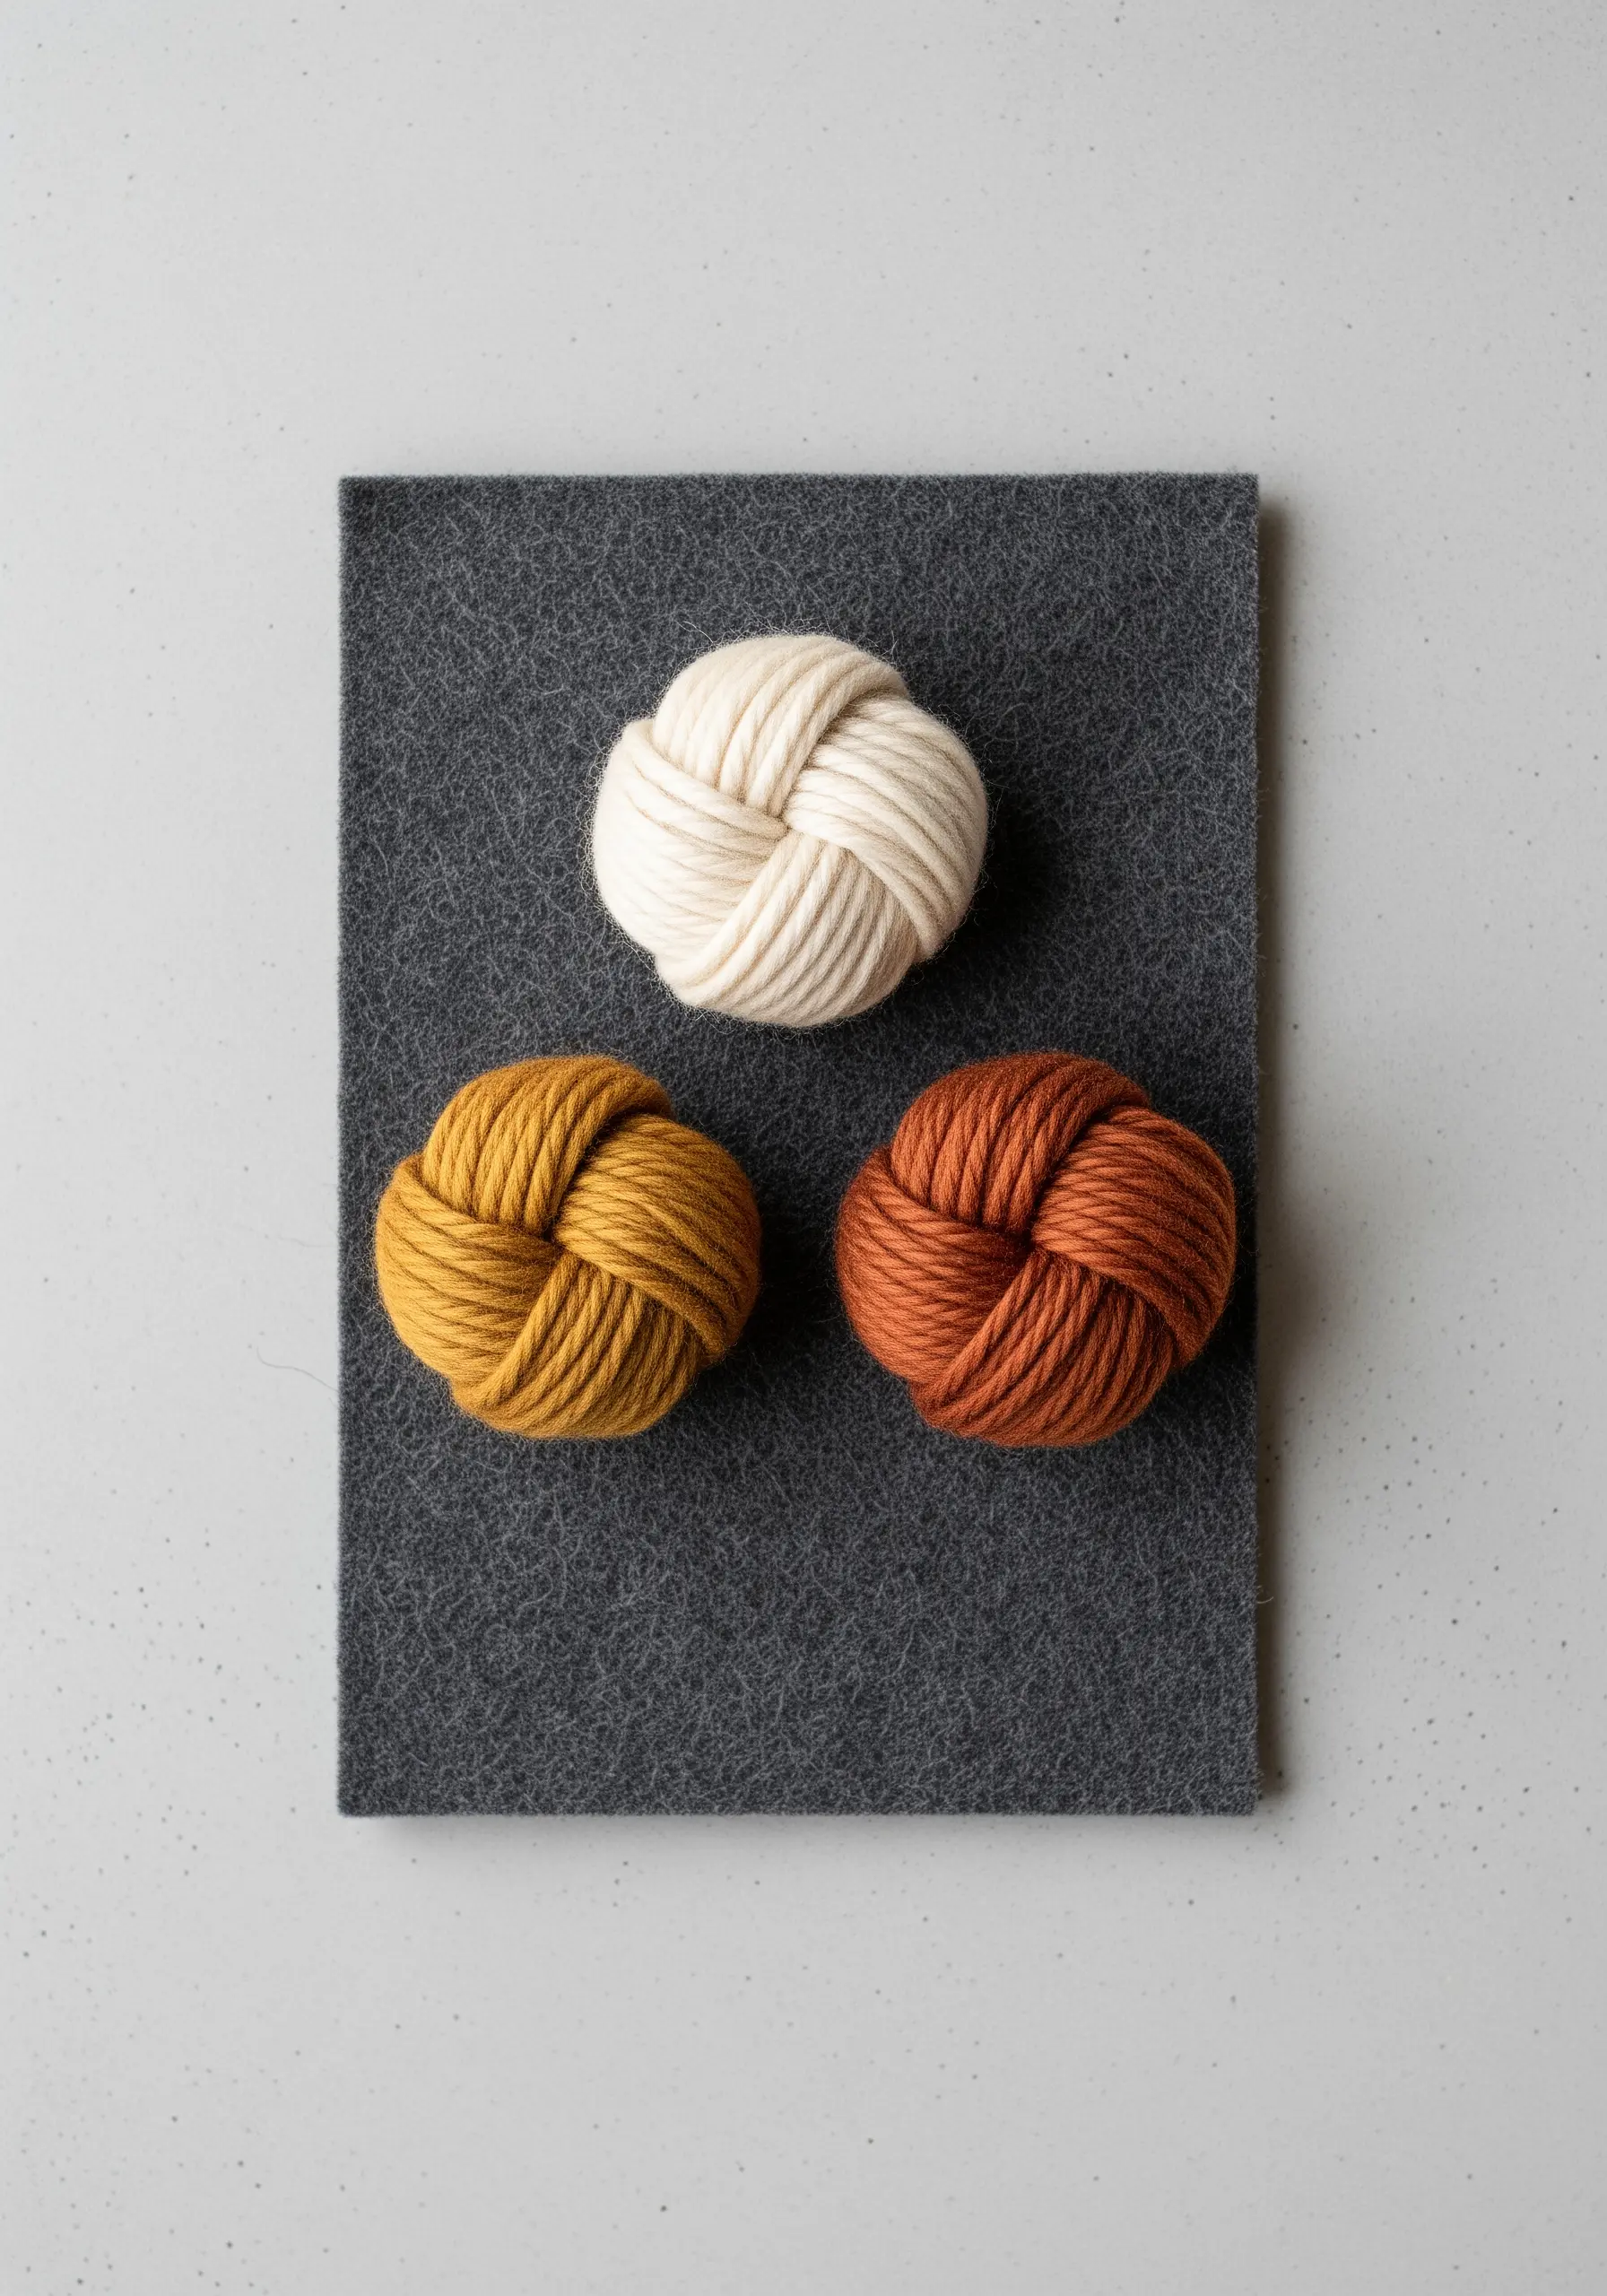
Step beyond traditional stitches and explore dimensional fiber art.
These beautiful knots are created by wrapping thick yarn or wool roving around your fingers or a small cylinder, then weaving the end through to create a secure, interwoven shape.
Mount them on a piece of thick felt for a stunningly tactile wall hanging.
This is a wonderful way to use up leftover yarn and is one of many mixed-fiber projects that look complicated but are actually easy to master.
17. Delicate Leaf Veins with Open Stitch Work
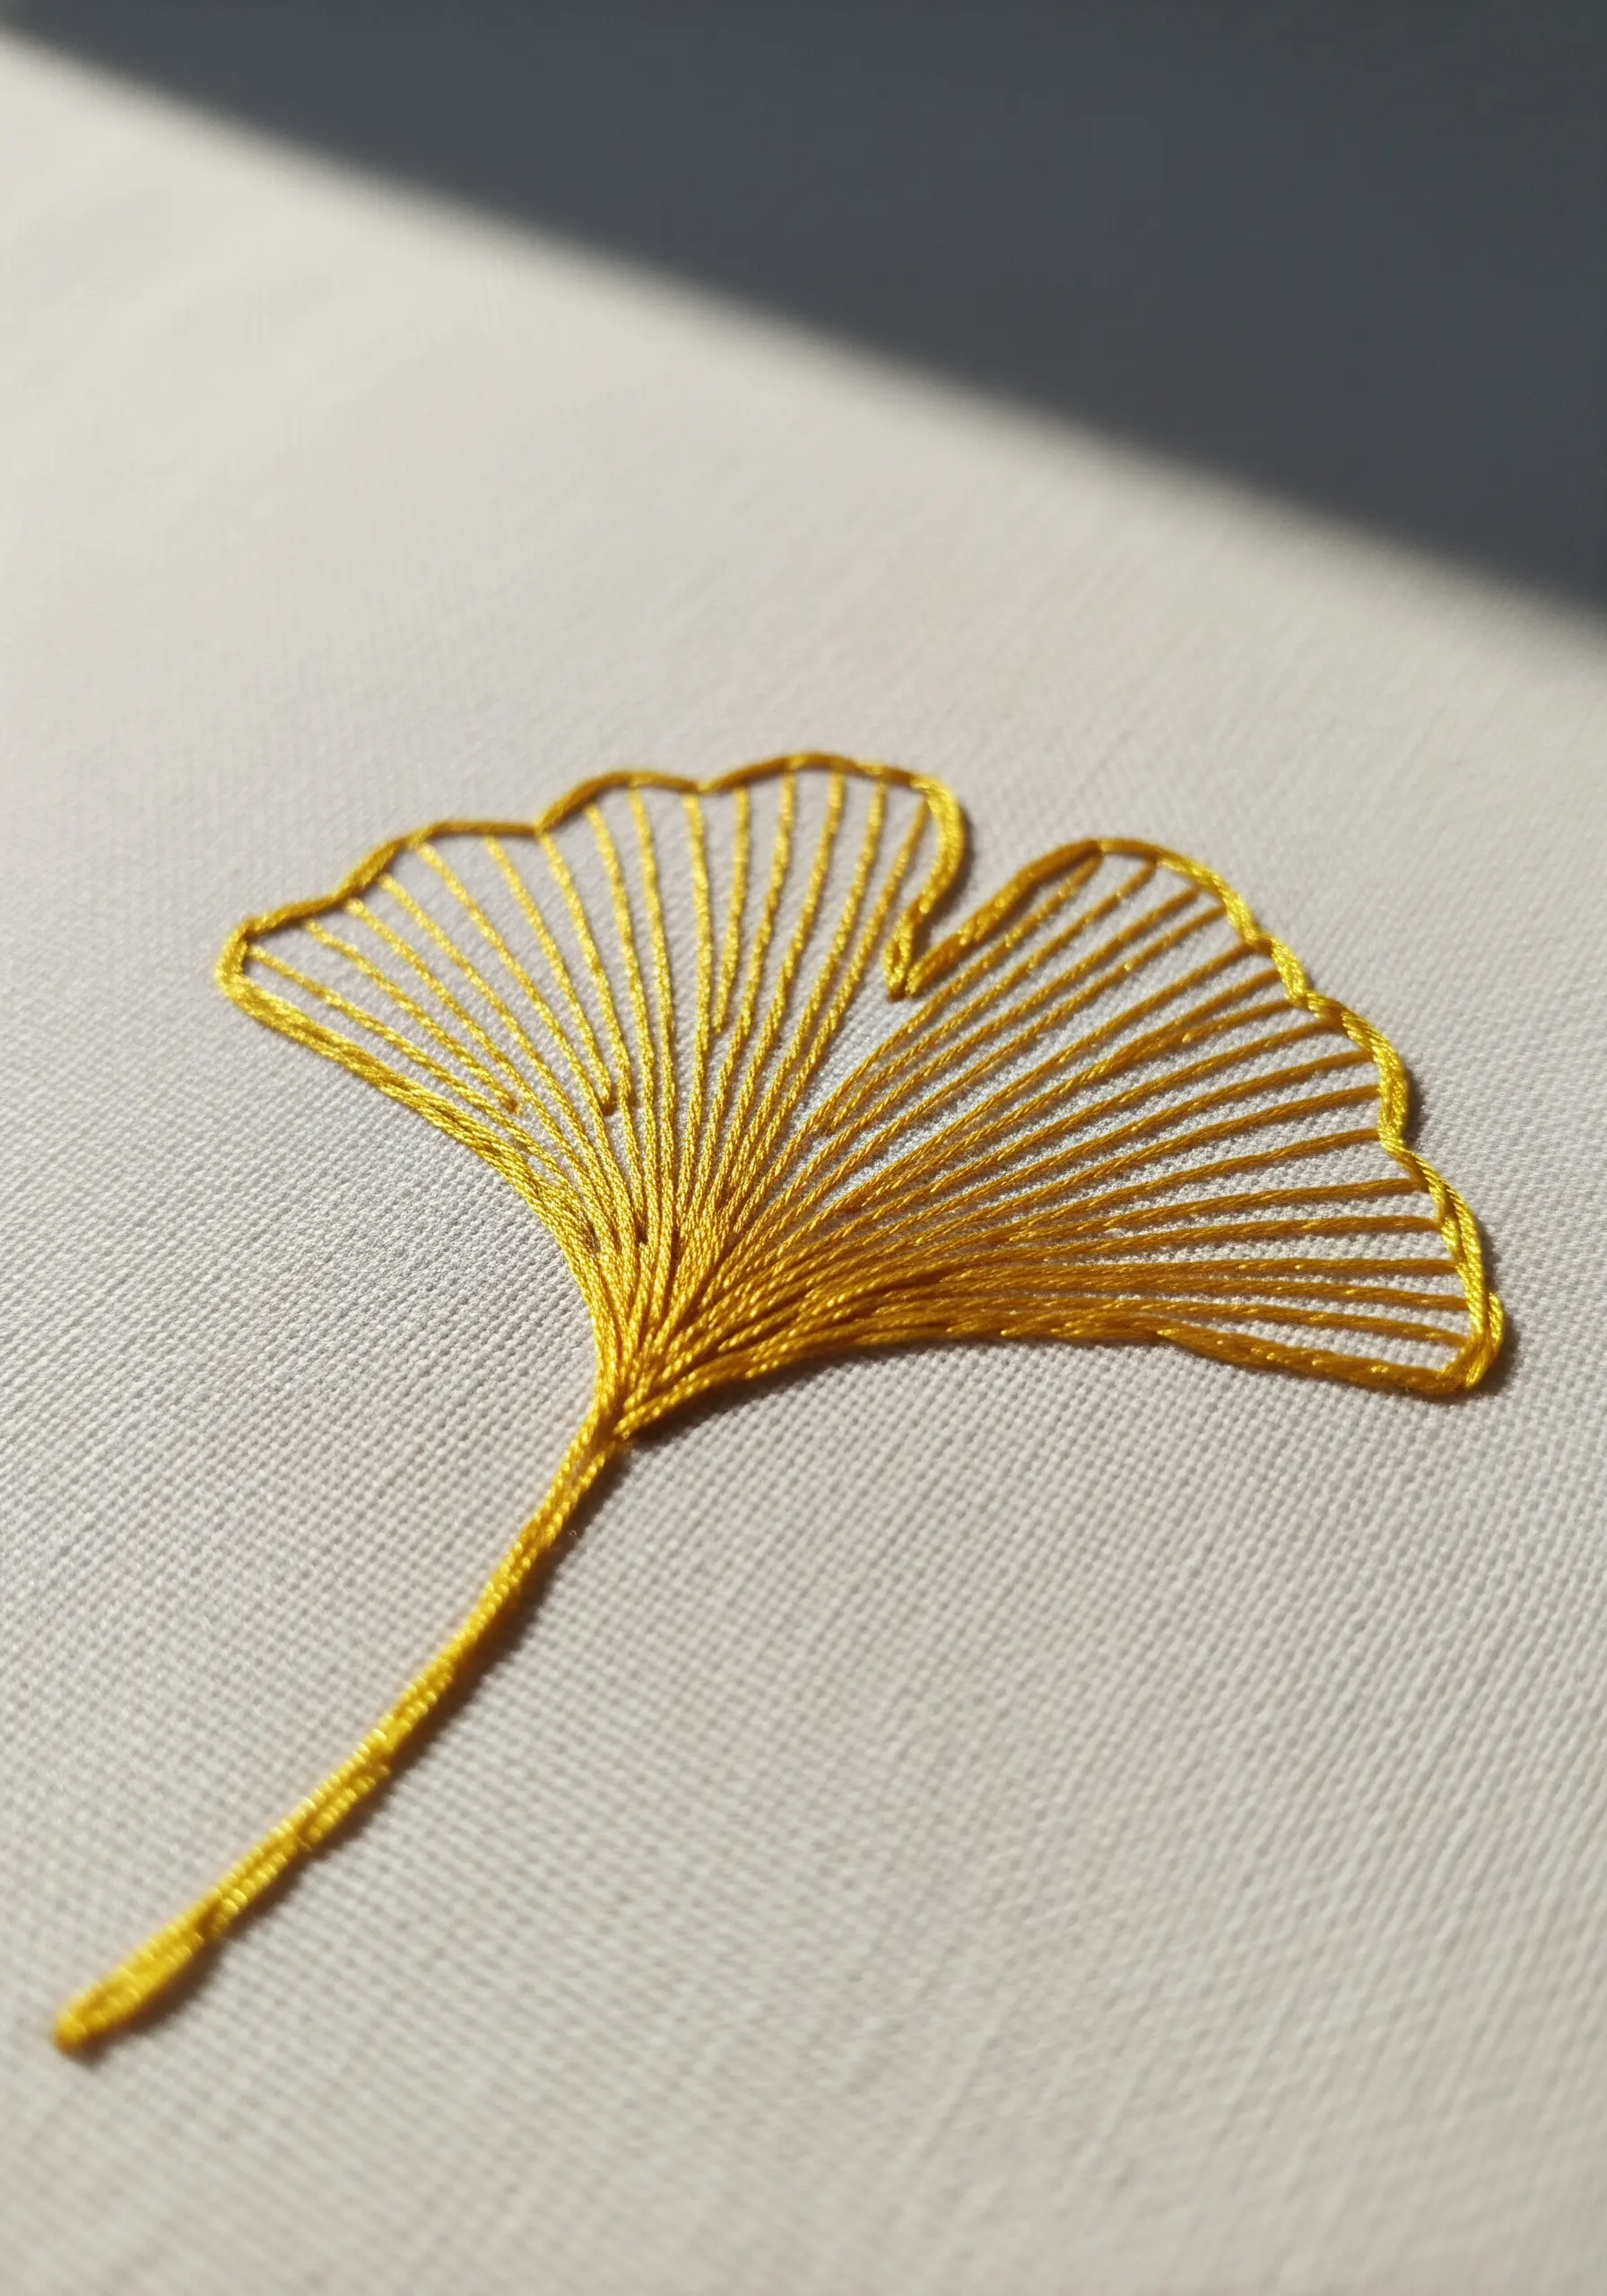
To capture the delicate, fanned structure of a ginkgo leaf, avoid a heavy fill stitch.
Instead, use an open fishbone stitch: work long, angled straight stitches from the outer edge towards the center spine, leaving space between them.
This technique perfectly mimics the leaf’s natural veins while keeping the overall feel light and airy.
Finish with a clean backstitch outline to define the unique shape.
These are great leaf and vine embroidery ideas for apparel.
18. Graphic Appeal with High-Contrast Outlines
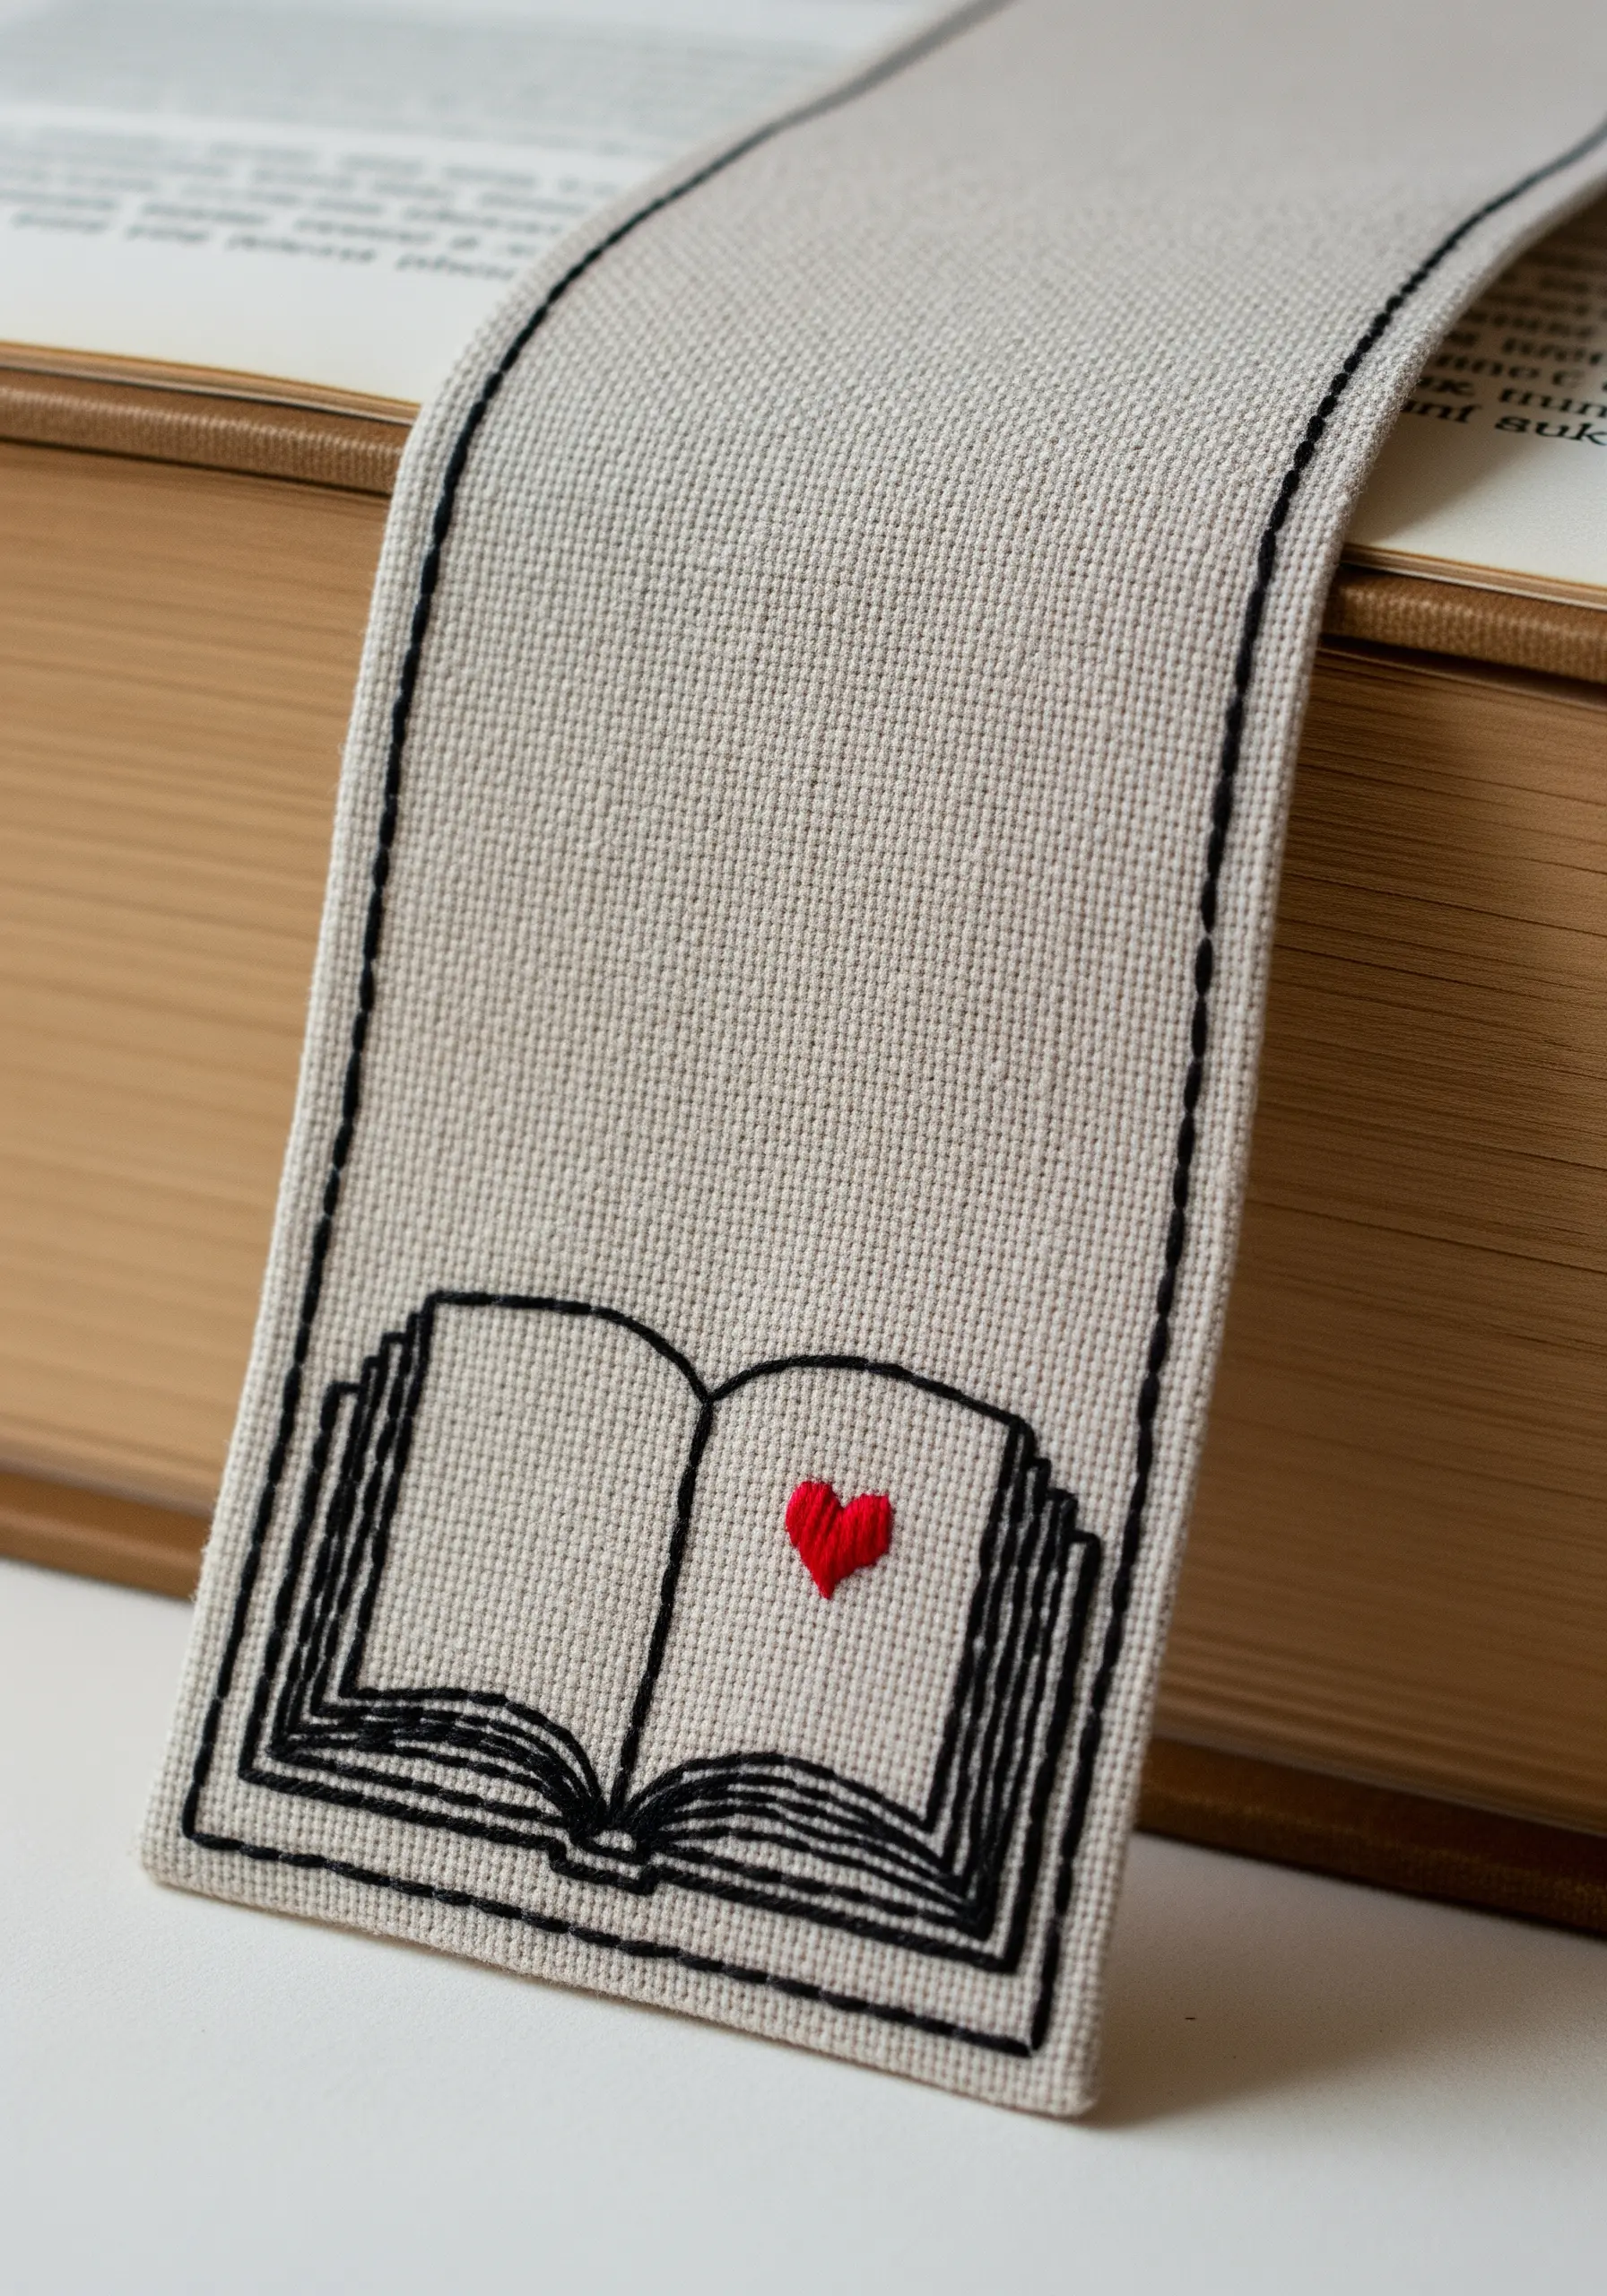
This charming bookmark relies on the power of a simple, clean line.
Use a black backstitch with three strands of floss to create a bold, graphic illustration that stands out against the neutral fabric.
The single pop of color—a tiny, satin-stitched red heart—draws the eye and adds a touch of warmth.
For a durable finish, back the fabric with felt and secure the edges with a neat blanket stitch.
It’s a perfect project for making cozy embroidery bookmarks.
19. The Perfect Silhouette with a Flawless Fill
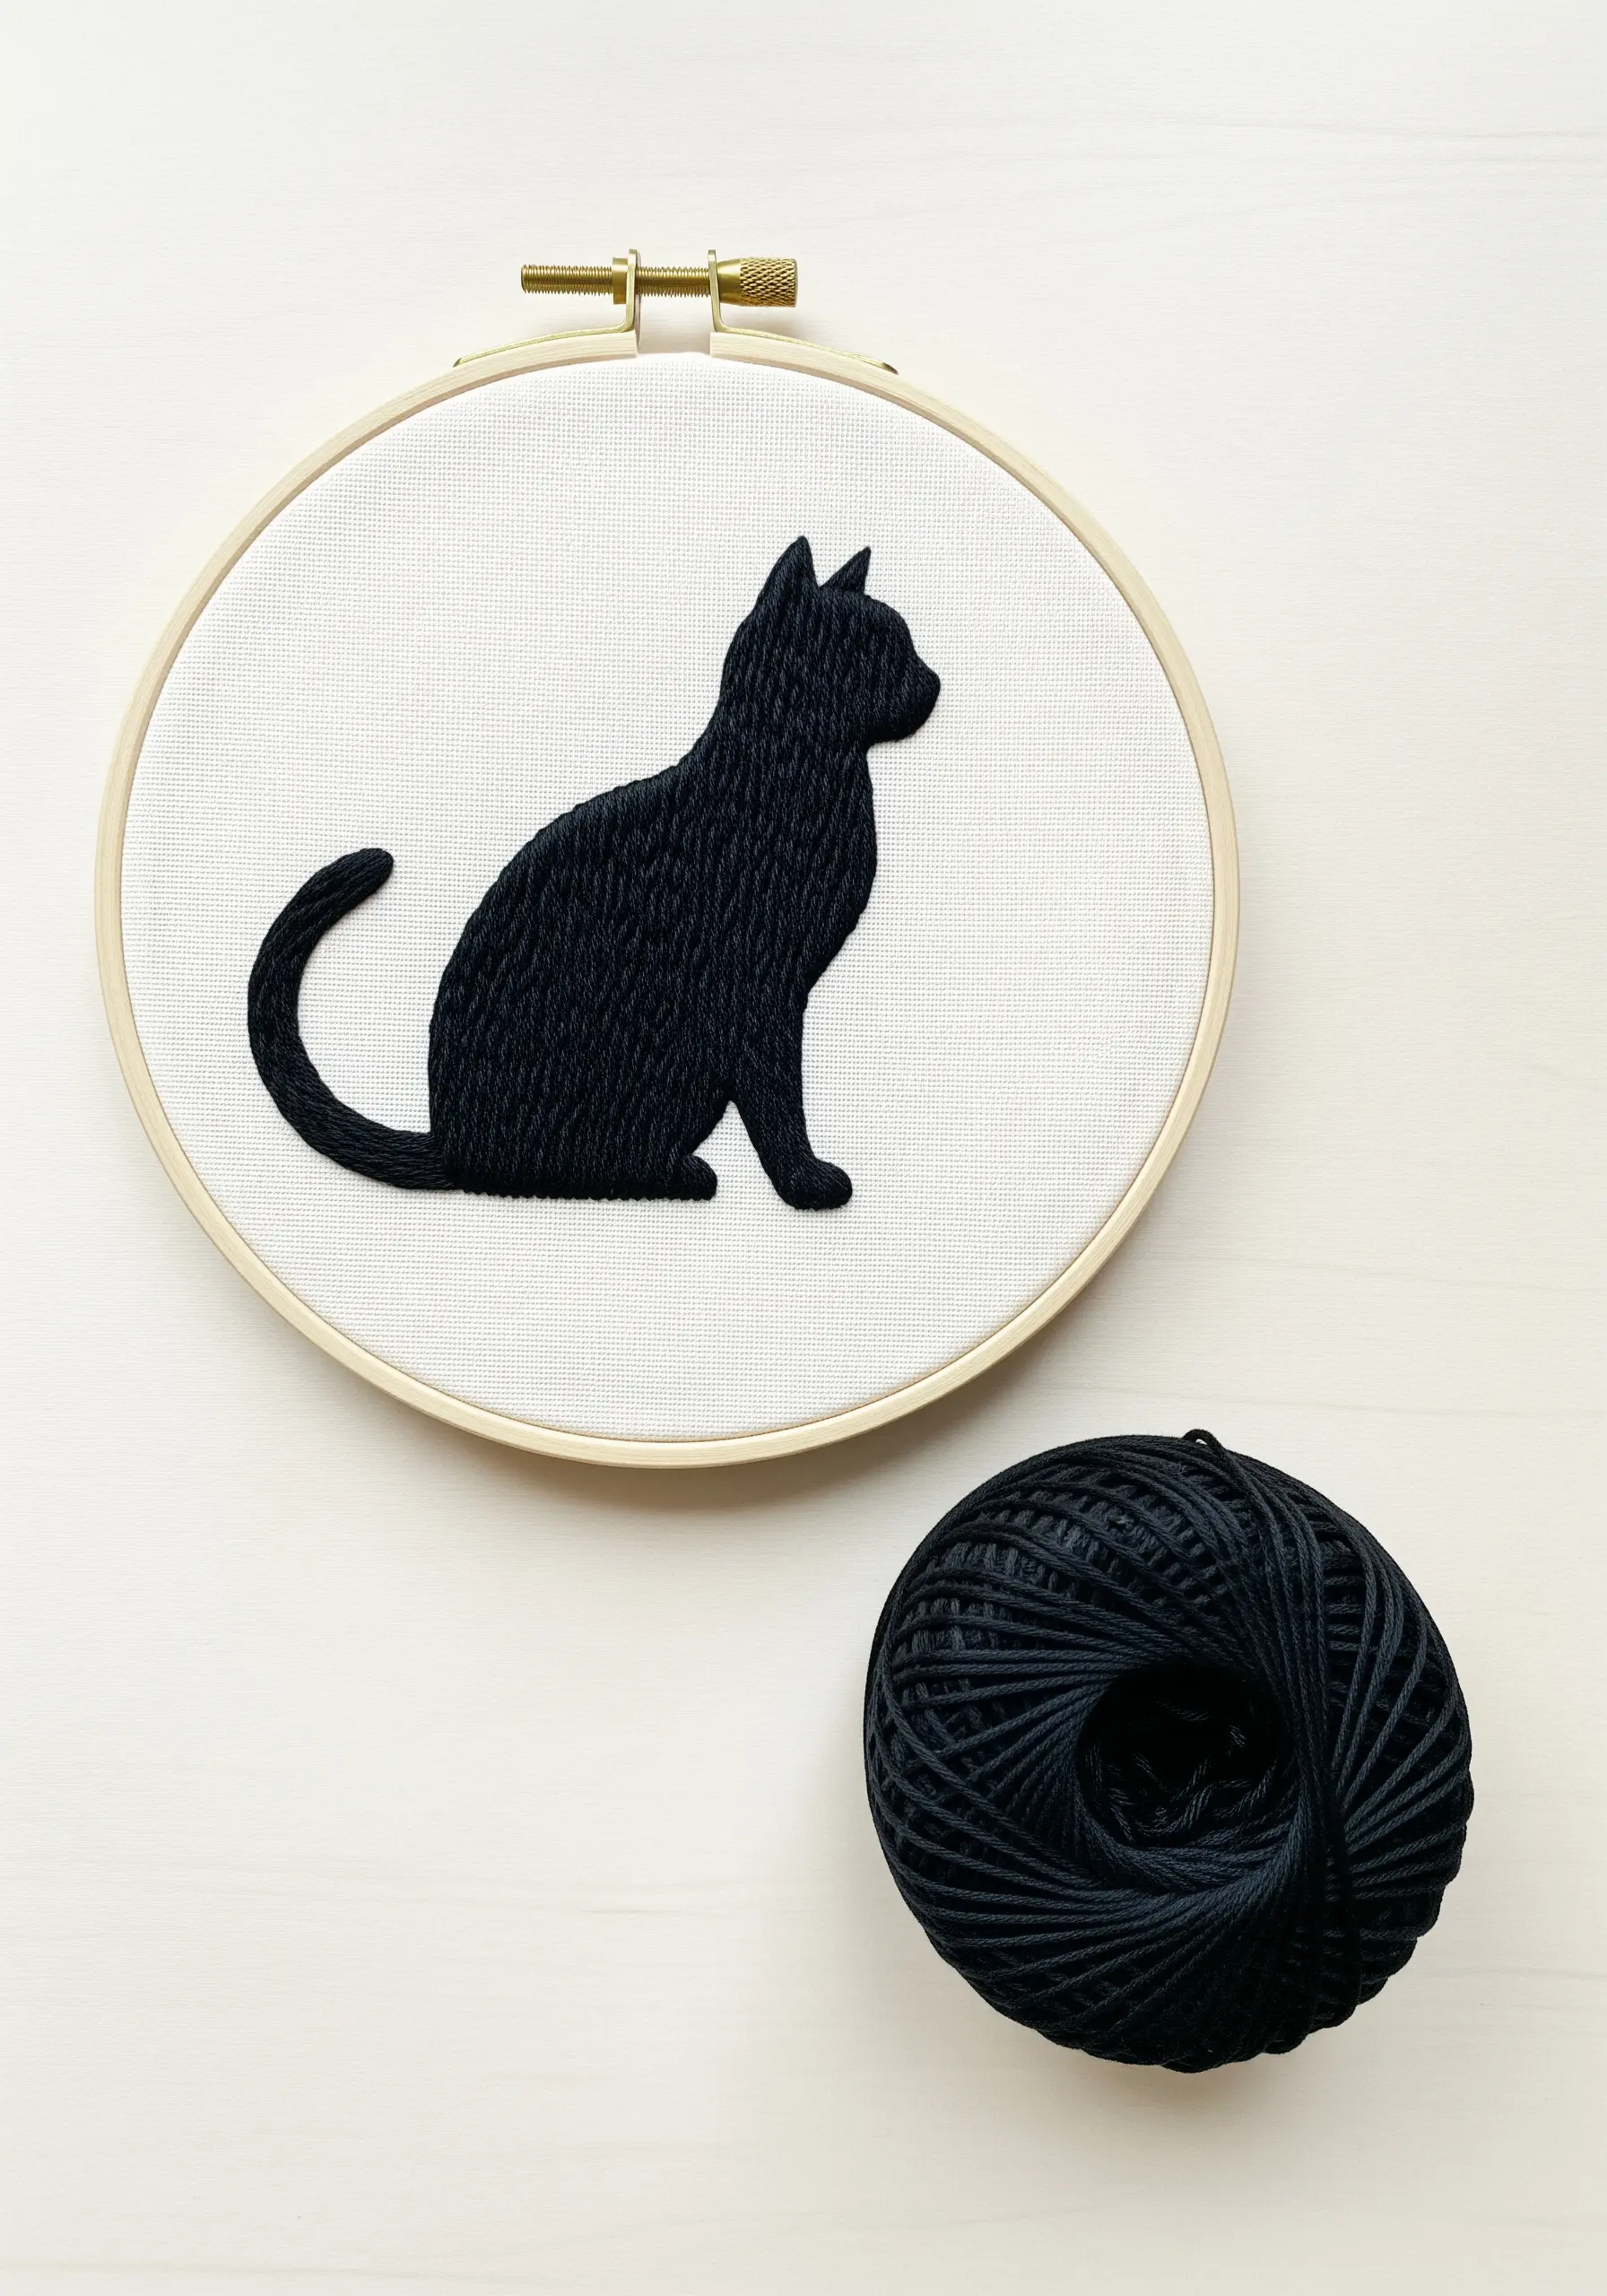
A striking silhouette requires two things: a razor-sharp edge and a perfectly smooth fill.
Achieve this by first outlining the shape with a tiny split stitch, which creates a raised boundary to tuck your fill stitches against.
Then, use a brick stitch or long-and-short stitch for the fill.
These stitches stagger the entry points, eliminating the gaps and lines that can plague a standard satin stitch over a larger area, resulting in a flawless, solid block of color perfect for meaningful pet-inspired keepsakes.
20. Lifelike Texture with the Fishbone Stitch
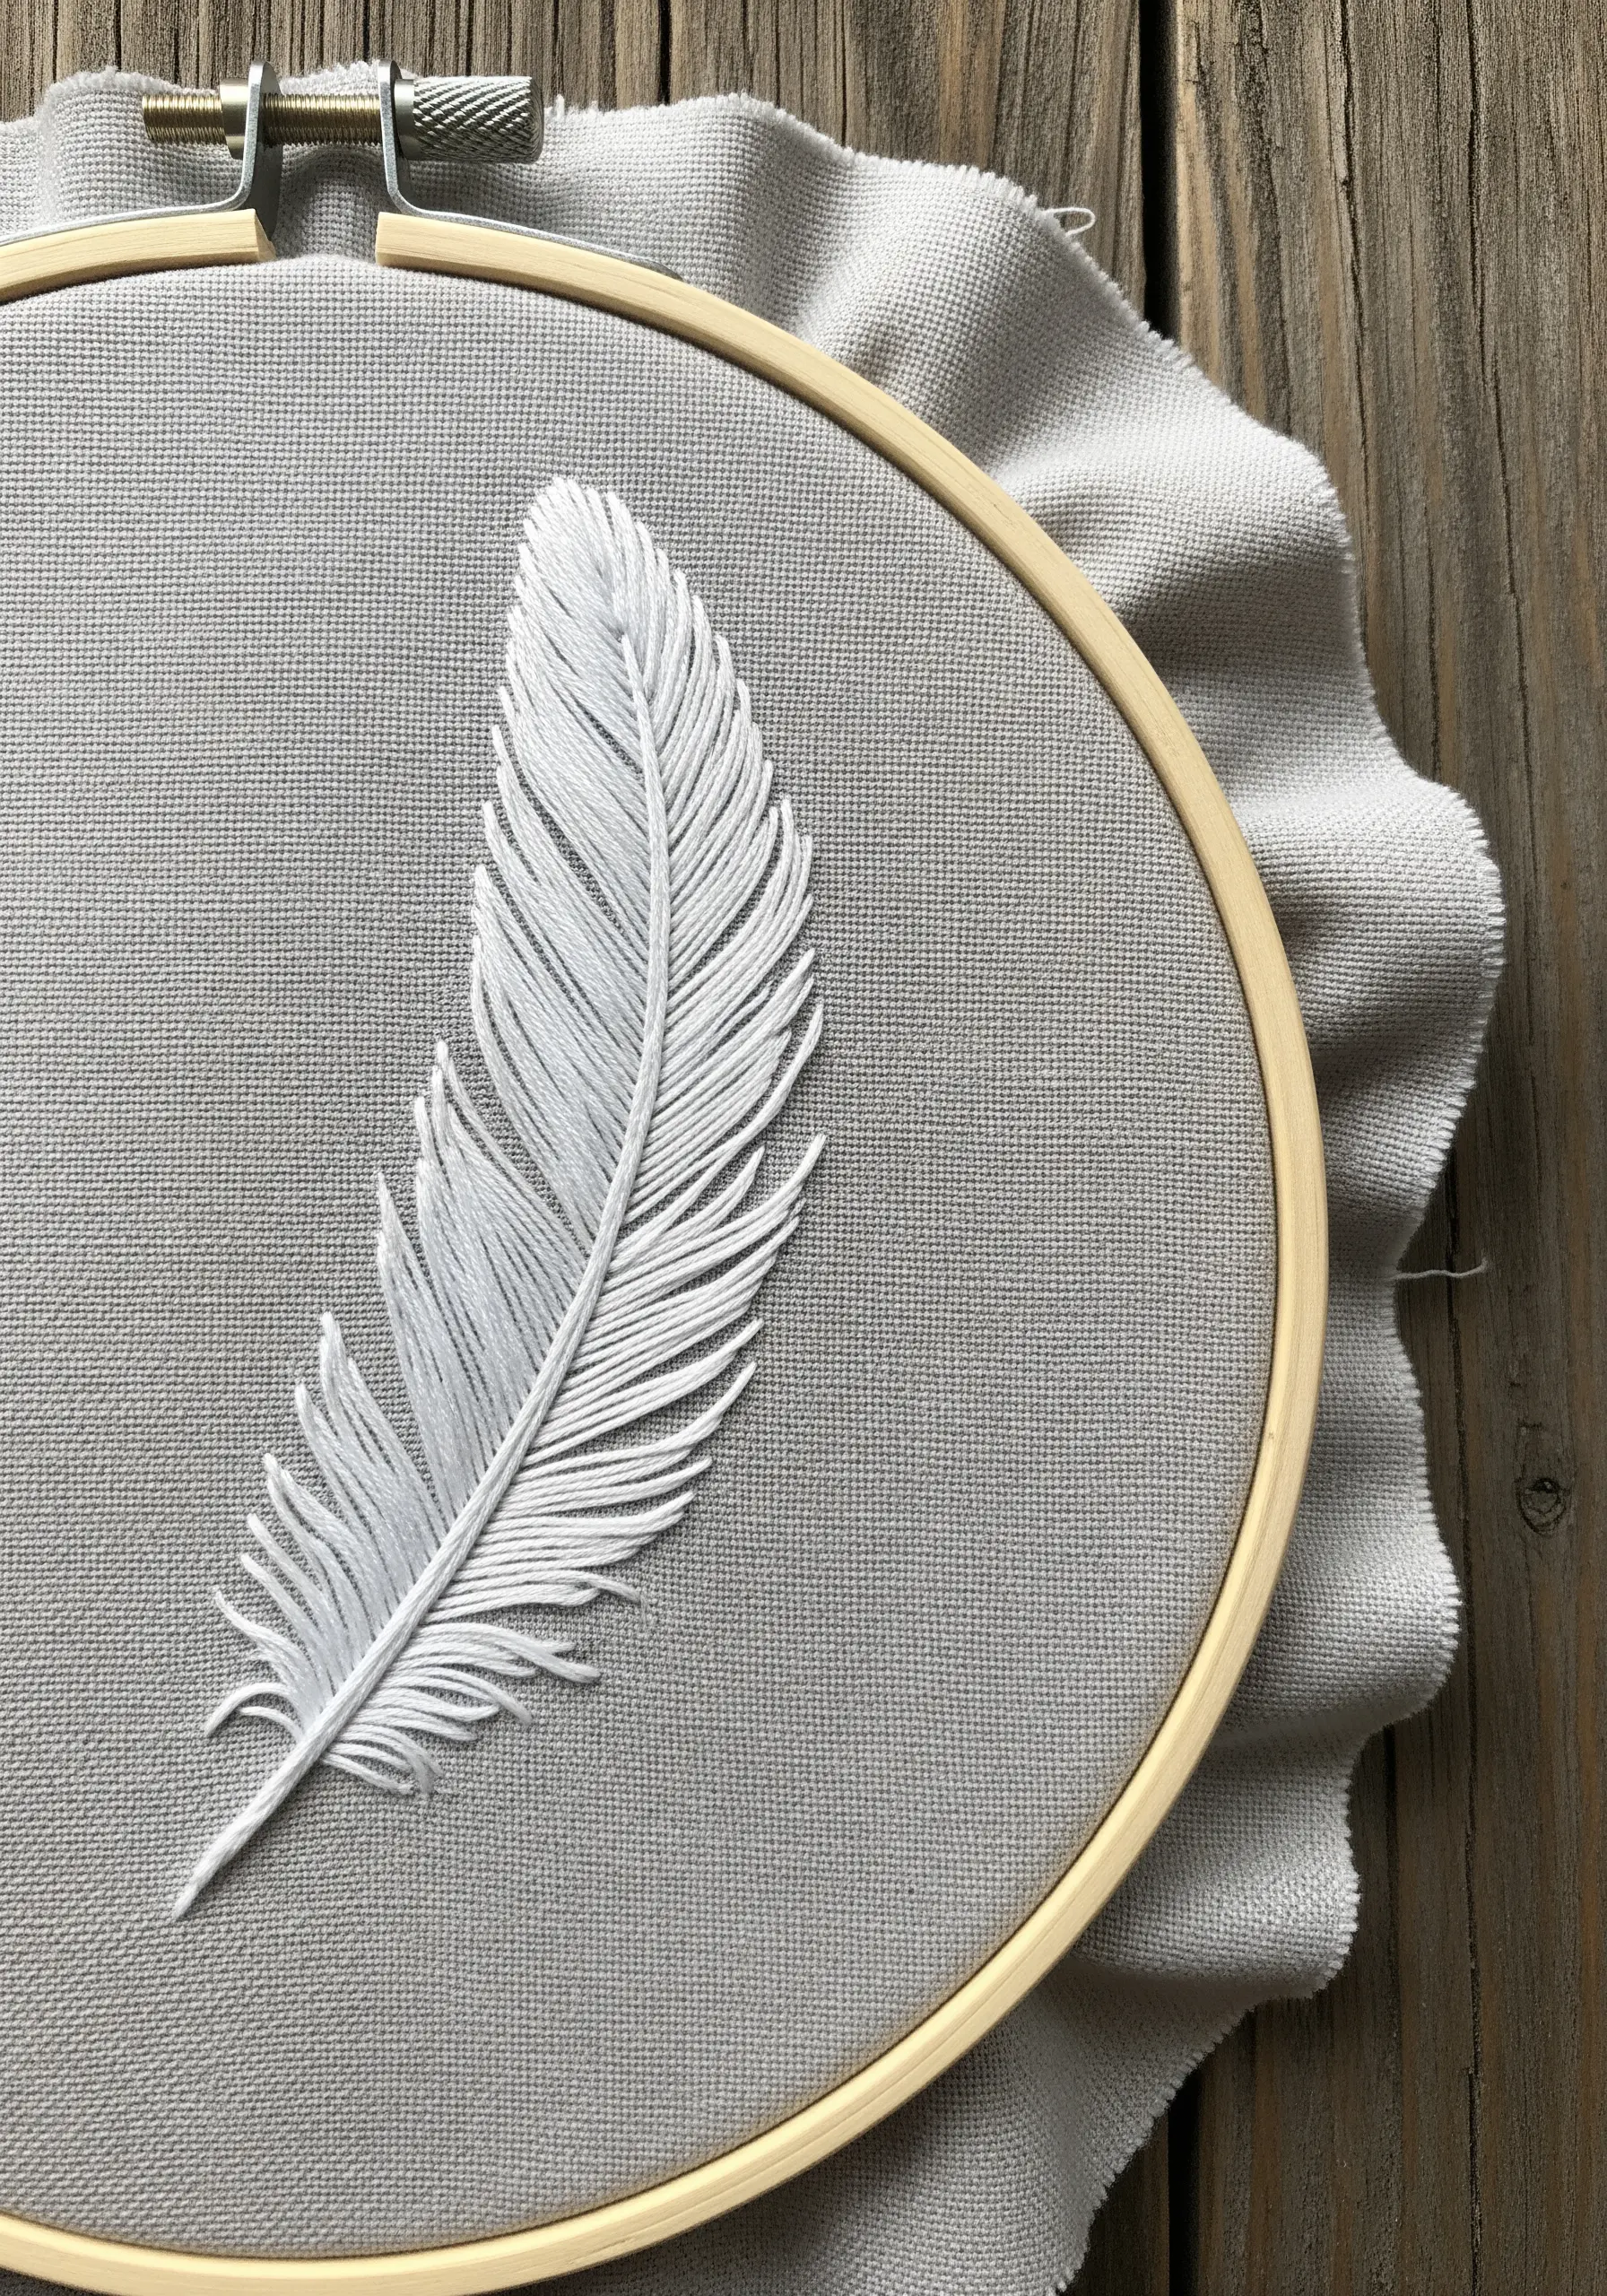
The fishbone stitch is the ultimate choice for creating the natural texture of feathers and leaves.
Start with a single straight stitch for the central shaft.
Then, work angled stitches from the outer edge down to the center, overlapping them slightly at the shaft.
This creates the iconic V-shape pattern of a feather’s barbs.
Using a single color places all the emphasis on this beautiful texture, proving how a single stitch can bring a subject to life. It is one of the most realistic feather embroidery techniques.
21. Playful Dimension with Stumpwork Mushrooms
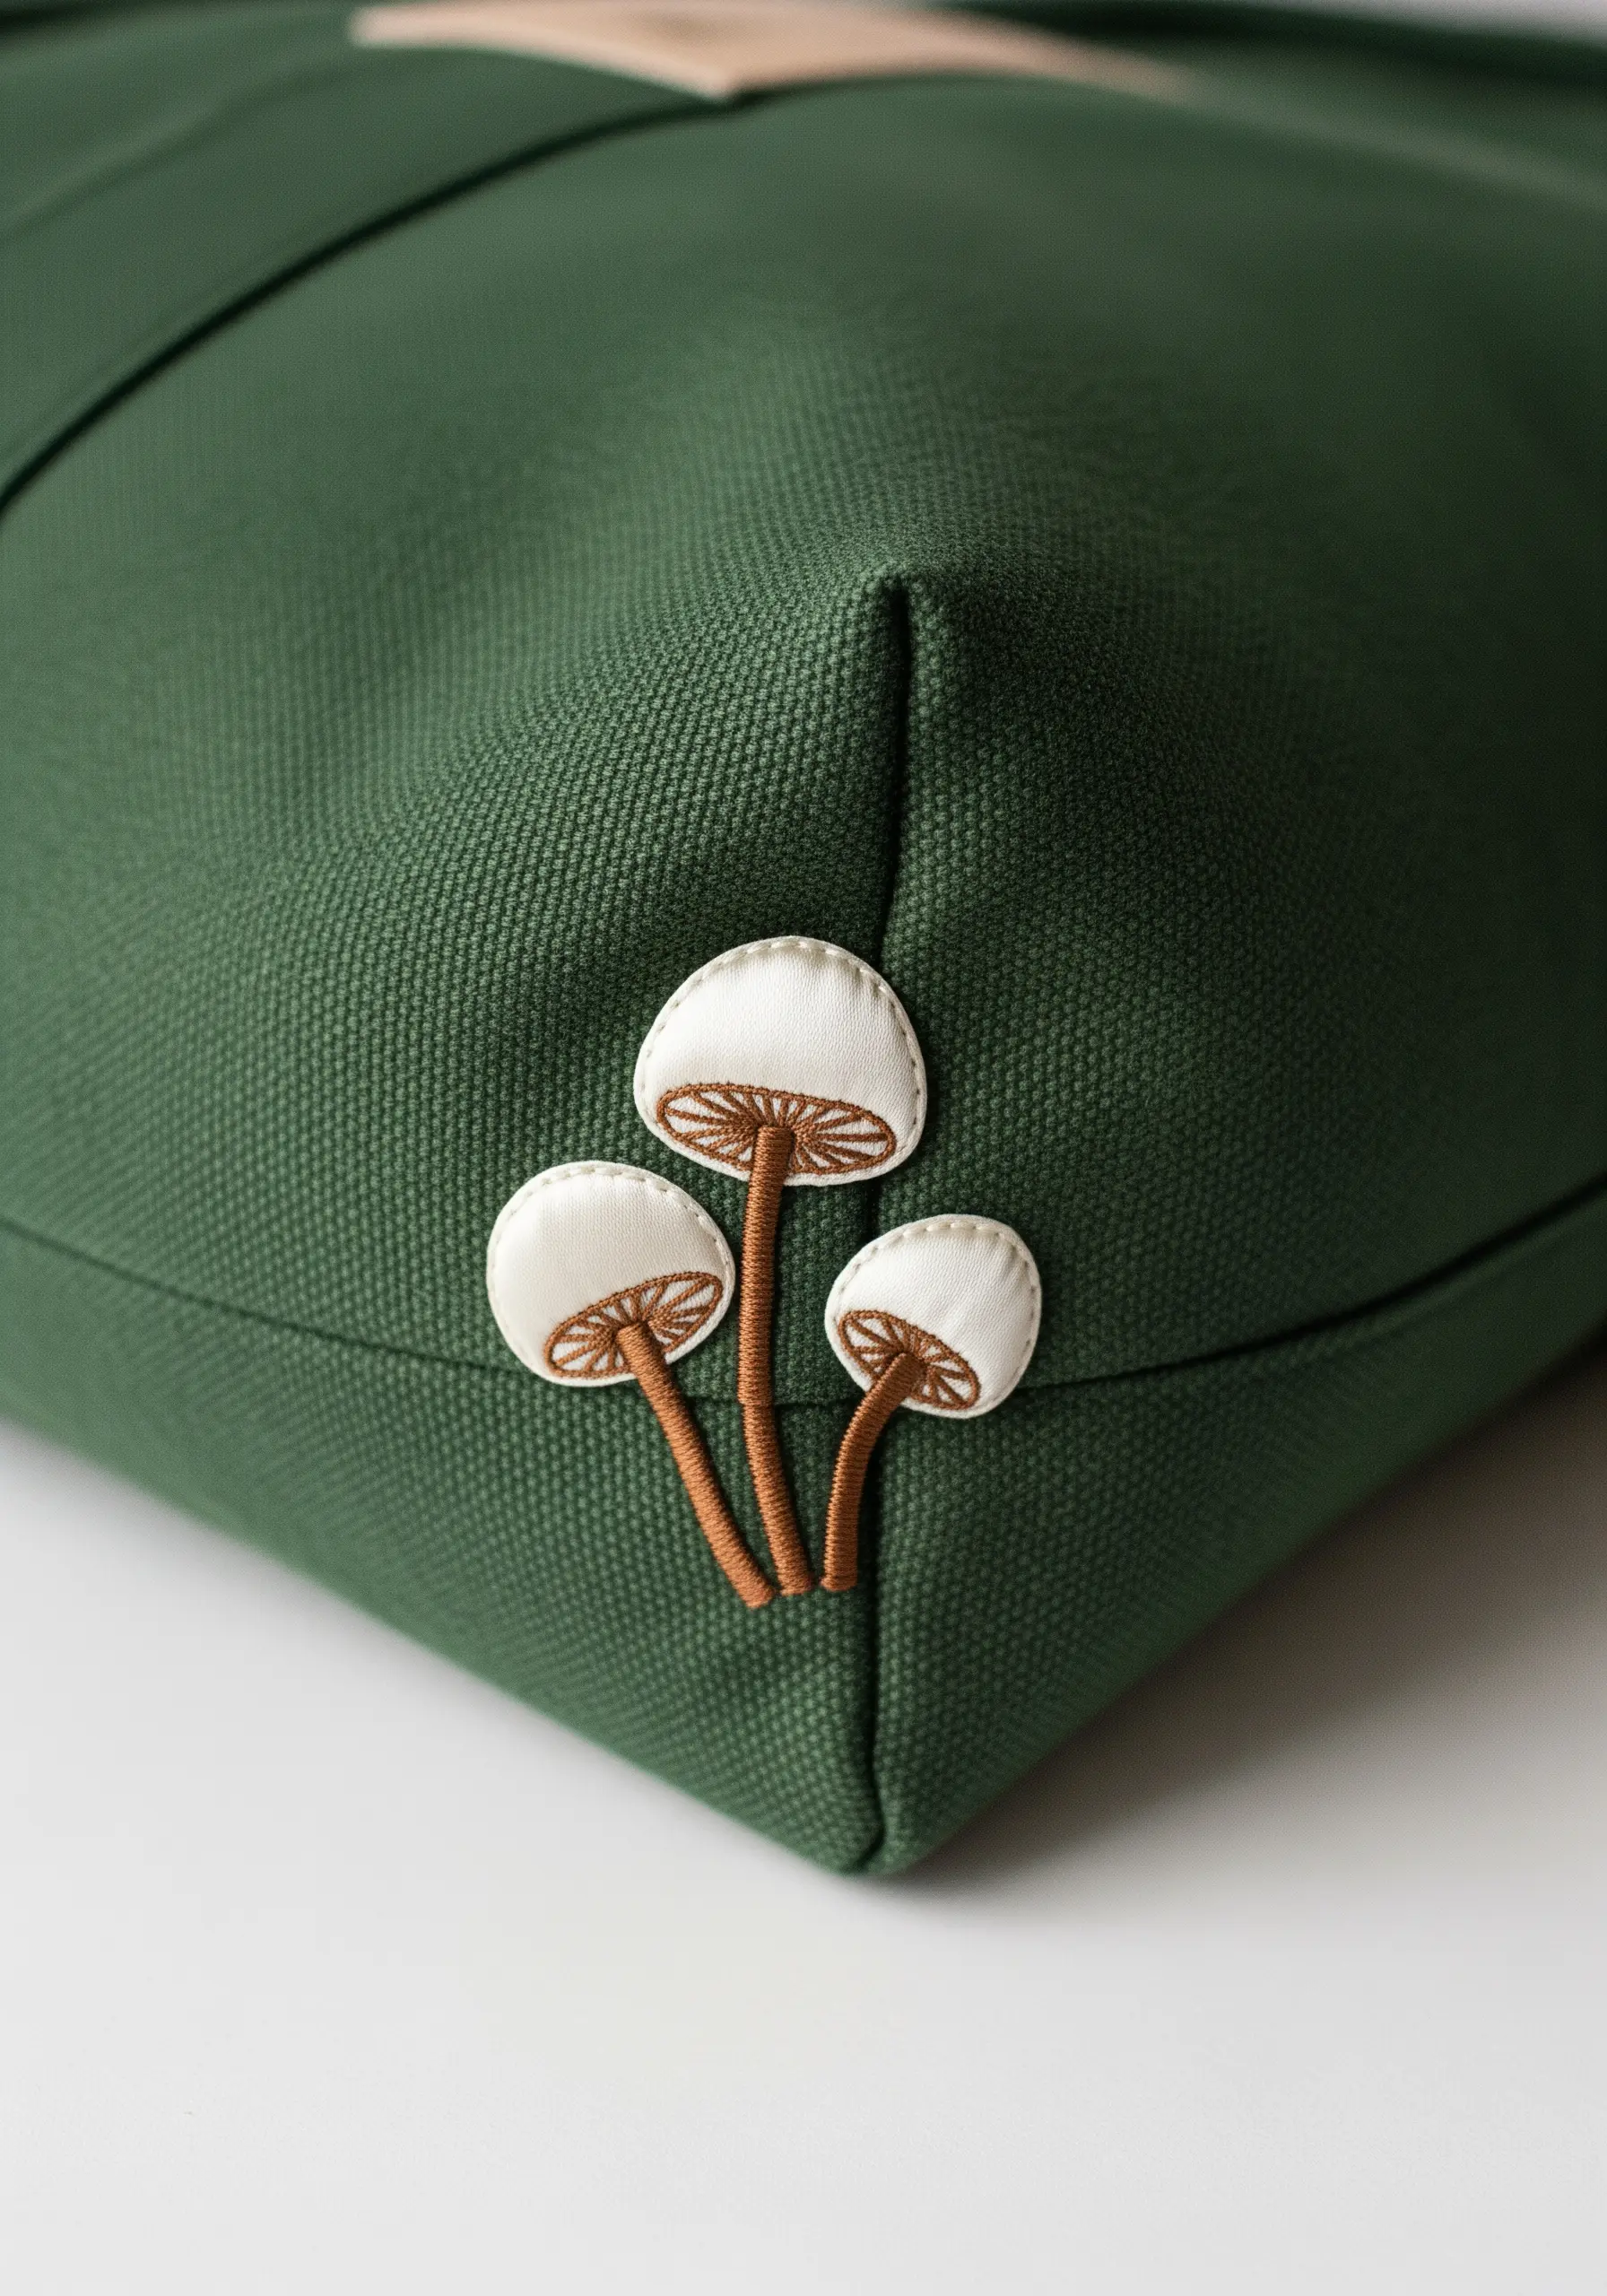
Elevate your embroidery by adding three-dimensional elements using stumpwork techniques.
Create the mushroom caps separately on a spare piece of fabric using a padded satin stitch, then cut them out carefully.
Attach them to your final project fabric, stitching only along one edge to allow them to lift slightly.
Embroider the stems directly onto the cushion with a whipped backstitch for a rounded look.
This method adds a surprising, tactile quality to your work and is perfect for forest floor botanical stitch ideas.
22. Abstract Texture with a Painterly Effect
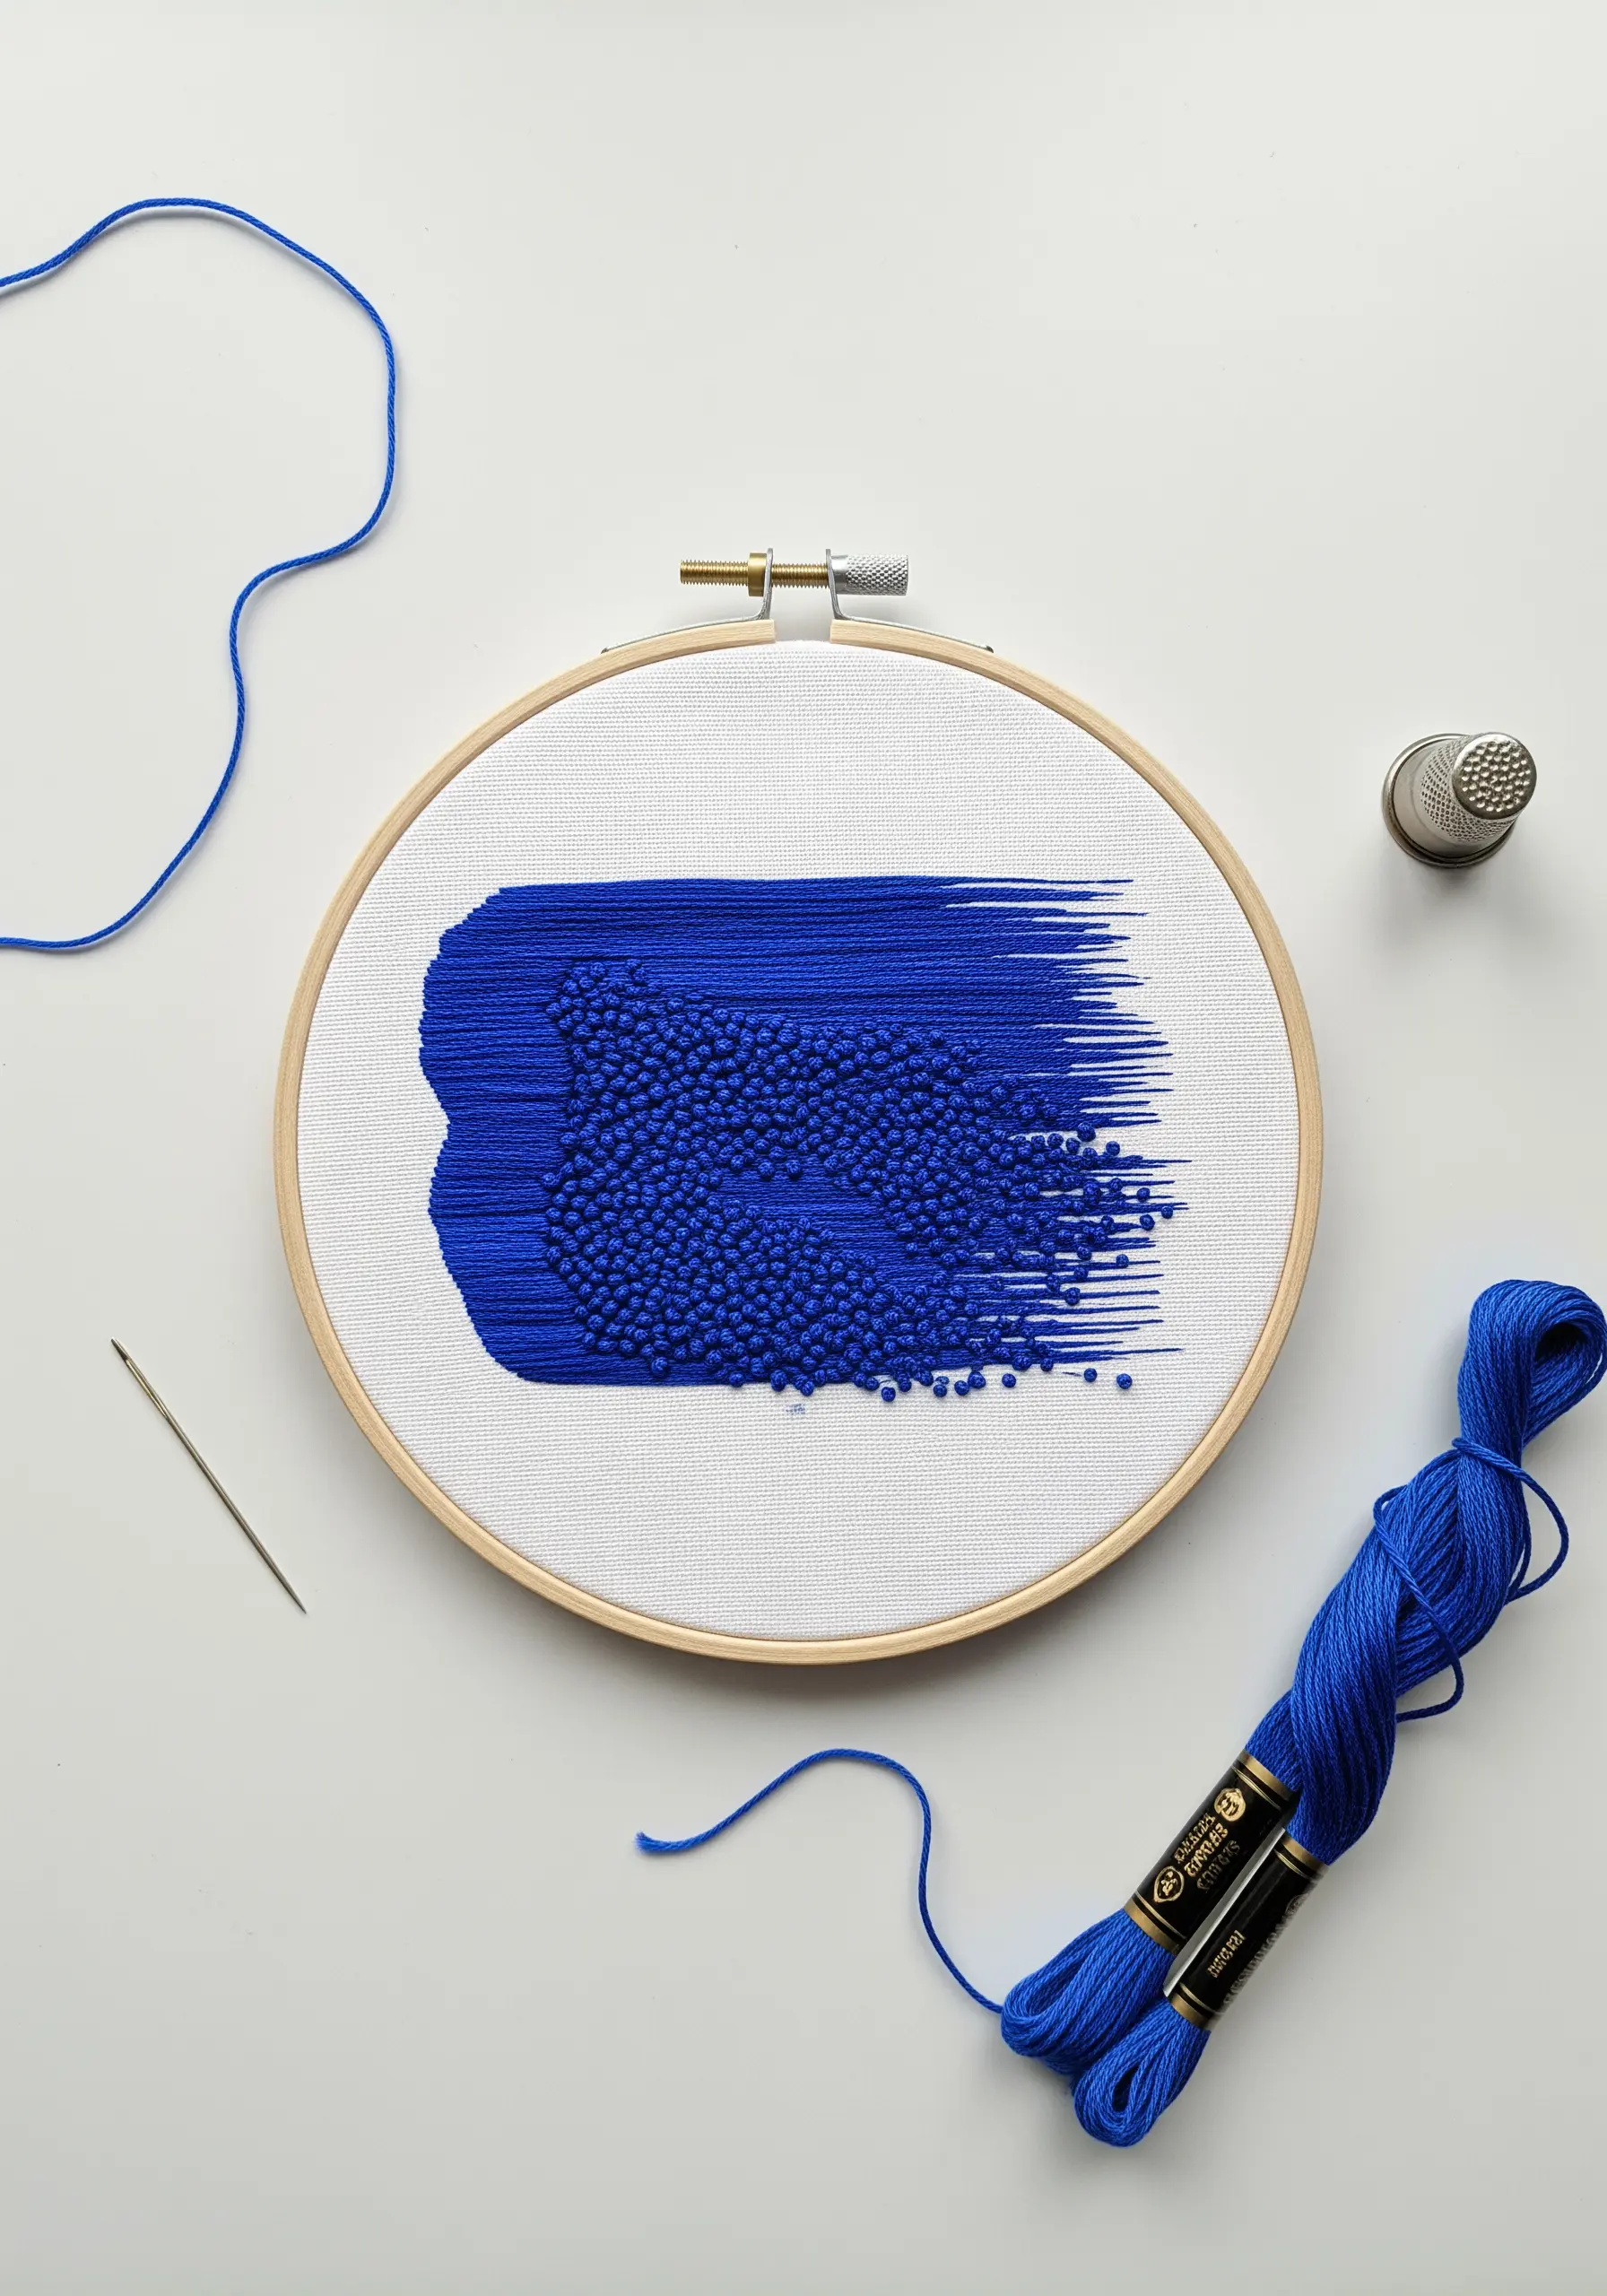
Mimic the effect of a painter’s brushstroke by combining two distinct textures.
Use long, parallel straight stitches for the smooth, dragged portion of the stroke, allowing the ends to trail off unevenly.
For the dense, saturated part, fill the area with a tight cluster of French knots.
This textural contrast between the smooth lines and bumpy knots creates a dynamic piece of abstract thread painting that is both visual and tactile.
23. A Miniature Garden of Textured Stitches
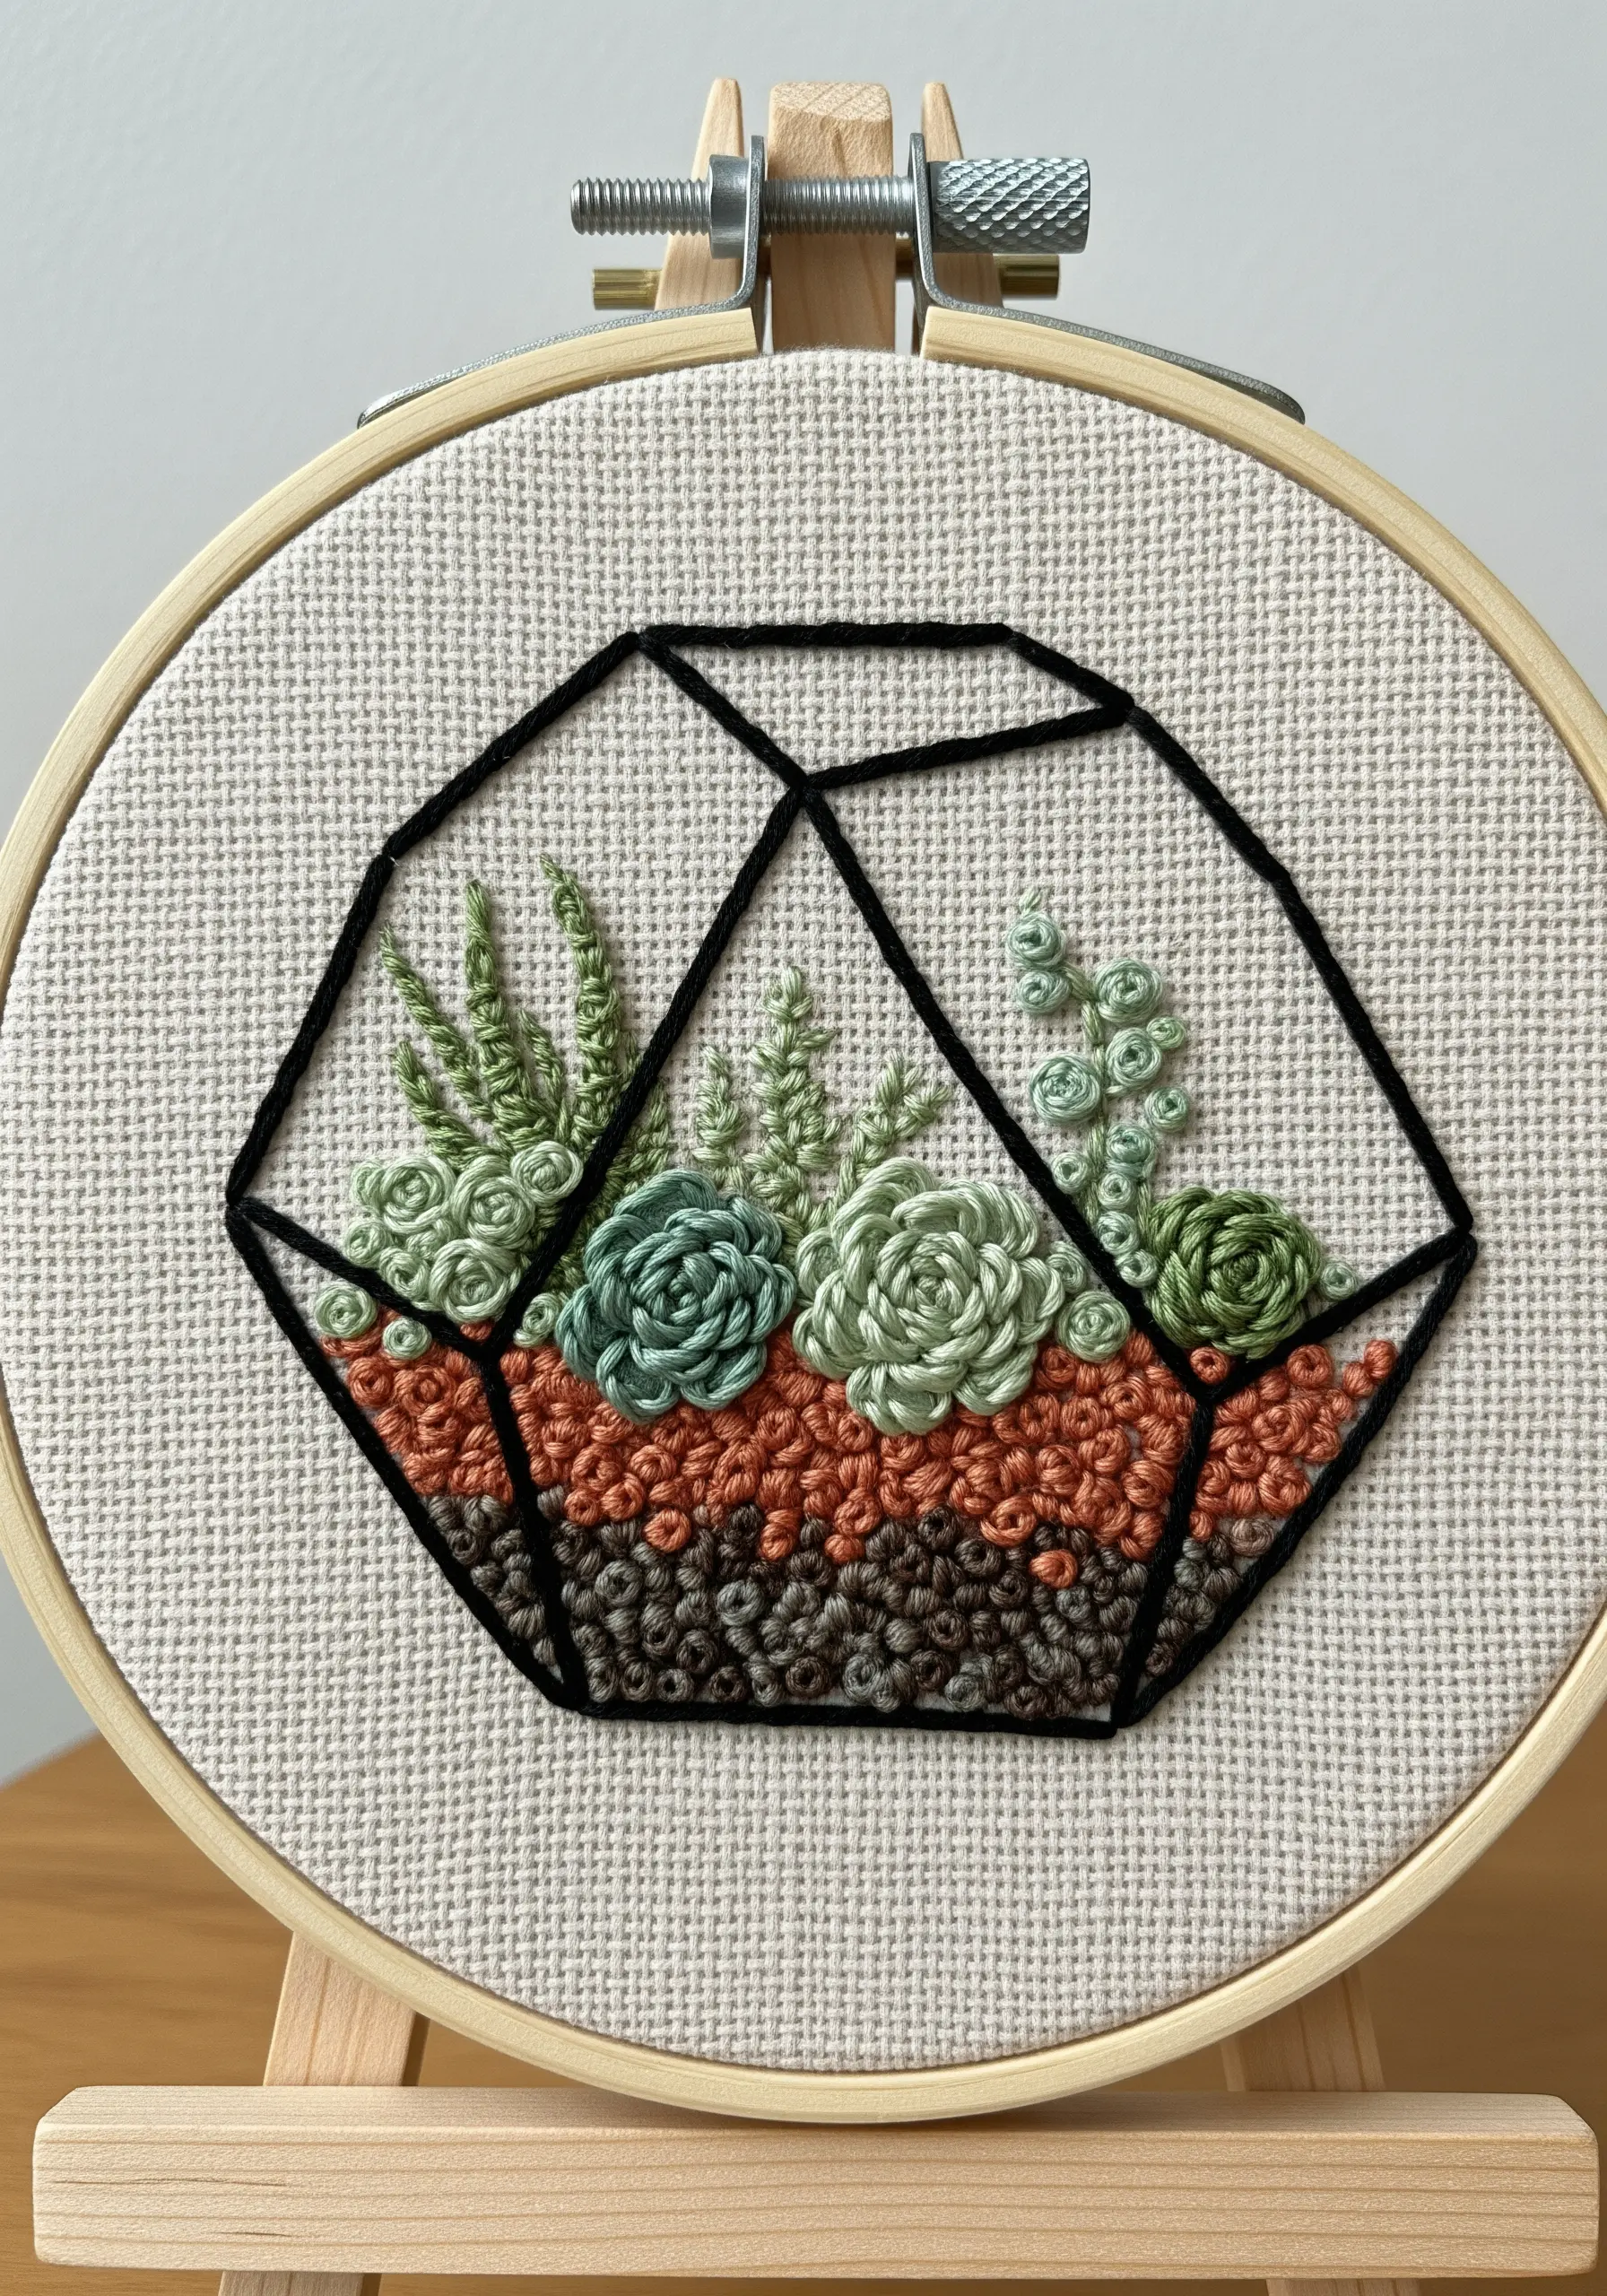
A geometric terrarium offers the perfect canvas to create a sampler of beautiful, textured stitches.
Use woven wheel stitches (or spider web roses) for the lush, rosette-shaped succulents.
Incorporate French knots for pebble-like plants and use fishbone stitch for the spiky aloe varieties.
This approach allows you to build a rich, tactile garden where each plant has its own unique character, turning you into an expert on houseplant embroidery motifs.


