

Perhaps you’ve mastered the basic stitches, but now you find yourself wondering how to move your work from craft to art. How do you make your embroidery feel not just decorative, but truly expressive? The answer often lies in looking beyond the thread alone.
Combining embroidery with paper, paint, and found objects opens up a world of texture, depth, and narrative. It allows you to build layered compositions where the tactile softness of thread can contrast with the crisp edge of paper, or where a wash of watercolor can create a mood that stitches alone cannot.
In these projects, you won’t just be following patterns. You’ll be learning techniques to blend media with intention. You’ll see how a few simple stitches can unify a chaotic collage, how thread can add sculptural dimension to a flat image, and how paper can become a canvas for your needle. This is your invitation to experiment, to break the rules, and to develop an artistic voice that is uniquely yours.
1. Unify Painted Paper with Stitched Outlines

When combining multiple paper patterns, embroidery can act as the unifying element that brings your collage together.
Use a simple backstitch or stem stitch in a consistent color to outline your main paper cutouts.
This technique defines the shapes, draws the eye to your focal point, and creates a visual thread that connects disparate elements like floral prints and solid color washes.
Consider a metallic gold thread for leaf veins; it adds a touch of light and sophistication that complements the organic paper textures.
This approach allows you to create complex, layered stories with confidence, knowing a few simple stitches will provide harmony and a professional finish.
2. Create Celestial Scenes with Foil and Fine Thread

To build a dimensional night sky, begin by preparing your fabric with a wash of blue paint and white splatters for a galaxy effect.
Once dry, apply silver foil paper using a craft adhesive for the moon and larger stars; its metallic sheen provides a stark, luminous contrast to the matte thread.
For the delicate constellation lines, use a single strand of silver metallic floss and a simple running stitch.
This ensures the lines are crisp and don’t overpower the painted background, allowing the piece to feel both detailed and atmospheric.
3. Add Sculptural Lines with Couched Yarn
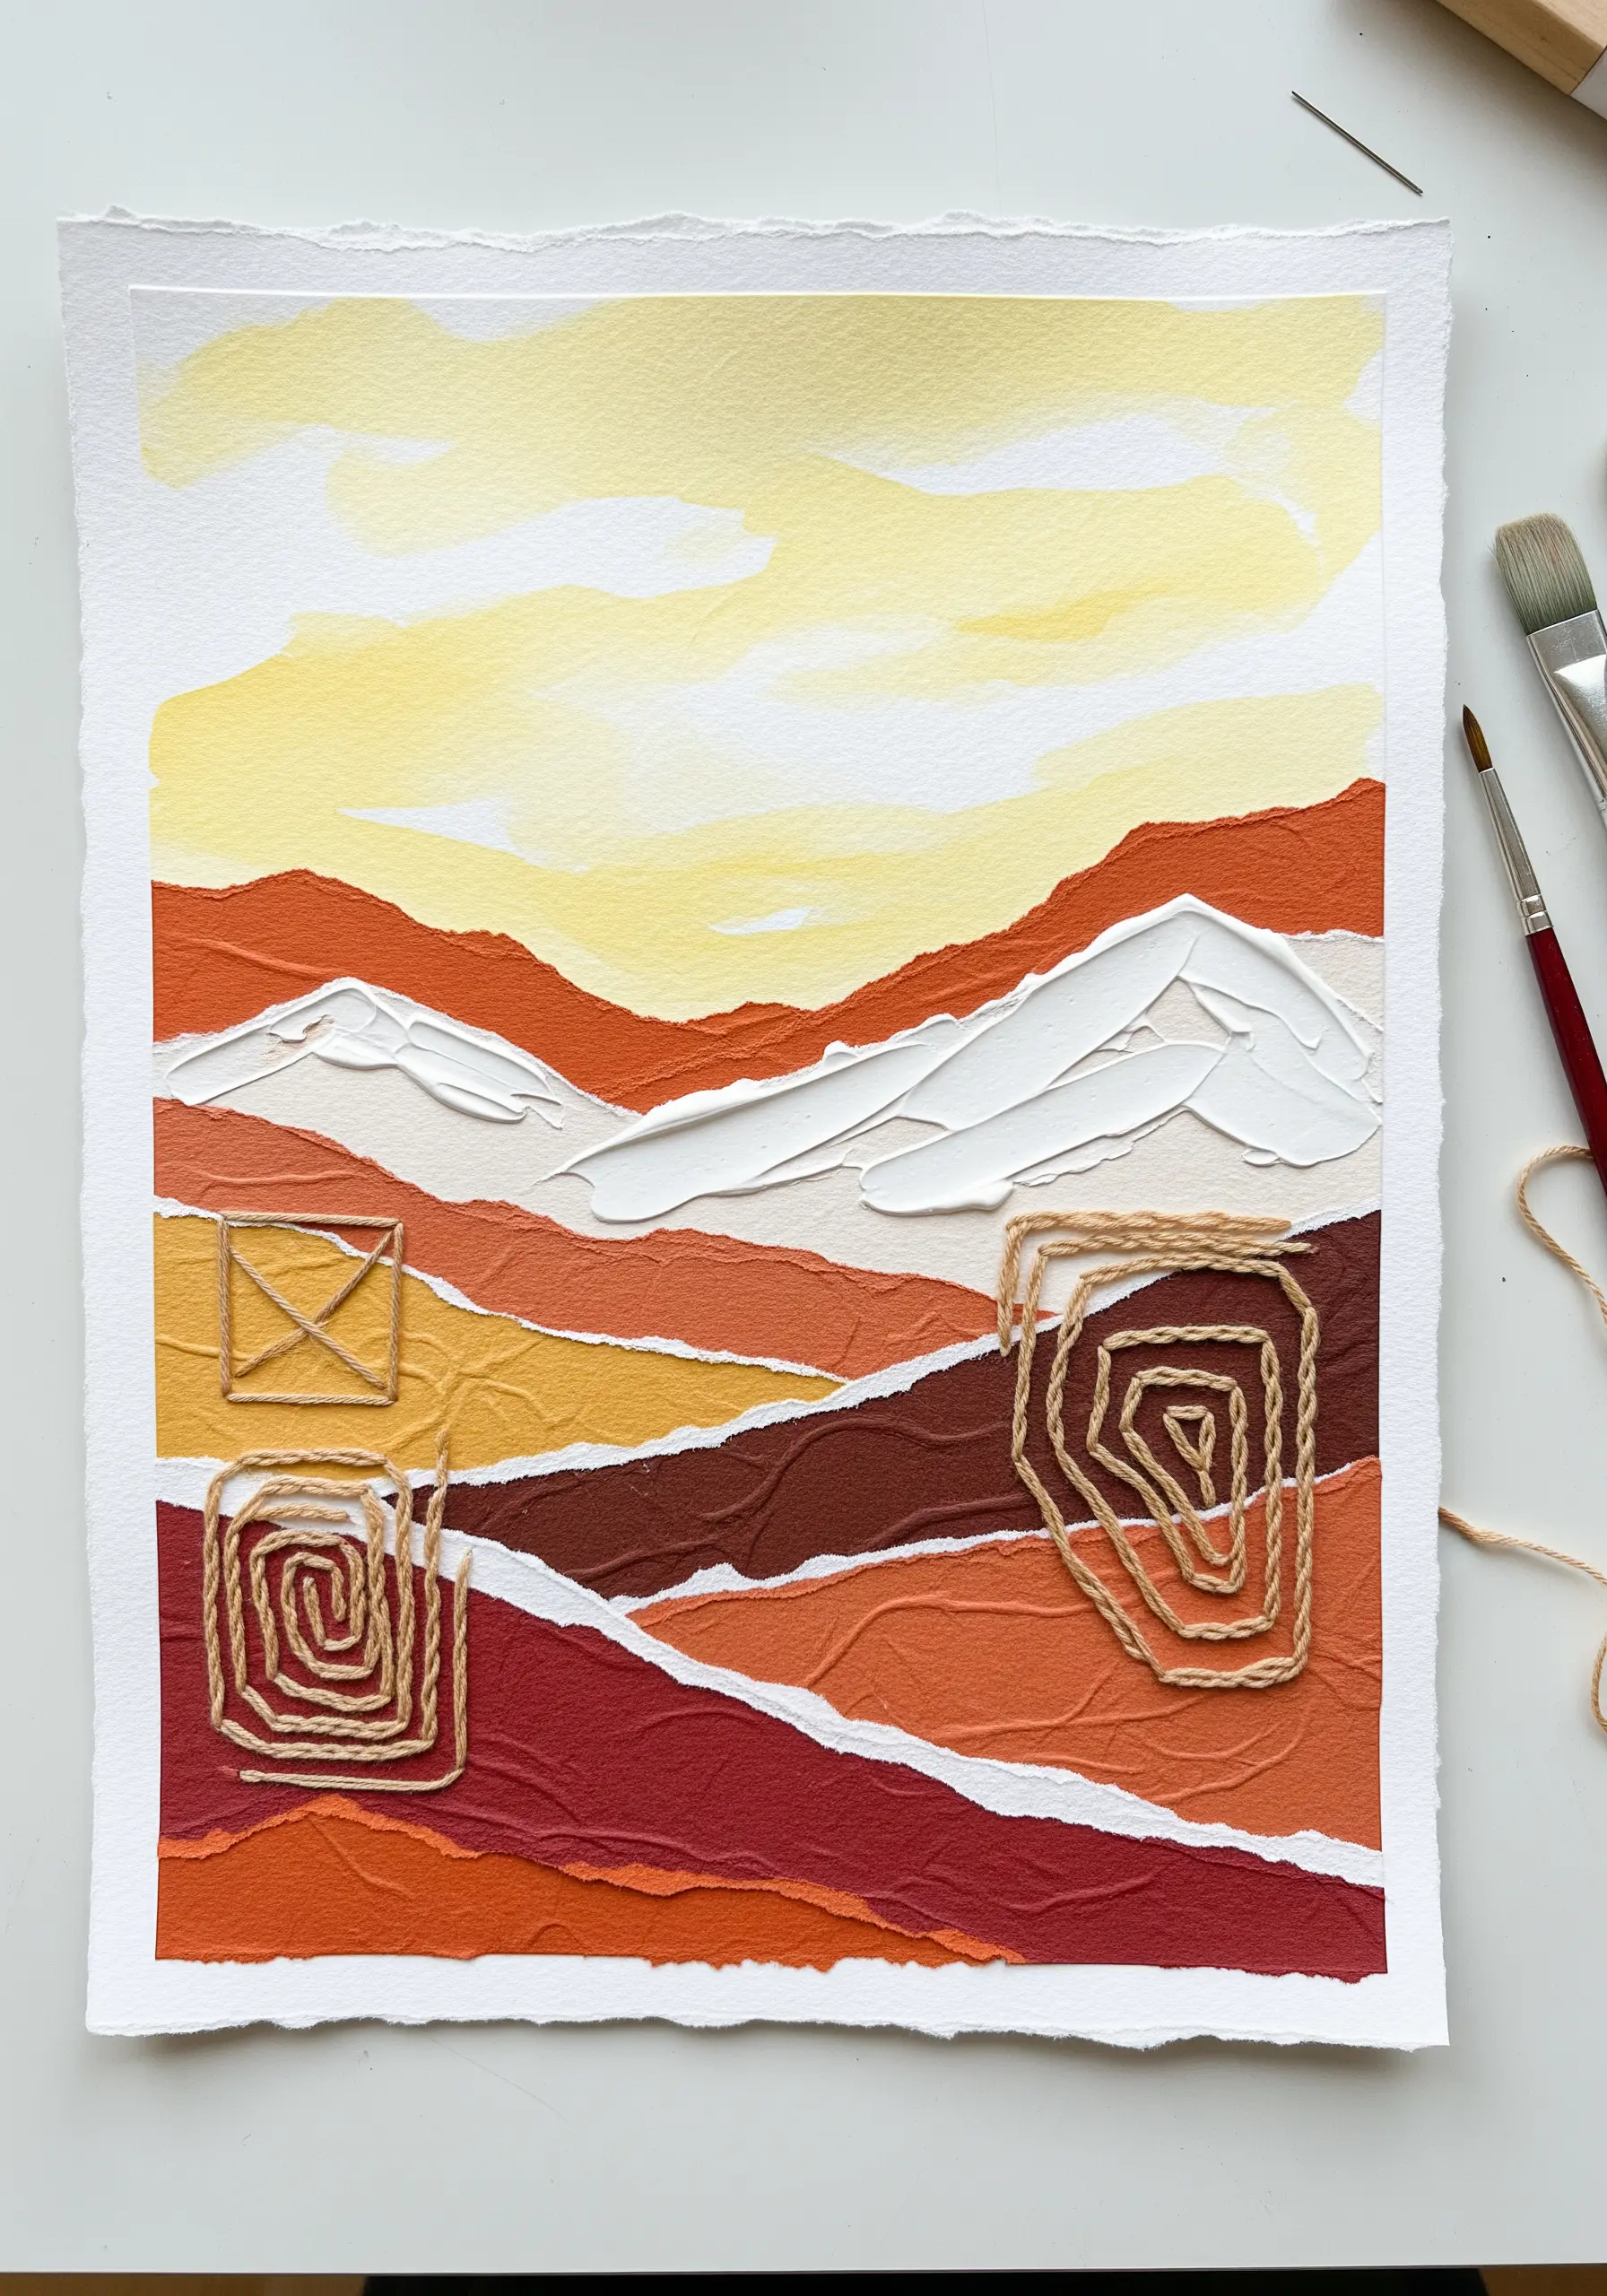
For bold, graphic lines that standard embroidery can’t achieve, try couching thicker fibers like jute or yarn onto your paper collage.
Lay the yarn in your desired shape—like a spiral or geometric outline—and secure it by making small, perpendicular stitches over it with a thinner, matching thread.
These anchoring stitches become nearly invisible, allowing the raw texture of the yarn to become the main feature.
This technique is perfect for adding dramatic, sculptural details to abstract landscapes made from torn, painted paper.
4. Stitch Character into a Paper Collage Portrait

Transform a static paper collage portrait into a vibrant character by adding a few carefully placed stitches.
Use a single strand of black floss to create delicate eyelashes with tiny straight stitches; this precision adds life and focus to the eyes.
For the lips, a dense satin stitch provides a pop of color and a raised texture that contrasts beautifully with the flat map and paper background.
A single vertical stitch on the nose adds a subtle highlight, proving that even minimal embroidery can have a major impact.
5. Integrate Embroidery into Your Art Journal
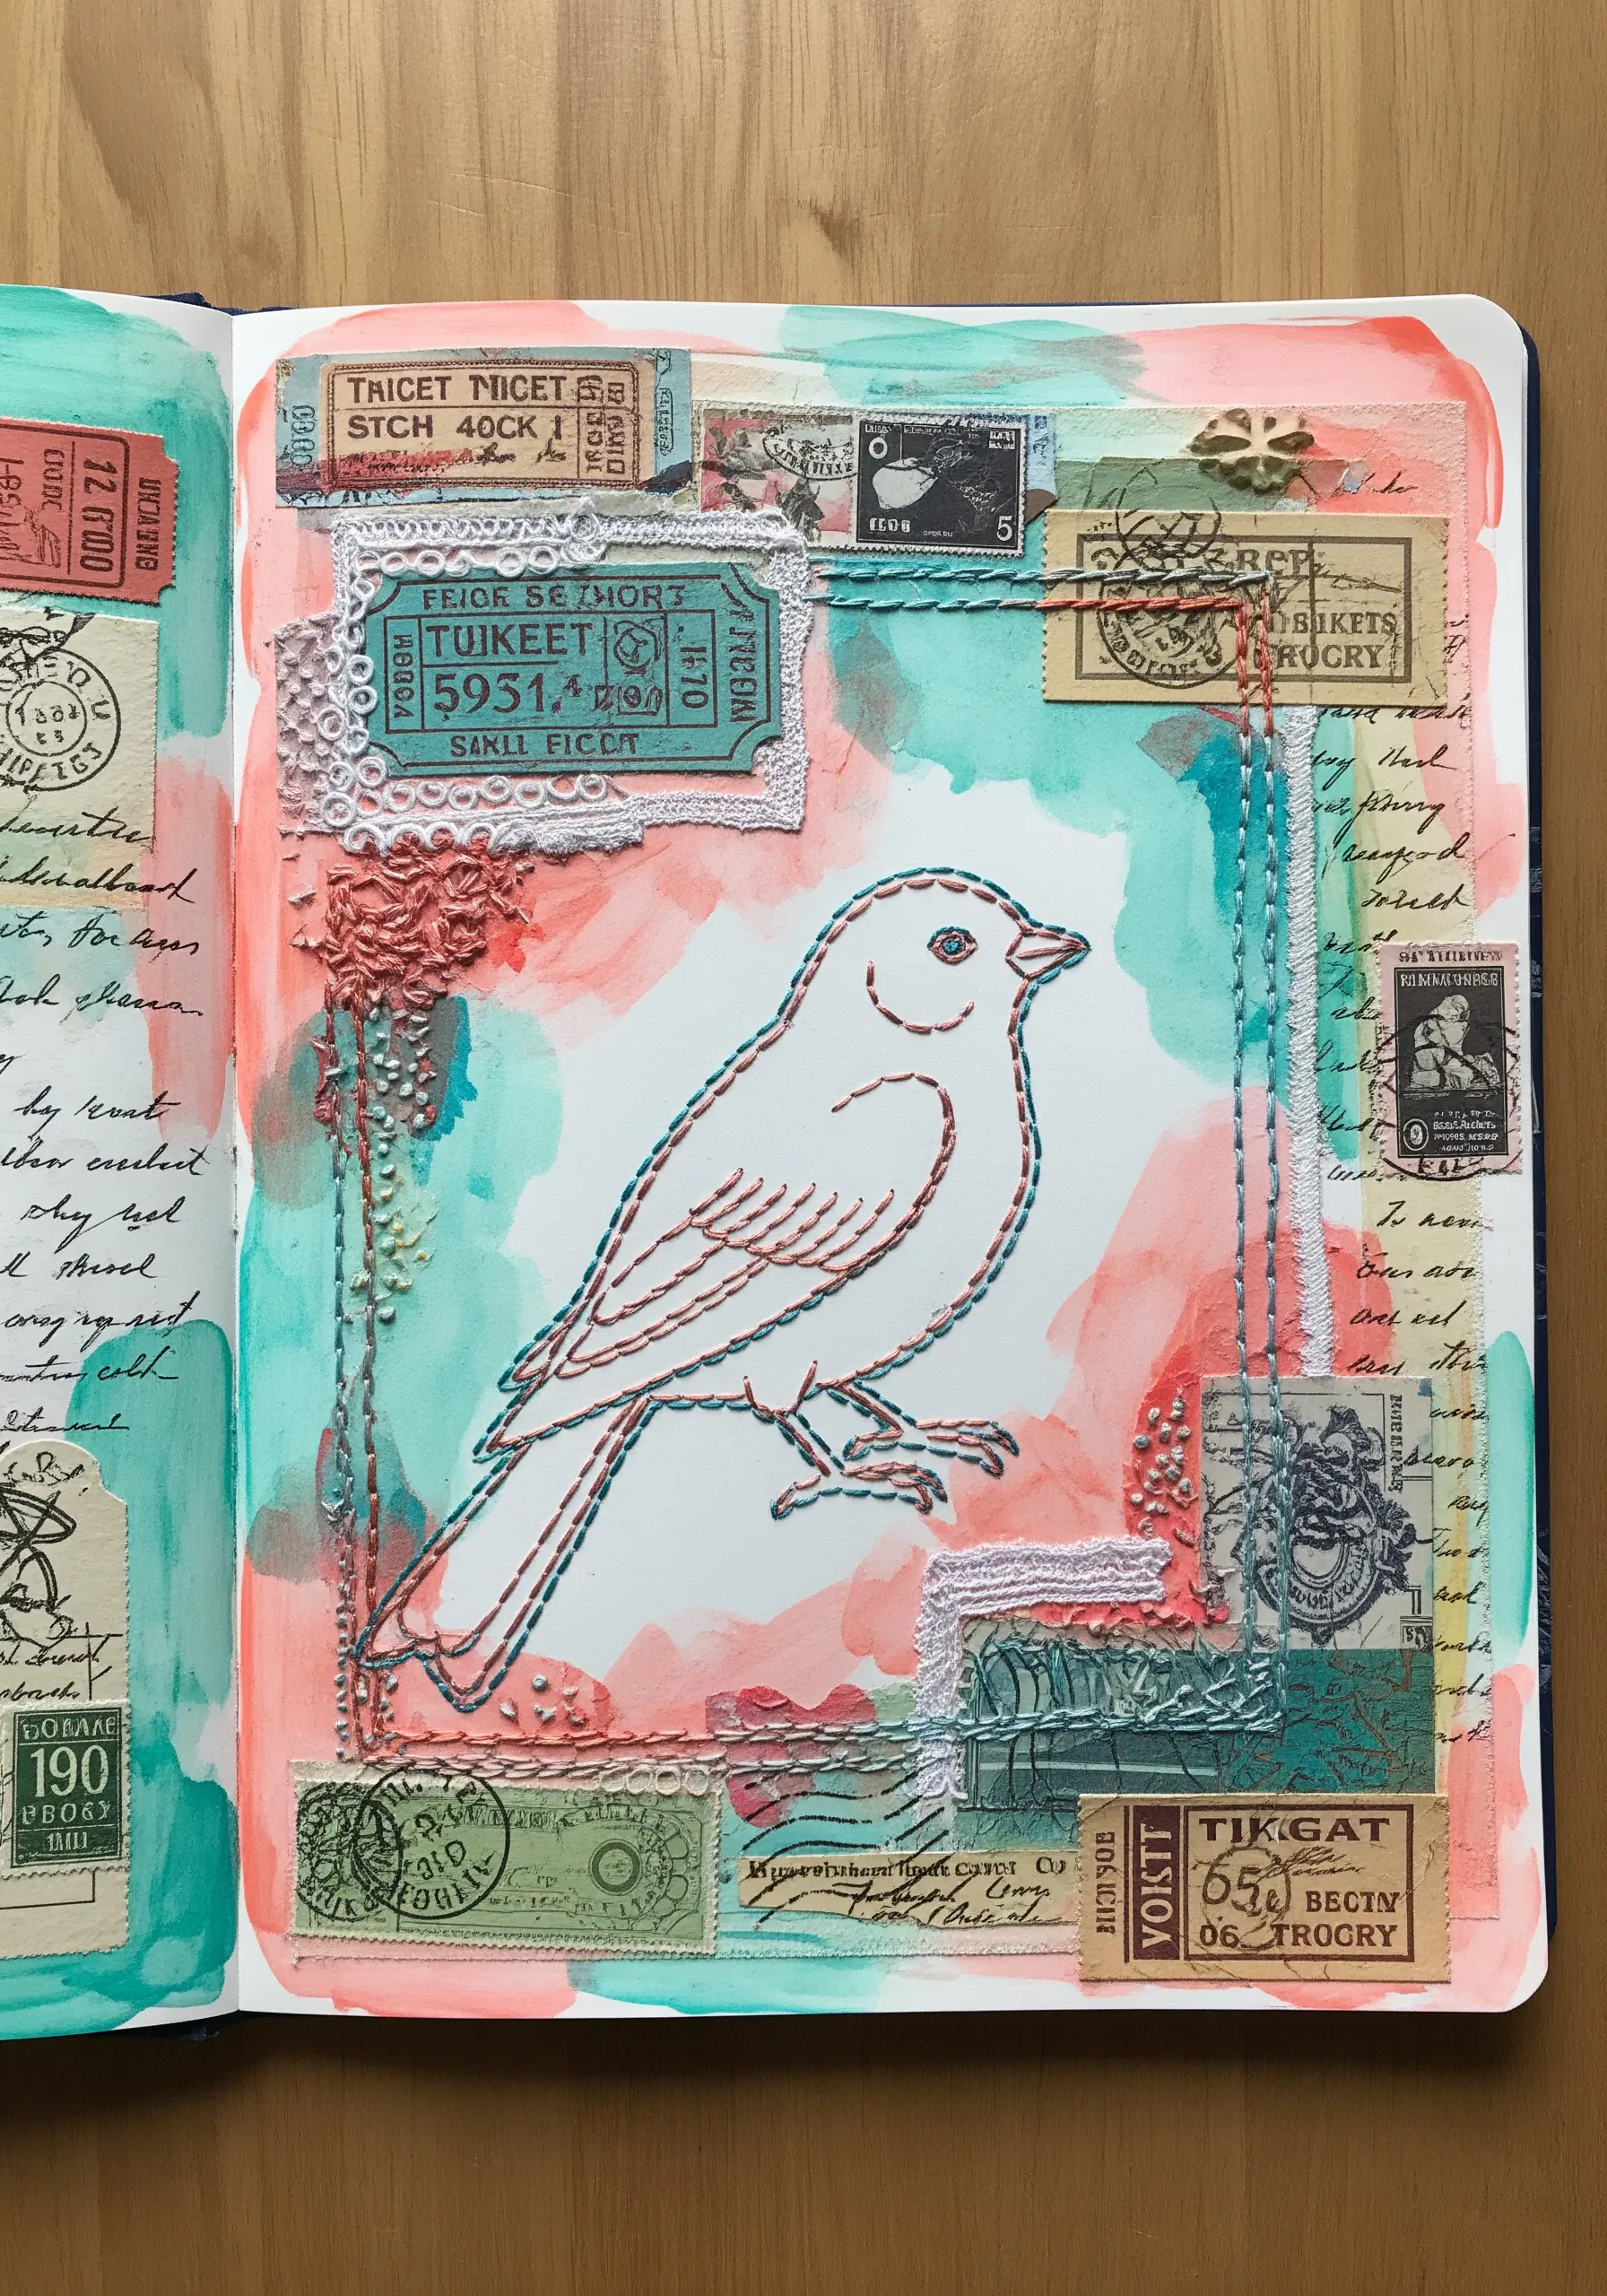
To stitch directly into your art journal without tearing the page, fuse a small piece of lightweight interfacing to the back of the paper before you begin.
Use a simple backstitch for clean, graphic outlines, which works perfectly for illustrative designs like birds or botanicals.
Incorporate small textural details like French knots or seed stitches to help blend the stitched elements with surrounding watercolor washes and collaged ephemera.
This creates a cohesive page where paint, paper, and thread feel intentionally combined.
6. Create Tension in a Geometric Composition

Use thread to create dynamic texture and contrast in an abstract, geometric composition.
On one paper shape, create an open grid with long running stitches; on another, use dense, short straight stitches packed tightly together for a solid fill.
This juxtaposition of open and closed stitch patterns creates visual tension and directs the viewer’s eye across the piece.
Choosing a high-contrast thread color—like white on red or silver on black—amplifies the graphic quality of the stitches and makes each texture pop.
7. Capture Coastal Textures with Paint, Beads, and Thread

Recreate the feeling of a shoreline by layering different materials that mimic their real-world counterparts.
Apply thick modeling paste or acrylic paint with a palette knife to form the raised, organic texture of sea foam.
For the water’s edge, couch a line of chain stitches in variegated blue thread to suggest the gentle rhythm of waves.
Finally, scatter tiny beads and clear craft sand (secured with gel medium) along the beach to capture the sparkle and grit of the coast, seamlessly blending paint and fiber.
This combination allows you to build realistic Coastal Textures that engage more than just the eye.
8. Build Folk Art Dimension with Felt Appliqué

Create a vibrant, layered effect by combining felt appliqué with decorative embroidery.
Start by cutting your main shapes from stiff felt and securing them to your background fabric with a thin layer of craft glue.
Then, use dense satin stitch and long-and-short stitch to add colorful patterns and details directly onto the felt pieces.
This technique creates a raised, almost 3D effect, giving your work a clean, graphic quality that makes the colors feel incredibly saturated and bold.
9. Use Thread as a Structural Grid in Abstract Collage
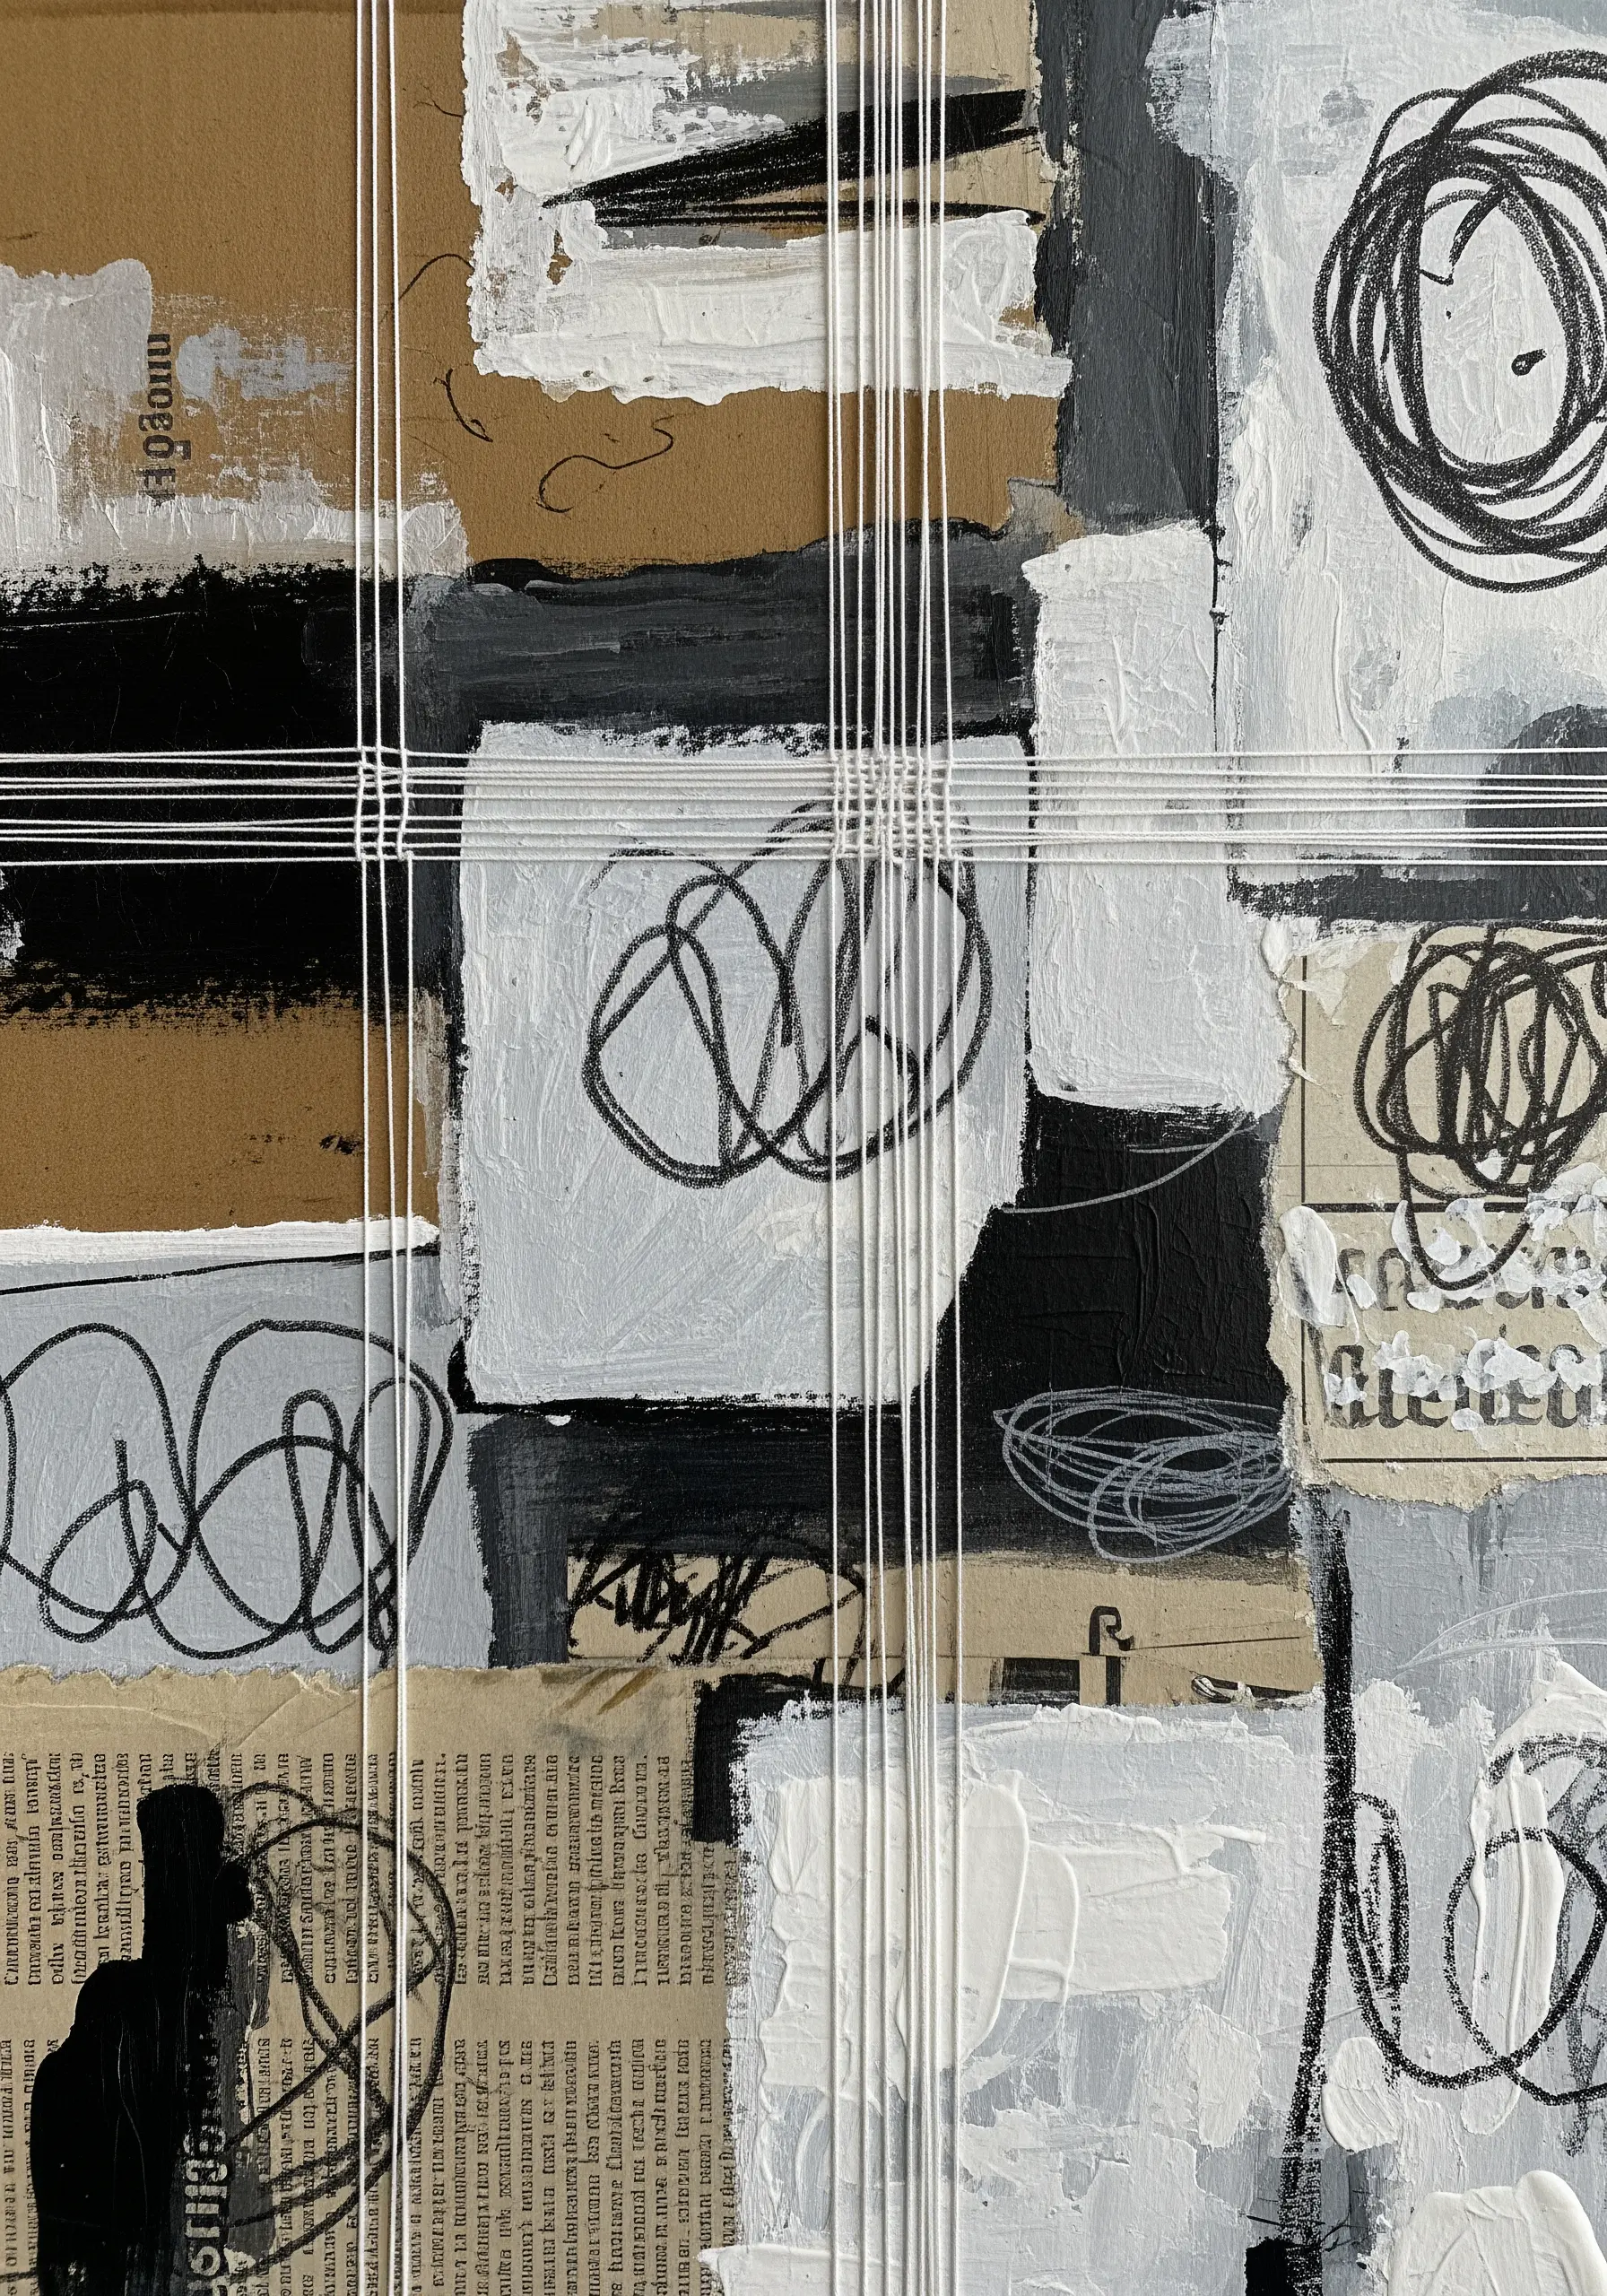
Move beyond embellishment and use thread as a key structural element in your abstract collage.
After composing your layers of painted paper and markings, stretch long, taut lines of thread across the entire piece, stitching directly through the heavy paper or canvas base.
This creates a clean, architectural grid that overlays the more chaotic textures below.
The contrast between the loose, expressive collage and the rigid, controlled lines of thread brings a sense of order and intentionality to the finished artwork.
10. Unify a Triptych with a Sculptural Thread

Connect multiple small art pieces into a single, cohesive statement by using thread as a physical binding element.
Create your individual mini-canvases using different textures like gold foil, modeling paste, and paper collage.
Arrange them with intentional spacing, then wrap a thick, contrasting cord around the group, letting the thread travel between them.
This technique transforms separate objects into a unified, sculptural story, where the red line becomes as much a part of the art as the canvases themselves.
11. Preserve Natural Elements with Couched Stitches
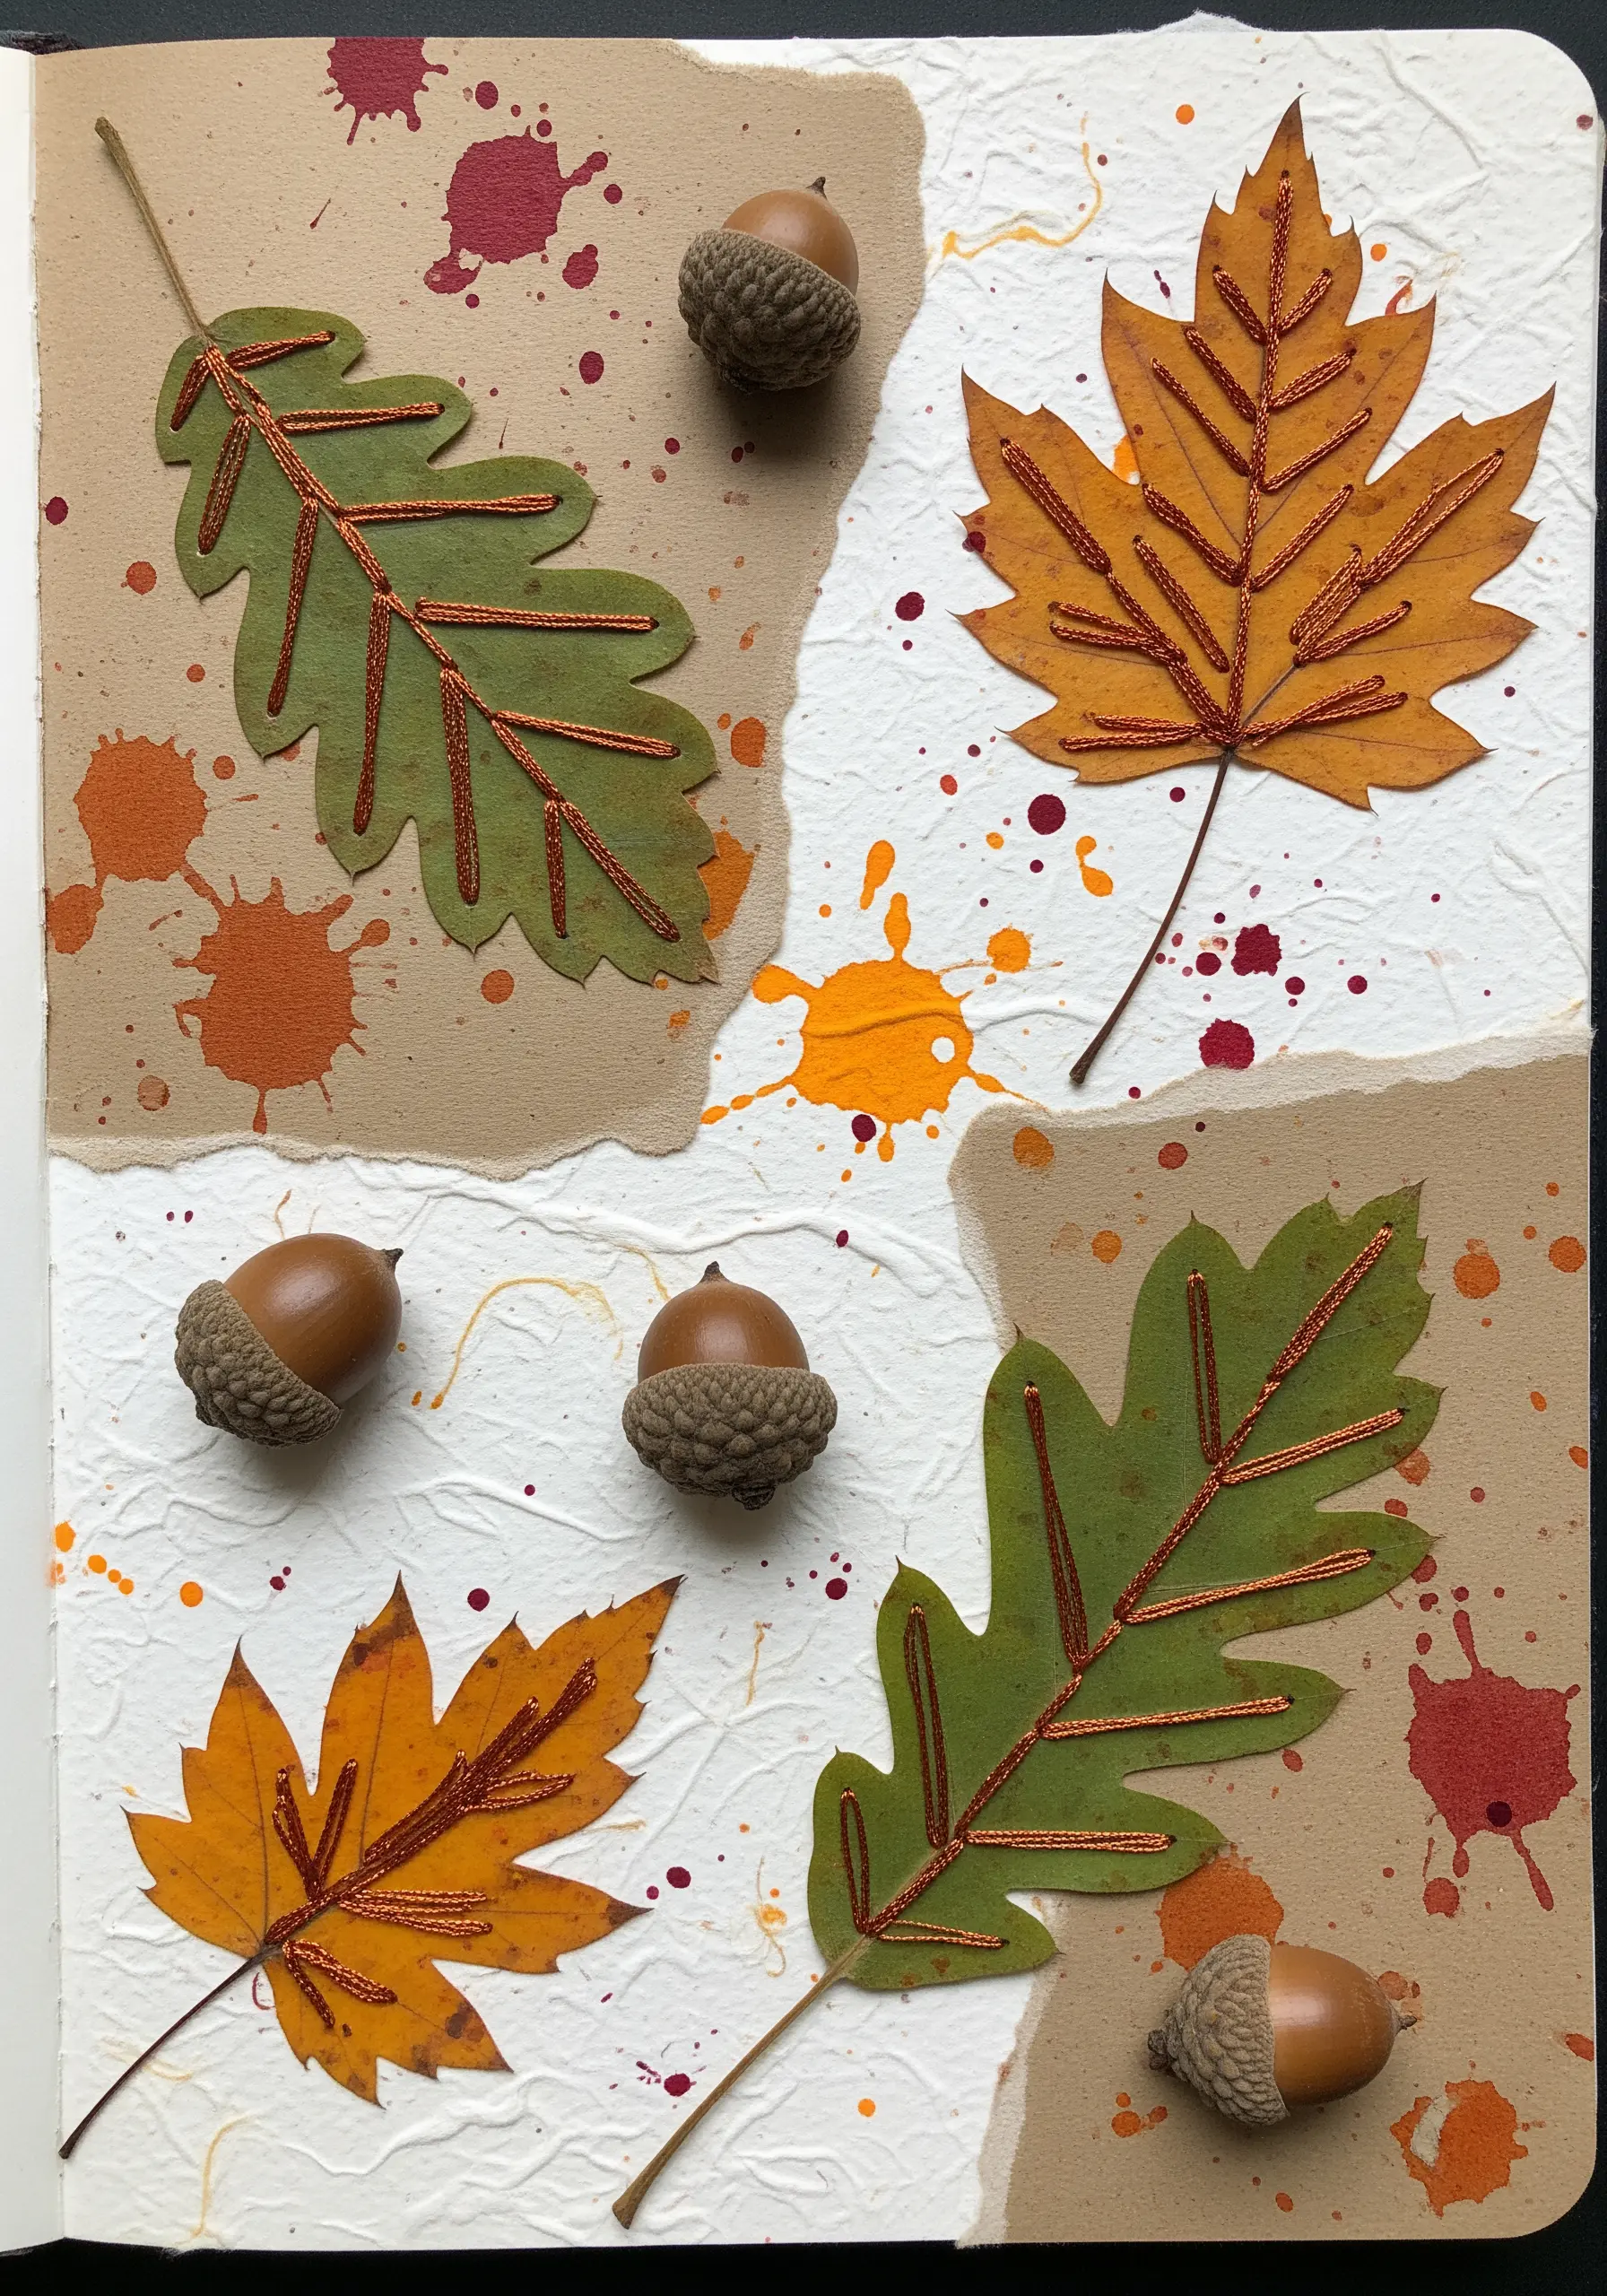
Incorporate delicate finds from nature, like pressed autumn leaves, into your mixed-media work.
First, carefully secure the leaves to your paper with a clear, acid-free adhesive to prevent them from crumbling over time.
Then, using a metallic or contrasting thread, couch along the main veins of each leaf.
This not only adds a beautiful, decorative line but also physically secures the fragile leaf to the page, creating a harmonious blend of natural and man-made texture.
12. Illuminate a Paper Cityscape with Neon Thread

Bring a monochromatic paper skyline to life by using neon thread to suggest the glow of city lights.
Stitch directly onto dark cardstock to make the fluorescent colors pop with maximum contrast.
Use a simple backstitch or running stitch in bright pink, green, or orange to outline the edges of buildings or fill in windows.
This simple technique transforms a flat paper collage into a dynamic scene that feels modern and energetic.
13. Engineer Delicate Embroidered Cards on Paper
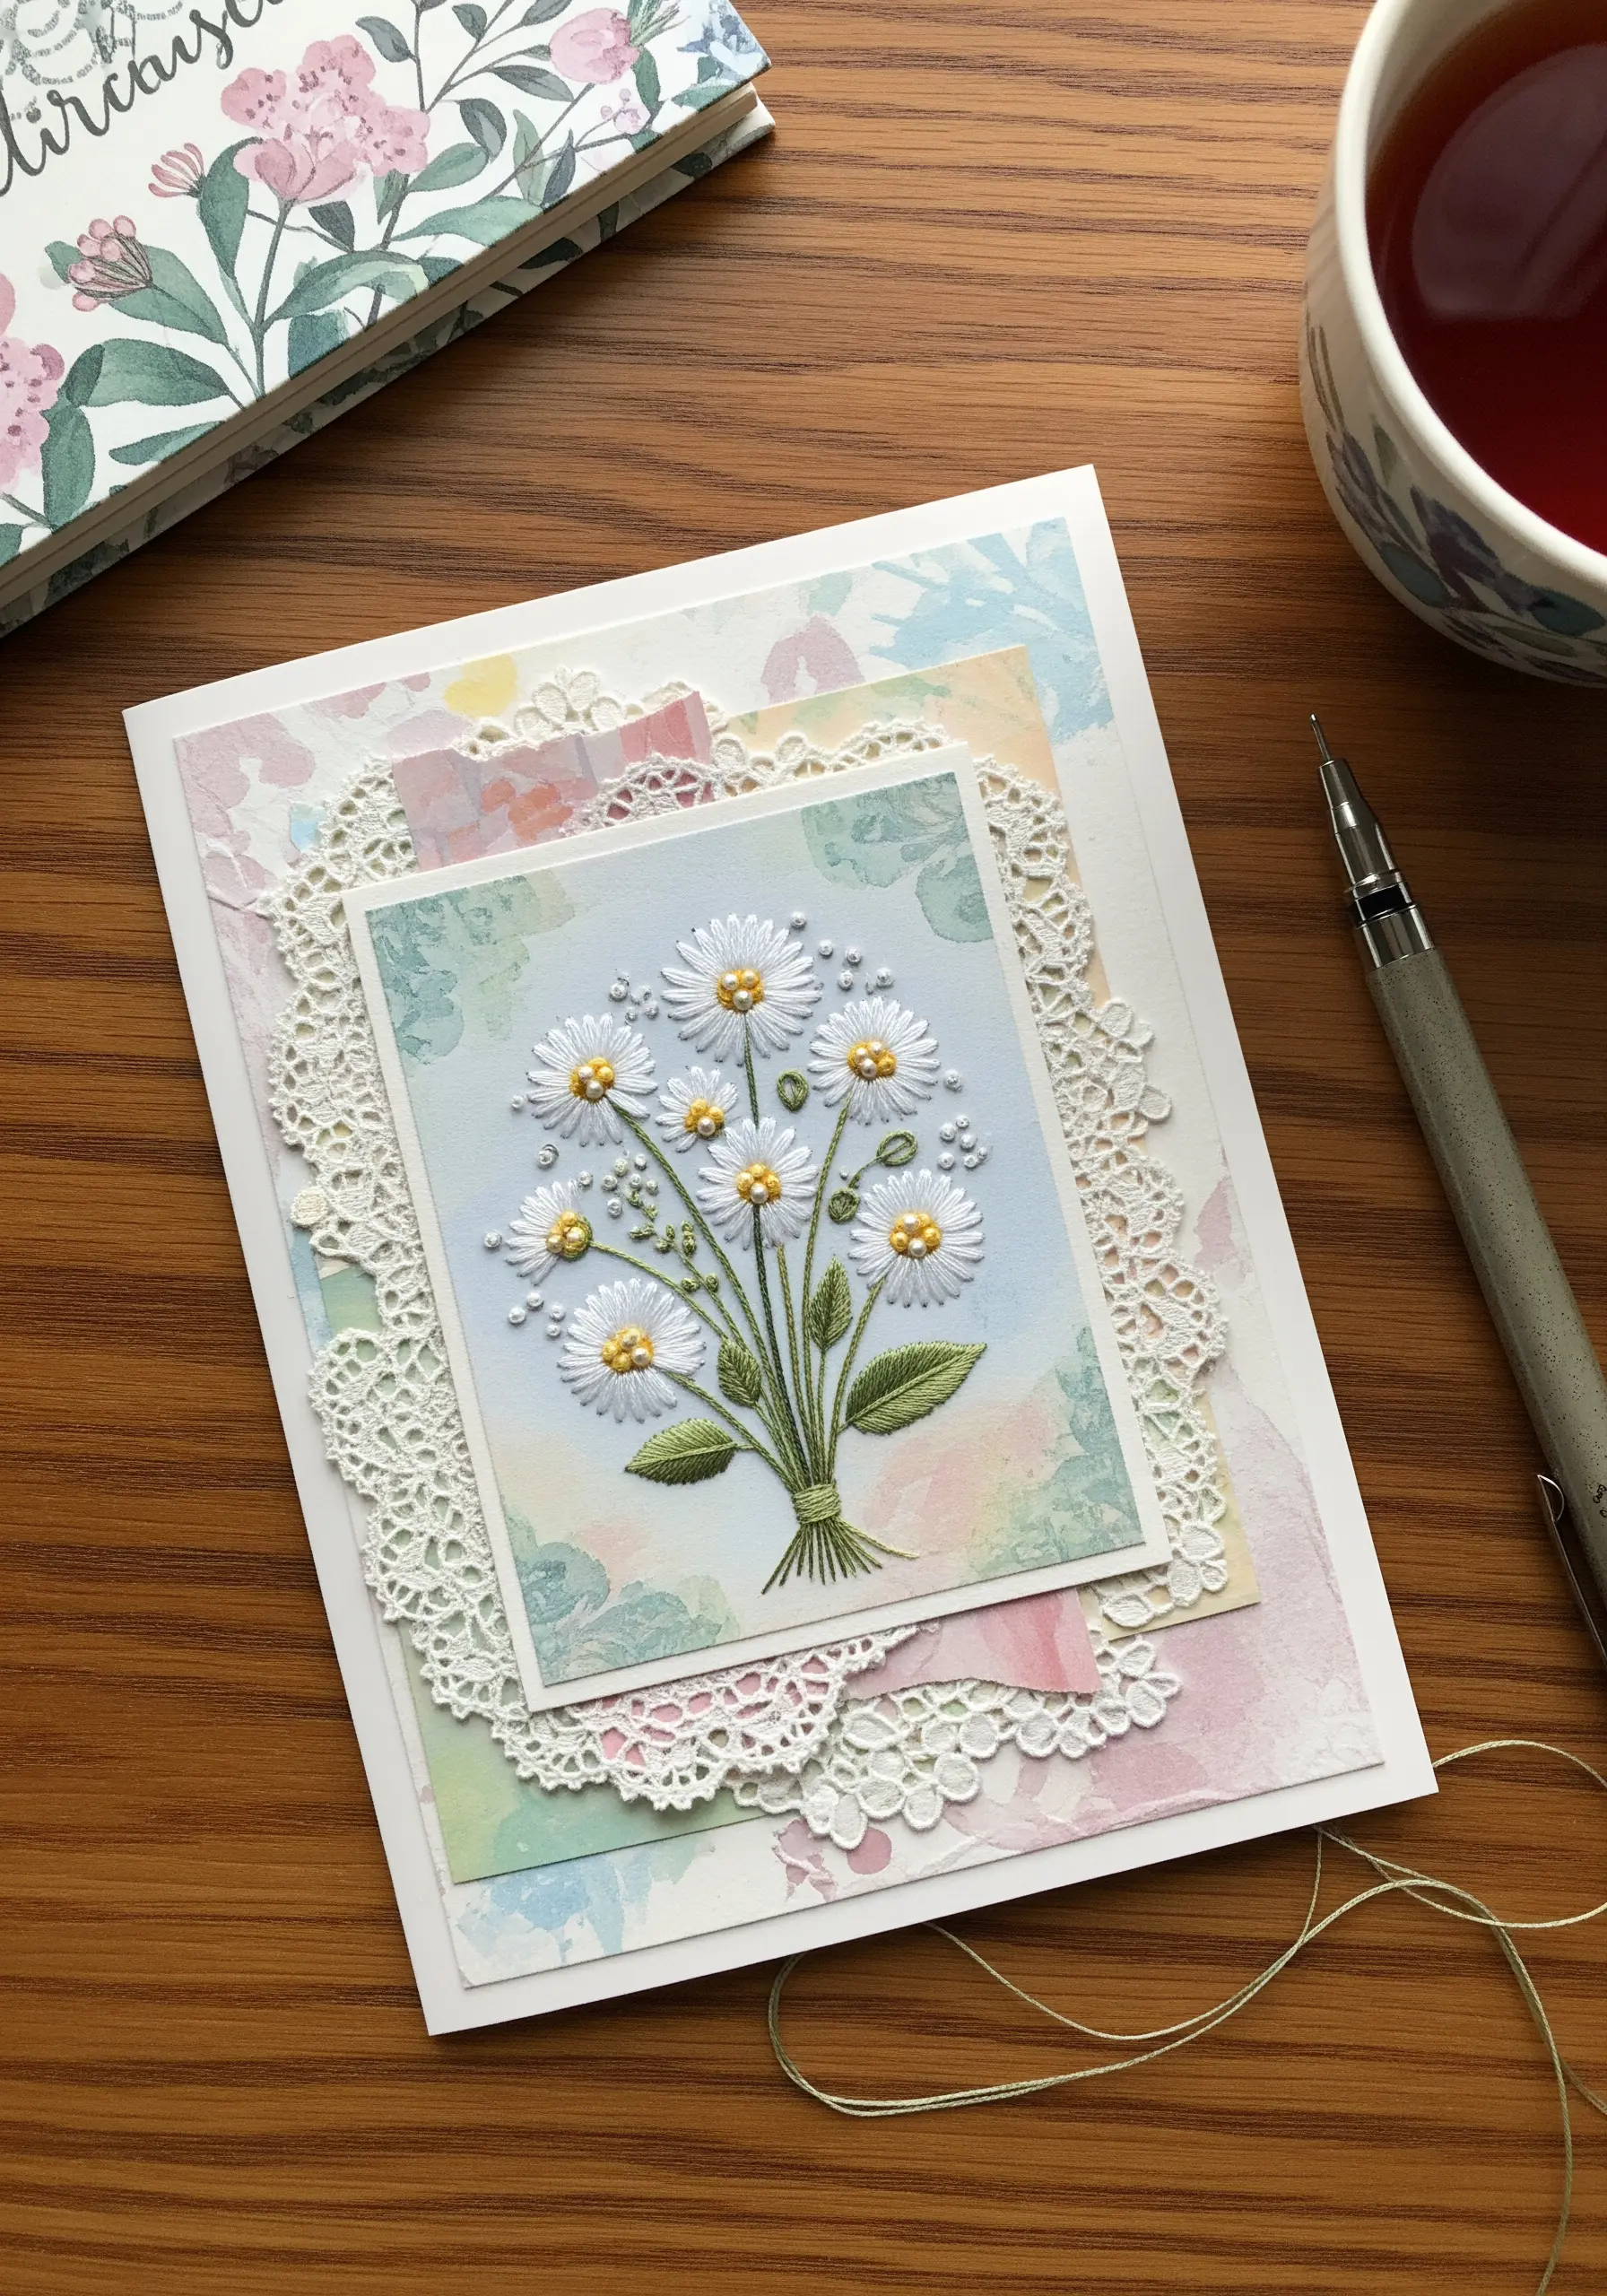
Stitching on paper requires a gentle touch and a bit of planning, but the results are beautifully crisp.
Before you stitch, use a pin to pre-punch your holes along your design lines; this prevents the paper from buckling or tearing as you pull the thread through.
For florals, use detached chain stitches (lazy daisies) for petals and French knots for centers to create a charming, raised texture.
Mount your finished embroidery on a blank card using foam adhesive dots to add dimension and neatly hide the back of your work, resulting in professional-looking embroidered cards.
14. Build Dynamic Texture with Layered Paper and Stitch

Create the illusion of fur or feathers by layering many small, hand-cut paper pieces.
Start from the bottom of your design and work your way up, overlapping each piece slightly, like shingles on a roof.
To add definition and secure the layers, use a simple running stitch in a coordinating thread down the center of some of the paper shapes.
This subtle addition of thread provides a delicate textural detail and enhances the sense of movement and depth in the final piece.
15. Create Polished Typographic Art with Satin Stitch

Give your stitched lettering a bold, dimensional quality by filling it with a dense satin stitch.
To ensure your edges are perfectly clean and sharp, first outline each letter with a split stitch or backstitch.
This simple preparatory step creates a raised edge that acts as a guide, allowing you to lay your satin stitches neatly against it.
The result is typography that looks incredibly polished and has a satisfying, tactile presence on the paper.
16. Add a New Layer of Story to Vintage Photographs
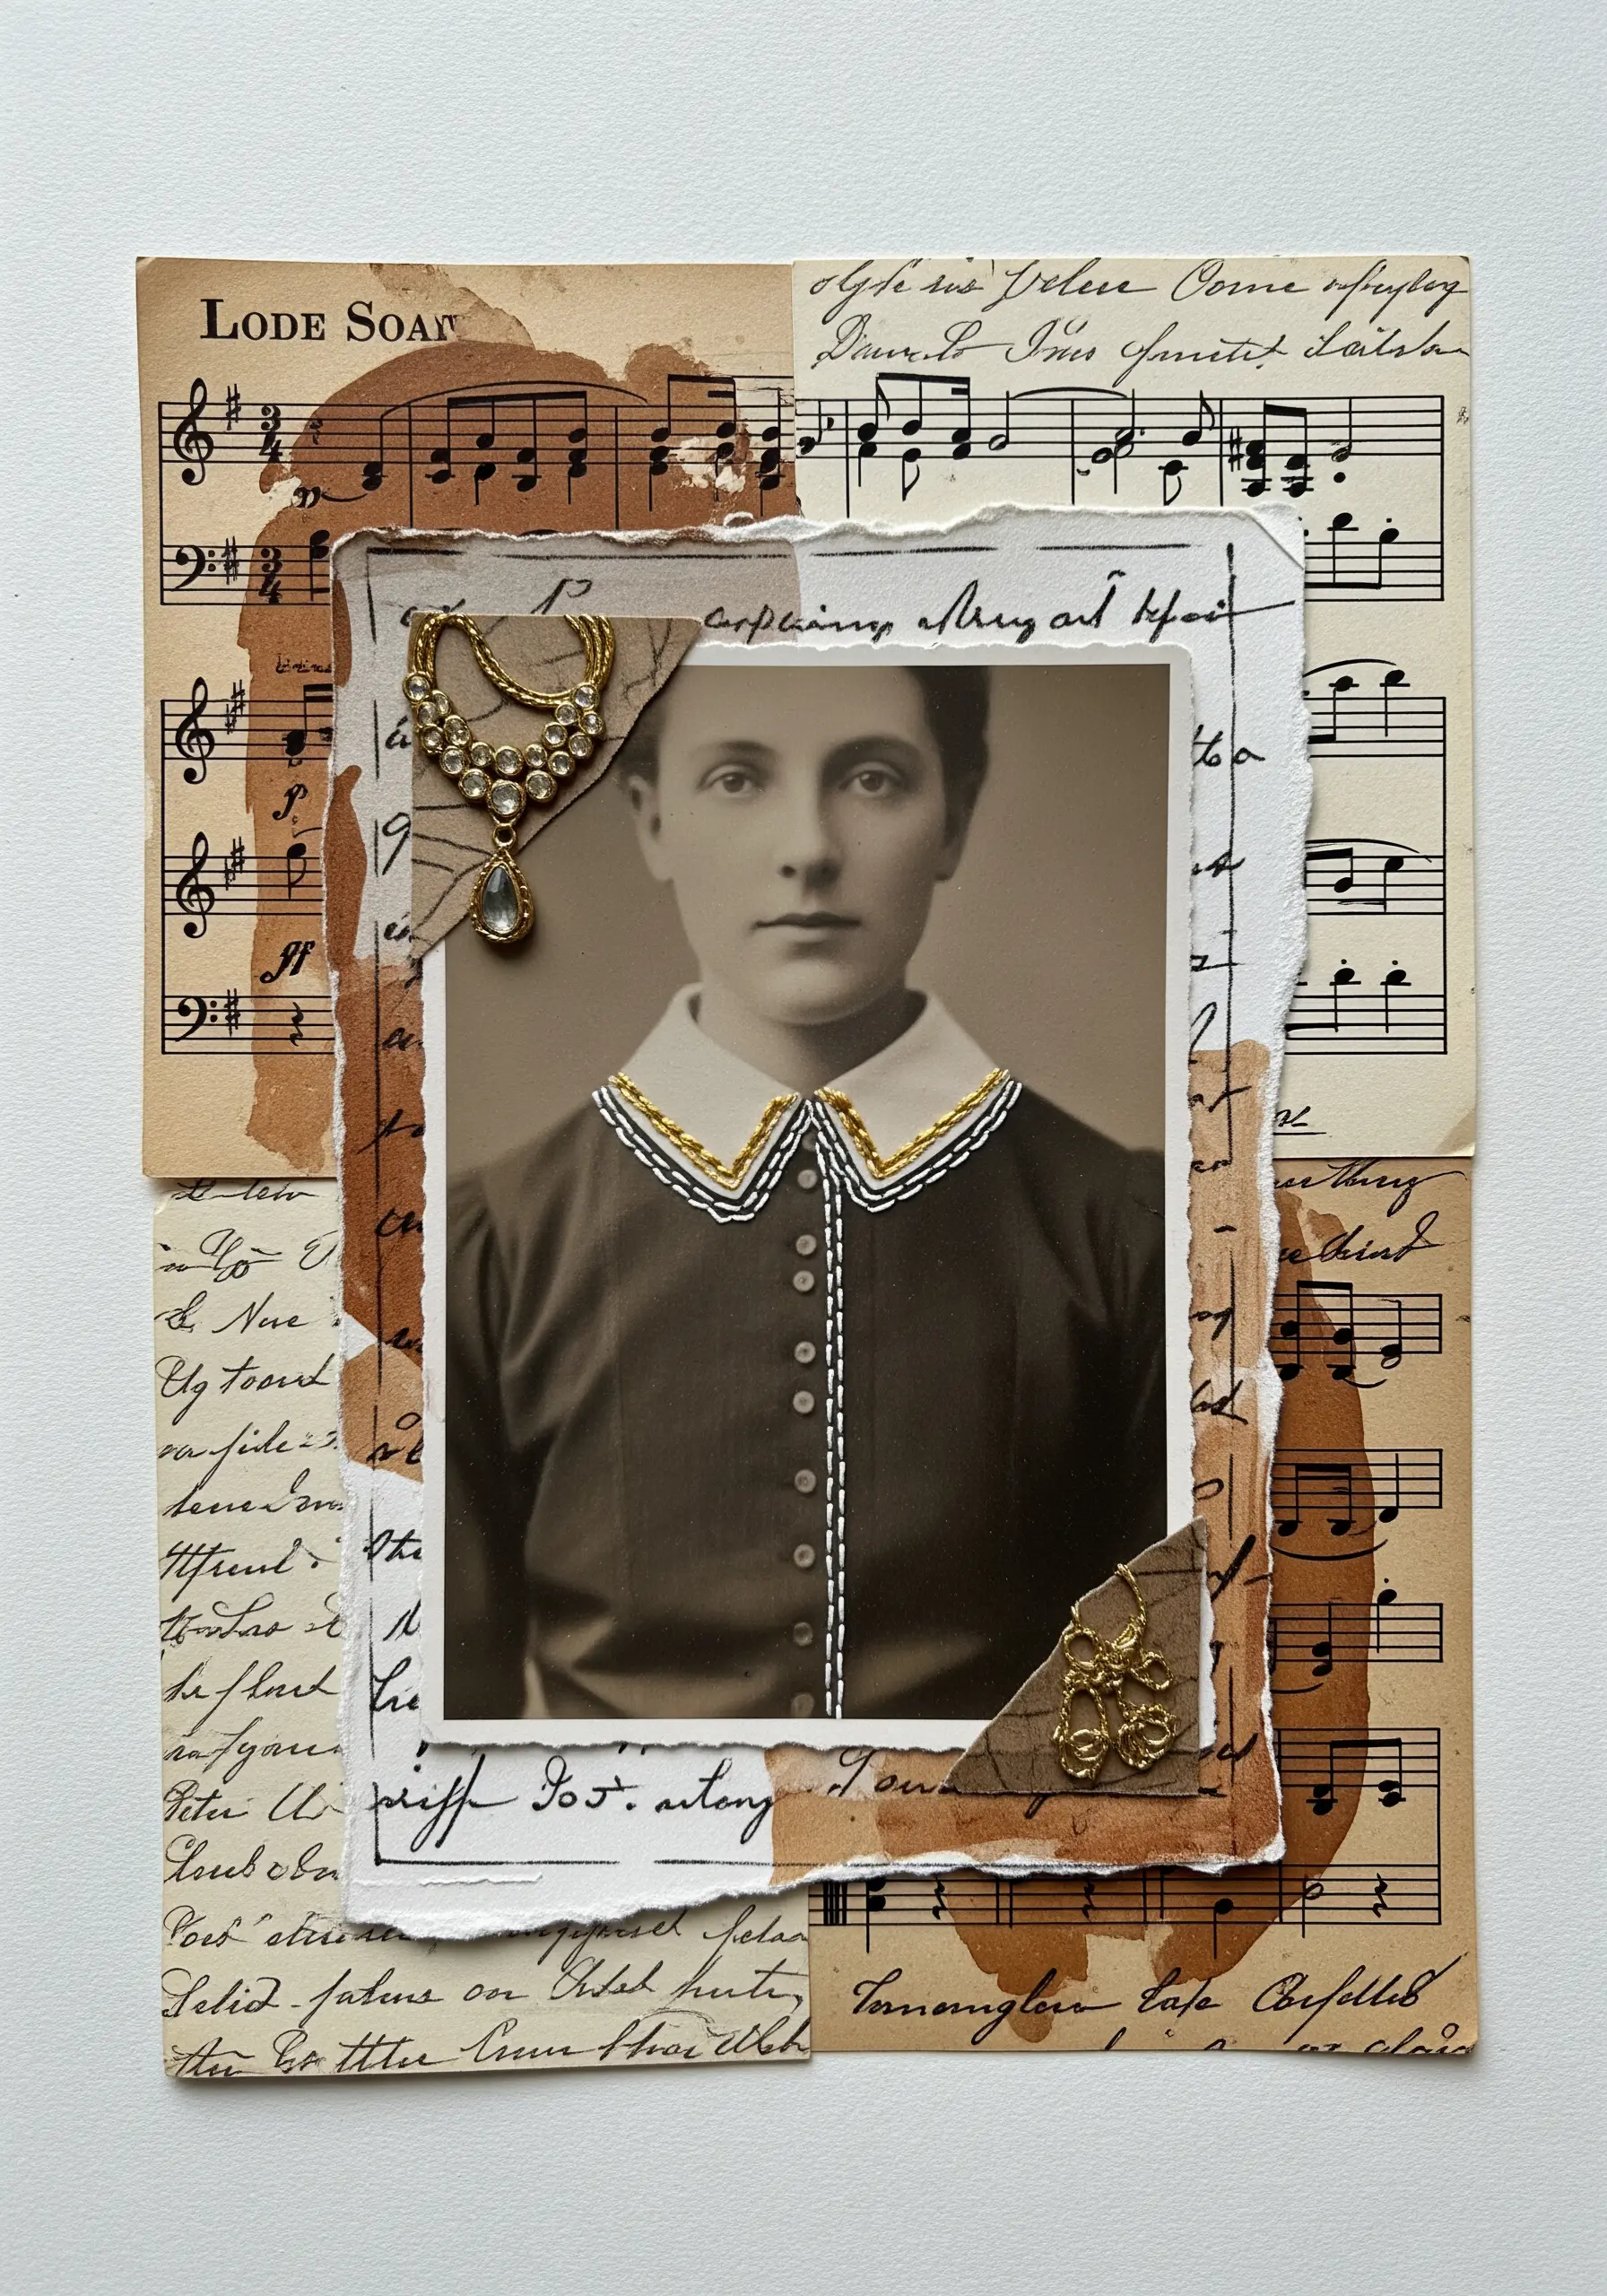
Interact with the past by adding selective, hand-stitched details to a vintage photograph or reproduction.
Use a very fine needle and a single strand of floss to avoid damaging the paper.
A simple running stitch can define a collar, while a few stitches of metallic thread can highlight a forgotten piece of jewelry, instantly drawing the viewer’s attention.
This thoughtful intervention adds texture and a personal new layer of story, connecting your hand to the history captured in the image.
17. Juxtapose Clinical Drawings with Organic Elements

Create a powerful visual narrative by combining vintage anatomical illustrations with vibrant, collaged botanicals.
Before adding your paper flowers, use fine red and blue threads to trace the main arteries and veins of the heart with a delicate backstitch.
This initial layer of embroidery grounds the image in textile art. Then, arrange and glue your paper flowers so they appear to grow from the stitched vessels.
Using small foam dots to elevate some of the petals will create a dynamic, three-dimensional effect.
18. Frame Mixed-Media Tiles with Wrapped Yarn

Construct a modular artwork by decorating individual cardboard shapes with varied textures like paint, paper, and modeling paste.
To unify these disparate elements, wrap the edges of each piece with a brightly colored yarn. This technique provides a consistent, soft frame for each tile and creates a bold graphic outline when they are assembled.
It’s an effective, no-sew way to incorporate fiber and create a bold, cohesive mosaic.
19. Use Directional Stitches to “Paint” on Paper

Instead of using paint or ink, fill paper cutouts with color and texture using thread.
After cutting your shapes from heavy cardstock, use dense, directional stitches to mimic the natural texture of the object you’re depicting.
Short, scattered seed stitches are perfect for the bumpy skin of an orange, while smooth, parallel satin stitches can represent the sheen on a grape.
This technique of “painting” with stitches on paper creates a uniquely tactile and visually rich still life.
20. Build Meditative Mandalas with Fabric and Beads

Construct a rich, layered mandala using scraps of your favorite fabrics.
Begin by cutting and arranging concentric circles of fabric, securing them with a fabric-safe glue stick.
Then, use embroidery to define the circular layers and add intricate details. Couching a metallic cord creates strong, shimmering borders, while adding clusters of beads and sequins provides focal points of texture and light.
This is a perfect, meditative way to give new life to precious textile remnants.
21. Elevate Fashion Illustrations with Fabric Appliqué

Bring your fashion illustrations to life by incorporating real textiles for the clothing.
Cut small pieces of denim, lace, or ribbon to match your sketched outlines and attach them using a clear-drying fabric glue.
To complete the illusion, add tiny stitched details that mimic garment construction—a red running stitch for a placket, or a line of gold backstitch to define a hem.
This blend of drawing and real-world texture creates a dynamic and sophisticated finish.
22. Stitch a Topographical and Textural Landscape

Give a map a true sense of dimension by using both layered paper and directional stitching.
Create topographical height for continents and mountains by layering cut pieces of cardboard or thick paper.
For the oceans, stitch long, flowing lines of thread directly through the paper base, using variegated blue floss to represent currents and depth.
By varying the length and angle of your stitches, you can create a sense of movement that transforms a flat map into a tactile, textural landscape.
23. Create a Minimalist Study in Texture
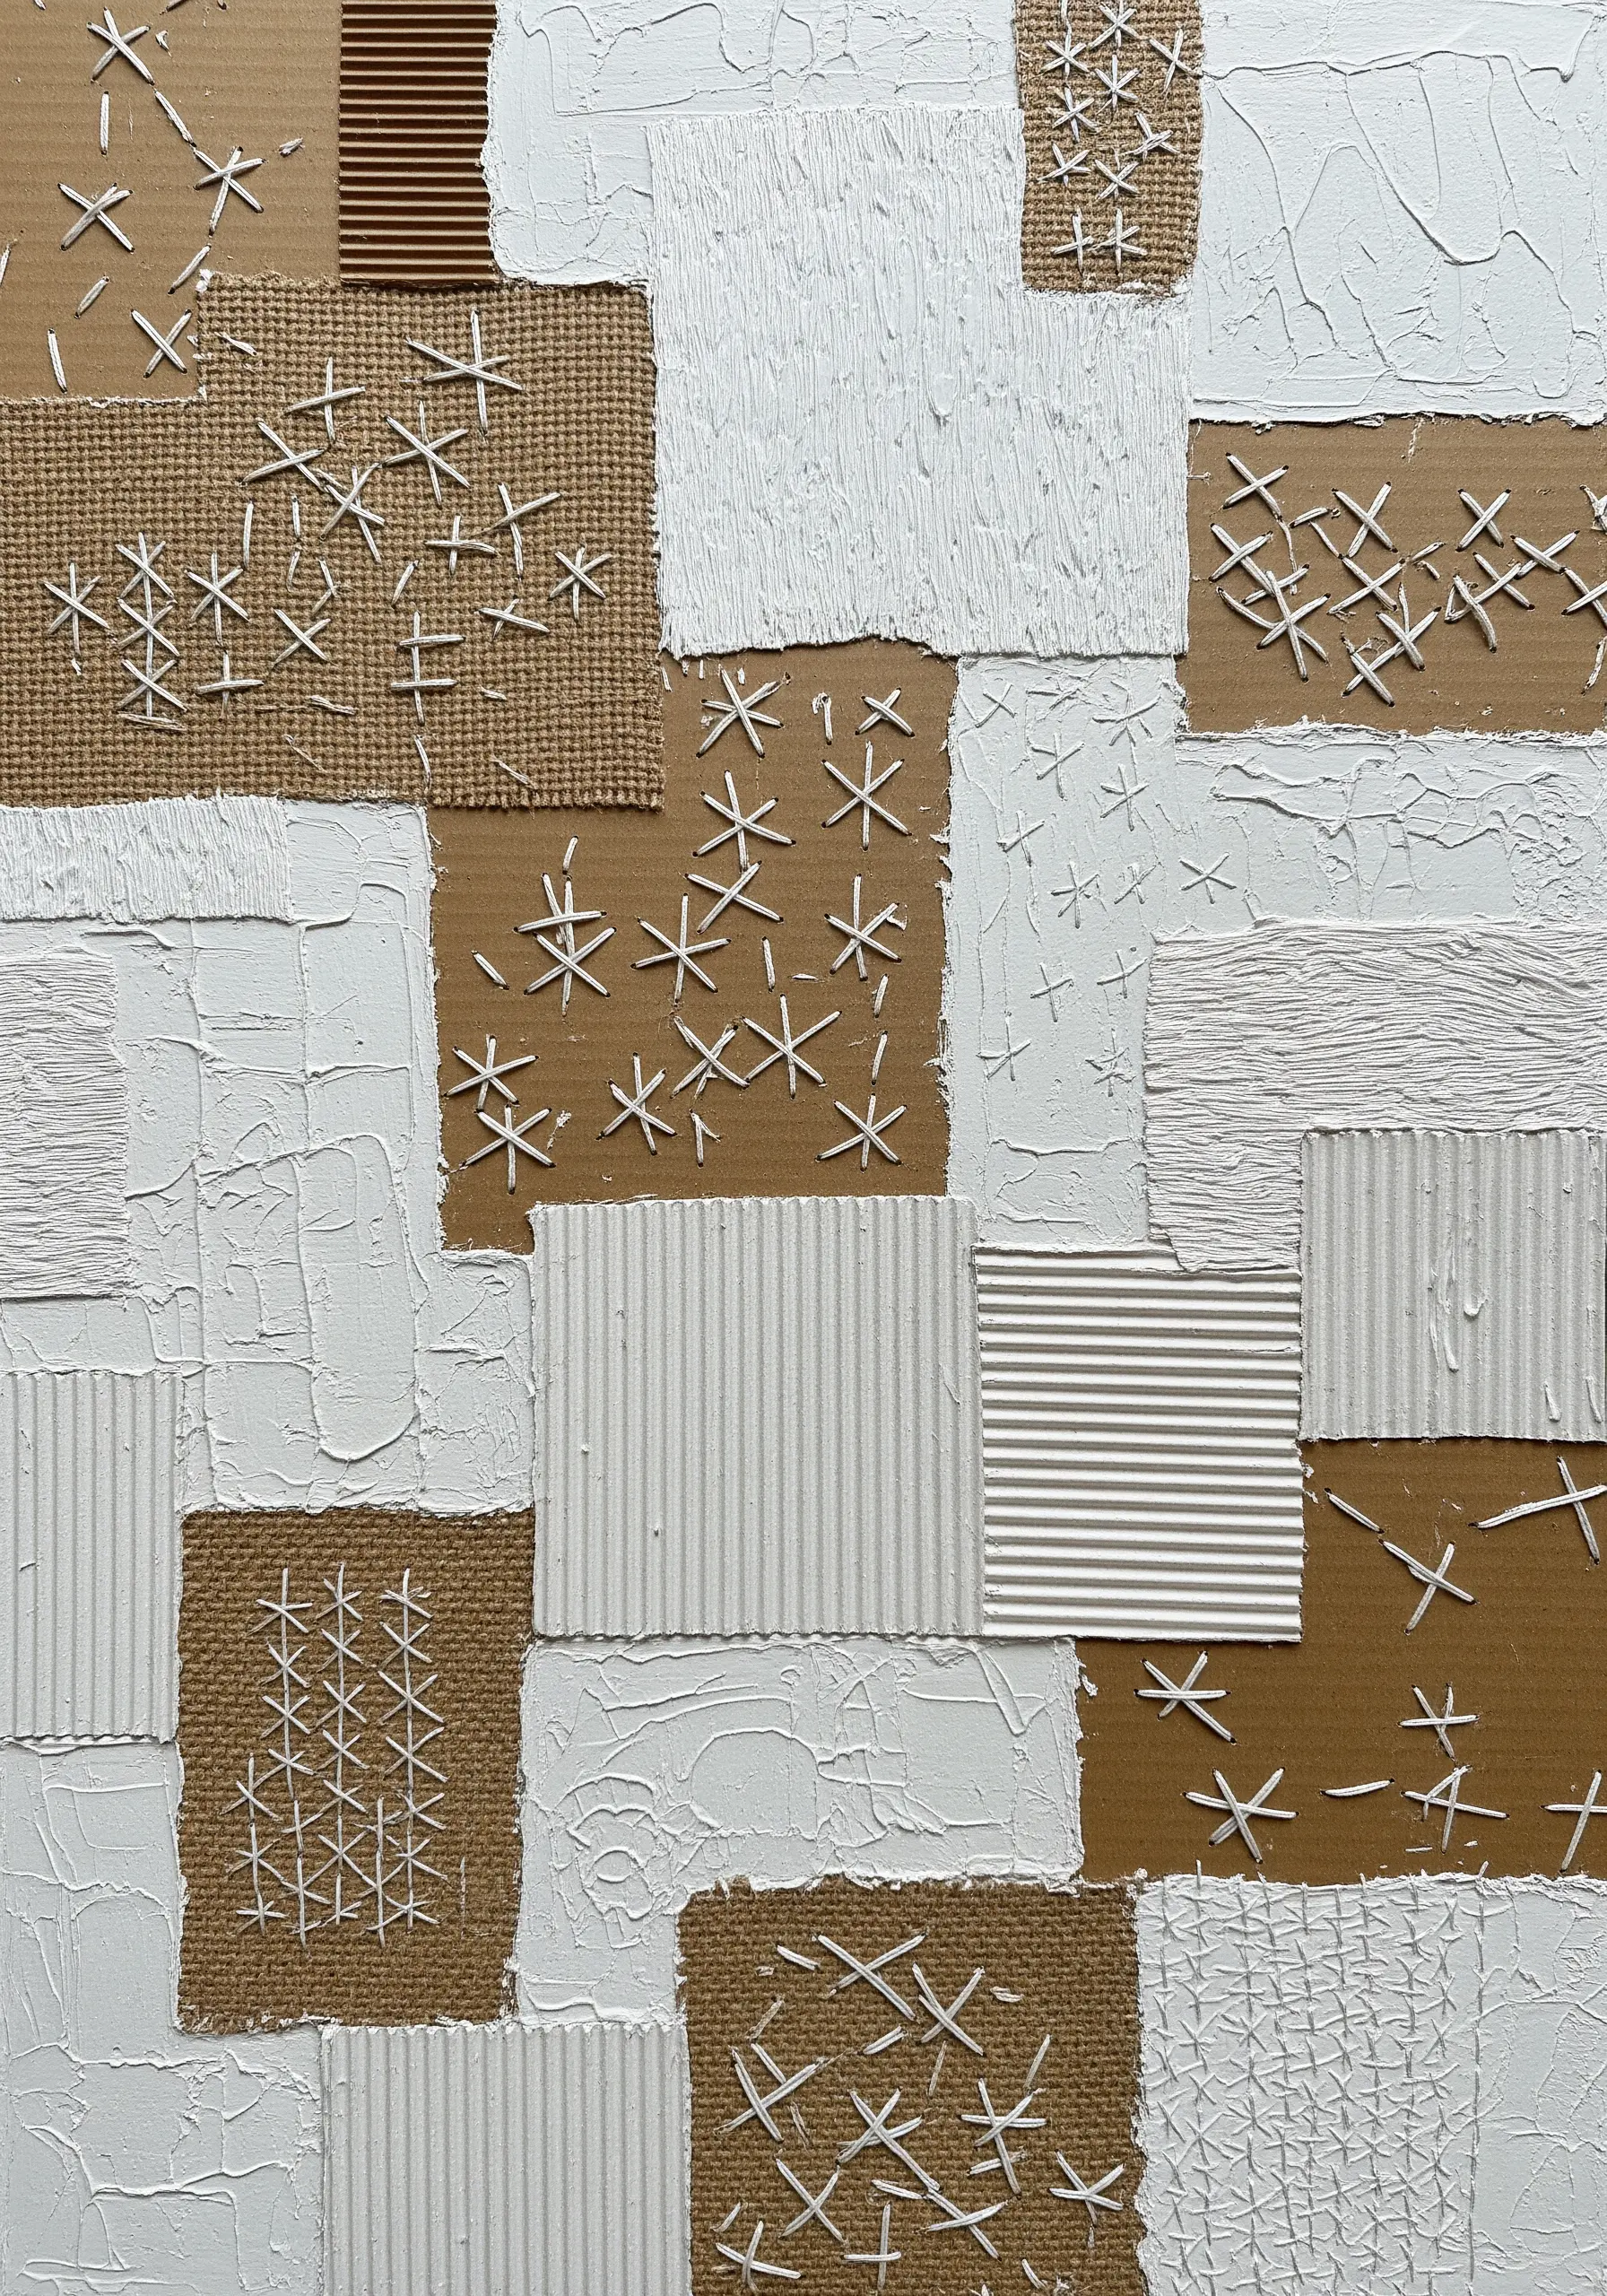
Explore the beauty of contrast by pairing raw, humble materials with clean, precise stitching.
Arrange patches of burlap, corrugated cardboard, and textured paper onto a canvas.
Then, using a thick, bright white cotton floss, add simple, scattered stitches like seed stitches or small crosses directly onto the textured surfaces.
The clean geometry of the stitches against the organic roughness of the base materials results in a sophisticated and modern abstract piece.
24. Sculpt a Coral Reef with Dimensional Stitches
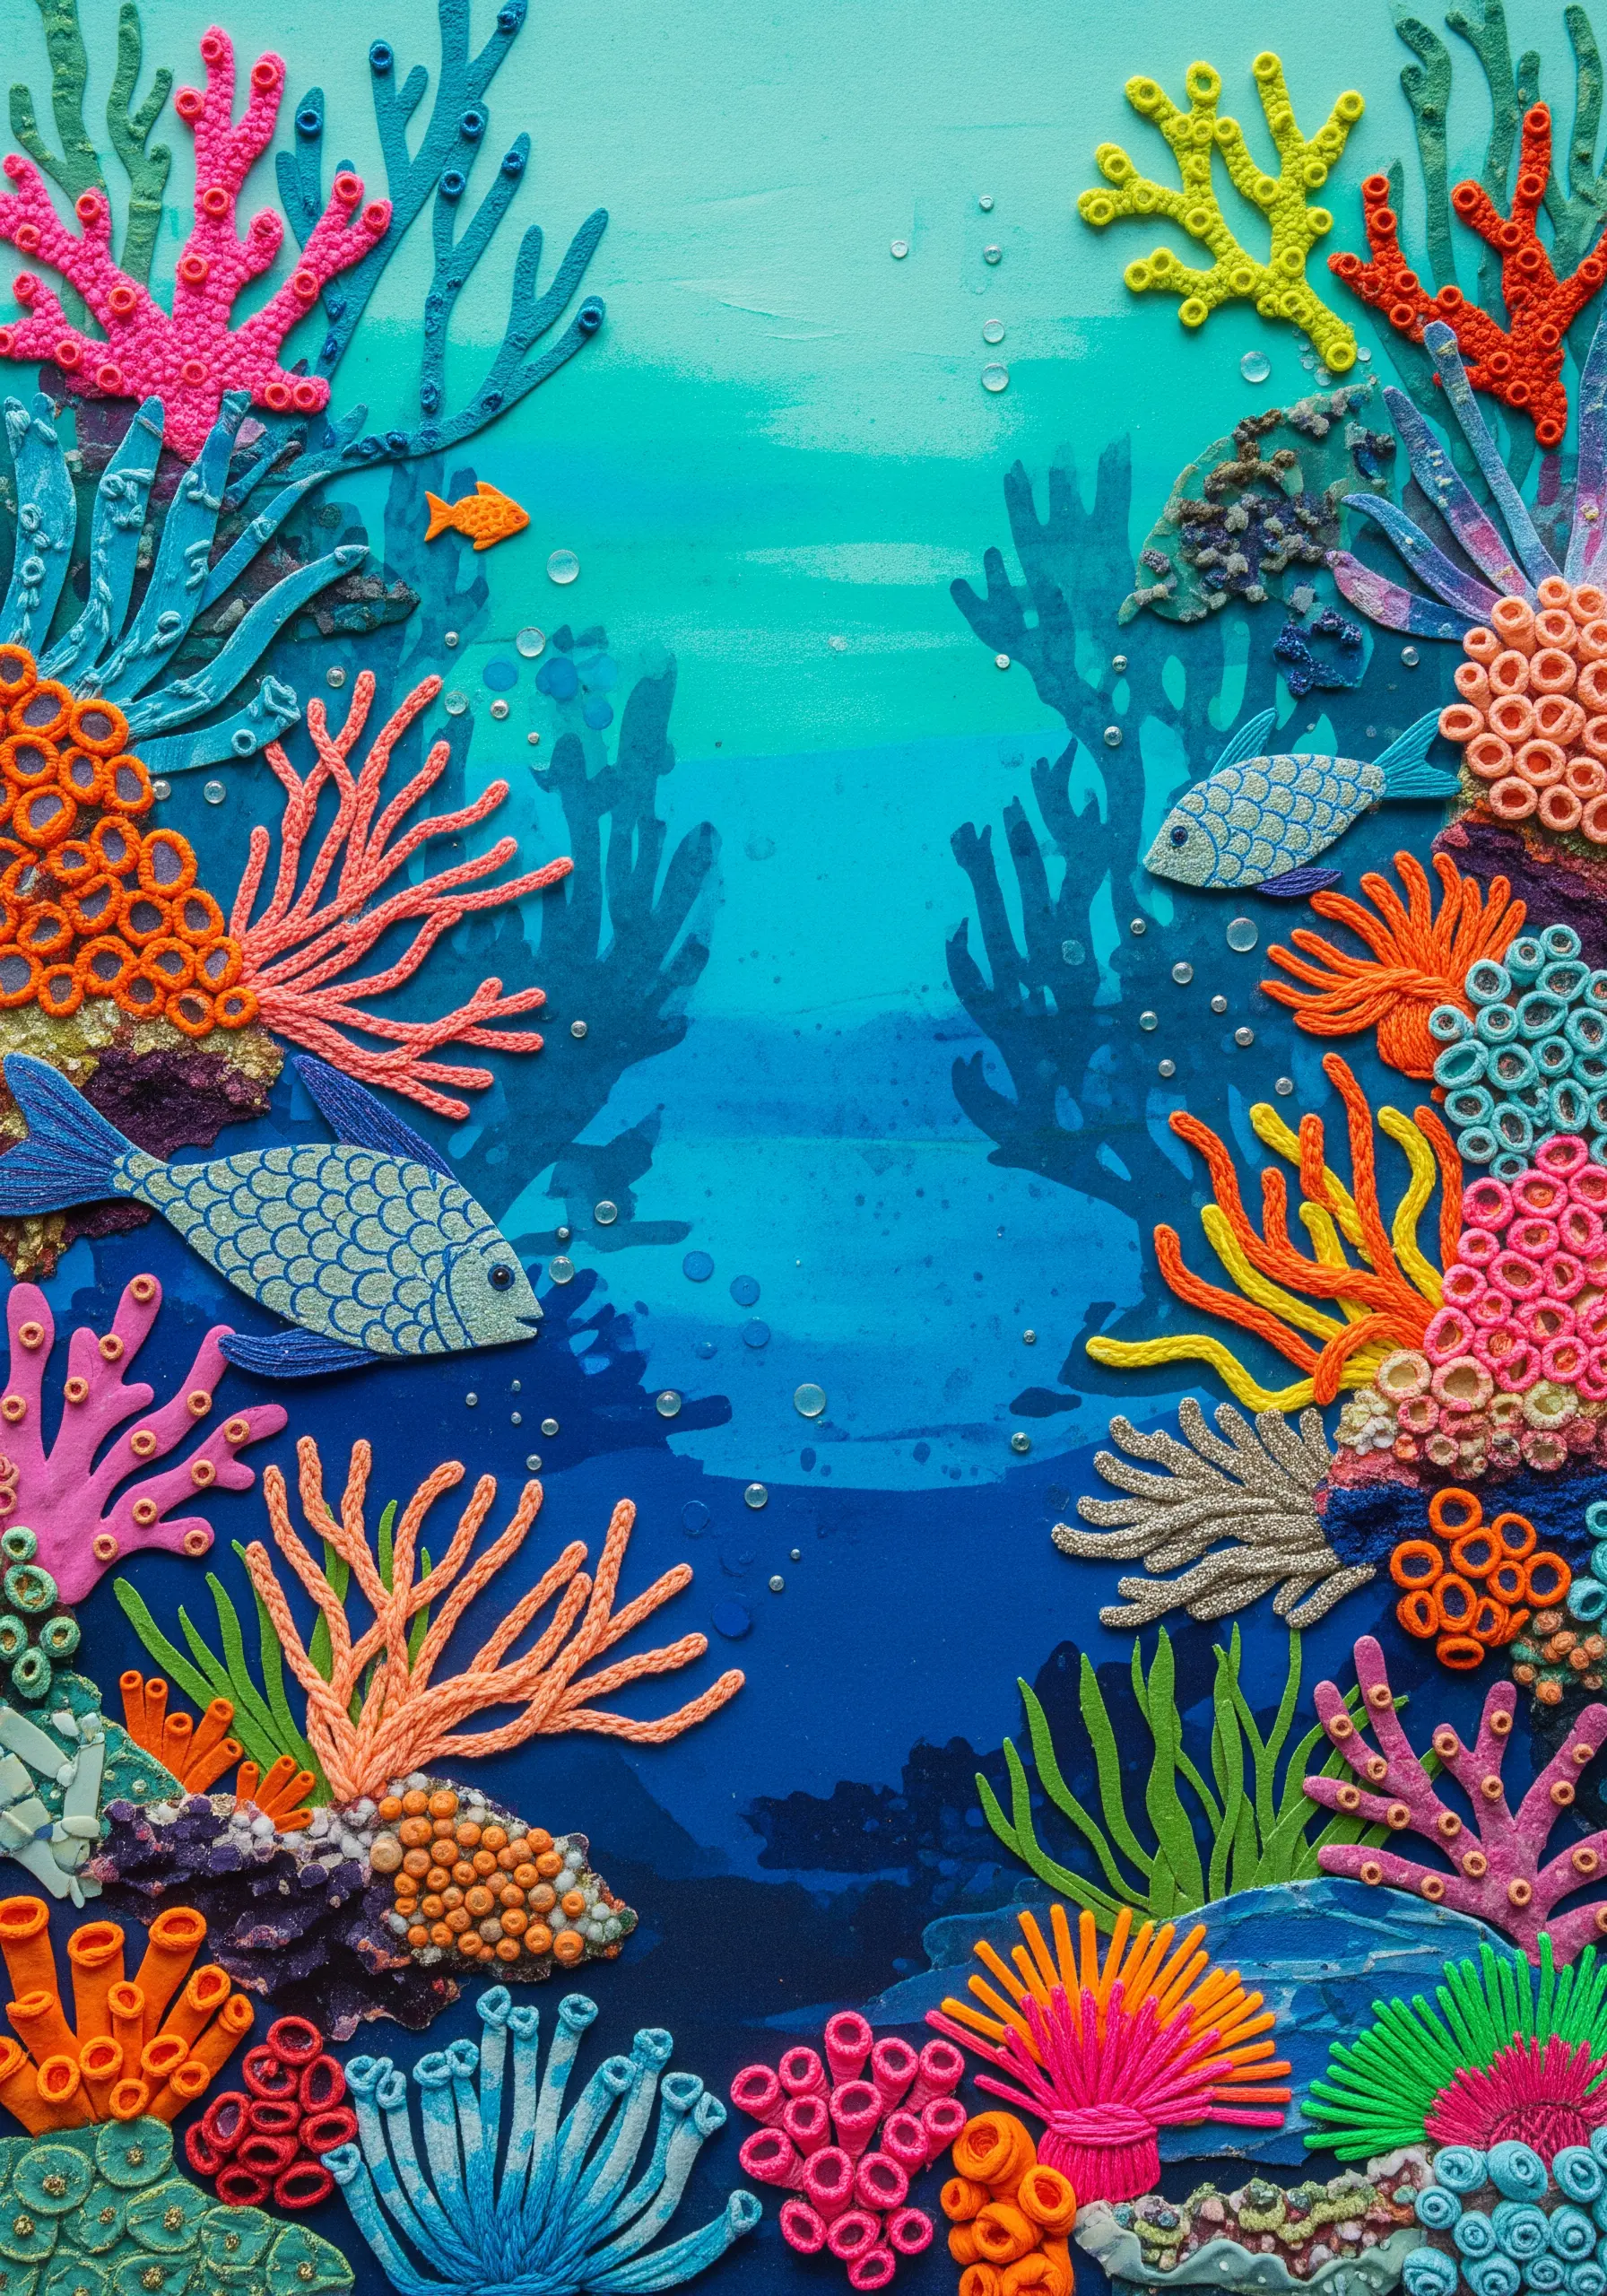
Move beyond flat embroidery to create a vibrant, tactile underwater scene using a variety of sculptural stitches.
Cluster French knots and bullion knots in bright colors to form the bumpy texture of coral. Use cast-on stitches or detached chain stitches to create seaweed that rises from the surface.
For a soft, brush-like effect, try turkey work and trim the loops to different lengths.
Layering these dimensional stitches is key to building a rich, deep-sea environment that invites touch.
25. Soften Architectural Lines with Organic Stitches

Juxtapose the precision of architectural illustration with the softness of embroidery to create a compelling piece.
After completing your drawing or painting of a building, add subtle organic textures with thread.
Use tiny French knots in various shades of green, clustered together, to represent moss growing on stone walls.
This small detail creates a beautiful contrast between the rigid, man-made structure and the gentle, persistent growth of nature, adding a layer of narrative and visual interest.
26. Channel Pop Art Energy with Chunky Yarn
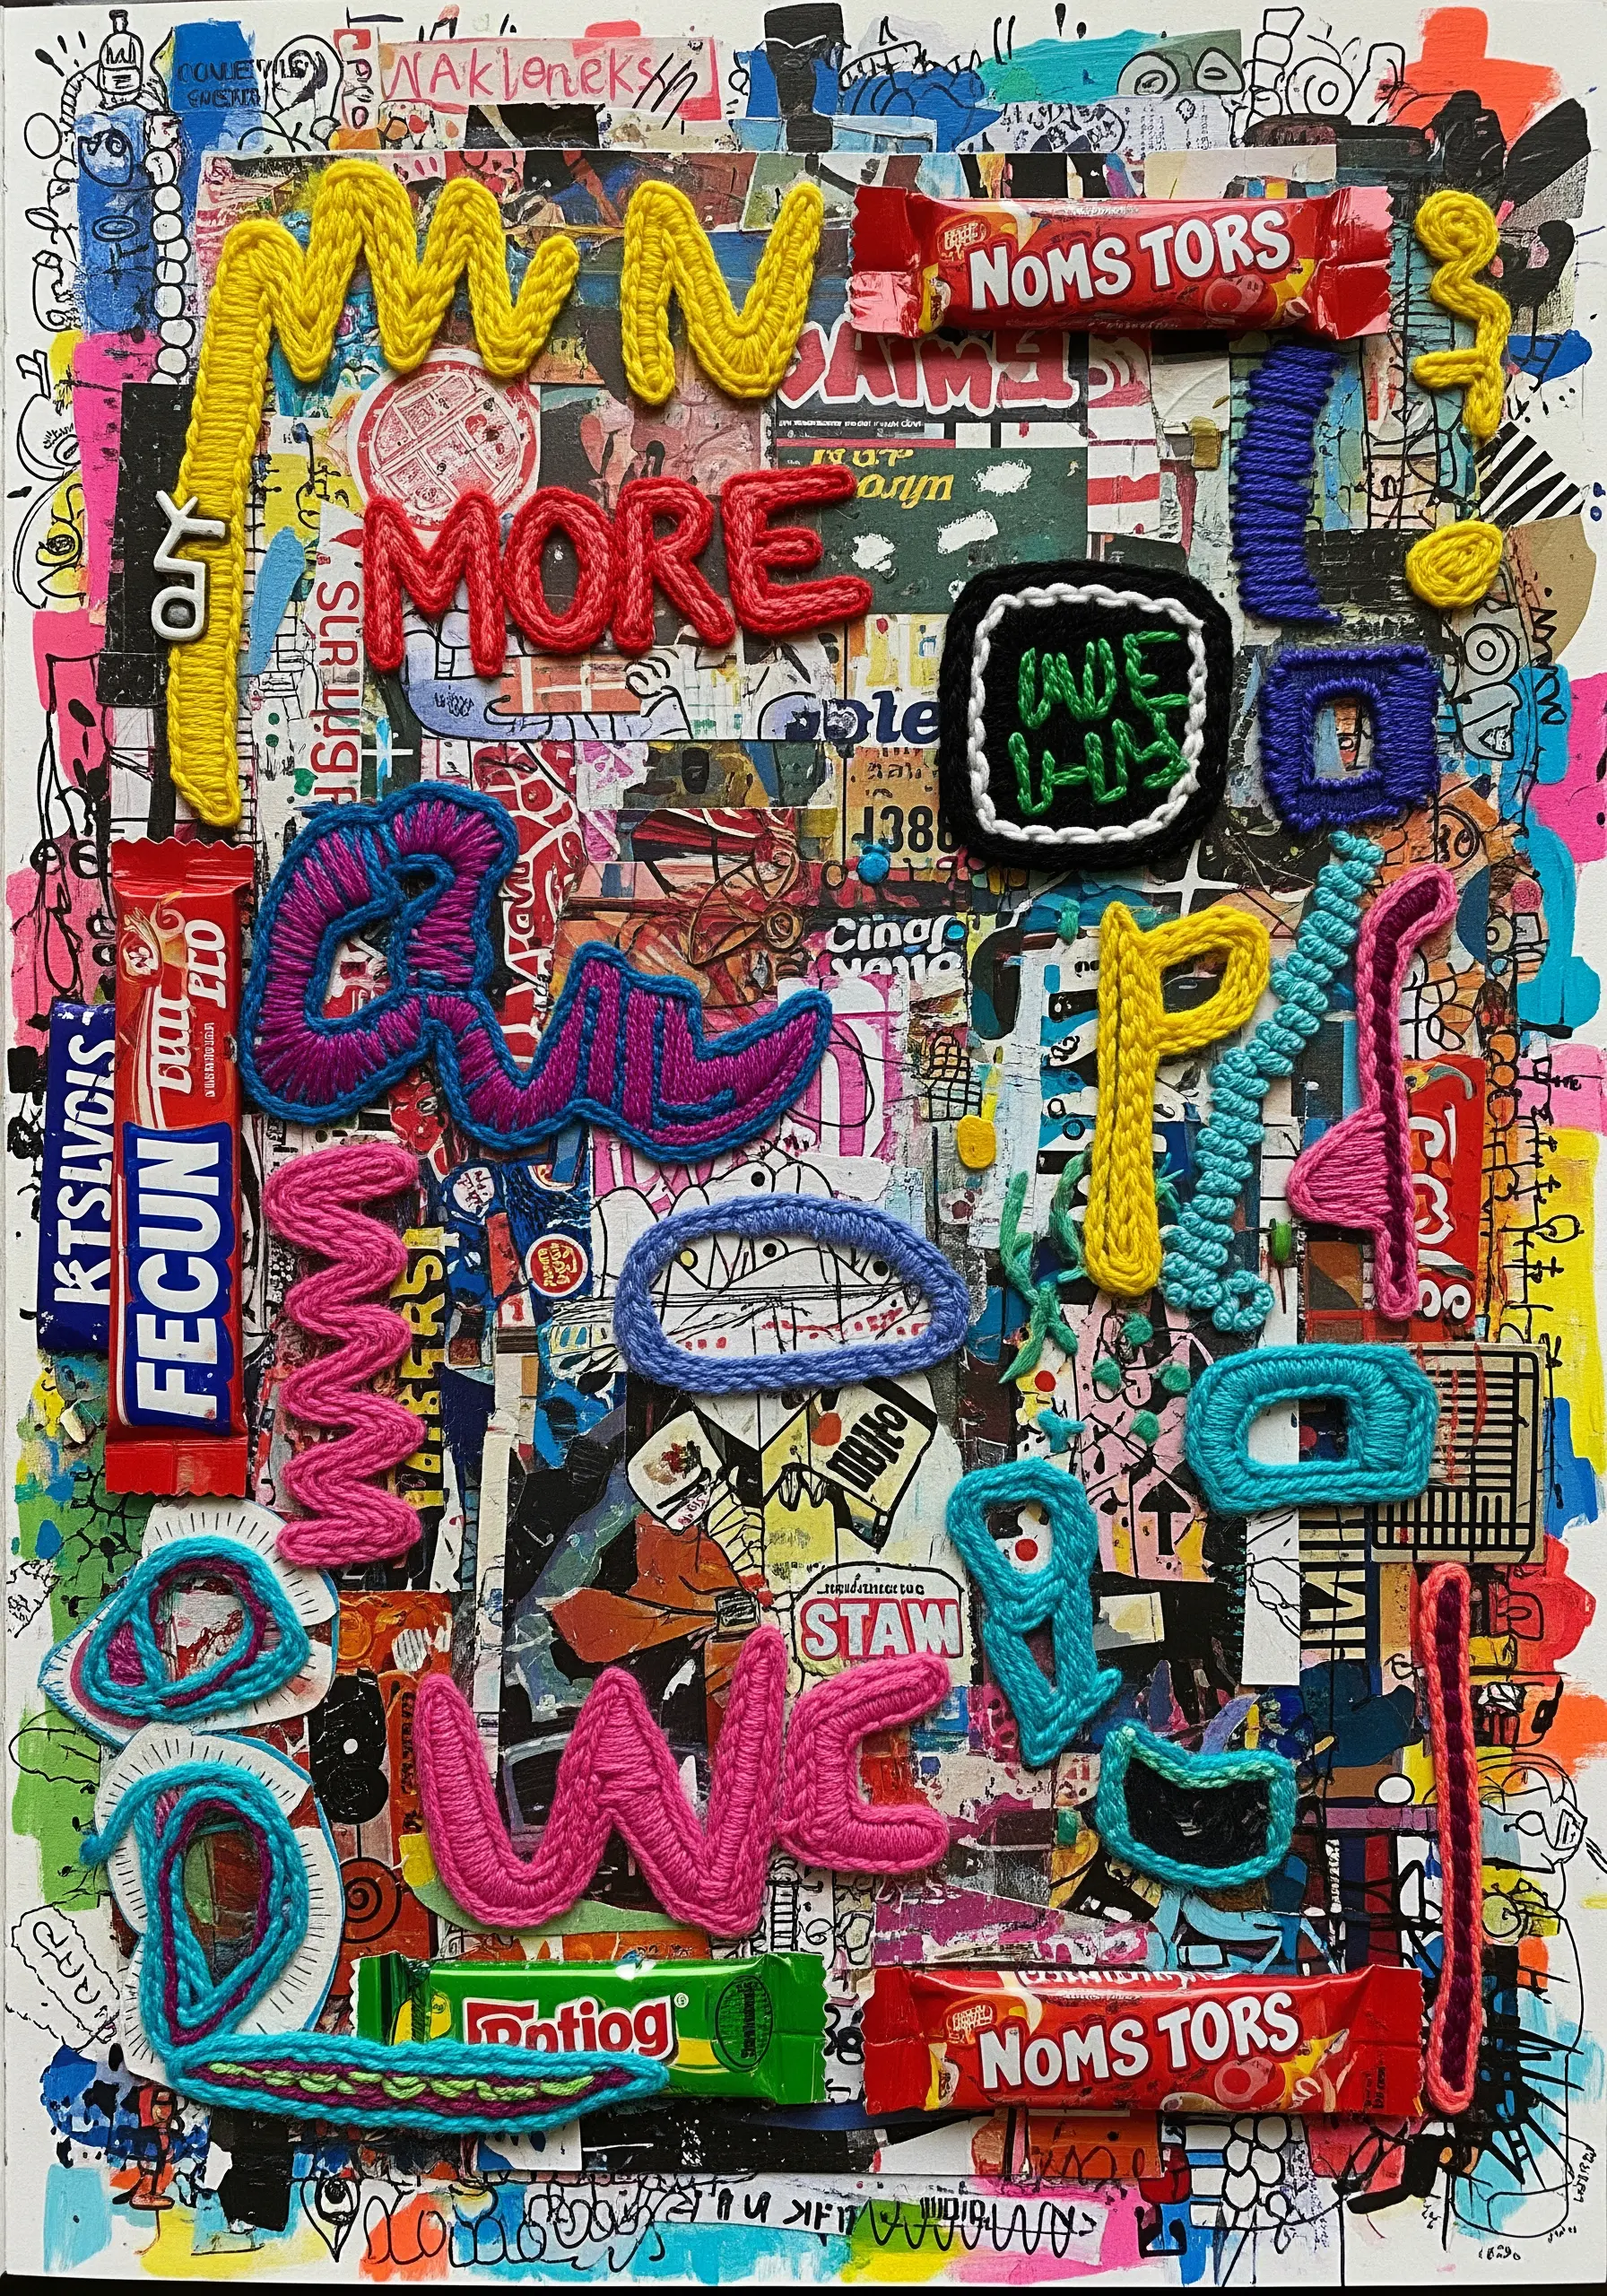
Make a bold statement by incorporating chunky yarn into a maximalist paper collage.
To create tactile, graphic words or shapes, use a punch needle on a sturdy canvas base, or simply couch thick yarn directly onto your collage.
The extreme, soft texture of the yarn provides a dramatic contrast to the flat, sharp edges of the paper cutouts and stickers.
This technique creates a fun, high-energy piece with a playful, street-art aesthetic.
27. Practice Restraint with a Single, Poetic Thread

In minimalist art, less is truly more. Create a powerful composition using just a few simple elements: a shaped piece of paper and a single, contrasting line of thread.
The focus shifts entirely to the thread itself—its color, its tension, and the path it takes as it emerges from and disappears into the paper.
Each choice is deliberate. This exercise in restraint results in a quiet, contemplative artwork where one simple line carries the entire narrative weight.
28. Add Tactile Dimension to Landscape Photography

Create a powerful focal point by Enhancing Photography with dimensional embroidery.
Print a landscape image onto matte photo paper or cardstock, which holds stitches well without tearing.
Using various shades of embroidery floss, cover specific elements, like trees, with dense French knots to give them a tactile, three-dimensional quality.
By leaving the rest of the photograph untouched, you create a striking contrast between the flat printed image and the lush, stitched texture, drawing the viewer’s eye exactly where you want it.
29. Create an Embroidered Specimen Display

Emulate the look of a classic entomology collection by creating your own stitched insects.
Lightly transfer or draw insect illustrations onto your fabric. Use a single strand of black floss and a fine backstitch for the delicate legs and antennae.
For the wings and bodies, fill the spaces with long-and-short stitch using silks or metallic threads to capture the iridescent sheen of real beetles and moths.
Arrange your finished pieces in a shadow box to create an elegant specimen display.
30. Build Atmospheric Depth with Stitched Tulle Layers

Construct a diorama with a palpable sense of atmosphere by using layers of semi-transparent fabric.
Place your central subject, like a printed tree, at the back of a shallow shadow box.
Then, create distance and a foggy effect by placing several layers of tulle or organza in front of it, each with its own minimal embroidery—like scattered seed stitches for snow or rain.
These translucent layers soften the background and add physical depth, giving your scene a dreamy, ethereal quality and creating beautiful atmospheric depth.


