

When you pick up a needle and thread, you’re not just starting a craft project; you’re beginning the process of creating a future heirloom. Whether it’s for a wedding, a new baby, or a quiet corner of your own home, the goal is always to create something with meaning, beauty, and a part of yourself stitched into its very fibers.
But how do you move from simply following a pattern to creating a piece that truly feels elevated and personal? It isn’t about mastering hundreds of complex stitches. It’s about learning to make intentional choices—understanding why a woven wheel stitch gives a rose its lush texture, how a single strand of metallic thread can catch the light just so, or why negative space can be as powerful as the stitches themselves.
These ideas are more than just inspiration; they are a collection of techniques and thoughtful approaches to design. Think of them as tools to help you add depth, texture, and sophistication to your work. Use them to create not just a beautiful gift, but a treasured keepsake that tells a story for years to come.
1. Mastering Dimensional Woven Wheel Roses
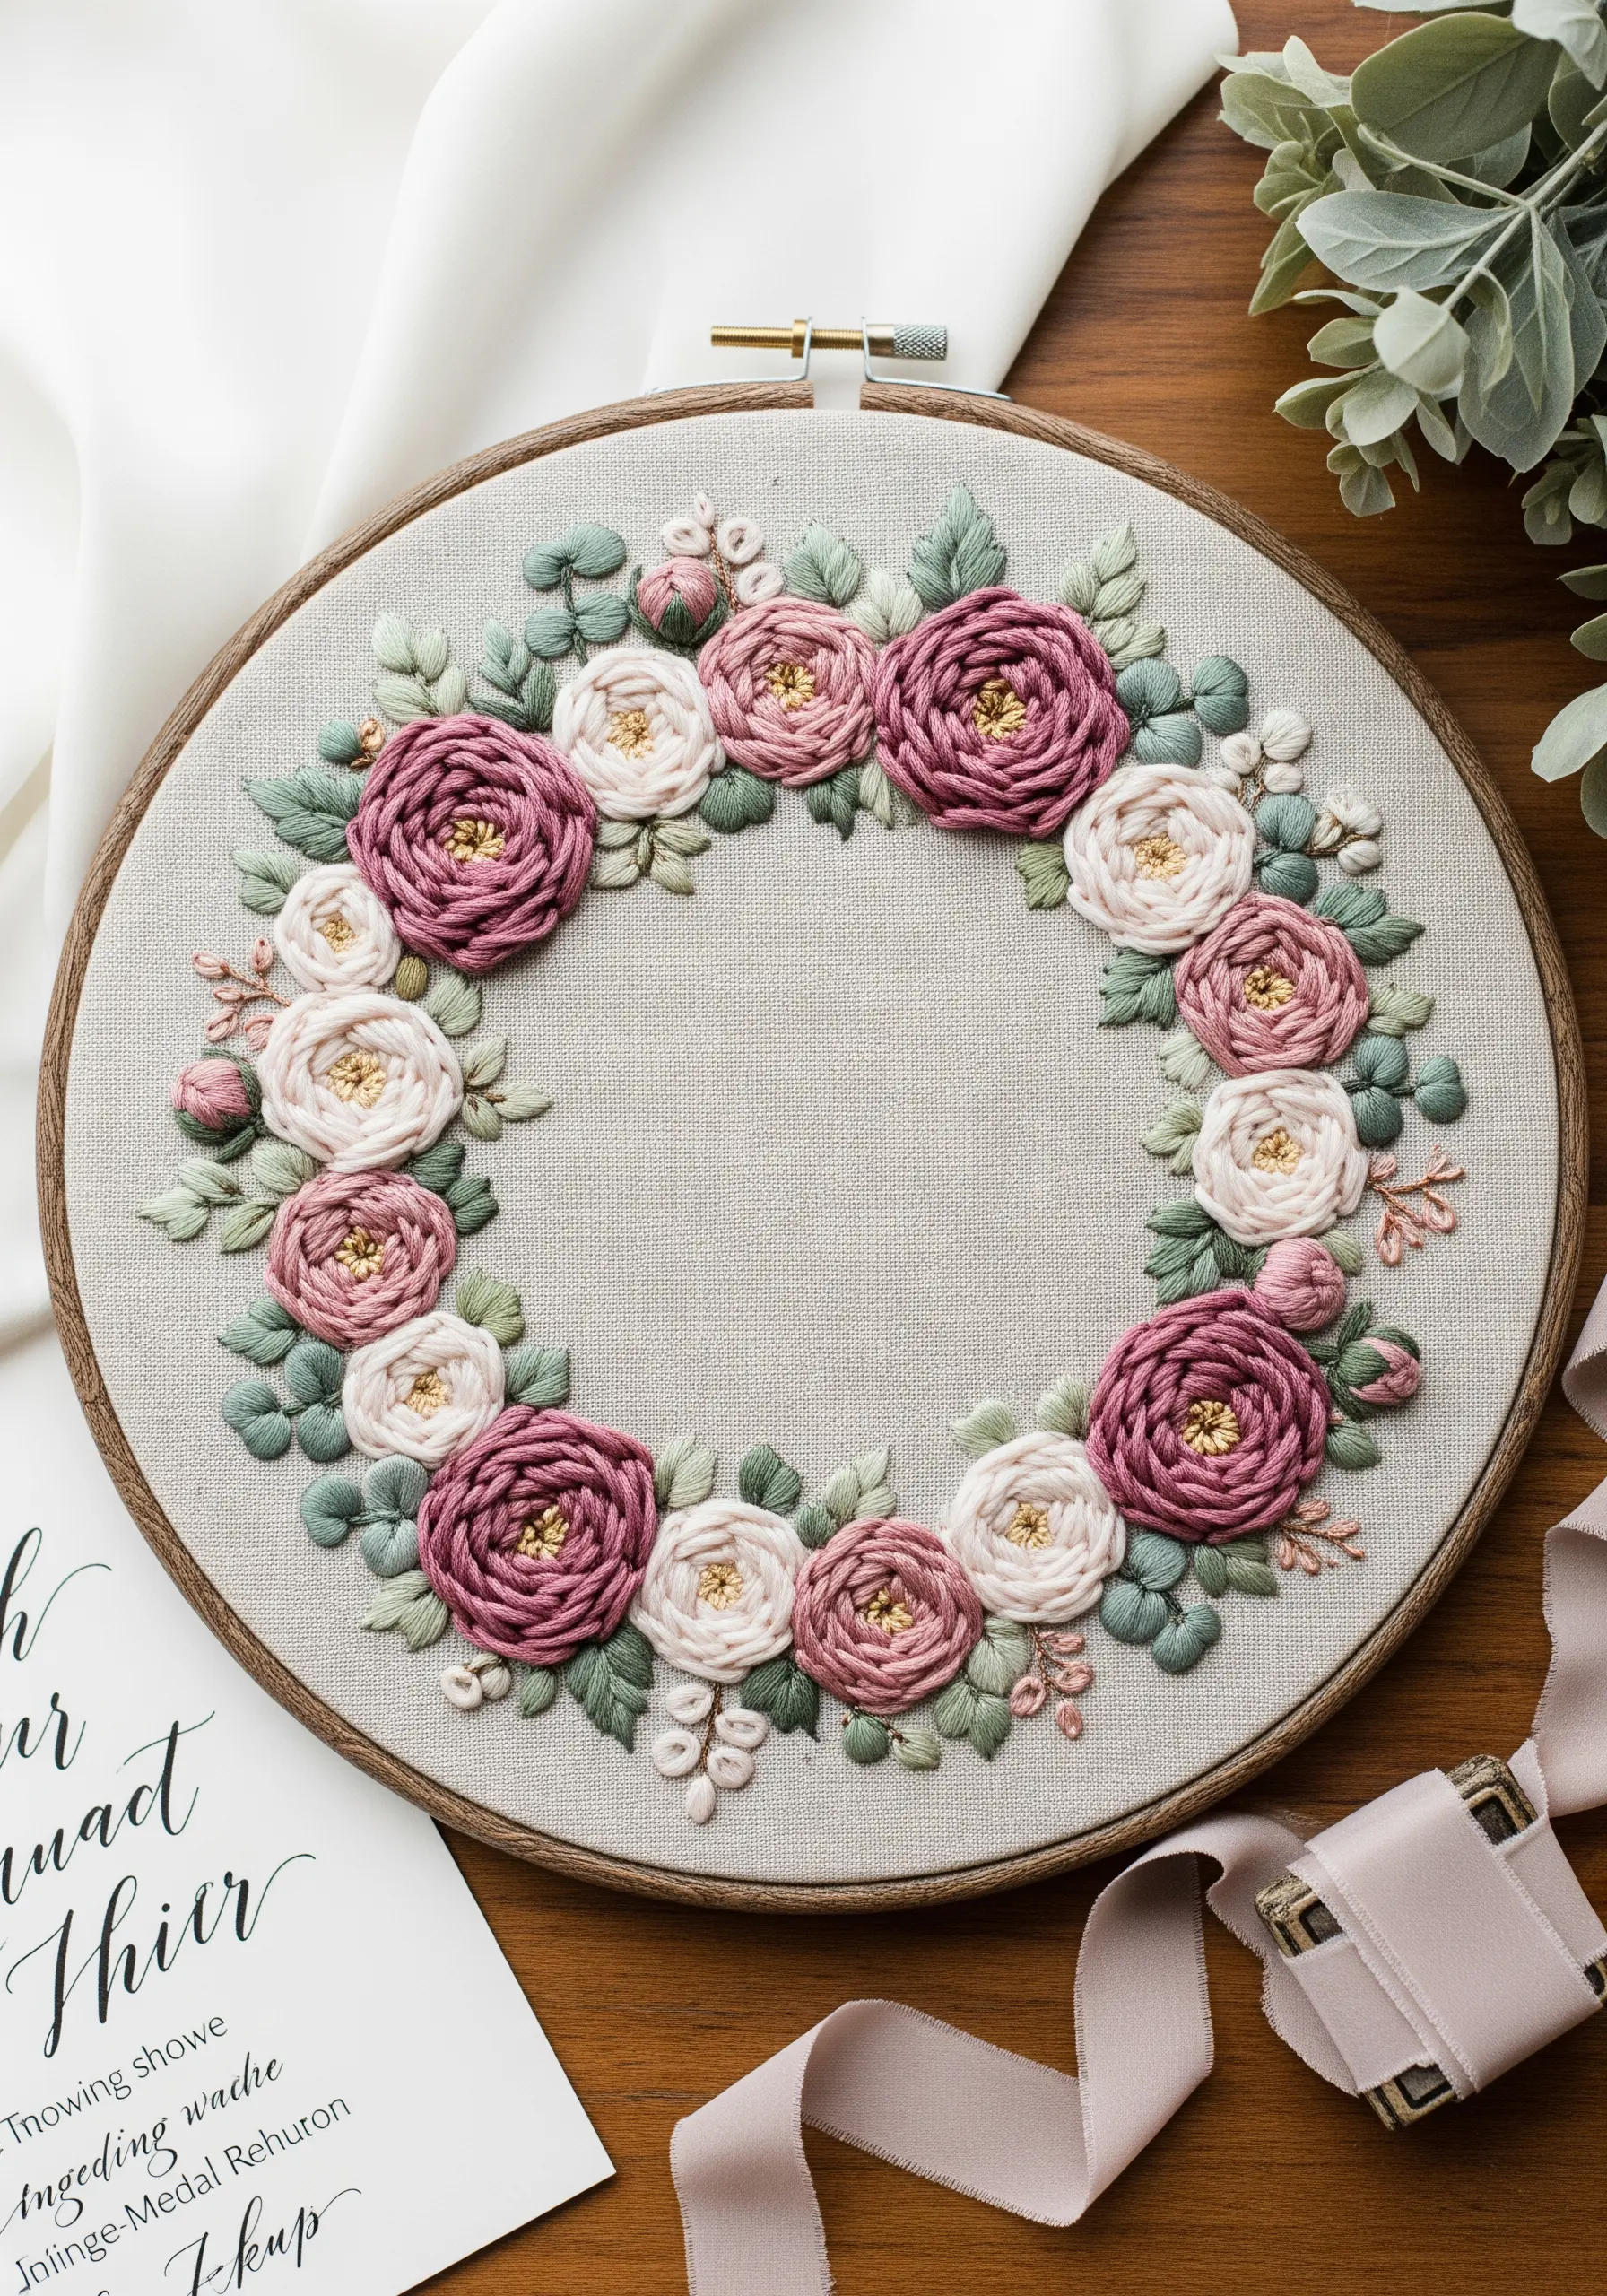
To achieve this wreath’s lush, three-dimensional texture, the woven wheel stitch is your most powerful tool.
Create an odd number of straight-stitch spokes—five or seven works best—and weave your thread over and under without piercing the fabric.
For fuller, open blooms, use all six strands of floss and maintain a slightly looser tension. For tighter buds, use fewer strands and pull the thread more snugly around the spokes.
Add a cluster of tiny French knots with a single strand of gold metallic thread in the center of each rose to catch the light and add a touch of heirloom elegance.
2. Balancing Delicate Florals in a Crescent Frame
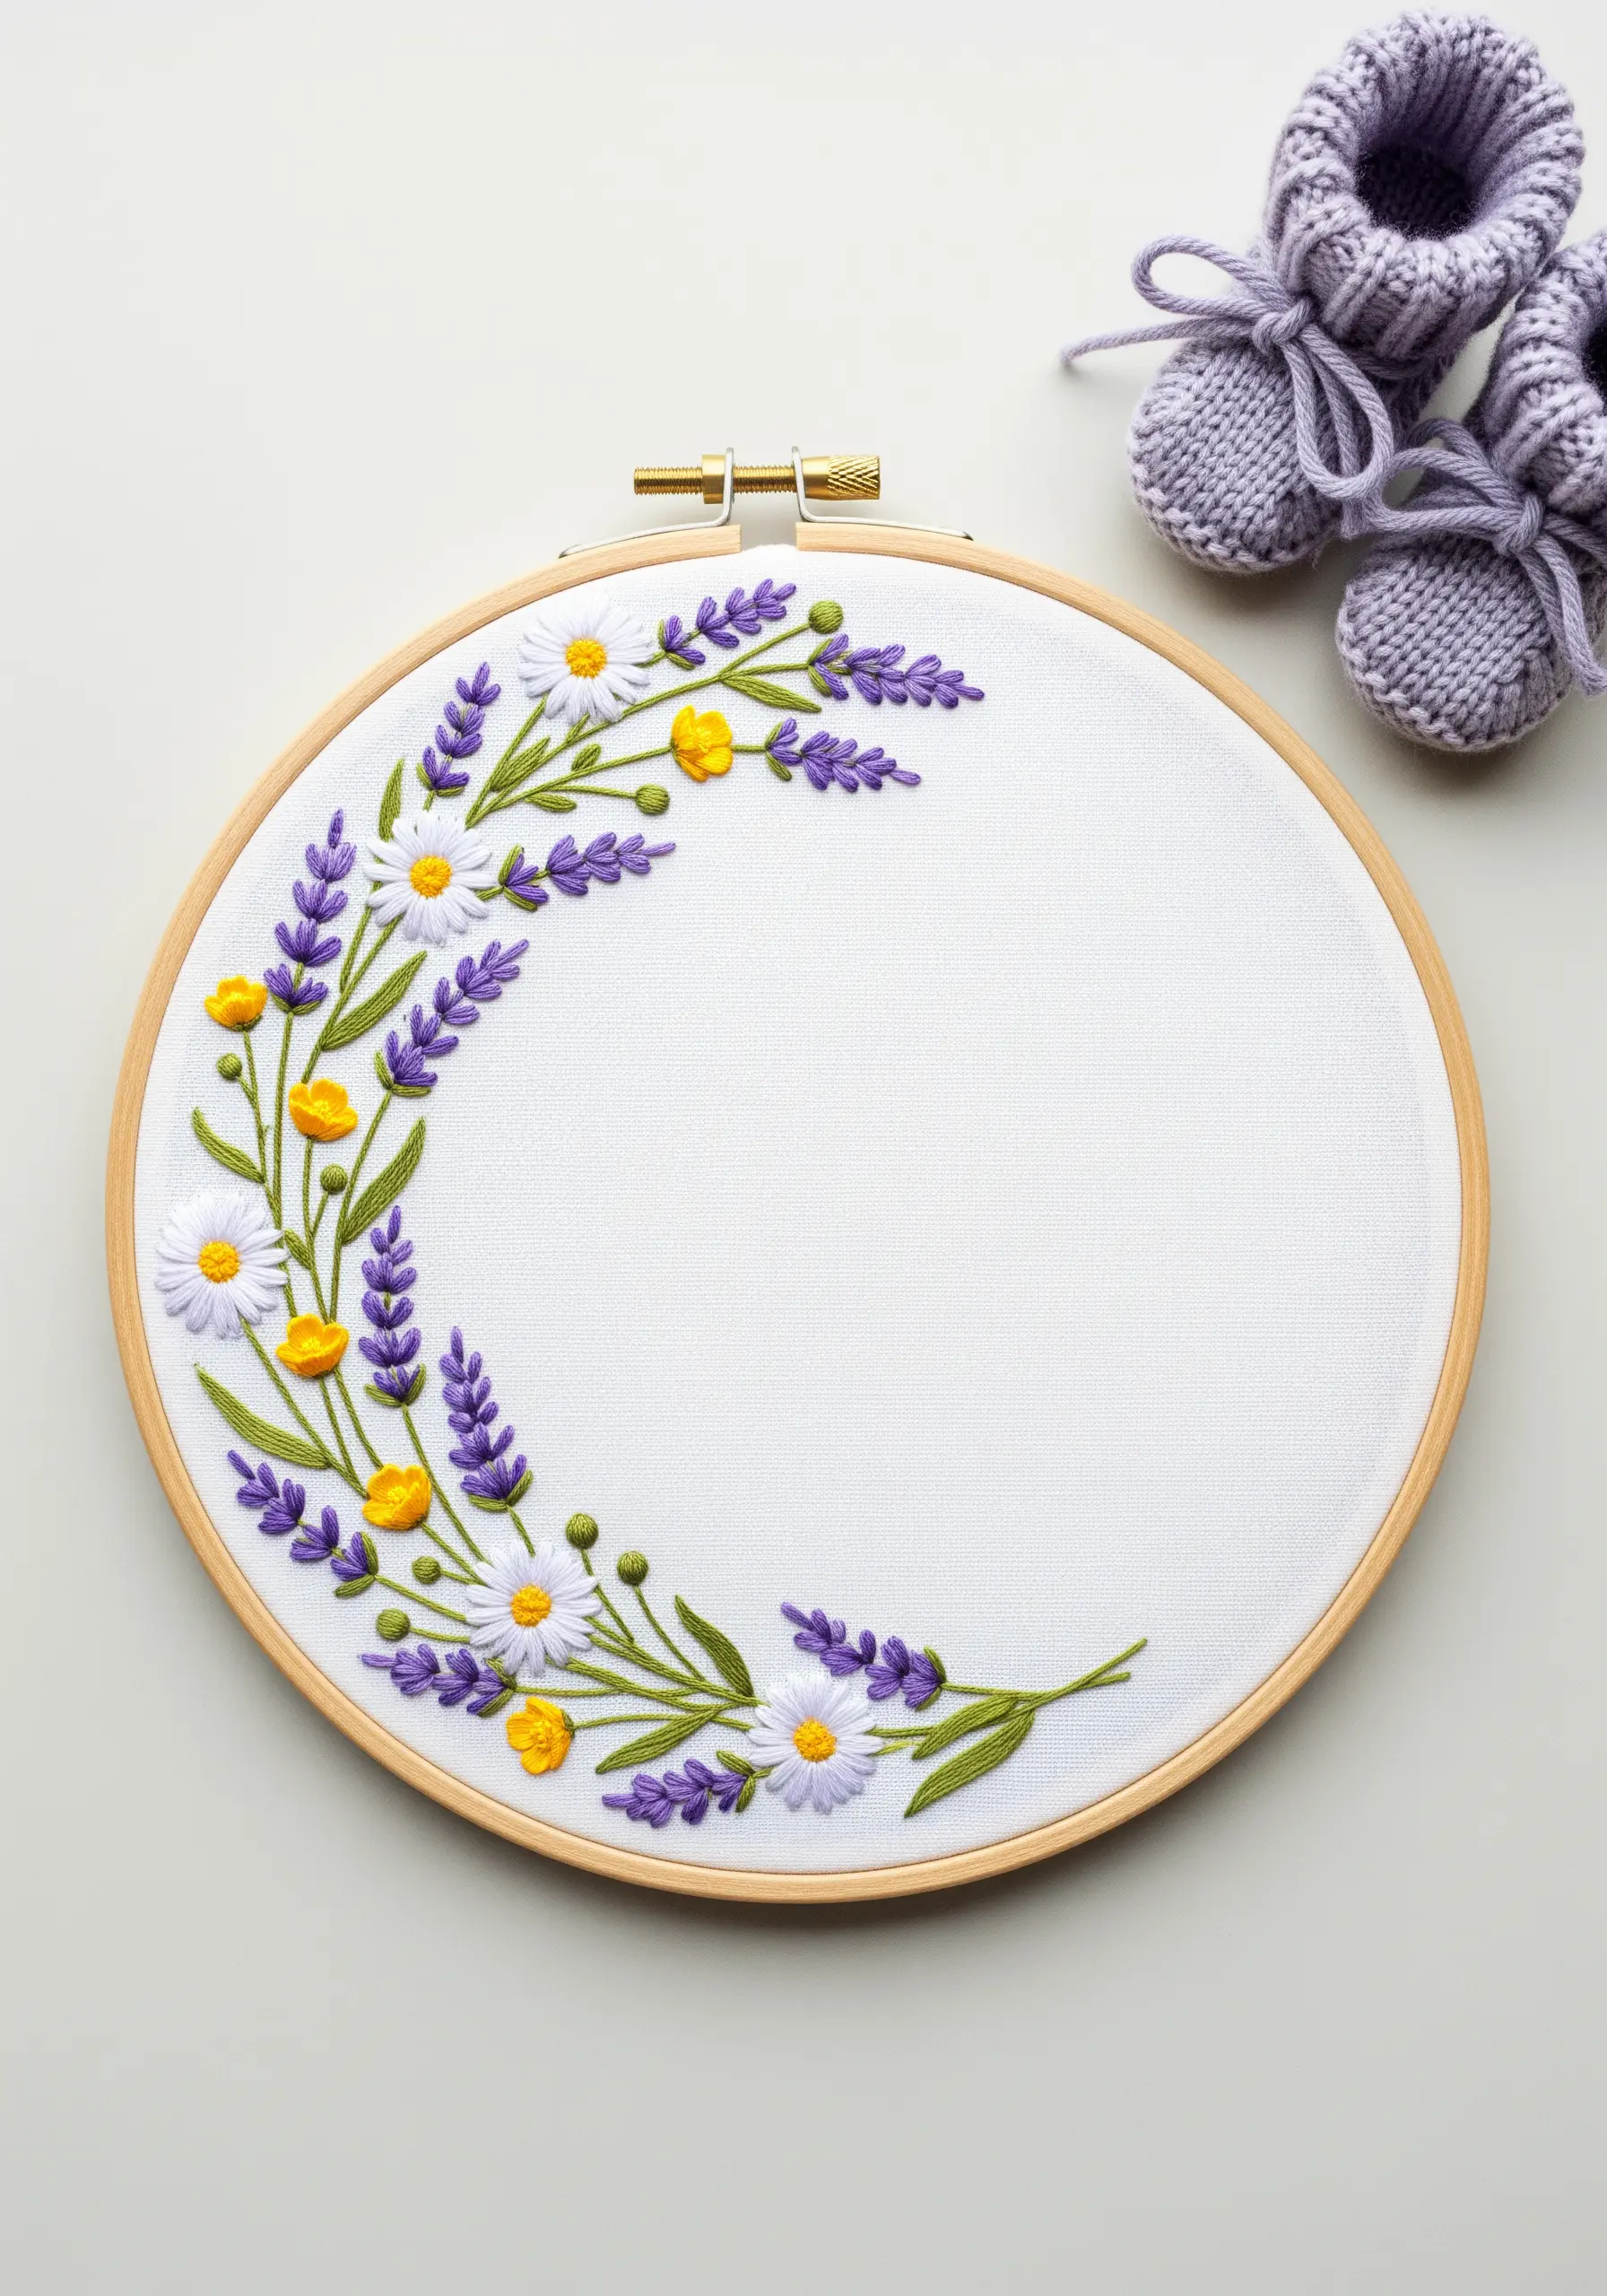
A crescent composition is perfect for framing a name or birthdate, as it gracefully draws the eye without overwhelming the central space.
Combine distinct stitches to give each flower its unique character: lazy daisy stitches for the clean, open petals of the daisies, and tight French knots for the clustered buttercups.
For the lavender, use short, angled straight stitches, varying their length and placement slightly to mimic the way lavender grows in nature.
This thoughtful mix of textures creates a design that feels both organized and organic—ideal for a cherished baby keepsake.
3. The Art of Negative Space in Botanical Frames
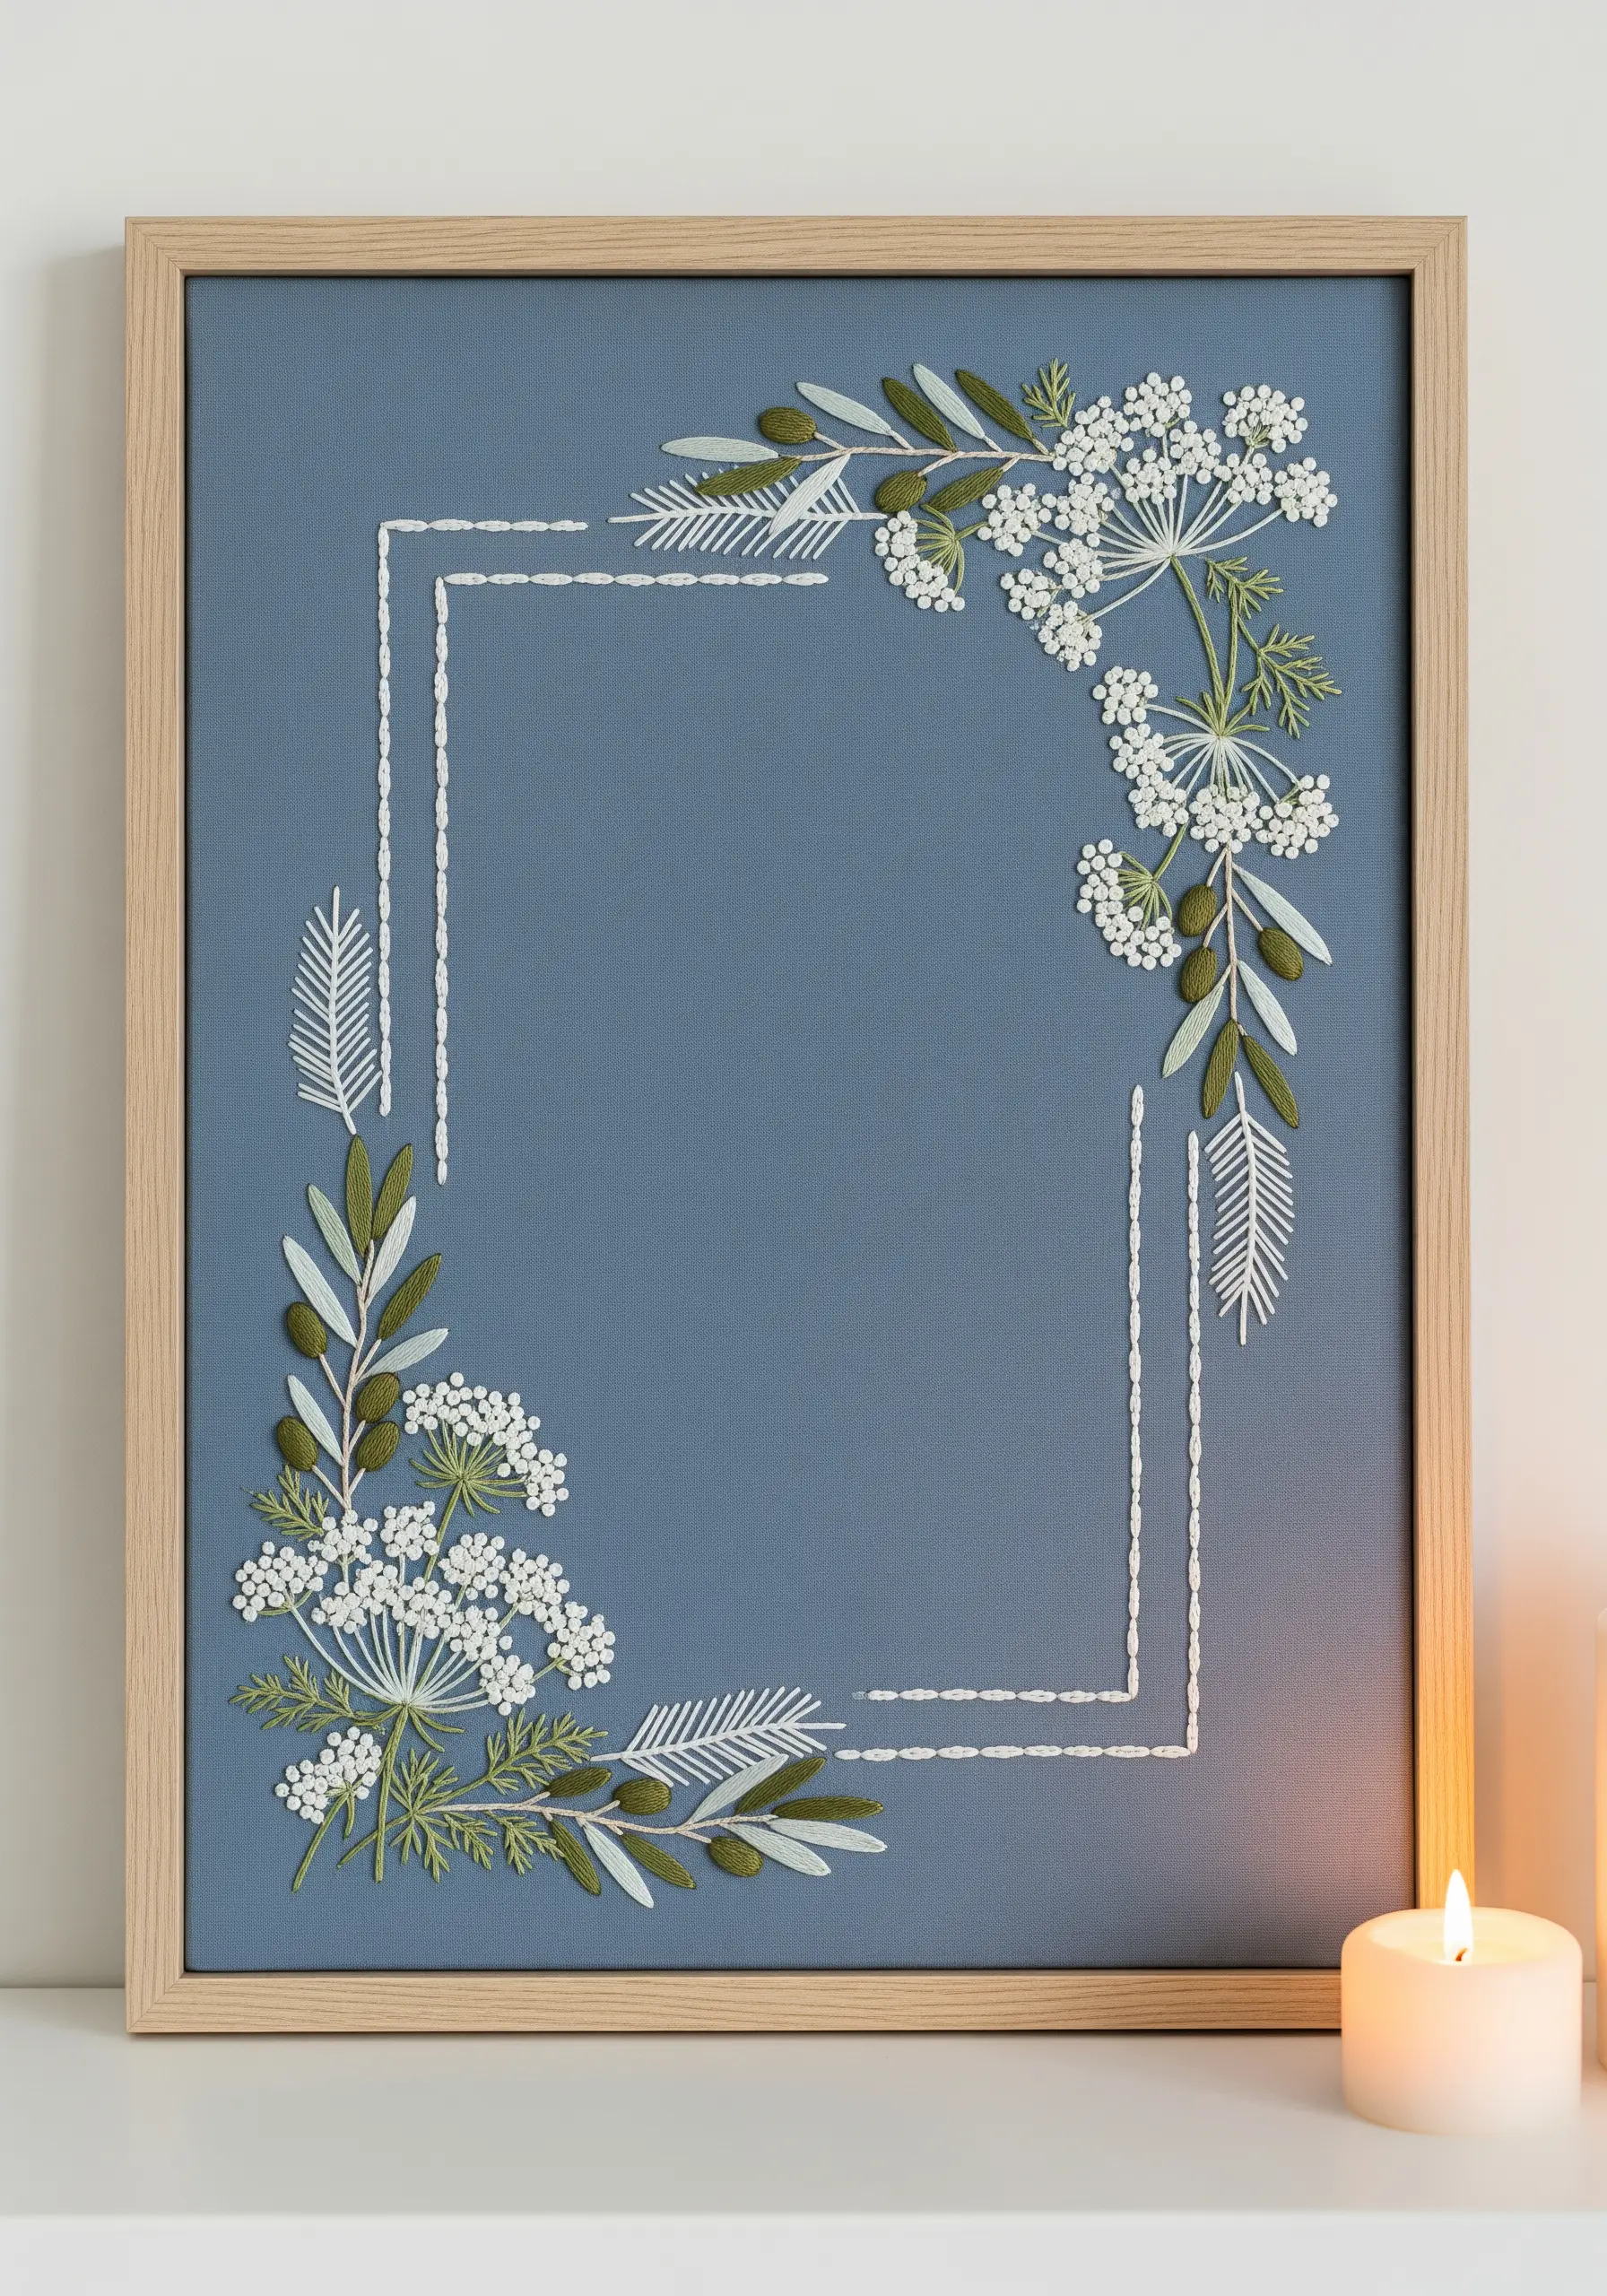
Elevate a simple design by using negative space as a key compositional element.
Stitch a simple inner border with a two-stranded backstitch, creating a clean, modern frame that contains your text or date.
For the delicate Queen Anne’s lace, use clusters of white French knots, which give a lovely, airy texture against the solid blue-gray fabric.
Contrast the soft florals with graphic leaves made from satin stitch and split stitch outlines. This mix of solid shapes, open lines, and empty space results in a sophisticated piece that feels intentional and artistic.
4. Achieving Vibrancy with Contrasting Colors
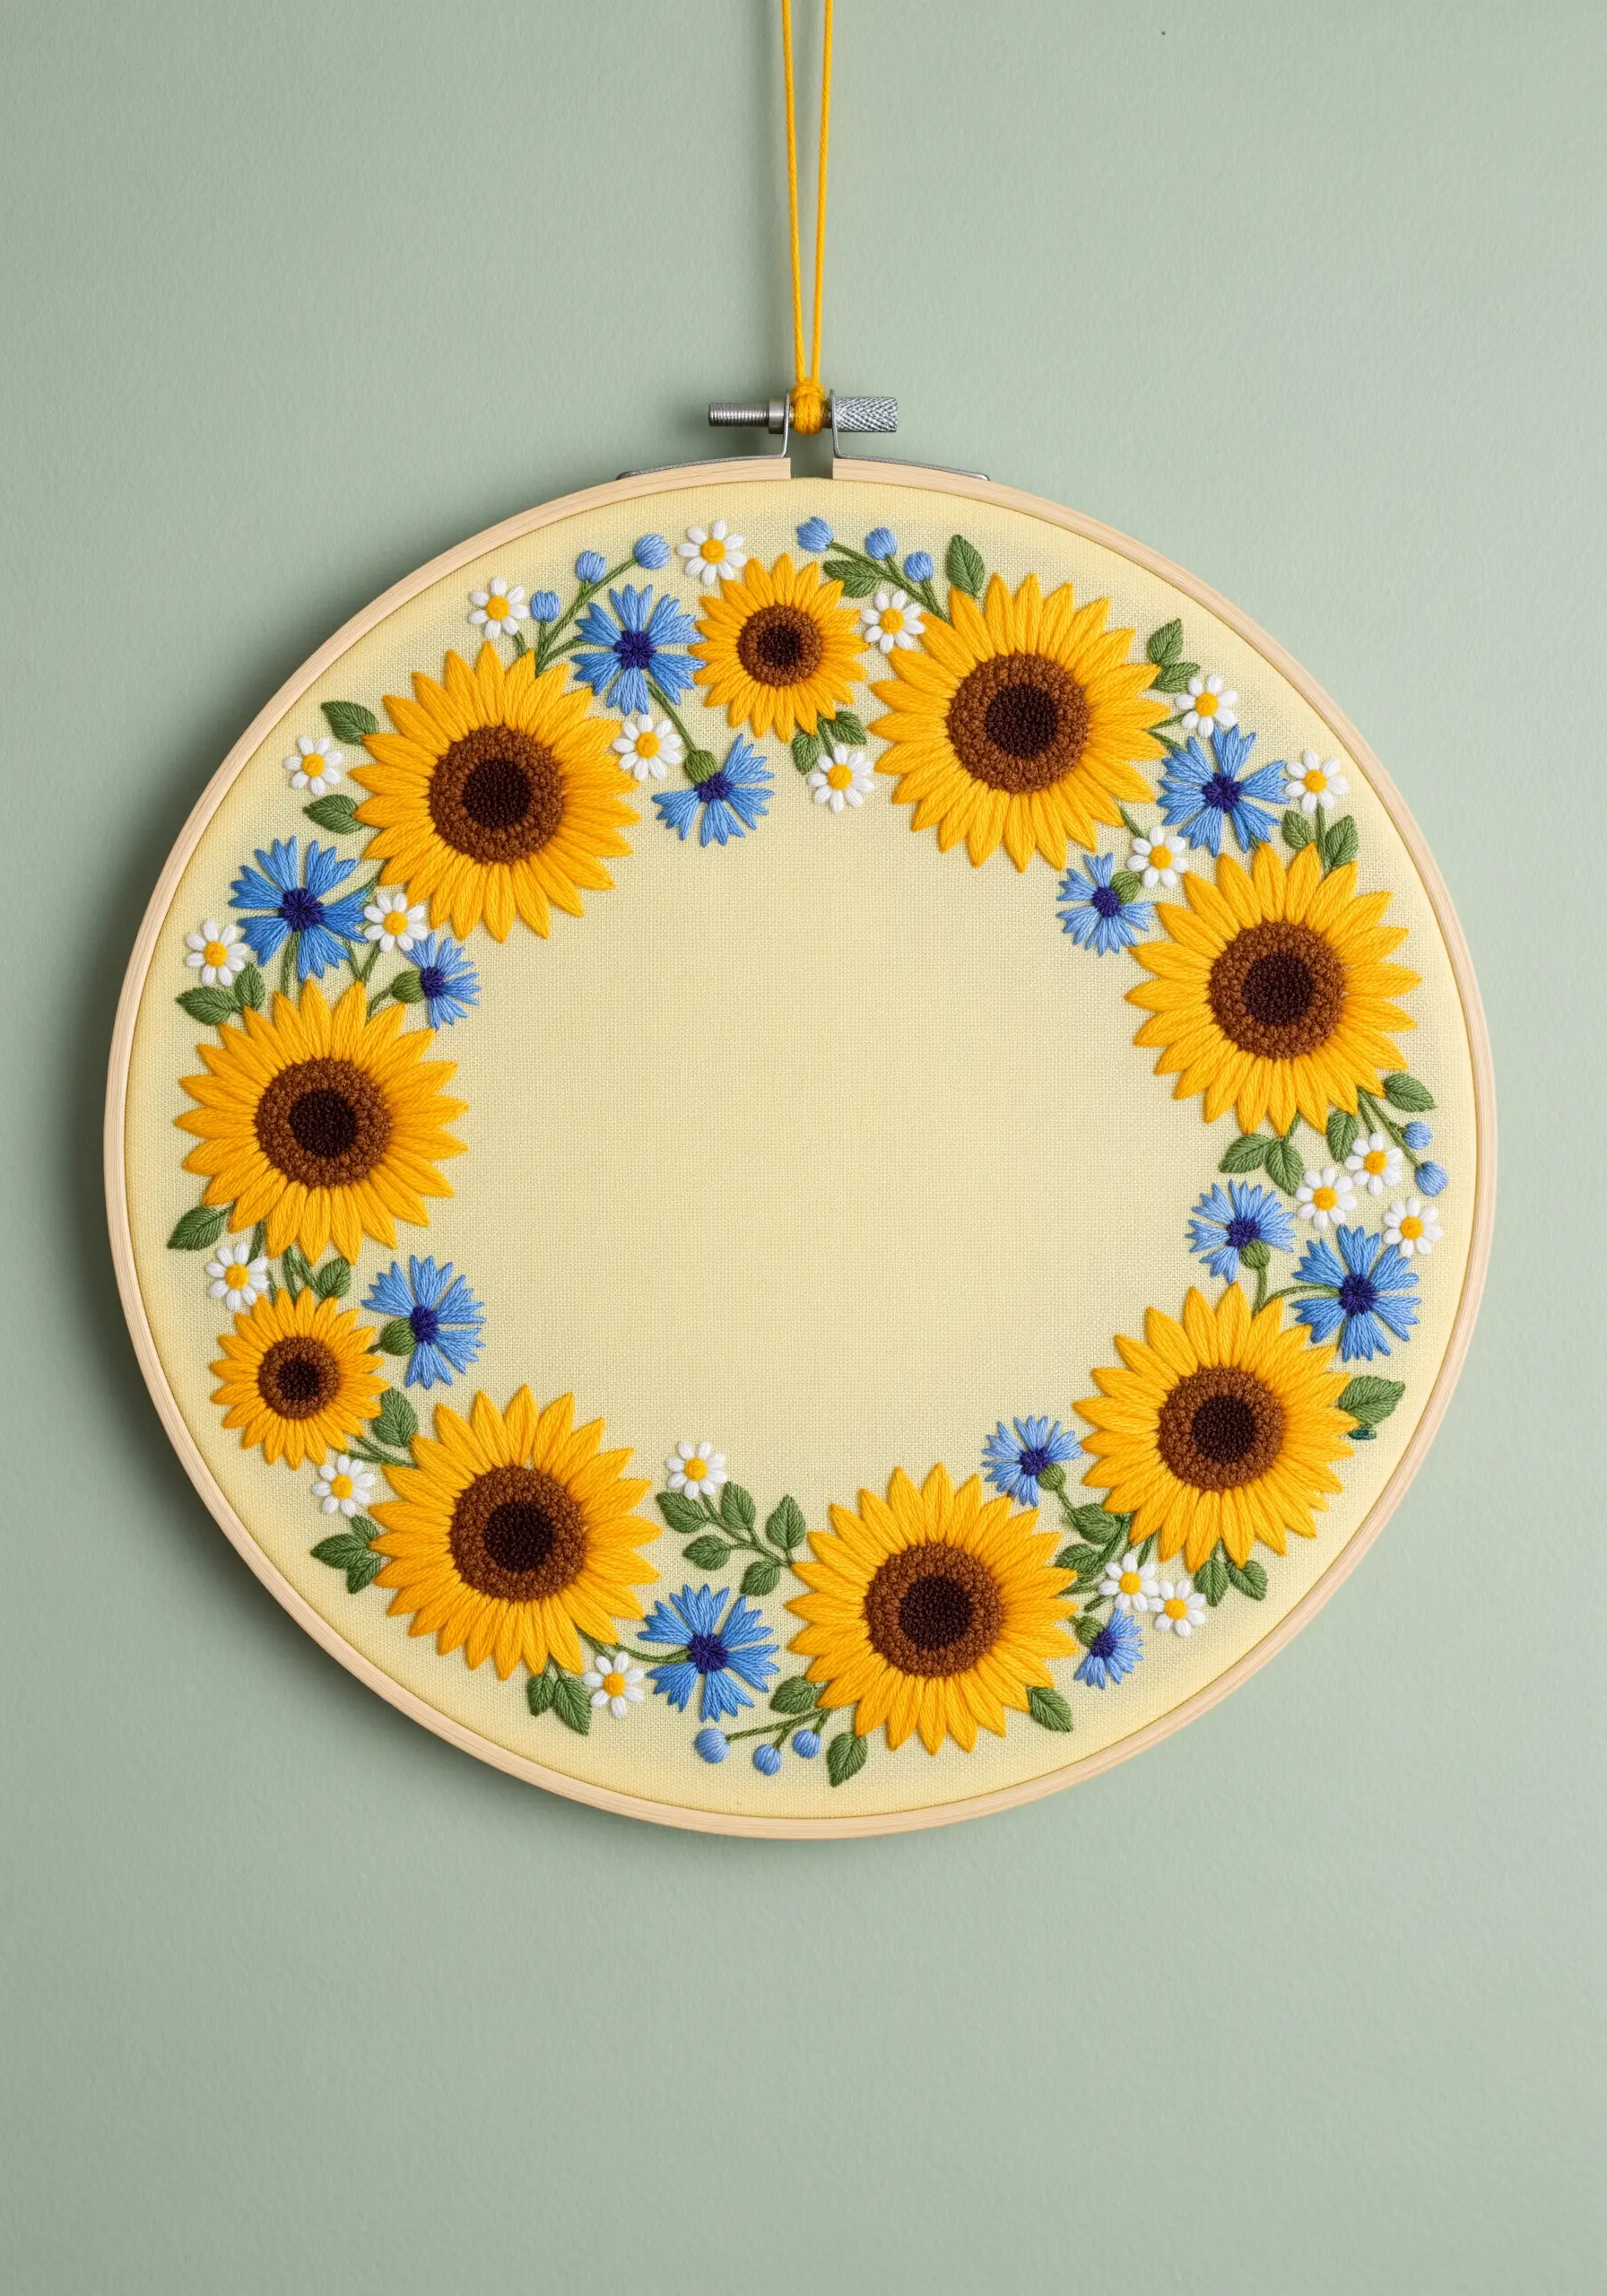
Make your floral wreath feel joyful and alive by pairing complementary colors—the warm gold of the sunflowers sings against the cool periwinkle blue of the cornflowers.
Use long and short stitch for the sunflower petals to blend two or three shades of yellow, adding realistic depth and movement.
The cornflowers are small clusters of lazy daisy stitches, which keeps them from competing with the larger sunflowers.
Stitching on a pale yellow fabric enhances the design’s overall warmth and creates a cohesive, sun-drenched palette.
5. Creating Daintiness with Micro-Florals
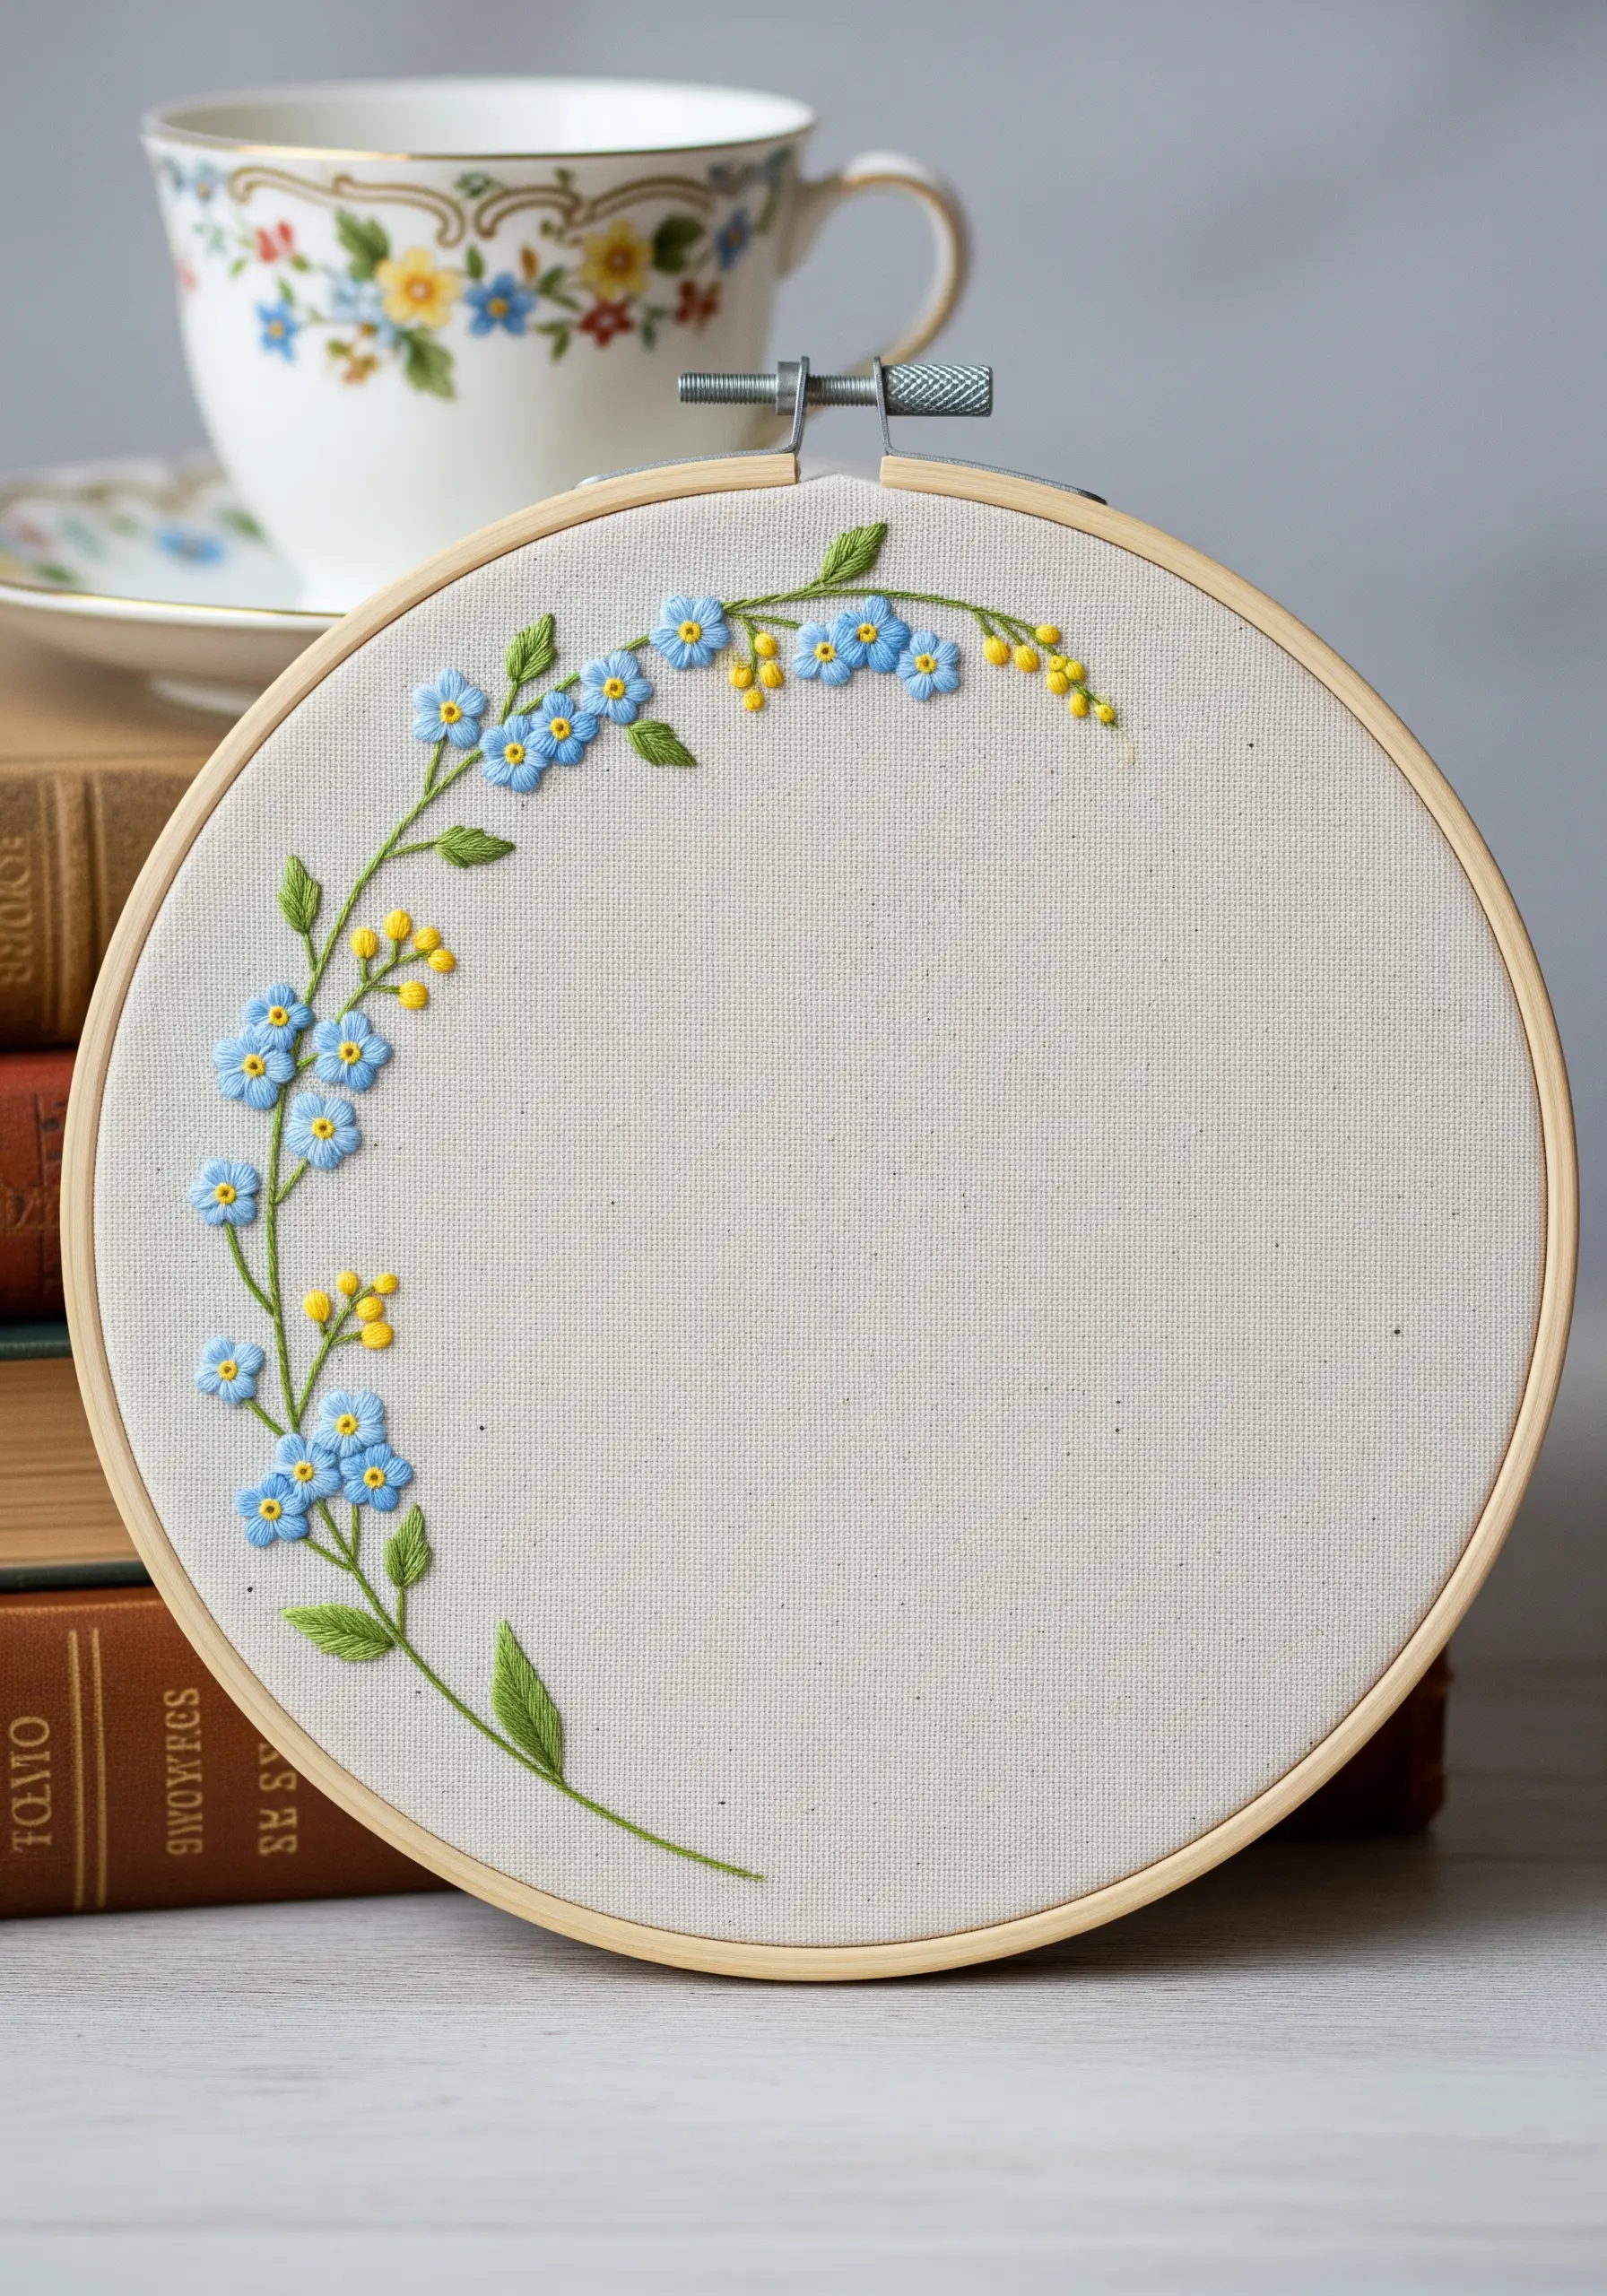
The key to truly delicate embroidery is working at a small scale with fine thread.
Use only one or two strands of floss to create these forget-me-nots. Each petal is a single, carefully placed lazy daisy stitch.
A tiny French knot in a contrasting yellow marks the center, drawing the eye and completing the flower.
For the slender, curving stems, use a whipped backstitch. This technique covers the stepped look of a standard backstitch, resulting in a perfectly smooth and elegant line—essential for refined feminine floral micro-embroidery frames.
6. Building Rich Autumnal Textures

Capture the essence of autumn by focusing on a rich variety of textures and a warm, analogous color scheme.
For the large orange mums, use a dense, slightly padded satin stitch to create a satisfyingly plump shape.
Contrast this with woven wheel roses, satin-stitched acorns, and defined maple leaves that combine fishbone stitch with a sharp stem stitch outline.
Stitching on a dark, even-weave fabric like Aida cloth makes these deep oranges, burgundies, and golds feel exceptionally vibrant and cozy.
7. Stitching Whimsical Nursery Motifs
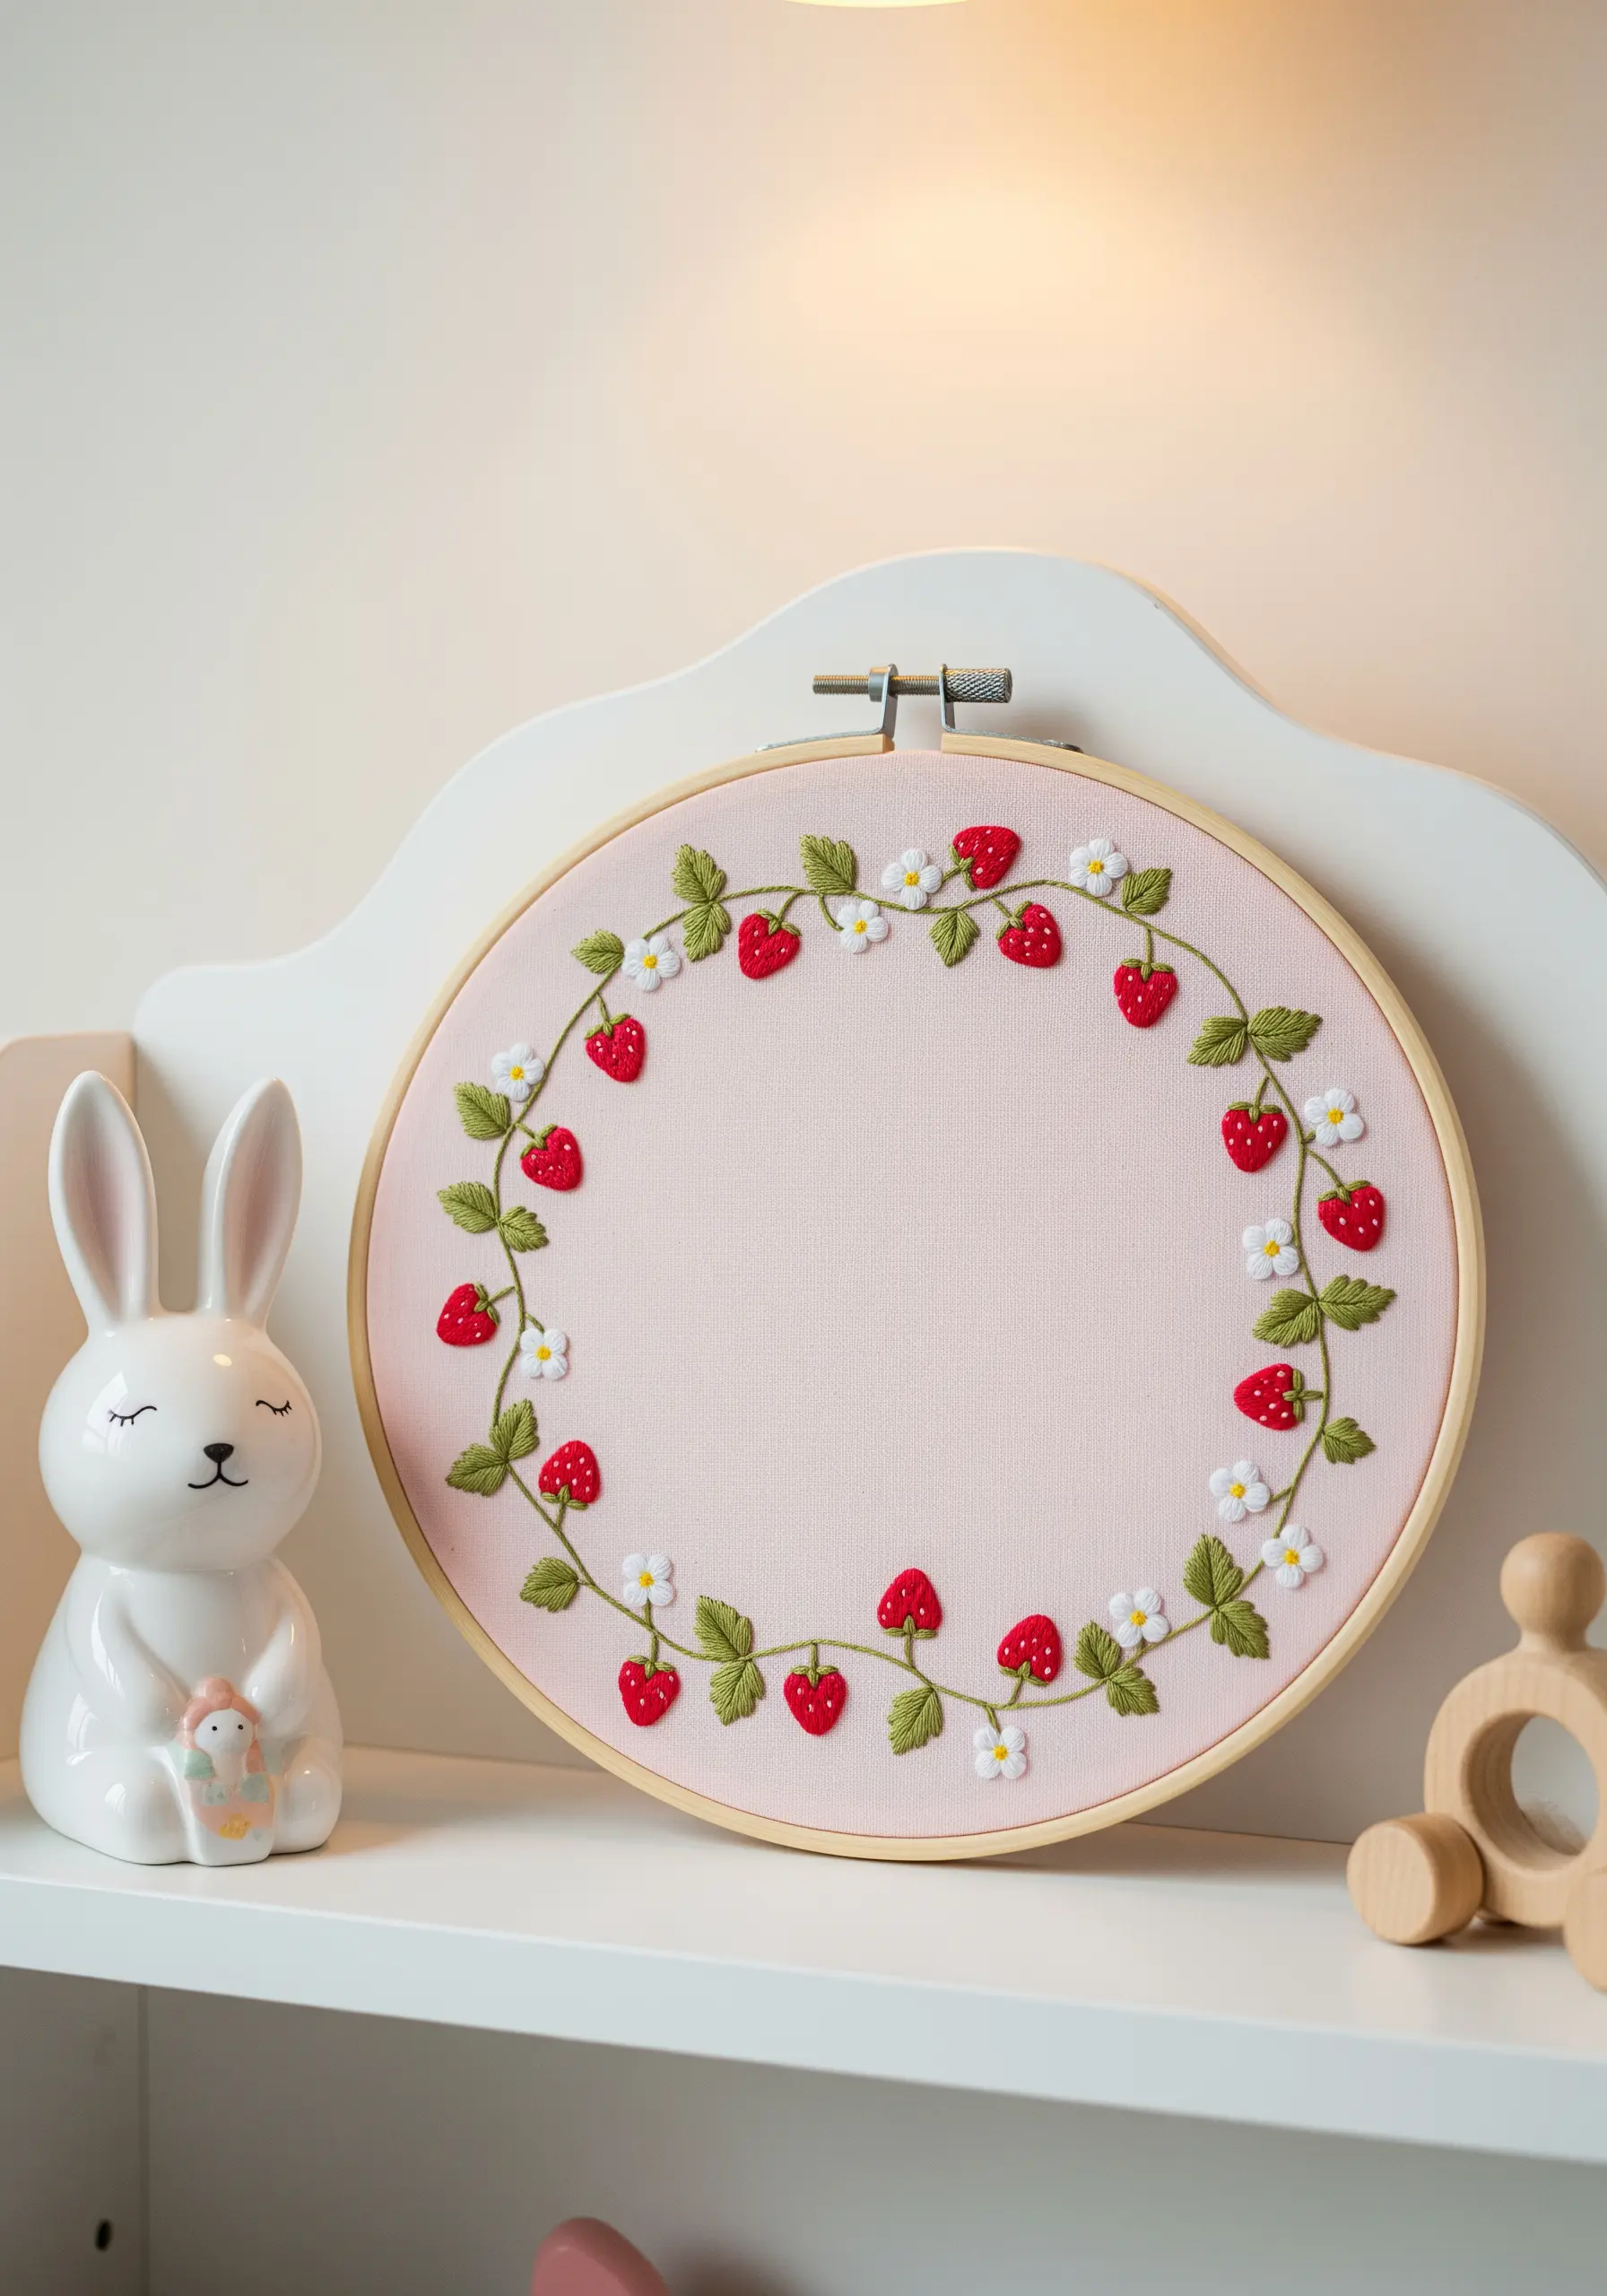
Create a sweet and playful design perfect for a nursery by using simple, dimensional stitches.
Pad your satin stitch for the strawberries by first laying down a few seed stitches; this will give them a plump, 3D effect that invites touch.
Add tiny seeds with single straight stitches in white or pale yellow floss.
The cheerful white blossoms are simply five lazy daisy stitches arranged around a central yellow French knot. A simple backstitch for the connecting vines keeps the whole design light and airy, making it perfect for nursery stitch art wall ideas.
8. Combining Ribbon Embroidery with Metallic Thread

For a look of true luxury, combine different materials to create a compelling textural contrast.
The white roses gain their soft, sculptural volume from silk ribbon. Use folded ribbon stitches and ribbon stitch to form the petals, allowing the ribbon to twist naturally for a realistic effect.
Juxtapose this softness with the sharp, delicate lines of ivy vines stitched in a fine gold metallic thread using split stitch.
This pairing of soft, matte ribbon and sharp, shimmering thread on a deep navy fabric creates a design that is both opulent and sophisticated.
9. Capturing a Meadow with Varied Stitch Heights
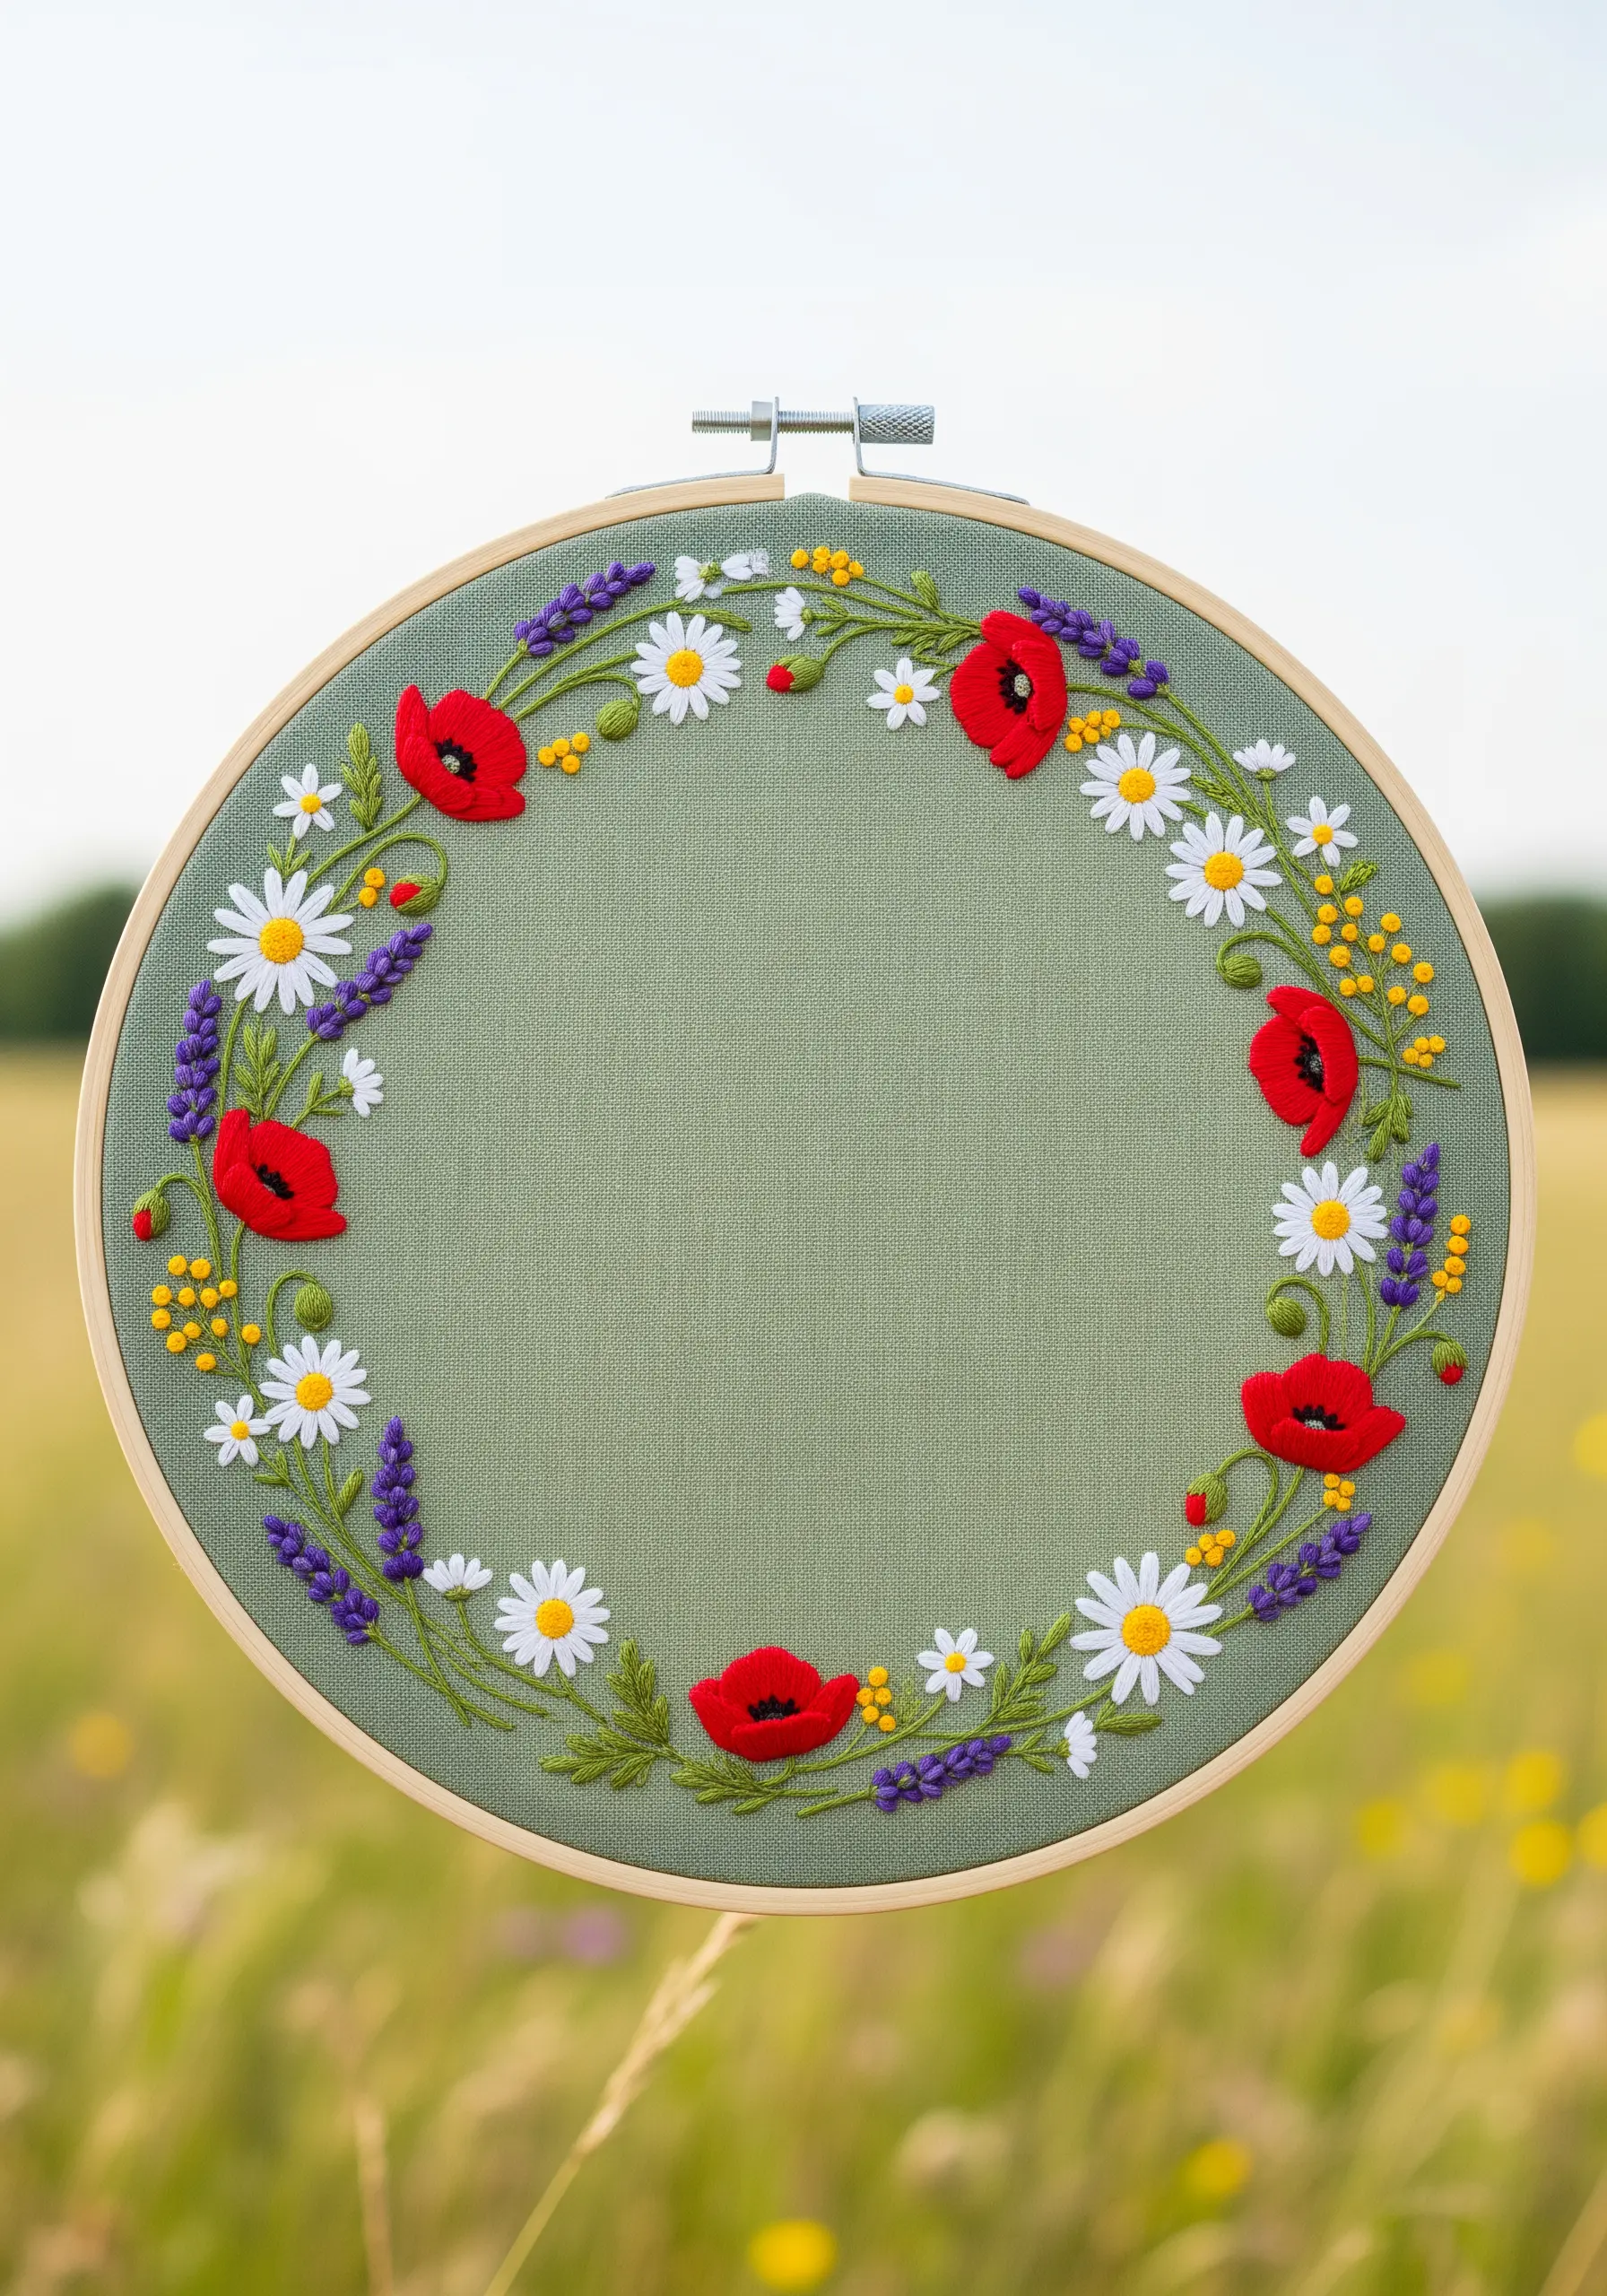
To evoke the feeling of a natural wildflower meadow, you need to create variety in dimension and texture.
Make your poppies the star by using a padded satin stitch, which lifts them from the surface of the fabric. Keep the daisy petals flat with simple lazy daisy stitches, letting them recede slightly.
Fill in the gaps with French knots and straight stitches of varying heights and colors to represent smaller filler flowers.
This intentional variation in stitch height makes the wreath feel dynamic, abundant, and alive.
10. Integrating Geometric Lines with Soft Florals
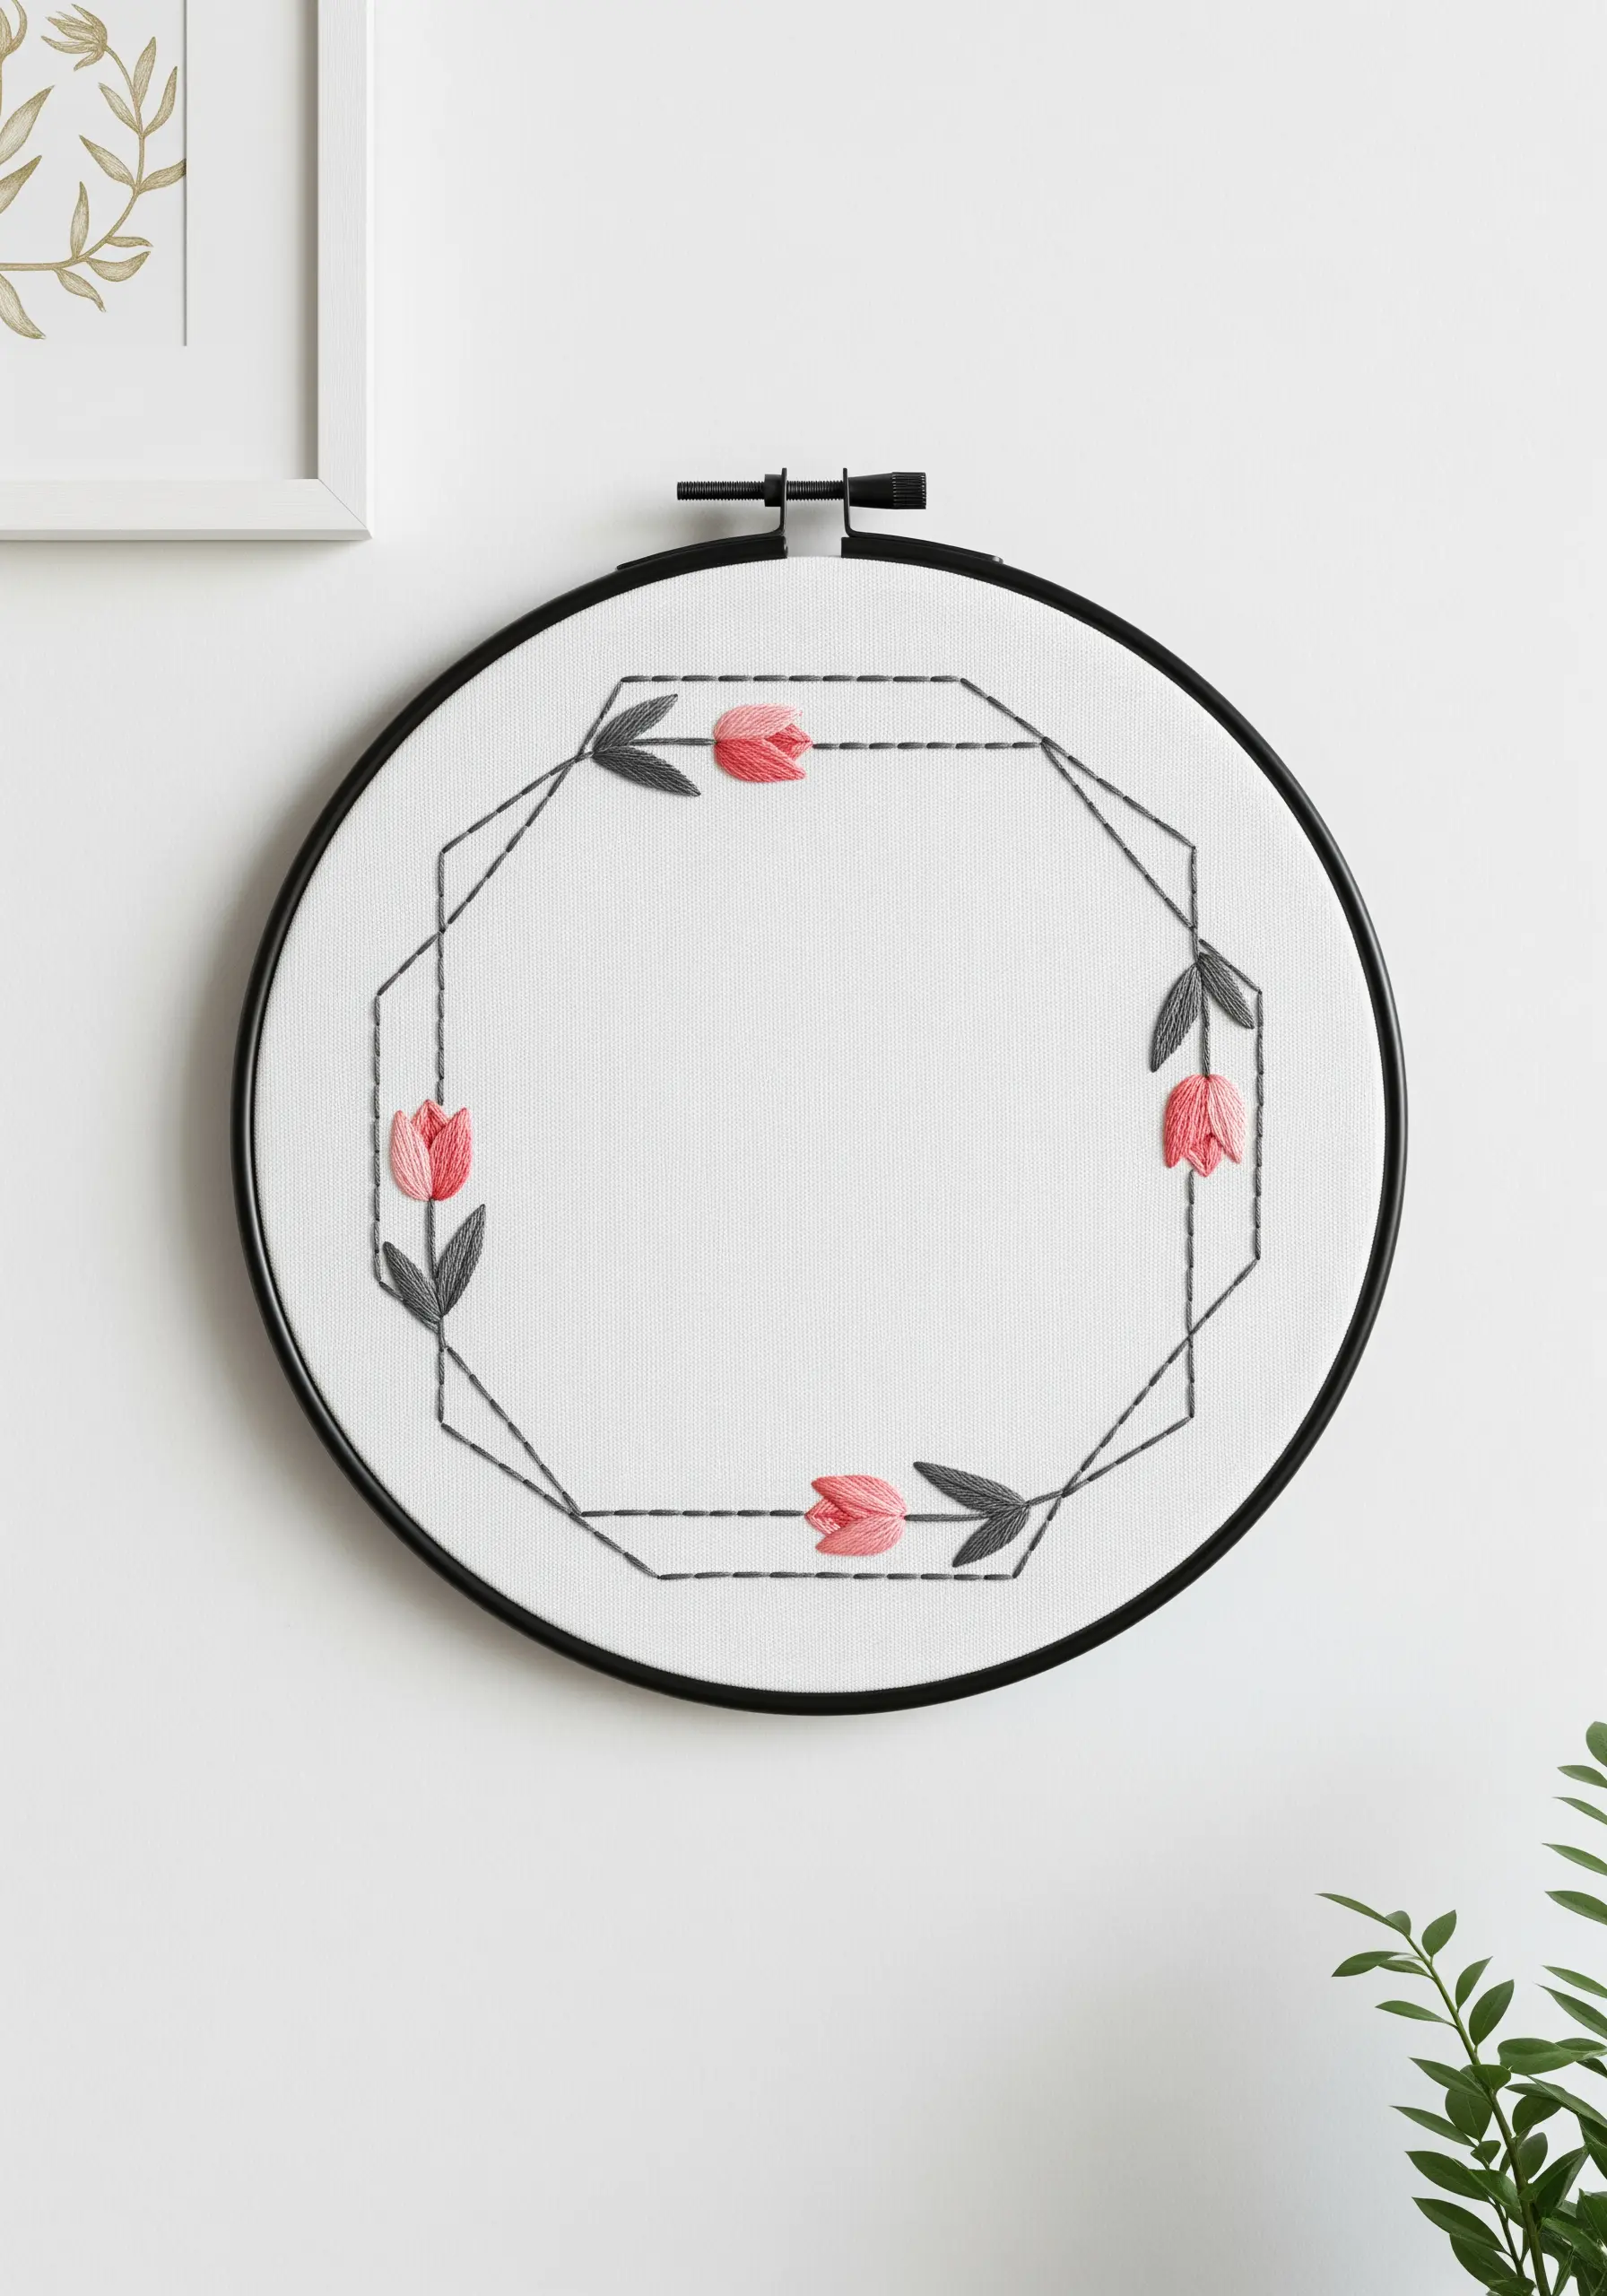
Achieve a chic, contemporary aesthetic by contrasting the rigidity of geometric lines with the softness of organic florals.
First, establish the octagonal frame using a simple, dark-colored backstitch or running stitch. This provides a clean, graphic structure for the design.
Next, fill the tulip shapes with a smooth satin stitch, angling your stitches to follow the natural curves of the petals.
This purposeful juxtaposition is the key to creating balanced and minimal embroidery designs that feel effortlessly stylish.
11. Creating Depth with a Monochromatic Palette
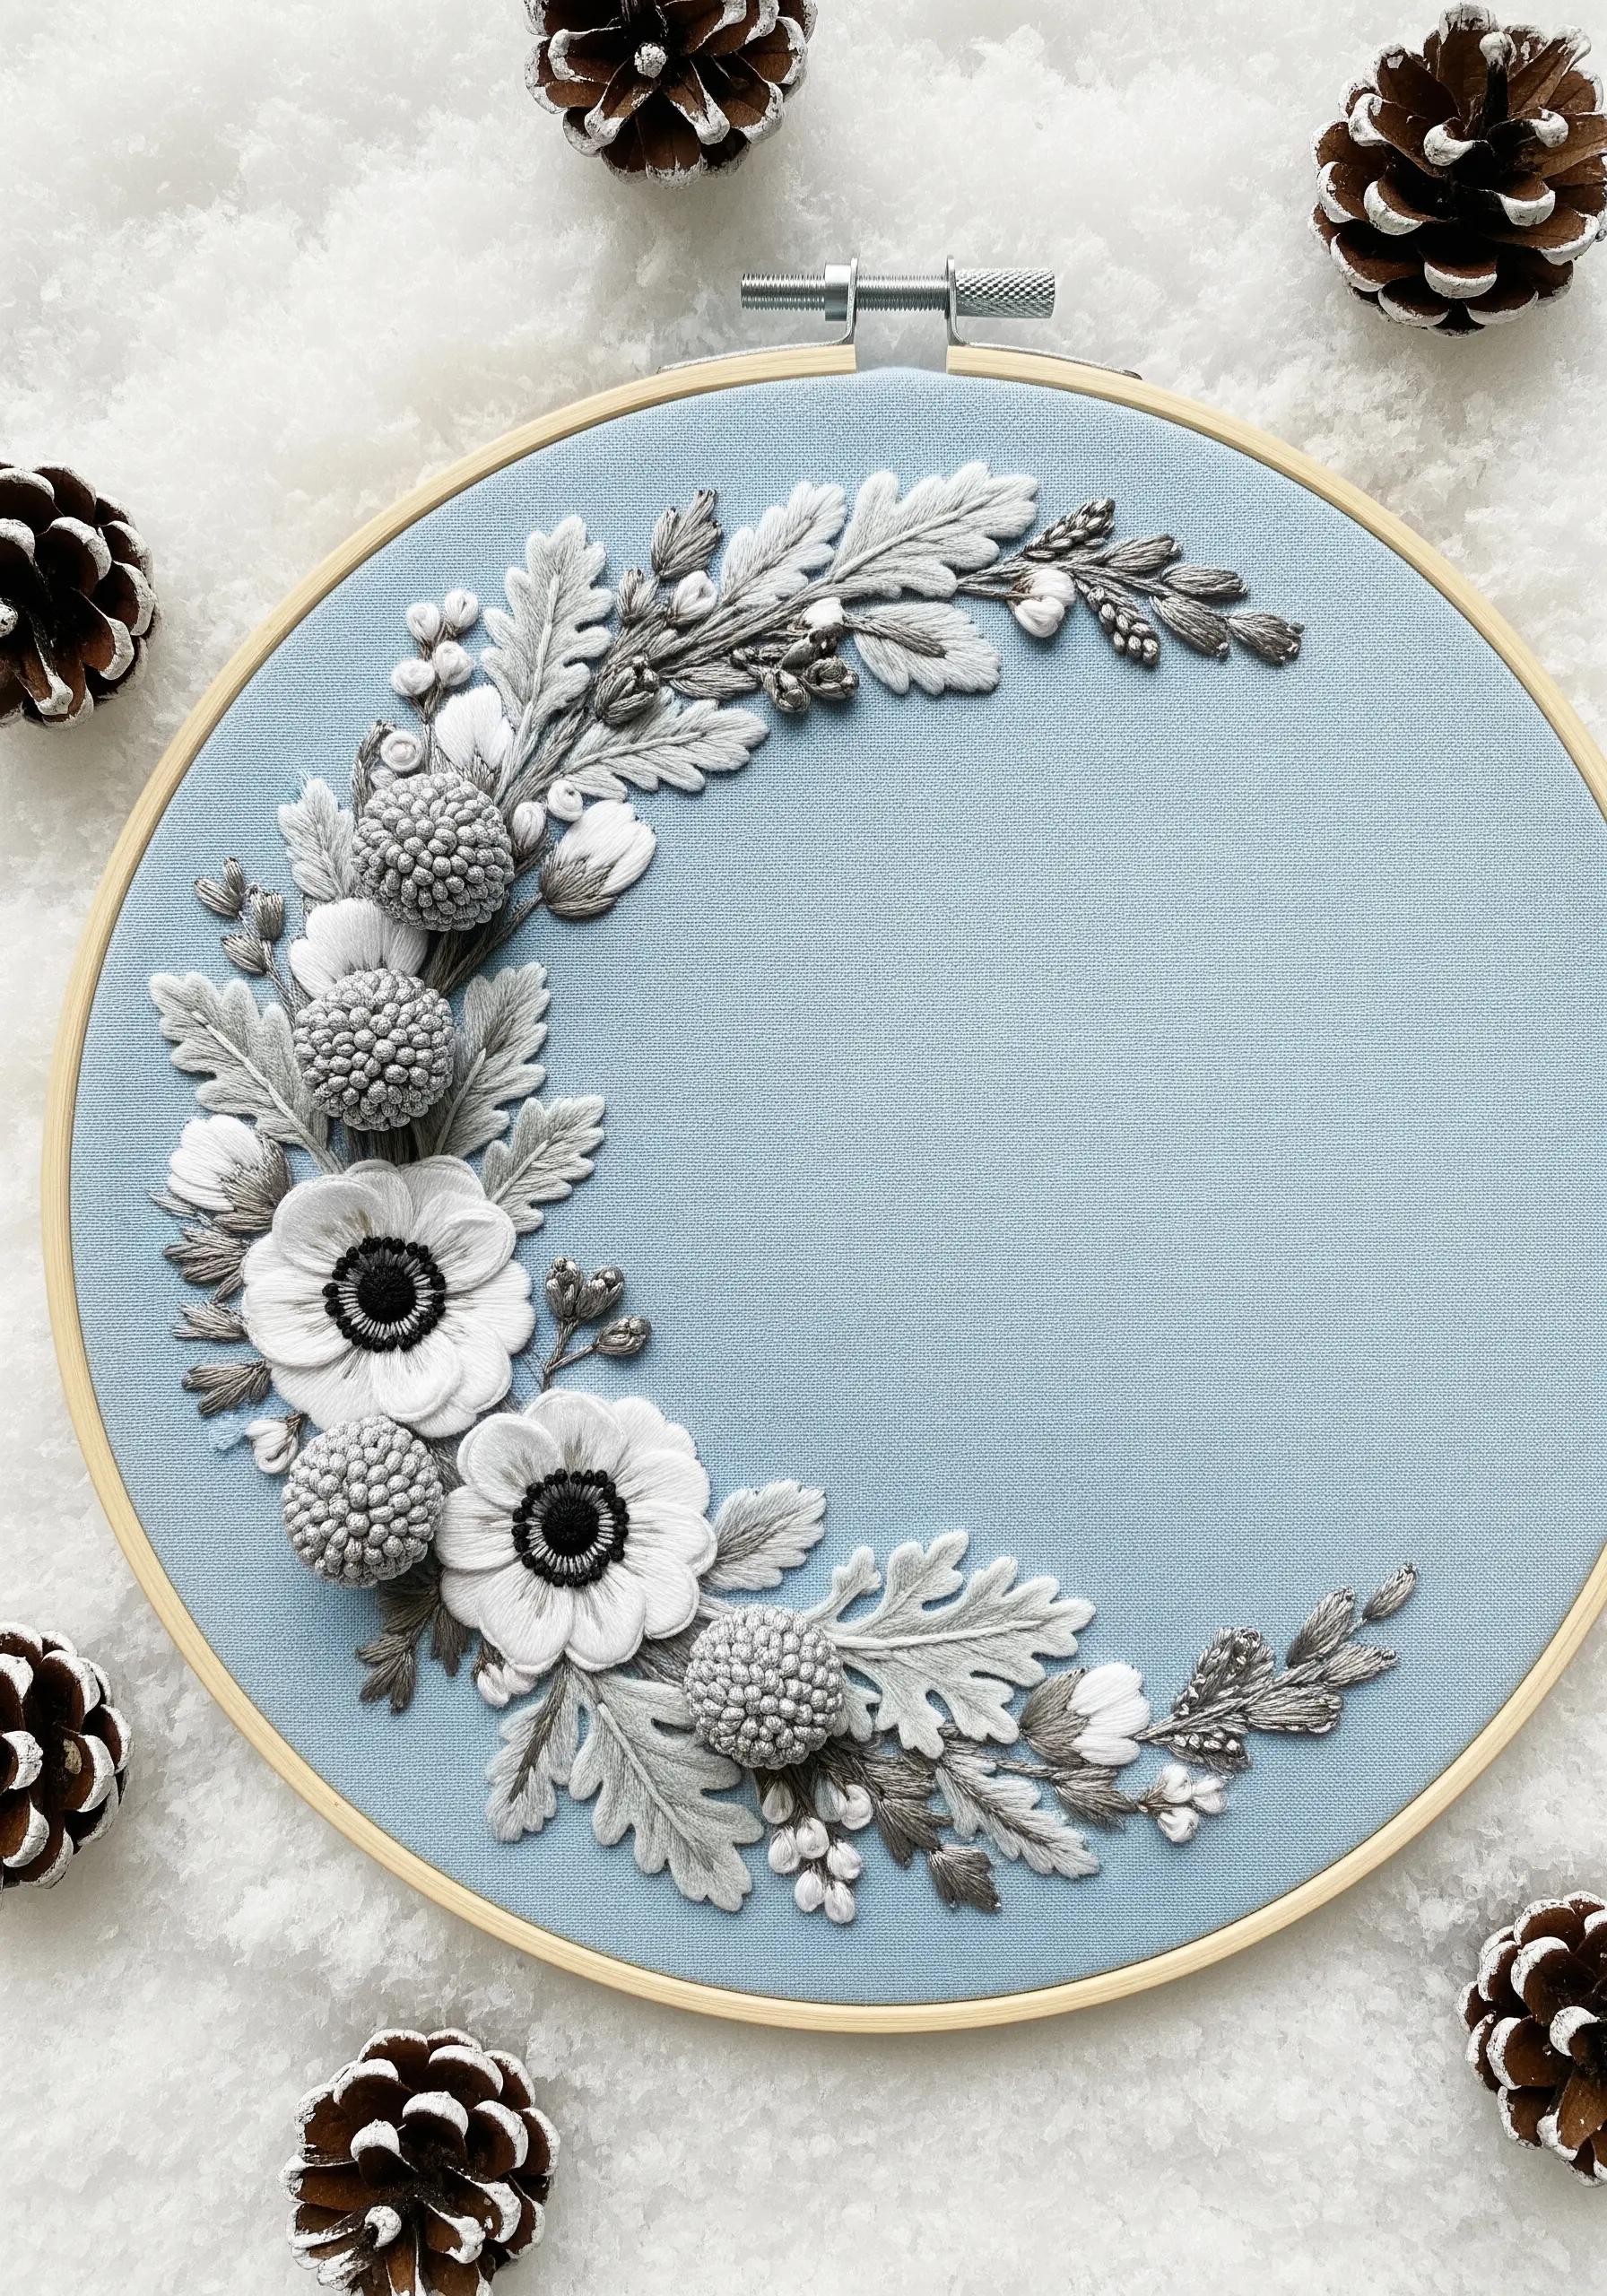
A limited, monochromatic color palette forces you to focus on what truly makes embroidery beautiful: texture.
Use long and short stitch with shades of white and pale grey to give the anemone petals soft, realistic shading.
Create a dense, highly textured center with a tight cluster of black French knots—this provides a crucial dark anchor point in the light-colored design.
For the dusty miller leaves, capture their fuzzy texture by overlapping silvery-grey lazy daisy stitches. The result is a design that is incredibly sophisticated and serene.
12. Illustrative Stitching for Storybook Scenes
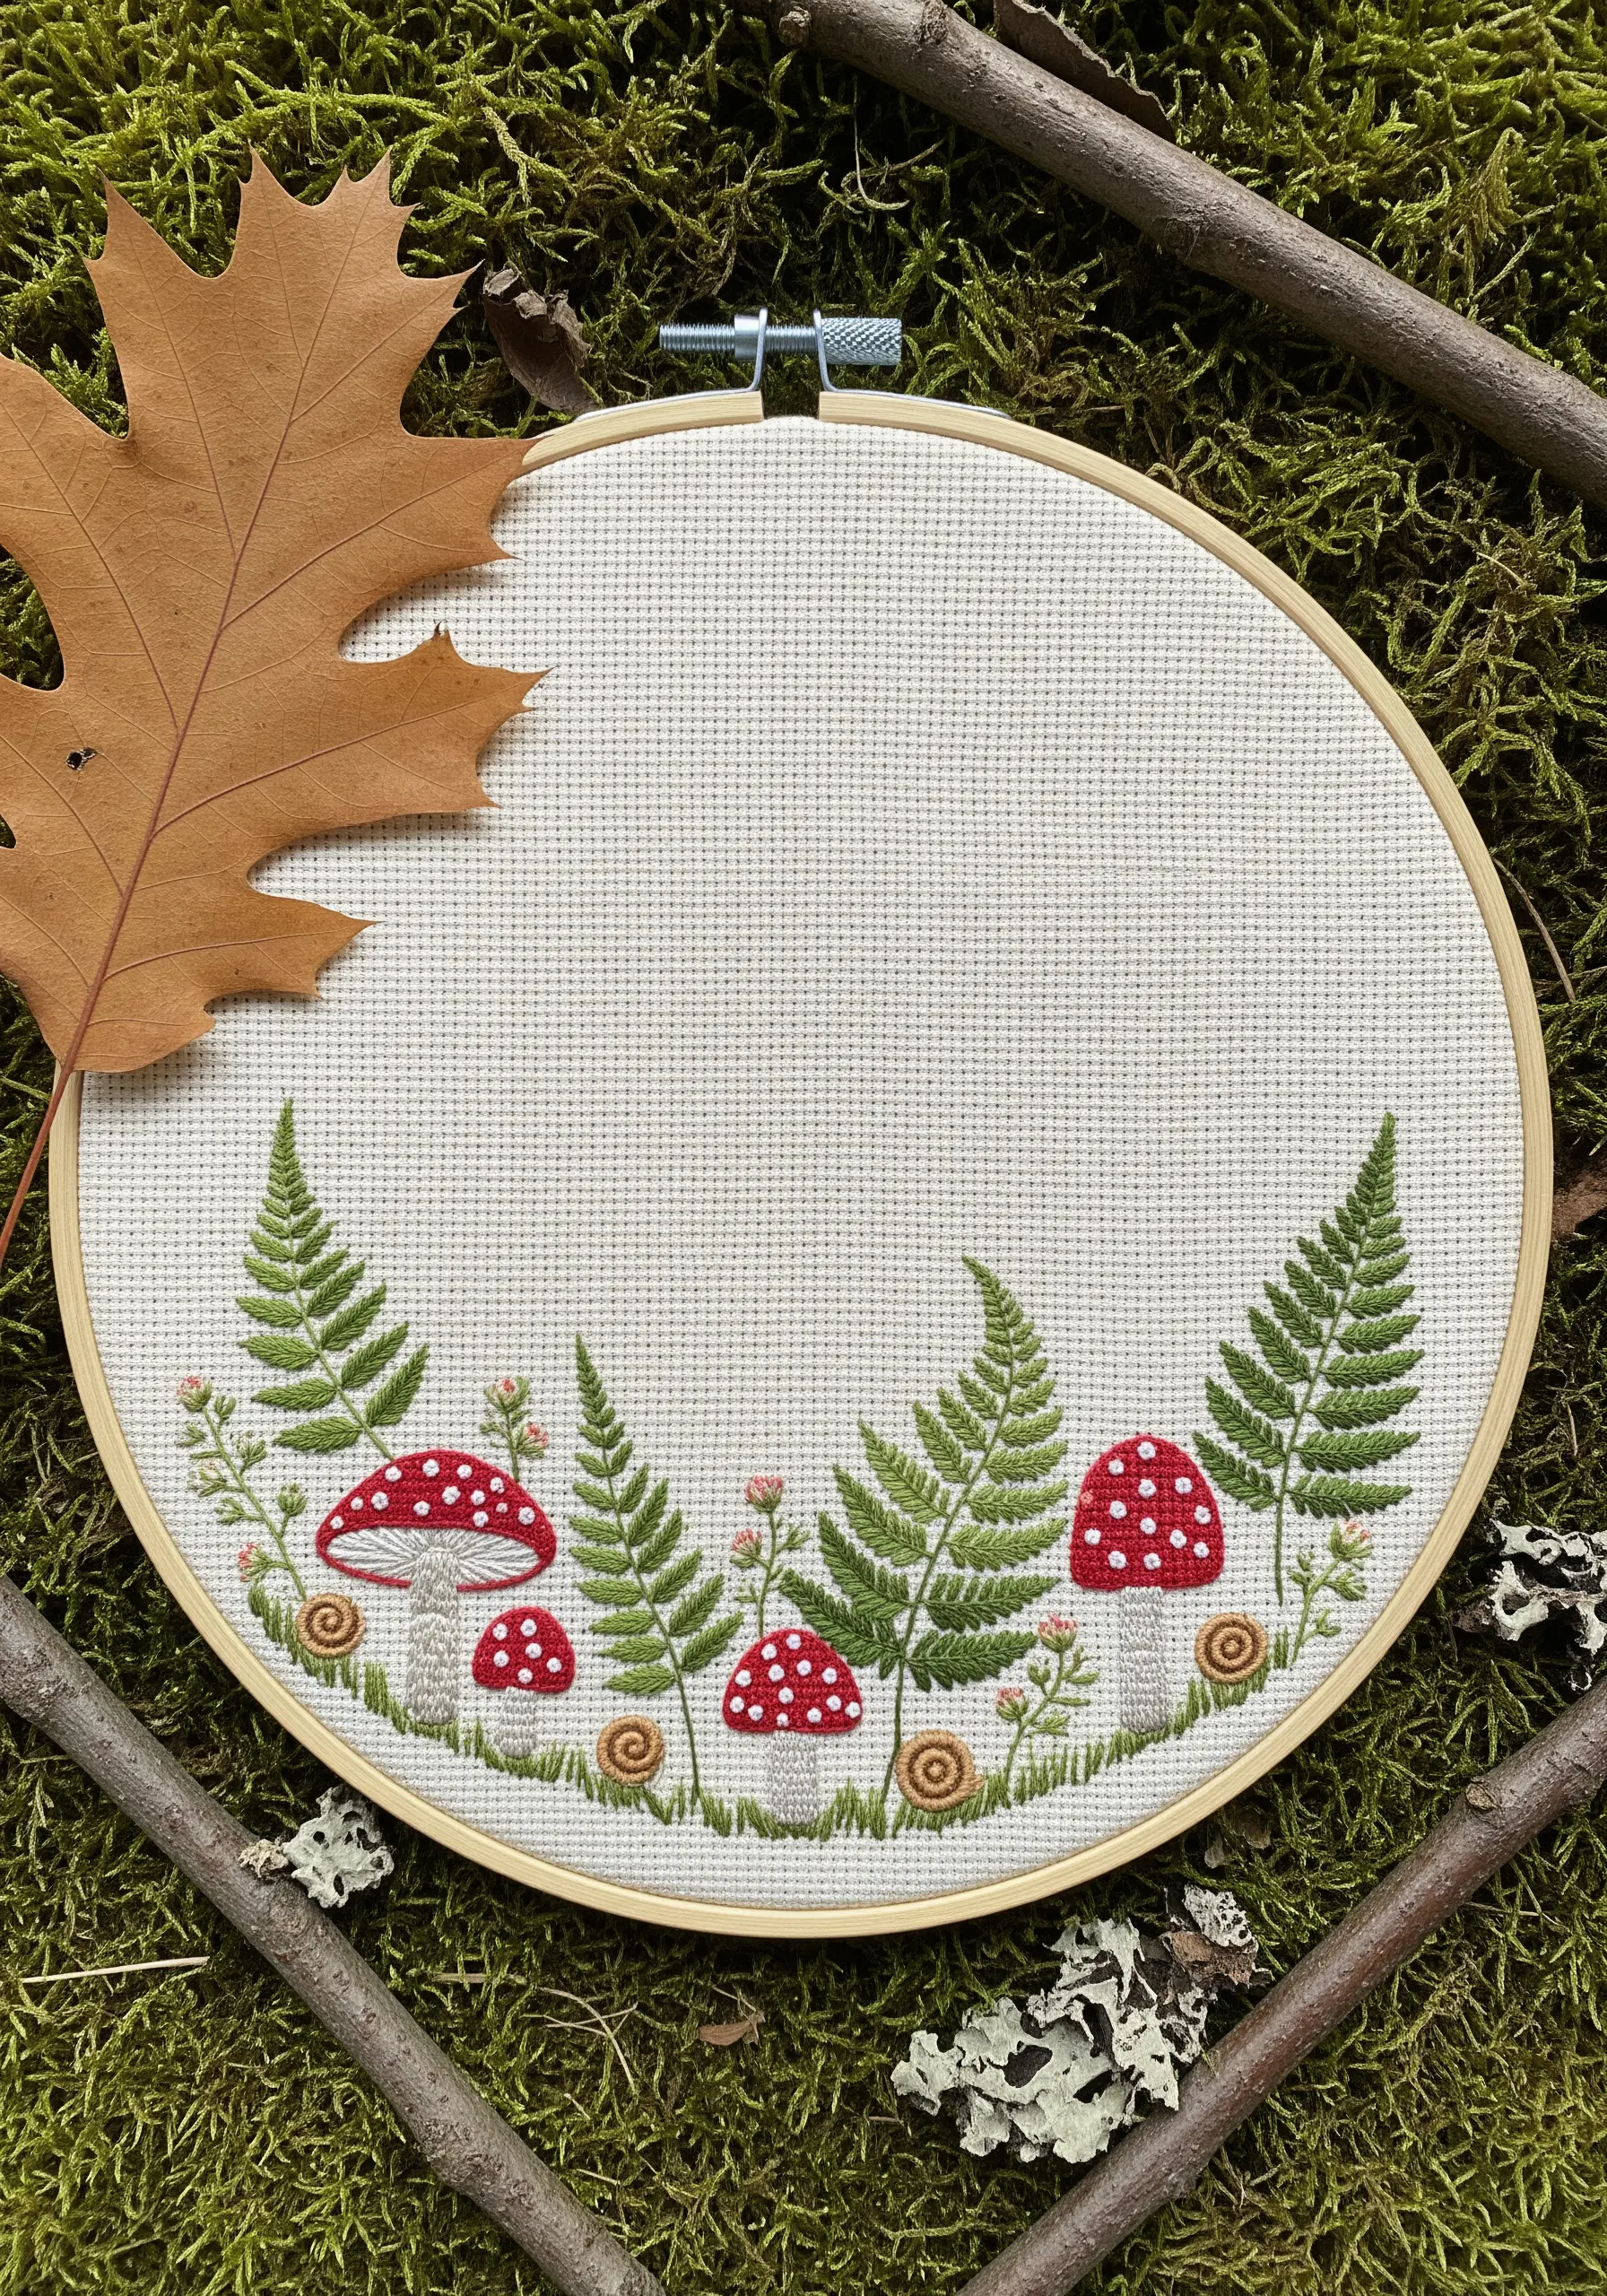
Approach this design like you’re illustrating a children’s book, using stitches to create distinct shapes and details.
The mushroom caps are smooth satin stitch, with the iconic spots created by adding white French knots on top.
To create the delicate fern fronds, use the fly stitch, working each stitch closely to the next along a central stem line.
Tiny details like the swirled stem-stitch snails add a layer of narrative charm, turning a simple border into a miniature woodland world. This is a lovely way to create whimsical forest touches.
13. Crafting an Elegant Monogram Wreath

For a truly timeless and personalized gift, a monogrammed wreath is unparalleled. The key to making it look professional is a perfect raised satin stitch for the initial.
To achieve this, first outline the letter with a split stitch, then fill the shape with a foundation of seed stitches. Finally, cover this padding with smooth, even satin stitches worked horizontally.
Frame this prominent initial with a delicate wreath of fishbone stitch leaves and tiny colonial knot berries. The contrast between the bold letter and the dainty florals is what creates that classic, heirloom quality.
14. Using Jewel Tones on a Dark Background
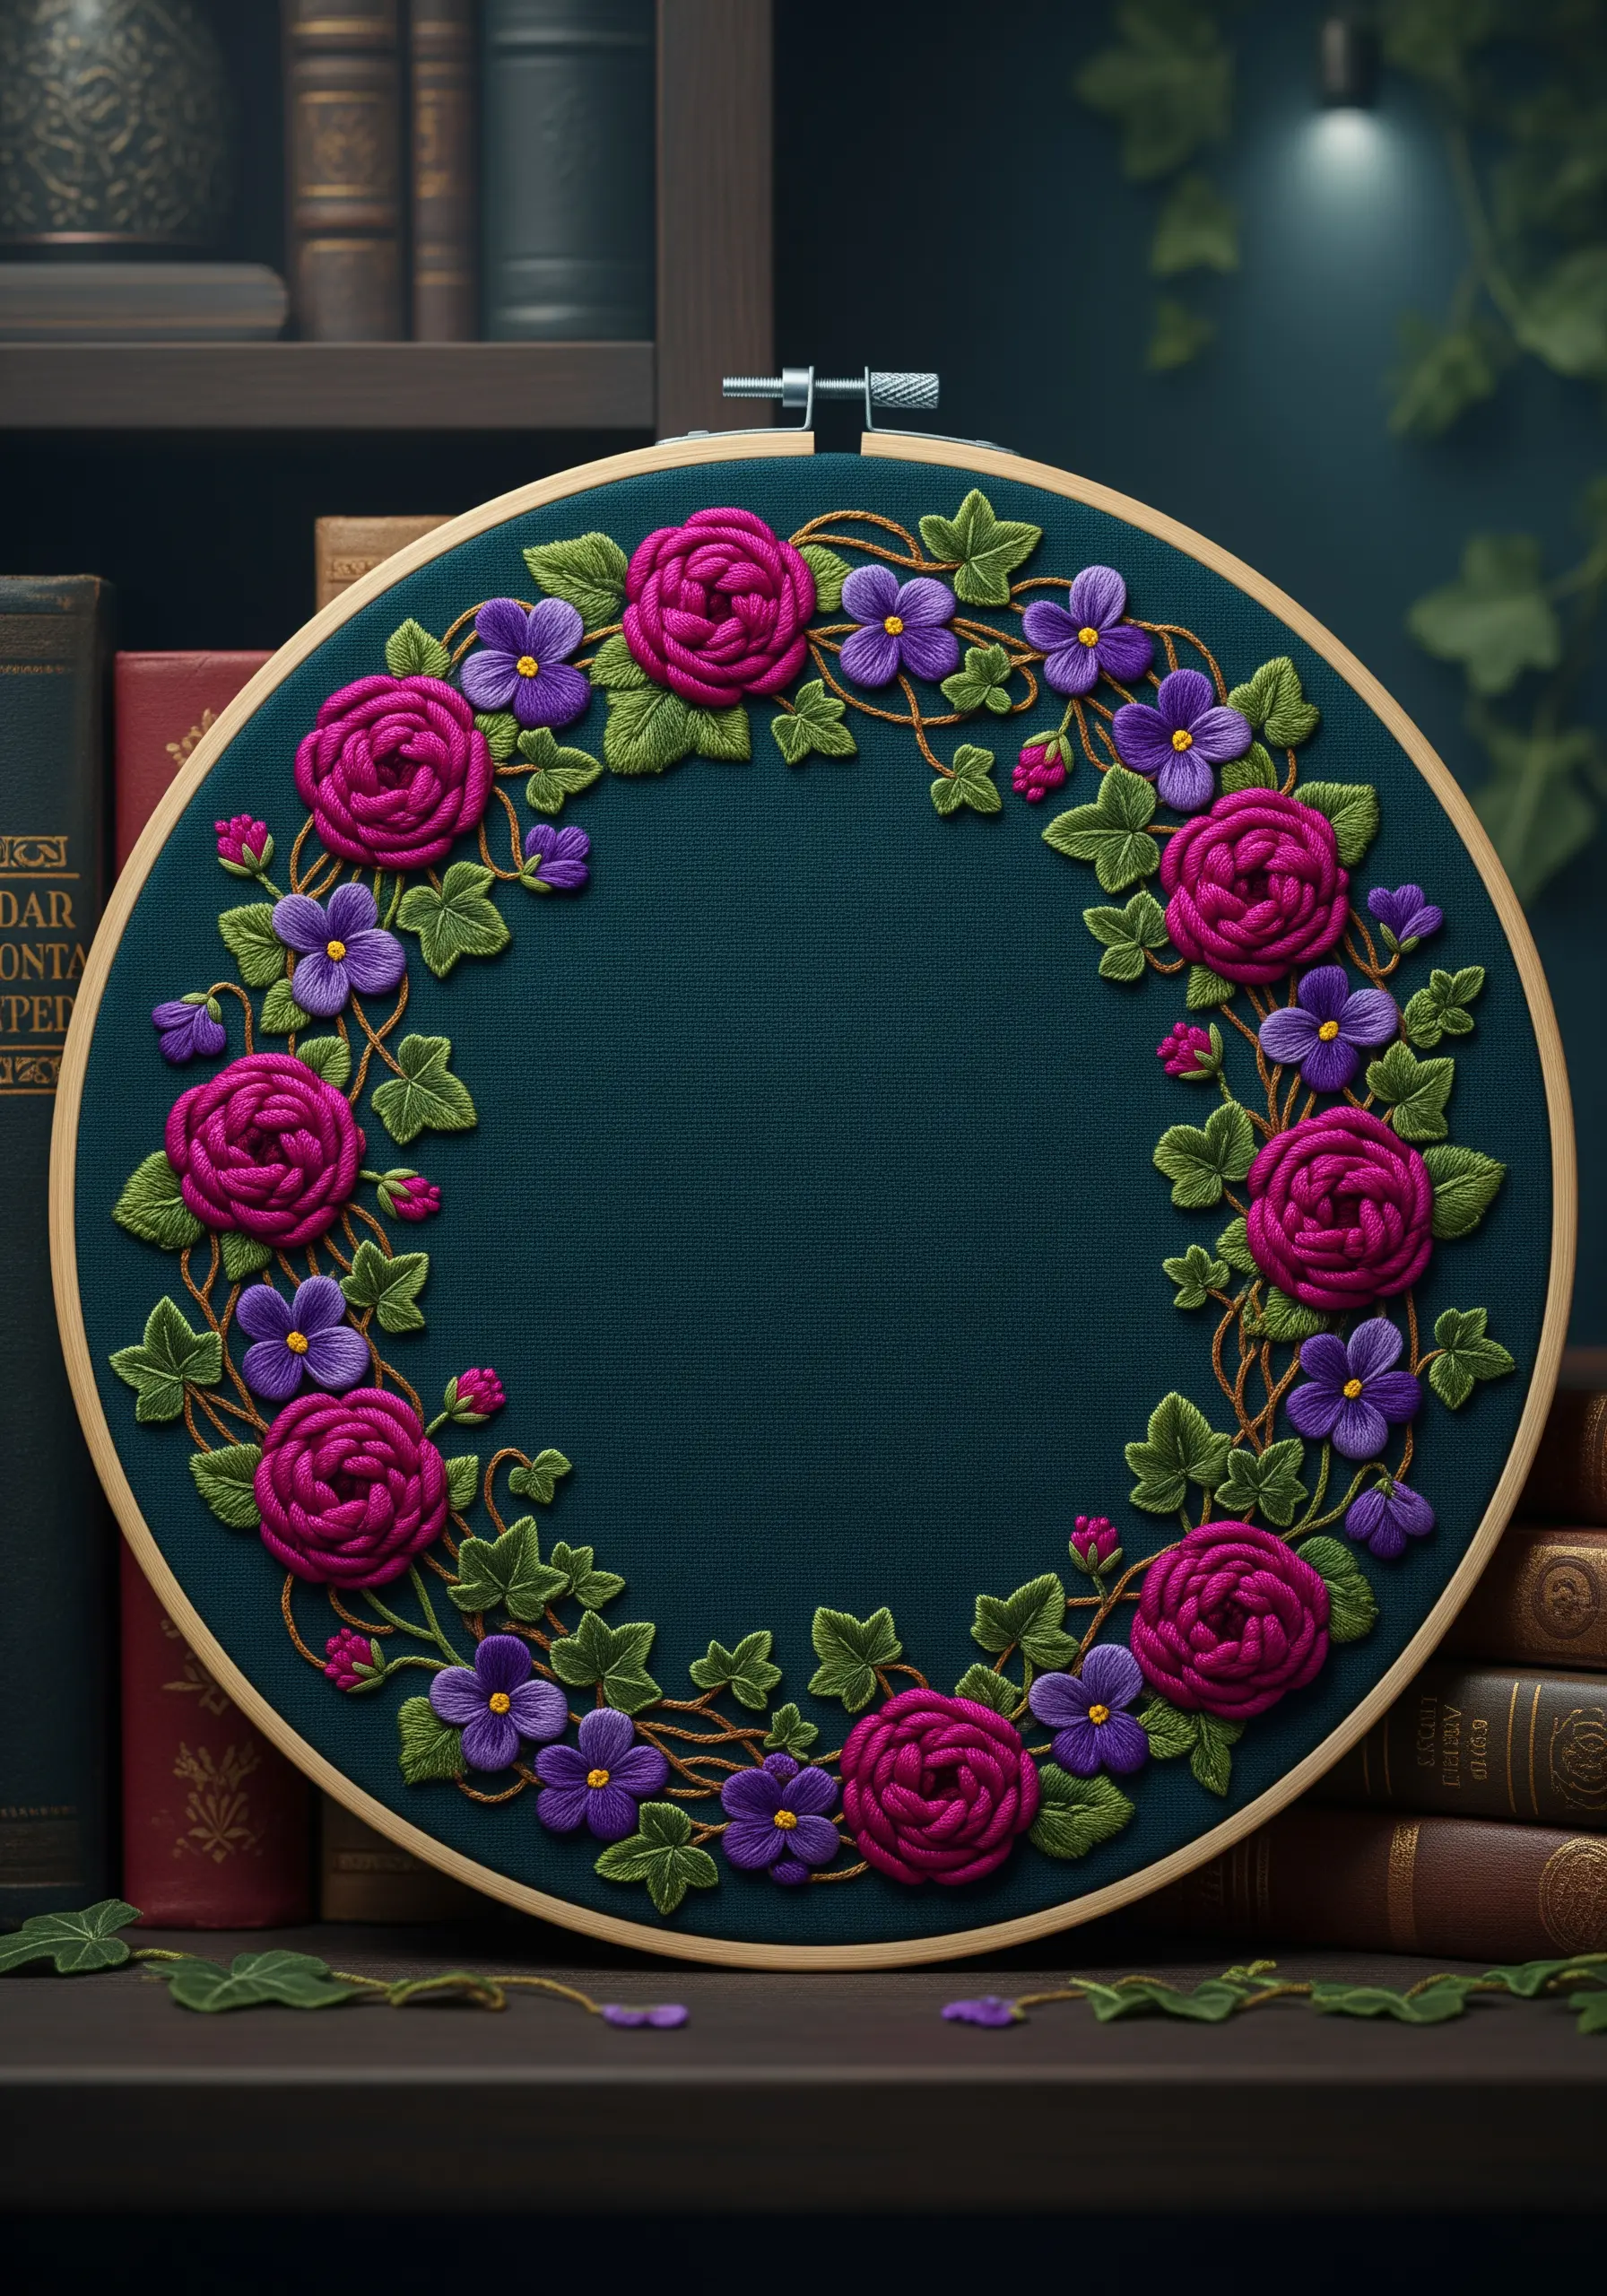
Let your colors shine by stitching with bold, saturated jewel tones on a dark, moody background fabric.
The deep magenta of the woven wheel roses and the rich violet of the satin-stitched pansies feel electric against the dark teal cotton.
To maximize this effect, use a high-quality cotton floss with a natural sheen, and ensure your stitches are dense and even so the background fabric doesn’t show through.
This high-contrast approach creates a visually stunning piece perfect for moody, high-contrast walls.
15. Mixed-Media Nursery Art with Appliqué
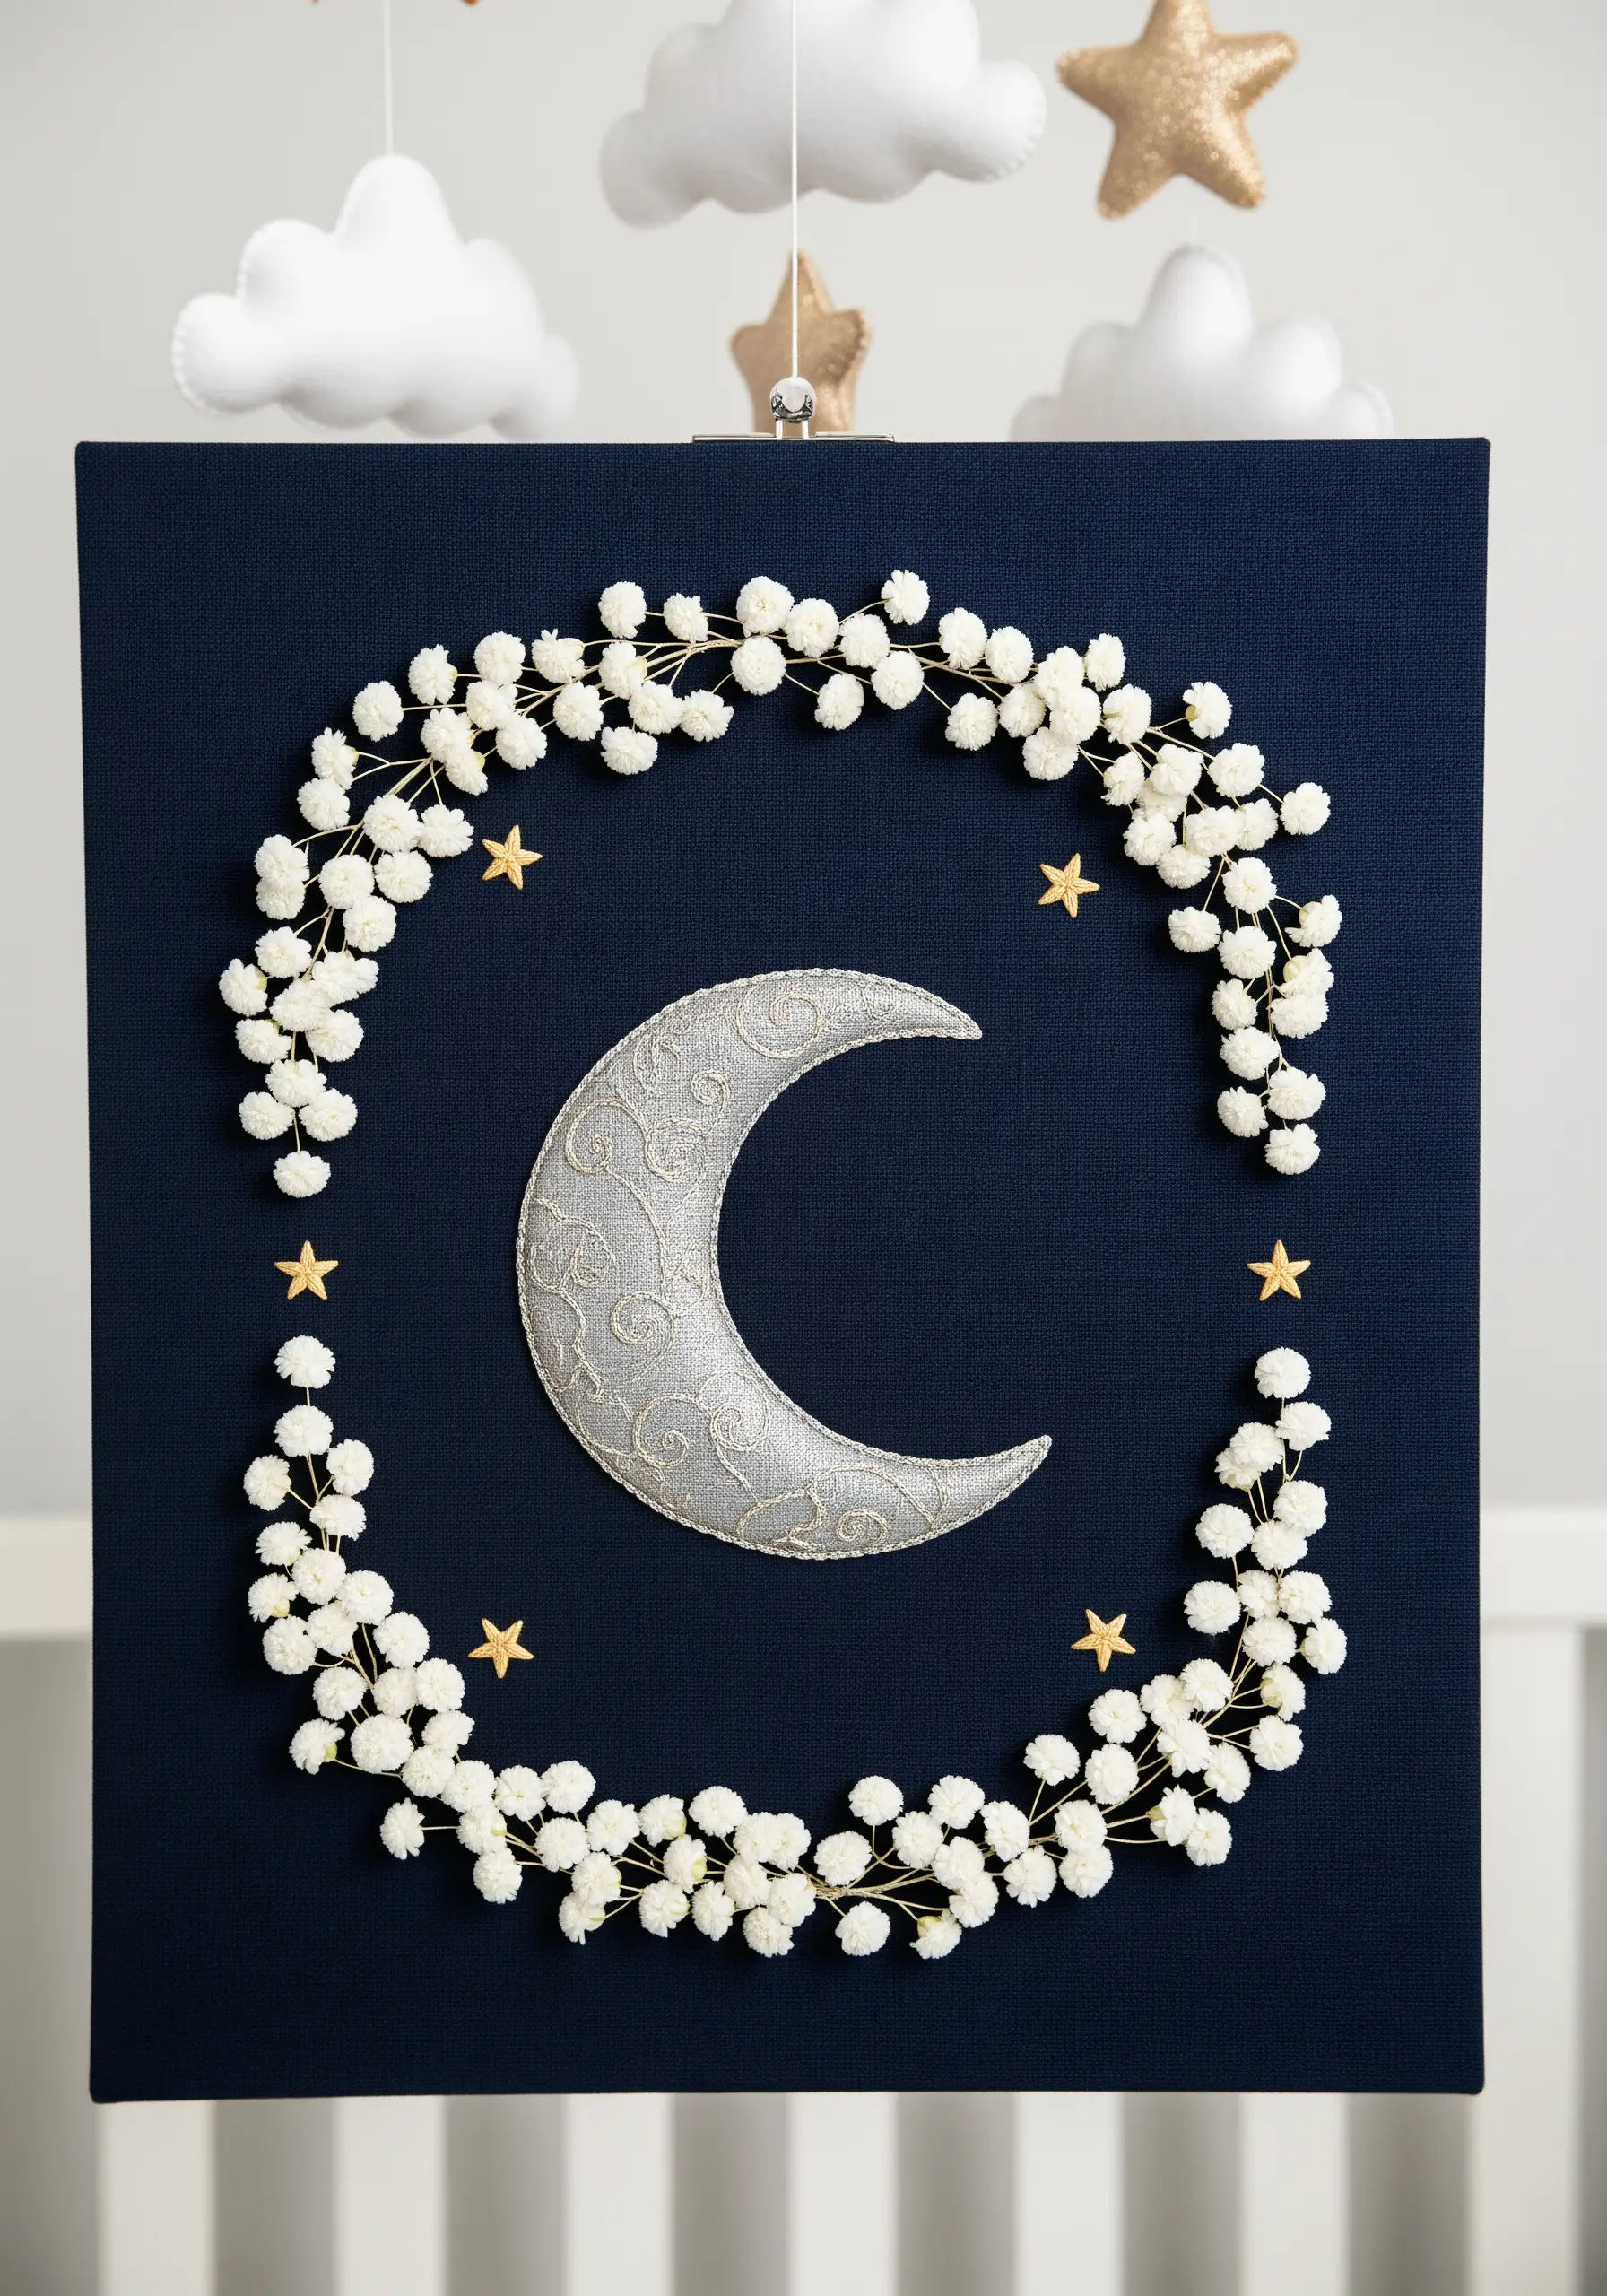
For a soft and tactile nursery piece, introduce the technique of appliqué.
Cut the crescent moon shape from a piece of shimmering silver fabric and tack it down with a neat blanket stitch around the edge. This creates a solid, smooth area that contrasts beautifully with your thread work.
Surround the appliqué moon with a wreath of delicate baby’s breath, formed by creating loose clusters of white French knots on wispy stems.
This beautiful blend of fabric and thread is perfect for creating minimal celestial embroidery wall designs with a soft, dreamy quality.
16. Layering Stitches for Lush Tropical Foliage
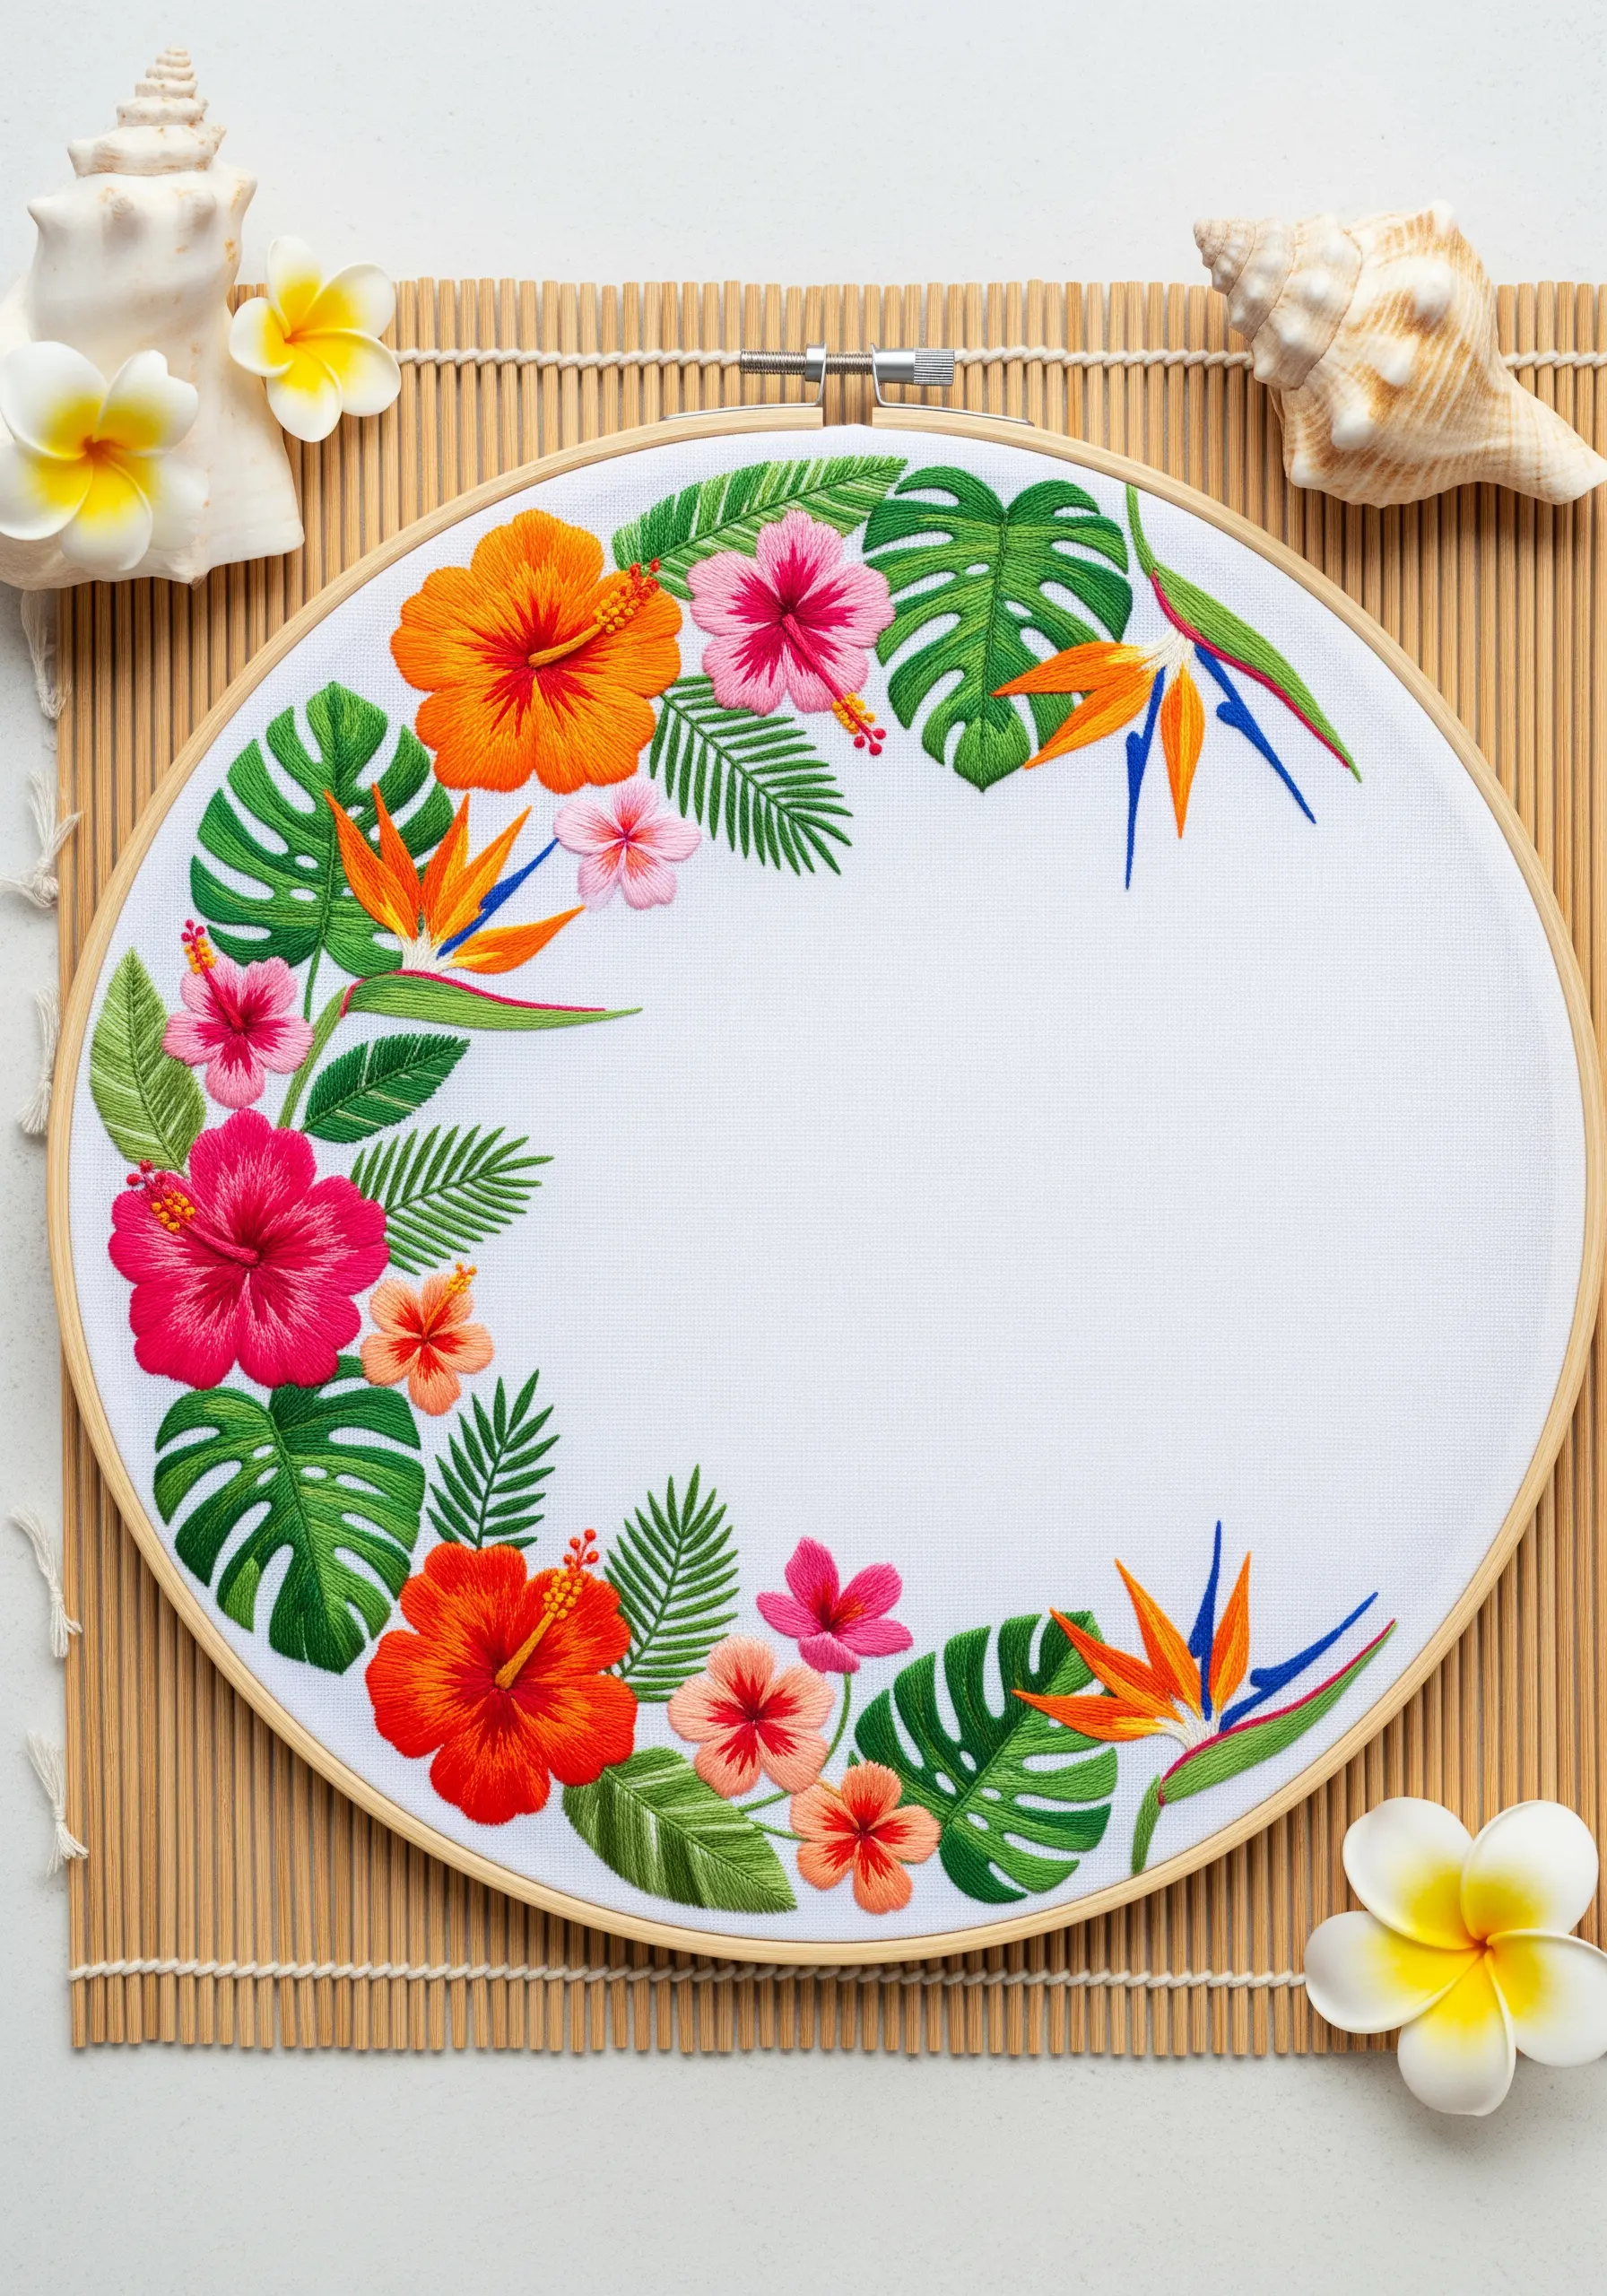
The secret to capturing the dense, overlapping feel of a tropical jungle is strategic layering.
For the large monstera leaves, use fishbone stitch to create the central vein and leaf shape simultaneously. Create the iconic splits by simply leaving empty space as you stitch.
Render the vibrant hibiscus flowers using long and short stitch, which allows you to seamlessly blend shades of pink and red for a realistic, painterly effect.
Don’t be afraid to stitch leaves and petals so they slightly overlap; this is what creates that wonderful sense of lush abundance.
17. Achieving Sculptural Elegance with Padded Satin Stitch
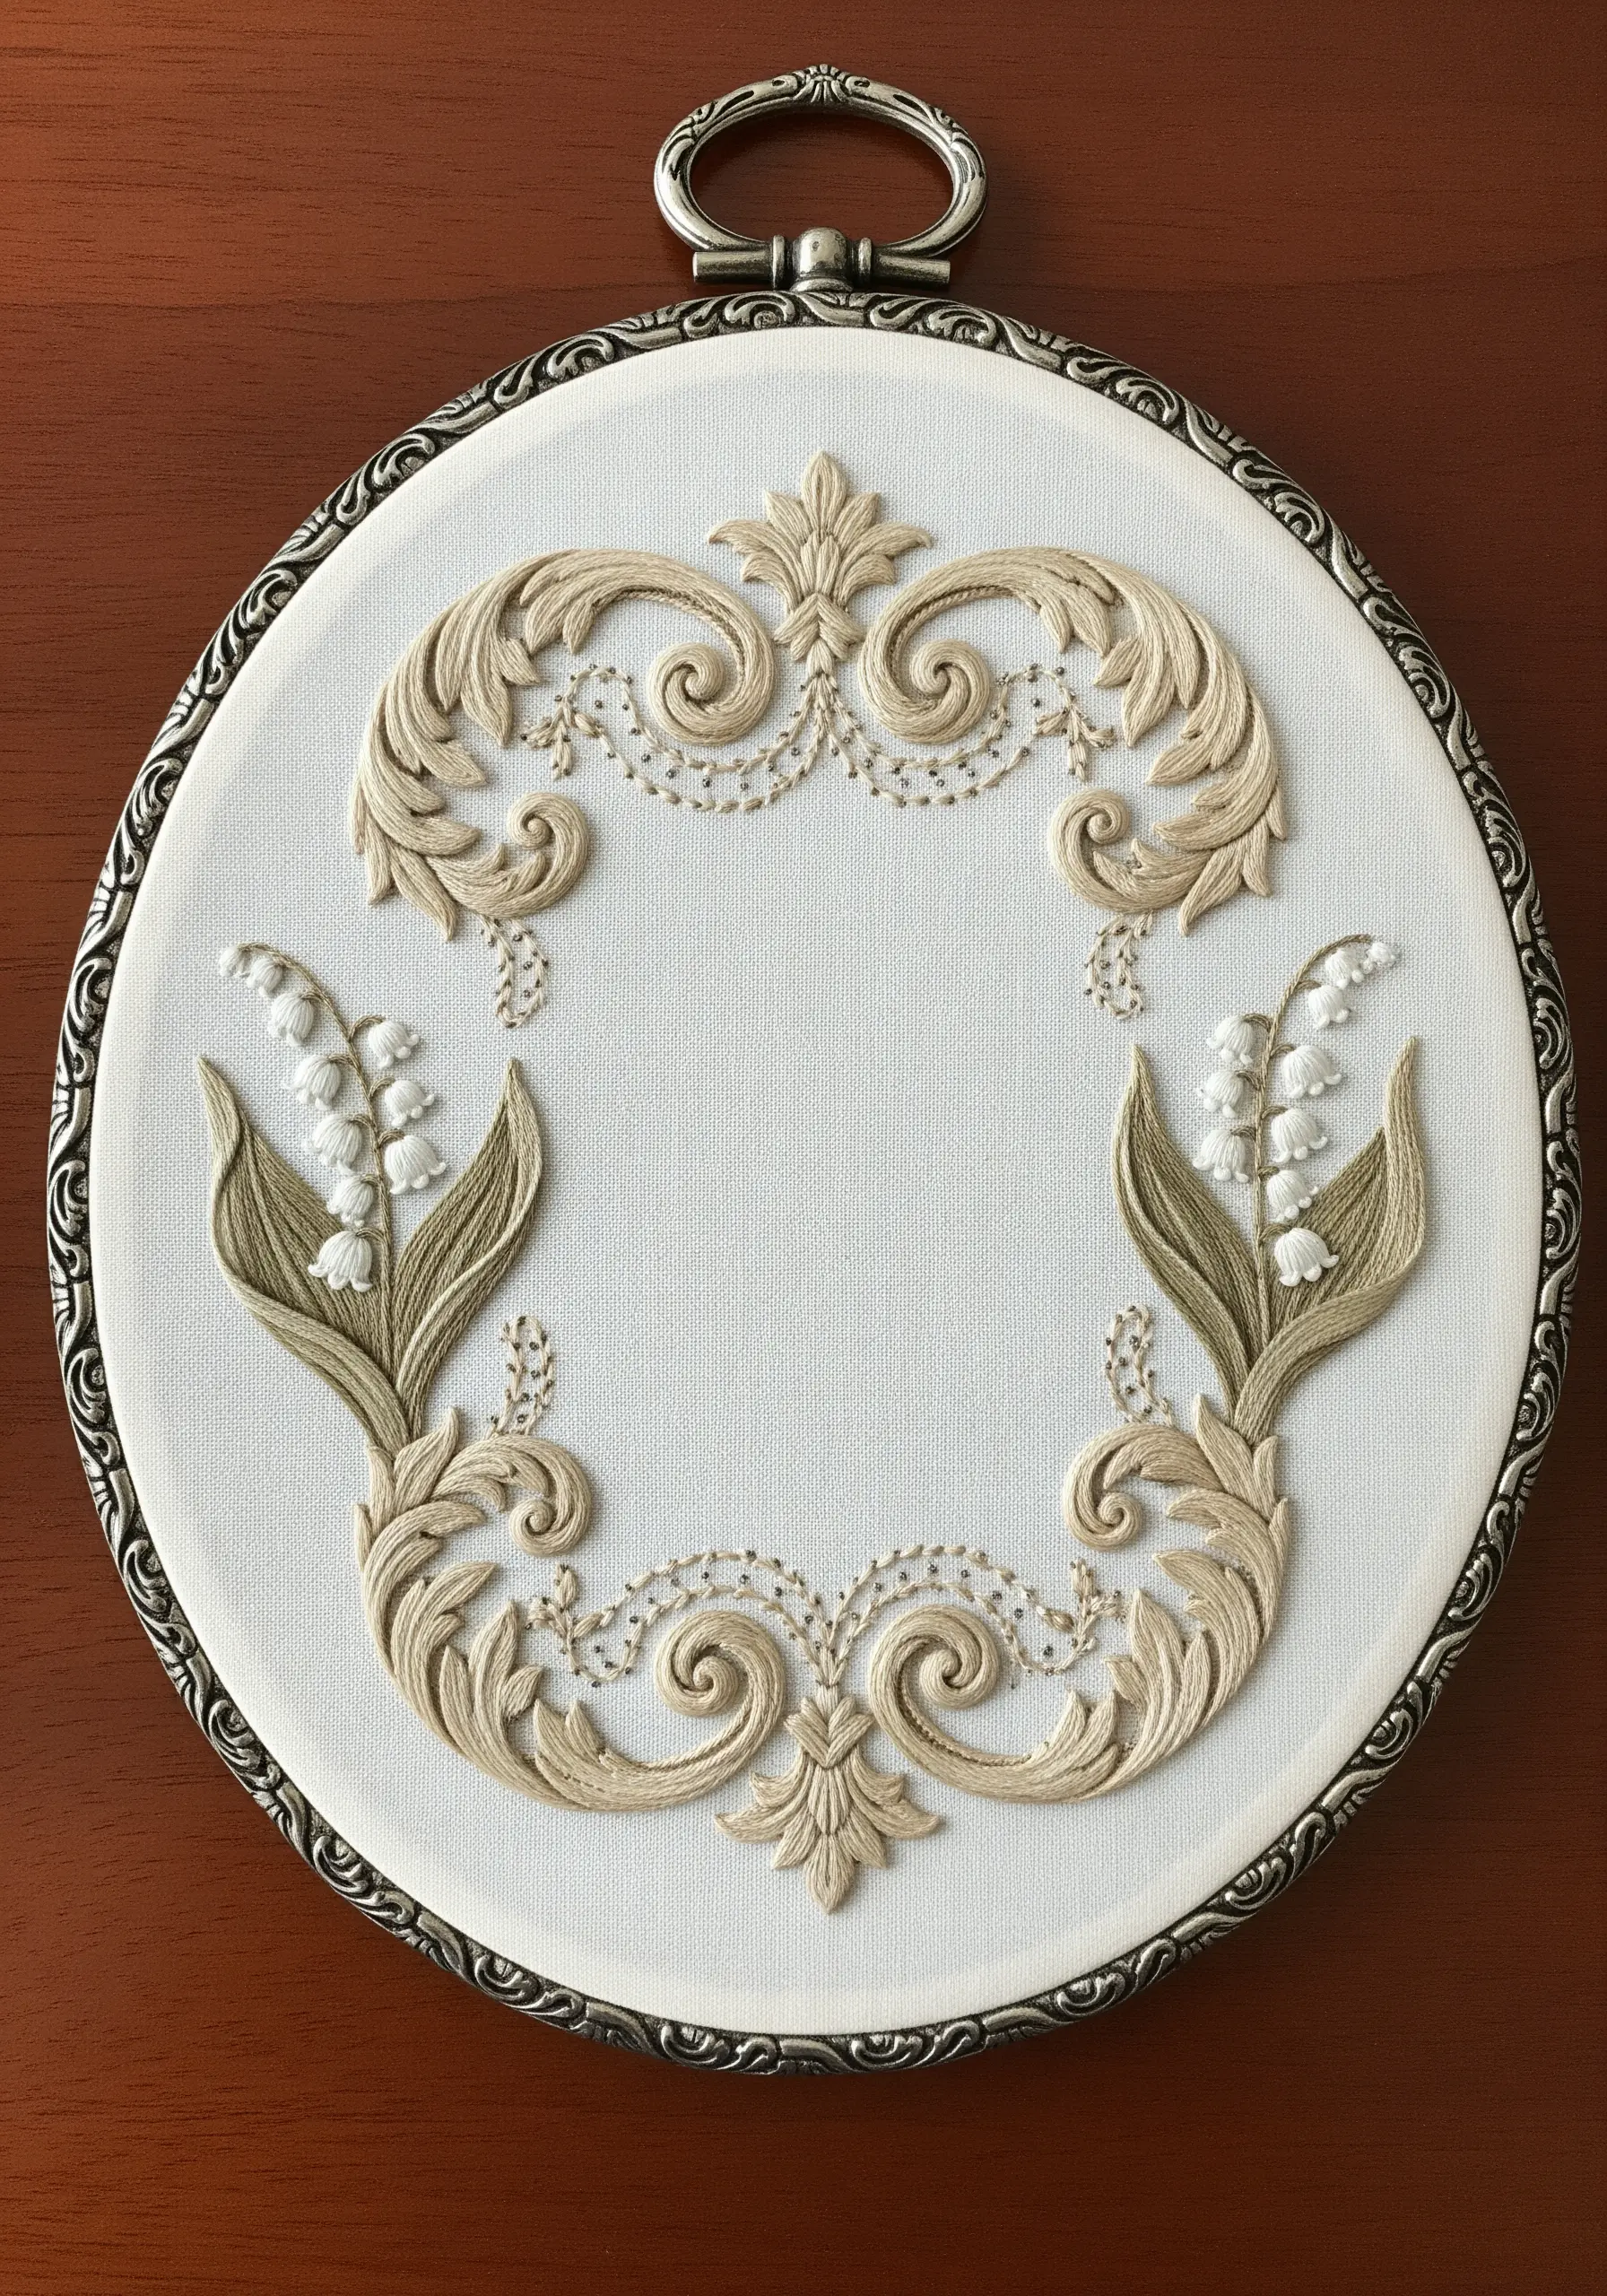
Create an incredible, three-dimensional effect that mimics carved wood or plasterwork by using heavily padded satin stitch.
Before you begin your final layer, fill the entire shape of the scrollwork with a foundation of perpendicular straight stitches or rows of split stitch. This builds up the area.
Then, cover this padding with smooth, tight, uniform satin stitches in your chosen color. This technique lifts the design dramatically from the fabric, giving it a stunning architectural quality ideal for heirloom-style table linen embroidery patterns.
18. Integrating Text with Botanical Illustrations
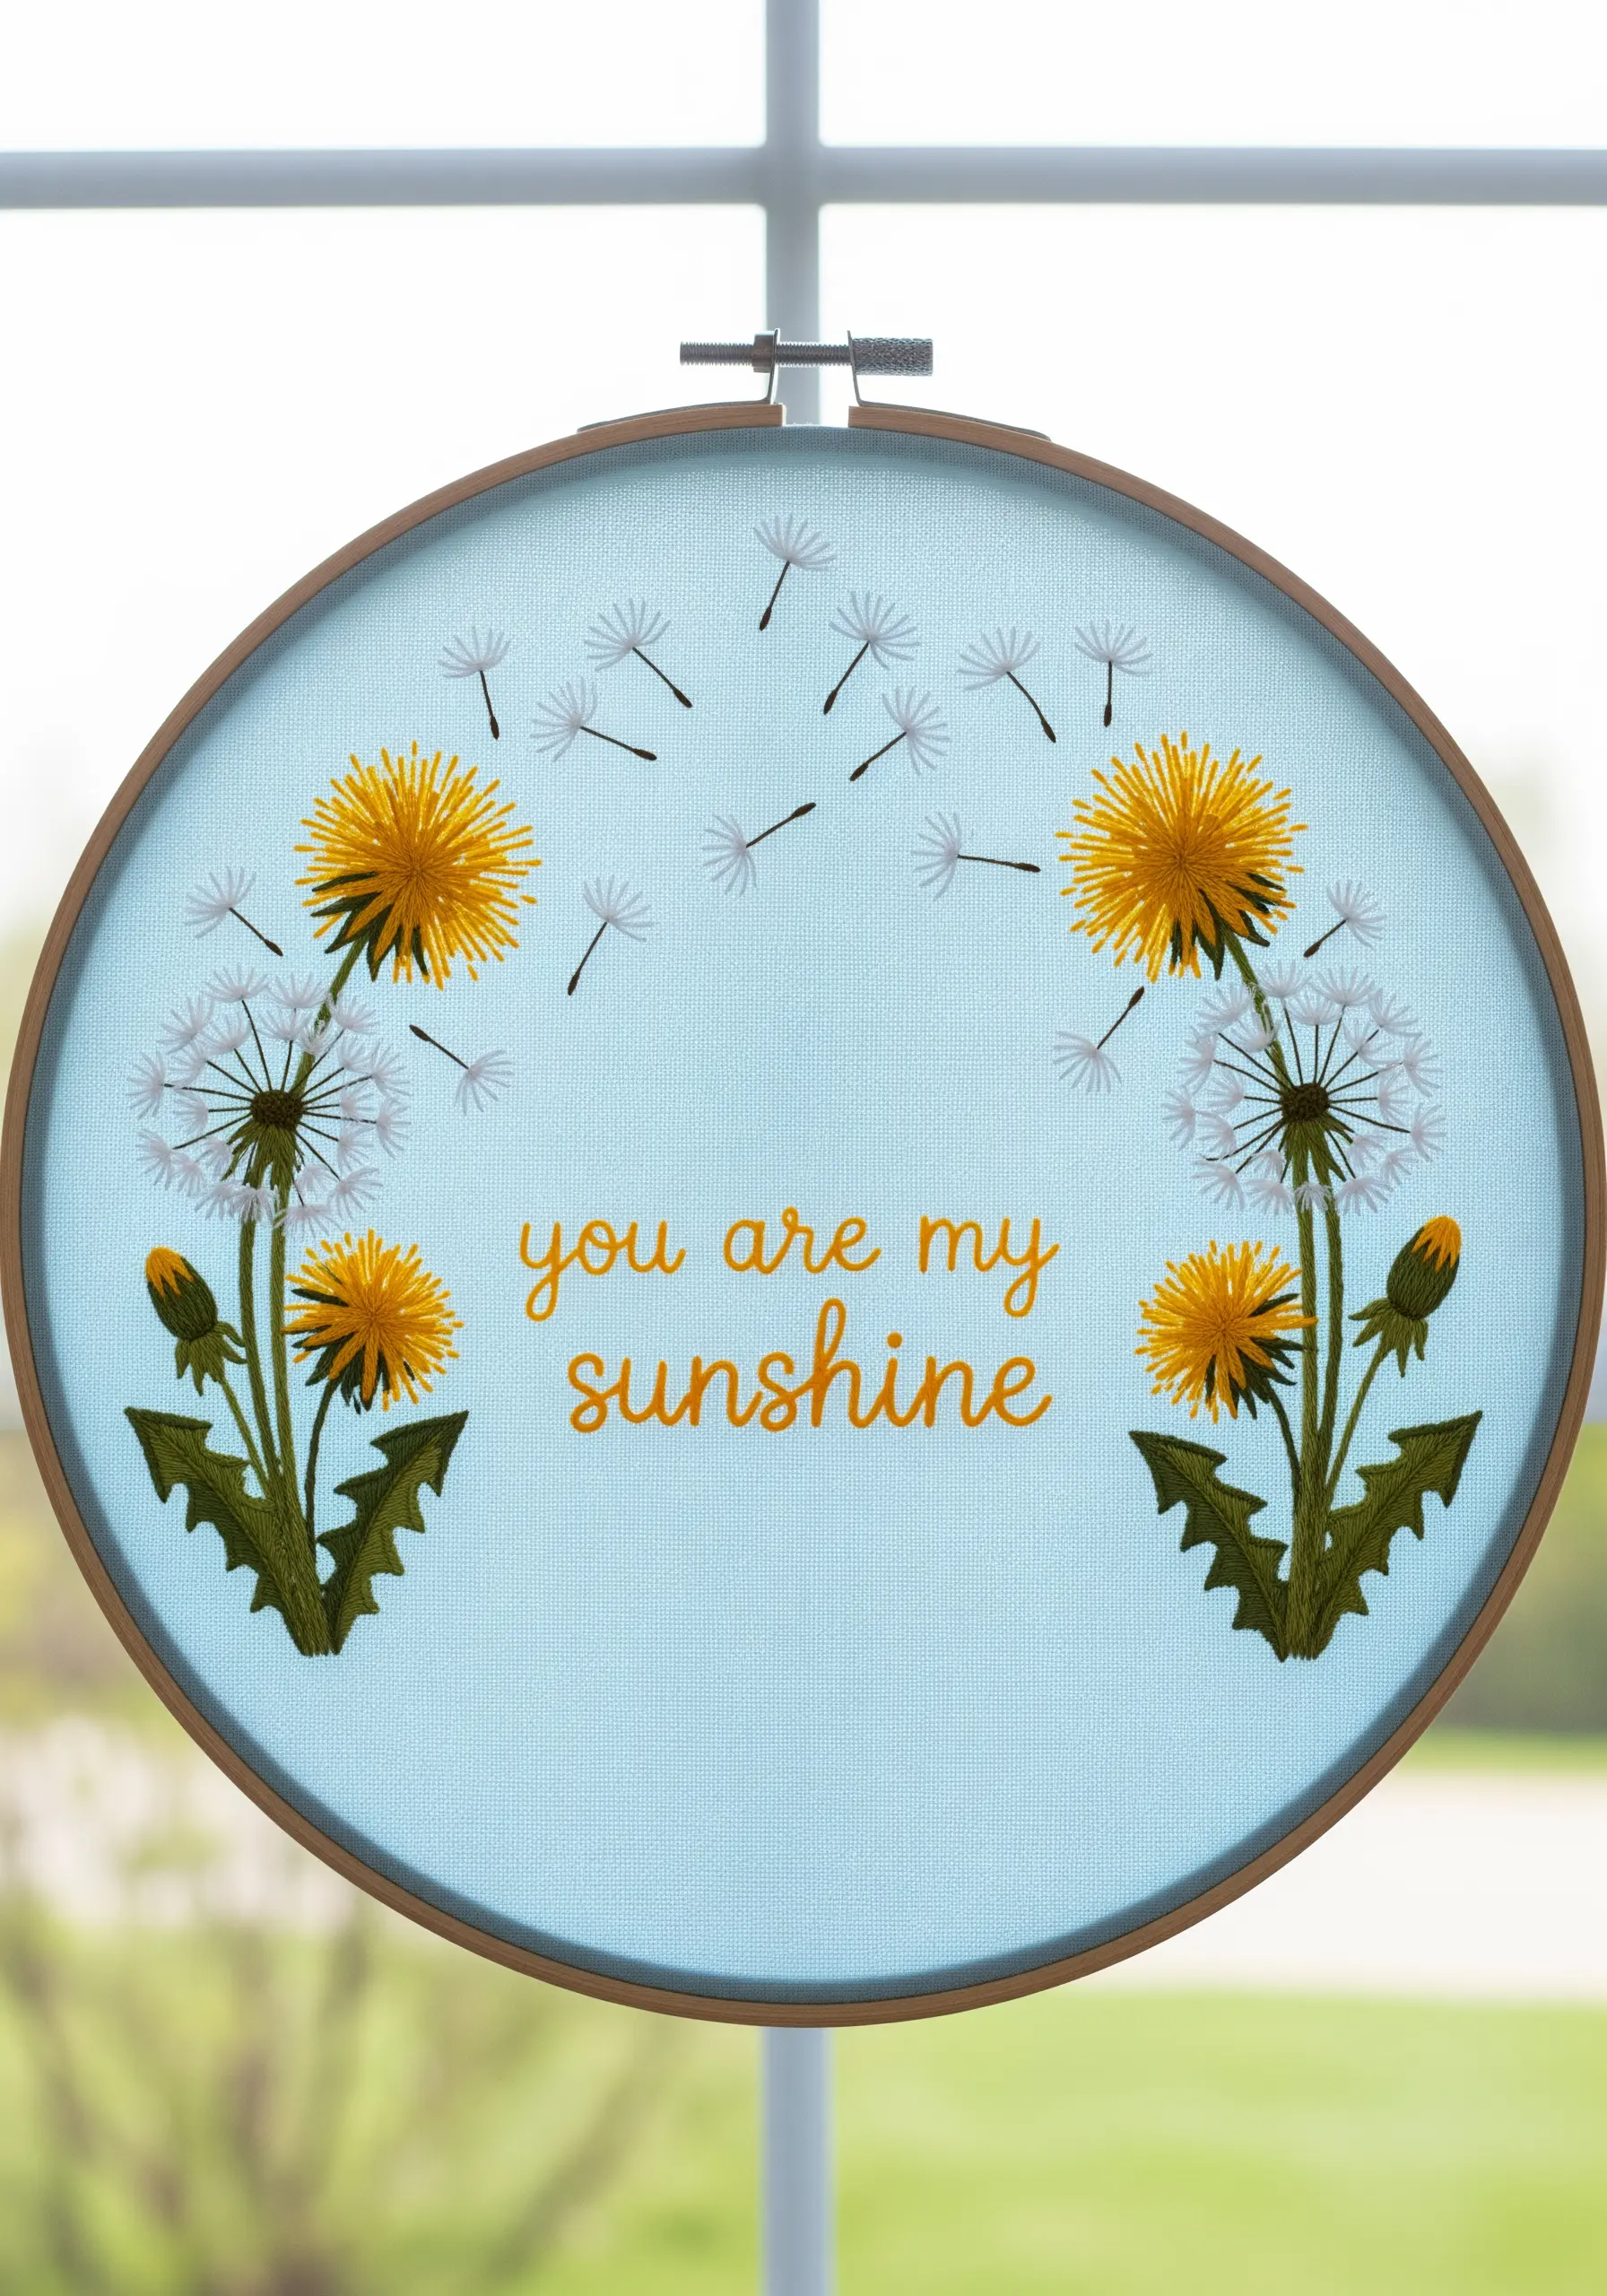
When combining text and imagery, the goal is harmony. Choose a simple, readable stitch for your lettering, like a whipped backstitch or a neat stem stitch, to ensure the words are clear.
Position the quote with enough breathing room around it, allowing the botanical elements to act as a frame.
For the dandelion seed puffs, use single, detached straight stitches radiating from a central point. This creates the light, airy feeling of seeds floating on the wind, beautifully complementing the sentiment of the text.
19. Modern Glamour with Metallic and Geometric Threads
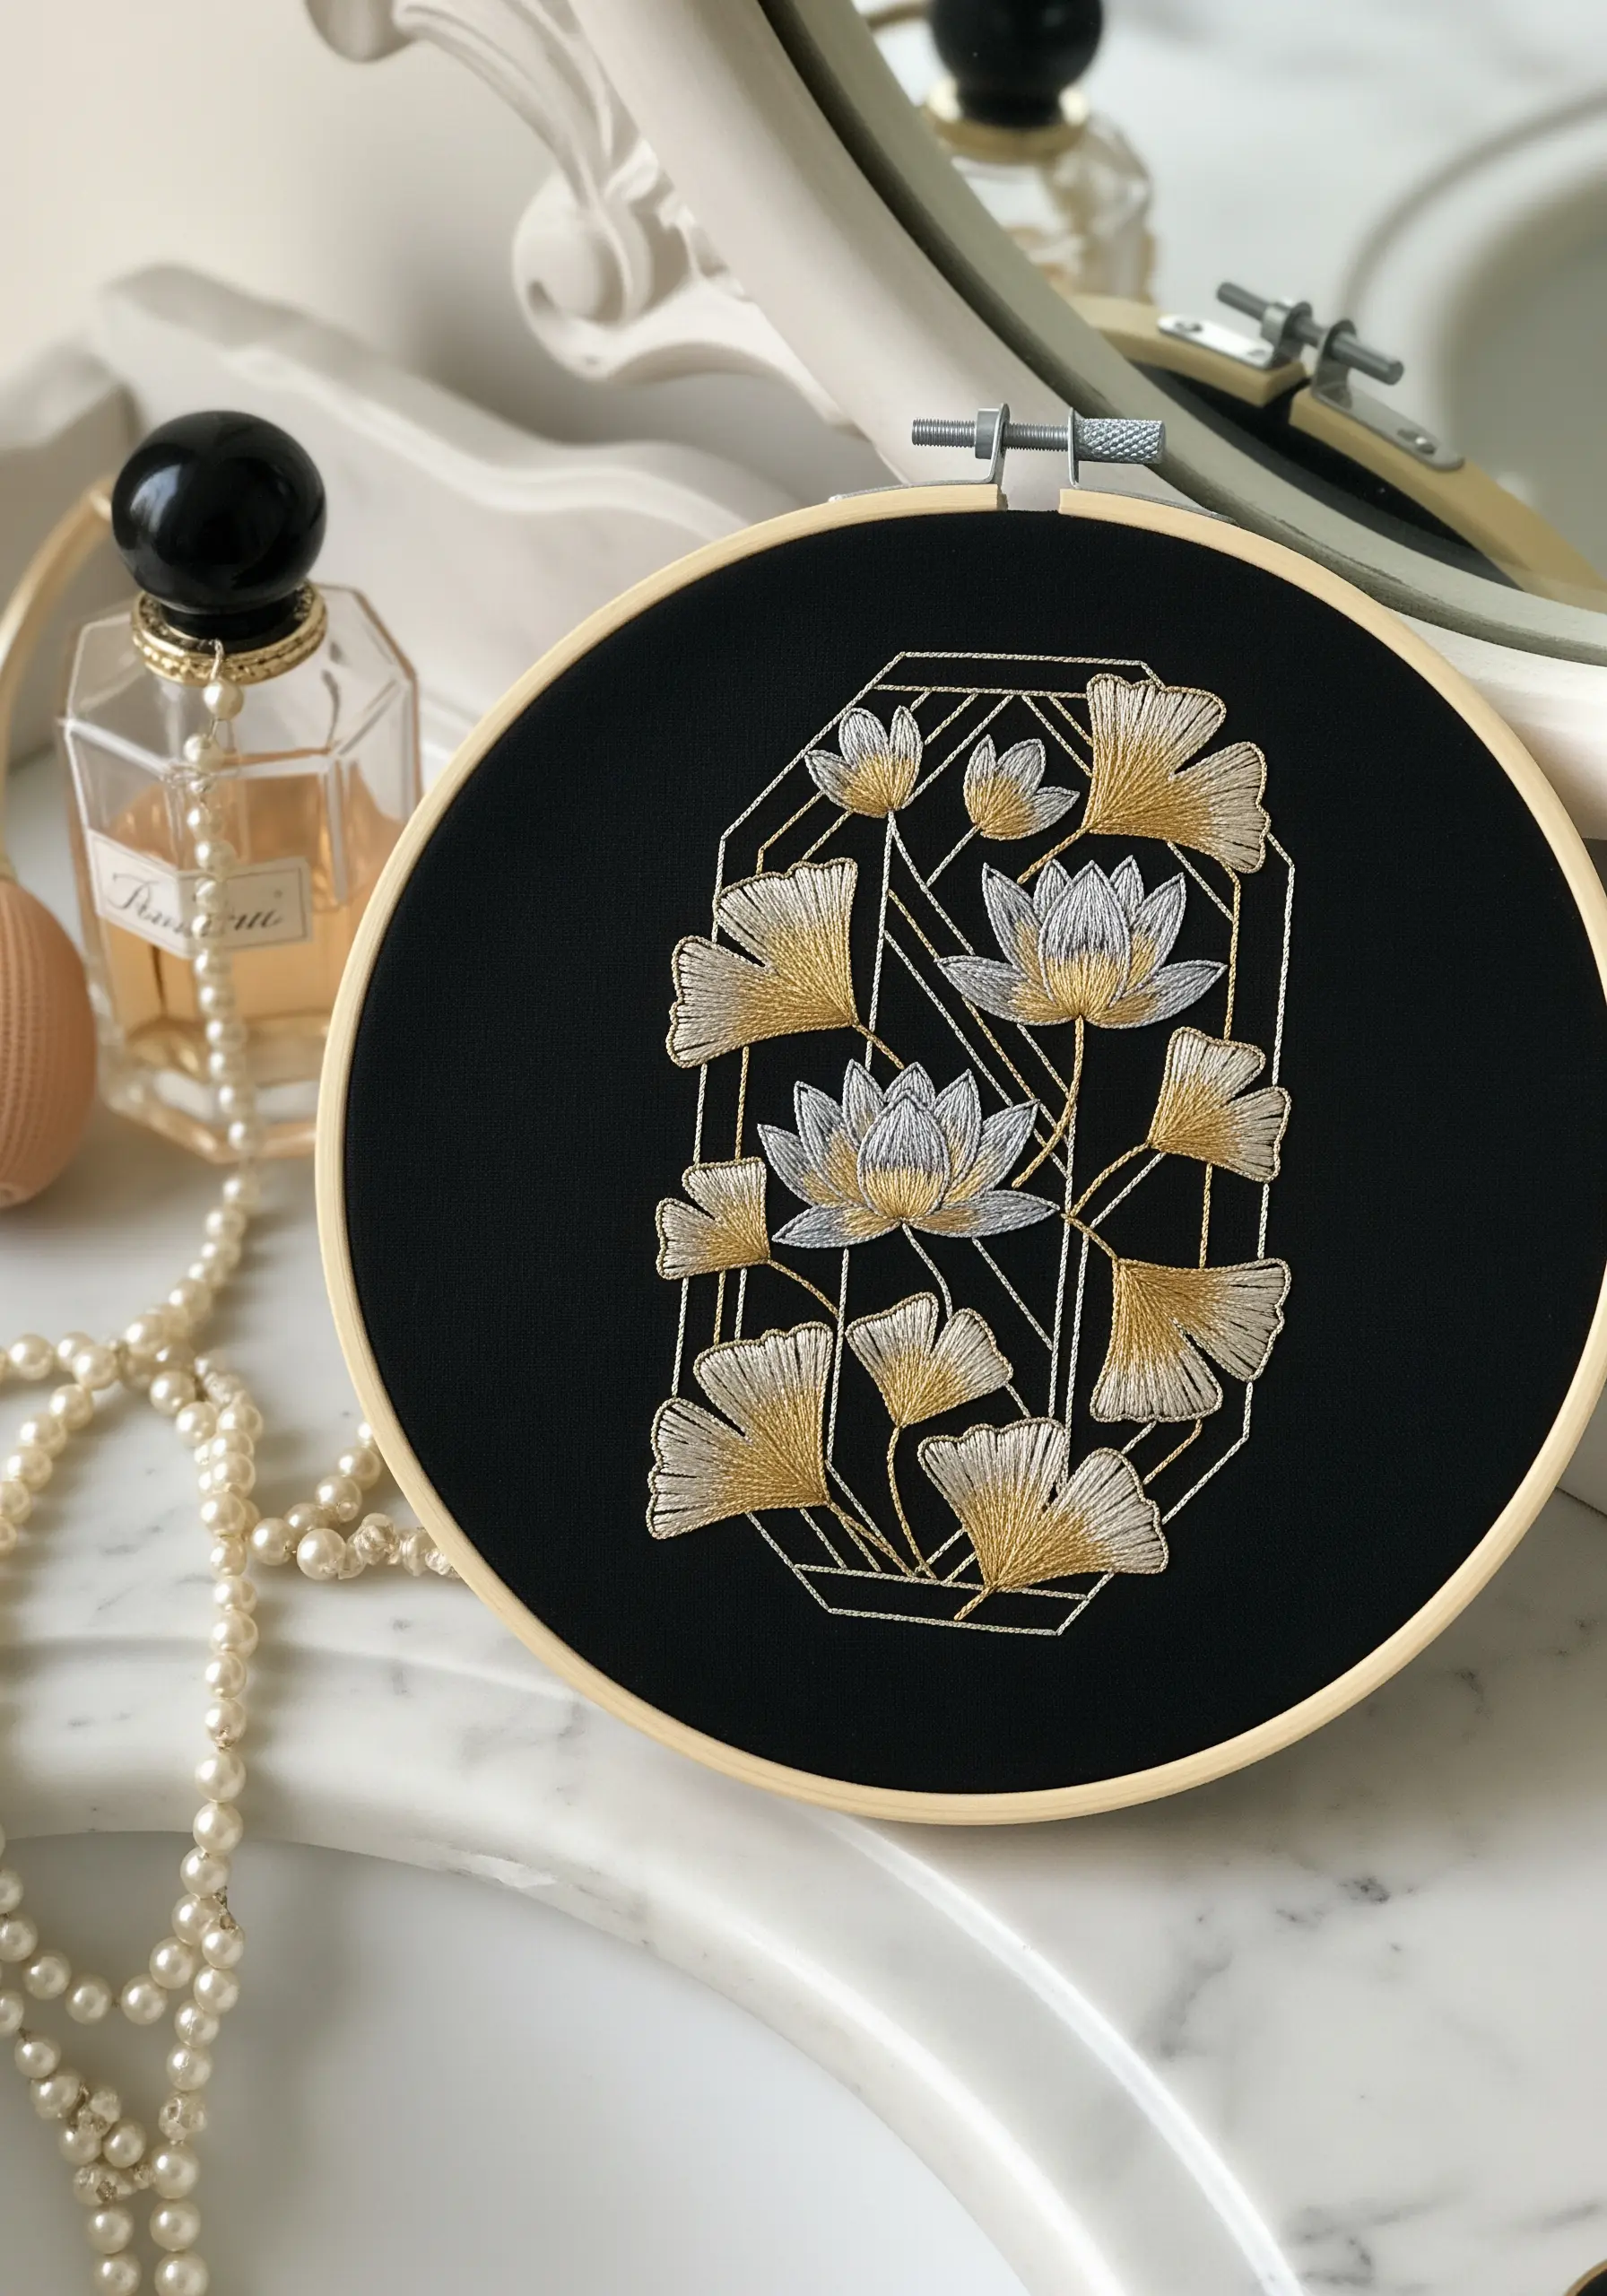
Capture the essence of the Art Deco era by blending shimmering metallics with bold, graphic lines.
Use long and short stitch to fill the ginkgo leaves, using both gold and silver metallic floss to create a beautiful, light-catching gradient.
Encase the entire floral arrangement within a sharp geometric frame stitched with a single, contrasting color. This combination of fluid, organic shapes and rigid, angular lines is a hallmark of the style.
It’s an unexpected way to use metallic thread for a look of pure sophistication.
20. Creating Rustic Charm with Natural Motifs
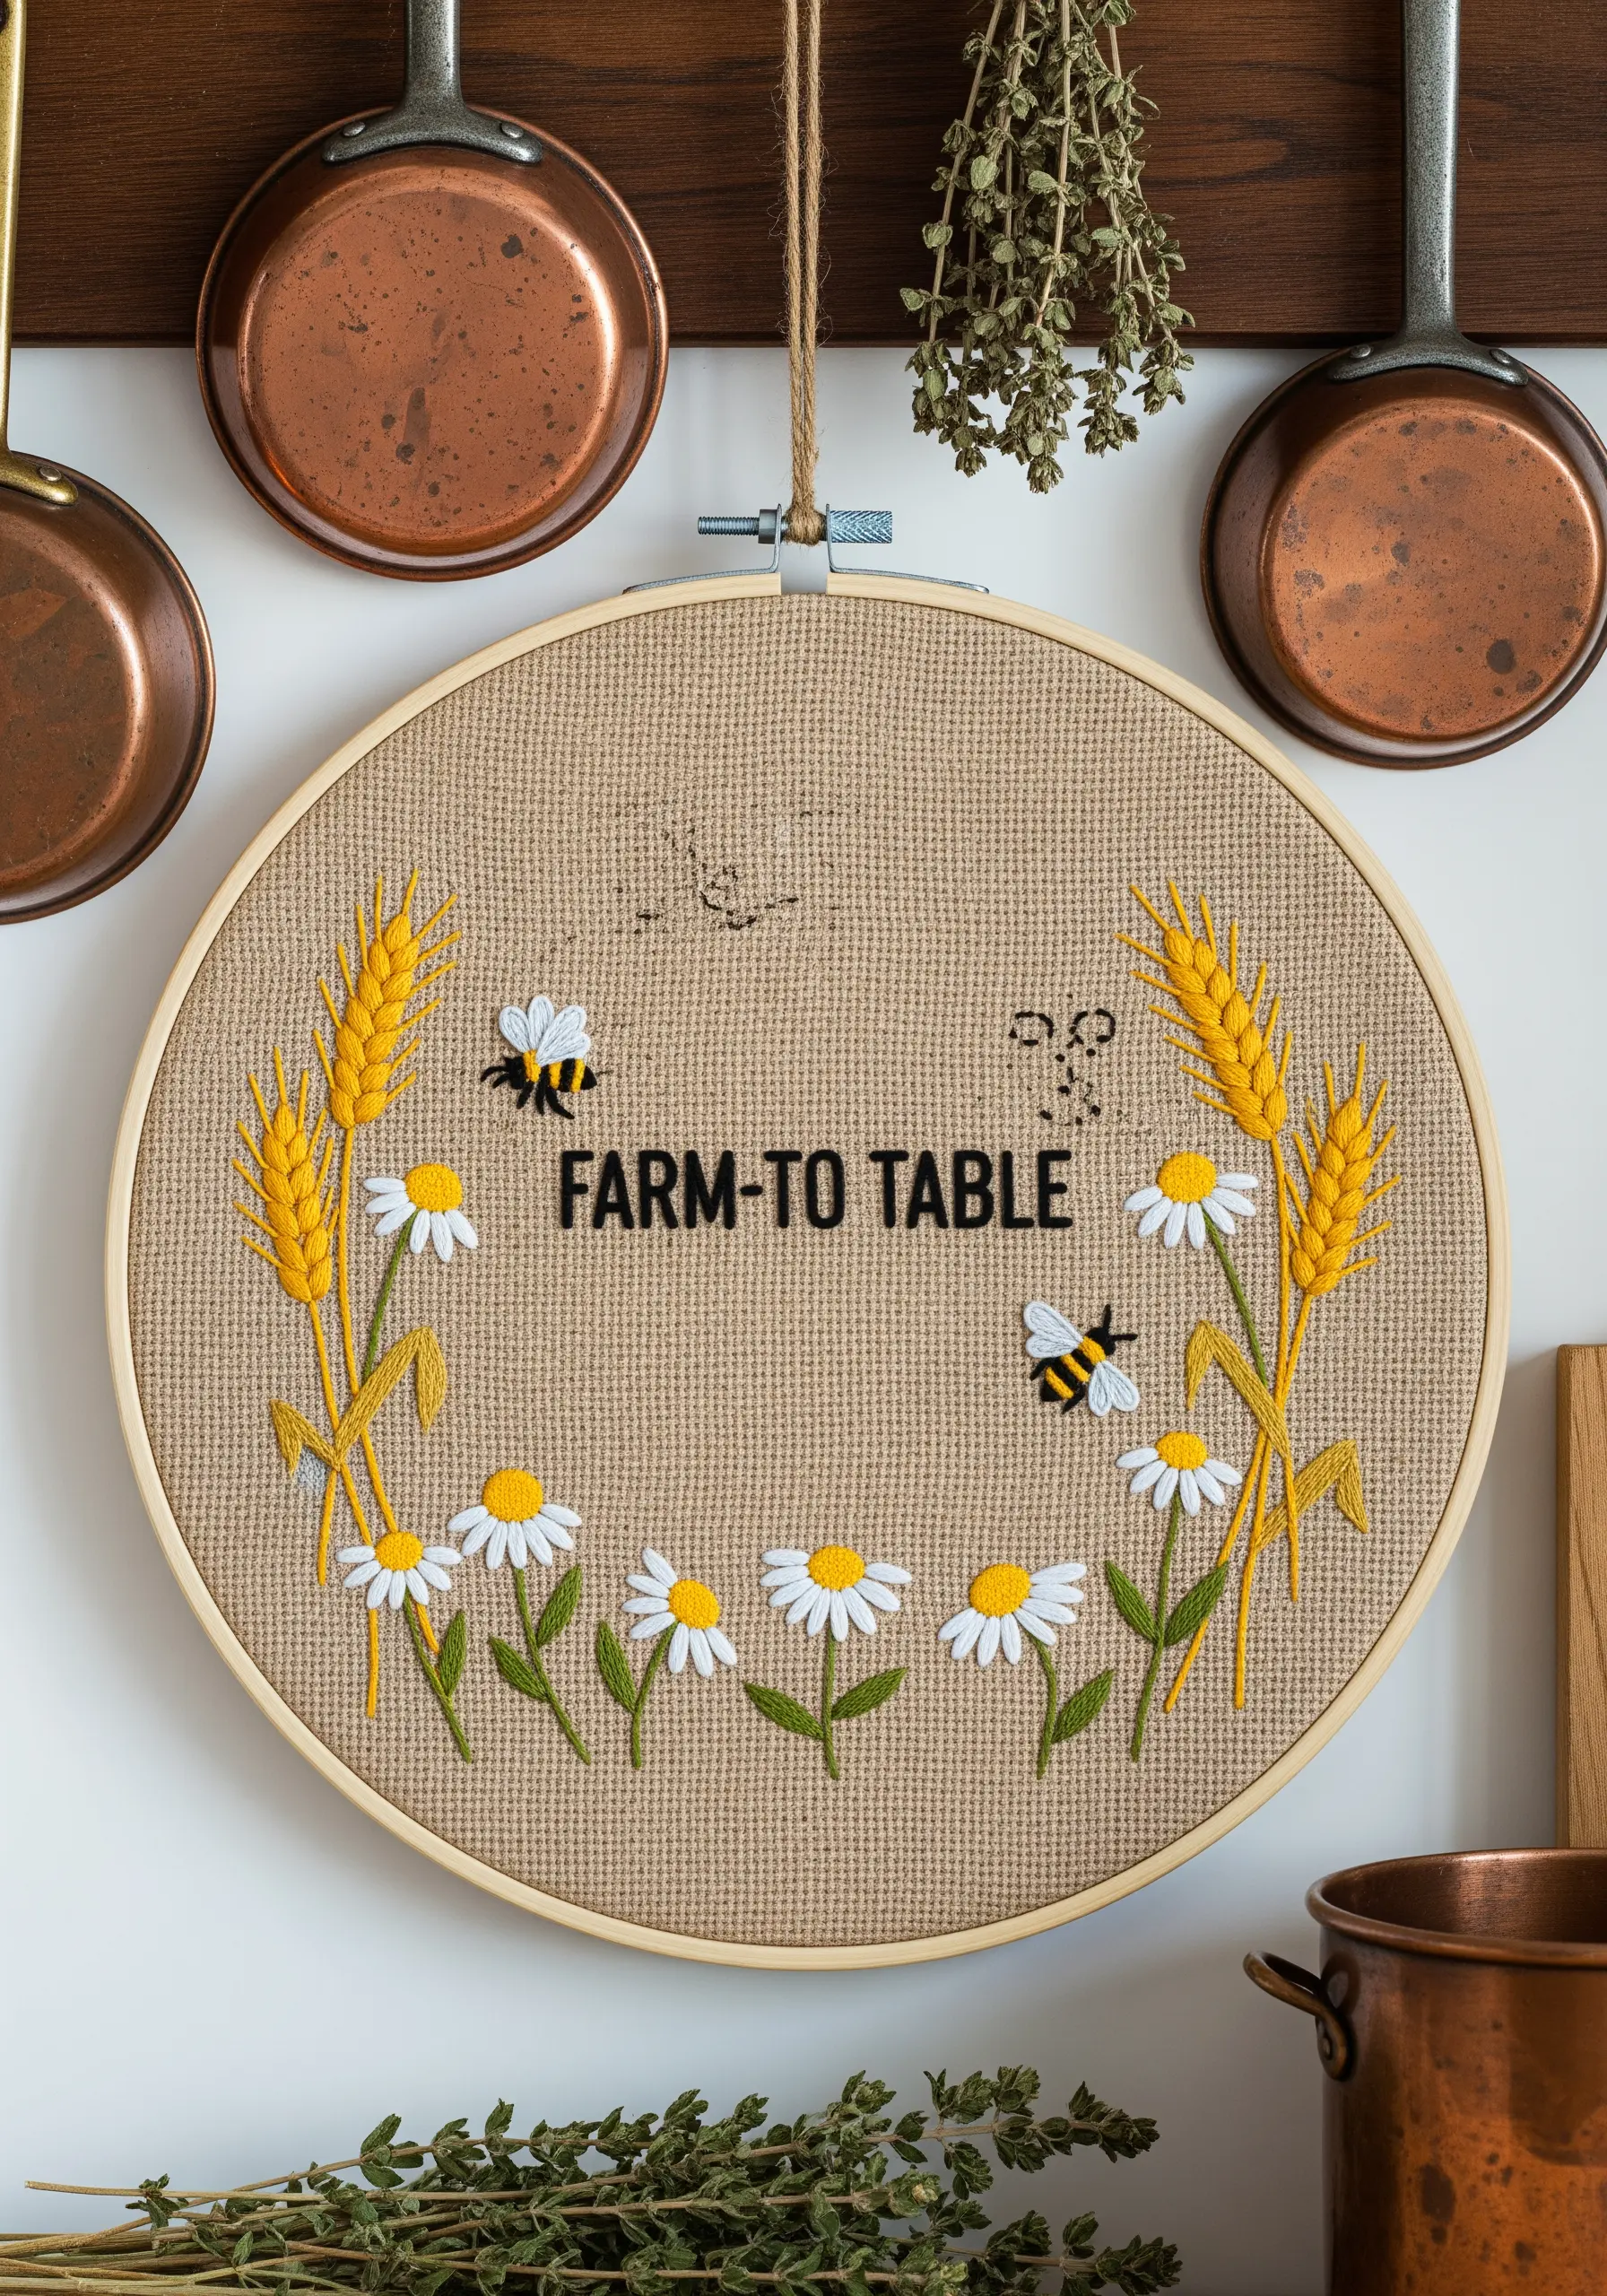
The choice of fabric is crucial for achieving an authentic rustic feel. Work on a textured, neutral base like burlap or a loosely woven linen to instantly set a farmhouse tone.
Use simple, illustrative stitches: fishbone stitch captures the texture of the wheat stalks perfectly, while lazy daisy stitch is all you need for the charming, simple daisies.
Keep the lettering clean and simple with a basic backstitch in a bold, contrasting color. This unpretentious combination of texture and motif creates a piece that feels warm, wholesome, and handmade in the best way.
21. Thread Painting for Delicate Butterfly Wings
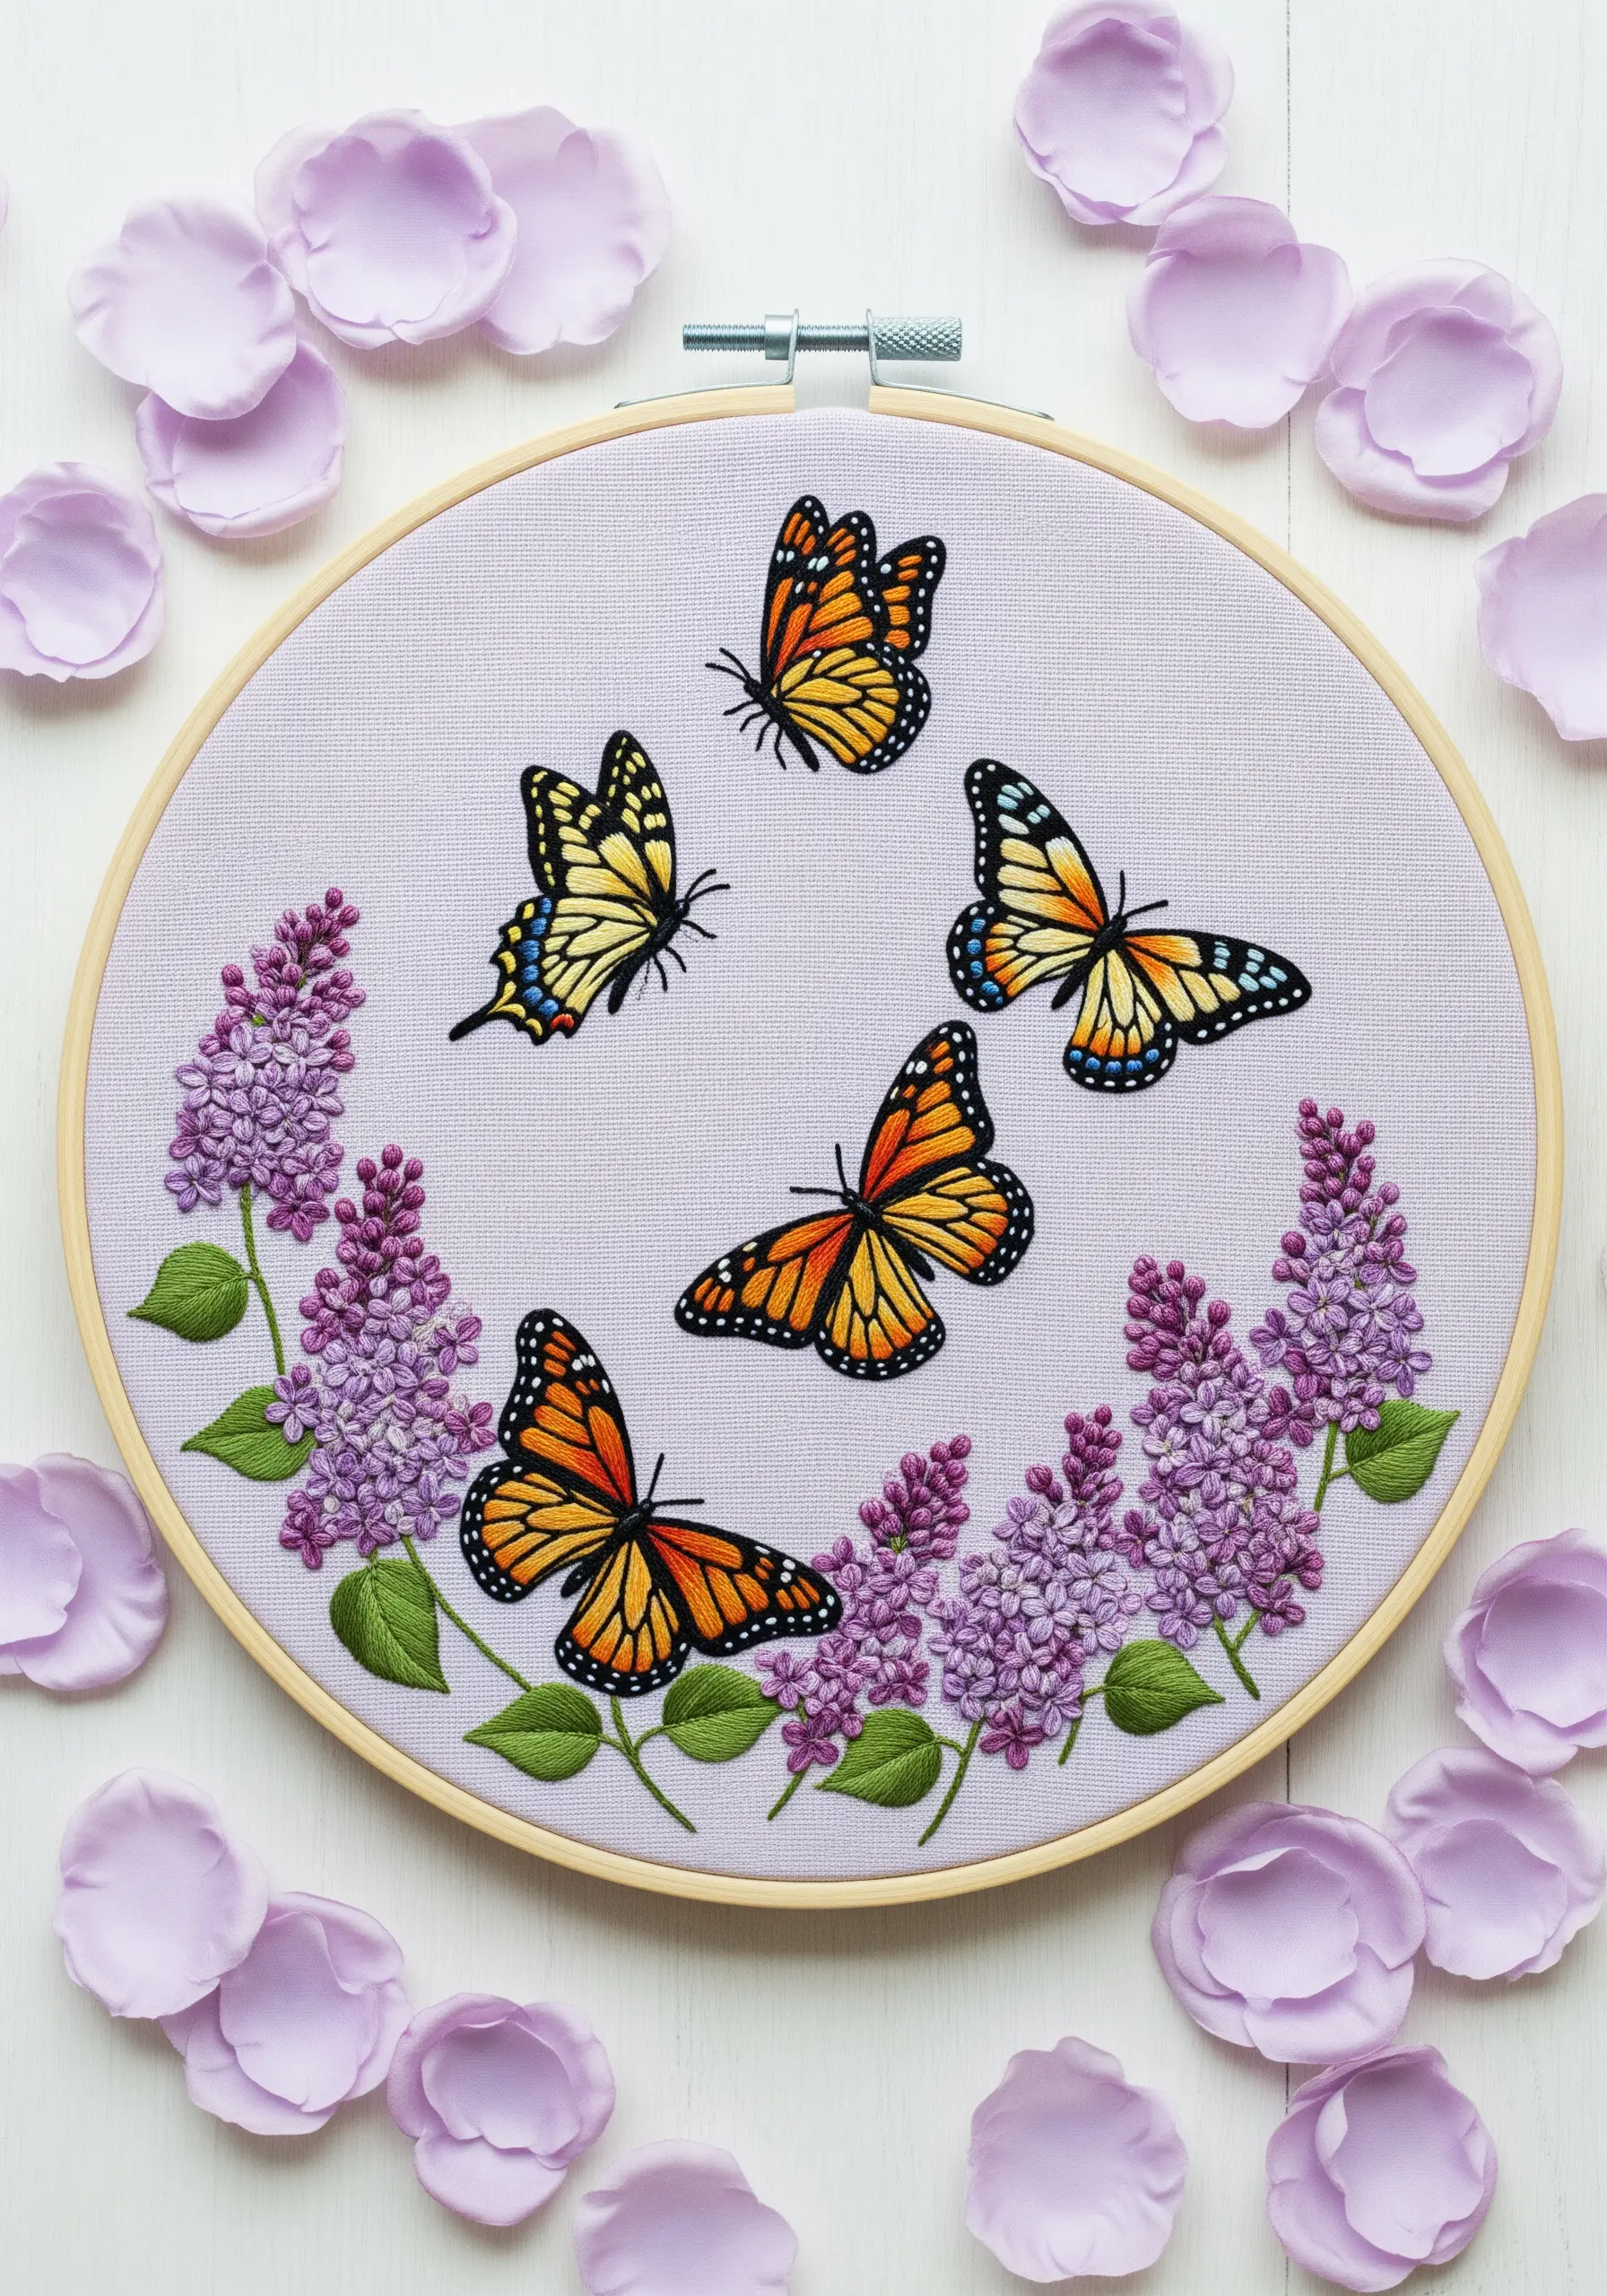
To capture the soft color transitions in butterfly wings, you need the control of thread painting, also known as long and short stitch.
Work with a single strand of floss and a tapestry needle, blending closely related shades of orange, yellow, and black to create a seamless gradient.
Once the wings are filled, use a single strand of black thread and a sharp split stitch to add the defining outlines and details. This final step is what makes the wings look crisp and realistic.
For the lilac clusters, a textured mix of French knots and lazy daisy stitches in shades of purple provides a soft backdrop.
22. Integrating Dried Florals with Embroidery
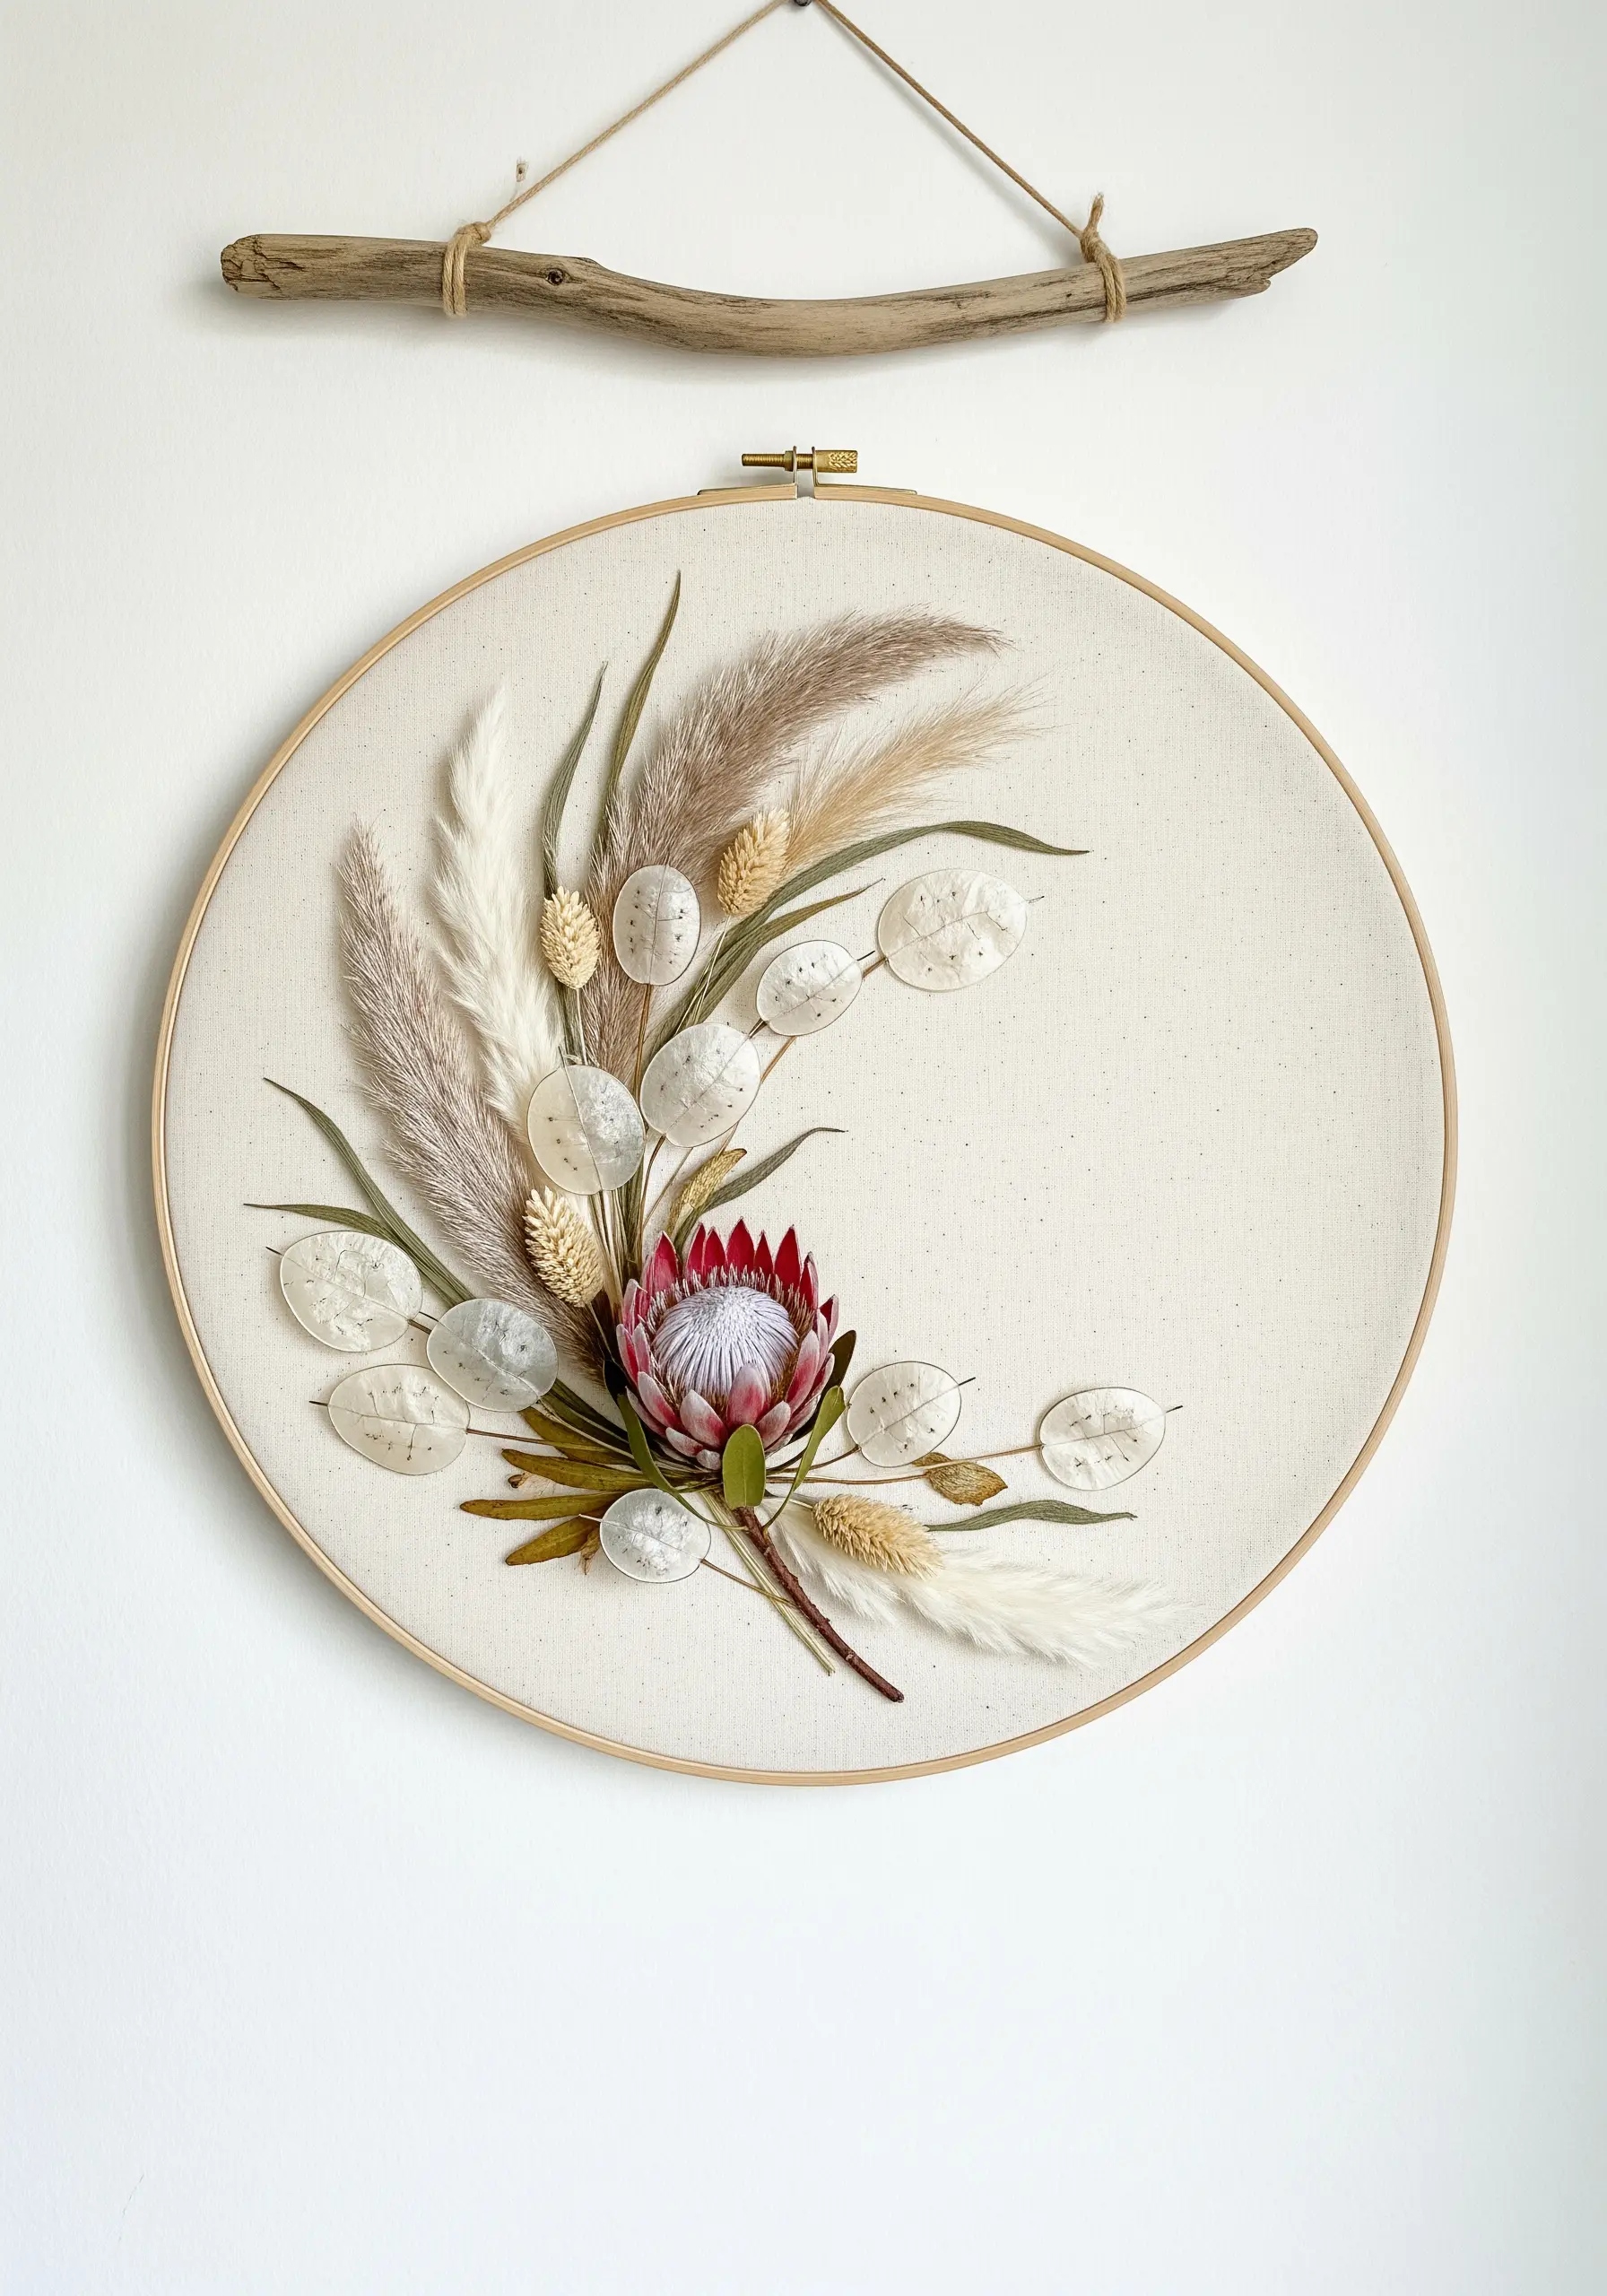
Create a truly one-of-a-kind piece by combining real dried botanicals with your stitching—a stunning mixed-media technique.
Begin by composing your bouquet of dried elements like protea, lunaria (honesty), and grasses. Secure them to the fabric using a few carefully hidden stitches or a strong, clear-drying craft adhesive.
Then, use embroidery to add delicate details that integrate the two mediums. Stitch stems, add leafy greens, or scatter tiny filler flowers to make the composition feel cohesive.
The result is a piece with breathtaking texture, depth, and a direct connection to nature.
23. Achieving a Classic Look with Cross-Stitch
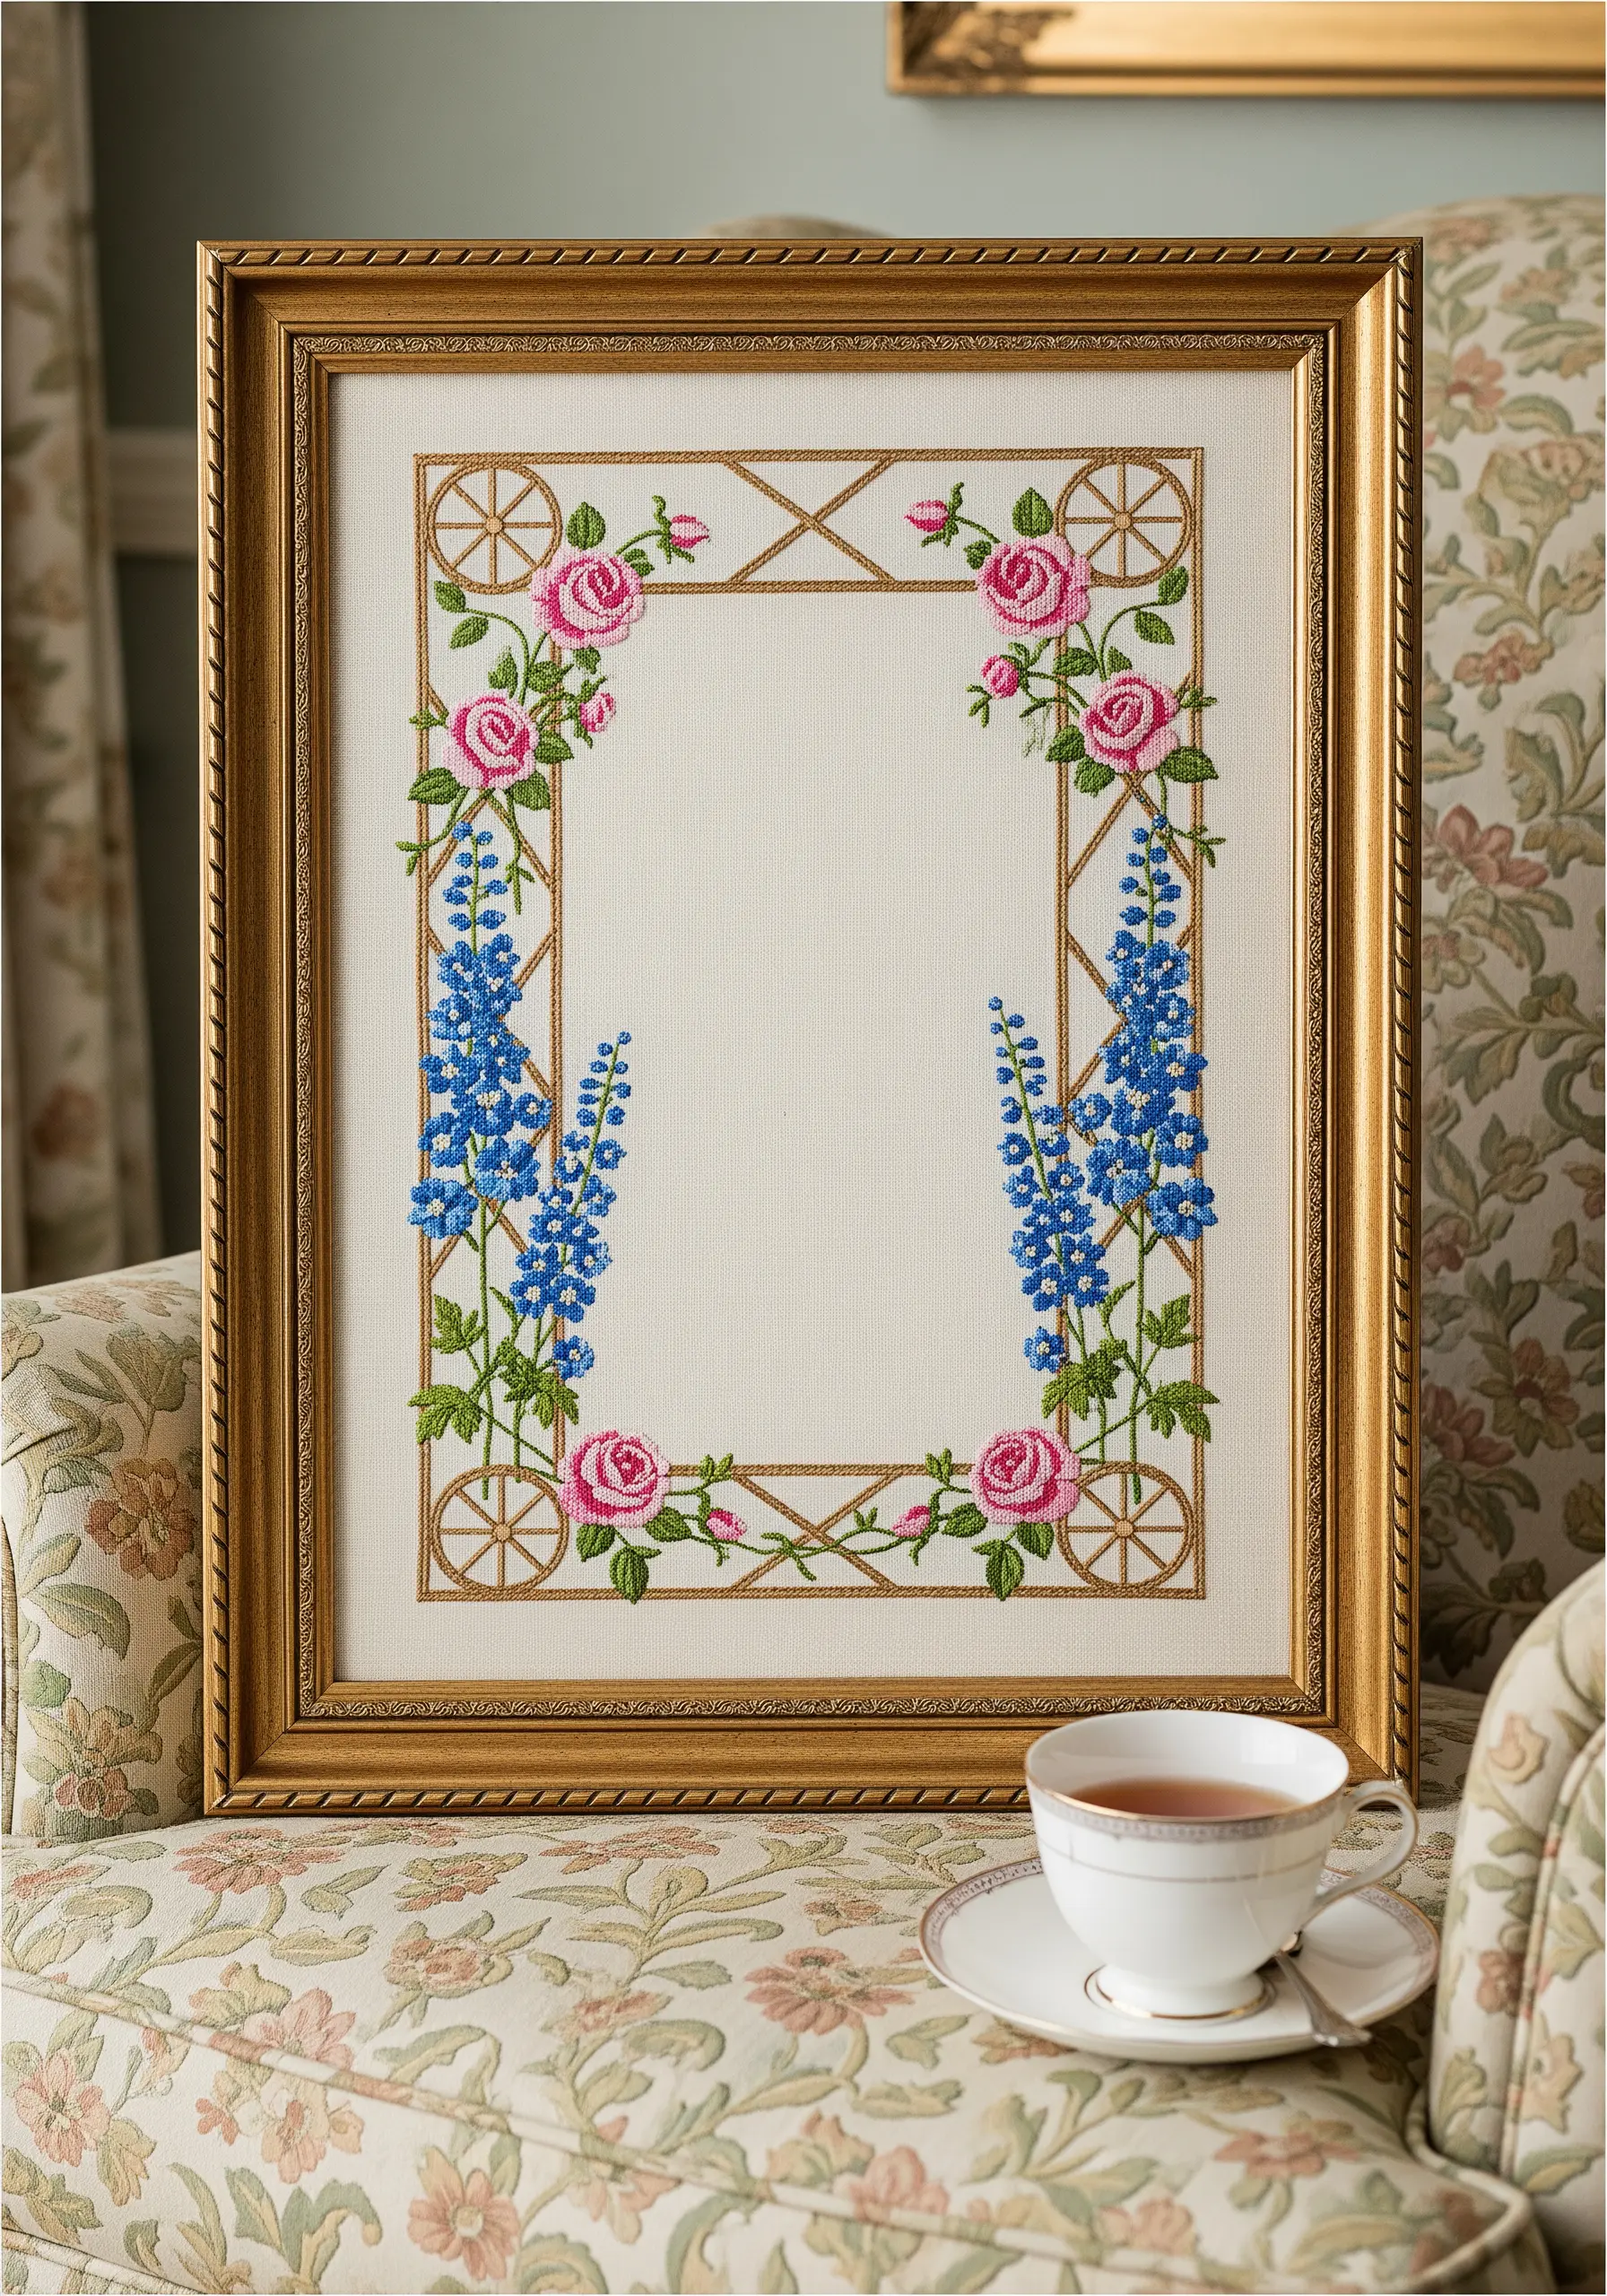
For a design with a timeless, heirloom quality, turn to the beautifully uniform texture of cross-stitch.
Working on Aida or evenweave fabric is essential, as the gridded structure ensures that every ‘X’ is perfectly sized and spaced, giving the final piece a polished, consistent look.
The slightly pixelated effect of cross-stitch is perfect for rendering traditional floral motifs like roses and bluebells, while a geometric lattice border adds a touch of formal elegance.
This technique creates a sturdy, classic piece that will be treasured for generations.
24. Creating Soft Nursery Decor with Felt Appliqué
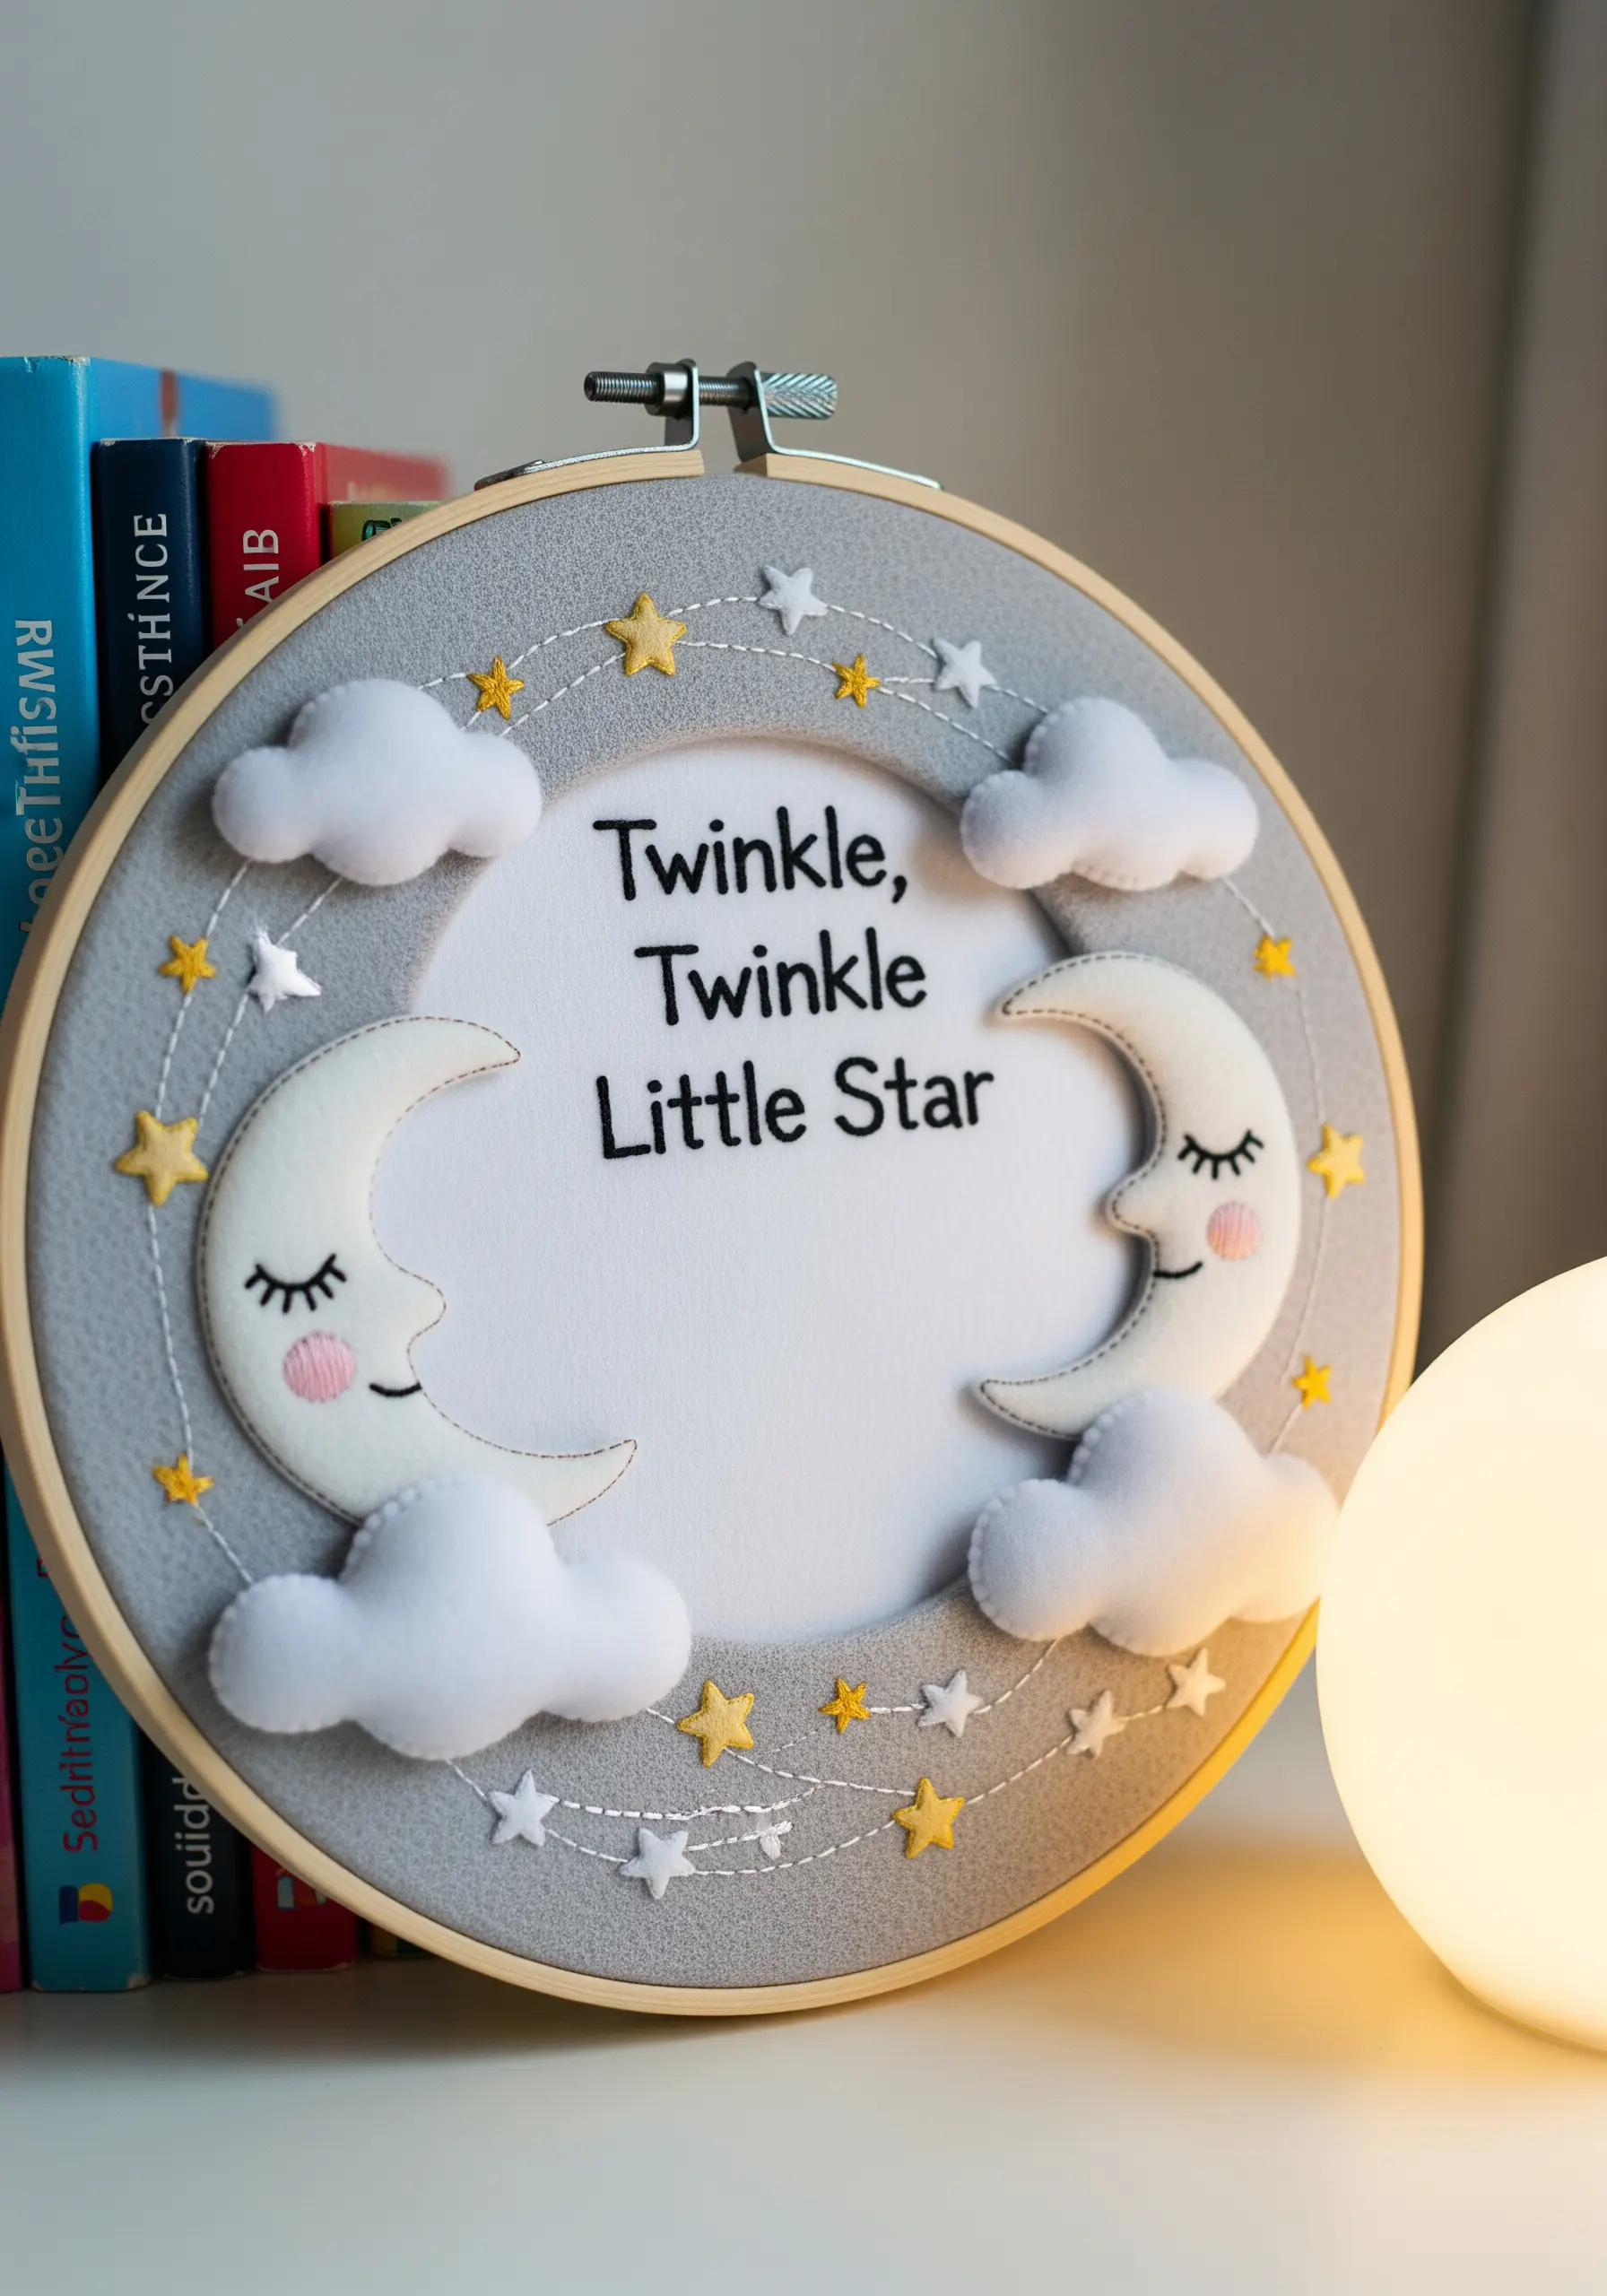
When creating for a nursery, soft textures and simple shapes are key. Felt appliqué offers a wonderful way to add dimension and color without dense, heavy stitching.
Cut your moon, cloud, and star shapes from high-quality wool-blend felt. Attach them to your background fabric with a simple, decorative running stitch or a neat blanket stitch around the edges.
You only need a few strands of floss to add charming details like sleepy eyes, rosy cheeks, and tiny starbursts. The result is a wonderfully soft, tactile, and safe piece for a child’s room.
25. Building Bold Texture with Layered Lazy Daisy Stitches
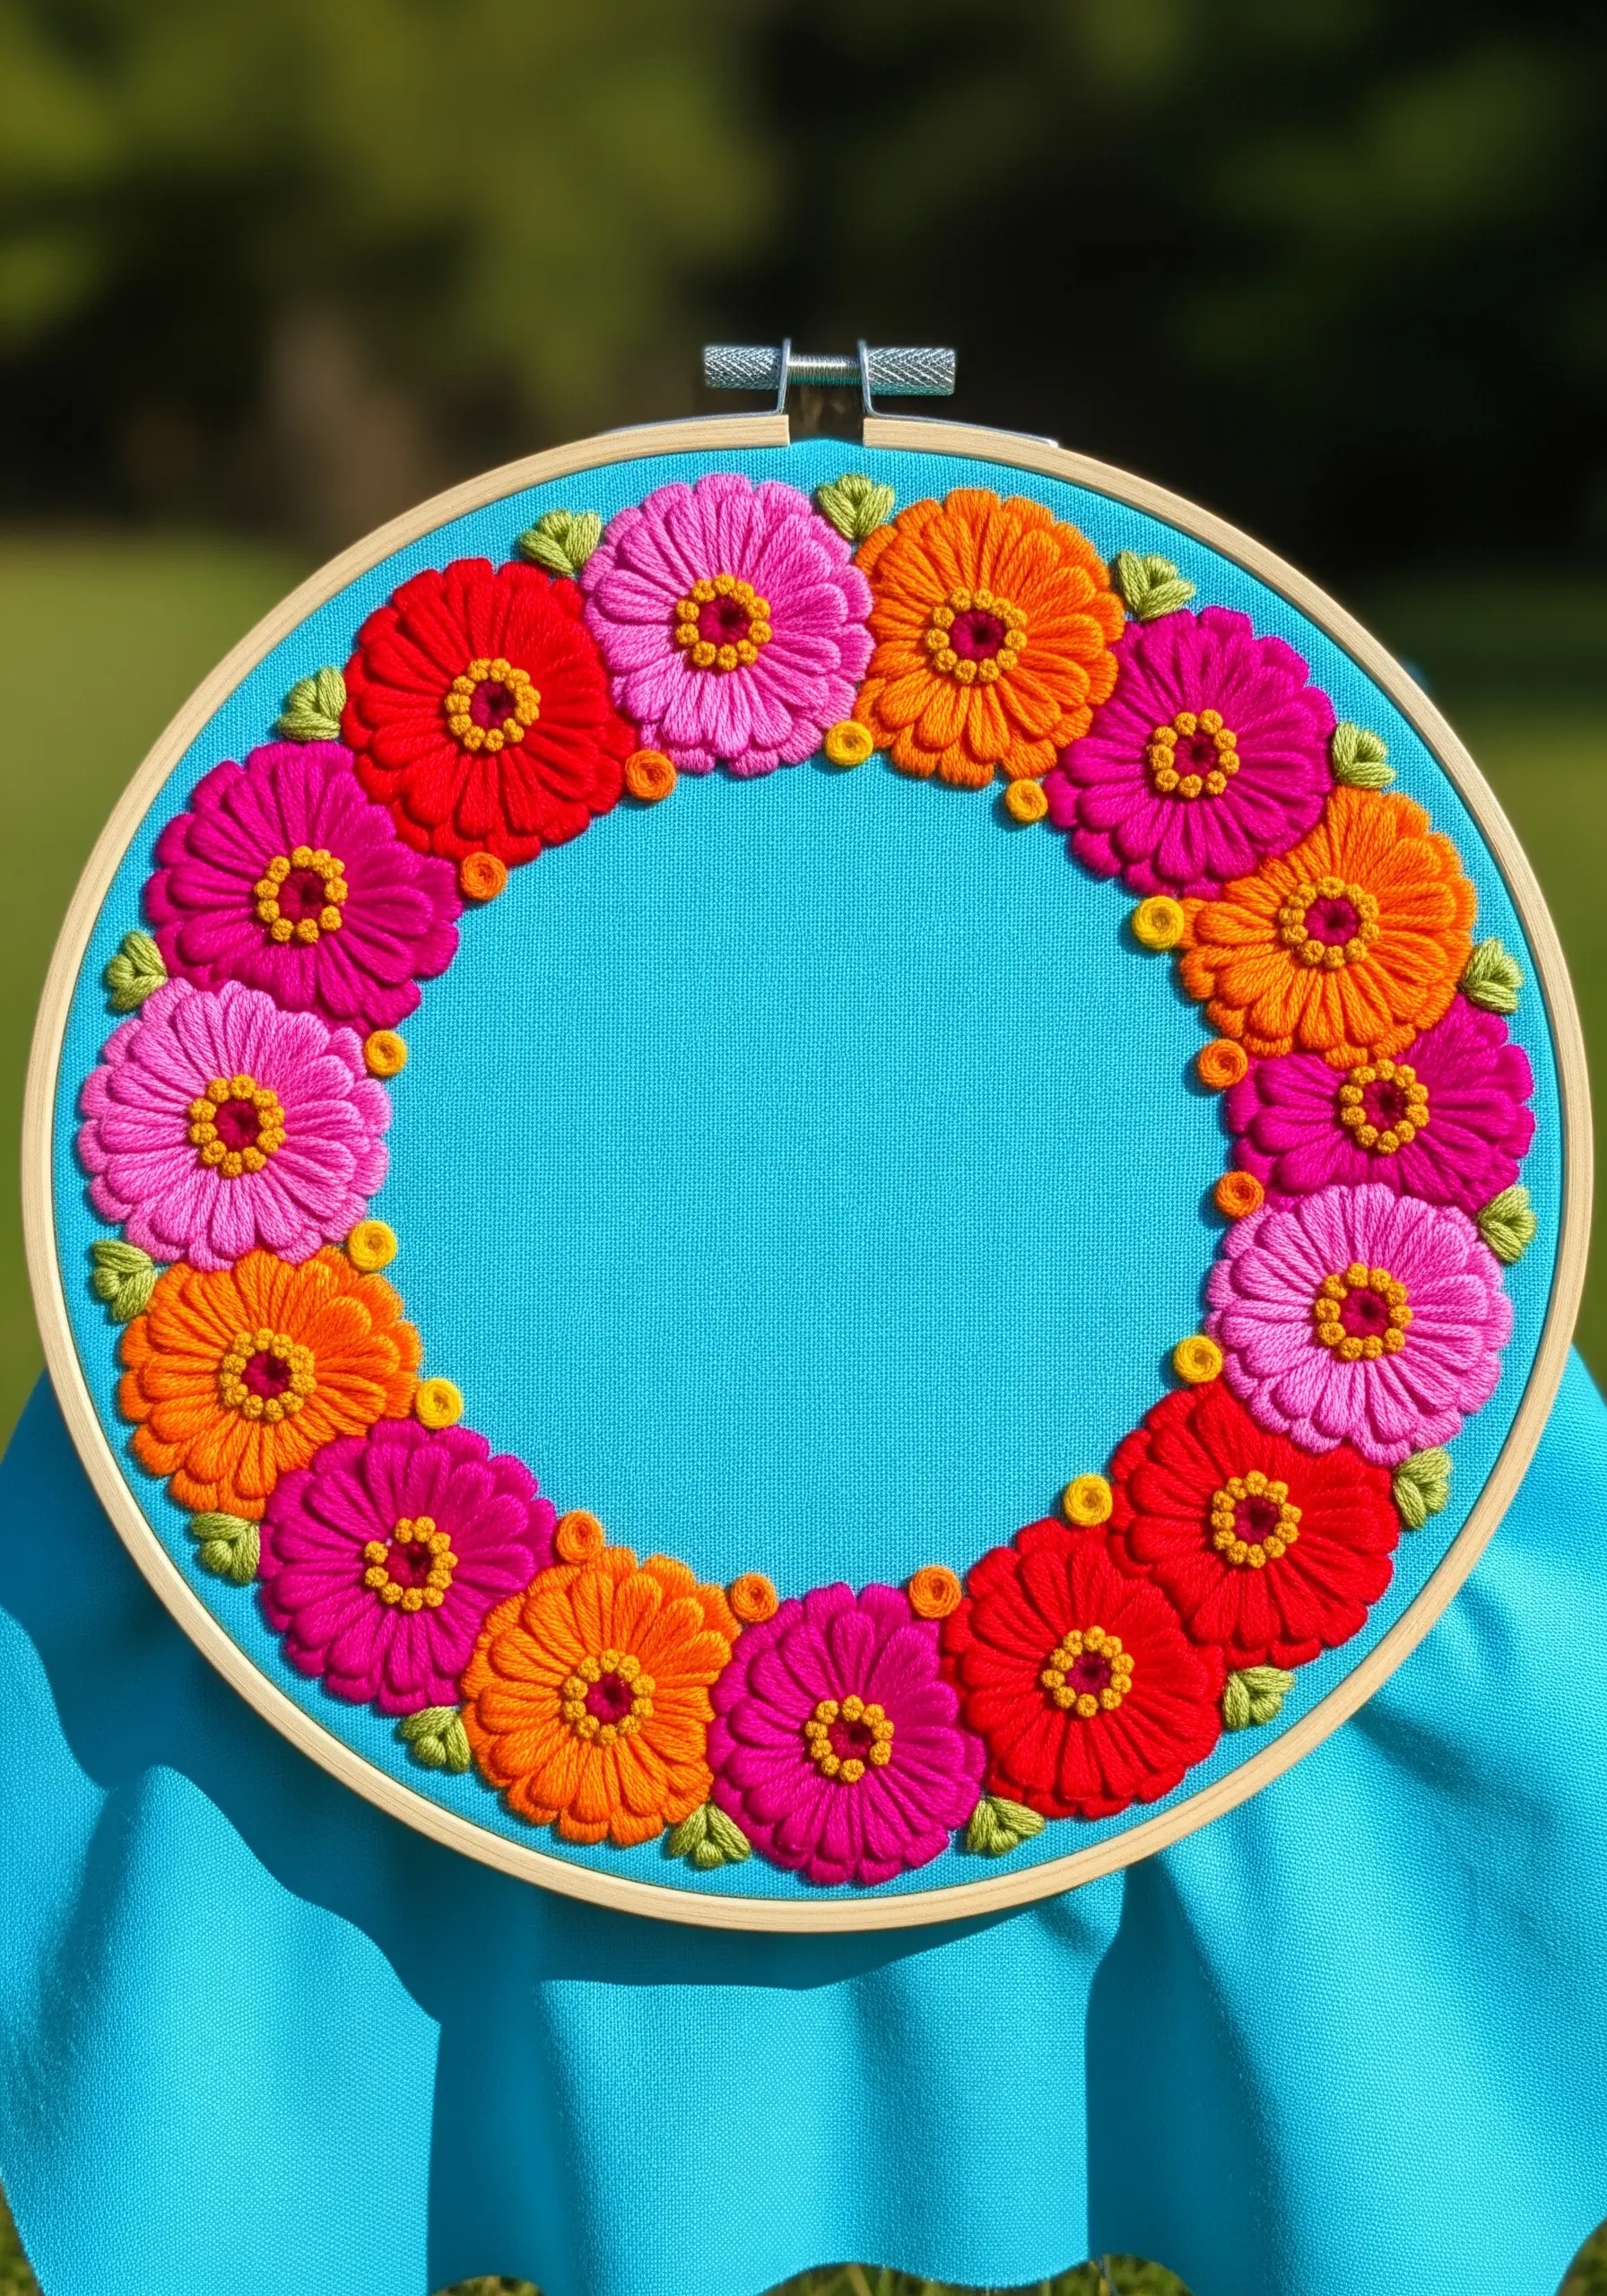
To recreate the full, ruffled petals of a zinnia, all you need is the humble lazy daisy stitch—used in layers.
Start by stitching a large circle of lazy daisy stitches for the outer petals. Then, switch to a slightly different shade and stitch another, smaller circle inside the first.
Continue this process until you reach the center, which you can fill with a dense cluster of French knots in a contrasting color.
This layering technique creates instant dimension and a wonderfully plush texture. Placing these hot-colored flowers on a cool turquoise fabric makes them pop even more.
26. Understated Elegance with a White-on-White Palette
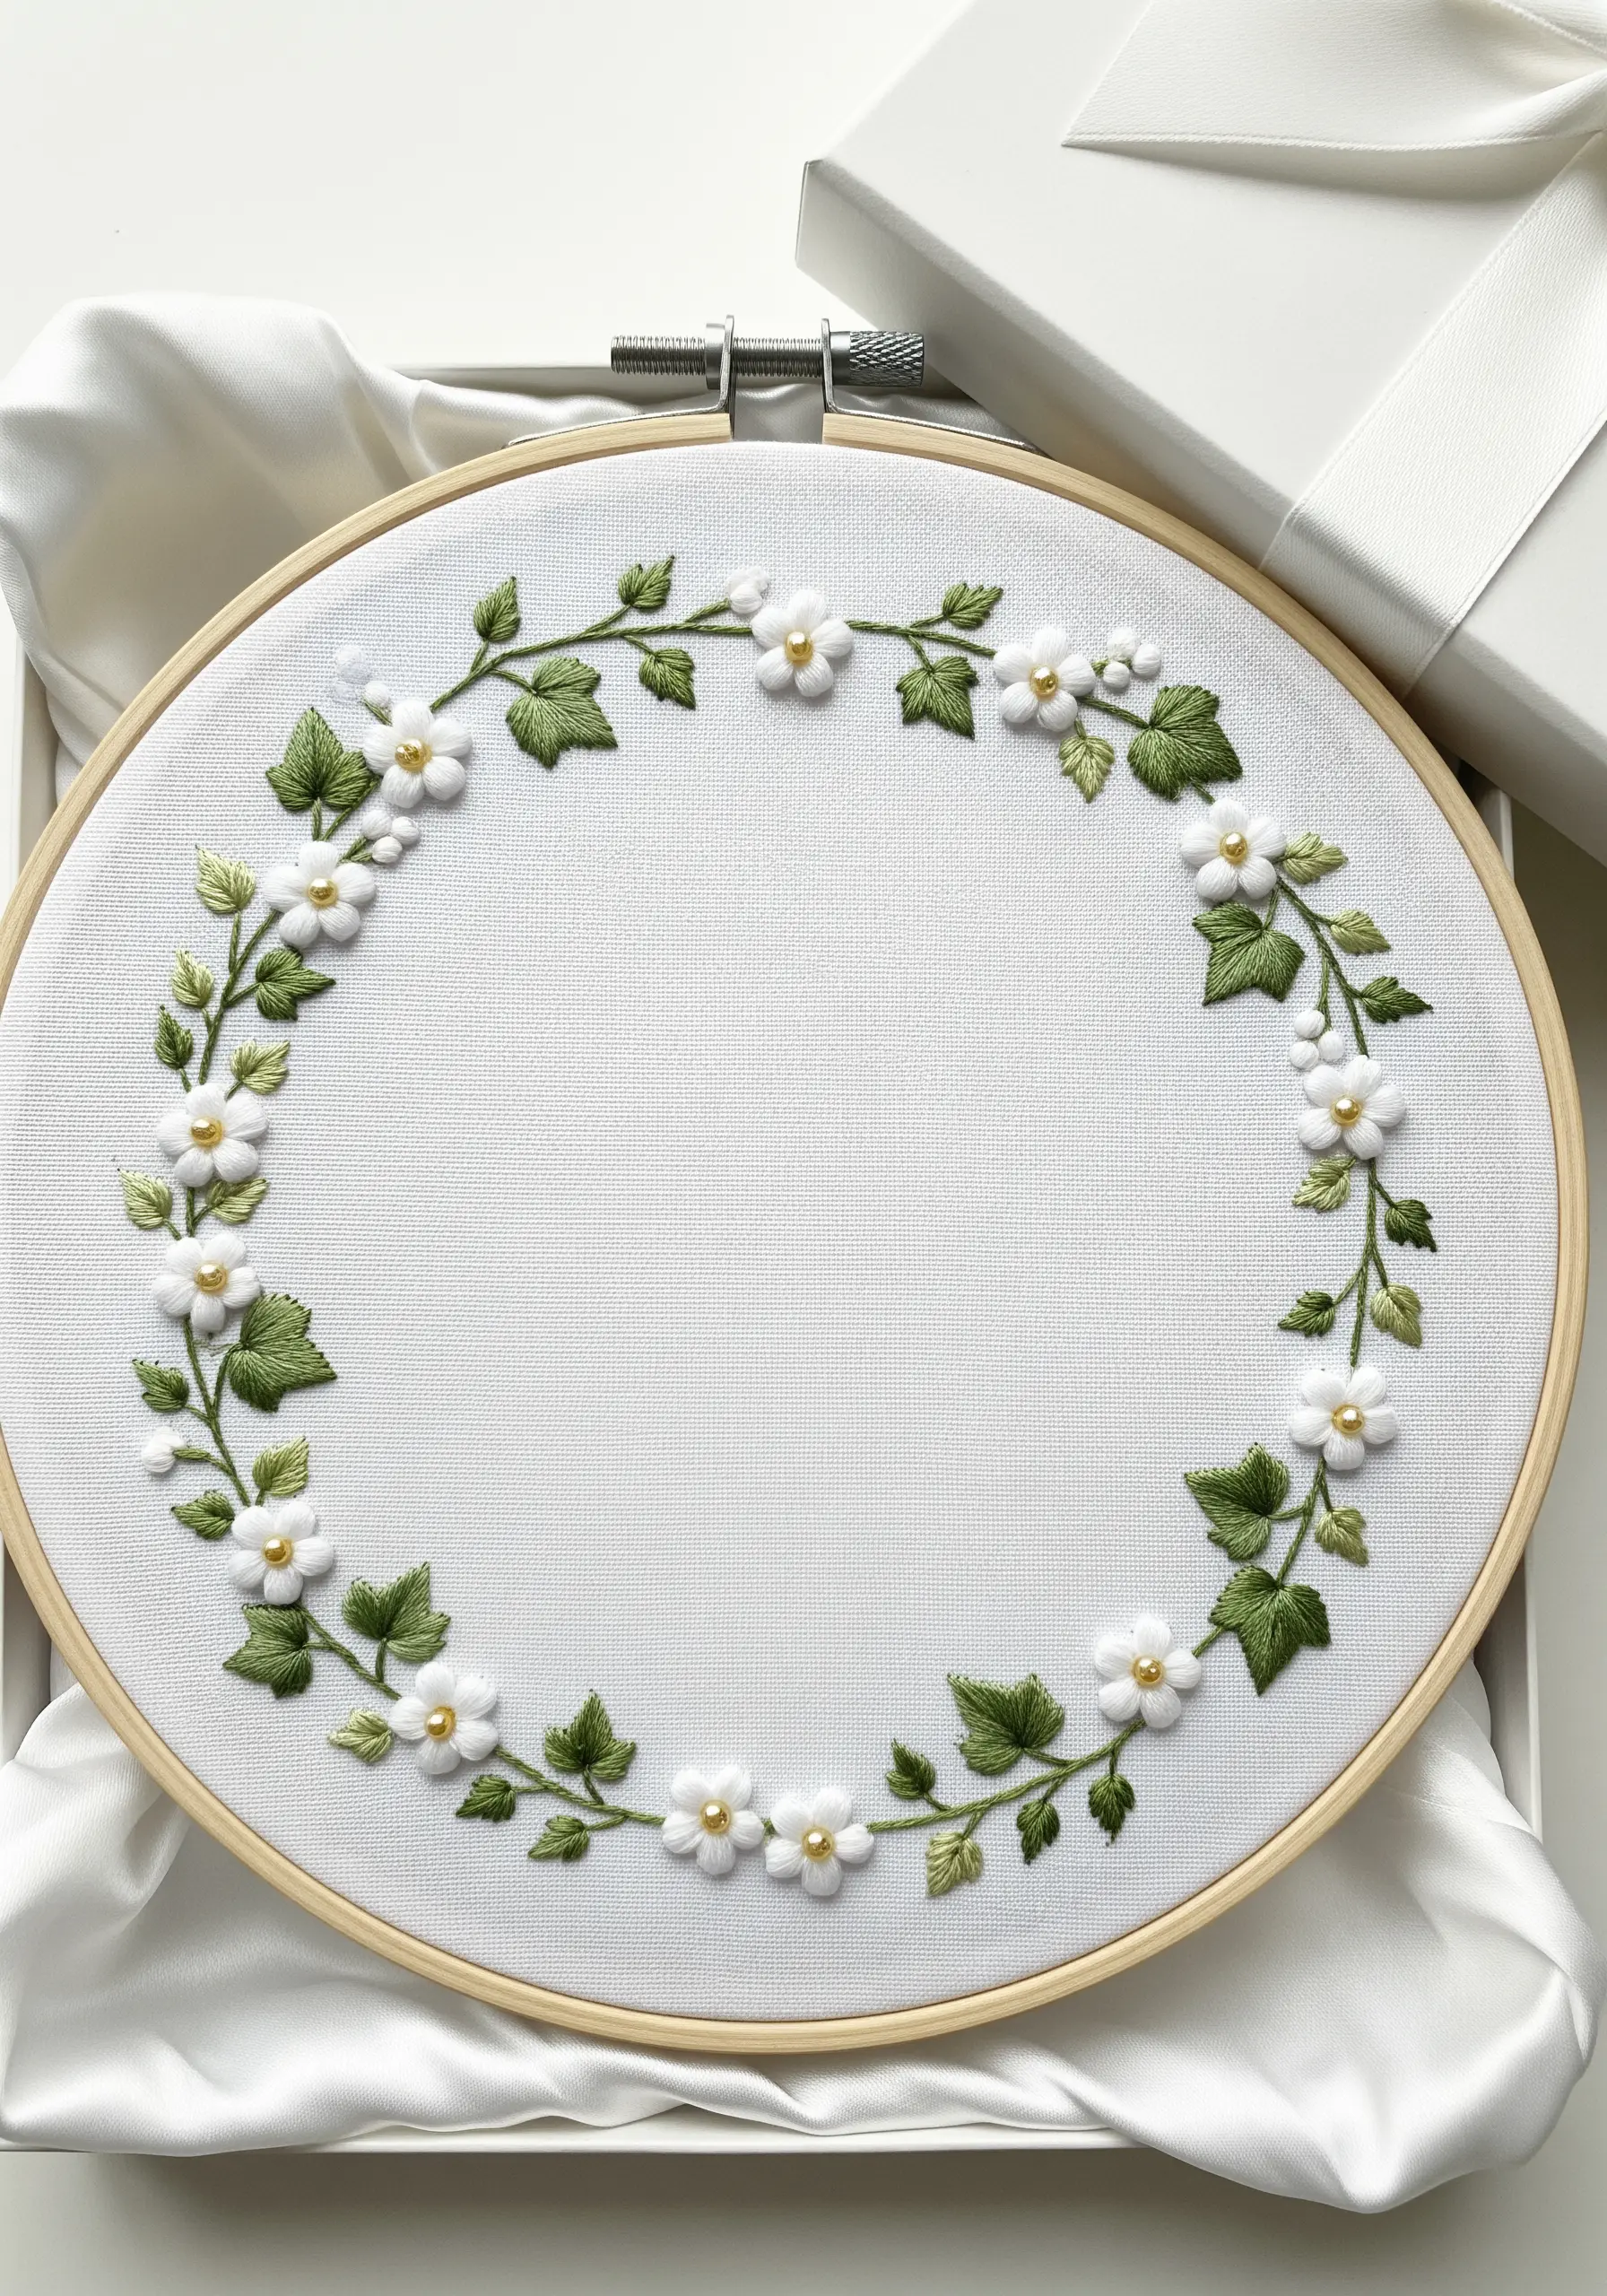
A tone-on-tone color palette is the essence of quiet luxury. By stitching with white thread on a crisp white fabric, you shift the focus from color to the subtle interplay of light and shadow on your stitches.
Use simple, classic stitches: lazy daisy for the flower petals, fishbone stitch for the leaves, and stem stitch for the vines.
For a final touch of refinement, add a tiny gold French knot to the center of each flower. This single metallic accent provides just enough warmth and contrast to elevate the entire piece, making it perfect for a sophisticated wedding gift.
27. Adding Magic with Integrated Fairy Lights
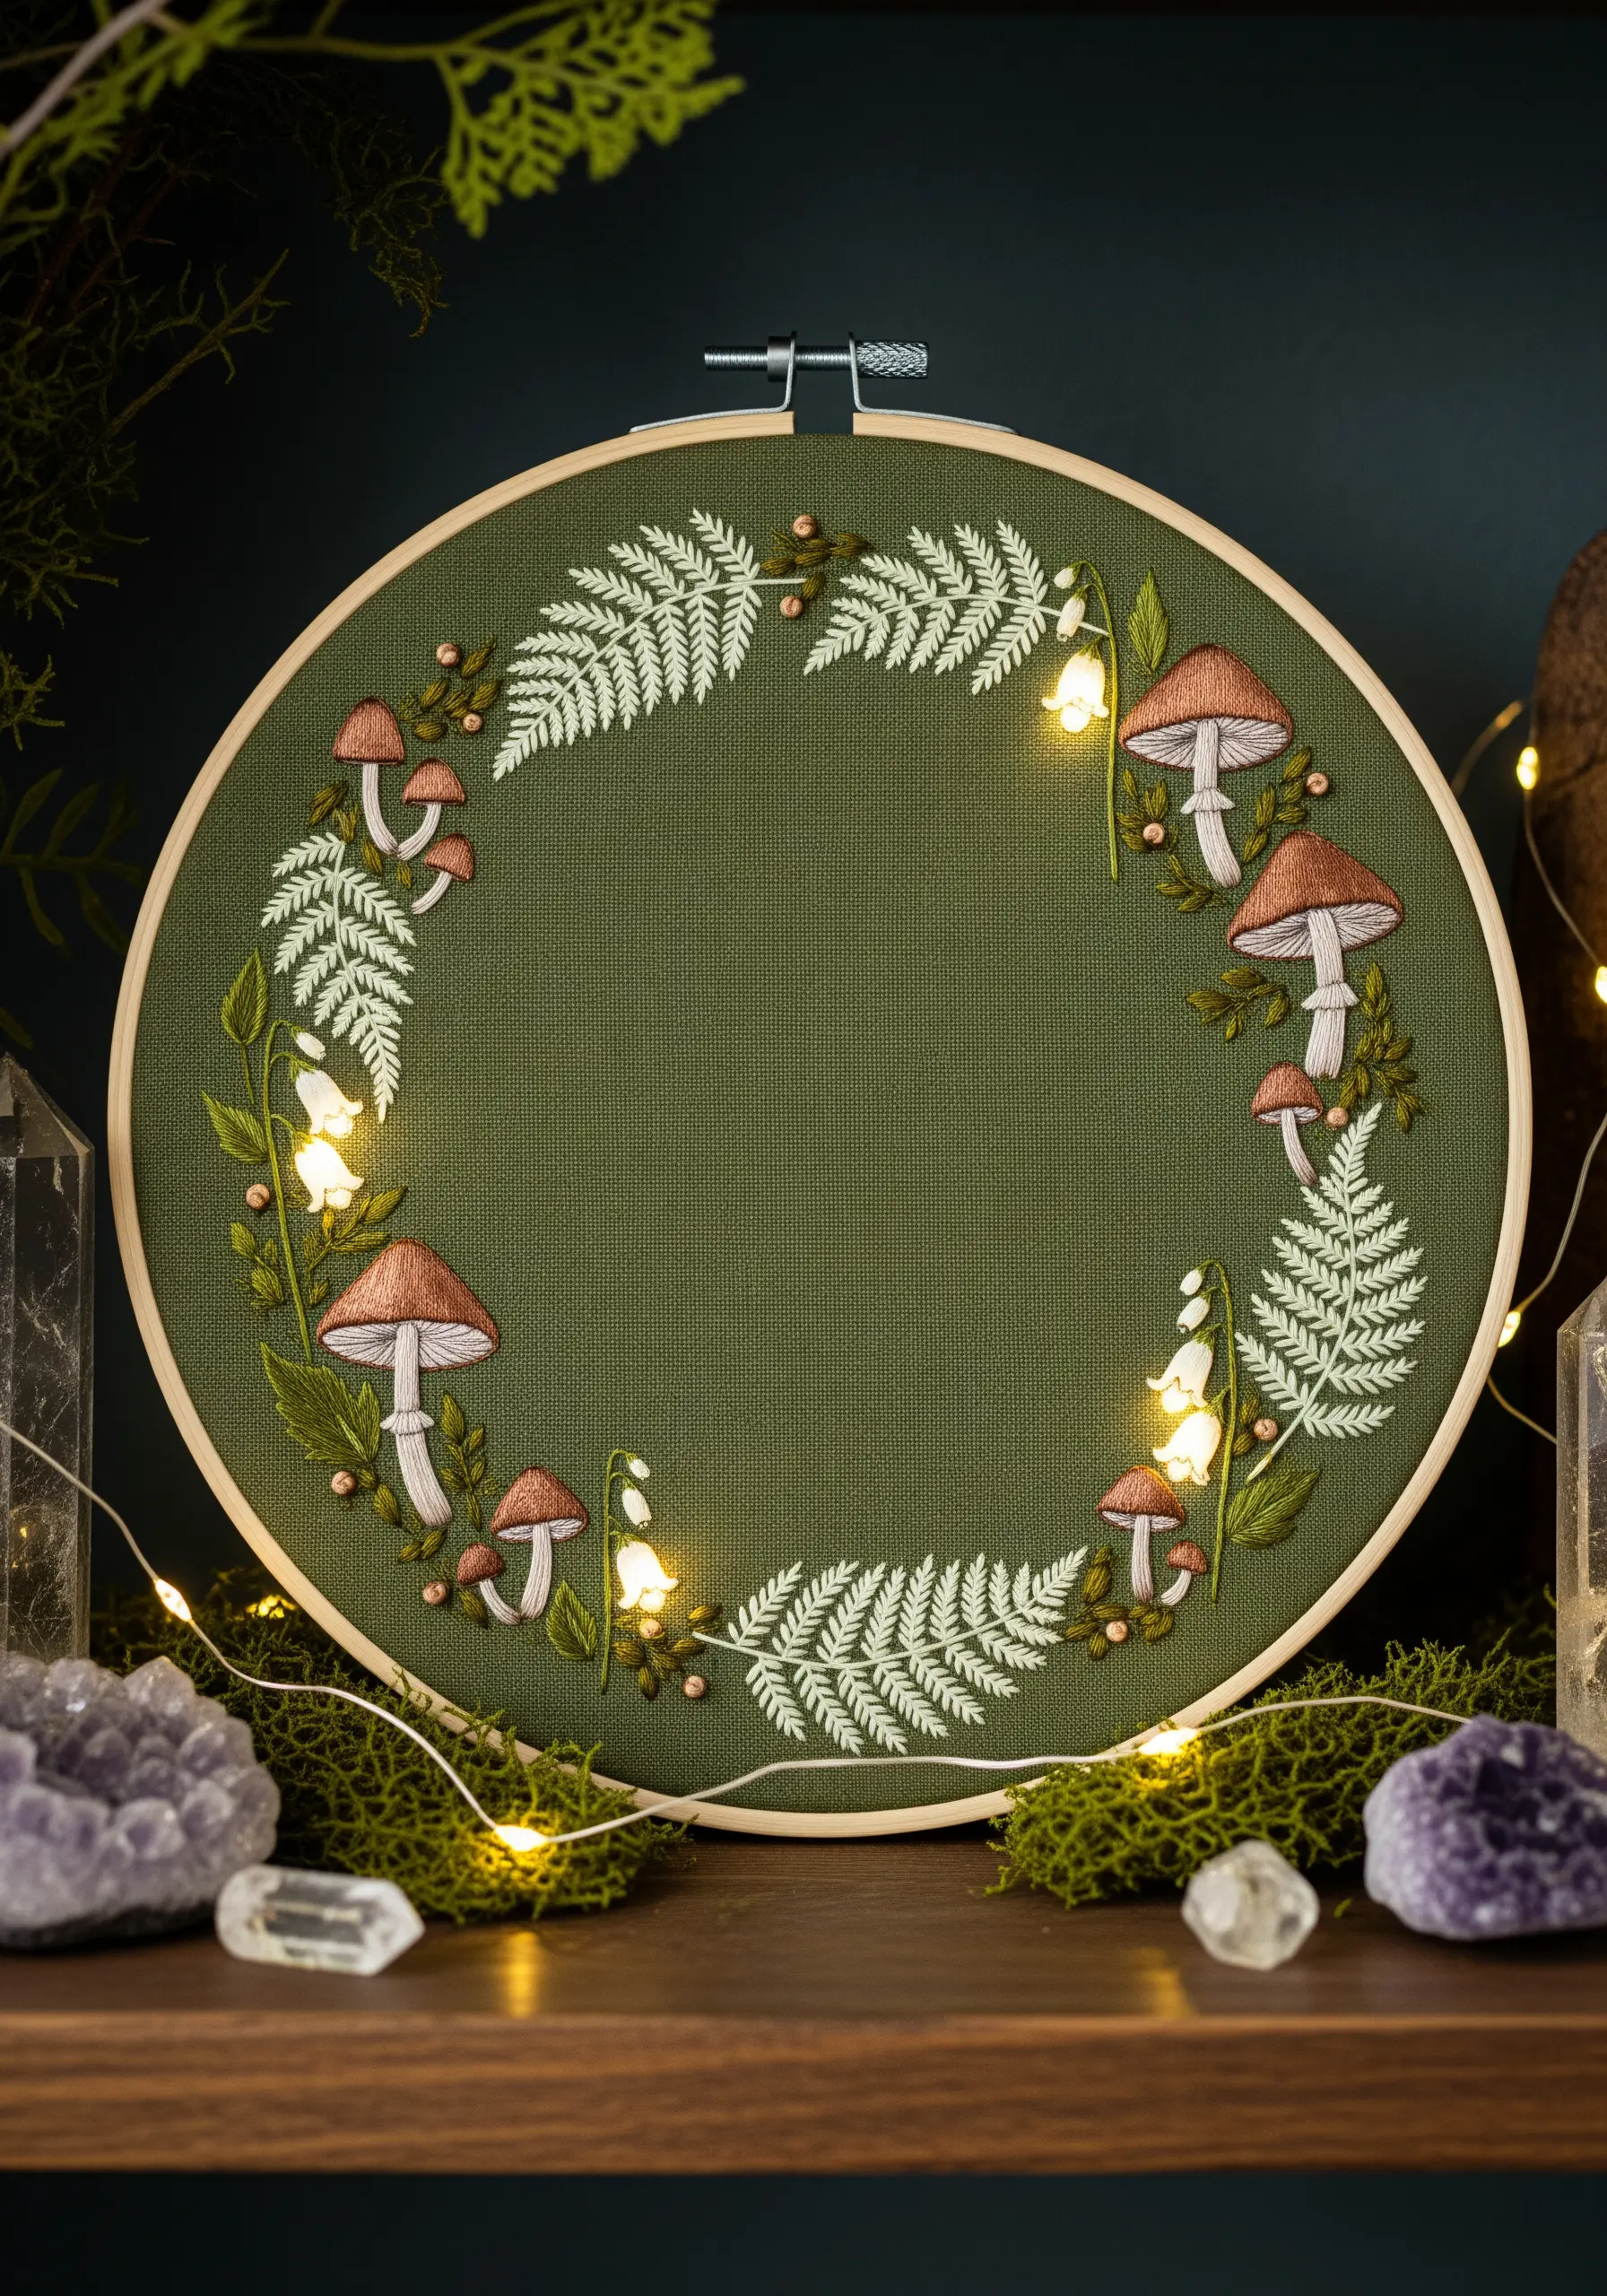
Transform your embroidery into an enchanting piece of decor by weaving in a strand of micro LED fairy lights.
Complete your embroidery first. Use techniques like thread painting for the mushroom caps and fly stitch for the delicate fern fronds.
Once finished, carefully pierce the fabric from behind in strategic spots—underneath the bell-shaped flowers or mushroom caps works well—and gently poke the tiny bulbs through to the front.
Secure the thin wire to the back of your work with small stitches or fabric tape. When lit, the piece will cast a soft, magical glow.
28. Incorporating Natural Elements into Coastal Designs
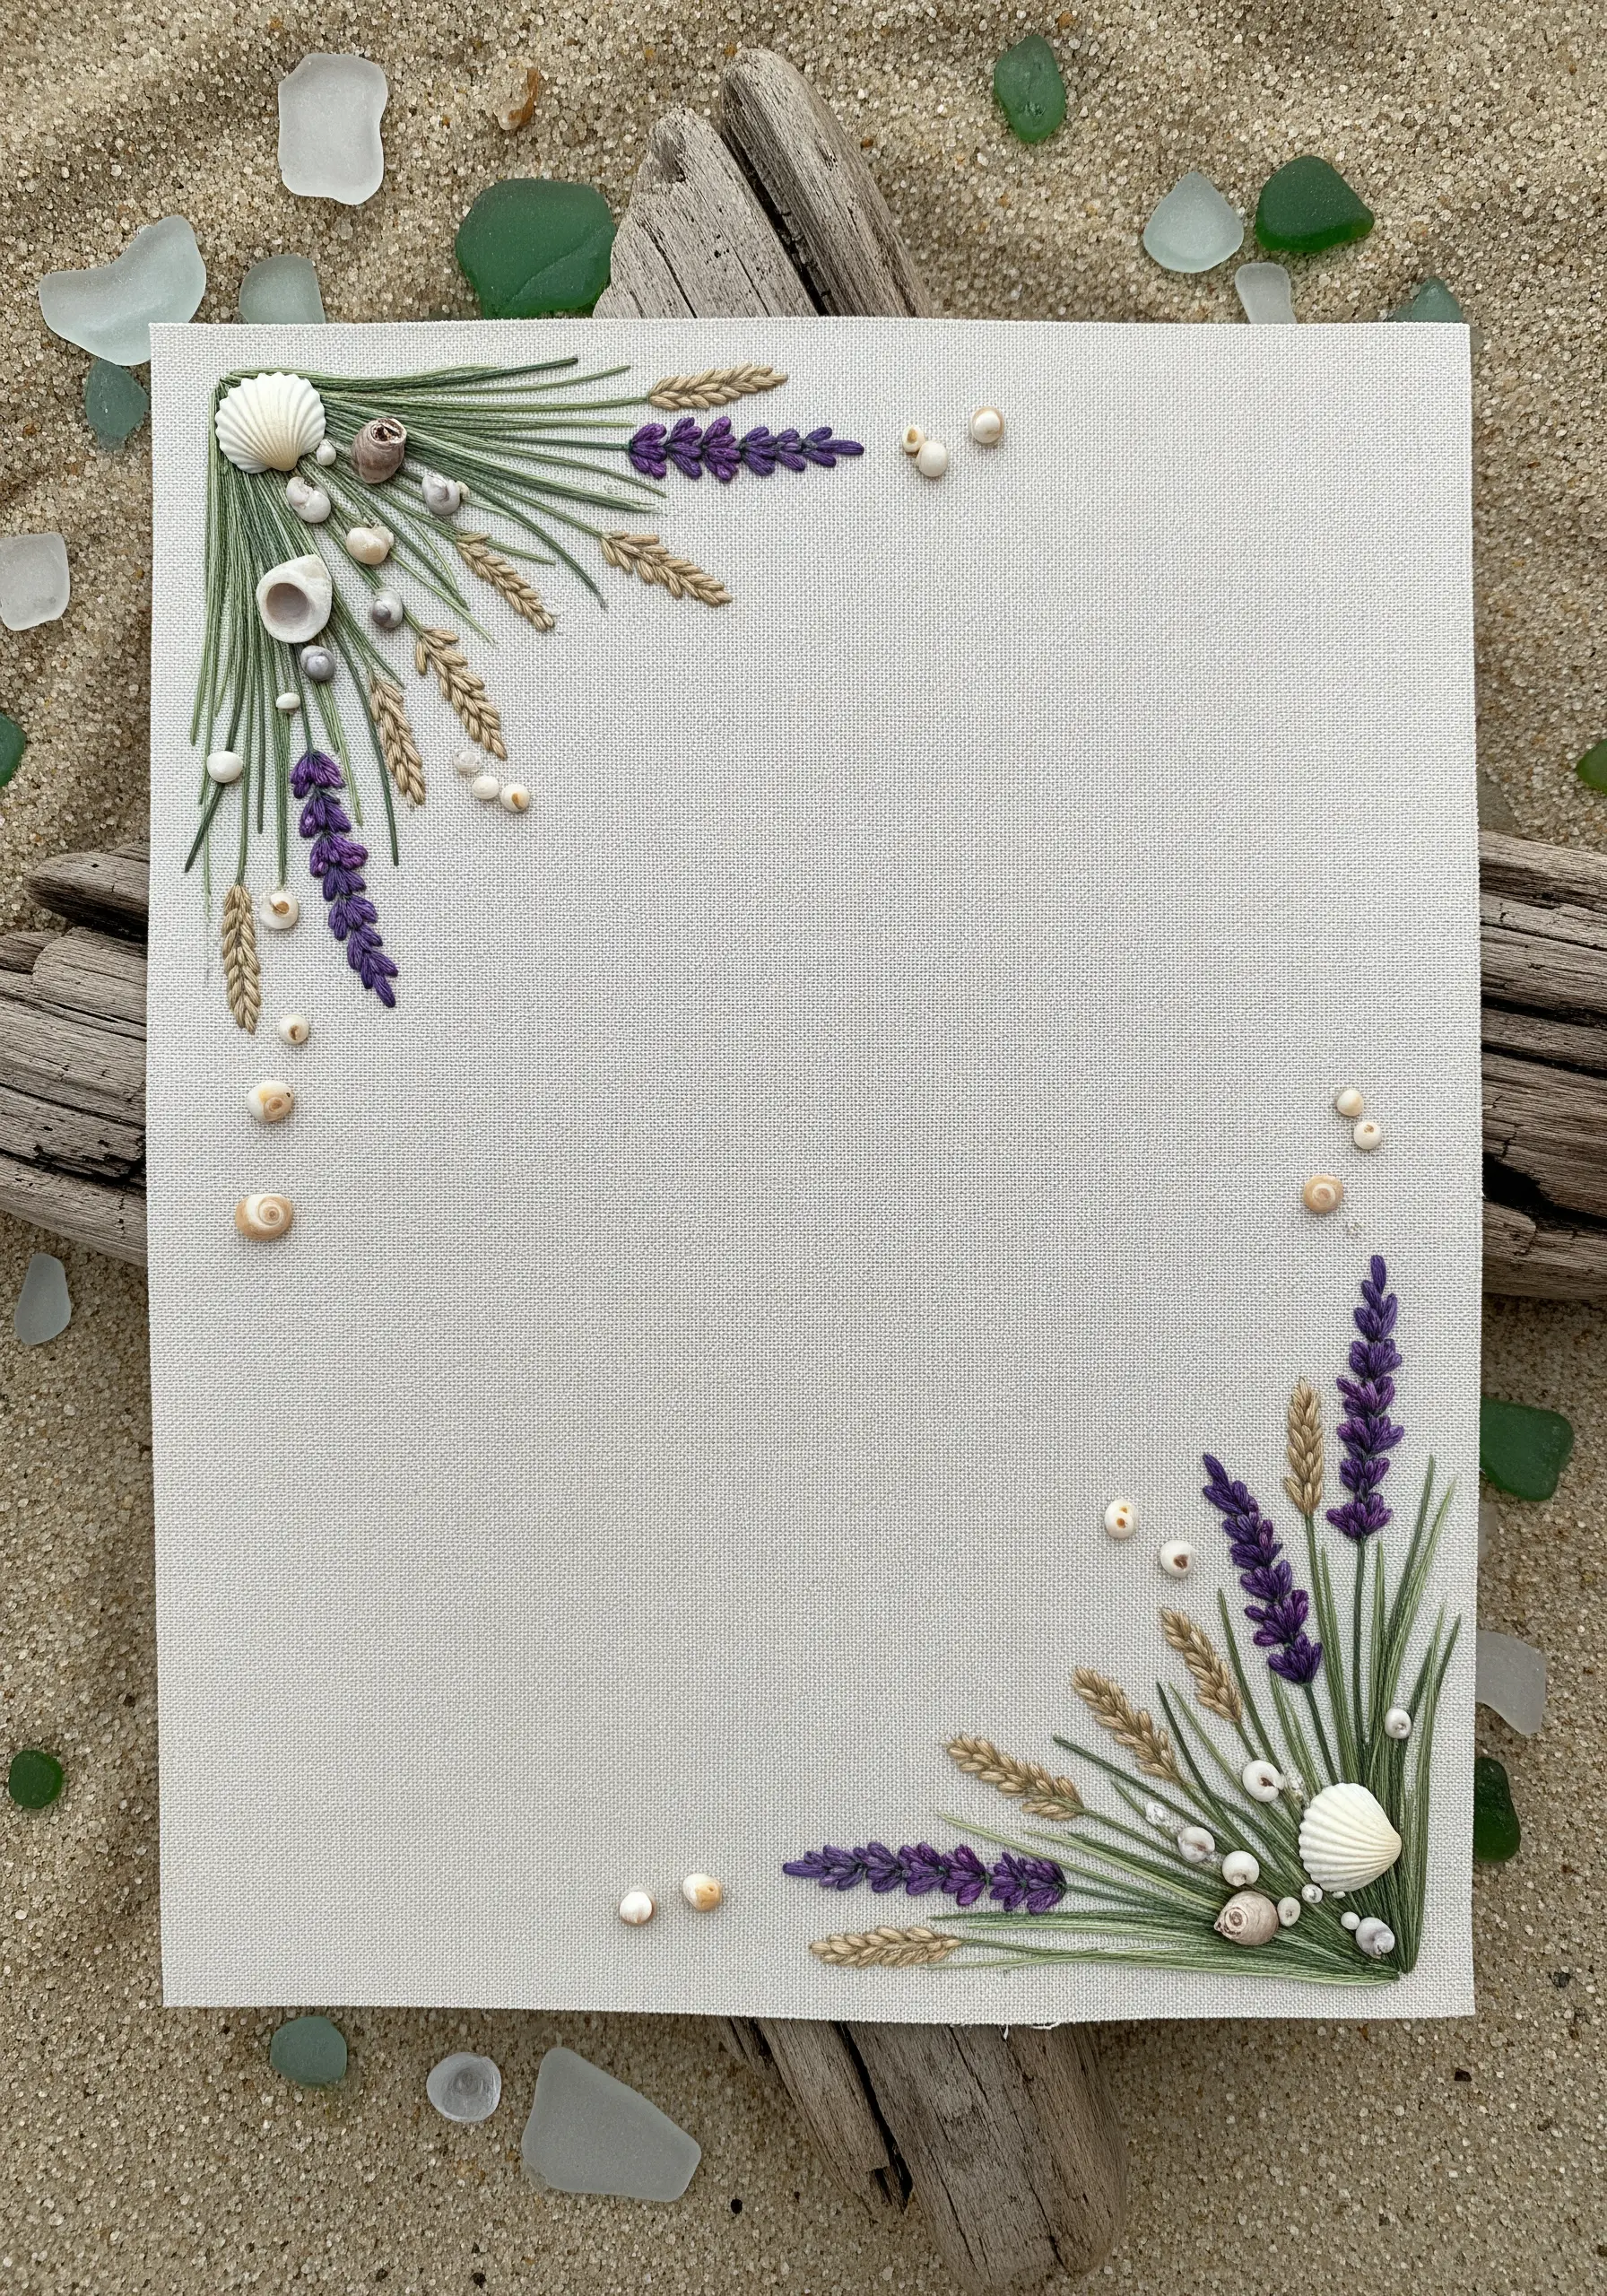
Give your coastal-themed embroidery an authentic touch by incorporating real, found objects from the shore.
First, stitch your botanical elements, such as sea grass and lavender, using simple straight stitches and lazy daisy knots.
Then, select your tiniest, most delicate seashells. You can either attach them with a dot of strong, clear-drying craft glue or carefully stitch them on by wrapping your thread around their base.
This beautiful mixed-media approach adds a layer of texture and memory that thread alone cannot replicate.
29. The Power of Simplicity and Line Art
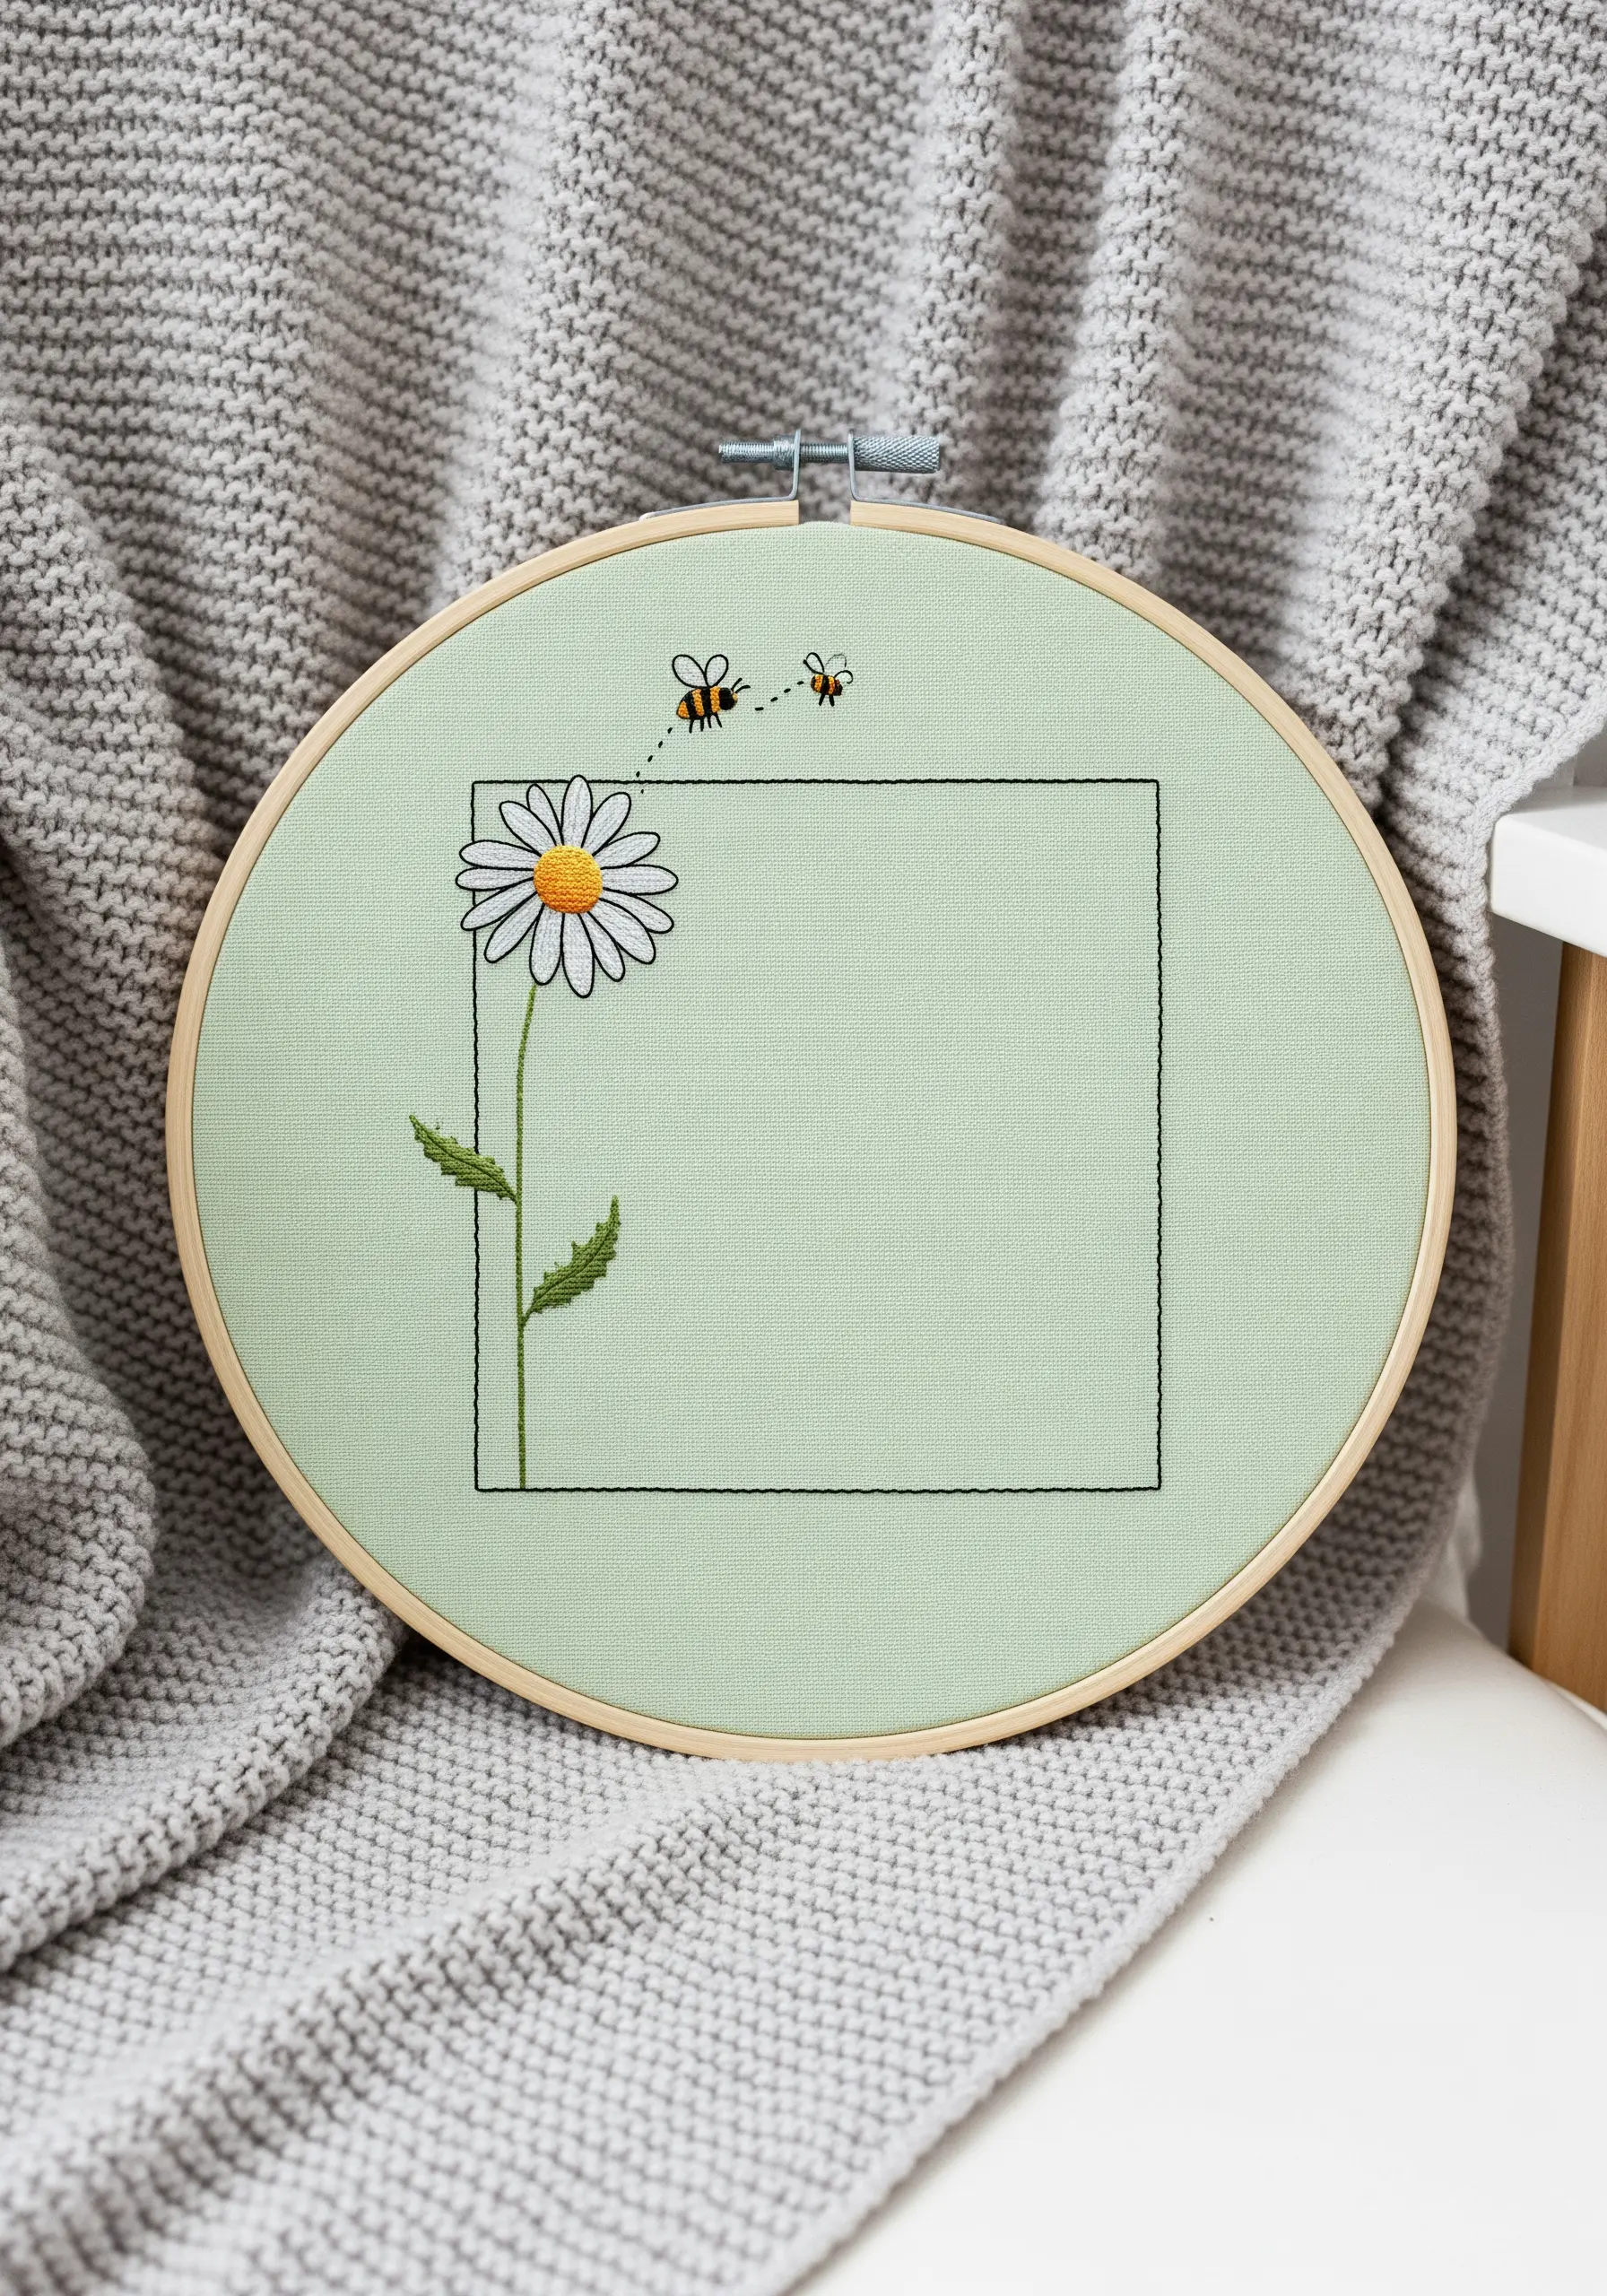
A confident design doesn’t always require complexity. This piece celebrates the beauty of minimalism and clean lines.
A simple square, stitched with a basic backstitch, provides a modern, graphic frame.
The single daisy is the clear focal point, created with a satin-stitched center and neat lazy daisy petals. The tiny bees are merely a suggestion, crafted from just a few well-placed stitches.
This clean, uncluttered, and minimalist approach feels fresh, modern, and is wonderfully quick to complete.
30. Creating Festive Dimension with Knots and Metallics
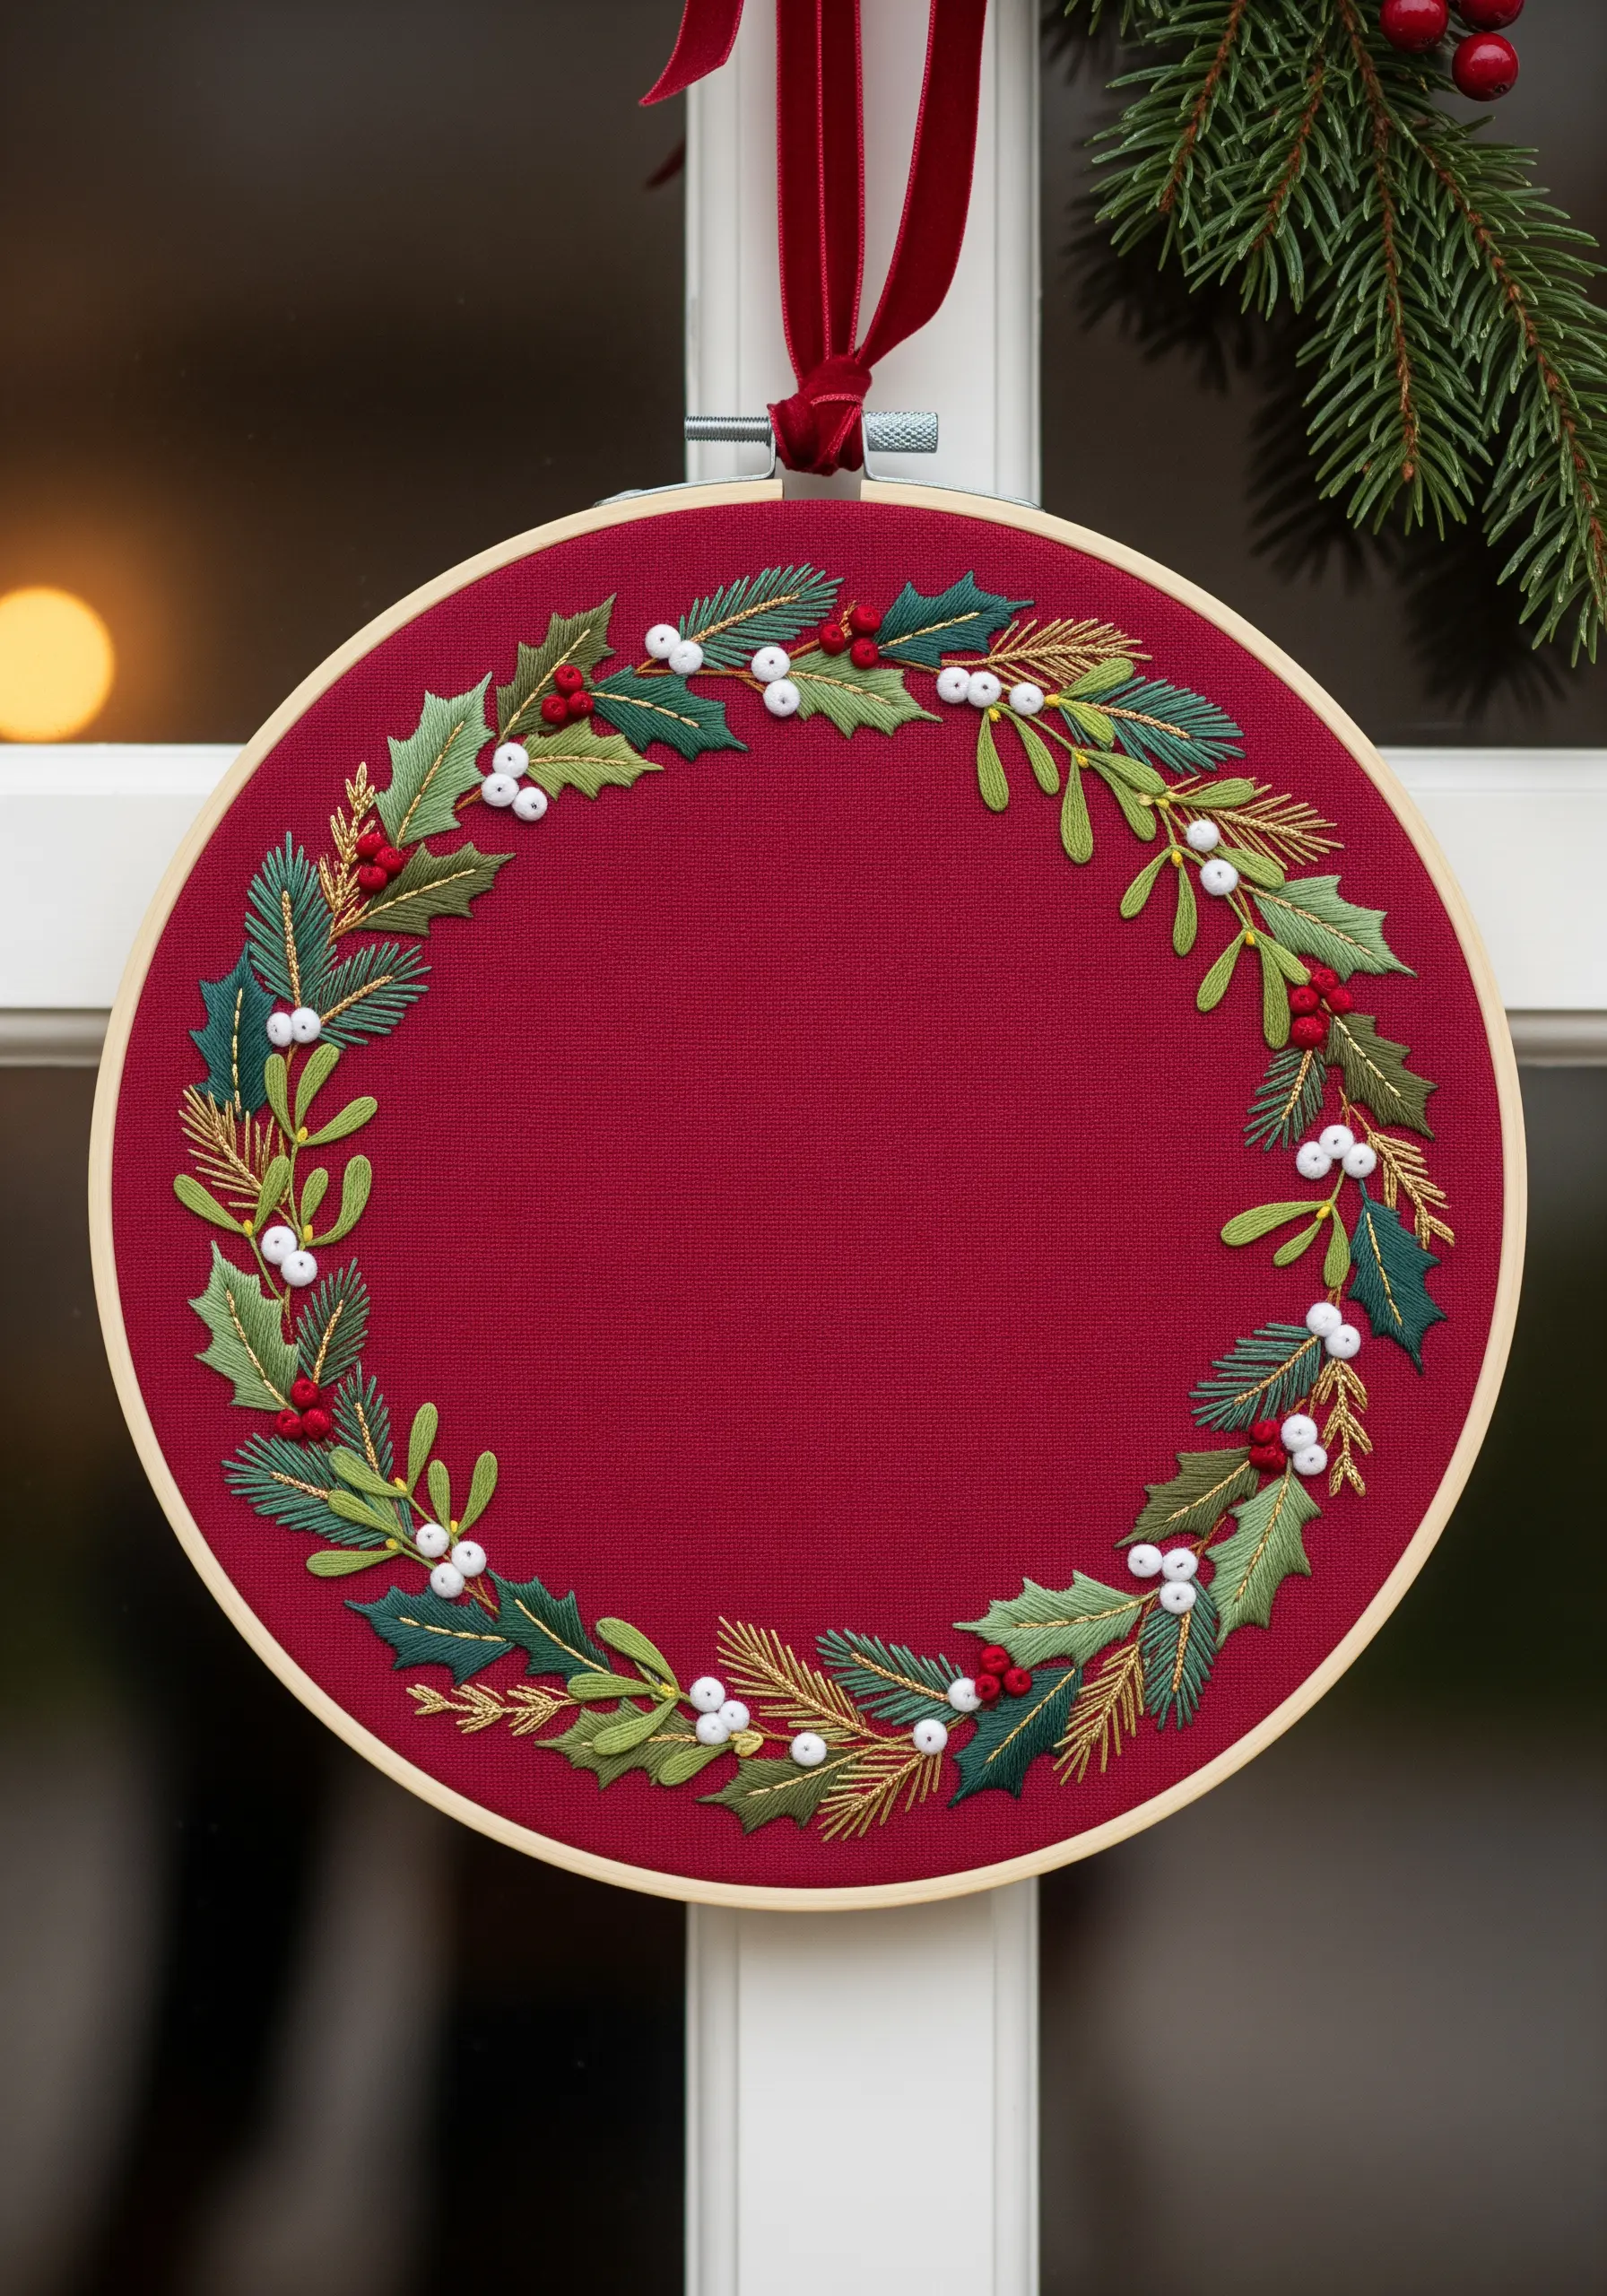
To make a holiday wreath truly stand out, focus on creating dimensional textures that catch the eye.
Instead of flat stitches, use colonial knots or bullion knots for the holly and mistletoe berries. These stitches sit raised off the fabric, creating a wonderful 3D effect.
Elevate the design further by adding highlights with a single strand of gold metallic thread. Use it to outline a few holly leaves or add sparkle to the pine needles.
Stitching on a deep, rich red fabric provides the perfect festive backdrop for these traditional greens and whites.
31. Using Borders to Create a Finished Composition
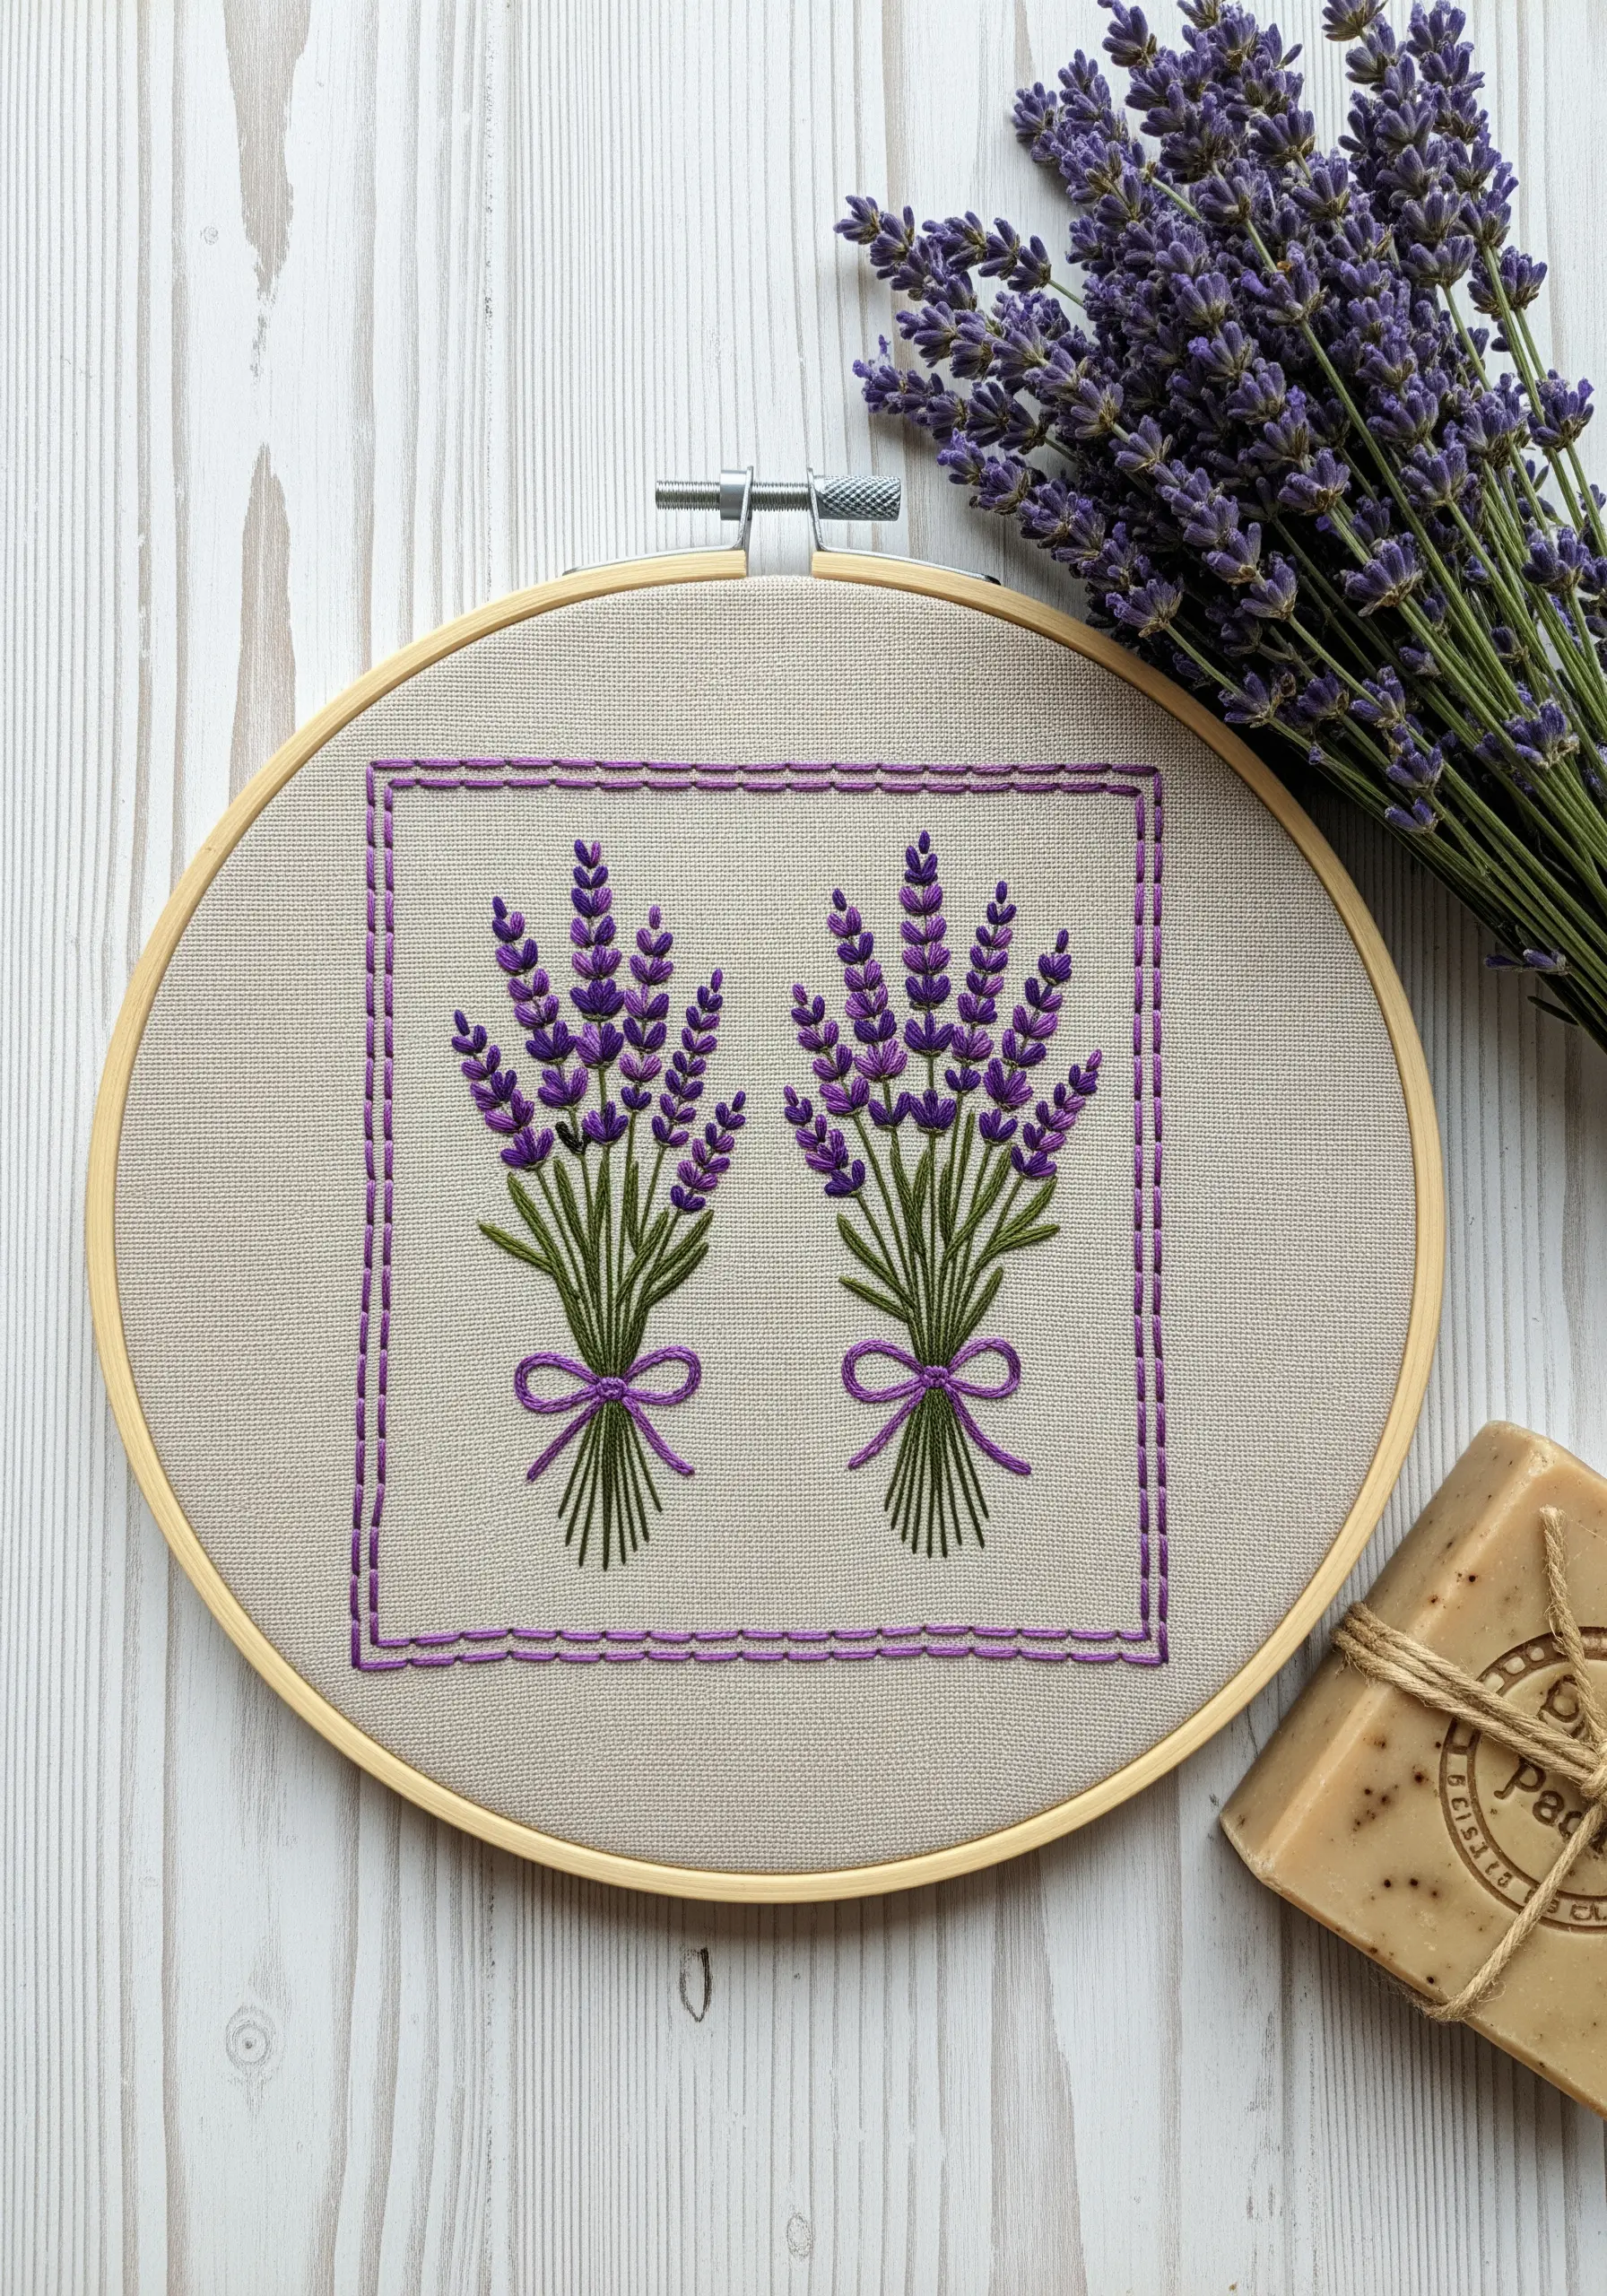
One of the easiest ways to make your embroidery look polished and complete is to add a stitched border.
Here, a simple dashed running stitch in a coordinating purple creates a clean inner frame. This small detail contains the lavender bouquets, making the entire composition feel more deliberate and professional.
For the lavender itself, use angled straight stitches for the blossoms. To create the smooth curves of the bows, a whipped backstitch is the perfect choice, as it eliminates the jagged look of a standard backstitch.


